
How to Install Peel and Stick Wallpaper
Hang Peel and Stick Wallpaper
I've removed my fair share of wallpaper. In fact, I removed an entire house full of wallpaper at our last place, and I've even removed some in this house too! And let me tell you, it's a huge pain. You'd probably think at this point I loathe wallpaper, but surprisingly that’s not the case at all.
I freaking love wallpaper!
As you may have been able to tell from the Sharpie wall I drew in my office, I love patterns in general. Heck, I've even been working to incorporate more patterns into my paintings! I can't get enough. And there are countless patterns and designs available for wallpaper.
Why I Decided to Install Wallpaper
After I've suffered through hours and hours of removing wallpaper, what in the world would make me want to potentially subject the future owner of my home into doing the same thing? Four words: peel and stick wallpaper.
Peel and stick wallpaper is a huge game changer! While traditional wallpaper I'm sure has its benefits, after installing peel and stick wallpaper, I can't imagine trying to install traditional wallpaper by myself. And I can't justify the likelihood of some other poor soul potentially having to remove it. But peel and stick wallpaper is not only super forgiving during installation - it's easily removable down the line! Win-win!
So one day, a friend texted me to ask my thoughts on leaving the doors off her pantry and installing wallpaper inside. I immediately egged her on to do it and to use a bold and bright pattern. I mean, a pantry is a small space that a bright and fun pattern wouldn't be too overwhelming. And then I went to bed… but my mind didn't. It was dreaming about wallpaper.
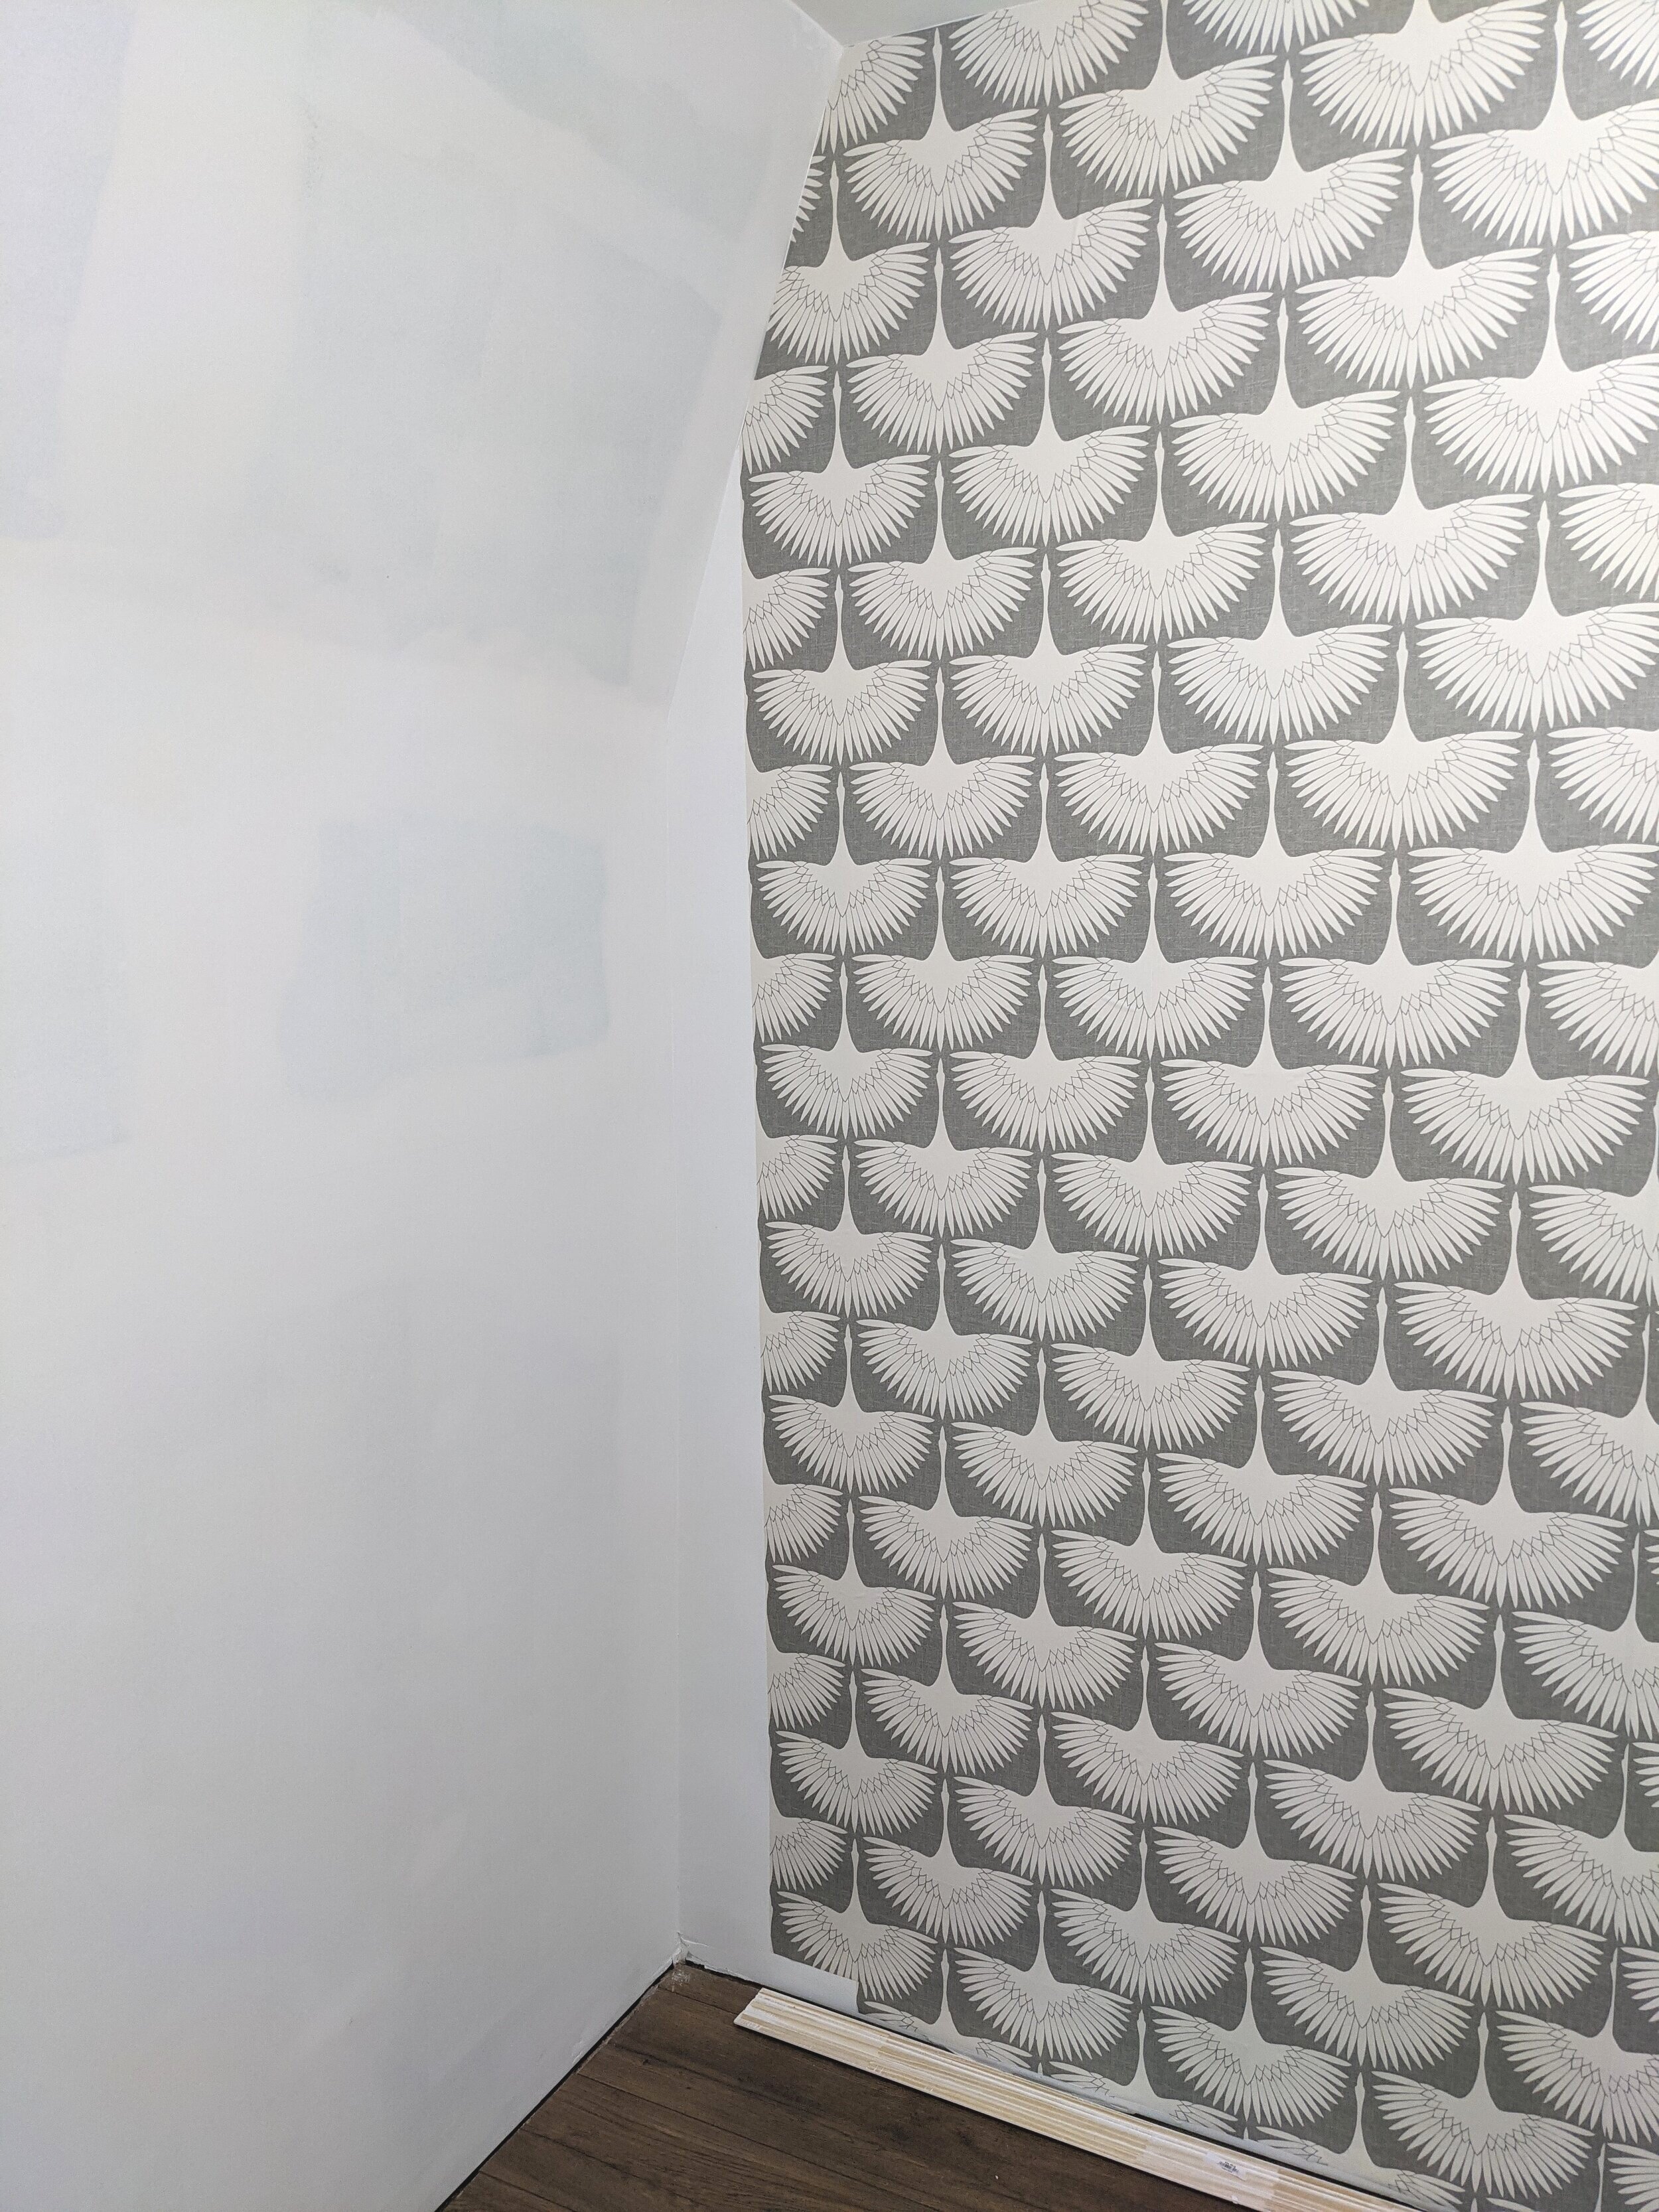
The next day I knew I had to find a place to install some of my own. I immediately knew my master closet would be perfect for my first try with wallpaper. It’s a space where I can enjoy it every day and not even have to take into consideration whether anyone else in my family likes it. Perfection.
As I previously shared, we built my master closet to be LARGE. I want to be able to get ready in here in the morning without waking up my husband. It's like its own little room. So why not make it a bit of an oasis?
As an Amazon Associate, I earn from qualifying purchases. This post may contain affiliate links, meaning I receive commissions for purchases made through those links, at no cost to you.
Choosing the Perfect Paper
Typically when I make a purchase I take my tiiiime. I mull it over. I pin tons of options and compare. Then I read the reviews and compare some more. Then I’ll usually put it in my cart and wait a few days before actually making the purchase because apparently, I have commitment issues. It’s a process.
But picking a wallpaper was a shockingly easy decision. I immediately knew I wanted this one:
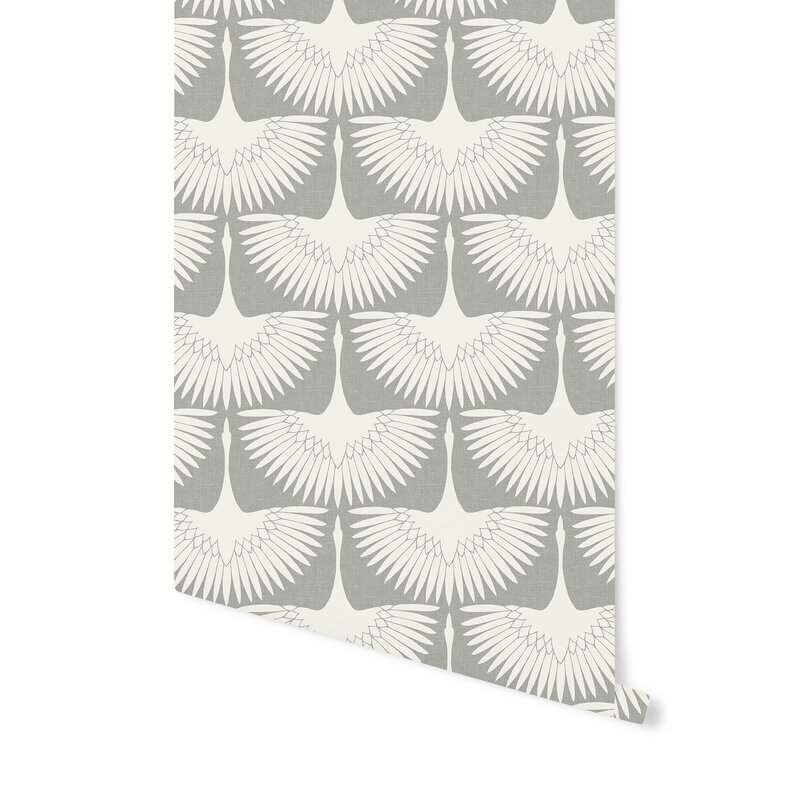
It's a pattern I've been swooning over forever. It feels soothing, yet dynamic. I love the soft tones and how the pattern almost turns the birds into abstraction when you look at a wall full of them. Plus, I figured, hey, it’s a small space that only I’ll see most of the time, why not take my own advice and go bold? So I measured my walls to figure out how much I needed and ordered it!
I didn't waste any time and installed it the day after it was delivered. Here's how to install your own:
Materials

- Step stool
- Level
- Pencil
- Exacto knife or box cutter
- Measuring tape
- Cutting pad
- Squeegee (or an old gift card if you’re me)
- Wallpaper!
Read the Directions!
First thing's first, read the directions before installing your wallpaper. Some designs require overlap between panels for the design to match up, or they may have other special instructions.
I'm not sure if this is standard, but the instructions on my wallpaper advised me to install the paper on a semi-gloss surface. So the day before I wallpapered, I threw a coat of leftover semi-gloss white paint onto the wall I was applying my wallpaper to (it was previously only primed).
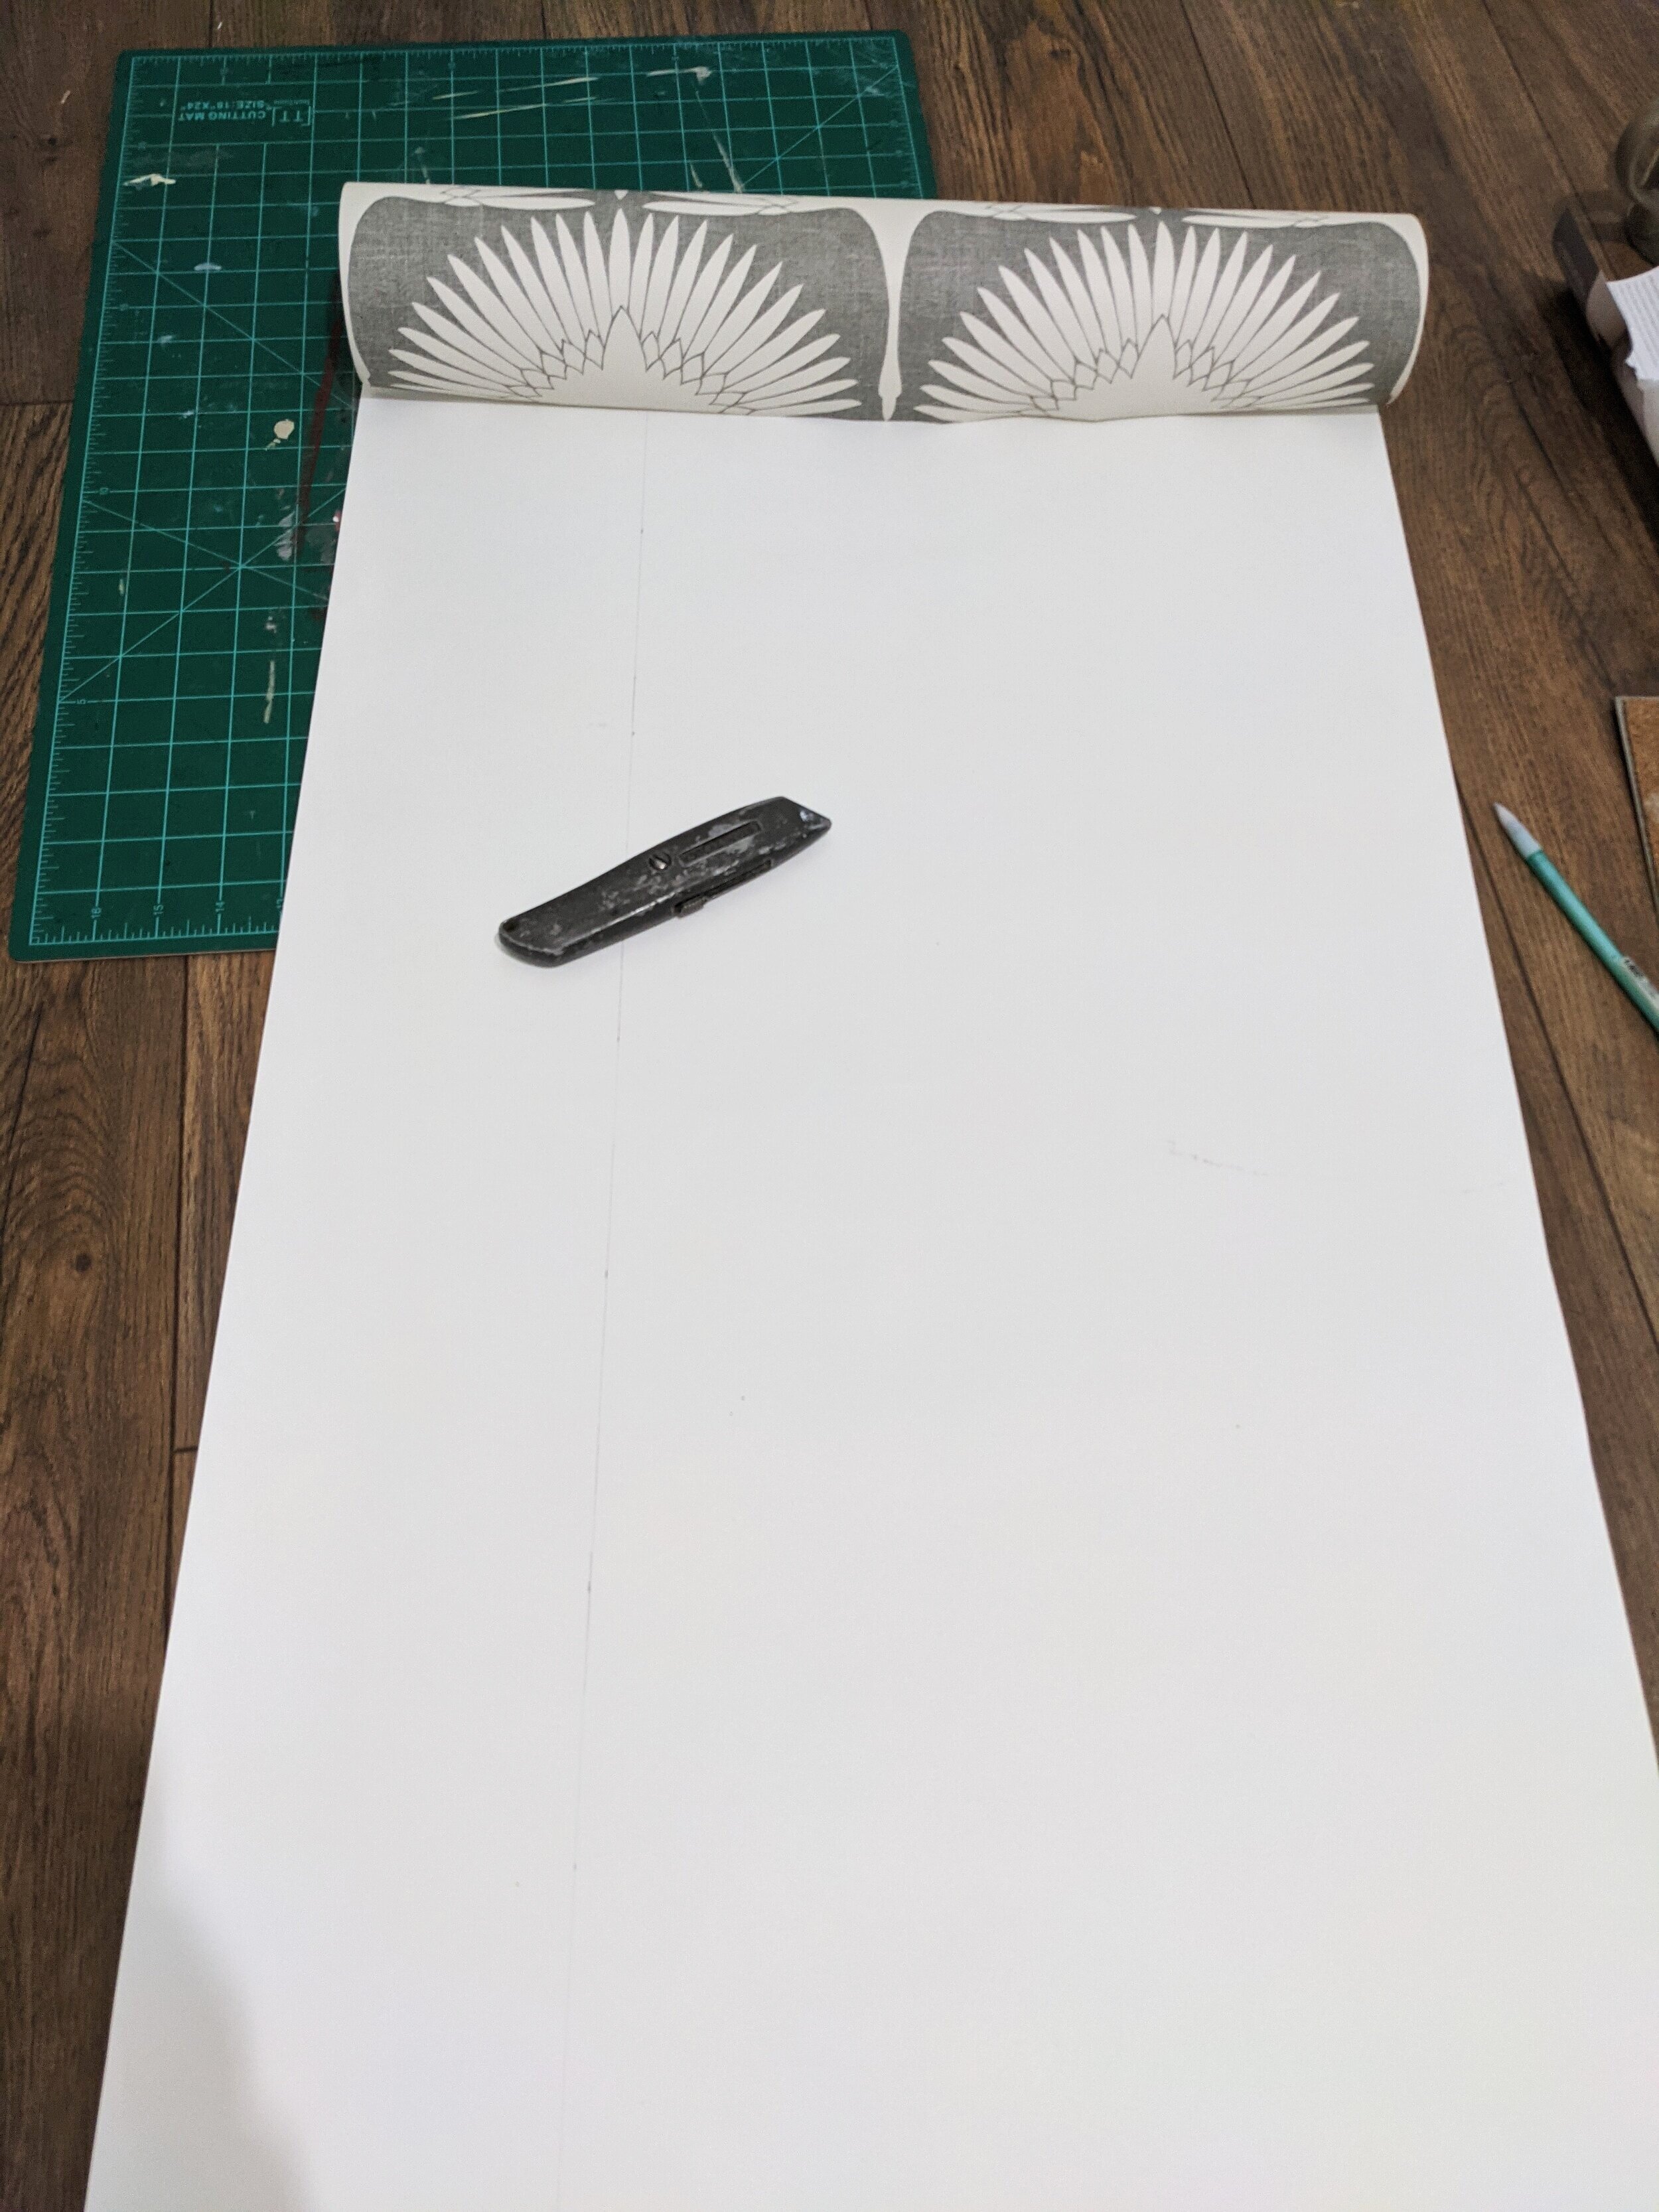
Prep Your Panels

When you're ready to wallpaper, you'll first need to cut your panels down to size by measuring the height of the wall and leaving a couple of inches for wiggle room. It's suggested to cut all your panels before you start the installation, and to match up the design from panel to panel on the floor as you go and number the panels on the back.
Draw a Plumb Line
I rarely dive into a project head-first, and this was no exception. A lot of tutorials I read before wallpapering my closet suggested starting at the top left-hand corner of the wall. But because my closet has an angled wall on the left-hand side, I felt more comfortable starting on the top right. I'm not sure if it makes a difference with other designs - I didn't have any issues starting on the right.
Either way, measure the width of your wallpaper. From whichever side of the wall you'll start hanging it from, mark how far out your first panel will hang. Using your level and your mark, draw a vertical line from the top to the bottom of the wall.
Hang Your Wallpaper
Grab your first panel and try to line it up as best as you can with the vertical line you just drew. Walls are rarely straight, so this line helps ensure the pattern on your design doesn't go completely haywire by the last panel. This being said, it's also not a bad idea to let a little bit of the wallpaper wrap onto the ceiling too. Don't worry - you'll cut off any excess later.
Peel back about 12-18 inches or so of the backing and carefully stick your wallpaper to the wall.

Using your squeegee (or in my case, an old gift card - which worked just fine!) as you apply the wallpaper, push out any bubbles to the edge of the paper. Continue peeling off the backing and squeegeeing out the bubbles until you get to the end of your panel.

If you start to notice that your panel isn't lining up with your guideline, simply peel it off and reapply! The earlier you do this while applying the panel, the better. It's much easier to work with a small area that is missing the backing than a large area that wants to stick to literally everything it touches (including itself).

Once you get to the bottom of the wall, carefully use your Exacto knife to trim off the excess wallpaper. You can trim off any overhang on the ceiling or adjoining walls (if you're only doing an accent wall) at this point as well.
Next, line up your second panel and follow the same steps, being careful to pay close attention to how the pattern is matching up.
Finishing Up
For my last panel, I only had about 6 inches of wall space to cover. I figured it would get a little hairy if I tried to use the entire width of the panel and them trim off the overhang because there would be so much. So before I applied my last panel, I cut it closer to the size I needed it, leaving a little extra in case the wall wasn't entirely square (it wasn't).
Since this is where the adjoining wall angles, I was especially concerned I would mess this panel up, but it was easier than I expected! I just took it slow and cut the backing off as I removed it so it didn’t get in the way.
Admire Your Work
Now that your wallpaper installation is complete, stand back and take it all in! You deserve it.
Final Thoughts
While hanging wallpaper wasn’t necessarily easy, it was an easy enough project for me to be completely willing to attempt it again. The payoff of seeing that beautiful design and creating a more interesting and dynamic space is totally worth it. Though I did learn some things along the way that I summarized for you below.
Tips for Installing Wallpaper
Start Small
While peel and stick wallpaper is forgiving, it's still not an easy job! I recommend sticking to a small surface area if you're a newbie wallpaperer until you can get the hang of it.
Choose a Forgiving Pattern
I didn't realize how tricky my pattern would be to line up from panel to panel. I love how it turned out, and I think any imperfections will be hidden, but if I knew then what I know now, I would choose a more abstract and less grid-like pattern for my first wallpapering extravaganza.
Know How Long Each Roll of Wallpaper Is
Make sure you know how long each roll of wallpaper is before you start cutting your panels. I didn't realize that one roll of mine was only enough for two panels. Luckily this didn't become an issue, but I cut it verrrrry close. (Get it!?)
Grab an Extra Pair of Hands
If you have someone to help you, utilize them! I did this project by myself. And while I'm really happy with the outcome, there probably would have been fewer curse words if I had another pair of hands.
