Let the dining room renovation begin!
Now that you’ve seen the house tour, you probably noticed our bright, froofy (I think I made that word up, but it fits so I’m sticking with it), and out of place dining room.

By itself, this room admittedly didn’t look terrible. With the right decor (and some squinting) I could see it working. However, it certainly wasn’t our style.
Before we moved in I was bound and determined to tackle this room first because it felt so out of place with the rest of the house. But then we moved in and other rooms took priority, like repainting the loft, repainting the foyer/upstairs landing, and making over our daughter’s room.
Stripping wallpaper and patching walls
Over the last couple of weeks I’ve been sitting on the couch in our living room while I’ve been working from home (#thankscoronavirus), which conveniently faces the doorway to the dining room. Every day I’ve been staring and glaring at that awful yellow and one day I blacked out. When I came to, I discovered someone had ripped the paint off the walls!

Who would do such a thing!? Even the T-rex is appalled.
Just kidding. It was totally me.
Now, you may be thinking, “What the heck? How did you rip the paint off the wall?” Well, let me tell you.
We originally thought the walls were painted with a yellow texture and we just had the red border above the chair rail to remove. I was pretty pumped because although I’m an odd duck and actually like stripping wallpaper, I got my fill of it in our last house where there was wallpaper in literally every room (kitchen and bathrooms included!). Buuuut a little while after moving in we noticed swirls under the paint and wallpaper seams… indicating that the previous owners had PAINTED OVER WALLPAPER. Please, for the sanity of whoever moves in after you, don’t do this.

Since by this point I had accepted the fact that the wallpaper had to go, I let my curiosity get the best of me. I found a spot where I had removed a drywall hanger that looked like I could get a grip on some of the paint, so I picked at it until this happened:

And this was where I realized I reached a point of no return and just kept on picking. Seriously. I picked and pulled and peeled almost all the paint off this wall by hand because I simply love to pick at things and couldn’t stop myself. And once I got most the paint off, I started picking at the wallpaper too. Guys, I think I have a problem.
The next day we pulled off the chair rail as well as the crown molding. The chair rail was never in my grand plan to stay, but I do want to put crown molding back up. I’ll explain why we took it down a little later.

And of course under the chair rail and the crown molding there were two more layers of wallpaper!

Right about here is where I broke out my wallpaper steamer and went to town, stupidly thinking that I could get all the wallpaper off in a few hours and have the nicks and inconsistencies on the walls patched by the end of the weekend.
Also, like the excellent blogger that I am, I completely forgot to document the process of stripping wallpaper, so I’ll write a separate post about how to do that another time. Get ready to be enthralled.
Jumping ahead, here are some pictures of the room partially stripped of wallpaper:


On the the right-hand side of the doorway in the picture above you’ll notice the wall is looking pretty rough. I discovered while trying to strip the wallpaper that it had already been removed on this part of the wall. My assumption is that the previous owners started stripping the wallpaper in this section, realized it was going to be a pain, and decided to paint over the rest of it. So essentially on this section of wall I stripped the paint off with a wallpaper steamer and ended up gouging the bajeezus out of it and pulling up big sections of the drywall paper. Whoops.
After what I’m calculating as approximately 10(!!!) hours of wallpaper removal it was all finally gone! And I was left with some seriously uneven walls that needed smoothing out. Bring on the spackle!
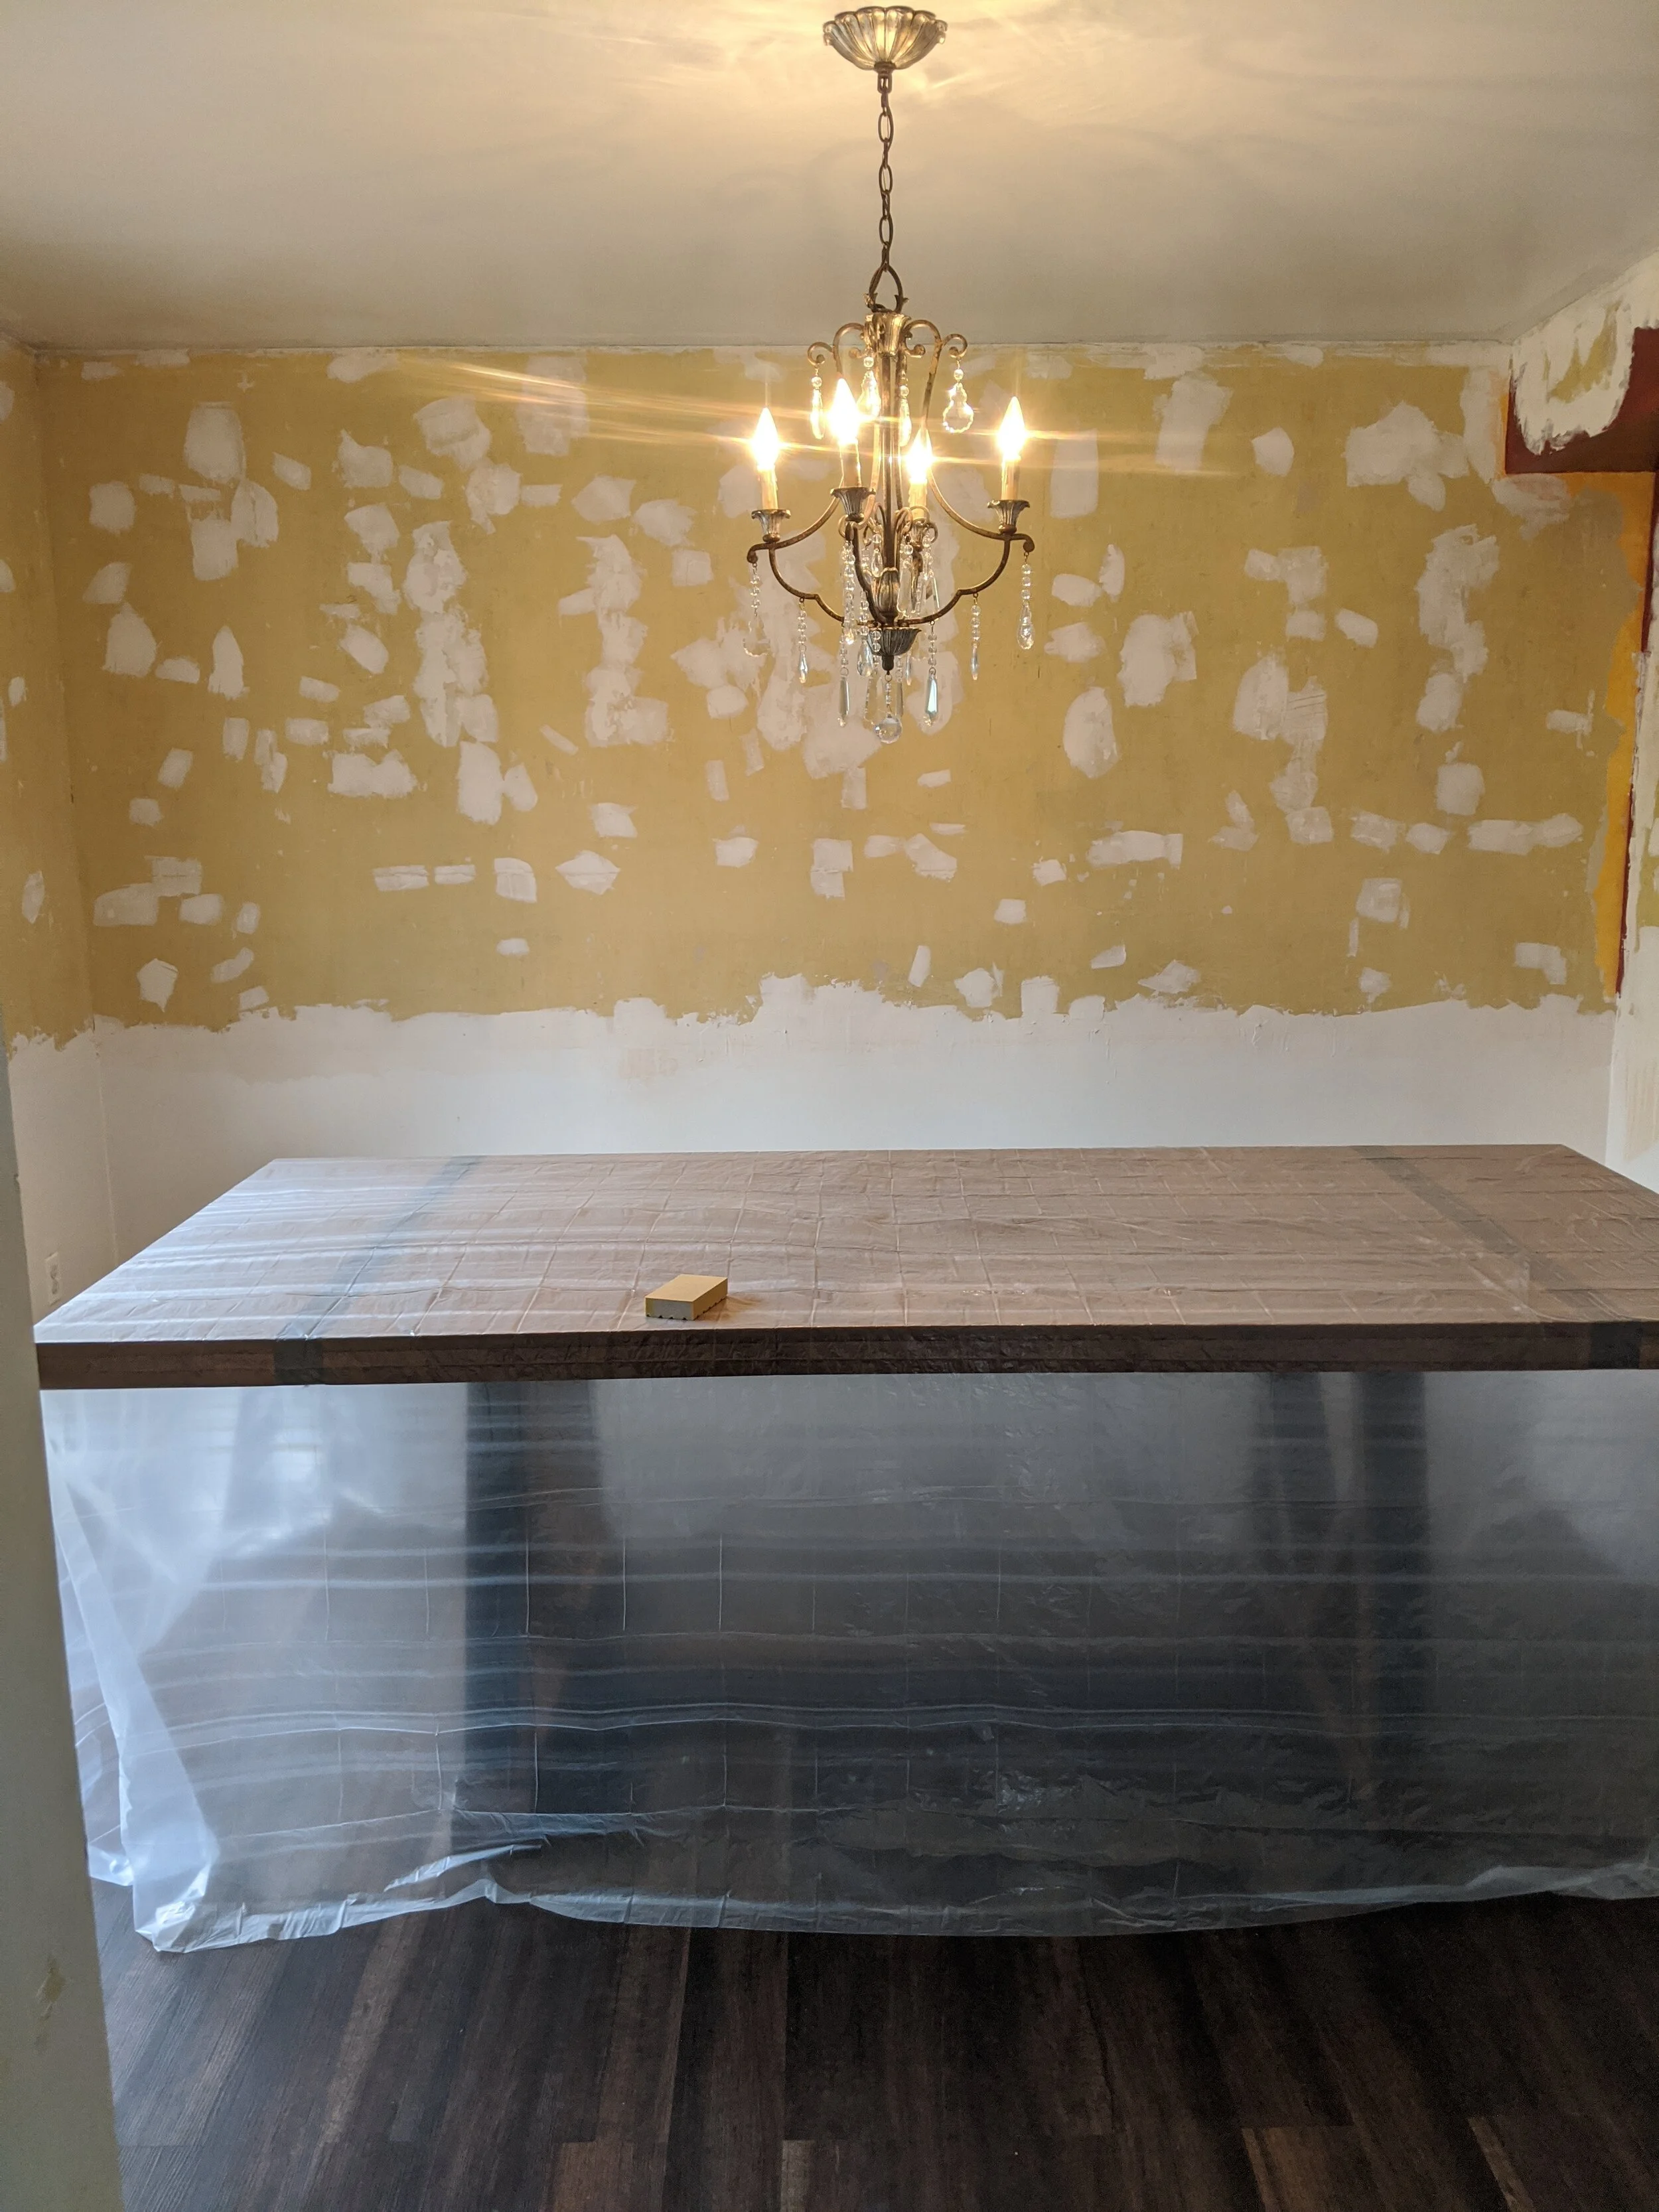

Quarantining like a boss.
To prep for sanding the spackle, I removed everything I could from the room and blocked it off as much as I could. If you’ve ever sanded spackle, you’ll notice that even the smallest patch can create a ton of dust that manages to get everywhere. And boy, am I glad I blocked off the doorways. Holy dust!
Post-sanding it now looks like a live in a haunted house.
And I am one of the ghosts.

On an unrelated note, I think I discovered some really good, pretty much free, dry shampoo!
My next steps are to patch any spots I missed the first time around and areas that are still uneven, and sand again. Then I can reinstall the crown molding, prime, paint, and get this room back to a presentable spot.
Inspiration and future plans
In the meantime, I’ll continue to daydream about my design plans for the space.
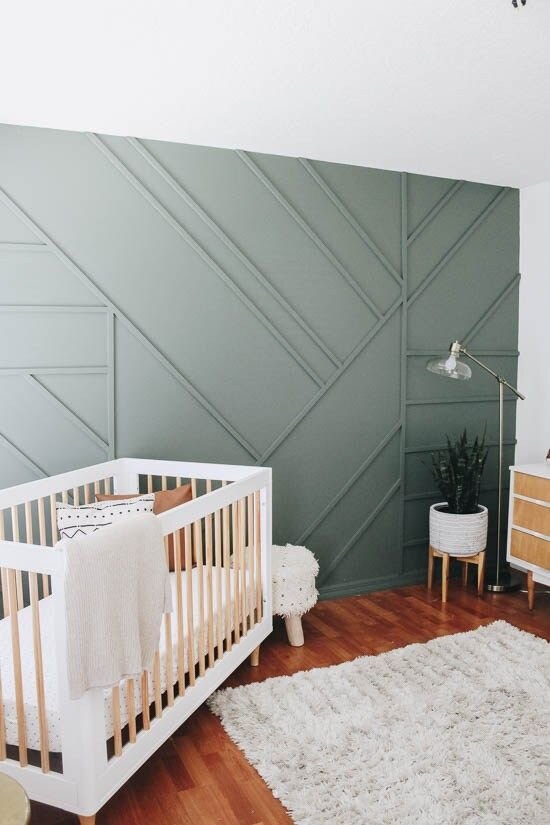
I’m obsessed with the wall treatment below for the large wall in this room that doesn’t have any windows or doors and I will make it happen, hence needing to remove the crown molding.

If we left the crown up, the boards for the accent wall would jut out further than the bottom of the crown molding. It’s difficult to explain without pictures, but essentially there would be a weird transition where the boards on the accent wall butted up against the crown molding. Instead, we’re going to put a thin piece of wood behind the crown molding on that wall to bump it out a little and give it some more depth to create a smoother transition with the accent wall.
I initially envisioned a really dark blue or teal on this wall, but after living here for a while I’ve noticed that unless it’s a nice day, the dining room can be pretty dark. So I’m going to opt for something lighter. Actually, the color will probably be similar to my inspiration pic above.
That’s actually a good note to consider - if time allows, before renovating a space live with it for a while to figure out how it looks and feels throughout the day, and how it functions for you and you family. If I dove right into this room as soon as we moved in it would probably feel like a black hole because I would have painted it a super dark color. Now that I know how it reacts to light throughout the day, I know I don’t want to go that route. Anywho…
I’m leaning towards painting the other three walls in the room a white tone. Not a true, bright white, but something more muted to help keep the room nice and bright and create a smooth transition to the surrounding rooms.
We plan on keeping the same dining room set that we currently own, especially since we bought it when we moved into this house and it’s really new. However, although I’m absolutely in love with the buffet table, it definitely doesn’t fit with the style of this house. I actually bought the buffet table a few years ago at a garage sale and completely refurbished it. It went so well with our last house, but this house was built in a different era and it just feels out of place. It breaks my heart to think about selling, but I think it’d be better suited in another house. I’d love to buy another dresser I could makeover for myself.

I will always love you, buffet table.
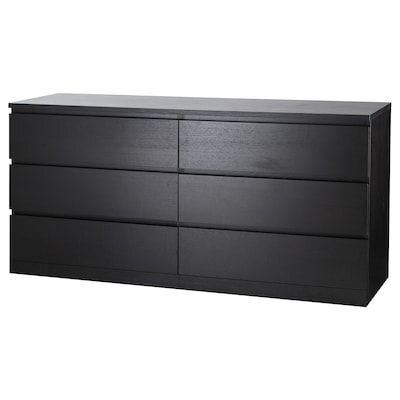
Why a new dresser instead of a new buffet table, you ask? Well, I’ve been thinking… and I might actually move my dresser from my bedroom into the dining room and buy something second-hand for the bedroom. Mid-century modern is really on trend right now, and I’m certainly not immune to falling for that style, but I don’t think it would go with our dining room table and chairs. Instead, the Ikea Malm dresser that I currently use could undergo a couple of tweaks (aka Ikea hacks) to make it more interesting and fit with the rest of the dining room decor.
At least, I hope it does. Because if Lucius takes it downstairs to the dining room, I don’t think I can convince him to take it back upstairs to the bedroom.
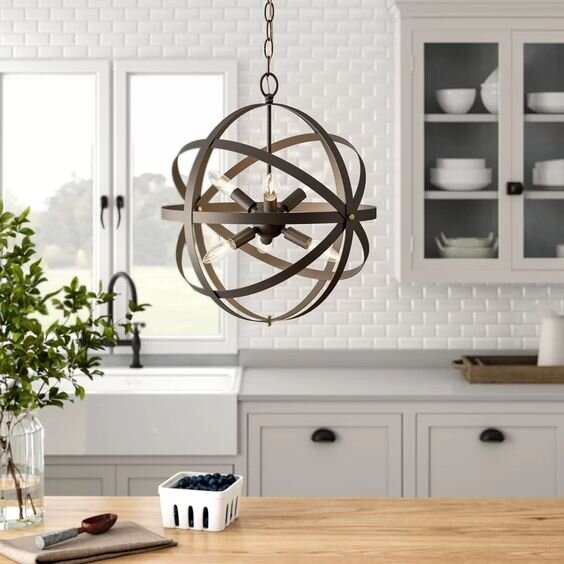
I also plan to replace the light fixture, because the current chandelier definitely doesn’t fit into my aesthetic. Shopping for light fixtures is one of my favorite things to do, alongside rug shopping. Sky’s the limit, but I think I’ve narrowed it down to something with a more of a circular element to break up all the straight lines going on in the room on the accent wall, the dresser/buffet table, and the dining table.

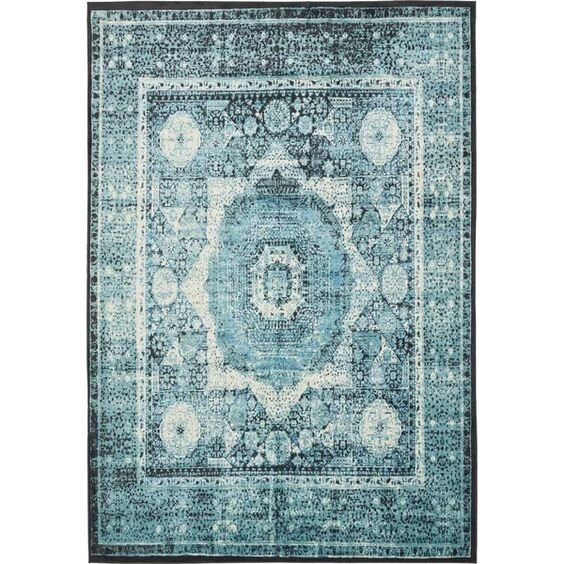
This room also needs an area rug in here to add some more dimension to the space and help break it up a little, especially with our crazy dark flooring that I’m certainly not crazy about. I’ve been swooning over oriental rugs for quite a while, and although Lucius will take some convincing, I’d love to put one in here.
I’m thinking I want to go with something with darker colors and of course some good pattern because practically thinking, it’ll be going under a dining room table. People drop things. Let’s hide those inevitable stains!

Lastly, we’ll add some artwork and general décor. I plan to put the curtains that I had in this room previously back up and hang some pictures to round it out.
And there you have it. My body is buzzing with excitement to put this room together (is that normal?), but I know there’s still a long way to go until it’s done. I can’t wait to turn this into a room I actually want to spend time in and share it with you along the way!
Pst - Check out the grid below to see all my inspiration pics in one place and dream with me about how great this room can will be!