DIY Geometric Wood Accent Wall
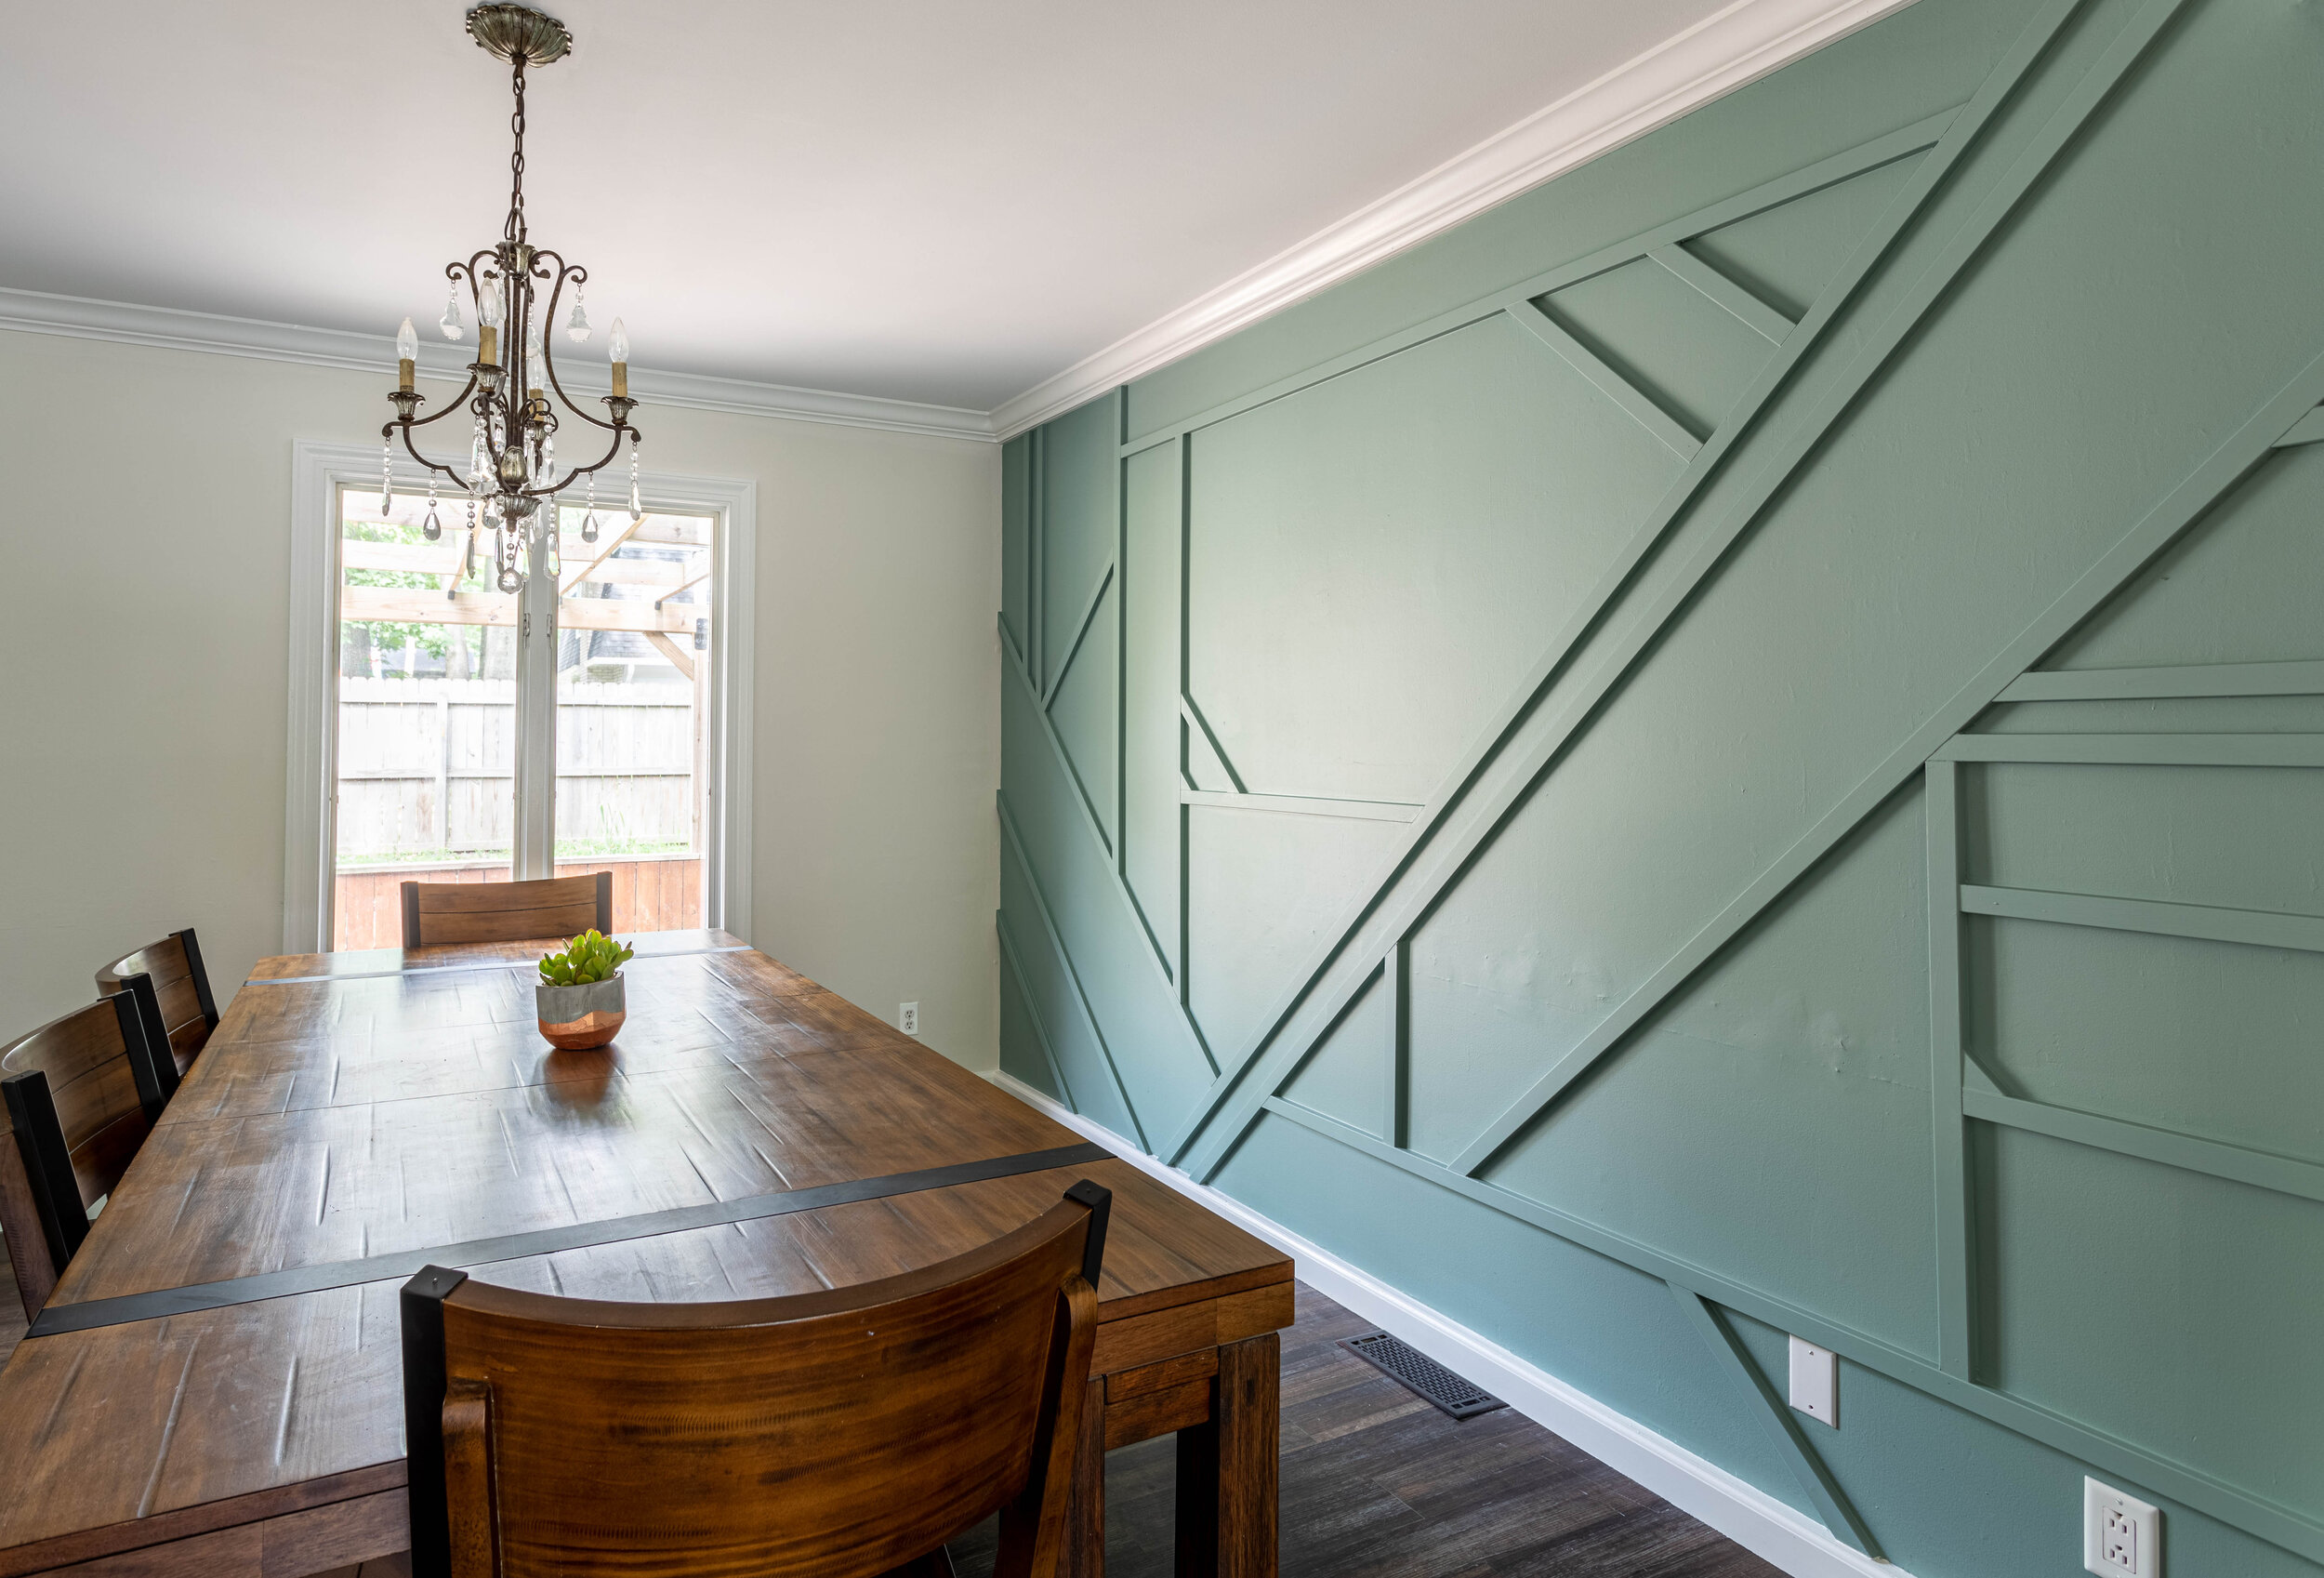
Well, we finally did it. Our geometric wood accent wall is complete and I’M SO IN LOVE WITH IT! In fact, I love the finished product so much, I wrote a tutorial about it! (Surprise, surprise).
How to Create a Modern Wood Feature Wall
Well, we finally did it. Our geometric wood accent wall is complete and I’M SO IN LOVE WITH IT!
Waaaayyyy back in March, I started renovating our dining room. I was completely inspired by the accent wall Liz over at Within the Grove created and just knew I had to give it a whirl. And heck - I had nothing to lose considering what we started with!

But because we seriously lack focus as far as home renovations go, we got distracted working on my home office redesign, finishing the flip, and… what else?
Oh yeah, completely demolishing our master suite.
But FINALLY, we were able to take a little bit of time, find some childcare (toddlers and nail guns don’t mix - who knew!?), and put this wall up in just a couple of hours! Easy peasy. Then I just had to caulk and paint and now I spend most of my time gazing lovingly at it. I mean, wouldn’t you!?

In fact, I love the finished product so much, I wrote a tutorial about it! (Surprise, surprise). Here’s how I created my geometric wood accent wall:
Materials
As an Amazon Associate, I earn from qualifying purchases. This post may contain affiliate links, meaning I receive commissions for purchases made through those links, at no cost to you.
- Primed 1 x 2 MDF boards (the amount you need will vary based on your design)
- Brad nail gun
- Nails
- Paint
- Paintbrush
- Craft brush
- Paintable caulk
- Wood Putty
- Sandpaper
- Miter saw
- Level
Draft the Design of your Accent Wall
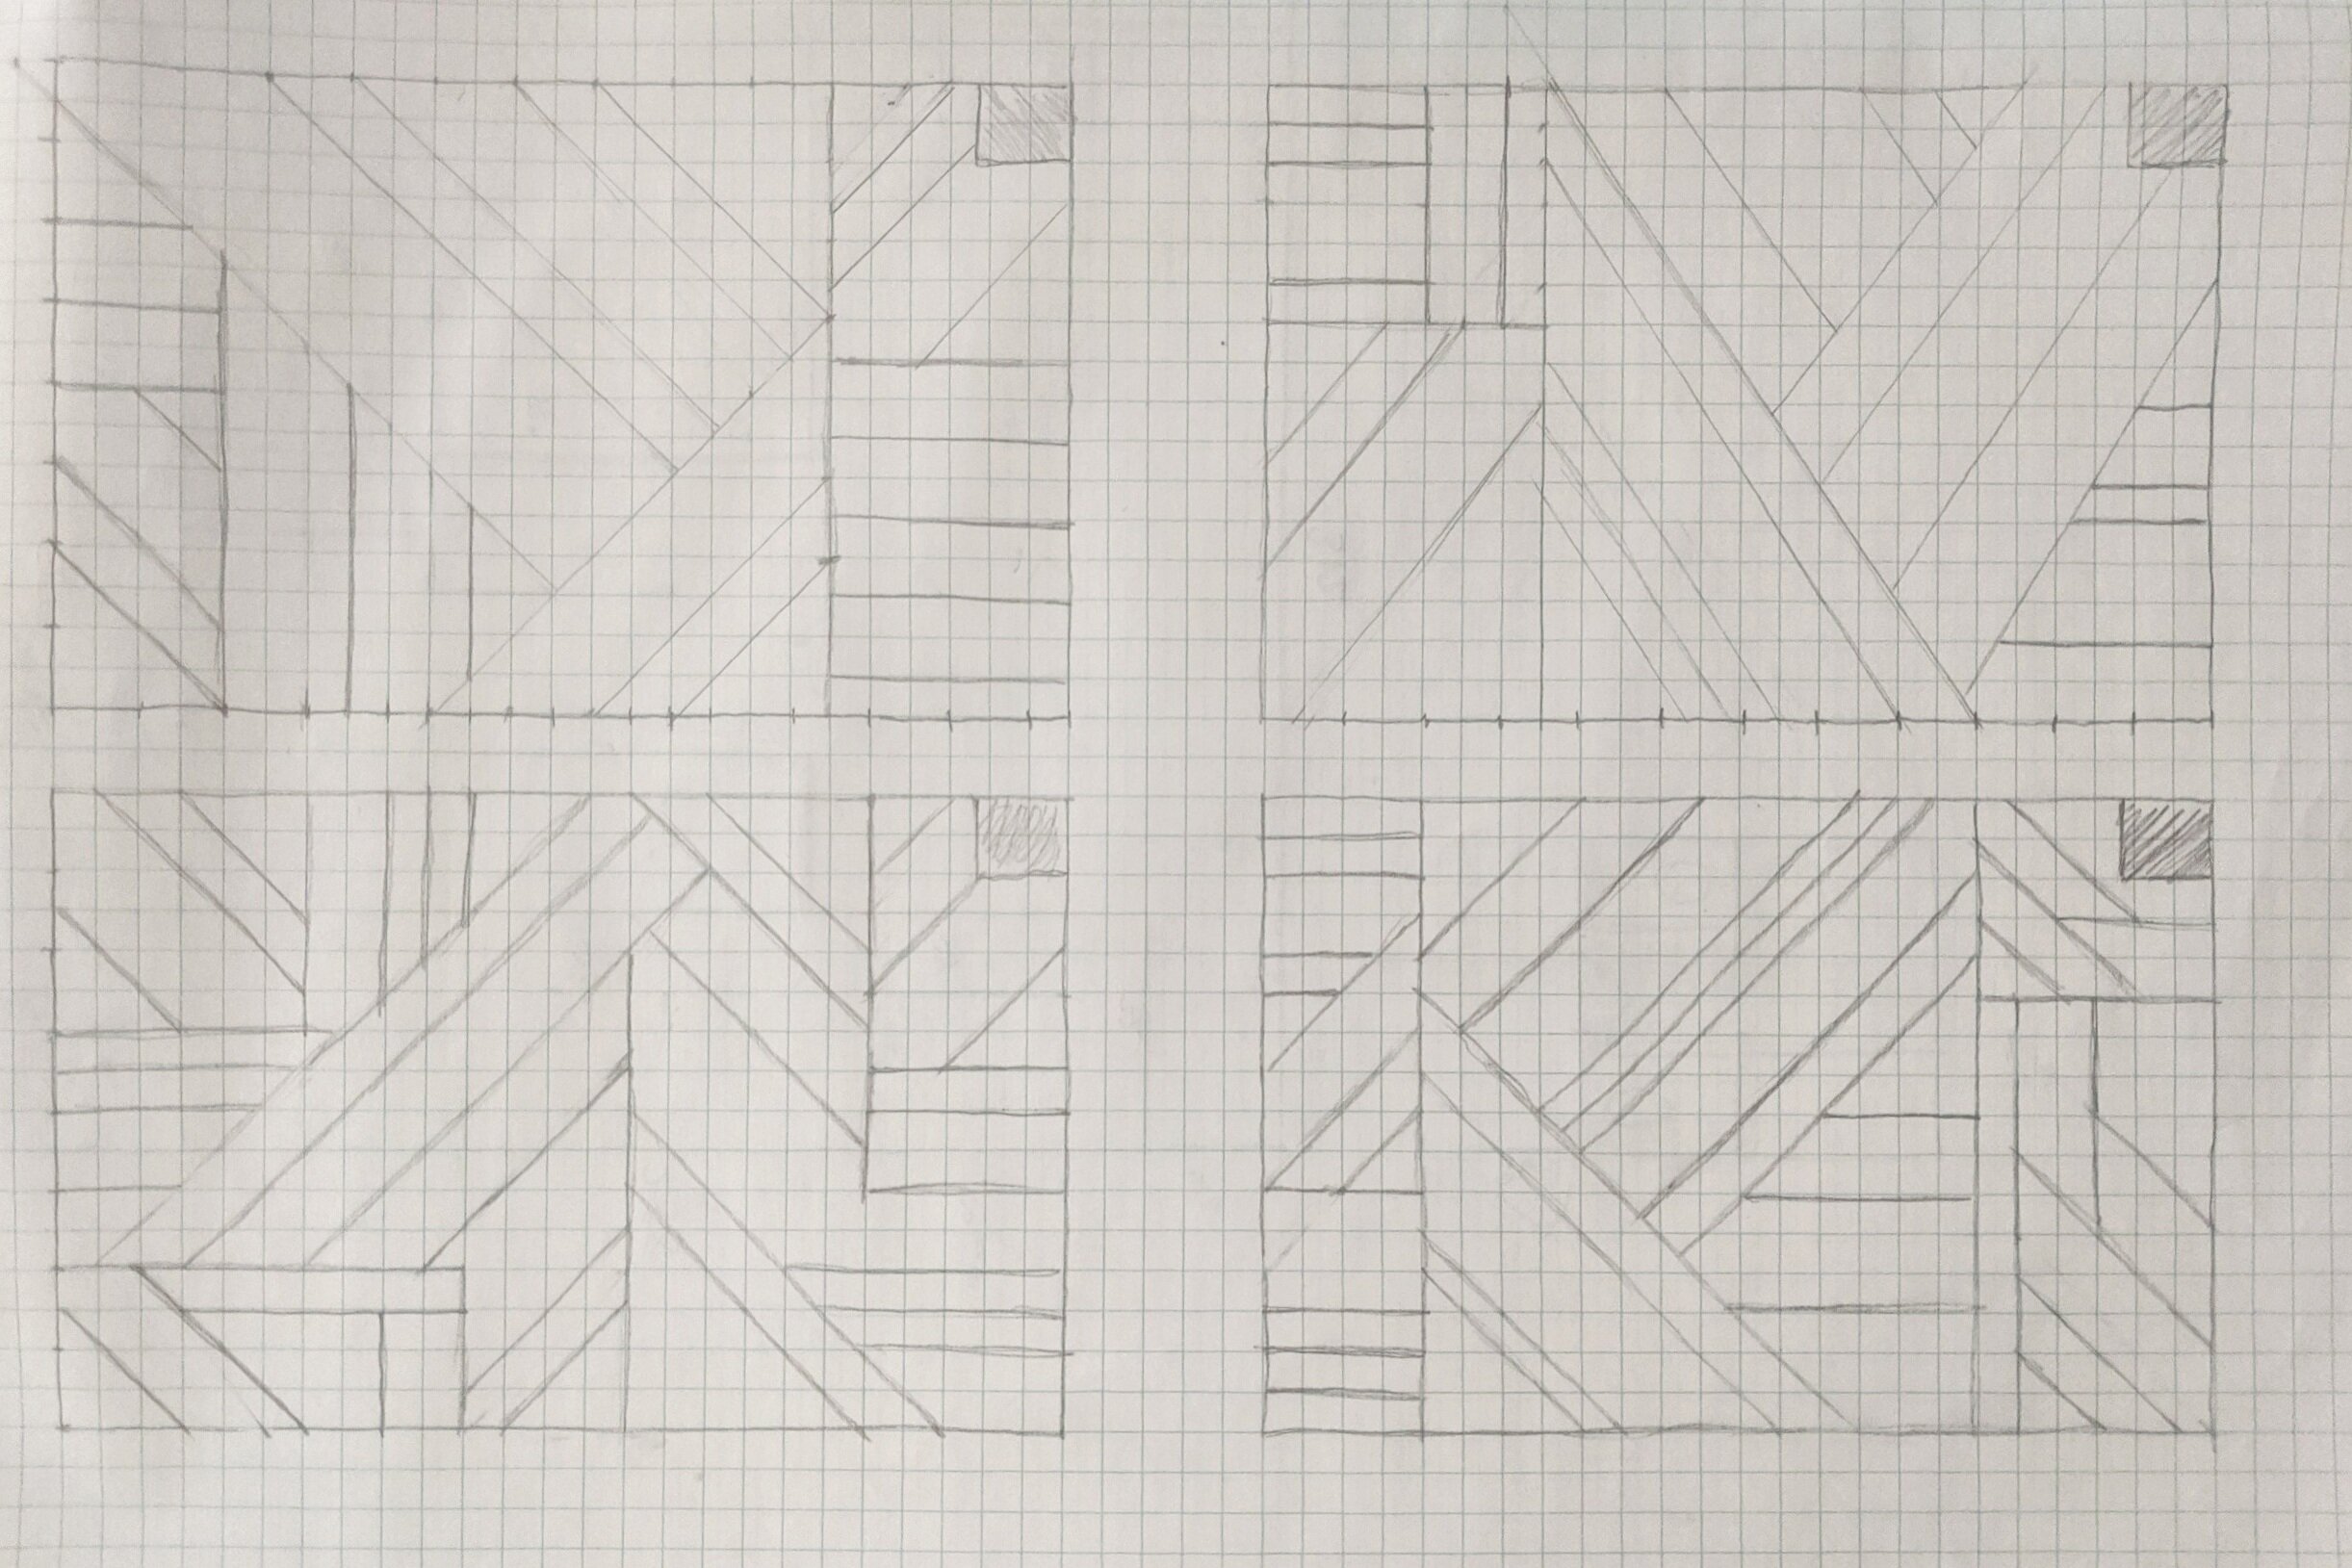
First things first, I started by drafting up a bunch of designs using graph paper. I initially drafted 4 designs and didn’t fall in love with any of them. Then I drafted 4 more. And you know what? I actually didn’t use anything I mocked up!
HOWEVER, I still think this step is important because it gave me an idea of what I definitely did and didn’t want to include in my final design.
Optional Step - Bump Out Your Crown Molding and Baseboards
This step is definitely not required, but I’m really happy we did it.
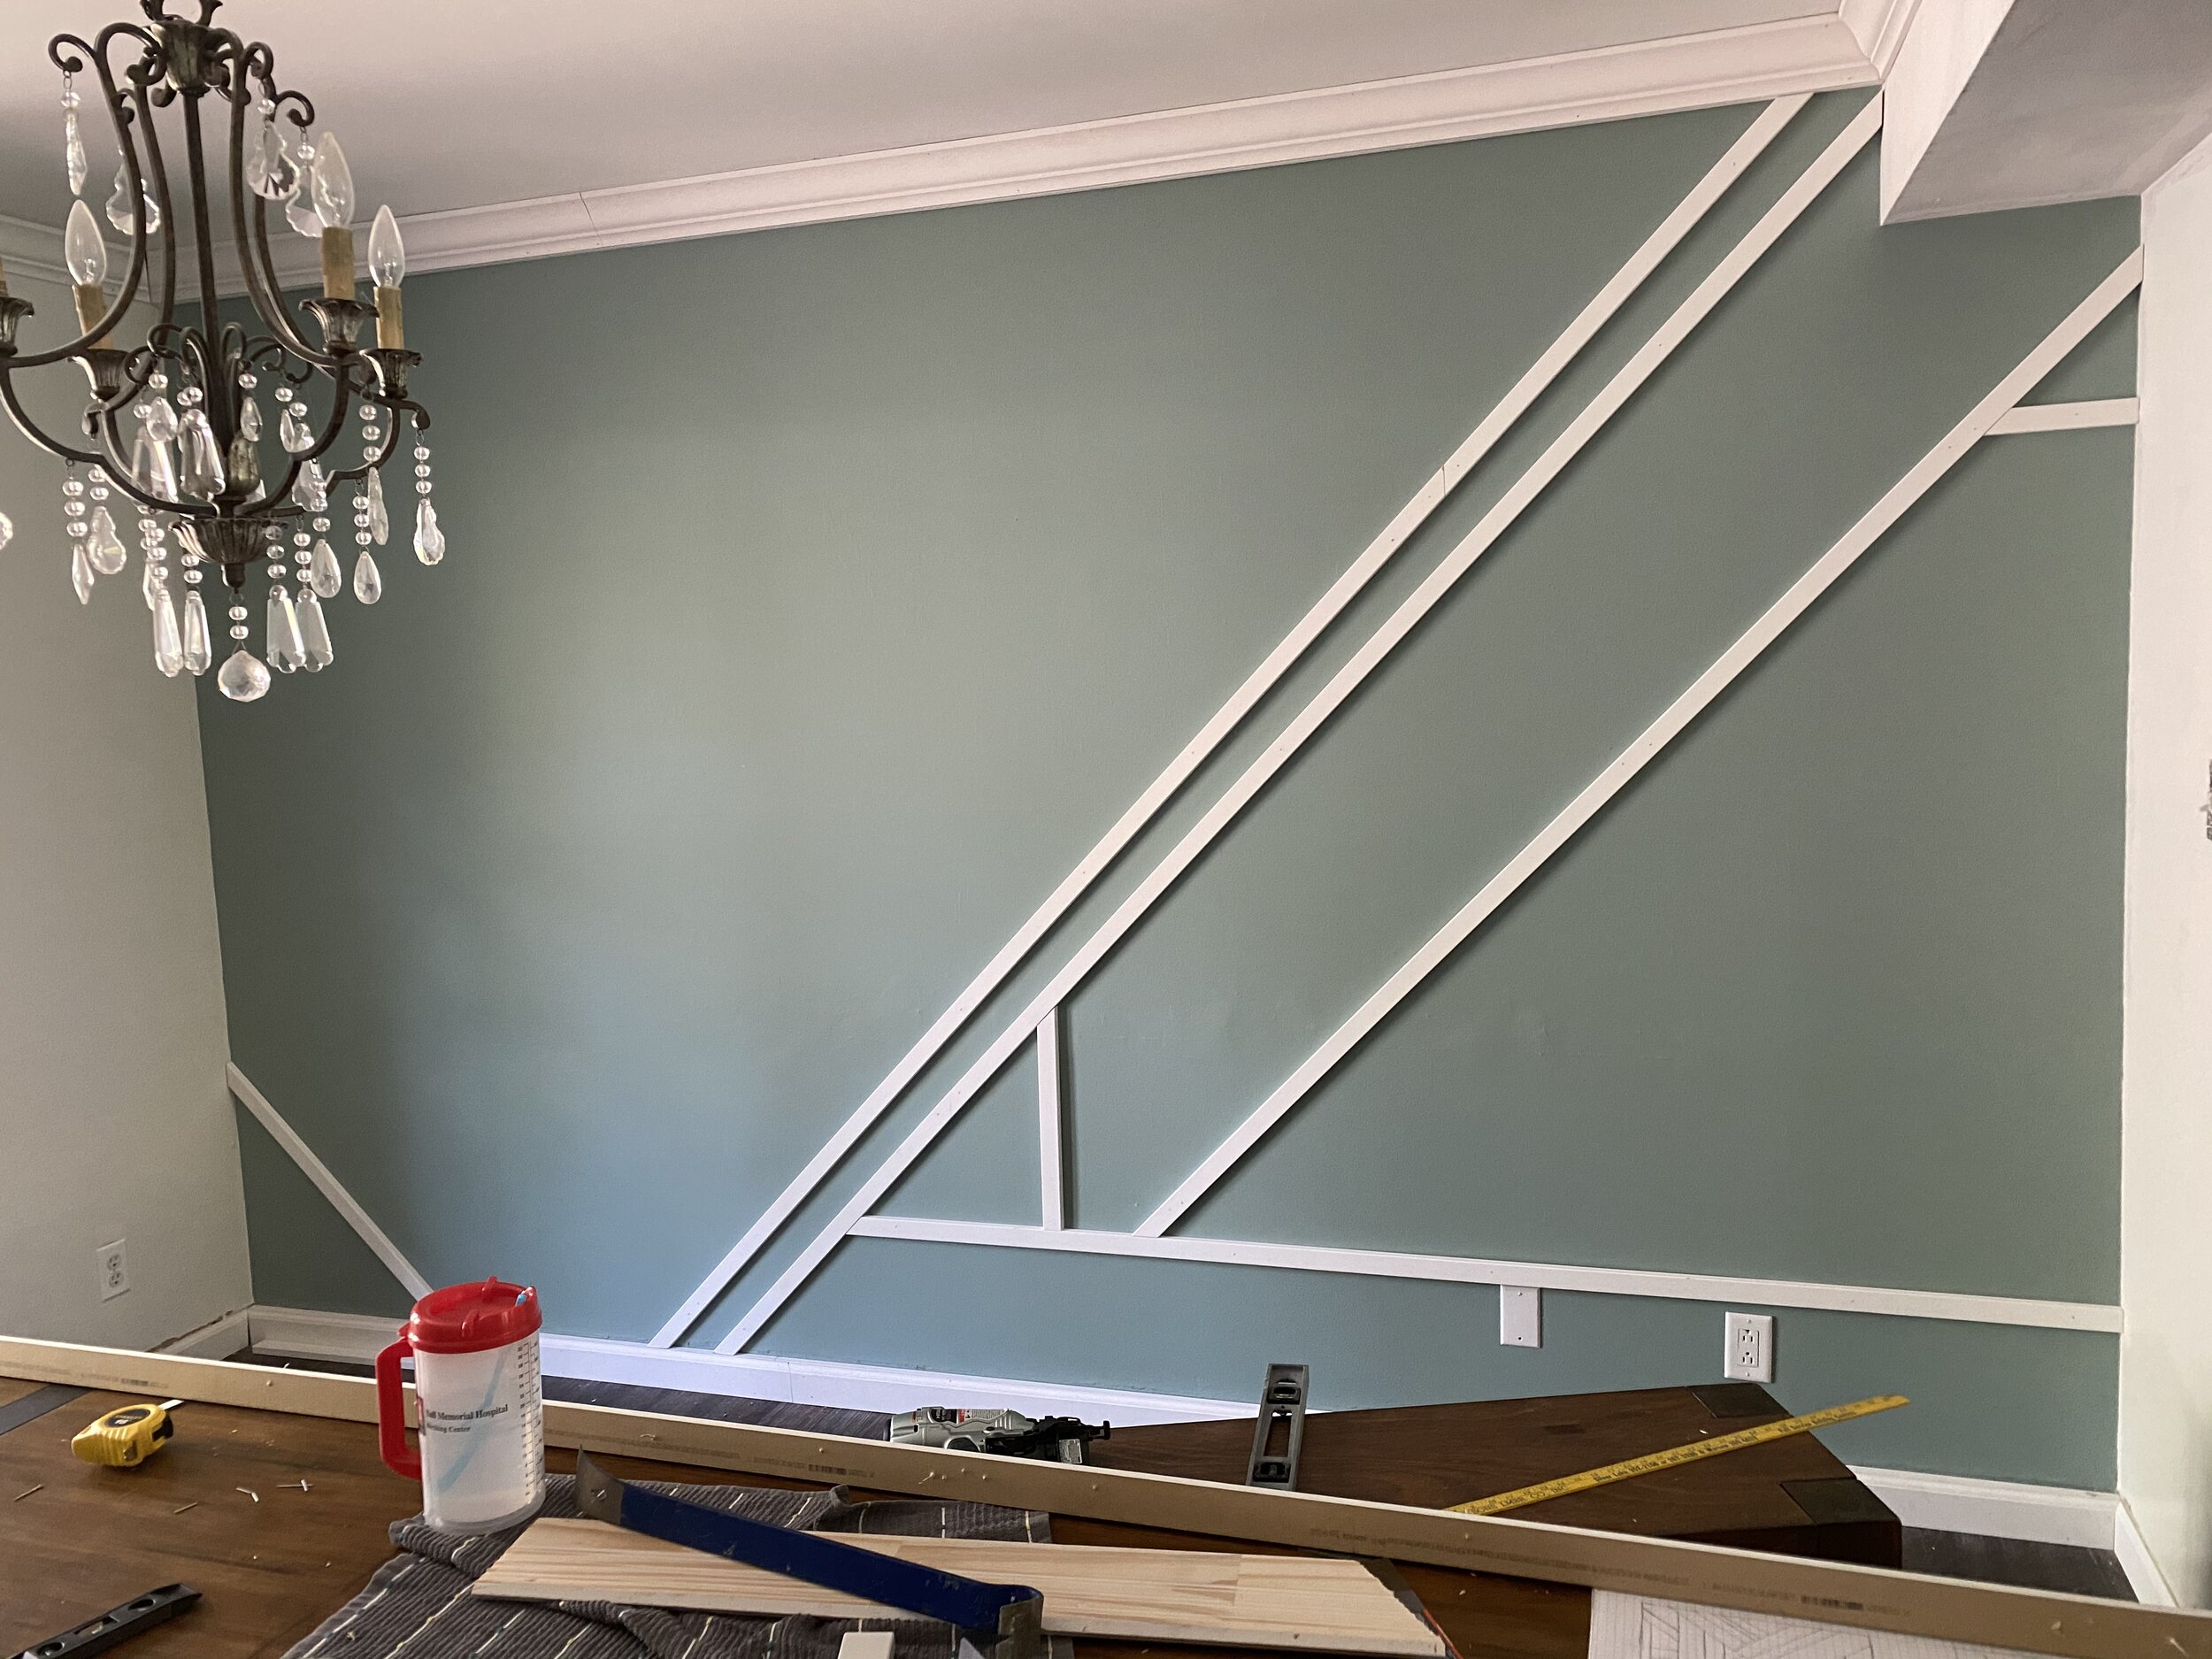
Since our crown molding and baseboards taper off on the edges, Lucius and I were concerned about how it would look where the MDF boards met up with them. Below is an example of what I’m talking about.

You see how the MDF sticks out further than the baseboard? We wanted a smoother transition. And since we were taking some of the trim off anyway to open the doorway, we just took it all down. Then on the accent wall, we put a piece of MDF up and placed the trim on top of that.

Paint
Once we had the trim finished, I painted the accent wall. This will save you time once your accent wall is installed.
My wall is Desert Lake by Sherwin Williams in an eggshell finish.
Install Your Accent Wall
Once the paint is dry, it’s time to install your accent wall! Here are a couple of tips to get you started:
Stick with 45 and 90-degree angles
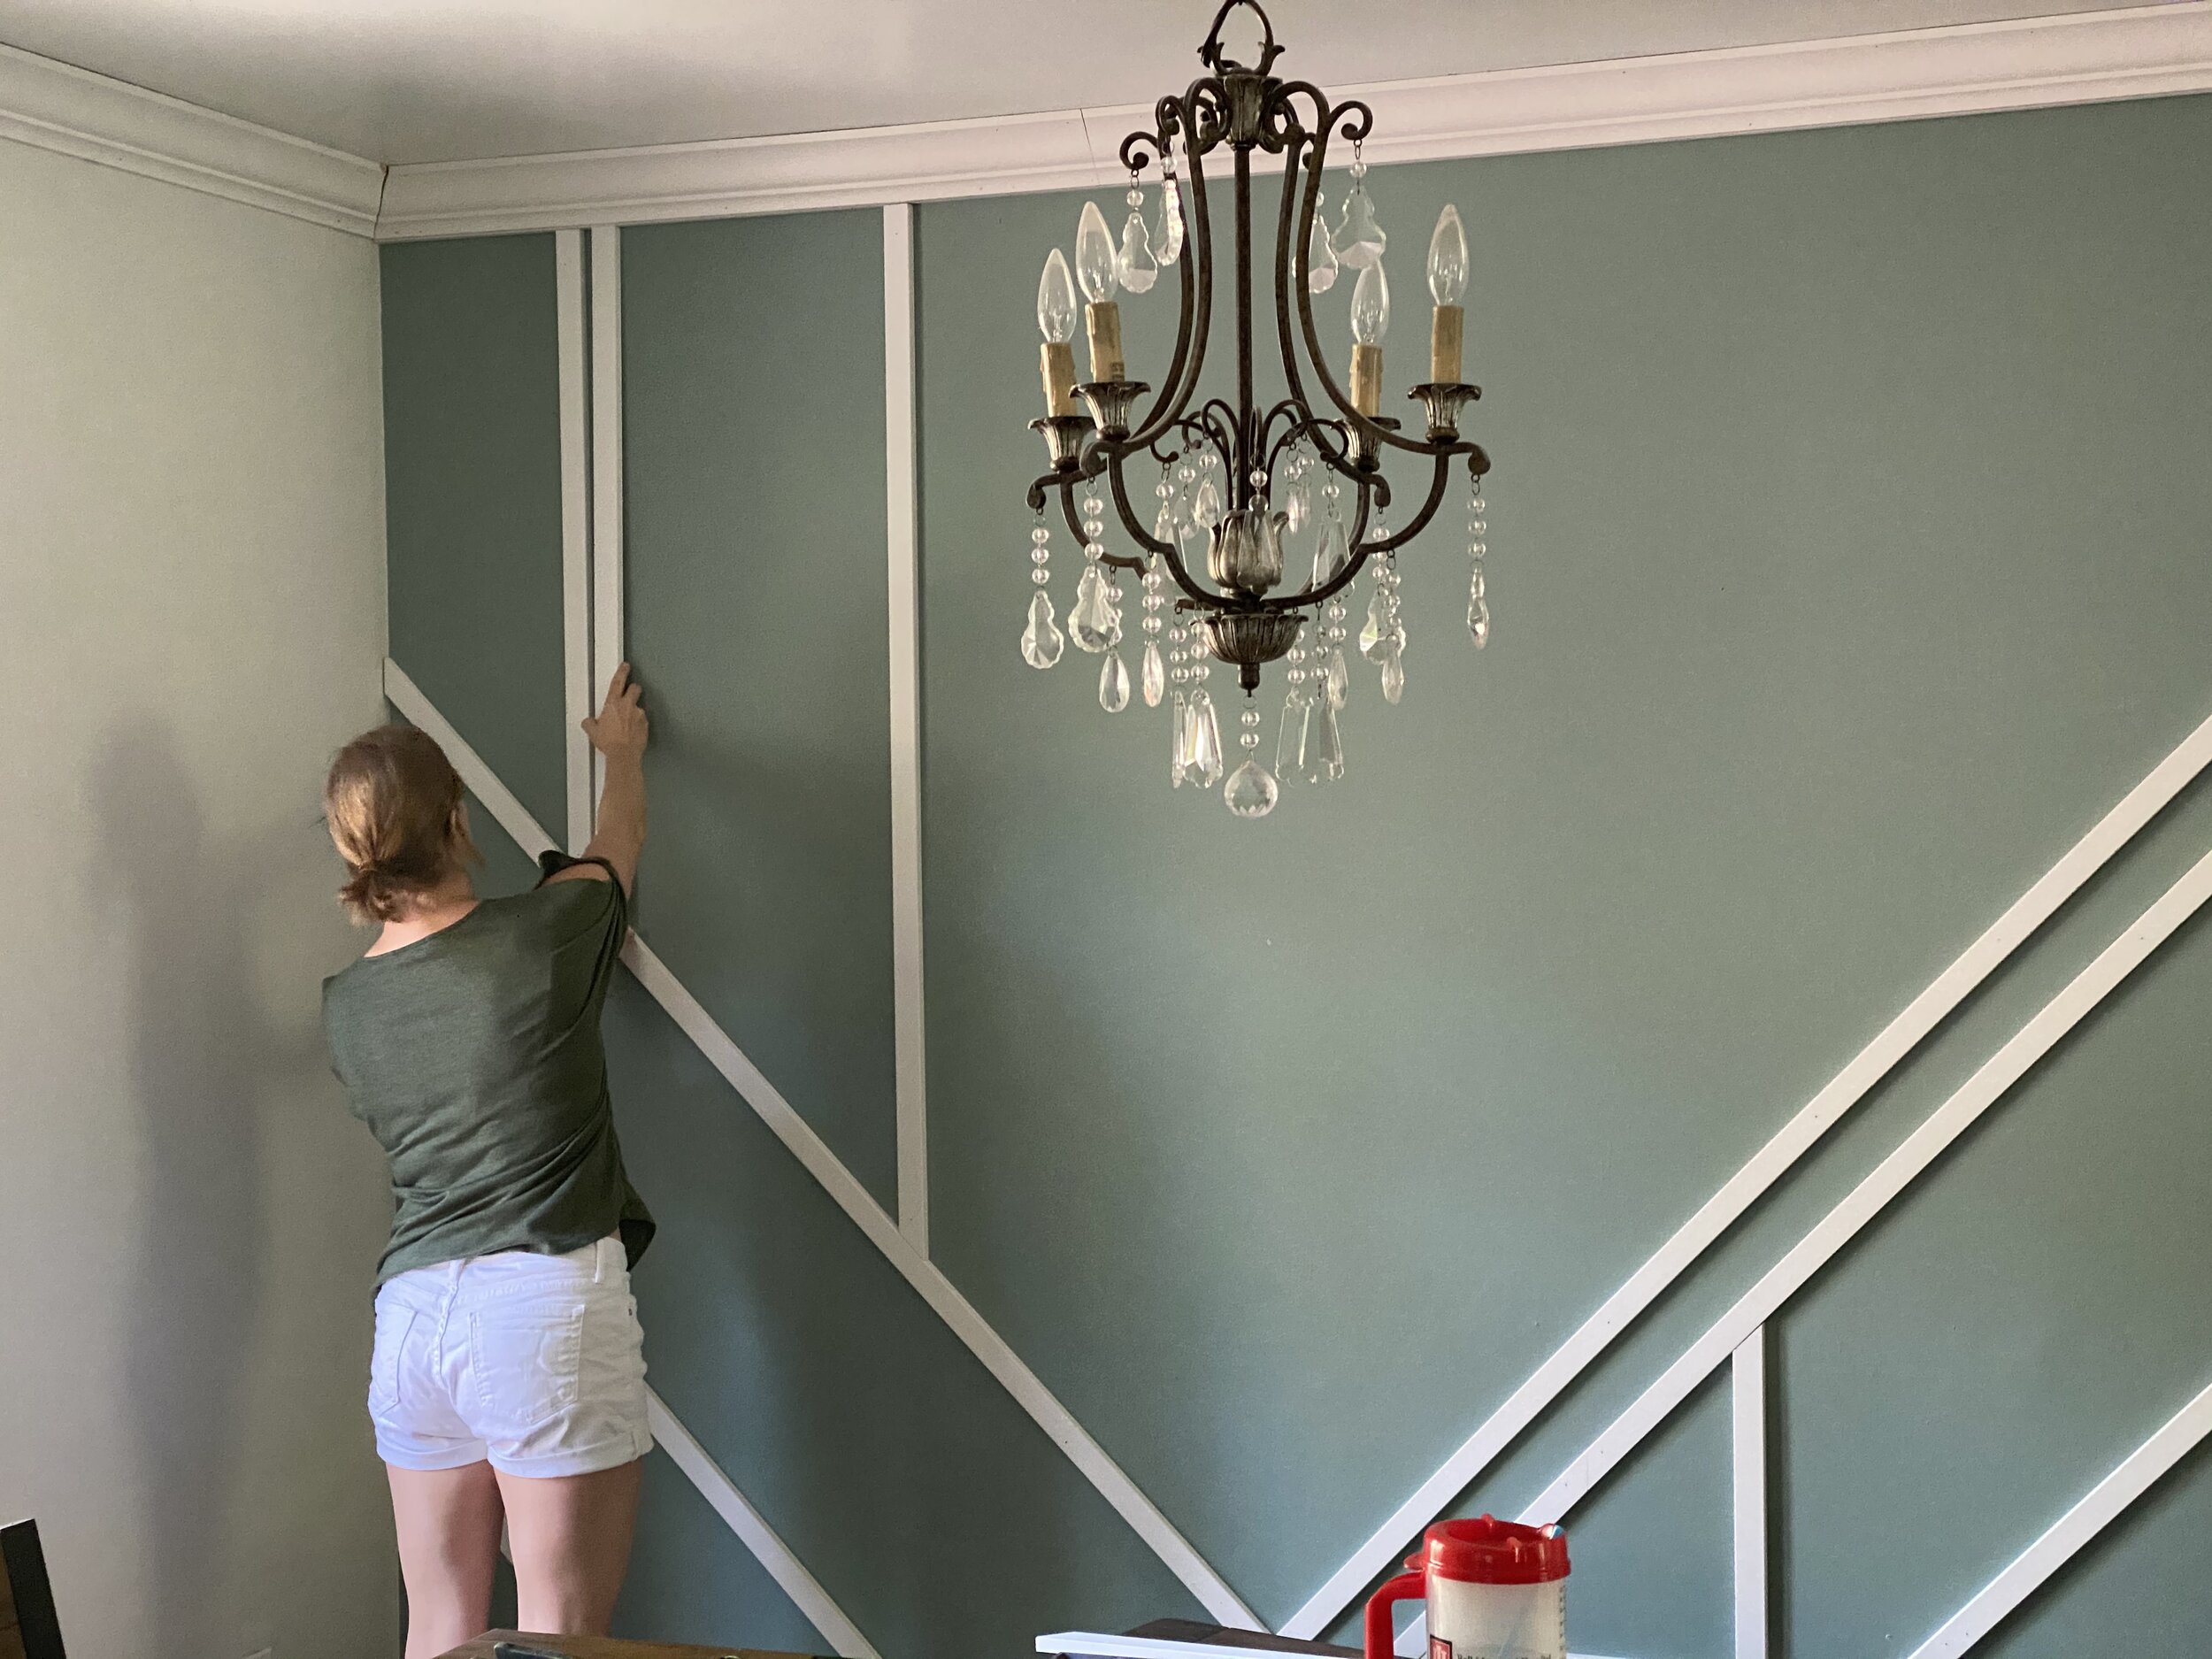
Have an extra pair of hands available (especially when it comes to leveling/nailing the long boards)
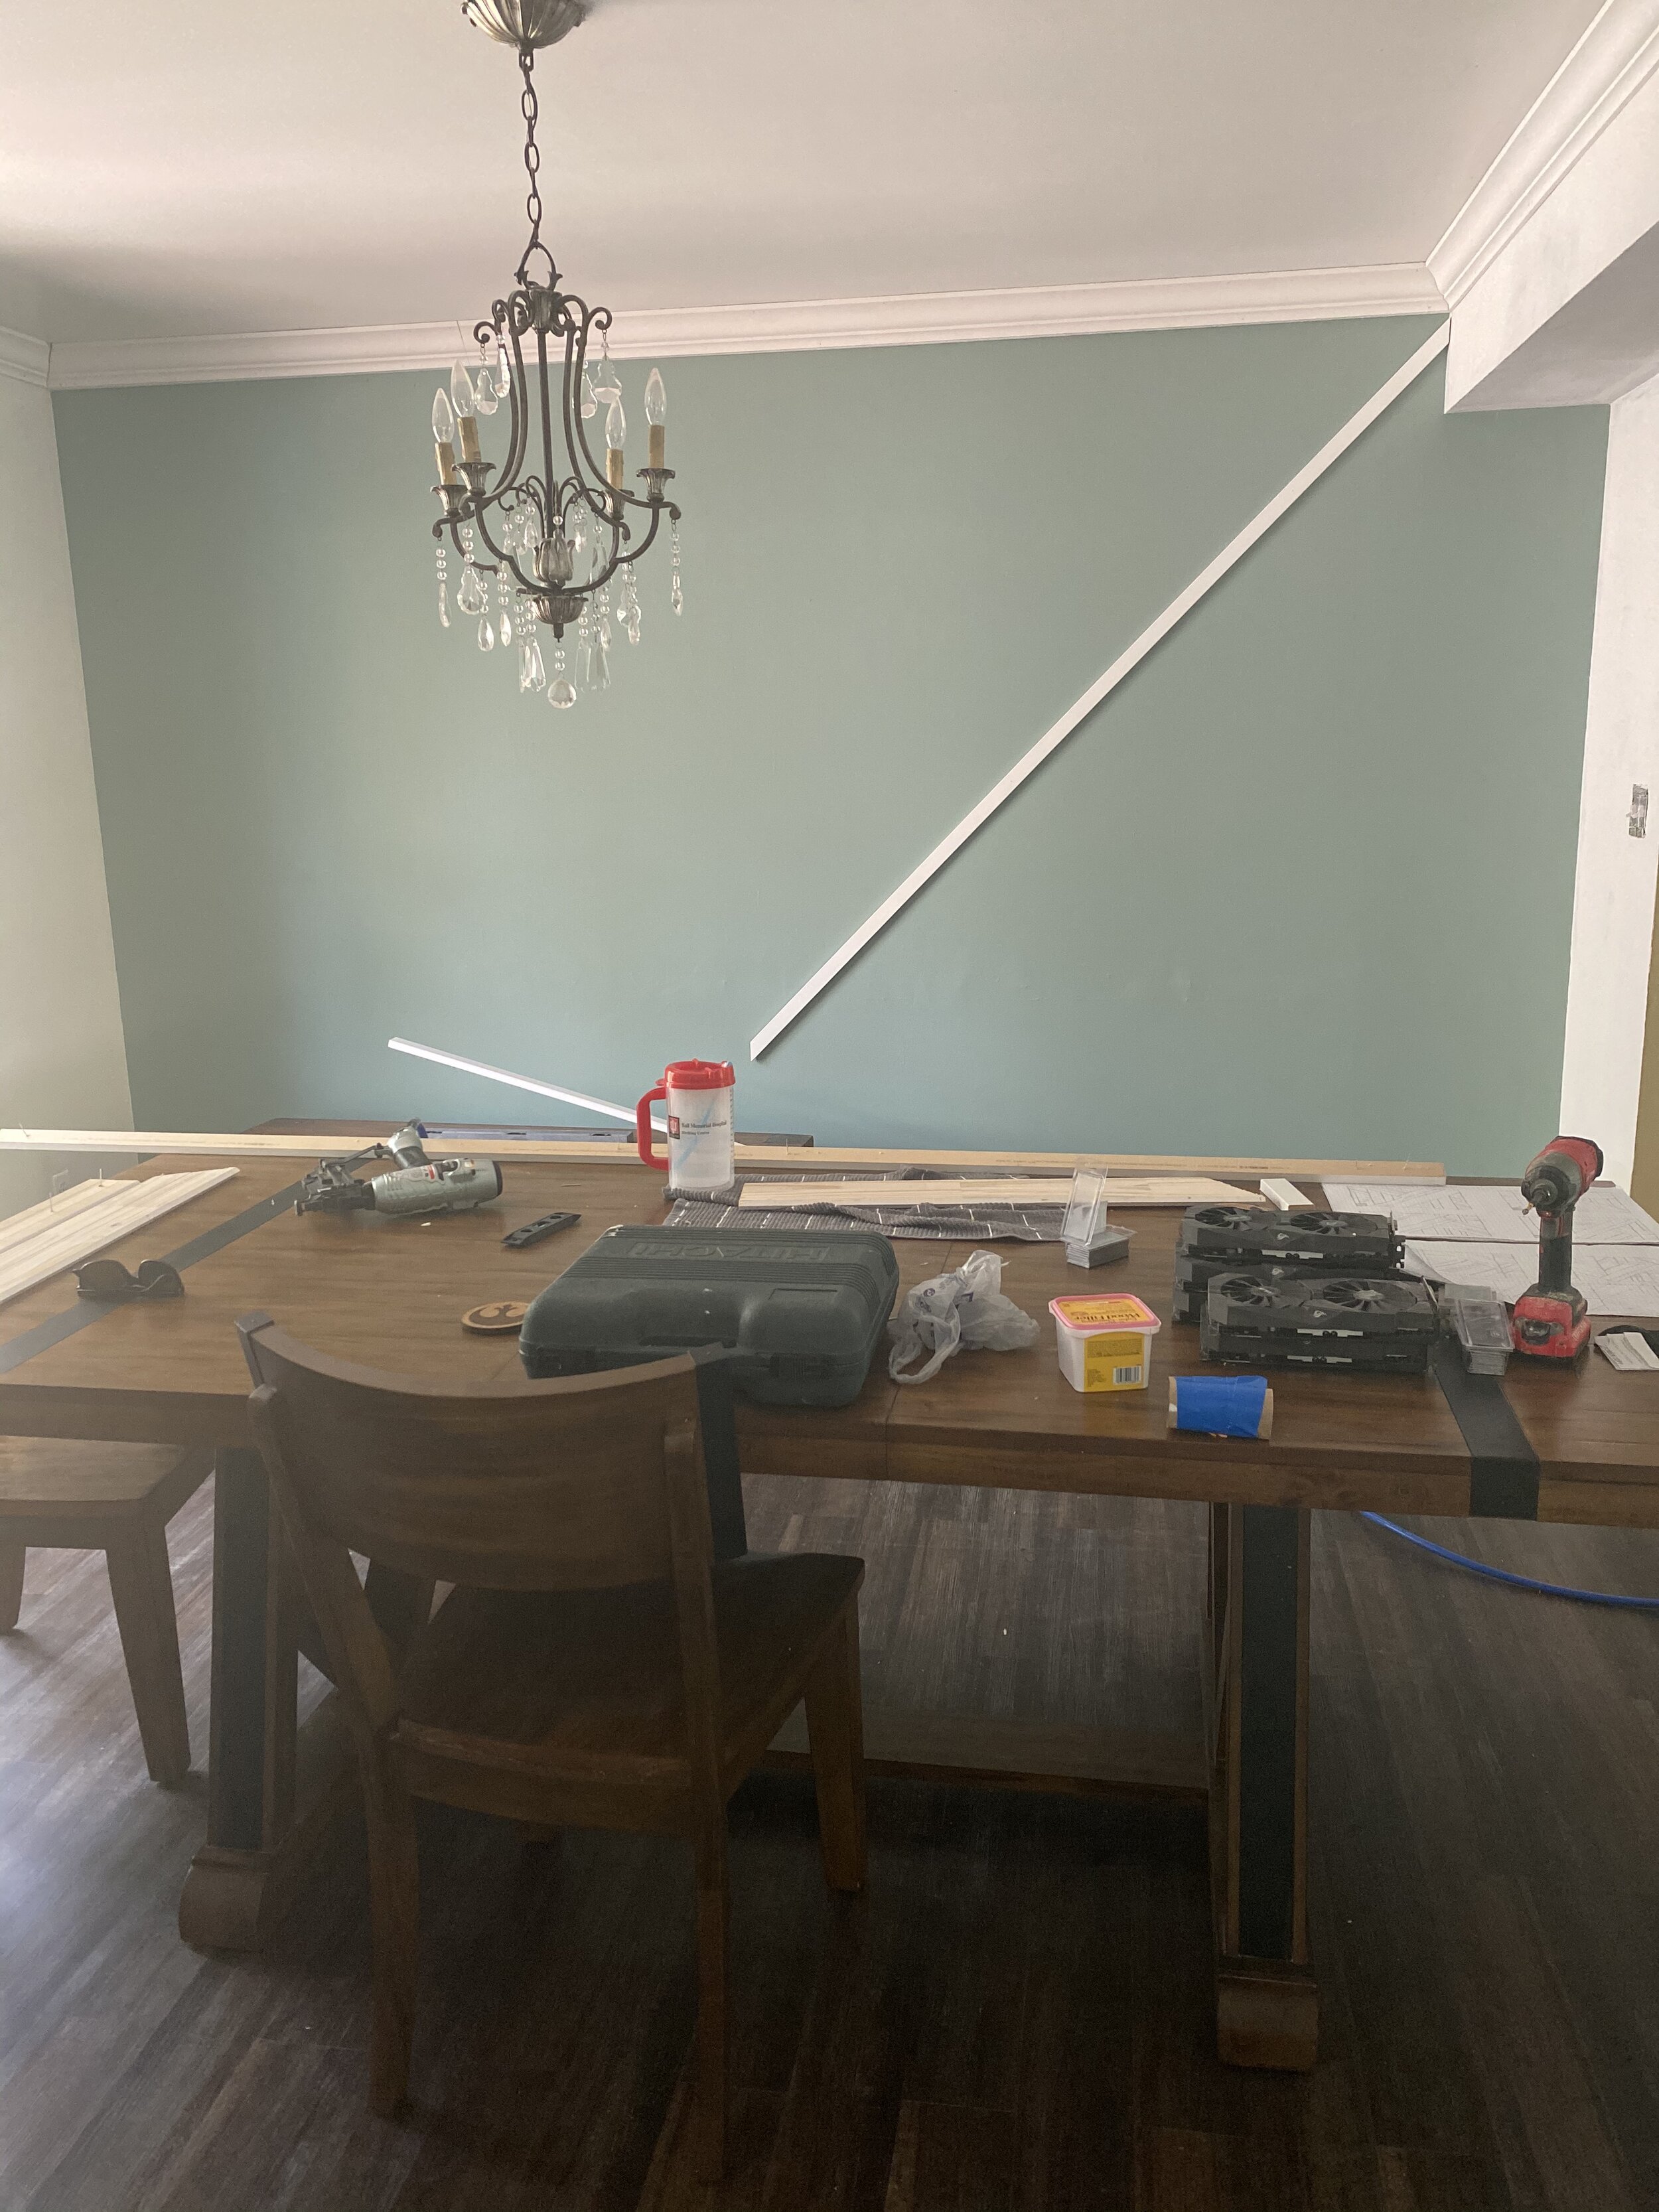
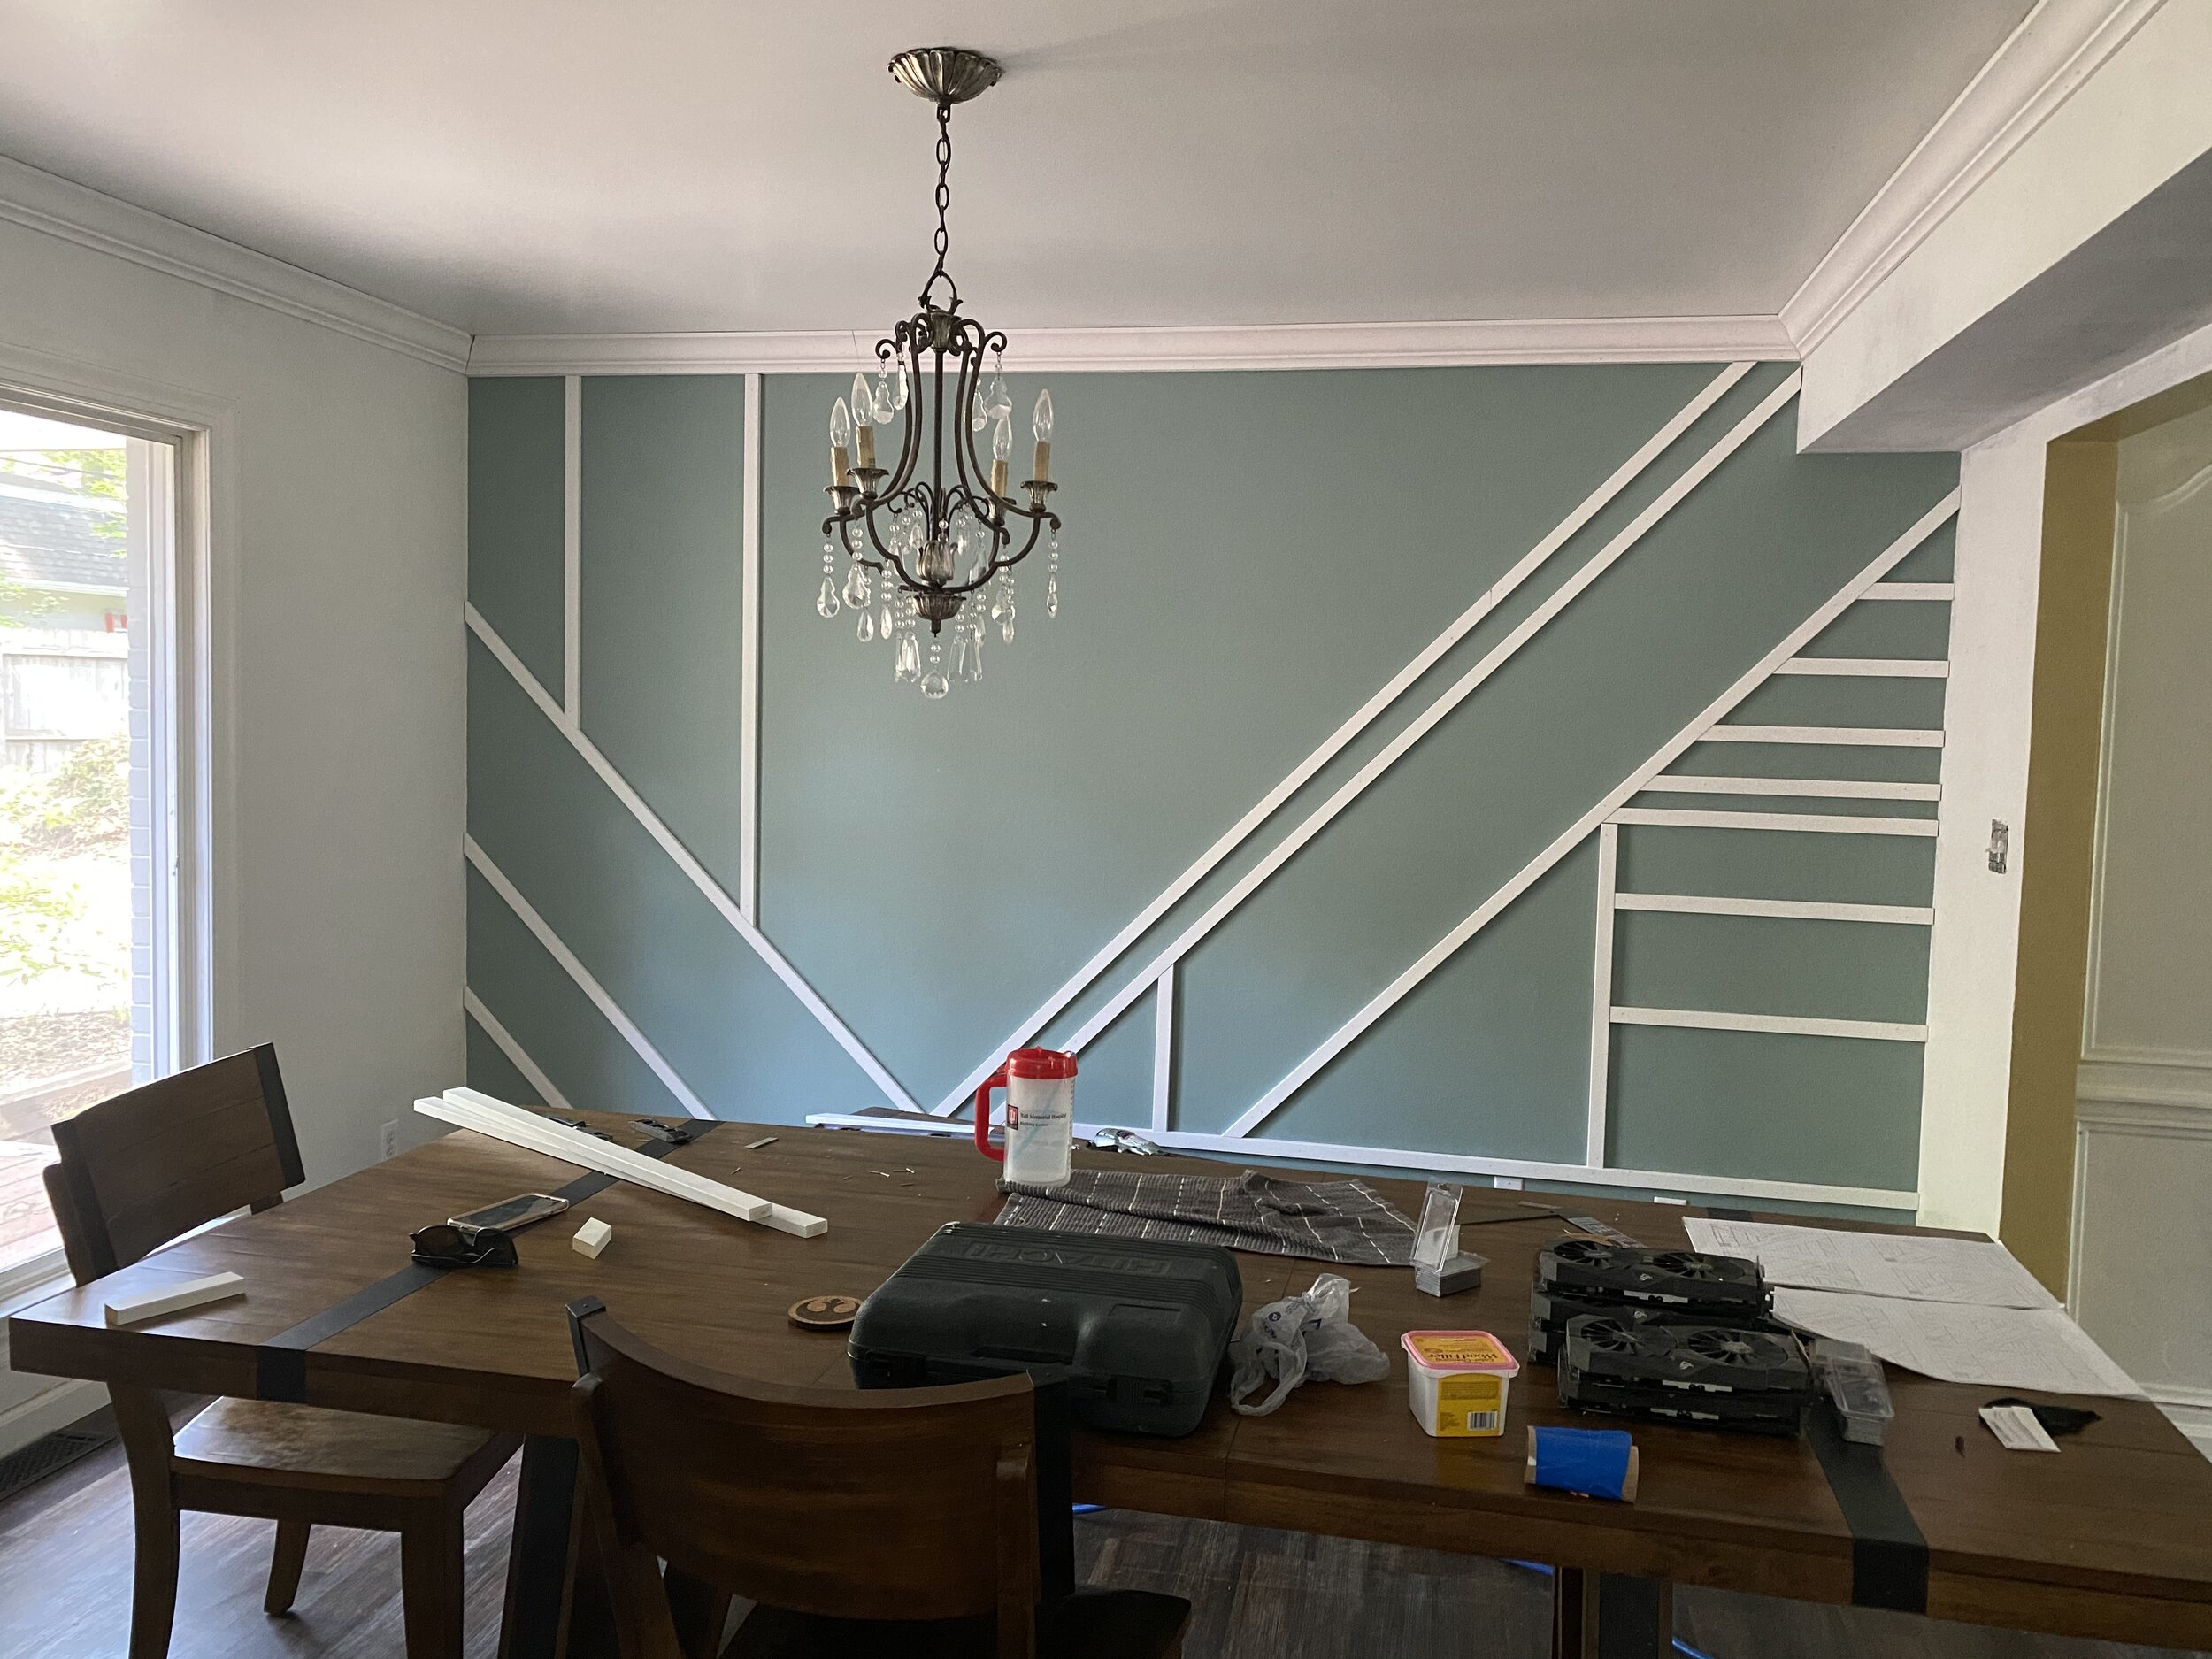
From drafting a bunch of designs, I knew I wanted one long section that went from the bottom left to the top right, so that’s where we started. This also happened to be the longest section and was the trickiest to level and nail.
And honestly, from there we just held up boards at different angles and with various spacing to see what looked and felt right. Then we leveled and nailed as we went - even using some of our scraps as filler pieces!
Once we got into a groove, the install went by really fast and ended up being a really fun project.

Fill the Gaps
Of course, installing the wall is only part of the project. Now you have to fill your nail holes with wood putty and caulk all your seams.
I caulked along the seams where the MDF met the wall. I also caulked where two pieces of MDF butted up against each other. You could use wood putty or joint compound here instead, which would probably be a smoother transition, but I really didn’t want to sand all that and I’m happy with the final product. I ended up using about 2 tubes of caulk.
Once the wood putty is dry, sand it down. And once the caulk is dry….
Paint Some More!
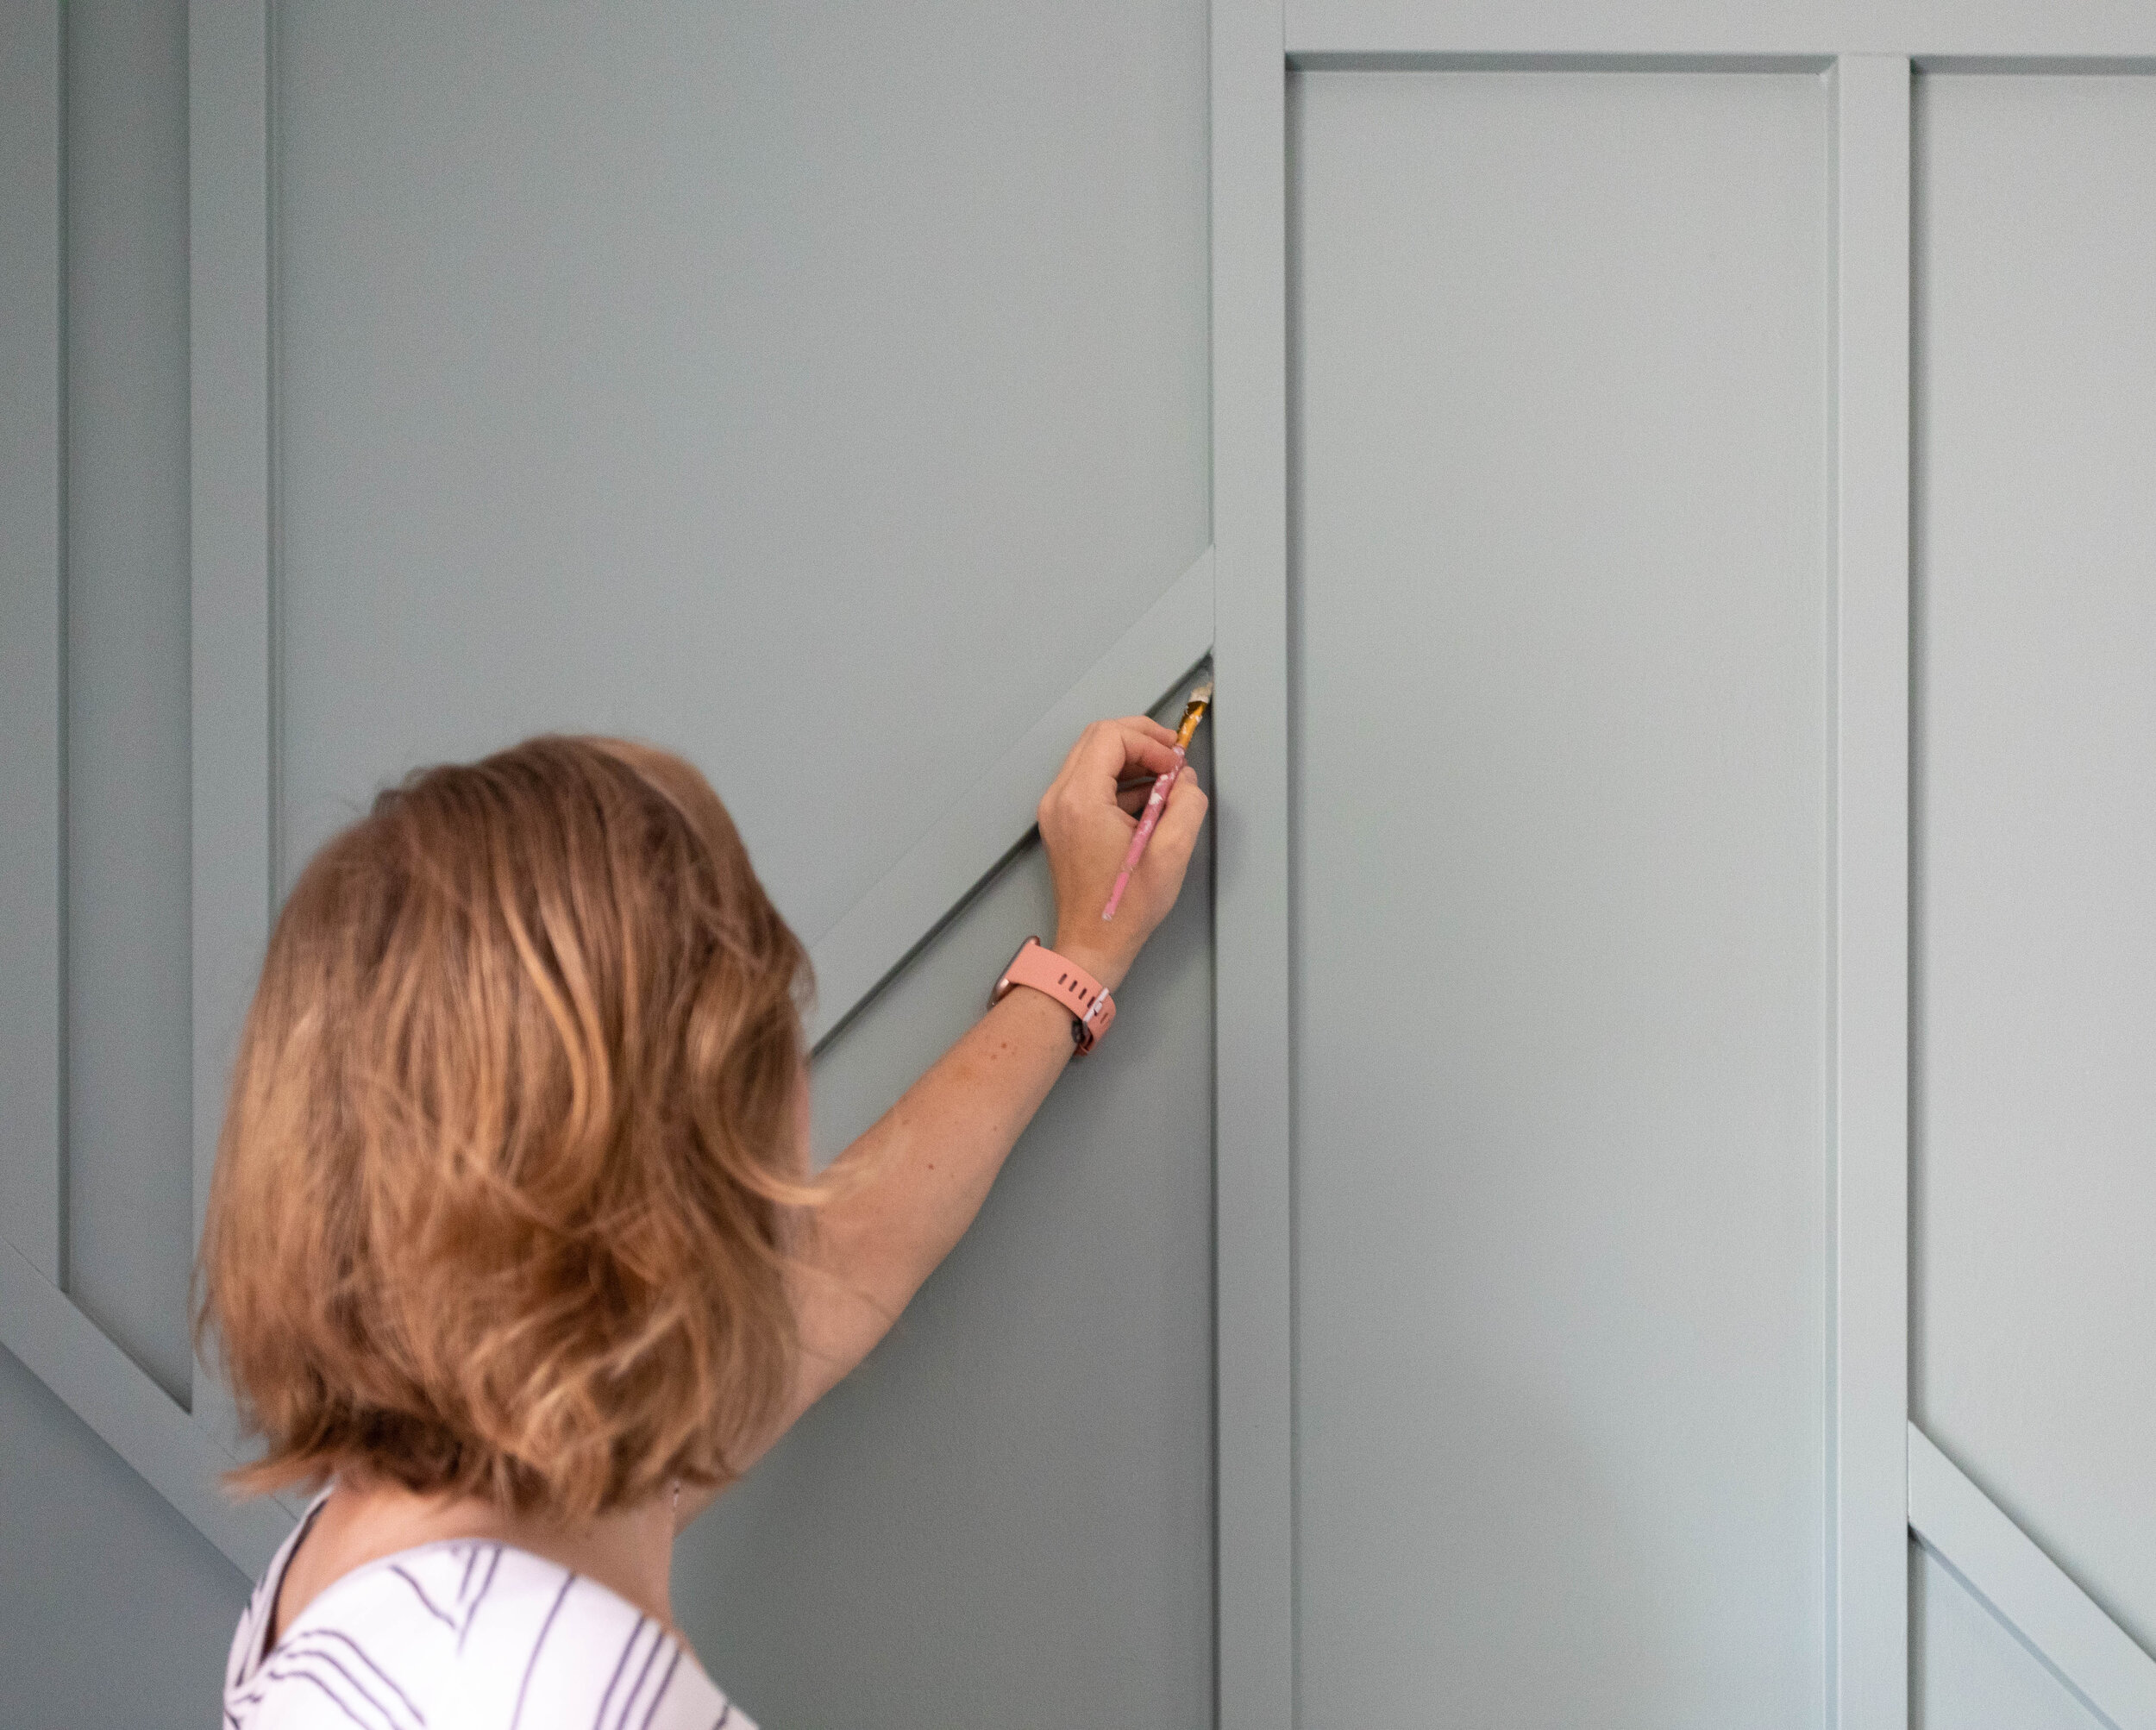
This part of the project gets a little tedious because you have to apply the rest of the paint with a brush, but you’ll get through it (I believe in you).
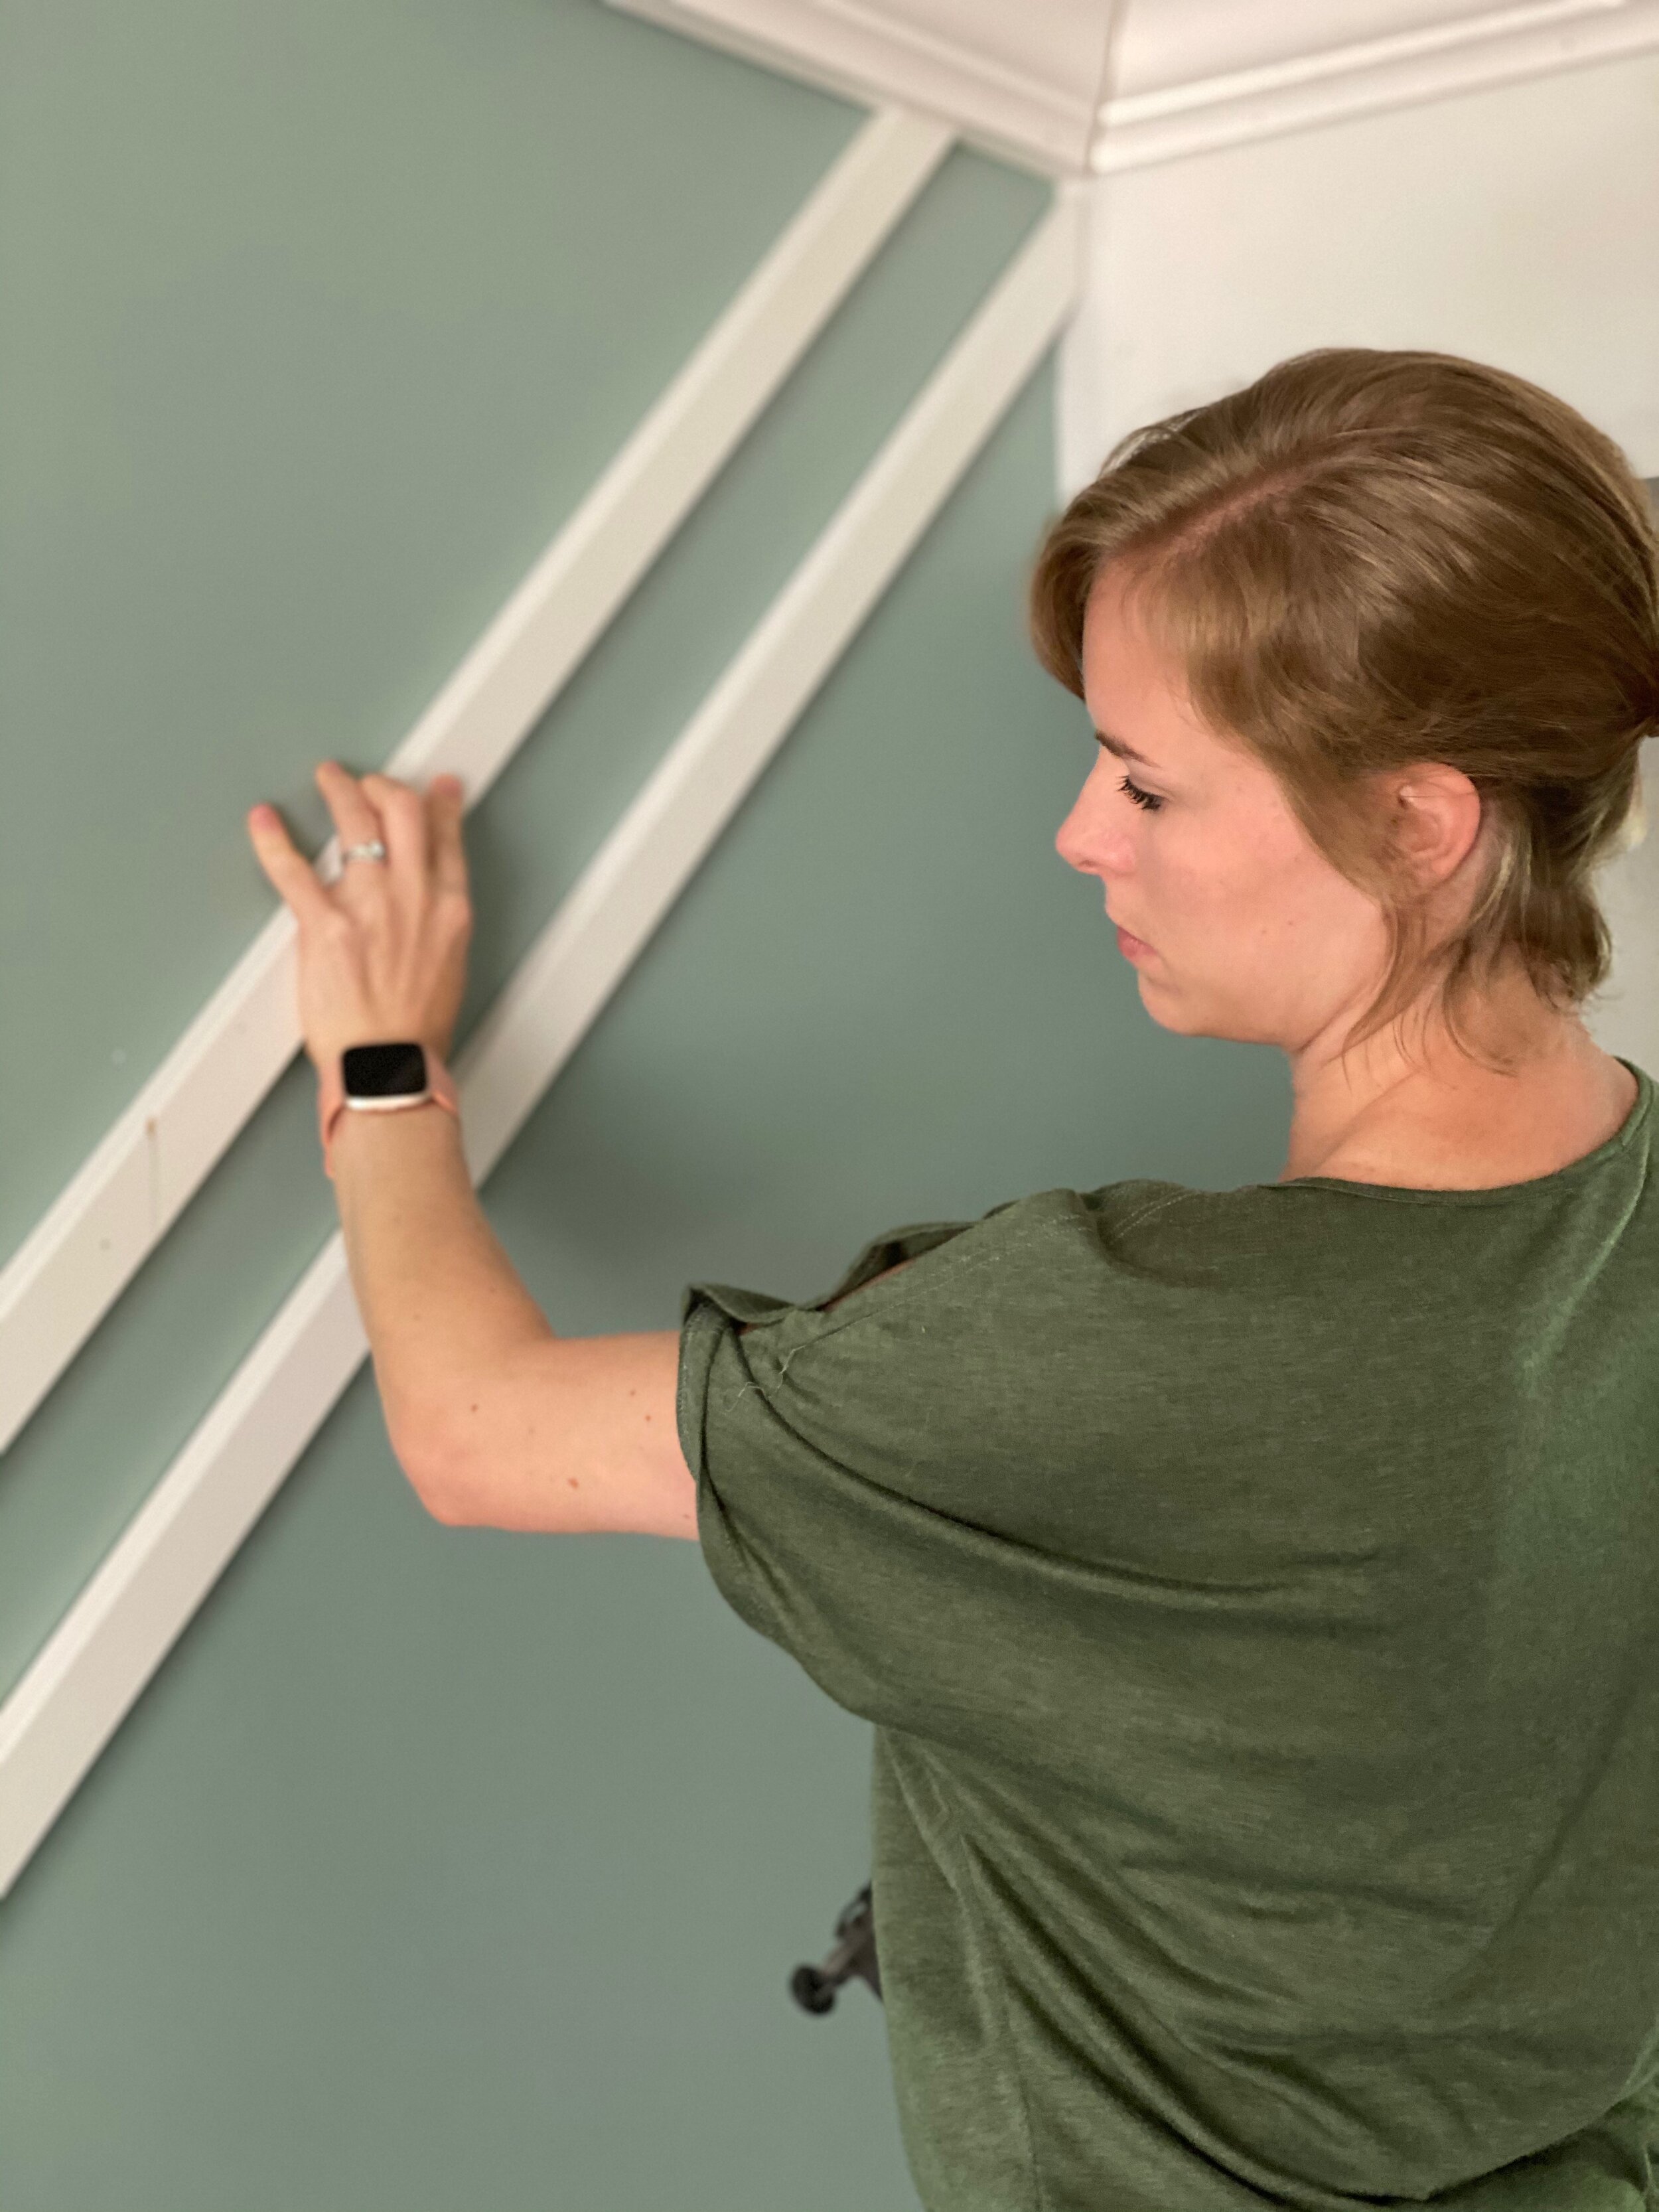
Make sure you get into every nook and cranny. I used a craft brush in the really tight spots where my boards met with an adjacent wall or the trim. You’ll definitely want to brush on two coats.
Once your paint is dry, you’re done! Now you can style your room and enjoy!
Final Thoughts About Our Geometric Accent Wall

I’m head over heels in love with it! Before this renovation, our dining room was so out of place. It was like it belonged in a different house. Although our house is still a bit of a mixture of different styles (there are several rooms we haven’t touched yet), it’s well on its way to having a cohesive look.
The only thing left to do now in this room is to fill it, and I.CAN’T.WAIT. And you better believe that light fixture is getting the boot! Watch for that post in the next couple of weeks!
Related Dining Room Renovation Posts
Build Your Own Geometric Wood Feature Wall

DIY Sharpie Wall Tutorial
HOT DAMN, it’s been a minute since I shared an update about my home office redesign. Well, don’t you worry your pretty little head. That doesn’t mean I haven’t been working on it!
I’ve finally painted this room and created a killer DIY Sharpie wall that I can’t wait to share with you (including a tutorial)!
How to Make Faux Wallpaper with Sharpie
HOT DAMN, it’s been a minute since I shared an update about my home office redesign. Well, don’t you worry your pretty little head. That doesn’t mean I haven’t been working on it!
I’ve finally painted this room and created a killer DIY Sharpie wall that I can’t wait to share with you (including a tutorial)!

But first, a quick refresher:
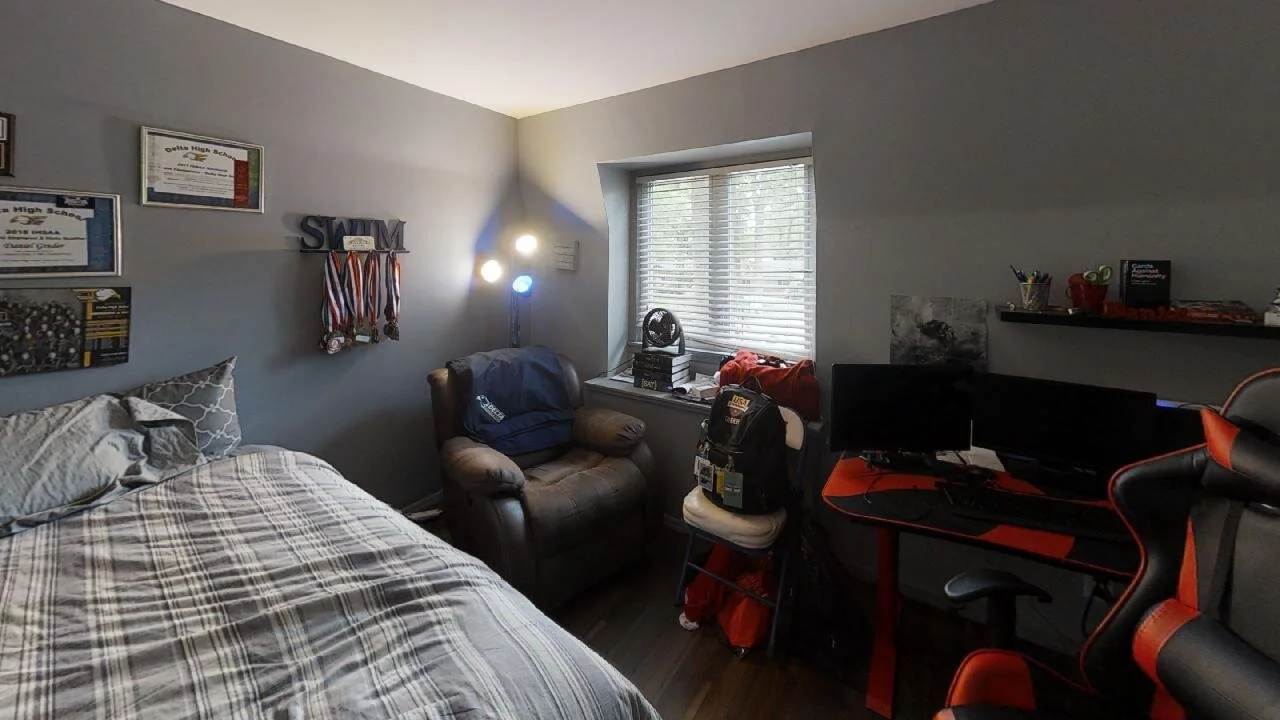
There was a lot to do to get this room prepped. If you recall, I started with this beauty of a space.
In my kick-off post, I shared the beginning stages of my redesign and my design inspiration to ultimately round out the room. When all was said and done, I had purchased a desk and chair and shopped around my own house to find a few items to make this room at least a little more tolerable, especially since it’s become my office since COVID started.

Baby PhotoBomb and all
As an Amazon Associate, I earn from qualifying purchases. This post may contain affiliate links, meaning I receive commissions for purchases made through those links, at no cost to you.
Of course, that wasn’t my final design plan though! Over the last several months(!!!), as we’ve been working on the dining room renovation (HERE and HERE), the flip (HERE, HERE, and HERE), and the master suite remodel (HERE), I’ve been stealing any free time I can find to work on this room - and it’s finally coming together!
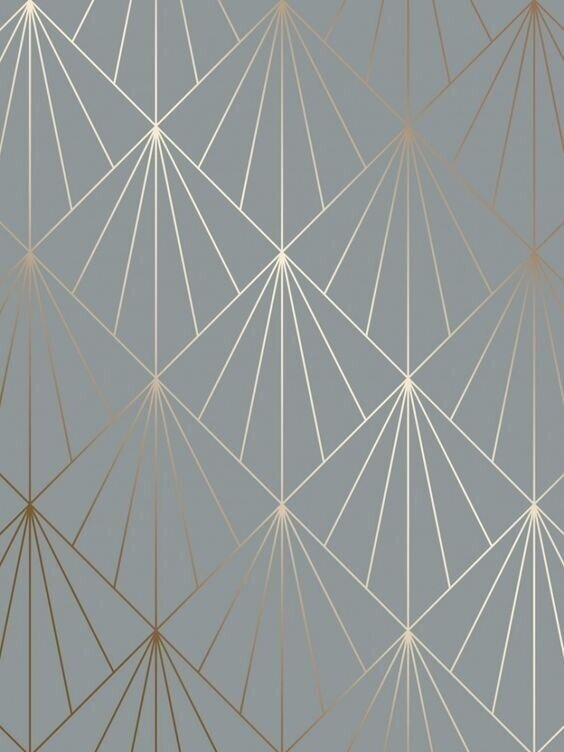
In the kick-off post for this room, I mentioned how I was loving the design below and I planned to use Sharpie Paint Pens to create an accent wall.
Well, I’ve done it! And of course, I’ll show you how I made it happen with a DIY Sharpie wall tutorial. Let’s go!
Materials
- Sharpie Paint Pens
- I ended up using 3 medium point oil-based gold metallic pens
- Make sure you’re using Sharpie Paint Pens and NOT a regular Sharpie or you’ll have a helluva time painting over it if you ever want to.
- Level
- Pencil
- Ruler
- Patience
- I’ll warn you, this project isn’t necessarily quick. But I think the end result is worth it for sure!
Step 1: Create a Template
I jumped into this project with a vision, but there were a few things I needed to do before I could get to the fun part. First things first, I needed to figure out the scale of my design. To do this, I simply drew one of the diamonds for the design in approximately the size I was imagining on a piece of paper and taped it up on the wall.

I’m glad I took this simple step, too, because the first diamond was larger than I wanted.
Once I figured out the sizing, I created a mocked-up design on some paper and taped that up as well. This helped me feel more confident to move forward.

Step 2 - Draw your Vertical Lines
Next, I worked on penciling my pattern onto the wall. I started by marking every 4 inches along the bottom of the wall by the baseboard.
I actually started in the middle of the room so I didn’t end up with a full diamond on one side of the wall and a partial diamond on the other. Now, both sides have partial diamonds and I think it flows nicely.
The mocked-up design was created out of 6x6 squares, but that doesn’t translate to 6 inches from corner to corner - it’s more like 8.5. To make it easier on myself, I didn’t fret over the diamonds being that EXACT dimension as long as they were close. I ended up making my diamonds 8x8 from corner to corner.
The image below hopefully helps show that the diamonds themselves are 8 inches, but because they all have a vertical line running through them as part of the design, I marked along the baseboard every 4 inches.

From here, I used a laser level that I hooked on to a laundry basket to lightly pencil in my vertical lines. This is the level we have. You could also use a traditional level for this step, though it’ll take you a little longer.
Pro tip: As you’re drawing your vertical lines, measure along the way every once in a while to make sure they’re still 4 inches from one another. I didn’t do this and had to fix quite a bit because of it (I think my level may have shifted a couple of times). I’ll show you what I mean a little further down.


Step 3 - Draw your Diagonal Lines
Once I drew my vertical lines, it was time to pencil in my diagonal lines. For this step, I measured up 4 inches from the bottom of every other vertical line and made a tick mark. Then, I went back and measured up 8 inches from the bottom of the remaining vertical lines and made a tick mark.

Once you’ve marked your vertical lines along the bottom accordingly, you can make a tick mark every 8 inches on each line until you hit the top of the line where it meets the ceiling.
When you’ve finished making all your tick marks, lightly (again, emphasis on the lightly part) connect your tick marks diagonally.
Step 4: Fix Your Mistakes
You will inevitably have measured a little off here and there. NOW IS YOUR CHANCE TO FIX THAT.
Remember how I said to check that your vertical lines were 4 inches apart all the way up the wall? Well, this is why I specifically called that out.

It’s super important to make sure that your vertical lines intersect with the points of your diamonds. Otherwise, when you add your remaining lines to each diamond, they’re going to look weird if the vertical line isn’t centered (or mostly centered. We’re not robots, after all).
So before you go gung-ho and bust out your paint pen, correct your lines or you’ll have to paint over a bunch of them like I did.

Bwomp Bwomp #DIYfail
Yeah, there were quite a few that didn’t line up as well as I wanted them to. It was a huge time suck that could have been avoided if I had corrected them before I traced over my pencil lines with Sharpie. Learn from my mistakes!
Once your lines are nice and centered, you can trace over them with your Sharpie Paint Pen. I recommend starting with your diagonal lines, as you can cheat the vertical lines here and there a little if needed. This design is so busy, it’s hard to tell if they don’t line up perfectly.
Step 5 - Add Lines to Each Diamond
This is where it starts to get more exciting (yet, also more time-consuming) because you can really see your design start to come together. To save my arms from falling off, I did this part in sections over several days.
Starting at the bottom tip of each diamond, make a tick mark at 2 inches and 4 inches along the bottom two sides.

Then, draw a line connecting the top point of your diamond to each of your tick marks.

It’s kind of an ugly little mock-up, but it gets the point across
Soon, you’ll see it start to come together. This is where I got a little excited and just HAD to see what a few of them looked like grouped together.

Eeeeeee, so exciting!
Step 6 - Finish the Edges
No matter how you plan out your design, you’re going to have pieces of the pattern that are incomplete where the design meets an adjacent wall. These sections are a little tricky to finish. Here’s what I did.
The bottom row: Because of how I started my design along the baseboard, there are half diamonds that needed to be finished. But since the bottom half of the diamond was missing, I had to figure out how to work around that.
To do so, I simply took a piece of paper, held it up in the middle (horizontally) of one of the completed diamonds, and marked where the lines were. I then used that to mark where those lines would be in the middle of each half diamond.

Then, I drew a line from the top of the diamond to each tick mark.

The top row: I followed similar steps on the top row. I took that same piece of paper and held it up in the middle of each diamond to identify where the line would intersect.

Then, I drew a line from the tick marks on the bottom edges of each diamond (remember how we made marks 2 inches apart in an earlier step?) to the tick marks I made in the middle of the diamond.

The sides: Along the sides of the wall where I only had a small section of a diamond to work with definitely took a little noodling to figure out. Since I didn’t have the rest of the diamond to use to make my tick marks or lines, I had to come up with another solution.
I ended up tracing one of my diamonds and cutting out a new template that I could wrap around the side of the wall. I made tick marks at the tip of the diamond and where any lines within the diamond would touch the bottom edge using the lines on the template as a guide.

Next, I used a piece of paper to wrap around the corner and connect my dots in pencil.

Then, I was able to use my ruler to trace my pencil line in Sharpie to the edge of the wall.

Step 7 - Touch-ups
There will most certainly be areas that you goofed up here and there (you can even catch some of my goof-ups in the pictures above!). Now that your design is complete, take a craft brush and touch up any lines that are a little wonky or any stray marks.
Bonus Step - Stand Back and Enjoy
Man, you just spent a lot of time creating an accent wall - relish in it because it looks AWESOME! I know I’ve spent a ridiculous amount of time admiring my handiwork. You should too!

Now, let’s be real. Would it have been easier to just use wallpaper? Probably! I found lots of similar wallpaper designs, but on many of them the design was way bigger than I wanted or the colors weren’t right. And don’t get me started on the cost! By DIYing my own design, I was able to completely customize it FOR CHEAP! Plus, I love a challenge and it feels good to know I created this wall with my own two hands.

This space has undergone such a huge transformation. It’s hard to believe it was once red and blue. Now it’s so much brighter and more inviting. I definitely don’t mind working in this office anymore and actually prefer to work in here now! Especially since I get to share my space with my sweet little plant babies all day long while I work.

I definitely don’t consider this room “complete” yet. Heck - I still have the whole other side of the room to furnish! But that’s a post for another day…

Related Home Office Design Posts:
How to Create a Sharpie Accent Wall

How to Paint an Ombre Wall in 5 Easy Steps
Unlike most people, I love painting. I love it so much I got my BFA in painting - true story! Not only do I love painting paintings, I also love painting rooms. I love the process of turning my mind off, getting in the zone, and drastically changing the look of a room in just a few hours with a gallon or two of paint. Let’s be honest - some of that might be the paint fumes talking.

Unlike most people, I love painting. I love it so much I got my BFA in painting - true story! Not only do I love painting paintings, I also love painting rooms. I love the process of turning my mind off, getting in the zone, and drastically changing the look of a room in just a few hours with a gallon or two of paint. Let’s be honest - some of that might be the paint fumes talking.
Although it’s not appropriate in all rooms, I love trying new things with paint. Whether it’s adding a simple accent wall that’s a couple shades darker than the main color or painting a room a bold, dark, moody teal to creating a stencil to make a design or (in my most recent room makeover) painting an ombre wall.


As I mentioned in this post, once I got sucked into the world of ombre walls on Pinterest, I knew I had to give it a try. Ombre walls are definitely trending right now, and as with any trend there’s always the fear that it’ll go out of style. You know another thing I love about paint? It’s SO easy to change if that happens! Plus, I figured if I could pull it off, it would look amazing. So off I went!

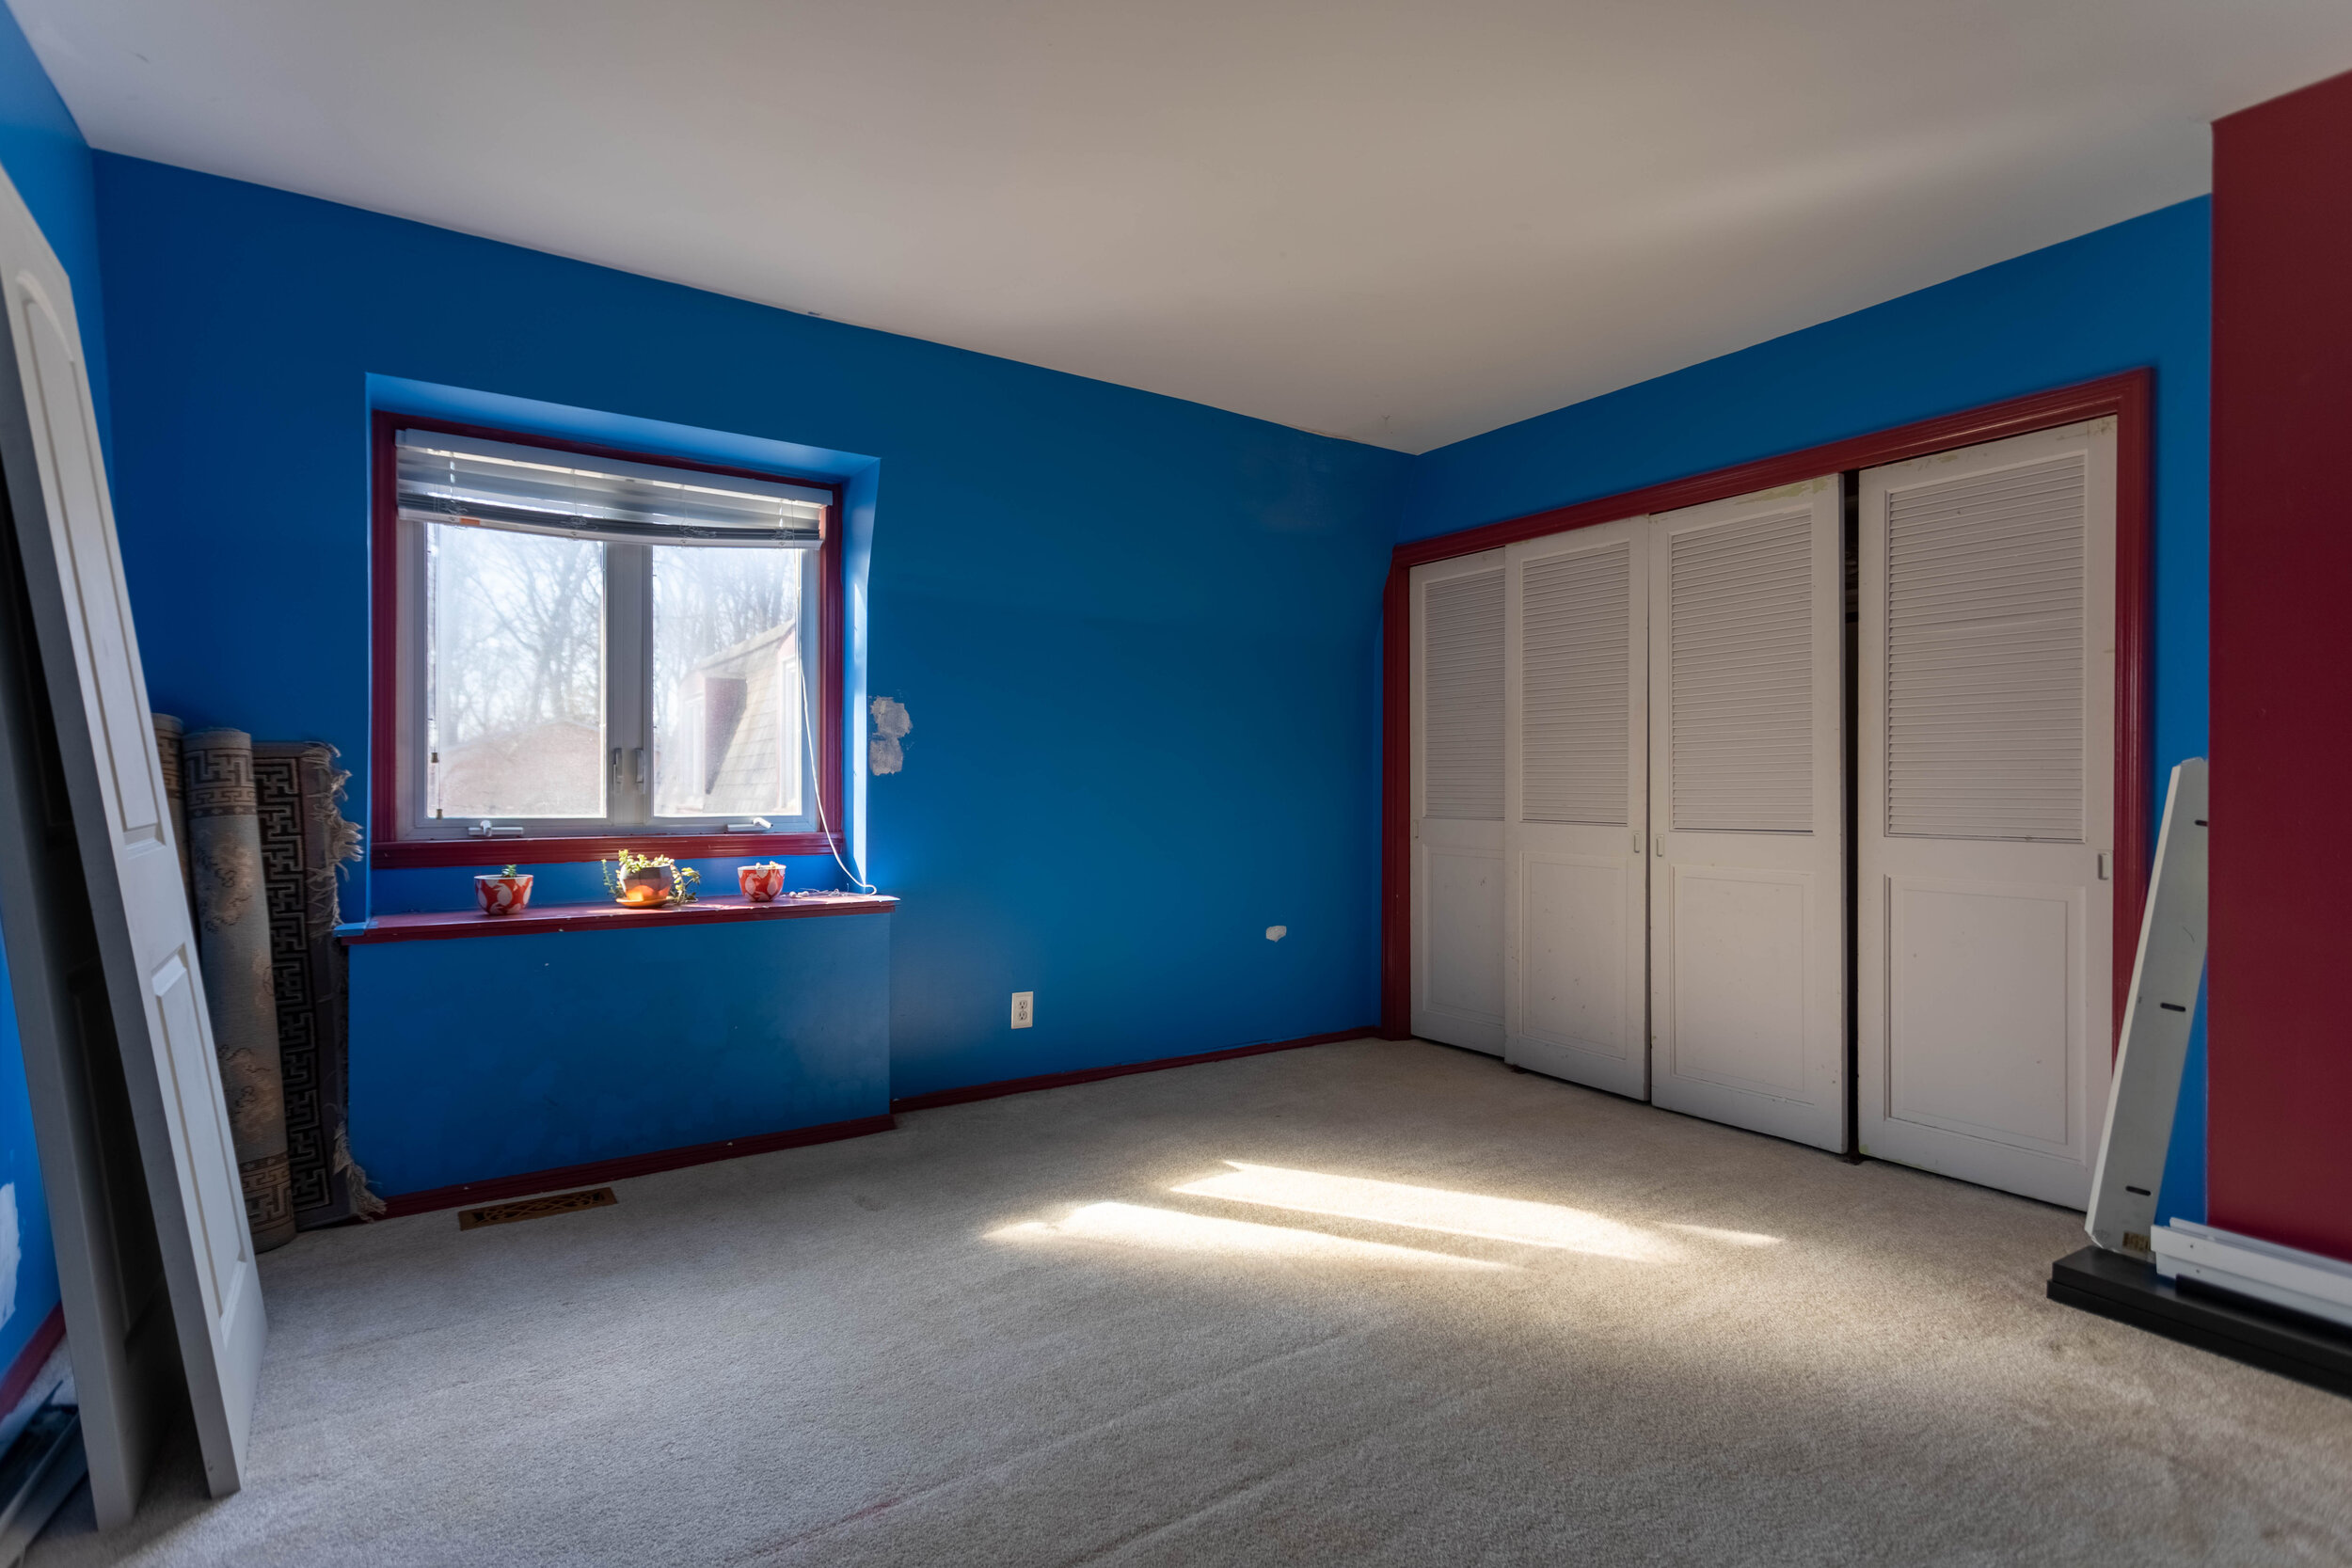
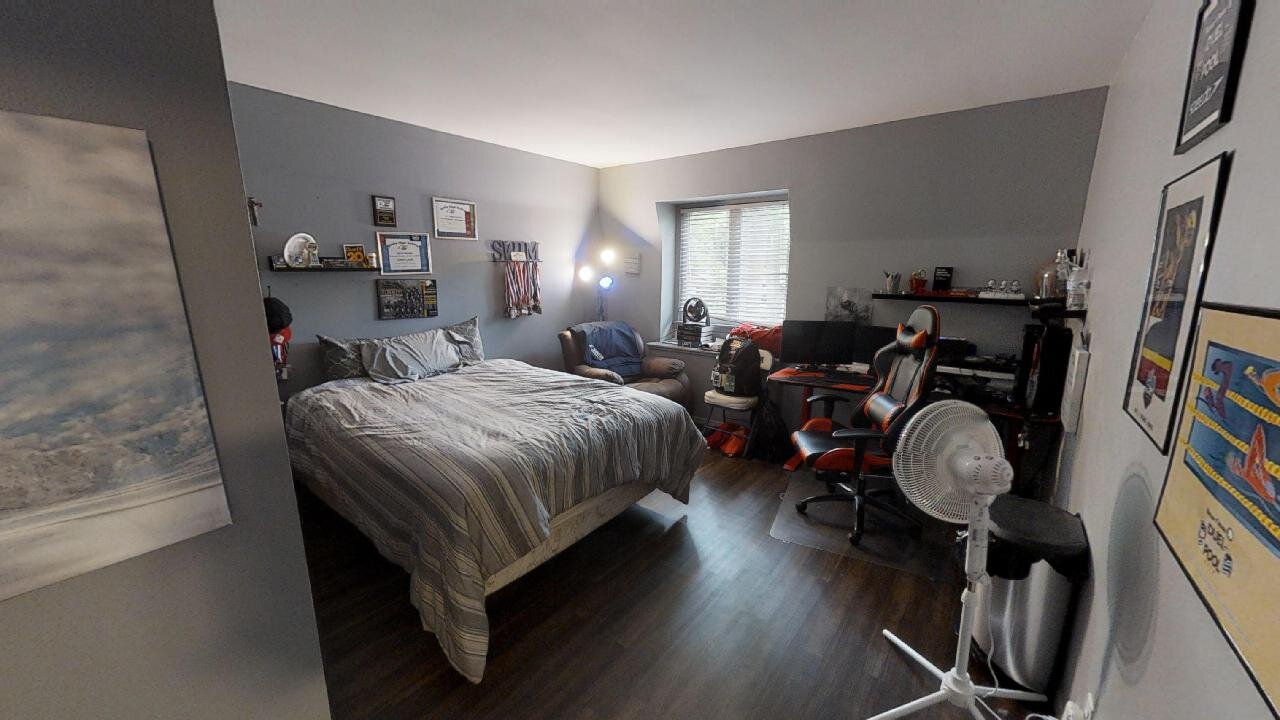
I was so excited to work on our daughter’s room and take it from the dark, light-sucking blue/gray we inherited to something bright and girly.
This is our daughter’s room from the listing photo. It worked for the teenage boy who resided here, but for a four-year-old girl? No way.
Picking a color
For some reason I couldn’t shake the idea of using pink and teal in this room, so then it was just a matter of picking the exact paint colors.
I love to hang out in the paint section at Lowe’s. I take so many paint chips that I might just single-handedly keep someone in a job constantly restocking them. I actually created our younger daughter’s mobile with paint chips I collected over time and for some reason felt the need to keep. (You can check out how I made the mobile HERE.)

This project was no different. I headed over to Lowe’s and grabbed a whole bunch of colors in the family I was thinking of and taped them to the wall.
Then I let them hang out there until I got a chance to paint a few weeks later. Sometimes my paint chips only stay up for a day or two, but typically it’s much longer. I’ve had paint swatches on our living room wall for a few months, with no real timeline of taking them down. I actually like to leave them up so I can see how they look in all different sorts of light.
In the end, for this project, I went with the lightest shade of blue on the first blue swatch on the left (Tame Teal by Sherwin Williams) and the middle shade of coral in the first swatch in the second row (Coral Mist by Valspar).

Usually, once I decide on a color, I get a sample container of paint and paint big swatches on several different walls. Then I let it hang out for at least a couple of days to once again see how it looks in different light. I can be very indecisive, and paint colors can change drastically during different times of day, so I feel like these steps help me to be sure in my decision and not waste money on paint.
A gallon of paint isn’t that expensive, but it can definitely add up if you keep repainting because you don’t like the color you chose! Those little sample paint containers are only around $5 each and are well worth it if it helps you commit to a color. I know I said I love painting, but that doesn’t mean I want to paint the same wall over and over again.
In this room, I actually felt confident in my paint choice just by looking at the paint chips and didn’t end up following my own rules. I just grabbed a couple of gallons and went to town!
The Process
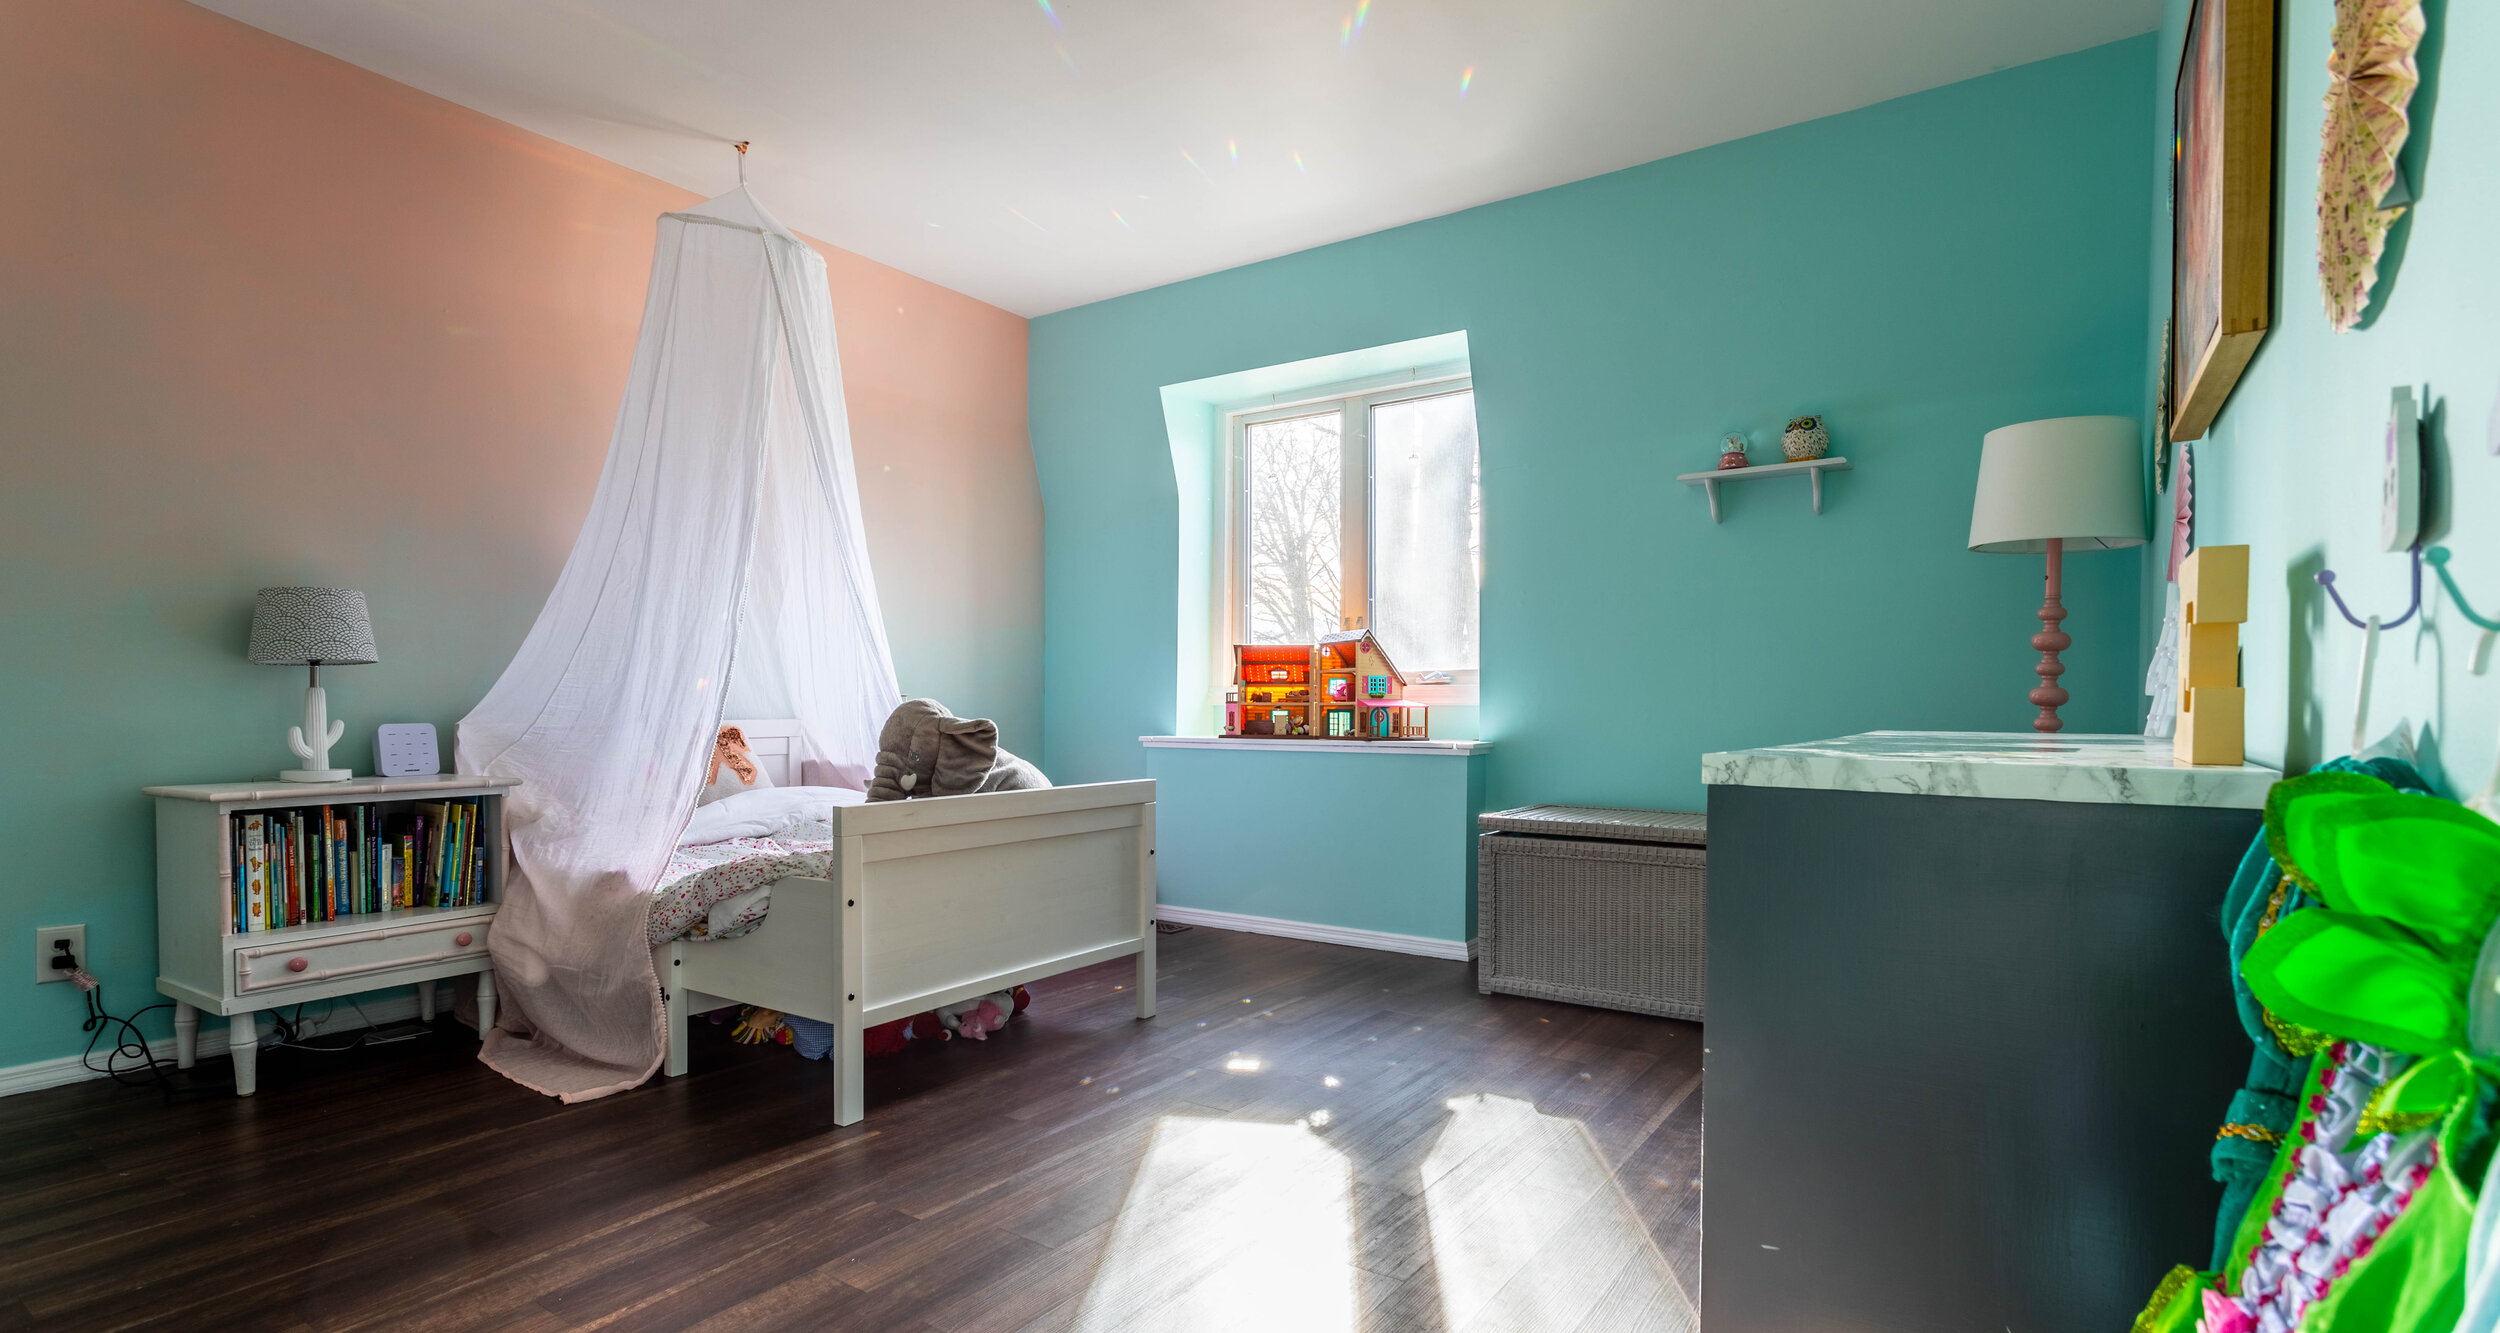
I painted all the solid walls first since those were run-of-the-mill and straightforward. Then it was a matter of painting the ombre wall.
I researched a lot of different tutorials and used the steps that I thought would work best. The step-by-step process is below including what I wish I had done differently.
One quick note - if you want a smooth transition from color to color, you have to work FAST. This can be intimidating. I pictured myself breaking a nervous sweat trying not to mess up the wall, but honestly, once I got started I just went with the flow and I love how it turned out.
Start by making light marks on the wall where you want your colors to transition.
Grab 3 paint trays and 3 rollers. Pour one color into one paint tray and the other color into another. In the third paint tray, pour equal amounts of both colors.
Make sure you mix enough of the combined color so you don’t have to mix more partway through (working quickly is the name of the game here), and so you don’t risk your new mixture mismatching the original.
Then, paint your color of choice on the bottom and the top. Since the goal is to have a smooth transition from one color to the next, don’t worry about taping anything off or painting a harsh line where the colors change.
Apply the mixed paint to the middle section of your wall, blurring the dividing line of color.
Using the roller you applied your mixed paint with, lightly dip your roller into the color on the top of the wall and start to soften the transition. Now do the same with the color on the bottom of the wall.
The most difficult part of this project, that no tutorial seemed to talk about, was what to do with the edges of the wall. Since your roller can’t get all the way to the edge, I used a brush to blend as well as I could. If you’re not good at cutting-in edges, apply painter’s tape to the adjoining walls before you begin.
And there you have it - how to paint an ombre wall. If you’d like to paint one in your house, I say, give it a try! It’s only paint, after all. If it turns out poorly, you can always paint over it. Easy peasy. Below is a list of supplies to help you get your ombre on. Enjoy!

Supply list
3 paint trays
3 rollers
1 paint brush
painter’s tape
2 gallons of paint (1 of each color) - this should be more than enough for one wall and you’ll have a lot of extra, but a quart won’t quite be enough.

Let the dining room renovation begin!
Come take a peek at the beginning of our dining room renovation - and all the mess involved. Then finish up with some beautiful design inspiration and my future plans for this room!
Now that you’ve seen the house tour, you probably noticed our bright, froofy (I think I made that word up, but it fits so I’m sticking with it), and out of place dining room.

By itself, this room admittedly didn’t look terrible. With the right decor (and some squinting) I could see it working. However, it certainly wasn’t our style.
Before we moved in I was bound and determined to tackle this room first because it felt so out of place with the rest of the house. But then we moved in and other rooms took priority, like repainting the loft, repainting the foyer/upstairs landing, and making over our daughter’s room.
Stripping wallpaper and patching walls
Over the last couple of weeks I’ve been sitting on the couch in our living room while I’ve been working from home (#thankscoronavirus), which conveniently faces the doorway to the dining room. Every day I’ve been staring and glaring at that awful yellow and one day I blacked out. When I came to, I discovered someone had ripped the paint off the walls!

Who would do such a thing!? Even the T-rex is appalled.
Just kidding. It was totally me.
Now, you may be thinking, “What the heck? How did you rip the paint off the wall?” Well, let me tell you.
We originally thought the walls were painted with a yellow texture and we just had the red border above the chair rail to remove. I was pretty pumped because although I’m an odd duck and actually like stripping wallpaper, I got my fill of it in our last house where there was wallpaper in literally every room (kitchen and bathrooms included!). Buuuut a little while after moving in we noticed swirls under the paint and wallpaper seams… indicating that the previous owners had PAINTED OVER WALLPAPER. Please, for the sanity of whoever moves in after you, don’t do this.

Since by this point I had accepted the fact that the wallpaper had to go, I let my curiosity get the best of me. I found a spot where I had removed a drywall hanger that looked like I could get a grip on some of the paint, so I picked at it until this happened:

And this was where I realized I reached a point of no return and just kept on picking. Seriously. I picked and pulled and peeled almost all the paint off this wall by hand because I simply love to pick at things and couldn’t stop myself. And once I got most the paint off, I started picking at the wallpaper too. Guys, I think I have a problem.
The next day we pulled off the chair rail as well as the crown molding. The chair rail was never in my grand plan to stay, but I do want to put crown molding back up. I’ll explain why we took it down a little later.

And of course under the chair rail and the crown molding there were two more layers of wallpaper!

Right about here is where I broke out my wallpaper steamer and went to town, stupidly thinking that I could get all the wallpaper off in a few hours and have the nicks and inconsistencies on the walls patched by the end of the weekend.
Also, like the excellent blogger that I am, I completely forgot to document the process of stripping wallpaper, so I’ll write a separate post about how to do that another time. Get ready to be enthralled.
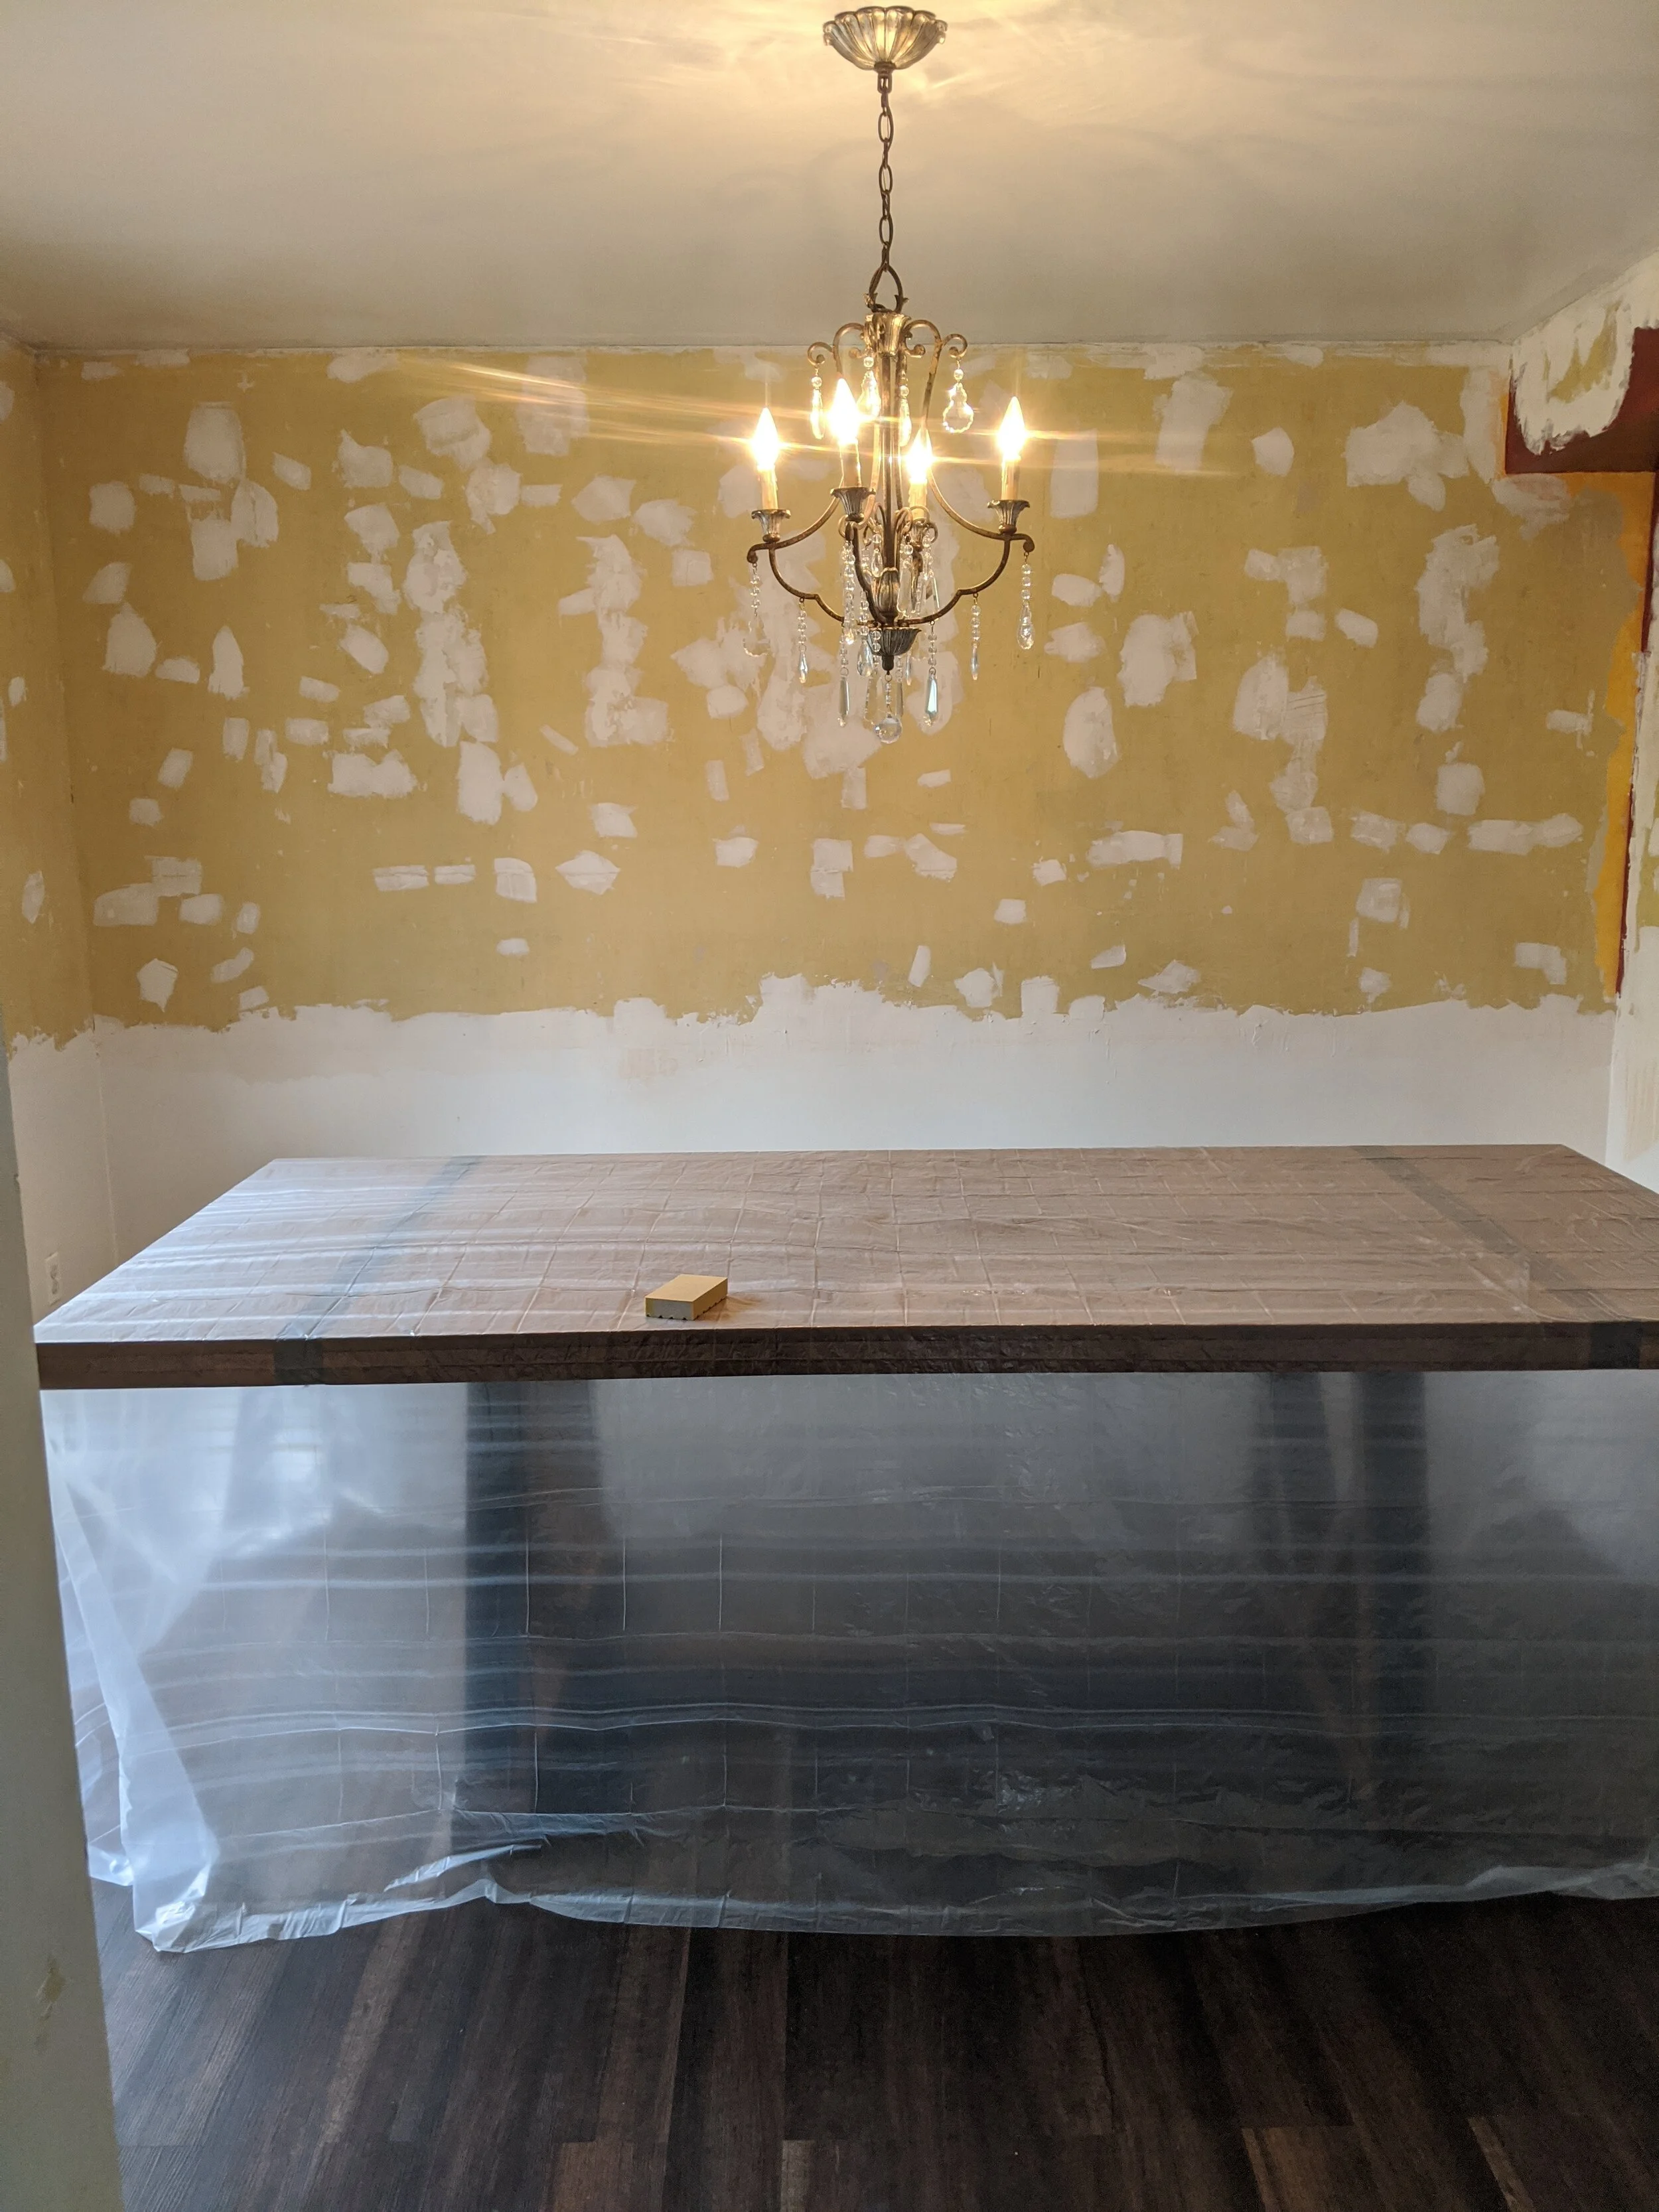
Jumping ahead, here are some pictures of the room partially stripped of wallpaper:


On the the right-hand side of the doorway in the picture above you’ll notice the wall is looking pretty rough. I discovered while trying to strip the wallpaper that it had already been removed on this part of the wall. My assumption is that the previous owners started stripping the wallpaper in this section, realized it was going to be a pain, and decided to paint over the rest of it. So essentially on this section of wall I stripped the paint off with a wallpaper steamer and ended up gouging the bajeezus out of it and pulling up big sections of the drywall paper. Whoops.
After what I’m calculating as approximately 10(!!!) hours of wallpaper removal it was all finally gone! And I was left with some seriously uneven walls that needed smoothing out. Bring on the spackle!

Quarantining like a boss.
To prep for sanding the spackle, I removed everything I could from the room and blocked it off as much as I could. If you’ve ever sanded spackle, you’ll notice that even the smallest patch can create a ton of dust that manages to get everywhere. And boy, am I glad I blocked off the doorways. Holy dust!
Post-sanding it now looks like a live in a haunted house.
And I am one of the ghosts.

On an unrelated note, I think I discovered some really good, pretty much free, dry shampoo!
My next steps are to patch any spots I missed the first time around and areas that are still uneven, and sand again. Then I can reinstall the crown molding, prime, paint, and get this room back to a presentable spot.
Inspiration and future plans
In the meantime, I’ll continue to daydream about my design plans for the space.
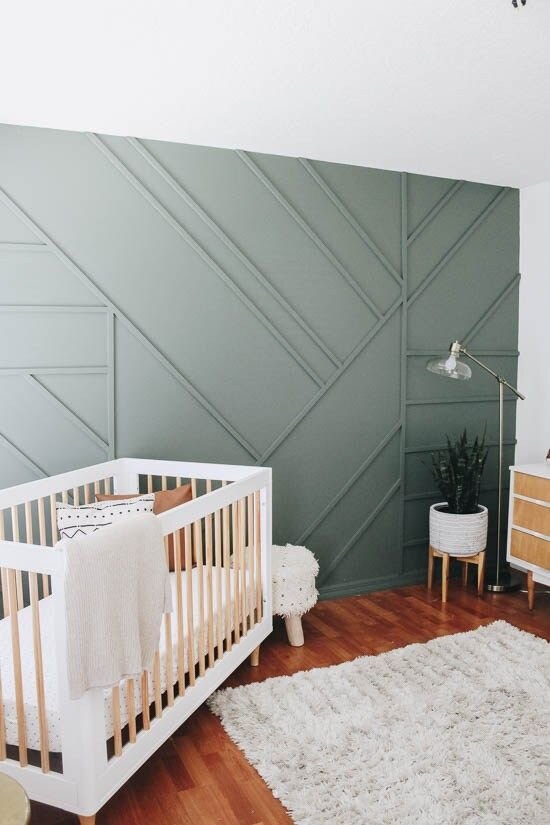
I’m obsessed with the wall treatment below for the large wall in this room that doesn’t have any windows or doors and I will make it happen, hence needing to remove the crown molding.

If we left the crown up, the boards for the accent wall would jut out further than the bottom of the crown molding. It’s difficult to explain without pictures, but essentially there would be a weird transition where the boards on the accent wall butted up against the crown molding. Instead, we’re going to put a thin piece of wood behind the crown molding on that wall to bump it out a little and give it some more depth to create a smoother transition with the accent wall.
I initially envisioned a really dark blue or teal on this wall, but after living here for a while I’ve noticed that unless it’s a nice day, the dining room can be pretty dark. So I’m going to opt for something lighter. Actually, the color will probably be similar to my inspiration pic above.
That’s actually a good note to consider - if time allows, before renovating a space live with it for a while to figure out how it looks and feels throughout the day, and how it functions for you and you family. If I dove right into this room as soon as we moved in it would probably feel like a black hole because I would have painted it a super dark color. Now that I know how it reacts to light throughout the day, I know I don’t want to go that route. Anywho…
I’m leaning towards painting the other three walls in the room a white tone. Not a true, bright white, but something more muted to help keep the room nice and bright and create a smooth transition to the surrounding rooms.
We plan on keeping the same dining room set that we currently own, especially since we bought it when we moved into this house and it’s really new. However, although I’m absolutely in love with the buffet table, it definitely doesn’t fit with the style of this house. I actually bought the buffet table a few years ago at a garage sale and completely refurbished it. It went so well with our last house, but this house was built in a different era and it just feels out of place. It breaks my heart to think about selling, but I think it’d be better suited in another house. I’d love to buy another dresser I could makeover for myself.

I will always love you, buffet table.
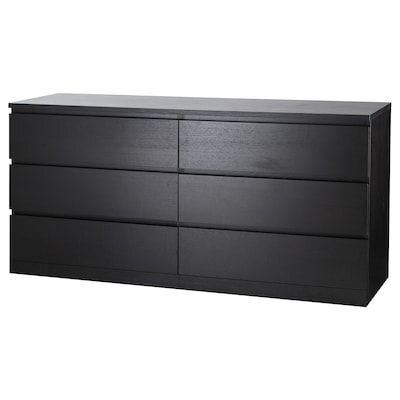
Why a new dresser instead of a new buffet table, you ask? Well, I’ve been thinking… and I might actually move my dresser from my bedroom into the dining room and buy something second-hand for the bedroom. Mid-century modern is really on trend right now, and I’m certainly not immune to falling for that style, but I don’t think it would go with our dining room table and chairs. Instead, the Ikea Malm dresser that I currently use could undergo a couple of tweaks (aka Ikea hacks) to make it more interesting and fit with the rest of the dining room decor.
At least, I hope it does. Because if Lucius takes it downstairs to the dining room, I don’t think I can convince him to take it back upstairs to the bedroom.
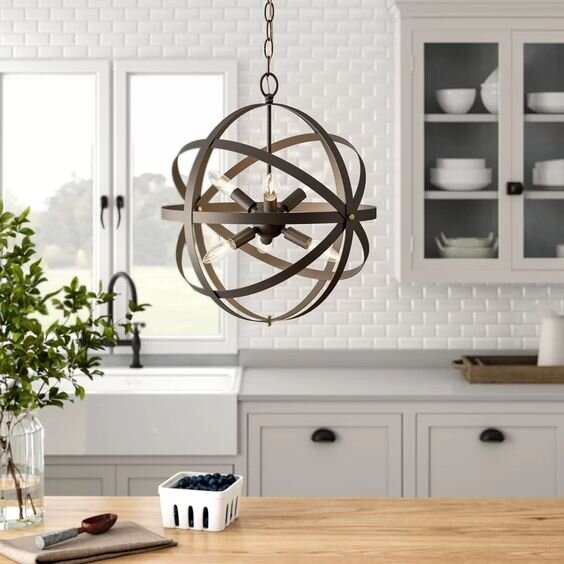
I also plan to replace the light fixture, because the current chandelier definitely doesn’t fit into my aesthetic. Shopping for light fixtures is one of my favorite things to do, alongside rug shopping. Sky’s the limit, but I think I’ve narrowed it down to something with a more of a circular element to break up all the straight lines going on in the room on the accent wall, the dresser/buffet table, and the dining table.

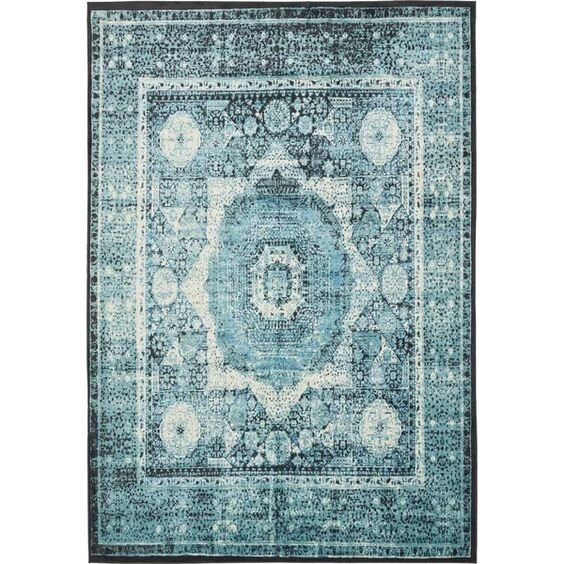
This room also needs an area rug in here to add some more dimension to the space and help break it up a little, especially with our crazy dark flooring that I’m certainly not crazy about. I’ve been swooning over oriental rugs for quite a while, and although Lucius will take some convincing, I’d love to put one in here.
I’m thinking I want to go with something with darker colors and of course some good pattern because practically thinking, it’ll be going under a dining room table. People drop things. Let’s hide those inevitable stains!

Lastly, we’ll add some artwork and general décor. I plan to put the curtains that I had in this room previously back up and hang some pictures to round it out.
And there you have it. My body is buzzing with excitement to put this room together (is that normal?), but I know there’s still a long way to go until it’s done. I can’t wait to turn this into a room I actually want to spend time in and share it with you along the way!
Pst - Check out the grid below to see all my inspiration pics in one place and dream with me about how great this room can will be!