
The Flip is Complete!
We finished the flip! (and have the pictures to show for it)
I’m so excited I’m not even gonna try to think of a formal introduction for this post… THE FLIP IS DONE!!! We put it up for sale 4 days ago and as of yesterday, it’s officially under contract!!! Picture me (and Lucius) with all the jazz hands!
Okay, now that that’s out of my system, I’ll take a step back and think of a more formal introduction… Oh yeah, here we go….
In early March, Lucius and I took the leap we’d been talking about for years and bought a house to flip! We had invested in flips previously and weren’t completely flying solo on this flip either, but this is the first flip that we took on as the primary party. From project management to design, it was all us, with a little financial backing from just one other investor.
It was definitely scary, but we’re so happy with how everything came together! I’m insanely excited to share the finished product with you all, so without further ado, welcome to our finished flip:
As an Amazon Associate I earn from qualifying purchases. This post may contain affiliate links, meaning I receive commissions for purchases made through those links, at no cost to you.
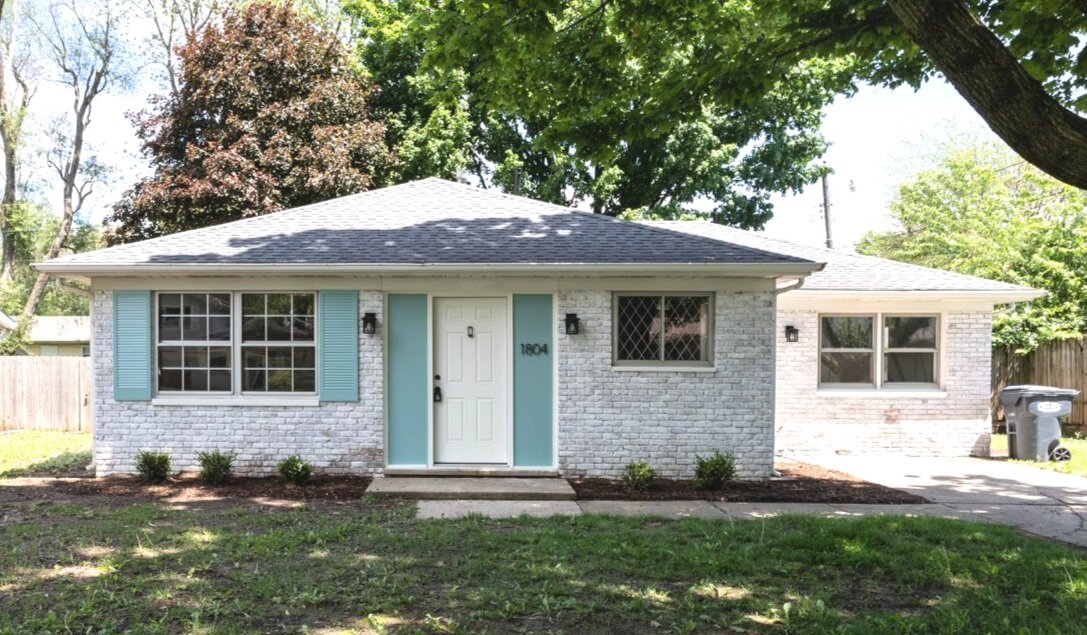
The Exterior
When we bought this house it was… sad. That’s the best word I can think of to describe it. It came across as an afterthought - a house that you would drive right by and never even notice was there.
Well, look at her now! I think I’ll call her Claire.
Now you drive by this gorgeous girl and do a double-take because she looks THAT good.
Here’s a little comparison to remind you what we started with.


The changes to the exterior are pretty obvious, and that was the point! I’m so happy we put all the manpower we did into amping up the curb appeal because I think it makes a huge (and much needed) improvement!

Here’s a rundown of what changed: I limewashed the brick, painted the shutters and wood on either side of the door (and wrote a post about how I chose the perfect paint color scheme), replaced the light fixtures, address numbers, and the front and side doors, threw a door knocker on the front door, and added some landscaping.
Oh, we also took out that tree in the “before” picture that had half of it being held together with a tow rope! The neighbors were very appreciative.
That seems like a ton of stuff, but it pales in comparison to what we changed inside.
The Living Room/Dining Room

Now I know an empty house isn’t crazy exciting to look at, but this isn’t HGTV, and staging an empty house isn’t always practical (though I would have loved to do it anyway!). But take a look at how far this space has come!
To start, we completely removed the wall you see in the picture below. This isn’t a big house so keeping the main living areas all chopped up just wasn’t a good use of the space. Plus, when you walked in the front door before, you ran right into a closet. This is what it looked like when we bought it.


What we changed: One of the major things we did throughout the house was replace the flooring. The previous renter put laminate on top of carpet padding… then there was a leak in the kitchen. When we bought the house the floors squished as you walked on them. So out they came!
We also replaced all the trim and doors, painted, and updated the light fixtures. Here’s the light fixture in the living room - and I love this light fixture so much it’s not the first time I’ve used it. I actually put it in the kitchen of our 1927 American Foursquare!
The paint color in the main living area is Smoke Infusion by Valspar. I ended up using colors from the same swatch throughout the house (except for the bedrooms) and I think I’m in love with it. It’s sort of a blue/green/gray color. It’s definitely more blue than green overall, but in certain lighting, it does take on more of a green hue.

The Kitchen
Aside from the exterior, the kitchen definitely underwent the most dramatic changes. I can’t stop looking at this before and after comparison.


I mean… is this even the same house!?
And that’s not even the best representation of the kitchen.

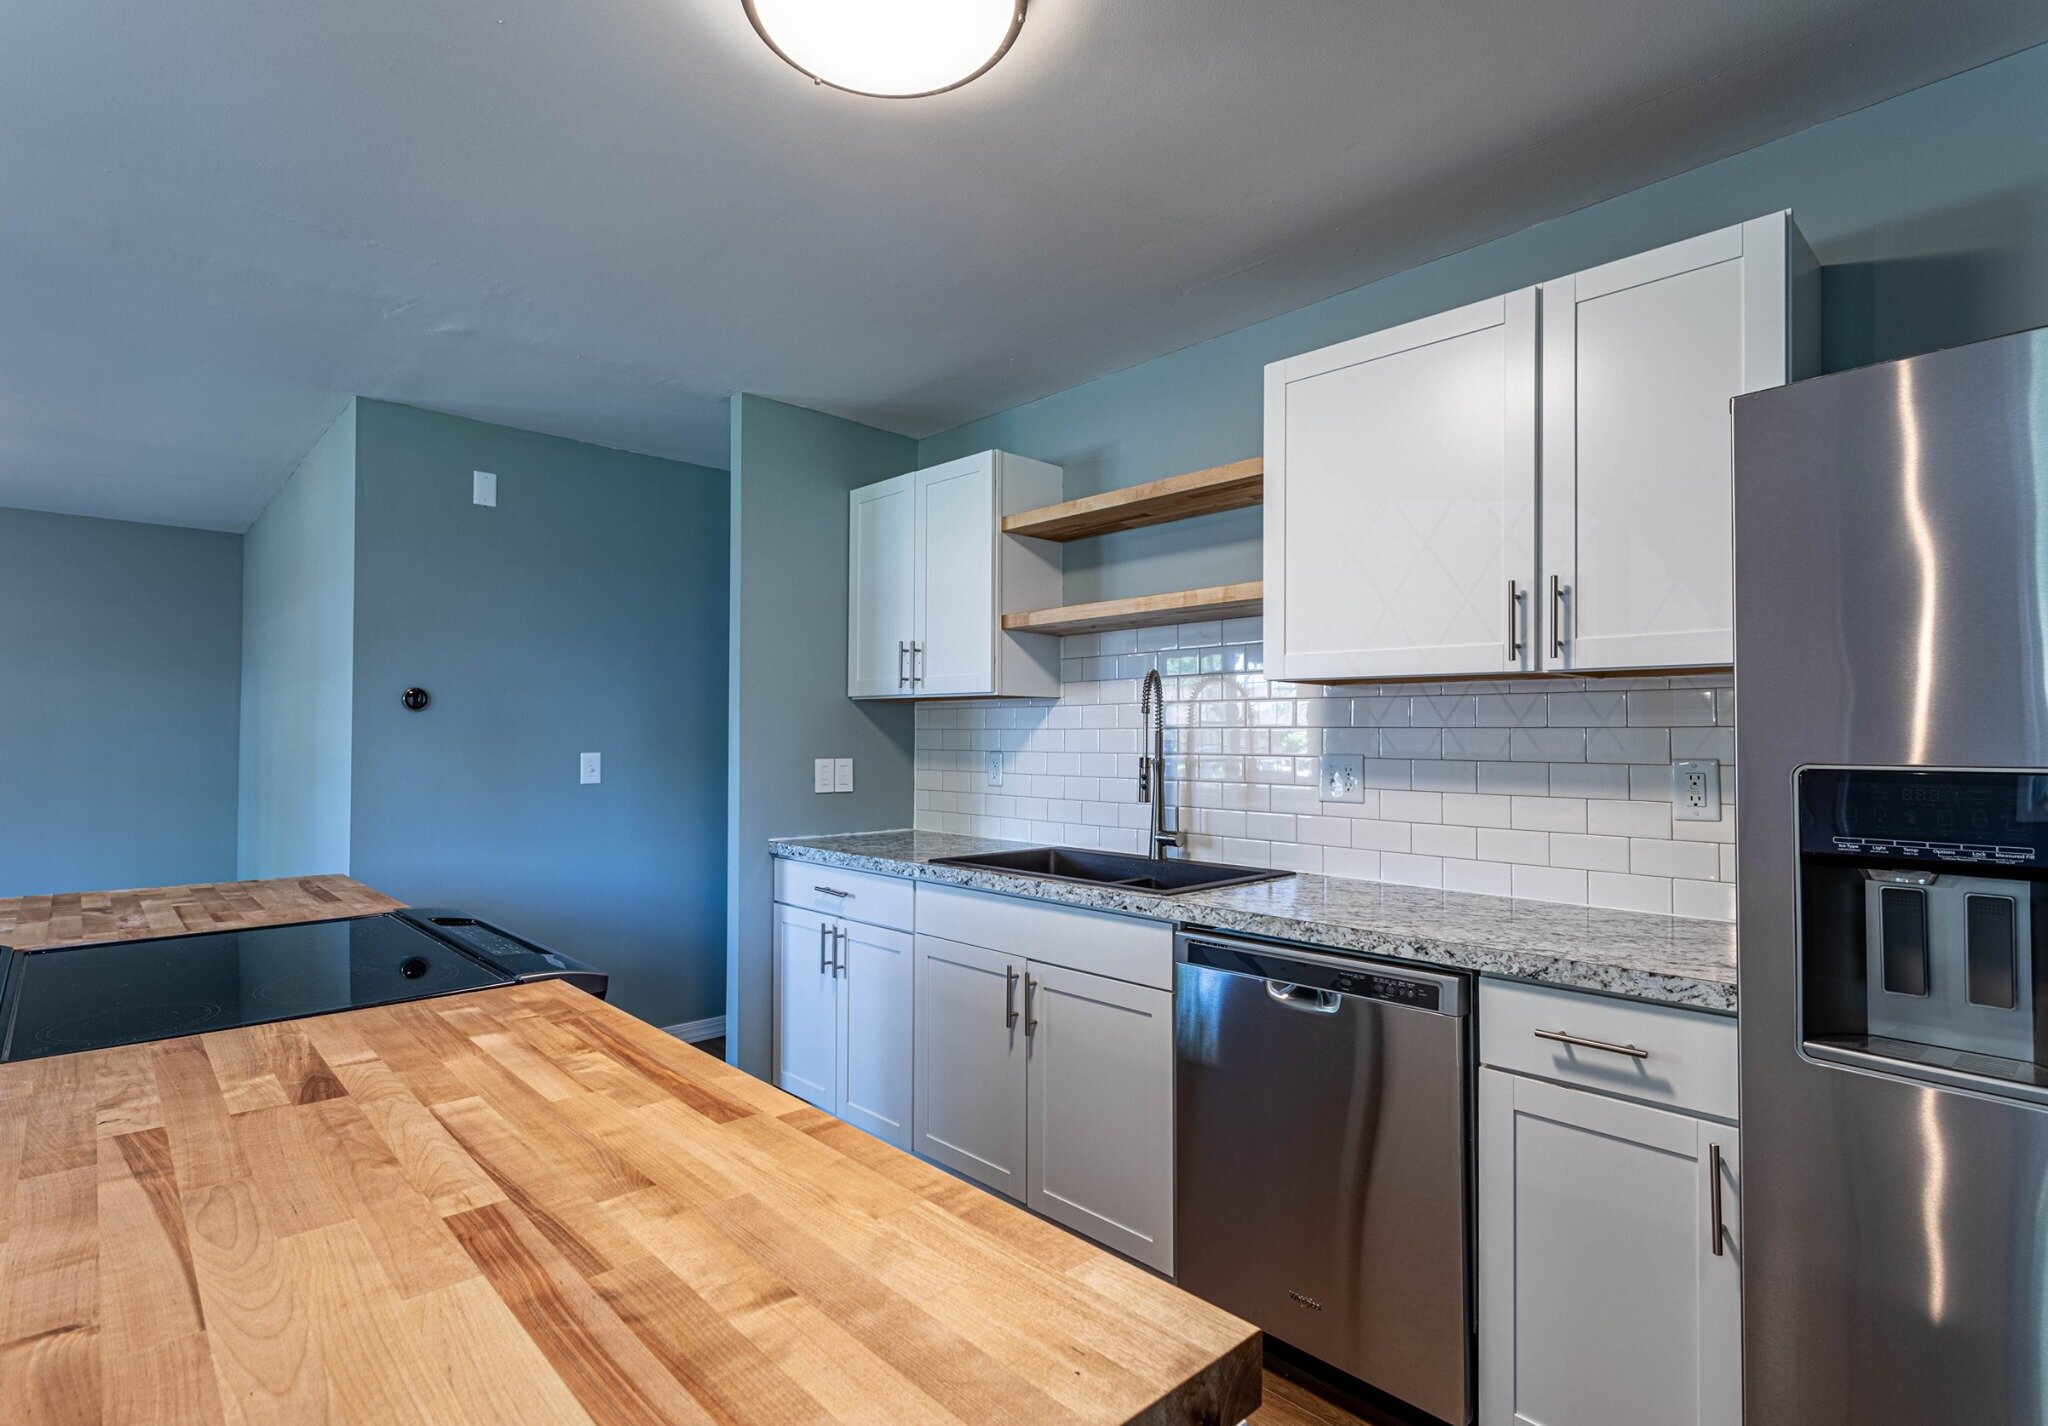

I wish I personally could take more credit for this amazing space, but honestly, Lucius came up with most of the ideas for it (who knew he had so much design acumen!?). I’m definitely the more risk-averse one between us (he comes up with the crazy ideas and I reel him back in. It’s a good balance). So when Lucius suggested removing a wall and changing the entire layout of the kitchen my alarm bells started ringing. But I have to admit that he was right and now this kitchen is so much more functional than it was when we bought the house.
The new layout adds way more counter space than was previously there and even increased the number of cabinets! Not only that, but it flows so nicely with the rest of the main living area and creates a much more conversational space.
The Bathroom
This house is tiny (around 1,100 square feet) and only has one small bathroom (which is tricky to photograph!), but it needed to be completely gutted. We carried the same laminate we used in the rest of the house into the bathroom as well.


The Bedrooms
This house has 3 bedrooms that are all pretty similar in size and style so I’ll just share one of the pictures. We put new carpeting in all the bedrooms and painted them a nice cool gray color - Tempered Gray by Valspar.
Side note: I feel like I should mention that I’m not sponsored by Valspar or Lowe’s since I mention them a lot. I would LOVE to try Benjamin Moore or BEHR paint but we only have Lowe’s and they only carry Valspar and Sherwin Williams. Therefore, those are the brands you’ll see me reference in a lot of my posts.

We also have new closet doors on the way but I couldn’t wait to share this post so they aren’t installed yet in this picture.
The Bonus Room
This house had a garage once upon a time, but at one point it was turned into a bonus room. It started out (like the rest of the house) in pretty rough shape.


But MAN does she clean up nice!


I love how the flooring brings some warmth to this house and I think it pairs really nicely with the calming paint tones. In this room, I used Paris in Winter everywhere except for the accent wall, which has Seafoam Storm, both by Valspar.

I wasn’t able to find a digital swatch of SeafoAm storm :(
We also replaced the french doors with a new sliding glass door. Normally I love french doors, but the ones in this room were failing and the sliding glass door brings in so much more light!
Lastly, we turned the closet back into a closet (it seemed like it was previously used as an entertainment center). This house has very little storage so we figured a closet would be more functional.
All the other things
Now that you’ve seen all the pretty stuff, I think it’s important to note that there are definitely parts to flipping a house that need attention that don’t have that “WOW!” factor but still gotta get done.
Water Heater
The biggest “hidden” item that we replaced was the water heater. We switched the old at-the-end-of-its-life traditional water heater to a tankless water heater. We installed one in our last house and we loved it! They’re not only much more energy efficient because they’re heating the water up as it’s being used (rather than continuously heating a tank full of water), but you don’t have to worry about running out of hot water AND they’re about the same price as a traditional water heater. Win-win-win!
Light Switches
First of all, I think one of the most simple and inexpensive ways to update a space is to switch out those old off-white light switches, outlets, and covers to white. Of course, we made that change throughout the house, but Lucius took it a step further. He’s a technology nerd and is really jumping on the “smart switch” train. He’s been changing all the light switches in our house to smart switches and was really excited to put them in the flip too!
In both our house and the flip we used Lutron Caseta switches and I have to admit they’re pretty cool. I think the best part is that they work with Google and Alexa so they’re great when you have little kids who a) leave the lights on all the time or b) can’t reach the lights yet to turn them on/off. Instead of walking around the house flipping switches all the time, you can just tell Google/Alexa to do it and you don’t even have to leave your seat.
Thermostat
Lastly, Lucius the technology nerd just HAD to replace the thermostat with a NEST thermostat. We’ve actually put one of these in our last three houses because we love them so much. As with the smart switches, I love that I can change the thermostat from wherever I’m at (I think technology is making me lazy…), but it’s also great because they learn your habits and recognize when you’re typically at home or away and adjusts the temperature so you’re not unnecessarily heating or cooling your house. Yay for energy efficiency!
And there you have it, the crisp, clean, COMPLETE tour of the flip!

Our goal during this flip (and what we will continue to strive for during future flips because, come on, there will definitely be future flips) wasn’t to earn the most profit. Our primary goal was to take a sad, neglected house and show its full potential. We of course still had a budget to stick to, but we weren’t concerned with using cheap flooring and finishes just to make a profit. We made sure we chose items that looked and felt good - like laminate with some padding, nice bathroom fixtures, and sweet, homey details like a door knocker.
Obviously, we wanted the end product to be beautiful, but it was also so important for us to make sure it was safe and didn’t have any hidden issues. That seems like a no-brainer, but you’d be surprised how many people flip houses and just touch the cosmetic stuff. Overall, we wanted this house to do the neighborhood (and the neighbors) justice.
I think best of all is that we had FUN doing it! The real estate market is a little nuts right now and there isn’t much inventory, but once we get our hands on another one of these babies you better believe I’ll be writing all about it! In the meantime, I guess I have some time to work on my own house. I have a dining room that has had three different paint samples up for a few weeks now that is calling my name….

