
How to: DIY Nursery Mobile on the Cheap
How to Make a Nursery Mobile
When I was pregnant with my second daughter and couldn’t continue with my normal home renovations, I had to redirect my energy somewhere else. I spent some time reupholstering our dining room chairs, painting, and creating curtains for our front door and sidelights. Then I got the idea to create a mobile for her room. Today I’d like to share my process with you so you can create one of your very own at little to no cost!

As an Amazon Associate, I earn from qualifying purchases. This post may contain affiliate links, meaning I receive commissions for purchases made through those links, at no cost to you.
Materials:
- Paint chips
- Several heavy books
- Glue
- Thin string/thread
- Twine
- A branch
- Scissors
- Command hooks or Cup hooks
Step 1: Collect paint chips - lots of them!

Honestly, this step is kind of misleading off the bat - you don’t necessarily have to use paint chips for this project. You could really use anything that’s a similar thickness, like colored cardstock. Oooo… or you could draw a pattern on cardstock and use that! The world is your oyster.
For me, paint chips were the most logical choice because for some reason I never get rid of them when I grab them from the store, so I had a whole box full of paint chips for no reason. Until now!
Most of the paint chips in the box were colors I had used around our house, but I find it sweet that the bright colored paint chips are ones that my older daughter picked out. She’s also a paint chip hoarder, but can only reach certain colors at the store… which usually end up being the brightest ones. I like that she was able to have a part in this project for her sister.
There are two big benefits I see to using paint chips for this project:
You have soooo many colors to choose from!
They’re free!
Step 2: Cut paint chips into shapes

For this step, I found 3 different sizes of circular-shaped items and spent my free time tracing and cutting circles while watching TV.
Apparently, there are punches in different sizes of circles that you can buy, but by the time I realized that was an option I was already in the process of tracing my circles and didn’t want to start over.
As with Step 1, you don’t have to follow my process exactly. I chose to cut my shapes into circles to keep the design from getting too crazy, but that’s just my preference. Really you could use any shape or shape combo you want!
Step 3: Pair your shapes up

No, you’re not seeing double. Yes, this is the same picture from Step 2. I created this mobile over a year ago when starting a blog wasn’t even on my radar. Luckily I took some random pictures of the process that are certainly coming in handy now!
This step is where you should actually follow my rules a little more closely. Because we’re going to be stringing the shapes up in Step 4, it’s important to lay out your design before you break out your glue.
First, pair each shape up with another shape of the same size. Then, lay out your design how you want it strung together.
Step 4: String your shapes together
This is where I experimented a little with some of the shapes from my discard pile.
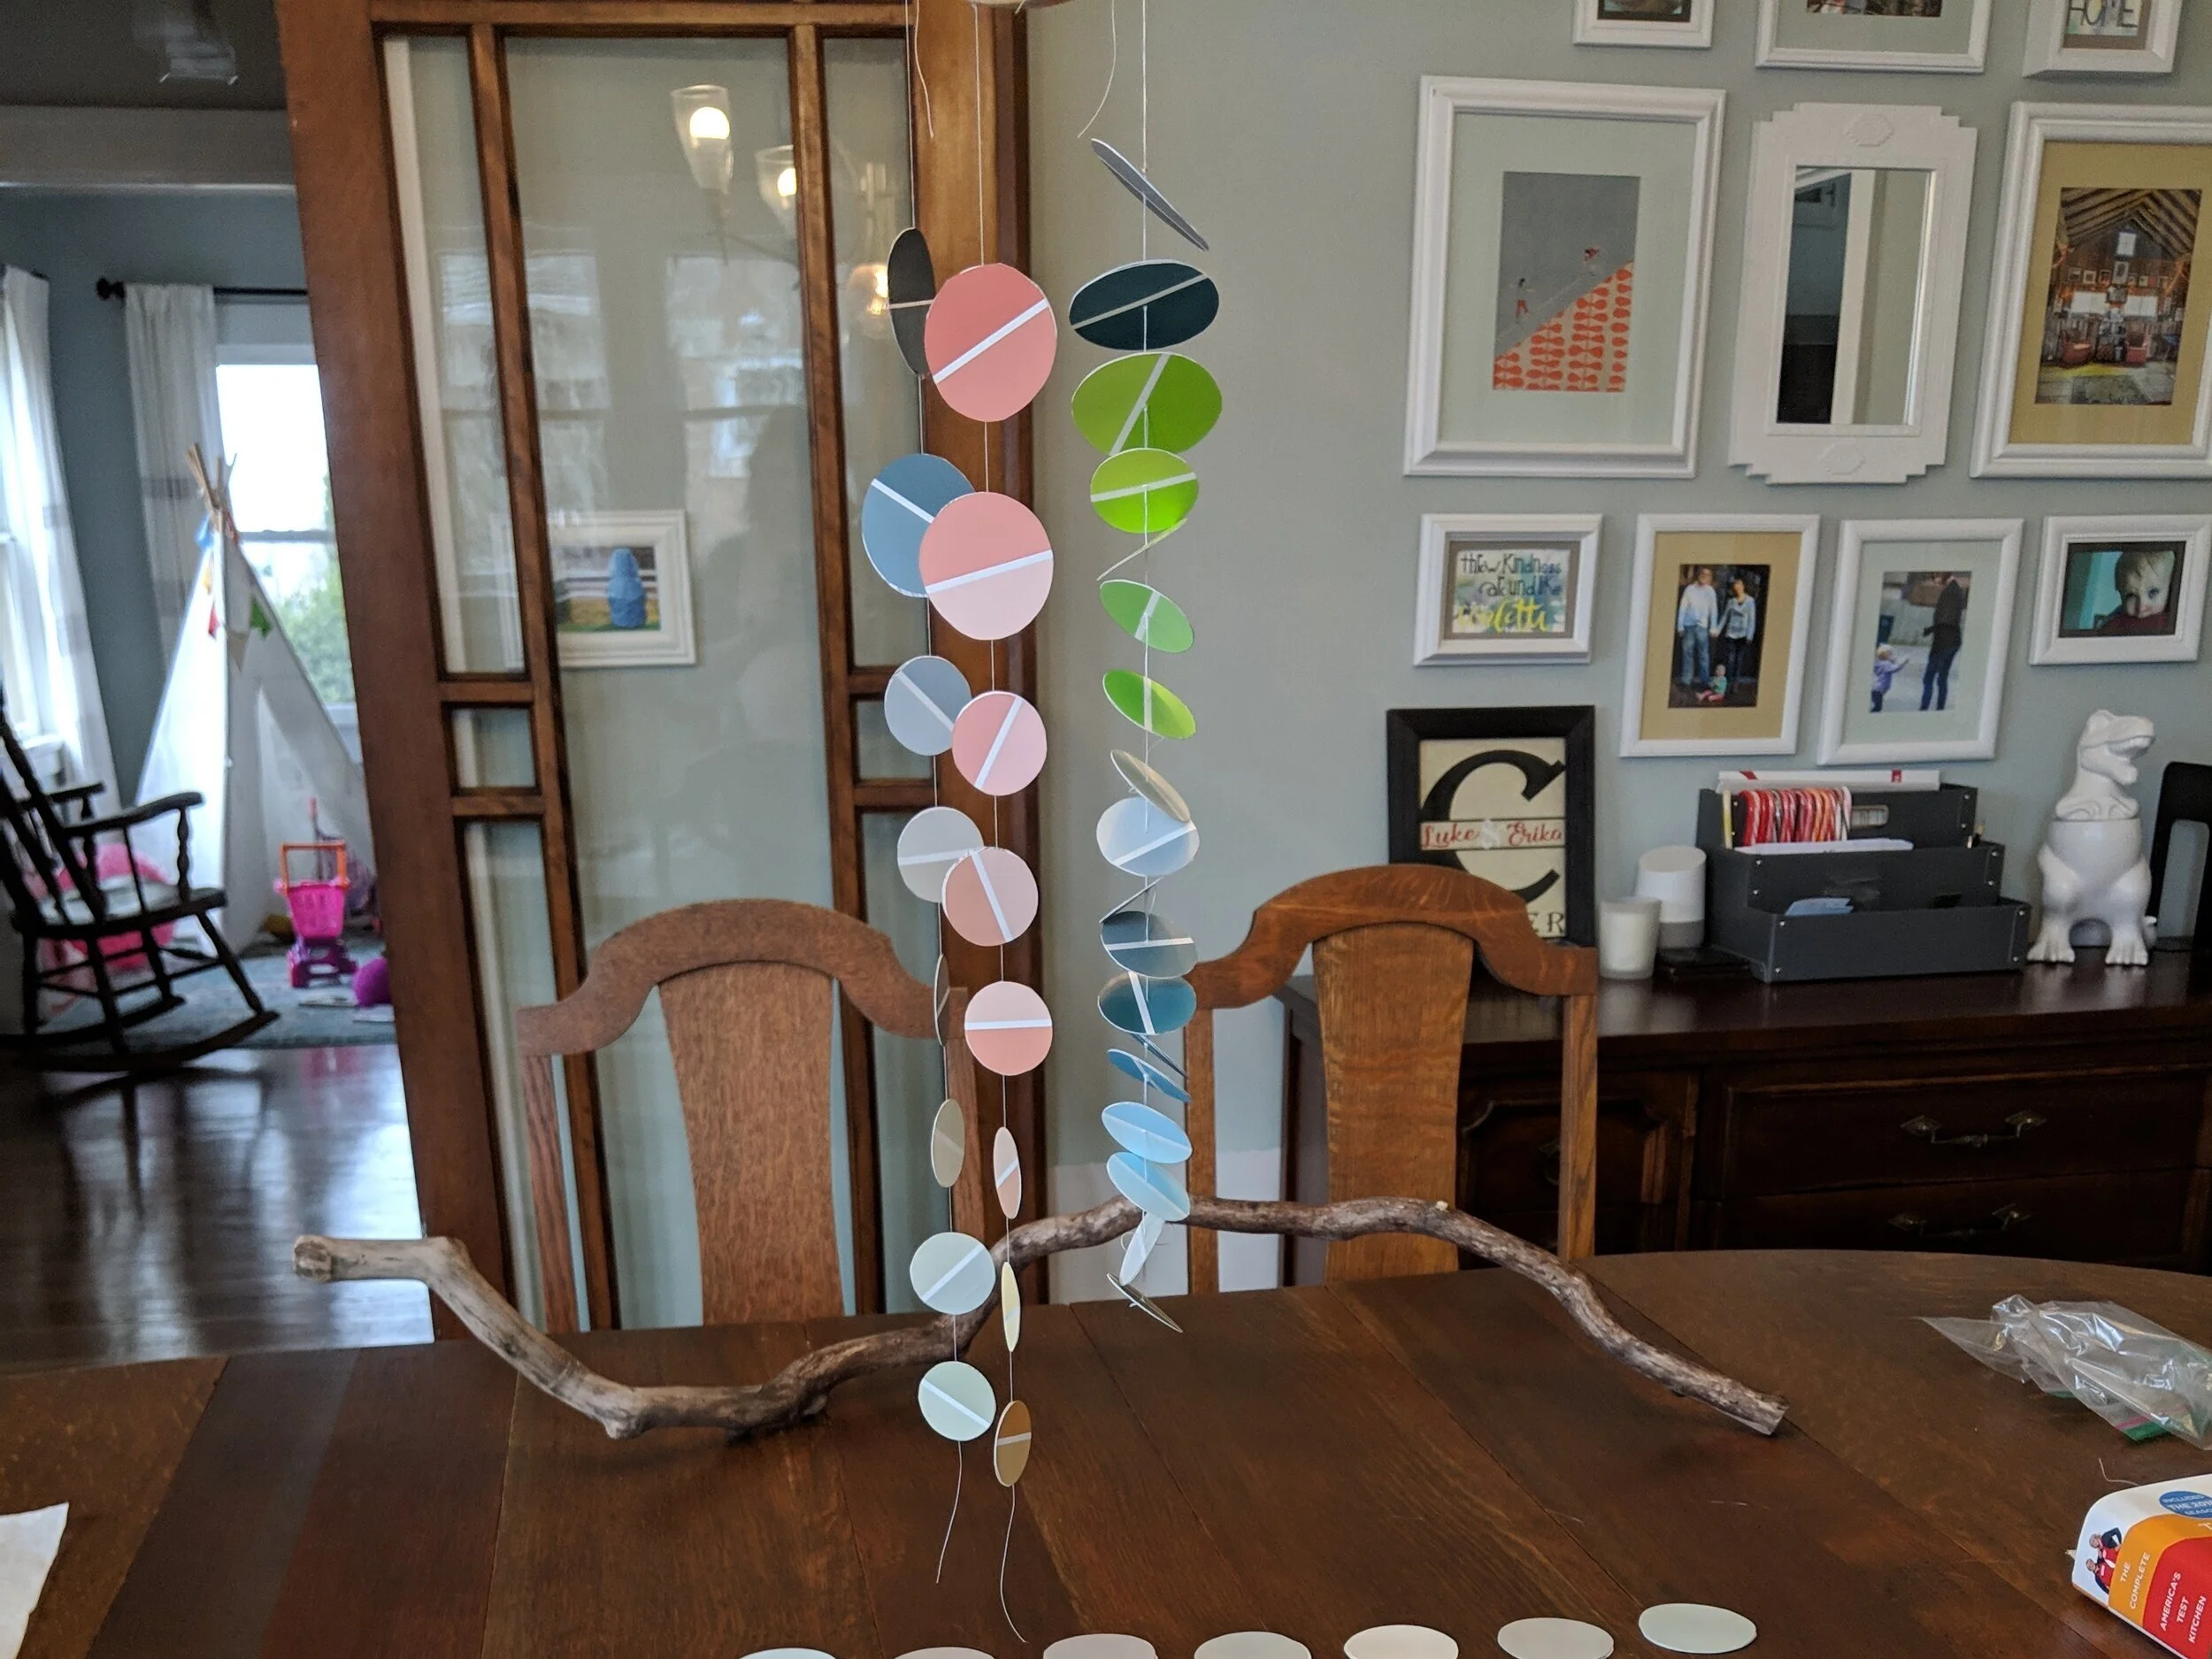
As you’ll see, the two strands on the left are hung with the string pressed between two shapes, where the string on the right is hung with the string thread (threaded?) through the middle of the shapes after they’ve been glued back to back. Either way works (this is YOUR mobile, after all), but I will warn you that the process on the right was MUCH more difficult. But I’ll give you the steps for both processes and let you decide which route you want to take.
For both processes, I cut a long piece of white sewing thread to begin - make sure it’s plenty long so you can string all your shapes and have room to tie it to your stick. You can always cut some of it off, but you can’t add more.
I used white sewing thread because I knew I wanted something thin and not super obvious. Also, it was something I already had around the house so it was virtually free! You could use other types of string or thread, but I recommend not using anything too thick or your shapes won’t be able to be glued together.
For the process on the left I put glue on the back of one circle, placed the string in the center, and placed the other circle on top. I did this for the whole strand, being sure to leave space between each circle. Then put a book on top of the entire strand as I worked on the other strands. Each time I finished a strand I placed a book on top of it and let it dry like that for about an hour.
For the process on the right I glued two circles back to back and put a heavy book on top of them and let them dry. Once dry, I took a needle and poked a hole in the center of each pair. Then, I strung the circles, tying a knot after threading each one so it didn’t slide down the thread.
Not only does the second process take more time, but you also need a lot more shapes because you’re hanging them horizontally. If you’re really committed though, you could end up with something awesome like this:

Step 5: Tie your strands to your support

I love wood tones, so for my mobile, I found a really cool branch to use as my support (note: branches are also free) that I cut down on my miter saw. If you wanted a circular mobile you could use an embroidery hoop instead, or a dowel rod for something less “natural”.
I love wood tones, so for my mobile, I found a really cool branch to use as my support (note: branches are also free) that I cut down on my miter saw. If you wanted a circular mobile you could use an embroidery hoop instead, or a dowel rod for something less “natural”.
Step 6: Hang your mobile, sit back, and enjoy

Okay, this is where I actually had to buy a couple of things.
To hang my mobile, I bought some twine and cut two pieces of the same length (one for each side). Then I looped it around each end of my branch several times until it hung at the height I wanted. Finally, I used a couple Command Strip hooks and hung the mobile from the ceiling. You could also use cup hooks, but I prefer Command Strips because I don’t have to patch a hole if I want to take them down later.
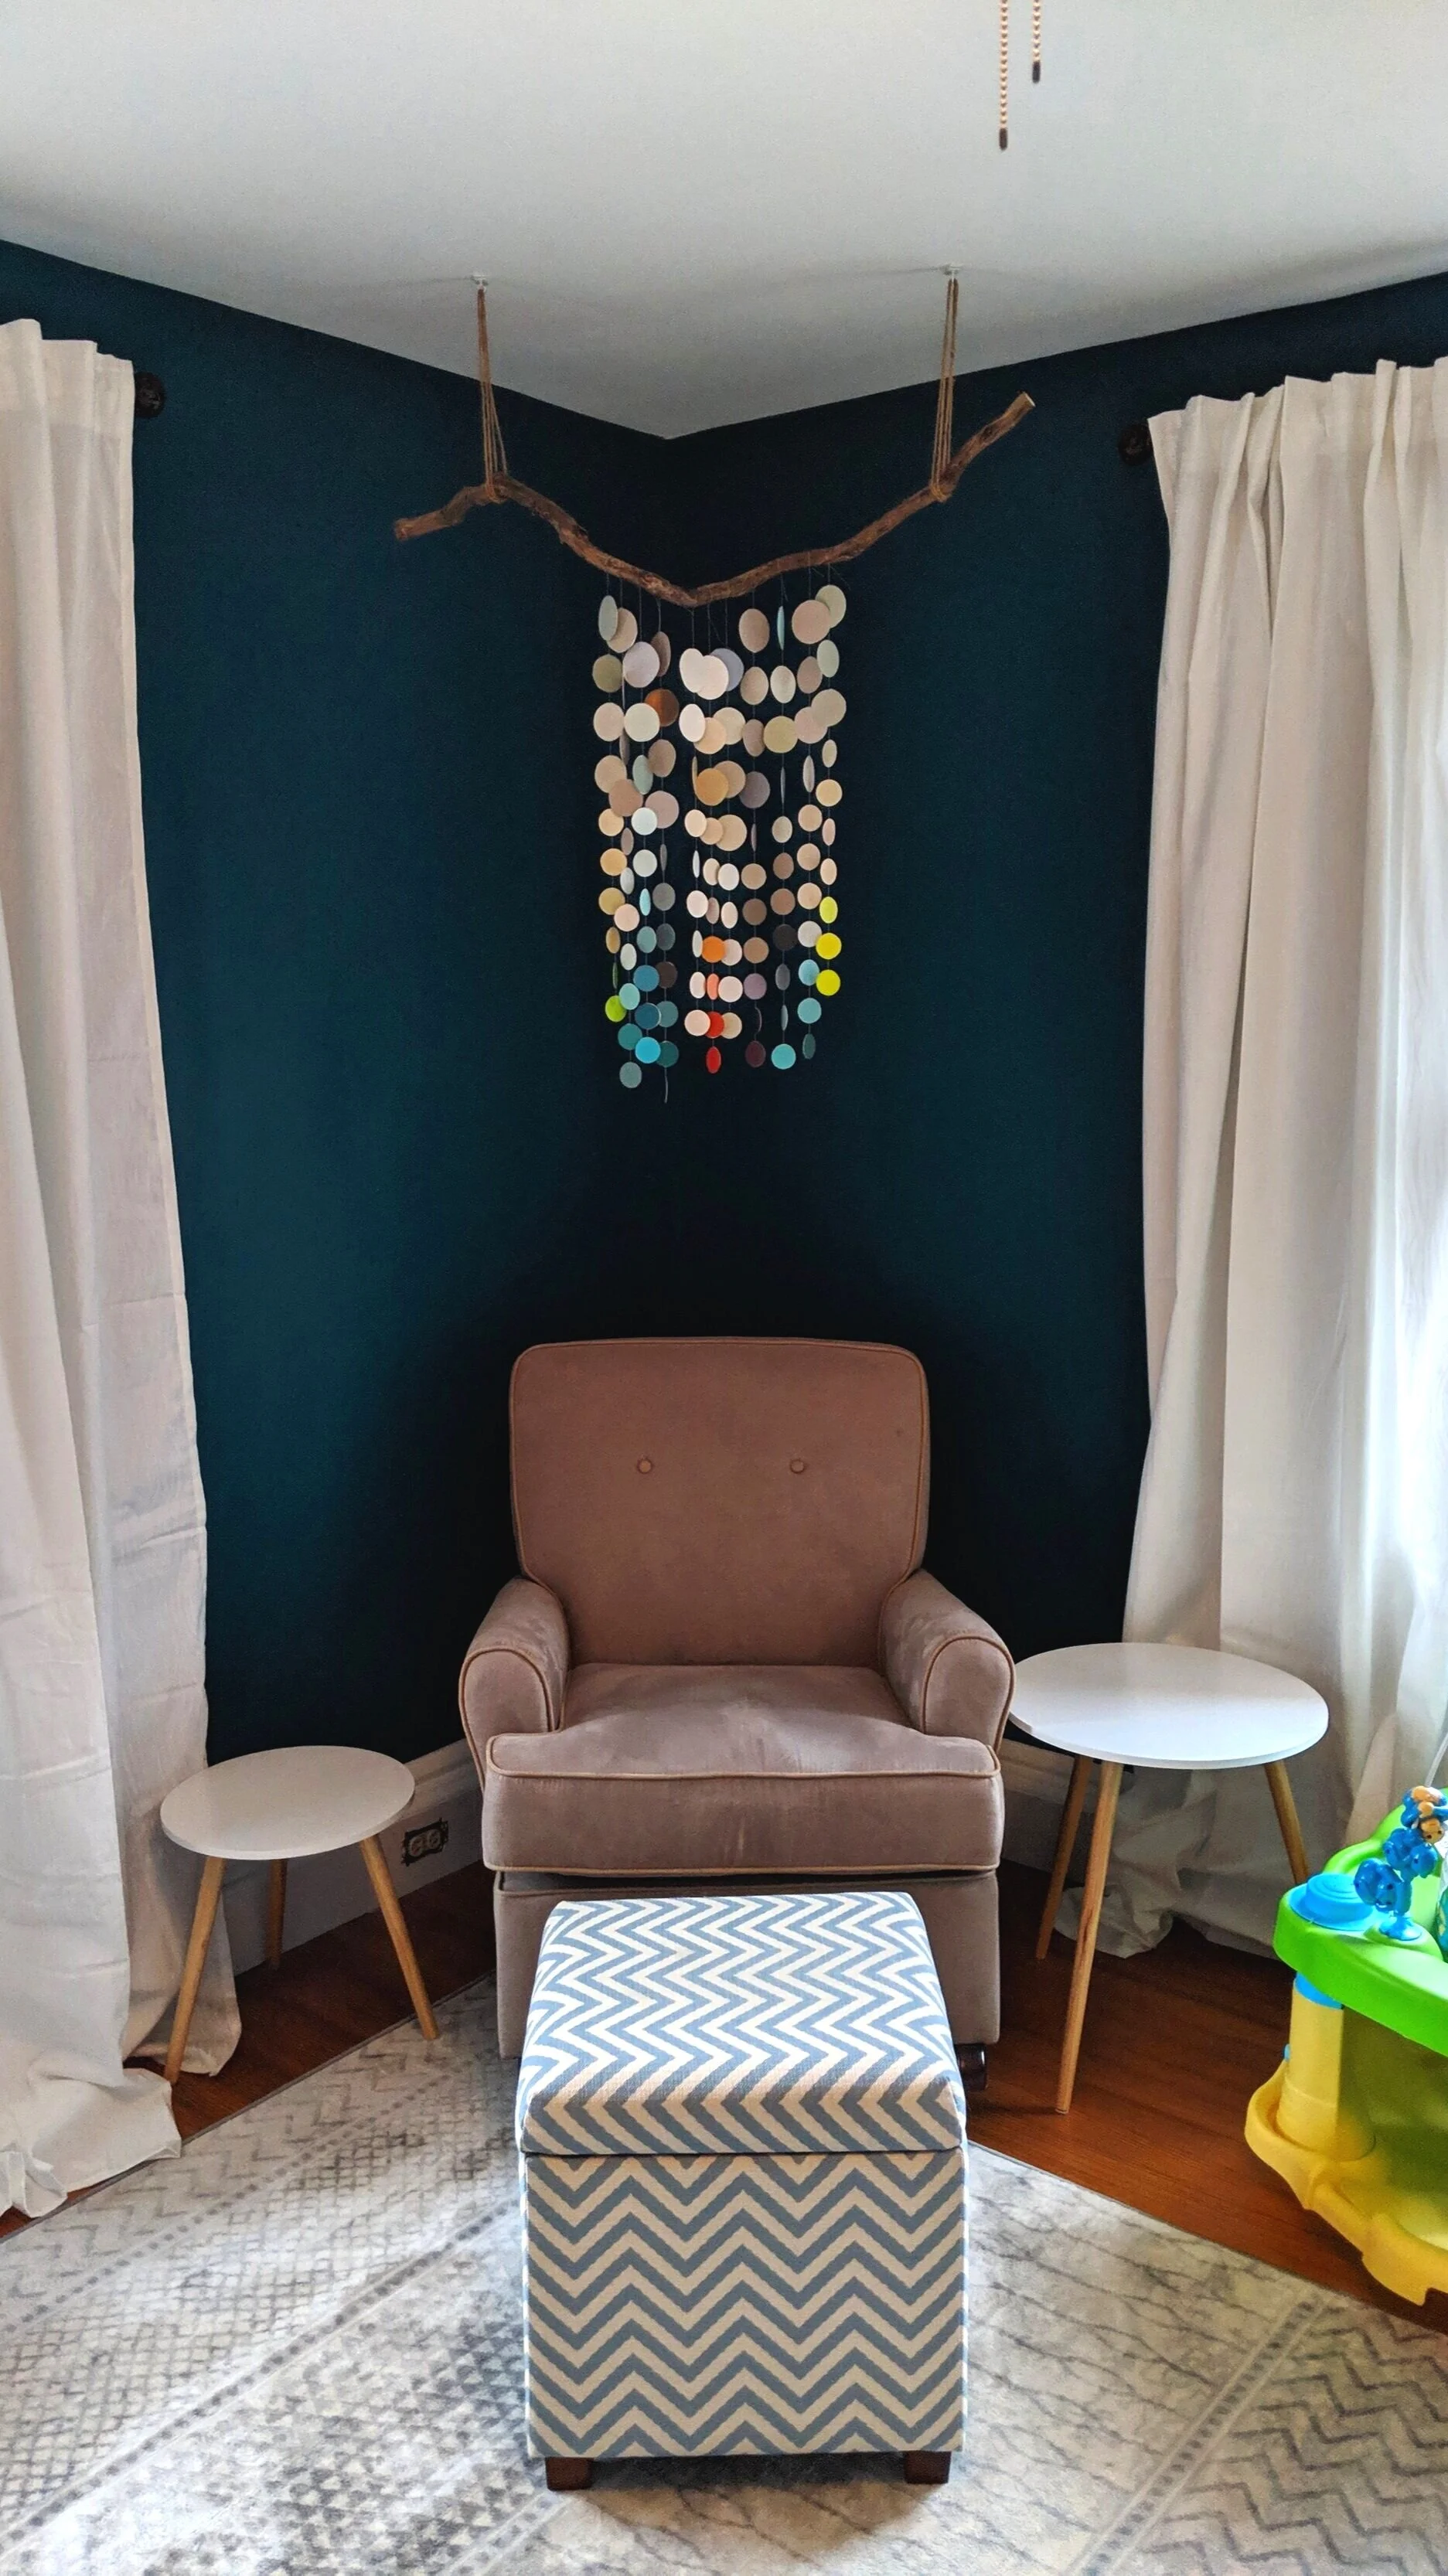
I love how the mobile turned out (and so does my little one!). I really enjoy sitting in her rocking chair with her and watching her watch the mobile as the strands slowly spin and sway with even the slightest breeze, revealing lots of different colors. Additionally, it brings me immense joy knowing I made something beautiful without breaking the bank!
The possibilities with this project are really expansive and you can put your own spin on it in so many different ways. I hope some of you will create your own mobiles while loosely following my steps and share your projects with me!