DIY Geometric Wood Accent Wall
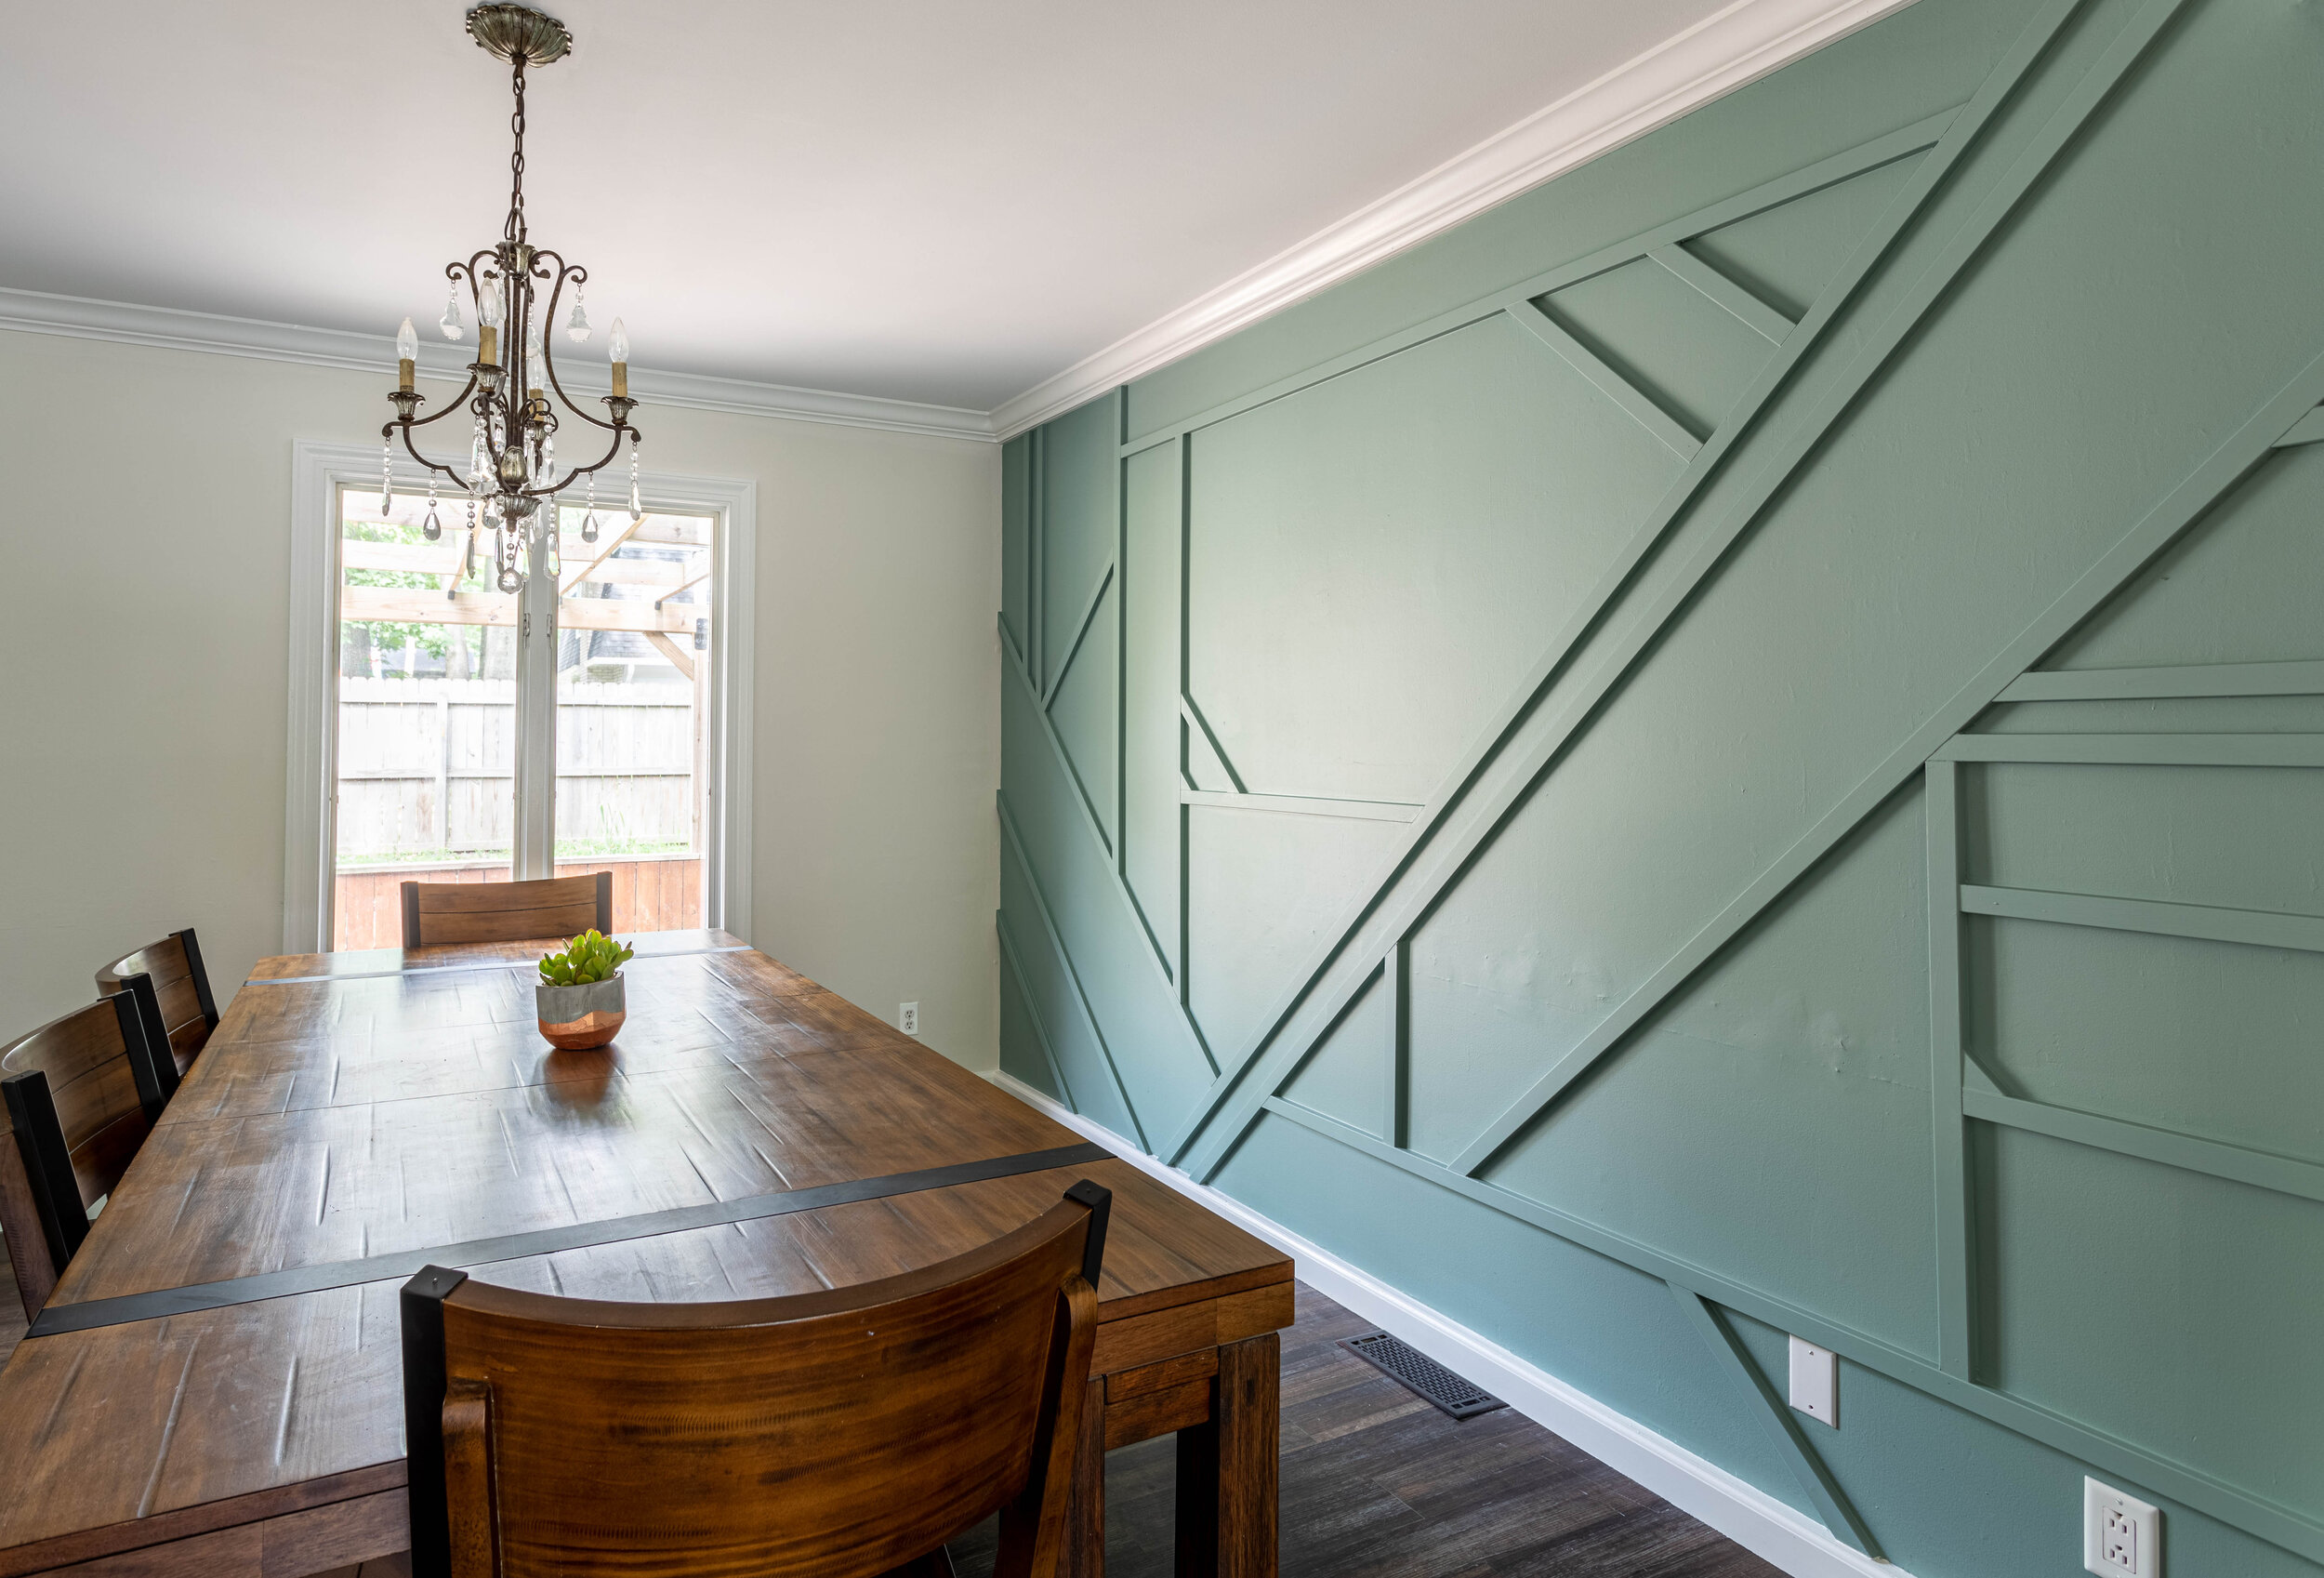
Well, we finally did it. Our geometric wood accent wall is complete and I’M SO IN LOVE WITH IT! In fact, I love the finished product so much, I wrote a tutorial about it! (Surprise, surprise).
How to Create a Modern Wood Feature Wall
Well, we finally did it. Our geometric wood accent wall is complete and I’M SO IN LOVE WITH IT!
Waaaayyyy back in March, I started renovating our dining room. I was completely inspired by the accent wall Liz over at Within the Grove created and just knew I had to give it a whirl. And heck - I had nothing to lose considering what we started with!

But because we seriously lack focus as far as home renovations go, we got distracted working on my home office redesign, finishing the flip, and… what else?
Oh yeah, completely demolishing our master suite.
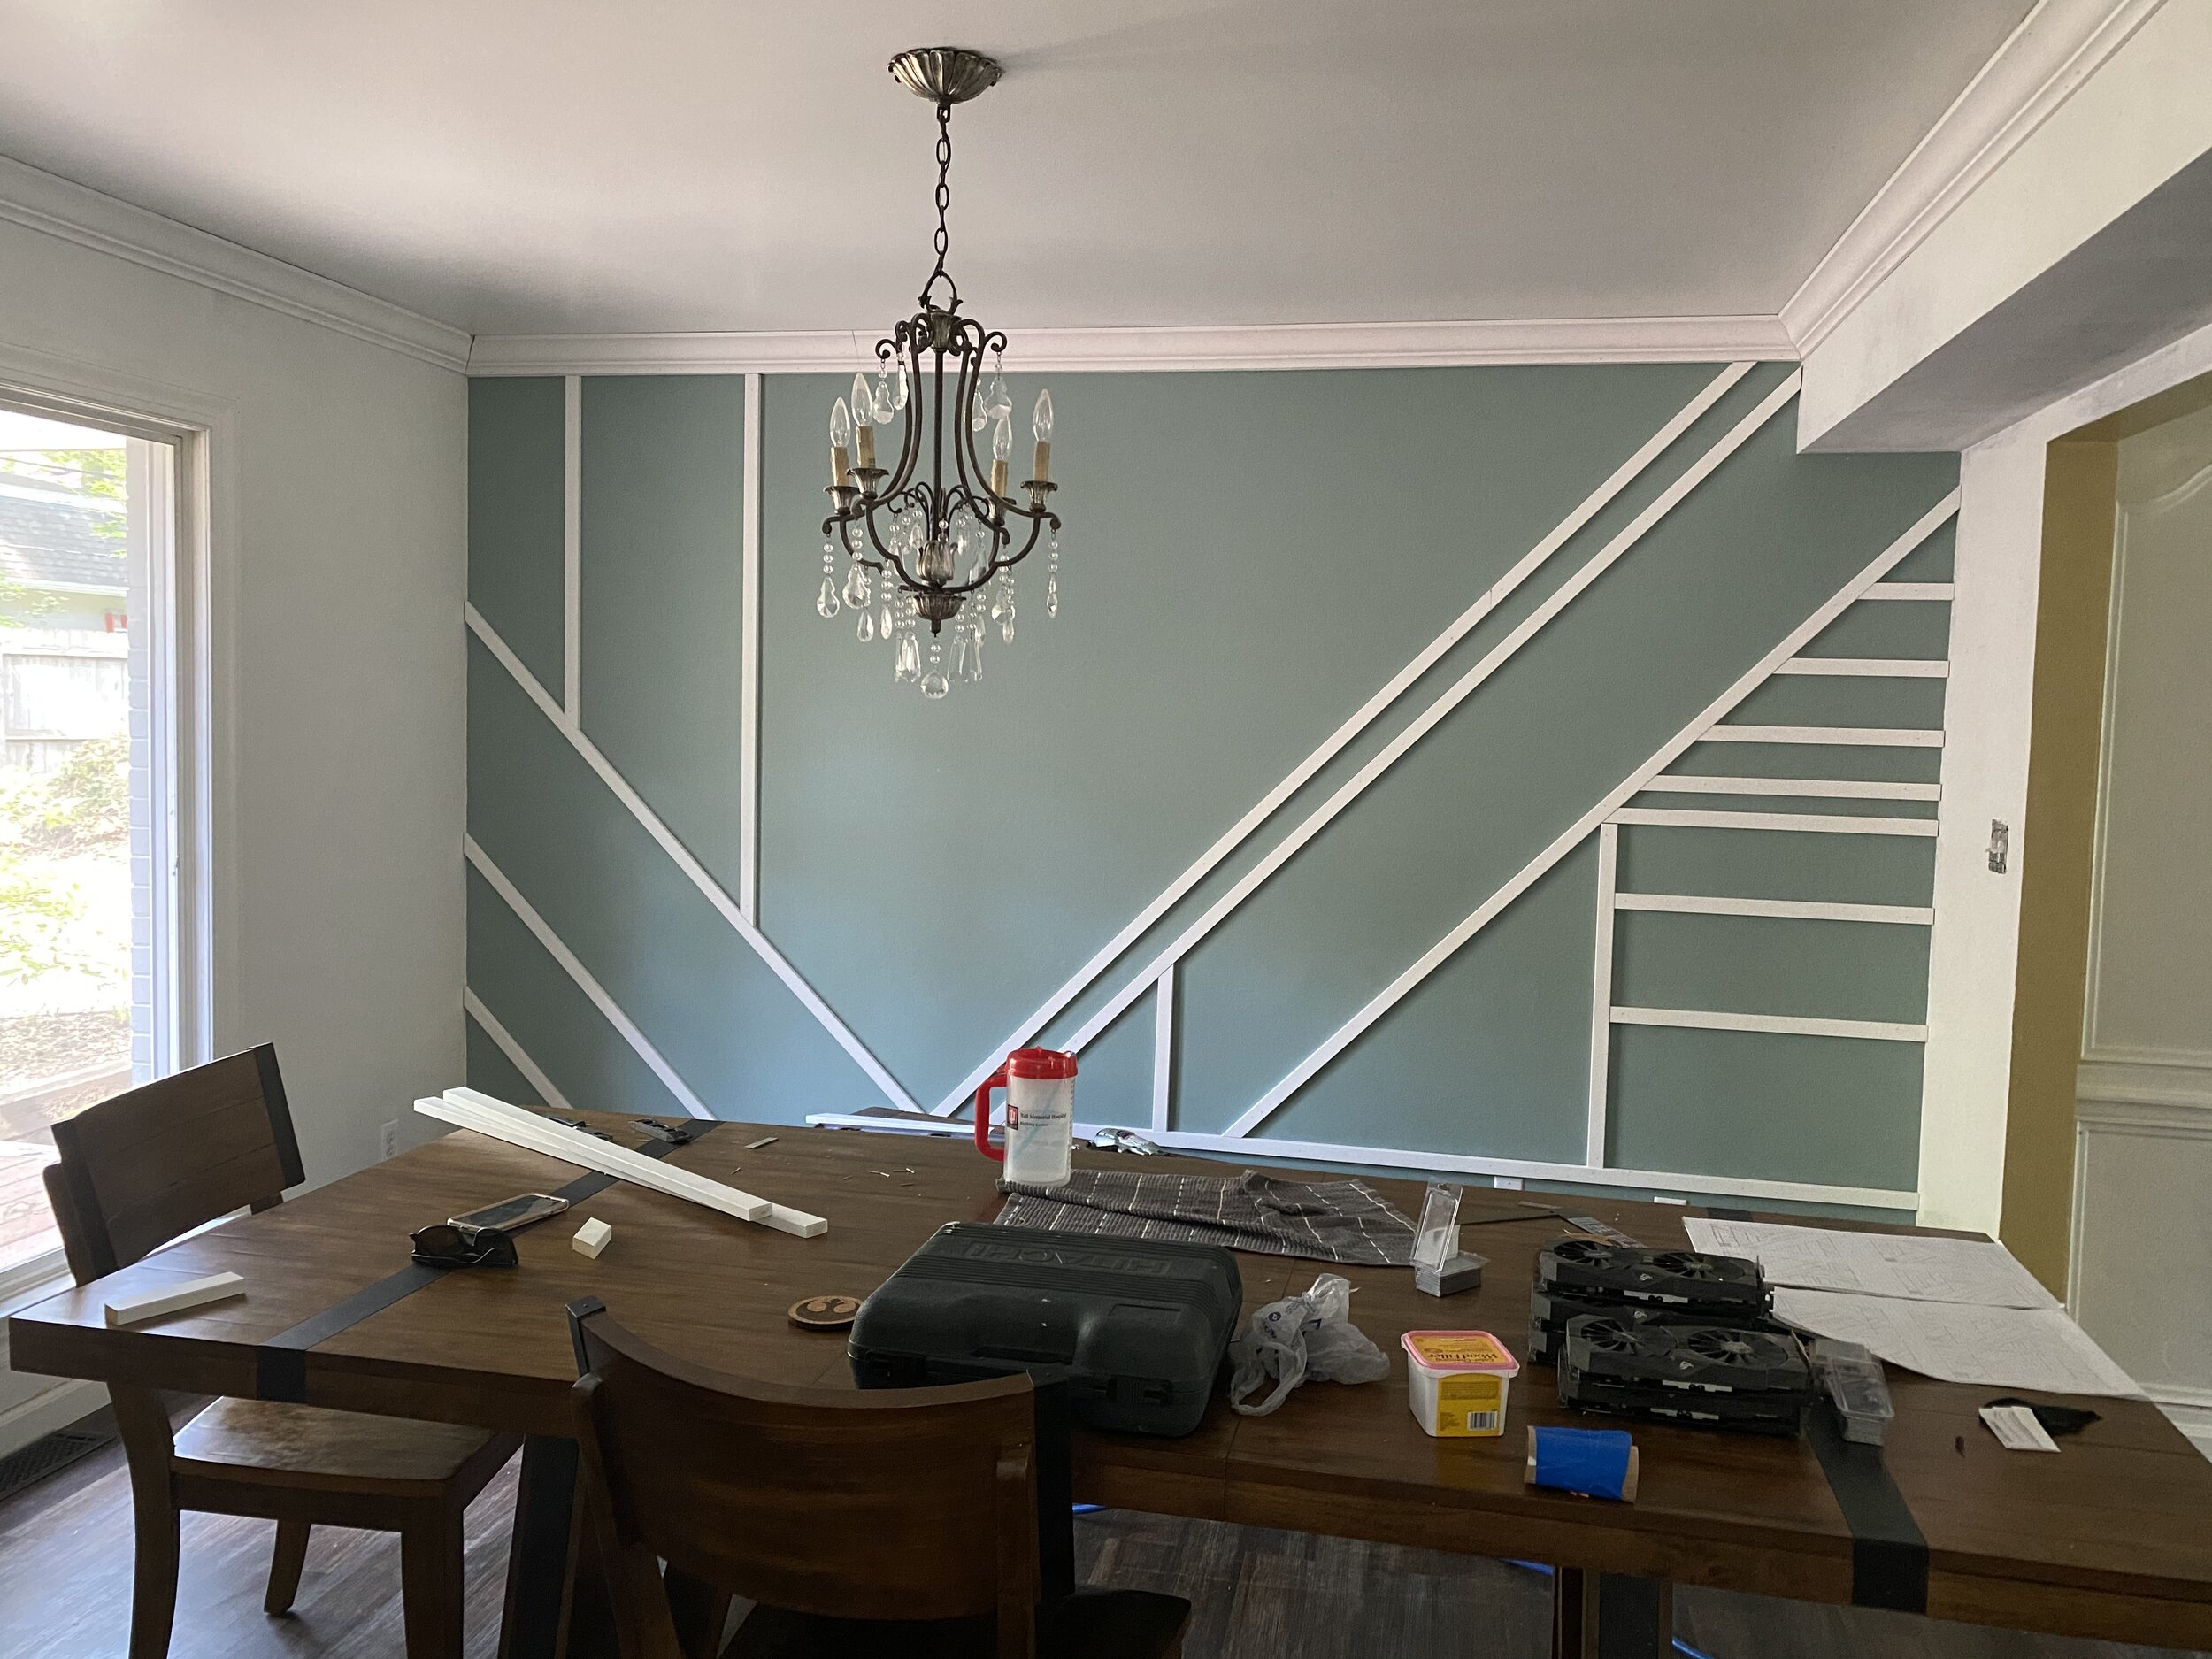
But FINALLY, we were able to take a little bit of time, find some childcare (toddlers and nail guns don’t mix - who knew!?), and put this wall up in just a couple of hours! Easy peasy. Then I just had to caulk and paint and now I spend most of my time gazing lovingly at it. I mean, wouldn’t you!?

In fact, I love the finished product so much, I wrote a tutorial about it! (Surprise, surprise). Here’s how I created my geometric wood accent wall:
Materials
As an Amazon Associate, I earn from qualifying purchases. This post may contain affiliate links, meaning I receive commissions for purchases made through those links, at no cost to you.
- Primed 1 x 2 MDF boards (the amount you need will vary based on your design)
- Brad nail gun
- Nails
- Paint
- Paintbrush
- Craft brush
- Paintable caulk
- Wood Putty
- Sandpaper
- Miter saw
- Level
Draft the Design of your Accent Wall
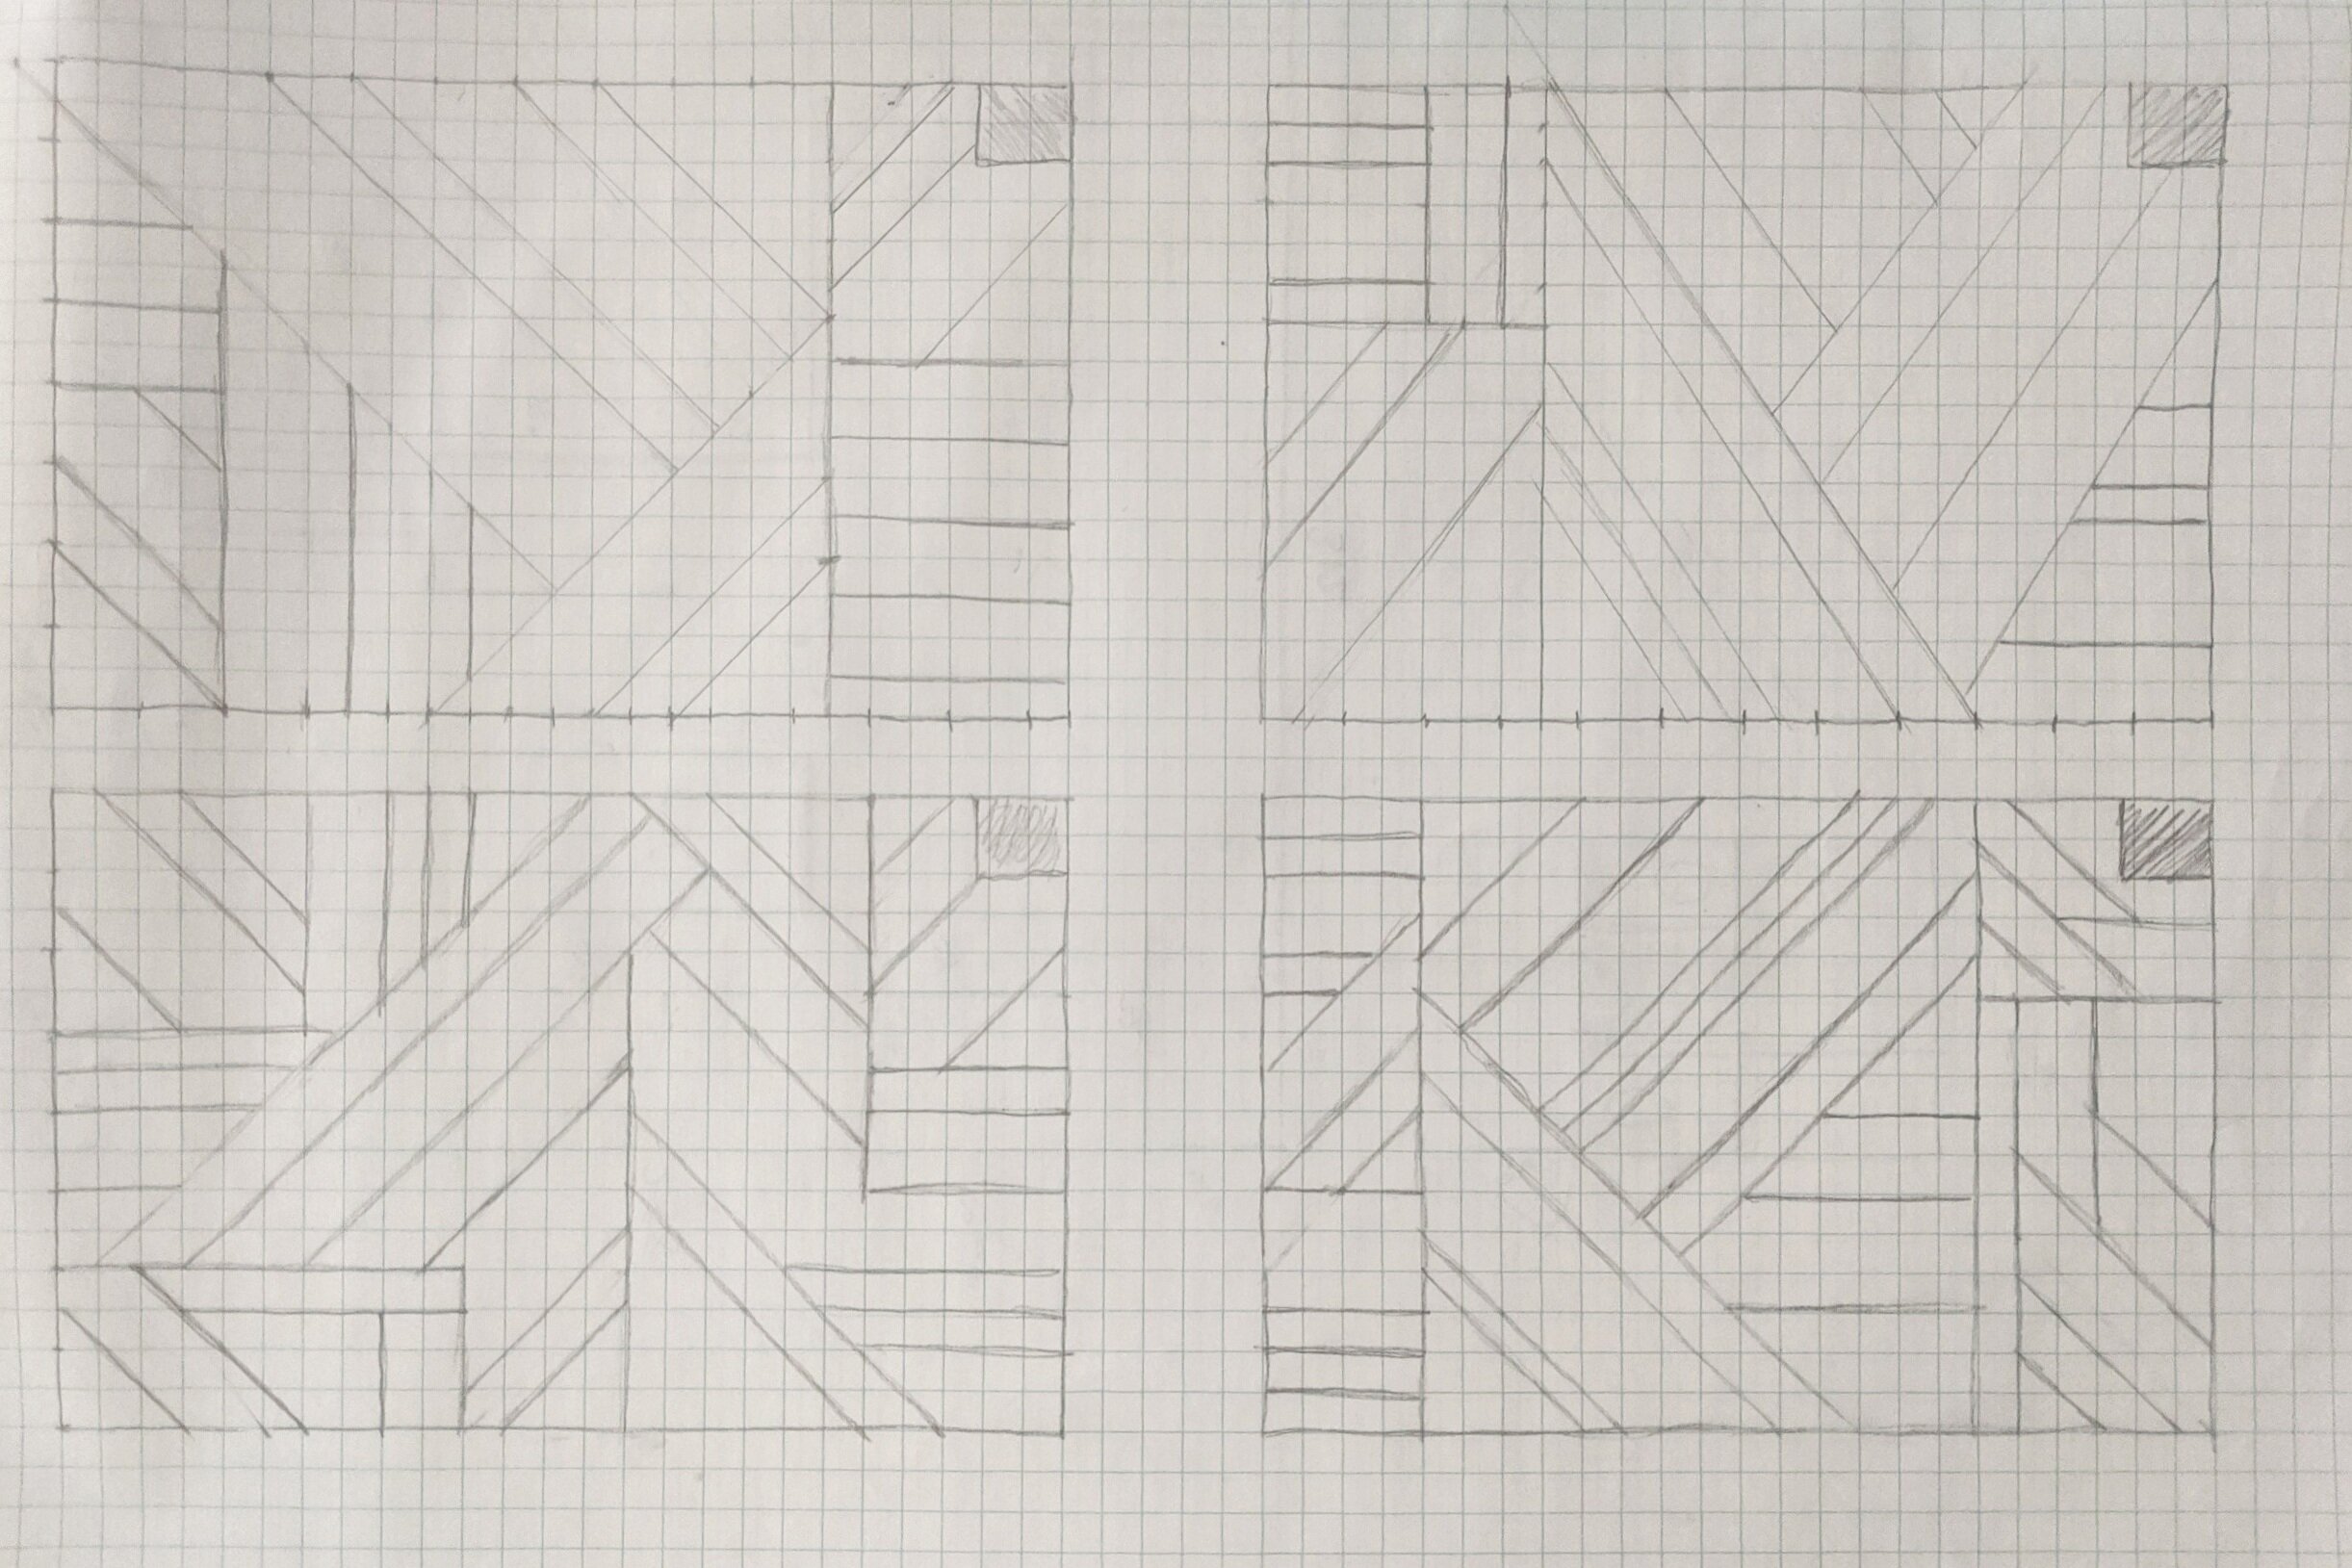
First things first, I started by drafting up a bunch of designs using graph paper. I initially drafted 4 designs and didn’t fall in love with any of them. Then I drafted 4 more. And you know what? I actually didn’t use anything I mocked up!
HOWEVER, I still think this step is important because it gave me an idea of what I definitely did and didn’t want to include in my final design.
Optional Step - Bump Out Your Crown Molding and Baseboards
This step is definitely not required, but I’m really happy we did it.
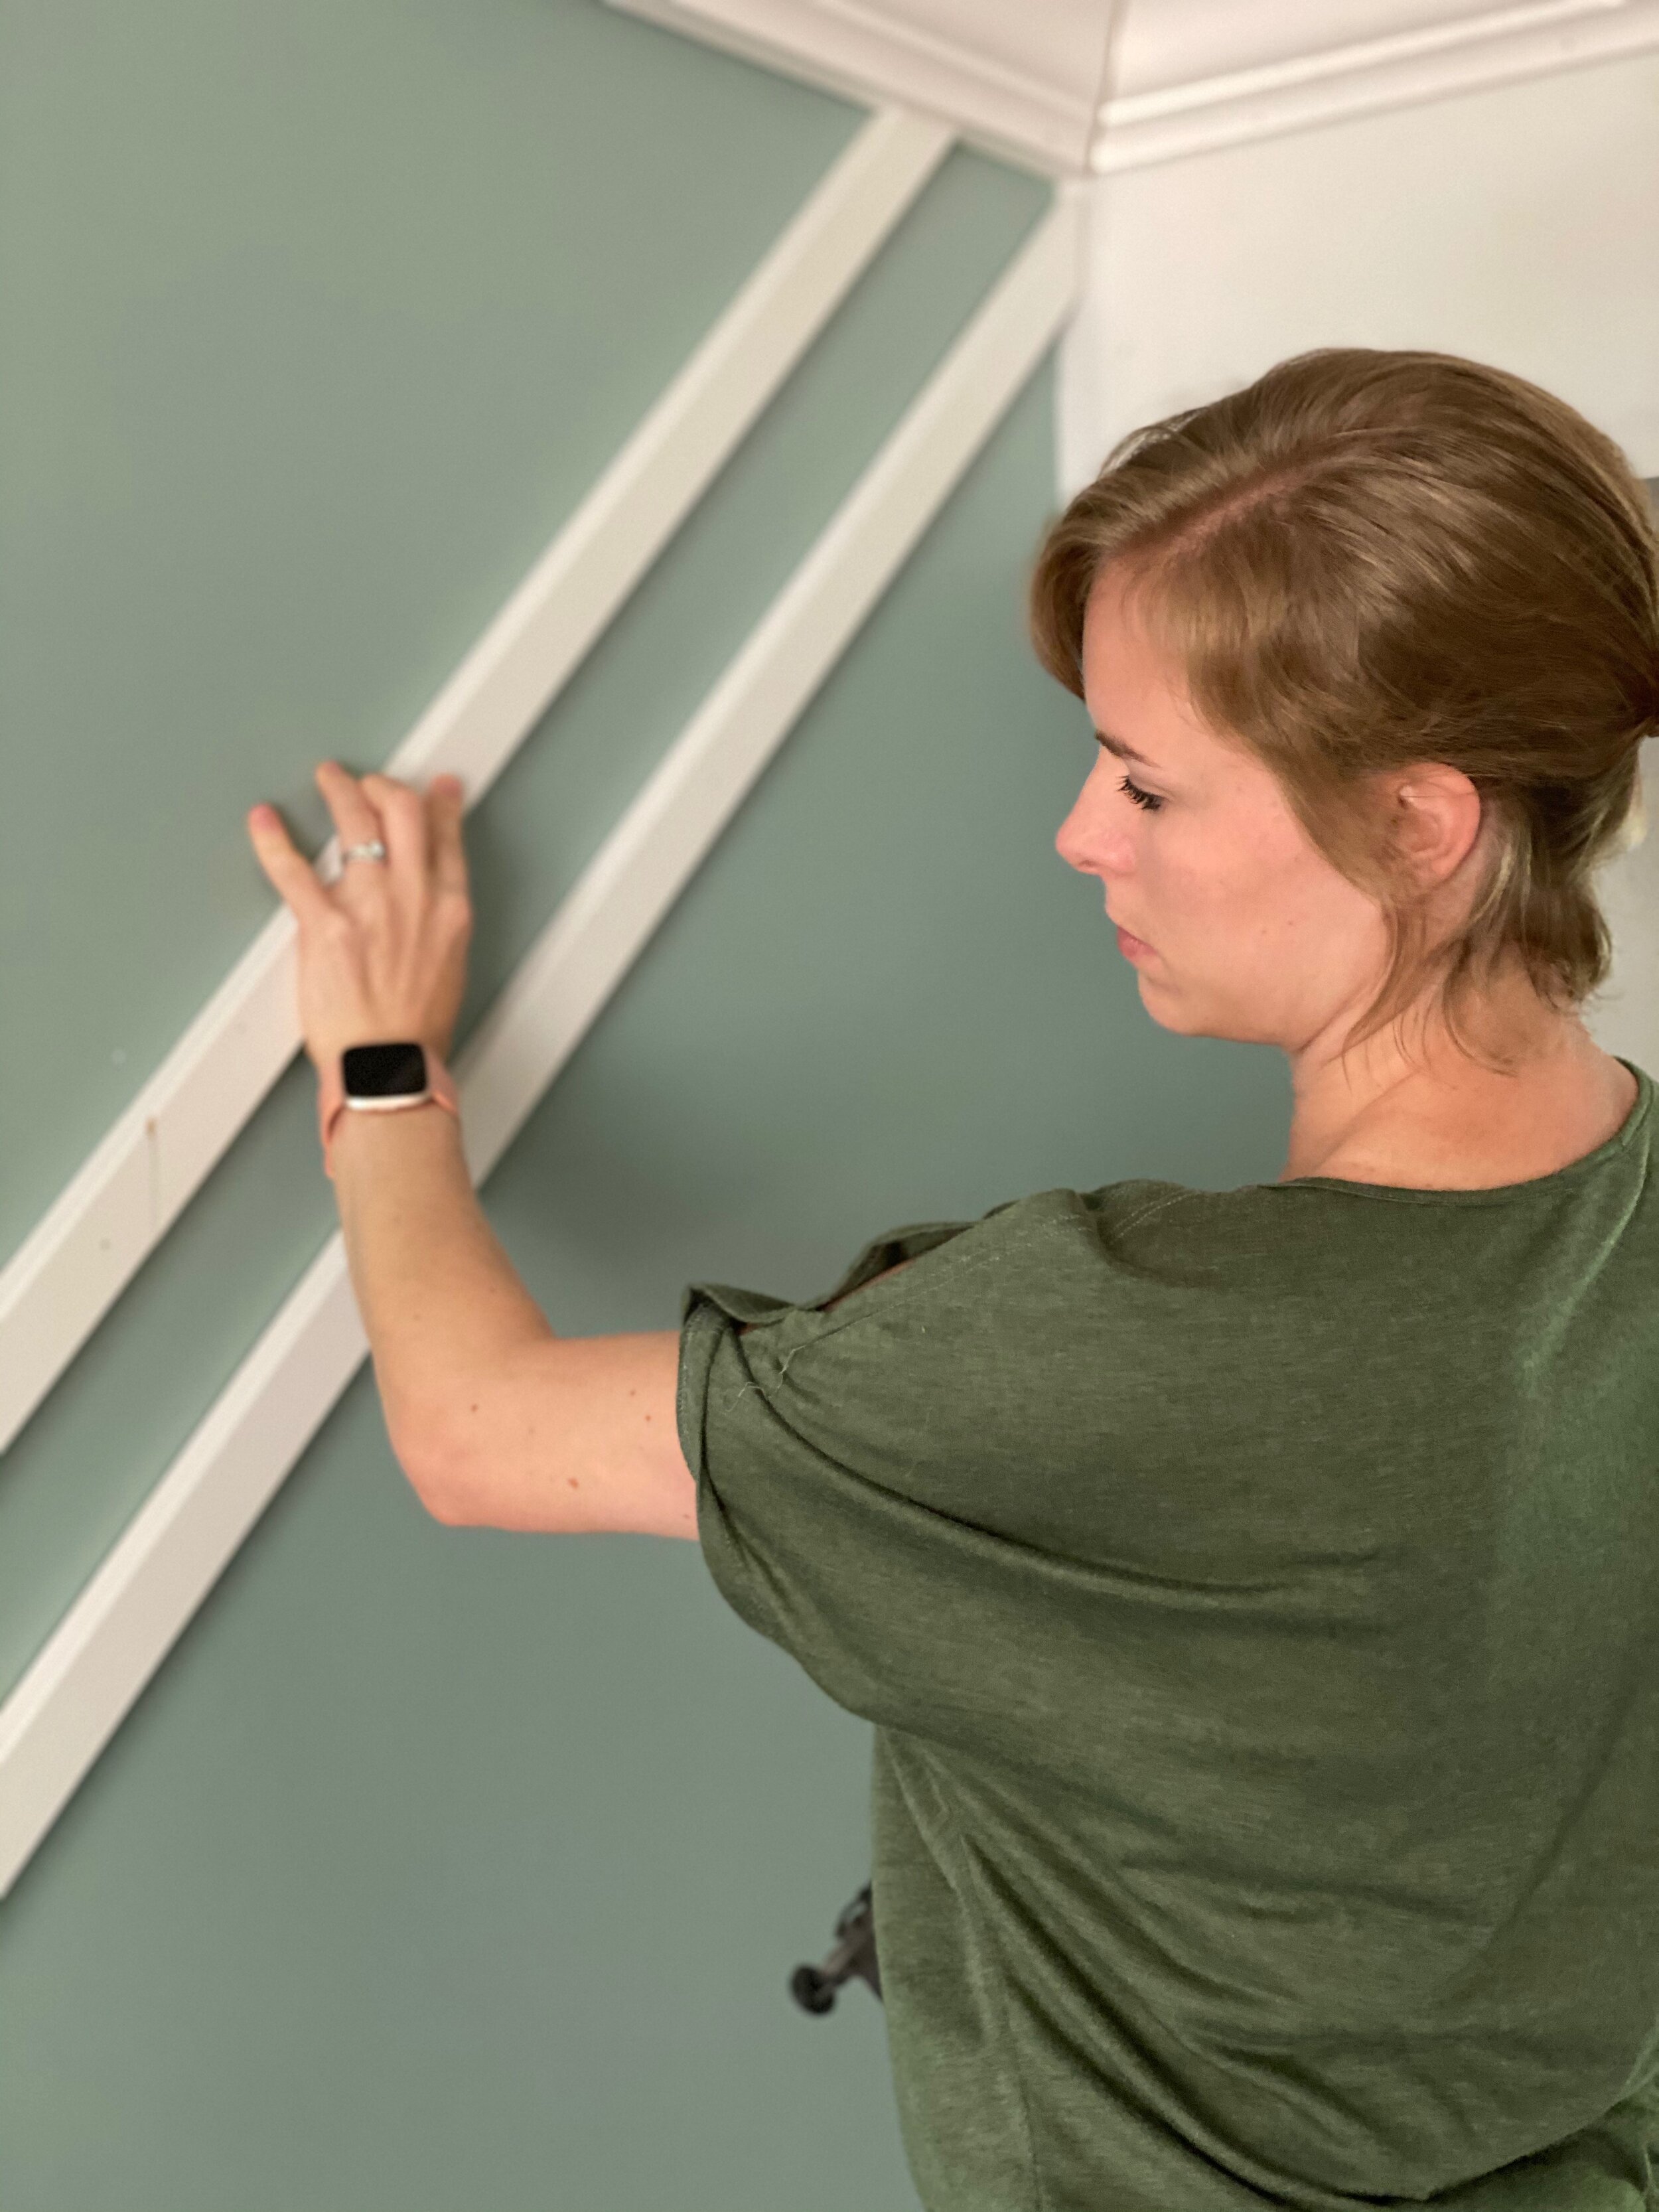
Since our crown molding and baseboards taper off on the edges, Lucius and I were concerned about how it would look where the MDF boards met up with them. Below is an example of what I’m talking about.

You see how the MDF sticks out further than the baseboard? We wanted a smoother transition. And since we were taking some of the trim off anyway to open the doorway, we just took it all down. Then on the accent wall, we put a piece of MDF up and placed the trim on top of that.

Paint
Once we had the trim finished, I painted the accent wall. This will save you time once your accent wall is installed.
My wall is Desert Lake by Sherwin Williams in an eggshell finish.
Install Your Accent Wall
Once the paint is dry, it’s time to install your accent wall! Here are a couple of tips to get you started:
Stick with 45 and 90-degree angles
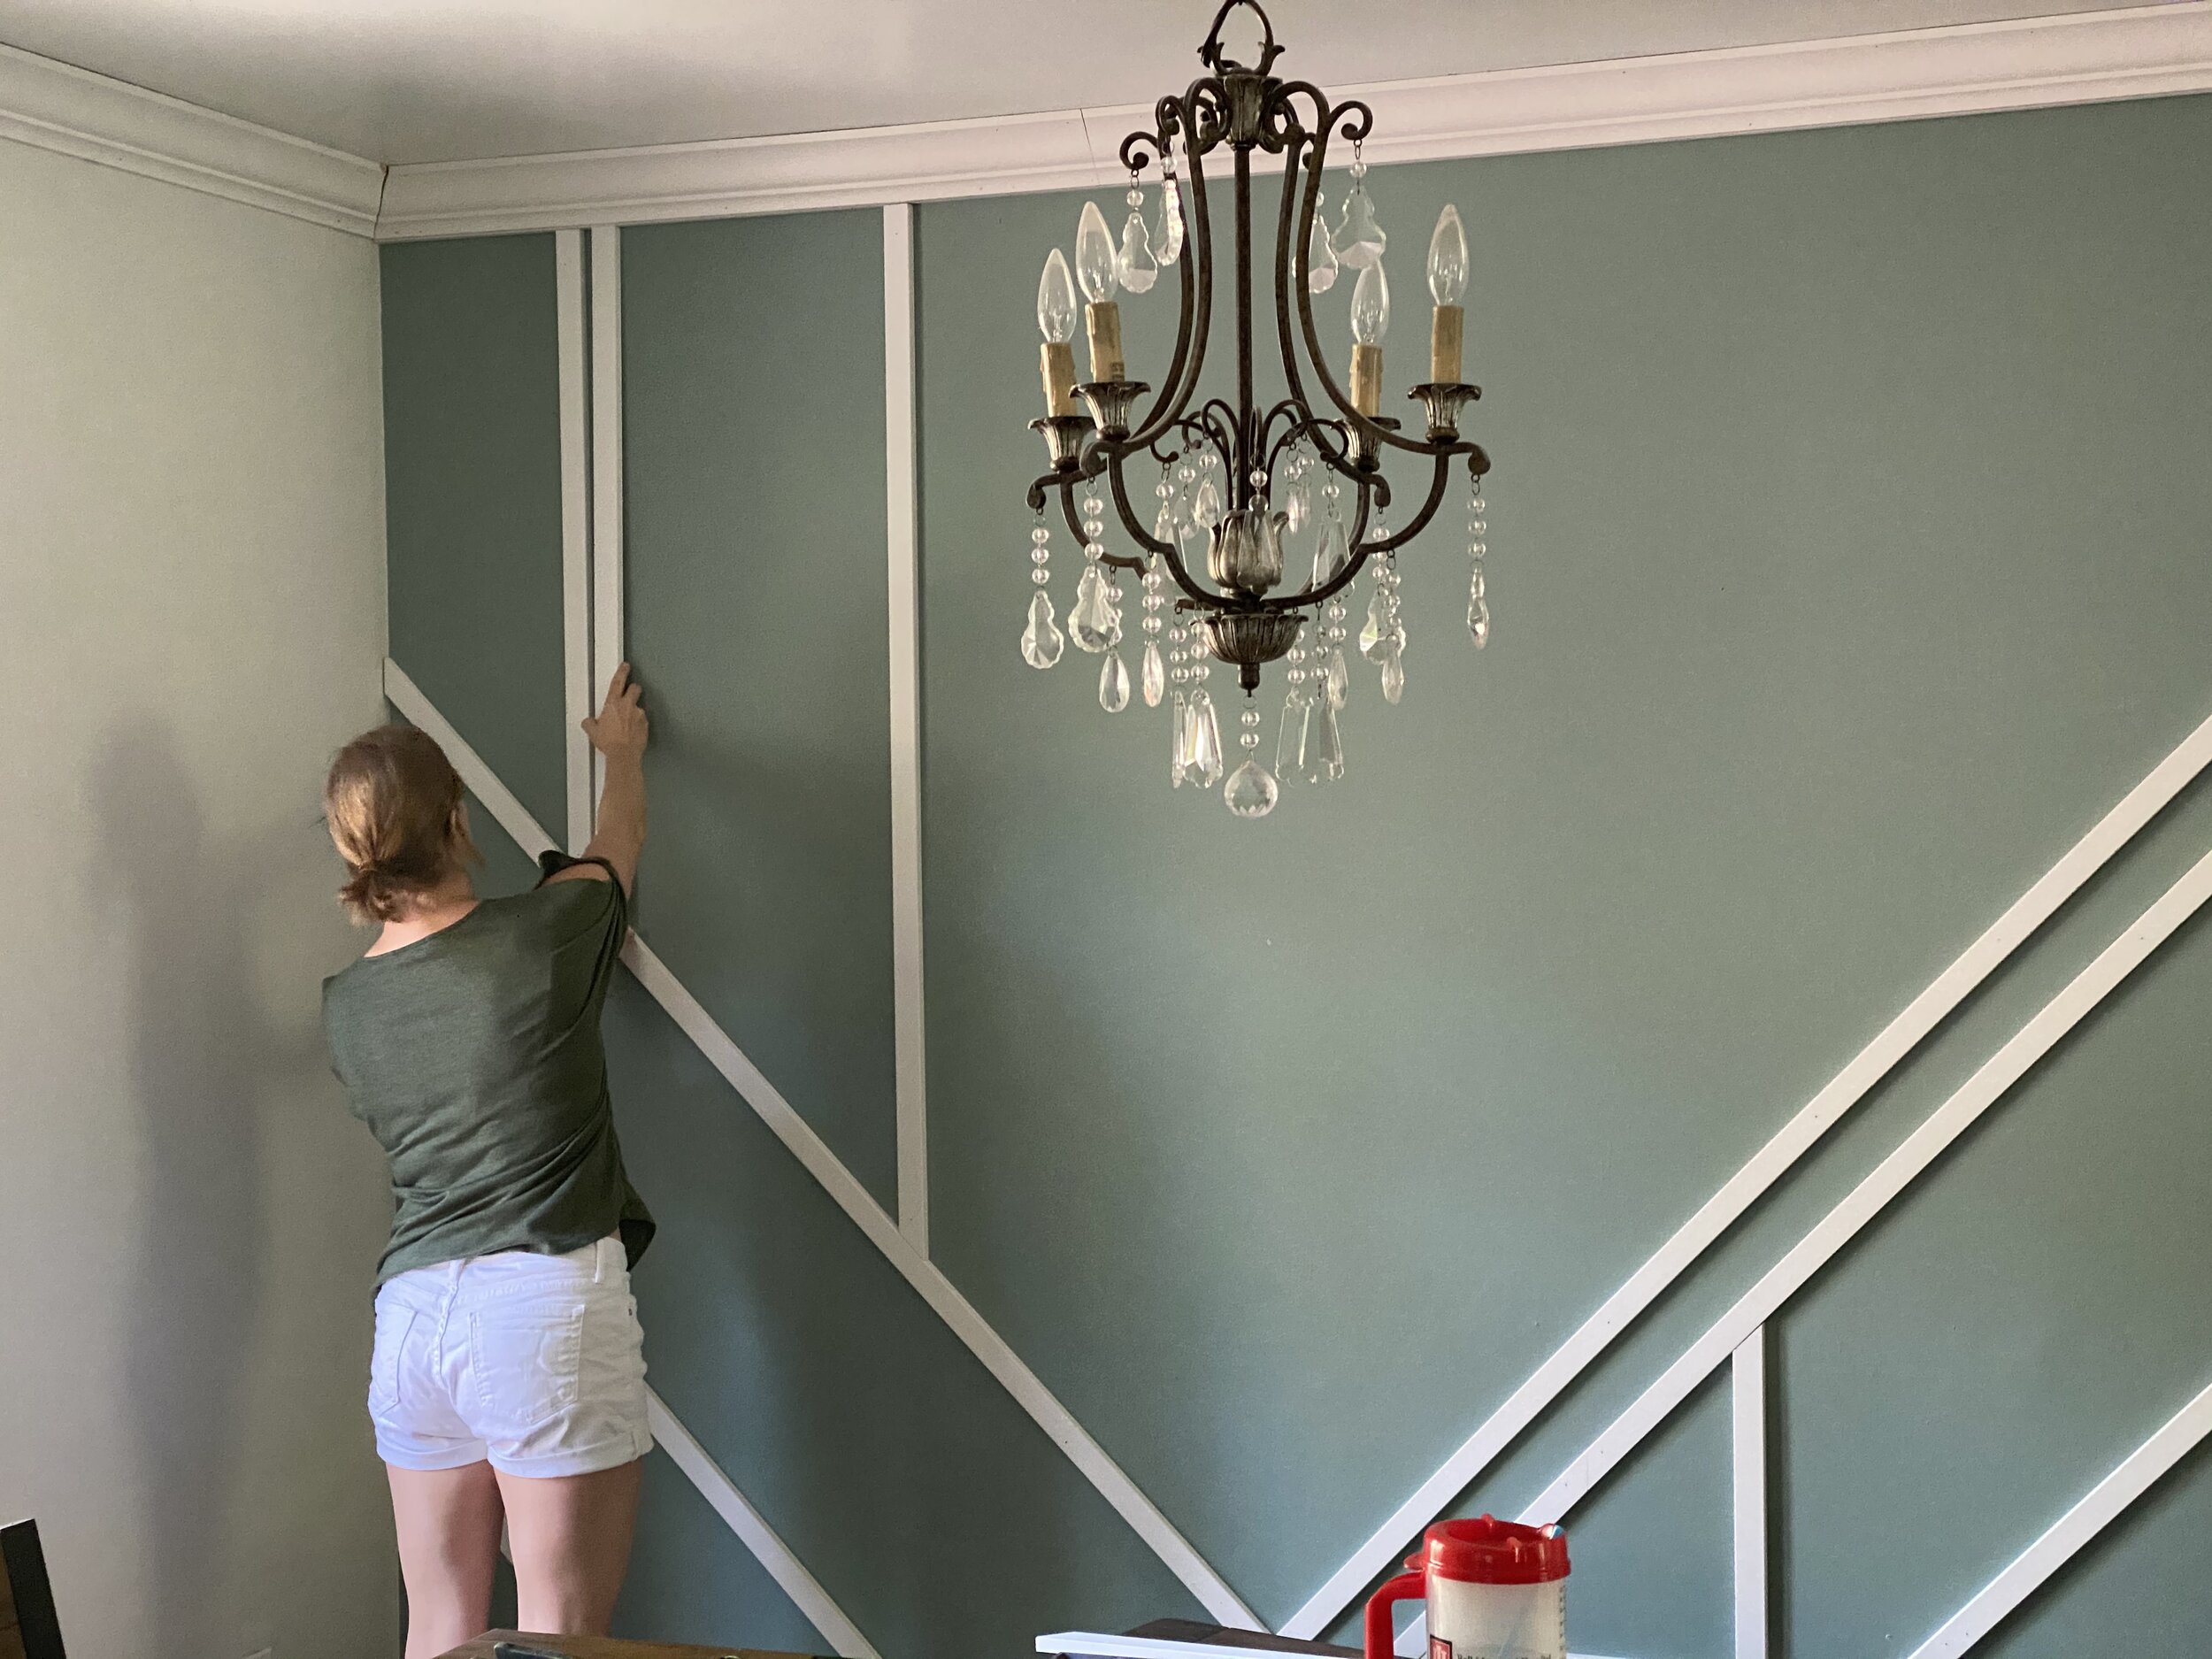
Have an extra pair of hands available (especially when it comes to leveling/nailing the long boards)
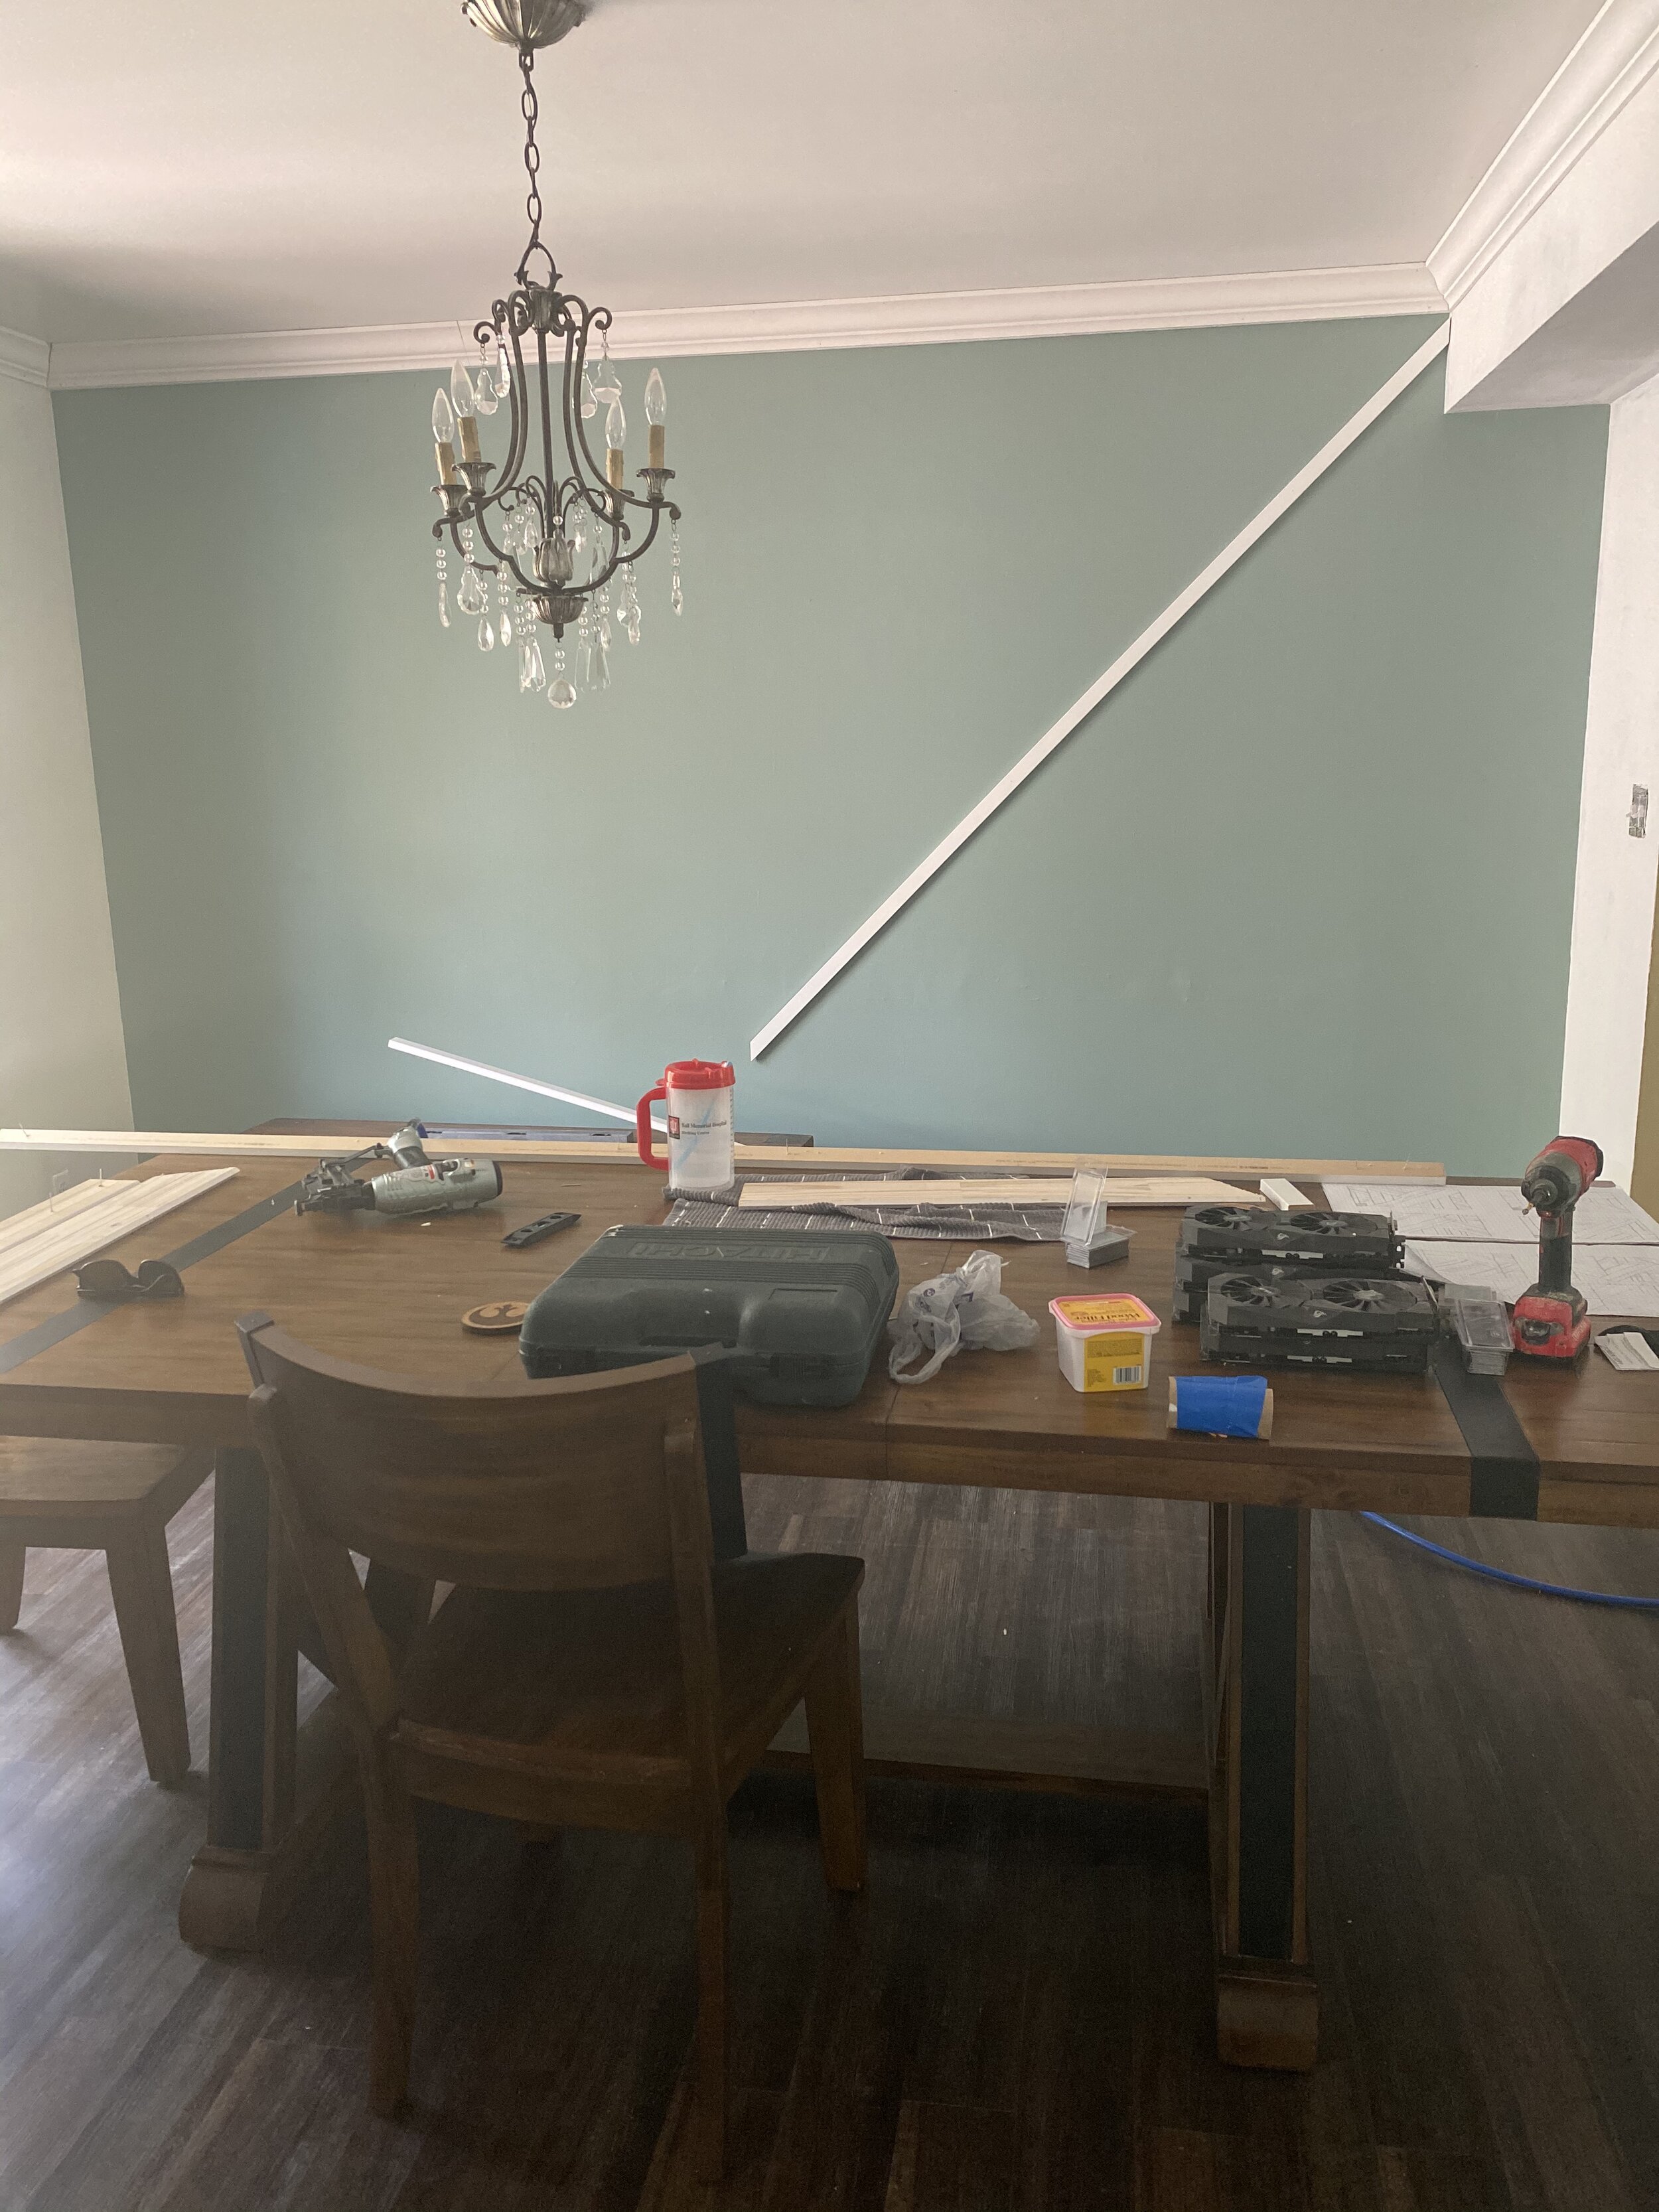
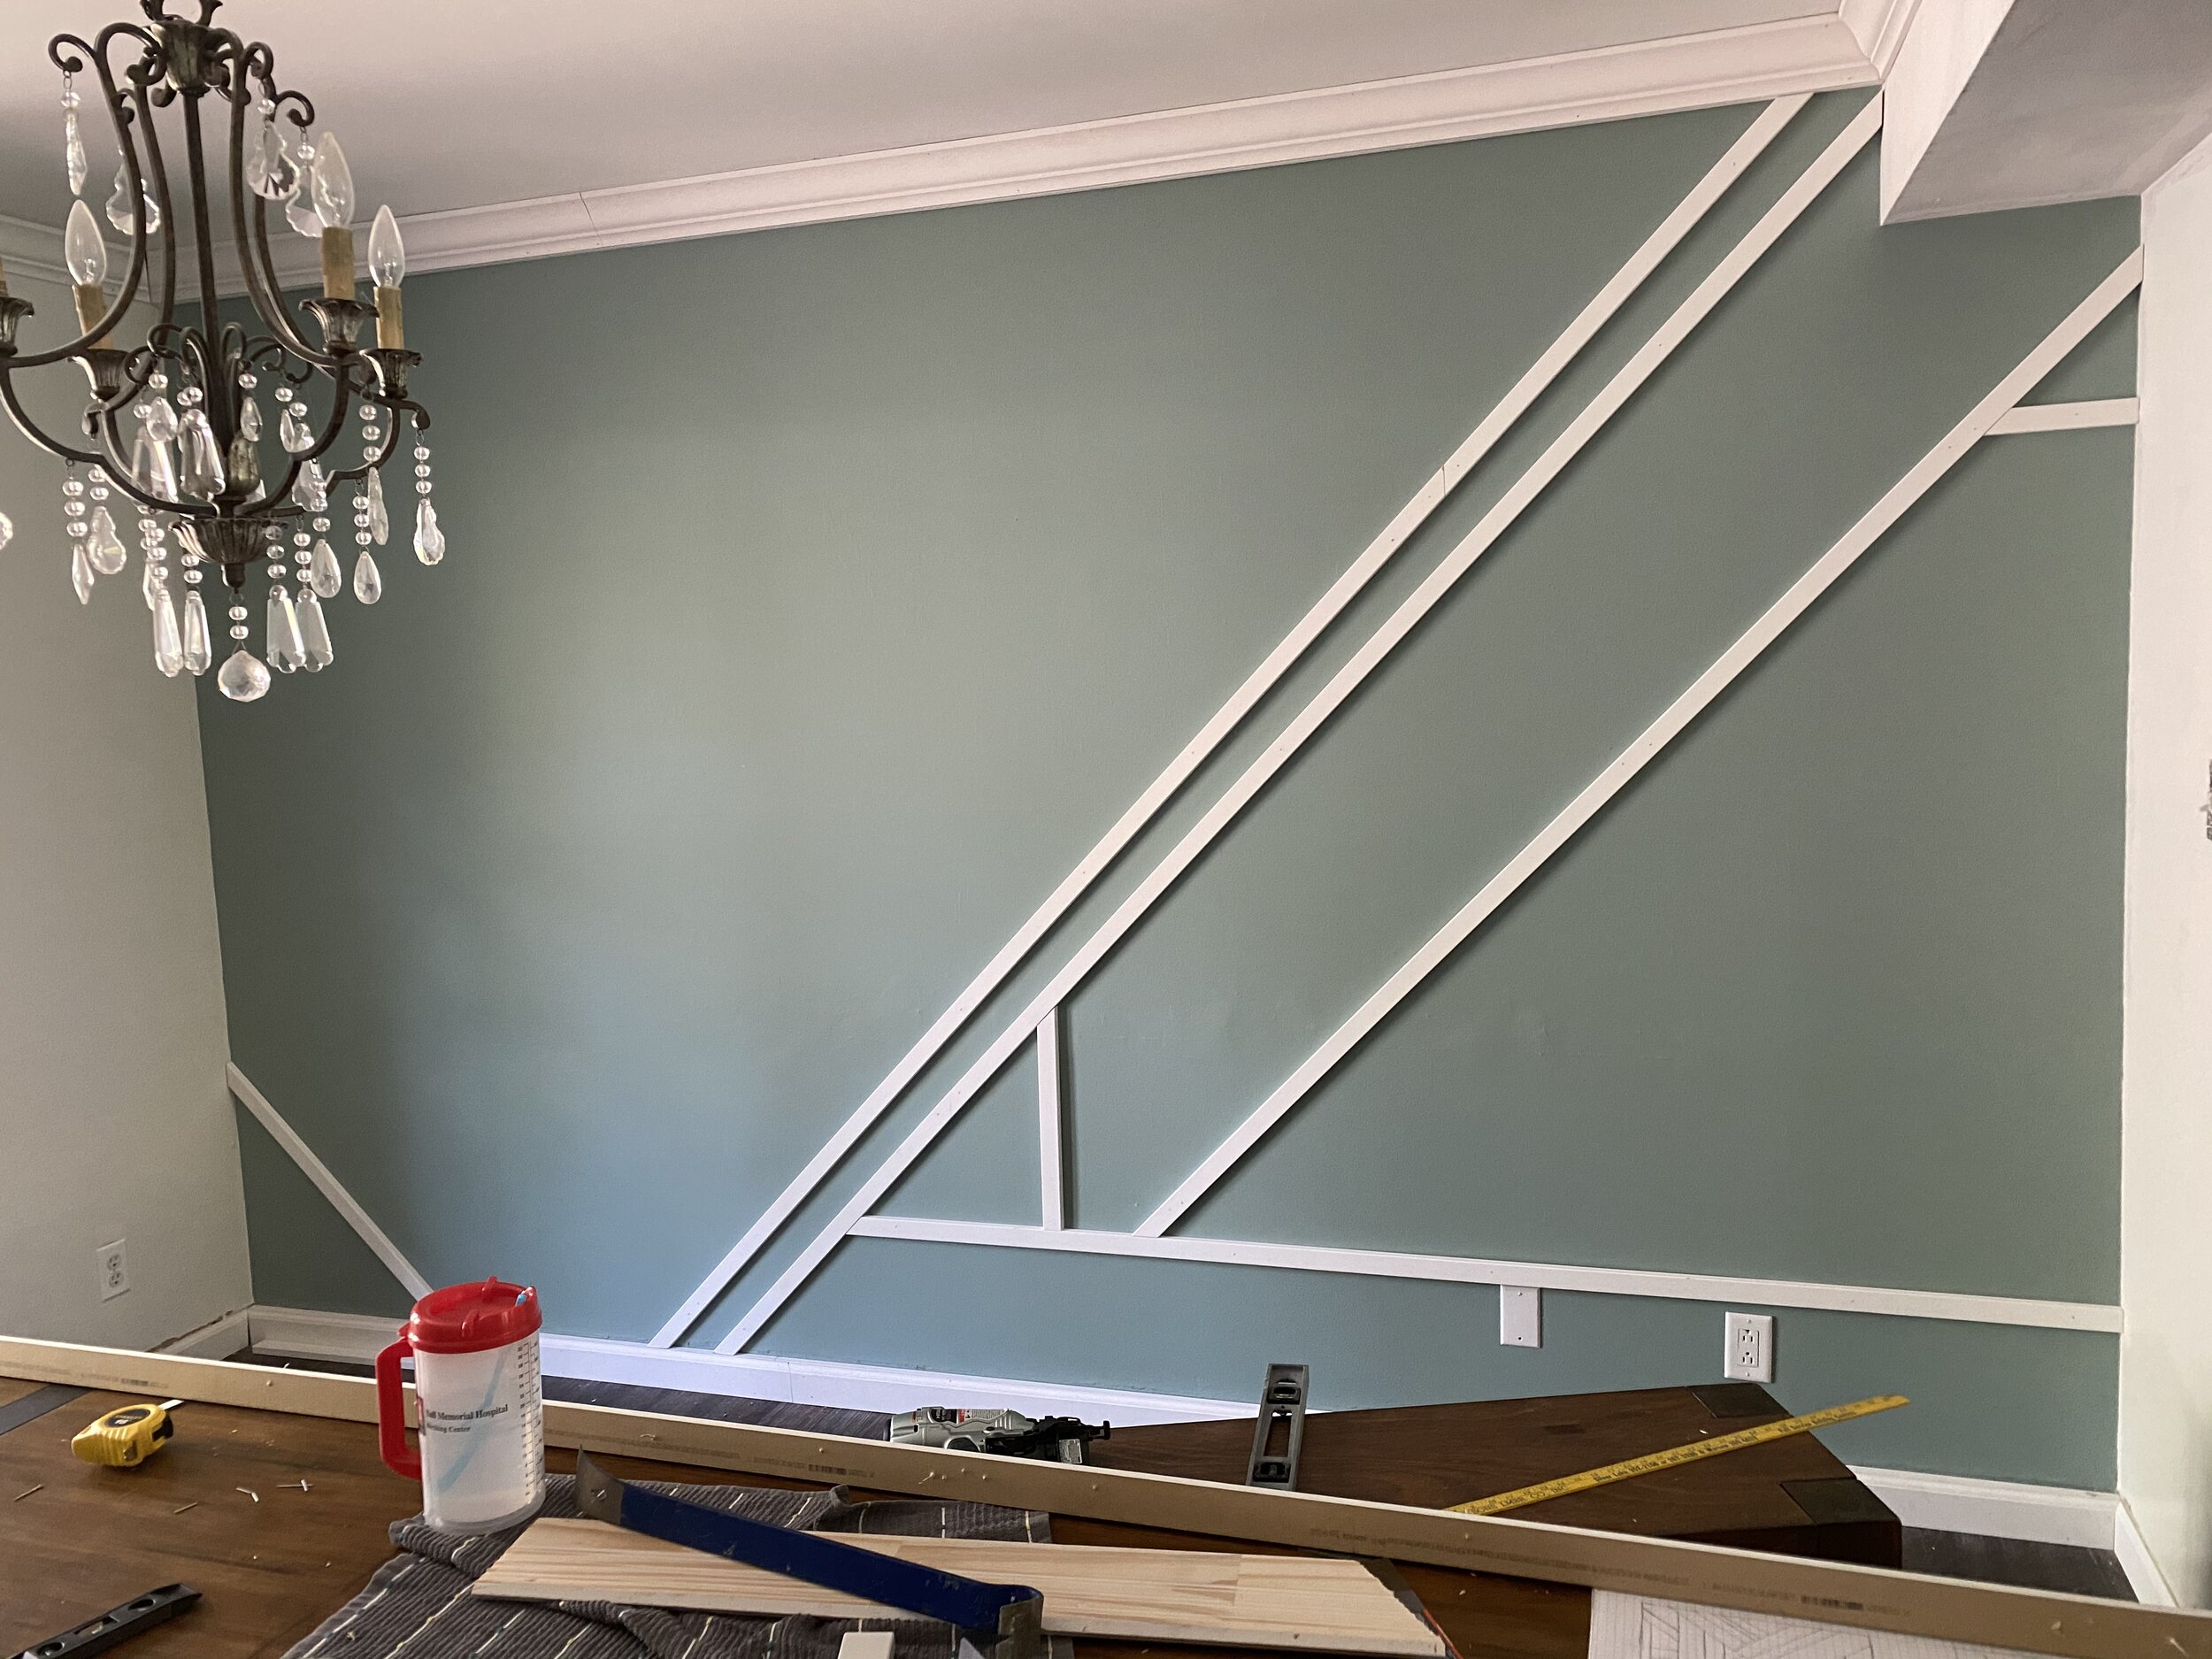
From drafting a bunch of designs, I knew I wanted one long section that went from the bottom left to the top right, so that’s where we started. This also happened to be the longest section and was the trickiest to level and nail.
And honestly, from there we just held up boards at different angles and with various spacing to see what looked and felt right. Then we leveled and nailed as we went - even using some of our scraps as filler pieces!
Once we got into a groove, the install went by really fast and ended up being a really fun project.
Fill the Gaps
Of course, installing the wall is only part of the project. Now you have to fill your nail holes with wood putty and caulk all your seams.
I caulked along the seams where the MDF met the wall. I also caulked where two pieces of MDF butted up against each other. You could use wood putty or joint compound here instead, which would probably be a smoother transition, but I really didn’t want to sand all that and I’m happy with the final product. I ended up using about 2 tubes of caulk.
Once the wood putty is dry, sand it down. And once the caulk is dry….
Paint Some More!
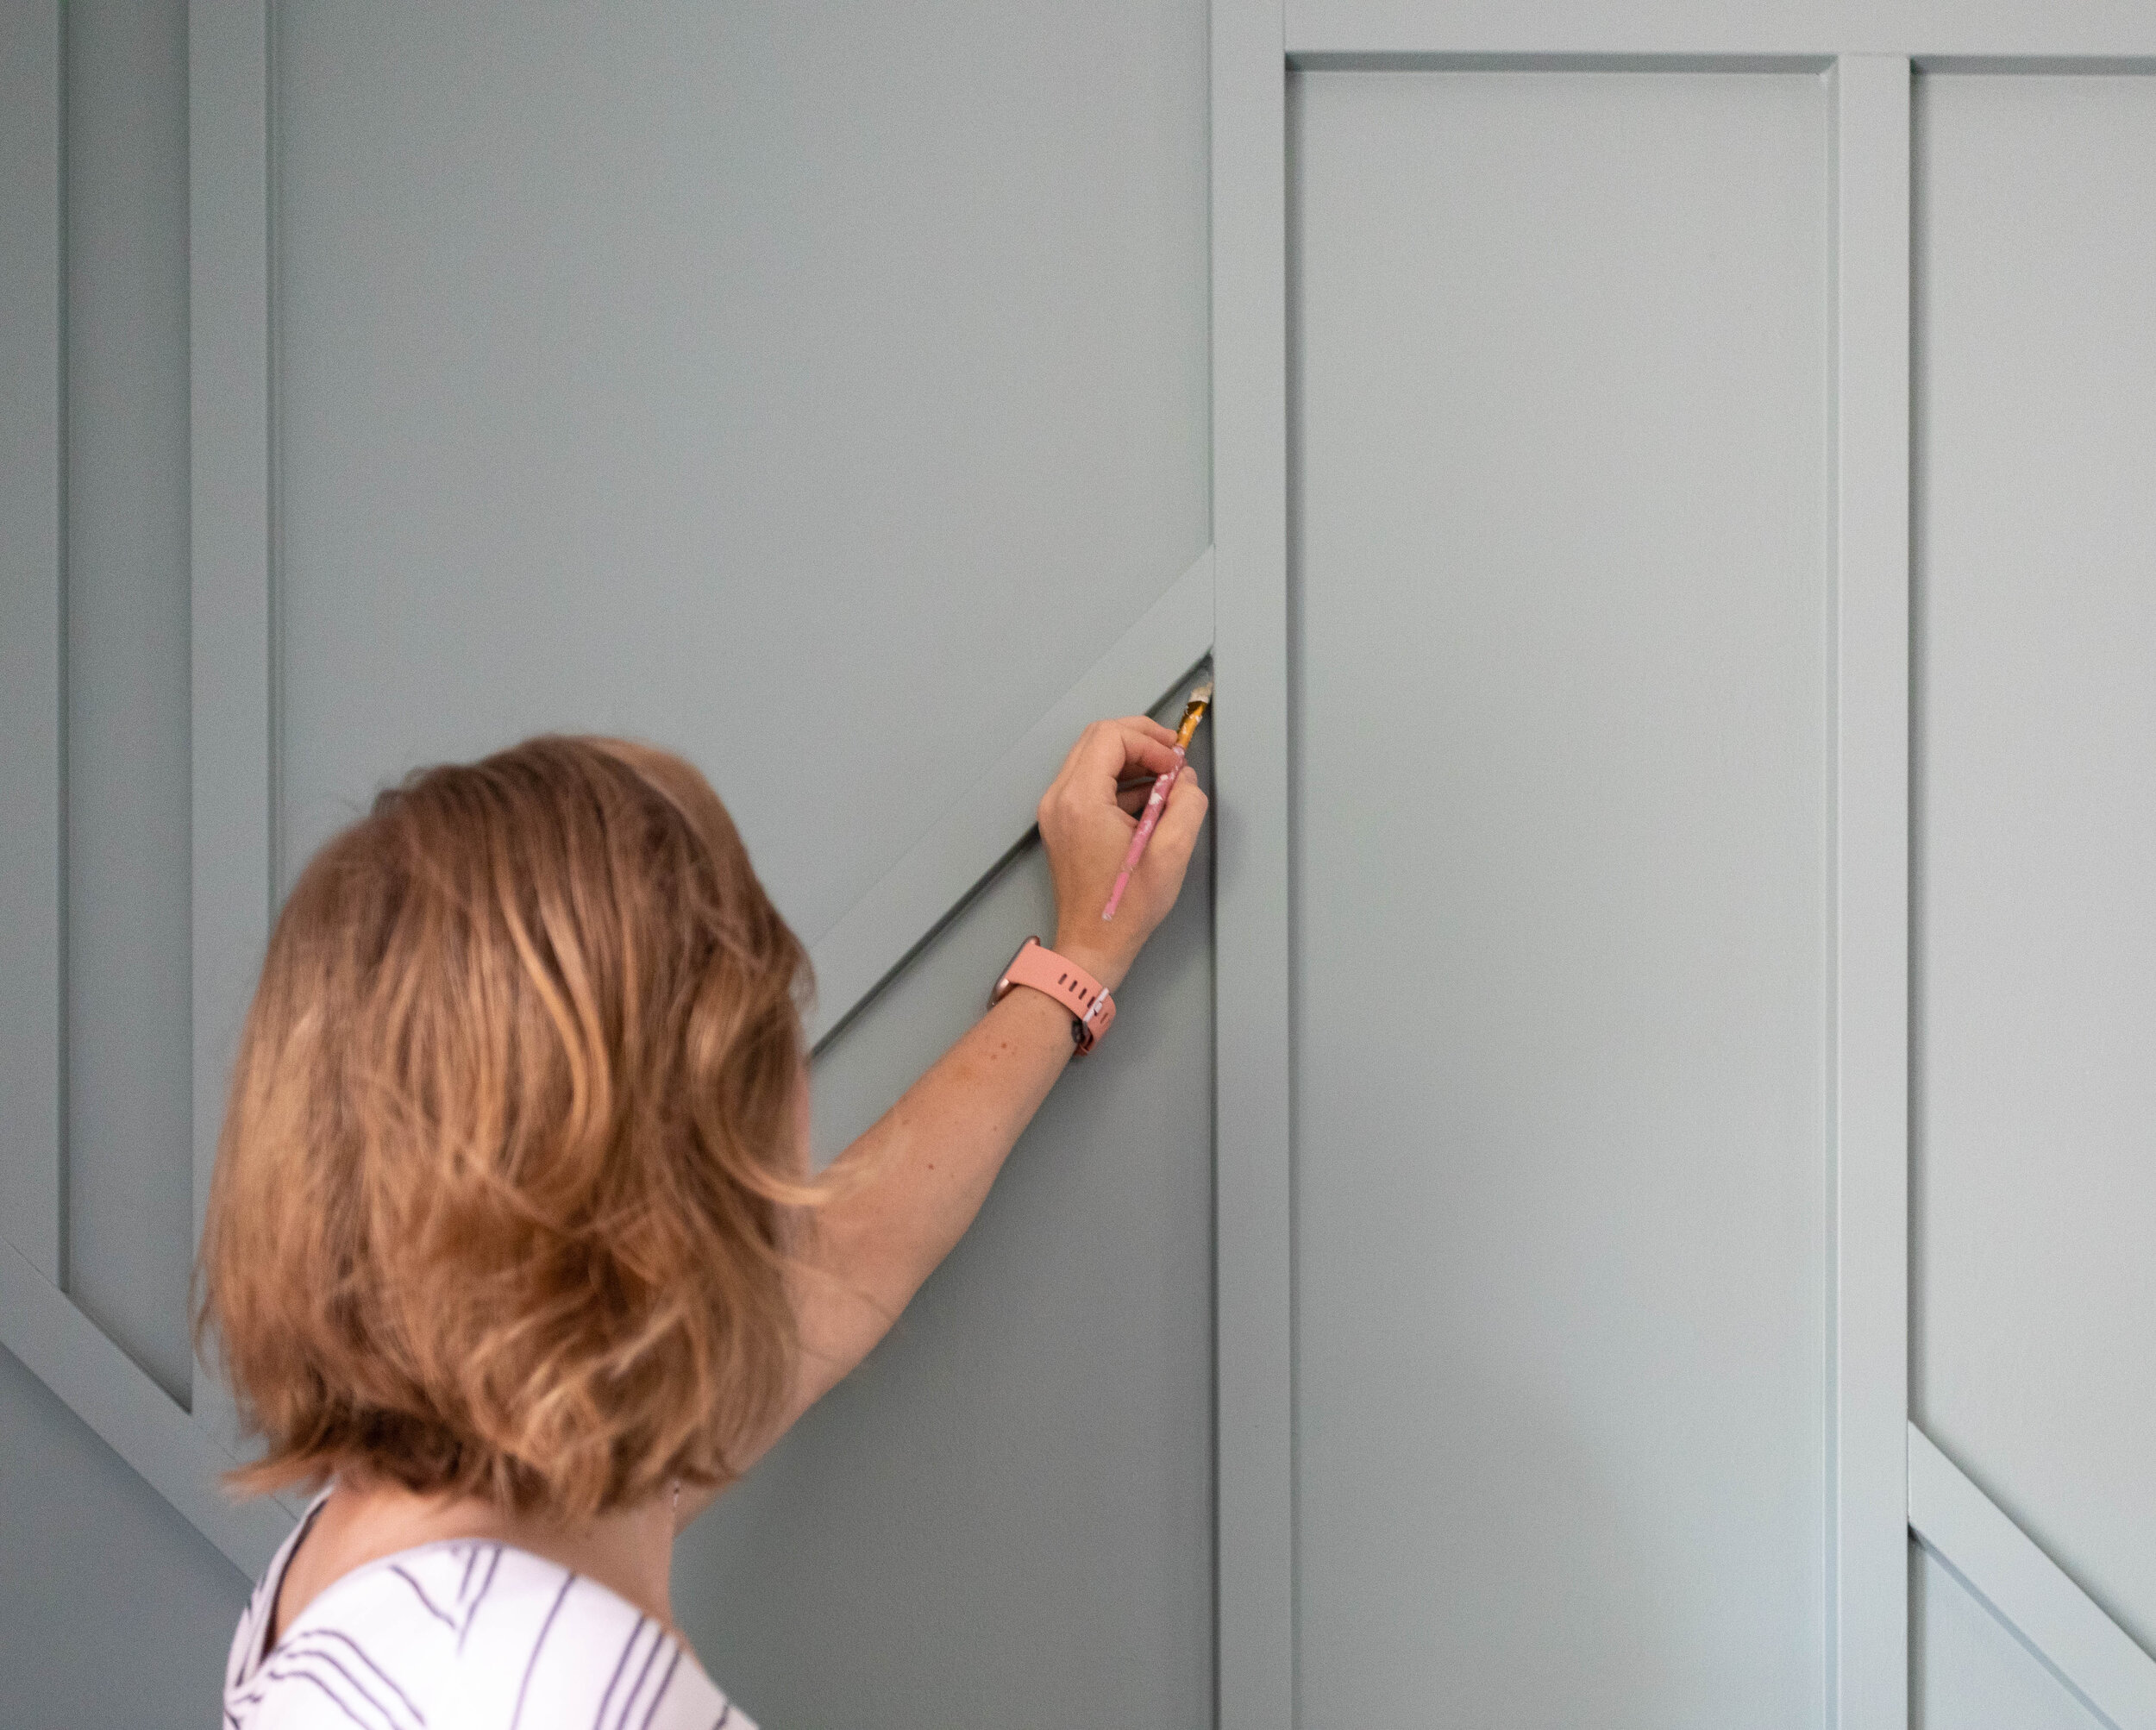
This part of the project gets a little tedious because you have to apply the rest of the paint with a brush, but you’ll get through it (I believe in you).
Make sure you get into every nook and cranny. I used a craft brush in the really tight spots where my boards met with an adjacent wall or the trim. You’ll definitely want to brush on two coats.
Once your paint is dry, you’re done! Now you can style your room and enjoy!
Final Thoughts About Our Geometric Accent Wall

I’m head over heels in love with it! Before this renovation, our dining room was so out of place. It was like it belonged in a different house. Although our house is still a bit of a mixture of different styles (there are several rooms we haven’t touched yet), it’s well on its way to having a cohesive look.
The only thing left to do now in this room is to fill it, and I.CAN’T.WAIT. And you better believe that light fixture is getting the boot! Watch for that post in the next couple of weeks!
Related Dining Room Renovation Posts
Build Your Own Geometric Wood Feature Wall

DIY Sharpie Wall Tutorial
HOT DAMN, it’s been a minute since I shared an update about my home office redesign. Well, don’t you worry your pretty little head. That doesn’t mean I haven’t been working on it!
I’ve finally painted this room and created a killer DIY Sharpie wall that I can’t wait to share with you (including a tutorial)!
How to Make Faux Wallpaper with Sharpie
HOT DAMN, it’s been a minute since I shared an update about my home office redesign. Well, don’t you worry your pretty little head. That doesn’t mean I haven’t been working on it!
I’ve finally painted this room and created a killer DIY Sharpie wall that I can’t wait to share with you (including a tutorial)!

But first, a quick refresher:
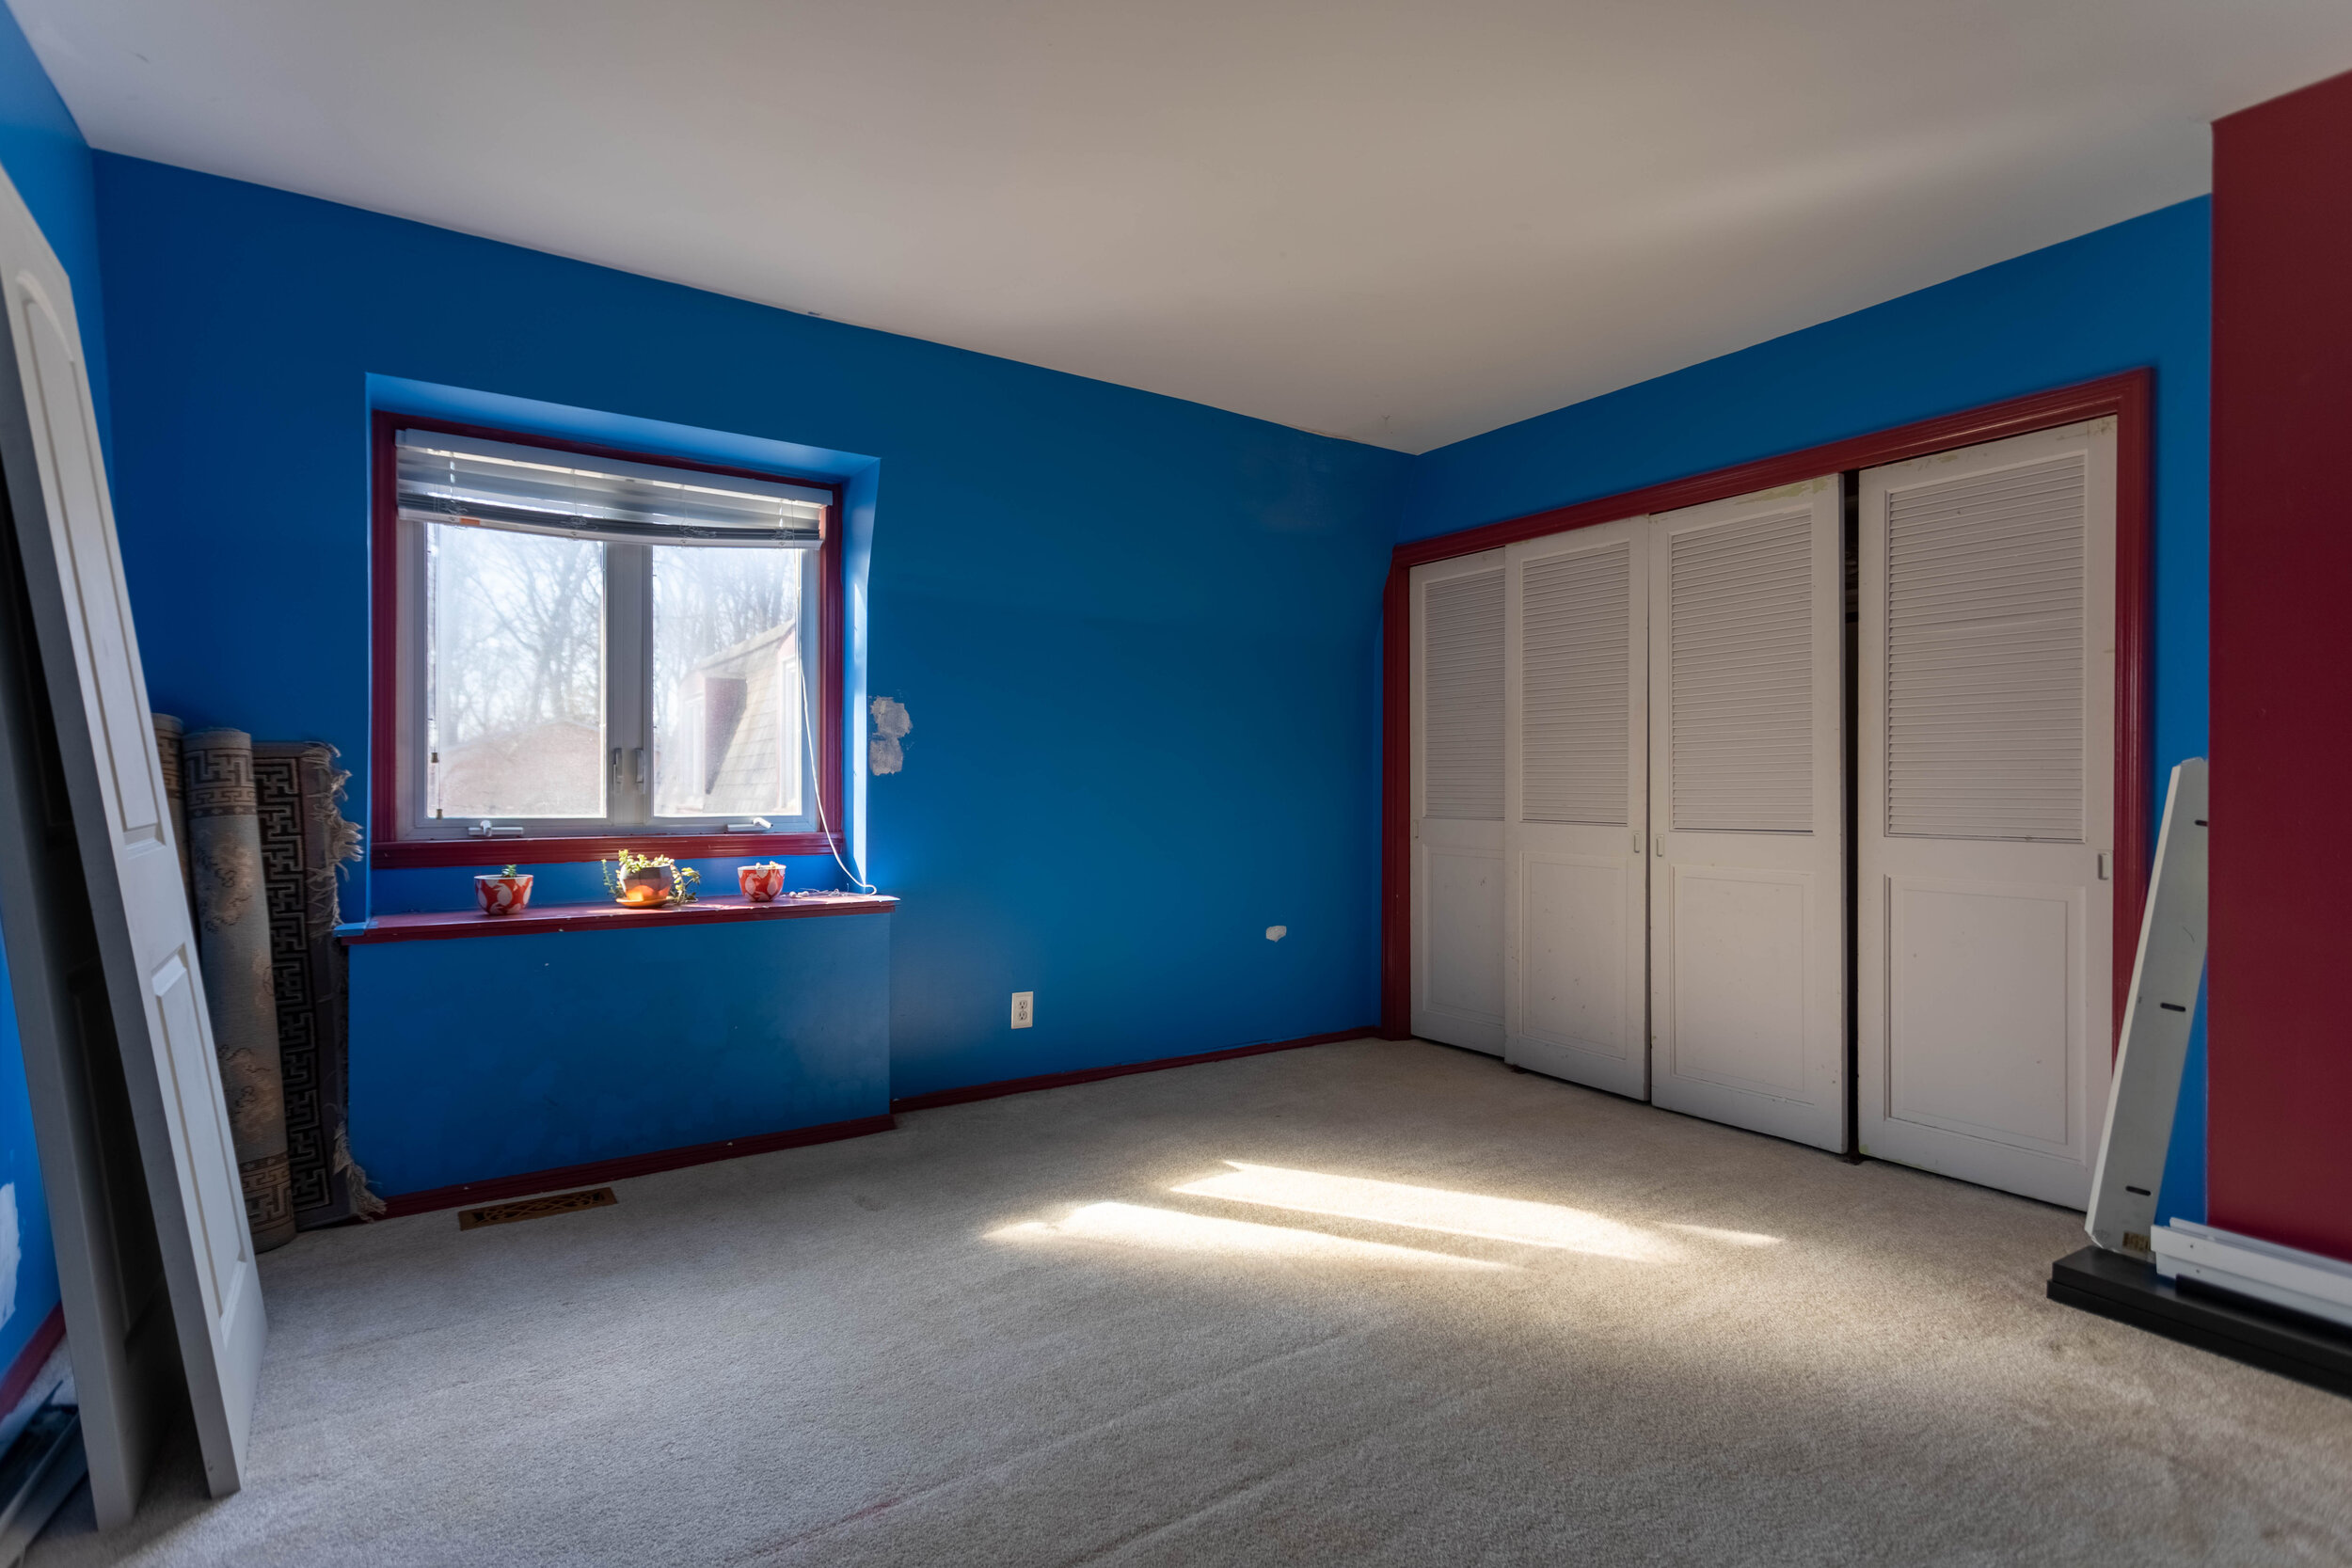
There was a lot to do to get this room prepped. If you recall, I started with this beauty of a space.
In my kick-off post, I shared the beginning stages of my redesign and my design inspiration to ultimately round out the room. When all was said and done, I had purchased a desk and chair and shopped around my own house to find a few items to make this room at least a little more tolerable, especially since it’s become my office since COVID started.

Baby PhotoBomb and all
As an Amazon Associate, I earn from qualifying purchases. This post may contain affiliate links, meaning I receive commissions for purchases made through those links, at no cost to you.
Of course, that wasn’t my final design plan though! Over the last several months(!!!), as we’ve been working on the dining room renovation (HERE and HERE), the flip (HERE, HERE, and HERE), and the master suite remodel (HERE), I’ve been stealing any free time I can find to work on this room - and it’s finally coming together!
In the kick-off post for this room, I mentioned how I was loving the design below and I planned to use Sharpie Paint Pens to create an accent wall.
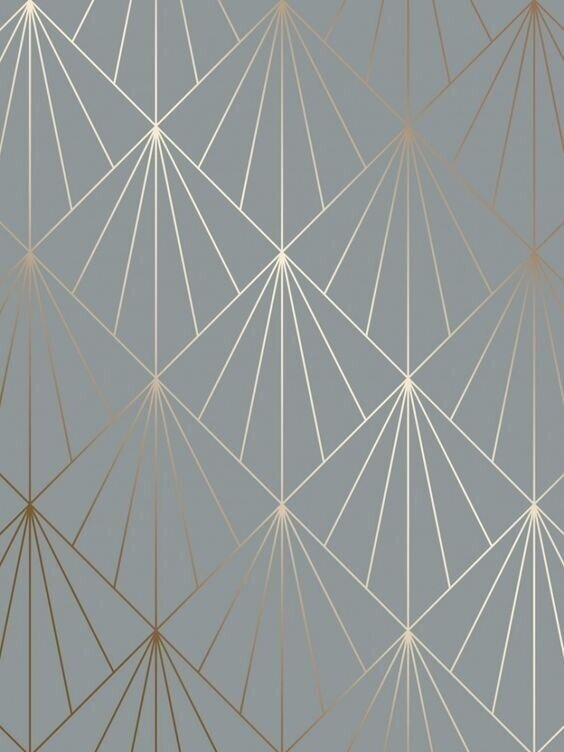
Well, I’ve done it! And of course, I’ll show you how I made it happen with a DIY Sharpie wall tutorial. Let’s go!
Materials
- Sharpie Paint Pens
- I ended up using 3 medium point oil-based gold metallic pens
- Make sure you’re using Sharpie Paint Pens and NOT a regular Sharpie or you’ll have a helluva time painting over it if you ever want to.
- Level
- Pencil
- Ruler
- Patience
- I’ll warn you, this project isn’t necessarily quick. But I think the end result is worth it for sure!
Step 1: Create a Template
I jumped into this project with a vision, but there were a few things I needed to do before I could get to the fun part. First things first, I needed to figure out the scale of my design. To do this, I simply drew one of the diamonds for the design in approximately the size I was imagining on a piece of paper and taped it up on the wall.

I’m glad I took this simple step, too, because the first diamond was larger than I wanted.
Once I figured out the sizing, I created a mocked-up design on some paper and taped that up as well. This helped me feel more confident to move forward.

Step 2 - Draw your Vertical Lines
Next, I worked on penciling my pattern onto the wall. I started by marking every 4 inches along the bottom of the wall by the baseboard.
I actually started in the middle of the room so I didn’t end up with a full diamond on one side of the wall and a partial diamond on the other. Now, both sides have partial diamonds and I think it flows nicely.
The mocked-up design was created out of 6x6 squares, but that doesn’t translate to 6 inches from corner to corner - it’s more like 8.5. To make it easier on myself, I didn’t fret over the diamonds being that EXACT dimension as long as they were close. I ended up making my diamonds 8x8 from corner to corner.
The image below hopefully helps show that the diamonds themselves are 8 inches, but because they all have a vertical line running through them as part of the design, I marked along the baseboard every 4 inches.

From here, I used a laser level that I hooked on to a laundry basket to lightly pencil in my vertical lines. This is the level we have. You could also use a traditional level for this step, though it’ll take you a little longer.
Pro tip: As you’re drawing your vertical lines, measure along the way every once in a while to make sure they’re still 4 inches from one another. I didn’t do this and had to fix quite a bit because of it (I think my level may have shifted a couple of times). I’ll show you what I mean a little further down.


Step 3 - Draw your Diagonal Lines
Once I drew my vertical lines, it was time to pencil in my diagonal lines. For this step, I measured up 4 inches from the bottom of every other vertical line and made a tick mark. Then, I went back and measured up 8 inches from the bottom of the remaining vertical lines and made a tick mark.

Once you’ve marked your vertical lines along the bottom accordingly, you can make a tick mark every 8 inches on each line until you hit the top of the line where it meets the ceiling.
When you’ve finished making all your tick marks, lightly (again, emphasis on the lightly part) connect your tick marks diagonally.
Step 4: Fix Your Mistakes
You will inevitably have measured a little off here and there. NOW IS YOUR CHANCE TO FIX THAT.
Remember how I said to check that your vertical lines were 4 inches apart all the way up the wall? Well, this is why I specifically called that out.

It’s super important to make sure that your vertical lines intersect with the points of your diamonds. Otherwise, when you add your remaining lines to each diamond, they’re going to look weird if the vertical line isn’t centered (or mostly centered. We’re not robots, after all).
So before you go gung-ho and bust out your paint pen, correct your lines or you’ll have to paint over a bunch of them like I did.

Bwomp Bwomp #DIYfail
Yeah, there were quite a few that didn’t line up as well as I wanted them to. It was a huge time suck that could have been avoided if I had corrected them before I traced over my pencil lines with Sharpie. Learn from my mistakes!
Once your lines are nice and centered, you can trace over them with your Sharpie Paint Pen. I recommend starting with your diagonal lines, as you can cheat the vertical lines here and there a little if needed. This design is so busy, it’s hard to tell if they don’t line up perfectly.
Step 5 - Add Lines to Each Diamond
This is where it starts to get more exciting (yet, also more time-consuming) because you can really see your design start to come together. To save my arms from falling off, I did this part in sections over several days.
Starting at the bottom tip of each diamond, make a tick mark at 2 inches and 4 inches along the bottom two sides.

Then, draw a line connecting the top point of your diamond to each of your tick marks.

It’s kind of an ugly little mock-up, but it gets the point across
Soon, you’ll see it start to come together. This is where I got a little excited and just HAD to see what a few of them looked like grouped together.

Eeeeeee, so exciting!
Step 6 - Finish the Edges
No matter how you plan out your design, you’re going to have pieces of the pattern that are incomplete where the design meets an adjacent wall. These sections are a little tricky to finish. Here’s what I did.
The bottom row: Because of how I started my design along the baseboard, there are half diamonds that needed to be finished. But since the bottom half of the diamond was missing, I had to figure out how to work around that.
To do so, I simply took a piece of paper, held it up in the middle (horizontally) of one of the completed diamonds, and marked where the lines were. I then used that to mark where those lines would be in the middle of each half diamond.

Then, I drew a line from the top of the diamond to each tick mark.

The top row: I followed similar steps on the top row. I took that same piece of paper and held it up in the middle of each diamond to identify where the line would intersect.

Then, I drew a line from the tick marks on the bottom edges of each diamond (remember how we made marks 2 inches apart in an earlier step?) to the tick marks I made in the middle of the diamond.

The sides: Along the sides of the wall where I only had a small section of a diamond to work with definitely took a little noodling to figure out. Since I didn’t have the rest of the diamond to use to make my tick marks or lines, I had to come up with another solution.
I ended up tracing one of my diamonds and cutting out a new template that I could wrap around the side of the wall. I made tick marks at the tip of the diamond and where any lines within the diamond would touch the bottom edge using the lines on the template as a guide.

Next, I used a piece of paper to wrap around the corner and connect my dots in pencil.

Then, I was able to use my ruler to trace my pencil line in Sharpie to the edge of the wall.

Step 7 - Touch-ups
There will most certainly be areas that you goofed up here and there (you can even catch some of my goof-ups in the pictures above!). Now that your design is complete, take a craft brush and touch up any lines that are a little wonky or any stray marks.
Bonus Step - Stand Back and Enjoy
Man, you just spent a lot of time creating an accent wall - relish in it because it looks AWESOME! I know I’ve spent a ridiculous amount of time admiring my handiwork. You should too!

Now, let’s be real. Would it have been easier to just use wallpaper? Probably! I found lots of similar wallpaper designs, but on many of them the design was way bigger than I wanted or the colors weren’t right. And don’t get me started on the cost! By DIYing my own design, I was able to completely customize it FOR CHEAP! Plus, I love a challenge and it feels good to know I created this wall with my own two hands.

This space has undergone such a huge transformation. It’s hard to believe it was once red and blue. Now it’s so much brighter and more inviting. I definitely don’t mind working in this office anymore and actually prefer to work in here now! Especially since I get to share my space with my sweet little plant babies all day long while I work.

I definitely don’t consider this room “complete” yet. Heck - I still have the whole other side of the room to furnish! But that’s a post for another day…

Related Home Office Design Posts:
How to Create a Sharpie Accent Wall
How to: DIY Nursery Mobile on the Cheap
When I was pregnant with my second daughter and couldn’t continue with my normal home renovations, I had to redirect my energy somewhere else. I spent some time reupholstering our dining room chairs, painting, and creating curtains for our front door and sidelights. Then I got the idea to create a mobile for her room. Today I’d like to share my process with you so you can create one of your very own at little to no cost!
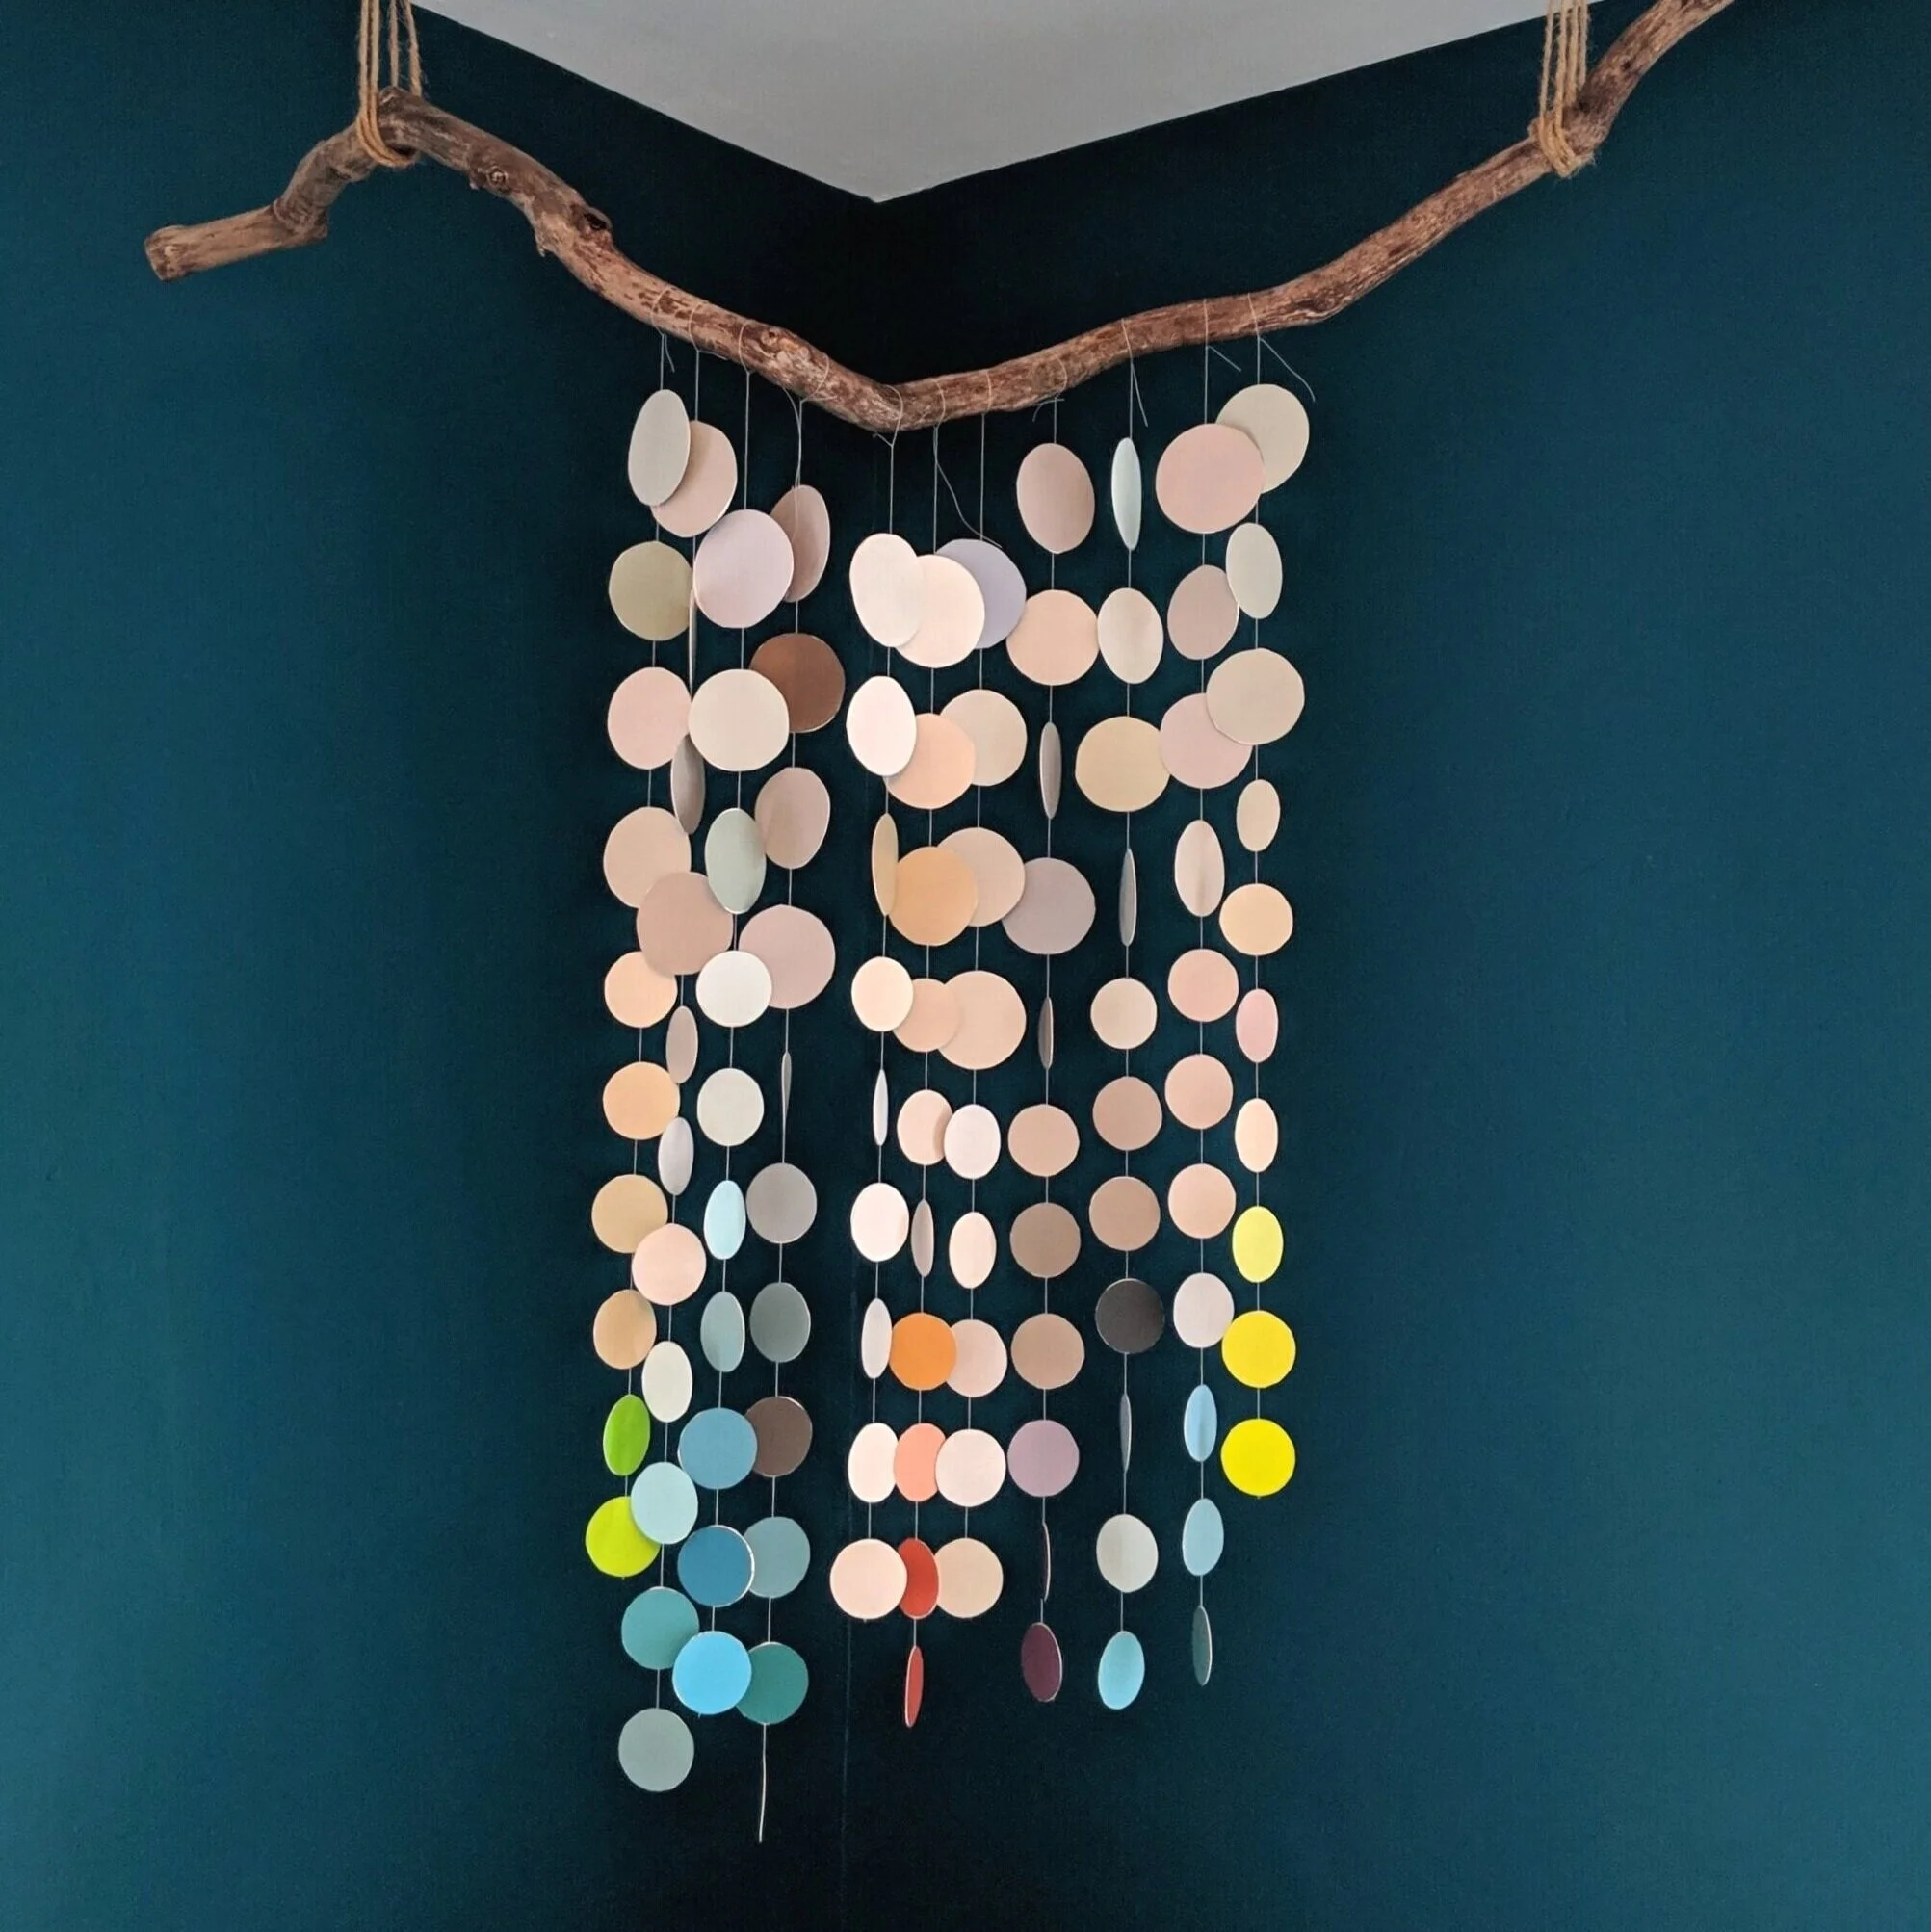
How to Make a Nursery Mobile
When I was pregnant with my second daughter and couldn’t continue with my normal home renovations, I had to redirect my energy somewhere else. I spent some time reupholstering our dining room chairs, painting, and creating curtains for our front door and sidelights. Then I got the idea to create a mobile for her room. Today I’d like to share my process with you so you can create one of your very own at little to no cost!

As an Amazon Associate, I earn from qualifying purchases. This post may contain affiliate links, meaning I receive commissions for purchases made through those links, at no cost to you.
Materials:
- Paint chips
- Several heavy books
- Glue
- Thin string/thread
- Twine
- A branch
- Scissors
- Command hooks or Cup hooks
Step 1: Collect paint chips - lots of them!

Honestly, this step is kind of misleading off the bat - you don’t necessarily have to use paint chips for this project. You could really use anything that’s a similar thickness, like colored cardstock. Oooo… or you could draw a pattern on cardstock and use that! The world is your oyster.
For me, paint chips were the most logical choice because for some reason I never get rid of them when I grab them from the store, so I had a whole box full of paint chips for no reason. Until now!
Most of the paint chips in the box were colors I had used around our house, but I find it sweet that the bright colored paint chips are ones that my older daughter picked out. She’s also a paint chip hoarder, but can only reach certain colors at the store… which usually end up being the brightest ones. I like that she was able to have a part in this project for her sister.
There are two big benefits I see to using paint chips for this project:
You have soooo many colors to choose from!
They’re free!
Step 2: Cut paint chips into shapes

For this step, I found 3 different sizes of circular-shaped items and spent my free time tracing and cutting circles while watching TV.
Apparently, there are punches in different sizes of circles that you can buy, but by the time I realized that was an option I was already in the process of tracing my circles and didn’t want to start over.
As with Step 1, you don’t have to follow my process exactly. I chose to cut my shapes into circles to keep the design from getting too crazy, but that’s just my preference. Really you could use any shape or shape combo you want!
Step 3: Pair your shapes up

No, you’re not seeing double. Yes, this is the same picture from Step 2. I created this mobile over a year ago when starting a blog wasn’t even on my radar. Luckily I took some random pictures of the process that are certainly coming in handy now!
This step is where you should actually follow my rules a little more closely. Because we’re going to be stringing the shapes up in Step 4, it’s important to lay out your design before you break out your glue.
First, pair each shape up with another shape of the same size. Then, lay out your design how you want it strung together.
Step 4: String your shapes together
This is where I experimented a little with some of the shapes from my discard pile.
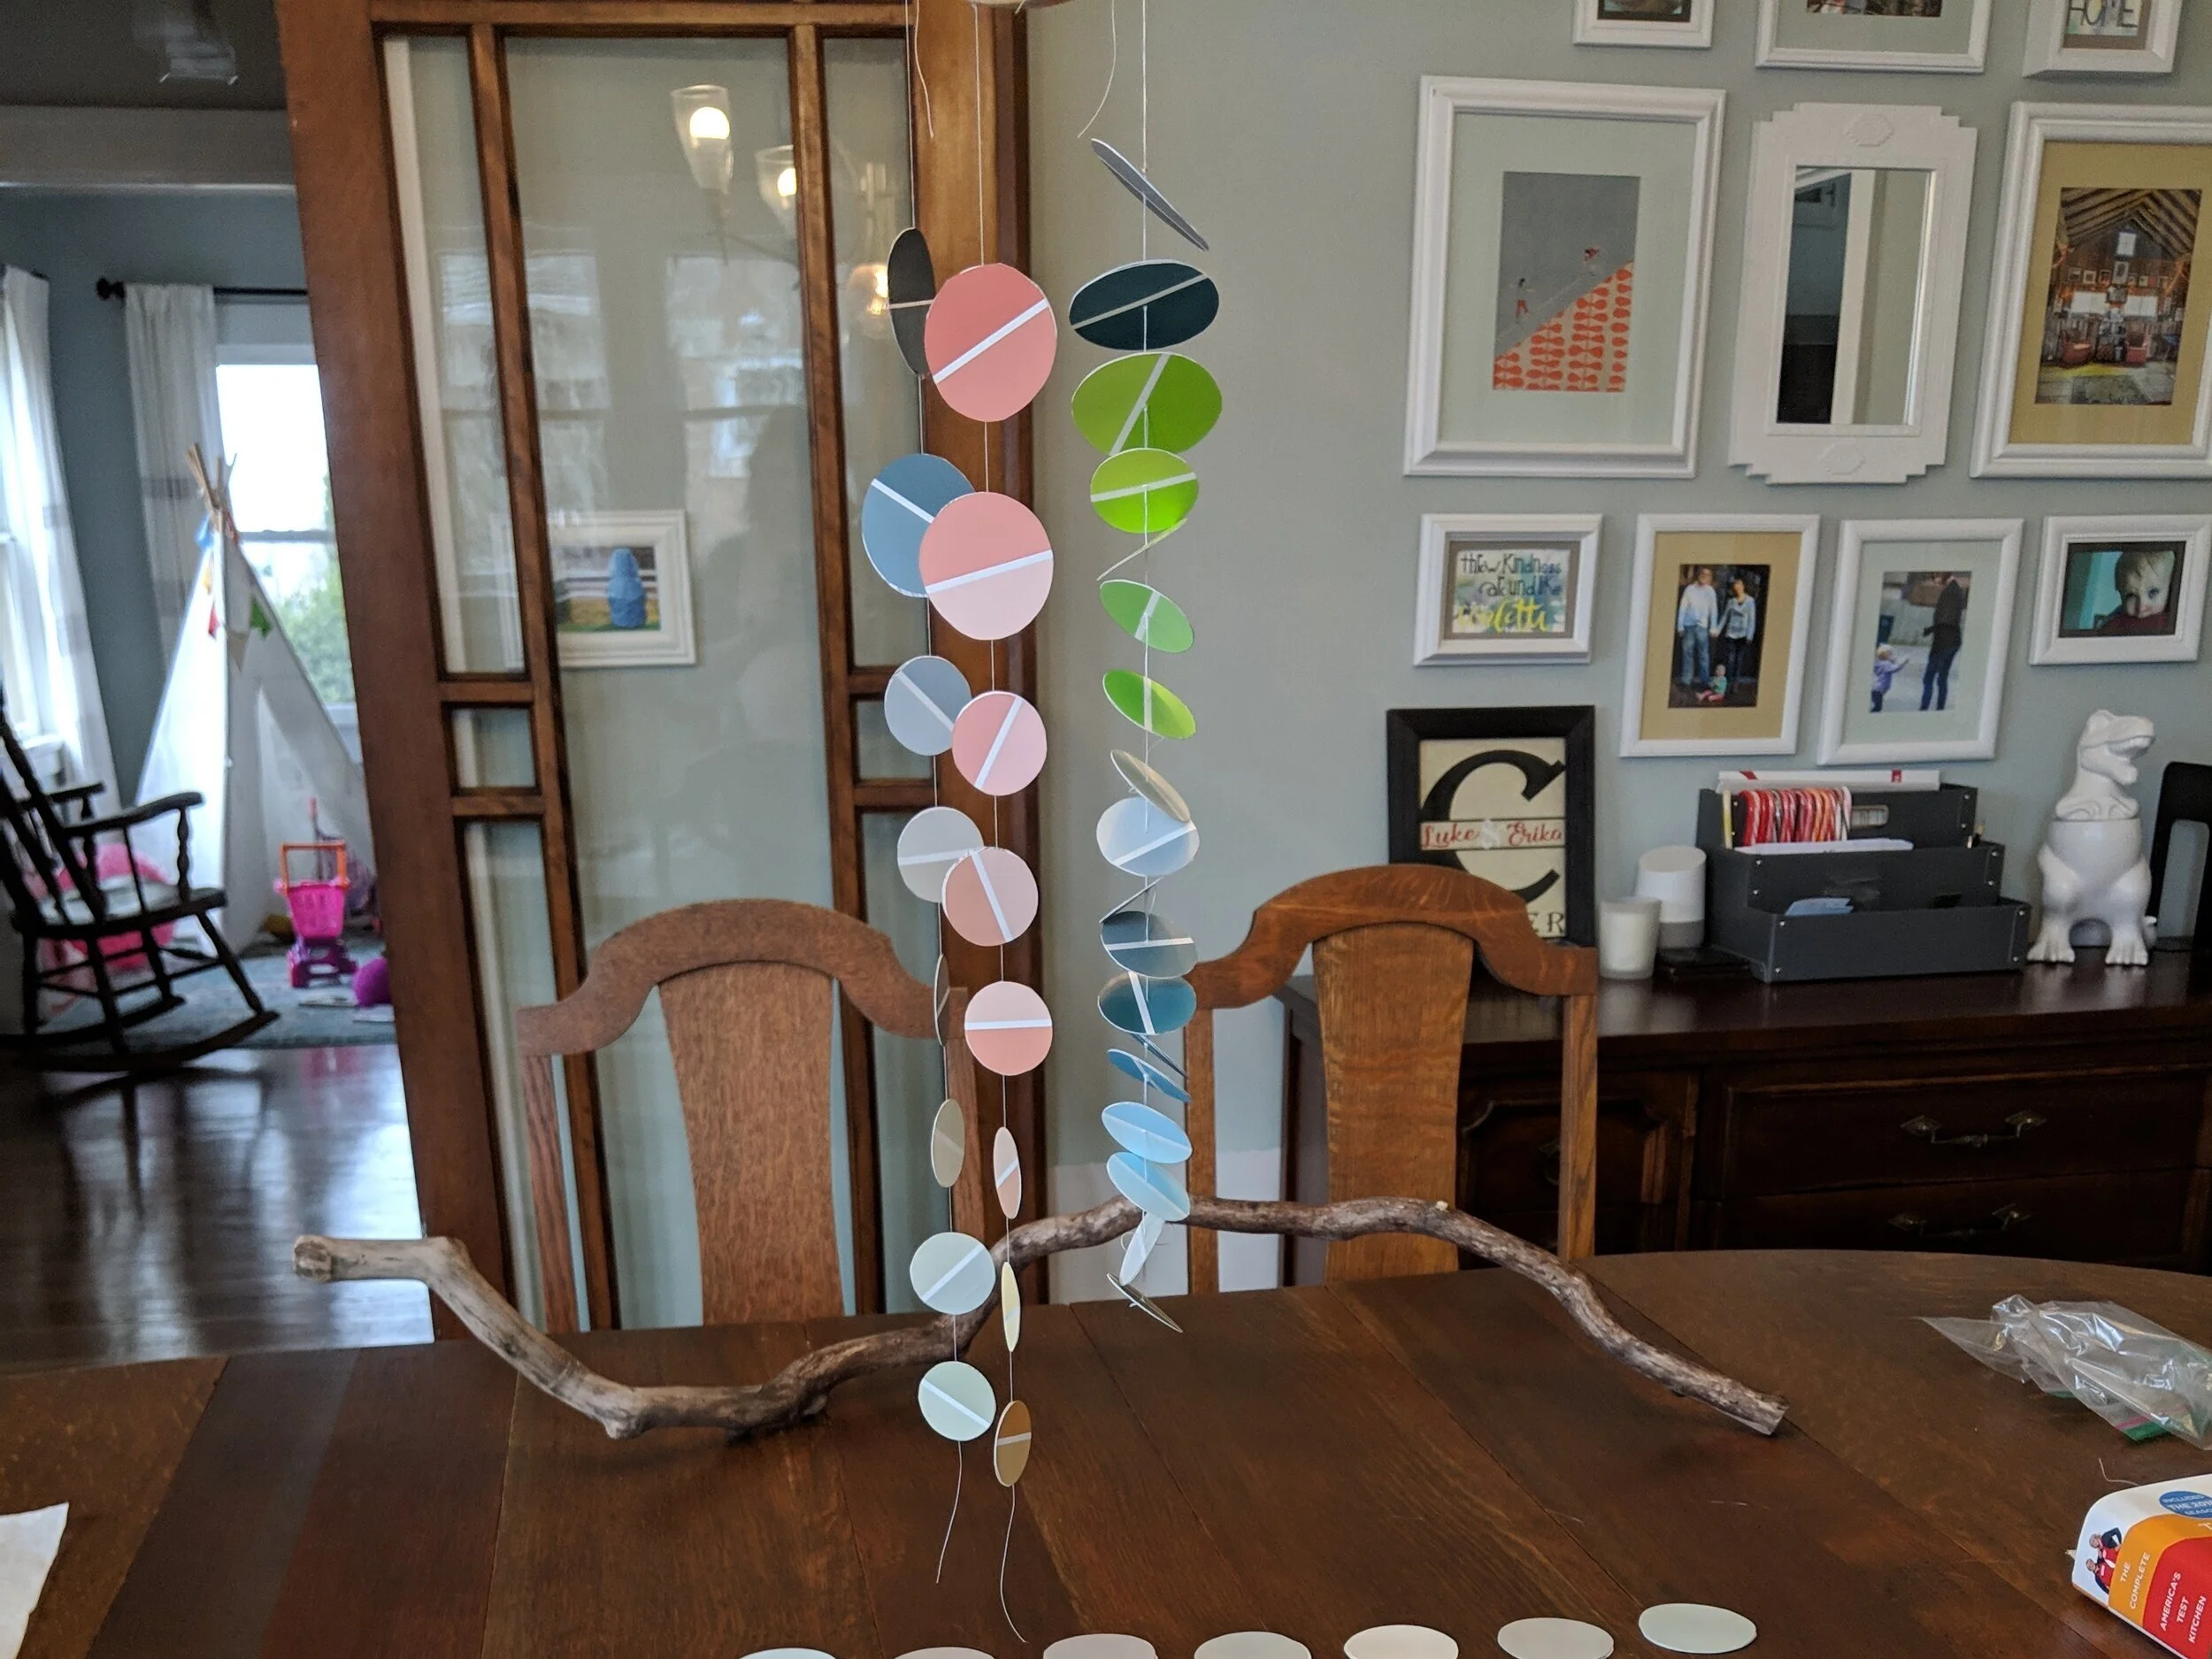
As you’ll see, the two strands on the left are hung with the string pressed between two shapes, where the string on the right is hung with the string thread (threaded?) through the middle of the shapes after they’ve been glued back to back. Either way works (this is YOUR mobile, after all), but I will warn you that the process on the right was MUCH more difficult. But I’ll give you the steps for both processes and let you decide which route you want to take.
For both processes, I cut a long piece of white sewing thread to begin - make sure it’s plenty long so you can string all your shapes and have room to tie it to your stick. You can always cut some of it off, but you can’t add more.
I used white sewing thread because I knew I wanted something thin and not super obvious. Also, it was something I already had around the house so it was virtually free! You could use other types of string or thread, but I recommend not using anything too thick or your shapes won’t be able to be glued together.
For the process on the left I put glue on the back of one circle, placed the string in the center, and placed the other circle on top. I did this for the whole strand, being sure to leave space between each circle. Then put a book on top of the entire strand as I worked on the other strands. Each time I finished a strand I placed a book on top of it and let it dry like that for about an hour.
For the process on the right I glued two circles back to back and put a heavy book on top of them and let them dry. Once dry, I took a needle and poked a hole in the center of each pair. Then, I strung the circles, tying a knot after threading each one so it didn’t slide down the thread.
Not only does the second process take more time, but you also need a lot more shapes because you’re hanging them horizontally. If you’re really committed though, you could end up with something awesome like this:

Step 5: Tie your strands to your support

I love wood tones, so for my mobile, I found a really cool branch to use as my support (note: branches are also free) that I cut down on my miter saw. If you wanted a circular mobile you could use an embroidery hoop instead, or a dowel rod for something less “natural”.
I love wood tones, so for my mobile, I found a really cool branch to use as my support (note: branches are also free) that I cut down on my miter saw. If you wanted a circular mobile you could use an embroidery hoop instead, or a dowel rod for something less “natural”.
Step 6: Hang your mobile, sit back, and enjoy

Okay, this is where I actually had to buy a couple of things.
To hang my mobile, I bought some twine and cut two pieces of the same length (one for each side). Then I looped it around each end of my branch several times until it hung at the height I wanted. Finally, I used a couple Command Strip hooks and hung the mobile from the ceiling. You could also use cup hooks, but I prefer Command Strips because I don’t have to patch a hole if I want to take them down later.
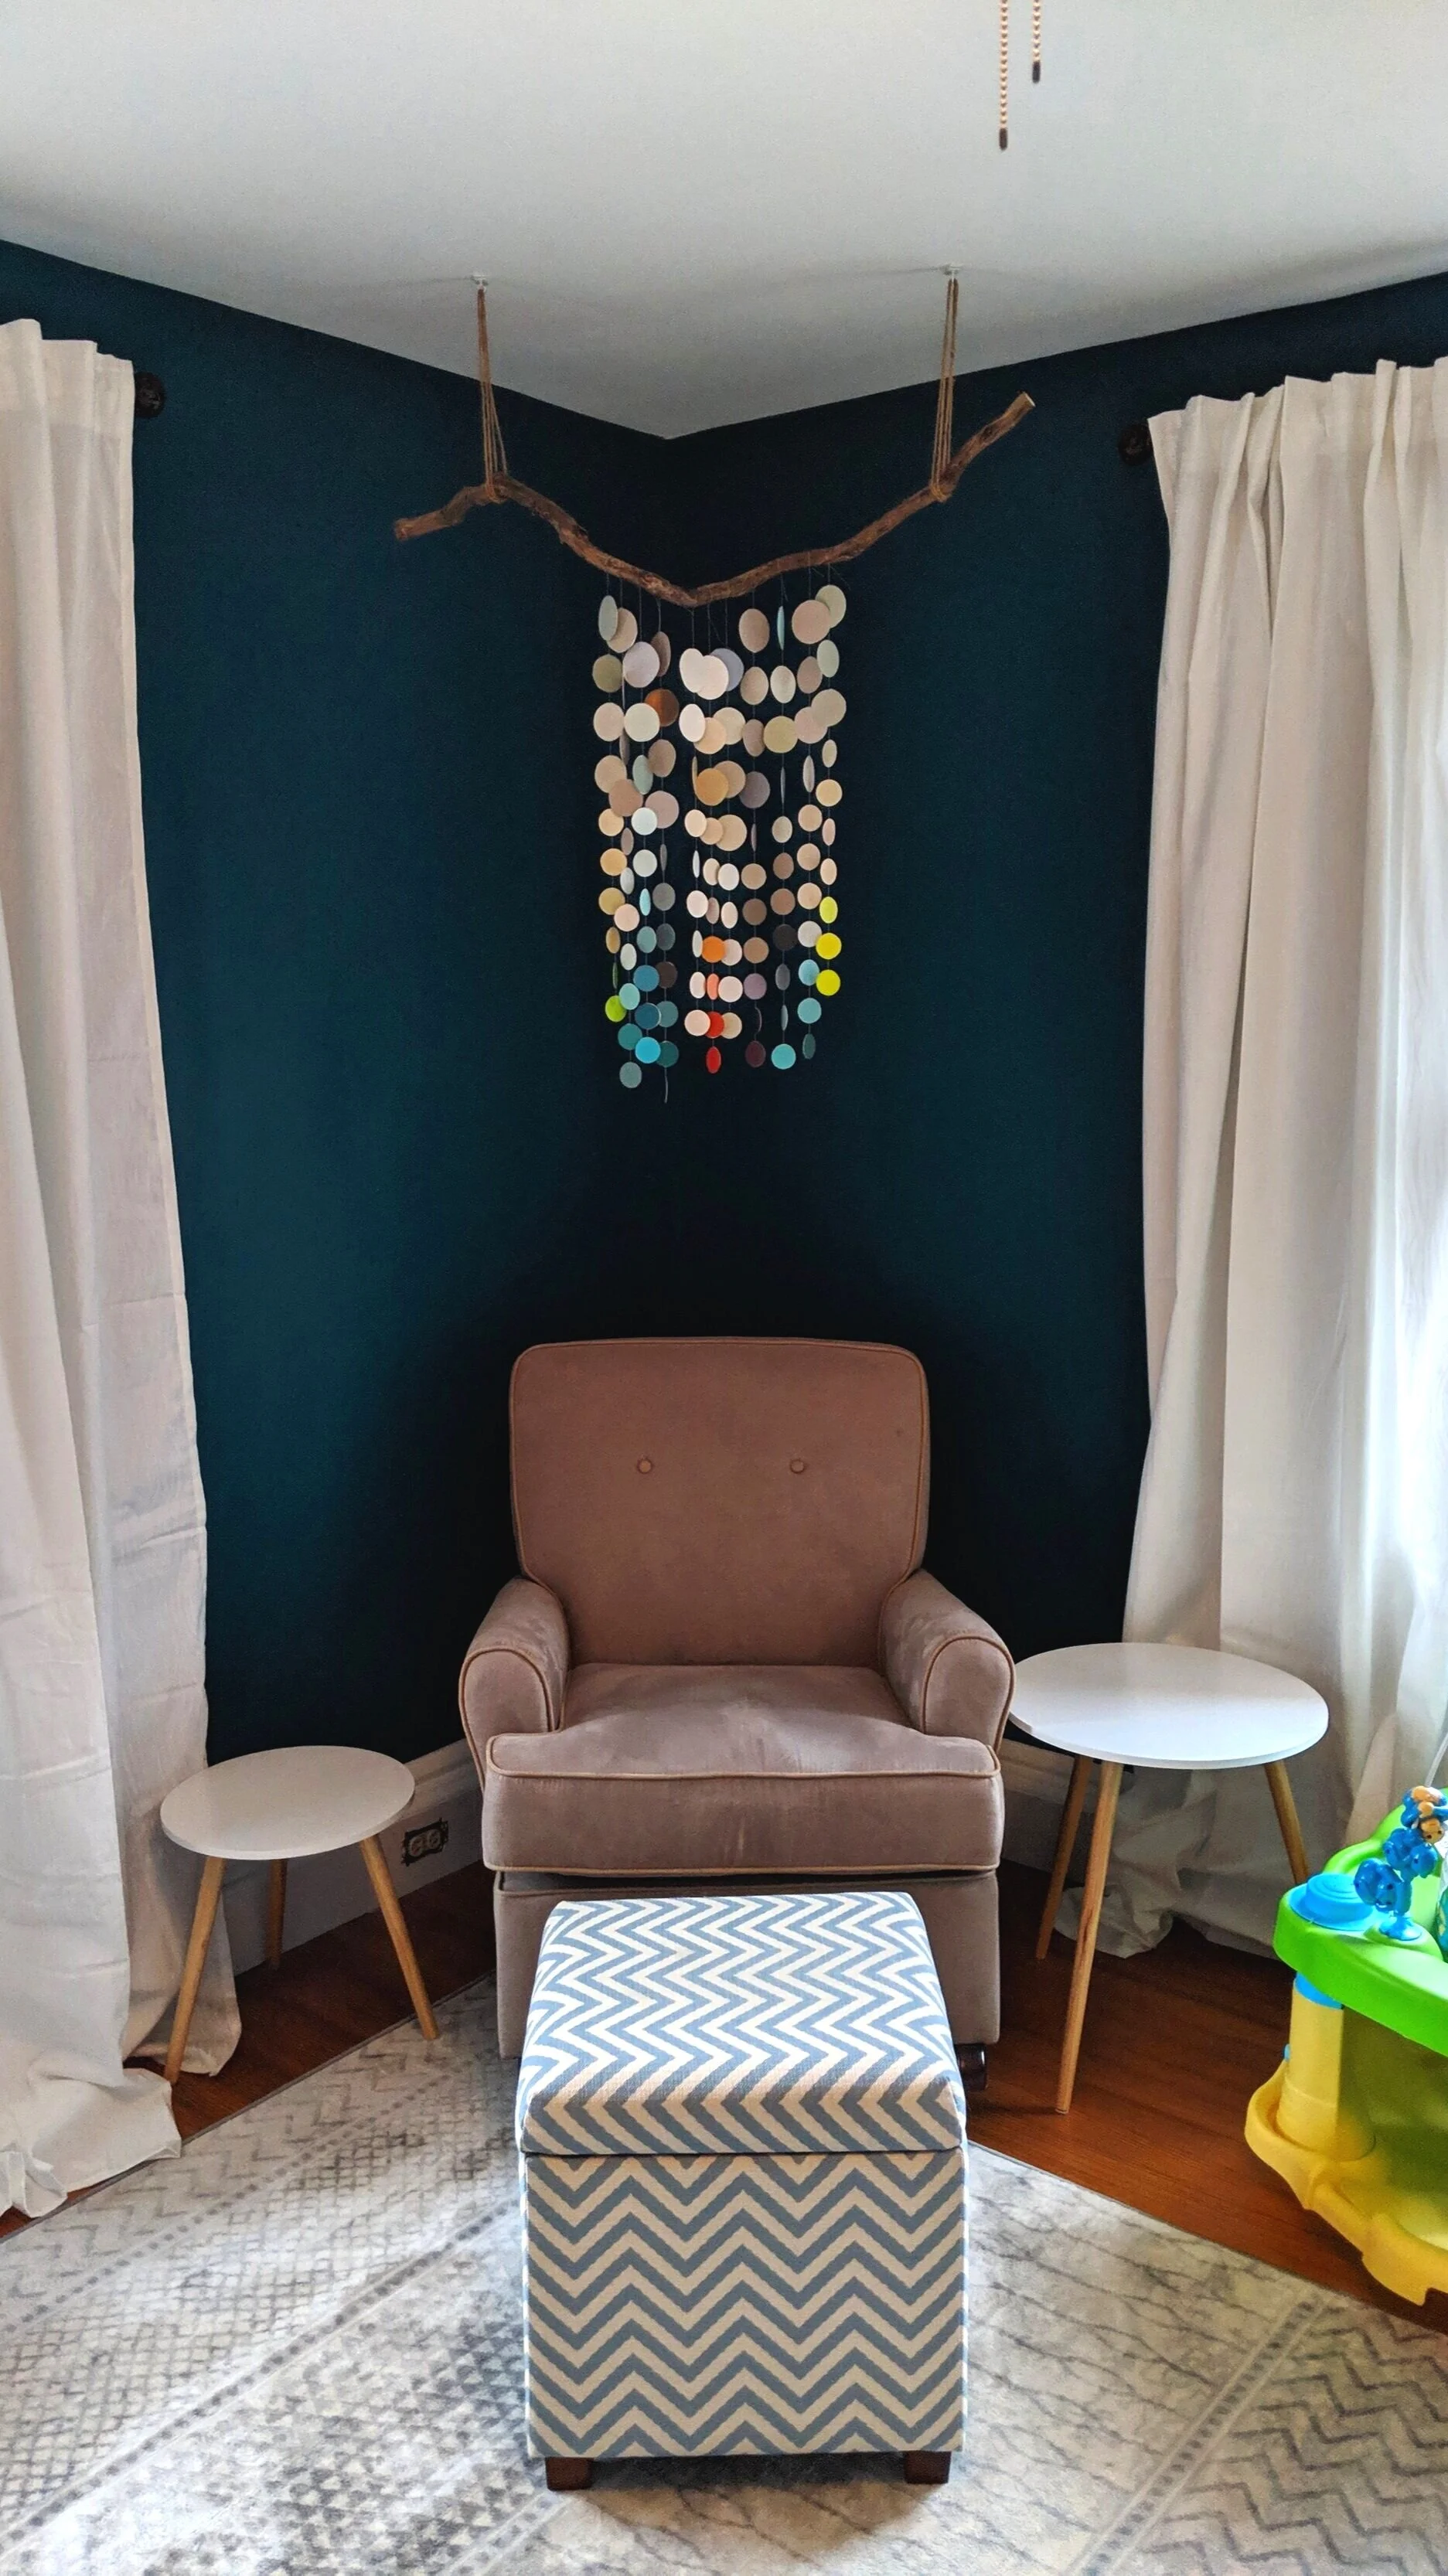
I love how the mobile turned out (and so does my little one!). I really enjoy sitting in her rocking chair with her and watching her watch the mobile as the strands slowly spin and sway with even the slightest breeze, revealing lots of different colors. Additionally, it brings me immense joy knowing I made something beautiful without breaking the bank!
The possibilities with this project are really expansive and you can put your own spin on it in so many different ways. I hope some of you will create your own mobiles while loosely following my steps and share your projects with me!
For more DIYs, check out these posts:
DIY Mobile with Paint Chips

How To Limewash Your Brick House
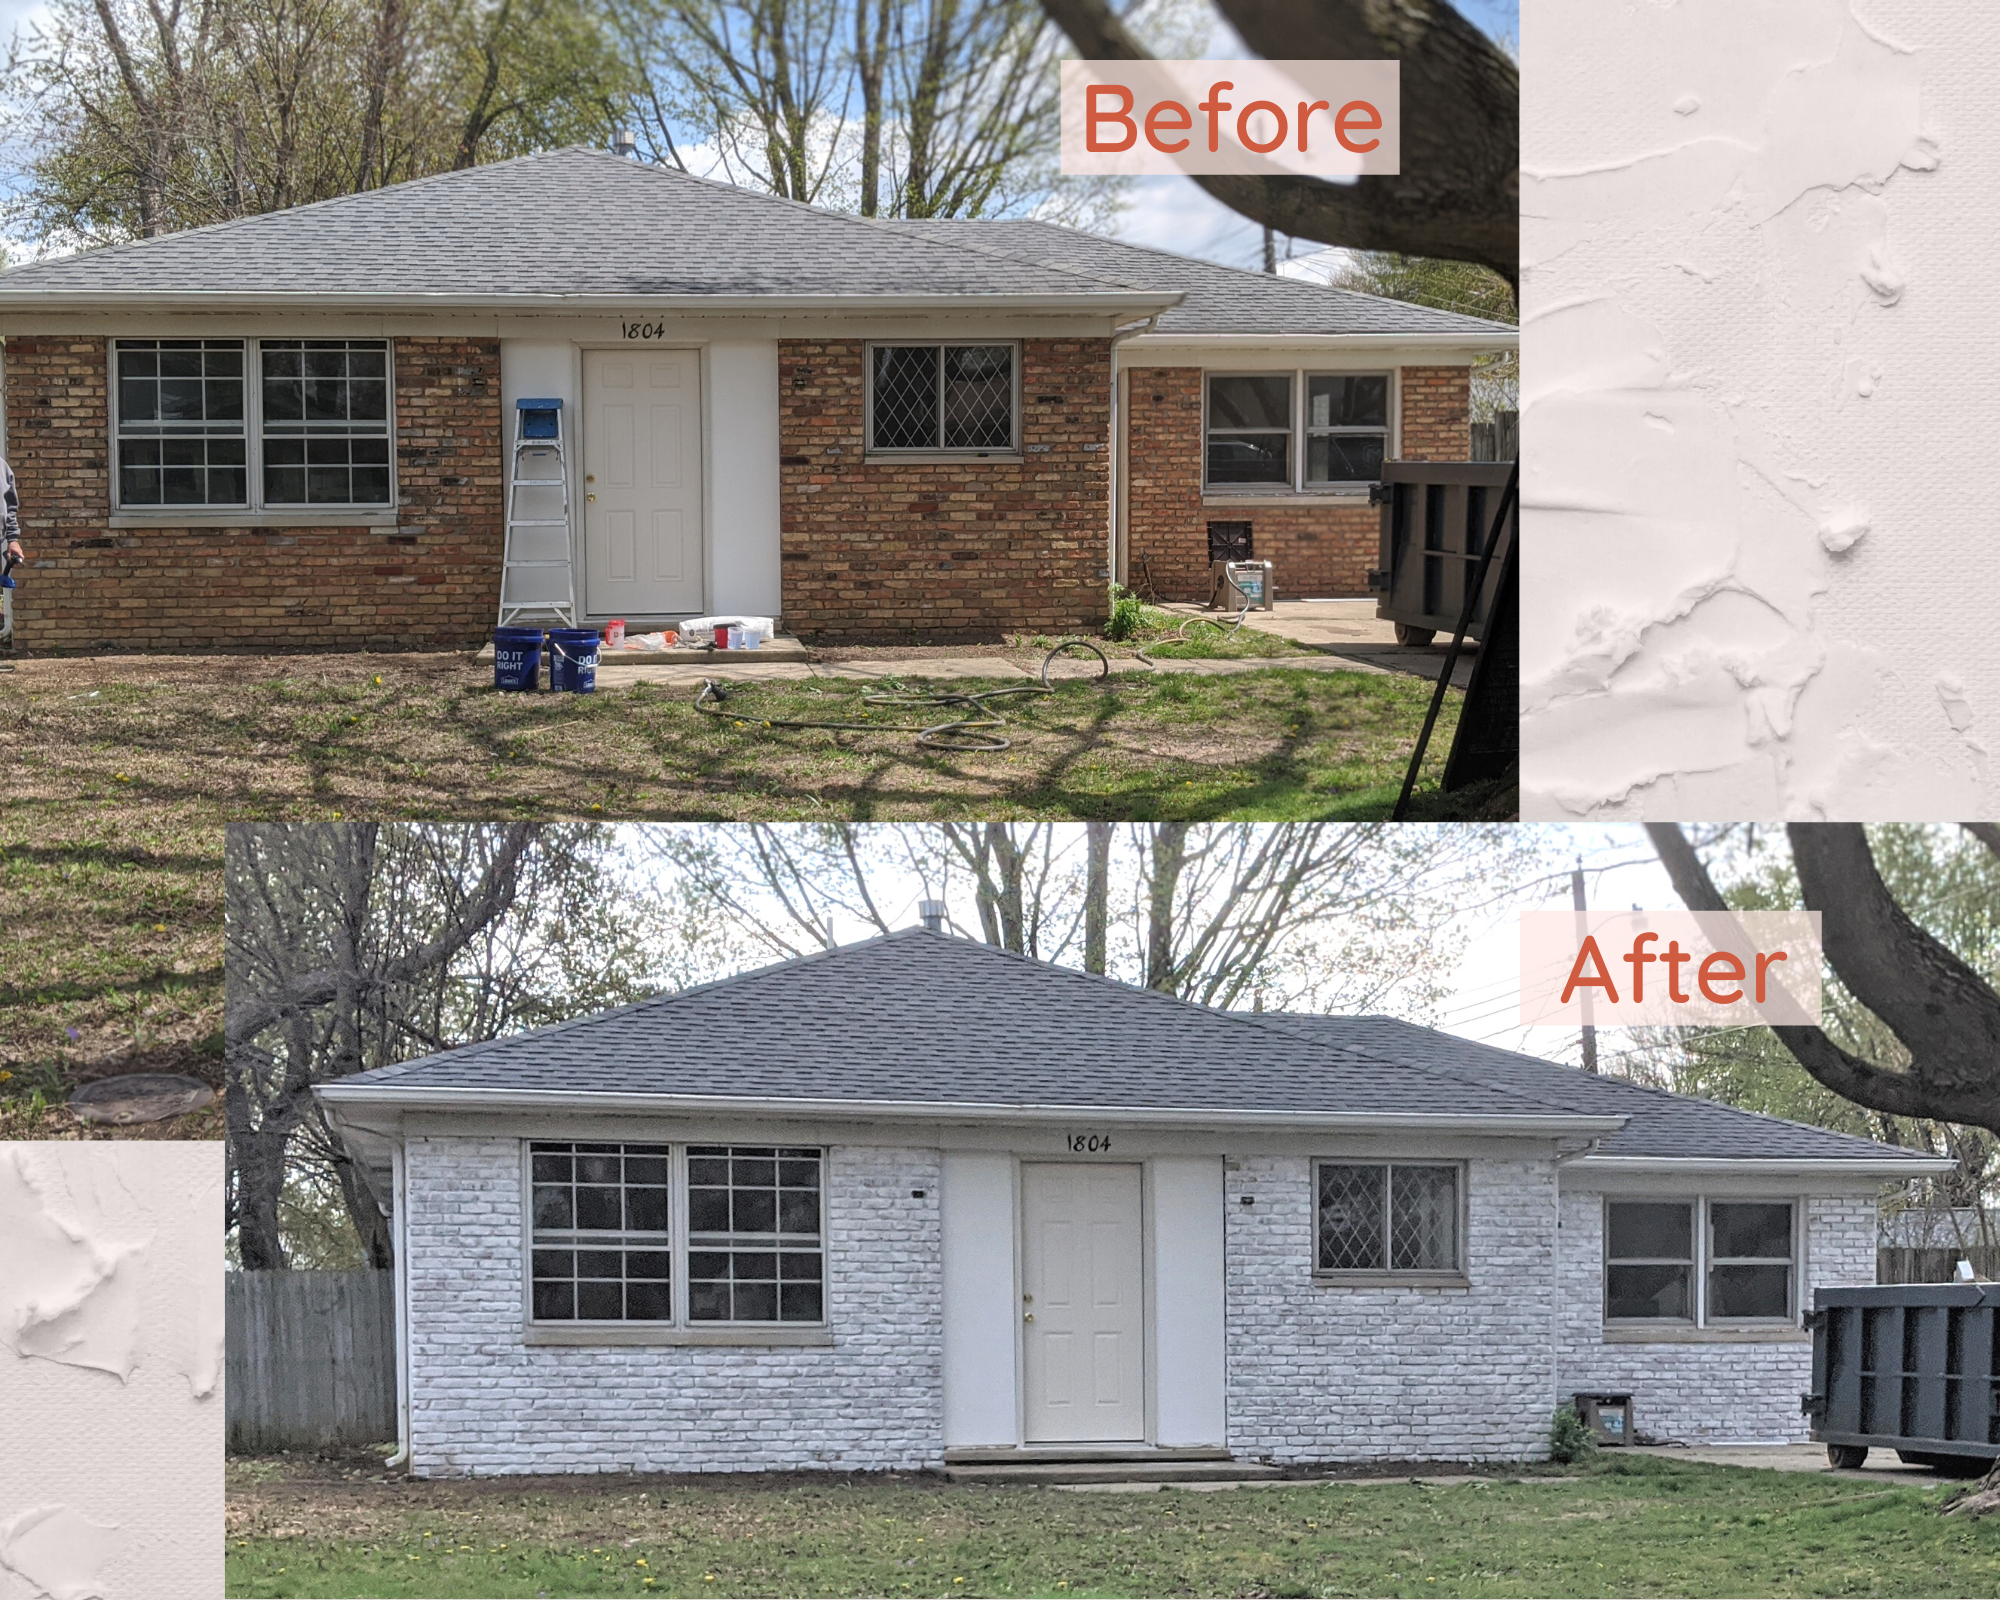
If you’ve read some of my previous posts, you may have come across the post where I wrote about the flip that we bought. In that post, I talked about painting our little brick flip house white. Well, I’m excited to say that now it IS white! But I didn’t end up painting it - I limewashed it!
How I Limewashed our Flip
If you’ve read some of my previous posts, you may have come across the post where I wrote about the flip that we bought. In that post, I talked about painting our little brick flip house white. Well, I’m excited to say that now it IS white! But I didn’t end up painting it - I limewashed it!

What is limewash?
You may be asking yourself, “What the heck is limewash!?” Well, I’m here to fill you in!
At a high level, limewash is essentially crushed limestone that is combined with water to make a wash. It’s a method that’s been around for centuries. When applied to a porous surface (like brick), it creates a chalky, matte finish. In the picture above I’ve only applied one coat, but you can apply multiple coats for a more opaque finish.
How is that different from whitewash?
There are actually lots of differences between limewash and whitewash. Allow me to break it down for you.
Going Green: First of all, limewash is environmentally friendly. In fact, it’s also mold-resistant, so once applied you shouldn’t have to worry about power washing that green fungus off the side of your house! On the flip side, whitewash is made with diluted water-based paint, which is pretty chemically and not so great for the environment.
Permeability: Limewash penetrates the brick, which means it won’t peel with time whereas paint never truly soaks in and can peel and flake after a couple of years. Limewash will erode eventually, but it takes much longer and can actually end up making the brick look antique and even better. But if you don’t like how it looks once the limewash starts to wear off, you can always apply more on top.
COST!: The ingredients for limewash are incredibly inexpensive. One 50-lb bag of hydrated lime cost us around $8. The only other ingredient is water.
Color: Limewash really only comes in one color - white. You can add pigment, but I didn’t explore that option for our house and didn’t see a lot of “how to’s” out there so I’m not sure how tricky it is. Whitewash on the other hand can technically be done with any color of paint.
Safety: Limewash is highly caustic and will burn you if it touches your bare skin. Paint on the other hand is… paint. No big deal.
Why did we choose limewashing over whitewashing?
Obviously, there are pros and cons to both limewashing and whitewashing. But how do you choose one method over the other? I think it’s really up to personal opinion. After hours of research, there were several big reasons that pushed me to give limewashing a try.
I knew I wanted the brick to be white, so color wasn’t an issue.
I really like the matte finish of limewashing. However, it’s worth noting that you can get a matte finish if you were to use flat paint for whitewashing.
I had never tried this method before, so it was definitely intriguing to try something new.
COST! Since this is a flip, we’re always focused on the budget. But even if it were my own house it’s just my nature to be sensitive to how much things cost.
And the biggest factor: permeability. Knowing that the limewash would stay on the surface of the brick for longer, and may even look better over time, was a big plus. Even though I won’t be living in this house, I want to do right by the person who eventually buys it, so the option with the proven longer-lasting result felt like the right way to go.
How did you do it?
Ah yes, the the fun part, where I give you a step-by-step first-hand experience as to how I limewashed our house! Here’s what you’ll need to get your limewashing on -
Materials

As an Amazon Associate I earn from qualifying purchases. This post may contain affiliate links, meaning I receive commissions for purchases made through those links, at no cost to you.
- Hydrated lime
- Large paintbrush (mine was 4 inches)
- 5-gallon bucket
- Hose w/ spray nozzle
- Gloves
- Long sleeves
- Mask
- Safety goggles
- Long stir stick or drill with mixing paddle
- Nice weather - I know this isn’t really a “material”, but it’s super important for a nice finished product! Avoid weather that is too cold or too hot. You should also try to avoid applying your wash in direct sunlight (especially on hot days) as it can dry out too fast, or on overly humid days (which will slow down the drying process).
Step 1 - Preparation

When preparing to do any finish on the exterior of a home it’s important to get rid of any grime or dirt that could cause a barrier between your exterior surface and your paint/wash. Several days before I limewashed the house, Lucius took some time to power wash the exterior to get it so fresh and so clean, clean.
It would have been smart to remove the shutters before the power washing but, meh. You live, you learn (and now you have Alanis Morissette stuck in your head). Above is my father-in-law helping me with a tricky screw on the shutters before I got started limewashing.
Step 2 - Mixing your wash

The main ingredient for this project is hydrated lime. Everything I read makes it sound like this is available at any hardware store, but in my experience, it was crazy hard to find! I was thisclose to buying a bag off Amazon for a lot more when we finally found a store that carried the brand above.
When I say this project is cheap, I mean it. The entire 50 lb bag cost us less than $8! And although only the front facade of our house is brick, we barely made a dent in the bag.
As previously mentioned, lime is really caustic. The hydrated lime comes in a fine powder that gets EVERYWHERE so before you start mixing your wash cover yourself up! Throw on some pants, long sleeves, gloves, goggles, and a mask.
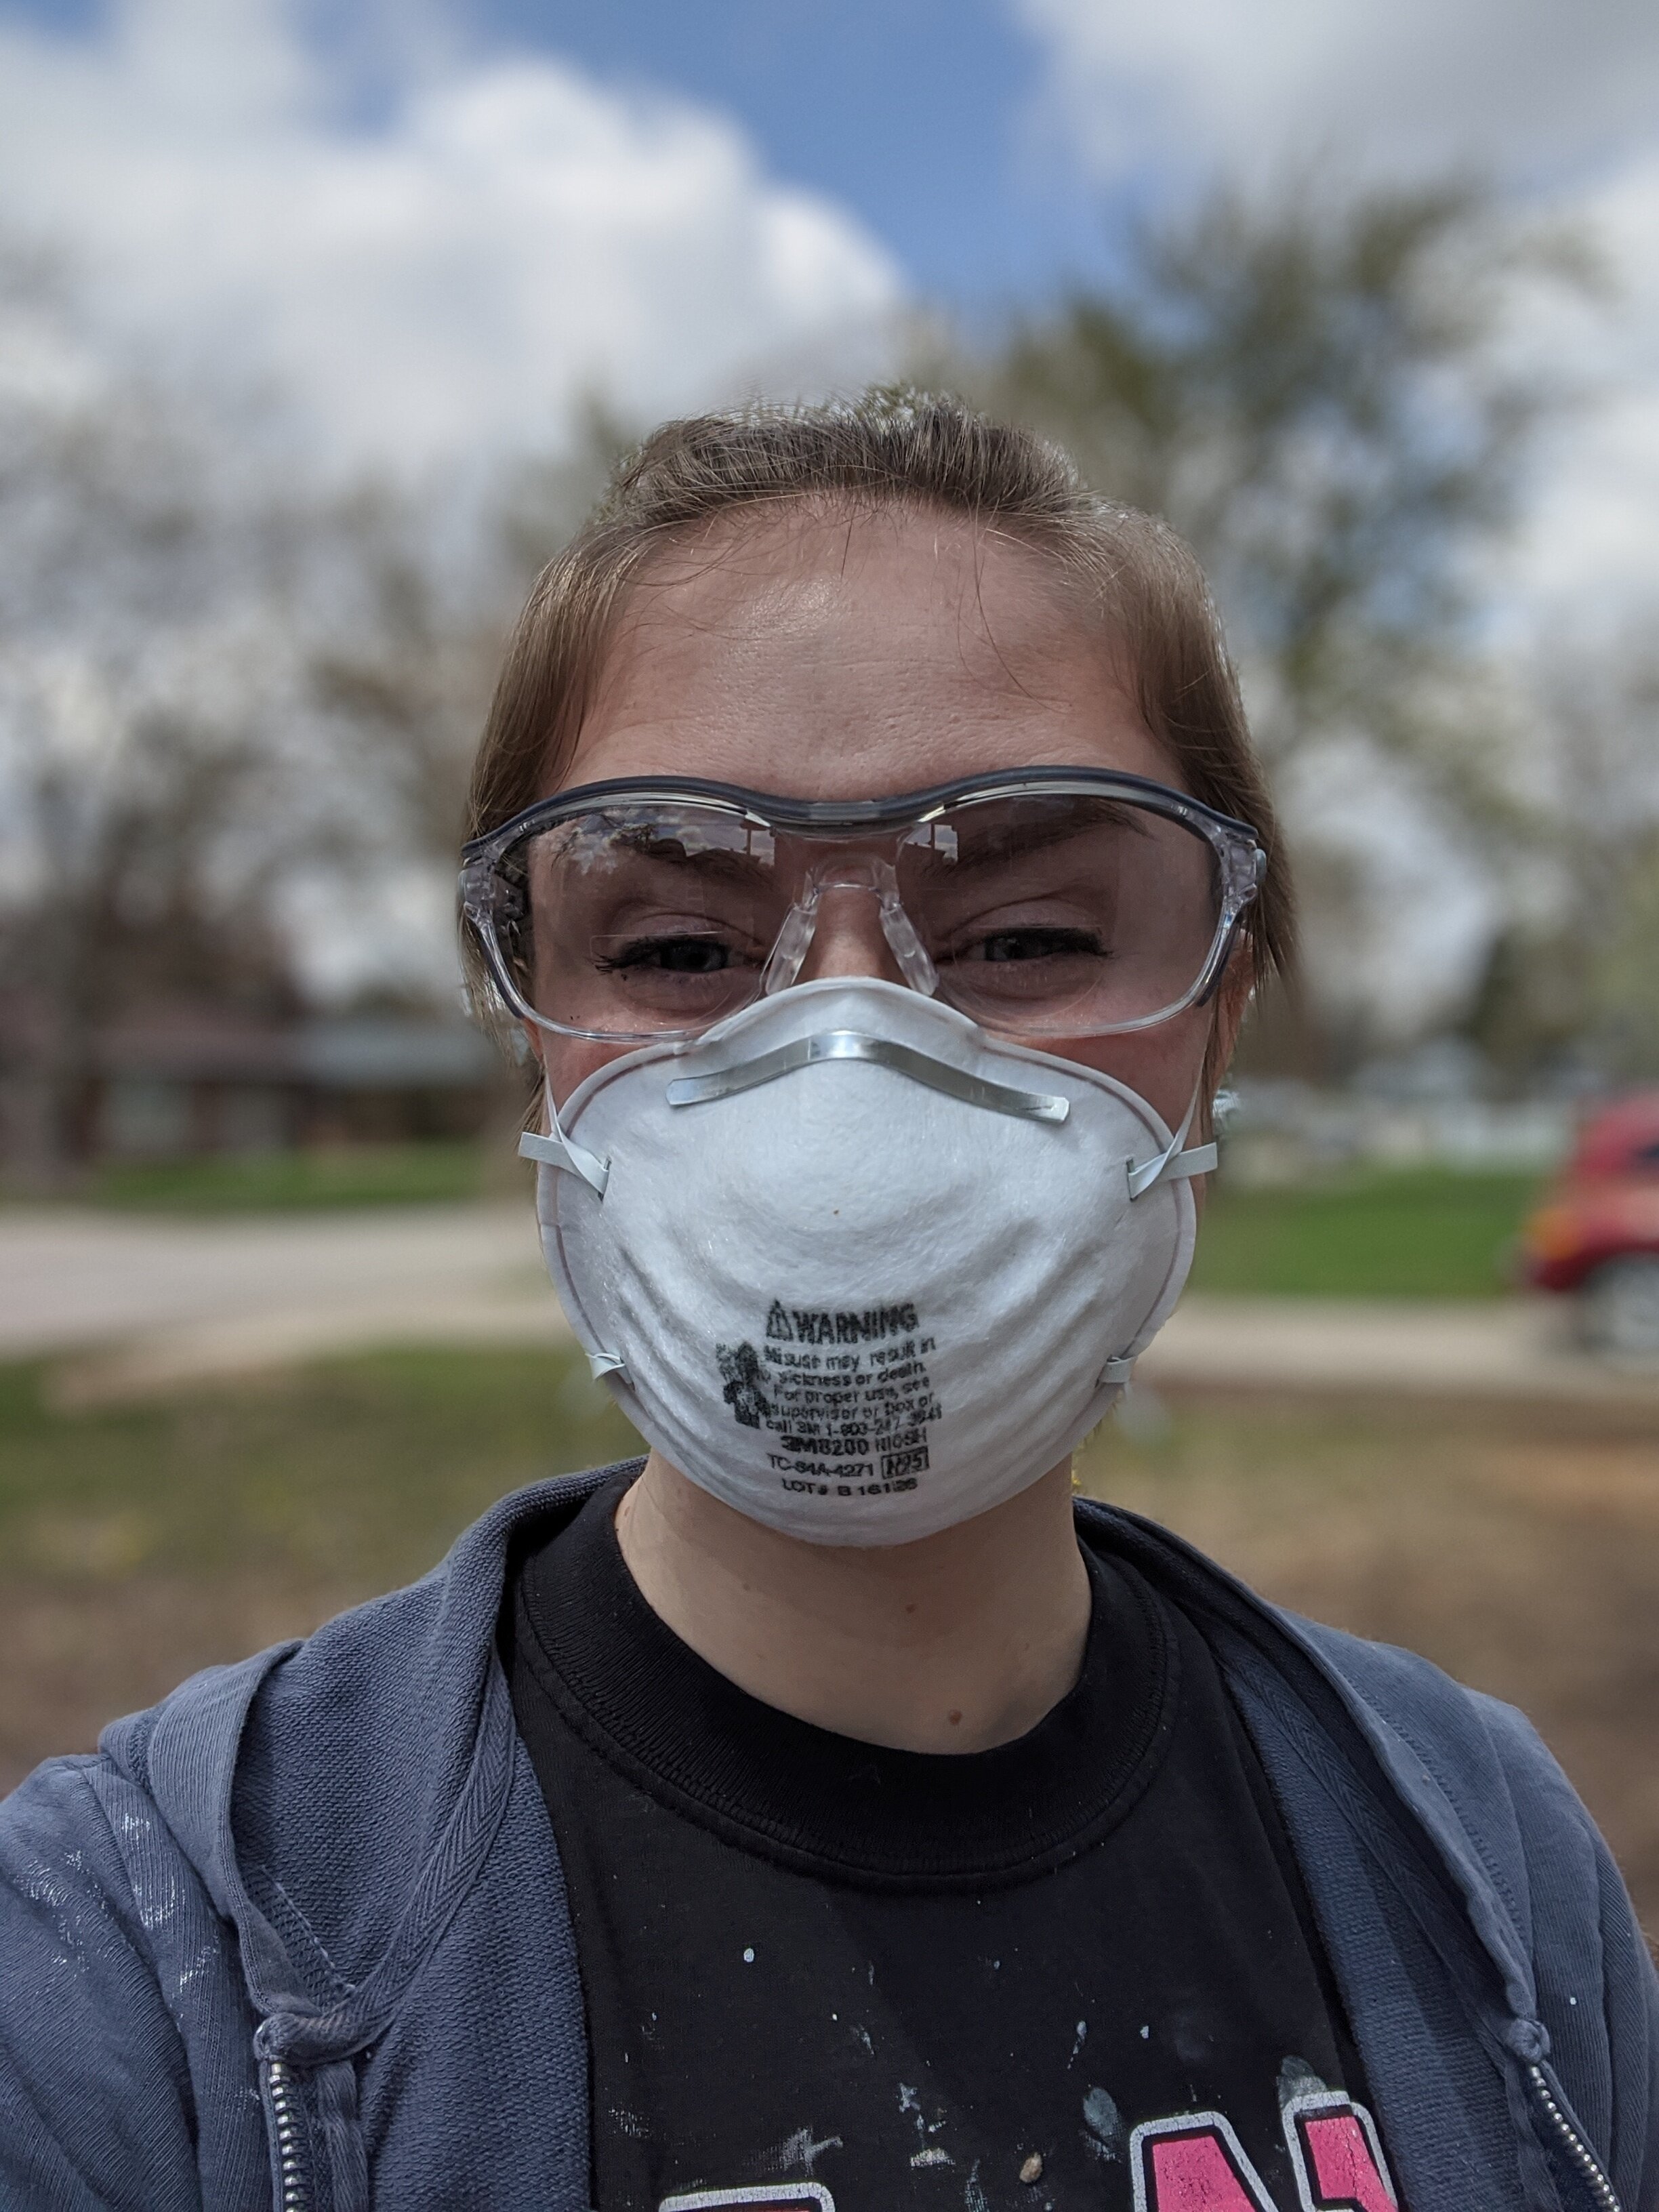
I don’t know why i felt the need to smile in this picture.
To mix your wash you need an 80/20 ratio - 80% water, 20% hydrated lime. I poured water and the hydrated lime in the correct proportions into a 5-gallon bucket until it was pretty full, then took my drill with the mixing paddle and mixed it up.
If you’re limewashing a whole house, several of the sources that I read talked about how it’s worthwhile to mix all your wash at once in a wheelbarrow so you have a consistent batch. You can mix batches as needed, but you run the risk of one batch being more opaque or transparent than the next. Since our house is small and only the front is brick, I didn’t think I’d need more than one small batch.
I don’t know why but I was anticipating it to be MUCH more difficult to mix. It was actually very easy and could be done with a long stir stick if needed. The most commonly used comparison I found when researching this process was that your final product should be the consistency of whole milk.
Step 3- Application
Changing the exterior of your house is pretty terrifying, especially with a process you’ve never done first-hand and that isn’t easily reversible if you dislike the end product. But let me tell you that limewash is insanely easy to apply!
To begin, wet the brick down with your hose. I recommend wetting it down in sections as you work your way around the house so it doesn’t dry before you get to it. Then, start at the top and work your way down in sections.
You can apply your limewash liberally, just take care not to drip a ton on any concrete or porous surfaces below that you don’t want limewashed. Depending on the look you’re going for, it’s not necessary to get in every nook and cranny.
Below is a quick little video I shot as I was applying the wash so you can see first-hand how easy this is.
As you can see, I wasn’t shy about loading up my brush and just slapping it on. I did try to avoid big drips on the lower bricks because I didn’t want them to dry before I could smooth them out, but even the inevitable drip here and there ended up being a nonissue.
Something good to know ahead of time - the wash goes on very transparent. Don’t let this scare you! I only did one coat on the whole house and as you can see in the picture below, as the wash dries it gets more opaque.

In fact, you can do multiple coats of the wash to create a completely opaque look.
This project is not only inexpensive and easy, but it’s pretty fast! Because you don’t have to be super precise with your wash (and if you’re going for an uneven look it’s even less important to apply wash to every square inch), this project only took me around 3 hours! Granted, only the front of our house is brick, an entirely brick house could be limewashed in a day or two, especially if multiple people were taking part in the limewashing party.
Admittedly, the house is looking pretty monotone right now, but have no fear! I’m deep in the brainstorming process of adding some pops of color and landscaping, which this house desperately needs.
We hope to finish up this flip in the next few weeks and I most definitely plan on sharing lots of photos when it’s all complete. Keep checking in so you can check out the final product!