
DIY Light Fixture Dupe: Get a $340 AllModern Look for Just $140
Rub n’ Buff Light Fixture DIY
Want the look of a designer light fixture without the price tag? I DIYed a $140 version of a $340 AllModern fixture using a tube of Rub ‘n Buff—and it turned out so good.
The best part? It only took a few basic tools, no fancy equipment, and zero prior experience. If you’ve got an outdated fixture (or anything that could use a luxe little glow-up), keep reading—this DIY is easier than you think.

As an Amazon Associate, and partner with other brands, I earn from qualifying purchases. This post may contain affiliate links, meaning I receive commissions for purchases made through those links at no cost to you.
Don’t you hate it when you find the perfect thing, but it’s wildly more money than you want to spend? That was exactly the case with the flush-mount light fixture for our mudroom. I had the vision. I found THE light fixture. I wanted it. But... I’m also overly practical and budget-conscious.
Lo and behold, I found this Amazon light fixture dupe for $113. Same size, same silhouette, same vibe. The only real difference? The AllModern version had a warm gold interior, and the Amazon one did not.

Did that stop me? Absolutely not.
Cue me dramatically setting down my coffee and declaring, “I can DIY that.”
Enter: Rub ‘n Buff
I briefly considered spray paint for the gold finish, but I wanted something with a little more richness and dimension. Then I remembered Rub ‘n Buff had always been on my “things I’d like to try” list. So, I gave it a whirl!
If you’ve never heard of Rub ‘n Buff, here’s the quick and sparkly rundown:
Rub ‘n Buff is a metallic wax-based finish that comes in a variety of shades—gold, silver, bronze, pewter, copper—you name it. It’s highly pigmented, easy to use, and magically turns plain objects into pieces that look like they were plucked from a boutique. Think of it as makeup for home decor. Plus, it's only $26 for a 5-pack!

I’d known about Rub ‘n Buff for years, but this was my first time actually using it. Spoiler alert: It was ridiculously easy and turned out even better than I imagined.
Here’s how I got the look—and how you can, too.
Tools & Materials
- Light Fixture (or whatever object you're zhuzhing up)
- Black Spray Paint (if your base isn’t already black)
- Rub ‘n Buff (I used Gold Leaf, but more on that below)
- Stiff Makeup Brush (you want something dense, not your fluffy powder brush! And definitely not one you’ll ever want to use on your face again)
- Optional: Spray Primer (for slick or high-touch surfaces)
- Optional: Clear Spray Sealant (for extra protection)
- Optional: Painter’s Tape (unless you love chaos)
Step 1: Find Your Perfect Shade
Rub ‘n Buff comes in more finishes than you'd think, but be wary of the color on the outside of the package as it doesn’t always match what’s inside.

To figure out which finish I liked best, I made a quick and dirty swatch board. I painted a scrap of cardboard with black acrylic paint (because the product really shines against a dark base) and applied a little dab of each color. Pro tip: If you’re doing this for real, use black spray paint on your actual project for durability.
The swatch board let me see how the colors looked IRL and in the actual lighting of the mudroom, because as we all know (say it with me now!), LIGHTING CHANGES EVERYTHING.
Bonus: this also gave me a practice run to get a feel for how Rub ‘n Buff applies. Heads up, it does not go on like regular paint. It’s waxy. It dries fast. It’s a little weird. But once you get the hang of it? Easy as pie.
Step 2: Prep Your Surface
If your fixture is super slick or will be touched often (think doorknobs or drawer pulls), it’s a good idea to lightly sand and prime before painting. A coat of black spray paint will give the Rub ‘n Buff depth and something to cling to.
My light fixture was already black, so I skipped the sanding and painting. I just used painter’s tape to mask off the parts I didn’t want to Rub ‘n Buff (which, by the way, sounds more inappropriate every time I say it).
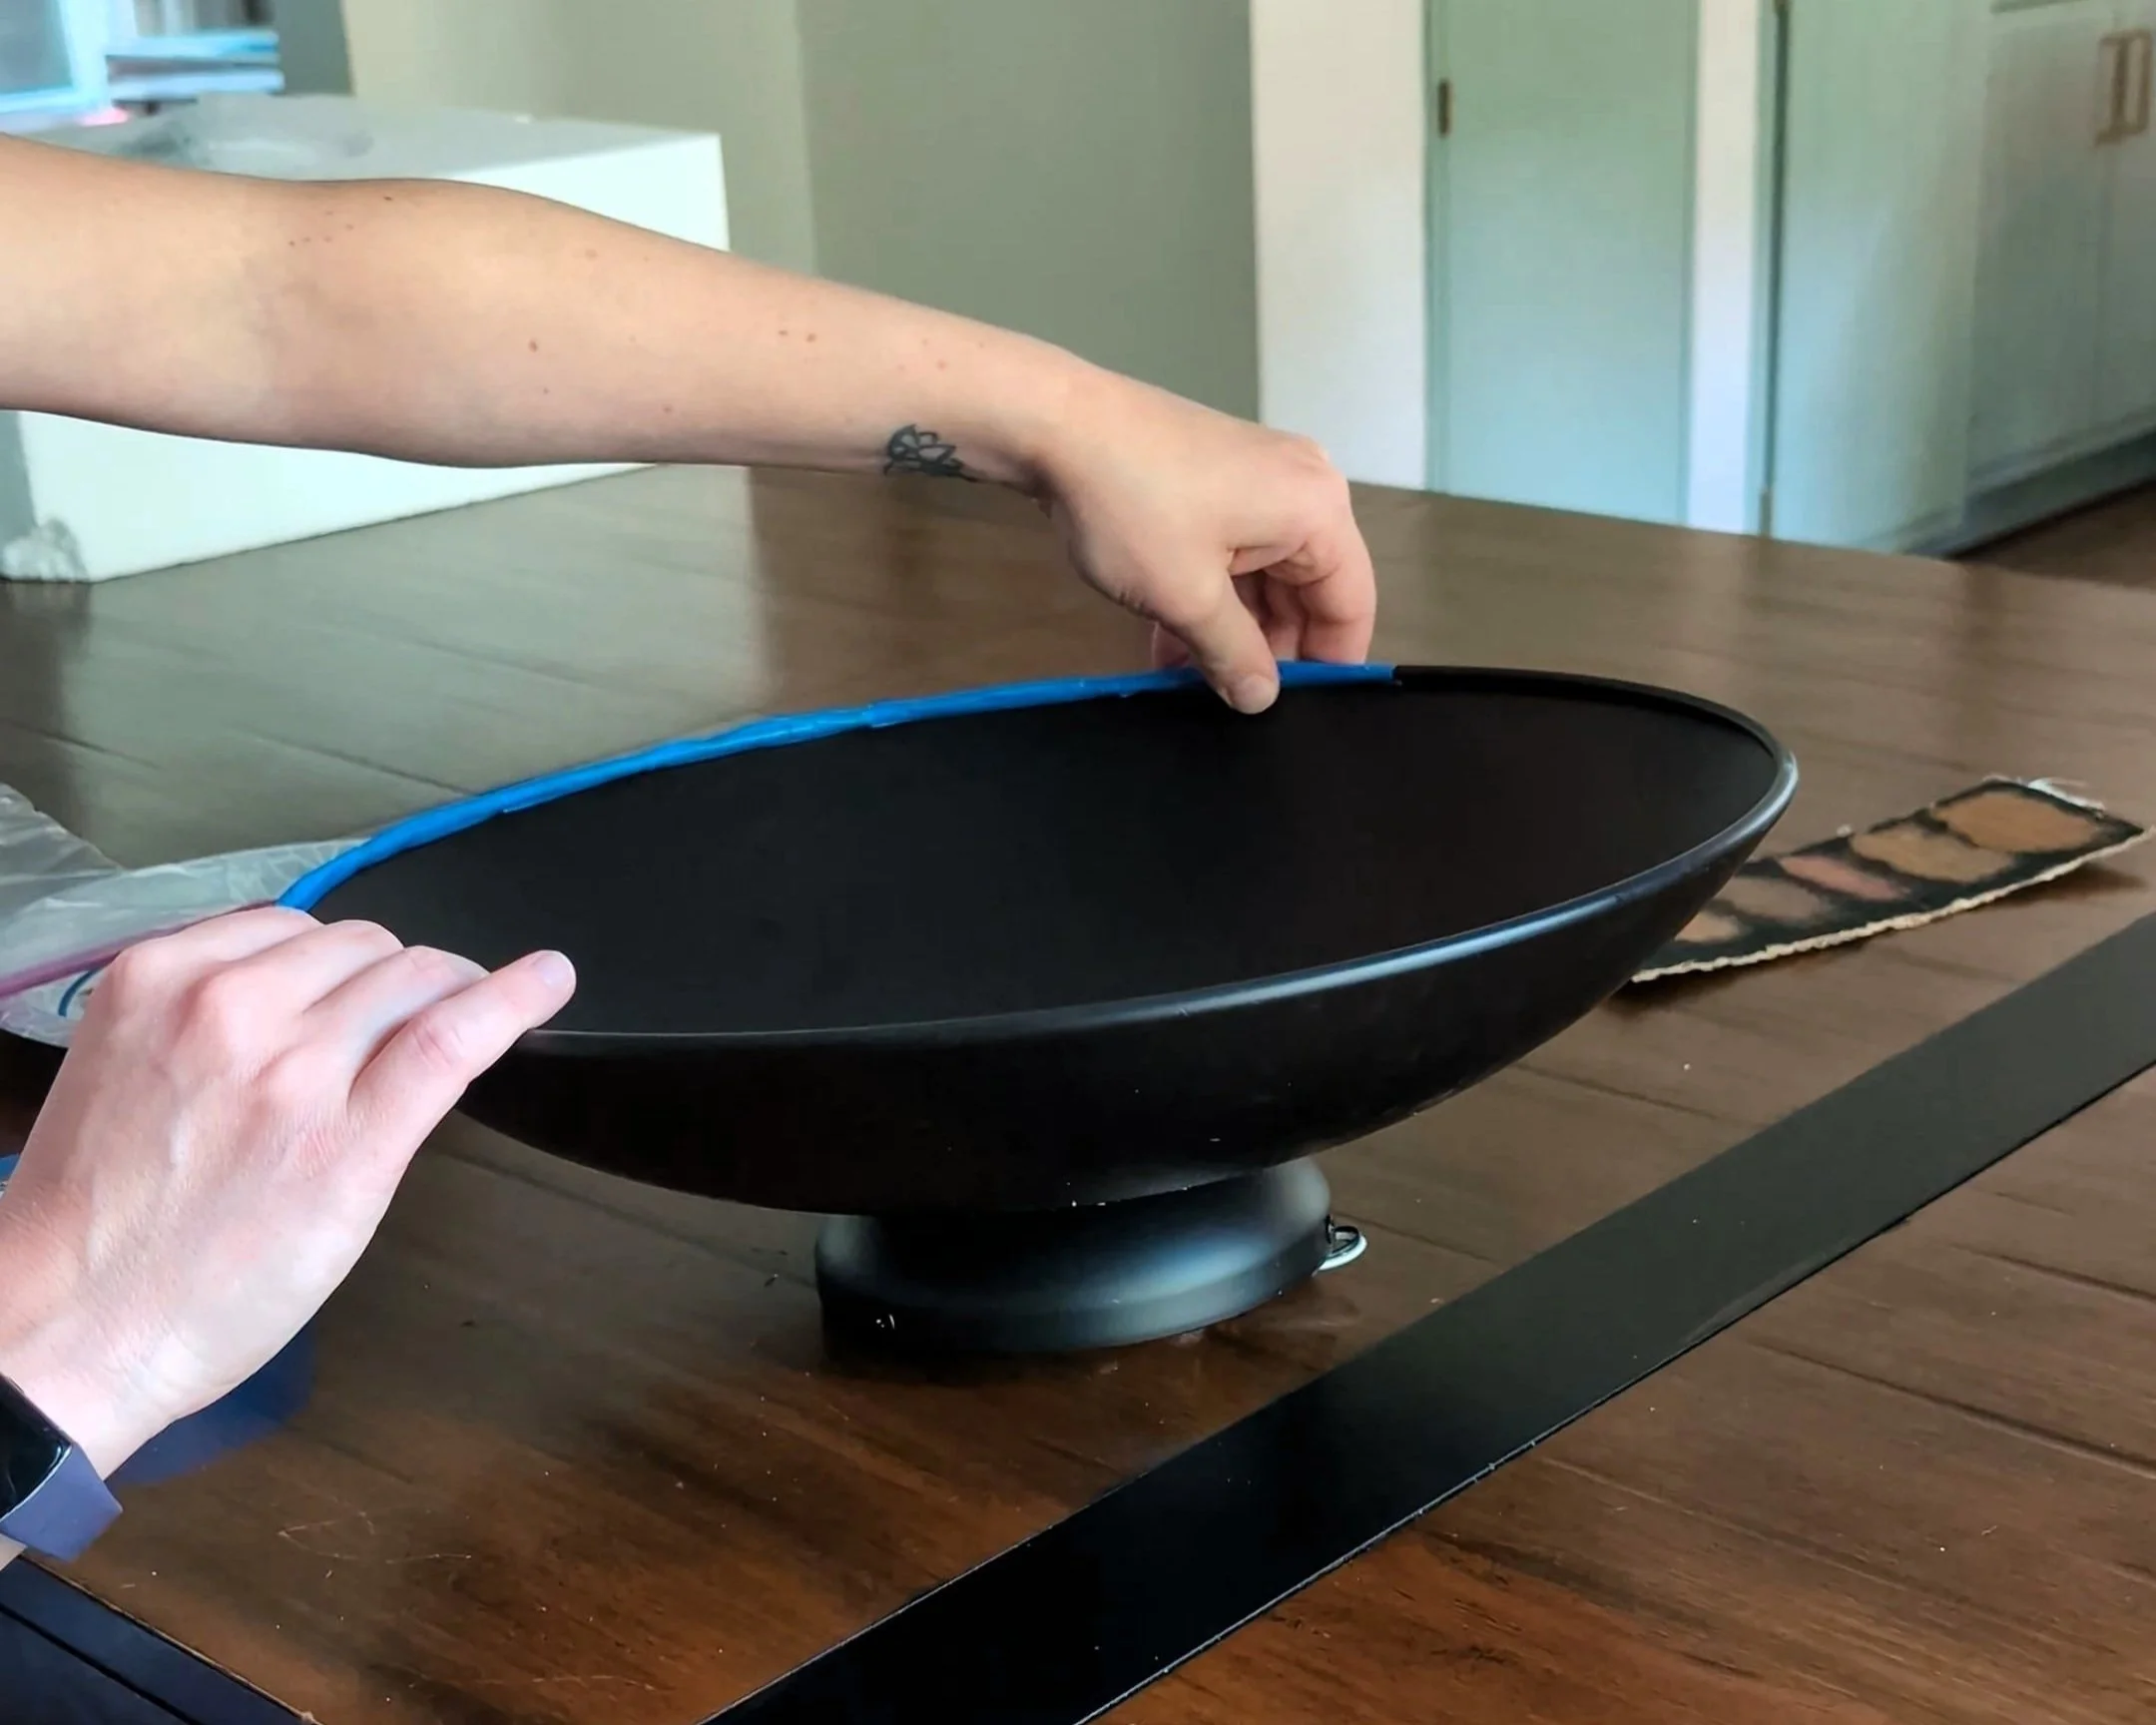
Step 3: Apply Rub ‘n Buff (Rub ‘n Buff Tutorial)
Now on to the fun part!
Squeeze a teeny bit of Rub ‘n Buff onto a paper plate (or foil, or whatever you’ve got). I loved the medium warmth of Gold Leaf against my Dark Auburn mudroom, so that’s the color I went with.
Dip your makeup brush in it, then offload the excess on a clean spot.
Apply to your surface using a dabbing or swirling motion—whichever gives you the texture you like.
Build up layers if needed. You can even use multiple colors. But be wary: once it dries, it’s dry. There’s no erasing.
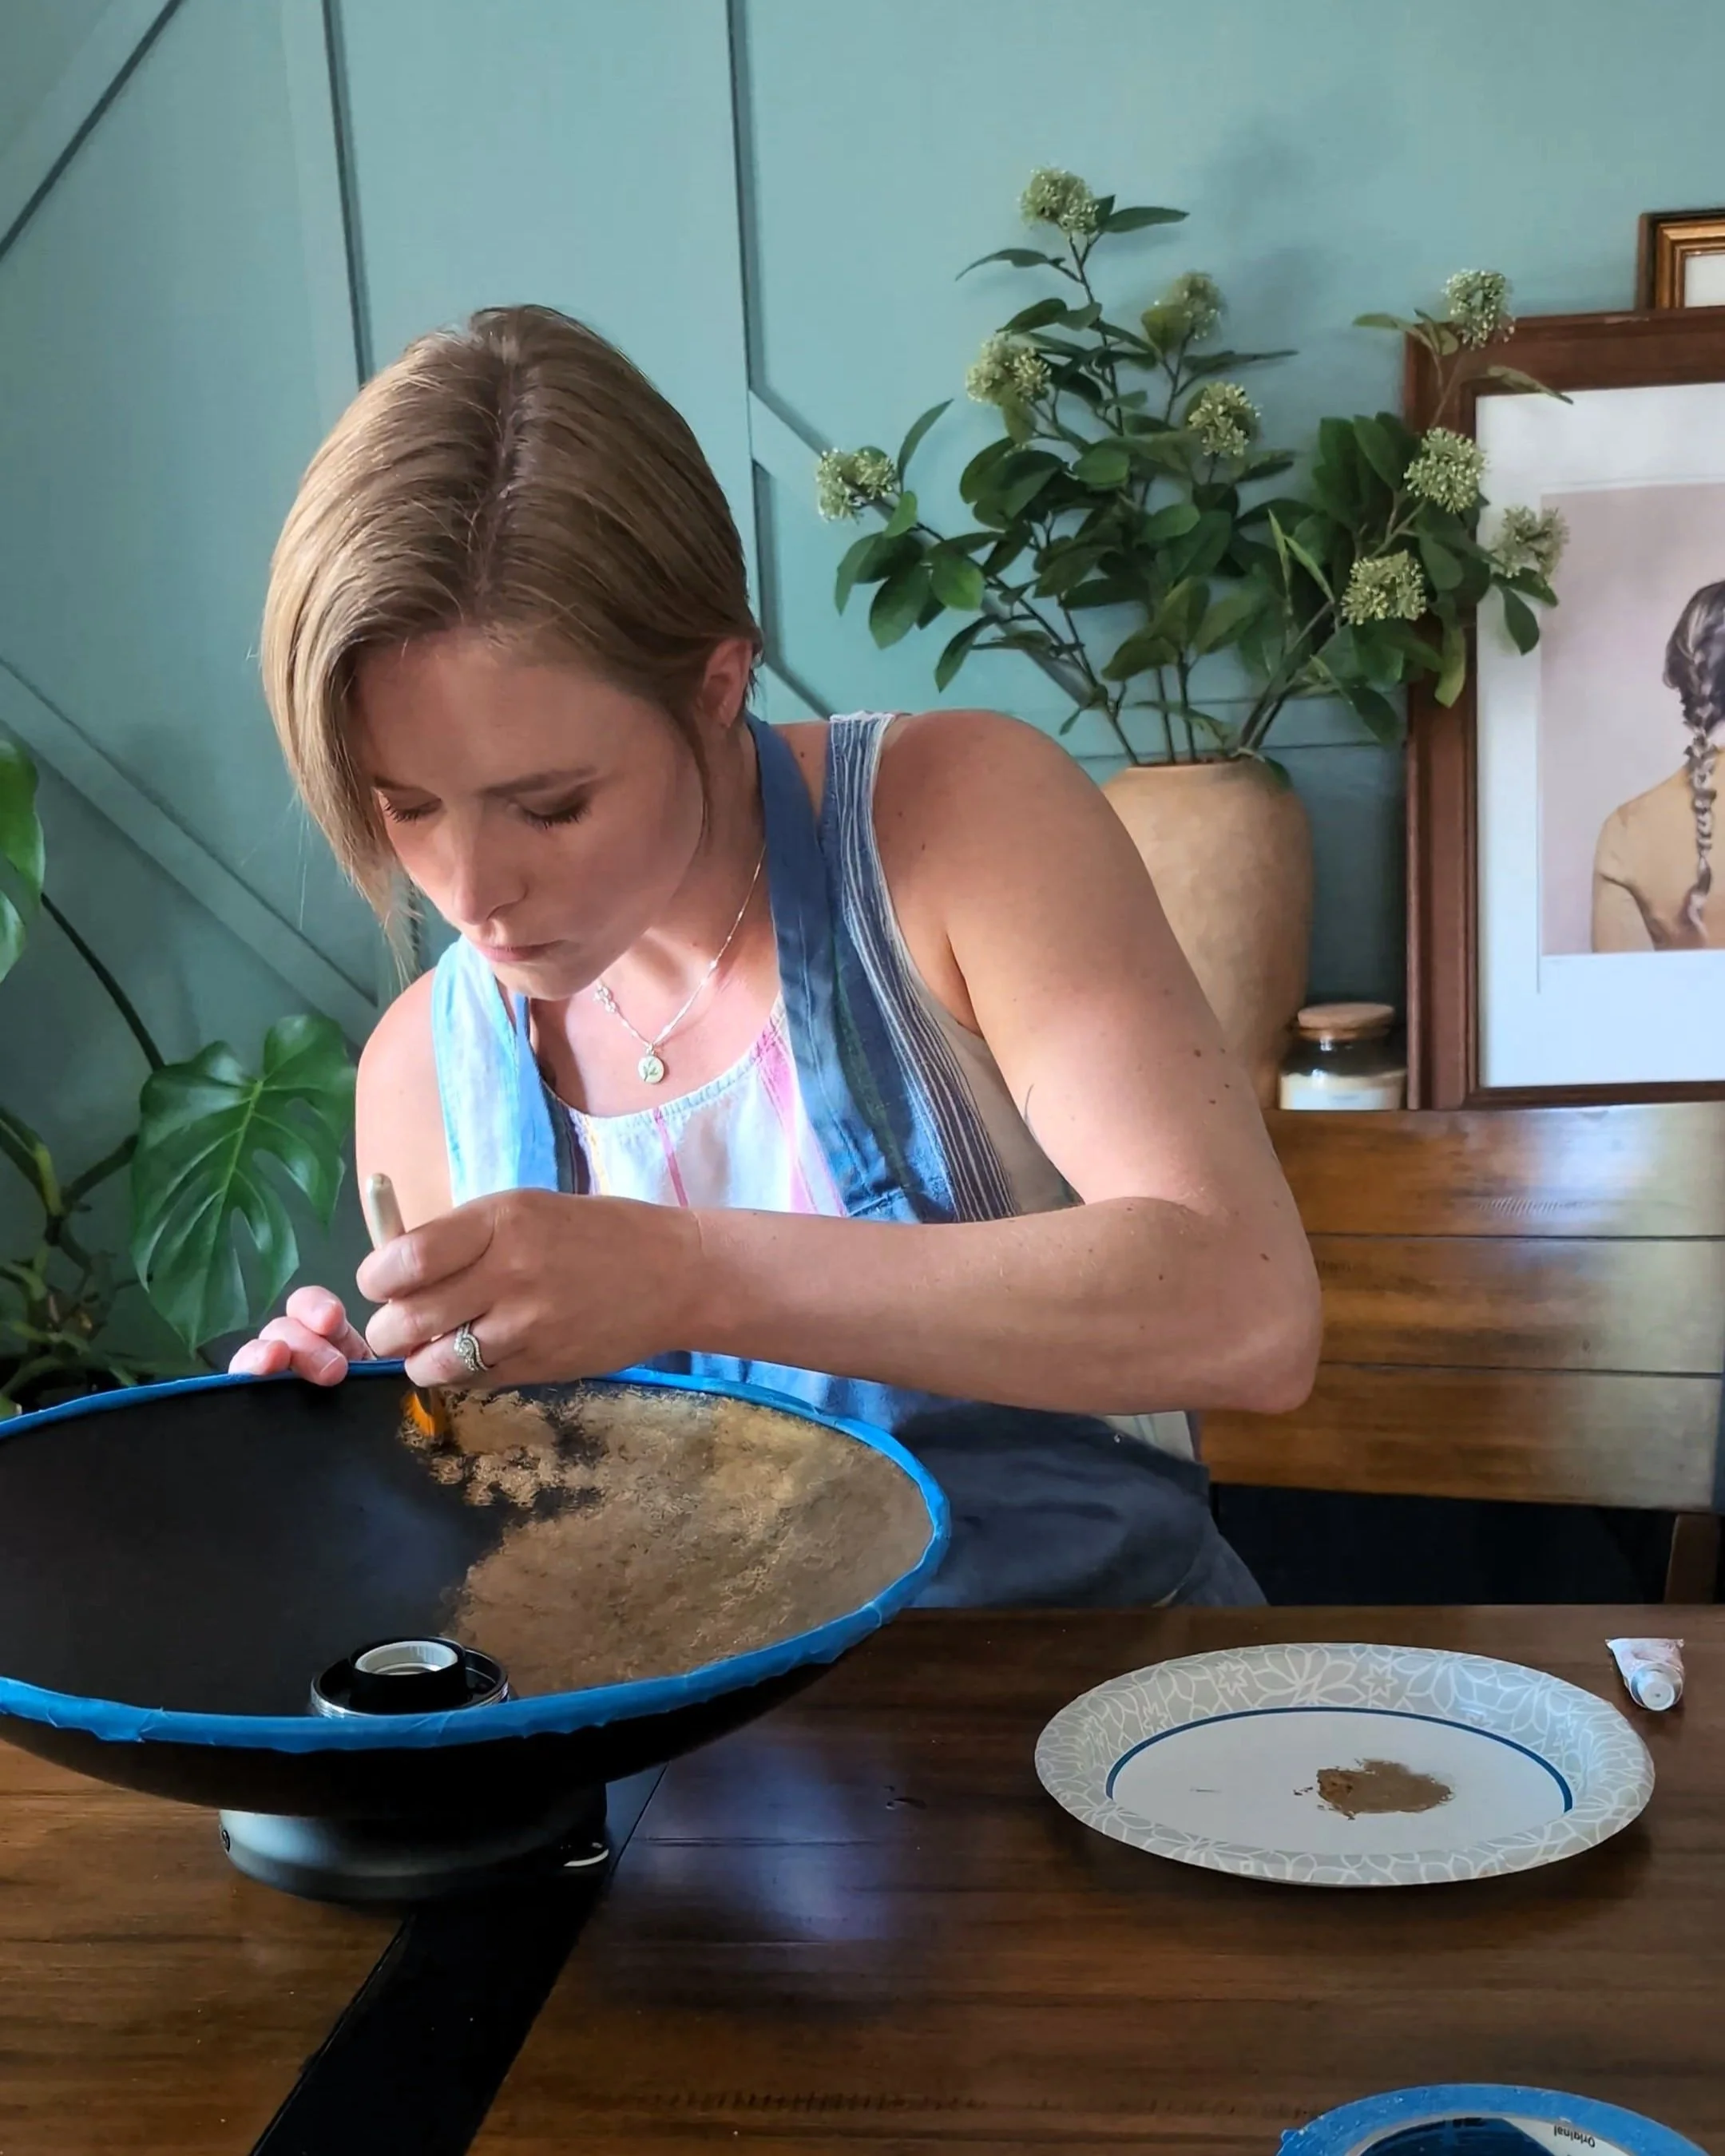
I chose to dab the wax on the interior of the light fixture, which gave it nice movement and subtle texture.
Step 4: Seal It (Optional)
Once everything is dry, you can leave it as-is or top it with a clear spray sealer for extra protection. I skipped the sealer because the inside of the light fixture isn’t exactly a high-touch zone.
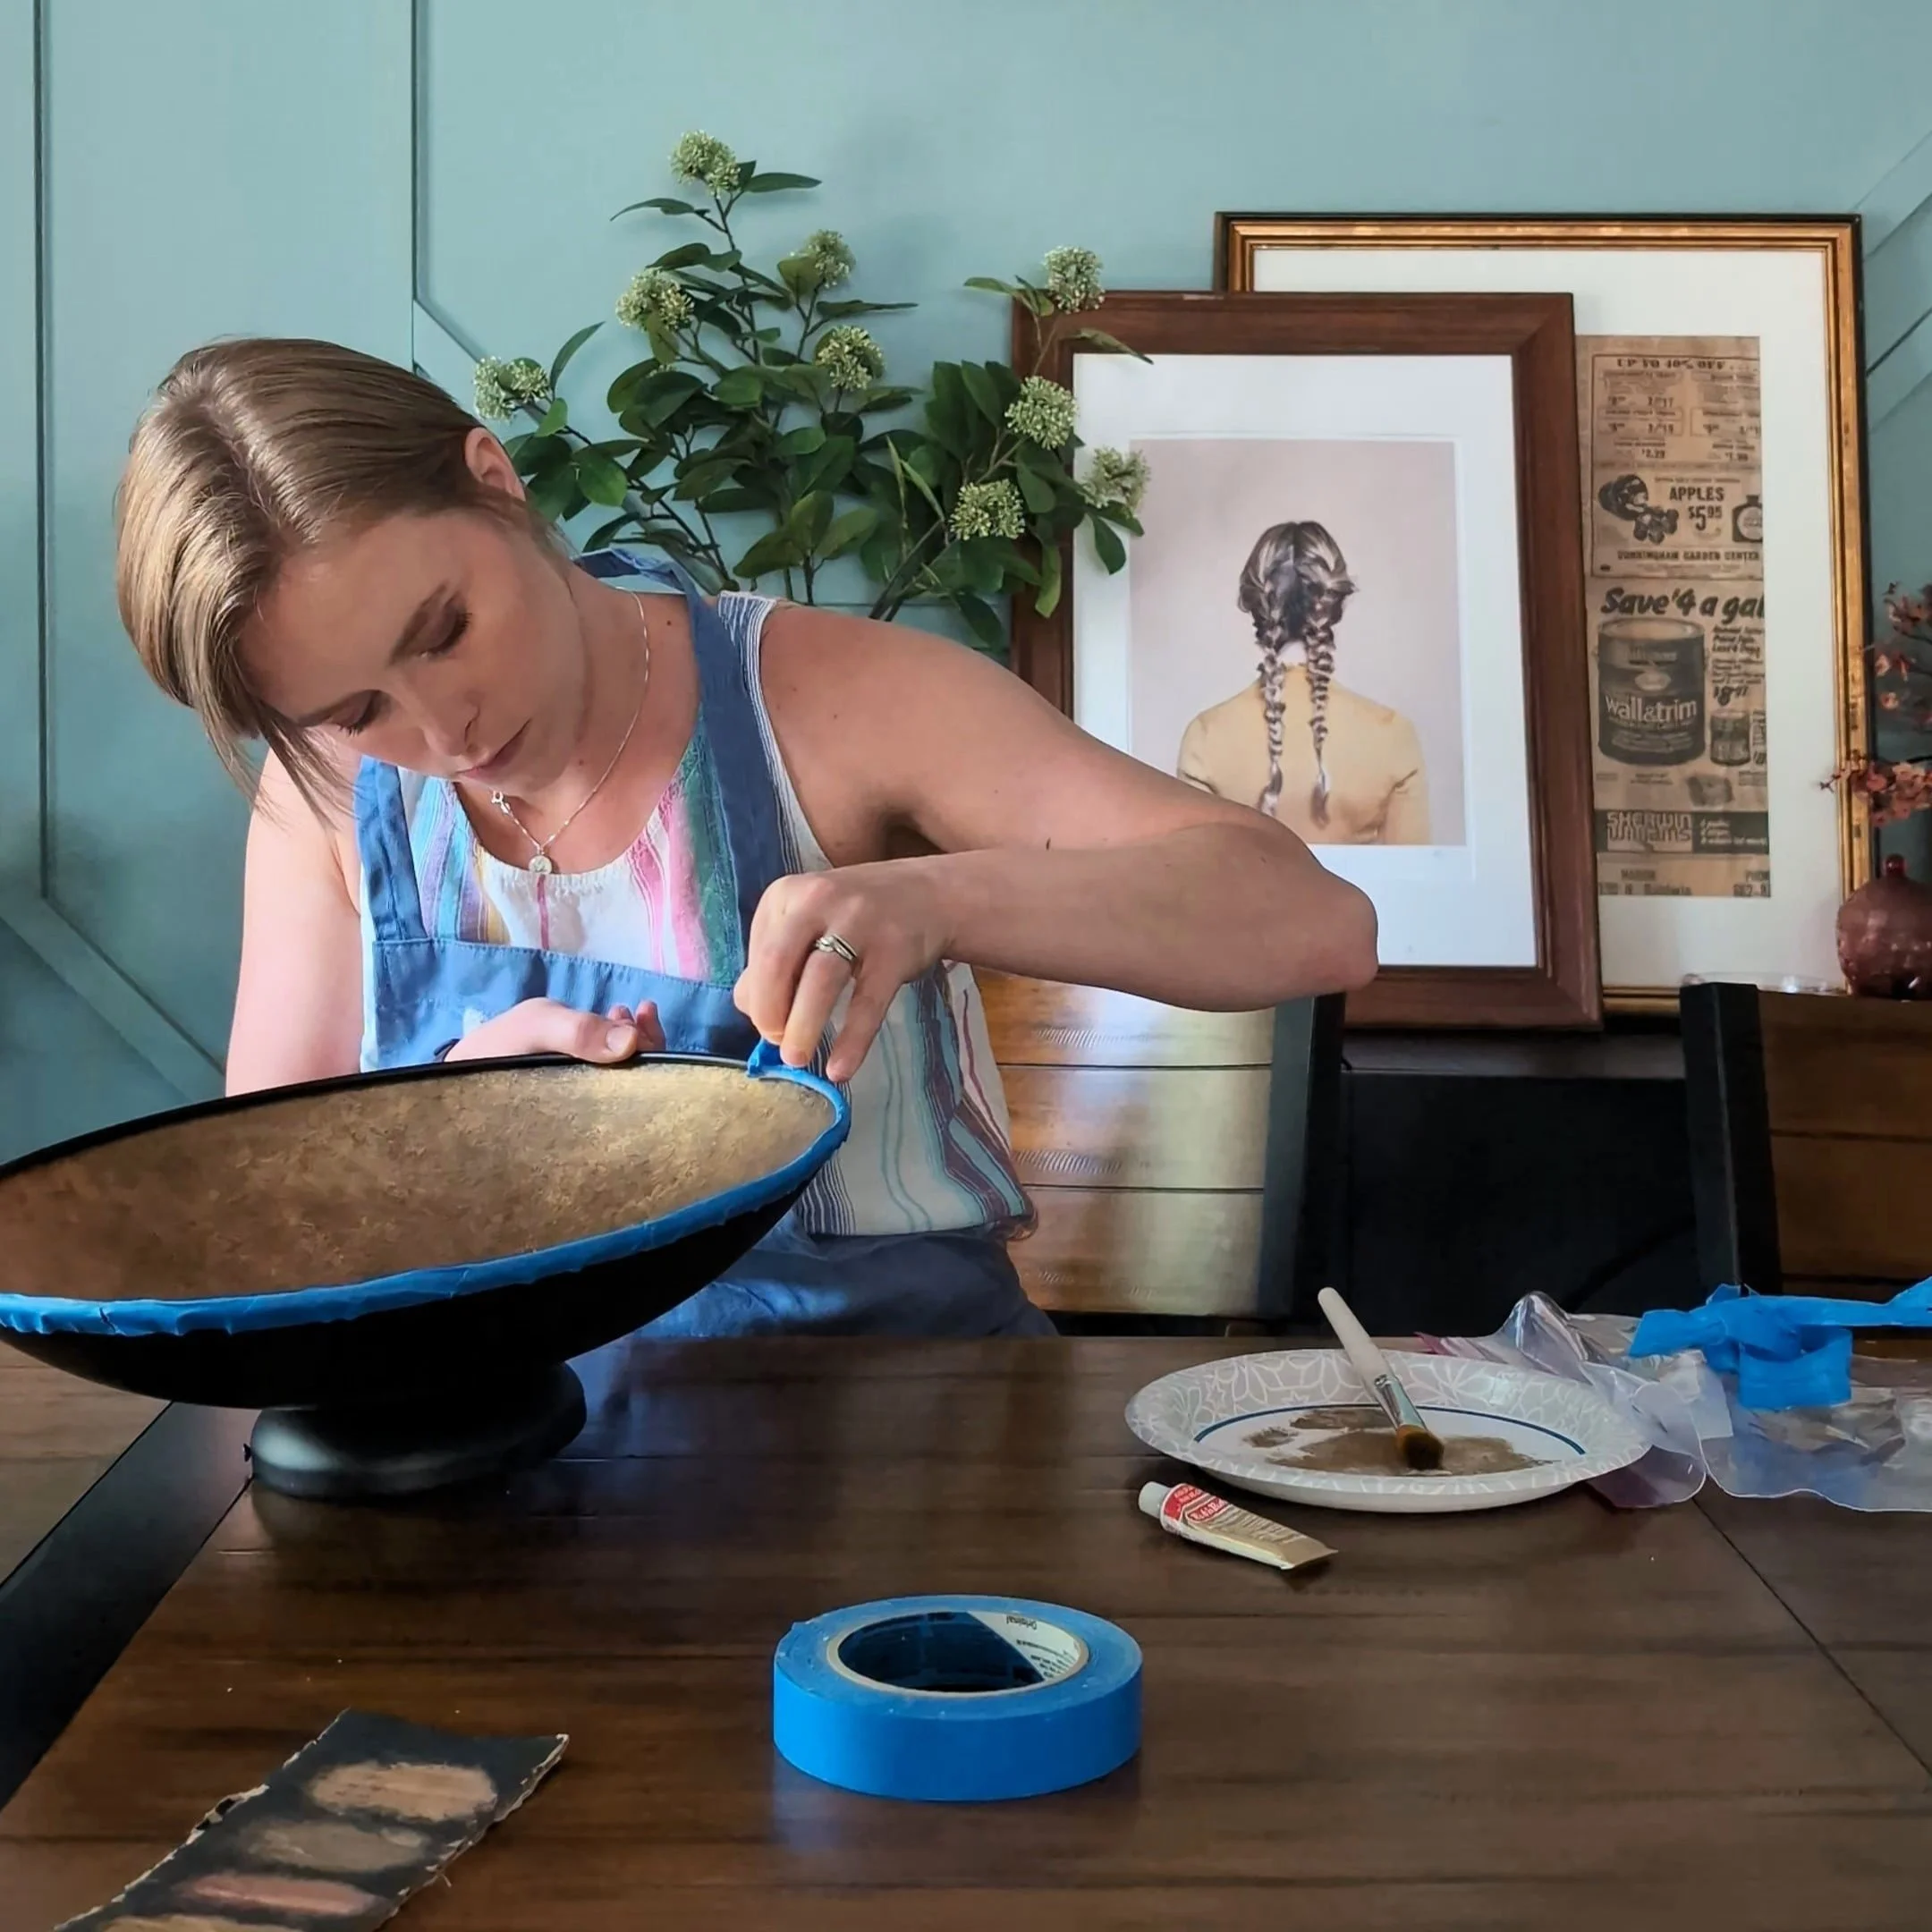
Then I pulled off the painter’s tape, did a little happy dance, and installed the fixture. Okay, Lucius installed the light fixture. Electrical freaks me out!
And That’s a Wrap
It might seem like a small detail in our mudroom project, but adding this light fixture made a huge difference.


Bonus: We finally added the globes to the pendant fixture in the lofted area of the mudroom—the same ones we bought three years ago and have been sitting in my closet in their original styrofoam packaging until now. (Please clap.)
Final Thoughts
This light fixture DIY took less than an hour and barely made a dent in my Rub ‘n Buff tube. I’m now actively looking for other things to gild—mirror frames, candlesticks, doorknobs, one of the kids… (Kidding. Mostly.)
If you're on the fence about trying Rub ‘n Buff, this is your sign. It's a small project with a big payoff—budget-friendly, beginner-friendly, and just the right amount of bougie.
Love the Look?
Here are a few other options that caught my eye:

