
Hallway Updates - Decor and Finishing Touches
Hallway Styling
If you’ve been following along, you know that we’ve been renovating the loft and the drywall was recently finished. Well, during the 3+ weeks it took for the drywall to be completed, I kept myself busy doing as much as I could in the hallway - and I have updates!
In my last post about the hallway, we had recently installed the floors and painted the walls. While those changes were a huge improvement from the unfinished drywall and subfloors we were living with for quite a while, the latest additions to this space really make it something special.

What’s Changed
Here’s what’s been going on…
As an Amazon Associate, I earn from qualifying purchases. This post may contain affiliate links, meaning I receive commissions for purchases made through those links, at no cost to you.
Doors and Trim
First of all, we installed new doors and trim on my office and my kids’ rooms. The doors that were there before definitely took a beating from the previous owners and weren’t worth saving. We also (finally) installed trim around our bedroom doorway. While we were at it, I did the finishing work of caulking and painting everything.
Artwork
Next up - I added some artwork, which made a HUGE impact.
On one wall, I DIYed a textured painting from an old painting I made years ago that just wasn’t doing anything for me anymore. As I was painting over it, naturally, Lucius expressed how much he liked the old one… whoops.

ANYWHO, I think the new painting is so much better. I love how the design creates subtle movement that guides you down the hallway and how nicely it fills the empty space on the wall. And you know what? I made it with joint compound! Here’s the tutorial in case you want to make your own!
If you read my last post about the hallway, I talked about installing a mirror gallery wall where this painting ended up. I originally created this painting as a placeholder while I collected enough mirrors. But looking at the hallway with this painting makes me want to scrap that idea completely and keep it as is. I love it that much!
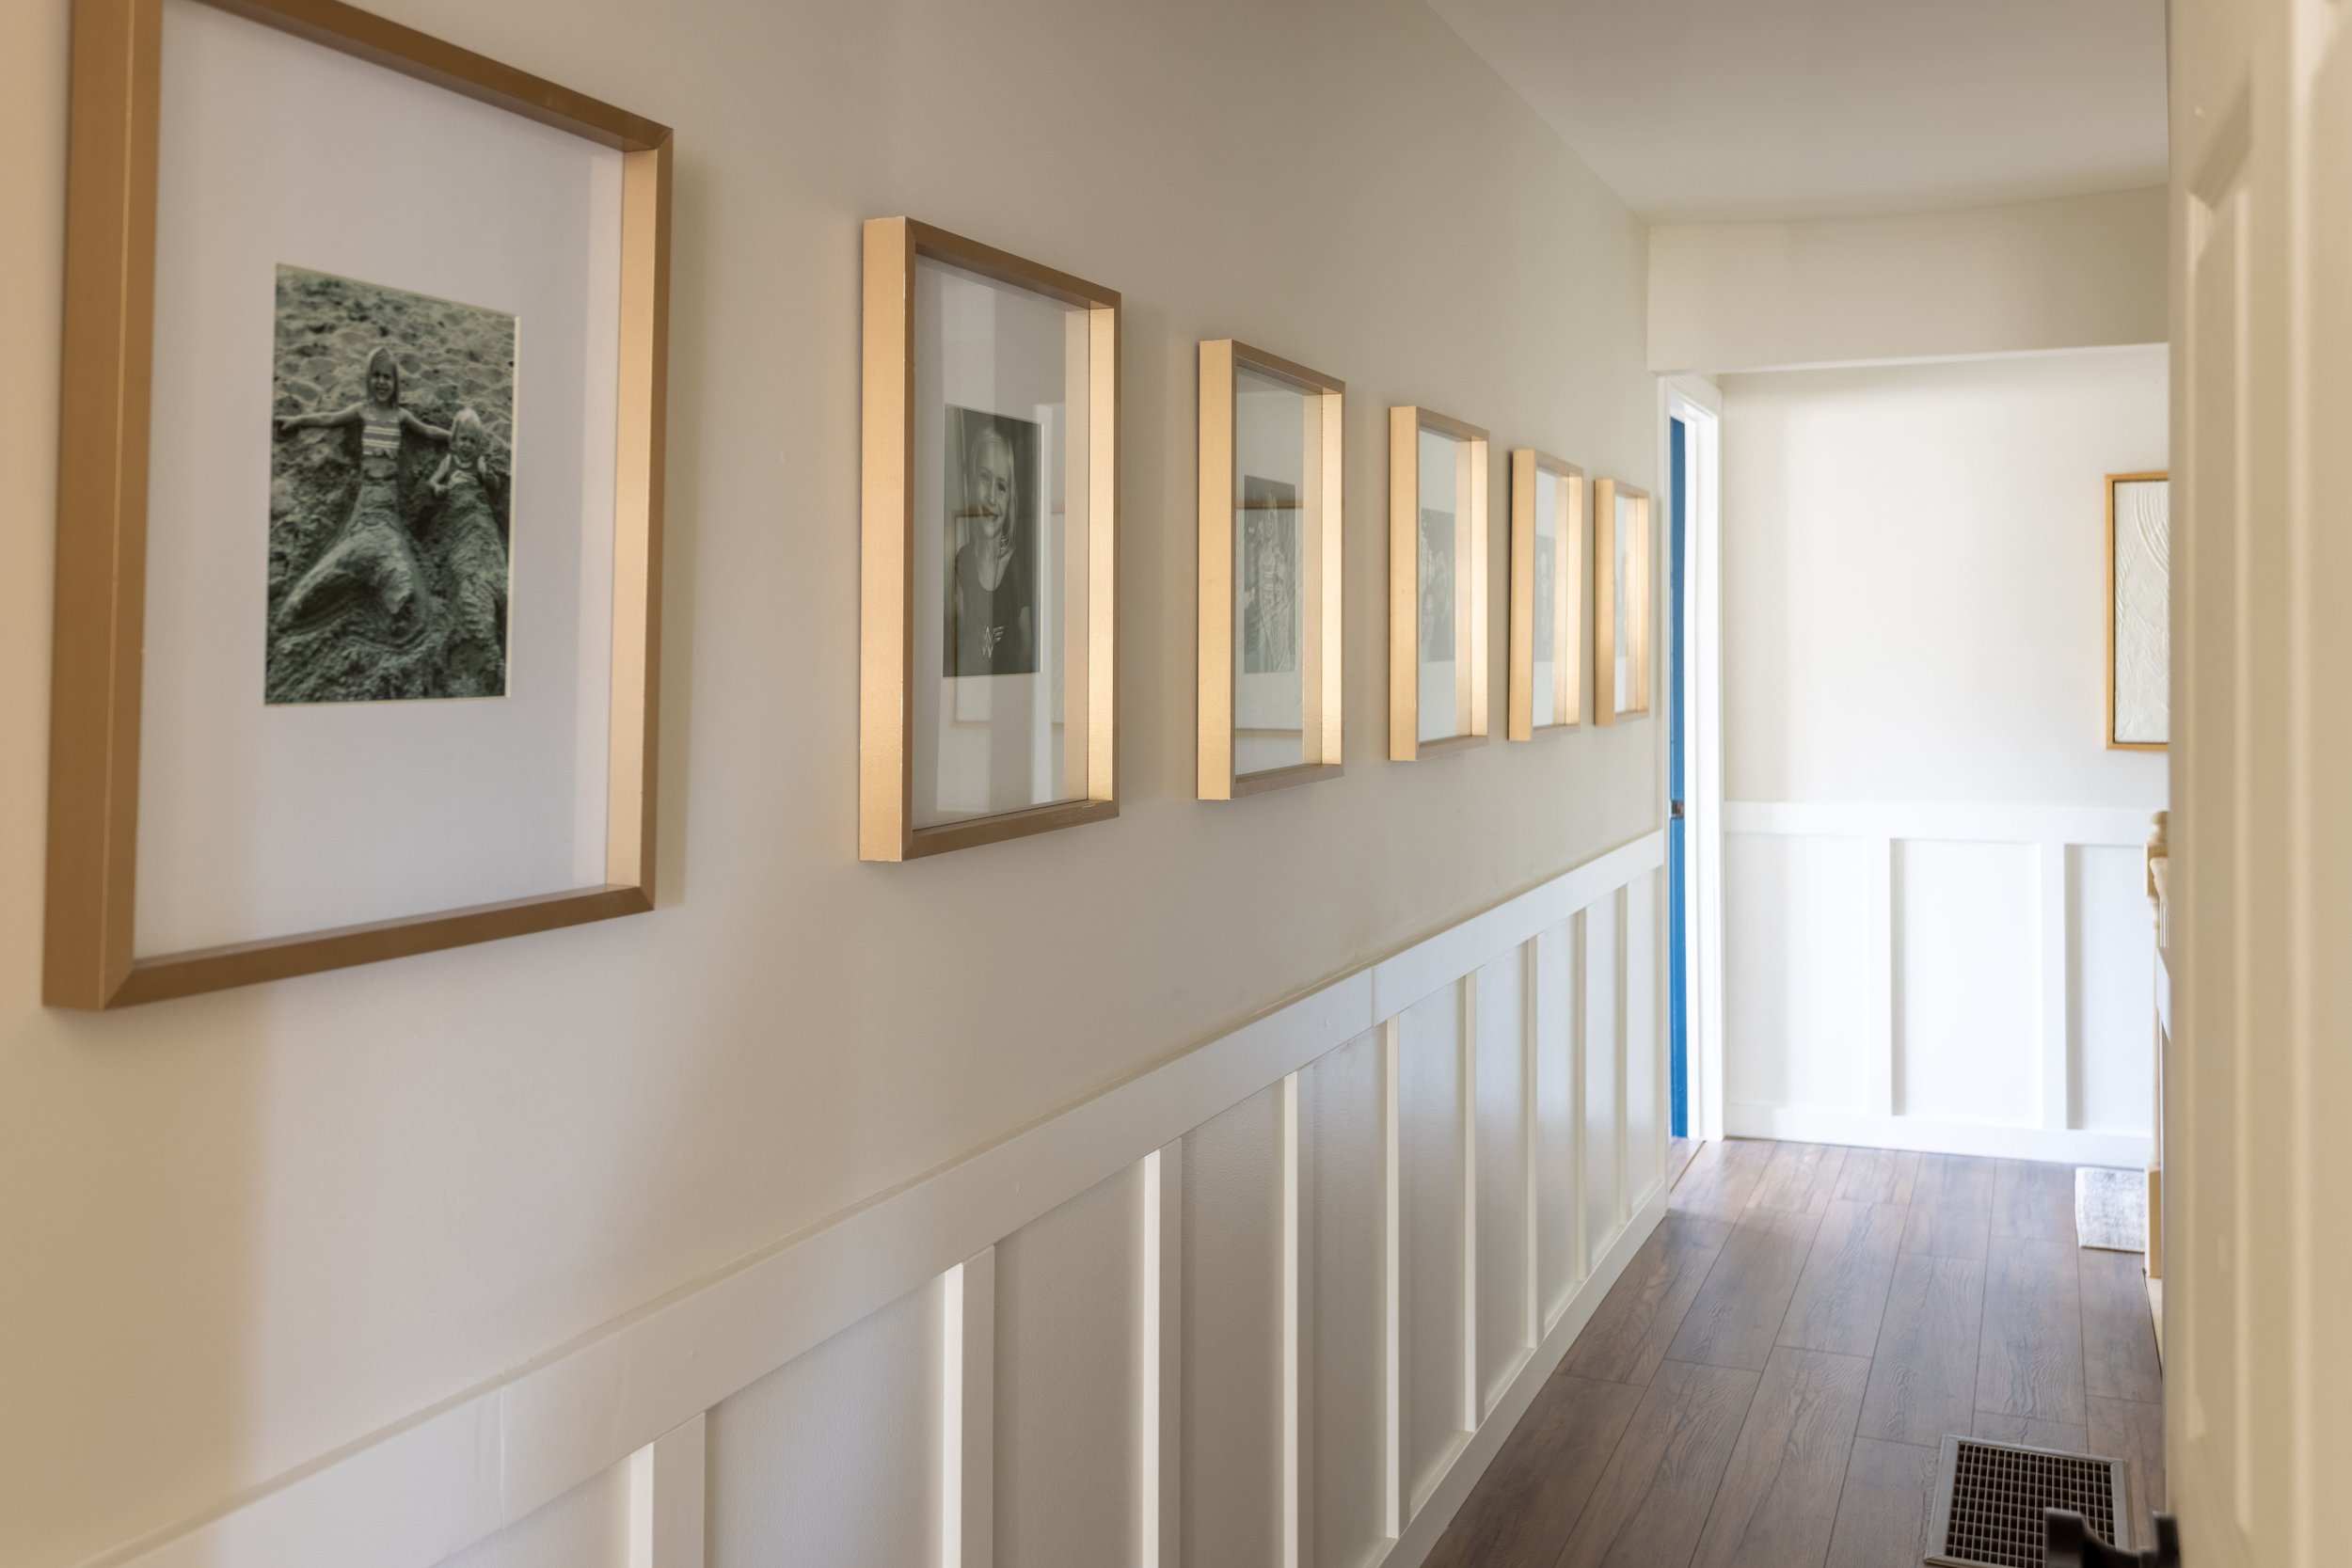
On the other stretch of the hallway, I hung these 16x20 inch picture frames frames all the way down one side. I bought them in the champagne finish (to match my champagne taste? I feel like there’s a pun somewhere in there - I’ll workshop it).
I realized I have almost zero family pictures displayed in my house so I filled them with a few of my favorites from this year. I had the pictures printed in black and white and love how they look against the large mats that come with these frames.

Runner
What really cozied this space up was adding a runner.
I can’t get enough of how bright this hallway is now that we’ve completely changed the layout and added some lighter colors, so I was looking for a lighter-toned runner to keep it that way. I also wanted something that worked with the rugs in the adjacent rooms.
I ended up buying this beautiful 12ft runner and I couldn’t be happier with it.

I was worried it would actually be too light, but the amount of color in it is perfect and the design is just what I was looking for. It’s a combination of reds and blues with a smaller-scale pattern that looks great in person.
Wainscoting! …or is it Board and Batten?
And lastly, I added board and batten! (Wainscoting is slightly different and I recently realized I’ve been using the wrong term up until now. Whoops.)
This was a big deal for me because I did it ALL BY MYSELF, start to finish.
We’ve done tons of DIYs and renovations over the years but when it comes to projects involving power tools and building, there’s always been this voice in my head telling me I couldn’t do it by myself. Oftentimes, on the more power tool-intensive projects, Lucius is either handling them himself or on the sidelines guiding me. But not this time, and I’m so proud!
I’m amazed by how empowering it was to install the board and batten by myself - manning the nail gun, handling the miter saw, and planning how I was going to put it all together - and now I’m actually excited for another, similar type of project. I can’t wait to look back years, or even months from now and see what other projects I’ve been brave enough to tackle.
What’s Next
More Trim
When we replaced the trim around the bedroom door frames, we didn’t replace the trim on the kid’s bathroom. Currently, that doorway is needlessly narrow at a mere 24 inches wide, so when we renovate the bathroom we plan on widening the doorway and shifting it over slightly.
HOWEVER, as much as we’re itching to rip the kid’s bathroom apart, we don’t have a timeline for when that will happen just yet. The more I looked at the old trim next to the new, the less I cared if I had to re-do the trim around that door frame later.
I can’t remember why, but we also didn’t replace the trim on the linen closet when we retrimmed all the other doors. I’ve already removed the trim on the bathroom and linen closet and started reinstalling it around the bathroom door (until I ran out) - I’ll be finishing both of those (all by myself!) soon.

We’re holding off on the trim around the door to the loft because we’ll be replacing that door with a frosted glass door hopefully before too long.
Banister
As I mentioned in my last post about the hallway, I plan on leaving the spindles of the banister white and painting the newel post and handrails gray (to match the treads of the stairs), like this:
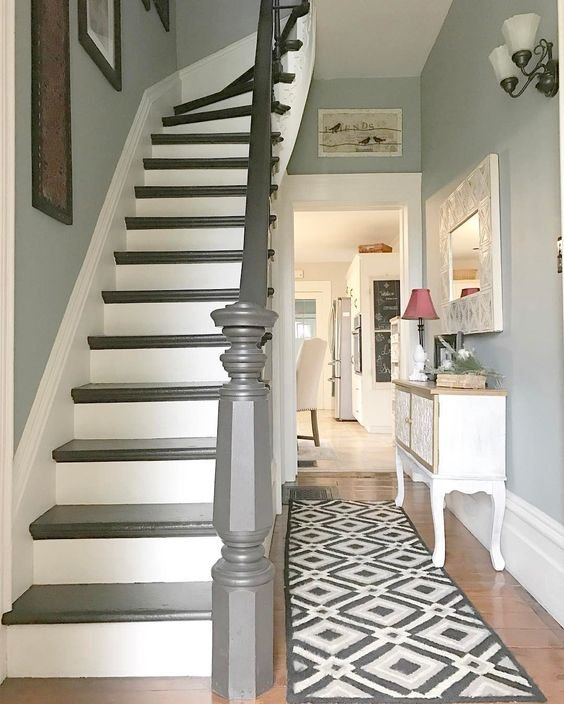
Source Unknown
I can’t shake the idea of painting it all black though… I mean, just look at this staircase!

But black can be a bit scary - not to mention difficult to paint over if I don’t like it. I’ll likely start “safe” with the white and gray and decide from there. I can always paint it black later if I want.
Transition Strips
I feel like we’ve lived without transition strips between the hallway and all the adjacent rooms for so long I don’t notice it anymore. But I bet they’ll be the icing on the cake once they’re installed! On that note…
Finishing Touches
Lucius is going to kill me, but I think I want to swap out the light fixtures in the hallway. I still like the ones we installed, but I’d like something that’s more of a statement. I can’t stop picturing this light in the space.

I think the scale of the fixture above will pop a little more than our current light fixtures and the matte black will tie in nicely with the doorknobs and hinges we’ve installed.
Final Thoughts
It feels a little ridiculous how amped up I am about this hallway, but I truly believe you should love where you live. And I can honestly say I love this hallway now - especially considering the transformation it’s undergone from the dark, uninspired landing it was when we moved in. I can’t lie though, I’m really looking forward to finishing up the last bits and pieces and finally sticking a fork in this project!