Easy Board and Batten Tutorial
How to Install Board and Batten
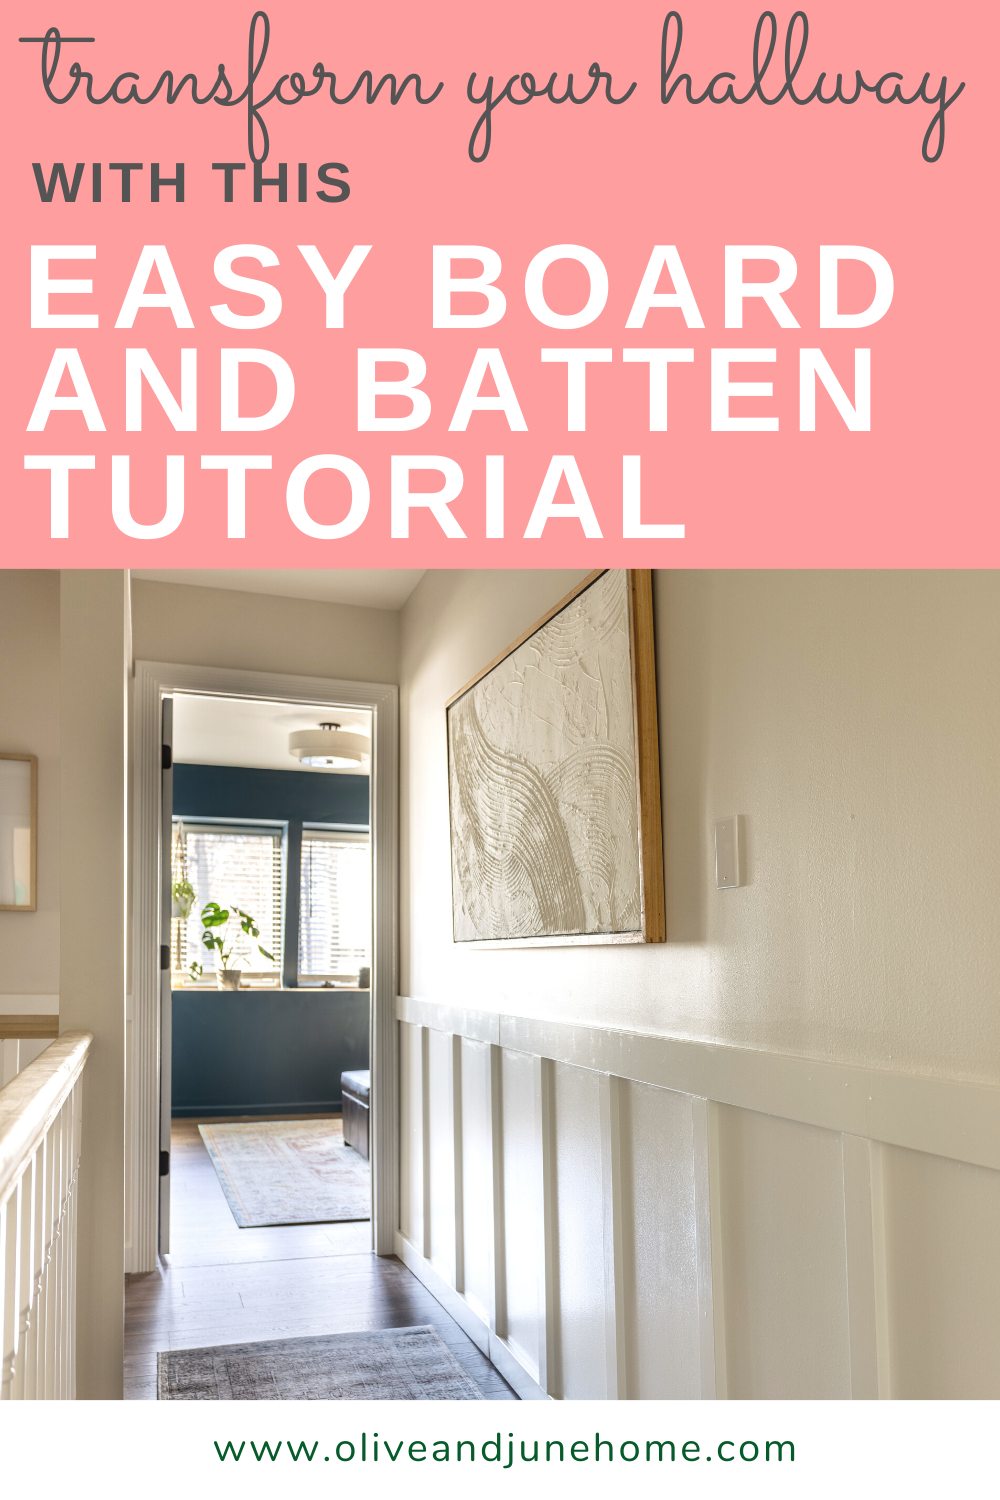
As you may have read in the last update about the hallway, or if you’ve been tuning in on Instagram stories, or if you’re my friend, an acquaintance, or even a simple passerby at the store, you may have heard that I finally installed board and batten in the hallway!

Obviously, I’m very excited about this project and haven’t kept my plans a secret whatsoever. But more than that, I’m downright PROUD because I did it ALL BY MYSELF! Start to finish, it was all me. And I’m ecstatic about the character it gives to the hallway now.

One of my goals for this blog is to encourage other folks (like me) who second-guess themselves and their abilities to step out of their comfort zone and try new things – because that’s exactly what I’m doing here.
I can paint anything and feel comfortable doing it, but building things gives me serious self-doubt and I’m working hard to change that. With each one of my projects, I hope I can show someone else that they, too, can do hard and scary things.
That being said, I admittedly didn’t share the progress of this project on Instagram because I was nervous I’d mess it up! I now realize how silly that was, and even if I had messed it up, it would’ve been entertaining at least!
I definitely learned a few things on the way – including what NOT to do. So, in this post, I’d like to share the steps to install board and batten, so that some other dreamer, like myself, can find the courage to do the same without making the mistakes I did. Let’s learn together!

First of all, as I mentioned in this post, board and batten isn’t the same thing as wainscoting - who knew!? I didn’t!
Second, you can make board and batten as elaborate as you’d like by adding additional molding, but Lucius and I are very drawn towards clean lines and simple shapes. Therefore, my board and batten is about as simple as it can get – perfect for a novice! Here’s what I used:
Materials
As an Amazon Associate, I earn from qualifying purchases. This post may contain affiliate links, meaning I receive commissions for purchases made through those links, at no cost to you.
- Primed 1x4 MDF (for the baseboard and top rail) and 1x3 MDF (for the battens)
- Note: MDF is an excellent choice for this project it comes primed, it’s cheaper than wood, there’s no concern about warped boards, and you don’t have to sand it first. Highly recommend!
- Tape measure
- Sandpaper
- Wood filler
- Paintable caulk
- Brad nailer
- 1 1/4 Brad nails
- Level - I used a standard level and a laser level
- Miter saw
- Safety goggles
- Primer
- Paint
- Paintbrush
- Roller
One quick note: I didn’t use any “boards” (the flat panel that traditionally attaches to the wall behind the battens). Since our walls are smooth, I simply used the wall as my board.
Step 1 – Planning
I have to be honest, I looked at a BUNCH of other tutorials trying to figure out how to do the math to plan my board and batten. It made my head spin and made me fall asleep simultaneously (math has NEVER been my thing). So, I did it the Erika way – with tape and graph paper.
If math is your jam, feel free to use a board and batten spacing tutorial like this one from Remodelaholic.
I started by leaning some scrap wood against the wall at varying intervals. Then I loosely applied tape to get a general idea of how tall to make my overall design and how far apart I wanted the boards.

Once I felt like I had a good idea of the spacing, I drew it out on my graph paper to figure out the exact dimensions. This helped me determine how to begin and end the design at each stopping point and calculate how much wood I needed. I decided to space my battens approximately 15 inches apart to achieve the look I was going for.

I got lucky and 15 inches between each batten worked for all the walls I applied board and batten to. BUT, that won’t always be the case. If you need to adjust the spacing of your battens based on each wall, that’s okay! No one will notice if the spacing is an inch or two different from wall to wall.
What people WILL notice, is if the spacing between your battens and door frames or corners is too small or too big compared to the spacing between the surrounding battens, so keep that in mind.
Once I had my measurements, I used a laser level to officially mark where my top rail would go. I tried to stay close to the height of the banister so visually they weren’t competing, which ended up being a weird 37.5ish inches, but hey, it works.


Step 2 – Install Baseboards and Top Rail
To ensure my battens terminated seamlessly into the baseboard, I used 1x4 MDF, rather than a traditional baseboard. Luckily, I was starting with a clean slate and the baseboards were already removed. Otherwise, I would have removed them. But there are other options if you don’t want to remove your baseboards.
One thing to note, I purposely didn’t glue any of my boards on the off-chance that I, or someone else down the line, want to remove them without entirely ruining the drywall. The nails, caulk, and paint should hold them in place just fine. But for some extra assistance, you can angle your nail gun in alternating directions as you secure them to the wall, and/or try to nail into studs.
After the new baseboards were installed, I nailed in the top rail, being sure to level along the way.

It’s common to add a 1x2 board to the top rail, but I didn’t love how it looked when I held it up in my hallway, so I left it off.
Step 3 – Install Battens
This part is exciting because you finally get to see your design come to life. Plus, it goes pretty fast!
To start, since I knew I wanted 15 inches between each of my battens, I cut a scrap piece of wood to 15 inches. You’ll see this come into play in a minute.
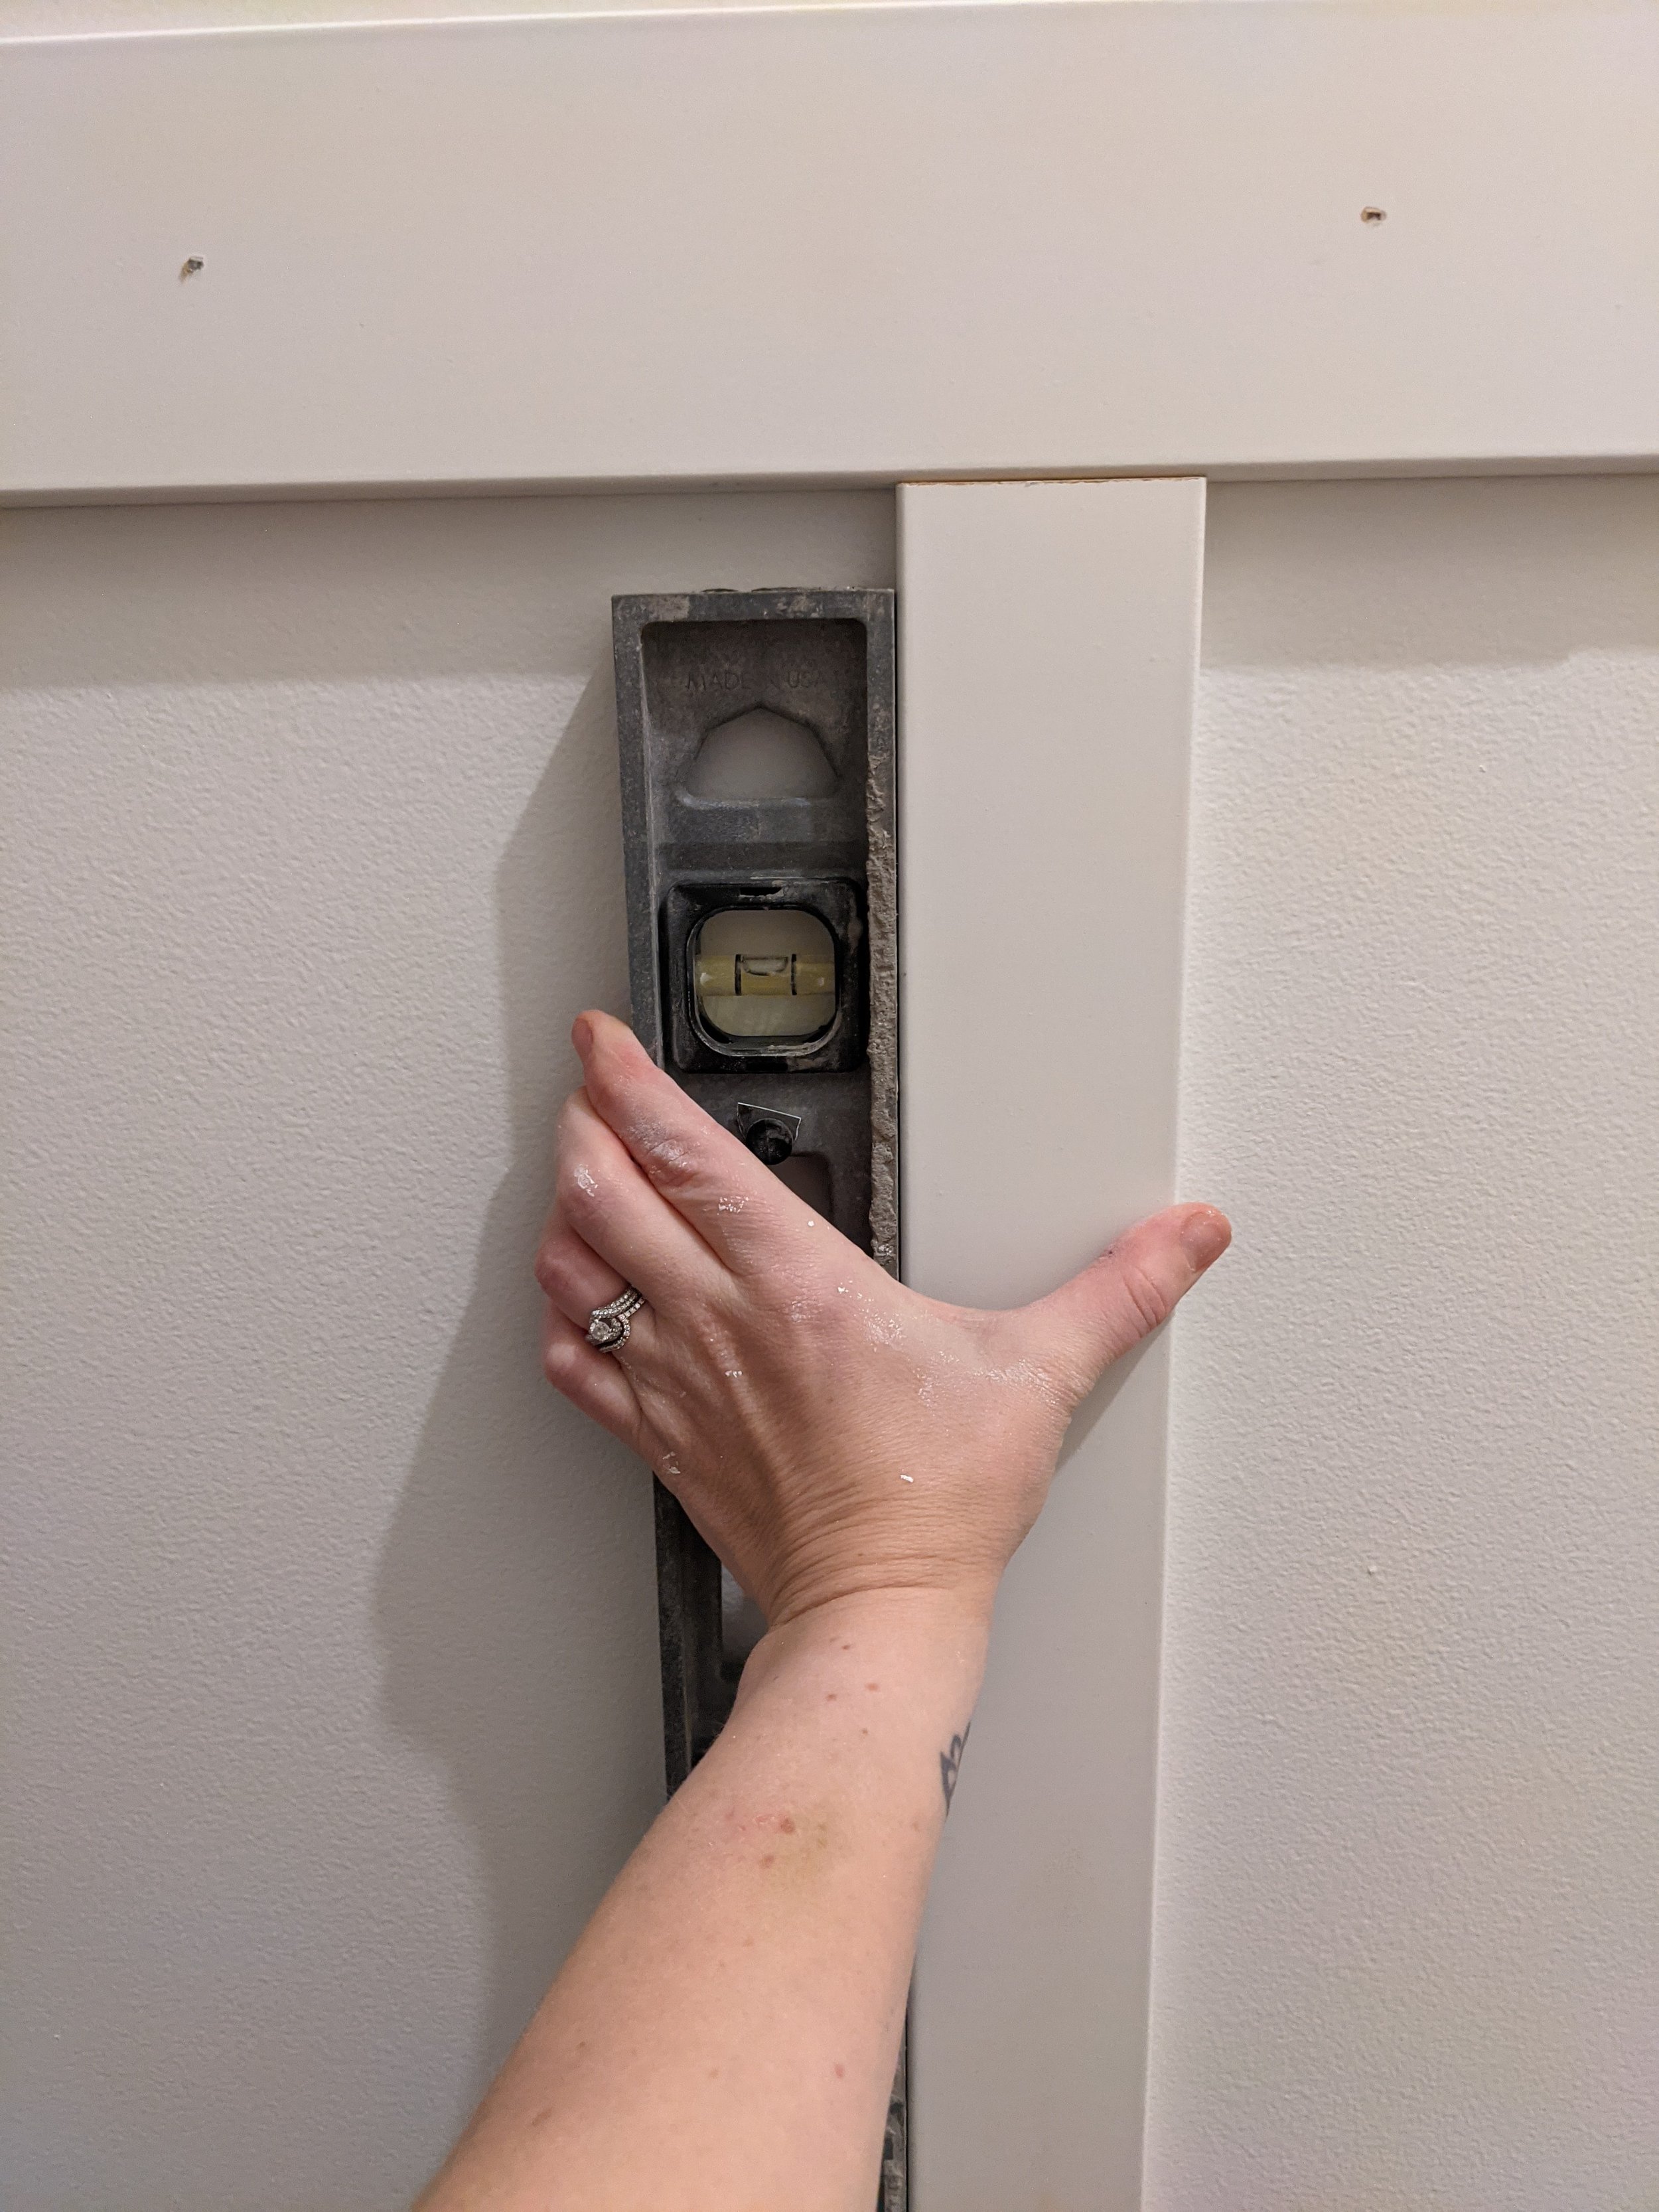
Before you go crazy cutting all your battens to the same length, STOP!
No matter how much you’ve leveled, your baseboards and top rail aren’t completely level. I promise. I highly recommend only cutting a couple of battens at a time and measuring along the way.
Oh, and that scrap piece of wood that you cut? Place it on your baseboard between the batten you just installed and the next batten to be installed.

Make sure your new batten is level and nail it in!
Step 4 – Finishing Work
This is, apparently, where I got in the groove and forgot to take many pictures - but everything in this step is pretty straightforward.
Once all your battens are installed, it’s time to fill in nail holes and caulk!
If you have any nails that aren’t completely flush with your boards, tap them in with a hammer first. Then, using wood putty, fill in your nail holes. Once dry, sand them down and slap on a little bit of primer.
Next, caulk all gaps and seams and smooth them out with your finger.
Now you can paint! I used the same trim color used throughout my house - Pure White by Sherwin Williams in semi-gloss - but you can paint it any color you want! I recommend cutting in around the battens with a brush, then using a small roller to paint the flat surfaces.
And that’s it!

Final Thoughts
With every enhancement to this hallway, it’s felt more and more inviting, but the board and batten truly is the icing on the cake. It gave the hallway the something it was lacking and this project gave me the confidence to tackle more new and scary adventures. I’d call that a win-win!
If you found this post helpful - please consider sharing it with others!