

Finding Thrifted Frames For Your Gallery Wall
In my last post, I shared how to curate art for your gallery wall. But what good is all that art if there aren't any frames to ground them? That’s why in this post, I'm covering how I gathered and oftentimes altered, frames for my gallery wall to create the overall look I was going for - without spending a fortune. There may even be a special trick that makes hanging artwork a breeze at the end of this post!
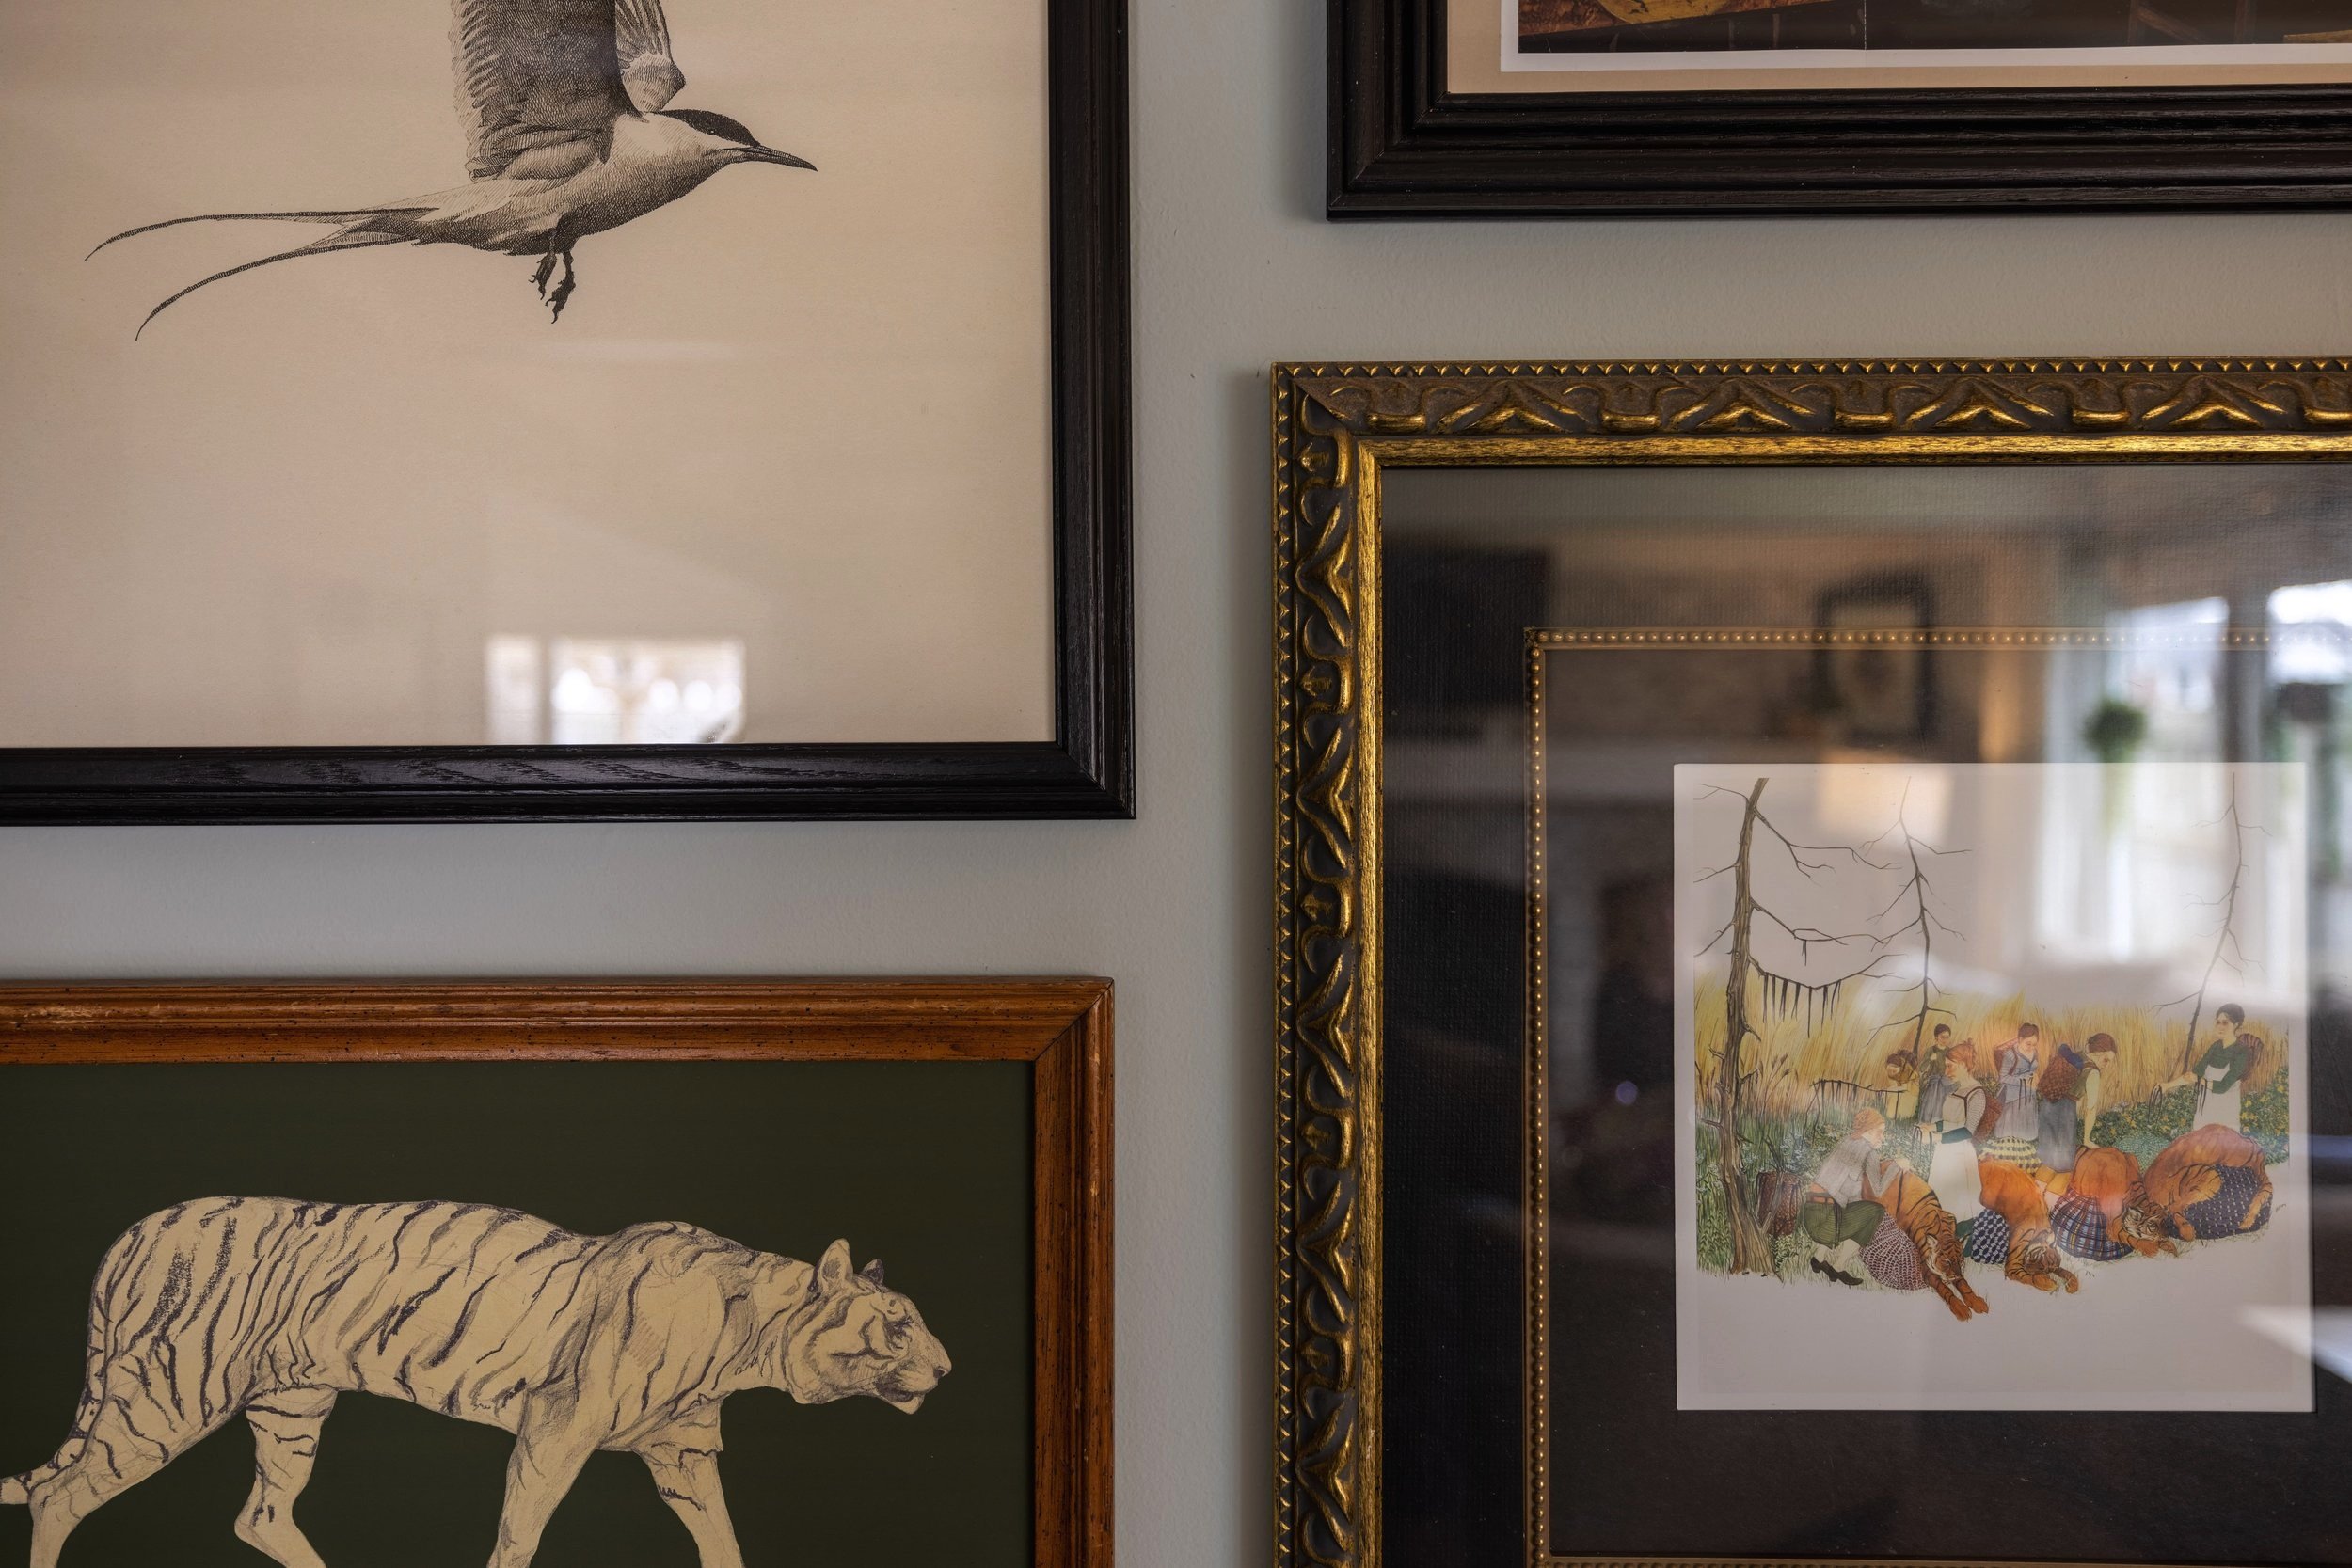
Eclectic Gallery Wall
In my last post, I shared how to curate art for your gallery wall. But what good is all that art if there aren't any frames to ground them? That’s why in this post, I'm covering how I gathered and oftentimes altered frames for my eclectic gallery wall to create the overall look I was going for - without spending a fortune. There may even be a special trick that makes hanging artwork a breeze at the end of this post!
As an Amazon Associate, I earn from qualifying purchases. This post may contain affiliate links, meaning I receive commissions for purchases made through those links at no cost to you.
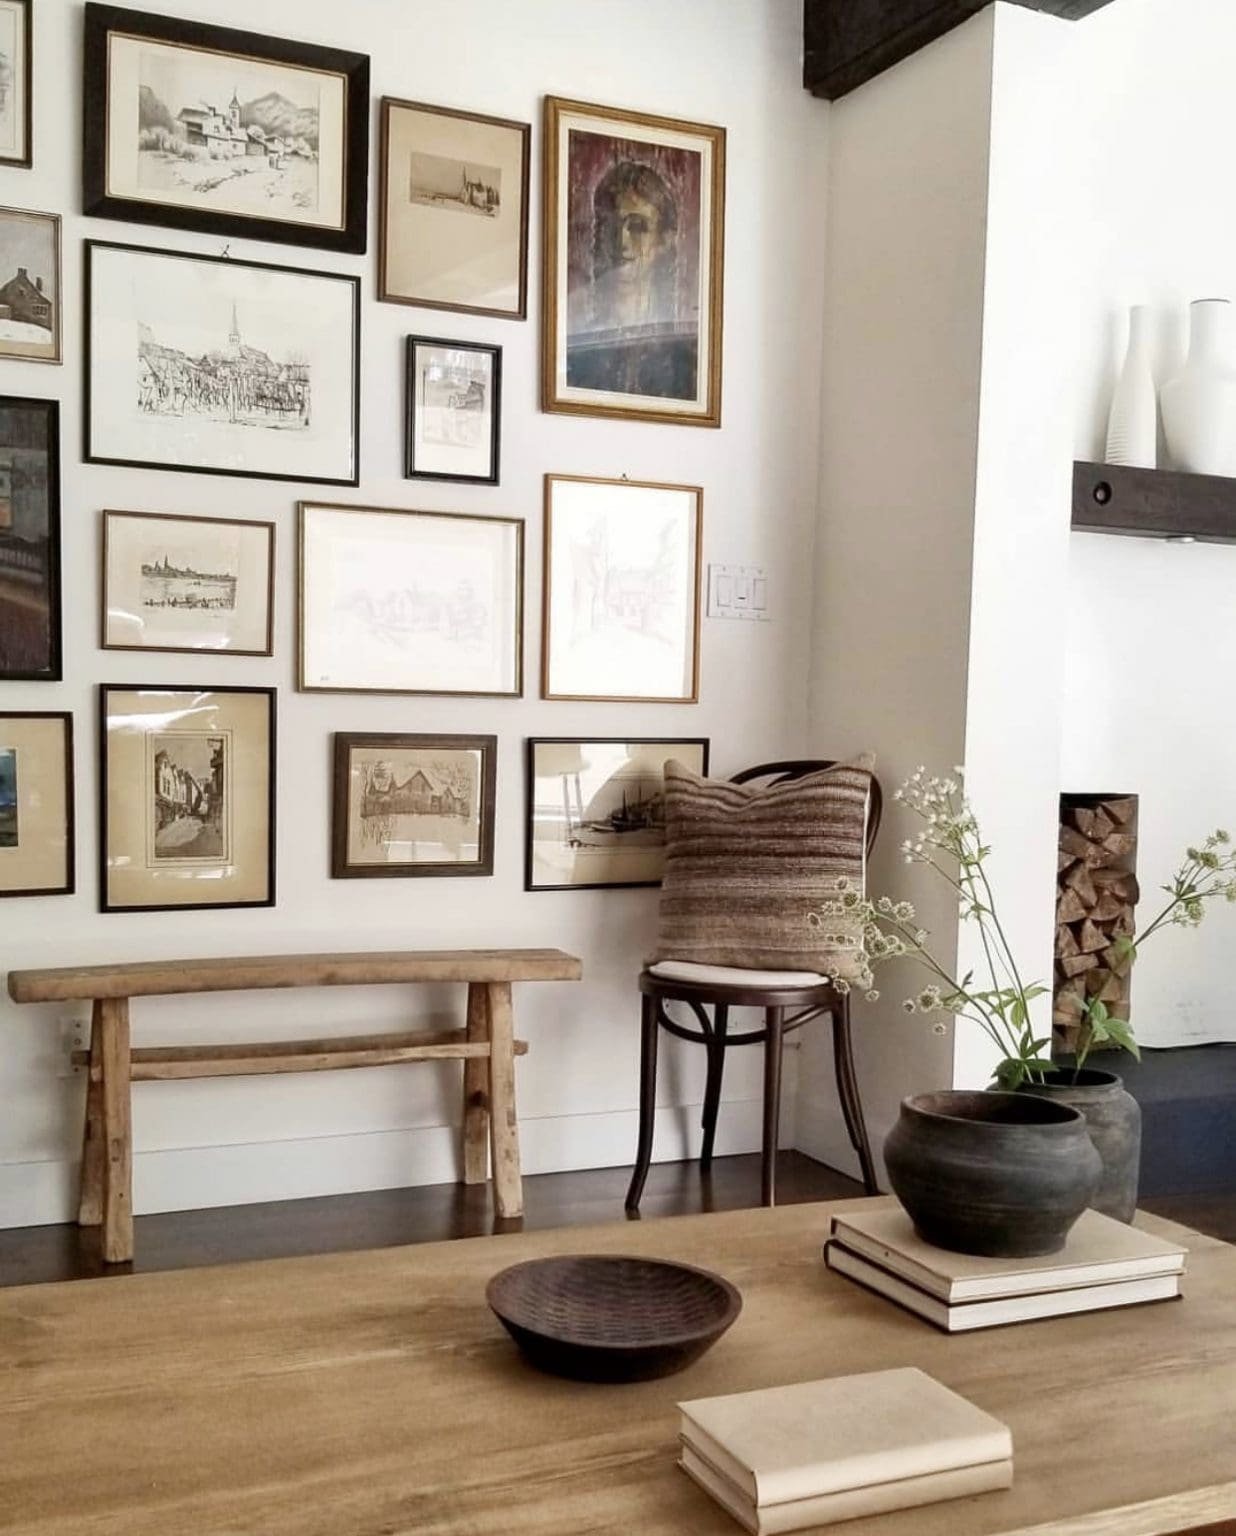
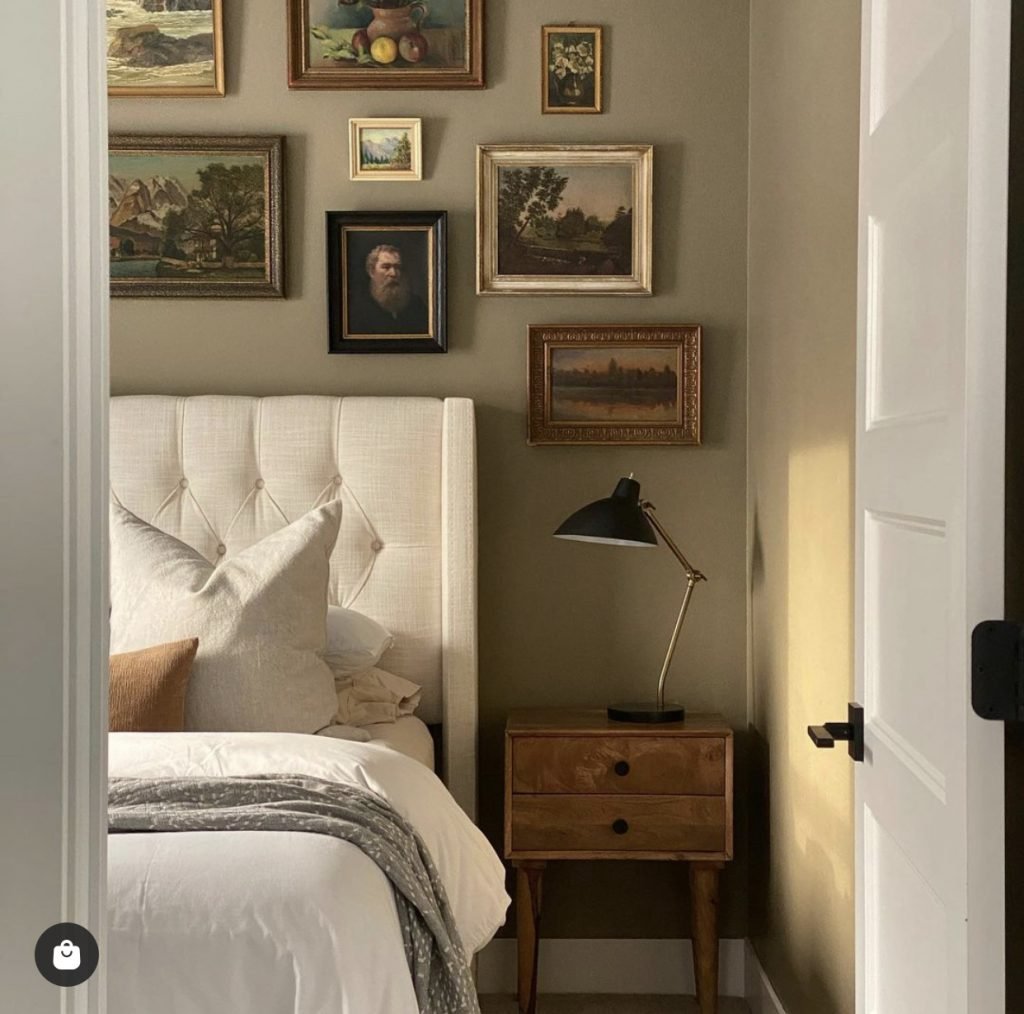
As I was gathering inspiration for my gallery wall, I noticed I was pinning a lot of images with an eclectic collection of frames. This was a big separation from my old gallery wall, which used the same type of frame throughout and hung in a symmetrical grid pattern. Neither option is right or wrong, they're just different.
For my new design, I needed all new picture frames in a variety of shapes, sizes, and colors, so I started researching options online. I quickly ran into two issues:
Option overwhelm. There were just too many to choose from! I didn't know where to start or what sizes to pick.
$$$. Frames can be expensive, especially if you're buying lots of them like I was.
Just like there's no correct way to hang a gallery wall, there's also no correct way to obtain frames for a gallery wall. You can certainly buy new frames if you're willing to spend the money and know what you're looking for. I found that thrifting frames was actually easier for me because of the limited choices - plus, the cost factor was a big bonus.
I decided to check out one of my favorite thrift stores in town, and BOY did I hit the jackpot. Here are the tips I used while gathering thrifted frames for my gallery wall.
Know your vision
My style has historically been pretty streamlined and modern, so my knee-jerk reaction was to grab frames that were as such. I had to stop myself and remember my overall vision for my gallery wall.
I reminded myself that I WASN’T looking for simple, streamlined frames. I needed frames with some oomph. I needed wood detailing, brass finishes, and a variety of sizes. I NEEDED DRAMA!
Okay, that’s a little… dramatic… but you get the point.
Keep an open mind
When you’re thrifting, it’s unlikely you’ll find exactly what you’re looking for. It’s important to keep an open mind and consider modifying items to fit what you need. Here are some tips and examples:
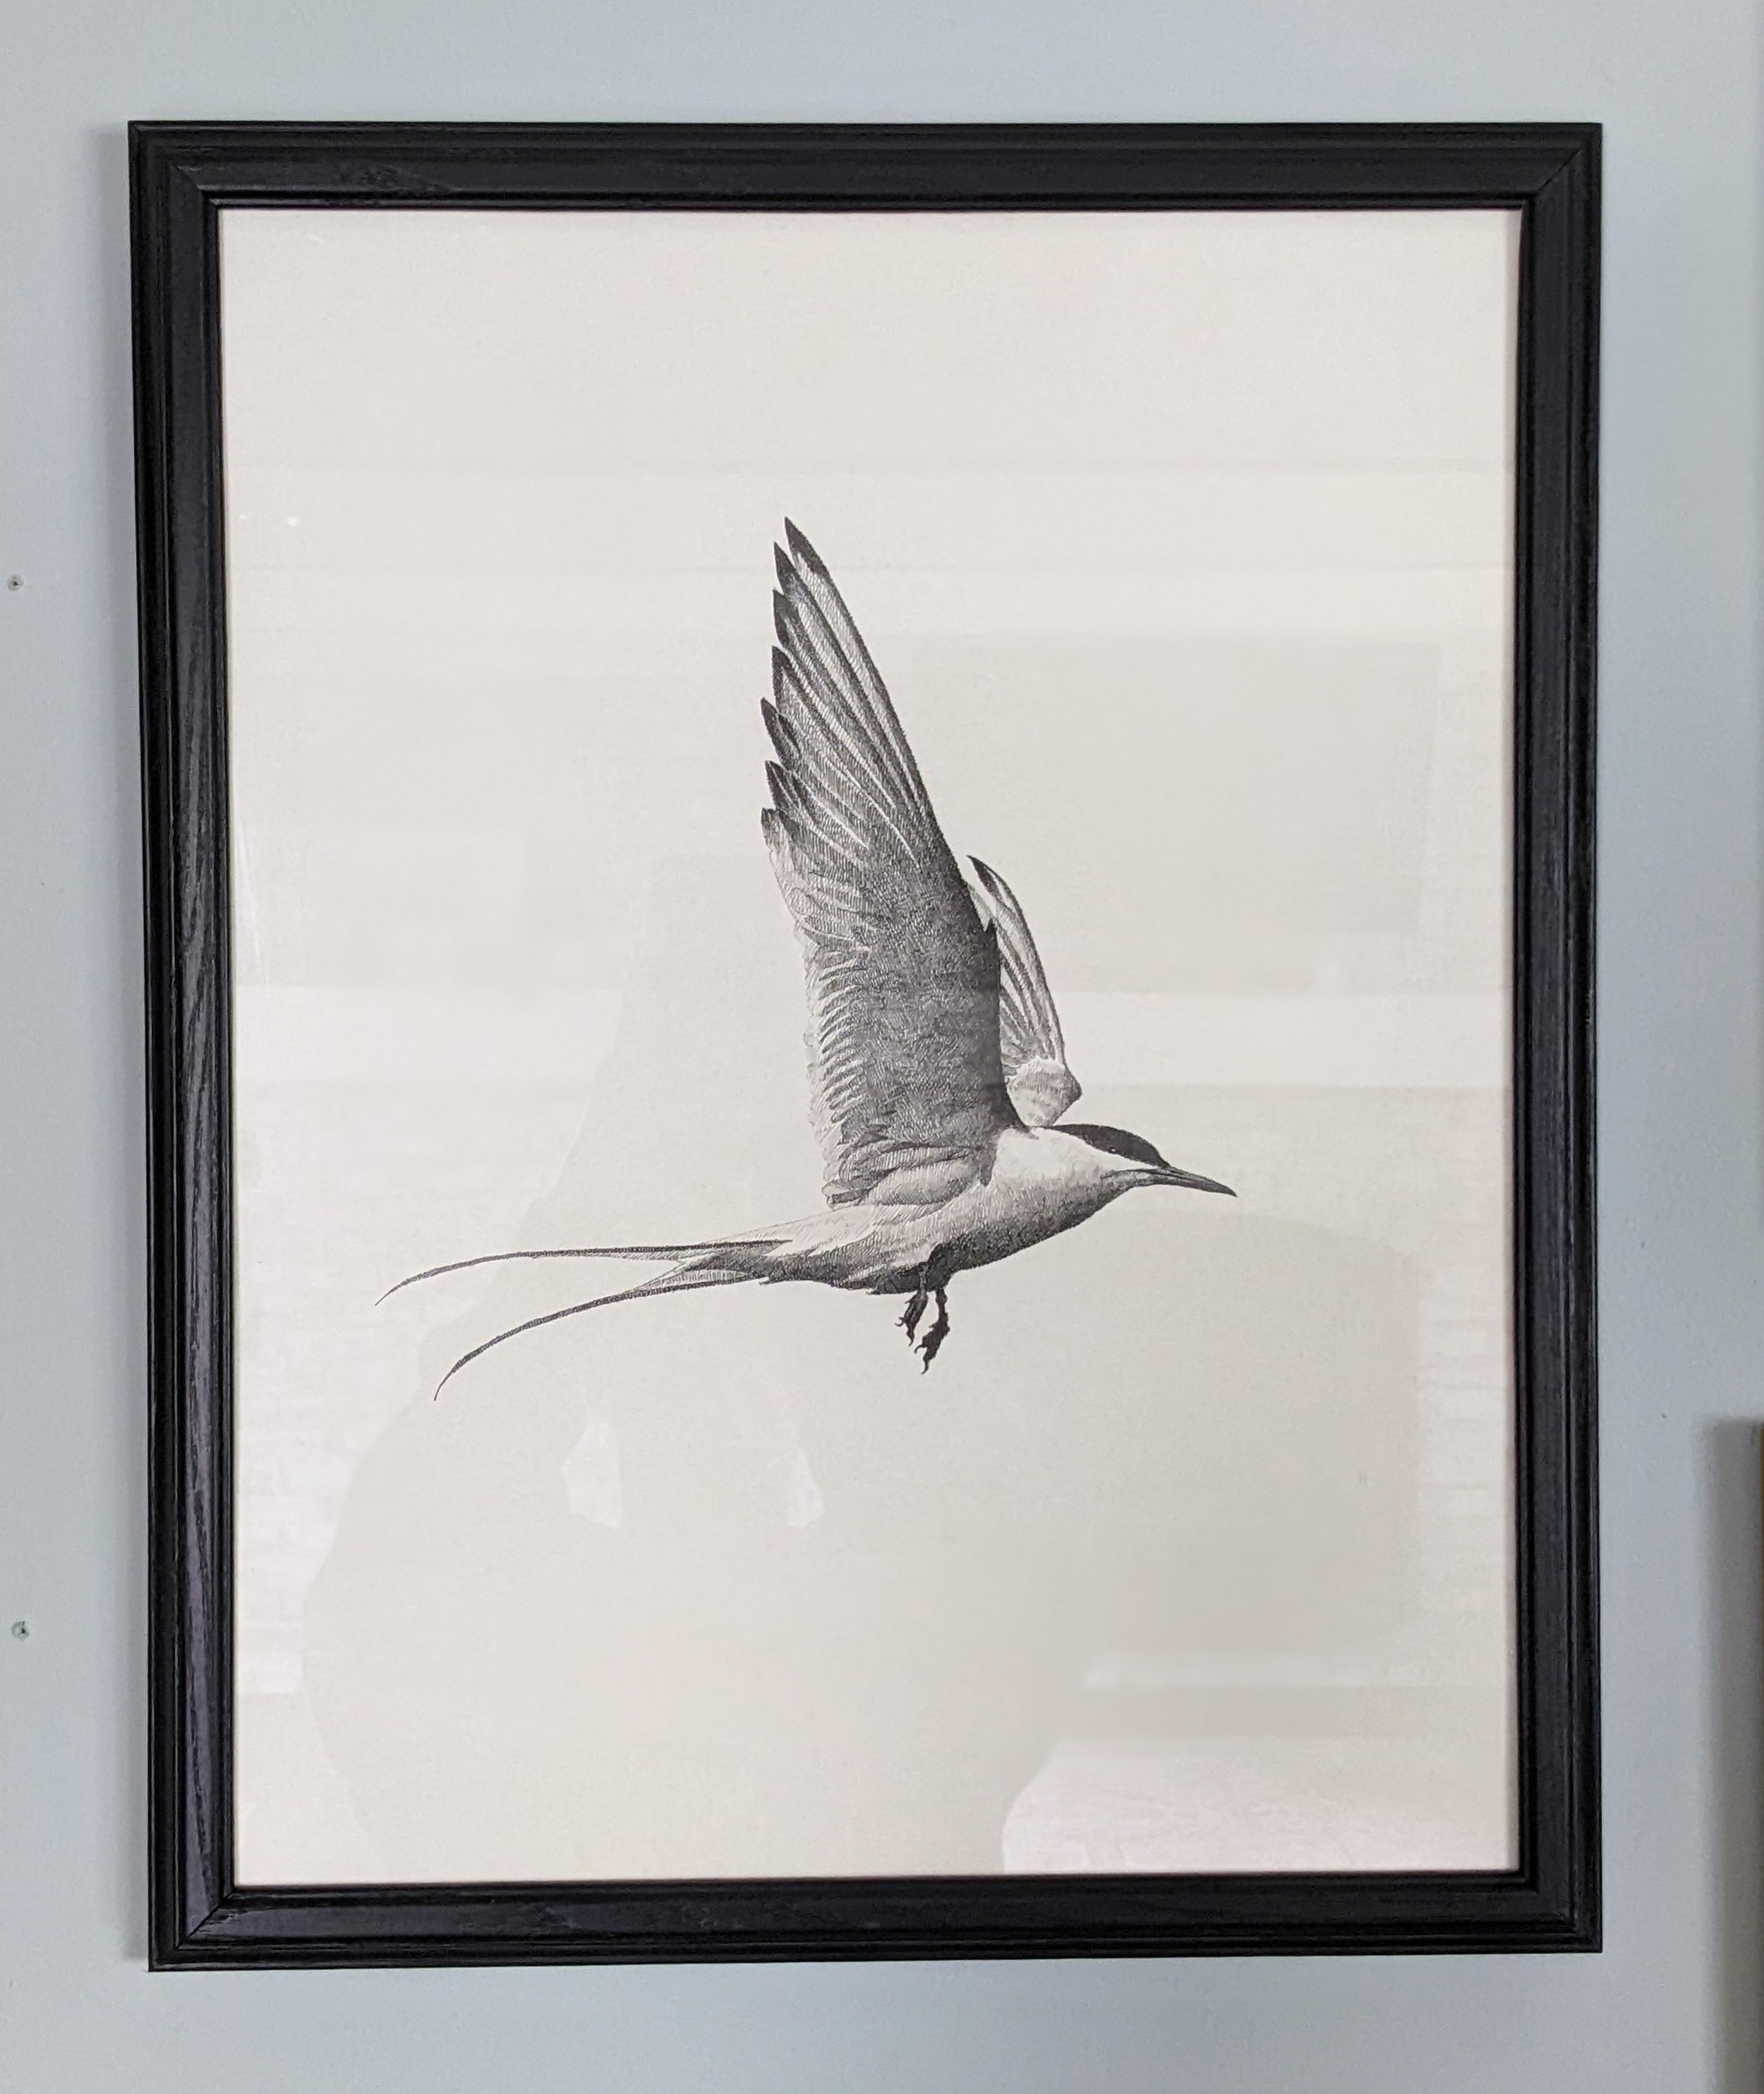
- Some art doesn't necessarily need to be displayed behind glass, which is good because many thrift store frames don't have it! Don’t pass up a beautiful frame just because it doesn’t have glass.
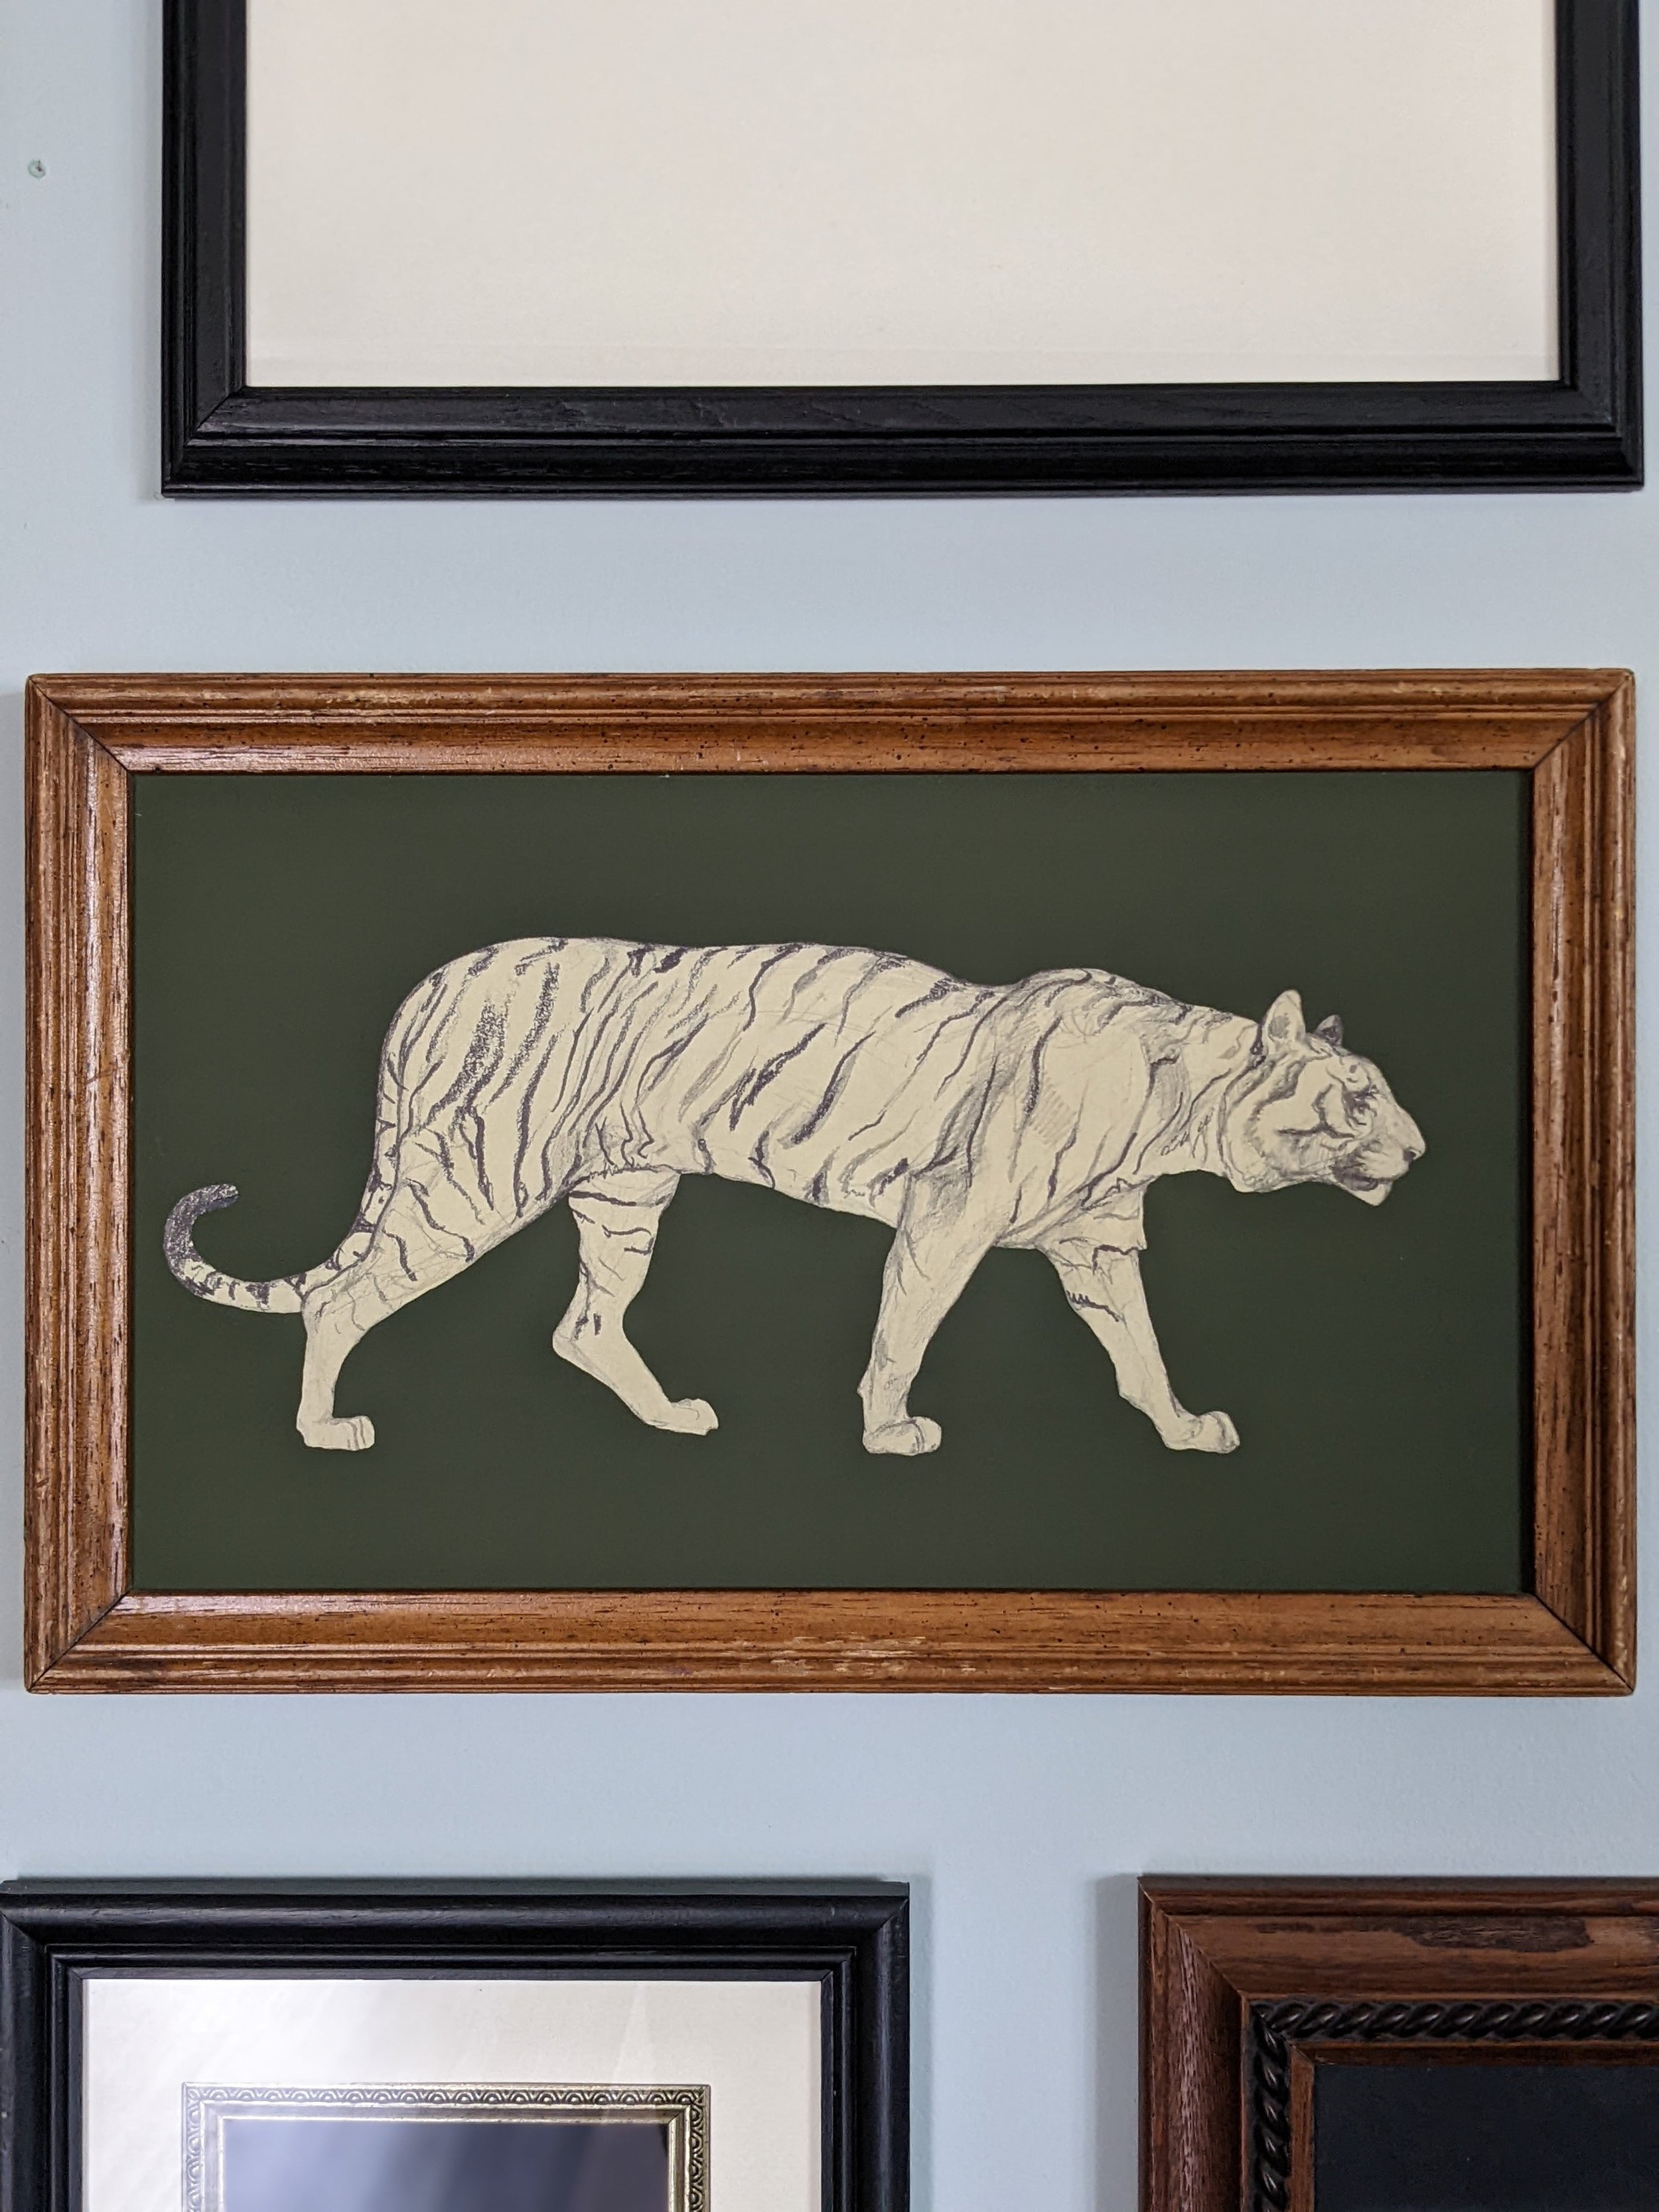
- It's no big deal if you can't find the perfect size frame for your artwork. Cutting a new mat is easy and can add an extra element to your art. You can even add a little consistency to your gallery wall by using the same color mat on several different pictures. Additionally, if you’re printing digital art you can choose a size that will fit in a specific frame.
- If you like the design of a frame but not the color, simply paint it!
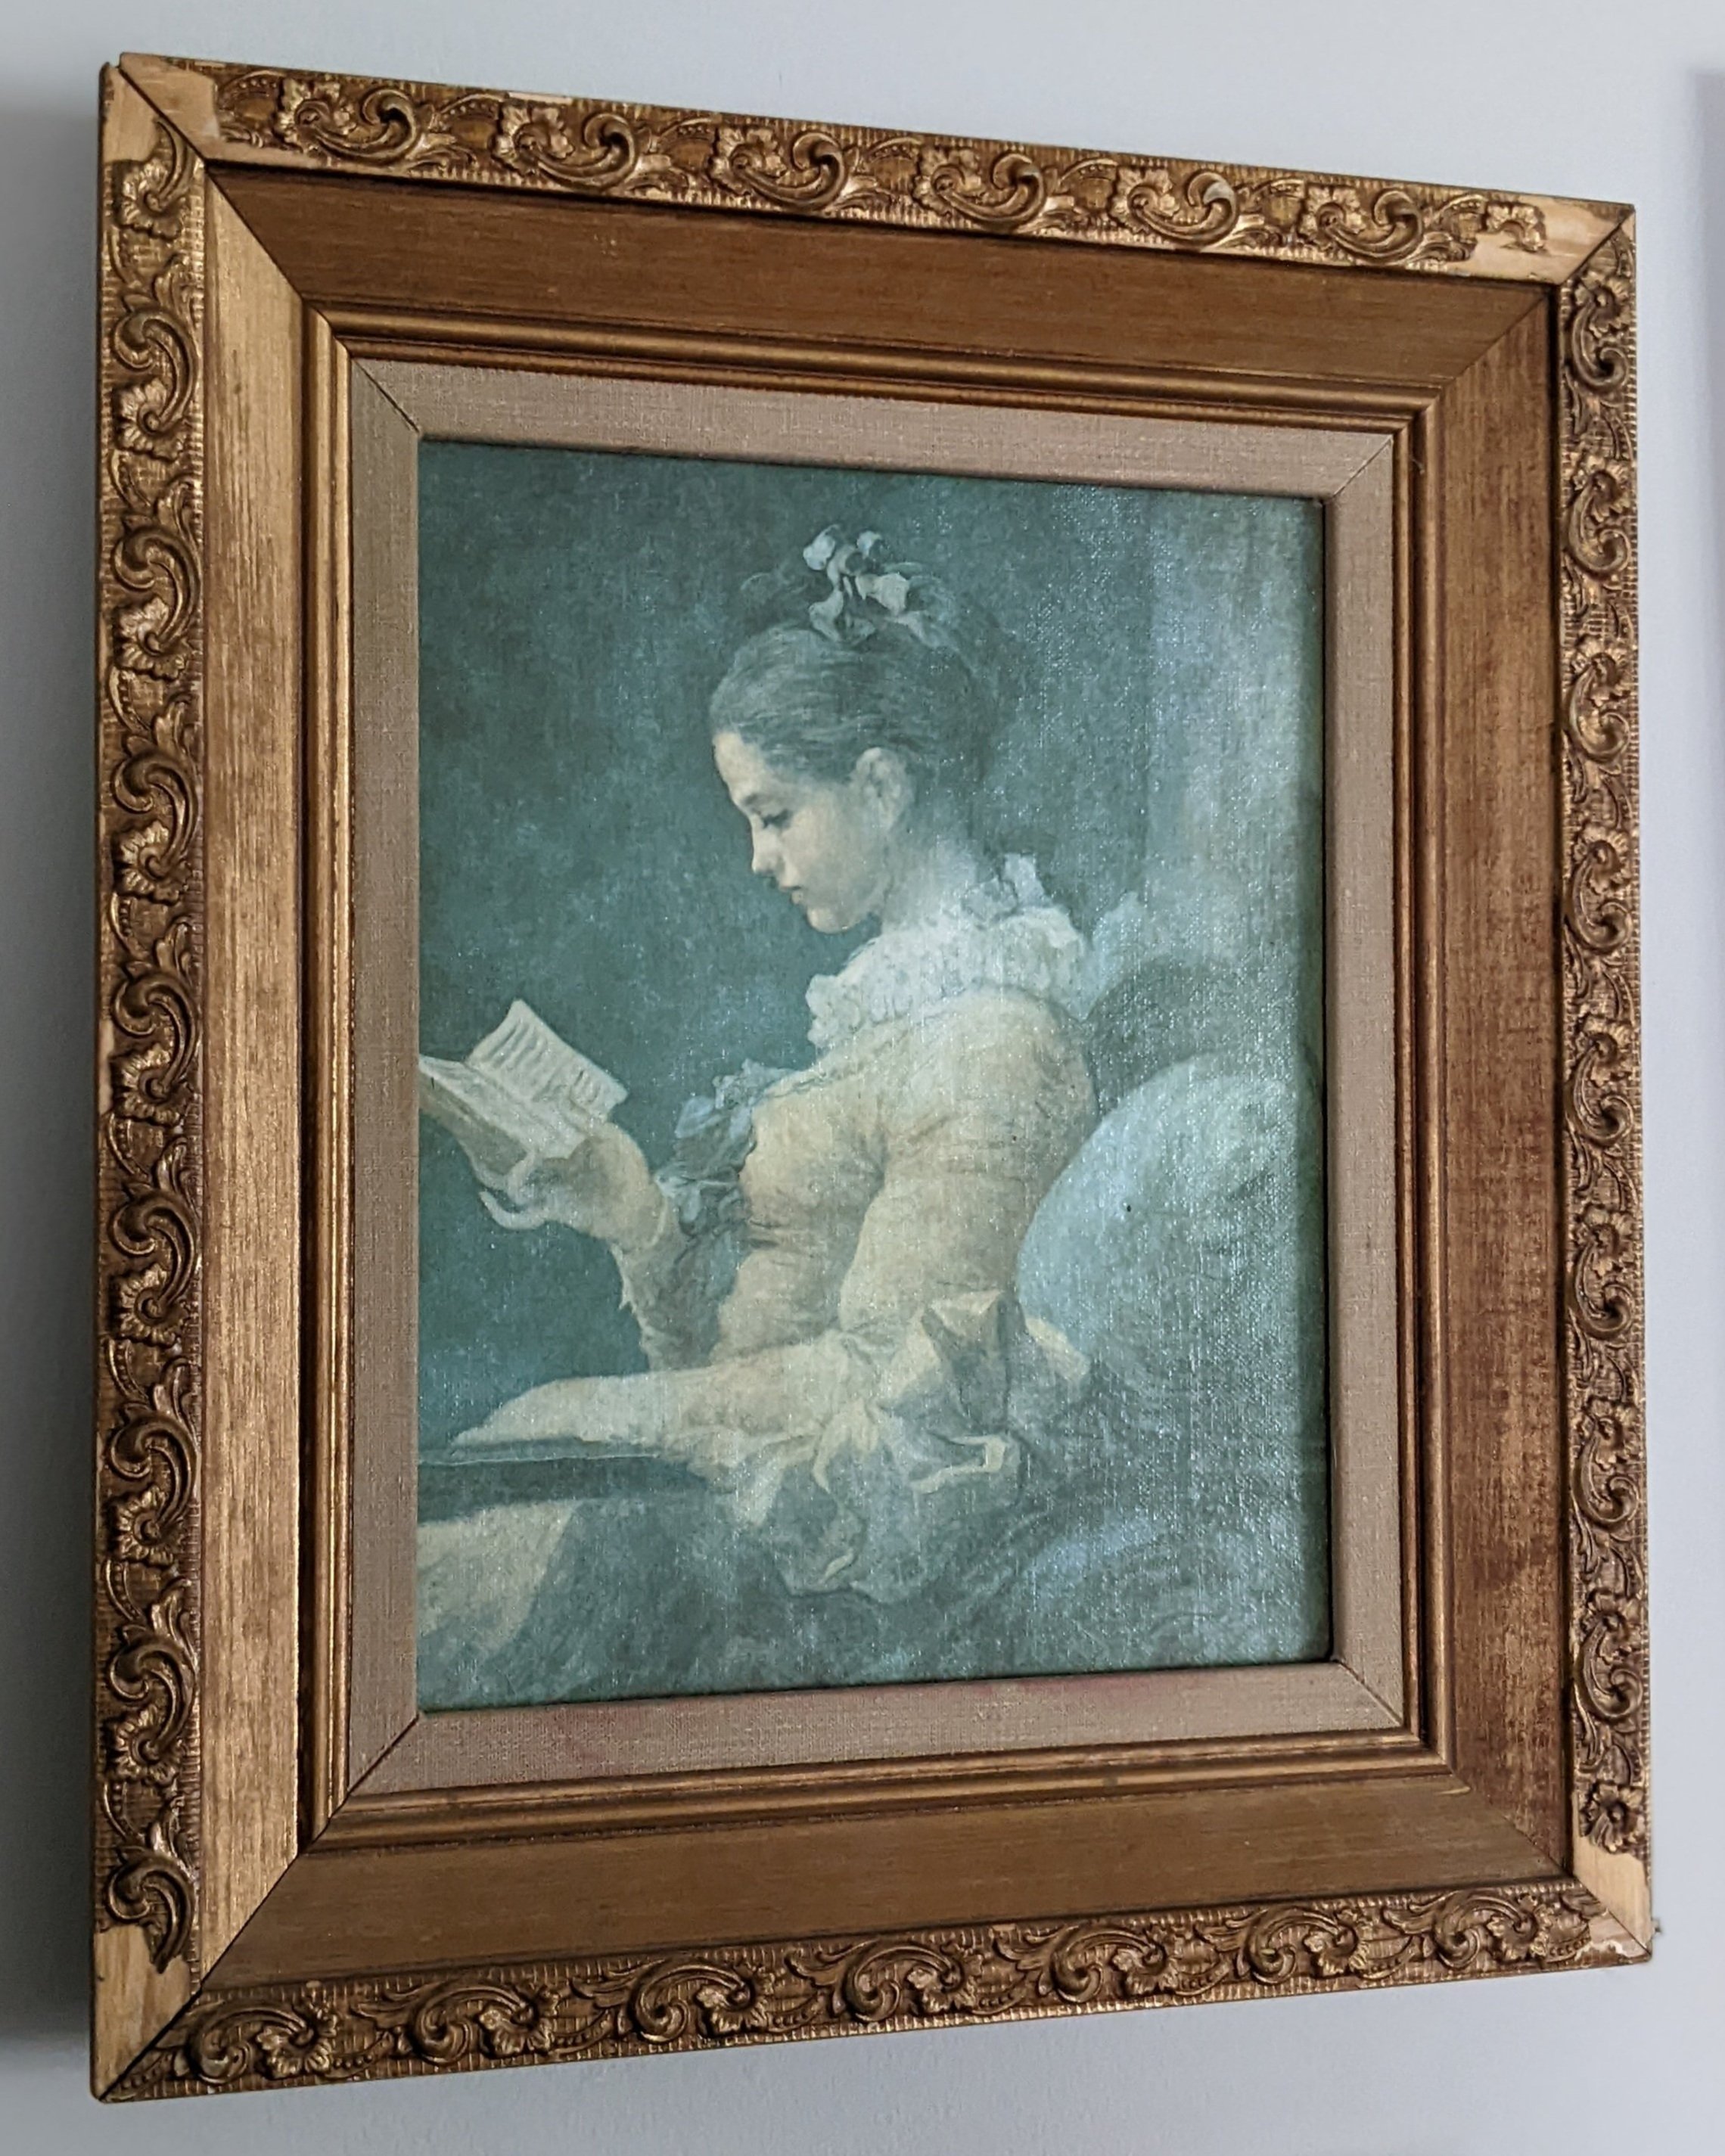
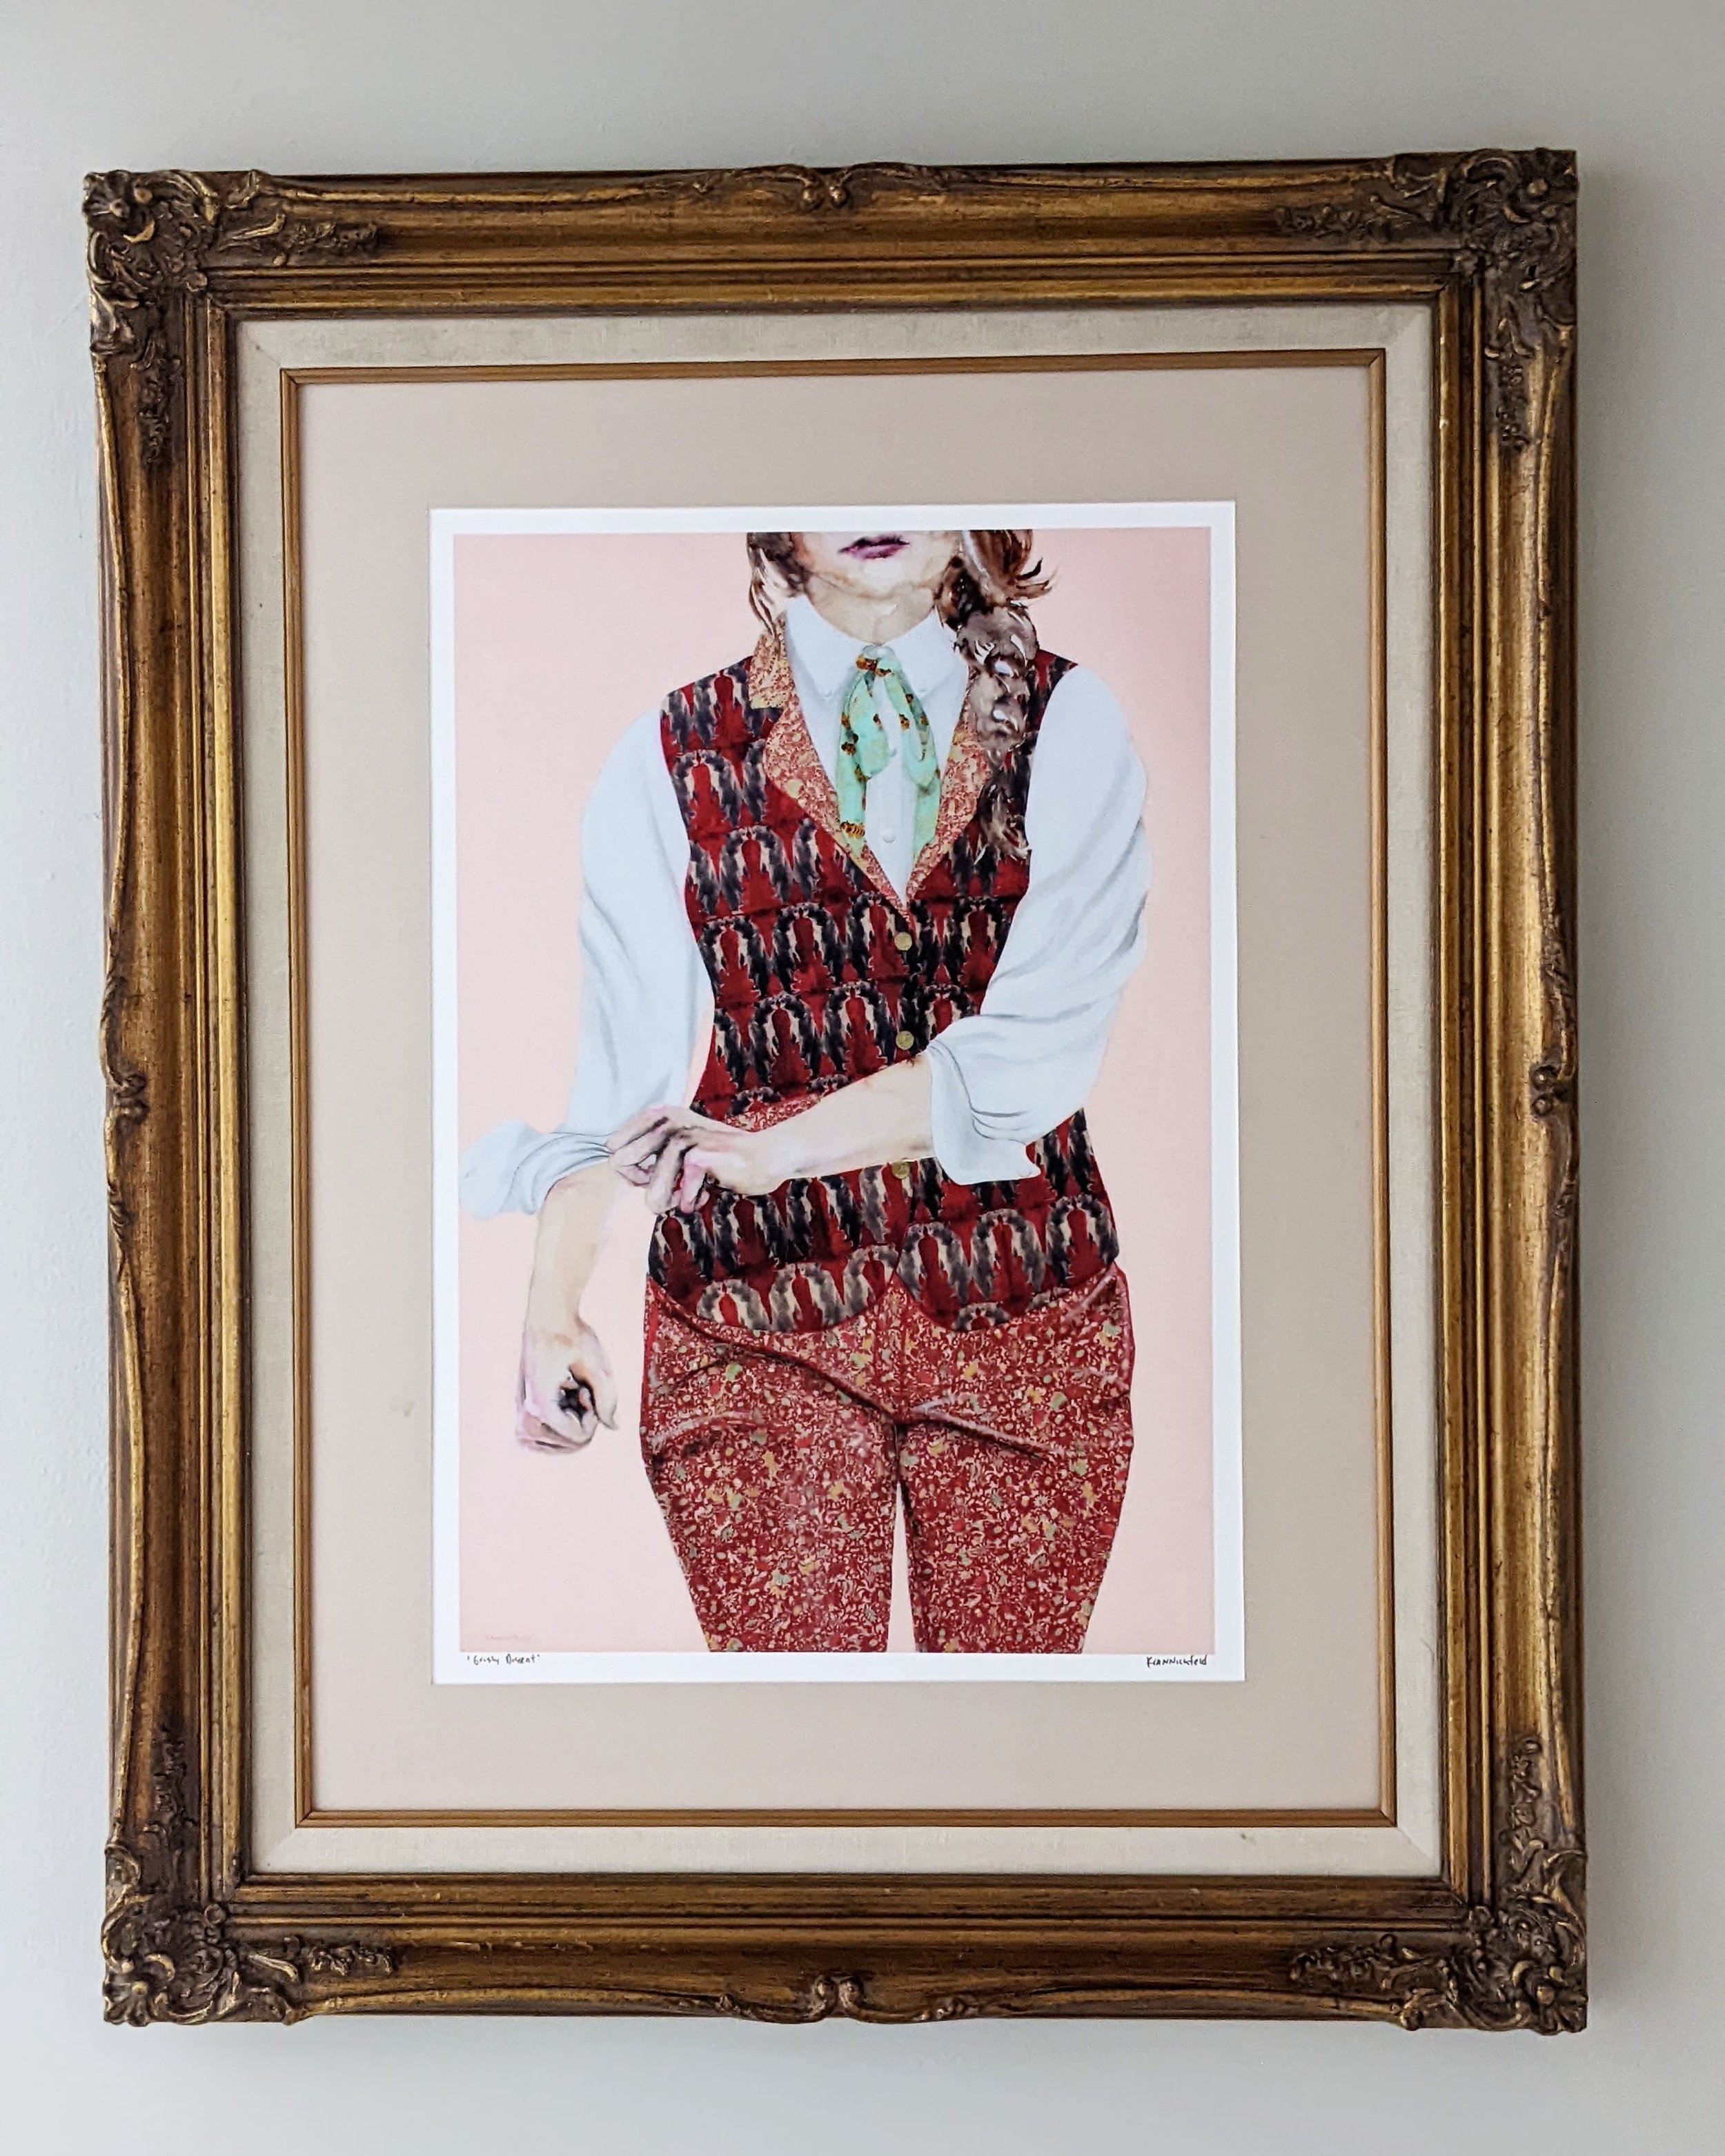
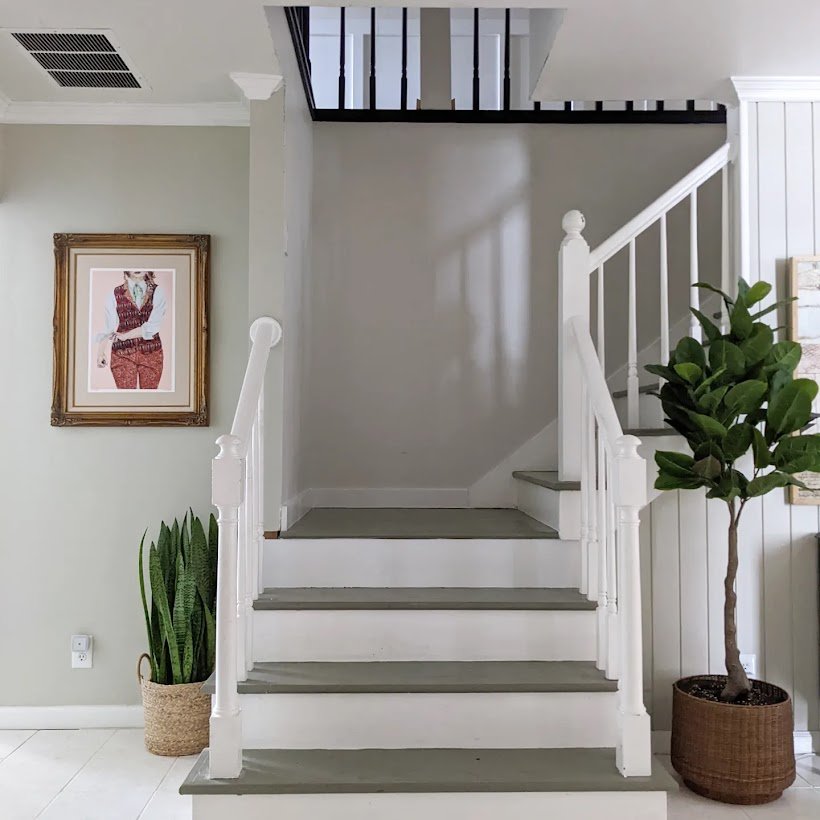
- The great thing with thrifted frames is that they're cheap. If you buy some and they don’t work with the overall style you're going for, you're not out very much money! Grab that frame that caught your eye - even if you don’t know exactly where you’ll use it. I bought the frame below hoping to use it in my gallery wall for TEN DOLLARS! It didn't end up in the final design, but I found another great place for it.
Variety, but with a theme
This is a repeat step from my last post, but it makes sense here, too!
Just because I wanted an eclectic mix of frames doesn’t mean they didn’t still need to go together. To achieve this, I stuck with three main color schemes: gold, black, and wood (being sure to maintain a similar wood tone throughout the design). I also made sure there were multiple of each color, which helped keep the design cohesive.

Lastly, I paid attention to how many horizontal vs vertical vs circular frames I had and tried not to skew too far in any particular orientation.
Easy Peasy
And that’s really it as far as choosing frames based on their aesthetic - pretty simple. But what do you do when you have a frame that needs a little extra love to make it work for you?
Thrifted Frames 101
As I implied above, thrifted frames can come in a less than ideal state. When looking for thrifted frames, I suggest looking at the back for two key things:
How is the art secured?
A lot of picture frames will come with a paper backing, which makes it impossible to see how the picture is held in place. More than likely, it’ll be held in by staples, in which case, unless you have a point driver, you might want to pass on it. (A point driver is a gun that shoots those little tabs into the back of a frame to hold in your picture.)
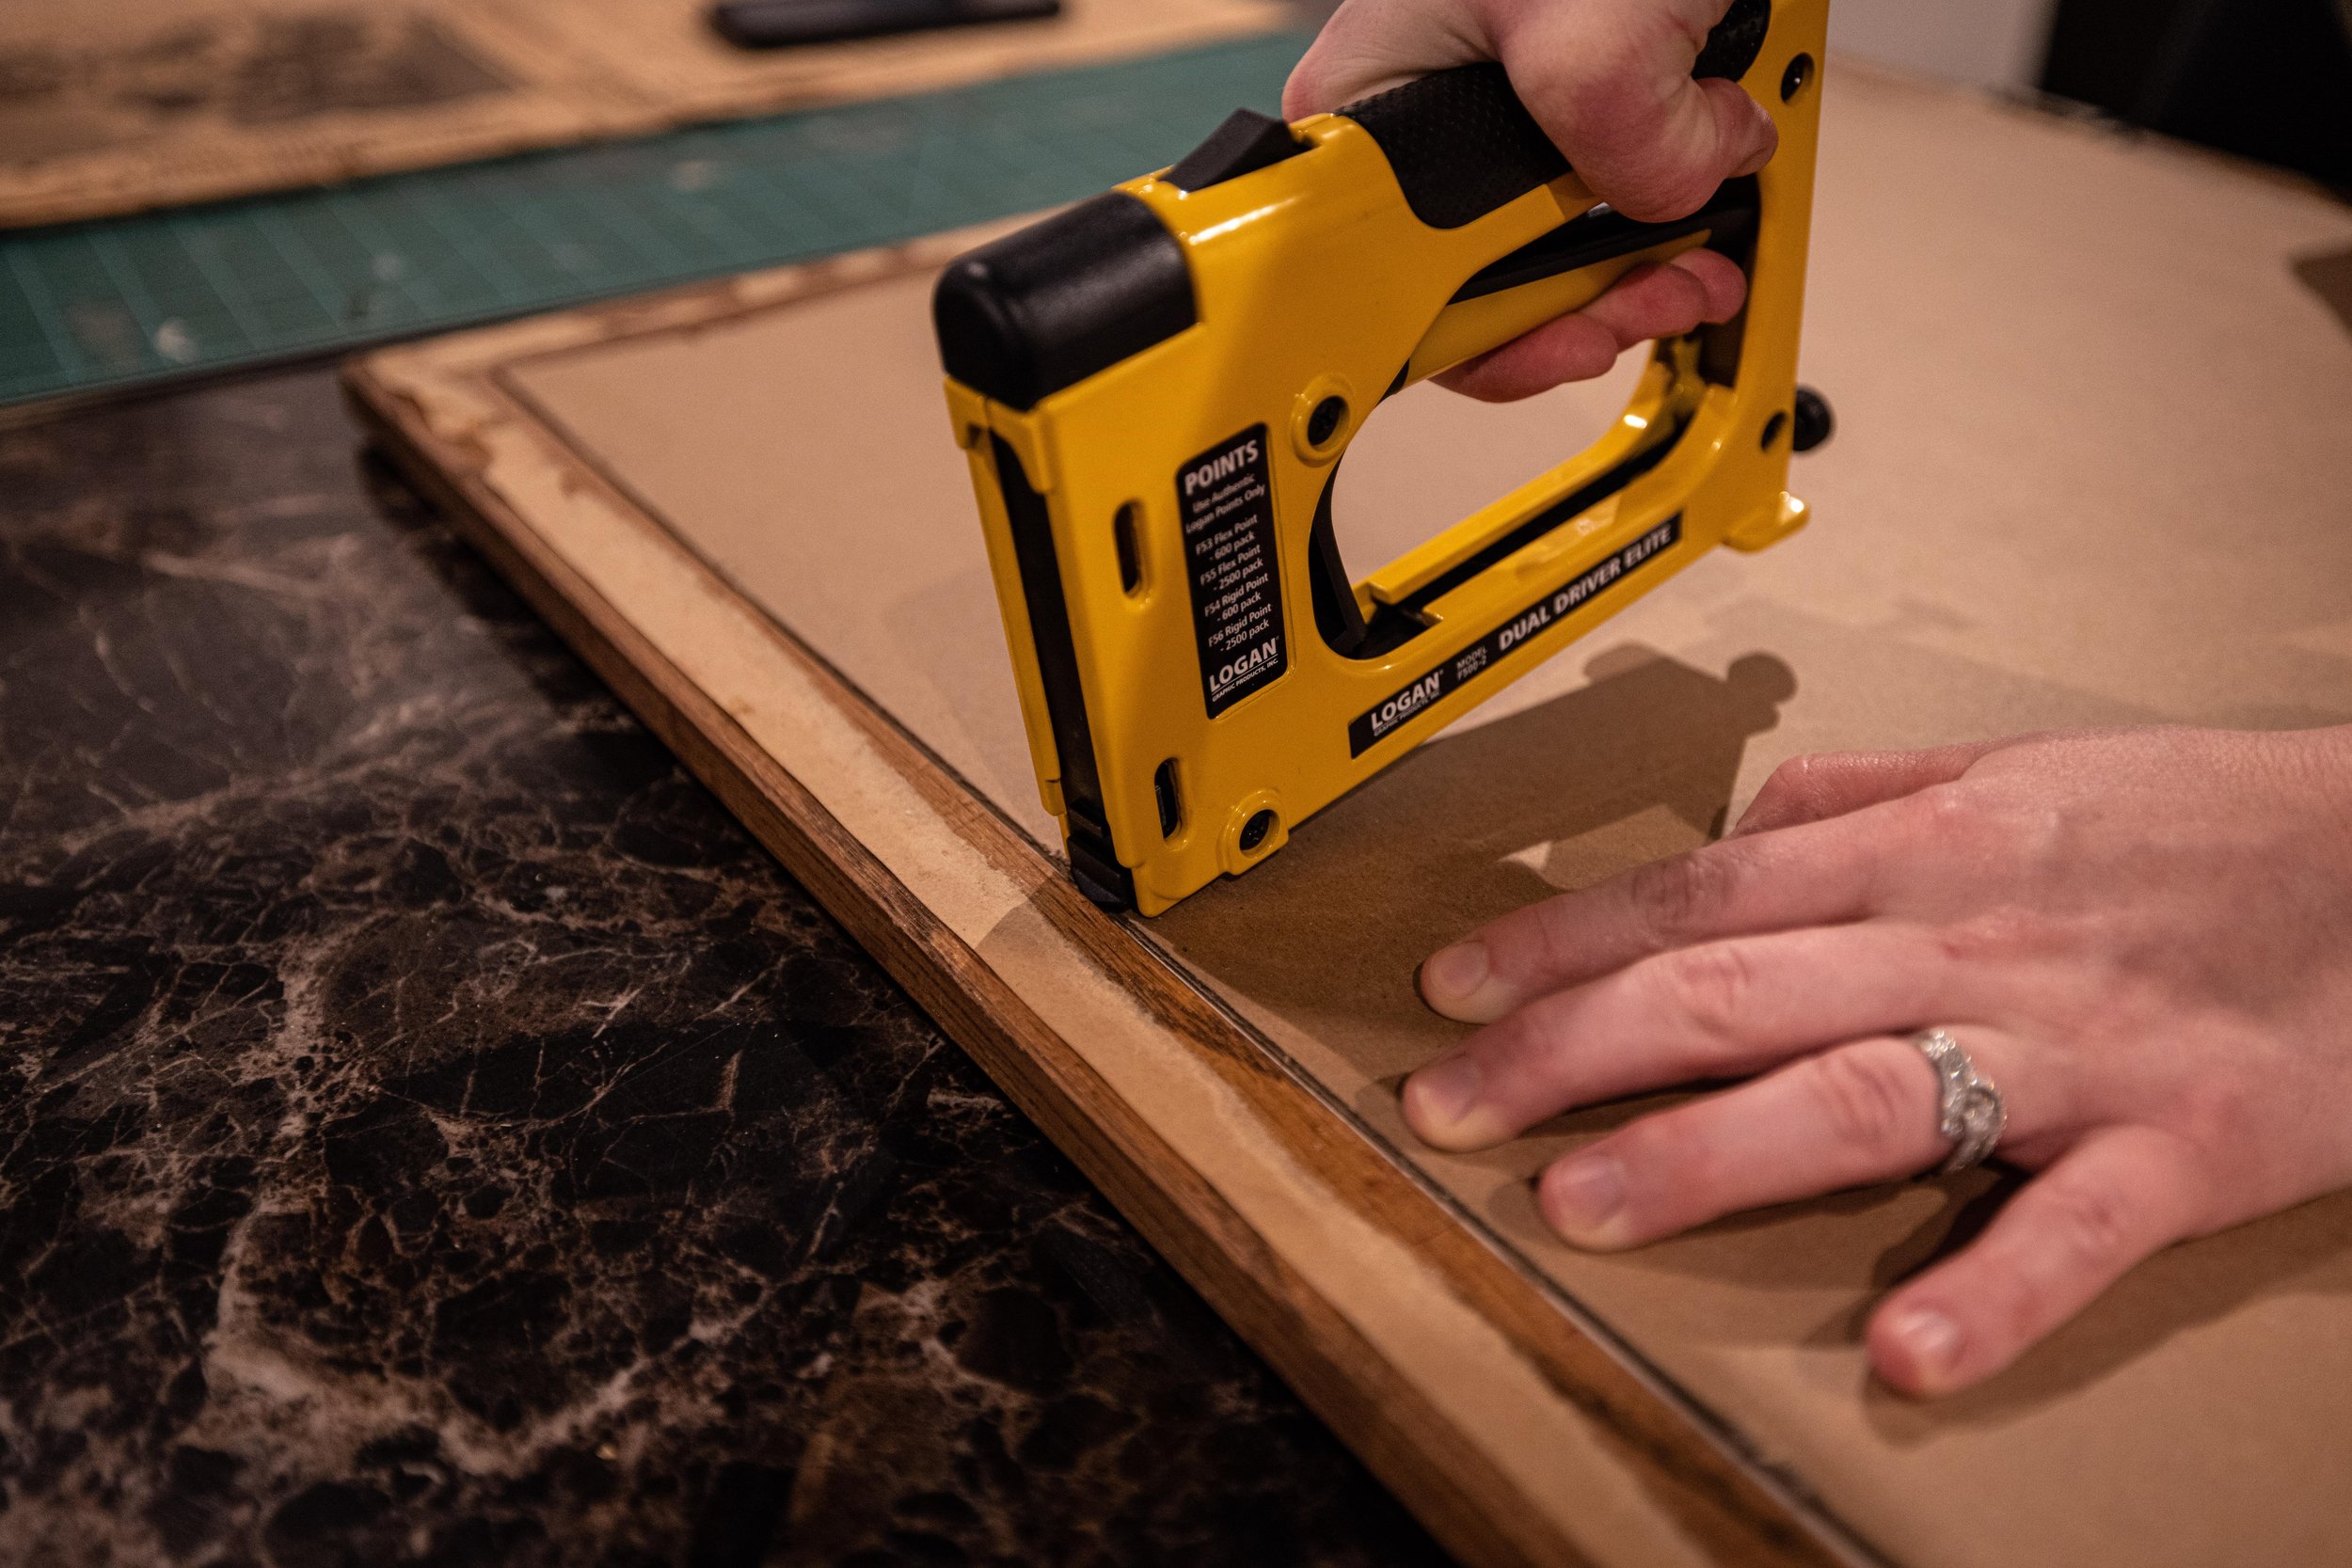
If you choose to buy the frame anyway, be prepared to pull the staples out with needlenose plyers and then find a way to resecure your artwork once you've reframed it. I've both tediously hammered tiny nails along the inside of a frame before and I've duct-taped my picture in. Neither is ideal.
I FINALLY talked myself into buying a point driver for this project and I'm so happy I did. As often as I replace pictures in my frames, I should have bought one years ago!
If you have no intention of buying a point driver, try to look for frames with points or the built-in turny things. I have no idea what they’re called, but they look like this:
How is the frame hung?
I also like to look for hanging hardware when frame shopping.
Installing your own hanging hardware is pretty simple and totally doable, but it's an extra step. If there's already hardware attached, you're good to go! (Bonus points if it's already in the orientation you need!)
Coolest Trick in the Book
And now for one last little bonus for ya - I recently saw Yellow Brick Home use this paint stir stick trick to hang some artwork. I gave it a try with my gallery wall and it made life SO much easier. No more tedious measuring, or toothpaste spots on the wall (admittedly, still a cool picture hanging hack). Here’s what you do:


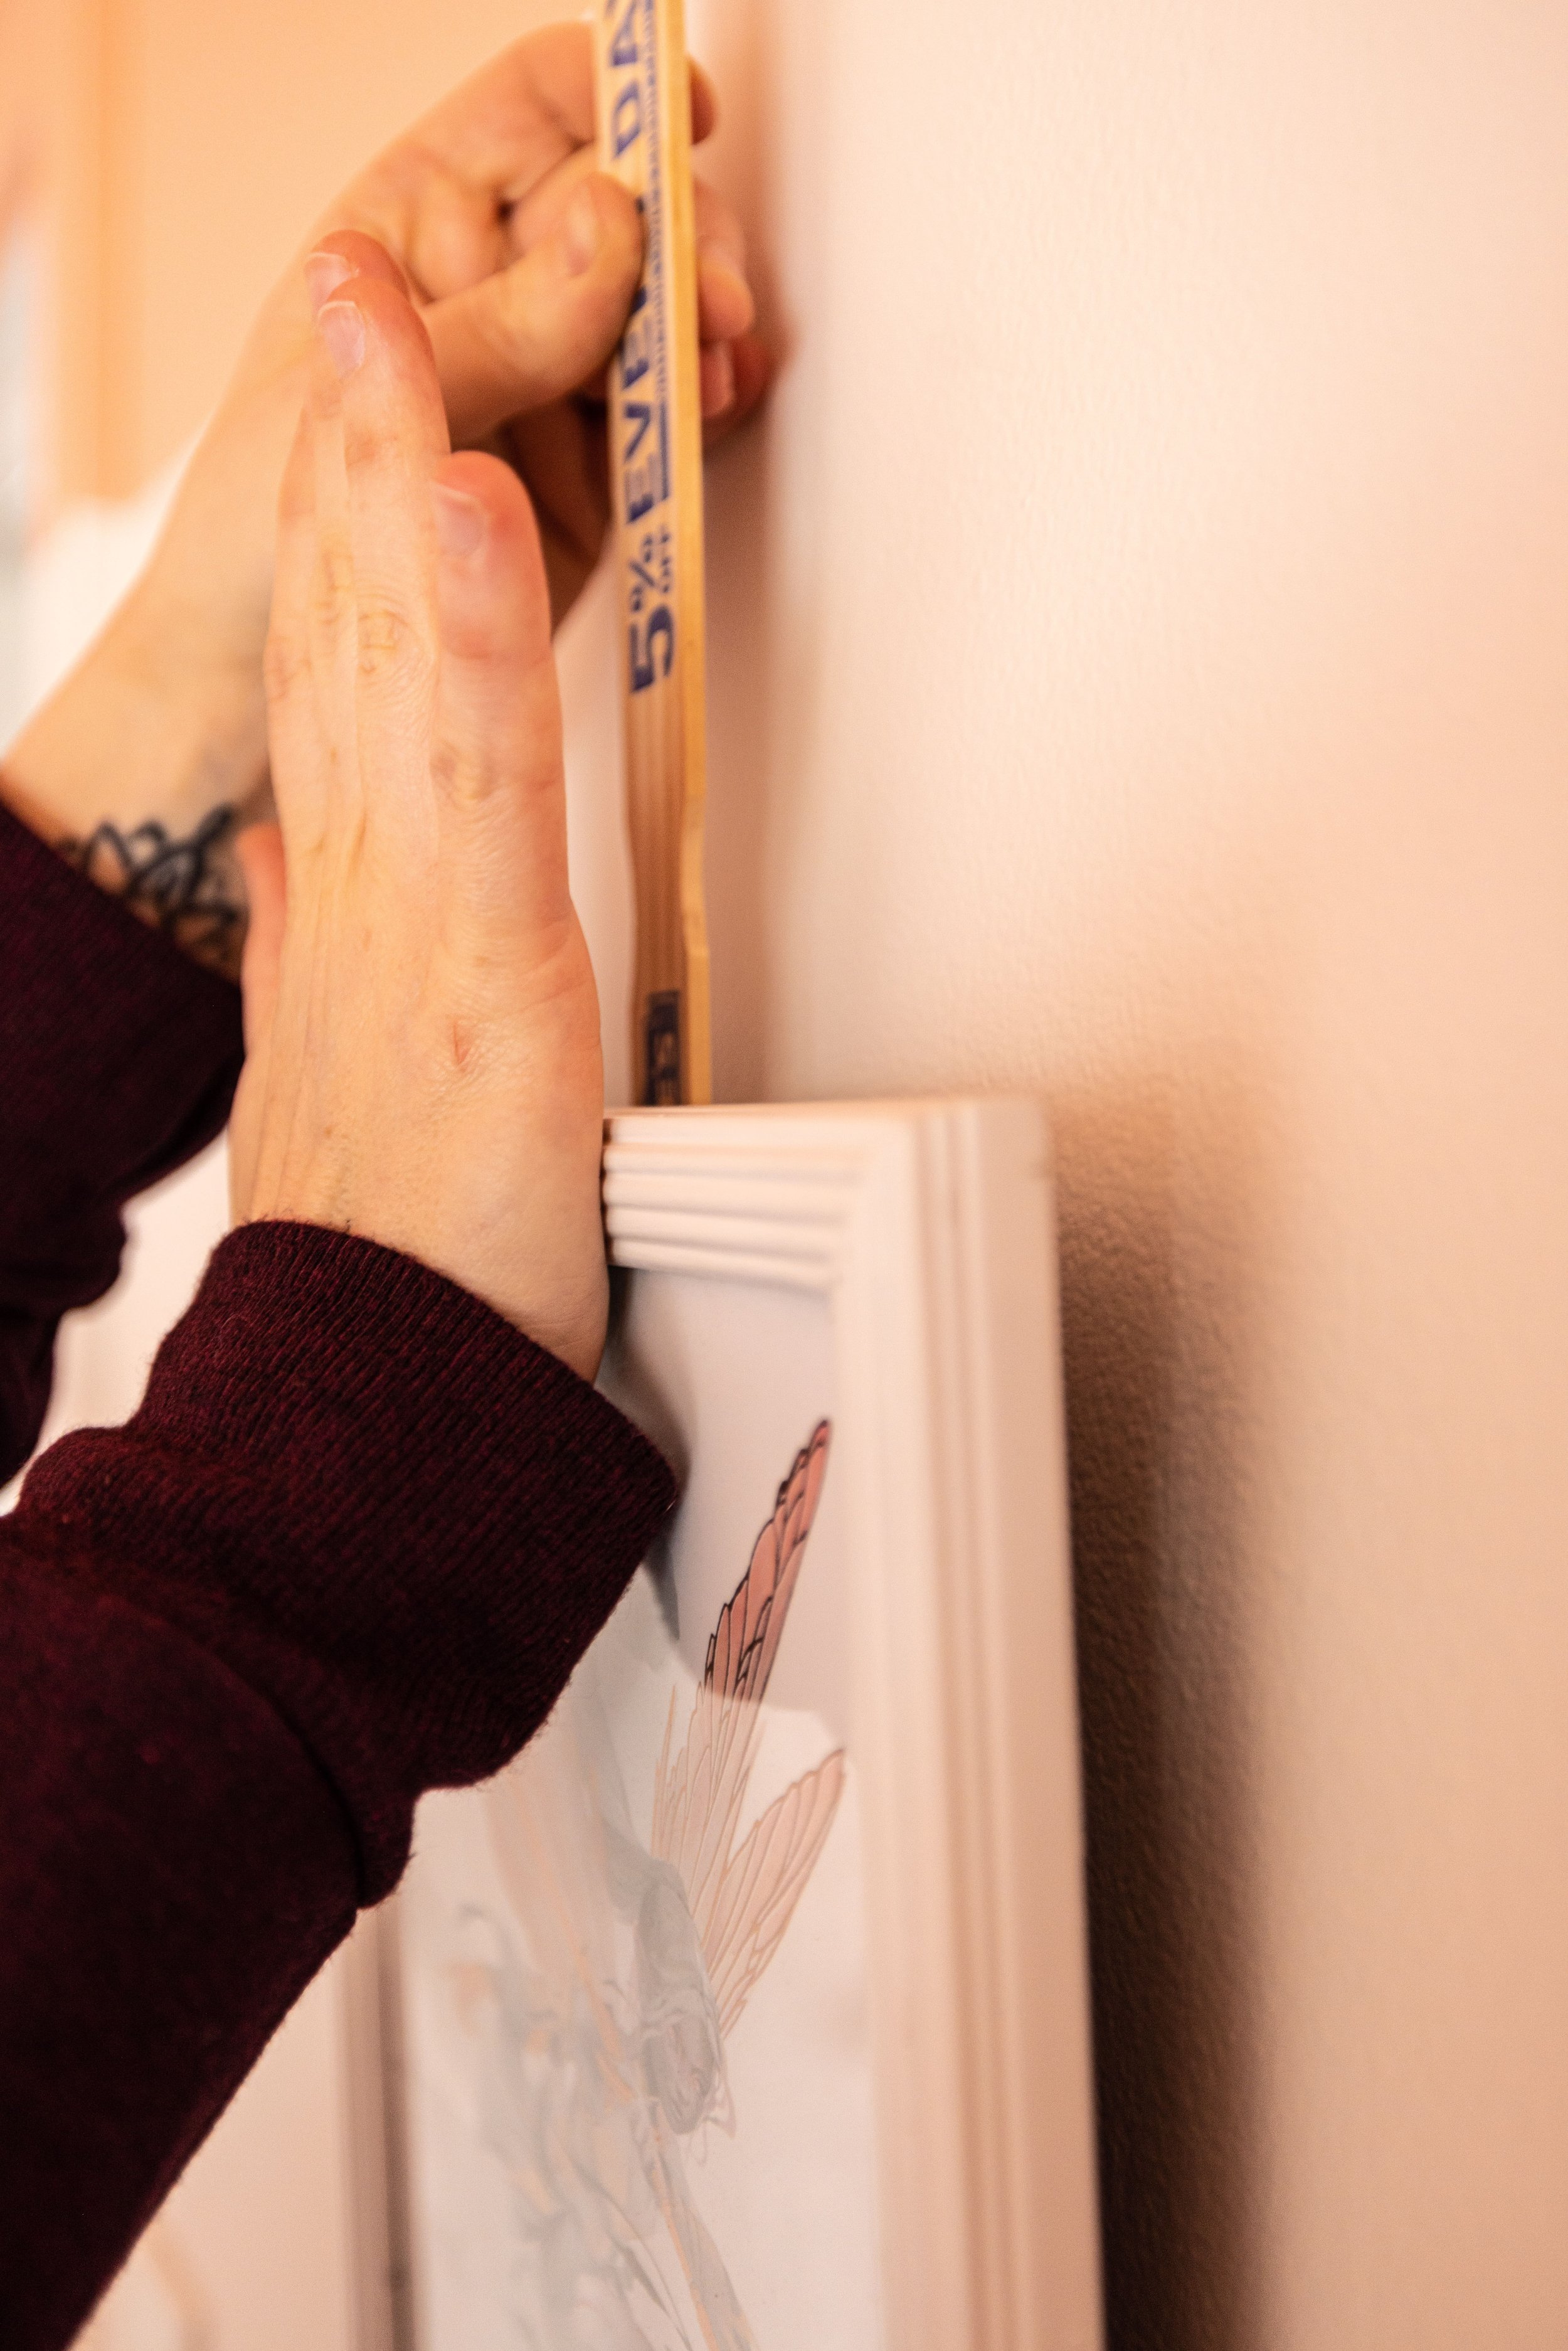
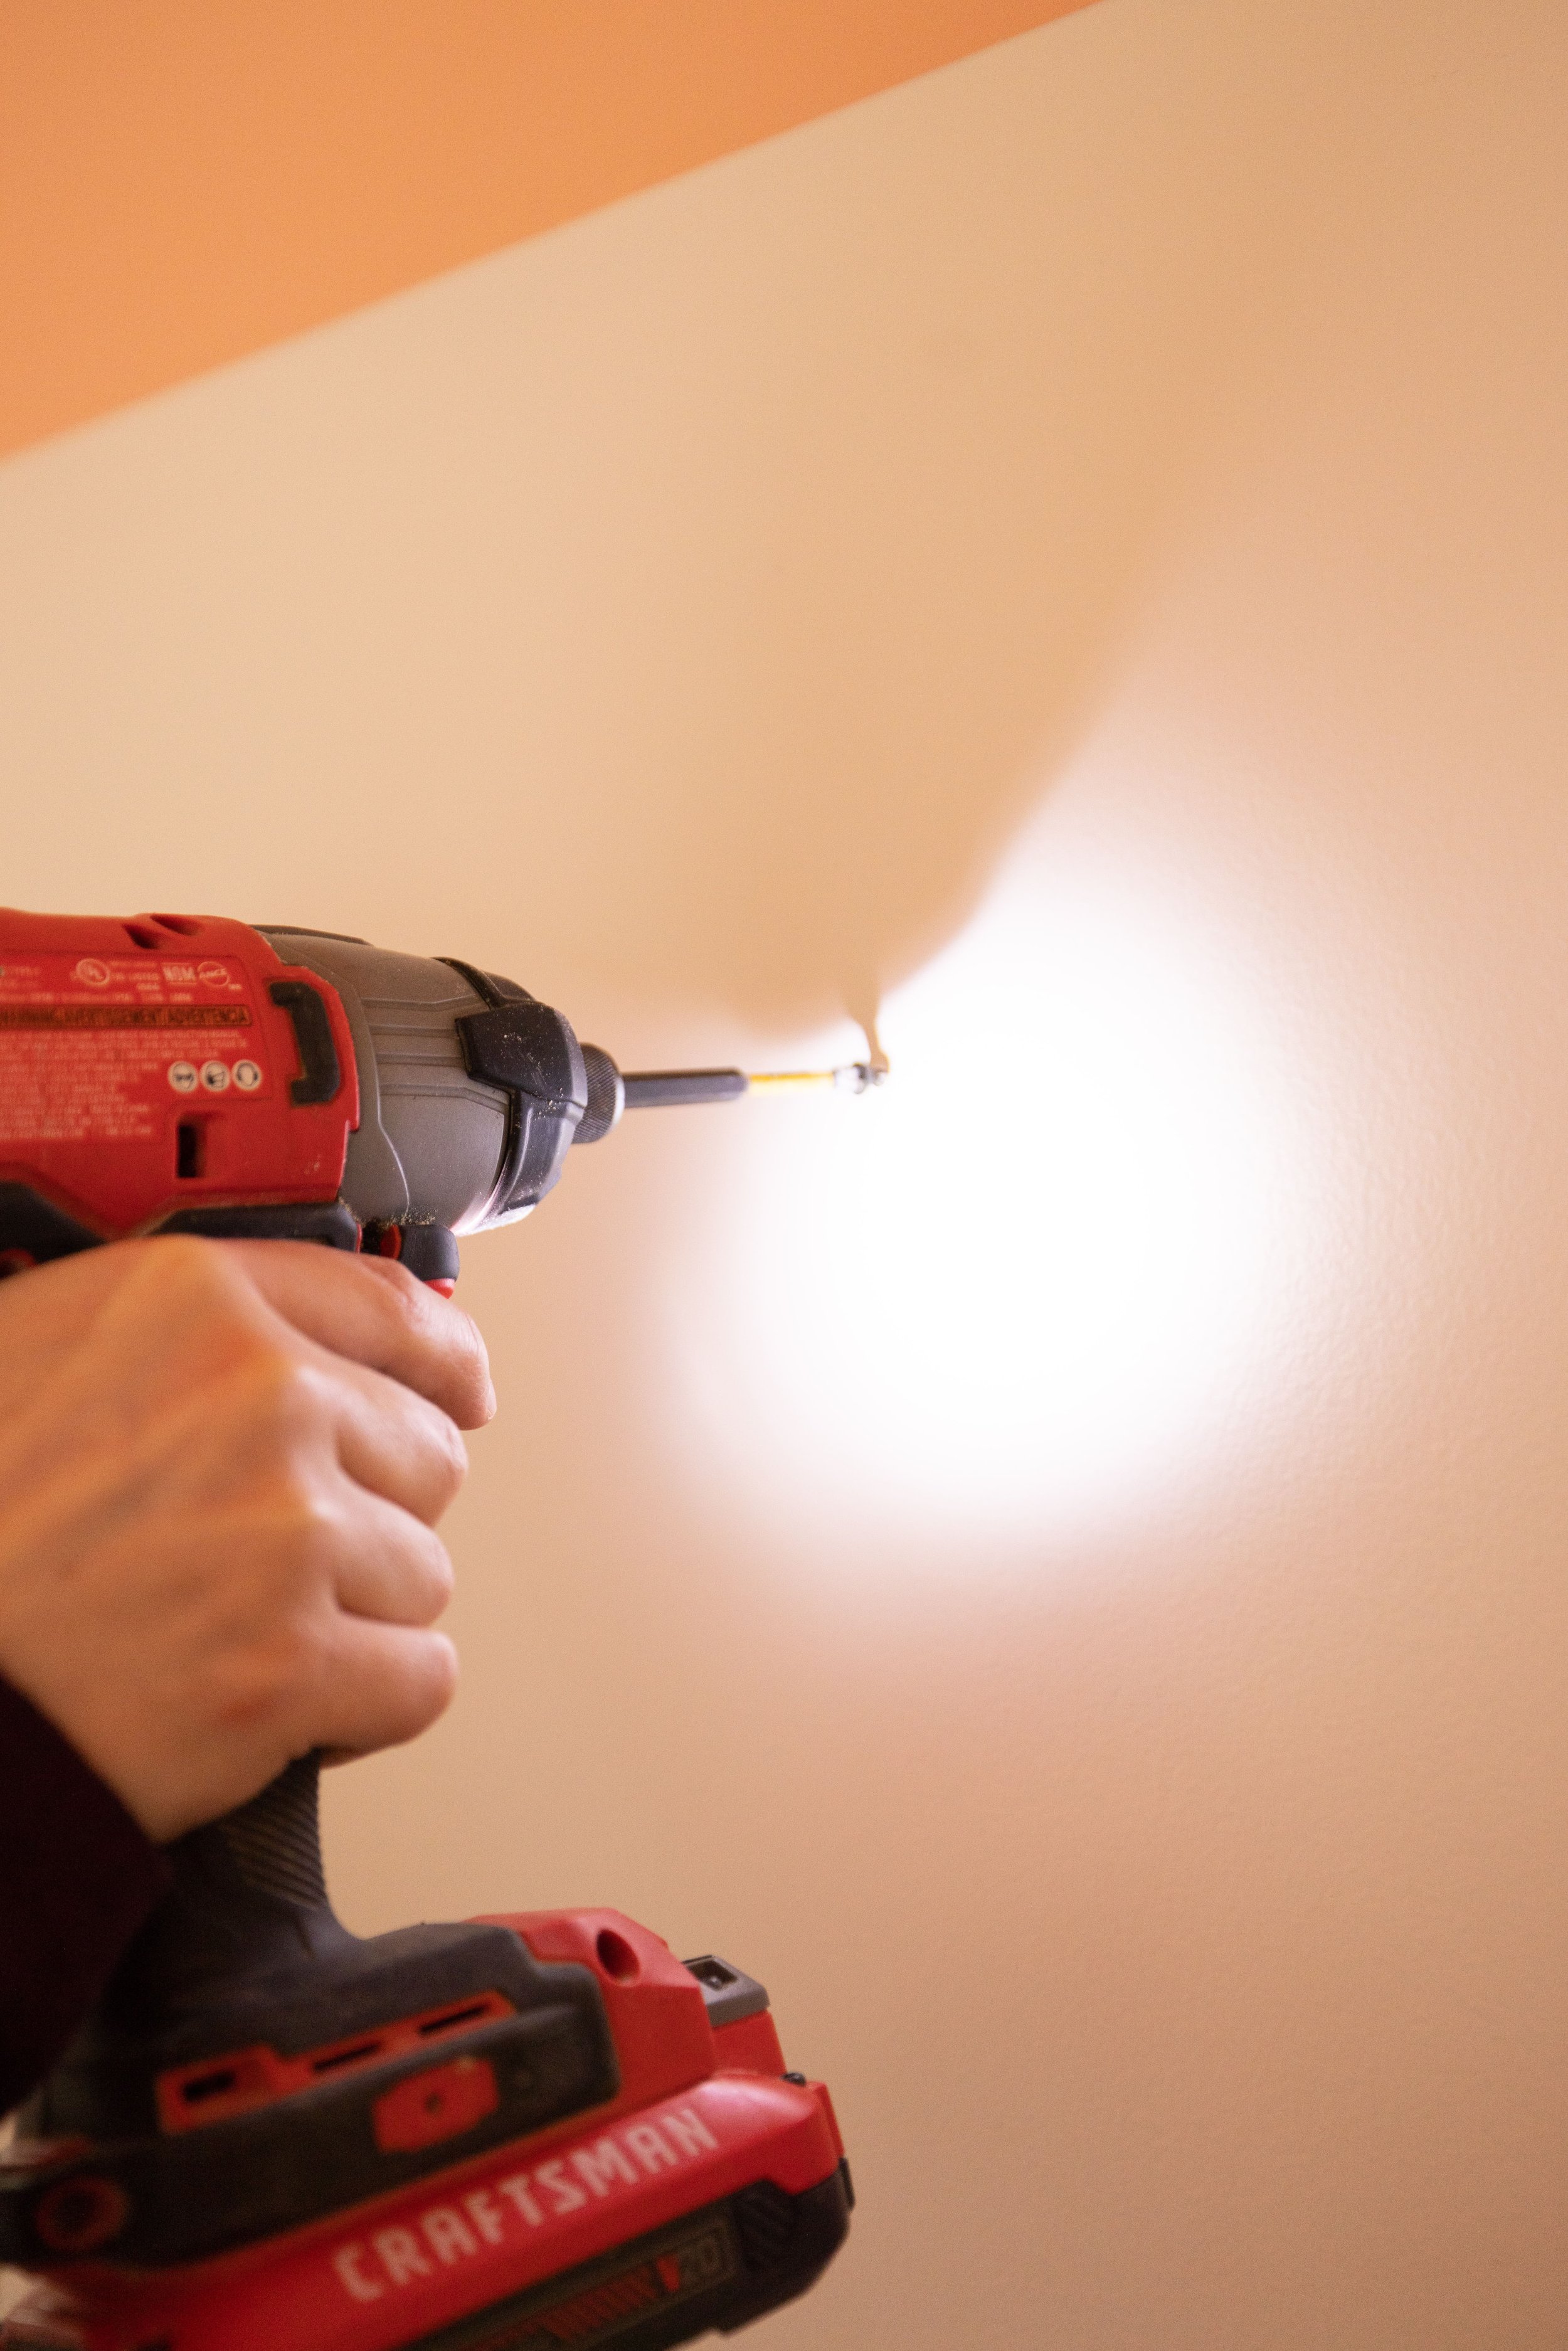

Drill a screw into the end of a paint stir stick.
Hang your artwork from that screw.
Hold it up to the wall where you want your picture hung and press. The indentation made by the screw will show you exactly where to drill.
Now all you have to do is drill your screw into the wall, hang your artwork, and voila!
Extra bonus tip: Level your picture, then stick a little Command Strip on the back so it doesn’t sway.
Final Thoughts
Whoosh, this turned into quite the hodgepodge of thrifted frame info - but hopefully, you found it useful! Have questions about how to make thrifted frames work for you that I didn’t cover? Let me know in the comments!


For more DIYs, check out these posts:
Upcycle Thrifted Picture Frames

How to Assemble a Gallery Wall in 4 Steps
Want to add more art to your home but don’t know where to start? I feel you - I was you. I recently decided to revamp a gallery wall in my home and quickly realized how overwhelmed I was with art options. But now that my gallery wall is finished, I put together this post to share the tips for curating art for your home I learned along the way.
Tips and Tricks for Curating a Gallery Wall
Want to add more art to your home but don’t know where to start? I feel you - I was you. I recently decided to revamp a gallery wall in my home and quickly realized how overwhelmed I was with art options. But now that my gallery wall is finished, I put together this post to share the tips for curating art for your home I learned along the way.

A couple of years ago, I hung a symmetrical gallery wall in our living room. It was filled with little studies in calligraphy I created using different funny quotes I found online. But as time has passed, my style has evolved and my original gallery wall has felt less and less like it fit into the overall aesthetic in our home. I knew I wanted a change - something more eclectic/moody/collected/quirky - but I didn't exactly know what I was looking for.
I found myself inspired by the overall look of images like these:
So, naturally, I started searching for artwork similar to the styles I saw in my inspo pics. My first instinct, as is typical with most of my design ventures, was to start pinning ideas… which brings me to my first tip!
Gather Inspiration
I love to use Pinterest when brainstorming new ideas. It’s great because it’s completely noncommital. I see something and I pin it, but that doesn’t mean I’m on the hook to use that specific image in my overall design.
Before I know it, I’ve pinned a whole slew of pictures and ideas. At that point, I can begin identifying common themes, get a clearer vision for what design aspects I’m leaning towards, and hone in on what I’m really looking for. Just take a look at this snippet of my board for our mudroom:

Based on the images above, you can clearly see that I’m leaning towards a moody blue tone and open hooks, rather than lockers, with shoe storage underneath.
My problem when I started searching for art for my gallery wall revamp was that I was looking for art similar to what I saw in my initial inspo pics, but nothing was standing out to me enough to pin.
There was nothing wrong with the art itself. I could have bought any combination of pieces I saw, and it would have turned out beautifully. But none of it felt like a true representation of me. And that brings me to my next tip…
Generic Isn’t Interesting
I quickly realized that what I was drawn to in my inspiration pictures was the overall aesthetic - not necessarily the artwork itself. The typical vintage-looking pictures of still lifes, landscapes, and painterly portraiture weren’t exactly what I was looking for. They all felt, well, generic.

I wanted a collection that spoke to me and made my heart sing a little every time I walked by. So how did I move on from the not-right-for-me pictures I was previously scanning?
As an Amazon Associate, I earn from qualifying purchases. This post may contain affiliate links, meaning I receive commissions for purchases made through those links at no cost to you.
Use What You Have
Before diving in and ordering a bunch of art I wasn’t sure I loved, I took a look around at what I already had in my house and used that as my jumping-off point. I gathered some previously thrifted art, wallpaper samples, fabric swatches, sketches I painted, interesting photos, pictures from magazines I’d been saving just because, and I even cut pictures out of some of my favorite art books.
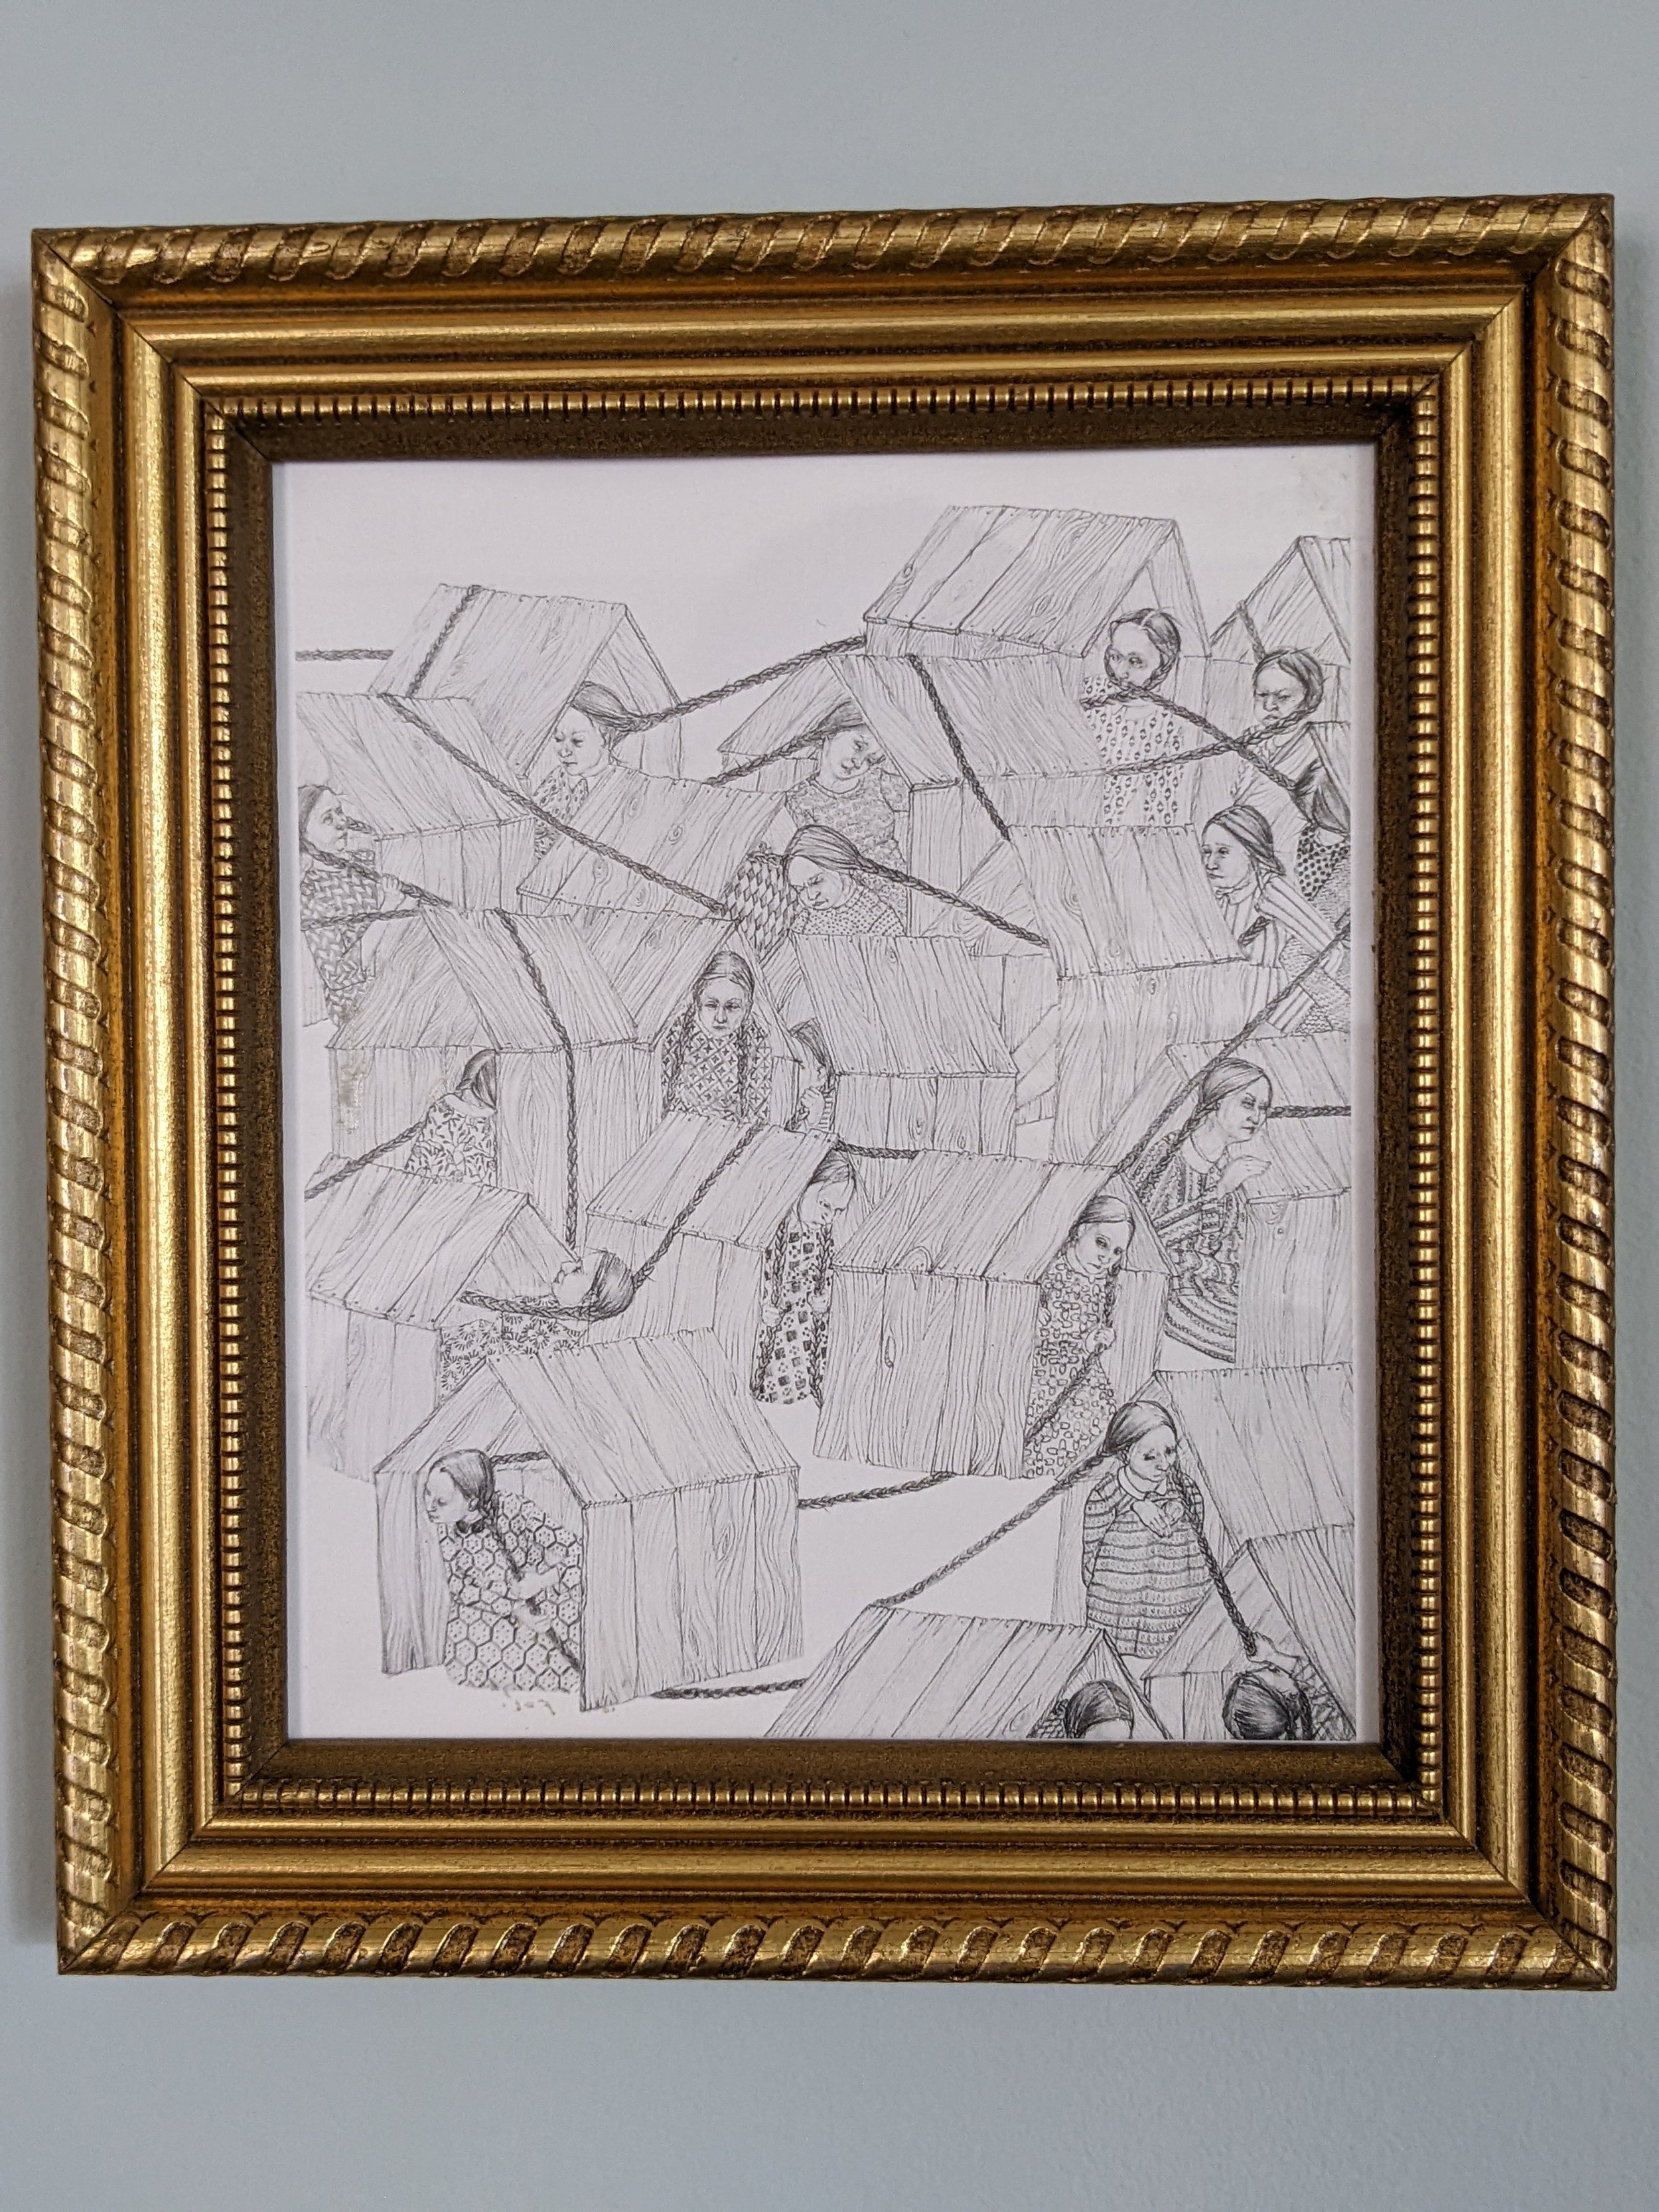
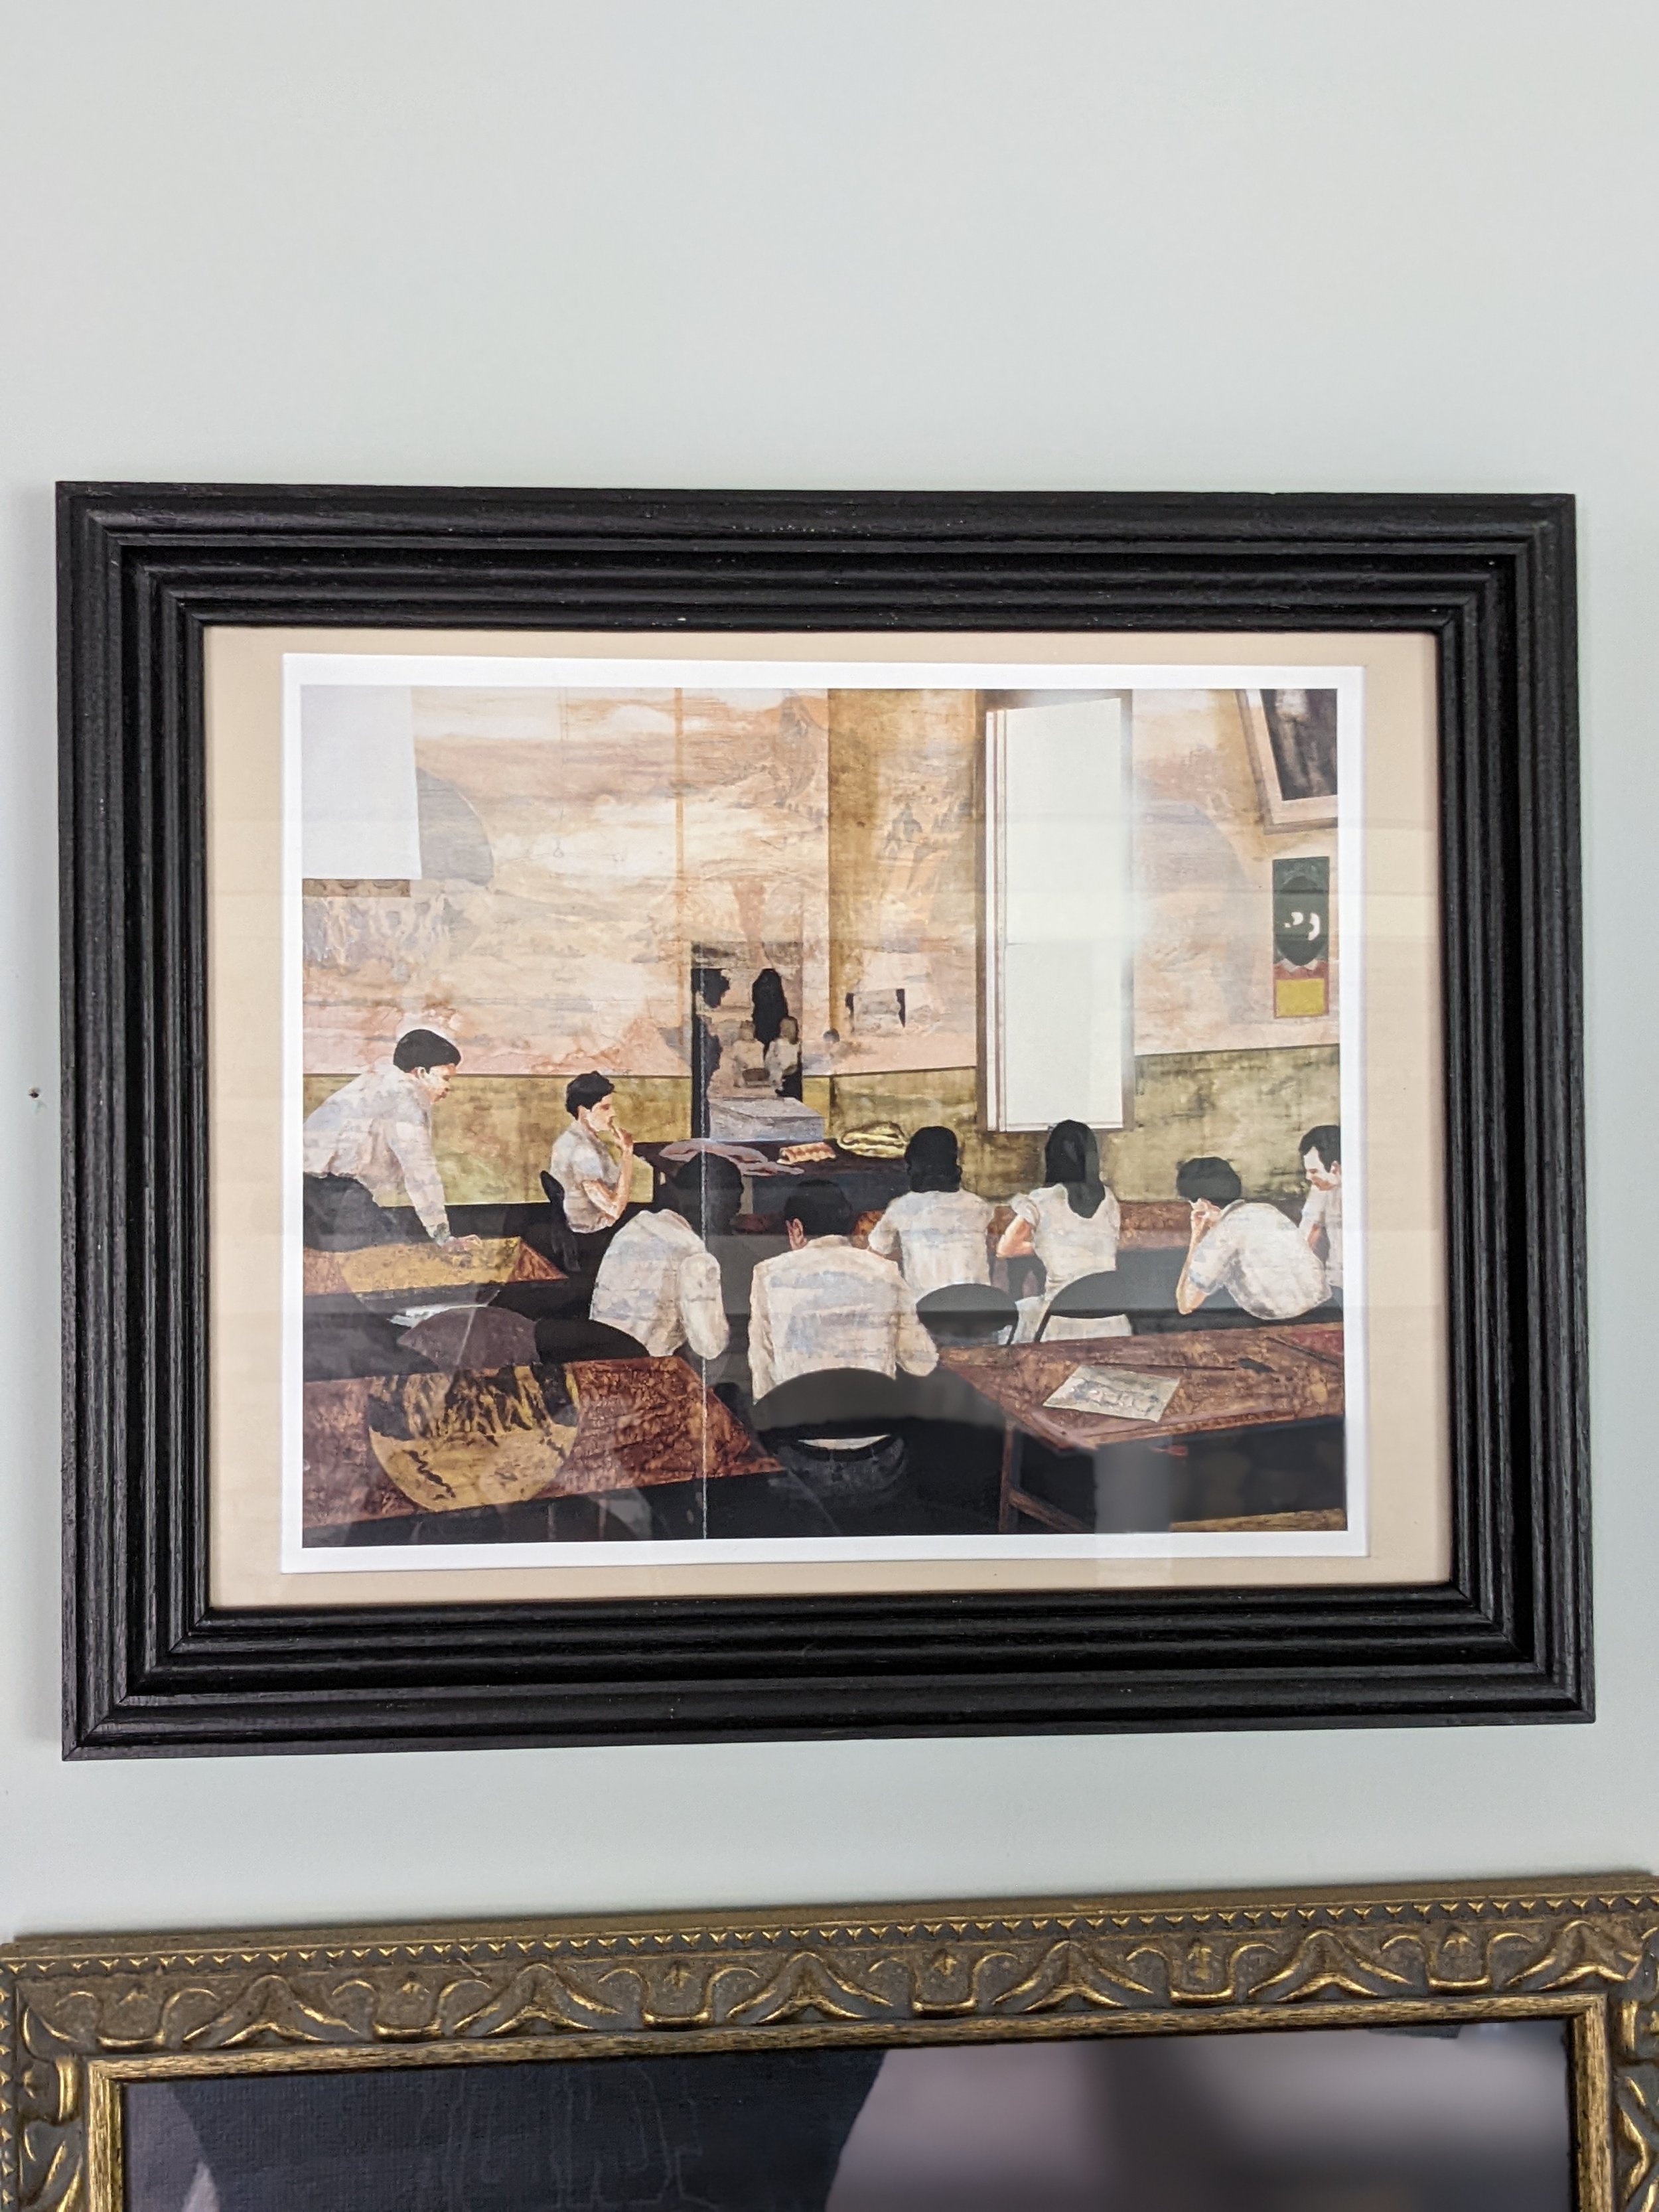
That last one was tricky to talk myself into, but I bought these books 15+ years ago because I loved the art in them - yet I never look at them. So why not use them in a way that I’ll see all the time?
My point is - you don’t have to go out and buy a bunch of new artwork. You may already have tons of images you love around your home.
Variety, but with a Theme
Once I was able to look at everything I already owned together, I noticed some recurring themes. My aesthetic isn’t landscapes! Apparently, I’m way more into figurative artwork, animals, and foliage. Who knew!?
While not everything I gathered made the final cut, much of it did! But I knew I wanted to supplement my collection with a few more pieces. Luckily, now I felt much more confident resuming my search for additional artwork and narrowing down what types of pieces would round out my overall design.

Repetition is your friend here. If you look at your collection and realize you have, for example, a bunch of portraits but only one landscape, you should search for another landscape or two to add to that theme. Or if you have a lot of colorful pictures but only one black and white sketch - maybe search for a second black and white sketch for balance.
In my case, I noticed I had one picture with animals in it, so I searched for a few more - and ended up with three! As another example, I had one sketchy watercolor figure, so I searched for another sketchy figure and found one that caught my eye.
On that note - while repetition among your art is a good idea, don’t feel like you need to be too matchy-matchy with the sizing. Sizing will come into play more in part 2 of this post, where I’ll be talking about getting frames for your gallery wall. Don’t stress yourself out about this part. Just know the more variety, the better!
The End Result
In the end, I bought 6 new digital prints from Juniper Print Shop, BFF Print Shop, and Etsy, all linked below, and paired them with 9 pictures I already owned.
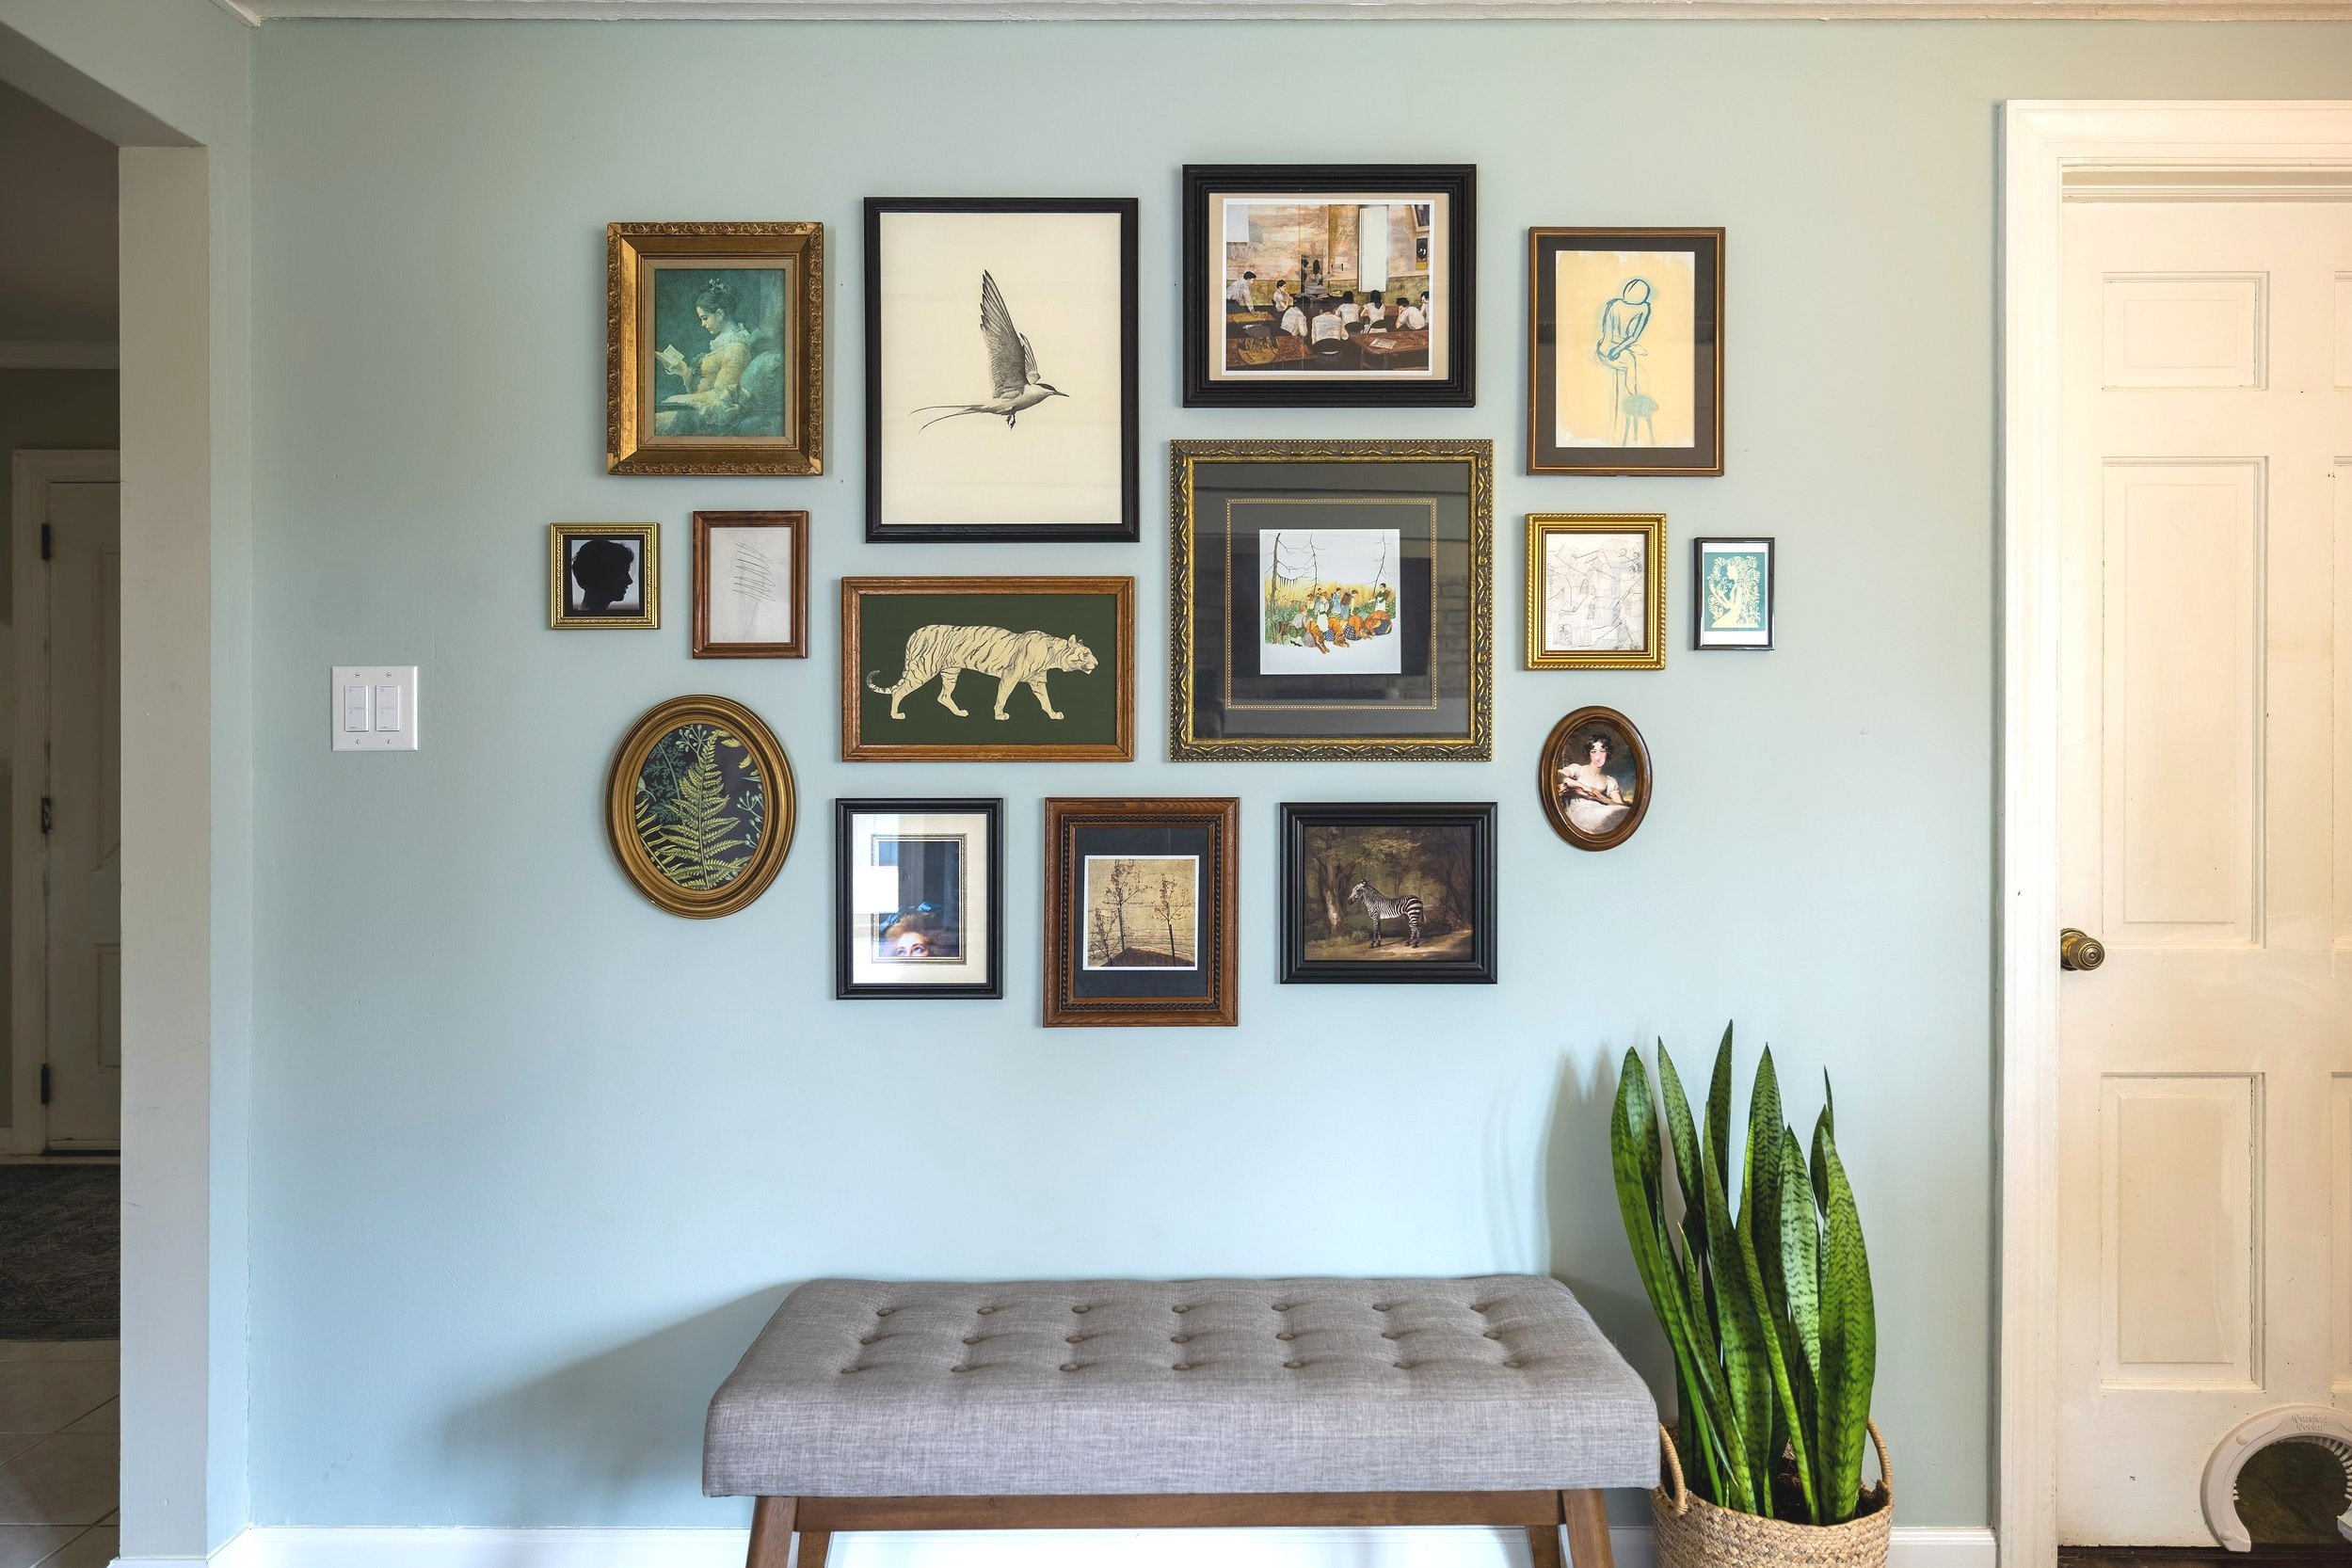
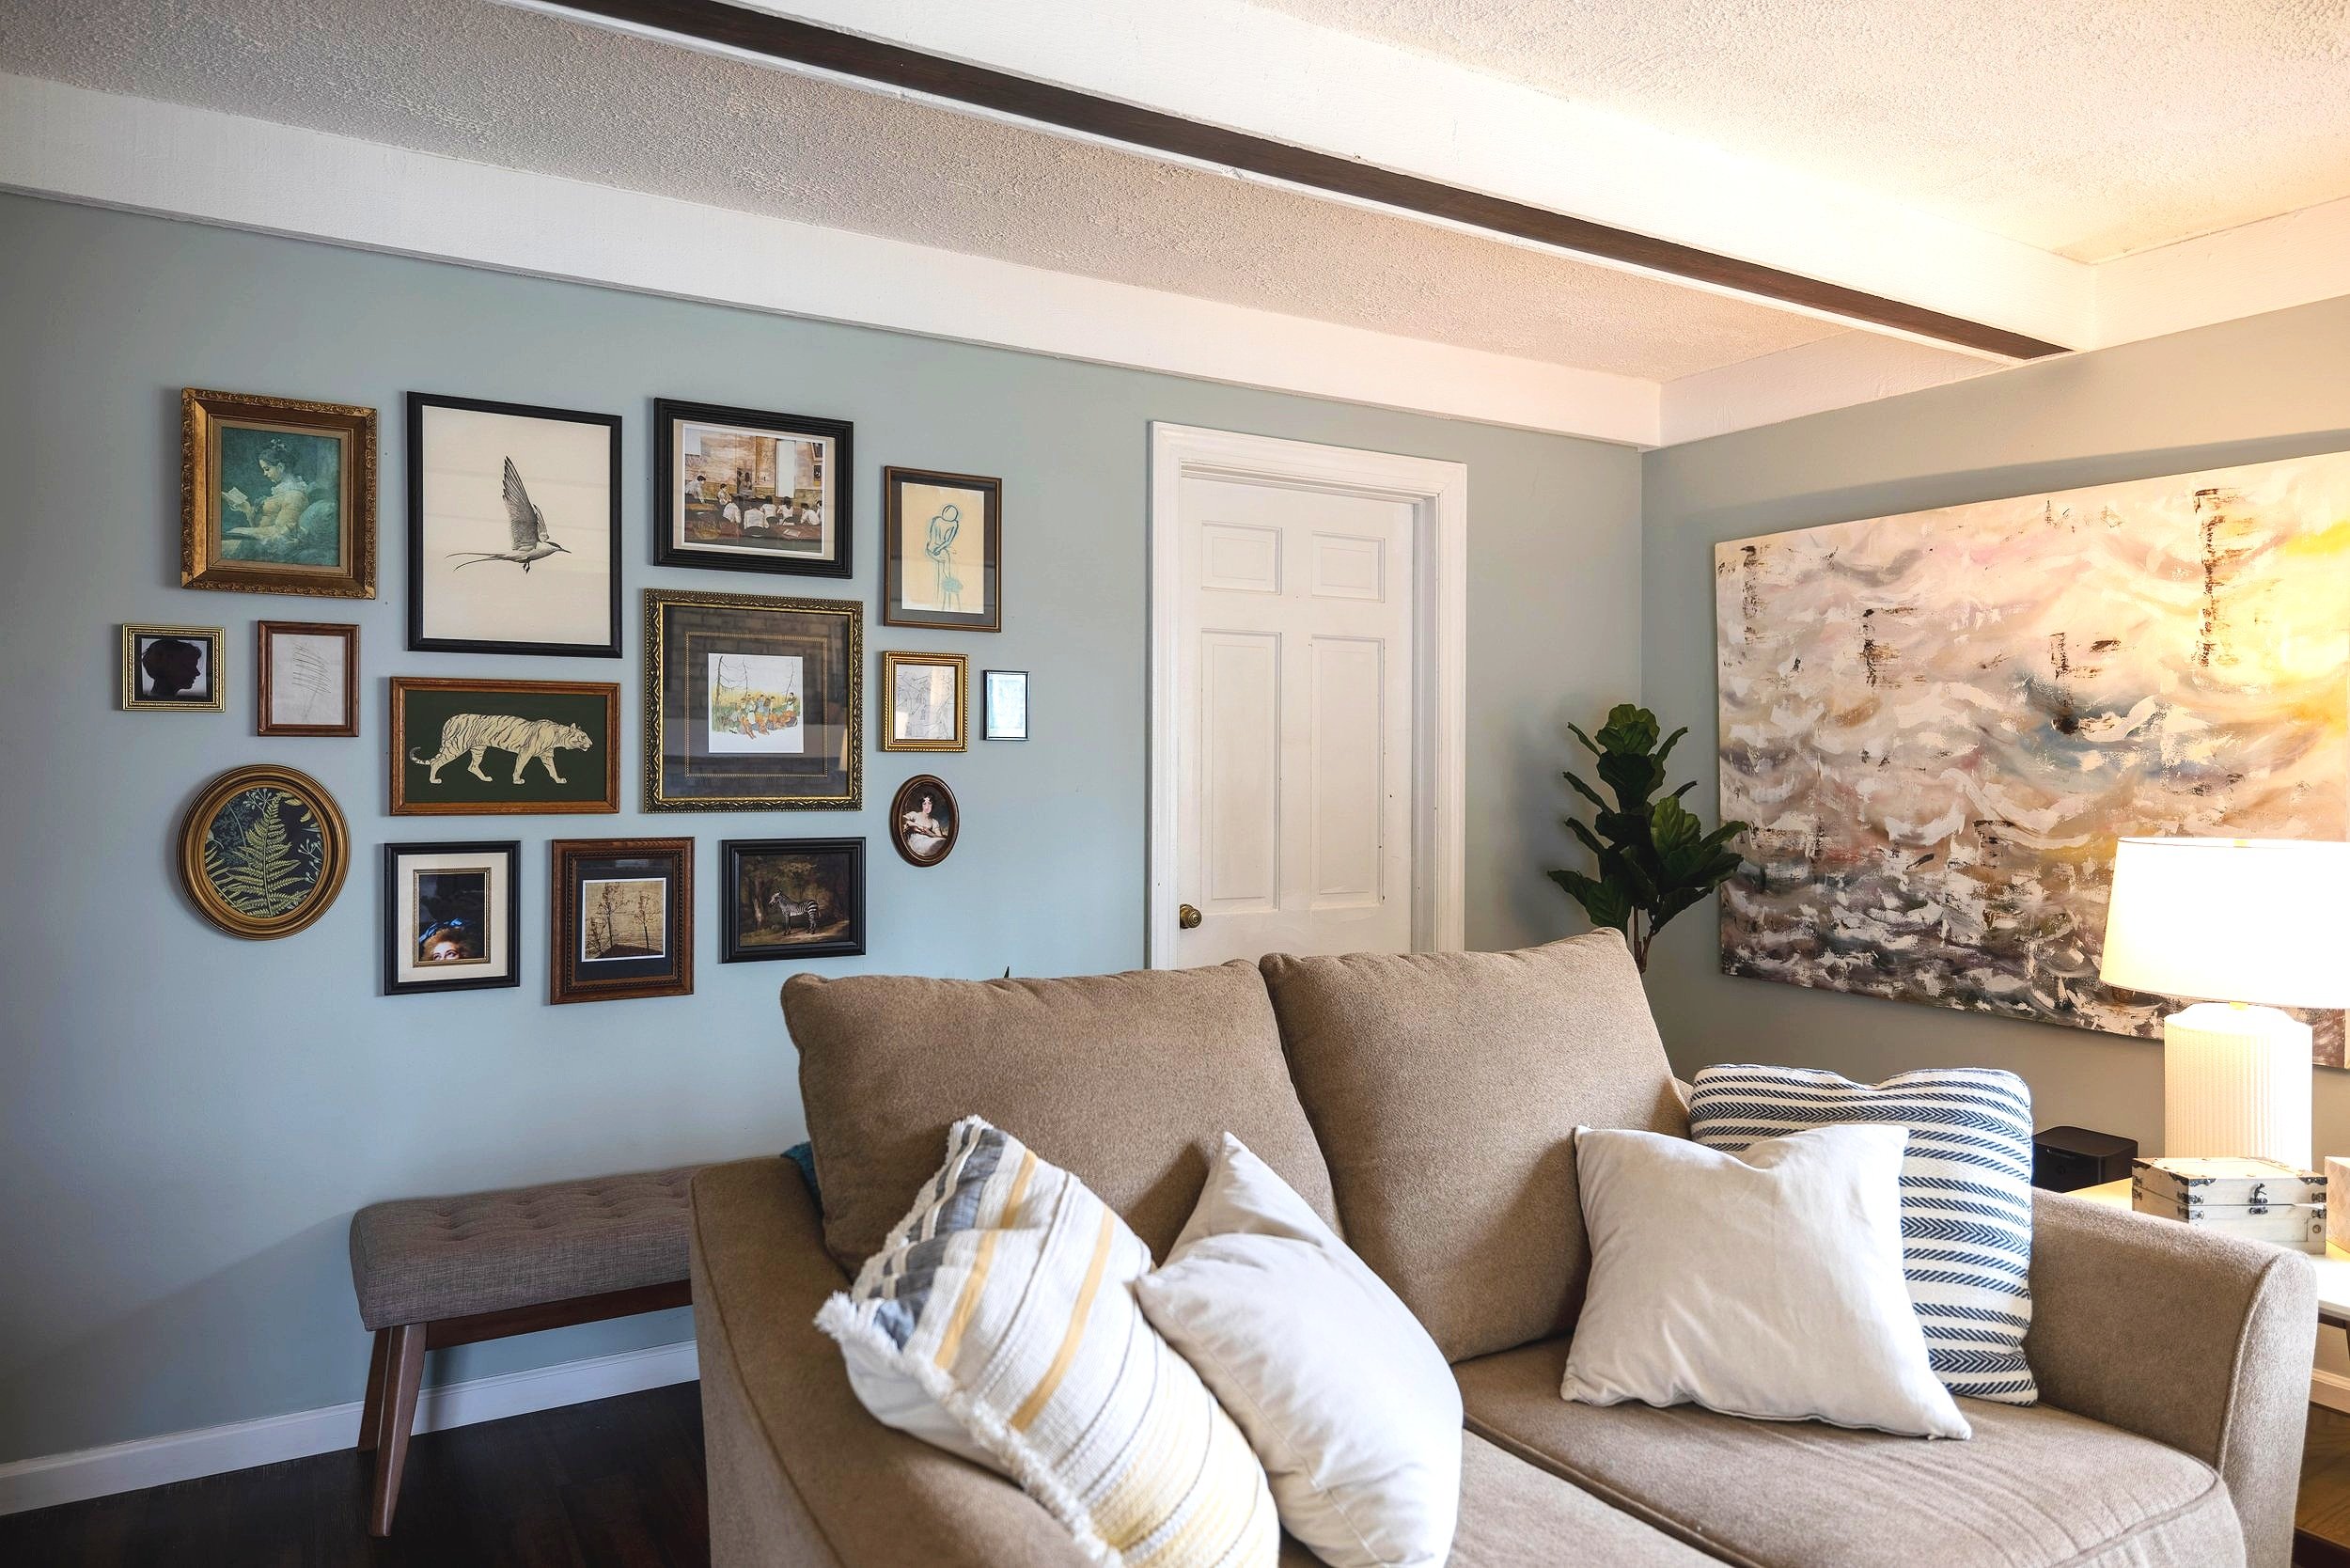
Admittedly, curating my gallery wall was a slow process - slower than I anticipated. And in true Erika fashion, I overthought it more than the average person probably would. BUT, I can honestly say I’m in love with each and every piece and the time I spent putting it all together was definitely worth it.
However, this gallery wall wouldn’t have nearly the same appeal if it wasn’t for the frames. Stay tuned for my next post, where I’ll share how I went about gathering and, in some cases, modifying the frames - without blowing my budget!
In the meantime, here are links to the prints I purchased:

And here are some of the prints I seriously considered adding to my gallery wall - with links, in case any of them strike your fancy.

Final Thoughts
For those of you who skipped to the end (you naughty minx, you), here’s the TL;DR version:
Gather inspiration: Use Pinterest to pin anything and everything that catches your eye. From there, you’ll begin to see common themes appear.
Generic isn’t interesting: Don’t fall back on what everyone else is doing. Make your gallery wall a reflection of you.
Use what you have: You don’t have to spend a fortune buying all new art. You’ve likely already gathered art around your house that you were obviously drawn to - add it to your gallery wall!
Variety, but with a theme: An interesting gallery wall will have a variety of images - both in subject matter and material - just don’t throw in everything but the kitchen sink. Find a few themes and build on those.
So, I have to ask - which is your favorite picture on the gallery wall?

Check out the articles below for more ways to add impact to your walls:
How to Assemble a Gallery Wall

Is it Better to Use a Brush and Roller or Paint Sprayer?
When it came to painting our loft, I was intimidated. It’s a BIG room - around 900 sq. feet. The thought of rolling paint on the ceiling alone had me Googling local chiropractors in preparation for the aftermath. But then Lucius and I realized that with the loft completely empty, this would be a good opportunity to finally invest in a paint sprayer. So invest we did!
And now that the job is done, I’m excited to break down how using a paint sprayer compares to rolling paint, and to answer the question you might be asking, “Should I use a paint sprayer or a roller for that project?”.
Spraying vs Rolling Paint
Most people don’t love to paint. But I’m not most people.
I’ve said it once and I’ll say it again - I love painting. It’s my time to put on a good podcast, zone out, and let my mind wander - something I don’t give myself nearly enough time to do on the regular.

But when it came to painting our loft, I was intimidated. It’s a BIG room - around 900 sq. feet. The thought of rolling paint on the ceiling alone had me Googling local chiropractors in preparation for the aftermath. But then Lucius and I realized that with the loft completely empty, this would be a good opportunity to finally invest in a paint sprayer. So invest we did!
And now that the job is done, I’m excited to break down how using a paint sprayer compares to rolling paint, and to answer the question you might be asking, “Should I use a paint sprayer or a roller for that project?”.
Learning Curve
As an Amazon Associate, I earn from qualifying purchases. This post may contain affiliate links, meaning I receive commissions for purchases made through those links at no cost to you.
First up, let’s talk about the learning curve of each method.
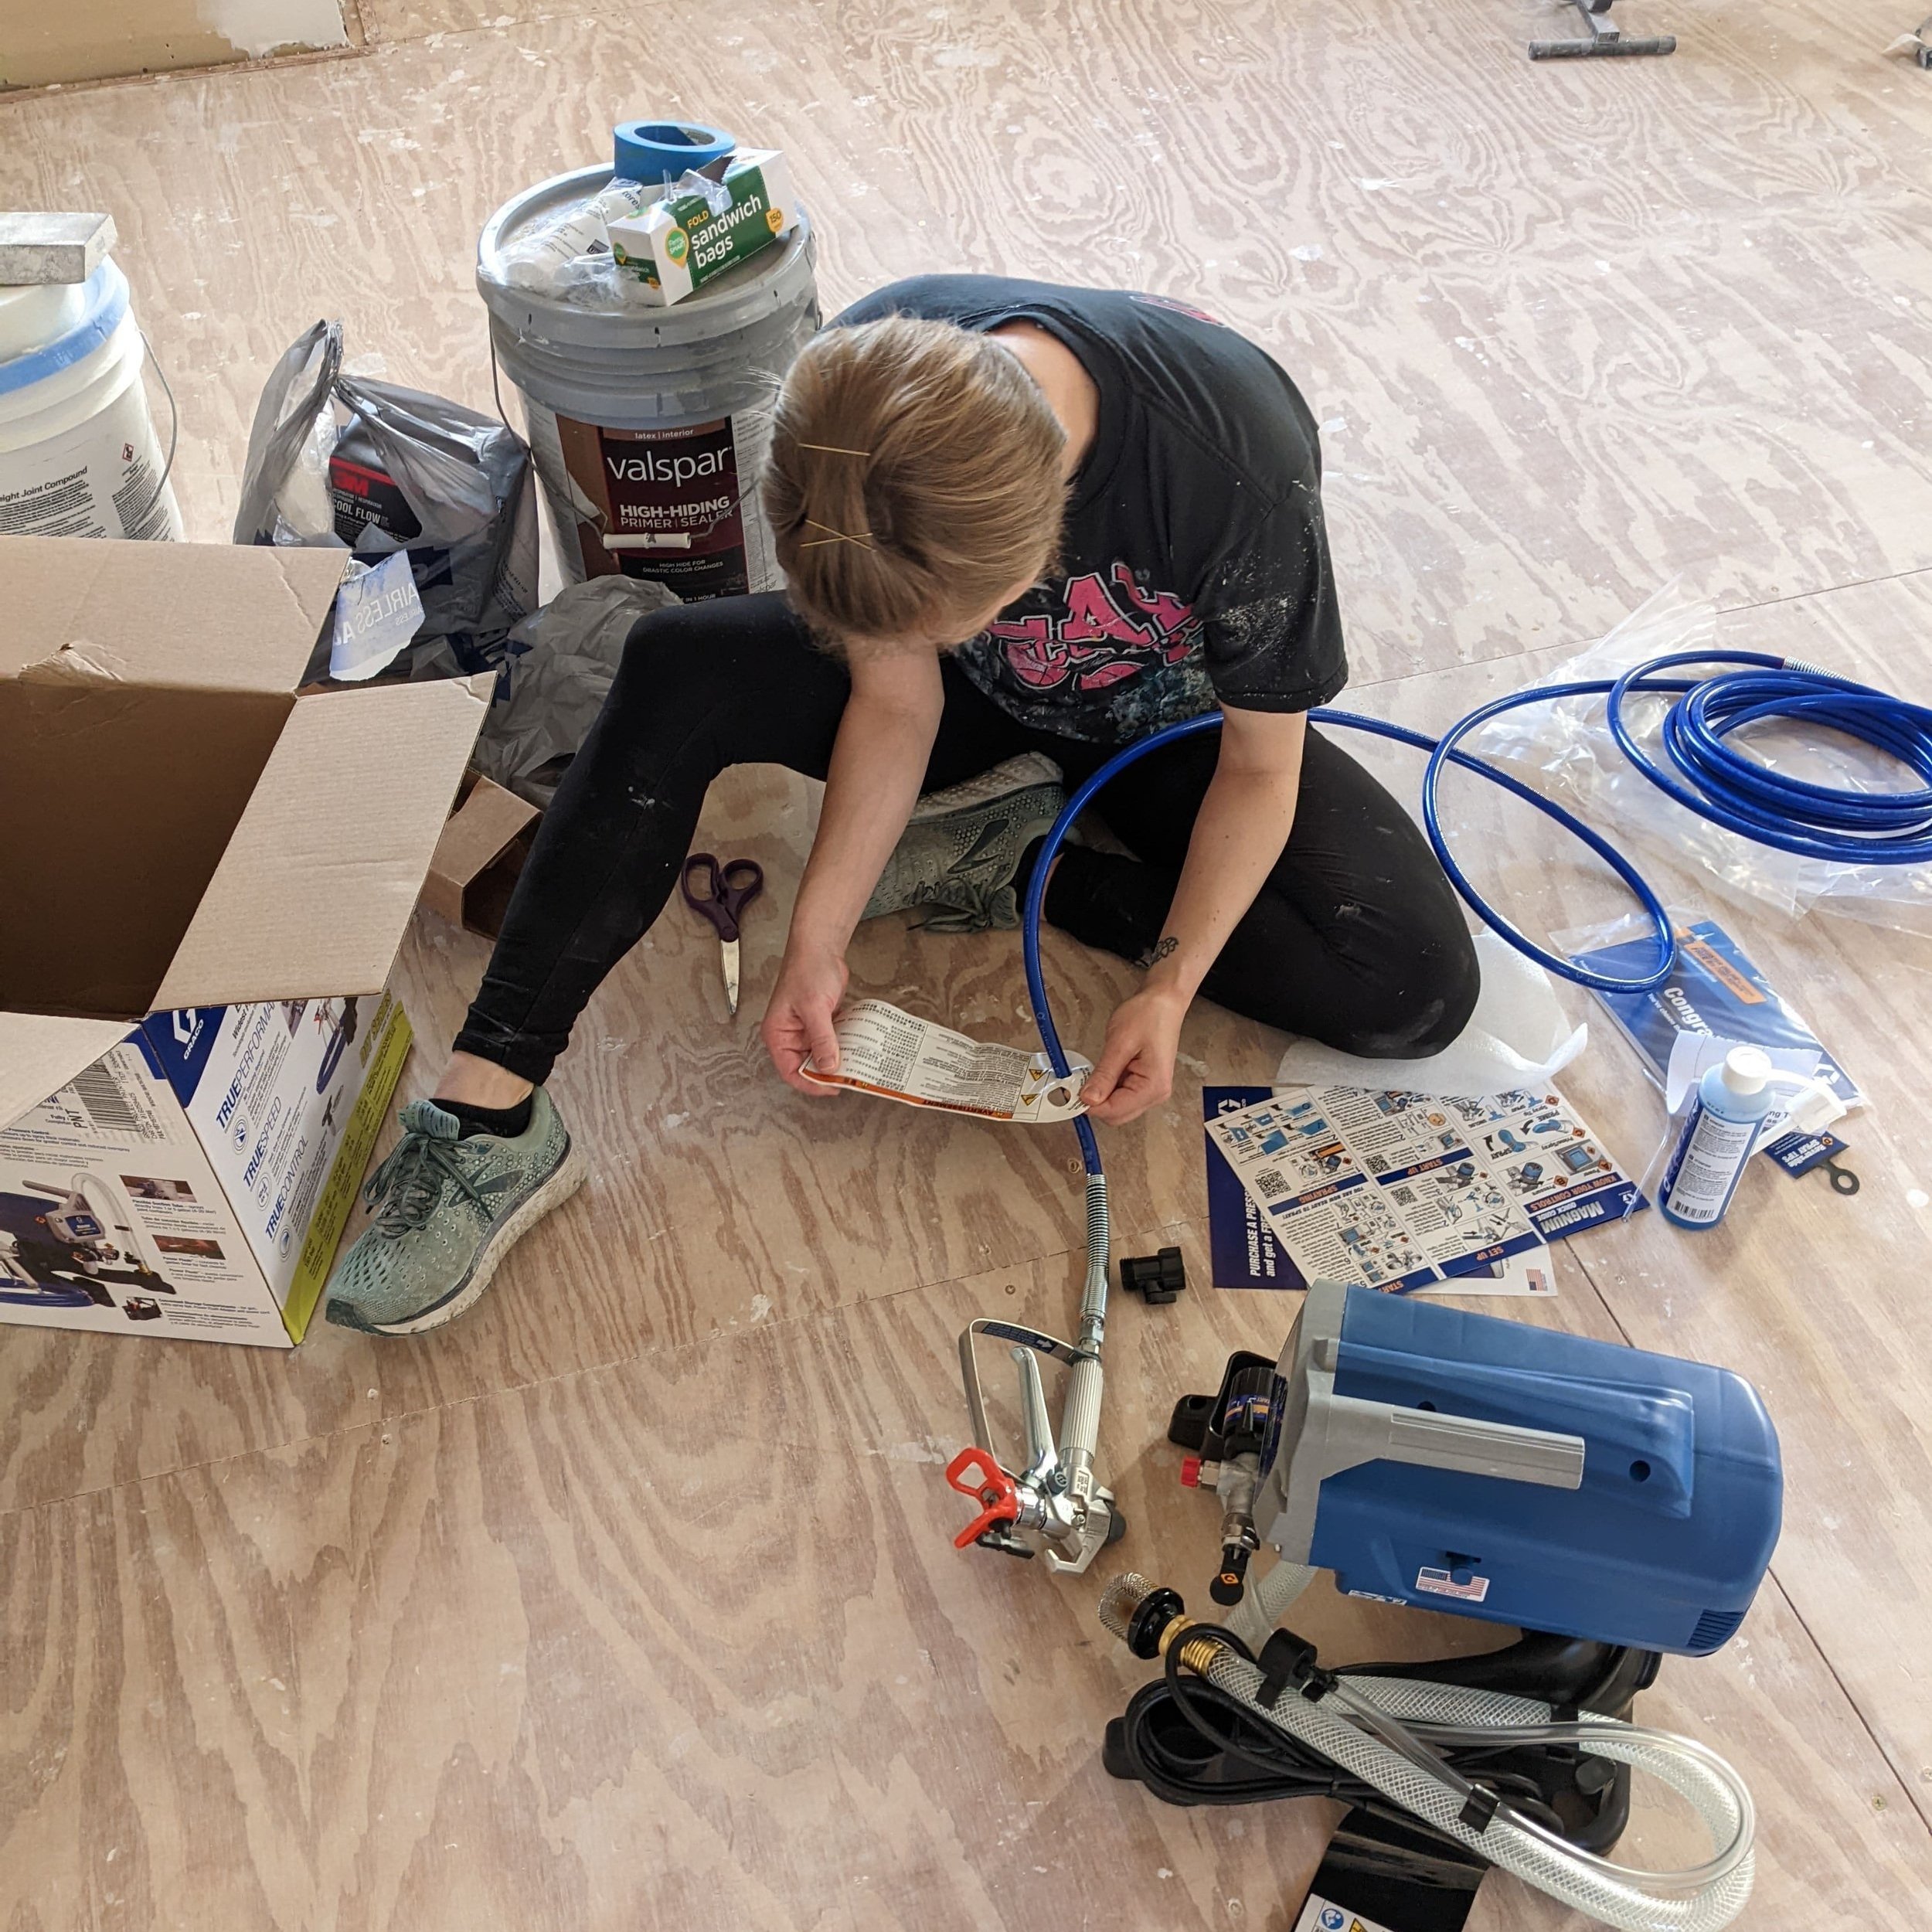
Using a paint sprayer definitely took a bit of getting used to. Trying to figure out how far from the wall you need to be, how quickly to move for each pass, and finding the right intensity of the spray took some trial and error. For the first several passes, I had the intensity way too high and applied so much paint it started dripping. After some practice, though, I got the hang of it, got into a rhythm, and zoomed right along.
For reference, here’s the paint sprayer I own.
Rolling paint is so second nature to me at this point, at first, I wasn’t even thinking there was a learning curve. But then I remembered the first time I painted a room with a roller… (cue wavy lines)
I was a teenager painting my bedroom in the new house we just moved into. I chose a seafoam green color and was going to paint the ceiling. I remember paint raining upon my head, and the hardwood floors my dad was so excited about. Yikes.
Even while using a brush, it took a lot of practice before I was good enough to not use tape when cutting in anymore. This is my favorite paintbrush to use nowadays, btw.
Winner: Neither! Needless to say, each method comes with its own challenges and will take some getting used to in its own way.
Cost

At this point I’ve been painting interiors for years, but, as I mentioned above, it wasn’t until it was time to paint the loft that we decided to invest in a paint sprayer. The main reason for our hesitation is simple: cost. Paint sprayers can be expensive! Of course, there are tons of different tiers of pricing depending on the bells and whistles each paint sprayer has. But the initial investment definitely felt like, well, an investment.
By comparison, a paintbrush and roller are significantly cheaper. BUT over time those costs can add up. I reuse my brushes loads of times before I replace them, and I’ll get at least a few good runs out of a roller too. But inevitably, they need to be tossed at the risk of sacrificing my finished product.
Another aspect of cost to consider is that paint sprayers overall use quite a bit more paint. I saw a couple of resources mention they could use up to 33% more paint! Mo paint = mo money. Unfortunately, most of that paint ends up being dispersed into the air and drying into fine dust before it hits anything.
Winner: I have to give it to the tried and true roller and brush method.
Coverage

I’ve said it before, but no matter what the paint manufacturers tell you, when using a roller, you should ALWAYS apply at least two coats of paint. I know, it’s annoying and time-consuming, but I guarantee you’ll miss little spots here and there and overall won’t see the true color of your paint with one coat.
On the flip side, I was impressed with how well the coverage was when using my paint sprayer. The walls in the loft turned out great. I think the off-white paint was a close enough match to the white primer that any light areas aren’t noticeable. HOWEVER, just because the coverage looks good, doesn’t mean you can always get away with one coat. (I learned this the hard way.)
When I sprayed the ceiling (with black paint, mind you), it looked a little streaky but I assumed that was where there was more paint applied and it would even out after it dried. NOT THE CASE. Once the paint dried the streaks were, although less noticeable, still visible. At that point, I had already cleaned up my sprayer and packed it in for the day. Shortly thereafter, we installed flooring and moved furniture back into the room (like a couple of dummies).
I guess what I’m saying is that I get the best of both worlds in this room because I get to go back and roll a second coat of paint on the ceiling! (Jealous?)
Winner: I’m not sure if my ceiling debacle is because of my inexperience with spraying paint, or if that’s a common problem. But since my walls turned out fine, I have to say a paint sprayer will typically give you better coverage.
Finish

One thing I was pleasantly surprised about after using my paint sprayer was the finish. I didn’t expect the walls to be as smooth as a baby’s bottom, but they are!
By contrast, rollers can leave a slight texture, though it’s never been noticeable enough to bother me. I think it’s worth noting that at the end of the day, the smoother finish from spraying paint wouldn’t be the deciding factor in choosing a sprayer over a roller.
Unfortunately for me, I didn’t realize there would be a difference in the texture of the paint after rolling vs spraying. When I started to tape off the ceiling to spray the walls, the ceiling wasn’t cured enough, and pulled some paint off with it. I decided to stop taping and instead spray only the bottom half of the walls and roll the top half.
Of course, I didn’t think about the difference in texture between the two at the time. It’s a subtle, barely noticeable thing, but it bothers me since I know it’s there.
Winner: Paint sprayer takes the cake for this one
Versatility

The way I see it, there are two main arguments for versatility: texture and paint type.
Texture
Rollers come in various nap sizes so that you can paint various different textures of walls. The different naps can even help add texture to a wall if you want. BUT, depending on the type of texture, rolling might not be your best option. Take popcorn ceilings for example, which are known to shred a roller.
A paint sprayer, on the other hand, can get into all those nooks and crannies with no problem, but can’t add texture.
Paint Type
Painting our loft actually wasn’t the first time I had used a paint sprayer. Last summer, when I was working on our deck, I spent loads of time tediously taping off everything in preparation to spray it. But once I started, I only made it a few passes before the sprayer got clogged. Unbeknownst to me, because of the added texture, deck paint cannot be sprayed (at least with the sprayers I’ve used). That being said, I’m sure there are other types of paint that are inadvisable to spray.
Using a brush and roller, however, saved the day! Yes, brushing paint between each of the deck boards before rolling on paint was tedious, but it got the job done. And had I known beforehand that the sprayer wouldn’t work, I would have saved a ton of time NOT taping off everything surrounding the deck.
Winner: I’m calling this one a tie.
Set up and Teardown

The time to set up and teardown a paint sprayer is, in my opinion, the biggest argument against not using one - especially with a more heavy-duty paint sprayer like mine.
With a brush and a roller, you just grab them and go. But with a paint sprayer, you have to deal with putting it together, priming it, and then pretty much doing all that in reverse once you’re done. Not to mention covering anything you don’t want to be painted (including yourself).
Plus, switching colors with a paint sprayer is much more complicated because you have to deal with flushing out the whole system. Typically with a brush and roller, I’ll have several on-hand. When switching colors, I simply put the used item in a Ziploc bag until I’m ready to wash everything at once at the end.
Winner: This is an easy one - a paintbrush and roller wins hand’s down.
On that note…
Speed

While you can practically jump right in with a brush and roller, if you’re planning on using a paint sprayer you really have to prepare. Unless your room is completely empty (like mine was), you have to ensure that ANY exposed surface is covered. All of that prep work can take quite a bit of time.
On the flip side, the act of spraying a room is significantly faster than cutting in with a brush and rolling on two coats of paint. Painting the loft would have taken me several days with a roller and brush. While spraying the room still took a good amount of time, I was able to get it done in two (long) days total.
Winner: Total tie
The question you really want answered…
When it comes down to it, many of you are probably saying to yourselves, “Okay, okay, get to the point. When should I use a paint sprayer vs a roller?”. Well, lucky for you I’m here to give you the most wishy-washy answer I can: It depends!
But seriously, each painting project is going to have its own circumstances. Your best bet is to weigh the pros and cons I outlined above and determine on a case-by-case basis which method is best for that specific project. Or, pin the infographic below to reference later!
Are there any pros or cons for either method I missed? Let me know in the comments!


For more painting-related posts, check out the articles below
Paint Sprayer vs Roller
Loft Reno - Updates, What’s Left, and New Ideas
I can’t believe how long it’s been since my last post about the loft! The most recent changes happened in such quick succession, it didn’t register how much has changed until, um… now. But a LOT has changed! So, in this post, I’ll walk you through what we’ve done to the loft since my last update, what’s still left to do, and some new ideas we’ve been throwing around!
Bonus Room Renovation
I can’t believe how long it’s been since my last post about the loft! The most recent changes happened in such quick succession it didn’t register how much has changed until, um… now. But a LOT has changed! So, in this post, I’ll walk you through what we’ve done to the loft since my last update, what’s still left to do, and some new ideas we’ve been throwing around!


As an Amazon Associate, I earn from qualifying purchases. This post may contain affiliate links, meaning I receive commissions for purchases made through those links at no cost to you.
Let’s kick this post off with a list of the most recent progress:
Paint
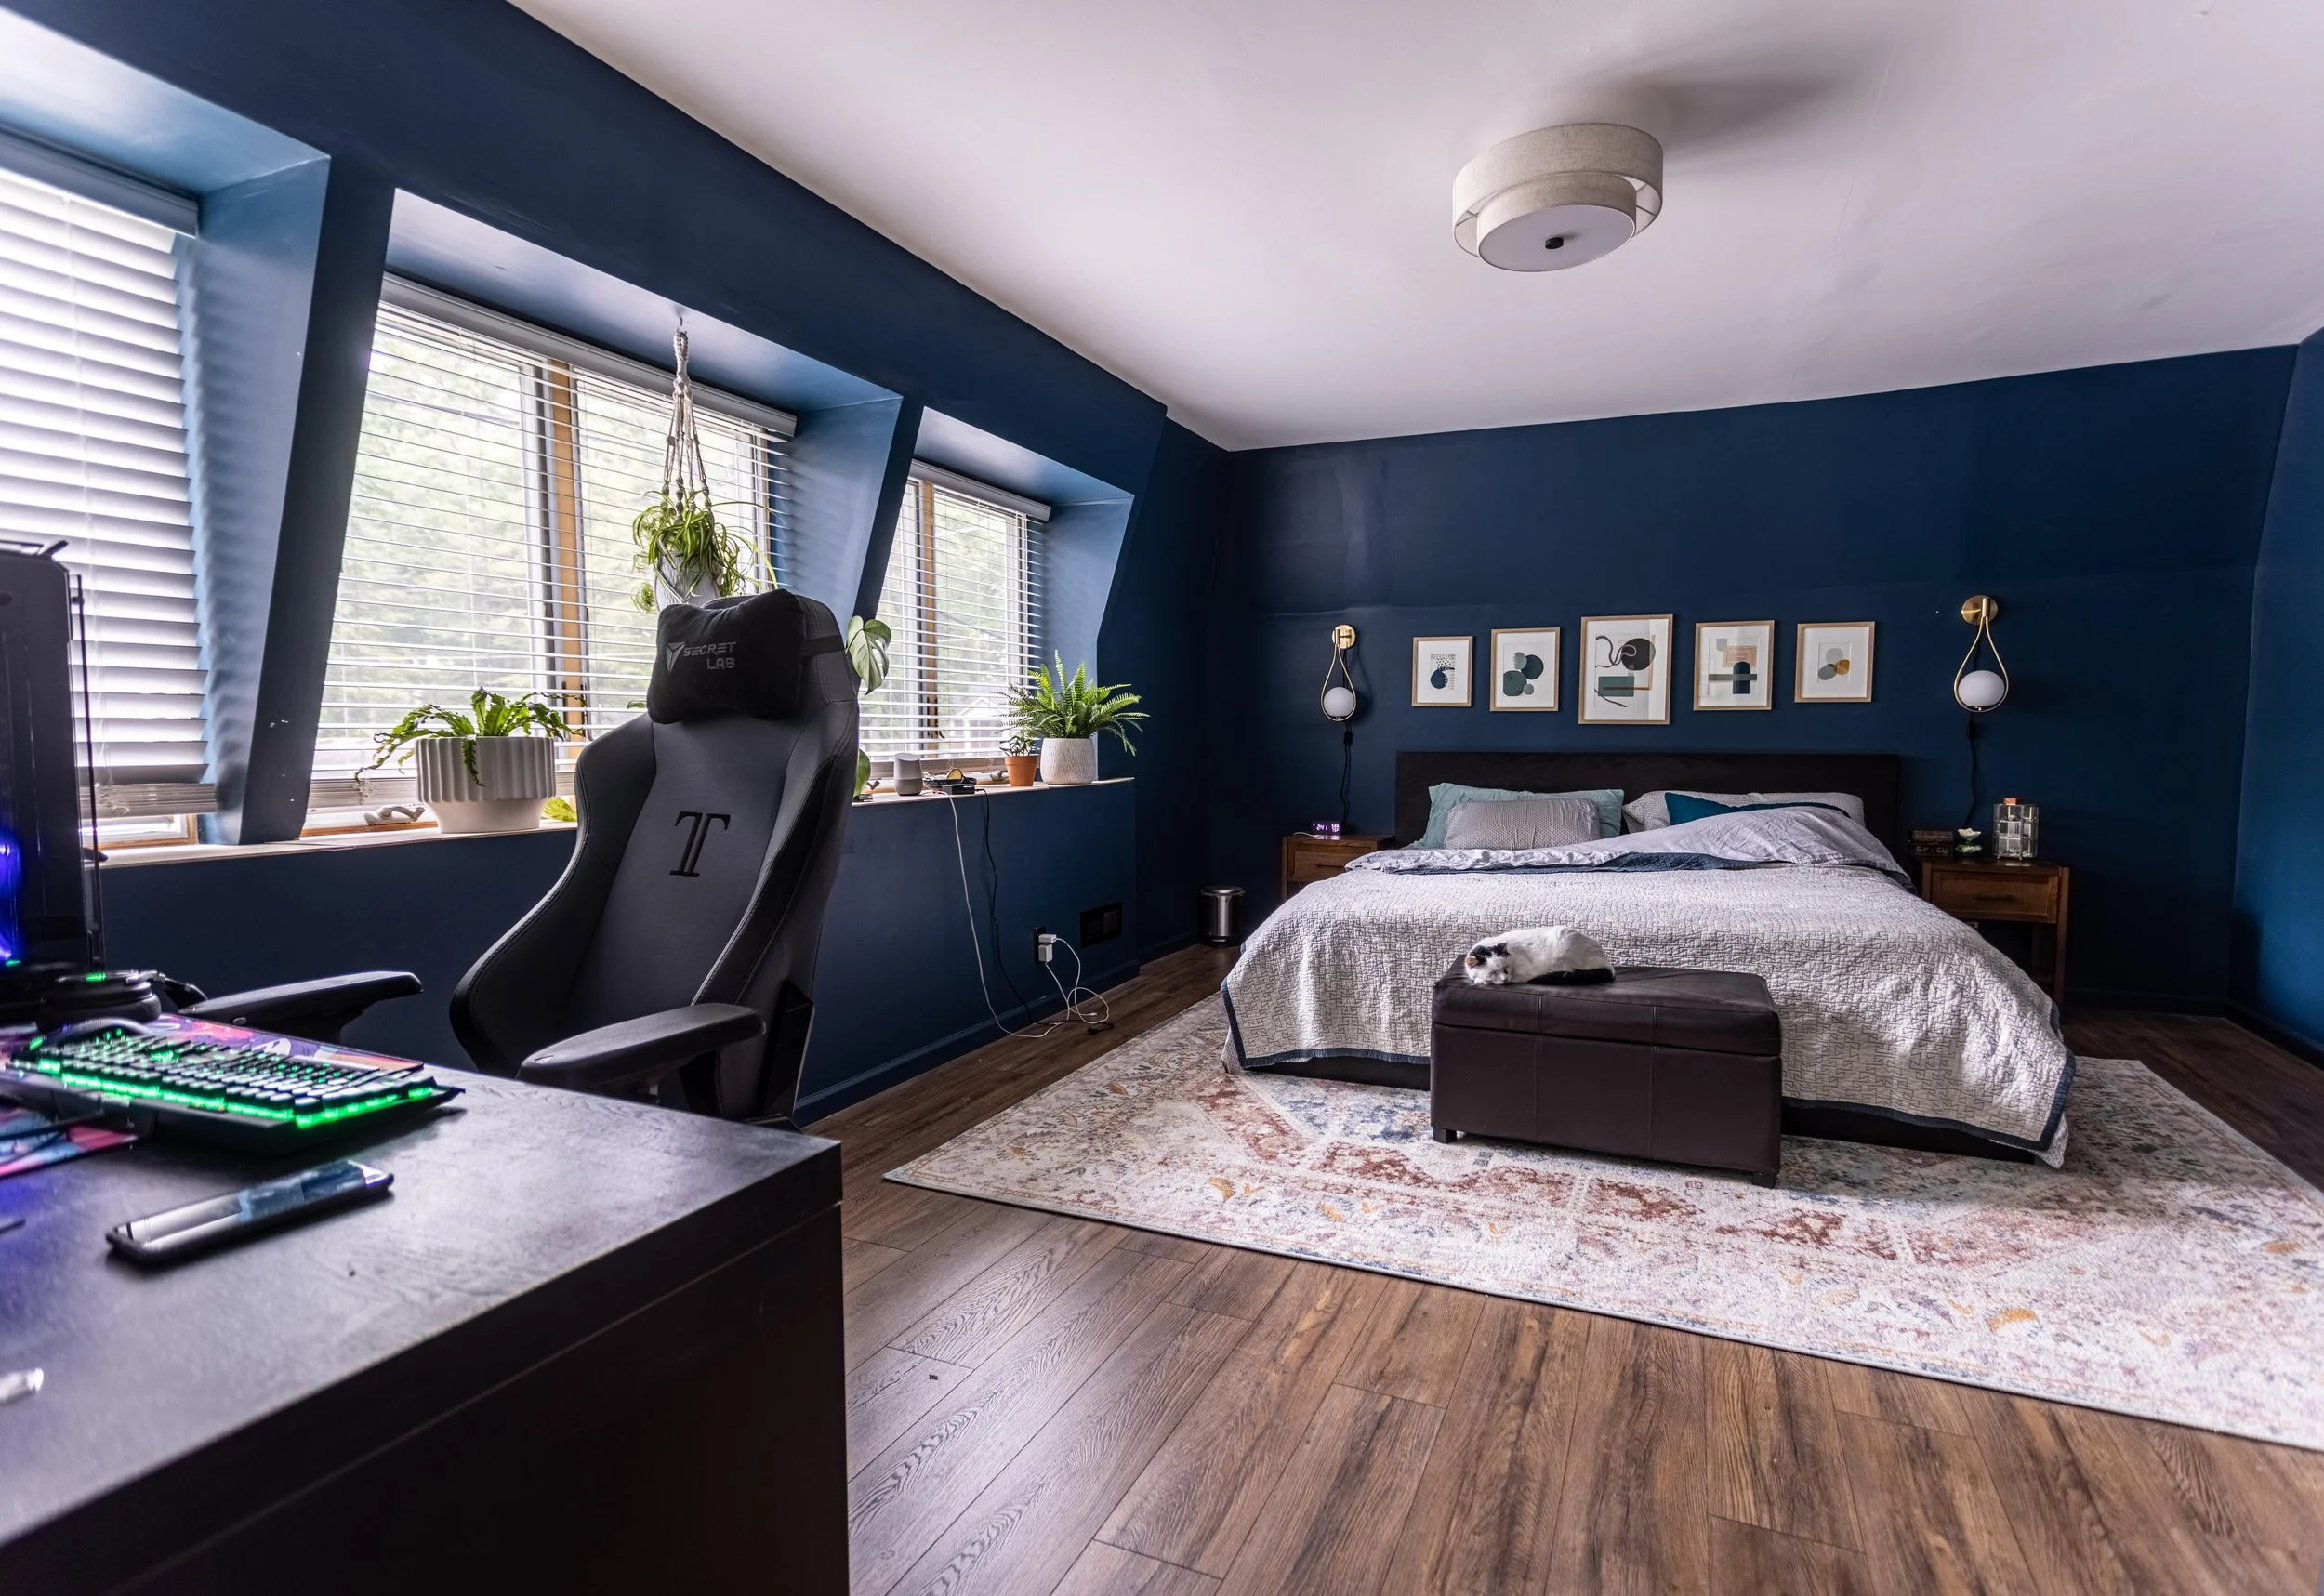
Ahhhh, paint. My favorite way to make a big impact on a budget - and this was no exception. I was especially excited to paint this room because I got to break in my new paint sprayer for the first time!
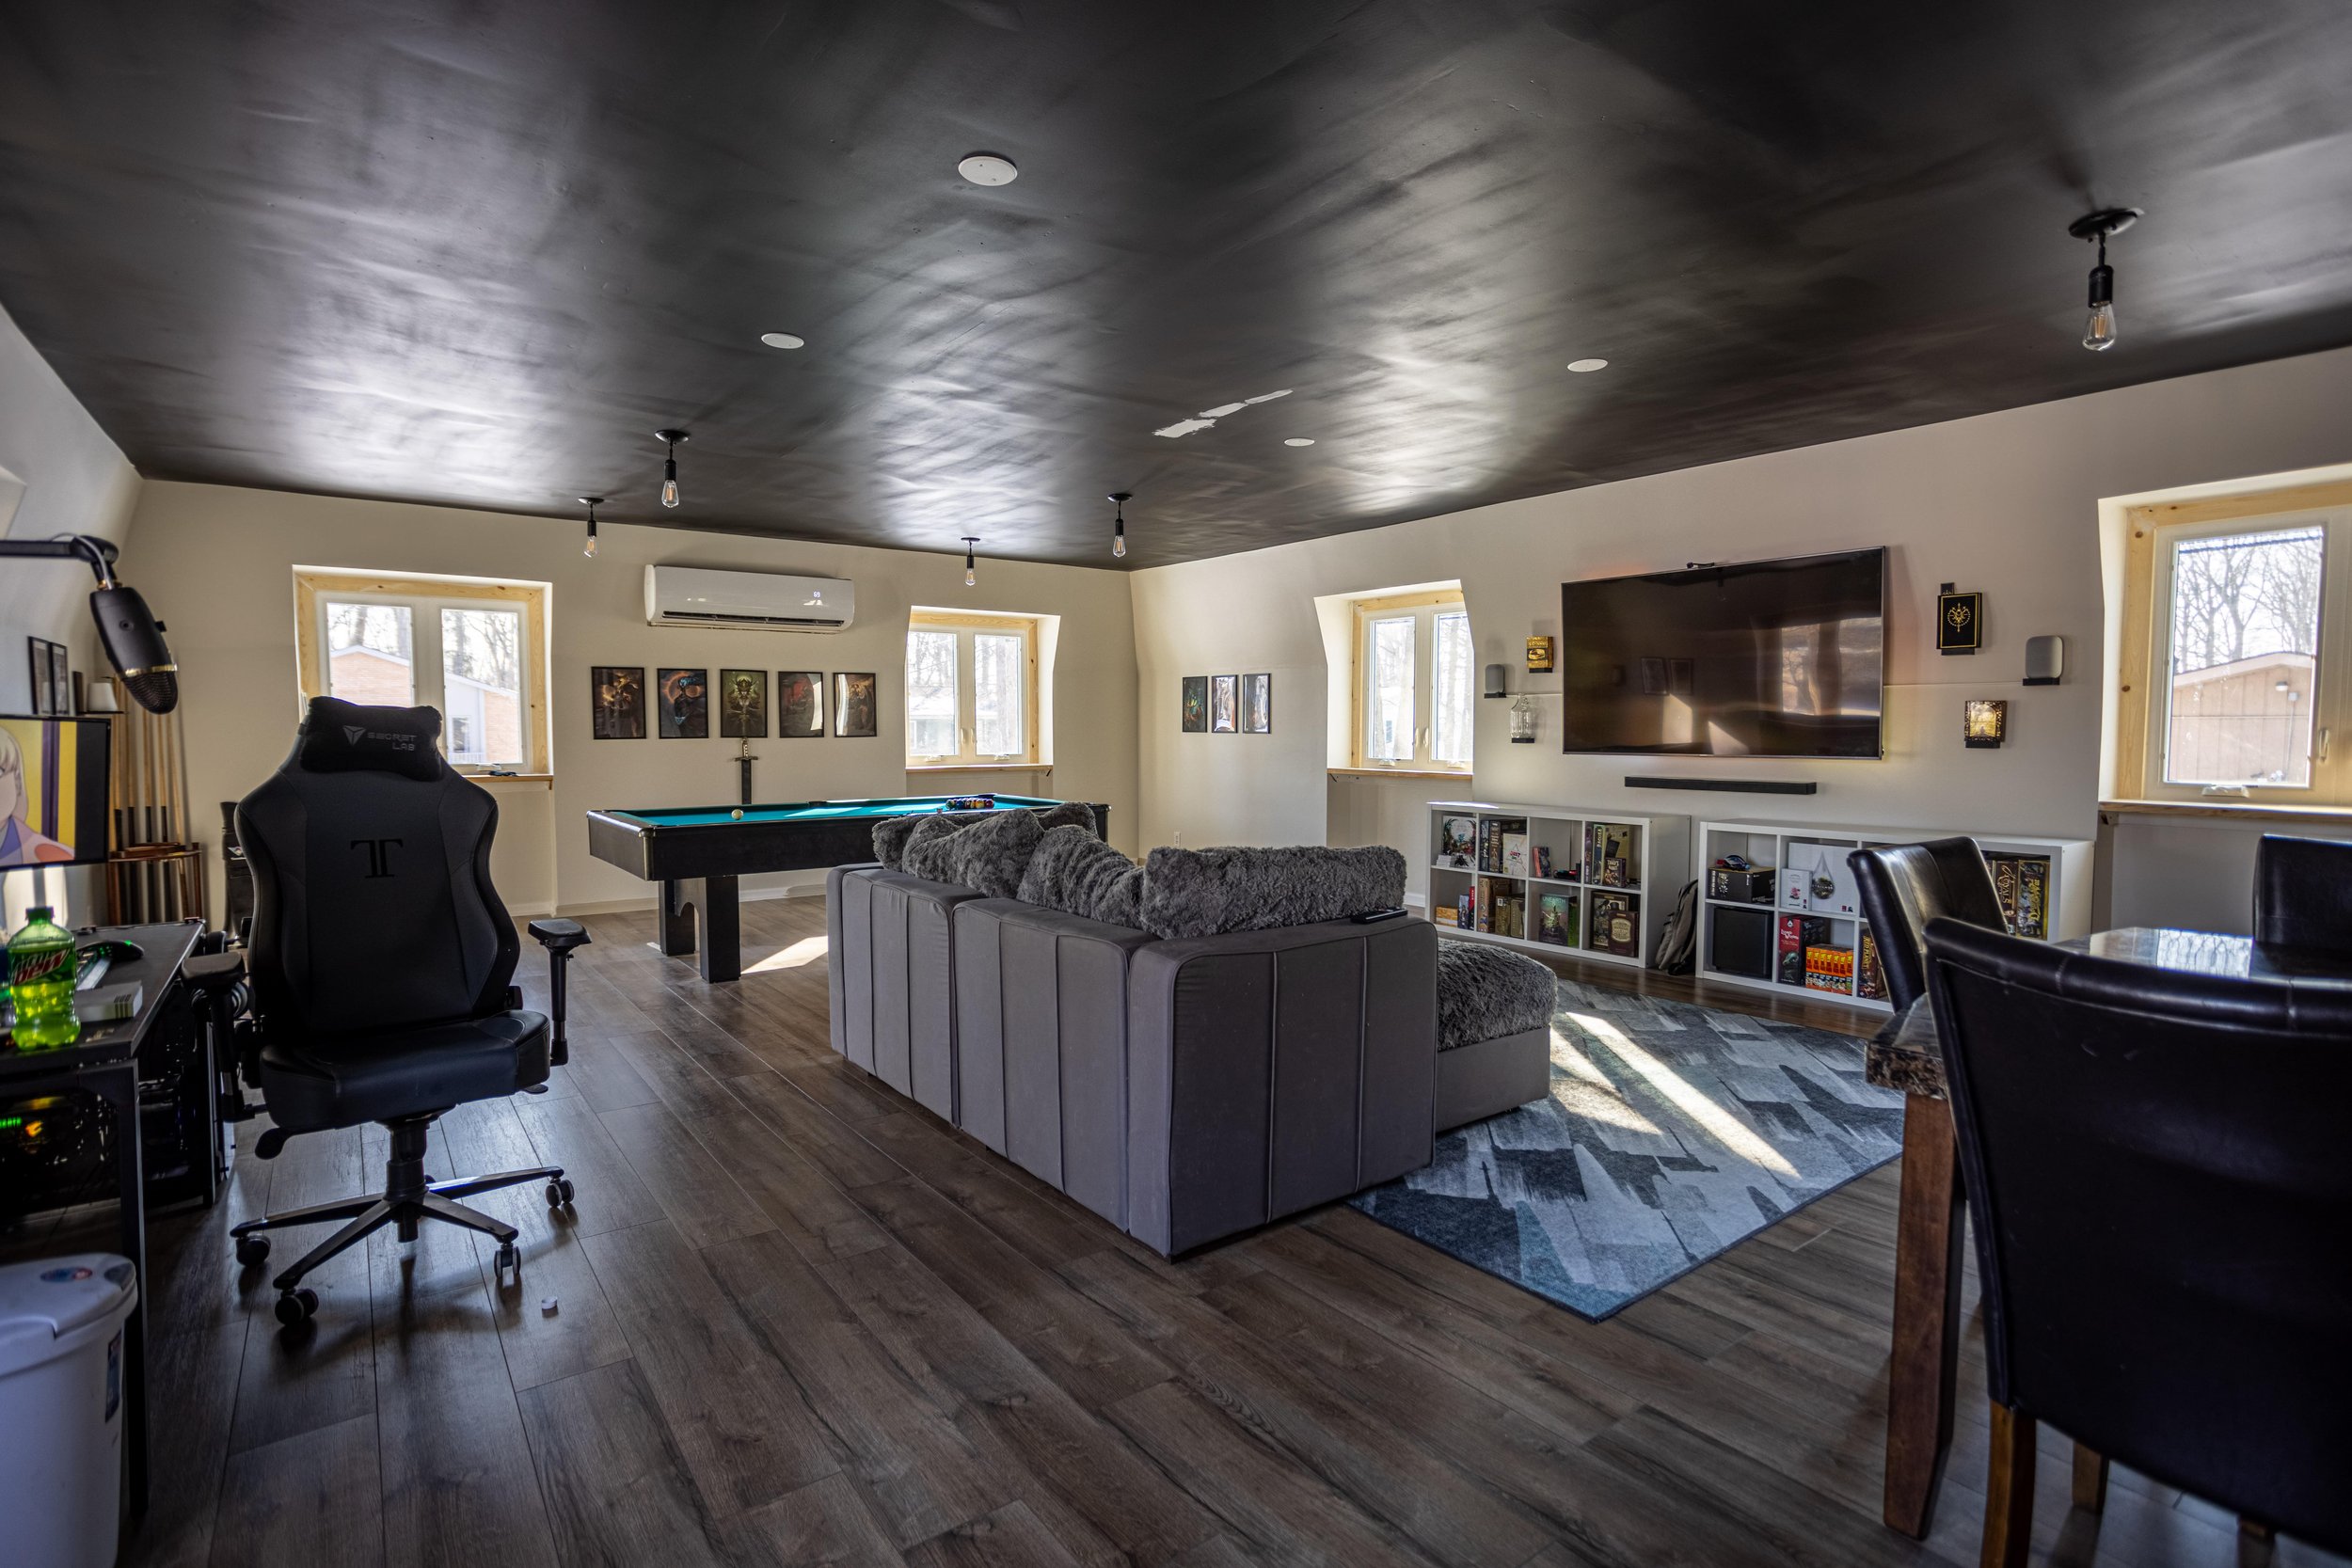
To stick with the industrial style I’ve envisioned all along for this room, I painted the ceiling black, which hasn’t entirely turned out exactly as planned. Don’t get me wrong, I love the black ceiling and vibe it gives to this room. I don’t love that although I used flat paint, it’s reading way more glossy than I’d like it to.
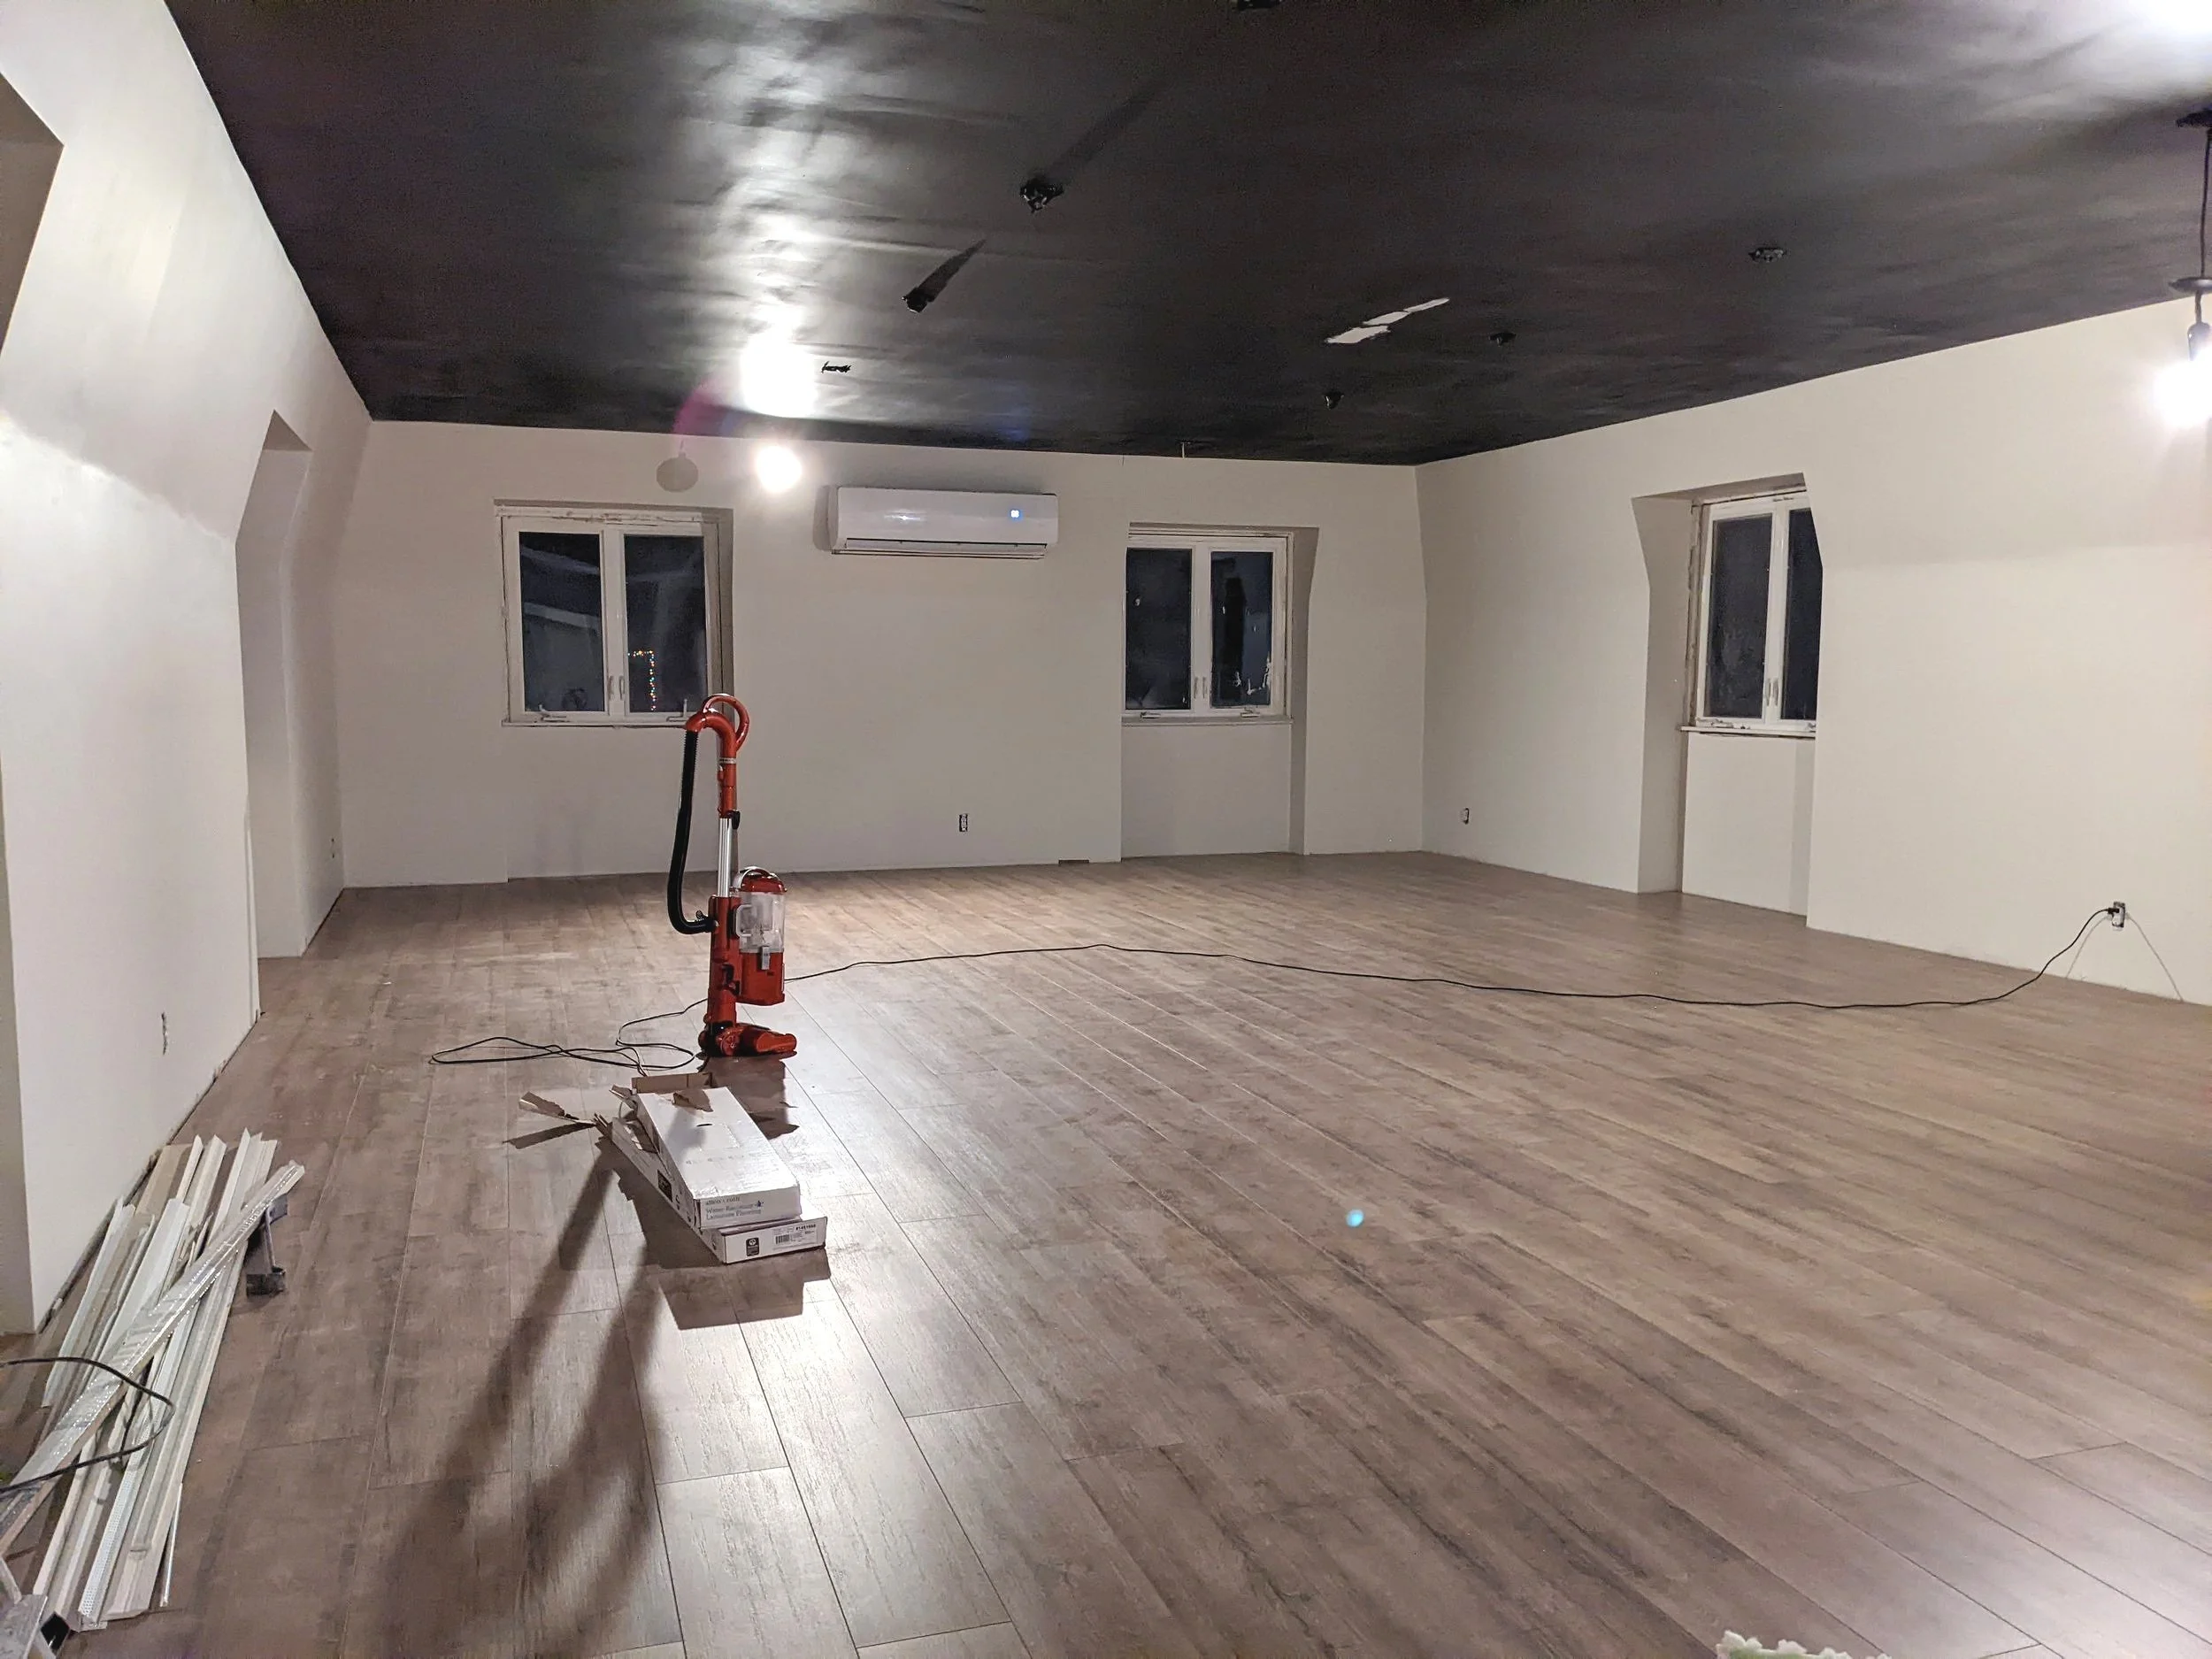
I’m also frustrated with myself for only spraying one coat of paint on the ceiling - because you can definitely see the spray lines. I plan on rolling a second coat of paint on later, which will hopefully even things out. But that’s a BIG ceiling, so I wish I would’ve just done a second coat with the sprayer while I had the chance.
After my experience spraying the paint on this entire room, I’m excited to share my thoughts on spraying vs. rolling in a different post - the good and the bad - but that’s for another time! For now, we’ll keep it focused on the design.
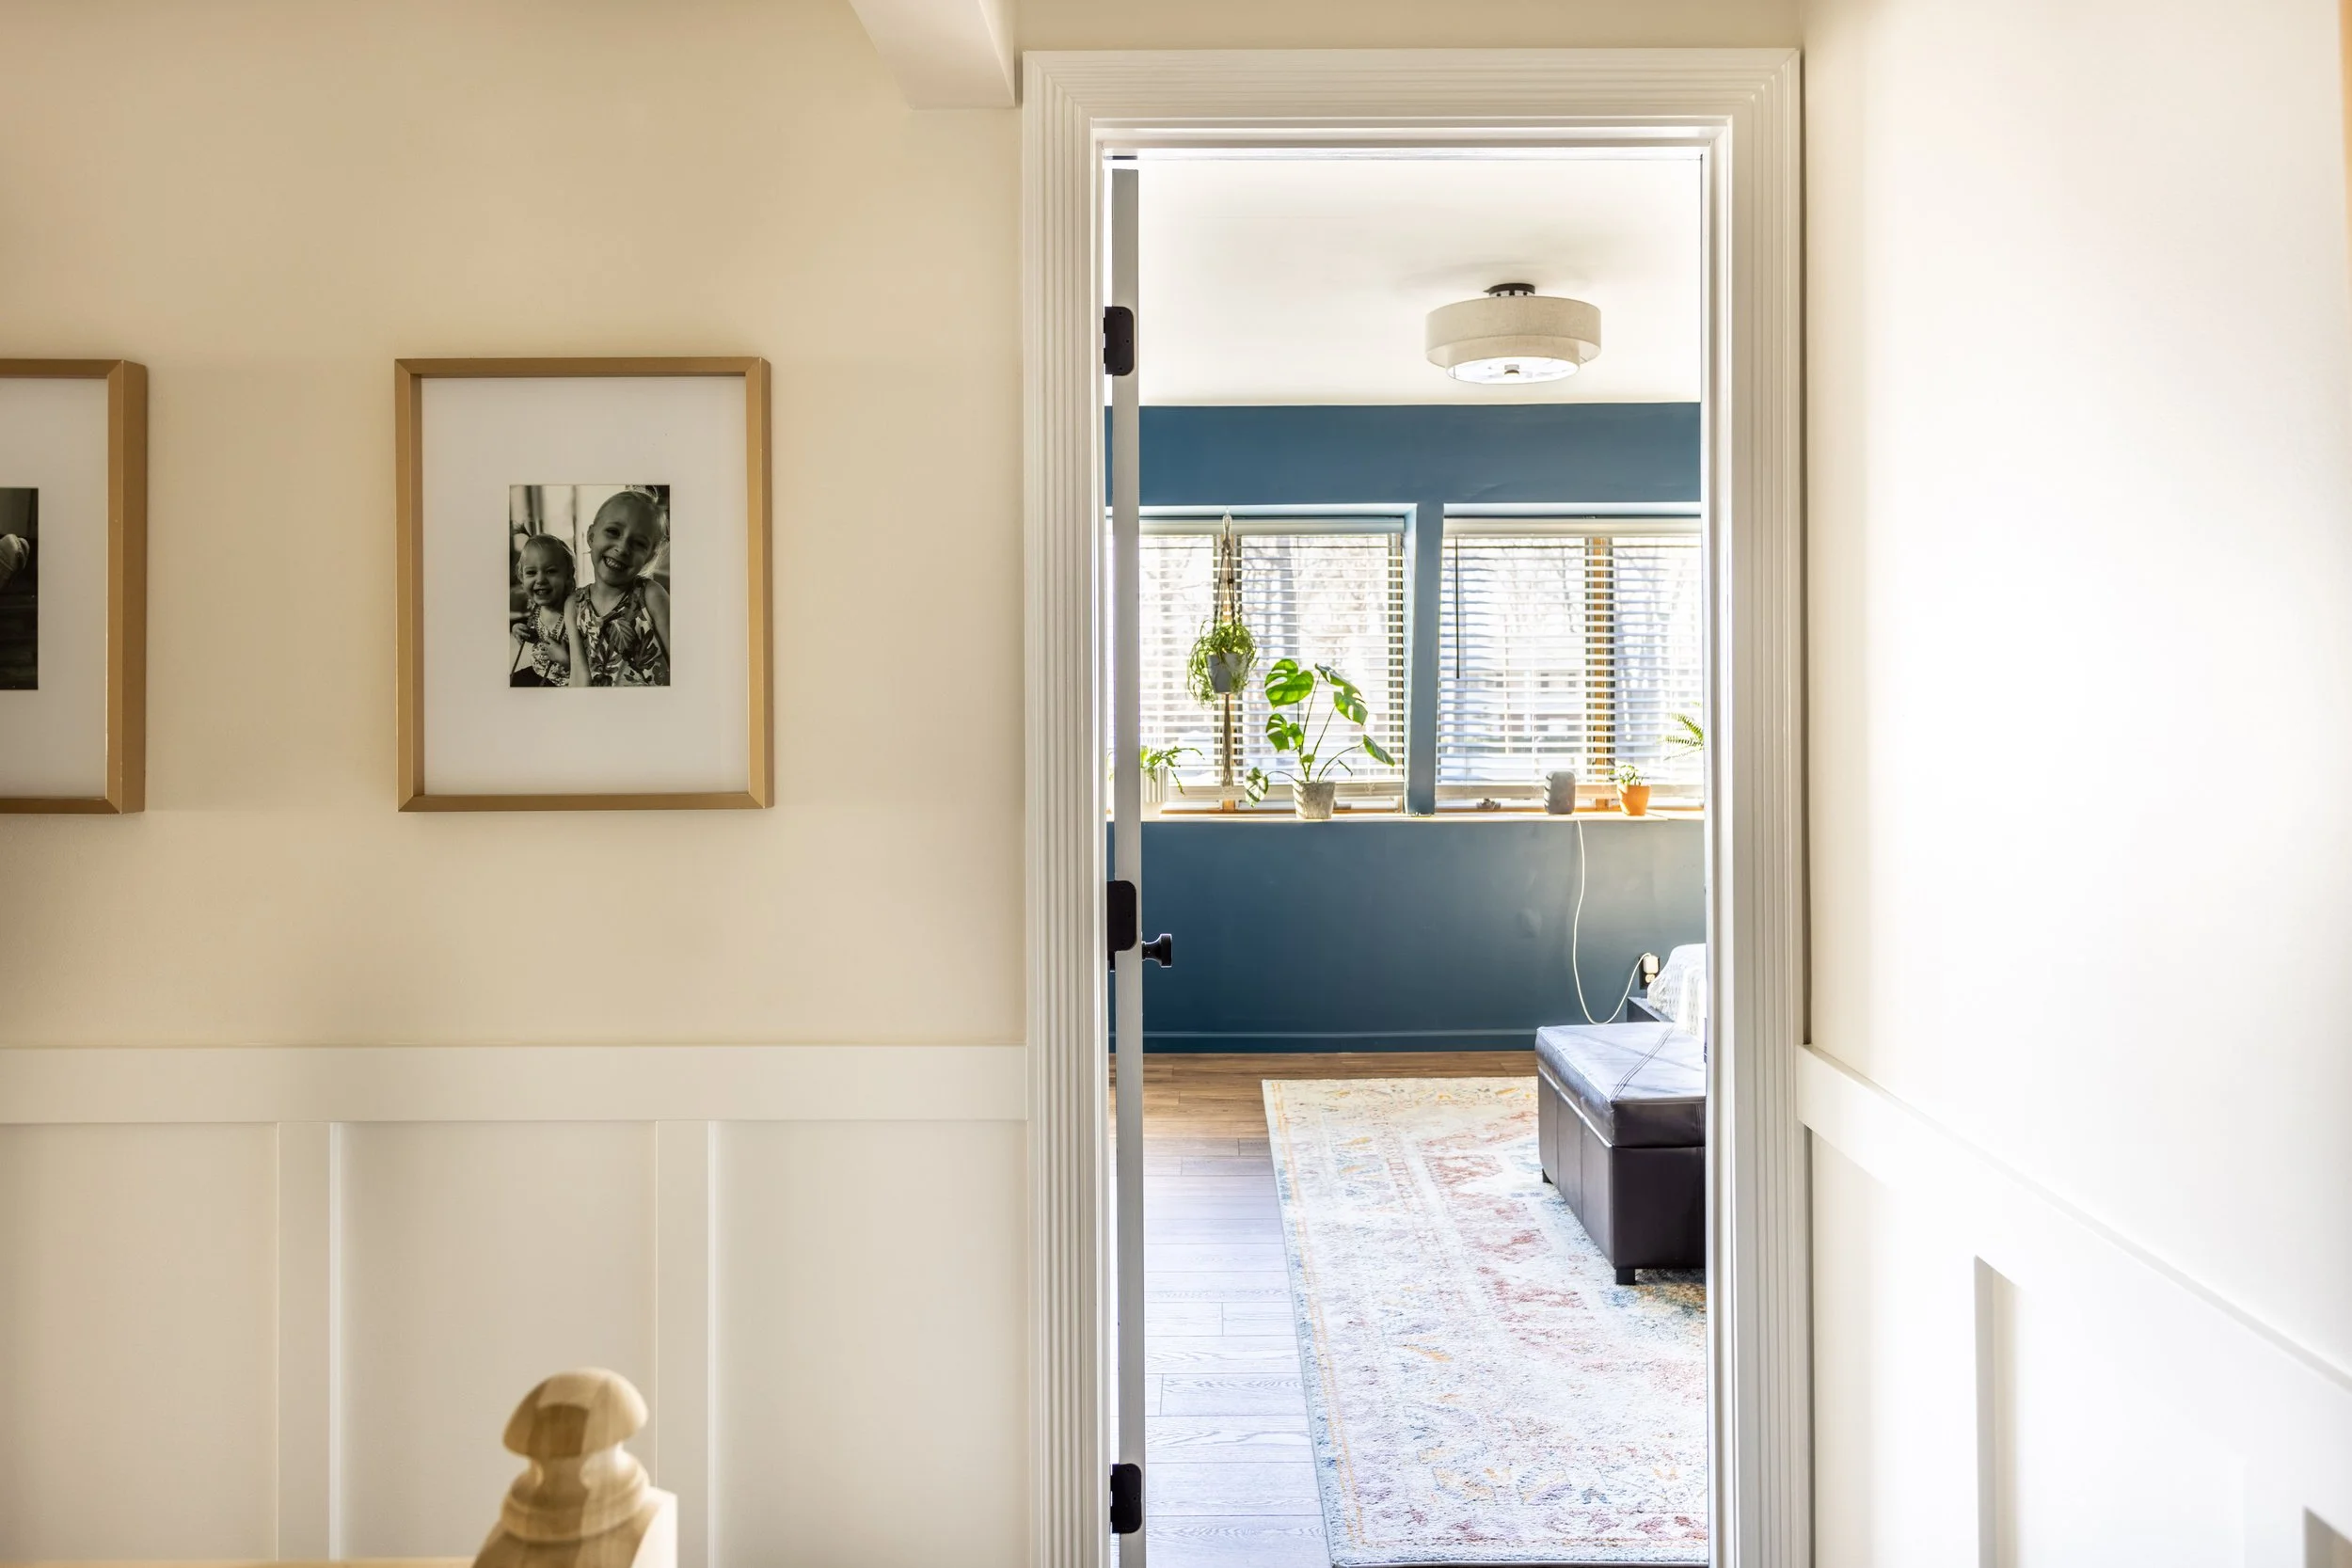
To balance out the ceiling, create a nice, neutral backdrop for plenty of artwork, and tie into the adjacent hallway, I painted the walls White Heron.
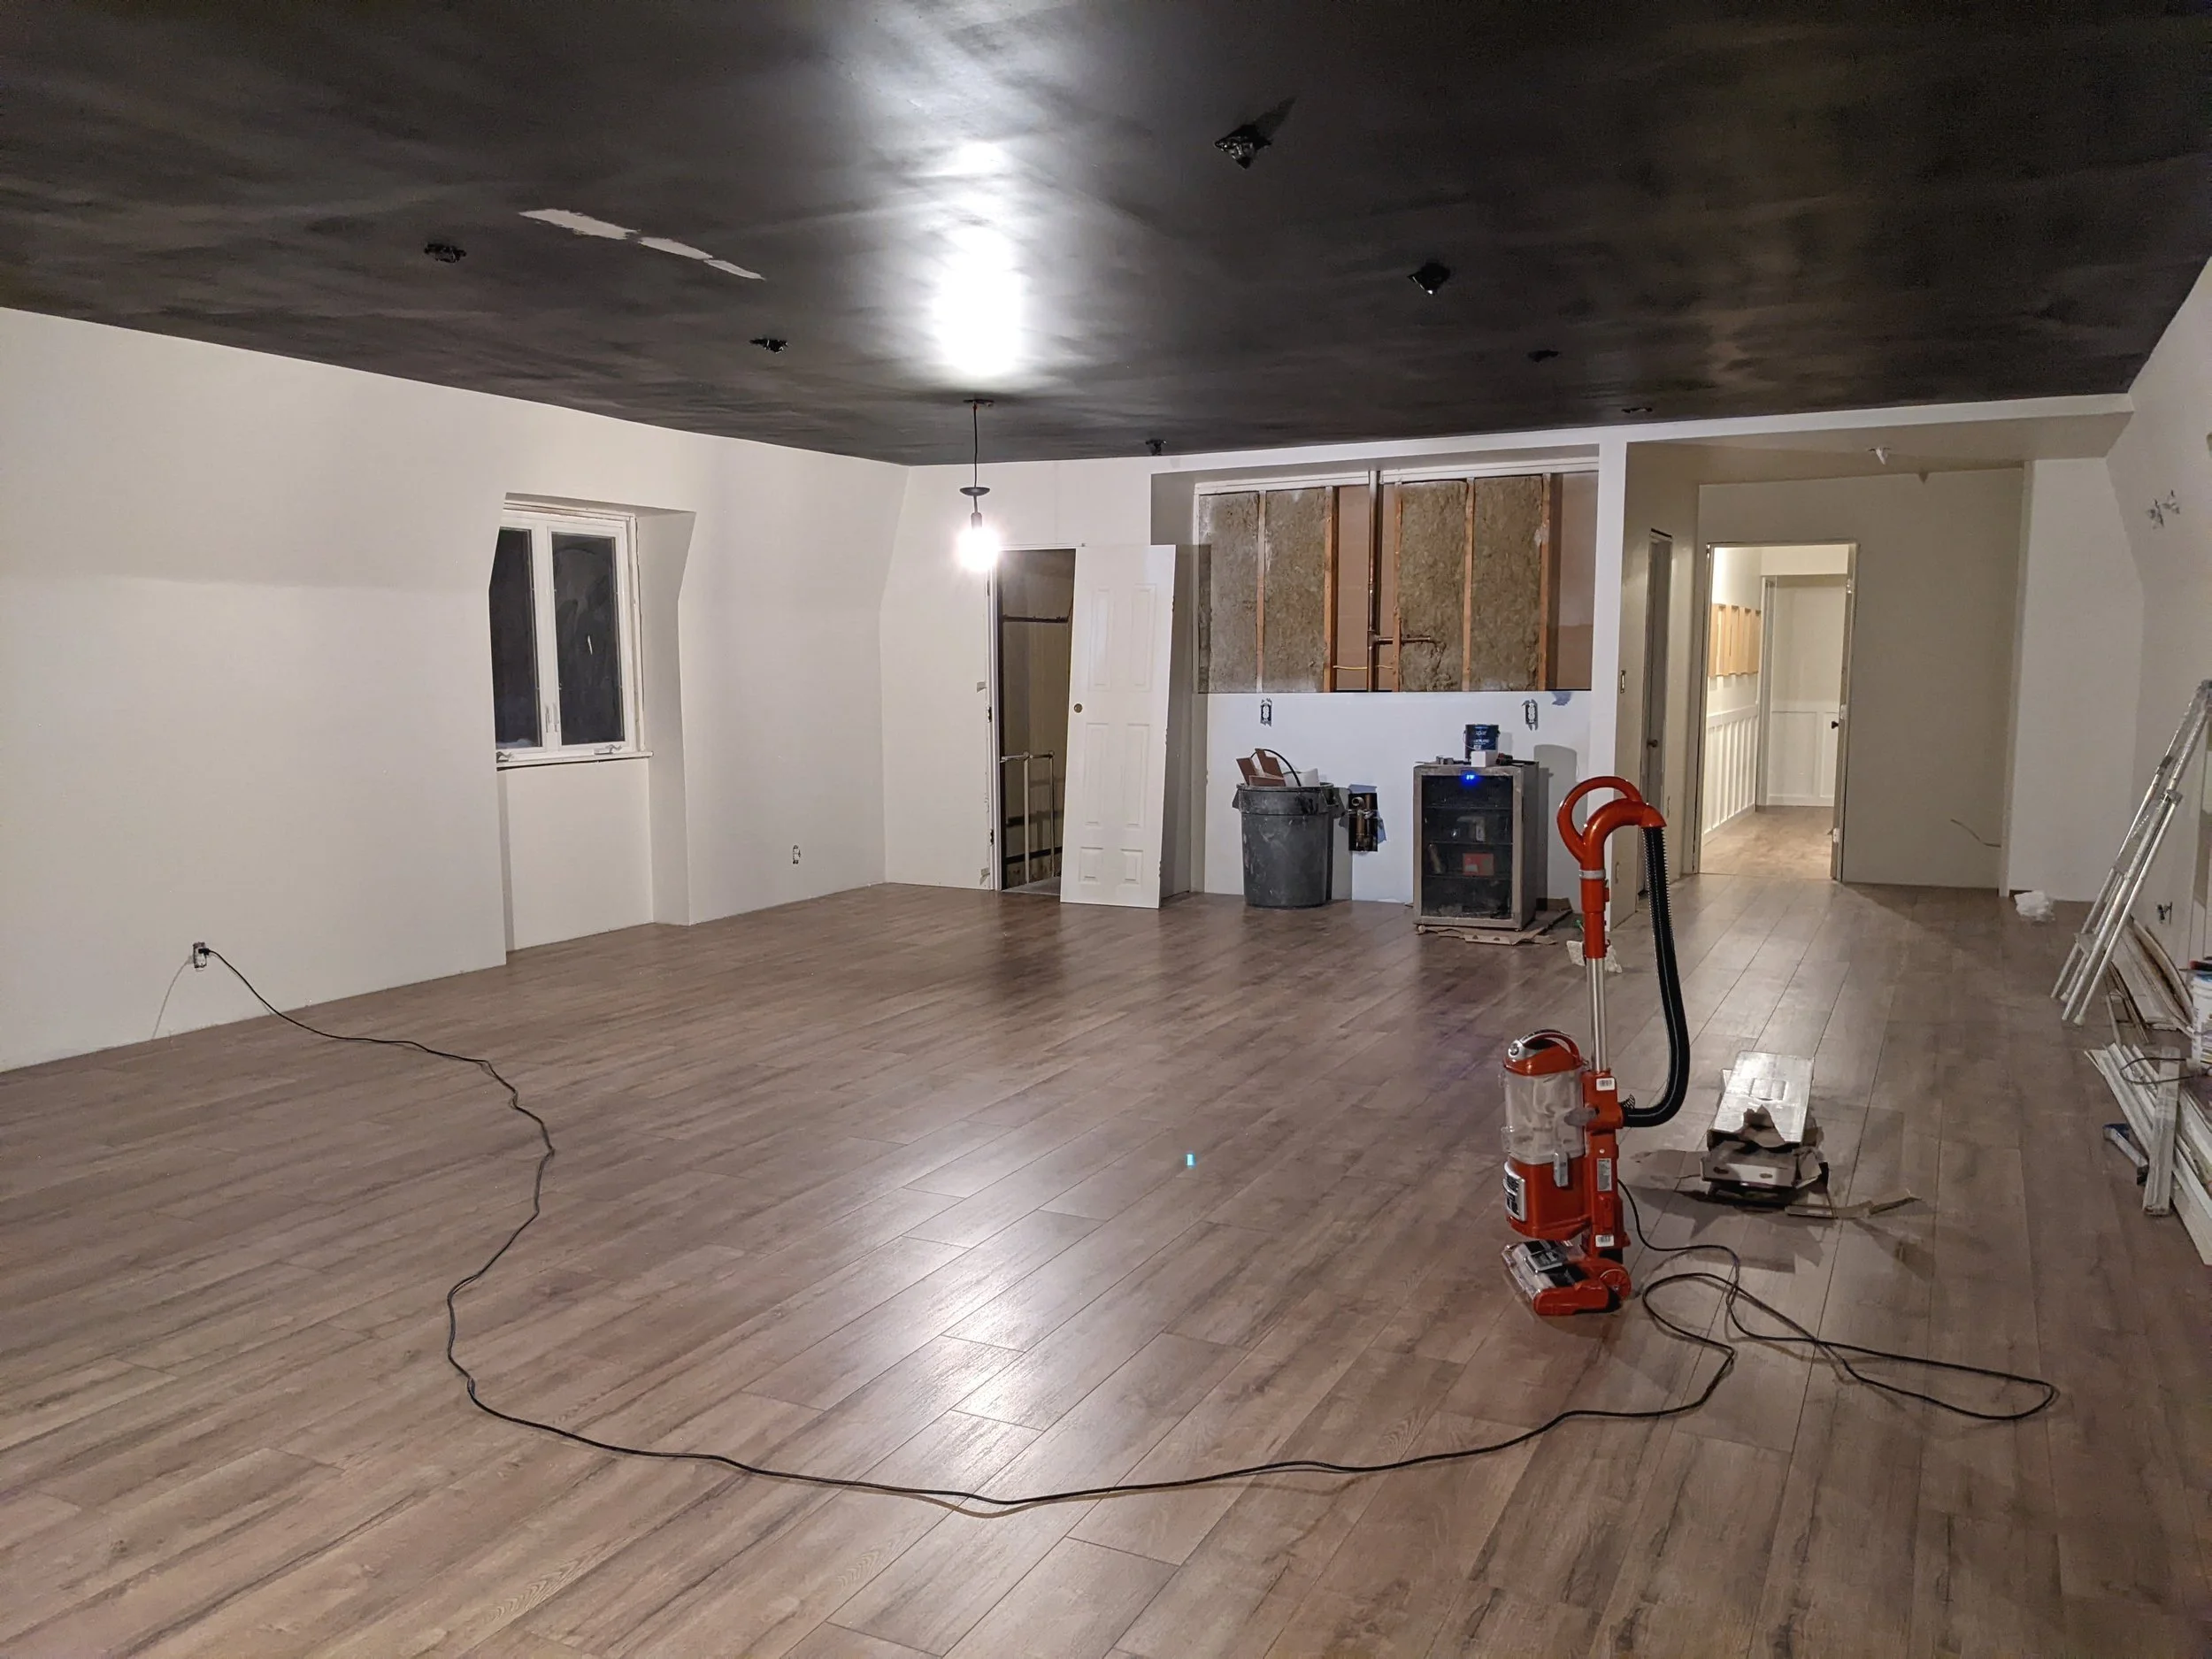
As I shared in the design plan from my last update, I painted the doors black to tie into the ceiling. I really love how the black creates some contrast against the off-white walls and draws attention to the pretty glass doors.
We also decided to switch out BOTH doors for glass-paneled doors. Initially, we only planned on the main door being glass, and we were going to frost it, but so far, we really like the look of the clear glass (aside from all the kid fingerprints). We were taking bets on which kid would run into it first. We haven’t had any incidents yet, but I’ll keep you posted.
Flooring
After I painted the ceiling and walls, we had the flooring installed. That made ALL the difference. If you remember from my first post about the loft, the flooring we chose for the hallway hasn’t been available for some time so we had to pick something similar. I’m happy to say that the difference between the two is really subtle. And to be honest, I think I actually like this flooring a little more than what we installed in the hallway.
Lighting
When we originally planned for this room, we researched how to figure out how much lighting we’d need. We determined that 13 overhead lightbulbs was our magic number. That sounded like a lot at the time. And, it is.
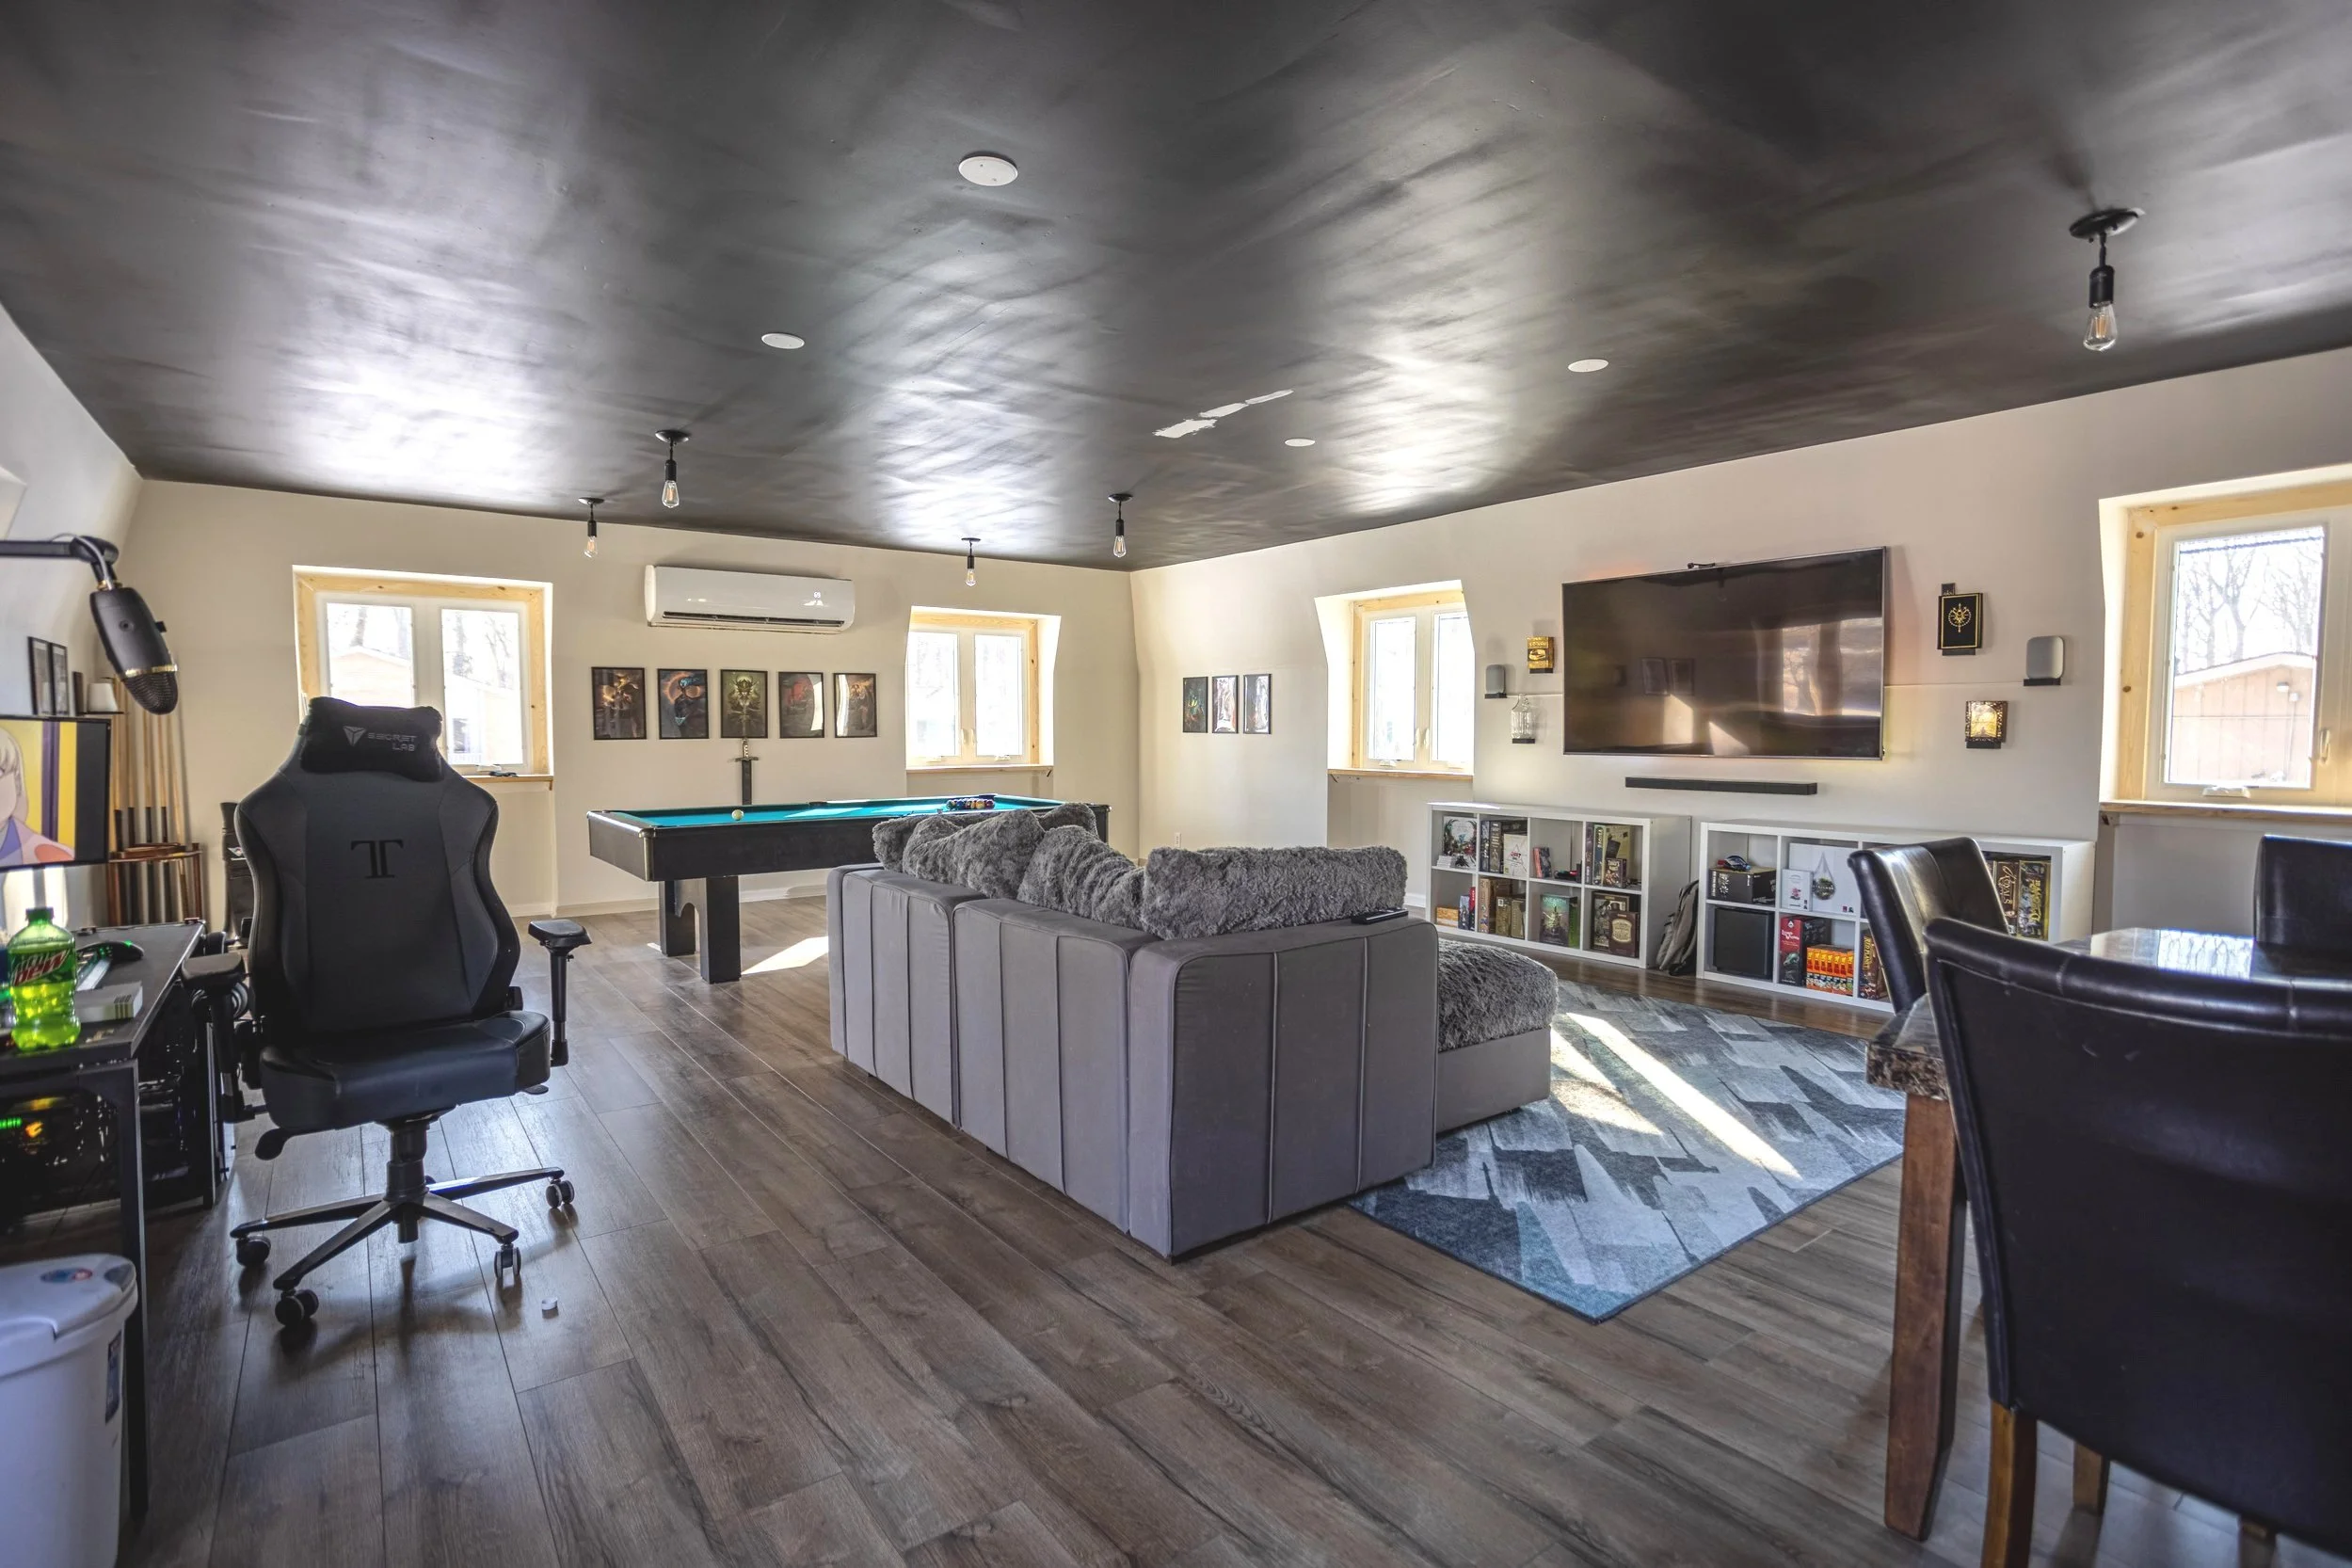
As we started installing the lights we quickly realized we didn’t need as many as we originally thought. Since they’re on a dimmer, we felt comfortable evening things out and installing 9 total (4 on either side of the room and 1 in the “entryway”). This amount seems to be working really well for us.
You’ll notice in the picture above the white dots on the ceiling. That’s where the other four were originally supposed to go. Would we have spaced the remaining lights differently if we knew then what we know now? Probably. But I think the symmetry of the placement of the lights makes them look intentional enough to keep them from standing out, and they serve their purpose to light the specific areas that need it (I’m lookin’ at you, pool table).
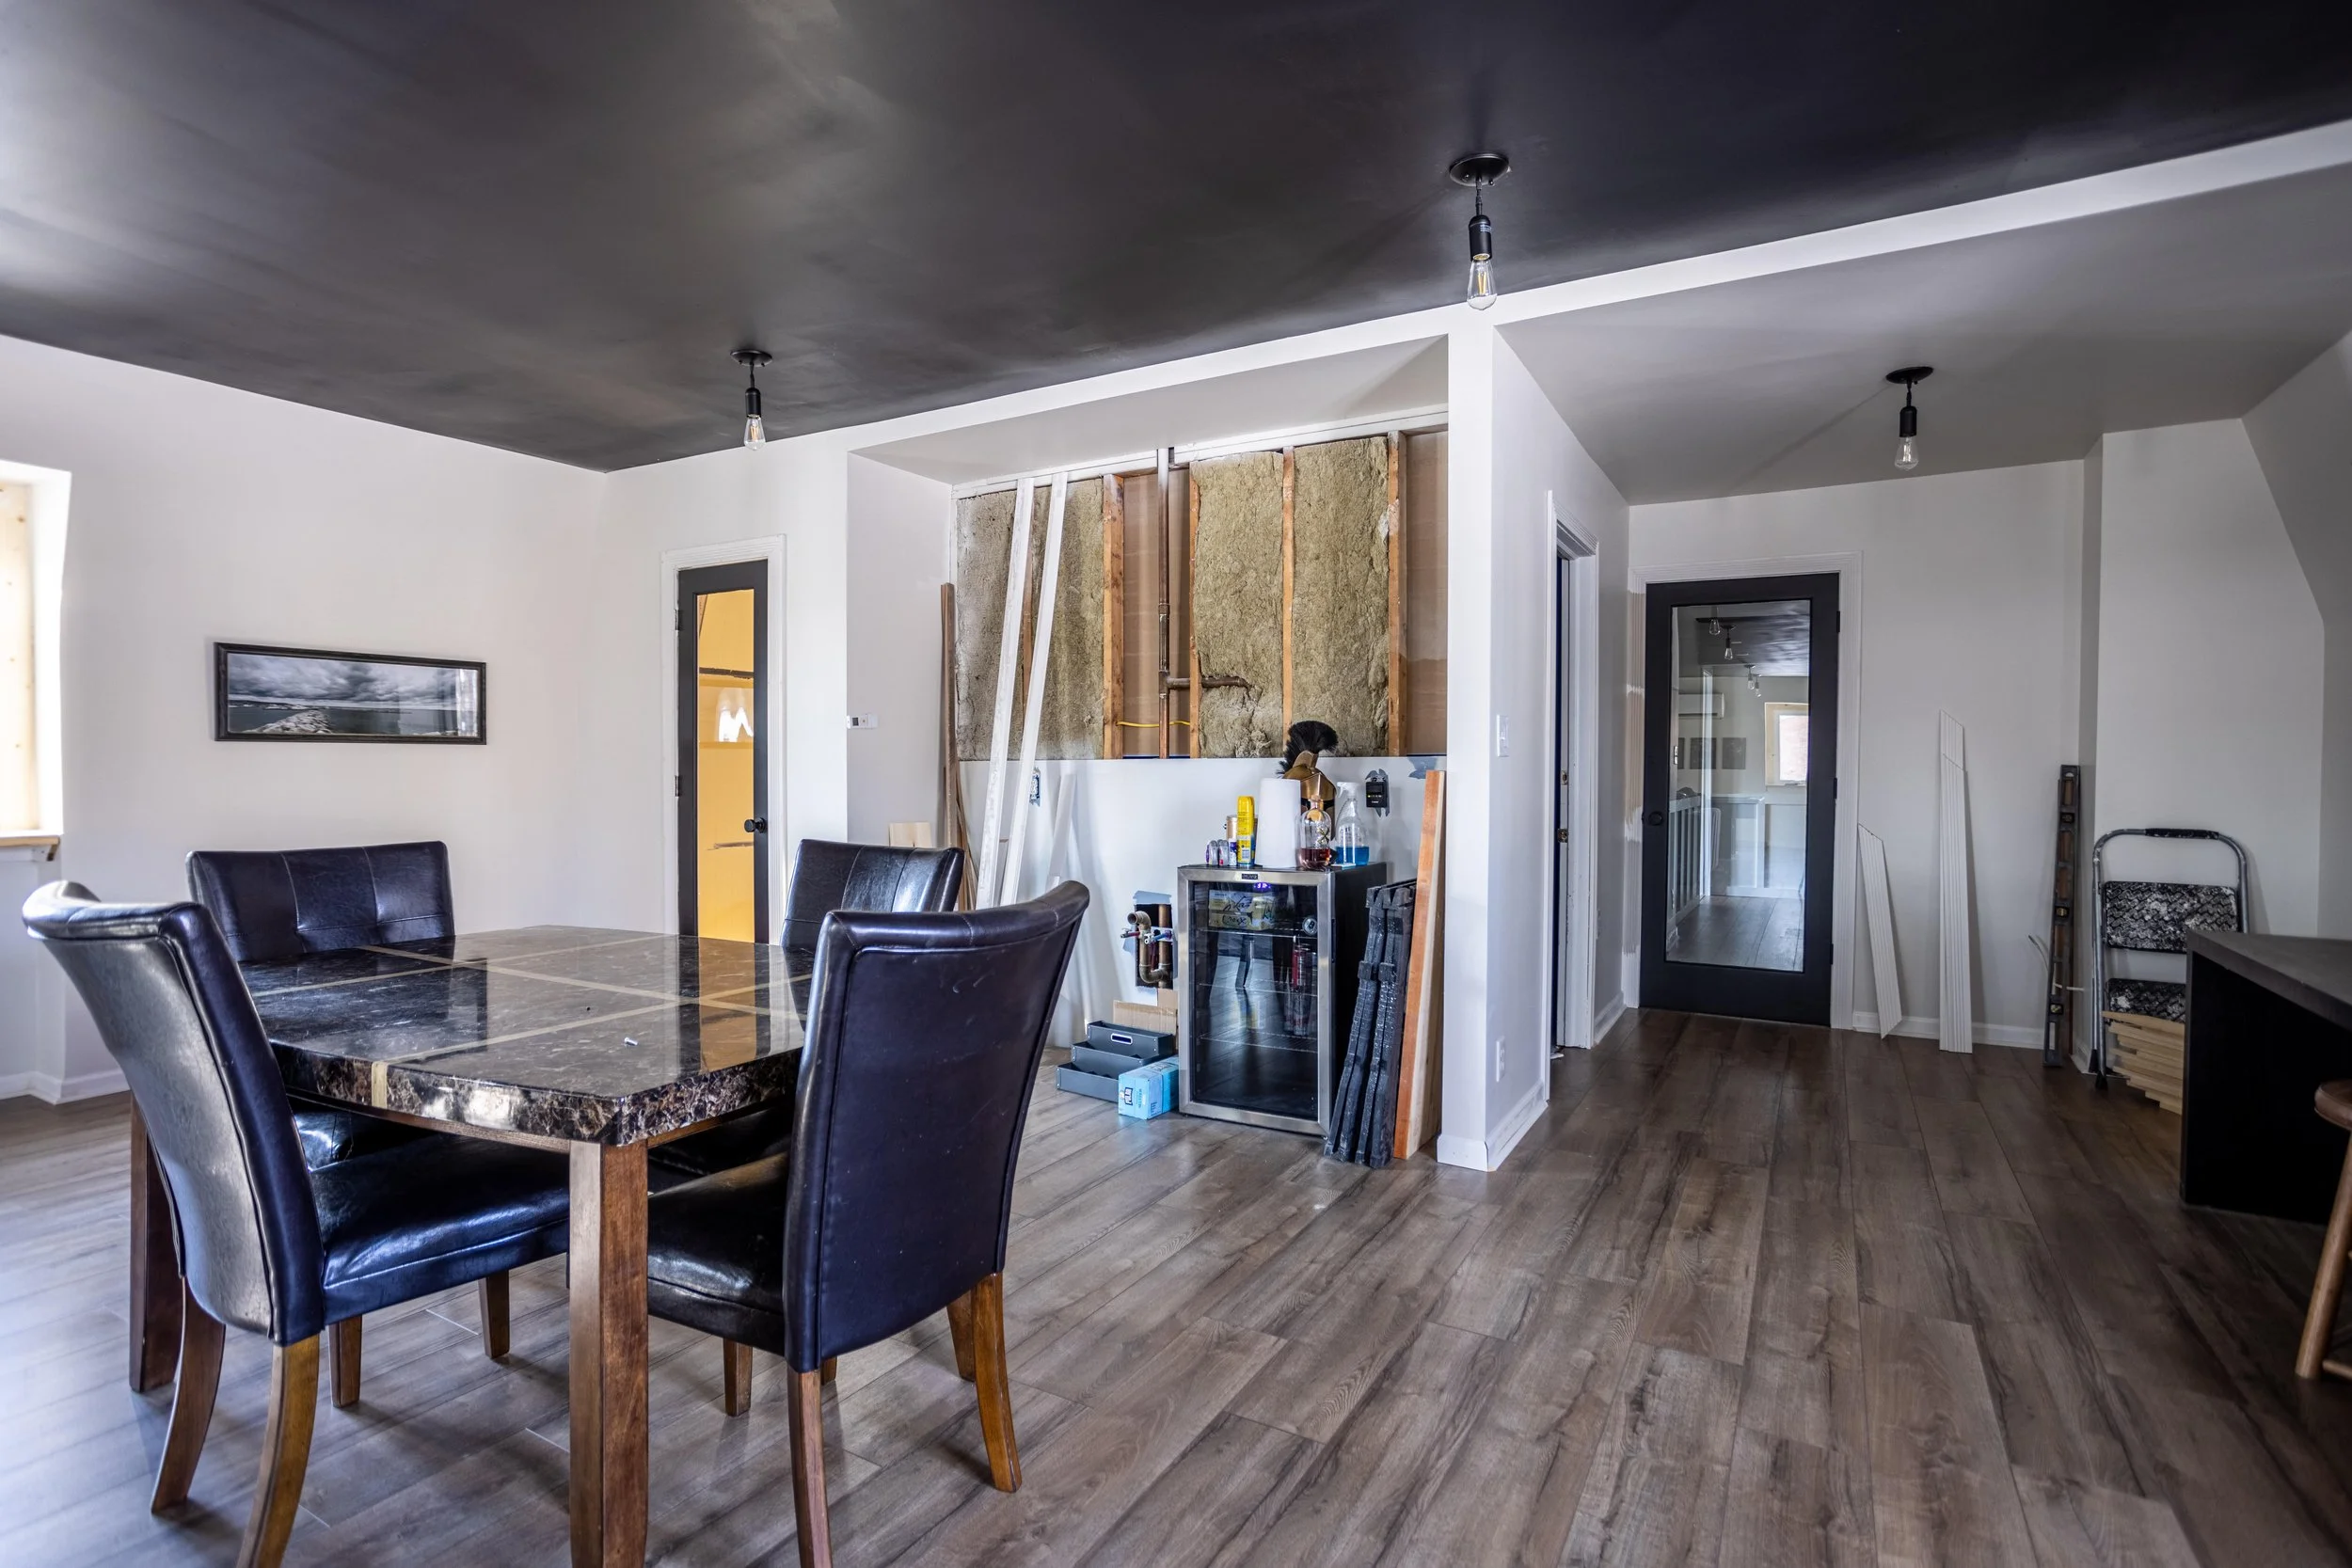
Furniture
One of our goals with this renovation was to make better use of the space. Not that we couldn’t have done that before the renovation, but with the ugly atmosphere we just didn’t really want to.
However, with its new makeover, the room is so much more inviting and we’re really making the most of it by creating different zones with furnishings. In fact, we hosted a New Year’s Eve party, and for the first time ever, we all ended up hanging out up here for a majority of the night!
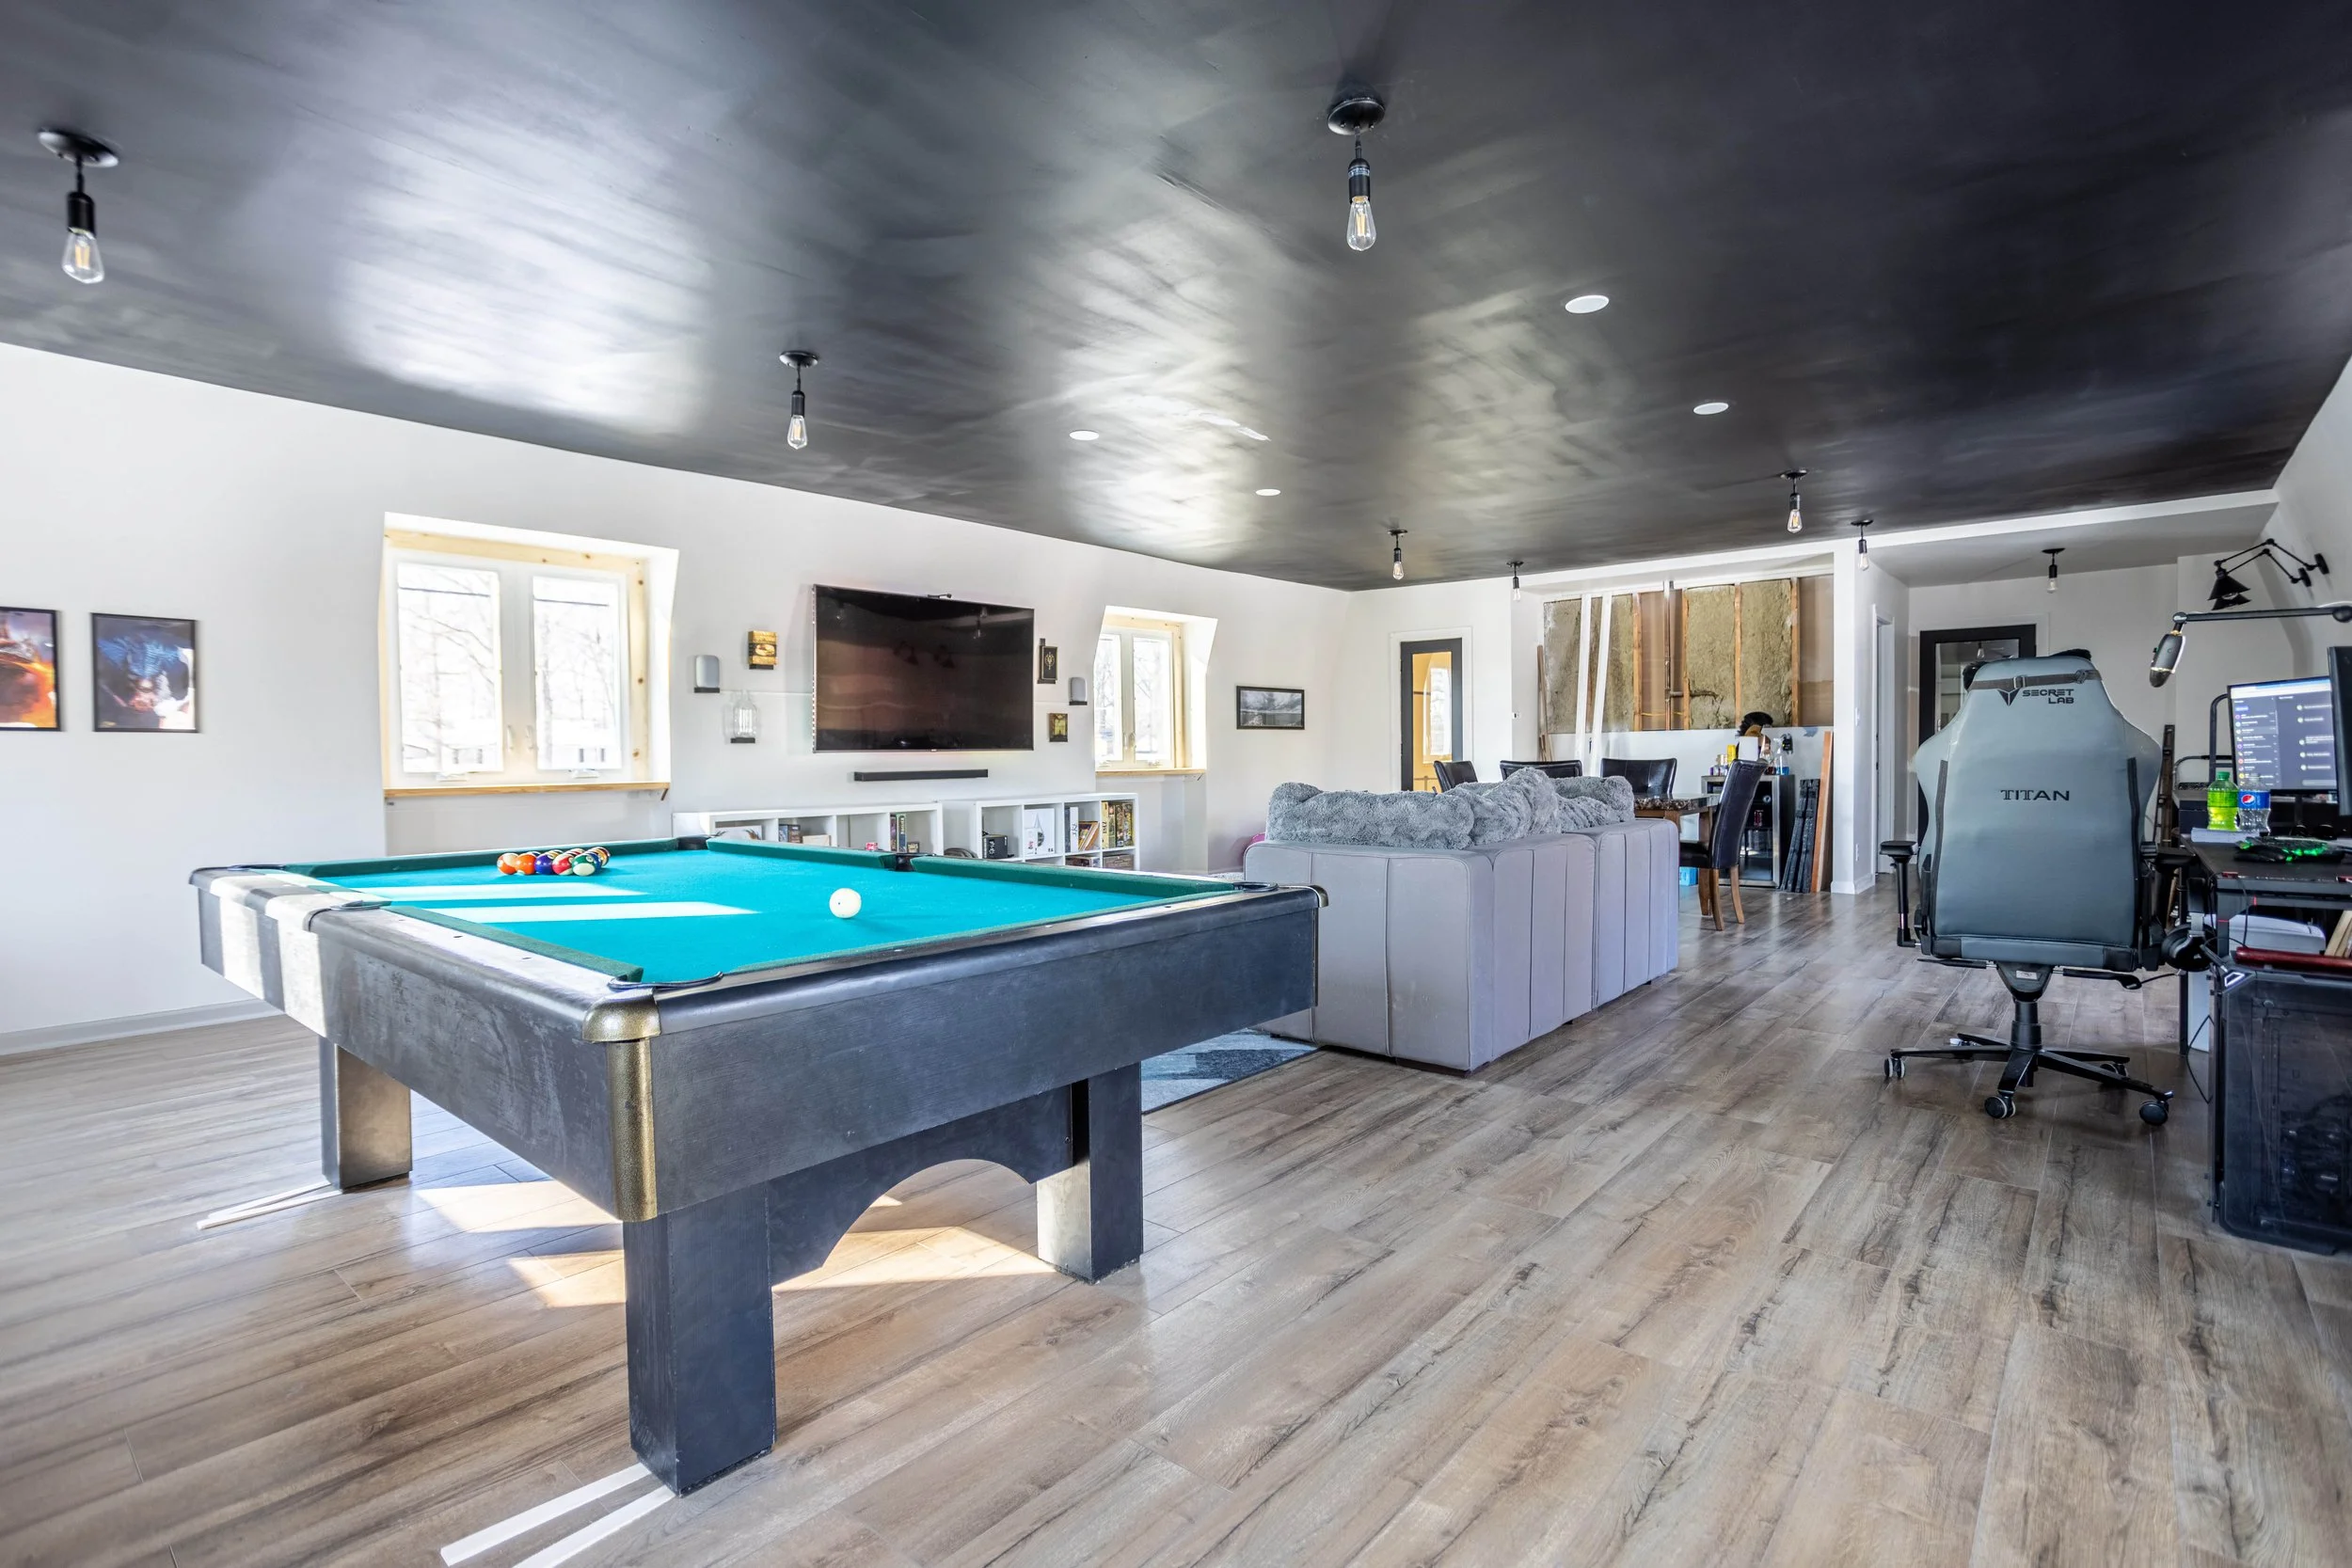
With the paint and flooring done, we were able to move the couch and TV back in. We also added a new, large rug to ground this area and create a visual “zone”.
Behind the couch, Lucius set up his computer area with his copious amounts of monitors. I have to admit, it does look pretty cool, though.

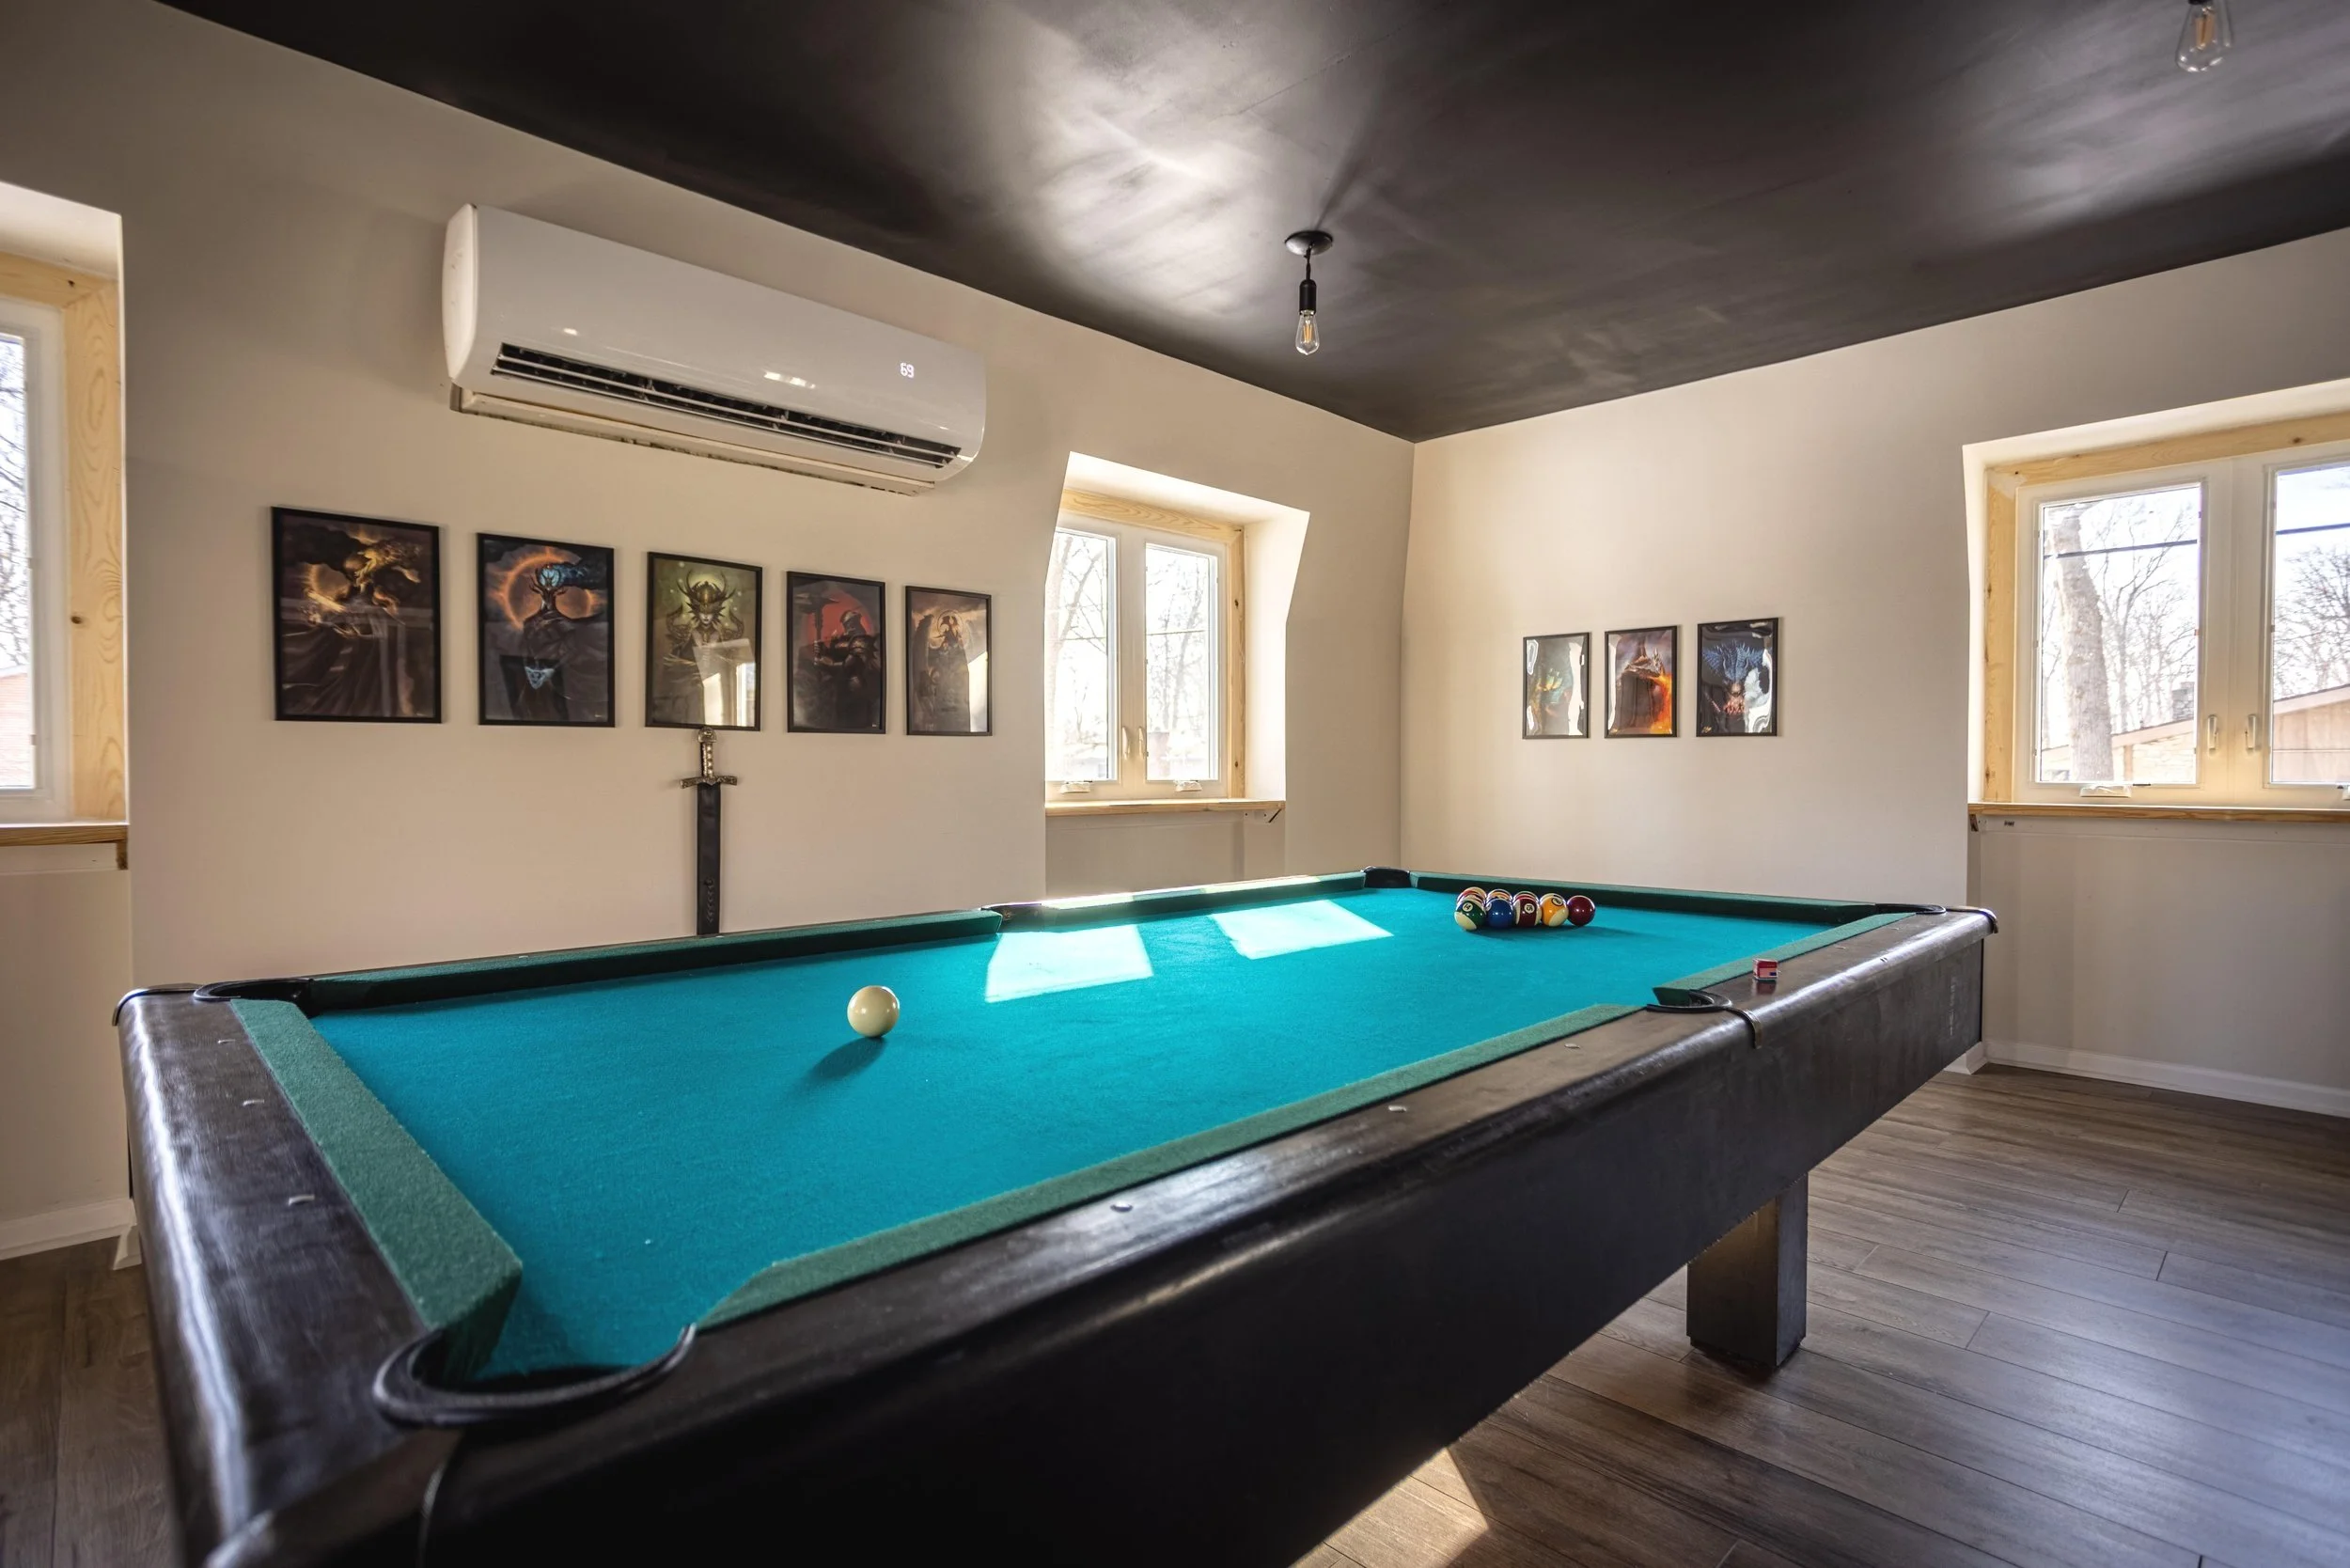
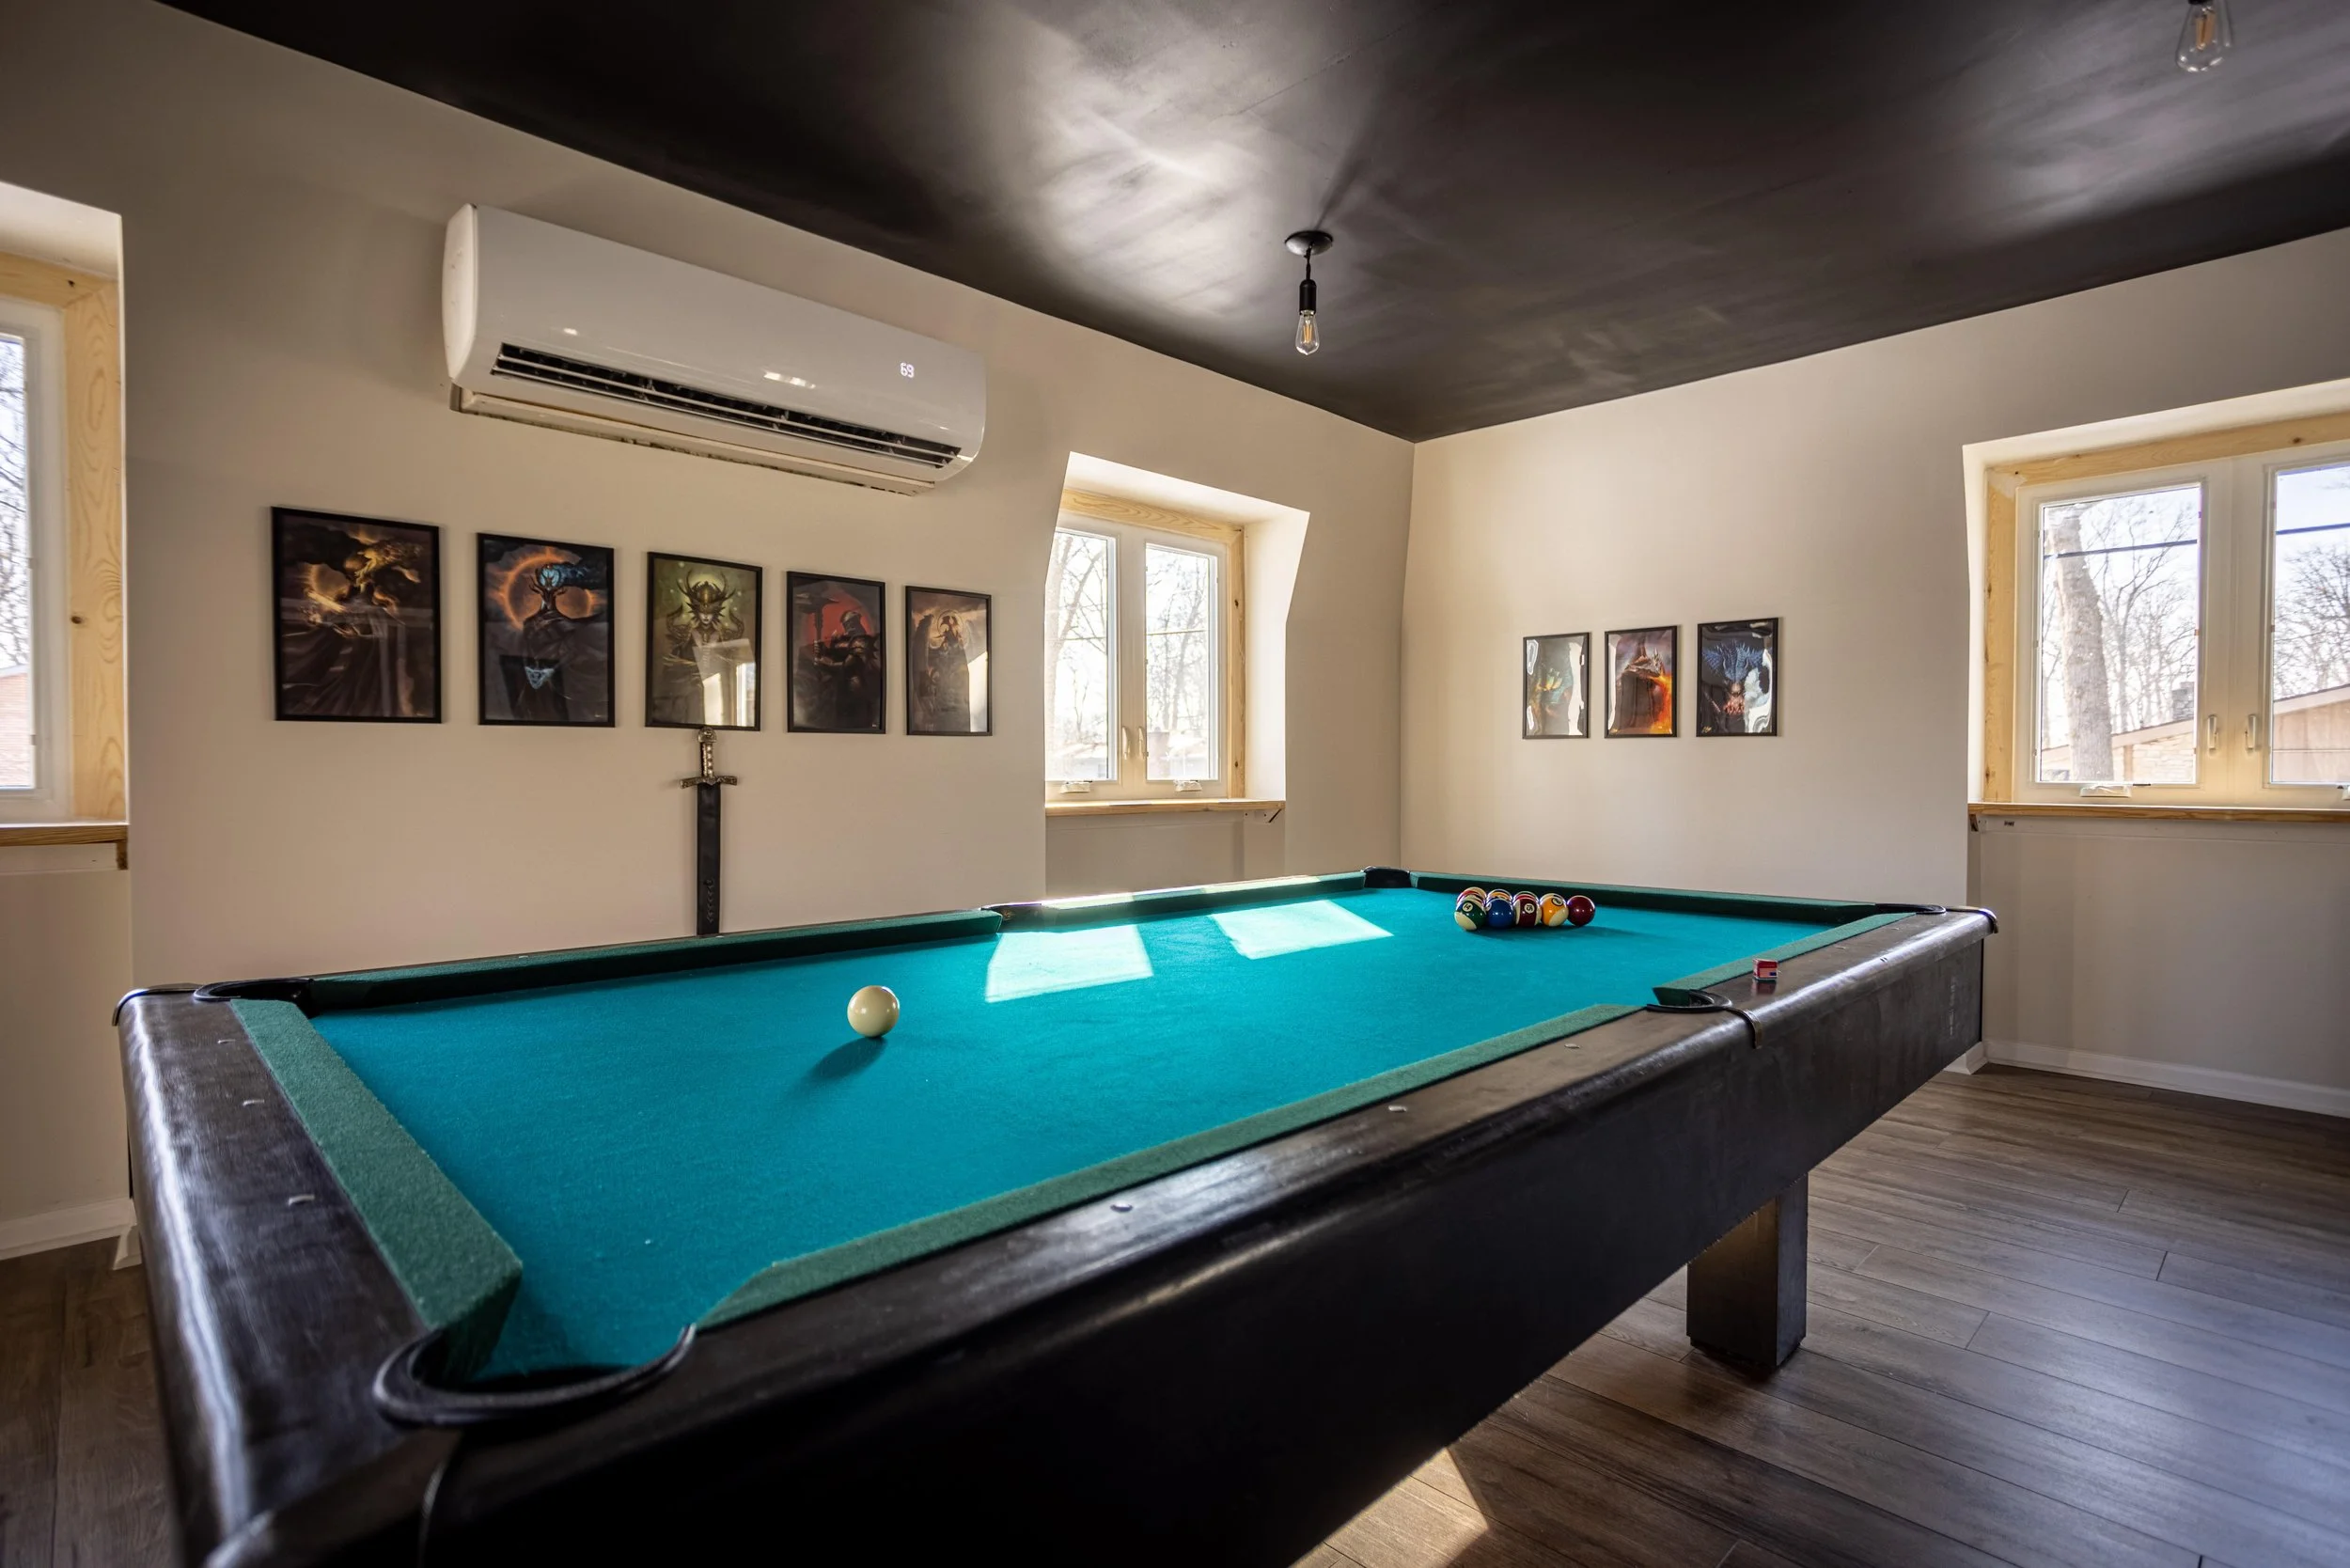
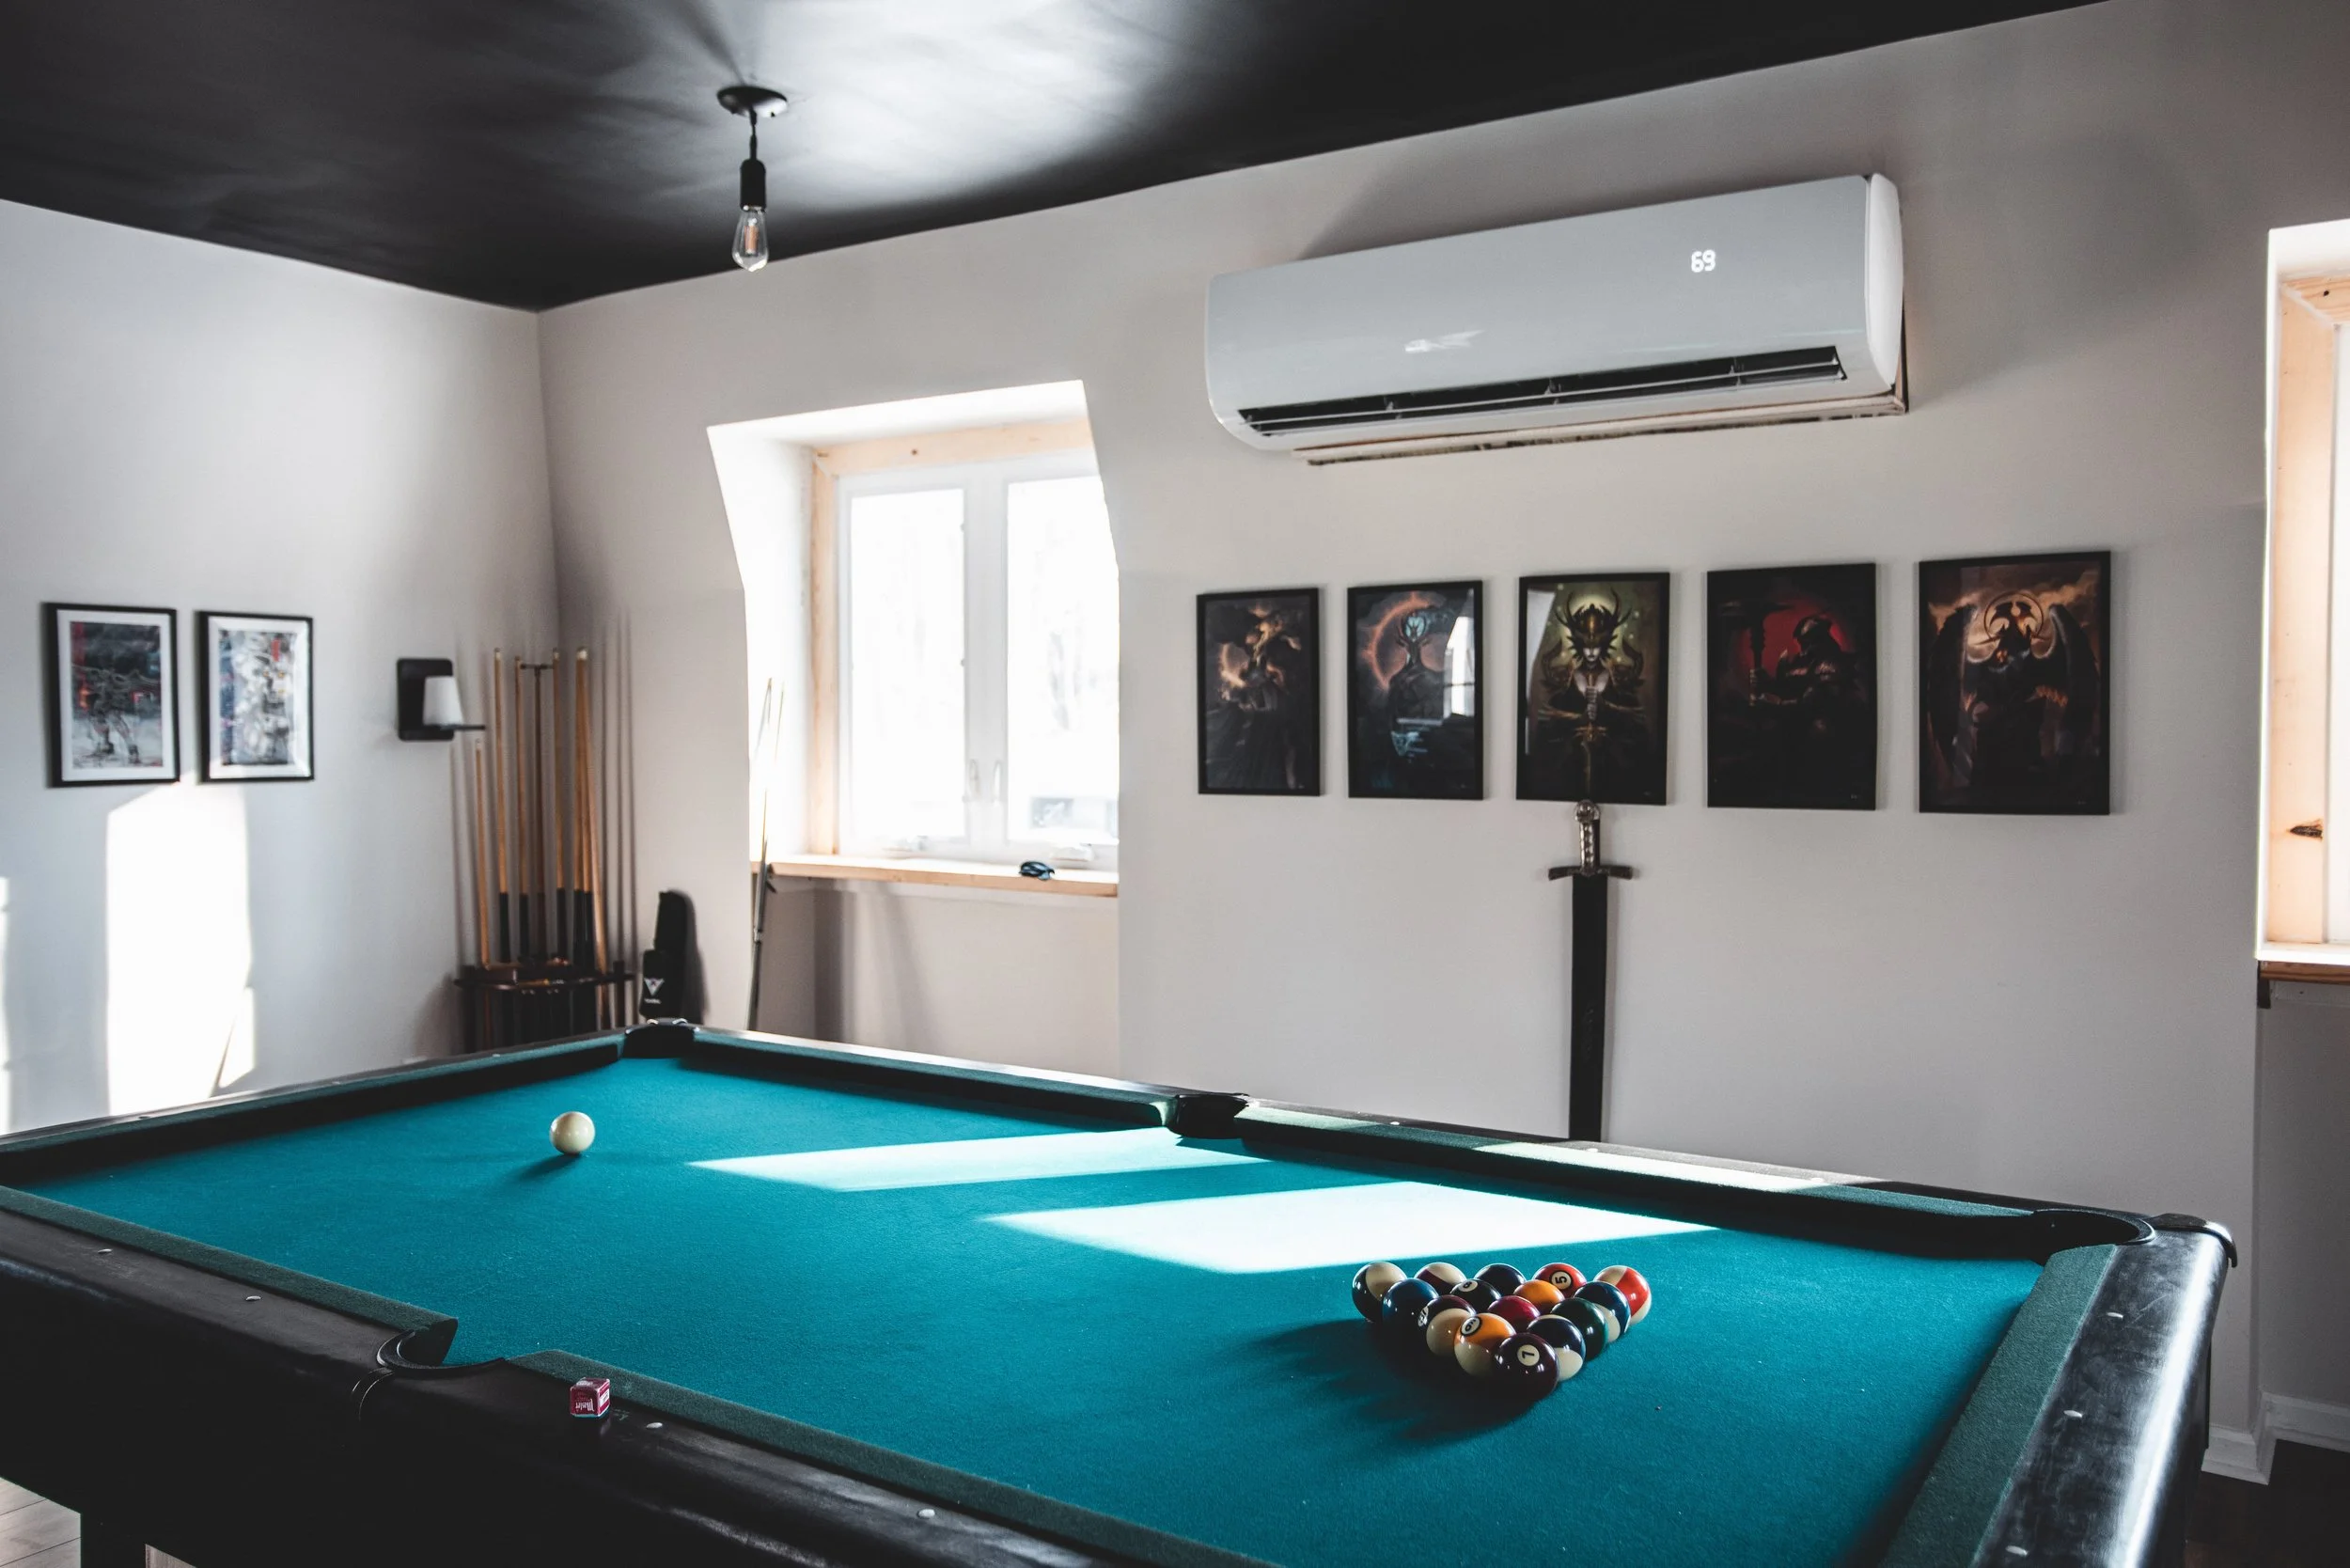
On the far side of the room, we placed the pool table Lucius found on Facebook Marketplace that I repainted.
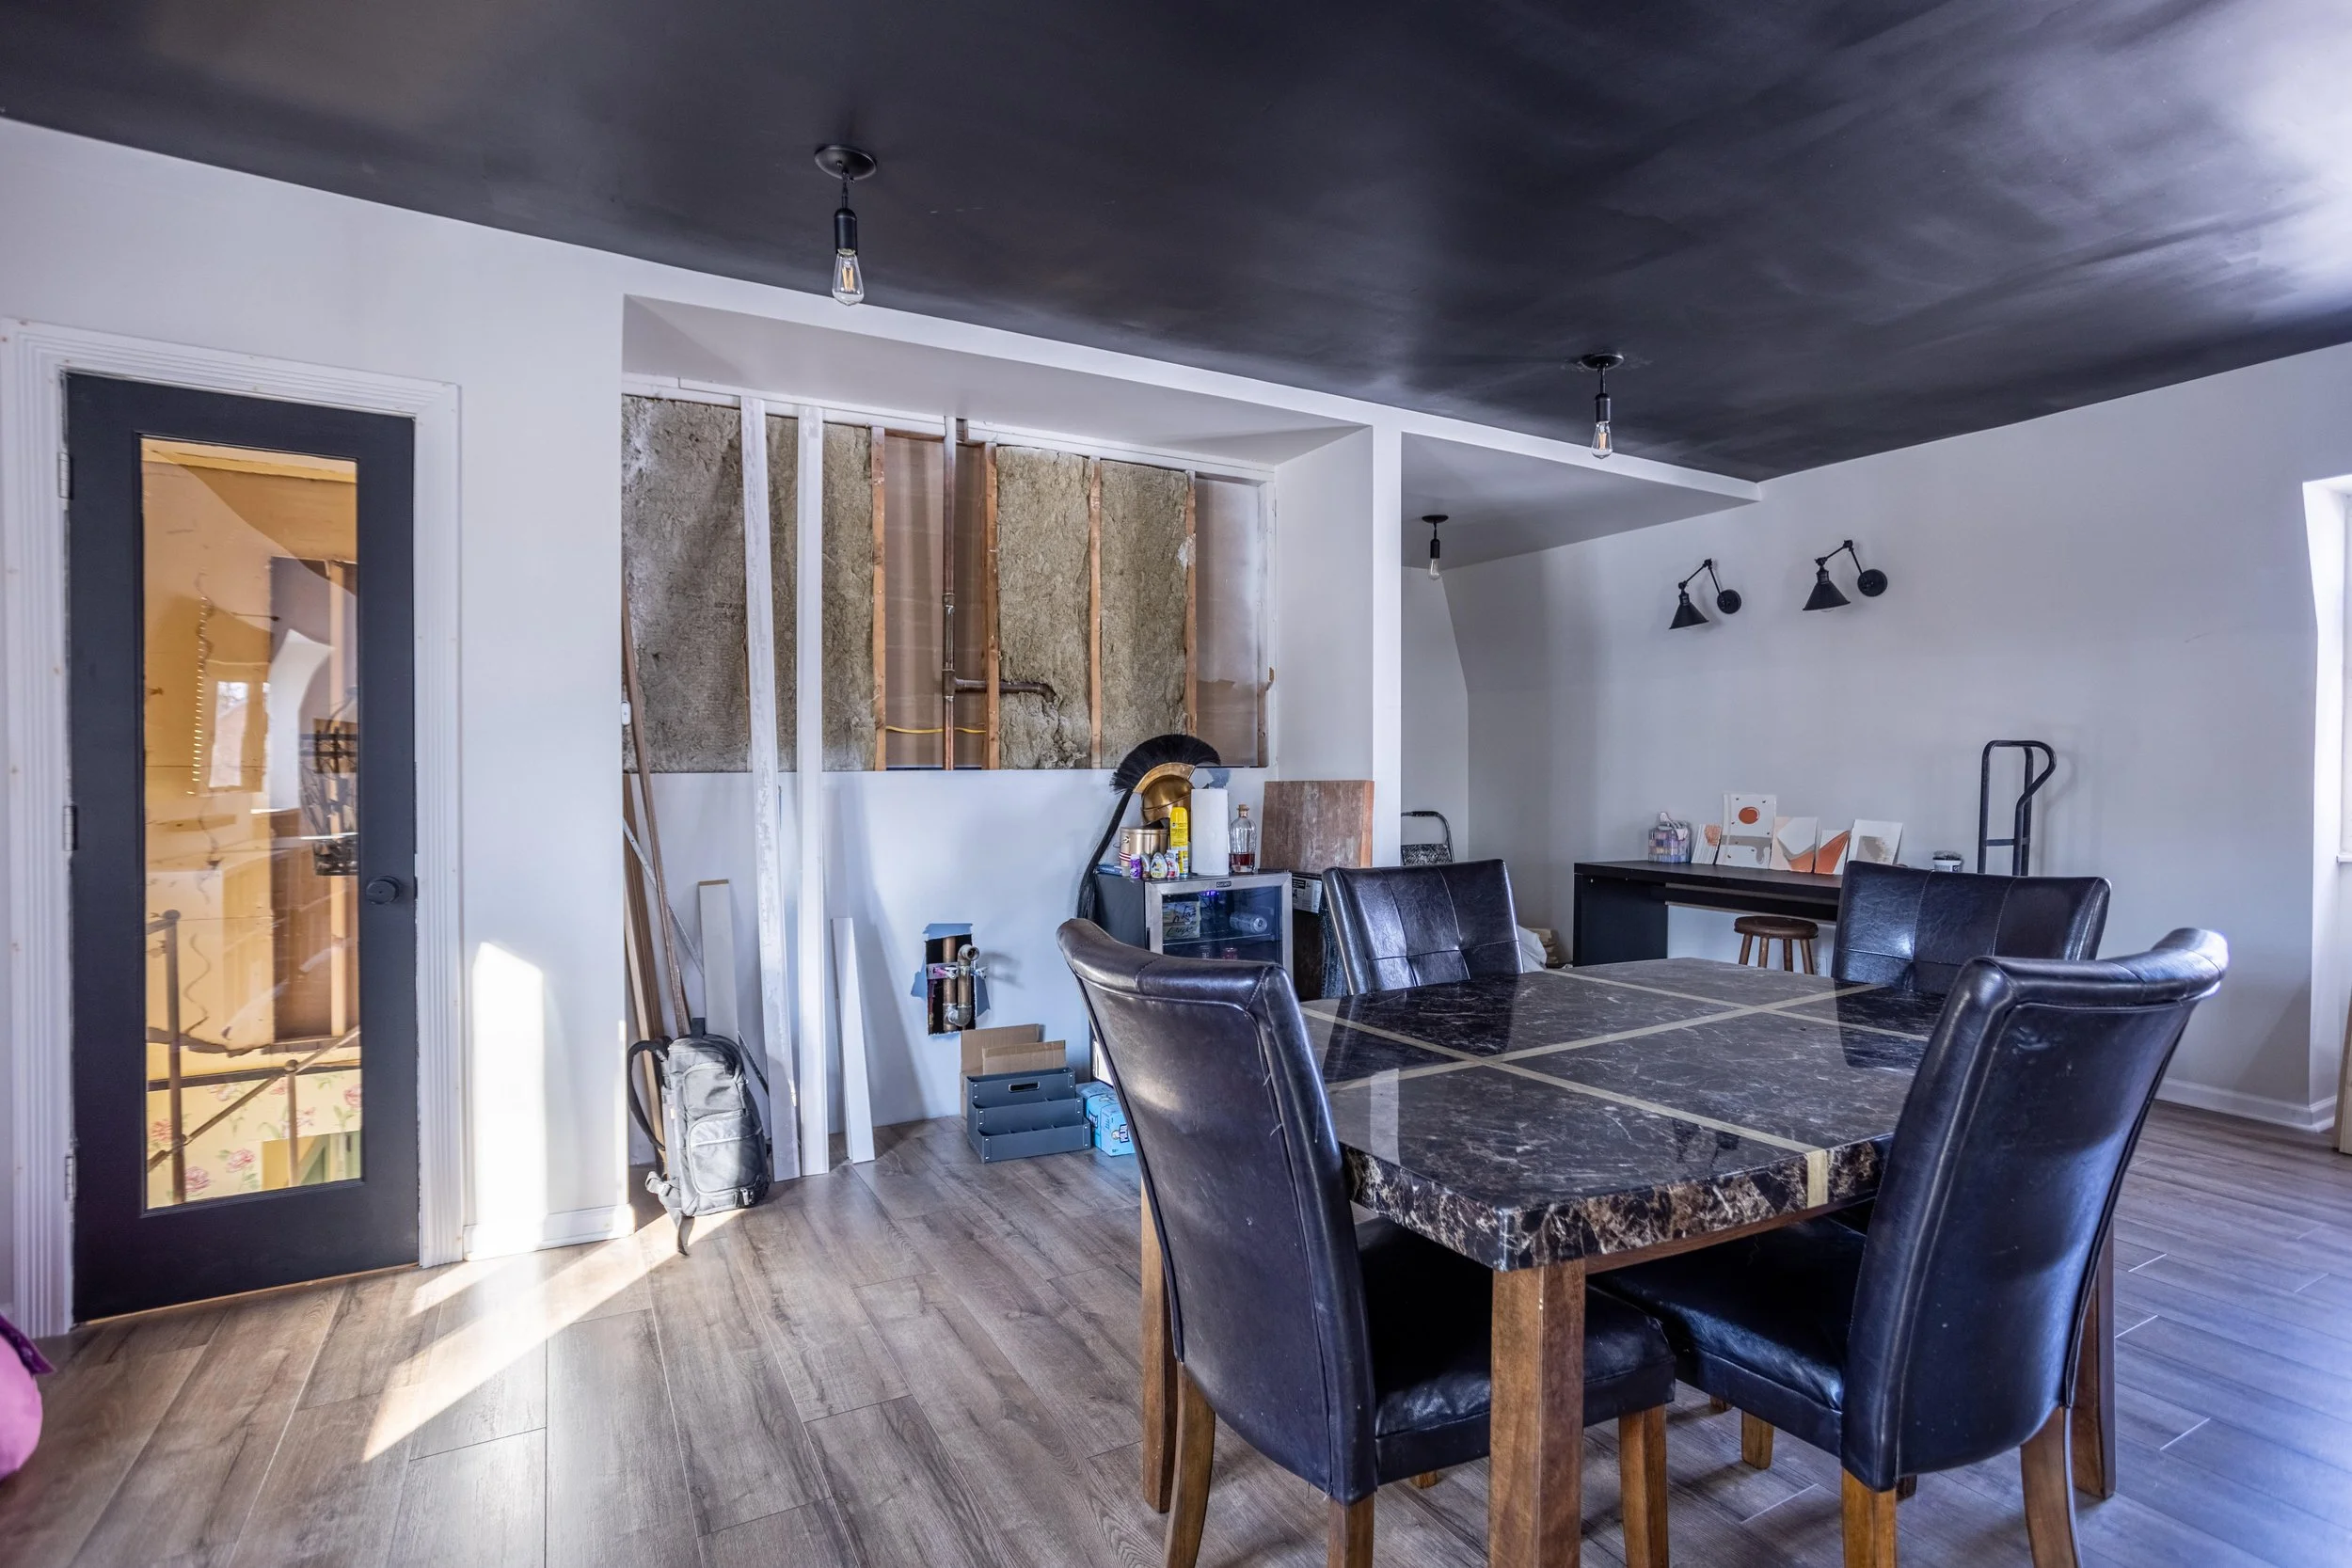
And on the opposite end, near the kitchenette, we added a hand-me-down table and chairs. It’s been great to have a dedicated place for the kids to craft and snack up here. We’ll replace it with a different table eventually, but this is working out great so far!
Near the entrance, I set up Lucius’ old desk as my stand-in art area.
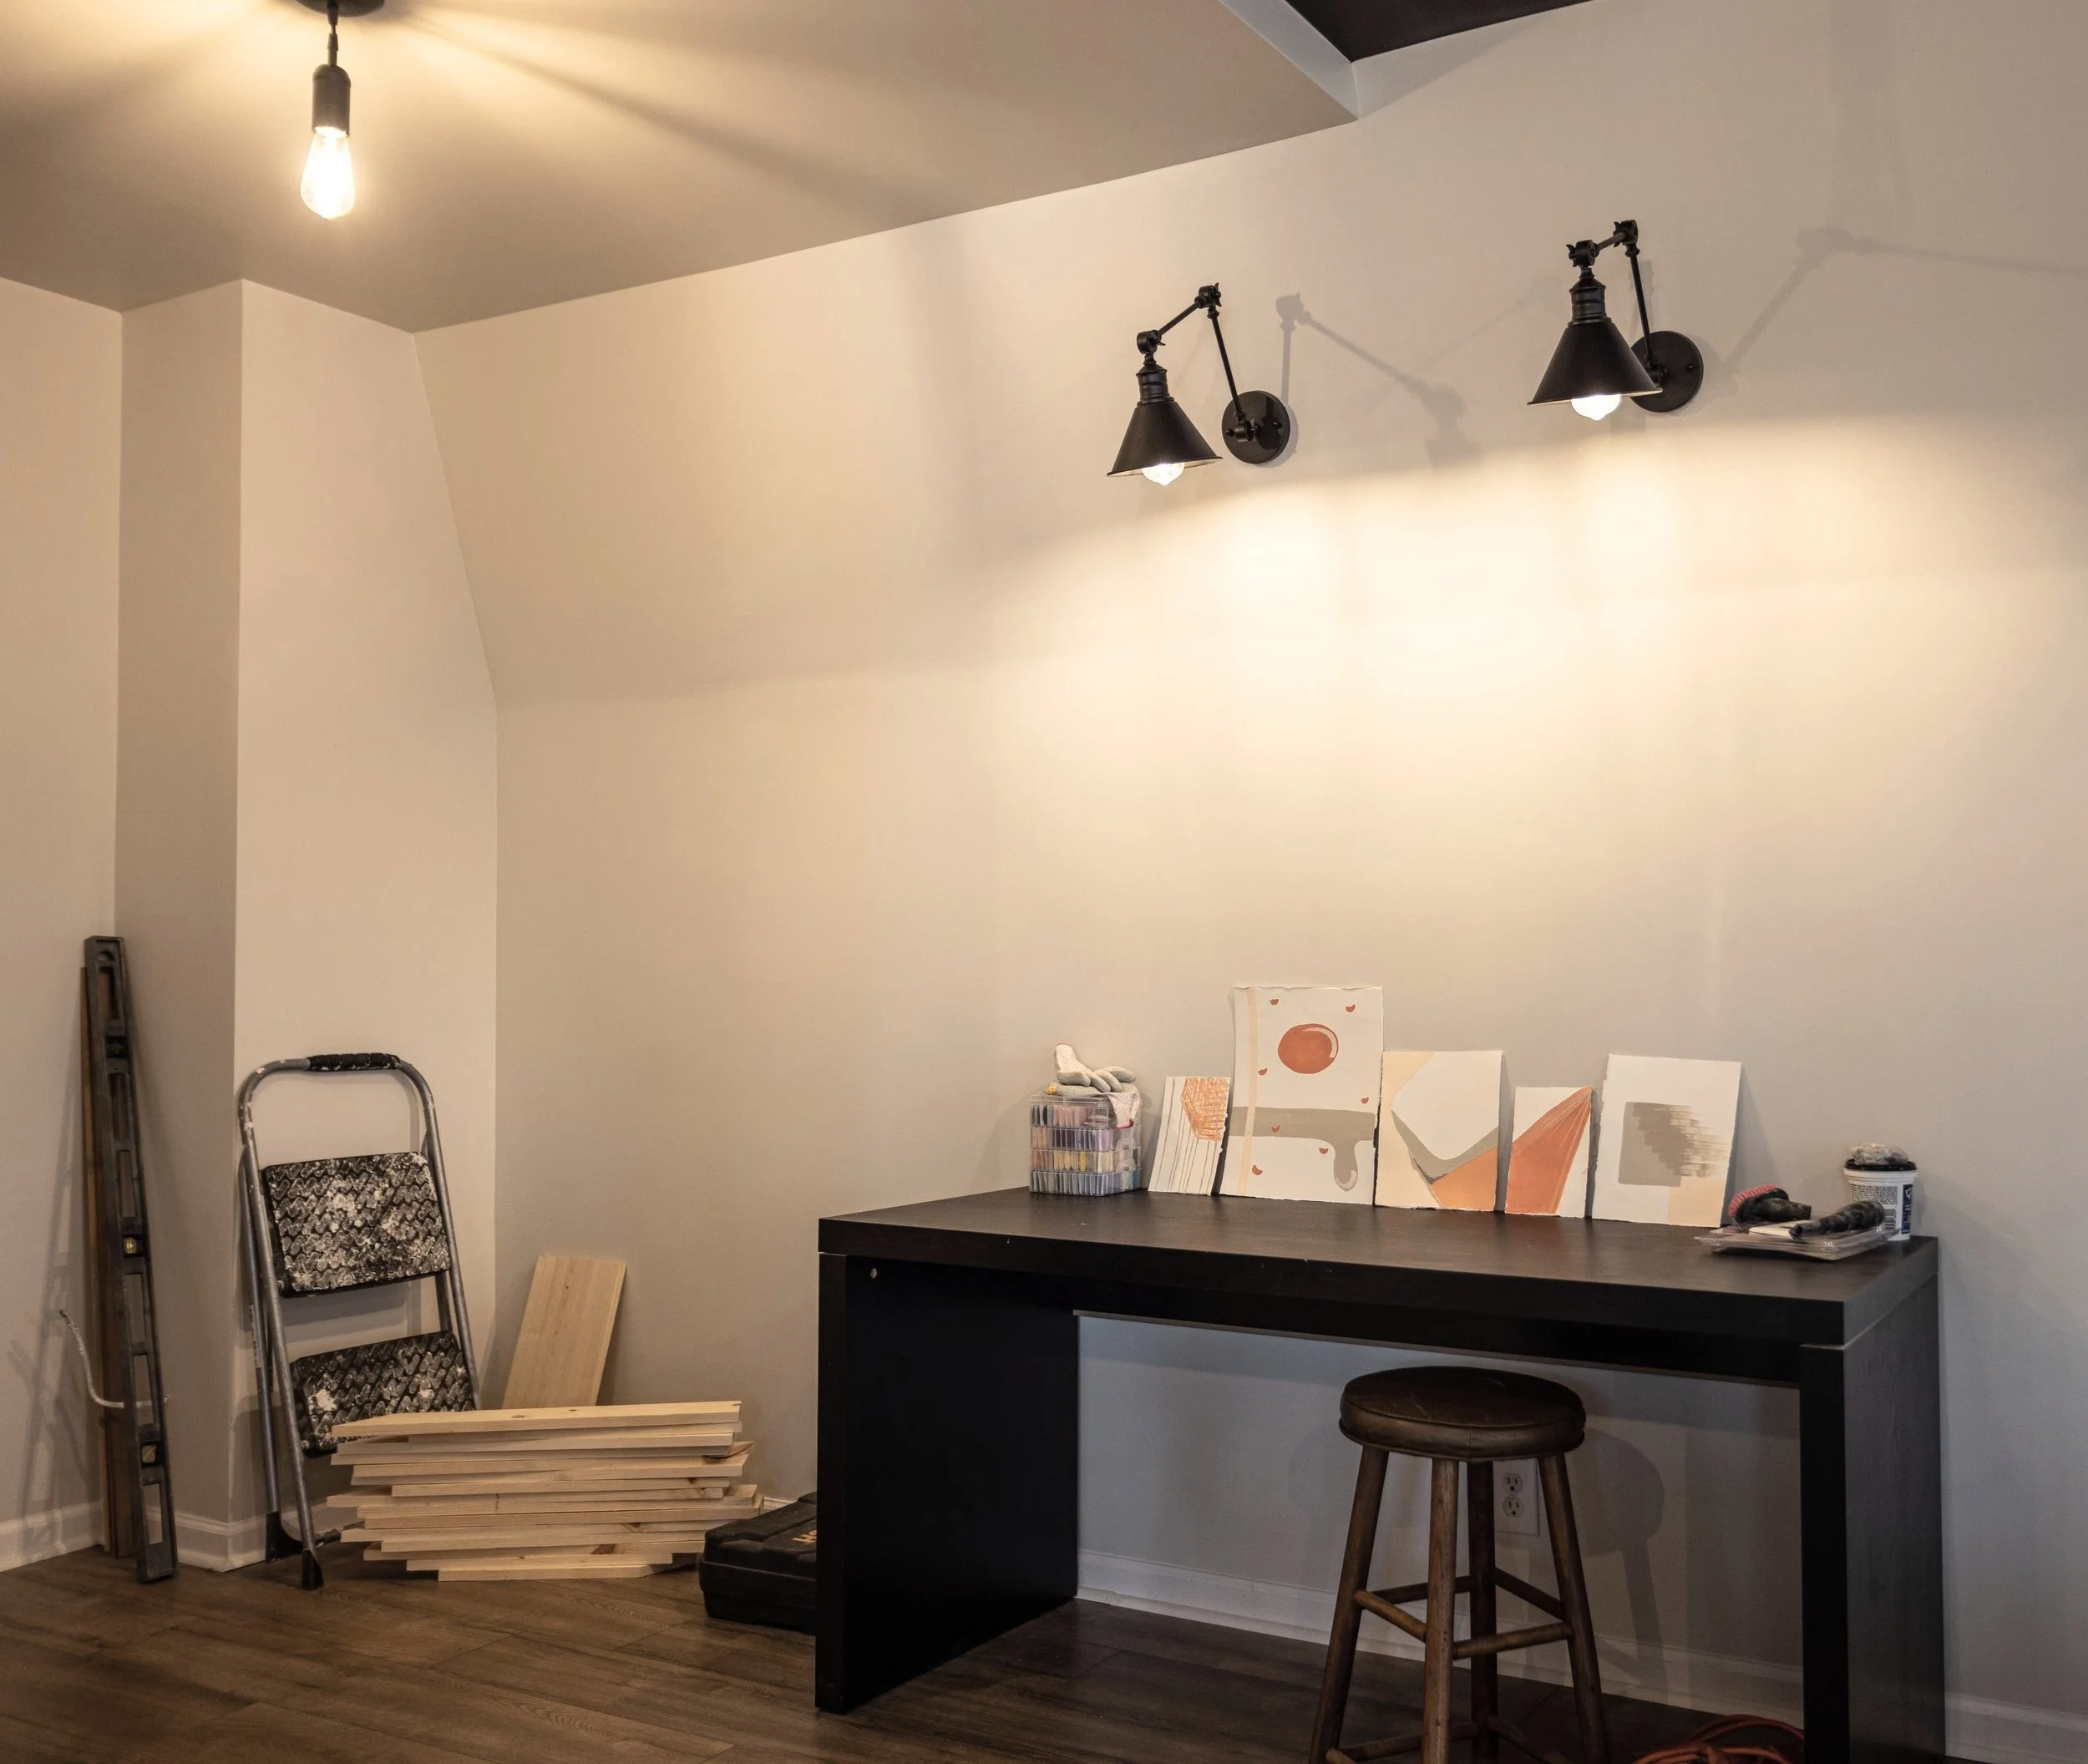
It’s looking a little sad right now, but I plan on expanding it to cover more of this section of the wall so I can really spread out. I’d love to create something like the art area below with lots of storage incorporated since most of my art supplies are currently occupying my unfinished walk-in closet.

What’s Left To Do
Trim
Now that the big things are finished, it’s time for finishing work - like the trim! The trim is installed around the windows, doors, and baseboards and now all that’s left to do is paint. I’d like to step out of the norm here and shake things up a bit though.
The window trim will be painted white to match the windows, but I’d really love to incorporate taupe contrast trim on the baseboards. It’s been a bit of a struggle to convince Lucius, but I think it would be an unexpected twist (and I think I’m wearing him down!).
As for the door trim, I’d like to push the envelope even more and paint it black to match the doors. This sounds crazy, but just take a look at this example and tell me it wouldn’t look great. I dare you.

Blinds
After we moved into this house, we installed cheapo blinds up here to get us by. But now that we’ve renovated, we’ve decided to invest in blinds that are a little nicer and more substantial. HOWEVER, we were waiting on our new windows to be installed first.
Welp, I’m excited to say that we have new windows! Now we just need to measure for blinds and get them ordered!
Beams
One of the major design elements we have yet to add to this room is the beams. This is still on our to-do list but a lower priority since they really serve no structural purpose. Besides, I’d really like it to get warmer outside so I don’t have to stain them in the cold!
Once we finally install them, however, I’m hoping that they help break up some of the light cascading across the ceiling and hide some of the imperfections.
Kitchenette!
Last but definitely not least is a project in itself: the kitchenette!
We recently stopped by IKEA to order the cabinets and countertop, so this piece of the puzzle is moving right along. There’s just enough space to incorporate built-in trash and recycling, the mini-fridge, and a cabinet big enough to place/hide a small microwave.
The cabinets are going to be black, and we’re pairing them with a white laminate countertop, which will have a cutout for a small sink. You can see the full design plan here.
New Ideas
Dual-purpose Window Sills
As challenging as it can be living through renovations, taking it slow can be a blessing in disguise in that it forces you to slow down and live with things before they’re final.
For example, when we had our New Year’s party, one thing that really stuck with me was the lack of places to put drinks and whatnot while people were playing pool. So I thought to myself… wouldn’t it be cool if we turned the window sills into bartops? So that’s what we’re gonna do!
At least, that’s what we’ll do along the back two windows. Since we have a mansard roof and the windows on the second story of our house are dormered, there’s a little inset created for each window box. This seemed like the obvious place to add extra seating and bartops. I plan on adding a couple of bar stools to each of them that will tuck underneath when not in use.
As of right now, all the window sills are built out as if they’ll all be bartops, but our long-term plan for the remaining four windows is a little different. We’ve noticed a lack of storage in this room. To counteract that, we’re planning on building storage underneath each of the other four window sills. Inside, we’ll add shelving and they’ll be finished off with doors.
The extra bonus for this “bartop” idea is that I have more places for plants!
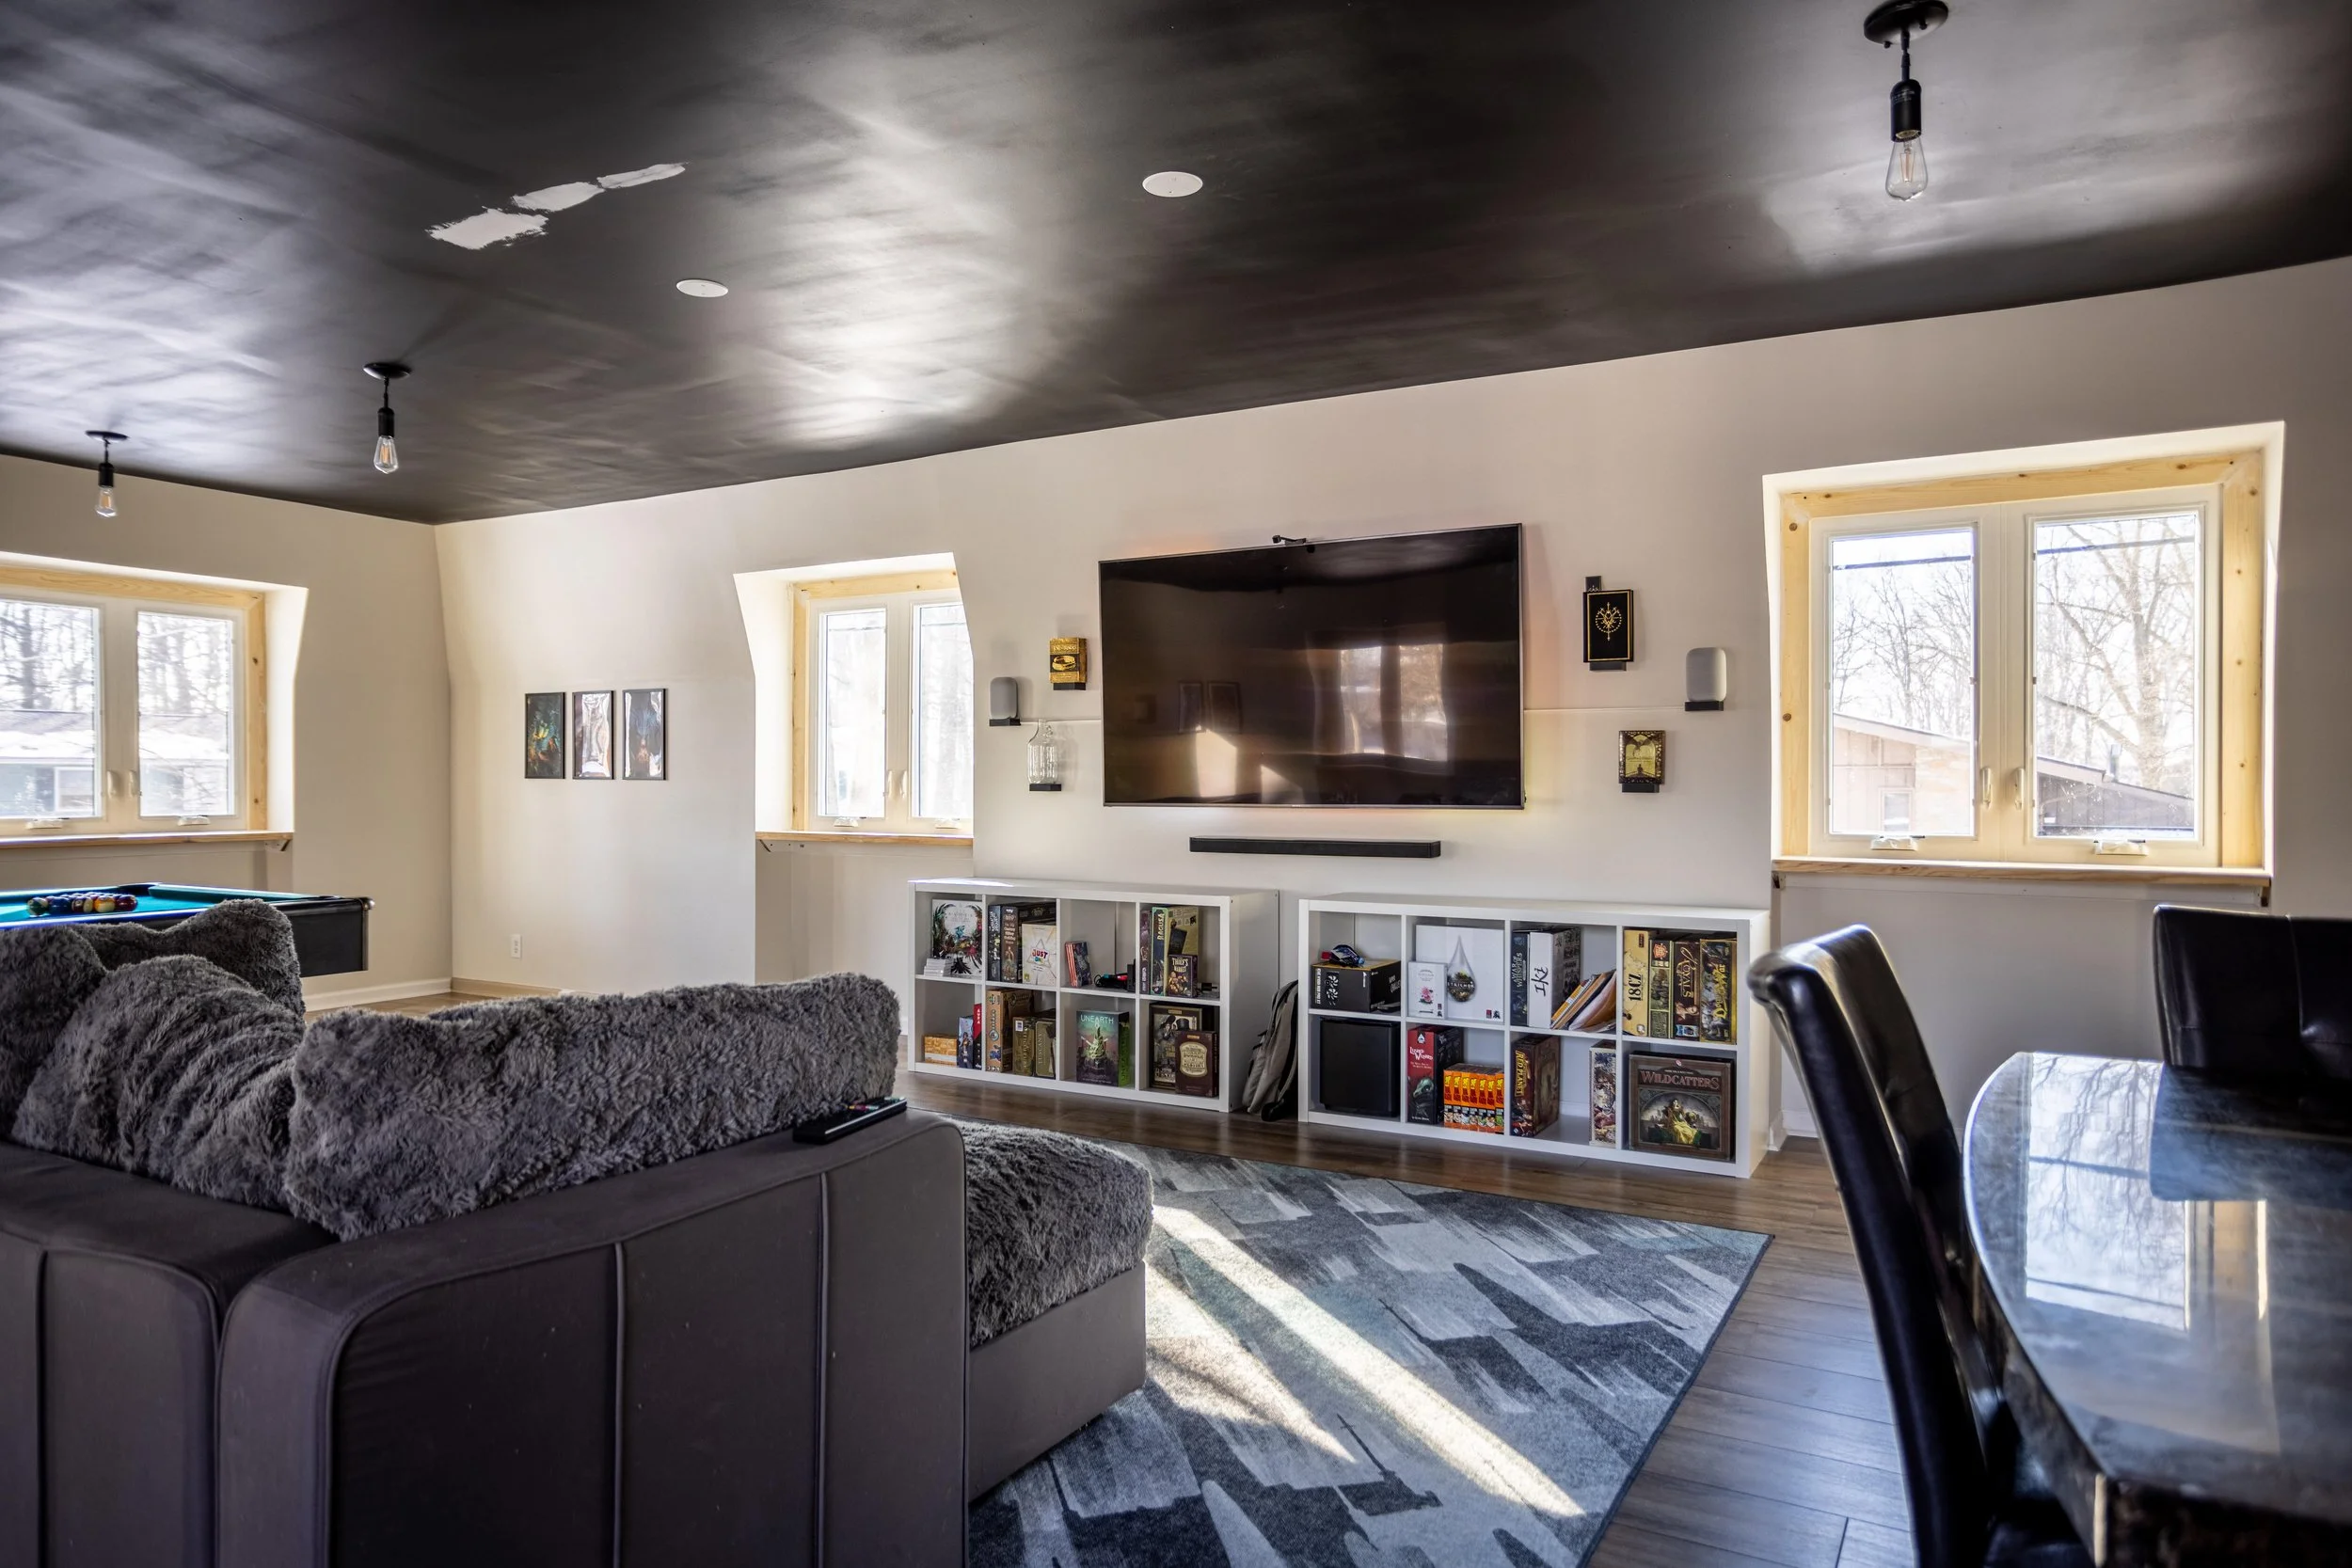
Built-in Entertainment Center
Our other new idea is to build an entertainment center customized to run between the windows on either side of the TV. I think this will help balance out the TV and make the wall less top-heavy. Plus, it’ll add EVEN MORE storage! I mean, can you ever really have enough storage (or plants)?

While we were at IKEA ordering the kitchenette, we picked up a couple of these Kallax bookshelves. We plan on raising them up to run trim along the bottom, adding a top so they appear as one piece, and painting them, you guessed it, black, to tie into the rest of the room.
Final Thoughts
As you can see, we’re moving right along with this room. And with our goal of FINISHING projects, before we start new ones, this room should be completely done in no time (I hope).
It’s hard to believe the change this room has undergone in just a matter of months, and pictures honestly don’t do it justice. I’ll continue to share updates along the way on Instagram stories, where you can see the progress in real-time.
While we’re working on finishing up this room, I’d love to know what’s your favorite part so far?

To follow along on our loft renovation journey, check out these other posts:
Rec Room Renovation
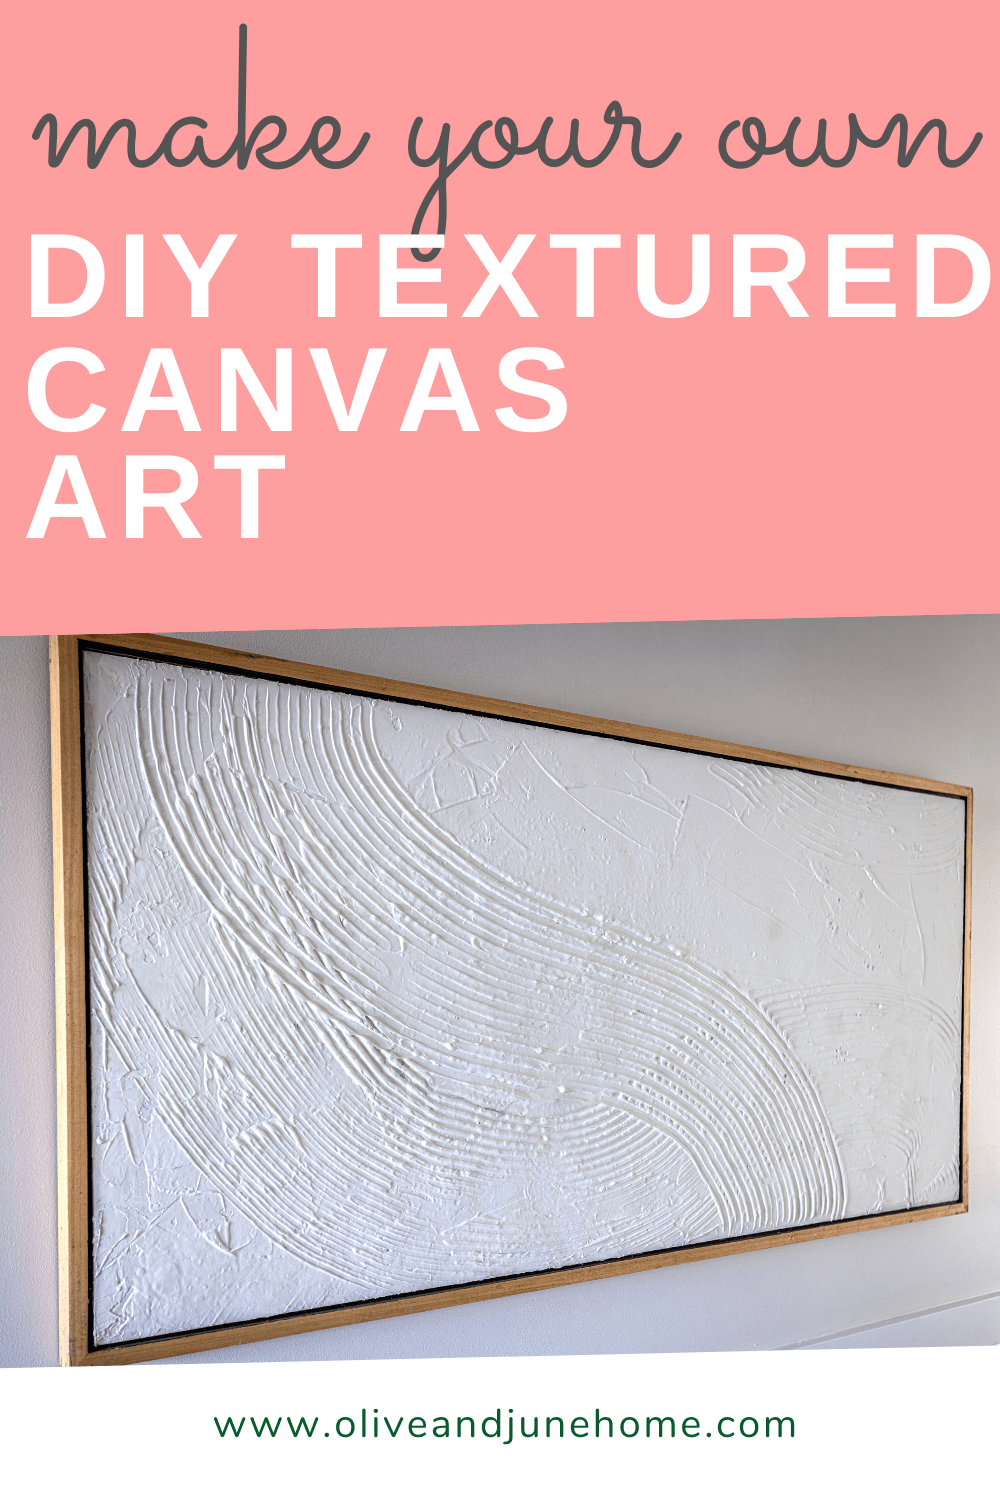
DIY Textured Canvas Art
You've probably come across textured wall art at a big box store and liked the look of it, but not the price tag. But did you know you can easily make your own for a fraction of the cost? In this post, I’m sharing exactly how to make textured canvas art!
How To Make A Textured Painting - Beginner Friendly
You've probably come across textured wall art at a big box store and liked the look of it, but not the price tag. But did you know you can easily make your own for a fraction of the cost? In this post, I’m sharing exactly how to make textured canvas art!
Materials:
As an Amazon Associate, and partner with other brands, I earn from qualifying purchases. This post may contain affiliate links, meaning I receive commissions for purchases made through those links at no cost to you.

- Stretched canvas of some sort (an old painting, a thrifted painting, something new, or you can even build your own!)
- Paint (for a basecoat - I used white acrylic paint)
- Paintbrush
- Joint compound
- Putty knife
- Something to make texture with - I used notched trowels in a couple of sizes, but the world is your oyster. Wanna use a fork? Go for it! Your fingers? Why not! You get the gist…
- Something to seal the joint compound - like clear sealant, spray paint, house paint, or acrylics. This is also an opportunity to add some color!
Step 1 - Prime canvas
This project is perfect for repurposing a piece of art that just isn’t doing anything for you anymore (like I did) or for buying a cheap painting from the thrift store. Here’s what I started with:
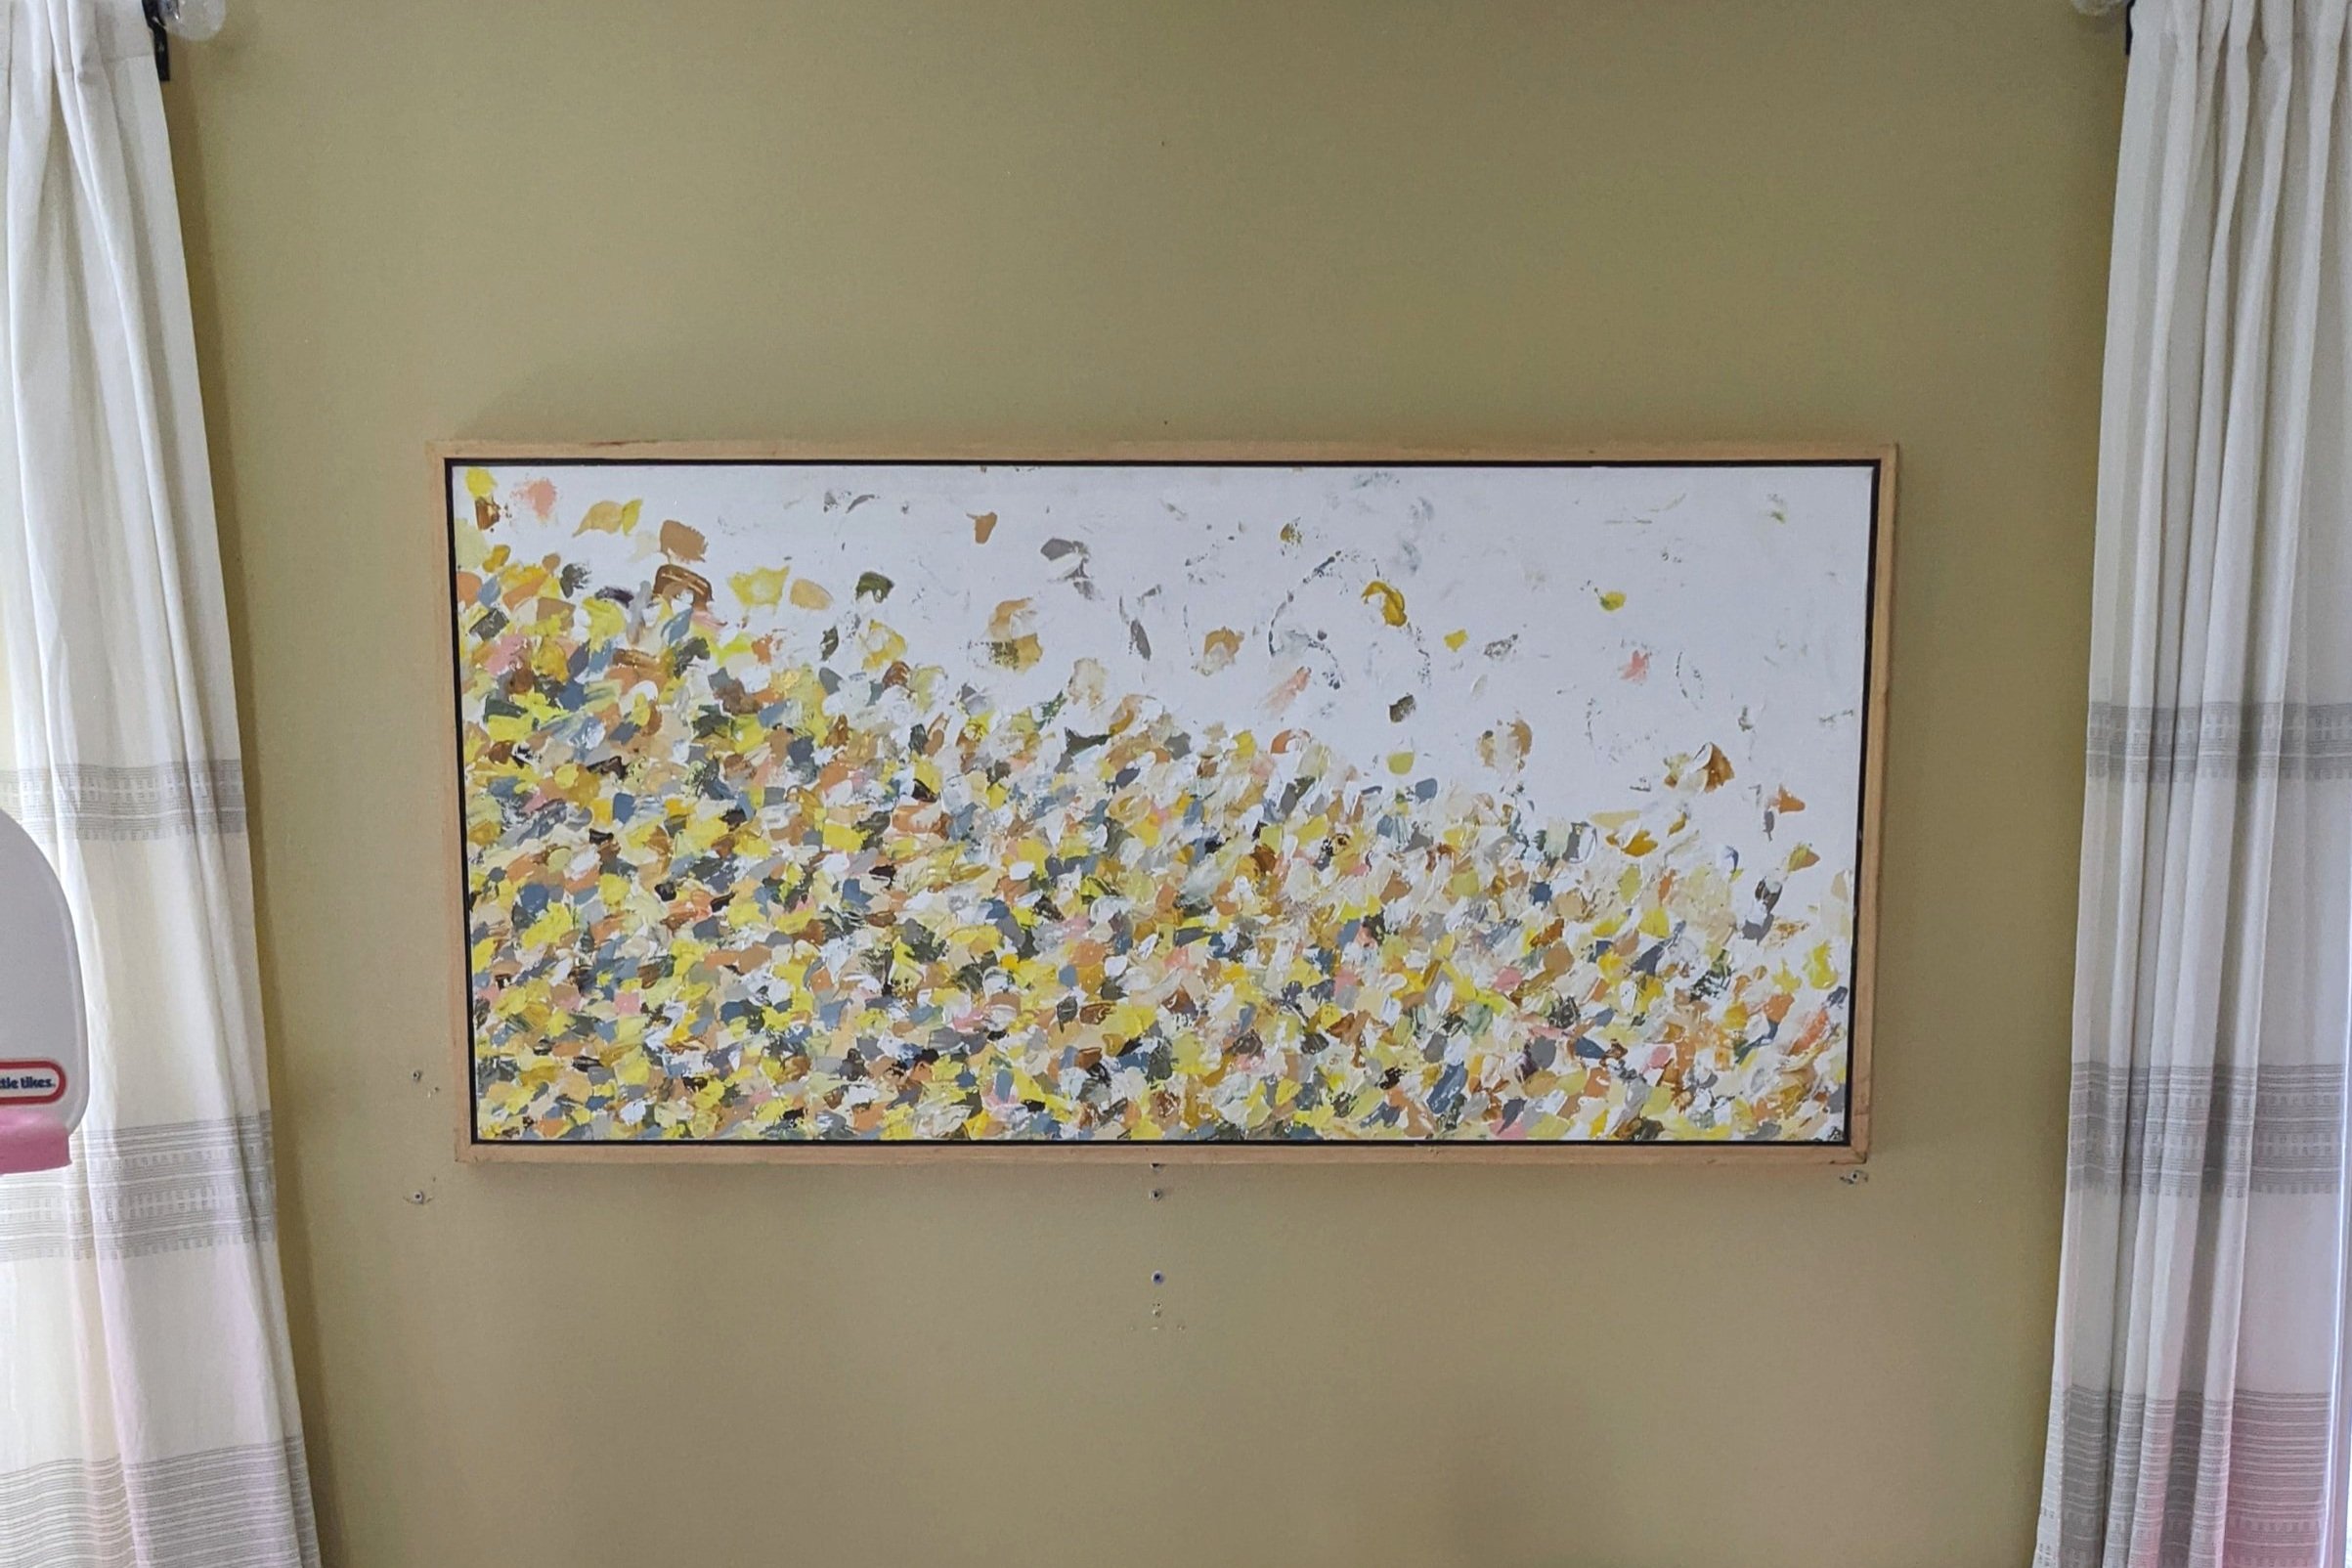
A new canvas will likely come pre-primed. If you're painting over an old piece of art or your canvas isn't already primed, you'll want to slap on a solid base coat of paint. I simply used some white acrylic paint I already had, but really just about any type of paint will do.
Step 2 - Apply joint compound
Once your basecoat is dry, glob on some joint compound. You don’t want to go too heavy with the joint compound because it’ll make the canvas sag, but you do want to have enough to cover the canvas and create texture.

Next, spread the joint compound around with your putty knife to cover the surface of your canvas. It doesn't have to be perfectly smooth.
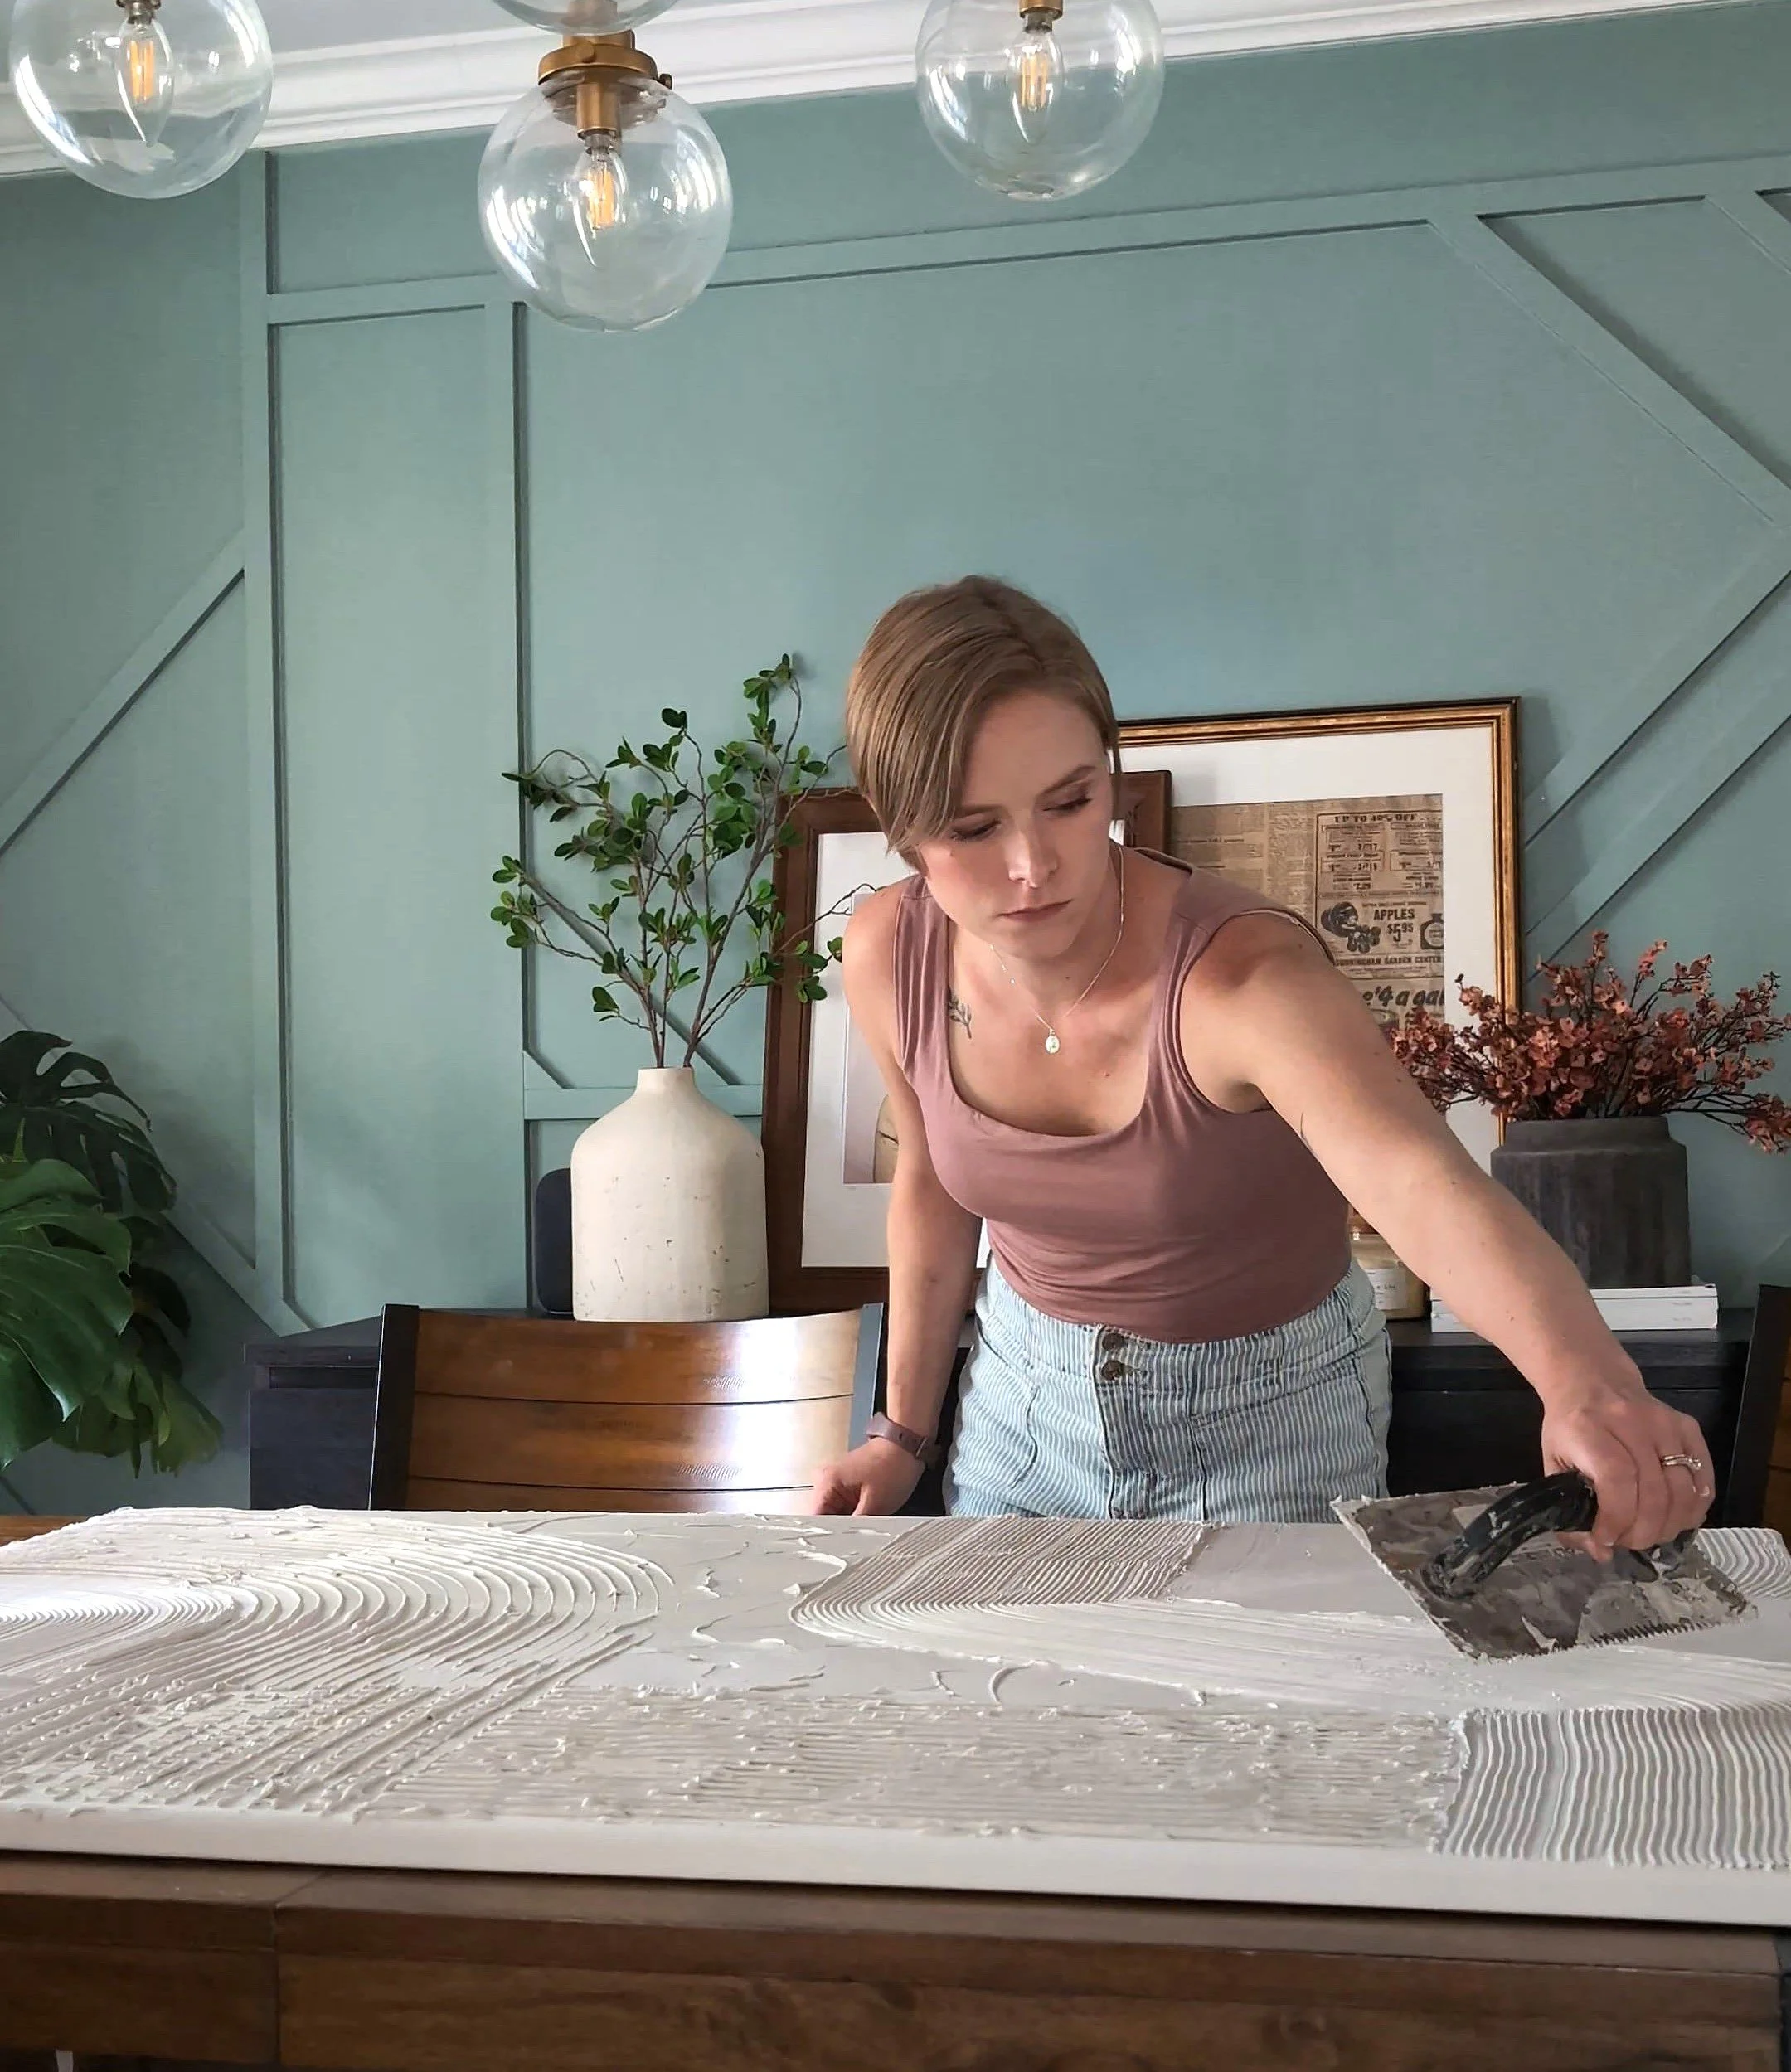
Step 3 - Play!
This is where you can experiment and create texture with whatever texturizing objects you grab. Just do what feels natural - there’s really no going wrong with this project.
If you create a design you don't like, simply even it back out with your putty knife and start over.

Step 4 - Let it dry
Once you’re happy with your design, leave it set to dry. This can take a WHILE - anywhere from several hours to a full day (or two). If you have cats, I recommend doing this project somewhere they can’t get to - otherwise, you’ll end up with a few kitty paw prints in your final piece like I did.

This was taken before the cats stepped on it
Step 5 - Seal your textured art
After the joint compound is dry, it’s a good idea to seal your art. This can be done with a clear sealant if you like the soft white color of joint compound (as I do).
However, you could also use this as an opportunity to add some color with acrylics, house paint, or even spray paint. And it doesn't all have to be one color either! You could easily use a paintbrush and add your own spin with multiple colors. HAVE FUN WITH IT!
DIY Textured Art FAQs
Why did you decide to use joint compound instead of plaster or spackle?

I honestly didn't think of using any other material for this project. I've heard of other people using spackle or plaster. I chose joint compound because I'm very familiar with it, it's inexpensive, and I always have it on hand for other projects. It was a no-brainer for me.
Do I have to prime my canvas/paint it white if my canvas is already white?
I recommend priming your canvas either with actual primer or paint to create a barrier so the canvas doesn't soak up the water in the joint compound. However, it doesn't necessarily have to be white - especially if you plan to add color to your final piece.
What dimensions is your piece and how much joint compound did you use?

My piece is about 2x4 feet. I don't have the exact amount of joint compound I used, but as you can see in step 2, a few good globs got the job done.
What kind of sealant did you use?
There are several ways to seal your painting - either by using clear sealant or paint as a sealant if you want to add some color.
How do you add different colors?
To add color, I would just paint right on top of my piece once it dries!
What tool did you use to get the lines?

I used a couple of different sizes of trowels I already had on hand for my lines - but you can use anything that will give you a fun texture! Go through your kitchen drawers or garage and see what you can come up with.
Why won't my joint compound dry?
If your joint compound hasn't dried and it's been a few days, you probably used too much. The only thing you can do is wait for it to dry, but there's a strong possibility you'll have some cracking and flaking.
How did you build the wood frame to go around the canvas?
I once had someone tell me the wood frame brought the whole piece together - and I have to agree! So, I'm working on a separate post to share how to DIY a floating frame. Stay tuned!
Final Thoughts
I’m beyond happy with how easy yet impactful this project was. This really feels like a statement piece of art now. I’m especially pleased with how well it fills the wall, yet it was SO INEXPENSIVE! Sometimes easy DIYs are the best DIYs, don’t you think?

For more easy DIYs, check out these posts:
Looking for the latest posts and projects? I gotchu!
How To Make Textured Wall Art With Joint Compound
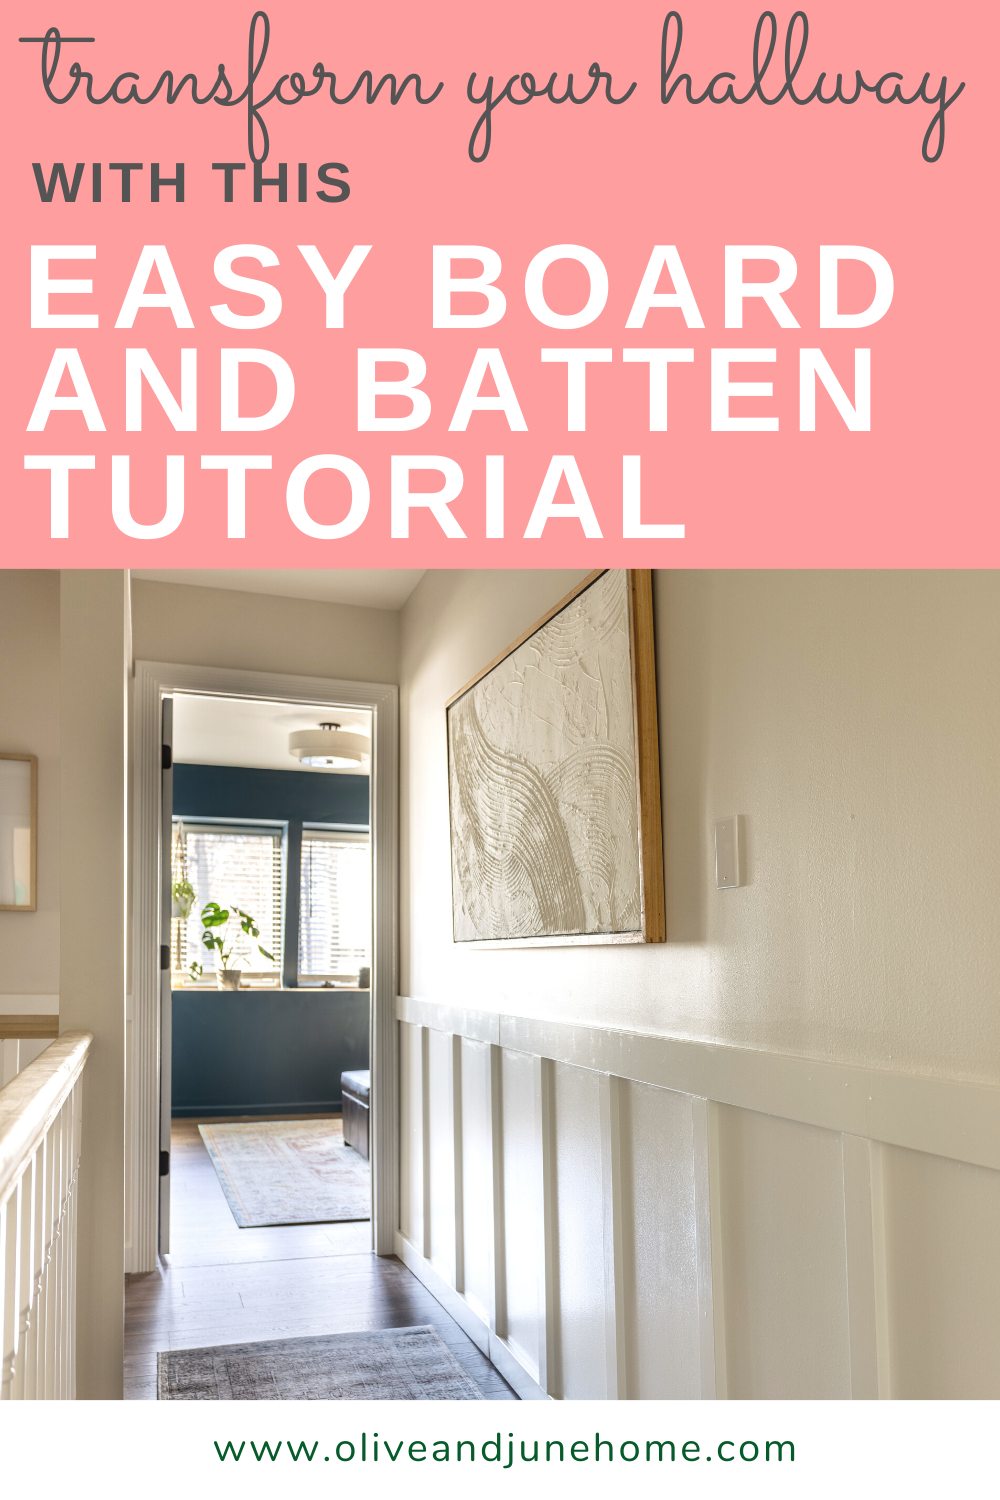
Easy Board and Batten Tutorial
As you may have read in the last update about the hallway, or if you’ve been tuning in on Instagram stories, or if you’re my friend, an acquaintance, or even a simple passerby at the store, you may have heard that I finally installed board and batten in the hallway!
How to Install Board and Batten
As you may have read in the last update about the hallway, or if you’ve been tuning in on Instagram stories, or if you’re my friend, an acquaintance, or even a simple passerby at the store, you may have heard that I finally installed board and batten in the hallway!

Obviously, I’m very excited about this project and haven’t kept my plans a secret whatsoever. But more than that, I’m downright PROUD because I did it ALL BY MYSELF! Start to finish, it was all me. And I’m ecstatic about the character it gives to the hallway now.

One of my goals for this blog is to encourage other folks (like me) who second-guess themselves and their abilities to step out of their comfort zone and try new things – because that’s exactly what I’m doing here.
I can paint anything and feel comfortable doing it, but building things gives me serious self-doubt and I’m working hard to change that. With each one of my projects, I hope I can show someone else that they, too, can do hard and scary things.
That being said, I admittedly didn’t share the progress of this project on Instagram because I was nervous I’d mess it up! I now realize how silly that was, and even if I had messed it up, it would’ve been entertaining at least!
I definitely learned a few things on the way – including what NOT to do. So, in this post, I’d like to share the steps to install board and batten, so that some other dreamer, like myself, can find the courage to do the same without making the mistakes I did. Let’s learn together!

First of all, as I mentioned in this post, board and batten isn’t the same thing as wainscoting - who knew!? I didn’t!
Second, you can make board and batten as elaborate as you’d like by adding additional molding, but Lucius and I are very drawn towards clean lines and simple shapes. Therefore, my board and batten is about as simple as it can get – perfect for a novice! Here’s what I used:
Materials
As an Amazon Associate, I earn from qualifying purchases. This post may contain affiliate links, meaning I receive commissions for purchases made through those links, at no cost to you.
- Primed 1x4 MDF (for the baseboard and top rail) and 1x3 MDF (for the battens)
- Note: MDF is an excellent choice for this project it comes primed, it’s cheaper than wood, there’s no concern about warped boards, and you don’t have to sand it first. Highly recommend!
- Tape measure
- Sandpaper
- Wood filler
- Paintable caulk
- Brad nailer
- 1 1/4 Brad nails
- Level - I used a standard level and a laser level
- Miter saw
- Safety goggles
- Primer
- Paint
- Paintbrush
- Roller
One quick note: I didn’t use any “boards” (the flat panel that traditionally attaches to the wall behind the battens). Since our walls are smooth, I simply used the wall as my board.
Step 1 – Planning
I have to be honest, I looked at a BUNCH of other tutorials trying to figure out how to do the math to plan my board and batten. It made my head spin and made me fall asleep simultaneously (math has NEVER been my thing). So, I did it the Erika way – with tape and graph paper.
If math is your jam, feel free to use a board and batten spacing tutorial like this one from Remodelaholic.
I started by leaning some scrap wood against the wall at varying intervals. Then I loosely applied tape to get a general idea of how tall to make my overall design and how far apart I wanted the boards.

Once I felt like I had a good idea of the spacing, I drew it out on my graph paper to figure out the exact dimensions. This helped me determine how to begin and end the design at each stopping point and calculate how much wood I needed. I decided to space my battens approximately 15 inches apart to achieve the look I was going for.

I got lucky and 15 inches between each batten worked for all the walls I applied board and batten to. BUT, that won’t always be the case. If you need to adjust the spacing of your battens based on each wall, that’s okay! No one will notice if the spacing is an inch or two different from wall to wall.
What people WILL notice, is if the spacing between your battens and door frames or corners is too small or too big compared to the spacing between the surrounding battens, so keep that in mind.
Once I had my measurements, I used a laser level to officially mark where my top rail would go. I tried to stay close to the height of the banister so visually they weren’t competing, which ended up being a weird 37.5ish inches, but hey, it works.


Step 2 – Install Baseboards and Top Rail
To ensure my battens terminated seamlessly into the baseboard, I used 1x4 MDF, rather than a traditional baseboard. Luckily, I was starting with a clean slate and the baseboards were already removed. Otherwise, I would have removed them. But there are other options if you don’t want to remove your baseboards.
One thing to note, I purposely didn’t glue any of my boards on the off-chance that I, or someone else down the line, want to remove them without entirely ruining the drywall. The nails, caulk, and paint should hold them in place just fine. But for some extra assistance, you can angle your nail gun in alternating directions as you secure them to the wall, and/or try to nail into studs.
After the new baseboards were installed, I nailed in the top rail, being sure to level along the way.

It’s common to add a 1x2 board to the top rail, but I didn’t love how it looked when I held it up in my hallway, so I left it off.
Step 3 – Install Battens
This part is exciting because you finally get to see your design come to life. Plus, it goes pretty fast!
To start, since I knew I wanted 15 inches between each of my battens, I cut a scrap piece of wood to 15 inches. You’ll see this come into play in a minute.
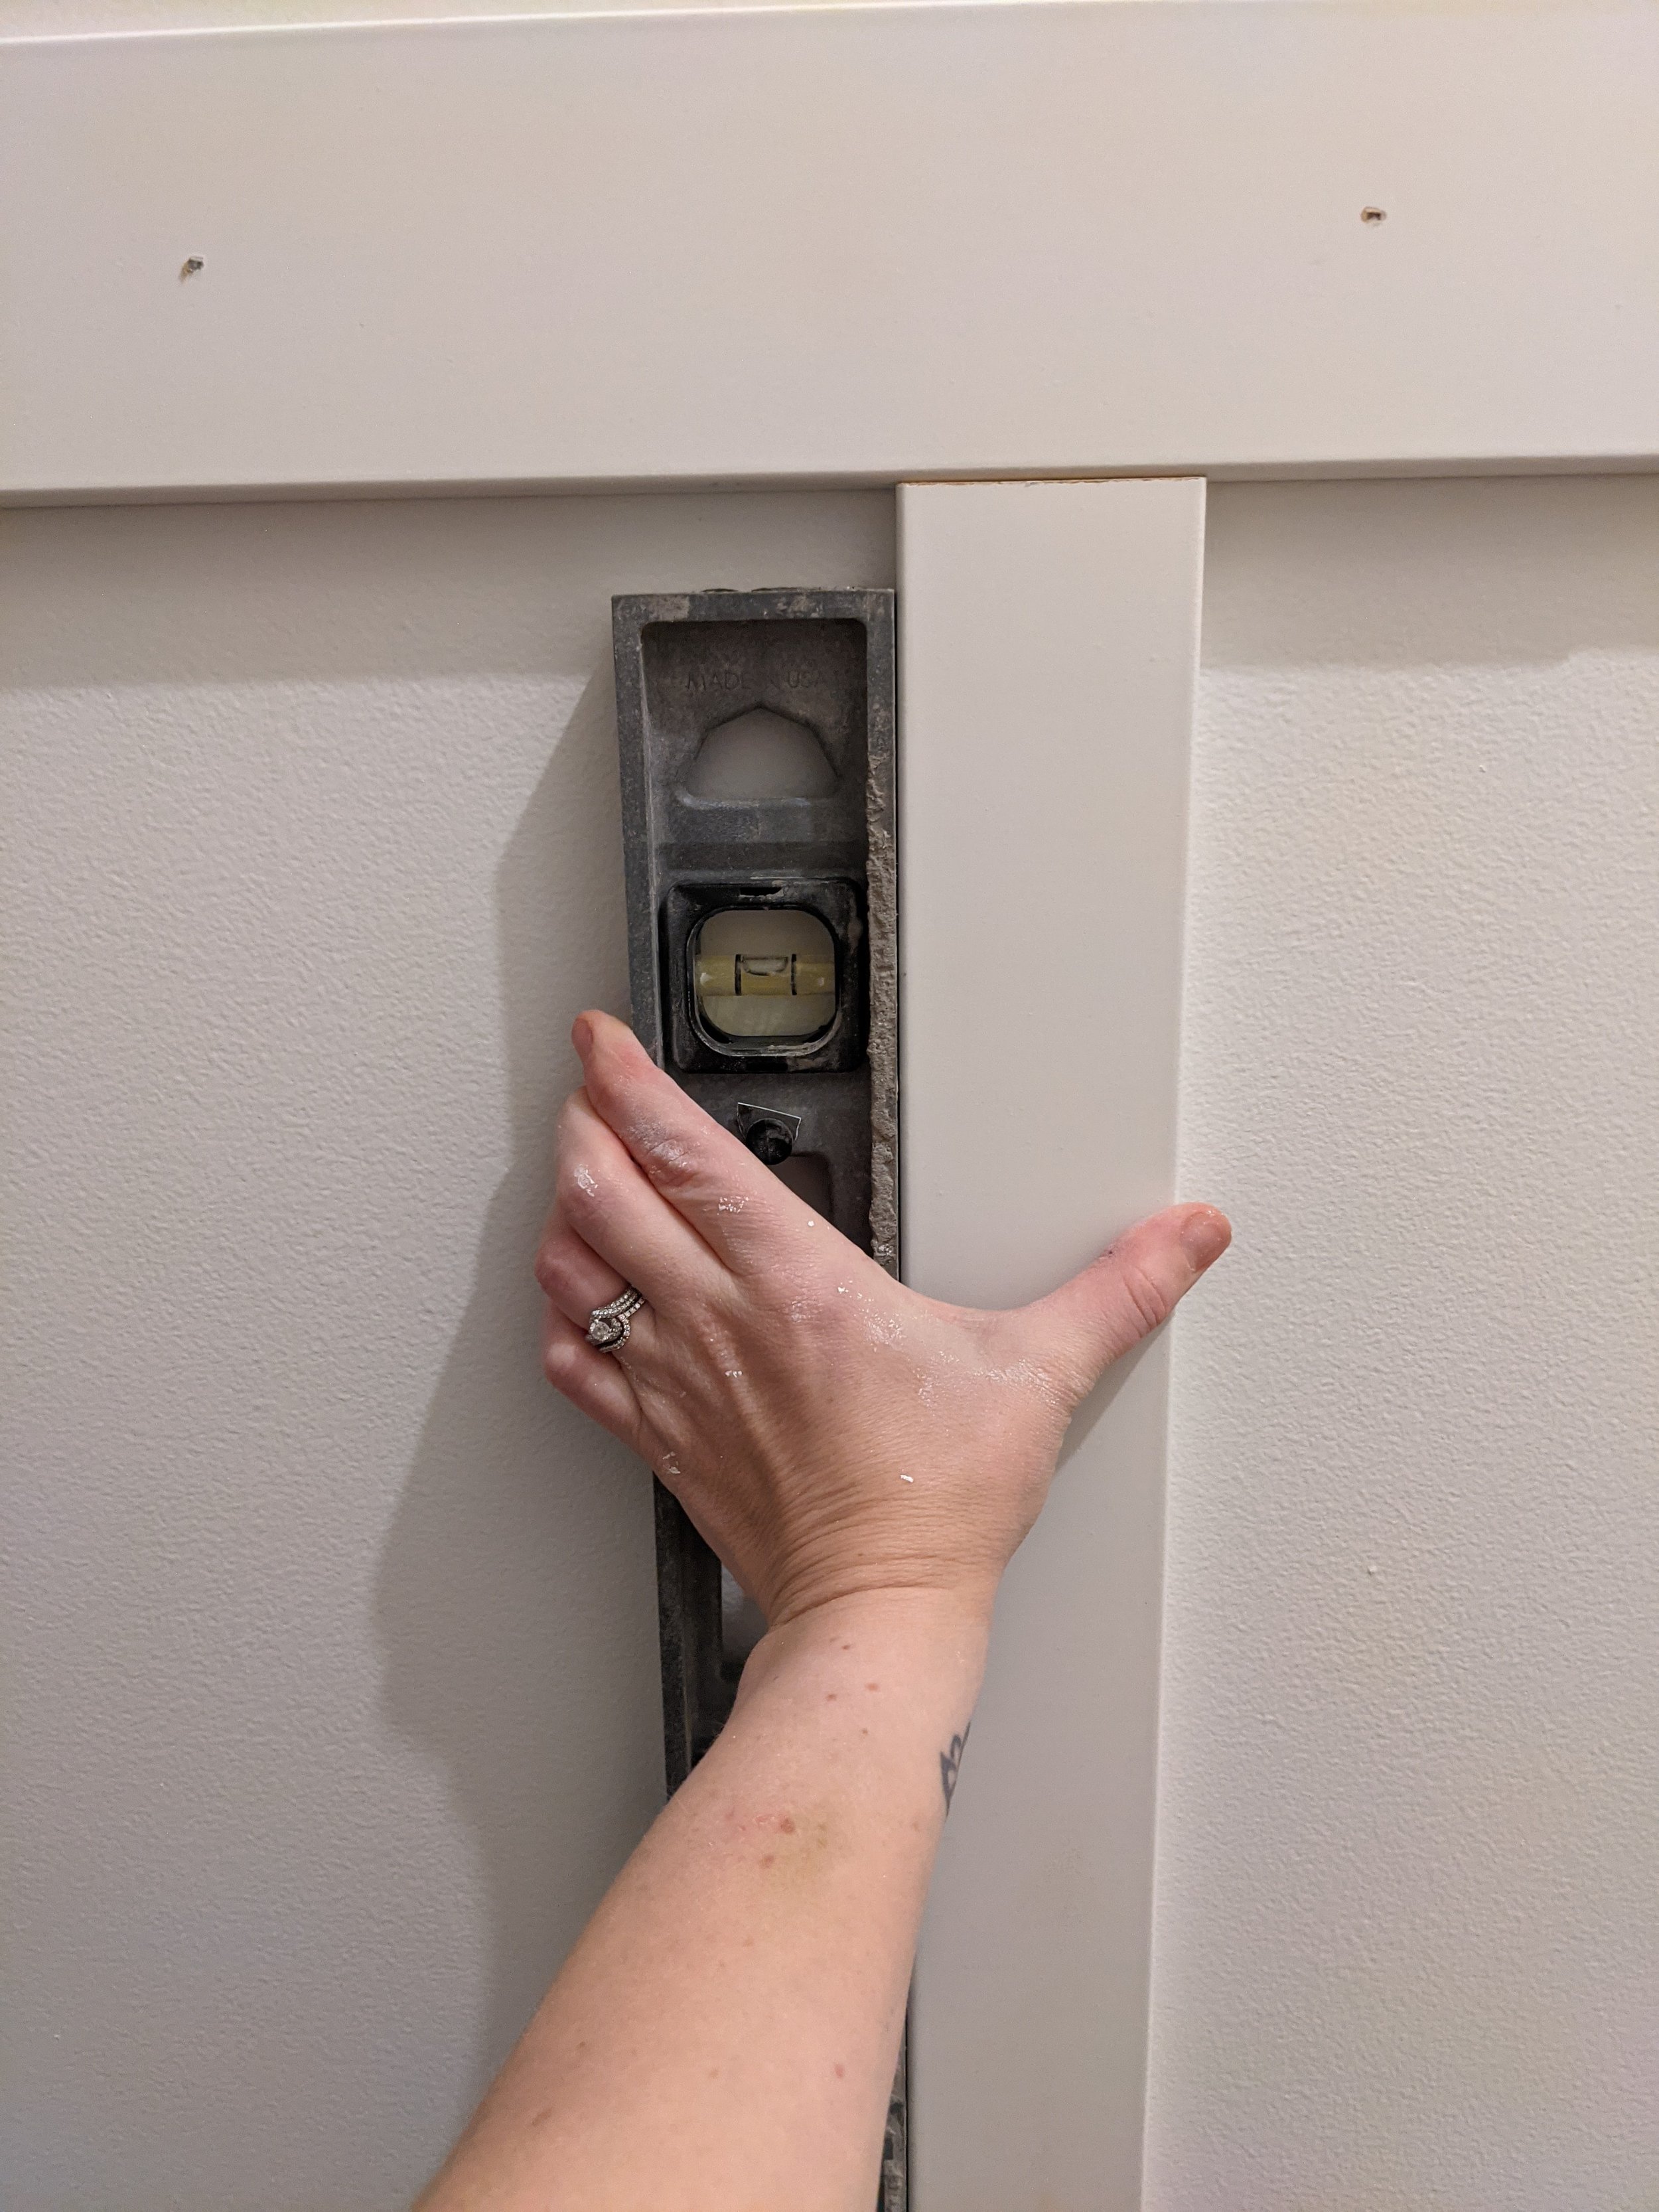
Before you go crazy cutting all your battens to the same length, STOP!
No matter how much you’ve leveled, your baseboards and top rail aren’t completely level. I promise. I highly recommend only cutting a couple of battens at a time and measuring along the way.
Oh, and that scrap piece of wood that you cut? Place it on your baseboard between the batten you just installed and the next batten to be installed.

Make sure your new batten is level and nail it in!
Step 4 – Finishing Work
This is, apparently, where I got in the groove and forgot to take many pictures - but everything in this step is pretty straightforward.
Once all your battens are installed, it’s time to fill in nail holes and caulk!
If you have any nails that aren’t completely flush with your boards, tap them in with a hammer first. Then, using wood putty, fill in your nail holes. Once dry, sand them down and slap on a little bit of primer.
Next, caulk all gaps and seams and smooth them out with your finger.
Now you can paint! I used the same trim color used throughout my house - Pure White by Sherwin Williams in semi-gloss - but you can paint it any color you want! I recommend cutting in around the battens with a brush, then using a small roller to paint the flat surfaces.
And that’s it!

Final Thoughts
With every enhancement to this hallway, it’s felt more and more inviting, but the board and batten truly is the icing on the cake. It gave the hallway the something it was lacking and this project gave me the confidence to tackle more new and scary adventures. I’d call that a win-win!
If you found this post helpful - please consider sharing it with others!

To follow our hallway renovation journey, check out these posts:
Board and Batten Hallway DIY

What’s on the Docket for 2022
Now that I’ve covered all the projects we accomplished (and what’s still left unfinished) in 2021, I can focus on all the projects we want to tackle in 2022!
Planned Projects for 2022
Now that I’ve covered all the projects we accomplished (and what’s still left unfinished) in 2021, I can focus on all the projects we want to tackle in 2022!


Lucius and I have an exceptionally difficult time throttling our urge to renovate new spaces before completely finishing up projects that are already in progress. The thought of renovating a new room is just. so. exciting! But I’m officially declaring 2022 the year of getting ish done!
This is the perfect year to finish all the outstanding projects we already have in flux - the master bedroom, hallway, loft, and laundry room - for several reasons:
Simply put, we have a lot of projects to finish up! And as finished as each project we’ve done may seem, there’s a handful of tiny things to do in every room. It’ll feel good to focus on tying up the loose ends and not thinking about them anymore. The devil really is in the details.
Lucius is having foot surgery sometime in the near future. He already had surgery on his left foot in November, which has required us to slow down on our heavy-hitter projects for a while. In fact, he’s just now (2+ months later) getting around without crutches, a boot, or a knee scooter. I don’t expect him to be back to his normal weight-bearing self for a few months after his next surgery.
We have a couple of expensive projects coming up in the first half of the year that we need to budget for. Like…
Windows
One big project that’s happening REALLY soon is that we’re getting new windows throughout the house! This is definitely not going to be a DIY and is honestly not that exciting for anyone except my crazy husband who incessantly walks around the house feeling the existing windows for drafts.
New Roof
We just found out a few days ago that we have to get a new roof, ugh.
We recently discovered a leak in our (almost finished) hallway. After removing the drywall, the source of the leak was obvious and we could tell it would be an easy fix. Unfortunately, when the roofers came to fix the issue, they discovered several unrelated issues.
As we wait for a quote on how much it’ll cost to replace, we’re bracing ourselves for the worst and hoping for the best. BUT, there are still some other, smaller projects we plan on tackling in the meantime.
Master Bedroom Closets
Somehow, for the 2021 to-do list, I completely excluded finishing both Lucius’ and my closets. I shared a while back how I installed wallpaper in my closet… and since then the only purpose it has served is storing stuff from the loft during the renovation. Since we started our master suite renovation in July 2020, my clothes have lived in my office. And Lucius’ closet simply has his dresser shoved in it. No hanging racks. No storage systems. Nada. Pretty glamorous.
So this year, I’m anxious to build out both closets using a combination of hanging racks and storage systems from IKEA Pax systems and DIY builds, as long as supply issues don’t thwart our plans. When it’s all said and done, I’m envisioning a closet similar to this beauty:

By contrast, Lucius’ closet will be pretty run-of-the-mill because he’s a dude and doesn’t care.
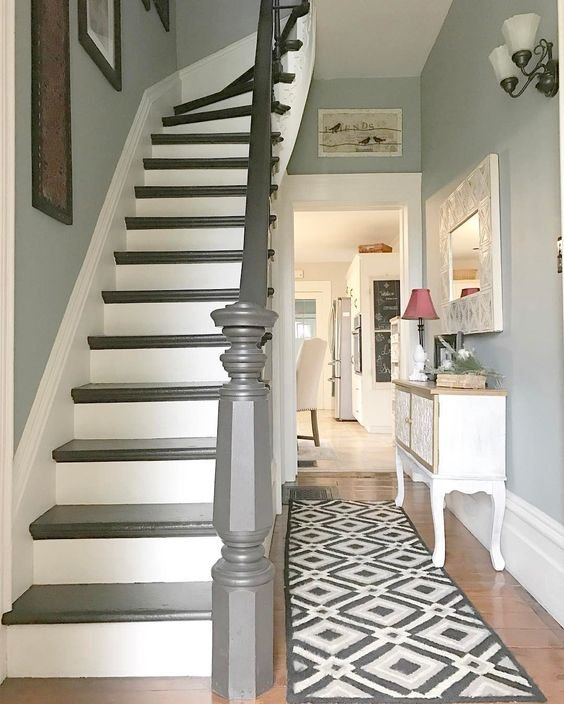
Staircase
“What? The staircase?” you say. “Didn’t you already finish that?”
Well, dear reader, the answer is, “Ehhhh…. sort of”.

If you’ve been following the blog for a while, you may have read about when I stripped the carpet off the staircase and painted it right after we moved in. But with the hallway renovation taking shape, I’m now re-thinking the color of the banister, which is making me re-think the color of the stairs, which is making me consider adding a new carpet runner, and now I’m thinking of repainting the foyer, and now do you see how we end up with so many projects going at once!?
I’ve shared some inspiration photos for the banister/staircase in the hallway update posts. But my latest inspiration is something along the lines of these staircases:


Image 1 Source | Image 2 Source
Plus, we still need to replace the landing… which we’ve ordered and can drive the 2.5 hours to pick up soon! (Only took us 2 years to get here!)
Outside Areas
While we made some great progress with the outside areas of our home last year, there are still some things I’d like to accomplish on my list.
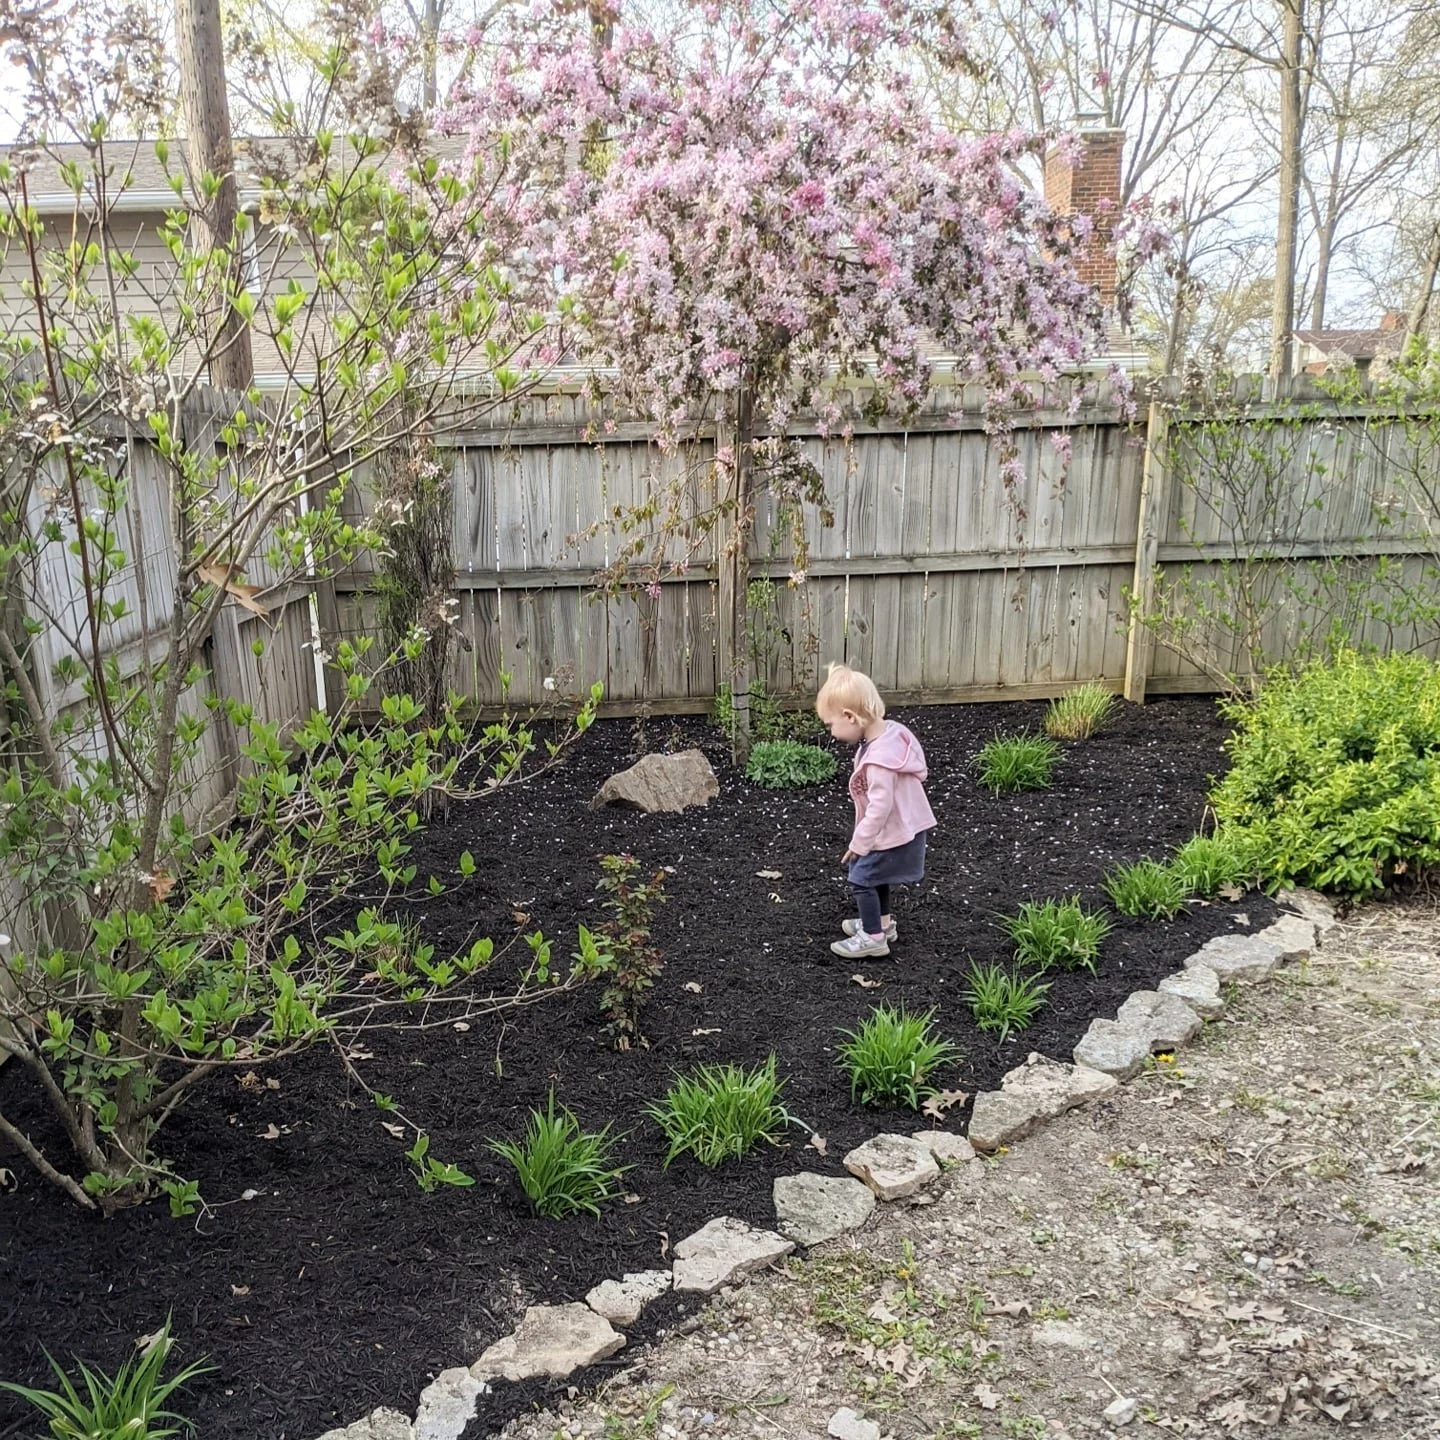
First, as mentioned previously, I’d like to start filling the garden beds with plants! For being such a plant lover, I’ve actually been really hesitant to go nuts buying plants for the garden beds for fear that they won’t survive. Indoor plants are pretty manageable, but outdoor plants are a little intimidating!

So, I plan on slowly adding to each of the garden beds year over year and seeing how the plants develop over time. No need to go all-in in one summer and blow loads of money if I kill them all.
Second, I’d like to convert our raised garden bed to a sandbox. Last year, per my older daughter’s request, we “grew” a garden. We built a raised garden bed and planted carrots, bell peppers, tomatoes, zucchini, strawberries, and probably something else I forgot about because… we only harvested three tomatoes and two zucchini, HA! Our yard is simply too shady for any good gardening. So I’ll be searching for somewhere to transplant the soil and fill the garden bed with sand instead.
We’ll also need to build some sort of cover to keep out any critters and the copious amounts of acorns and tree debris that fall into our yard.
Third: Compost pit! It kills me to throw away compostable items, so I’d really like to build a compost pit. And on that note, I might try to add a rain barrel, too!
Toddler Room
When we moved into this house, I set up the nursery for our 6-month-old, and… haven’t touched it since. When I say I set it up, I mean I put our daughter’s things in the existing room and that’s it (aside from testing out a bunch of paint colors on the wall).

But our (now) toddler’s room desperately needs a paint color that isn’t so light-sucking as the existing color and definitely needs some storage solutions as she’s starting to play in there more and more. Kids’ rooms are so much fun, and my wheels are definitely turning!
I previously posted about the trend of color blocking, and I think this room would be the perfect space to give it a go. I’m picturing something like the room below, with the pink covering the top portion of the walls and ceiling and even cascading across the doors, trim, and anything else in the way - really cutting the room straight in two.

Pipe Dream Projects
If we get through the above list and still have a budget and time to play with, here are a few more spaces I’d love to tackle:
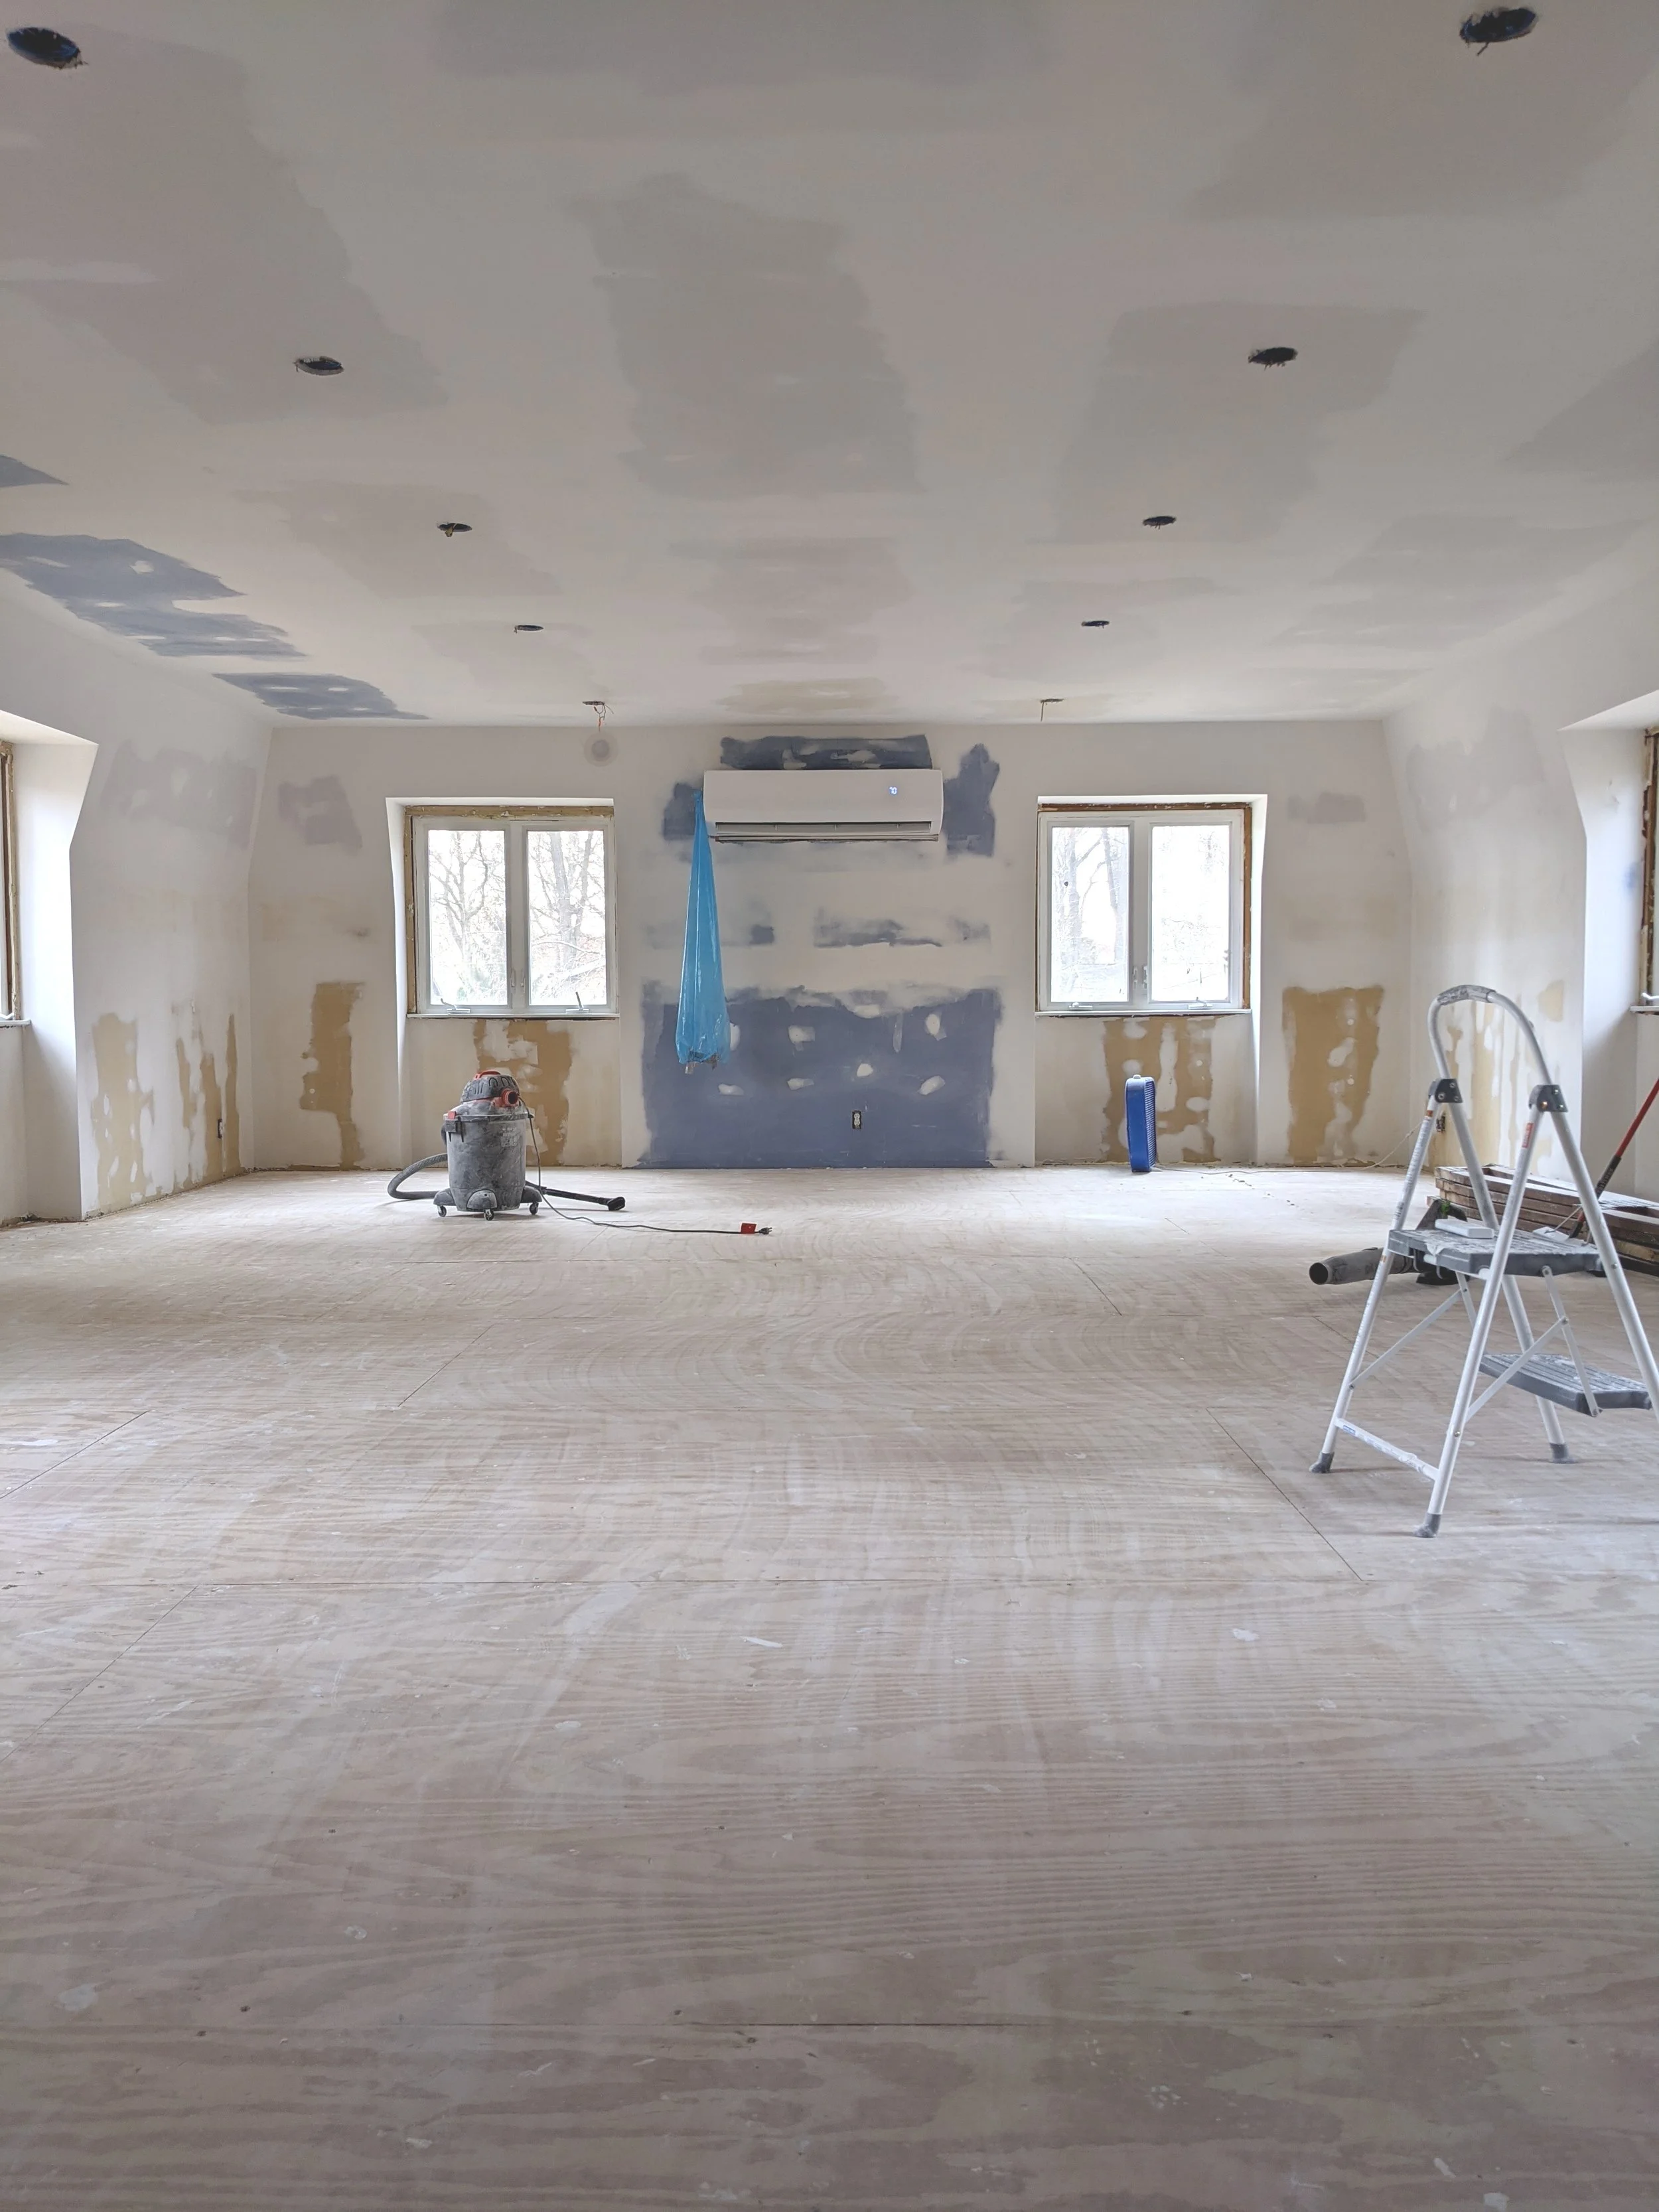
Mudroom
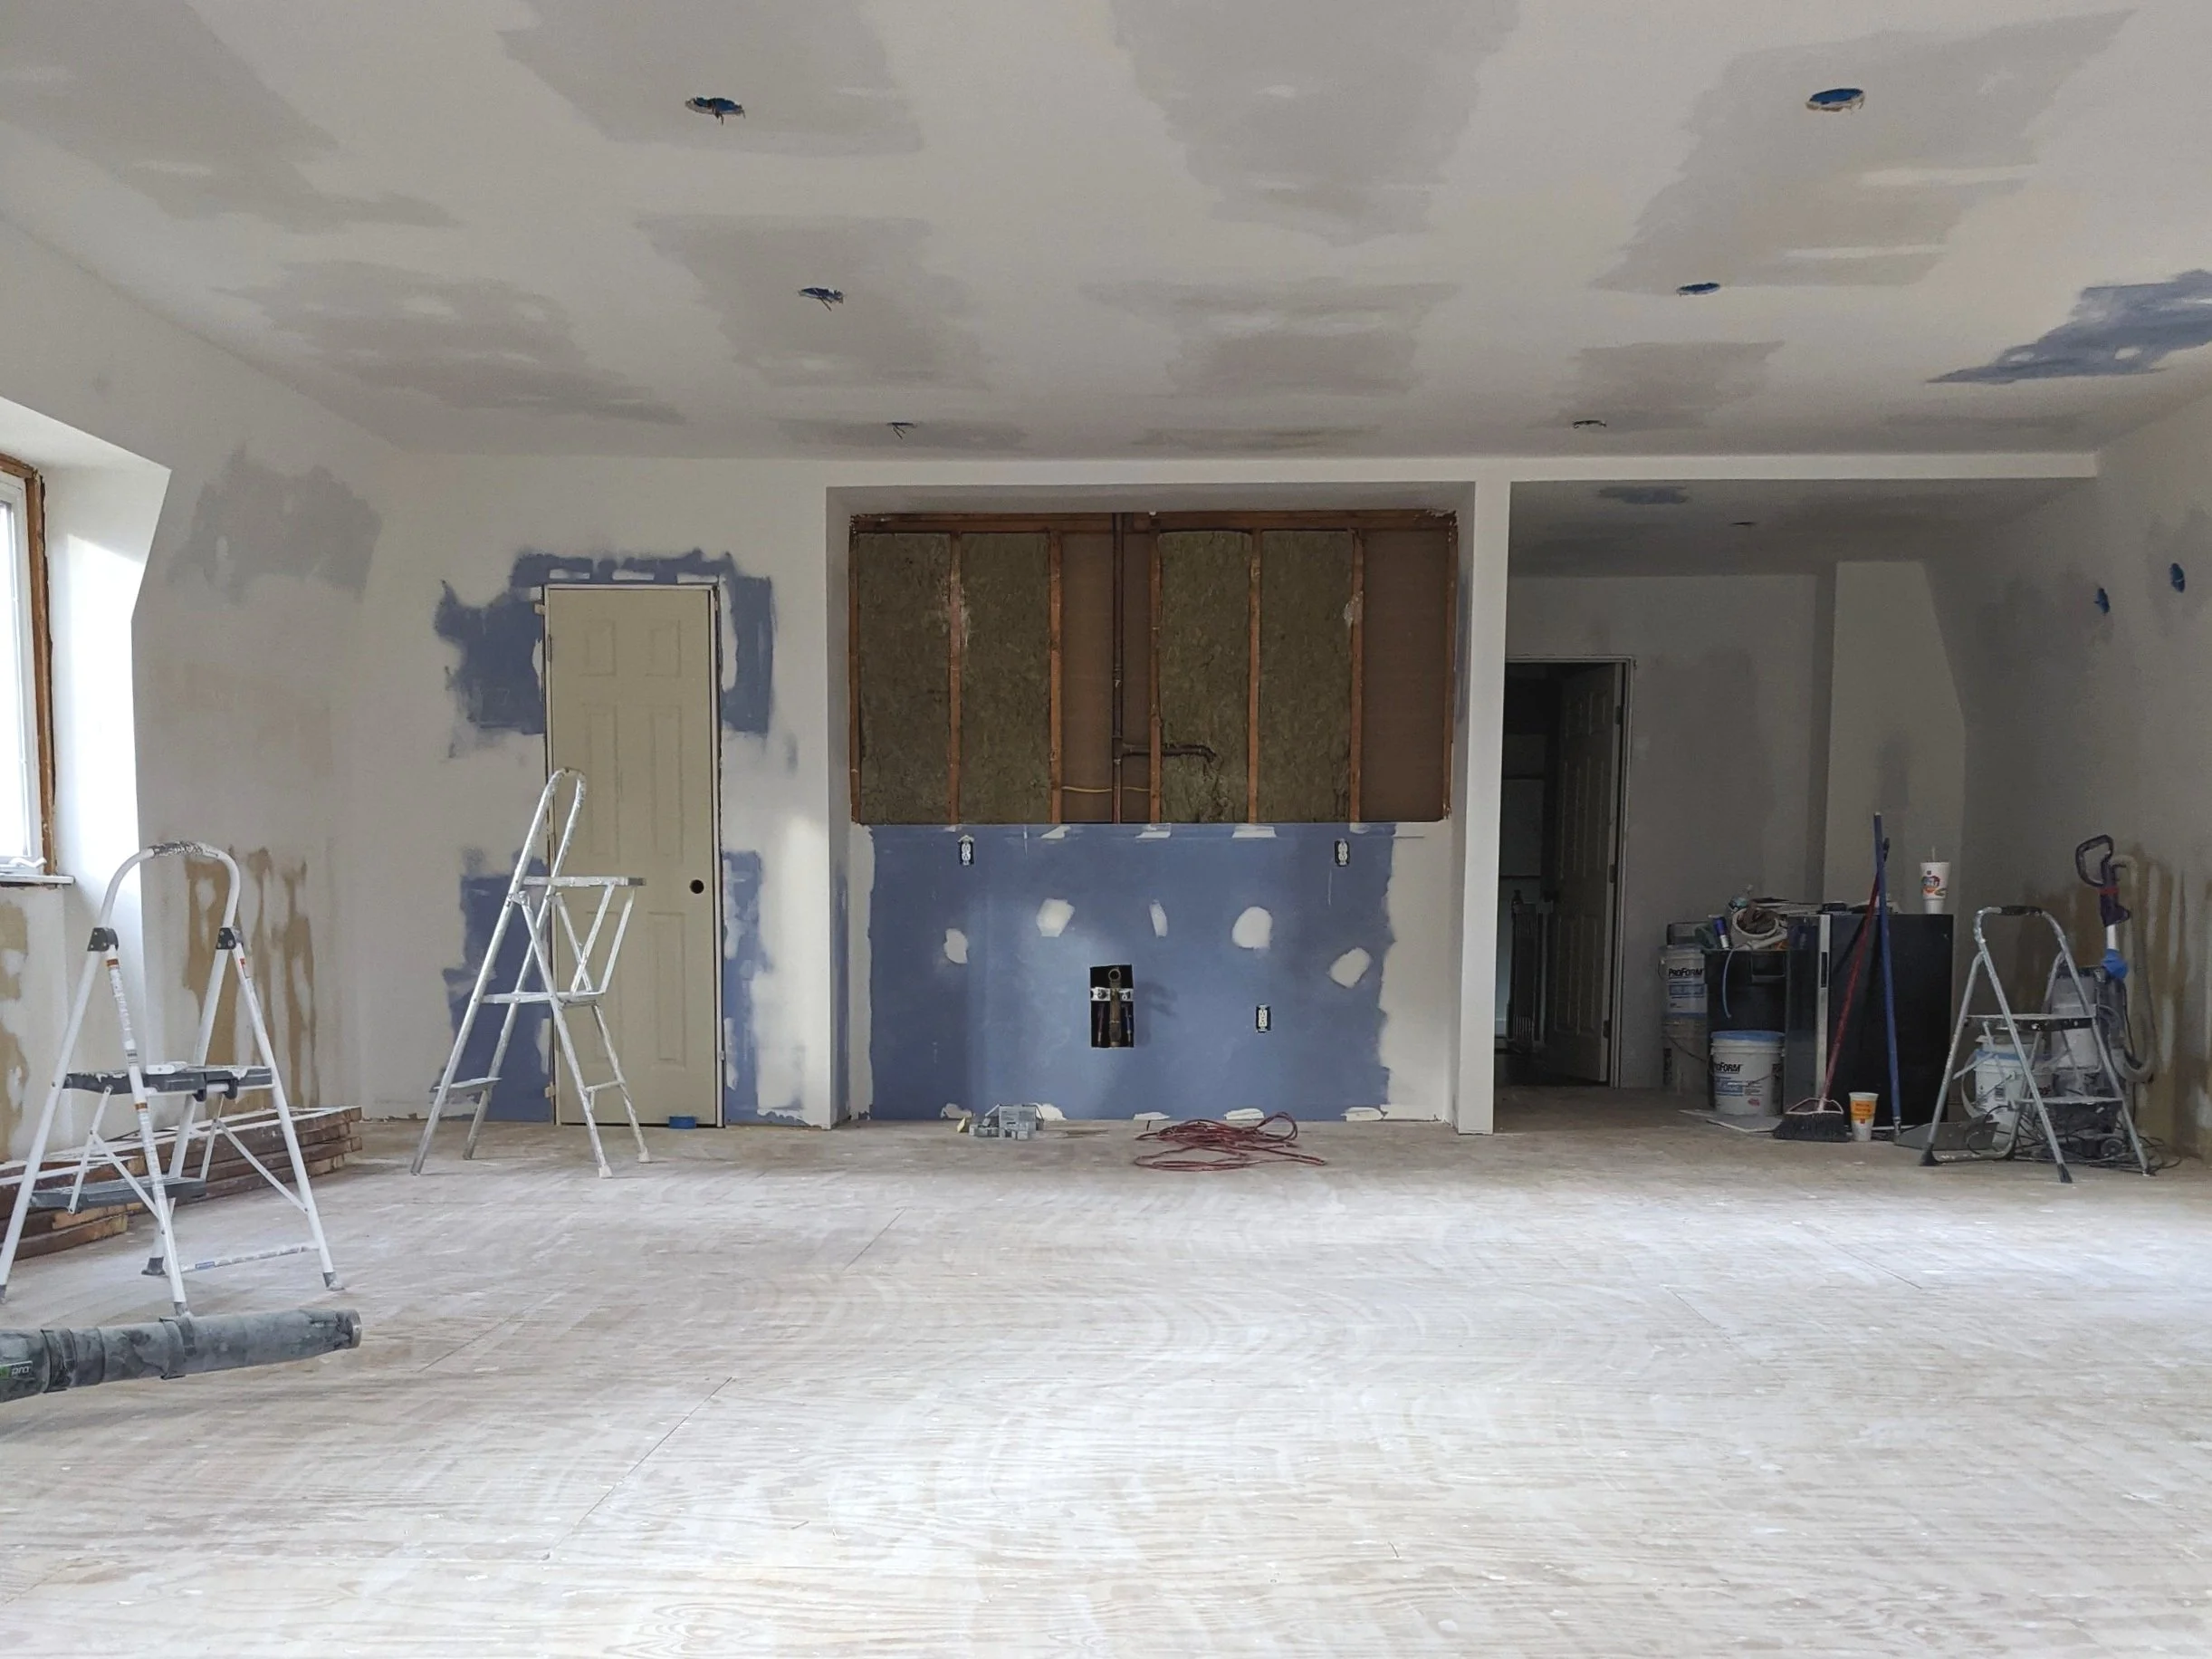
One of the reasons I leaned towards buying this house rather than the other one we considered was the mudroom. I was so excited to have a dedicated space for our coats, shoes, and backpacks. Unfortunately, we haven’t actually been able to utilize our mudroom with the other renovations going on.

As I mentioned in my last post, to install the plumbing for the master bathroom, we removed a big chunk of drywall RIGHT where the mudroom cubbies would go (the blue drywall in the picture above) and have since been using the foyer to store our coats. Now the foyer is incredibly cluttered and it drives me nuts. I can’t wait to free it up for when we have guests!
I’d love to build a dedicated space for all our stuff and paint it a deep color to tie into some of the other pops of contrast throughout our house.

Playroom
Since we moved in, the playroom has felt like the red-headed stepchild of the house. The odd footprint makes space planning tricky, and it simply hasn’t been a priority. But as we renovate the surrounding rooms, this room looks more and more out of place. This year might just be the year we actually take some action on it.

Our main hesitation with this room has been the fact that we’ll be rebuilding the built-ins and the fireplace surround, which is going to take some work. I’d love to do some sort of faux plaster on the fireplace like this:

Source Unknown
Rather than dark blue on the back wall of the bookshelves, I’d carry a shade of the blue/green color from the dining room that is adjacent to the playroom to tie them together.
The rest of the room would be outfitted with strategic toy storage, crafting areas, and fun ways to display kid art.
Half Bath
And last but not least on my wishlist for 2022 projects is the half bath.
This room wasn’t on our radar anytime soon until one day I got a vision in my head that I just couldn’t shake, and I quickly developed an entire design scheme! I don’t want to spill all the beans just yet, but here’s one of the inspiration pictures:

I’m picturing something bold, dark, and quirky. I mean, if you’re gonna take a risk, might as well be in a half bath, right!?
Although the space is small, it’ll be an entire gut job considering the walls have a texture to them that I’m pretty sure was created by someone making swirls in wet drywall mud with their fingers…

It all has to go! Including the outdoor lantern that for some reason is on a dimmer switch, the oddly short vanity, and the seashell sink. (Classiest bathroom for the win!) I’m crossing my fingers we can get to this renovation this year because I’m so excited about it!
Final Thoughts
Woo! That’s a big list!
I know we likely won’t get to everything over the next year. Things come up, plans change, priorities shift. But no matter how it shakes out, it’s still fun to make a plan and dream about how we want to transform our home to really make it feel like us. What room are you most looking forward to seeing change?

2022 Project Inspiration
Status Report: 2021 Project Goal Recap
At the beginning of 2021, I took a look back at the projects we completed in our first year of living in this house. I also shared our project goals for the rest of 2021. I thought this year it might be fun to break down where all those planned projects ended up, including the project we tackled that didn’t even make our original list! Let’s dive in.
A Look Back At Our 2021 Projects
At the beginning of 2021, I took a look back at the projects we completed in our first year of living in this house. I also shared our project goals for the rest of 2021. I thought this year it might be fun to break down where all those planned projects ended up, including the project we tackled that didn’t even make our original list! Let’s dive in.
Finish the Renovation
At the top of our to-do list for last year was to finish the master suite renovation. That was quite the broad and lofty goal encompassing multiple areas, so let's see where we're at with all those rooms now…
Master Bedroom - Status: Almost done
The master bedroom is REALLY close to being complete. I know I said that last year…
..but this is our year! There are just a few things that are stopping me from checking off that box.

The first thing on my list is to finish out the top of the pony wall. All along I've had visions of incorporating warm wood tones into this room. One of the ways I wanted to add mix it in was by adding wood along the top of the pony wall under the windows.
Lucius took a stab at knocking that project out, but we quickly learned that the wood we originally grabbed was way too thin. I'm looking forward to ripping that out and putting in some more substantial wood after we get new windows in a few months.
Another to-do item for this room is to officially fill the ever-evolving corner.

Over the last year, this corner has been a bit of a workhorse. We've used it as bathtub/vanity storage, a temporary office for Lucius, a place to hold big Christmas presents that wouldn't fit anywhere else, and an interim bedtime reading nook. But my ultimate vision for this corner is to make it a cozy relaxation den, outfitted with a comfy chair, ottoman, lamp, and possibly an end table.
We also need to change the light switches and outlets to black. I’ve already replaced the covers, but that’s the easy part. And lastly, I want to replace the bench at the end of the bed. I have an old cedar bench that’s been in my garage for a couple of years just waiting for me to flip once I get the chance. And if that doesn’t work, I might steal the one from the foyer.
Master Bathroom - Status: DONE!
Finishing the master bathroom is the project that took up most of our time last year, but MAN was it worth it!

Lucius and I were really anxious to stop sharing a bathroom with the kids and get into our own space. We made this project a priority last year, which means that some spaces didn’t get much attention, for instance…
Laundry Room - Status: Not even touched
It’s so much fun to look back at my wish list from last year and laugh at my naivety, like when I said, “The laundry room is a pretty small space, so luckily it shouldn’t take long to finish.”
HA! What a fool I was.

Aside from installing the floors, we haven’t done ANYTHING in the laundry room. And that was actually for the best! Using our laundry room as I had originally designed made me realize that a different layout would work much better. So before we finish the drywall, we’ll be moving the placement of the washer and dryer for a more functional set-up.
Hallway - Status: Almost done!
I’ve been sharing plenty of updates (here and here) regarding the hallway, so no need to get too deep into it here. It feels so good to be thisclose to calling the hallway complete!

Fix Our Hot Mess of a Yard
As an Amazon Associate, I earn from qualifying purchases. This post may contain affiliate links, meaning I receive commissions for purchases made through those links, at no cost to you.
Our yard was another project that included lots of areas in need of improvement. I did a pretty terrible job of documenting my outdoor improvement progress over the summer here on the blog, but luckily I took some pictures along the way!
Grass - Status: DONE!
We grew grass last year and it felt sooooo good. When we moved in, we had zero grass in the backyard (you can see the progress in some of the pictures below). And while the kids loved making mudpies, I didn’t love cleaning up after them all the time. We called in a landscape company to help us through it (we haven’t had the best luck on our own in the past) and it seriously paid off!
Garden Beds - Status: In progress
I worked my tail off clearing out all 4 of our garden beds and laying mulch as far as the eye could see. And while I didn’t plant many new plants, I’m happy to have knocked out most of the dirty work last year (get it!?) so that next year I hopefully just have to lay a light layer of mulch and can start to fill in the garden beds with some more plants.

Deck - Status: DONE!
Our deck was in pretty rough shape when we moved into this house. We started improvements by boarding over the hot tub hole at the end of the deck, which put this mama’s anxious mind to rest. It was such a relief not to constantly worry about a kid falling in.

After thoroughly cleaning the deck, I also painted it… twice! It was quite the event. I really should have documented it because I learned quite a bit. For instance, after I spent hours taping EVERYTHING off, I learned that you can’t use deck paint in a paint sprayer.

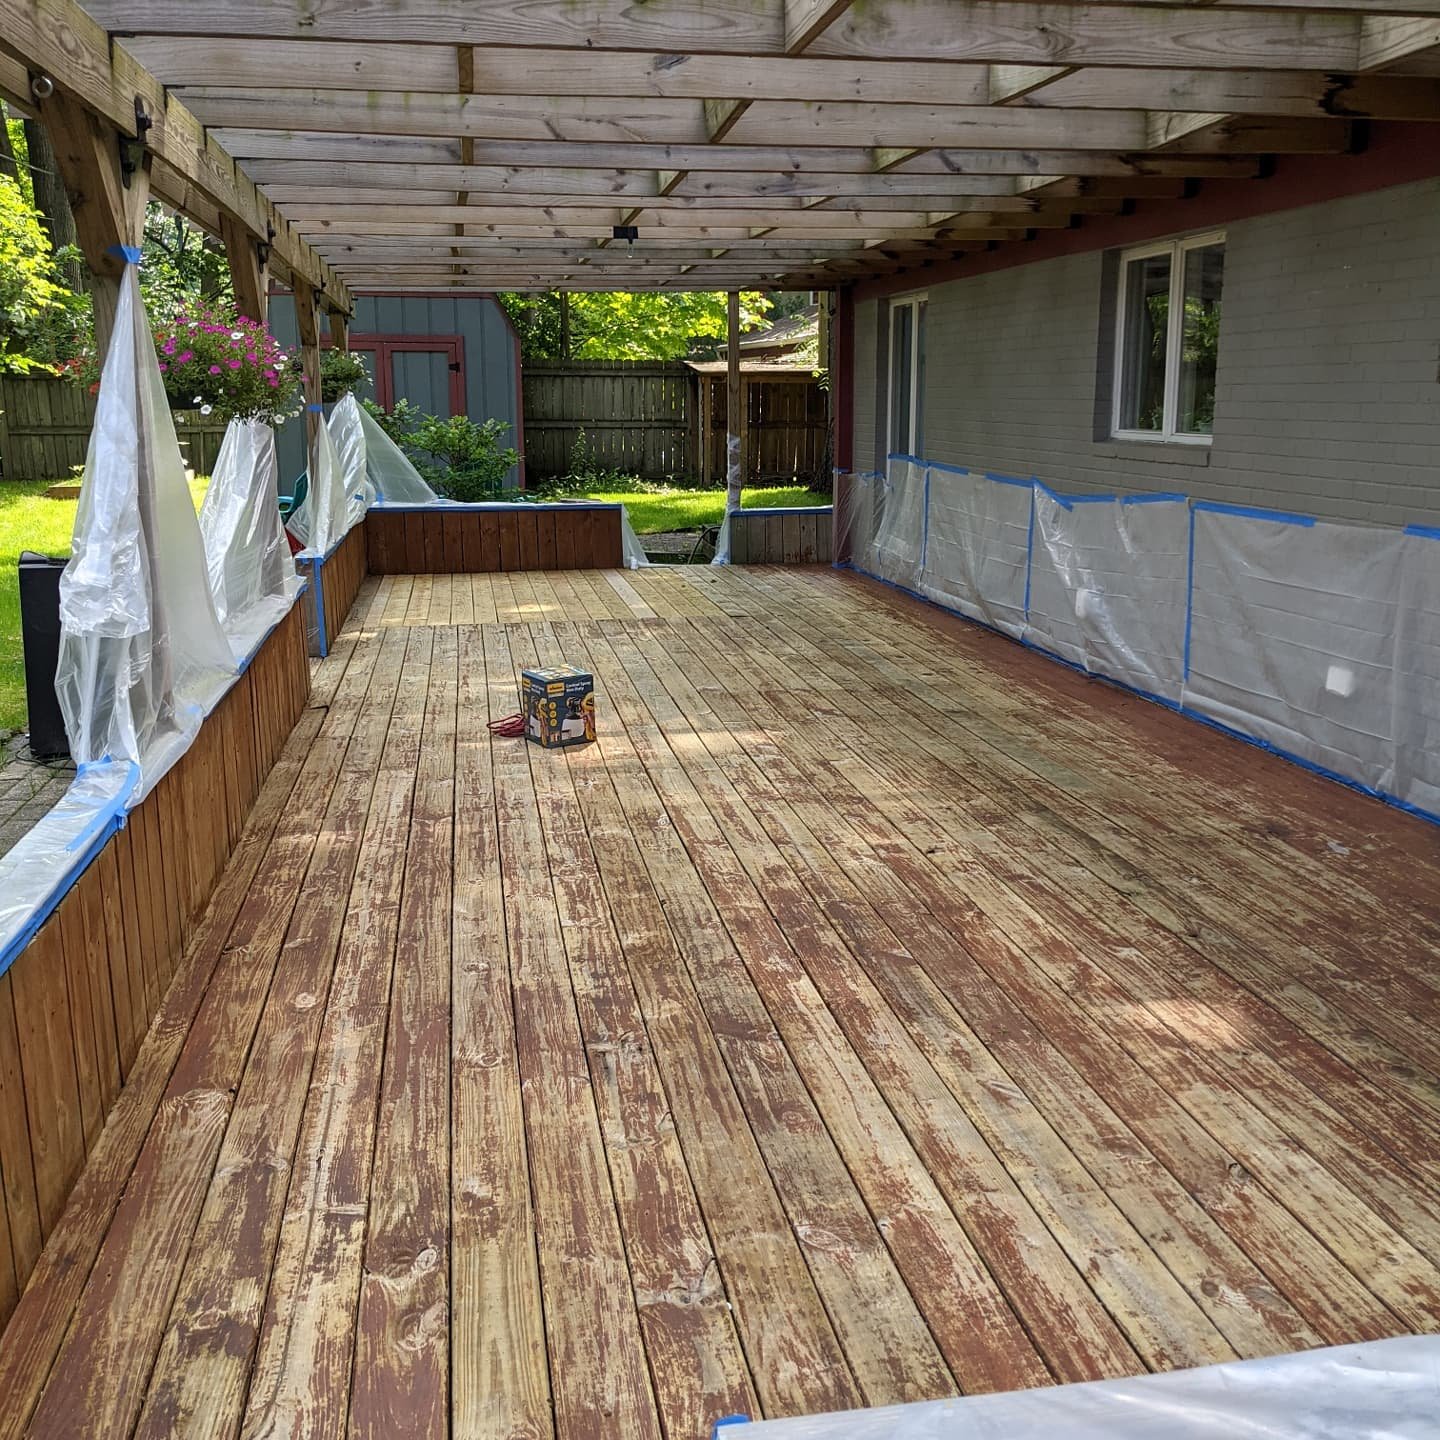
I also learned that you can’t get sample pots of deck paint, which is unfortunate because when I originally painted the deck a gray/blue color it ended up looking like a pool. We hated it. Fortunately, my second choice in colors was a much better pick.


For a little ambiance, I added these string lights. It was the BEST decision - they’re lovely and create such a relaxing space on those warm summer nights!

I also bought a table and some benches, which led to many outdoor dinners and me spending at least half my workday last summer outside with my laptop. Next year perhaps I’ll get around to replacing the Adirondack chairs with something a little more classy.
Front Porch/Entrance - Status: Haven’t touched it
Not much to say here except that this space just wasn’t a big enough priority last year.

The View Outside Our Living Room Window - Status: Done!
My plan to improve this view was to build a trellis filled with clematis vines on the fence right outside our living room - and I did just that!

This was one of the most rewarding projects of last year. I loved watching the vines grow and then bloom in the fall. By the end of the summer, they reached the top of the fence. I can’t wait to see them come back in the spring!
Kitchen - Status: Minor progress
The kitchen has been one of those passive projects that has very slowly been progressing. Last year I shared the repainted cabinets. Other than that, all I’ve done is installed new toe kicks and baseboards. I’ve started looking at new light fixtures, but we’re not in a huge rush to make any big changes in here right now.
Playroom - Status: Worse for wear

I have high hopes for the playroom… someday. But this year was not its year. Truth be told, it’s actually looking a little worse than it was a year ago!

If we’ve learned anything about renovations, it’s that while you’re improving one space, other spaces in your house have to become the catch-all for all the “stuff” from the renovated area.
During our loft renovation (more on that below), the playroom became our new hangout spot, which included removing the mirror above the fireplace so we had a place to put the giant TV from the loft. It looked ridiculous, but hey, it was temporary. Except now we’re left with more of an eyesore than we had before. No big deal though, we’re planning an entire overhaul of the fireplace/bookshelf wall when we tackle this room.
Foyer - Status: Minor progress
I replaced the light fixture, added a fake plant, and flipped a cabinet, but other than that, the foyer hasn’t seen much movement. Like the kitchen, this is just one of those passive projects that we’ll tackle slowly as the mood strikes.
Mudroom - Status: Worse for wear
Oh, our poor, poor mudroom. I have a vision for this space, but with everything else we tackled this year, the mudroom just kept falling lower on the list. Yet another example of when you renovate one space, another space takes a hit.


You see, to run the plumbing for the master bathroom upstairs, we removed a big chunk of drywall in this space. So, like the playroom, the mudroom looks worse now than it did last year.
And with the changes we plan on making to the laundry room, the mudroom will likely continue to suffer for a while longer. It’ll definitely be worth it in the end, but I’m itching for a functional mudroom with storage solutions galore for coats, shoes, and backpacks!
Bonus: Loft - Status: In progress
One project that wasn’t even on our radar for last year was the loft… and we’ve made BIG progress there! I think we spent enough time hanging out in there that we just couldn’t bear living with the stained carpet and low ceiling anymore - so we took them out!


You can follow the progress here and here. Even though it’s not complete yet, the space is entirely different from what we started with and I’m so excited to watch it evolve into the vision I have in my head.
Final Thoughts
I’ve said it before and I’ll say it again - when you’re in the thick of a renovation, it’s hard to comprehend the progress you’ve made and it can be discouraging how long a project seems to take. But looking back, I’m always so amazed at what we accomplish each year and I finally feel like I can pat myself on the back.
I’m excited to keep working on this house and continuing to make it our own - we’re definitely not running out of projects anytime soon. Keep watch for my next post where I’ll share our planned projects for 2022!

Projects We Tackled in 2021

Hallway Updates - Decor and Finishing Touches
If you’ve been following along, you know that we’ve been renovating the loft and the drywall was recently finished. Well, during the 3+ weeks it took for the drywall to be completed, I kept myself busy doing as much as I could in the hallway - and I have updates!
Hallway Styling
If you’ve been following along, you know that we’ve been renovating the loft and the drywall was recently finished. Well, during the 3+ weeks it took for the drywall to be completed, I kept myself busy doing as much as I could in the hallway - and I have updates!
In my last post about the hallway, we had recently installed the floors and painted the walls. While those changes were a huge improvement from the unfinished drywall and subfloors we were living with for quite a while, the latest additions to this space really make it something special.

What’s Changed
Here’s what’s been going on…
As an Amazon Associate, I earn from qualifying purchases. This post may contain affiliate links, meaning I receive commissions for purchases made through those links, at no cost to you.
Doors and Trim
First of all, we installed new doors and trim on my office and my kids’ rooms. The doors that were there before definitely took a beating from the previous owners and weren’t worth saving. We also (finally) installed trim around our bedroom doorway. While we were at it, I did the finishing work of caulking and painting everything.
Artwork
Next up - I added some artwork, which made a HUGE impact.
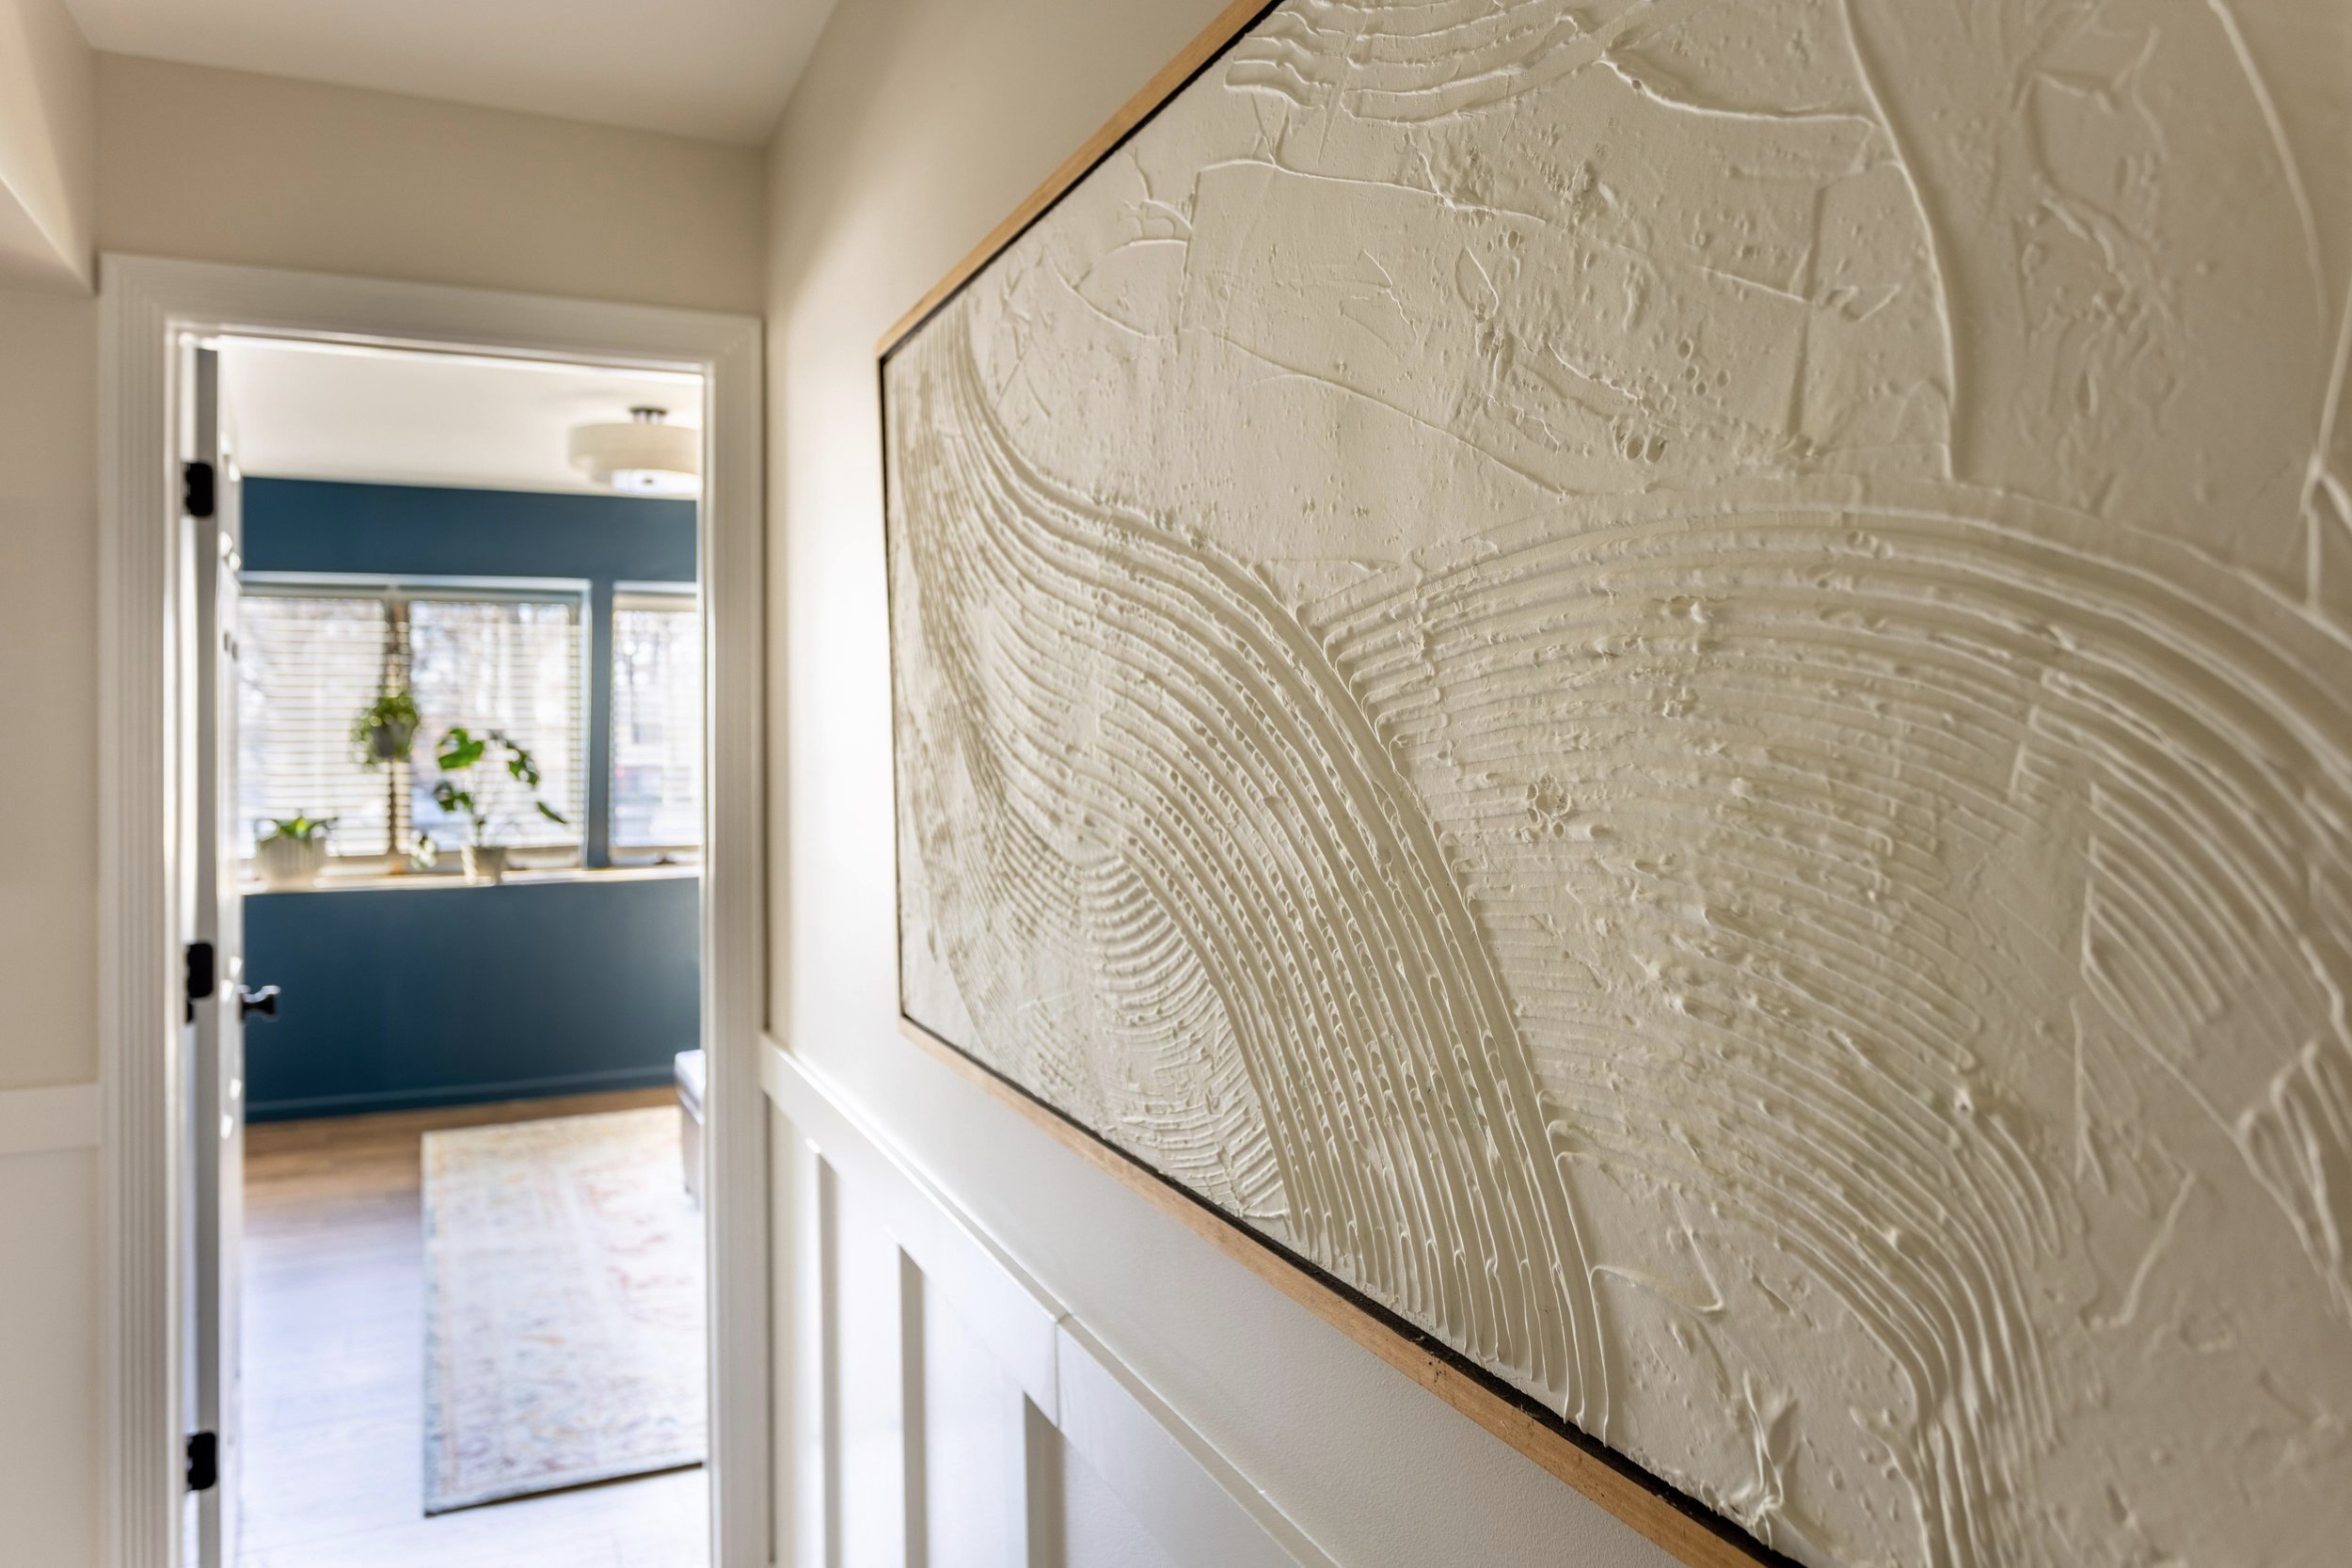
On one wall, I DIYed a textured painting from an old painting I made years ago that just wasn’t doing anything for me anymore. As I was painting over it, naturally, Lucius expressed how much he liked the old one… whoops.

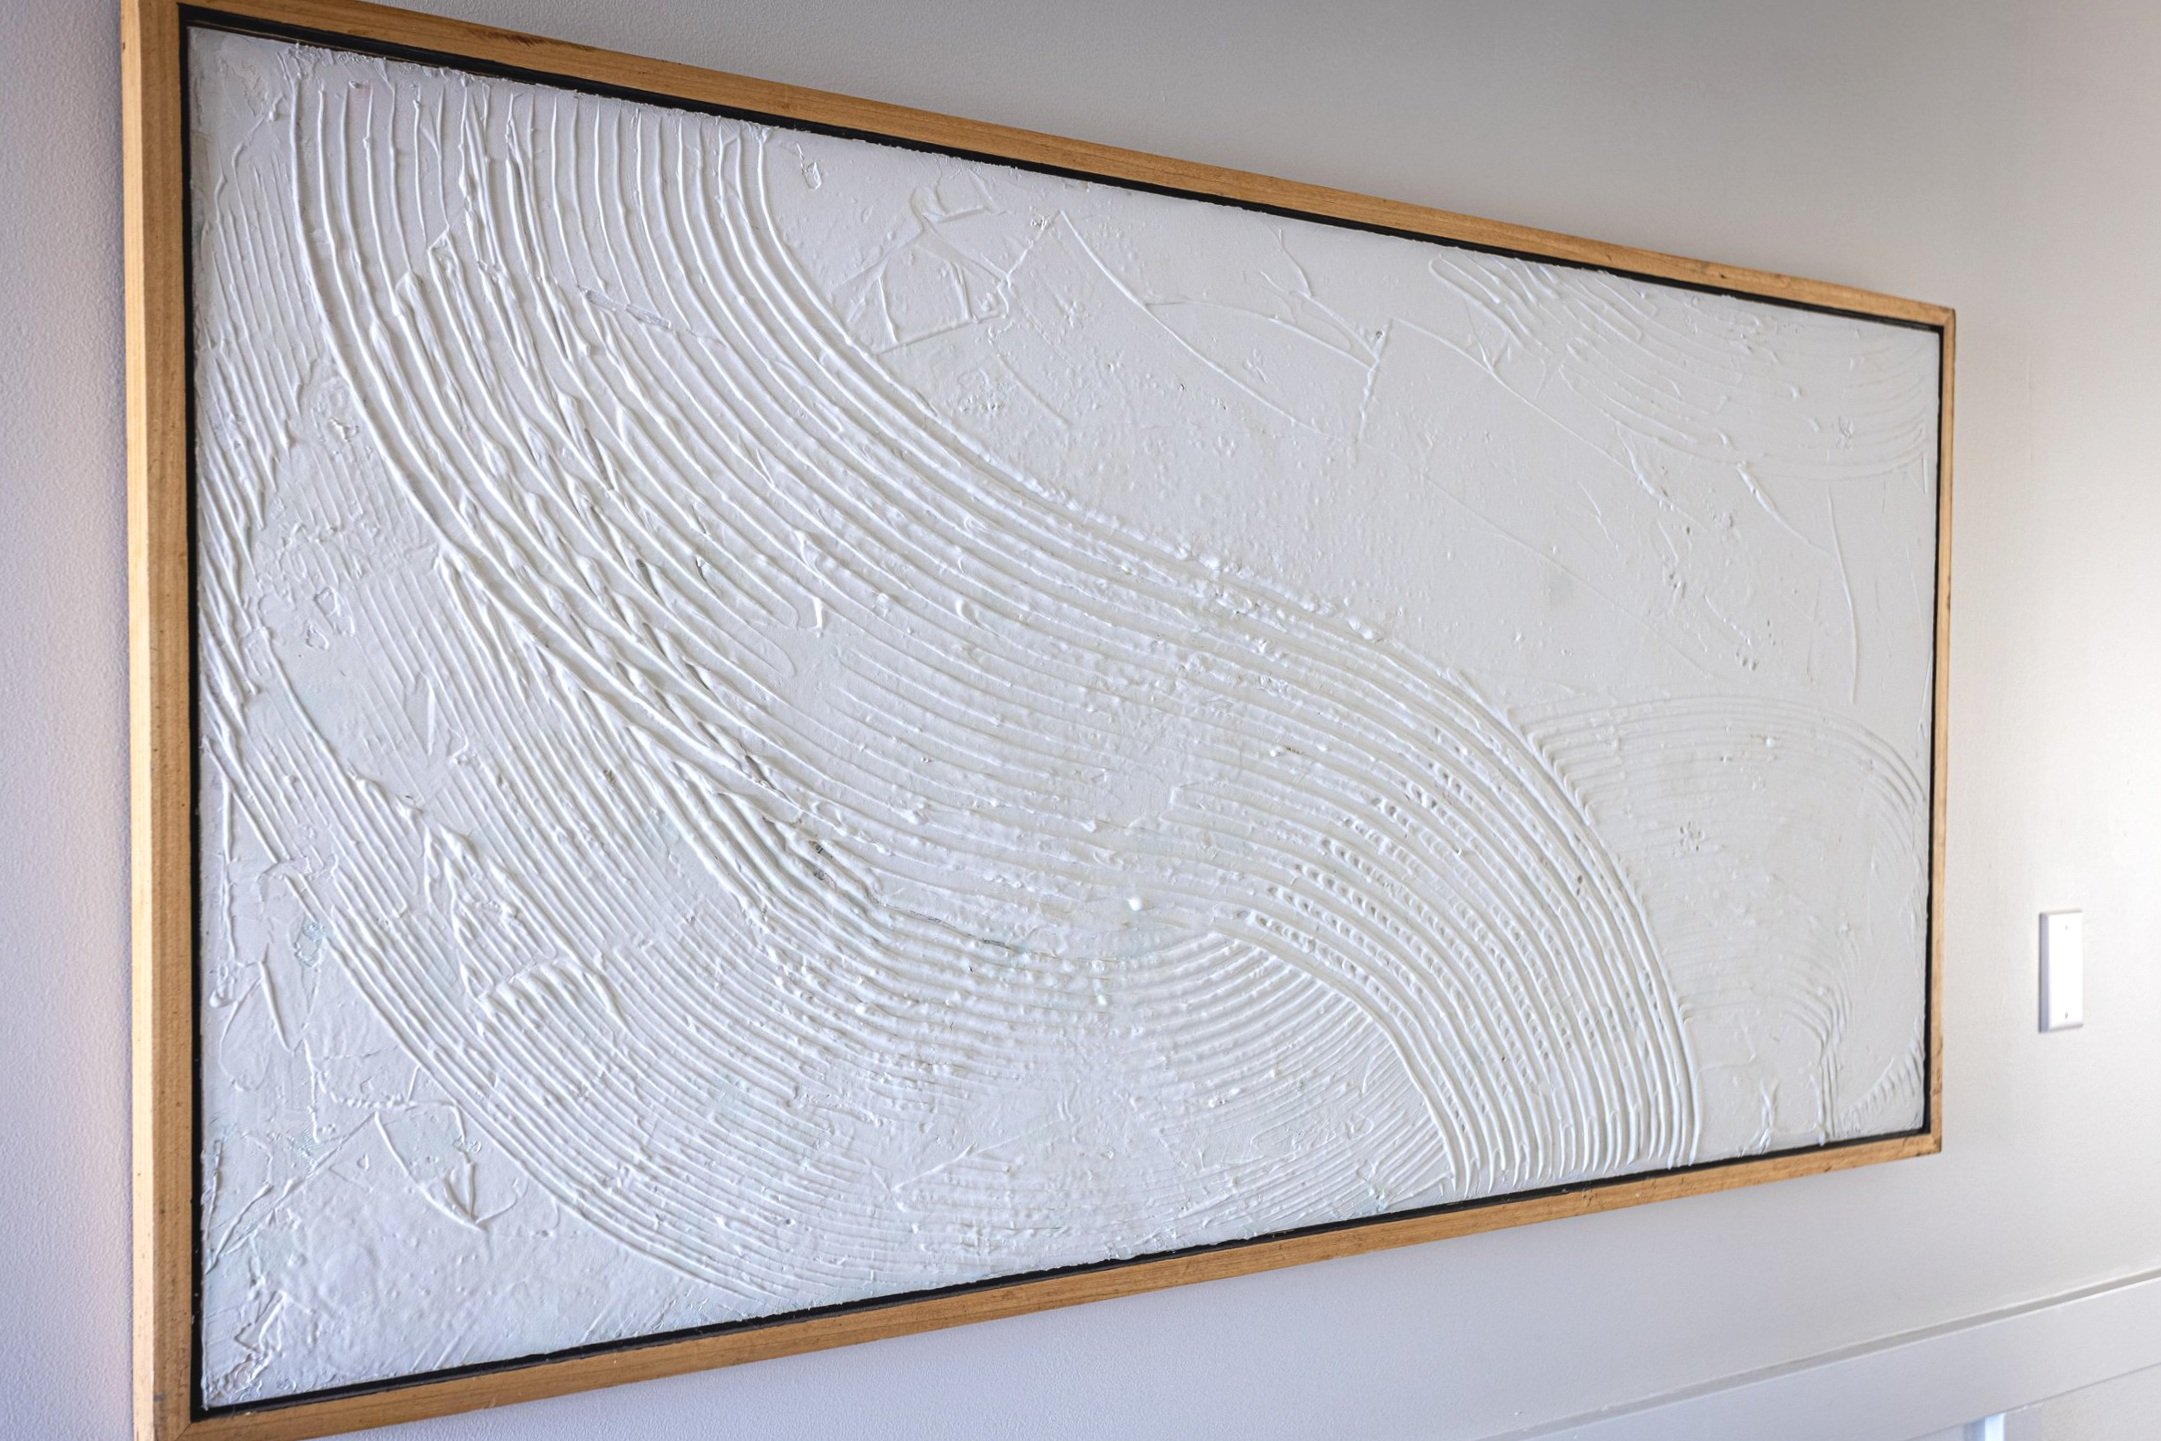
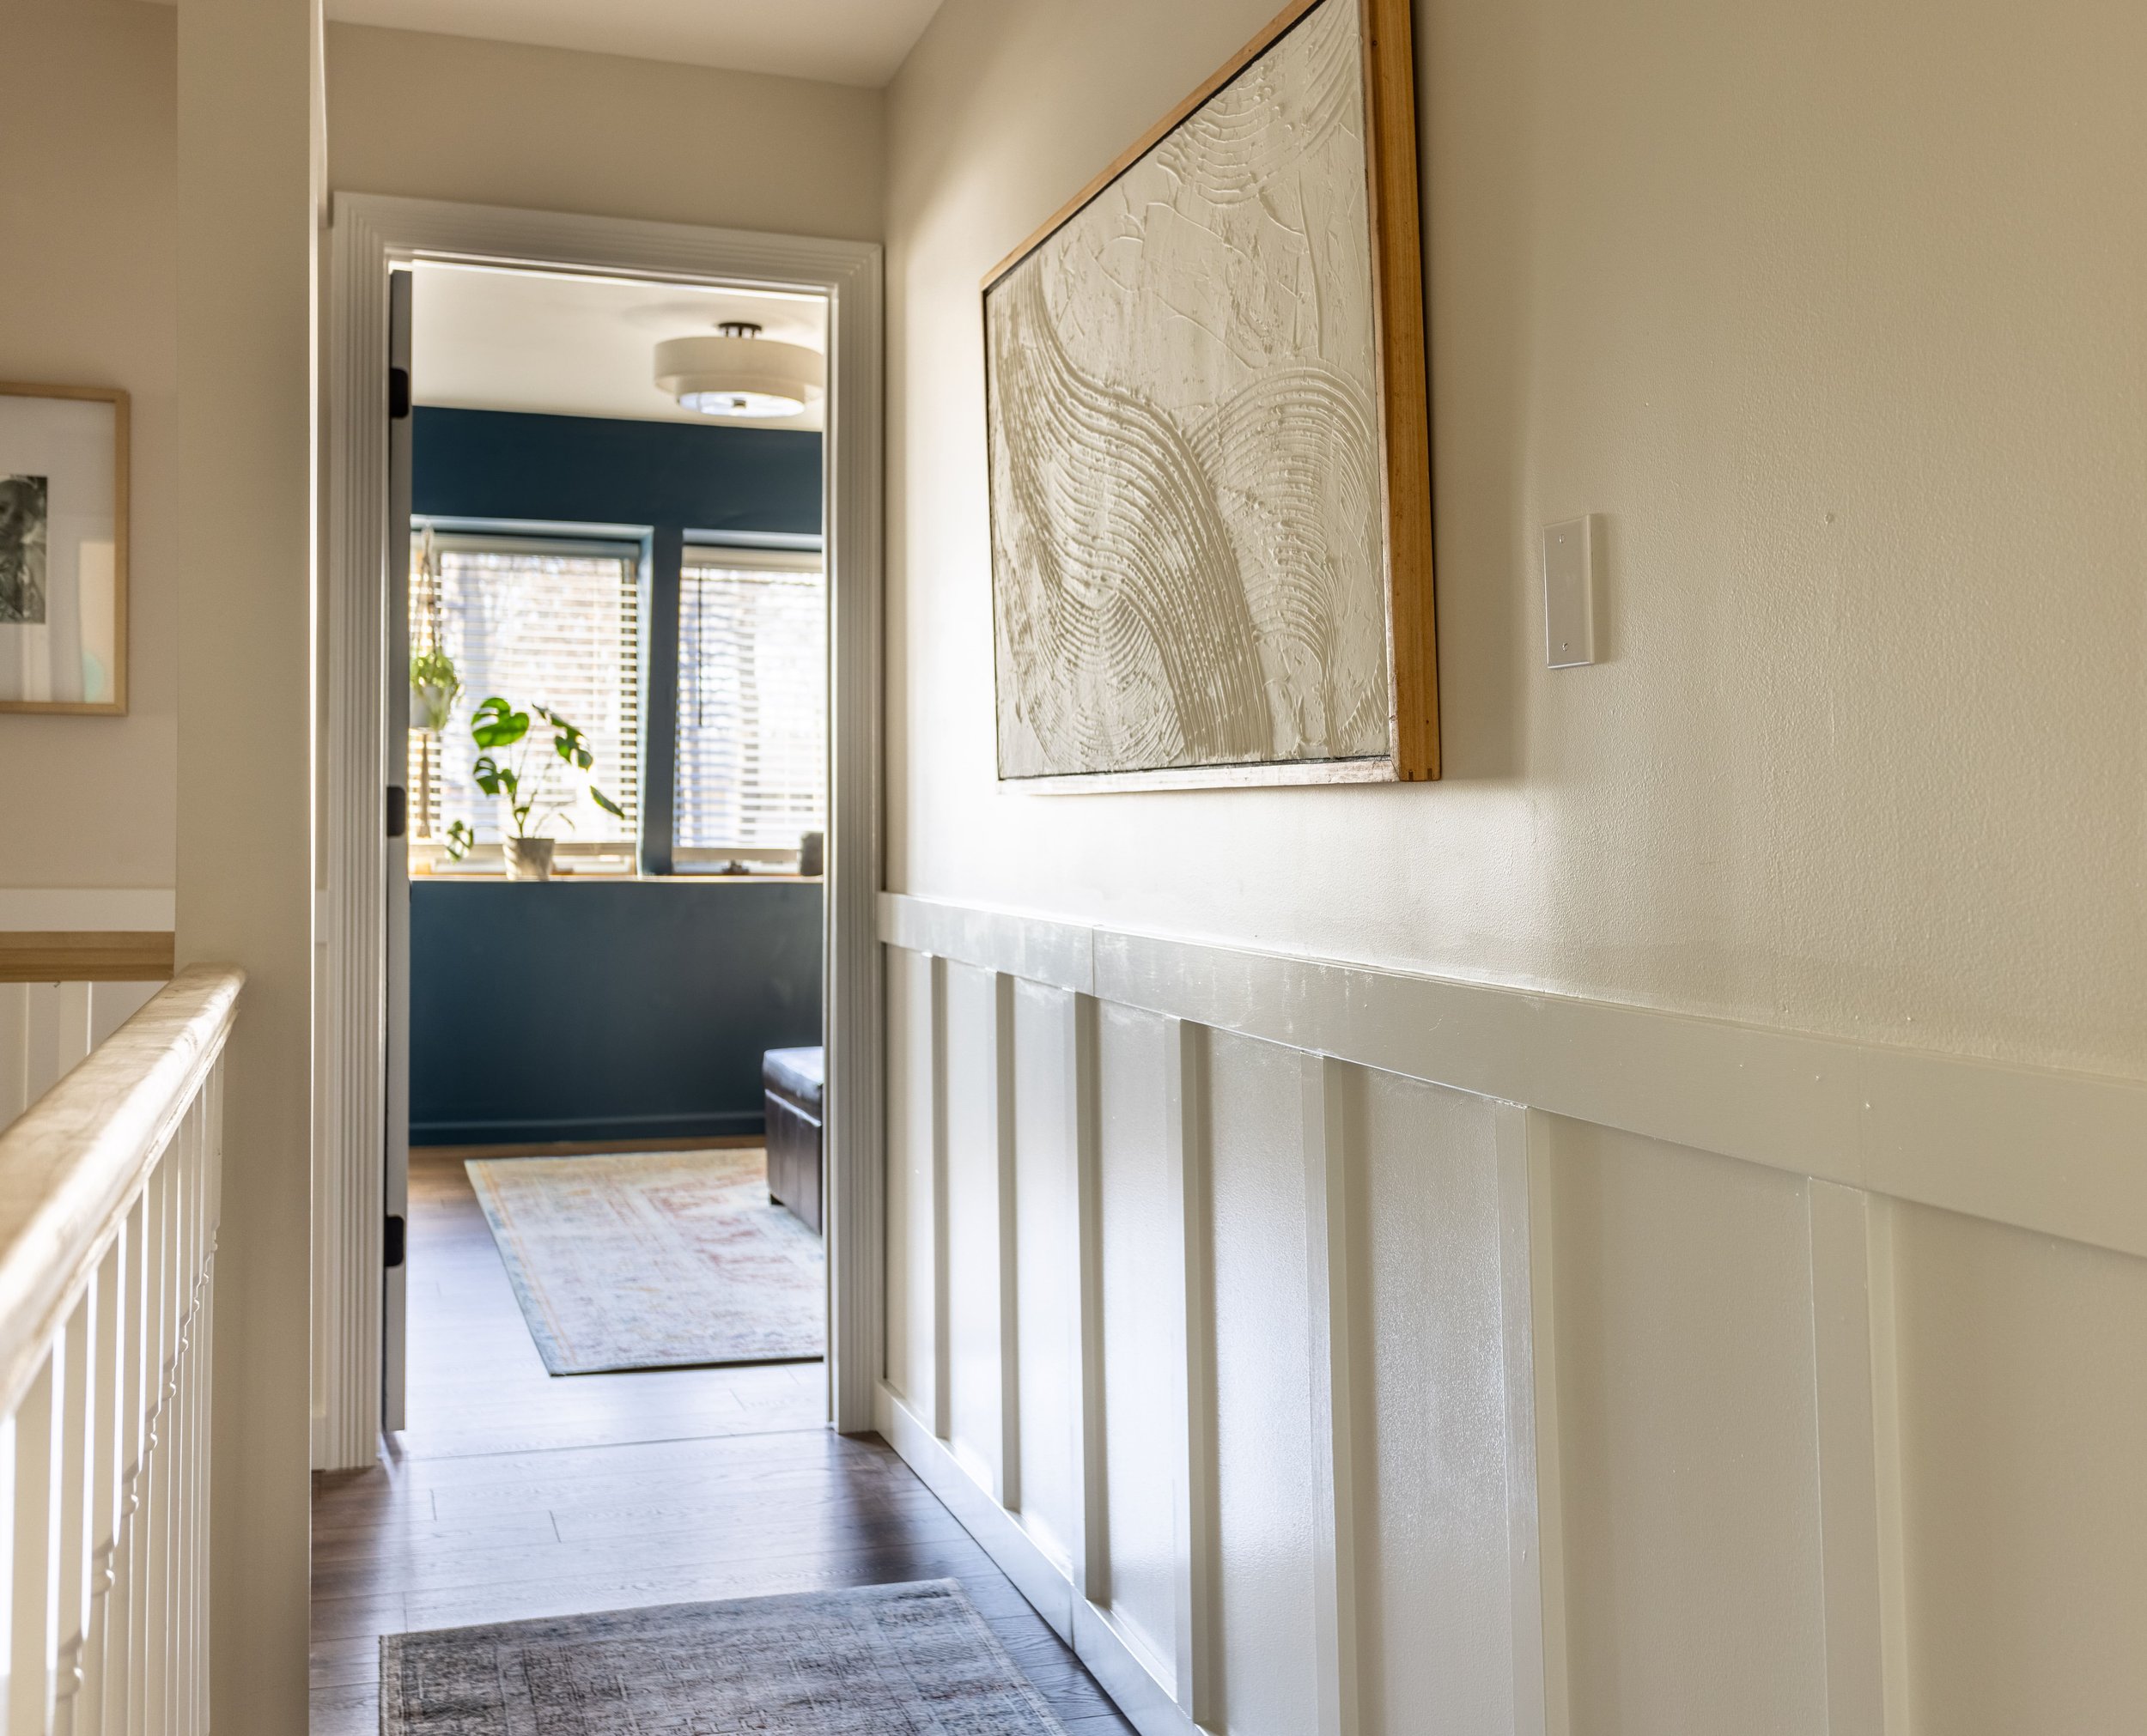
ANYWHO, I think the new painting is so much better. I love how the design creates subtle movement that guides you down the hallway and how nicely it fills the empty space on the wall. And you know what? I made it with joint compound! Here’s the tutorial in case you want to make your own!
If you read my last post about the hallway, I talked about installing a mirror gallery wall where this painting ended up. I originally created this painting as a placeholder while I collected enough mirrors. But looking at the hallway with this painting makes me want to scrap that idea completely and keep it as is. I love it that much!
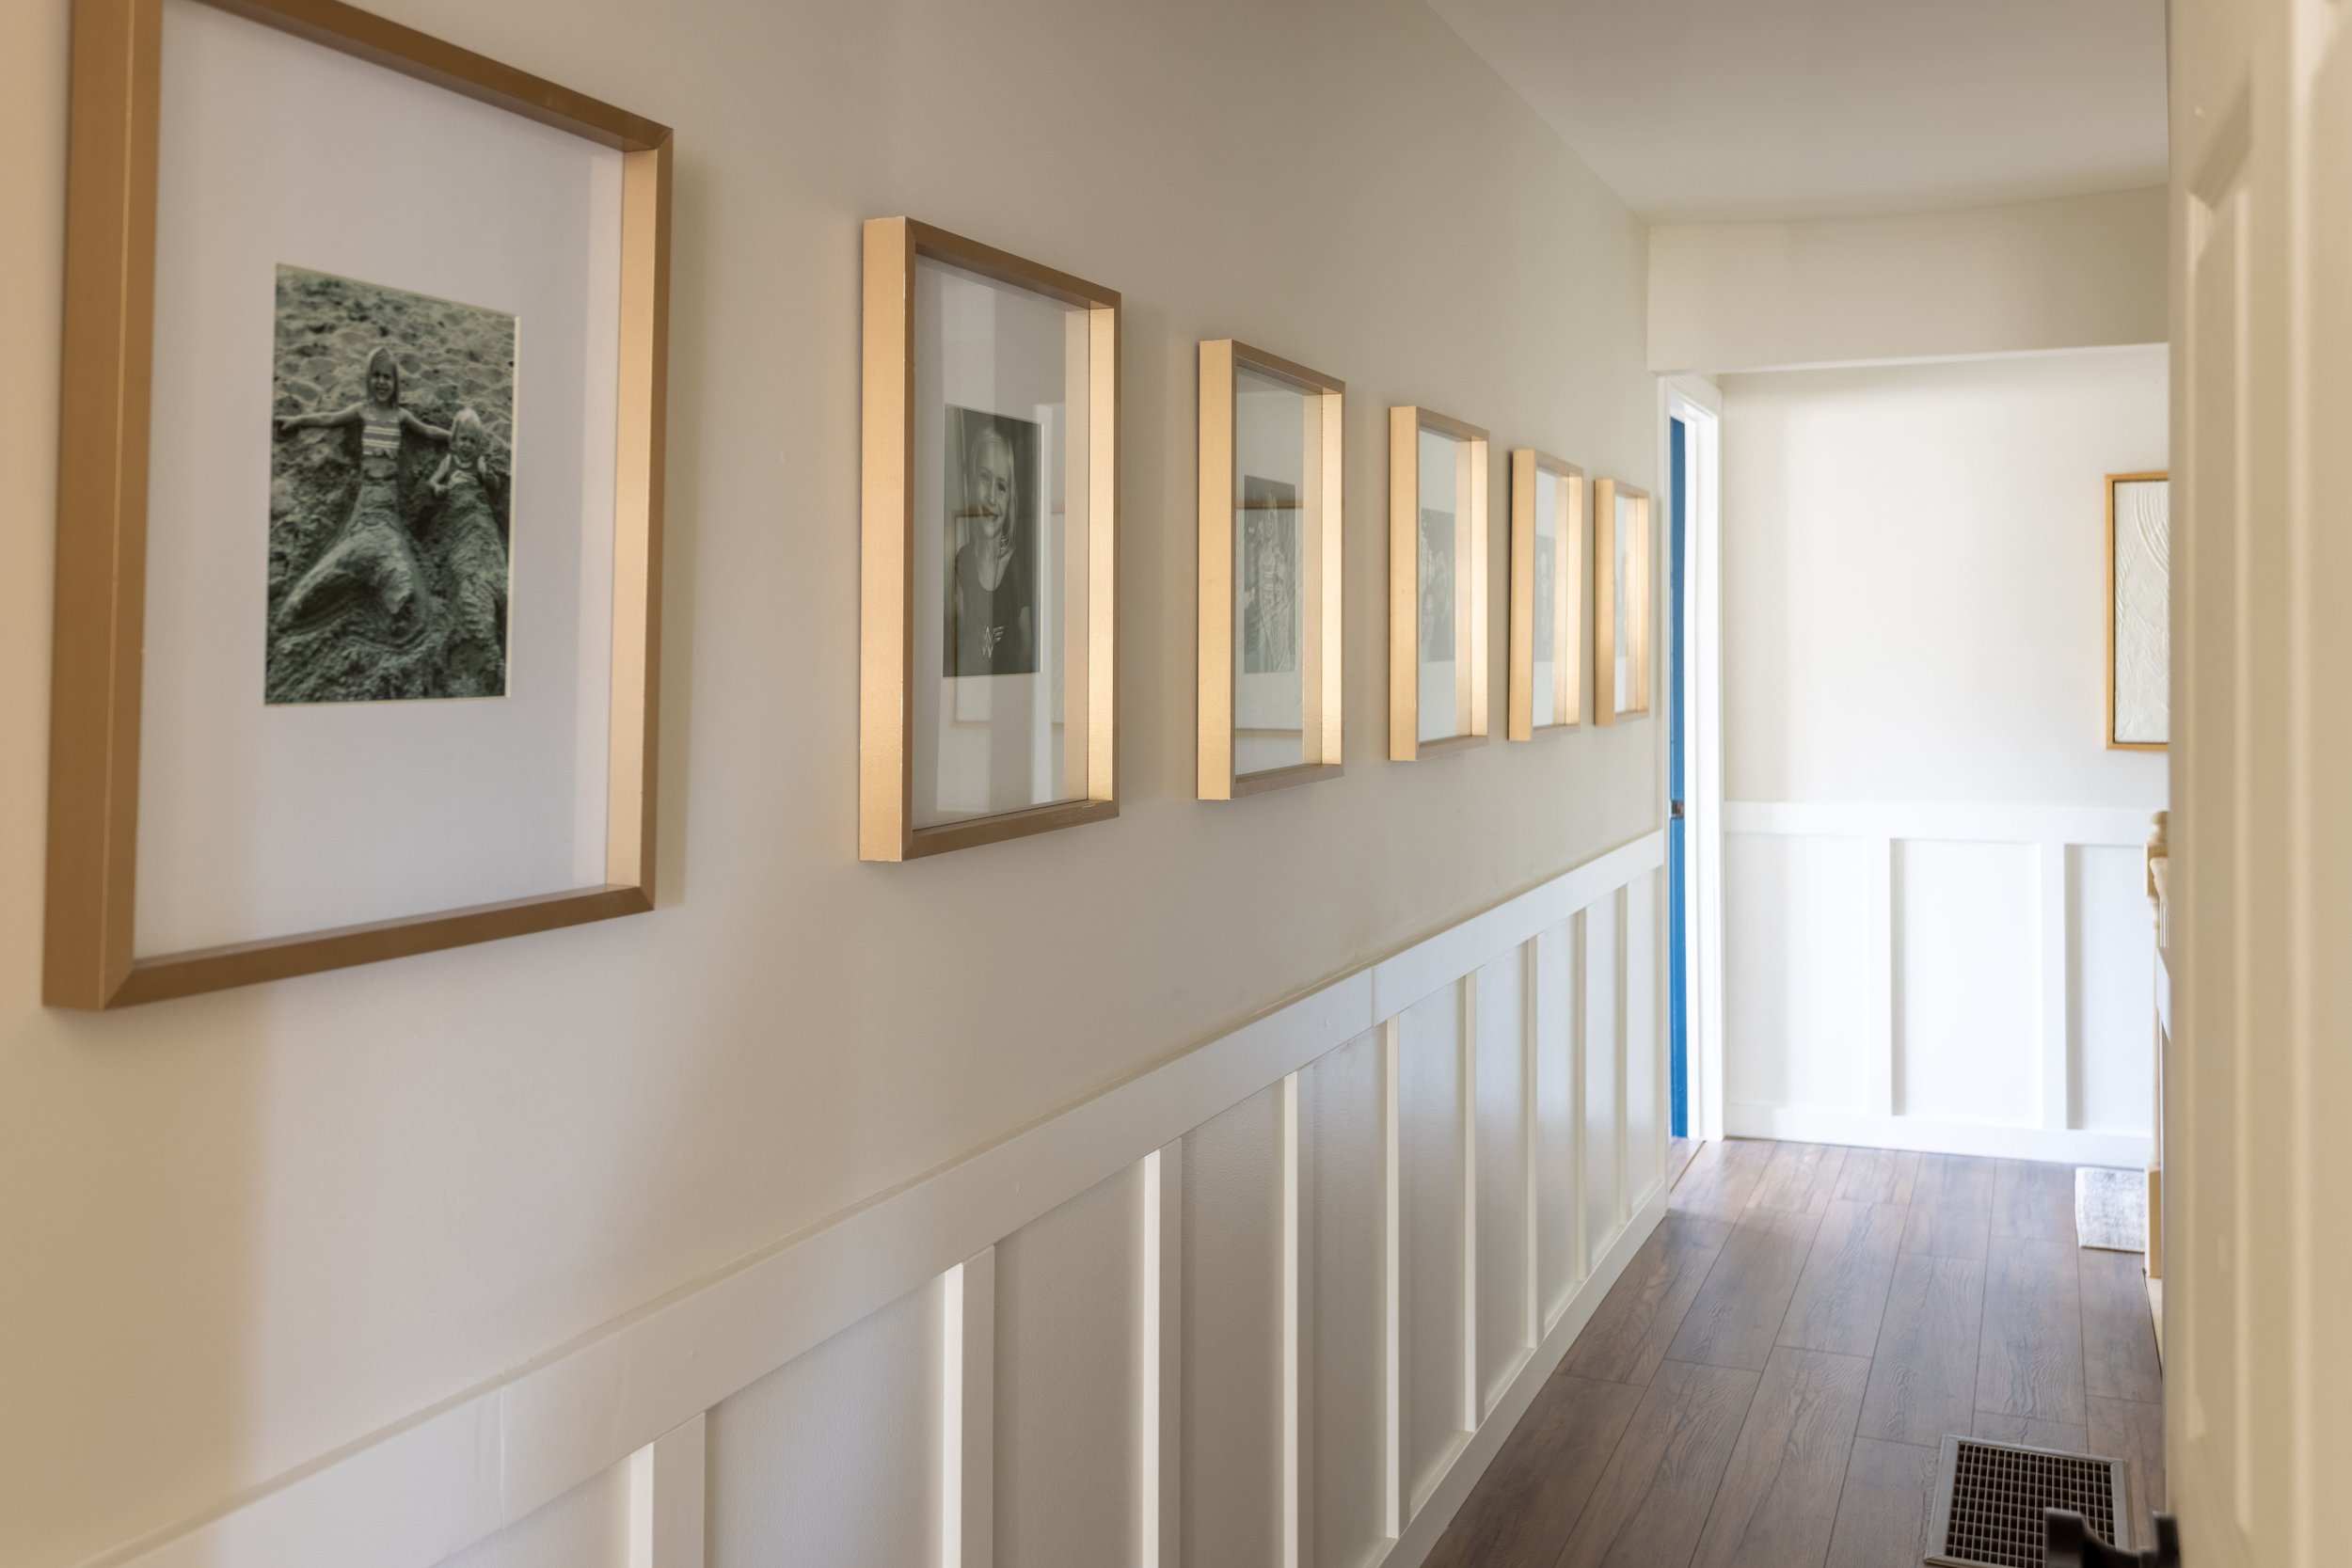
On the other stretch of the hallway, I hung these 16x20 inch picture frames frames all the way down one side. I bought them in the champagne finish (to match my champagne taste? I feel like there’s a pun somewhere in there - I’ll workshop it).
I realized I have almost zero family pictures displayed in my house so I filled them with a few of my favorites from this year. I had the pictures printed in black and white and love how they look against the large mats that come with these frames.

Runner
What really cozied this space up was adding a runner.
I can’t get enough of how bright this hallway is now that we’ve completely changed the layout and added some lighter colors, so I was looking for a lighter-toned runner to keep it that way. I also wanted something that worked with the rugs in the adjacent rooms.
I ended up buying this beautiful 12ft runner and I couldn’t be happier with it.

I was worried it would actually be too light, but the amount of color in it is perfect and the design is just what I was looking for. It’s a combination of reds and blues with a smaller-scale pattern that looks great in person.
Wainscoting! …or is it Board and Batten?
And lastly, I added board and batten! (Wainscoting is slightly different and I recently realized I’ve been using the wrong term up until now. Whoops.)
This was a big deal for me because I did it ALL BY MYSELF, start to finish.
We’ve done tons of DIYs and renovations over the years but when it comes to projects involving power tools and building, there’s always been this voice in my head telling me I couldn’t do it by myself. Oftentimes, on the more power tool-intensive projects, Lucius is either handling them himself or on the sidelines guiding me. But not this time, and I’m so proud!
I’m amazed by how empowering it was to install the board and batten by myself - manning the nail gun, handling the miter saw, and planning how I was going to put it all together - and now I’m actually excited for another, similar type of project. I can’t wait to look back years, or even months from now and see what other projects I’ve been brave enough to tackle.
What’s Next
More Trim
When we replaced the trim around the bedroom door frames, we didn’t replace the trim on the kid’s bathroom. Currently, that doorway is needlessly narrow at a mere 24 inches wide, so when we renovate the bathroom we plan on widening the doorway and shifting it over slightly.
HOWEVER, as much as we’re itching to rip the kid’s bathroom apart, we don’t have a timeline for when that will happen just yet. The more I looked at the old trim next to the new, the less I cared if I had to re-do the trim around that door frame later.
I can’t remember why, but we also didn’t replace the trim on the linen closet when we retrimmed all the other doors. I’ve already removed the trim on the bathroom and linen closet and started reinstalling it around the bathroom door (until I ran out) - I’ll be finishing both of those (all by myself!) soon.

We’re holding off on the trim around the door to the loft because we’ll be replacing that door with a frosted glass door hopefully before too long.
Banister
As I mentioned in my last post about the hallway, I plan on leaving the spindles of the banister white and painting the newel post and handrails gray (to match the treads of the stairs), like this:
Source Unknown
I can’t shake the idea of painting it all black though… I mean, just look at this staircase!

But black can be a bit scary - not to mention difficult to paint over if I don’t like it. I’ll likely start “safe” with the white and gray and decide from there. I can always paint it black later if I want.
Transition Strips
I feel like we’ve lived without transition strips between the hallway and all the adjacent rooms for so long I don’t notice it anymore. But I bet they’ll be the icing on the cake once they’re installed! On that note…
Finishing Touches
Lucius is going to kill me, but I think I want to swap out the light fixtures in the hallway. I still like the ones we installed, but I’d like something that’s more of a statement. I can’t stop picturing this light in the space.

I think the scale of the fixture above will pop a little more than our current light fixtures and the matte black will tie in nicely with the doorknobs and hinges we’ve installed.
Final Thoughts
It feels a little ridiculous how amped up I am about this hallway, but I truly believe you should love where you live. And I can honestly say I love this hallway now - especially considering the transformation it’s undergone from the dark, uninspired landing it was when we moved in. I can’t lie though, I’m really looking forward to finishing up the last bits and pieces and finally sticking a fork in this project!
Related Hallway Renovation Posts
Styling a Long, Narrow Hallway
Loft Updates - Finished Drywall and Kitchenette Plans
The loft has made some big progress since my last update, so let’s dive right in and see what’s been going on!
Loft Renovation
When I last posted about the loft, I talked about how we had ripped out the carpeting, torn off the paneling and most of the drywall, and demoed the kitchenette. Well, the loft has made some big progress since then, so let’s dive right in and see what’s been going on!
What’s New
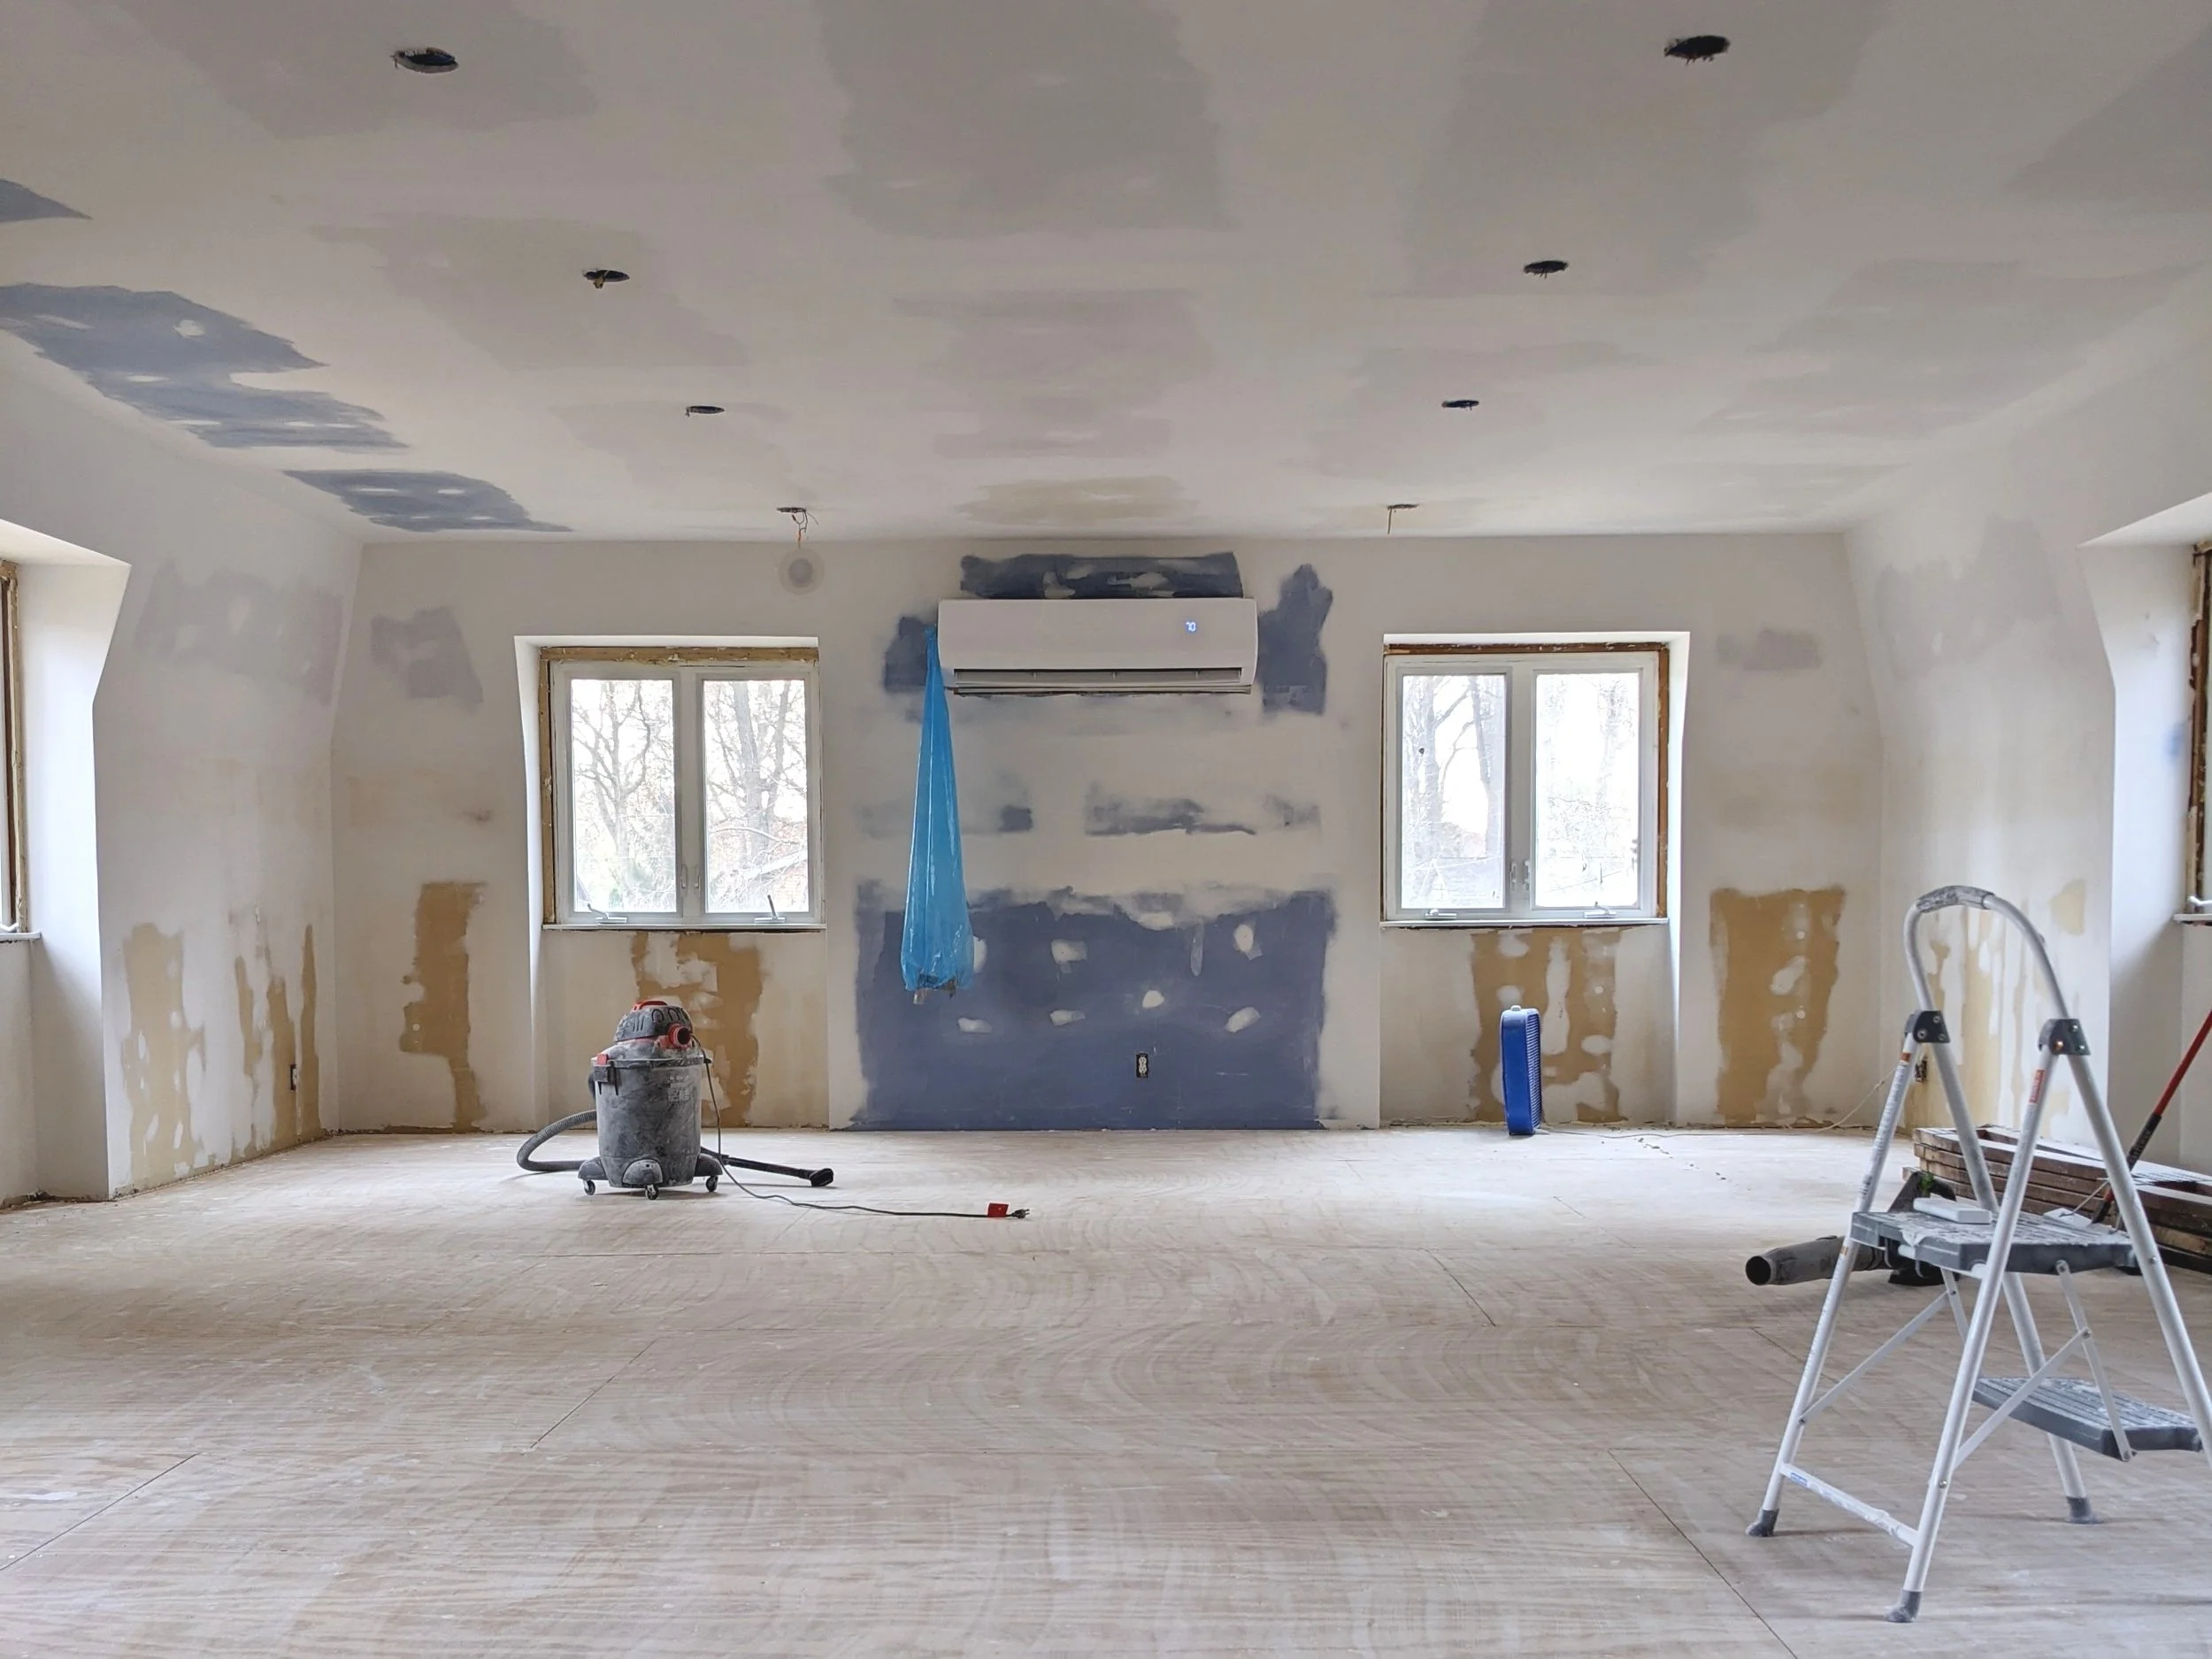
After we made all the aforementioned changes, we took the opportunity while the walls were still opened up to have our HVAC guys move the split unit on the far wall up so it’s less of a focal point and gives us more wall space to hang artwork.

We were also able to install the electrical for allll the lights (18 of them!) going into this room.
Before we got in too deep with putting things back together, we ended up having a couple of warmish days that made us realize it was in our best interest to insulate the ceiling and reinstall drywall, rather than leaving the rafters exposed. It’s a bit of a bummer because I liked the look of the exposed rafters but it’s obviously the smart choice concerning our utility bills.
But don’t worry, ripping down the original ceiling wasn’t all for nothing - we gained over a foot of height! (You can see the difference in the last picture.) I should also mention that in order to drywall the ceiling, we decided to remove the remaining trusses to make drywalling easier - with plans of reinstalling them after the drywall was complete.
After 3+ weeks of drywall dust creeping throughout my house, I’m happy to say that it’s now complete!

The Inevitable Change in Plans
Unfortunately, as with all renovations, we ran into an unexpected issue - the trusses aren’t fitting back on the ceiling as nicely as before we drywalled. We talked about modifying them enough to get them to fit, but since they’re over 12 inches tall each and we JUST gained that much headspace, Lucius used this as a “sign” that we should do something else. Instead, he proposed installing doubled-up 1x10 beams and presented me with this inspiration picture.
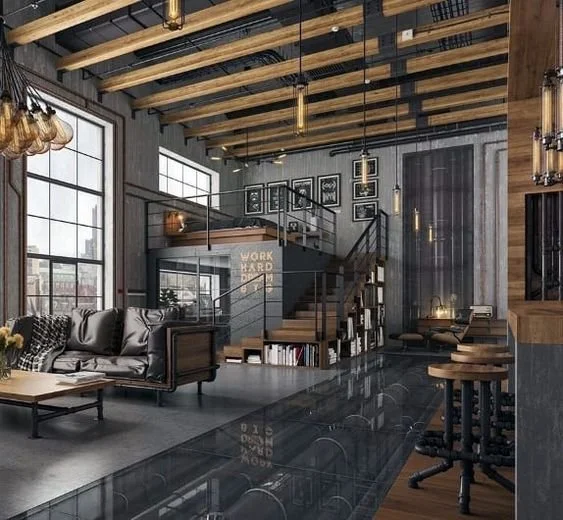
Our initial plan was to paint the trusses matte black like the ceiling. Since the new beams won’t be as imposing as the original trusses, we think we can get away with staining them to match the floors. We’d also like to incorporate some black brackets, like in the image above, to pull in some of that industrial flair.
Next Steps and Kitchenette Planning
As an Amazon Associate, I earn from qualifying purchases. This post may contain affiliate links, meaning I receive commissions for purchases made through those links, at no cost to you.
The next step: PAINTING! As much as I love painting, this is especially exciting because I got a fancy new paint sprayer! I’ll let you know how it goes. I’m picturing quite the adventure consisting of a full body suit (coveralls?), a respirator, and goggles. Sounds like my idea of a good time!
Until I can find the time to paint, I’ve been daydreaming about the kitchenette and putting my ideas together in digital form.

Here’s a shot of that side of the room in real life as it stands now for comparison.

Let me break down the design for you (because I love this part!).
We’d like to install black cabinets, possibly from the IKEA Sektion line - likely with a flat front as opposed to the ones in the mood board. We’ll also install a new sink and matte black faucet. We’re still discussing the type of countertop we’d like to use and the color of the sink, but I’m really liking the combination in the picture above.
I played around with some different shelf ideas as well and finally landed on the staggered design above. We’re picturing wood shelves with pipe brackets. We’ve already bought these sconces to go across the top and we’ll finish everything off with a brick tile backsplash all the way up to the ceiling.
While I’ve been thinking about the kitchenette, Lucius, on the other hand, has been prepping for the finished room by… buying a pool table. He actually found a really nice one on Facebook Marketplace about an hour from here and snagged it!
Final Thoughts
We’re still a little ways off from actually putting the room back together, but it’s too much fun not to think about! Hopefully, soon I’ll be sharing a painted (and maybe floored???) room. Follow along on Instagram stories for the latest updates!
For more renovation posts, check out the articles below:
Kitchenette Plans

Color Blocking in Interior Design
In case you haven’t taken notice of the color blocking trend yet, hold on to your butts! Because in this post, I’m going to take you on a deep dive into the wonderful world of color blocking!
Color Blocking Ideas
In case you haven’t taken notice of the color blocking trend yet, hold on to your butts! Because in this post, I’m going to take you on a deep dive into the wonderful world of color blocking!
It may be because it’s just that popular right now or because I’m so in love with this trend and keep Pinning images of it (probably both, TBH), but color blocking is showing up all over my Pinterest feed.
Apparently, color blocking is a super popular trend in fashion, but I, personally, can’t stop noticing it in interior design. There are so many different ways to interpret this trend. My goal today is to expose you to just a few of those to get your creative wheels turning. Let’s go!
Going Bold

Why not start right off the bat with some intense color blocking, eh?
The room above is an amazing example of the versatility of color blocking by showing how it can be used within an entire room. Heck, even the couch is an extension of the design on the walls!
I love the use of warm tones in this room. And although the colors are pretty intense, they’re ALL intense so no one color stands out and the overall design is surprisingly more subtle.

But if you’re looking for something a little less energetic, this green on green room is a wonderful option.
One of the things I love about color blocking (and you’ll definitely notice it throughout this post) is how it has no borders. This room is a perfect example of that in how the colors span right over any architectural details in the way, which in turn actually accentuates them more. Ah! I can’t get enough.
Half and Half
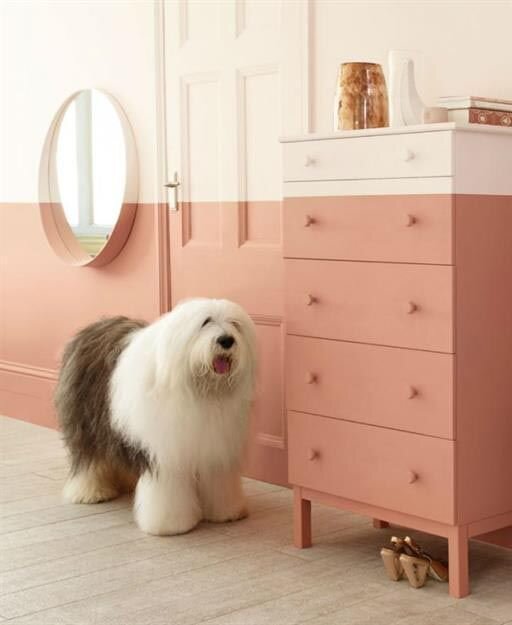
Source Unknown
Speaking of a blatant disregard for borders, check out this pink on pink room. I feel a very strong pull to do this in my younger daughter’s room - dresser and all!

This design is a fabulous take on creating some interest in a hallway. I especially love that they used the same color on part of the ceiling, which brings your eye up and really encourages you to take in the whole hallway.

For a little bit more of a dynamic look, consider splitting a room in half diagonally! Pairing the diagonal design with the bright orange definitely creates an energetic corner of what could otherwise be a really dull sitting area.

Source Unknown
I love this unique take on splitting a kids’ room in half. Growing up, I remember helping one of my friends make a line through their room with duct tape to make sure their little brother stayed on their side. I’d say this option is a whole lot more aesthetically pleasing! If I knew then what I know now….
Using paint to divide a kids’ room in half would also be a great way for each kid to express their own style by picking the color and designing their side the way they’d like. But I have to say I especially love the light, pastel colors used in the picture above and the subtle transition between them.
Defining the Space
One way that I love to see color blocking utilized is to define spaces or create architecture within a room. Below are some excellent examples of how it can be done.

The color blocking in an abstract shape in the picture above is a super playful way to define a reading nook in a playroom.
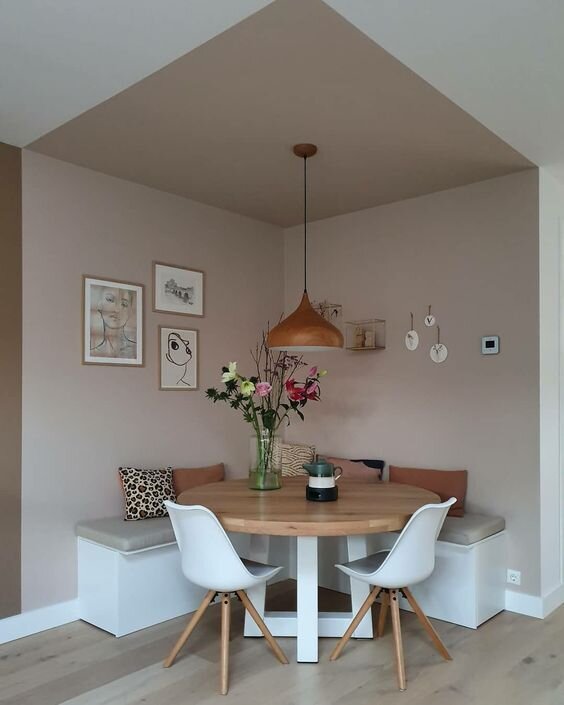
Source Unknown
For a more “serious” example, the dining area above is defined by using color blocking on the walls and then extending it to the ceiling. This effect almost creates a room within a room and makes it clear that this set-up was intentional.

The arch surrounding this vanity and on the walls next to it are true design elements in this space. By using a lighter tone paint for the arches, your eye is almost tricked into thinking they’re built rather than painted. Plus, it looks so glamorous!

Source Unknown
I love this example of color blocking. By extending the color blocking from the headboard to the ceiling, the space is defined as important and the bed really becomes a focal point of the room. The addition of the same yellow-colored blanket at the end of the bed really accentuates that line.
Keeping it Simple
If covering an entire wall with color is a little intimidating, or just simply not your jam, have no fear! There are tons of ways to bring bits and pieces of color blocking into a room without too much commitment.

I love the bright colors used on the back of this door. When it’s open, no one would be the wiser. But the person inside the room gets to reap all the spunky benefits once the door is shut. Plus, the juxtaposition of the modern design on the door next to the older, natural wood dresser is beautifully done.

Source Unknown
Another subtle way to take advantage of color blocking is to incorporate some smaller shapes in a specific area. While the walls and trim are a bright white, the darker green squares create some interest and tie in nicely with the dark floor.

Source Unknown
Even a bold stripe can be a simple way to incorporate color blocking into a room! I’m loving the addition of this burnt orange stripe in the corner of this room and how it’s the perfect width of the nightstand. The hanging planter strategically placed in front of the stripe really brings the whole look together.
Off the Wall
Maybe you’re a renter, or you’re still unsure about the whole color blocking thing. Here are a couple of additional ways to incorporate color blocking without painting a single wall.

You can easily try out the color blocking trend by adding it to a piece of furniture. While this sideboard would be beautiful without color blocking, adding it really elevates this to a statement piece.

While this example definitely isn’t for everyone (my artsy side is coming out here), I love the idea of color blocking a piece of art. This one is especially well thought out in that the solid color stops just under the figure’s eyes. I also love the bright, bold color next to the muted tones of the painting and the frame. Just imagine a wall with 3 or 5 of these lined up in a row.
Final Thoughts
I think it’s pretty clear that I’m Team Color Blocking - what about you? Lucky for me, I have lots of unfinished spaces in my house still where it just might work. Time to start planning!
For more examples of colorful interiors, check out these posts:

Color Blocking Examples to Incorporate into Your Home
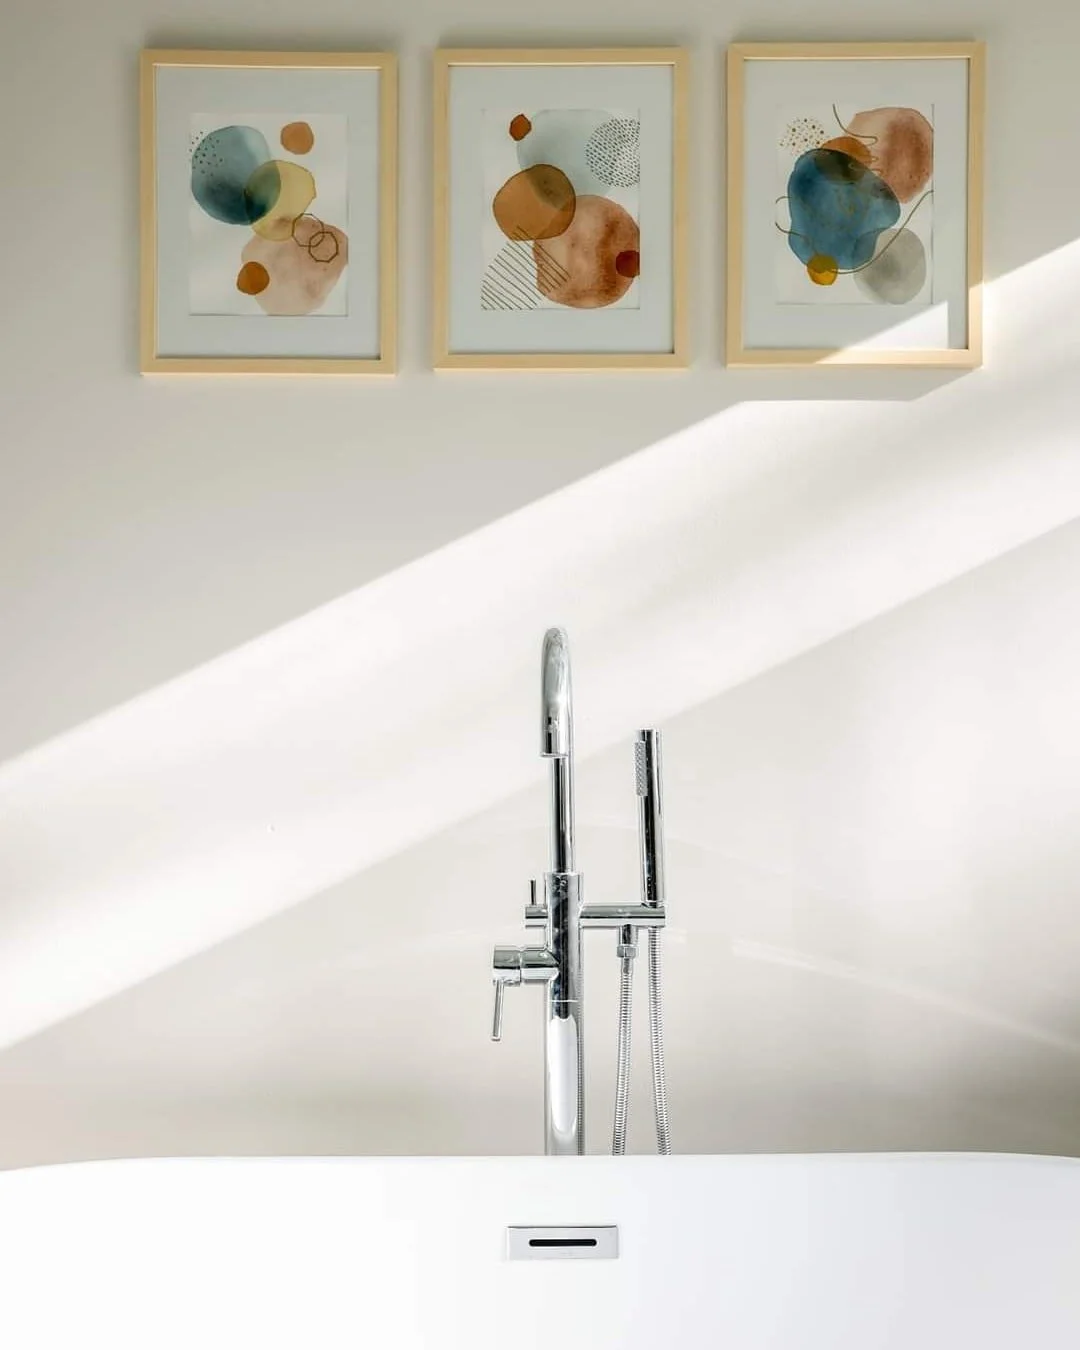
Master Bathroom Reveal
It’s been a loooong road, but I’m ecstatic to say that our master bathroom is complete! Actually, it’s been complete for a couple of months but we just got around to taking pictures. We’re busy, you know, finishing other projects and starting new ones before those are even complete. Better late than never though, right?
Organic Modern Bathroom
It’s been a loooong road, but I’m ecstatic to say that our master bathroom is complete! Actually, it’s been complete for a couple of months but we just got around to taking pictures. We’re busy, you know, finishing other projects and starting new ones before those are even complete. Better late than never though, right?

As per usual, before I share all the fun “afters”, let’s take a trip down memory lane because this space has undergone some HUGE changes.
As an Amazon Associate, I earn from qualifying purchases. This post may contain affiliate links, meaning I receive commissions for purchases made through those links at no cost to you.
Before
We first looked at this house in September of 2019, and while I wasn’t in love with it, Lucius clearly was. One thing was for sure though, we both HATED the master suite layout, especially the master bathroom. It felt less like a luxurious master suite and more like a hotel bathroom - the vanities were separated from the toilet, which was also separated from the shower. It was just plain weird.
In the image below, I’m standing in the bedroom in the foreground. Lucius’ closet was on the left, followed by the double vanity. My closet was on the right, followed by the “water closet”.

And straight ahead was the shower room. Yep, an entire room devoted to the shower.
Back in the day, it was a working sauna that was clearly long out of commission. Oh, and that door waaay in the back? That was the doorway to the loft. Makes sense you’d access it through your bathroom, right? And do I even need to mention all the carpet? WHY!? Just… why?


Oh, and do you see all the glorious natural light streaming into the bathroom in that very first picture in this post? Notice how there’s ZERO natural light in the original pictures of the bathroom? That’s because all of the windows in the original layout were behind my closet and the water closet. This is what was on the other side:

I’ve described it before, but to quickly refresh your memory this was essentially a long, narrow sunroom called a “loggia”. It had no heating/cooling so unless the temperature was perfect, there was no reason to go out there. It would’ve been a great plant room, but other than that, I can’t think of any reason why we would have used it. Plus… look at all those wasted windows!
Back to when we first looked at the house…. Lucius won me over with tales of what our master suite could be - what we could turn it in to. My mind started spinning with possibilities and before I could wrap my head around it, a month later we were moving out of our classic American Foursquare and moving into our new, quirky house.

Demo
Jump to the following summer and we got the itch to make some BIG changes. We started demo!

Don’t get me wrong, this was definitely an intimidating project. This has by far been our biggest renovation to date. But we’ve simply taken it in stages, pivoting as needed along the way, and trying to keep the dust at bay as much as possible. We’re definitely fortunate that we have the space and amenities to move to other areas of the house as we’ve needed to (i.e., sharing the kid’s bathroom, temporarily moving our bedroom to the loft, using my office as a master closet, etc.) and don’t take that for granted one bit.

I call this picture: The lone abode
Reconstruction
Once everything was demoed, we got to put it all back together how we envisioned. I shared floor plans in this post, and you can see a mood board for the bathroom here.
It’s amazing to think back to each stage of this project and the excitement I felt. From framing out the walls…

…to beginning to install drywall and dry fitting the vanity and tub…


…to tiling the shower and floors and mudding the drywall… (while our tub and vanity took up residence in the corner of our bedroom)


…to painting…

…and every little step in between until we were finally FINALLY able to actually use our bathroom. It’s been a heck of a learning experience, for sure, but I’m so proud of how it turned out.
The Reveal
And that brings us to today, where we have a fully functioning, beautiful master bathroom that I am simply head over heels for. When I was designing this bathroom I wanted it to feel light and warm. That being said, you’ll notice a lot of light tones throughout with the tile choices and paint colors (White Heron on the walls and a surprise of Sea Salt on the ceiling - both Sherwin Williams). To warm things up, I incorporated brass finishes and wood tones throughout.
Allow me to show you around….

Oof, the shower of my dreams! I can’t believe you’re MINE!
This shower was the topic of many discussions/decisions between Lucius and me. We spent a lot of time taping out the subfloor and standing in the bones of the room trying to get a feel for the perfect size before fully committing. Then there was the debate over whether or not to add a curb to the shower. And of course, if we were going to install a shower door.
In the end, our shower ended up being 4 by 6ish feet with no curb or door. It’s separated from the rest of the bathroom by a MASSIVE 6 by 8-foot piece of glass that was tricky to get in place, to say the least.
In fact, the glass installers couldn’t even get it up the main staircase. (#measuringprobs) So, how did we get it in the bathroom, you ask? Innovation! And wall removal.
You see, on the other side of the wall of the shower is our (luckily) unfinished laundry room, which shares an exterior wall with the lofted portion of the mudroom. I’m sure that’s hard to follow, so here’s an image of the mudroom with an arrow pointing to the wall I’m referring to.

Essentially, Lucius removed the drywall in the laundry room so that he and six other men could hoist the glass through the opening, through the laundry room door, and into the loft. From there, they were able to finagle it down the hallway and into the bathroom. WHEW! To say I wasn’t sweating a little at the end of it would be a lie. Here’s what it looks like from another angle:

For the wall tile, we went with a smaller-scaled herringbone tile across the shower surround and spanning the entire back wall. Since we decided to go door-free, I think spanning the tile across the entire back wall helps make the shower more like part of the room and helps it feel less separated.
I cannot for the life of me find the link for the shower tile, but we essentially went with a smaller version of the floor tile we used in the rest of the bathroom. It’s a matte porcelain tile and I luuuurve it. We used light grey grout throughout. The image below shows a little glimpse of the tile on the shower floor. And a better view of the greeny-blue ceiling.

Along the back wall, we also installed some simple shelves that I made out of pine boards, stained with a natural-toned stain, and threw a couple of coats of Polycrylic on them for protection in the humid bathroom environment. We hung the shelves using these brass brackets and added these baskets, which are strategically filled with shower-related items (razors, extra shampoo, etc). I also snagged this faux string of pearls from World Market, because every corner needs a little green.
For towel storage I played a little game I like to call “basket shuffle” where I tried out every basket I own in this corner to see which one looked best. In the end, the Snidad from IKEA won.
The towels are currently hung on these brass hooks. Although I love the look of a towel hung on a hook, we’re planning on switching them out for the matching towel bars to get better airflow to our wet towels and help them dry faster.
One happy little moment I love with this bathroom is when the bathroom door is open and you get this bold pop of the bedroom color.

Flipping over to the other side of the room, we have the vanity area and a glimpse of the beautiful contrast of the cozy bedroom next to the bright bathroom.

We went with a 60-inch vanity. Unfortunately, it doesn’t look like this exact vanity is sold anymore. But can I just say that this is the first time I’ve had a bathroom with under-mount sinks and I’M NEVER GOING BACK! So much easier to brush the beard hairs Lucius leaves all over the place into the sink. 10/10 would recommend.
I paired the vanity with these faucets and these mirrors, which are impressively nice and heavy for the price. And here’s a link to the light over the vanity. But possibly one of my favorite finishing touches in this bathroom are the hooks for the handtowels. Luckily, they come in a pack of 6 so I have some spares to use elsewhere throughout the house!
I mean, c’mon….

I finished off this corner with a warm-toned runner that I actually love so much I bought it in a 9x12 size for the living room and I love it just as much in there! Ours is the Tangerine/Mist.
Opposite from the vanity is the soaker tub. Ohhhh, the soaker tub. How I love you.
I’ve never been much of a bath person UNTIL NOW.

It doesn’t look like they sell the same one we have anymore, but this one is similar. Would you believe I got it on Amazon!? Man, the world we live in… My tub has the chrome drain kit and I paired it with this tub filler, which echos the shape of the faucets on the vanity.
I made some multi-media abstract paintings above the tub to add some color and break up that empty wall. I put them in natural-toned frames to match the shelves we installed.
I honestly have no idea what toilet we bought - Lucius just grabbed one he liked from the hardware store. But above the toilet, I placed another shelf that matches the ones by the shower. I found these adorable canisters to fill the shelf while simultaneously hiding my feminine products. #smartstorage
Since we don’t have any walls next to the toilet on either side, I opted for a free-standing toilet paper holder with a bar for extra rolls in brushed brass, and let me tell you, it’s a game-changer! I’m pretty sure I’ve noticed at least a 75% increase in the likelihood that Lucius will refill the toilet paper since we started using this.
And last, but not least are the windows. The glorious, glorious windows.

I know, windows in a bathroom can be a bit controversial. But as I covered in my tutorial, I frosted them! No funny business is going down here!
I strategically chose to frost them only about 2/3 of the way up simply for a little extra design aesthetic. The light filters in so beautifully now and disperses throughout the room. But late in the afternoon when the sun is on this side of the house, it shines through the top 3rd and we end up with amazing shots like this:

And do you even need to wonder if my plants like it in here? They abso-freaking-lutely do! The typical bathroom humidity combined with all the natural light is like a greenhouse. This room has quickly turned into a propagation station.
Final Thoughts
So there you have it - the official reveal of our bathroom! I know it’s down the line a bit considering we still have several projects in progress right now, but now I’m definitely feeling the itch to renovate the kids’ bathroom and our half bath. I need to slow my roll, but that probably won’t stop me from gathering inspiration images in the meantime!
Check out these posts for more Bathroom Renovation details
Master Bathroom Renovation
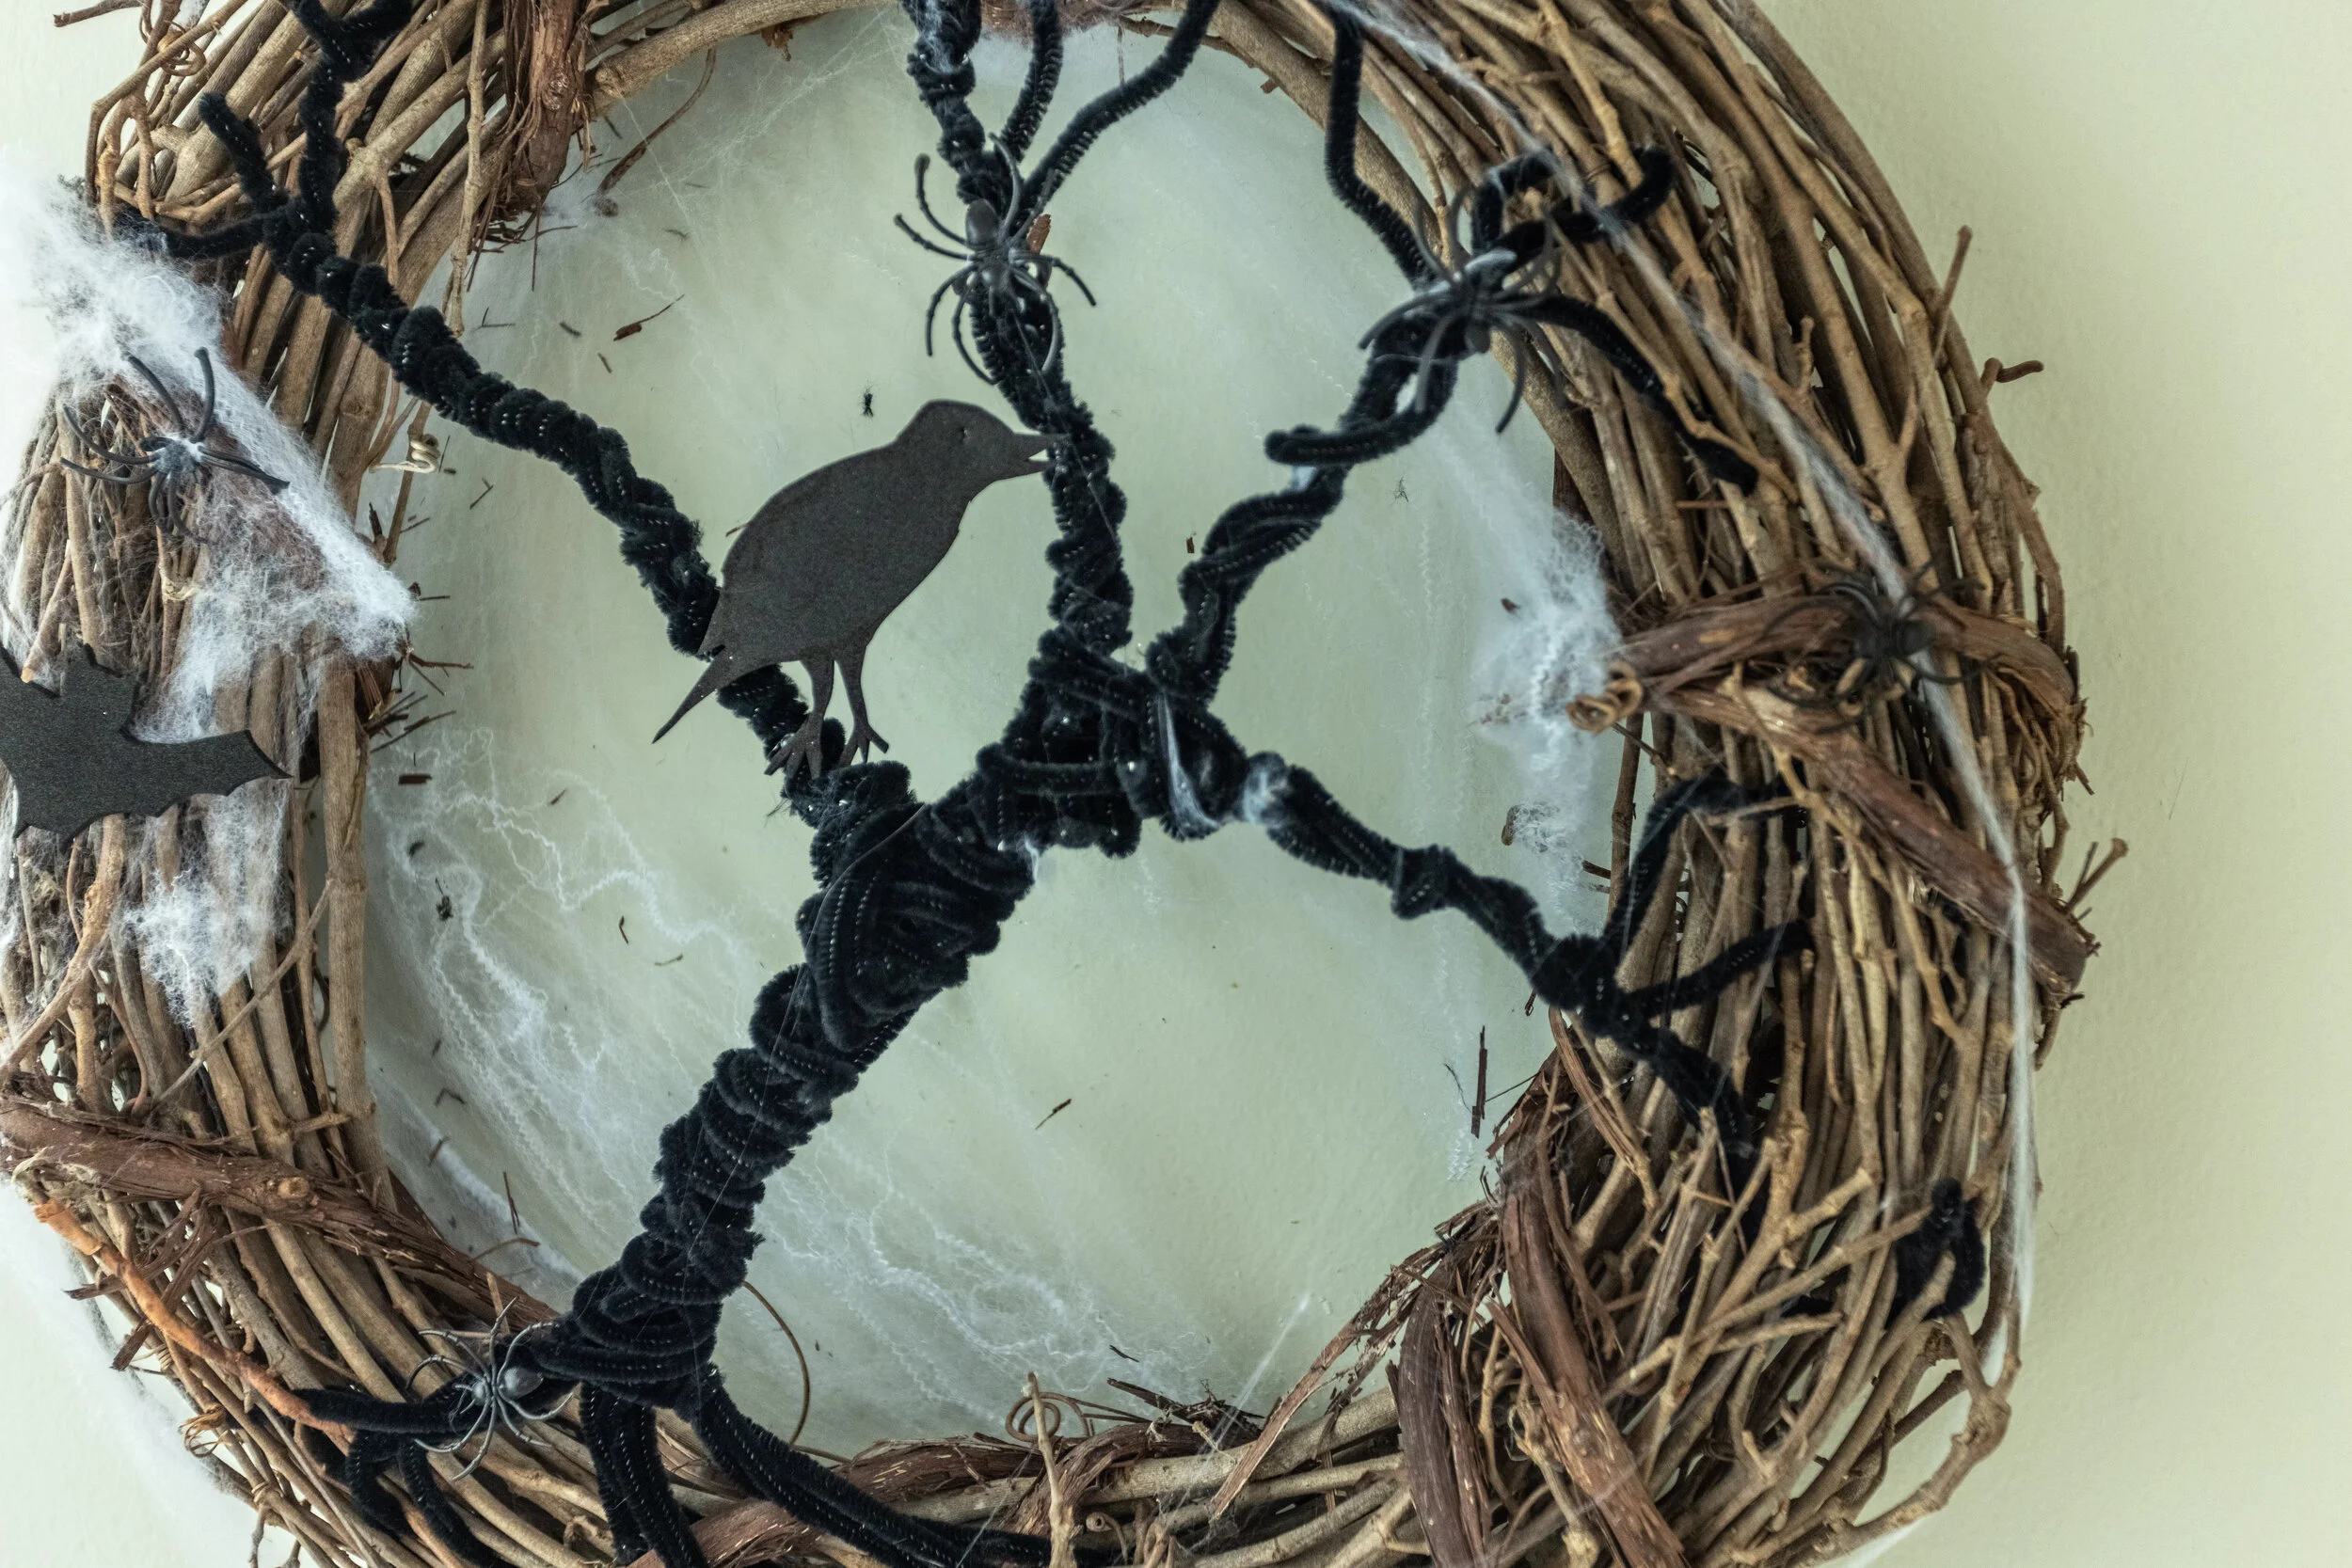
DIY Spooky Halloween Wreath
Last year was the first time as an adult I ever decorated for Halloween. I knew I wanted to add to my Halloween decor collection this year but didn’t have anything in particular in mind. Until I found this broken-down wreath at the thrift store!
Fast and Easy Halloween Decor
Holiday decor can get expensive! Last year was the first time as an adult I ever decorated for Halloween. I was hesitant about spending a ton of money on decorations I might never use again so I DIYed my little heart out in hopes of creating a spooky and festive atmosphere. Lo and behold, I enjoyed it way more than I anticipated! So this year I eagerly broke out all my Halloween decorations again.

I knew I wanted to add to my Halloween decor collection but didn’t have anything in particular in mind. Until I found this broken-down wreath at the thrift store!

It was only a few dollars and the flowers were already falling off before I made it out of the thrift store, which was fine since I planned on removing them anyway. I was especially drawn to the look of the wreath itself - I like all the sticks wrapped and woven together. (I’m a simple gal, impressed by twigs, apparently.)
As an Amazon Associate, I earn from qualifying purchases. This post may contain affiliate links, meaning I receive commissions for purchases made through those links, at no cost to you.
As soon as I spotted it, I immediately remembered I had Pinned the wreath below previously and figured, “Heck, I can DIY that!”. (Enter the narrator: “And DIY that she did.”)

Source Unknown
Off I went to the store to see what I could find to make all my spooky wreath dreams come true. Here’s what I used:
Materials
- Wreath base
- Black pipe cleaners
- Fake spider webs & spiders (1 package)
- Black foam (1 sheet)
I grabbed some black pipe cleaners, fake spider webs (which conveniently came with fake spiders), and this foam paper stuff that smelled really bad but was super easy to cut.

Creating a Spooky Wreath
I started by sticking some of the spider webs across the back of the wreath to create a little backdrop. Then, I wrapped the pipe cleaners around the wreath and around each other to create a creepy, twisty tree shape. In hindsight, it would’ve been better to wait on the spider webs til the end because MAN, those things stick to everything (like pipe cleaners, for example)!

Once I had a basic tree shape, I beefed it up by twisting more pipe cleaners around and around until it felt substantial enough. Then I added some more of the spider webs to the front and attached the spiders.

For the finishing touch, I drew a couple of bats and a raven onto the foam, cut them out with scissors, and hot glued them to the wreath and tree. Easy peasy! The best part about this project is that it’s completely customizable. Want more spiders? Go for it! Wanna add some color? Wrap some ribbon around it!

More DIY Halloween Decor Ideas
There are TONS of different ways to DIY a Halloween wreath (and they can get INTENSE). Here are a couple of other DIY wreath examples that I especially like for their simplicity and lack-of-intimidation factor:


And if you’re looking for even MORE Halloween decor projects, check out this post from Redfin where I, along with other experts, shared fang-tastic and easy Halloween décor projects you can put together in no time. Check out what we had to say so you can give your space a fright this October!
Final Thoughts
I might go back in and add more spider webs to add some more contrast, but all in all, I’d call this a successful DIY spooky Halloween wreath and a great addition to my decor stash!

Of course I decorated other areas of the house too. In the living room, I added to the mantel decor from last year by modifying the luminaries I previously made as part of my Christmas decor. I simply flipped them over, painted the back black, and put some orange lights behind them. Now we have a spooky little neighborhood!

And in the dining room, I went with a bit of a more sophisticated vibe by switching out my everyday faux branches with some beautiful faux ginkgo branches. I paired them with a vase that I just refinished using my DIY Stoneware Decor tutorial. I also added a glass pumpkin, a very fitting owl bookend I already owned, a bowl full of colorful fake leaves, and some matte black candlestick holders, with tapered candlesticks.

I’m already looking forward to shaking it up and trying some new festive decor ideas next year. Heck, maybe I’ll even get started crafting BEFORE October!

Related Holiday Decor Posts
DIY Halloween Decor Ideas
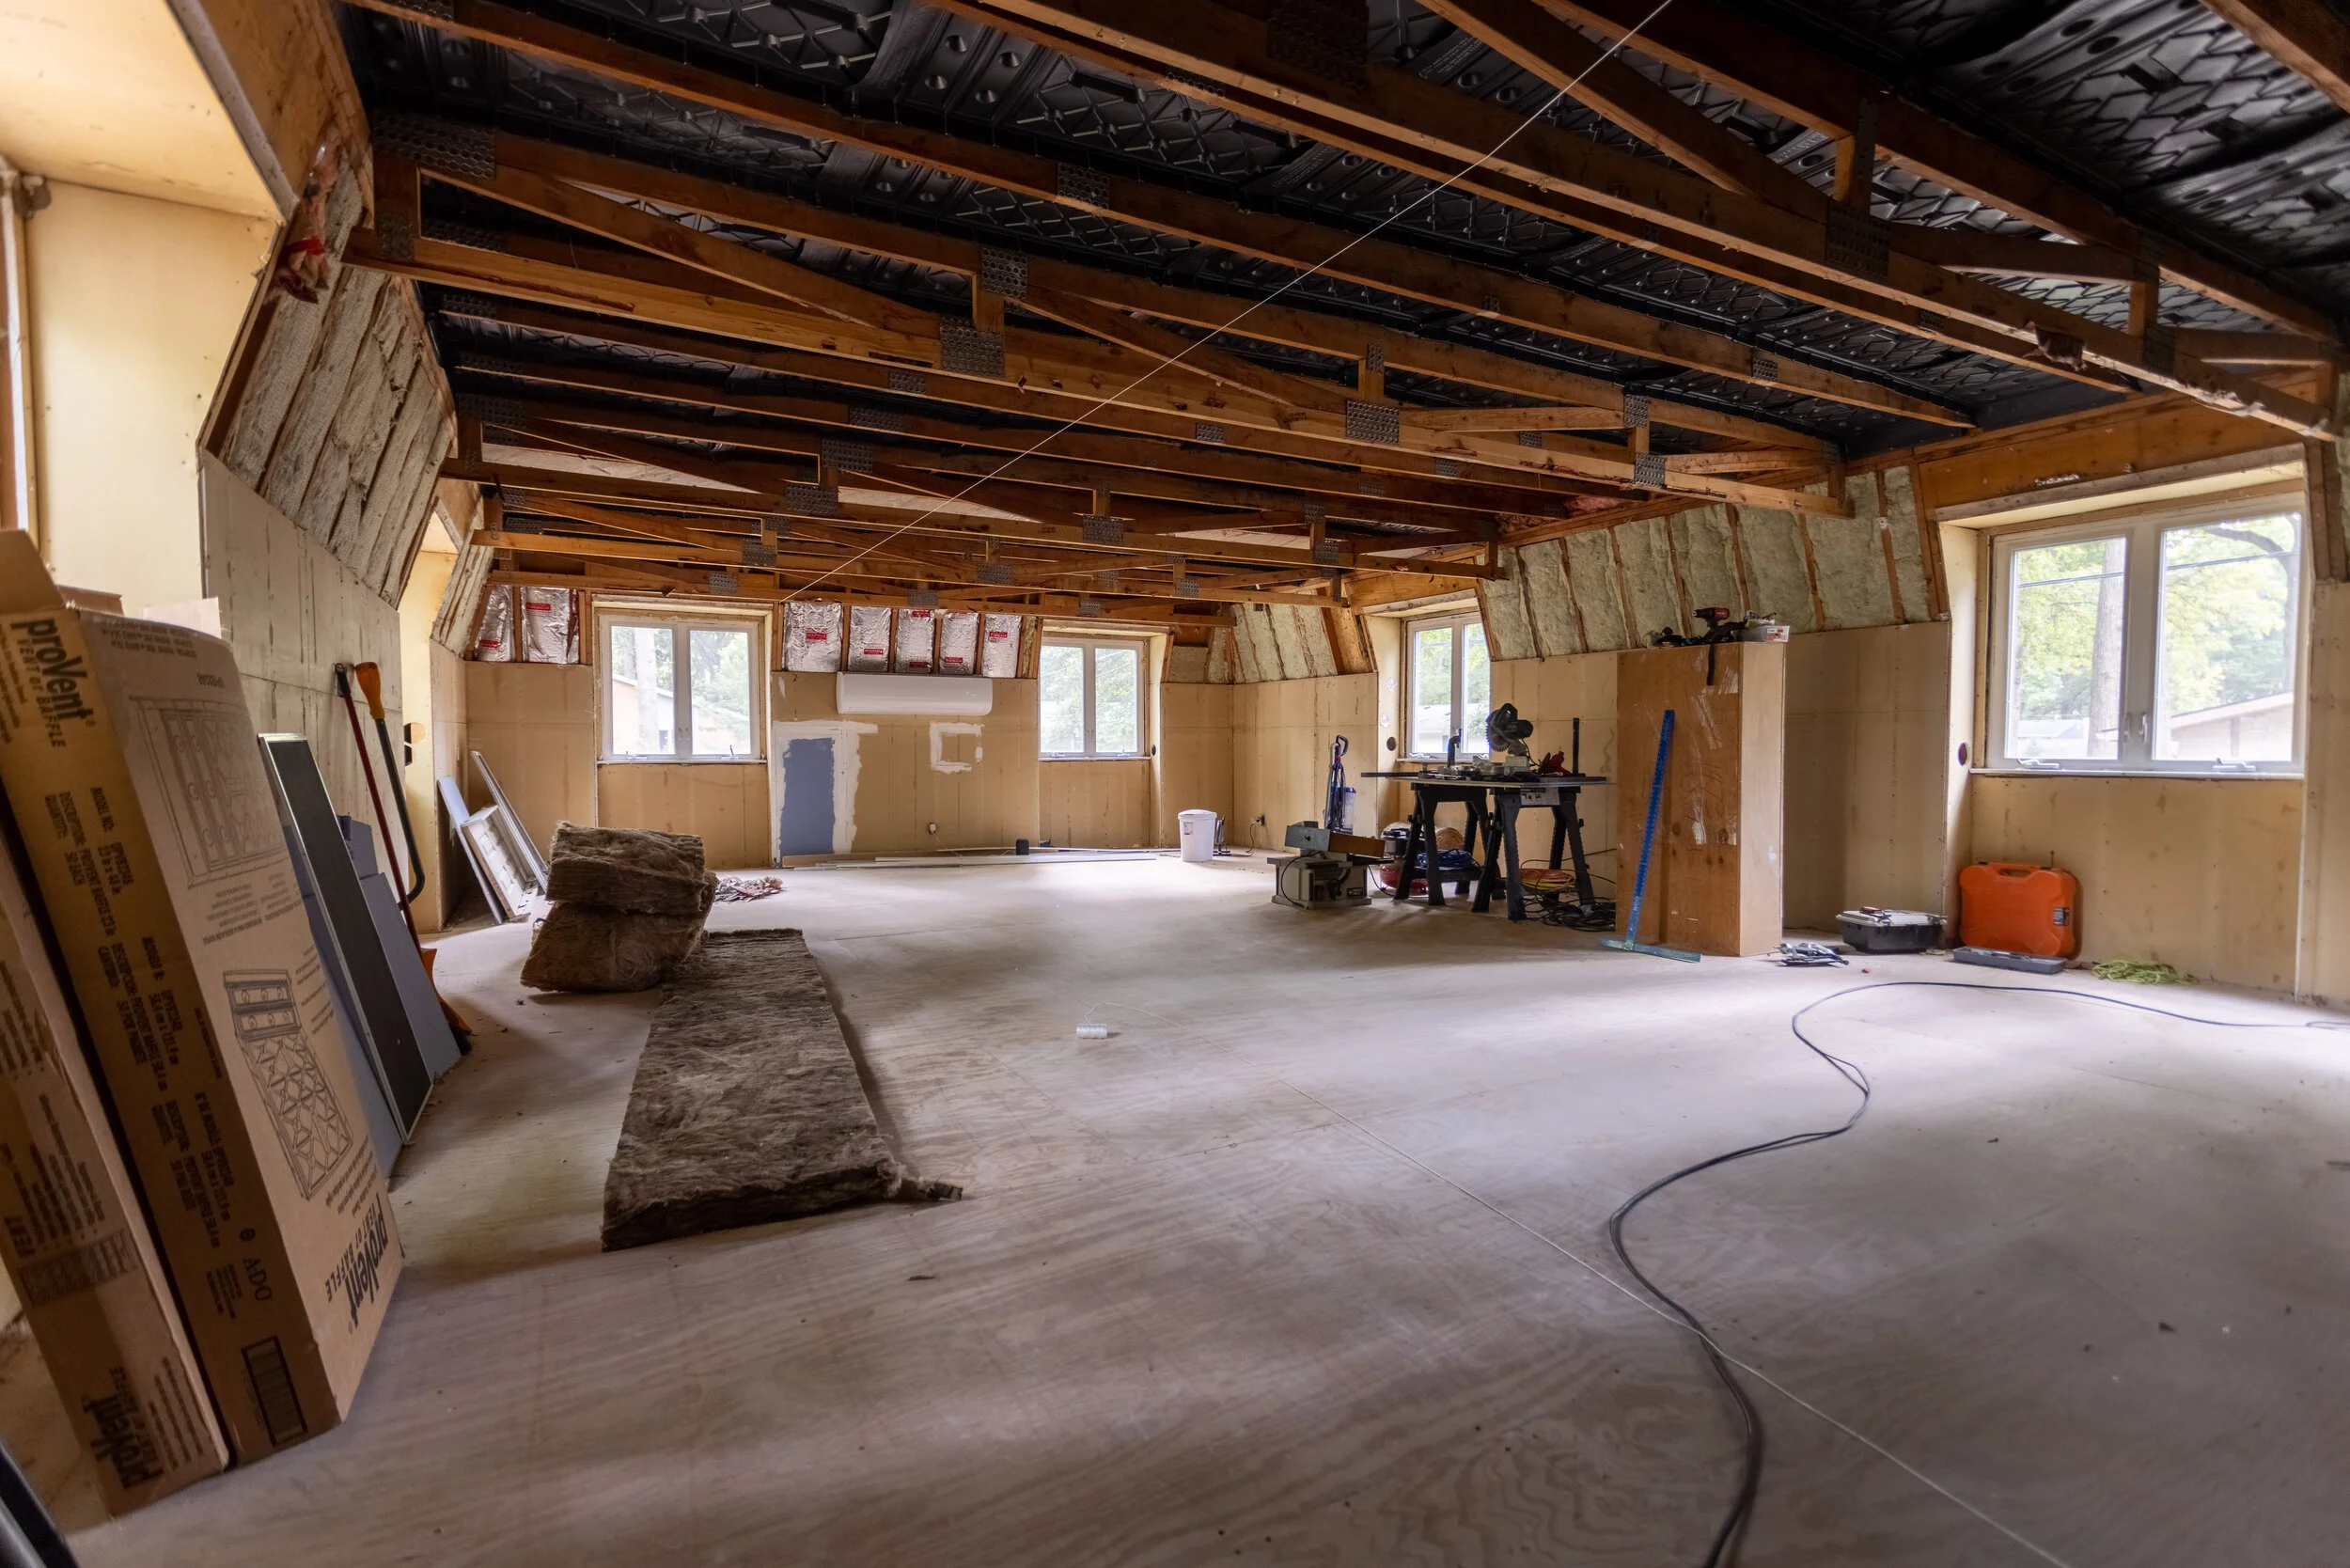
What's Happening in the Loft?
Remember how I mentioned in my last post that we were focusing really hard on wrapping up the hallway renovation? Yeah… we started a big new project. We’re renovating the loft!
Loft Renovation
Remember how I mentioned in my last post that we were focusing really hard on wrapping up the hallway renovation? Yeah… we started a big new project. We’re renovating the loft!


At the end of our BRAND! NEW! HALLWAY! (please tell me you said that like Bob Barker announcing a car as the prize on The Price is Right) is the loft. When we moved in, this room was 900 square feet of disgusting carpet, paneling, and RED walls. The previous owners were big Ohio State fans, and it showed. This was actually the first room in the house we painted - Crucible by Sherwin Williams.
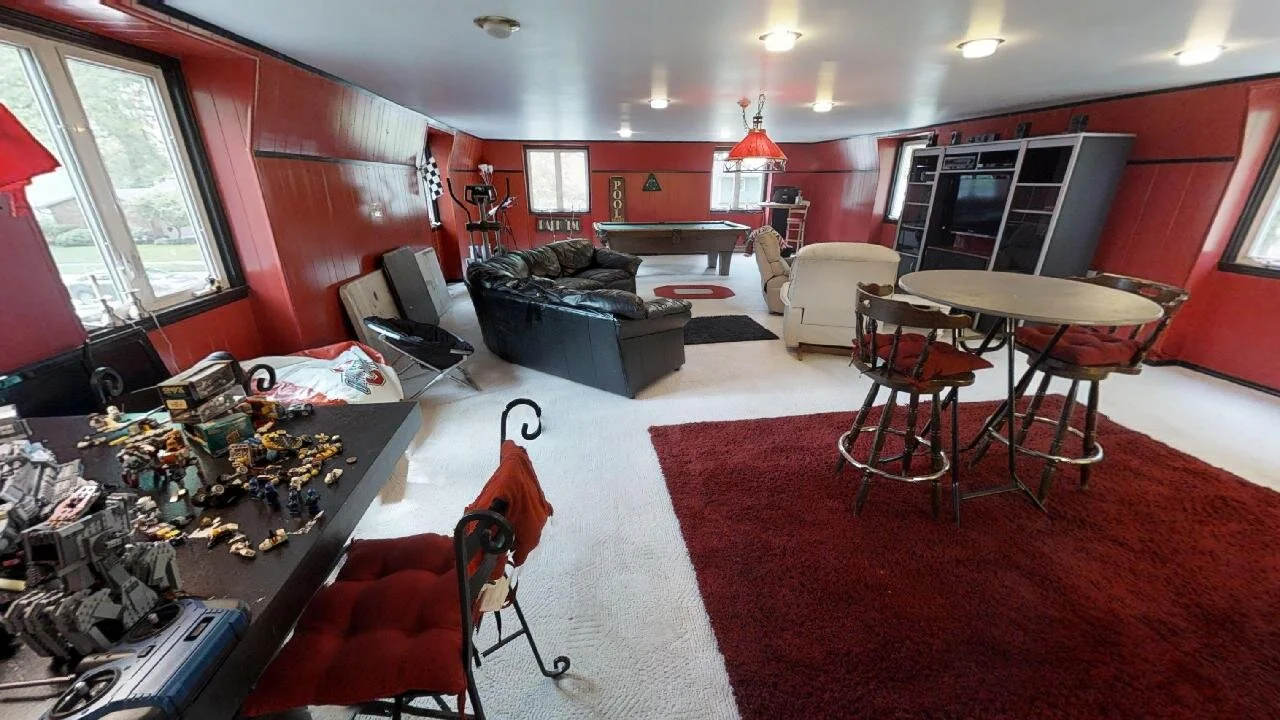

Aside from painting, in the short term, we removed the hazardous railing over the lofted section by the stairs (over by that yellow bit of wall way in the back of the picture above) and added a pony wall in its place (and very recently added a full wall with a door!), and removed the oddly-placed billiards light in the middle of the room. And for the past two years, the loft has served us well as an evening family hangout spot.


Other than our small “Phase 1” renovations, the loft remained mostly unchanged… until recently.
Enter my harebrained husband stage right. Always scheming up something, that one.
The Idea That Started It All
One day not so long ago my husband, Lucius, decided that right then and there was the perfect time to rip up the carpet. Ever the renovation enthusiast, I didn’t take much convincing - the existing carpet was in bad condition and, frankly, embarrassing. The vision of replacing it with the same flooring we used in the hallway and our master bedroom was enough to quickly get me on board!

A Big Hiccup
While we were deep in the process of ripping up carpet and pulling out staples came the unsettling realization that the laminate we installed in the hallway and our bedroom was no longer available. HUGE planning fail on our part.
It’s not that the flooring isn’t manufactured anymore. Apparently, it still is, but the hardware store hasn't been able to get any from the distributor for the last 10 months and they don’t know when they will have more (if ever). So we started brainstorming alternatives - carpeting, an entirely different material, painting the subfloor in the interim. In the end, we found a different, super similar laminate that we’ve decided to use.
No, it’s not exactly the same and that REALLY bothers me, but I have a picture in my head of the loft with laminate and wanted to follow through with that. The boards of the laminate for the loft are slightly wider and have a little less red in them, but my hope is that the differences will be so subtle no one will be able to tell. (Except everyone reading this. Hi!!!)
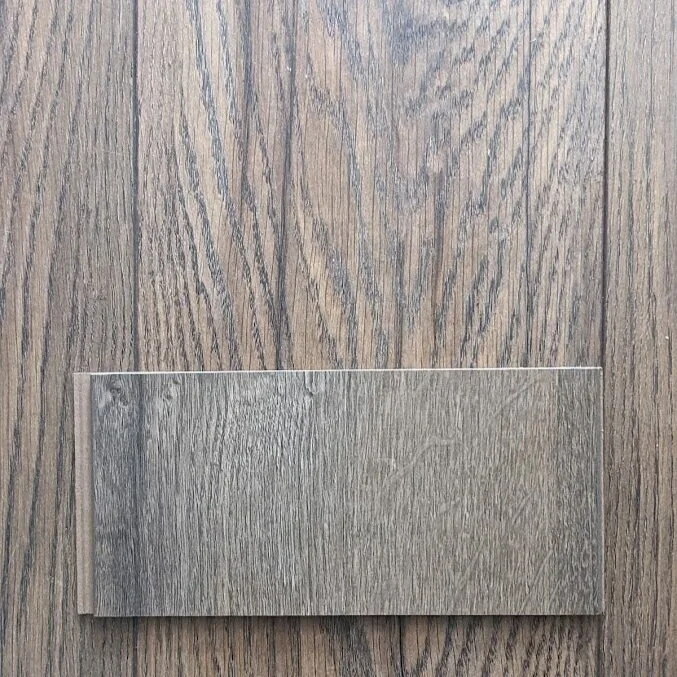
My saving grace is that the transition into the loft is pretty dark, so maybe that’ll help hide our inconsistent little secret. And HOPEFULLY, the old flooring comes back in stock eventually and we can use it in the other upstairs bedrooms.
Where Things REALLY Went Off the Rails
Once we had all the carpet ripped up and our flooring fiasco was resolved, Lucius and I got to thinking, scheming, and dreaming. We spend a shocking amount of time just standing in various unfinished areas of our house talking about what could be. Usually after the kids have gone to bed and we can form a complete thought. It typically leads to trouble renovations. This was no exception.
Seeing the room completely open and without the distracting stains all over the carpet really got our wheels spinning.
Lucius said that while he was installing the new door at the top of the spiral staircase, he got a glimpse of what was above the drywall and noticed there was a lot of open space up there - and even some trusses! He so slyly mentioned ripping out the drywall to expose the trusses while also creating more headroom.
Two hours later and the loft looked like this:

The Plot Thickens
That subheader is a lot more dramatic than it needs to be.
Over the course of the next few days, we made the decision to remove over half of the trusses for less visual clutter. But don’t worry, beforehand we determined that they weren’t structural at all and were installed simply to drop the ceiling height. (Lower ceiling = less to heat/cool = lower heating/cooling costs.)
We also decided to remove the paneling. We already knew there was drywall underneath that could be smoothed out with a skimcoat so this wasn’t a big deal. Plus, it saves us from having to try to seamlessly patch the paneling in areas where we were removing outlets and filling in the holes from when we insulated the second story - NOT an easy feat.
So now we’re here:
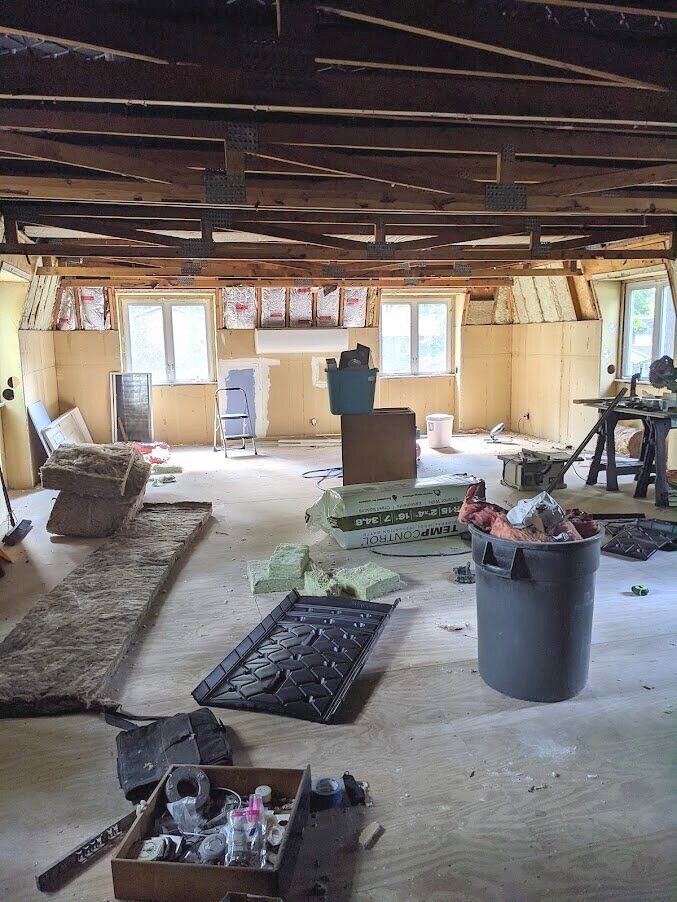
I’m glad we removed so many trusses so now you can actually see the detail of the ones we left. And although I didn’t mind the paneling, I also don’t mind that it’s gone!
As an Amazon Associate, I earn from qualifying purchases. This post may contain affiliate links, meaning I receive commissions for purchases made through those links, at no cost to you.
The Design
Ah, yes, my favorite part!
As scary as it can be to dive into a big renovation, having a vision of how much better a space can look makes the risk worth it. For the loft (or, I guess now it’s a bonus room since we’re enclosing the space?), I’ve been putting together an informal vision for a while (only the last 2 years… who’s counting?).
Although this is a family hangout space, my husband quickly claimed that since he uses it the most (which is true), he gets the final say in the design. Challenge accepted!
After talking it through, we decided that an industrial feel would suit this room, and Lucius’ aesthetic, nicely. So off I went to look for some inspiration and boy, did I find it!
Ceiling
Quickly after removing the drywall on the ceiling, I mentioned painting the ceiling matte black. So naturally, I gathered some examples for Lucius to see my vision. Although the image below is a basement, the concept is still the same, and Lucius is on board. It’s also helpful that the flooring is similar to what we are planning on installing so he can see how it’ll work together.

Kitchenette
The kitchenette below is another great inspiration image. I mean, exposed brick? Yes, please!

We’d like to do a similar design scheme with our kitchenette by installing brick tiles, open shelving, and black cabinets. Though we’d like to use flat cabinet doors for a more sleek feel and probably butcher block counters - it might just be our first try at an IKEA kitchen!
Since we ripped out the ceiling, we can’t do recessed lighting, but I think these sconces would look very on theme.
But before we can really get excited about the kitchenette, we need to put the rest of the room back together first!
Walls
One hurdle we had to cross after taking the drywall off the ceiling was deciding how to handle the edges of the drywall on the walls. I really like how the example below is just a clean, simple stop between materials. No muss, no fuss. Plus, this room is undeniably gorgeous!

I love the black windows, and would incorporate them into the loft in a minute… if we weren’t replacing our windows within the next few months. I inquired about having black windows installed and they were over $300 more per window! Yikes! And I can’t paint brand new windows… I just…. can’t.
BUT, this room did inspire me to go light with the paint color. I’d actually like to go with my tried and true White Heron by Sherwin Williams in the loft if I can convince Lucius. He has this thing against too much white, but I think the loft/bonus room could benefit from some contrast. Plus, White Heron is more of an off-white. That’s a good enough argument, right?
Lighting
I already mentioned the plan for lighting above the kitchenette, but there’s still A LOT of loft left to illuminate, and I have to say, it took some serious thought to figure out how many lights we’ll need. There was plenty of Googling phrases like “how do you calculate how many lights you need?”, which led us down a bit of a rabbit hole about foot candles, lumens, and wattage. My brain has already purged it all but I was at least able to commit to memory that we need a minimum of 11 lightbulbs in this room.
That’s a lot of lightbulbs! But I’ve already come up with a plan. To stay with the design and also keep cost in mind, we’re thinking we’ll use simple hanging Edison lights. They’re not only industrial but super cost-effective. Plus, the cord and base being black will blend in with the ceiling so they’ll be nice a subtle.
Below I’ve put together a definitely to-scale drawing of the lighting layout. All the unfilled circles will be single bulb Edison lights, and the filled-in circles will be wall sconces.

You might notice that there are actually 13 unfilled circles. That’s simply the best layout we could find to work with the spacing of the trusses we left hanging. The lights will be on a dimmer though, so if 13 is too bright we’ll just dim them a bit!
Furniture
To be honest, I haven’t given much thought to furniture in this space. We know what we want to use the room for, but it’ll be a while before it’s fully outfitted in all of its man-cave-esque glory. Here’s a rough plan though:

First of all, that square smack-dab in the middle is intentionally spelled that way. We have one of the couches made by the company LoveSac, called the Sactional. The cool thing about it is that each section can be moved around to create the layout you want. We always go back to the classic square, so that’s what I’ve mocked up.
Lucius’ desk will stay in the corner for now, but may move behind the couch - we’ll have to see how much room we have once we get a pool table. Oh yeah, we’re getting a pool table, eventually. (That’s a down-the-line item for sure.) Lucius is also a giant board game nerd, so we’d like to create a designated space for that.
And then there’s my art table/area. There was a bar-height table perpendicularly attached to the wall here originally, but we took it out when we removed the carpet. I’d like to replace it with a longer, lower table that’s parallel to the wall for more walking space and more surface area. I’ve also penciled in a couple of flexible sconces designated to light my workspace.
Final Thoughts
Was I prepared to start another big renovation while we’re still finishing up the details from our last big renovation? Nope! But there’s no turning back now! Plus, as messy and time-consuming as renovations can be, they’re also really exciting. Stay tuned on Instagram for more frequent updates, but I’ll be sure to post periodic updates here, too!
For more renovation posts, check out the articles below:
Loft Turned Bonus Room
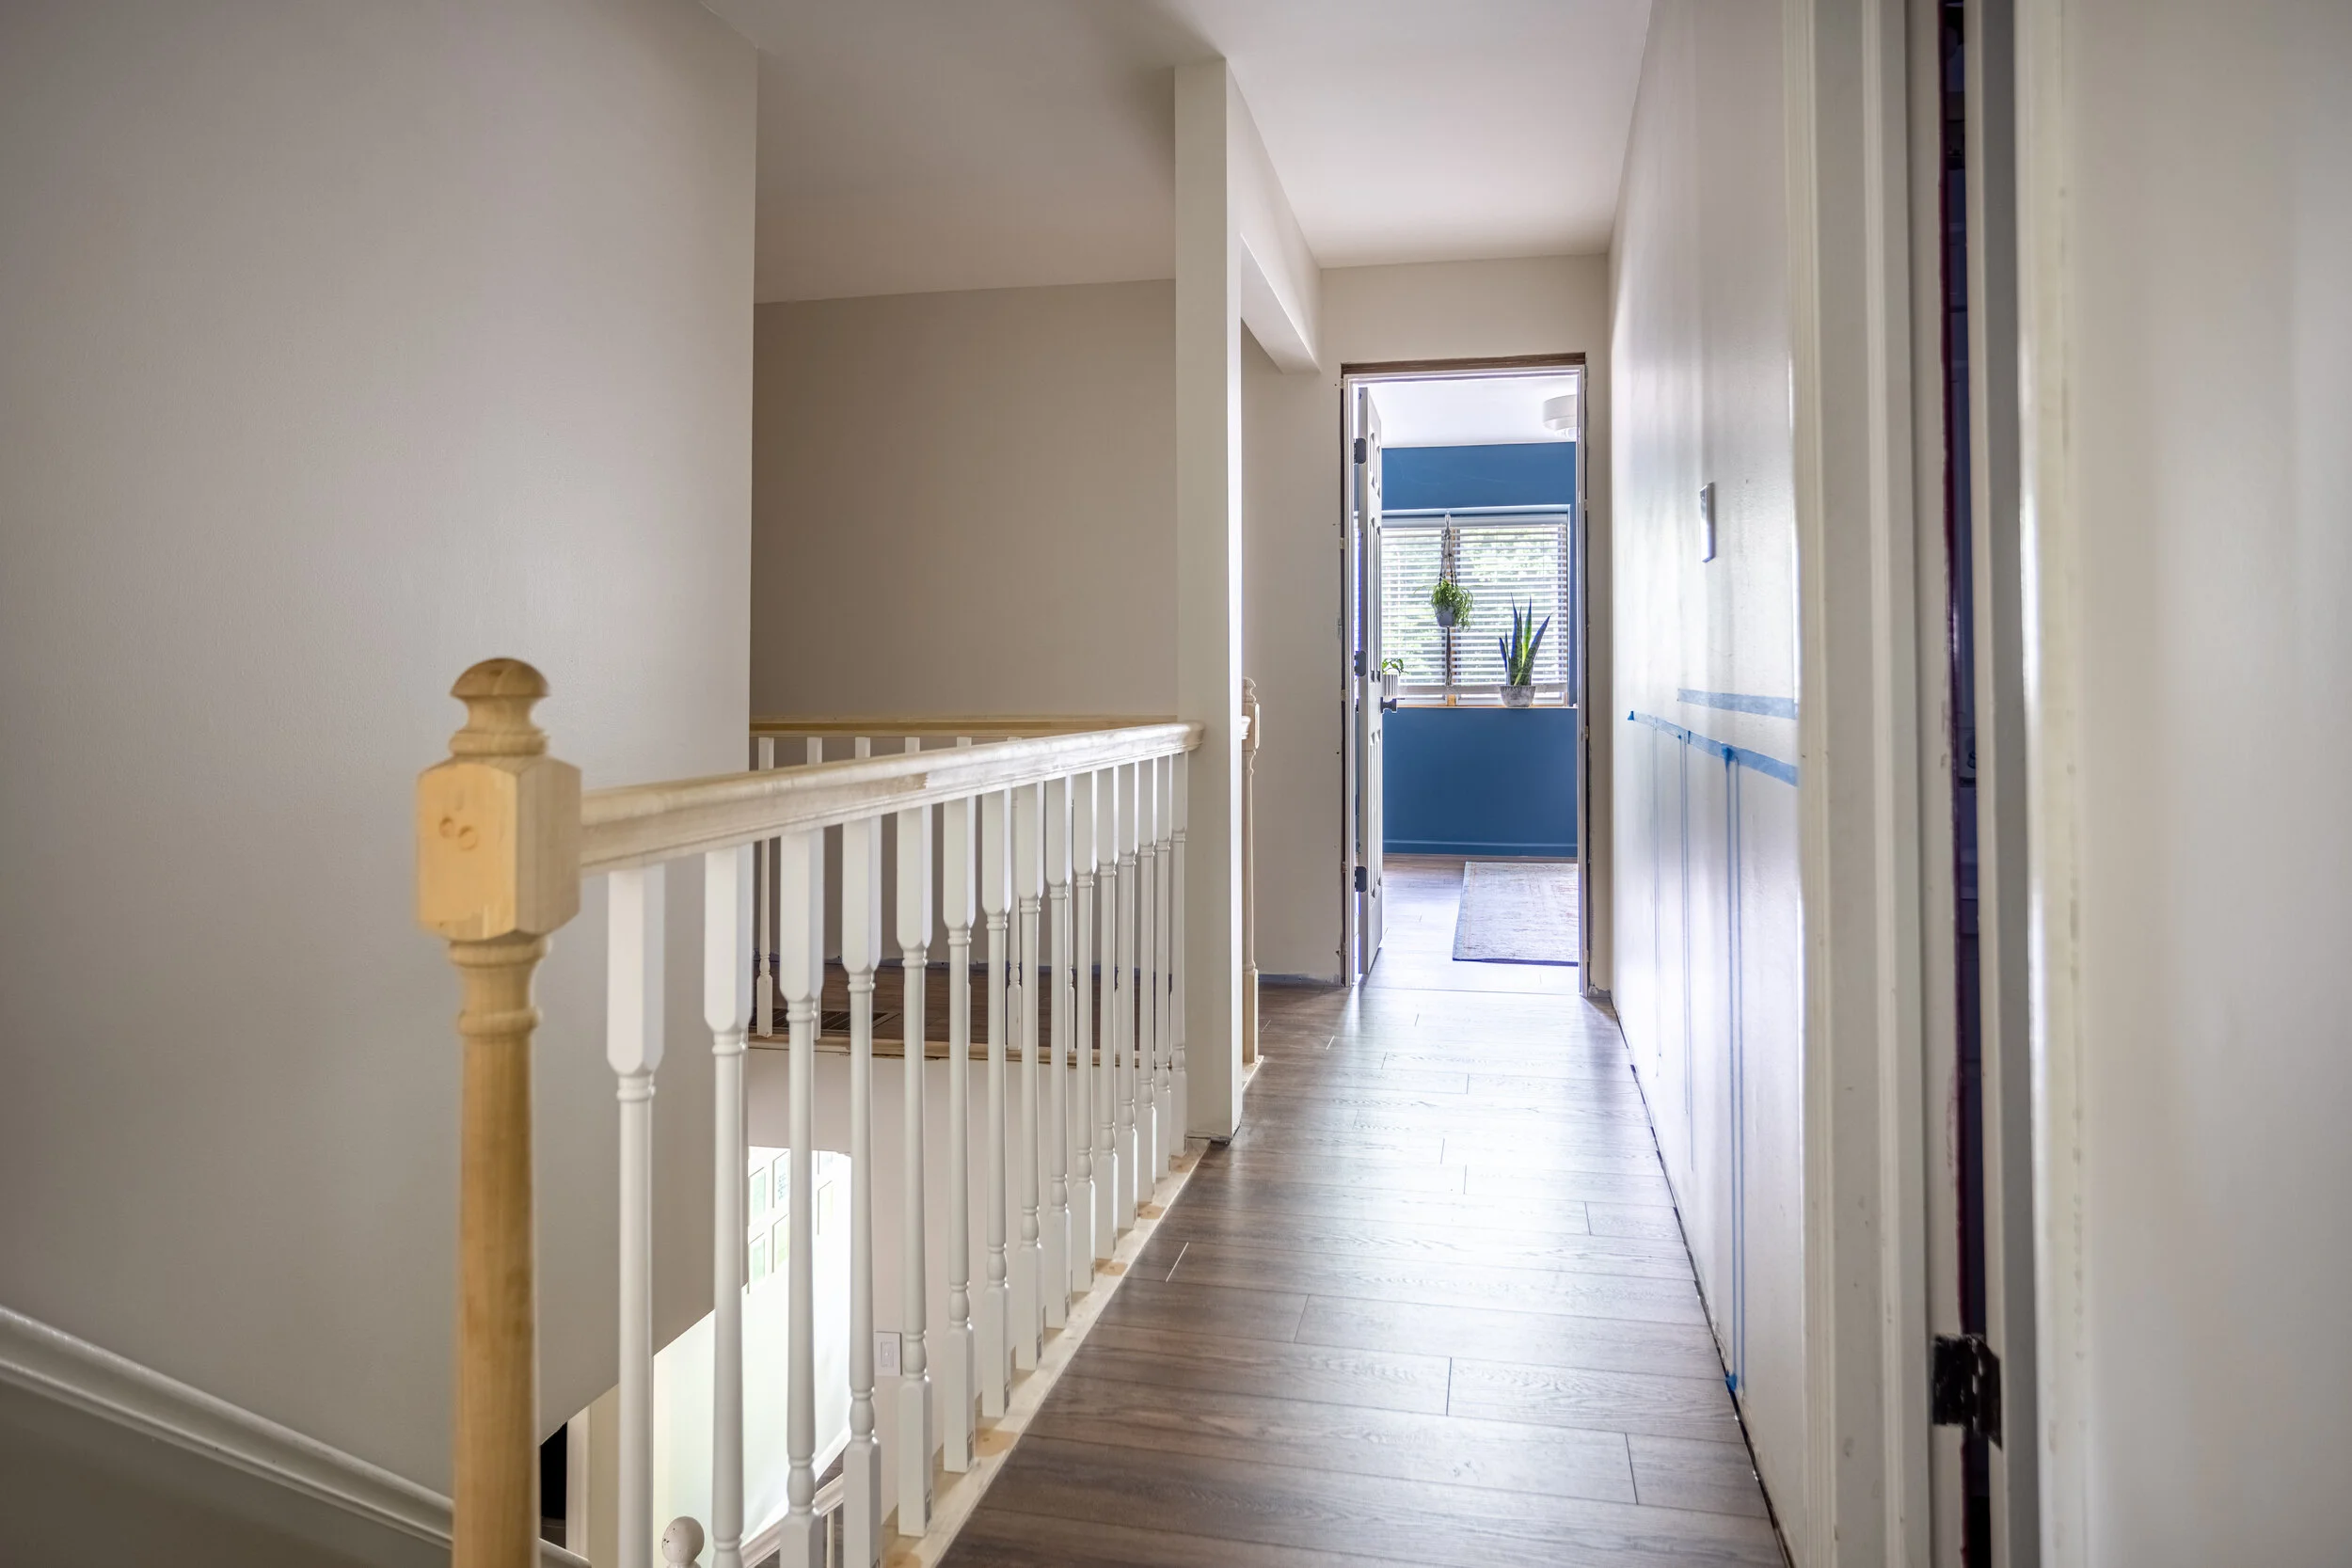
Hallway Progress and Plans
We’ve been focusing HARD on wrapping up the hallway renovation the last couple of weeks. The closer we get to the finish line, the more my brain buzzes with ideas on how to really turn it into more than just a passthrough but rather an integral, well thought out part of the house. So in this post, I’d like to share some updates on our hallway progress, and future plans for what I have in mind.
Hallway Remodel
We’ve been focusing HARD on wrapping up the hallway renovation the last couple of weeks. The closer we get to the finish line, the more my brain buzzes with ideas on how to really turn it into more than just a passthrough but rather an integral, well thought out part of the house. So in this post, I’d like to share some updates on our hallway progress, and future plans for what I have in mind.

I recently shared on Instagram that we finished painting the walls and installing the flooring, which was a HUGE milestone considering we’ve been walking on subfloor for the last year. But before I get into that, let’s take a look at some before and afters. Because, really, who doesn’t love a good before and after? Or is it a “during” in this case, since we’re not done yet? Hmmm…
A Trip Down Hallway Memory Lane
We started renovating the master suite in July of 2020. At that time, this hallway barely existed. Seriously.
The hallway when we moved into this house was so insignificant we apparently didn’t even bother to take a picture before we started demo, but I went back into my archives and grabbed a couple of layout shots from when I was working out the floor plan for the reno.
We started with this itty bitty piece of hallway (and overall stupid master suite layout) circled below:

As you can see by following the orange arrows, to get to the loft you had to walk through our bedroom, past our closets, through the bathroom, and through our odd shower room (because that was a thing for some reason). It was a weird layout, to say the least.

Now that we’ve completely reconfigured the space, we have a much more efficient (and less invasive) way to get to the loft through our beautiful new hallway!

It really is amazing to look back at these floor plans and see our ideas come to life. And while I definitely owe some official “reveal” posts of the other rooms involved in this renovation, today we’re talking about the hallway. Focus, people!
So, in short, here’s where we started (using the best actual picture of the hallway “before” I could find):

And here’s where we are today!

You see that post in the hallway? Imagine that the old bedroom doorway was about a foot in front of that. Here are a few more angles for ya.
This is looking from our bedroom to the kids’ rooms and vice versa.
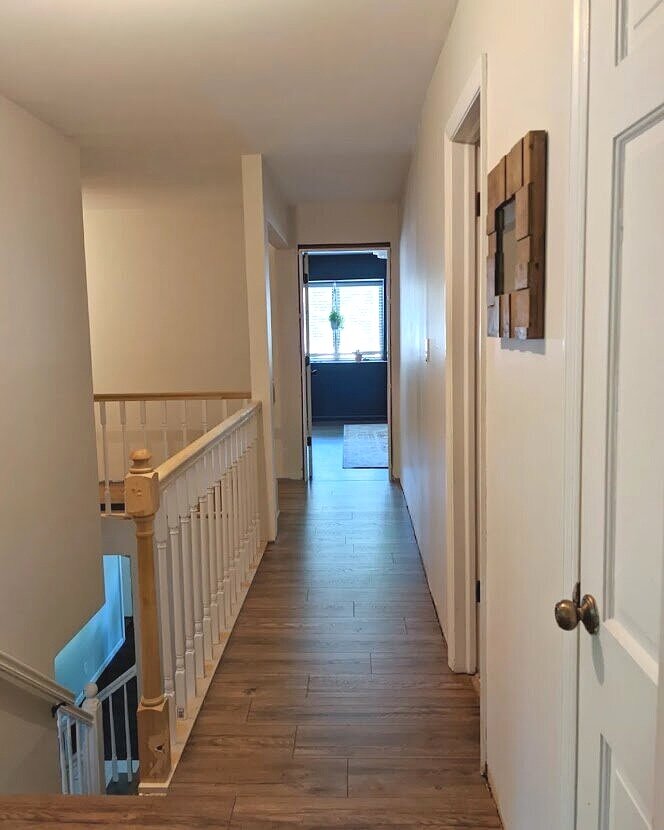
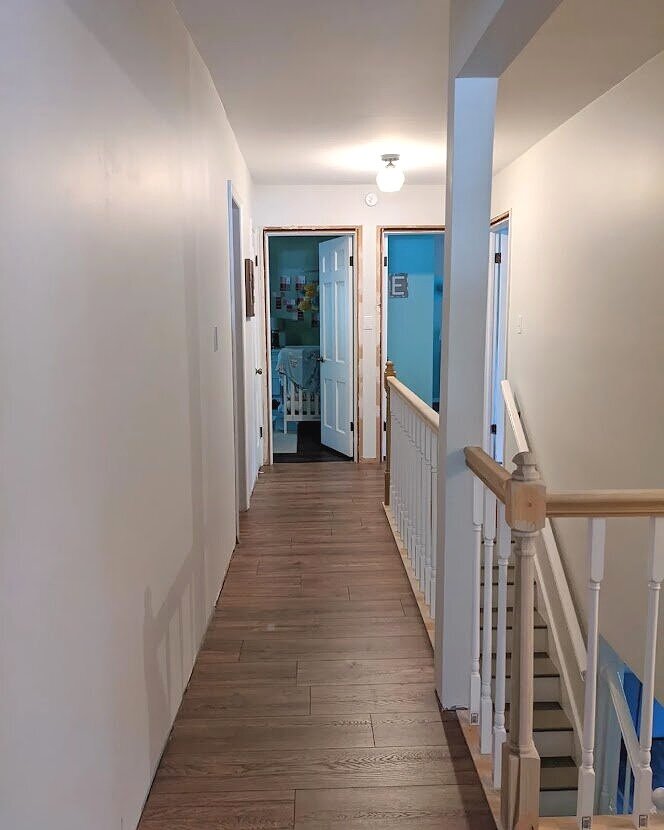
And this is looking from the corner by our bedroom into the loft and back.
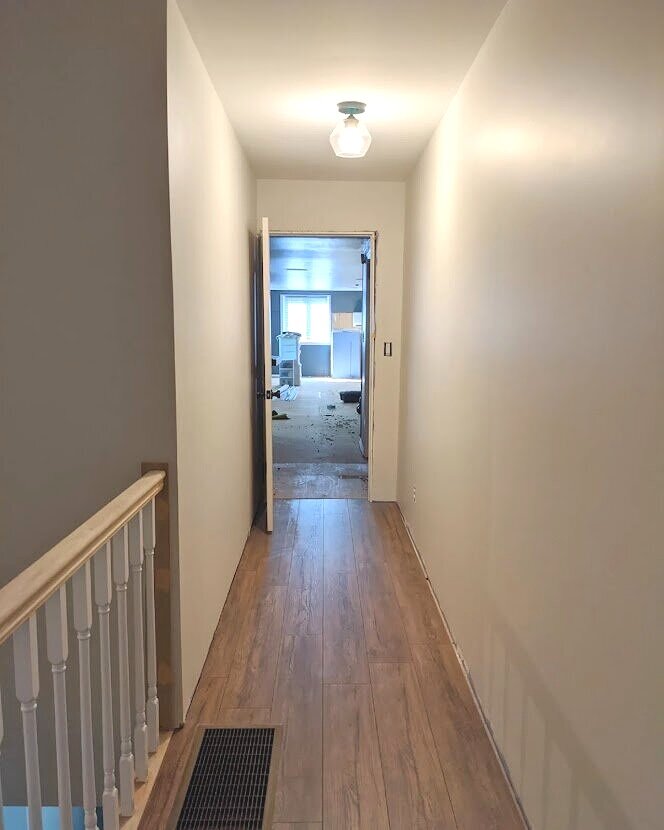
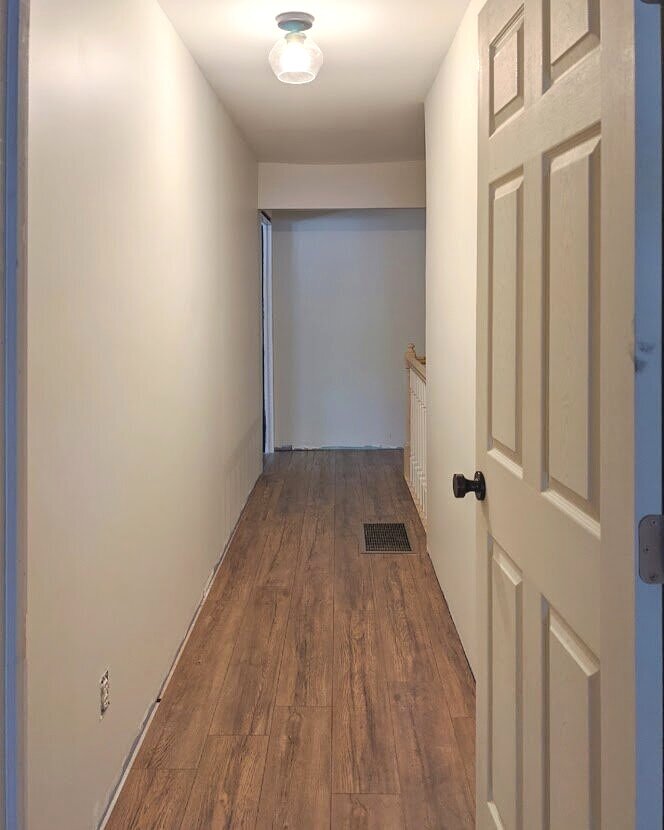
We plan on replacing the door leading to the loft with a frosted glass door to let some of the light into the hallway, like this:

As an Amazon Associate, I earn from qualifying purchases. This post may contain affiliate links, meaning I receive commissions for purchases made through those links, at no cost to you.
Wainscoting and Runners
So what’s next for this hallway of ours? Well, I’m glad you asked! I have plans.
After an initial “veto” from my other half, Lucius has agreed to let me install wainscoting! Of course, after I finish painting I decided to do that, ha! But I think it’ll be totally worth it. The top half of the walls will stay White Heron, and the bottom half with the wainscoting will change to a slightly glossy Pure White, both by Sherwin Williams.
While I love this big hallway 1000% more than the old little landing we used to have, there’s a whole lotta empty wall space. I think wainscoting will add some much-needed interest and architecture. Plus, I have some other ideas to liven it up. Here are some inspiration images I used to win my argument. #teamwainscoting
I really like the simplicity of the wainscoting in the example below. Honestly, it’s even a little more ornate than what I plan on installing. I’m also feeling the evenly-spaced pictures with large mats lining the hallway, which is something I’m toying with incorporating on the stretch of hallway leading to the loft.
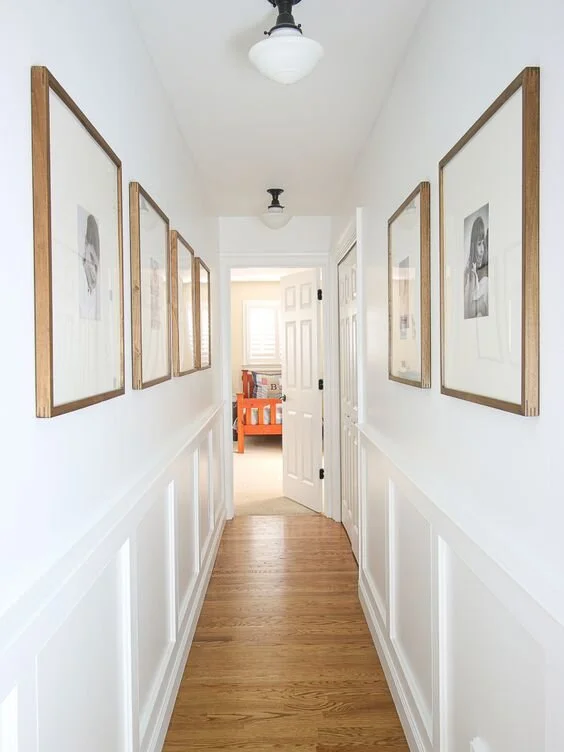

The example below is not only absolutely gorgeous, but I like that they used three of the same runners to create one long one. Considering the length of our hallway, I may have to do the same, so it’s nice to see it in action!

Gallery Wall
While the frosted door and the evenly-spaced artwork are all fine and dandy for the section of hallway leading to the loft, the part that is open to the staircase will get slightly different decor. I’m thinking: mirror gallery wall. I put together some super helpful and professional-looking sketches in Instagram for you:
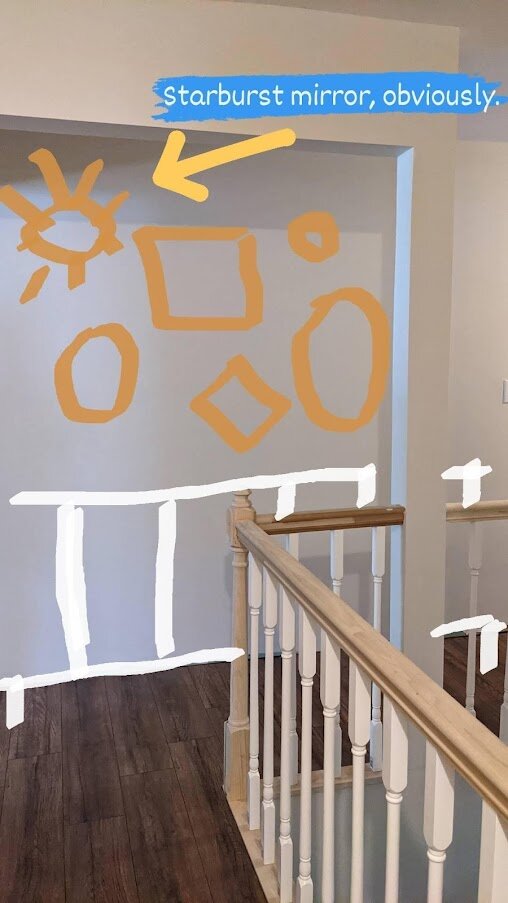
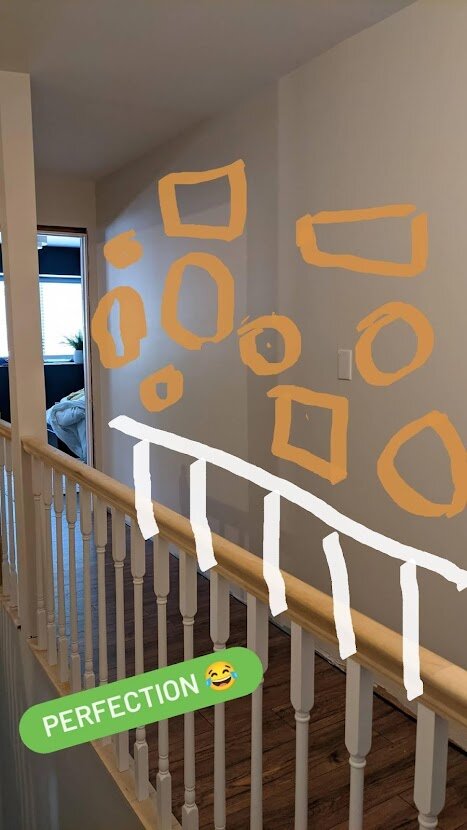
In reality, it’ll look much nicer. I’m picturing something more like these examples:


The mirrors will hopefully help bounce some light around bring more interest to what could otherwise be a dark, boring old hallway.
Handrails, Newel Posts, and Spindles
And last, but not least, is the detail of what to do with the handrails, newel posts, and spindles. While I LOVE a black railing and pretty seriously considered it, I was afraid it’d be too busy with our setup.
And while it’s easy to stick with white all around, I think I’d like to mix it up and keep the spindles white (hooray for not having to paint those!), but painting just the newel posts and handrails gray to match the treads I painted. Of course I have examples to back up my case. Check out these beauties!

Source Unknown

Source Unknown
Final Thoughts
So there ya go - a big old brain dump of hallway ideas and inspiration. Seriously, who knew so much thought (and love) could go into a hallway? I’m looking forward to putting these plans into action! In fact, I’ve already started mapping out the wainscoting.

We have new doors and trim ordered so once that’s installed, it’s wainscoting time. And I’ll be sure to share updates along the way.
Related Hallway Renovation Posts
Styling a Long, Narrow Hallway

Tropical-Inspired Office Redesign
I have to be honest with you. While I enjoy writing tutorials and showing you all how I DIY’d something, what I really love is sharing my thought process behind the decisions I make while designing a room. And lucky for you (or me?), that’s what I’m covering in this post.
Reviving a Dull Office Space
I have to be honest with you. While I enjoy writing tutorials and showing you all how I DIY’d something, what I really love is sharing my thought process behind the decisions I make while designing a room. And lucky for you (or me?), that’s what I’m covering in this post.

I was fortunate enough recently to be hired to redesign an office in MadJax, which is a local co-op lab where entrepreneurs can rent office spaces with the added benefit of the creativity and innovation from the other entrepreneurs who occupy the space. The building is cool and industrial and the whole vibe just makes my creative heart sing.
The icing on the cake is that my client let me have free reign of his office, which was INCREDIBLE and may never happen again so I’m relishing it.
I’m pumped up to share the final product with you today, but first, let’s take a step back to see what (and who) I was dealing with.
The Client
Meet Brad.

Okay, that’s not Brad. I got tired of waiting for him to send me a picture so this was the next best thing. That’s not even my dog.
Anywho, the REAL Brad is the founder, and owner of Hoola Managed IT, a Managed IT Services company that works with businesses to secure their networks and provide first-in-class IT helpdesk services.
While IT may sound boring (Brad probably even thinks so), I could tell immediately upon walking into his office that there was some pizazz there just waiting to escape. I like to think the room spoke to me… or maybe it was the bright orange hammock that set my wheels in motion. Who really knows?

But obviously, the space needed some help to make that giant hammock fit in.

I’m not necessarily talking about making the hammock fit in physically - somehow this behemoth actually fits in the office. But visually, there was no theme or consistency with the design. It simply looked like a giant hammock shoved in an office. But I wasn’t scared - I saw the potential.
As an Amazon Associate, I earn from qualifying purchases. This post may contain affiliate links, meaning I receive commissions for purchases made through those links, at no cost to you.
The Vision
As crazy as having a giant orange hammock in your office may seem, it wasn’t going anywhere. Not only is it a huge conversation piece - drawing people into Brad’s office where he can tell them to take a load off, serve them a Mai Tai, and talk them into buying his IT services - but it’s also convenient for those necessary post-lunch naps. Win-win.
So really, I owe a lot to this hammock for being the primary inspiration for my design.

But there were other factors at play, too.
First of all, I knew I wanted to incorporate the colors from the business logo - bright cerulean blue and, not surprisingly, orange.
I had a hunch that I could go a little wild with this design. So I took a risk and shared the inspiration images below with Brad.
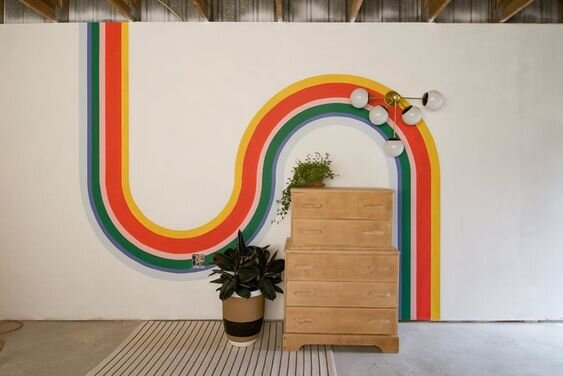
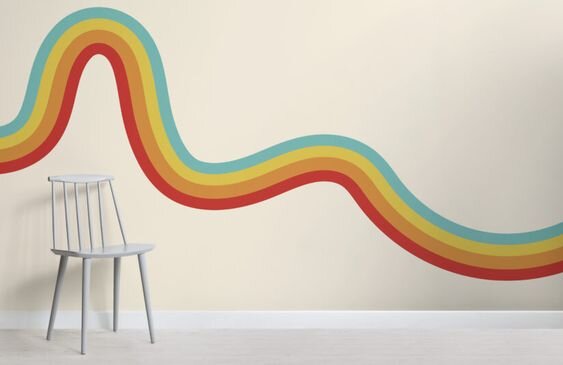
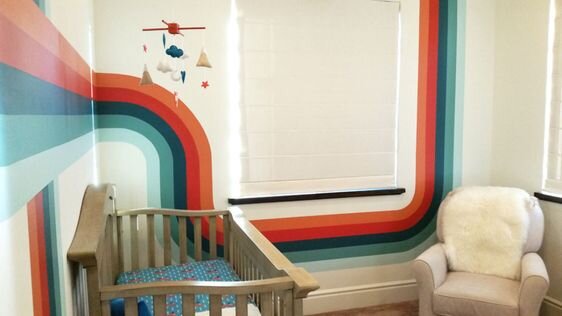
And to my delight, he was totally on board!
Choosing the Color Palette
From there, I started searching for color palette ideas that included bright and energetic colors, being sure they incorporated the blue and orange tones from the logo of course. I landed on this palette as a starting point:
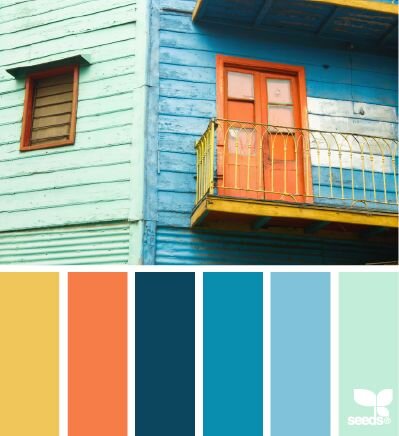
I love that it has the bright blue and orange I wanted to include in the design, as well as another warm color in yellow. But it also has that pastel minty green to soften the bright colors and that dark blue to ground the palette.
Then off I went to the store to grab paint chips and determine the exact paint colors I’d be using. I grabbed a bunch of potential samples and laid them out on the floor, then narrowed down my choices by trying different combinations grouped together.
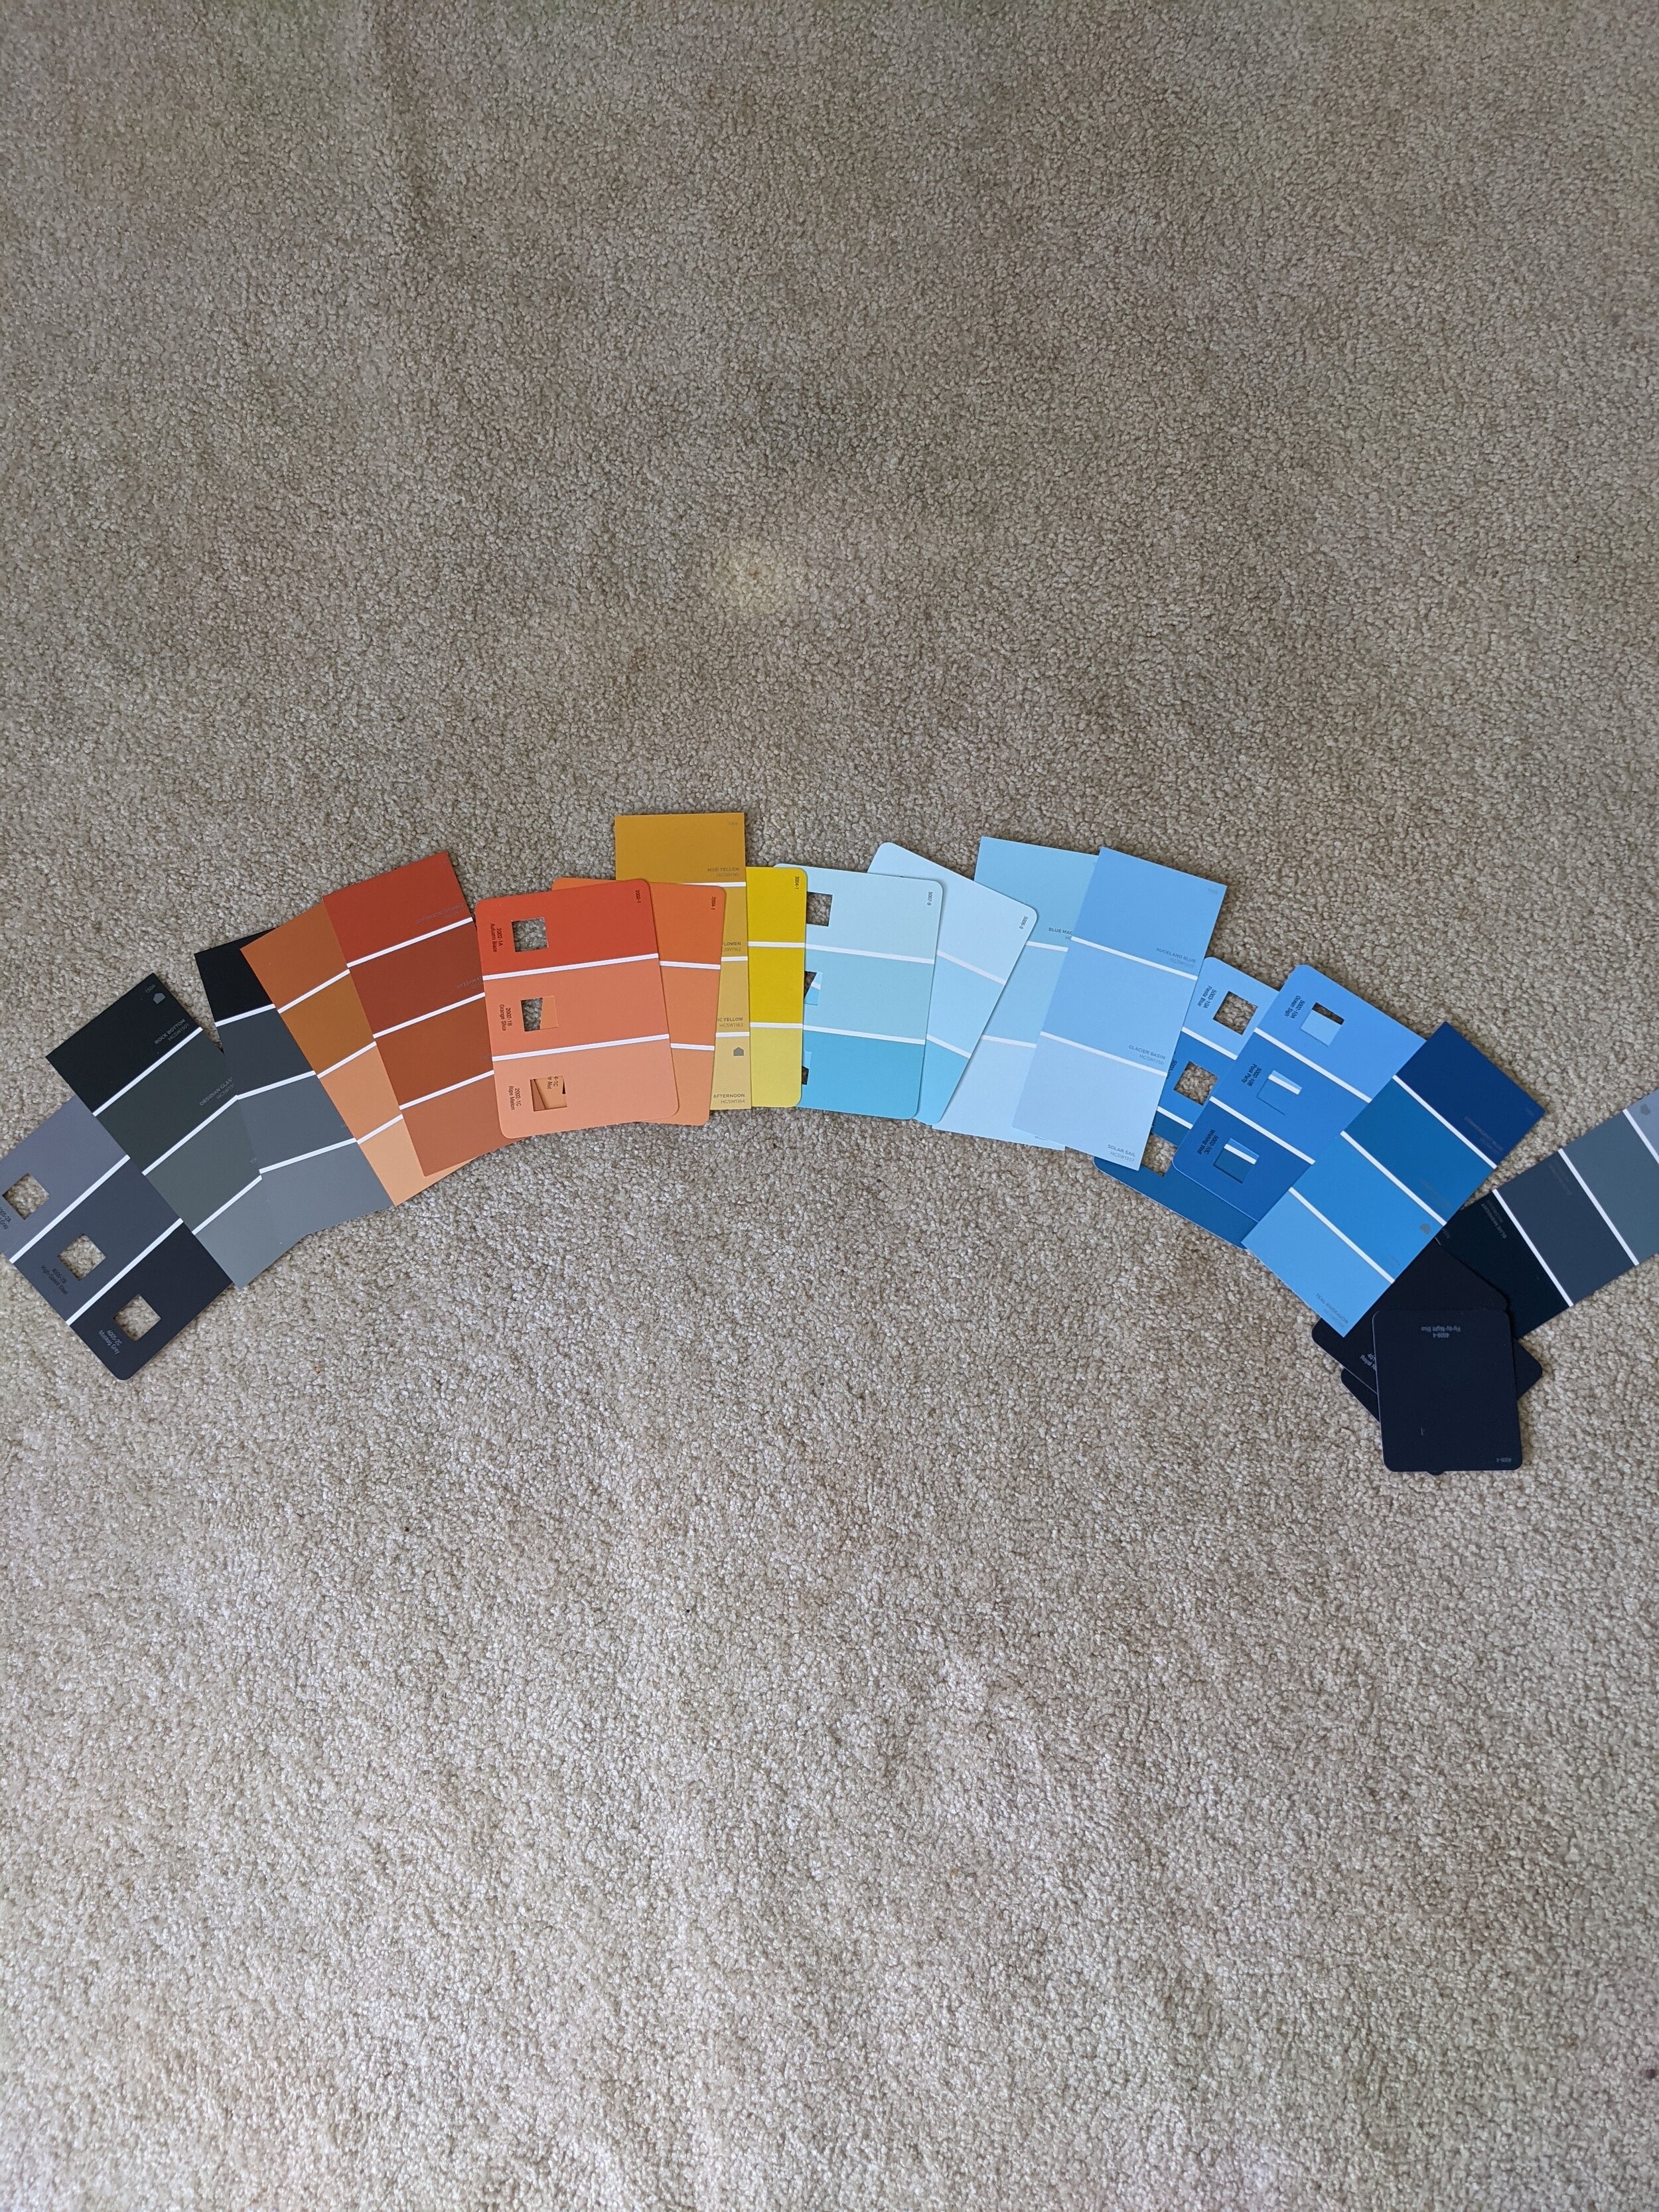
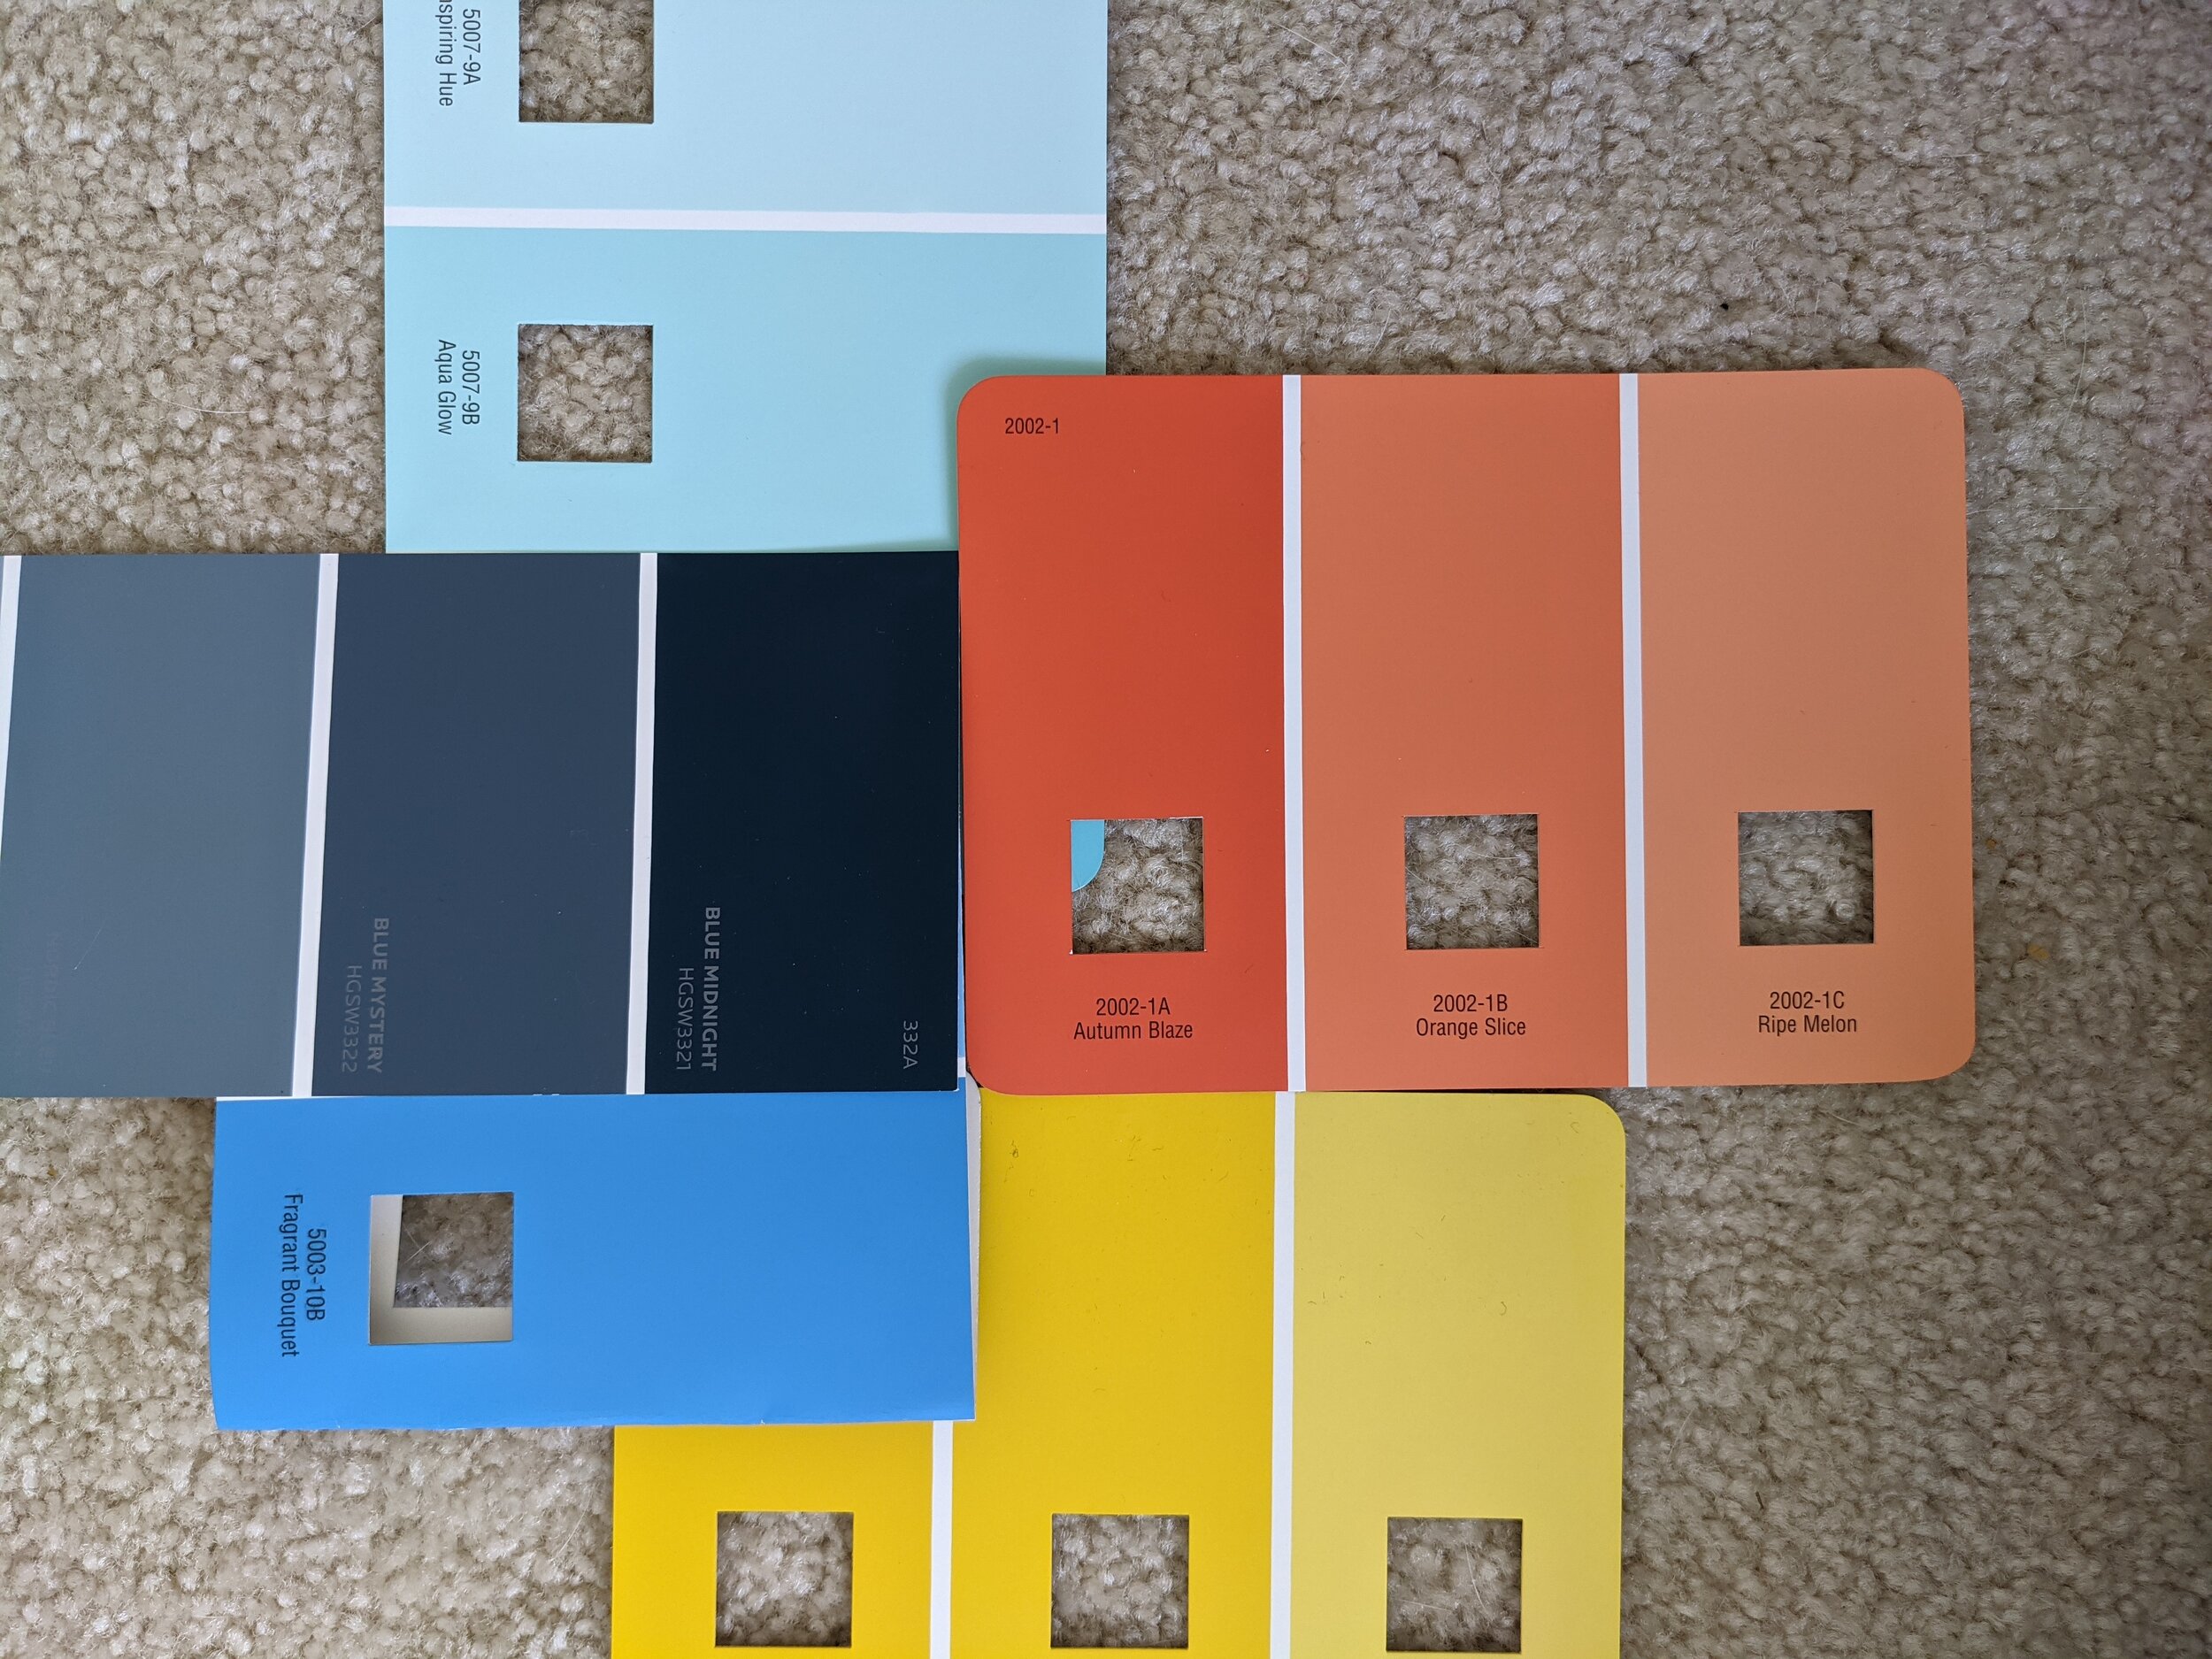
Once I felt like I had a good idea of the colors I wanted to use, I grabbed sample pots and slapped the colors on the wall.

This helped me see how they would look in real life in the space as well as to decide in what order to paint the stripes. I also tested out white since I wanted a fresh base color to really make my design pop.
The final colors I used were Blue Midnight and Pearly White (Sherwin Williams), and Aqua Glow, Fragrant Bouquet, Autumn Blaze, and Golden Spell (Valspar).
Planning the Design
Before I got started, I had to plan the overall design. I had a general idea for the design of the stripes I was painting on the walls, but before I went nuts throwing a bunch of colors all over the place, I sketched out several different options.
I ended up going with the design below because I like the way it flows, drawing your eye all the way from the floor up to the ceiling. Plus, the design on the wall below almost looks like a wave, kind of playing off the whole Hoola/hula/hammock/tropical thing Brad has going on.

Here’s a fun little time-lapse video of me painting the stripes on the wall above, just for kicks. In real-time the section painted in this video took at least an hour. Many true crime podcasts were listened to during the making of this office (I’m looking at you, Wine and Crime!)
Mood Board Time!
While I was sketching up different paint design options, I was also gathering resources for the actual furniture and decor. Here’s the final mood board I came up with:

Now let me break it down for you. There’s a method to my madness, people!
Brad had already purchased the desk. And while he was willing to return it, I was able to use it as a jumping-off point. It’s white, so the color obviously wasn’t an issue. And he mentioned that he bought that type of desk specifically for the additional storage it added, so I didn’t want to take that away.
So now I had an orange hammock and a white desk… obviously, I had to add some natural tones, right? Right!
The Perfect Desk Chair
I found these swanky chairs first. I was looking for something comfortable, but also unique, and I think I hit the jackpot! I love the faux wood finish on the sides, back, and arms of the chairs. And they look even better in person!

The chairs in the mood board above were just too tricky to crop out without making the desk look weird, but they weren’t part of the final design. Stay with me, folks!
More Cowbell! Storage!
Since I knew Brad already needed more storage from the discussion about his desk, I figured a bookshelf would serve him well. I found this etagere bookshelf early on in my search and couldn’t stop thinking about it. So in the design it went!
It’s the whole package for a couple of reasons:
It fits perfectly between the window and door (see the perfection below)
The etagere style doesn’t block the design on the wall behind it (see lack of design blockage below)
The style also doesn’t make the entrance into the office feel like a hallway (see open concept below)
The white frame and wood shelves tie the white desk and faux wood chairs together (again, see below)
It’s tall! The ceilings in this office are close to 12 ft so I wanted something that would bring your eye up, and this bookshelf does just that (see height below)

The Lightbulb Moment
This office doesn’t necessarily need lamps, but Brad had one in here before, so I figured, why not give the man what he wants? I found several different lamps with tropical-inspired shades that I was drawn to, but I knew I wanted to incorporate some natural woven textures elsewhere and didn’t want to go overboard. So when I found these babies I knew I had to get them.

And I know I said this about the chairs, but these, too, were even better in person!
(Maybe this post should be called, “Don’t Diss Faux Wood Because It’s Pretty Convincing”? It’s a working title…)
But seriously, the faux wood actually looks really nice, and the subtle change in wood tones near the base is a beautiful touch. Plus, these suckers are surprisingly heavy (aka: sturdy)!
Taking a Turn for the Tropical
And this is where things got even more fun. Now I was ready to start incorporating my natural textures and woven materials to really drive home the tropical theme we were going for.
I was admittedly a little hesitant at first to include woven blinds AND a woven rug, but once I saw them on the mood board I knew it was the right call. I grabbed this bamboo/seagrass area rug, making sure that it had a really flat weave so the office chairs could still roll. Then I snagged some shades for the windows in a similar tone.
Now Brad can close the shades and take his post-lunch naps in peace.
I also grabbed some bamboo boxes to add a little somethin’ somethin’ and help hide the typical office stuff that tends to accumulate.

Details, Details…
Once all the big stuff was taken care of, I was able to focus on filling in the gaps with accessories.
I hung funky shelves above the desks and added some of the silly signs that Brad already had.
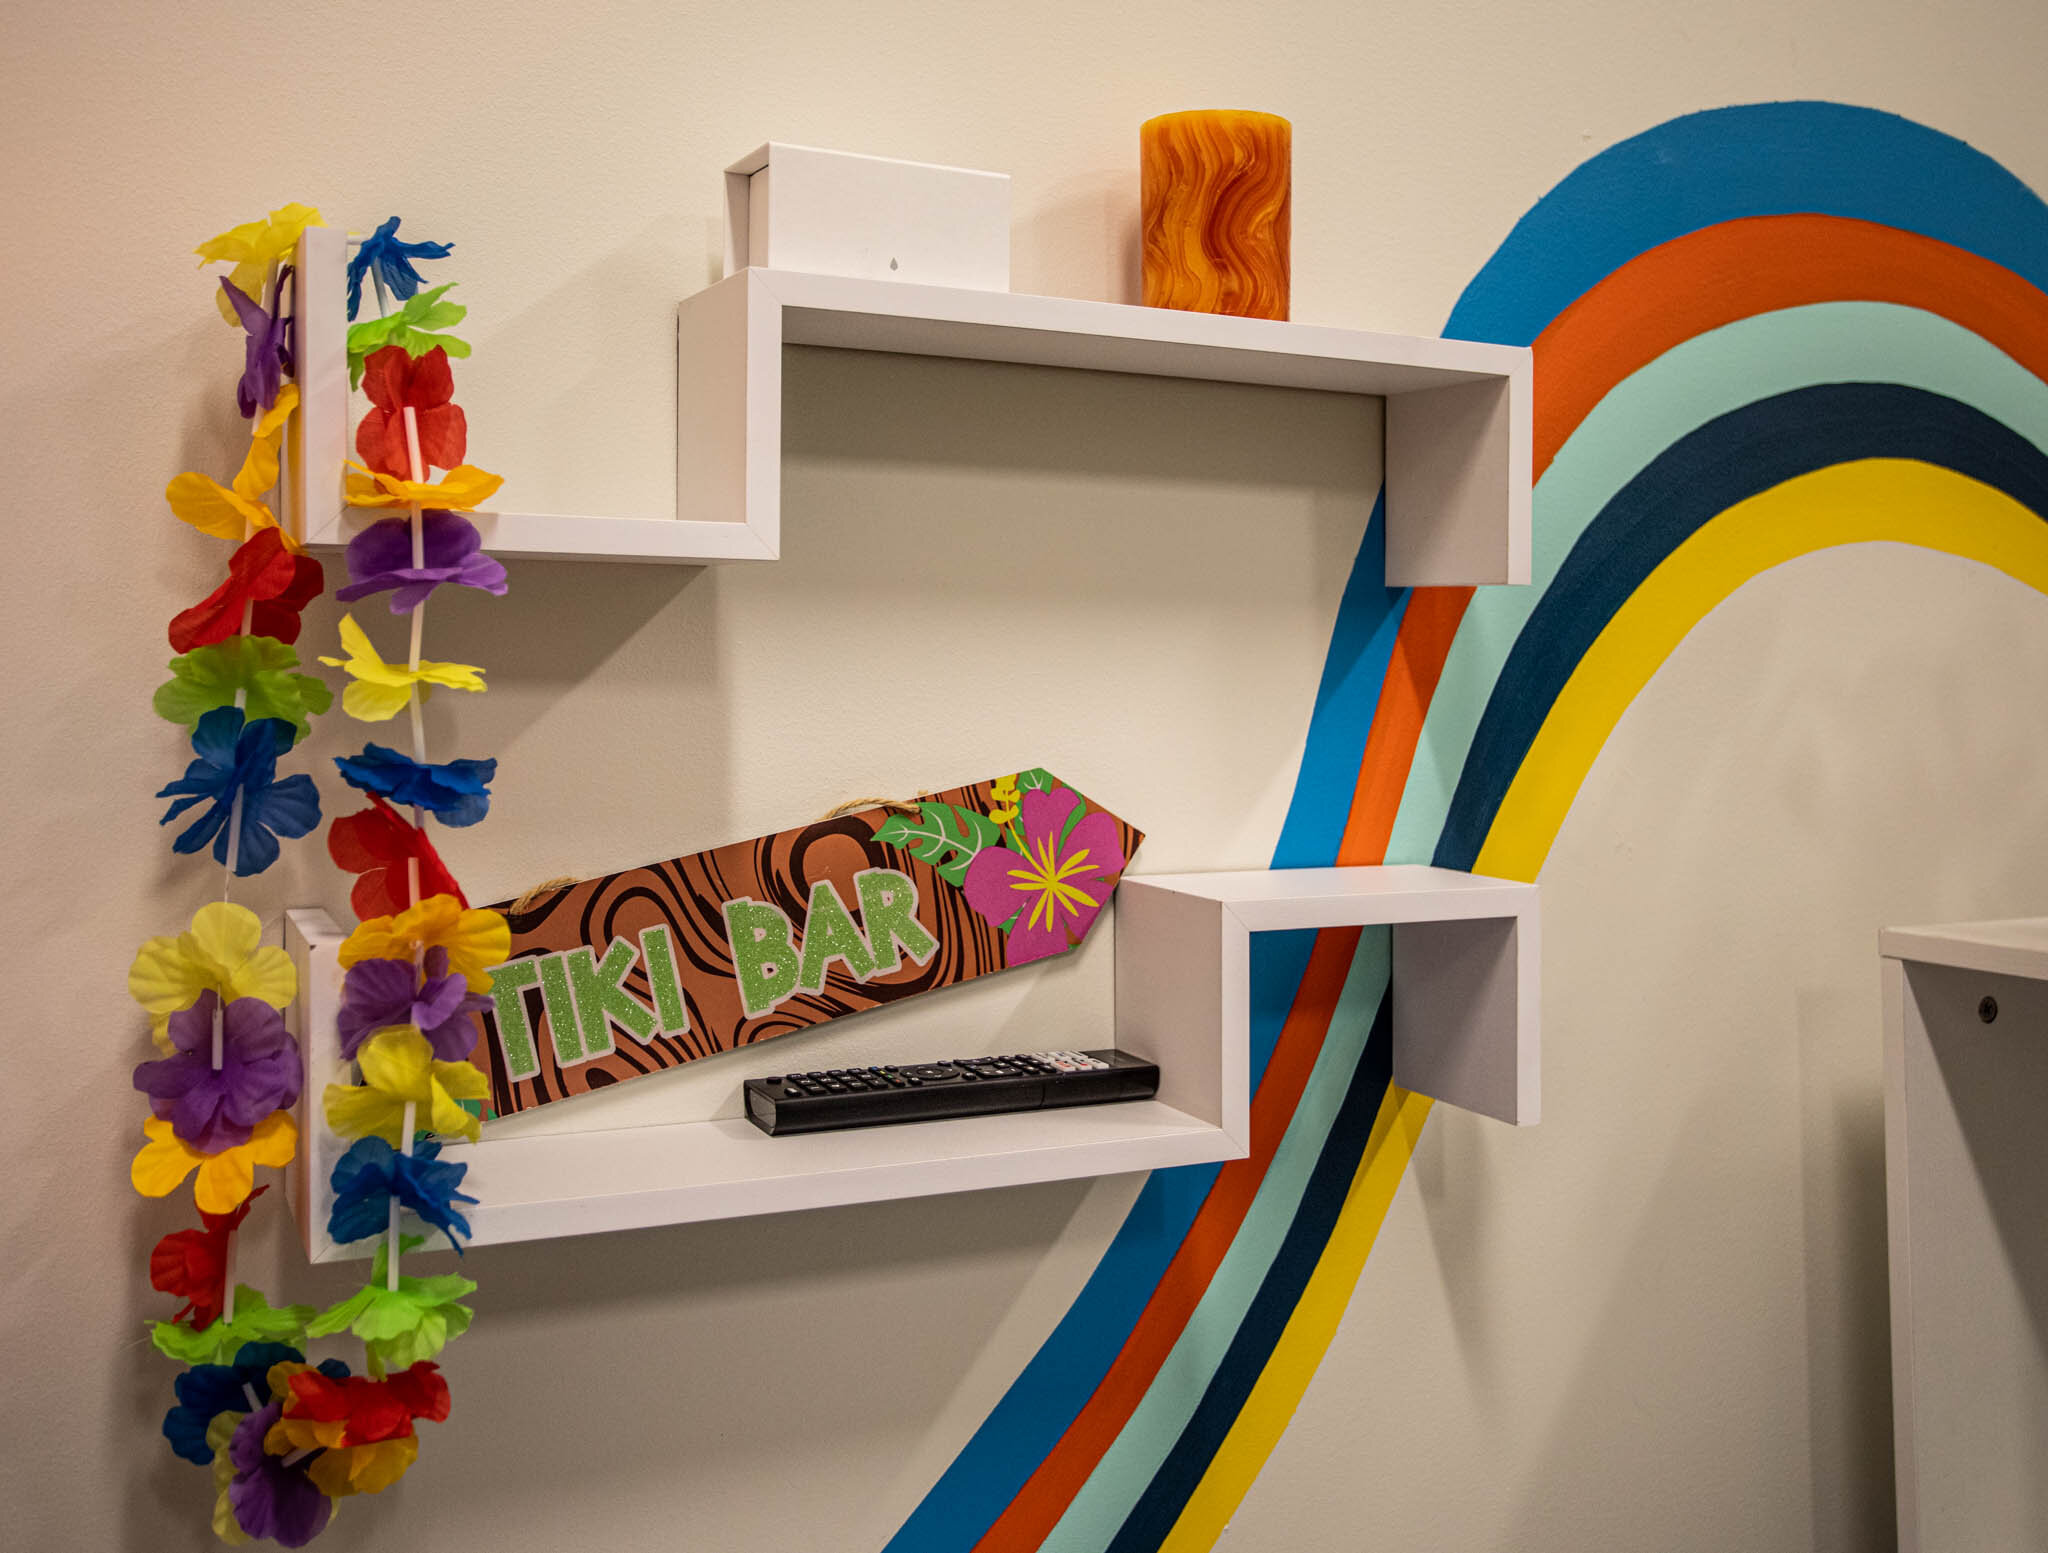
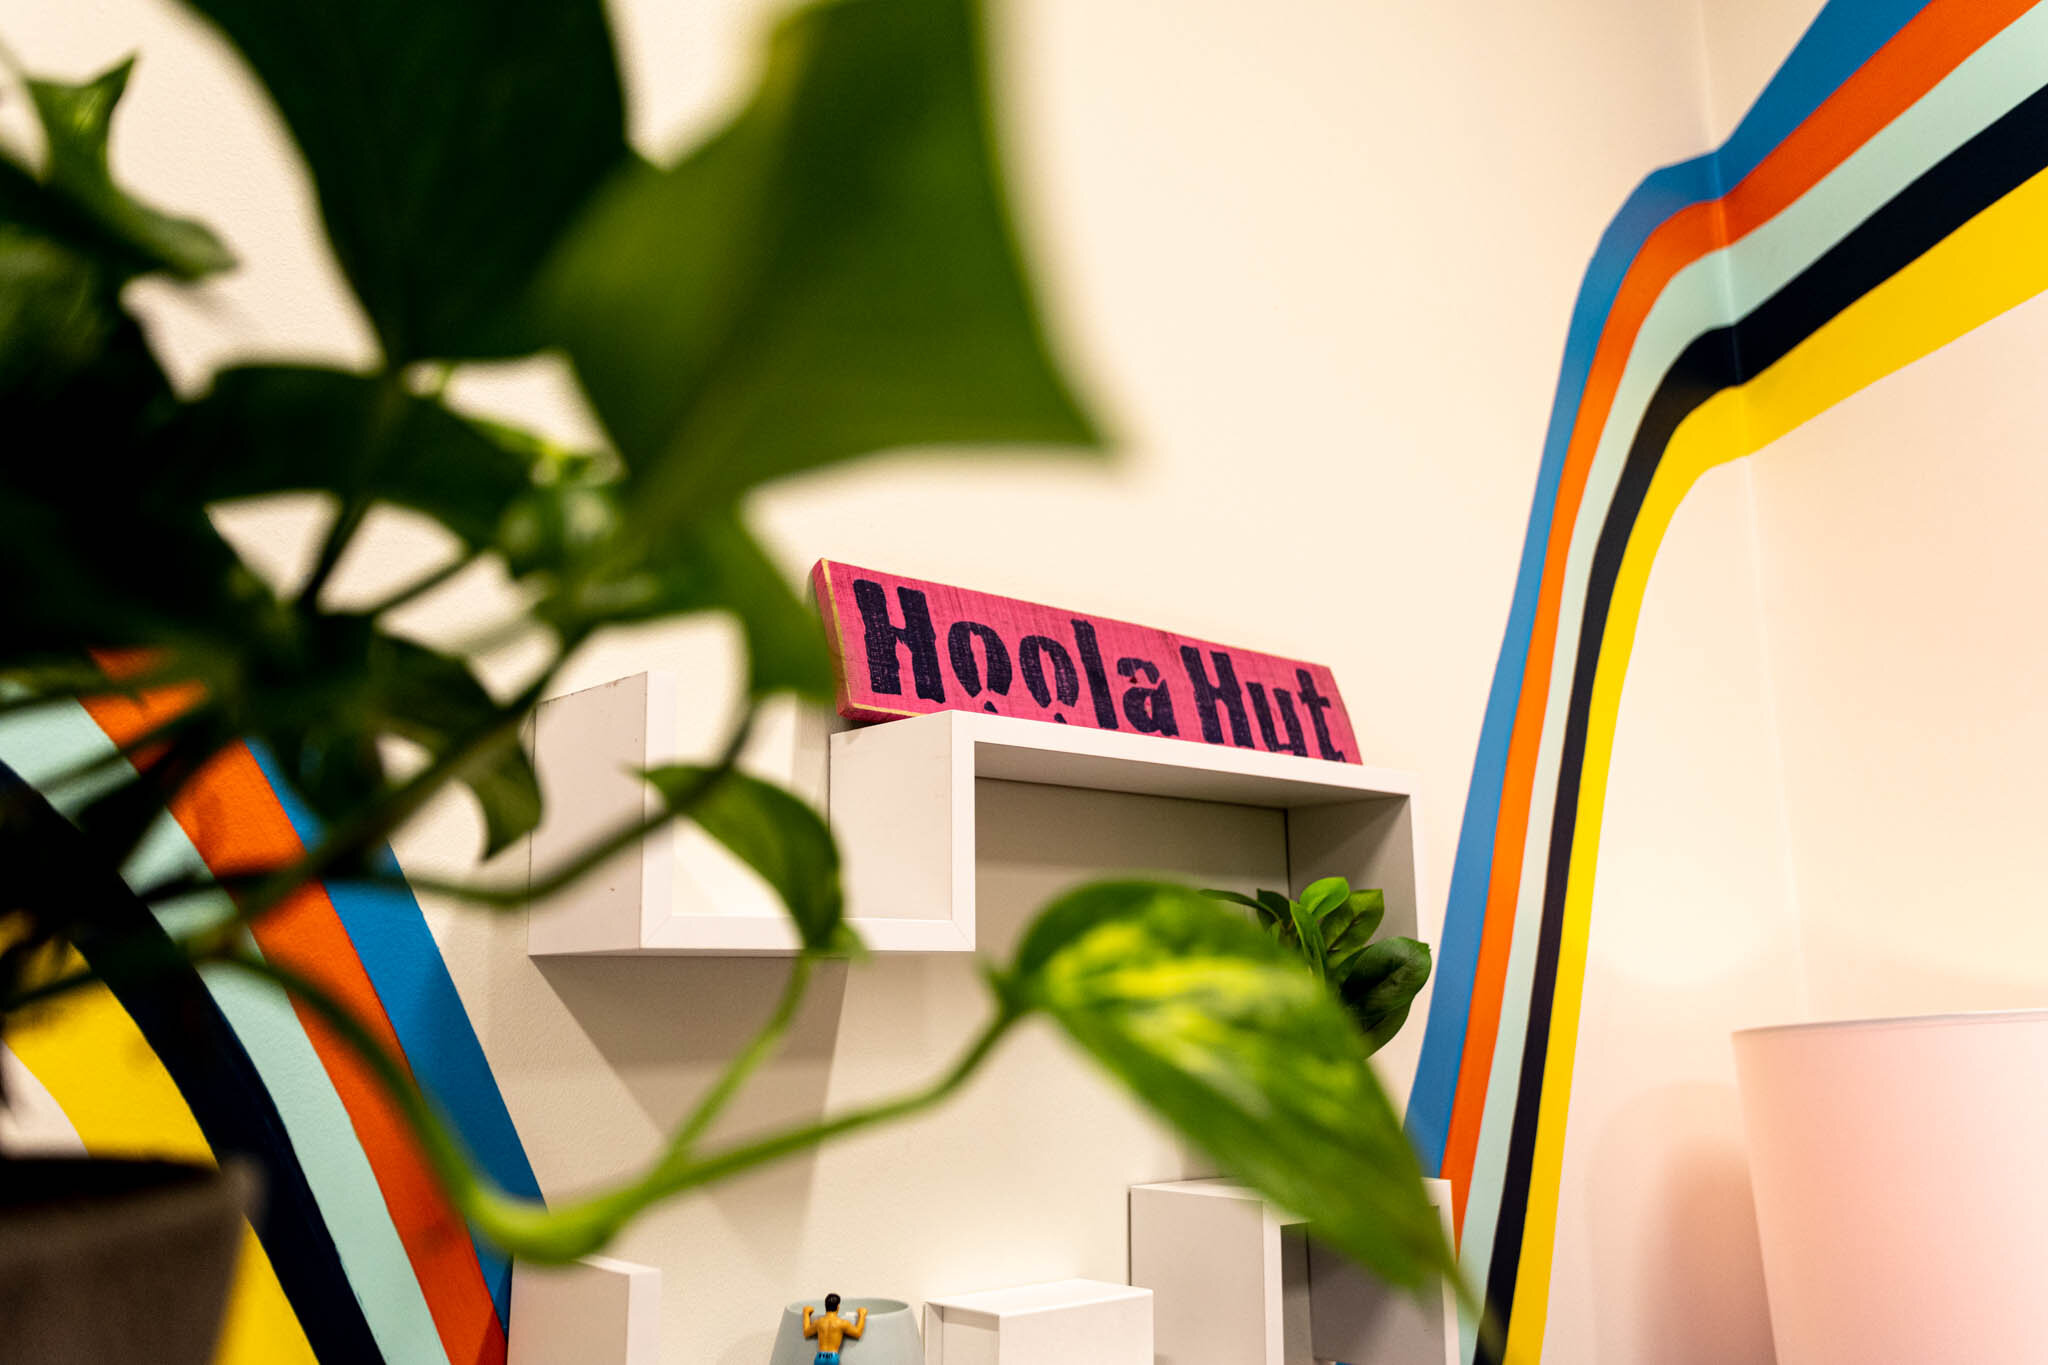
Then came the plants! (Would you expect anything less?) I mean really, how tropical would this office feel without any greenery?
But the plants definitely took a little bit of thought. Since this office doesn’t get a ton of natural light, I made sure I went with some low-light-loving plants.
I plopped a pothos on top of the desk in a pot with a faux stone finish. Then I put four snake plants of two different varieties in a couple of big stone floor planters in front of one of the windows, which may or may not have made a really big mess but they were too heavy to move so I left it there (don’t look behind them, Brad).

Final Thoughts
And with the finishing touches added, this project was complete! What once was a lifeless, gray office filled with a hodgepodge of furniture is now a mood.
My goal with this office was to bring life to it, to make it energetic, and to somehow make that hammock make sense. I feel like I accomplished just that. And although hand-painting all those stripes took a whole bunch of time, I’d absolutely do it again. Someone hire me to paint a mural on their wall!

Related Room Redesign Posts
Energetic Office Redesign
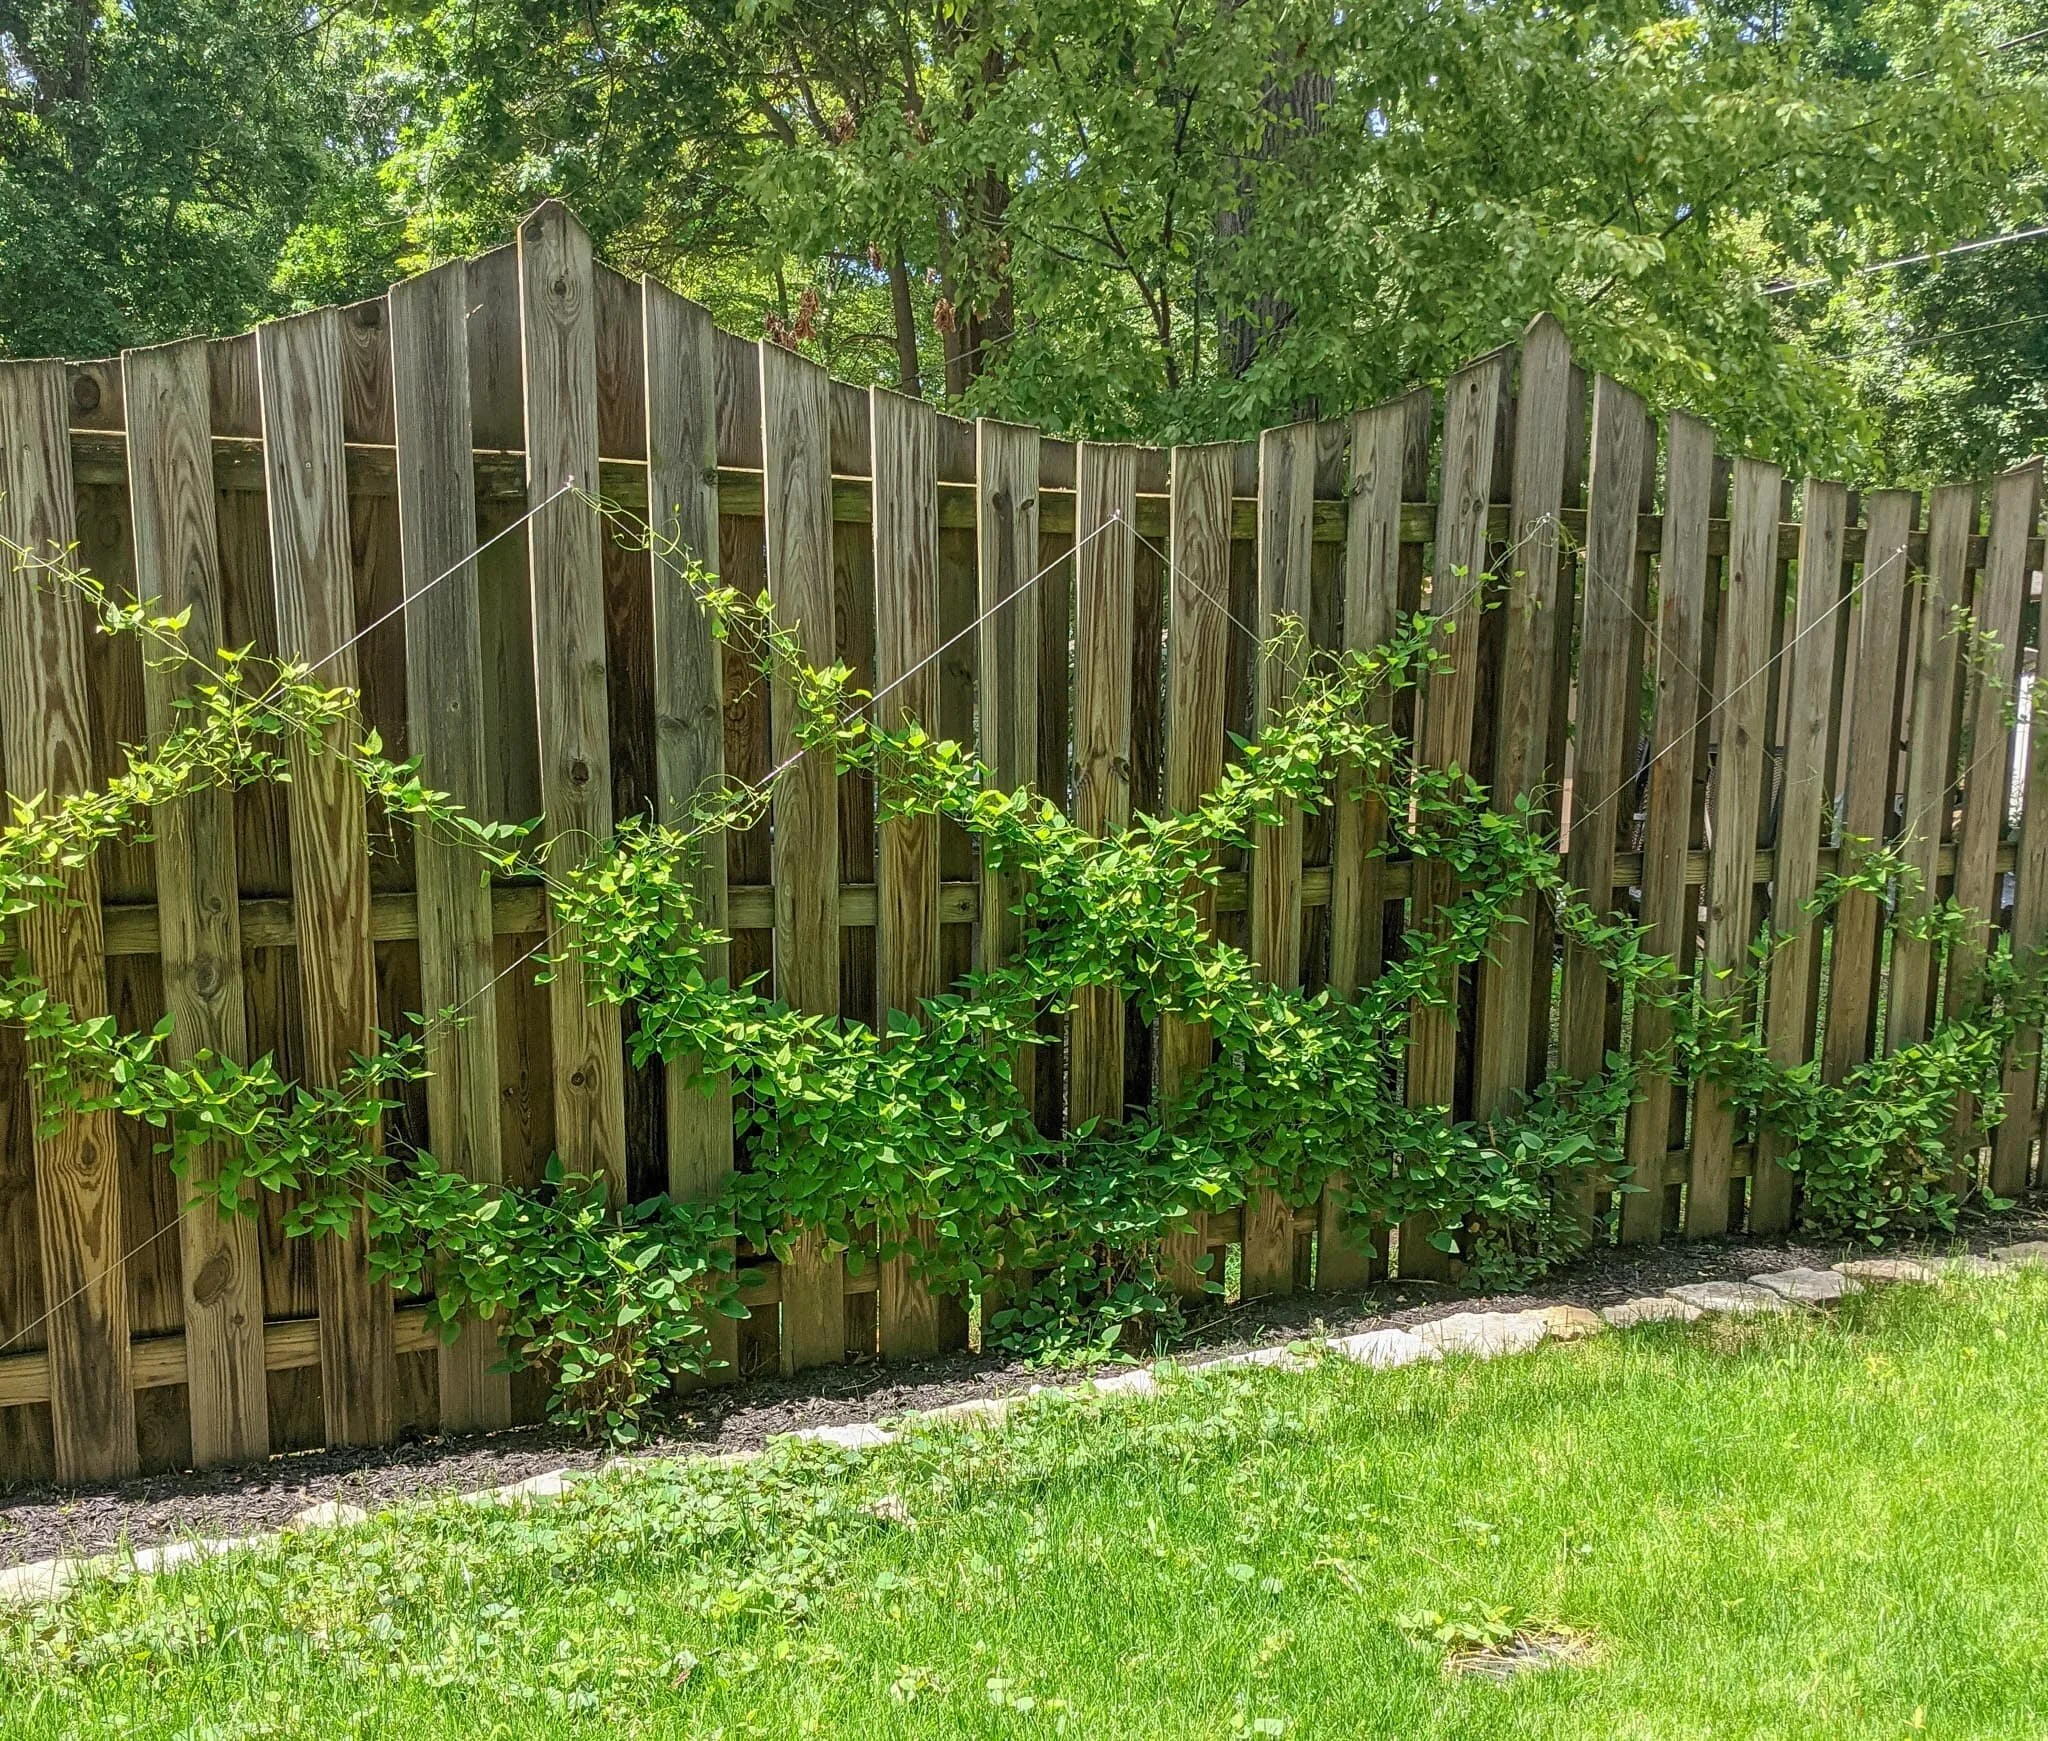
Build Your Own Trellis
Have a fence that’s just kind of “blah”? Liven things up with a trellis and some climbing vines! In this post, you’ll learn how to build your own wire trellis and create a beautiful backdrop for your yard.
Easy Trellis Tutorial
Have a fence that’s just kind of “blah”? Liven things up with a trellis and some climbing vines! In this post, you’ll learn how to build your own wire trellis and create a beautiful backdrop for your yard.

I love that our house has a privacy fence, both for wrangling the kids and the dog and for, ya know, privacy. What I don’t love is that there’s one pretty much directly outside our living room windows.

While I’d prefer looking at the privacy fence rather than looking right at the neighbor’s house, it’s not exactly the prettiest view.

Last summer was our first year in this house. And while I envisioned building a trellis with climbing vines on this fence, we were already deep into several other projects (here’s lookin’ at you, master suite renovation) and a lot of the exterior updates fell by the wayside. But this year I made it a priority and I finally have a trellis to pretty up this view! And some clematis vines who have happily made it their home. Here’s how I did it.
As an Amazon Associate, I earn from qualifying purchases. This post may contain affiliate links, meaning I receive commissions for purchases made through those links, at no cost to you.
Materials
- 1/16th Galvanized Steel Wire Rope (I used 100 ft)
- 1/16th Aluminium Ferrules (My design only needed 4)
- Wire Cutters
- Wire Crimping Tool (You can use pliers too, but I didn’t have quite enough force in my little lady hands to crimp the ferrules by myself using pliers. The hubs had to step in for that part.)
- 2” Screw Eyes (I used 18)
Planning
You can most definitely jump into this project without any preparation, but I’m a planner through and through. Before I got started, I mocked up my design on the old computer. I knew I wanted a diamond pattern, but because of the style of our fence, I didn’t have a ton of options for the design. Here’s what I came up with:

Build Your Trellis!
Screw in Your Screw Eyes
Once I had my design nailed down, it was just a matter of putting it all together. I started by screwing in my screw eyes at specific intervals, indicated by the coral-colored dots below.

My design extends past the edge of the picture, but you get the gist.
String the First Ferrule and Screw Eye
Next, you’ll attach the beginning of your wire to the first screw eye using a ferrule, which is these little things.

To do this, you’ll thread the wire through one side of a ferrule. I didn’t take a picture of this part of the process while I was doing it, so I recreated it to snap some photos for you lovely folks.

Then thread the wire through the screw eye.
(The example below isn’t a screw eye, but it has the same looped piece. You get the idea.)

Next, string the wire through the other side of the ferrule.

Finally, you’ll crimp the ferrule so it holds the wire tight.

Done!

Thread the Wire Through the Screw Eyes
Once your first screw eye is threaded and the wire is secured tight, you can thread your wire through the rest of the screw eyes. I did this using two 50ft lengths of wire partially because I ran out of screw eyes and had to get more, but the shorter length of wire also helped keep it from tangling.
Once you reach the end of the wire, you’ll follow the same process of attaching a ferrule. It helps to have an assistant here so one of you can make sure the wire is pulled taut while the other attaches the ferrule.

Conclusion
And it’s as easy as that! Now you have a trellis and you can plant your plants!
I cleared out a small area in front of my fence to plant four cute little clematis vines (I think they’re sweet autumn clematis) in early May and just a couple of months later they’ve grown in so well!

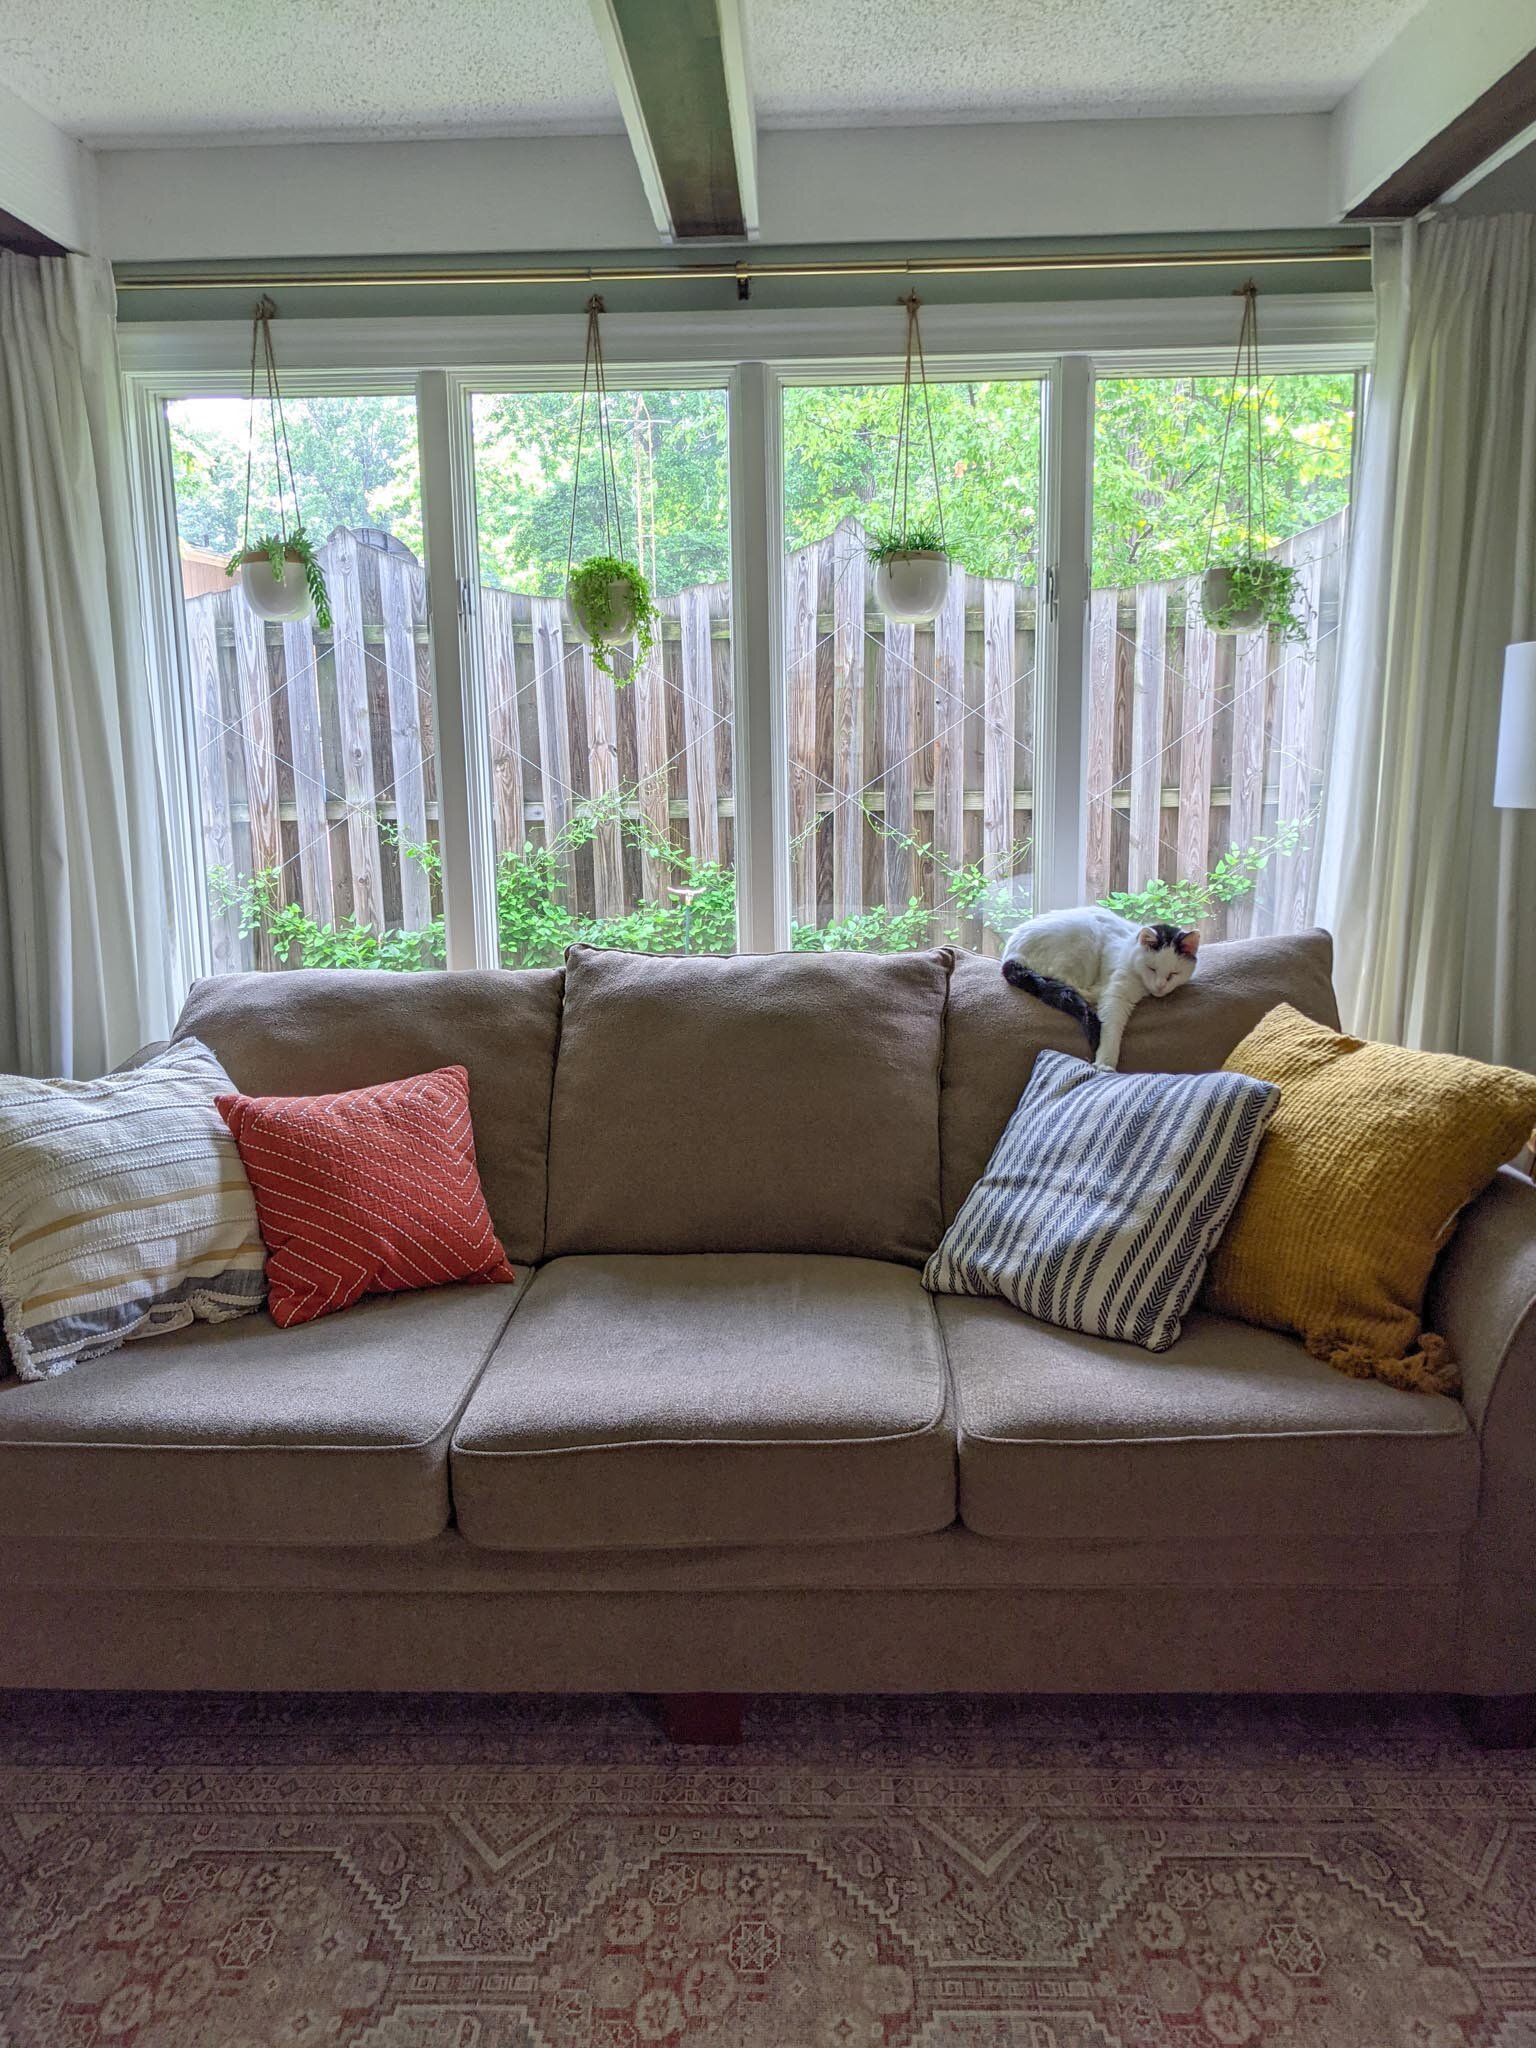
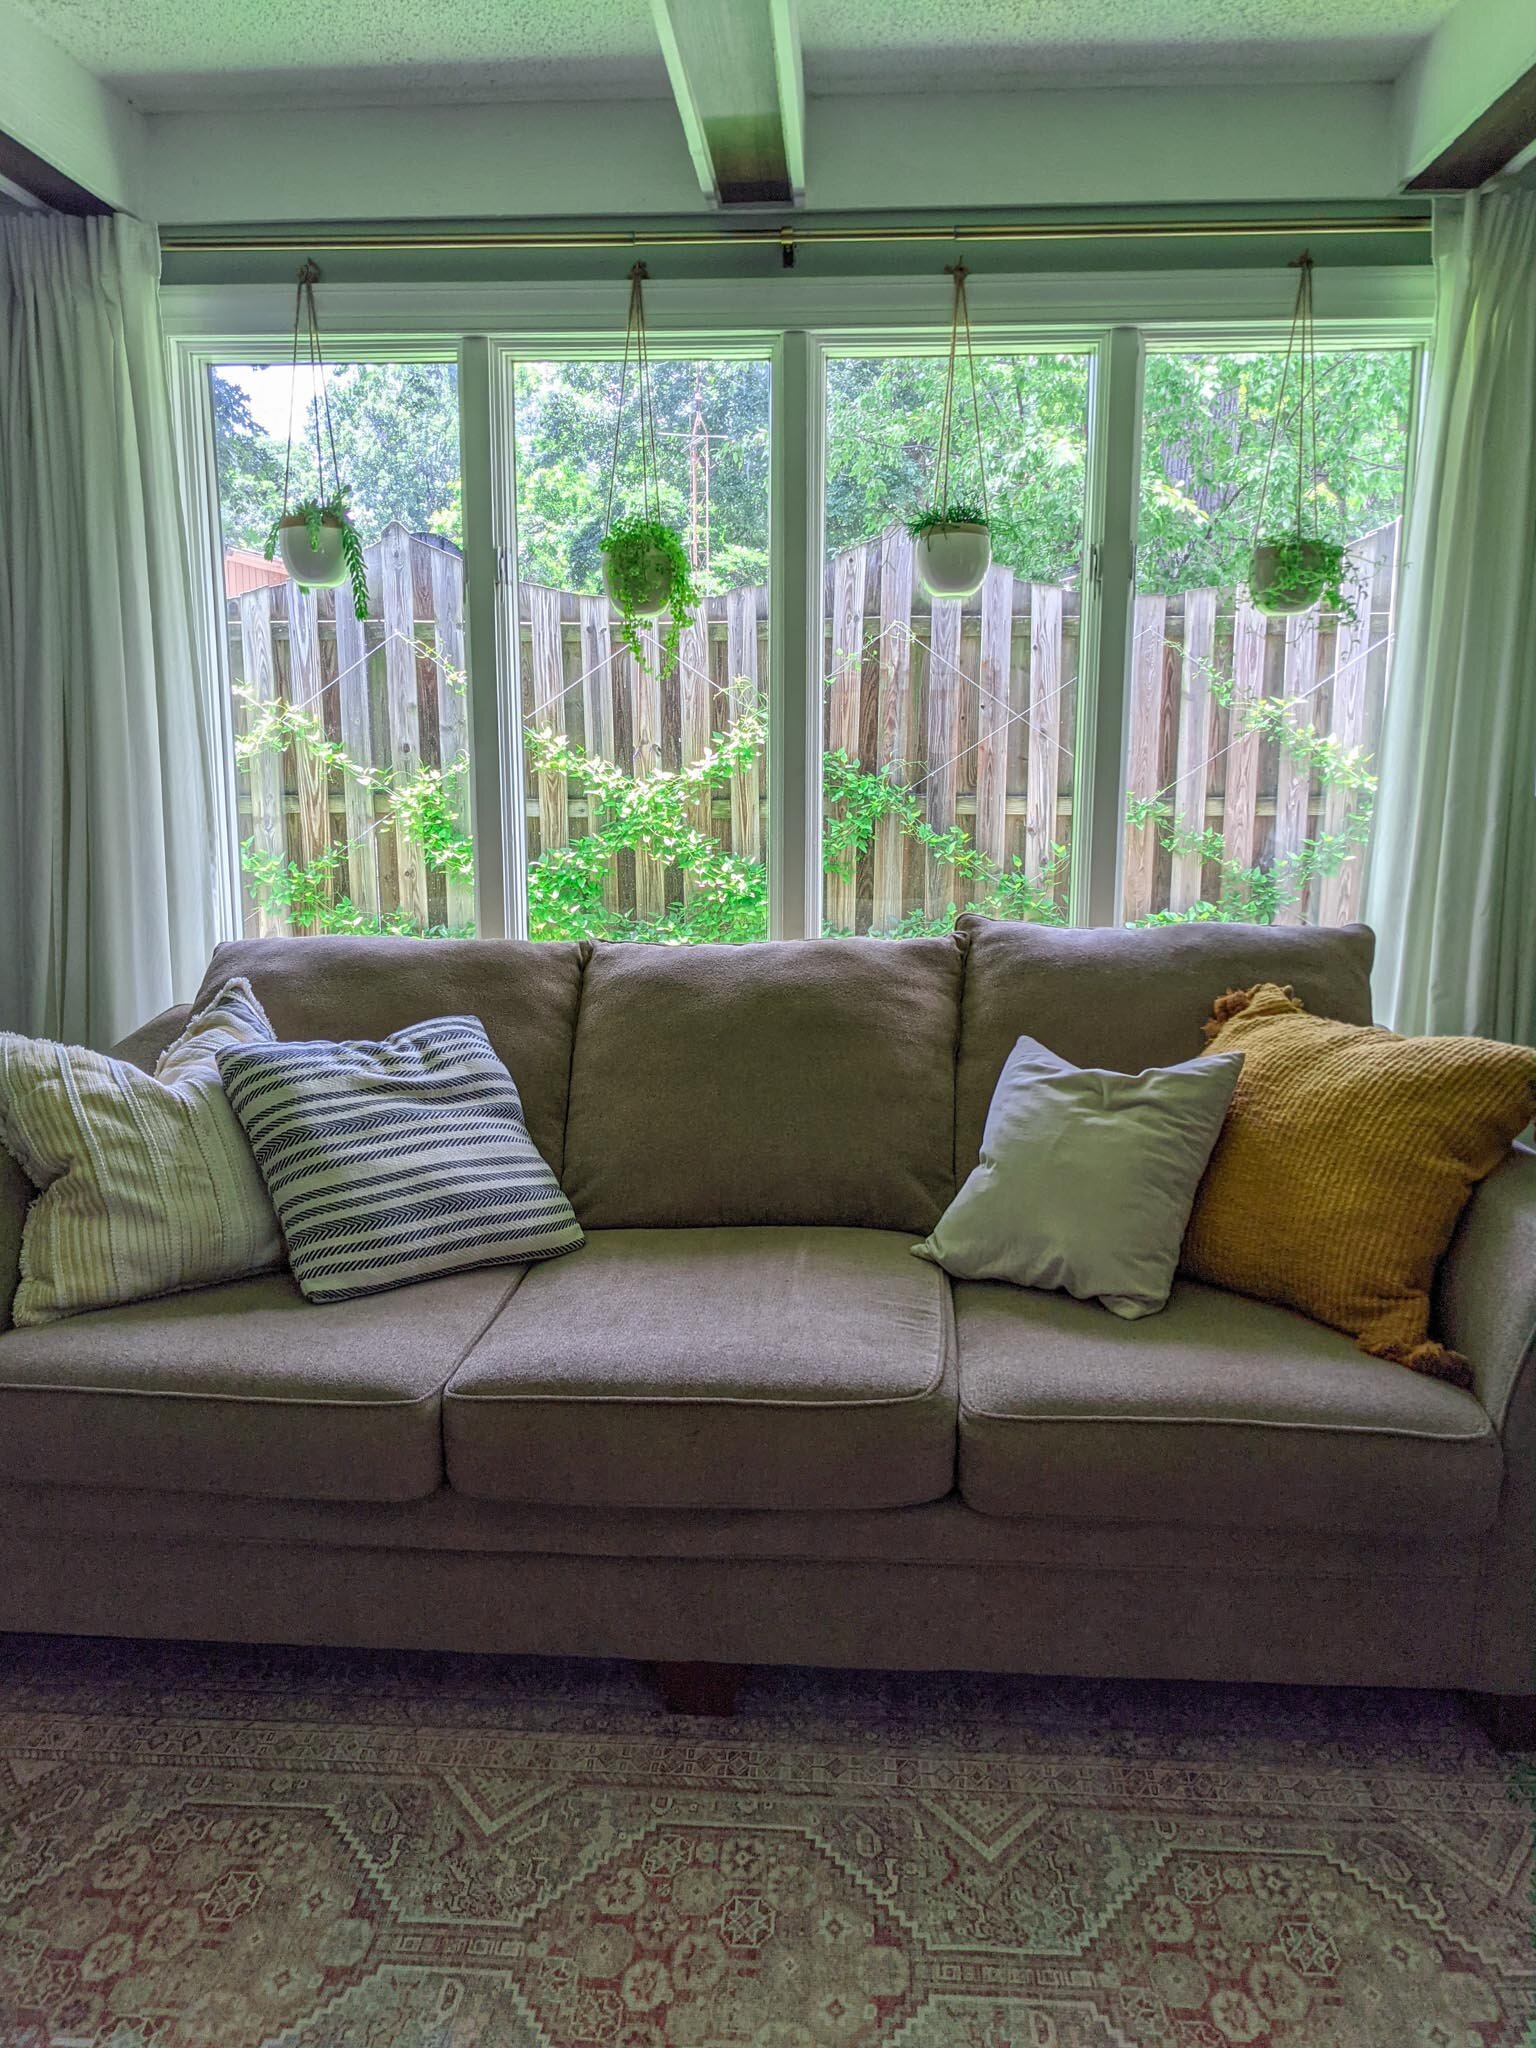
Every day I walk out to visit the vines and train them to climb up the trellis while whispering sweet nothings. I’m already loving the view 1000% more than I did last summer. Once the vines bloom, this fence should be filled with beautiful green leaves and little white flowers, and I.CAN’T.WAIT.
For more plant-inspired posts, check out these articles:

DIY Wire Trellis
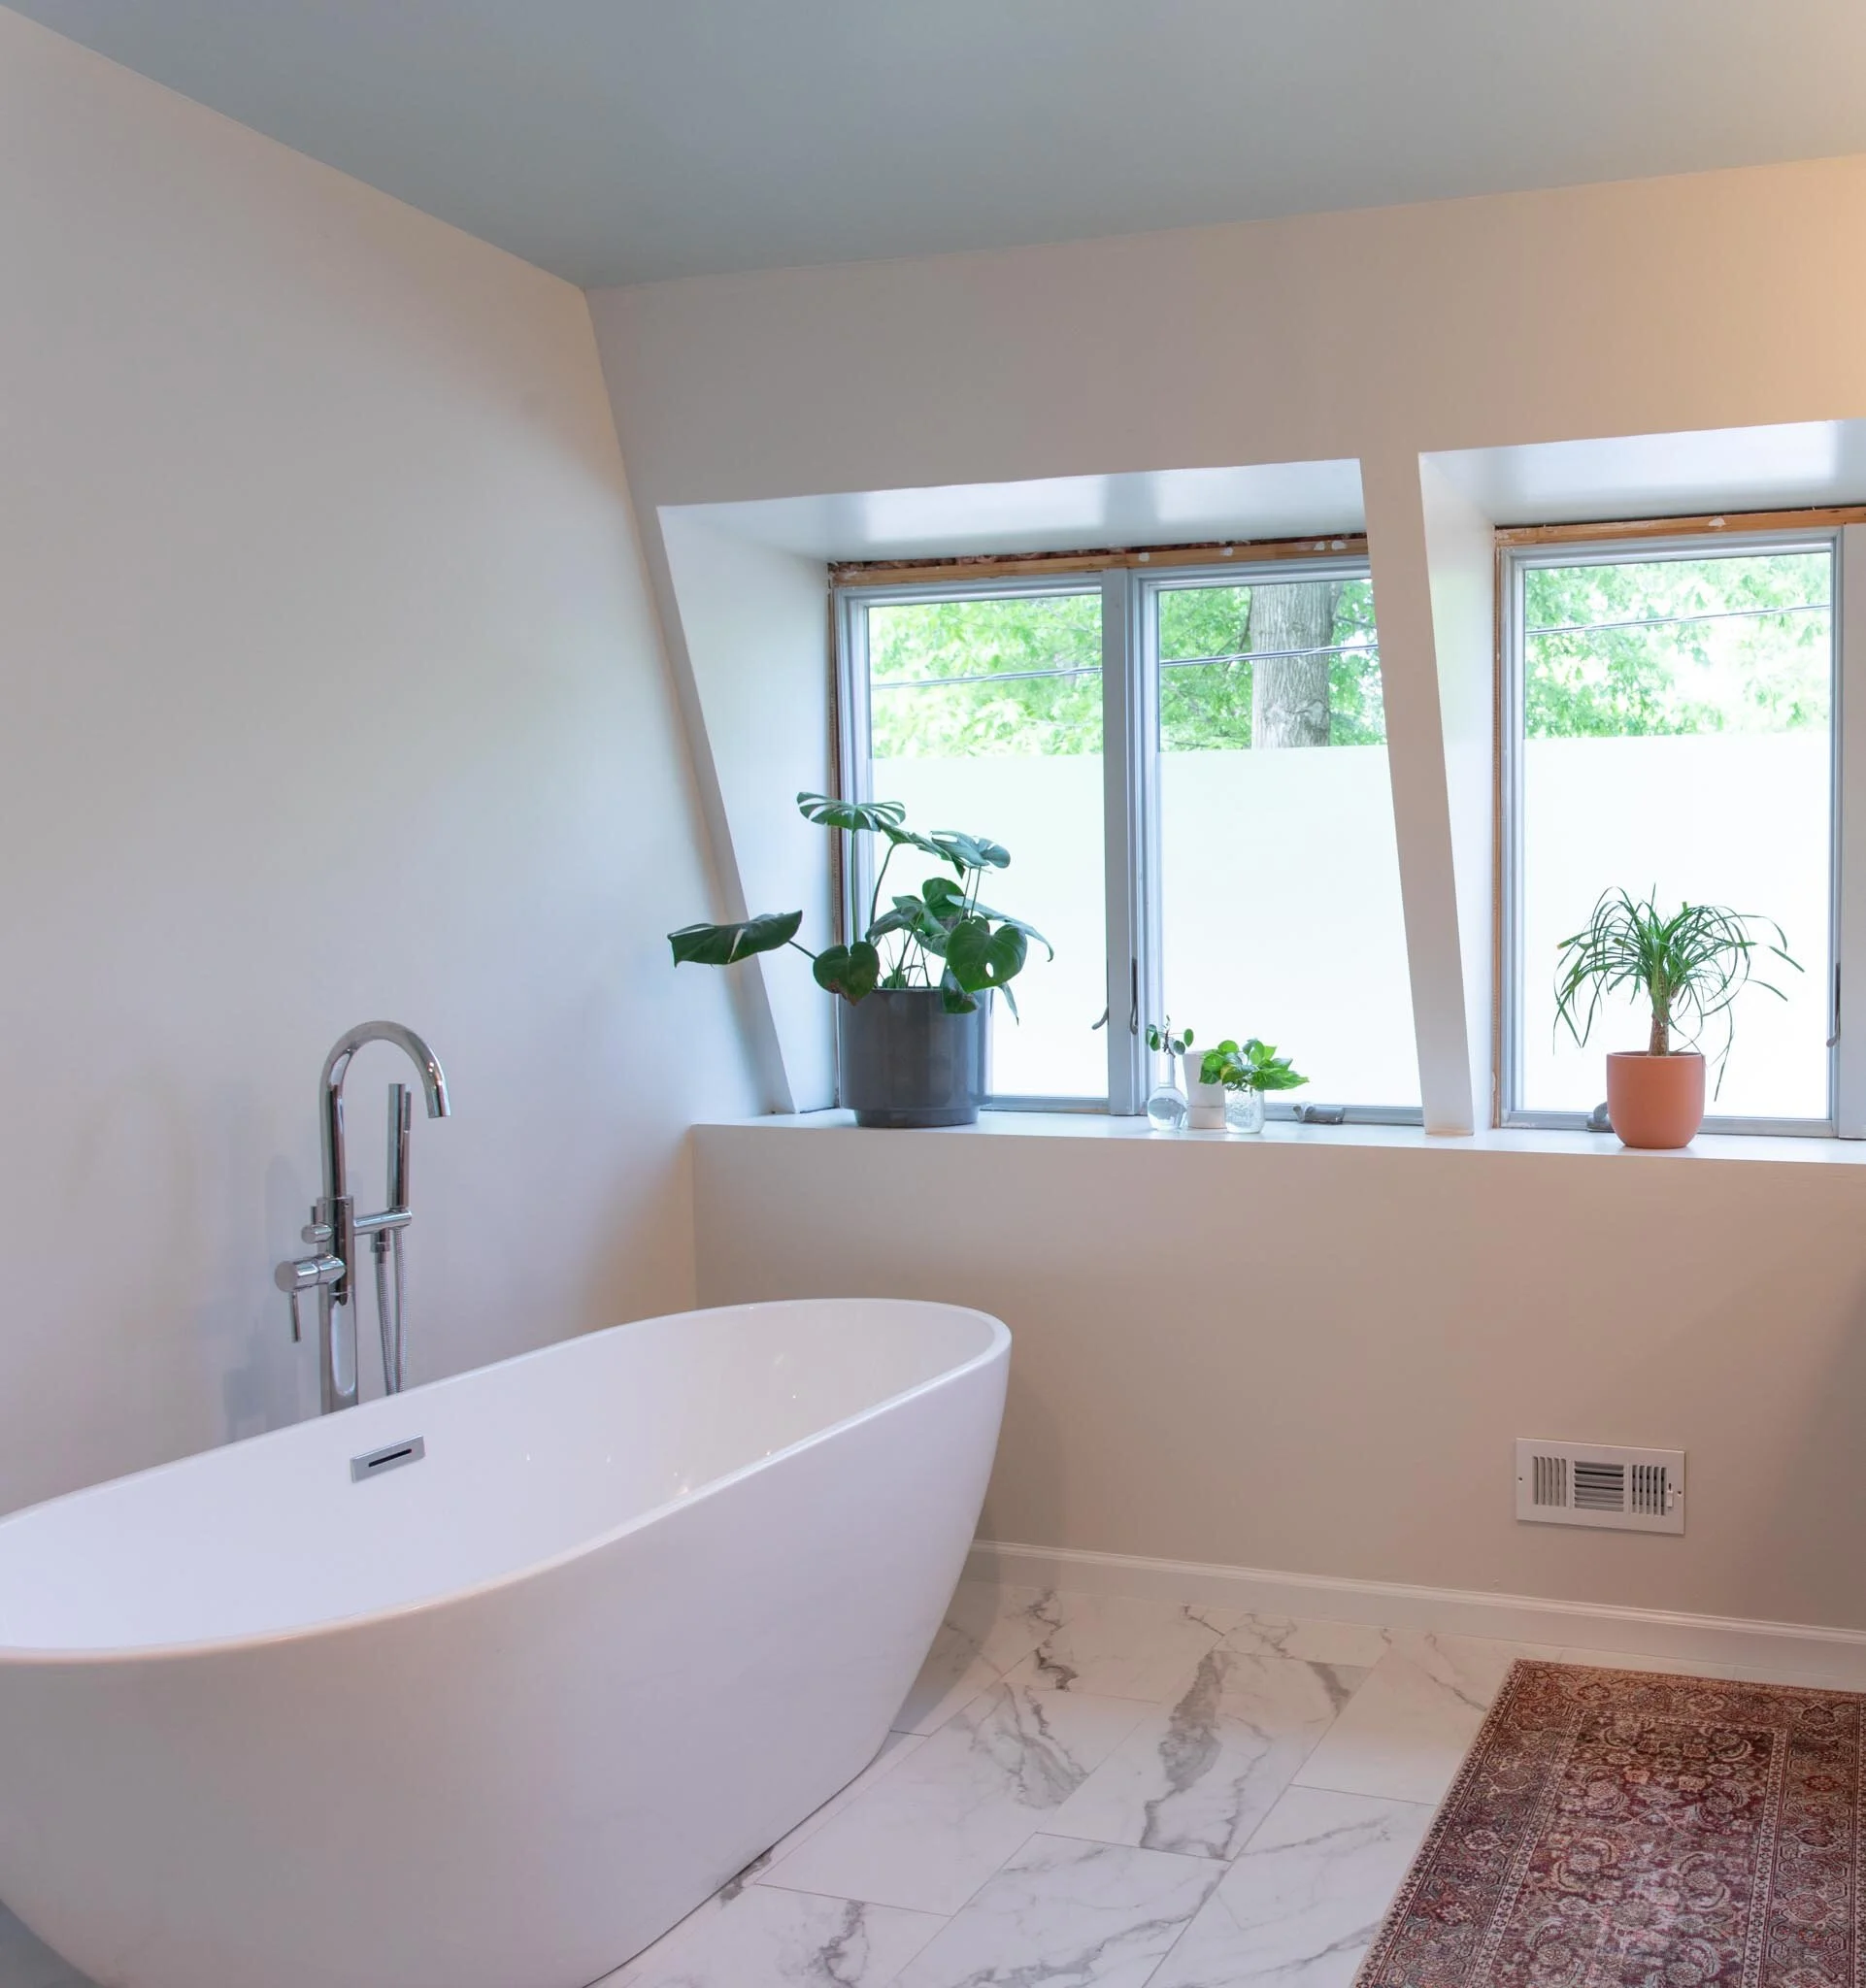
Easiest DIY - How to Frost Windows
Frosting your windows is the easiest DIY ever! Way easier than I anticipated, and inexpensive too. So in this post, you’ll learn the step-by-step process to frost your windows so you can do it too!
How to Add Privacy to Windows Using Vinyl
So it’s official. We’ve been using our newly renovated master bathroom for about a month now and it.is.amazing! While I definitely owe you all a bathroom reveal post, that’ll have to wait. But what couldn’t wait in order for us to start using the bathroom was frosting the windows.
And let me tell you - frosting your windows is the easiest DIY ever!
Way easier than I anticipated, and inexpensive too! So in today's post, you’ll learn the step-by-step process to frost your windows so you can do it too!

We have four large windows across one entire wall of our bathroom.
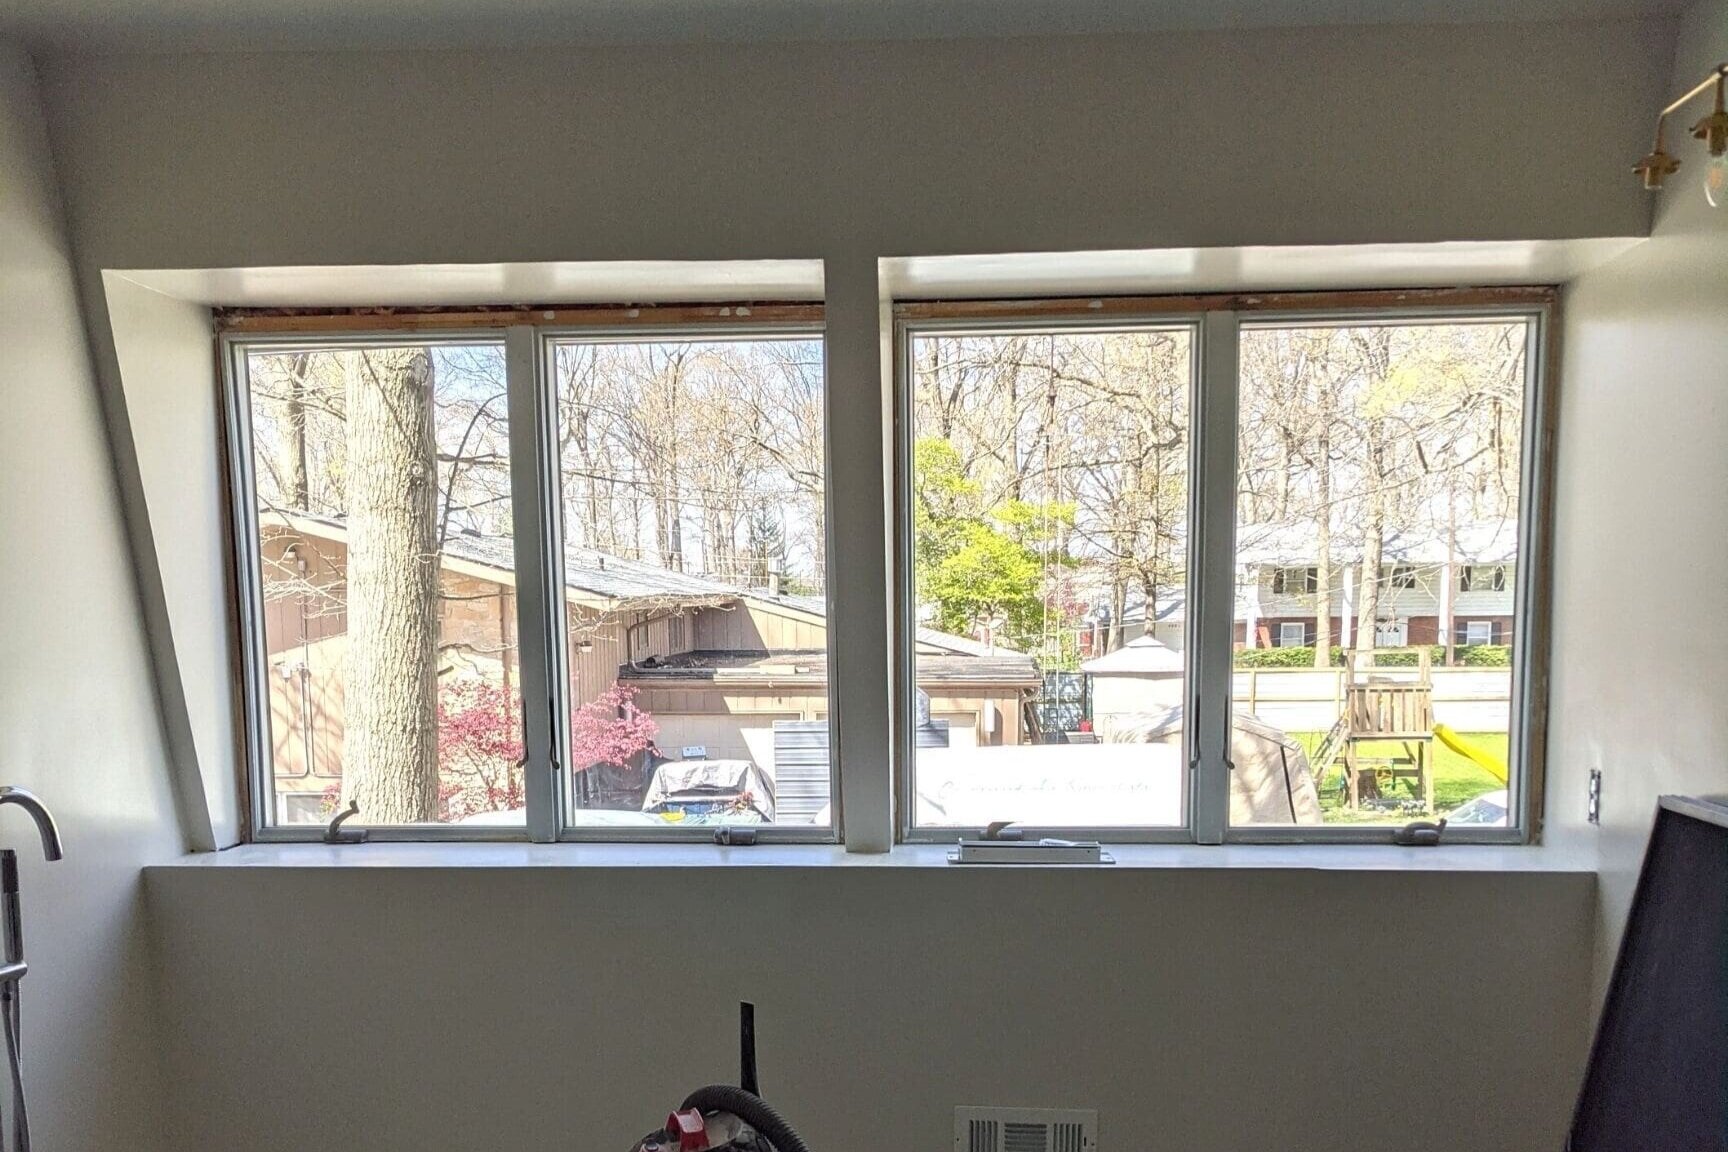
I love the natural light they bring in, but obviously don't love the idea of everyone and their mama being able to see directly into my bathroom. So I took a little bit of time and knocked out this shockingly quick and easy DIY.
When I shared the mood board for the master bathroom, I included this inspiration picture.
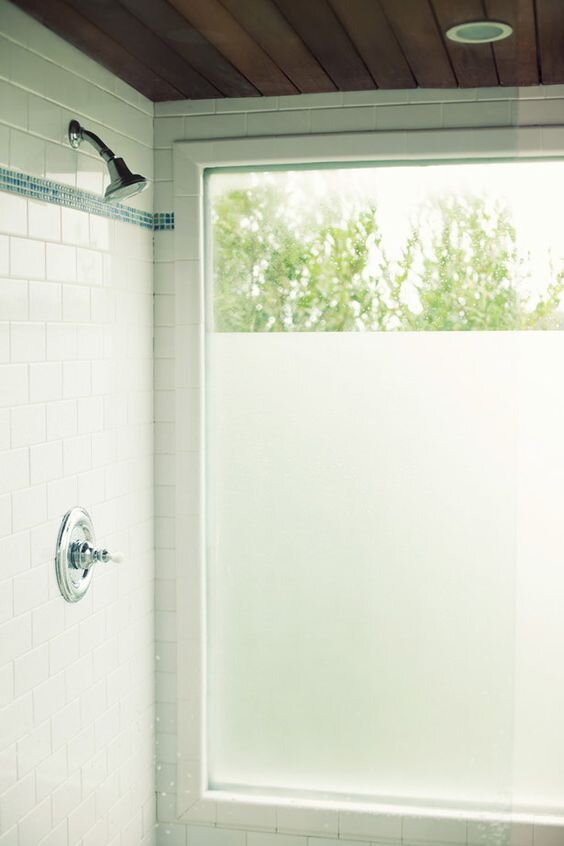
I love how these windows are frosted for privacy, but still leave some of the window exposed to the outside. I knew I wanted to try the same effect - I just had to figure out the best way to go about it.
As an Amazon Associate, I earn from qualifying purchases. This post may contain affiliate links, meaning I receive commissions for purchases made through those links, at no cost to you.

Options for Frosting Windows
During my research on exactly how to go about this task, I discovered there are actually a couple of different methods for frosting your windows.
Option 1: Clear Contact Paper
One option is to use clear contact paper. I steered away from this option though for a couple of reasons: 1 - contact paper isn't wide enough for our windows so I was afraid there'd be visible seams. 2 - I was nervous how well it would stick long-term in a humid bathroom.
Option 2: Frosted Spray Paint
Alternatively, you can use frosted spray paint that is made specifically for this purpose. Although spray paint wouldn't have a problem adhering to the windows, I was concerned with the thought of overspray, especially since I just painted the walls and the floors are installed. There would have been a lot of prep work involved to protect the surrounding surfaces.
Option 3: Vinyl Frosted Window Film
Then there's the option of vinyl frosted window film, which is what I used. And man, I'm glad I did! Here's how I did it.
Materials
- Ruler
- Pen/Marker
- Scissors
- Vinyl Frosted Window Film
- Squeegee (or credit card)
- Utility Knife
- Spray Bottle
- OR, instead of buying the last three items individually, just grab an all-in-one application kit
Step 1: READ THE INSTRUCTIONS
These instructions cover the method I used for the vinyl I bought and the end product turned out fantastic. That doesn't mean that all window vinyl will work the same way. Please make sure you read the directions on the product you buy before beginning.
Step 2: Cut the Window Film to Size
First thing's first: measure, mark, and cut each piece of your window film with scissors. Since I wasn't covering the entire window, it was really important for me to make sure my pieces were square (or so I thought… wait for it!).
I used a green Sharpie in the example to mark where to cut so you could see, but then I switched to a micron pen after realizing the Sharpie might be visible on the window film once I put it up.
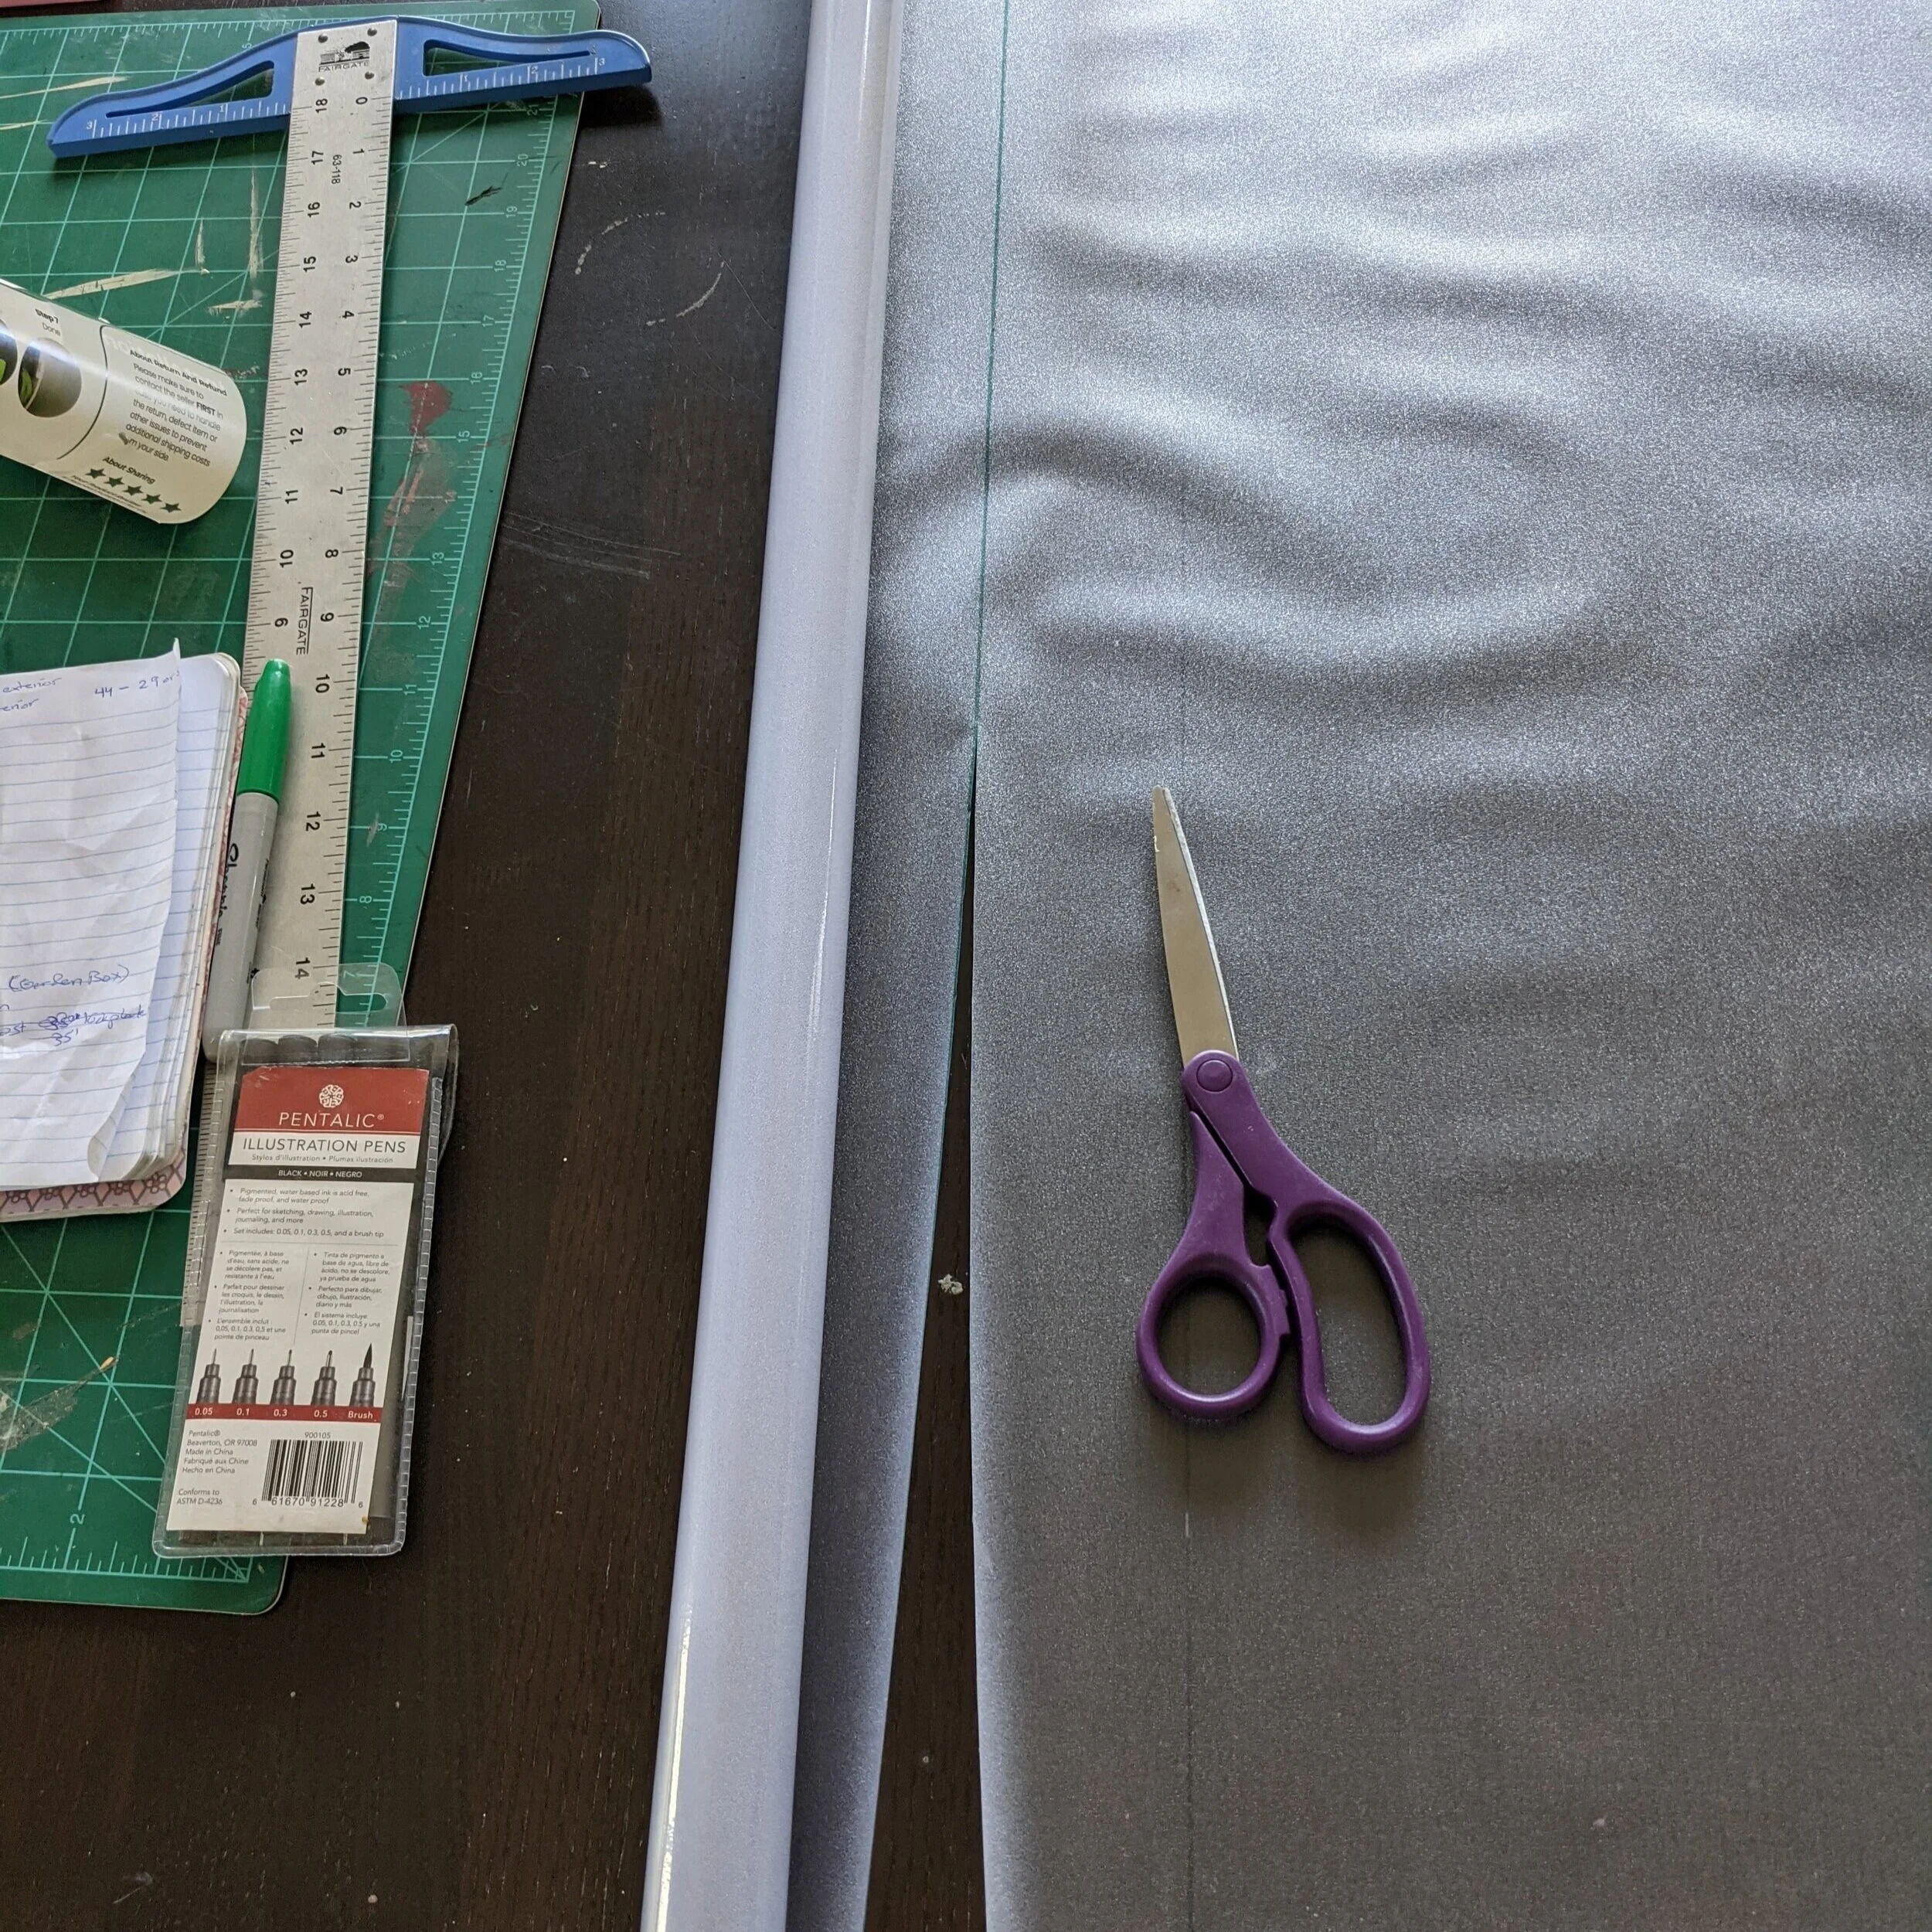
I recommend cutting your film a little bigger than your window since you can trim off any excess once the vinyl is applied.
It's also never a bad idea to do a dry fit before the real deal. This is where I realized the size I was cutting my vinyl to be was ultimately a square so my perfect measurements and straight cuts didn't matter since I just used the factory edge as my top and bottom. Any excess that hung off the sides was cut off after the vinyl was applied.
Step 3: Thoroughly Spray the Window with Water
Using the spray bottle, spray the bejeezus out of the window. Even the instructions say that more water is better, and I agree! But don't fear, if you find that after you initially put your vinyl up you need more water, just peel it back a little a spray some more. This stuff is super forgiving!
Step 4: Stick Your Vinyl on the Window
Now you'll need to peel the backing off the vinyl and stick it to the window.
I read that if you're having trouble peeling the back off, you can put a piece of Scotch tape on the backing and the vinyl and pull it apart. I tried this and it didn't really work, but it wasn't too difficult to get my fingernail between the two and separate them.
Once the vinyl and backing are separated, stick the vinyl to the window.
I was expecting the vinyl to act more like peel and stick wallpaper, wanting to stick to everything it touches and not wanting to let go. But no, I mean it when I say this material is insanely forgiving.
All you have to do is get semi-close to the window and the static pulls the vinyl toward it.
For the look I was going for, I stuck the vinyl as evenly as I could, then just slid it to the bottom of the window so the edge lined up perfectly. Here’s a quick video showing my process.
Step 5: Squeegee Out the Bubbles
Using your squeegee or credit card, push the bubbles to the edge of the window film. Make sure you get them all. Applying your vinyl at night might make it easier to see all the bubbles!
Step 6: Trim off the Excess
Finally, you'll trim off any overhang using your utility knife. Make sure it's a sharp blade! I found that when I first started cutting, it wanted to pull the edge of the vinyl with it. So I pushed my squeegee to the edge of the vinyl and used that to hold it in place while I cut. This also helped make sure my cut stayed straight. I shot a quick little video of this part too to demonstrate.
Final Thoughts
And that's it! Four windows took about 30 minutes and it makes a huge difference! The bathroom still gets just as much natural light as it did before, but now we have the privacy a bathroom needs.
Plus, the film disperses the light from the sunset so gorgeously in the bathroom in the late afternoon/early evening hours. I mean, just look at it!
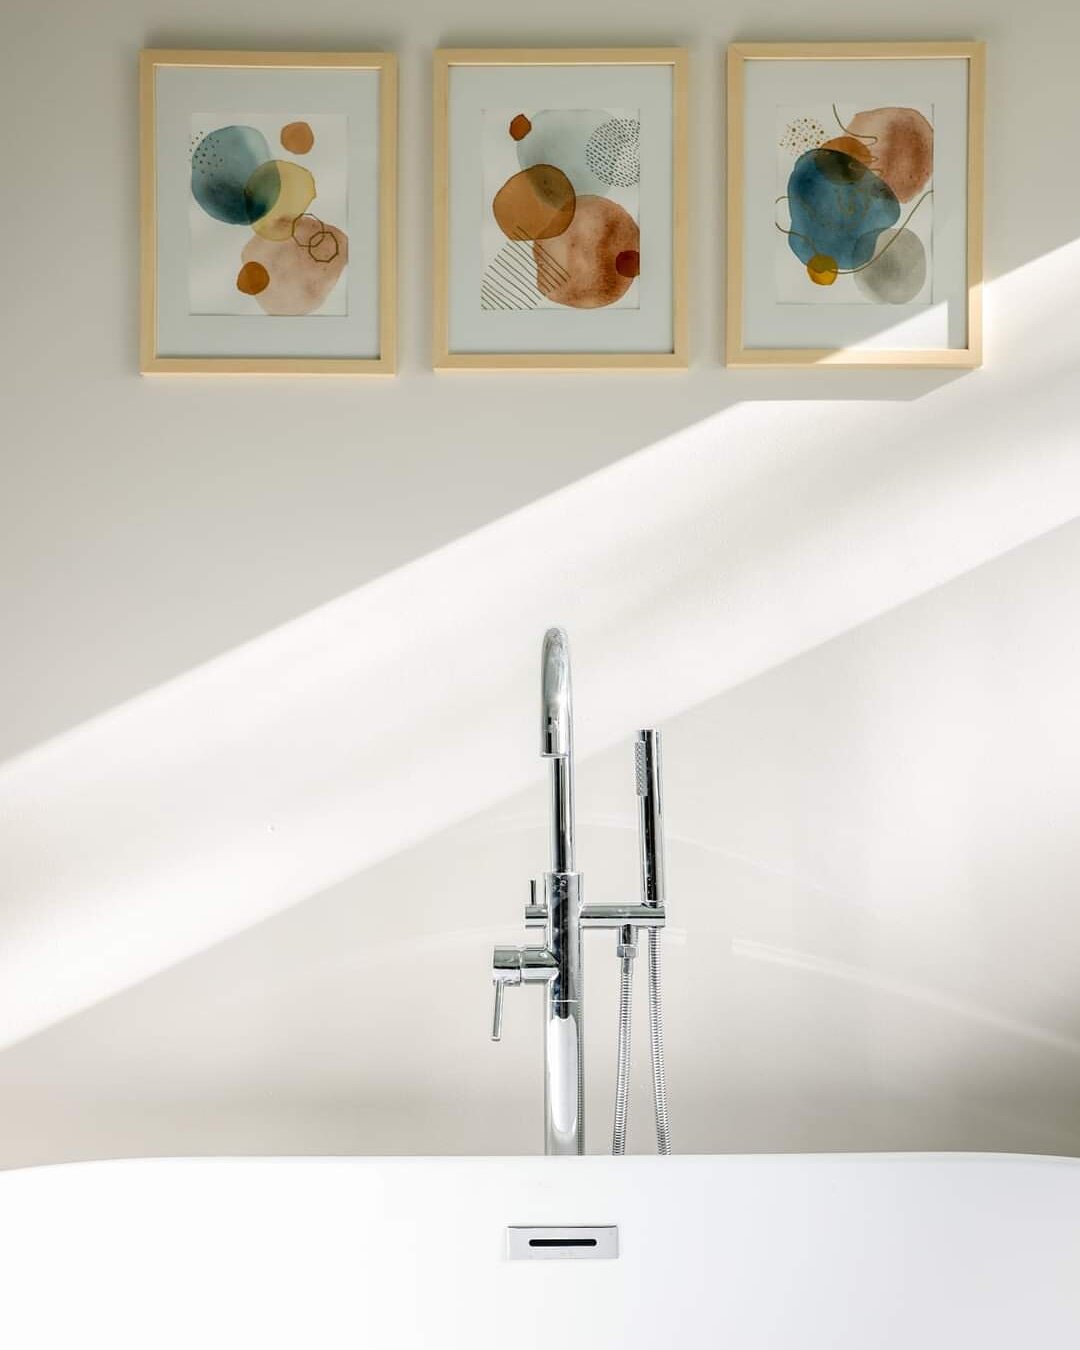
Since I’ve frosted the windows, I’m happy to report that they’re holding up to the humidity perfectly. And yes, we’ve tested how much you can actually see from outside and the vinyl does a primo job of blocking any risk of a peep show.
Related Master Bathroom Posts
Frost Your Bathroom Windows
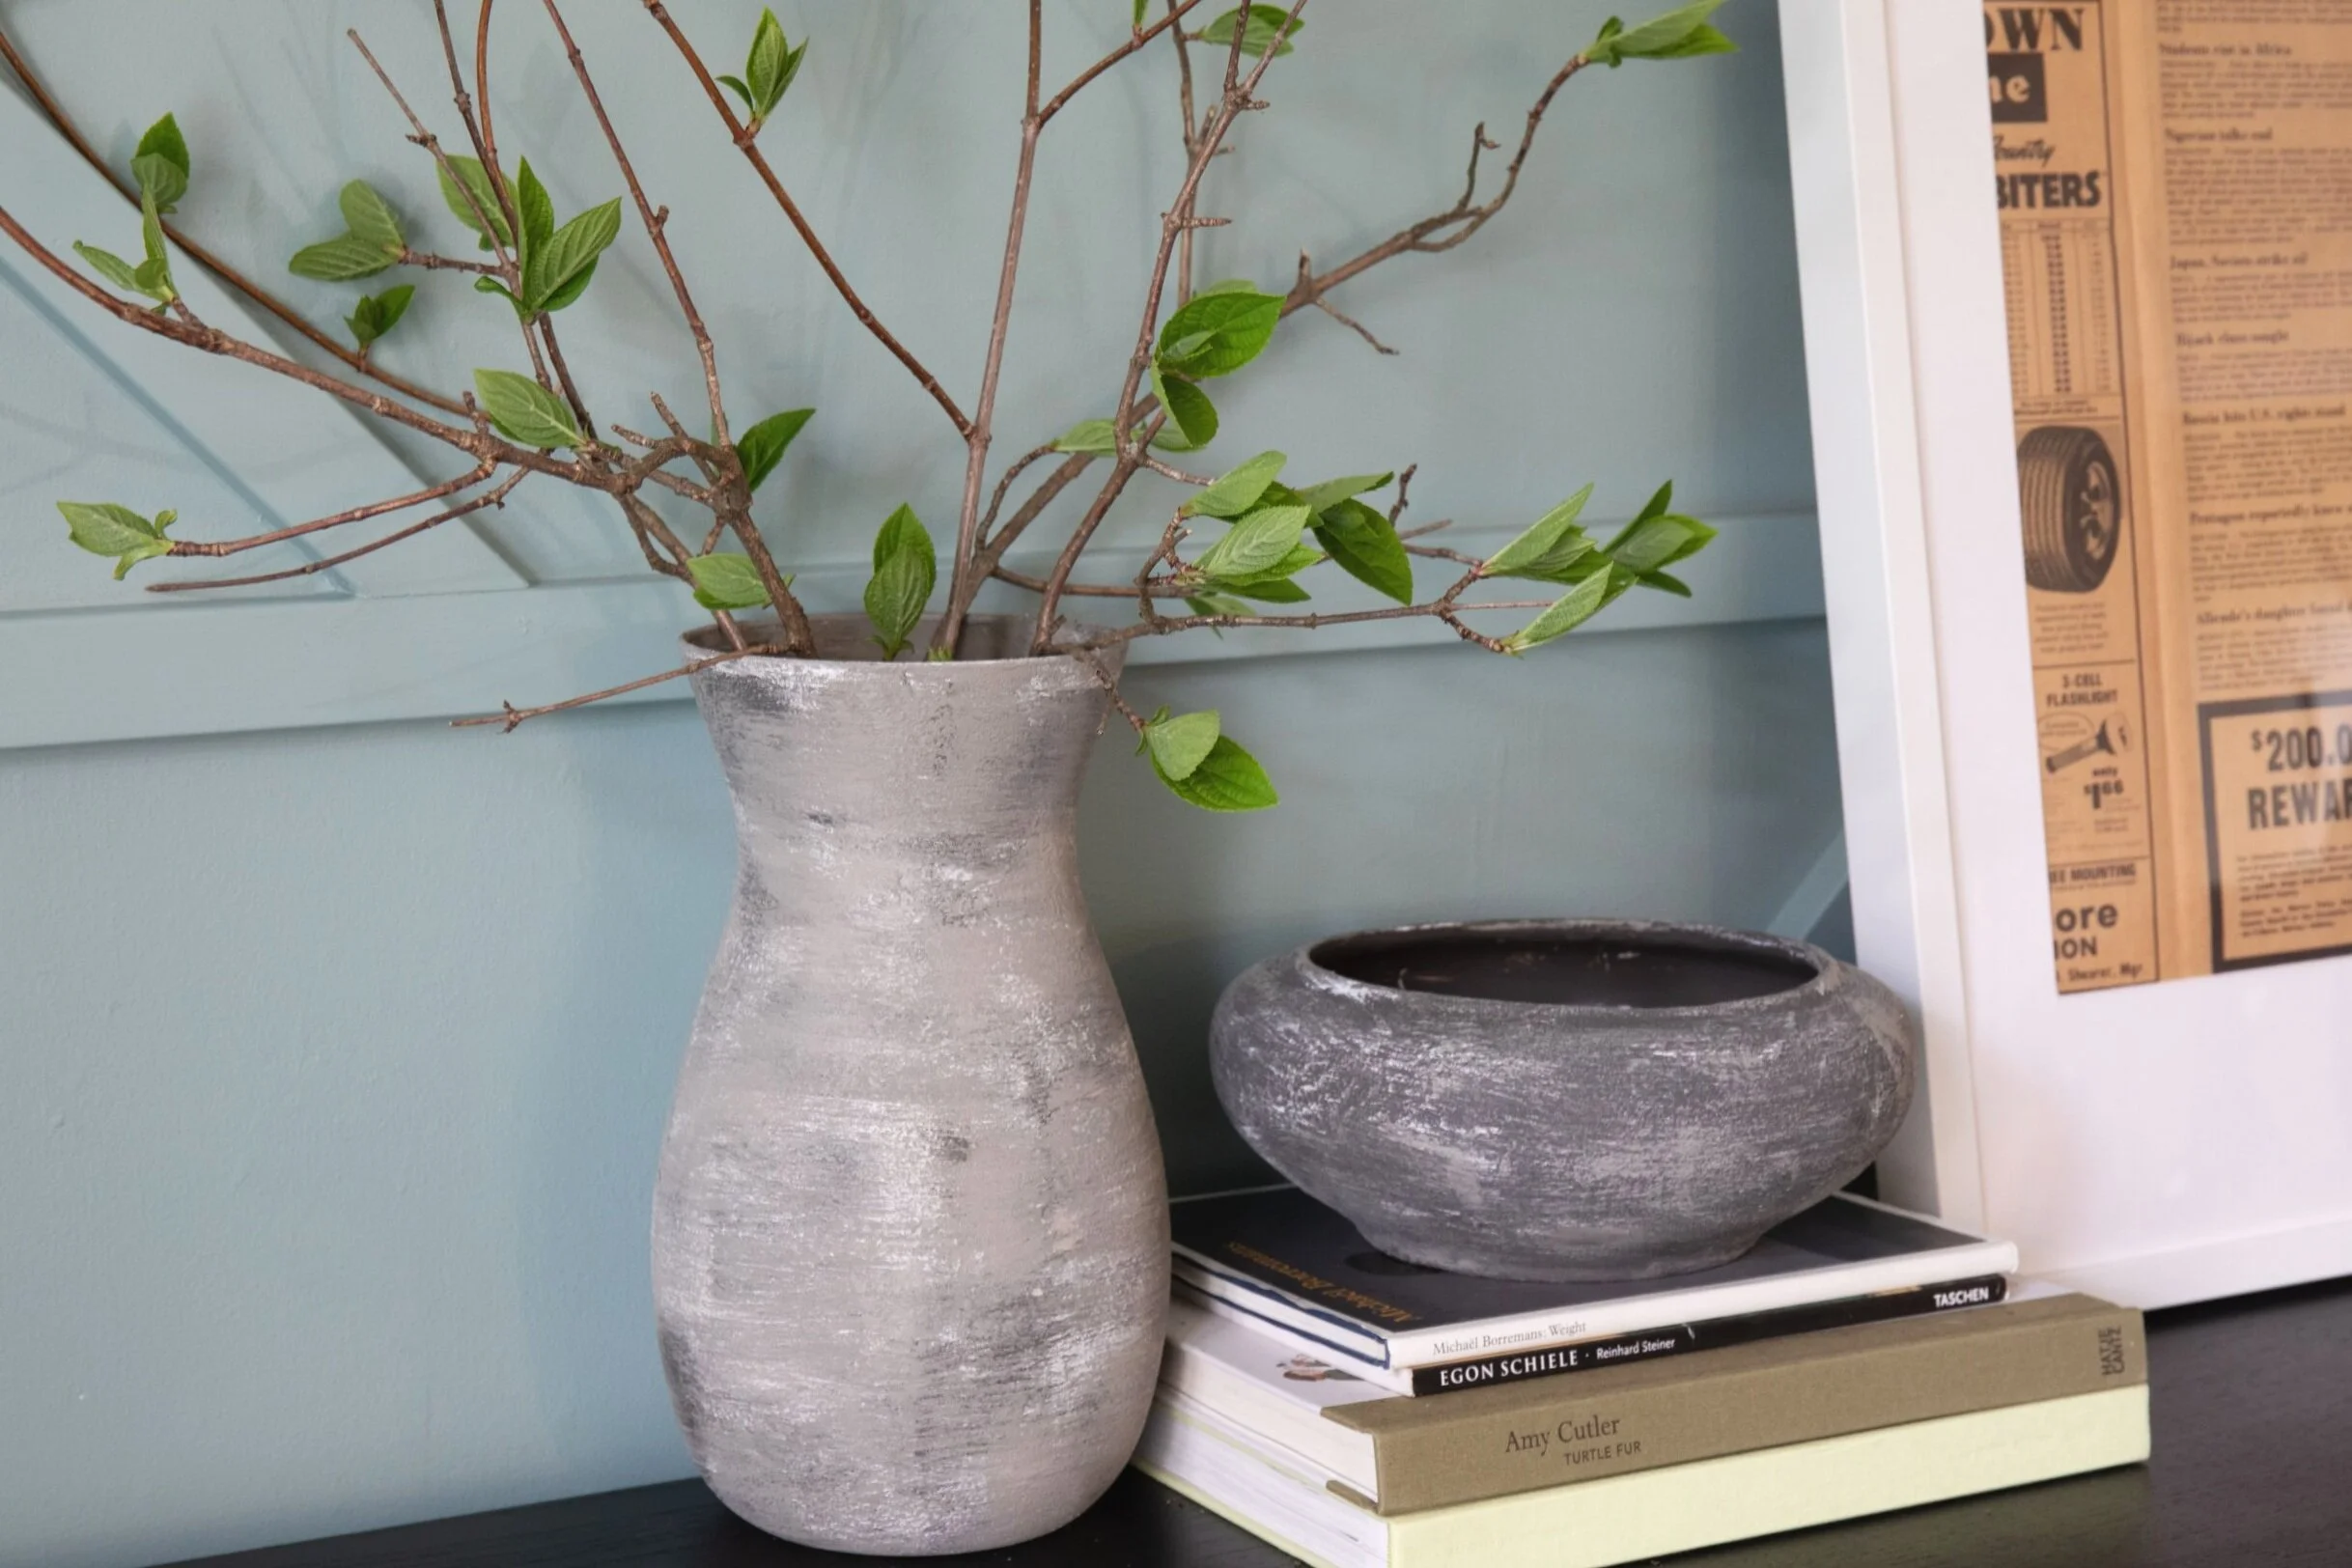
5 Easy Ways to DIY Stoneware Decor
And as much as I love the stoneware decor I’ve purchased, I still can’t believe that cheap little old me paid full price, especially after I realized I could easily make my own! Yep, that’s right. And I’m gonna show you just how to do it. In fact, in this tutorial, I’ll show you 5 different ways to create the stoneware look for less! Here we go…
How to Make Your Own Stoneware Decor
If you’ve seen any pictures in the last several years featuring interior design, I’m sure you’ve seen an aged-looking vase, bowl, lamp, or planter somewhere in the photo. You may have not even realized it because it fit in so well, but I bet it was there.
While these decor items (essentials, even?) are gorgeous, who wants to pay full price for them? Not me! Except that I already did when I came across this beaut from Studio McGee and this bowl from Hearth & Hand with Magnolia. And as much as I love them, I still can’t believe that cheap little old me paid full price, especially after I realized I could easily make my own!
Yep, that’s right. And I’m gonna show you just how to do it. In fact, in this tutorial, I’ll show you 5 different ways to create the stoneware look for less! Here we go…
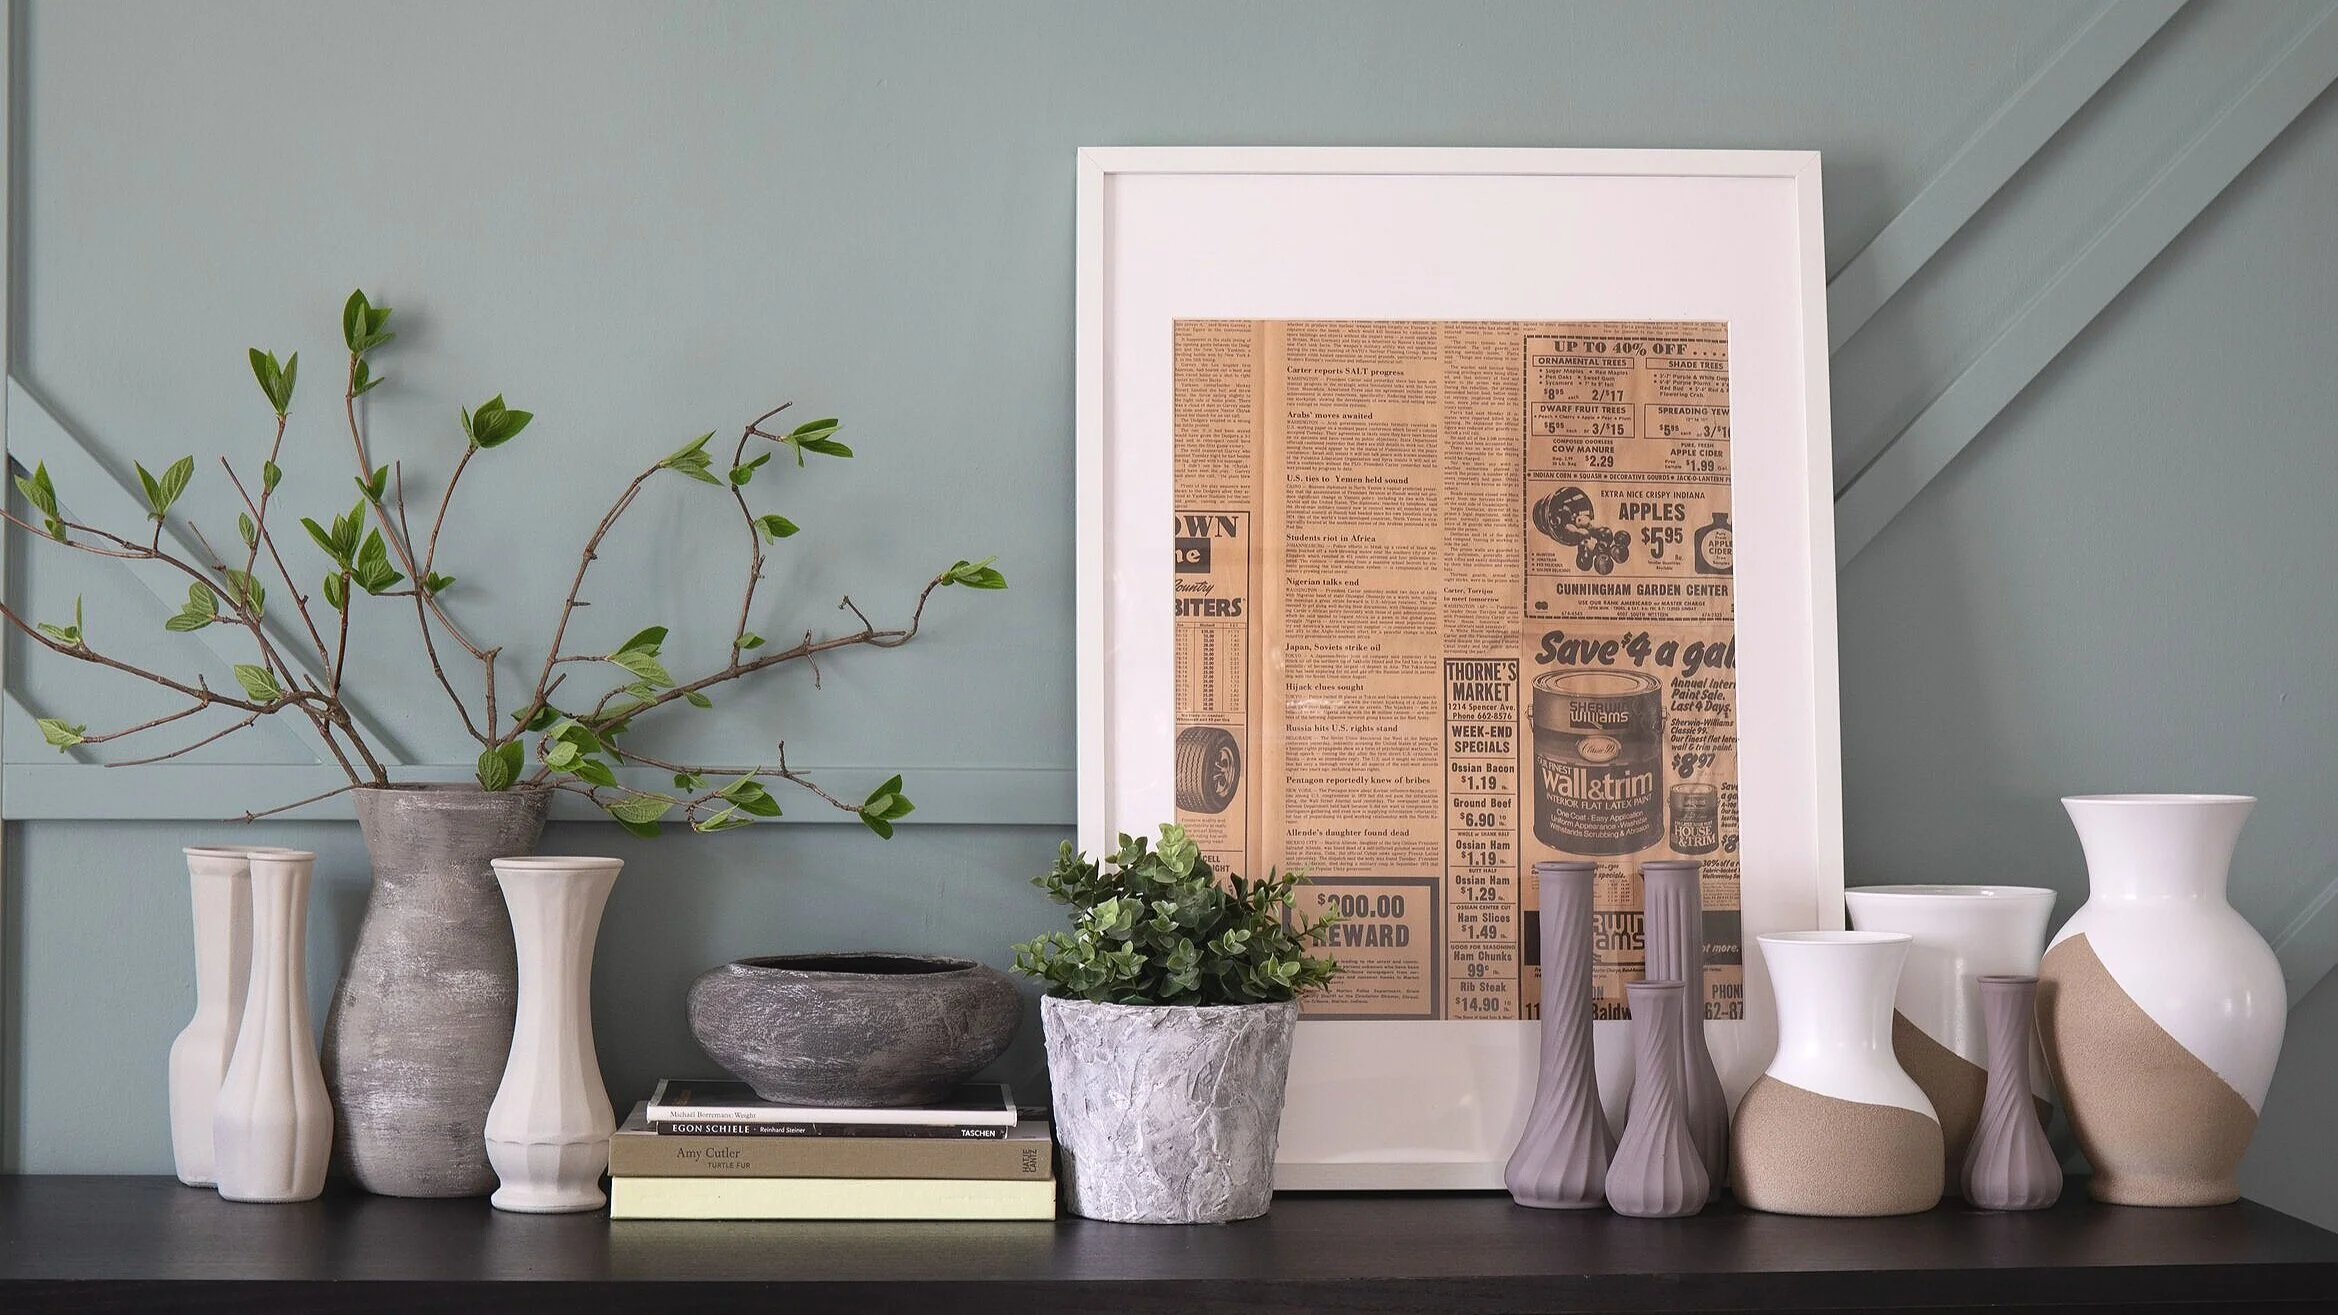
Getting Started - what types of vases and bowls to look for
I was intrigued by this project because I wanted to add more earthy elements to my décor. I've noticed my aesthetic can lean towards the geometric side of things. To soften things up, I figured more natural-looking/feeling elements would suit. Of course, I didn't want to spend a ton buying loads of décor, so, I figured DIY was the way to go! And since I didn't know which method would have the best final product, I tried just about every method I could find and documented it for you lovely people. So off I went to gather my materials!
I started by heading to my local thrift store. There's always a ton of glassware at thrift stores. Until now, I've never given it a second thought. But MAN was there a lot to choose from! I ended up coming home with $30 worth of various shapes and sizes of vases and bowls. Big shoutout to the checkout girl who wrapped everything in newspaper for me!

The trick here is to look for items with interesting lines within the glass and/or an overall interesting silhouette. It's easy to get caught up in the ugly of some of these pieces, but if you squint a little and cock your head to the side, you just might be able to see their true potential.
Once I had my glassware, I took a look at it all together and broke them into groupings of how I thought they might work as sets. This helped me think through the materials I'd need to buy to try a bunch of different methods. Then off I was to the hardware store!

From here, I'll break down how I created each stoneware look.
One quick note: I didn't prime any of my pieces beforehand (bad, Erika). I'm not sure if it would have made a difference, but I would recommend doing so just in case.
As an Amazon Associate, I earn from qualifying purchases. This post may contain affiliate links, meaning I receive commissions for purchases made through those links, at no cost to you.
Latex (or Acrylic) Paint + Baking Soda
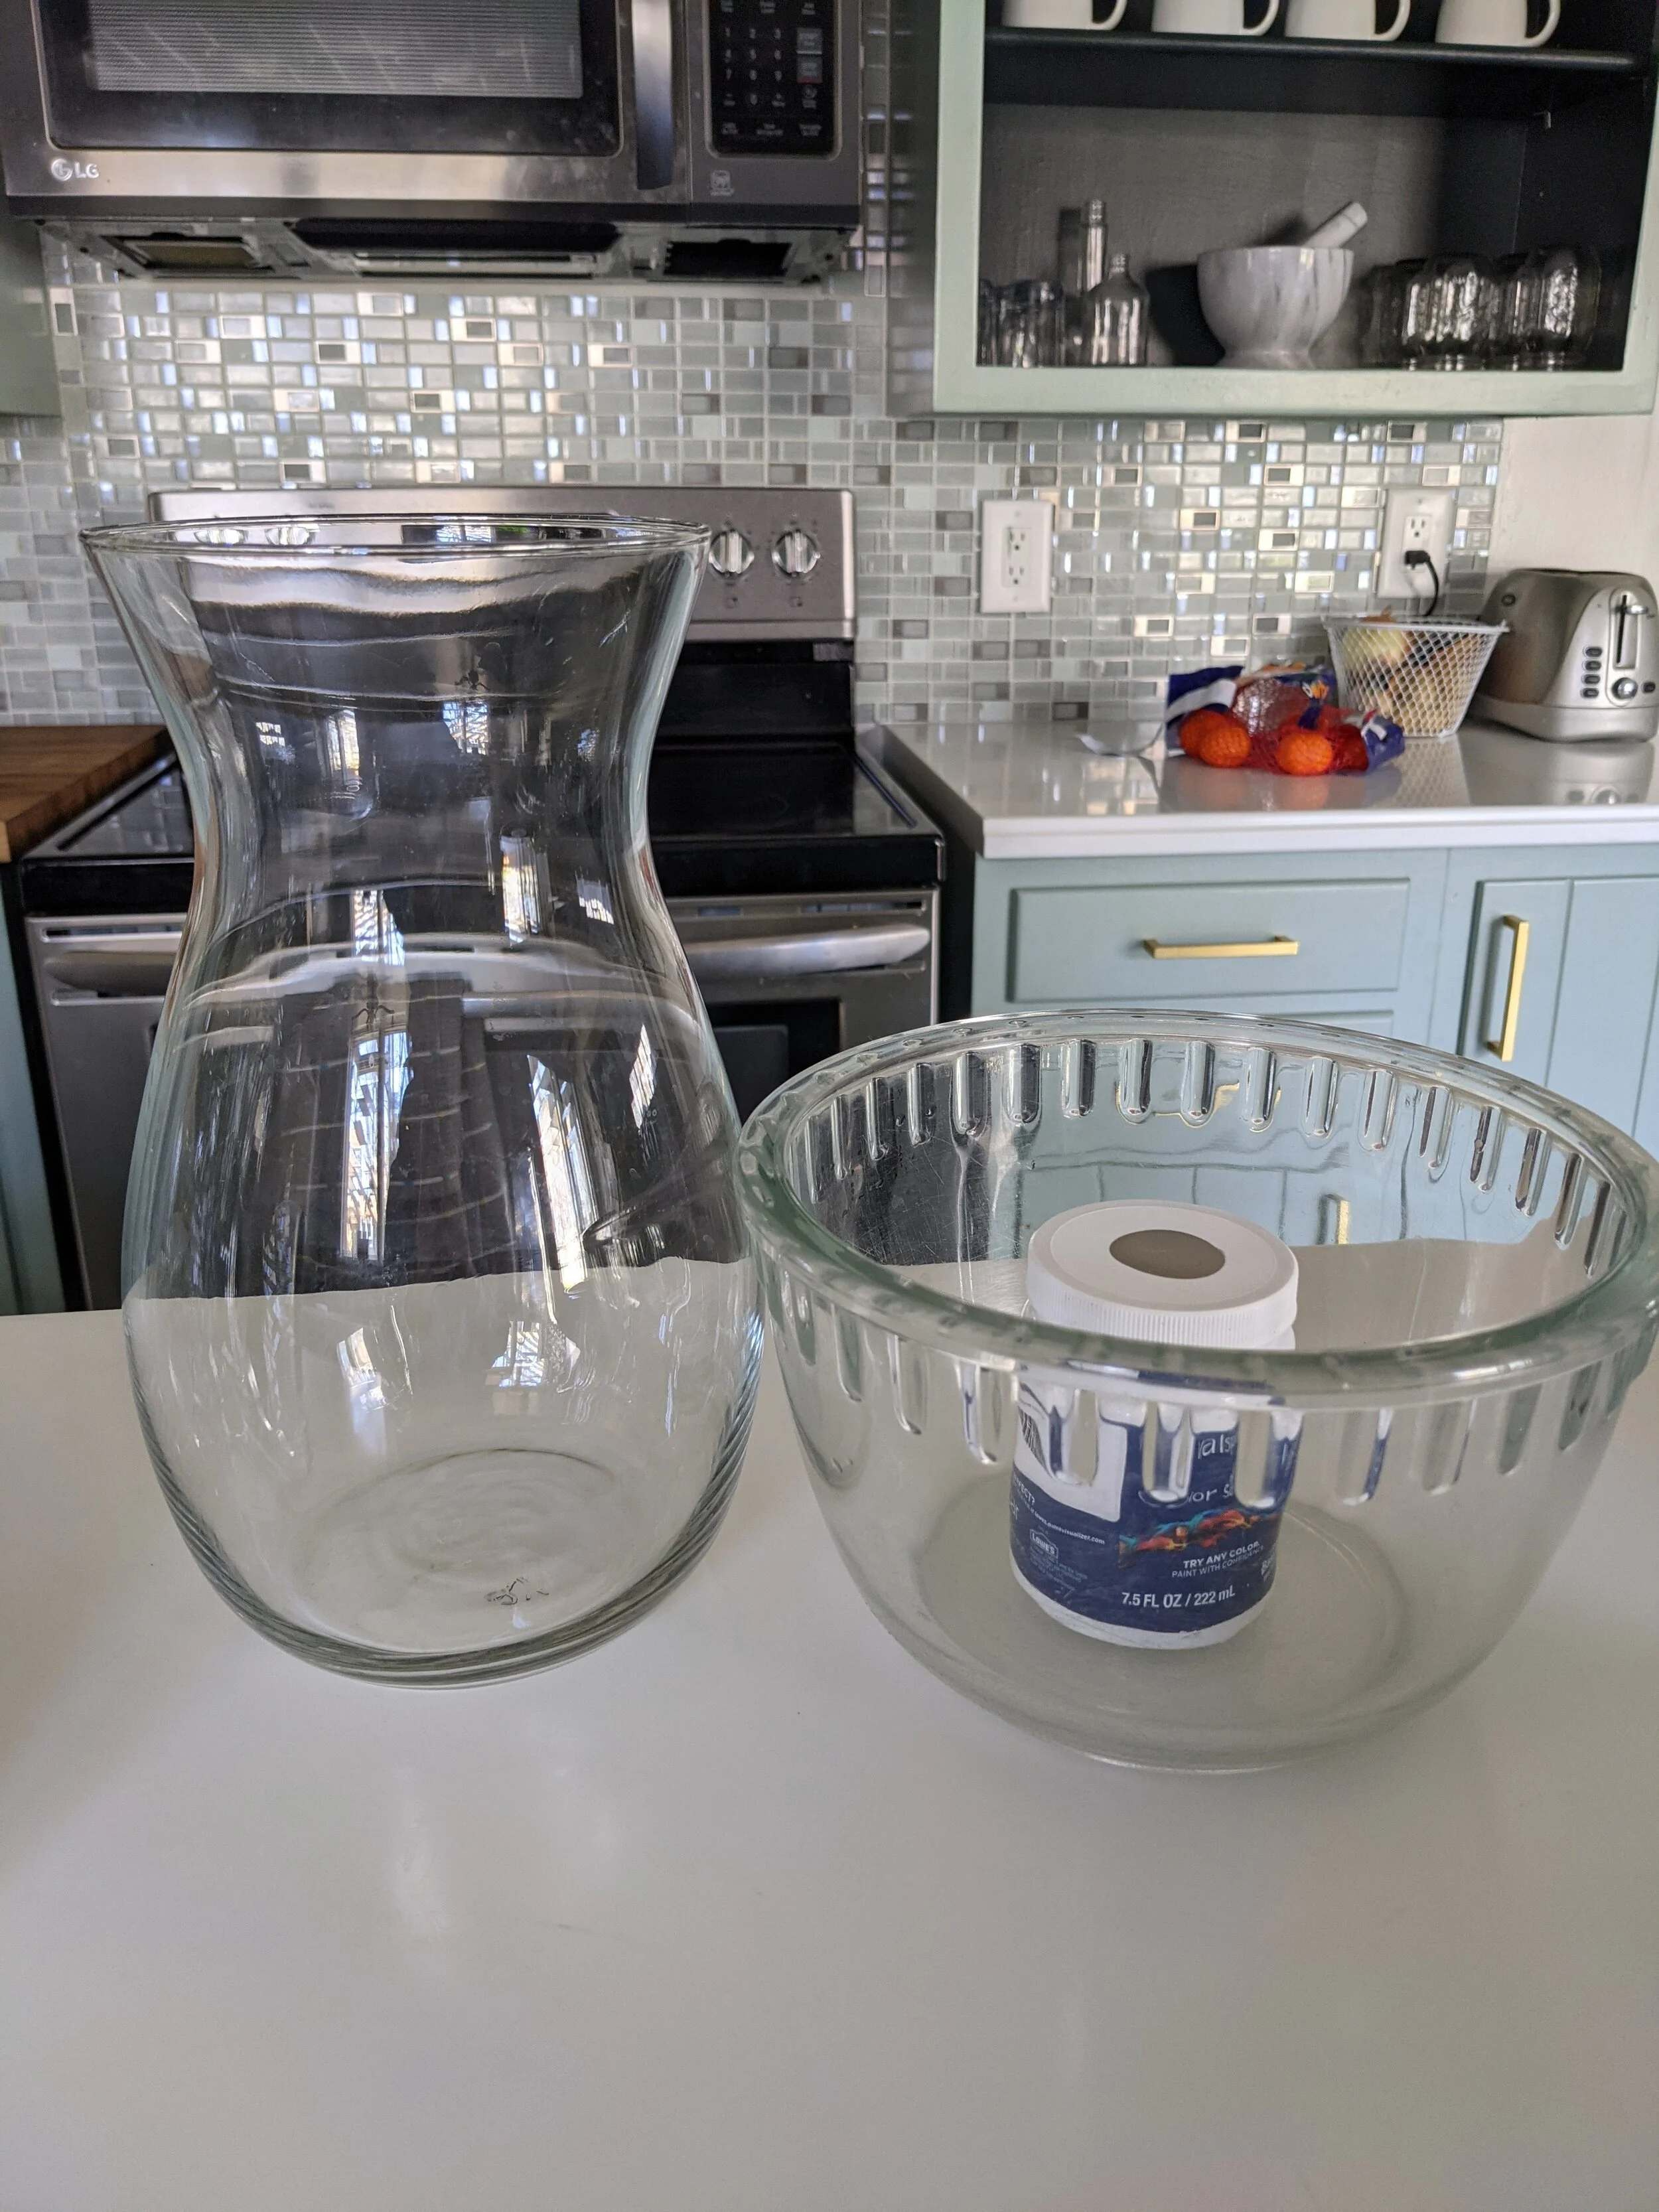
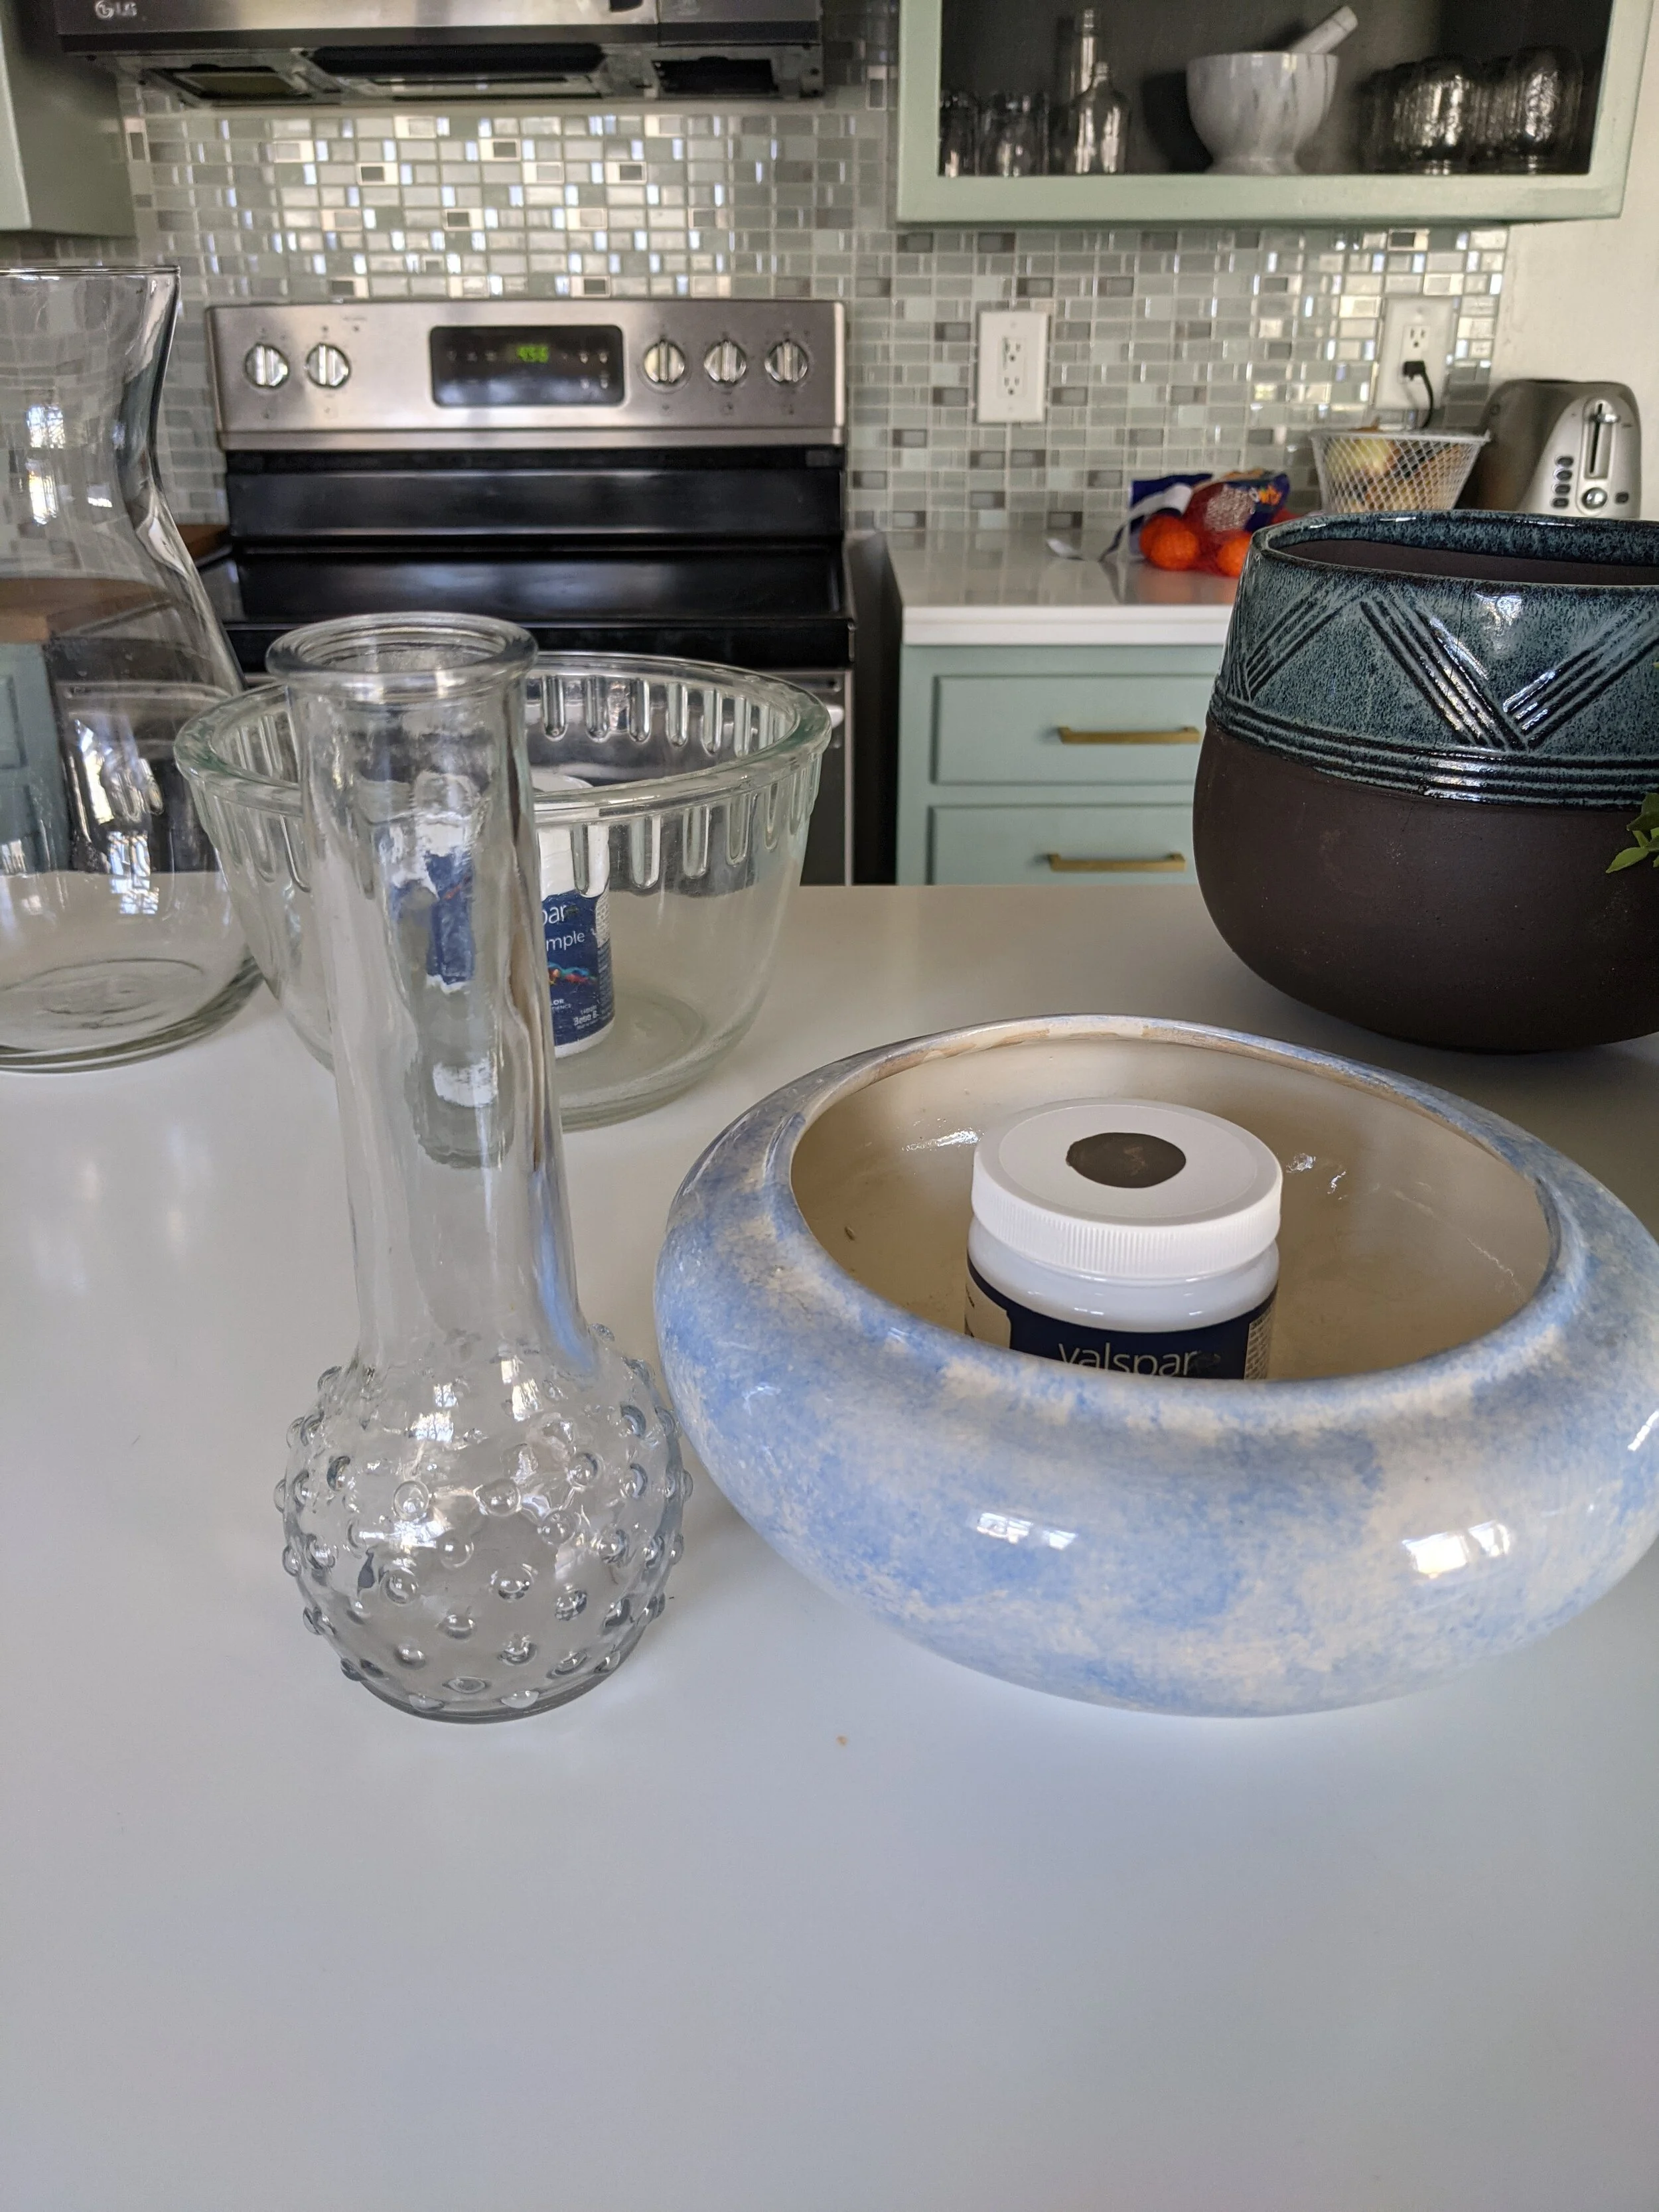
Materials
- Paint - I grabbed a couple of samples from the hardware store (Sherwin Williams Urbane Bronze and Curling Willow in Valspar), but I've seen other tutorials where acrylic paint was used instead
- Baking Soda
- Paint Brush
- Container you don't mind ruining
- Stirring utensil you don't mind ruining
Process
This is just about as easy as it gets. Pour a little bit of your paint into a container and add baking soda. I wish I had measurements to give you, but honestly, it's kind of a guessing game. You kinda just add a little at a time, stir, and see how you like the consistency. Then keep adding more baking soda until you feel good about it.

Then paint it on! I tried a couple of different methods here.
On the tall vase, I chose to apply my paint horizontally to try to make it look like a real piece of spun pottery. Since the opening is so large, I also applied paint inside of the vase to the point that it narrows.

This is after two coats of paint
On the big bowl, I used a random pattern of paint strokes. Also, I plan on using this bowl for a planter, so I taped off the inside a couple of inches down. I wanted to make sure that the actual glass wasn't showing, thus ruining the illusion of a stoneware bowl. But I also didn't think it was necessary, or good for the plant, if I painted the entire inside of the bowl (which honestly would probably just come off over time anyway).


My 5-year-old got in on the action and painted the other bowl and the bubbly-looking vase. I actually love the texture she came up with by globbing the paint on. The bubbly vase didn't end up making it down the line (it just didn’t look right with this method), but the bowl is one of my favorite pieces!

Tips for this method:
You'll need to apply several coats of paint. Mine took 3 to completely cover the glass.
Give plenty of drying time between coats and don't overwork it. A couple of times I jumped the gun a little and started applying another coat too soon and reactivated the initial coat of paint.
Finishing Work
For these vases/bowls, I used a mixture of dry brushing and wiping the paint on with paper towels. I used matte white paint (just plain old ceiling paint) and the two paint samples I bought to get the look.

For the dry brushing technique, dip your brush in a little bit of paint and then brush some of it off a scrap piece of paper or cardboard. Then gently brush it on your vase or bowl, trying to blend the beginning and end of your brushstrokes.
I used a mixture of dry and damp paper towels to help smear the paint and help create a layered look.
To create more layers, you can even do one method and let it dry and come back with the other method. You can do this as many times as you like to create more depth! Just experiment. If you don’t like the look of it, you can always paint over it!
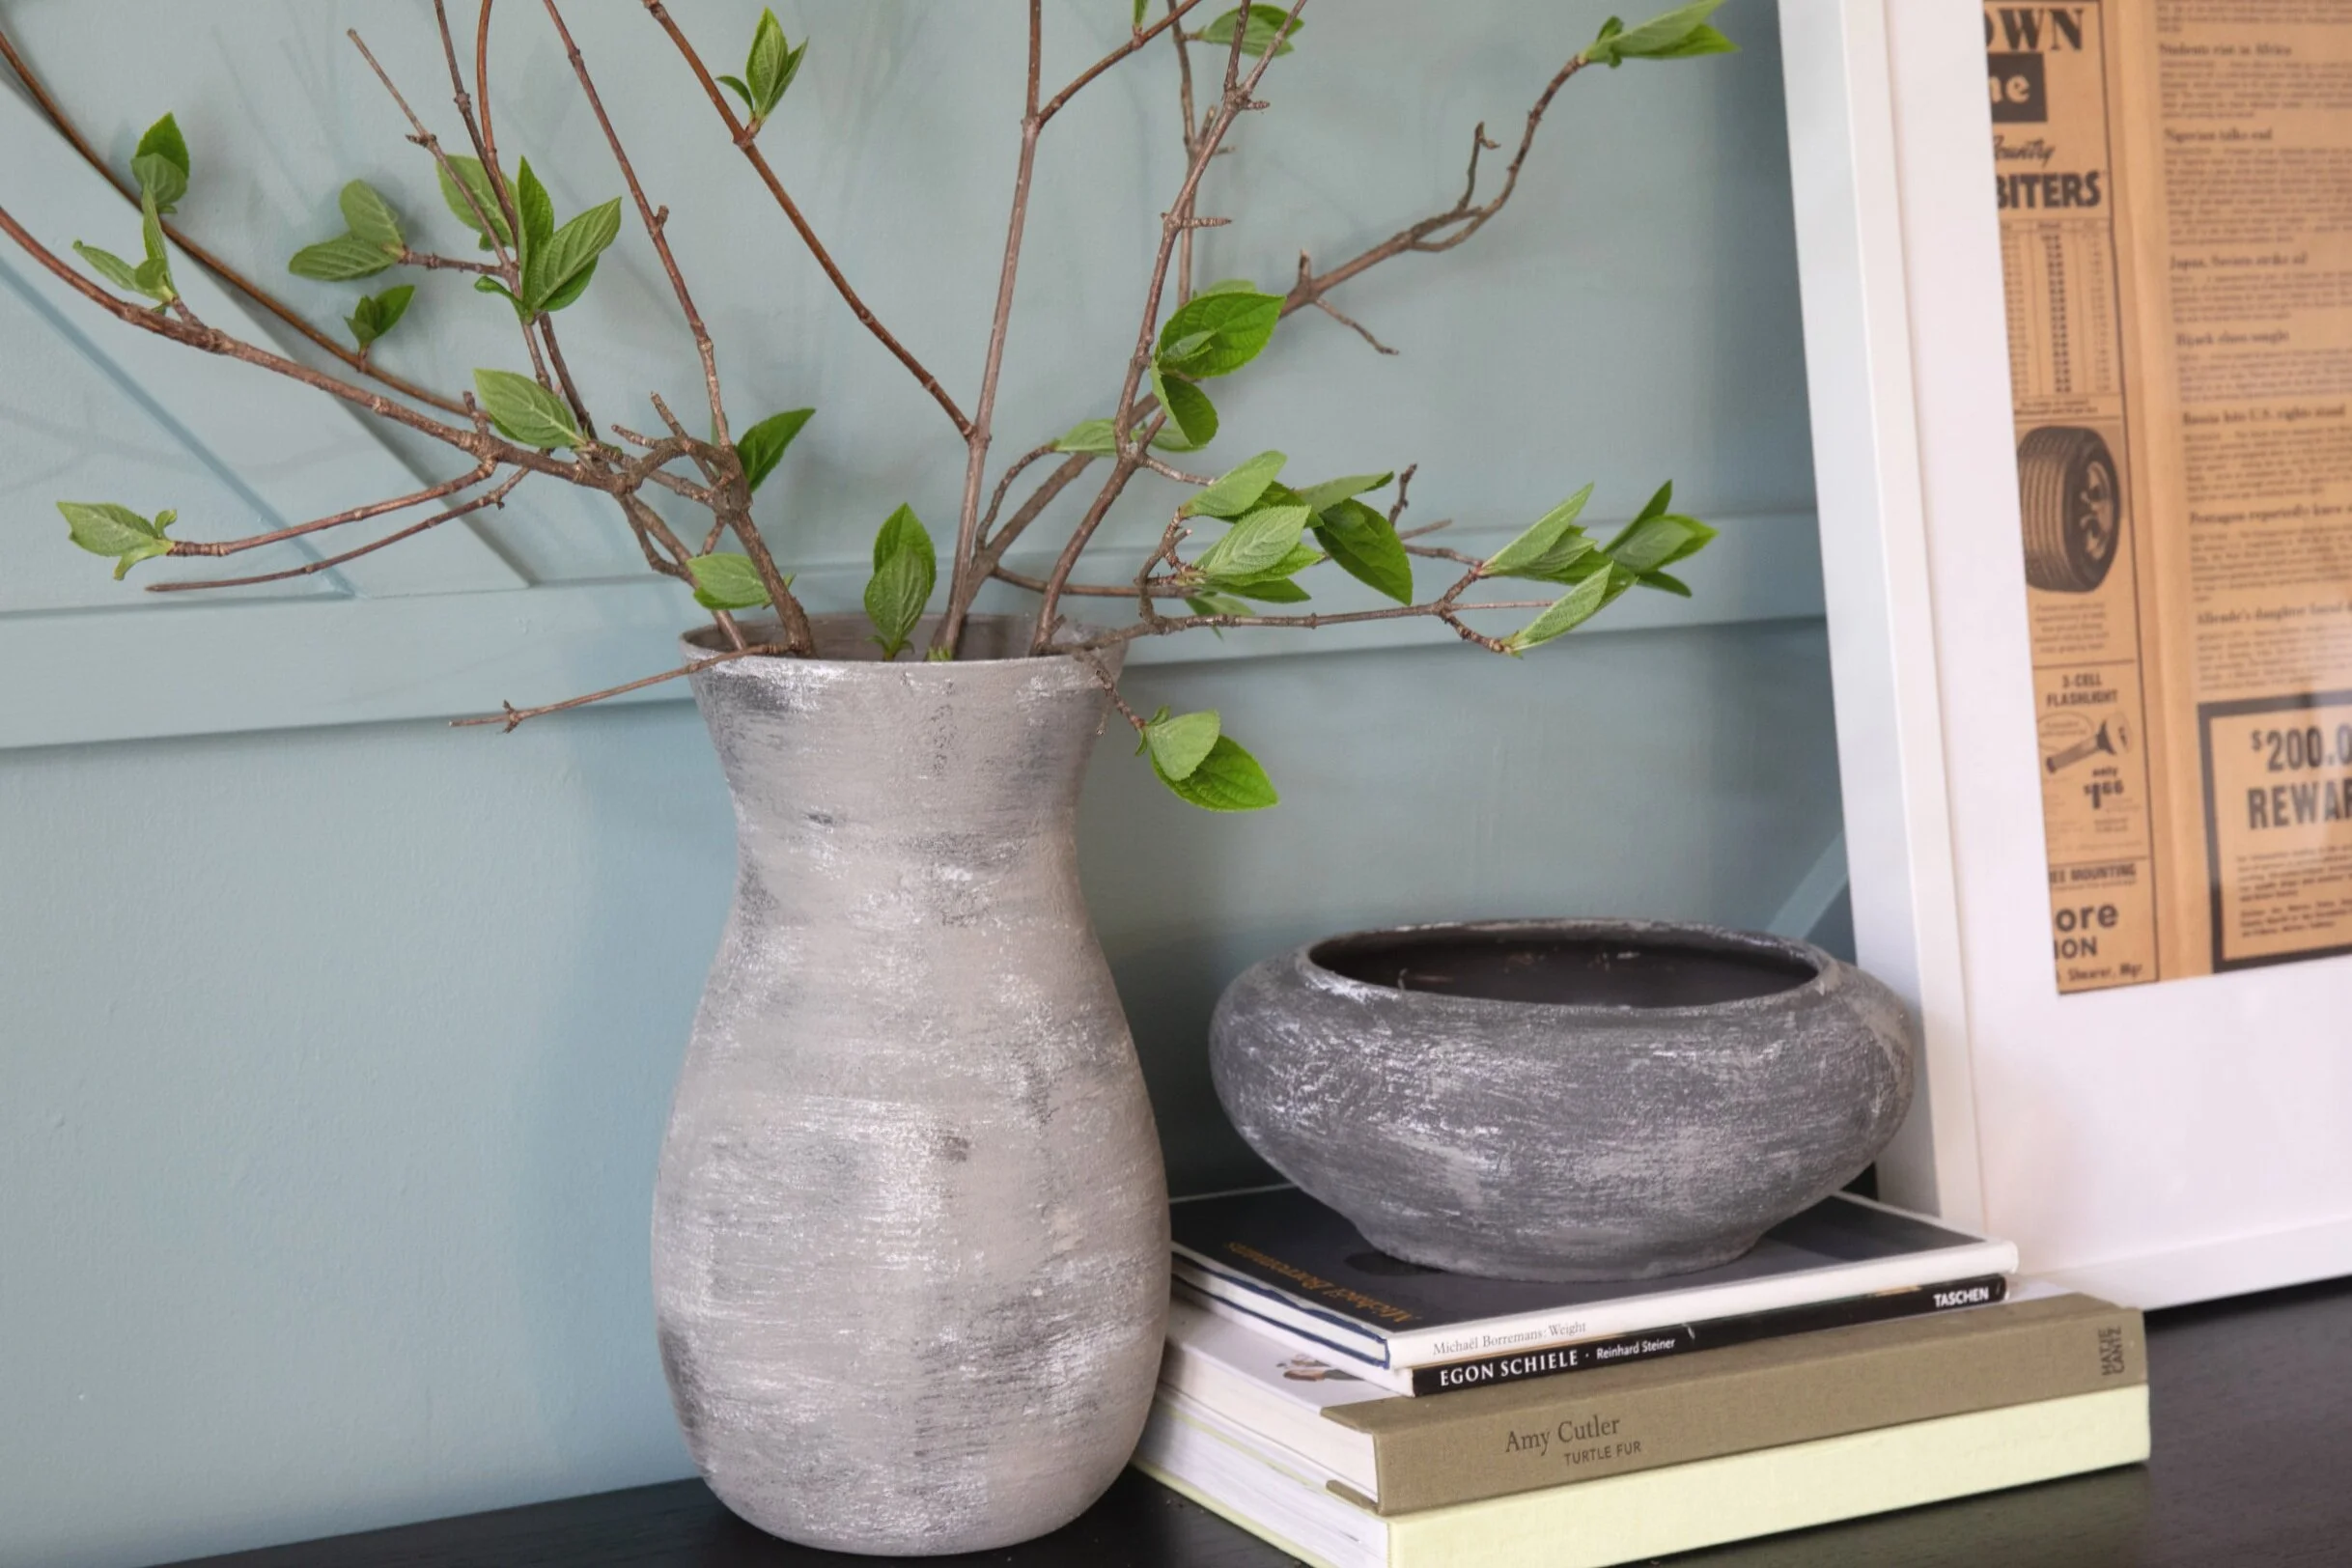
Somehow I forgot to take pictures of the finished larger bowl! I’ll have to add some later - it’s lovely!
Spray Paint
I had a blast experimenting with different methods and types of spray paint on some of my vases. The next 3 methods are all various ways you can use spray paint for this project.
Textured Spray Paint

Textured spray paint was a really easy method to get the stoneware look without any brush strokes.
For these vases, I used Krylon Textured Finish in Textured Sandstone. I really love the color, but I will warn you that the textured spray paint runs out a lot faster than regular spray paint. It took two cans to fully cover these three vases. It's also imperative that you shake the bajeesus out of the paint before you start to get good coverage and avoid drips! (lesson learned)

Somehow I can’t find a link to the spray paint above online, but there are other options that could also result in some beautiful vases, like this Krylon Coarse Stone Texture Spray Paint or this Krylon Fine Stone Texture Spray Paint, neither of which I saw at the hardware store.
For each of the spray-painted vases, I made sure to spray the visible inside area of the vase too as I worked my way around.
I considered going back and dry brushing some paint on these vases too, but decided to just live with them as-is for a little bit.
Matte Spray Paint

I came across another tutorial where the blogger used matte spray paint, so I figured I'd give it a whirl too. I grabbed a can of Krylon in Mink.
These vases turned out okay, though they’re not my favorite look. It could be the style of vase I chose or maybe I just don’t like the finished product itself. Plus, I’m not sure what caused it (likely user error), but I ended up with little bubbles in some areas. But that’s why we experiment, right!?
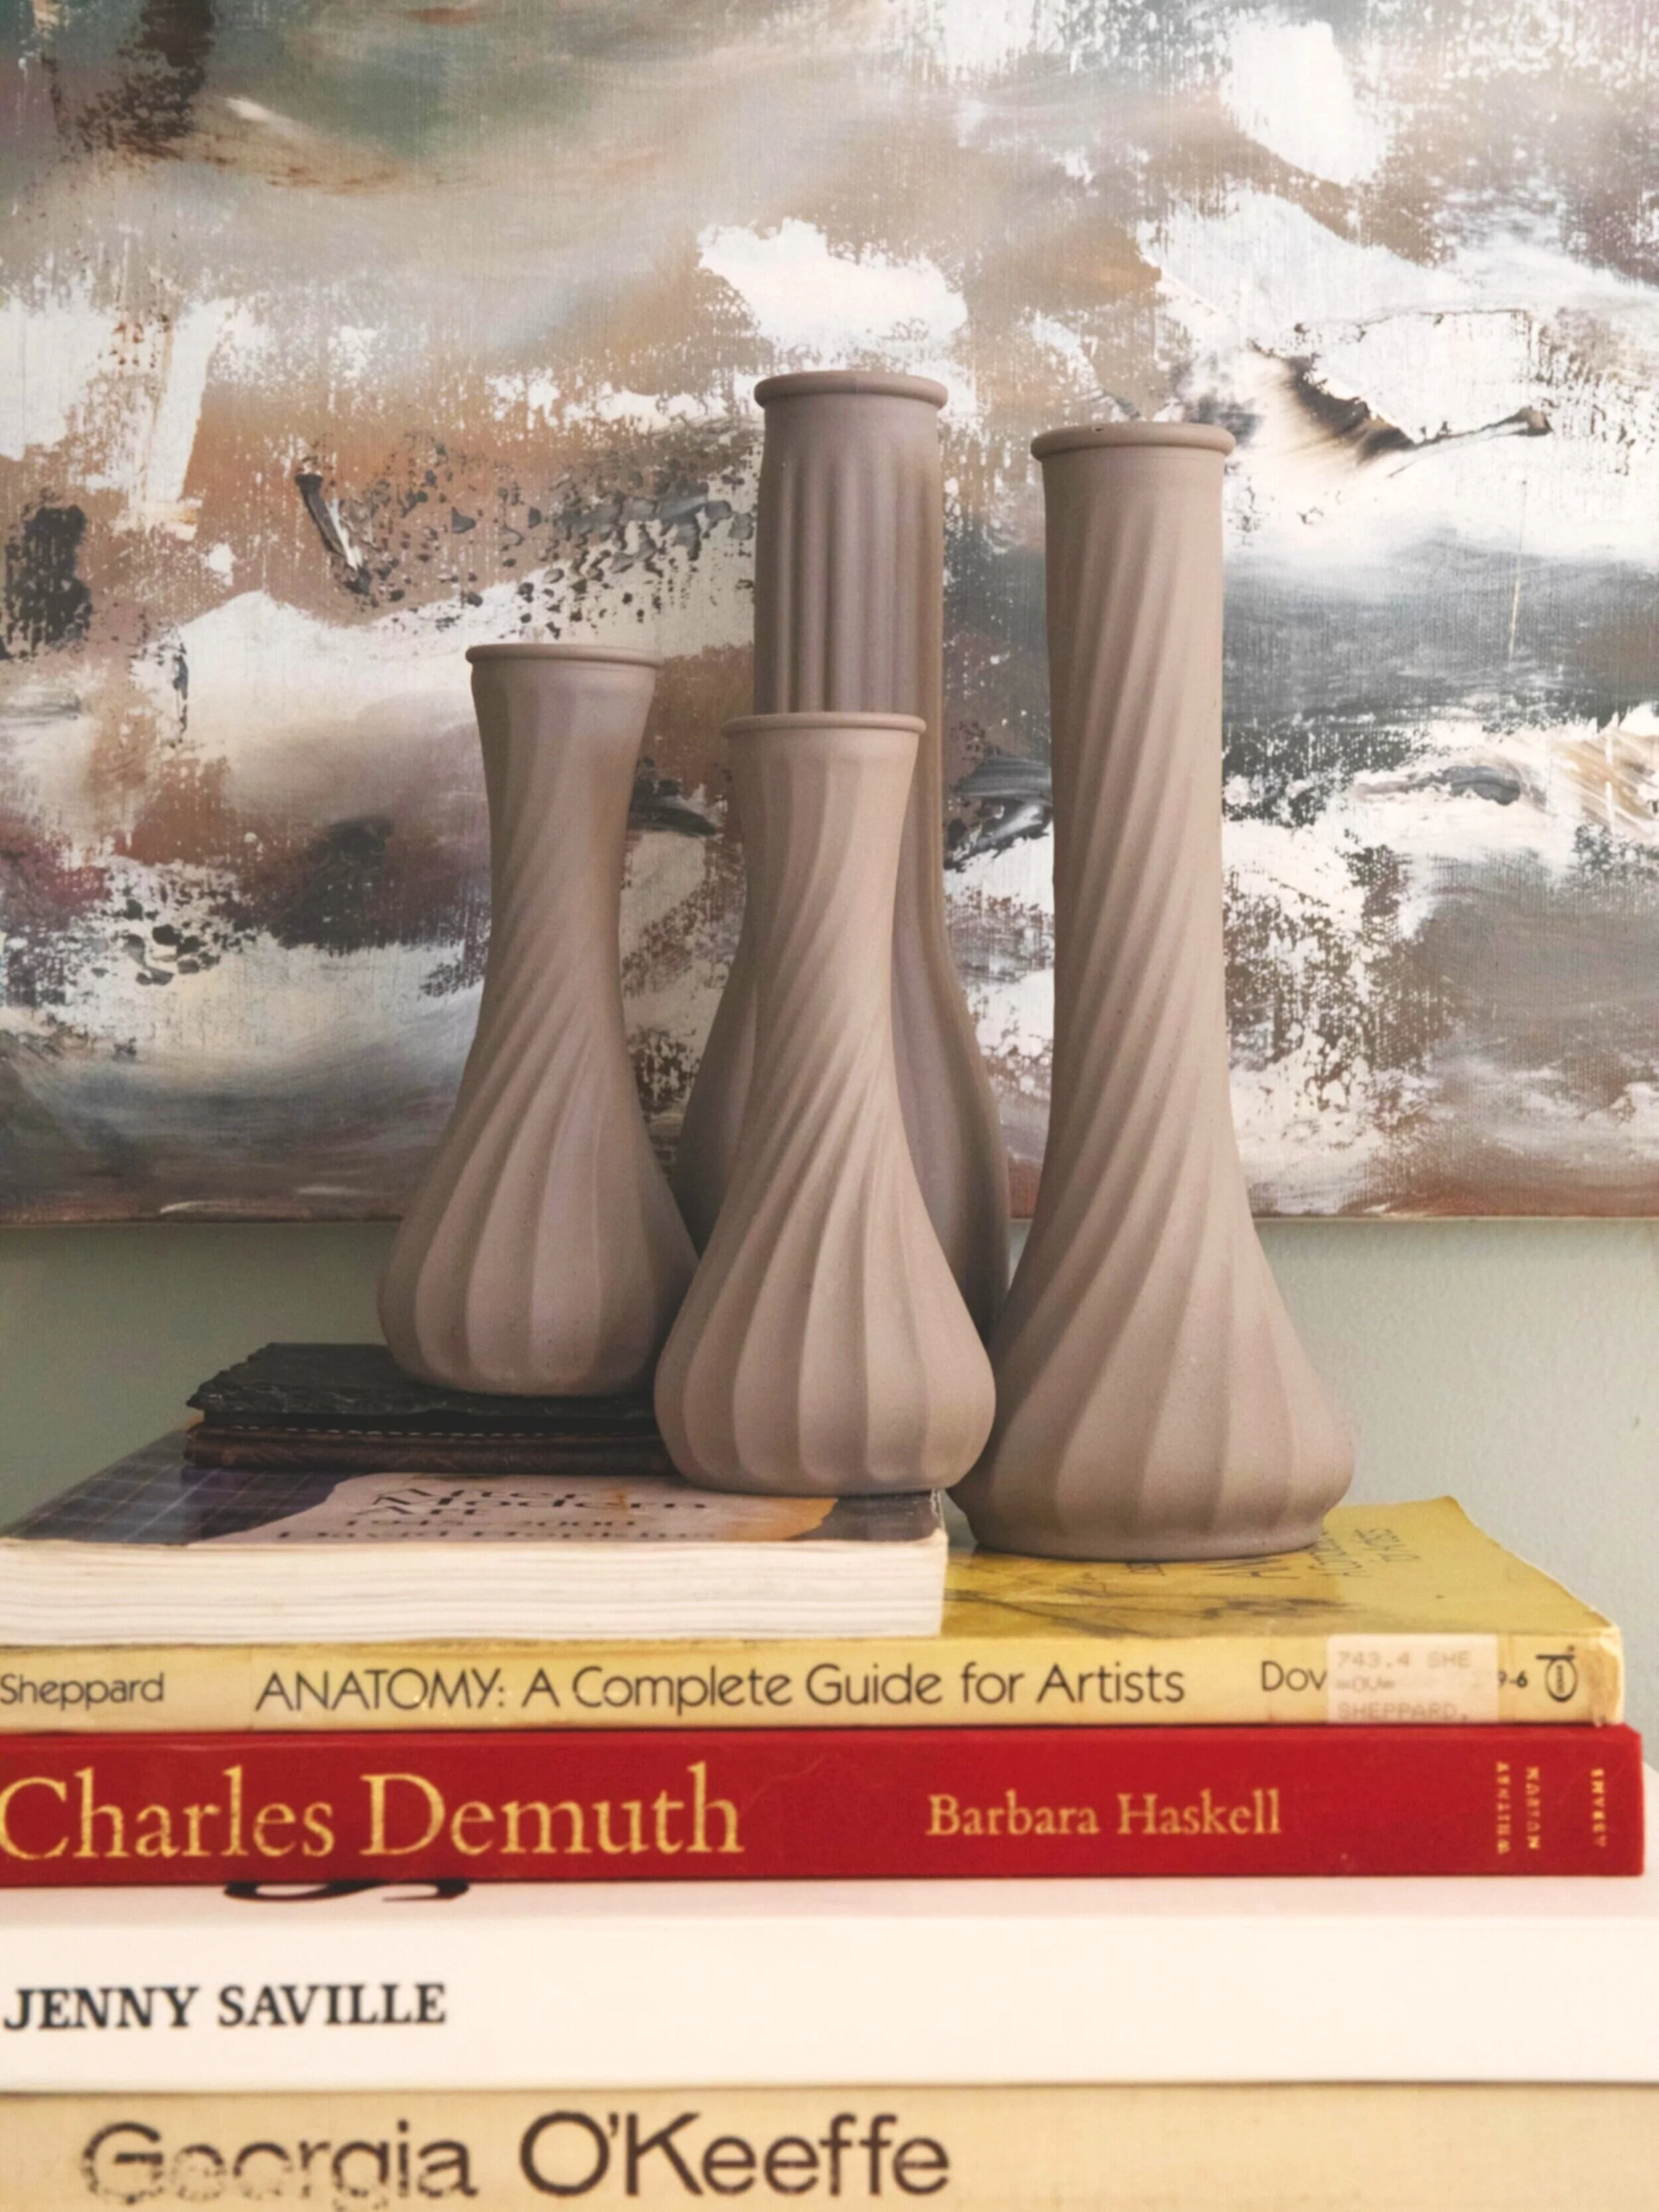
It might also be fun to try out some other natural, flat colors like Misty Gray, Anvil Gray, or Slate to see how they turn out.
Glossy/Textured Spray Paint Combo
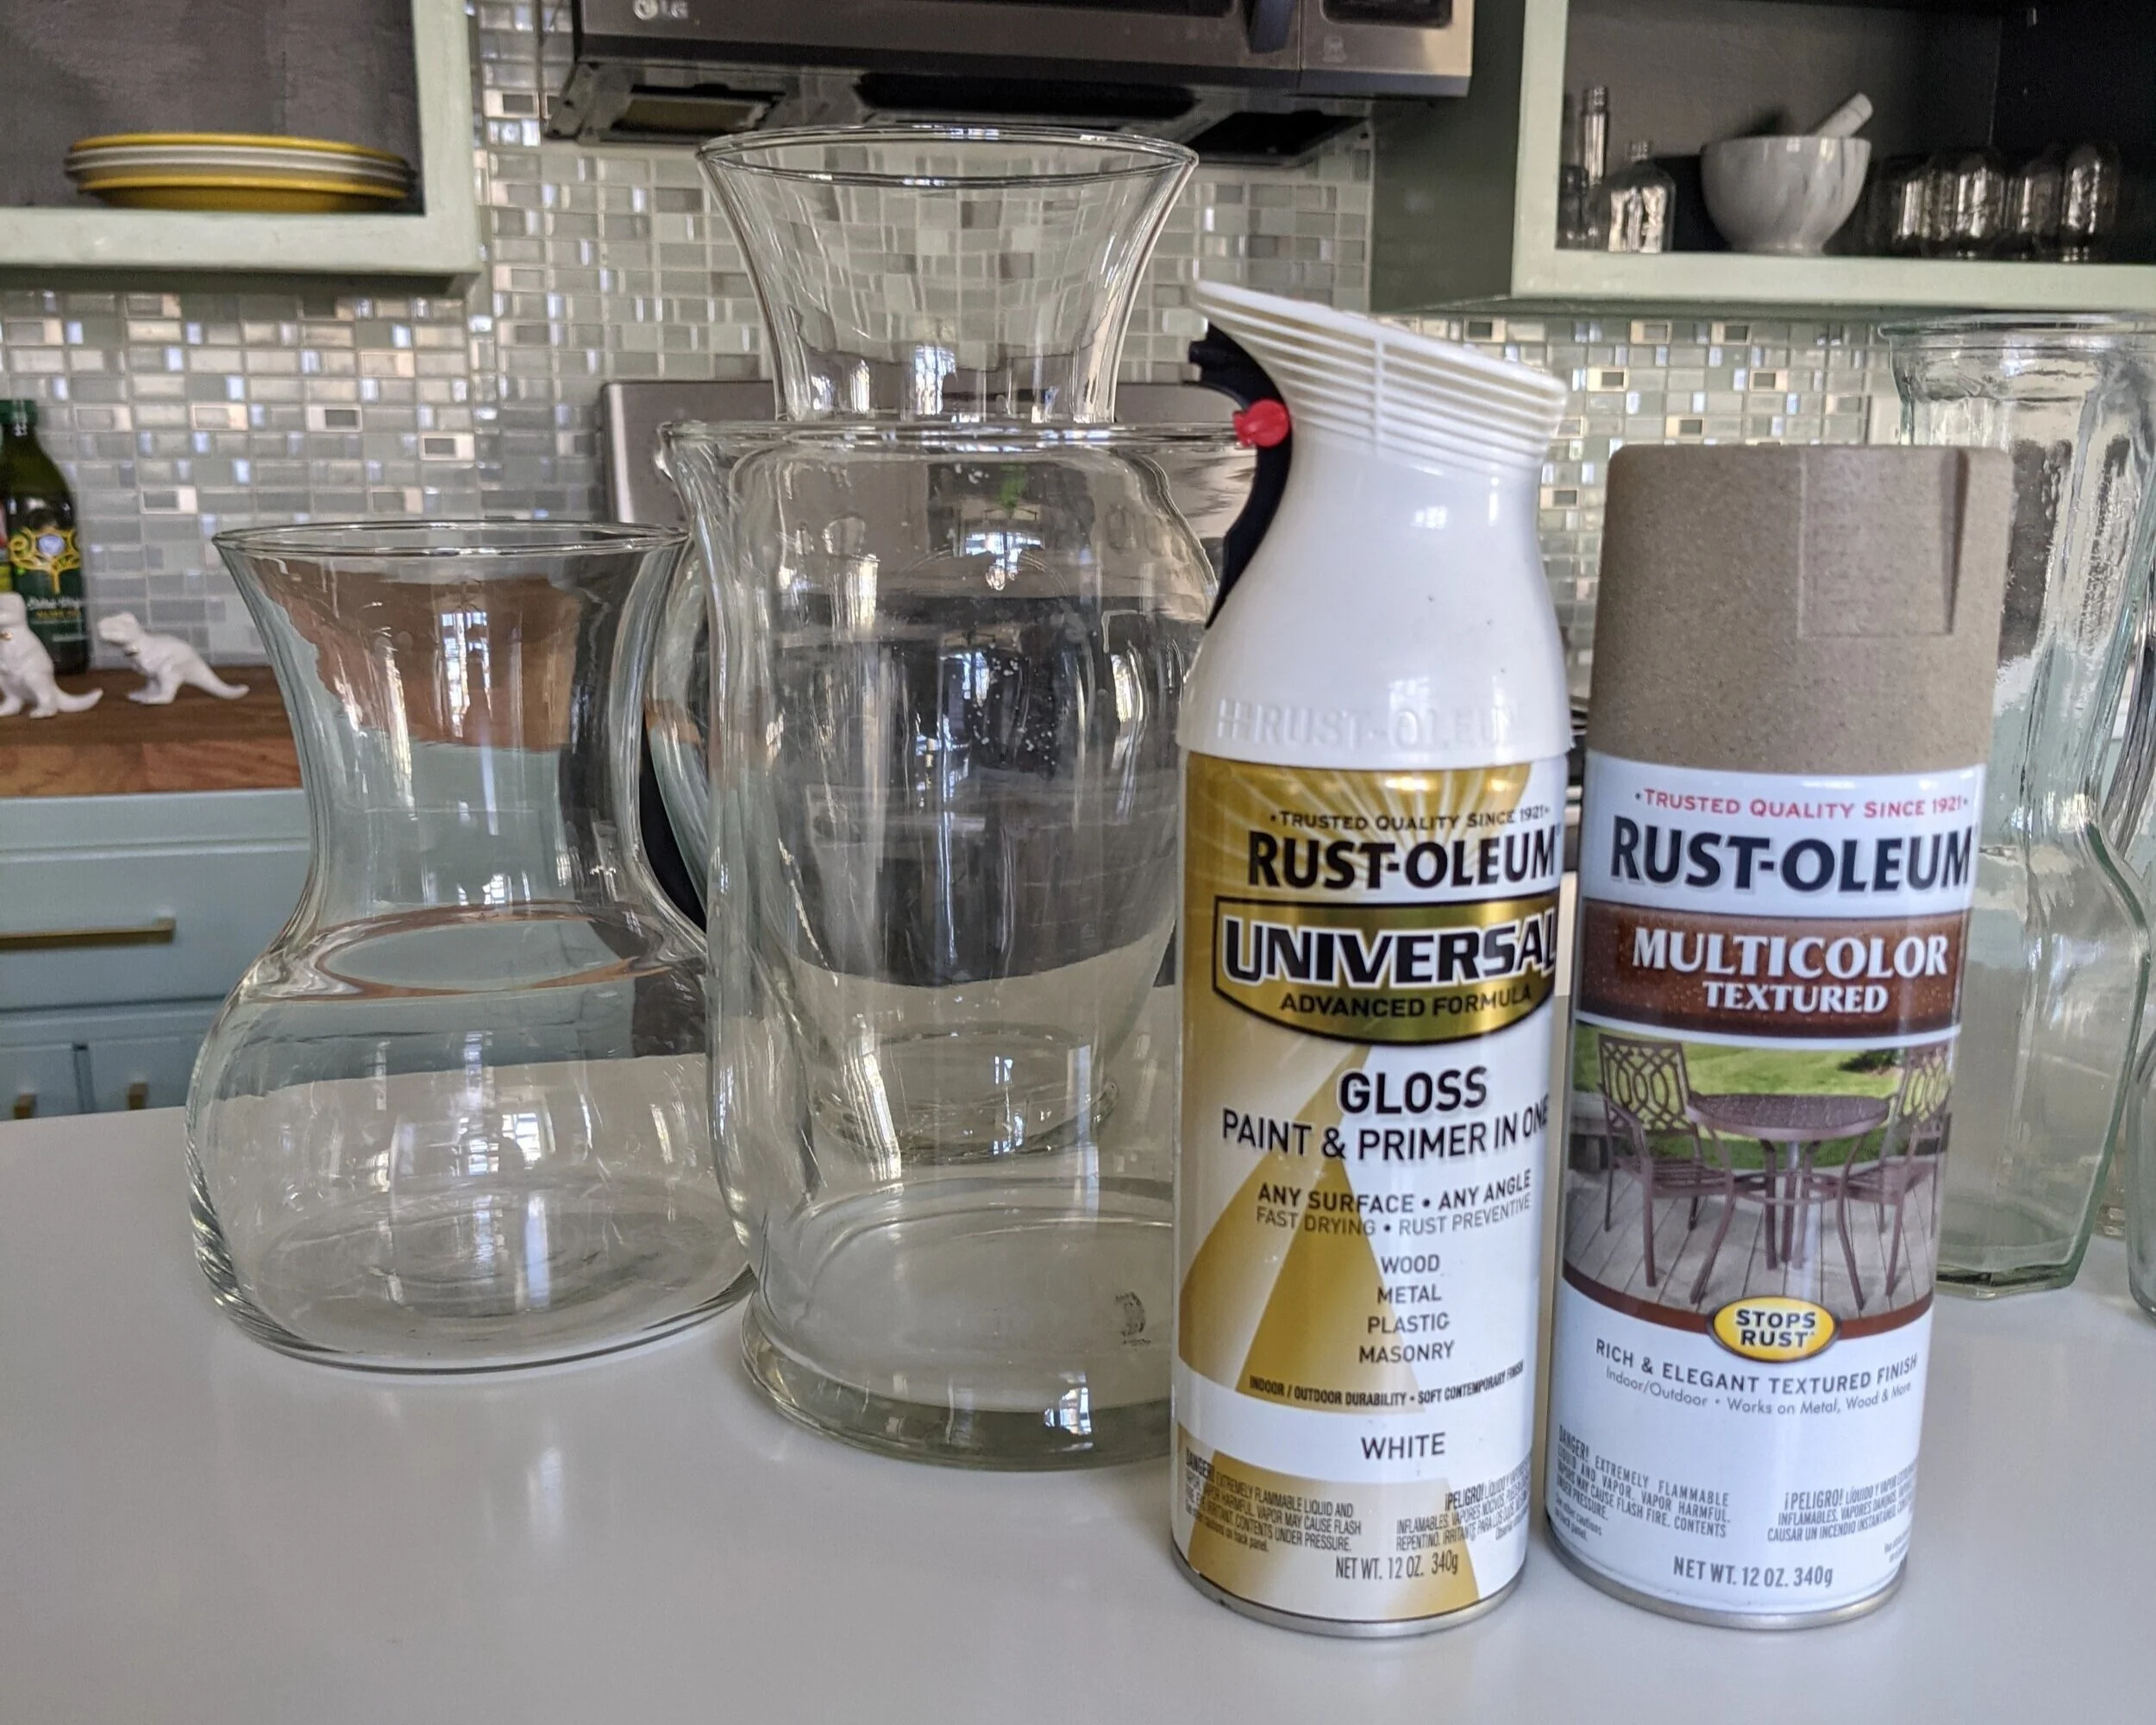
I stumbled upon this image of these pretty vases on Pinterest and really liked the look.

But being from West Elm, I figured they would be pricey. So I did what I do and tried my hand at making them - and I think they turned out to be pretty convincing!

Once that dried (I gave it a couple of days), I used painter’s tape and GENTLY wrapped the tape around the vases at an angle, being sure to avoid making any creases where the tape meets the vase. This isn’t as hard as it sounds, but you do want to try to get it right on the first try to avoid having to pull it off and restick, therefore increasing your chance of peeling some of your paint off (ask me how I know!). You can practice on your vases before painting on the base coat.

Then, I wrapped any area I didn’t want painted with my second color with Press’n Seal, which left a little bit of a sticky residue. Saran wrap would probably work just fine.

Once everything was protected, I applied a couple of layers of my textured spray paint - Rust-oleum Multicolor Textured.
Shortly after the final layer of paint was applied (maybe 30 minutes), I unwrapped everything. I was nervous if I let it sit for too long that I’d have trouble pulling the tape off. In a couple of tiny areas it pulled the white paint off with it, but if I display the vases strategically, no one will know the difference!
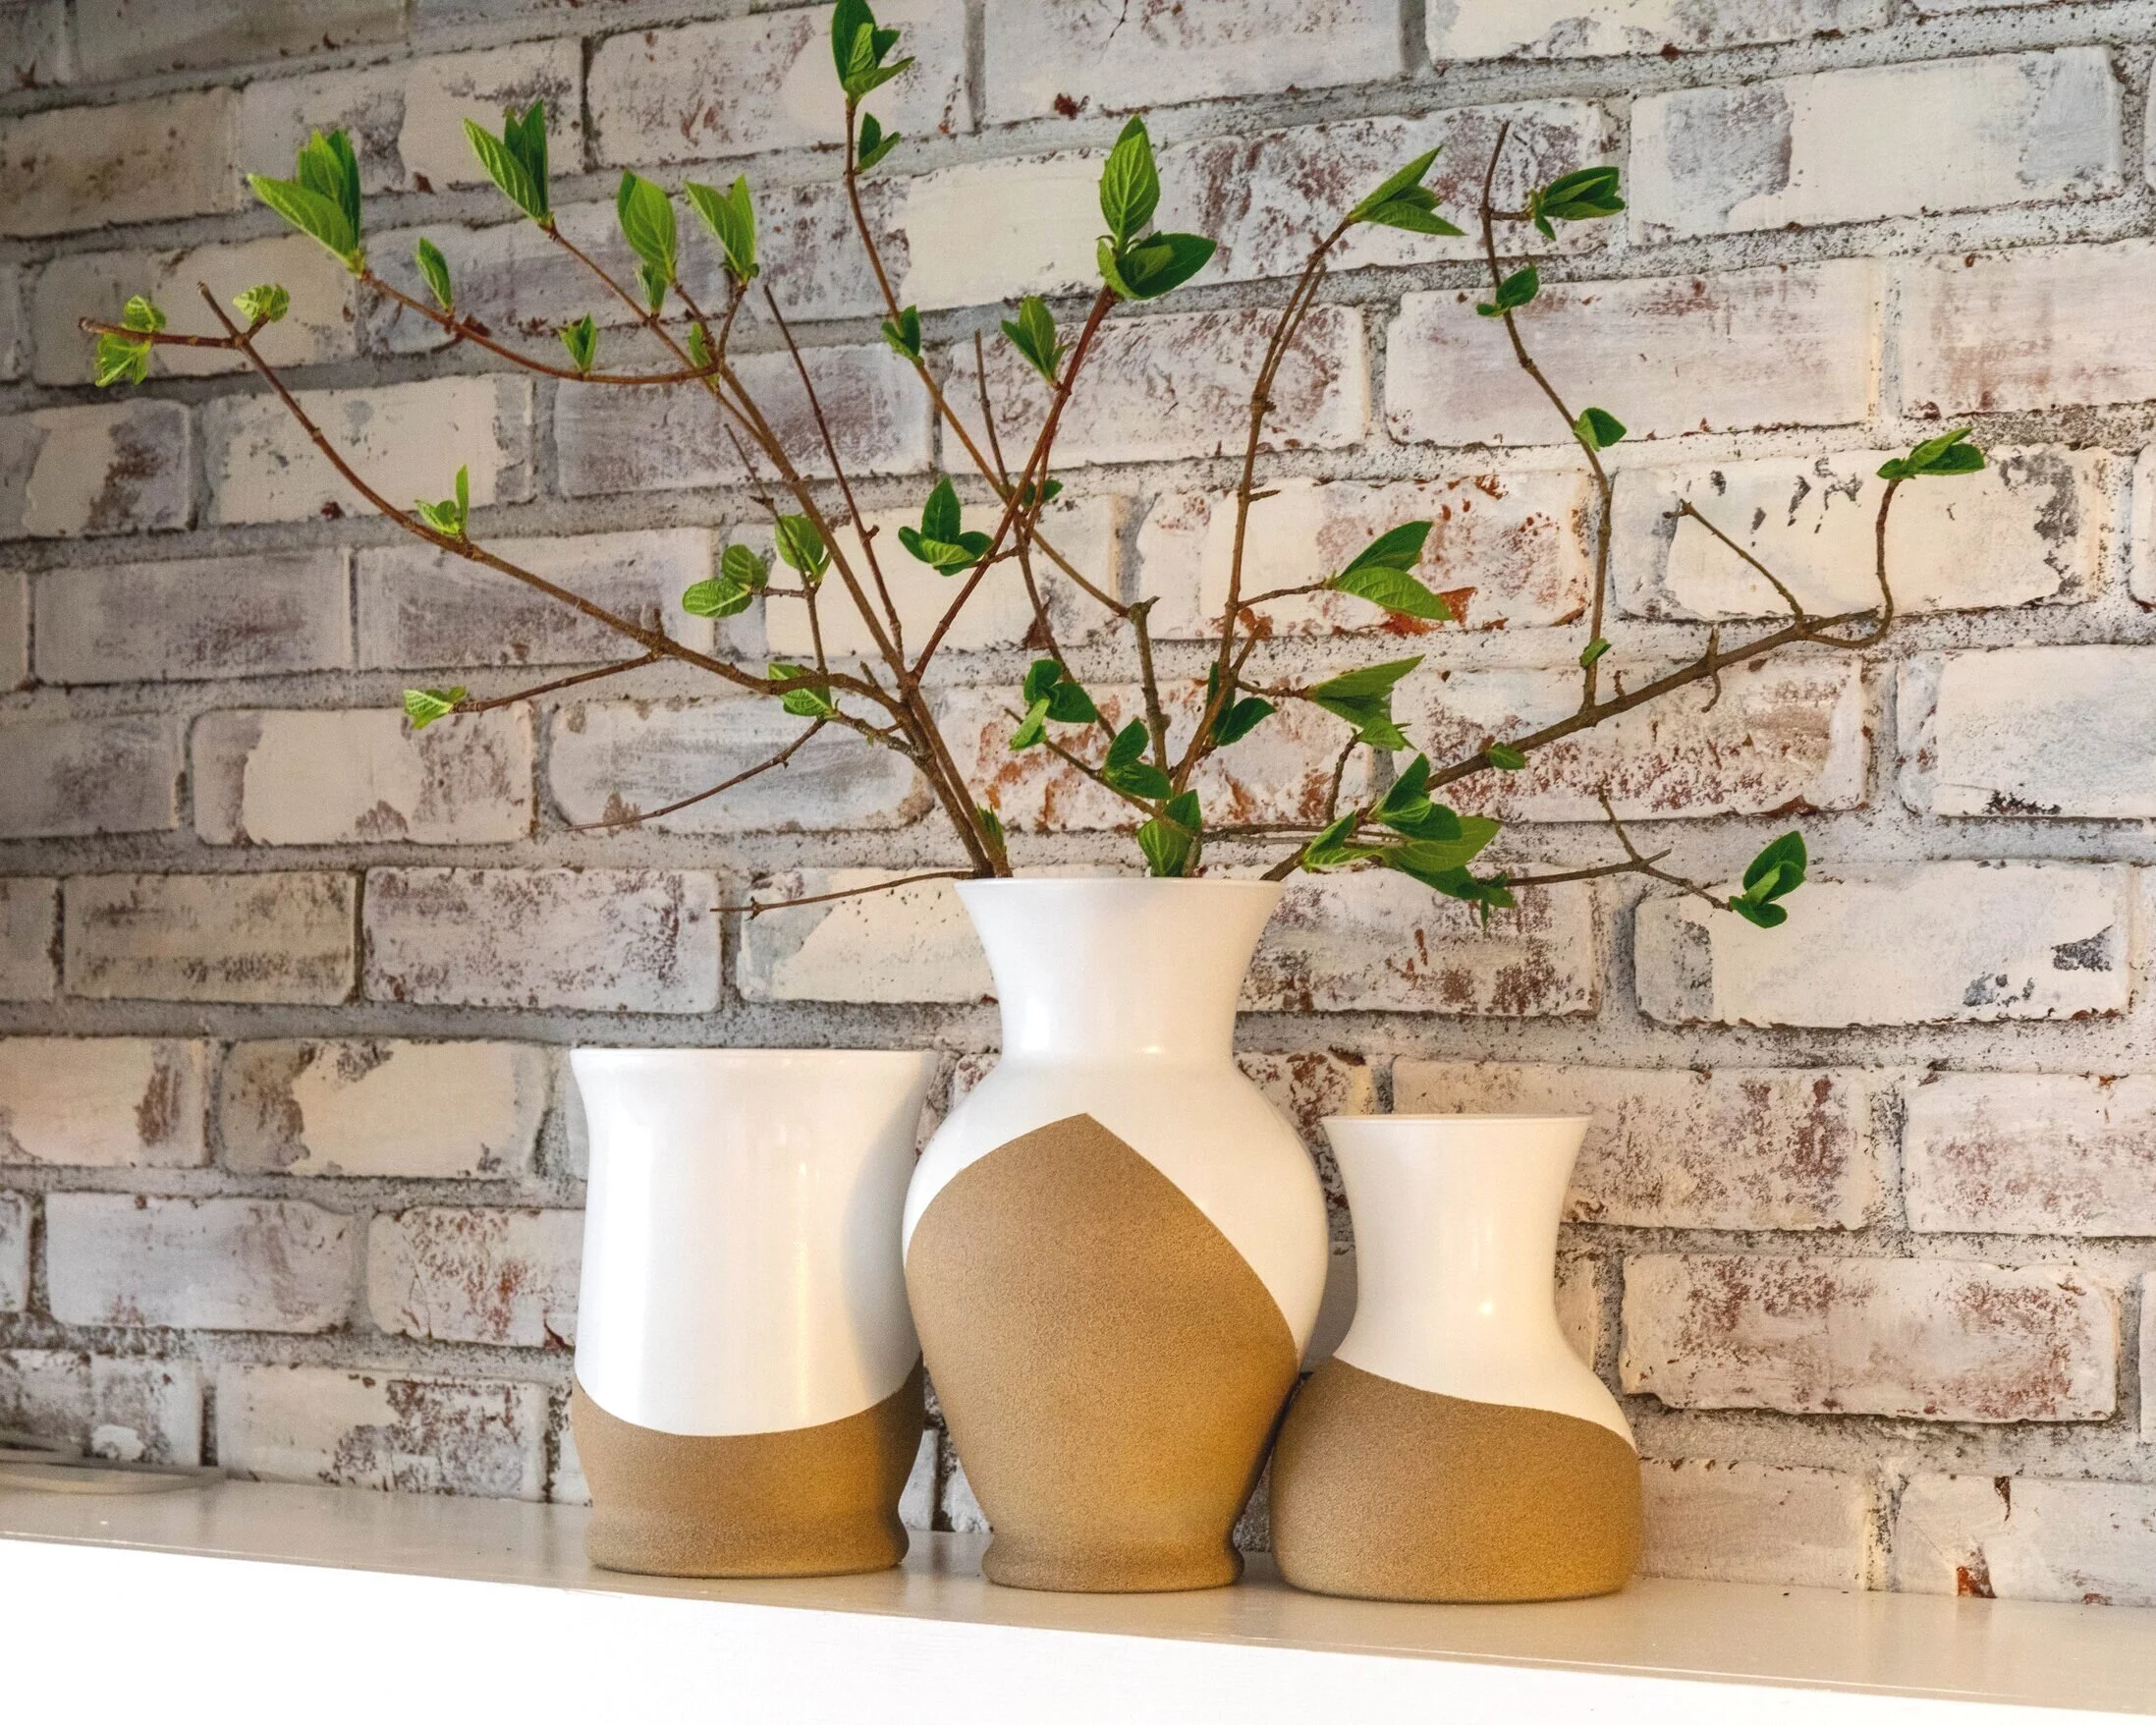
Joint Compound

Materials
Process
After I tried all the other methods, I wanted to see what something with a ton of texture looked like. To achieve this look, I used a terra-cotta pot and joint compound. I chose a terra-cotta pot because I figured the joint compound would adhere to that texture better than glass. And I specifically chose a pot without a rim around the top (like most terra-cotta pots have) to help camouflage it a little more.
Really all you need to do here is slap globs of joint compound on and smooth it around to your liking. I flipped my pot upside down and put one of my hands inside the pot as I turned it and applied joint compound. Since I applied some slightly around the bottom edge of the pot, I propped it up on a bowl to dry.
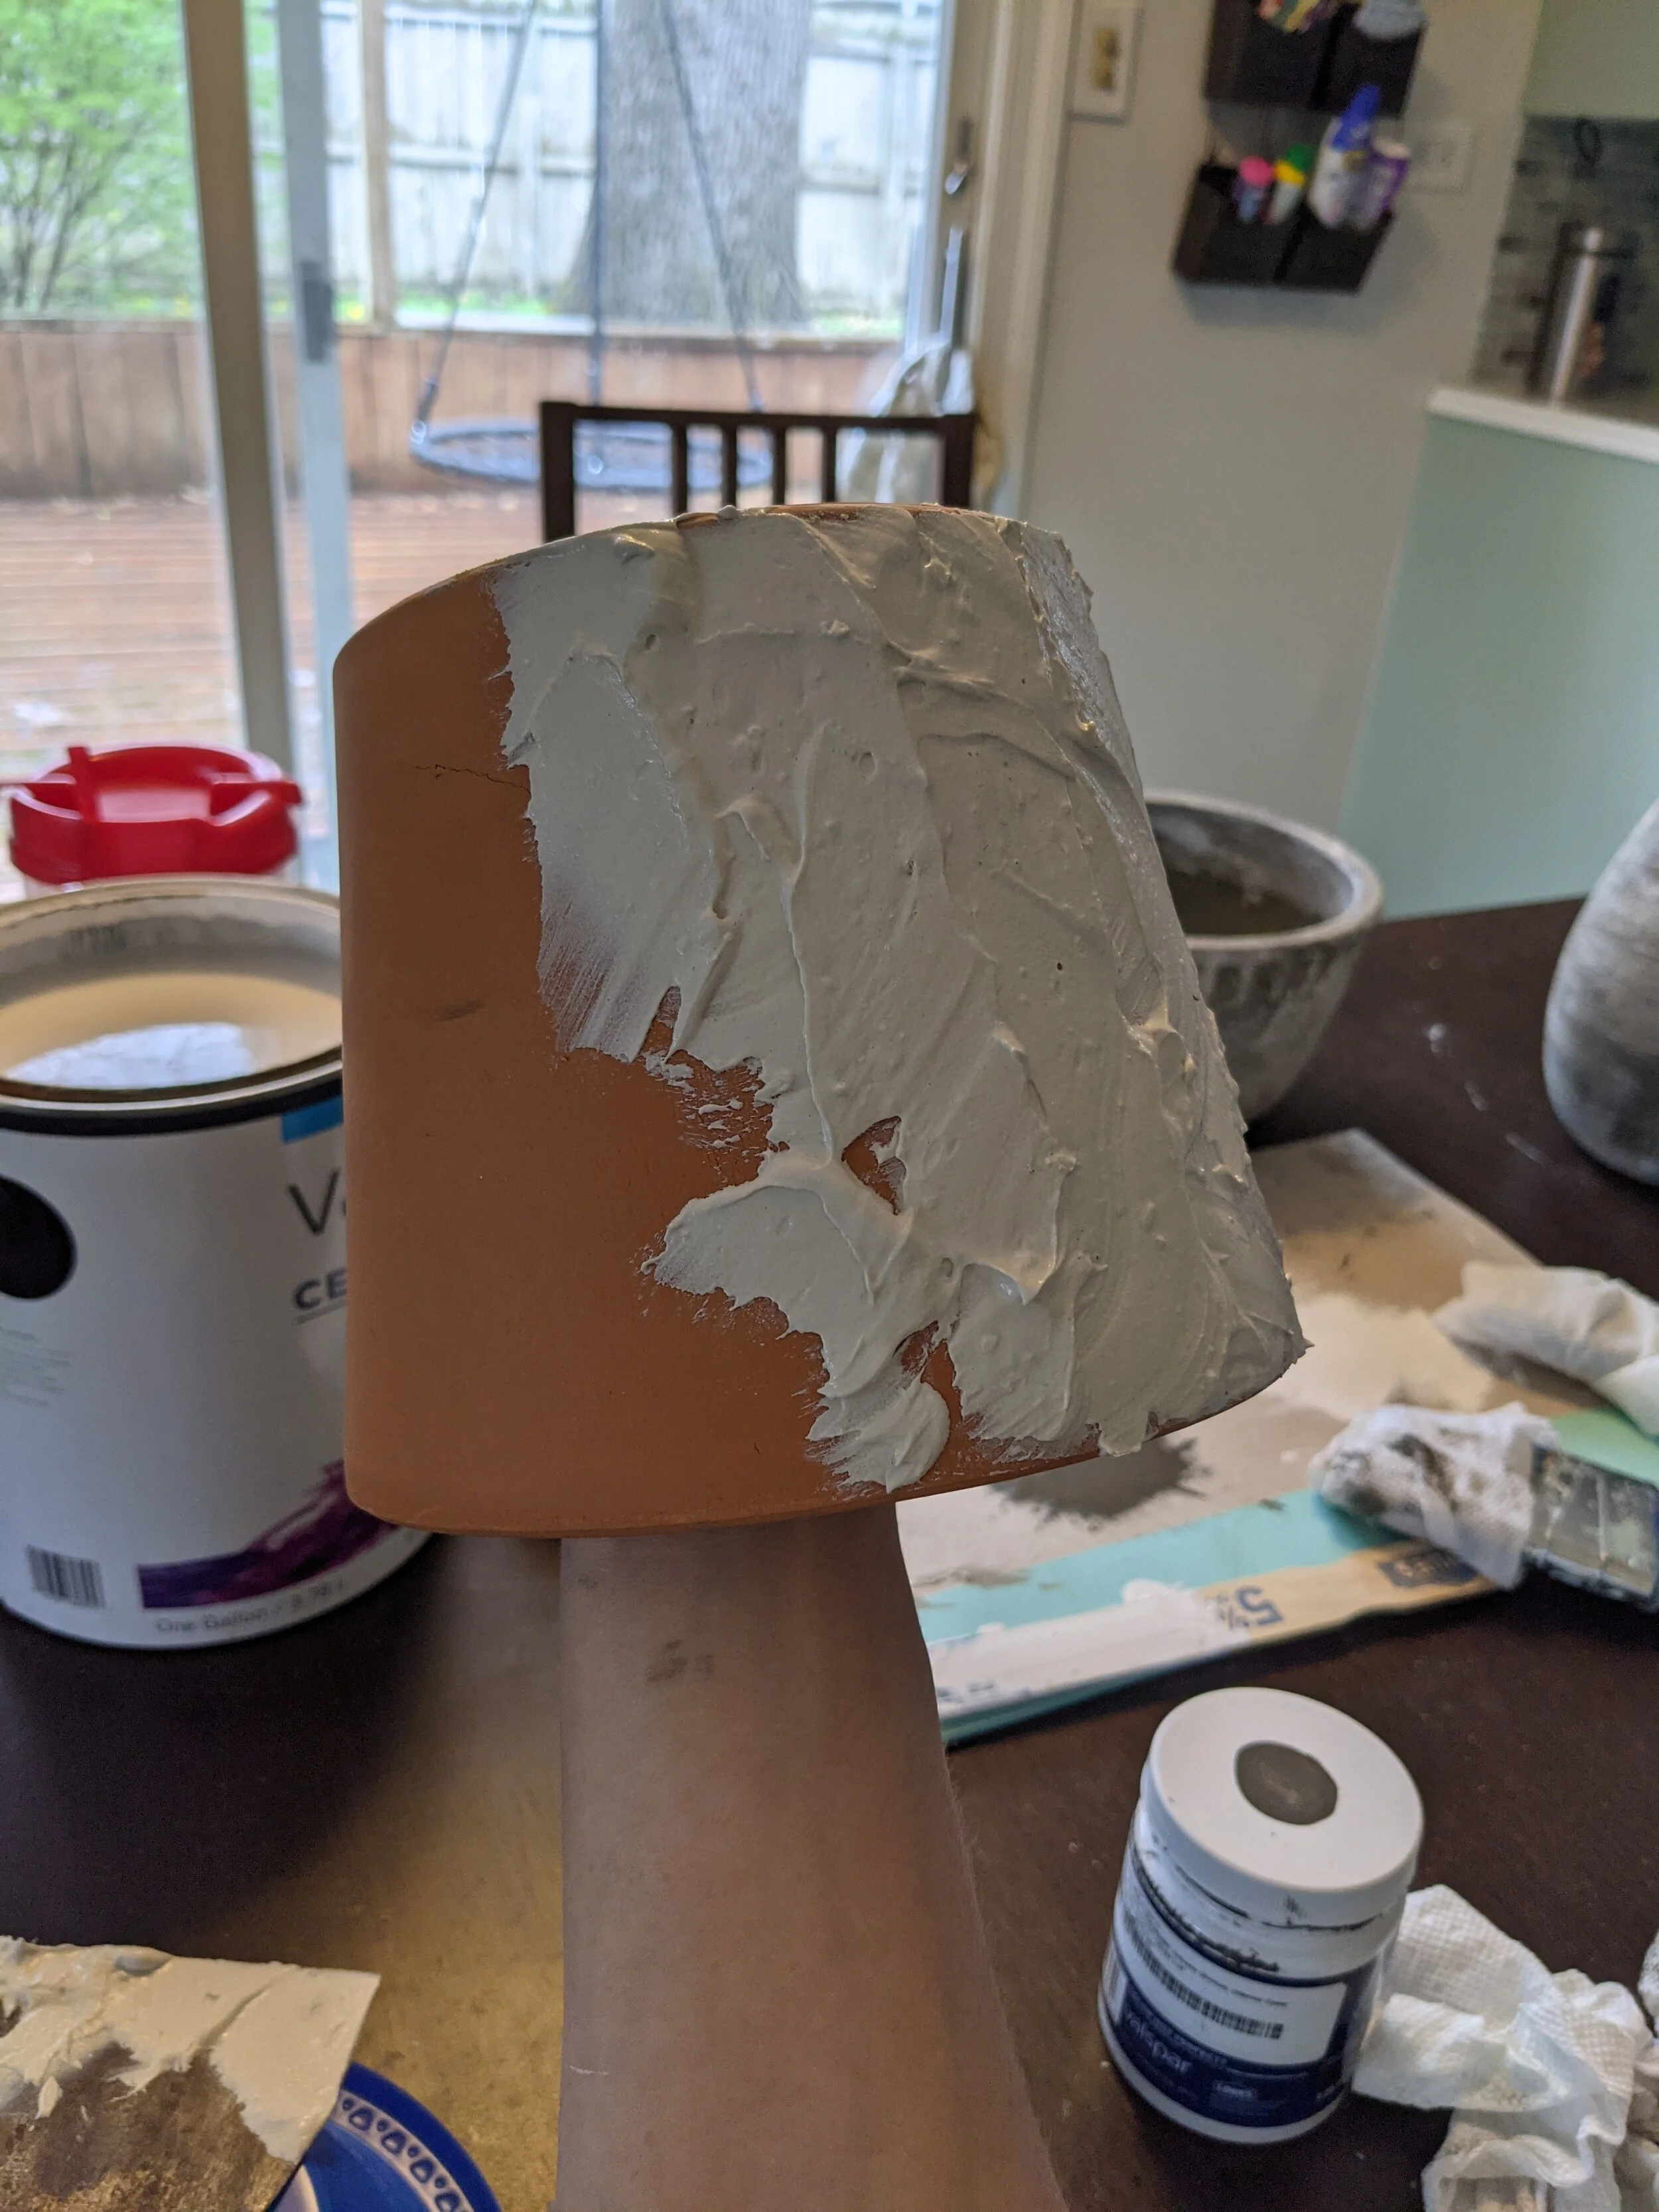

As with the large bowl in the first method, I applied the joint compound a couple of inches down on the inside of the pot. Now that it’s filled with a plant, you can’t even tell that this isn't the natural texture of the pot.
Finishing Work
Once the joint compound is dry (I recommend at least 24 hours) you can start painting!
I was less gentle with painting this pot than I was with the first method I tried. I first painted the whole pot a mid-tone base color. Once that was dry, I went back with damp paper towels and wiped on white paint, followed by darker tones. I went back and forth with this method until I felt like I achieved the look I was going for.

Final Thoughts
I had a blast experimenting with all these methods and hope this post helps you figure out which method will create the end result you’re looking for. I’d love to see your finished products created by using one of the methods above so send them my way! But if you love the look but don’t want to do the work, here are a few pretty stoneware vases you can buy:


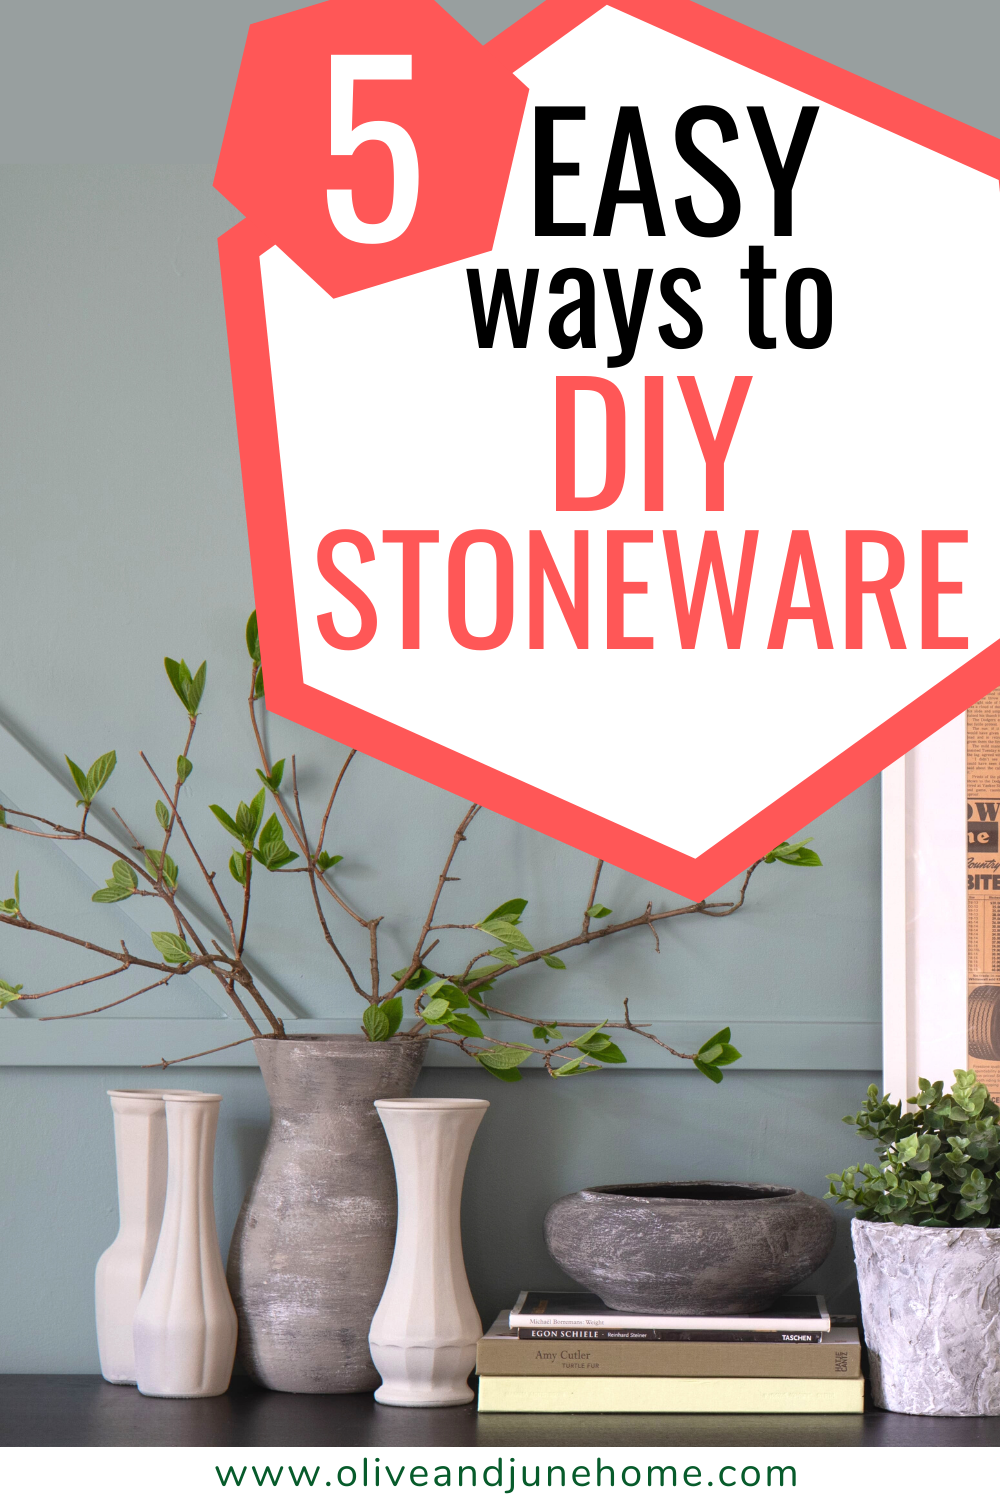
Stoneware Home Decor - Get the Look for Less

Target Accent Cabinet Makeover - with Cane Webbing!
In my post outlining our home improvement goals for 2021, I mentioned I wanted to work on whipping the foyer into a better, more inviting space. So why not start by flipping a piece of furniture I already have in there!?
How to Upgrade a Cabinet with Cane Webbing
In my post outlining our home improvement goals for 2021, I mentioned I wanted to work on whipping the foyer into a better, more inviting space. So why not start by flipping a piece of furniture I already have in there!?

I got this wildly popular cabinet from Target as a Christmas present probably 7 or so years ago and in that time it has served us well, generally housing random tools that we use frequently enough to keep close by. Lucius and I have even lovingly taken to calling it “The Gray Thing” when referring to it.
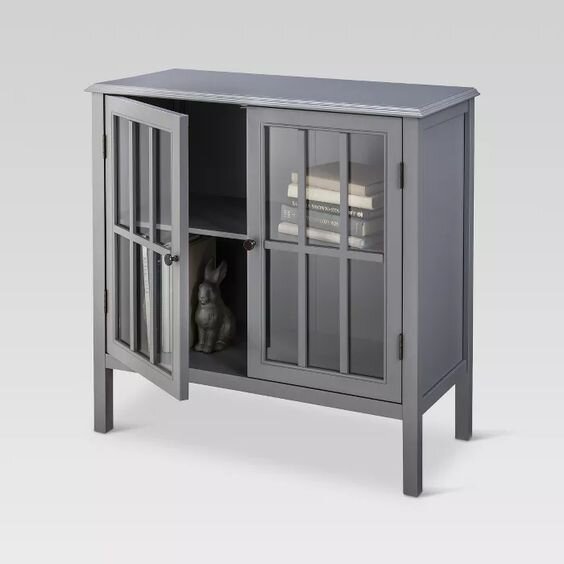
As an Amazon Associate, I earn from qualifying purchases. This post may contain affiliate links, meaning I receive commissions for purchases made through those links, at no cost to you.
Right off the bat after putting this lil’ guy together I realized I didn’t necessarily like being able to see inside. I mean, random hammers, measuring tape, extension cords, and paint supplies aren’t exactly the most luxurious home decor. So I took some double-sided tape and stuck a couple of sheets of a patterned paper to the inside of the windows. And for a long time, that was that.

But once we moved into our most recent house, The Gray Thing just seemed to fall flat where it lives in our foyer. I was actually on the verge of buying a console table to replace it when I found this image:

I was immediately inspired. I love the contrast of the black paint with the warmth of the brass and cane.
In our foyer, I’m really drawn to the dark greens of the snake plant I have on the side of the staircase and how the black basket it sits in pops against the more neutral tones in this space, so I figured trying to balance that out by painting my cabinet a darker color was worth a shot. Plus, I was really excited about the prospect of incorporating cane webbing into my space! And if it didn’t work out… no loss. I was planning on replacing it anyway. So I got to work!

How I Flipped my Cabinet
Materials
These are the tools you’ll need for everything except the cane webbing installation (we’ll get to that down below):
- Drill
- Oscillating tool
- Box cutter
- Sandpaper
- Orbital sander (optional)
- Primer
- Paint
- Paintbrush
- Foam Roller
- Paint Tray
Remove Doors and Hardware
This step is pretty self-explanatory - just grab a drill and go to town!
Remove Glass from Doors
Although it looks like there are 6 panels of glass in each door of this cabinet, it’s actually one piece of glass per door. Unfortunately, I kinda jumped into this step really quickly and failed to take pictures, so I’ll explain what I did as best as I can.
Using my oscillating tool, I stuck the blade between the frame of the door and the wood that made up the “windowpanes”. Gently do this around each piece of wood and it’ll pop right off. You should then have one piece of glass, intact. Hopefully, the picture below helps explain a little better.

As you can see, the wood that made up the “panes” pops out in one piece.
Then, to remove the piping holding the glass in (I’m sure there’s actually a term for whatever that is, but I don’t know it), I took a box cutter and pried it out.

Sand, Prime, & Paint
Next, you have your general prep work - sanding, priming, and painting. I simply took my orbital sander and some 80 grit sandpaper and roughed up the surface of the cabinet. Then used a brush and small foam roller to apply a coat of primer. Lastly, I used my brush and foam roller to apply two coats of paint.
I painted my cabinet Jasper by Sherwin Williams. It’s a super dark, almost black, green. I used this same color on the interior of a couple of our kitchen cabinets and love it! I figured seeing it in another area of the house would tie the spaces together nicely.

Add Cane Webbing

Now, this is what I bet most of you are here for - cane webbing!
This material is all over the place right now, and rightfully so! It’s a beautiful material that easily brings a natural element to any space. I even wrote about how it was trending in this post a while back! And I was super excited when I realized I found a way to incorporate it into a DIY project.
I ordered mine from this shop on Etsy, but you can also find it on Amazon. I added it to the doors of my cabinet using a staple gun. Here’s how:
- Soak your cane webbing
- Soaking the cane webbing for about 30 minutes before you begin work makes it way more pliable.
- Gather your materials
- While your cane is soaking, grab the following items:
- Scissors
- Measuring tape
- Staple gun
- Staples (I used 1/4 inch)
- Needle nose pliers
- While your cane is soaking, grab the following items:
- Cut the cane webbing
- Measure the inside of the frame of the cabinet door and cut the cane webbing to size. It’s okay (and honestly, not a bad idea) if you cut it just a hair bigger than the opening.
- Staple it in place
- I was fully expecting the installation of the cane to be WAY harder. I bought spline expecting to push the cane into the notch around the edge of the door frame that held the glass. But before I tried that, I thought I’d at least have to use wood glue. Nope, not true. I didn’t use either of those. I simply stapled the cane to the lip on the interior of the cabinet door that held the glass panes.
- A few hints here:
- Remember how I said to cut the cane a hair bigger than you measured? This is why. The cane wants to unweave itself. Cutting it a little larger gives you some extra material to work with.
- Be liberal with your staples. As you’ll see below, I put my staples so close together, they even overlapped at times. It’s hard to aim with a staple gun, so using lots of staples helps ensure you’re grabbing the cane webbing all along the edge. And if a staple goes in a little wonky, just use your needlenose pliers to pull it out.
- After you staple the cane webbing to the door frame, it’ll look a little wavy. Have no fear! As it dries, the cane tightens up and straightens itself out.


And that’s it! Installing the cane webbing was as simple as that. Now you get to put it all back together!
Reinstall Hardware
Lastly, I decided to change up the knobs on my cabinet, but you could definitely keep the ones that came with it. I did end up using the same hinges that came with the cabinet though.
Final Thoughts
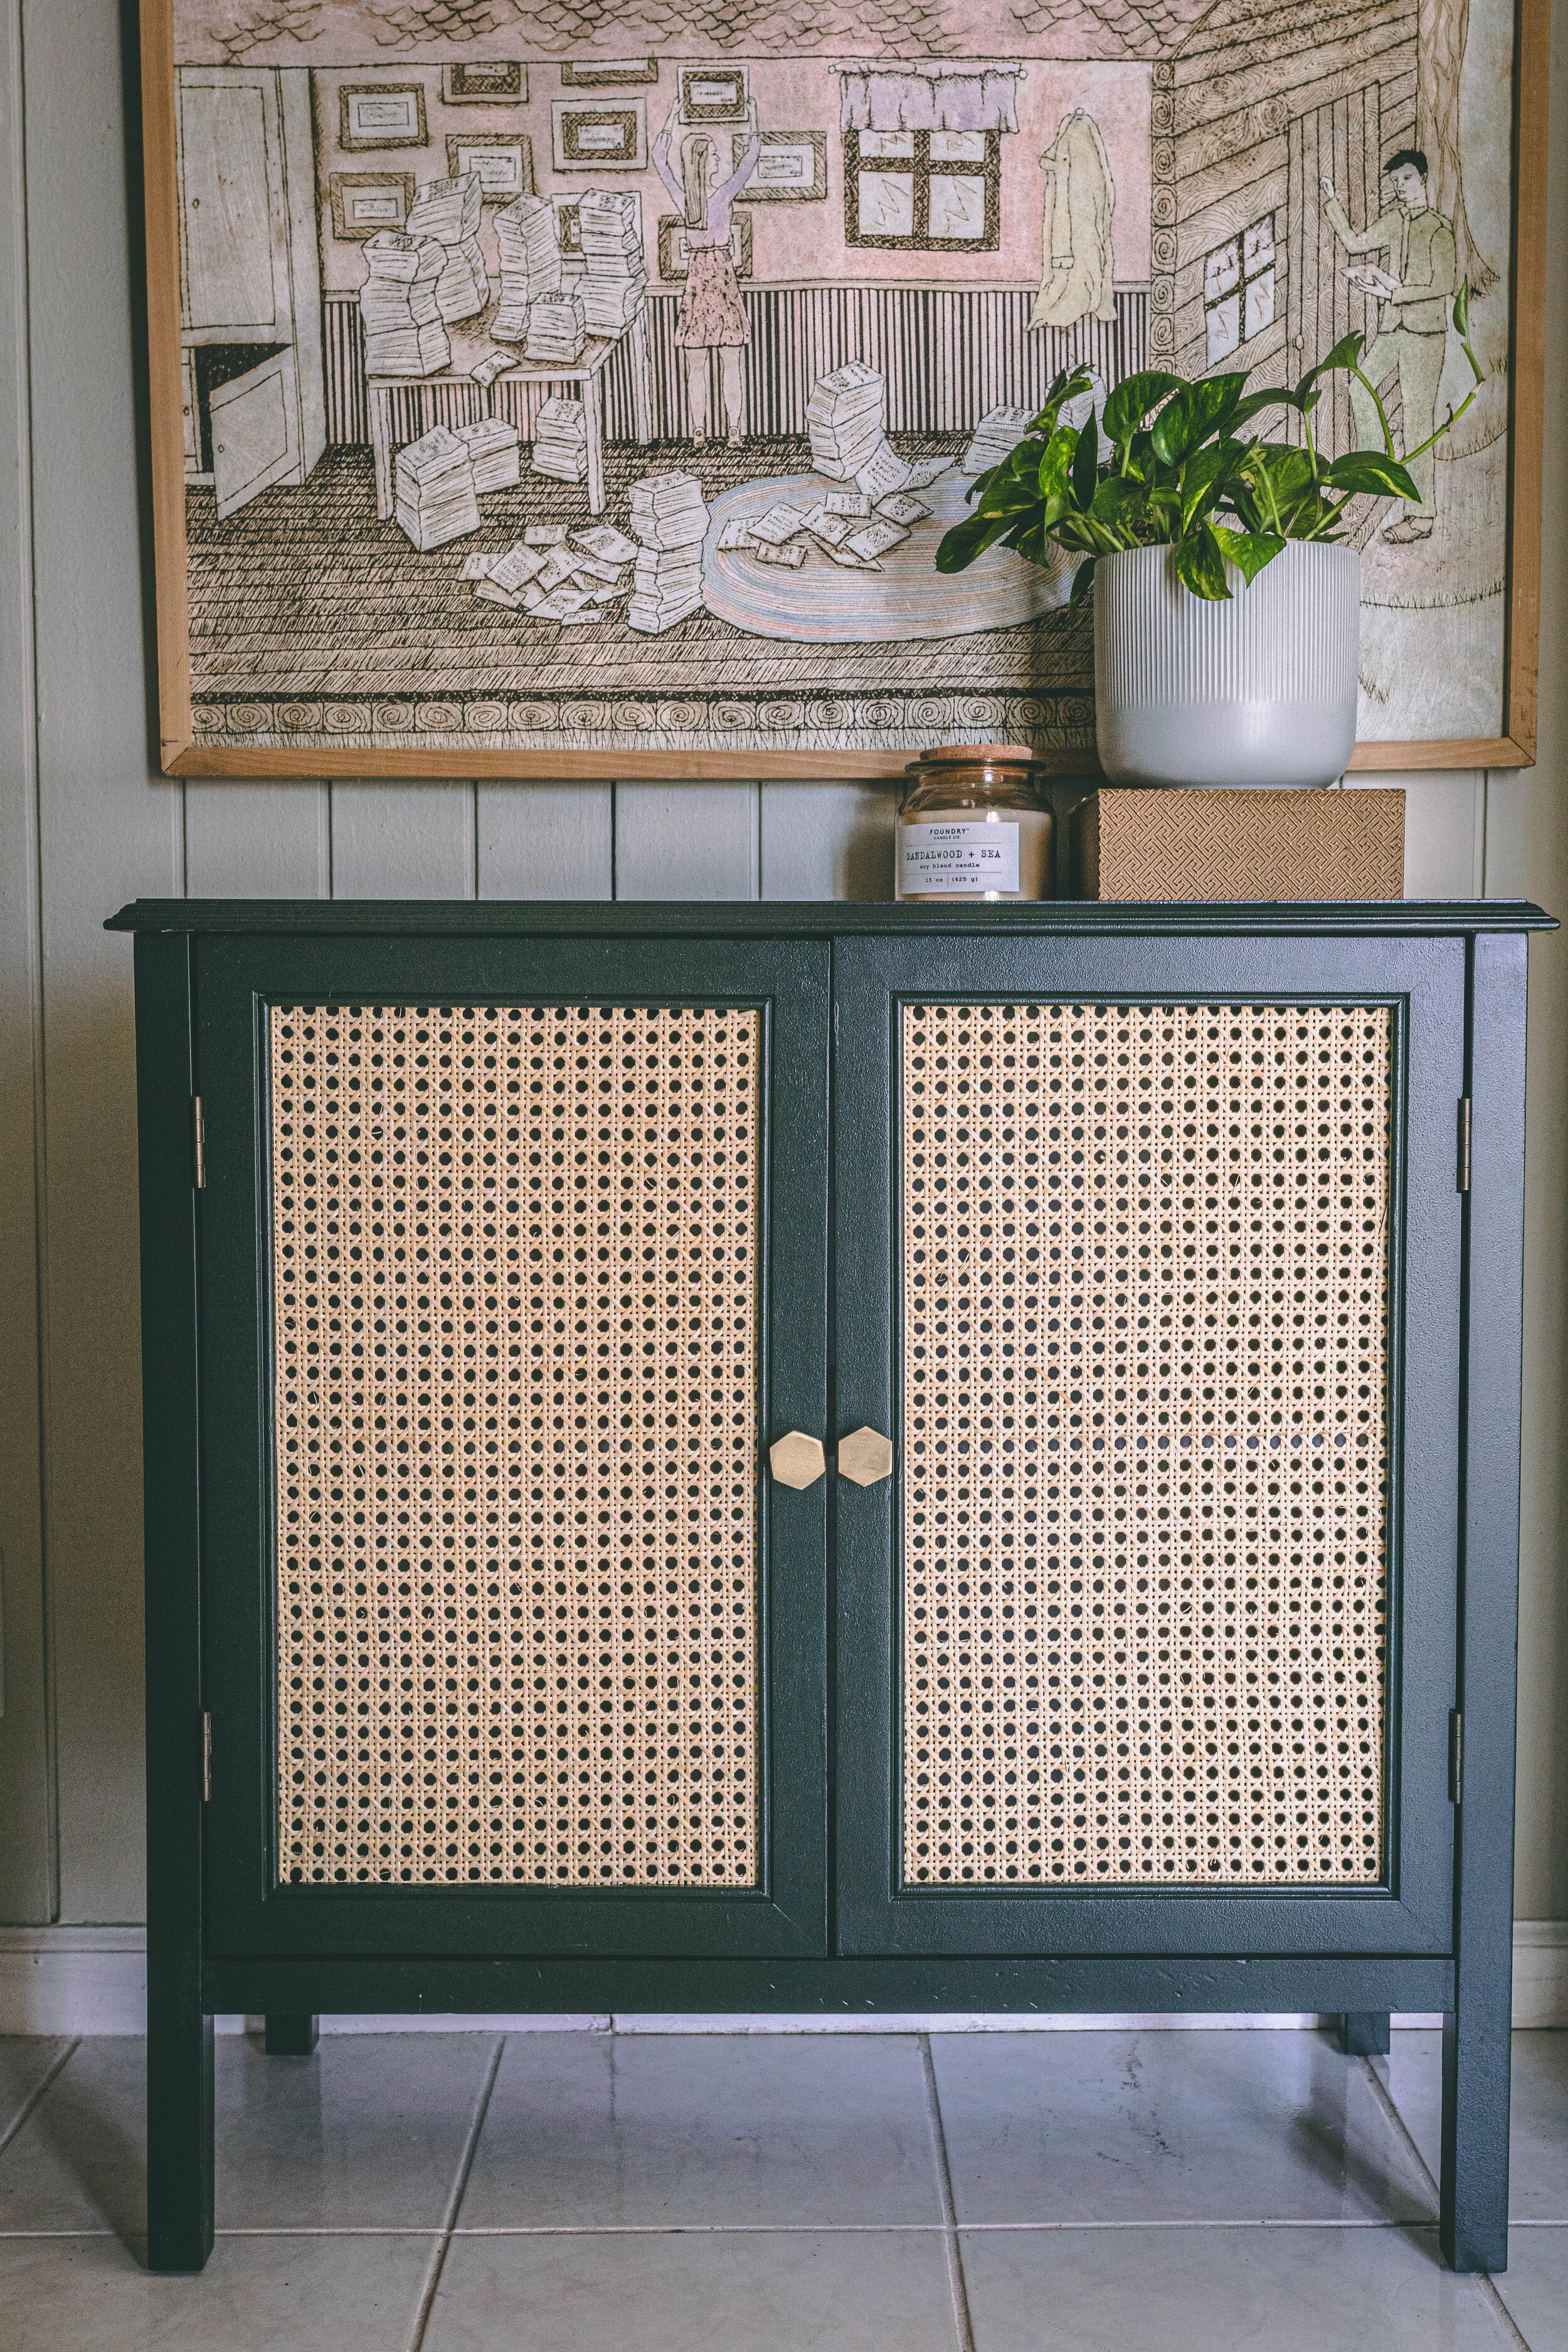

Aren’t these the best DIY projects? The ones that are low-risk and turn out exactly as you wanted? I feel like it rarely goes this smoothly in DIY so I’ll take this one as a win! Plus, I’m loving how my updated cabinet is helping to transform the foyer into a much more put-together entryway. There’s still some work to do in this area… obviously finishing the staircase is on the list but I’m also picturing a big rubber tree next to the cabinet (now renamed “Jasper” after the paint color it’s painted). More to come!
