
Loft Reno - Updates, What’s Left, and New Ideas
Bonus Room Renovation
I can’t believe how long it’s been since my last post about the loft! The most recent changes happened in such quick succession it didn’t register how much has changed until, um… now. But a LOT has changed! So, in this post, I’ll walk you through what we’ve done to the loft since my last update, what’s still left to do, and some new ideas we’ve been throwing around!


As an Amazon Associate, I earn from qualifying purchases. This post may contain affiliate links, meaning I receive commissions for purchases made through those links at no cost to you.
Let’s kick this post off with a list of the most recent progress:
Paint
Ahhhh, paint. My favorite way to make a big impact on a budget - and this was no exception. I was especially excited to paint this room because I got to break in my new paint sprayer for the first time!
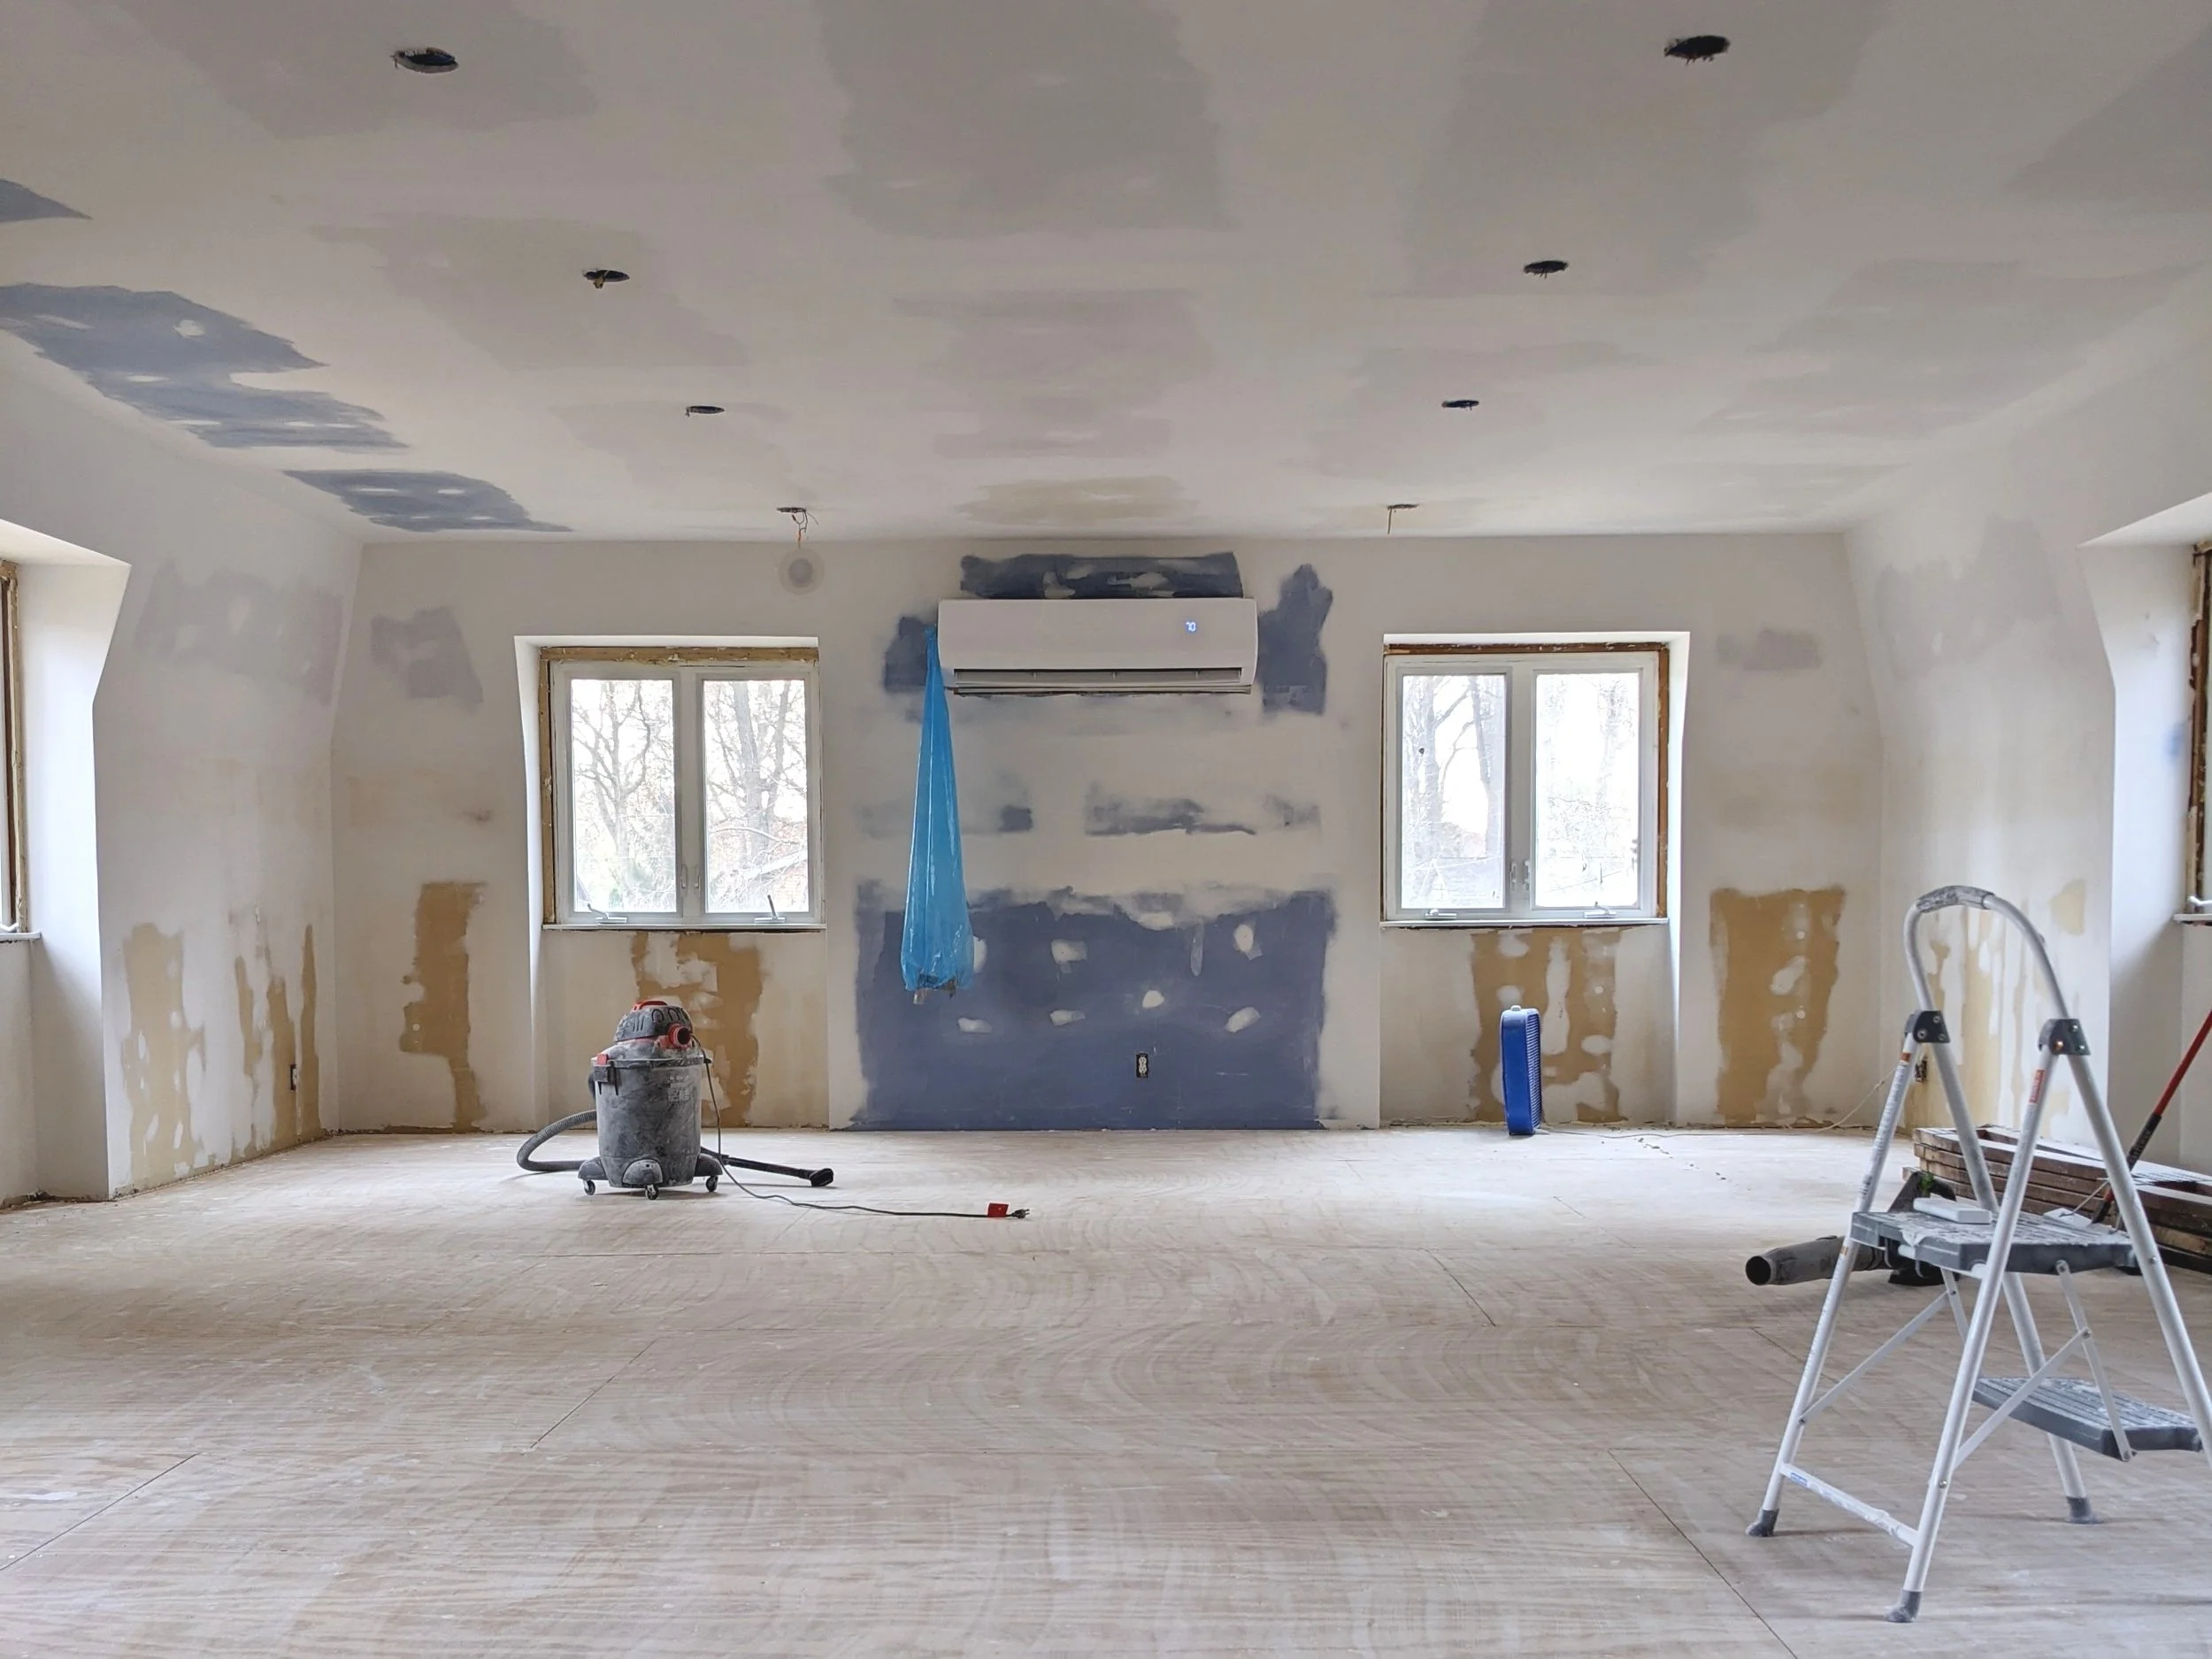
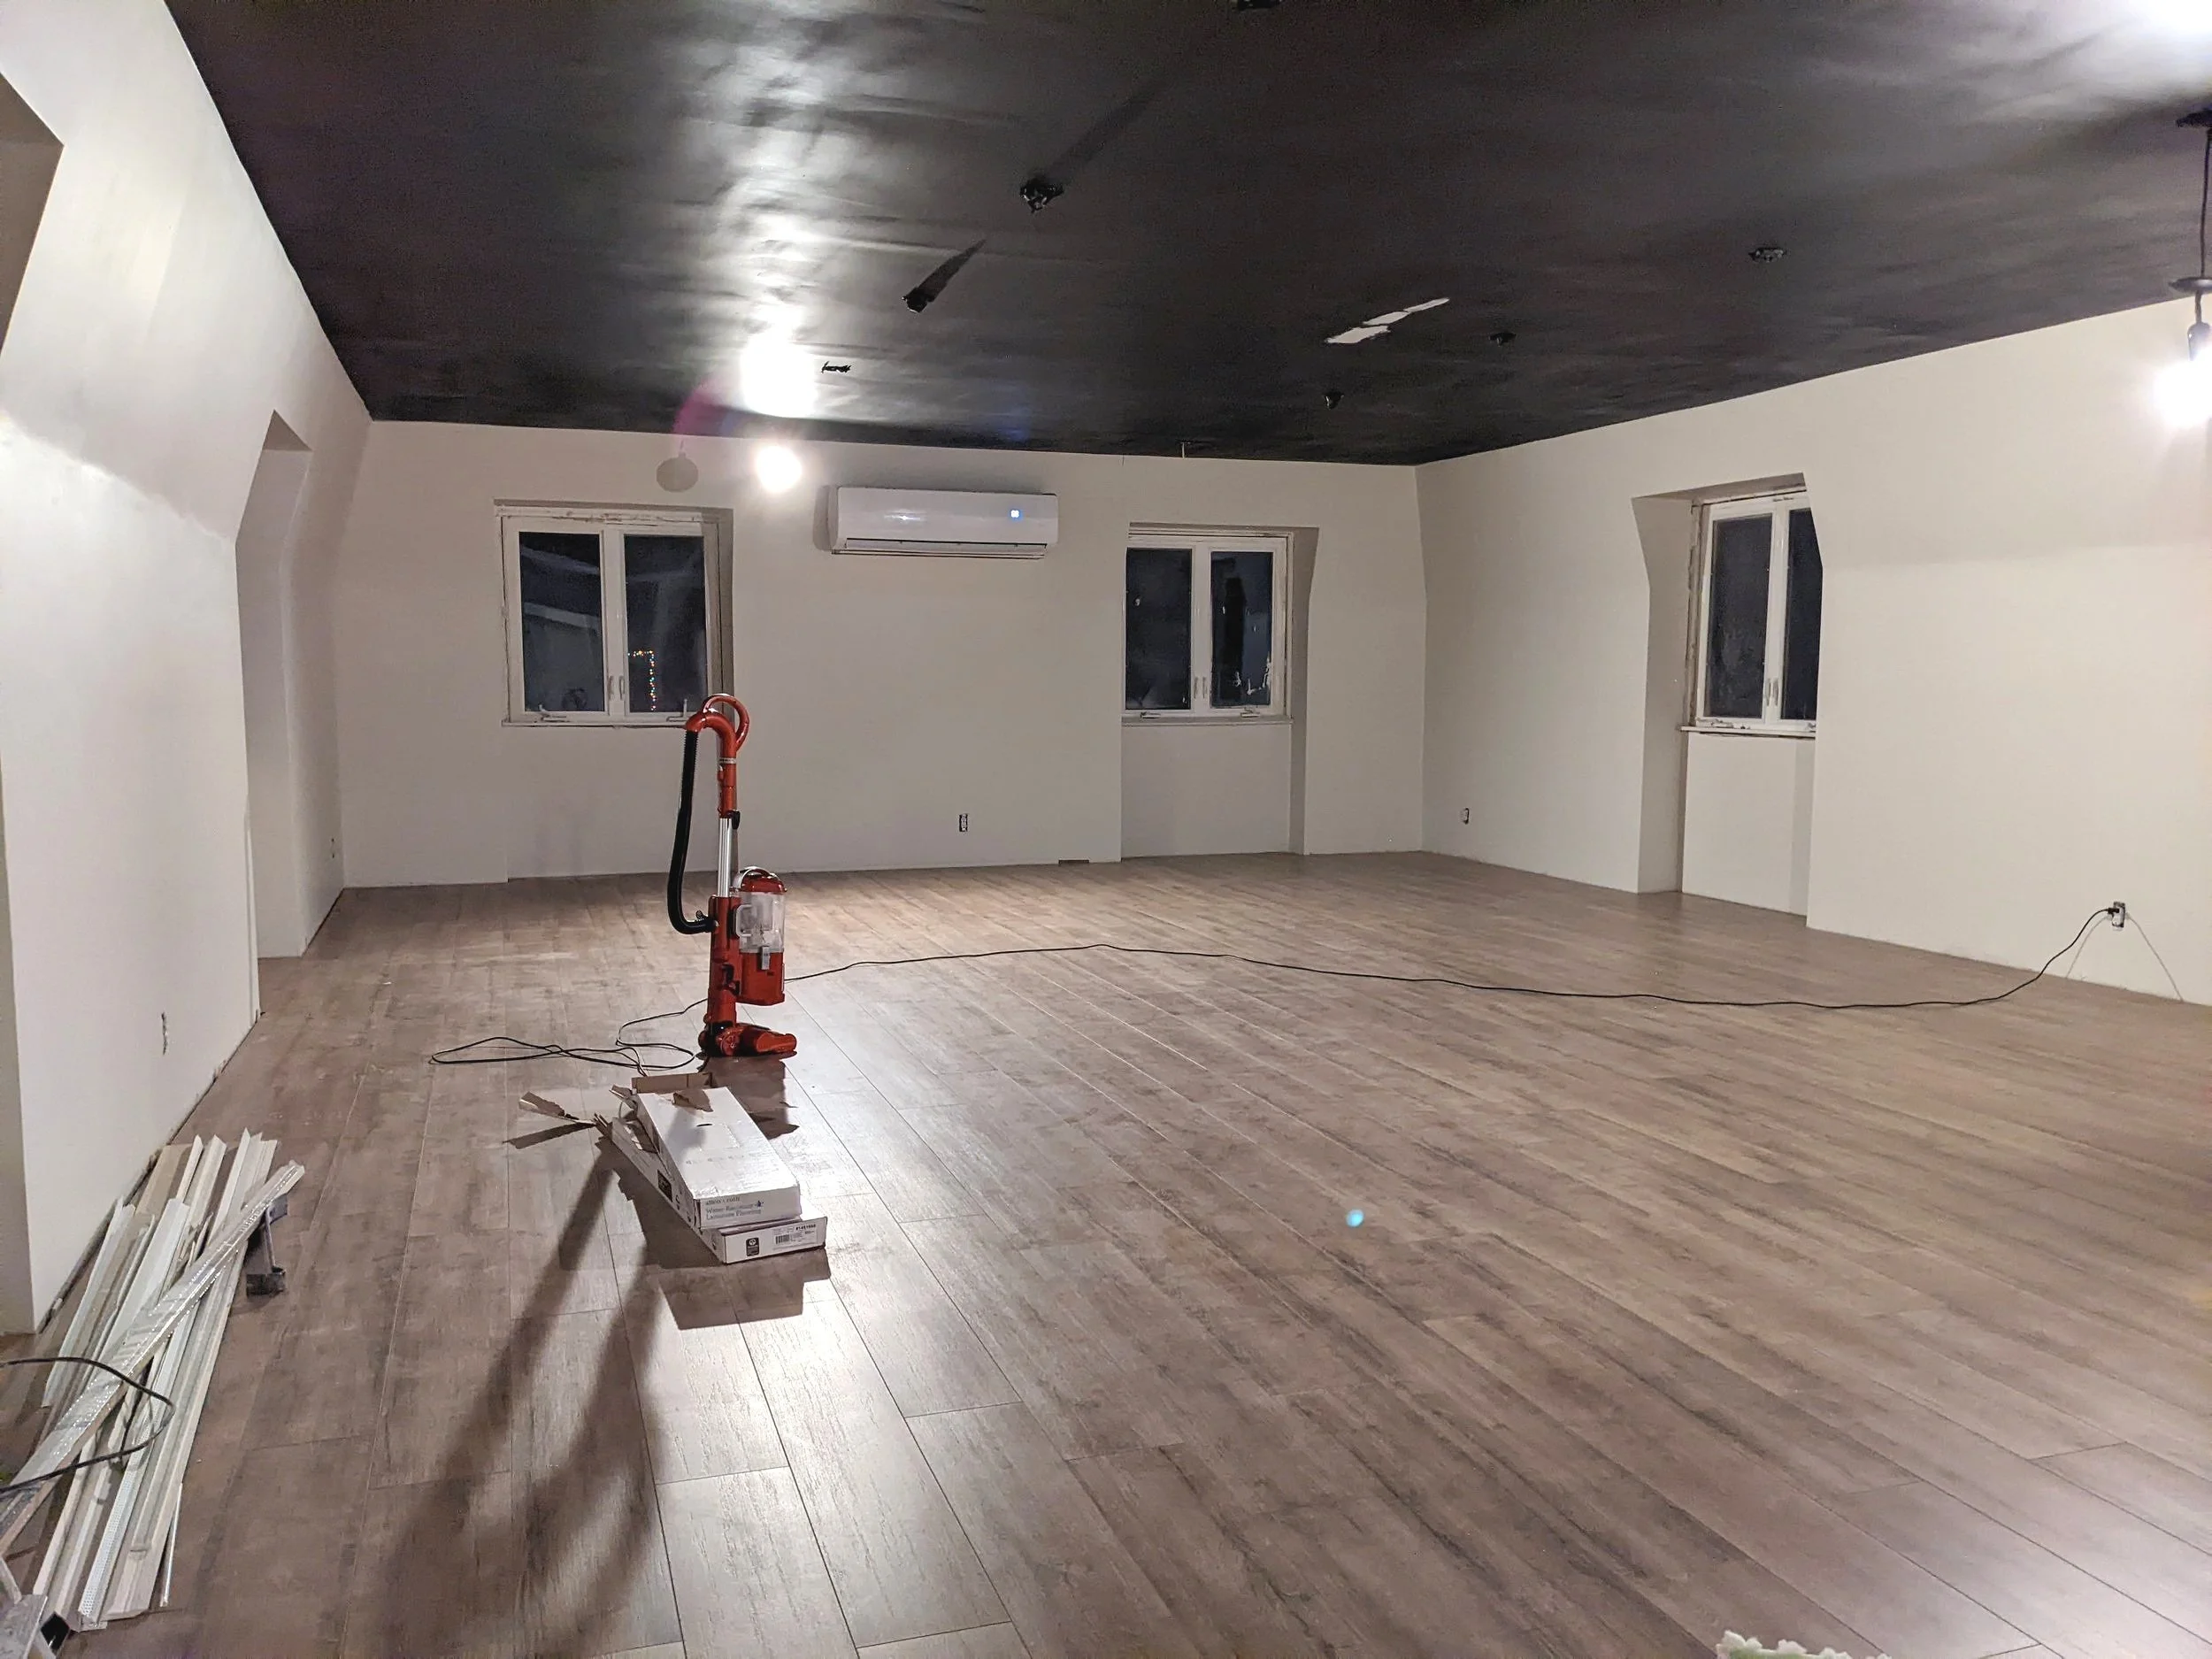
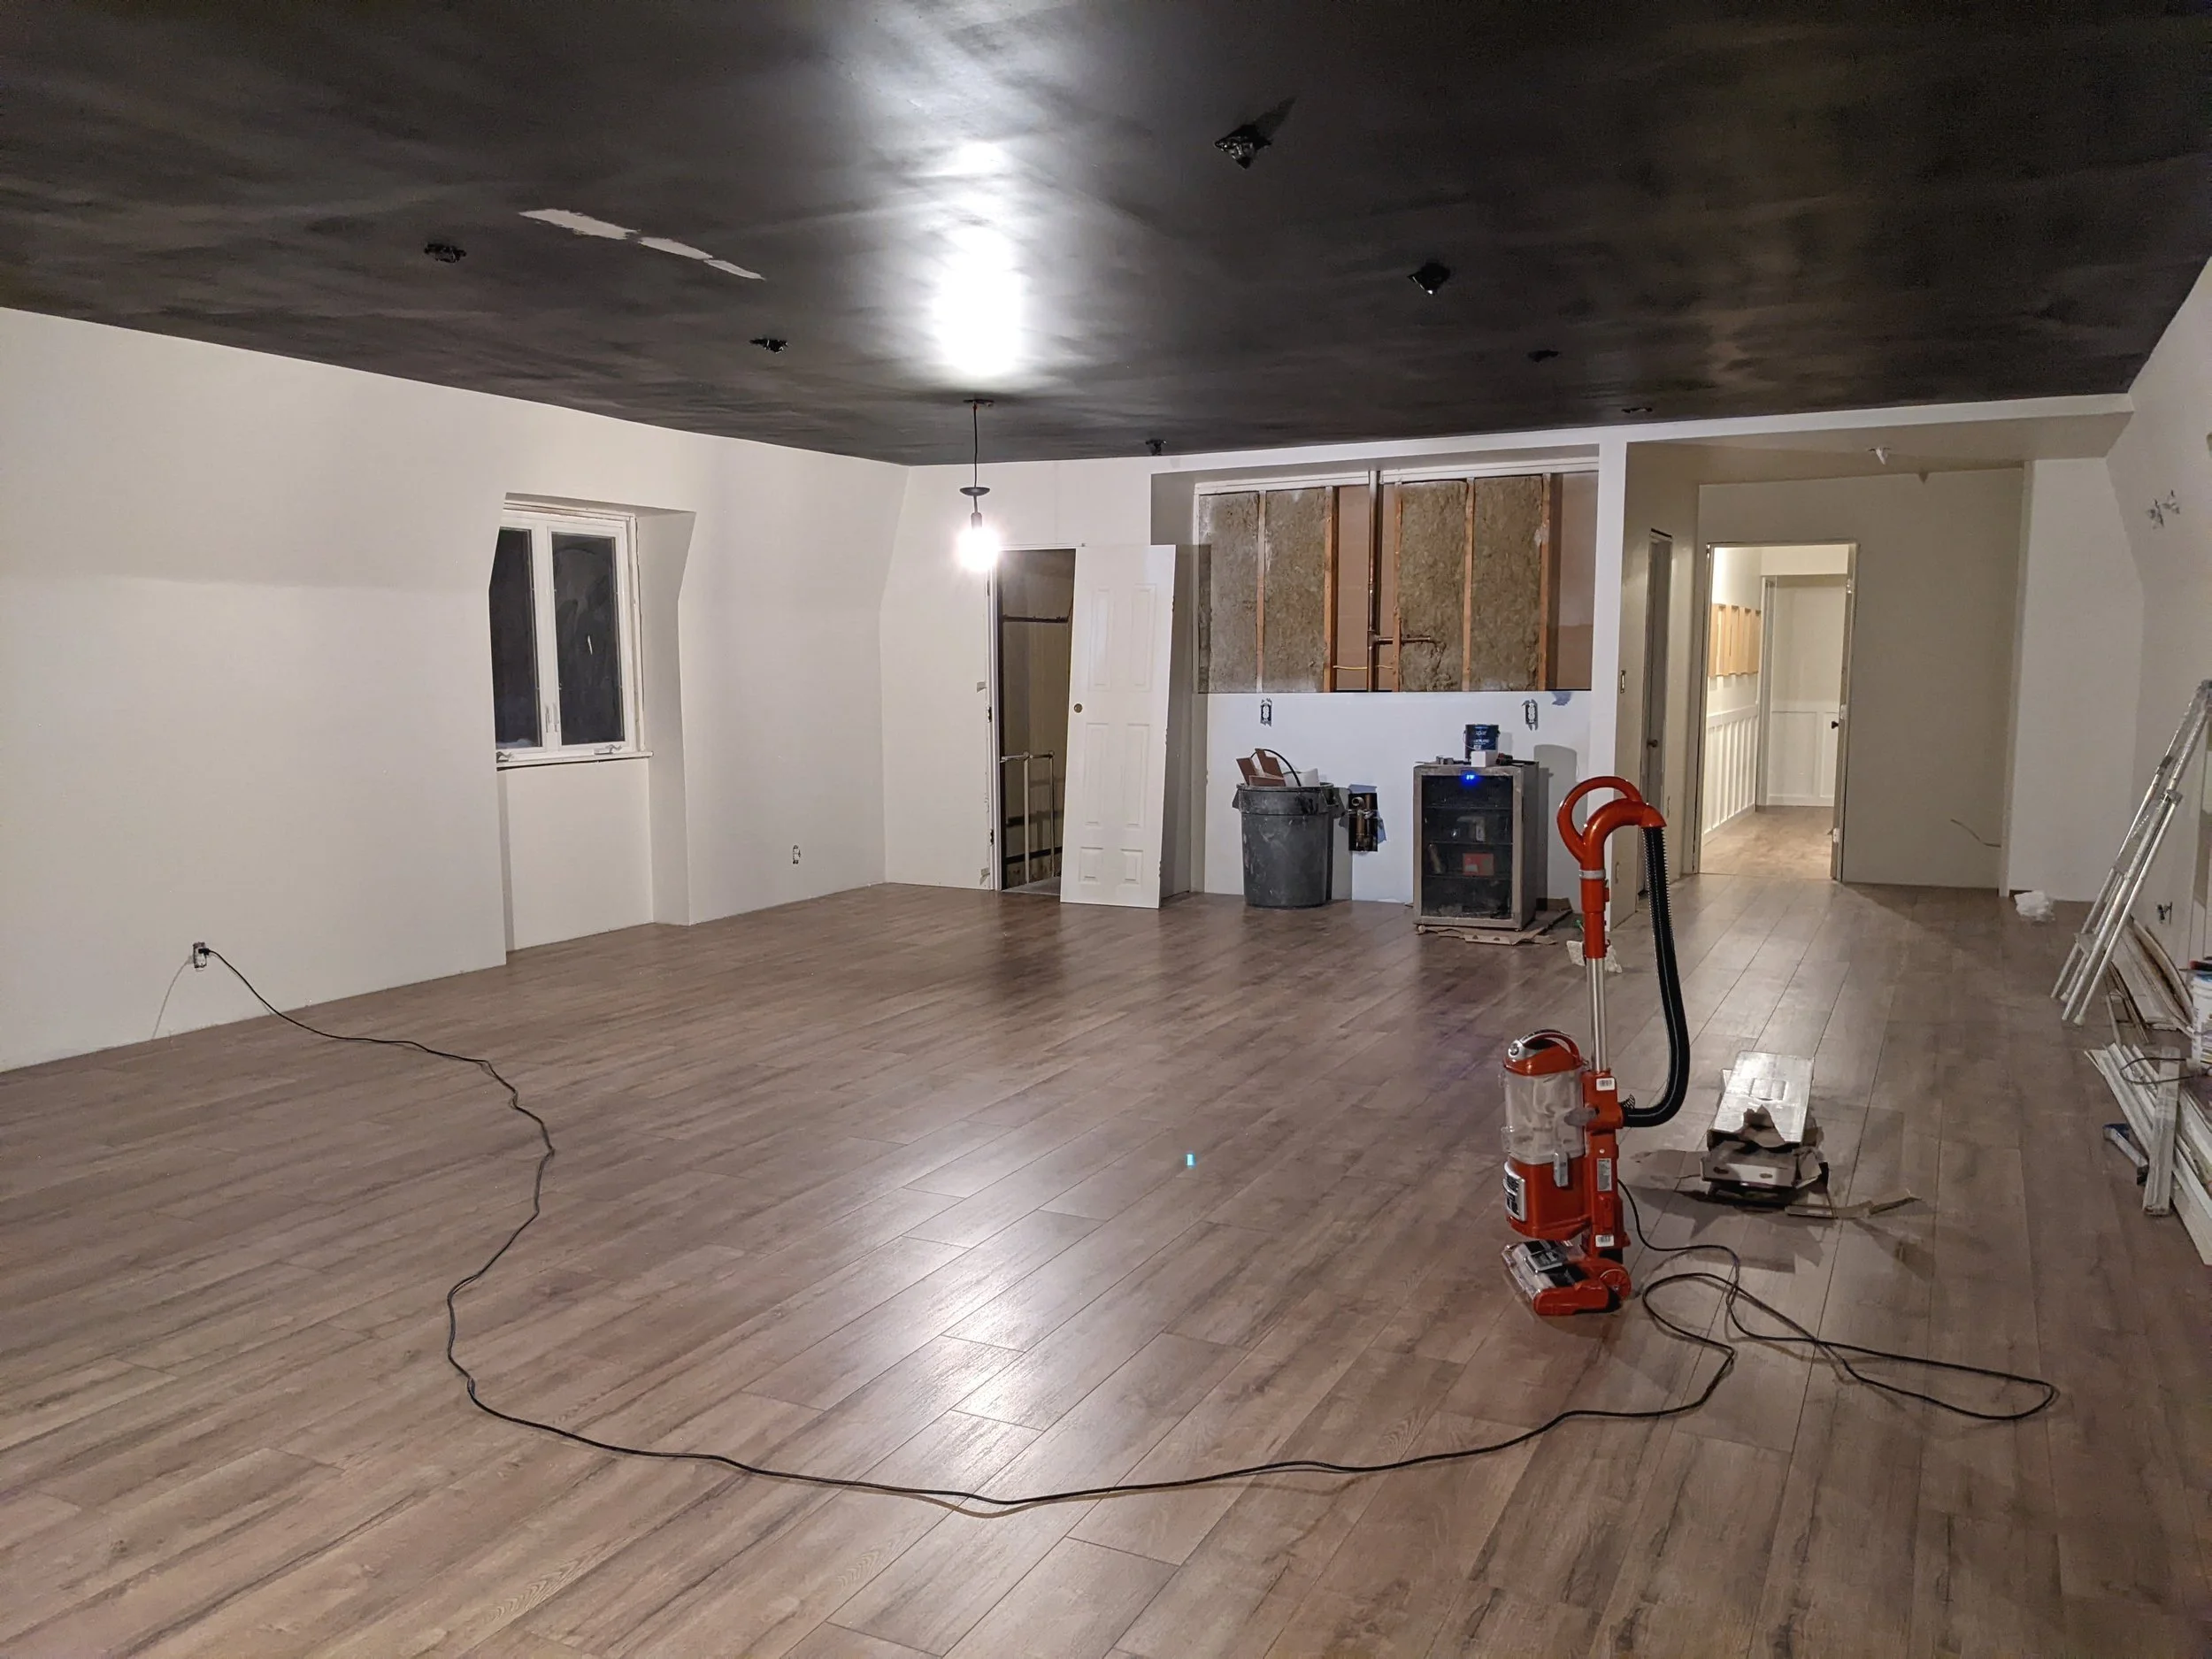
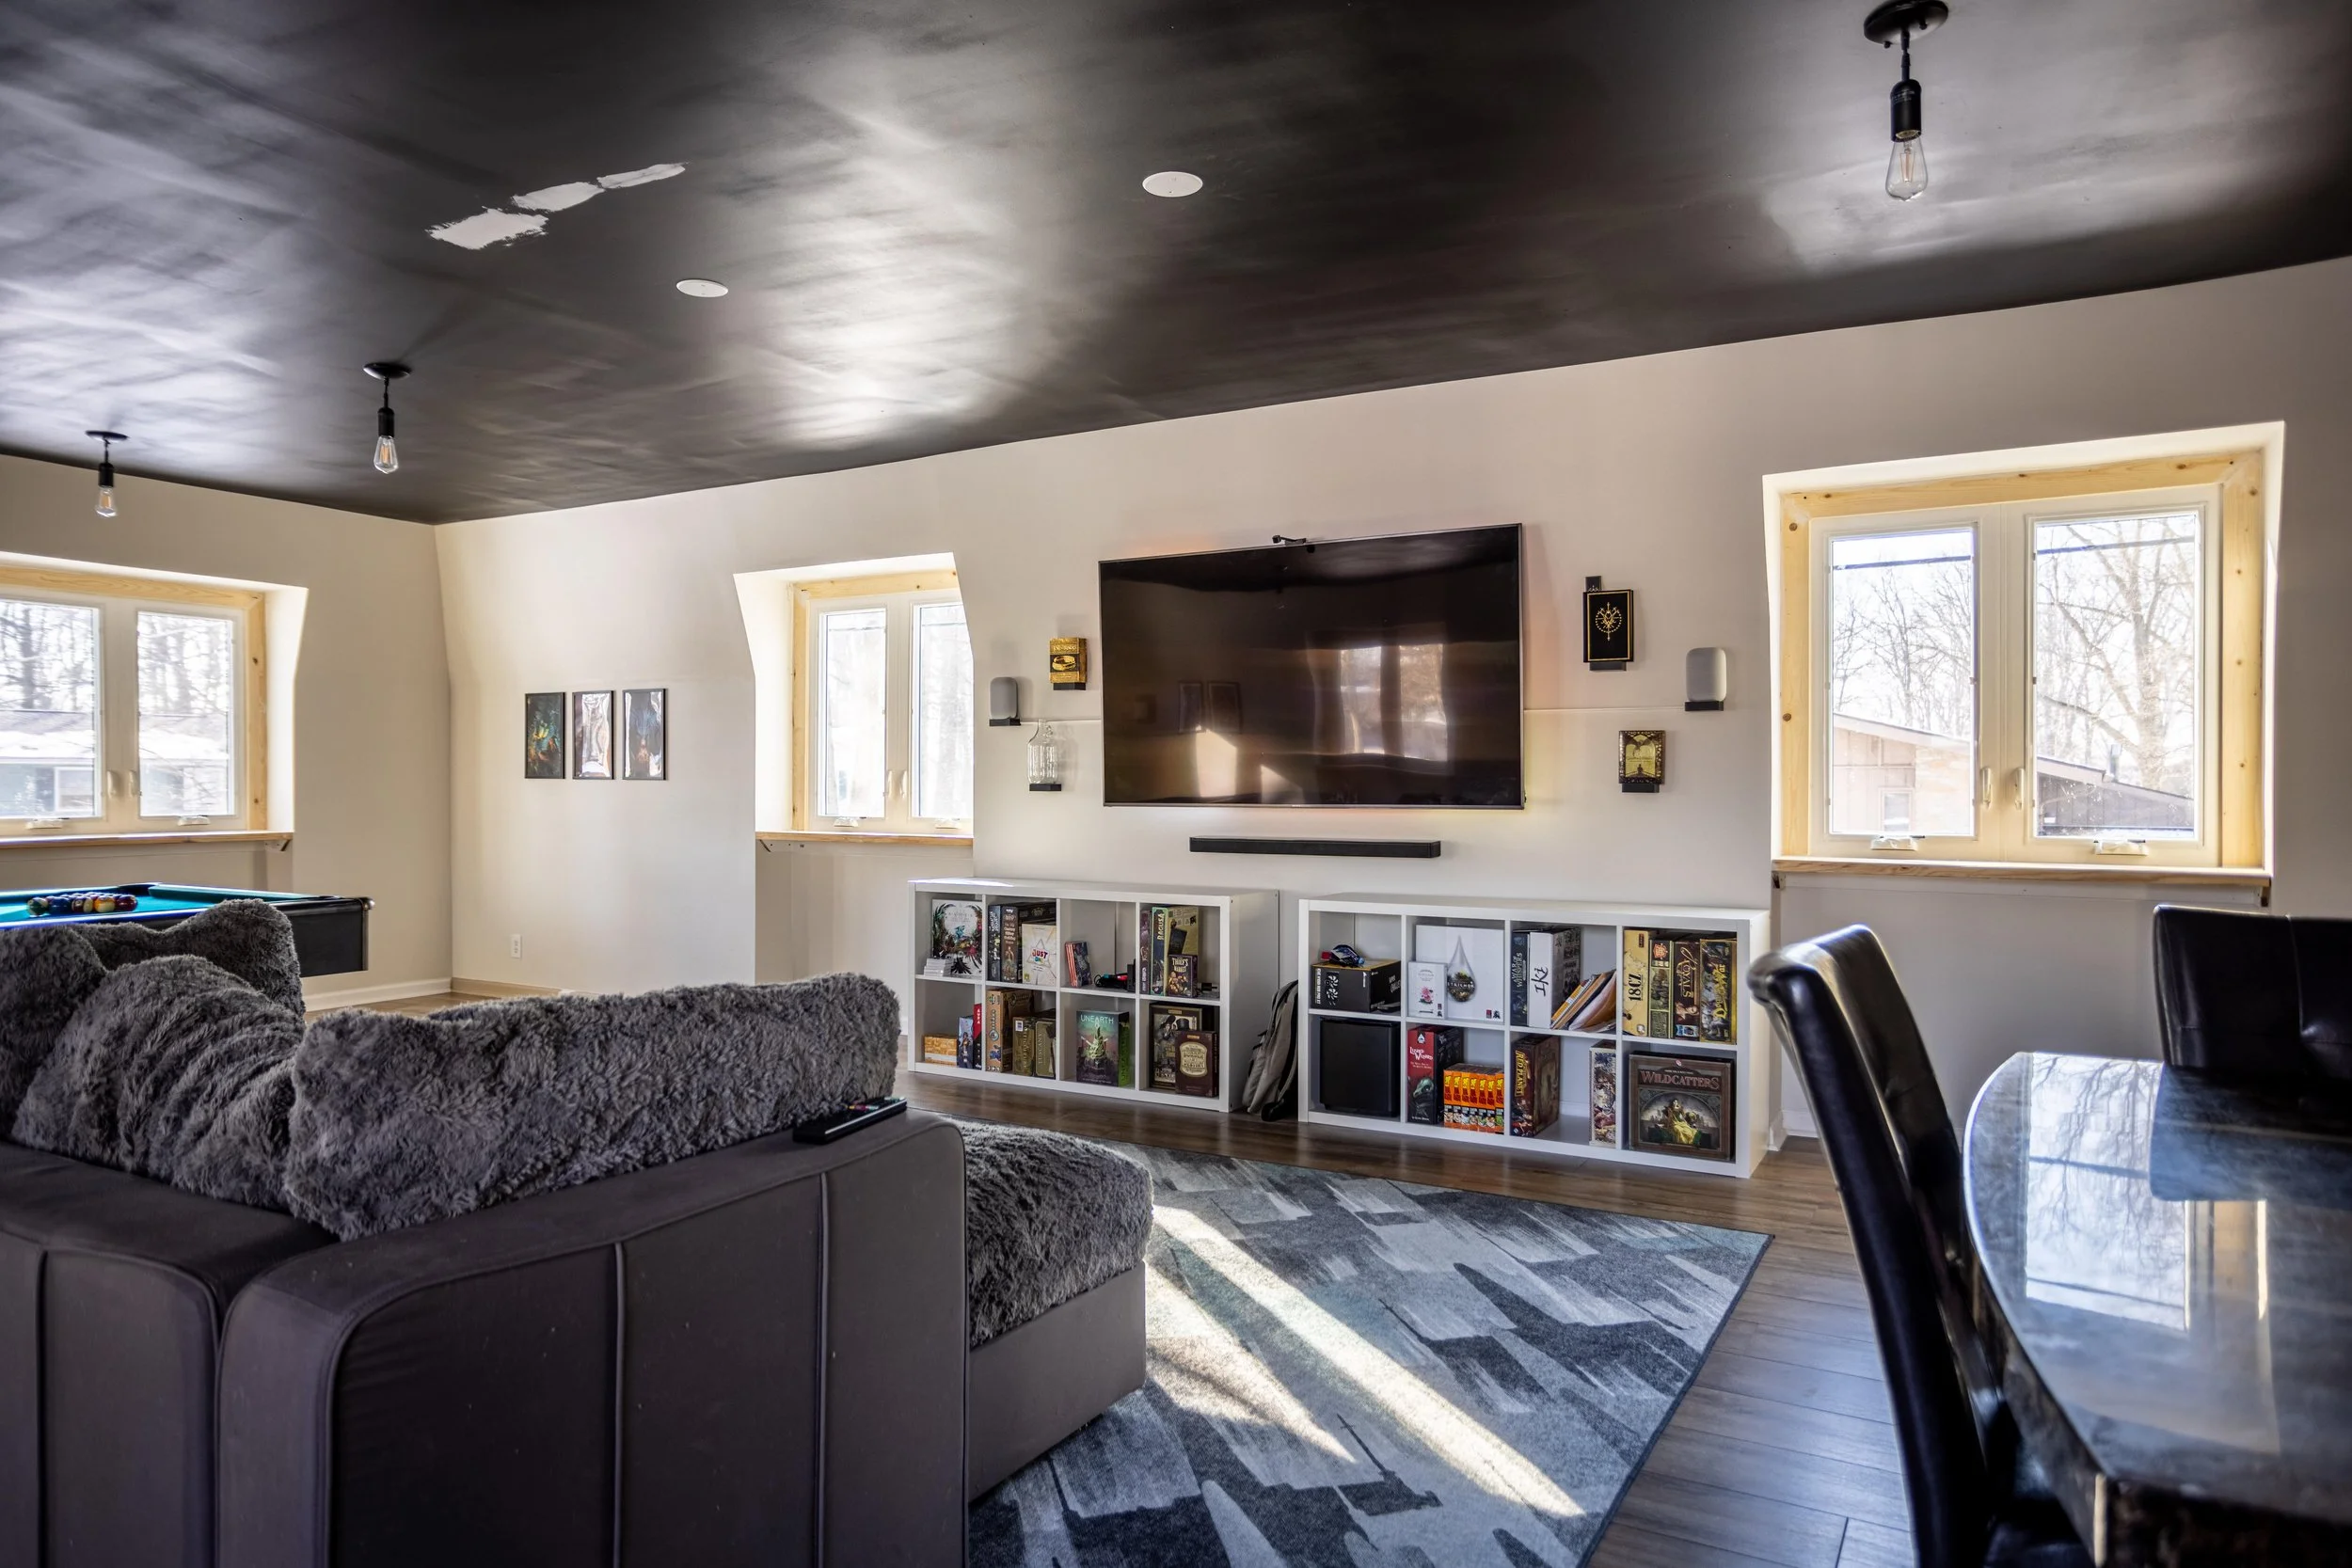
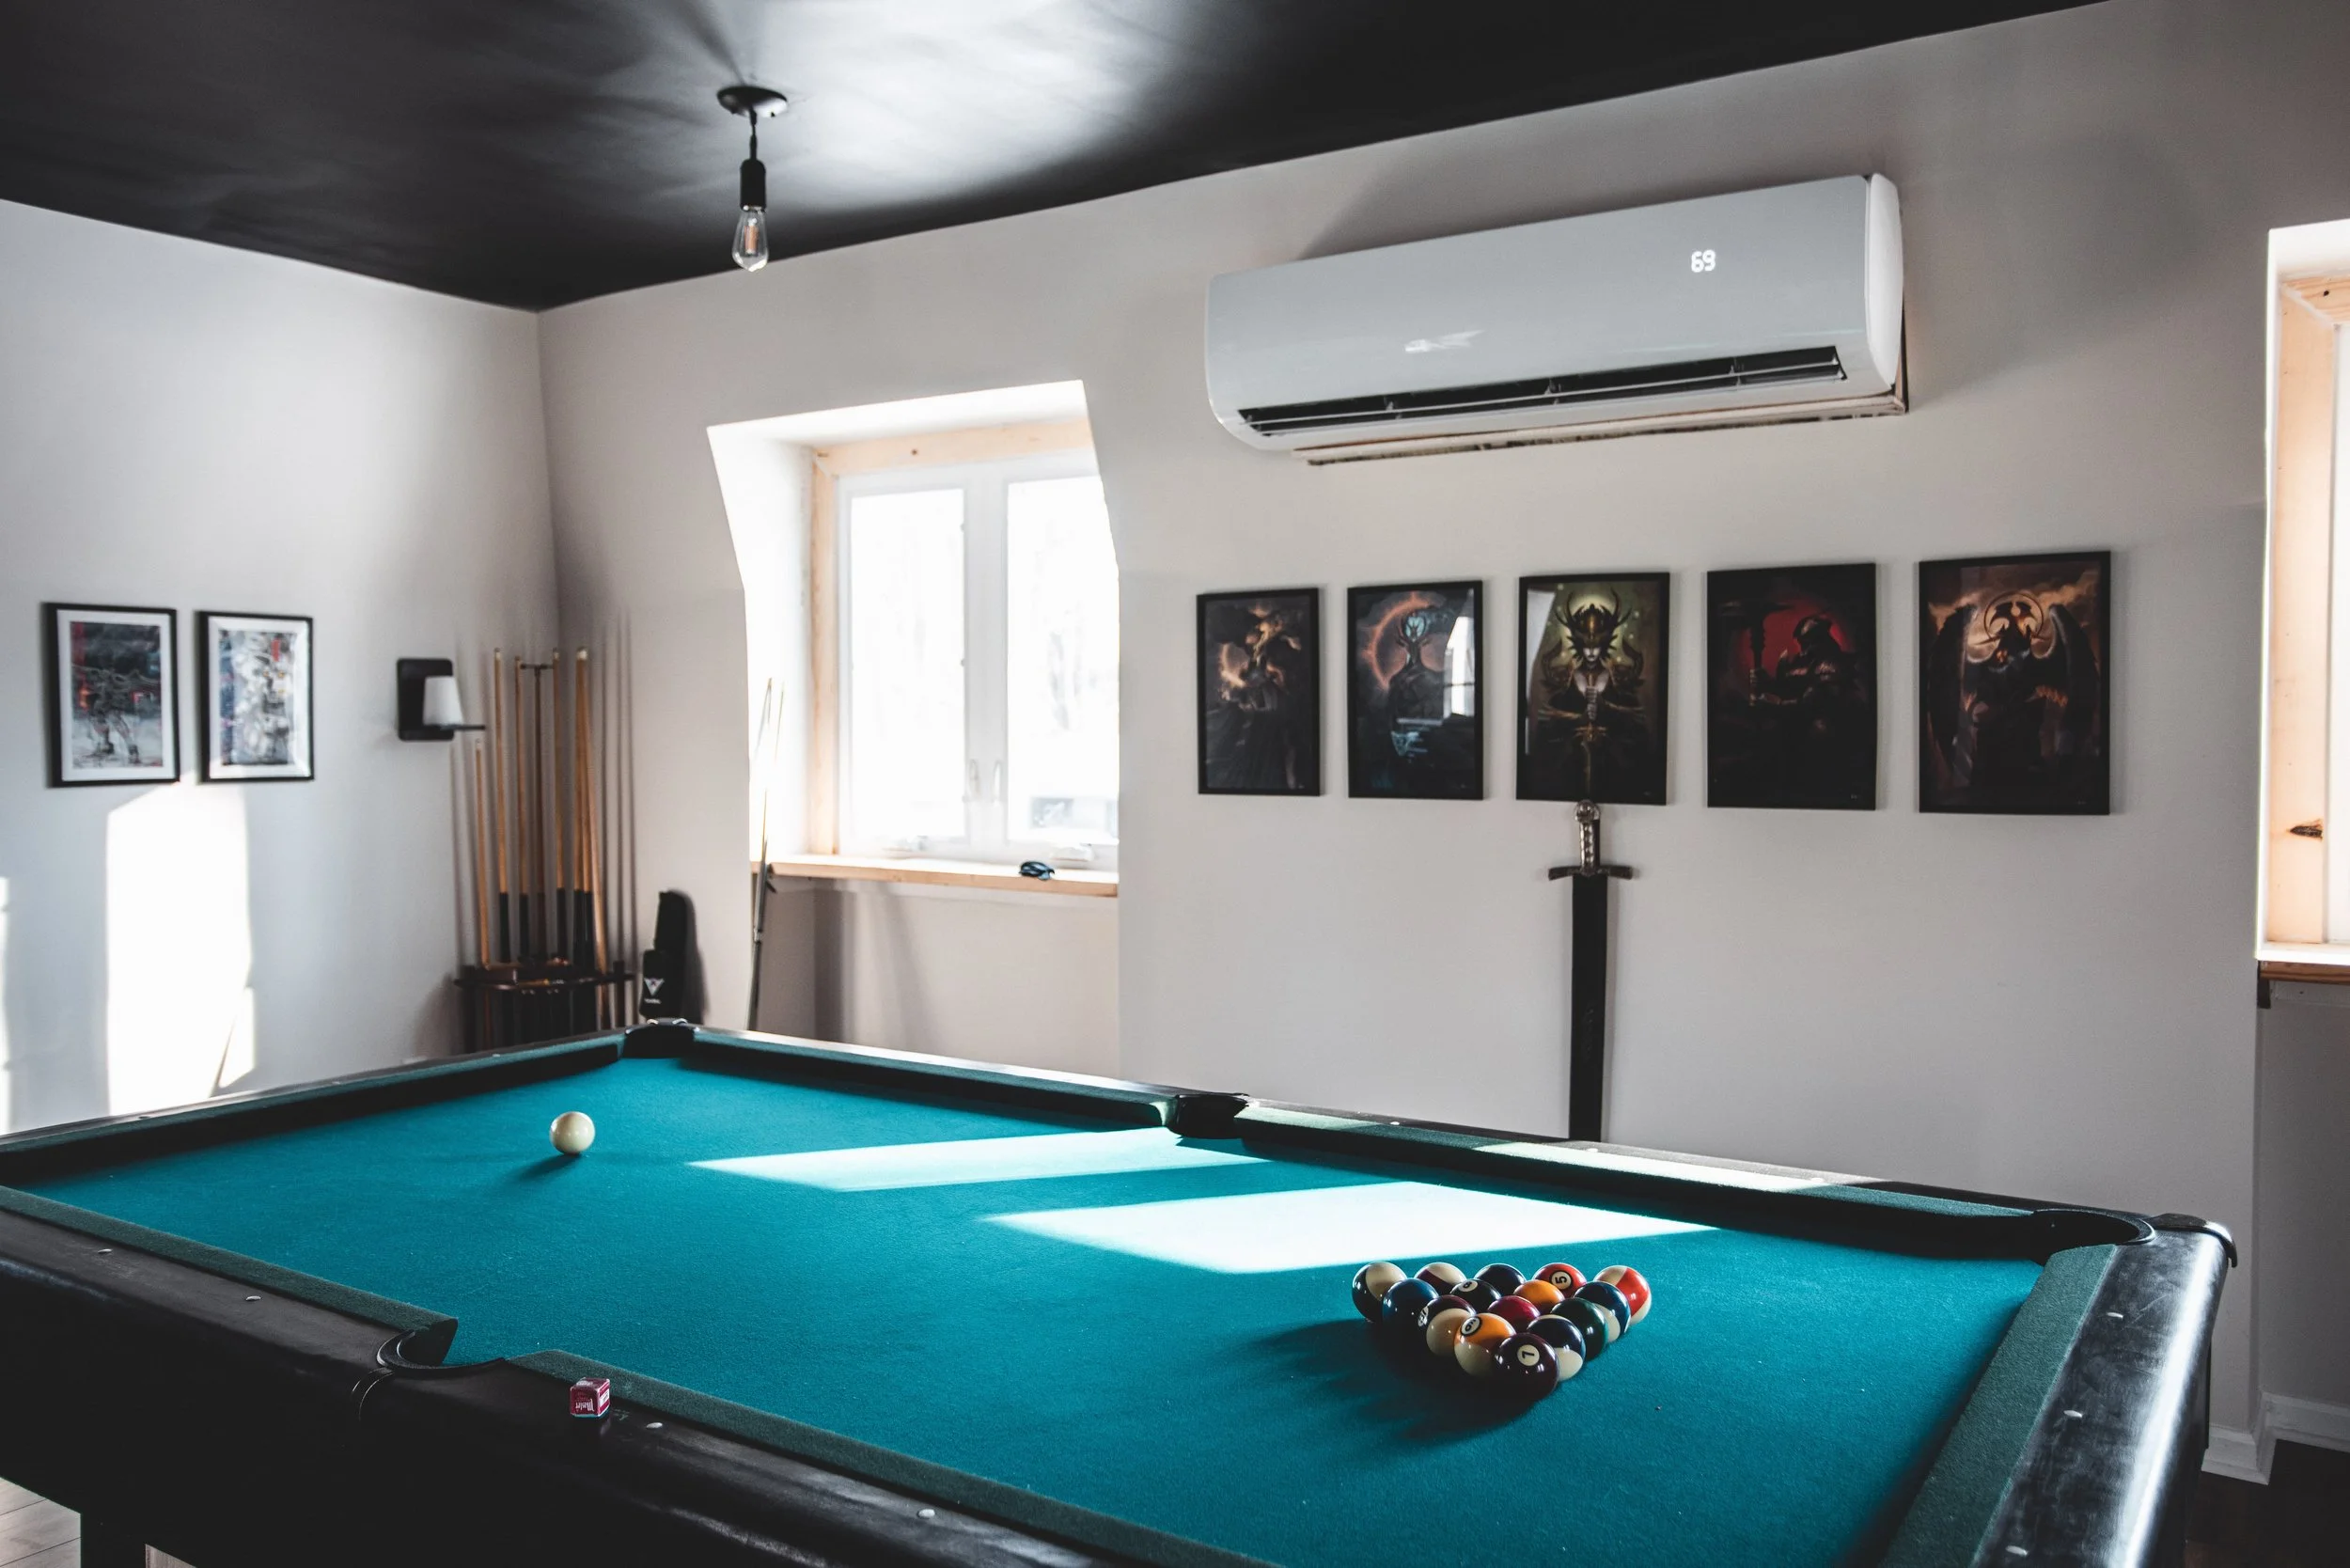
To stick with the industrial style I’ve envisioned all along for this room, I painted the ceiling black, which hasn’t entirely turned out exactly as planned. Don’t get me wrong, I love the black ceiling and vibe it gives to this room. I don’t love that although I used flat paint, it’s reading way more glossy than I’d like it to.
I’m also frustrated with myself for only spraying one coat of paint on the ceiling - because you can definitely see the spray lines. I plan on rolling a second coat of paint on later, which will hopefully even things out. But that’s a BIG ceiling, so I wish I would’ve just done a second coat with the sprayer while I had the chance.
After my experience spraying the paint on this entire room, I’m excited to share my thoughts on spraying vs. rolling in a different post - the good and the bad - but that’s for another time! For now, we’ll keep it focused on the design.
To balance out the ceiling, create a nice, neutral backdrop for plenty of artwork, and tie into the adjacent hallway, I painted the walls White Heron.
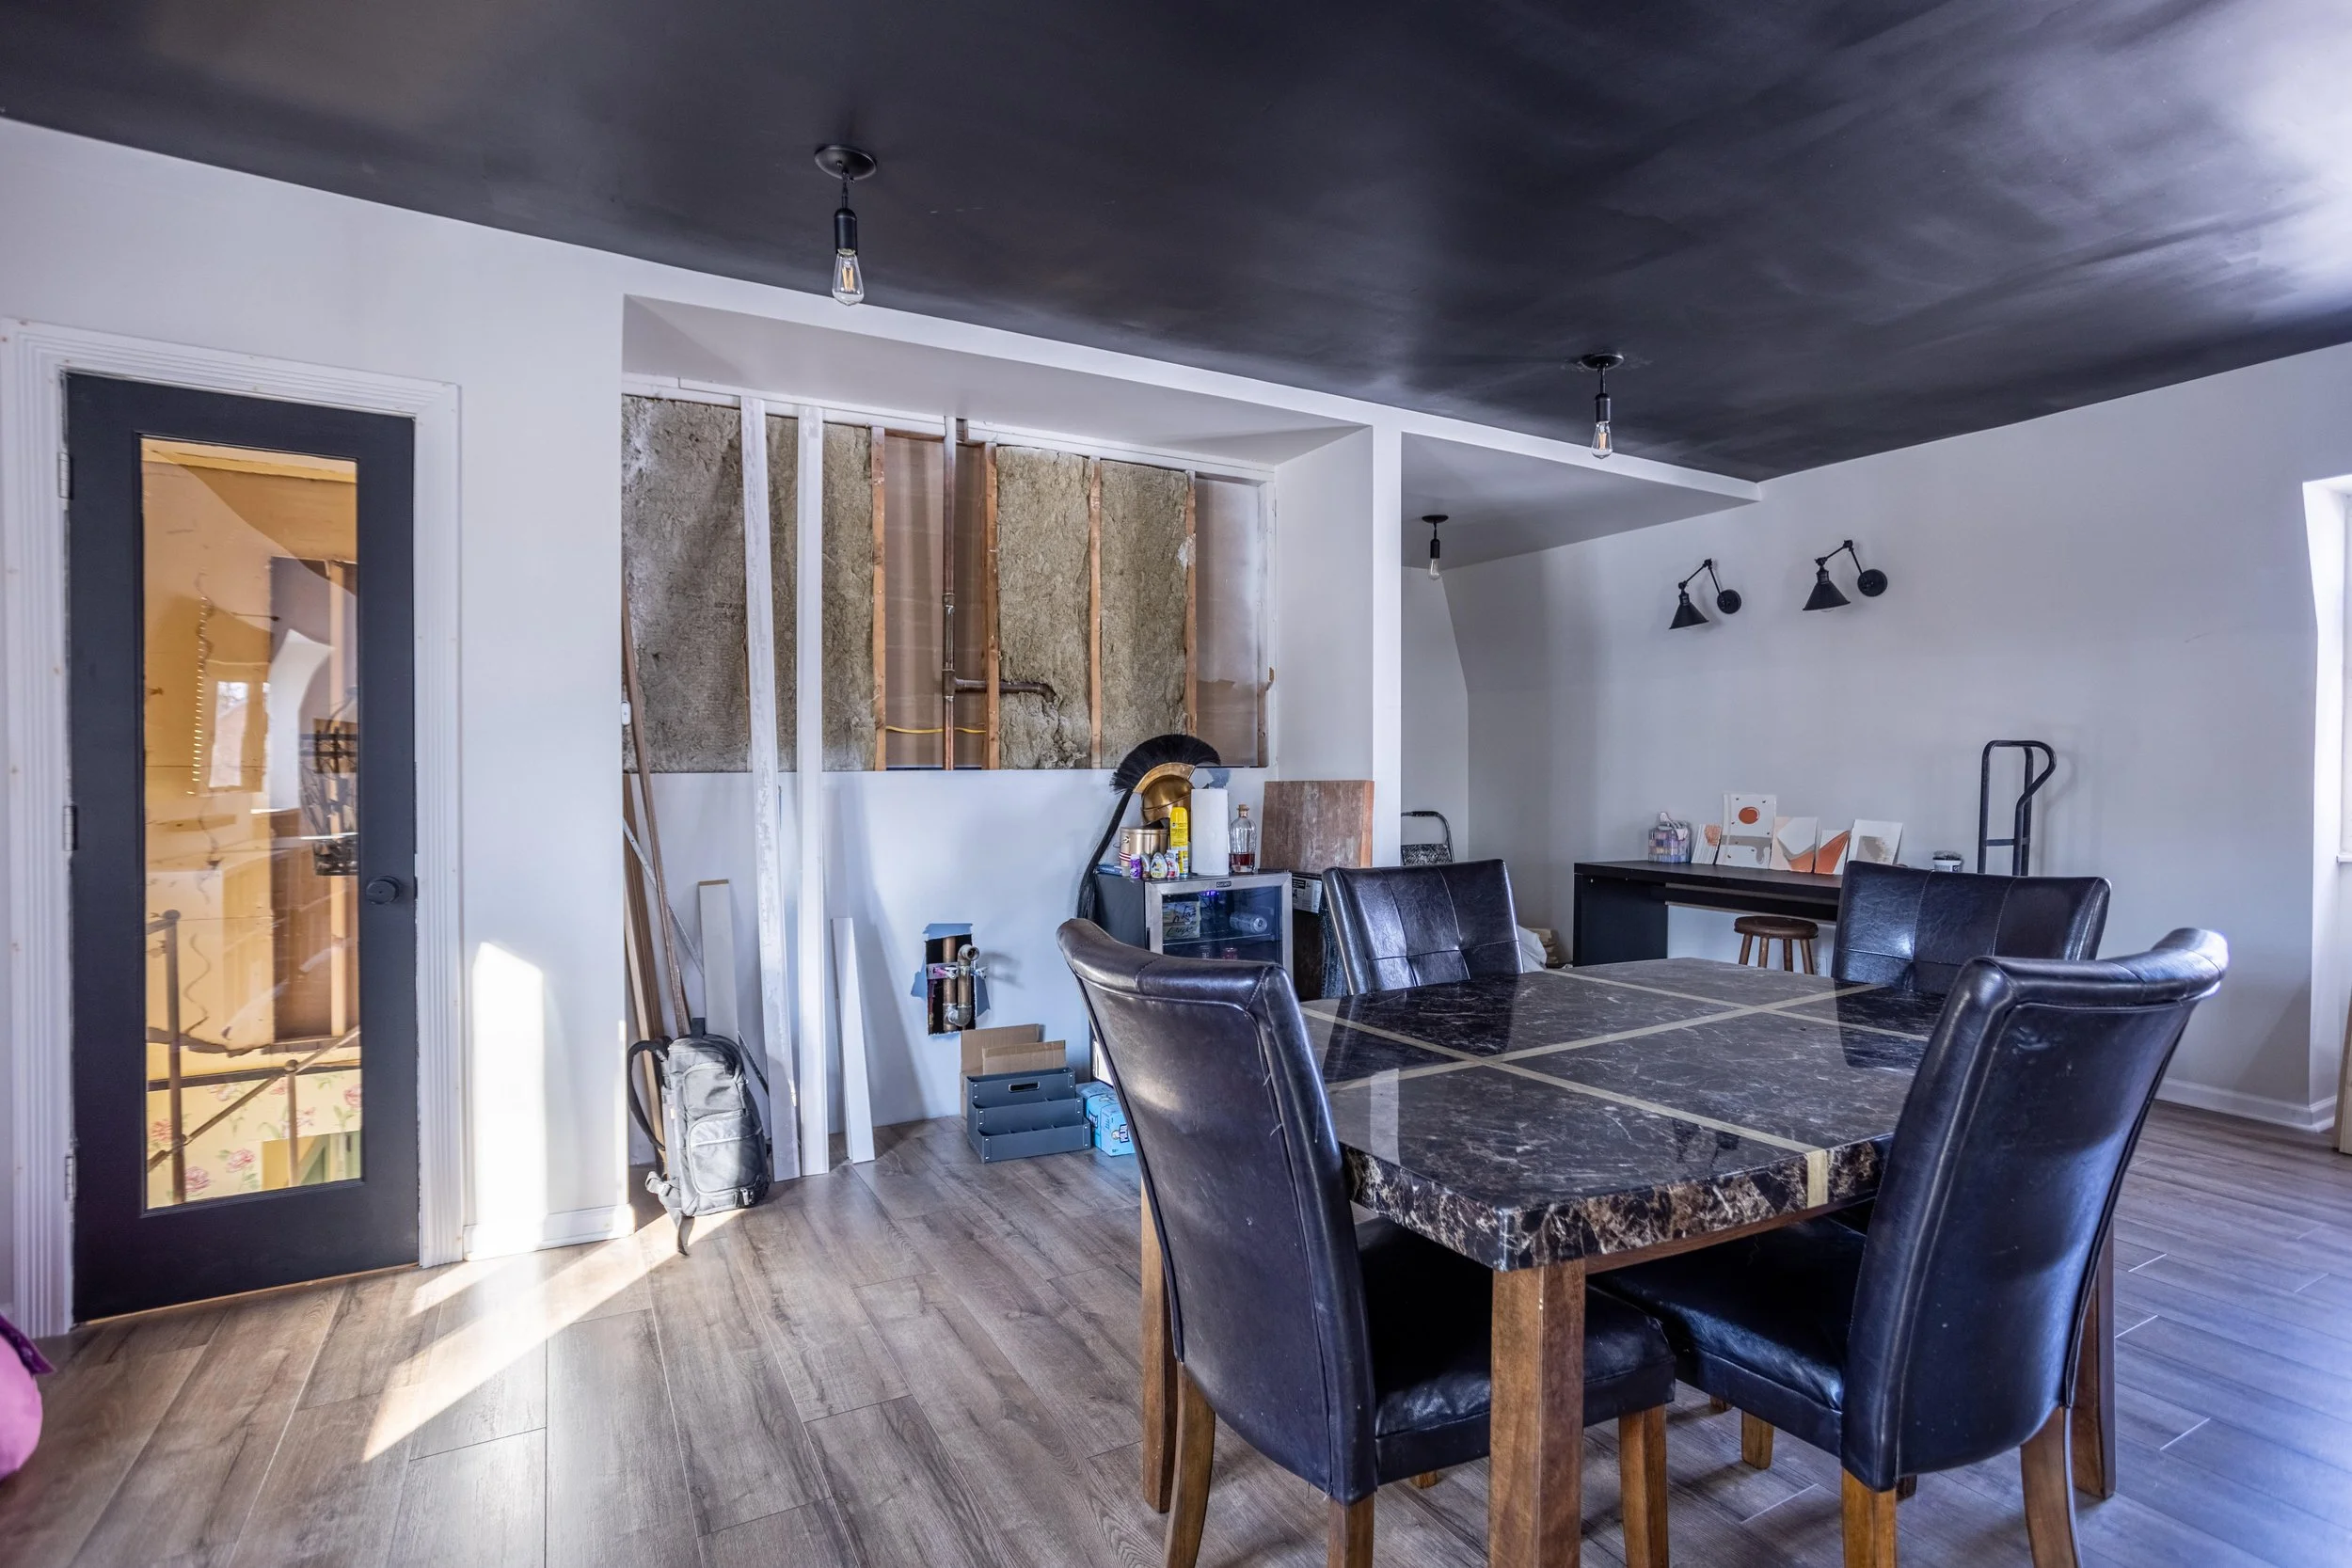
As I shared in the design plan from my last update, I painted the doors black to tie into the ceiling. I really love how the black creates some contrast against the off-white walls and draws attention to the pretty glass doors.
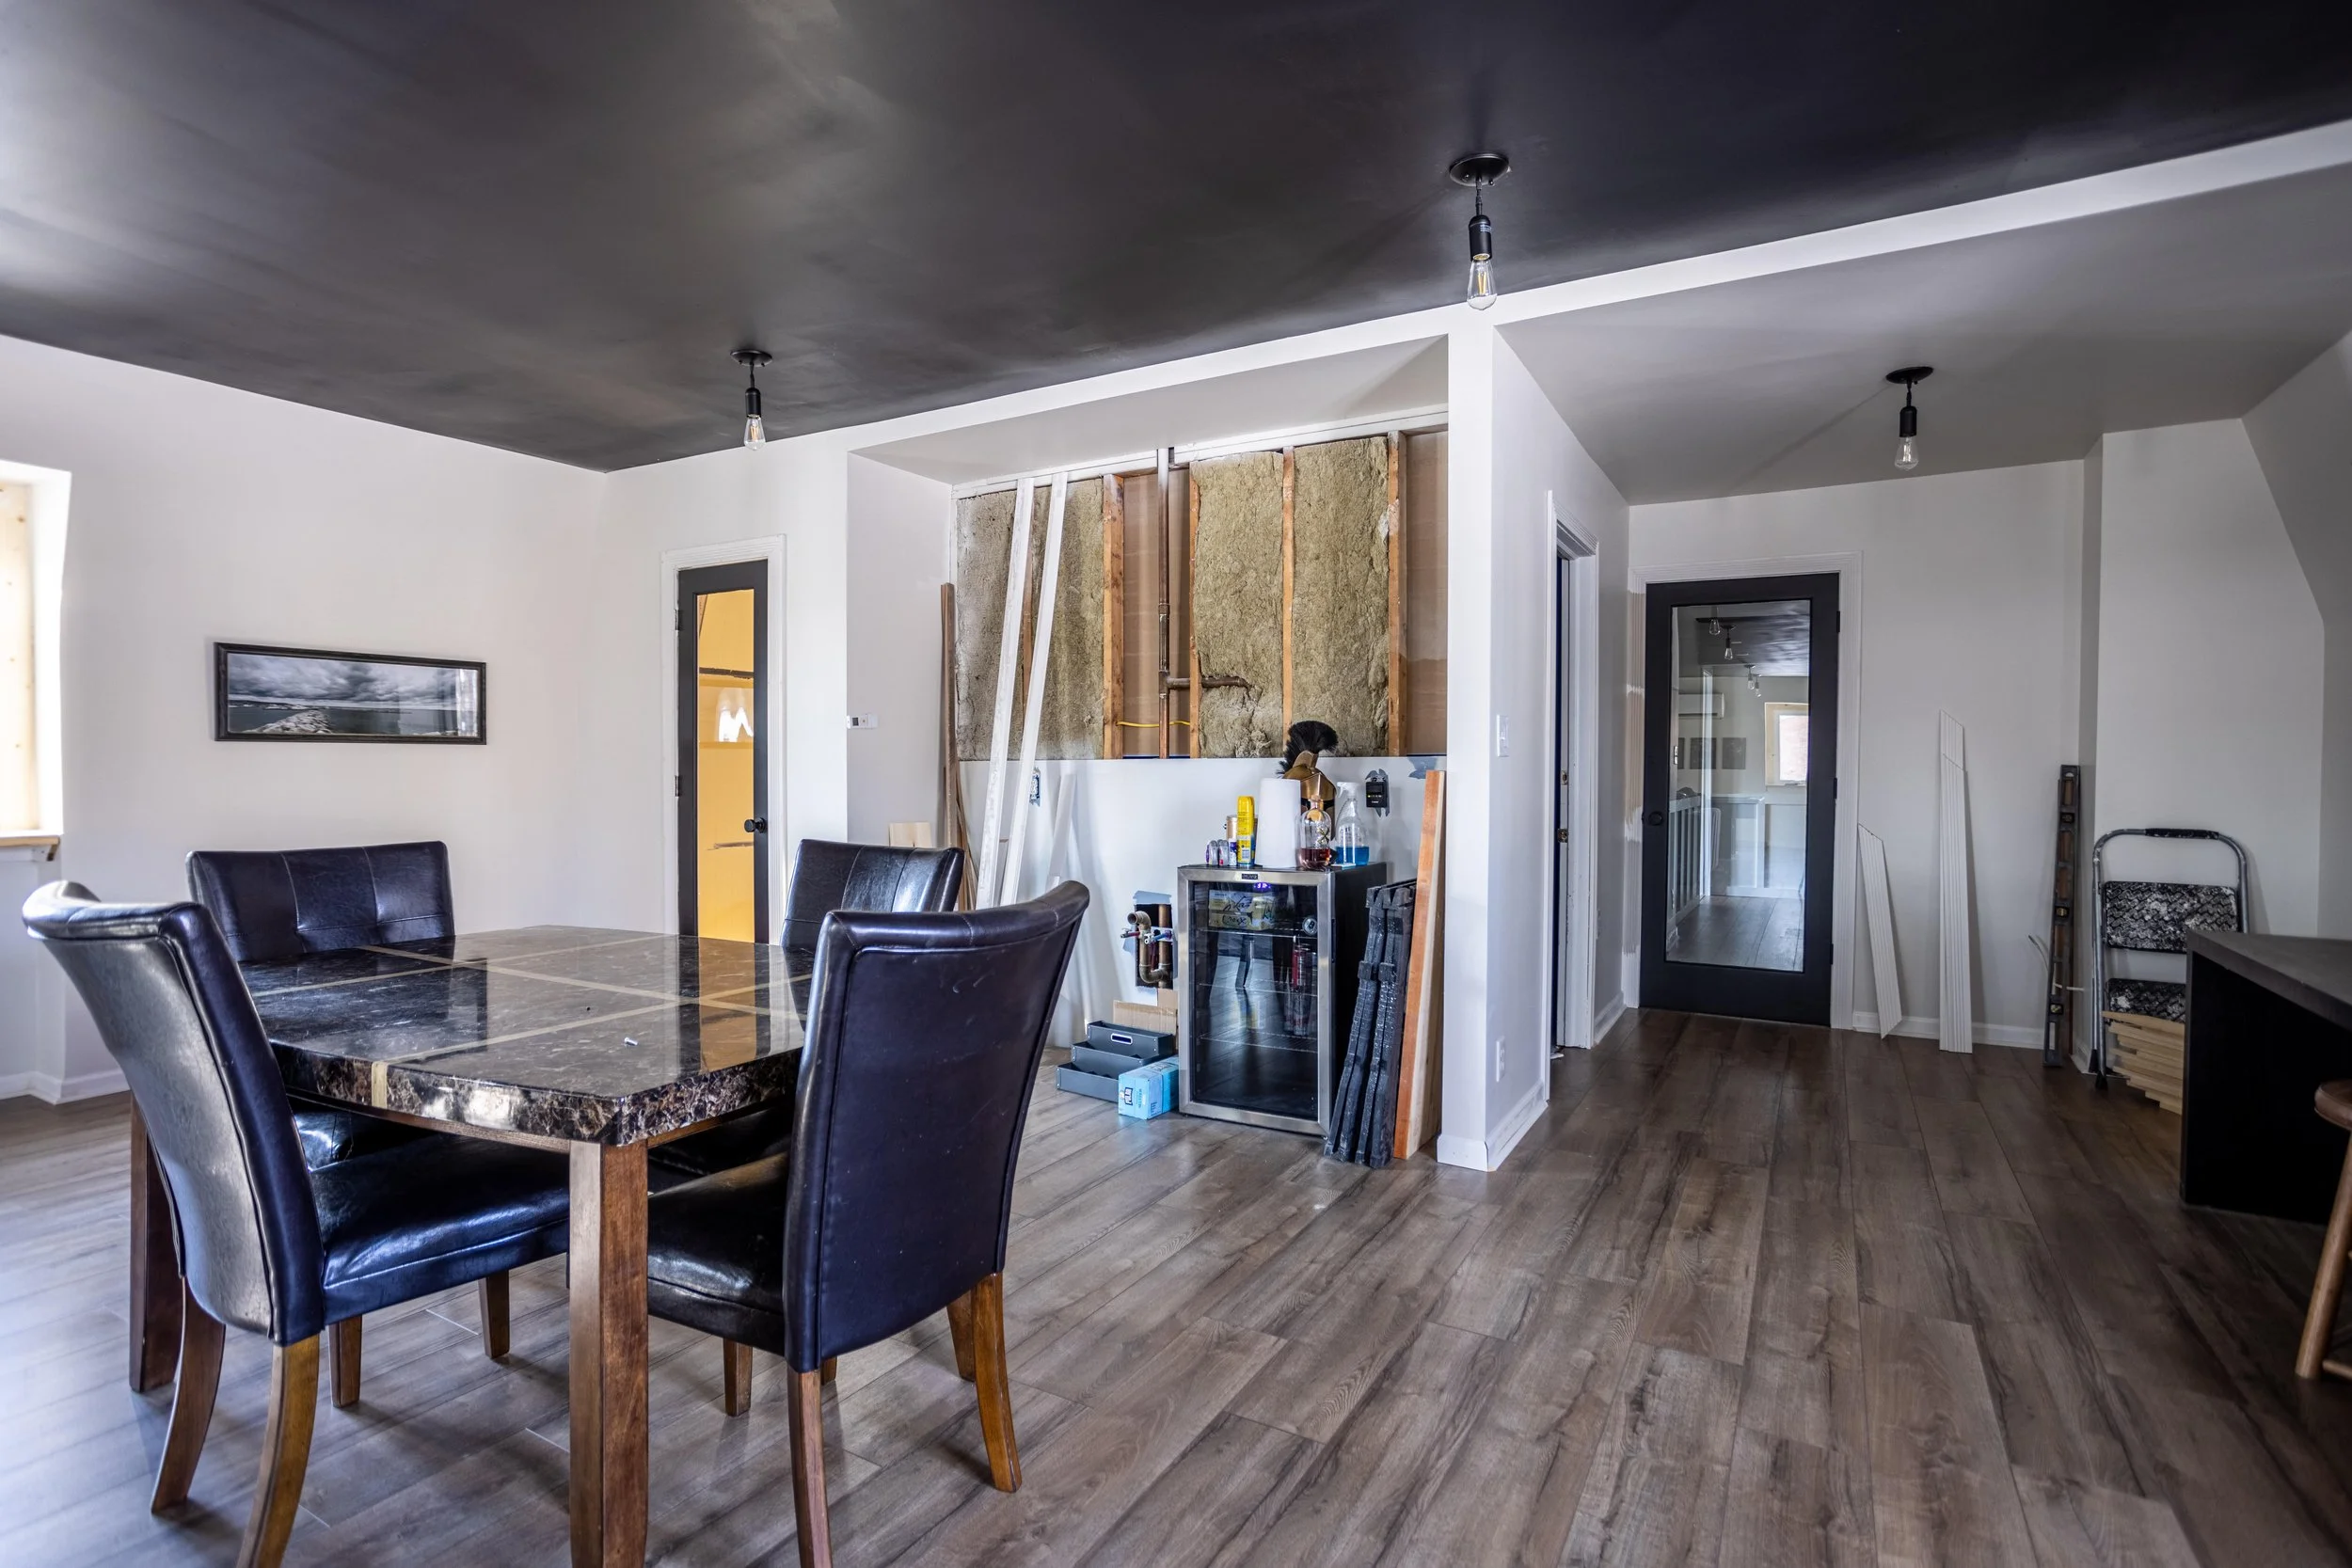
We also decided to switch out BOTH doors for glass-paneled doors. Initially, we only planned on the main door being glass, and we were going to frost it, but so far, we really like the look of the clear glass (aside from all the kid fingerprints). We were taking bets on which kid would run into it first. We haven’t had any incidents yet, but I’ll keep you posted.
Flooring
After I painted the ceiling and walls, we had the flooring installed. That made ALL the difference. If you remember from my first post about the loft, the flooring we chose for the hallway hasn’t been available for some time so we had to pick something similar. I’m happy to say that the difference between the two is really subtle. And to be honest, I think I actually like this flooring a little more than what we installed in the hallway.
Lighting
When we originally planned for this room, we researched how to figure out how much lighting we’d need. We determined that 13 overhead lightbulbs was our magic number. That sounded like a lot at the time. And, it is.
As we started installing the lights we quickly realized we didn’t need as many as we originally thought. Since they’re on a dimmer, we felt comfortable evening things out and installing 9 total (4 on either side of the room and 1 in the “entryway”). This amount seems to be working really well for us.
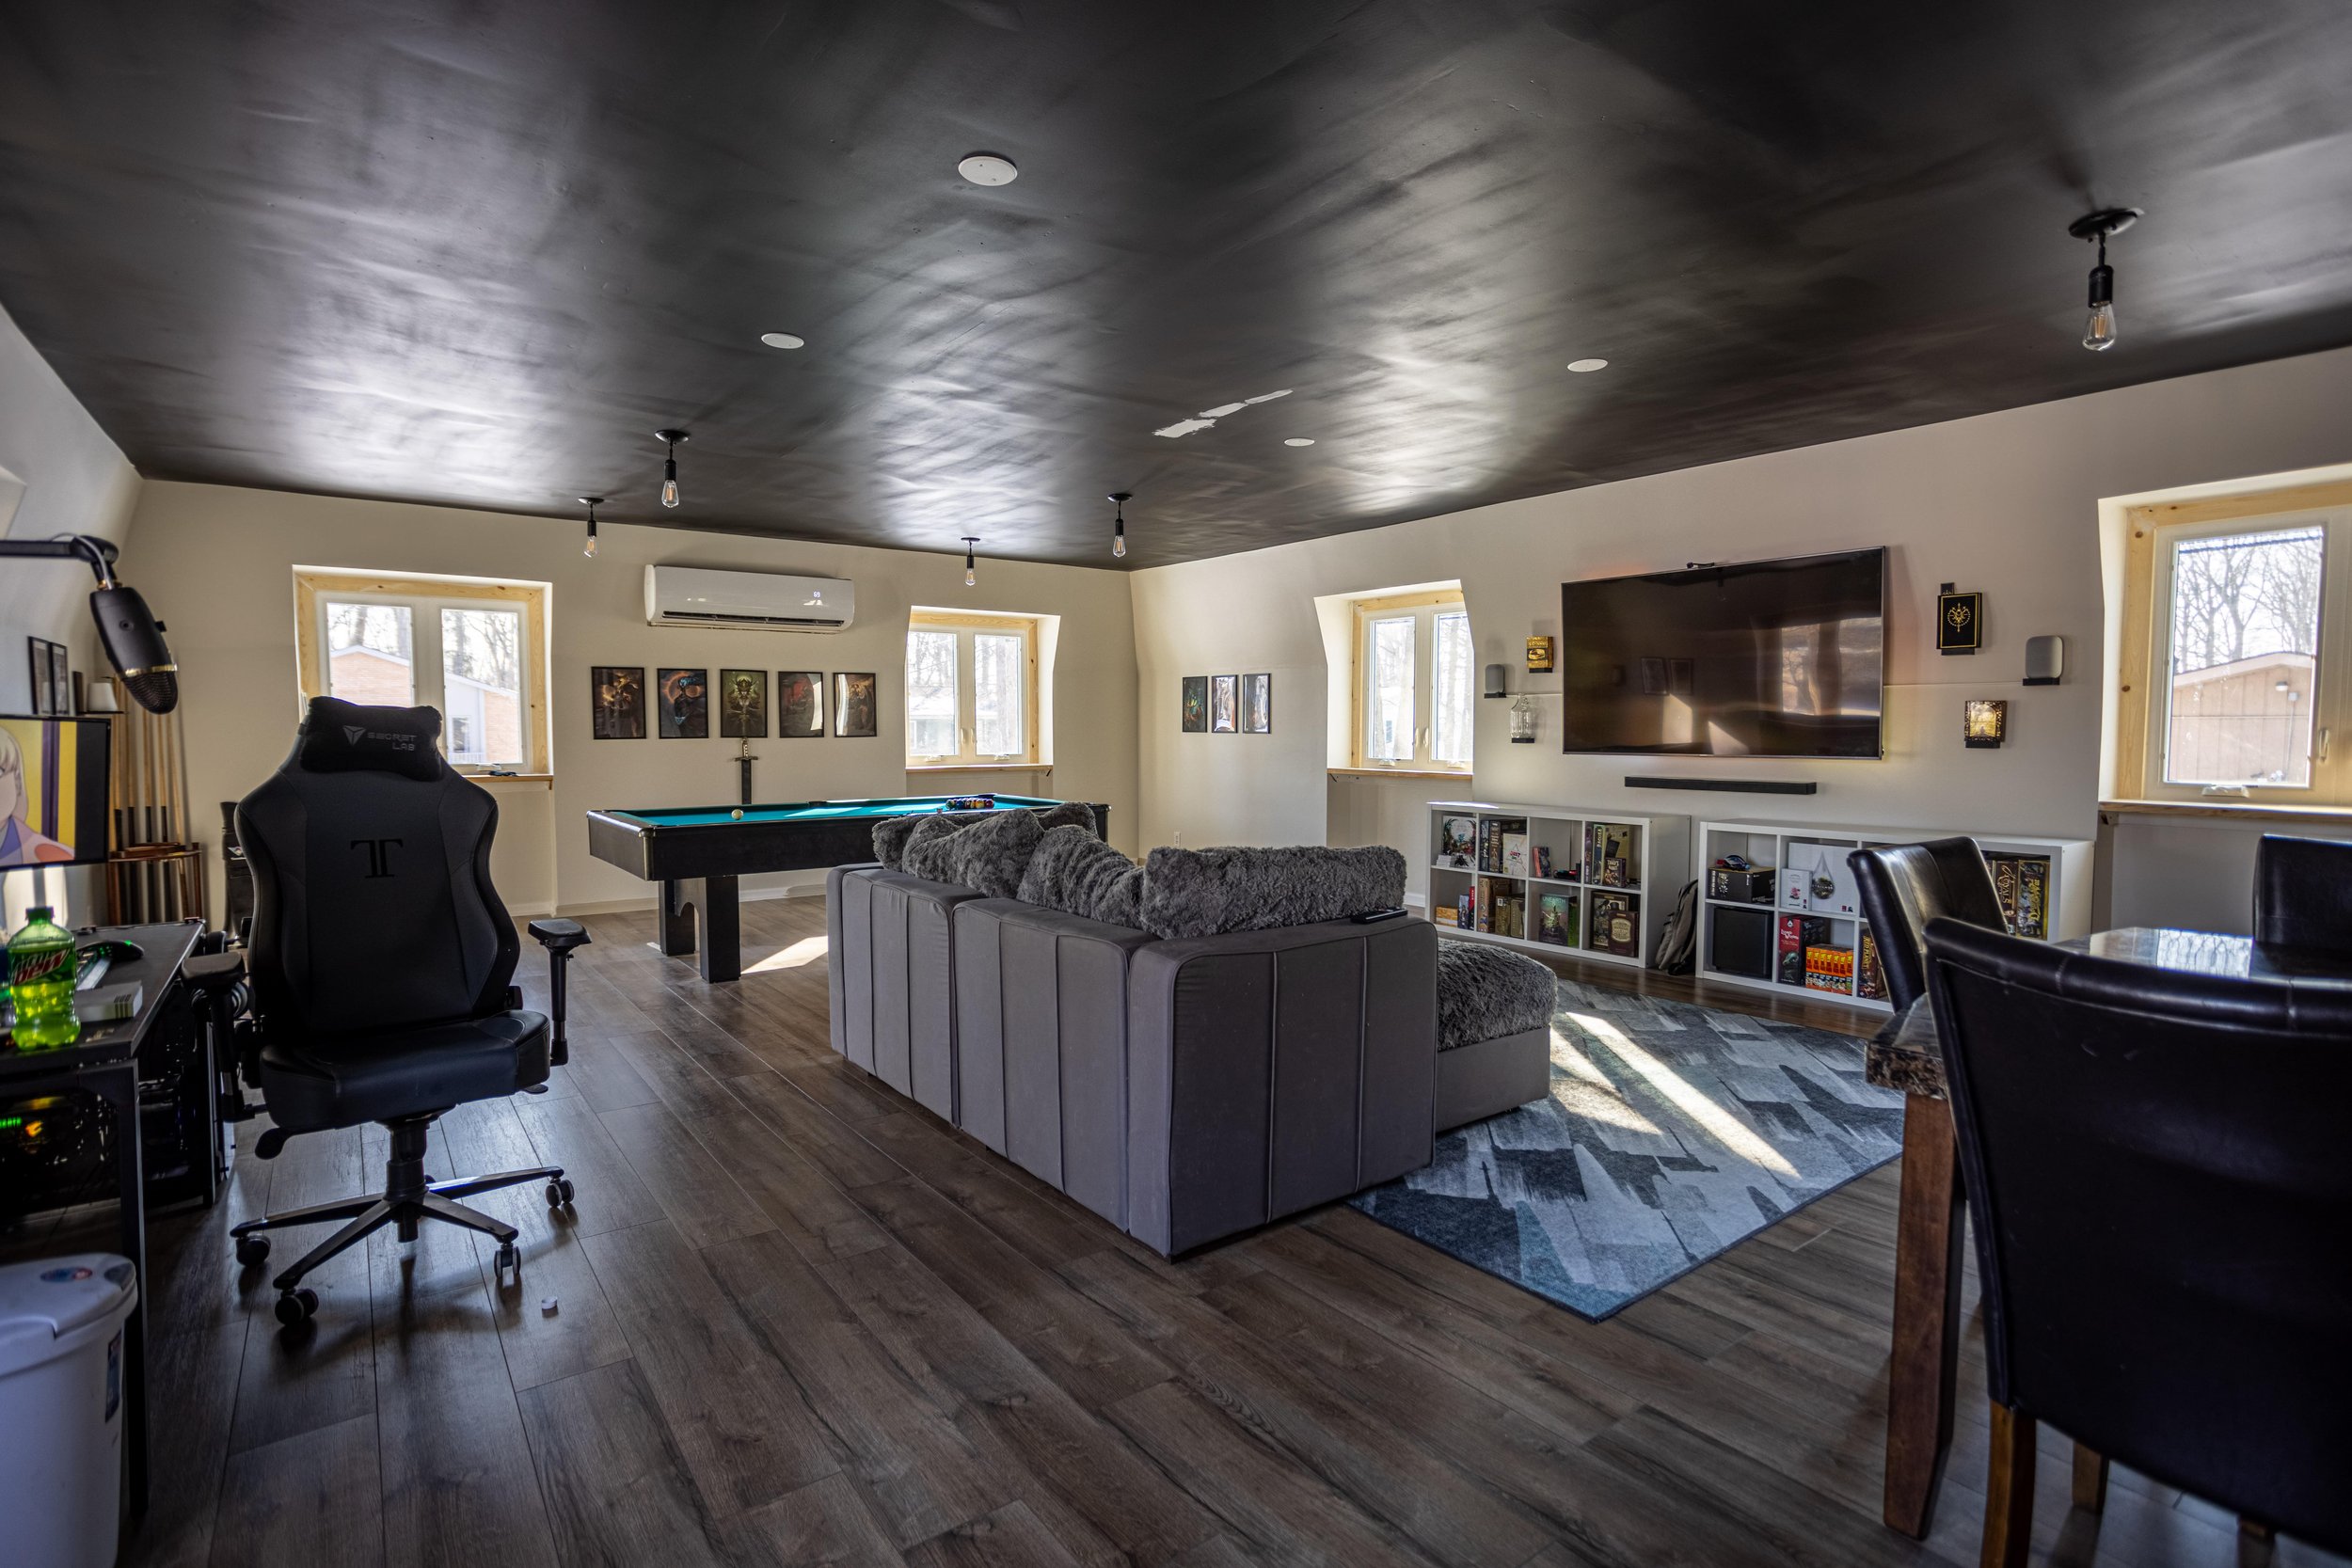
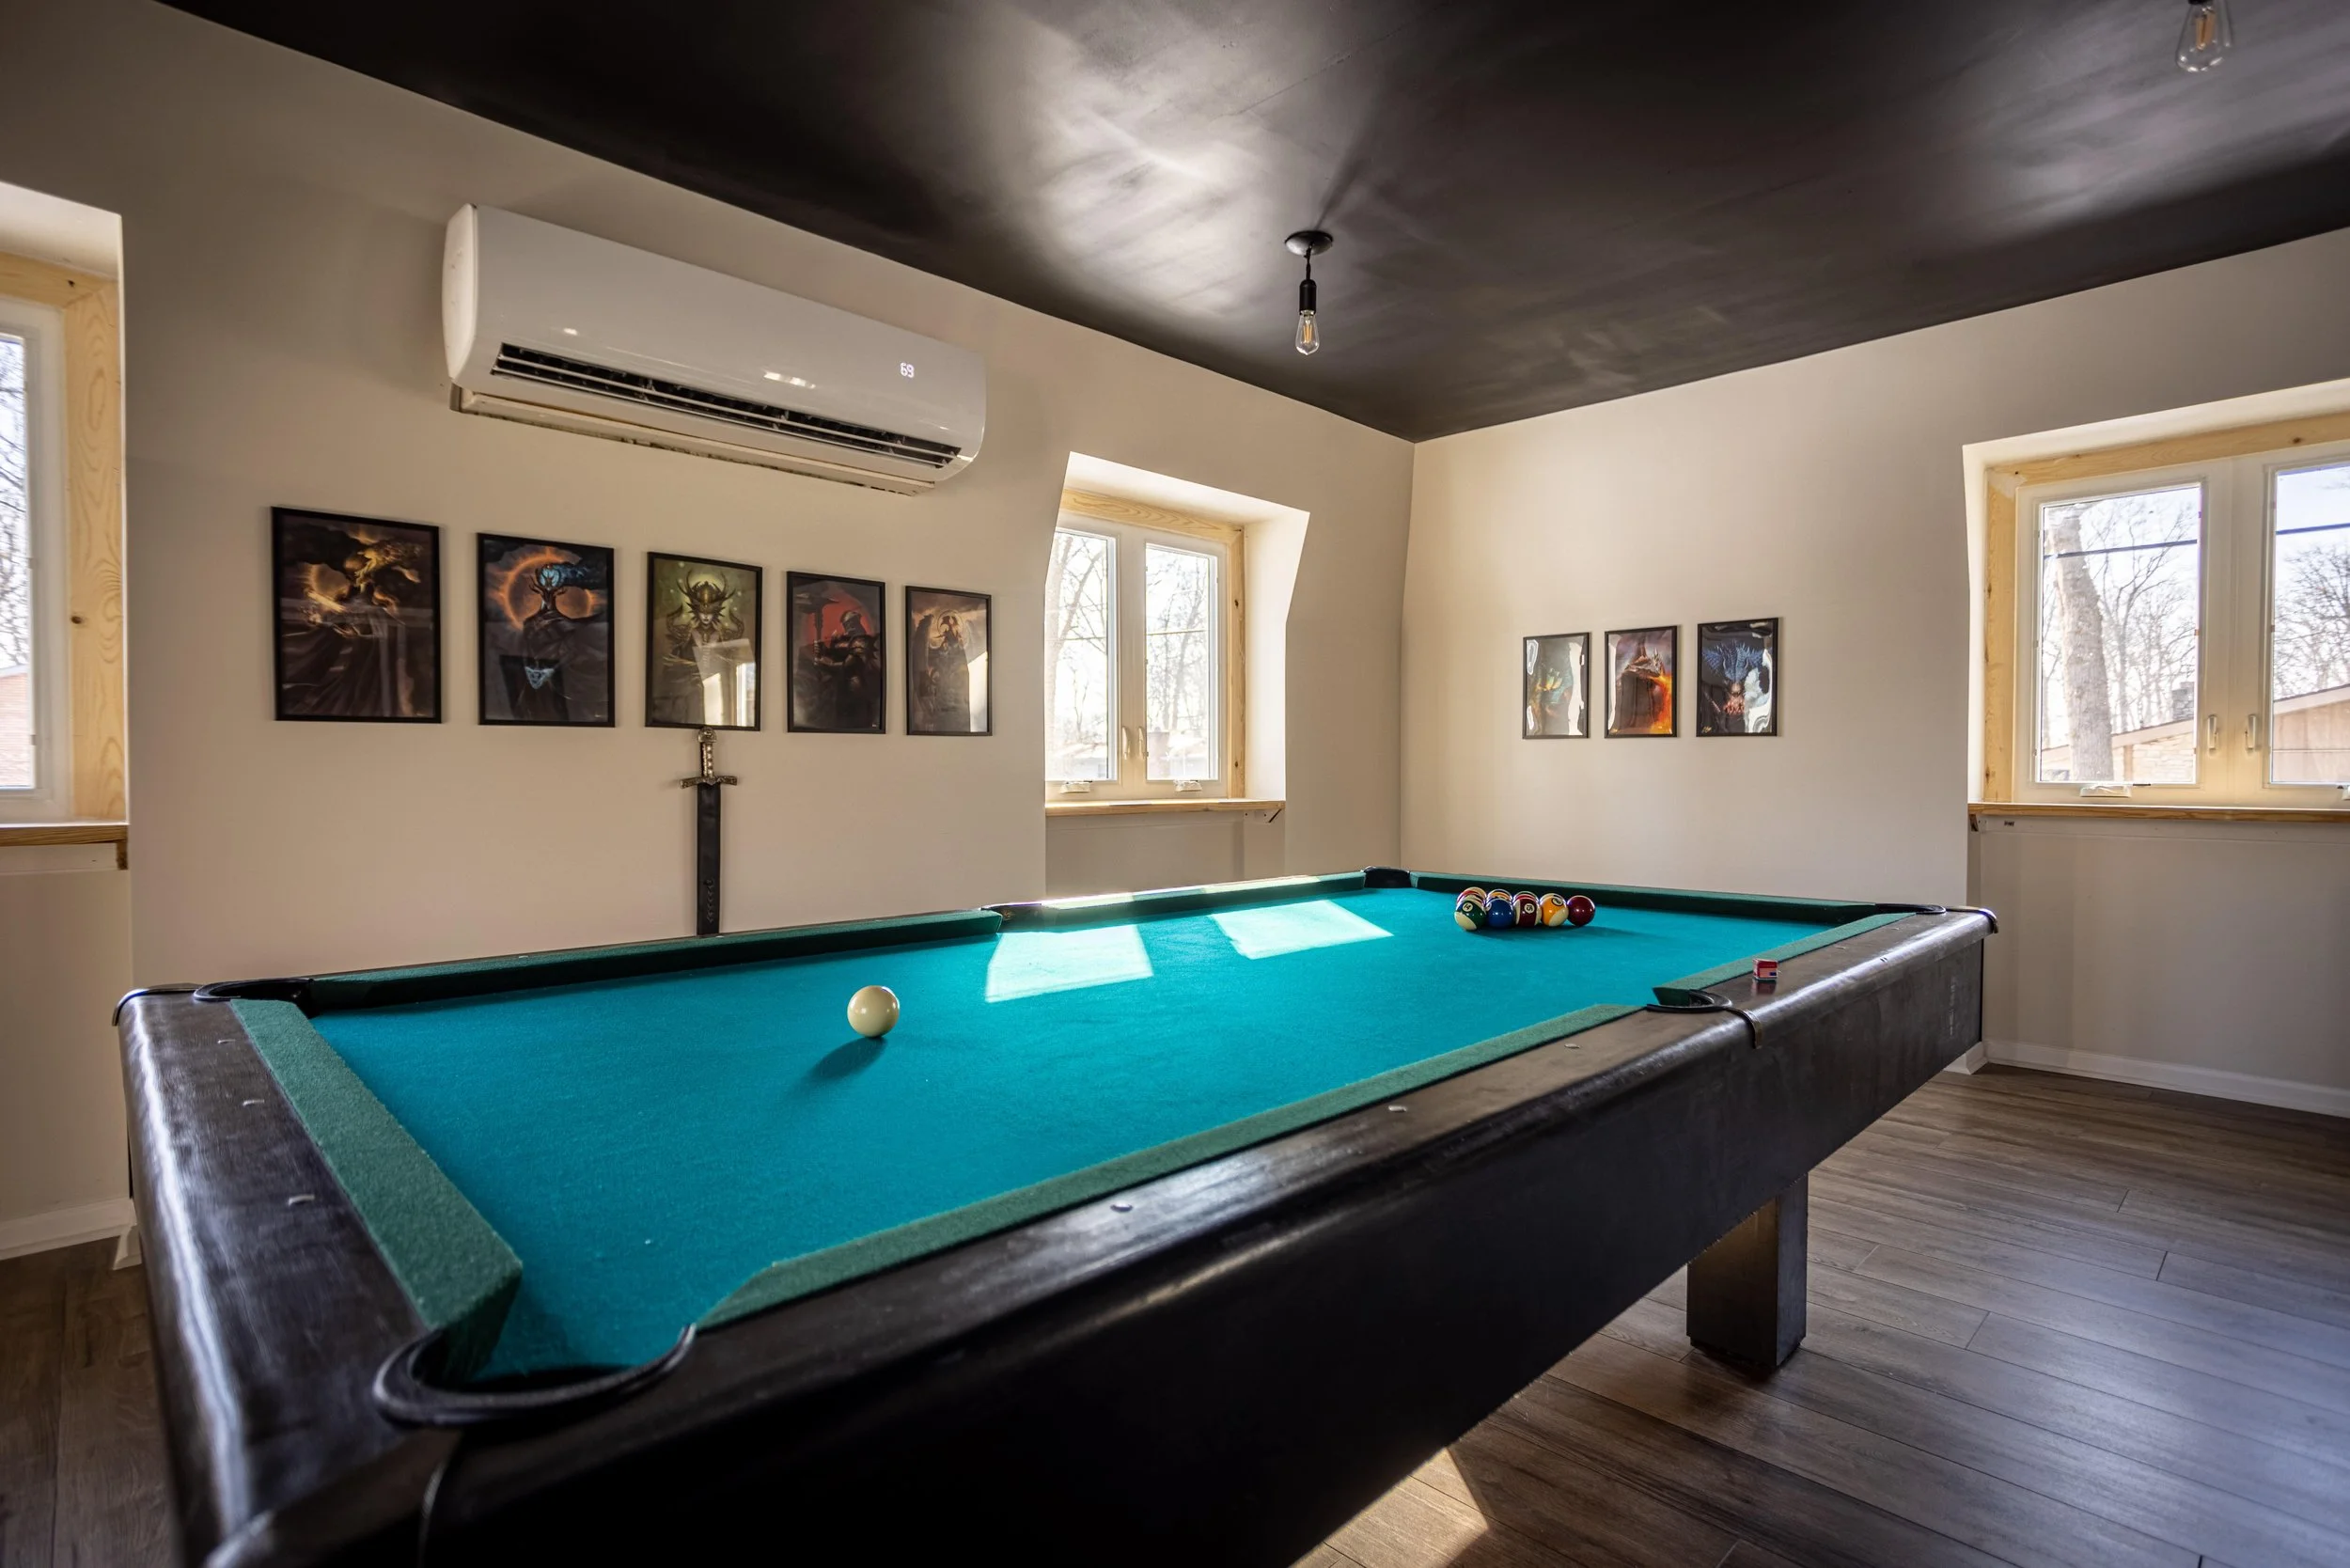
You’ll notice in the picture above the white dots on the ceiling. That’s where the other four were originally supposed to go. Would we have spaced the remaining lights differently if we knew then what we know now? Probably. But I think the symmetry of the placement of the lights makes them look intentional enough to keep them from standing out, and they serve their purpose to light the specific areas that need it (I’m lookin’ at you, pool table).
Furniture
One of our goals with this renovation was to make better use of the space. Not that we couldn’t have done that before the renovation, but with the ugly atmosphere we just didn’t really want to.
However, with its new makeover, the room is so much more inviting and we’re really making the most of it by creating different zones with furnishings. In fact, we hosted a New Year’s Eve party, and for the first time ever, we all ended up hanging out up here for a majority of the night!
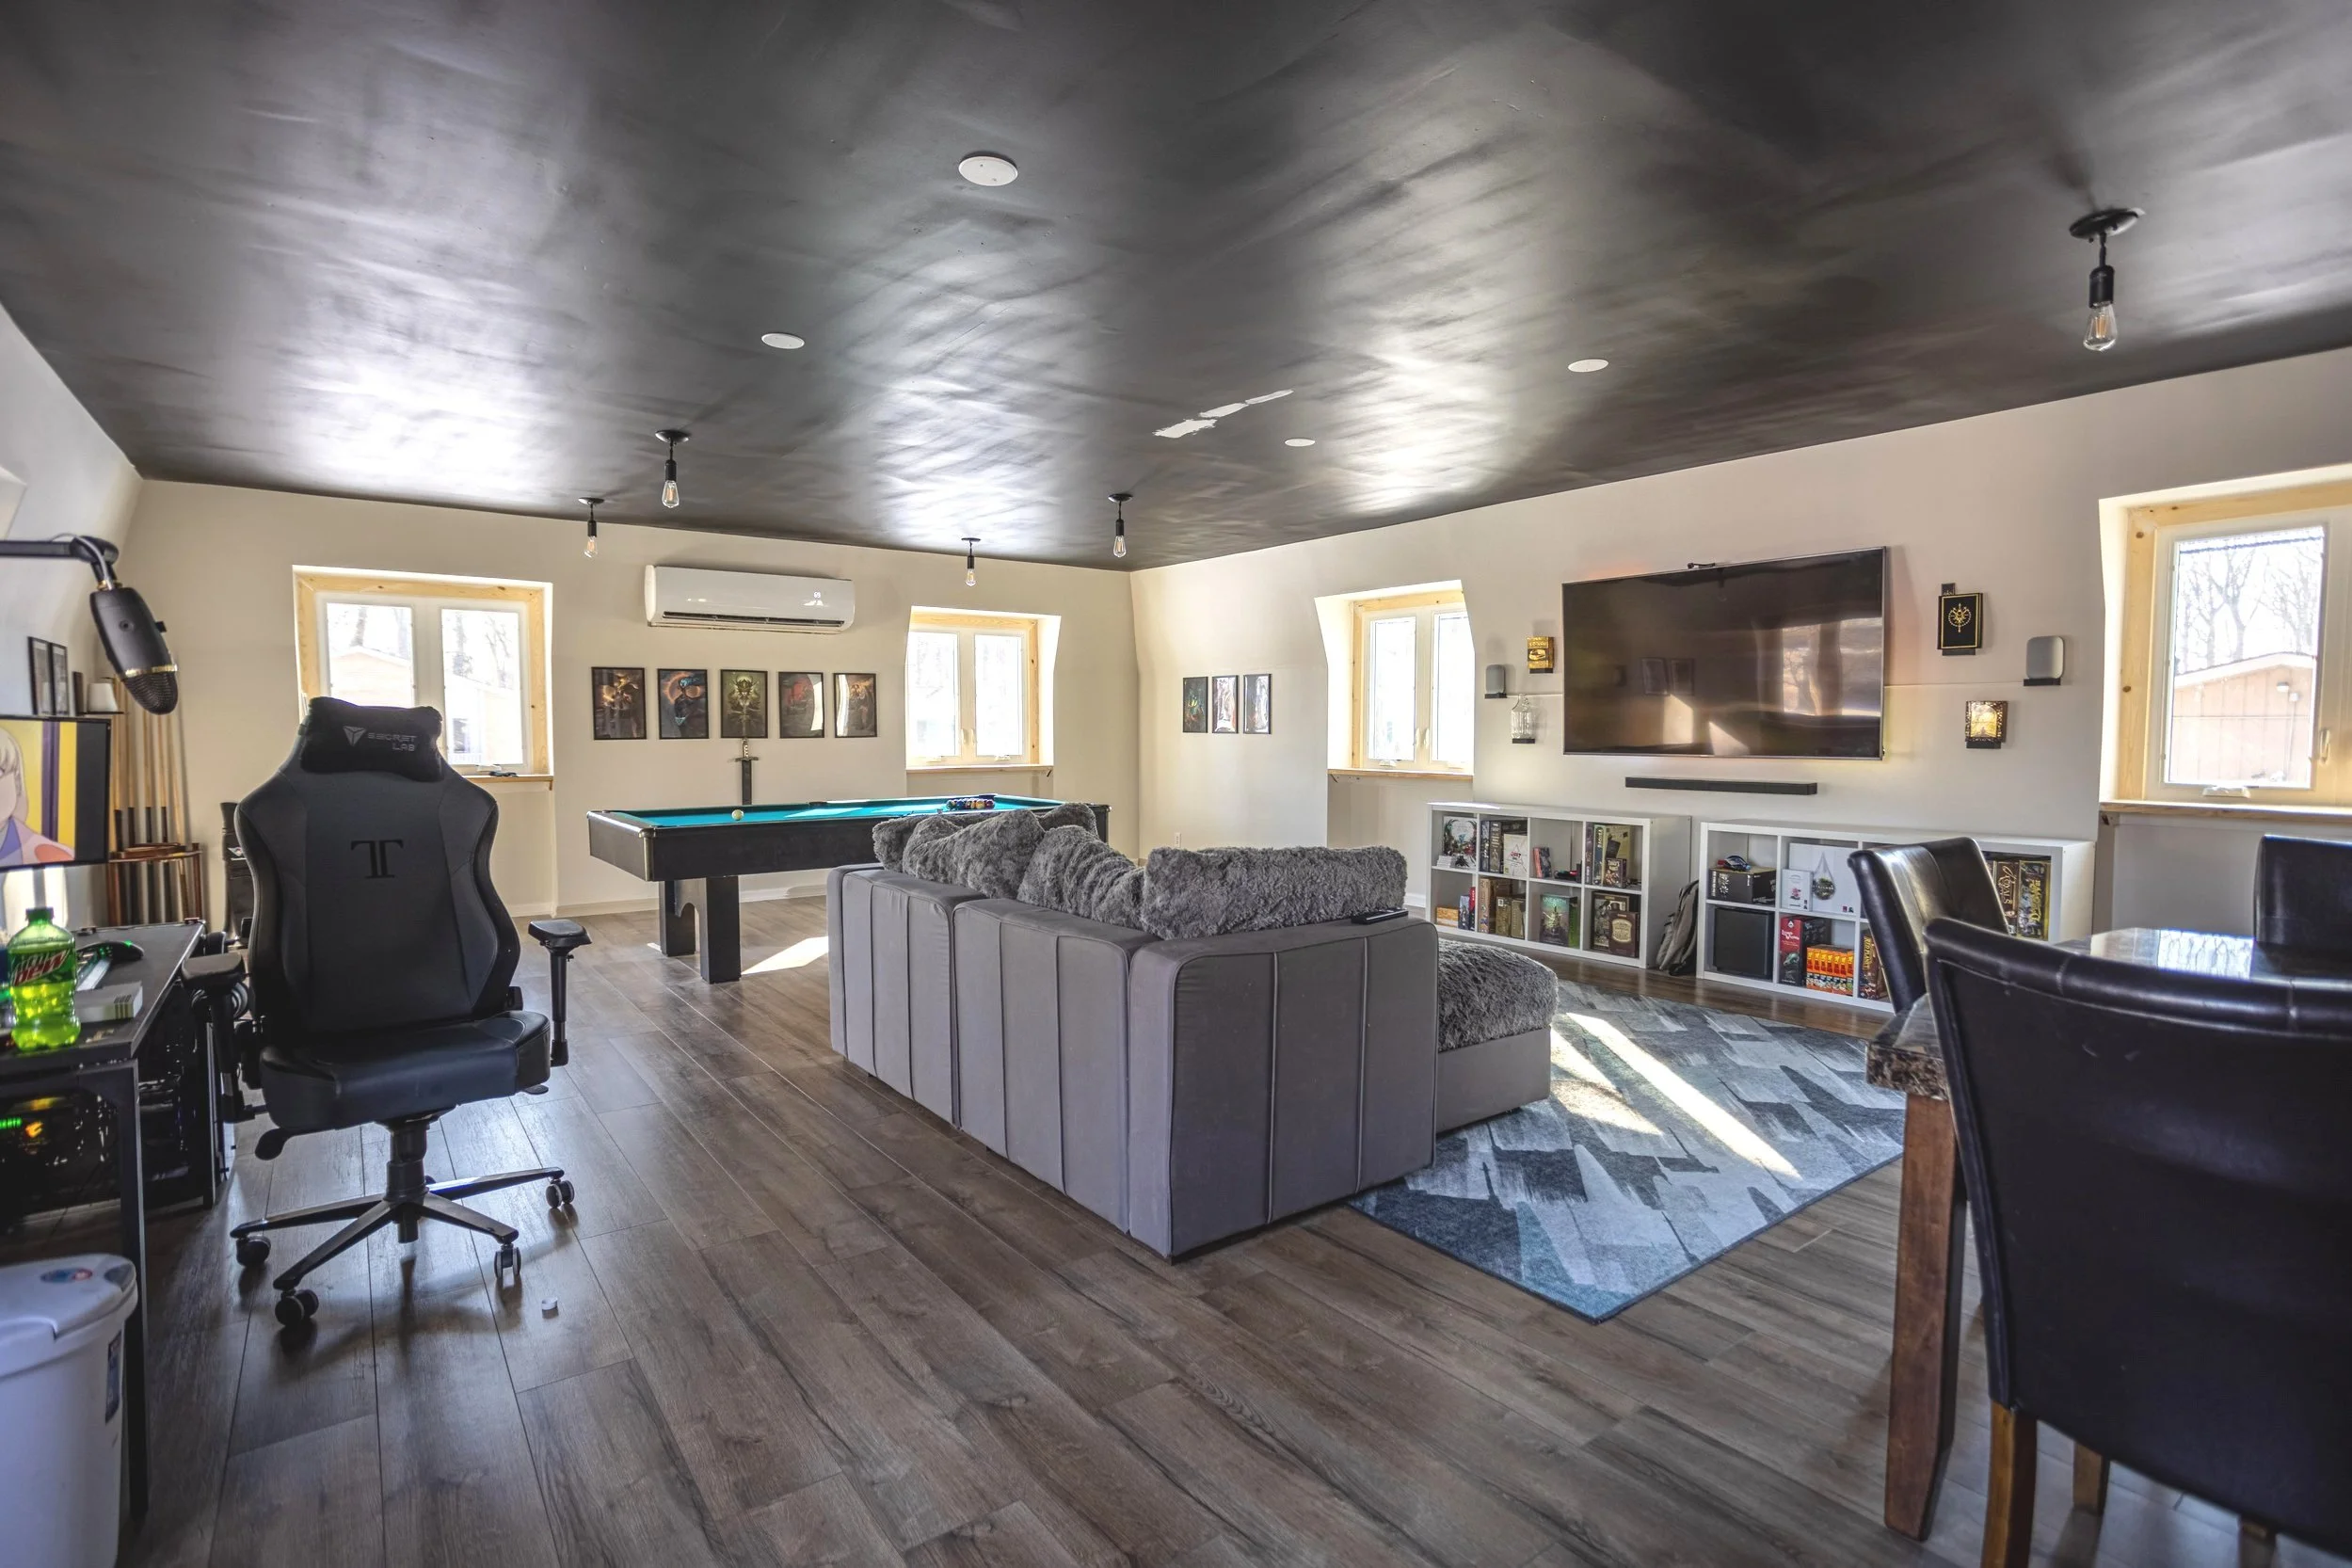
With the paint and flooring done, we were able to move the couch and TV back in. We also added a new, large rug to ground this area and create a visual “zone”.
Behind the couch, Lucius set up his computer area with his copious amounts of monitors. I have to admit, it does look pretty cool, though.

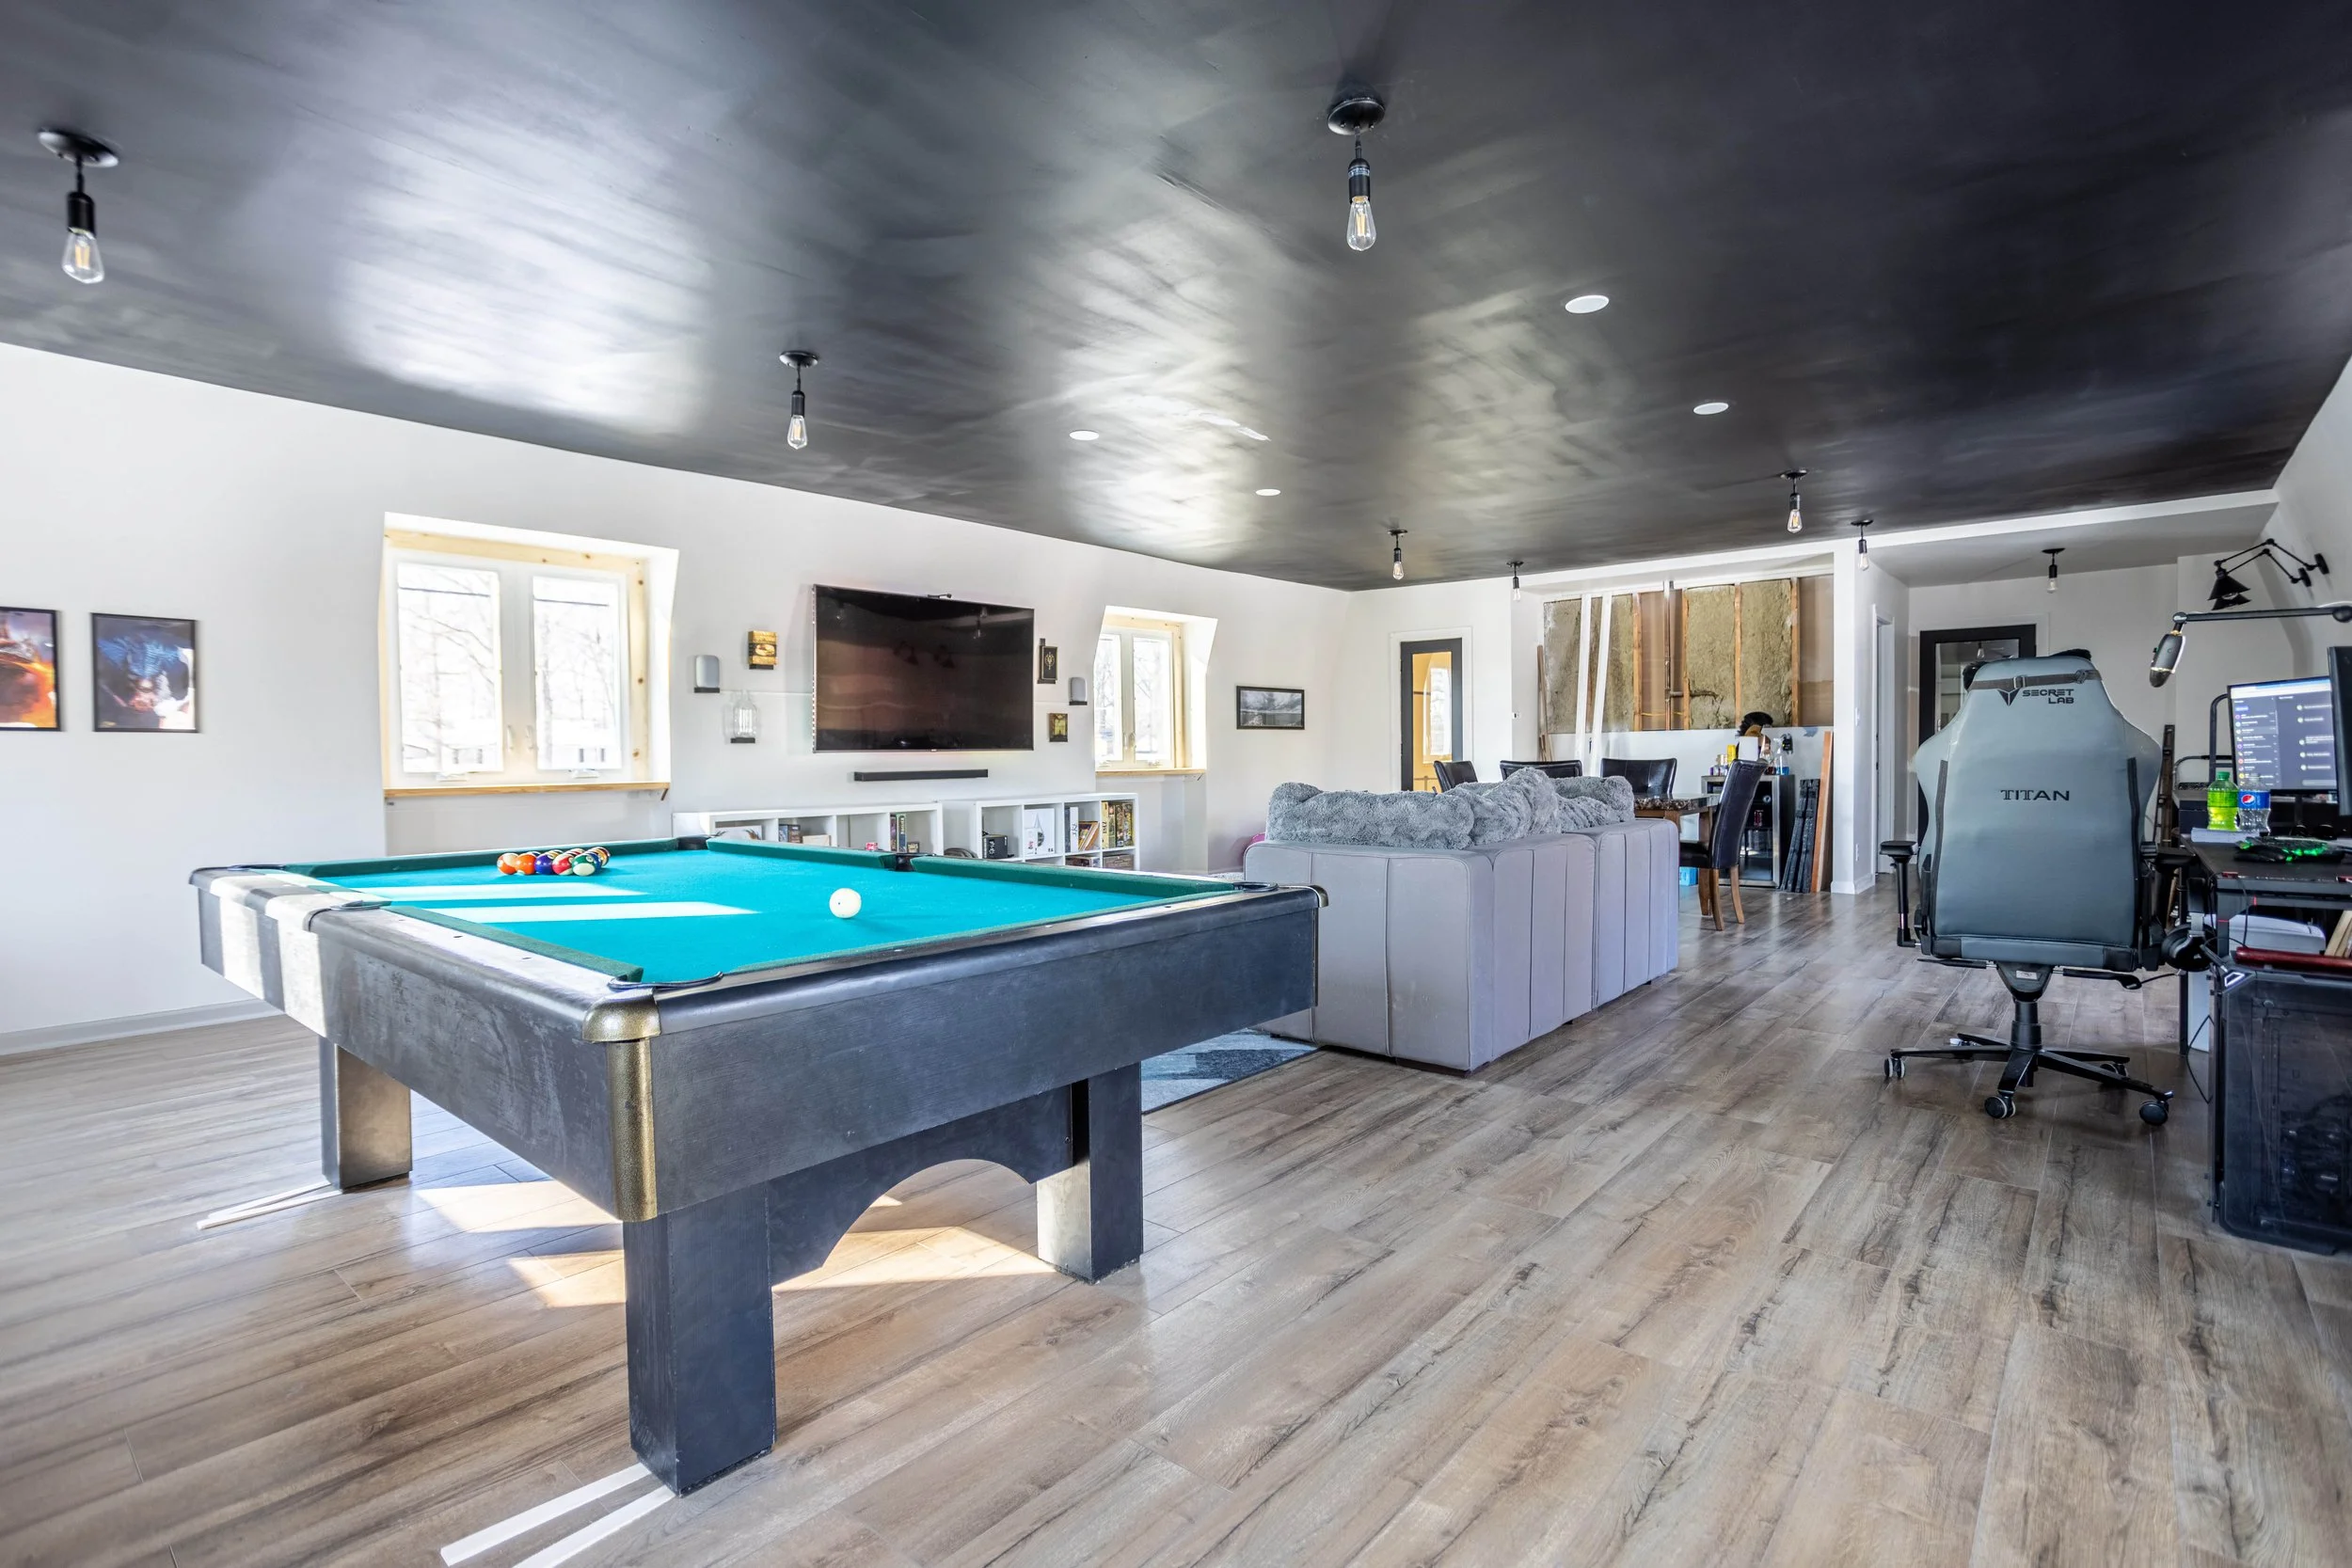
On the far side of the room, we placed the pool table Lucius found on Facebook Marketplace that I repainted.
And on the opposite end, near the kitchenette, we added a hand-me-down table and chairs. It’s been great to have a dedicated place for the kids to craft and snack up here. We’ll replace it with a different table eventually, but this is working out great so far!
Near the entrance, I set up Lucius’ old desk as my stand-in art area.
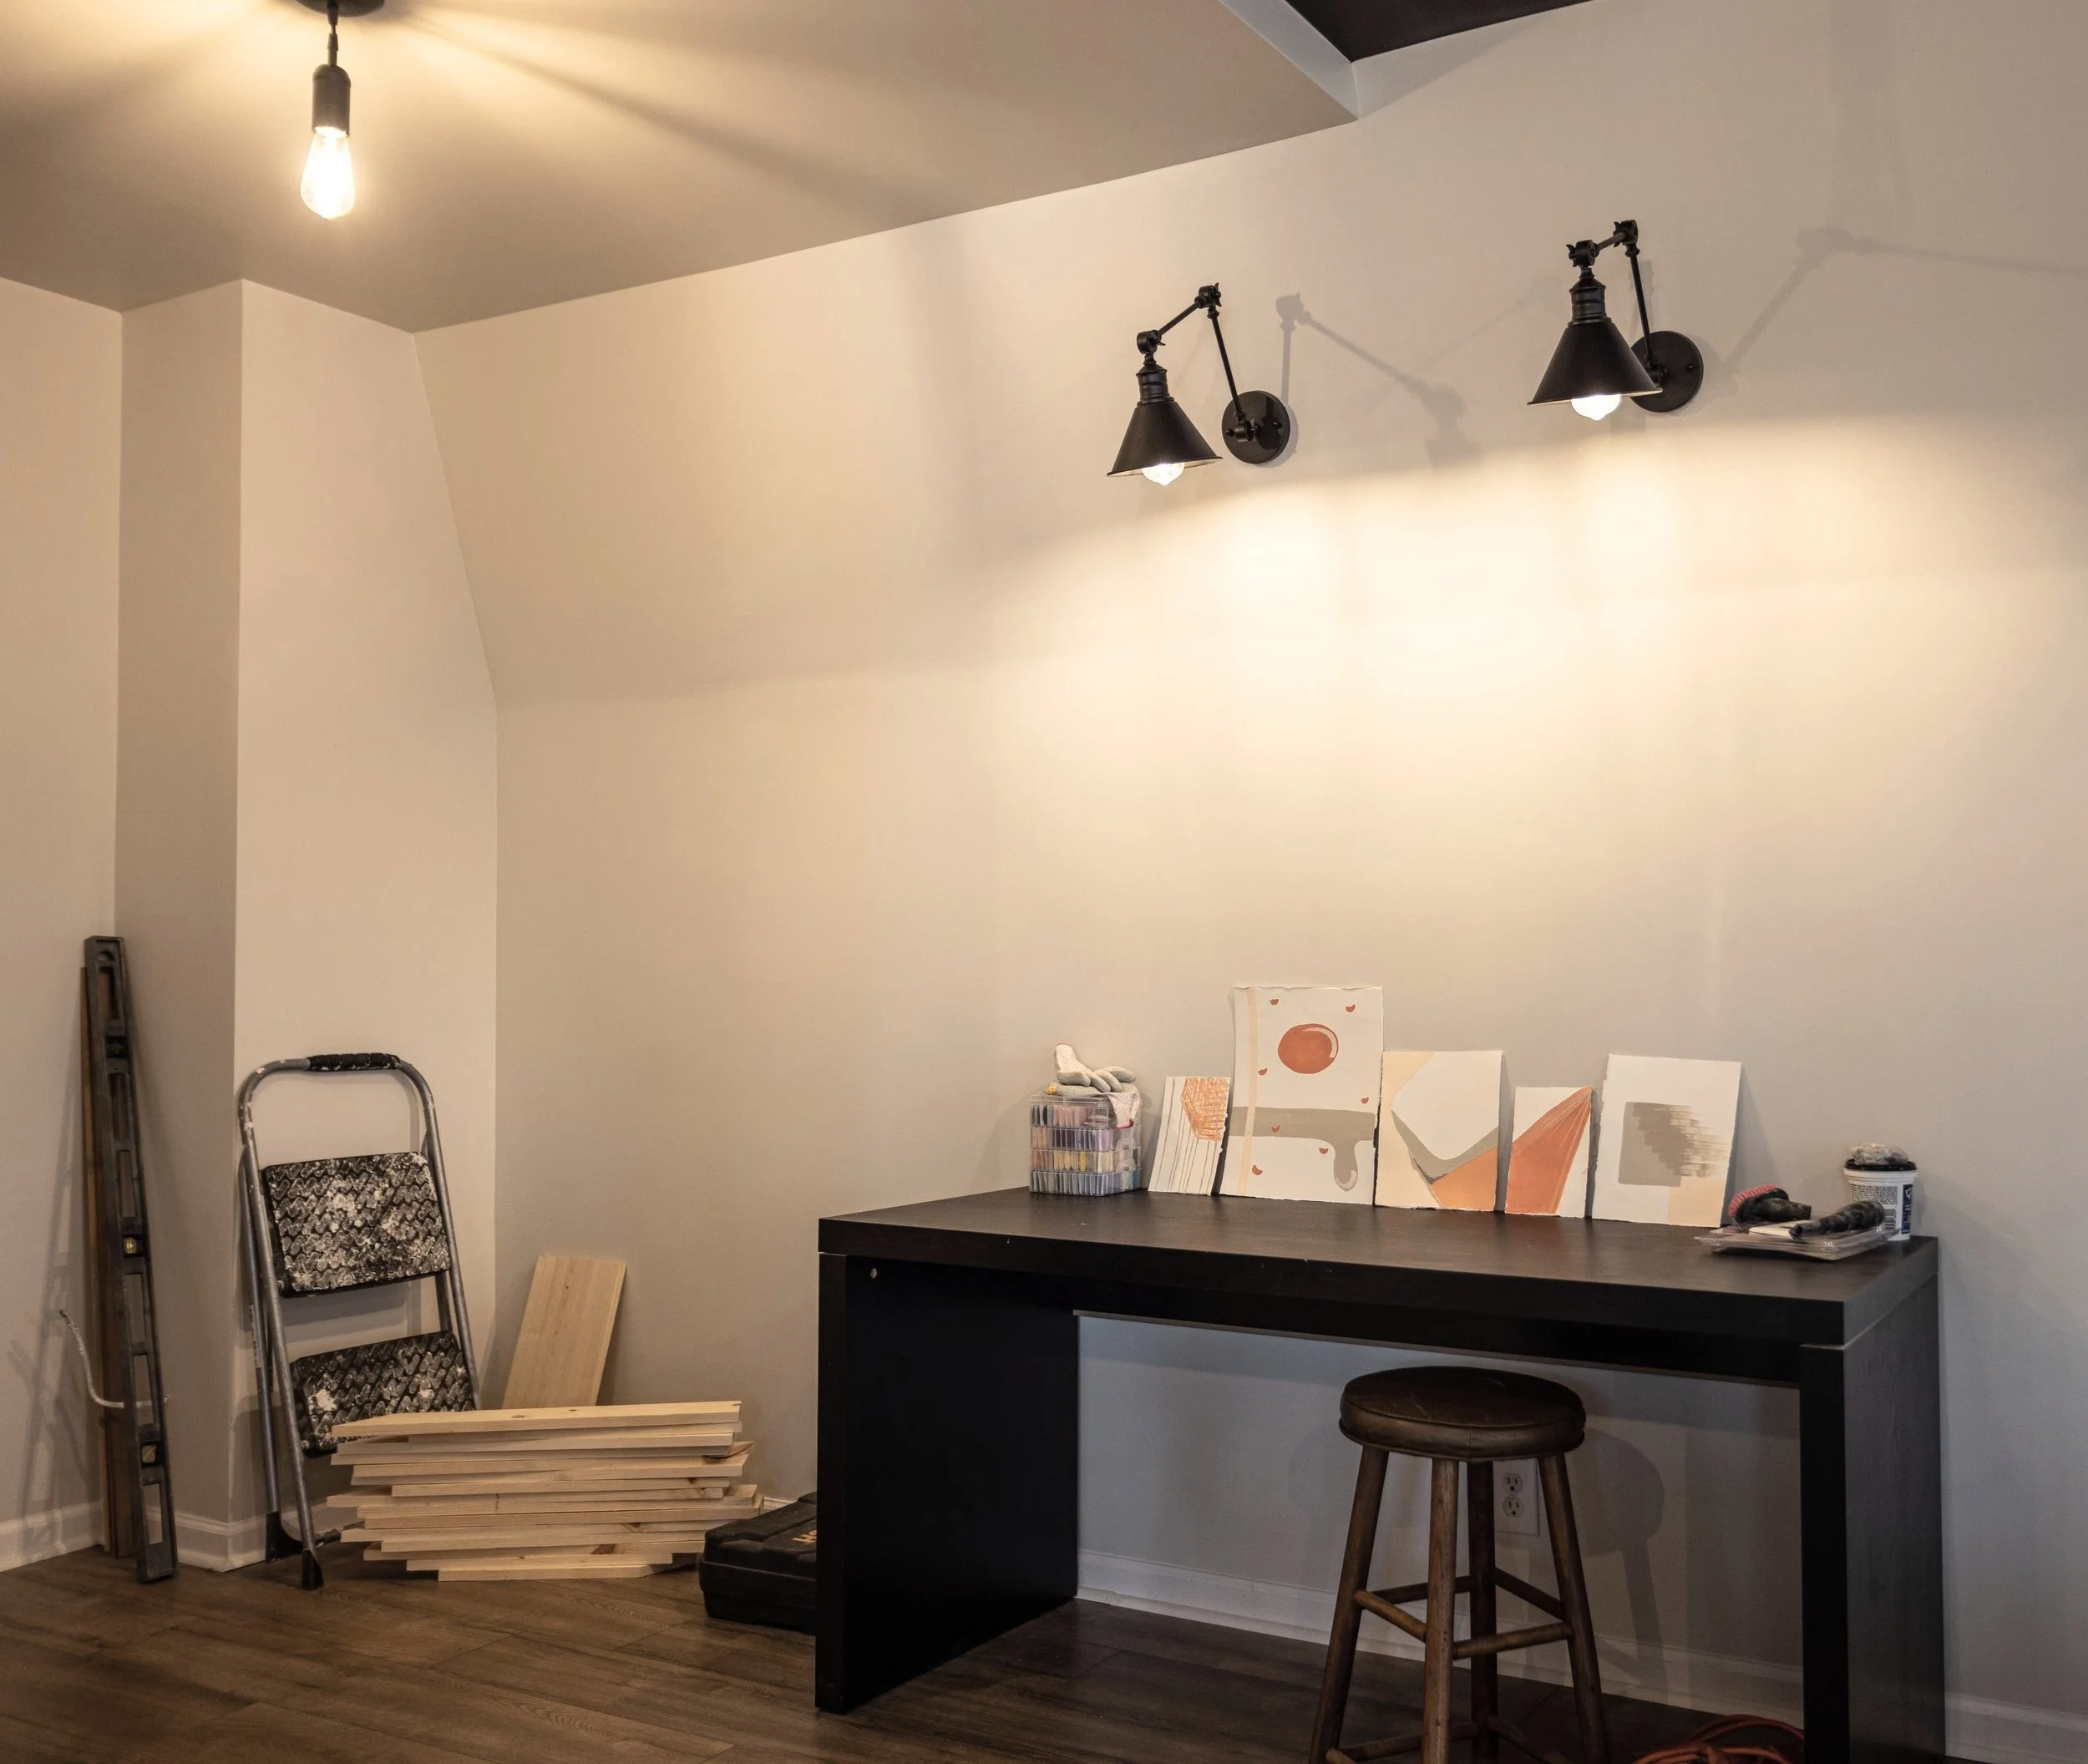
It’s looking a little sad right now, but I plan on expanding it to cover more of this section of the wall so I can really spread out. I’d love to create something like the art area below with lots of storage incorporated since most of my art supplies are currently occupying my unfinished walk-in closet.

What’s Left To Do
Trim
Now that the big things are finished, it’s time for finishing work - like the trim! The trim is installed around the windows, doors, and baseboards and now all that’s left to do is paint. I’d like to step out of the norm here and shake things up a bit though.
The window trim will be painted white to match the windows, but I’d really love to incorporate taupe contrast trim on the baseboards. It’s been a bit of a struggle to convince Lucius, but I think it would be an unexpected twist (and I think I’m wearing him down!).
As for the door trim, I’d like to push the envelope even more and paint it black to match the doors. This sounds crazy, but just take a look at this example and tell me it wouldn’t look great. I dare you.

Blinds
After we moved into this house, we installed cheapo blinds up here to get us by. But now that we’ve renovated, we’ve decided to invest in blinds that are a little nicer and more substantial. HOWEVER, we were waiting on our new windows to be installed first.
Welp, I’m excited to say that we have new windows! Now we just need to measure for blinds and get them ordered!
Beams
One of the major design elements we have yet to add to this room is the beams. This is still on our to-do list but a lower priority since they really serve no structural purpose. Besides, I’d really like it to get warmer outside so I don’t have to stain them in the cold!
Once we finally install them, however, I’m hoping that they help break up some of the light cascading across the ceiling and hide some of the imperfections.
Kitchenette!
Last but definitely not least is a project in itself: the kitchenette!
We recently stopped by IKEA to order the cabinets and countertop, so this piece of the puzzle is moving right along. There’s just enough space to incorporate built-in trash and recycling, the mini-fridge, and a cabinet big enough to place/hide a small microwave.
The cabinets are going to be black, and we’re pairing them with a white laminate countertop, which will have a cutout for a small sink. You can see the full design plan here.
New Ideas
Dual-purpose Window Sills
As challenging as it can be living through renovations, taking it slow can be a blessing in disguise in that it forces you to slow down and live with things before they’re final.
For example, when we had our New Year’s party, one thing that really stuck with me was the lack of places to put drinks and whatnot while people were playing pool. So I thought to myself… wouldn’t it be cool if we turned the window sills into bartops? So that’s what we’re gonna do!
At least, that’s what we’ll do along the back two windows. Since we have a mansard roof and the windows on the second story of our house are dormered, there’s a little inset created for each window box. This seemed like the obvious place to add extra seating and bartops. I plan on adding a couple of bar stools to each of them that will tuck underneath when not in use.
As of right now, all the window sills are built out as if they’ll all be bartops, but our long-term plan for the remaining four windows is a little different. We’ve noticed a lack of storage in this room. To counteract that, we’re planning on building storage underneath each of the other four window sills. Inside, we’ll add shelving and they’ll be finished off with doors.
The extra bonus for this “bartop” idea is that I have more places for plants!
Built-in Entertainment Center
Our other new idea is to build an entertainment center customized to run between the windows on either side of the TV. I think this will help balance out the TV and make the wall less top-heavy. Plus, it’ll add EVEN MORE storage! I mean, can you ever really have enough storage (or plants)?

While we were at IKEA ordering the kitchenette, we picked up a couple of these Kallax bookshelves. We plan on raising them up to run trim along the bottom, adding a top so they appear as one piece, and painting them, you guessed it, black, to tie into the rest of the room.
Final Thoughts
As you can see, we’re moving right along with this room. And with our goal of FINISHING projects, before we start new ones, this room should be completely done in no time (I hope).
It’s hard to believe the change this room has undergone in just a matter of months, and pictures honestly don’t do it justice. I’ll continue to share updates along the way on Instagram stories, where you can see the progress in real-time.
While we’re working on finishing up this room, I’d love to know what’s your favorite part so far?
