
Halloween Mantel Decor on a Budget
How to Decorate Your Mantel for Halloween - for Cheap!
In the blogging world, this post is way overdue. Apparently, I’m “supposed” to have posted my Halloween-inspired decor posts like a month ago to give them time to spread all over the interwebs. But let me tell you, I have had a helluva time decorating my mantel for Halloween and putting this post together… because I’m cheap.
Let me explain…
A couple of months ago, I didn’t own a single Halloween decor item. Seriously!
Being my frugal self, I have a hard time spending money on nonfunctional items. And other than Christmas, I don’t get too excited about many holidays. But between feeling the pressure from the blogging world, not to mention my 4-year-old who is PUMPED UP about Halloween, I caved and bought a bunch of decorations, but I didn’t break the bank!
Let’s Go Shopping!
I knew I had to throw something together for Halloween, so being inspired by the craftiness of other bloggers, and the frugalness of my wallet, I headed on over to Dollar Tree and grabbed a bunch of cheap decorations - pumpkins, gourds, wooden ghosts, more pumpkins, flowers, leaf garlands, and more. I also made a pit stop at Wal-Mart for some larger pumpkins to add more interest since Dollar Tree really only carries smaller pumpkins. At Wally World, I also found some Halloween-inspired bouquet fillers for about $1 each so I grabbed those too.
Now that I had my decor items, I was honestly feeling overwhelmed with how to make the hodgepodge of decorations I bought work together. You see, while I was shopping, I didn’t really have a vision for what the end product would look like. But I did know one thing, some of the decor wasn’t quite my style.
Tweaking My Decorations
I wouldn’t necessarily consider myself a hoarder, but when it comes to paint and crafting supplies, I have a REALLY hard time letting go. That’s probably how I ended up with all these paint samples.

I’d been hoping to find some way to make use of all the paint samples I’ve collected, and this was a great opportunity! All over Pinterest, I’ve seen other folks painting their Dollar Tree pumpkins, and rightfully so because those things are insanely bright. So I figured, why not? Let’s give it a whirl…
My daughters and I spent a nice evening painting - my older daughter and I painted pumpkins and gourds together while she regaled me with tales from the playground and my younger daughter painted herself. The best part about using paint samples I already had on hand was that they’re colors I love and already use in my house, so they effortlessly look like they belong.
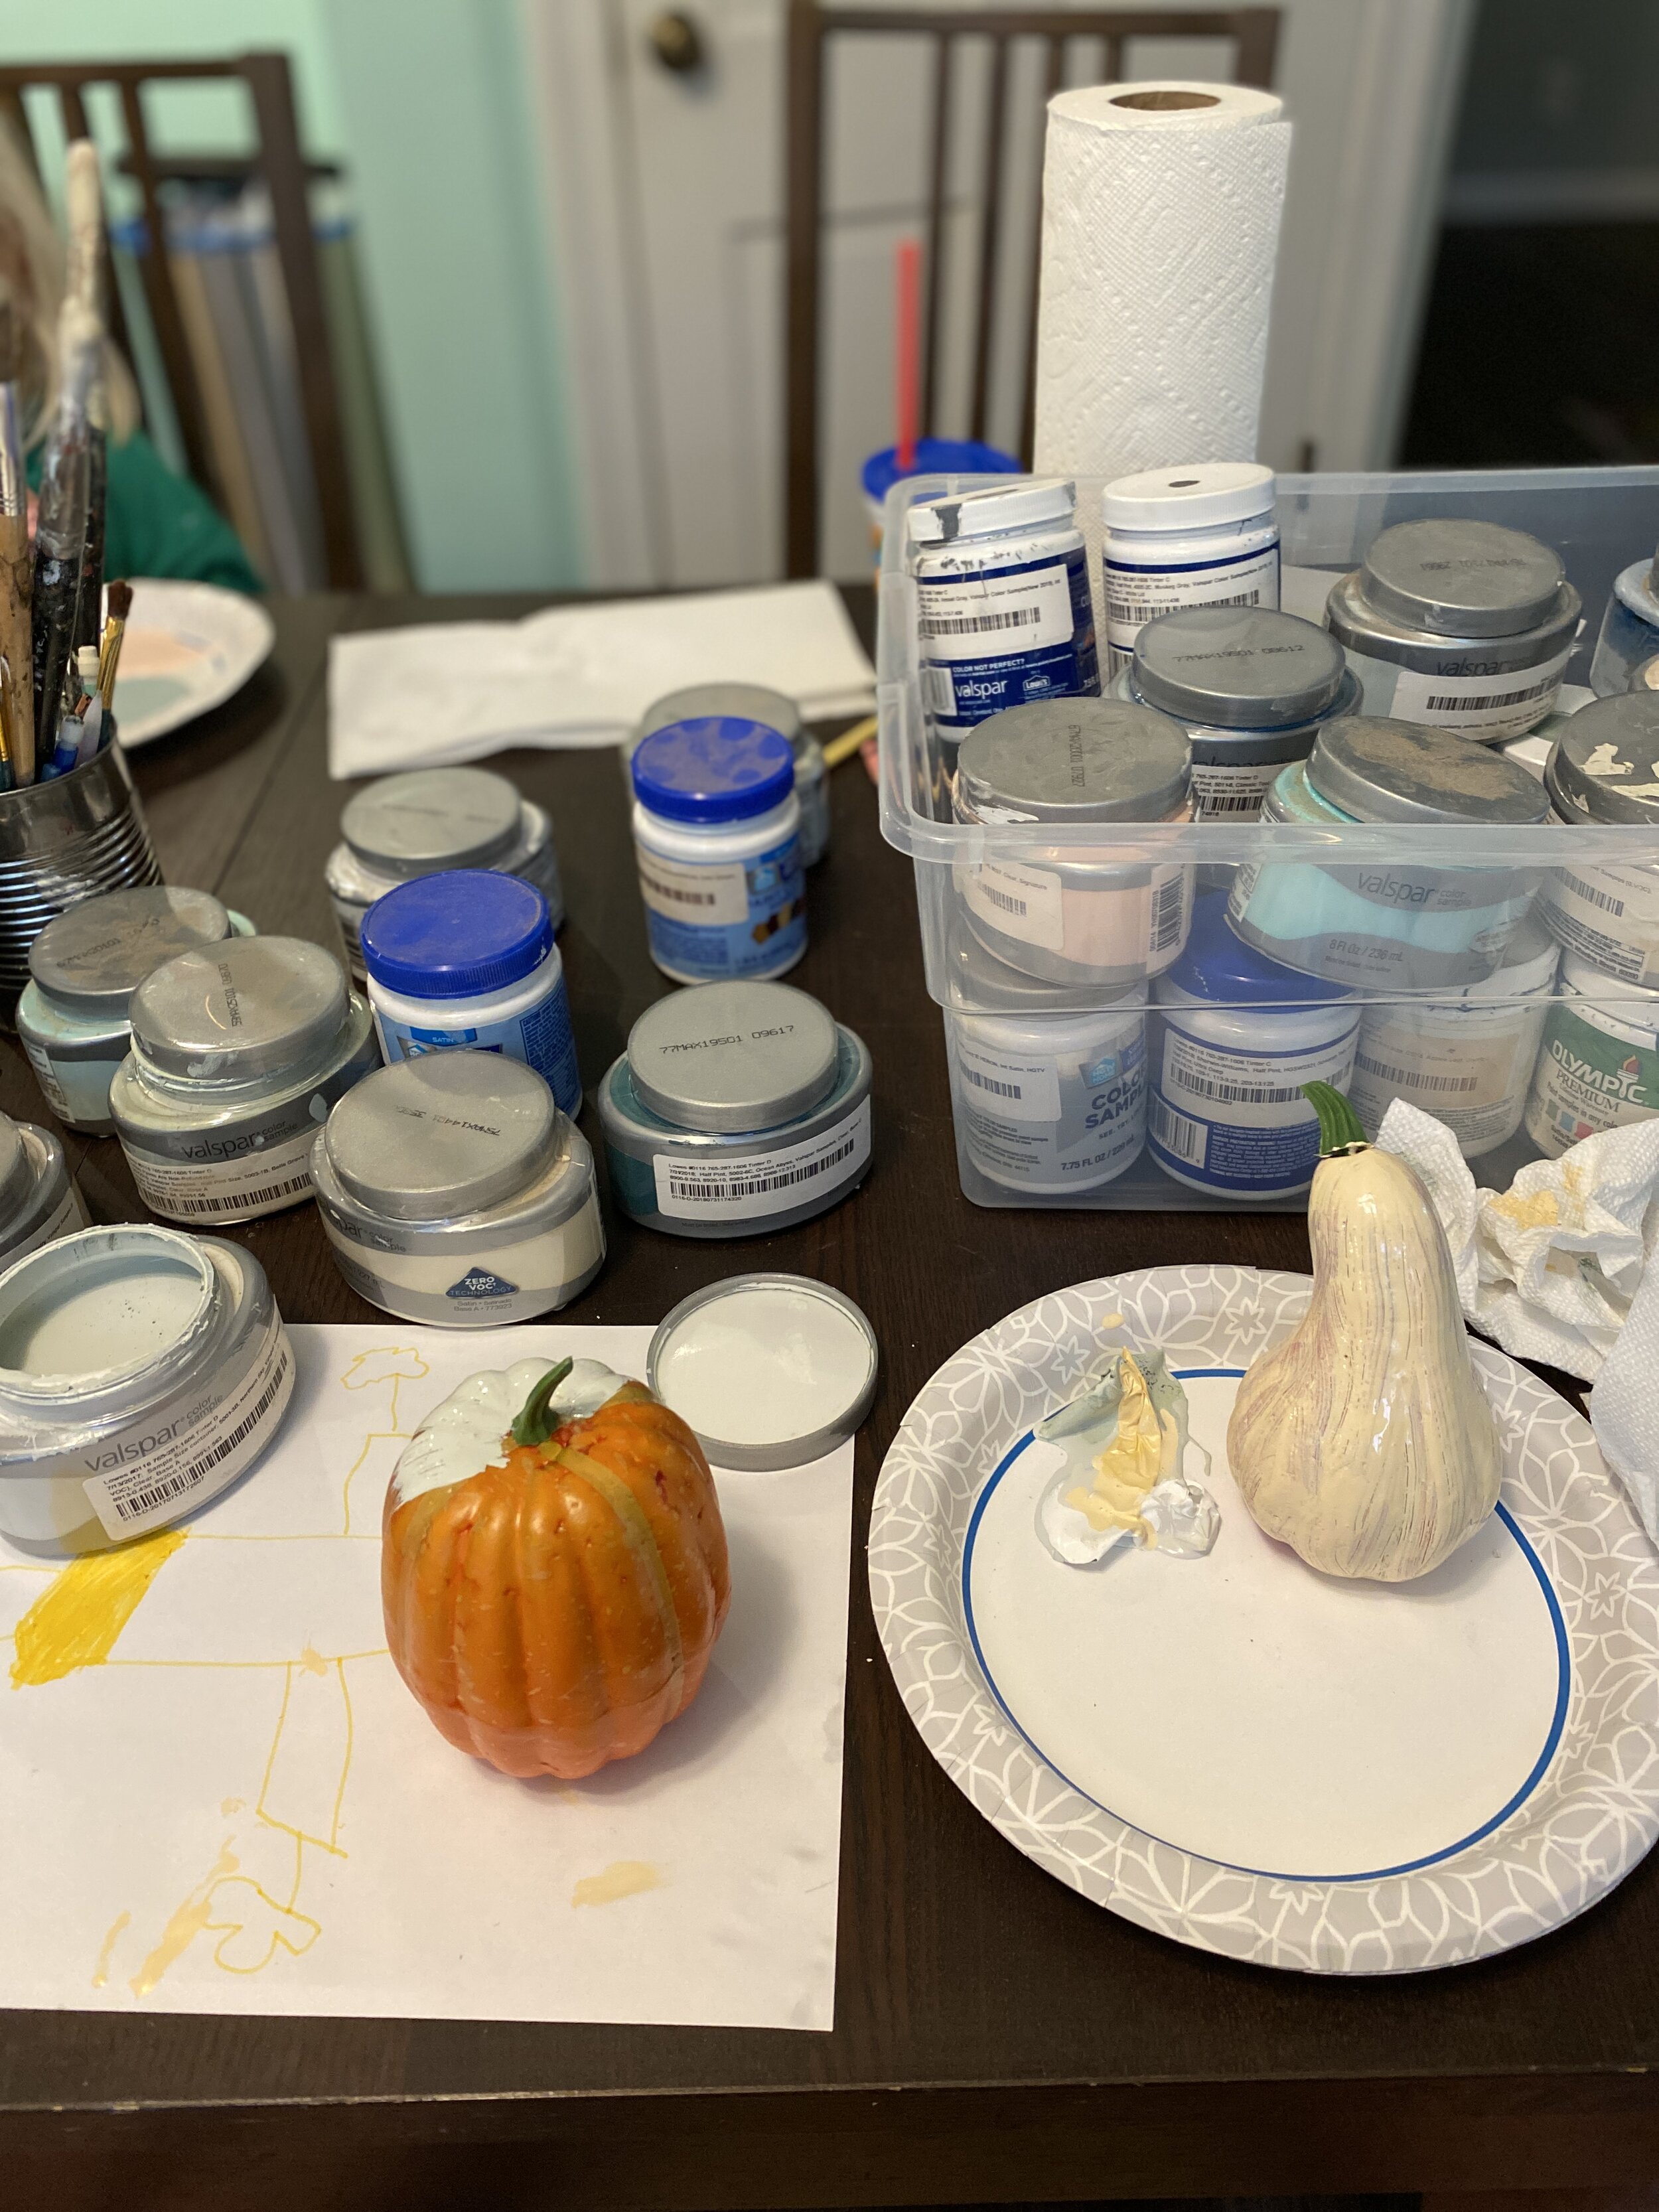
As for my daughter’s pumpkins, I gave her just a few colors to choose from so her pumpkins didn’t end up looking like they were dipped in mud. Then I conveniently arranged them together in a little grouping by themselves in the other room. (That sounds terrible… but it’s the truth.) And don’t worry, my younger daughter had non-toxic finger paints.
Once I modified my pumpkins, I was feeling more confident in my purchases. Here’s how I put it all together:
How I Decorated My Mantel for Halloween
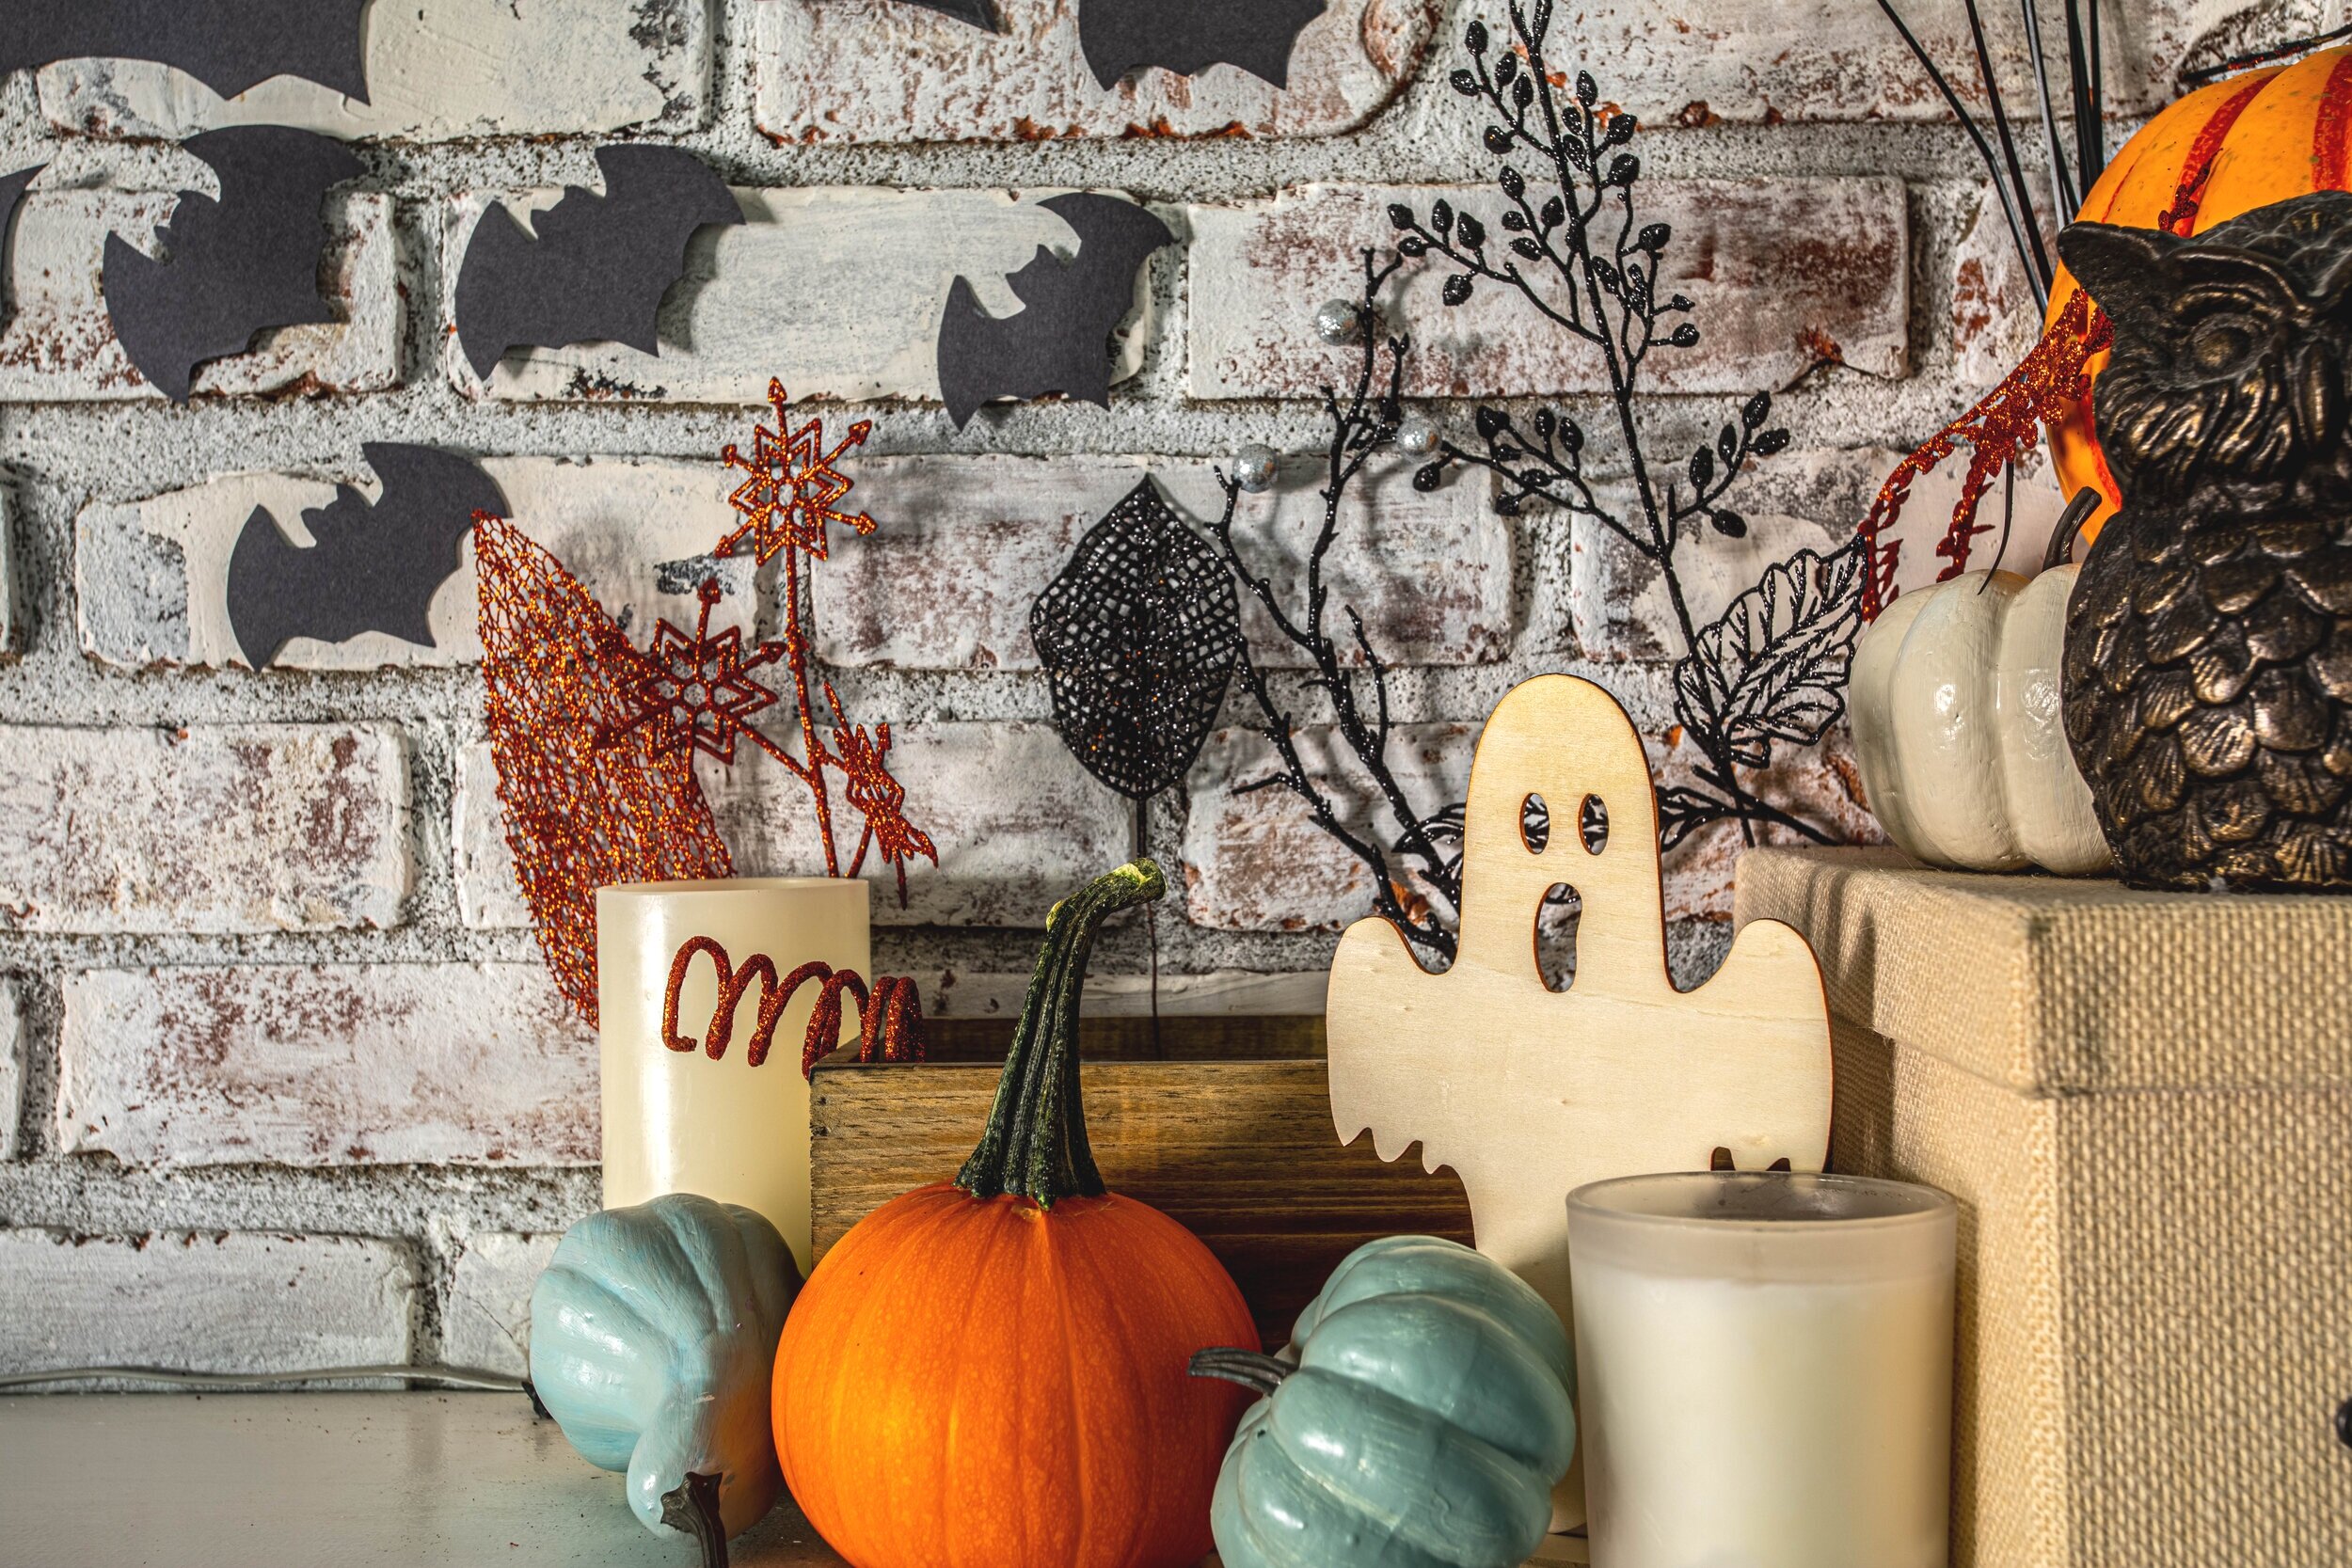
Our mantel is abnormally large. It spans the whole wall! Plopping decor items all along the mantel like I did initially looked crazy busy. I actually wish I had snapped a picture of the hodgepodge of decorations I threw up on the mantel before I took them down and started giving it some actual thought because it was a HOT MESS. I ended up mimicking how I typically decorate this mantel and created groupings on either end.
Normally, I like to keep the groupings on the mantel pretty minimal, but that just didn’t look right to me in this case. I think it was because I had mostly small items that looked insignificant when there were only a few. So, I threw out my own rules, grabbed a whole bunch of my decorations, and put together some spooky little dynamic scenes on each end.

First, to give the larger pumpkins some height, I stacked them on random items that would lift them up juuust enough. I think I used a bowl to lift up one pumpkin and a candle for the other. I already mentioned above that my daughter and I painted the smaller pumpkins and gourds. I used those to hide the items that were raising the larger pumpkins and to add some variety.
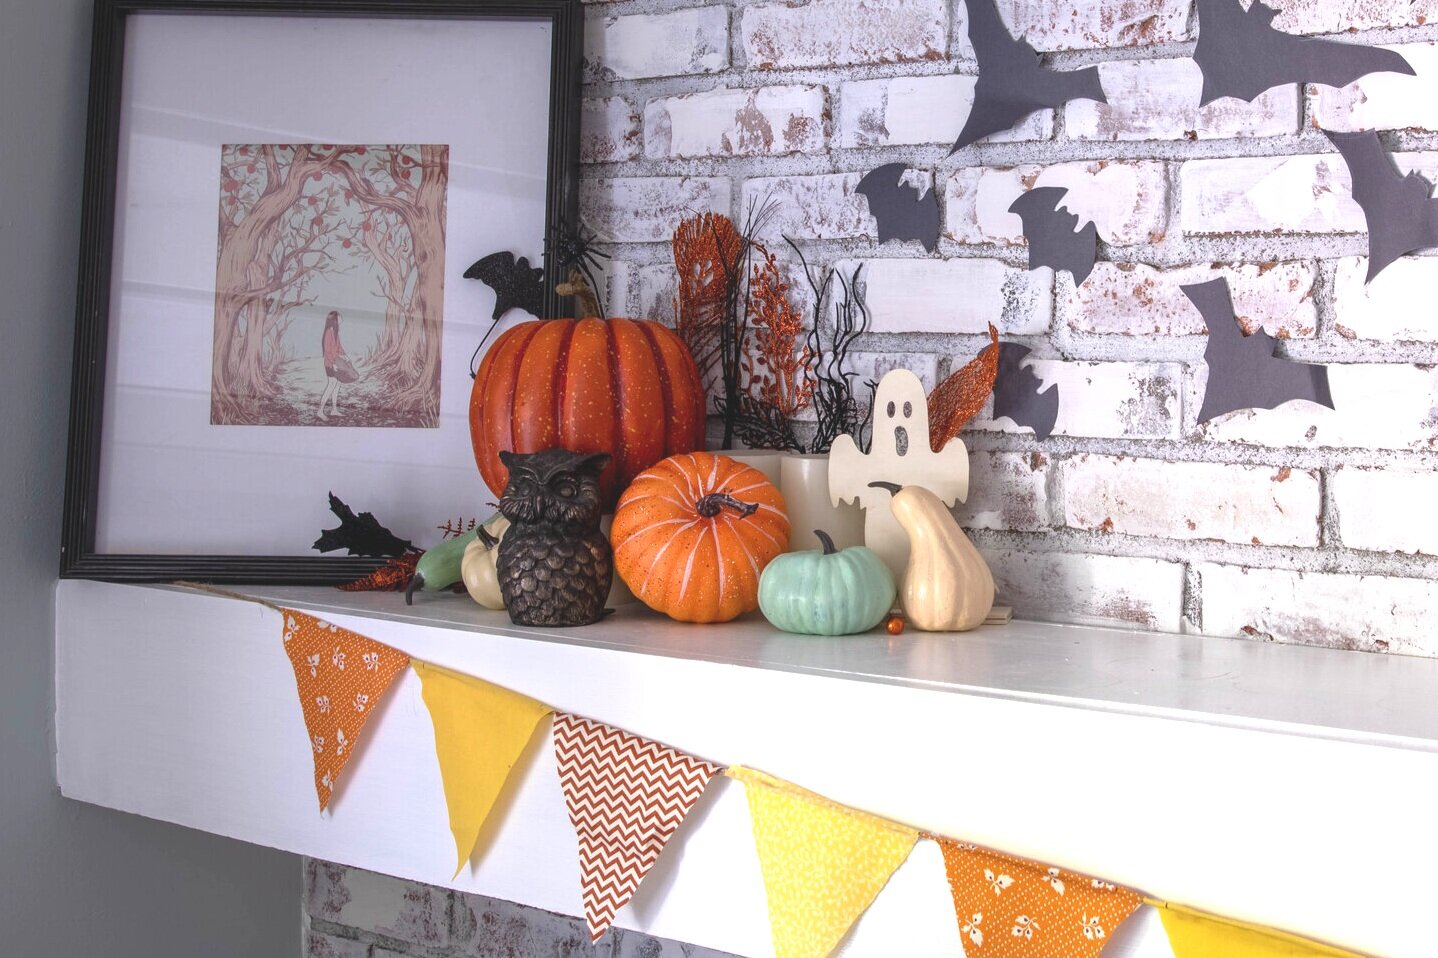
Next, I plopped on cute wooden little ghosts I grabbed from The Dollar Tree on each end of the mantel. I thought about painting them white, but I actually really like the blonde wood so I left them as is. I also used the smaller pumpkins to hide the base of the ghosts.
To add a spooky backdrop, I took the Halloween bouquet fillers that I bought, broke them apart, and spread them out behind the scenes I created. I also shopped around my house and grabbed some other things I already had - like some fake candles and my owl bookends that seemed to fit the theme.

As an Amazon Associate, I earn from qualifying purchases. This post may contain affiliate links, meaning I receive commissions for purchases made through those links, at no cost to you.
Then, there are the bats. THE BATS!
I think the bats are really the icing on the cake and they were probably the easiest and most enjoyable part of this little project. I took another opportunity to involve the kids in this project by drawing and cutting out bats while they colored and cut their own shapes and designs.
I LOVE how the bats add so much movement and really bump up the spook factor. (Admittedly, I bogarted all the black construction paper, but the kids didn’t seem to mind.)
If you don’t want to make your own bats, you can buy packs of them in all different sizes!

Lastly, there’s the bunting that I recently made. The bunting is cheap, easy, and completely customizable. I love how it visually links each end of the mantel, and I’ll be sure to share a tutorial on how to make your own soon.
There are a million other options for garland, lights, or something else I could have hung across the front of the mantel. And you know what? I’m kind of excited to brainstorm and see what I can come up with next year.
One thing to note is that I purposefully didn’t decorate at the base of the fireplace. In case you didn’t pick up on the fact that I have a mischievous little one, I most definitely do. And my mom-brain can’t stop picturing her pulling a giant pumpkin on herself or dragging smaller pumpkins throughout the house. Maybe in a couple of years, I’ll consider mixing it up and adding some decor within the her reach, but for now, I’m good with sticking to keep the decorations up high.

Final Thoughts
This honestly wasn’t a project I was really looking forward to. But once I stopped procrastinating and started putting my Halloween mantel design together, I started to have some fun. I can’t say exactly how much I spent because I didn’t use all the decor I bought and I shopped around my own house for some of it, but I guesstimate it was less than 50 bones (couldn’t help the Halloween pun there)!
So there you have it! It took me way too long to get my butt in gear and decorate, but I’m happy that I did - and the kids are pretty pumped too. I’m loving how switching up the decor is shaking up the every day just a little and really getting us in the spirit. I’m almost willing to say I’m excited to decorate for Christmas. We’ll see…
