
Mini mantel makeover

By now you’ve seen the lay of the land house and you’ve probably noticed the massive mantel we have on the brick wall in the living room. What you may have not noticed is that since we’ve moved in, we’ve actually made some updates to it.
When we moved in, we were greeted with this:

The picture above is from the listing so the furniture wasn’t actually there when we moved in, but it’s the only one I have with the shelves still there since we knocked them out the next day. I considered keeping them for about 5 seconds, then I thought about having to dust them and about little kids taking everything and anything off them and decided that taking them out would be better for our family, and for my sanity.
If there’s anything I’ve learned renovating our past houses, it’s that our family certainly favors function over form. There are tons of great décor ideas out there, and I can certainly appreciate the aesthetic, but if it’s going to require me to dust more stuff or constantly worry that a kid is going to destroy it, it’s not for me. These shelves just weren’t functional for us, so out they came! Not only that, but I also felt like they were pretty busy considering they were in front of a brick wall.
Once we removed the shelves, we realized there was a charming little wood storage area built into the brick that was previously boarded up. WHO IN THEIR RIGHT MIND WOULD COVER THAT UP!?
Once we got settled, we lived with the mantel as shown above for a few months, but during that time Lucius was spending most of his freetime walking around the room convinced he could feel a draft. Seriously, he would be in the middle of talking, stop, and run his hands over the mantel and exclaim, “Come here, don’t you feel a draft!?” I thought he was a little nuts.
Okay, I might have felt a little draft too, but he still looked crazy.
To stop the insanity, I went along with Lucius’ plan to take the mantel apart and try to seal whatever was letting in a draft. And what we found when we popped the front of the mantel off was…

…another mantel!
It’s hard to tell in the picture above, but the mantel underneath was a little rough and definitely uneven. It also wasn’t as deep as the old mantel, so putting things on it would have been tricky. Therefore, once we filled the gaps (yes, there were actually some gaps seeping cold air), we opted to put the mantel back together.
However, if you scroll up a couple of photos you’ll notice the narrow strips of wood on the old mantel facade. I felt like these were a little busy (like the shelves), unnecessary, and more farmhouse chic than I could handle, so I was happy to take them off for good.
Sidenote, in the picture above you’ll also notice that the previous owners didn’t carry the German smear to the brick behind their TV! I’m not quite sure how to update that area so it blends nicely yet, but it haunts me daily.
Once we put the solid piece of wood back on the face of the mantel, I had to fill nail holes, prime and paint. Then I put all my decor back.

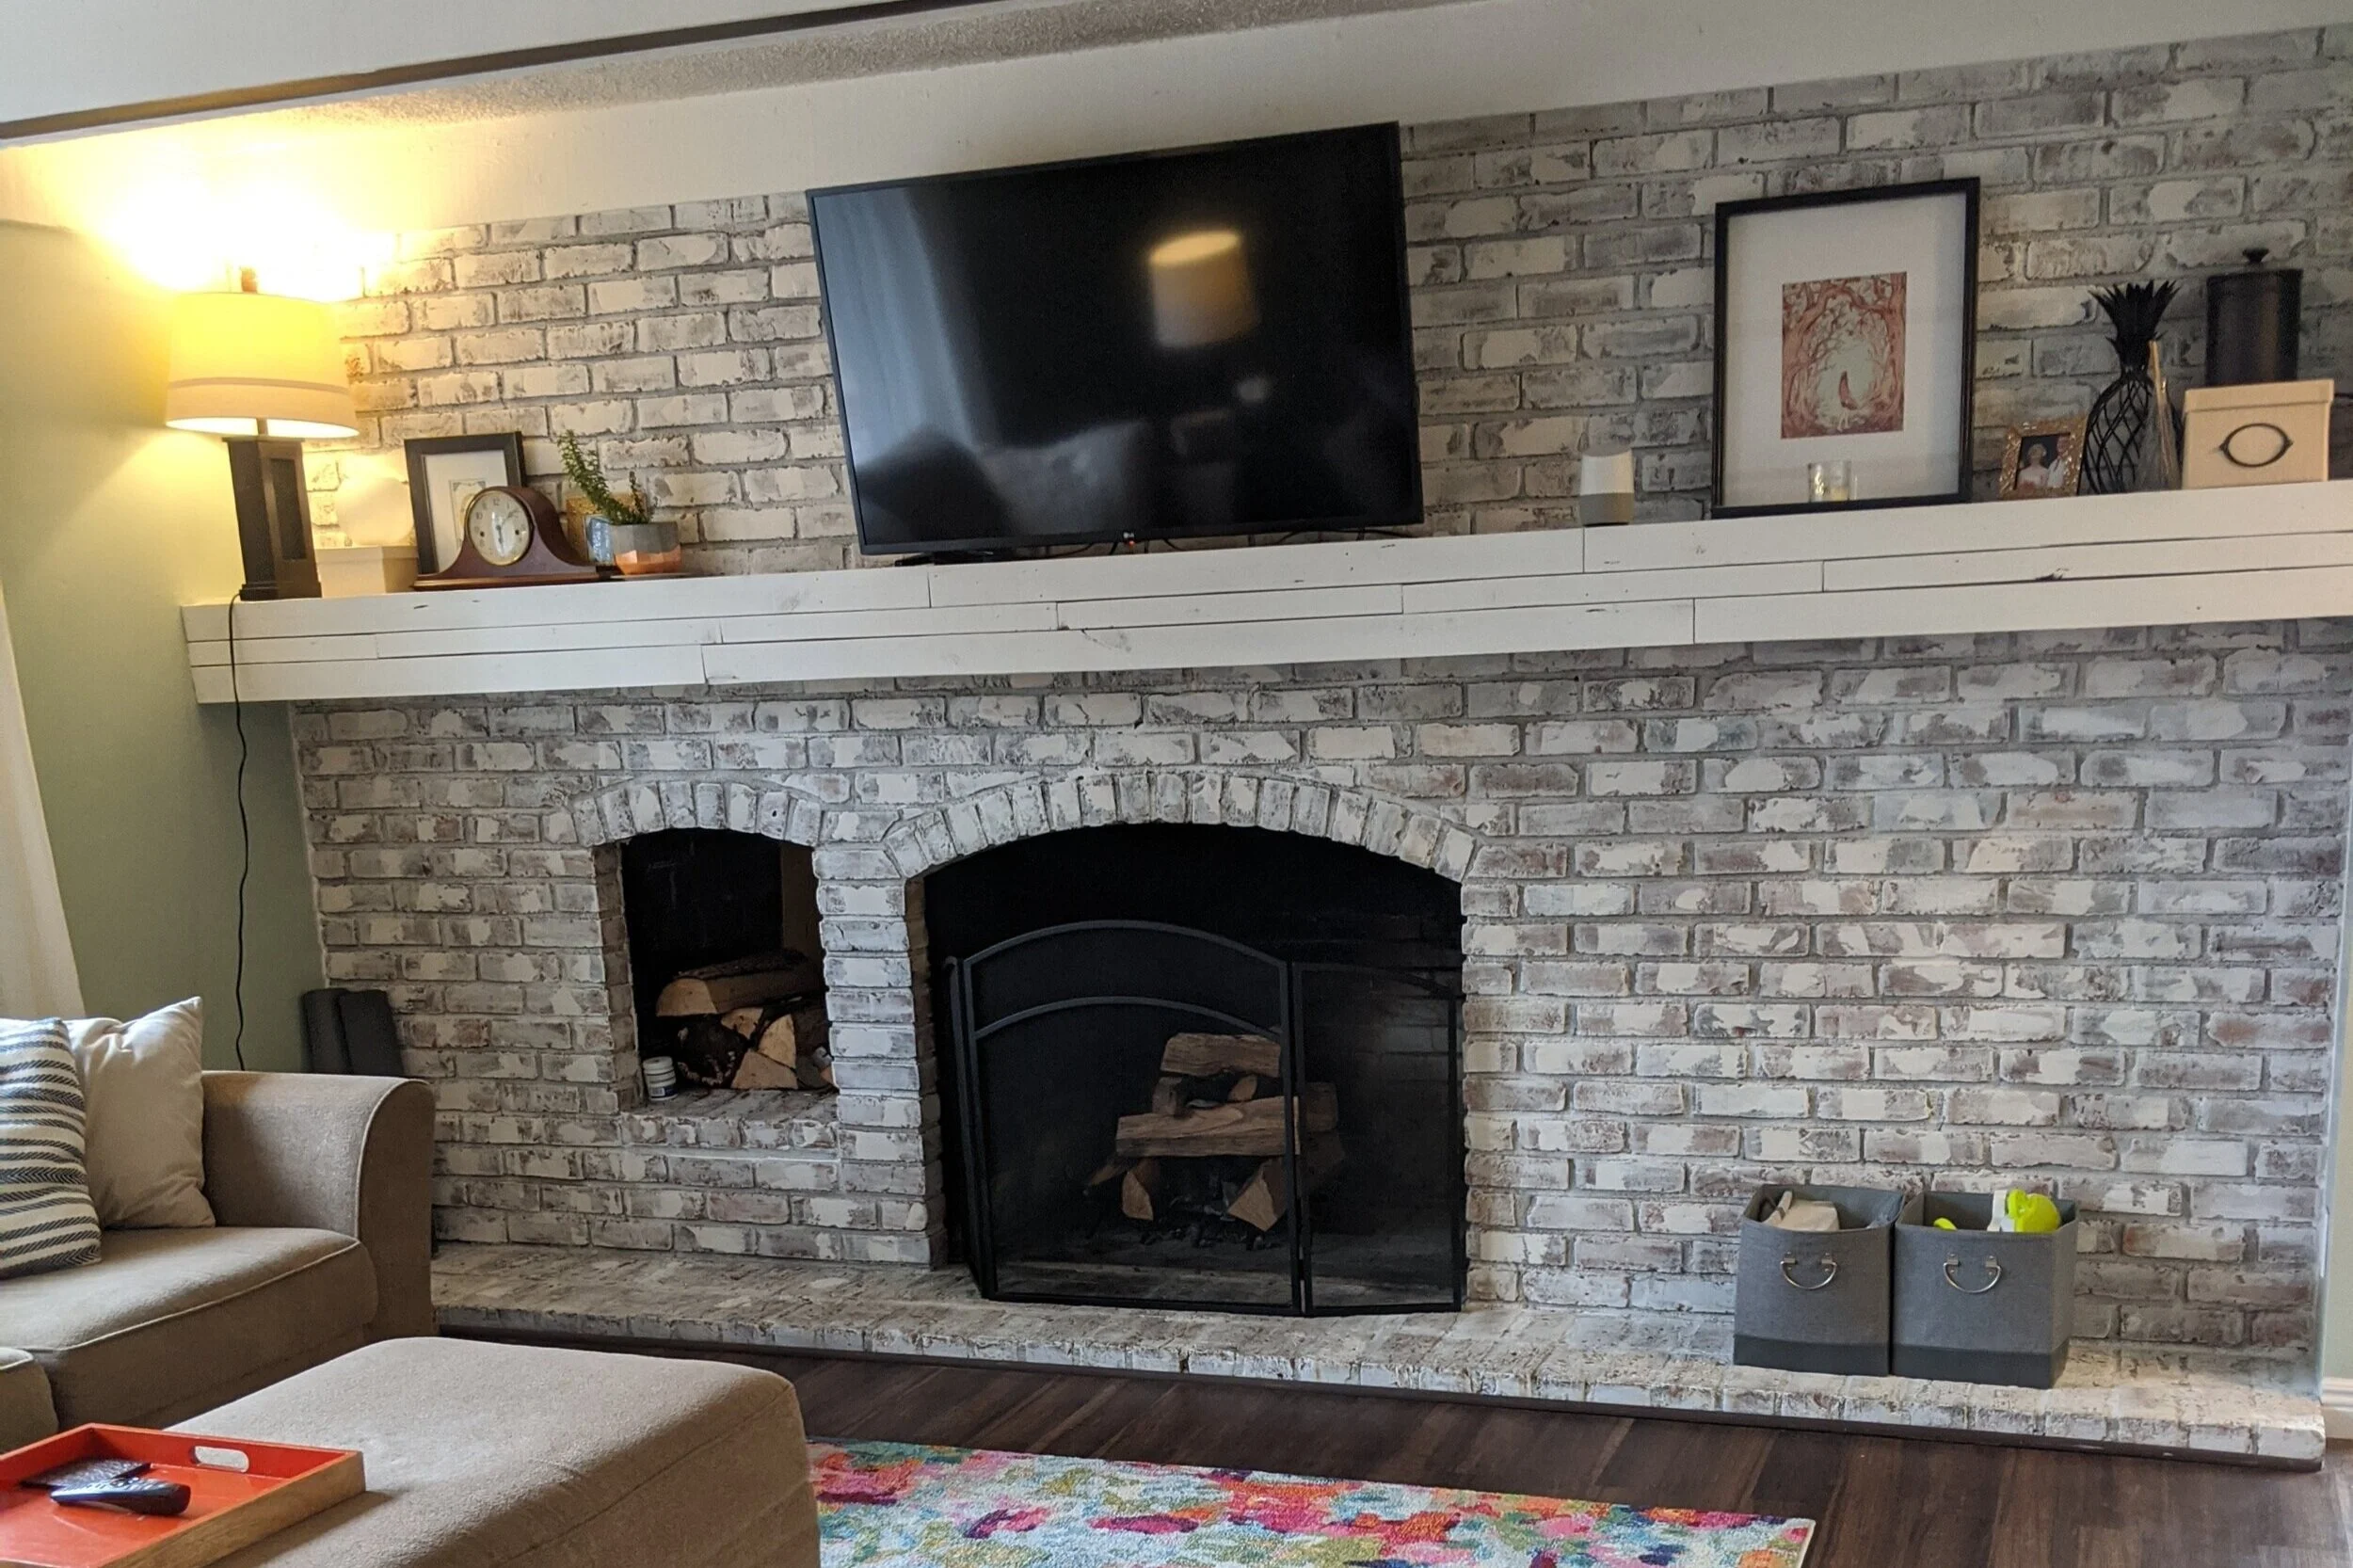
After living with the mantel as seen above for several months it was starting to feel a little busy, like all the decor items from the ends of the mantel were creeping towards the TV. Plus, I really needed to dust up there so that was good incentive by itself to pull everything down.
I started by taking everything I could off the mantel - but there were a couple of items that had to stay. The Google Home lives up there and luckily is inconspicuous enough for me not to mind too much. The lamp unfortunately also has to stay on the mantel for now. I plan to replace it with a floor lamp when I start focusing more on this room but we have (many) other areas of the house we’re working on at the moment.
Next, I shopped around my own house and gathered all my decor items from the mantel and the haphazardly designed bookshelves in the playroom.

I call this look: Unpack all the boxes and put stuff wherever it fits
Actually, that’s a good tip - if you ever want to refresh your decor, shopping around your own house is a great way to start. Sometimes taking something from one room and putting it in another can completely transform how the space/the item looks or feels. Also, it’s a good activity to keep yourself busy during quarantine that doesn’t involve spending any money or leaving the house! #winwin
Since I knew I had to keep the lamp on the mantel, I needed to find a way to balance it on the opposite end with something with the same visual height and weight. Here was my first attempt:

I felt like I was on the right track, but it still seemed a little more cluttered than what I was hoping for. I did, however, really like the introduction of the plants on either end of the mantel so I knew I wanted to work those into the end product. One note - if you don’t have identical items to put on either end of your mantel, don’t stress! It’s certainly not a requirement for each end to be symmetrical and would actually be kind of boring.

I realize the change from the previous set up is pretty subtle, and that’s because I didn’t change a whole lot. Really this is just an experiment in seeing what works and what feels the best to you. I was still feeling a little bit of that creep going on with this set up, so I tweaked it one more time.

And this is the set-up I ultimately landed on, except I switched the tan colored items at a day or so later. I like this one the most in how the larger picture echoes the height and the contrasting colors of the lamp. Obviously I have my little plants up there and then I threw in a rock and a box in a similar tone/shape to mirror one another. Lastly, I put a small candle on the left-hand side of the mantel to balance out the Google Home.


As for the leftover decor items…

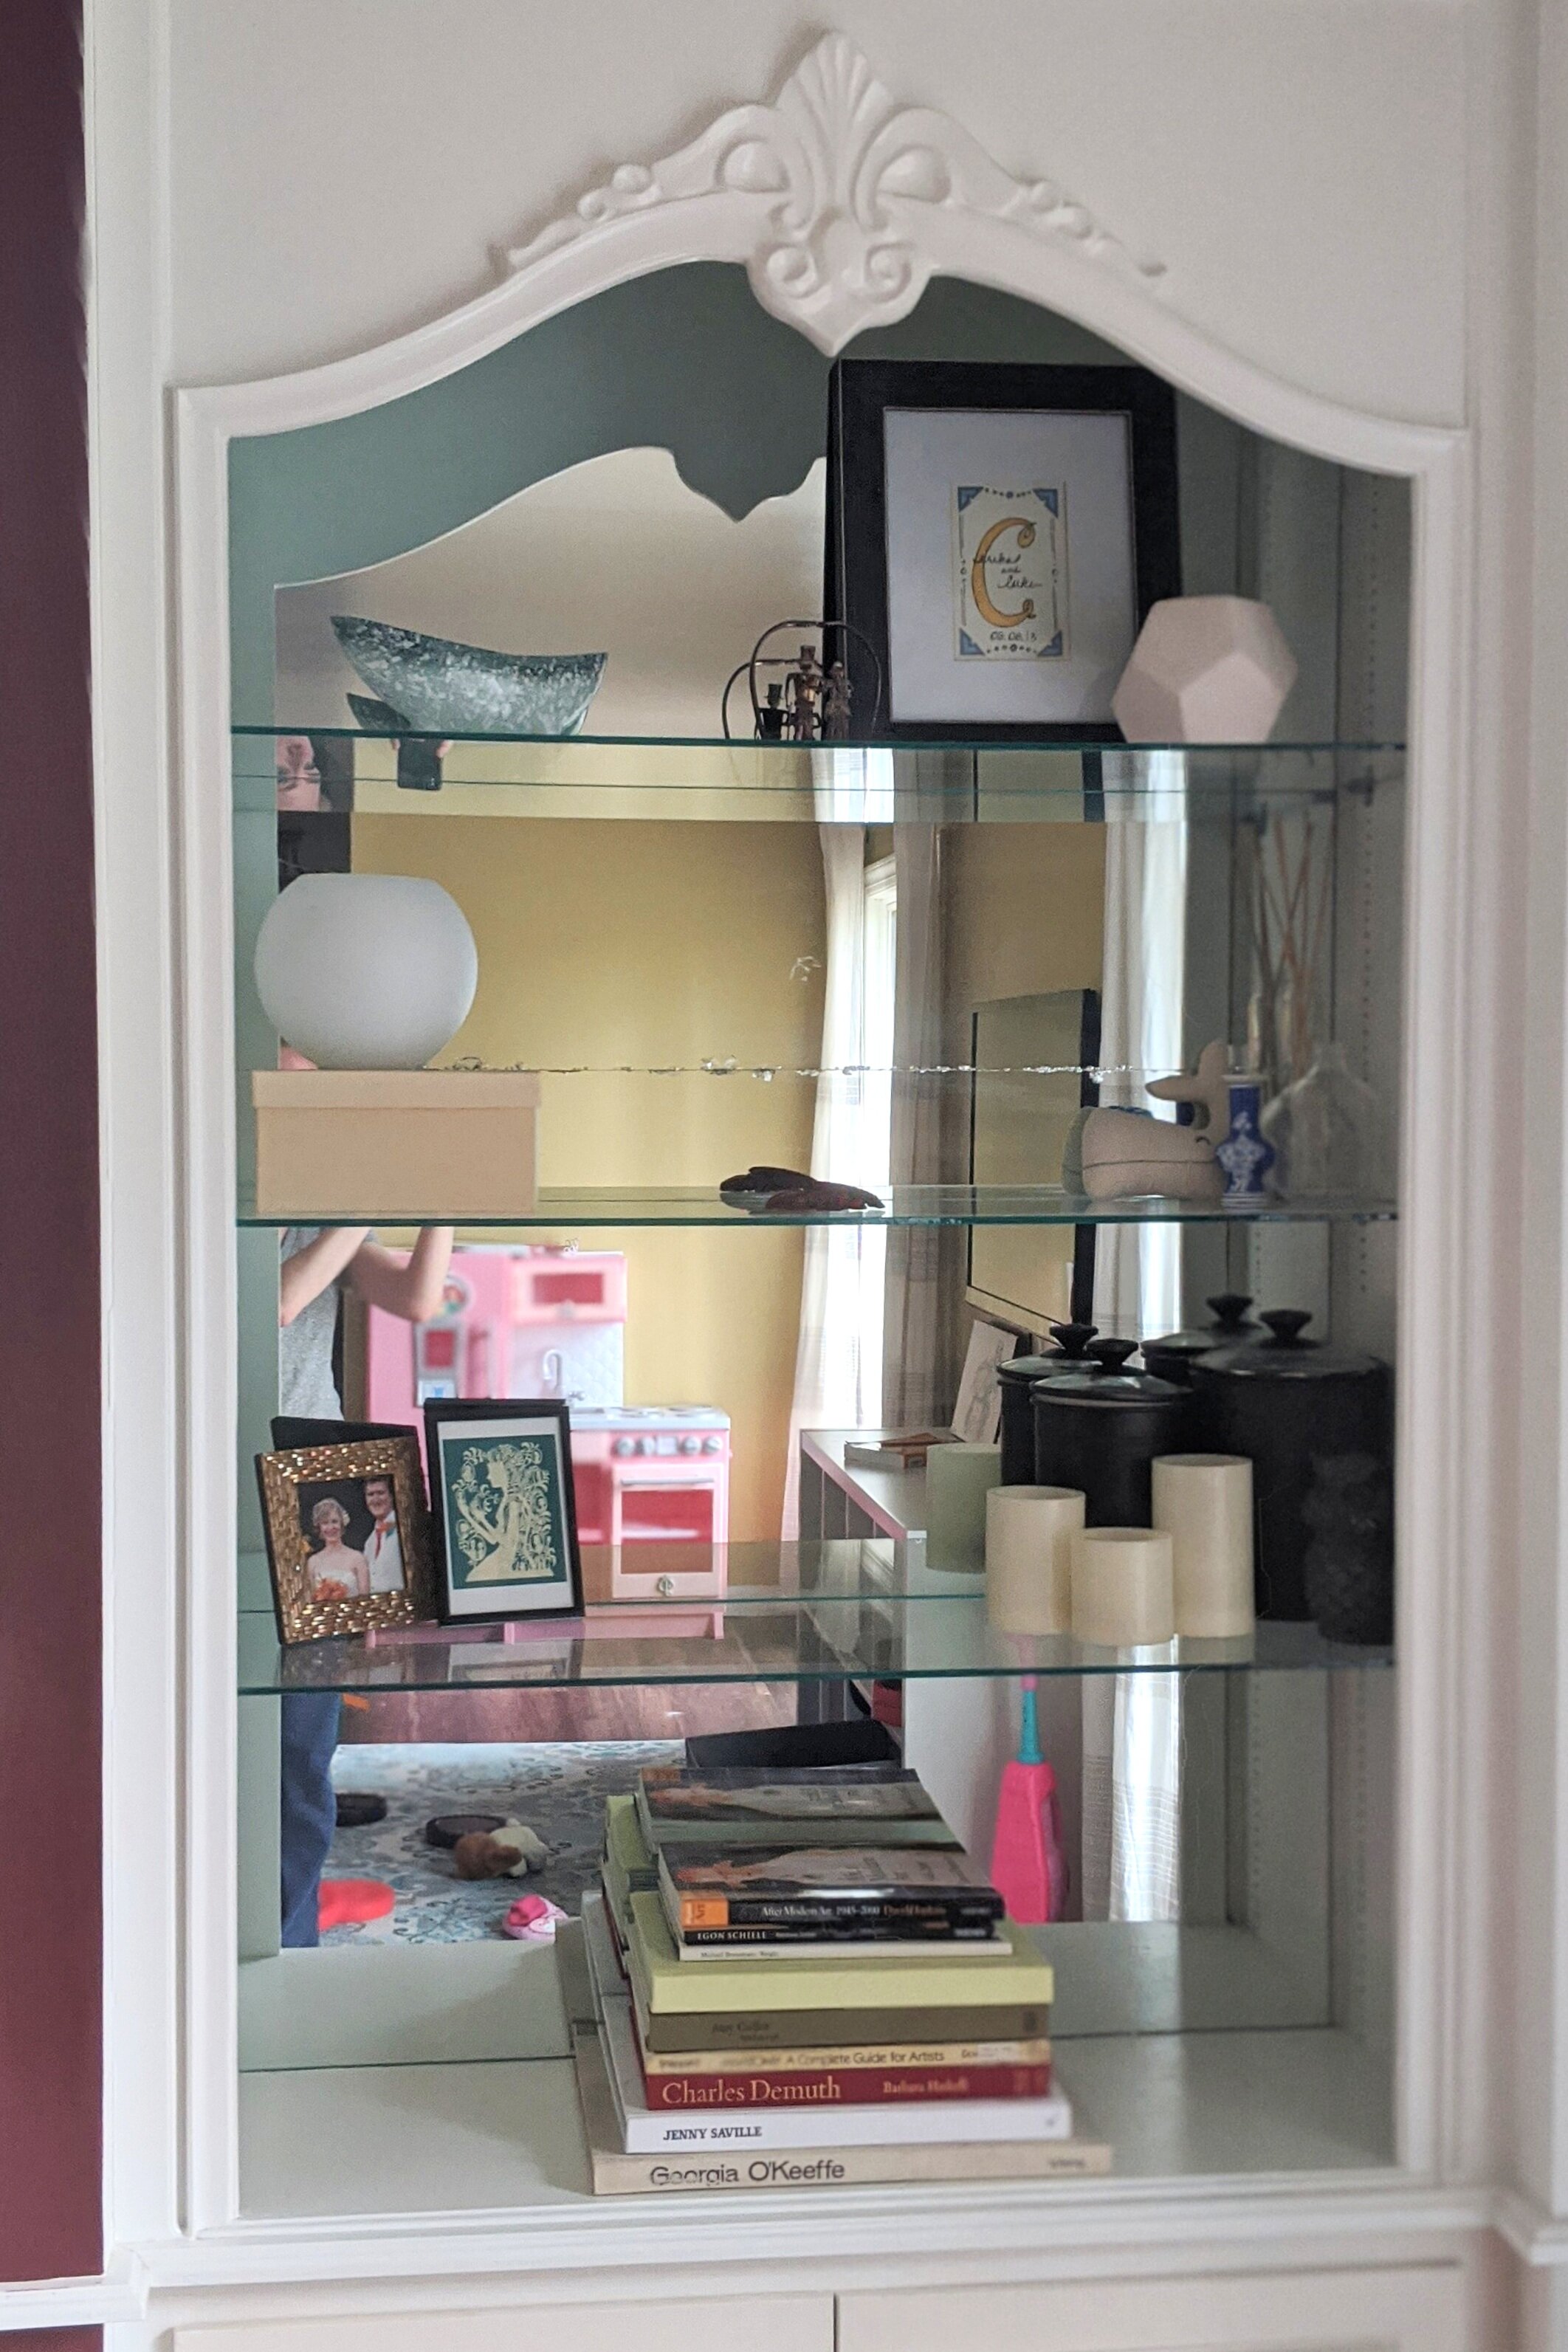
The bookshelves in the playroom got a little makeover too!
Admittedly, these bookshelves don’t look how I would ideally want them to, but I’m definitely restricted with how much I can put on each shelf since they’re glass. Plus, there’s still those stupid mirrors on the back that make them look busier than they are. Once we update the built-ins and remove the glass I’ll be able to add some books and really style these the way I’d like. But at least for now they’re looking better than they did before.
So here we are, after a pretty quick, easy, inexpensive update we have our updated and, more importantly, SIMPLIFIED mantel so we can focus more on all that glorious, glorious brick and that amazing fireplace.