
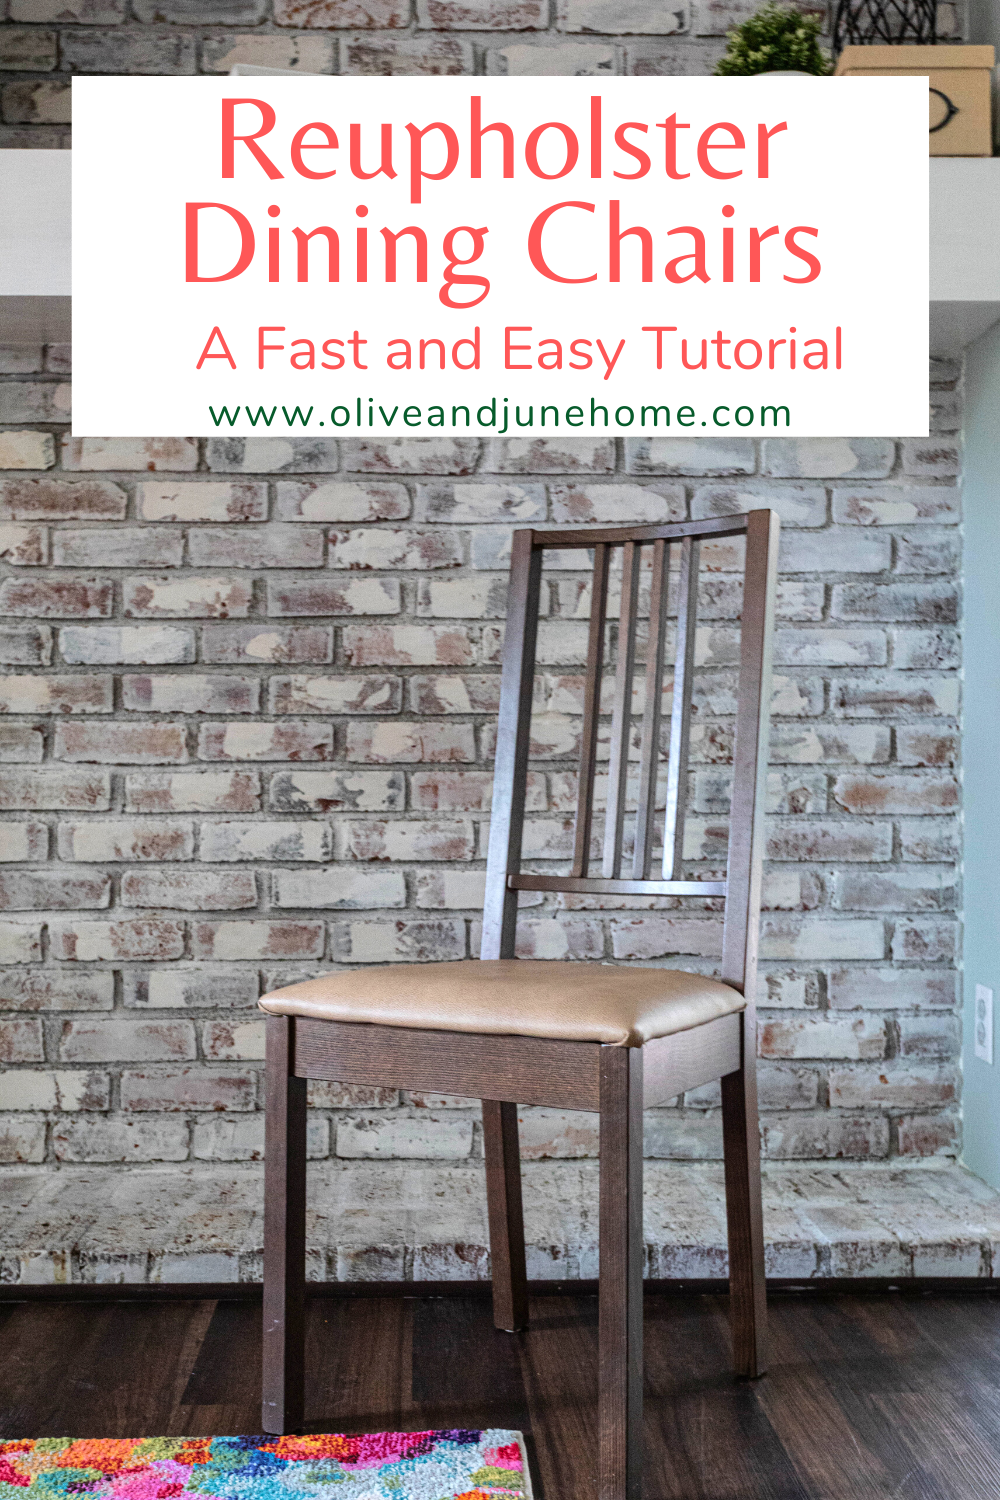
How to Reupholster Dining Chair Seats
Easy DIY - Recover Your Chairs
I recently took a little break from the current projects around the house I’ve been working on, like redesigning my home office (HERE and HERE), updating the dining room (HERE and HERE), and remodeling our master suite (HERE and HERE), to reupholster the chairs in our eat-in kitchen - and wrote a little tutorial so you can do it too! This is a quick and easy upgrade that seriously anyone can do!
We bought the table and chairs in our eat-in kitchen from IKEA about 8 years ago when we bought our first house… and they have served us well! Unfortunately, the white cloth covers the chairs came with have seen better days (i.e. days before we had kids). I considered sharing a picture, but they were so stained and kinda embarrassing, so I decided not to. Just imagine two little kids eating and you get the idea.
I actually soaked the covers in OxiClean not that long ago and was pleasantly surprised by how clean they got. Then I stupidly put them back on the chairs and our four-year-old immediately dropped steak on hers. The next day, our one-year-old pulled a bowl of cereal on another one. It was a lost cause. So I’ve decided to reupholster them in a kid-friendly, wipeable vinyl fabric. Here’s how I did it:
Materials

As an Amazon Associate, I earn from qualifying purchases. This post may contain affiliate links, meaning I receive commissions for purchases made through those links, at no cost to you.
- Needle nose pliers
- Upholstery foam
- Batting
- Fabric - my seats are about 16 x 17 inches and 2 yards of fabric was way more than enough
- Staple gun
- Staples (1/4 inch)
- Scissors
- Chair (obviously)
- Box cutter (optional)
Step 1 - Remove Existing Covers
Since these chairs came with removable covers for easy cleaning (#thanksIKEA), I just unscrewed the seats and took the covers off. More than likely though, you’ll need to remove the fabric of your chairs by pulling out the staples with your needle nose pliers.
Step 2 - Cut Your Foam, Batting, and/or Fabric
Next, if you’re replacing the foam, lay the seat on top of a piece of foam and trace around it. Then using your scissors or a box cutter, cut it out - taking care to NOT cut into your floor or table.
Now, you’ll need to cut your batting (if it needs to be replaced) and fabric. I don’t actually measure anything when I’m reupholstering a chair. I just take the seat, lay it face down, and make sure I can pull the batting/fabric over the edge so that I have enough available to staple.
You don’t want a TON of excess fabric. It’s unnecessary and will just get in your way. Don’t go nuts here - just cut as much as you need to staple.
Once I have an idea of how much fabric I need, I cut it out. You can use this first piece as a template for your other seats.

Tip: If you’re using a patterned fabric, make sure you’re cutting your fabric with the design lined up the direction you want it on your seats.
If you’re replacing the batting, you can do one or two layers to give your seat more cushion. I recommend cutting your first layer for all the seats, stapling those down, then cutting your second layer, and following the same steps. Once that’s complete, follow the same process with your fabric. This will ensure you’re giving yourself enough excess batting/fabric to staple to the underside of your seat.
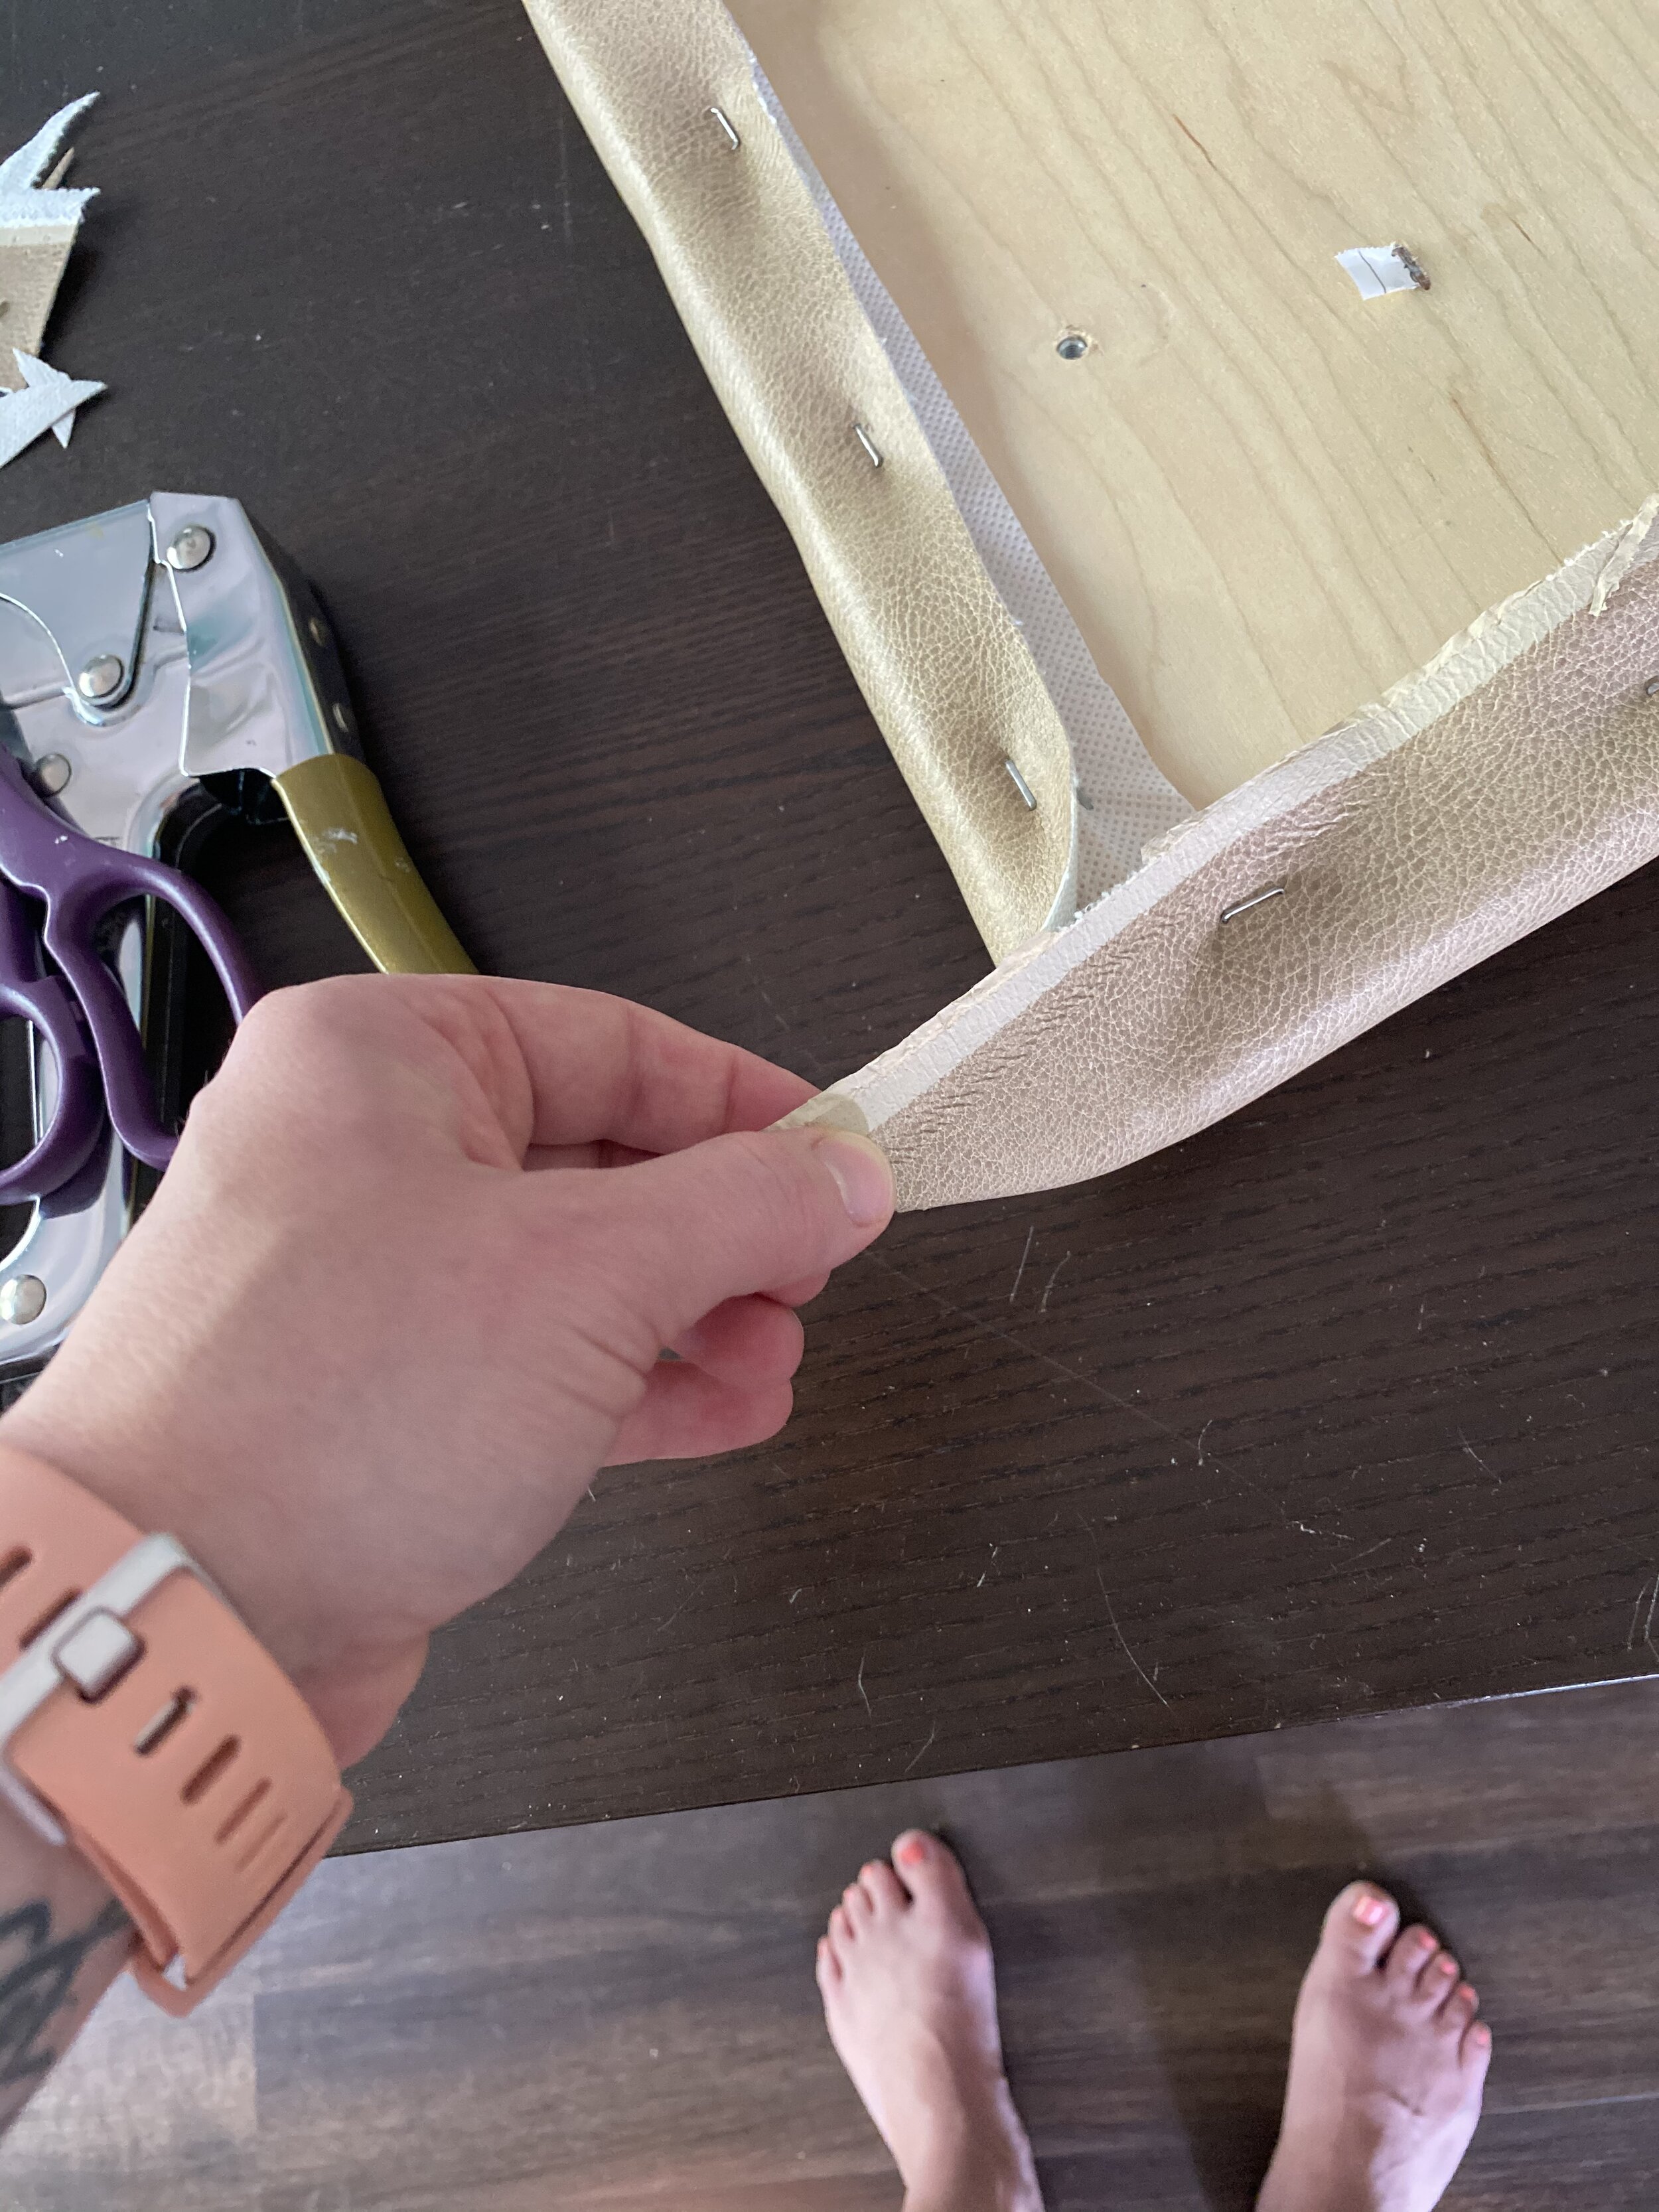
Step 3 - Staple
Now that you’ve cut your fabric, you can staple it to the seat. I’m going to share the process I use here that I was actually taught in college when I learned how to stretch canvas for my paintings. It helps ensure that your fabric is stretched equally all the way around the seat.
Tip: If you’re using a patterned fabric, you’ll need to be sure you’re pulling your fabric equally on each side as you staple so you don’t skew the design.
1. Start by placing one staple in the middle of one side of the seat (1). On the side opposite of that, put another staple (2). Then do one staple on each of the other two sides, rotating the seat as you go (3 & 4).

2. From here, to the far left of one of your staples, place another staple (1). On the opposite side of the seat, do that again (2). Then do the same on each of the other two sides (3 & 4).

3. Follow step 2 but starting on the far right of each side of your seat.

4. Follow step 2, but place a staple between the middle and far left staples on each side.
5. Follow step 3, but place a staple between the middle and far right staples on each side.

My seats were small enough that 5 staples on each side were sufficient. If your seats are larger, you’ll want to use more staples - shoot for 1 every couple of inches - using the same idea of the steps above.
You’ll likely see the fabric pucker as you add your staples - and that’s okay! It just means you’re pulling your fabric taut.

Step 4 - Corners
Once you have your edges stapled, you can work on the corners. I suggest gathering the fabric and trimming some of it off.
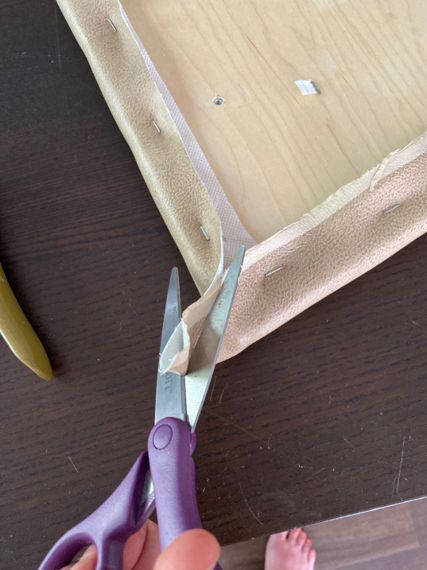
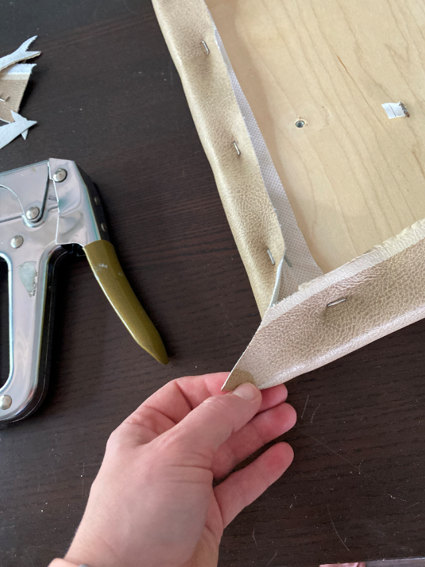
Then you can wrap your fabric around the corner and staple it down.
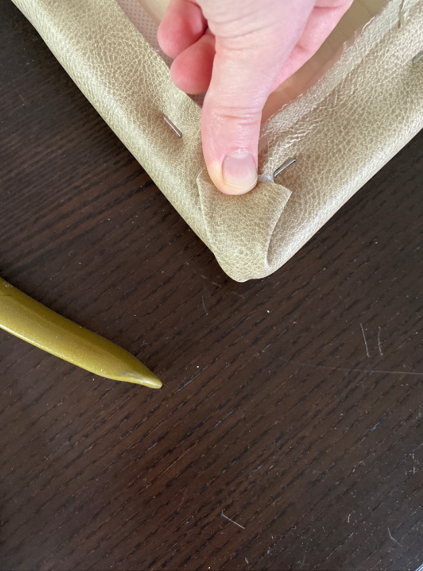
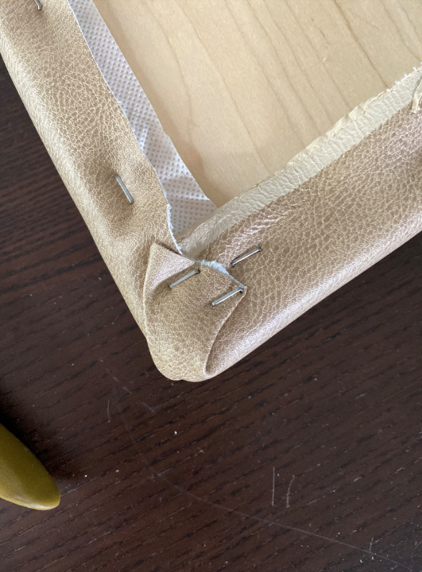
Tip: When you’re placing your fabric on the corner, keep in mind where you want the crease to hit. It doesn’t really matter if it’s on the front or the sides of your seat, but you want to be consistent.
Step 5 - Trim and Secure
At this point, your seats should be reupholstered! But all that work is kind of pointless if you don’t actually attach them back on the chairs. If you find yourself with some excess fabric, especially if it’s covering the holes you’ll use to screw the seat back onto the chair, trim the excess off.

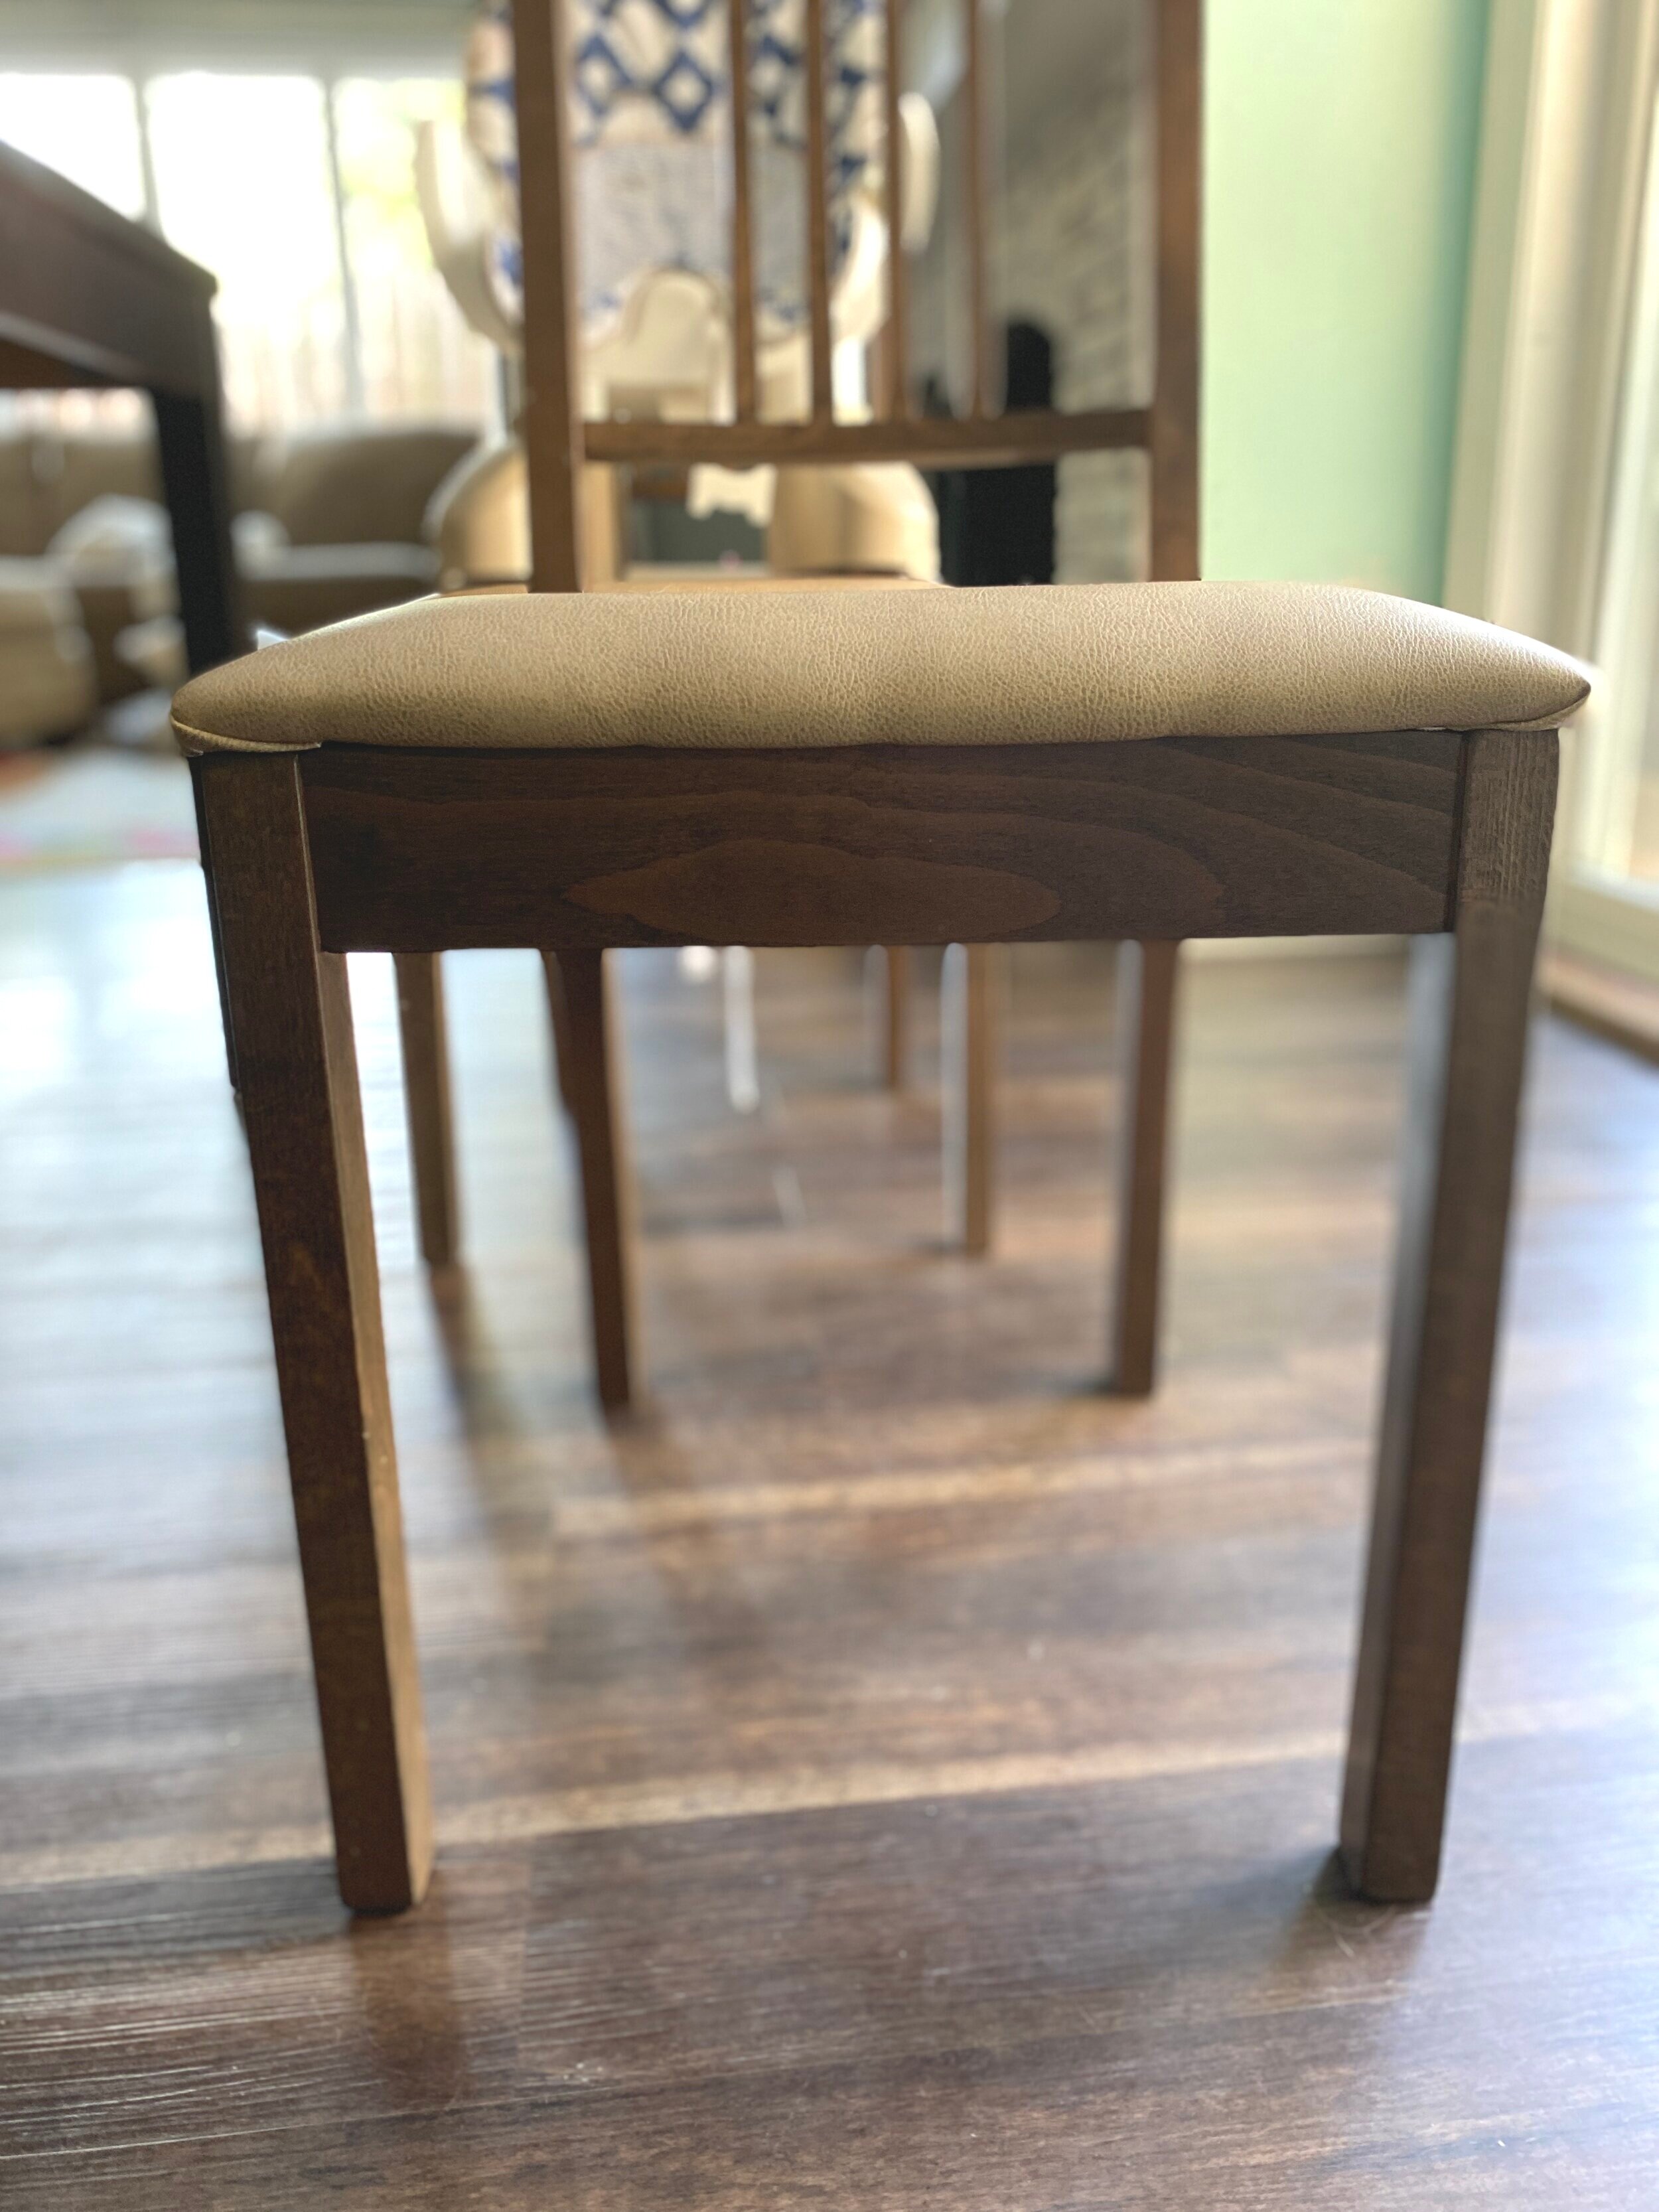
Then, all you have left to do is screw your seats back on and enjoy!

Just look how happy I am in my newly reupholstered chair!
I’m very happy with the wipeability of my new seat covers, although admittedly I don’t looove the color. I was hoping to find a white vinyl - something that would pop a little more - but unfortunately, this was the lightest color I could find. However, The fact that this dining set blends in with the flooring bothers me so much I’ve been considering painting the table and chairs anyway, so that project might be on the horizon!
In the meantime, I’ll continue to see the silver lining in being able to easily clean off the chairs. Hope this tutorial was helpful for you!