
How to Convert an Antique Dresser into a Vanity
Repurposed Dresser Turned Bathroom Vanity Tutorial - Fall ORC ‘23 Week 7
Converting an old piece of furniture into a one-of-a-kind custom vanity is a great project to add a unique style to your bathroom. In this post, I’m sharing the step-by-step process for how I turned a dresser into my new bathroom vanity!

We’re less than ONE week away from the end of the One Room Challenge and the reveal of my half-bathroom makeover! The vanity is, obviously, a huge part of the design of this tiny space, so I’m excited to share how I gave this old piece of furniture destined for the landfill new life as my vanity.

Because this DIY is typically done with dressers, for SEO purposes, that’s the term I’ll be using (Mama didn't raise no fool!). However, I think my piece of furniture is actually a console/buffet/credenza (whatever you choose to call it). Either way, the same steps apply.
You’ll also notice that I converted my dresser out of the order of the steps provided. I was nervous to start cutting my piece apart so I started with what I felt most comfortable with. In the end, it doesn’t really matter, but following the steps in the order below is a little more efficient.
Let’s jump in!
As an Amazon Associate and partner with other brands, I earn from qualifying purchases. This post may contain affiliate links, meaning I receive commissions for purchases made through those links at no cost to you.
Materials and Tools:
- Dresser or Console Table
- Sink and faucet
- Jigsaw
- Drill
- Drill bit
- Hole saw or spade bit
- Orbital sander
- Sandpaper
- Primer and paint or wood stain
- Paintbrushes and foam rollers
- Sealer
- Drawer pulls or knobs
- Caulk Gun
- Silicone caulk
- Plumbing supplies (P-trap, water supply lines, etc.)
- Adjustable wrench and pliers
- Finish nailer and nails
- Wood glue
Choose the Dresser
Obviously, to convert a dresser into a vanity, you actually need to acquire a dresser. Vanities are expensive! This is a great place to save a little money so you can splurge elsewhere in your bathroom.

Start by taking measurements of your space, taking note of the width, depth, AND height you need. Typically, vanities are around 34” high. You’ll also want to be sure your dresser is deep enough to hold a sink. Then search your local thrift stores or Facebook Marketplace for the perfect piece.
I’ve mentioned that I started designing this bathroom two years ago. I knew at that time the current vanity would need to be replaced. Based on my design, I was looking for a green vanity. I loved this one, but it was out of budget.
So, I hopped on Facebook Marketplace and fell in love with this buffet. Not only was it the perfect dimensions, but I loved the style. I picked it up, and there it sat in my garage, gathering sawdust for a few years until this project rolled around.
Cut the Hole for the Sink and Faucet
Remove the hardware and drawers and set them aside.
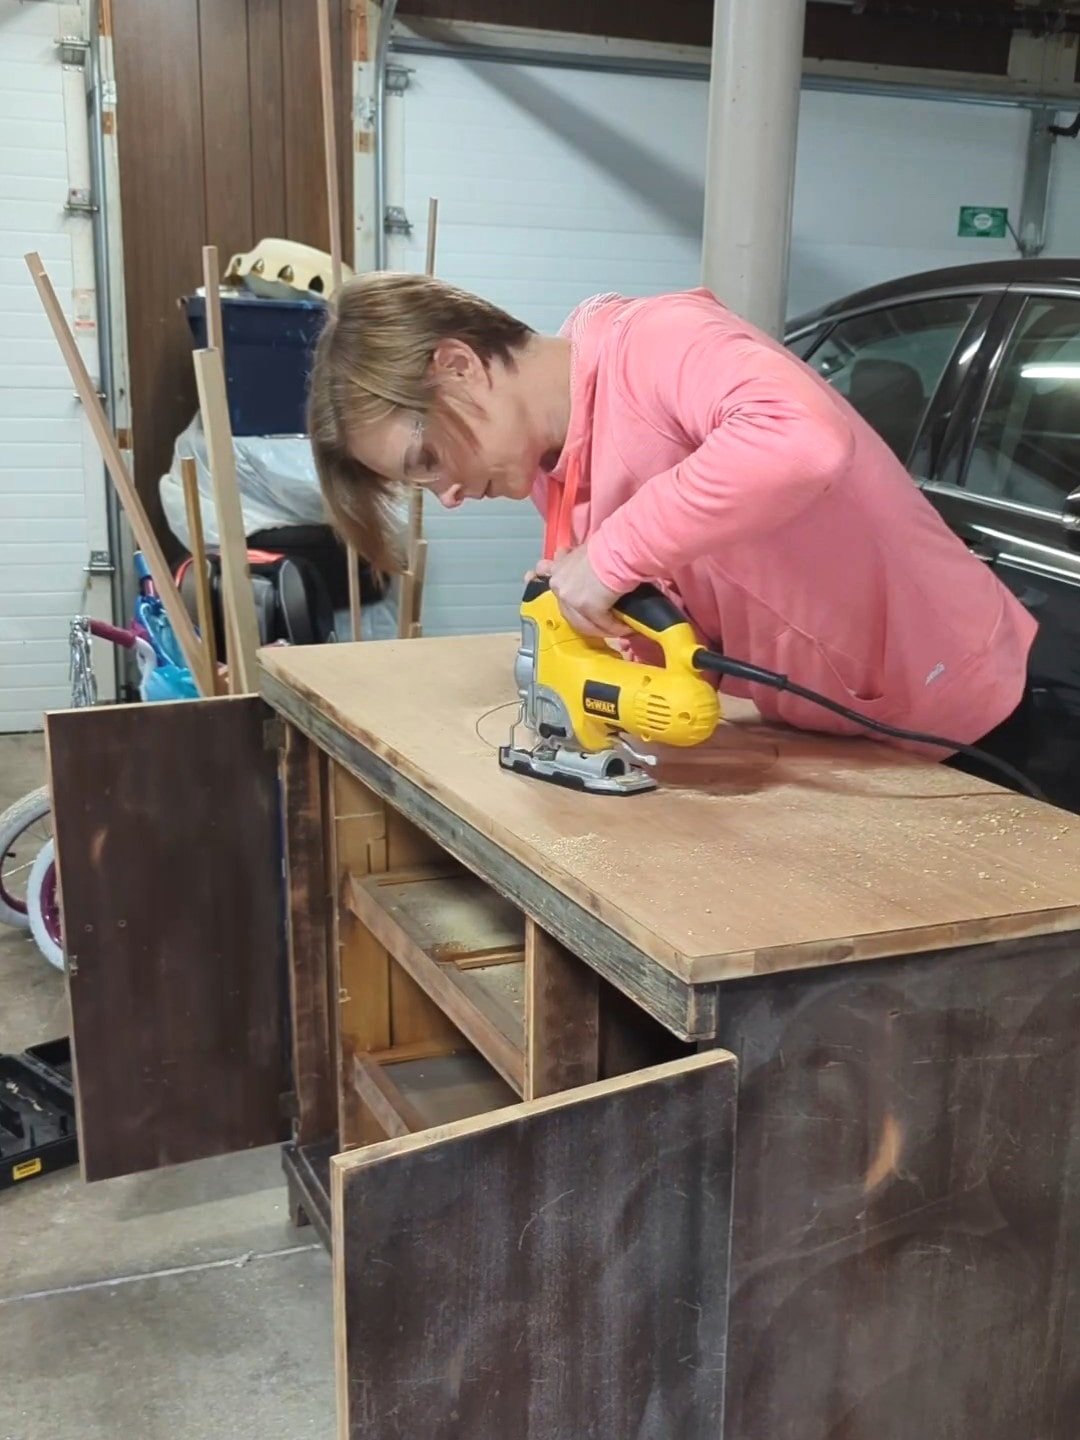
Measure to find exactly where to install your sink (or sinks if it’s a double vanity). Then, using the template that came with your sink, trace the outline. Make sure to leave room for your faucet placement!
Drill a hole large enough for a jigsaw blade to get through on the inner edge of the outline. Then, cut along the outline with the jigsaw until the hole falls out.
Because I’m using wall-mounted fixtures, I didn’t need to drill holes for the faucet in the vanity itself. But if you’re using standard fixtures, you can use a hole saw to make your faucet holes.
Modify Drawers for Plumbing

If your dresser has drawers in the way of plumbing, you’ll need to modify them. There are loads of tutorials online on how to do this. This isn’t one of those tutorials. Instead, I opted to remove the drawers completely and use the fronts to create a faux door for easier access to the plumbing if something goes wrong down the line.
First, I separated the drawer fronts from the drawer with a rubber mallet. Then, I cut a scrap piece of 1/4” plywood to the size of the opening on my table saw. Using wood glue and my finish nailer, I attached the doors to the plywood. Then I added some 1x2s for extra support.
Using a Kreg Concealed Hinge Jig, I drilled the holes for my hinges to sit in.
Sanding and Staining/Painting
How you prep for paint or stain will vary slightly. If you’re staining, you’ll want to sand off the existing finish to bare wood, beginning with a medium grit (120) and moving down to a high grit (220). If you plan to paint your piece, you’ll likely just need to scuff up the surface.
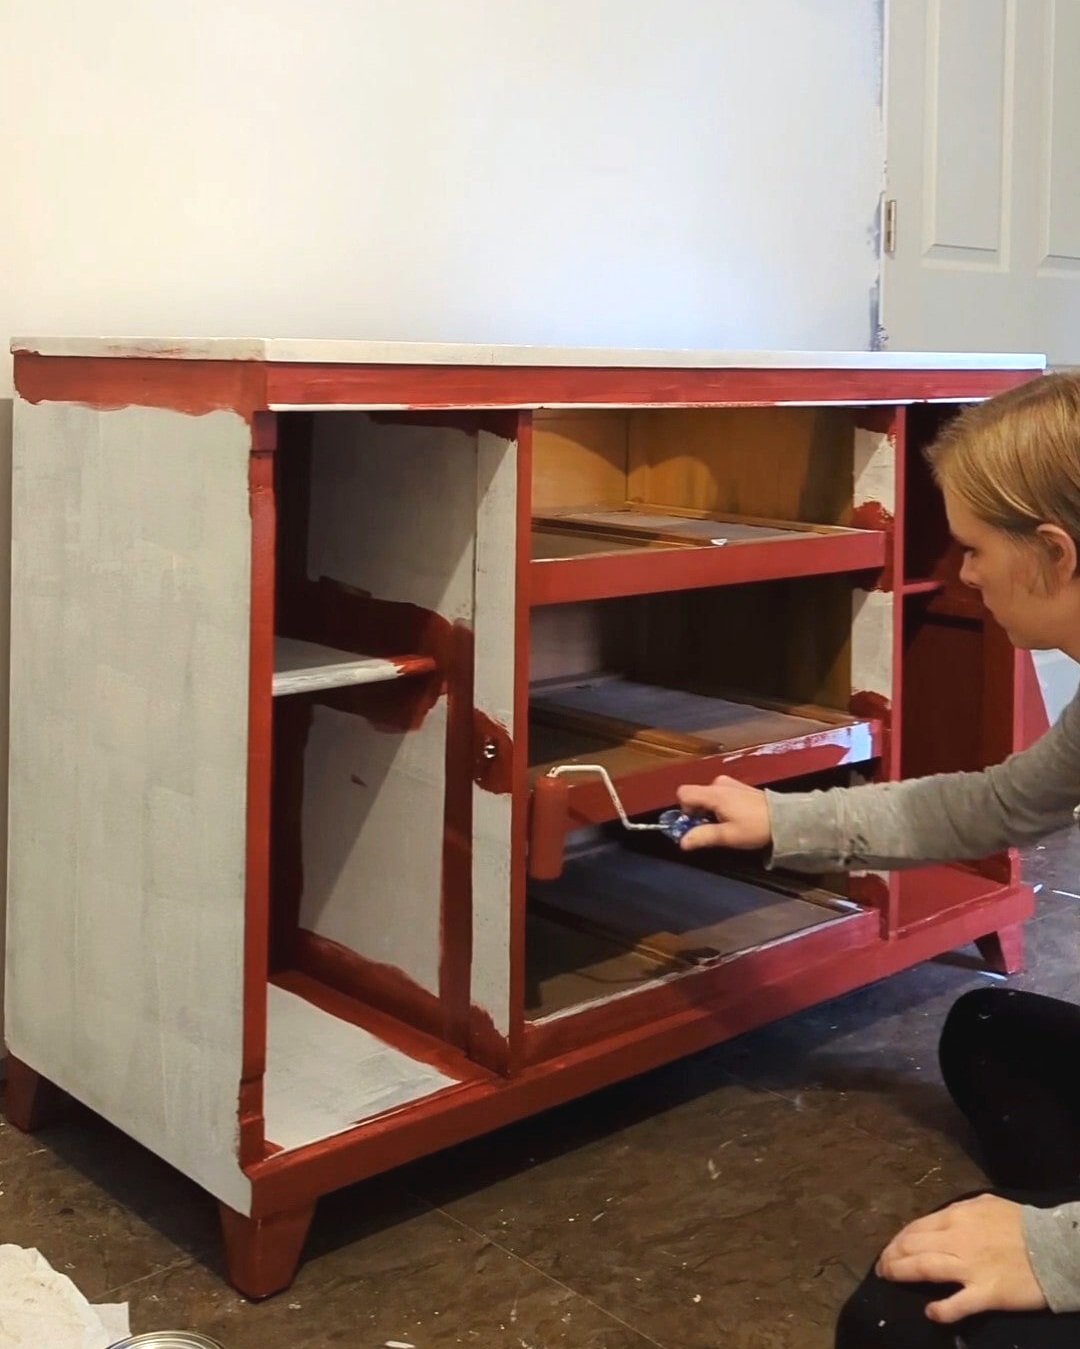
I sanded my piece down with 150 grit, primed it with an oil-based primer, and then painted it with Valspar’s Cabinet and Furniture Enamel.
I mentioned above that I originally wanted a green vanity. But when I started choosing colors, green didn’t feel right in the space anymore. I shocked the heck out of myself when I ended up going in the opposite direction and choosing Rustic Red by Sherwin Williams.
I sealed the top of the vanity with a couple of coats of semi-gloss Polycrylic.
Once everything is dry, apply silicone caulk to the sink and faucet where they meet the vanity top to prevent water seepage.
Connect Plumbing
Connect the water supply lines to the faucet and the drain to the sink. You’ll probably need to cut holes in the back of the dresser to accommodate the plumbing lines, which can be done with a hole saw. Make sure there are no leaks and that the plumbing functions correctly.
Finishing Touches
Lastly, reinstall your doors and drawers and add knobs or pulls. I cleaned up the pulls that came with my dresser and spray-painted them Rustoleum Antique Brass.
Your vanity is now complete!
Final Thoughts
I’ve always wanted to tackle this type of project, and I’m excited to have had the opportunity! I love how much more customized my half-bathroom is now. Besides, I always love tackling a project I’ve never done before.

This room has come such a long way from where it started just seven short weeks ago. Be sure to follow along for the reveal of this room next week!

