
My Top Tips for Installing Penny Tile
How to DIY a Penny Tile Design - Fall ‘23 ORC Week 4
Looking for a timeless tile for your bathroom? Look no further. Here are all my tips for installing penny tile - with a classic pattern!

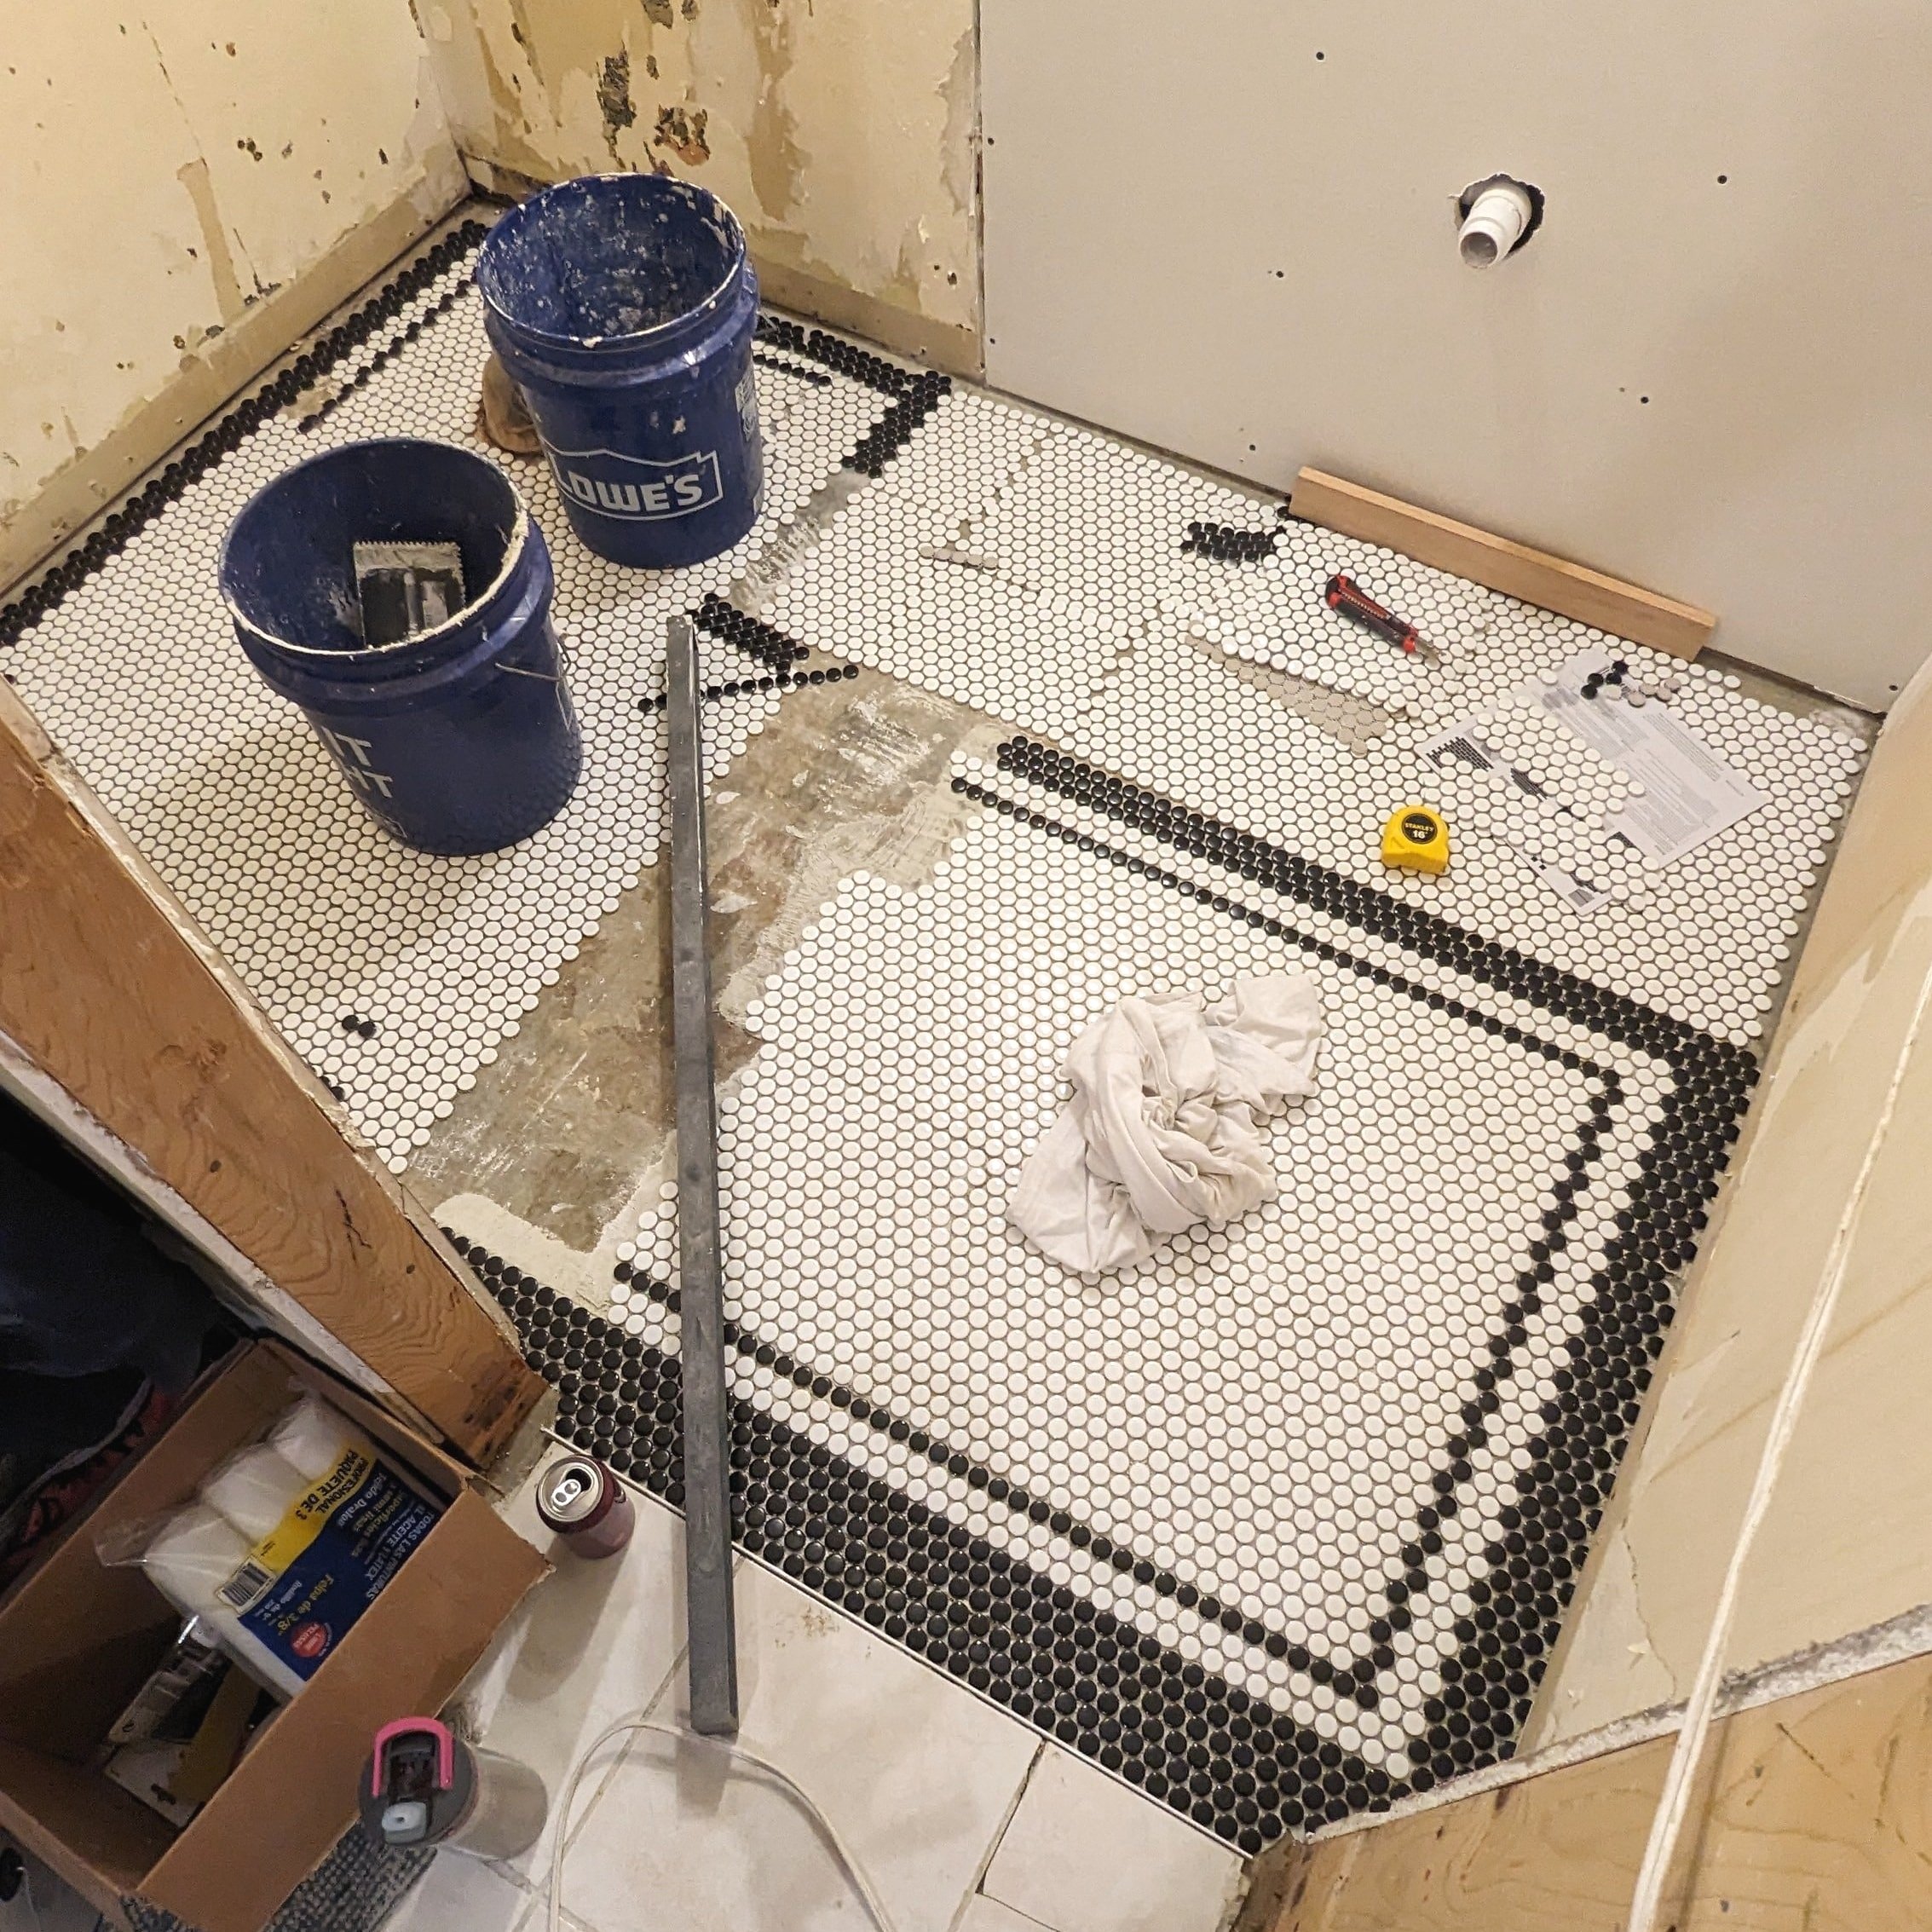
It’s week 4 of the One Room Challenge, and we’re officially halfway there! This week was all about tiling the floors in the half-bathroom. I took a stab at installing penny tile, and I love how it turned out.

Admittedly, I was never a big fan of penny tile until I saw Chris Loves Julia use it in their half-bathroom and swooned over the classic design. I felt like it would be the perfect contrast to the more modern elements in my own half-bathroom design.
I once had a contractor refuse to install penny tile in a client’s house because he said it was too difficult. So I was understandably a little nervous about this project. Luckily, I have an inexplicable love for tedious tasks, so this project was right up my alley!
Here’s what you need to lay round penny tile:
As an Amazon Associate and partner with other brands, I earn from qualifying purchases. This post may contain affiliate links, meaning I receive commissions for purchases made through those links at no cost to you.
Materials
- Black and White Penny Tile (Mine is from Floor and Decor, but Home Depot also carries it here and here.)
- Drill
- Mixing Paddle
- Buckets (I used 3)
- Trowel
- Mortar
- Pre-Mixed or Powdered Grout
- Grout Sponges
- Straight Edge
- Utility Knife
- Dry Erase Marker
- Flathead Screwdriver
- Grout Sealant
- Tile Nippers*
- Wet Saw*
*If your tile is bumping up next to a straight edge that won’t be covered by something else (like the edge of a bathtub, for instance), you might need a wet saw for this project. Fortunately for me, all my edges will be covered by the baseboard. In fact, I bought tile nippers but didn’t actually end up needing them at all!
Prep
As with any project, the key to a good end product is in the prep. Before laying your tile, I recommend following the steps below.
Check Your Tile Batches
Tile color can vary from batch to batch. Before you even think about tiling, check the batch numbers on the boxes to ensure they’re all from the same one. (This tip goes for any tiling project, BTW!)
Remove Baseboards
To greatly reduce (or eliminate) the amount of tile cuts you’ll need to make, I recommend removing your baseboards and laying the tile up to the wall. Afterward, you can reinstall your baseboards on top and cover any rough edges or gaps.
Prep Your Floors

If you have a plywood subfloor, you'll need to install cement board before tiling.
Because I installed my tile over a cement slab this wasn't required.
However, before I could lay my new tile, I had to chip up all the mortar left from the old tiles to create a smooth surface. Luckily, it was pretty easy to chip up with my handy dandy 5-in-1 tool.
Plan Your Layout

Now we start getting to the fun part - figuring out your design! Forewarning: this part will probably take longer than you think. But it’s worth it!
I initially assumed I would only use a couple of sheets of tile to plan out my design, but I actually dry-laid the entire bathroom.
This might not be necessary for every project. But it was very reassuring to know exactly what the whole design would look like and that I had enough tile to do what I wanted. It was also fun to play without any commitment.
Additionally, the tile mesh backing is easy to cut apart with a utility knife, so it wasn’t a huge chore to dry-lay.
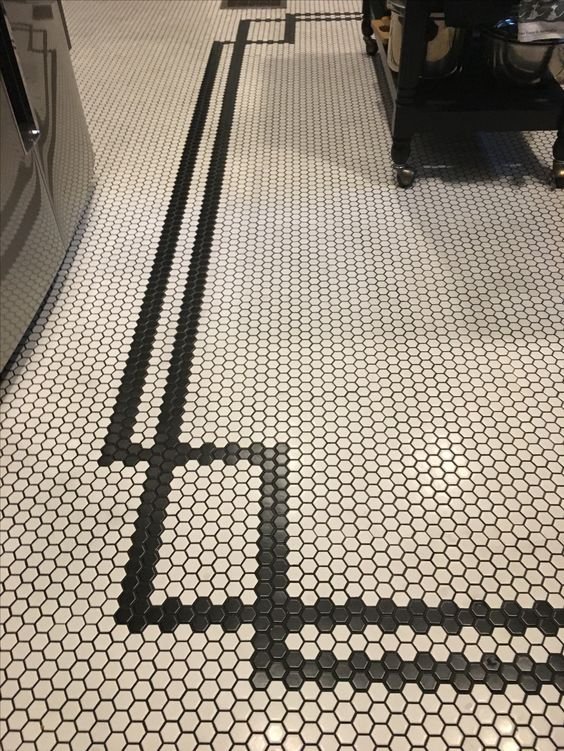
Before I started, I gathered lots of inspiration so I had an idea of the direction that I wanted to go. Each bathroom is unique in its dimensions, so not every design will be exactly the same. And that’s part of the fun of this tile!

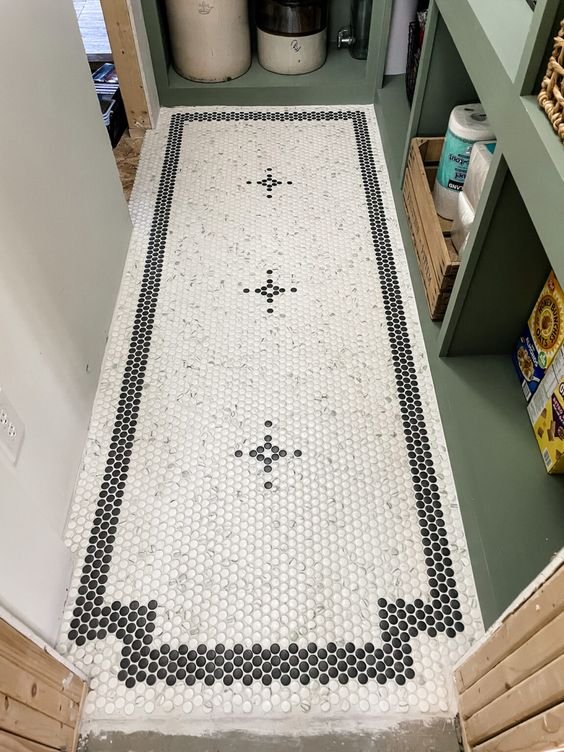
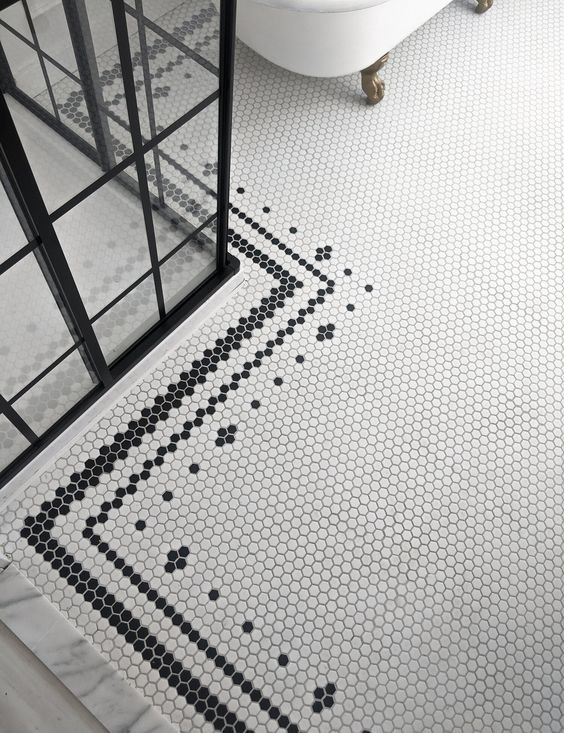
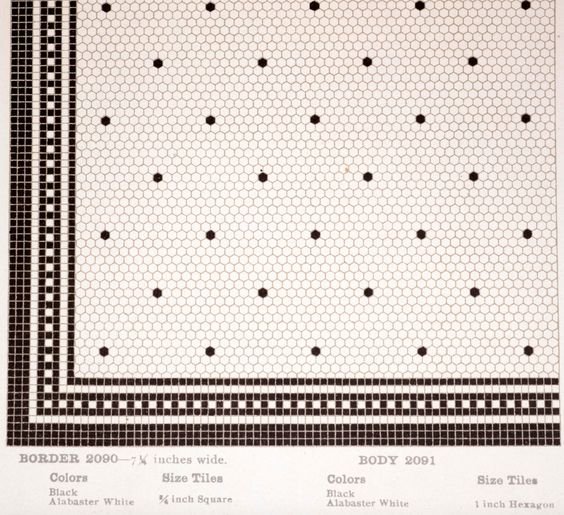
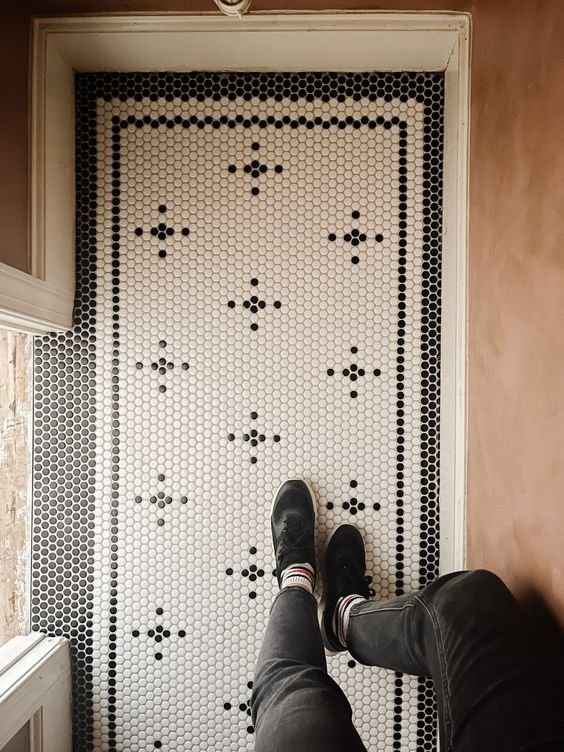
I decided to create a border with my design, which is a recurring theme in all my inspo pictures. But since my vanity isn’t open at the bottom, I opted to run the border in front of the vanity so it wouldn’t be hidden. At the last minute, I chose to add a little bit of a design down the center with the stars, too (asterisks? I don’t exactly know what they are in this case).

Installation
Finally, we’ve reached the installation stage!
Use The Right Color Mortar
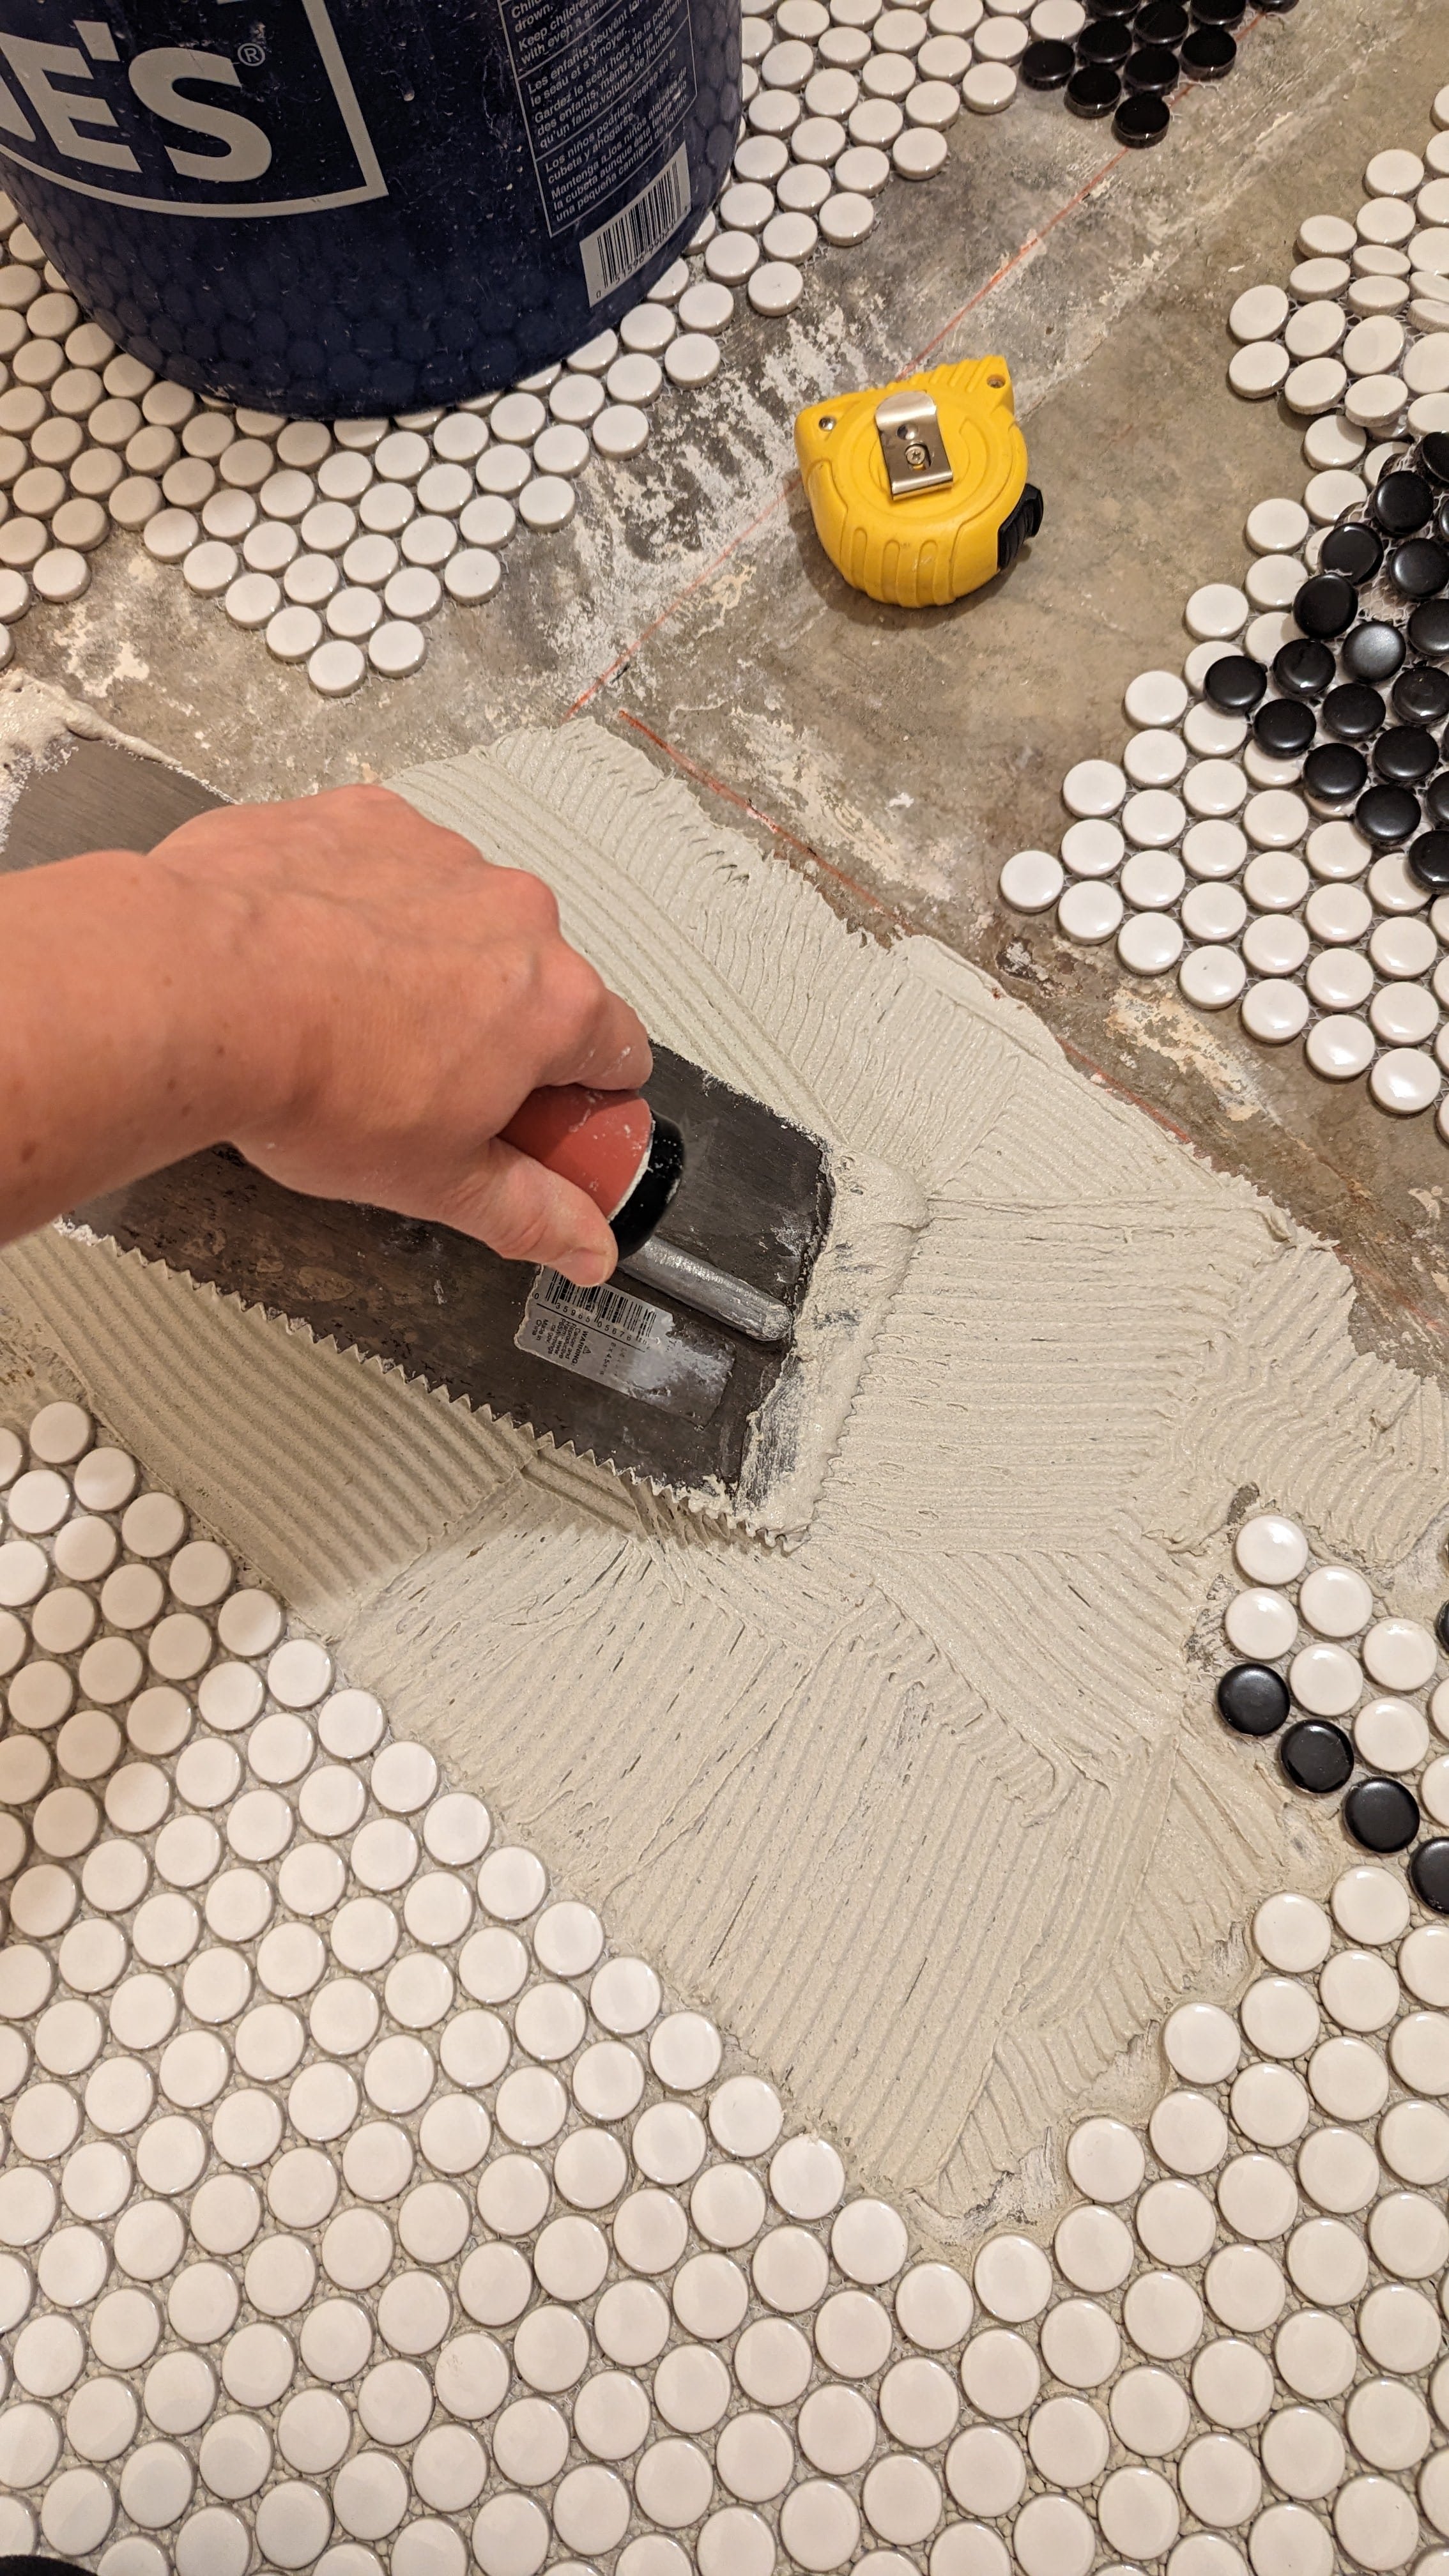
Use mortar in a similar color to your grout in case any pushes up between your tiles, and you don't catch it (trust me, it always happens). Since I used a light gray grout, I chose white mortar.
You can further prevent this from happening by using the right-sized trowel.
Use The Correct Size Trowel
Your trowel size depends on the size of your tiles. The larger the tile, the larger the notches you’ll need on your trowel. This is to make sure the correct amount of mortar is applied for your specific tile and it doesn’t ooze up between them.
For my penny tile, I used a 3/16” x 5/32” v-notched trowel. If you’re not sure what size trowel you need, a quick Google search can point you in the right direction.
Start in the Most Noticeable Spot

This is going to sound counterintuitive because it means I literally tiled myself into a corner, but I started tiling at the doorway. By doing this, I was able to ensure that the most commonly viewed part of the tile was perfectly aligned. That way if things got wonky further into the room, they’d be hidden by the vanity or toilet.
Install in Small Sections
Installing penny tile with a pattern is a meticulous process. To keep your mortar from drying out while you’re checking your design and spacing, only spread a small amount at a time.

Watch Your “Flowers”
While we’re talking about spacing, a cluster of penny tiles will make a little flower. The best way to make sure your spacing is correct with penny tile is to step back and look at the flowers the different sheets of tile make together. If you can’t tell where one sheet ends and one begins, you’re golden.
Use a Straight Edge
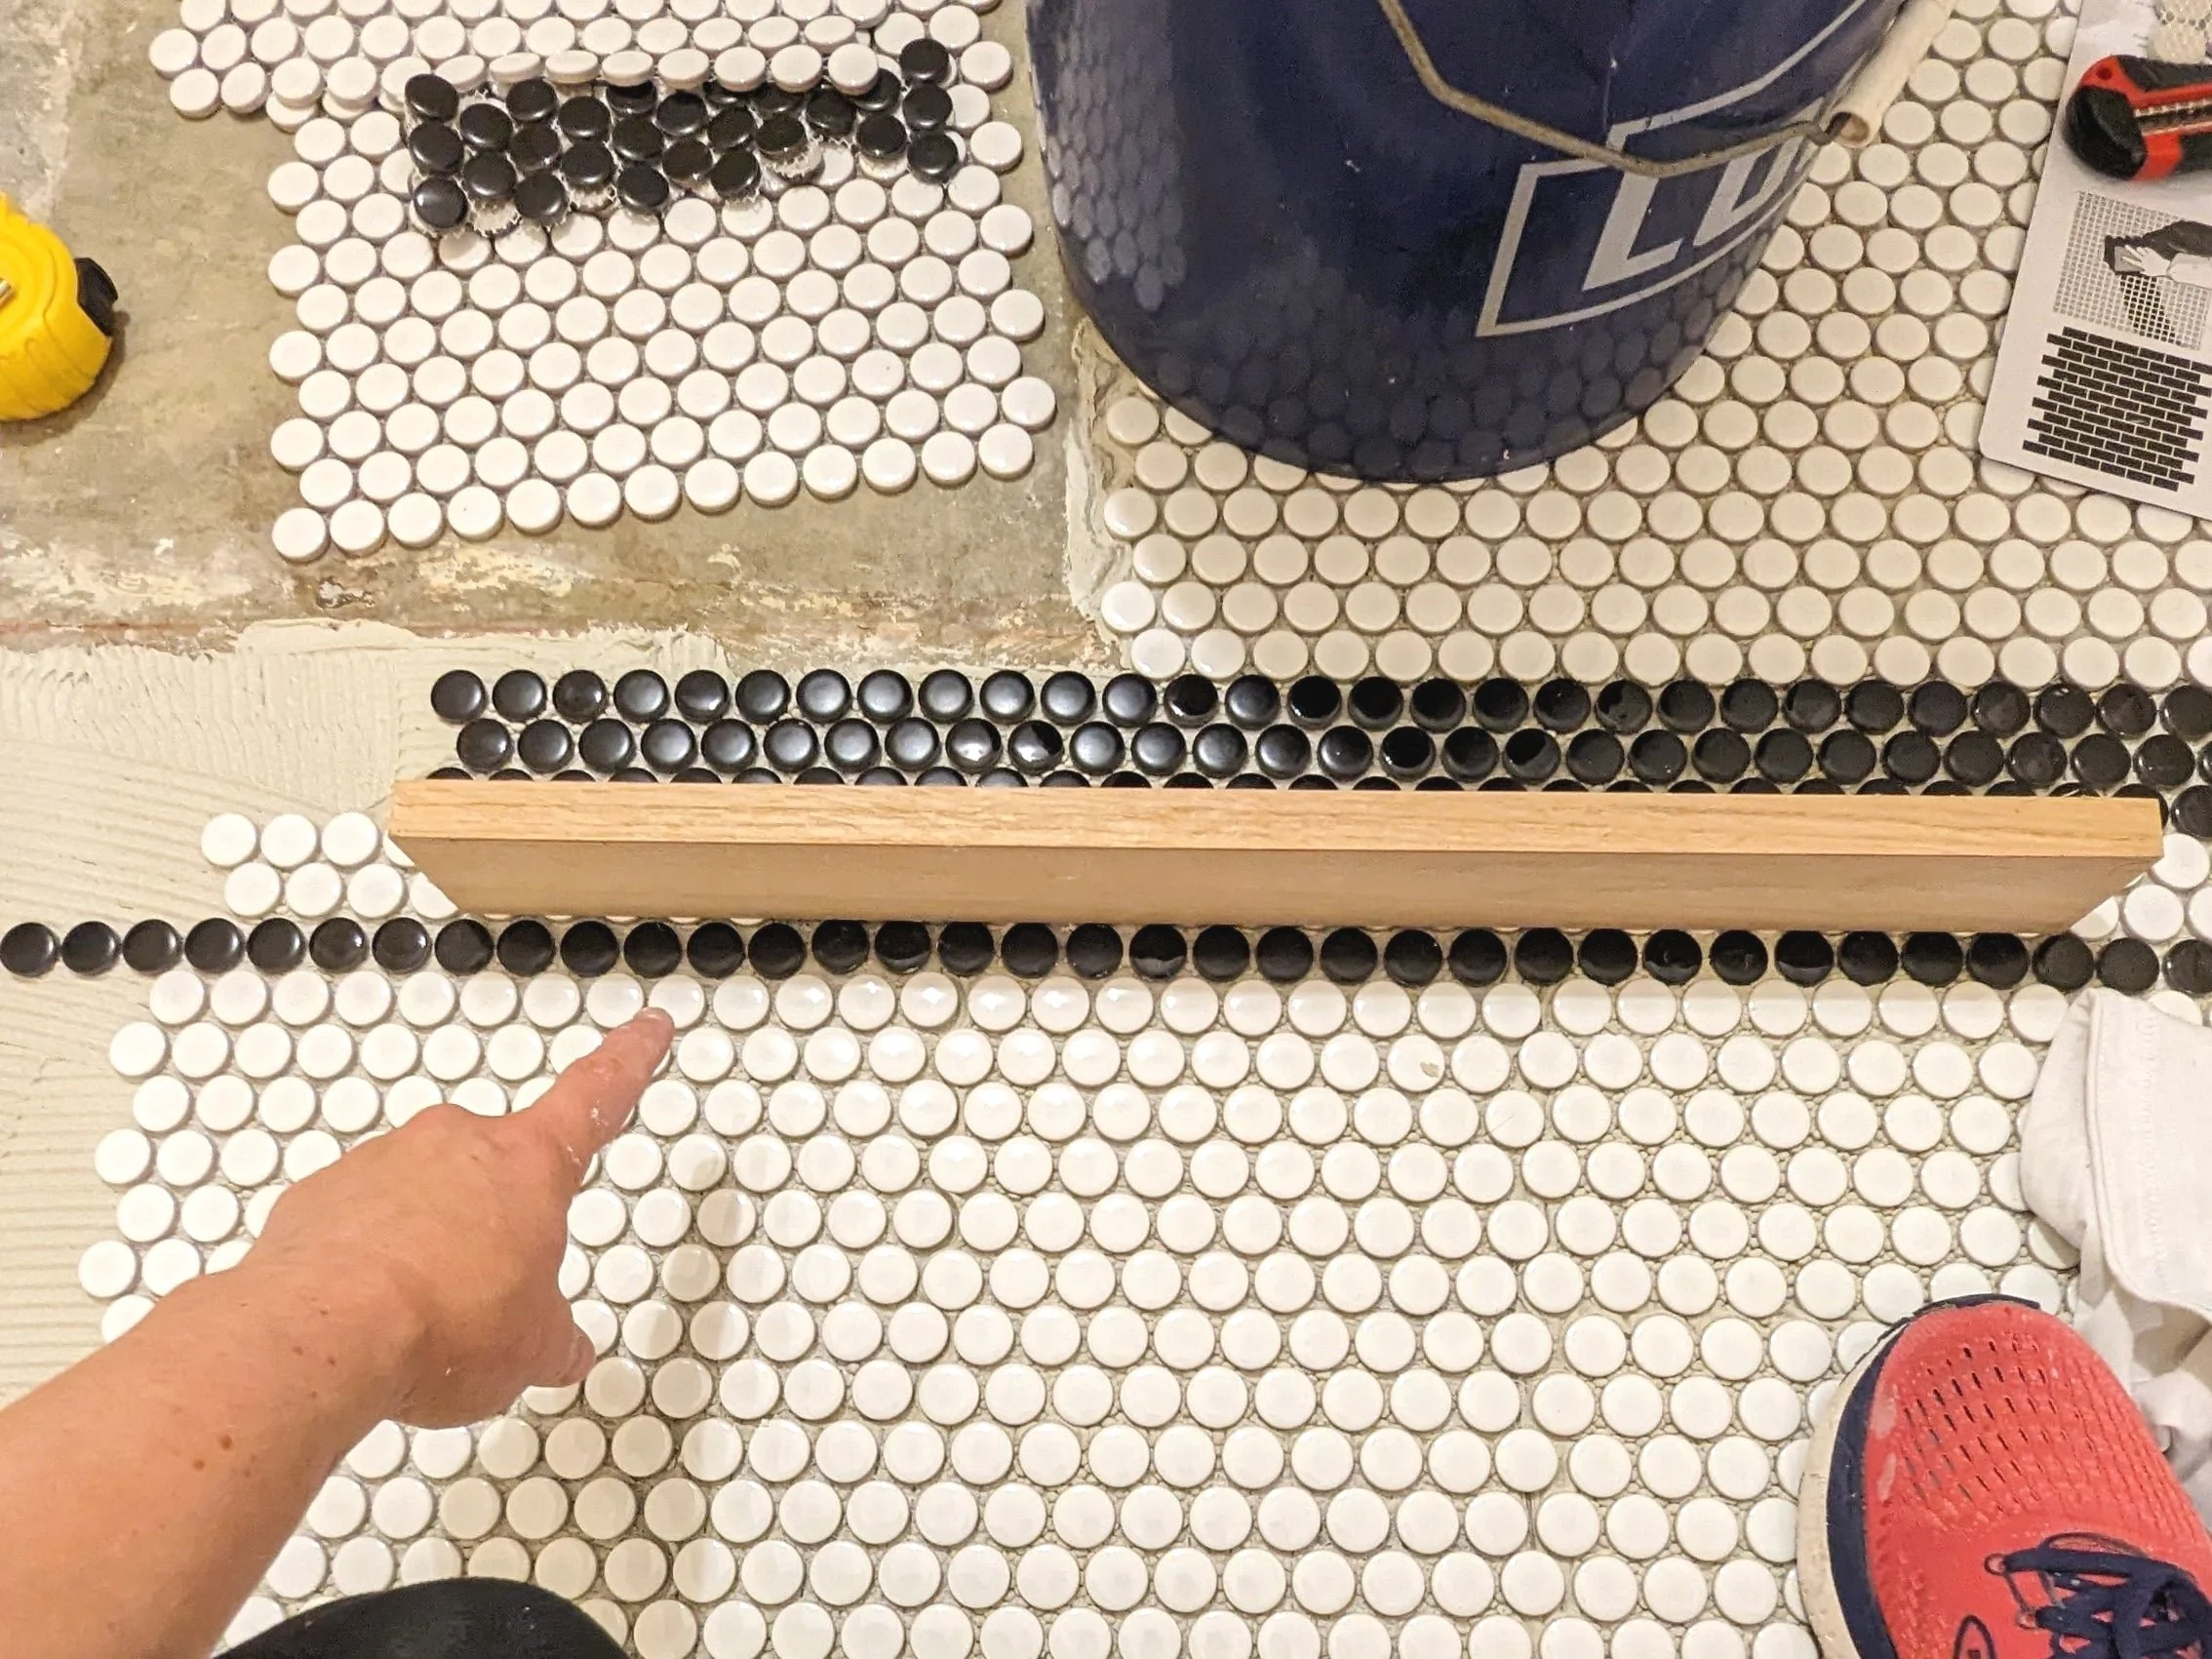
It’s easy for your pattern to start to slip out of alignment as you’re installing your tile. Use a straight edge like a scrap piece of wood or a level to check that your sheets are lining up evenly as you go.
Adding a Pattern
So you’ve installed your penny tile, and now you want to add the pattern to the middle, eh? This is actually really simple to do!
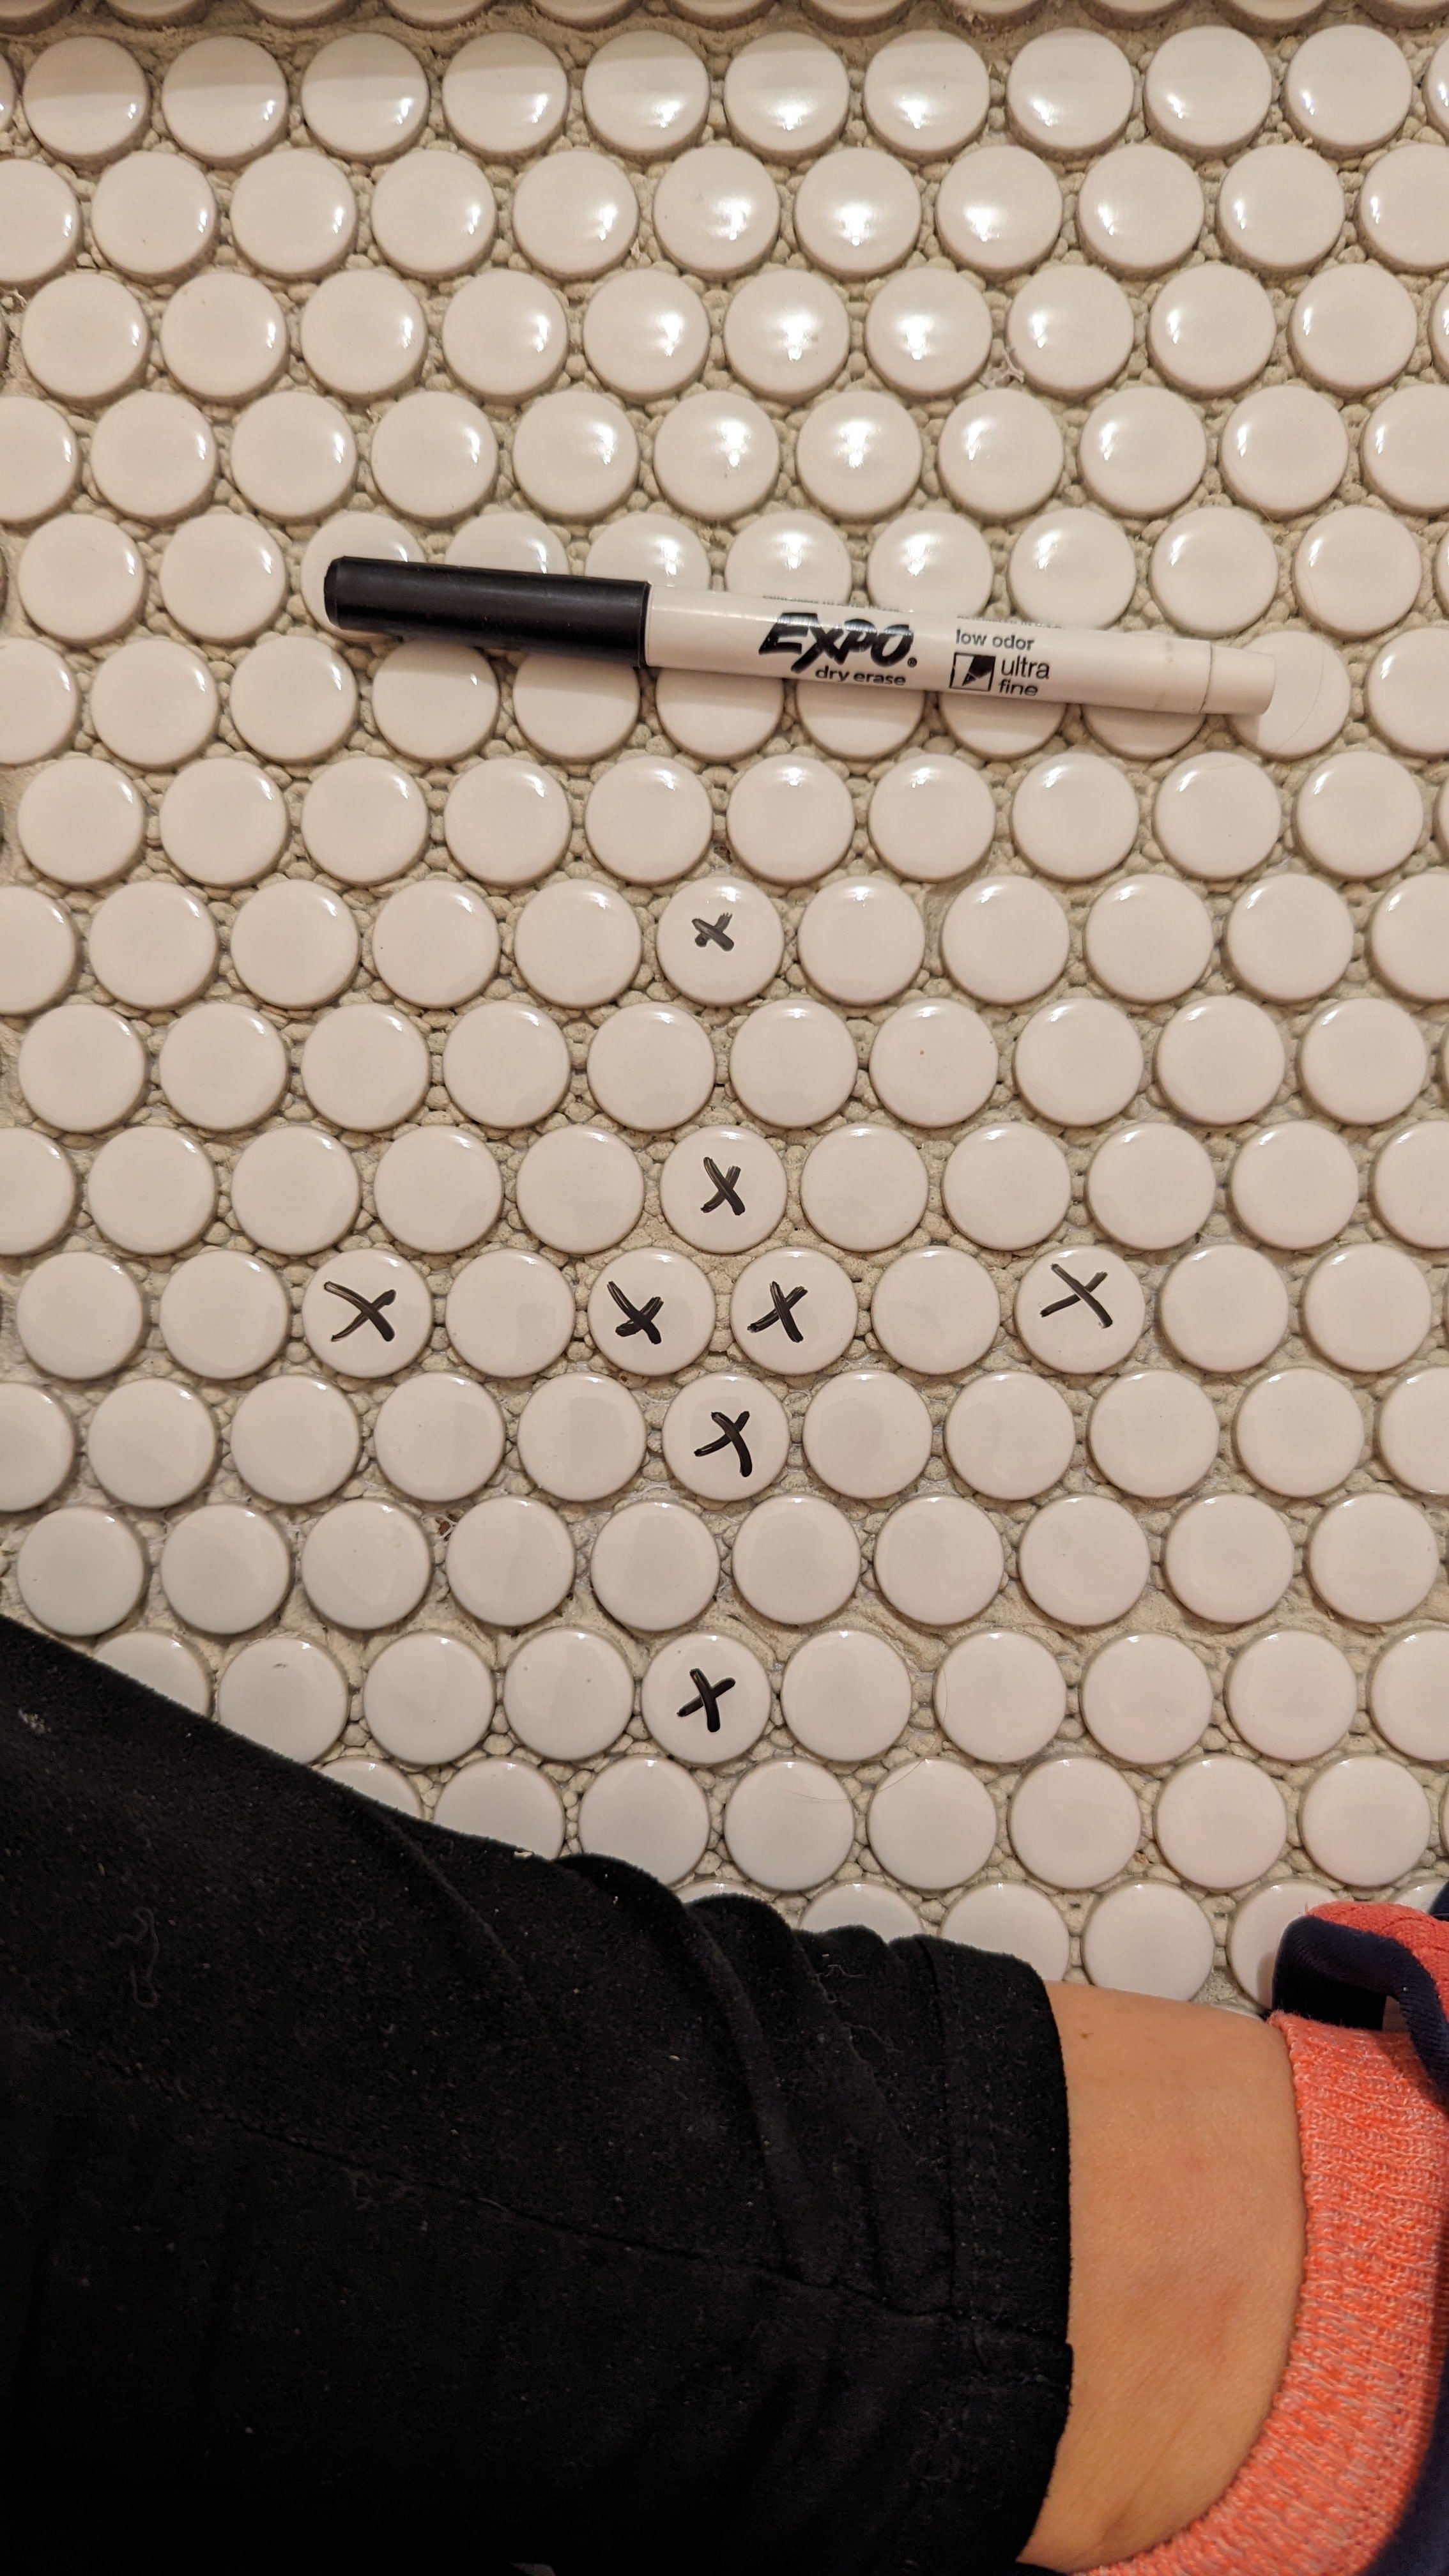
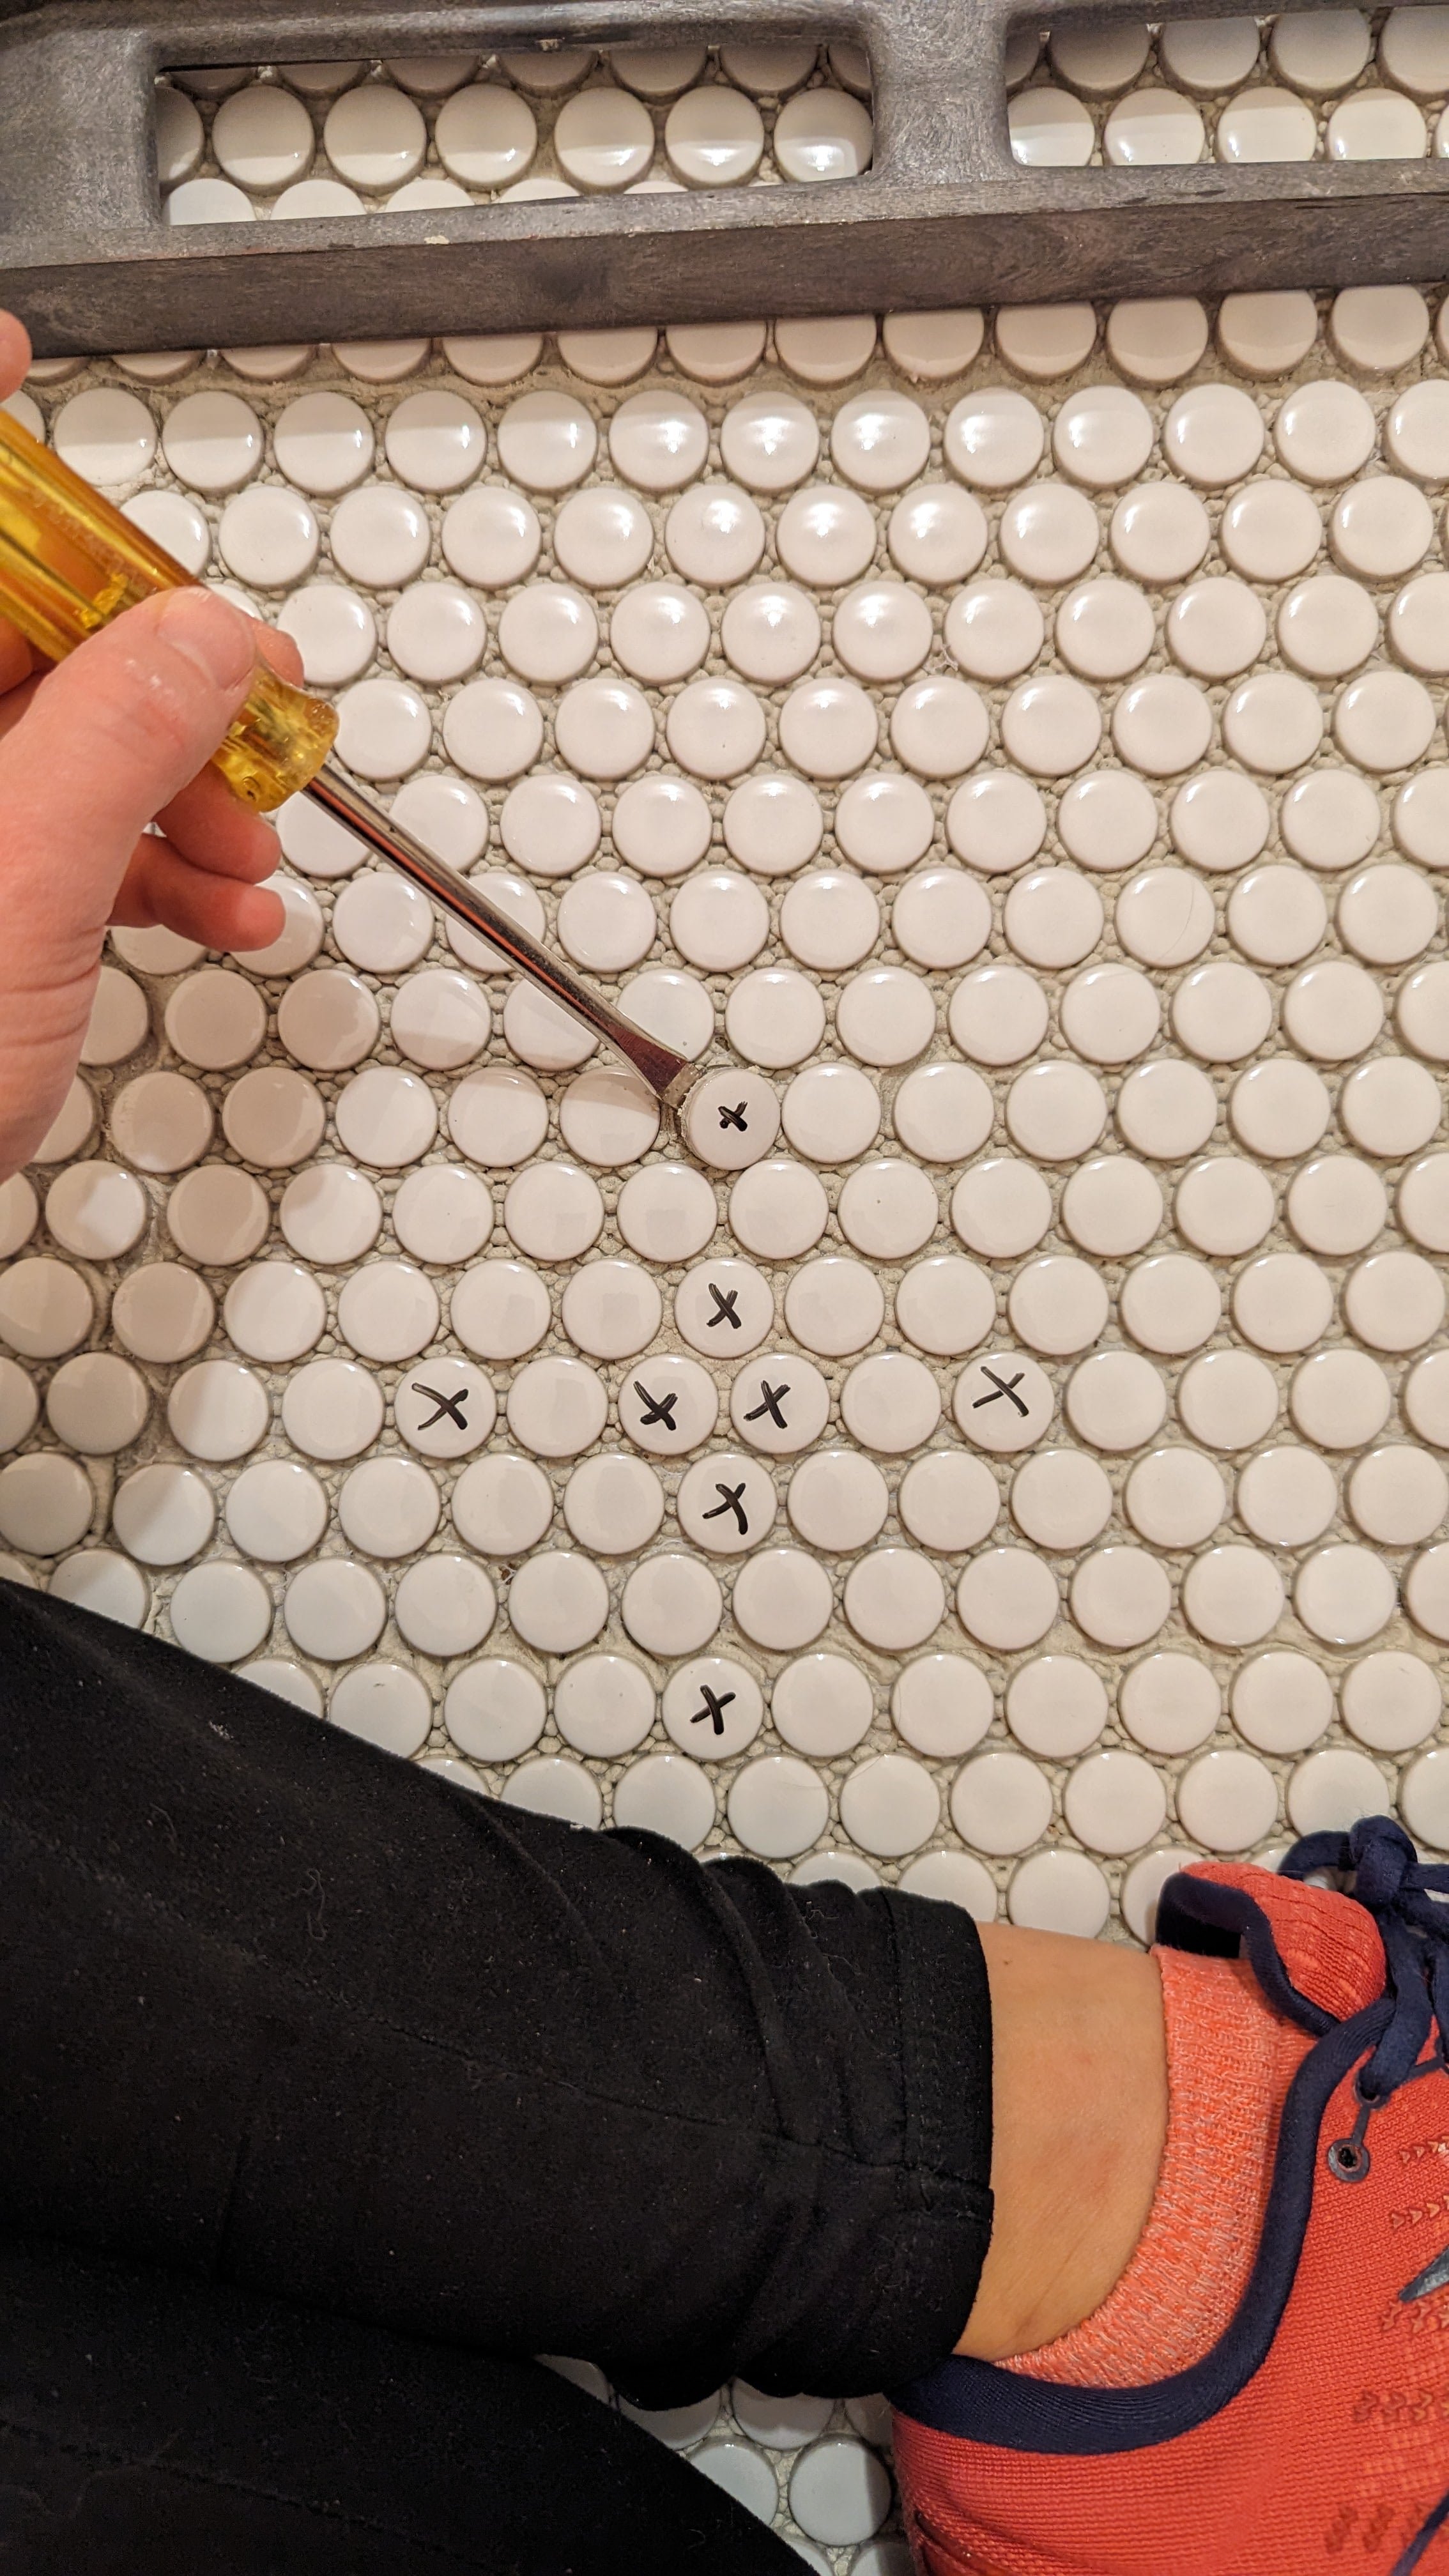

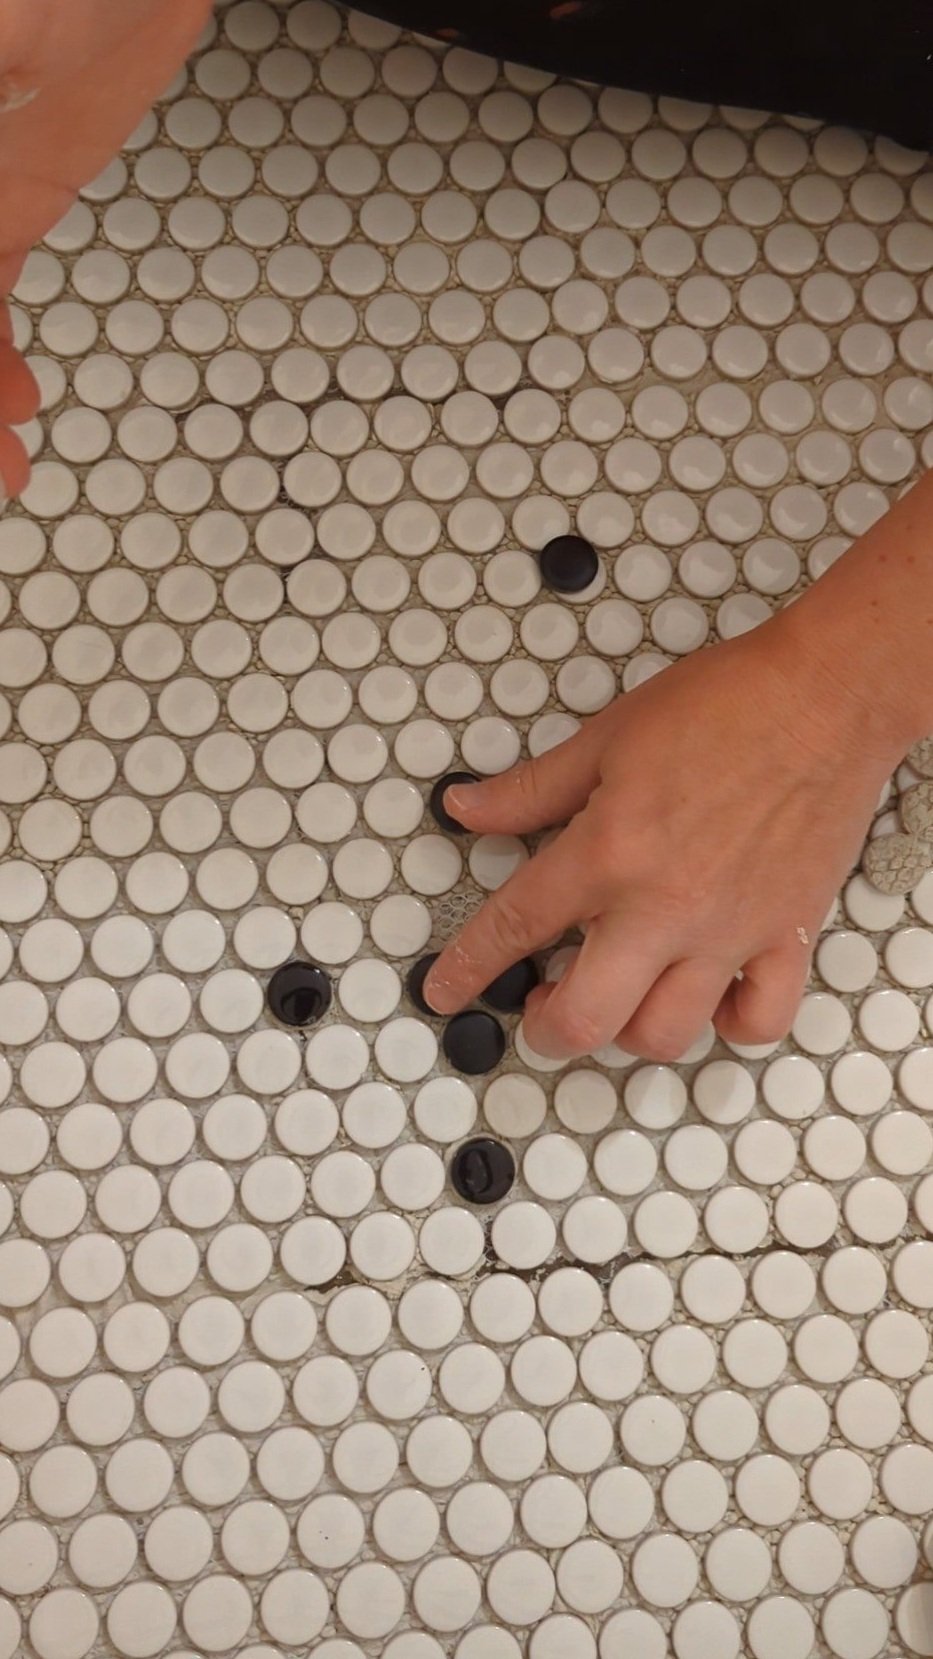
Start by marking the tiles you want to replace with a dry-erase marker. Then, using a flathead screwdriver, pop them out. Next, dab a little mortar on the replacement tile and pop it into place.
Voila! Easy peasy.
Grouting
After the mortar has dried the recommended amount of time, you’ll need to grout. Here are my tips:
Buy Plenty of Grout

Because penny tile is small, there are a lot of gaps to fill with grout. You’ll end up using more grout than you think, so make sure you buy plenty.
Consider Grout Color
Tone-on-tone grout color can minimize mistakes. This is true not only for penny tile but really for all tile. However, with the amount of joints in penny tile it's especially noteworthy. I chose to use Mapei’s Warm Gray grout. The pre-mixed kind is more expensive but worth it to ensure a consistent color.
Grout Haze Hack
After your grout has dried, you’ll need to clean off the grout haze. If you have porcelain or ceramic tiles, mix 1 part vinegar with 4 parts water and scrub off the grout haze with a cloth. I just learned this hack during this tile project, and it saved me a ton of time, so I wanted to share it here!
Seal Your Grout
If your grout requires it, don’t forget to seal your tile after the grout dries! This is my preferred grout sealant.
Final Thoughts

Penny tile is unlike any other tile I’ve ever installed - which isn’t necessarily a bad or good thing. It’s just different.
I really enjoyed the ability to customize my pattern to my space and the flexibility penny tile offers. It was also pretty nice not having to run to the wet saw to make a million cuts, ha! But it’s definitely easier to make mistakes when you’re dealing with so many grout lines. Regardless, I would absolutely tackle this project again.
If you found this post helpful, please share! And be sure to follow along during the rest of the One Room Challenge on my Instagram where I’m sharing every step of the process!

