
ORC Week 6 - How to Tile Backsplash
DIY Tile Backsplash
There’s a first time for everything - and this week of the One Room Challenge marked my first time at tiling! And you know what? It’s a super beginner-friendly project that makes a really big impact! In this post, I’m sharing the steps I took to tile my laundry room backsplash.

What’s the One Room Challenge?

If you’re new here, the One Room Challenge is an event where DIYers from all around encourage and motivate one another to makeover one room in their homes over a period of 8 weeks. In my case, I’m finally tackling our laundry room remodel.
Each Wednesday during the challenge I'll share a post with the previous week's progress until the final reveal on November 16th!
The Tile I Chose
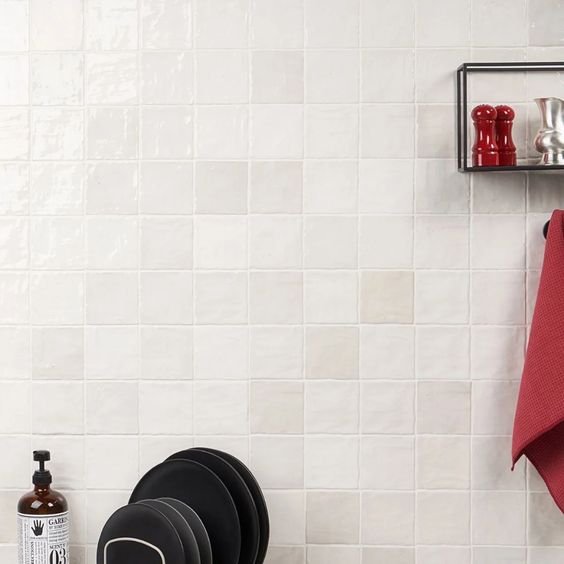
I’ve been fangirling over the look of handmade 4x4 tiles in a staggered (technically called running bond) pattern for A WHILE. The tile in the image below is exactly what I had in mind.

When I realized I had an opportunity to use them in the laundry room I was pumped!
My initial design called for these tiles, which are almost exactly what I was looking for - the right size and texture - but I didn’t love the iridescent finish. And once I read some reviews, I learned that there was little variation in color from tile to tile (something I wanted in my design!)
BUT they were the closest tiles I could find in my price range. As I was on the brink of buying them, I came across a close cousin that checked all my boxes.
I purchased them immediately!
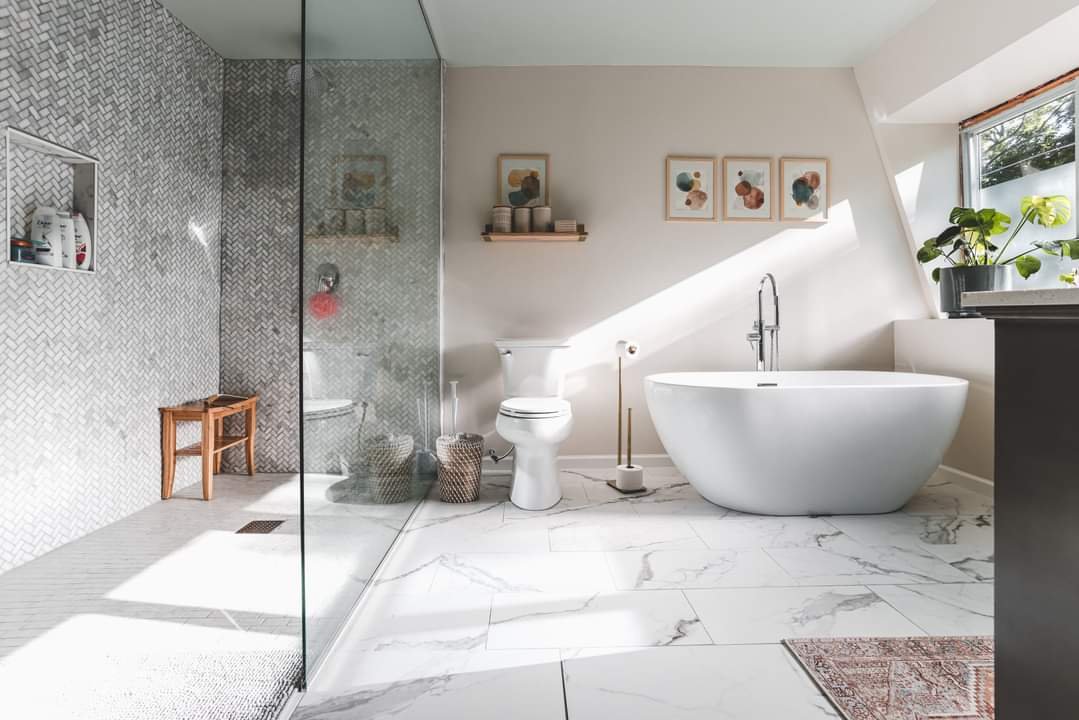
If you were here for our master bathroom reveal, you’ll know we tiled the bejeezus out of that space.
As an Amazon Associate, I earn from qualifying purchases. This post may contain affiliate links, meaning I receive commissions for purchases made through those links at no cost to you.
But in reality Lucius and a friend tiled the whole thing while I peeked in between work meetings and grouted on the weekend. So in the grand scheme of things, this was my first foray into the tiling abyss. Here’s what you need for your own tiling adventures:
Materials
Note: These are the materials I used for my tile so please just use them as a guide. Depending on the type and size of your tile, you may need slightly different materials.
Tiling
- Your tile of choice
- Mortar Thin Set
- Drill
- Mixing paddle
- Water
- 5-gallon bucket
- Trowel
- Shims and/or Tile Spacers
- Plastic sheeting (optional)
- Painter's tape (optional)
- Laser Level or Standard Level
- Tile Saw, Tile Snap Cutter, or Handheld Tile Snipper
Grouting
Grouting
Prep
Yeah, yeah, yeah, always with the prep. Before you bust out your mortar and get to mixing, start with these steps!
First, I laid down some plastic sheeting (the kind with tape attached) on my countertops. There's NO WAY I was going to mess those babies up! I even added extra painter’s tape to get my grout line where it would meet the countertop nice and straight.
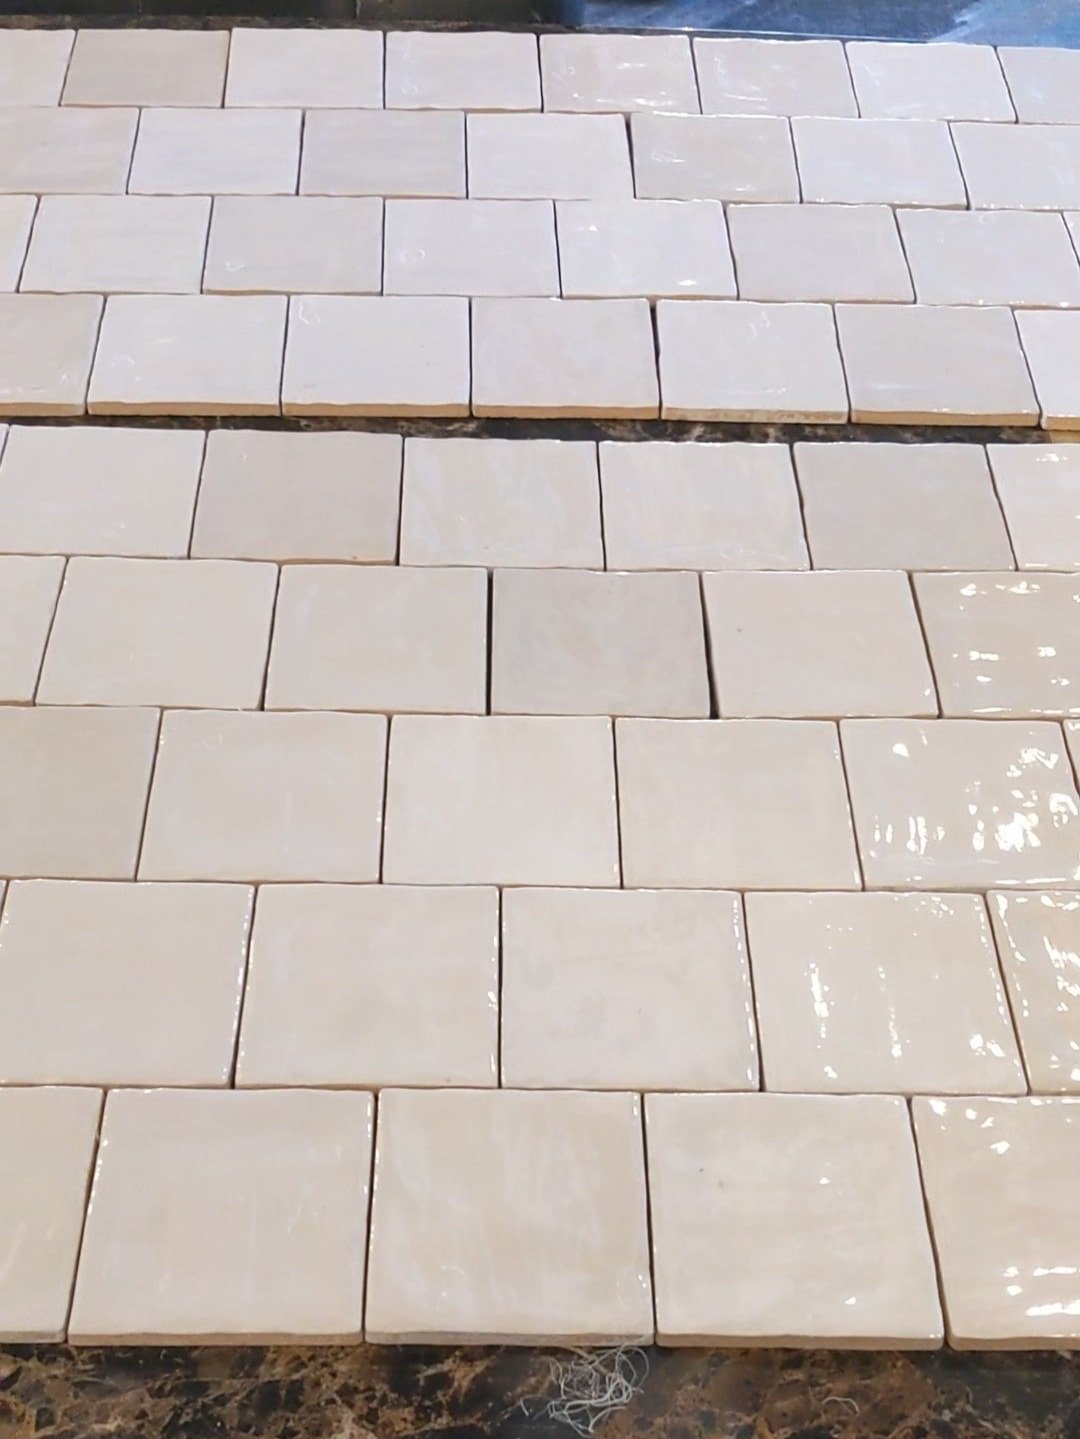
I ended up with 4 boxes of tiles, so I started by mixing them together to make sure I had a good variation of coloring. Then, I started to figure out my design.
I knew the pattern I wanted to use, but I still had to determine where to start and end my rows. I decided to start in the corner where the walls meet and install a whole tile. Then move out from there.
That left me with enough at the ends that I didn't have any awkwardly weird slivers to deal with. I even laid out my first row along the countertop to make sure the different shades of tile were nicely mixed.

This is important because sometimes you'll have tiles that have coloring that's just a little bit off and it can be really obvious when installed. Not laying out the tiles and looking them over beforehand is my one regret in our master bathroom (see the group of darker tiles in the top left corner of the shower in the picture above? Ugh).
Next, I set up my laser level at the same height as the top of my first row of tiles.
Installing Whole Tiles
Once everything was prepped, I was ready to mix up some mortar. Using COLD water (as I mentioned when we installed brick veneer in the loft, hot water will speed up drying time) and the mixing attachment on my drill, I added a little mortar at a time until it was a peanut buttery consistency. Because mortar only has a workable time of a couple of hours, I only mixed up a small amount.

Did you know there are different colors of mortar? There aren't a TON - just basic shades. It's recommended that with light-colored or glass tiles you use white mortar. So that's what I did.
You're also apparently supposed to start your tile in the middle of the row, but because I knew I wanted a full tile on a certain end, that's where I started.

Using my trowel, I spread mortar on the wall in small sections. I realized my tiles weren't picking up as much mortar as I needed by just putting it on the walls, so I also back-buttered the tiles (a fancy term for "spreading mortar on the back of the tile").
There are lots of different shapes and sizes of trowels, which can be confusing. If you're not sure what to use for your specific tile, check on the manufacturer's website.

Then, I smooshed the tile to the wall and wiggled it back and forth a little. I finished up by adding shims where needed to make sure the top of my tile was touching the laser level line.

As you can see above, the shims definitely came in handy as my countertops weren't quite as level as I'd hoped.
The manufacturer of my tile suggested using 1/16" spacers, but I found that the inconsistencies in the tile created spaces about that wide on their own and the spacers just fell out. I opted not to use them and I’m super happy with how it ended up looking.
The first row was definitely the hardest, but after it was installed, the other rows were a breeze. I still had to use shims here and there to make sure the tiles were staying level where I didn't get them quite level enough on the first row.

Cutting Tile
After I had all the whole tiles installed, I started making my cuts!
Using a crayon, I made marks on my tiles approximately where they needed cut. Then, set the guide on the tile saw and ran them through. If you don’t have a tile saw, you can use a tile snap cutter for basic cuts, but some cuts won’t be possible without a tile saw.
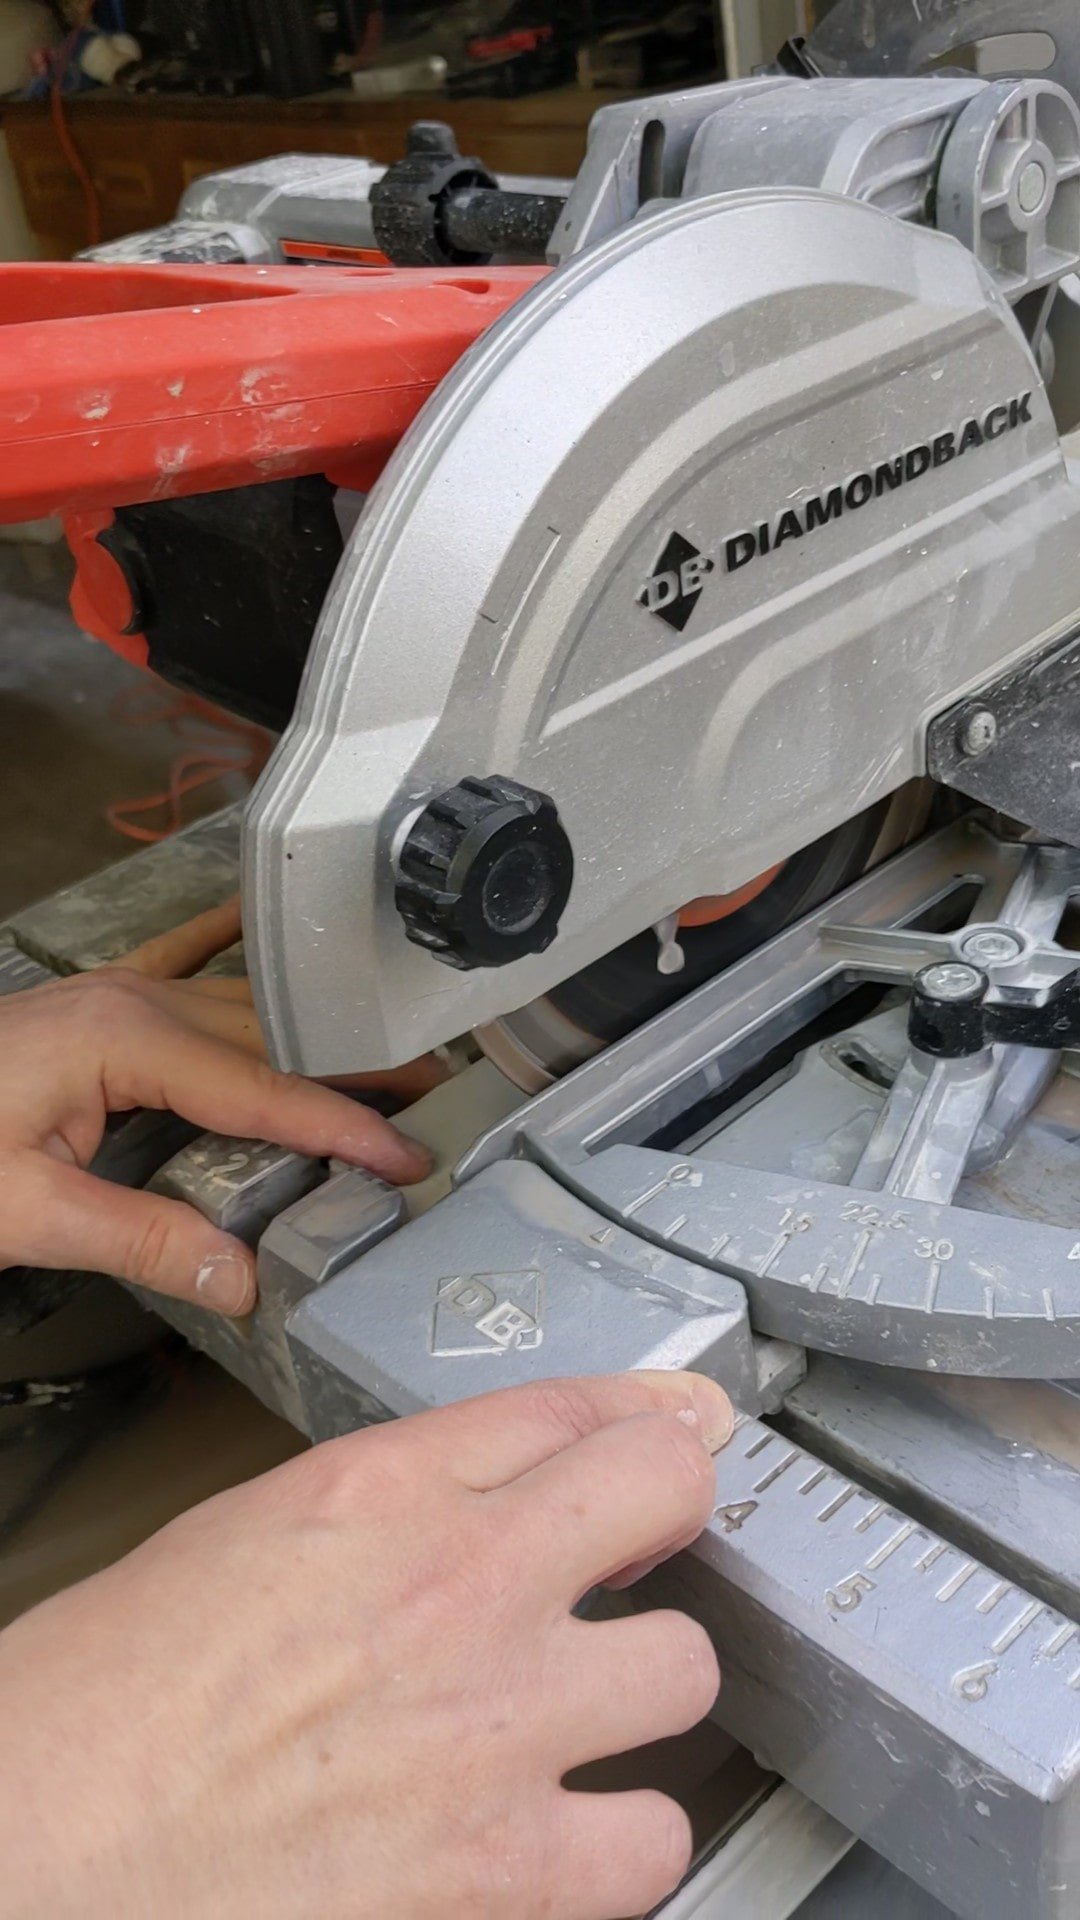

A couple of tips for using a wet saw:
Make sure water is running off the saw blade before you start cutting.
Don't be like me - wear protective glasses! (whoops)
Corner cuts are a bit tricky. I found it easiest to cut through as far as I could on the front side of the tile, then flip it over and do the same on the back. This didn't always cut clean through so occasionally I had to snap the piece off. Luckily, all my corner cuts are hidden under the thingy that holds the washing machine hoses (I’m sure that’s the technical name for it).

Grout
Once you're done installing the tile, you need to give it at least 24 hours to dry before you grout.
Picking a grout color is easy to overlook, but it can make a big impact on the look of the finished product. There are lots of grout colors to choose from - the chart below doesn’t even cover all of them!
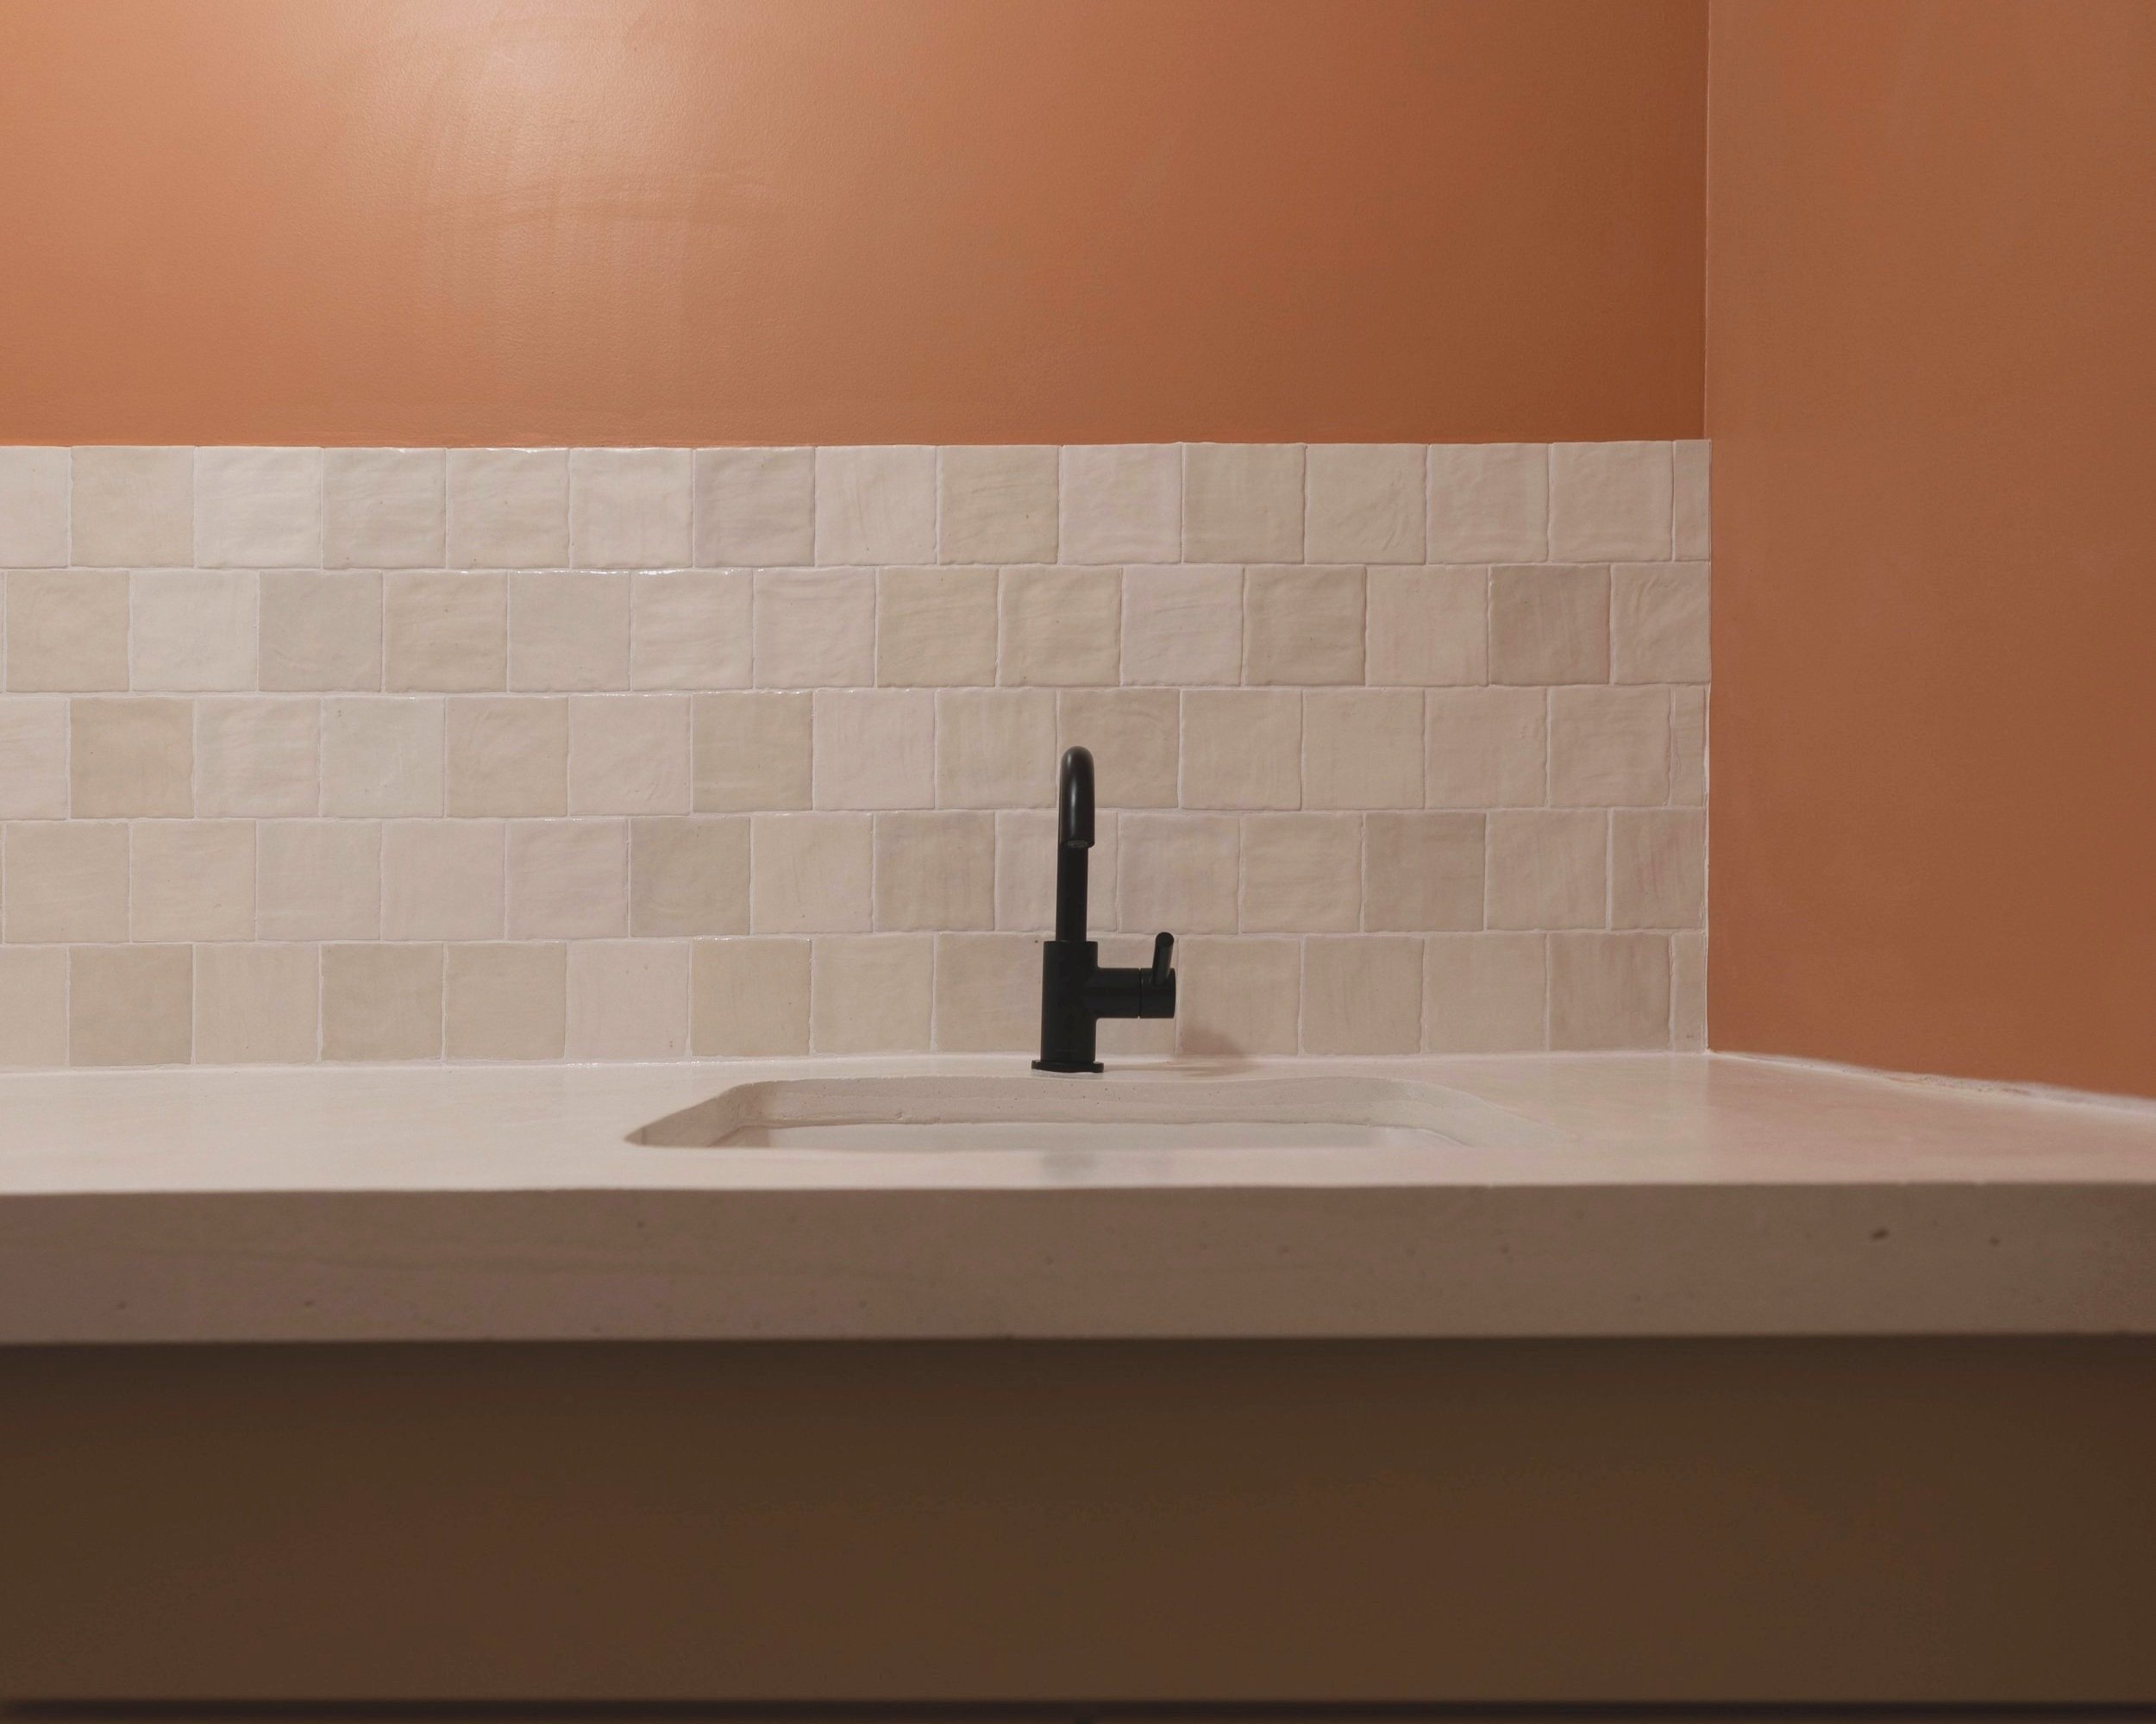
In my case, I knew I wanted something on the lighter side to go with the overall feel of my room. I debated using the color biscuit but opted for white to hide the imperfections in my tile installation (specifically that big ol’ gap between the countertop and tile).
You’ll also need to determine if you need sanded or unsanded grout. Sanded grout is typically recommended for tiles that are spaced greater than 1/8” apart. It has better adhesion and is less likely to crack.
But for tiles with smaller spacing, you’ll need unsanded grout. Unsanded grout is also recommended for certain types of tile that would be easily scratched by sanded grout. Make sure you read the tile manufacturer’s installation instructions before you start to determine which type to use!
As with mortar, grout only has a certain amount of time that it’s workable - so gather your materials before you mix it up.
Mixing grout is similar to mixing mortar - you’ll want it thin enough to spread but not so thin that it falls off the grout float. And since grout is only being applied between the cracks, you’ll need to mix up less grout than mortar so keep that in mind.

Start by scooping some grout onto your float and spreading it on the gaps between the tiles. The goal isn’t to cover the tiles, but the smaller your tiles are, the more likely this is to happen and it’s no big deal (see exhibit A).

Exhibit A
Work in small sections because after the grout sets up for 15-30 minutes, you’ll have to come back with a sponge and wipe it off. If you wait too long the grout will dry and be much more difficult to remove.
To wipe off the grout, dip a big grout sponge in water and wring it out really well. Then, wipe in a circular motion. This process not only removes the grout from the surface of the tiles but helps smoosh it into any spaces that need a little more.
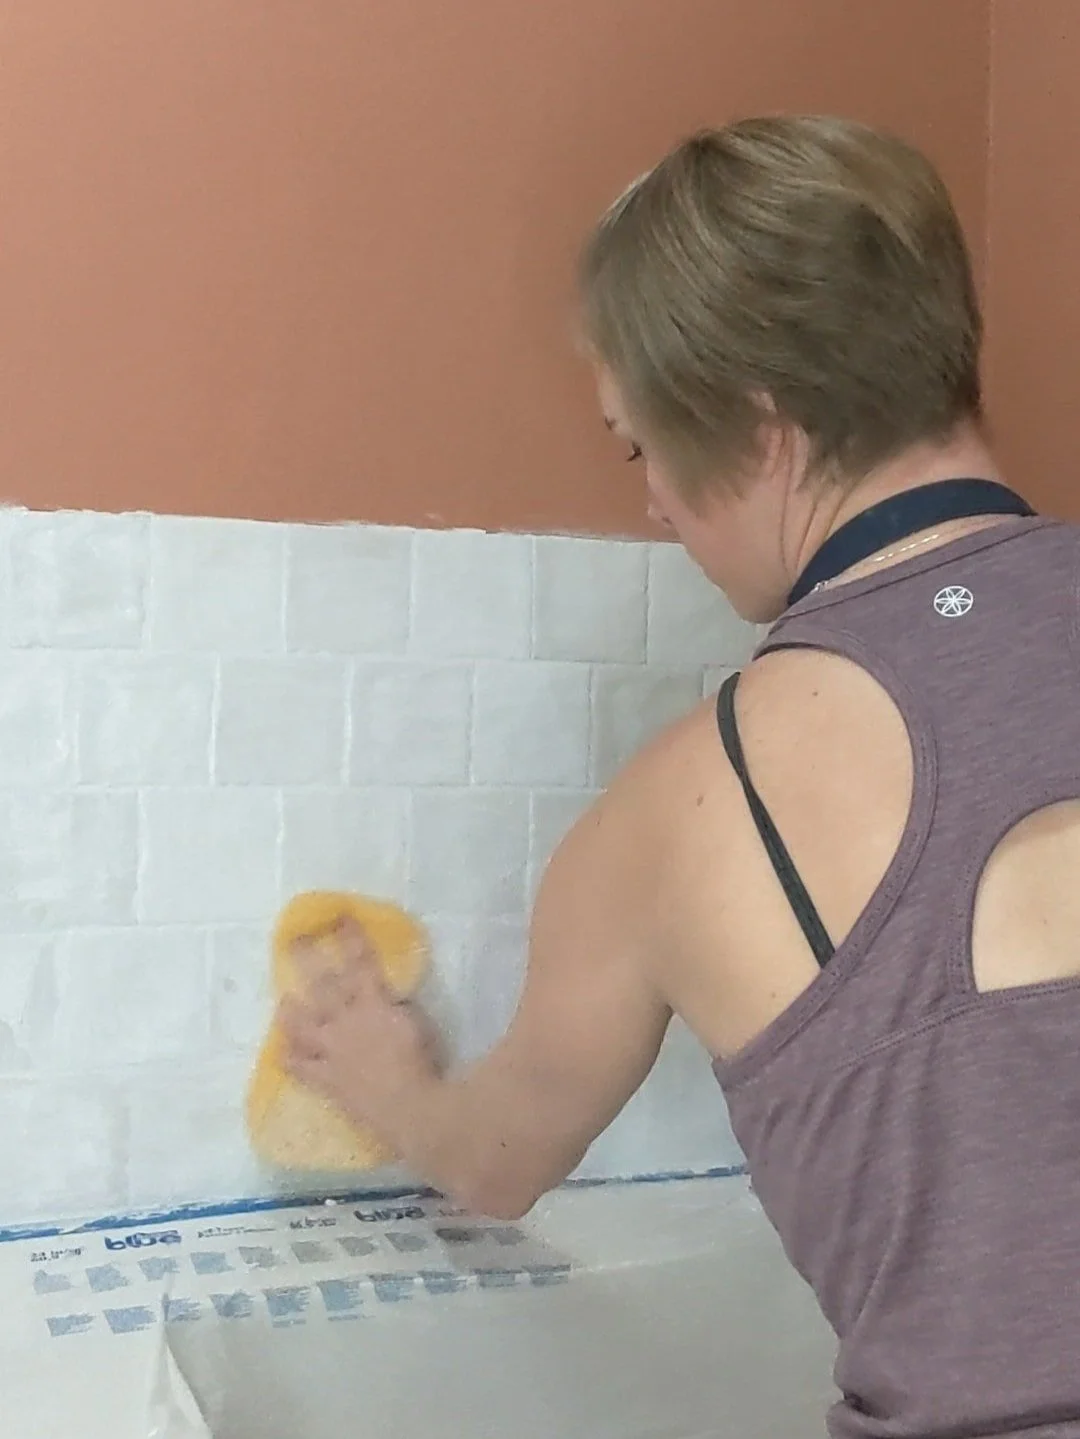
You’ll need to rinse your sponge (and probably change out your water) frequently. You can see in the picture below where I’ve wiped the grout off the top right-hand side.

Get as much grout off the surface of the tiles as you can, but it’s completely normal (and okay) to have a little bit of a film - aka grout haze - left over.
After the grout has had plenty of time to dry (at least several hours or overnight), come back with a cloth (I used a microfiber cloth) and buff off the grout haze “wax on/wax off” style and watch those babies sparkle! Unless you have matte tile… then they won’t necessarily sparkle.

Finishing Touches
It’s worth noting that some tiles need finish pieces for the edges, but I didn’t love the options I had for my tiles. I decided not to use any to help maintain the handmade look and instead finish my edges with a bead of caulk. If my tiles didn’t terminate into the walls I probably would have installed edging but since the only exposed edge of my tile is the top I’m okay with leaving it as-is.
Most tile and/or grout needs to be sealed after they’re installed. There are lots of sealers available to use. In our master bathroom, we used this spray-on sealer, and it has worked well so far, so I used it again in this space. Though I'll warn you - it's smelly!
Final Thoughts
I’m absolutely enamored with my backsplash and knowing that I did it completely on my own makes me love it even more! I’ve really been trying to push myself to step out of my comfort zone and work on projects on my own during the One Room Challenge.
It’s slower and tough at times, but the confidence boost when I tackle a project feels amazing! Plus, I can be as nit-picky as I want without the worry of annoying anyone else with my perfectionistic tendencies. I see a whole wide world in front of me.

Dare I say I'm almost looking forward to the projects I have in store for myself next week: building out the cabinet above the washer and dryer and the floating shelves for the back wall. Be sure to follow along here and on Instagram to see all the step-by-step progress of this laundry room renovation!

