
ORC Week 5 - DIY Concrete Countertops
Pour In Place Concrete Countertops
Are you looking for beautiful and unique countertops that don't cost thousands? Give concrete countertops a try! In this post, I'm sharing the step-by-step process of how I installed white concrete countertops in my laundry room as part of the One Room Challenge.
This is an in-depth monster of a post, so grab a cup of coffee, sit back, and enjoy!

Thank you to Concrete Countertop Solutions for partnering with me and sponsoring this post. As always, all thoughts and opinions are 100% my own.
As an Amazon Associate, I earn from qualifying purchases. This post may contain affiliate links, meaning I receive commissions for purchases made through those links at no cost to you.
What’s the One Room Challenge?

If you’re new here, the One Room Challenge is an event where DIYers from all around encourage and motivate one another to makeover one room in their homes over a period of 8 weeks. In my case, I’m finally tackling our laundry room remodel.
Each Wednesday during the challenge, I'll share a post with the previous week's progress until the final reveal on November 16th!
A Journey Into DIY Concrete Countertops
When I originally started hammering out the details for the laundry room design, I assumed we’d just use the same laminate countertop we used in the loft kitchenette. However, we were really concerned about getting a clean cut on the mitered corner we’d need.

Then we considered quartz. My excitement about the prospect of a stone countertop was quickly diminished when the quote came back at $2600! As beautiful as it was, I couldn’t justify spending that much on a countertop for a laundry room. So back to the drawing board I went!
I remembered, once upon a time I saw Young House Love use Ardex feather finish on their kitchen counters. I’ve wanted to try it ever since, but we were concerned about its durability. Then I figured – well, why not do actual concrete countertops?
I was nervous about properly building the molds needed to pour concrete countertops in the garage, carrying them inside after they dried, hoping that they fit perfectly, and crossing my fingers that they didn’t break in the move (yikes!)
Then I came across a company called Concrete Countertop Solutions and was really impressed with their product. They have everything you need for DIY pour-in-place concrete countertops – plus a white concrete option that I knew would go perfectly with my design!
And if it seems overwhelming trying to figure out what exactly you need, they have this super handy “What do I need?” form. I filled it out with some basic information and the next day got an email with a link to a cart with all the products added. As a habitual second-guesser and overthinker, I was pumped to know that I wasn’t missing anything or buying more than I needed.

Here are the items you'll need that aren't supplied by Concrete Countertop Solutions:
- Cement board
- Measuring Tape
- Level
- Miter Saw
- Styrofoam (for the sink cut-out)
- Oscillating tool or jigsaw (again, for the sink cut-out)
- Silicone caulk
- Caulk gun
- Drill
- Mixing paddle (or you could see if your local hardware store rents out cement mixers)
- Utility knife (with a sharp blade to cut cement board!)
- Gorilla tape
- Gloves
- 5-gallon bucket
- Orbital sander
Additional materials for our specific project:
- Rosin paper and painter's tape (to protect the floors)
- Plastic (to protect the walls & cabinets. This kind with the tape attached is pretty nifty!)
- Stud finder, 2x4s, & screws (to create supports where we didn't have cabinets installed)
- Heat gun
Step 1: Protect Your Surfaces
Chipping dried cement off the floor and walls didn’t sound like my idea of a good time, so I started my project by taping rosin paper to the floors and sticking pre-taped plastic to the cabinets and walls.
Step 2: Cement Board
Next, measure your countertop surface and score the cement board using a utility knife. Scoring the cement board will quickly wear down the blade on your knife, so make sure you have extras!
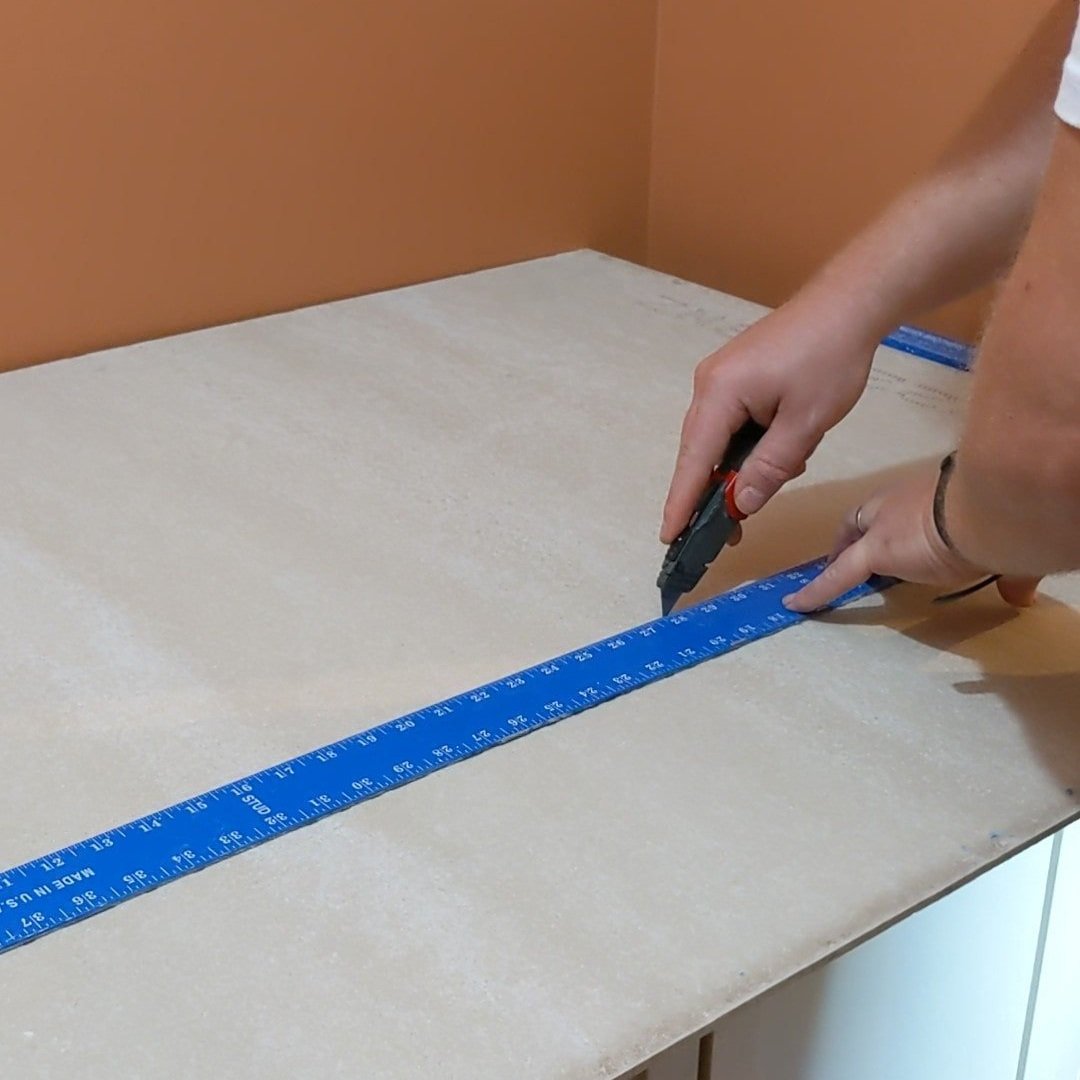
Cement board cuts similarly to drywall - score the surface, then snap the board.

Something I wish I had thought about earlier - you don’t need to worry about adding an overhang on the cement board because the countertop forms already come with it.
Once your cement board is all cut to size, adhere it in place using silicone caulk. Tape any seams using Gorilla Tape.

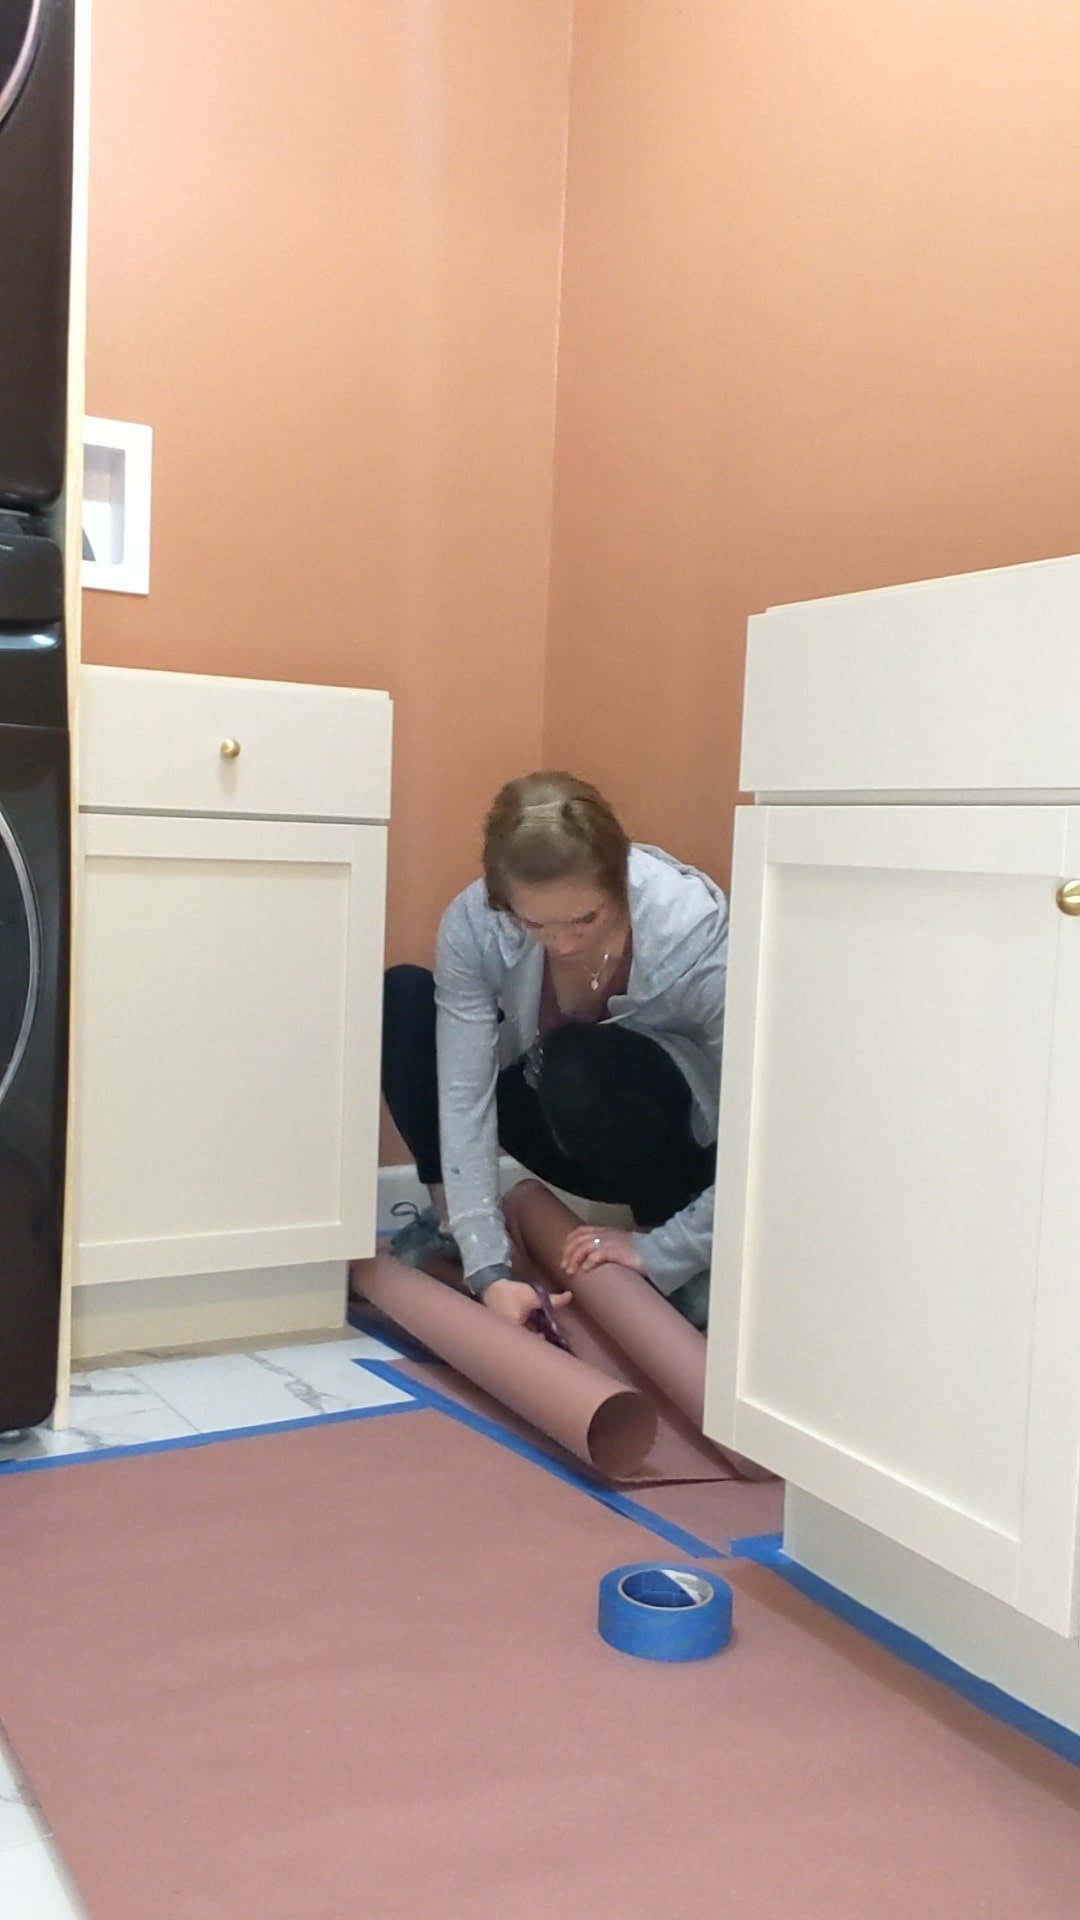
Step 3: Install Countertop Forms
Now you’re ready to cut the countertop forms. Using a miter saw, cut the forms to size. Try to create as few seams as possible so you don’t have to worry about them appearing in your finished countertops.
I will warn you, connecting the odd shape of the forms for the front of our countertops to the forms for the backside was a little mind-bending. Just be sure to measure twice and cut once!
Once all your forms are cut, using the recommended screws attach the forms to the cement board.

Next, it’s time to seal it all up. Start by taping the outside corners where each form meets with Gorilla Tape. Then apply caulk to any seams - including corners and where the form meets the cement board. I don’t think there’s a way to go overboard with this step.
Step 4: Sink Installation
Although we have a 36” sink base, I was more concerned about having the extra counter space than a big sink. Therefore, I bought a smaller porcelain undermount sink. But when we got to the point of installing it with the specific sink form, it wasn’t making sense.
I couldn't find any good tutorials on how to install an undermount sink using the Z Counterforms so I reached out to Concrete Countertop Solutions. They got back to me within 24 hours with recommendations on how to troubleshoot. Hopefully, I can help someone else with these tips.
Here's how we ended up installing our sink:
We started by measuring a hole big enough for our sink to fit in, but small enough that the flanges would sit on top of the cement board. Then we cut it out using an oscillating tool.
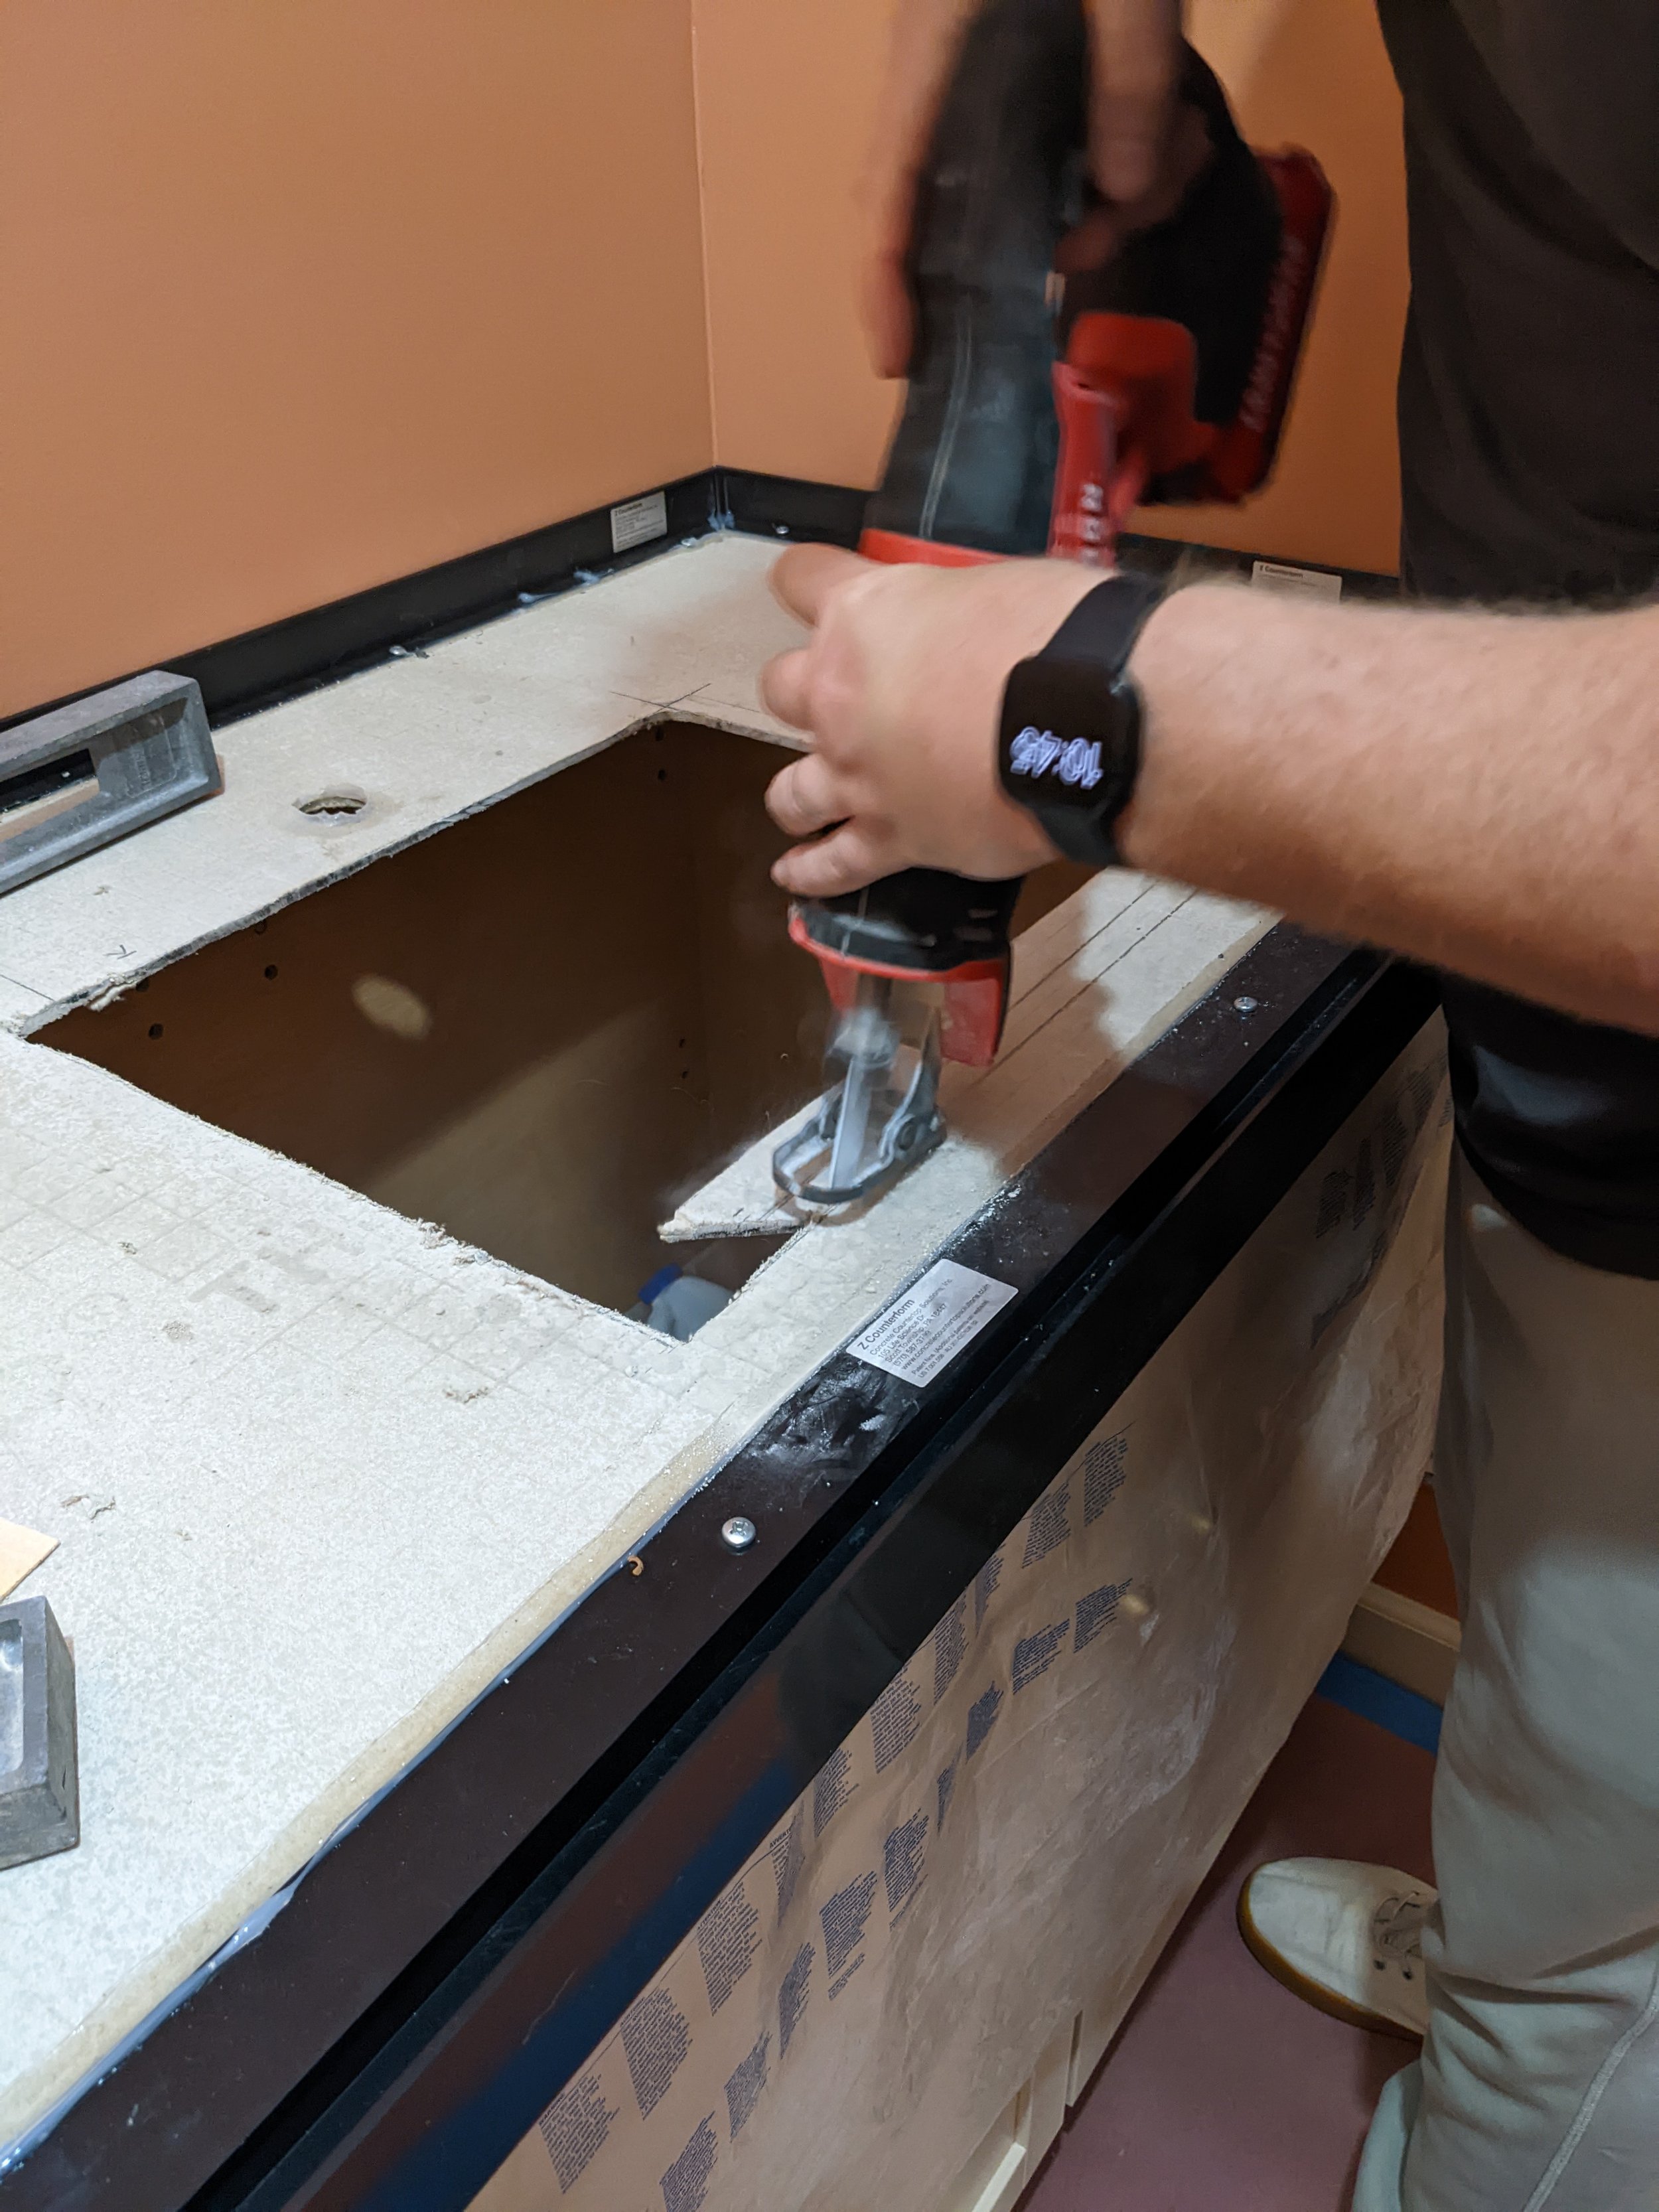
We also cut out the hole for our faucet.
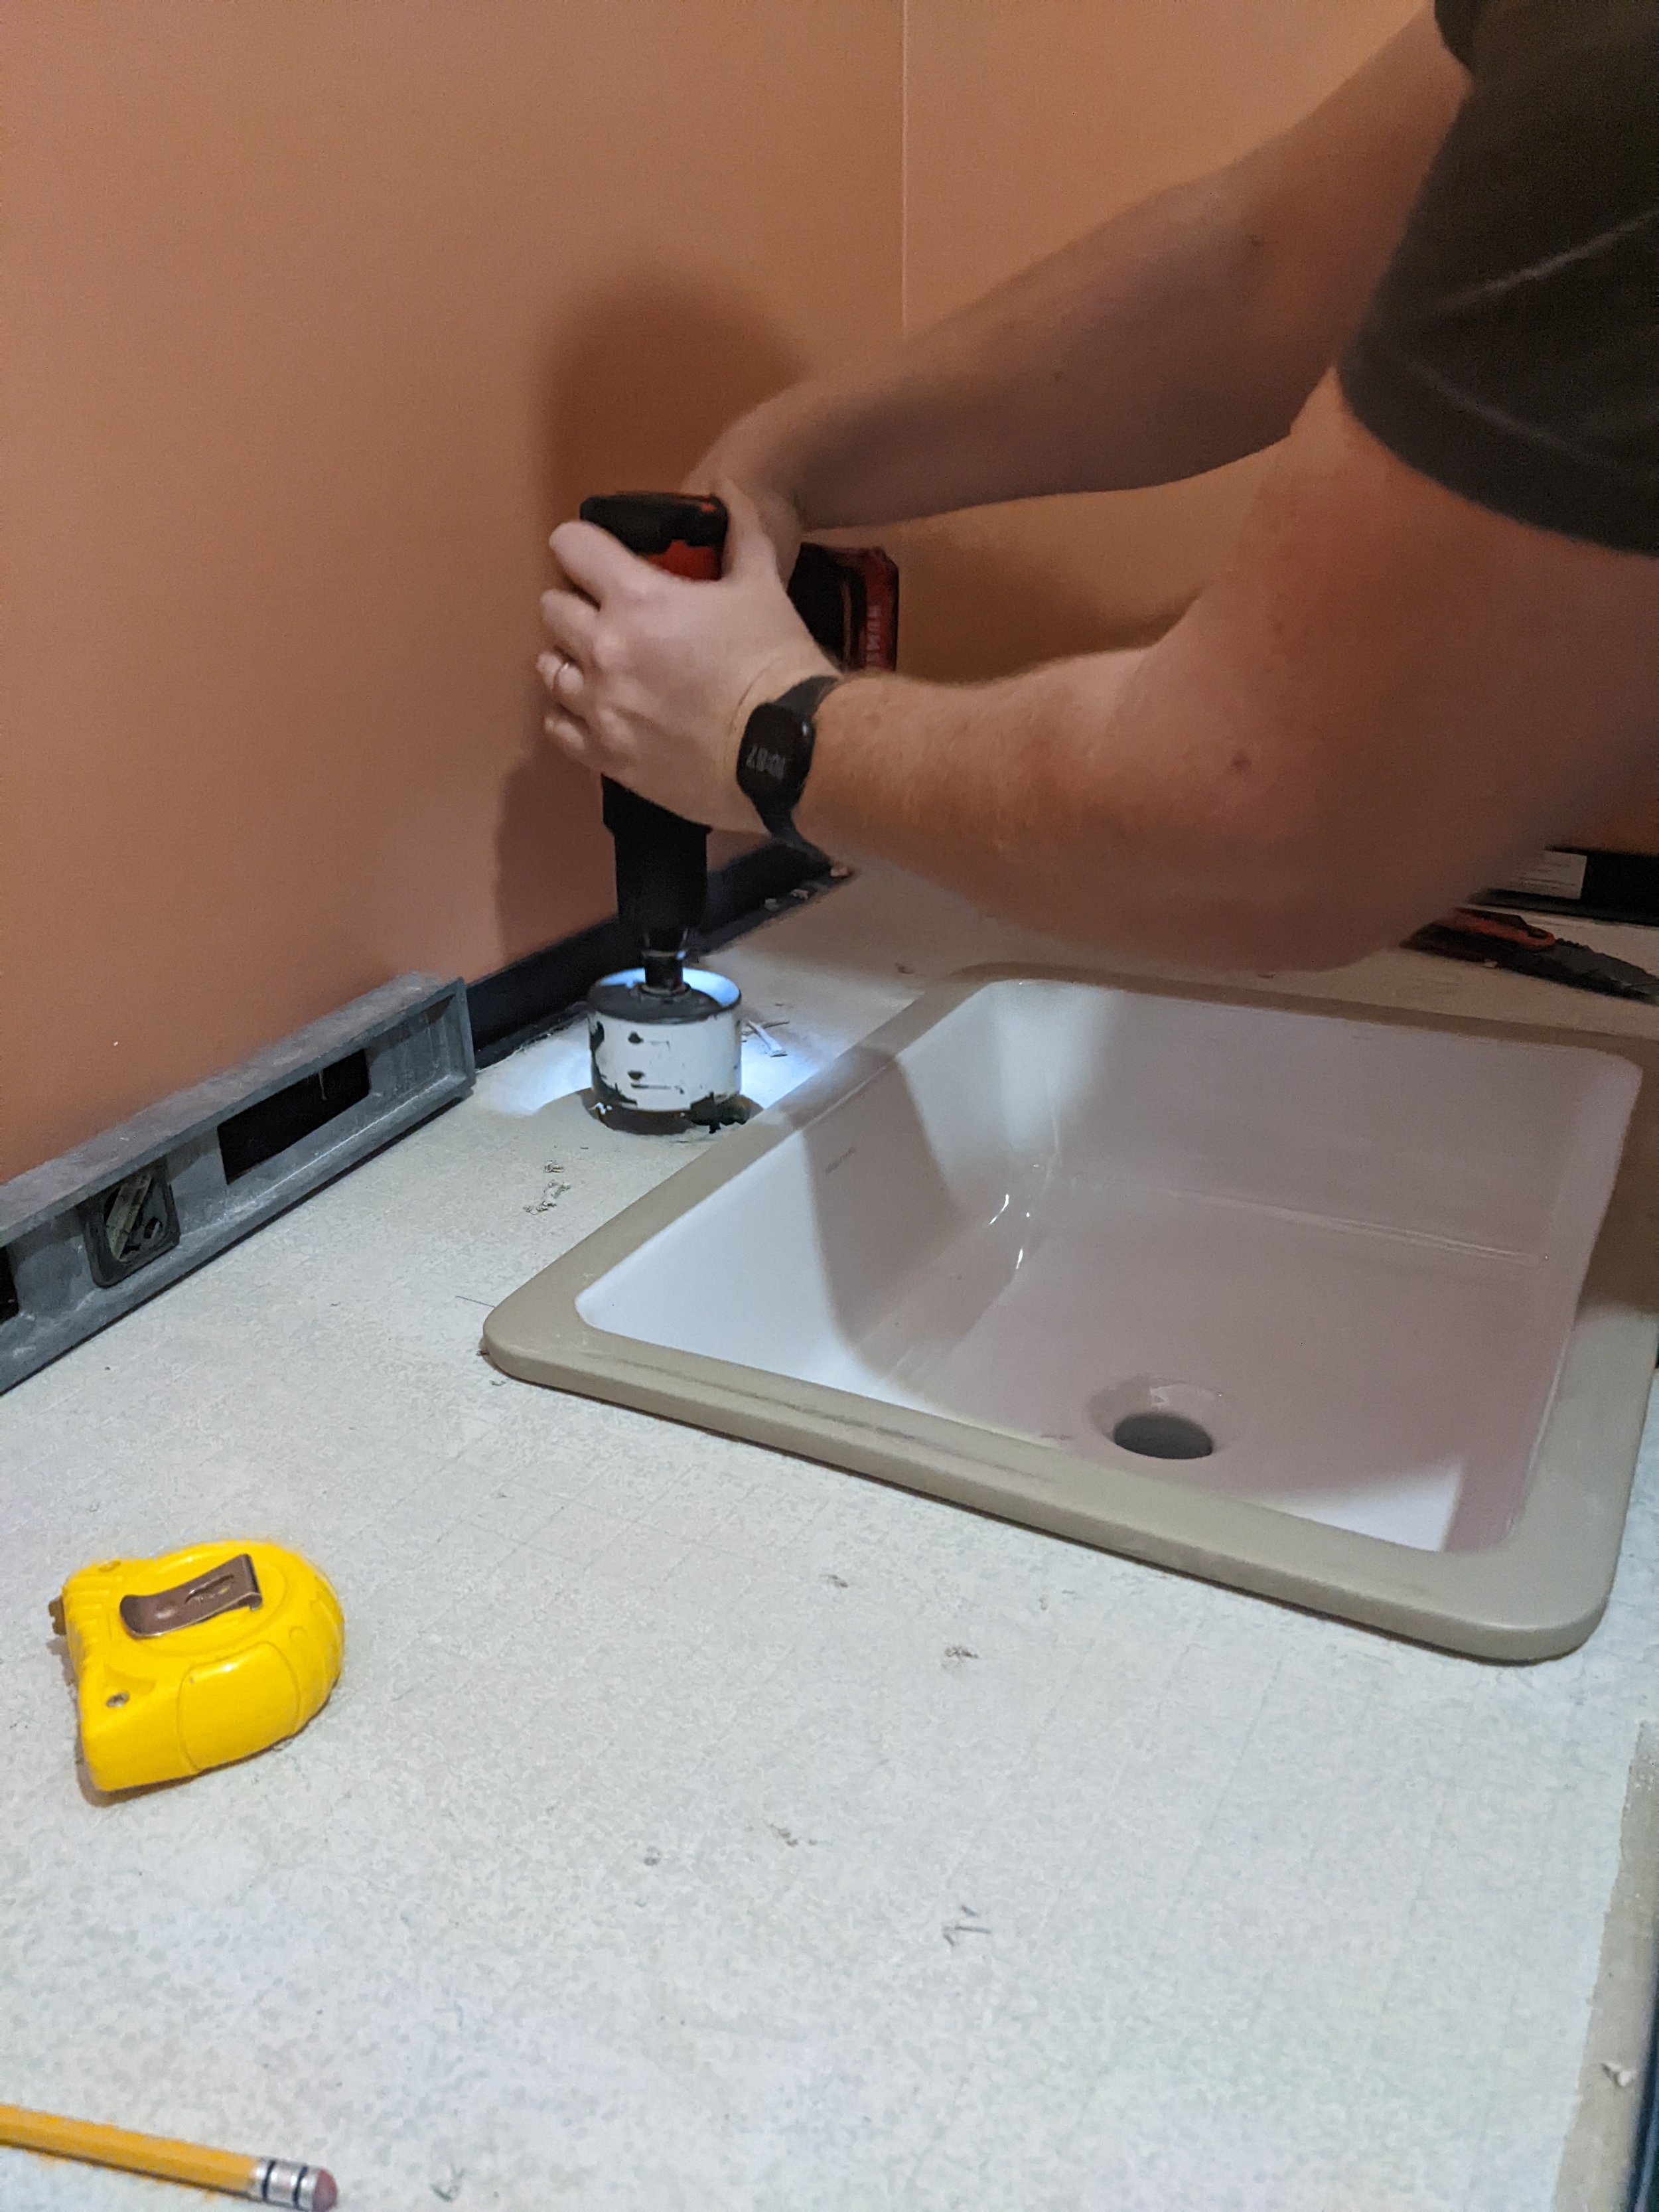
Then, using a couple of pieces of styrofoam (and a bread knife!), we created a knockout for the sink, sanded it smooth, and wrapped it in packing tape.

Notice there’s styrofoam in the sink as well.
From here, we used a heat gun to soften the sink form so we could mold it around the styrofoam. I don’t know if it’s typical to have to use a heat gun but it worked for us!

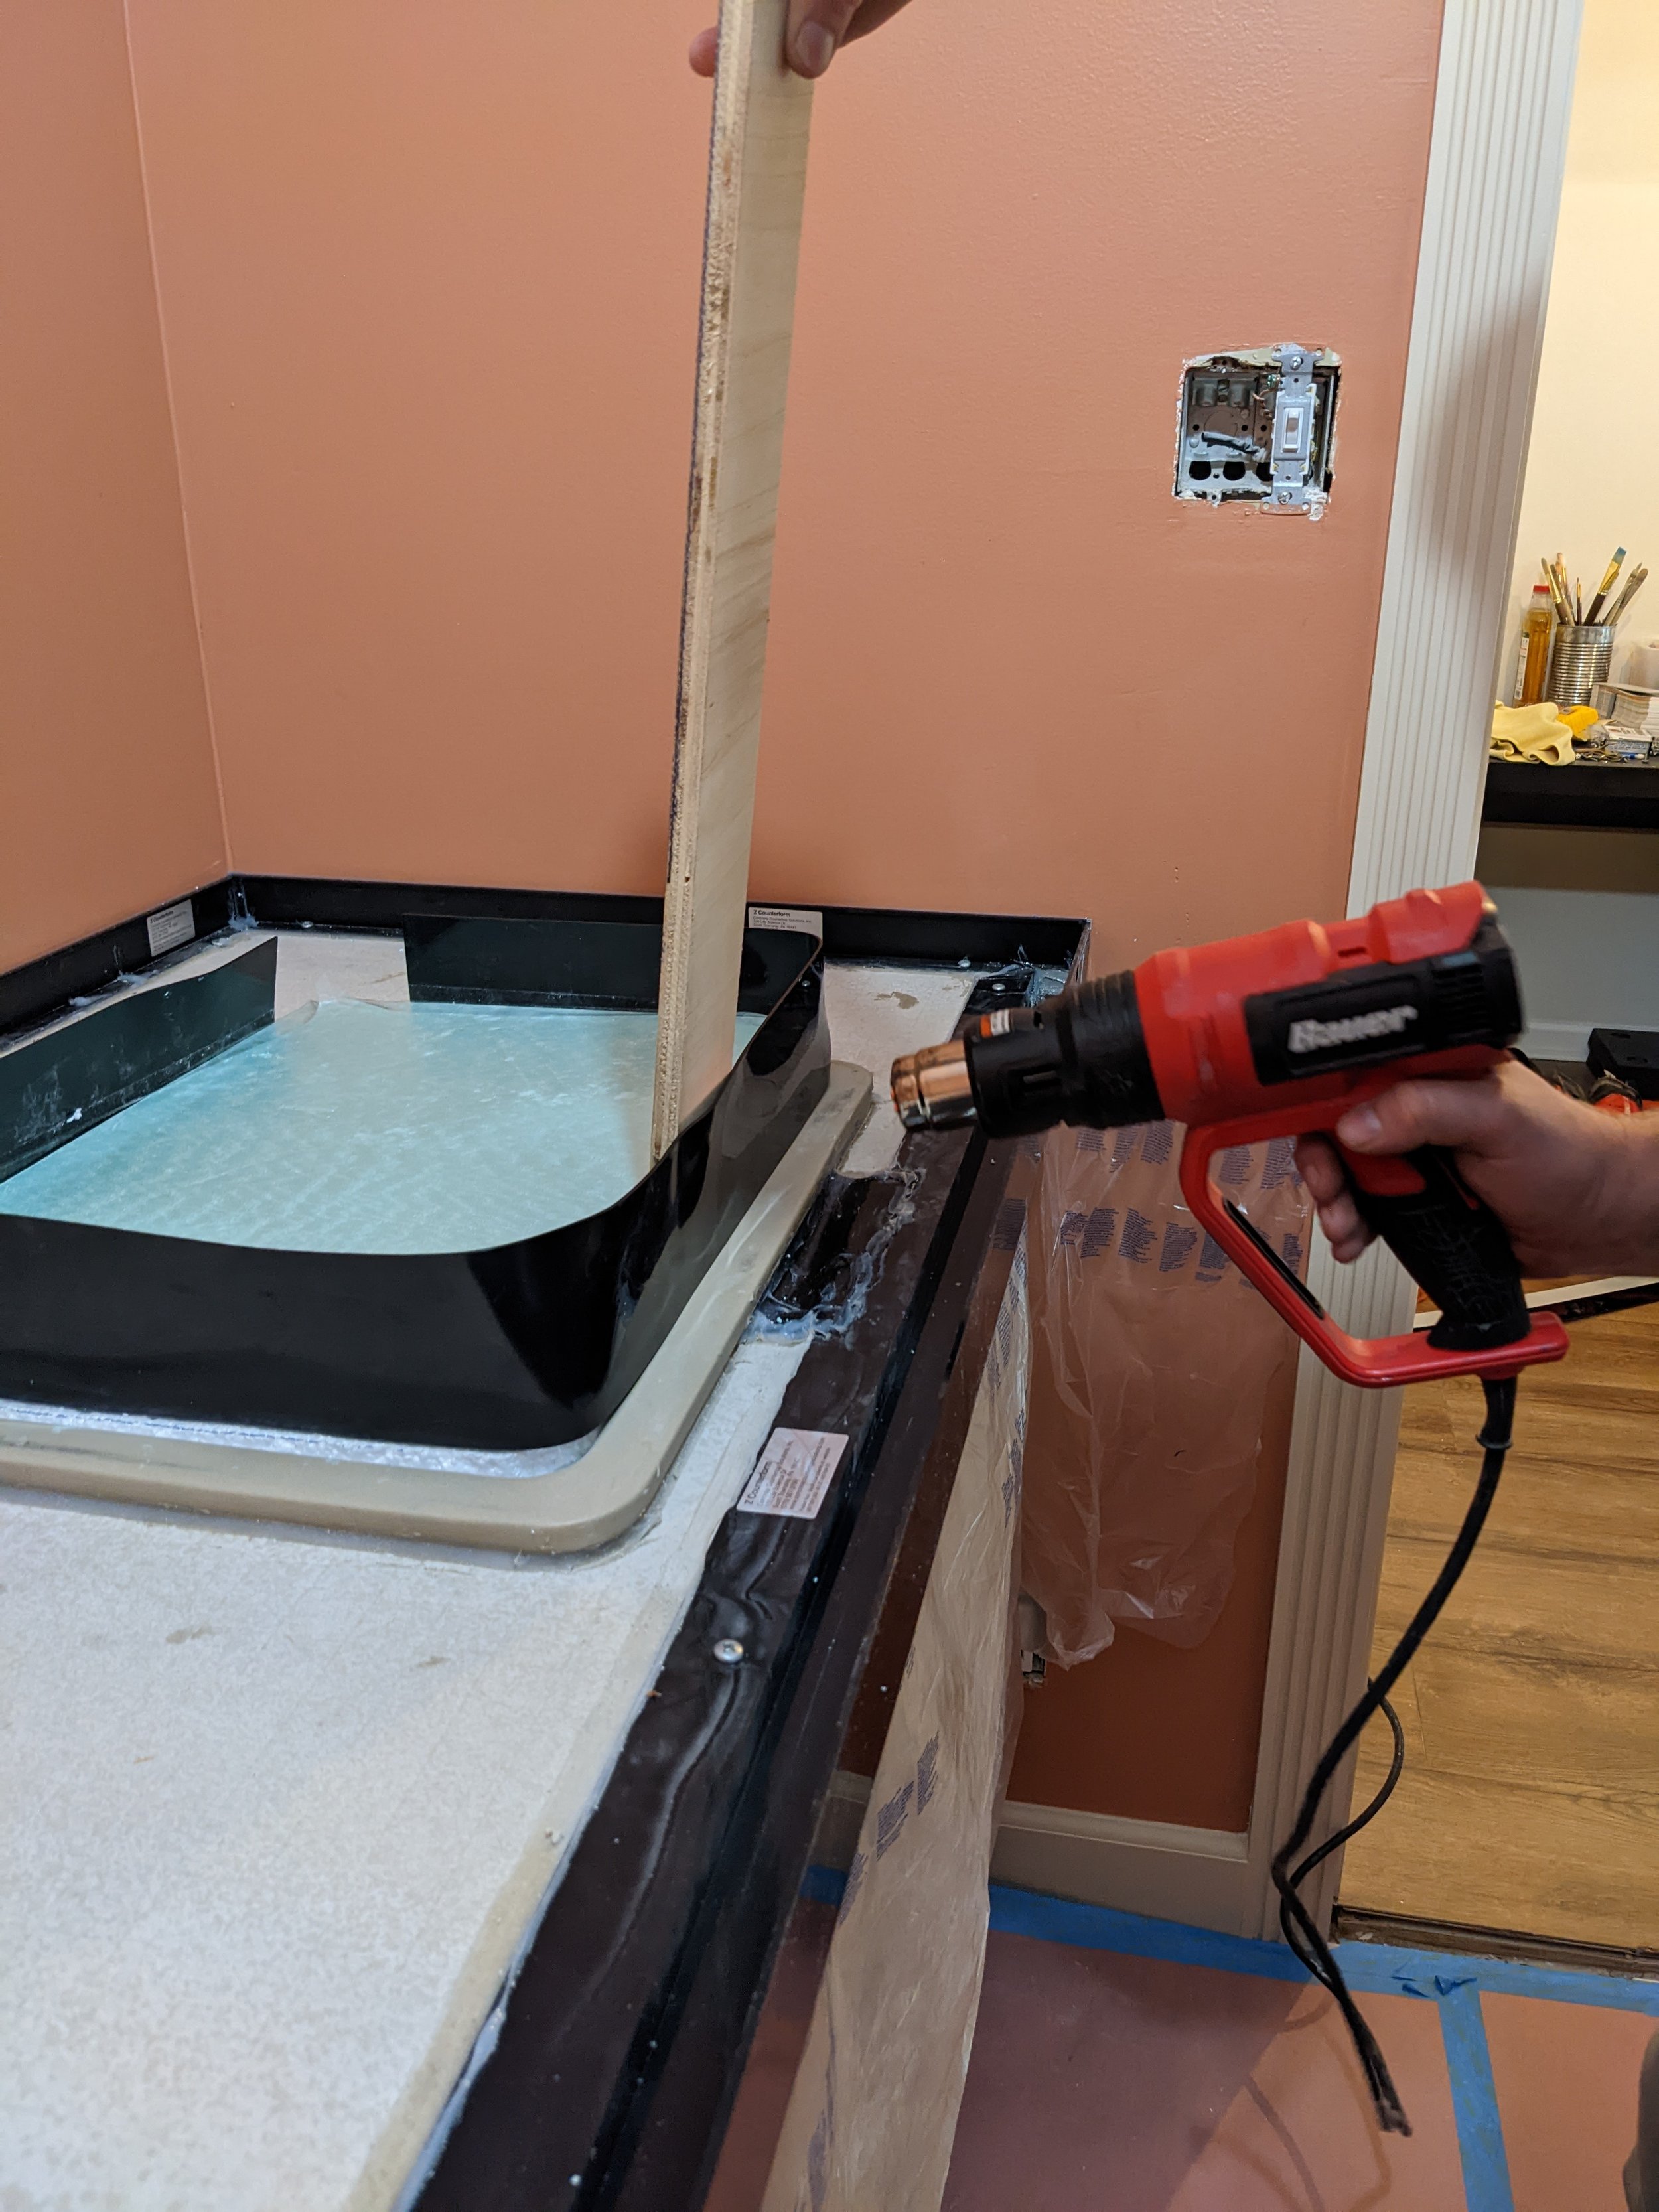
Once the sink form was on, I caulked around the sink where it met the cement board and around where the form met the sink.
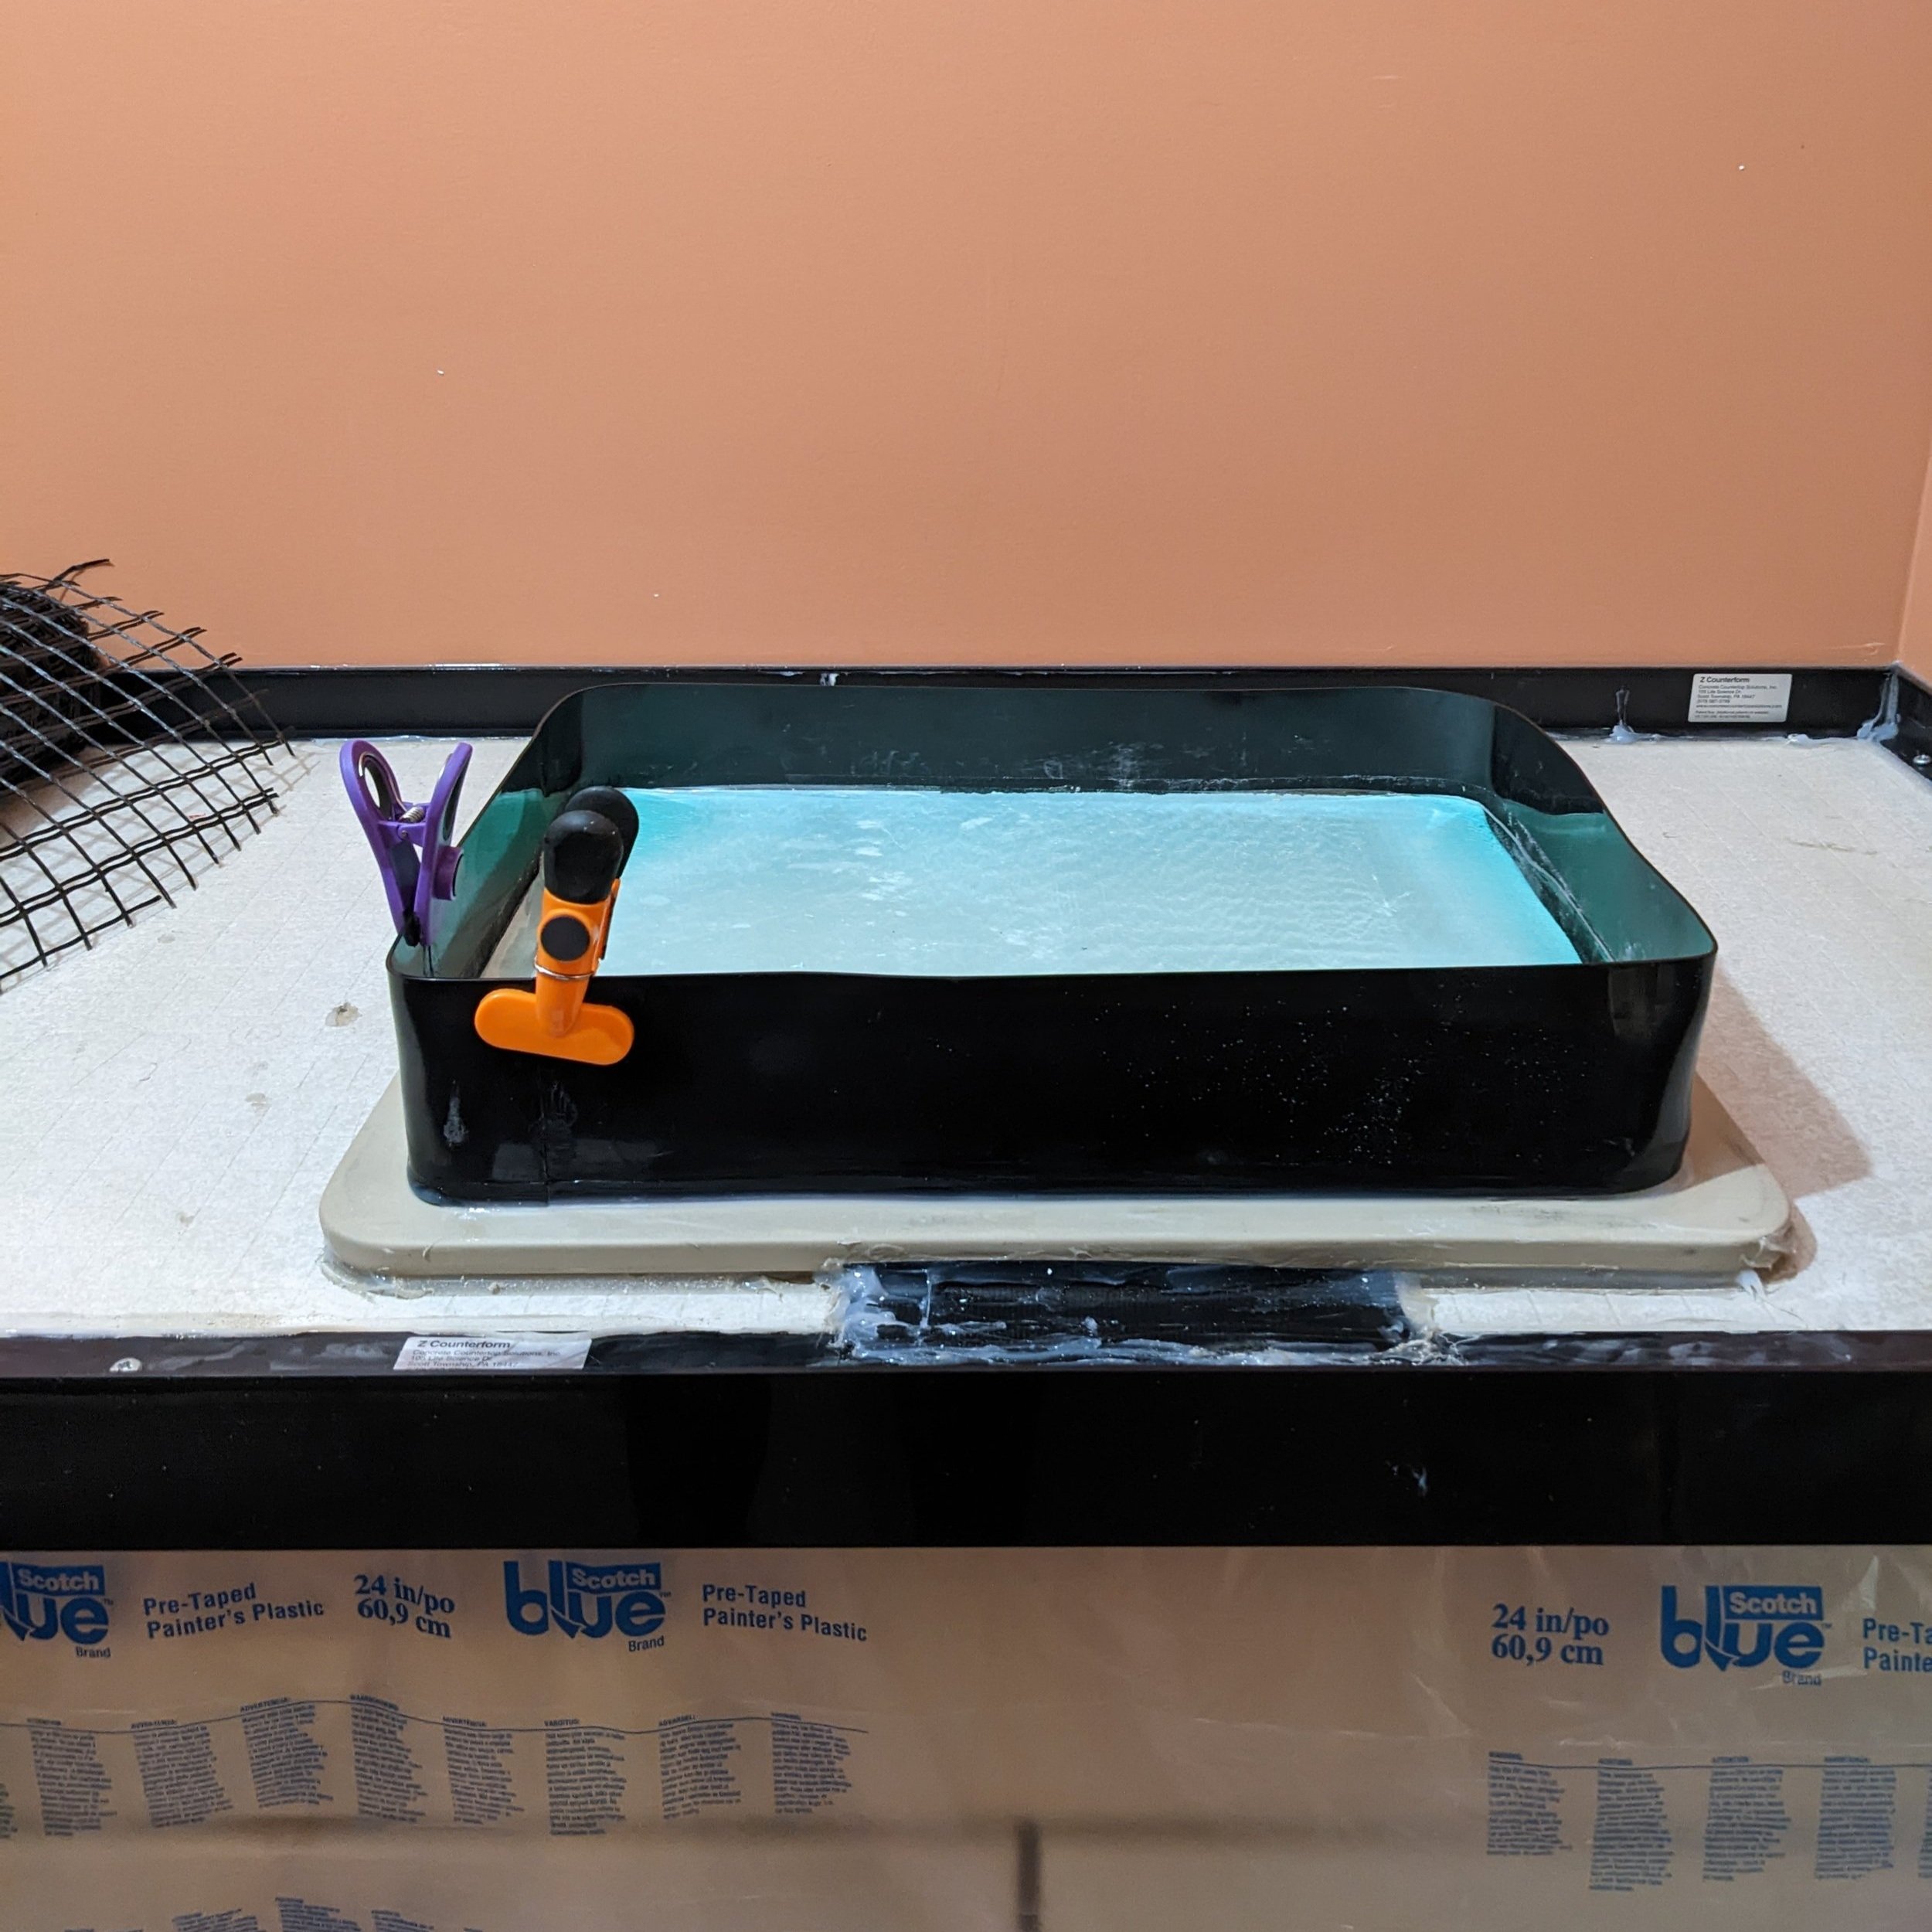
Don’t mind the chip clips. We cut the form a little too small and had to patch the gap. We used the clips as clamps to get as clean of a seam as possible.
At this point, we also installed the faucet knockout and caulked that in place too.
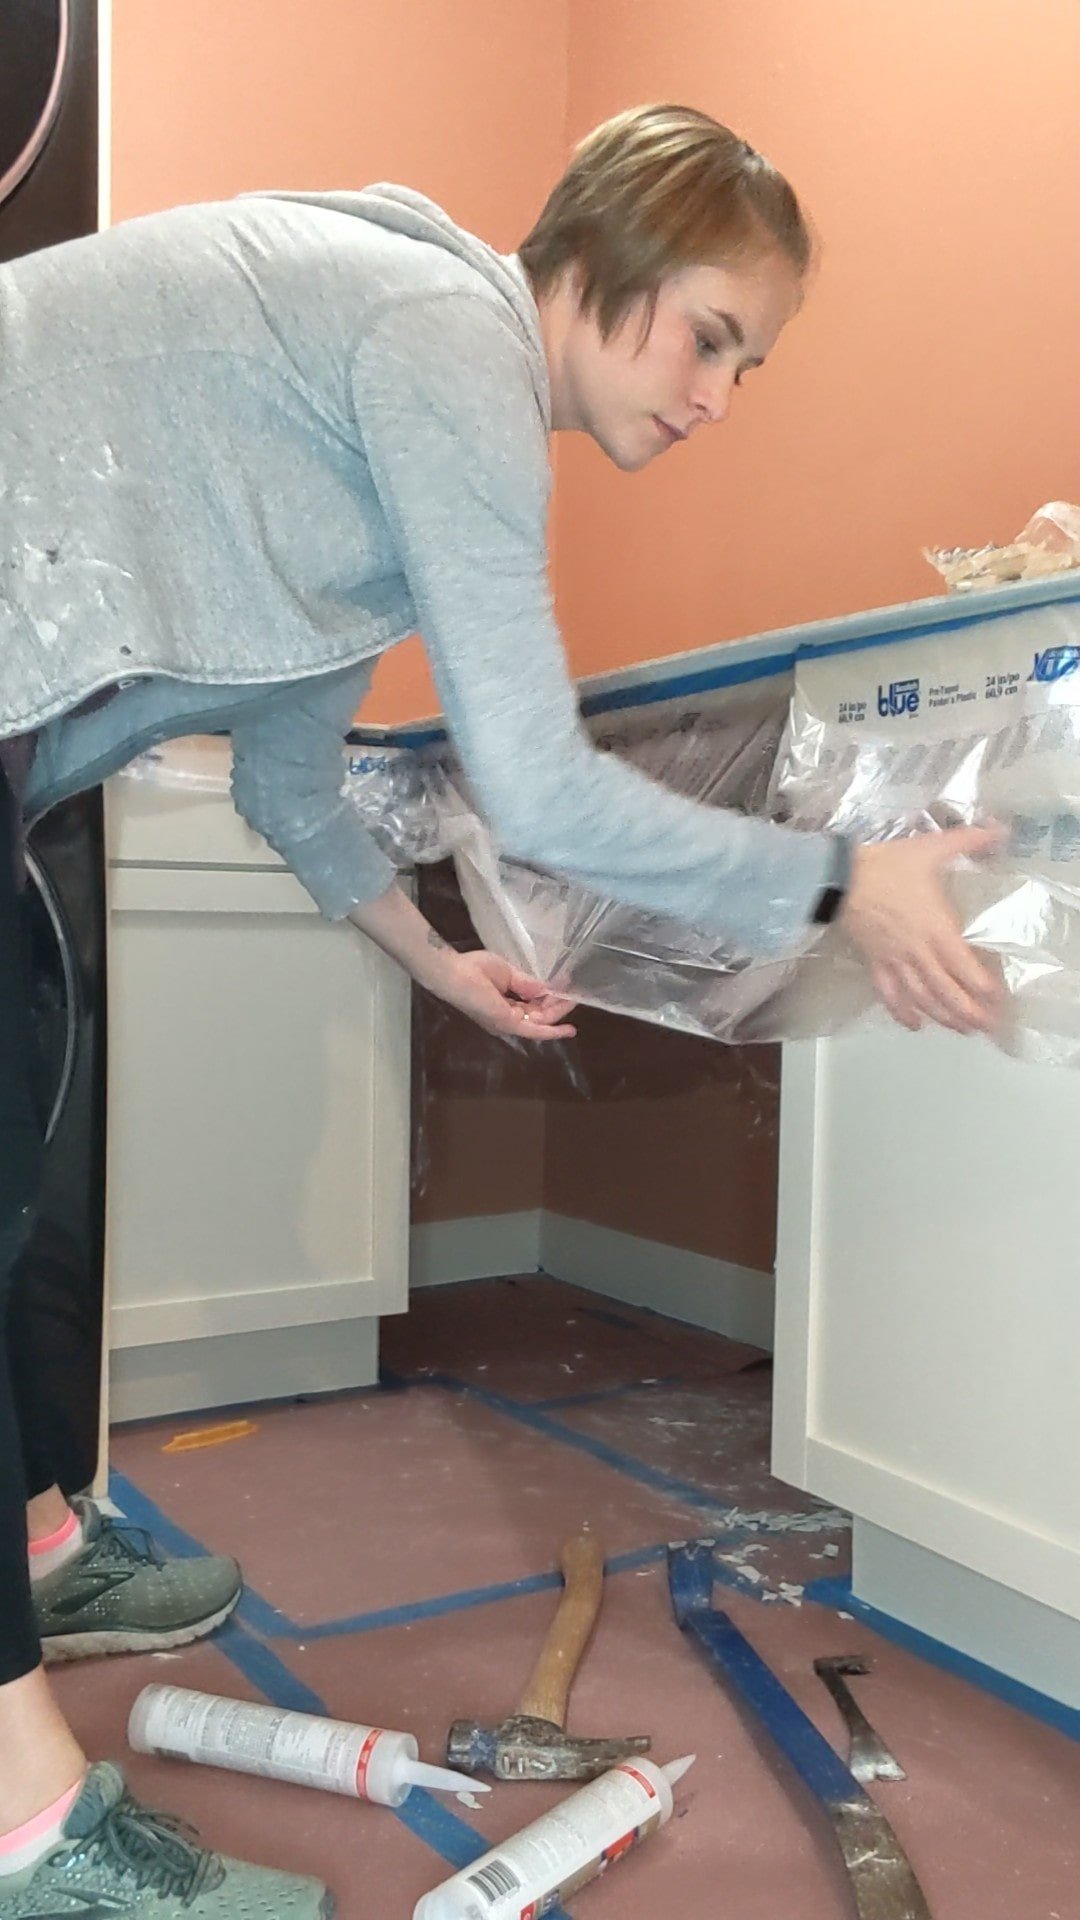
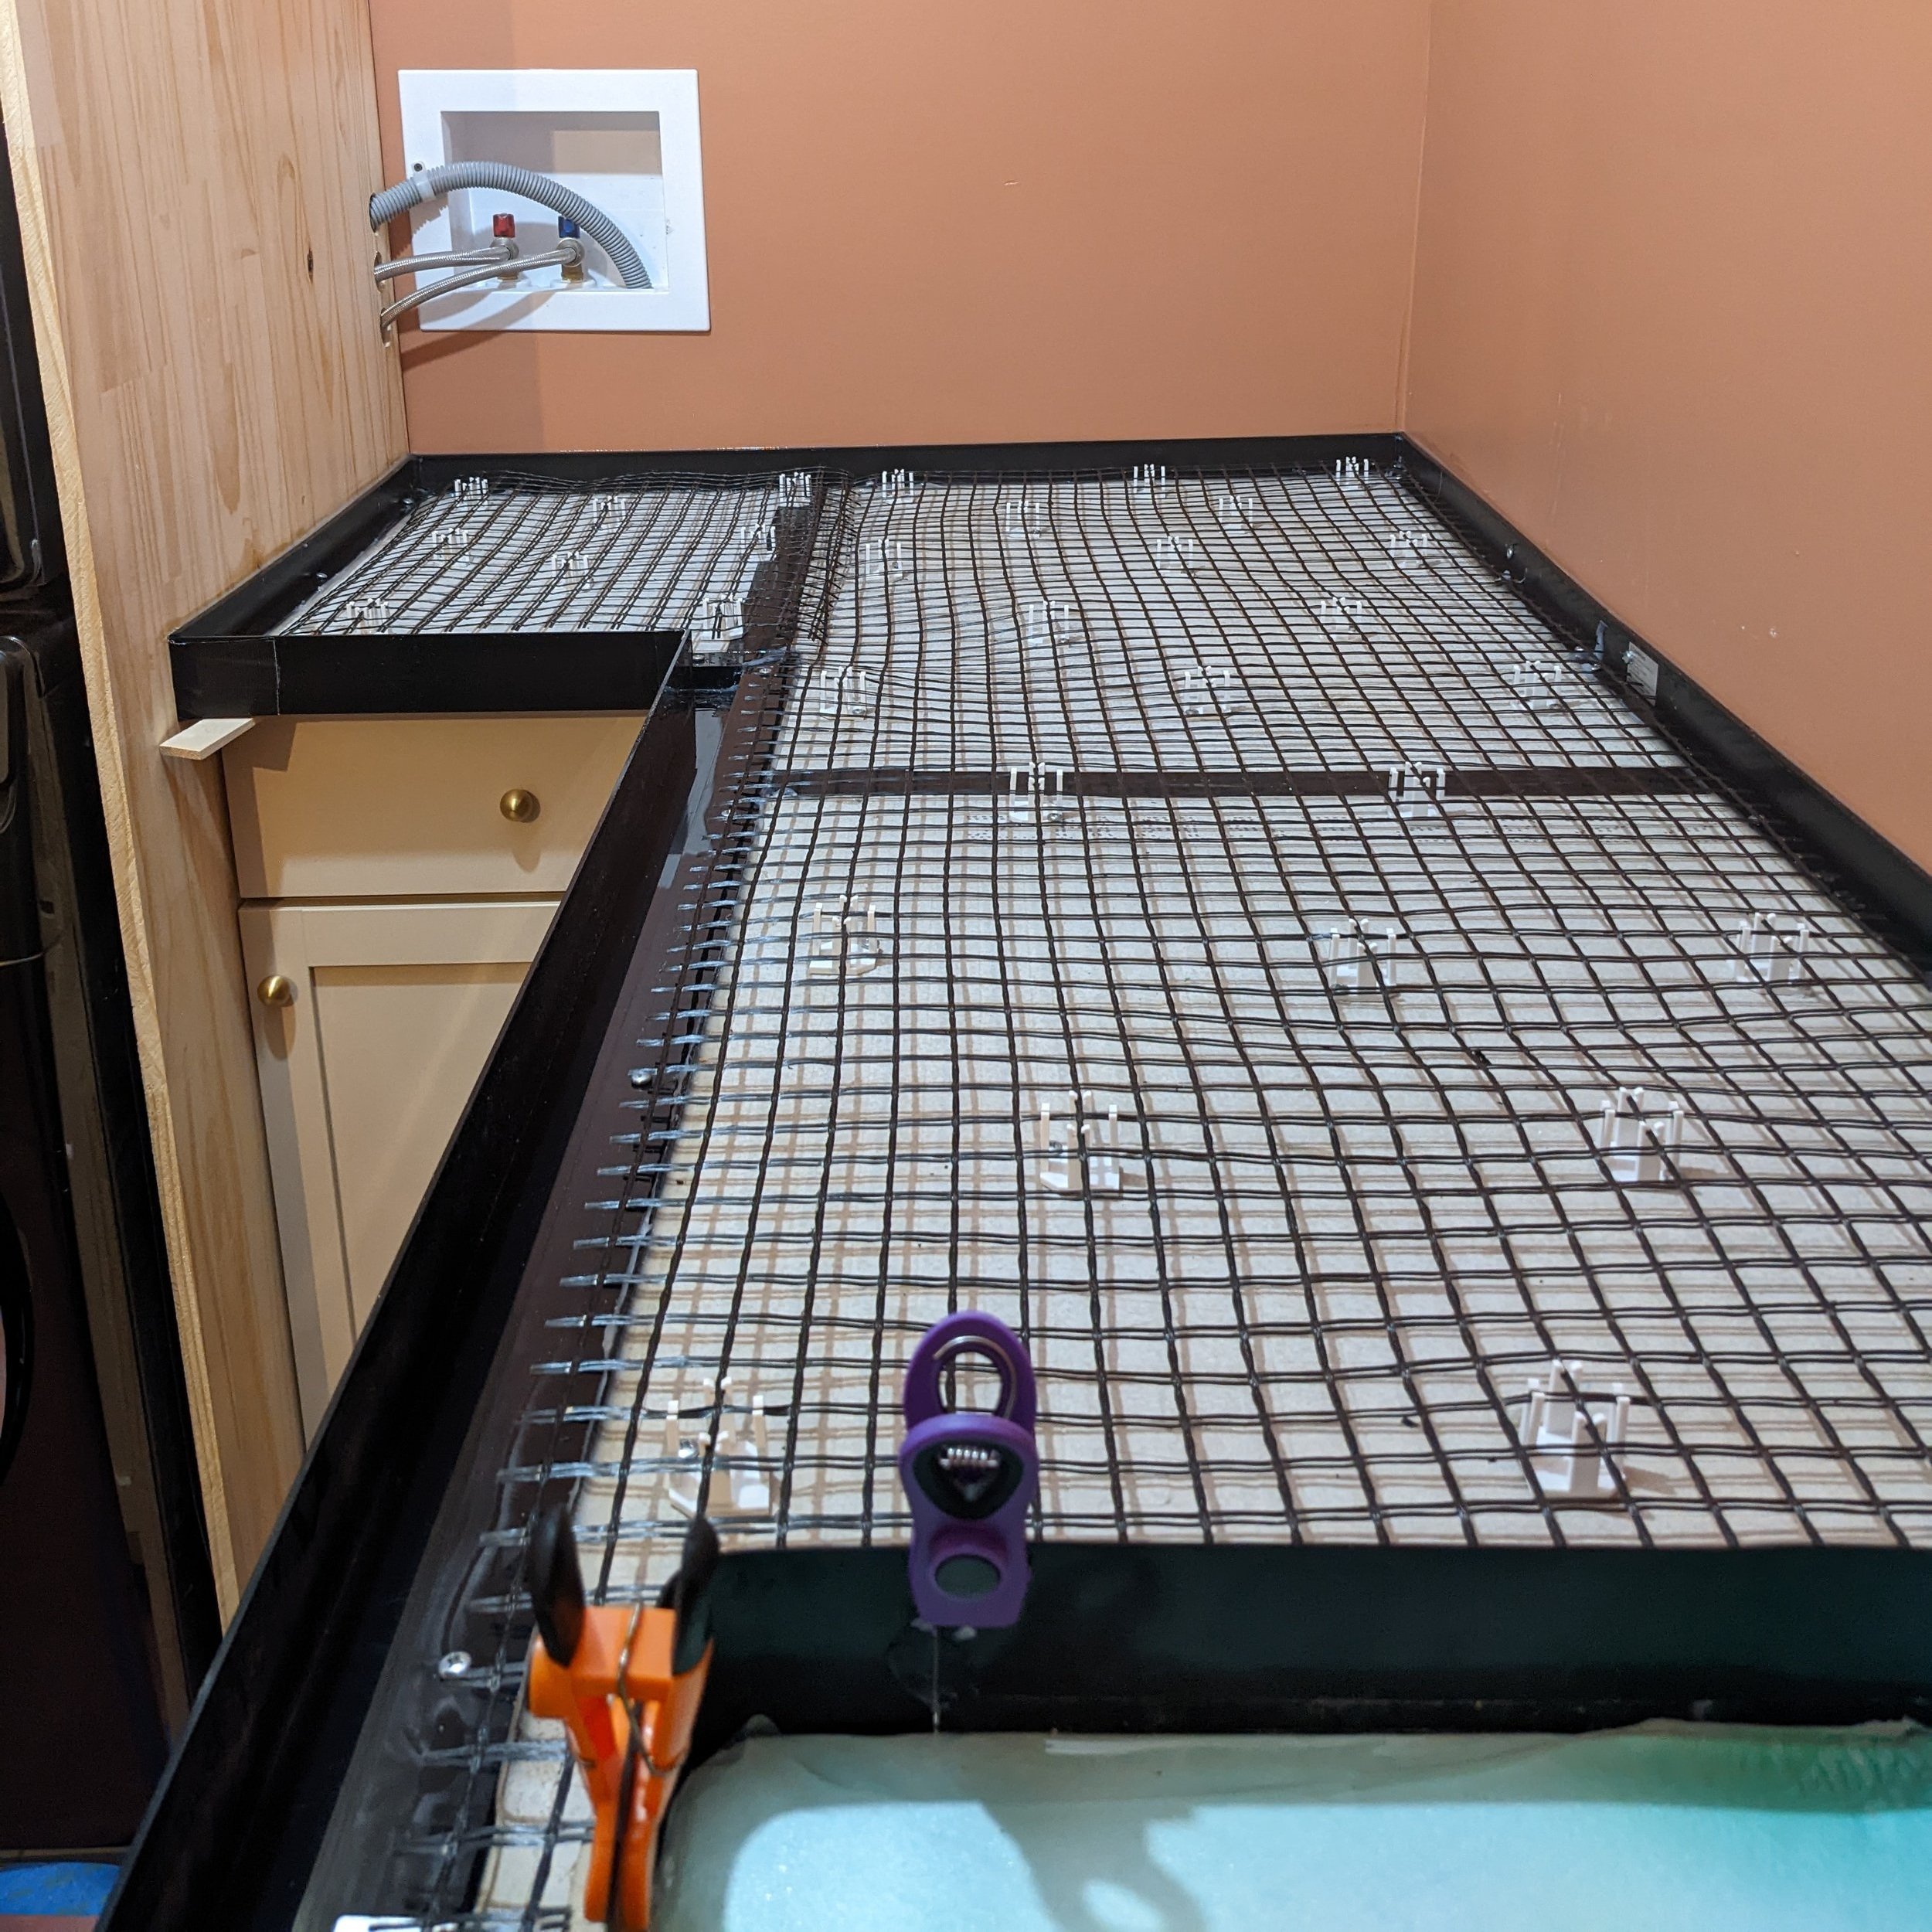
Step 5: Mesh
Once the caulk is dry, you can install the mesh. Make sure you wear gloves for this part.
I just rolled mine out over the countertop and cut to size using regular scissors. Then I slid the Z-clips (the white clips below that hold the mesh in place) underneath every 8-12 inches. After that, you simply drill the Z-clips in place using the screws provided.
Step 6: CONCRETE
When you think of DIYing concrete countertops, you may underestimate the amount of prep that needs to happen before you can actually start pouring concrete. I know I did! I’m happy to tell you that FINALLY, at step 6, you can start mixing your concrete.
We found that a thinner mixture worked best for us. We ended up using about 4 quarts of water per bag. With this ratio, we found way fewer lumps when pouring and it was easier to mix overall (our drills thanked us for that).
We started with a couple of quarts of water and half a bag of concrete, then slowly added more water and concrete until the whole bag was mixed up. We used one bag of concrete per bucket.

Mixing up enough concrete for our small countertop was a LOT of work! While Lucius literally did the heavy lifting by carrying the buckets to the laundry room, it was even physically taxing on me simply using the drill to mix. If I were to DIY concrete countertops again, I’d definitely consider renting a concrete mixer.

As we poured each bucket, we used our small trowel to spread out the concrete and push it into the corners and to the edges of the mold. While you do want to work fast, it’s worth noting that it took us over an hour to mix and pour all 7 bags and the concrete was still malleable. Here’s an action shot for ya:
Once your concrete is poured, level it out. We didn’t trust that any of the wood we had on hand was straight enough, so we used an actual level.
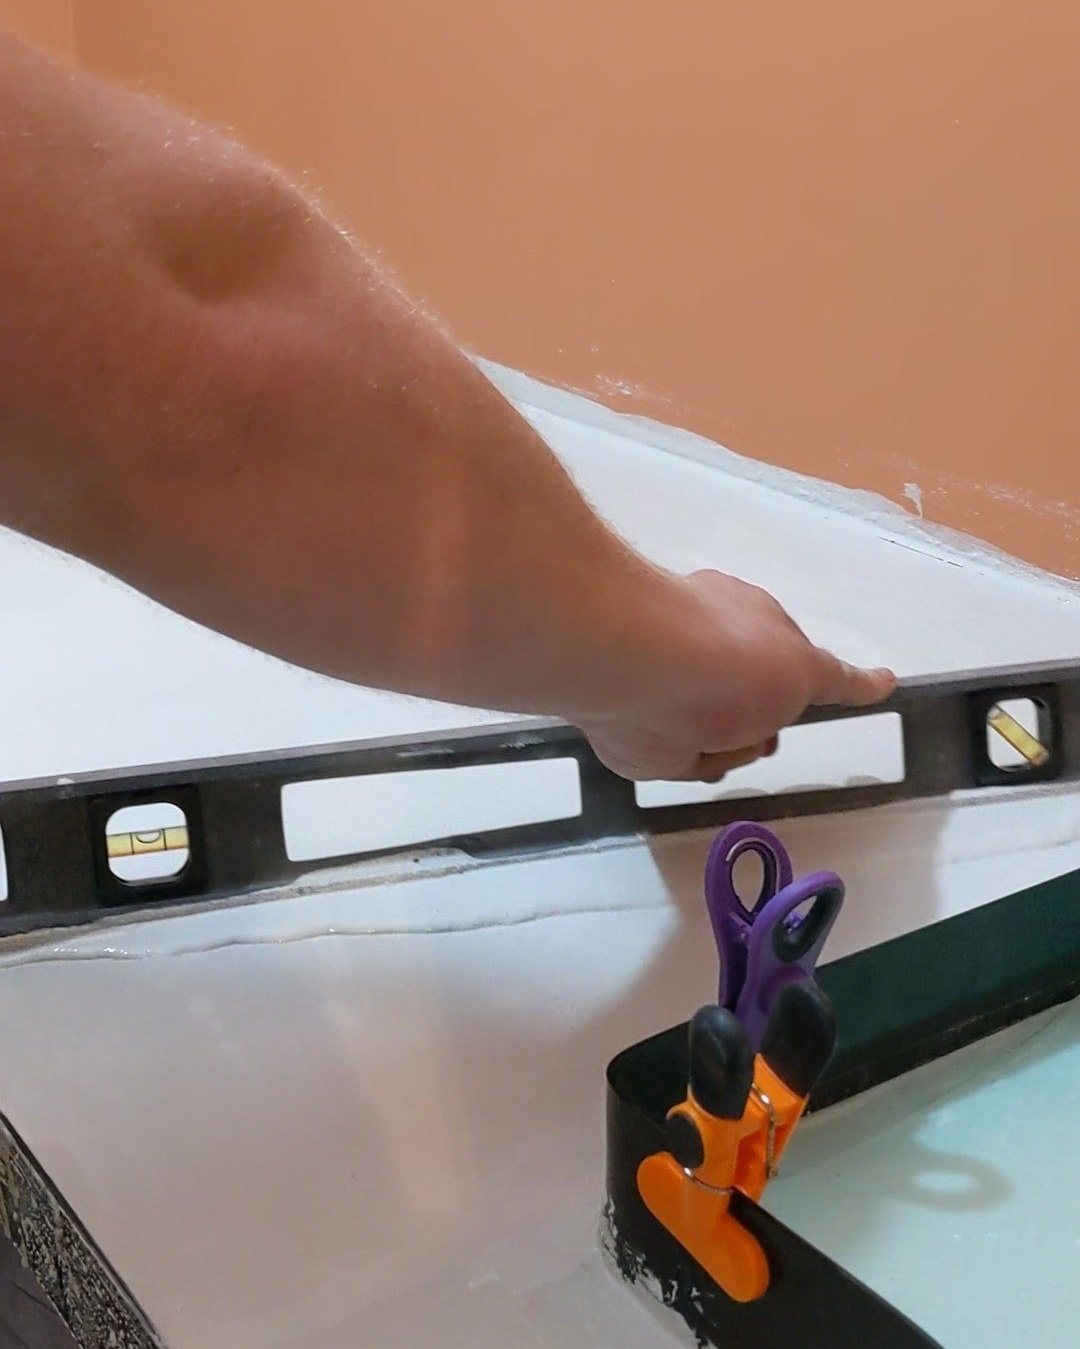
Once your concrete is level tap the outside of the form until all the bubbles are out. I used the handle of my trowel. If you skip this step you WILL end up with visible air pockets along the edges of your countertop.
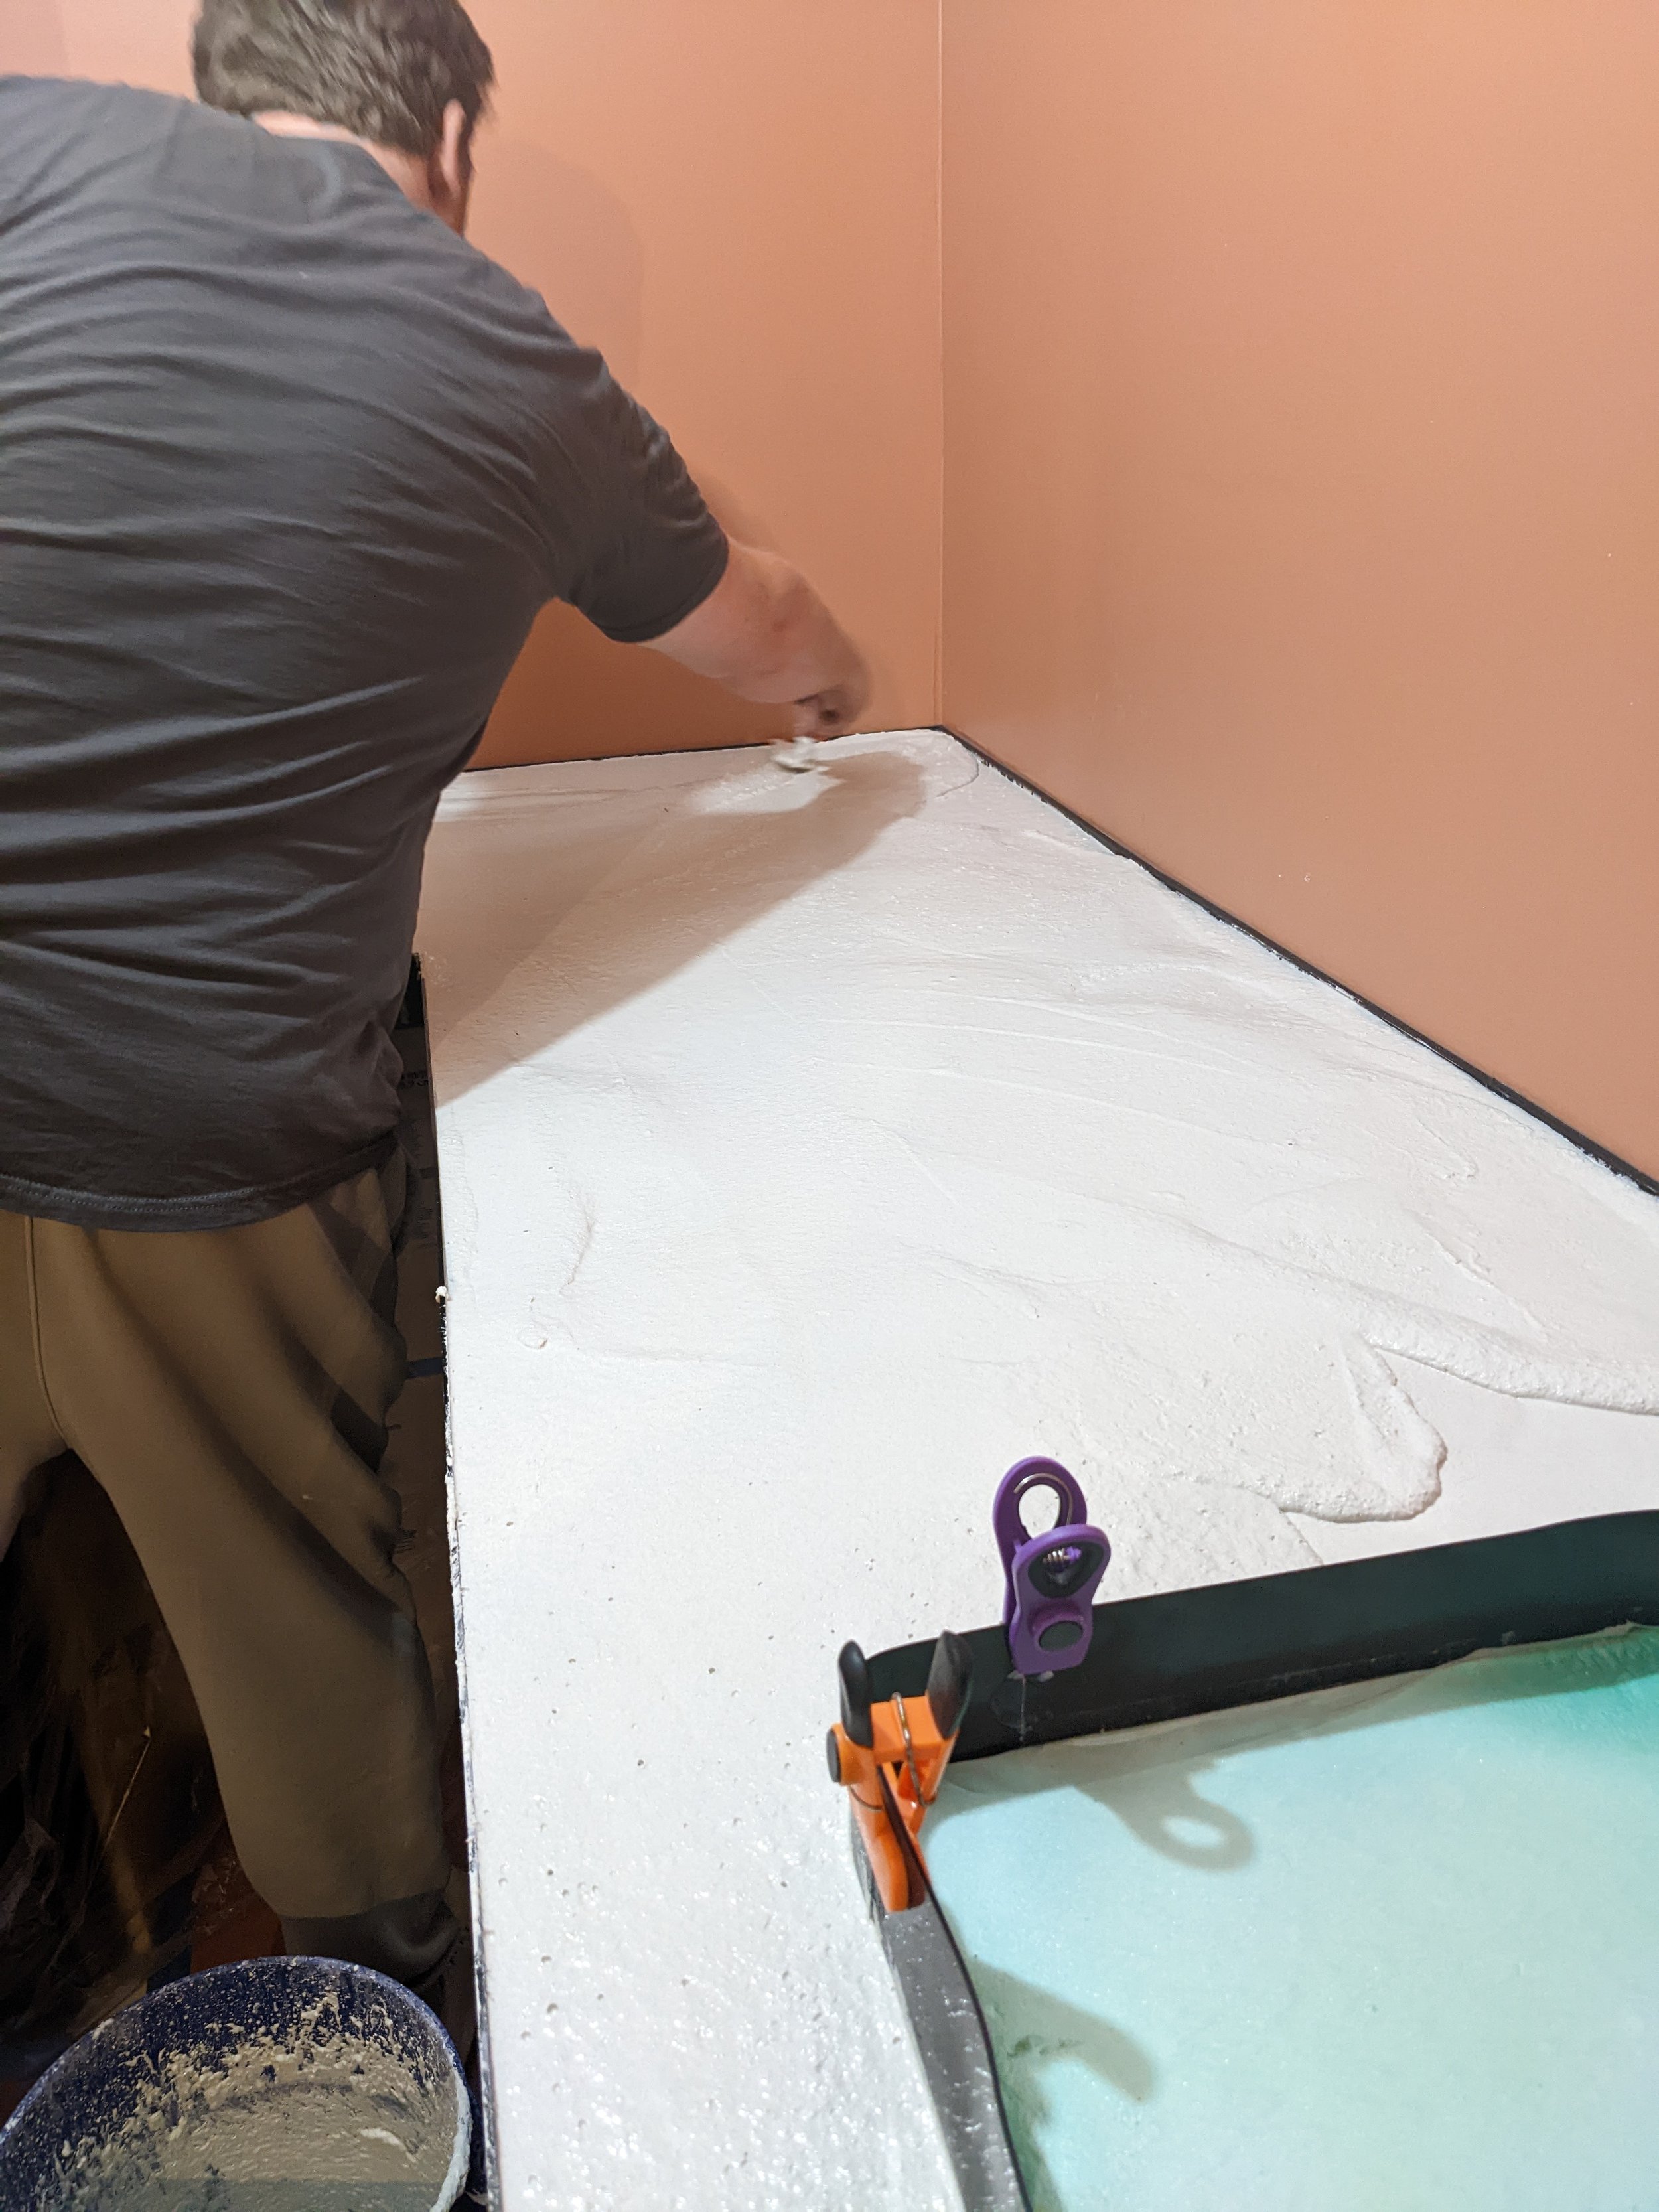
After the concrete is de-bubbled, let it sit for 30-minutes or so. Once it starts to firm up, take your plastic trowel and work on smoothing it out. Make sure you hold the trowel at a bit of an angle as you drag it across the surface.

Wait another hour or two, then come back in with your steel trowel and further smooth out the surface. You can apply more pressure this time around. And if you wait a little too long for this step (like I did), you can spritz your countertops with some water to reactivate the concrete a bit.
Step 7: Remove the Forms
After you finish up with the steel trowel, let your countertops dry for 24-48 hours. Then comes the moment of truth: breaking off the forms!
Lightly sand along the top of the form if the concrete is covering it at all with 220-grit sandpaper.

Then, run the edge of a putty knife between the form and the concrete along the entire edge of the countertop to separate the two.

Now you can pry the form away from the countertop with your fingers. The form is made to break underneath so the front of the form should pop off. My little lady fingers weren’t strong enough to do this on my own so I had to enlist Lucius’ man hands to help but it was a success!

We have some bubbles in our final product but since concrete is expected to be imperfect, I don’t necessarily hate them. If they bug me enough, Concrete Countertop Solutions has a patch product I can buy to fill them in.

To remove the sink form, Lucius oh-so-gently punched a hole in the styrofoam knock-out we created. Then we were easily able to pull the sink form off. This part was especially nerve-wracking but it also turned out well!
I have quite a bit of caulk to clean off, but it did its job of keeping concrete out of the sink so I’d say it was worth it.
Step 8: Sand
To smooth out the surface, the next step is to sand starting with 80-grid sandpaper and working your way down to 220. I started off sanding with my orbital sander and within less than 3 minutes the room was FILLED with dust.

There’s no window in the laundry room so I ended up hand-sanding my counters to keep the dust at bay. Luckily, I don’t have a lot of counter space. But this is definitely something to keep in mind if you decide to tackle your own concrete countertops.
Sanding will also expose the aggregate in the concrete, which I love. It’s subtle but really beautiful.

Oh yeah, and if it wasn’t obvious, WEAR A MASK!
Step 9: Seal
Once the dust has literally settled, thoroughly clean off your countertops to prep for sealing them.
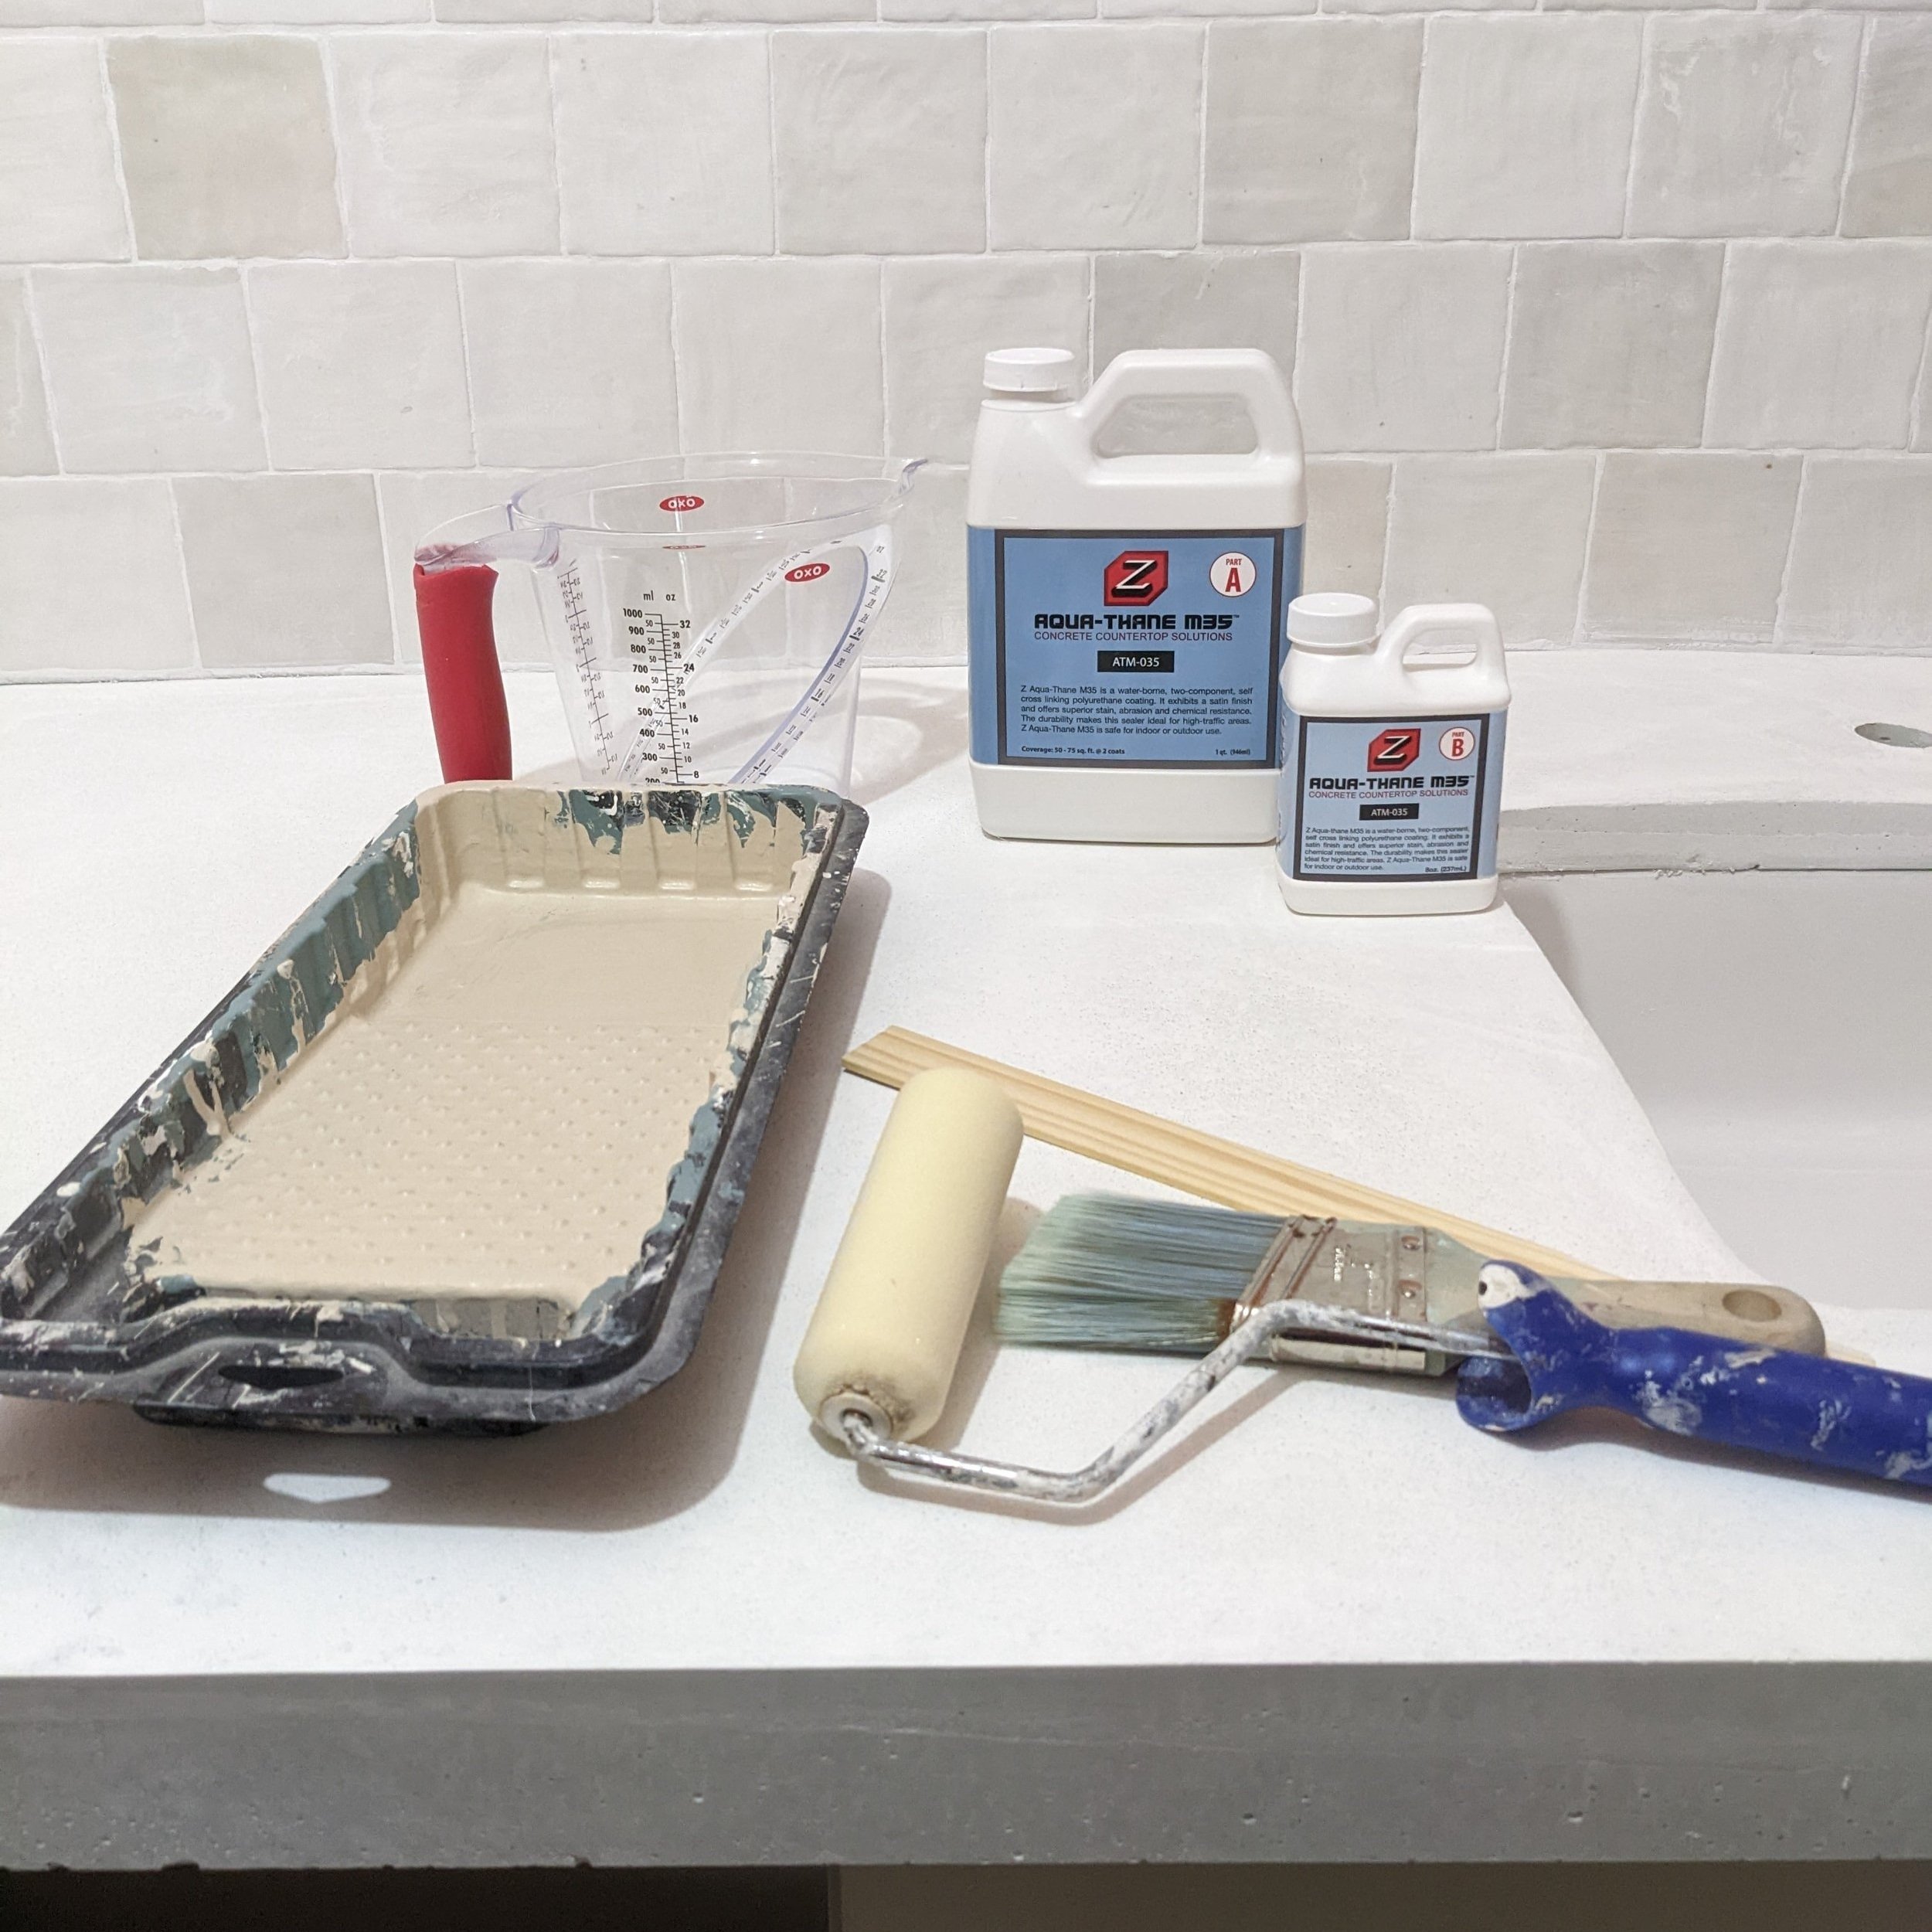
I used Concrete Countertop Solutions Aqua-Thane to seal mine. It comes in two solutions that you mix together according to the directions and then apply with a roller. I applied two coats.
Final Thoughts

I’m really happy with how my countertops turned out, but I’ll admit that they were a lot more work than I expected! I bet a lot of you are wondering, was it worth it? I think that answer really comes down to personal preference and whether you’d rather save the money and put in the sweat equity or just pay someone else to do it. Here’s some perspective:
The total cost for our concrete countertops came out to roughly $1000. That cost includes the supplies from Concrete Countertop Solutions and anything additional we had to purchase to complete the process. It does NOT include tools we already had on hand.
The cost to have concrete countertops installed can cost between $65 and $135+ per square foot - but it would save you a lot of time and energy.
That being said, Lucius and I have already discussed using up our excess materials on concrete countertops in the garage - which should be easier since we won’t have to haul buckets of concrete upstairs, and we’ll DEFINITELY be renting a cement mixer.
There are only THREE MORE WEEKS of the One Room Challenge. Any guesses on what I’ll be tackling next week to really make this laundry room sing???

