ORC Week 8 - Laundry Room Reveal
Laundry Room Before and After
It’s hard to believe it, but we’ve reached the end of the One Room Challenge, and the laundry room is done!
Well… almost. I’ll get into that later. But here she is in all her 95% complete glory!

What’s the One Room Challenge?

I know I’ve explained the One Room Challenge in every post, but let’s do it one more time for the people in the back!
The One Room Challenge is an event where DIYers from all around encourage and motivate one another to makeover one room in their homes over a period of 8 weeks. In my case, I finally tackled our laundry room remodel.
Each week I’ve shared my progress here with a blog post and over on Instagram, and now we’ve reached the end!
As an Amazon Associate, I earn from qualifying purchases. This post may contain affiliate links, meaning I receive commissions for purchases made through those links at no cost to you.
The Before
It always blows my mind to look at where a room started, so let’s go into the way way back machine to a time when I was doing laundry in this glamorous space:

Certainly nothing to write home about.
And as a reminder… before we turned it into a laundry room of any sort, it was the old master bathroom shower room! (Yes, apparently the builders of our house thought they needed an entirely separate room for the shower.)

Needless to say, this room has come a long way.
One of my favorite parts about the design process is looking back at the beginning and realizing that I made a room I dreamed up out of nothing come to life.
This is the design I came up with in the beginning. And while some things changed for one reason or another (as they often do), the room is more or less the same as my original vision.

The After
This little room packs a punch! Let’s take a tour, shall we?

When I was thinking of what I'd like this finished space to look like, I really let myself go wild. Since it's such a small space, I knew I could push the limits and still make it an affordable project, so I let myself dream.
After living with the washer and dryer side-by-side for over a year in the unfinished room, it was clear the layout needed to change, so that’s where I started. Although this required us to move the water lines and dryer venting, it was well worth it.
The new layout also made it clear that we could now fit some cabinetry, a good chunk of counter space, and a sink! I even managed to build a custom cabinet above the washer and dryer for extra storage and a truly built-in look!
As for the design, after I saw the inspo picture below I couldn't get the idea of a warm, terracotta wall color mixed with natural tones and textures and black accents out of my head. So I ran with it.

The terracotta walls were admittedly a bold choice, but I love the color so much. And although beige can easily be considered dated, I think the cabinets pair incredibly well with the wall color. The walls are Kitchen Terracotta by Valspar, and the cabinets are Kilim Beige by Sherwin Williams.
To tone down the walls and brighten the room, I knew I wanted to incorporate white countertops. I didn't realize when I was designing this room that I would end up pouring my own concrete countertops!
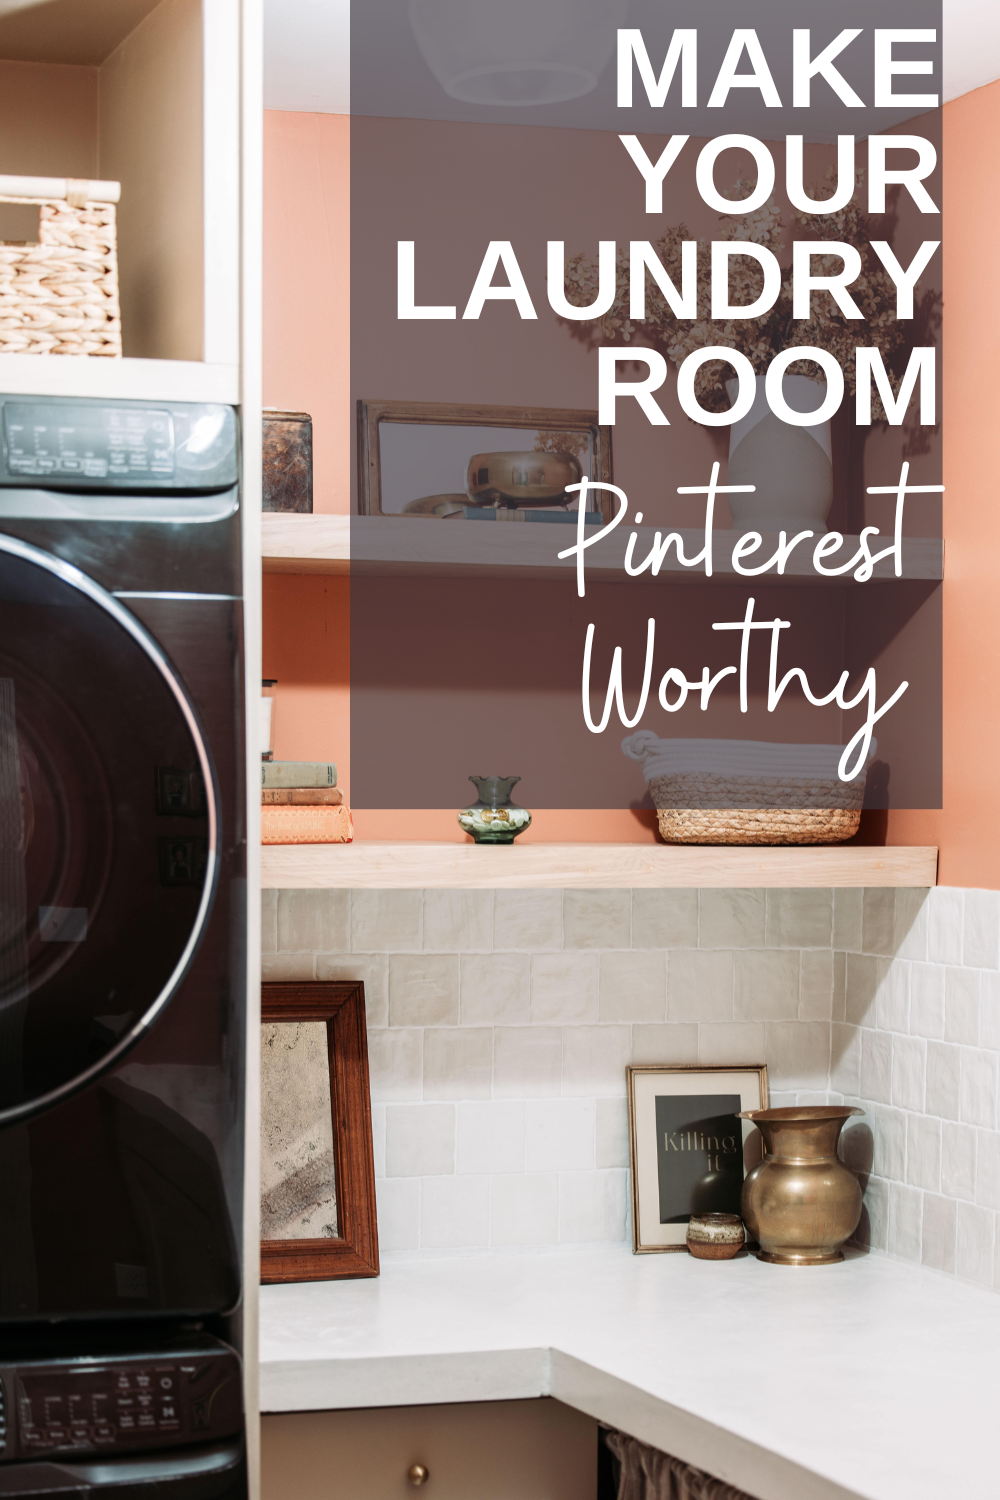
They turned out perfectly imperfect (bubbles, inconsistencies, and all) and pair amazingly well with these 4x4 handmade-look square tiles I had been eyeballing for A WHILE. I was stoked to be able to use them as the backsplash for this space.
As originally planned, I added additional functionality with floating shelves along the back wall. And while I don't necessarily need them for storage, they sure do provide a good place for décor to make this laundry room inviting.

I had a blast styling this room with thrifted items, curated prints, and dried flowers from my backyard. I even DIYed an antiqued mirror for this space using a thrifted frame. And do you spot one of the vases from another DIY project?
Also, I can't get enough of this thrifted spittoon and badass print.

Below the countertop, I left the perfect little nook to hide laundry baskets. The kids have also discovered that it's a great cubby to play in.

I covered up the opening with some adorable cafe curtains that are hung on a simple tension rod.
On the opposite end of the counter, we installed a small sink with a matte black faucet to tie into the black stainless steel washer and dryer.
Over the sink, I hung a cute bird print from Etsy in this gorgeous thrifted frame. And I got EXTRA bougie when I installed this leftover sconce from our loft kitchenette (they come in a 3-pack!). It was a bit of an afterthought - we didn’t think to run electrical for a light there. To make it functional I screwed in a remote-controlled puck light.

I found these pretty brass frames while thrifting too. While I was initially drawn in by the frames I kinda fell in love with the two creepy little girls that came in them.

What's Left
As for the last 5% that needs finishing…
Plumbing
While the sink is plumbed, the drain line isn't hooked up yet. There's no problem with it, just something we couldn't finish in time.
While that's the only "must-have" left to do, there are a couple of things I want to do just for me.
Cabinet doors

I'm so proud of myself for building the cabinet above the washer and dryer - but I'll be even more proud if I can build shaker doors to finish it off. (Pssst - I did! You can see how in this post.) So that's the plan! I'll be sure to keep you in the loop as I tackle that project.
Under-Cabinet Shelves
This is a super duper "nice-to-have" that I'm not 100% sold on yet - building a shelf so I can store more laundry baskets in the nook under the counter. I don't necessarily need it, but this laundry room is already so over the top, so why not?
Final Thoughts
I think my favorite part about this room is how much of it I renovated by myself.

Please enjoy this picture of me with the longest arms in the world
Honestly, I've been on a journey to find my confidence and self-worth for a really long time, and with every project I complete the more I feel myself grow. I've learned that I am capable and can do more than I think I can. I can't even describe how happy that makes me.
And let’s be real, with every project I do by myself I can be as perfectionistic as I want, and I don't have the fear of annoying anyone, which is pretty great.