

Feast Your Eyes on This 100-Year-Old Victorian Mansion
Each summer, our city has a festival in the historic district where homeowners open up their beautiful old houses for curious eyes like ours to stroll through. Well, one of those houses is for sale, and Lucius, being a local real-estate agent and all, is fortunate enough to be the listing agent! That means I have an “in” and absolutely HAVE to share this house with the world because it’ll BLOW YOUR MIND!
Home Tour - 1901 Victorian Mansion
If the fact that Lucius and I bought and updated a 1927 American Foursquare isn’t an indication that we love old houses, I don’t know what is. We simply swoon for them.
Each summer, our city has a festival in the historic district where homeowners open up their beautiful old houses for curious eyes like ours to stroll through. It’s certainly a treat to see all these gorgeous houses up close and personal - original woodwork and wallpaper galore! We love it.
We’ve wandered through loads of houses on that tour over the years, but some just stick in your mind more than others. Well, one of those houses is for sale, and Lucius, being a local real-estate agent and all, is fortunate enough to be the listing agent! That means I have an “in” and absolutely HAVE to share this 100-year-old Victorian mansion with the world because it’ll BLOW YOUR MIND!
So without further ado, welcome to The Charles Over Mansion:

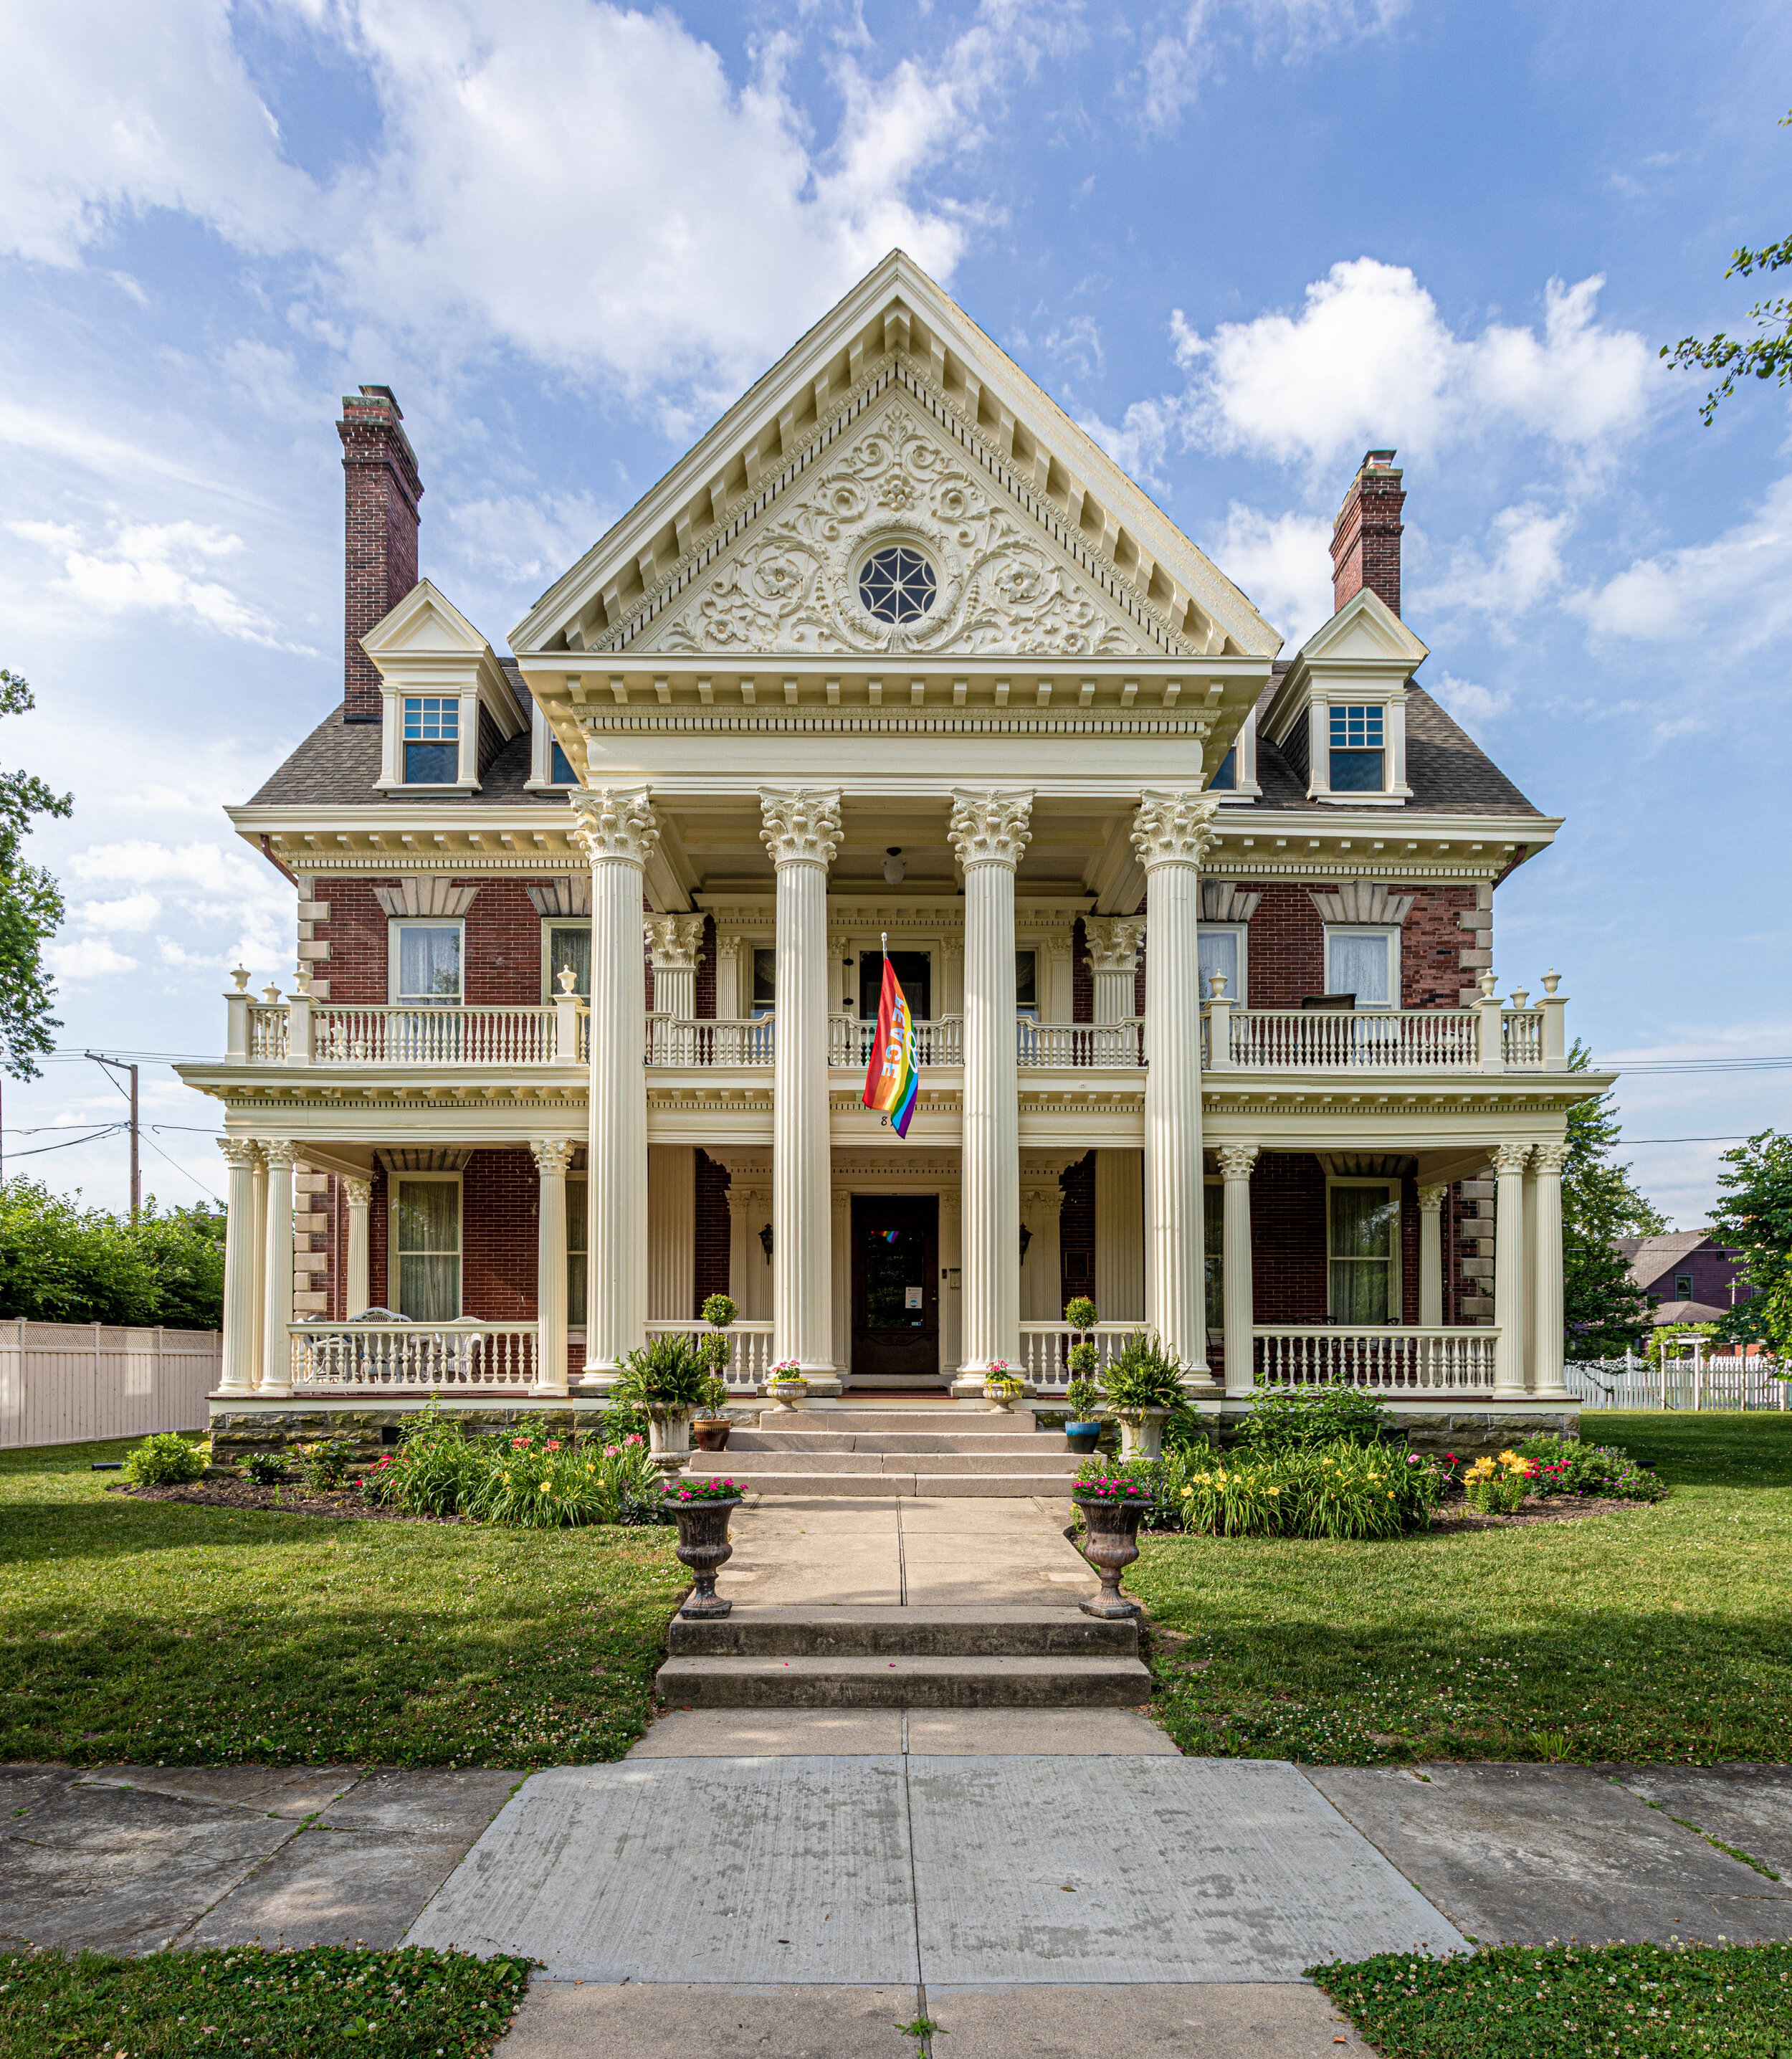
This incredible house was built in 1901 and is chock-full of original charm. It has 5 bedrooms, 3 bathrooms, more fireplaces than I can keep track of, 12,000 square feet, and is probably one of the most gorgeous historic homes I’ve ever seen.
I mean, just LOOK AT HER!
But before we dive in too deep, I’d like to introduce you to the homeowner, Jonathan.

Jonathan radiates creativity. He runs his own company right out of this house as a talented mask maker (many of which you can see as part of the decor around the house). He has put in countless hours of work restoring this house to its original glory after he bought it 5 years ago in a pretty neglected state. In fact, he handcrafted plaster molds for some of the exterior detail that was in disrepair!
Now, let’s head back to the tour so you can see some of the incredible details of this house and the sweet touches Jonathan has incorporated.
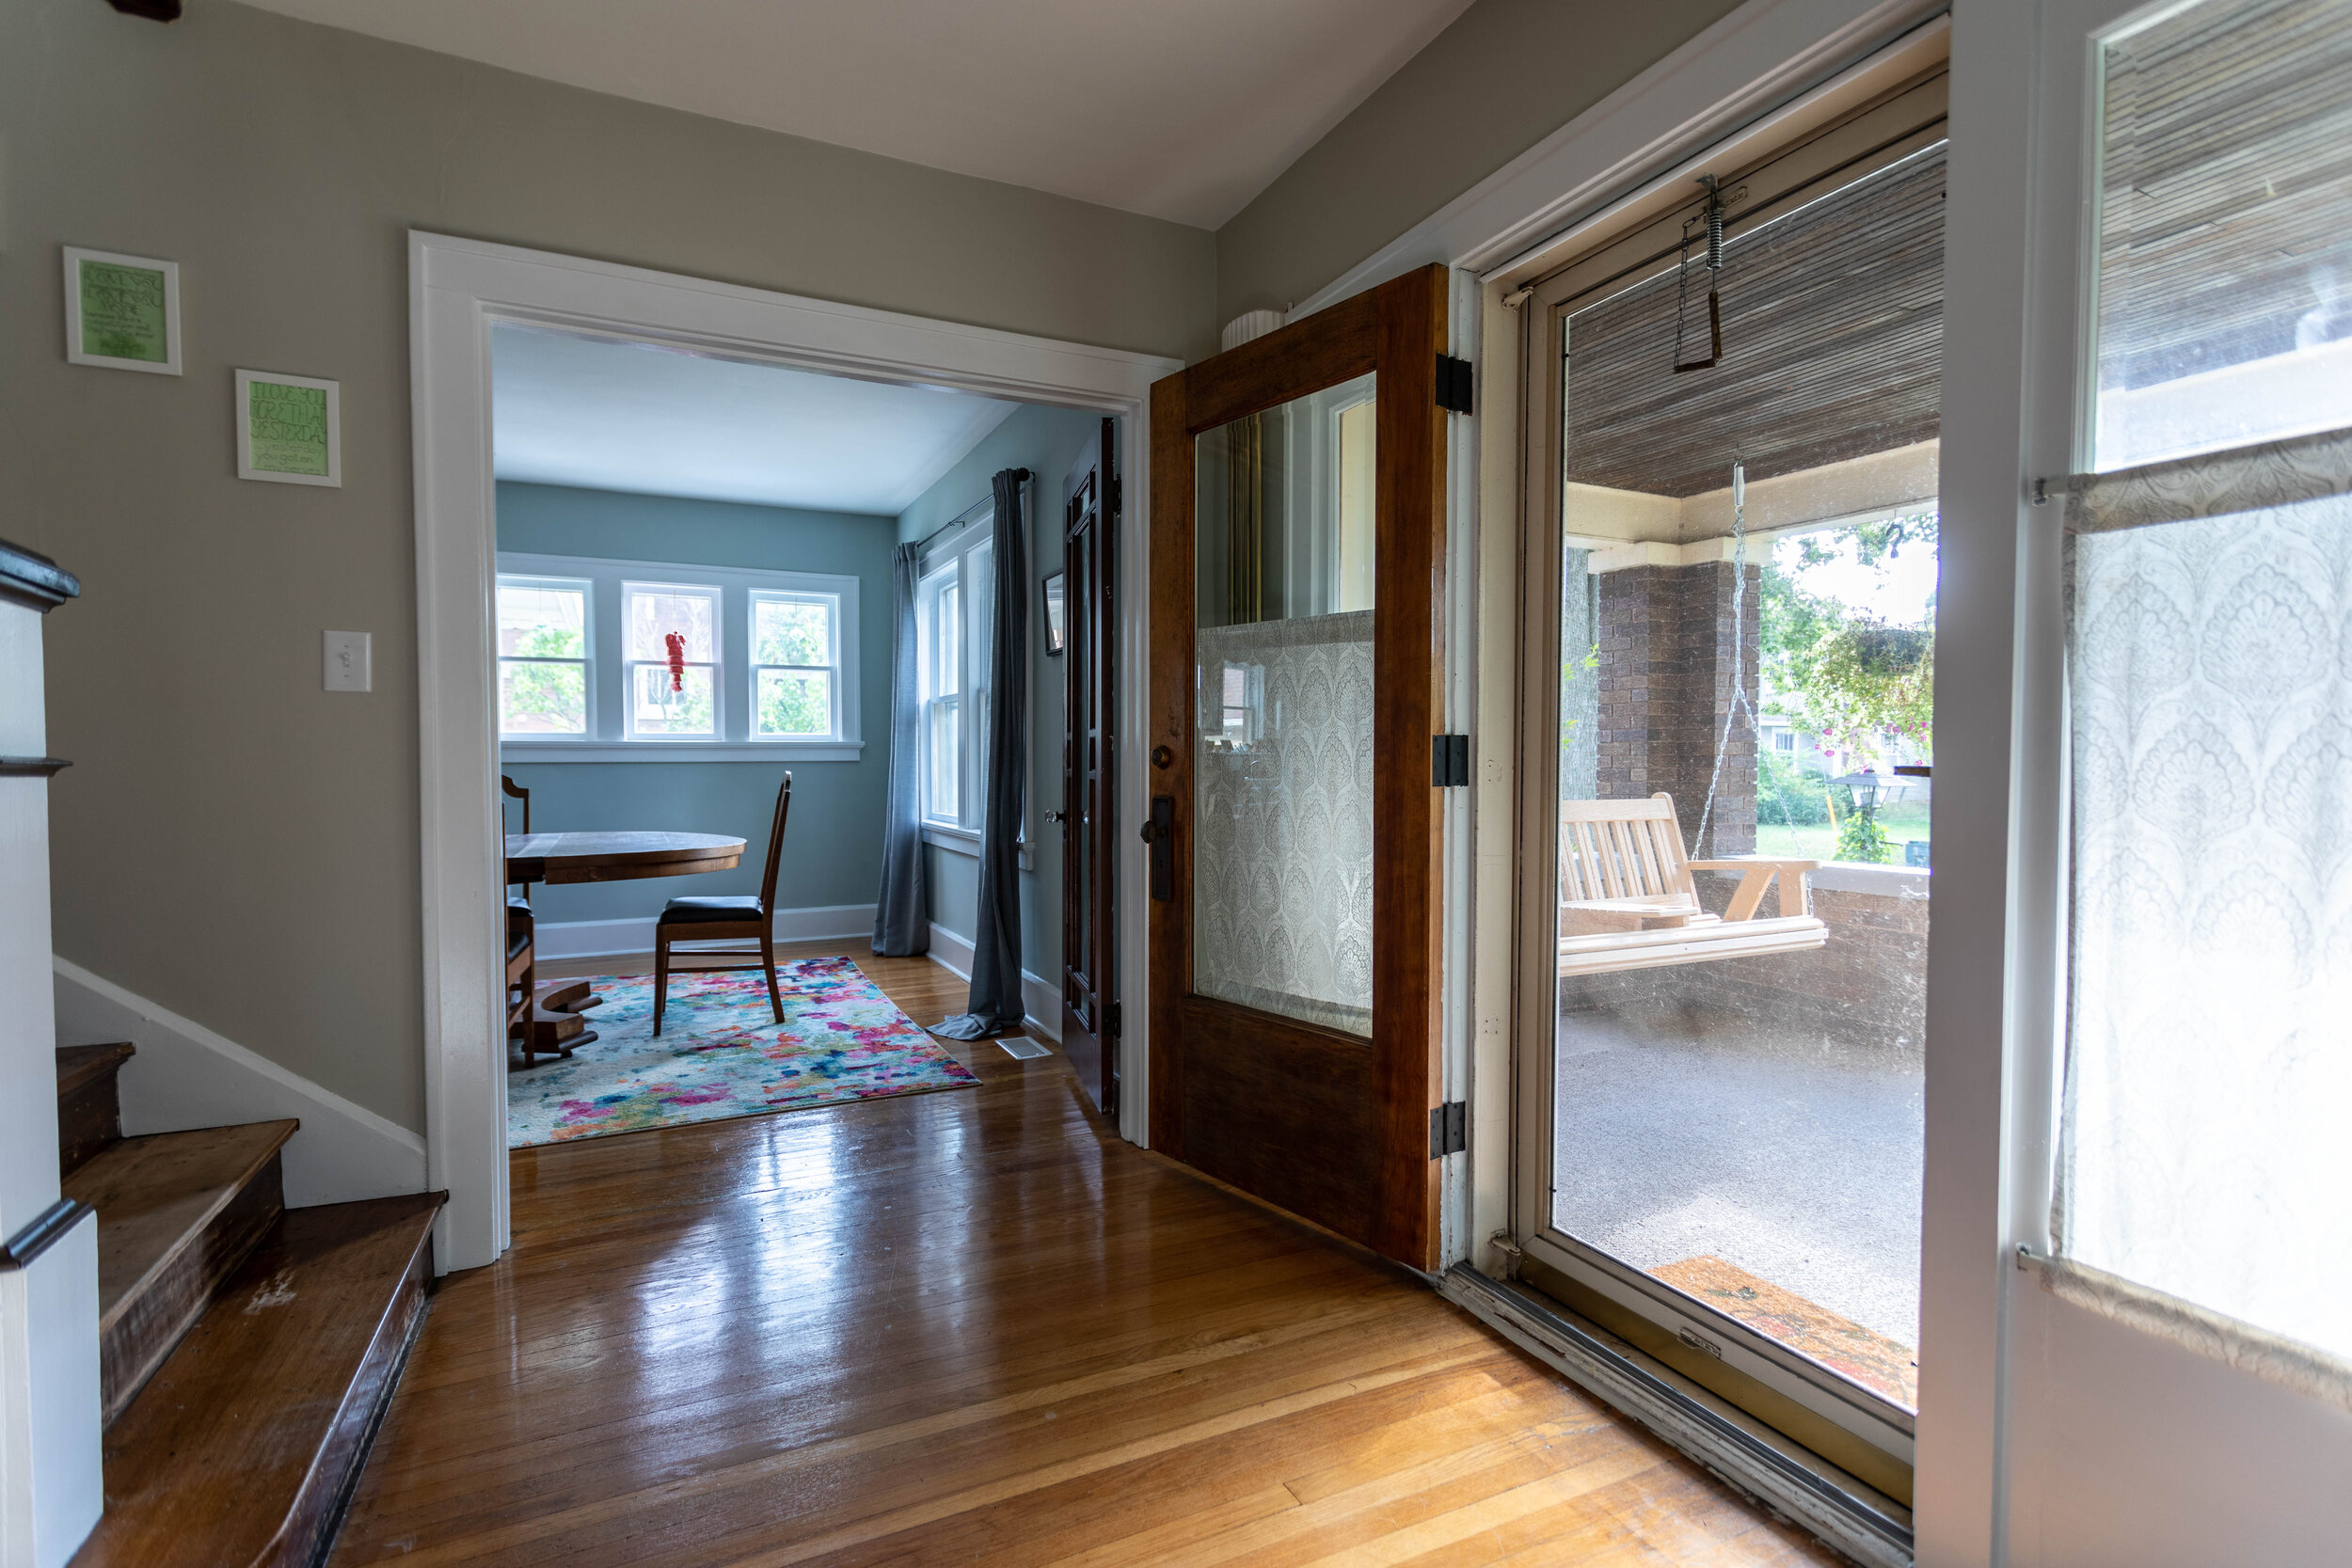
The Entryway and Foyer
First off, before you even walk through the front door, you’re greeted with this wildly spacious front porch. I mean, I can just TASTE the lemonade I would be sipping out here if I owned this place.

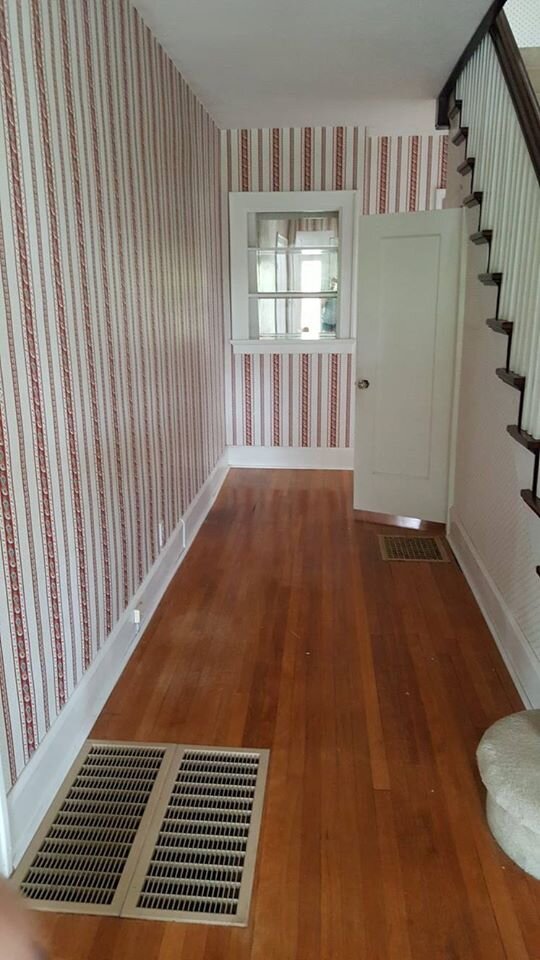
As soon as you step foot inside, you’re met with a giant foyer and an ultra-grand staircase. These features are only made grander by the 16-foot ceilings on the first floor! And that large doorway you see below? That’s one of many giant pocket doors that can be found throughout the house!

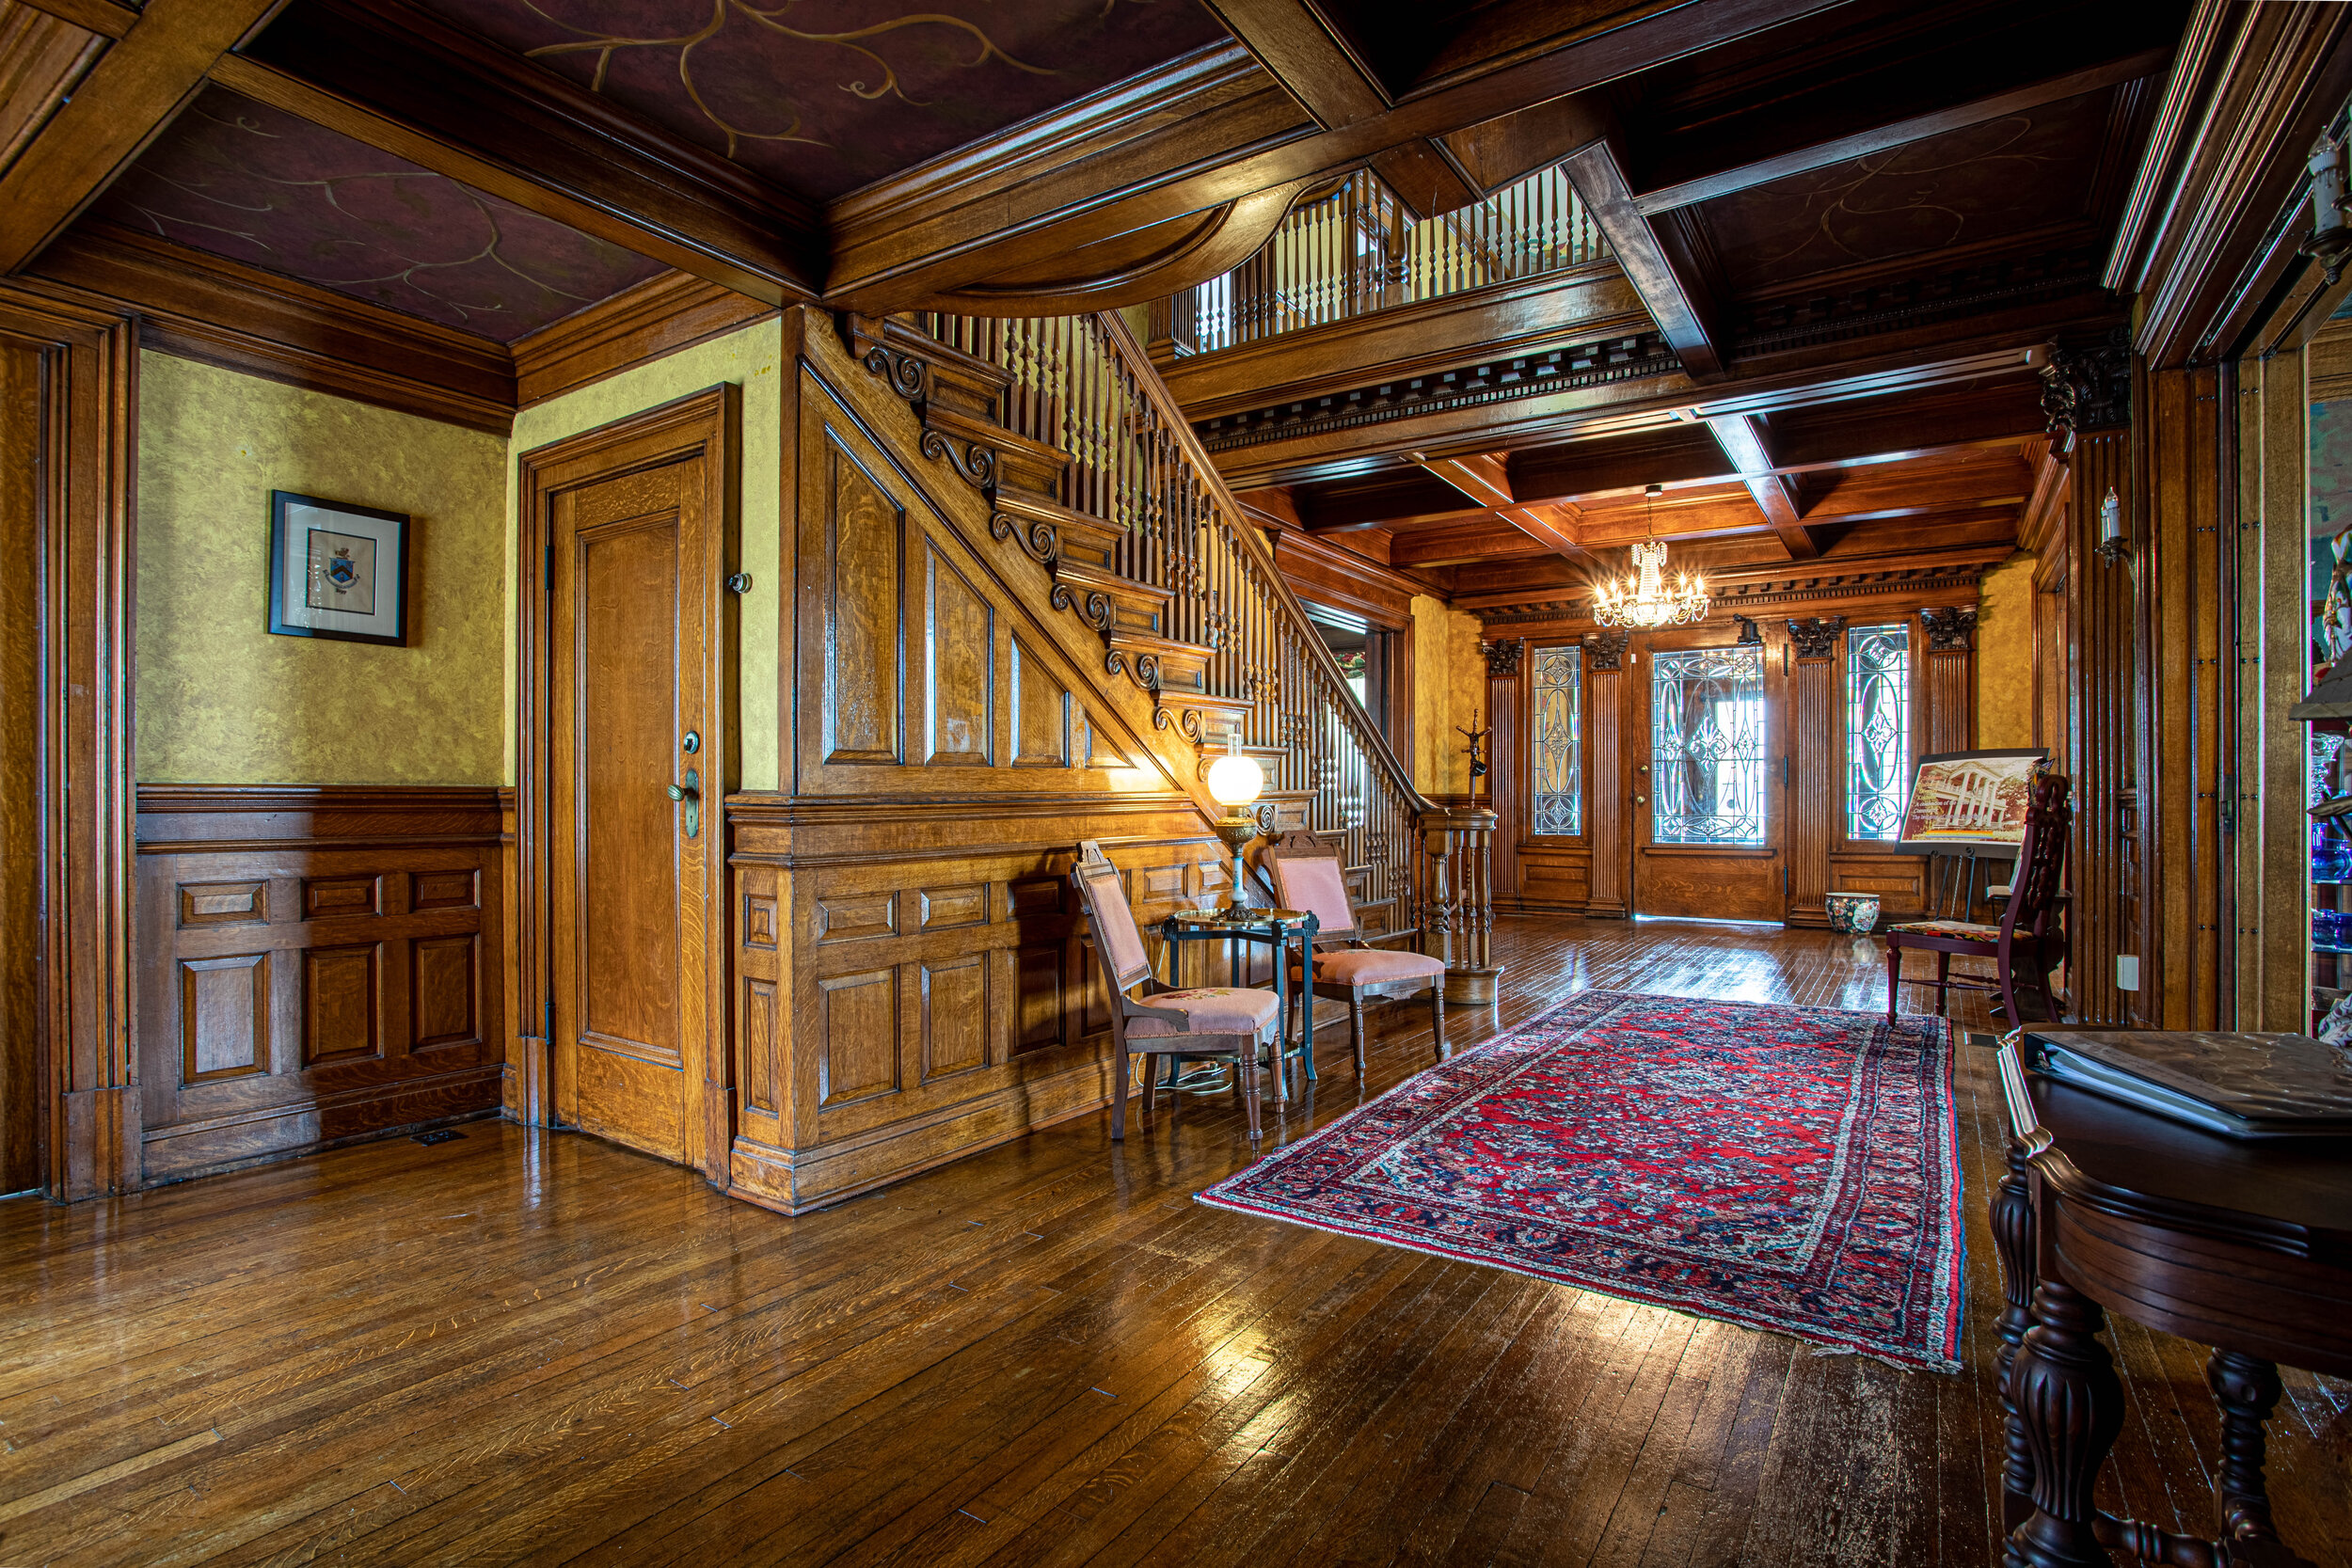

You guys, I felt like straight-up royalty walking down this MASSIVE staircase. No joke. I felt like the queen! And a little historic tidbit - this house actually was built for a prestigious family back in the day. True to this era, there’s actually a second, smaller staircase near the kitchen for “the help”. Tucked right next to the dumbwaiter, which has been turned into a cold air return. Amazingly, this house actually has modern amenities (including 4 HVAC units), which is hard to find in houses this old!
Now back to the details - check out that intricate, pristine woodwork! Not to mention the coffered ceiling in the foyer and those stained glass windows in the staircase. Am I dreaming?


And while we’re at it, let’s take a quick stroll up the stairs to get a closer look, shall we? (I promise we’ll head back downstairs in a moment.)

A fireplace on a landing? If you have space, why not!?
Okay, heading back downstairs…
You know how I mentioned the coffered ceilings? Well, check this out:
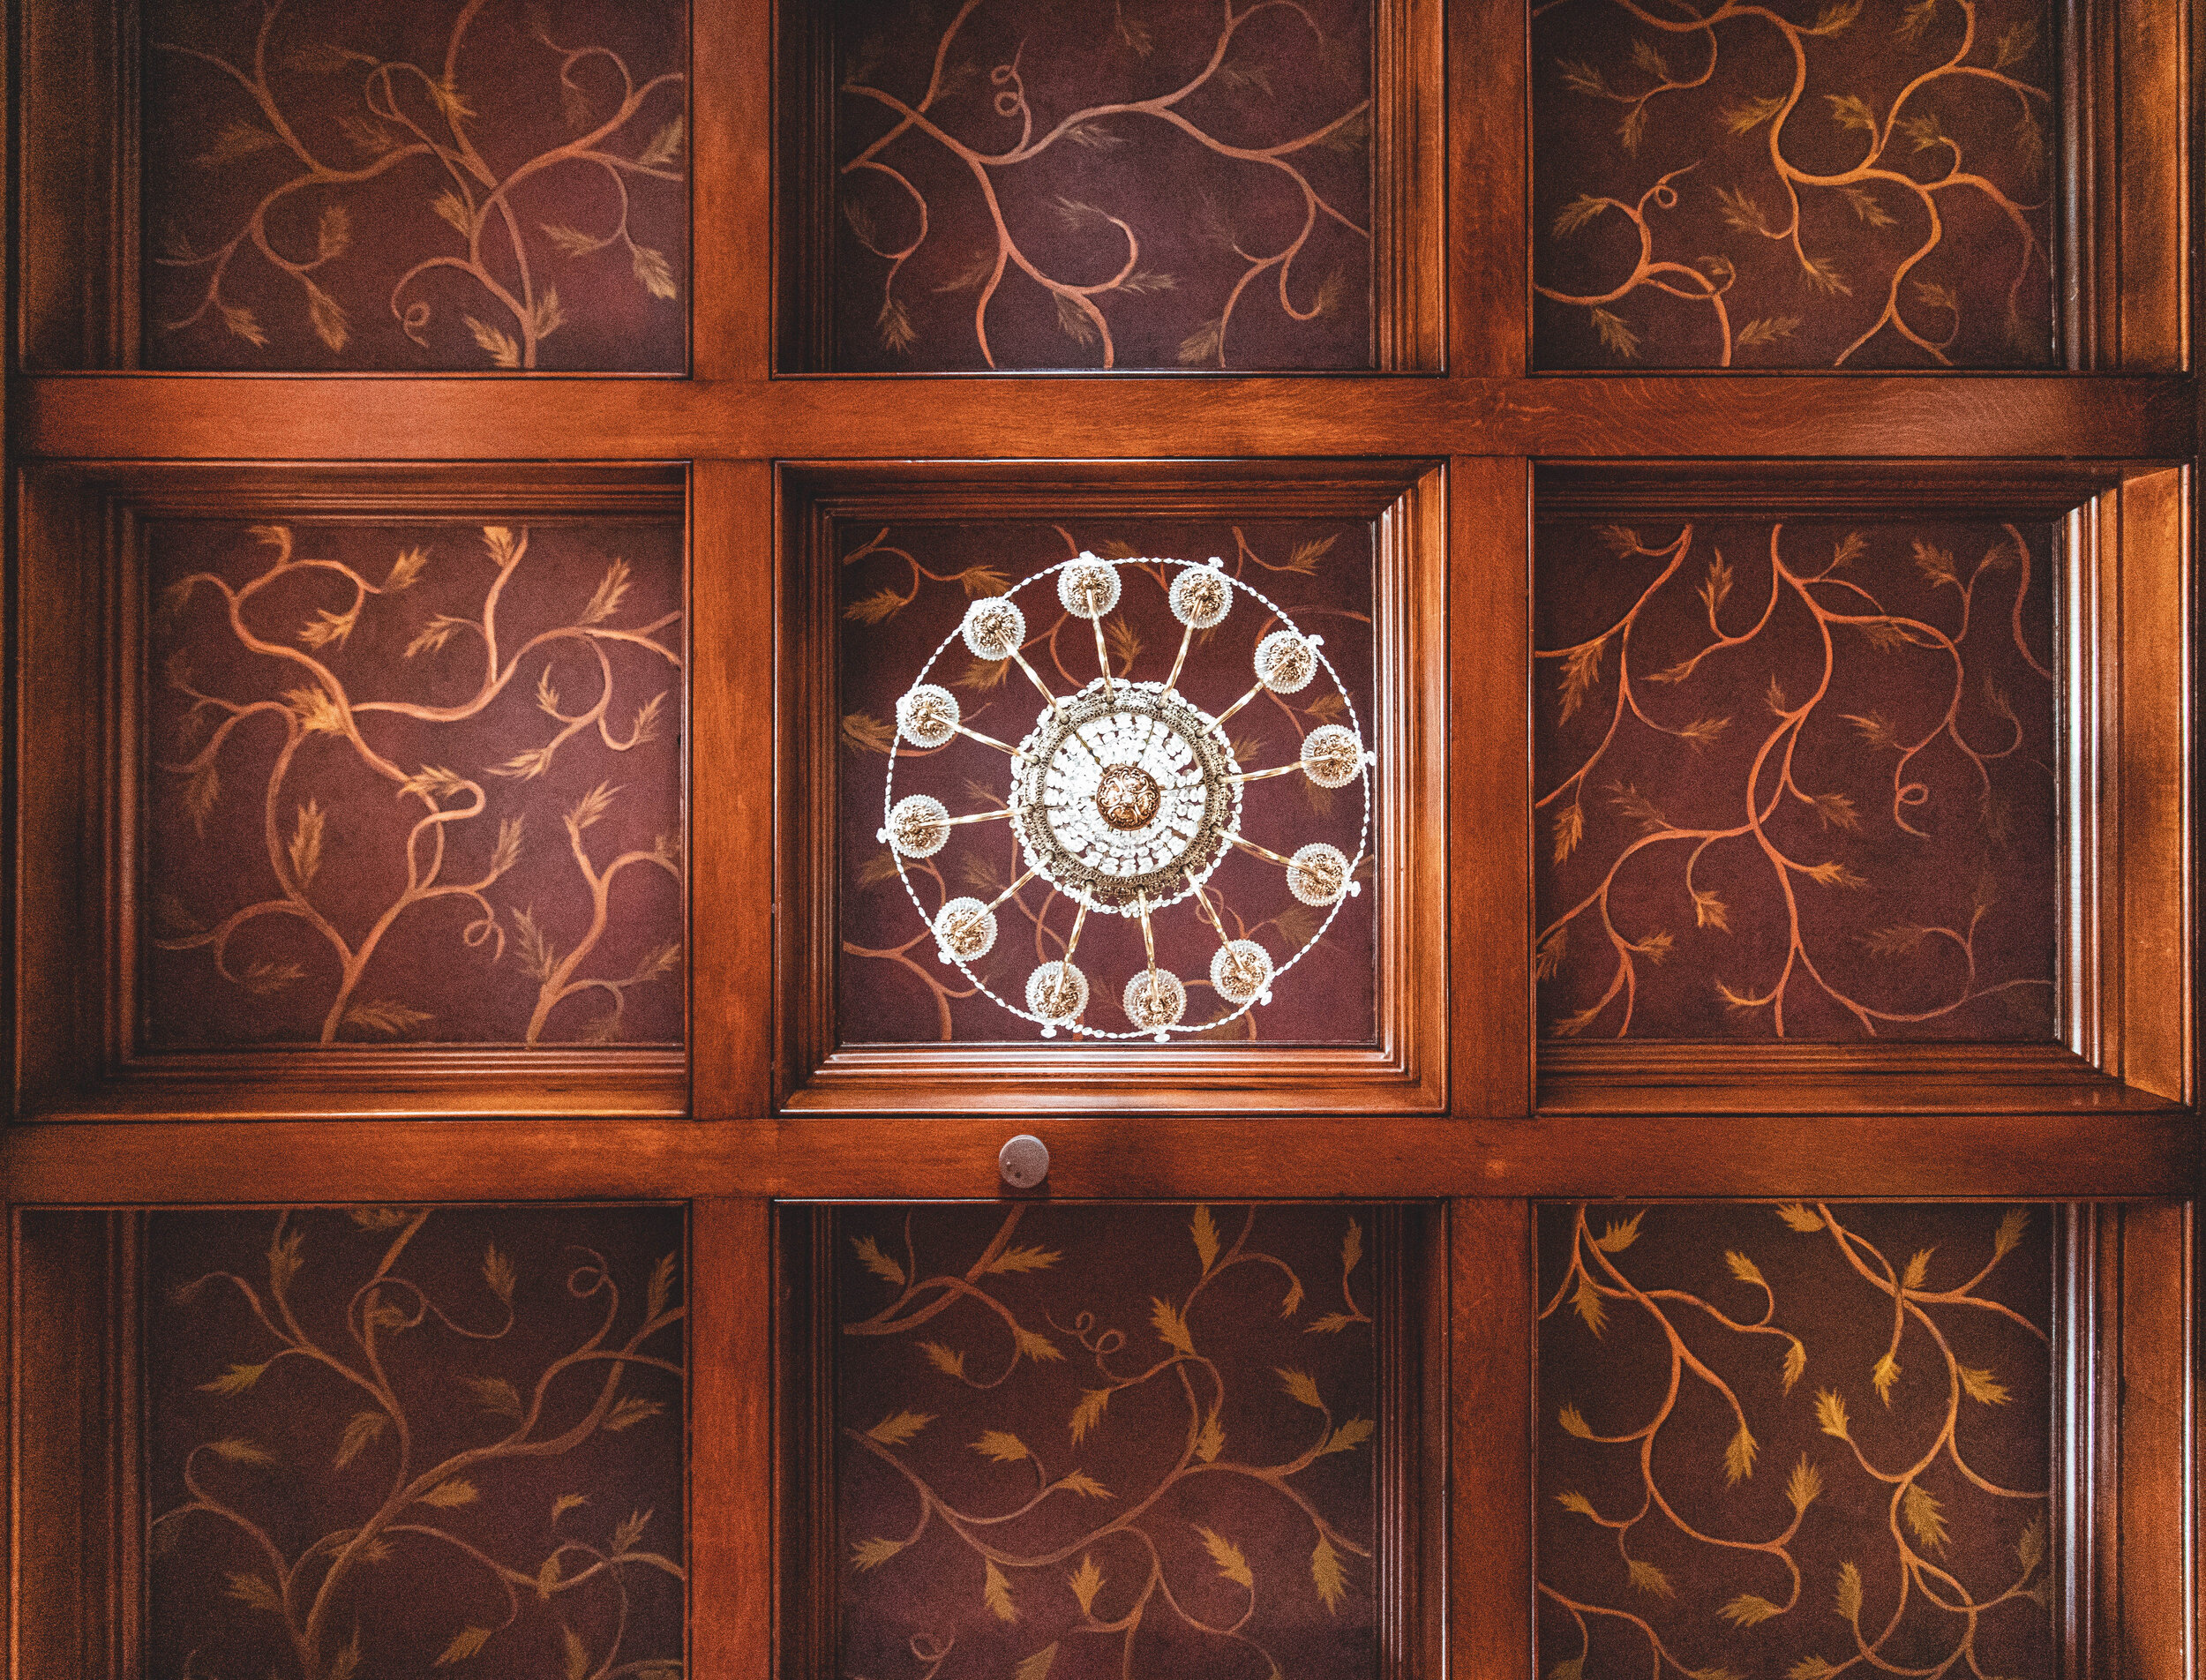
Not only is that chandelier absolutely beautiful, the pattern on the ceiling is gorgeous too! You’d think it’s wallpaper, wouldn’t you? But it’s most definitely not - it’s all hand-painted! And that’s a detail you’ll see all over this house.
The Sitting Rooms and Dining Areas
As you wander through the house, to the right of the staircase you have a sitting room with another insanely intricate original fireplace.

And just behind the sitting room is the breakfast room.

Check out those high ceilings, giant windows, and don’t even get me started on the chunky trim!
If you were to turn to the left after entering the foyer, you’d walk into another sitting room.

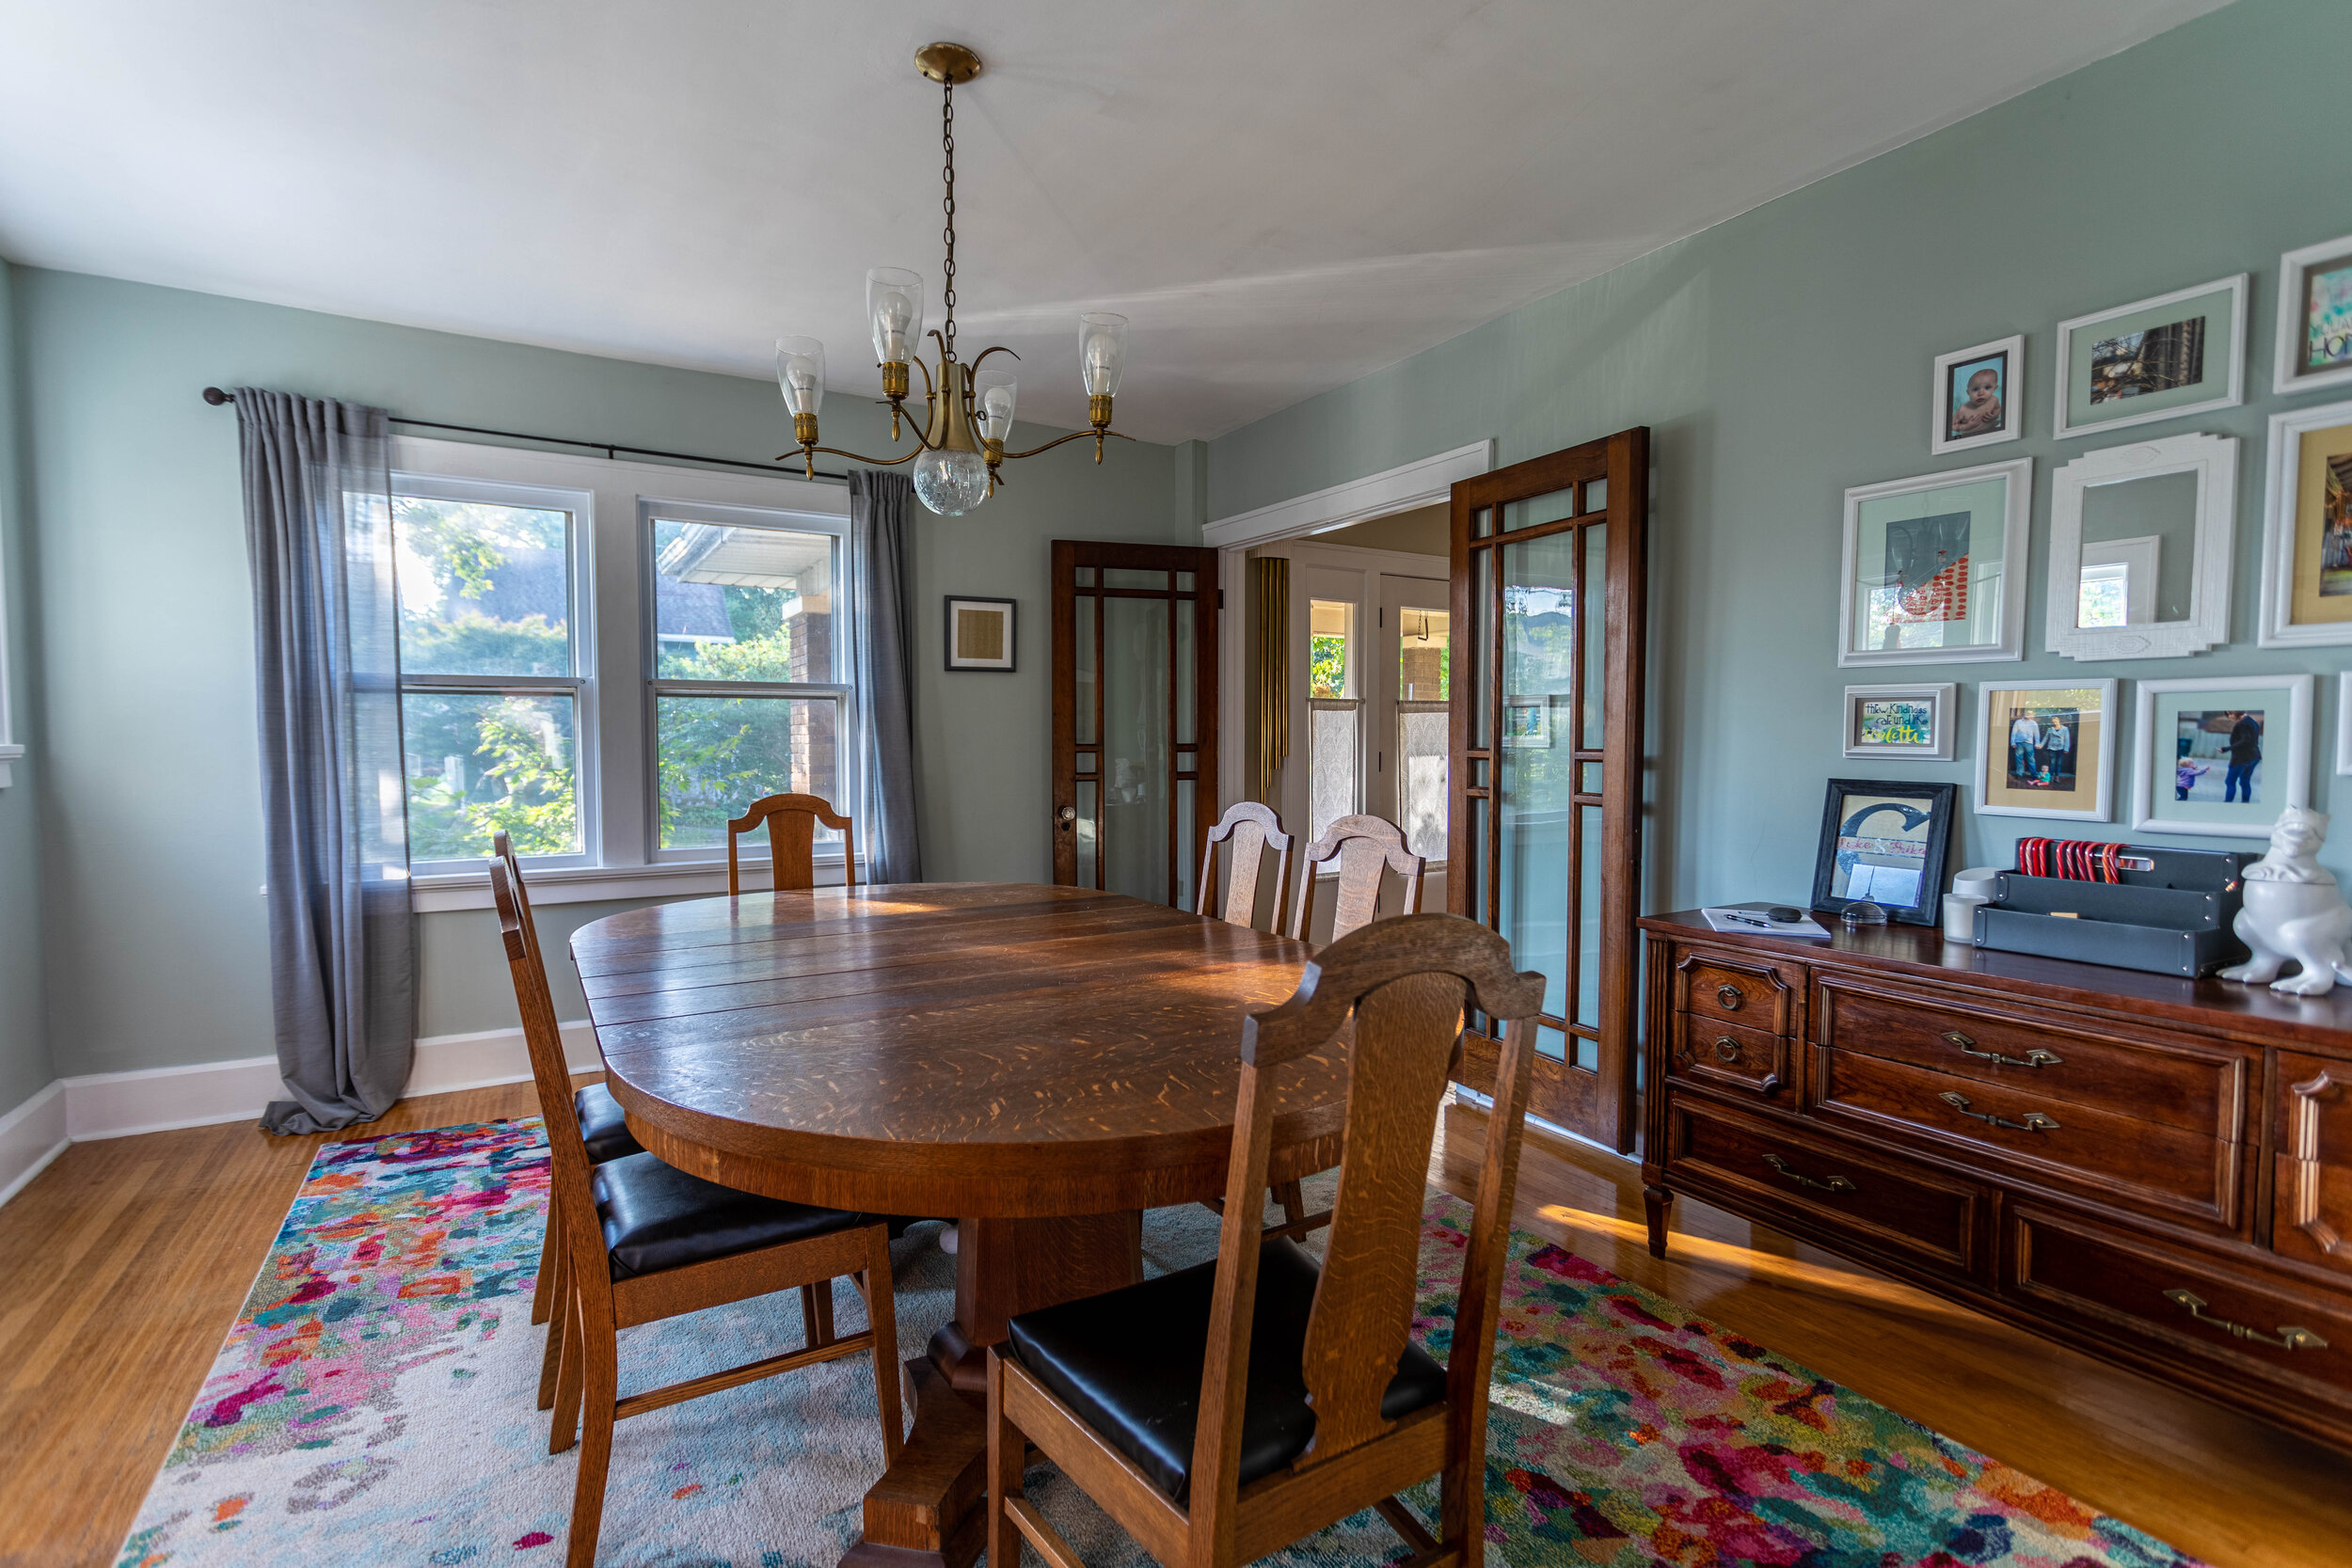
Through this sitting room, you’re led into the most epic dining room I’ve ever seen. I can’t decide which angle of this room is best so I’m just gonna show you all of them.
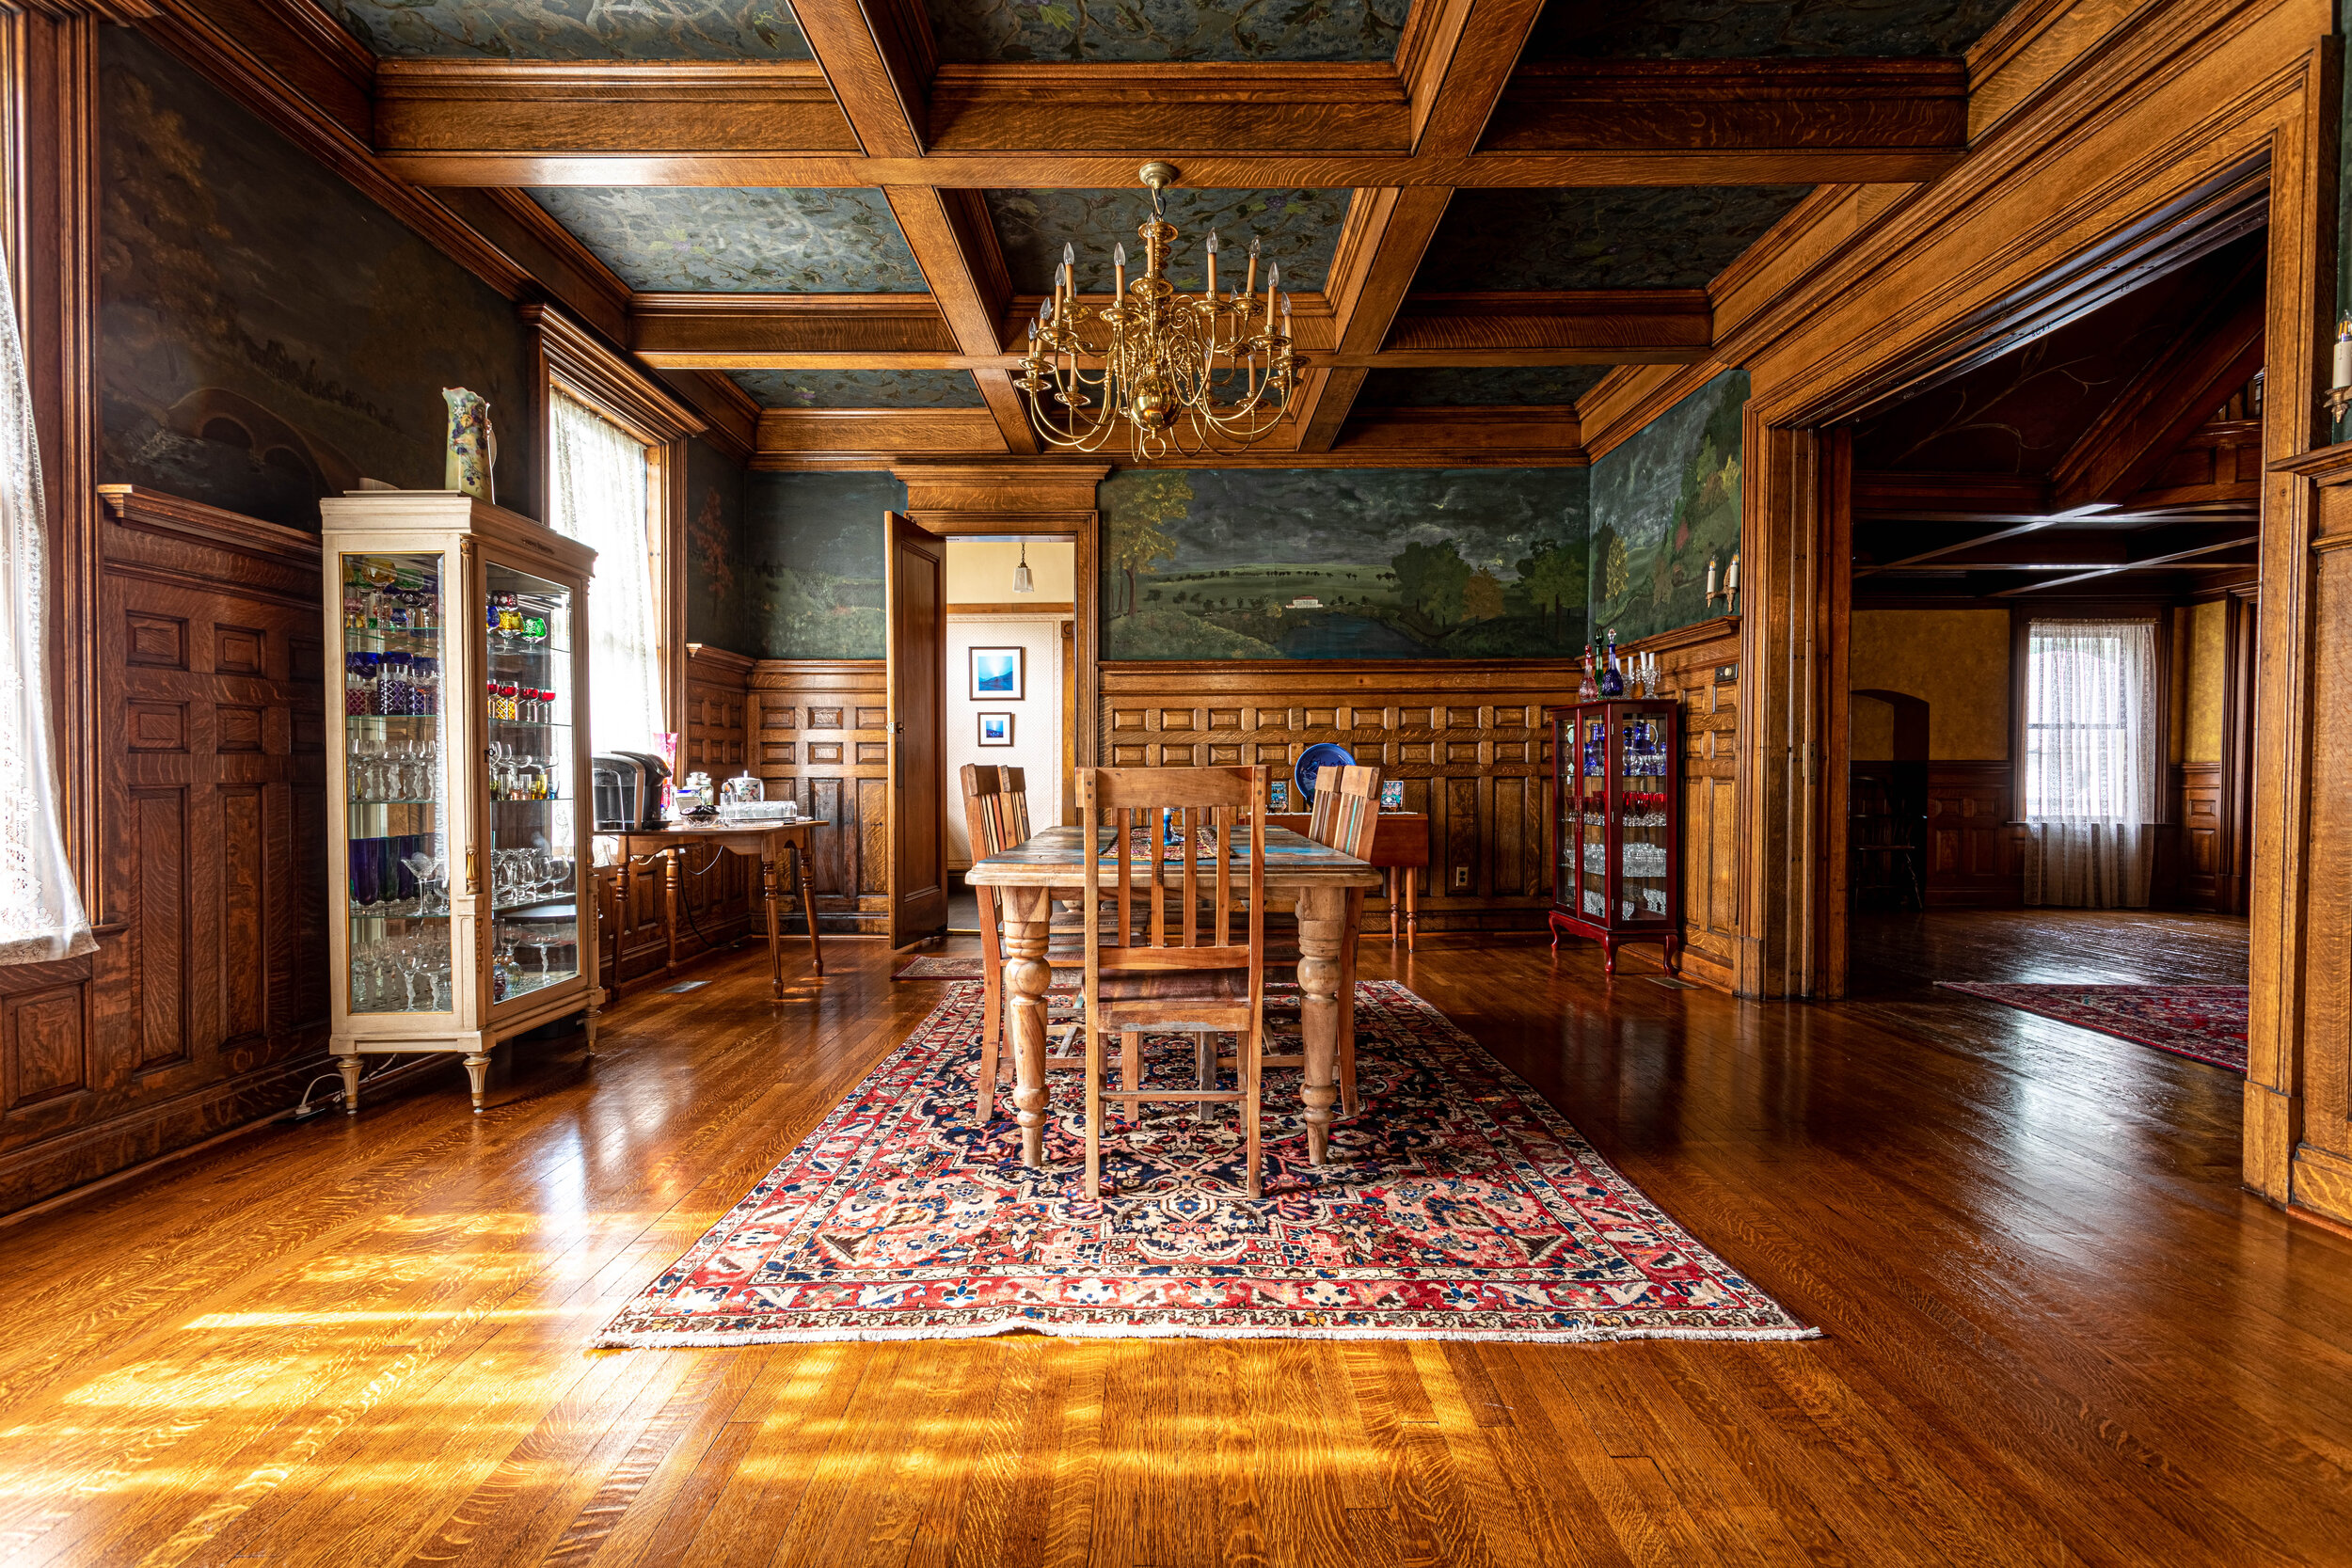
That wainscoting is simply flawless and I’m in love with the dramatic mural above it. Yep, it’s not wallpaper. The mural and the ceiling in this room were also hand-painted.
Because this room is so large, it would be easy for it to be cold and uninviting, but the use of dramatic and dark colors complements the orange in the wood and creates a really warm space. The oriental rug under the table is also a really great, dramatic touch.


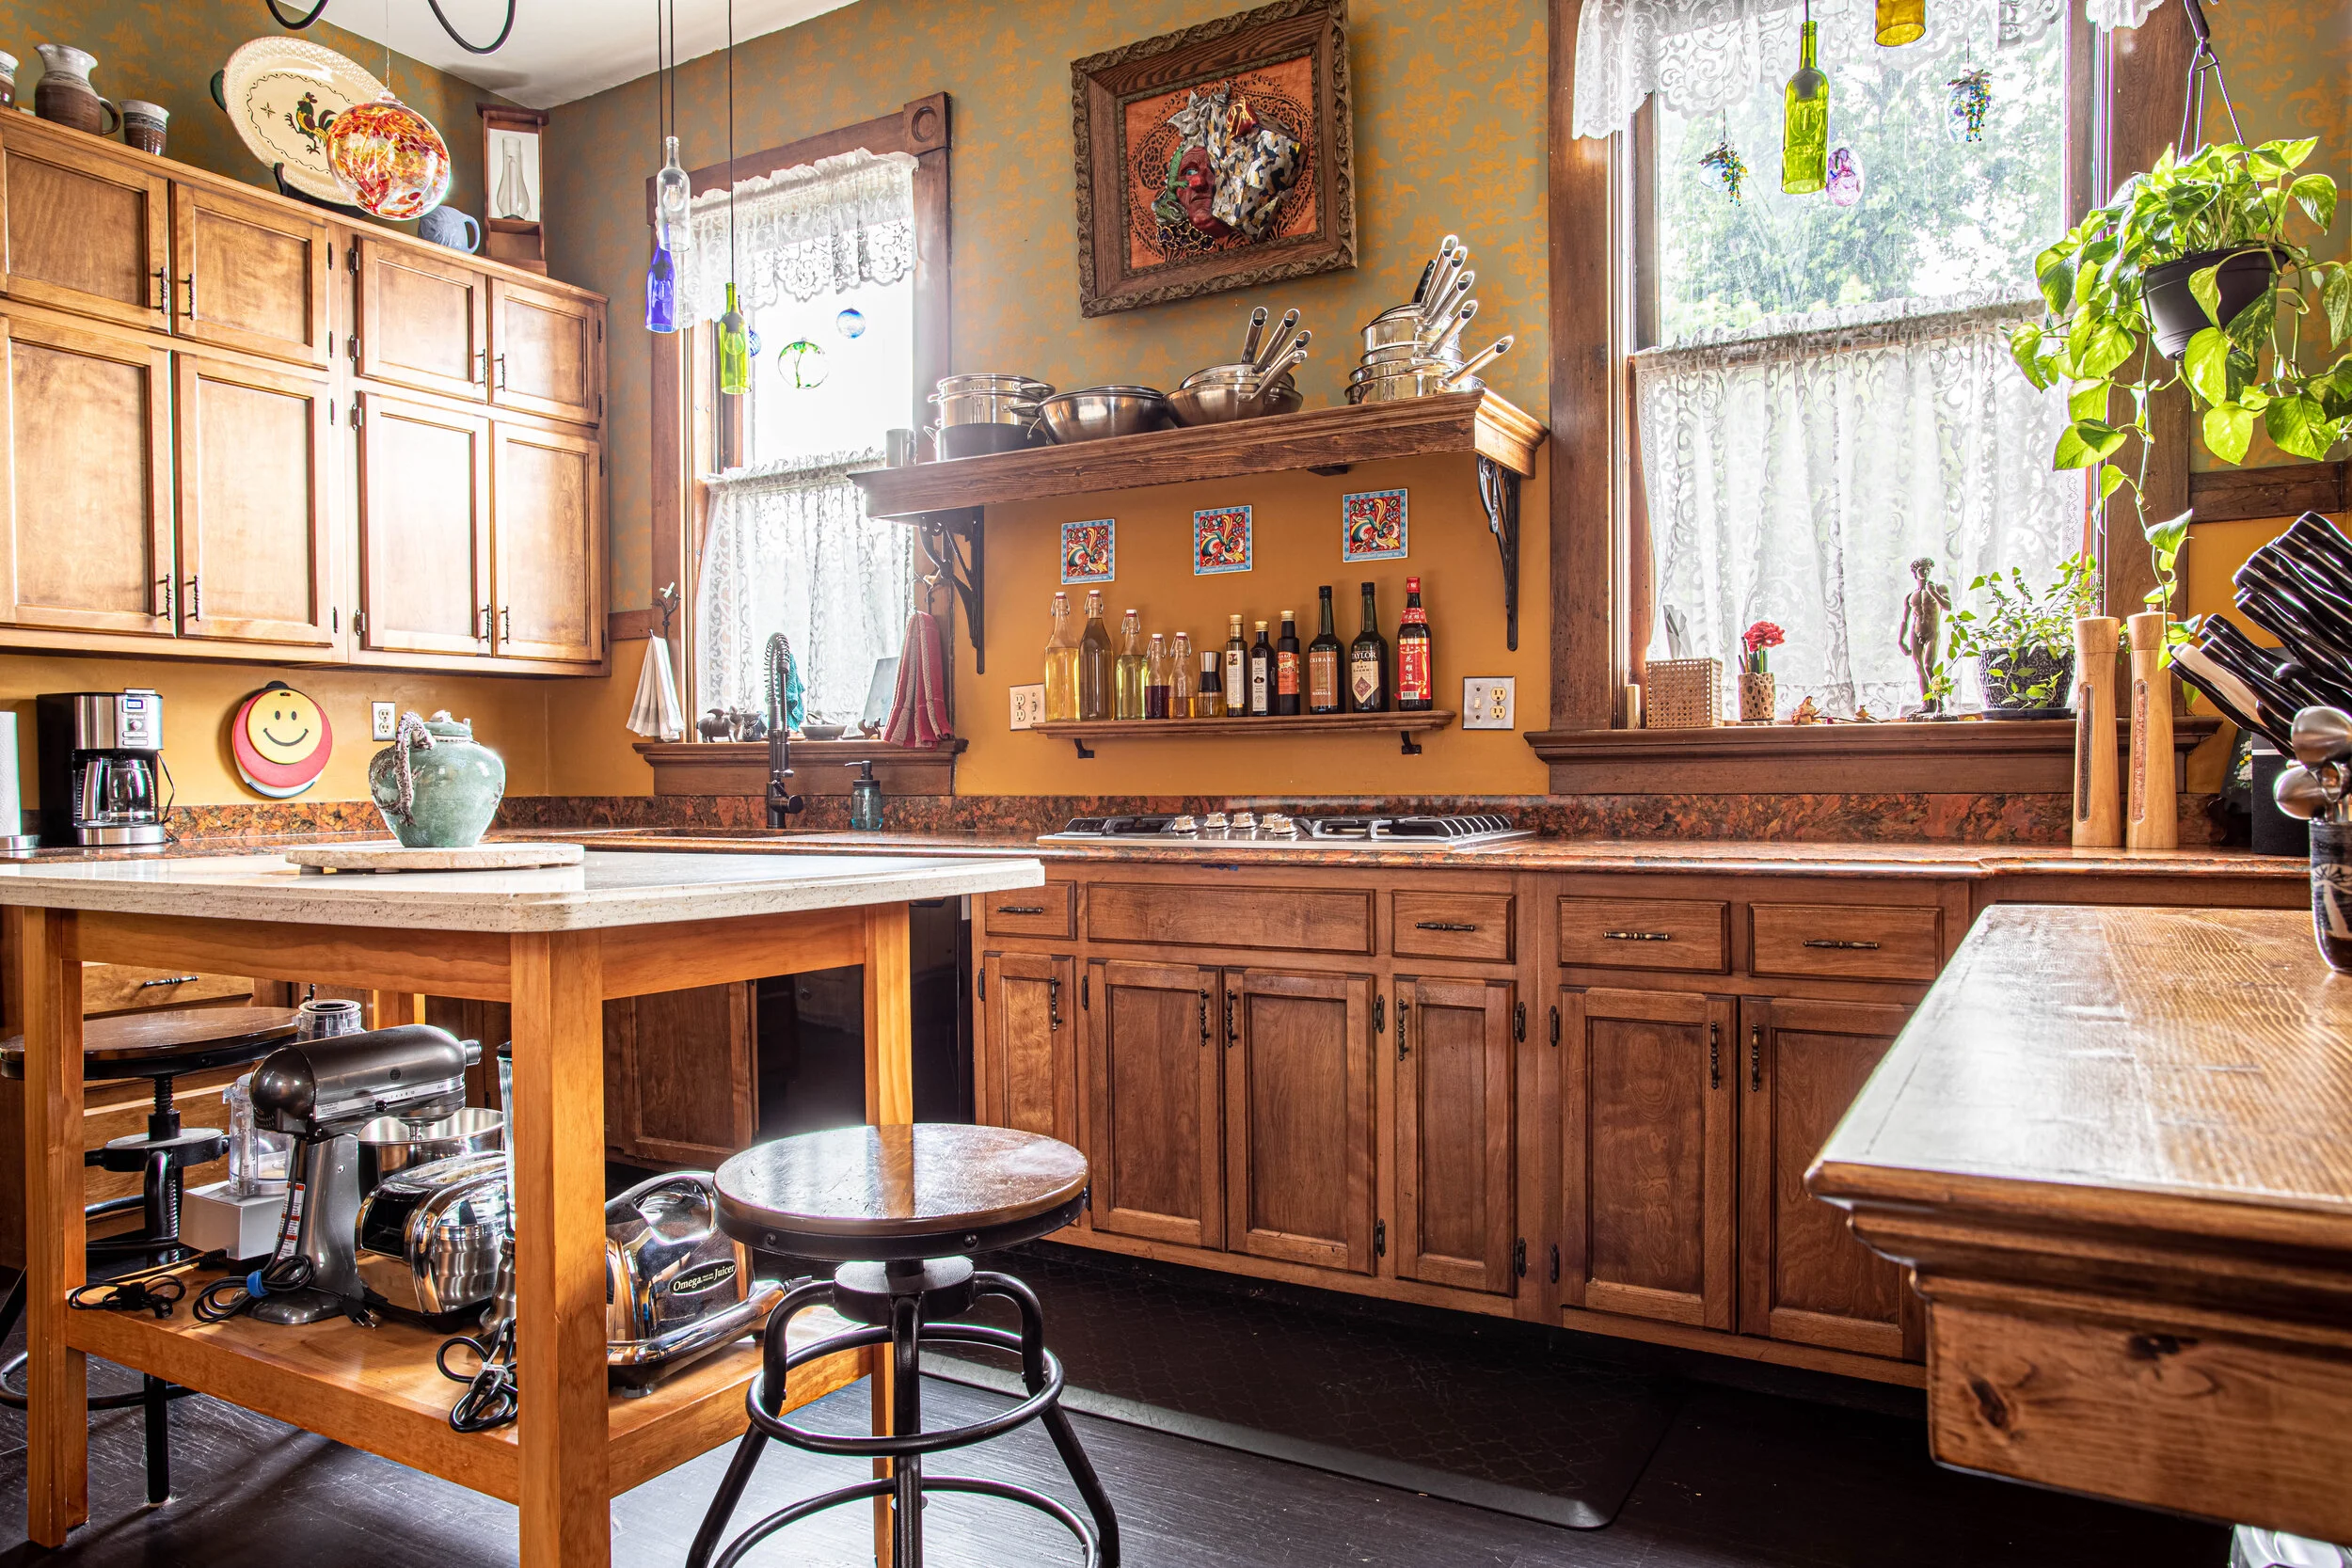
The Kitchen
Through the dining room is one of the pantries (this house has two!) and then the kitchen. Houses from this era typically don’t have very functional (in terms of this day and age) kitchens. The kitchen in this house has been updated and is now not only functional but still flows nicely with the rest of the house in the use of wood tones and ornate wall finishes.


The Bedrooms
Heading back on up that amazing staircase… Once you make your way to the top and catch your breath, you’ll realize that you’re not in a room - you’re on a giant landing, which leads to five large bedrooms.

Our first stop on the bedroom tour is Jonathan’s room, which is simple, clean, and modern.
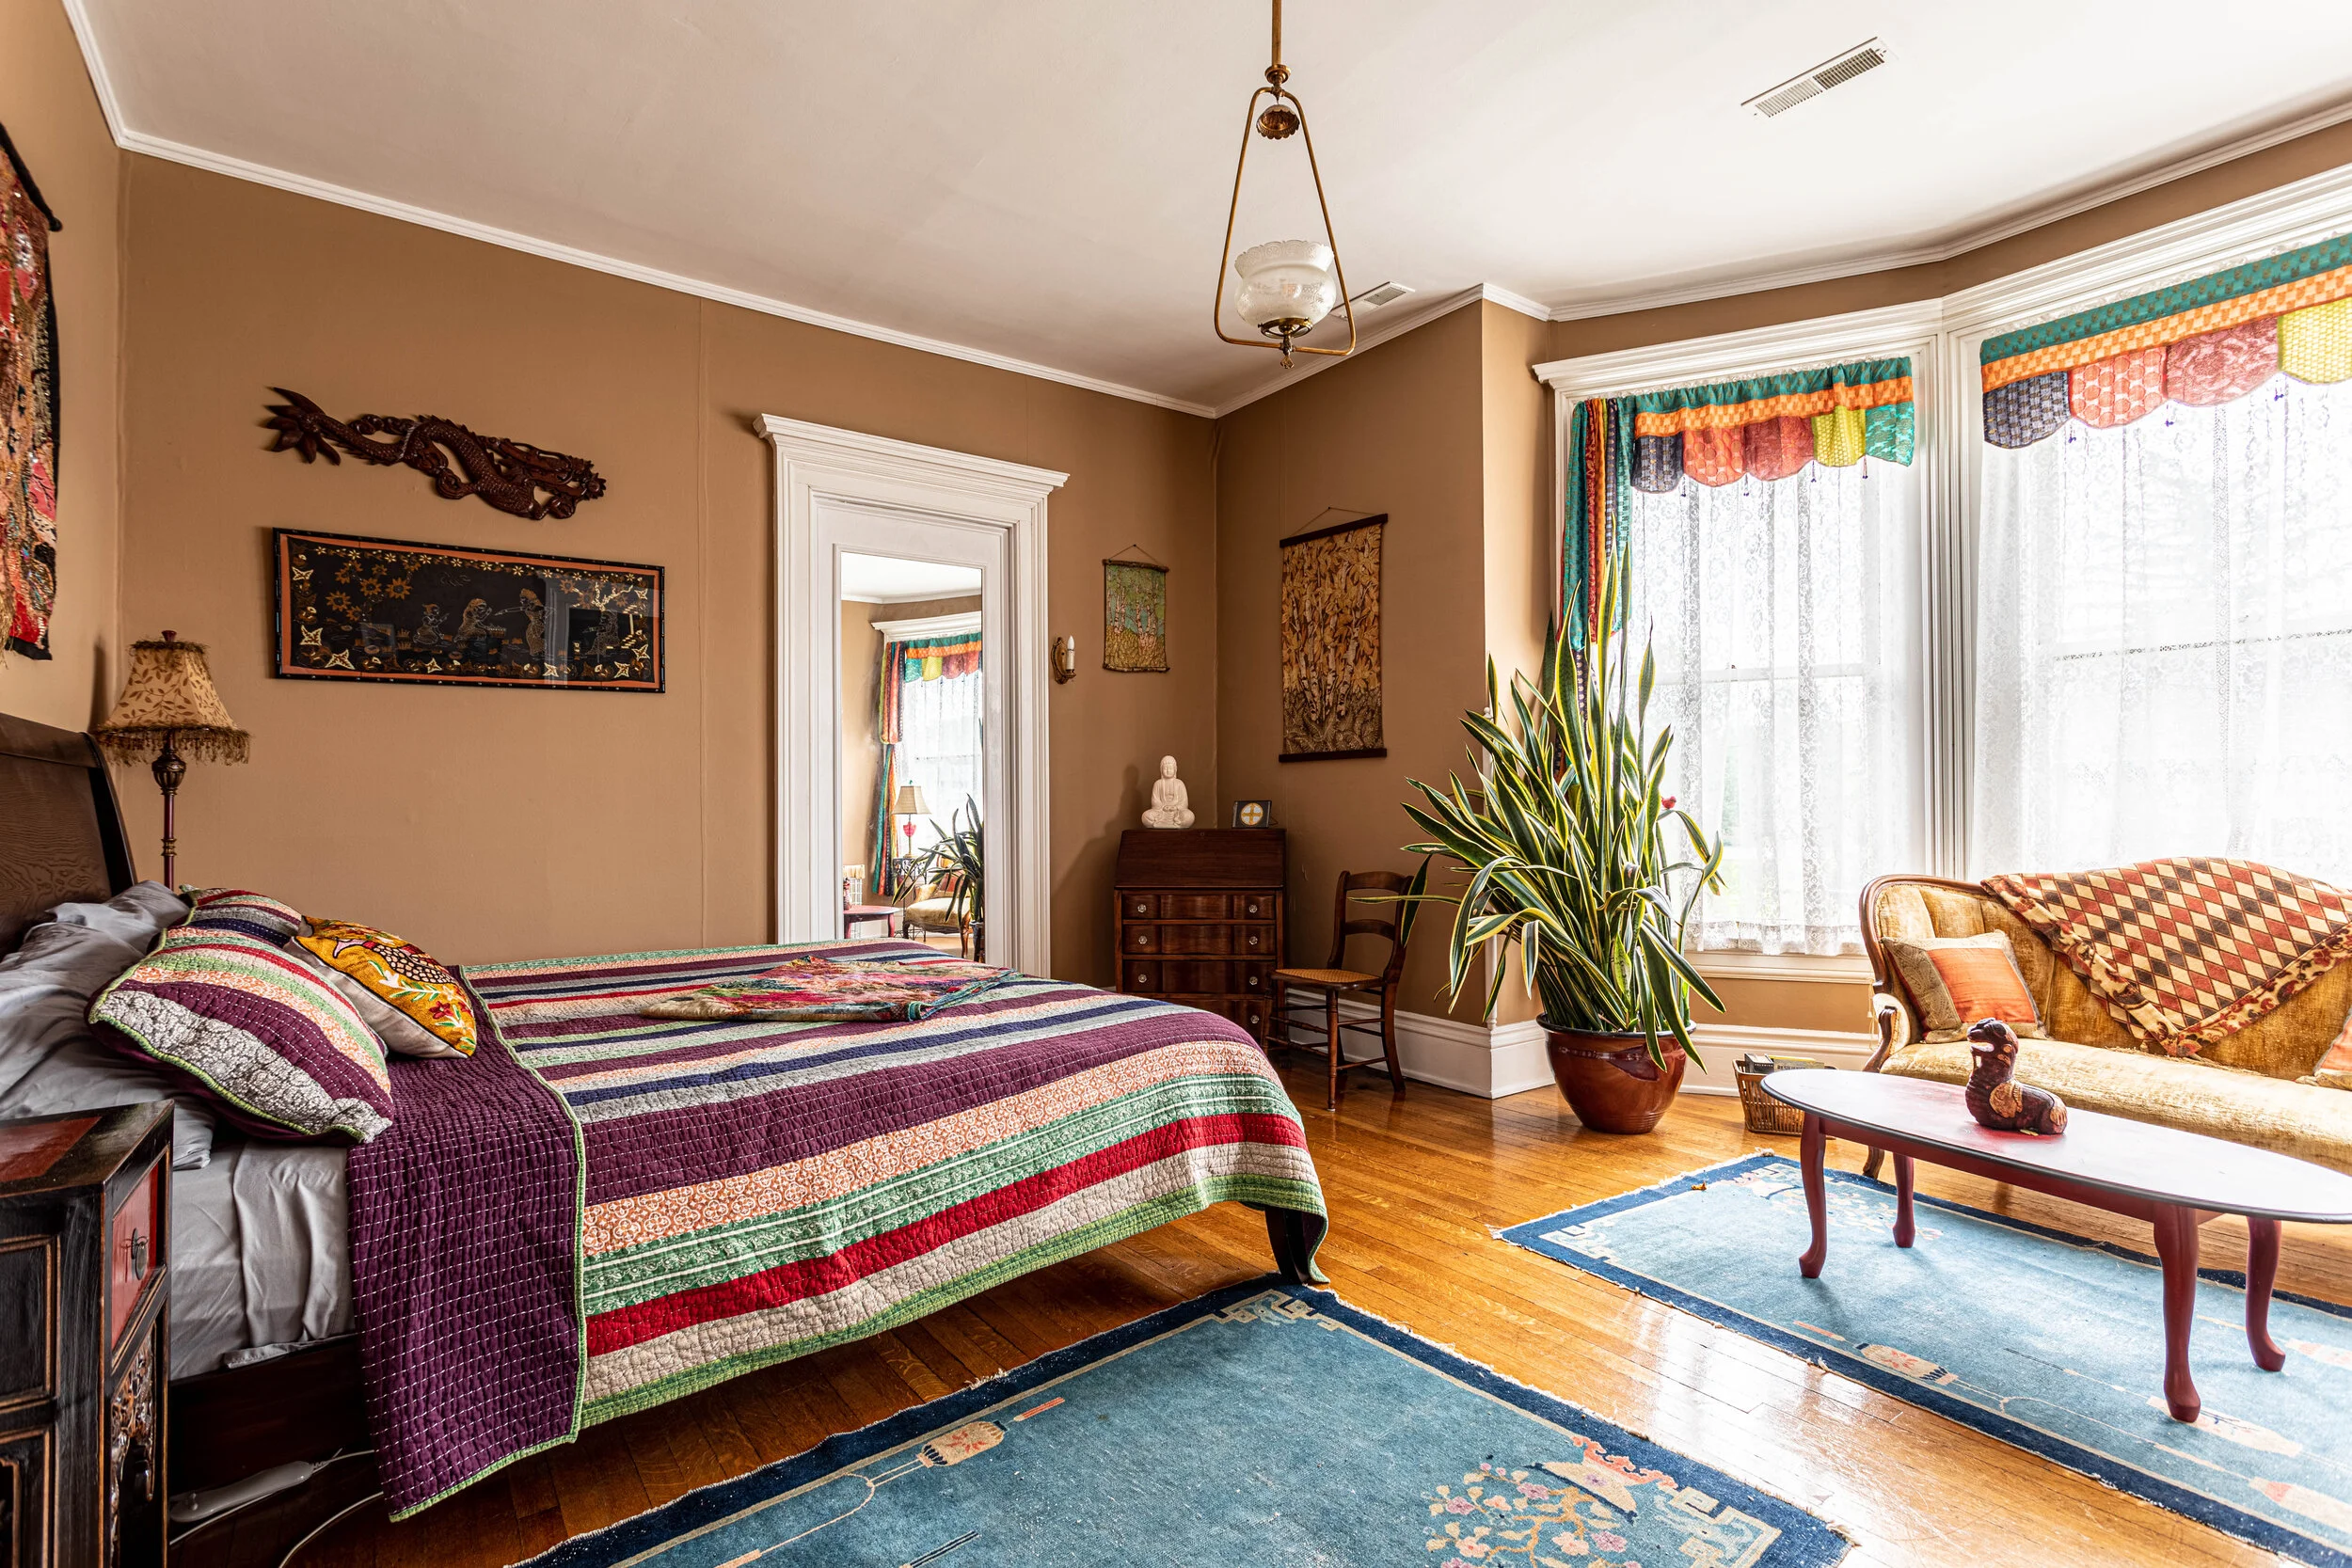
The other four bedrooms are decked out in true Victorian style, which is a good thing because they can be rented for an AirBnB stay! Yep, you can book your stay in your pick of one of the four beautiful bedrooms.
Your first option is what Jonathan affectionately calls The Rose Room (aka “Grandma’s Room”). It’s dressed in sweet, floral wallpaper and a delicate quilt.

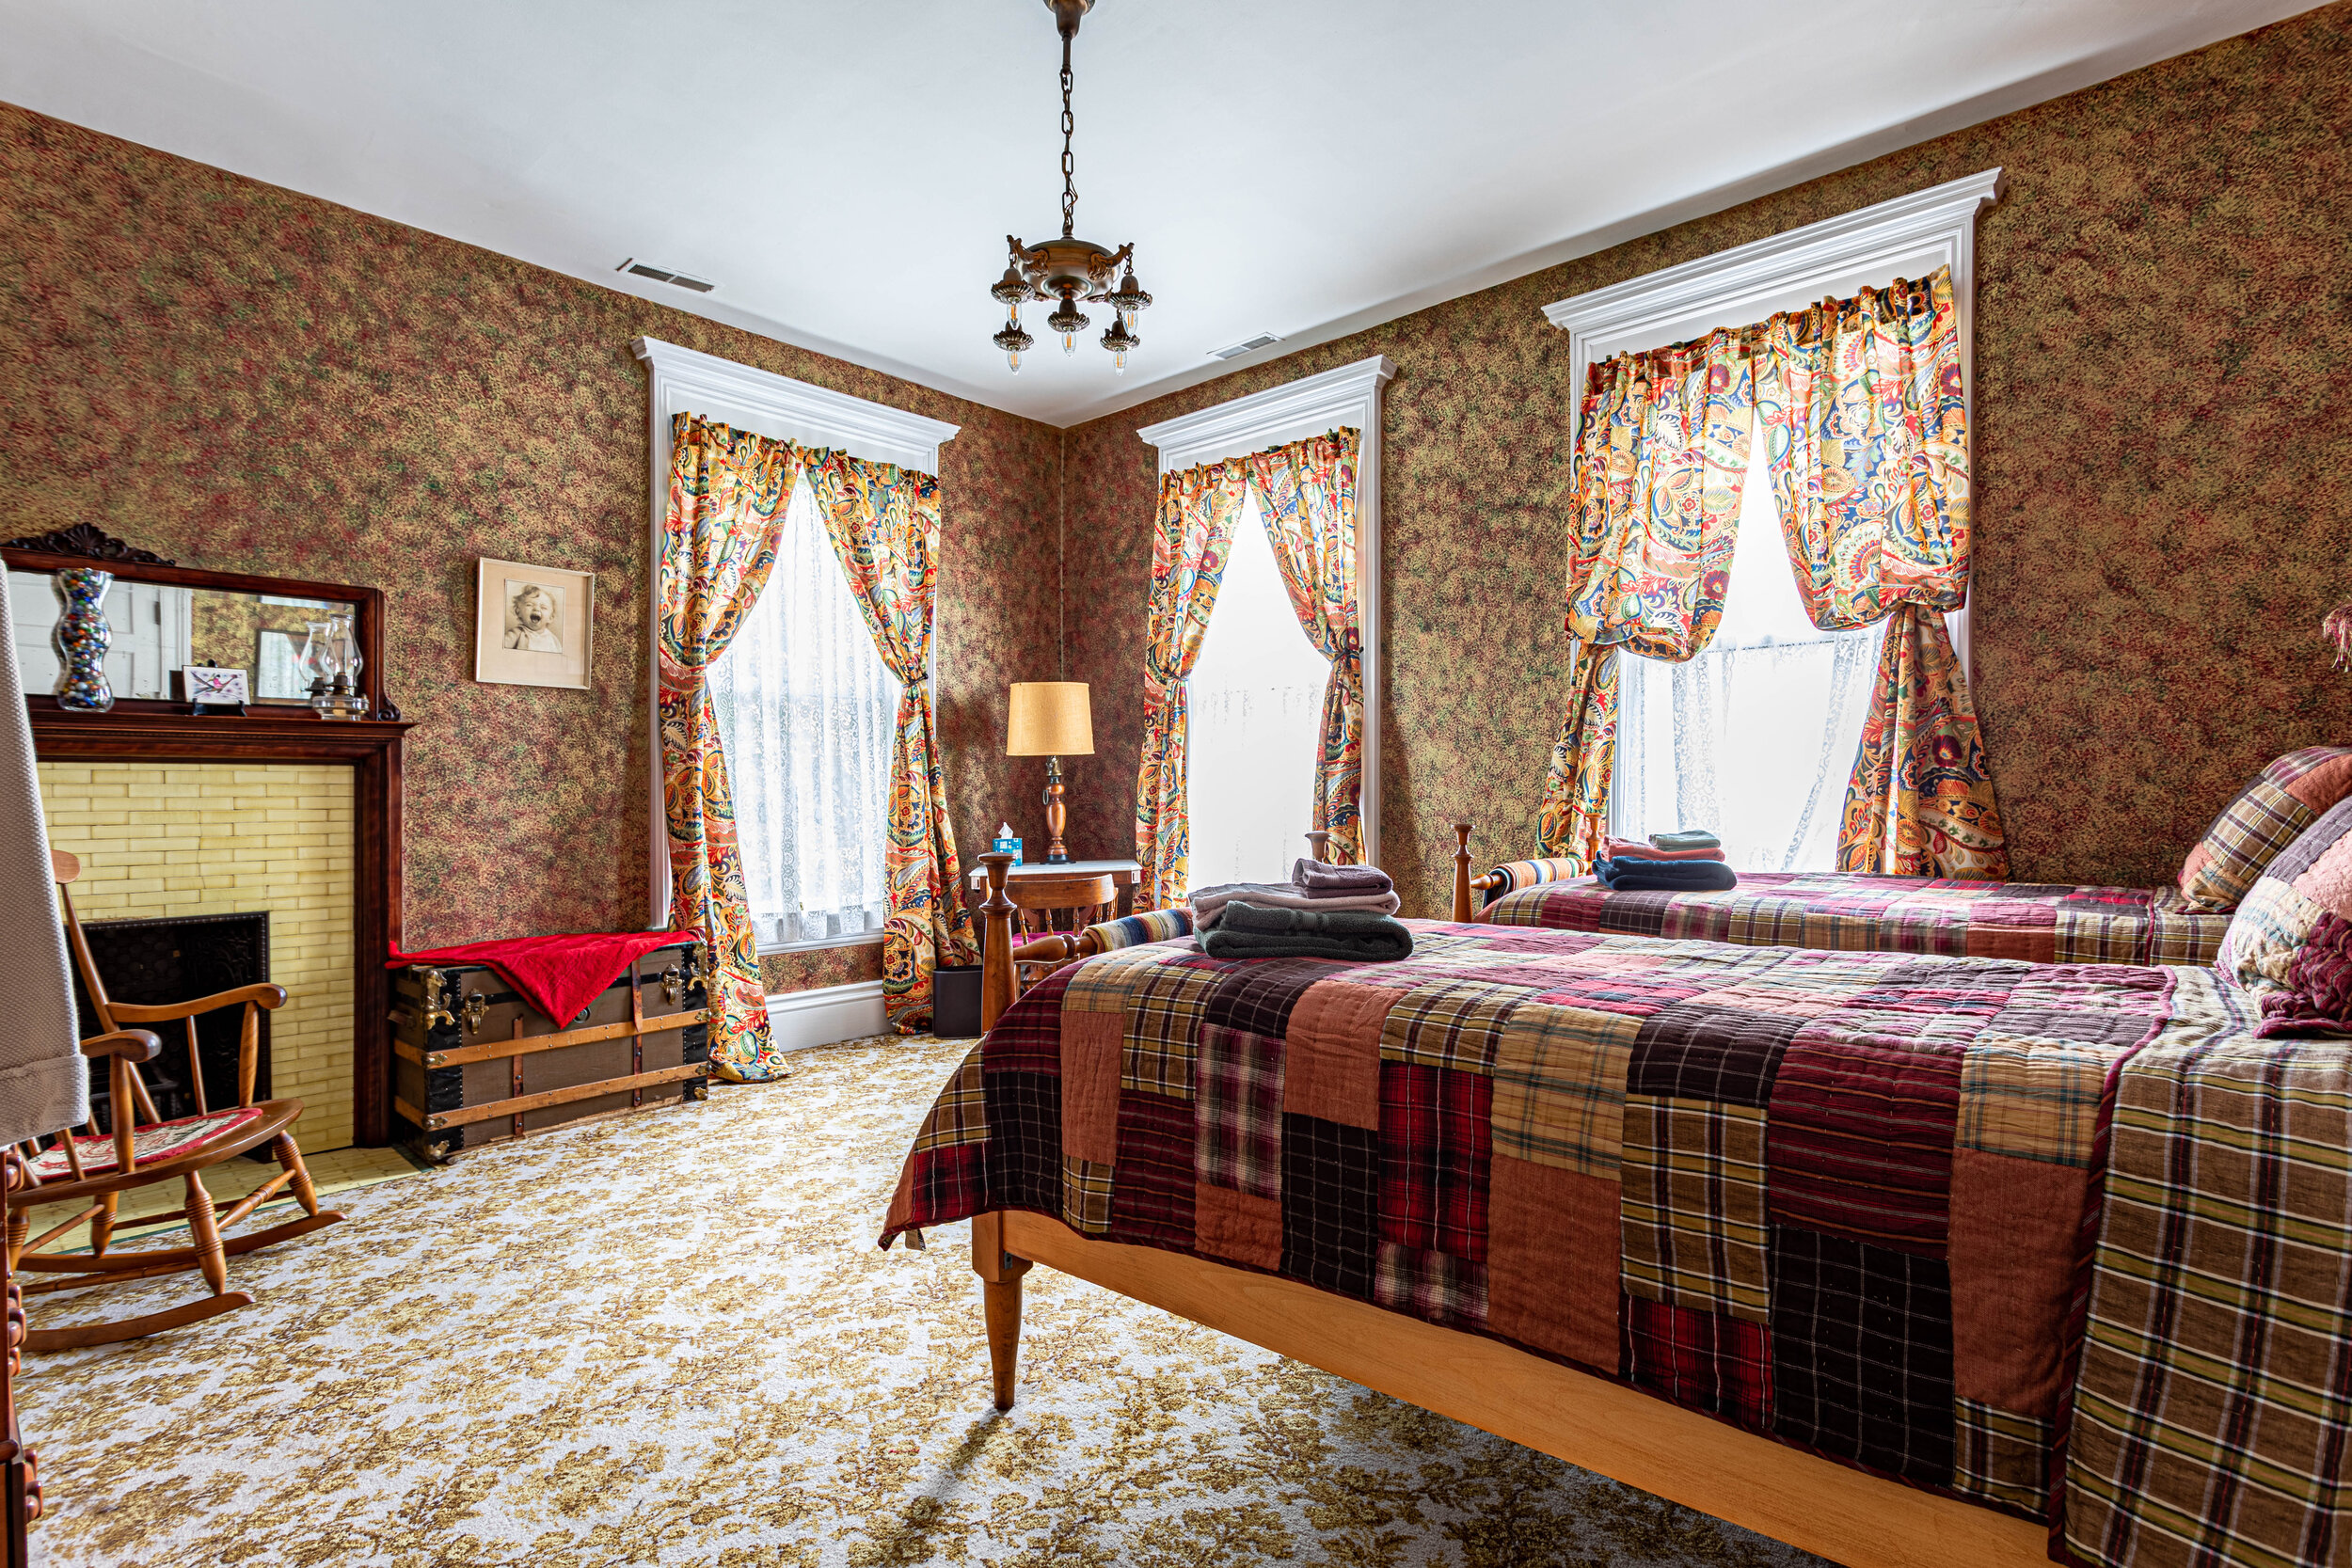
Option number 2 is what has been donned The Circus Room due to the red, yellow, and green striped wallpaper that was hung before Jonathan got his hands on it. In here you have two twin beds and a fireplace (and no more circus wallpaper!).

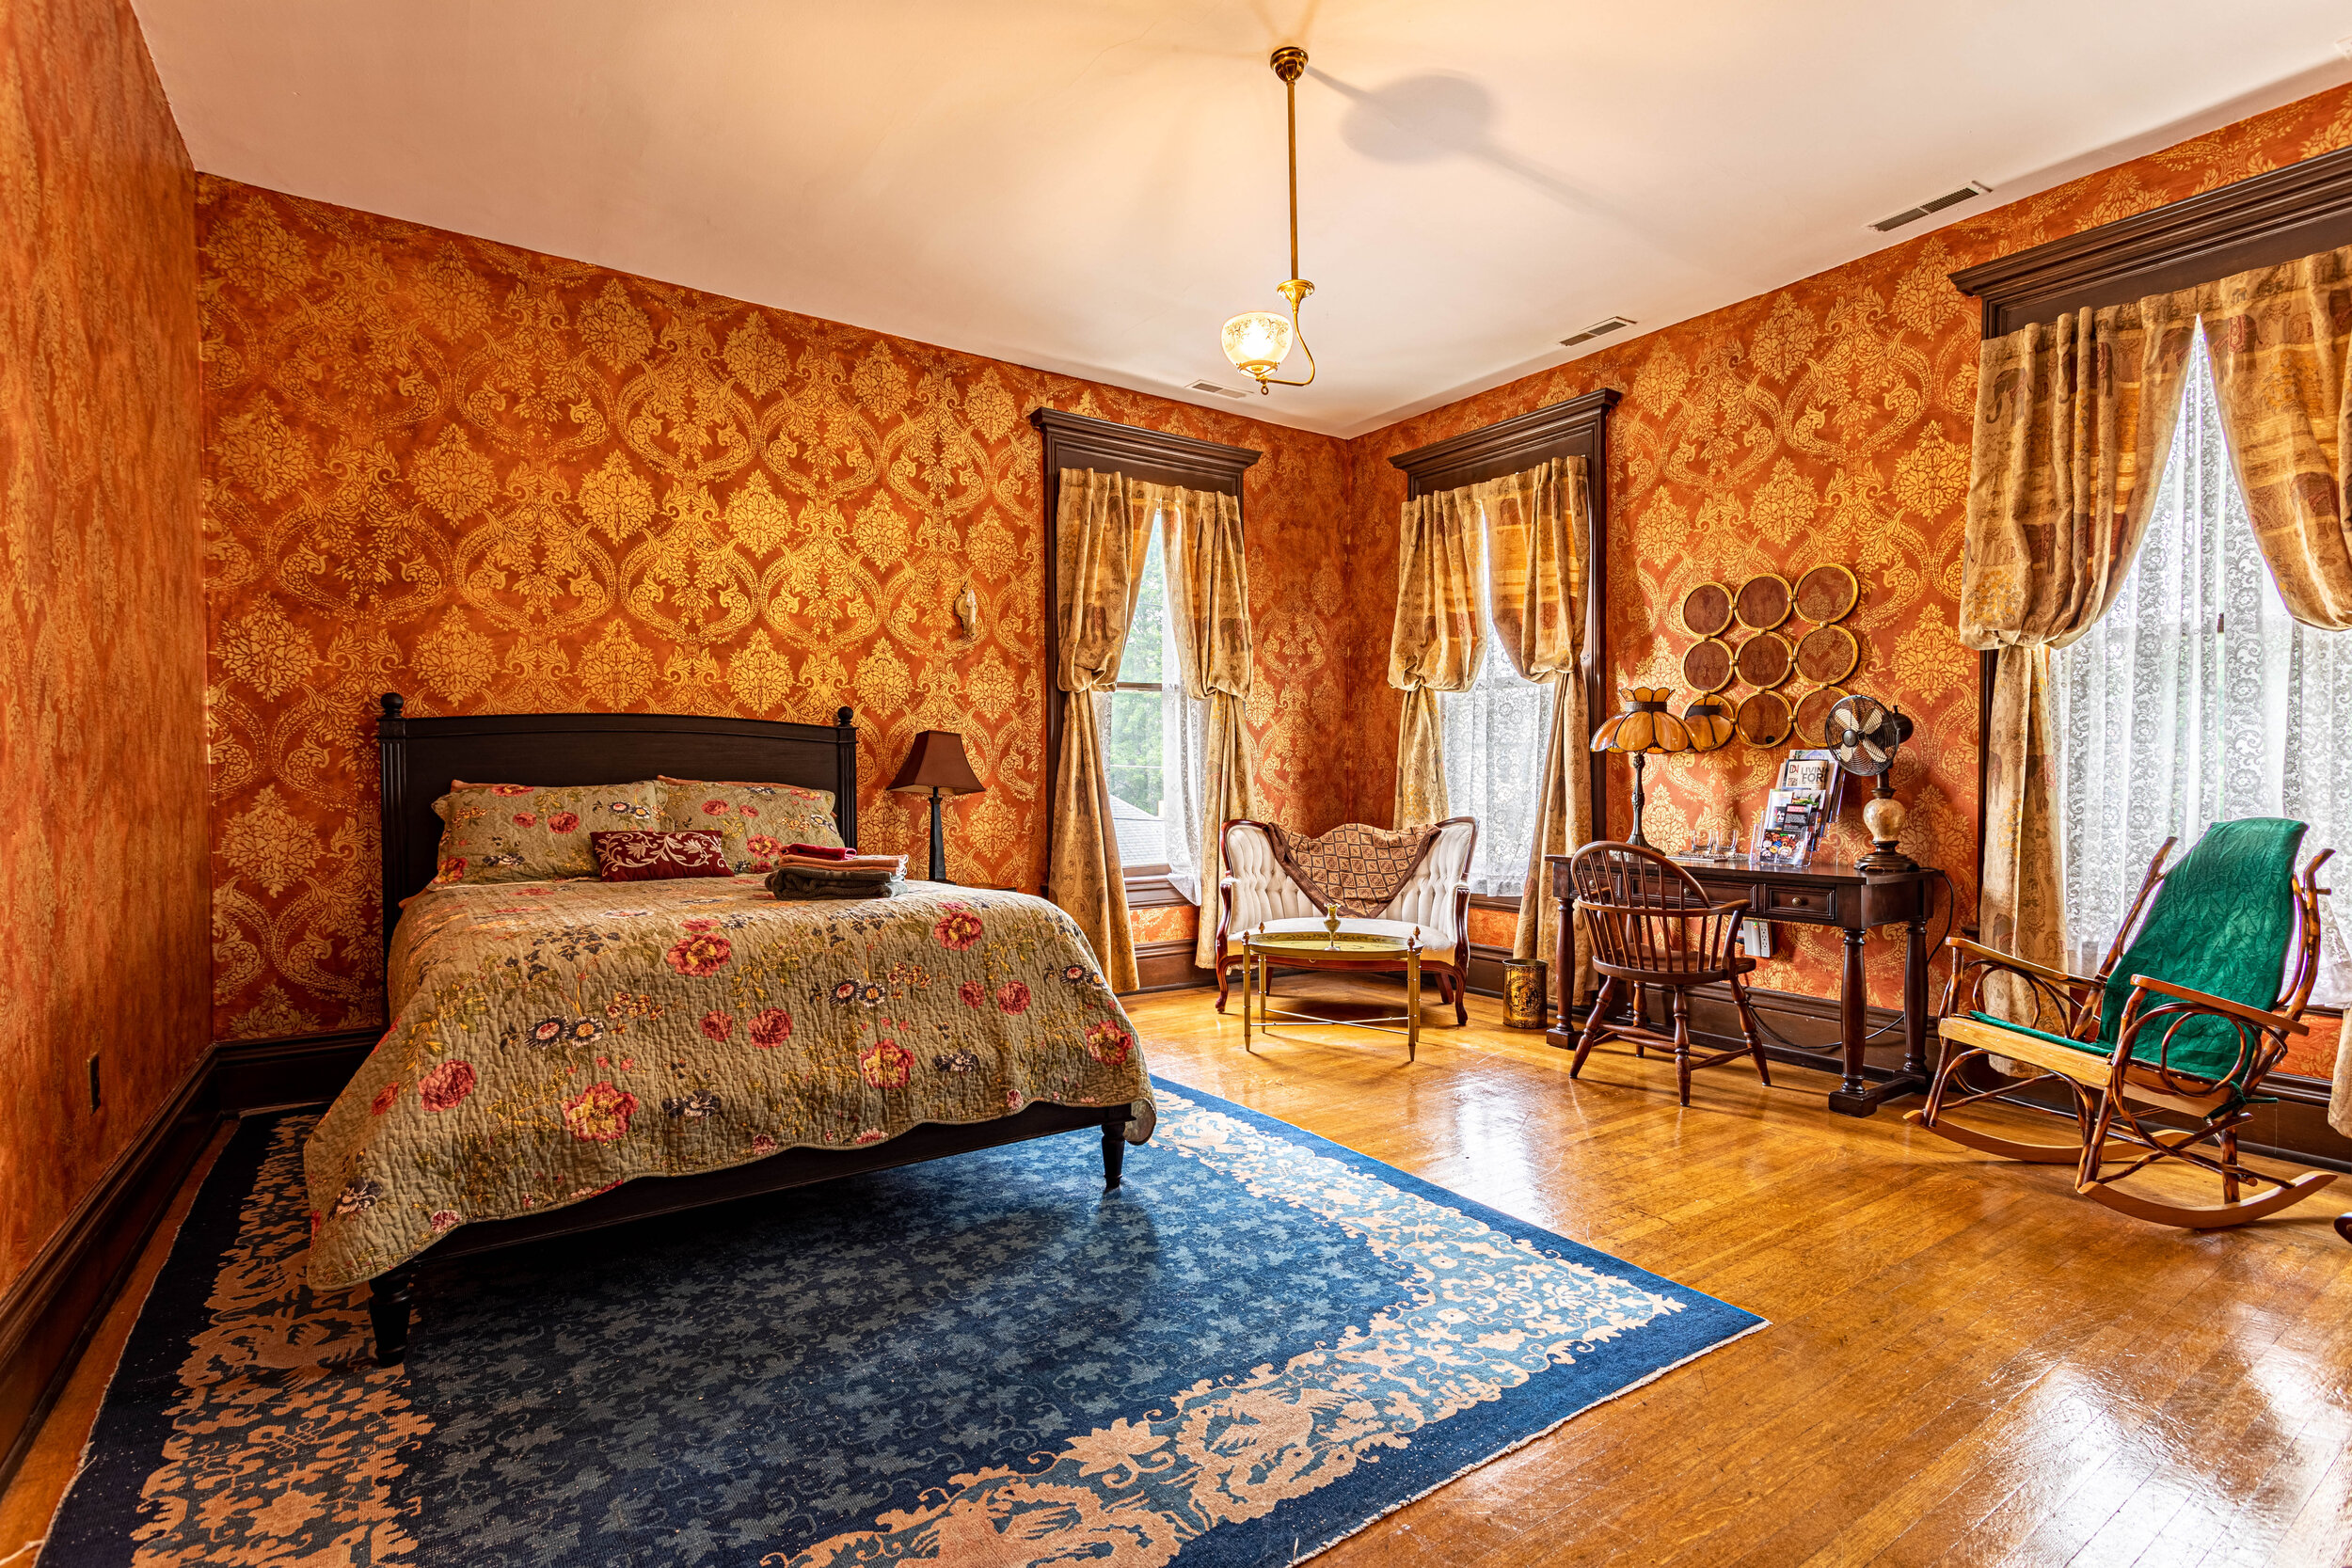
Bedroom number 3, The Gilded Room, might be my favorite with its intricately stenciled metallic walls. Jonathan explained his multi-step paint application process to me (involving 5 layers of paint!) and man, it was a labor of love at an estimated 60 hours of work.

And lastly, you have The Purple Room, one of the more Victorian-inspired bedrooms including, you guessed it, another fireplace!

The Bathrooms
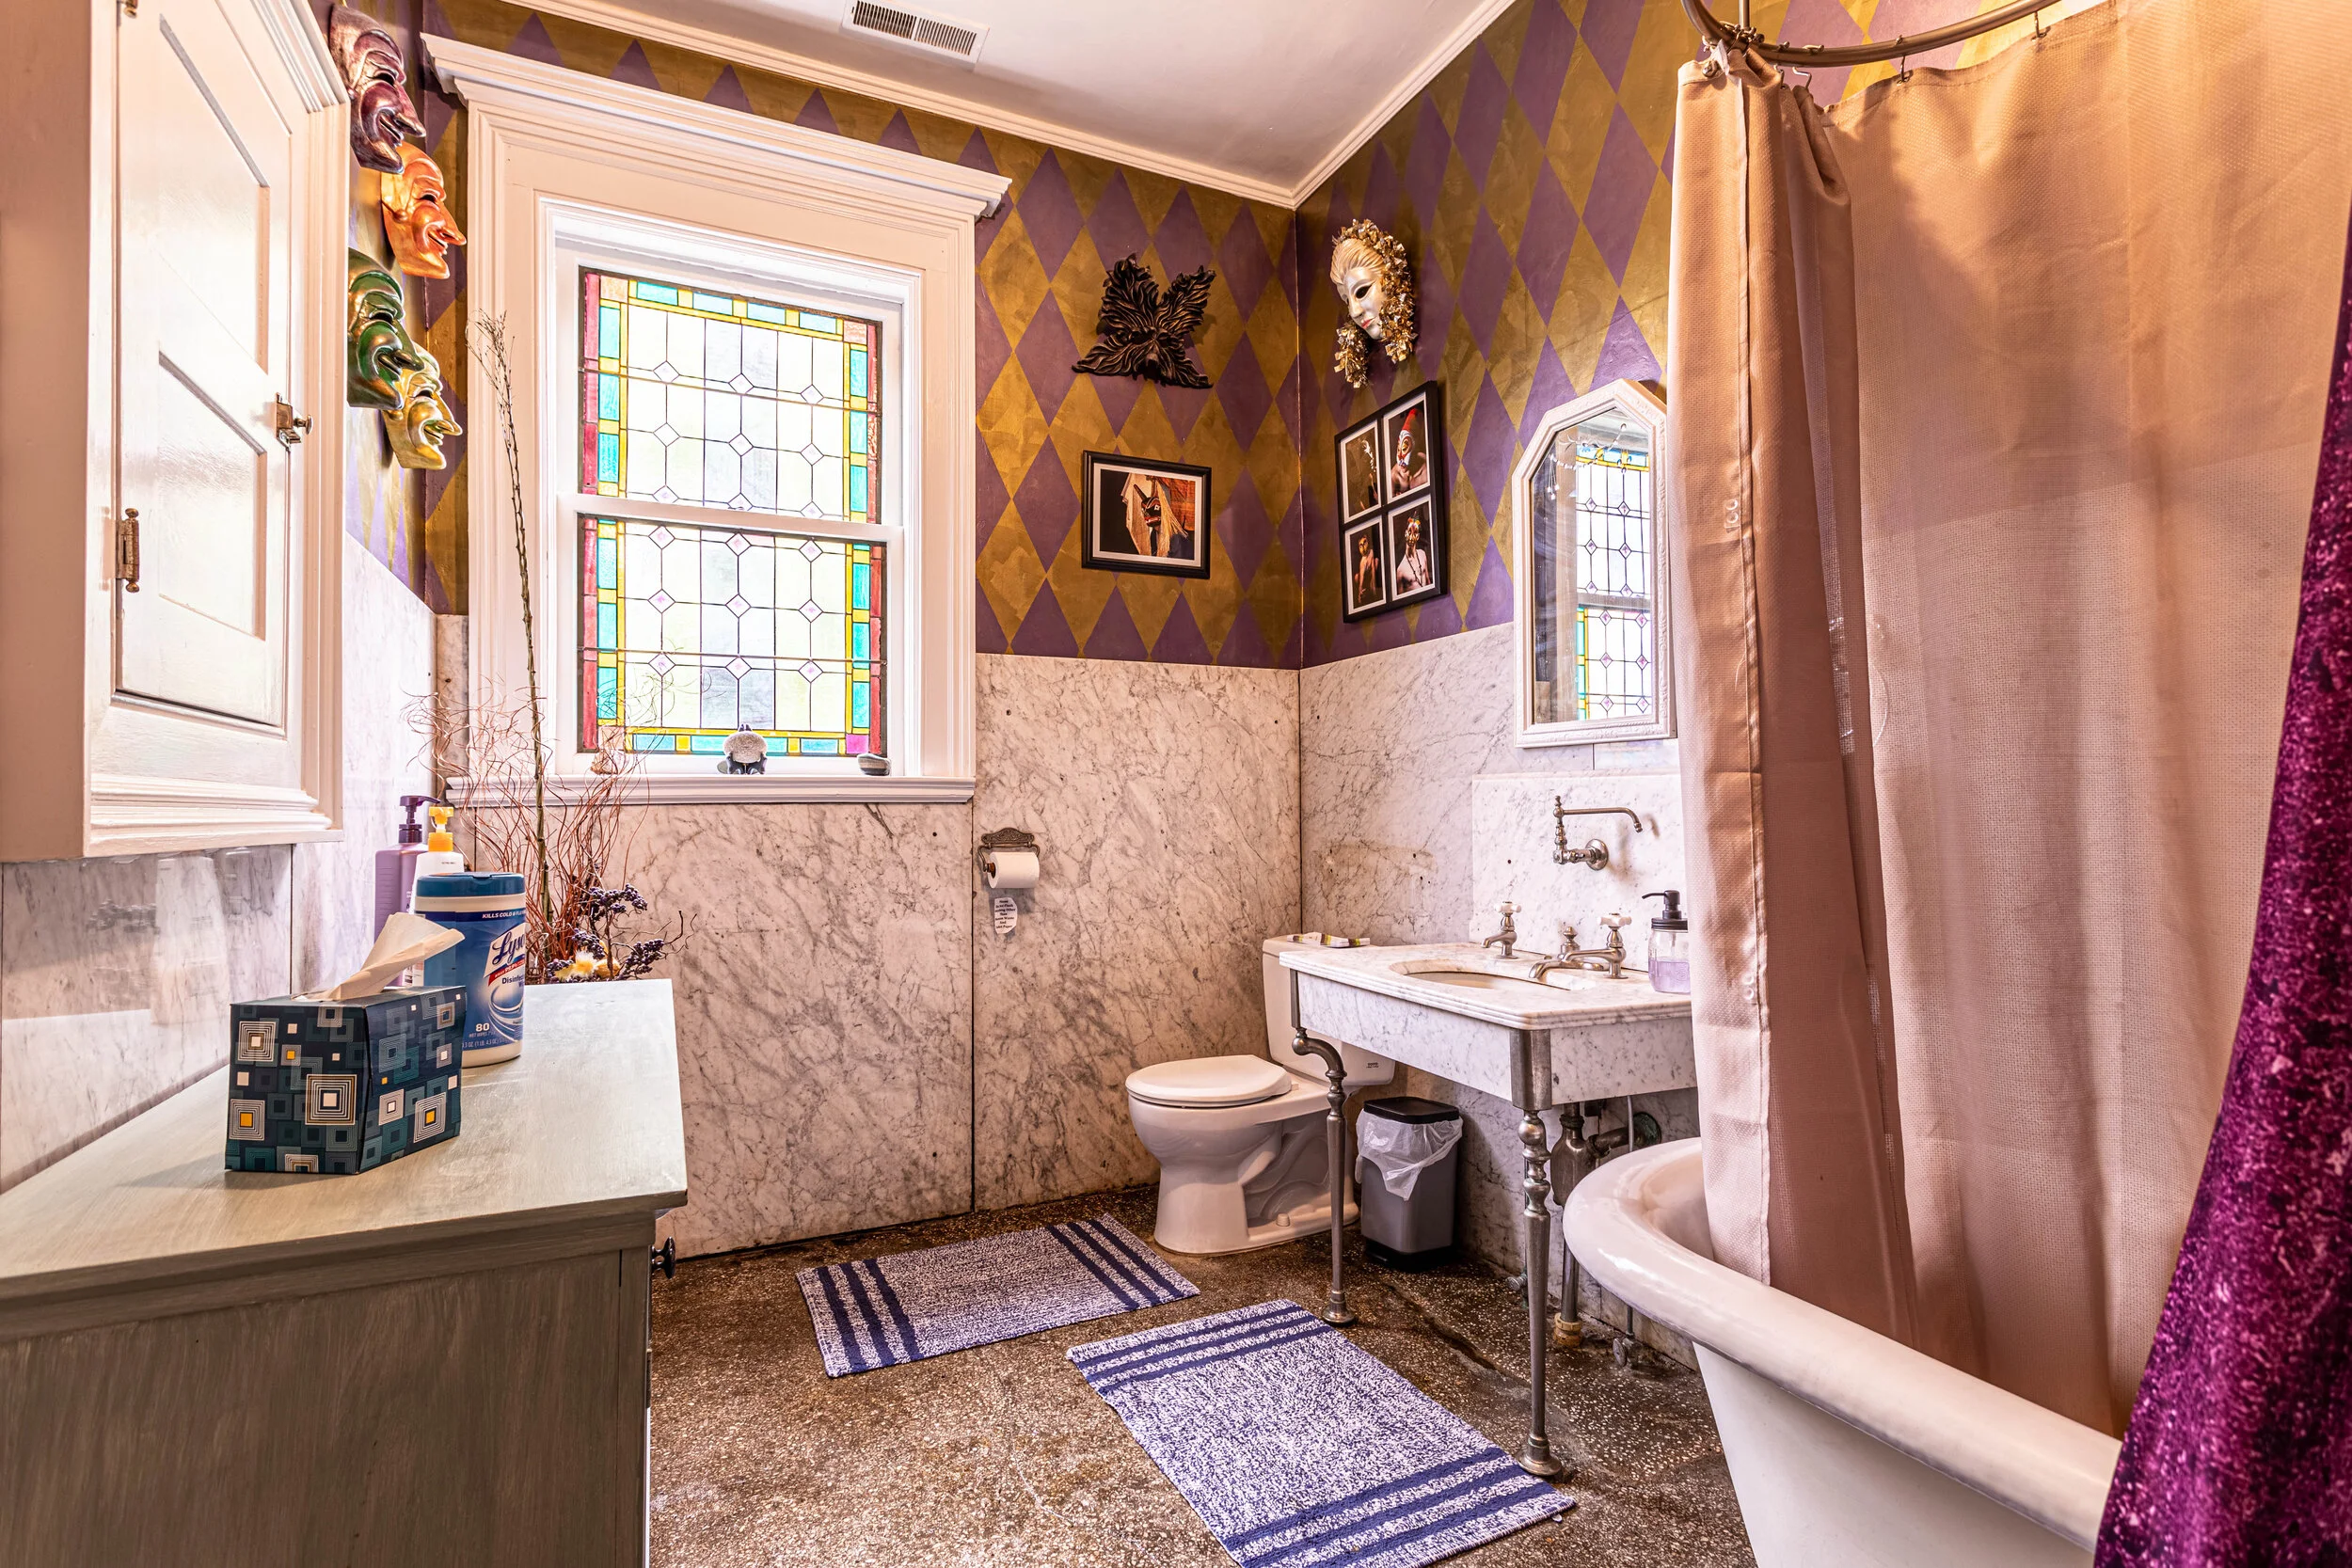
There are two full baths on the second floor (and one half bath on the first floor), that of course aren’t lacking in charm and detail.
Both bathrooms are spacious and feature beautiful stained glass windows. At the time of day I was able to visit, the sun was hitting this window just right to light the whole room in a surreal yellow glow.

And of course, in a house from this era, you HAVE to have a clawfoot tub. Also, check out the legs on that vanity!

The Third Floor
And for the grand finale, we’ll mosey up yet another set of stairs to the third floor, which is currently used as Jonathan’s workshop. However, in its heyday, it was used as a ballroom - and you’ll see why.

WOW! What a whirlwind of a house - I hope you enjoyed it as much as I did. What was your favorite part? The woodwork? The stained glass? The whole dang house!?
And don’t forget - until it’s sold you can stay here on your next trip! In case you didn’t catch the AirBnB links above, here they are: The Rose Room, The Circus Room, The Gilded Room, The Purple Room. And here’s the link to the listing.

Related Home Tour Posts:
1901 Victorian Mansion Home Tour

The 1927 American Foursquare
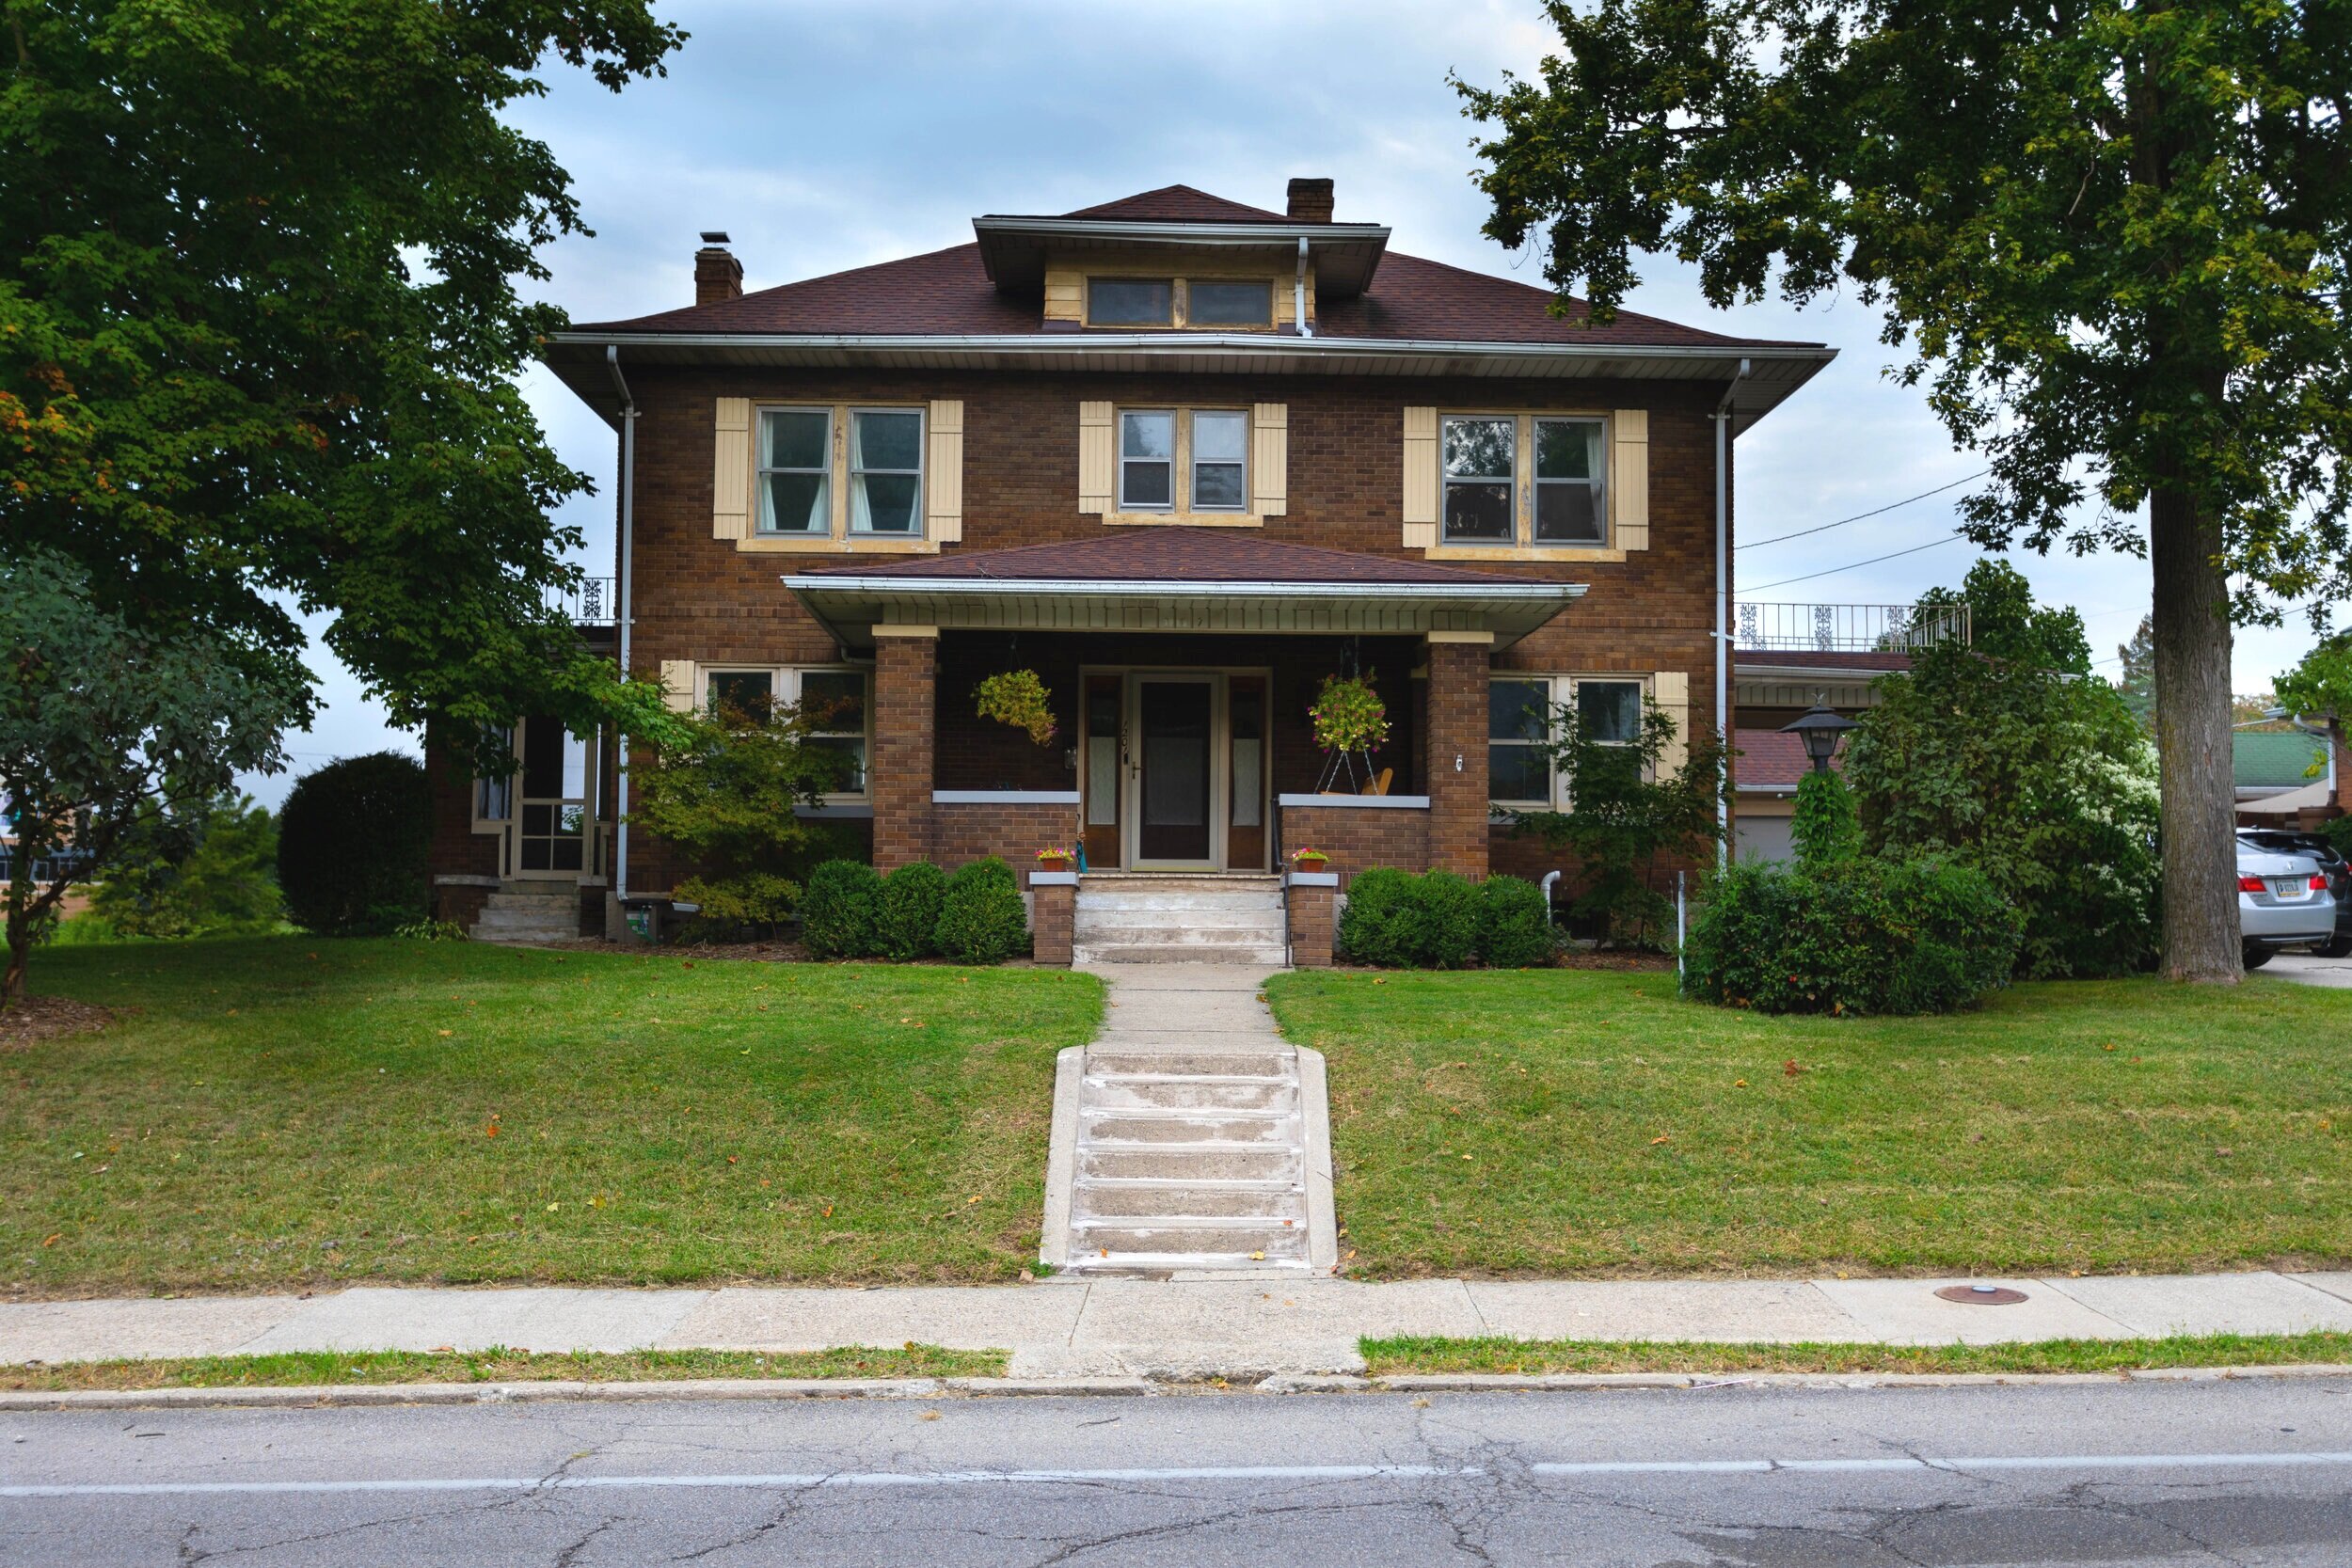
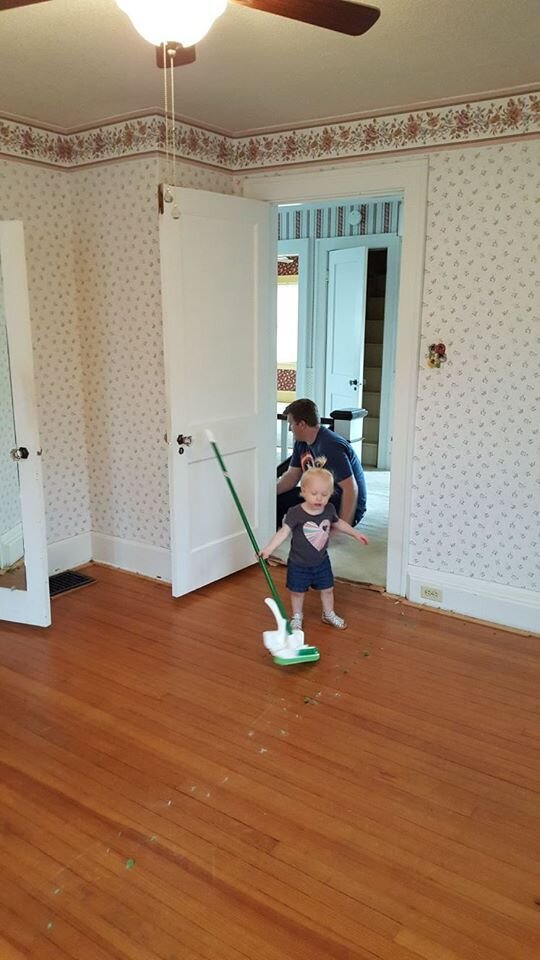
We put our house on the market and moved so quickly after announcing to our family and friends that we were going to make that our forever home, that I think we left many of them baffled as to the sudden change. Most people didn’t get a chance to even see the listing – let alone how the house looked when it was complete. So I’d like to take the opportunity now to show the before and afters and give those who know us personally, and those who don’t, a peek at how we modernized our 1927 American Foursquare, while still keeping its charm.
How We Modernized Our 100-year-old Home

As I’ve mentioned before, we’ve only lived in our current house since October 2019. Our move was pretty sudden and unexpected.
We actually hadn’t planned on moving from our previous house… ever. Seriously. A couple of months after we decided to make our former house our “forever home”, we had to majorly shift gears and start looking for a new house.
The decision to list our house was made on a Sunday night and we had it listed the following Wednesday. The first day our house was on the market we had 10 showings and 3 offers! I barely had time to clean, let alone style and declutter the house the way I would have preferred.
We put our house on the market and moved so quickly after announcing to our family and friends that we were going to make that our forever home, that I think we left many of them baffled as to the sudden change. Most people didn’t get a chance to even see the listing – let alone how the house looked when it was complete. So I’d like to take the opportunity now to show the before and afters and give those who know us personally, and those who don’t, a peek at how we modernized our 1927 American Foursquare, while still keeping its charm.
As a side note - if you love checking out old houses like I do, I highly recommend the Instagram account Cheap Old Houses where they highlight old houses across the country, typically for sale under $100k. I also wrote a post where I got the opportunity to tour a gorgeous historical Victorian mansion (built in 1901!). Now, let’s get into this house tour!
The exterior
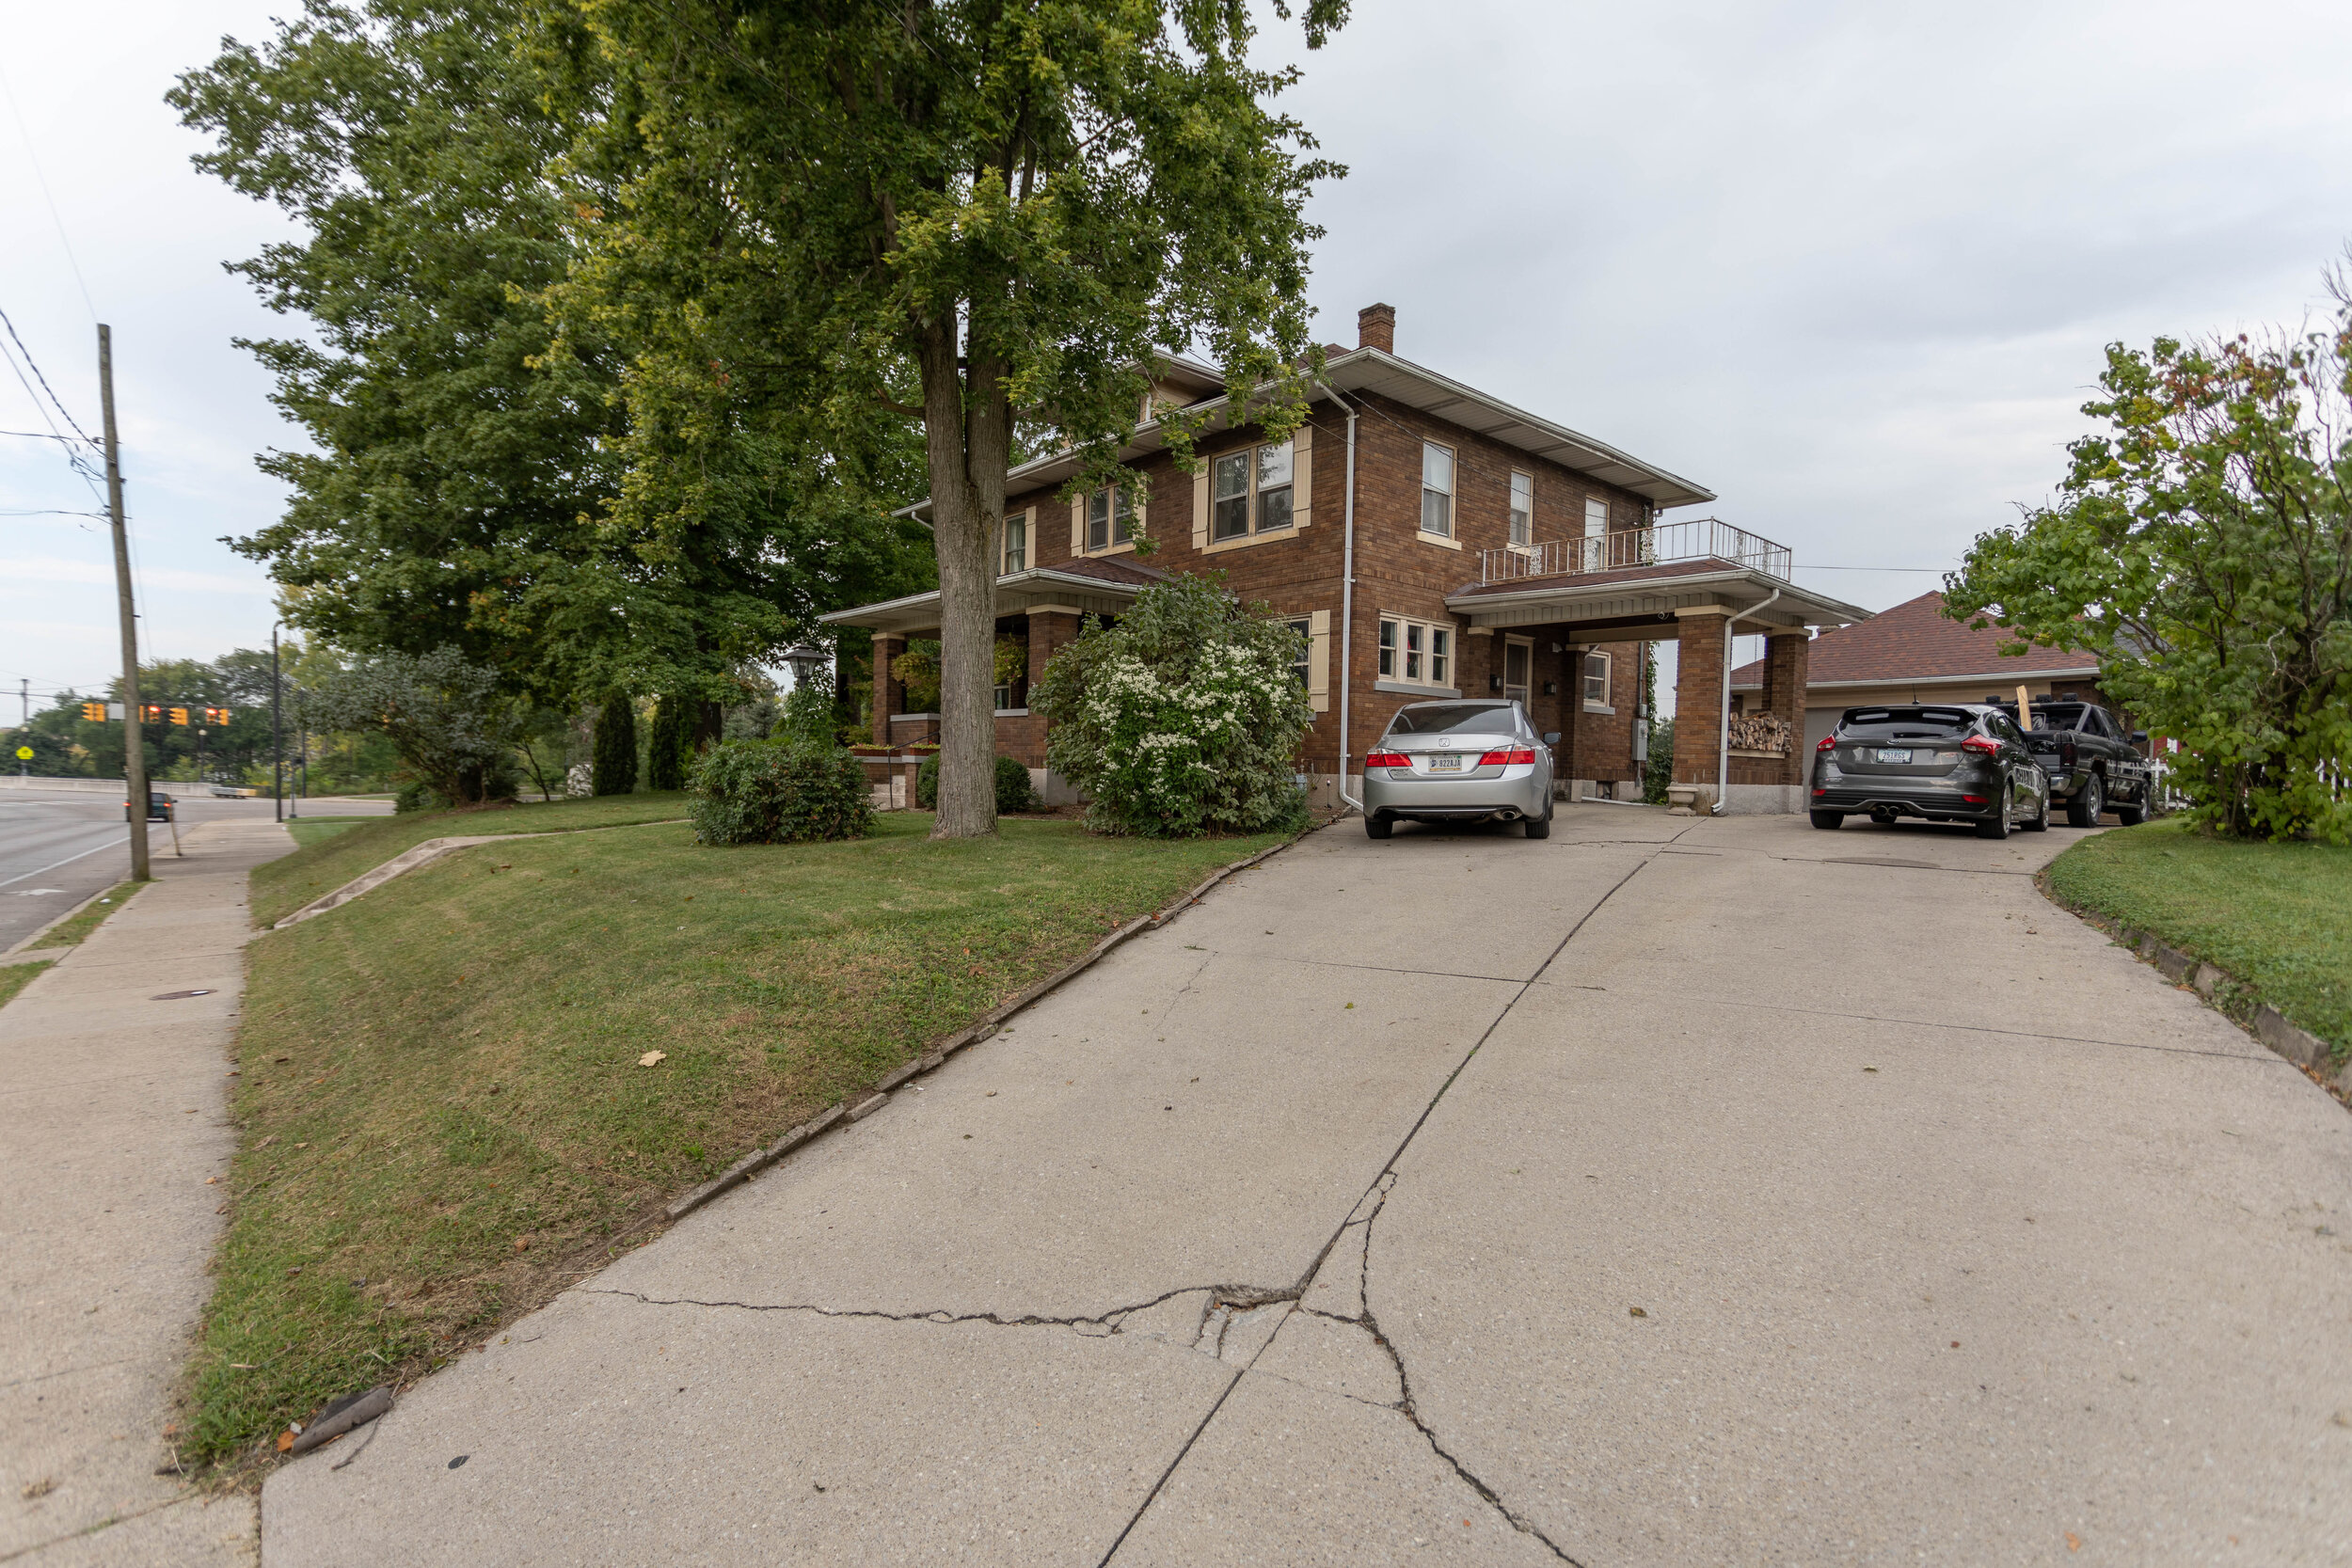
We actually didn’t do much to the exterior of our old house. I would never paint the brick on a historic house like this, but we did want/need to repaint the shutters and window sills.
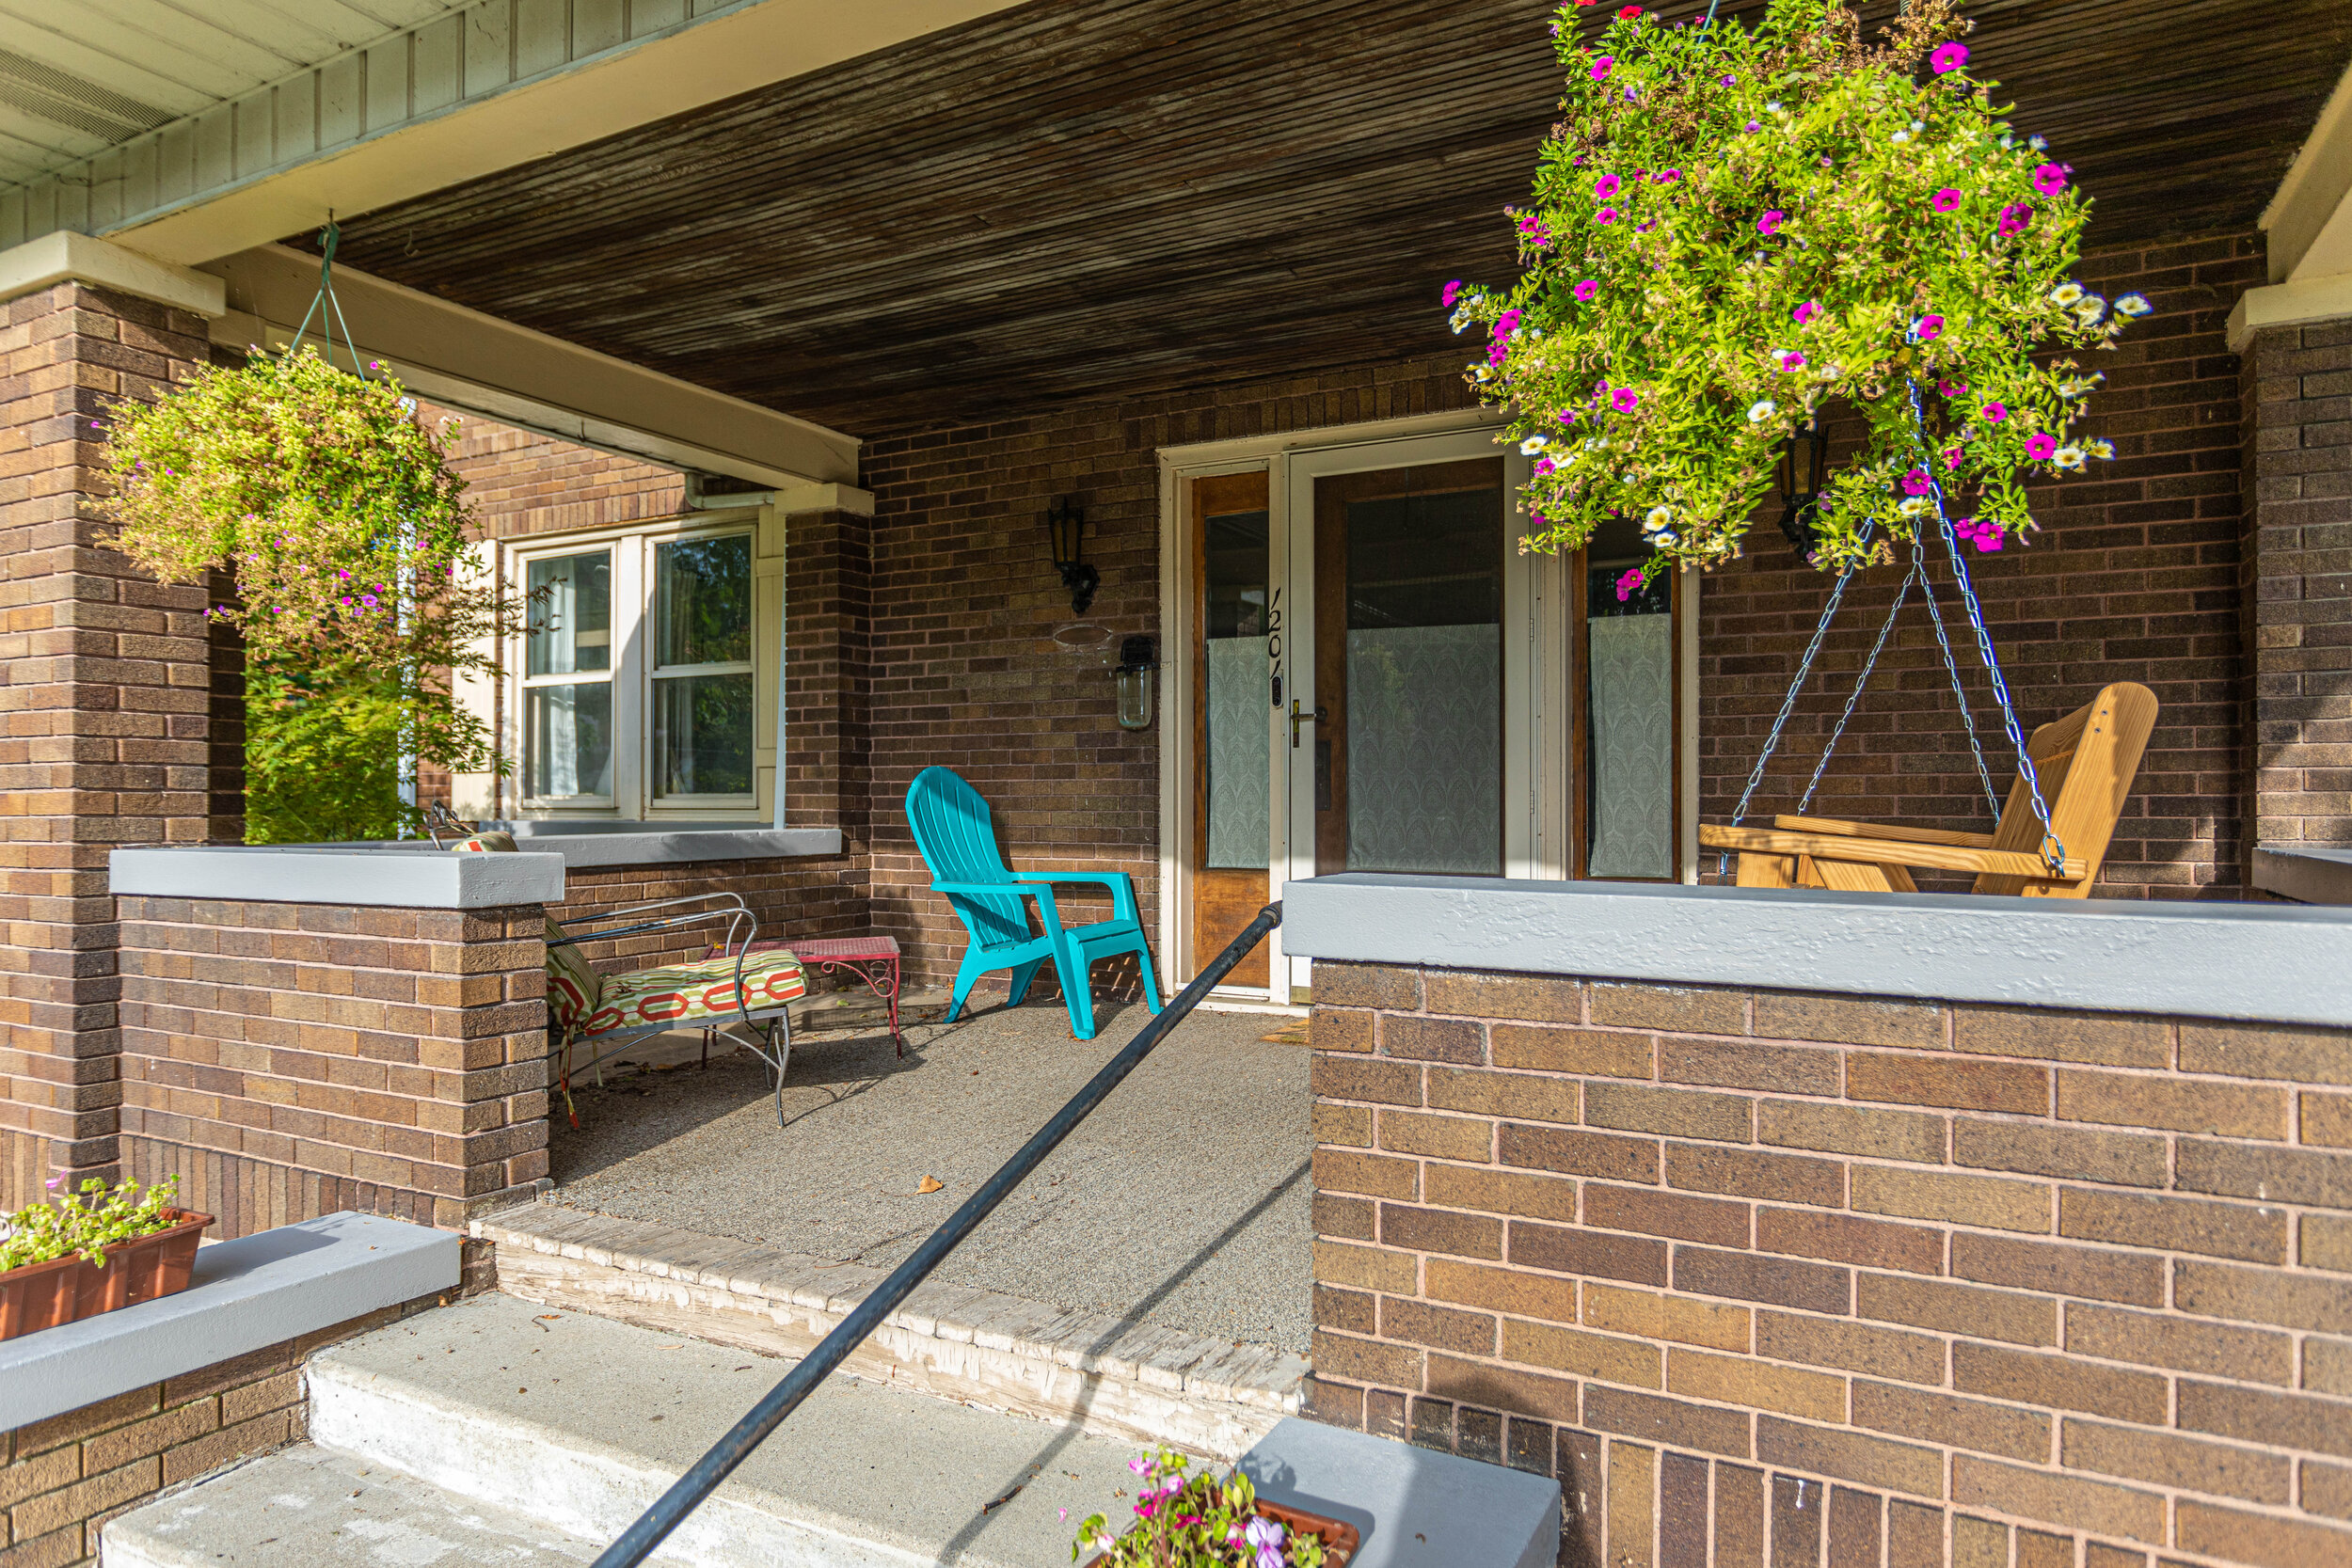
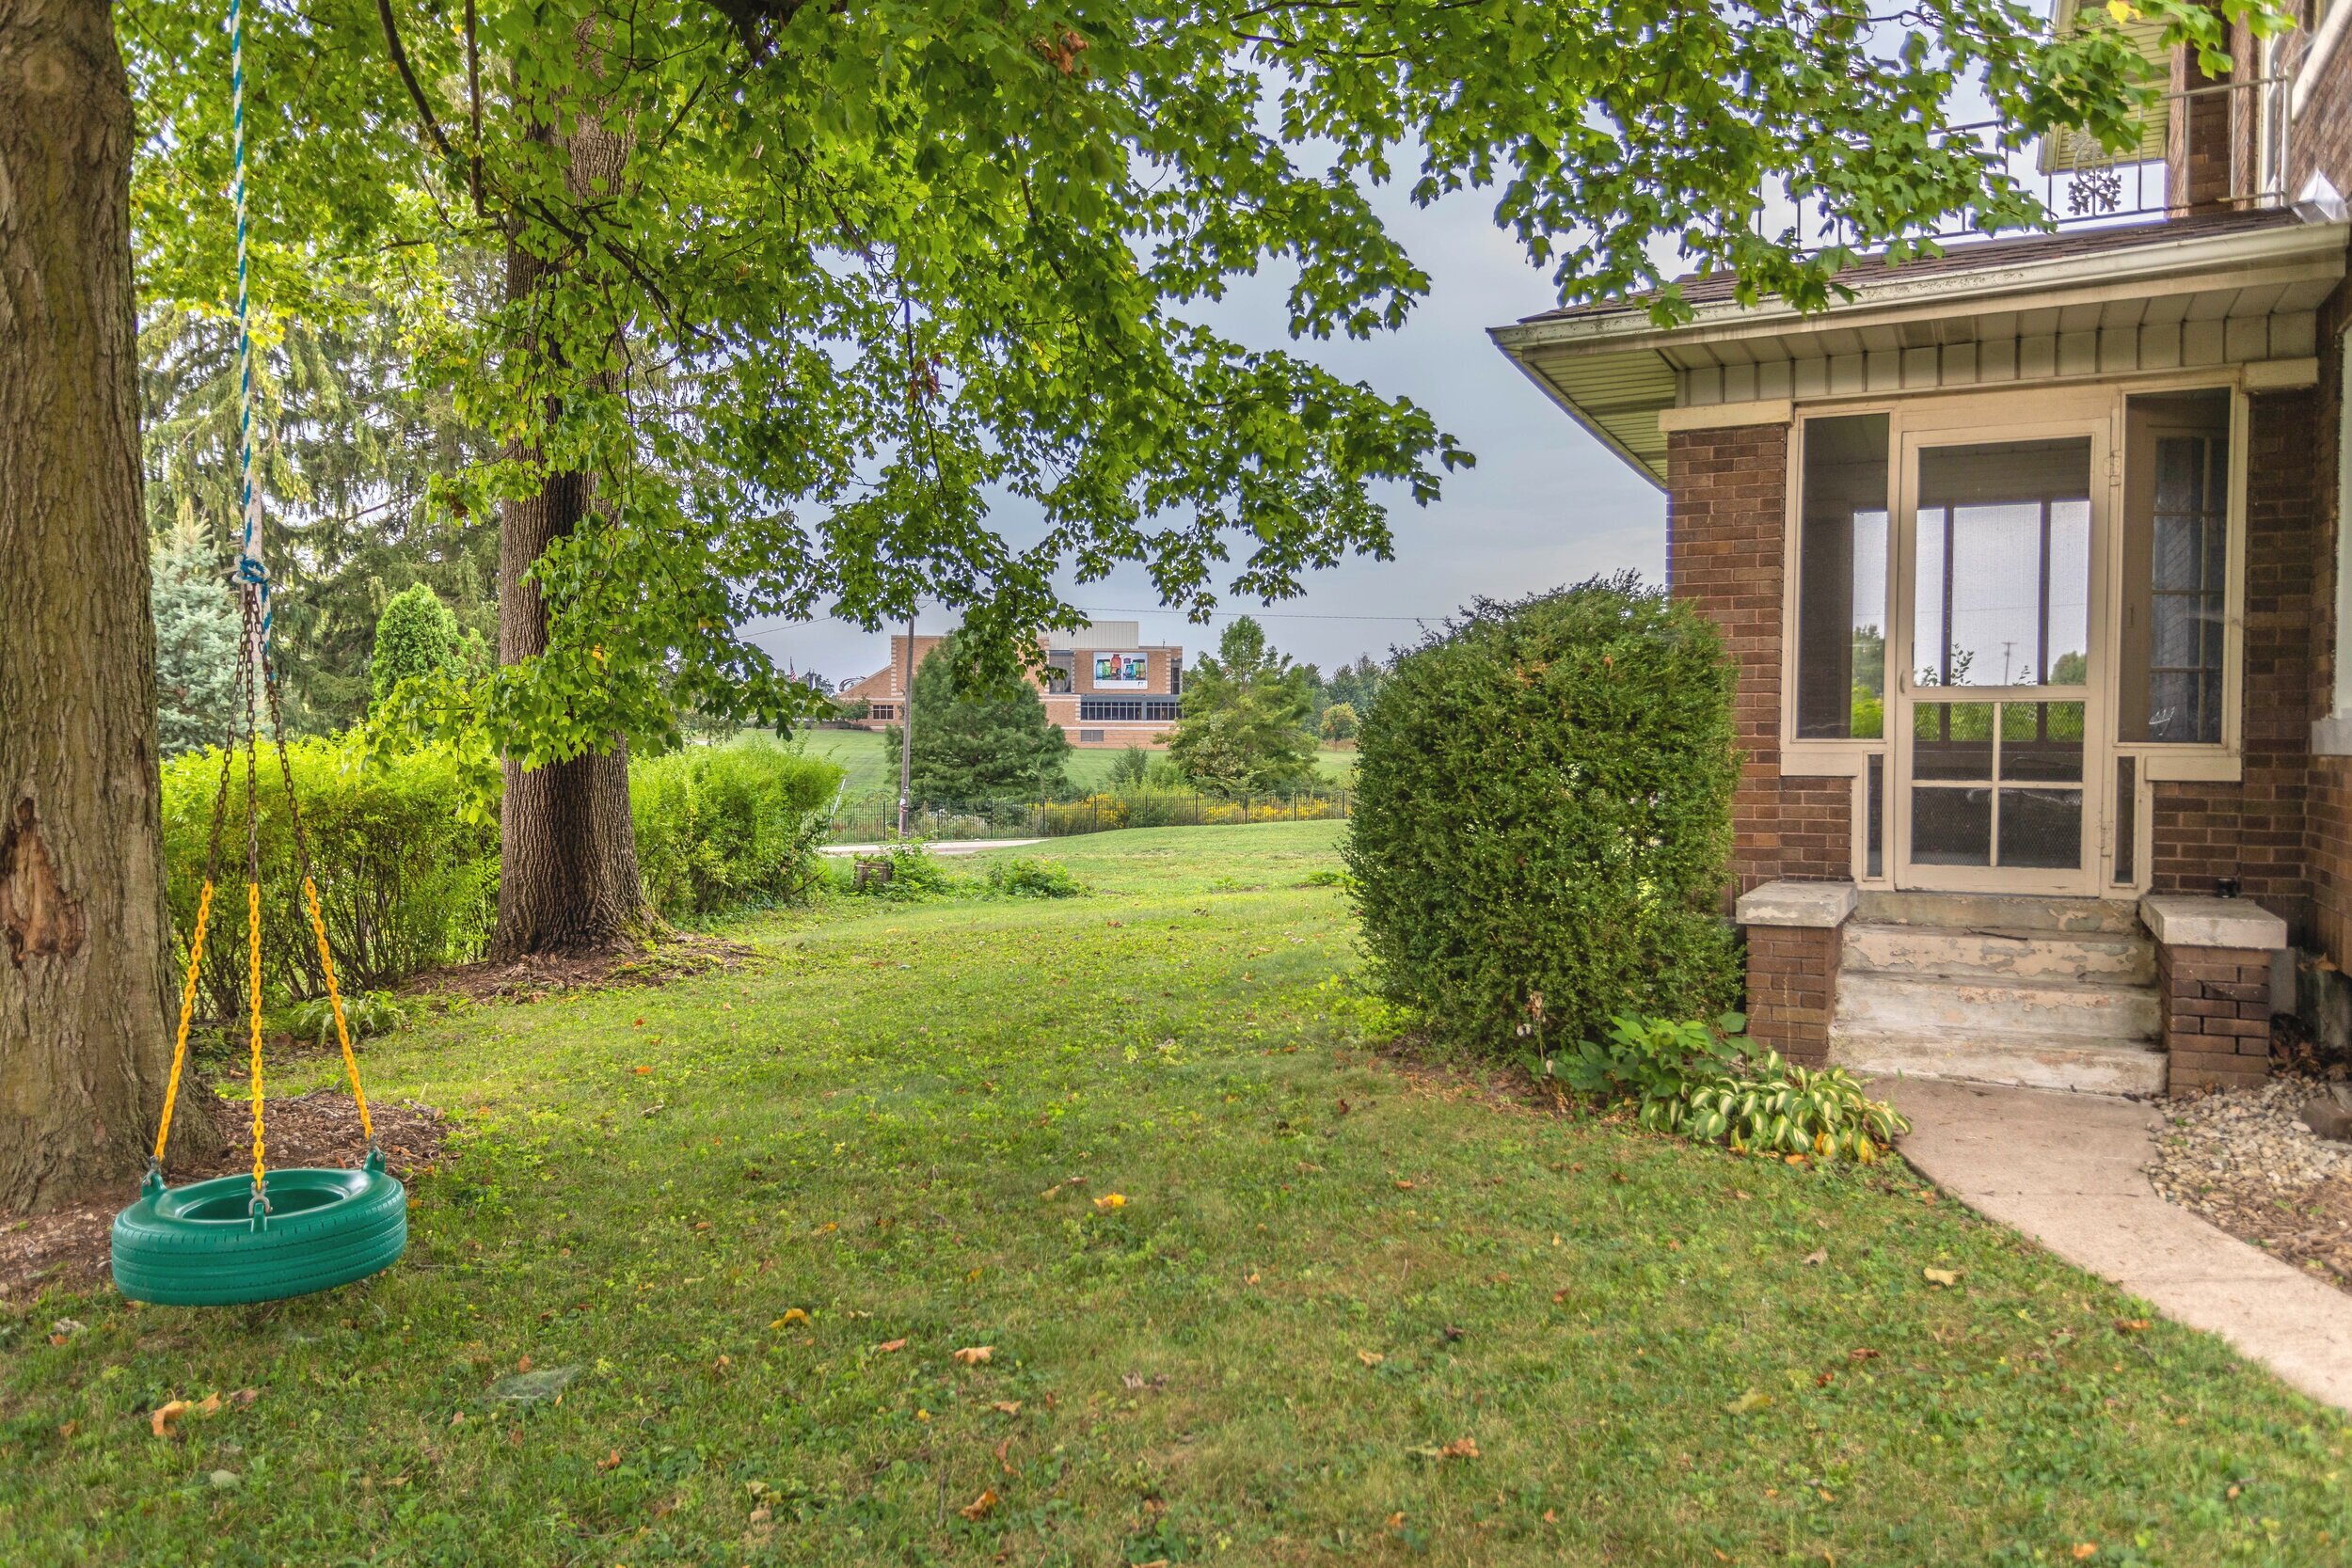
I love the symmetry and functionality of the exterior of this house. On all four sides of the house, there’s an exterior door leading to some sort of functional outside area. For instance, the front door leads to that amazing porch. Unfortunately, it took me almost two years to buy a porch swing because I’m cheap… and then we moved a few months later. It got a lot of use during that time, though!
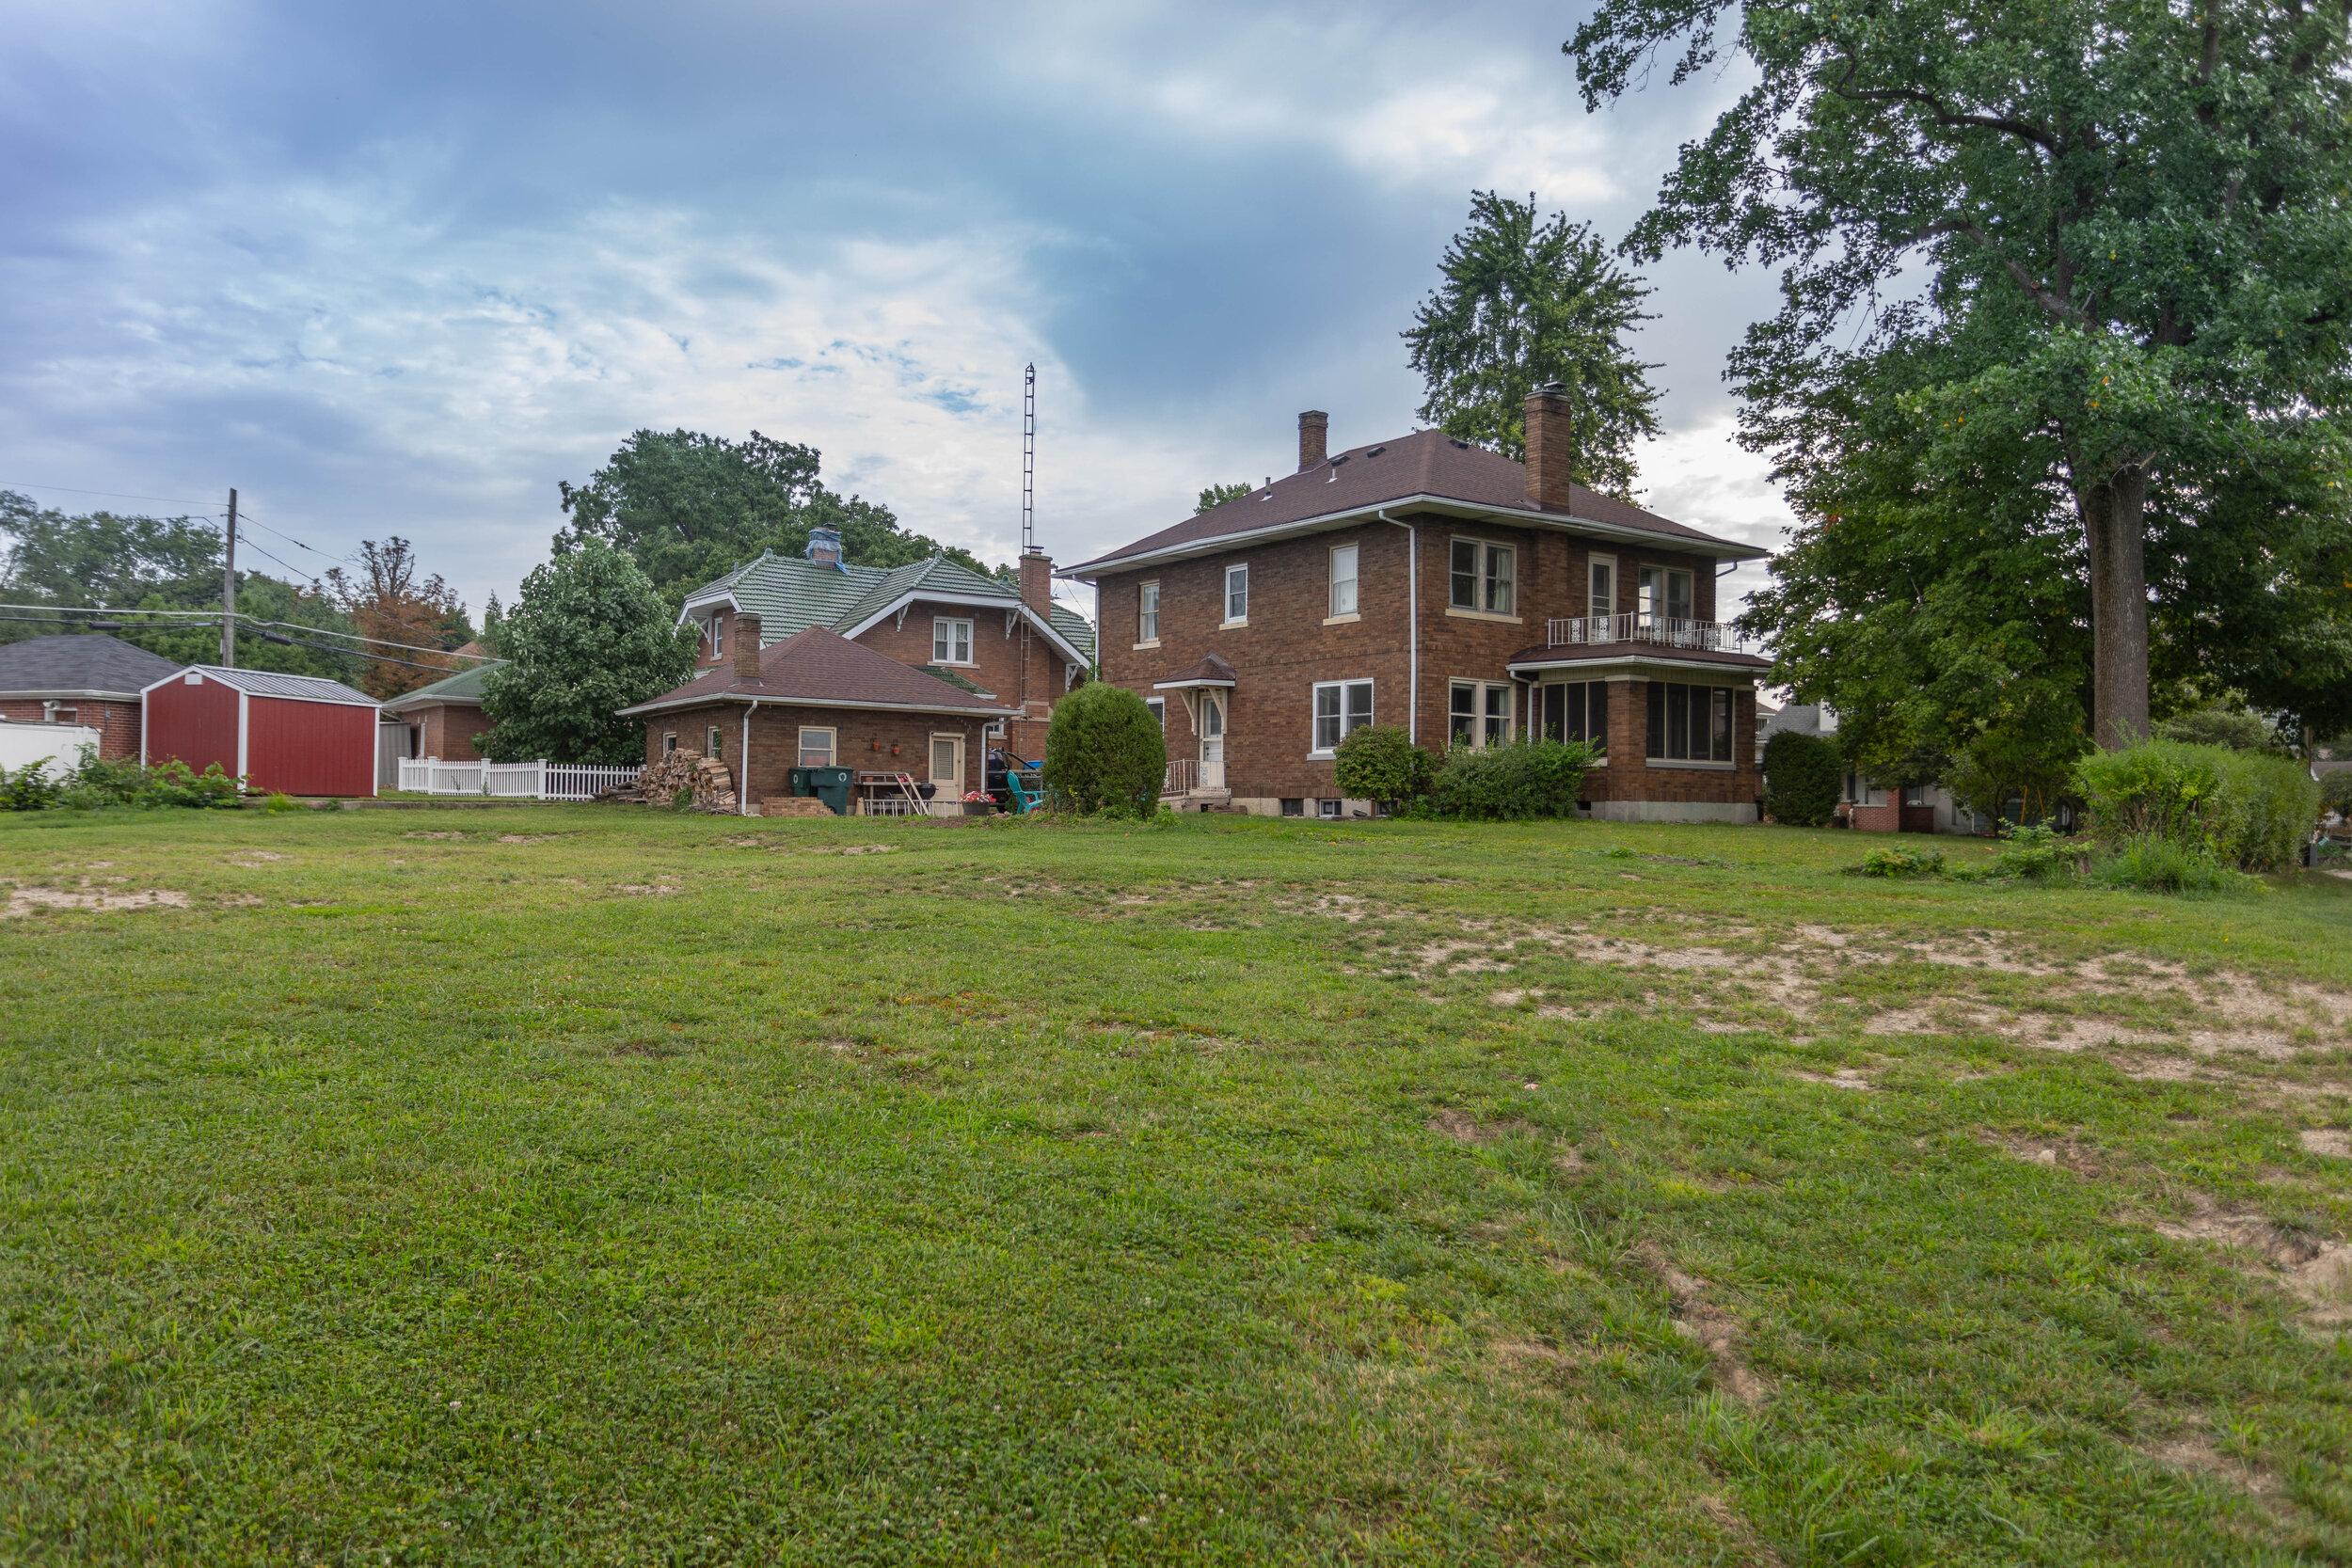
In the driveway the side door leads to a carport, on the back of the house the door leads to a patio, and on the opposite side of the house from the driveway there’s a screened-in sun porch. There’s even a balcony over the sun porch which you get to through the master bedroom!


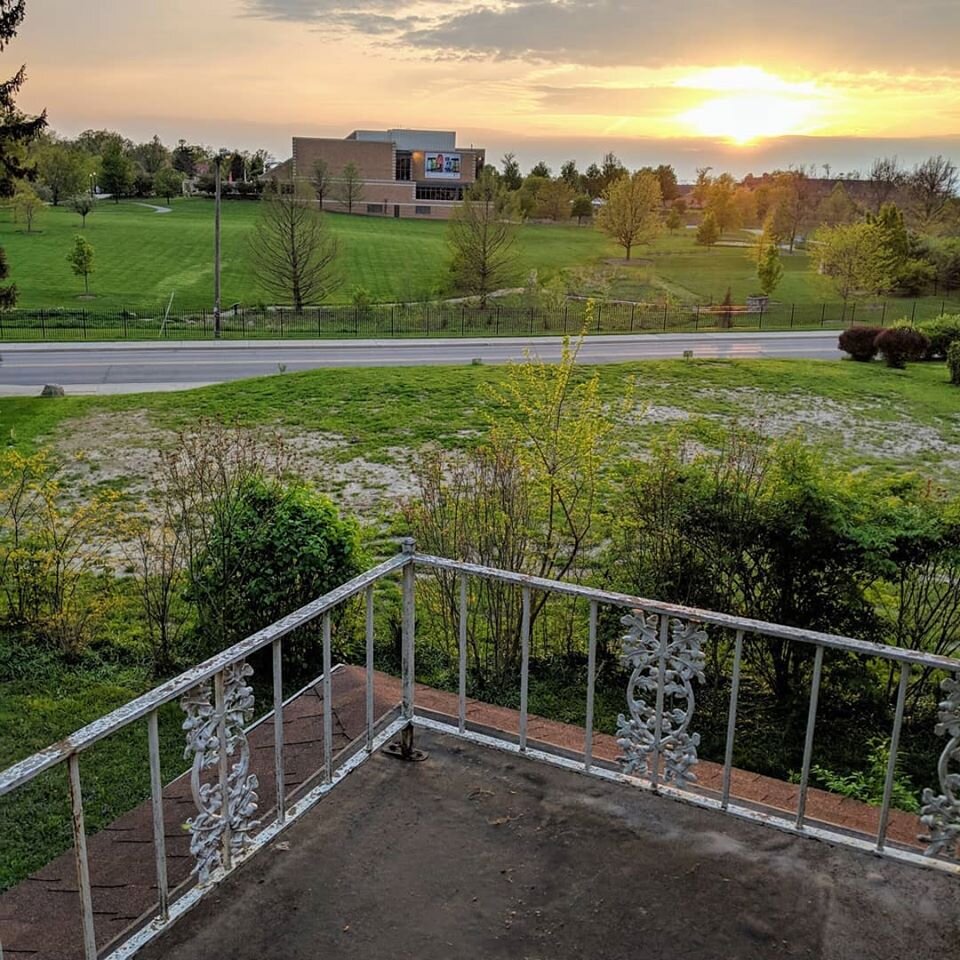
If you’ll notice in the pictures above, the last one is taken from the balcony overlooking some sad looking grass (and a pretty awesome sunset). Here, I’ll post it below so don’t have to go searching:

When we bought the house, our property ended at the treeline you see above. About a week after we moved in, the house that once lived in that empty space of land beyond the treeline was demolished and by today’s standards it was too small to build a new structure. It just so happened that the next door neighbor of that house owned it.
So last summer when we decided to make this our forever home we bought it from him, planning on putting up a retaining wall, a fence, adding a pool, and pretty much making the yard into an oasis. Obviously those plans didn’t work out, but we did sell the land with the house so at least we don’t still own a random plot of land!
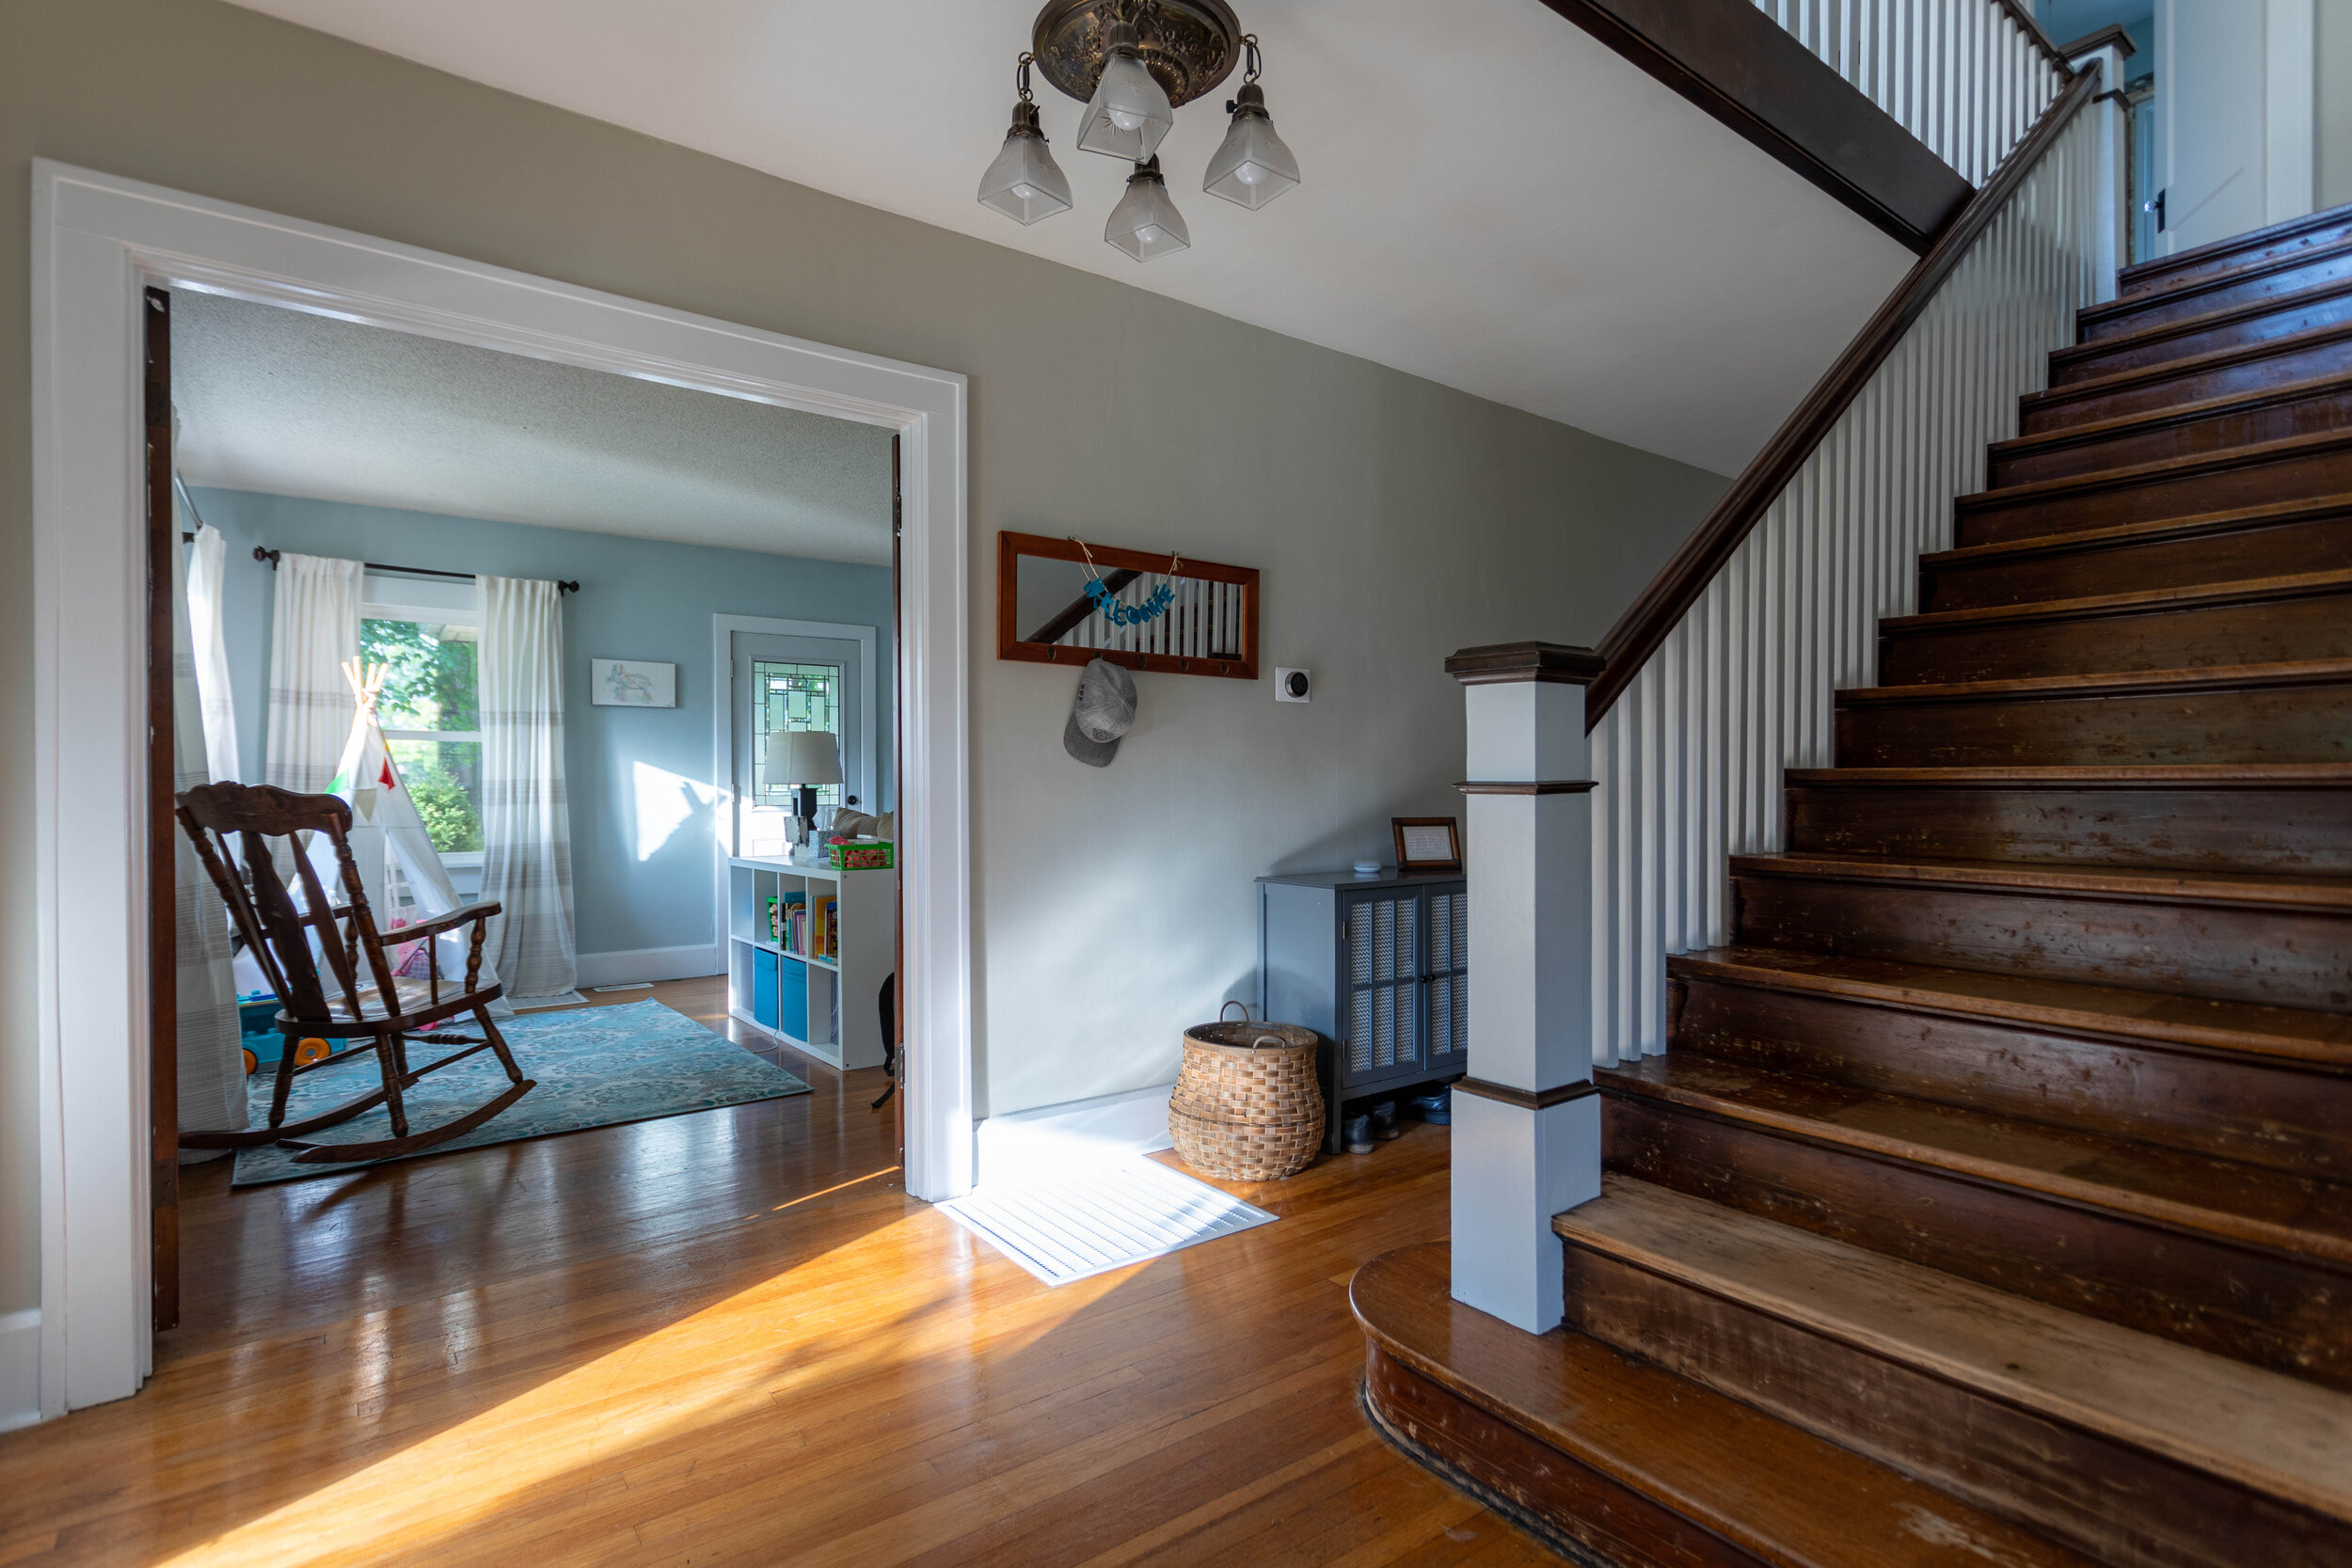
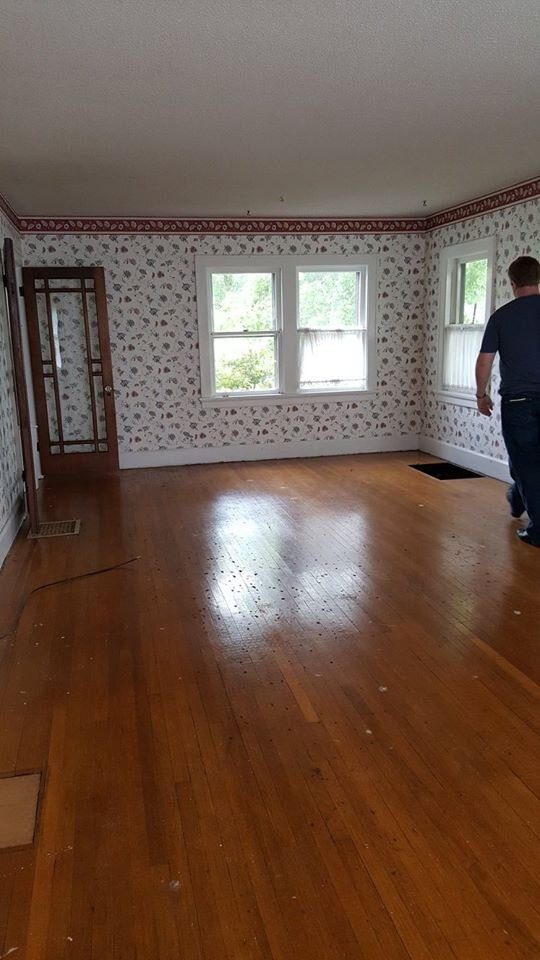
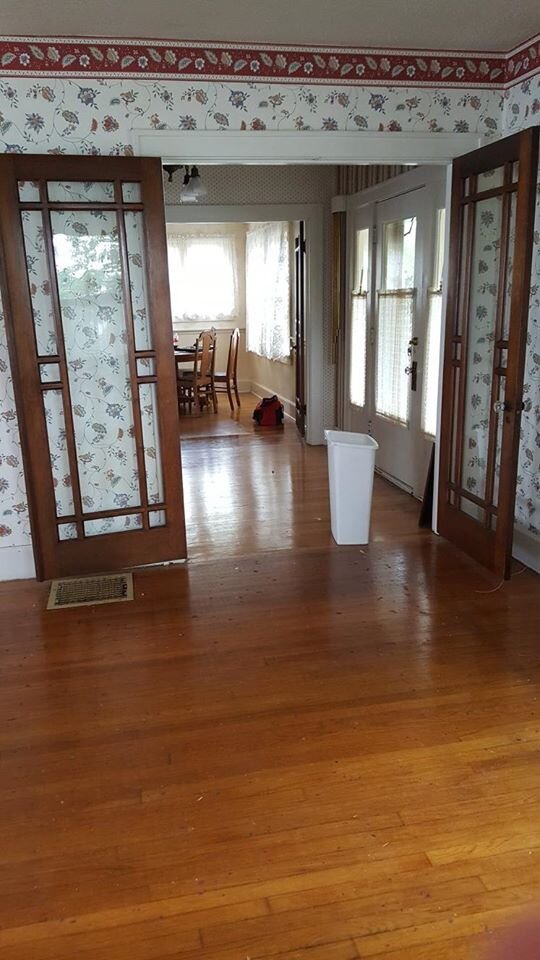
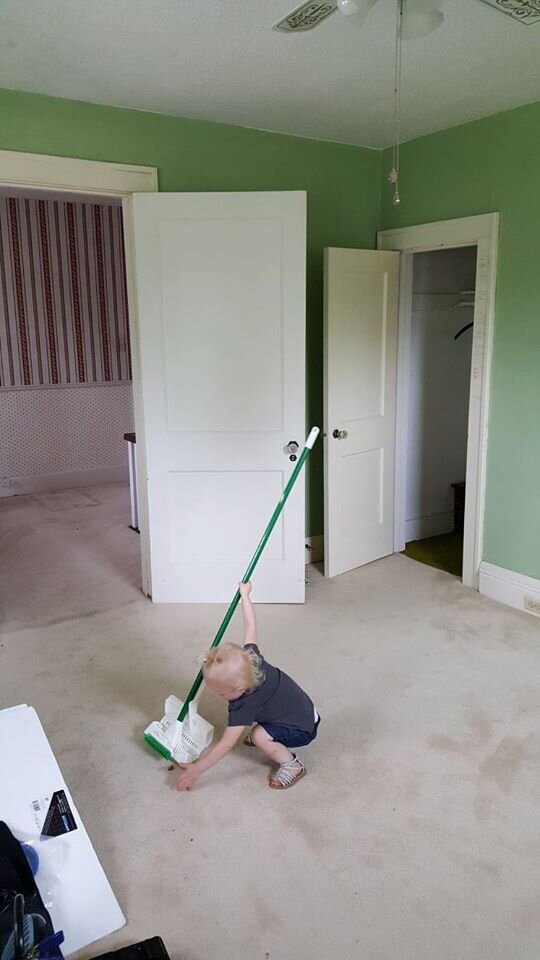
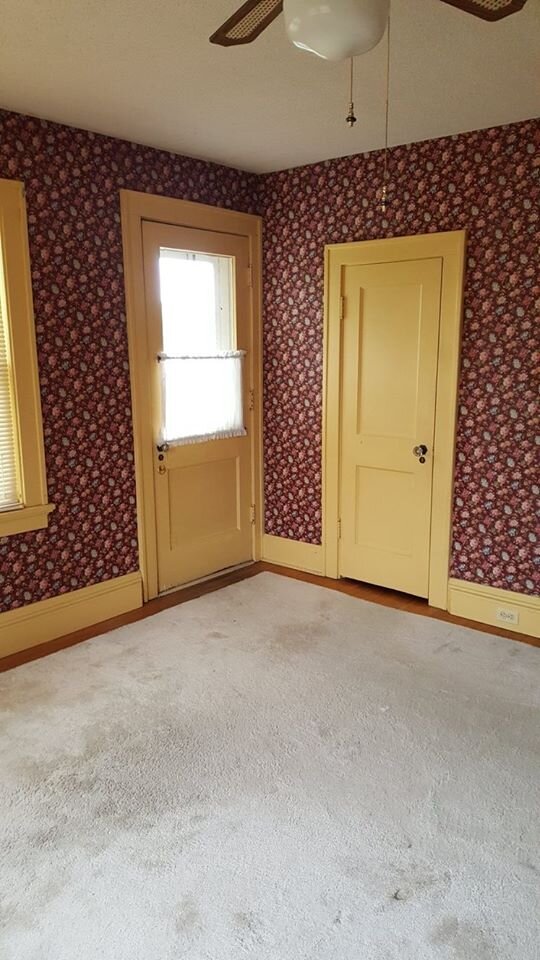
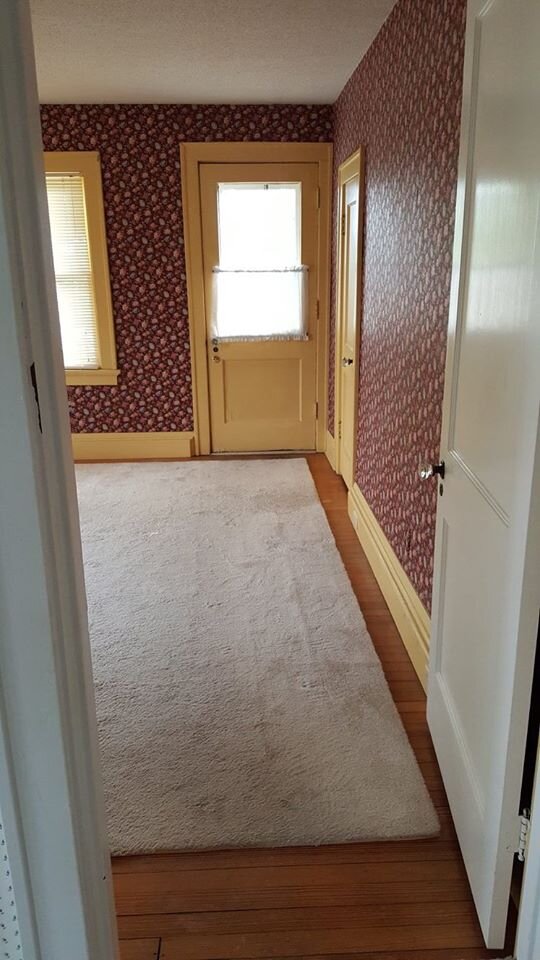
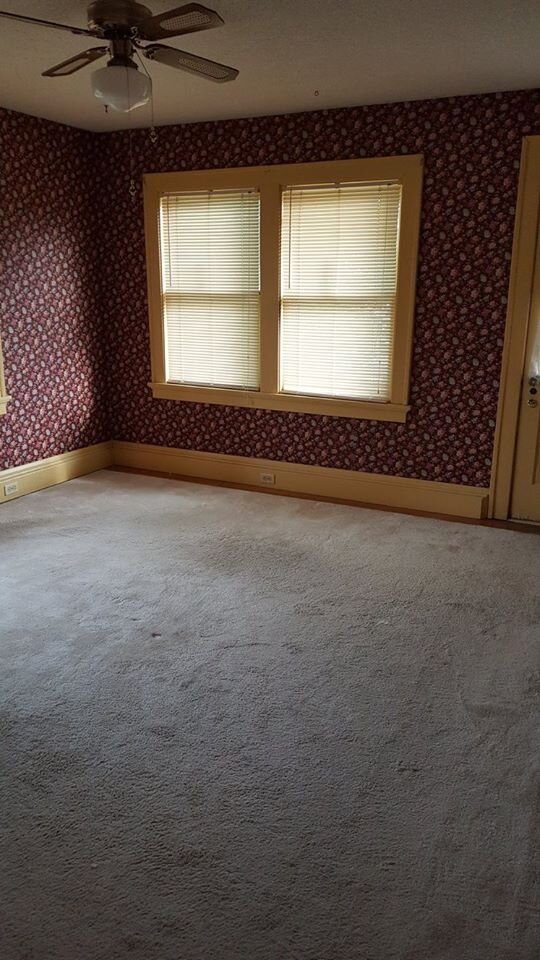
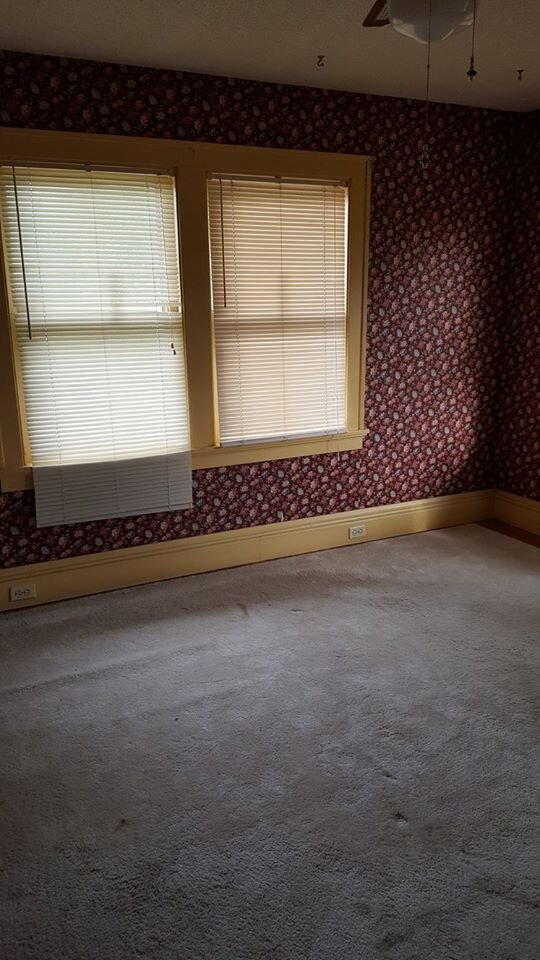
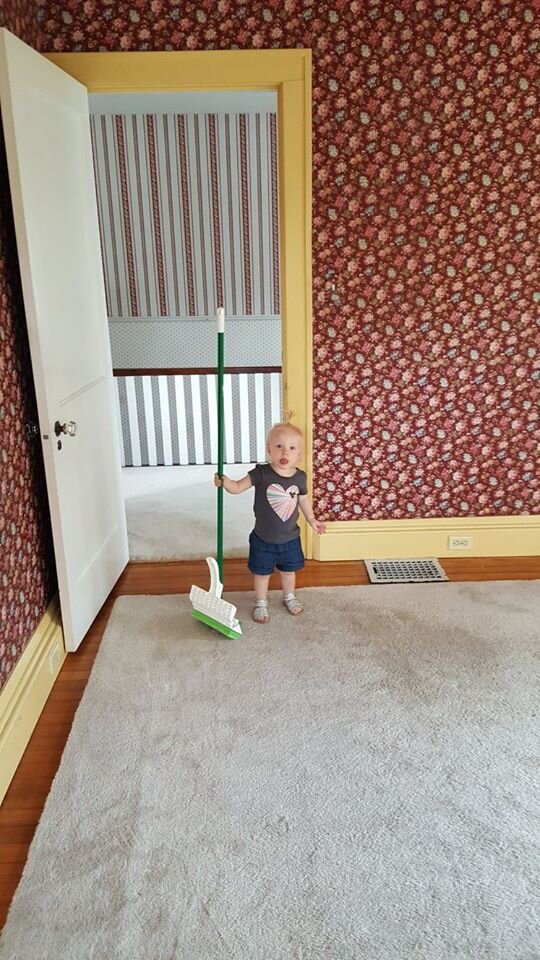
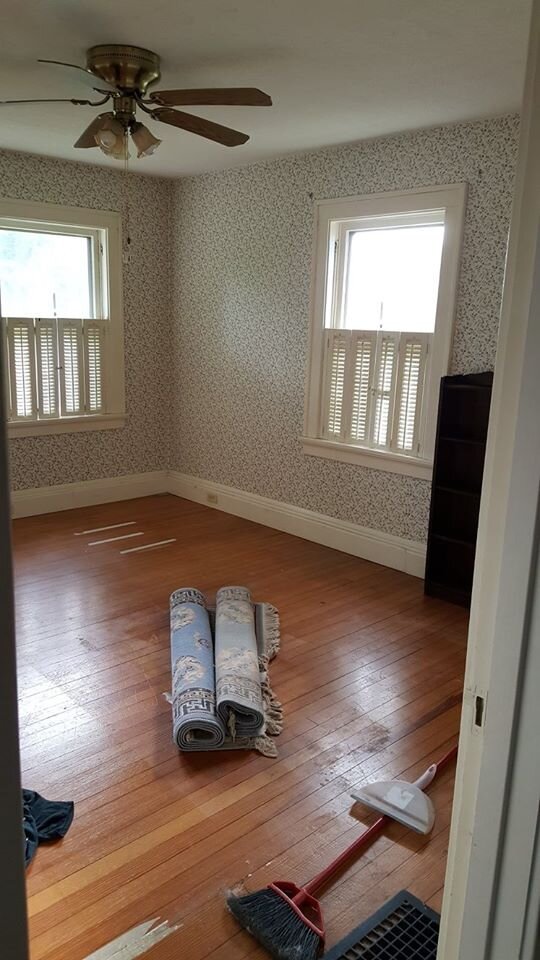
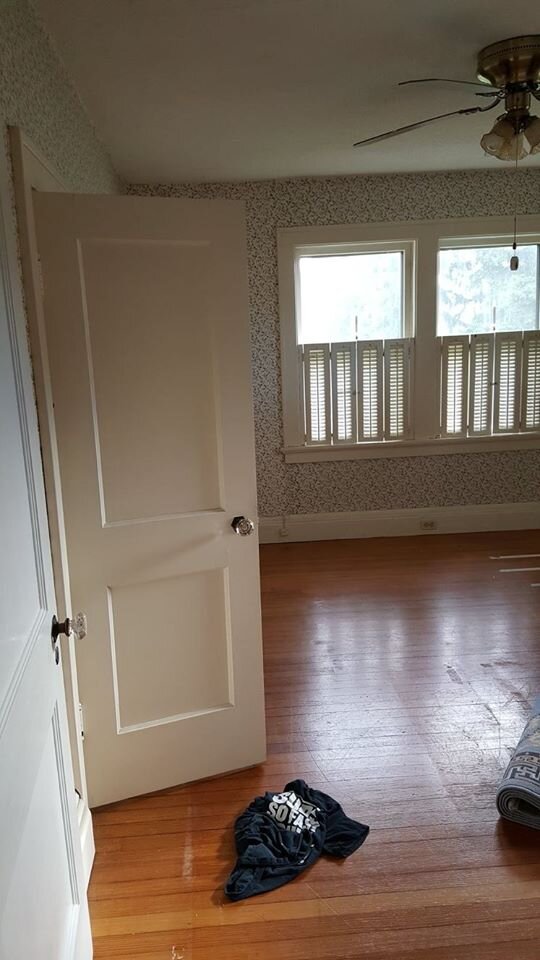
The foyer
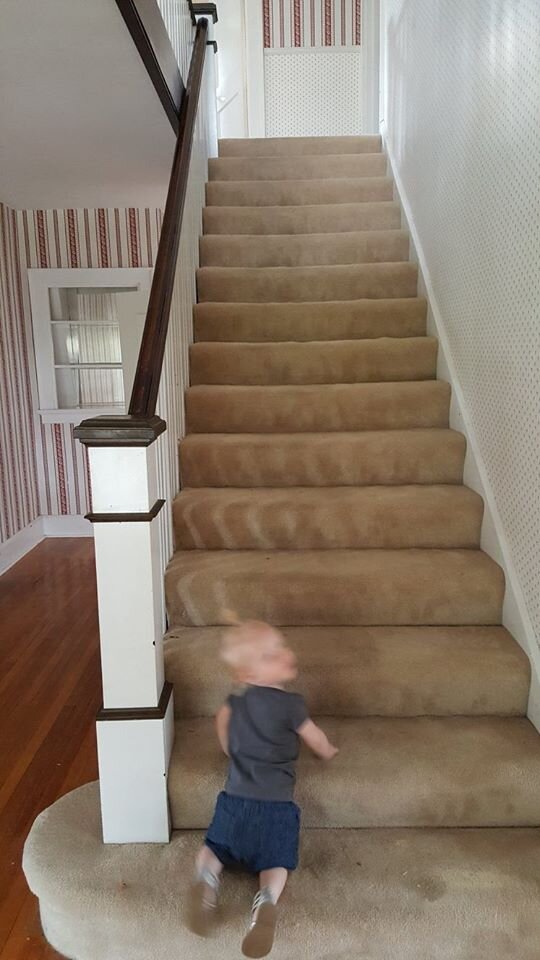
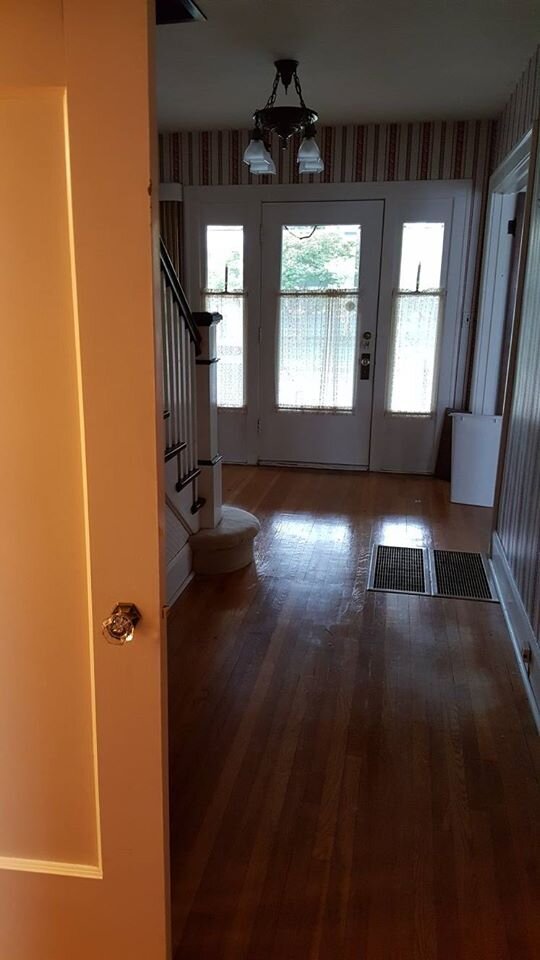
Check out all that sweet, sweet wallpaper. And it didn’t stop here! There was wallpaper in every single room of this house (bathrooms and kitchen included) when we moved in with the exception of ONE bedroom. Also, apologies for the creepy looking child in the picture of the stairs.
By the time we left, I had removed all the wallpaper! So I definitely meant it when I said I’ve had my fair share of stripping wallpaper. This house was a doozy!
Aside from stripping wallpaper in the foyer and painting it with my favorite neutral (Villa Grey by Valspar), we pulled the carpet off the stairs. I planned on refinishing them, and actually started experimenting with how much effort they would be to sand down to the bare wood, but soon after I got pregnant with our younger daughter and had to put that project on hold. And then we moved a few months after she was born.
While I was on maternity leave with her I did manage to paint all the trim in the foyer and the upstairs hallway though.

The half bath
I debated not sharing this room because it didn’t have any sort of real transformation, but decided to go ahead and show it anyway because, why not?

I liked to call this the Harry Potter bathroom because it’s under the staircase on the main floor. It’s super tiny and Lucius, being a rather large fella at 6’1’’, could barely fit.
I had big dreams for this tiny space that I would have loved to see to fruition. I pictured doing something bold and unexpected in here, like painting it a strong jewel-toned color. I even considered (gasp) WALLPAPER. Hey - just because I tend to strip wallpaper in every house I live in doesn’t mean I don’t like it. It just needs to be the right pattern and style.
I also planned on replacing pretty much everything else in this room - the vanity, mirror, toilet, light fixture. All of it.
Unfortunately, the most I was able to tackle in this room was stripping the wallpaper and potty training a toddler. Hence the M&M’s & Reese’s Pieces (for bribery, of course).

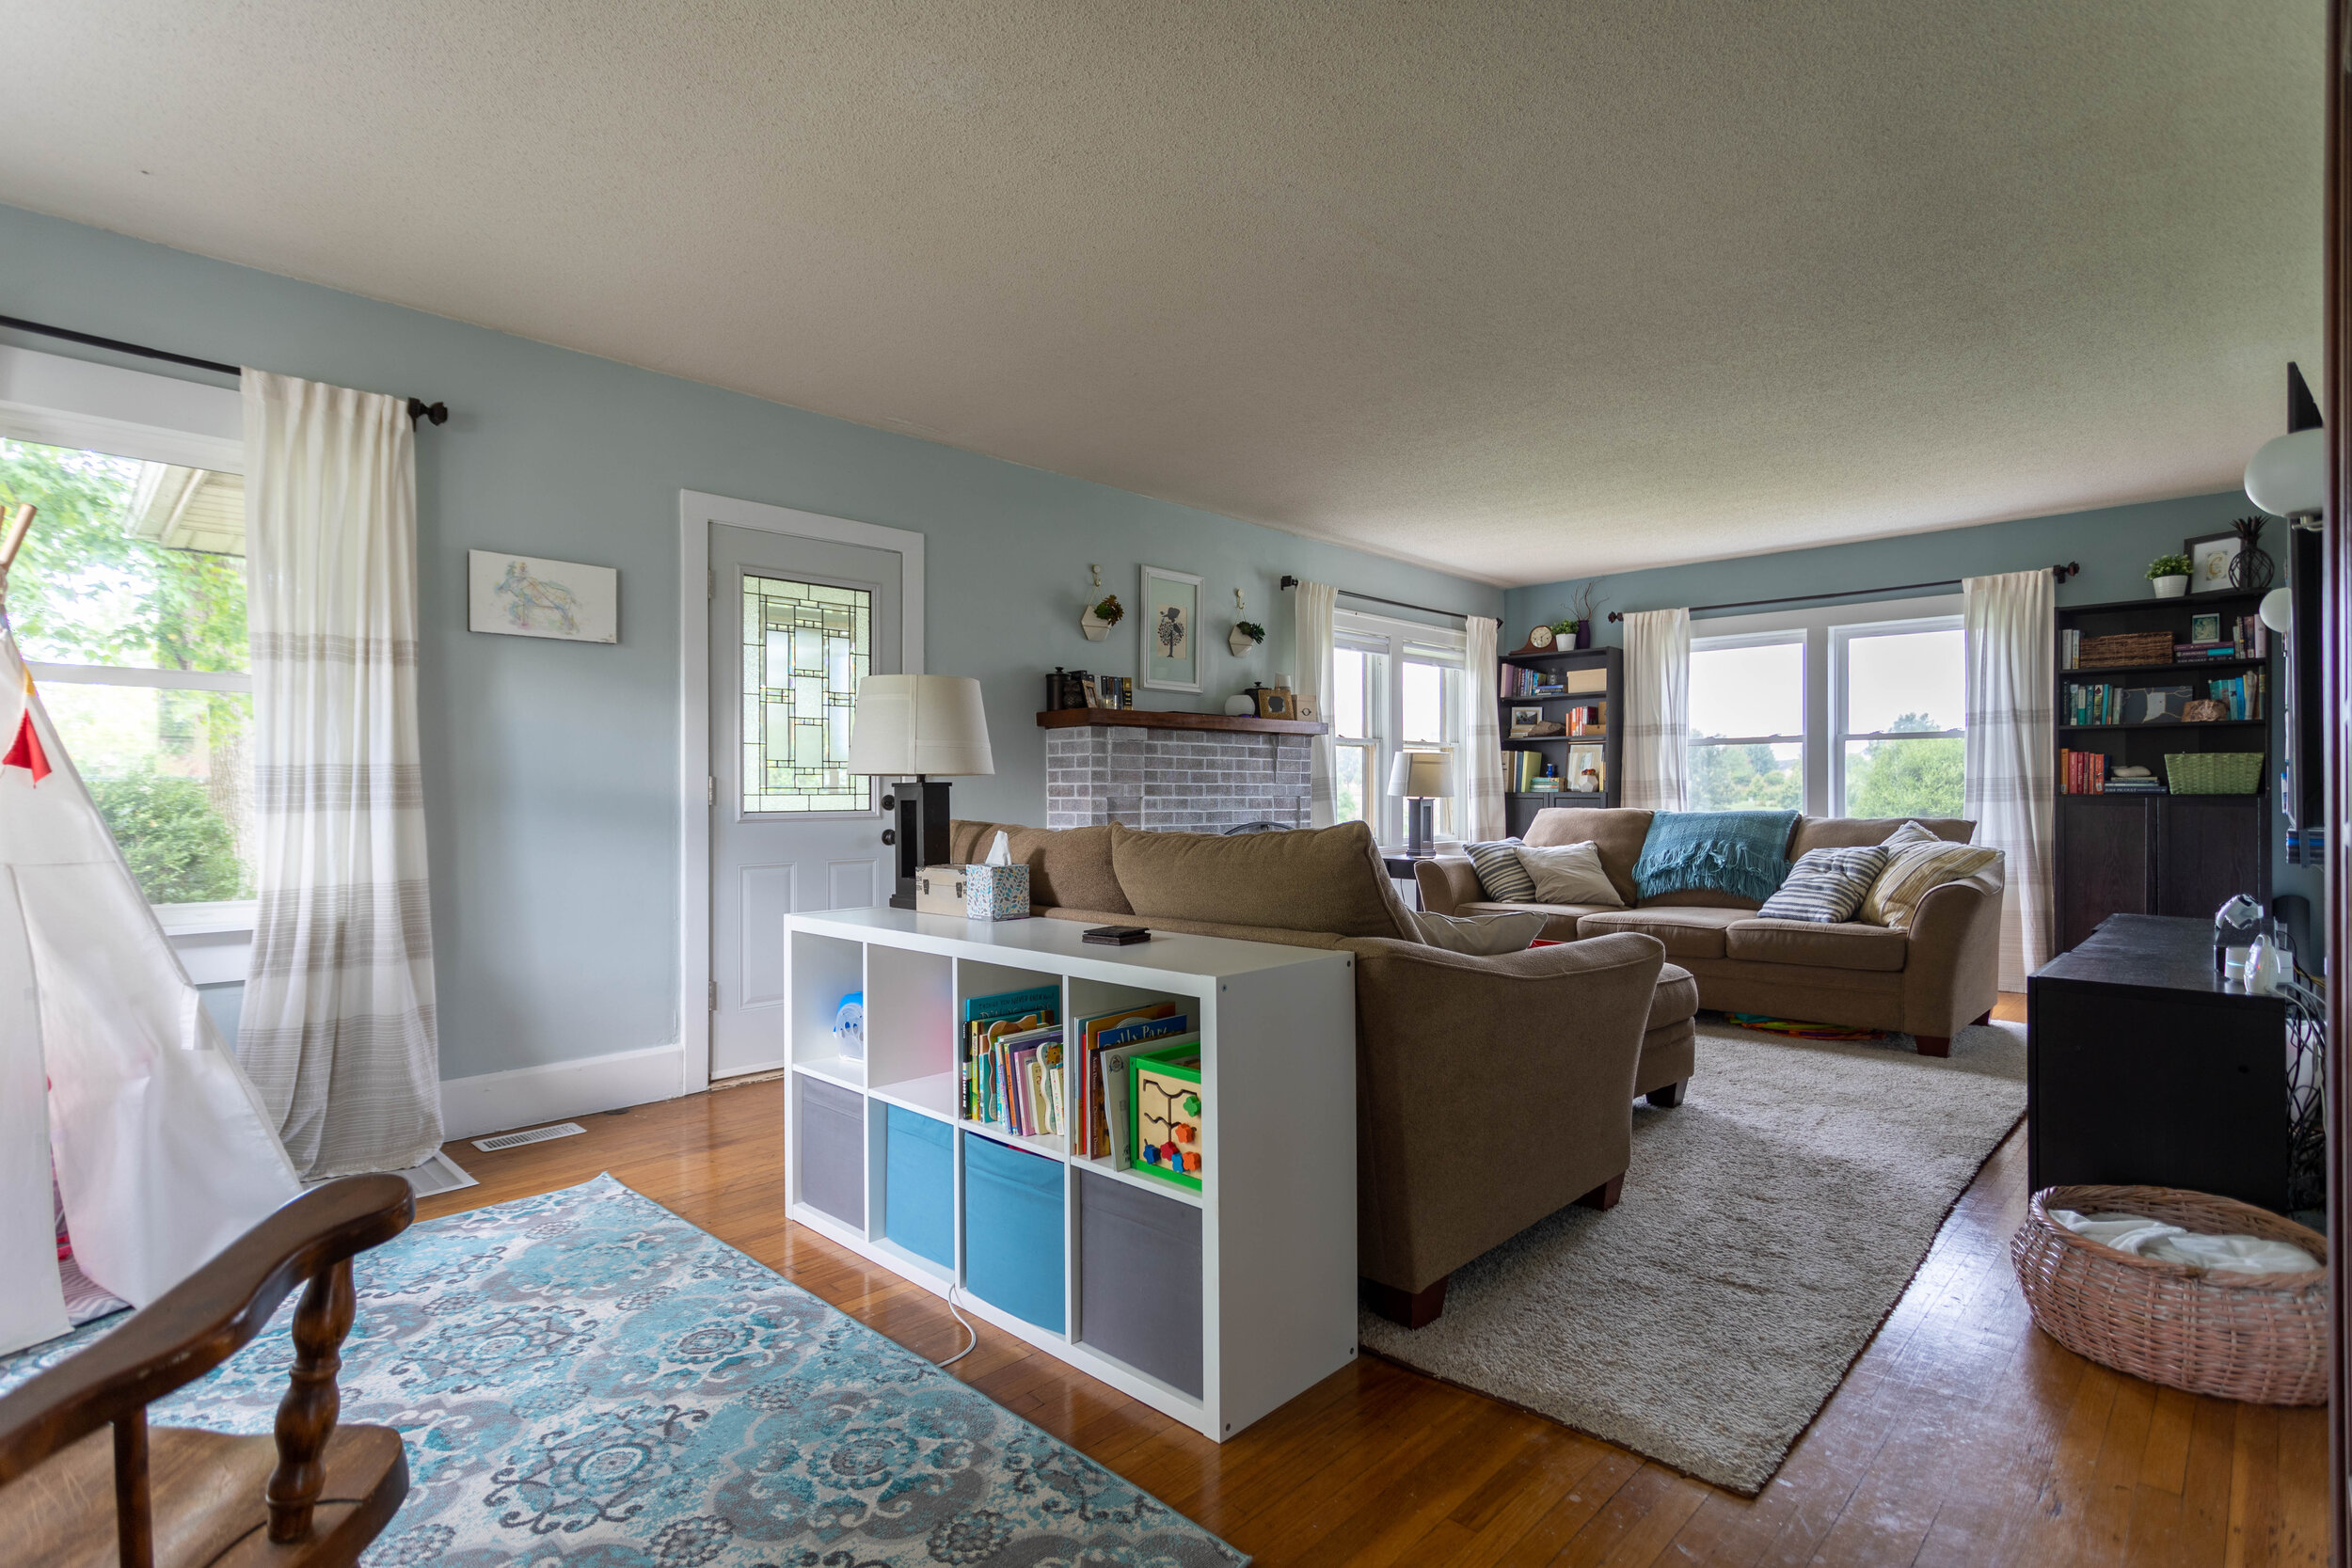
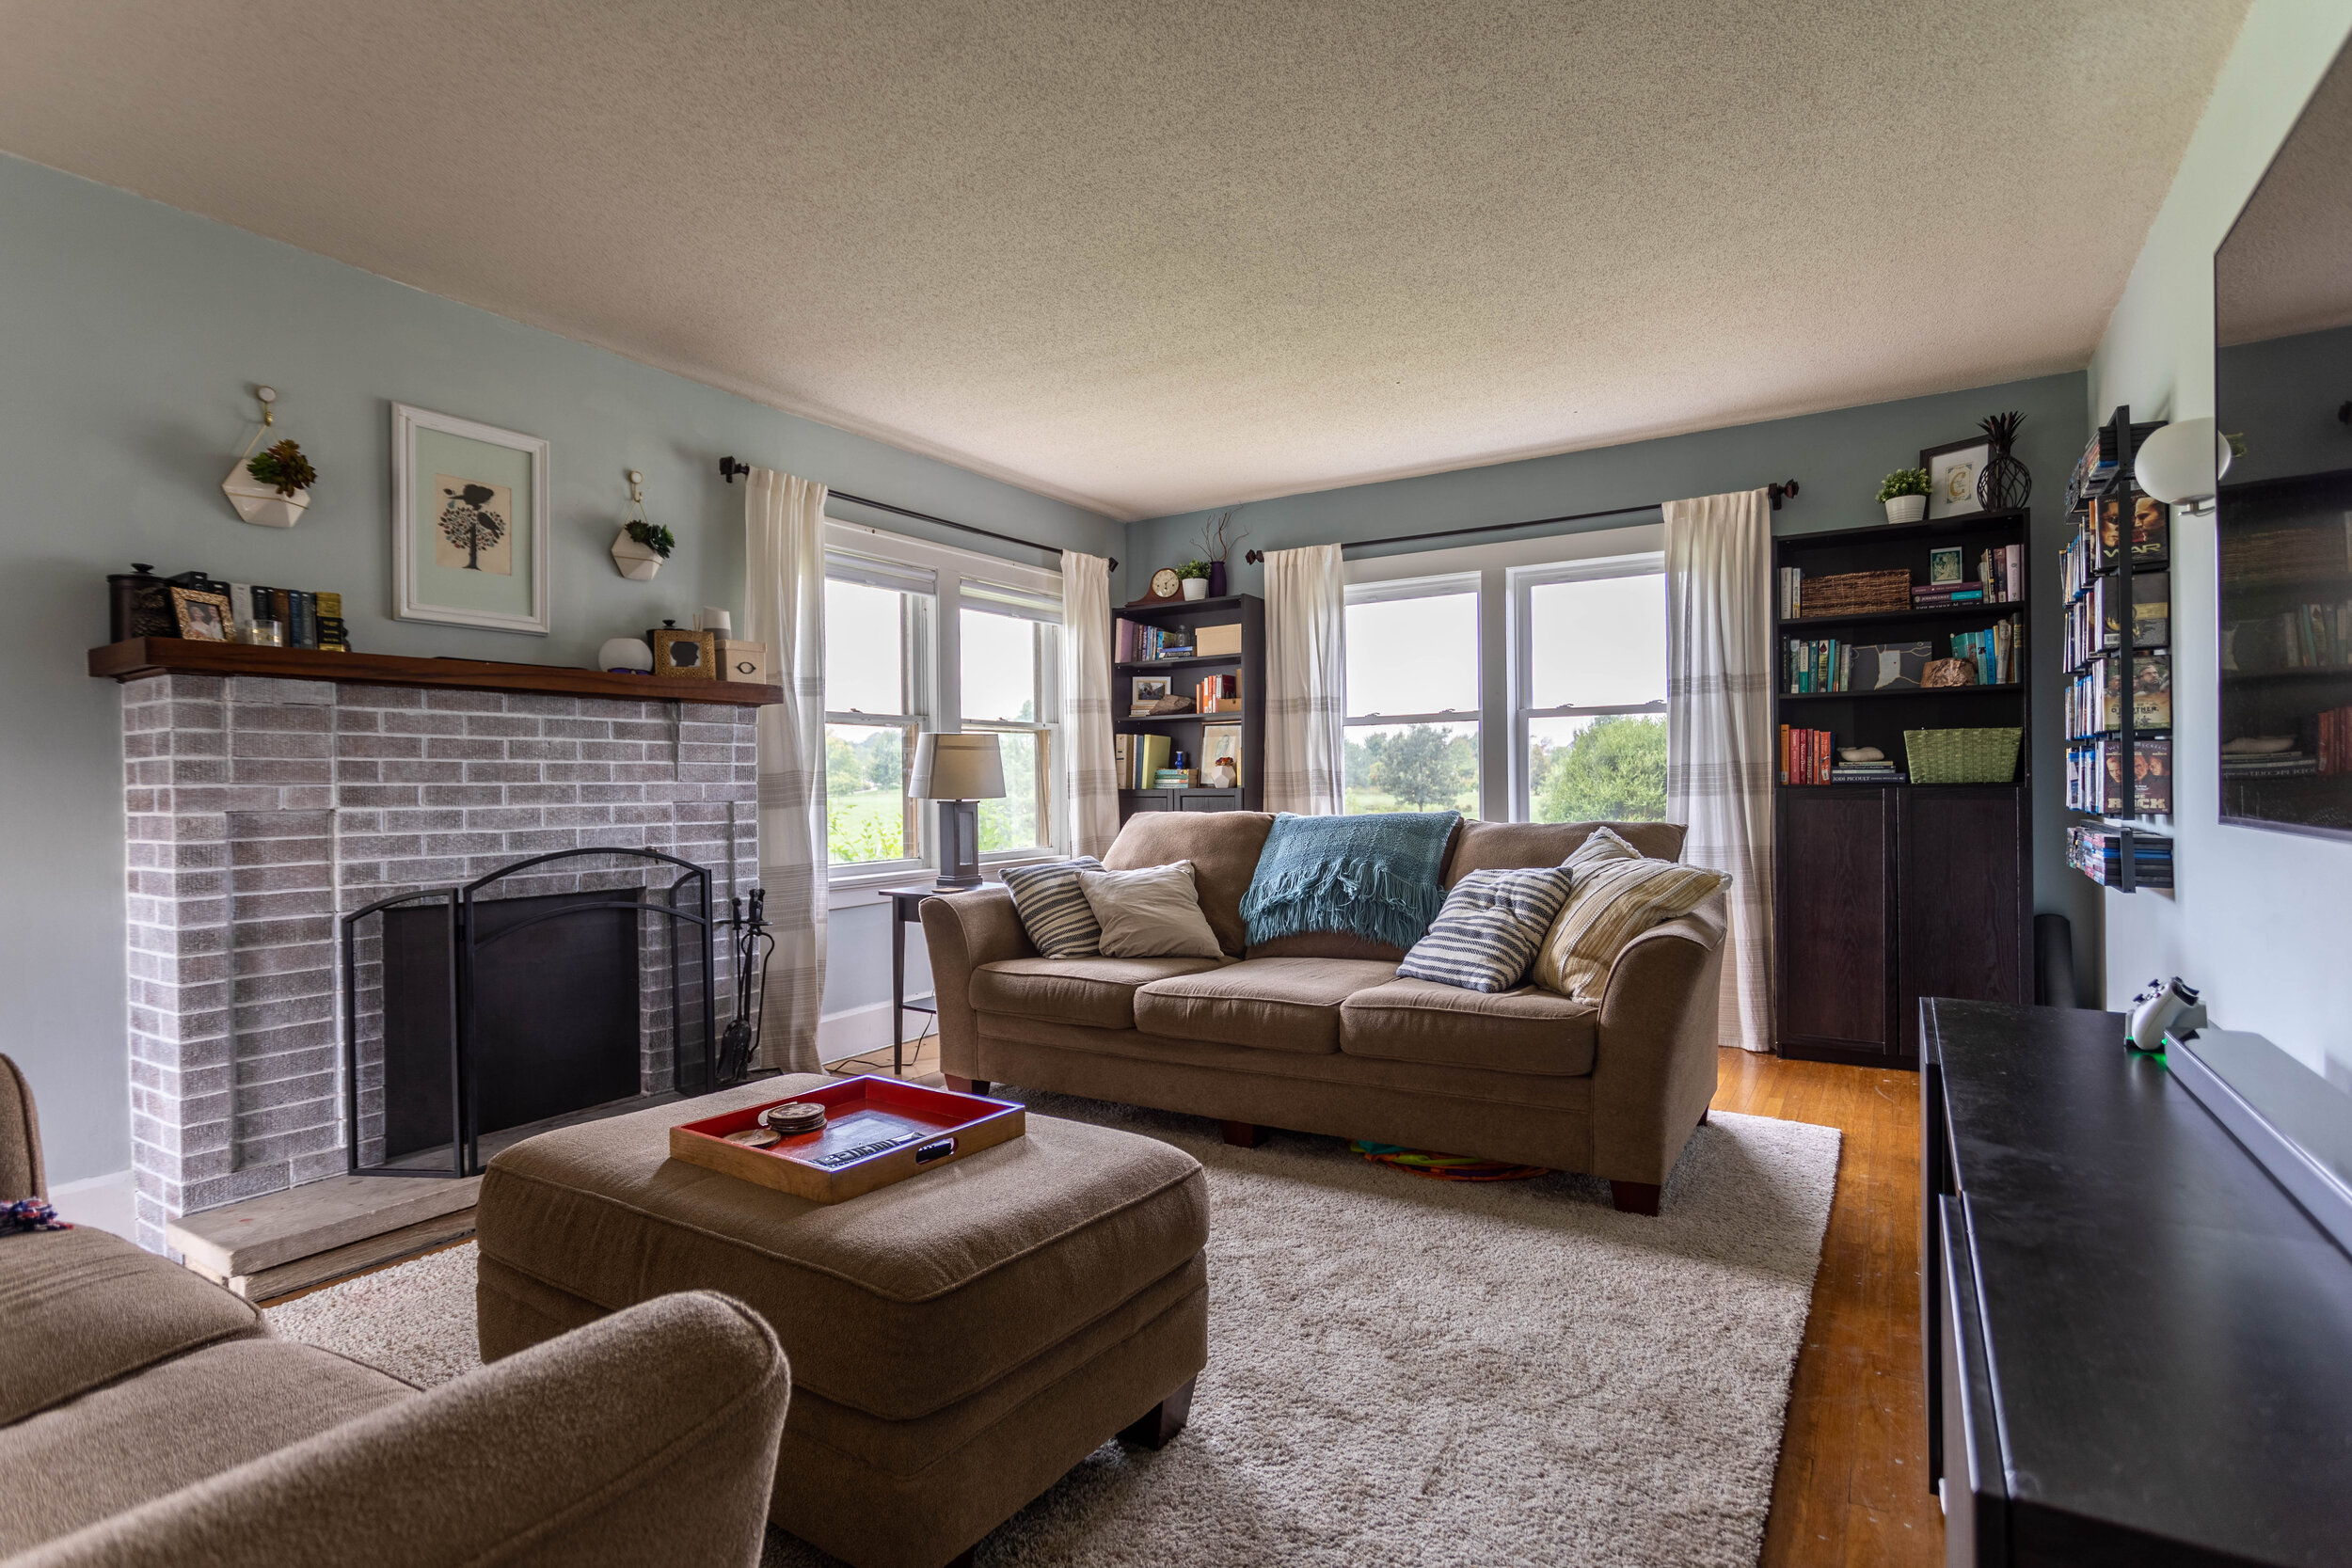
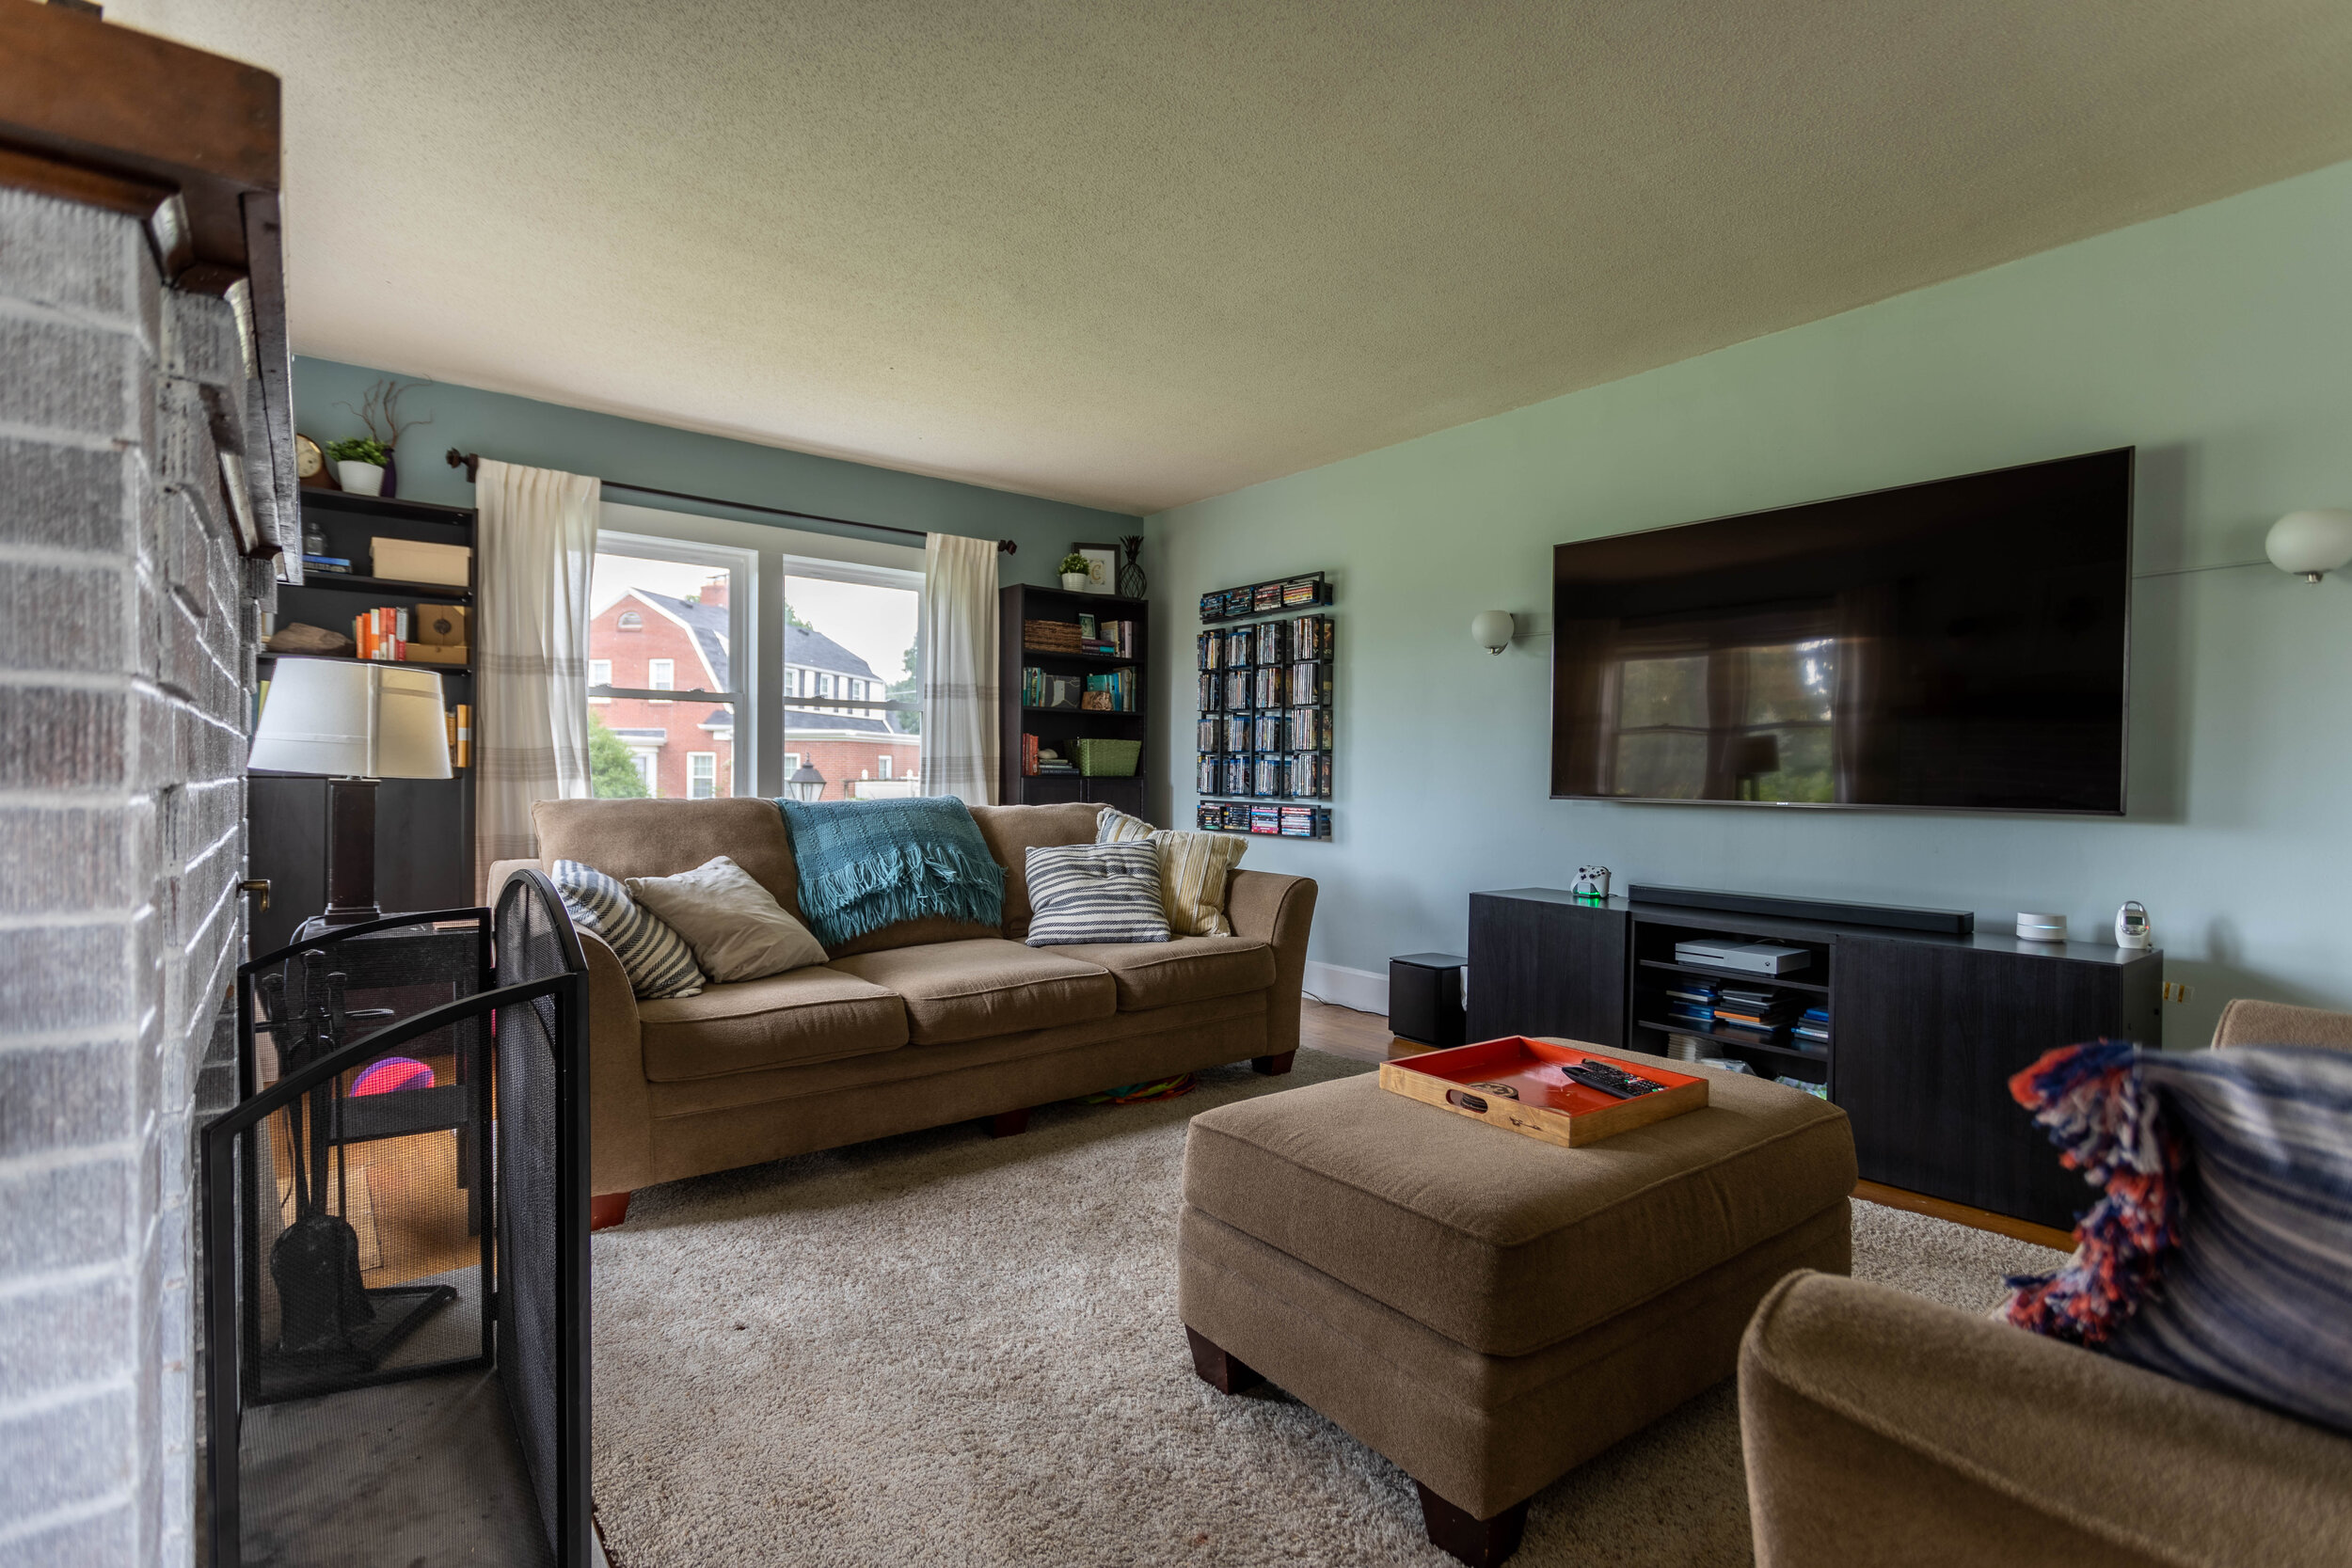
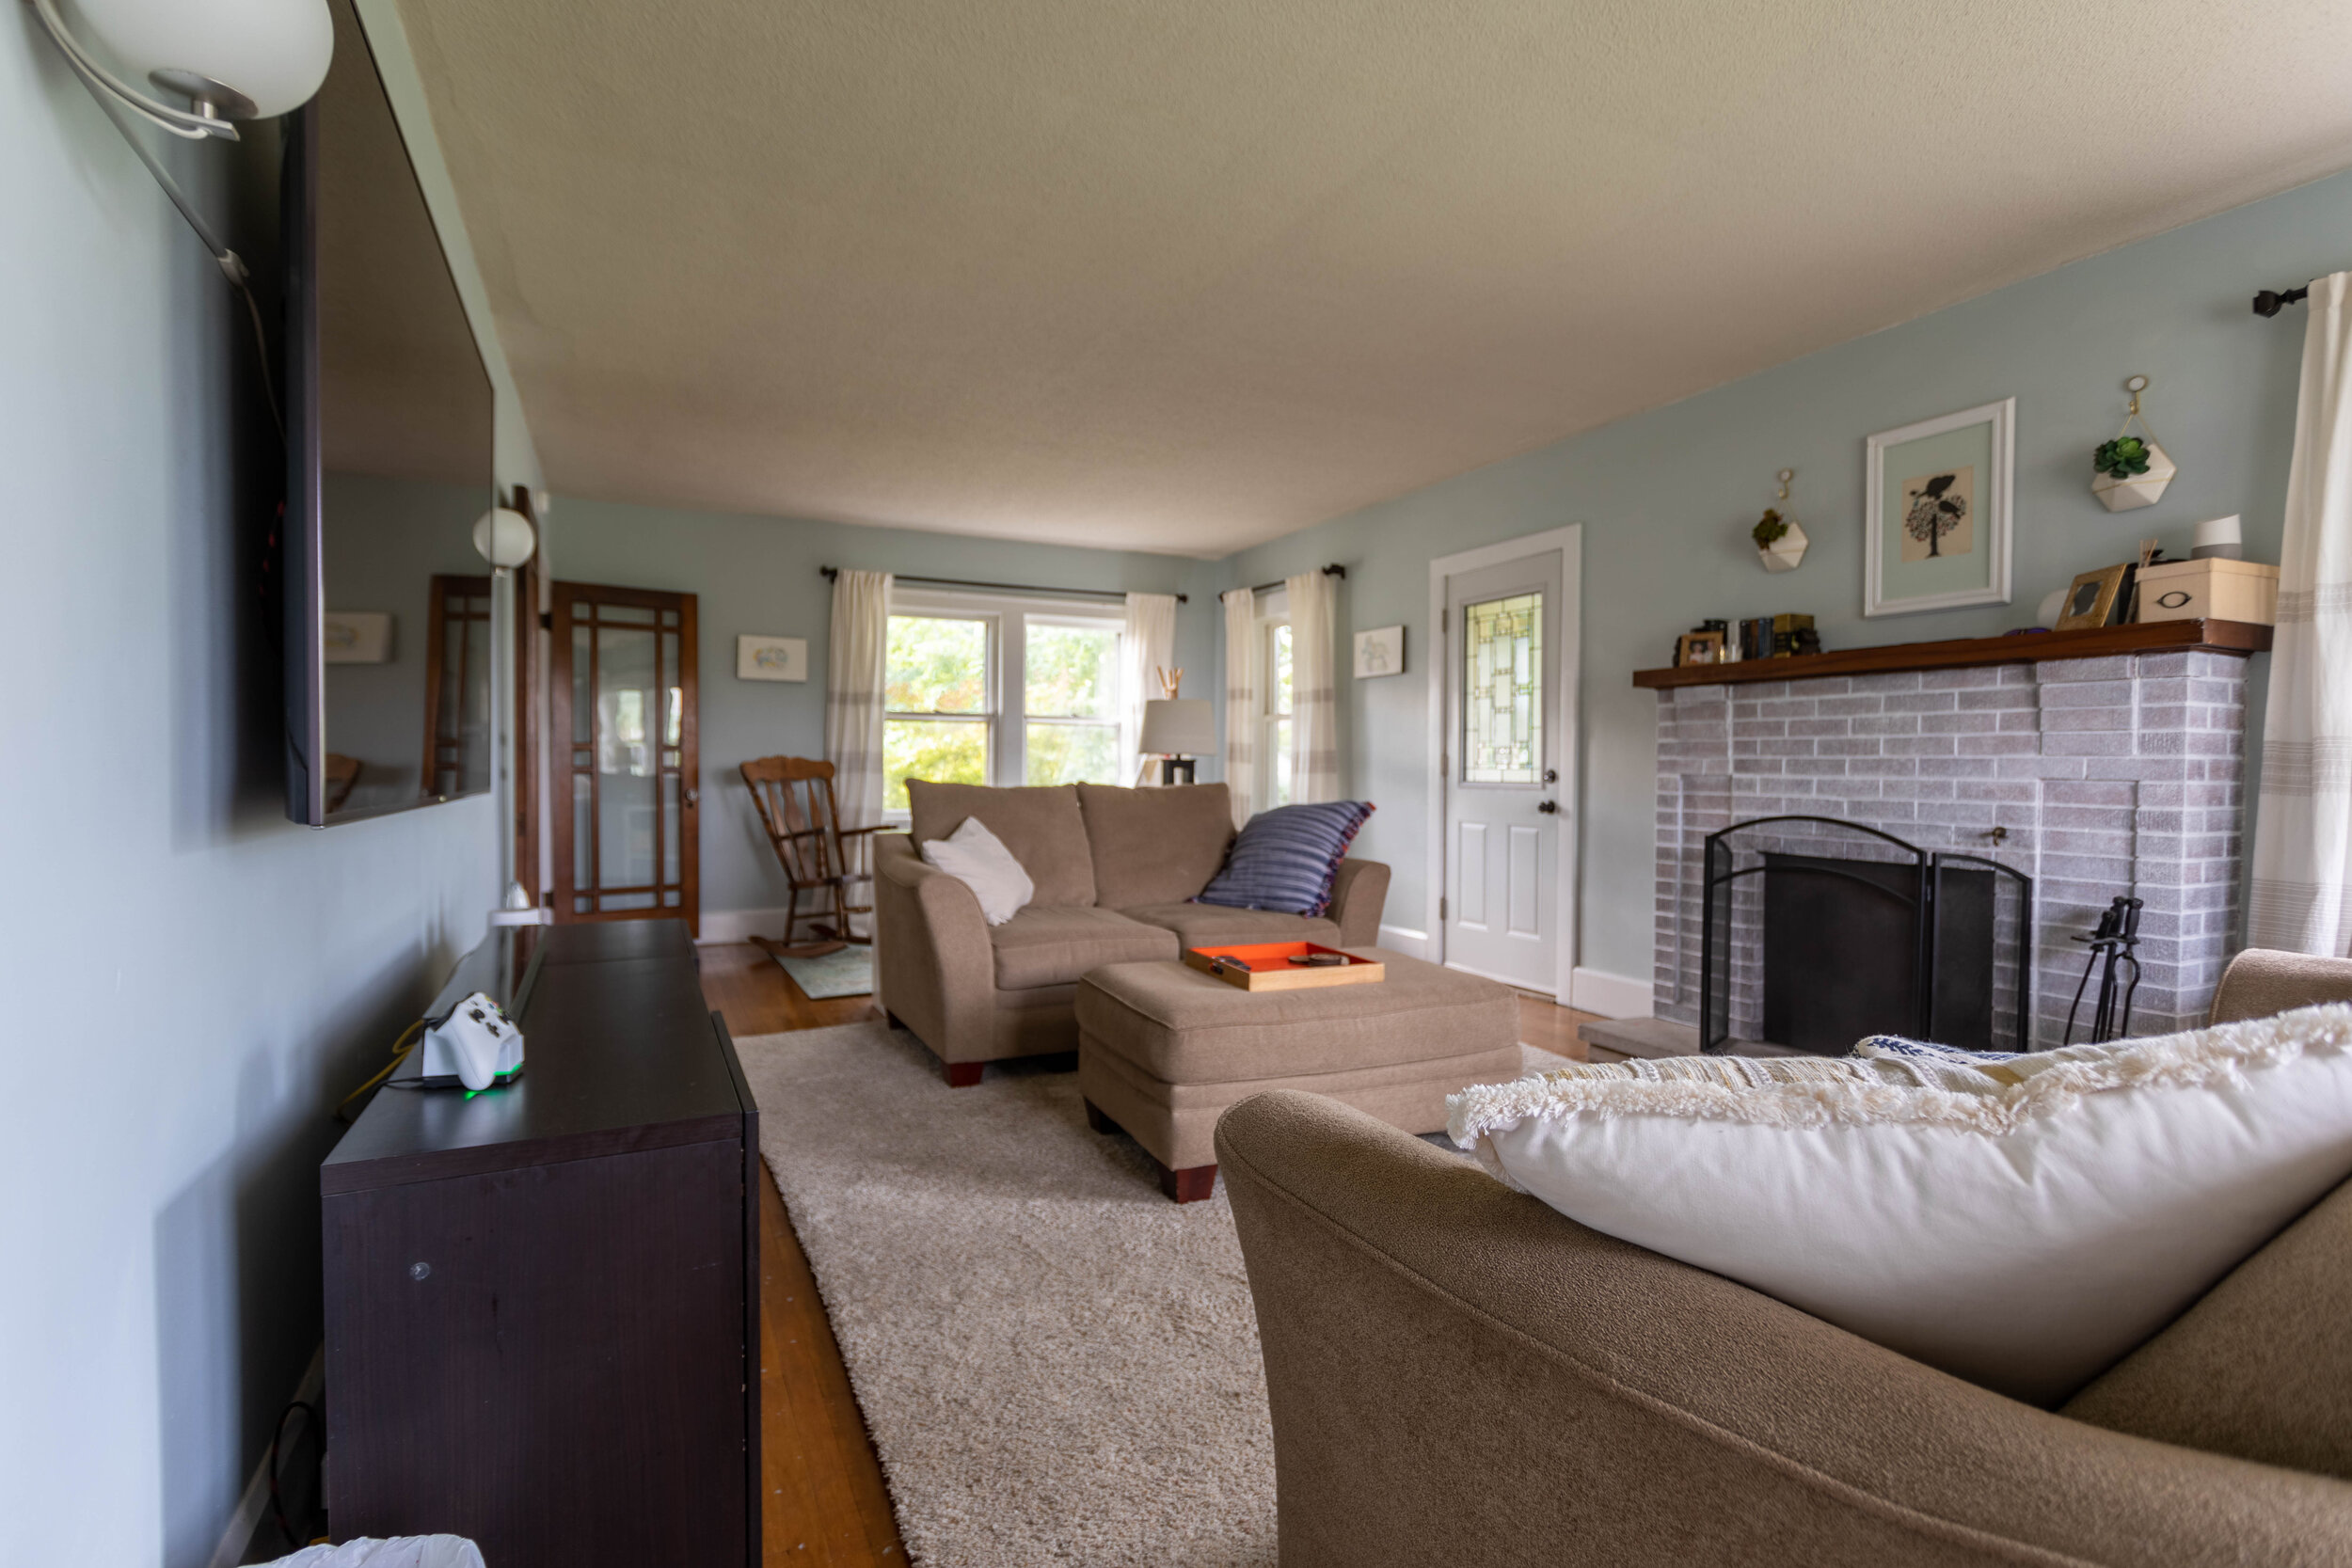
The living room

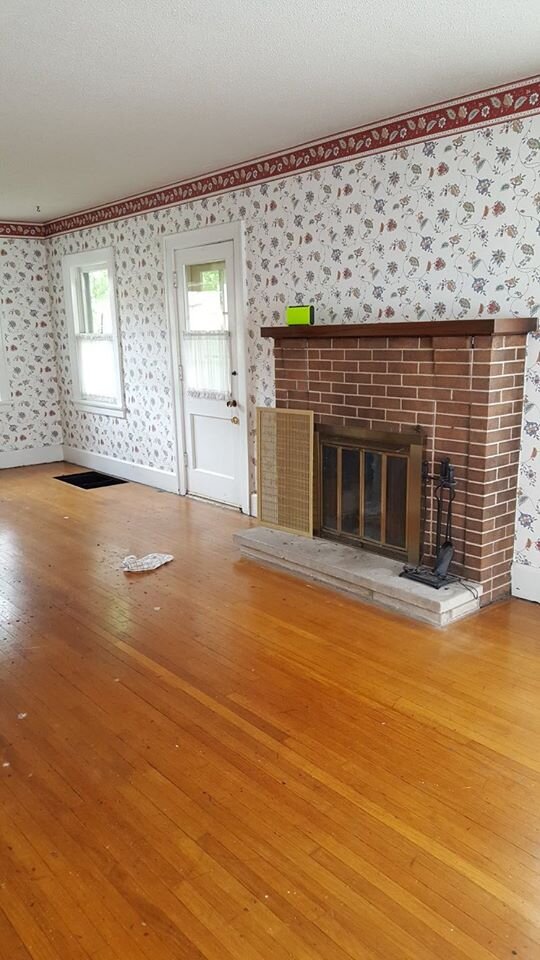
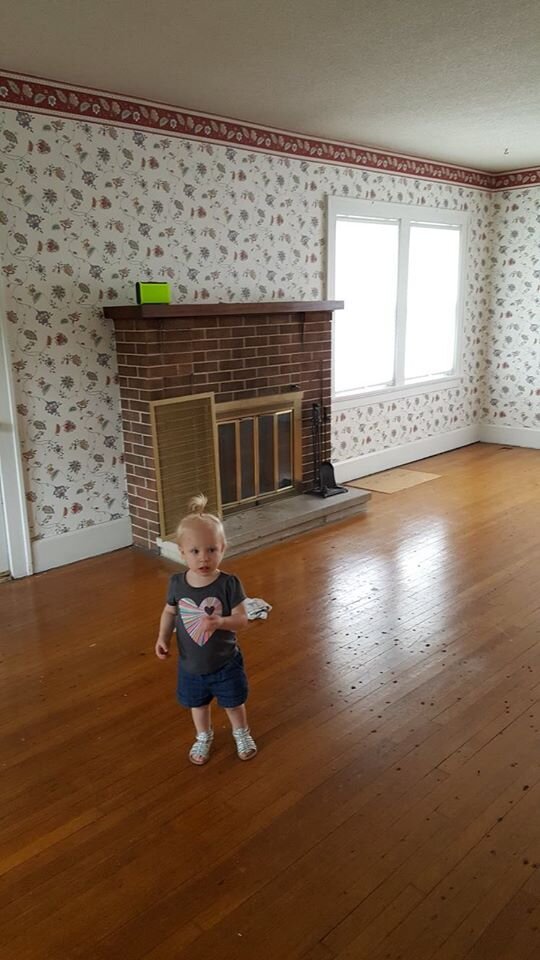
We were so excited after we closed on this house that we drove straight from the closing to the house and ripped up the carpet in the living room. Aside from removing the carpet, we also stripped the wallpaper/painted, replaced the sun porch door, replaced three windows, and whitewashed the fireplace.
Thankfully this was the easiest room in the whole house to de-wallpaper because it’s also the biggest. The wallpaper actually came off in full-sized floor-to-ceiling sheets. We literally just pulled them off by hand (no steamer, no wallpaper goo) in about an hour.
The sun porch door was old and drafty so we replaced that pretty early on. The windows throughout the whole house were original and also so, so drafty and noisy so we started replacing some of those before we moved. We ended up replacing 6 windows in the whole house. Three of them happened to be in this room.
Since this house is by a pretty busy intersection, every time someone playing loud music would stop at the stoplight nearby we’d hear the windows vibrate. Also, most of them didn’t open so strategically replacing them gave us the ability to let some fresh air flow through the house! Also, you know, fire safety…
Lucius taught himself how to install windows and reframed the windows in the first picture above at least 3 times… without consulting with me first. Seriously. I walked downstairs one day and there was a gaping hole in my living room. And no, that isn’t the first time something like that has happened (and I’m sure it won’t be the last).
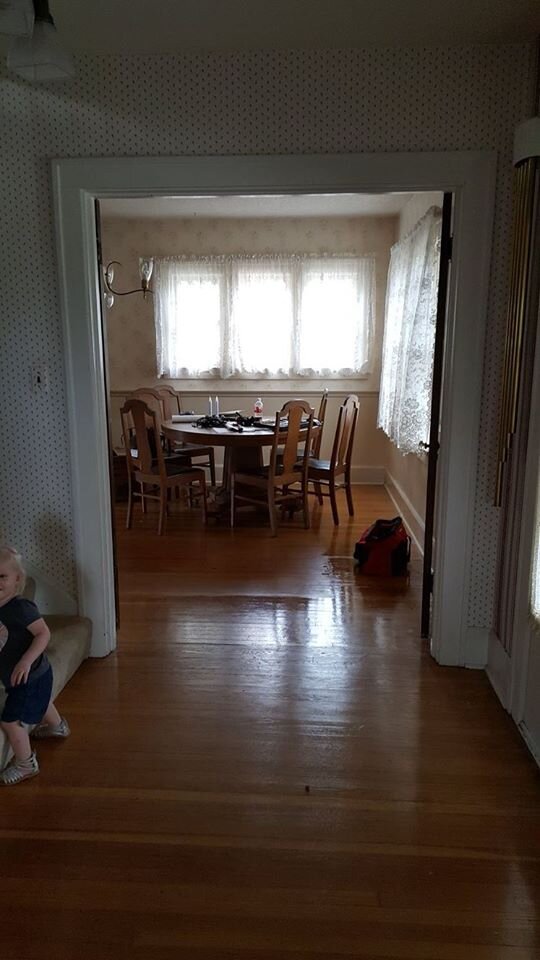
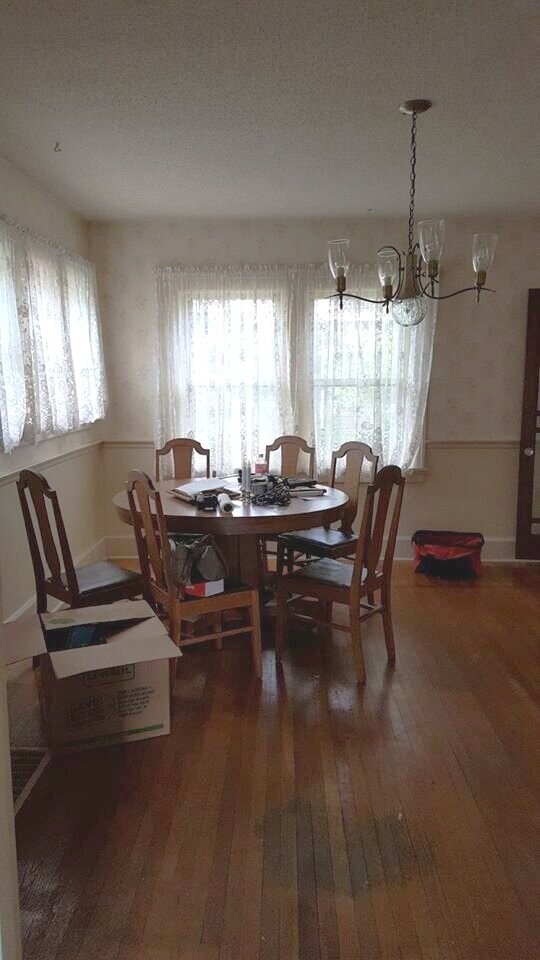
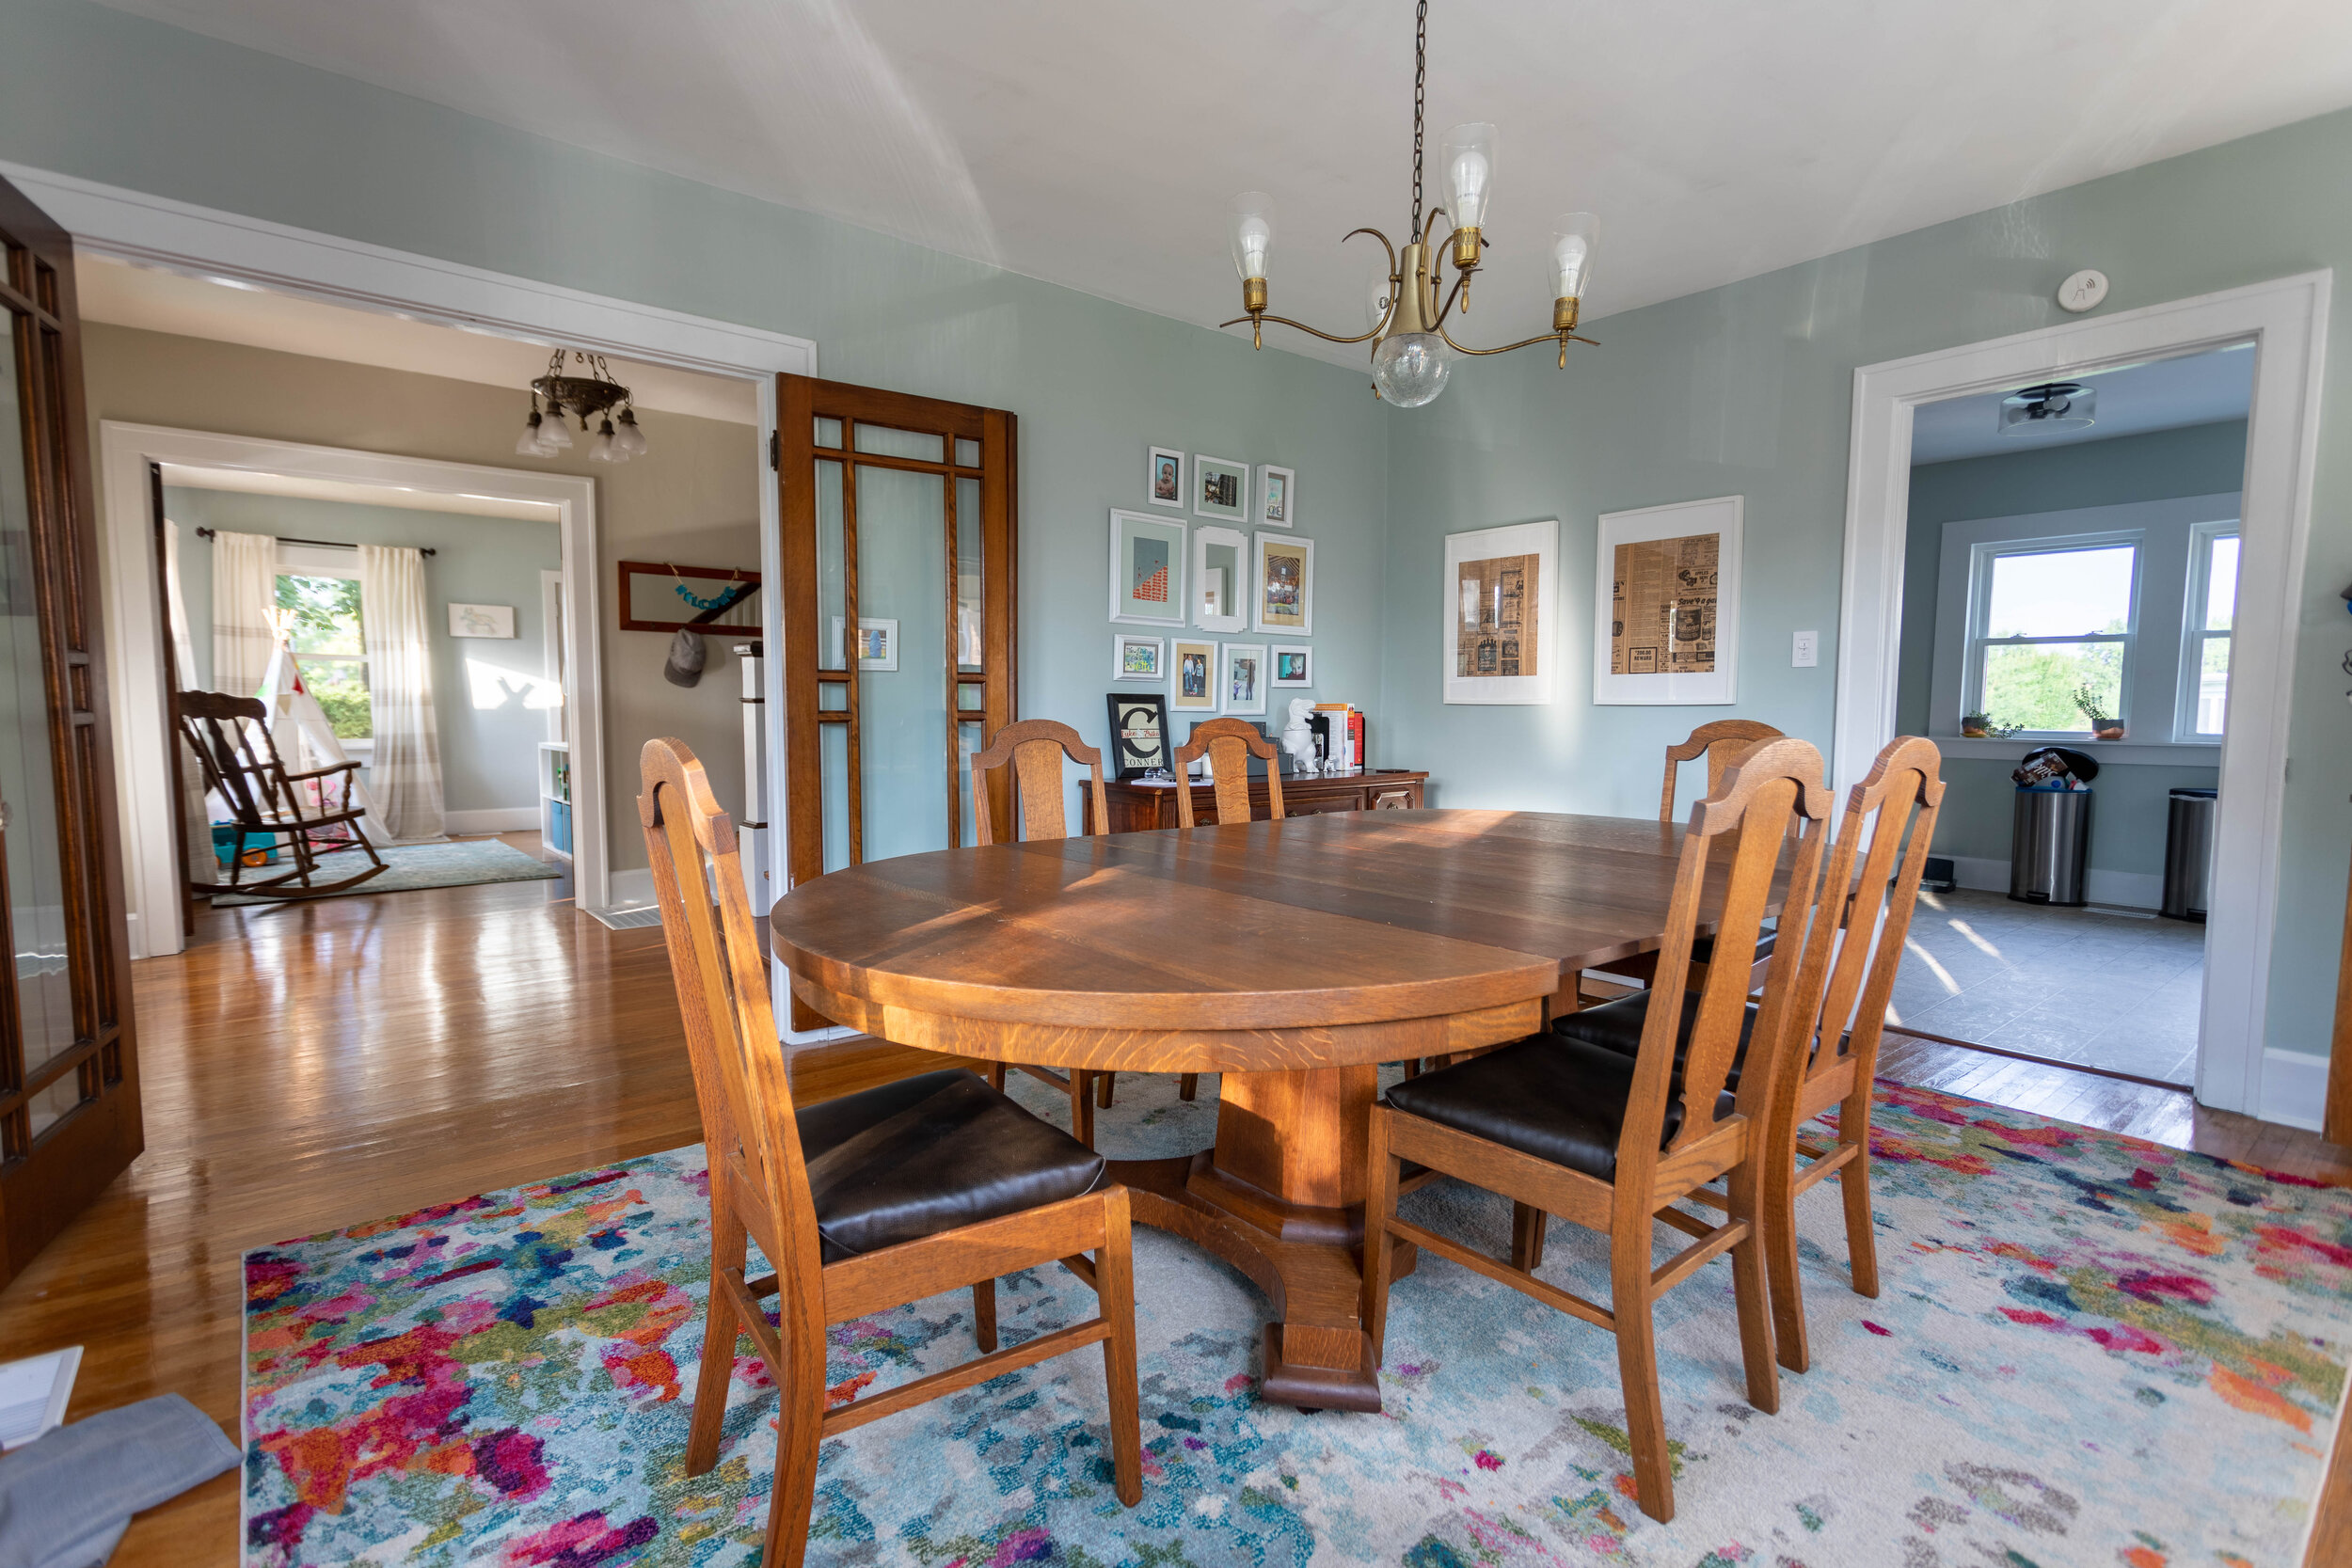
The dining room
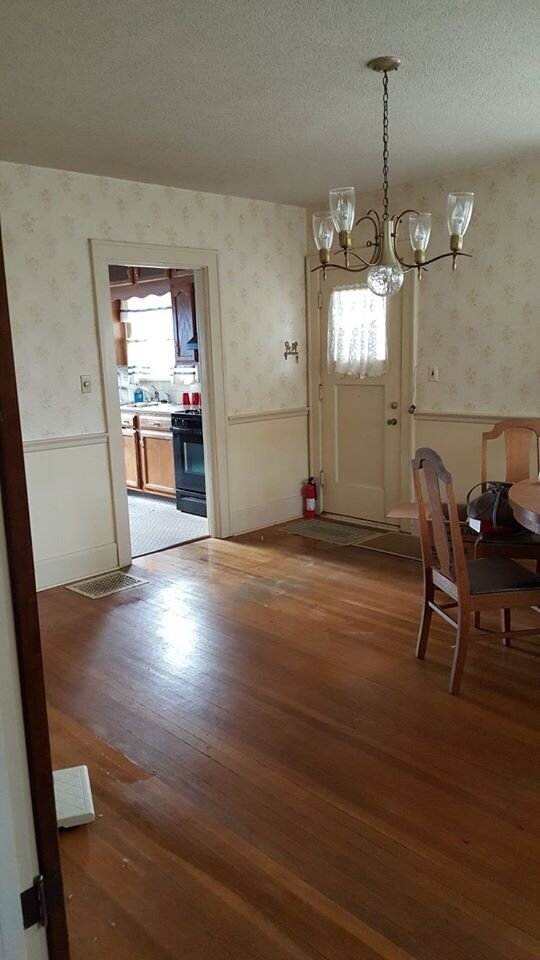
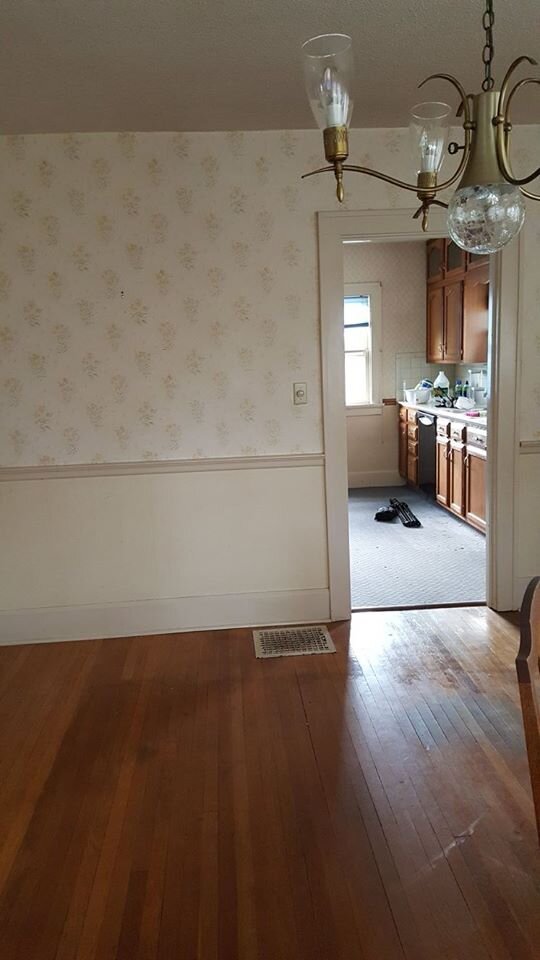
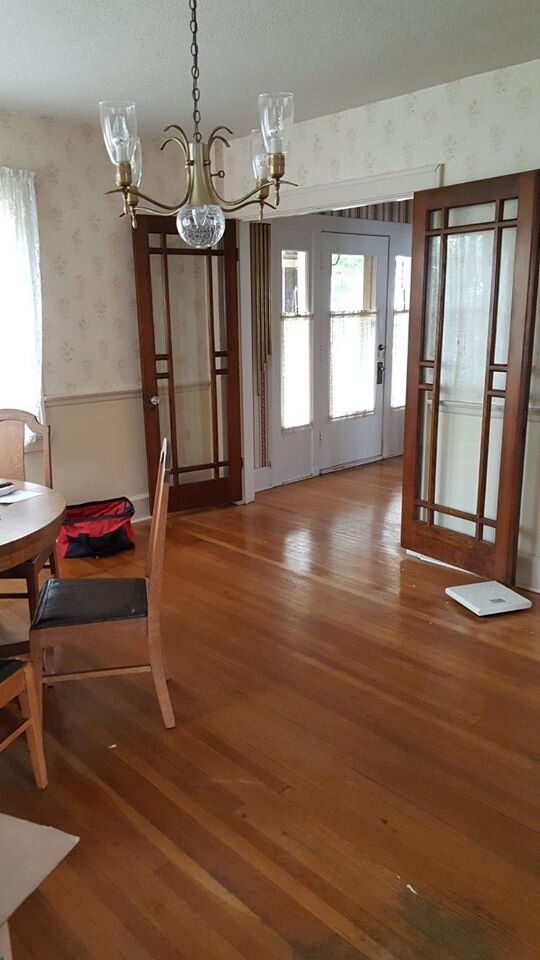
Oddly enough, the dining room ended up being one of my favorite finished rooms in the house by the time we left.
In this room we, once again, stripped the wallpaper and painted the trim. We also removed the chair rail and I took my first stab at scraping a popcorn ceiling (which is actually really easy)!

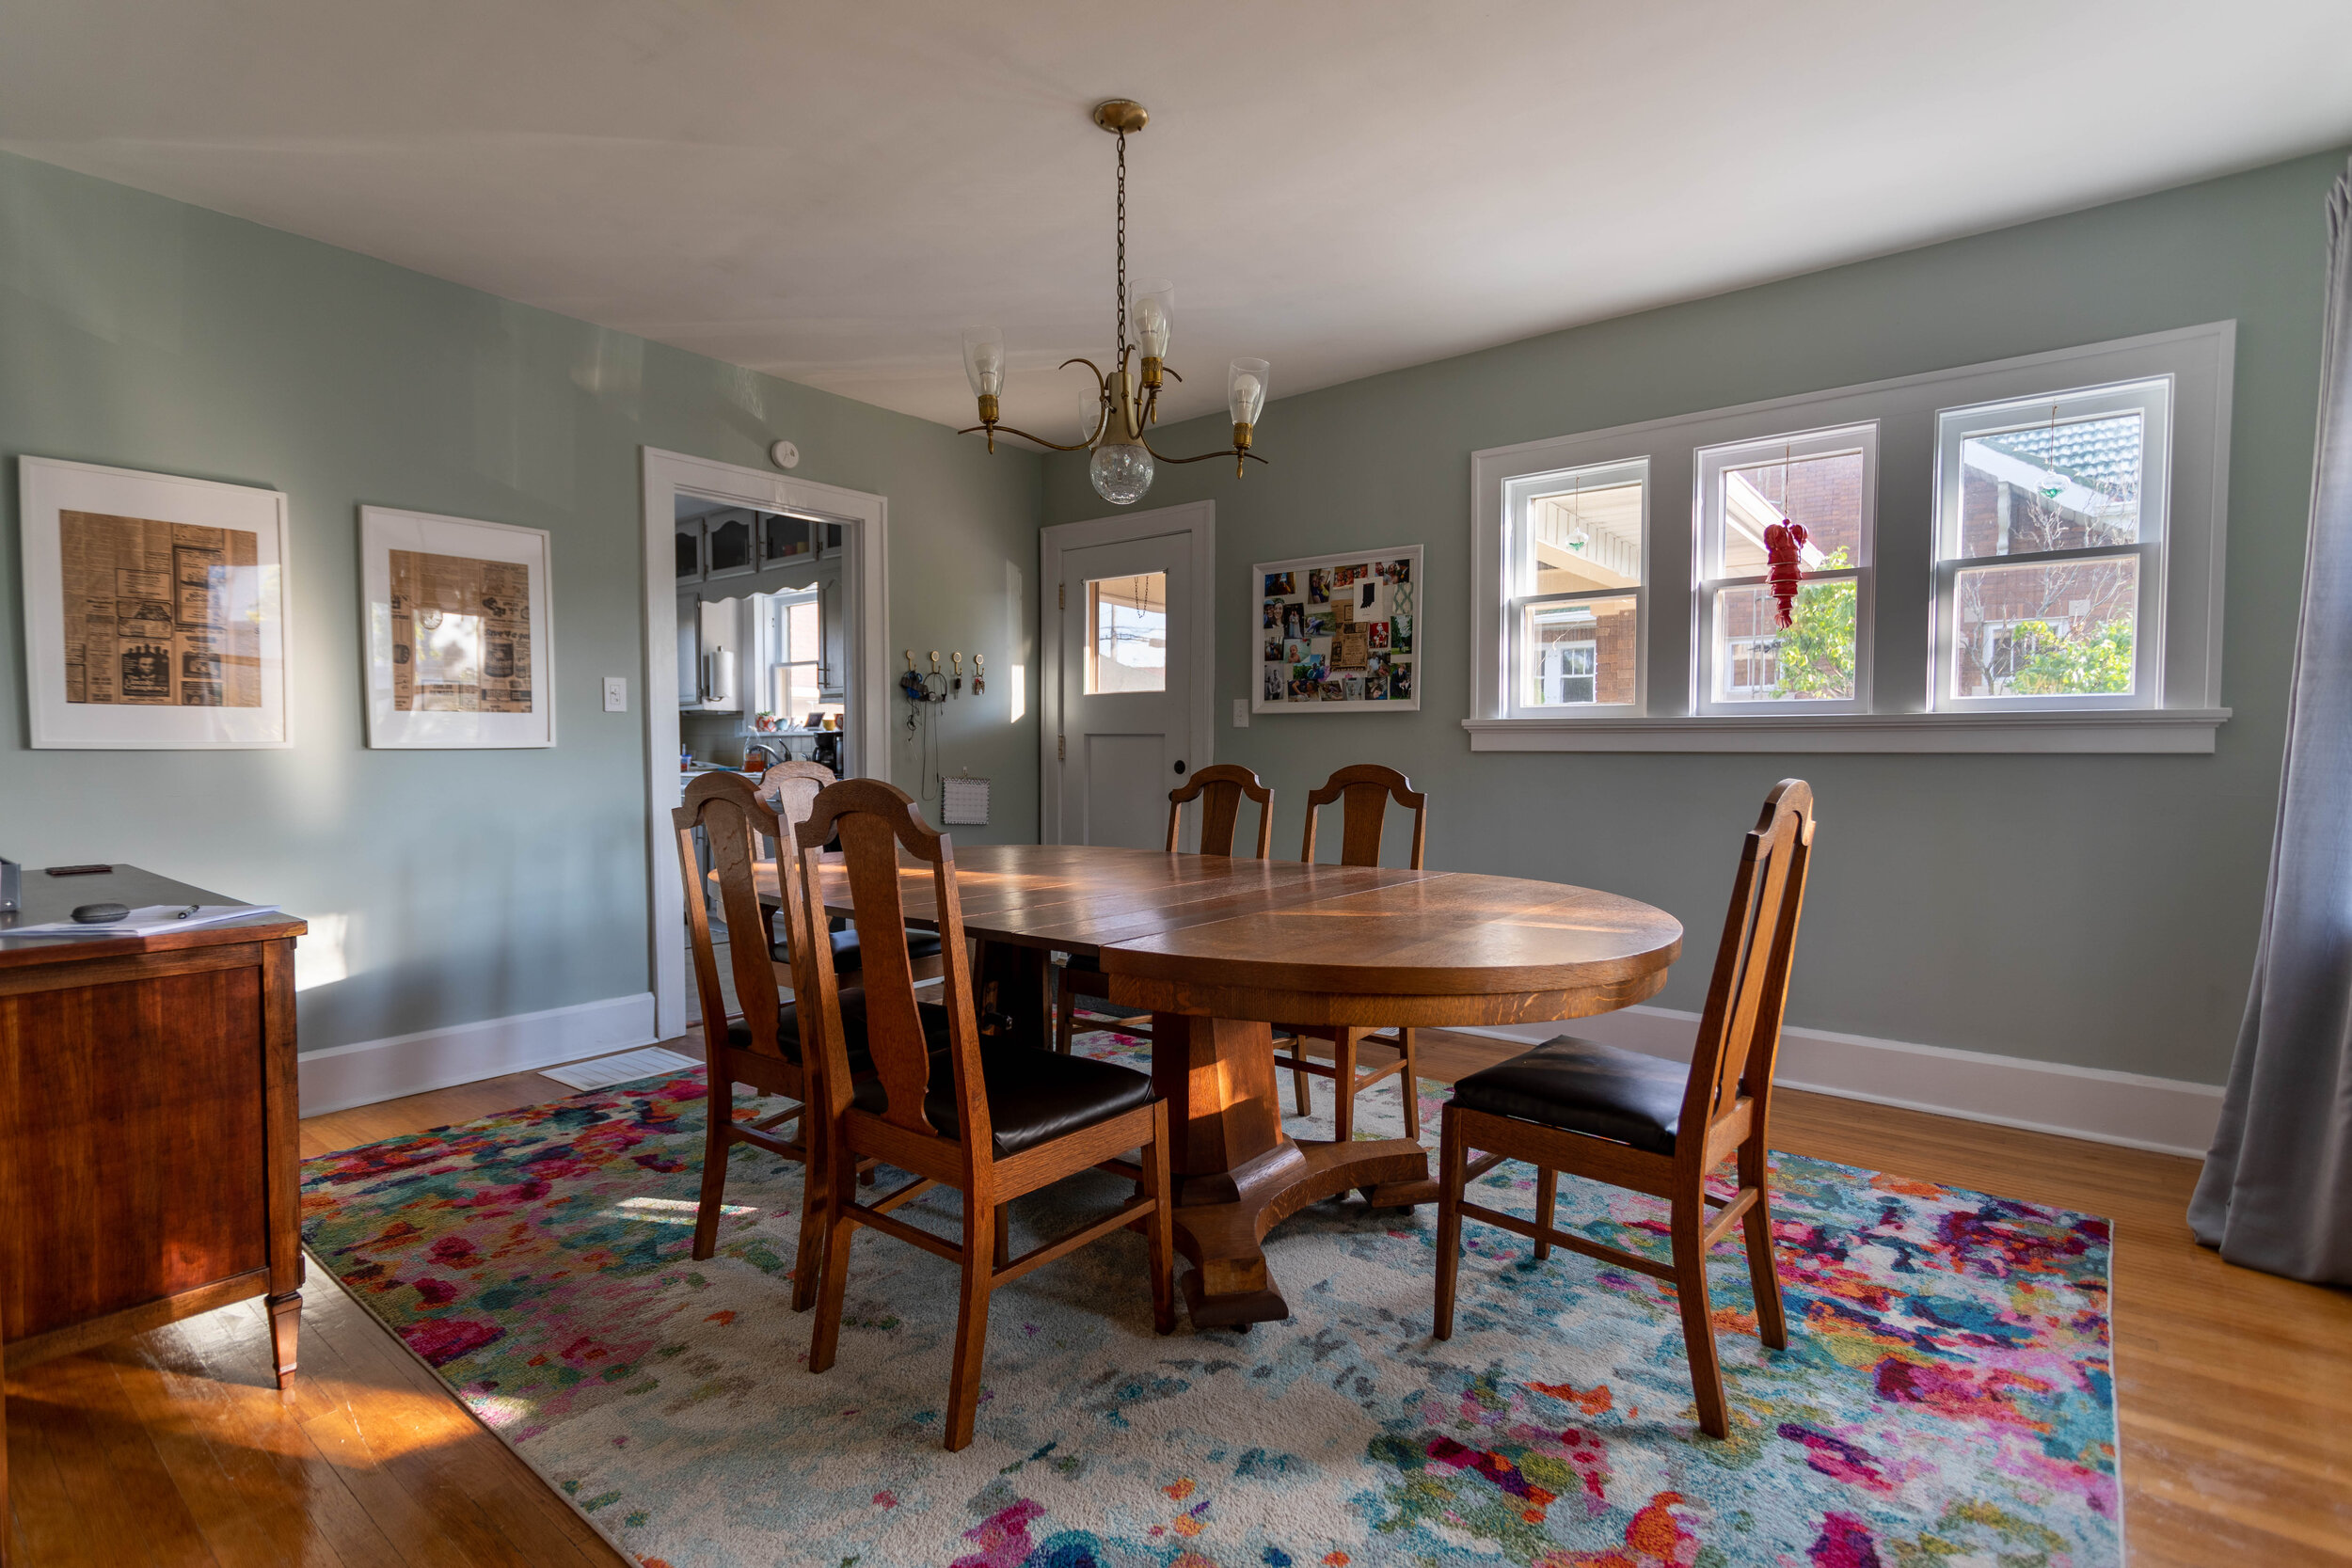
Lucius really hated the light fixture, but once I redecorated the room I felt like it actually fit in the space pretty well and I managed to procrastinate replacing it until it was too late and we moved. Luckily, the new owners like it too!
You know how they say styles always come back around? The light fixture in this room is a great example of this. The use of gold tones are really popular right now, and I’m seeing sputnik lights pop up all over the place. In a way this light has kind of a sputnik-style to it, while still being pretty traditional. If you don’t know what a sputnik light is - check out the picture below.

The story of the dining room table is actually pretty interesting, too. The previous owner was elderly and was moving to a retirement home, so his family was auctioning off all of the furniture in the house. Someone at the auction was bidding up the table just for fun, then decided at the end of it all they didn’t want it.
The owner’s children, who showed us the house, remembered me commenting on the table during our showing and called Lucius to see if we wanted to buy it. They sold it to us really really cheap, considering that it’s such a large table (it has SIX leaves!). And we learned that the table is actually older than the house, which I thought was pretty cool.
It didn’t feel right to take the table with us since it had lived there for so long, so we sold it with the house and I have no regrets. It just belongs there.
You can also see the buffet table I talked about in our dining room renovation kick-off post and how it just doesn’t work in our current house. Maybe I should have just left that, too.
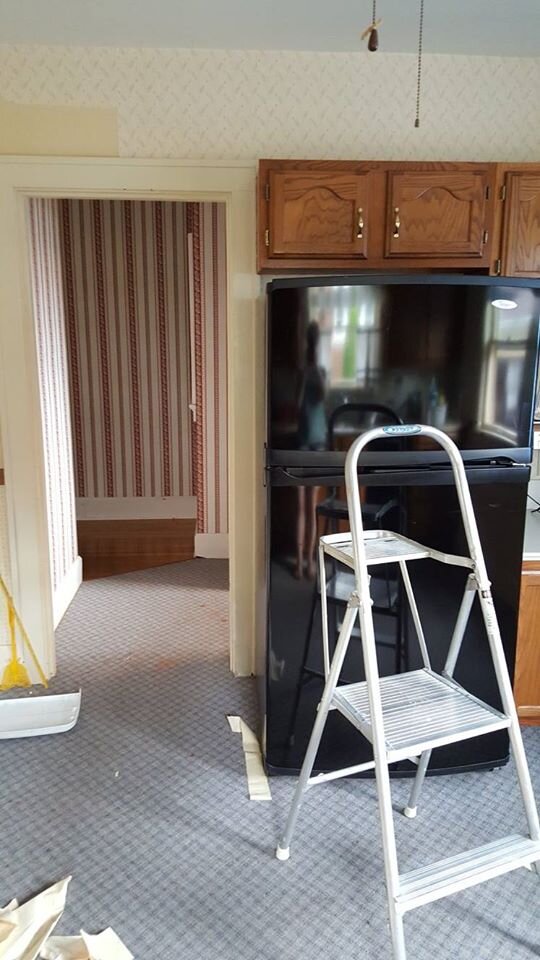
The kitchen
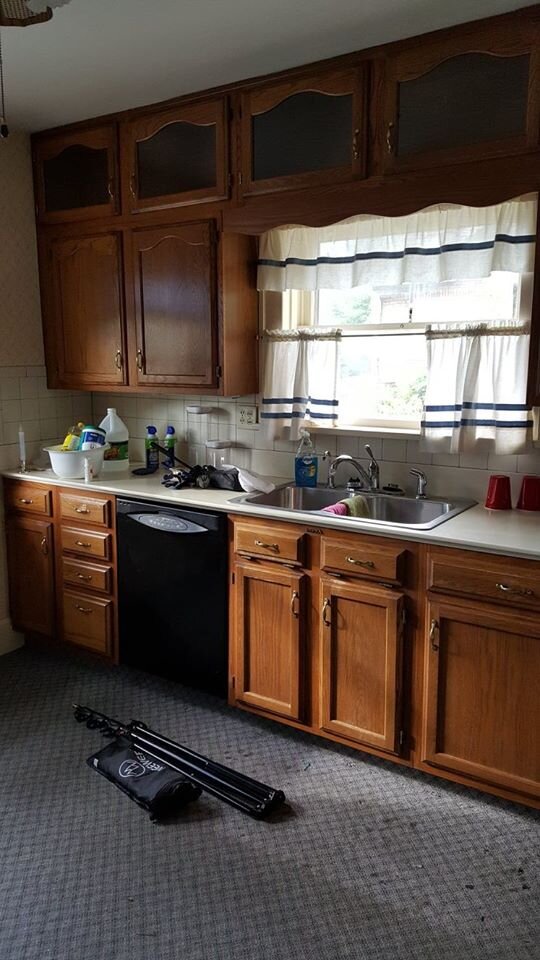
Whyyyyy with the carpet!? Seriously.
And the surprising thing is, this isn’t the first house I’ve lived in with carpet in the kitchen. Gross.
In this room I, you guessed it, stripped the wallpaper! I also painted the trim, the ceiling, and the walls. Can we just assume that’s a given from here on out? Because I made those updates in just about every room.
Aside from the above, we tore out the carpet in here and replaced it with some rolled laminate. It definitely wasn’t the nicest or most expensive stuff, but we assumed it was going to be a temporary fix that would be replaced with something nicer, like tile, down the road. It at least got us through a couple of carpet-free years and gave the new owners a cleaner slate to start with.
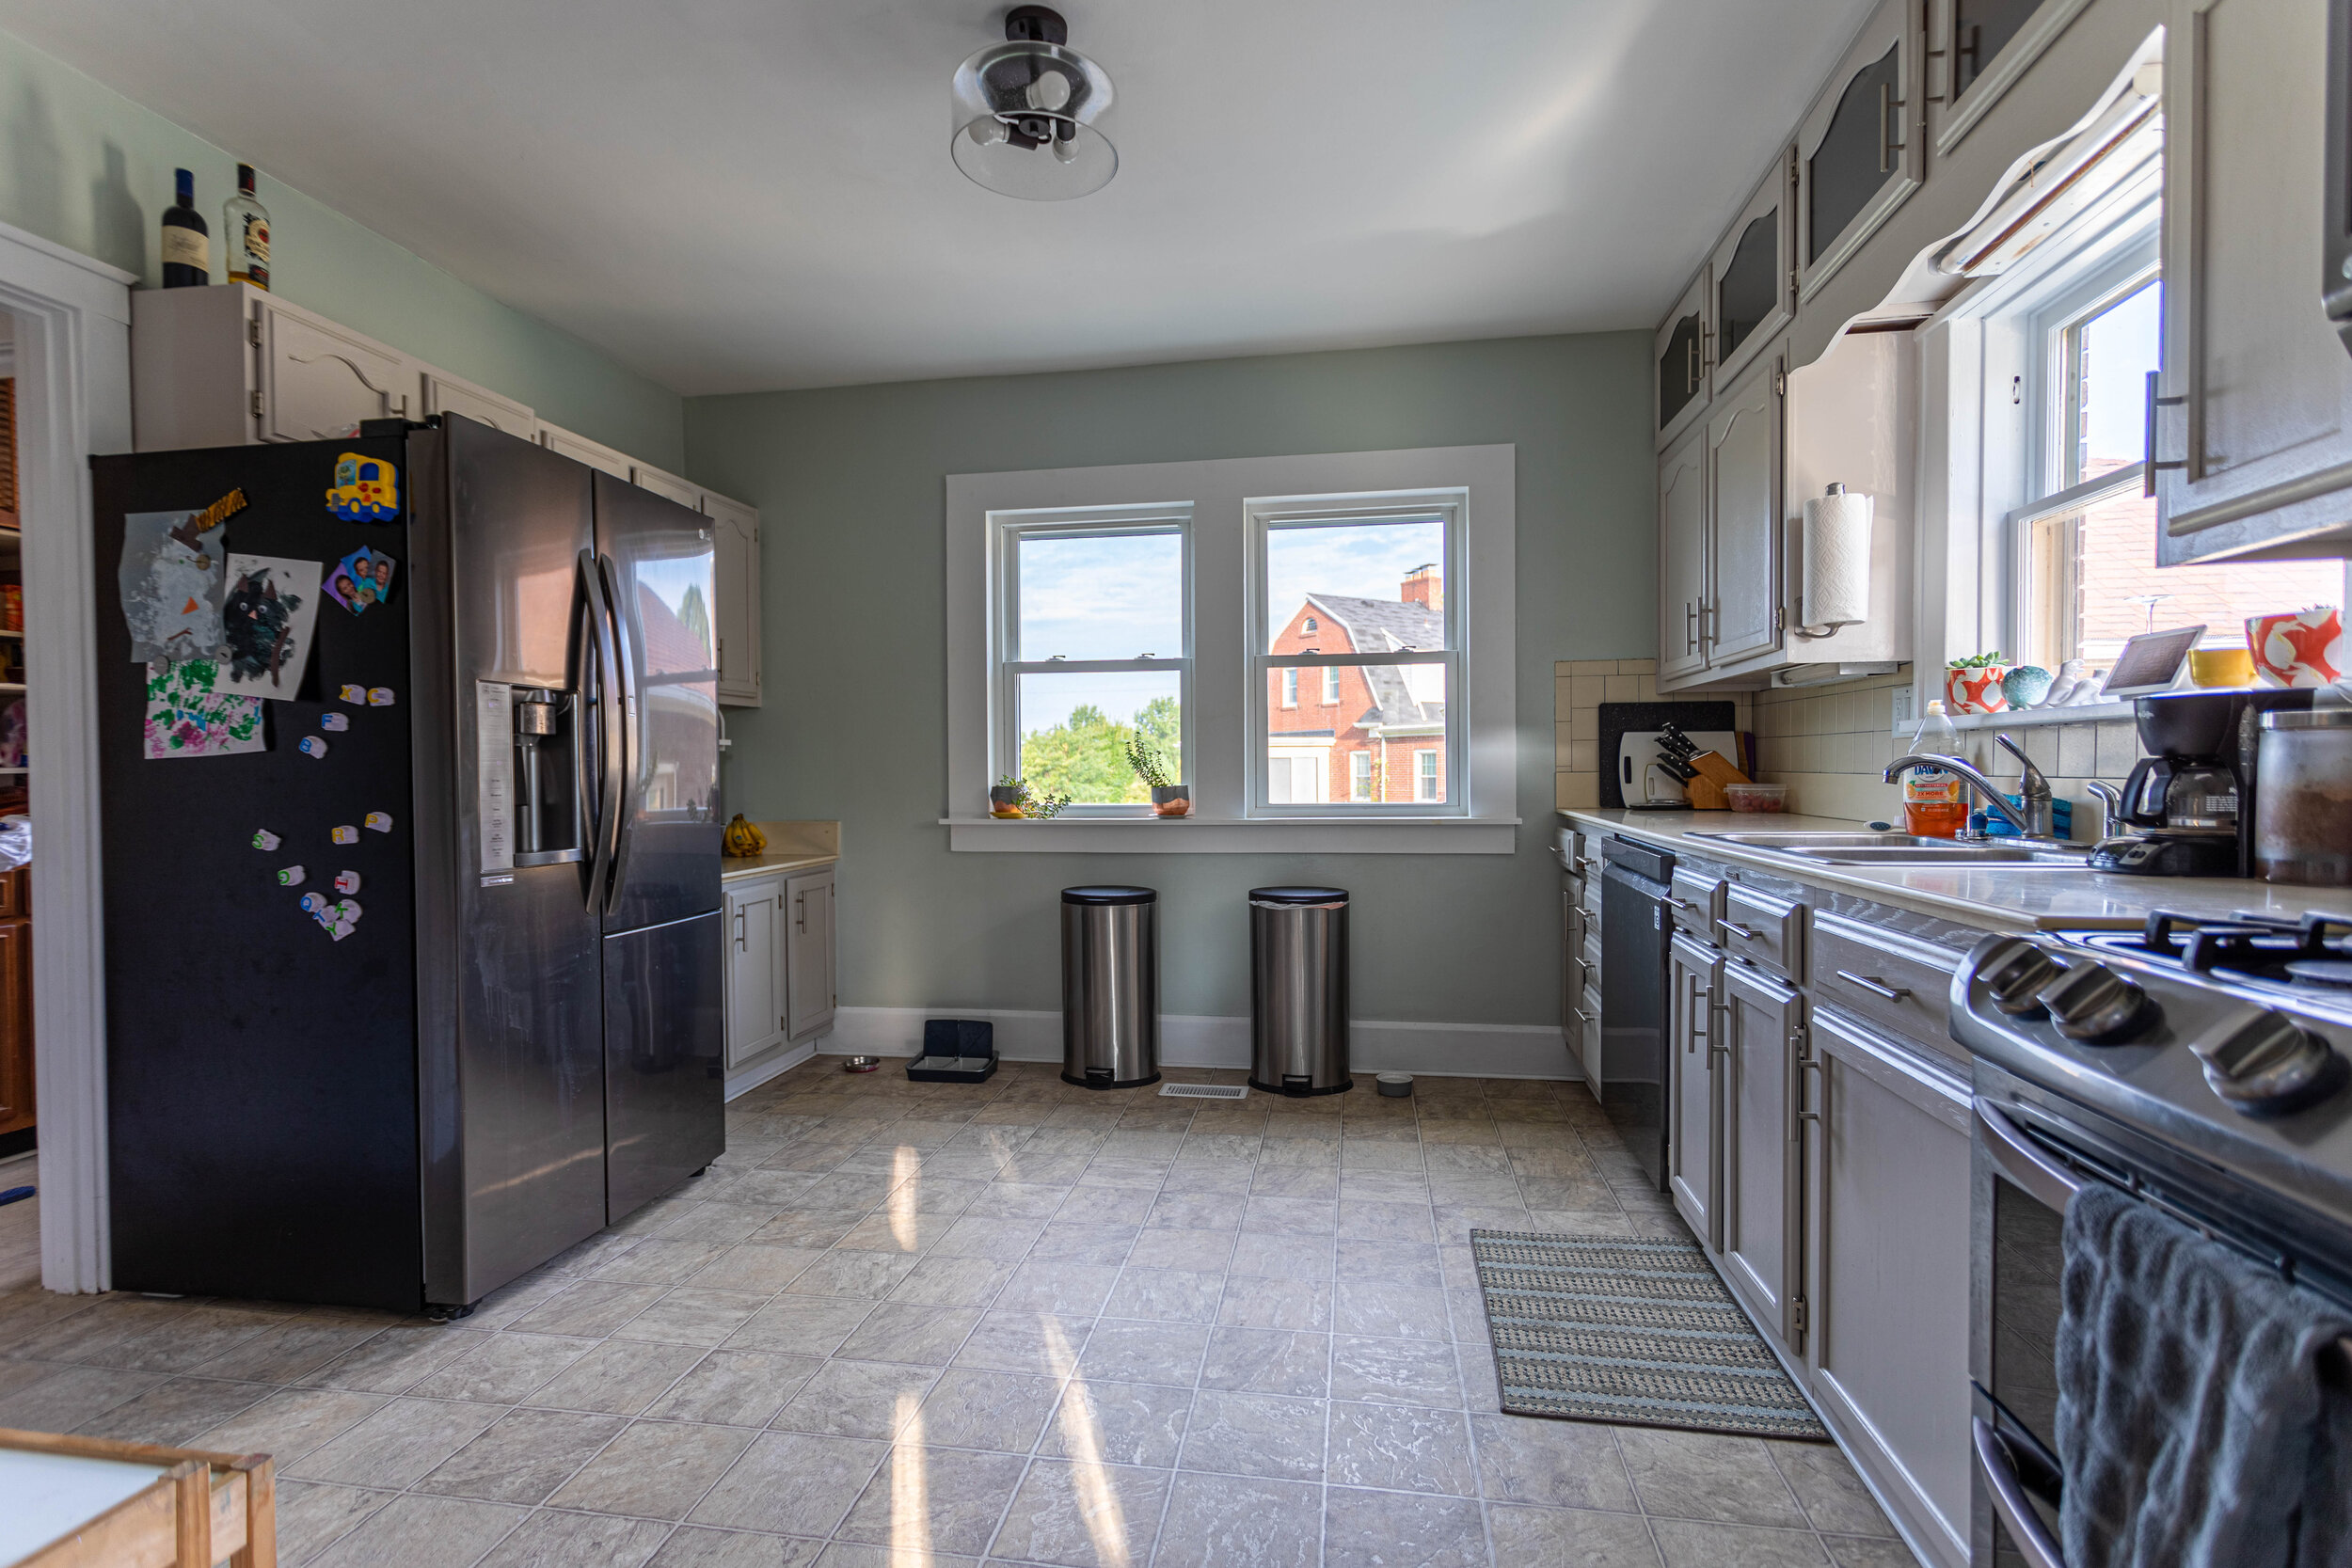
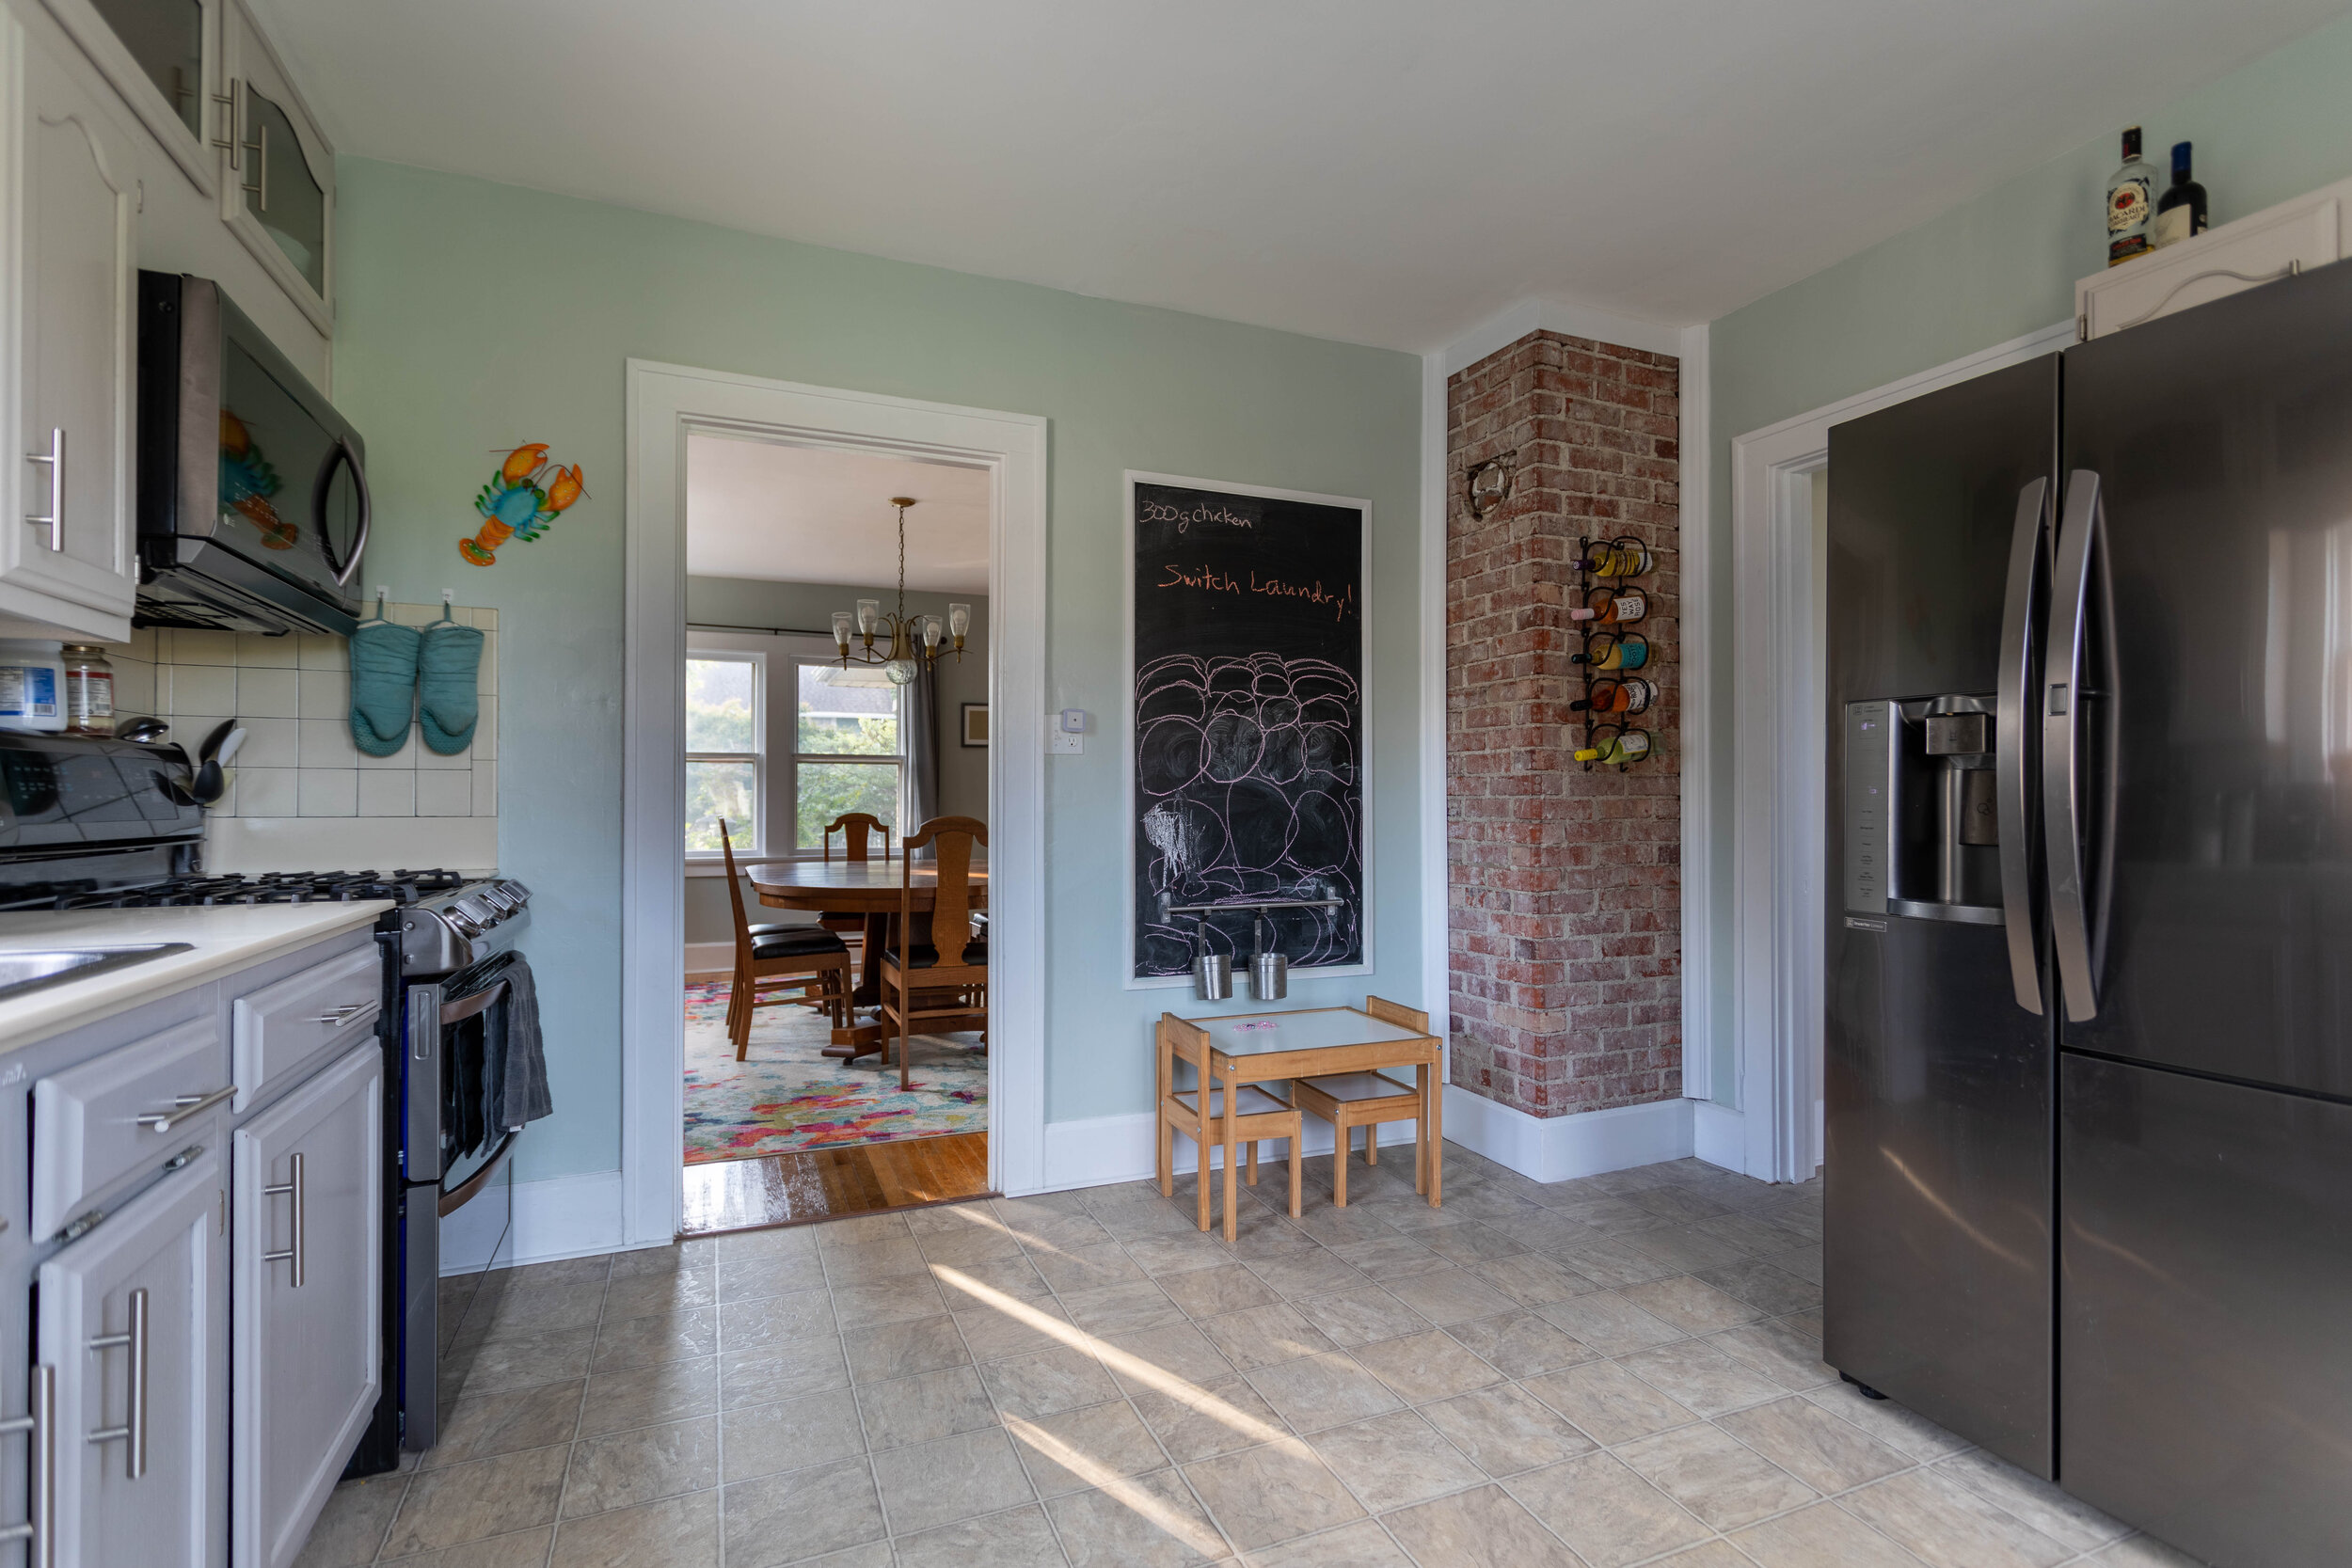
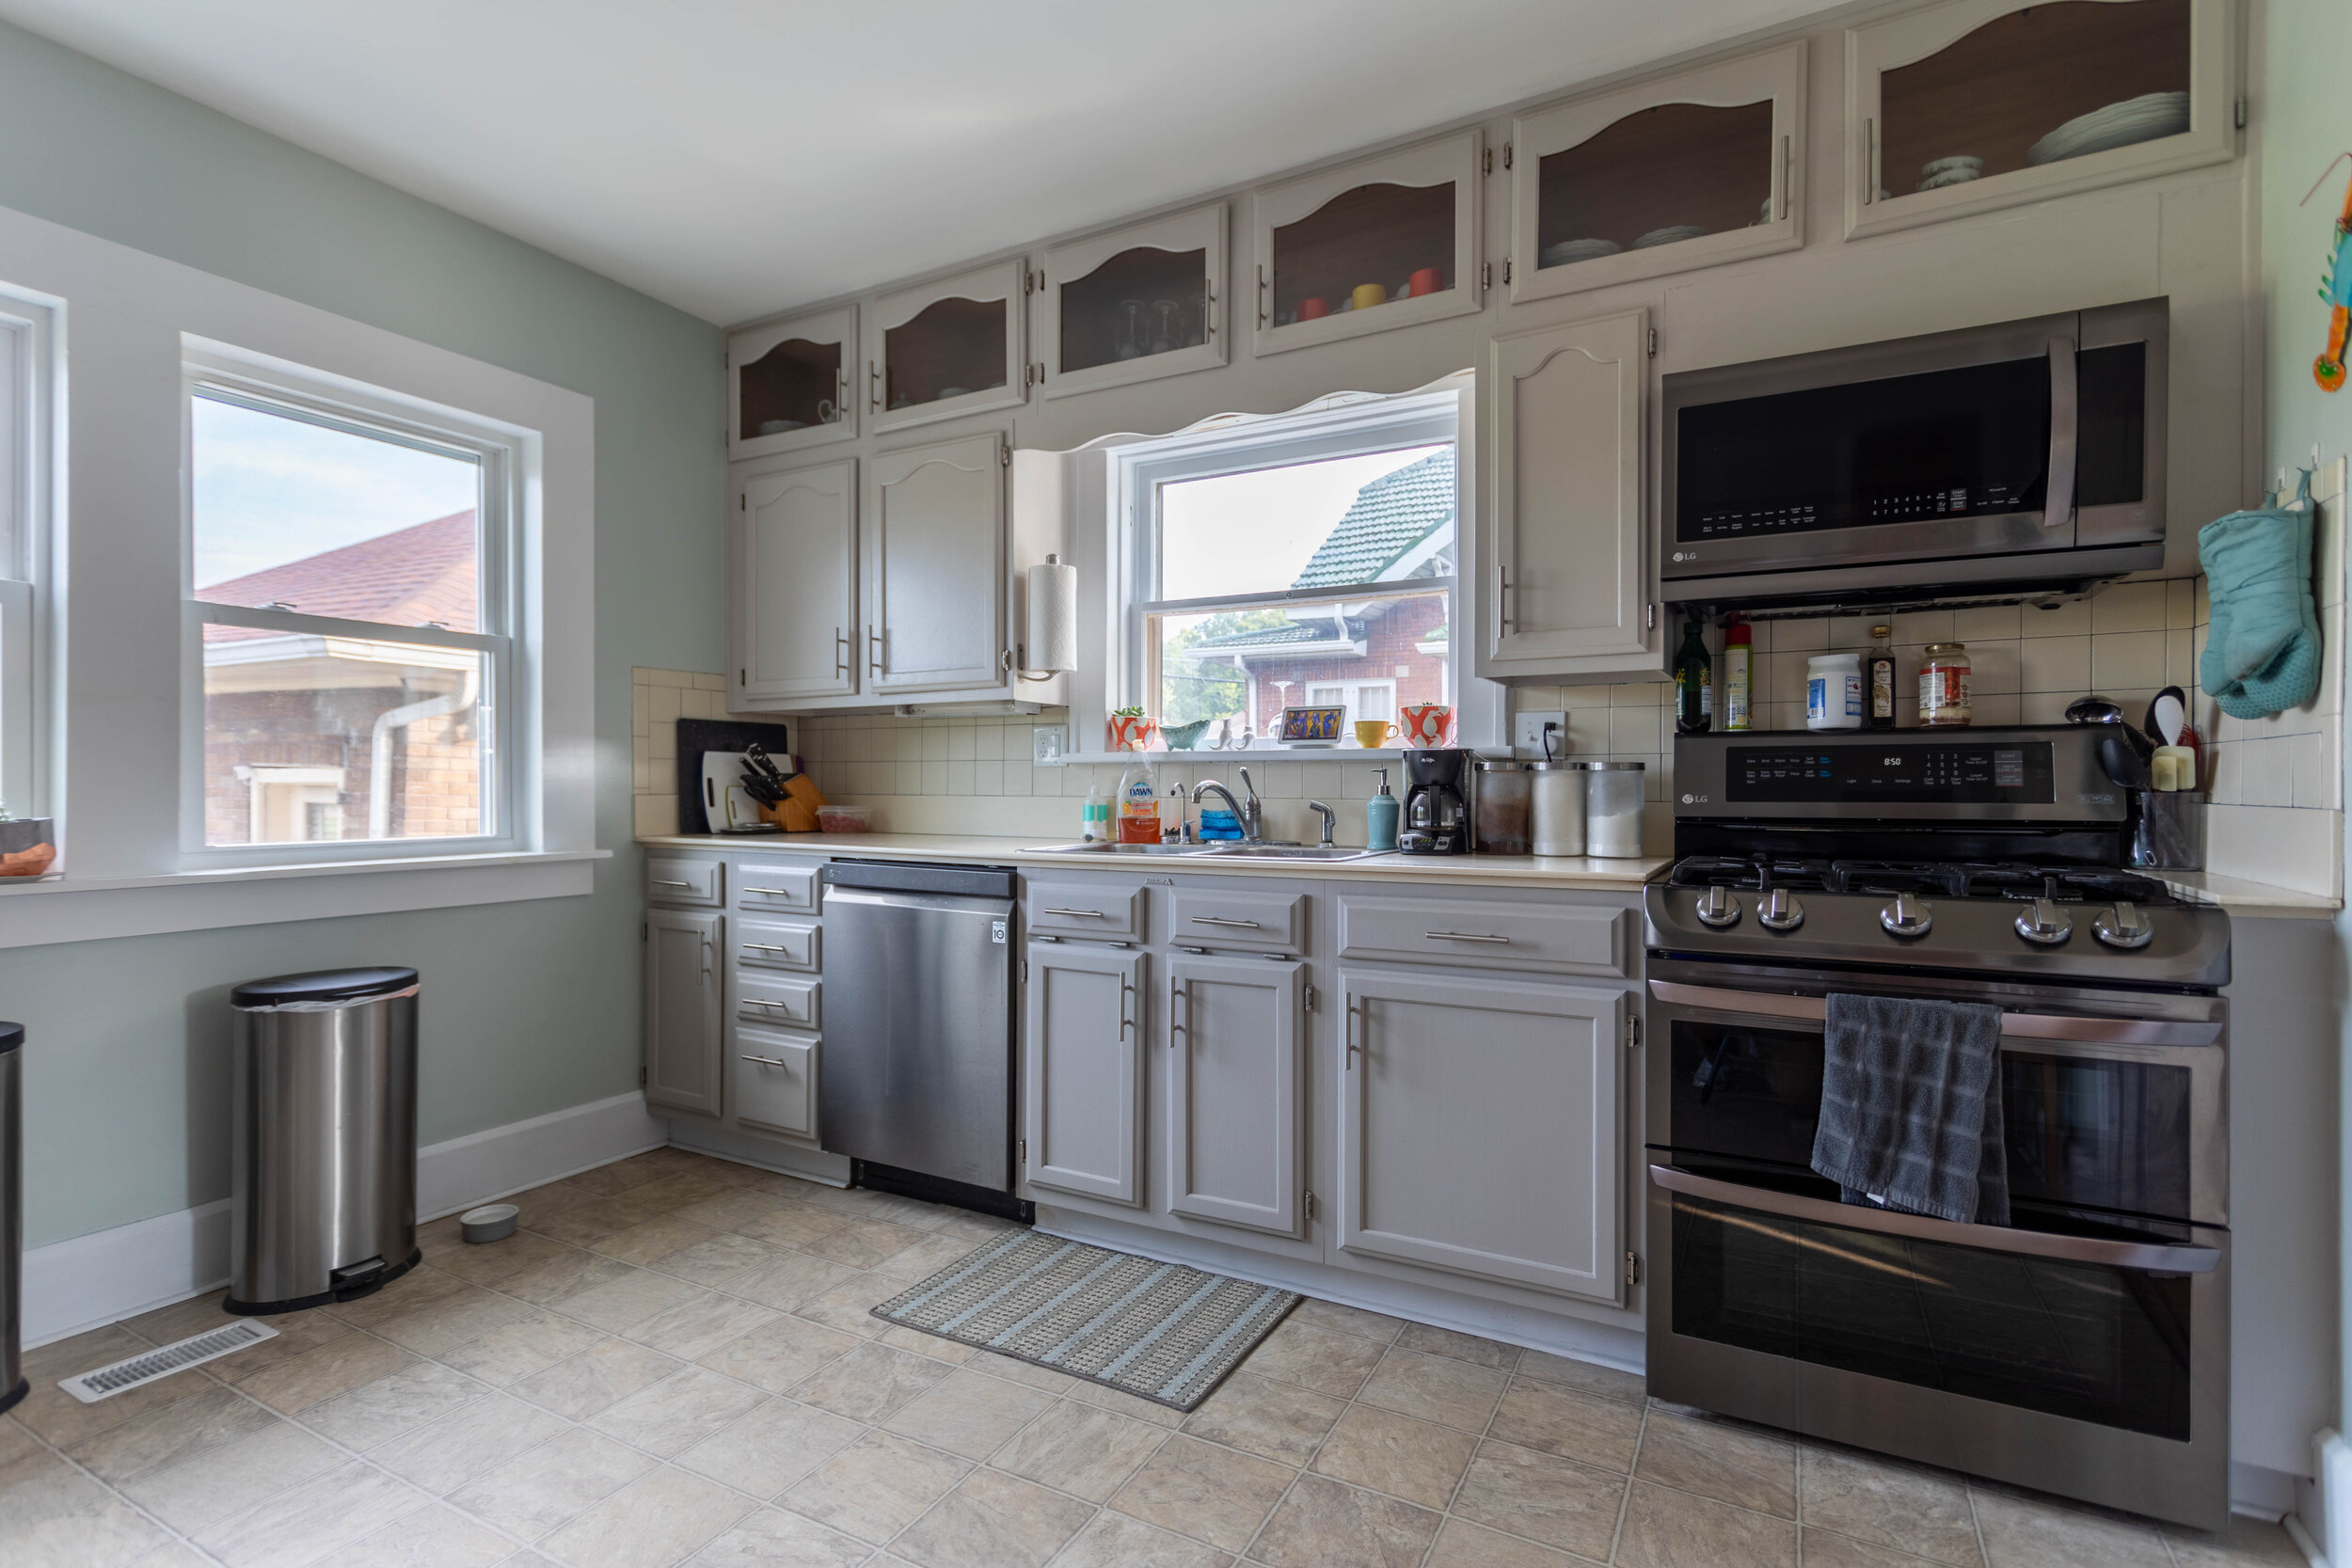
We also replaced the hardware on the cabinets, the appliances, the two side-by-side windows, updated the light fixture, made a chalkboard area, and exposed the brick chimney, because I love me some exposed brick. And Lucius loves destroying things.

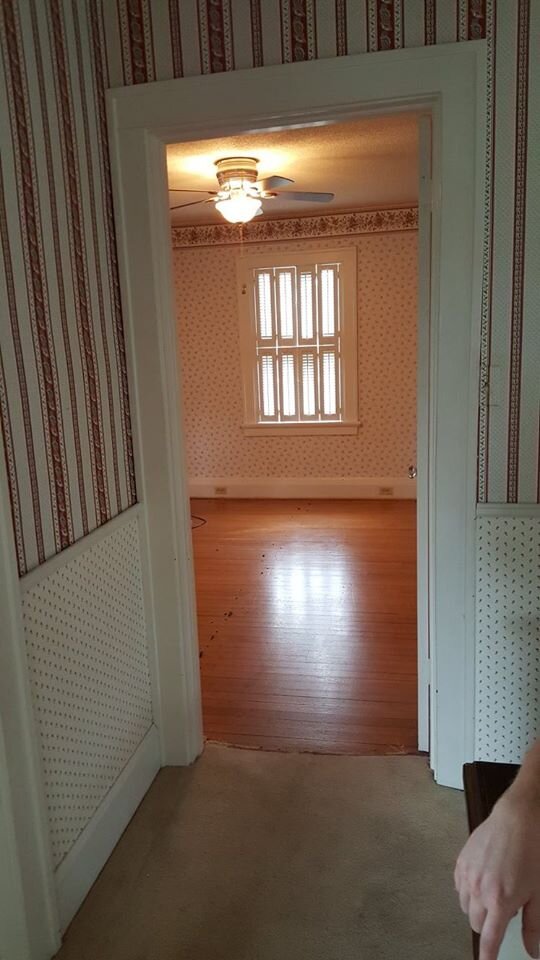
The upstairs hallway


Unfortunately the only “after” picture I have of the upstairs hallway is from one end, but I think you get the gist.
Oddly enough, the foyer and this upstairs hallway are what really sold me on the house. I was actually on the fence when Lucius started talking seriously about wanting to buy it, but there was something about these spaces that really drew me in.
In the picture above, the little bench at the end of the hallway is actually one of my favorite elements to this house - a laundry chute to the basement! Man, that definitely came in handy. Though we often joked about adding a pulley system to bring the laundry back up two flights of stairs that never did happen.

Aside from the aforementioned list of updates, we also replaced all the door knobs to the bedrooms after I got trapped in the master bedroom one day.
And just for fun, here’s a not-scary-at-all shot of me stripping wallpaper over the staircase:

Cool as a cucumber…
The bathroom
Like the half bath on the first floor, I considered not sharing this bathroom either because it wasn’t even a little bit close to the finished product when we moved. But, I’d like to be honest and transparent in this blog and sometimes things just don’t work out the way you want them to in the end.
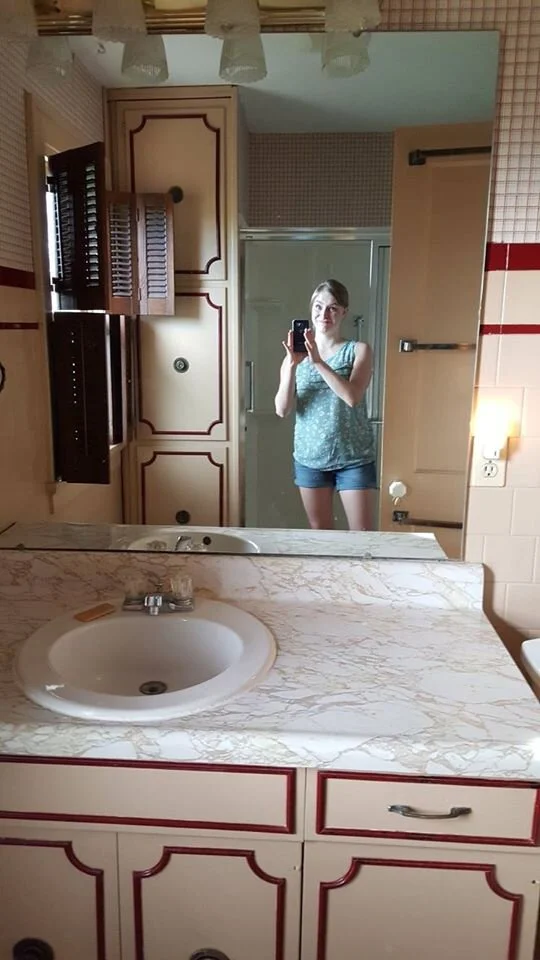
For a long time we called this bathroom “The Smoker’s Lounge” because of its beige and burgundy color scheme. It just felt old and dingy like someone back in the day spent a lot of time smoking cigars in there.
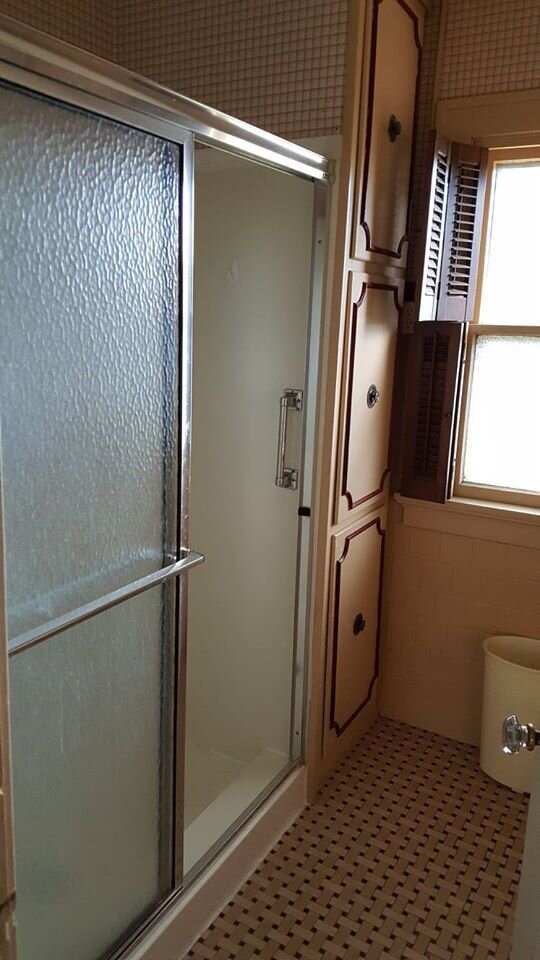
We started to remodel this room little by little, first replacing the shower with a bathtub. We moved into this house with an 1.5 year old and bathing her in a portable baby tub just wasn’t cutting it. That update required us to replace the cupboards next to the shower stall because the tub wasn’t the same proportions as the shower stall.
After we stripped the wallpaper, popped off the tiles on the bottom 2/3rds of the wall, and painted, we ran into a ton of issues with the plaster cracking. We were so sick of trying to patch and smooth this room that we decided (before we made the decision to move) that we would gut this room and start from scratch during the coming winter… then of course we moved and none of that happened and when we left the bathroom looked like this:
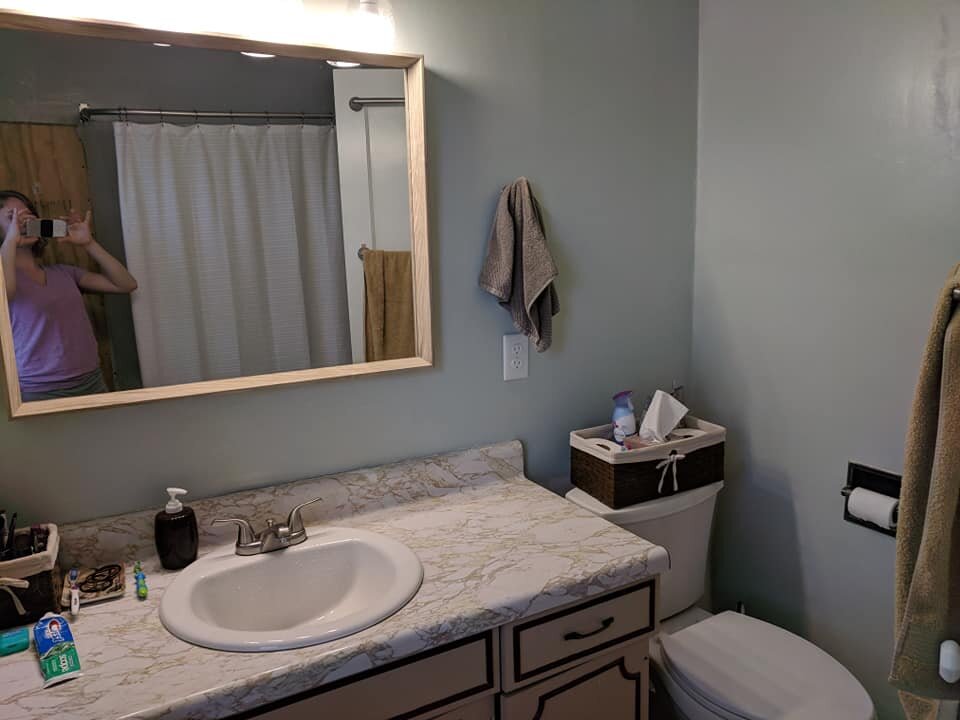
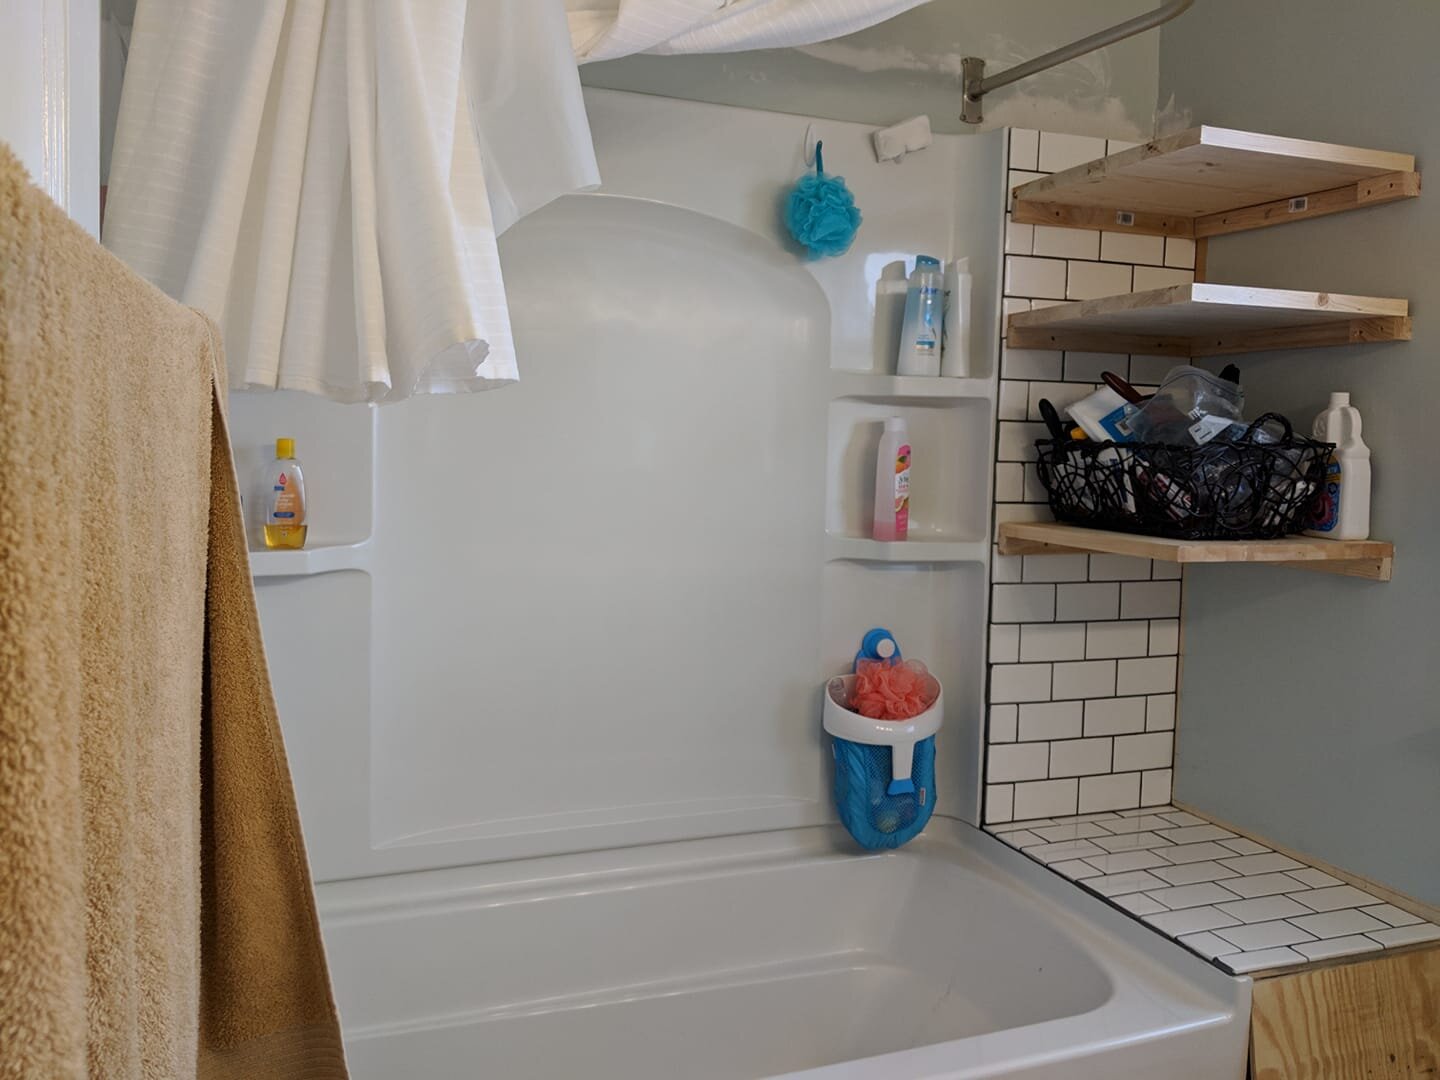
It was certainly an improvement from where we started, but definitely a far cry from where we wanted it to be.
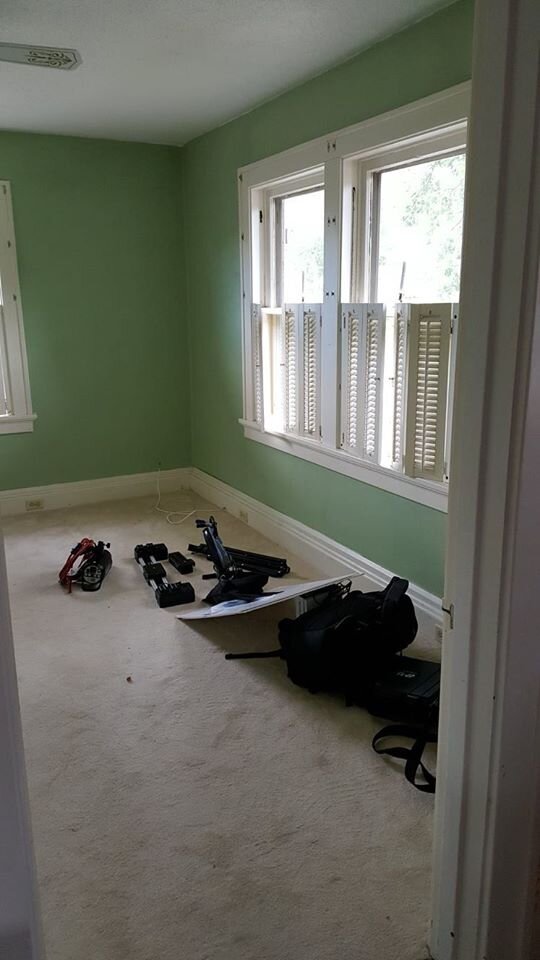
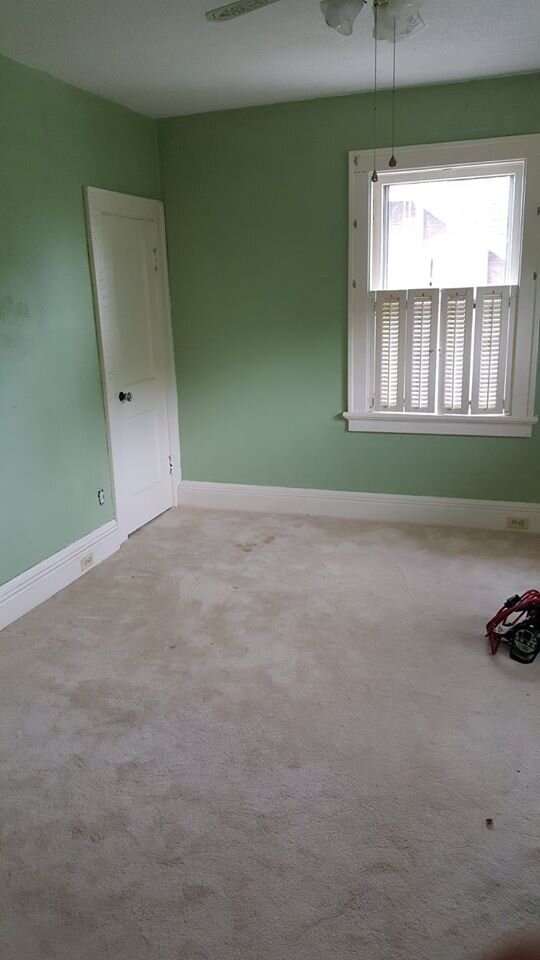
The office
Let’s start the tour of the bedrooms with the least exciting one: the office. This was the only room in the house we didn’t really touch before we moved, aside from removing the carpet and the shutters.
Fun note: this was also the only room in the house that didn’t have any wallpaper.

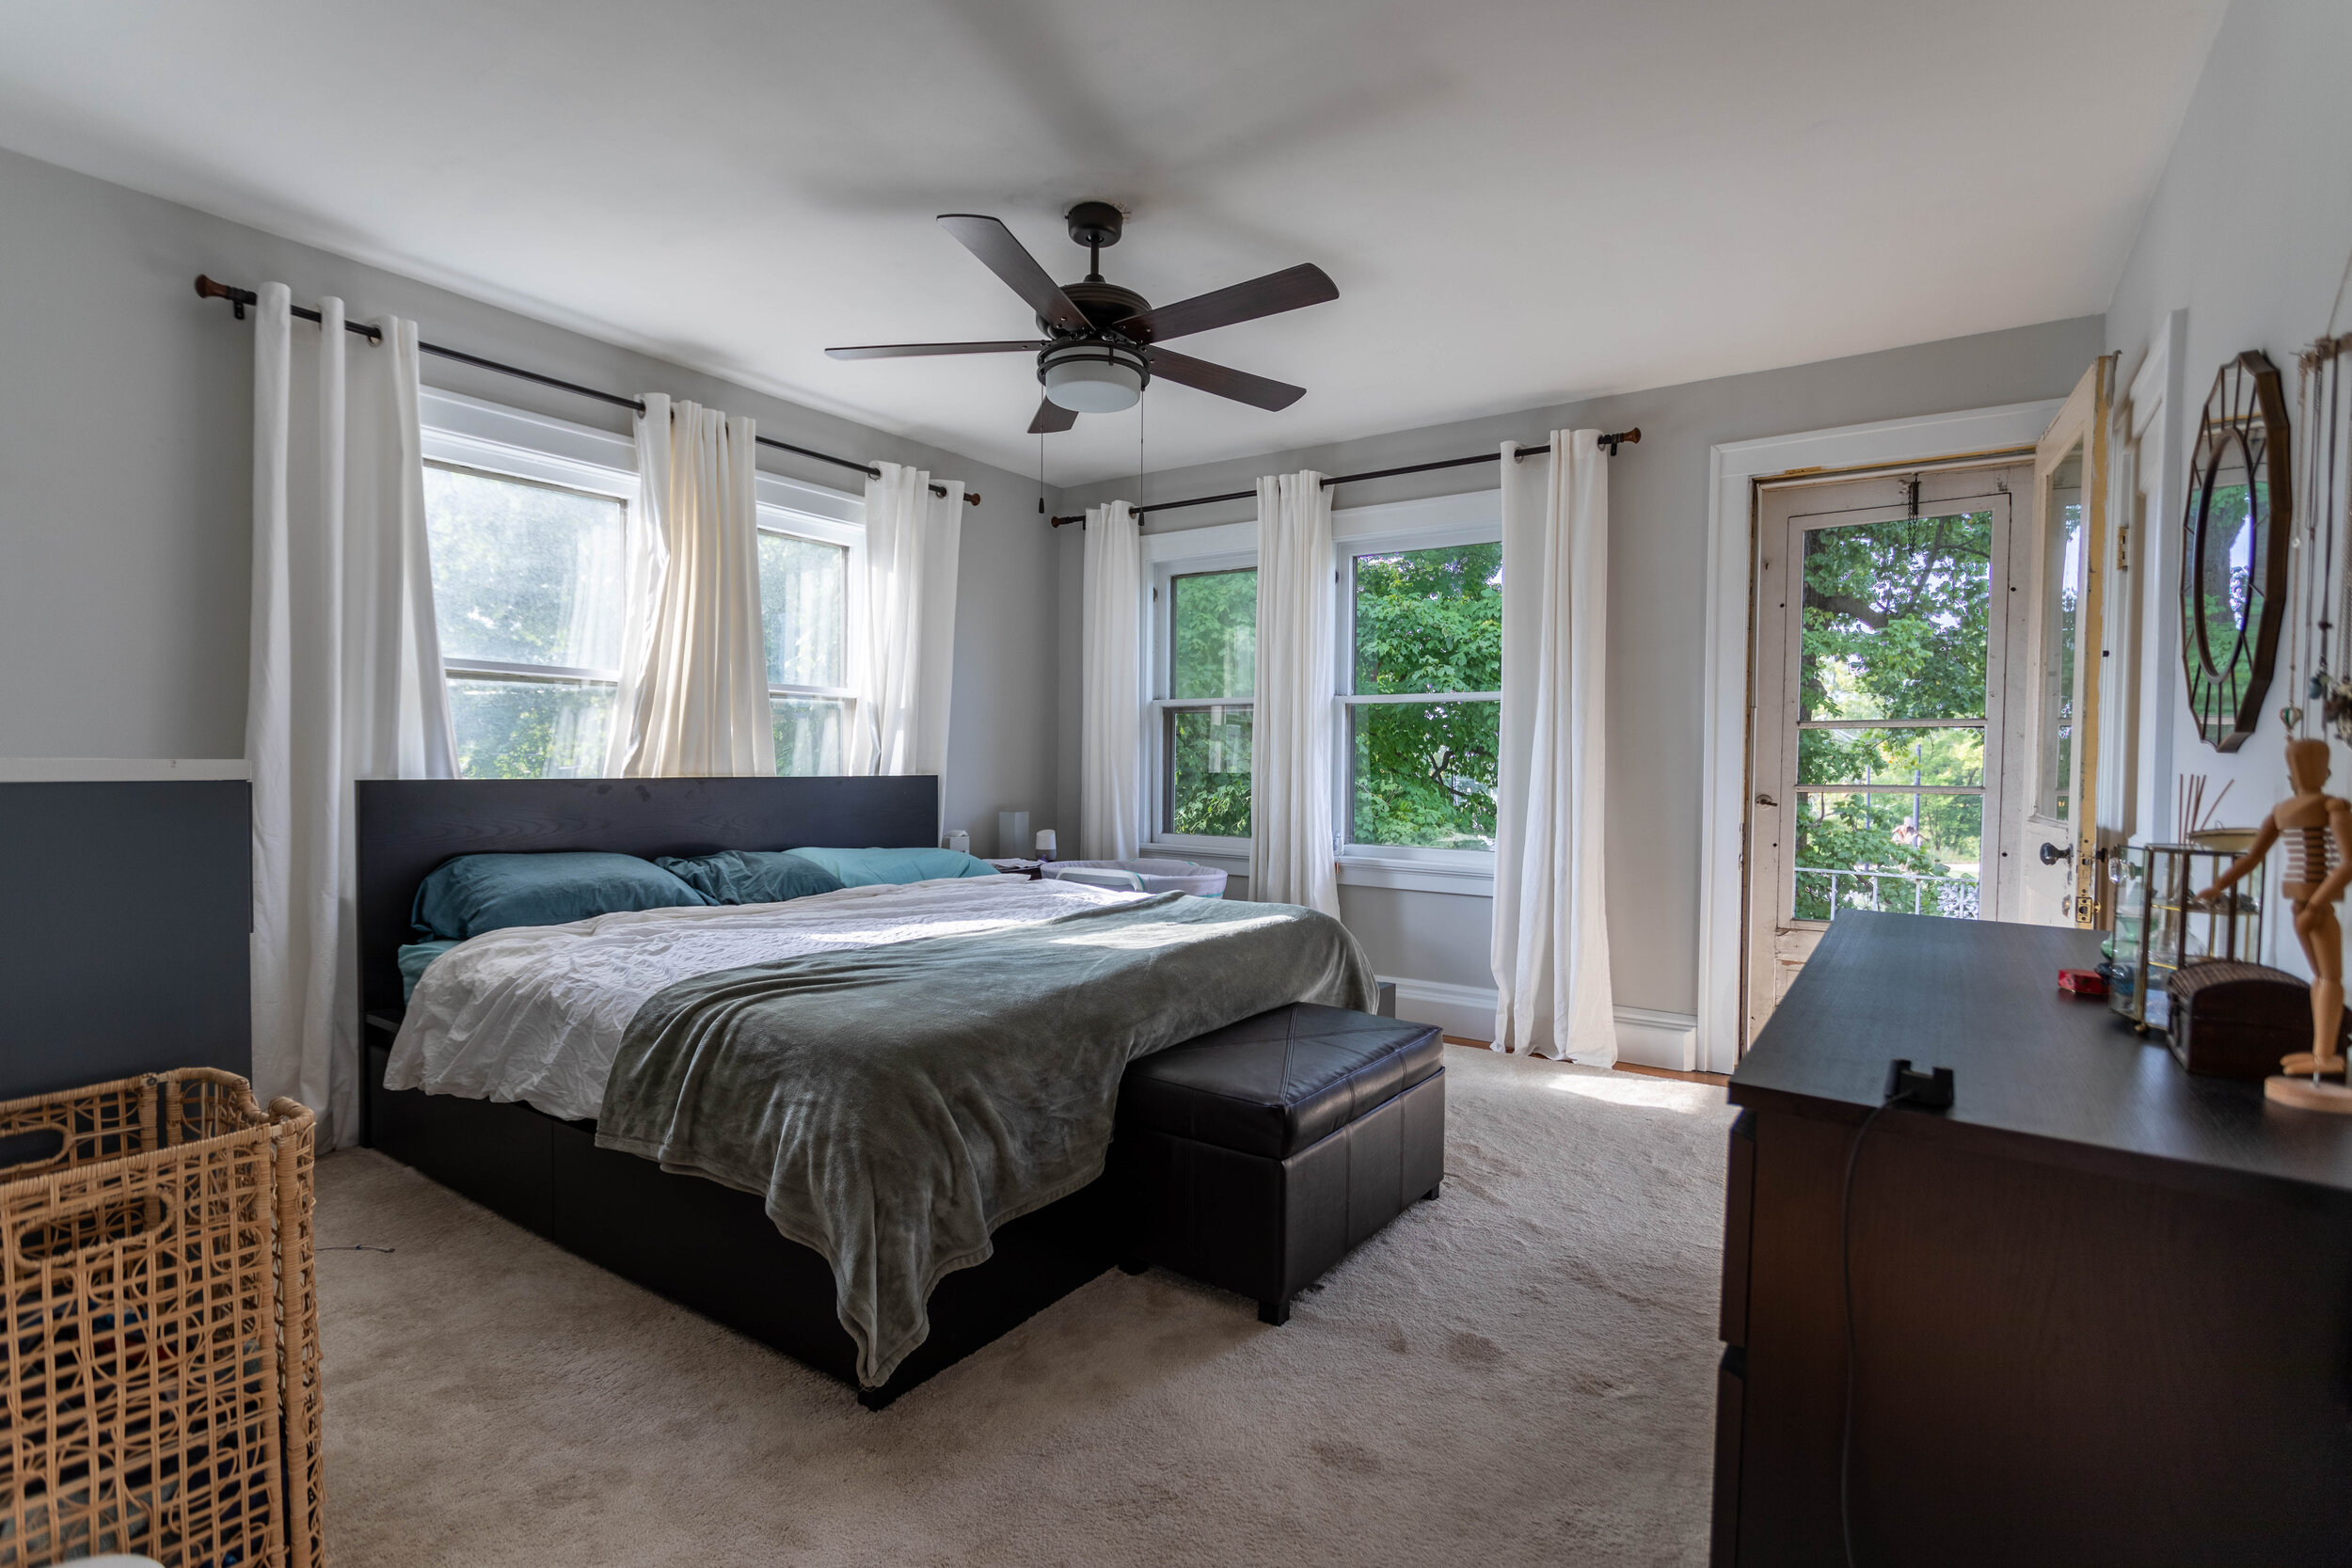
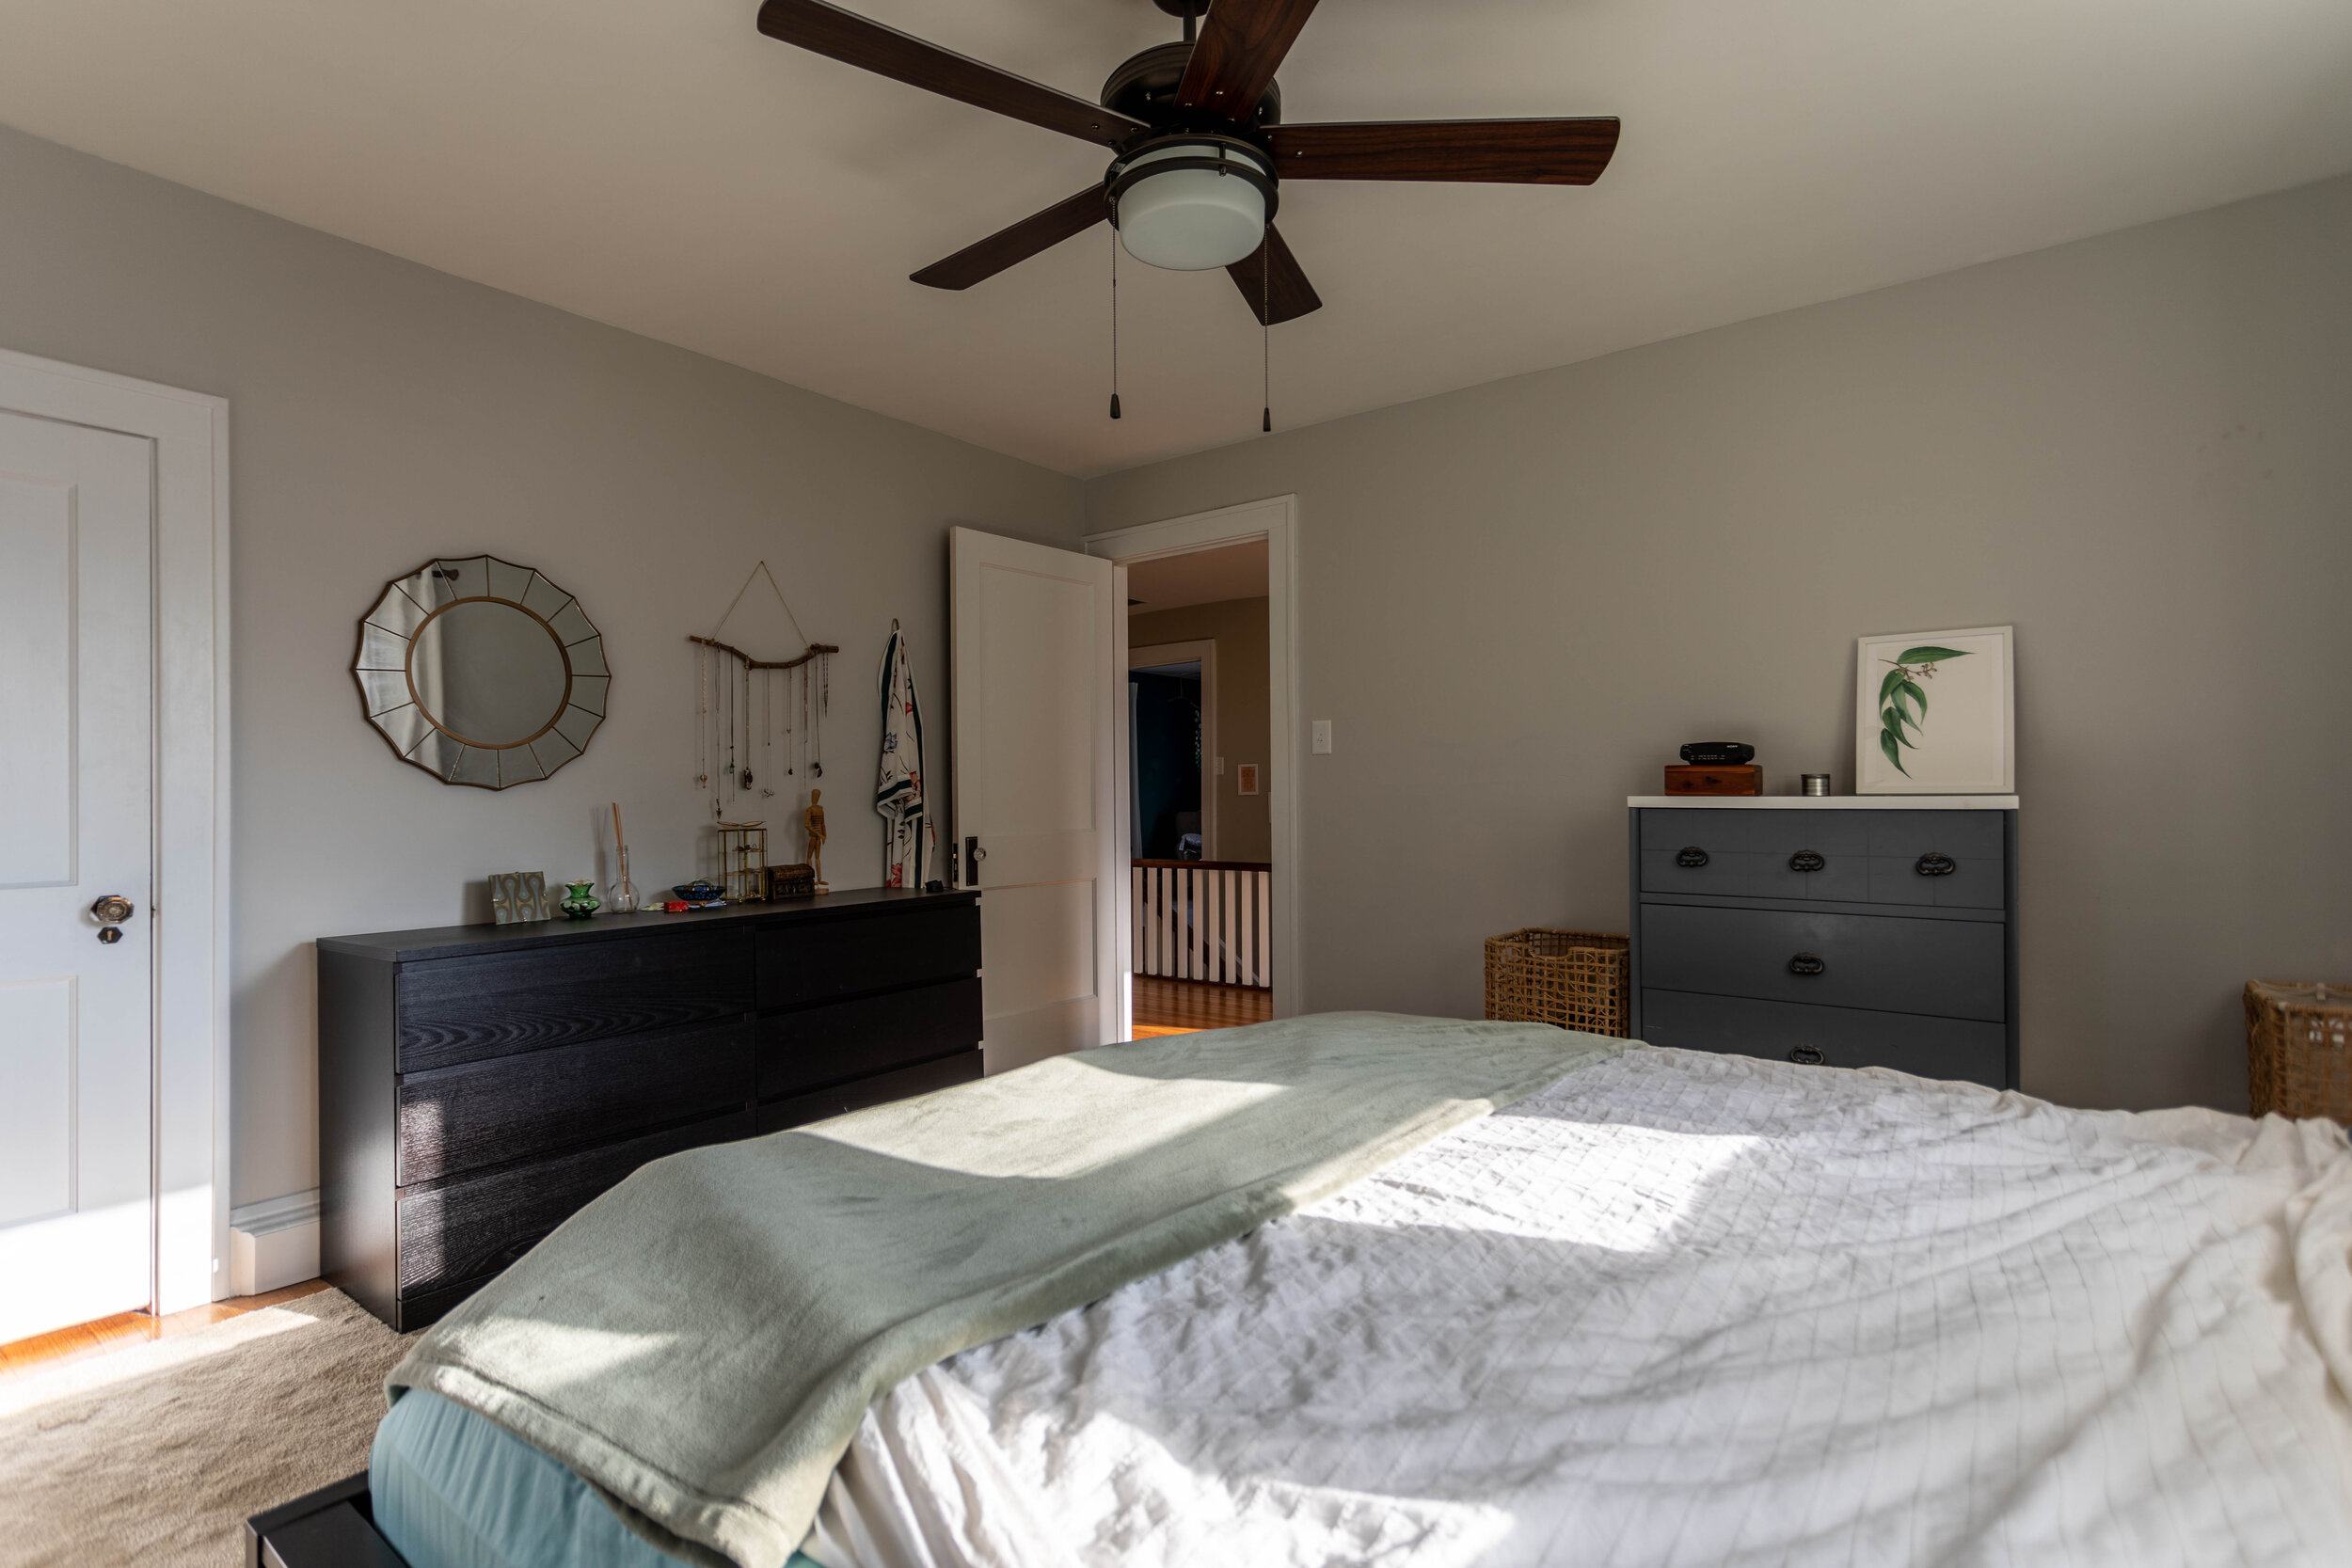
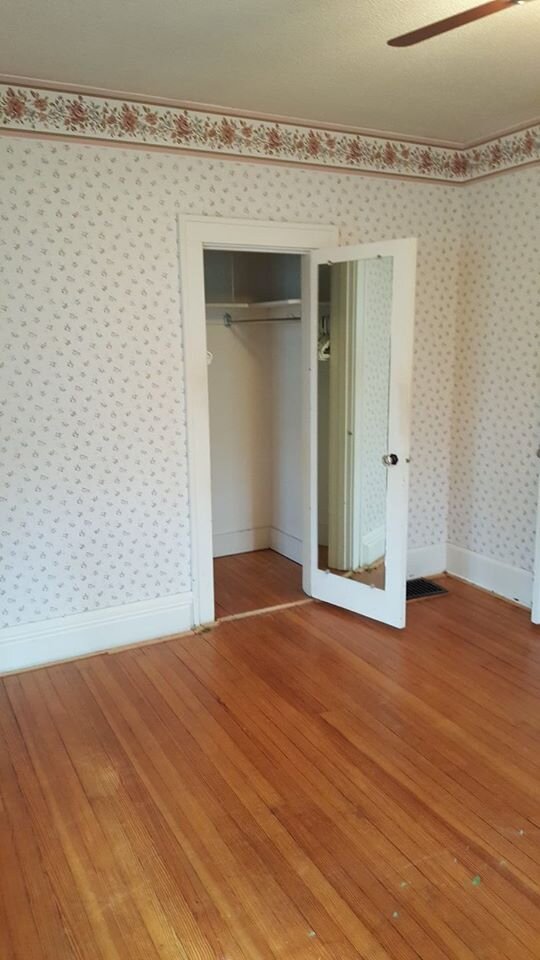
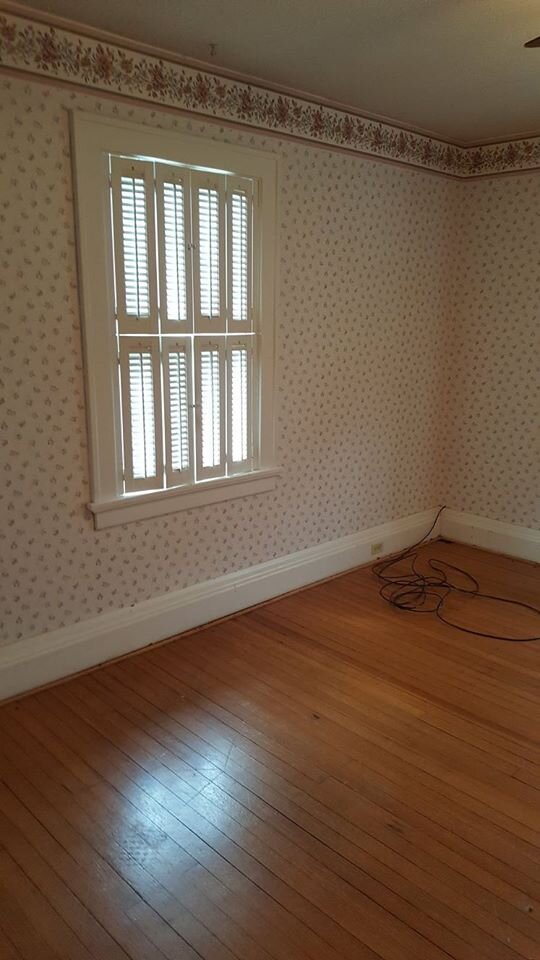
The master bedroom
This room was pretty overwhelming to look at when we moved in, but it was surprisingly easy to update, even with two layers of wallpaper.

Can you imagine how it used to look with that green/yellow wallpaper!?
In the end, the updates made the room feel so much lighter and airier.
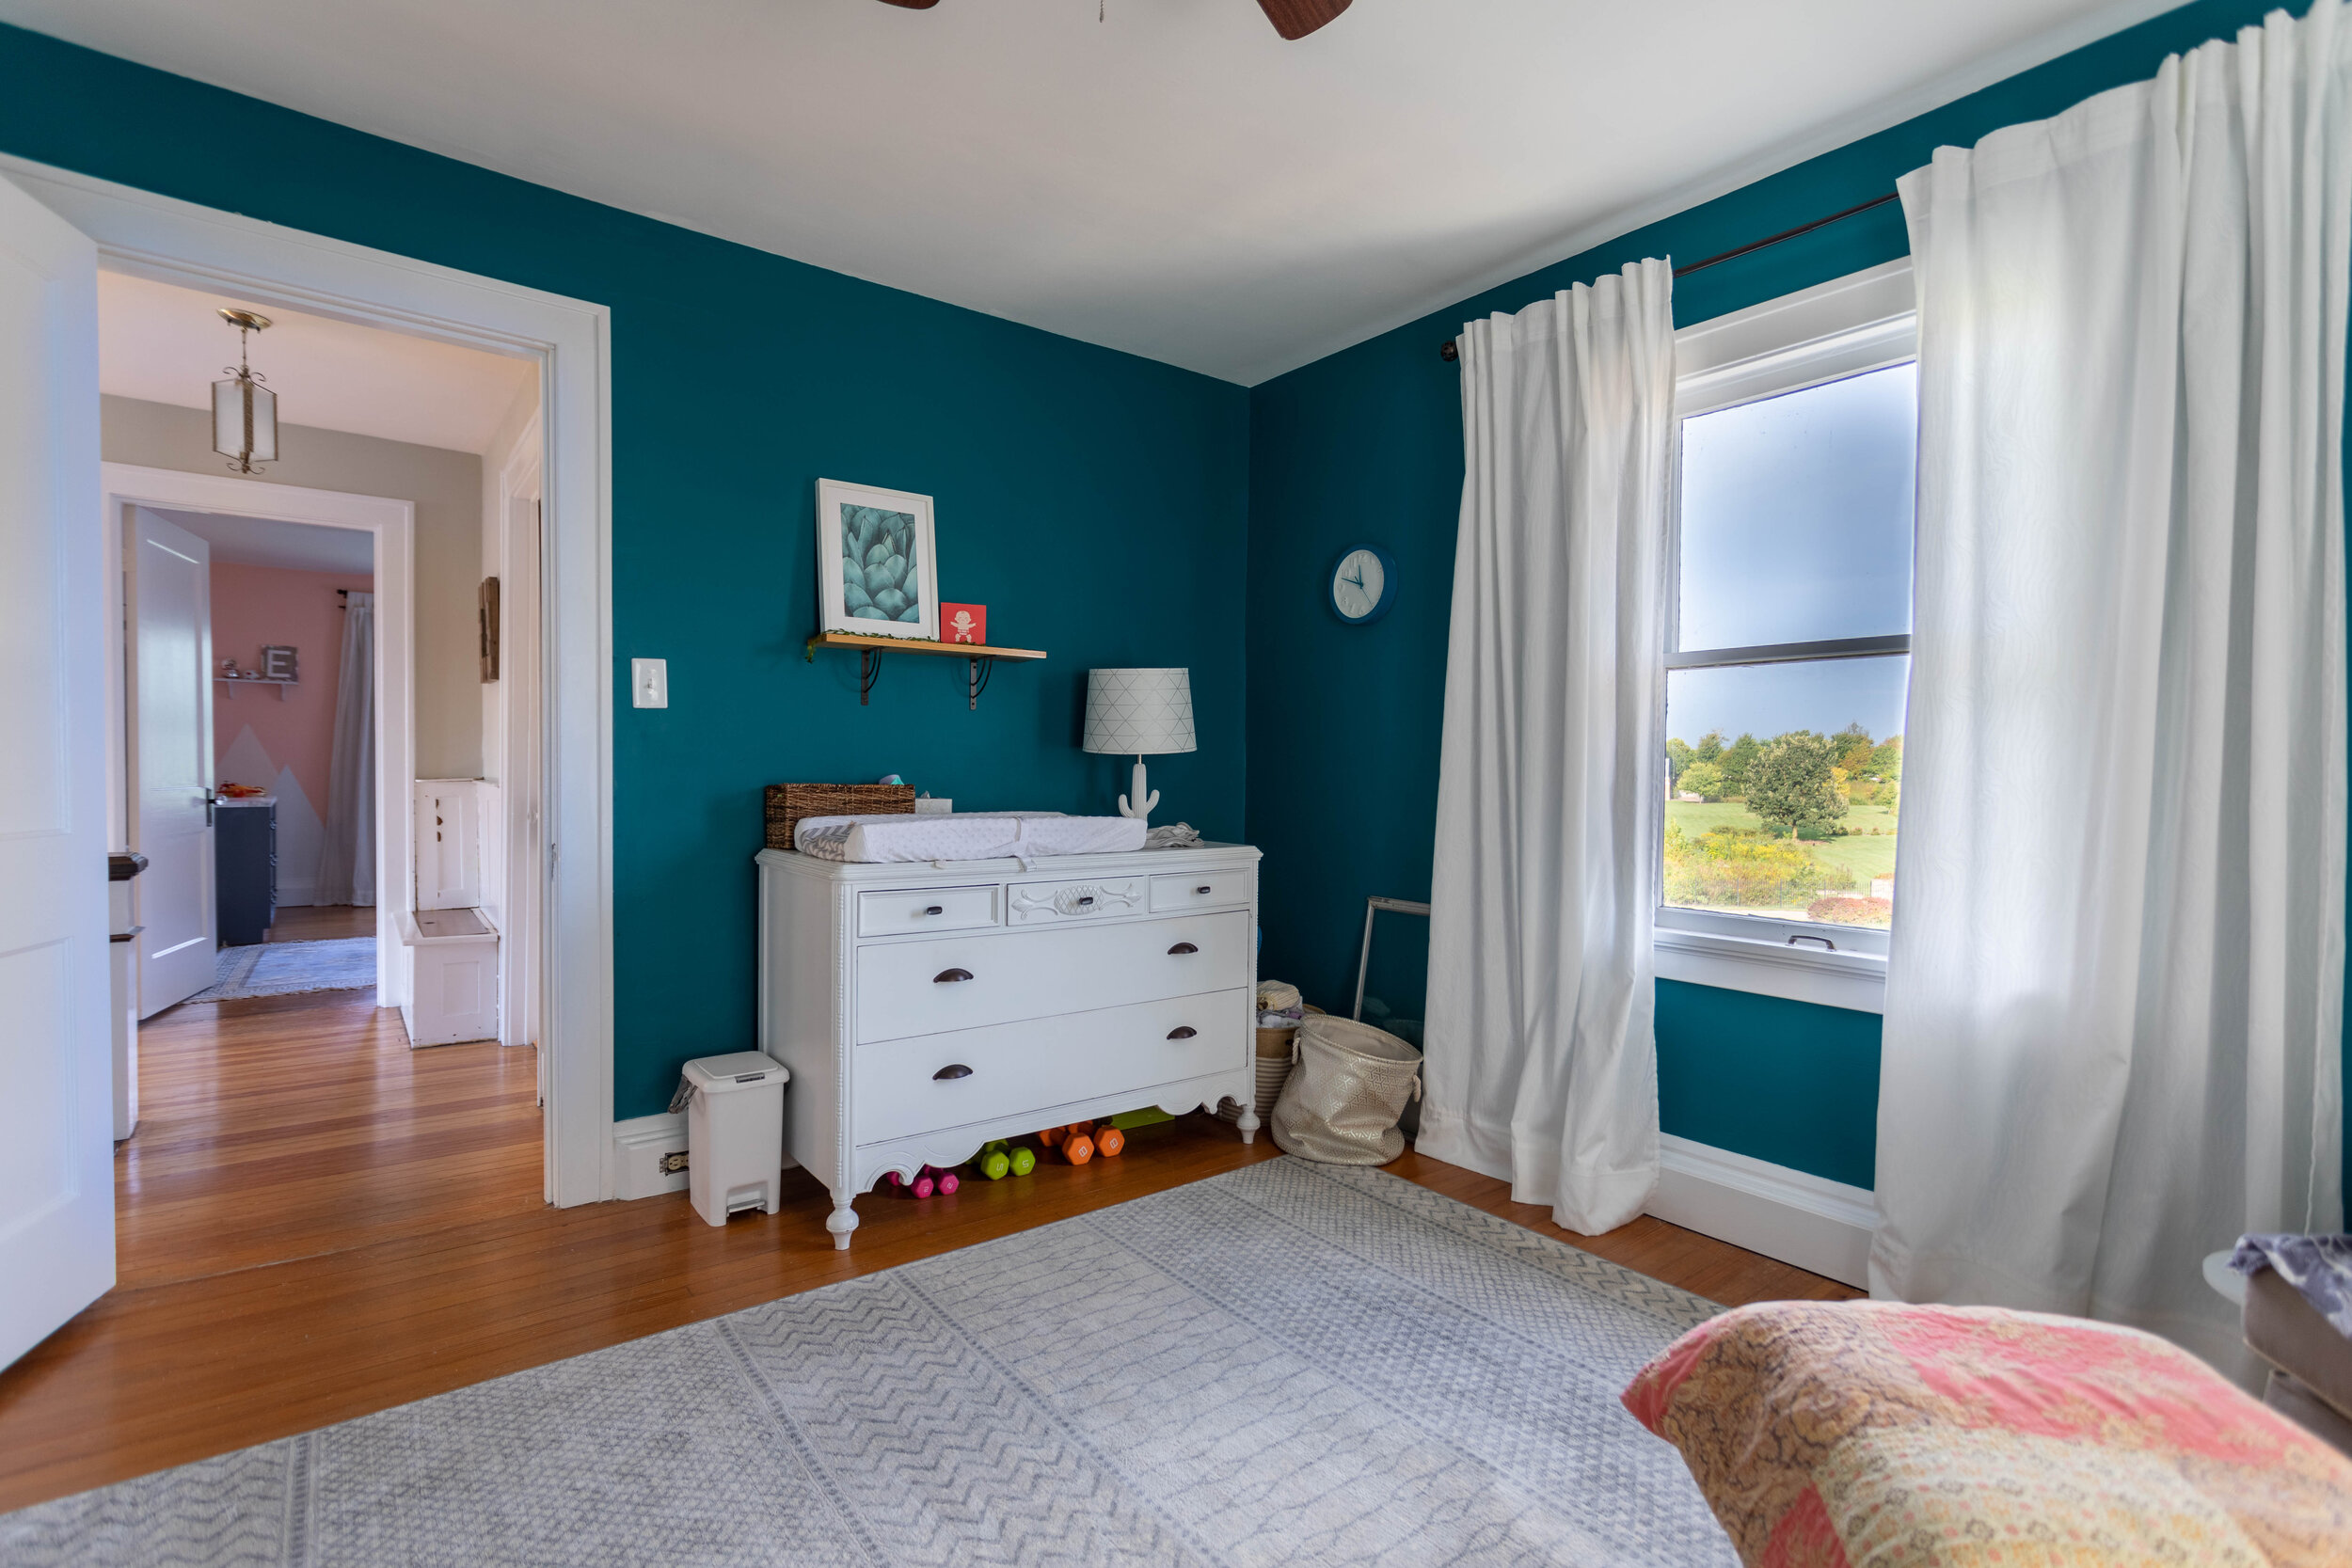
Our older daughter’s room

I actually didn’t mind the wallpaper in this room - most likely because we knew it was going to be our daughter’s room and the floral wallpaper was dainty and cute. But I got the itch about a year after we moved in to do something fun in here so I took a week off work and tackled this room and the nursery, because that’s my idea of a good time.
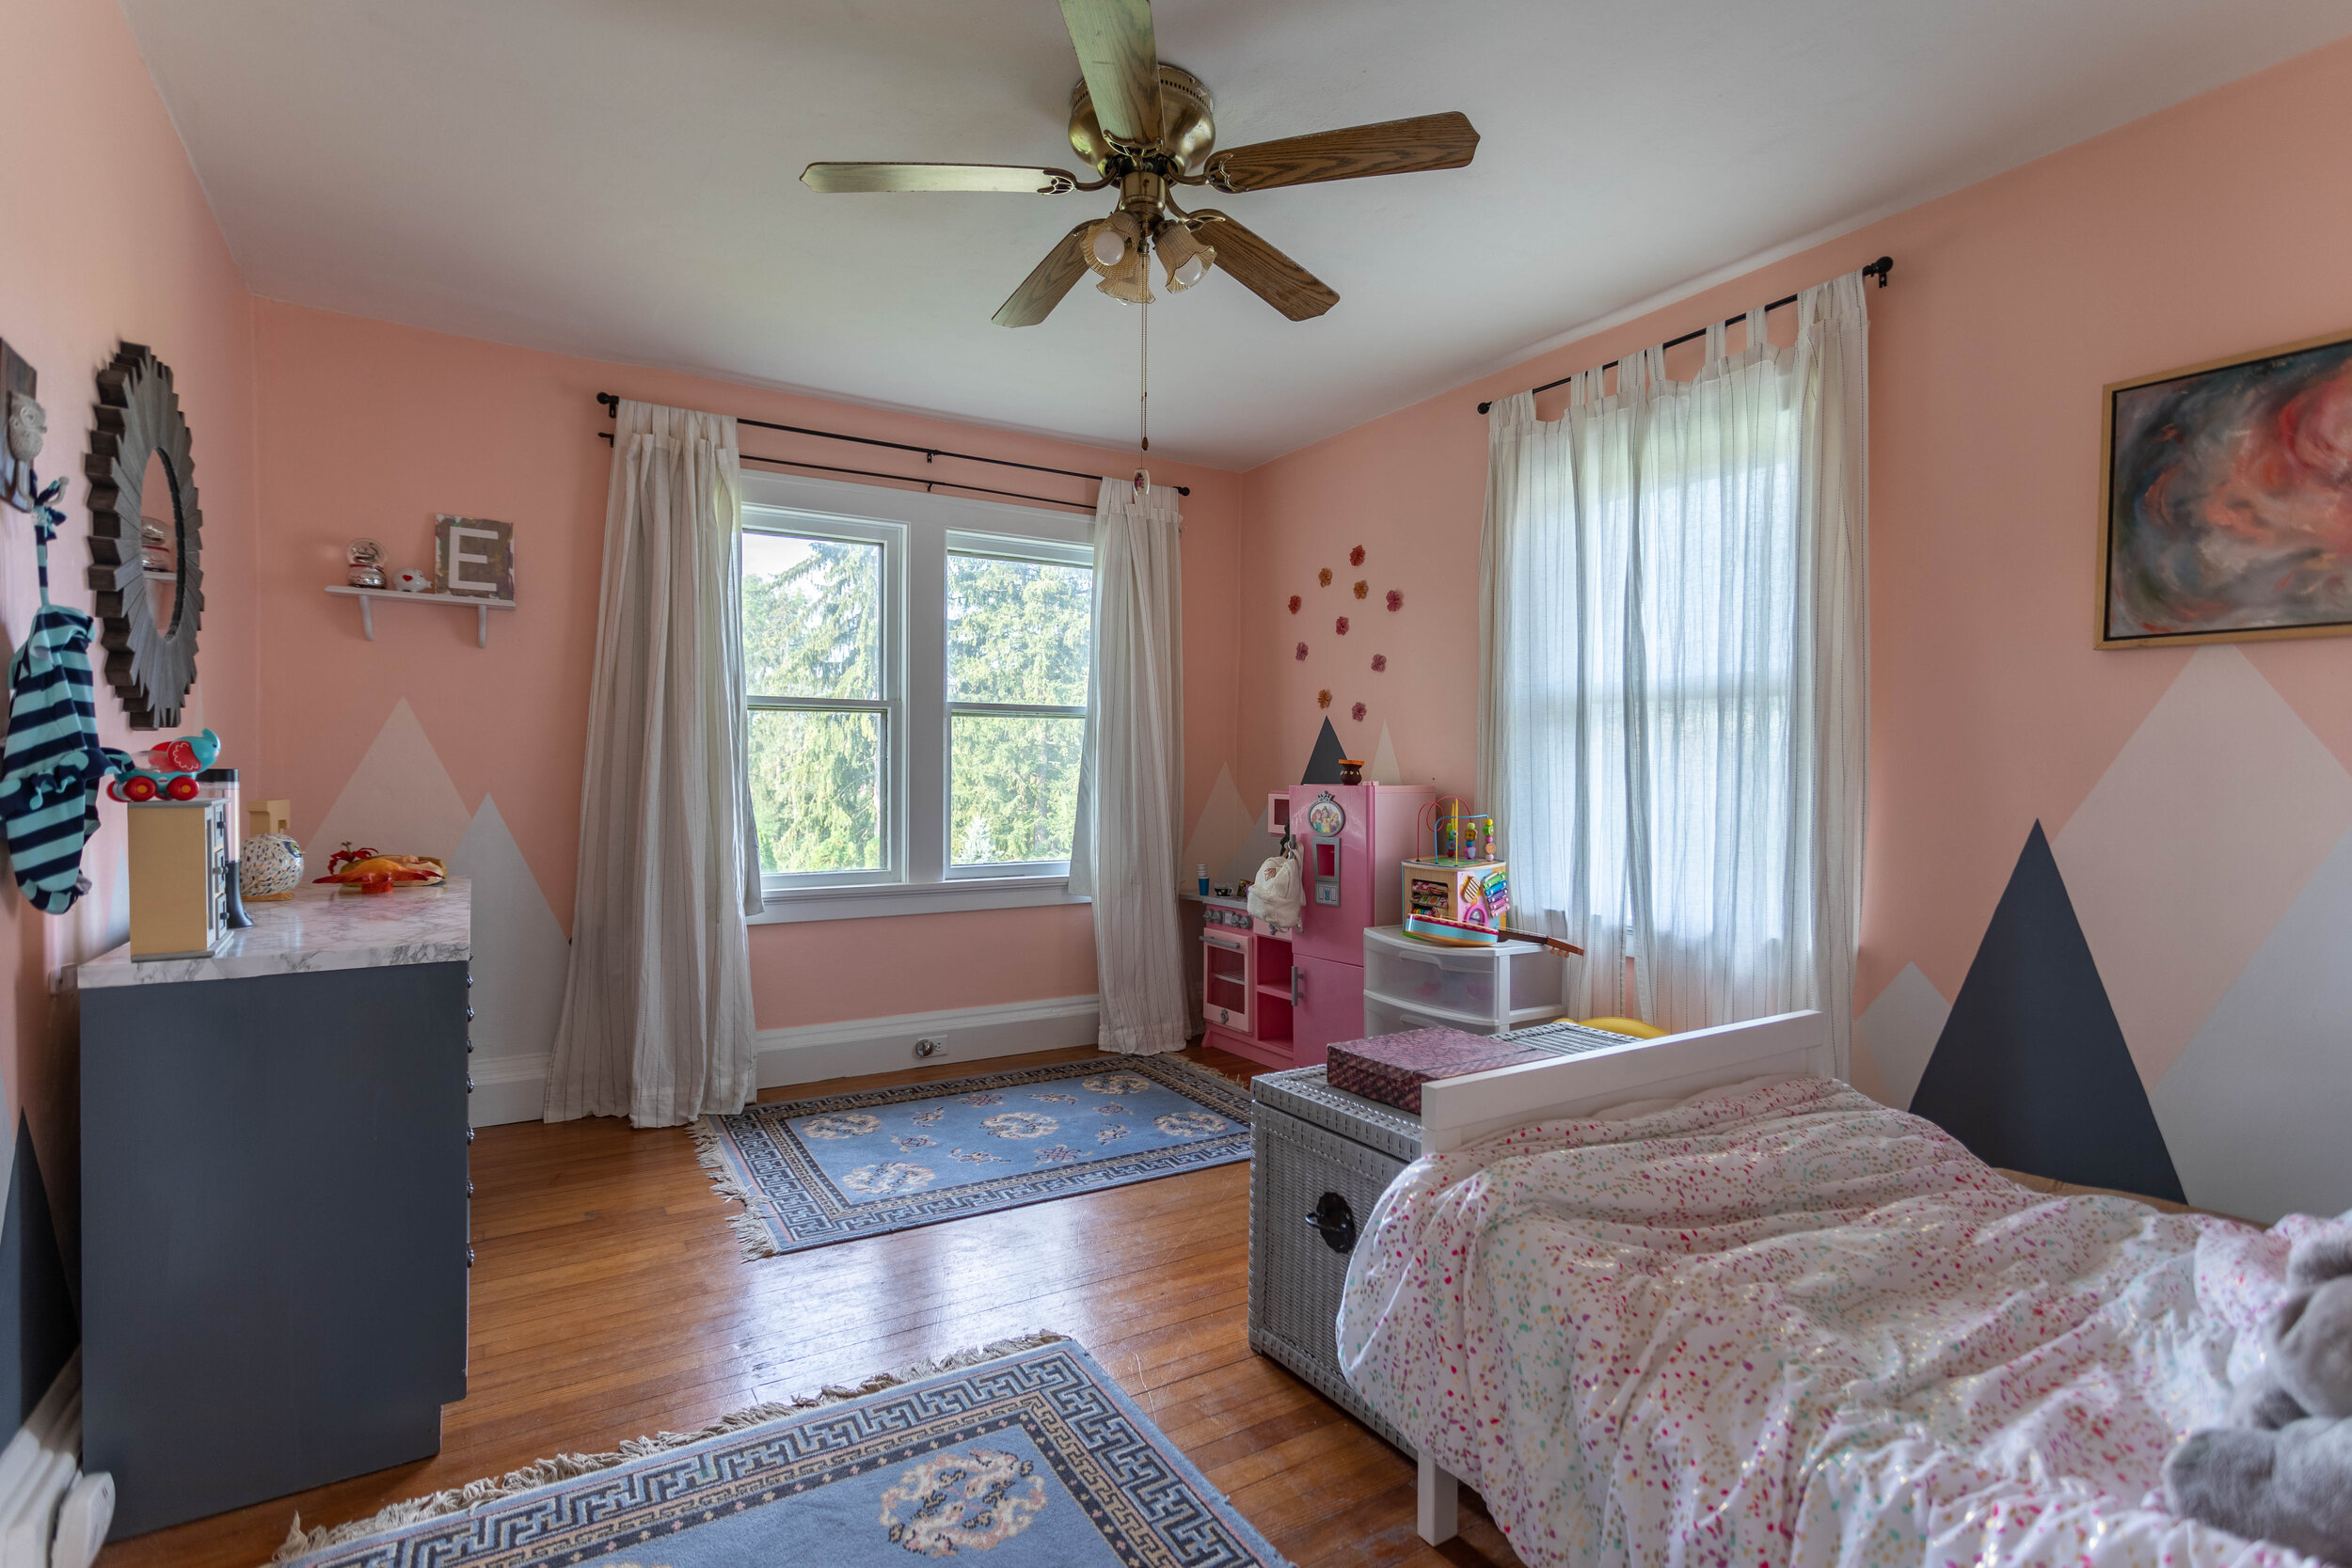
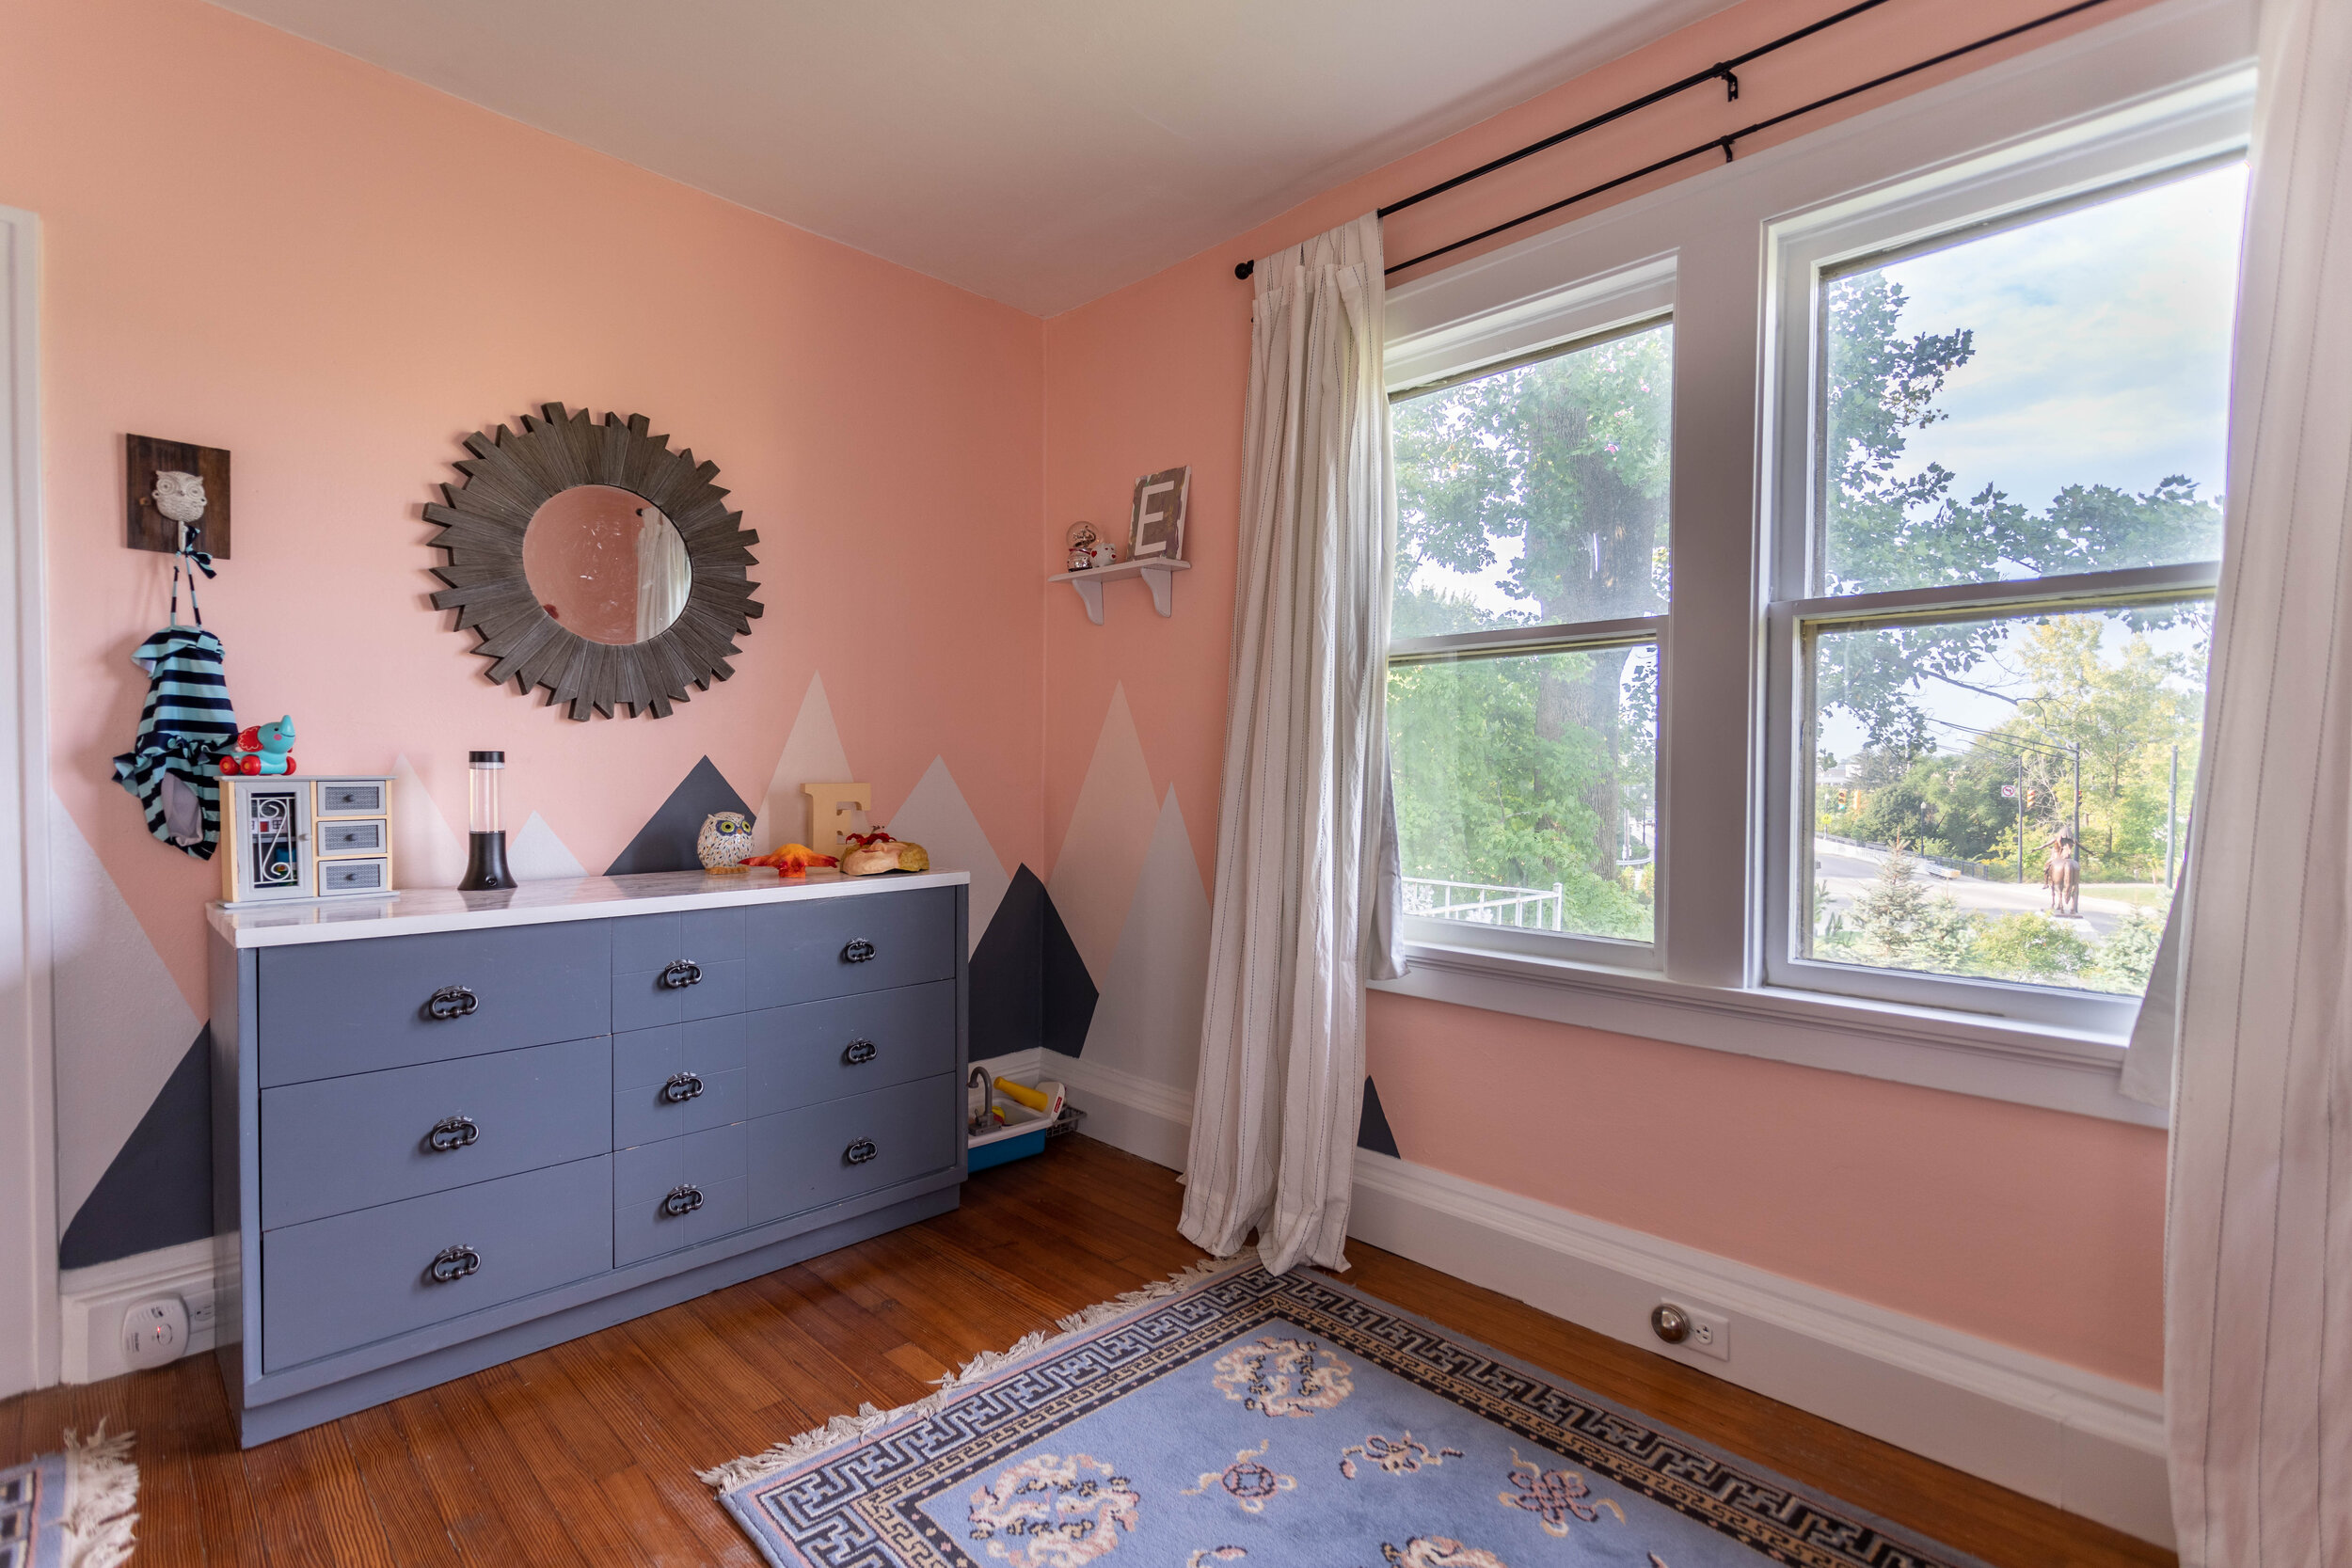
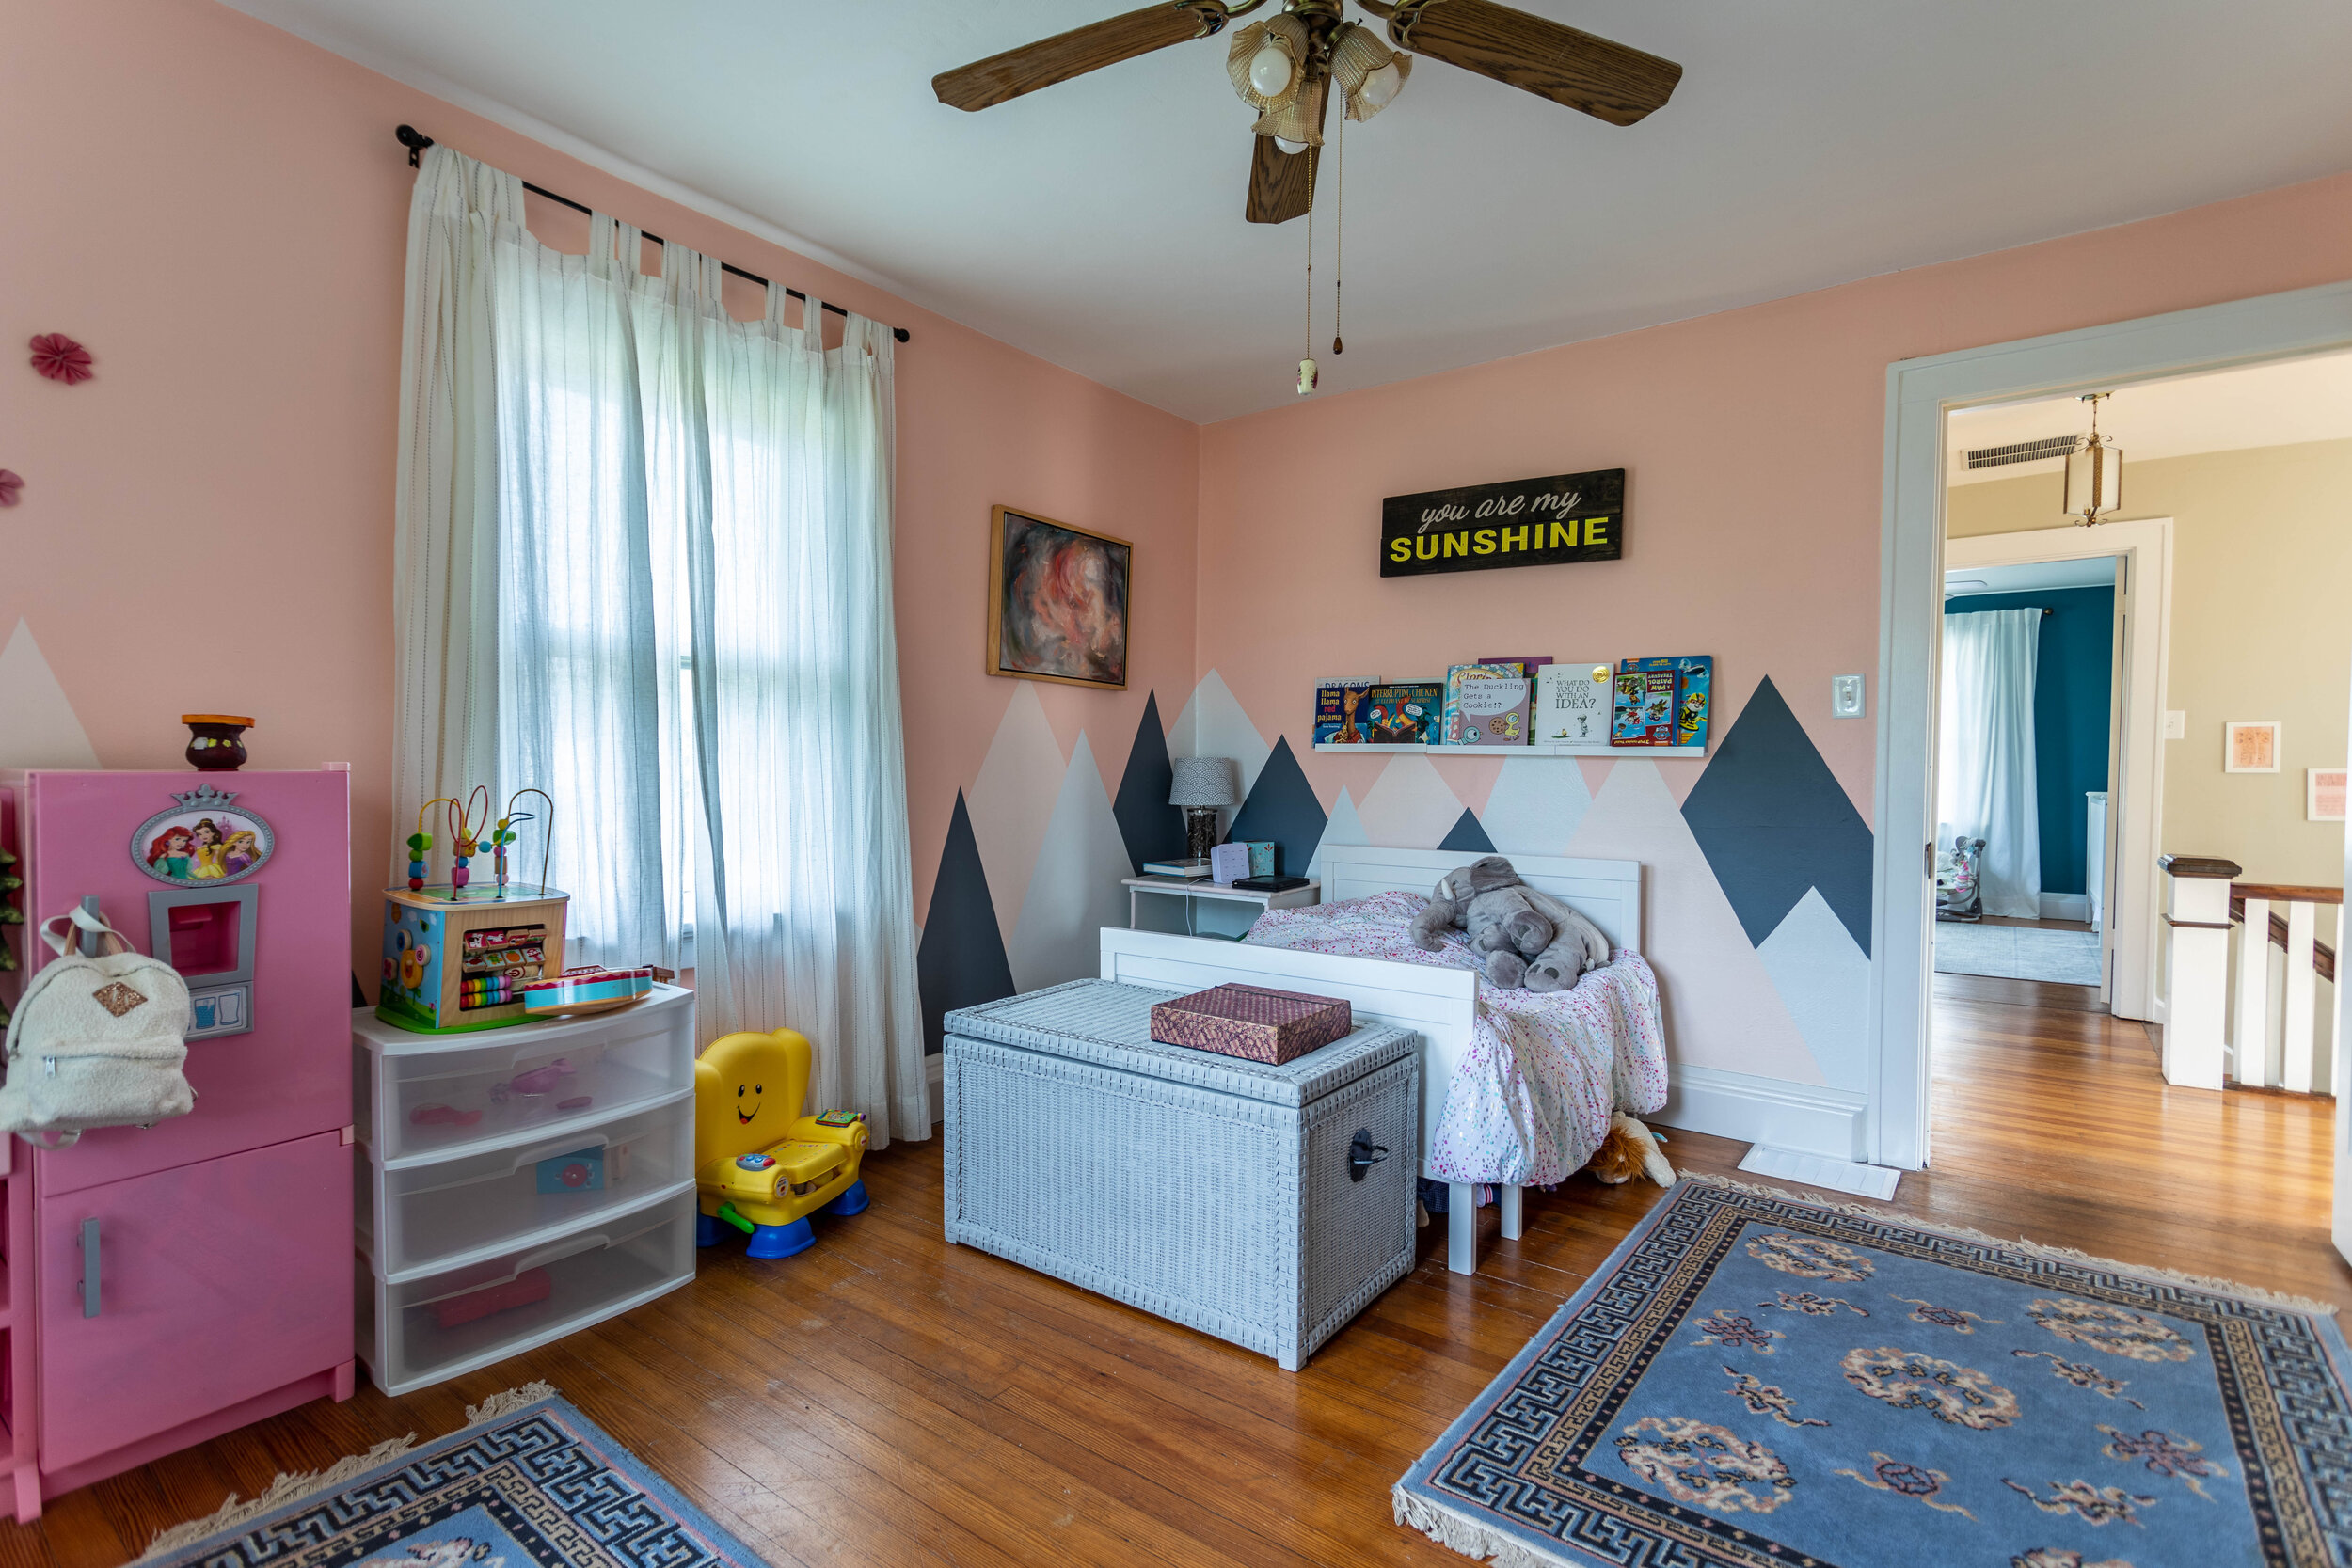
The area rugs were actually left by the previous owners and fit perfectly into the color scheme so I kept them. I wish I had a chance to switch out the light fixture before we moved, but whaddyagonnado?
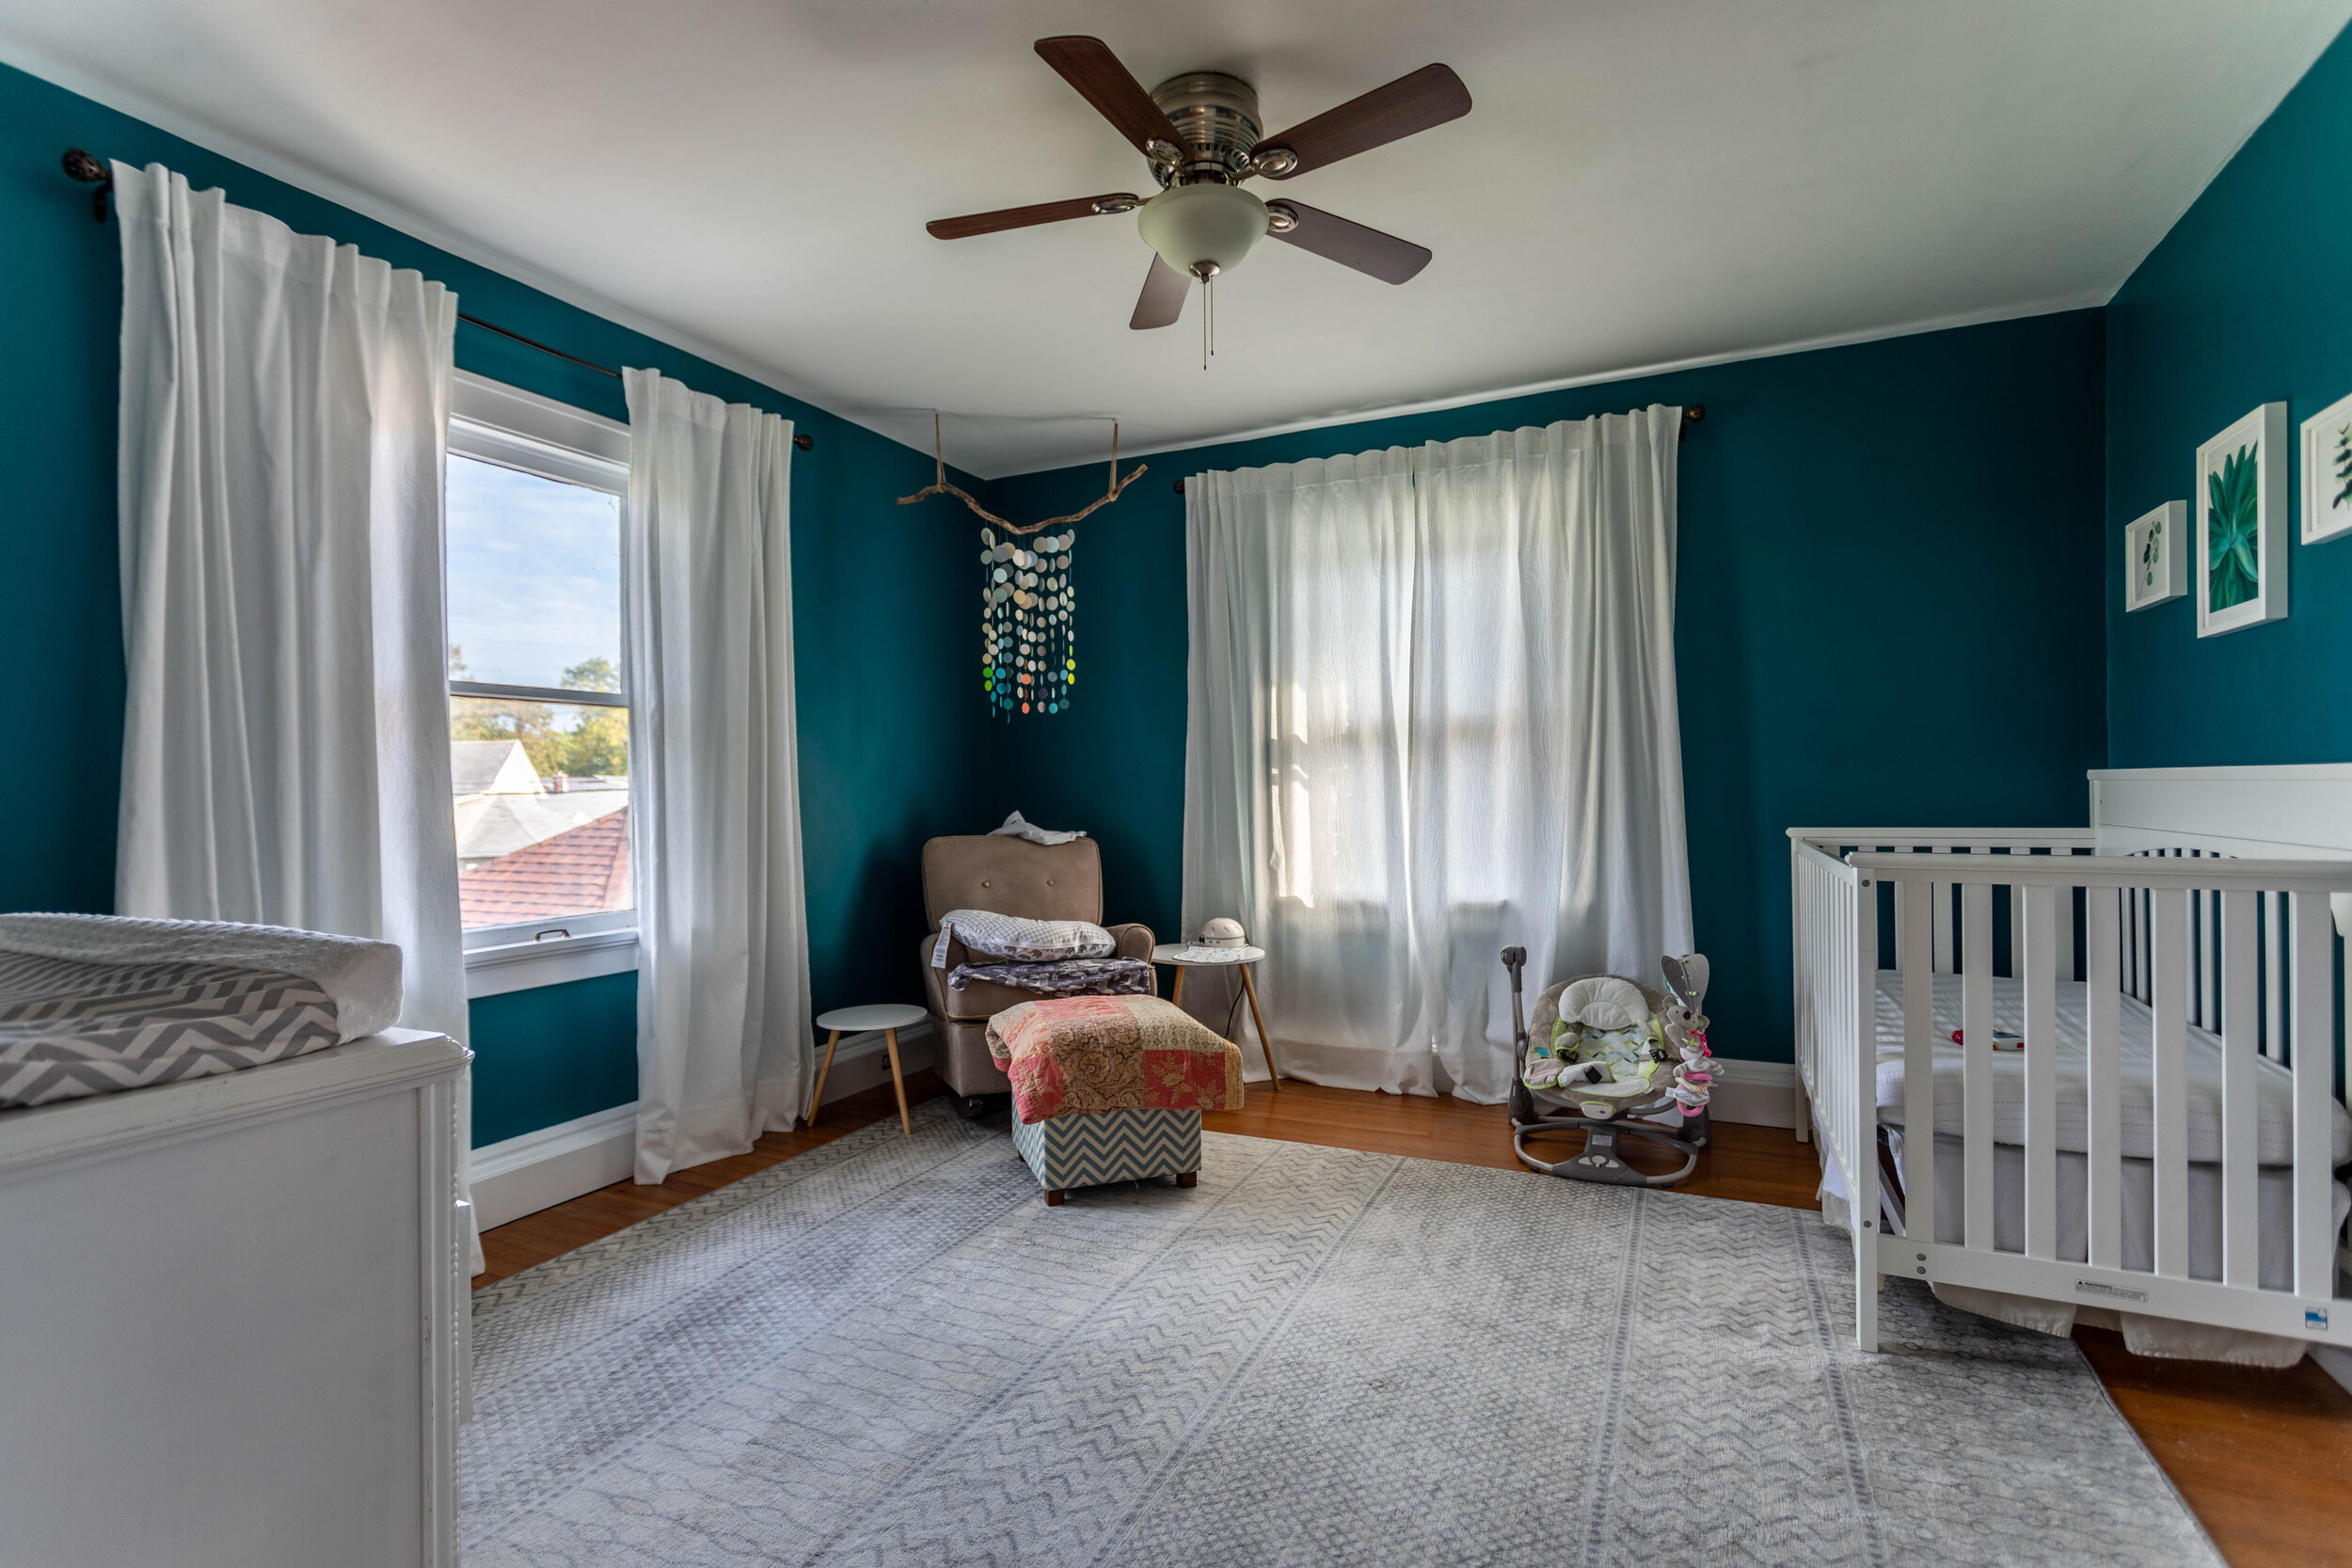
The nursery
This is another room that we ripped the carpet out of as soon as we closed on the house, so in the pictures above it’s already gone. For being one of the smallest rooms in the house, this one took the most time to de-wallpaper. There were two stubborn layers of wallpaper on the walls and even some sort of wallpaper backing under the popcorn ceiling! By the end of it, my shoulders were lookin’ gooooood.

The color inspiration for this room stemmed from the fact that Lucius told me I was being a wimp using so many light colors in the house, which caused me to have an “I’ll show you!” moment. And I’m so glad I did because I loved the dark teal so much I want to paint it everywhere now.
There’s a lot of fear in using dark colors, and although I’m still choosy on where I use them, painting this room a dark color gave me a lot of confidence. It didn’t make the space feel small at all and brought a neat kind of drama to the space.
What you can’t see
Although I showed a majority of the house, it also has a full basement and a walk-up attic that I, unfortunately, don’t have pictures of.
When we moved in, the basement was finished but old, dark, and musty. It had dark paneling everywhere and forest green carpet. We ended up tearing everything out and it’s a good thing we did because we discovered that there was water gradually seeping in every time it rained. Interestingly, we also uncovered an old root cellar behind the paneling that we turned into an unfinished storage area. The previous owners had no idea it was there!
The attic is actually a pretty cool space with a lot of potential. Most of it is usable space, though unfinished, with enough headroom for even Lucius to walk around. It’s a walk-up attic that you access through a door in the upstairs hallway. I had visions of turning it into the ultimate kids’ playroom someday, but again, the whole moving thing got in the way.
Lastly, one major renovation you can’t really see is the HVAC. We ended up replacing the furnace and air conditioner and having the venting rerouted for efficiency. Spending money on those types of updates is always a little hard to swallow because you don’t get that visual gratification, but it was definitely worth it when temperatures dipped or soared.
A happy ending
Lucius and I had a blast renovating this house and we learned so much along the way. A super common reaction I heard when word got out that we were moving was along the lines of, “But you put so much work into it!”
Yes, we did put a ton of work into the house, but when we bought it, and for much of the time we lived there, we didn’t expect to stay long-term. We renovated it because it’s what we enjoy doing.
In the end, I definitely ended up falling in love with the house and it was hard to leave. But finding the silver lining: moving to a new house is giving us an opportunity to flex our reno muscles again on a new project and gave me the motivation to start this blog!
Related Posts With Before and After Pictures
Historic House Tour: Before and After
We bought another house...
You’re probably thinking, “But didn’t you just move into your house?” Well, yes, but this new house isn’t one we’ll be living in. We bought a flip!
You’re probably thinking, “But didn’t you just move into your house?” Well, yes, but this new house isn’t one we’ll be living in. We bought a flip!

We’ve been a part of a few flips in the past, but this is the first time we’ve taken the leap to be the primary owner. Flipping houses is something we’ve dreamed about for years, so it was only a matter of time before we pulled the trigger.
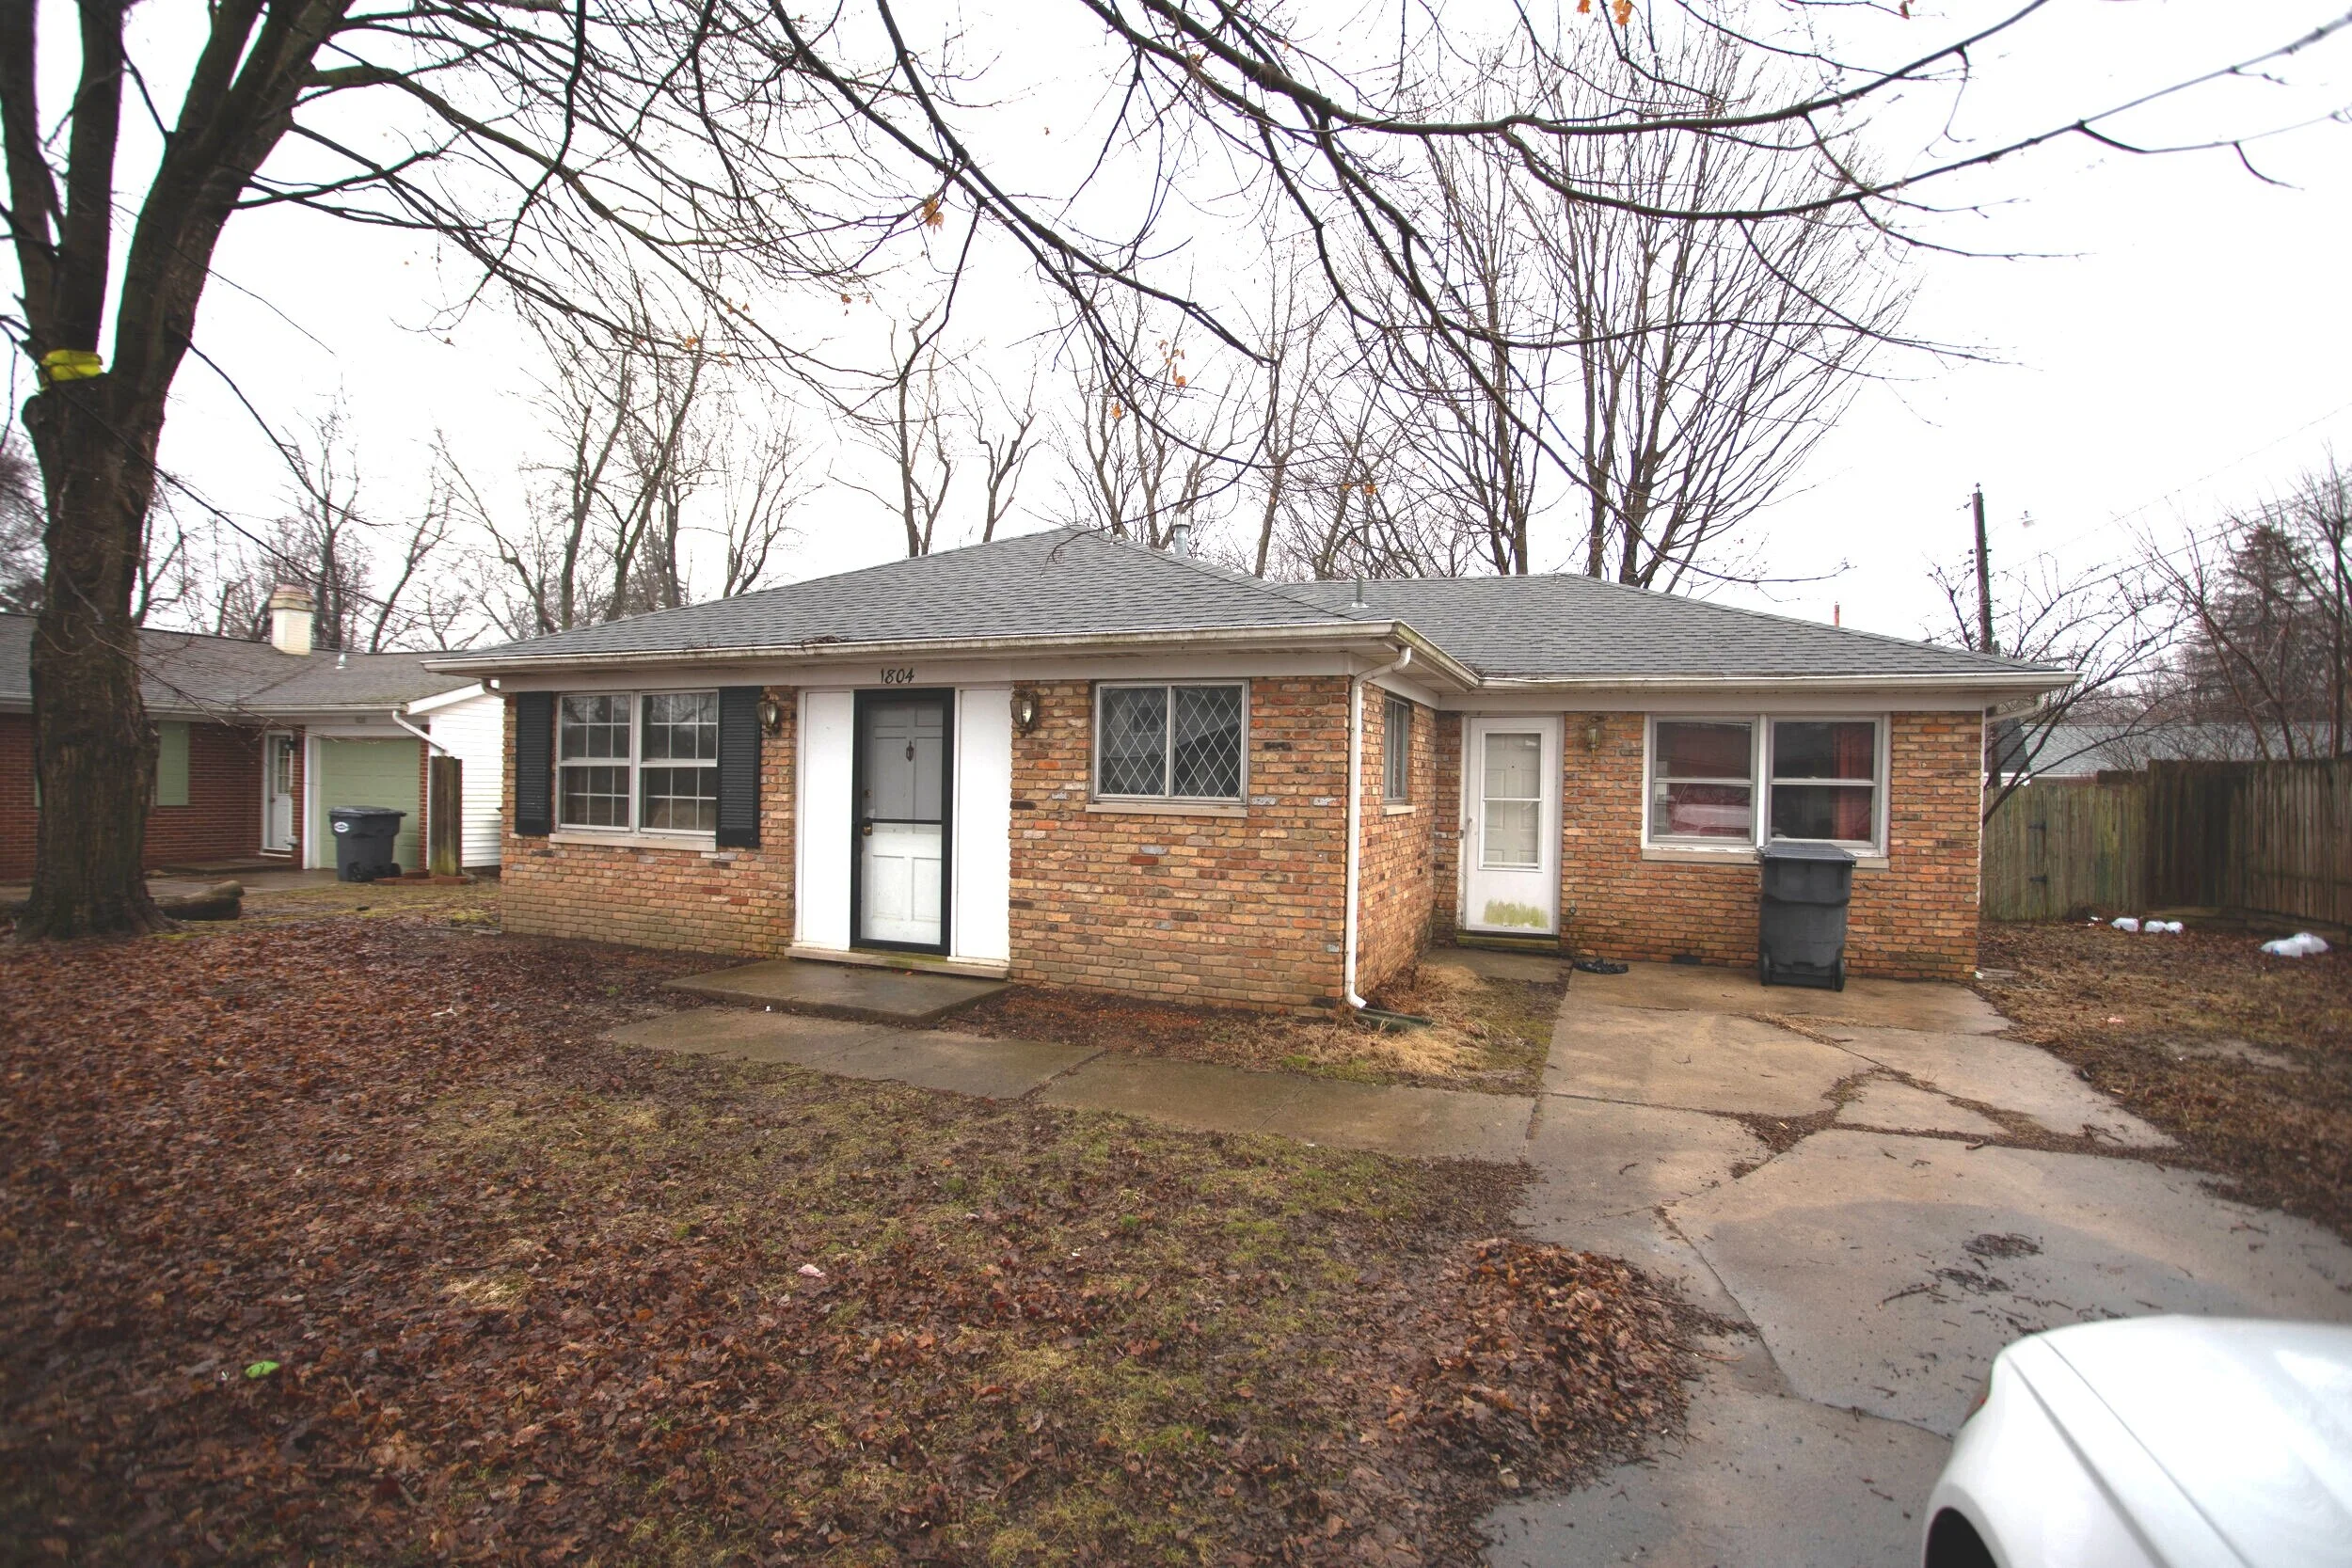
The flip house is a cute (beauty is in the eye of the beholder here) little 3-bedroom one-bath starter home in a great location. It’s not much to look at right now (and definitely something you don’t want to smell), but boy do we have plans.
Let’s start with the exterior. We closed a couple of weeks ago and obviously the weather isn’t the greatest this time of year, so everything is looking pretty sad right now. First off, the whole exterior and driveway/walkway need power washed. (I love power washing, so sign me up!) And the yard needs some basic maintenance.
Now picture this house looking something along the lines of these beauties:


I love brick, but not all brick is created equal. The brick on this house isn’t anything special, and I think the house would look amazing if it were painted white. We still have to figure out if painting the brick is in the budget, but man oh man do I hope it is because I think it would look INCREDIBLE. I also plan to paint the front door a bright color and add a fun and unique knocker. Below is some of my current inspiration.


Obviously I haven’t narrowed down the color of the door yet.
Adding a little bit of landscaping out front will also help brighten it up and increase the curb appeal. I’m thinking that some boxwood bushes would be perfect. If you aren’t sure what boxwoods are, let me tell you that they’re amazing. From someone who doesn’t have the greenest thumb, these bushes are easy to maintain and look great! I’m sure you’ve seen them before but probably didn’t even realize it. Here’s an example of what they look like:

Look familiar? I thought so…
Now, on to the interior!
At this point, we’ve already completed most of the demo, but here are a few pictures of what we started with.

Living room. Free couch! woo! (Just kidding)

Dining Room on the left/Kitchen on the Right

Kitchen

Bathroom

Bedroom

Bedroom

Bonus Room

Opposite end of the bonus room
And below is what it looks like all cleared out. You can take the virtual tour if you want to walk through the place yourself. Just use your cursor to navigate by clicking on the little circles on the floor. I’ve also taken some snapshots to help explain some of the ideas swirling around in my head - there’s a lot going on up there.
To get us started, picture the whole house in shades of a blue/green/gray color with rich medium tone laminate flooring and crisp white trim.

Living Room
In the picture above, before we demoed it there used to be a wall right where I’m standing. There was a doorway between the dining and living rooms and a coat closet a few feet in front of the front door.
In the picture below, if you look at the ceiling you can see where we knocked out the wall separating the dining room and kitchen from the living room. You can also see the giant hole in the ceiling where the coat closet used to be. To save you from scrolling, I posted one of the pictures from before we took out the wall from a similar angle below.

Living Room on the left/Kitchen on the right

This house is pretty tiny, so taking out that wall felt like a good decision to really open the space up and make it feel bigger and create some good sight lines across the living areas.

Kitchen on the left/Dining Room on the right
Now that the wall is gone, you can see from the living room into the dining room and kitchen. Open concept for the win!

Kitchen
Doing the demo work and clearing out a flip to make a blank slate is pretty exciting in itself, but unless you’re staging, the transformation of a lot of the rooms is pretty limited to paint and flooring. I know, I know. On HGTV everything is so glamorous and there’s a huge reveal with tons of special details throughout the house. That’s simply not real life. Now the kitchen is where you get to put in a little of that HGTV flair and make things more exciting.
The previous kitchen left a lot to be desired. The layout wasn’t functional, there was very little counter space, and it was pretty dark. Now that the wall is gone, we’re able to reconfigure the space to provide more storage, counter space, better flow, and let in some light! Lucius put together a little mockup of the kitchen layout to get a sense of how the space will feel once it’s put back together.

Obviously the wall on the left-hand side won’t be there and there is a doorway on the right-hand side to get to the bonus room, laundry room, and side door. We’re thinking of putting some open shelving above the sink area and adding a tile backsplash. The doors on the cabinets in the island will be facing the other direction so the side of the island that you see now will actually be flat.
I’m picturing white shaker cabinets and maybe a lighter countertop with stainless steel appliances, natural wood (or maybe white) for the open shelving, and some clean and simple subway tile for the backsplash. The picture below is a good example of what I’m imagining, though maybe a little higher end than what we are willing to put in a flip. It’s all about balance, guys!

Below is the bathroom. It’s in pretty rough shape so we’re gutting it and starting over. It’s tiny, so we plan to put a medicine cabinet back in and I’m searching for a vanity with as much storage as possible. To add a little surprise I would love to tile the floor with something fun and unexpected, but we’ll see how everything pans out.

Aside from ripping up the carpet, the bedrooms look more or less the same as the pictures above, so I haven’t included pictures. The bonus room hasn’t undergone any huge renovations yet either, though we did replace the failing french doors with a sliding glass door and already it’s getting a ton more light!

So as you can see, things are moving right along (and pretty quickly!) with the flip. I’ll be sure to keep posting as we continue to renovate and beautify this cute little house!