

Designing a Home Office
I never really thought I’d need a home office, so until recently I hadn’t given much consideration as to how I would want it to look if I were to create one. But now that it was actually happening, my mind was buzzing with possibilities. In this post (and subsequent posts on this subject, since I’m just in the beginning stages of this room makeover) I’ll give you a sense of how I tackle a room and walk you through my overall design thought process start to finish.
How I Designed My Home Office

I mentioned in our house tour that I, like many people these days, have been working from home. During this time, the living room has been my office. (Picture me sitting on the couch in my sweatpants with a cozy blanket and my laptop.)
Well, before COVID-19 when I was only working from home a couple days a week, the couch worked just fine. But once I got the call that I’d be working from home consistently for who knows how long, Lucius suggested I get a desk and set up an office in our previously empty spare room. I was on board right away. Not only because by the end of the day working from the couch I usually feel pretty gross and lazy, but Lucius telling me to buy house stuff? Okay!
I’m the type of person who likes to do lots of research before I commit to anything. I like to know what I’m getting myself into and I like to avoid the unexpected when at all possible. So I figured since I’m starting at ground zero for this project, why not take you guys along as I plan out my home office?
In this post (and subsequent posts on this subject, since I’m just in the beginning stages of this room makeover) I’ll give you a sense of how I tackle a room and walk you through my overall design thought process start to finish.

As an Amazon Associate I earn from qualifying purchases. This post may contain affiliate links, meaning I receive commissions for purchases made through those links, at no cost to you.
Finding your inspiration
I never really thought I’d need a home office, so until recently I hadn’t given much consideration as to how I would want it to look if I were to create one. But now that it was actually happening, my mind was buzzing with possibilities.
One of the biggest pieces of advice I can give is when you’re starting to design a room, don’t overthink it. This can be hard advice to follow, especially if you’re like me and tend to overthink just about everything. But when designing a room I try to force myself to let one thing be my inspiration and build on that, otherwise you can get really overwhelmed really fast.
For this room, the biggest necessity was of course a desk and a chair, so that’s where I started, but really ANYTHING can be your inspiration - it doesn’t have to be a big piece of furniture or the color you plan to paint your room. It CAN be those things, but your inspiration could also be something as simple as a vase or a painting that you like.
Since this room was empty to begin with, using the immediate necessities as my inspiration was the most logical choice for me.

I knew my minimum requirements were to have a desk that fit my computer and all my stuff and a chair that I could comfortably curl up in. (Even when I work in the office at work I tend to sit cross-legged in my chair, so I certainly wouldn’t expect anything different at home.)
Being the cheap budget-conscious person that I am, I started looking at desks and chairs on Facebook Marketplace. I use Marketplace a lot like I use Pinterest to organize my thoughts. I saved everything that was intriguing and then looked at them as a group. This helped me figure out the style I was most attracted to for these staple items and I highly recommend using this technique to figure out your style, too.
Here’s how you do it: hop on Pinterest, search for the item you’re after, and pin anything that looks even remotely interesting to the same board. Once you’re done pinning, look at your board as a whole and you should start to notice some recurring themes/trends. You can take it a step further and either delete anything that doesn’t fit into the general theme or create a second board and pin your favorite items to that. Then go searching in real life for items similar to what you were most drawn to!
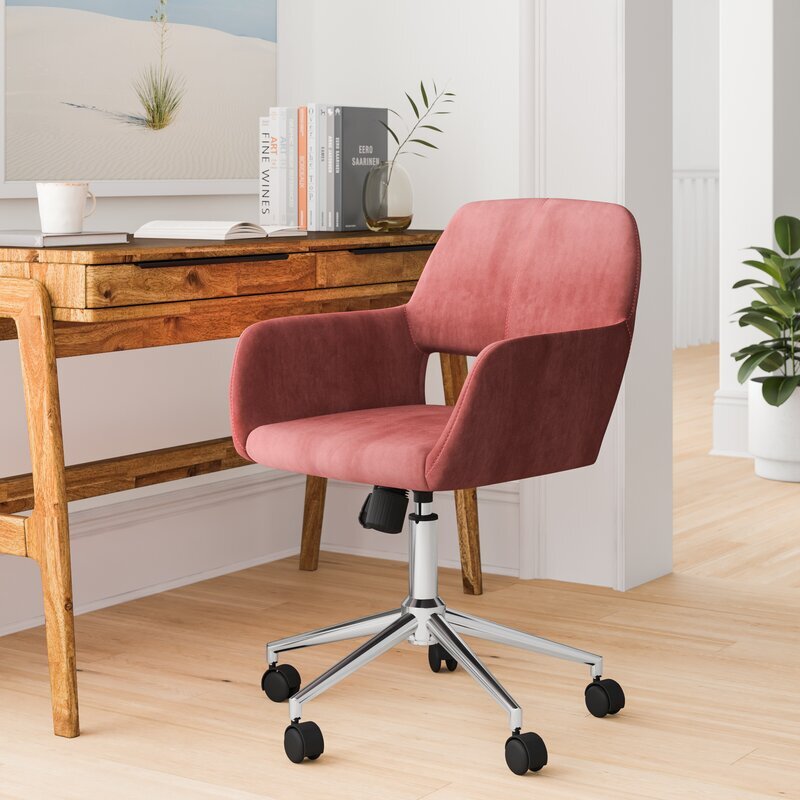
When I looked at all my saved items, I noticed I was saving a lot of light colored desks and velvet jewel-toned desk chairs so I figured that was where my head was at and I ran with it.
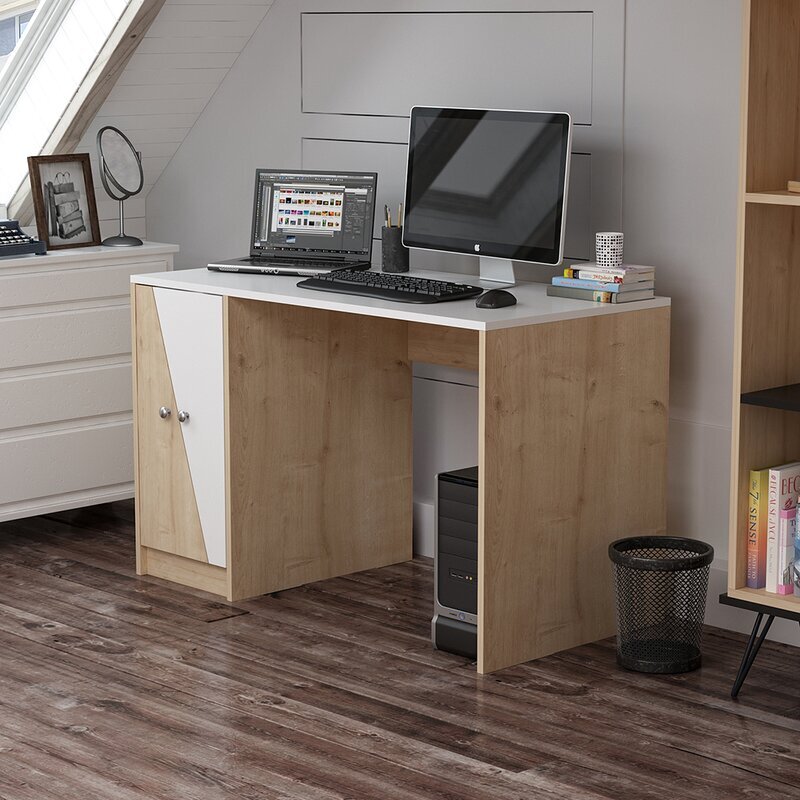
Because I have commitment issues, I continued to brainstorm options to make sure I was buying exactly what I wanted. We ended up taking a trip to IKEA to see what they had available too. This trip was a great way to also figure out what size desk felt best by sitting down and “testing” out several options.
I was most drawn to the Hilver desk and I was really considering pairing it with the Ekero armchair.


We almost bought them, except we didn’t have enough room in the car with both kids. We figured Lucius would just have to take a quick trip back the next day.
This was actually a blessing in disguise because I wasn’t 100% sold on either of those items. The desk felt a little too much like a table and I was concerned with the chair being difficult to move in and out since it didn’t have wheels. There were actual desk chairs at IKEA, but I wasn’t really in love with the look of any of them.
As an Amazon Associate, I earn from qualifying purchases. This post may contain affiliate links, meaning I receive commissions for purchases made through those links, at no cost to you.

One of the most exciting things about designing this room is that the only person I have to think of is myself! Normally I’m trying to design a room with Lucius in mind too so I have to be a little more thoughtful in some of my choices. It’s not very often that I get to run uninhibited with my ideas. With that being said, I totally bought a pink velvet chair AND I LOVE HOW IT LOOKS!

Building on your inspiration
For the past month or so (I’m losing track of my days at this point so it could be longer) I’ve been working in my new office. It’s still lacking quite a bit considering all I’ve done so far is bought the necessary furniture, stole a lamp from our bedroom, threw down an area rug, and hung a mirror I had lying around.

But of course I’ve been daydreaming and planning like crazy! Now that I have my staple items, my wheels are really turning.
My next tip: once you have your main source of inspiration, use that to drive your design. You can pull colors or patterns from your inspiration piece and use them elsewhere in the room. You can look on Pinterest for rooms with similar items as your inspiration piece(s) and create a board to pin images that get you excited and pull ideas from there. You might even realize that what you thought was your original inspiration shifts to something else once you start building up some reference images.
Here are my thoughts for this room…
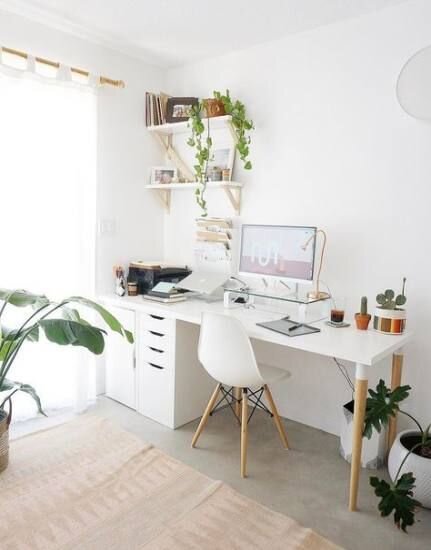
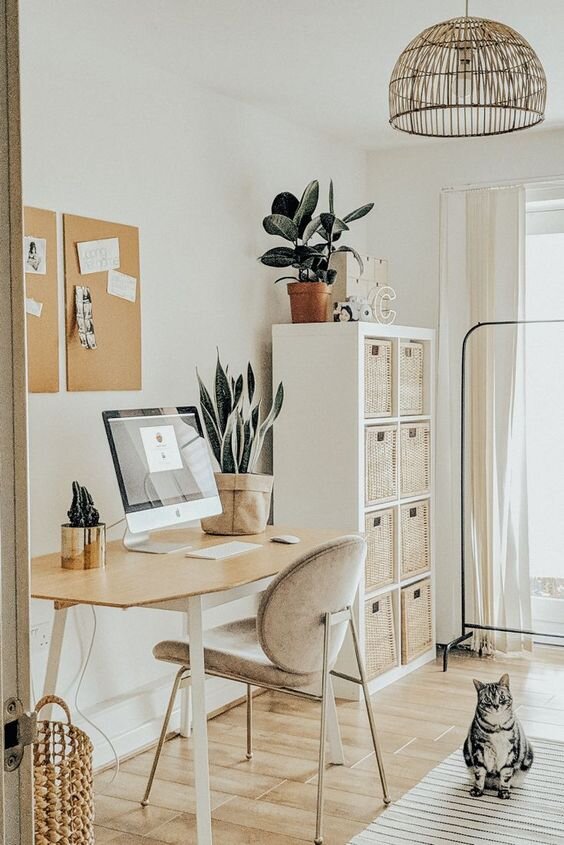
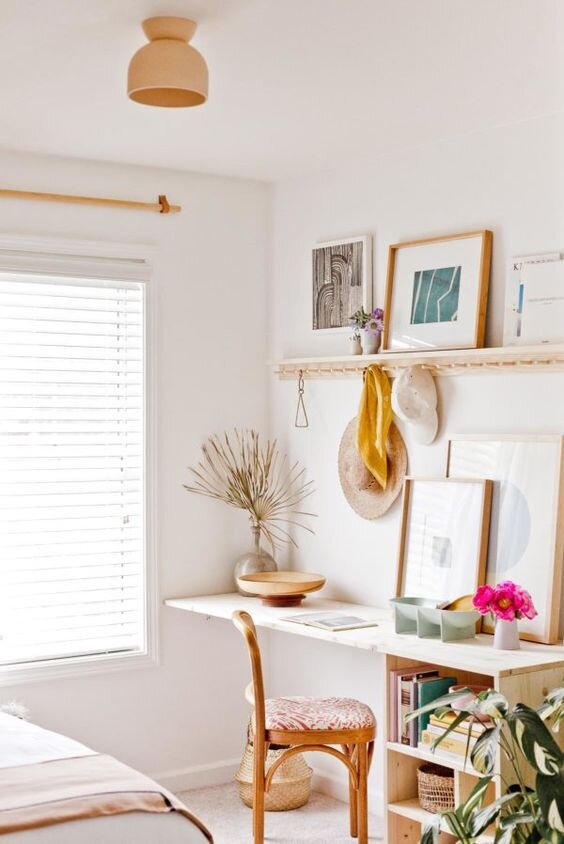
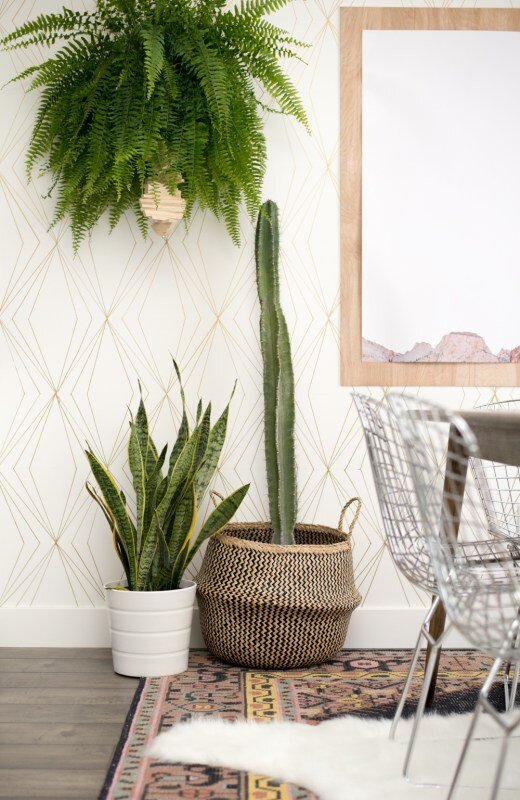
Maybe it was the trip to IKEA, but I picture this room being somewhat Scandinavian design inspired: bright and airy, small bursts of color, natural wood tones, clean lines. I already had the desk with wood tones and the chair with my burst of color, so I was on the right track. Below are examples of some inspiration photos.

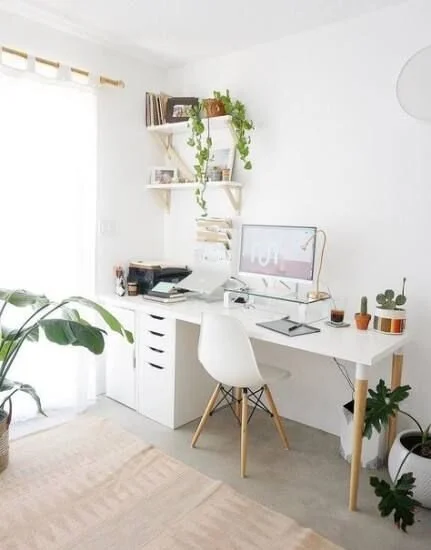

But I also want a little more dimension and excitement in the room than what you see above. I considered doing wallpaper in here but I’d like to save that for the nursery once I get to updating that room. And if you haven’t noticed, I really like trying new/different wall treatments so in this room I’m going to draw a pattern with Sharpie paint pens!
I’ve been obsessed with the pattern below lately. It’s a little bit art-deco but I think I can make it work with the Scandinavian-inspired elements.

My plan as of right now is to paint the walls a light gray/off-white color and draw the pattern on the wall that my desk is facing using a gold paint pen. The design could end up being too in your face if it were black or high contrast compared to the wall color, so I think the gold paint pen with the light colored paint will help make the pattern more subtle.
Below is an awesome example of a Sharpie paint pen wall using the gold pen and a really cool design.

I have a strange addiction to mindless, tedious tasks (painting rooms, peeling wallpaper), so this undertaking doesn’t scare me in the least. In college I even created a conceptual art piece where I made a tally on a piece of wood for every dollar I owed in student loans!

This represents one student loan. I actually made one for each of my loans! Apologies for the terrible photo. And yes, it currently lives in my garage because I graduated college years ago and don’t know what to do with it but can’t seem to throw it away.
The point being, if I’m feeling really crazy I might even draw on all the walls! We’ll see how difficult it is and how much I like the design.
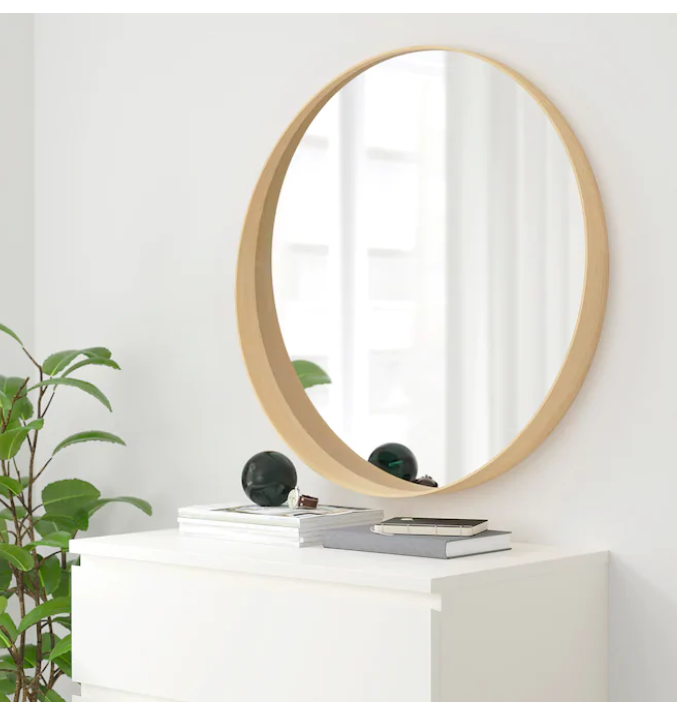
Since the desk has some strong lines in it and the wall pattern is very geometric, I’d like to switch out the current mirror with a simple round mirror. I’ve been stalking this one at IKEA for a while now.

I whisper sweet nothings to it every time I pass it in the store.
I think the circular shape of the mirror will really help soften up some of those hard lines and tie in nicely with the softness of the chair. Plus, it has more of the wood that I’d like to pull into the room.
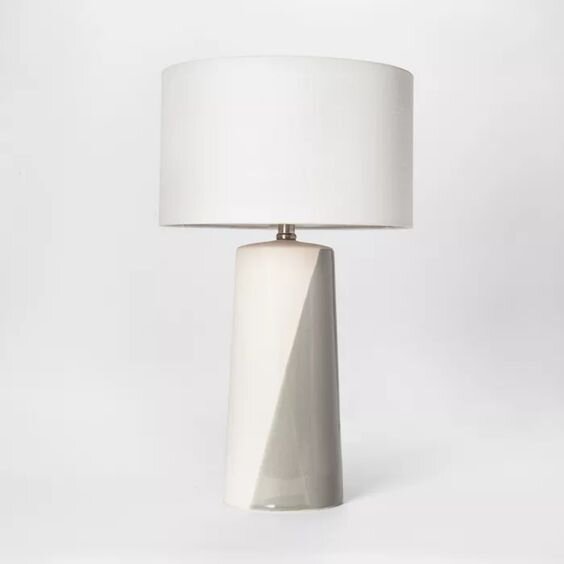
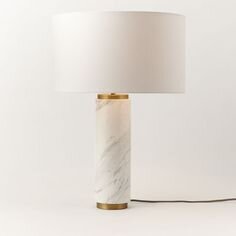
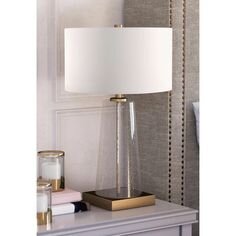
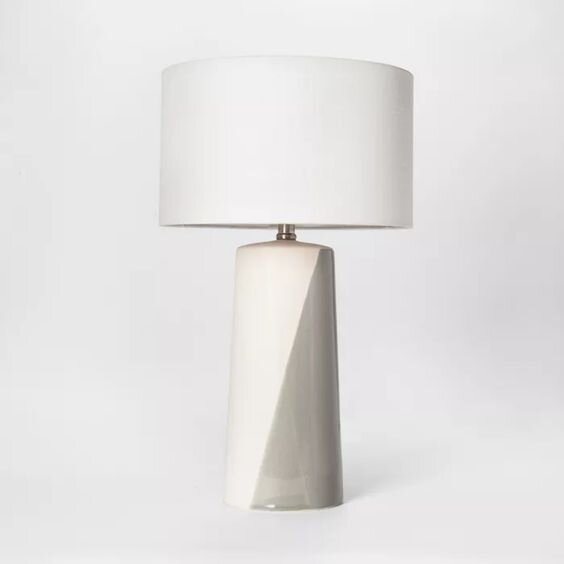
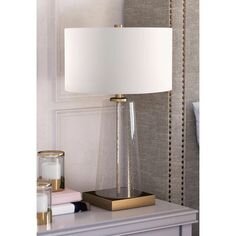
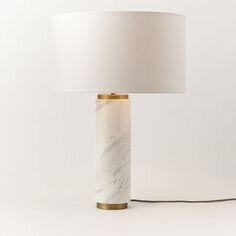
I’ll also need a new desk lamp so I can put the one I’m currently using back in our bedroom. Here I might introduce some more natural materials like stone or at least go with a softer, rounder silhouette for the lamp. Here are a few ideas:
Rounding out the room
Now that I have my office space somewhat planned out, there’s a whole other two-thirds of the room to consider! We planned on turning this into a guest room originally and I’m confident this space can still serve that purpose. It’s just a matter of working it into the overall design.
Obviously to make this into a guest room we’ll need a bed.
The natural wall where you’d place the bed is actually where I’m setting up my desk area. I could put my desk elsewhere in the room, but I figured since this will primarily be used as my office I should make it the most inviting space possible for me - and this wall gets the most light and has the best view. With that being determined, I have to rethink the bedroom portion of the room.
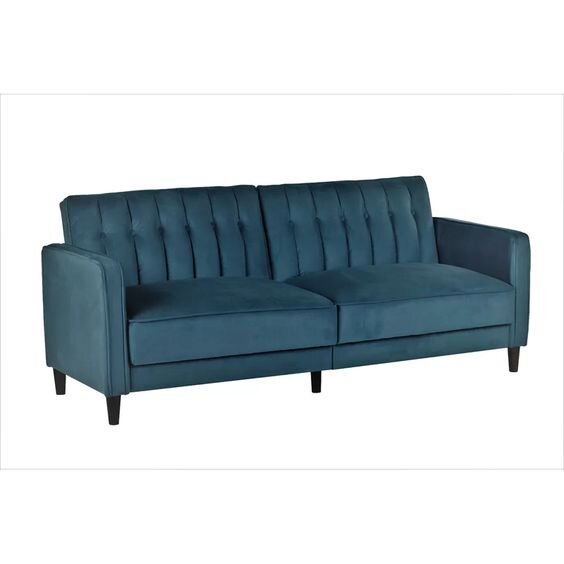
I think a normal bed might be a little awkward in the space available, but a daybed or stylish sofa bed could work! Apparently I’m pretty into jewel-toned velvet right now in general, because I’m really feeling this sofa bed:

I’ll also likely bring some end tables, maybe a footstool, and a dresser into this room. I’ve been thinking about stealing the dresser from the nursery and putting it in this room instead too.

I picked this dresser up from a thrift store years ago and refurbished it. I love it, but it can be difficult to open and I figure once our younger daughter will want to start dressing herself she’s going to have a heck of a time getting to her clothes. Plus, I think this dresser will fit nicely in the spare room both in style and function.
In a perfect world this room would have hardwood floors and I would have an awesome area rug in place of the carpet that’s in there currently. Replacing the flooring in the house is pretty far down the line, so for now I’ll just keep dreaming of what’s to come. I’m picturing a natural fiber rug, but I could be swayed for something with a design…. don’t even get me started on rugs. I’ll go down a rabbit hole I might never come out of.
Finishing touches
Of course the room wouldn’t be complete without some artwork on the walls and just some general decor items so I’ll be sure to add those once I get to that point. In the meantime, I have one last piece of advice: be comfortable changing your plans.
I find that a lot of times when I’m updating a room I’ll think I’m in love with an item I’m planning on buying or an idea I’d like to run with but once I make other updates it just doesn’t make sense in the space anymore. And that’s okay!
We’re not perfect and you can’t expect to get it right on the first try. I’m sure some of the things I’ve shared in this post won’t make it in the final room. Flexibility is key to winding up with an end product that flows. And at the end of the day, the point is to make yourself happy and to create a space that you love.
Related Office Design Posts
How I Designed My Home Office

The 1927 American Foursquare
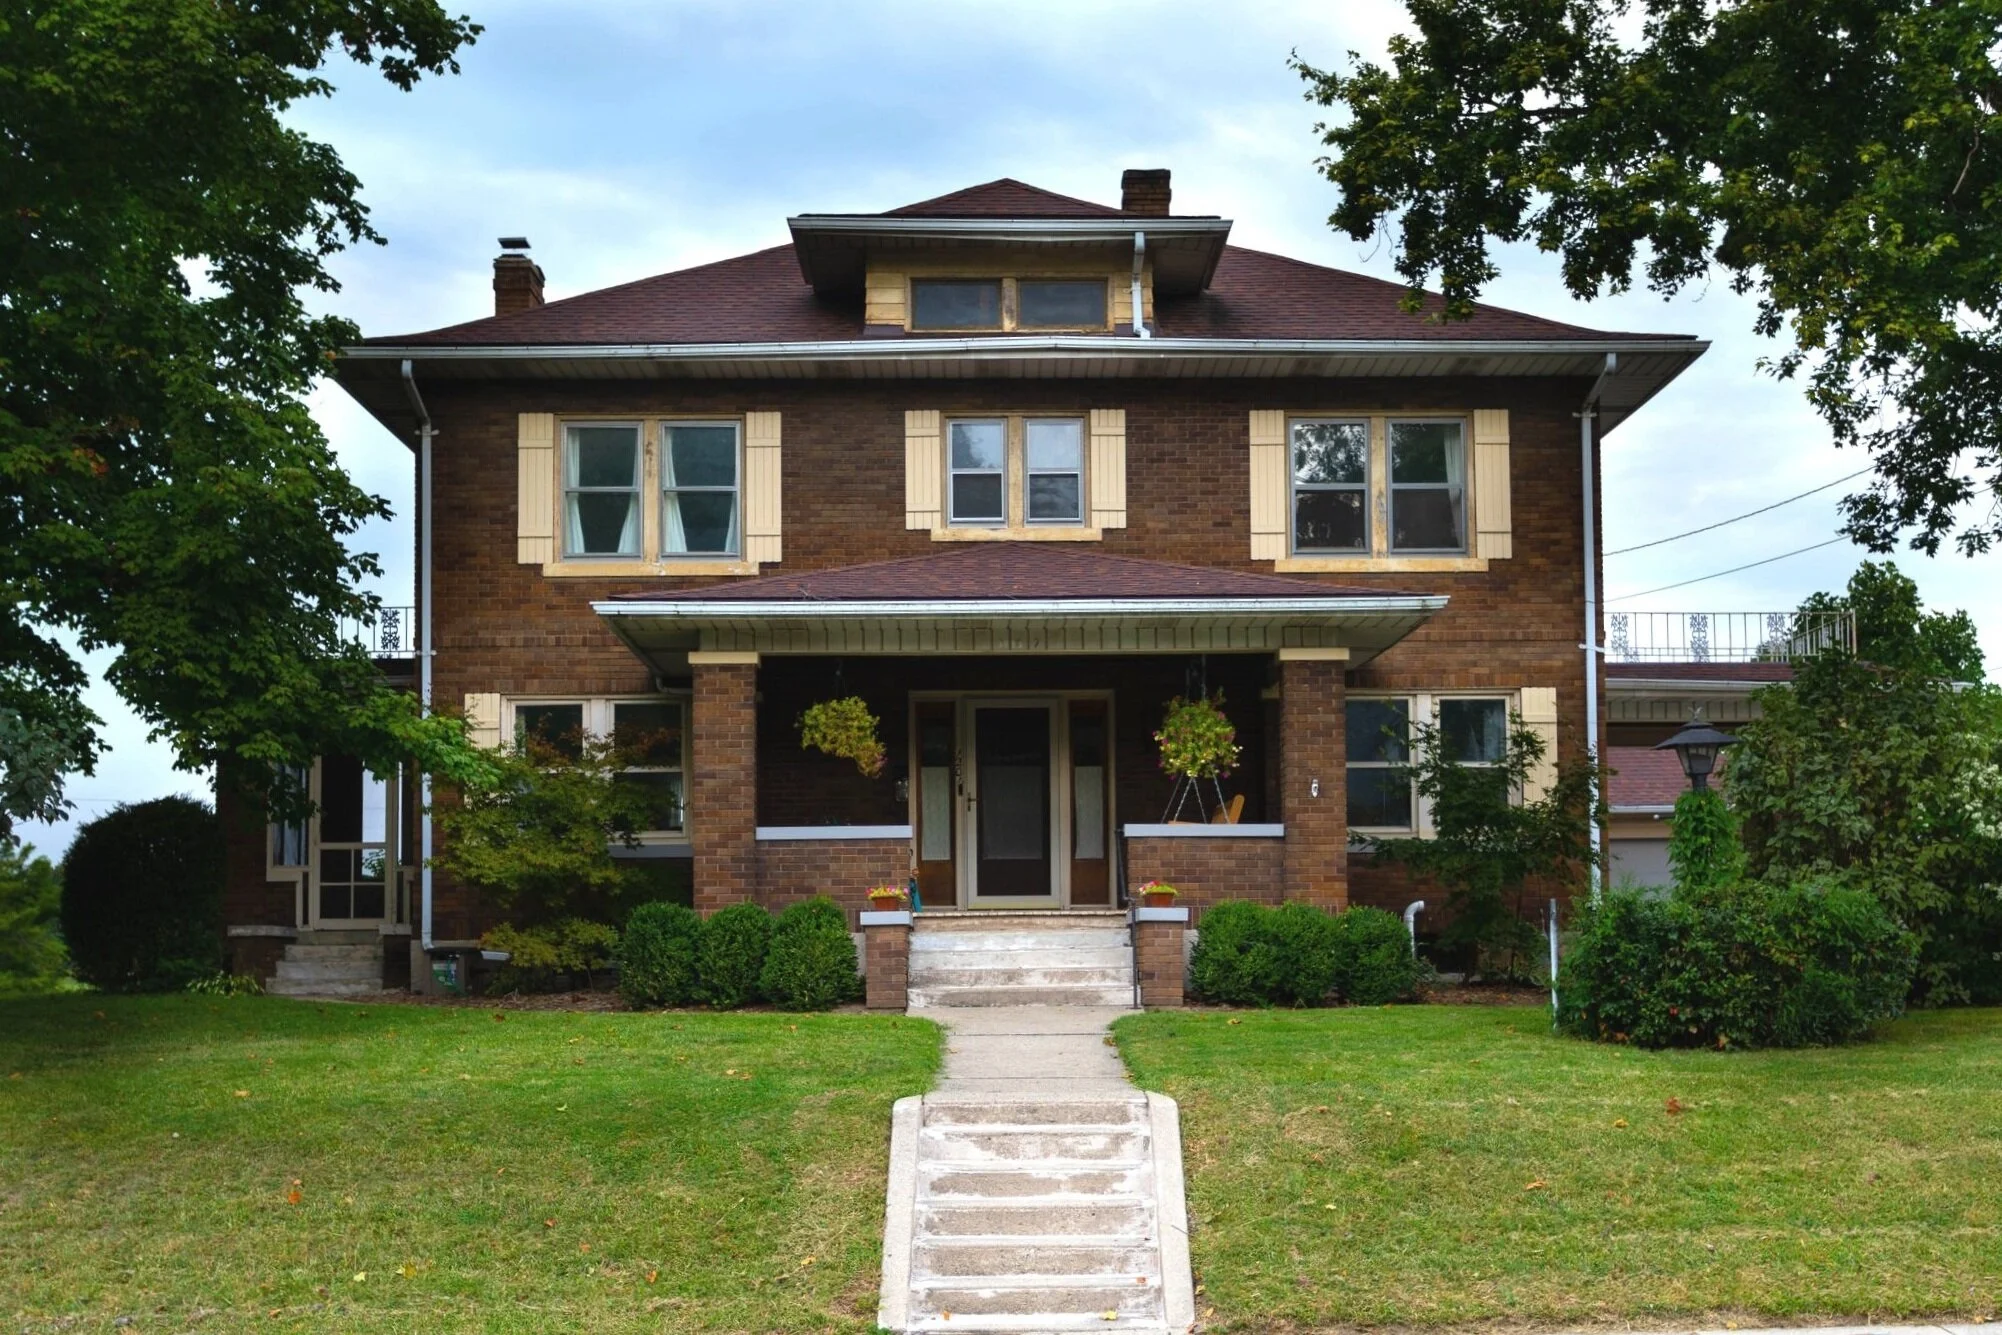
We put our house on the market and moved so quickly after announcing to our family and friends that we were going to make that our forever home, that I think we left many of them baffled as to the sudden change. Most people didn’t get a chance to even see the listing – let alone how the house looked when it was complete. So I’d like to take the opportunity now to show the before and afters and give those who know us personally, and those who don’t, a peek at how we modernized our 1927 American Foursquare, while still keeping its charm.
How We Modernized Our 100-year-old Home
As I’ve mentioned before, we’ve only lived in our current house since October 2019. Our move was pretty sudden and unexpected.
We actually hadn’t planned on moving from our previous house… ever. Seriously. A couple of months after we decided to make our former house our “forever home”, we had to majorly shift gears and start looking for a new house.
The decision to list our house was made on a Sunday night and we had it listed the following Wednesday. The first day our house was on the market we had 10 showings and 3 offers! I barely had time to clean, let alone style and declutter the house the way I would have preferred.
We put our house on the market and moved so quickly after announcing to our family and friends that we were going to make that our forever home, that I think we left many of them baffled as to the sudden change. Most people didn’t get a chance to even see the listing – let alone how the house looked when it was complete. So I’d like to take the opportunity now to show the before and afters and give those who know us personally, and those who don’t, a peek at how we modernized our 1927 American Foursquare, while still keeping its charm.
As a side note - if you love checking out old houses like I do, I highly recommend the Instagram account Cheap Old Houses where they highlight old houses across the country, typically for sale under $100k. I also wrote a post where I got the opportunity to tour a gorgeous historical Victorian mansion (built in 1901!). Now, let’s get into this house tour!
The exterior
We actually didn’t do much to the exterior of our old house. I would never paint the brick on a historic house like this, but we did want/need to repaint the shutters and window sills.
I love the symmetry and functionality of the exterior of this house. On all four sides of the house, there’s an exterior door leading to some sort of functional outside area. For instance, the front door leads to that amazing porch. Unfortunately, it took me almost two years to buy a porch swing because I’m cheap… and then we moved a few months later. It got a lot of use during that time, though!
In the driveway the side door leads to a carport, on the back of the house the door leads to a patio, and on the opposite side of the house from the driveway there’s a screened-in sun porch. There’s even a balcony over the sun porch which you get to through the master bedroom!
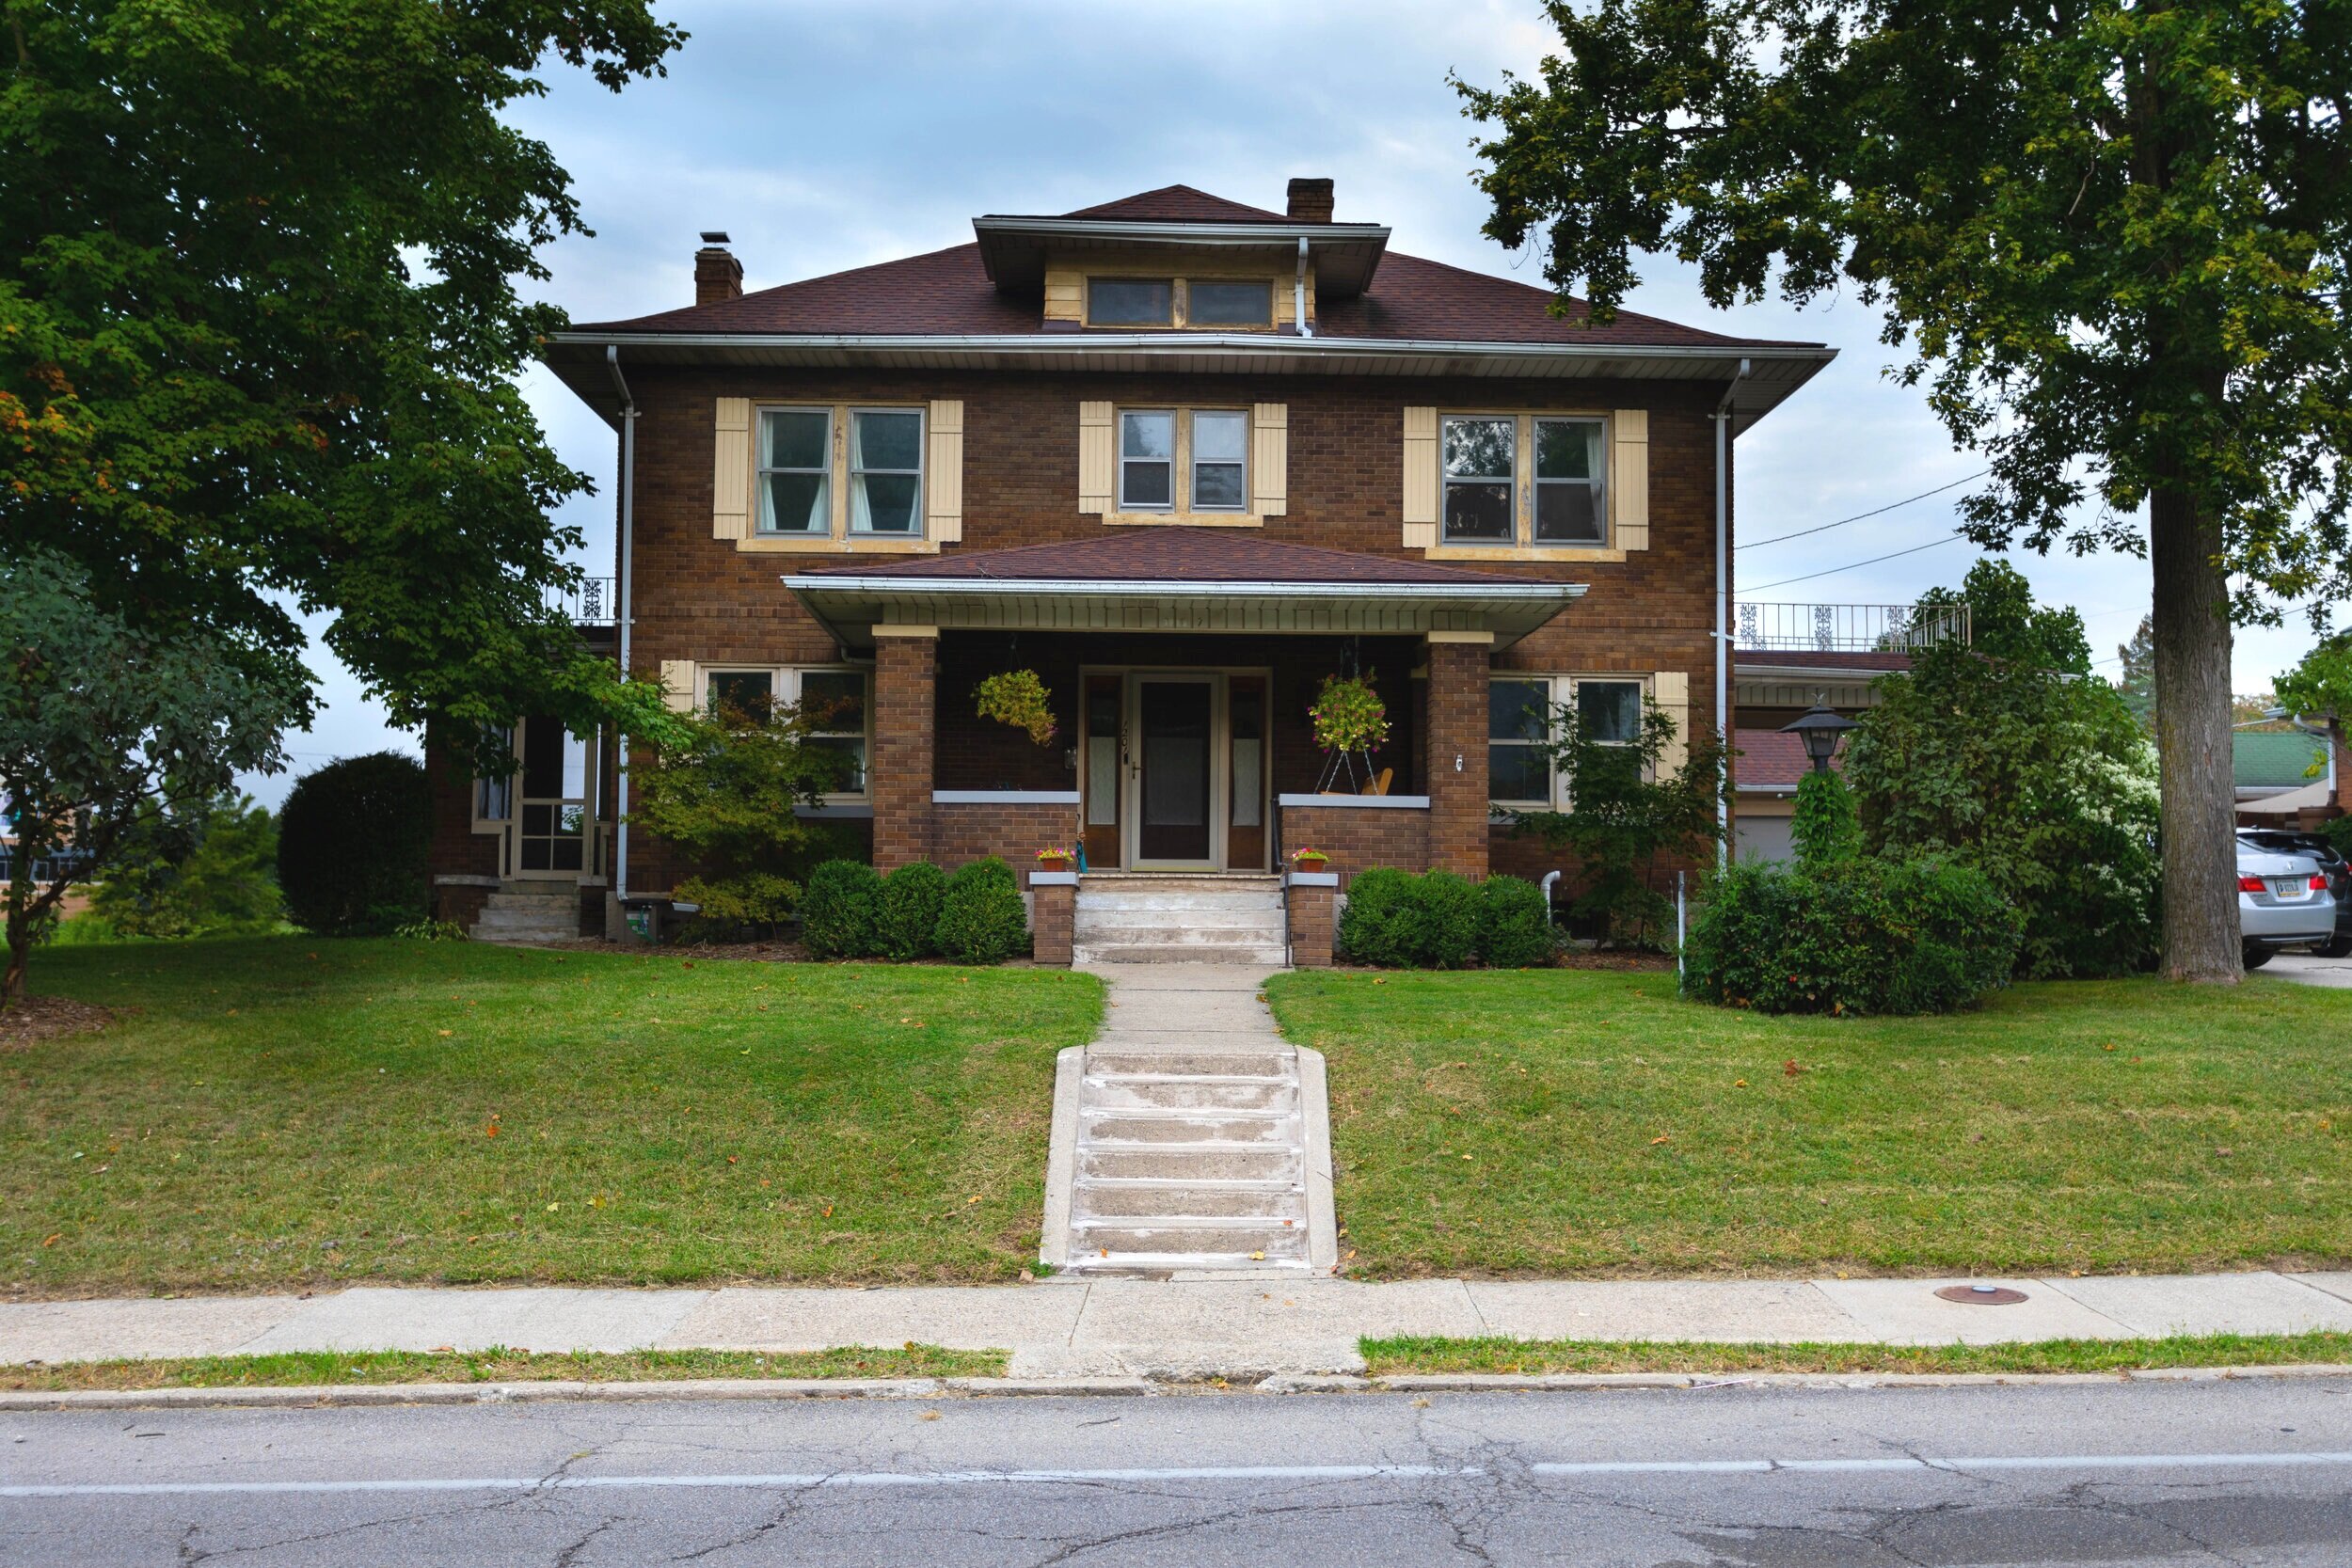
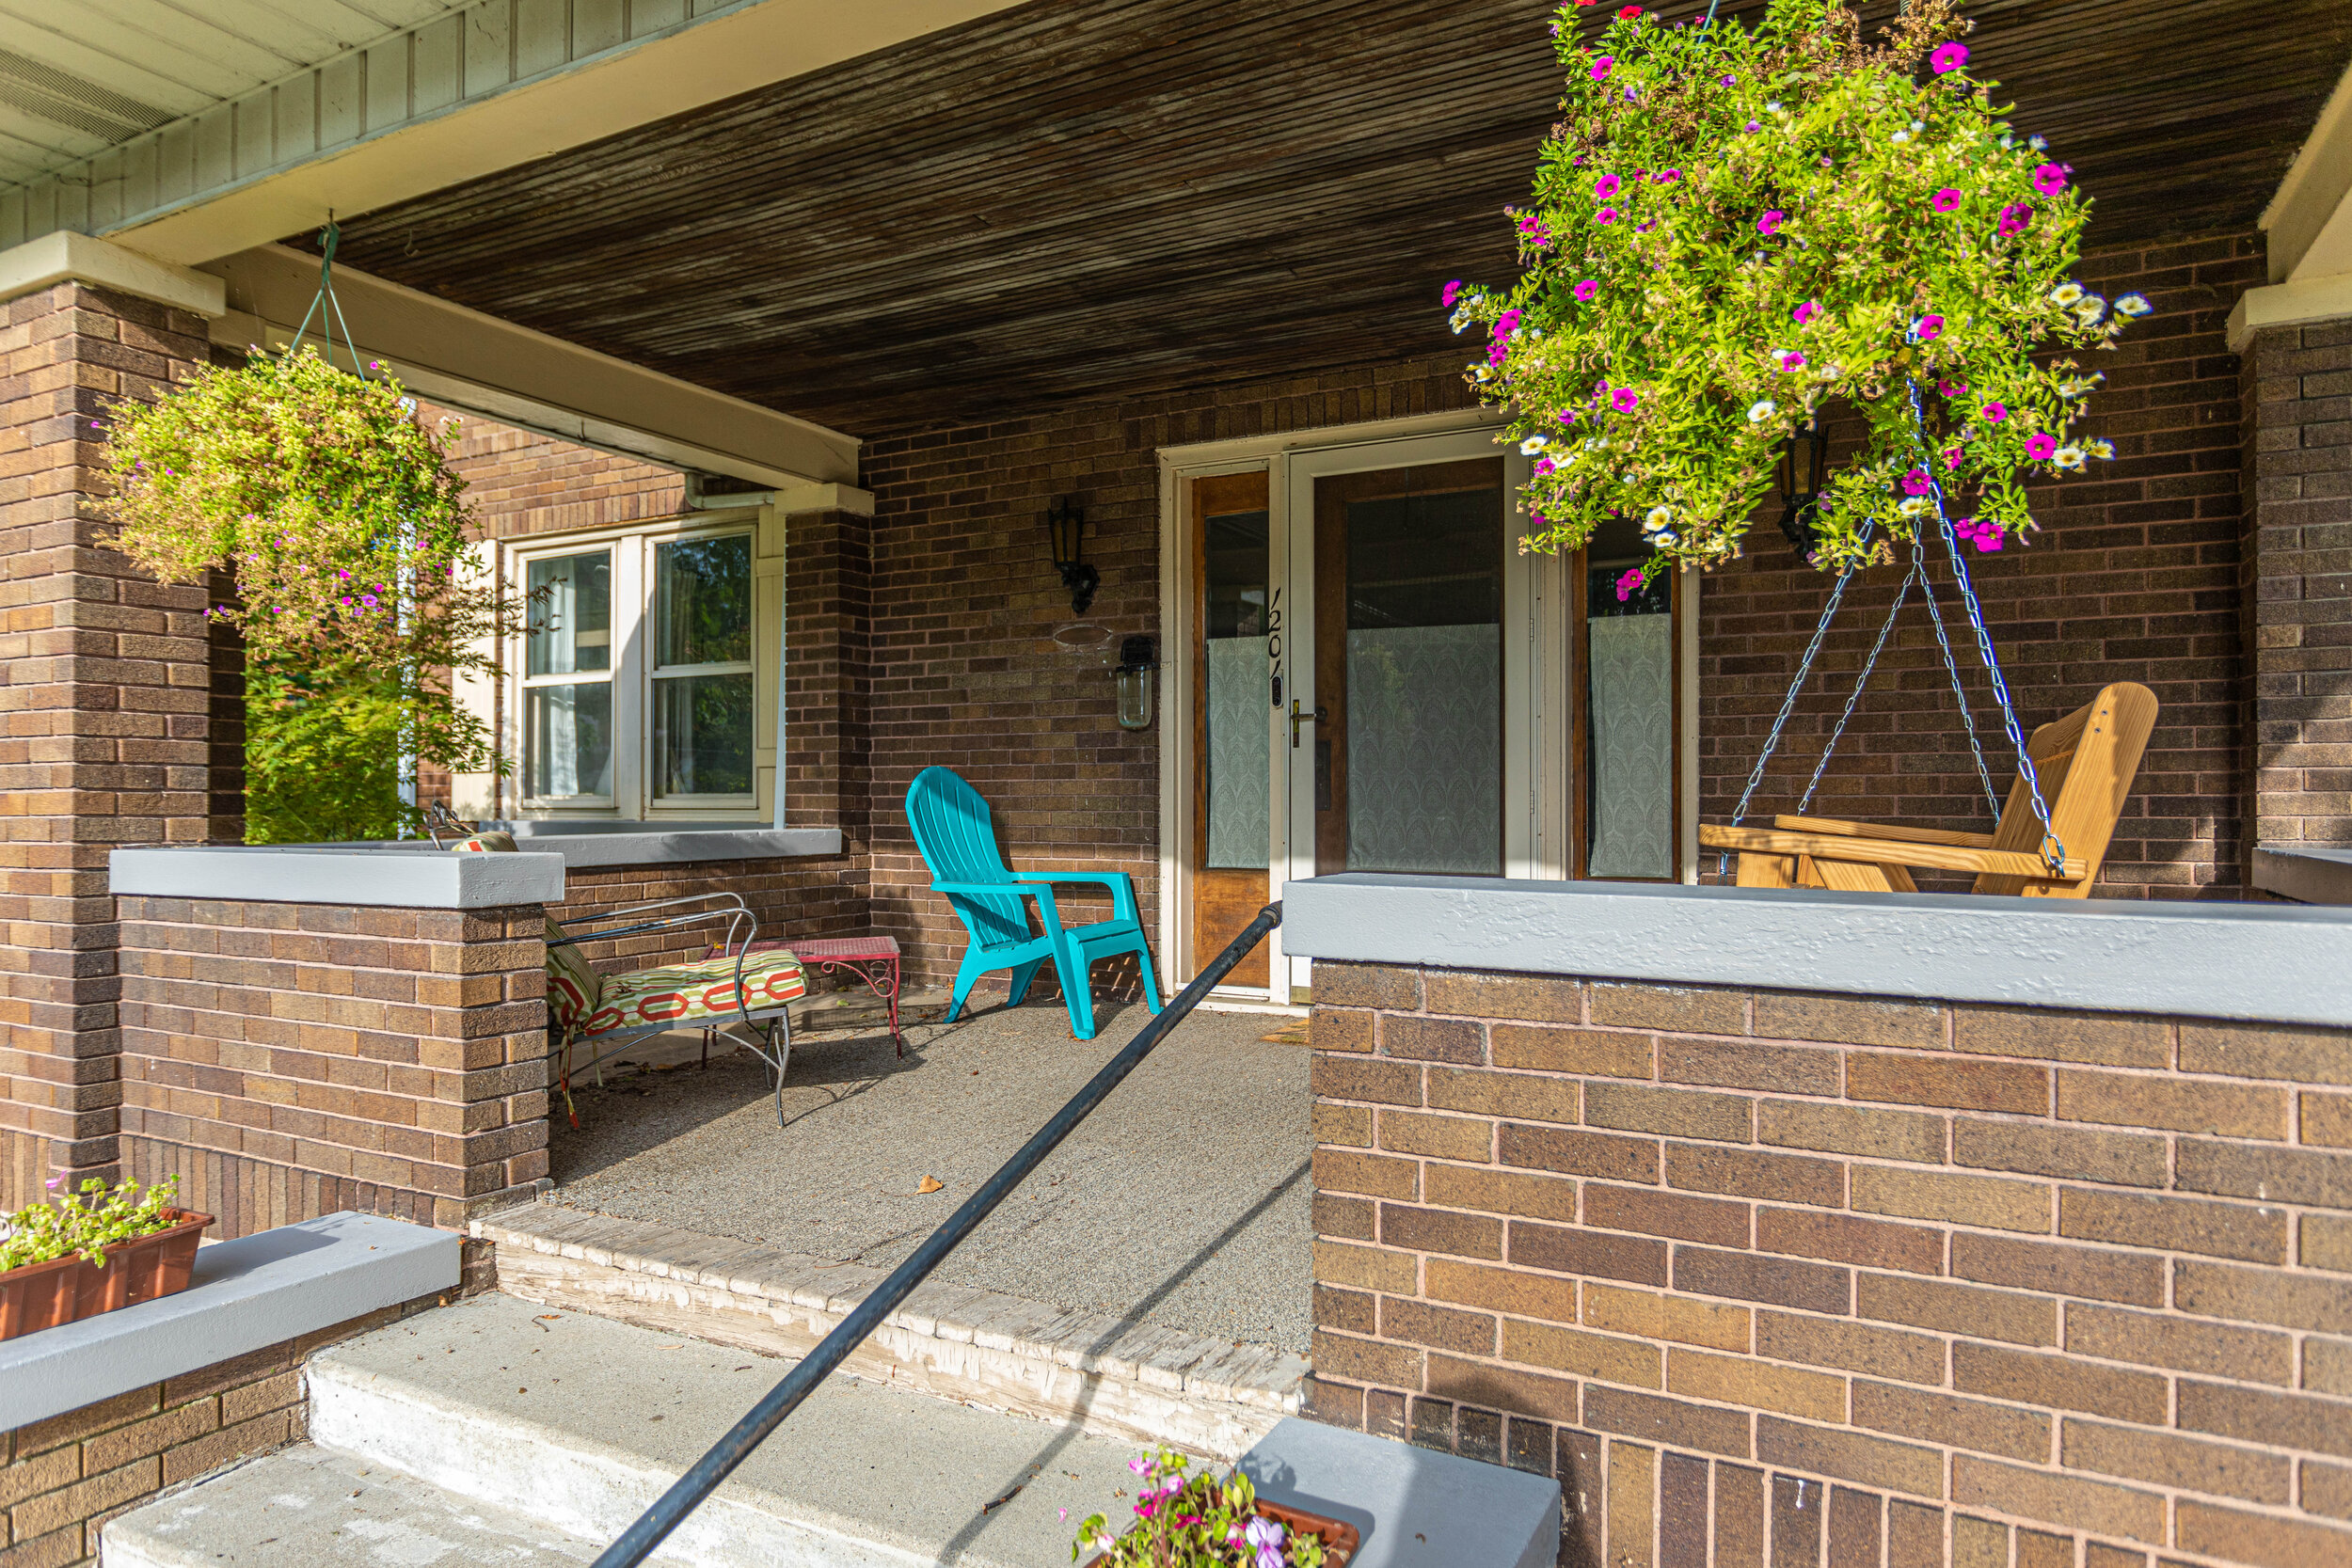
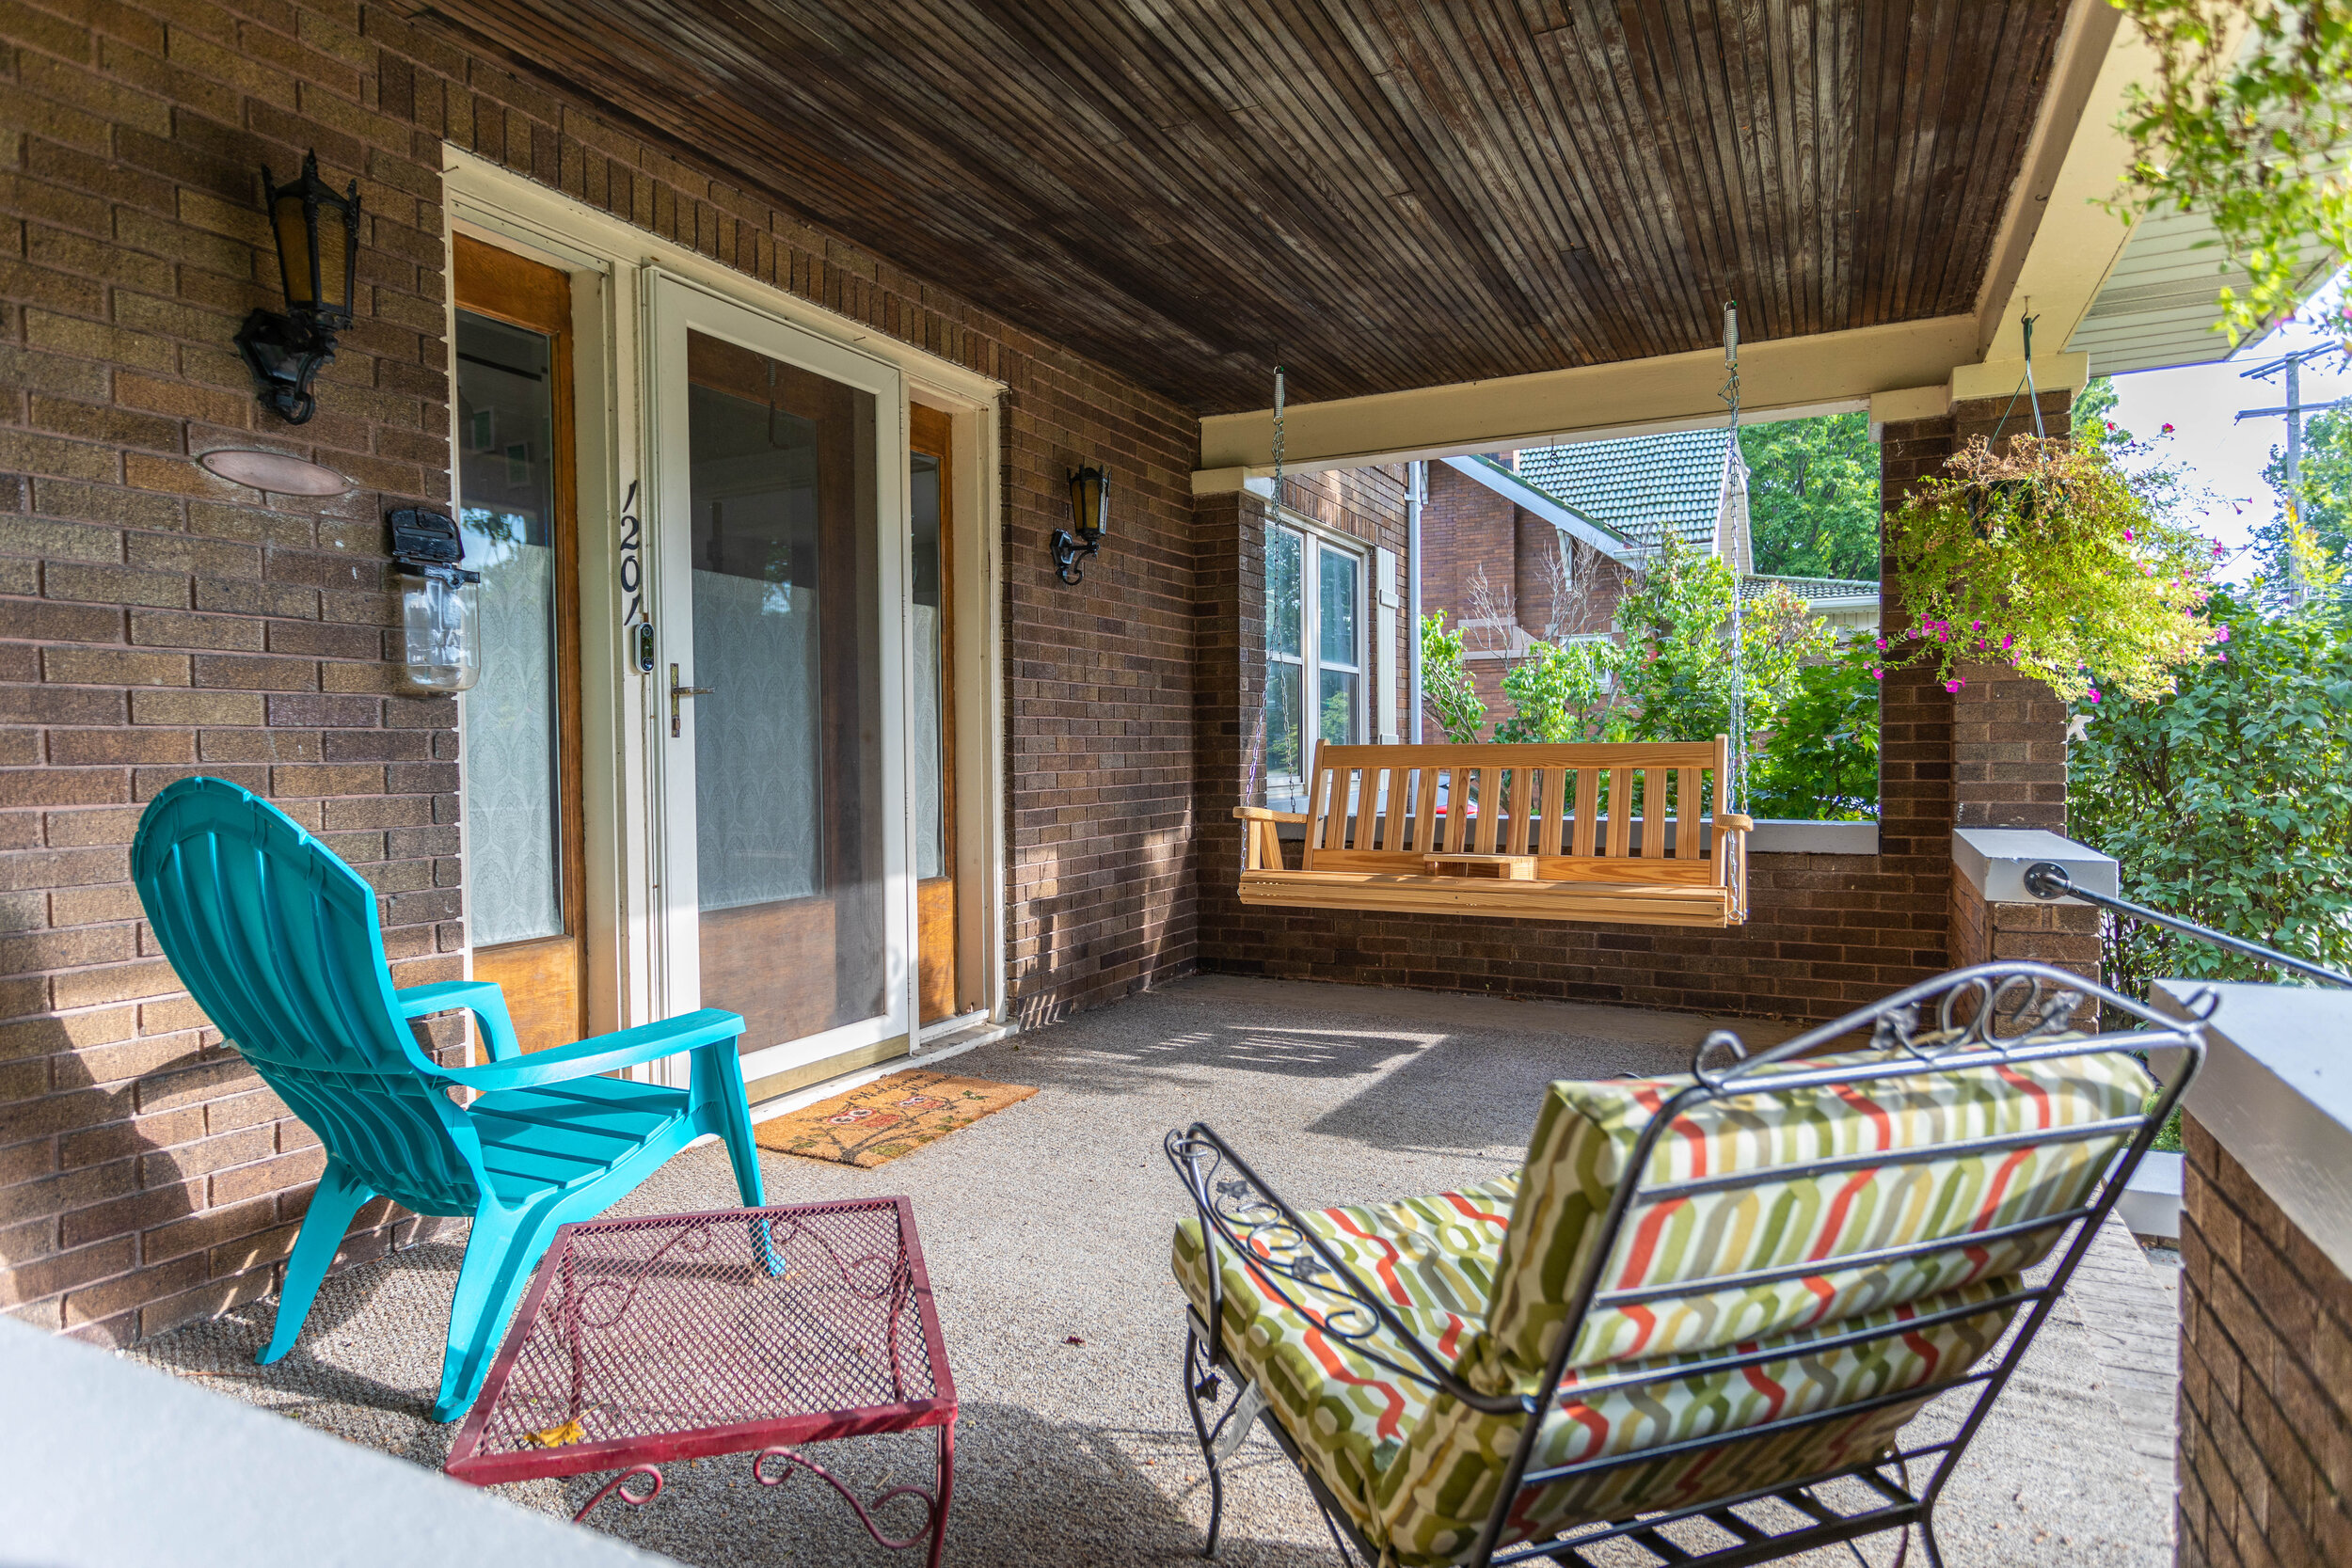
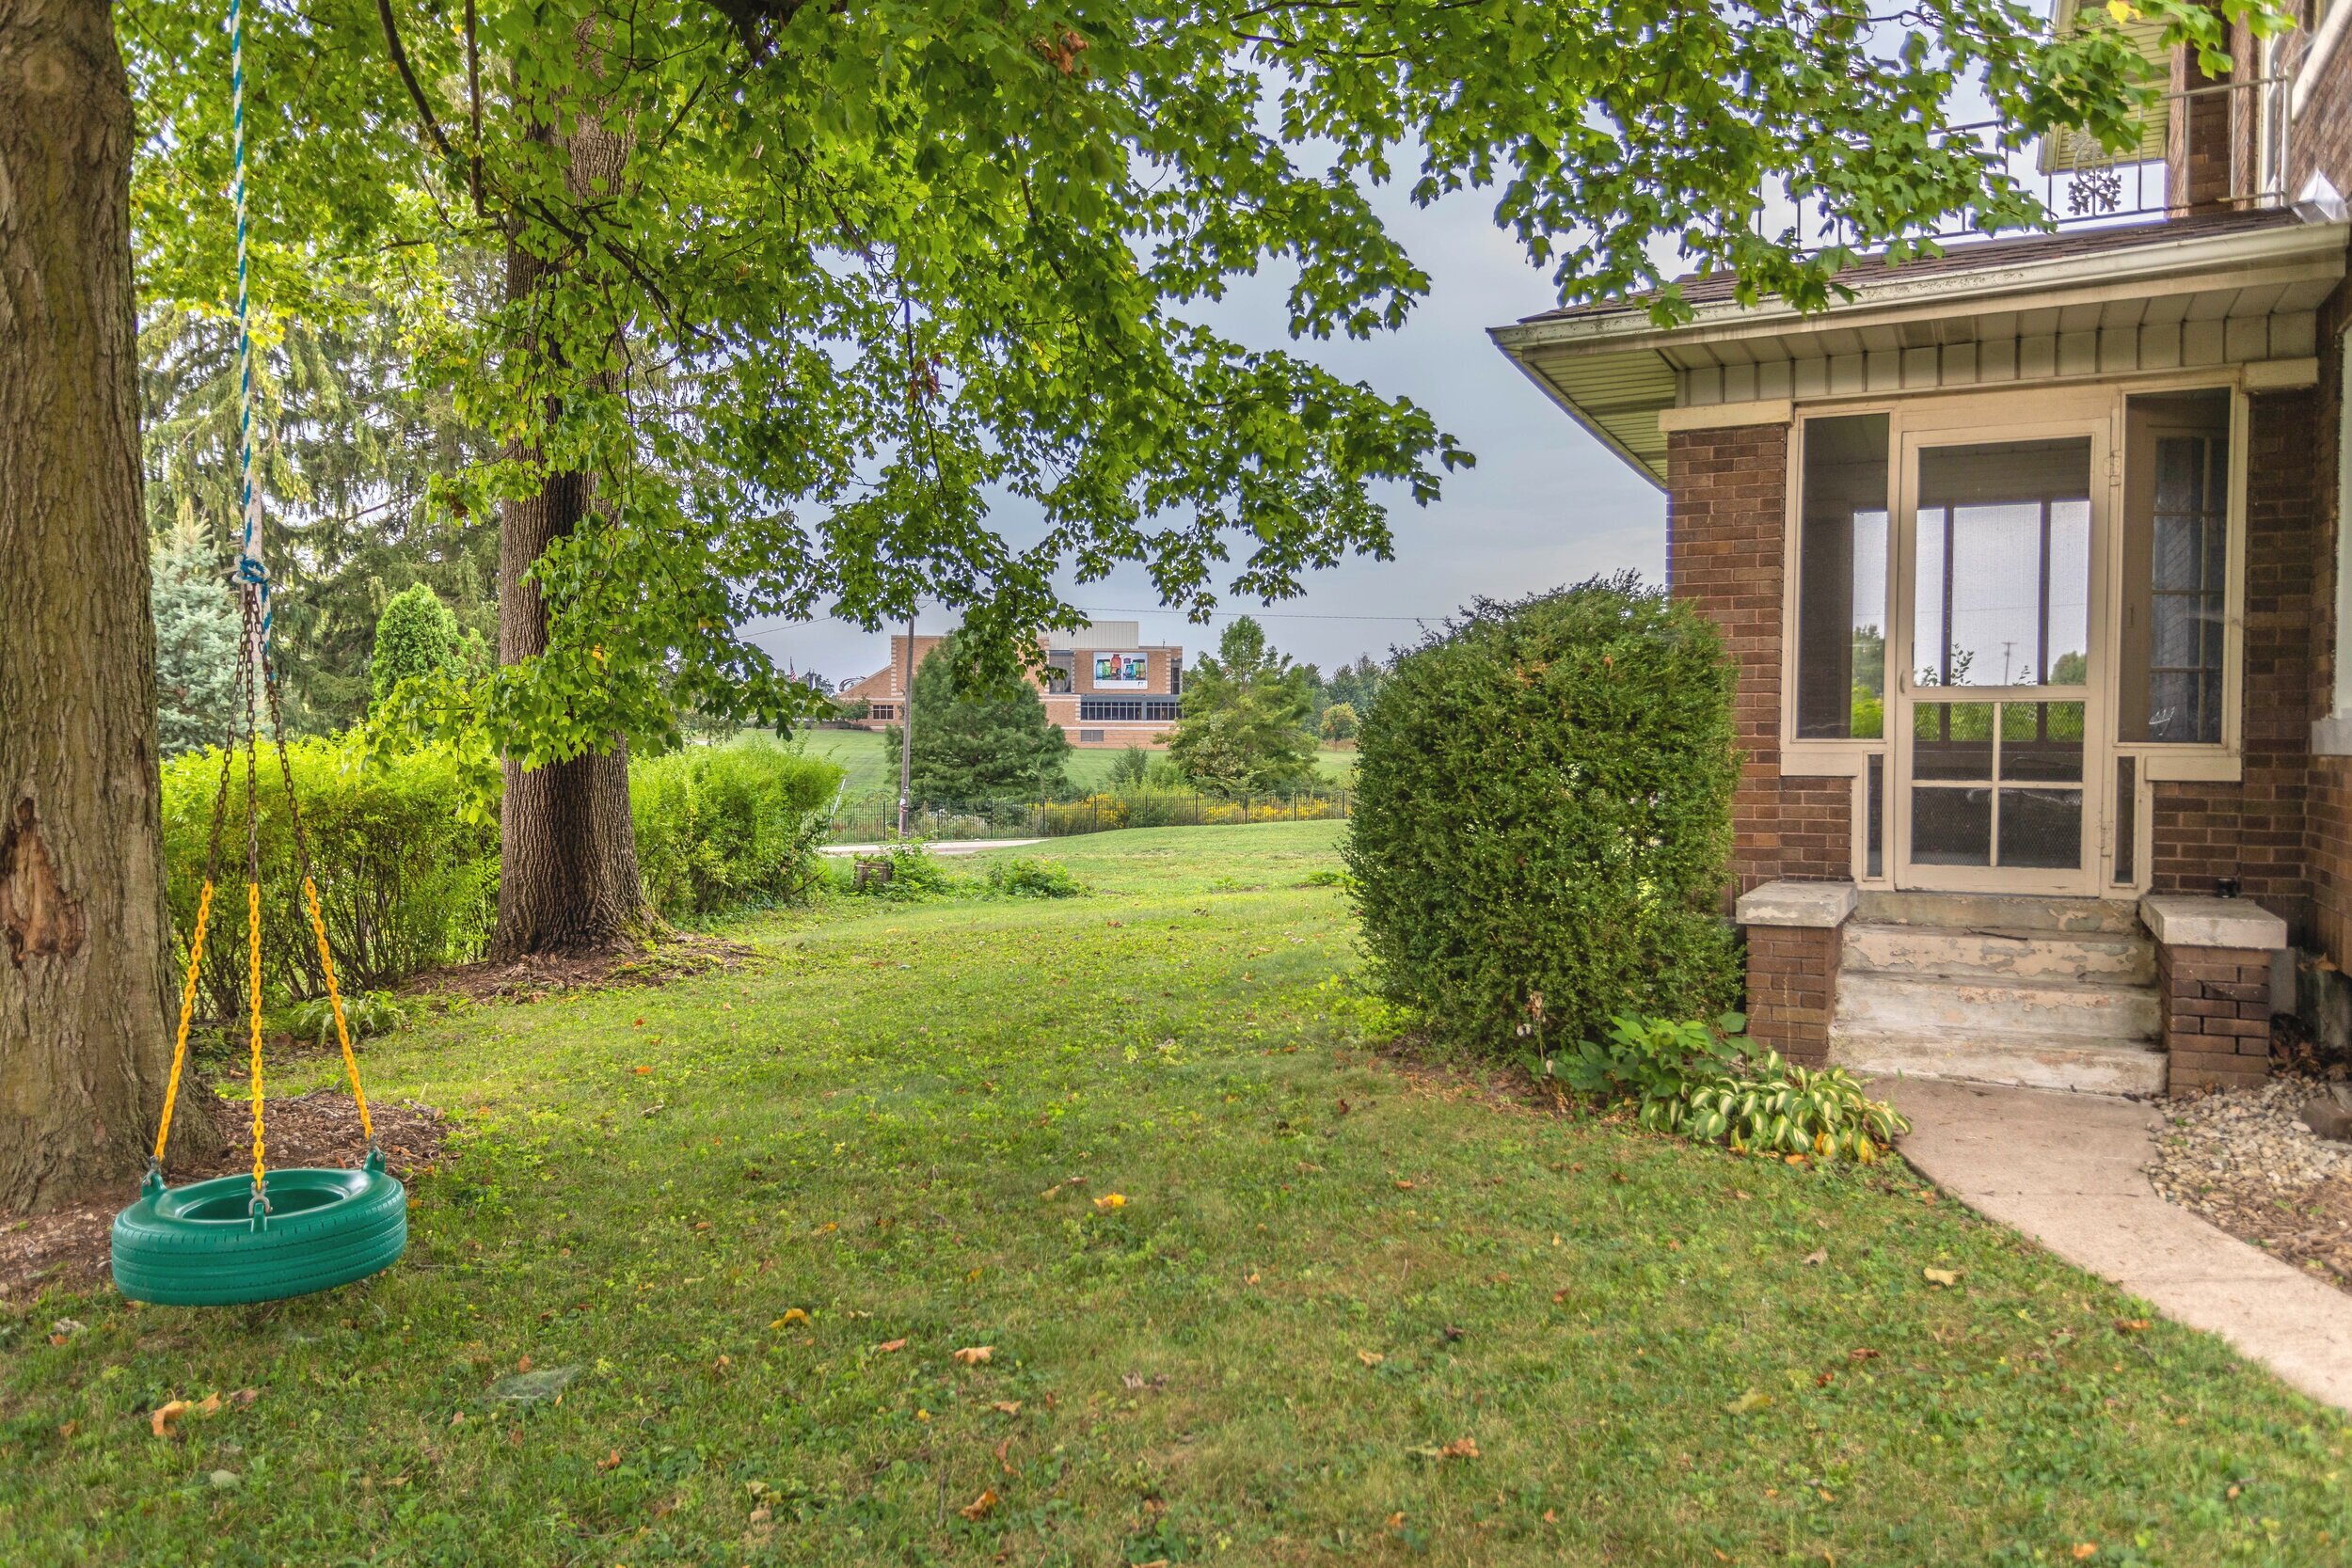
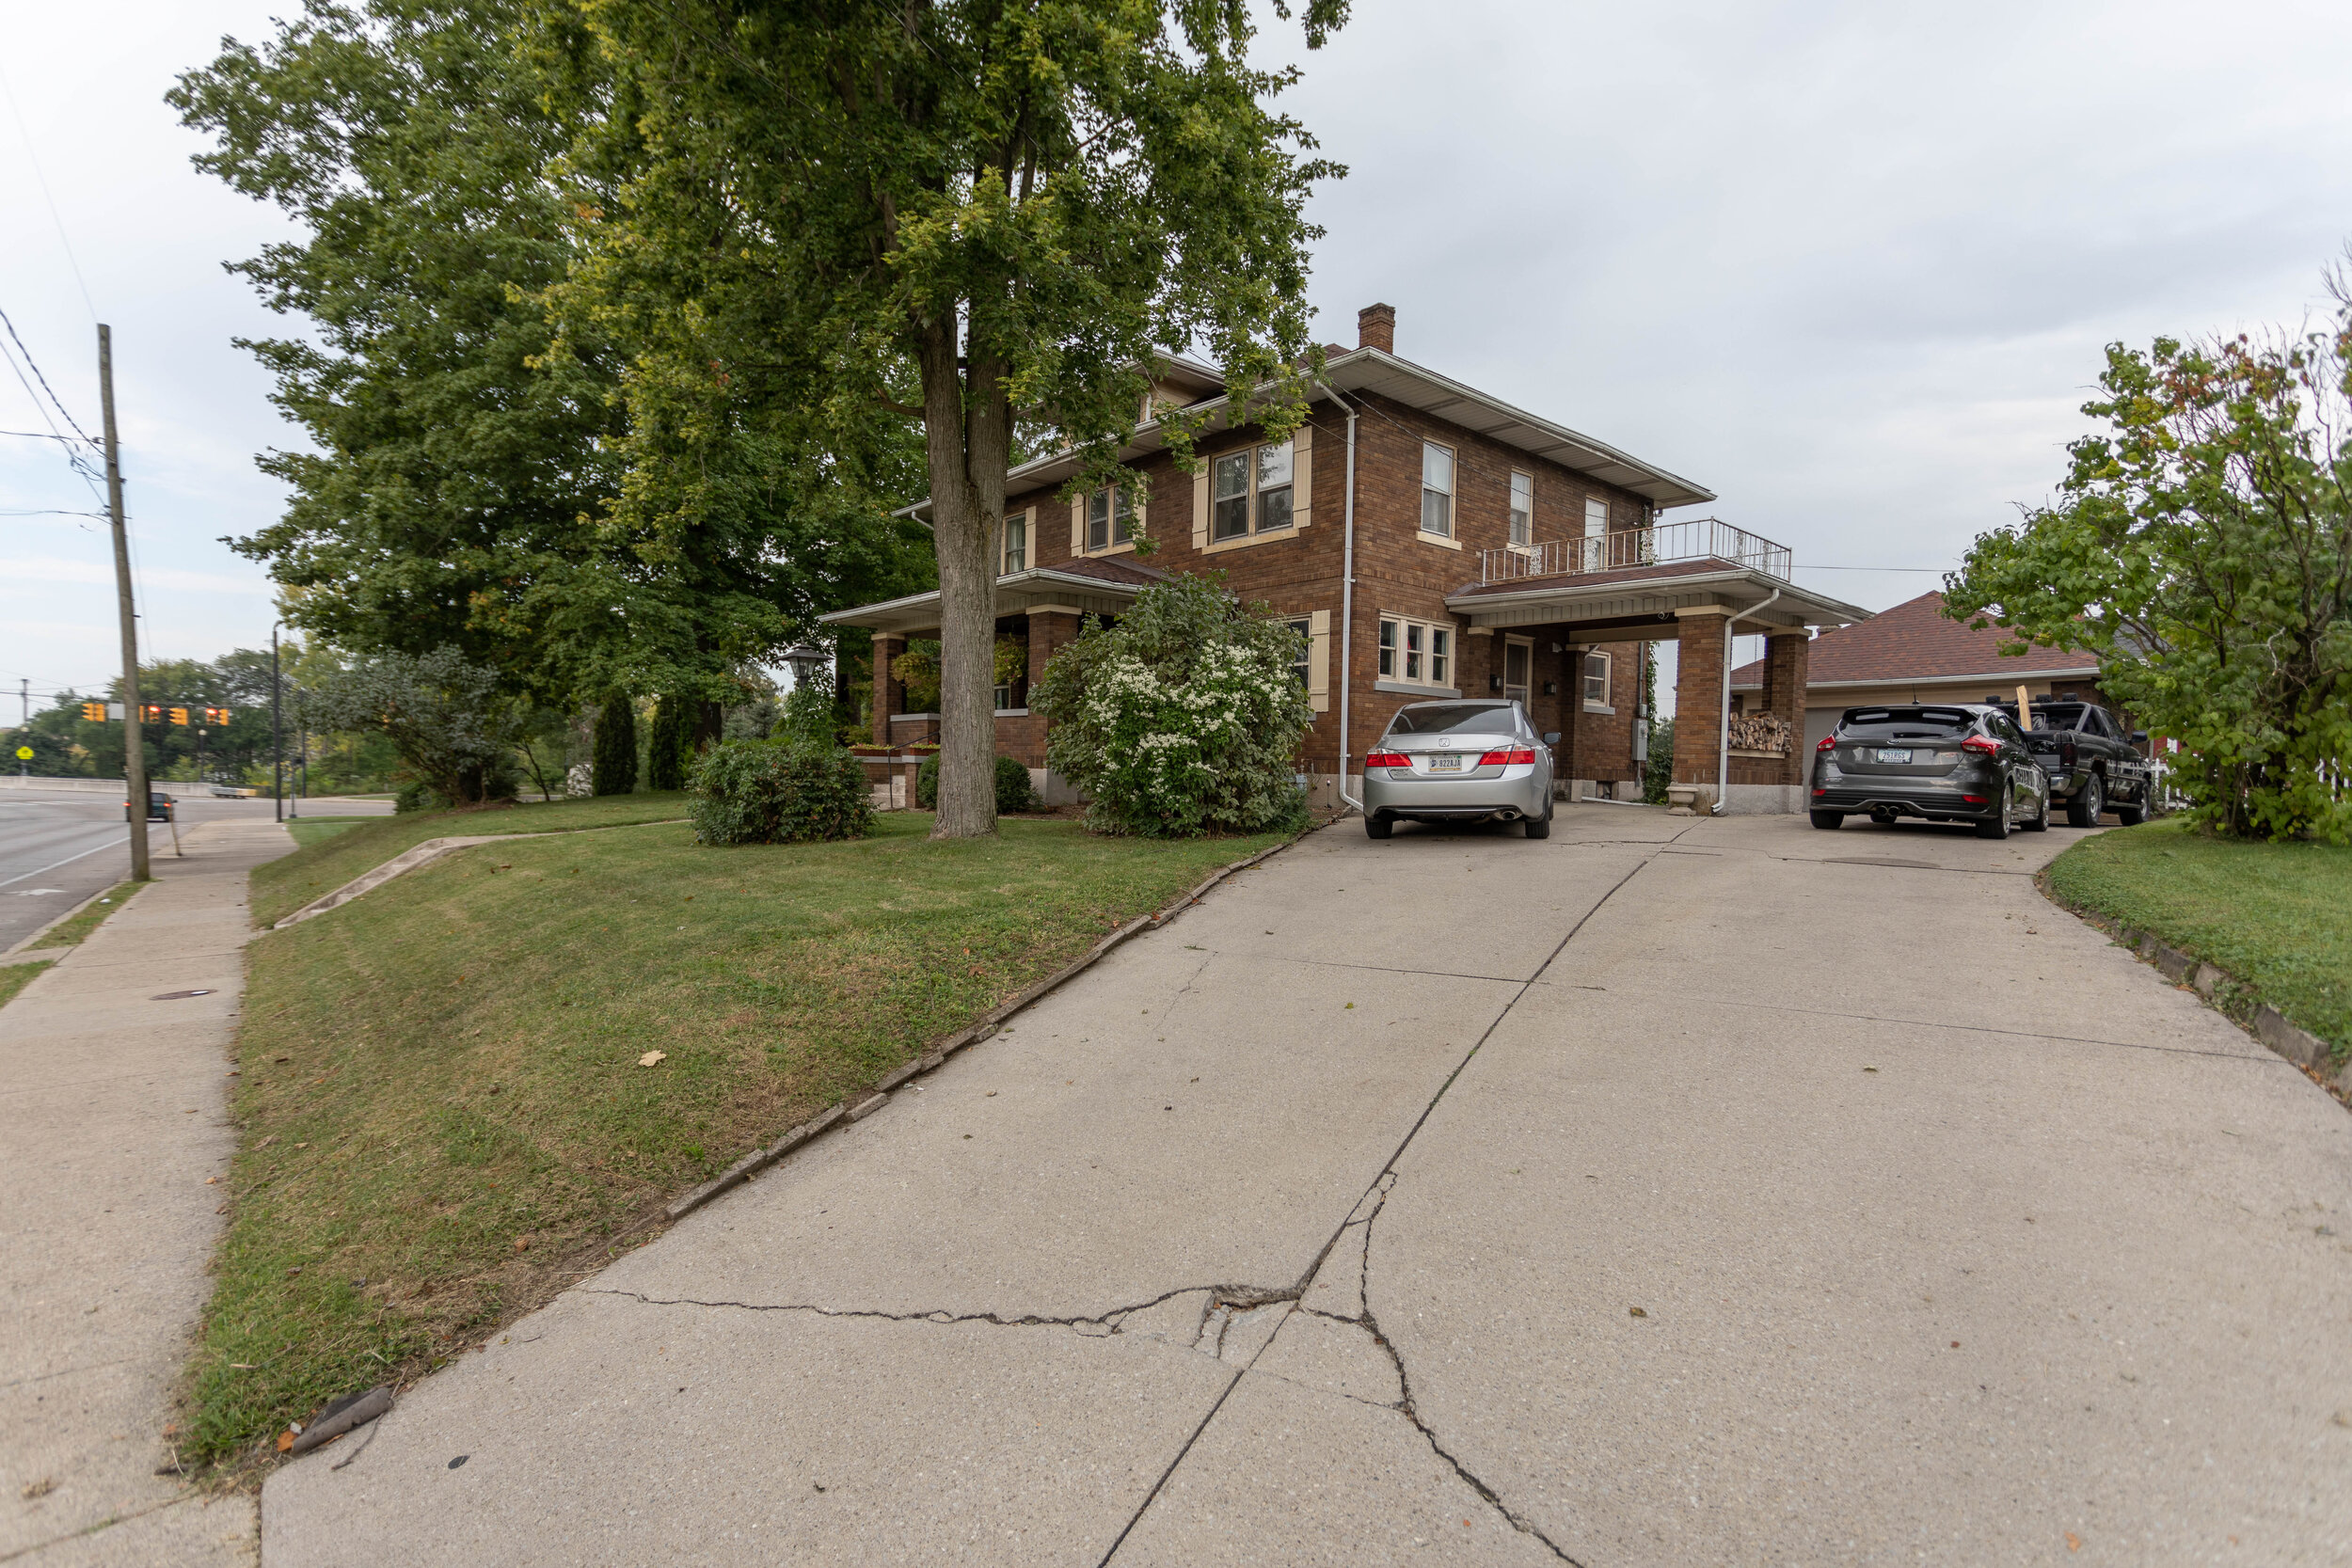
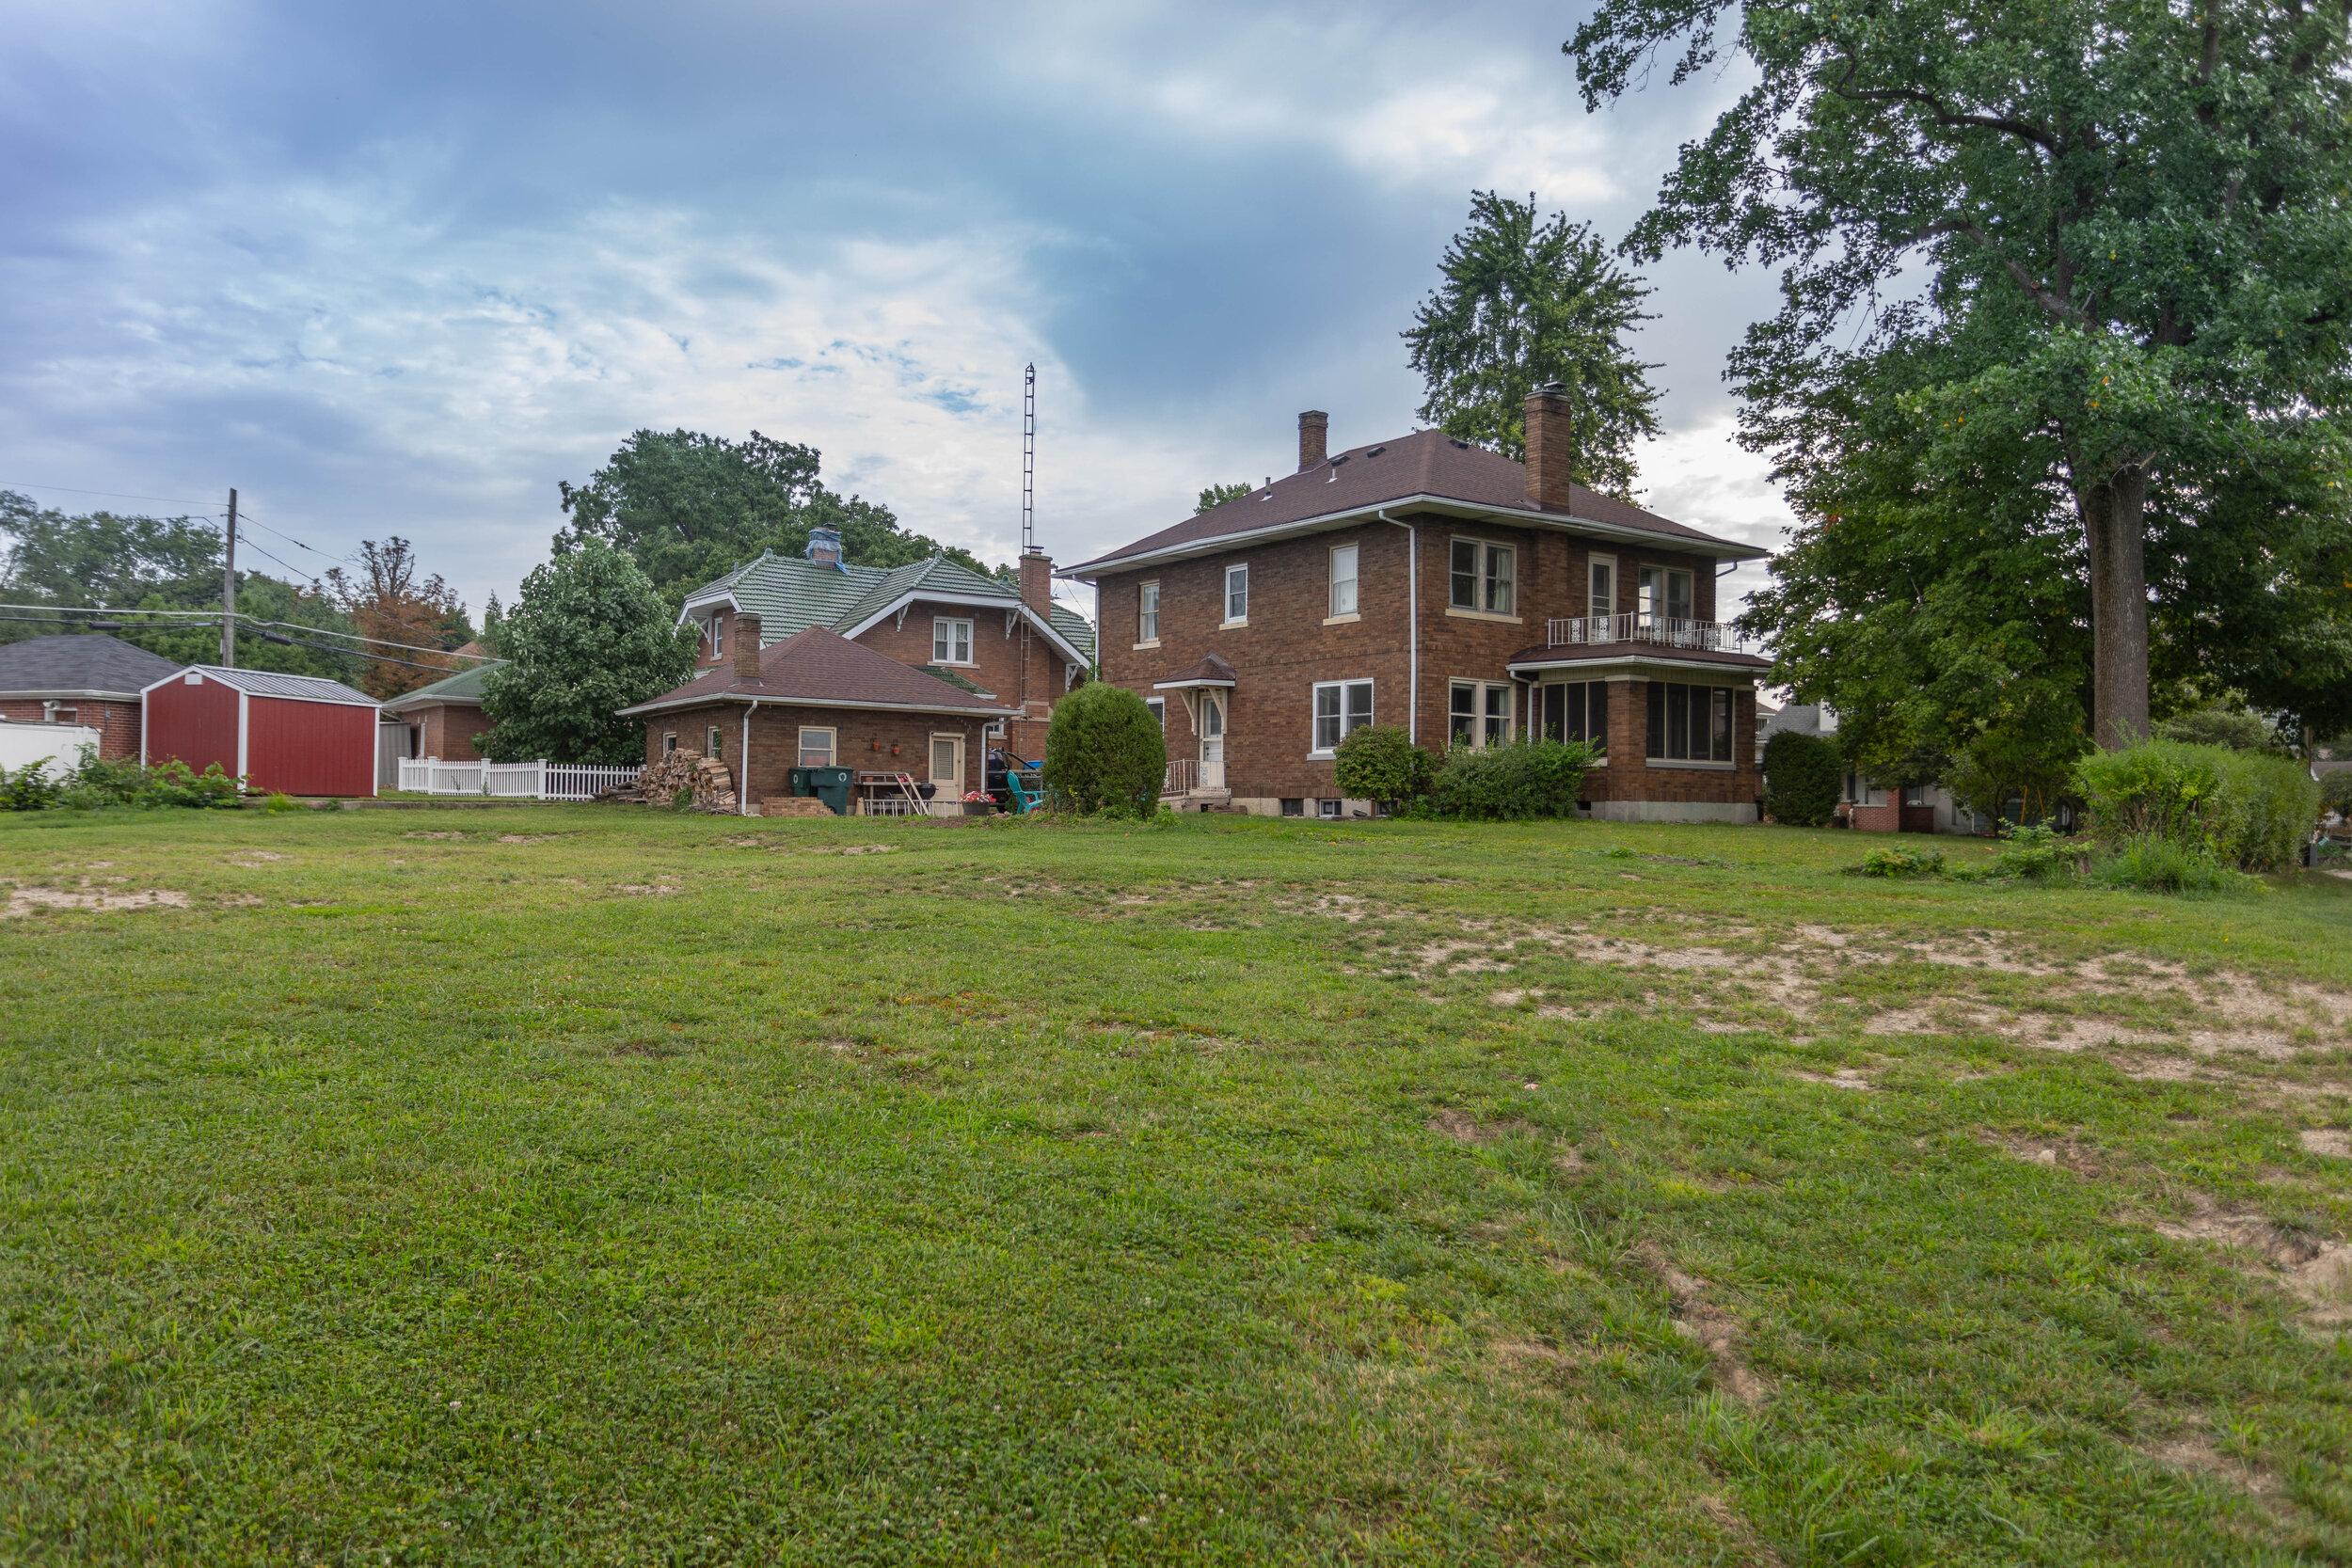
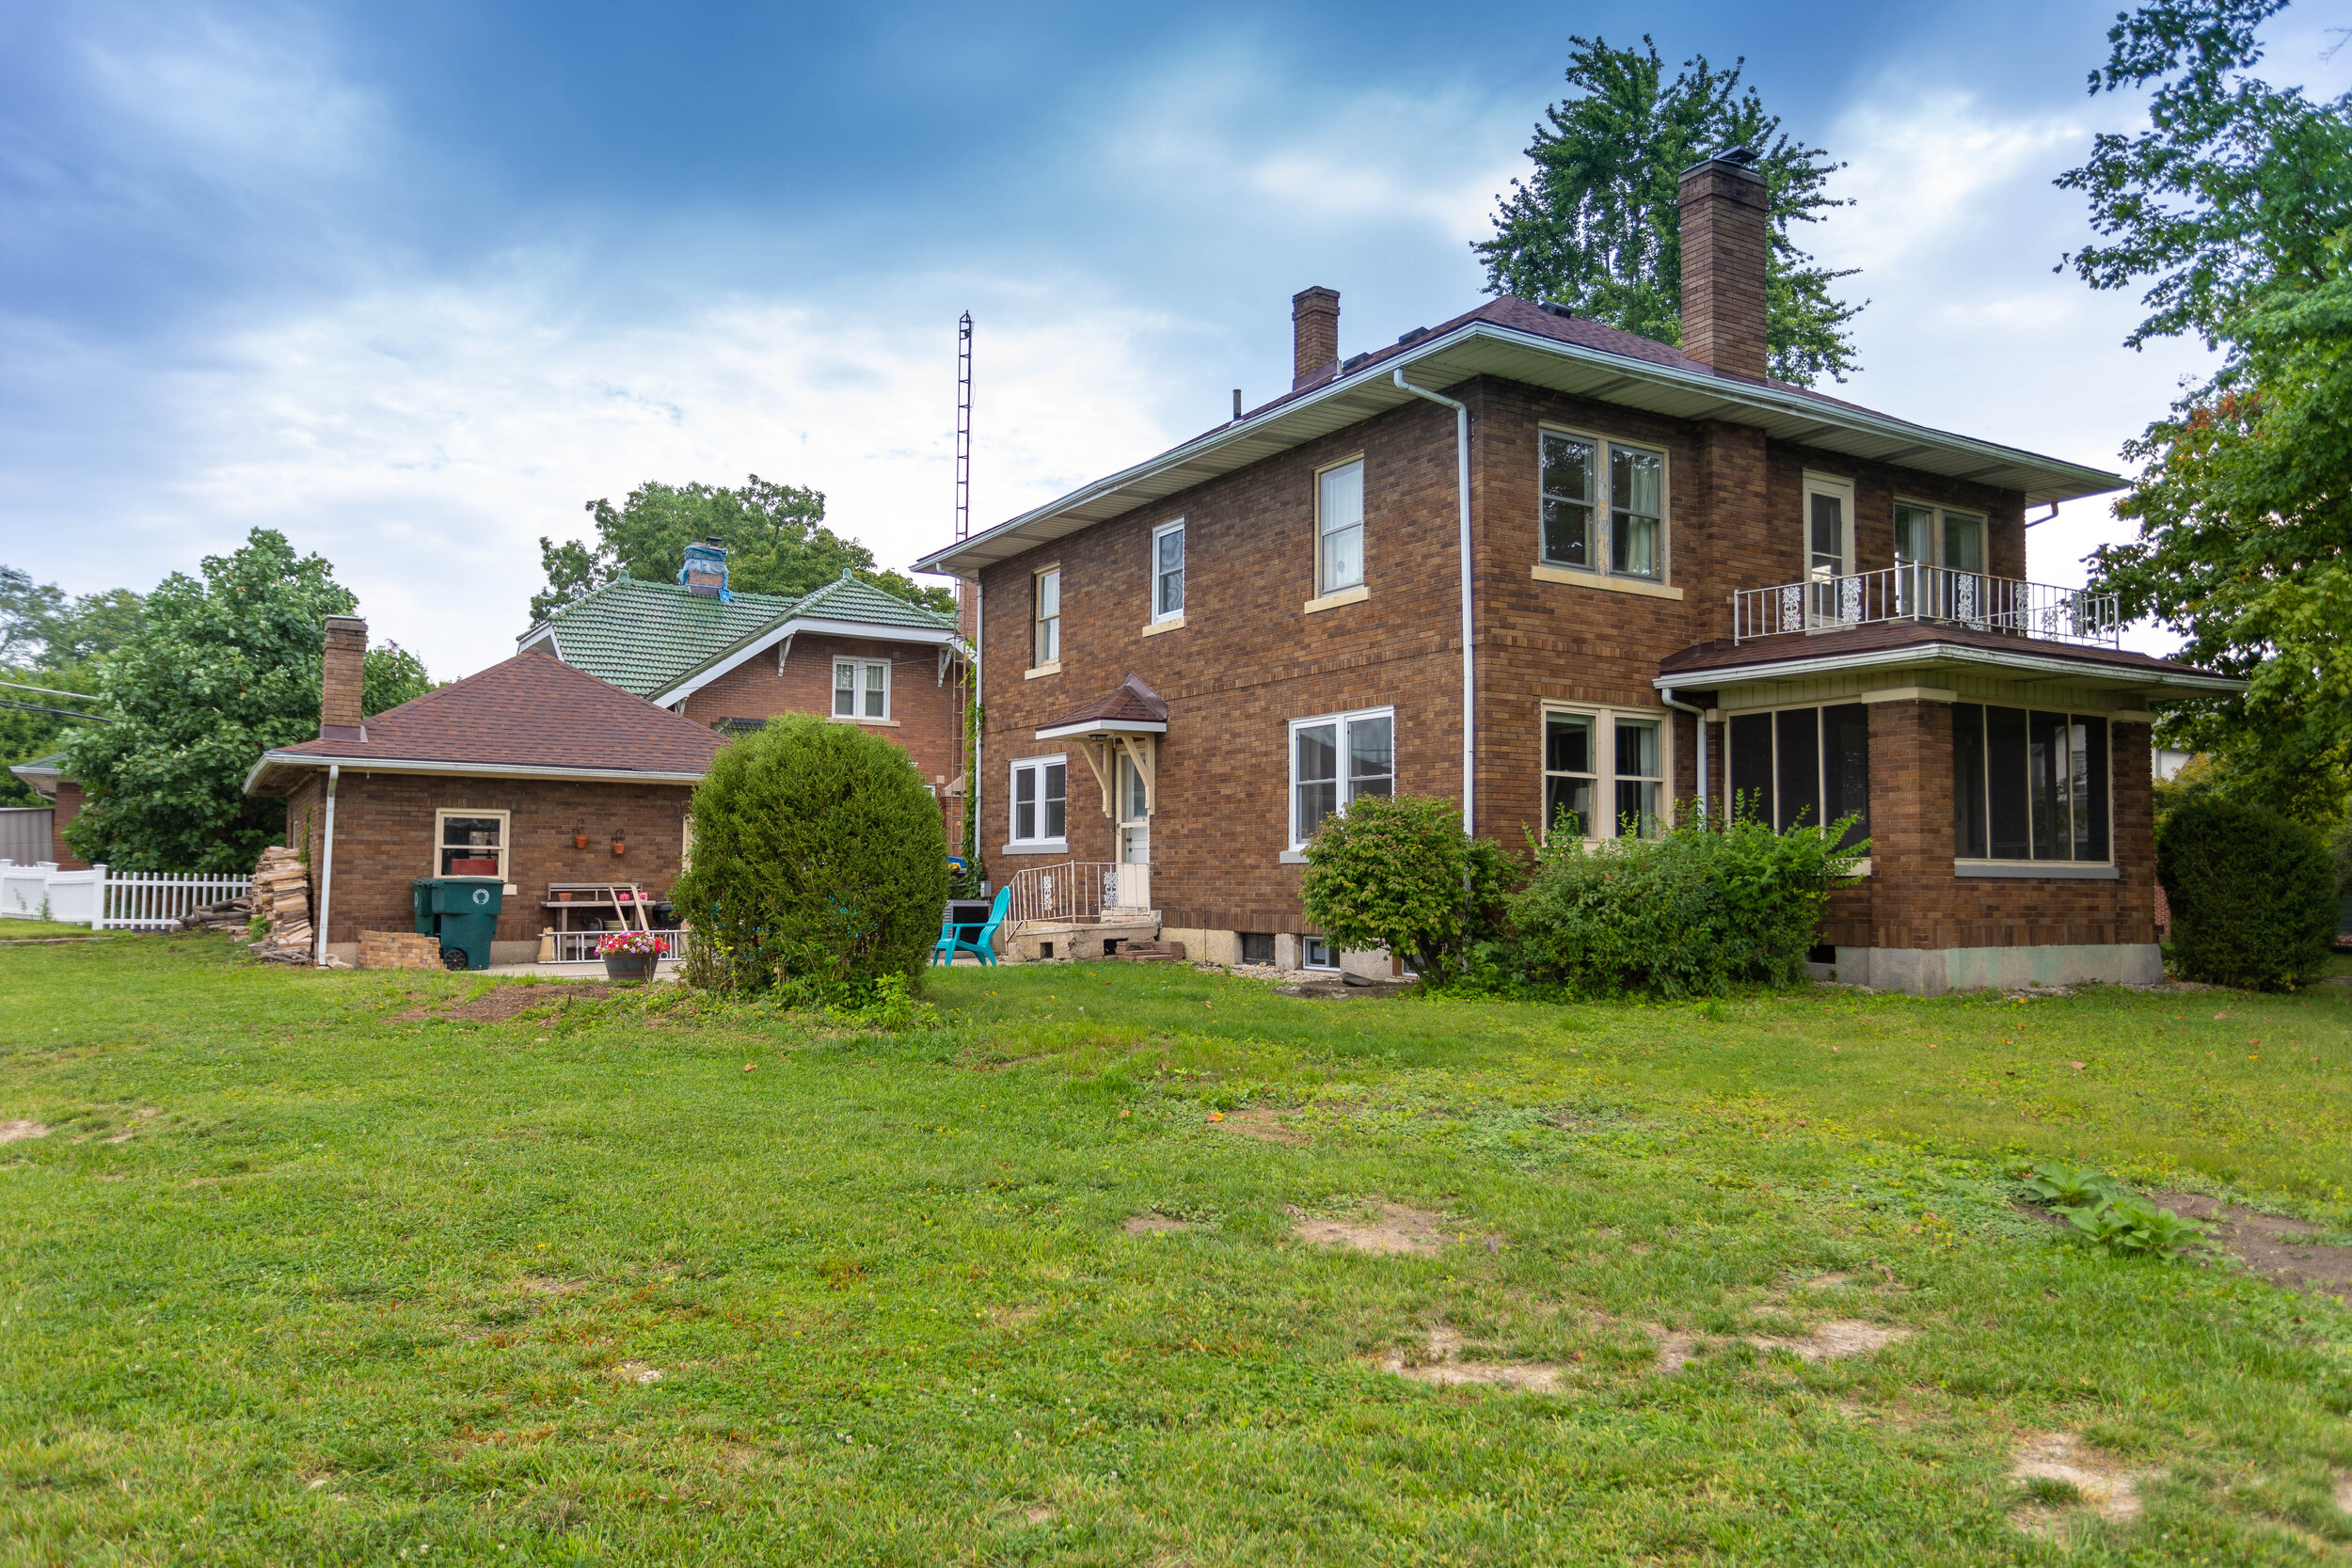
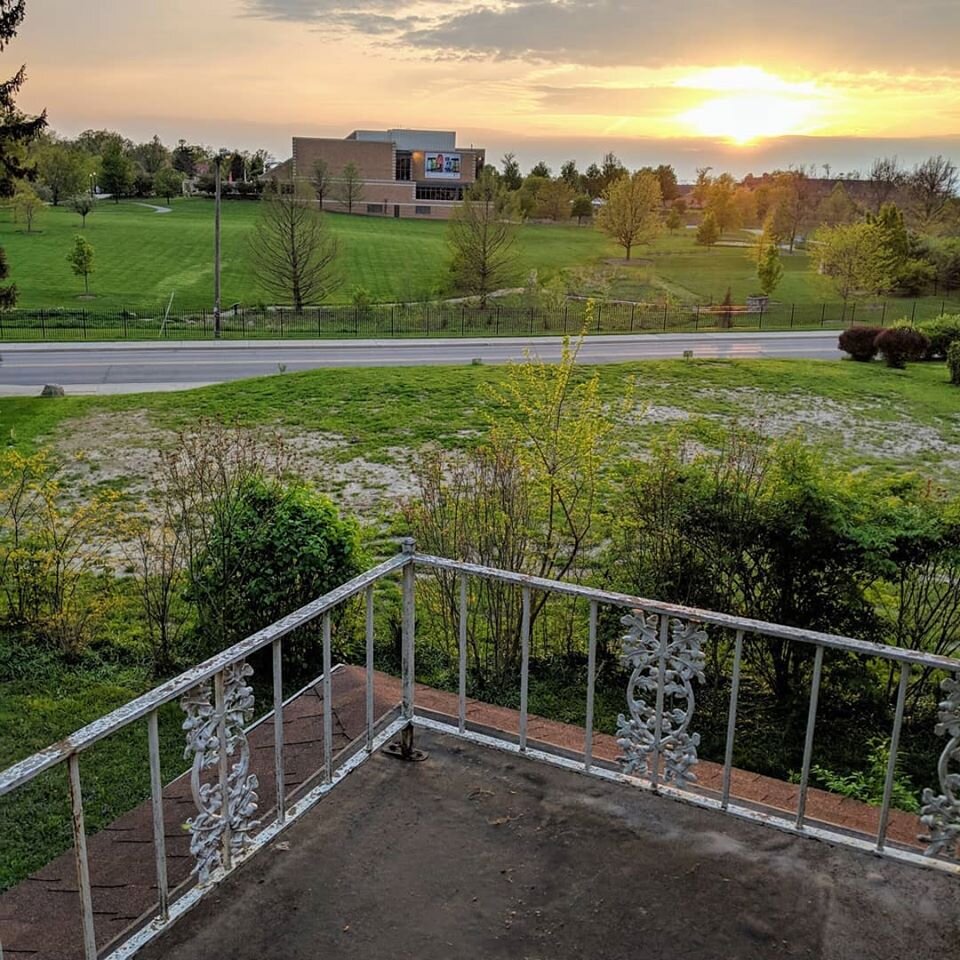
If you’ll notice in the pictures above, the last one is taken from the balcony overlooking some sad looking grass (and a pretty awesome sunset). Here, I’ll post it below so don’t have to go searching:

When we bought the house, our property ended at the treeline you see above. About a week after we moved in, the house that once lived in that empty space of land beyond the treeline was demolished and by today’s standards it was too small to build a new structure. It just so happened that the next door neighbor of that house owned it.
So last summer when we decided to make this our forever home we bought it from him, planning on putting up a retaining wall, a fence, adding a pool, and pretty much making the yard into an oasis. Obviously those plans didn’t work out, but we did sell the land with the house so at least we don’t still own a random plot of land!
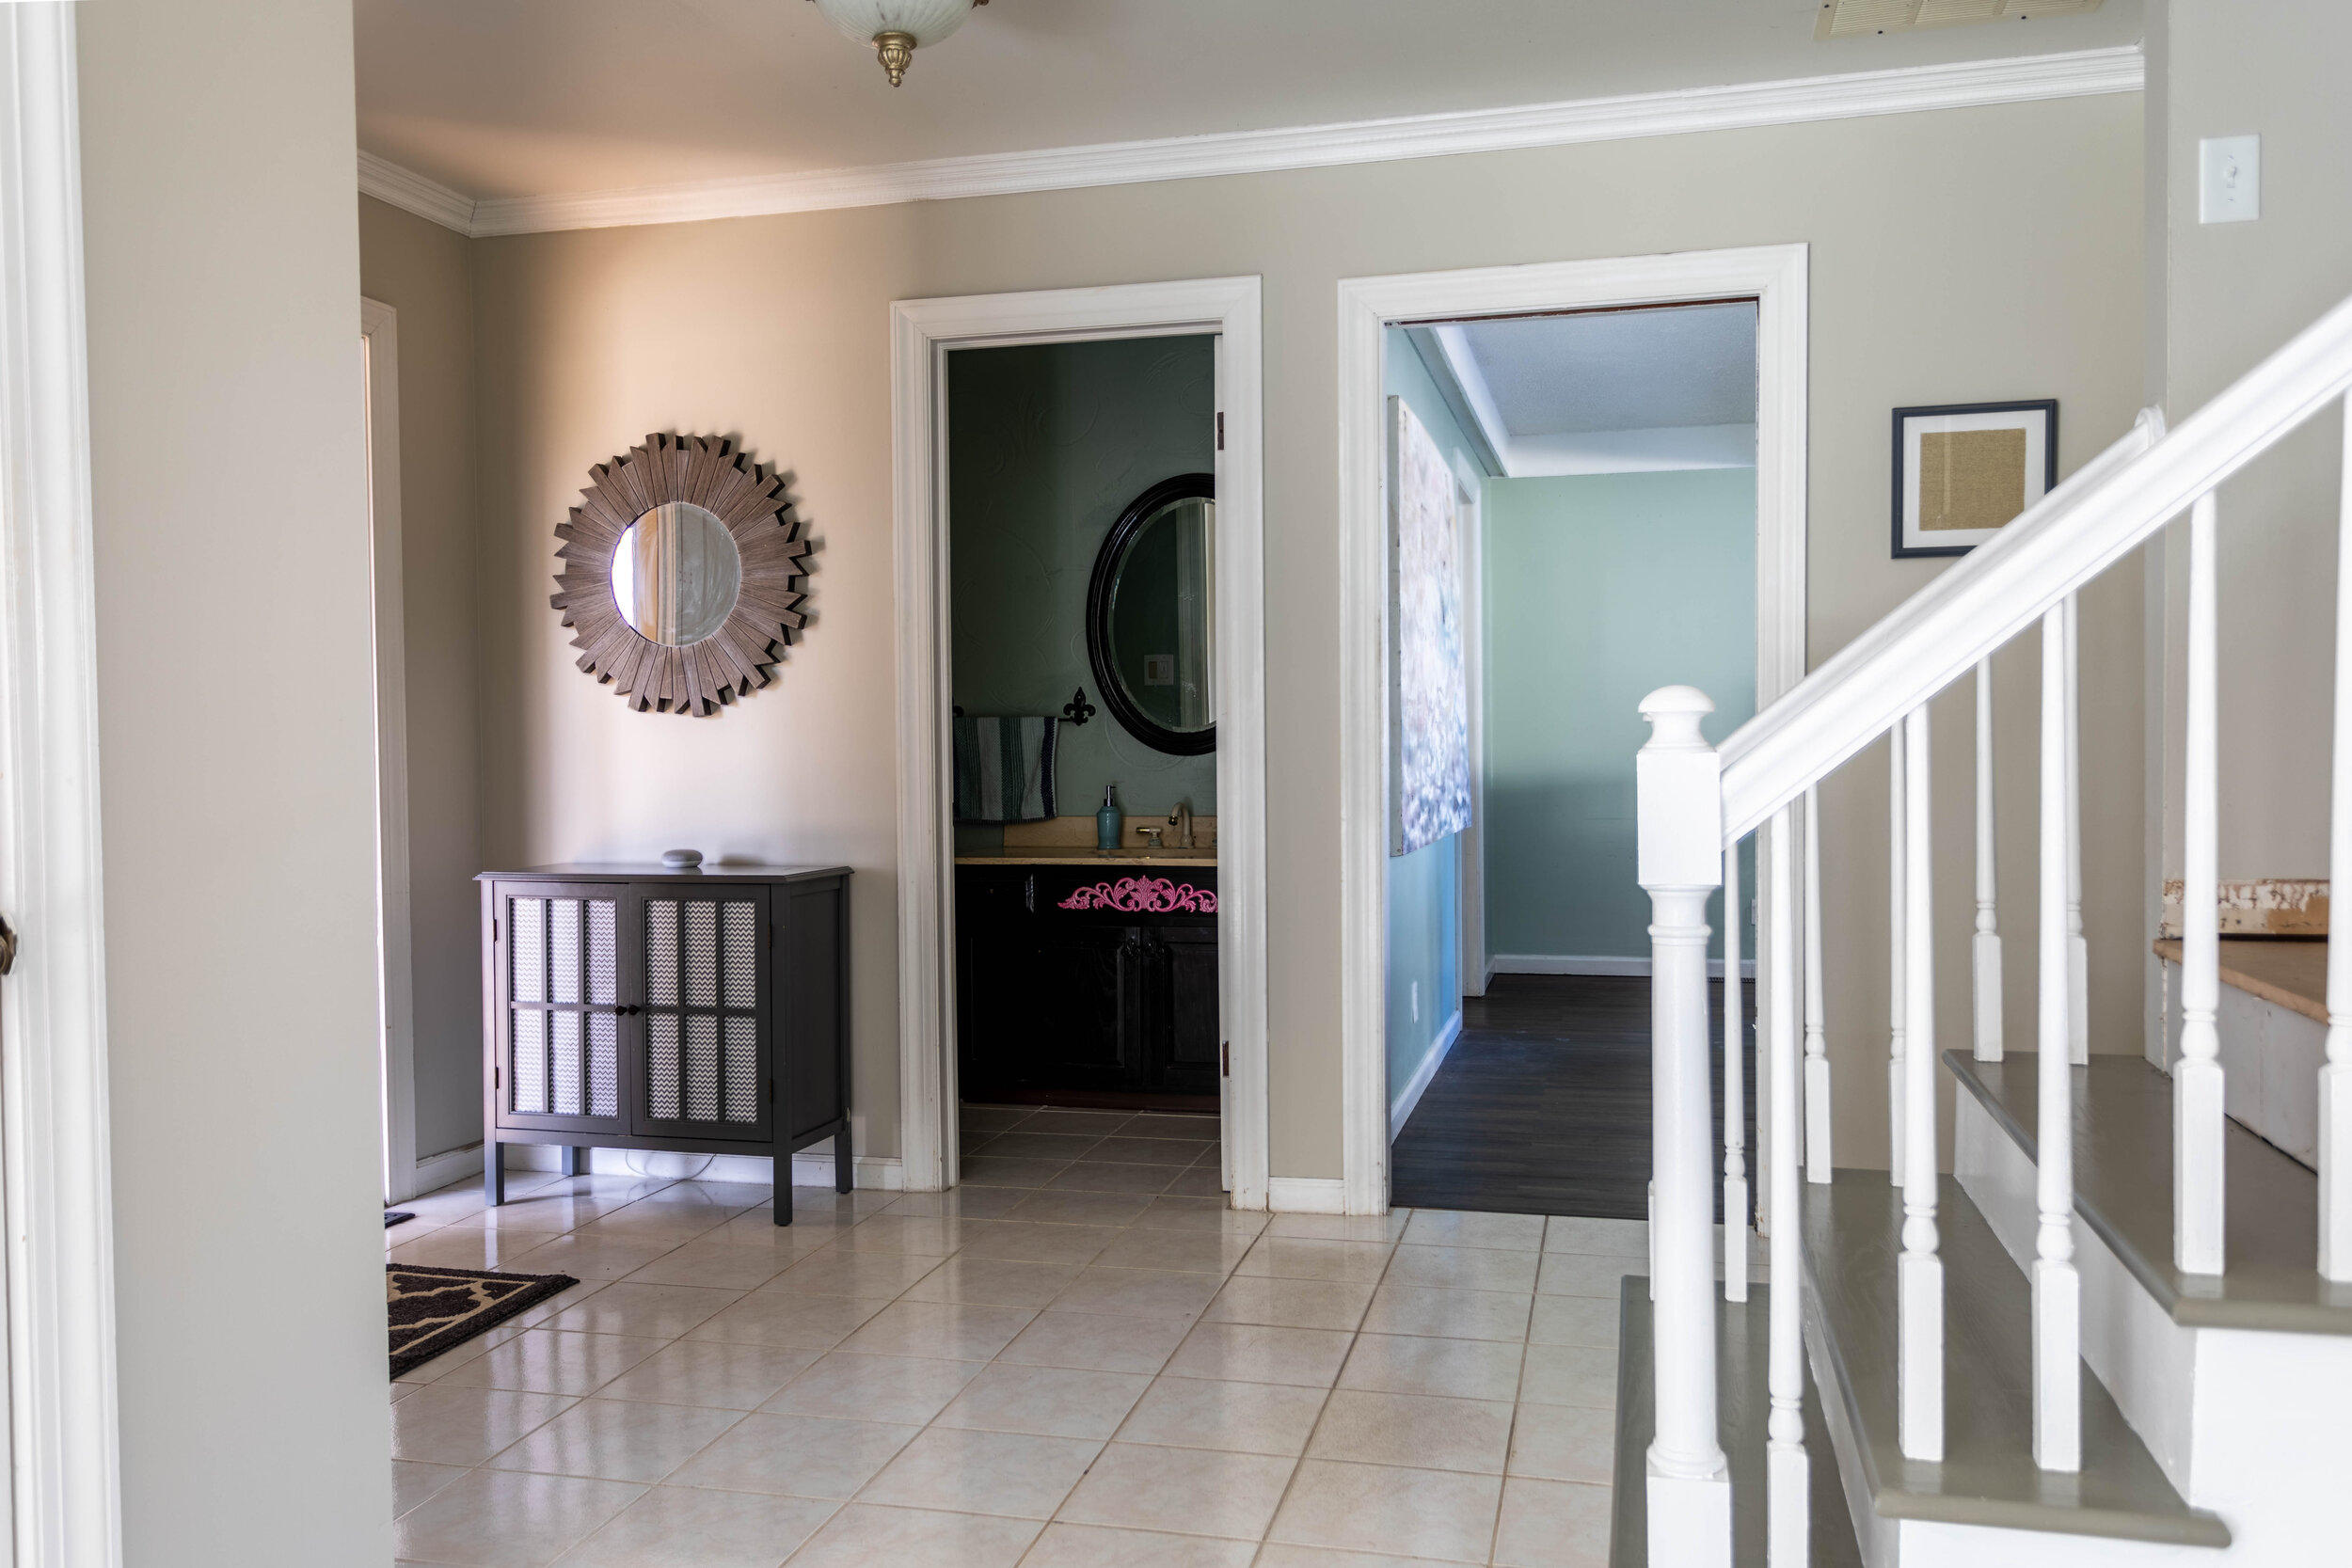
The foyer
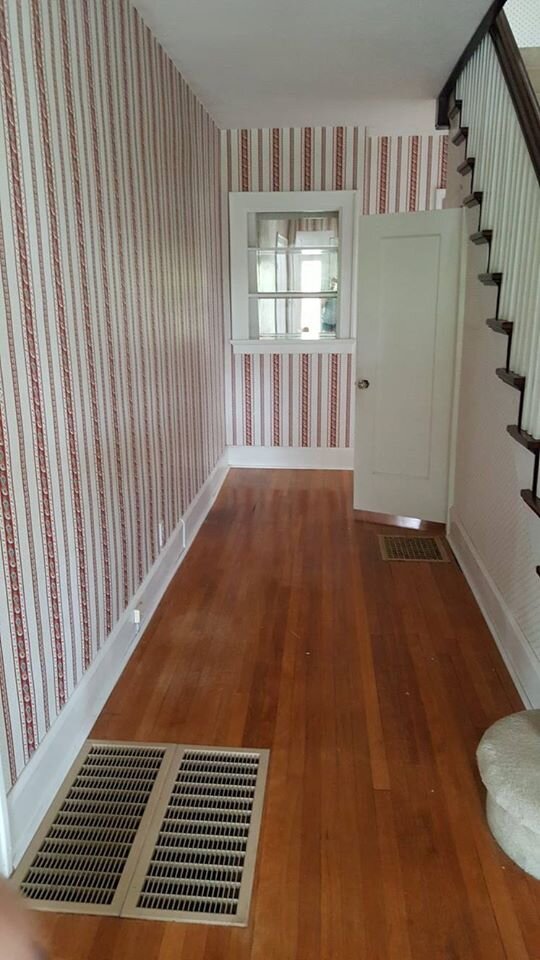
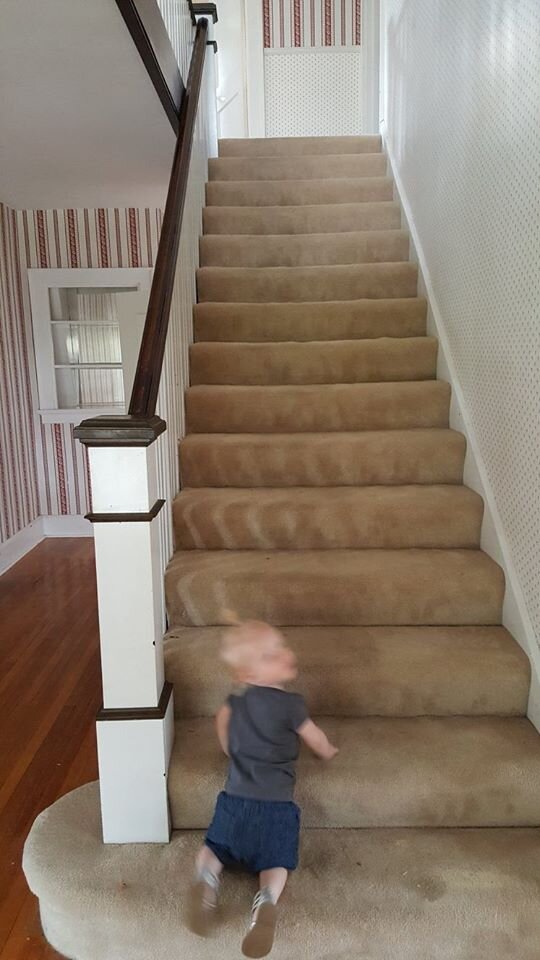
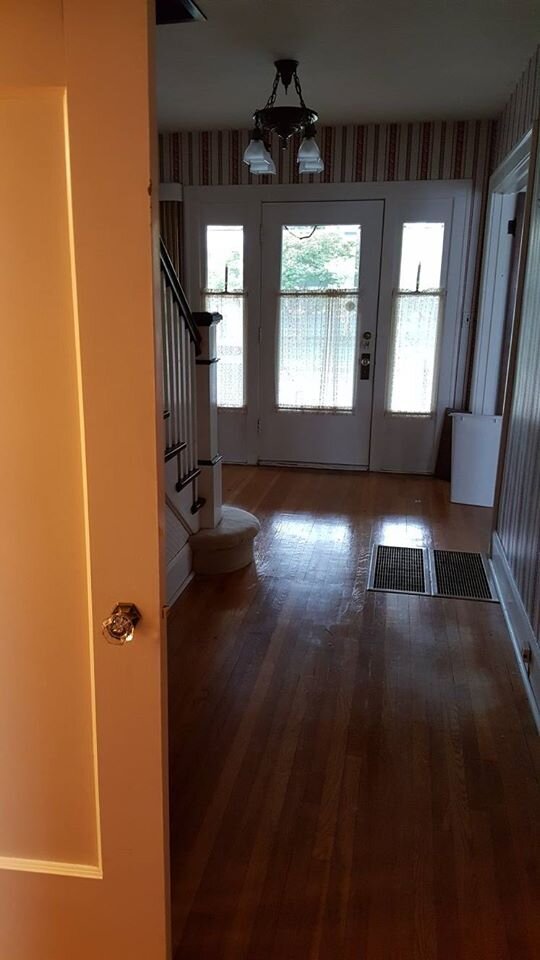
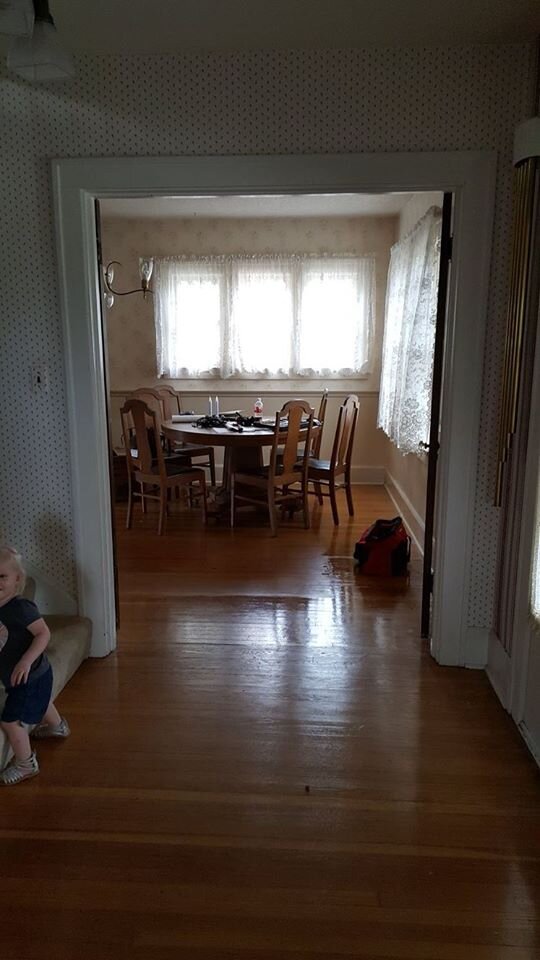
Check out all that sweet, sweet wallpaper. And it didn’t stop here! There was wallpaper in every single room of this house (bathrooms and kitchen included) when we moved in with the exception of ONE bedroom. Also, apologies for the creepy looking child in the picture of the stairs.
By the time we left, I had removed all the wallpaper! So I definitely meant it when I said I’ve had my fair share of stripping wallpaper. This house was a doozy!
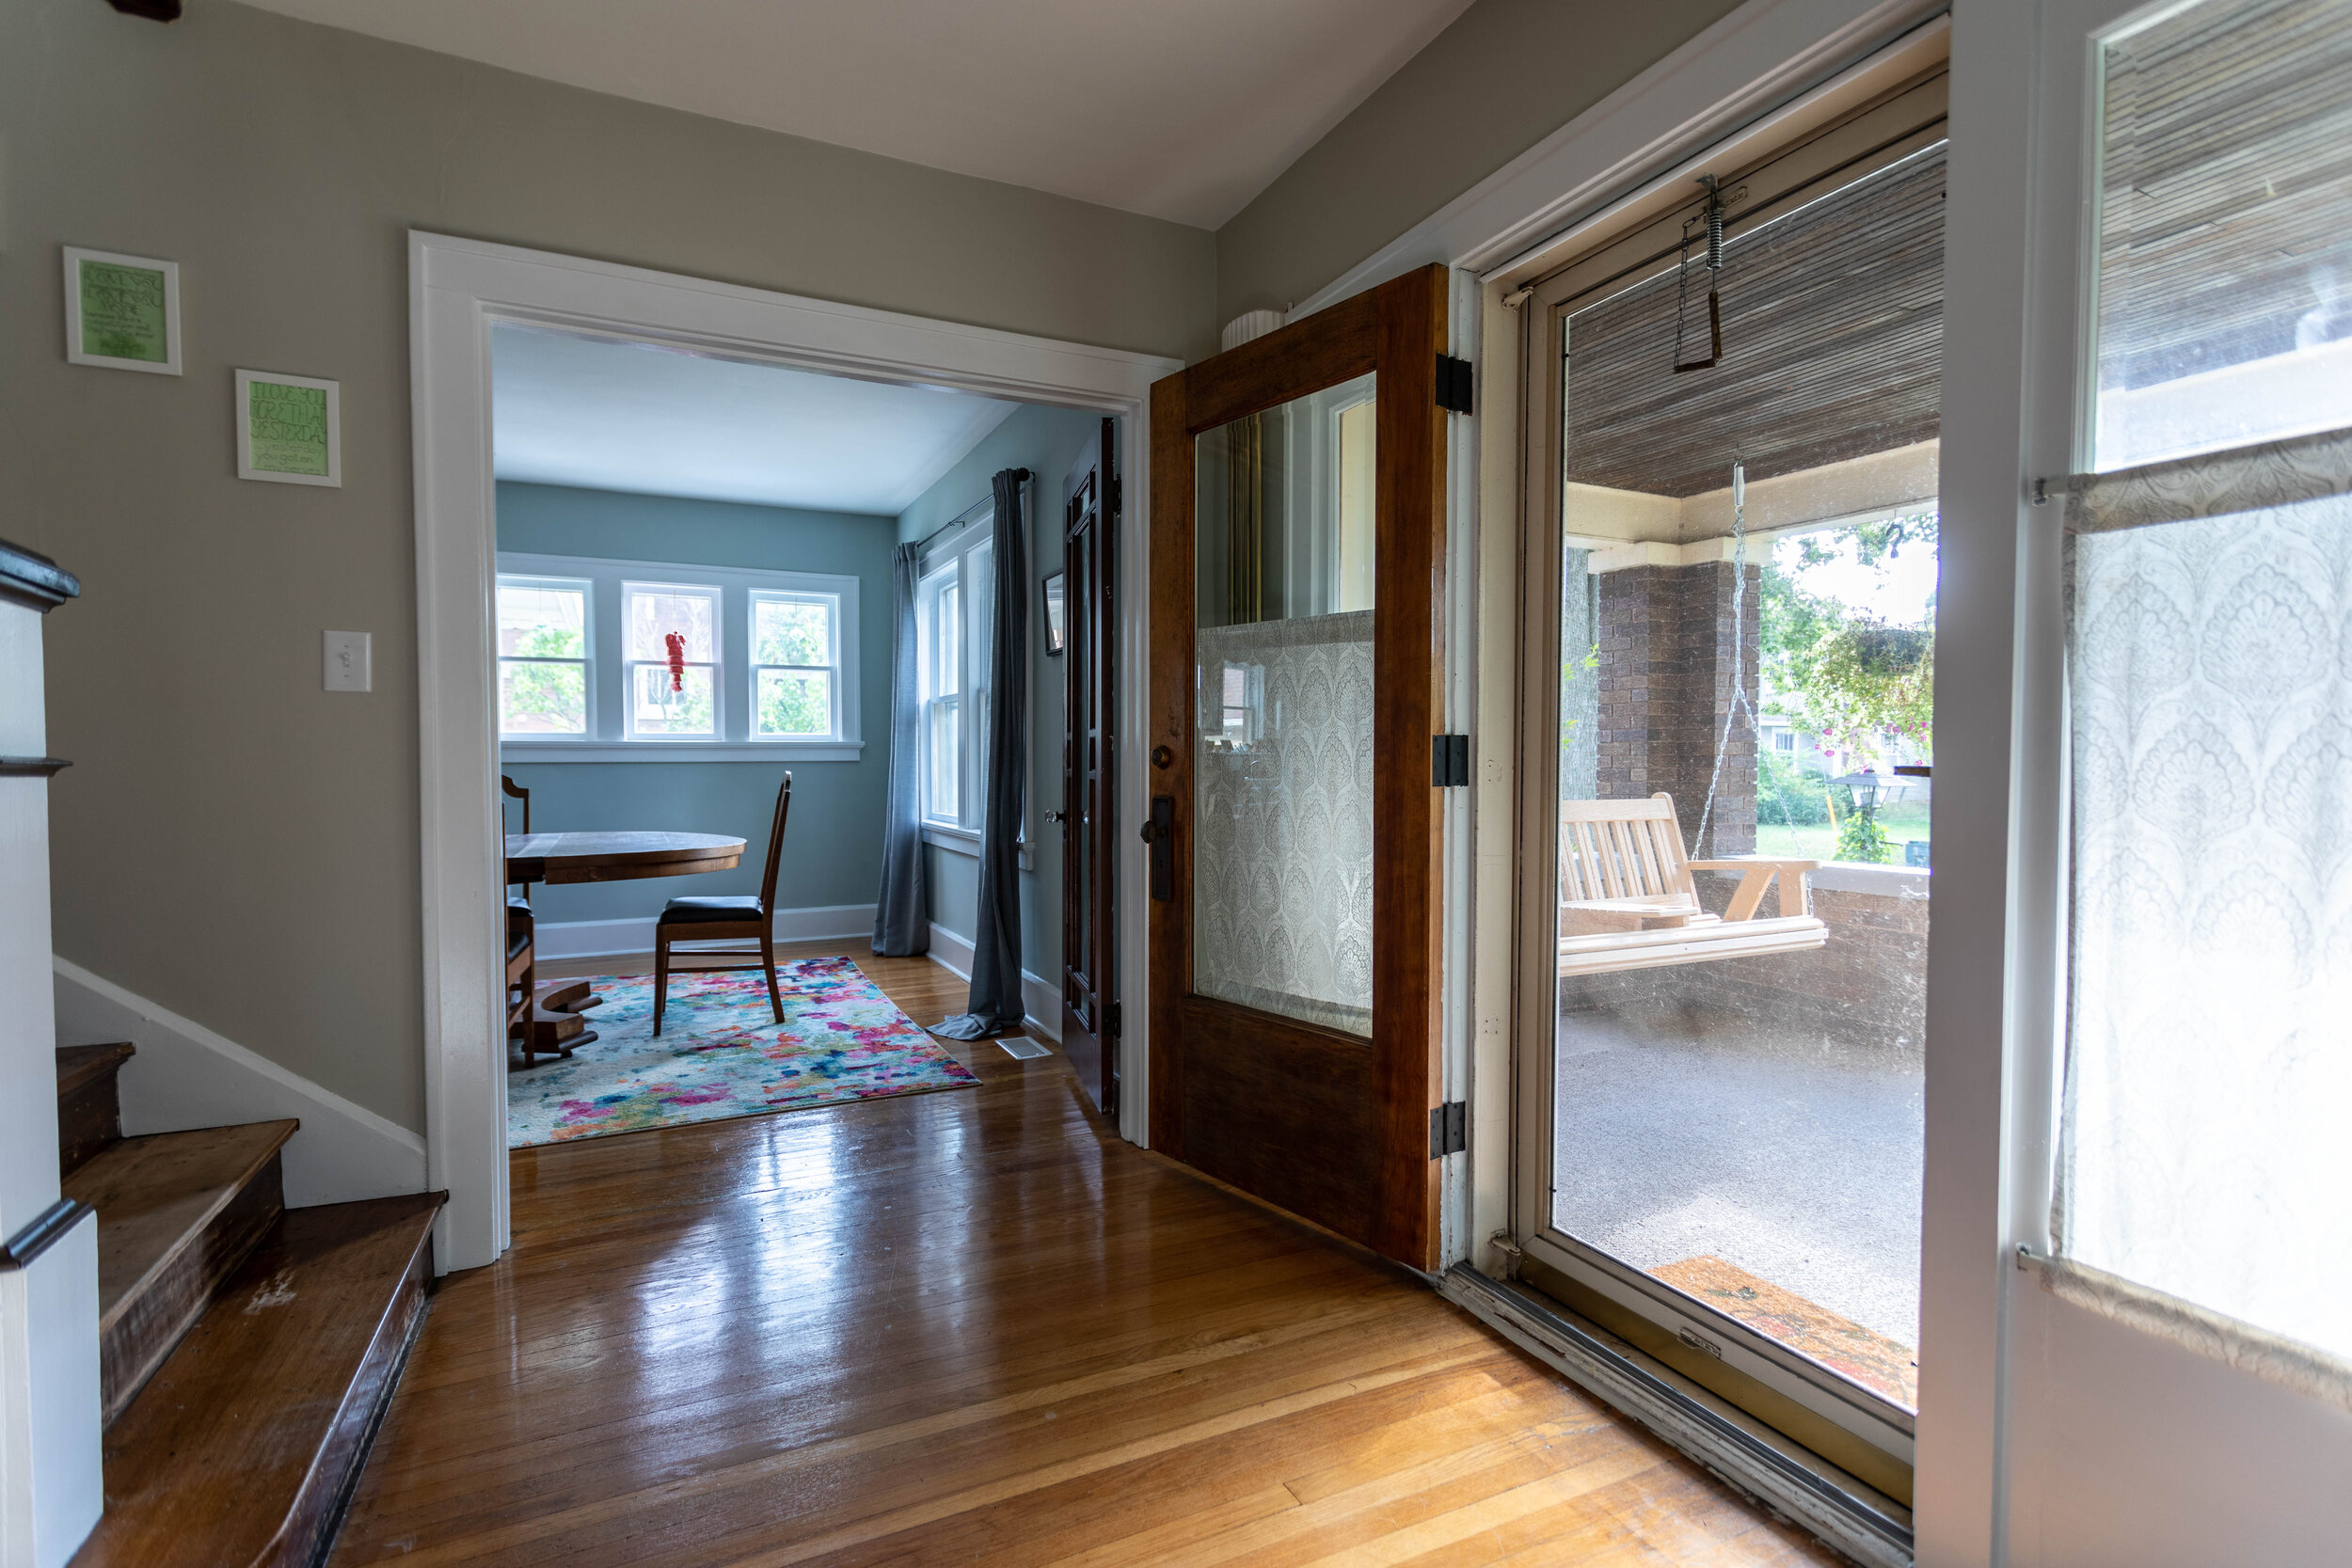
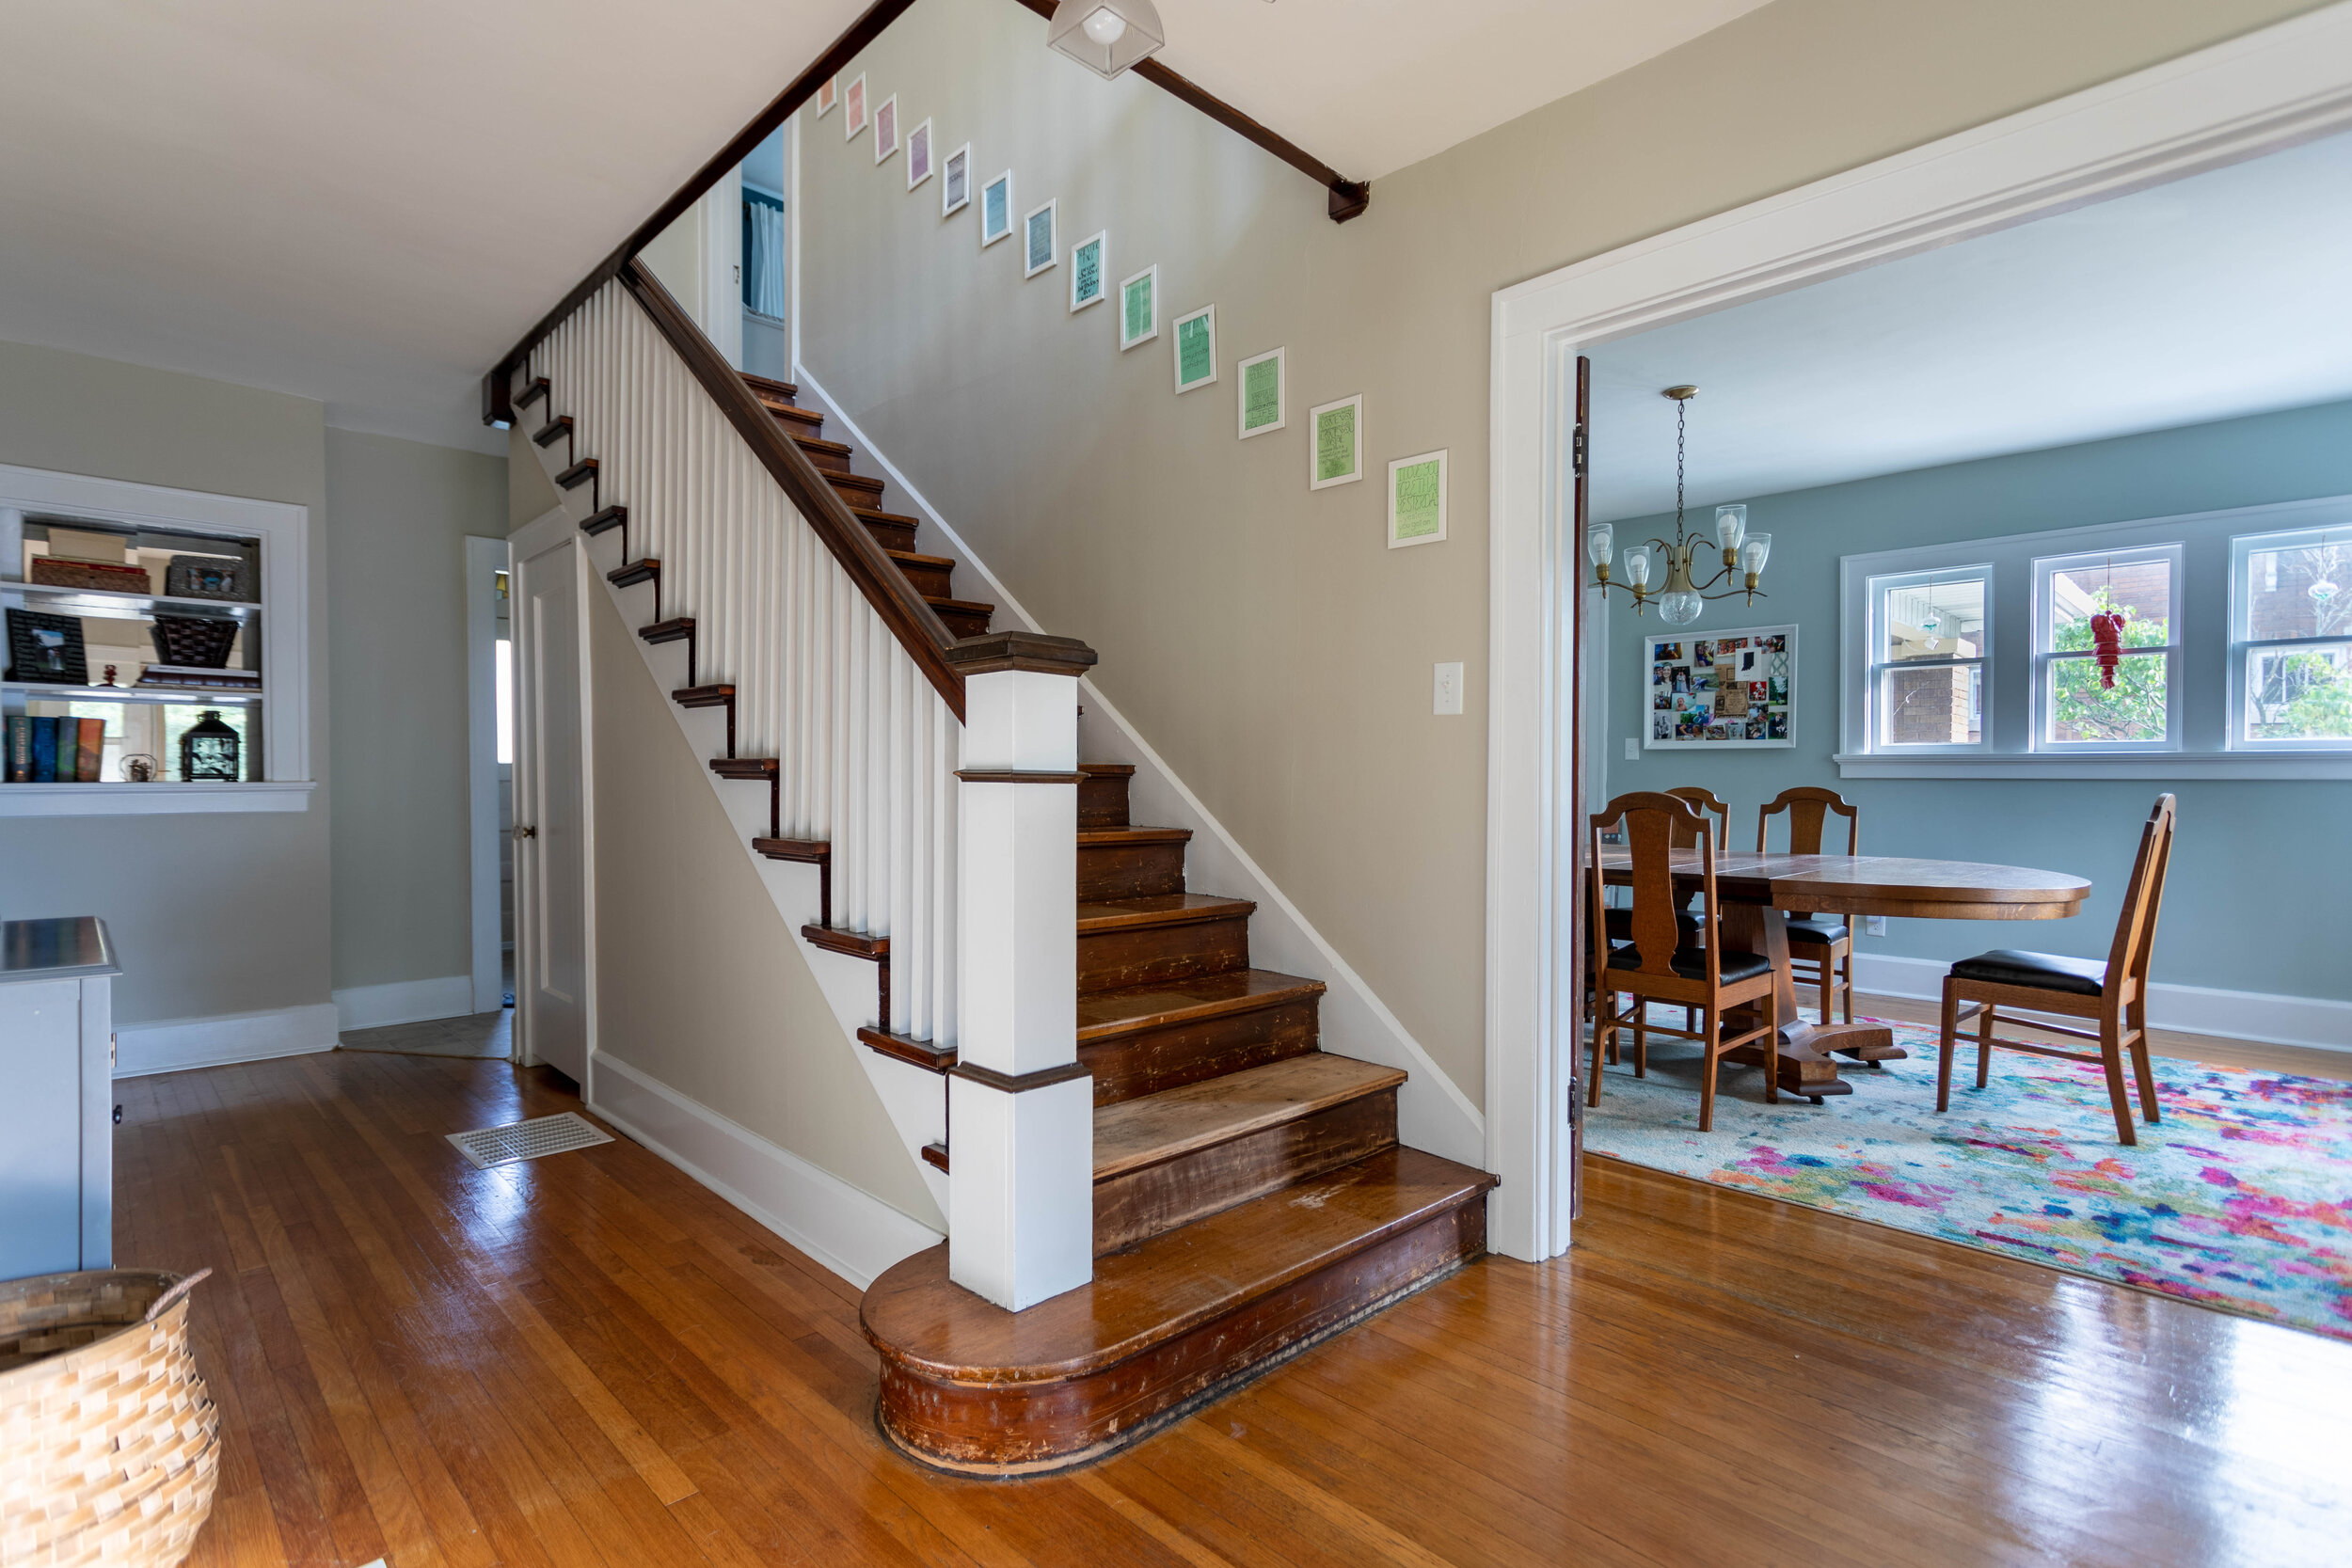
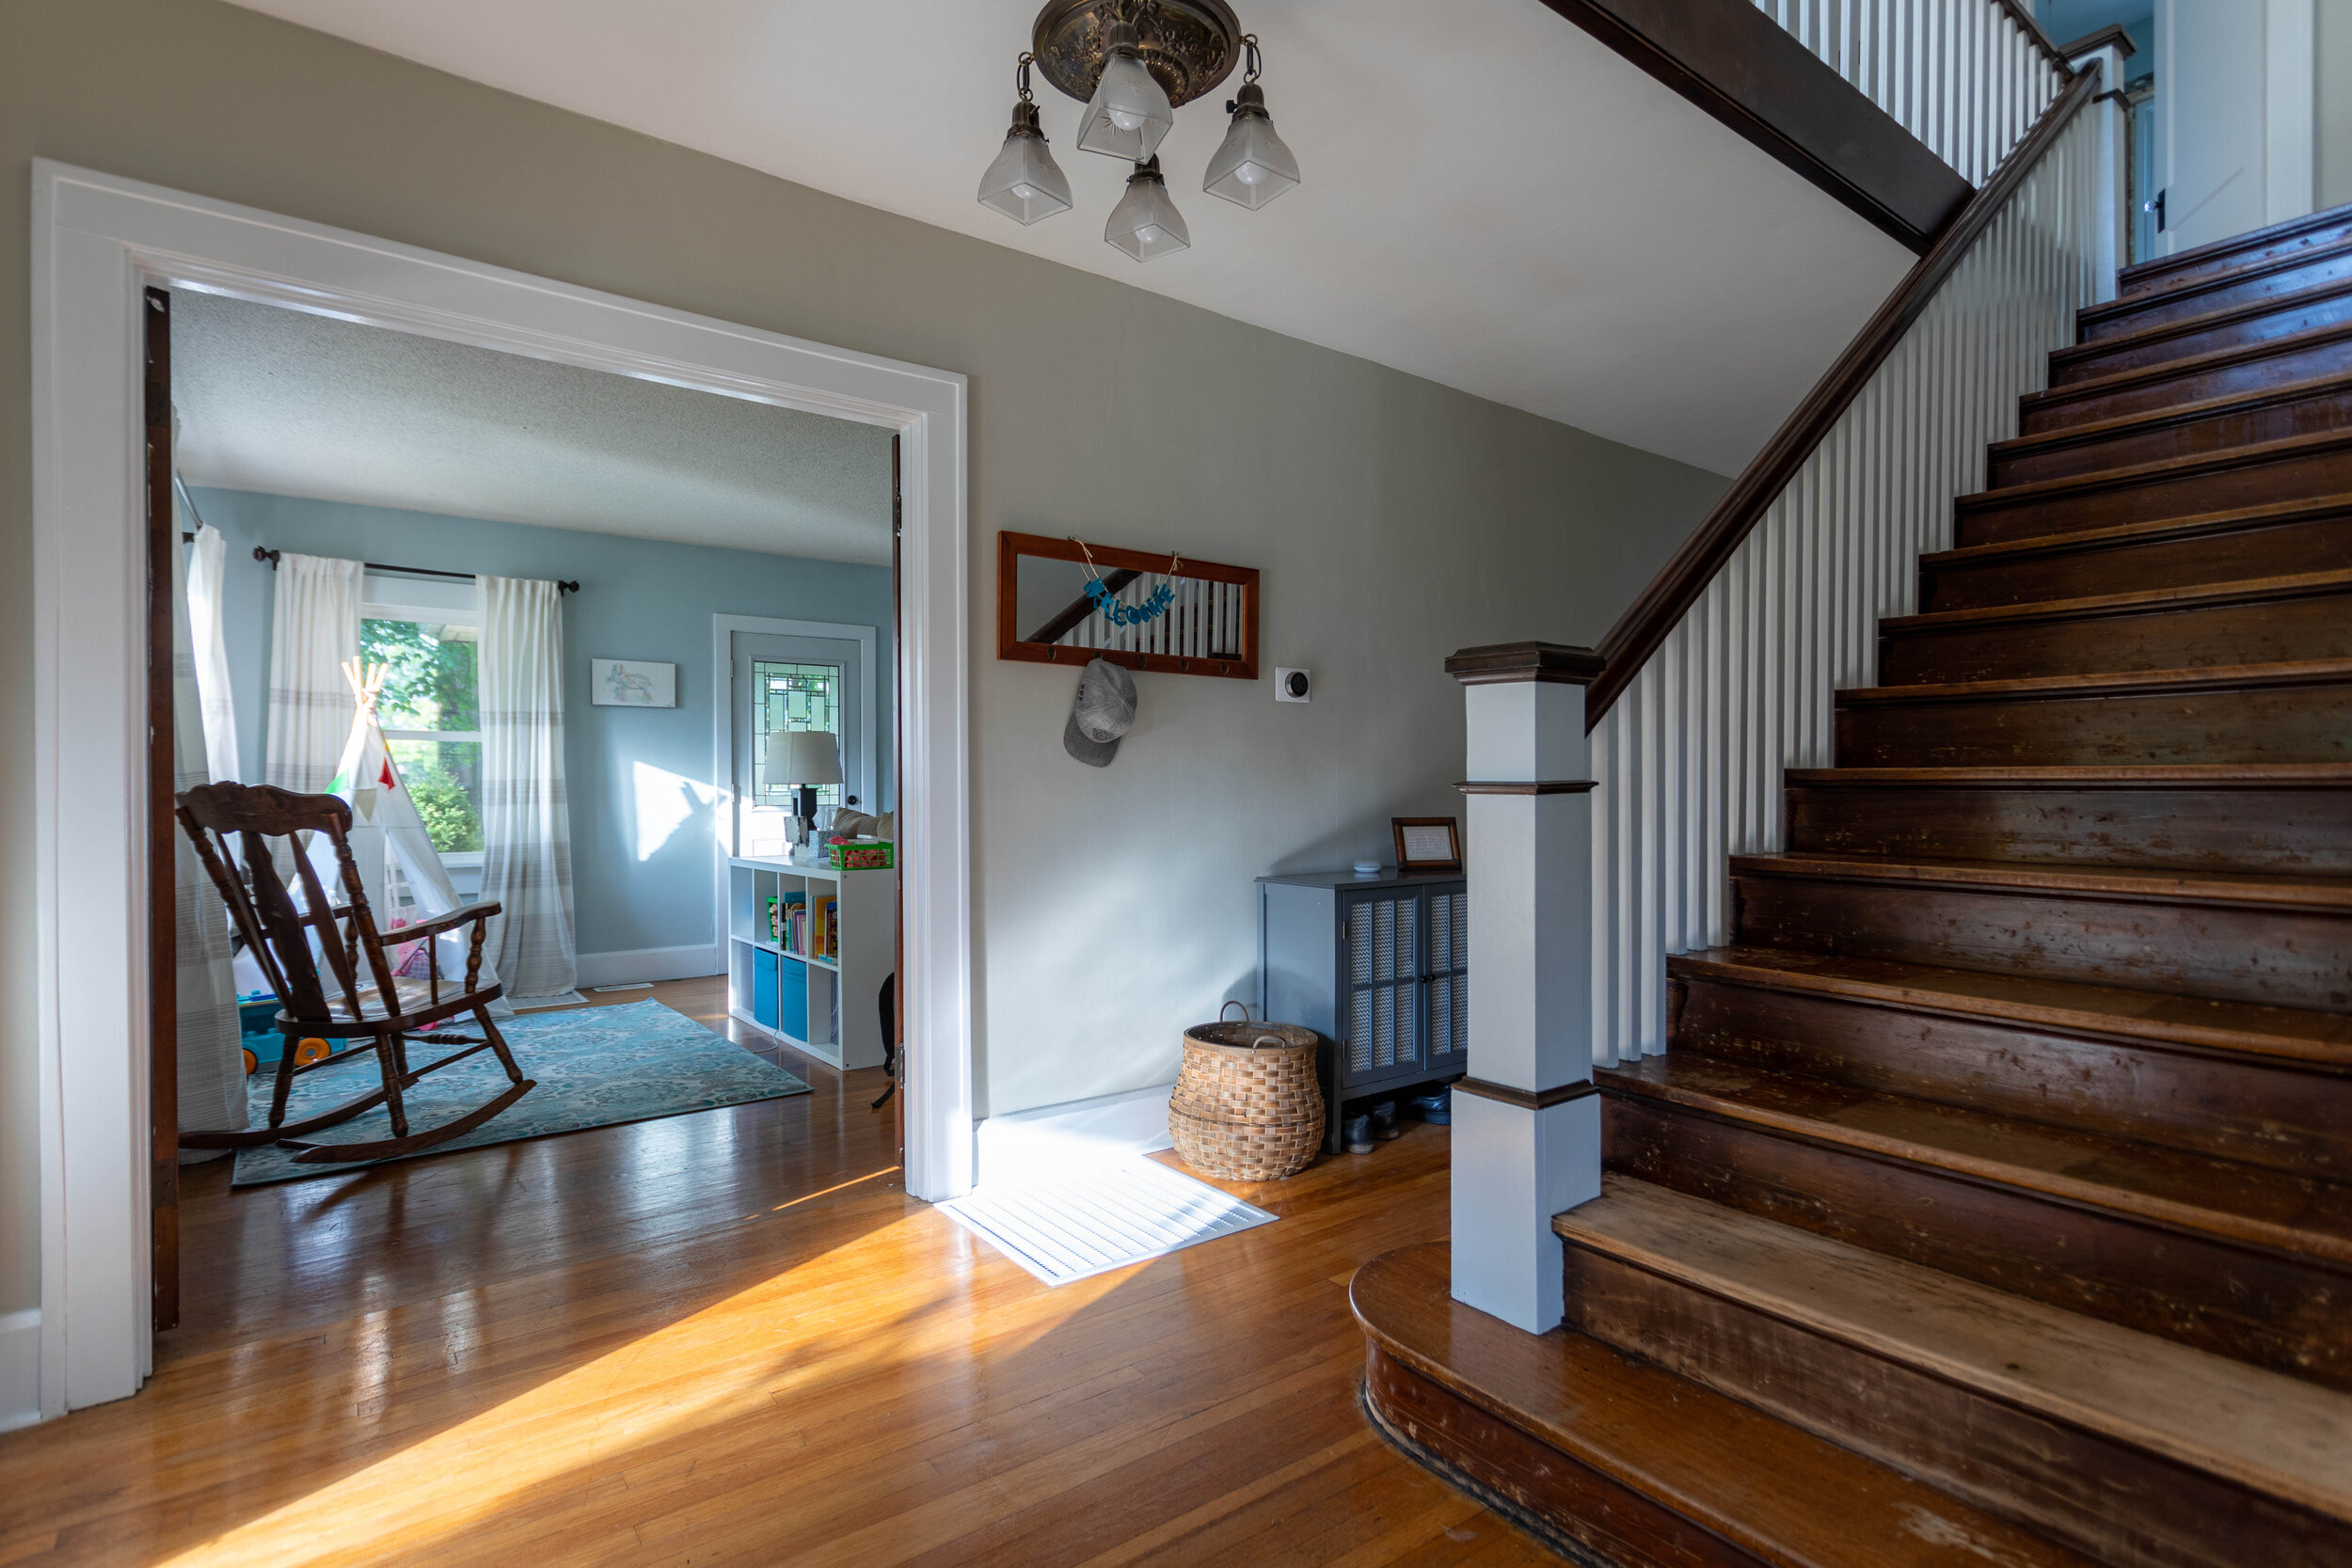
Aside from stripping wallpaper in the foyer and painting it with my favorite neutral (Villa Grey by Valspar), we pulled the carpet off the stairs. I planned on refinishing them, and actually started experimenting with how much effort they would be to sand down to the bare wood, but soon after I got pregnant with our younger daughter and had to put that project on hold. And then we moved a few months after she was born.
While I was on maternity leave with her I did manage to paint all the trim in the foyer and the upstairs hallway though.
The half bath
I debated not sharing this room because it didn’t have any sort of real transformation, but decided to go ahead and show it anyway because, why not?

I liked to call this the Harry Potter bathroom because it’s under the staircase on the main floor. It’s super tiny and Lucius, being a rather large fella at 6’1’’, could barely fit.
I had big dreams for this tiny space that I would have loved to see to fruition. I pictured doing something bold and unexpected in here, like painting it a strong jewel-toned color. I even considered (gasp) WALLPAPER. Hey - just because I tend to strip wallpaper in every house I live in doesn’t mean I don’t like it. It just needs to be the right pattern and style.
I also planned on replacing pretty much everything else in this room - the vanity, mirror, toilet, light fixture. All of it.
Unfortunately, the most I was able to tackle in this room was stripping the wallpaper and potty training a toddler. Hence the M&M’s & Reese’s Pieces (for bribery, of course).

The living room
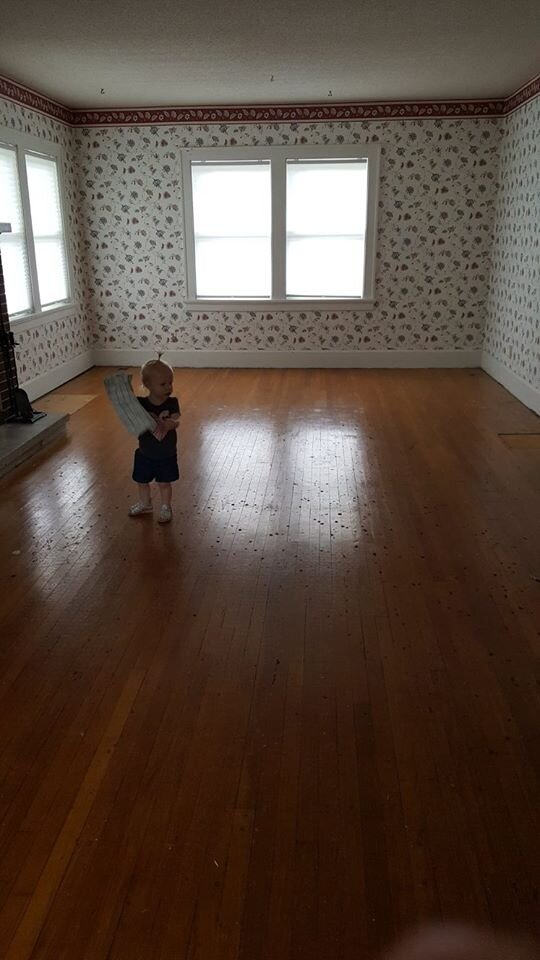
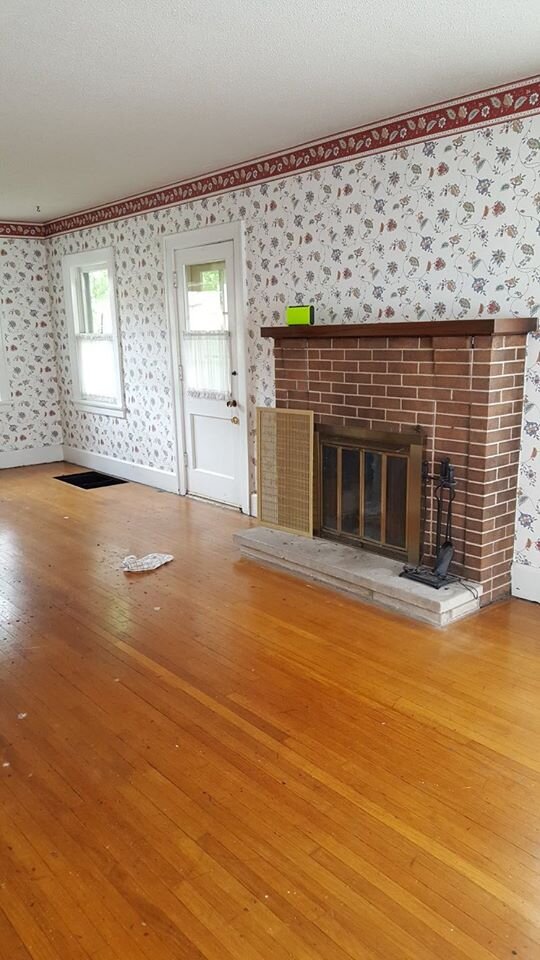
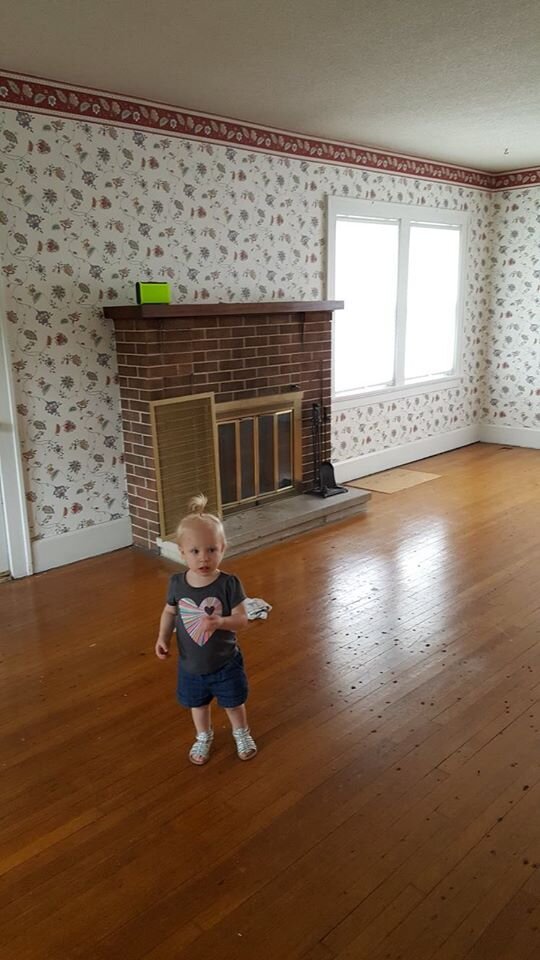
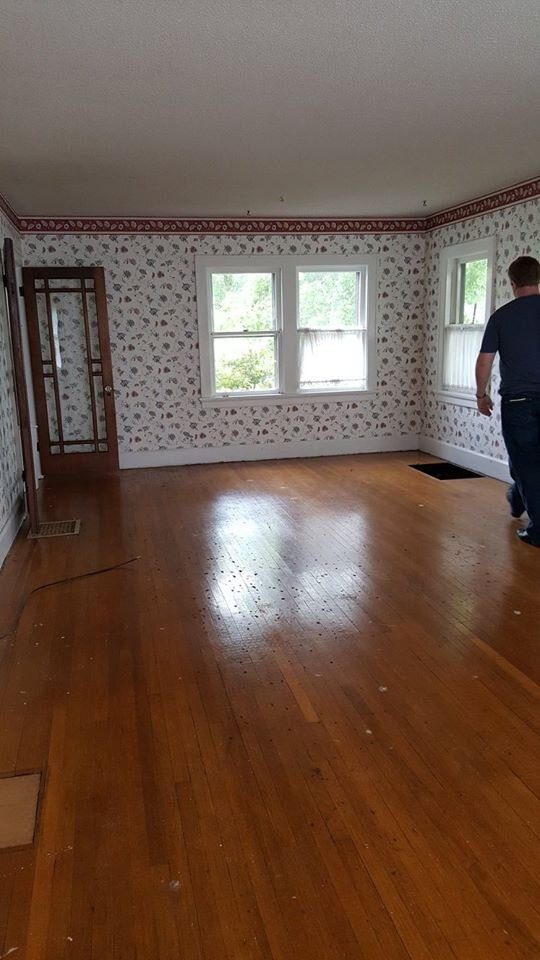
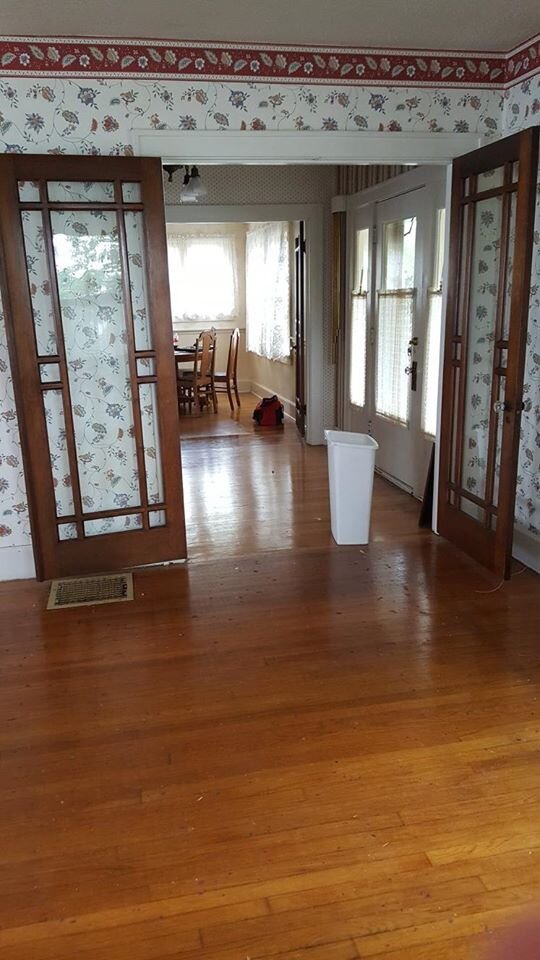
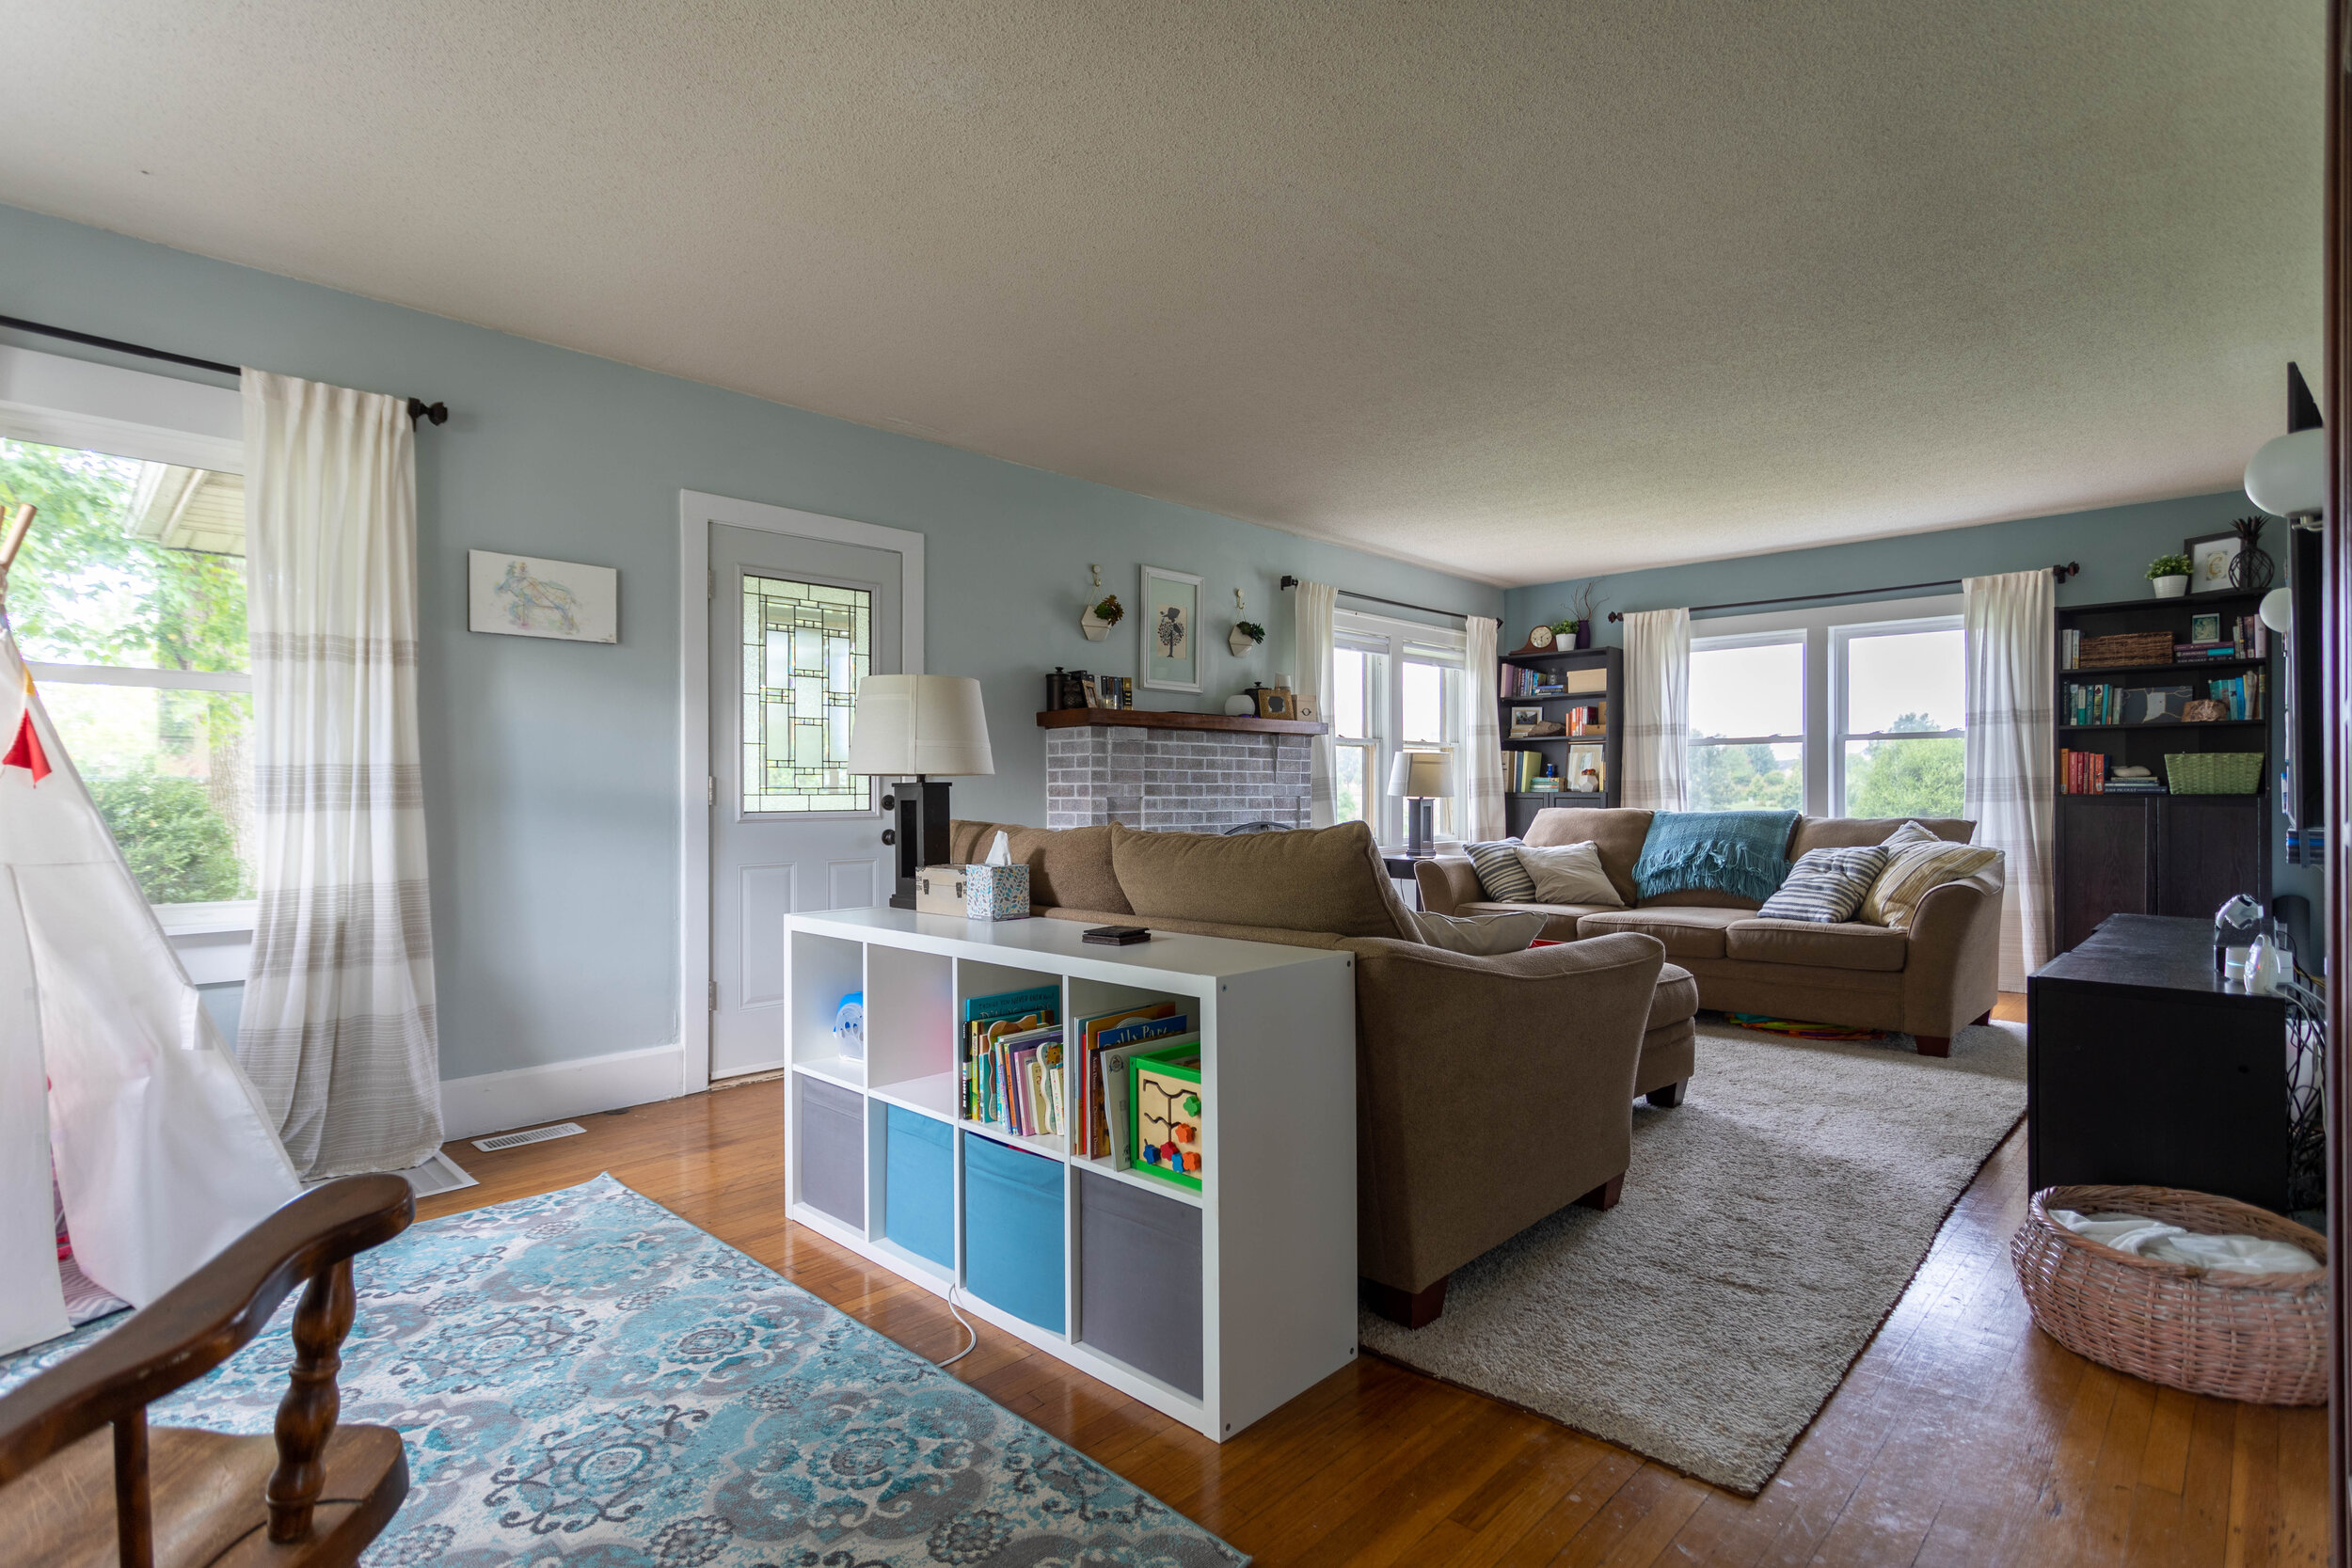
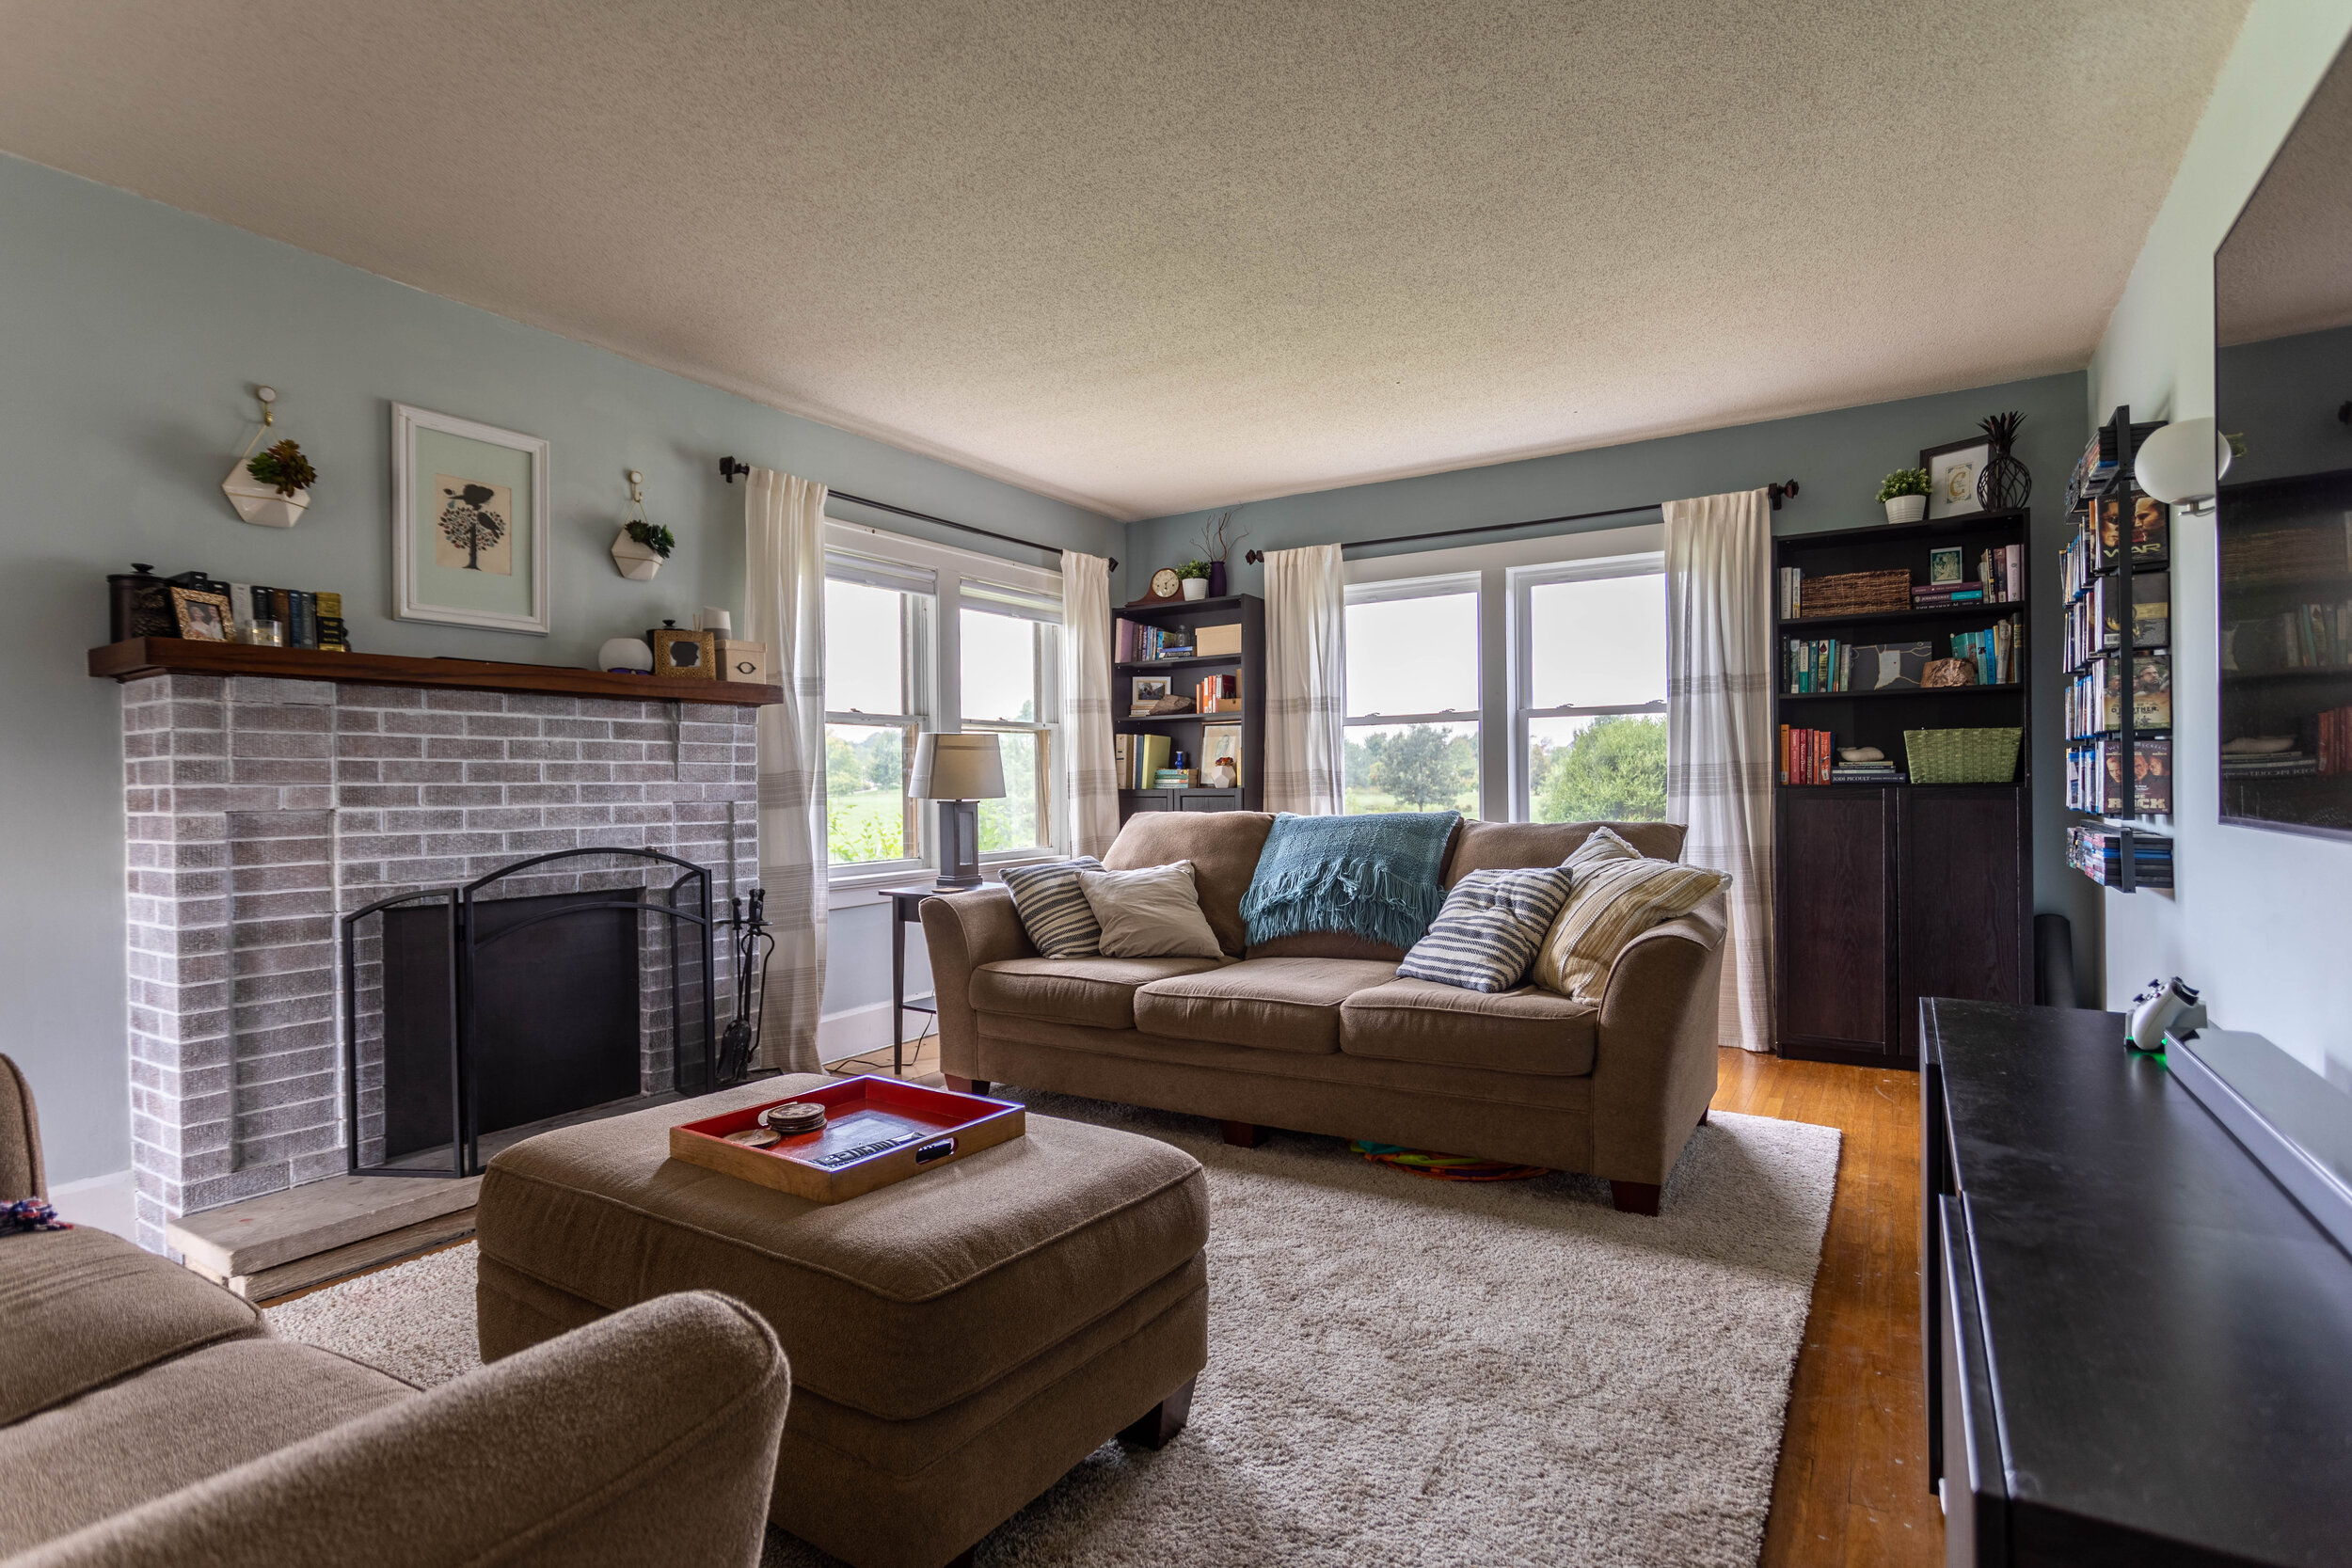
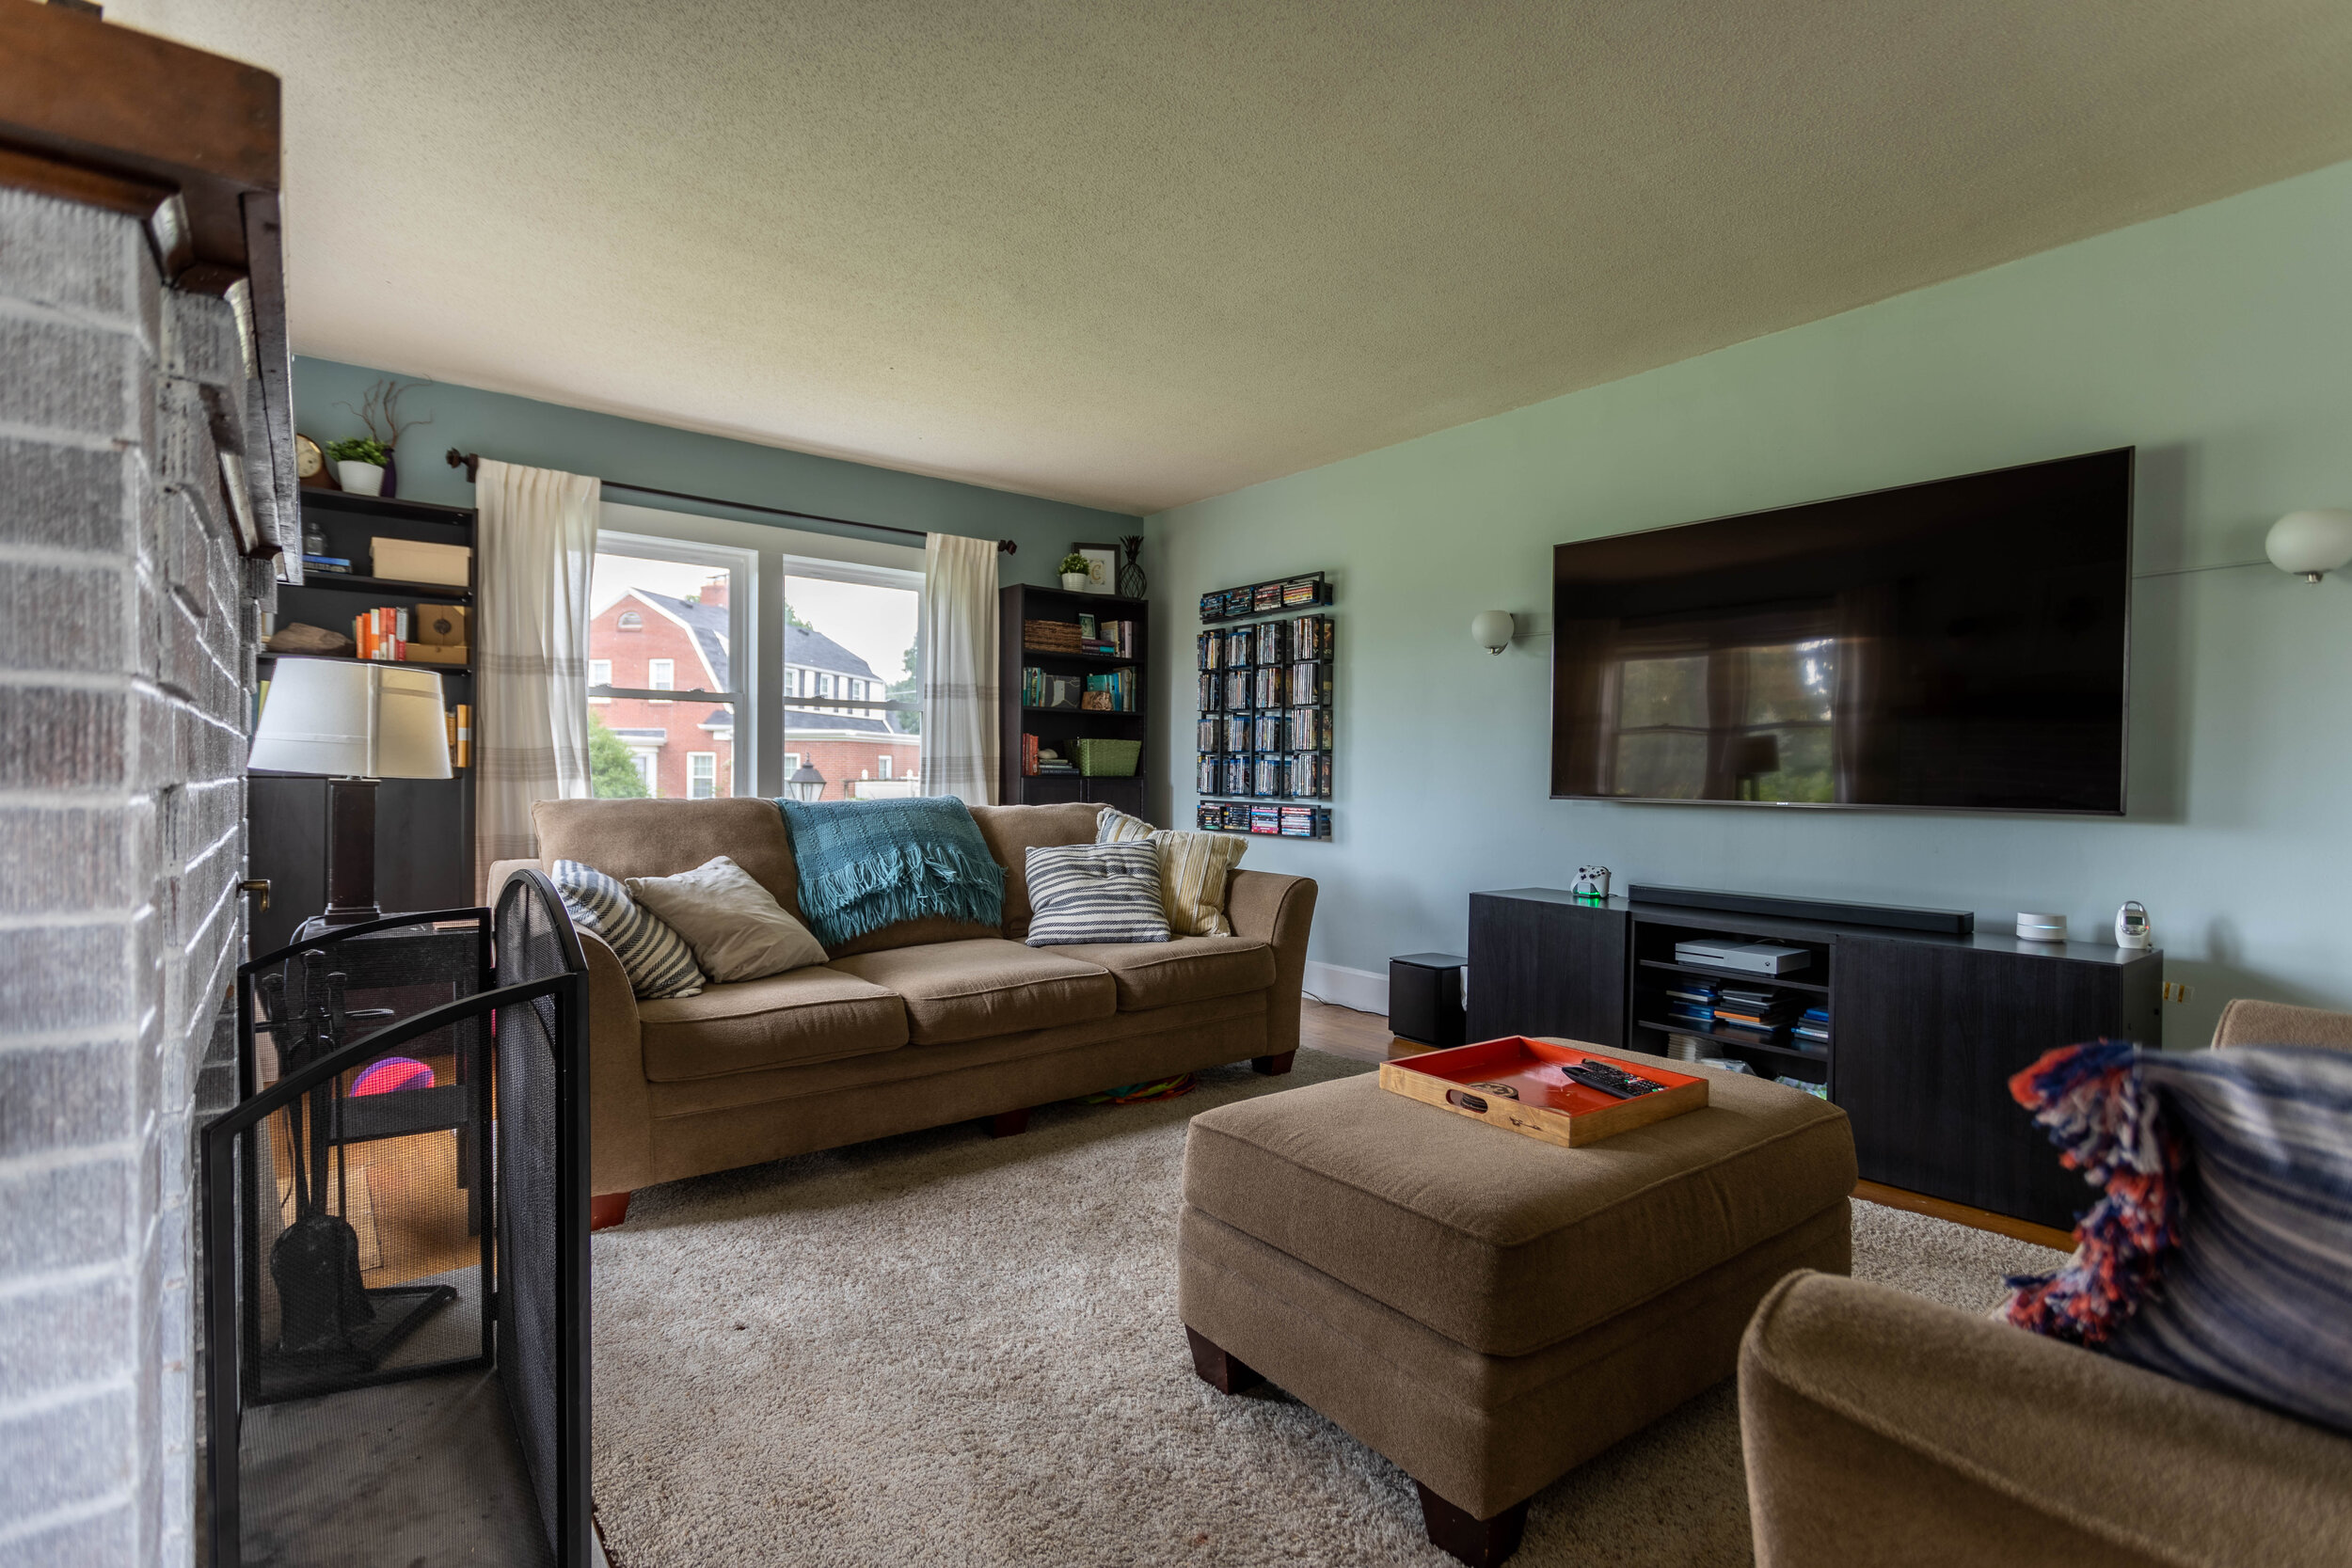
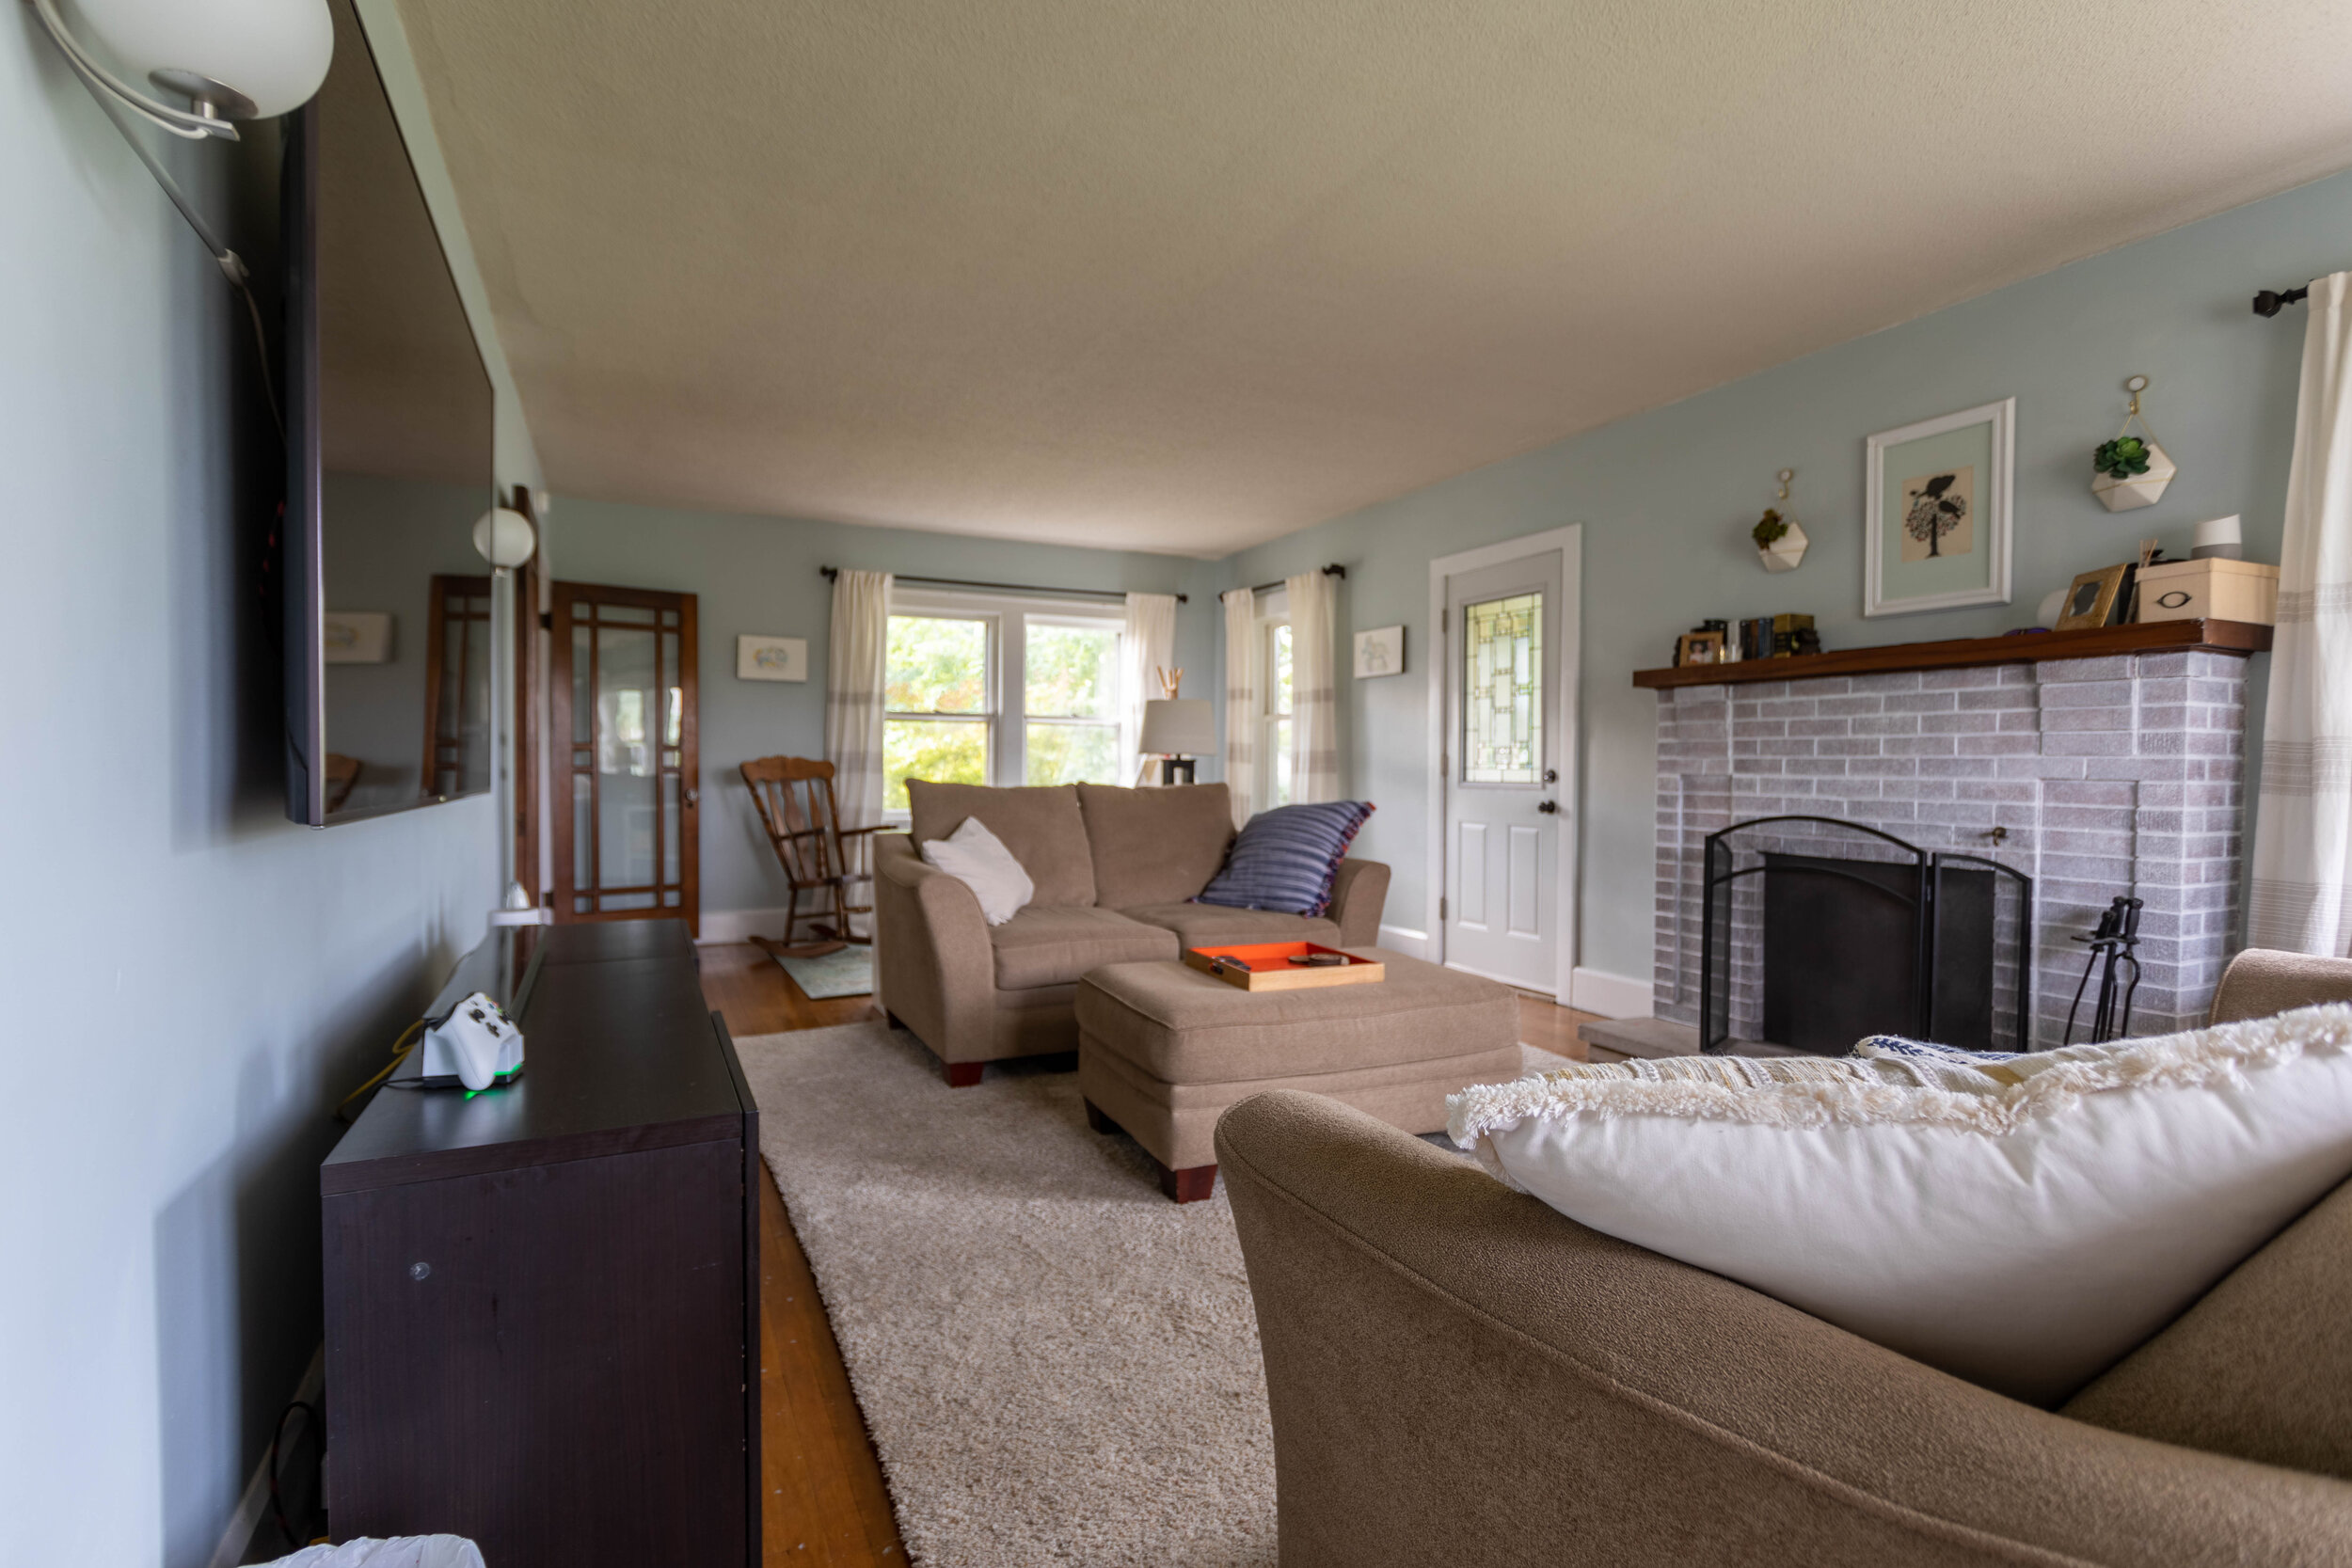
We were so excited after we closed on this house that we drove straight from the closing to the house and ripped up the carpet in the living room. Aside from removing the carpet, we also stripped the wallpaper/painted, replaced the sun porch door, replaced three windows, and whitewashed the fireplace.
Thankfully this was the easiest room in the whole house to de-wallpaper because it’s also the biggest. The wallpaper actually came off in full-sized floor-to-ceiling sheets. We literally just pulled them off by hand (no steamer, no wallpaper goo) in about an hour.
The sun porch door was old and drafty so we replaced that pretty early on. The windows throughout the whole house were original and also so, so drafty and noisy so we started replacing some of those before we moved. We ended up replacing 6 windows in the whole house. Three of them happened to be in this room.
Since this house is by a pretty busy intersection, every time someone playing loud music would stop at the stoplight nearby we’d hear the windows vibrate. Also, most of them didn’t open so strategically replacing them gave us the ability to let some fresh air flow through the house! Also, you know, fire safety…
Lucius taught himself how to install windows and reframed the windows in the first picture above at least 3 times… without consulting with me first. Seriously. I walked downstairs one day and there was a gaping hole in my living room. And no, that isn’t the first time something like that has happened (and I’m sure it won’t be the last).
The dining room
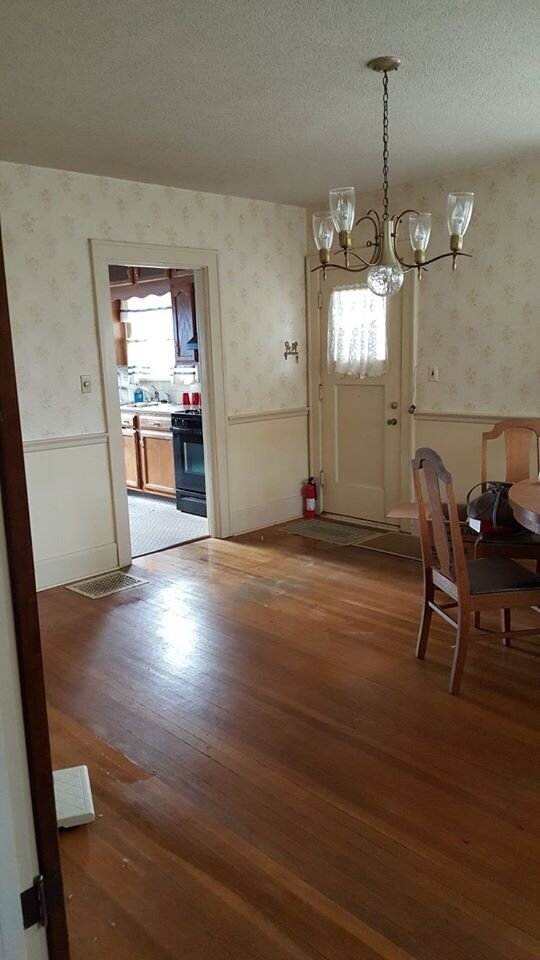
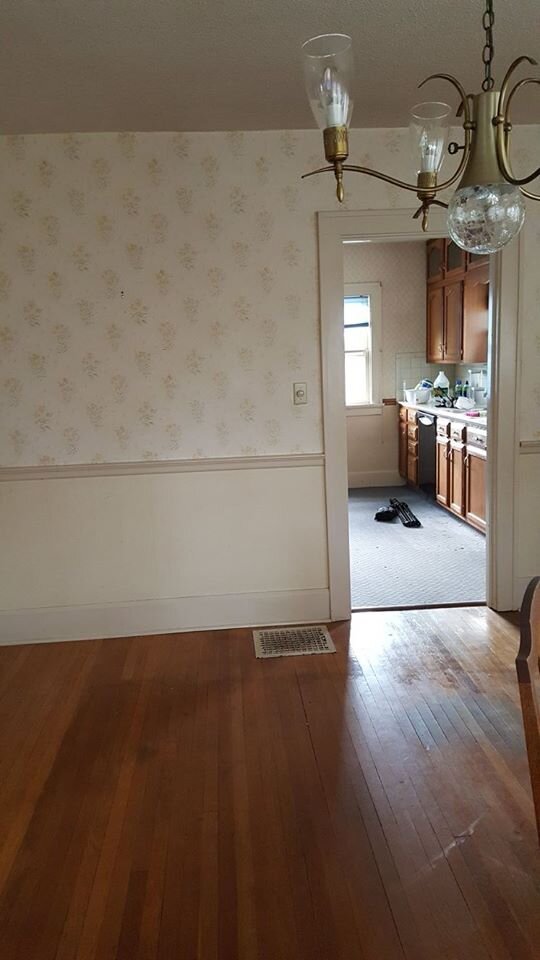
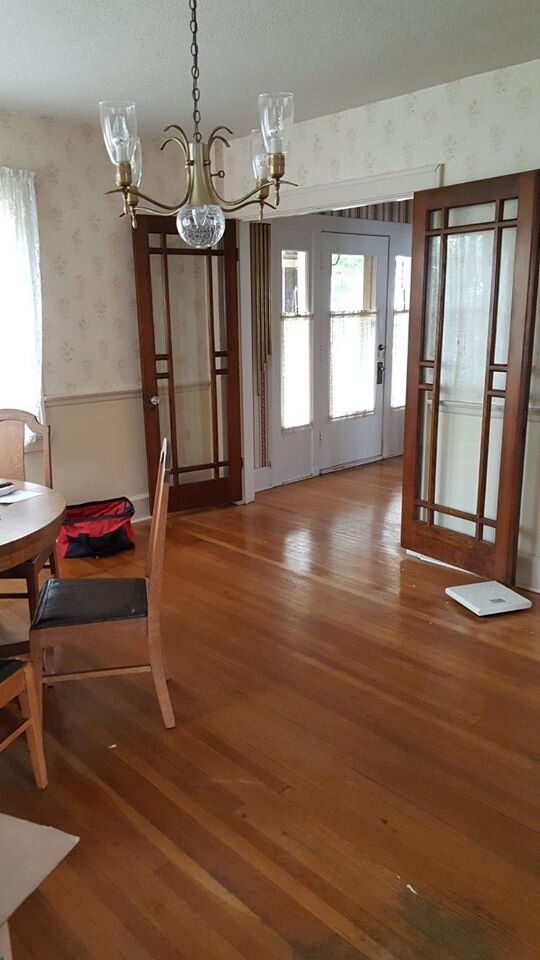
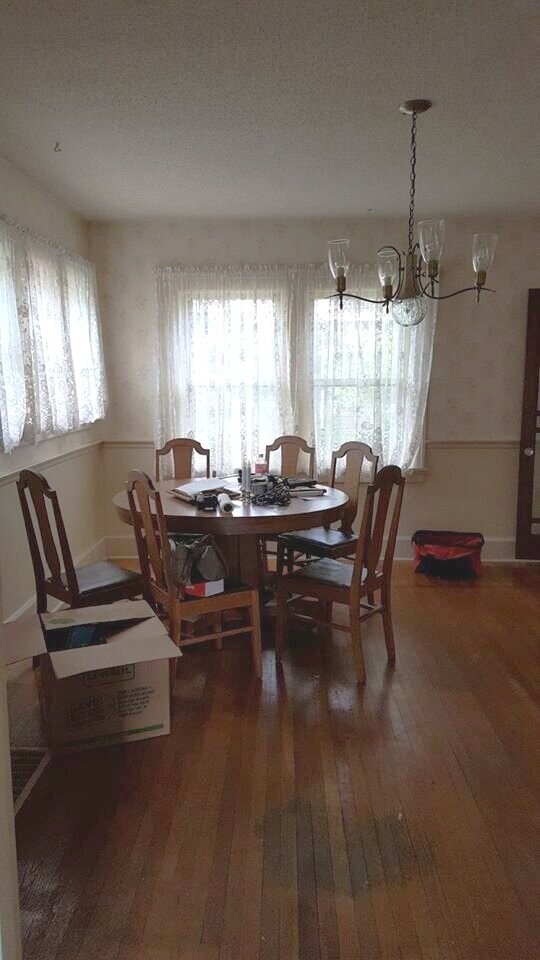
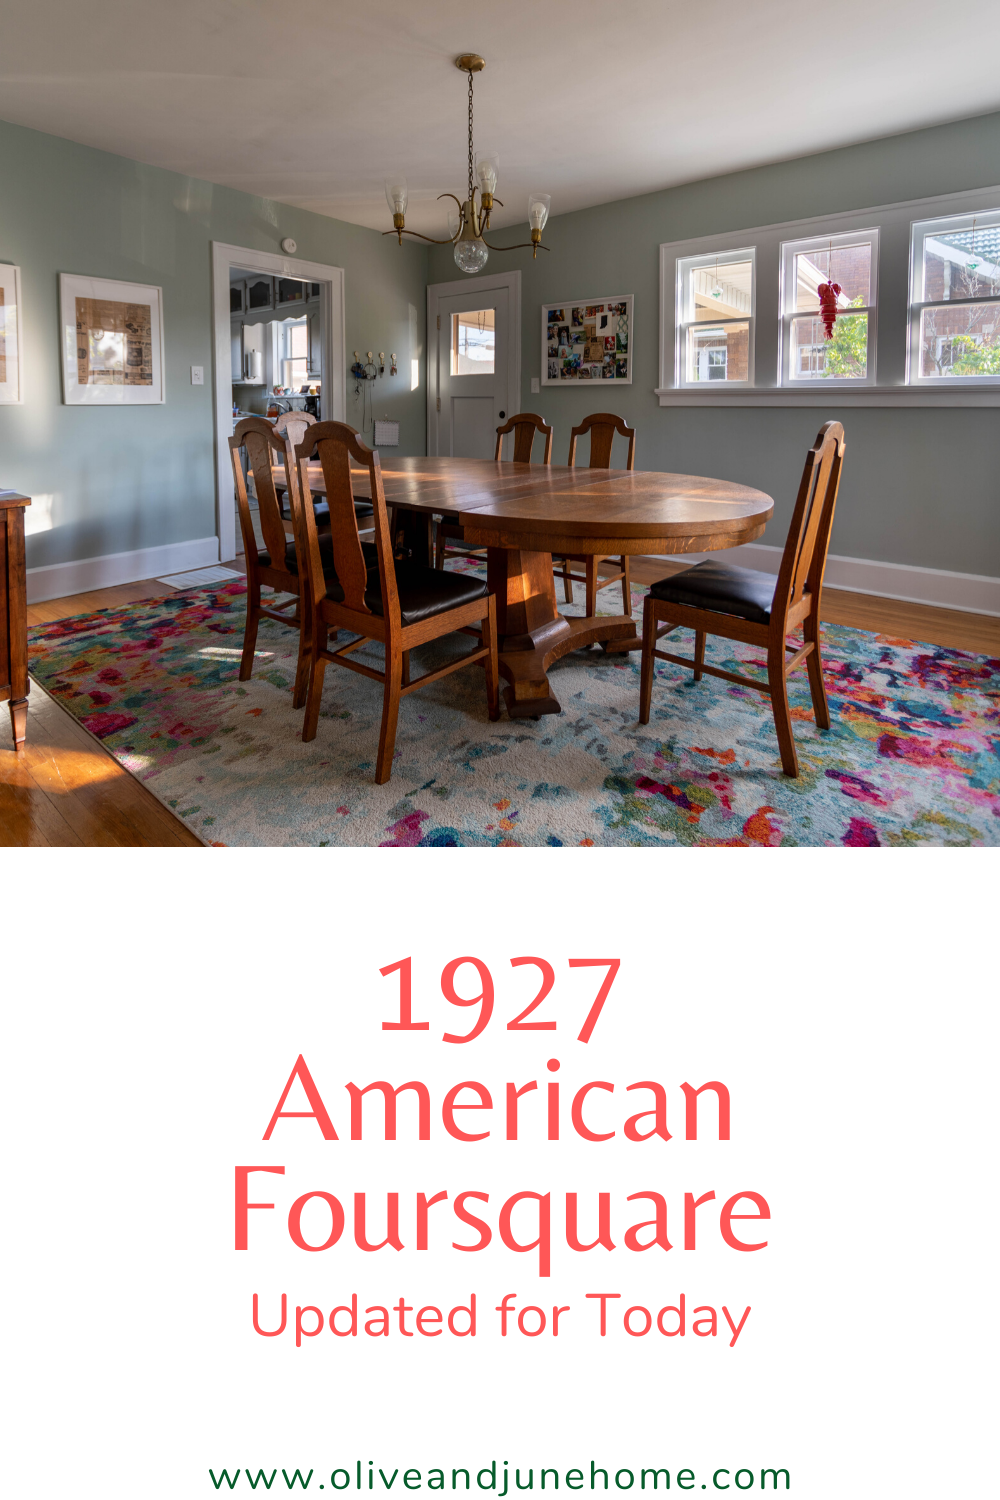
Oddly enough, the dining room ended up being one of my favorite finished rooms in the house by the time we left.
In this room we, once again, stripped the wallpaper and painted the trim. We also removed the chair rail and I took my first stab at scraping a popcorn ceiling (which is actually really easy)!

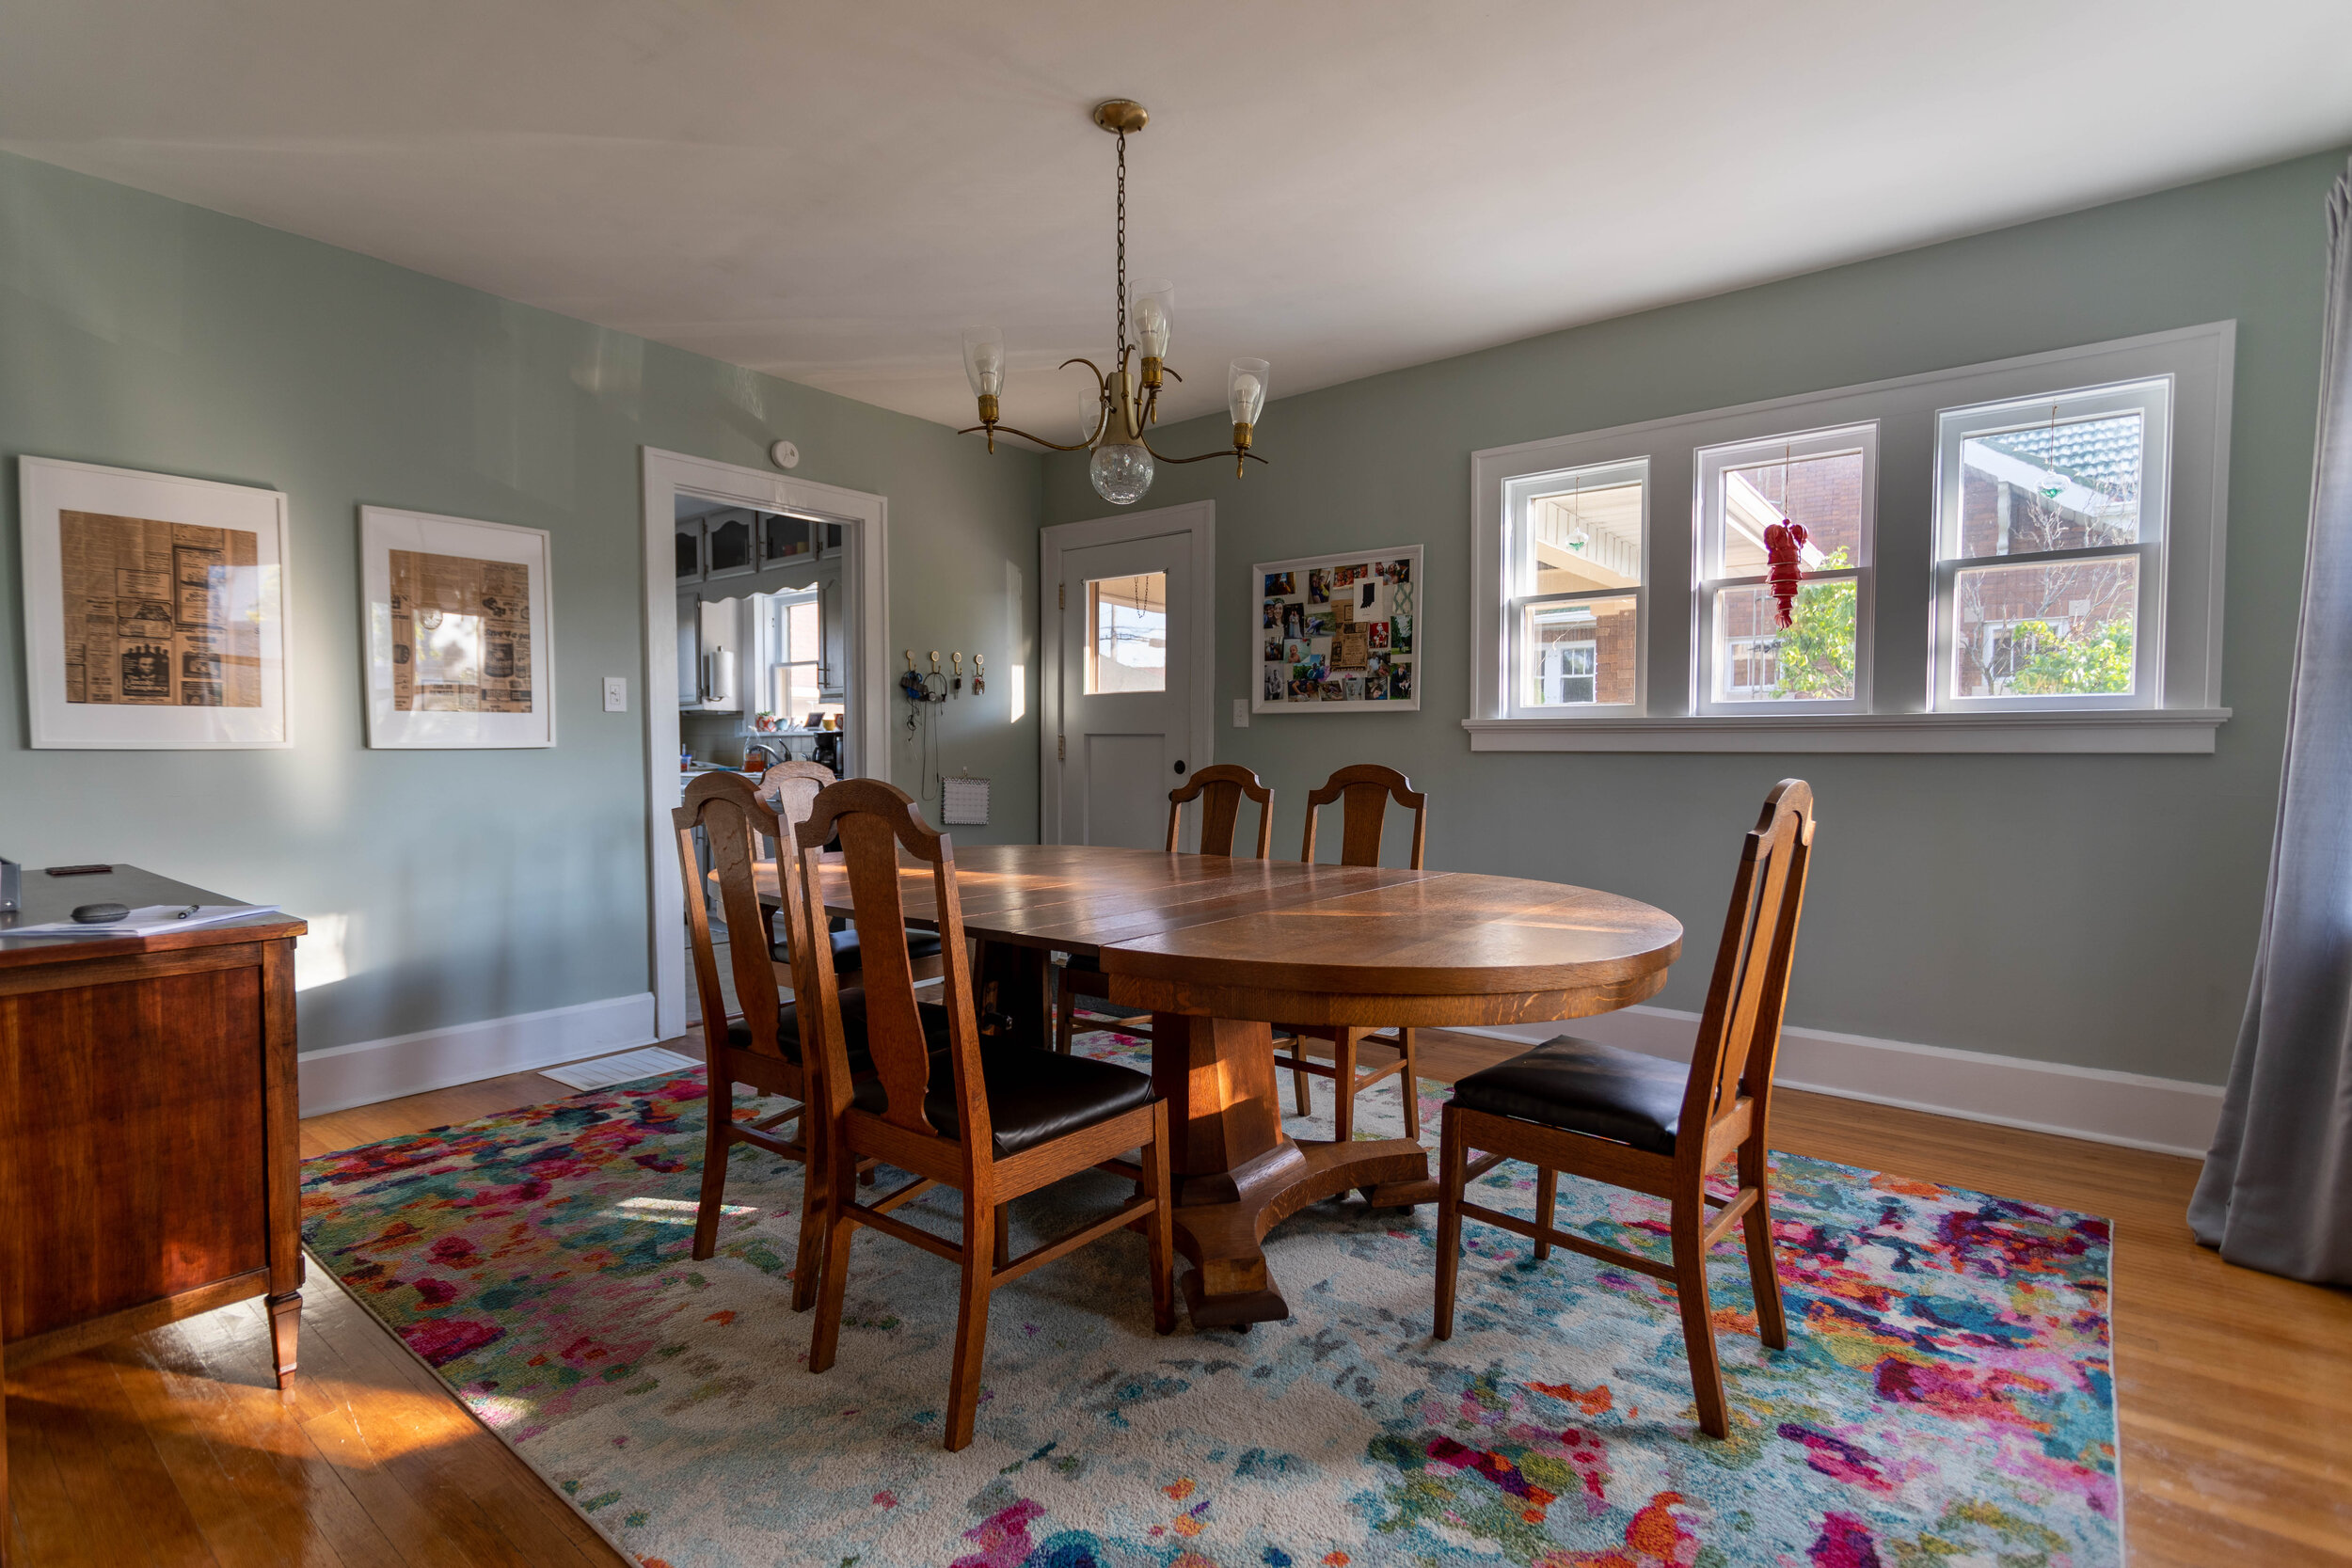
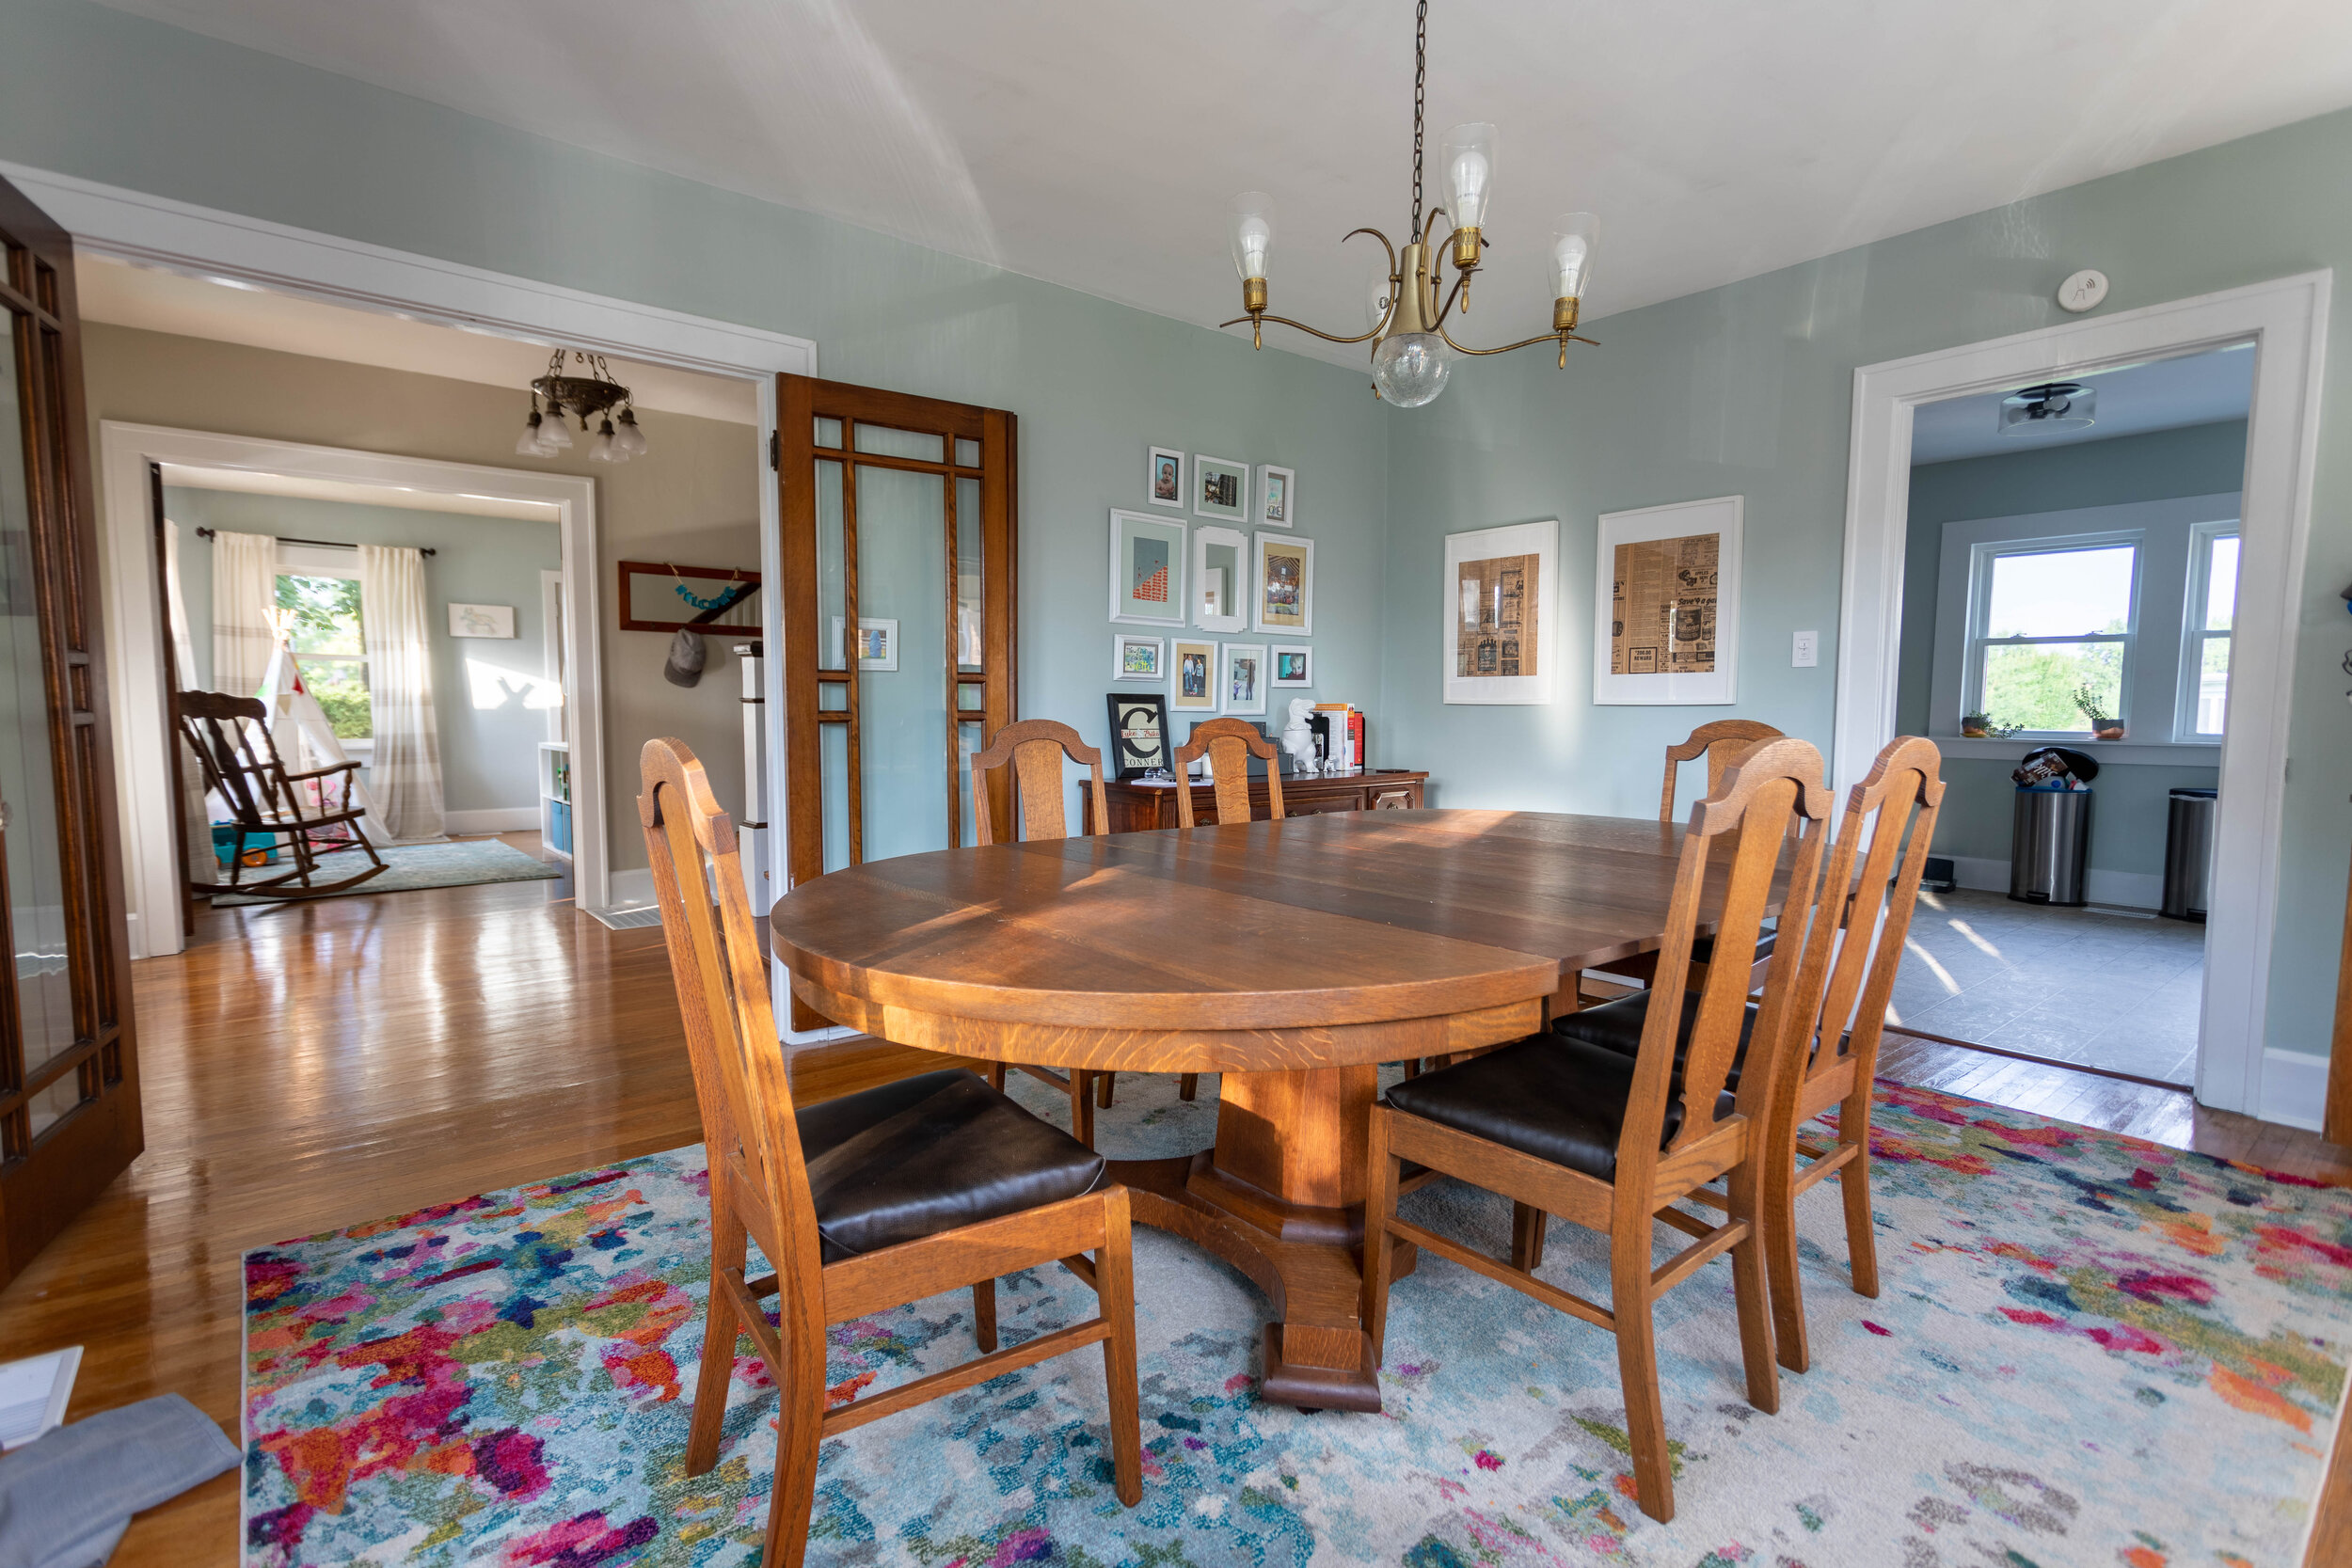
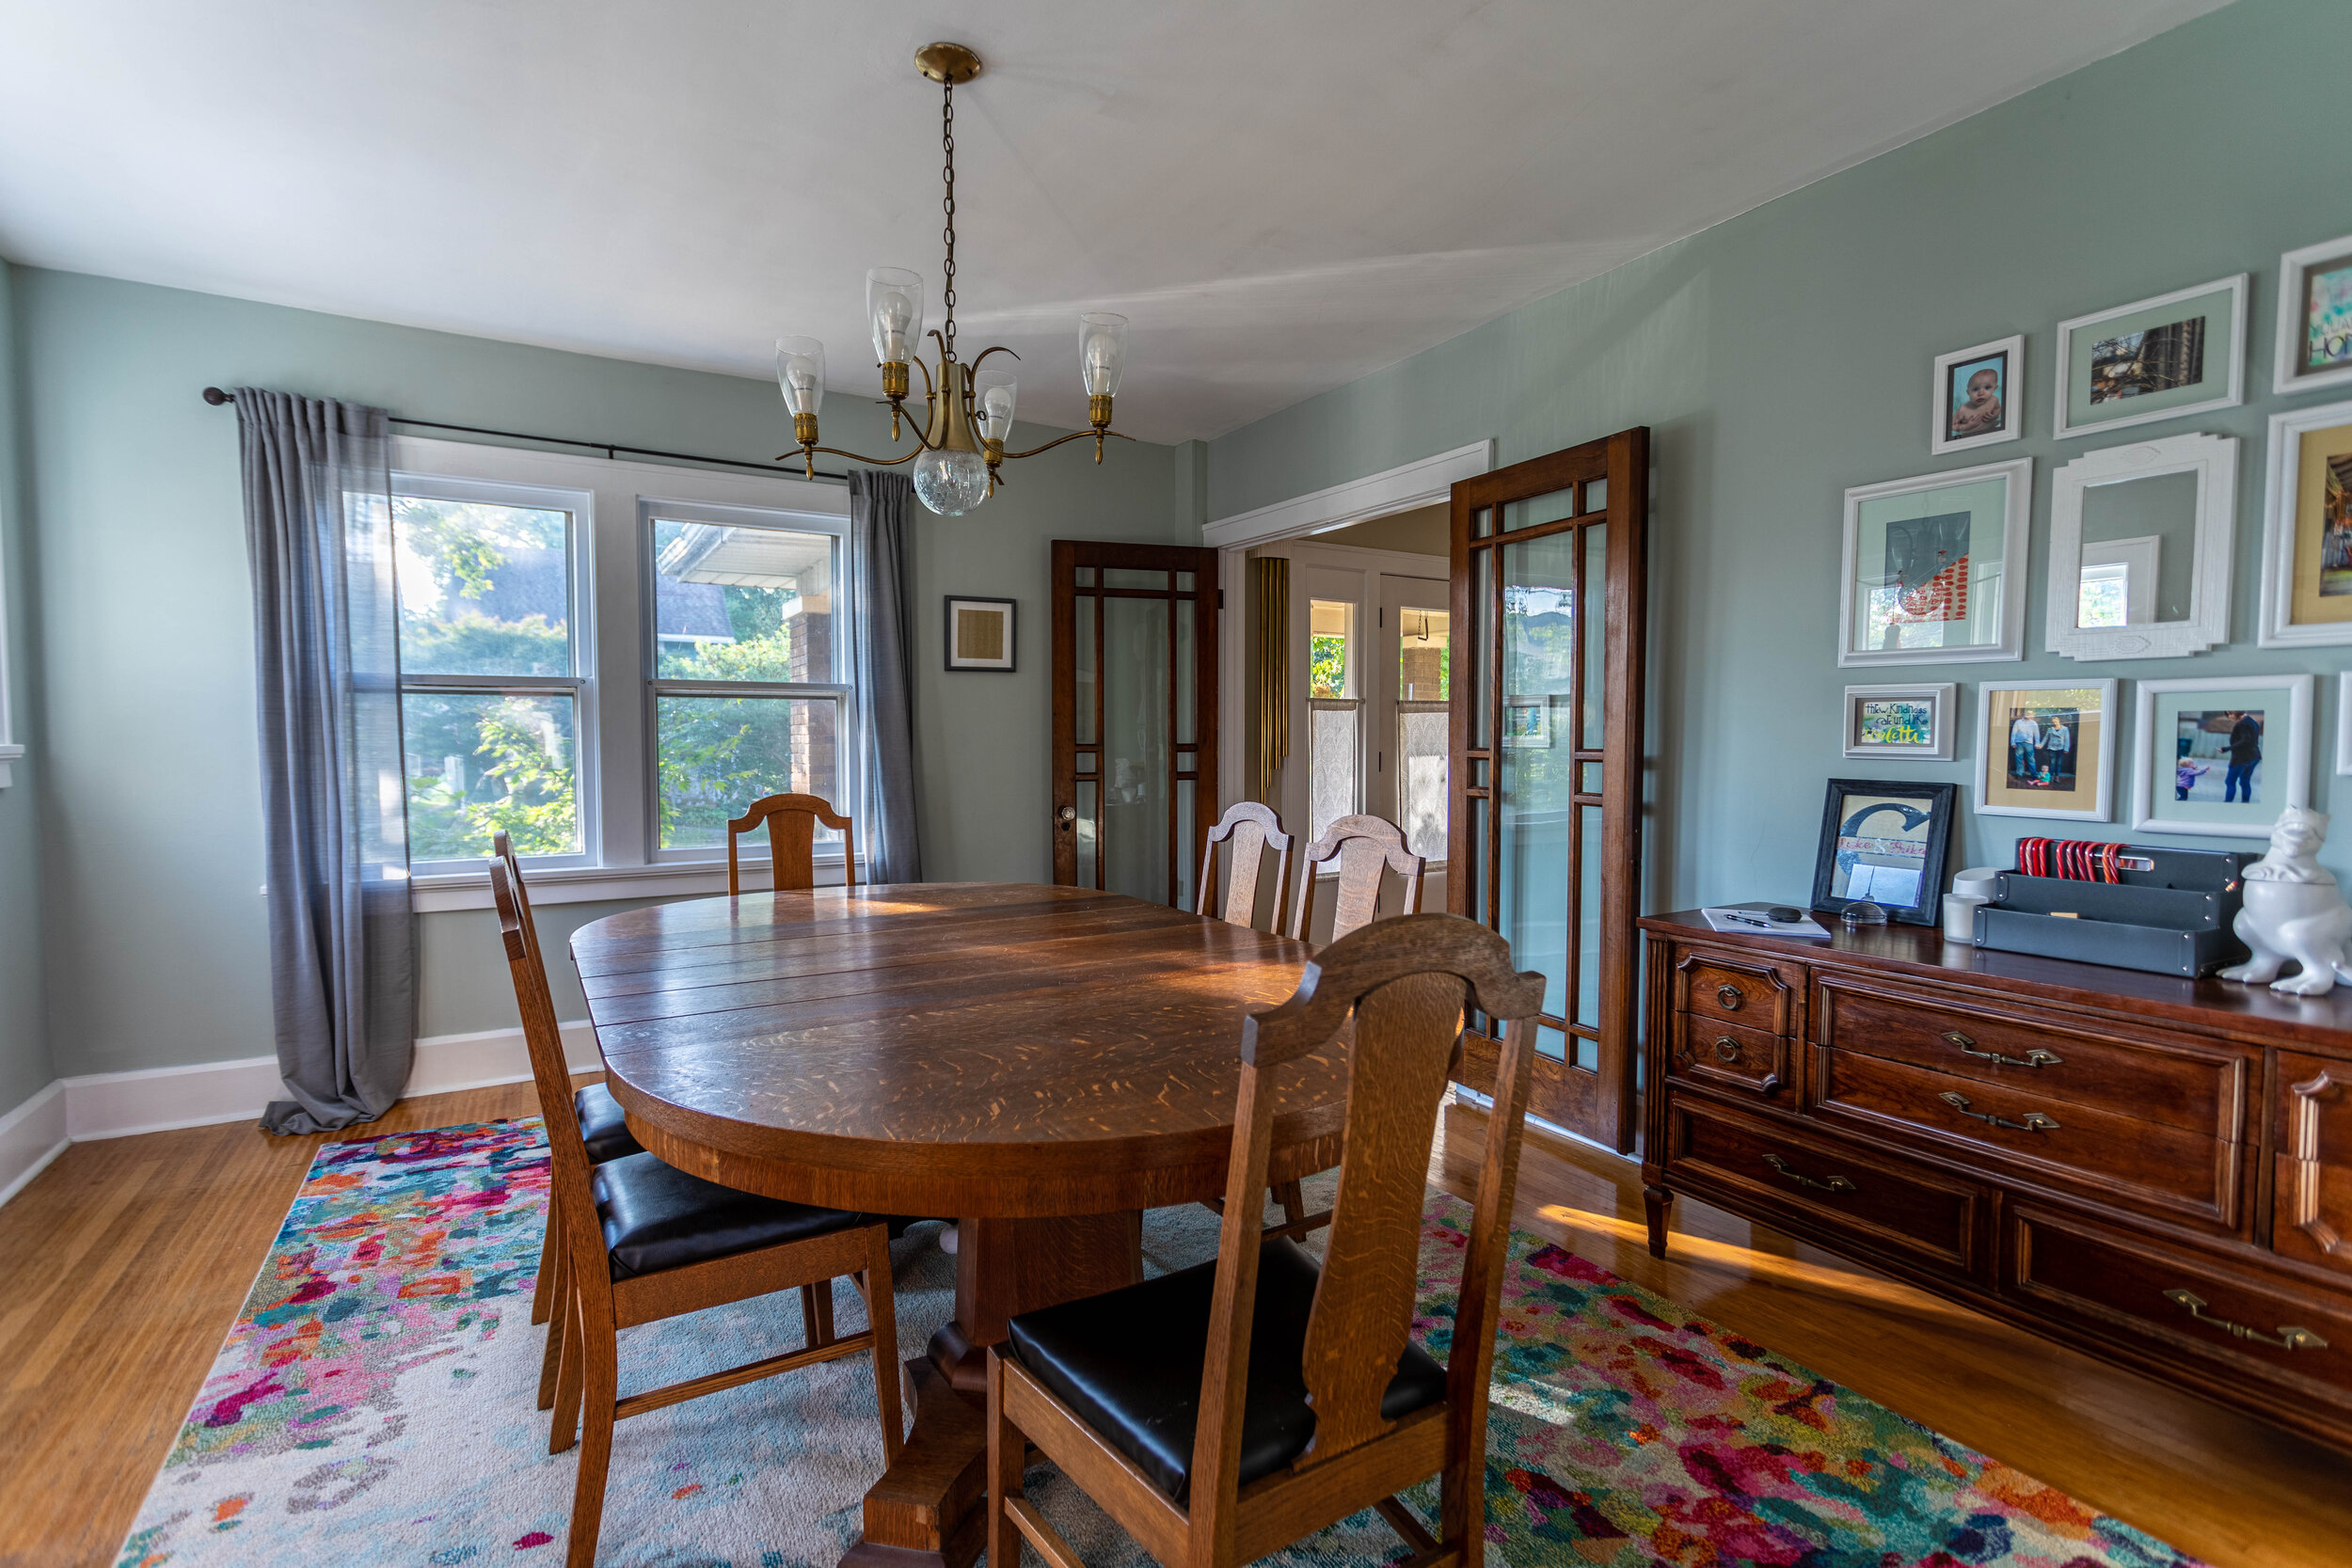
Lucius really hated the light fixture, but once I redecorated the room I felt like it actually fit in the space pretty well and I managed to procrastinate replacing it until it was too late and we moved. Luckily, the new owners like it too!
You know how they say styles always come back around? The light fixture in this room is a great example of this. The use of gold tones are really popular right now, and I’m seeing sputnik lights pop up all over the place. In a way this light has kind of a sputnik-style to it, while still being pretty traditional. If you don’t know what a sputnik light is - check out the picture below.

The story of the dining room table is actually pretty interesting, too. The previous owner was elderly and was moving to a retirement home, so his family was auctioning off all of the furniture in the house. Someone at the auction was bidding up the table just for fun, then decided at the end of it all they didn’t want it.
The owner’s children, who showed us the house, remembered me commenting on the table during our showing and called Lucius to see if we wanted to buy it. They sold it to us really really cheap, considering that it’s such a large table (it has SIX leaves!). And we learned that the table is actually older than the house, which I thought was pretty cool.
It didn’t feel right to take the table with us since it had lived there for so long, so we sold it with the house and I have no regrets. It just belongs there.
You can also see the buffet table I talked about in our dining room renovation kick-off post and how it just doesn’t work in our current house. Maybe I should have just left that, too.
The kitchen
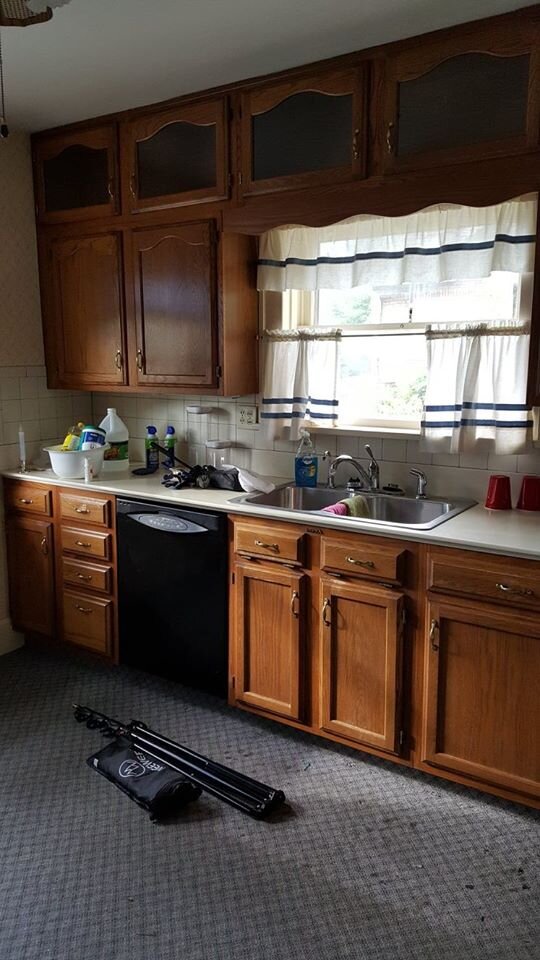
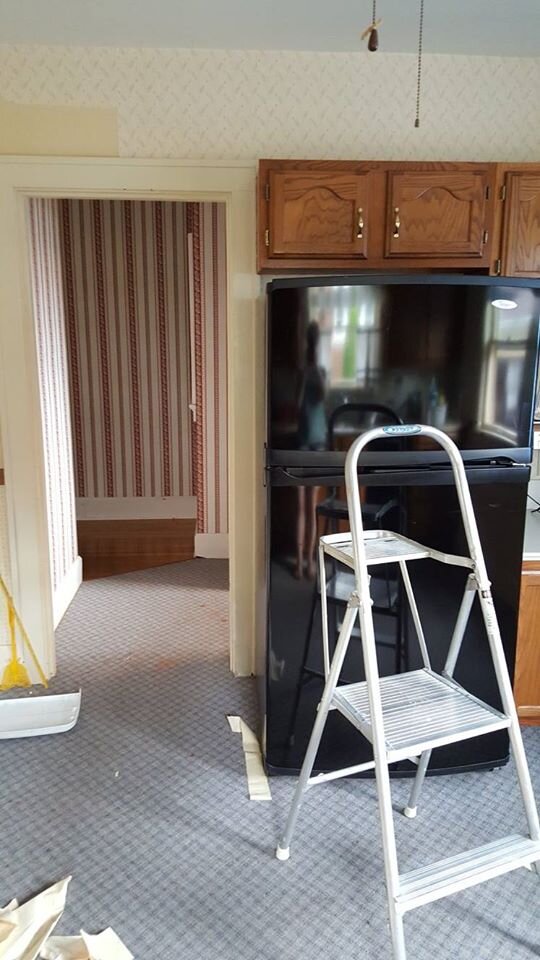
Whyyyyy with the carpet!? Seriously.
And the surprising thing is, this isn’t the first house I’ve lived in with carpet in the kitchen. Gross.
In this room I, you guessed it, stripped the wallpaper! I also painted the trim, the ceiling, and the walls. Can we just assume that’s a given from here on out? Because I made those updates in just about every room.
Aside from the above, we tore out the carpet in here and replaced it with some rolled laminate. It definitely wasn’t the nicest or most expensive stuff, but we assumed it was going to be a temporary fix that would be replaced with something nicer, like tile, down the road. It at least got us through a couple of carpet-free years and gave the new owners a cleaner slate to start with.
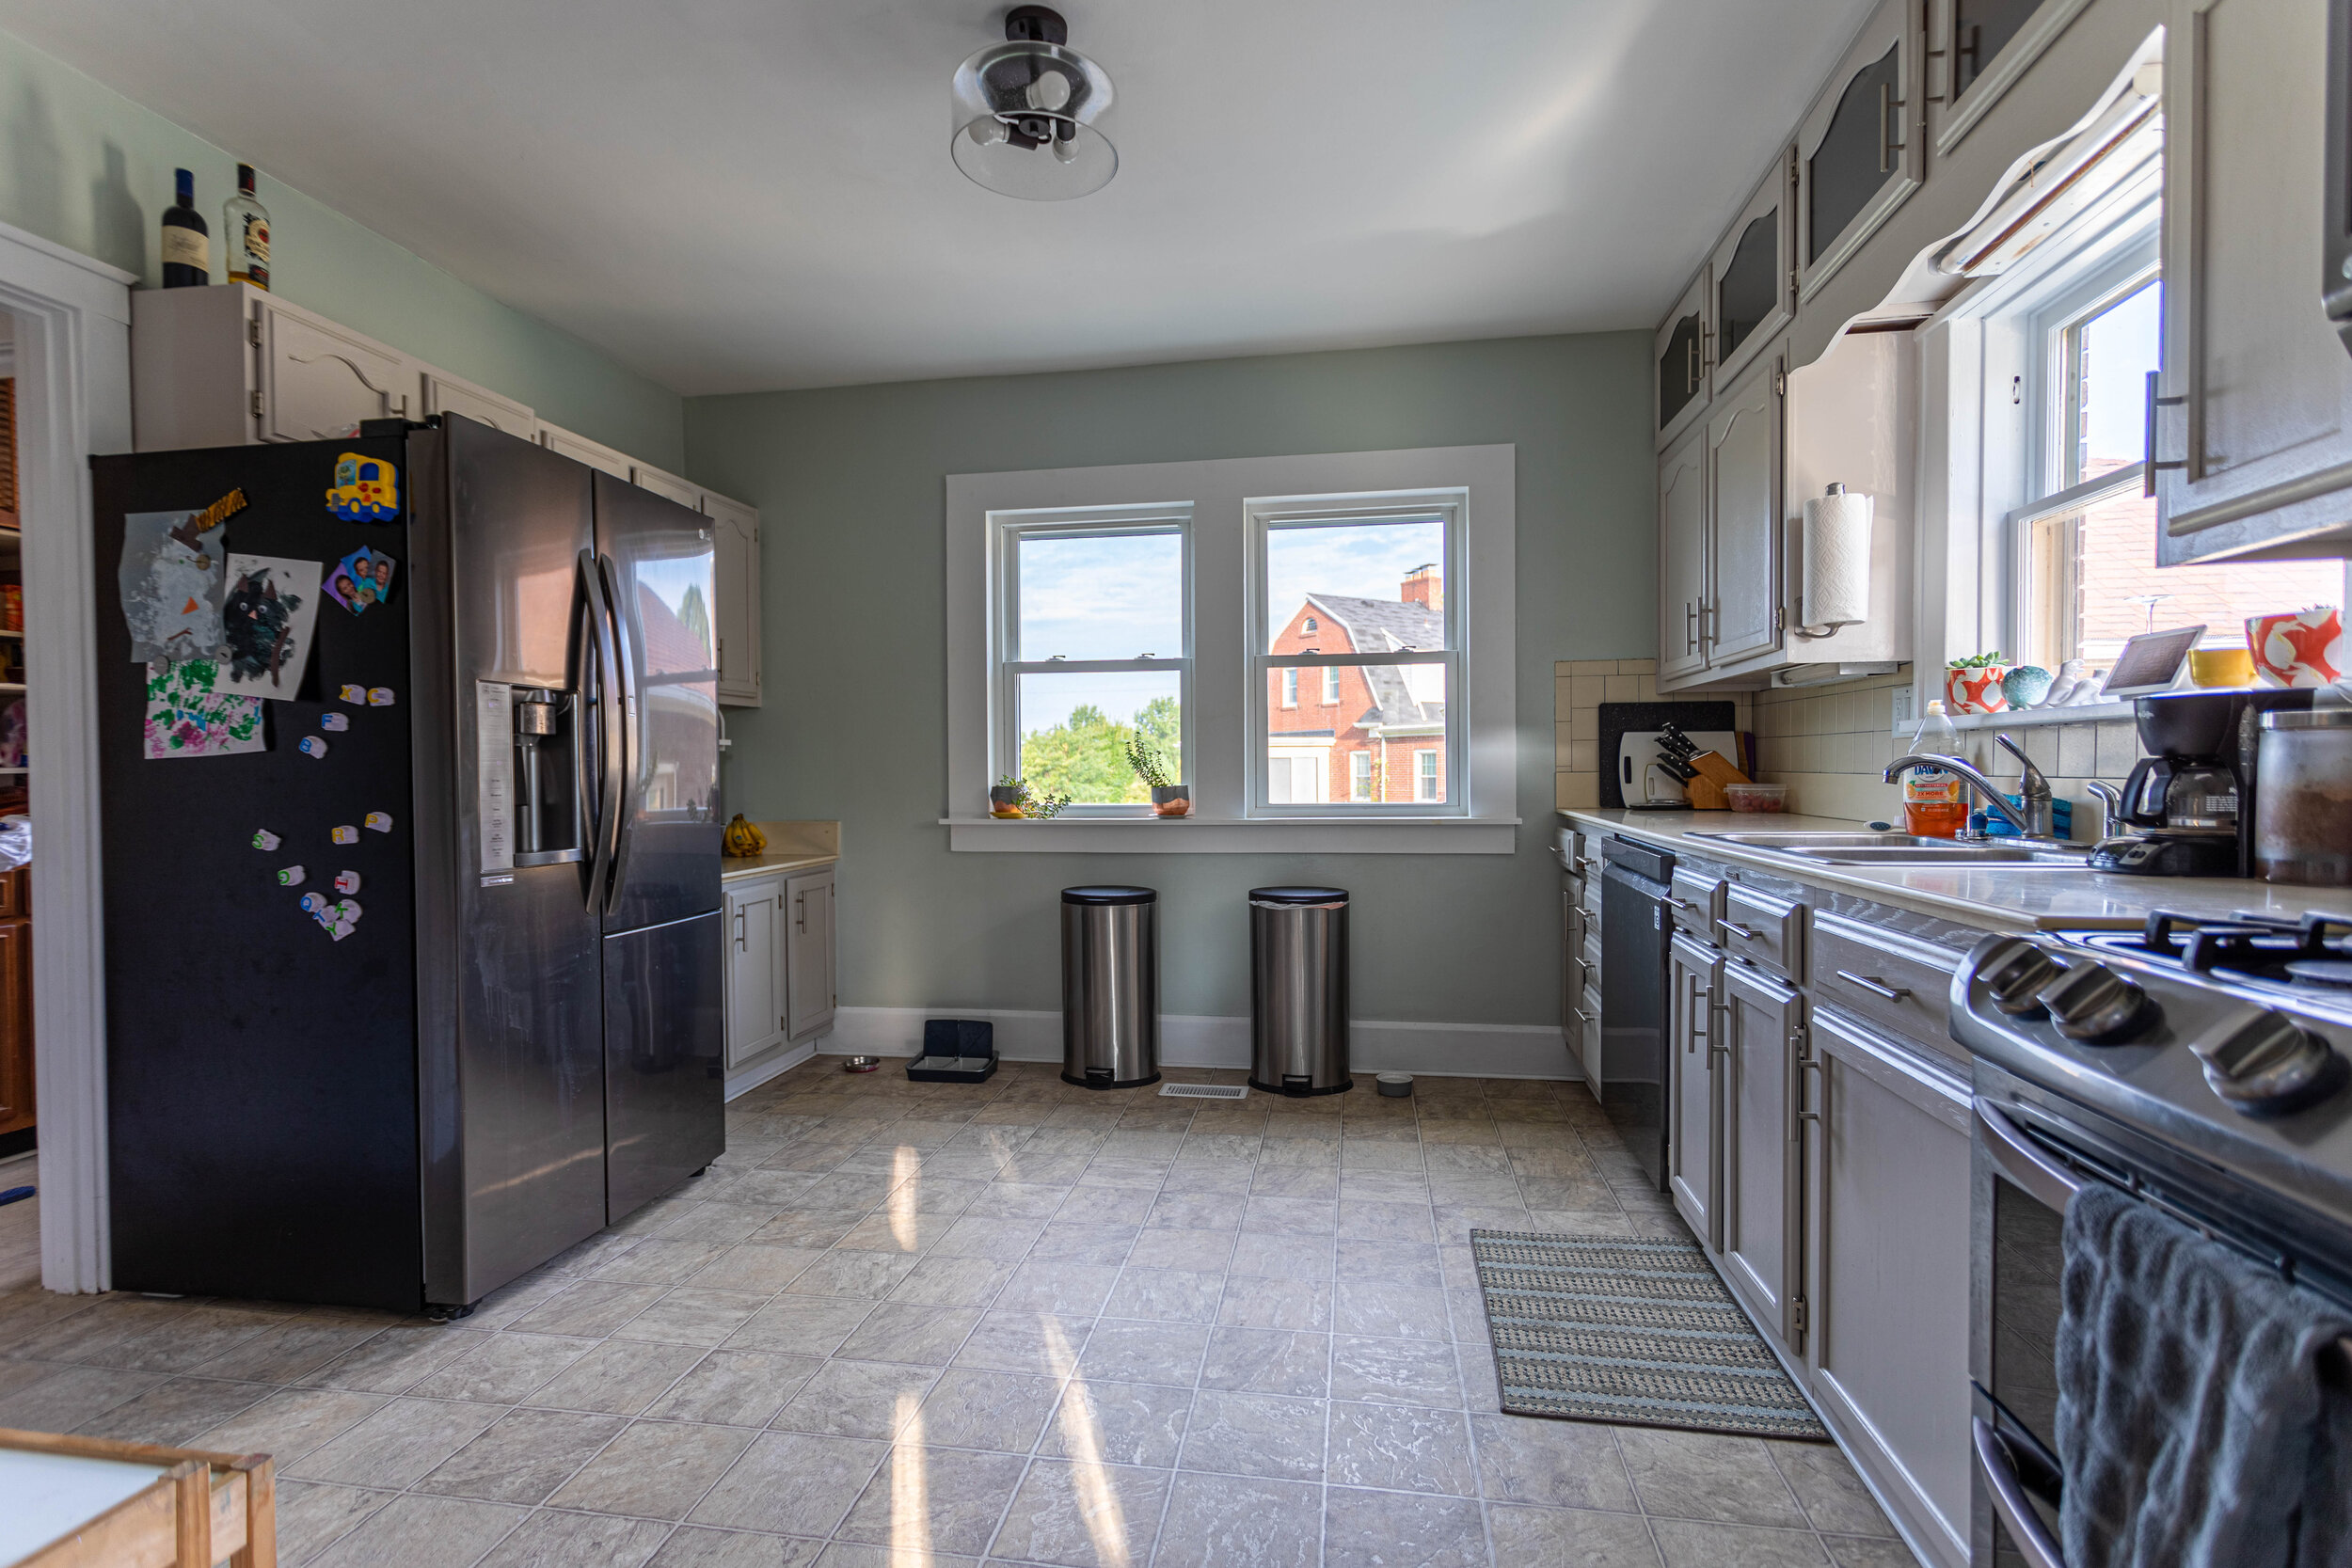
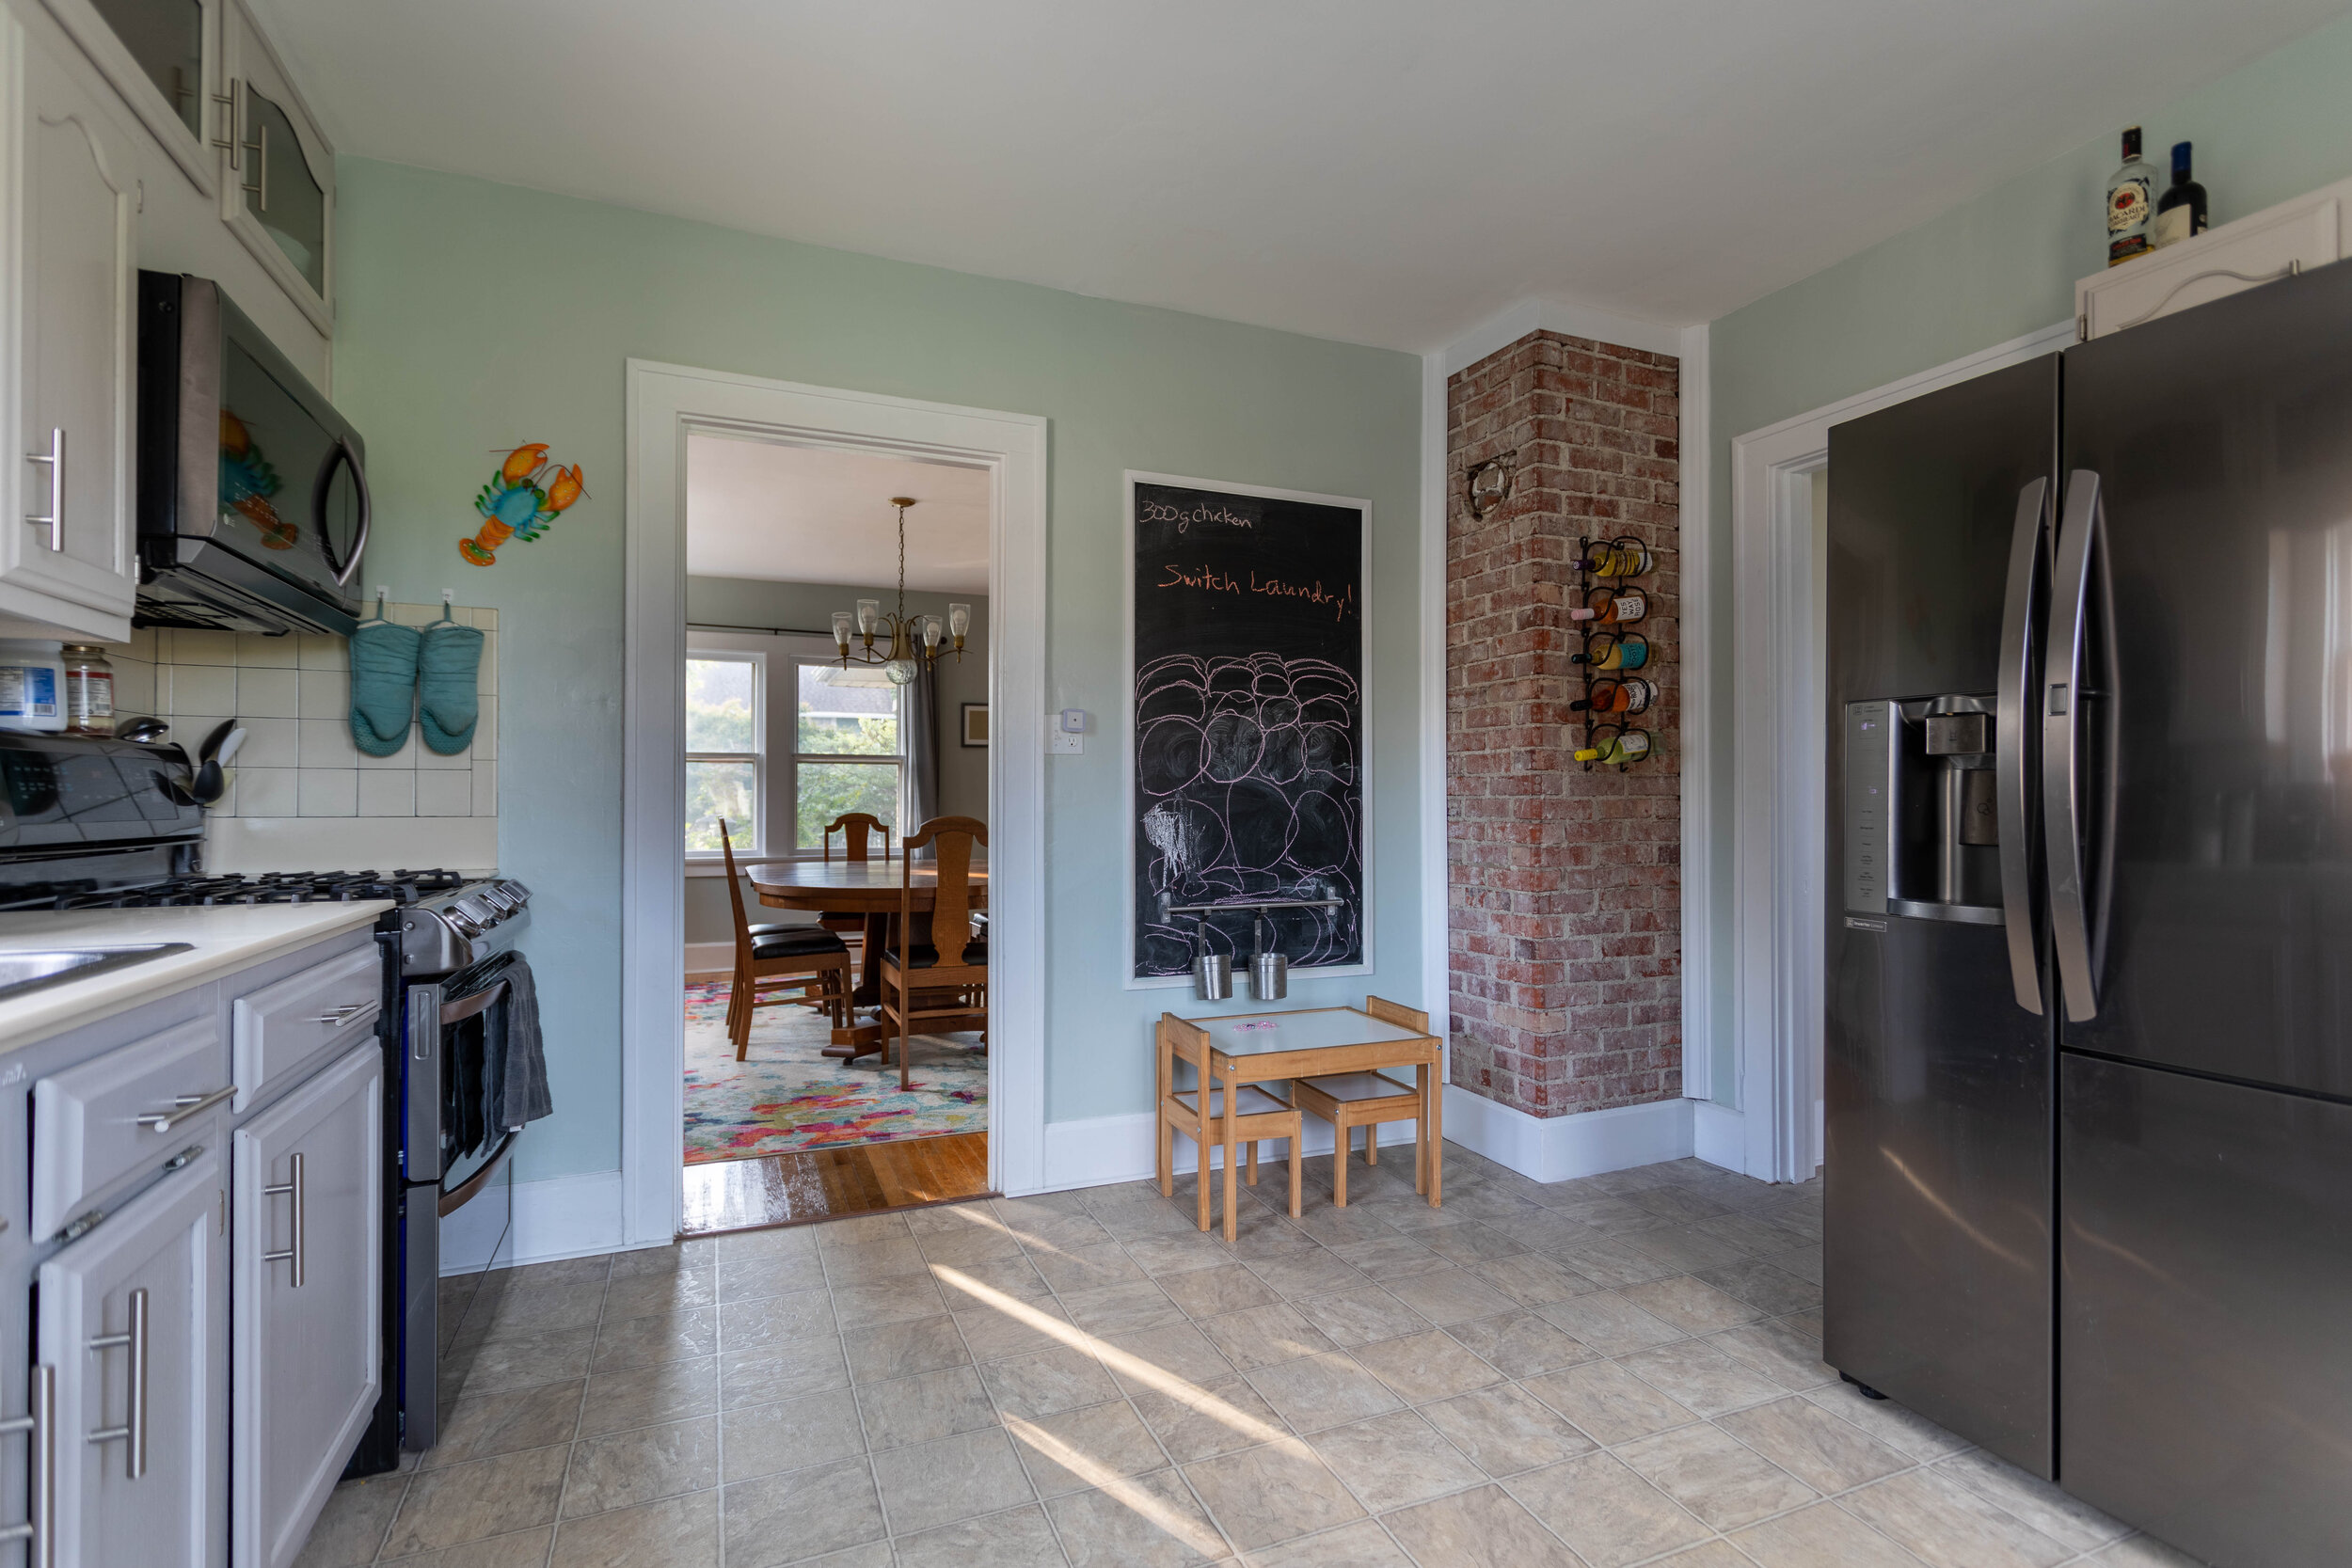
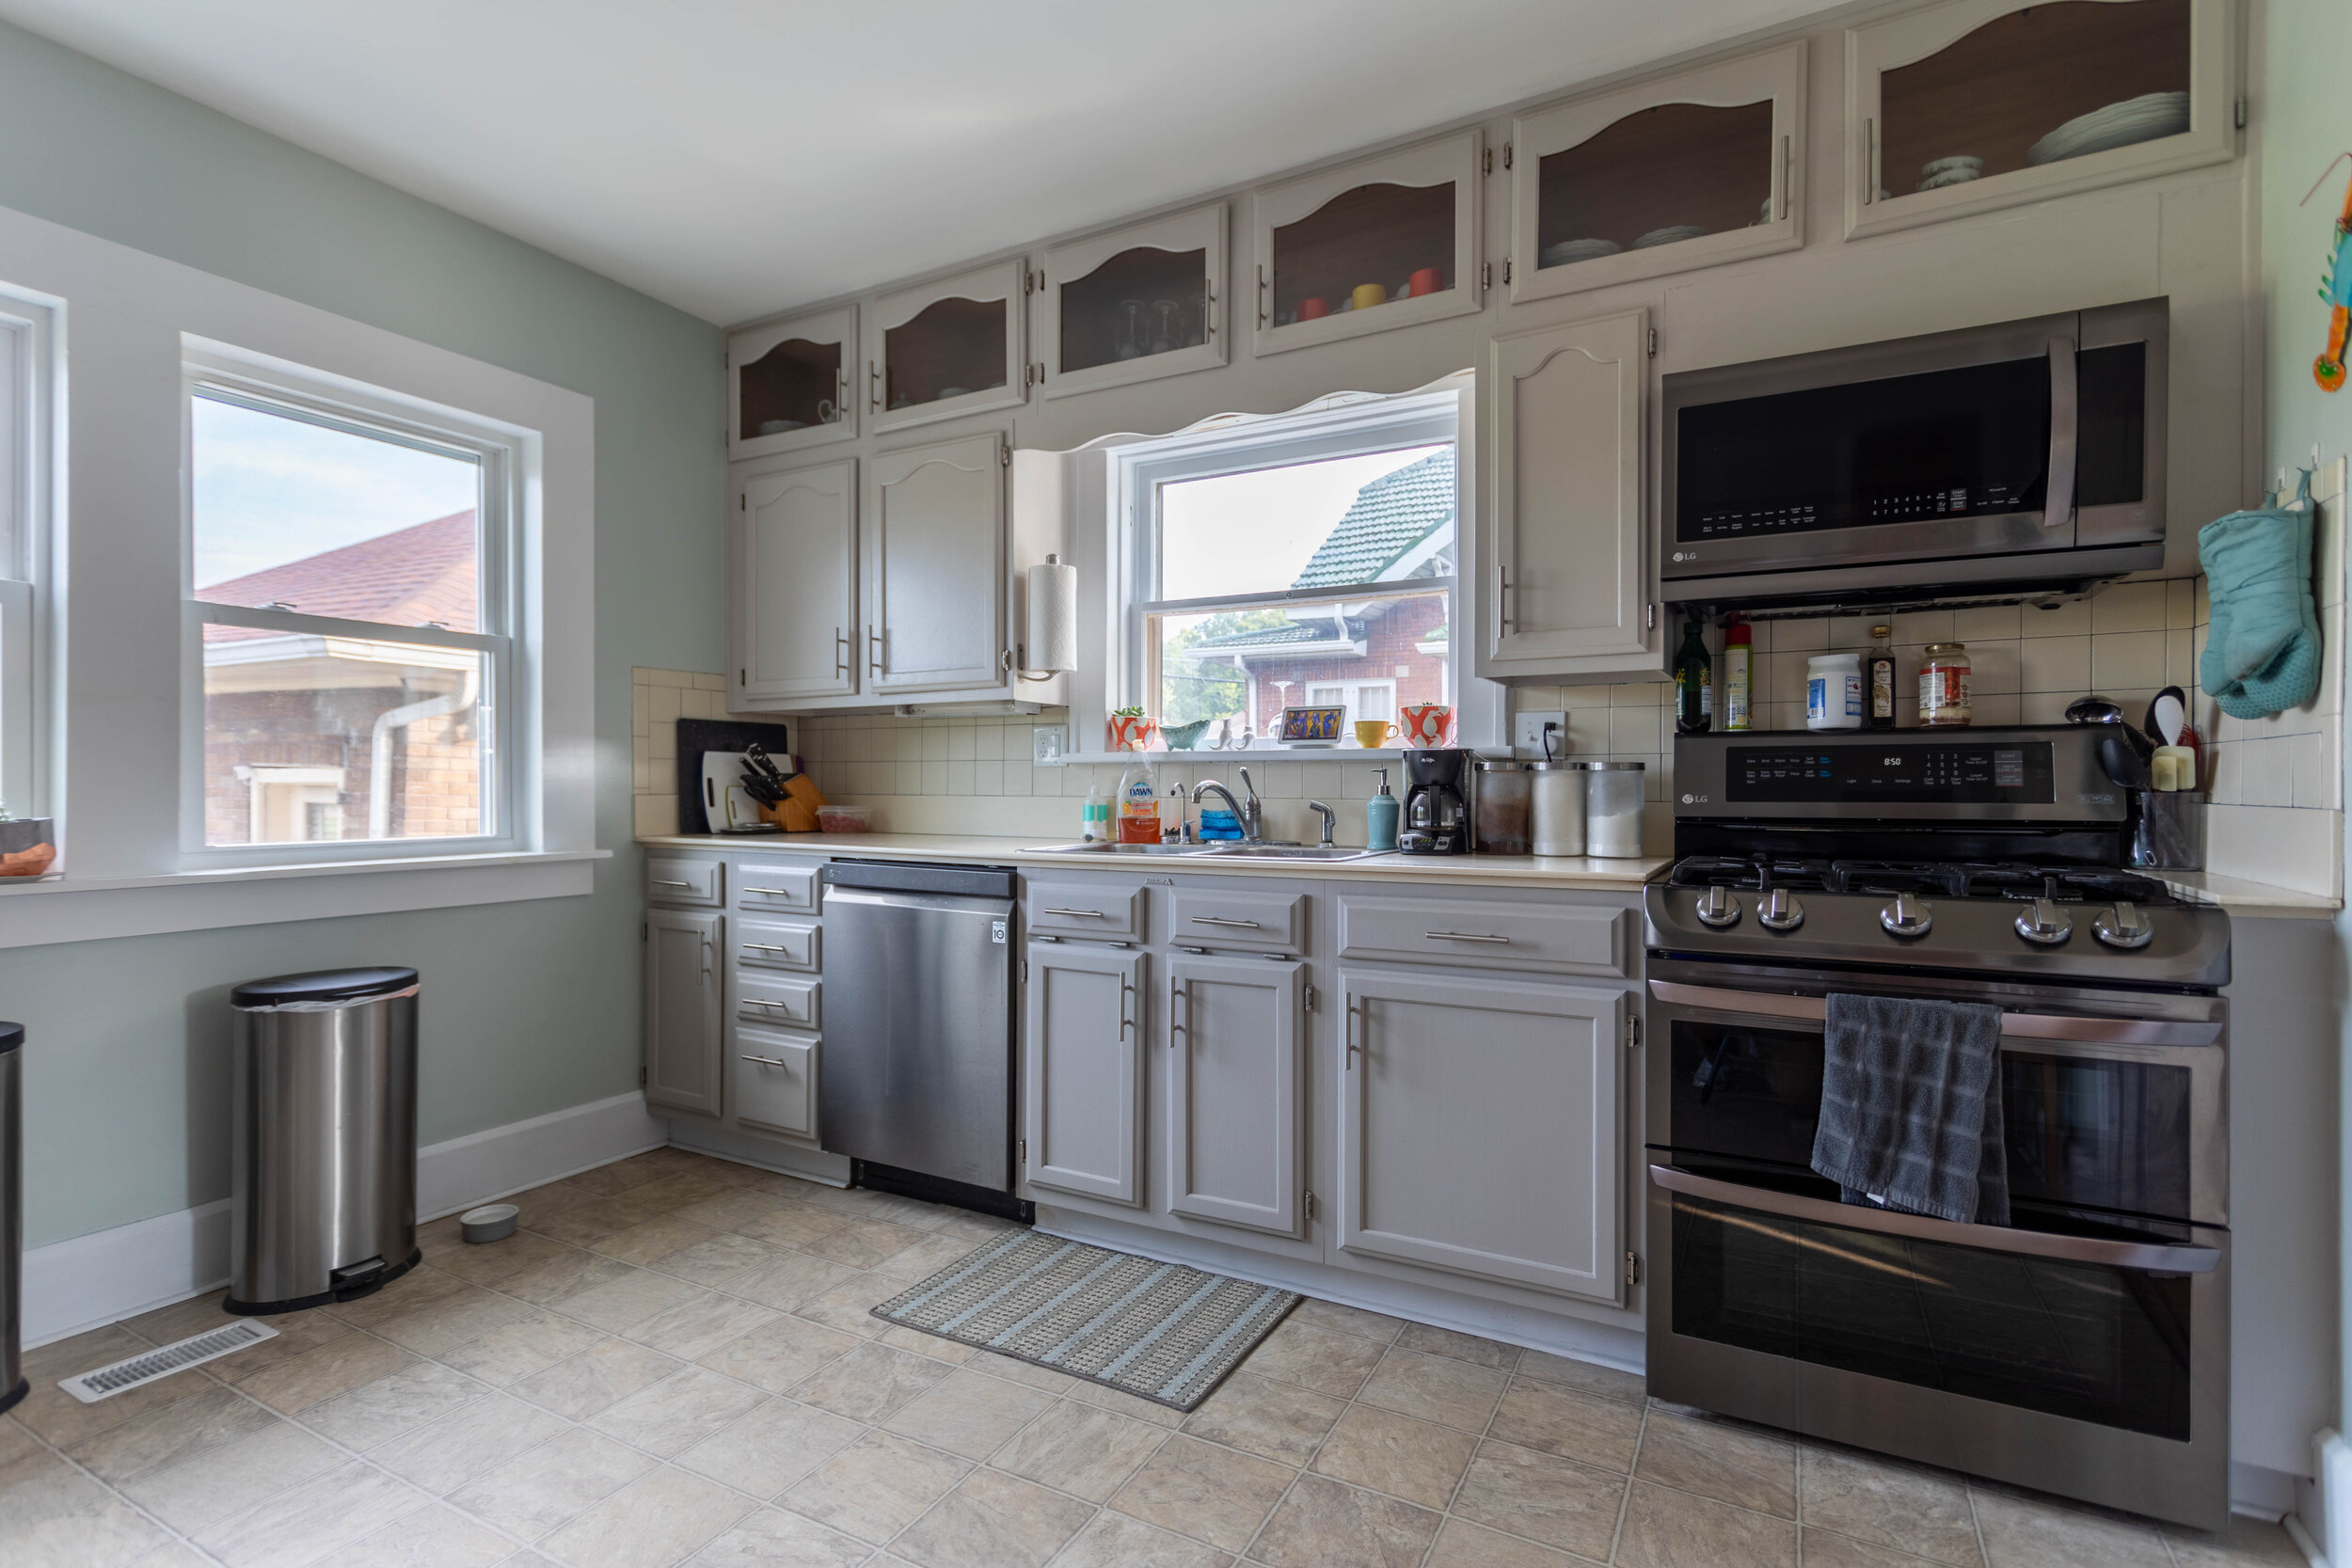
We also replaced the hardware on the cabinets, the appliances, the two side-by-side windows, updated the light fixture, made a chalkboard area, and exposed the brick chimney, because I love me some exposed brick. And Lucius loves destroying things.

The upstairs hallway


Unfortunately the only “after” picture I have of the upstairs hallway is from one end, but I think you get the gist.
Oddly enough, the foyer and this upstairs hallway are what really sold me on the house. I was actually on the fence when Lucius started talking seriously about wanting to buy it, but there was something about these spaces that really drew me in.
In the picture above, the little bench at the end of the hallway is actually one of my favorite elements to this house - a laundry chute to the basement! Man, that definitely came in handy. Though we often joked about adding a pulley system to bring the laundry back up two flights of stairs that never did happen.

Aside from the aforementioned list of updates, we also replaced all the door knobs to the bedrooms after I got trapped in the master bedroom one day.
And just for fun, here’s a not-scary-at-all shot of me stripping wallpaper over the staircase:

Cool as a cucumber…
The bathroom
Like the half bath on the first floor, I considered not sharing this bathroom either because it wasn’t even a little bit close to the finished product when we moved. But, I’d like to be honest and transparent in this blog and sometimes things just don’t work out the way you want them to in the end.
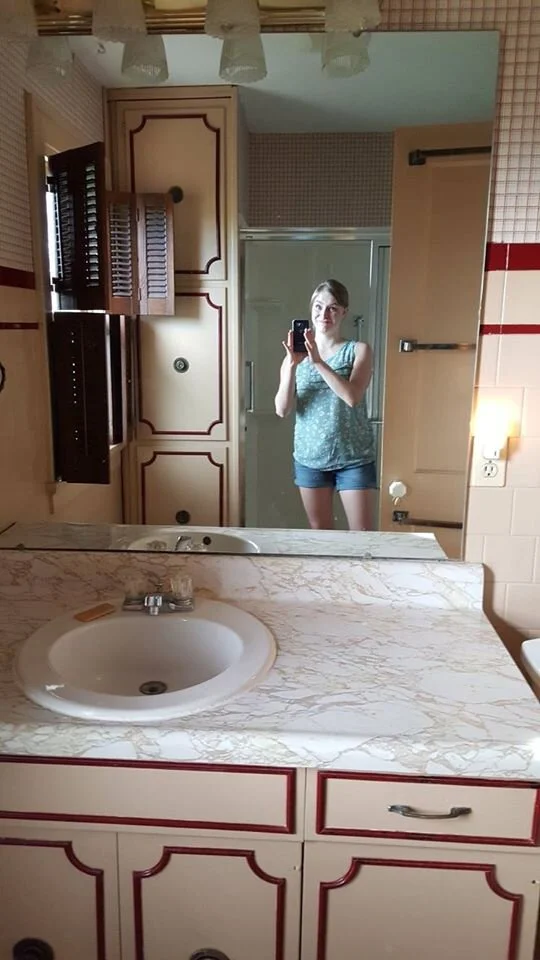
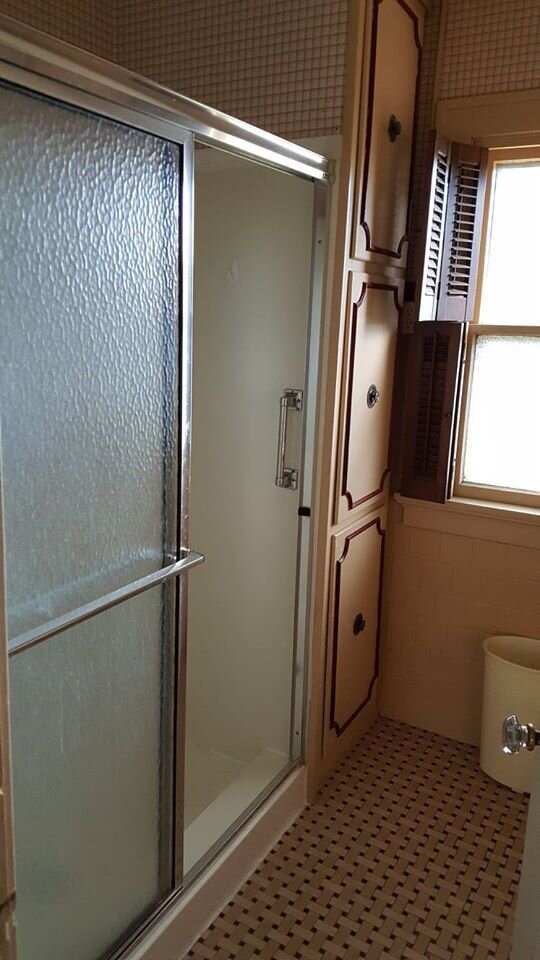
For a long time we called this bathroom “The Smoker’s Lounge” because of its beige and burgundy color scheme. It just felt old and dingy like someone back in the day spent a lot of time smoking cigars in there.
We started to remodel this room little by little, first replacing the shower with a bathtub. We moved into this house with an 1.5 year old and bathing her in a portable baby tub just wasn’t cutting it. That update required us to replace the cupboards next to the shower stall because the tub wasn’t the same proportions as the shower stall.
After we stripped the wallpaper, popped off the tiles on the bottom 2/3rds of the wall, and painted, we ran into a ton of issues with the plaster cracking. We were so sick of trying to patch and smooth this room that we decided (before we made the decision to move) that we would gut this room and start from scratch during the coming winter… then of course we moved and none of that happened and when we left the bathroom looked like this:
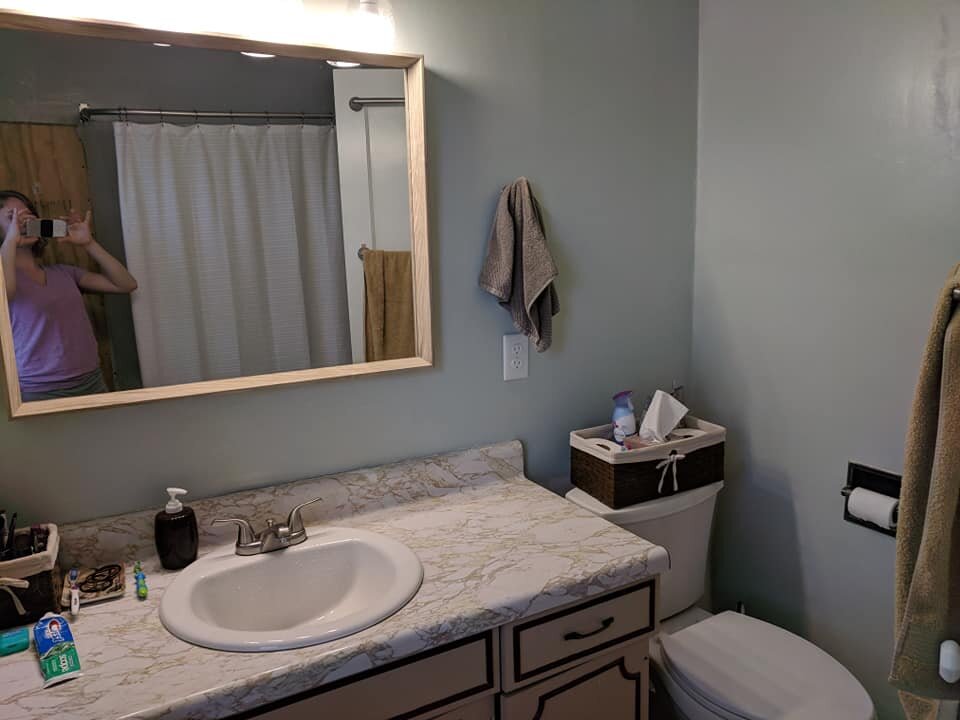
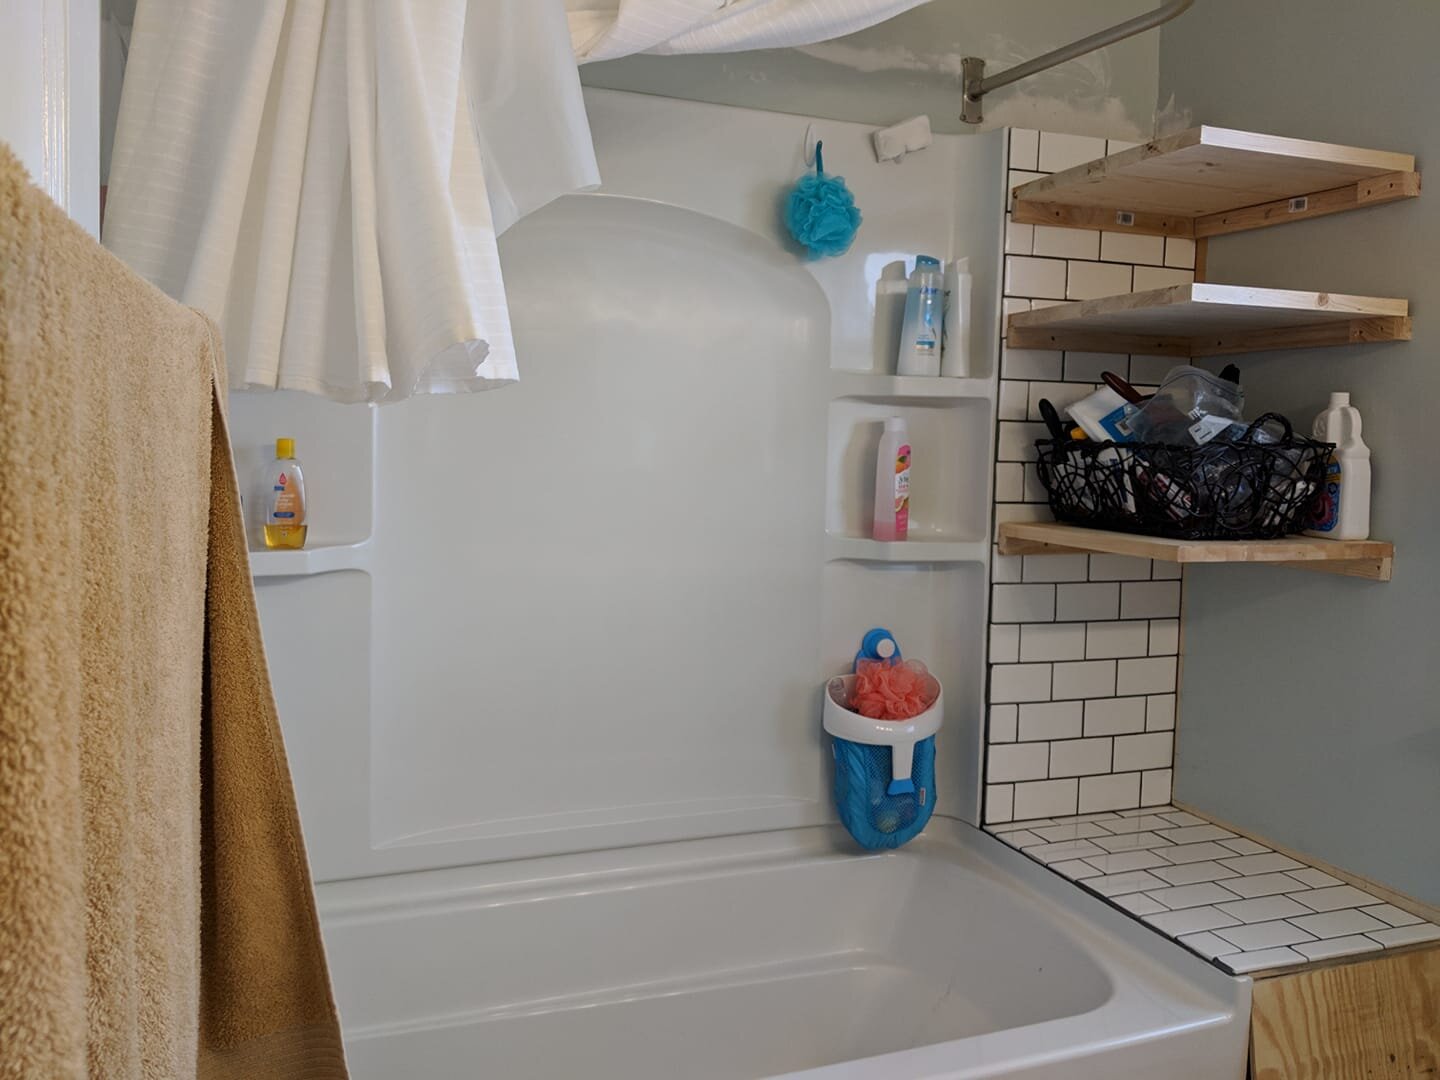
It was certainly an improvement from where we started, but definitely a far cry from where we wanted it to be.
The office
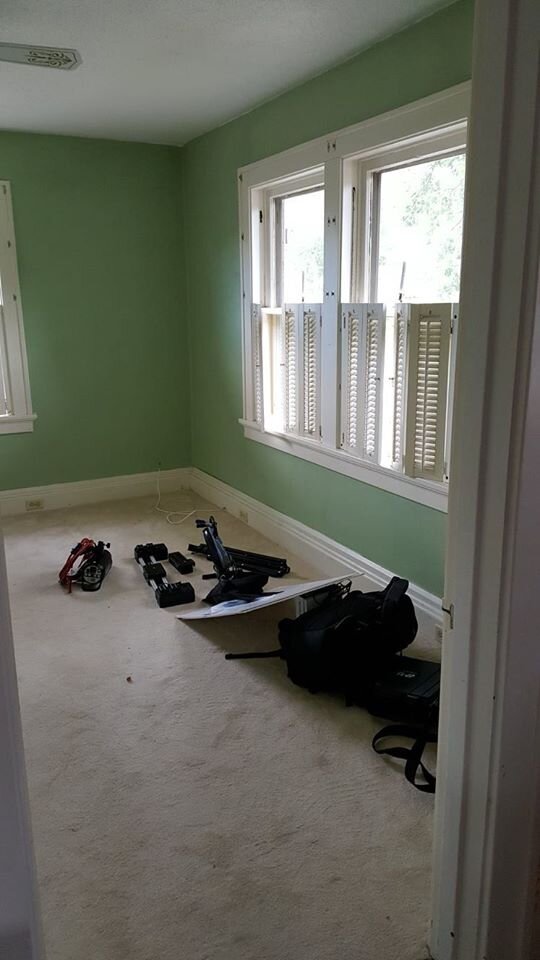
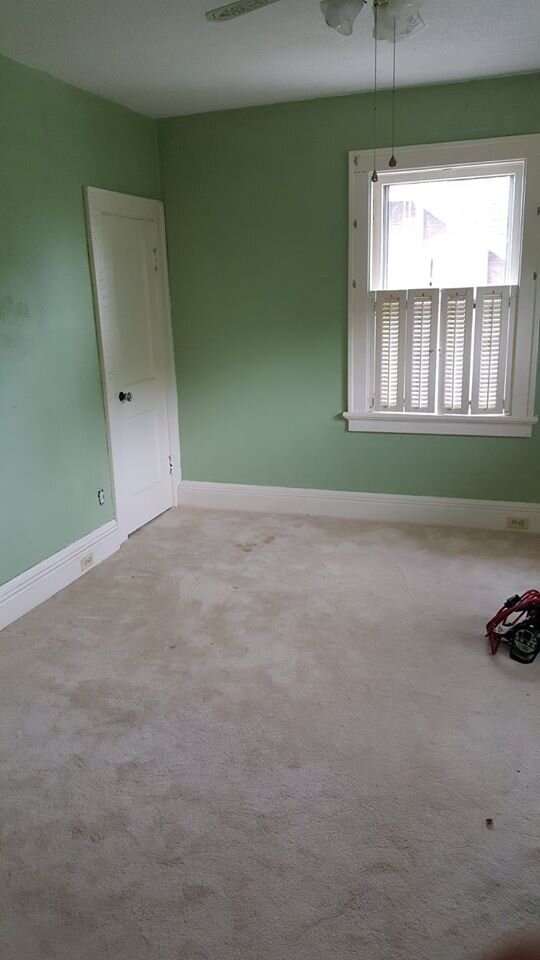
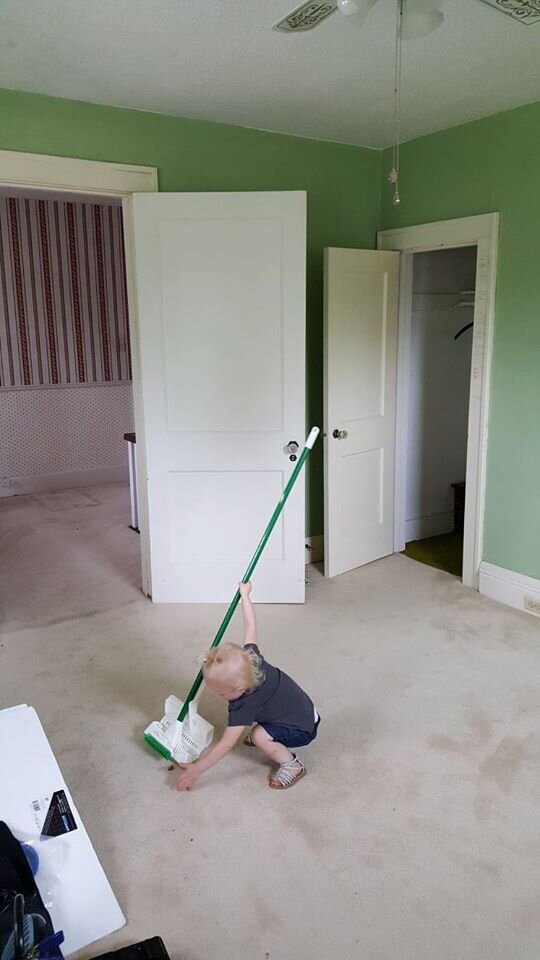
Let’s start the tour of the bedrooms with the least exciting one: the office. This was the only room in the house we didn’t really touch before we moved, aside from removing the carpet and the shutters.
Fun note: this was also the only room in the house that didn’t have any wallpaper.

The master bedroom
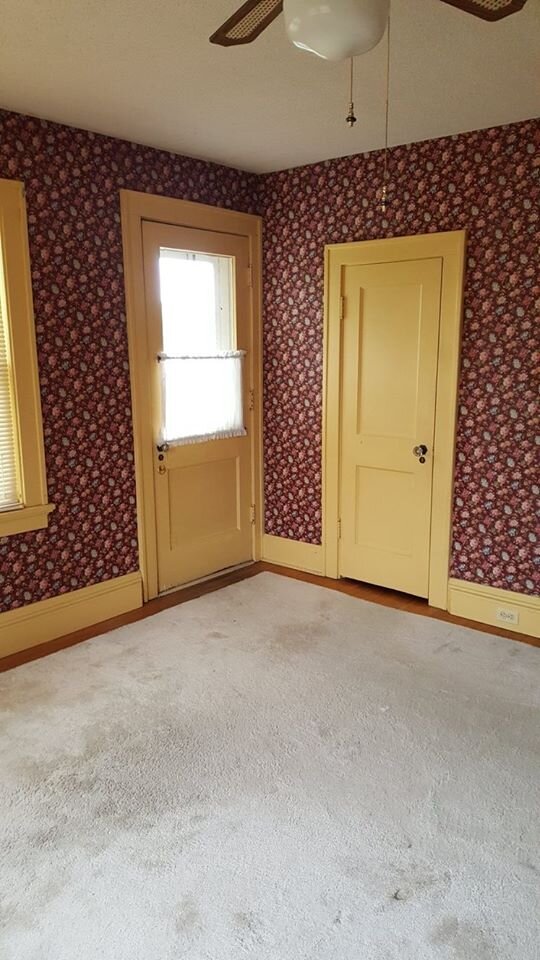
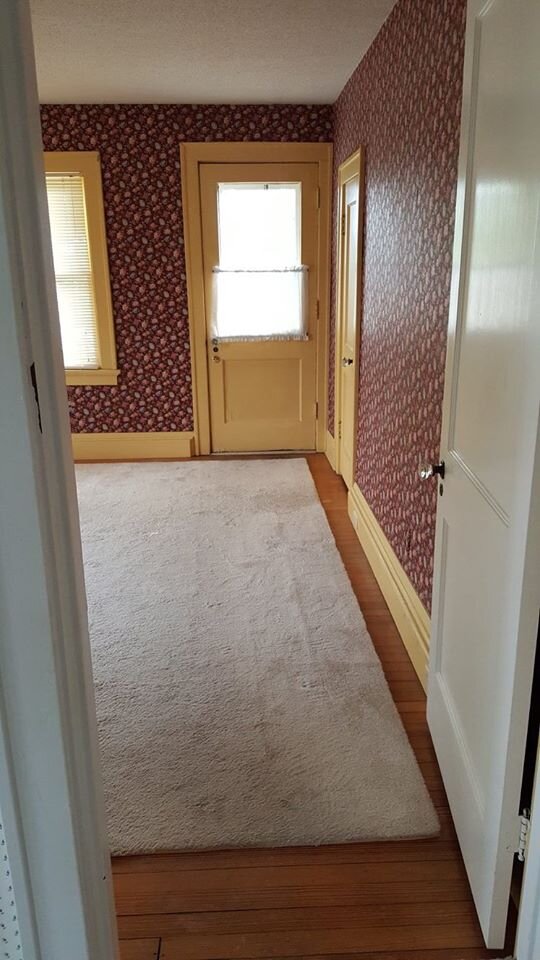
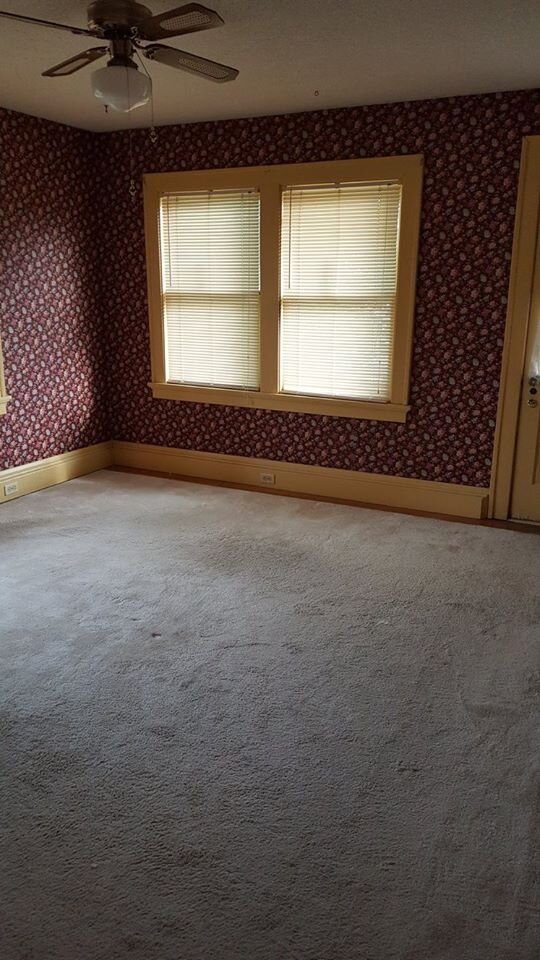
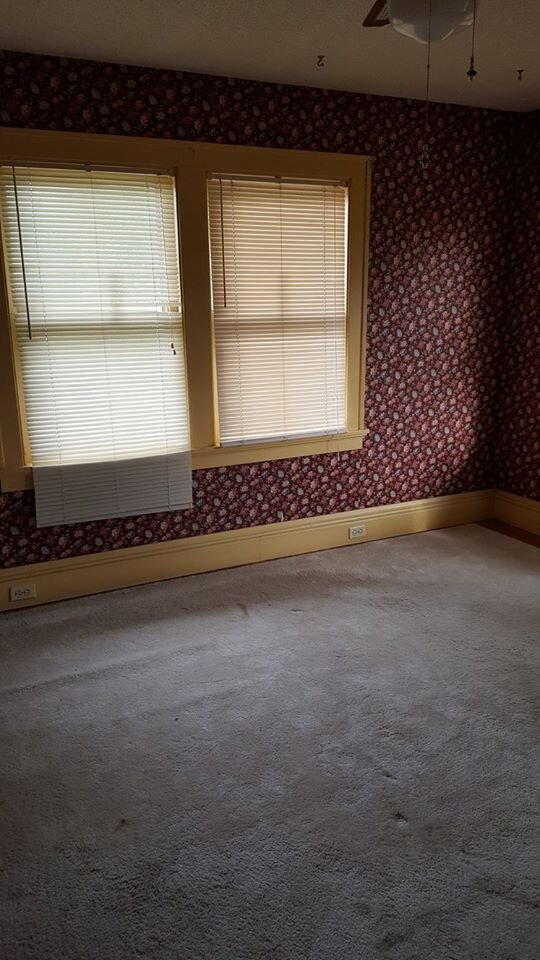
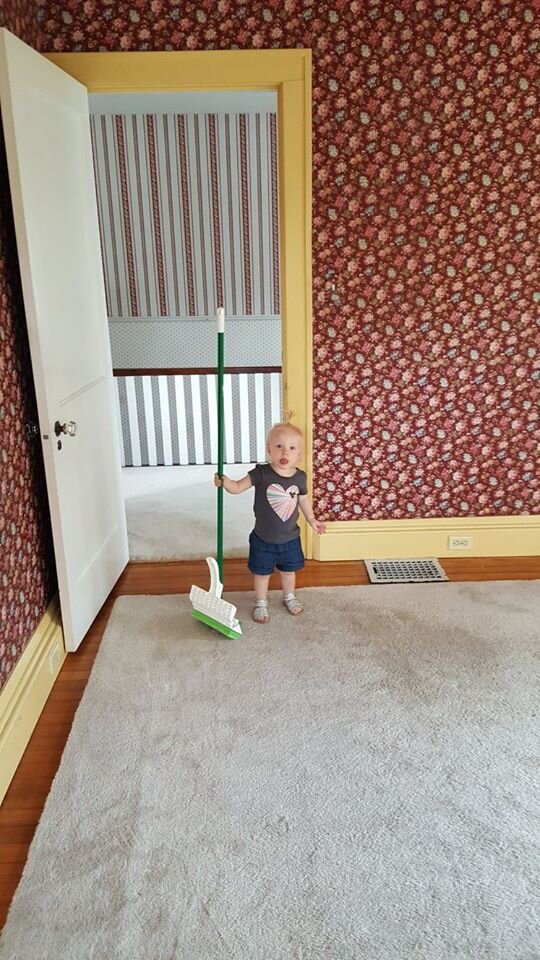
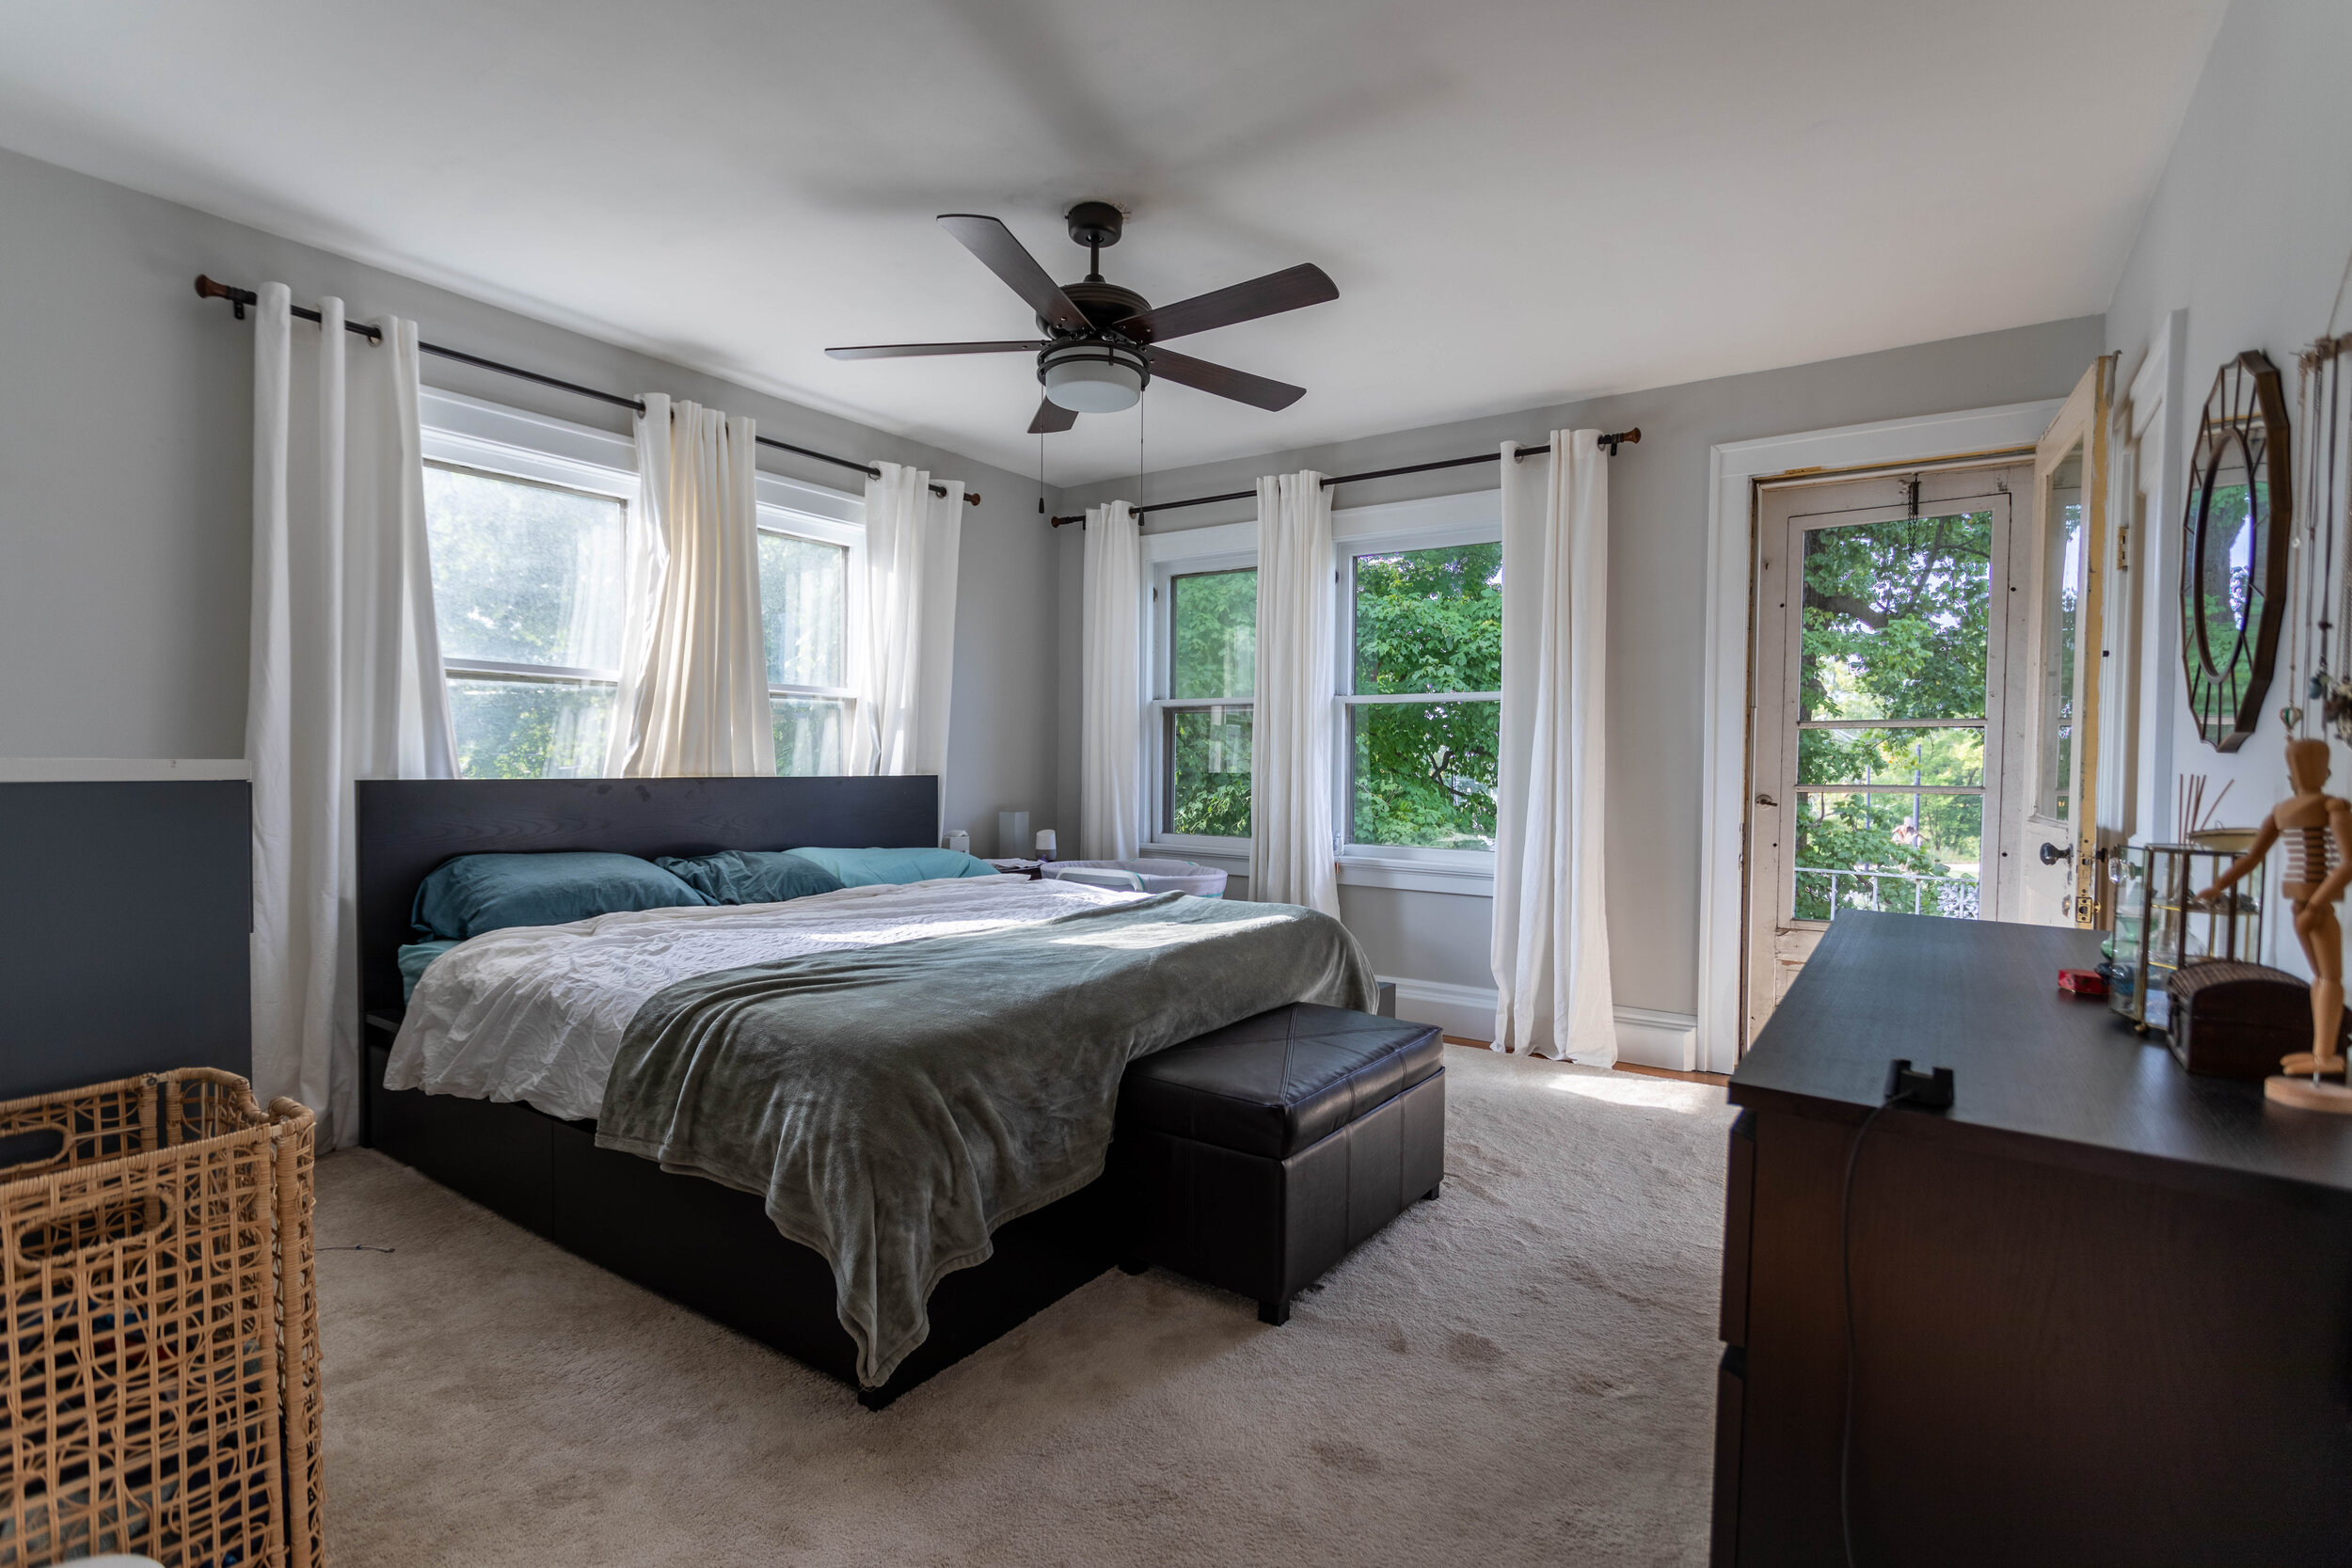
This room was pretty overwhelming to look at when we moved in, but it was surprisingly easy to update, even with two layers of wallpaper.

Can you imagine how it used to look with that green/yellow wallpaper!?
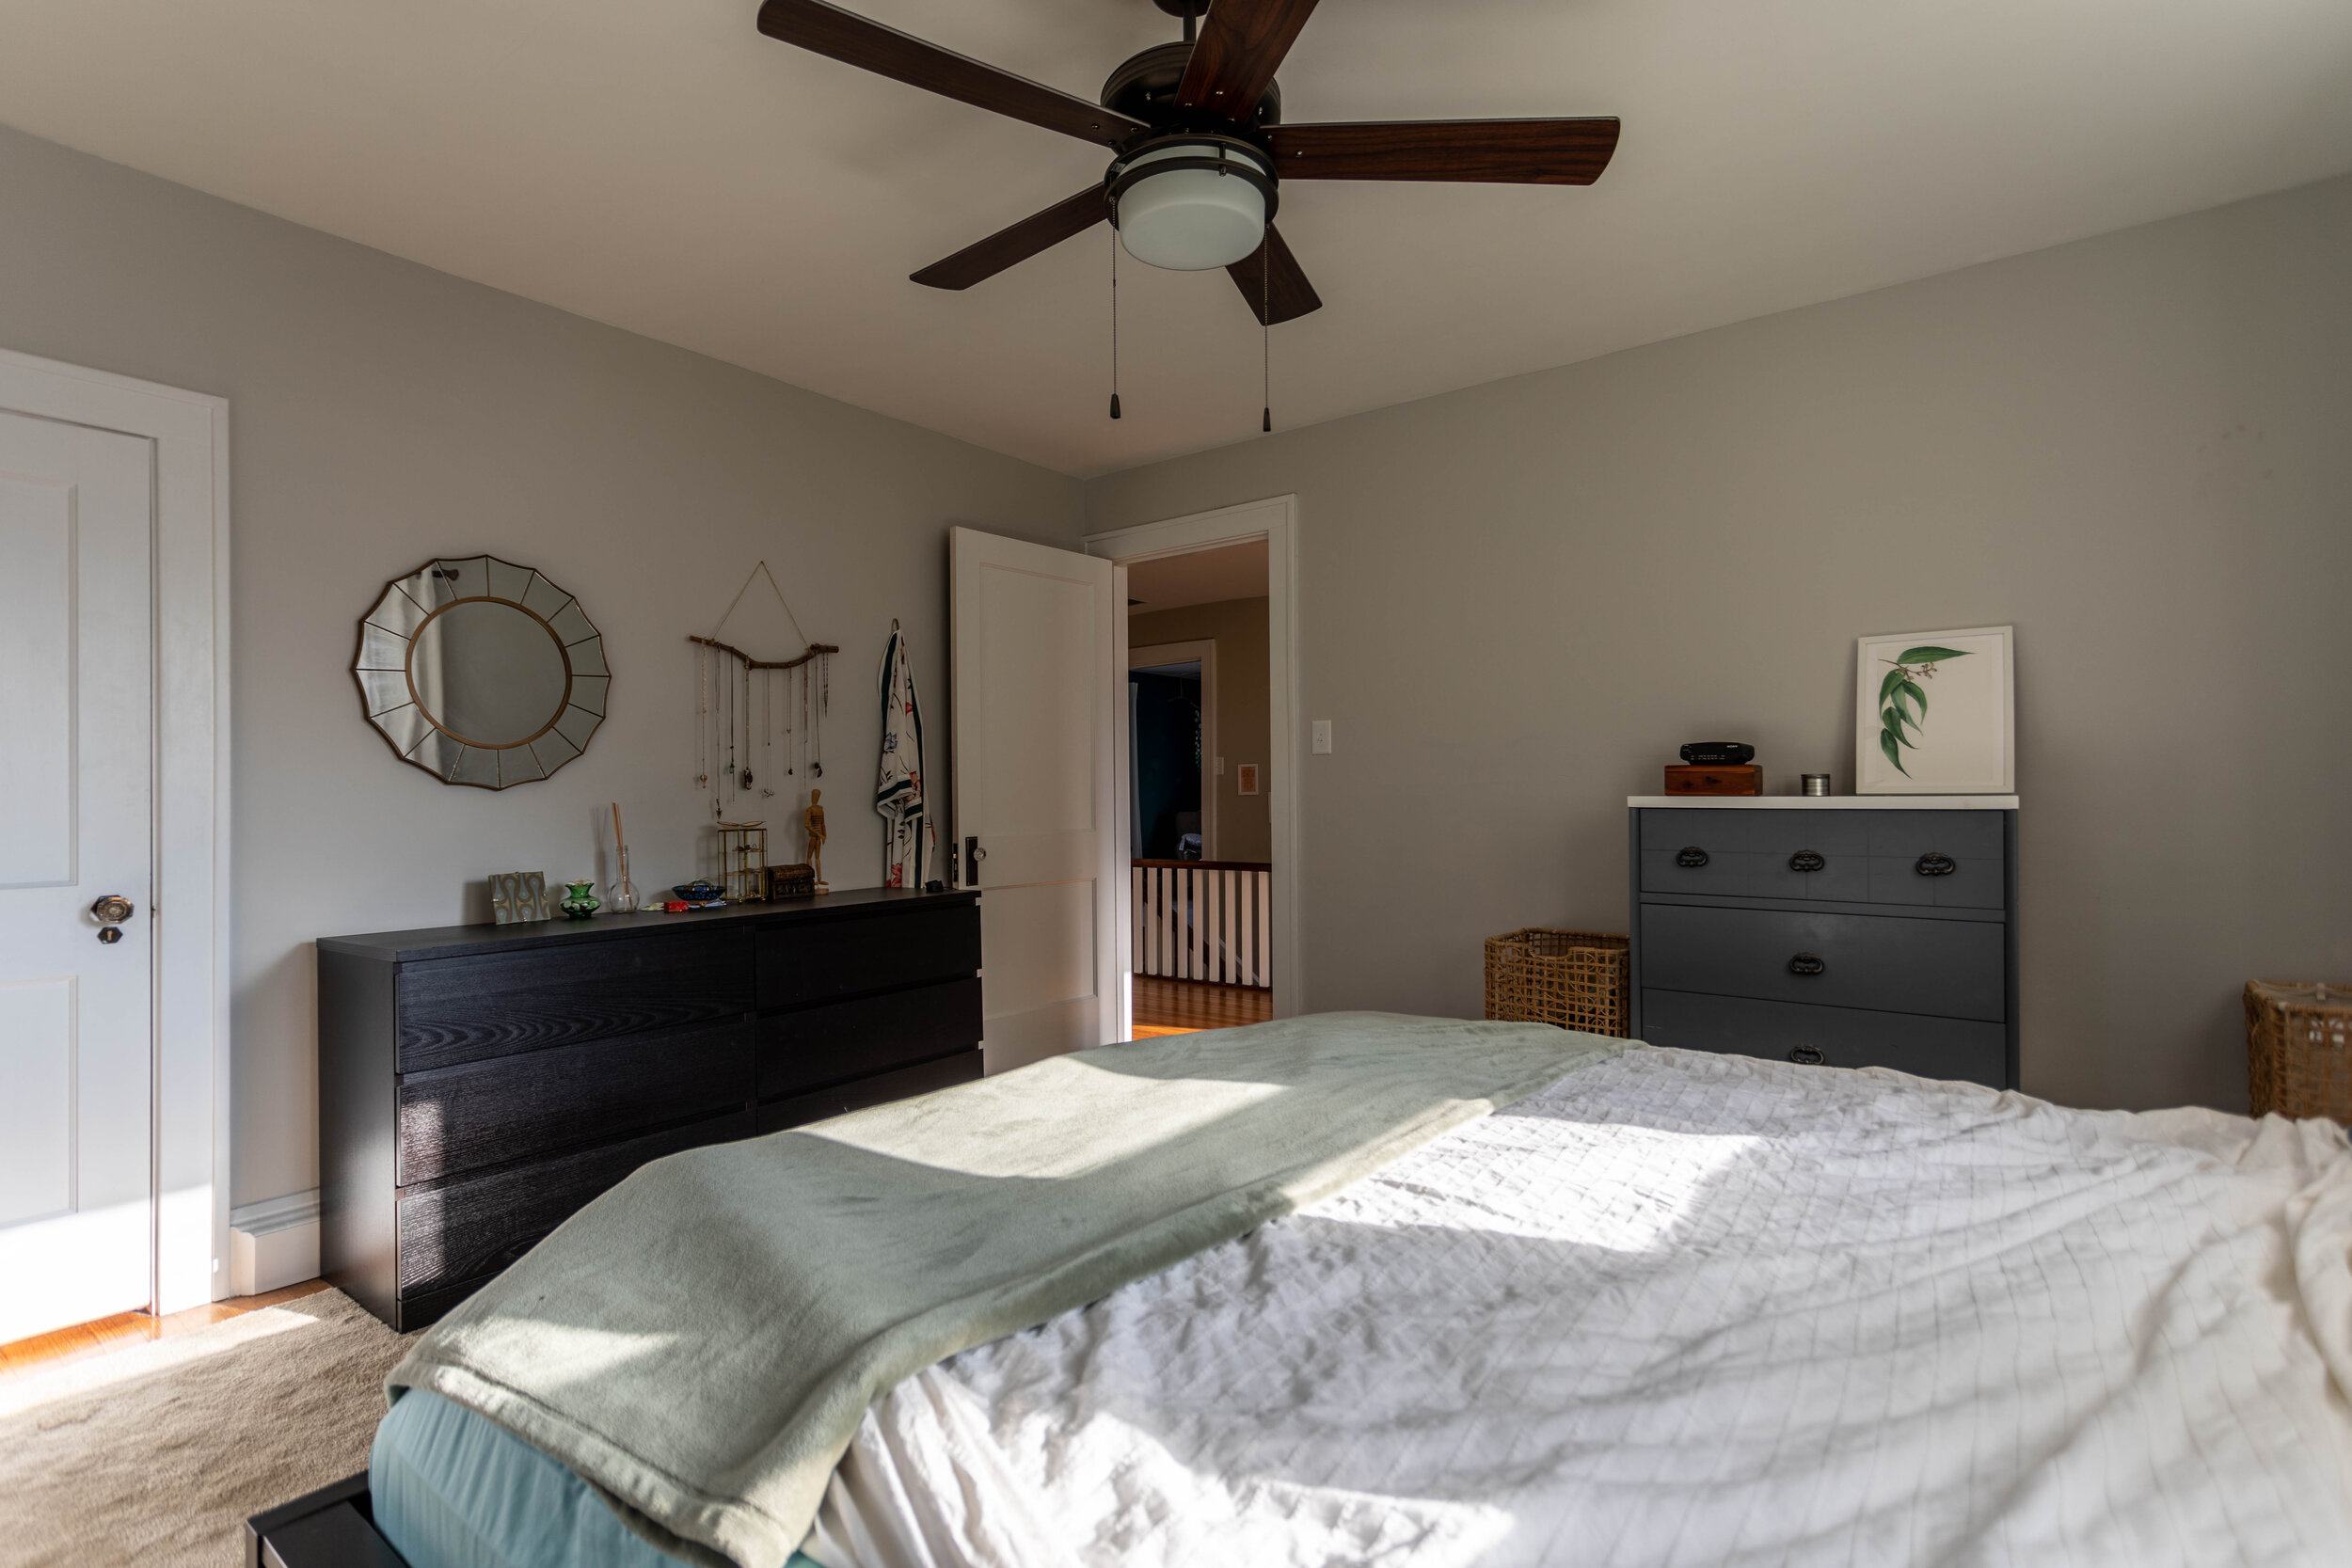
In the end, the updates made the room feel so much lighter and airier.
Our older daughter’s room
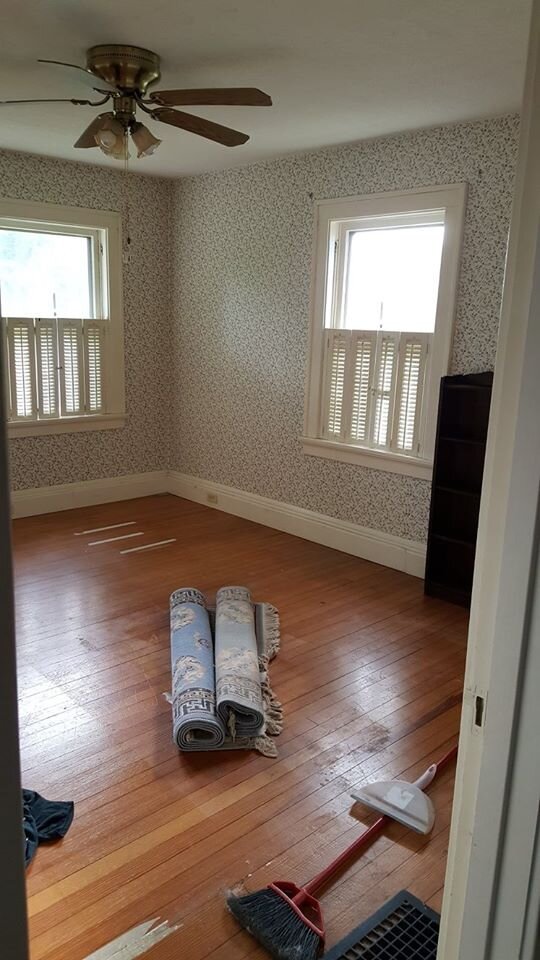
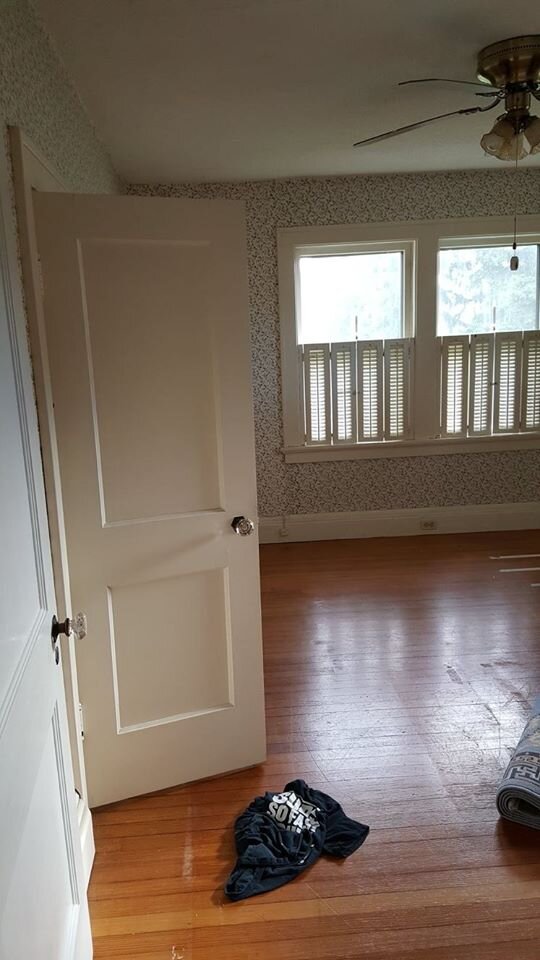
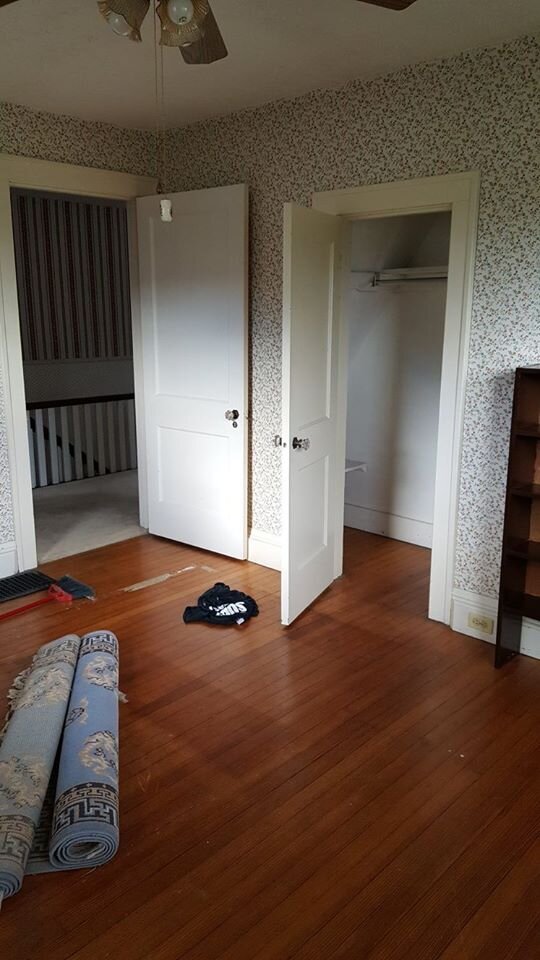
I actually didn’t mind the wallpaper in this room - most likely because we knew it was going to be our daughter’s room and the floral wallpaper was dainty and cute. But I got the itch about a year after we moved in to do something fun in here so I took a week off work and tackled this room and the nursery, because that’s my idea of a good time.
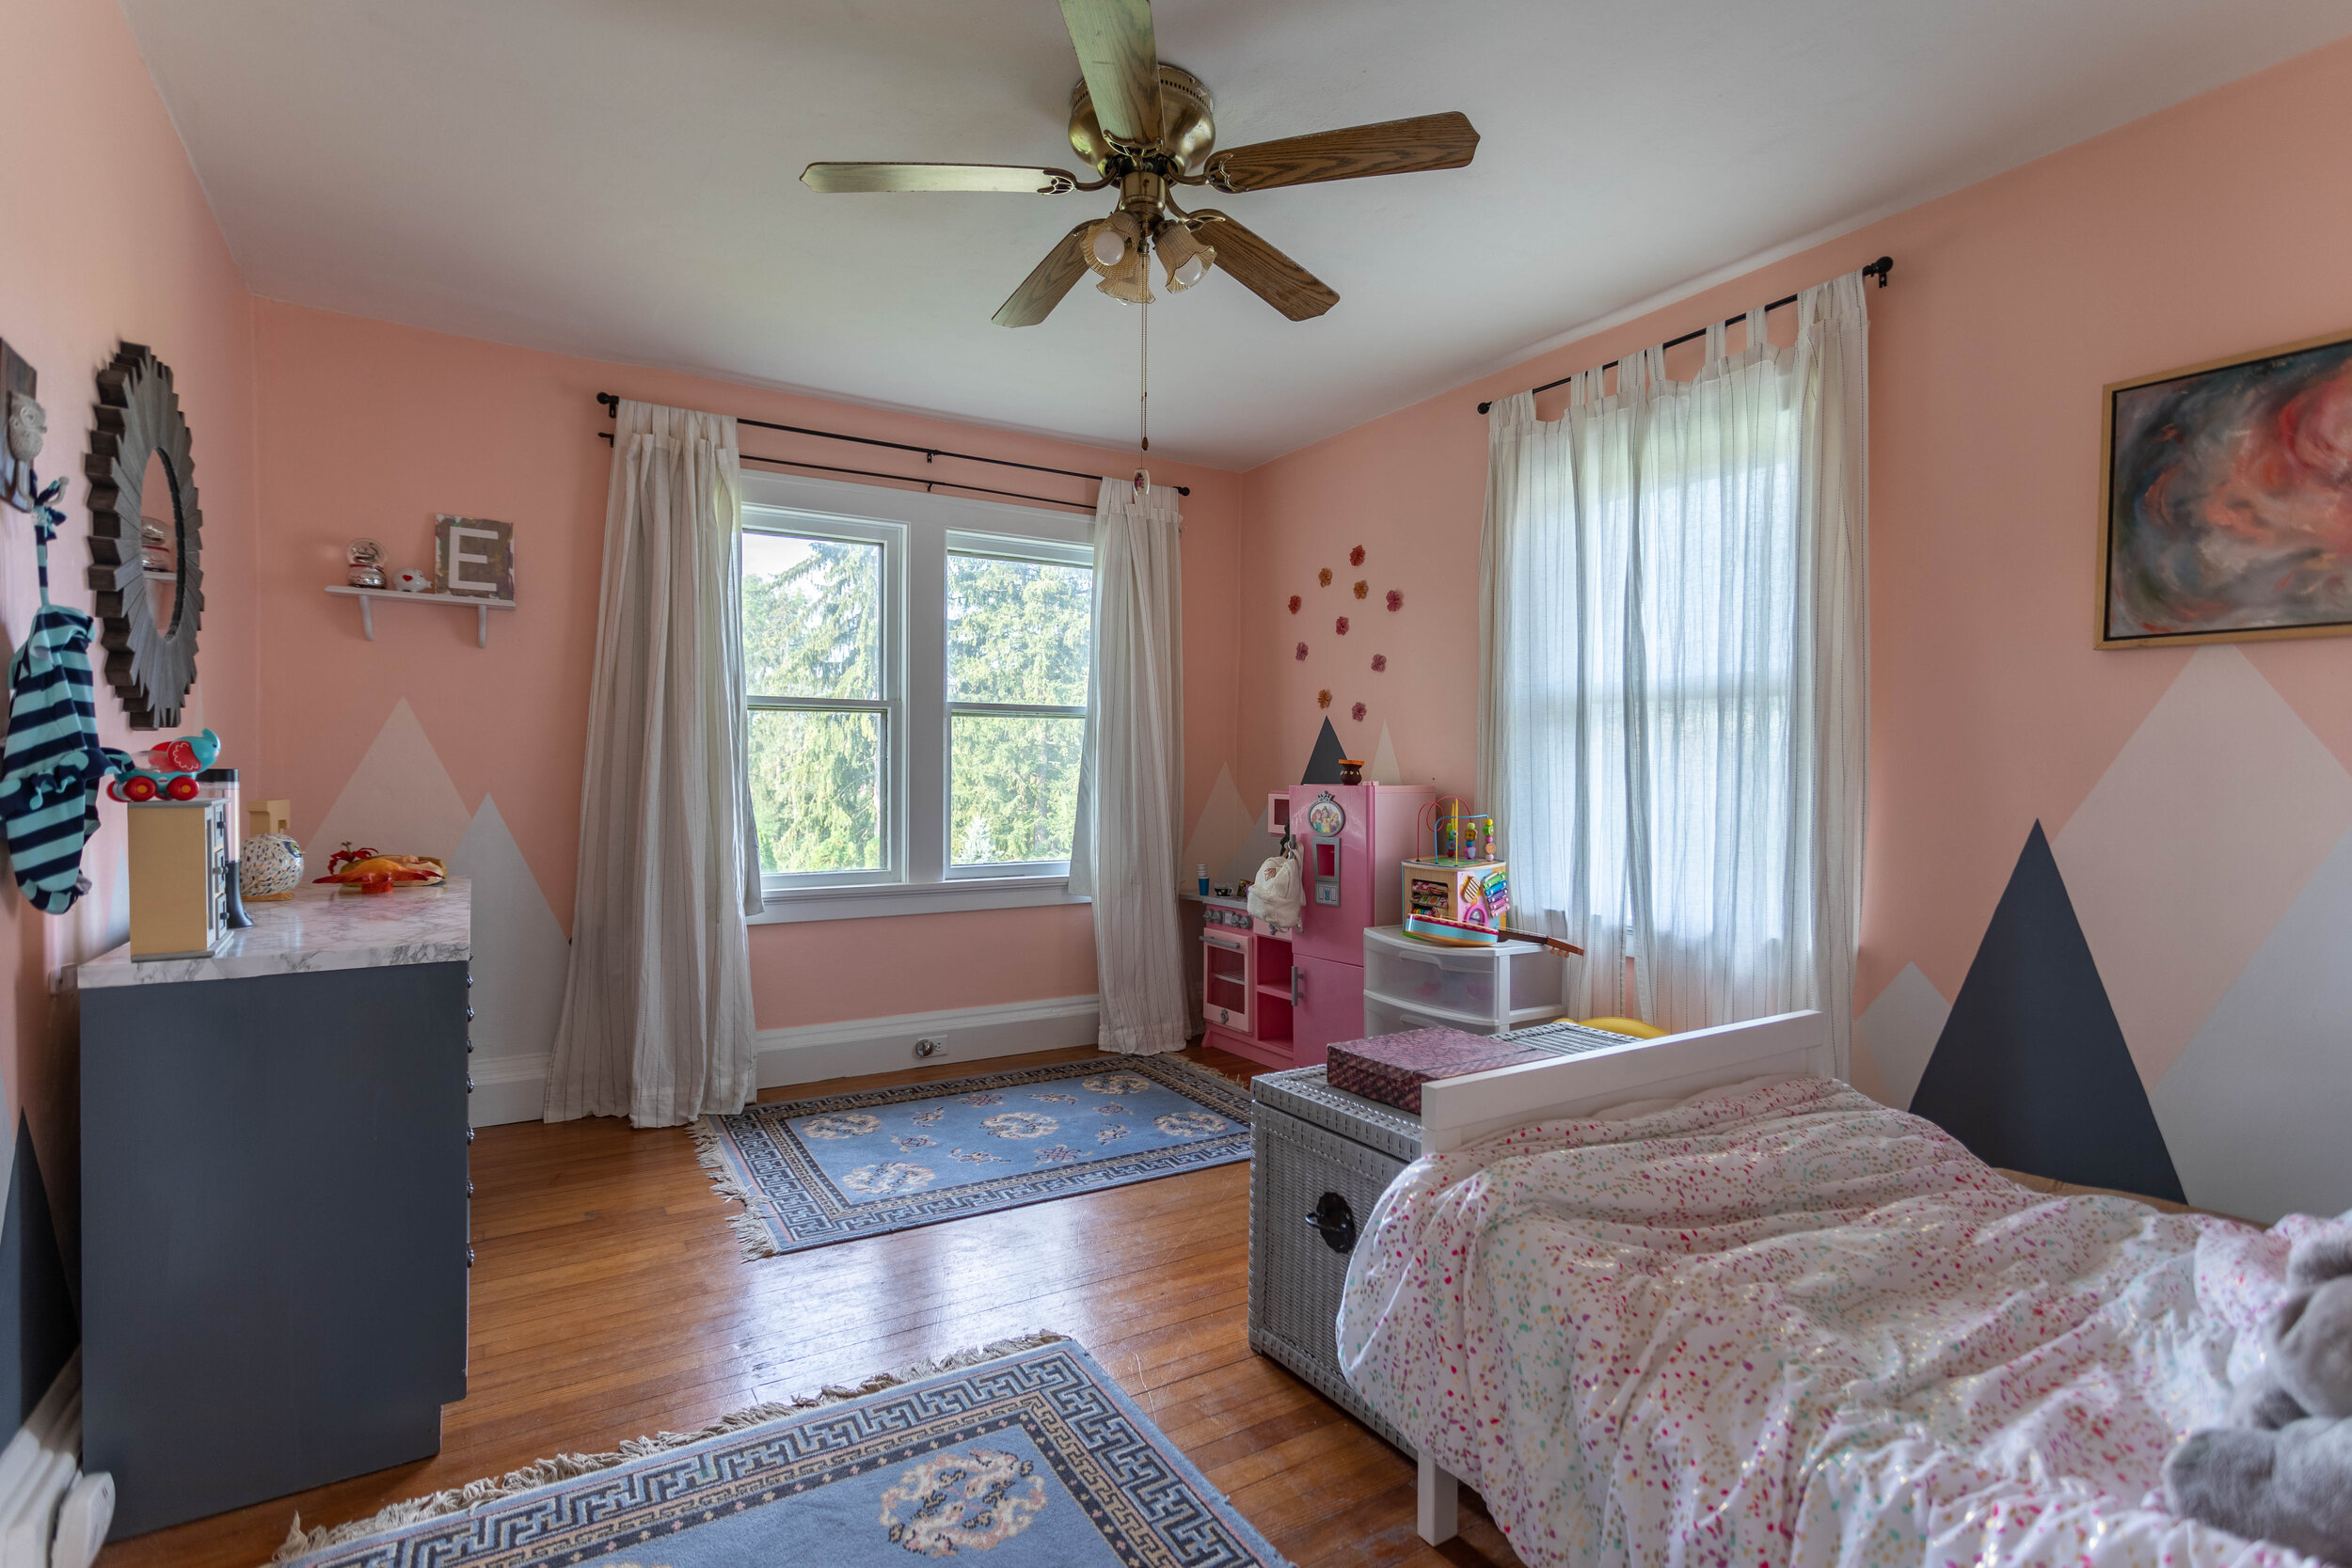
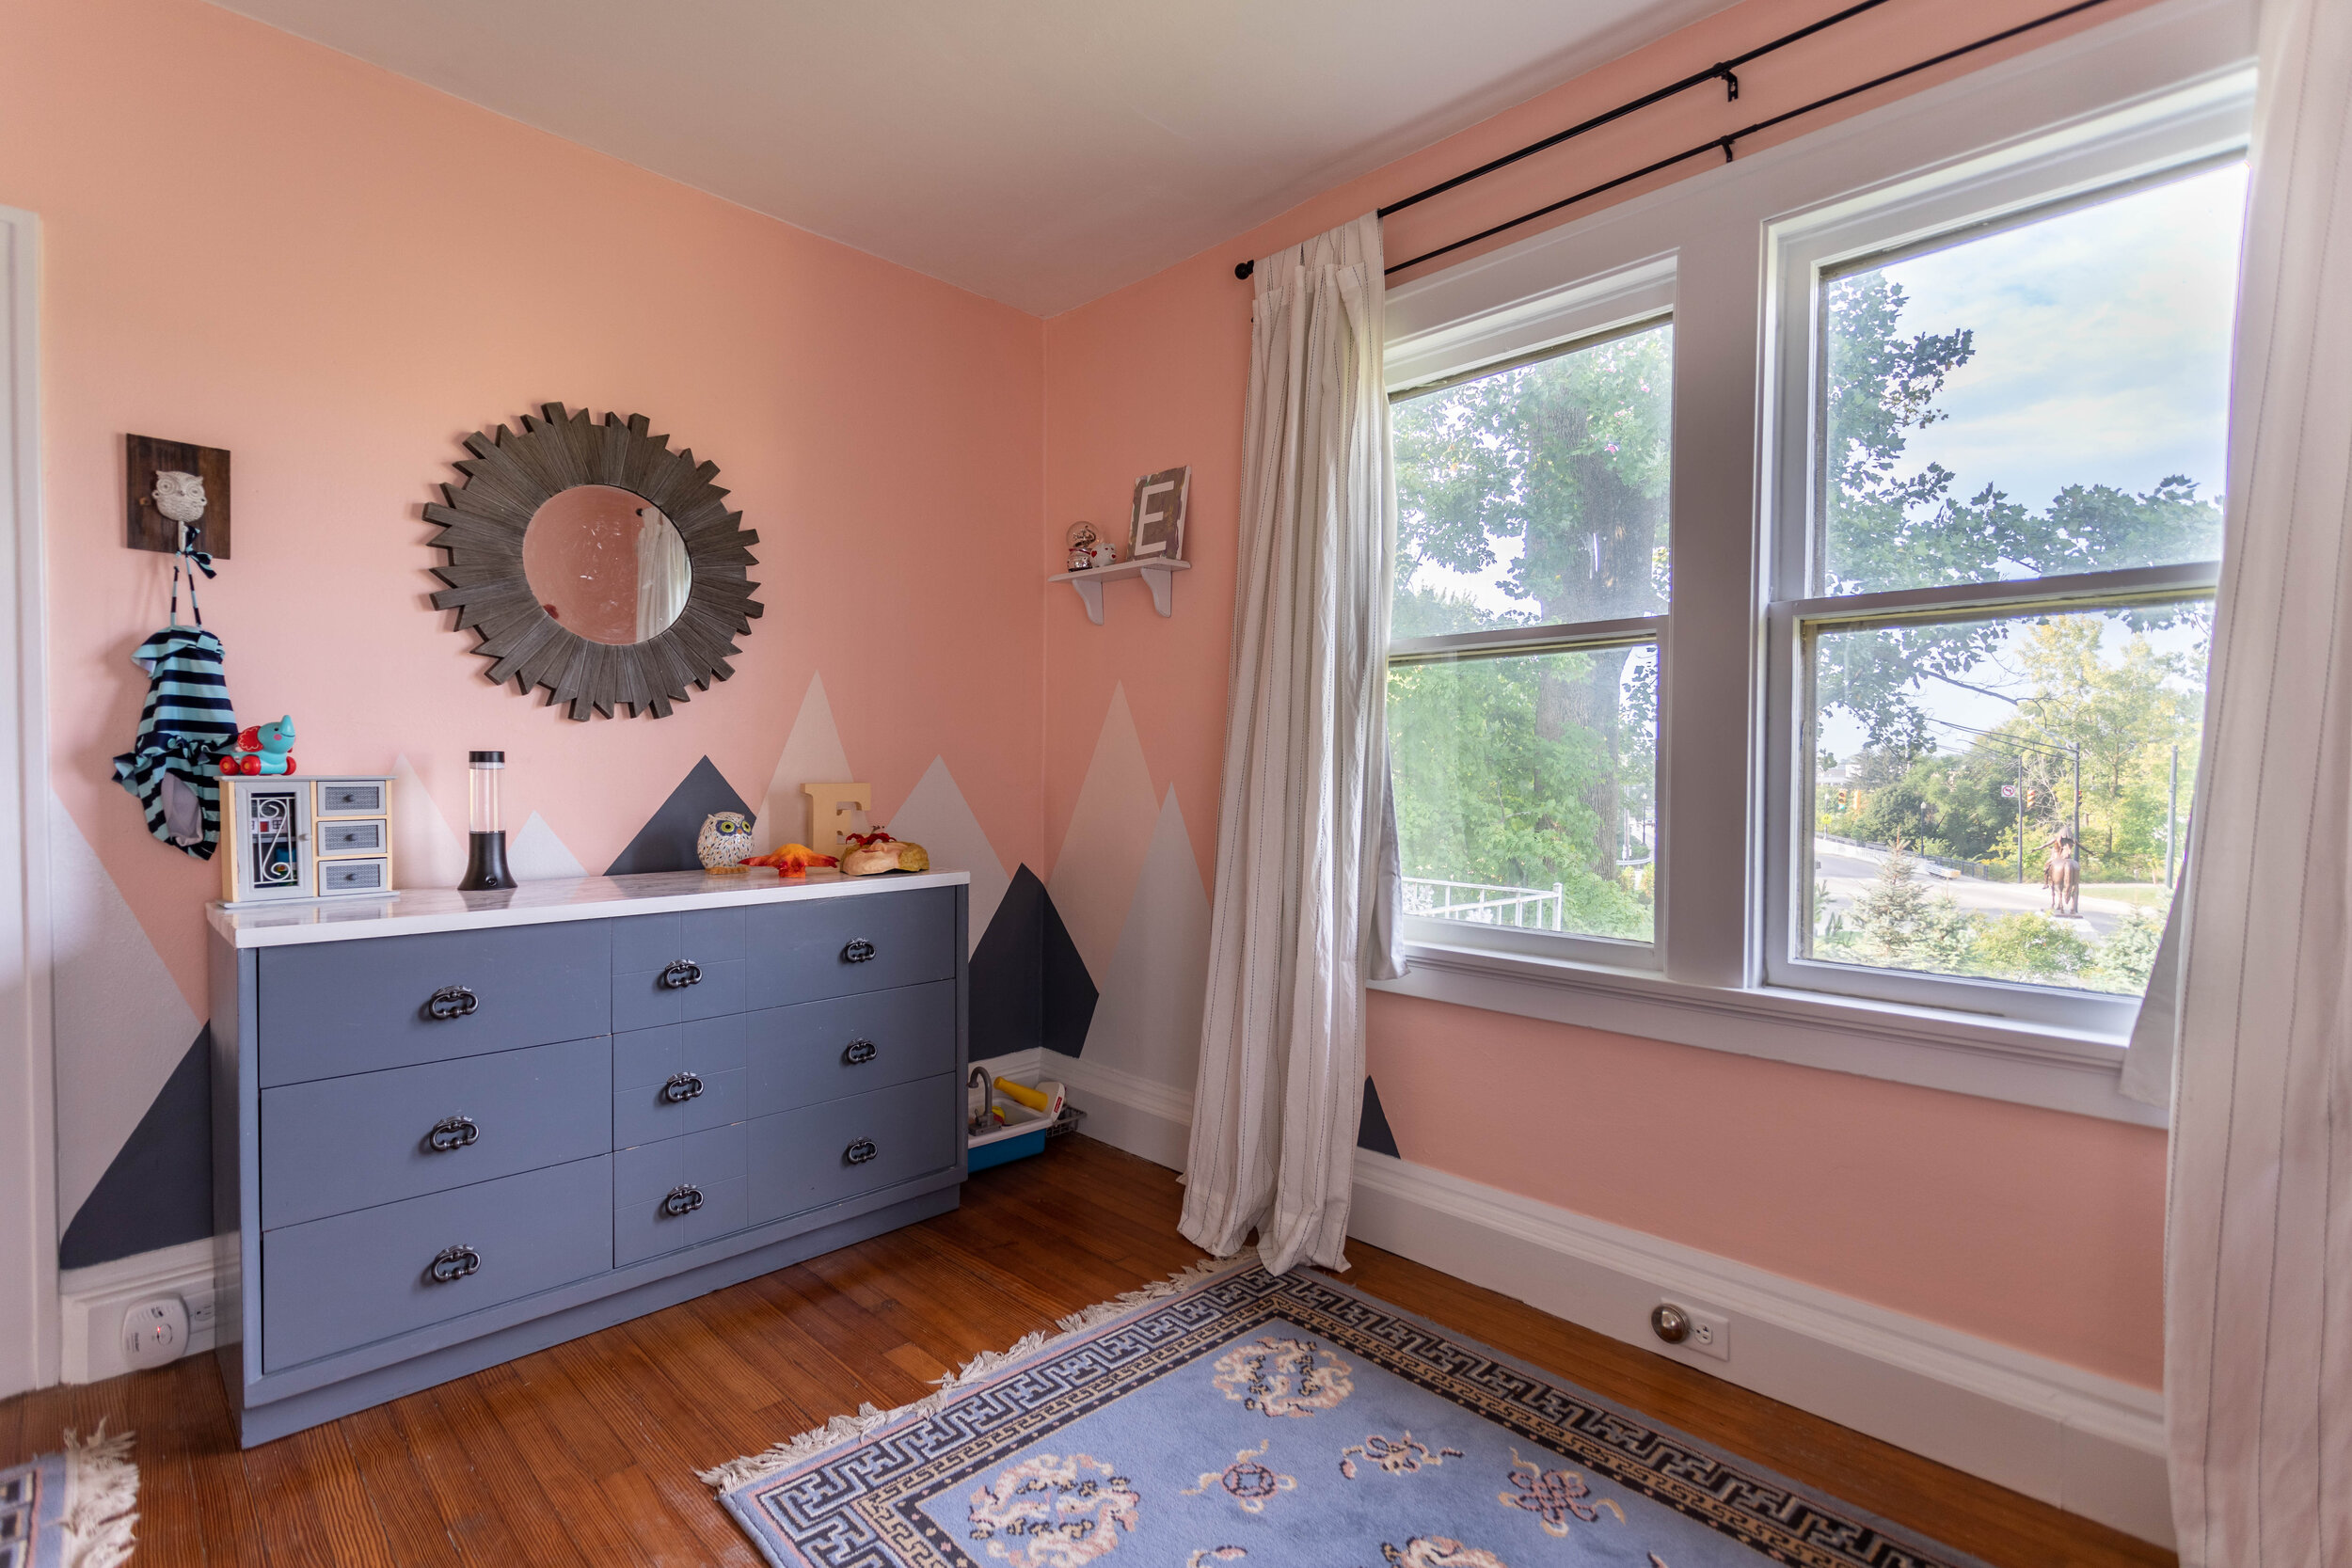
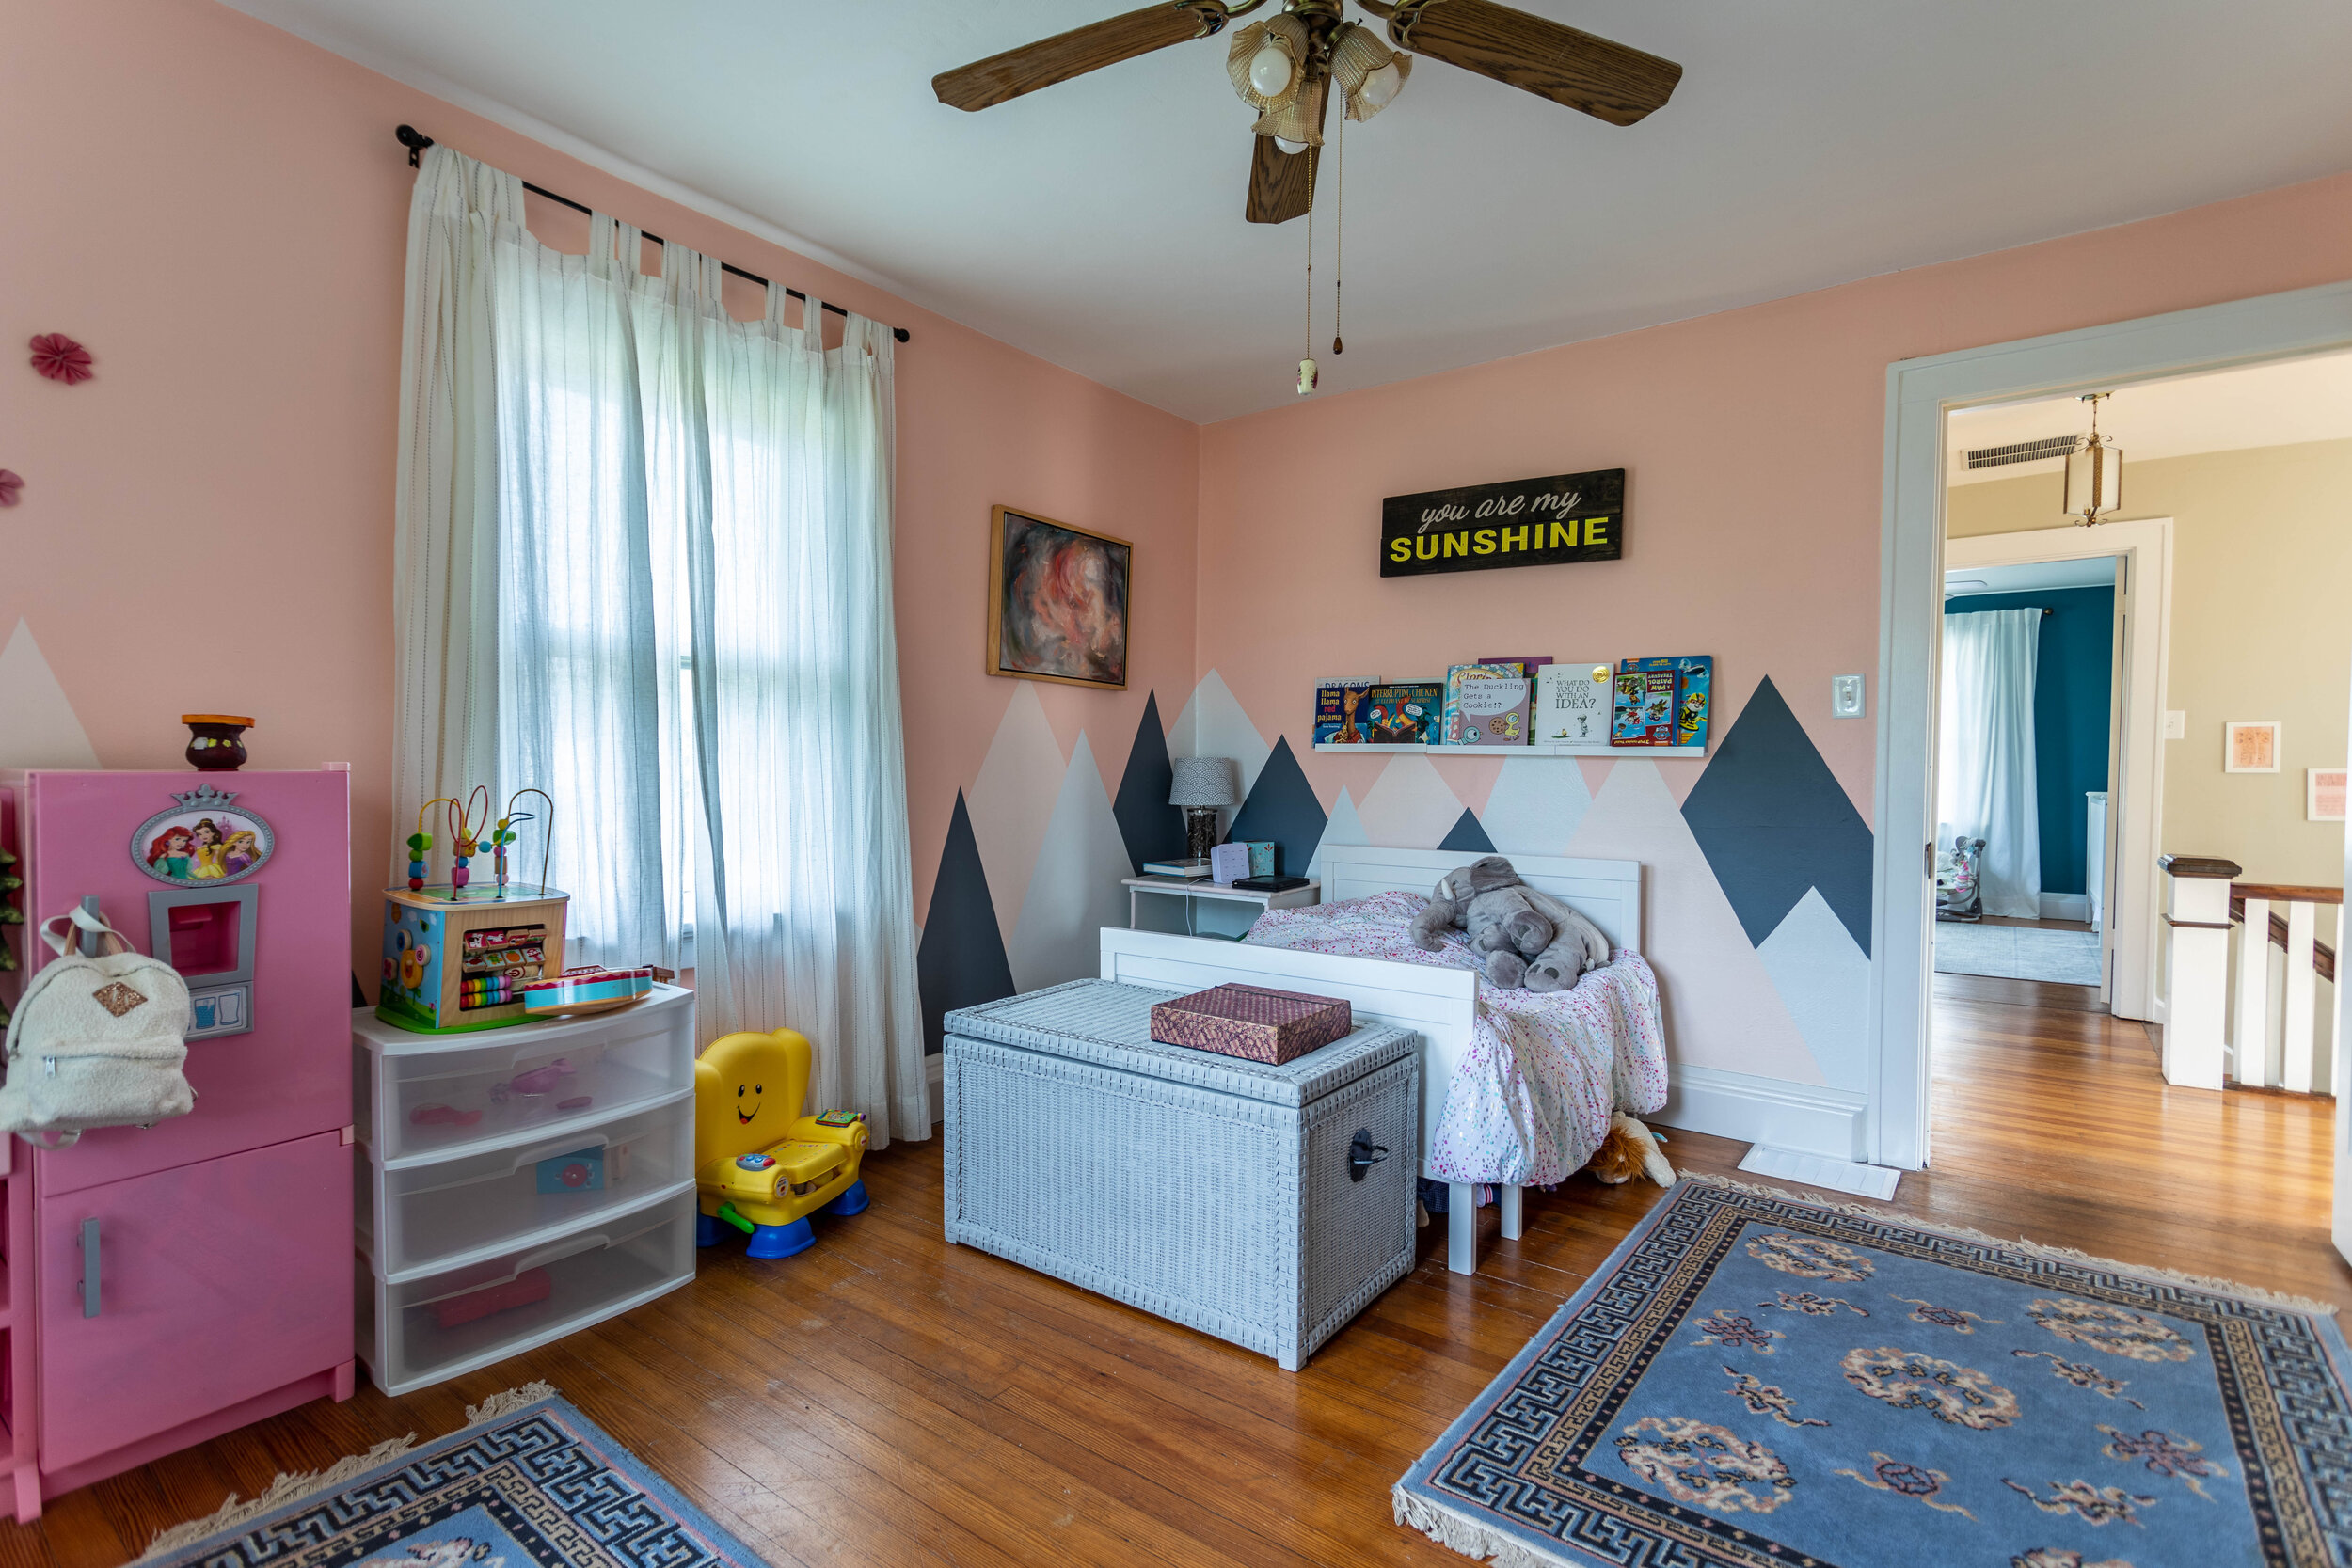
The area rugs were actually left by the previous owners and fit perfectly into the color scheme so I kept them. I wish I had a chance to switch out the light fixture before we moved, but whaddyagonnado?
The nursery
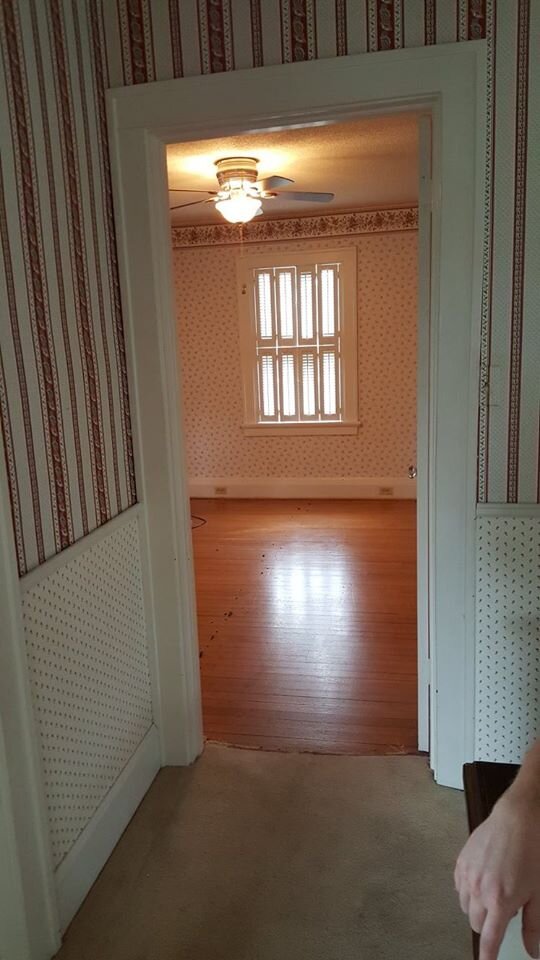
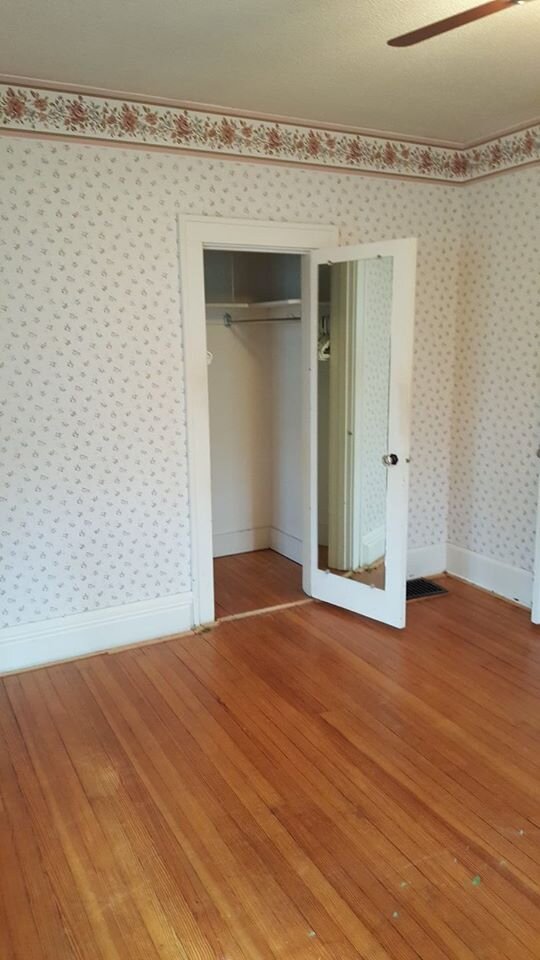
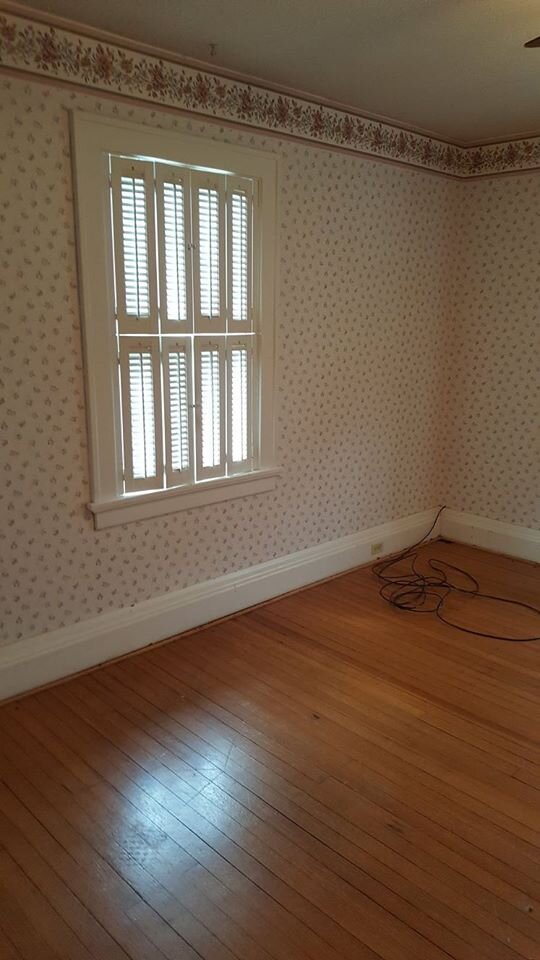
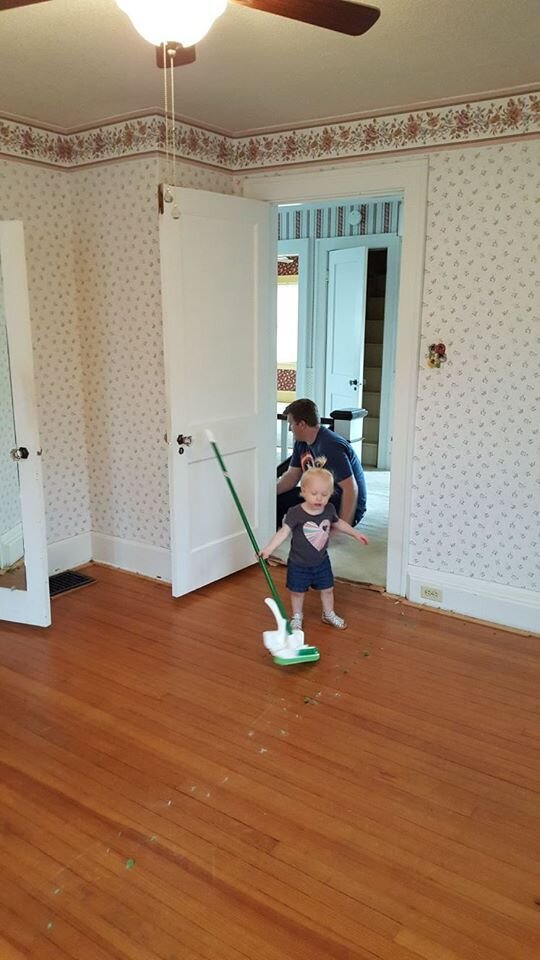
This is another room that we ripped the carpet out of as soon as we closed on the house, so in the pictures above it’s already gone. For being one of the smallest rooms in the house, this one took the most time to de-wallpaper. There were two stubborn layers of wallpaper on the walls and even some sort of wallpaper backing under the popcorn ceiling! By the end of it, my shoulders were lookin’ gooooood.

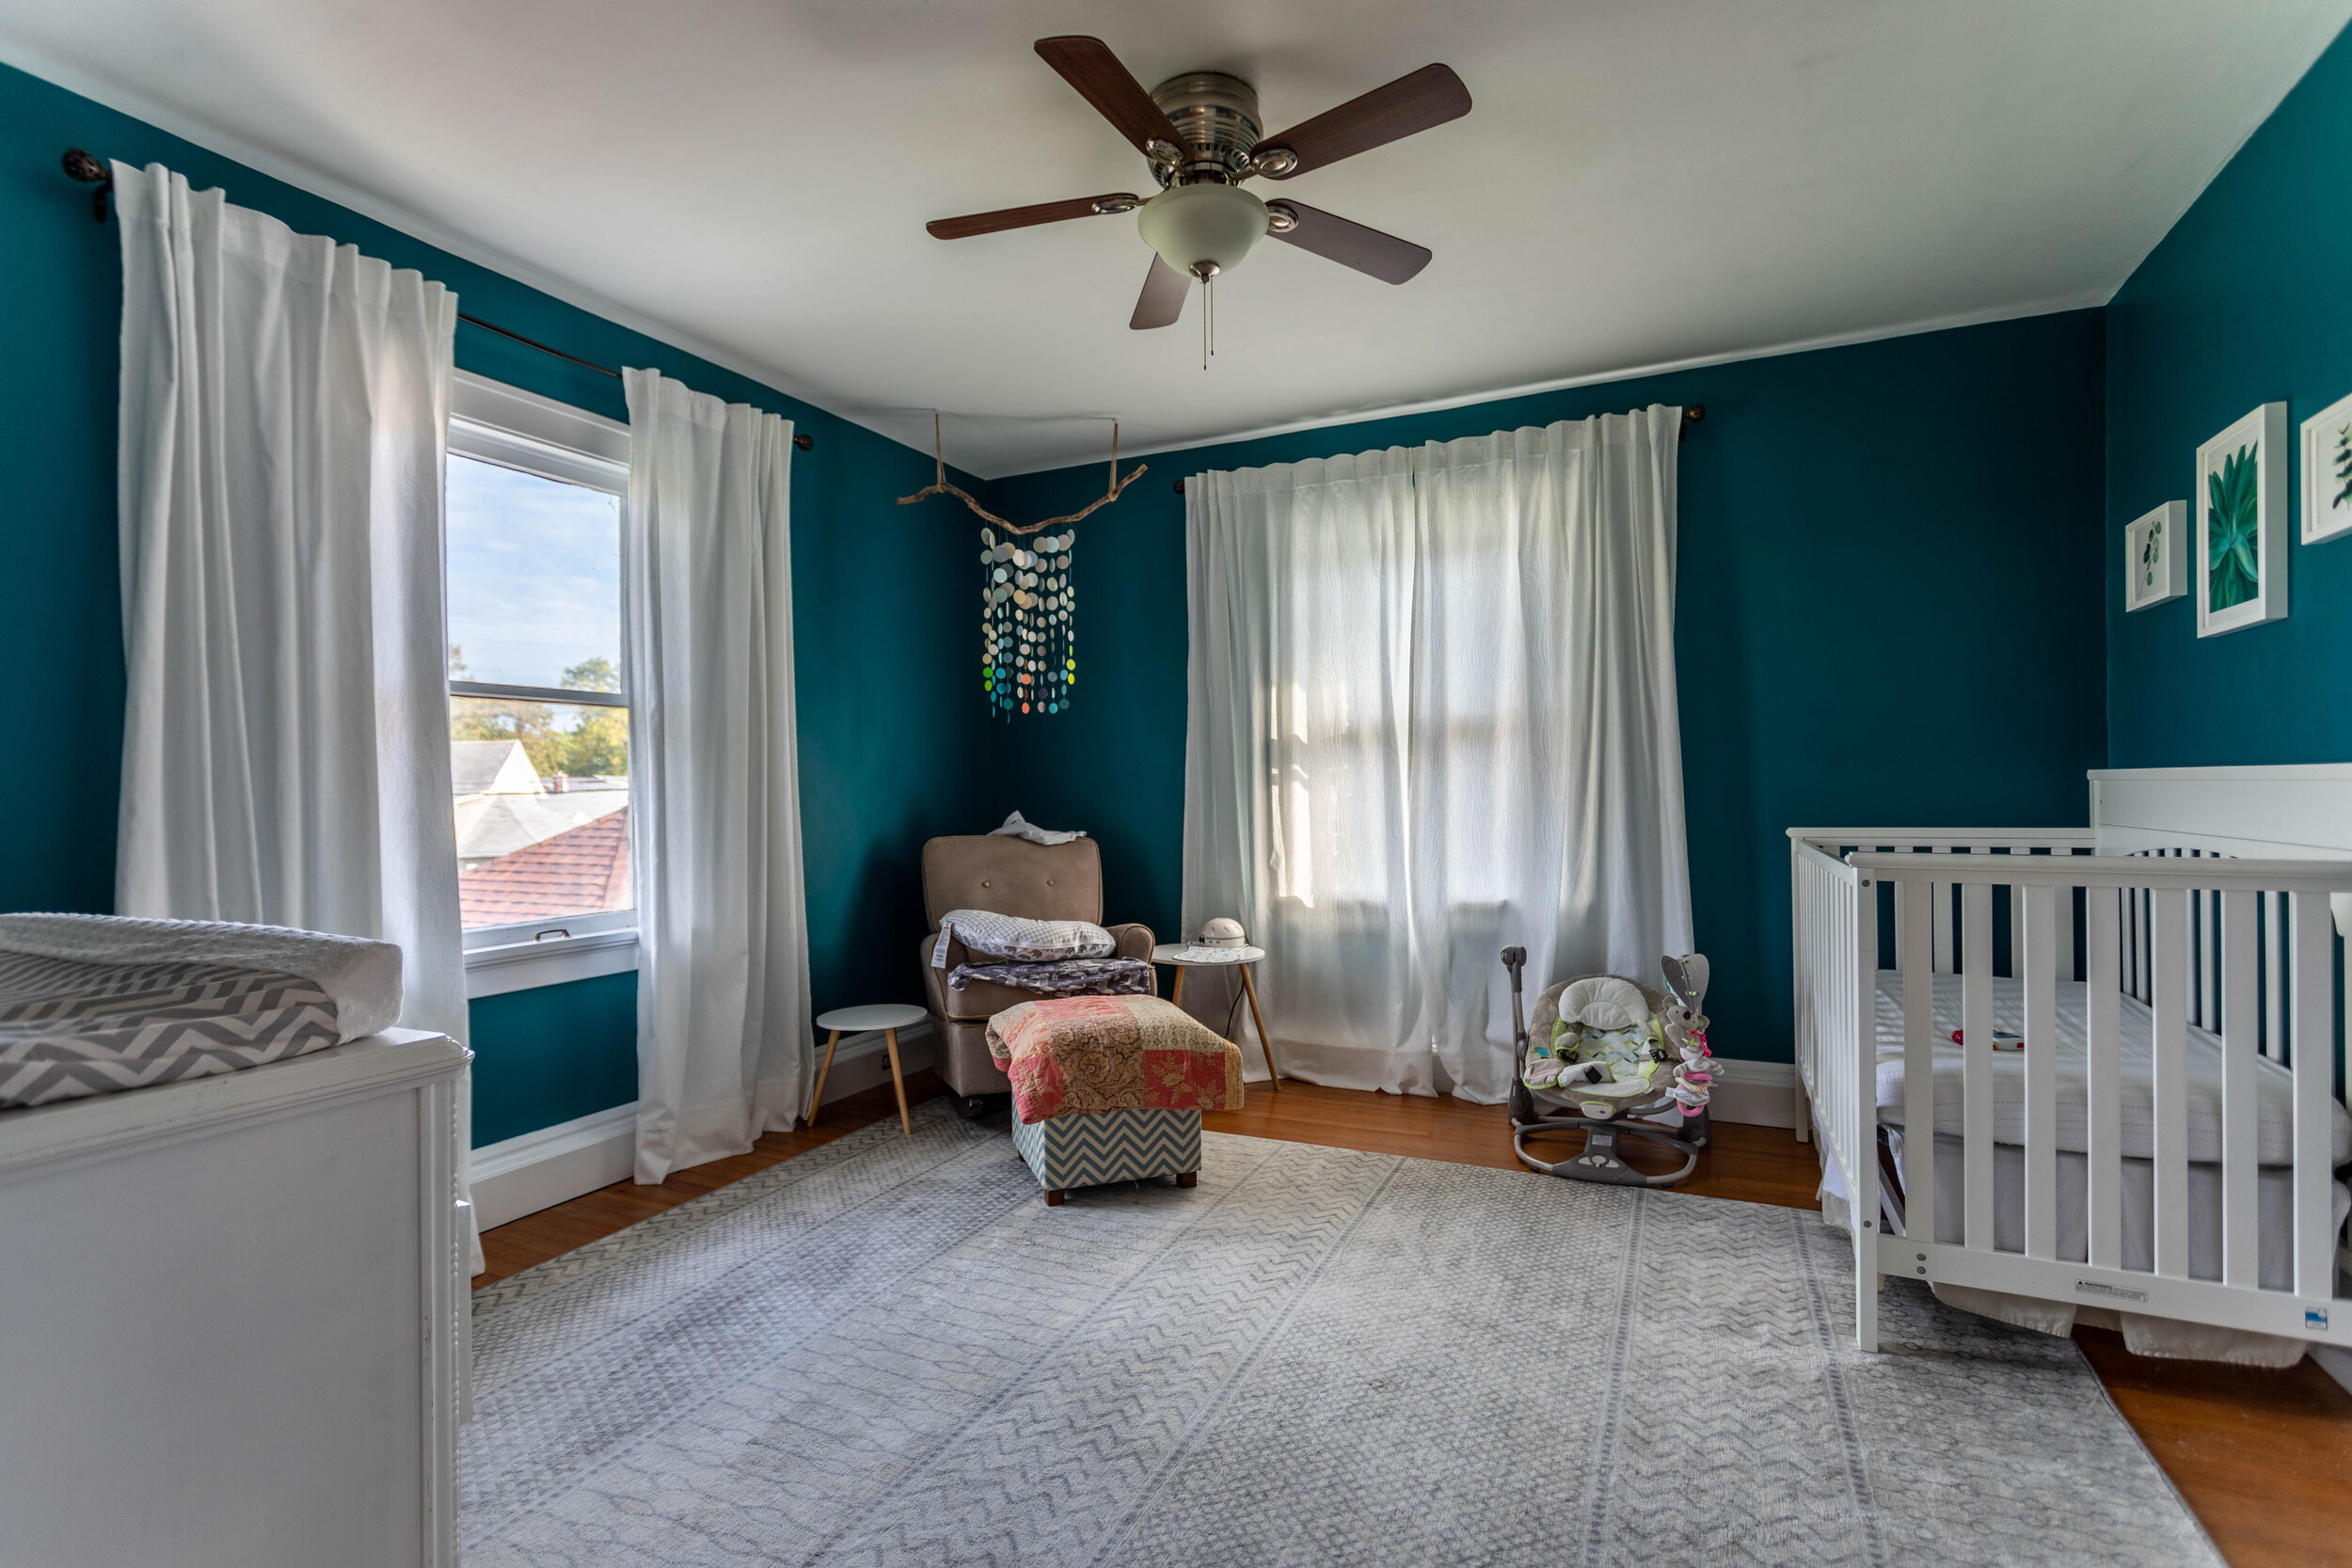
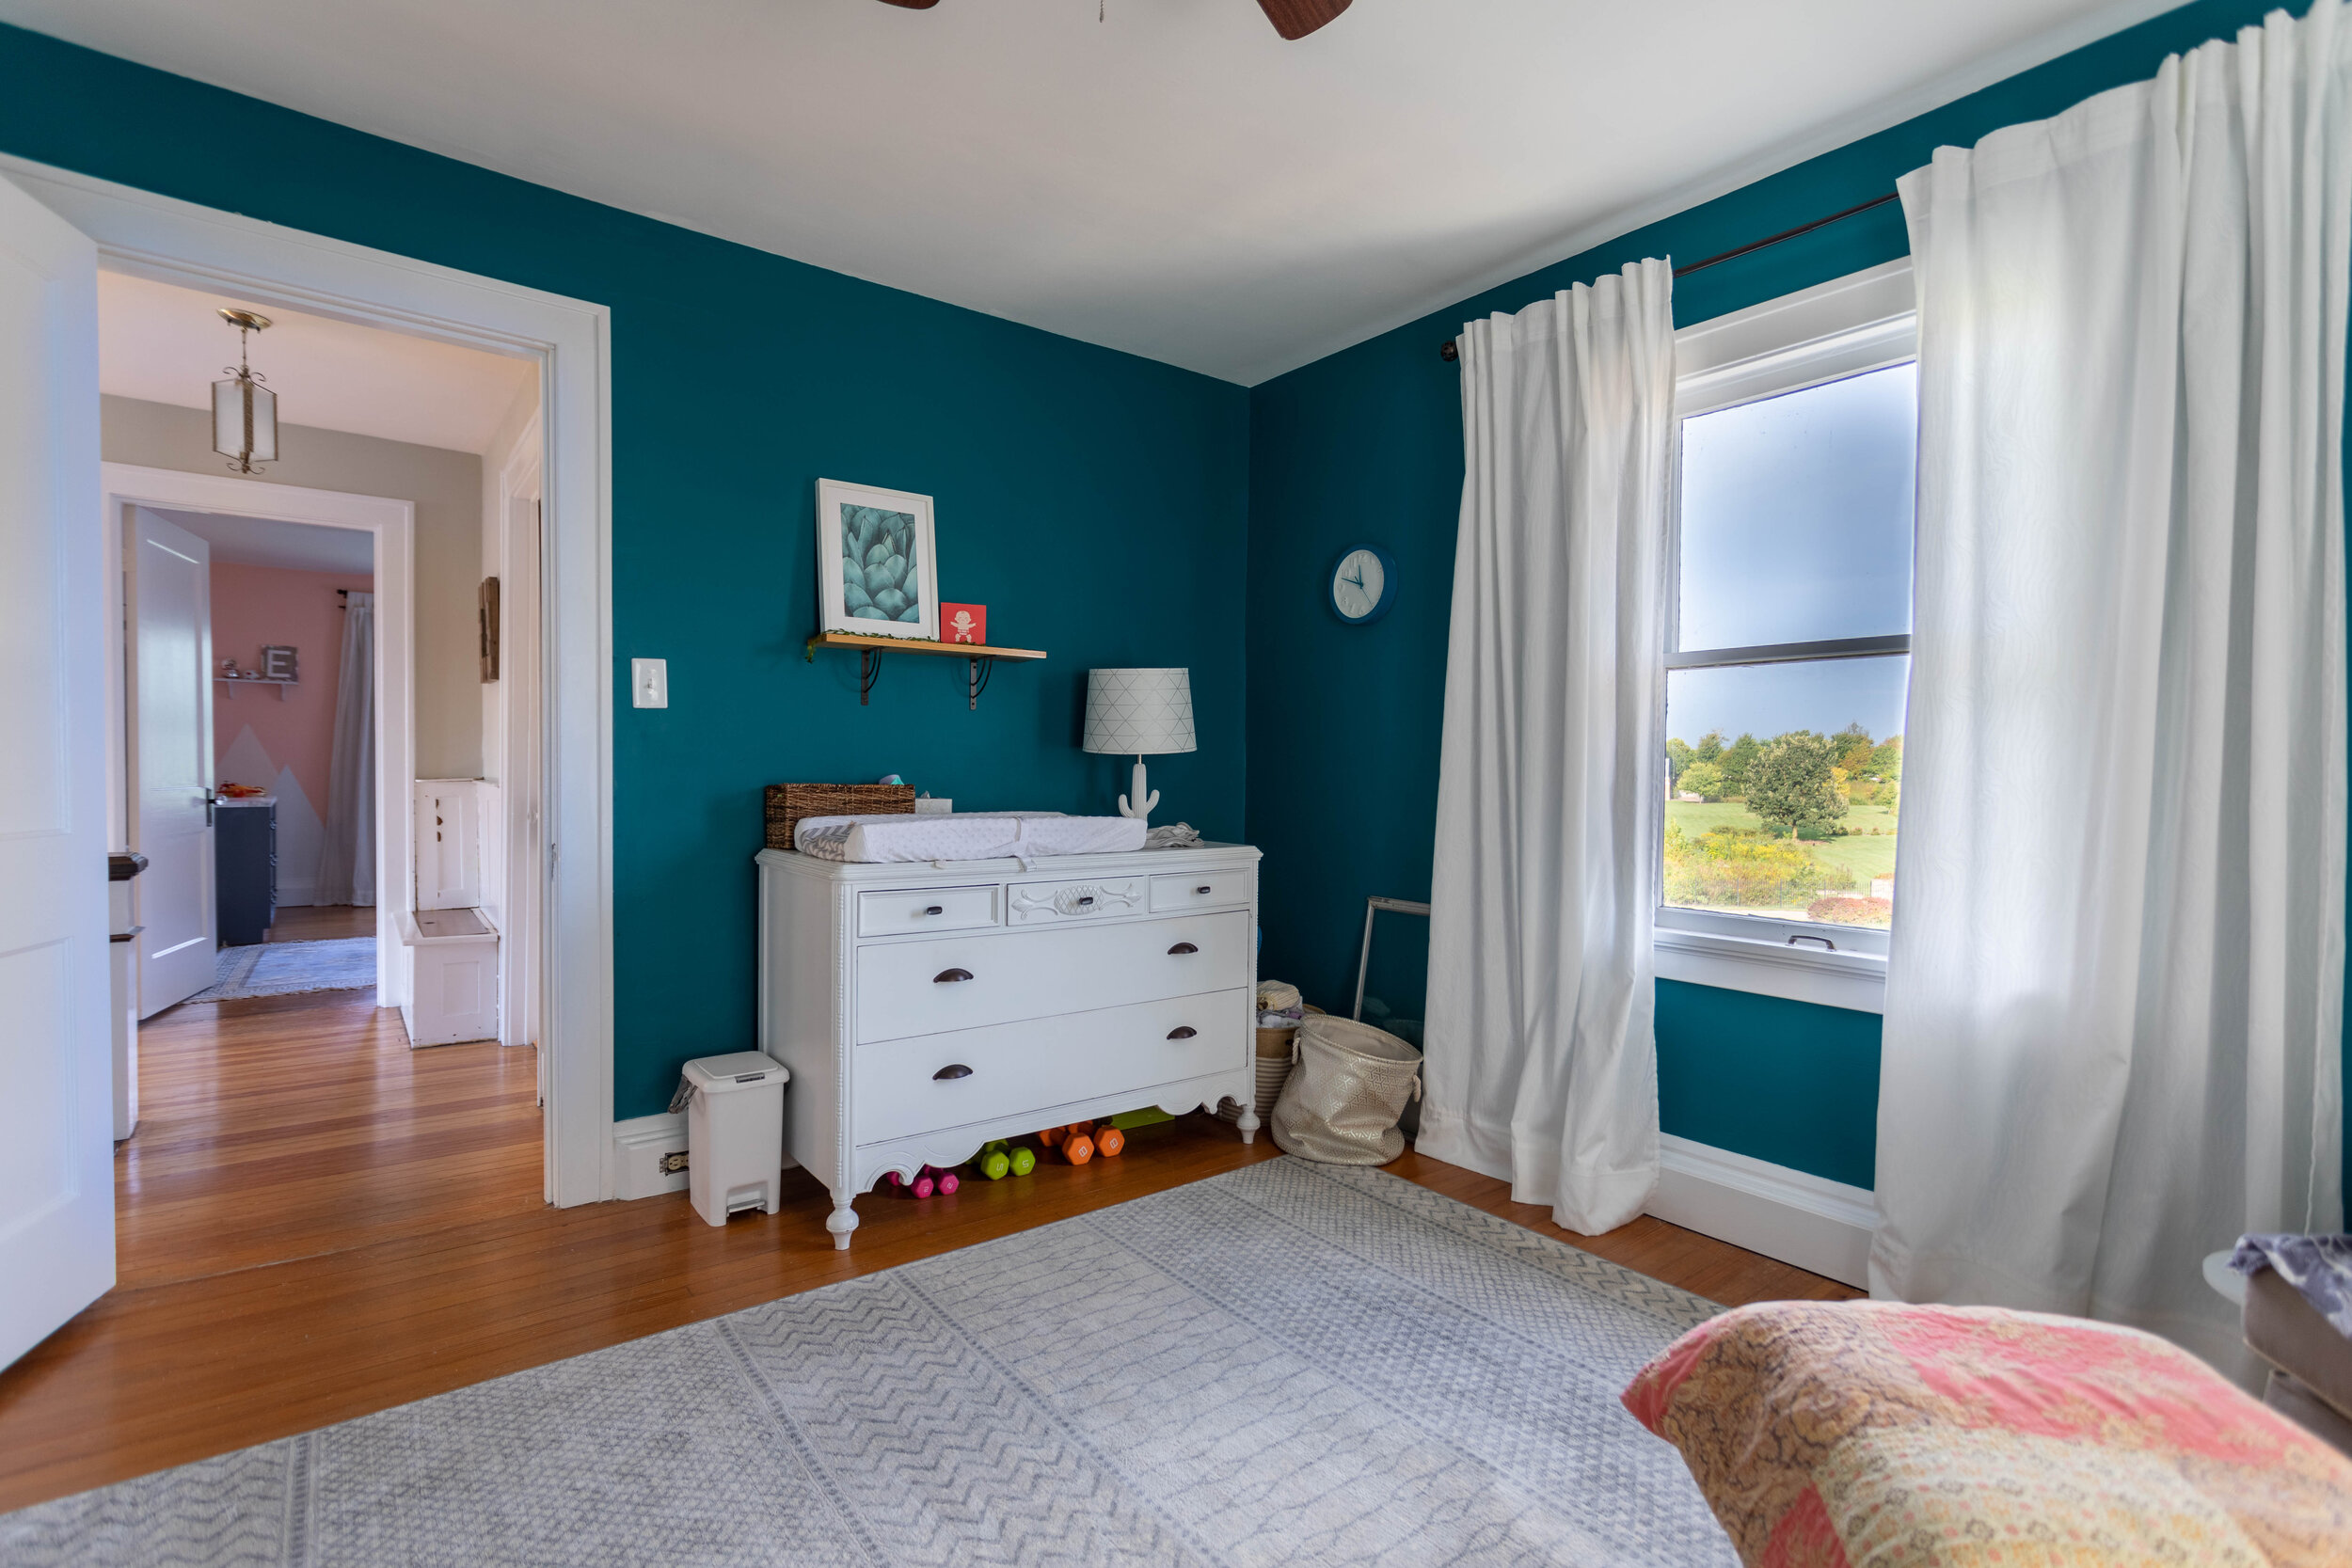
The color inspiration for this room stemmed from the fact that Lucius told me I was being a wimp using so many light colors in the house, which caused me to have an “I’ll show you!” moment. And I’m so glad I did because I loved the dark teal so much I want to paint it everywhere now.
There’s a lot of fear in using dark colors, and although I’m still choosy on where I use them, painting this room a dark color gave me a lot of confidence. It didn’t make the space feel small at all and brought a neat kind of drama to the space.
What you can’t see
Although I showed a majority of the house, it also has a full basement and a walk-up attic that I, unfortunately, don’t have pictures of.
When we moved in, the basement was finished but old, dark, and musty. It had dark paneling everywhere and forest green carpet. We ended up tearing everything out and it’s a good thing we did because we discovered that there was water gradually seeping in every time it rained. Interestingly, we also uncovered an old root cellar behind the paneling that we turned into an unfinished storage area. The previous owners had no idea it was there!
The attic is actually a pretty cool space with a lot of potential. Most of it is usable space, though unfinished, with enough headroom for even Lucius to walk around. It’s a walk-up attic that you access through a door in the upstairs hallway. I had visions of turning it into the ultimate kids’ playroom someday, but again, the whole moving thing got in the way.
Lastly, one major renovation you can’t really see is the HVAC. We ended up replacing the furnace and air conditioner and having the venting rerouted for efficiency. Spending money on those types of updates is always a little hard to swallow because you don’t get that visual gratification, but it was definitely worth it when temperatures dipped or soared.
A happy ending
Lucius and I had a blast renovating this house and we learned so much along the way. A super common reaction I heard when word got out that we were moving was along the lines of, “But you put so much work into it!”
Yes, we did put a ton of work into the house, but when we bought it, and for much of the time we lived there, we didn’t expect to stay long-term. We renovated it because it’s what we enjoy doing.
In the end, I definitely ended up falling in love with the house and it was hard to leave. But finding the silver lining: moving to a new house is giving us an opportunity to flex our reno muscles again on a new project and gave me the motivation to start this blog!
Related Posts With Before and After Pictures
Historic House Tour: Before and After

How to Paint an Ombre Wall in 5 Easy Steps
Unlike most people, I love painting. I love it so much I got my BFA in painting - true story! Not only do I love painting paintings, I also love painting rooms. I love the process of turning my mind off, getting in the zone, and drastically changing the look of a room in just a few hours with a gallon or two of paint. Let’s be honest - some of that might be the paint fumes talking.

Unlike most people, I love painting. I love it so much I got my BFA in painting - true story! Not only do I love painting paintings, I also love painting rooms. I love the process of turning my mind off, getting in the zone, and drastically changing the look of a room in just a few hours with a gallon or two of paint. Let’s be honest - some of that might be the paint fumes talking.
Although it’s not appropriate in all rooms, I love trying new things with paint. Whether it’s adding a simple accent wall that’s a couple shades darker than the main color or painting a room a bold, dark, moody teal to creating a stencil to make a design or (in my most recent room makeover) painting an ombre wall.


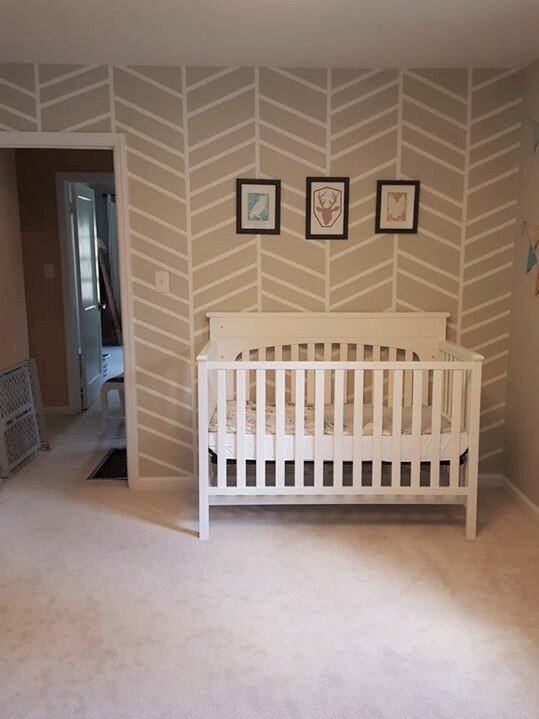
As I mentioned in this post, once I got sucked into the world of ombre walls on Pinterest, I knew I had to give it a try. Ombre walls are definitely trending right now, and as with any trend there’s always the fear that it’ll go out of style. You know another thing I love about paint? It’s SO easy to change if that happens! Plus, I figured if I could pull it off, it would look amazing. So off I went!

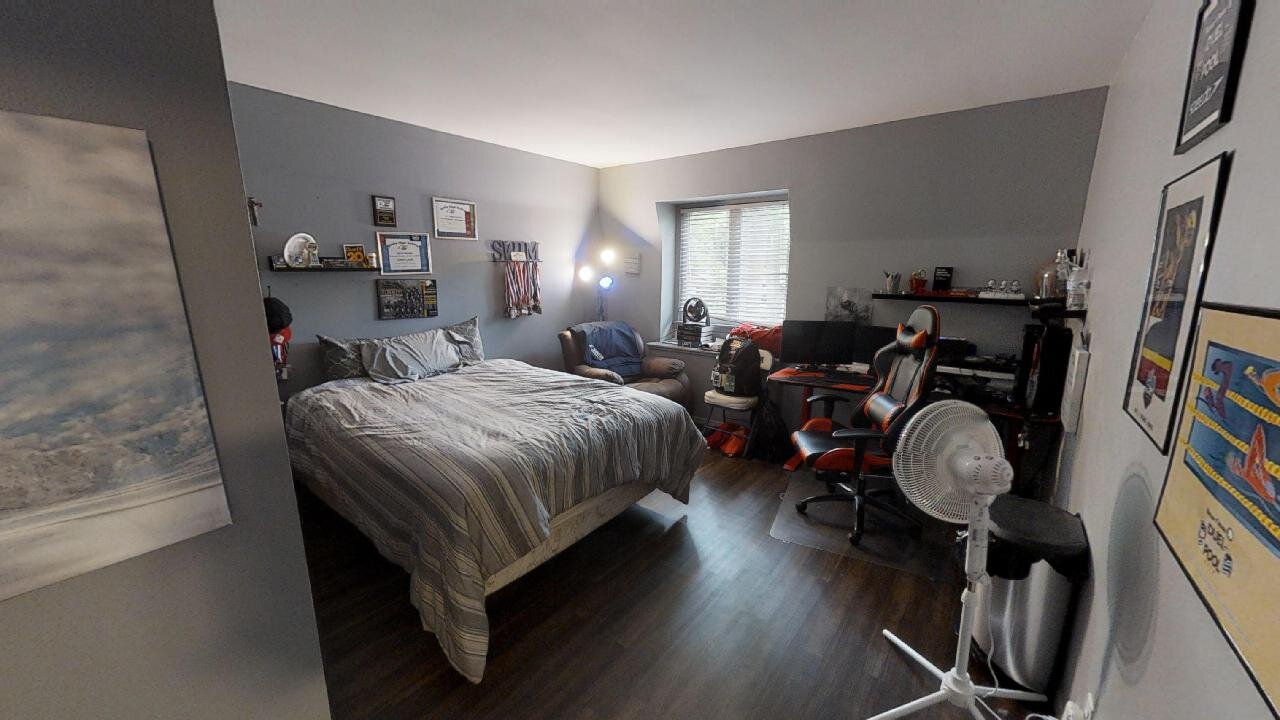
I was so excited to work on our daughter’s room and take it from the dark, light-sucking blue/gray we inherited to something bright and girly.
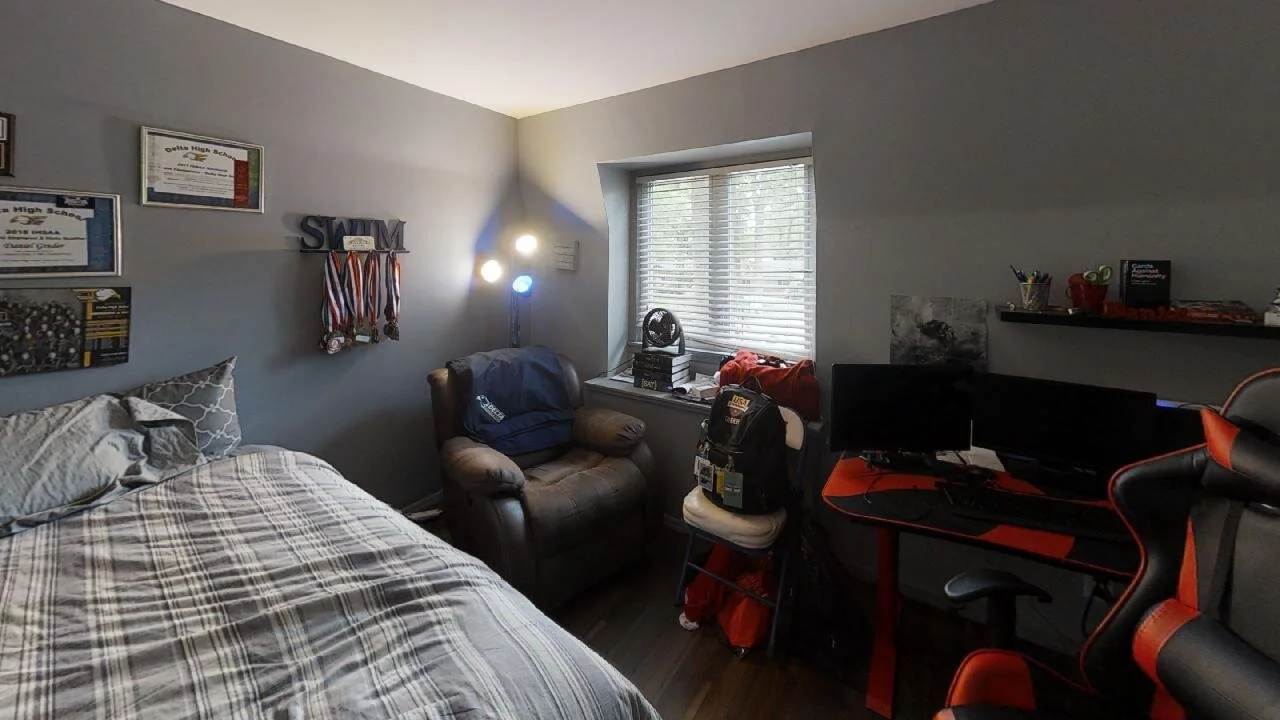
This is our daughter’s room from the listing photo. It worked for the teenage boy who resided here, but for a four-year-old girl? No way.
Picking a color
For some reason I couldn’t shake the idea of using pink and teal in this room, so then it was just a matter of picking the exact paint colors.
I love to hang out in the paint section at Lowe’s. I take so many paint chips that I might just single-handedly keep someone in a job constantly restocking them. I actually created our younger daughter’s mobile with paint chips I collected over time and for some reason felt the need to keep. (You can check out how I made the mobile HERE.)

This project was no different. I headed over to Lowe’s and grabbed a whole bunch of colors in the family I was thinking of and taped them to the wall.
Then I let them hang out there until I got a chance to paint a few weeks later. Sometimes my paint chips only stay up for a day or two, but typically it’s much longer. I’ve had paint swatches on our living room wall for a few months, with no real timeline of taking them down. I actually like to leave them up so I can see how they look in all different sorts of light.
In the end, for this project, I went with the lightest shade of blue on the first blue swatch on the left (Tame Teal by Sherwin Williams) and the middle shade of coral in the first swatch in the second row (Coral Mist by Valspar).

Usually, once I decide on a color, I get a sample container of paint and paint big swatches on several different walls. Then I let it hang out for at least a couple of days to once again see how it looks in different light. I can be very indecisive, and paint colors can change drastically during different times of day, so I feel like these steps help me to be sure in my decision and not waste money on paint.
A gallon of paint isn’t that expensive, but it can definitely add up if you keep repainting because you don’t like the color you chose! Those little sample paint containers are only around $5 each and are well worth it if it helps you commit to a color. I know I said I love painting, but that doesn’t mean I want to paint the same wall over and over again.
In this room, I actually felt confident in my paint choice just by looking at the paint chips and didn’t end up following my own rules. I just grabbed a couple of gallons and went to town!
The Process
I painted all the solid walls first since those were run-of-the-mill and straightforward. Then it was a matter of painting the ombre wall.
I researched a lot of different tutorials and used the steps that I thought would work best. The step-by-step process is below including what I wish I had done differently.
One quick note - if you want a smooth transition from color to color, you have to work FAST. This can be intimidating. I pictured myself breaking a nervous sweat trying not to mess up the wall, but honestly, once I got started I just went with the flow and I love how it turned out.
Start by making light marks on the wall where you want your colors to transition.
Grab 3 paint trays and 3 rollers. Pour one color into one paint tray and the other color into another. In the third paint tray, pour equal amounts of both colors.
Make sure you mix enough of the combined color so you don’t have to mix more partway through (working quickly is the name of the game here), and so you don’t risk your new mixture mismatching the original.
Then, paint your color of choice on the bottom and the top. Since the goal is to have a smooth transition from one color to the next, don’t worry about taping anything off or painting a harsh line where the colors change.
Apply the mixed paint to the middle section of your wall, blurring the dividing line of color.
Using the roller you applied your mixed paint with, lightly dip your roller into the color on the top of the wall and start to soften the transition. Now do the same with the color on the bottom of the wall.
The most difficult part of this project, that no tutorial seemed to talk about, was what to do with the edges of the wall. Since your roller can’t get all the way to the edge, I used a brush to blend as well as I could. If you’re not good at cutting-in edges, apply painter’s tape to the adjoining walls before you begin.
And there you have it - how to paint an ombre wall. If you’d like to paint one in your house, I say, give it a try! It’s only paint, after all. If it turns out poorly, you can always paint over it. Easy peasy. Below is a list of supplies to help you get your ombre on. Enjoy!

Supply list
3 paint trays
3 rollers
1 paint brush
painter’s tape
2 gallons of paint (1 of each color) - this should be more than enough for one wall and you’ll have a lot of extra, but a quart won’t quite be enough.

Let the dining room renovation begin!
Come take a peek at the beginning of our dining room renovation - and all the mess involved. Then finish up with some beautiful design inspiration and my future plans for this room!
Now that you’ve seen the house tour, you probably noticed our bright, froofy (I think I made that word up, but it fits so I’m sticking with it), and out of place dining room.

By itself, this room admittedly didn’t look terrible. With the right decor (and some squinting) I could see it working. However, it certainly wasn’t our style.
Before we moved in I was bound and determined to tackle this room first because it felt so out of place with the rest of the house. But then we moved in and other rooms took priority, like repainting the loft, repainting the foyer/upstairs landing, and making over our daughter’s room.
Stripping wallpaper and patching walls
Over the last couple of weeks I’ve been sitting on the couch in our living room while I’ve been working from home (#thankscoronavirus), which conveniently faces the doorway to the dining room. Every day I’ve been staring and glaring at that awful yellow and one day I blacked out. When I came to, I discovered someone had ripped the paint off the walls!

Who would do such a thing!? Even the T-rex is appalled.
Just kidding. It was totally me.
Now, you may be thinking, “What the heck? How did you rip the paint off the wall?” Well, let me tell you.
We originally thought the walls were painted with a yellow texture and we just had the red border above the chair rail to remove. I was pretty pumped because although I’m an odd duck and actually like stripping wallpaper, I got my fill of it in our last house where there was wallpaper in literally every room (kitchen and bathrooms included!). Buuuut a little while after moving in we noticed swirls under the paint and wallpaper seams… indicating that the previous owners had PAINTED OVER WALLPAPER. Please, for the sanity of whoever moves in after you, don’t do this.

Since by this point I had accepted the fact that the wallpaper had to go, I let my curiosity get the best of me. I found a spot where I had removed a drywall hanger that looked like I could get a grip on some of the paint, so I picked at it until this happened:

And this was where I realized I reached a point of no return and just kept on picking. Seriously. I picked and pulled and peeled almost all the paint off this wall by hand because I simply love to pick at things and couldn’t stop myself. And once I got most the paint off, I started picking at the wallpaper too. Guys, I think I have a problem.
The next day we pulled off the chair rail as well as the crown molding. The chair rail was never in my grand plan to stay, but I do want to put crown molding back up. I’ll explain why we took it down a little later.

And of course under the chair rail and the crown molding there were two more layers of wallpaper!

Right about here is where I broke out my wallpaper steamer and went to town, stupidly thinking that I could get all the wallpaper off in a few hours and have the nicks and inconsistencies on the walls patched by the end of the weekend.
Also, like the excellent blogger that I am, I completely forgot to document the process of stripping wallpaper, so I’ll write a separate post about how to do that another time. Get ready to be enthralled.
Jumping ahead, here are some pictures of the room partially stripped of wallpaper:


On the the right-hand side of the doorway in the picture above you’ll notice the wall is looking pretty rough. I discovered while trying to strip the wallpaper that it had already been removed on this part of the wall. My assumption is that the previous owners started stripping the wallpaper in this section, realized it was going to be a pain, and decided to paint over the rest of it. So essentially on this section of wall I stripped the paint off with a wallpaper steamer and ended up gouging the bajeezus out of it and pulling up big sections of the drywall paper. Whoops.
After what I’m calculating as approximately 10(!!!) hours of wallpaper removal it was all finally gone! And I was left with some seriously uneven walls that needed smoothing out. Bring on the spackle!
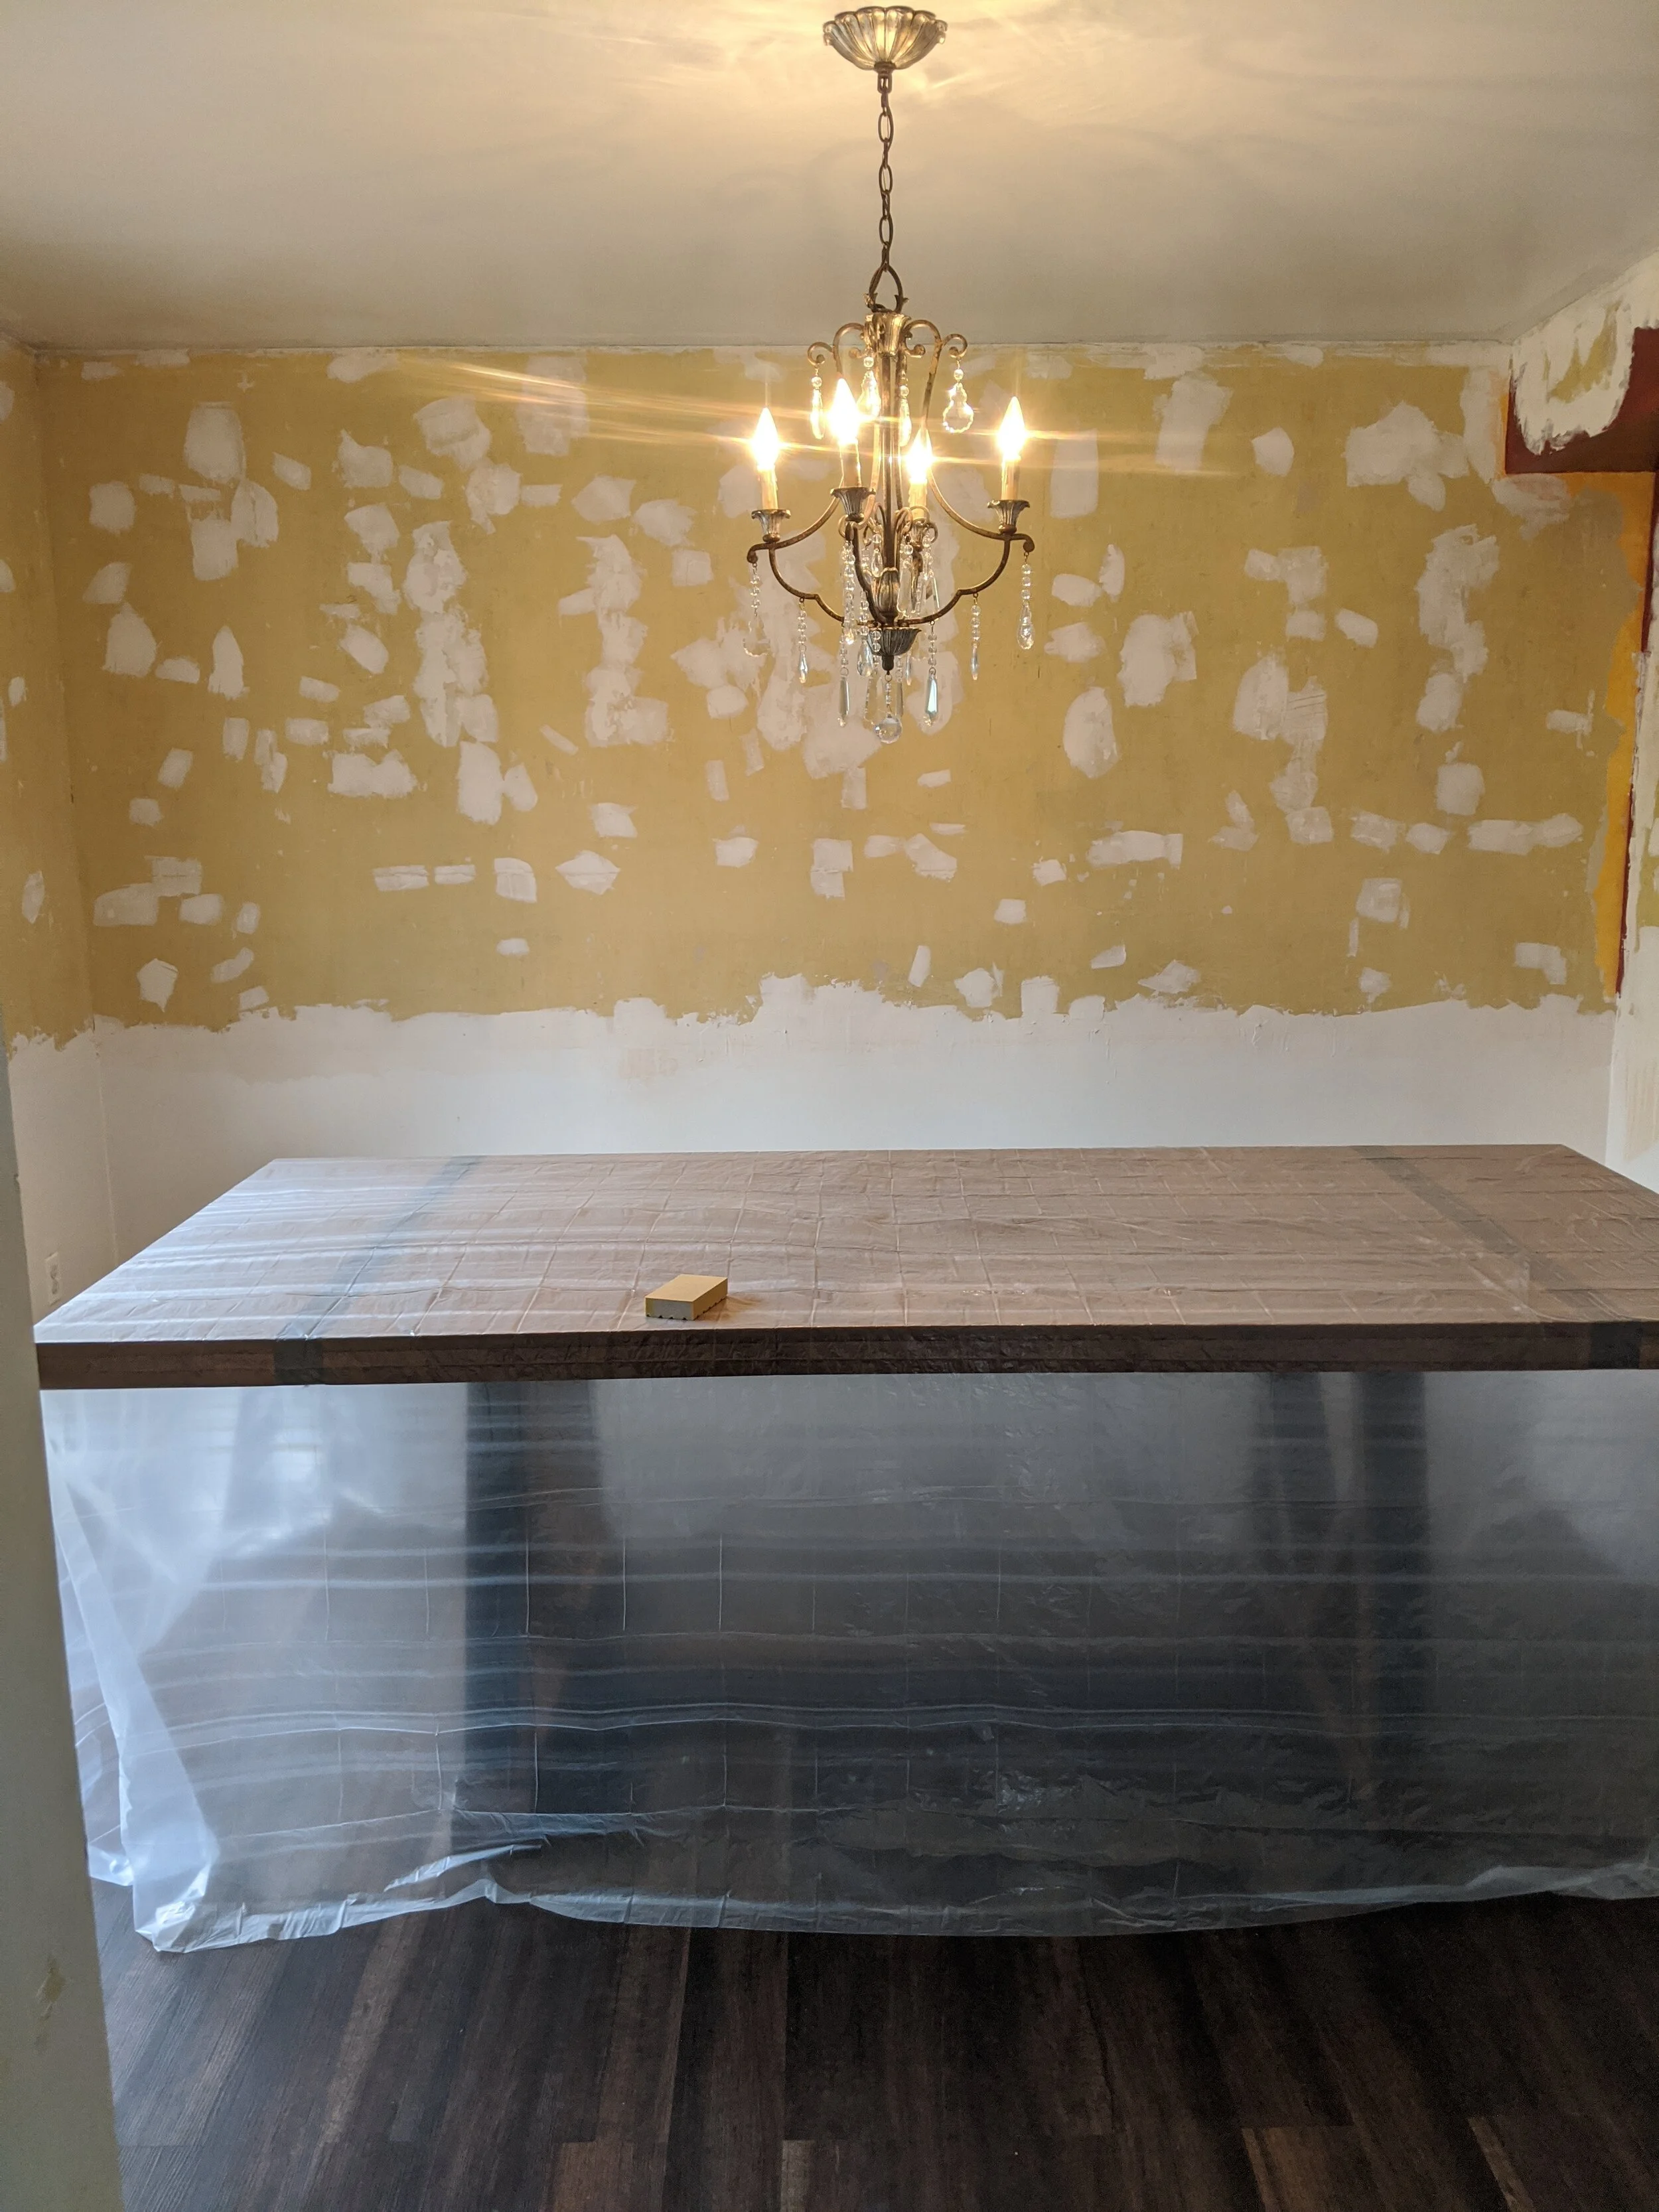

Quarantining like a boss.
To prep for sanding the spackle, I removed everything I could from the room and blocked it off as much as I could. If you’ve ever sanded spackle, you’ll notice that even the smallest patch can create a ton of dust that manages to get everywhere. And boy, am I glad I blocked off the doorways. Holy dust!
Post-sanding it now looks like a live in a haunted house.
And I am one of the ghosts.

On an unrelated note, I think I discovered some really good, pretty much free, dry shampoo!
My next steps are to patch any spots I missed the first time around and areas that are still uneven, and sand again. Then I can reinstall the crown molding, prime, paint, and get this room back to a presentable spot.
Inspiration and future plans
In the meantime, I’ll continue to daydream about my design plans for the space.
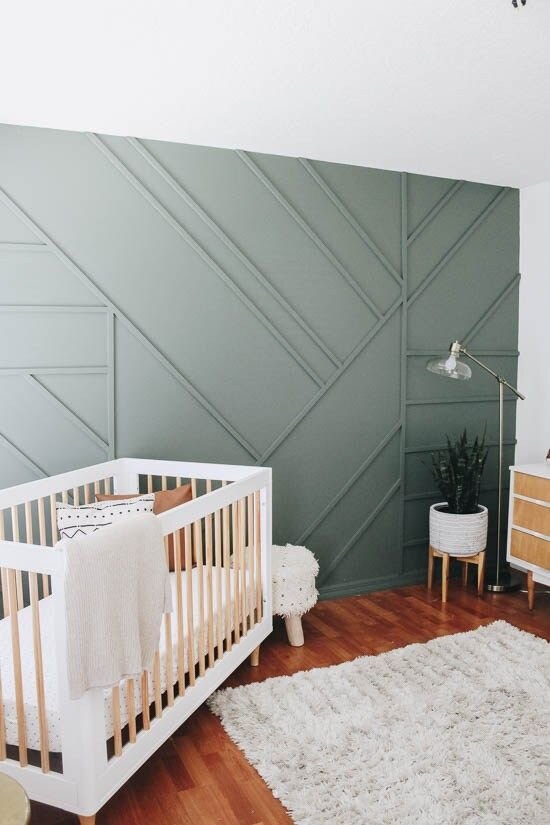
I’m obsessed with the wall treatment below for the large wall in this room that doesn’t have any windows or doors and I will make it happen, hence needing to remove the crown molding.

If we left the crown up, the boards for the accent wall would jut out further than the bottom of the crown molding. It’s difficult to explain without pictures, but essentially there would be a weird transition where the boards on the accent wall butted up against the crown molding. Instead, we’re going to put a thin piece of wood behind the crown molding on that wall to bump it out a little and give it some more depth to create a smoother transition with the accent wall.
I initially envisioned a really dark blue or teal on this wall, but after living here for a while I’ve noticed that unless it’s a nice day, the dining room can be pretty dark. So I’m going to opt for something lighter. Actually, the color will probably be similar to my inspiration pic above.
That’s actually a good note to consider - if time allows, before renovating a space live with it for a while to figure out how it looks and feels throughout the day, and how it functions for you and you family. If I dove right into this room as soon as we moved in it would probably feel like a black hole because I would have painted it a super dark color. Now that I know how it reacts to light throughout the day, I know I don’t want to go that route. Anywho…
I’m leaning towards painting the other three walls in the room a white tone. Not a true, bright white, but something more muted to help keep the room nice and bright and create a smooth transition to the surrounding rooms.
We plan on keeping the same dining room set that we currently own, especially since we bought it when we moved into this house and it’s really new. However, although I’m absolutely in love with the buffet table, it definitely doesn’t fit with the style of this house. I actually bought the buffet table a few years ago at a garage sale and completely refurbished it. It went so well with our last house, but this house was built in a different era and it just feels out of place. It breaks my heart to think about selling, but I think it’d be better suited in another house. I’d love to buy another dresser I could makeover for myself.

I will always love you, buffet table.
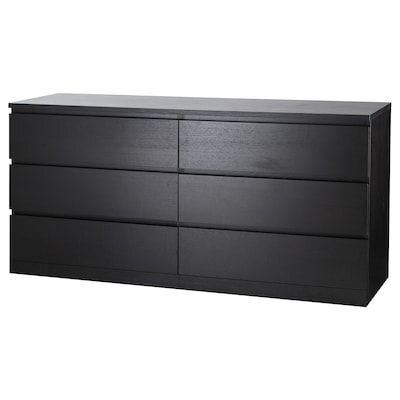
Why a new dresser instead of a new buffet table, you ask? Well, I’ve been thinking… and I might actually move my dresser from my bedroom into the dining room and buy something second-hand for the bedroom. Mid-century modern is really on trend right now, and I’m certainly not immune to falling for that style, but I don’t think it would go with our dining room table and chairs. Instead, the Ikea Malm dresser that I currently use could undergo a couple of tweaks (aka Ikea hacks) to make it more interesting and fit with the rest of the dining room decor.
At least, I hope it does. Because if Lucius takes it downstairs to the dining room, I don’t think I can convince him to take it back upstairs to the bedroom.
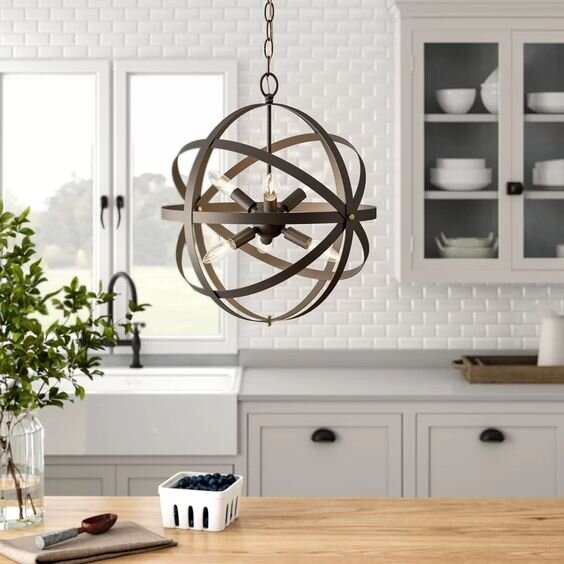
I also plan to replace the light fixture, because the current chandelier definitely doesn’t fit into my aesthetic. Shopping for light fixtures is one of my favorite things to do, alongside rug shopping. Sky’s the limit, but I think I’ve narrowed it down to something with a more of a circular element to break up all the straight lines going on in the room on the accent wall, the dresser/buffet table, and the dining table.

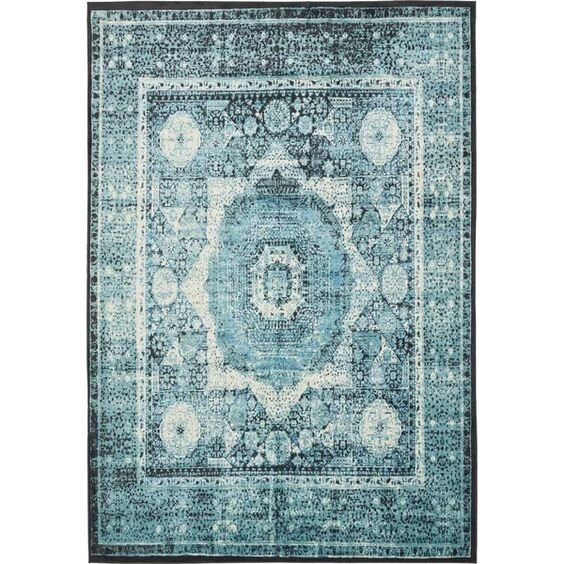
This room also needs an area rug in here to add some more dimension to the space and help break it up a little, especially with our crazy dark flooring that I’m certainly not crazy about. I’ve been swooning over oriental rugs for quite a while, and although Lucius will take some convincing, I’d love to put one in here.
I’m thinking I want to go with something with darker colors and of course some good pattern because practically thinking, it’ll be going under a dining room table. People drop things. Let’s hide those inevitable stains!

Lastly, we’ll add some artwork and general décor. I plan to put the curtains that I had in this room previously back up and hang some pictures to round it out.
And there you have it. My body is buzzing with excitement to put this room together (is that normal?), but I know there’s still a long way to go until it’s done. I can’t wait to turn this into a room I actually want to spend time in and share it with you along the way!
Pst - Check out the grid below to see all my inspiration pics in one place and dream with me about how great this room can will be!

Related Dining Room Renovation Posts
We bought another house...
You’re probably thinking, “But didn’t you just move into your house?” Well, yes, but this new house isn’t one we’ll be living in. We bought a flip!
You’re probably thinking, “But didn’t you just move into your house?” Well, yes, but this new house isn’t one we’ll be living in. We bought a flip!

We’ve been a part of a few flips in the past, but this is the first time we’ve taken the leap to be the primary owner. Flipping houses is something we’ve dreamed about for years, so it was only a matter of time before we pulled the trigger.
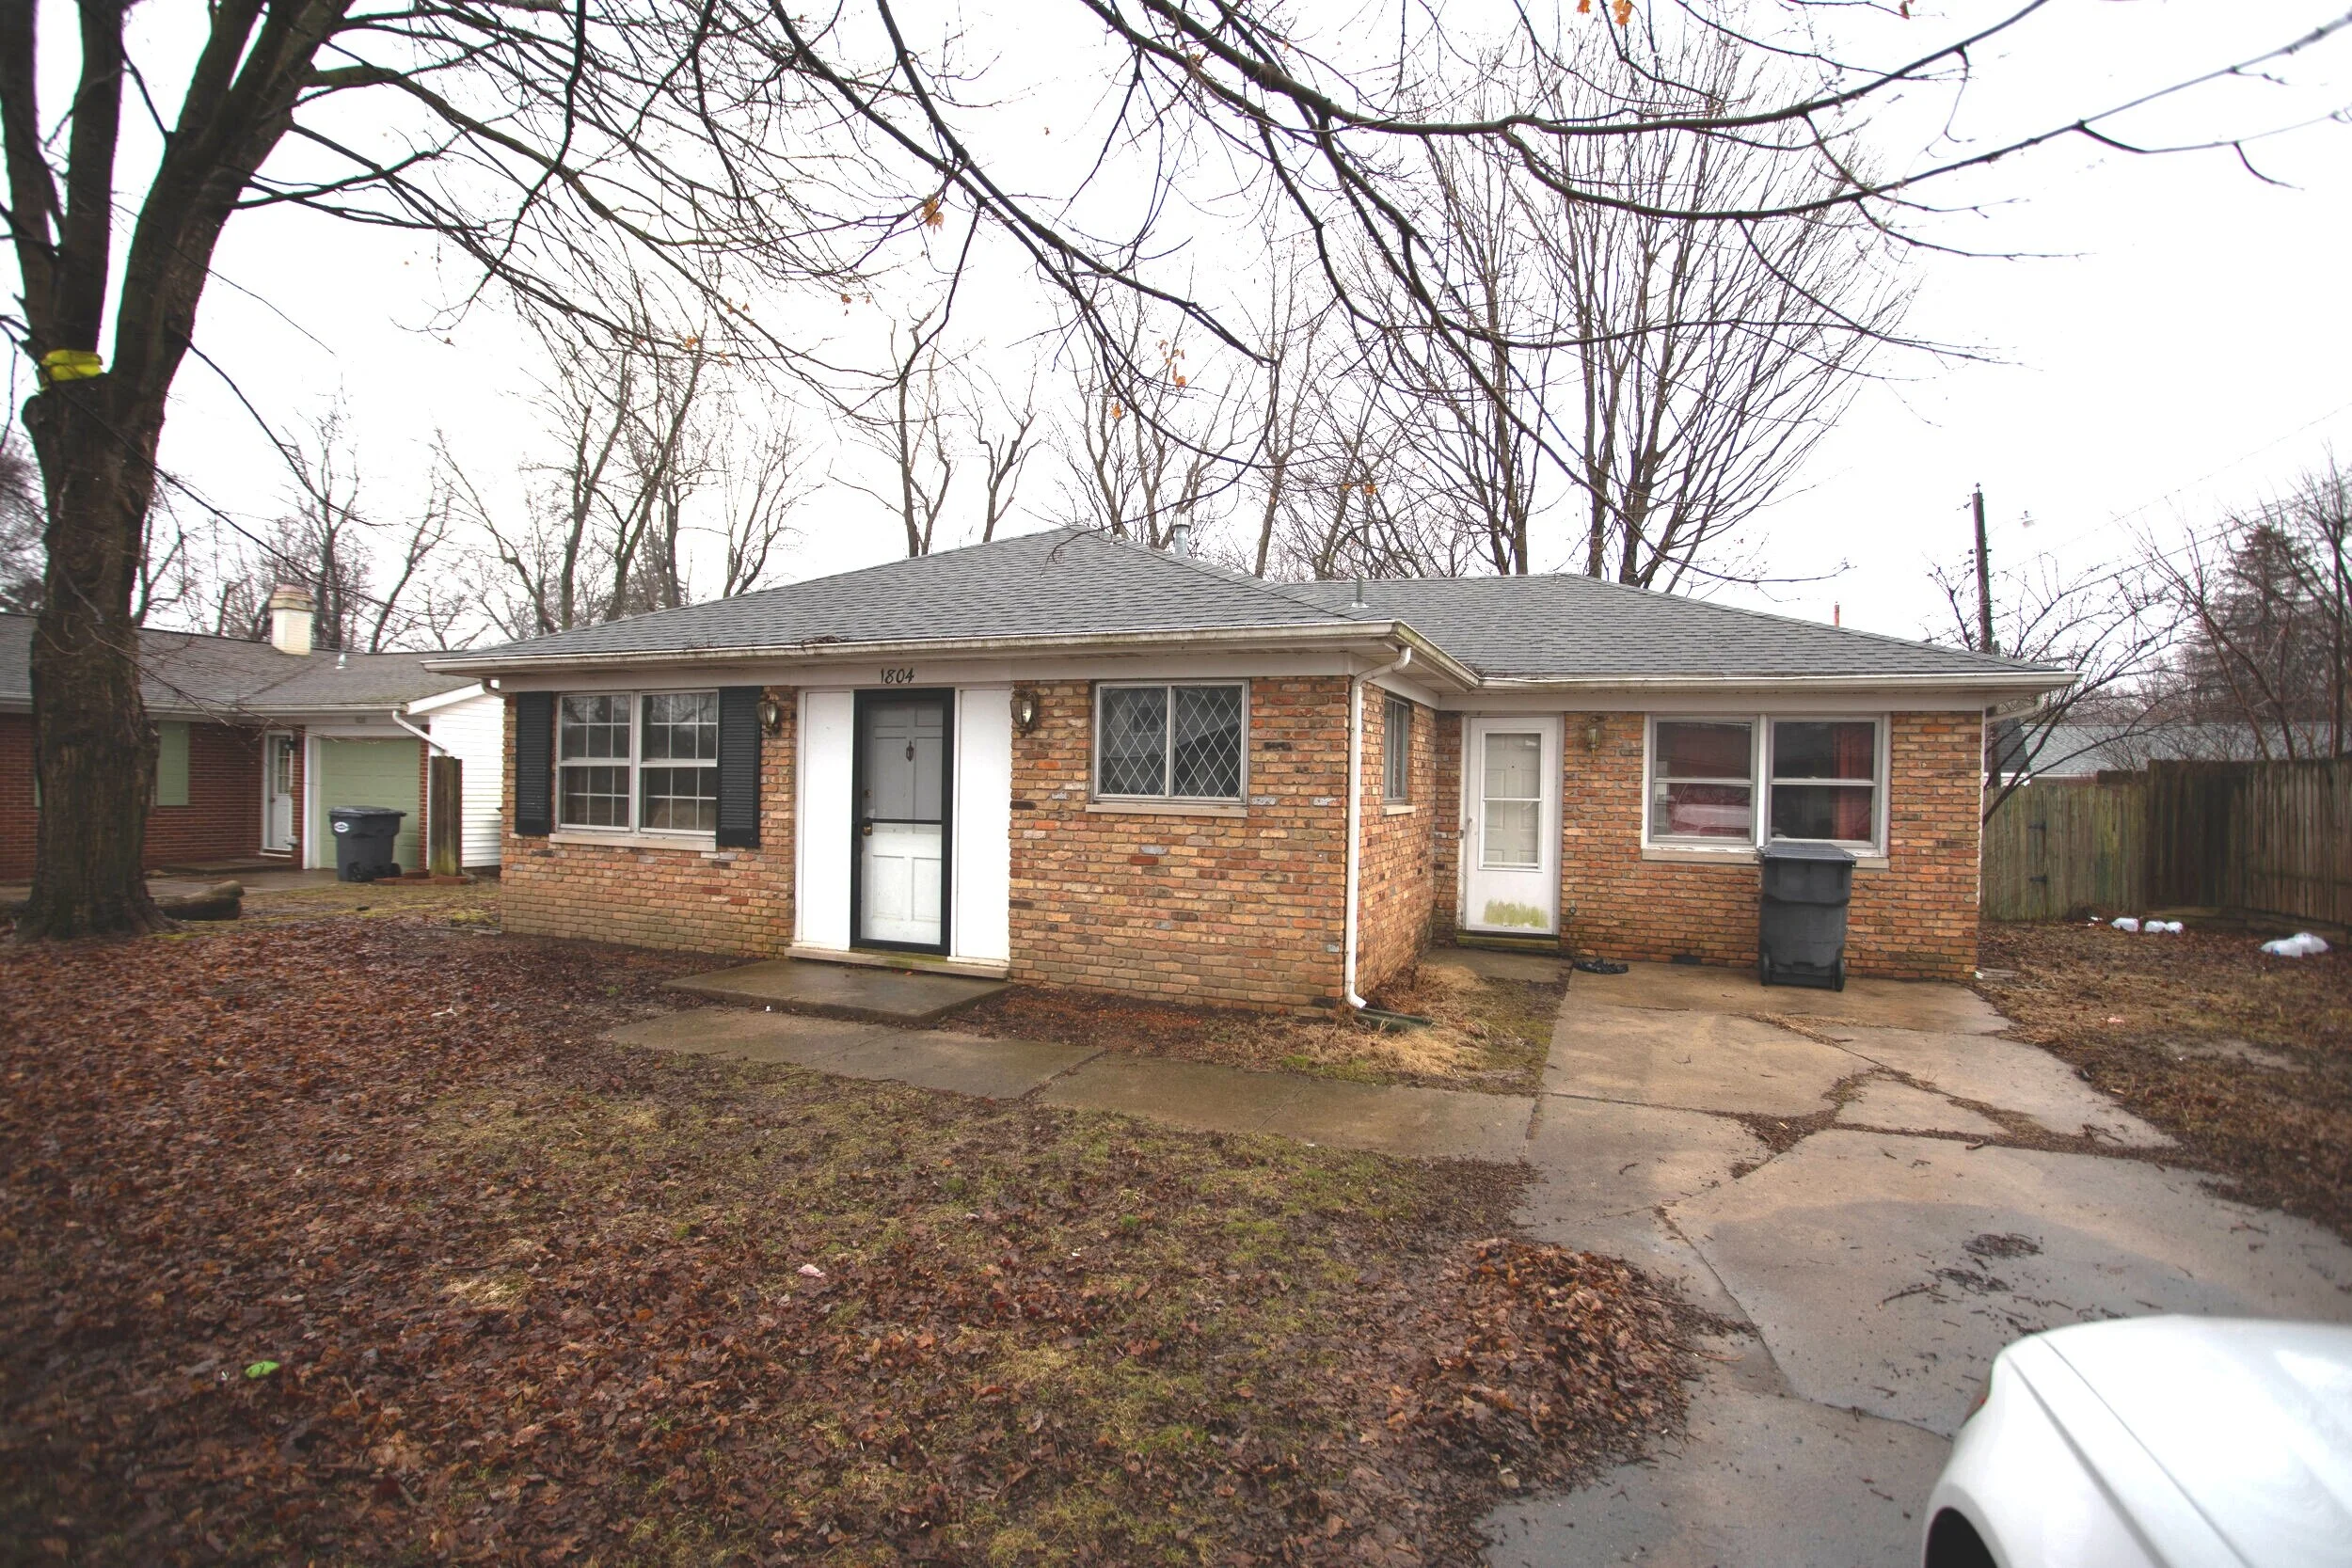
The flip house is a cute (beauty is in the eye of the beholder here) little 3-bedroom one-bath starter home in a great location. It’s not much to look at right now (and definitely something you don’t want to smell), but boy do we have plans.
Let’s start with the exterior. We closed a couple of weeks ago and obviously the weather isn’t the greatest this time of year, so everything is looking pretty sad right now. First off, the whole exterior and driveway/walkway need power washed. (I love power washing, so sign me up!) And the yard needs some basic maintenance.
Now picture this house looking something along the lines of these beauties:


I love brick, but not all brick is created equal. The brick on this house isn’t anything special, and I think the house would look amazing if it were painted white. We still have to figure out if painting the brick is in the budget, but man oh man do I hope it is because I think it would look INCREDIBLE. I also plan to paint the front door a bright color and add a fun and unique knocker. Below is some of my current inspiration.



Obviously I haven’t narrowed down the color of the door yet.
Adding a little bit of landscaping out front will also help brighten it up and increase the curb appeal. I’m thinking that some boxwood bushes would be perfect. If you aren’t sure what boxwoods are, let me tell you that they’re amazing. From someone who doesn’t have the greenest thumb, these bushes are easy to maintain and look great! I’m sure you’ve seen them before but probably didn’t even realize it. Here’s an example of what they look like:

Look familiar? I thought so…
Now, on to the interior!
At this point, we’ve already completed most of the demo, but here are a few pictures of what we started with.

Living room. Free couch! woo! (Just kidding)

Dining Room on the left/Kitchen on the Right

Kitchen

Bathroom

Bedroom

Bedroom

Bonus Room

Opposite end of the bonus room
And below is what it looks like all cleared out. You can take the virtual tour if you want to walk through the place yourself. Just use your cursor to navigate by clicking on the little circles on the floor. I’ve also taken some snapshots to help explain some of the ideas swirling around in my head - there’s a lot going on up there.
To get us started, picture the whole house in shades of a blue/green/gray color with rich medium tone laminate flooring and crisp white trim.

Living Room
In the picture above, before we demoed it there used to be a wall right where I’m standing. There was a doorway between the dining and living rooms and a coat closet a few feet in front of the front door.
In the picture below, if you look at the ceiling you can see where we knocked out the wall separating the dining room and kitchen from the living room. You can also see the giant hole in the ceiling where the coat closet used to be. To save you from scrolling, I posted one of the pictures from before we took out the wall from a similar angle below.

Living Room on the left/Kitchen on the right

This house is pretty tiny, so taking out that wall felt like a good decision to really open the space up and make it feel bigger and create some good sight lines across the living areas.

Kitchen on the left/Dining Room on the right
Now that the wall is gone, you can see from the living room into the dining room and kitchen. Open concept for the win!

Kitchen
Doing the demo work and clearing out a flip to make a blank slate is pretty exciting in itself, but unless you’re staging, the transformation of a lot of the rooms is pretty limited to paint and flooring. I know, I know. On HGTV everything is so glamorous and there’s a huge reveal with tons of special details throughout the house. That’s simply not real life. Now the kitchen is where you get to put in a little of that HGTV flair and make things more exciting.
The previous kitchen left a lot to be desired. The layout wasn’t functional, there was very little counter space, and it was pretty dark. Now that the wall is gone, we’re able to reconfigure the space to provide more storage, counter space, better flow, and let in some light! Lucius put together a little mockup of the kitchen layout to get a sense of how the space will feel once it’s put back together.

Obviously the wall on the left-hand side won’t be there and there is a doorway on the right-hand side to get to the bonus room, laundry room, and side door. We’re thinking of putting some open shelving above the sink area and adding a tile backsplash. The doors on the cabinets in the island will be facing the other direction so the side of the island that you see now will actually be flat.
I’m picturing white shaker cabinets and maybe a lighter countertop with stainless steel appliances, natural wood (or maybe white) for the open shelving, and some clean and simple subway tile for the backsplash. The picture below is a good example of what I’m imagining, though maybe a little higher end than what we are willing to put in a flip. It’s all about balance, guys!

Below is the bathroom. It’s in pretty rough shape so we’re gutting it and starting over. It’s tiny, so we plan to put a medicine cabinet back in and I’m searching for a vanity with as much storage as possible. To add a little surprise I would love to tile the floor with something fun and unexpected, but we’ll see how everything pans out.

Aside from ripping up the carpet, the bedrooms look more or less the same as the pictures above, so I haven’t included pictures. The bonus room hasn’t undergone any huge renovations yet either, though we did replace the failing french doors with a sliding glass door and already it’s getting a ton more light!

So as you can see, things are moving right along (and pretty quickly!) with the flip. I’ll be sure to keep posting as we continue to renovate and beautify this cute little house!

House Tour!
If you’ve been following along, you’ve seen bits and pieces of the house as we’ve been making updates and writing individual posts. But today I’m going to show you the whole house, top to bottom, so you can get a feel for the flow and all the spaces we plan on updating. I’ve included TONS of pictures, and even took a (possibly motion sickness-inducing) video.
If you’ve been following along, you’ve seen bits and pieces of the house as we’ve been making updates and writing individual posts. But today I’m going to show you the whole house, top to bottom, so you can get a feel for the flow and all the spaces we plan on updating. I’ve included TONS of pictures, and even took a (possibly motion sickness-inducing) video, which you can watch here:
One note, I went the wrong way out of the foyer so the room by room walkthrough doesn’t quite match up with the pictures below, but I think you’ll be able to keep up.
The Exterior

I don’t have many pictures of the exterior of our house to show just yet. We moved in at the end of October and the weather quickly turned gross and cold. The picture above is from last summer when the house was listed for sale. I love all the green (look at all those huge trees!) and can’t wait to see how the backyard looks when everything is alive again. I’ll be sure to take pictures then.
RELATED: I have now posted a tour of the exterior of our house, which can be found HERE.
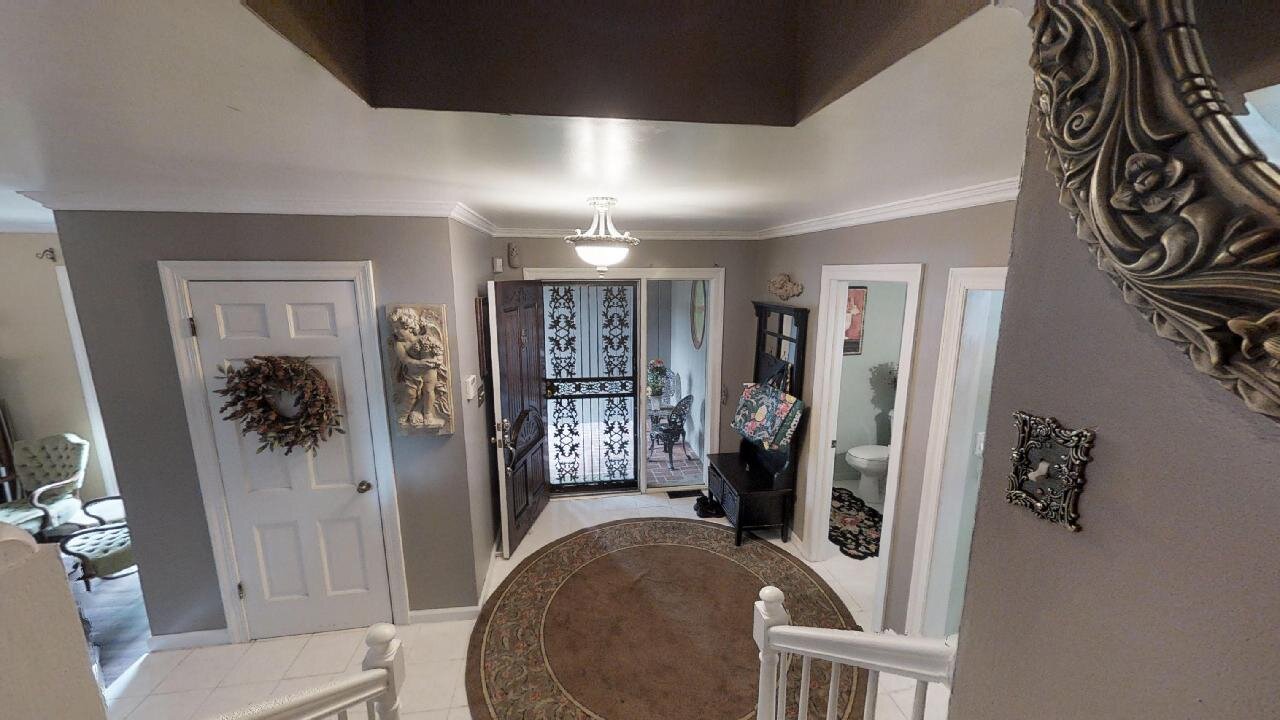
The Foyer

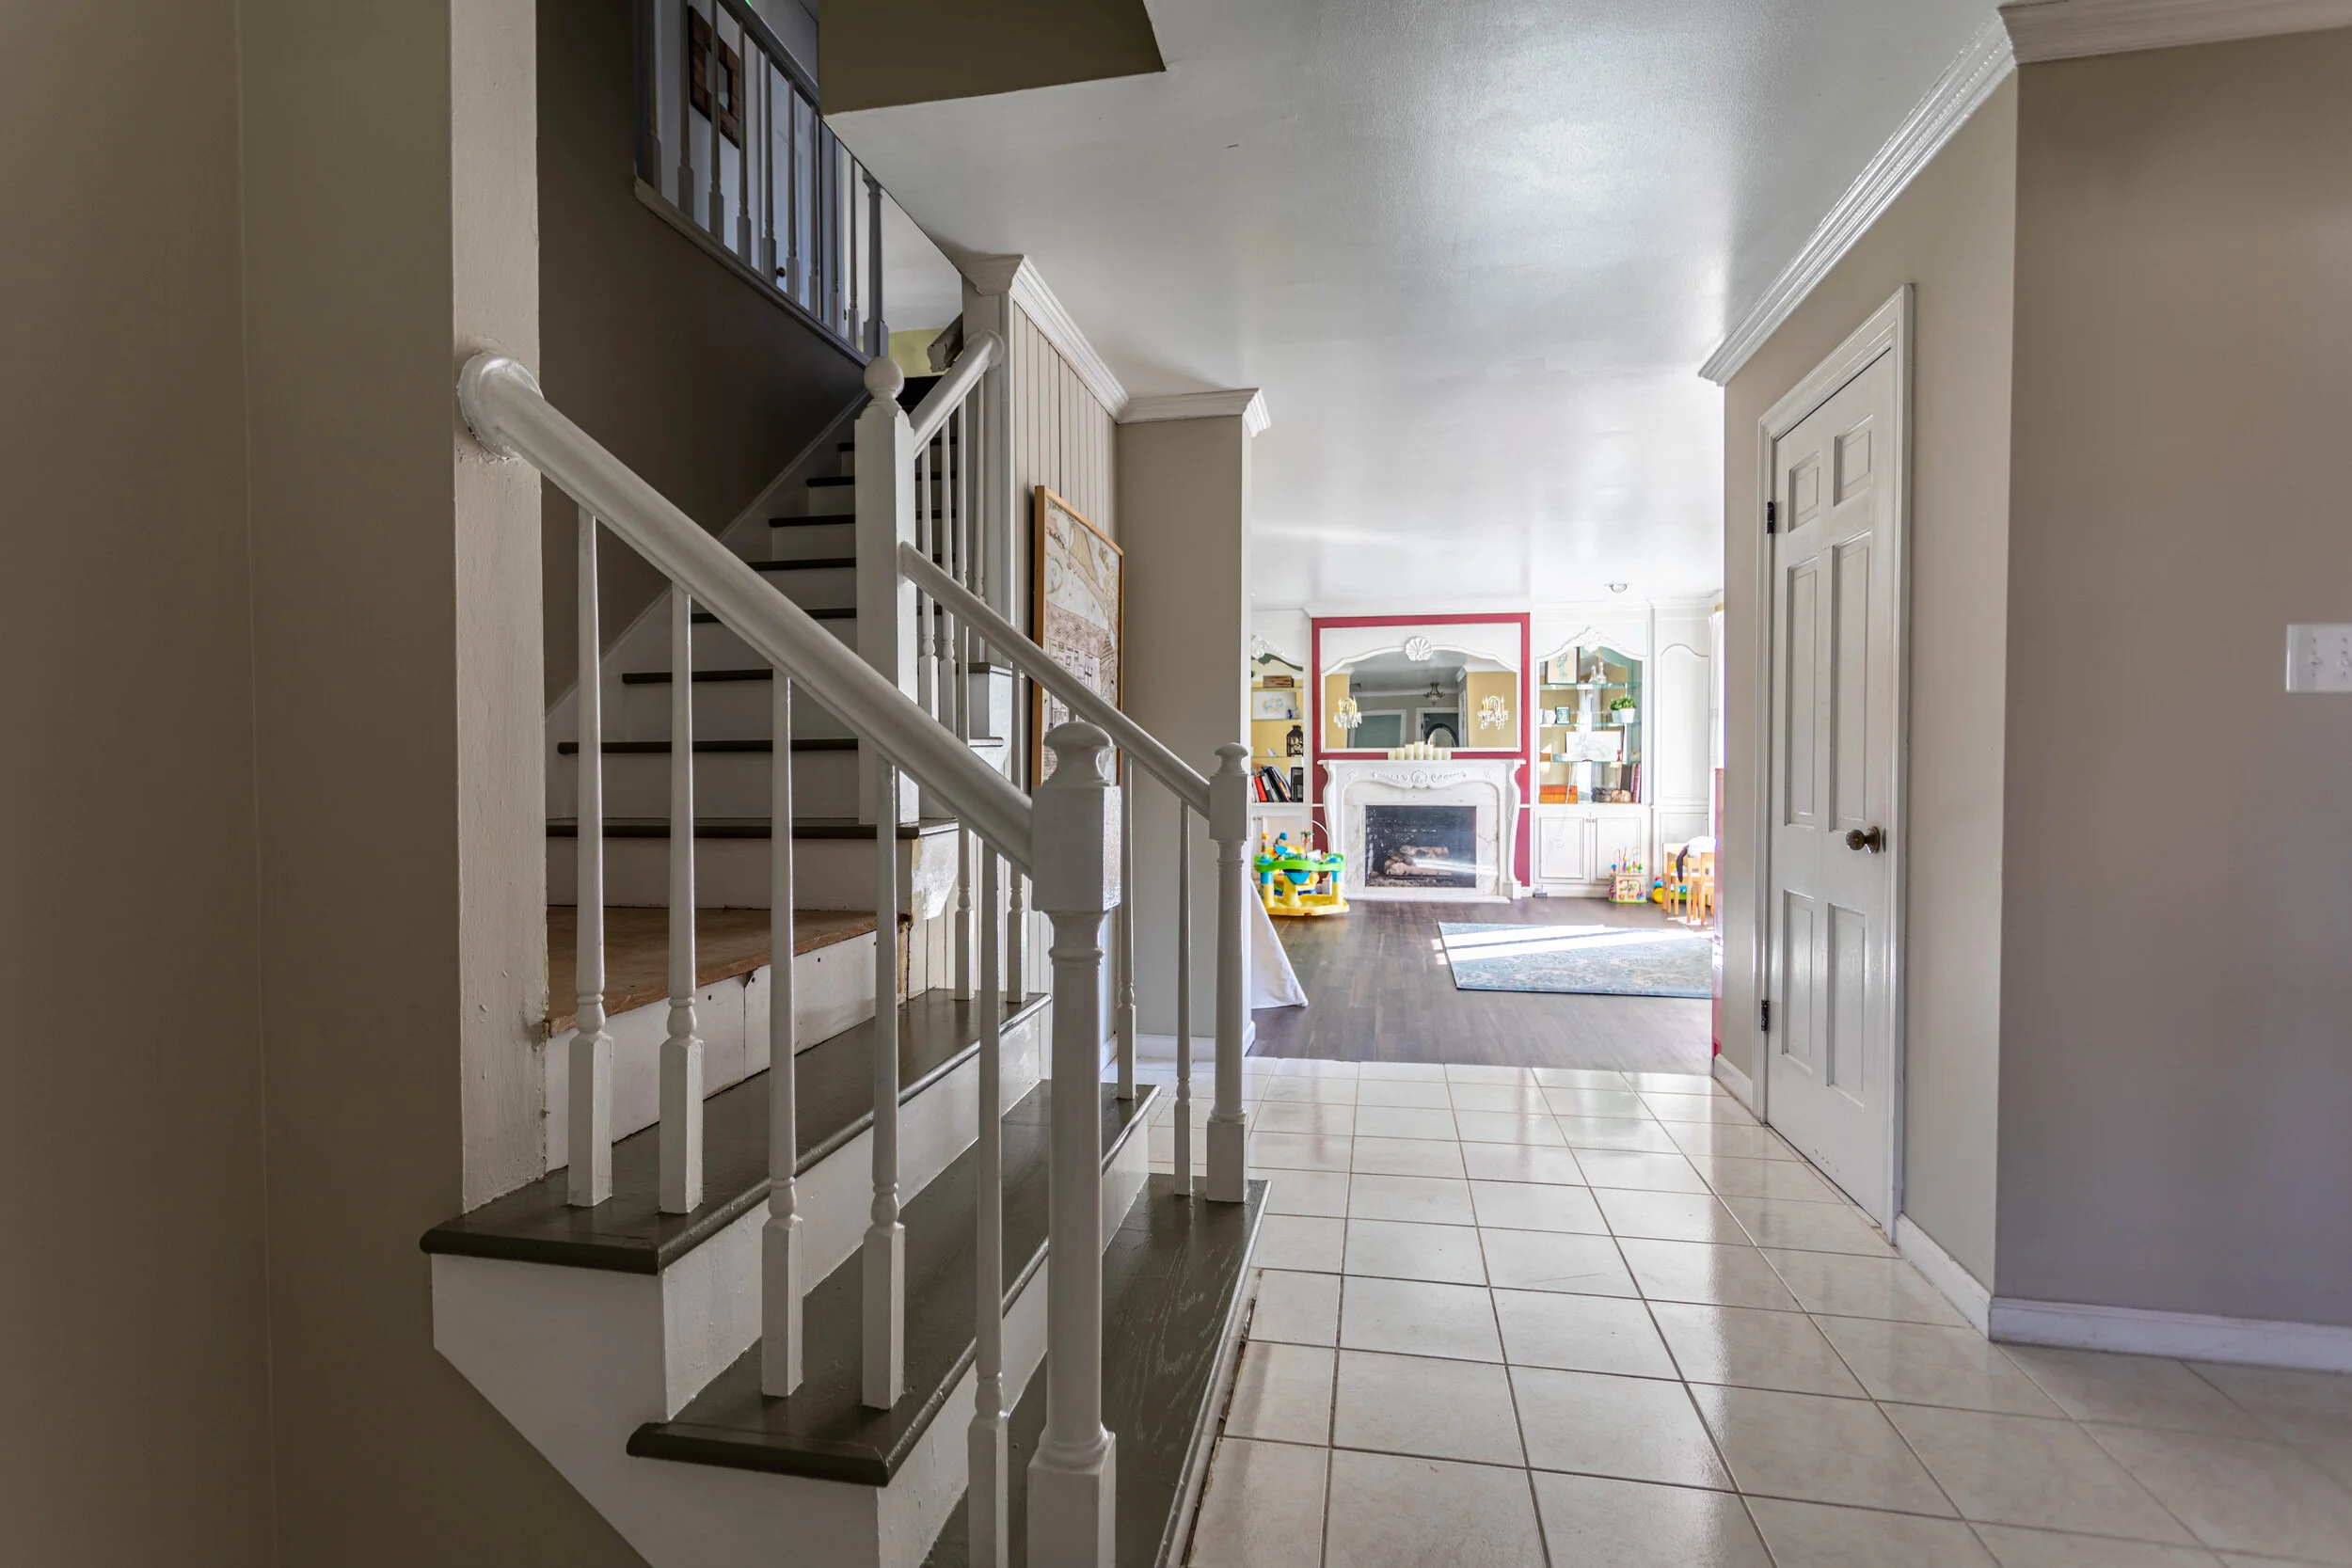
In the picture above, the front door is blocked by the closet on the left-hand side of the frame. The door is solid, with no windows, though there is a tall window next to it.
The door frame to the left of center is the half bath, and the door frame right of center goes to the living room.
The picture below is the other side of the foyer, looking into what was intended to be a formal living room, but we’re not exactly formal people so we’ve deemed it the playroom. The door on the right is the giant coat closet that currently has two coats and my wedding dress living in it.
The Half Bath

Although this is a fairly large half bath, it’s still small enough to make it tricky to get decent pictures. All in all, it’s pretty basic, but certainly has some quirks that I’ll get into later, like the exterior light fixture and the swirls in the plaster.
The Living Room


Through the foyer is the living room. I love the coziness created by the beams on the ceiling and that AMAZING brick wall/fireplace. The living room is open to the eat-in kitchen and through the door on the left of the picture above is the mudroom/laundry room.
The Mudroom
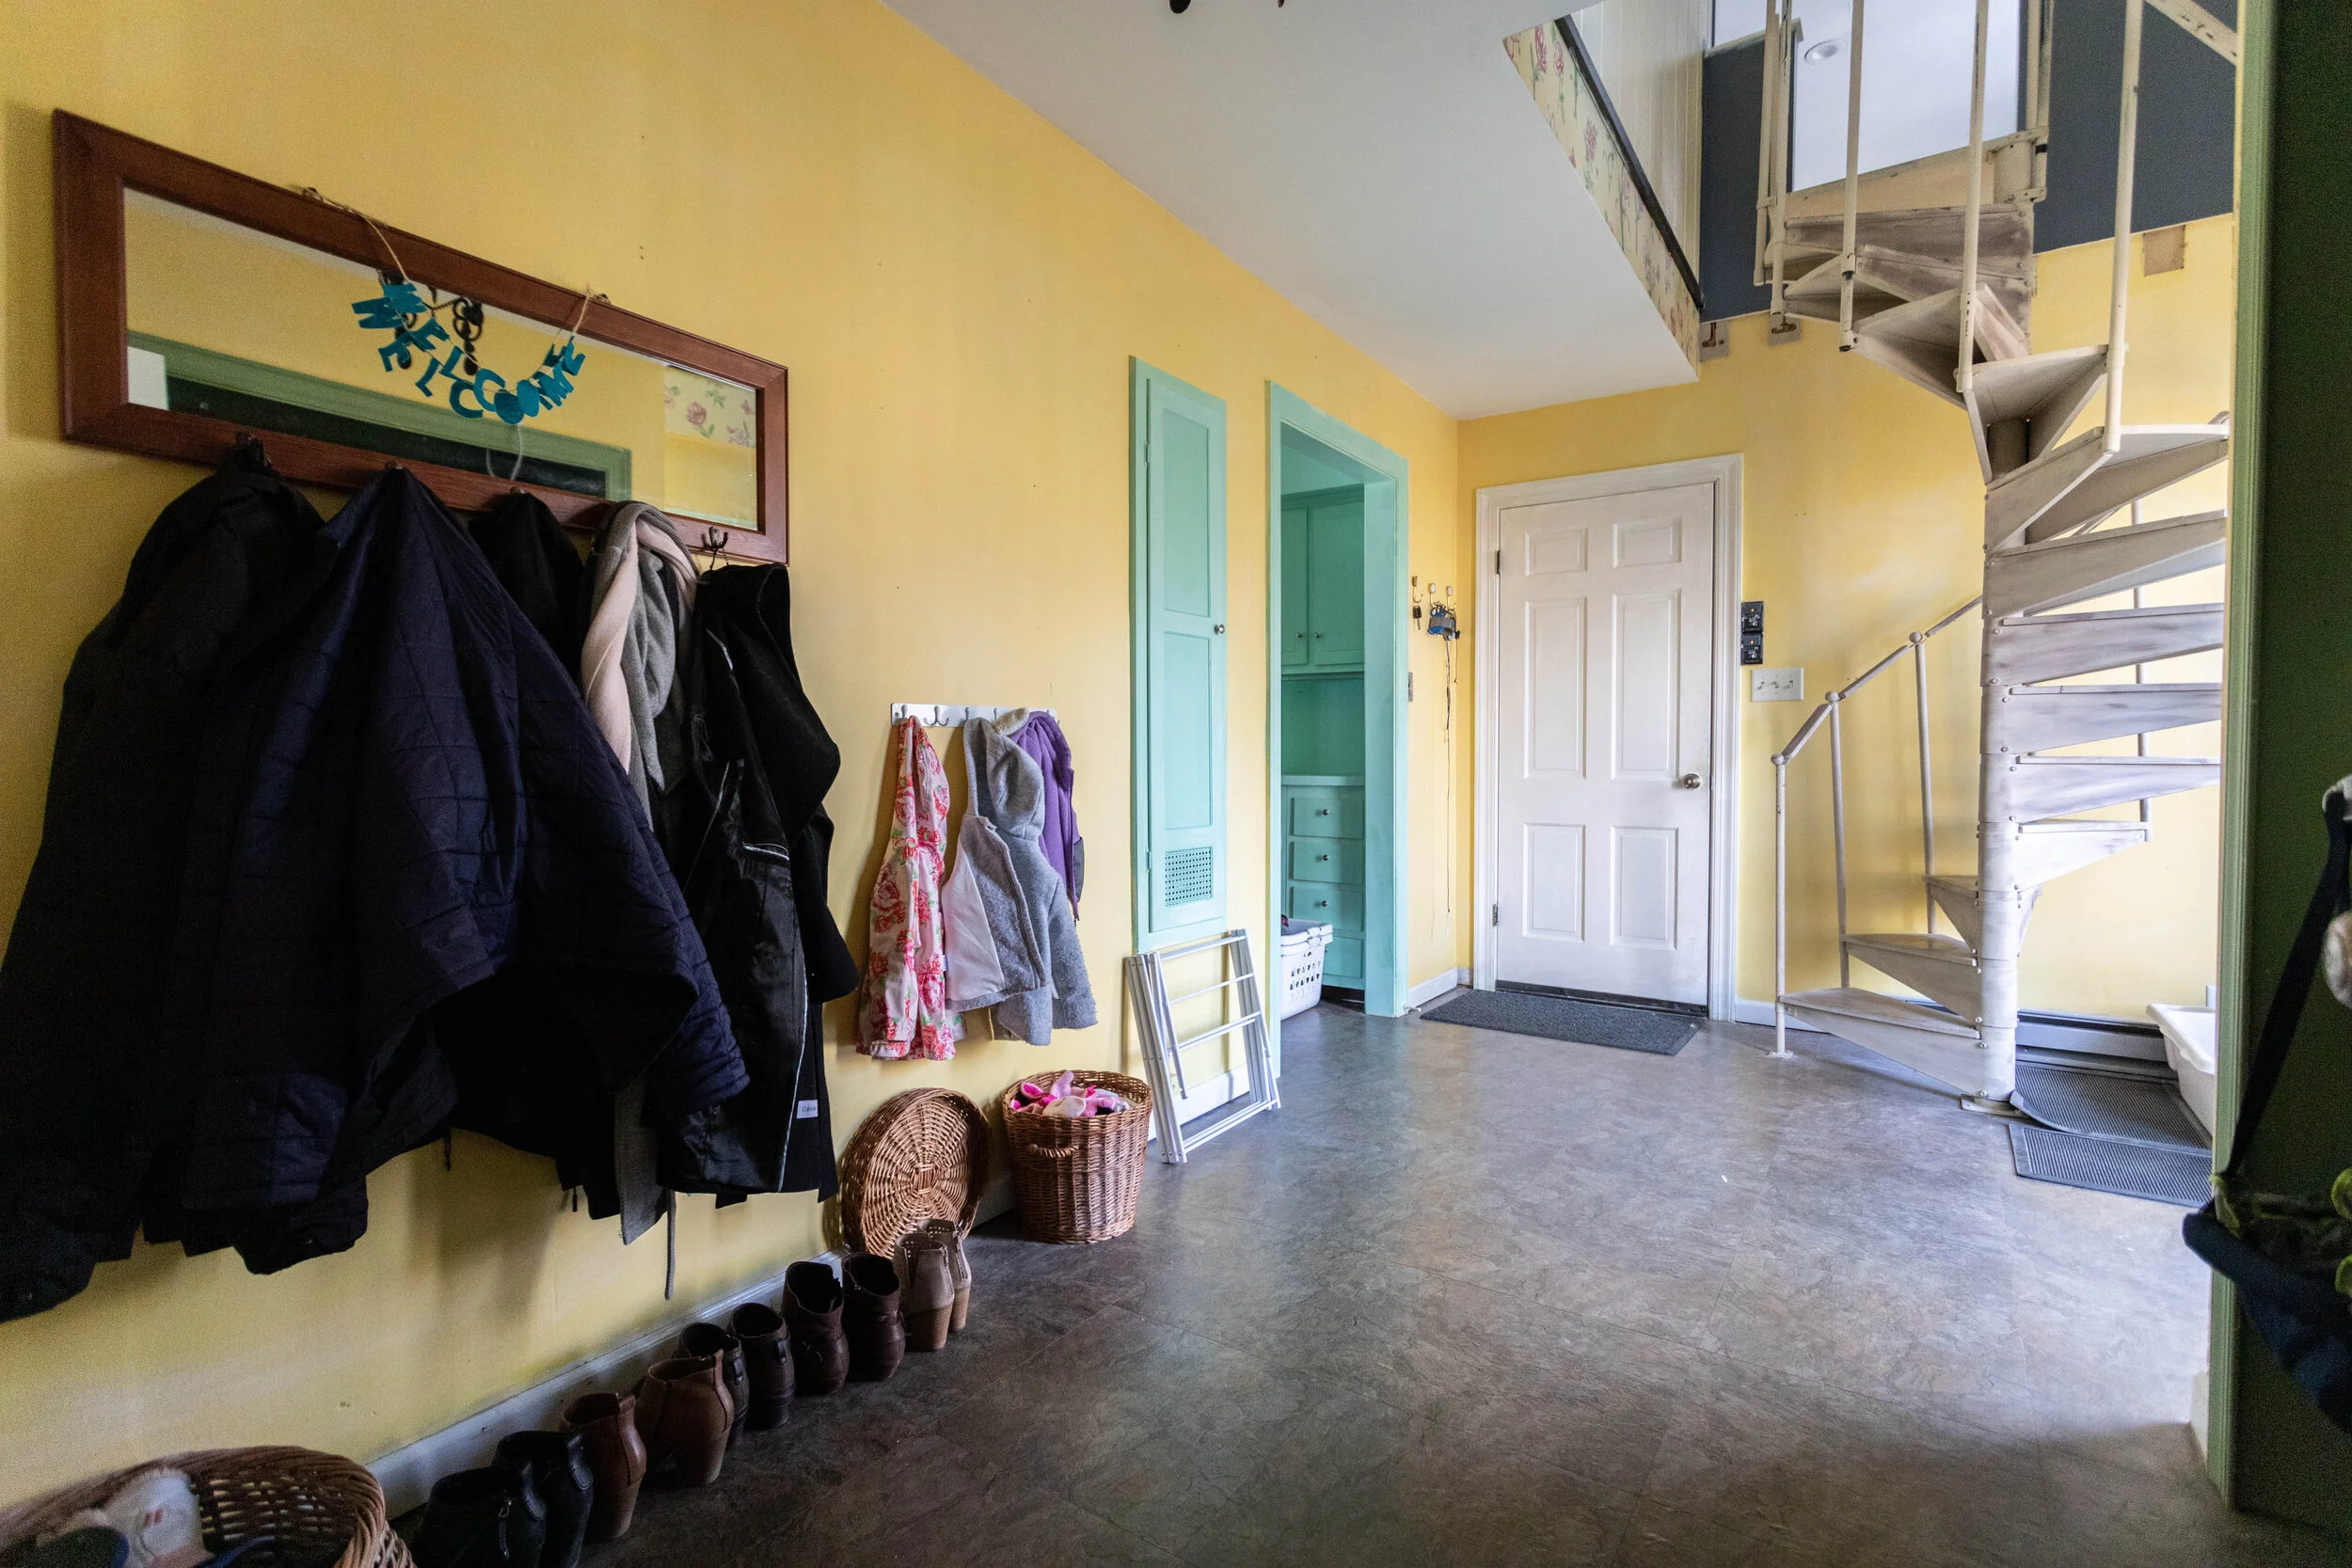
The mudroom could definitely be more functional (and I’ve got big plans that I’ll share later), but it’s amazing to have a dedicated spot to drop all our things. The little door on the left is a built-in ironing board, which I think is so stinkin’ cute. The through the doorway next to it is the laundry room with more storage than I know what to do with. The door next to the stairs used to open to a second mudroom but Lucius ripped that out a couple of weeks after moving in (and before we got any pictures) since a) it took up space in the garage, and b) who needs two mudrooms? Lastly, the spiral staircase takes you up to the loft above the garage.

Standing against the garage door you can see the opposite side of the mudroom, complete with wallpaper (yay) and a chandelier… because we like to feel fancy in our mudroom. Just kidding, that thing isn’t staying.
The doorframe on the left is a closet that was turned into a desk area that we’ve been using as storage. Also, these photos are making me realize that I might have a boot obsession.
The Kitchen
Back through the living room is the kitchen. Below, you can see the sliding glass door that leads out to the deck. Also, (surprisingly) Hunter’s first photobomb of this series of pictures. Through the door frame on the far end of the kitchen is the dining room.

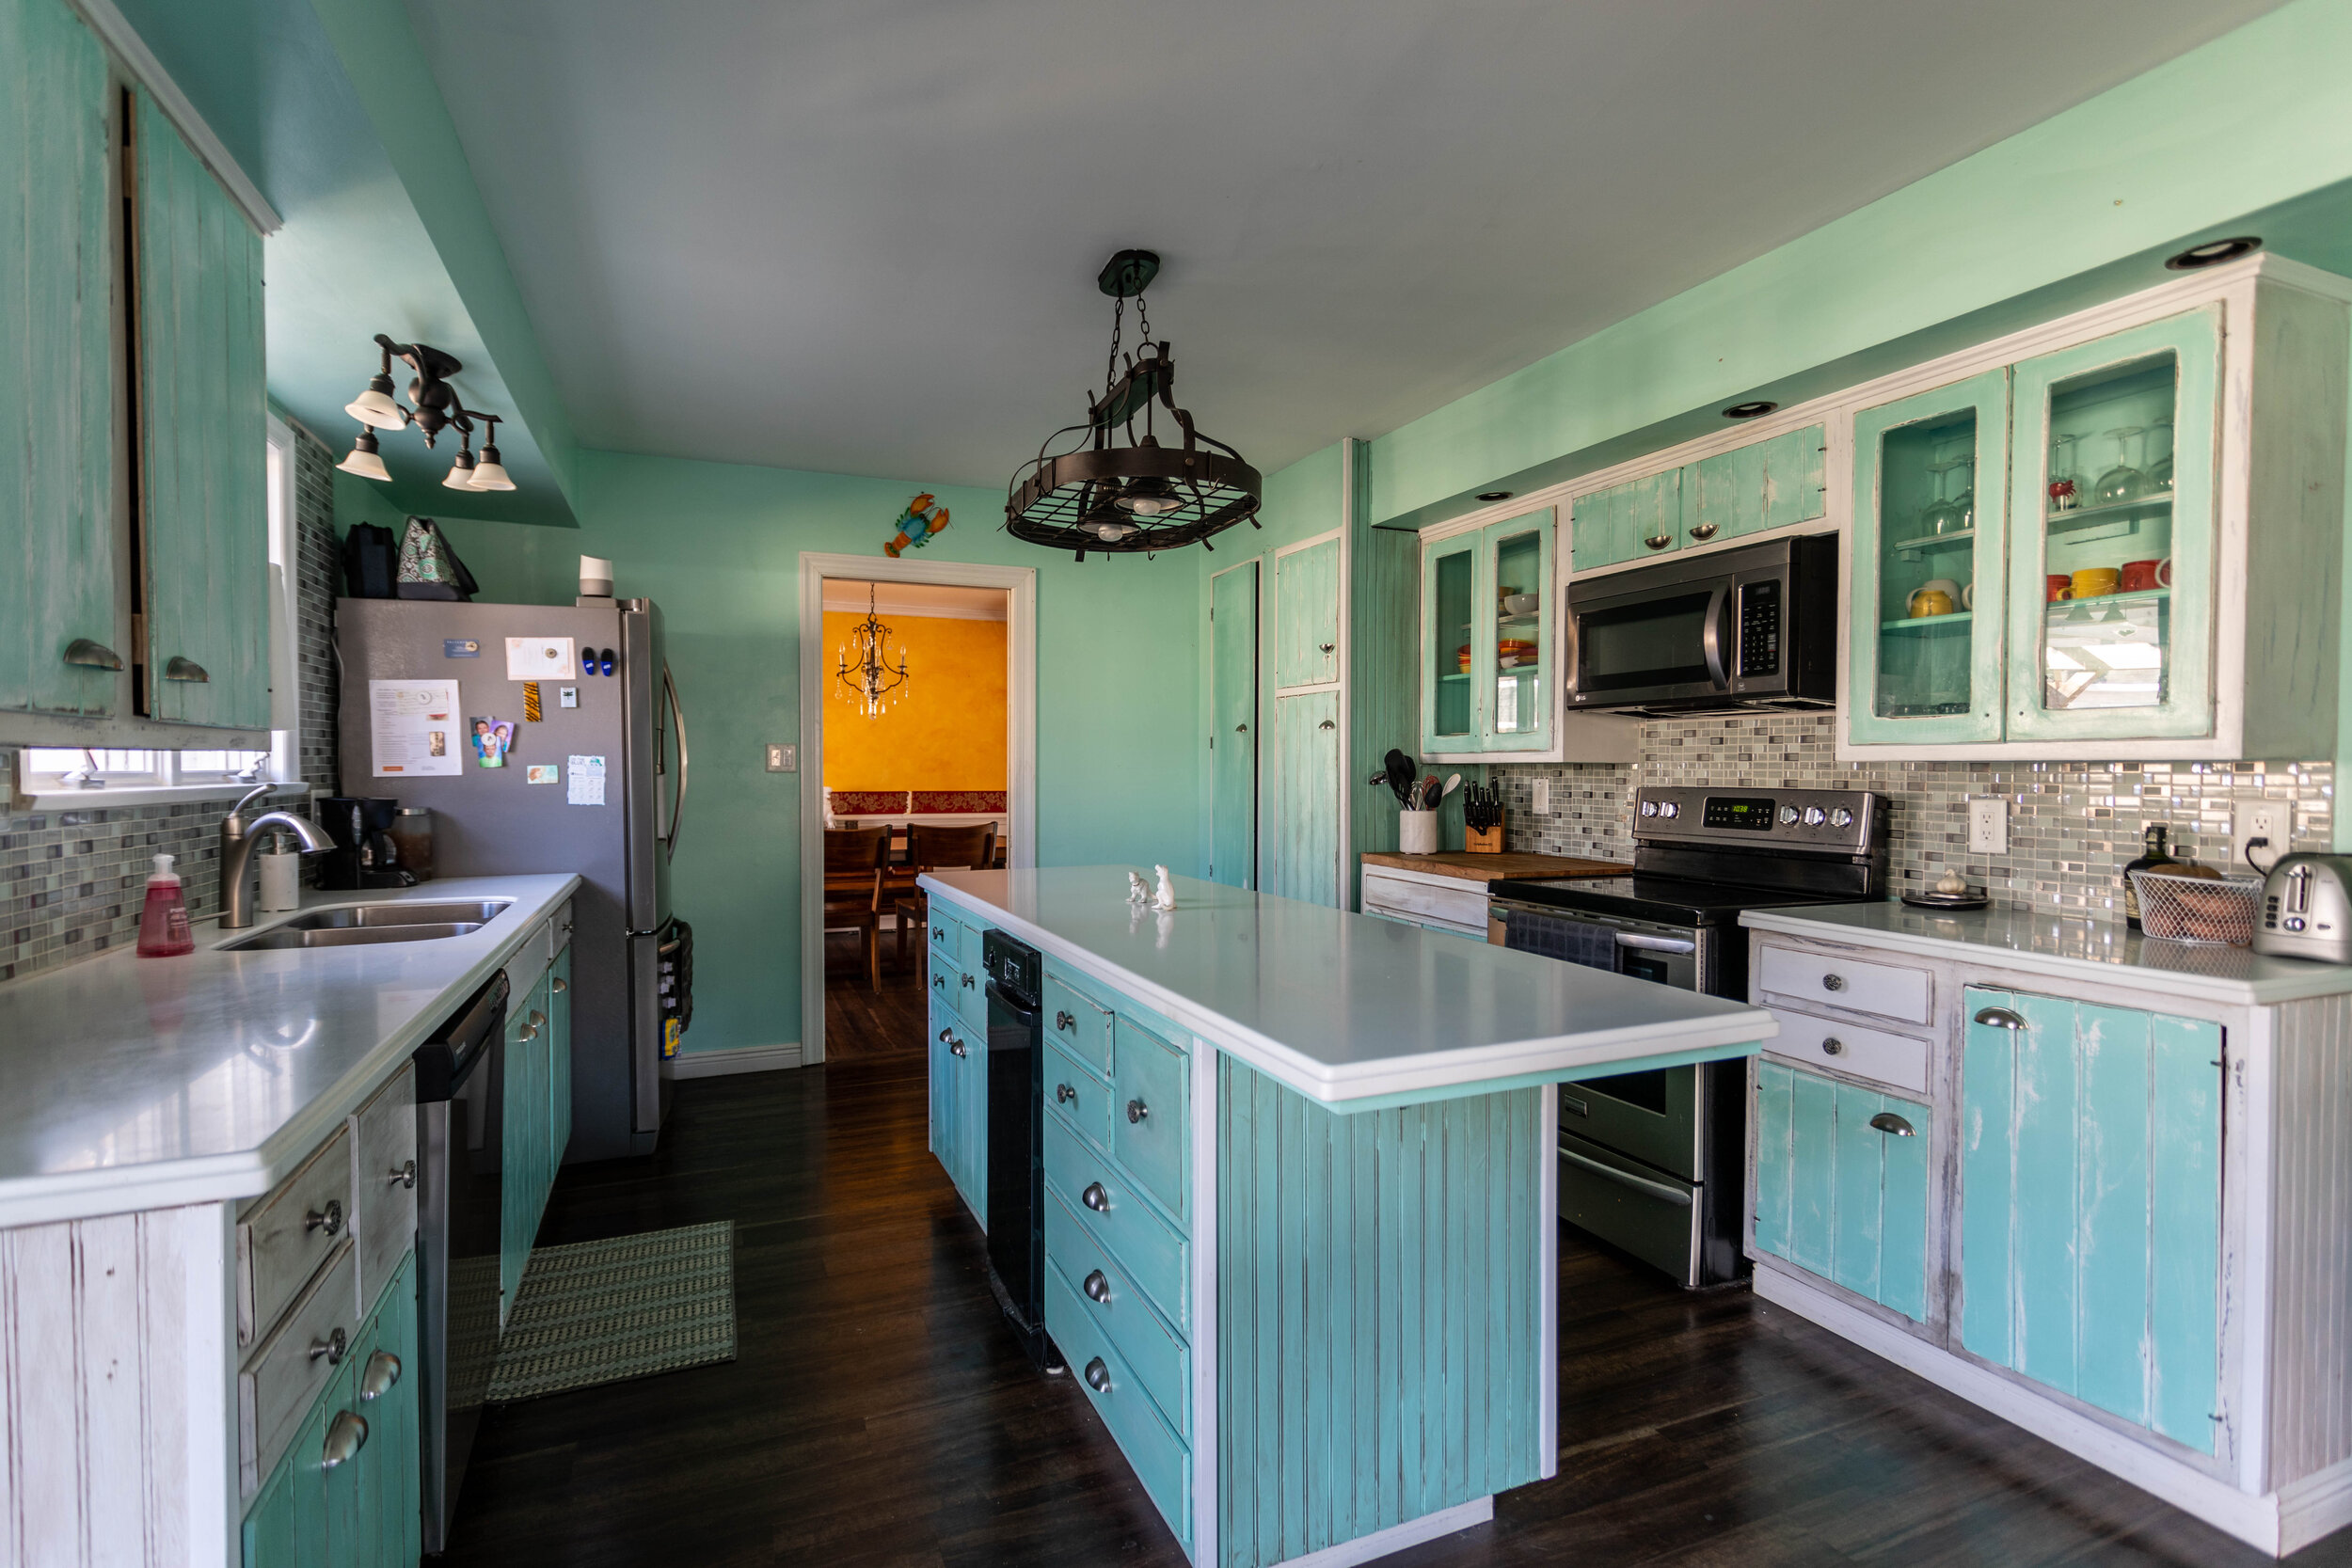
The picture below hopefully gives you a better sense of the open concept living room/kitchen flow.
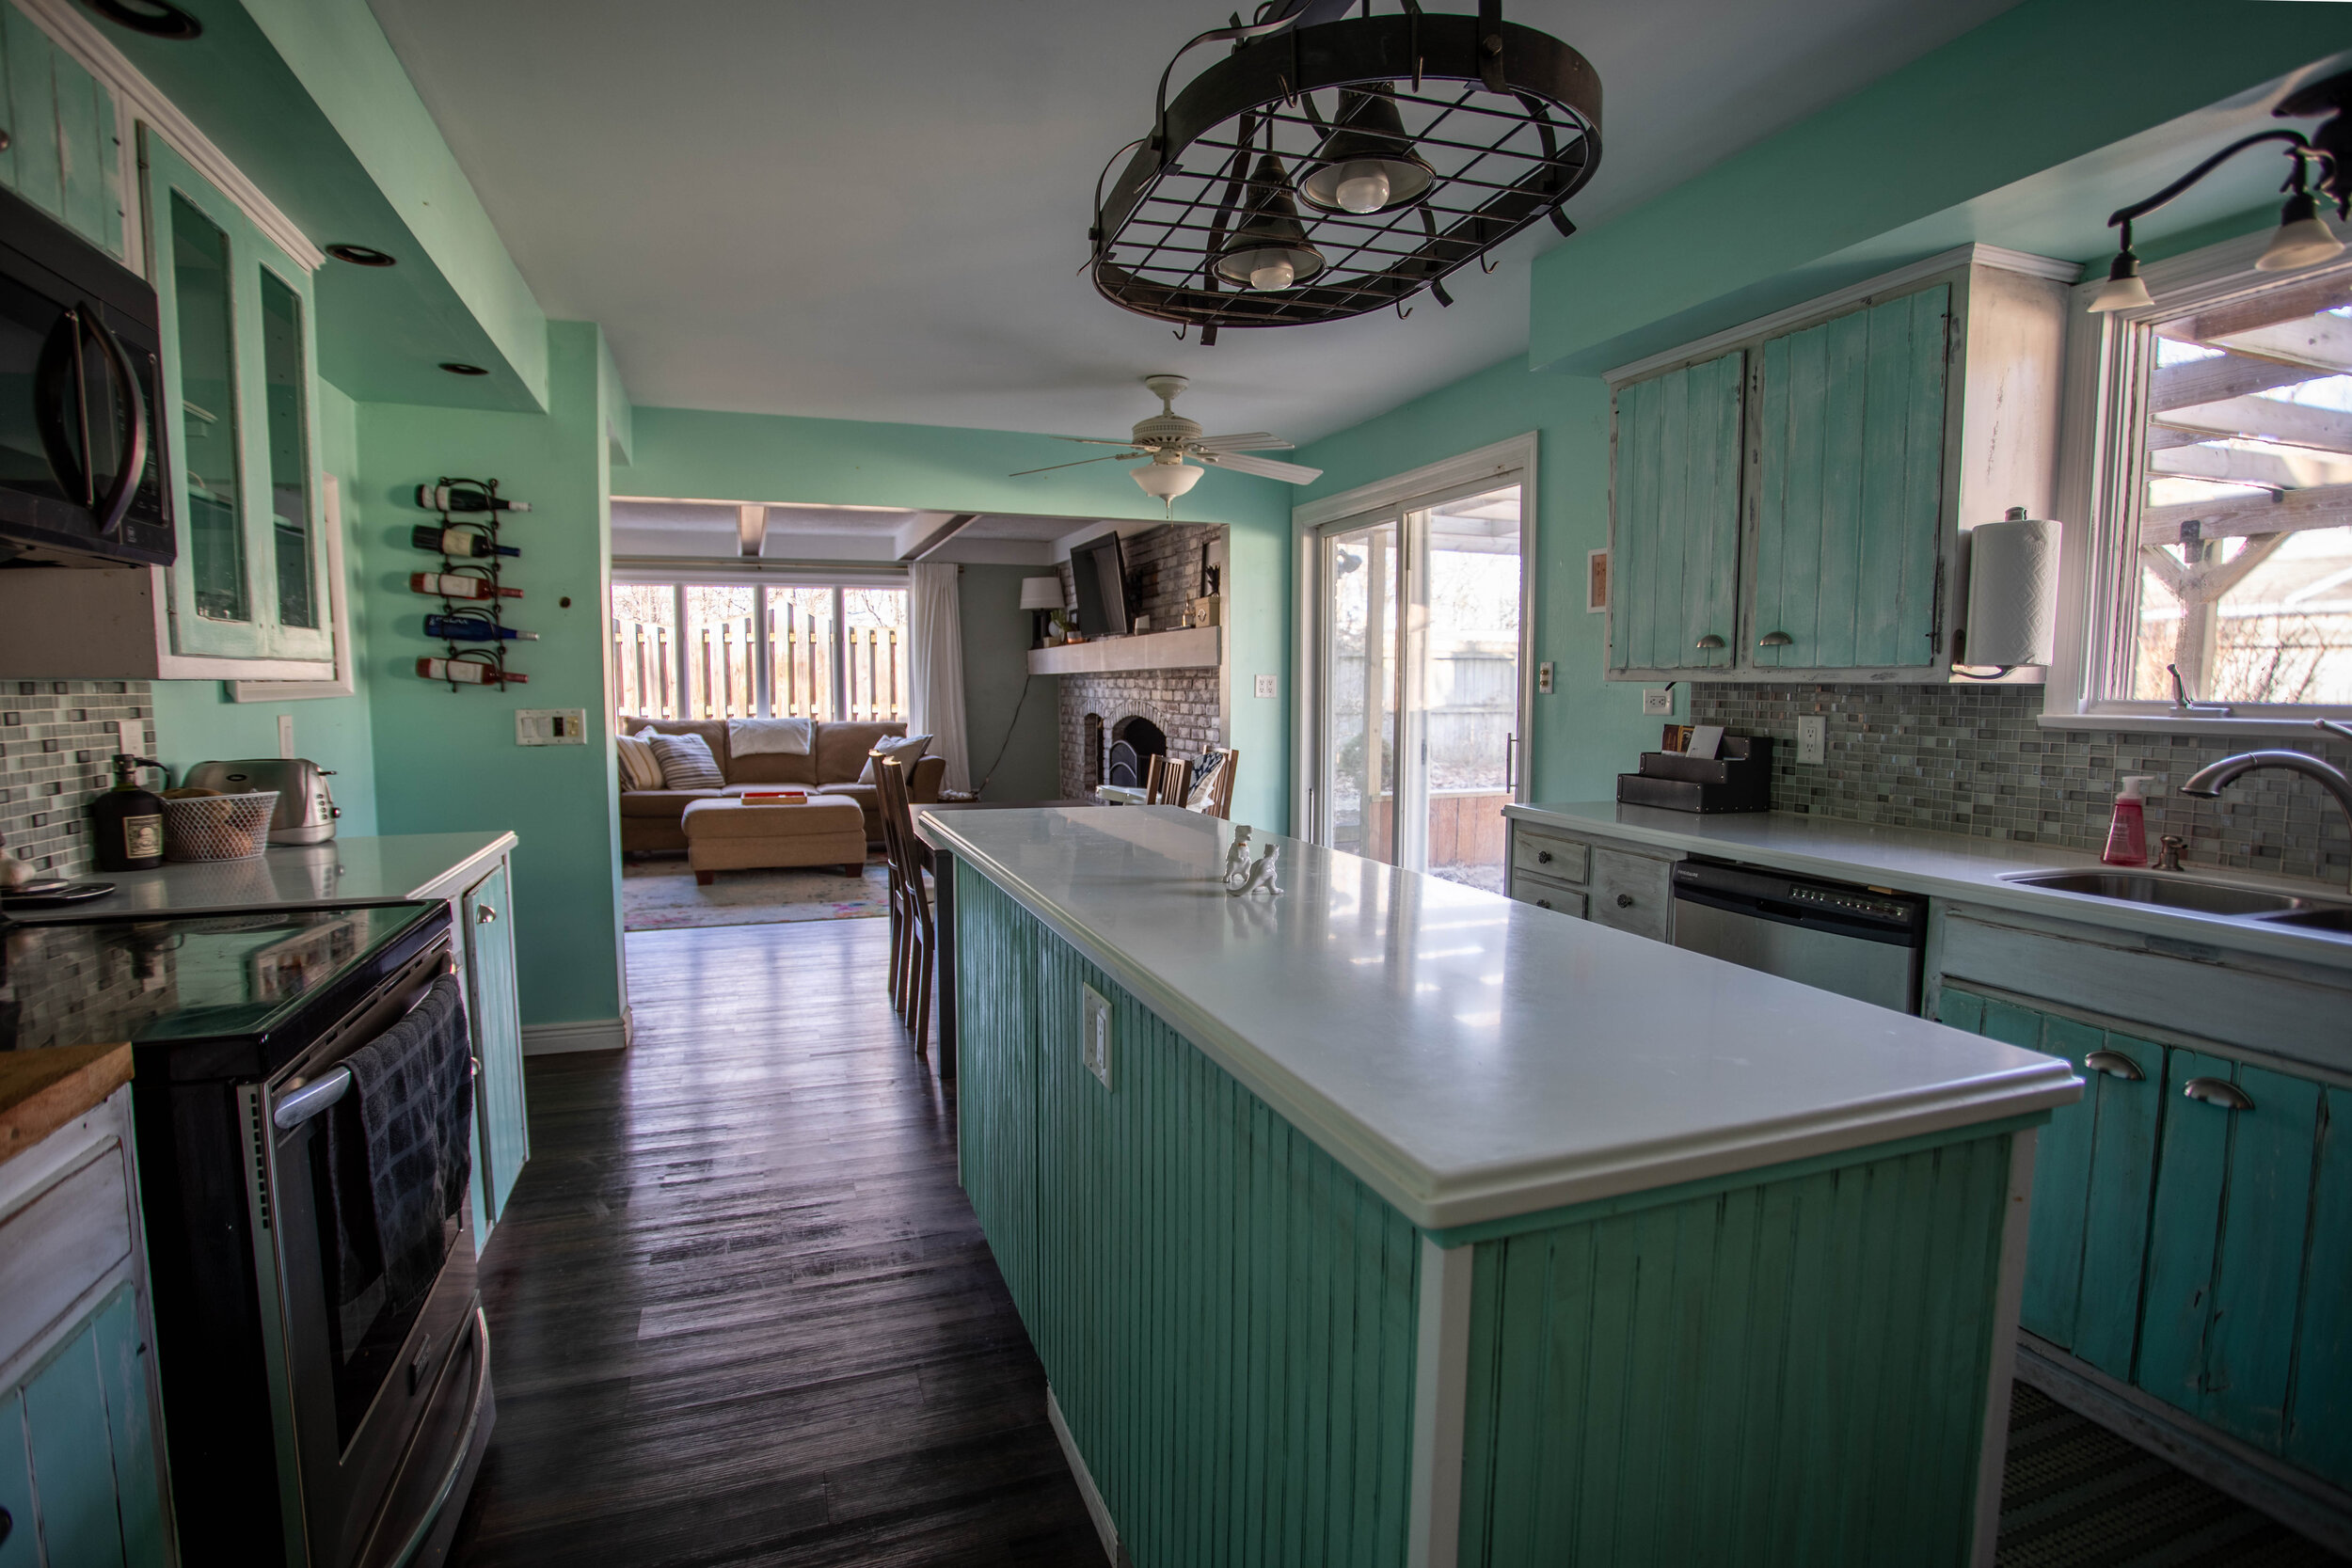
The Dining Room

Holy yellow dining room. This room is a hot mess mix of styles at the moment, but I think the t-rex cookie jar really pulls it all together.
RELATED: You can check out our progress on this room HERE and HERE.
The Playroom
Open to the dining room is the playroom, which currently is a hodgepodge of toys with really no design scheme at all, and a severely undersized rug. Past the playroom in the picture below you can see that we’ve come full circle (literally), as we’ve ended up back in the foyer.
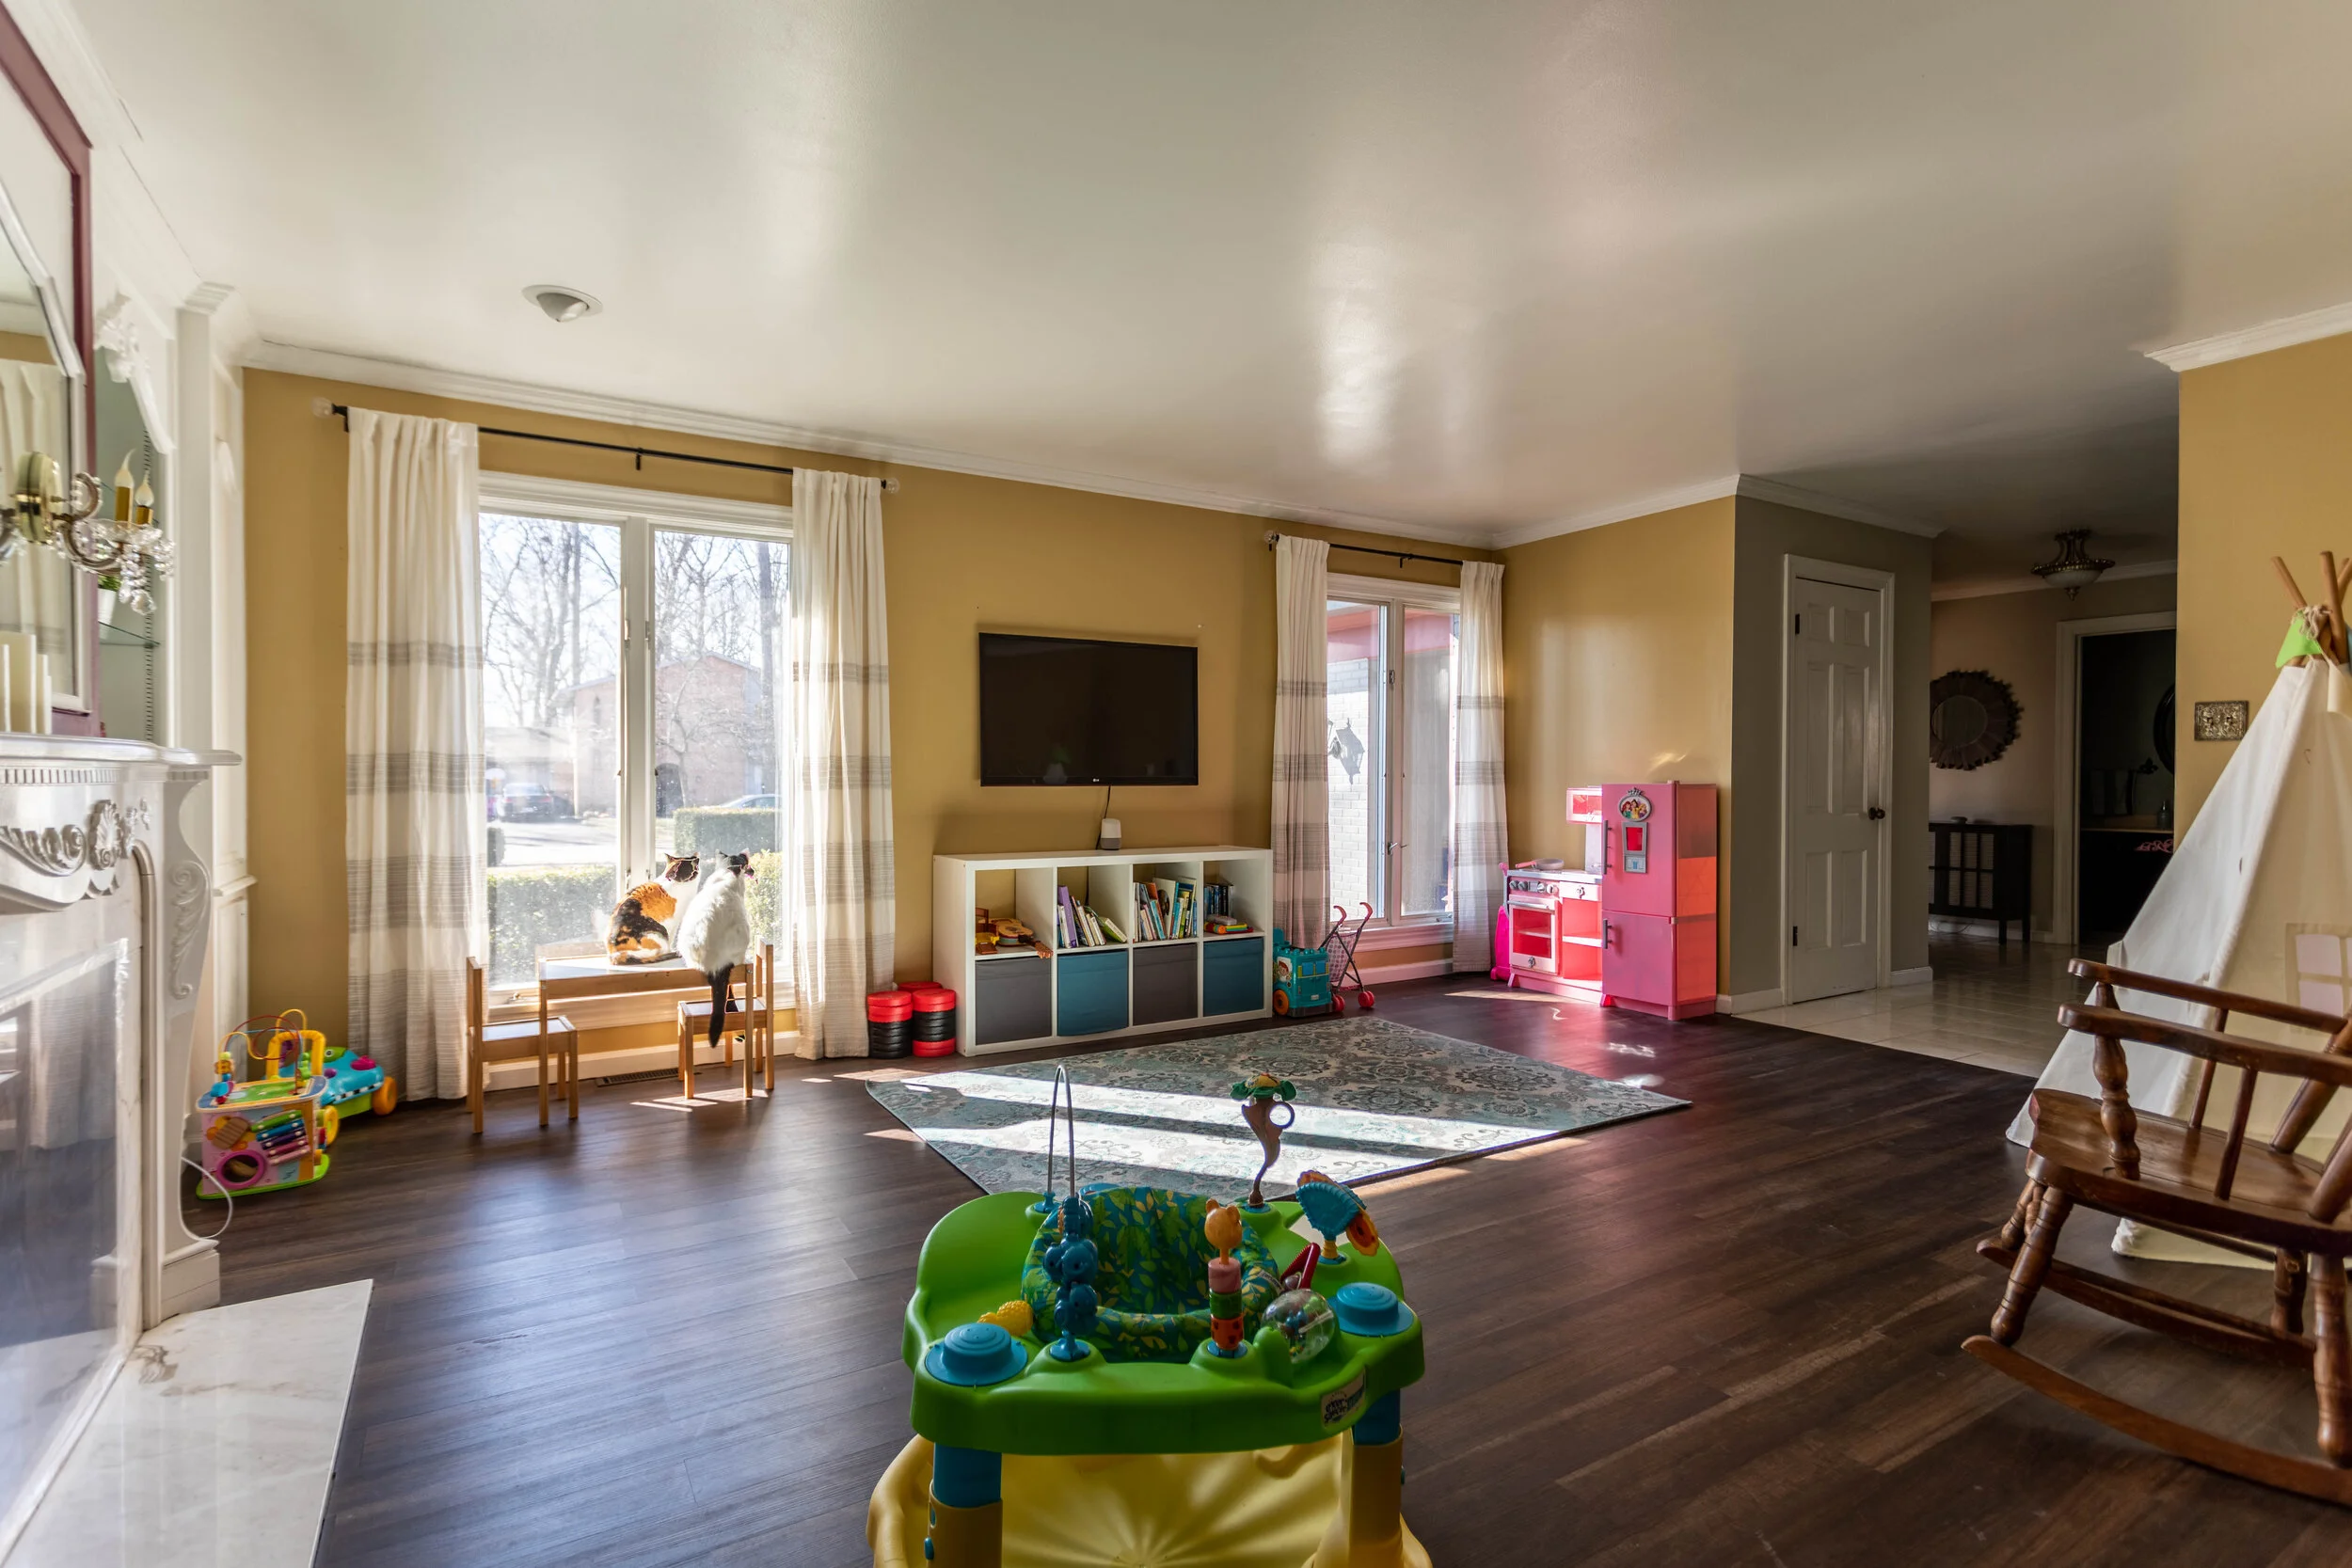

The Spare Room

Heading upstairs the first bedroom to the right is the spare room. It’s very sparse right now, pretty much just containing overflow items - shelves, curtains, rugs, pictures, mirrors.
RELATED: Check out my plans for this room HERE.
Our Oldest Daughter’s Room


Next to our oldest daughter’s room is the nursery. You’d think the kids would wake each other up since their rooms share a wall, but surprisingly that hasn’t been an issue!
RELATED: Want to know how I made the mobile in the corner? All the deets can be found HERE.
The Kid’s Bathroom
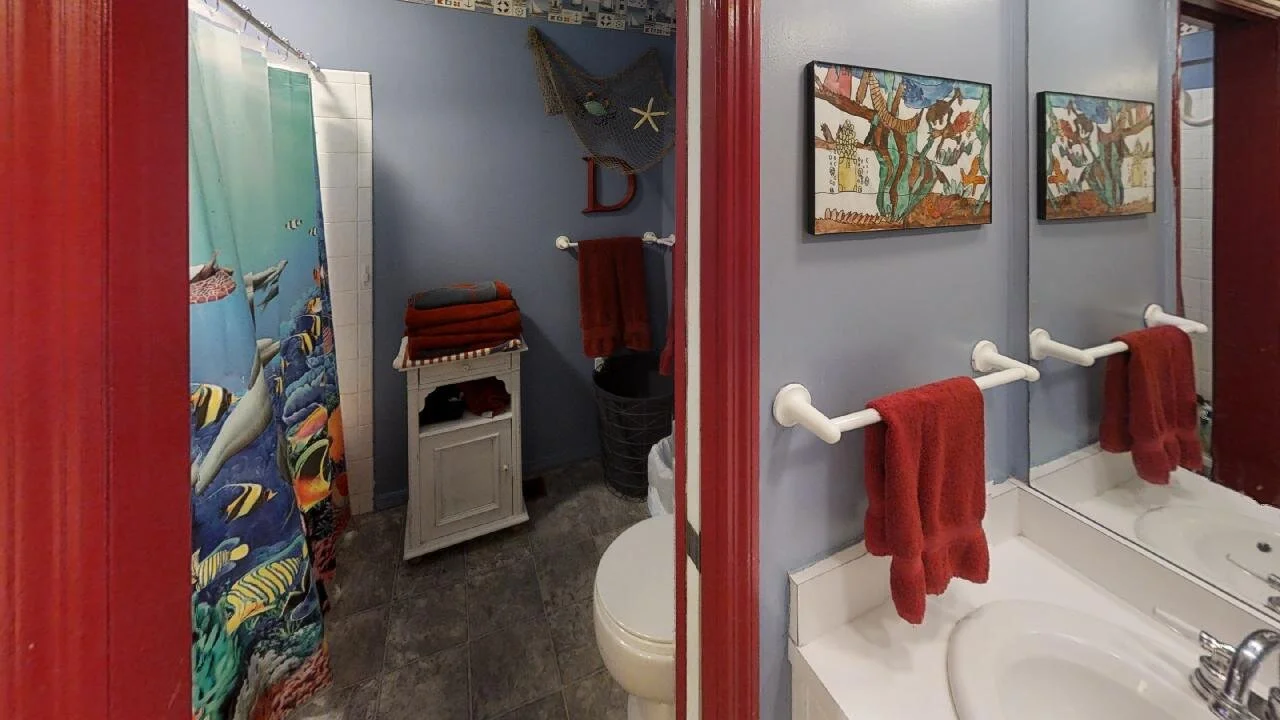
The picture above is from the house listing. The kid’s bathroom is a functional space, but there are lots of walls that make it really difficult to photograph and honestly a little cramped feeling in person. Out of frame on the left-hand side is a second vanity and the doorway in front of you is a pocket door. It makes sense - one kid can shower while the other one uses the sink/vanity, but it doesn’t flow as well as it probably could.
The Master Bedroom
(and some really peculiar design decisions)
I’m going to do my best to explain this room, but I would recommend watching the video to get the best understanding of its weird layout. Also, I hope someone out there appreciates the fact that I made my bed for this. I’m pretty sure making my bed is my least favorite chore.

The bedroom itself if pretty basic, but there’s a weird sunroom that you can see straight ahead in the picture above. For some reason the sunroom doesn’t extend all the way to the wall on the right. Instead, there’s a strange little alcove with a vanity light and an overhead light over there.
Making the sunroom even weirder is that it’s really long and narrow. Lastly, to top it all off, there’s a window on each of the far ends of it. As you can see below, we’re standing in the alcove looking through the window on the far end of the sunroom and peering all the through the other window on the other side that looks out over the loft. (Please ignore the mess, Lucius couldn’t help himself and started peeling back some of the paneling already.)

The picture below shows the other side of the bedroom if you’re standing in the alcove. The mirror on the wall is built into place and can’t easily be taken off the wall. Yay.

The doors on the right of the picture above is Lucius’ closet and mine is on the opposite side of the hall. As you can see, it’s insanely dark because all the glorious windows are in the sunroom that we’ll never use. Below is a shot of the hallway from the center of the door frame.

The Master Bathroom
Continuing with our theme of weirdness for this part of the house is the master bathroom. Referencing the picture above, once you walk past our closets, on the left-hand side of the wall is our vanity, on the right-hand side is our toilet closet, and straight ahead through the doorway is our shower.
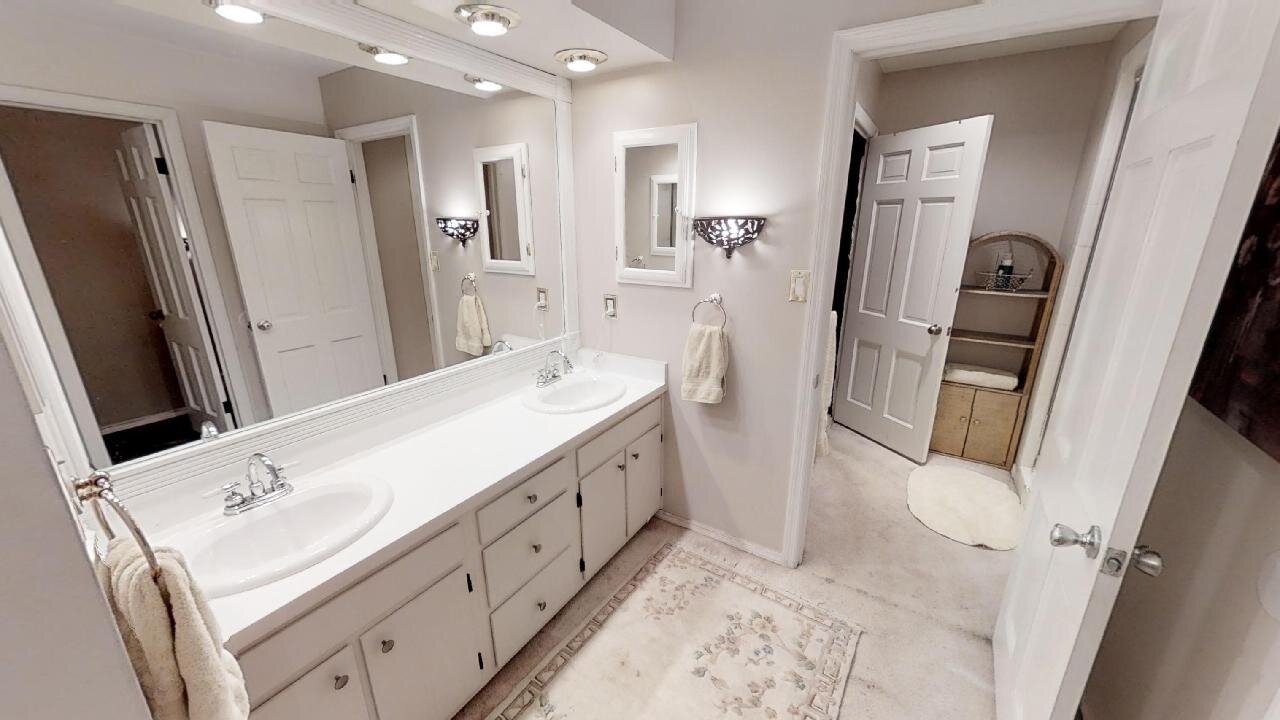
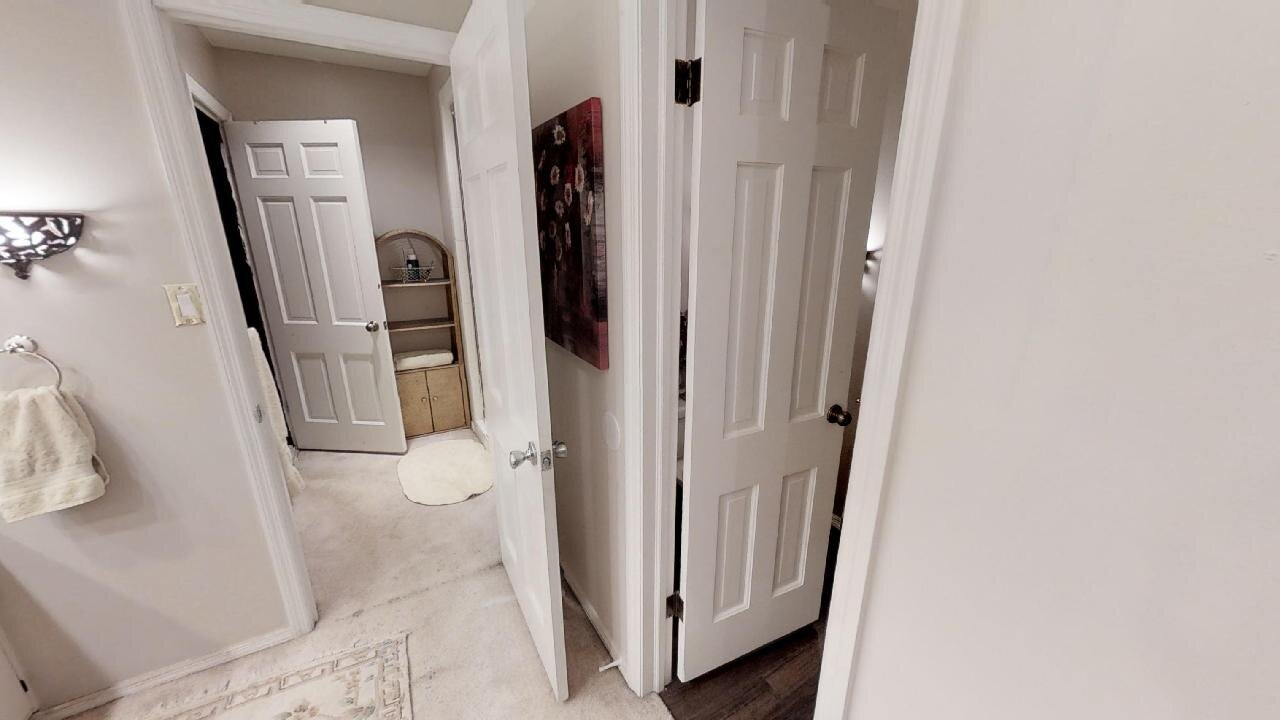
The shower being in its own room is very weird, but it actually makes sense. At one point in time it was a working sauna but I don’t think it’s been functional in a long time. Currently it’s just a really big shower in its own strange little room.
Oh, and if you didn’t notice in the picture above, take another look at the OTHER door in the shower room. Other than using the spiral staircase in the mudroom, that doorway is the only other way to get to the loft.
RELATED: Demo is officially underway. The progress report and floor plans for the master suite can be found HERE and HERE.
The Loft

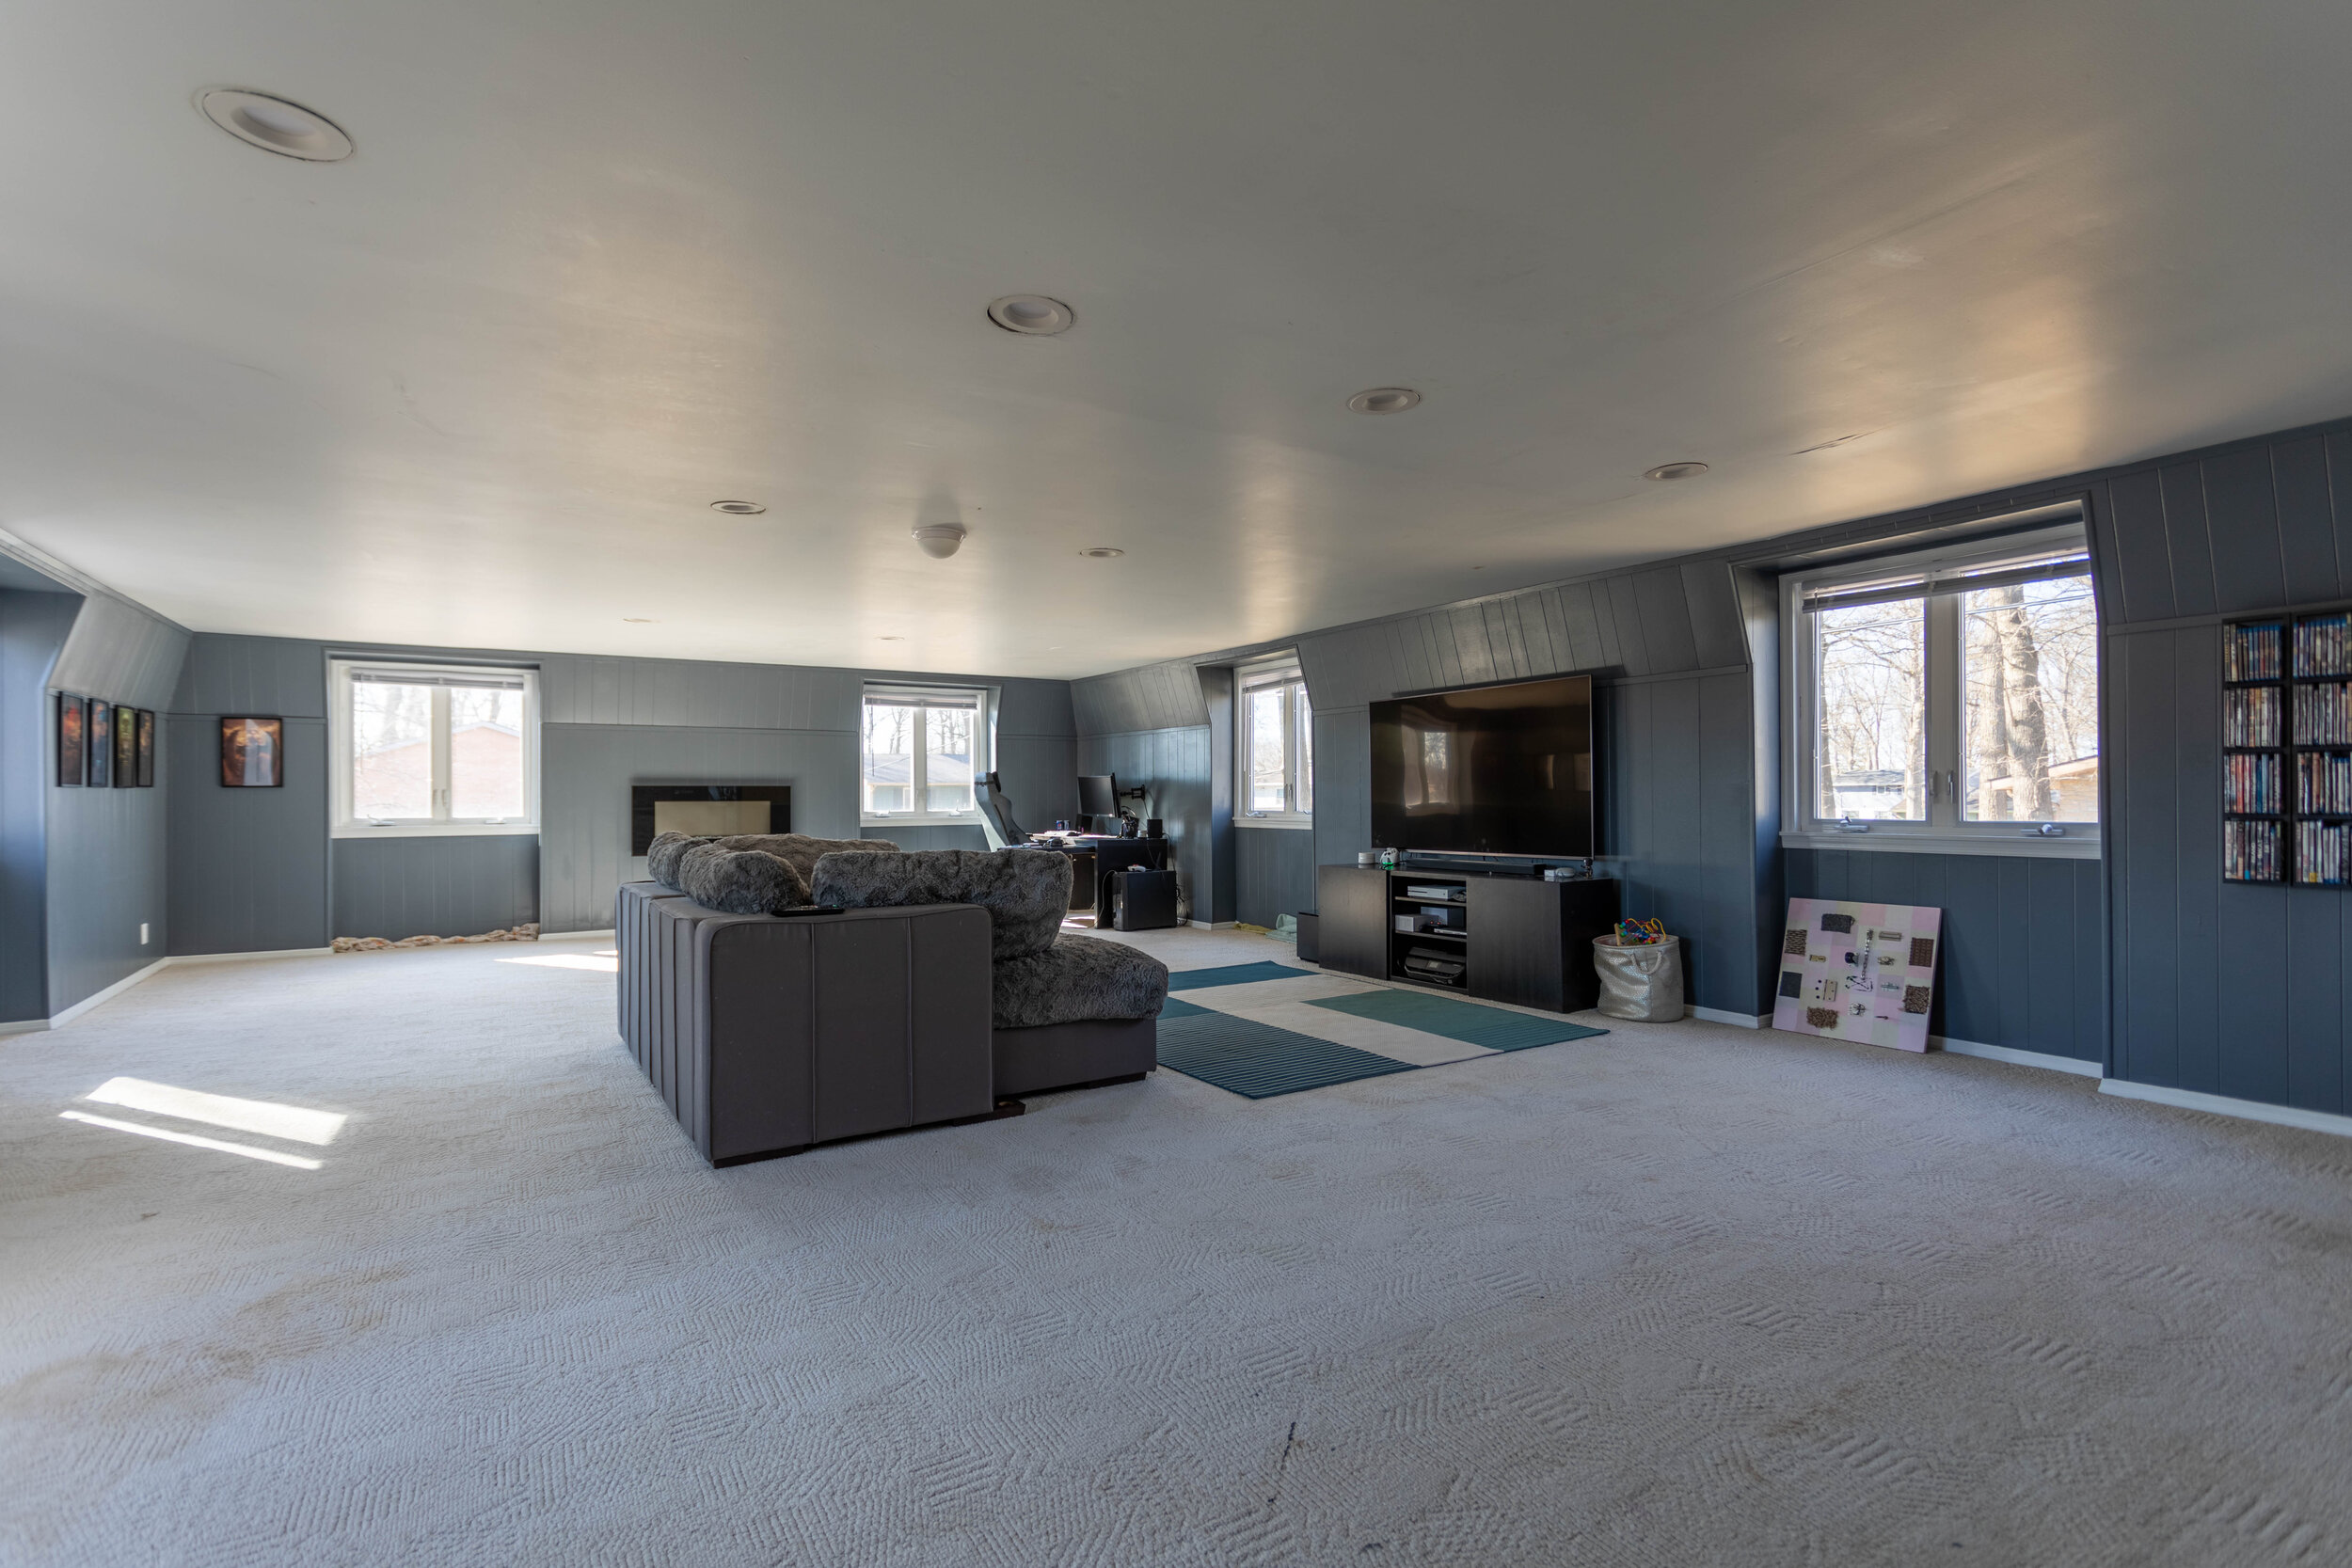
Upon walking through the shower room into the loft, the view above is what you see. It’s a giant space - it actually spans the entirety of the 3-car garage below. The carpet is a hot mess, which we didn’t help when I forgot to close a paint can and Lucius, unable to find a stir stick, decided to shake it to mix it up…

Whoops….
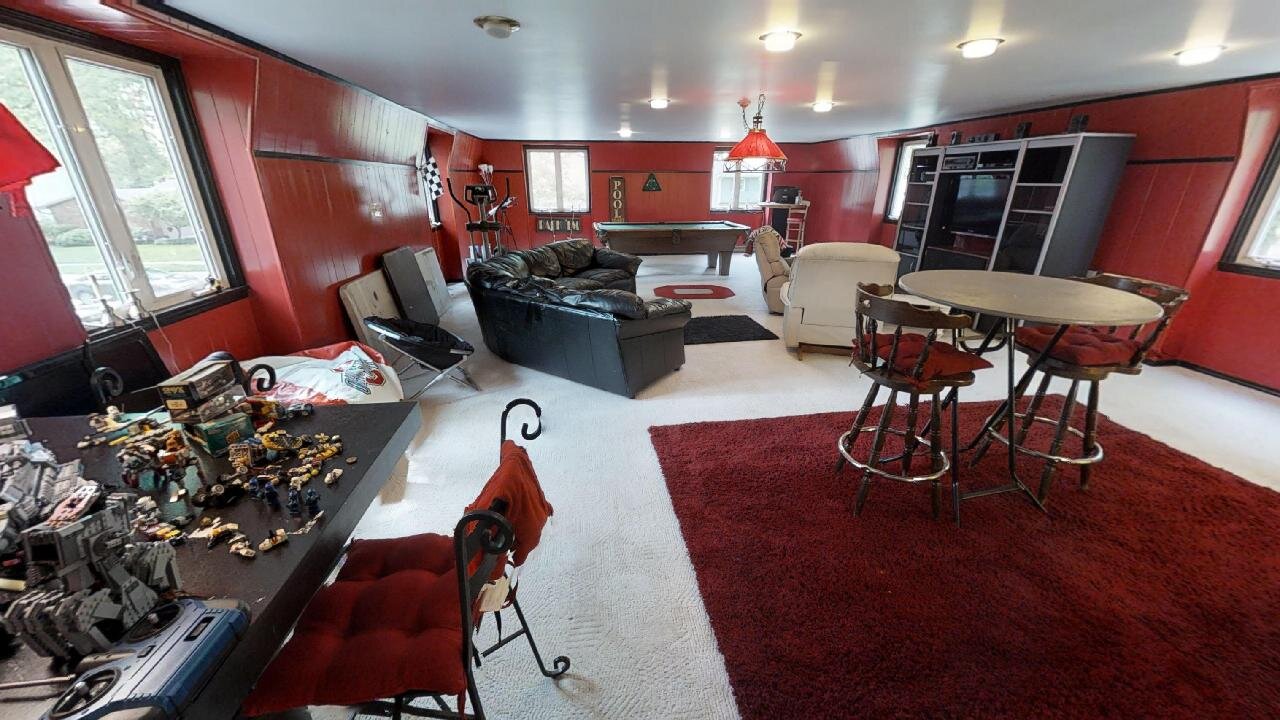
Would you believe that this room started off painted Ohio State red with black trim!?

Standing on the far side of the loft, you can see the kitchenette. The yellow area you see is where the spiral staircase comes up to the loft.

And there you have it - the official house tour! We have big plans for literally every room of this house, and you get to follow along as we renovate our little hearts out! It’s not going to be easy, but we’re excited to make this house our own.

Related House Update Posts

Painting our stairs, part 1
A few days after we moved into this house I took the day off work to get things organized. 8 hours later I had ripped the hideous carpet runner (and 8,000 staples) off the stairs. And 3 months later I got my butt in gear, painted our stairs, and haven’t looked back since!
How to Prep and Paint Your Stairs
A few days after we moved into this house I took the day off work to get things organized. 8 hours later I had ripped the hideous carpet runner (and 8,000 staples) off the stairs. And 3 months later I got my butt in gear, painted our stairs, and haven’t looked back since!

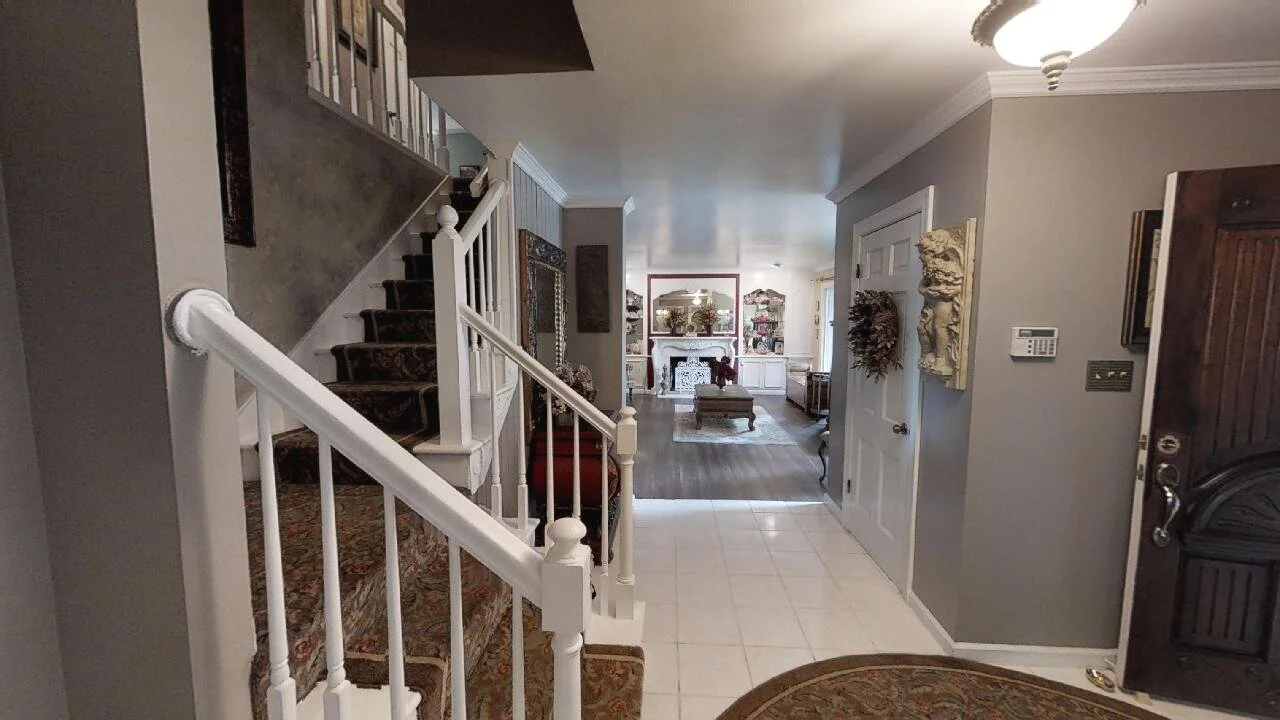
The carpet that was on the staircase when we moved in was dark, musty, and not to mention ugly. I couldn’t wait to get it out of there!

Picture from the house listing.
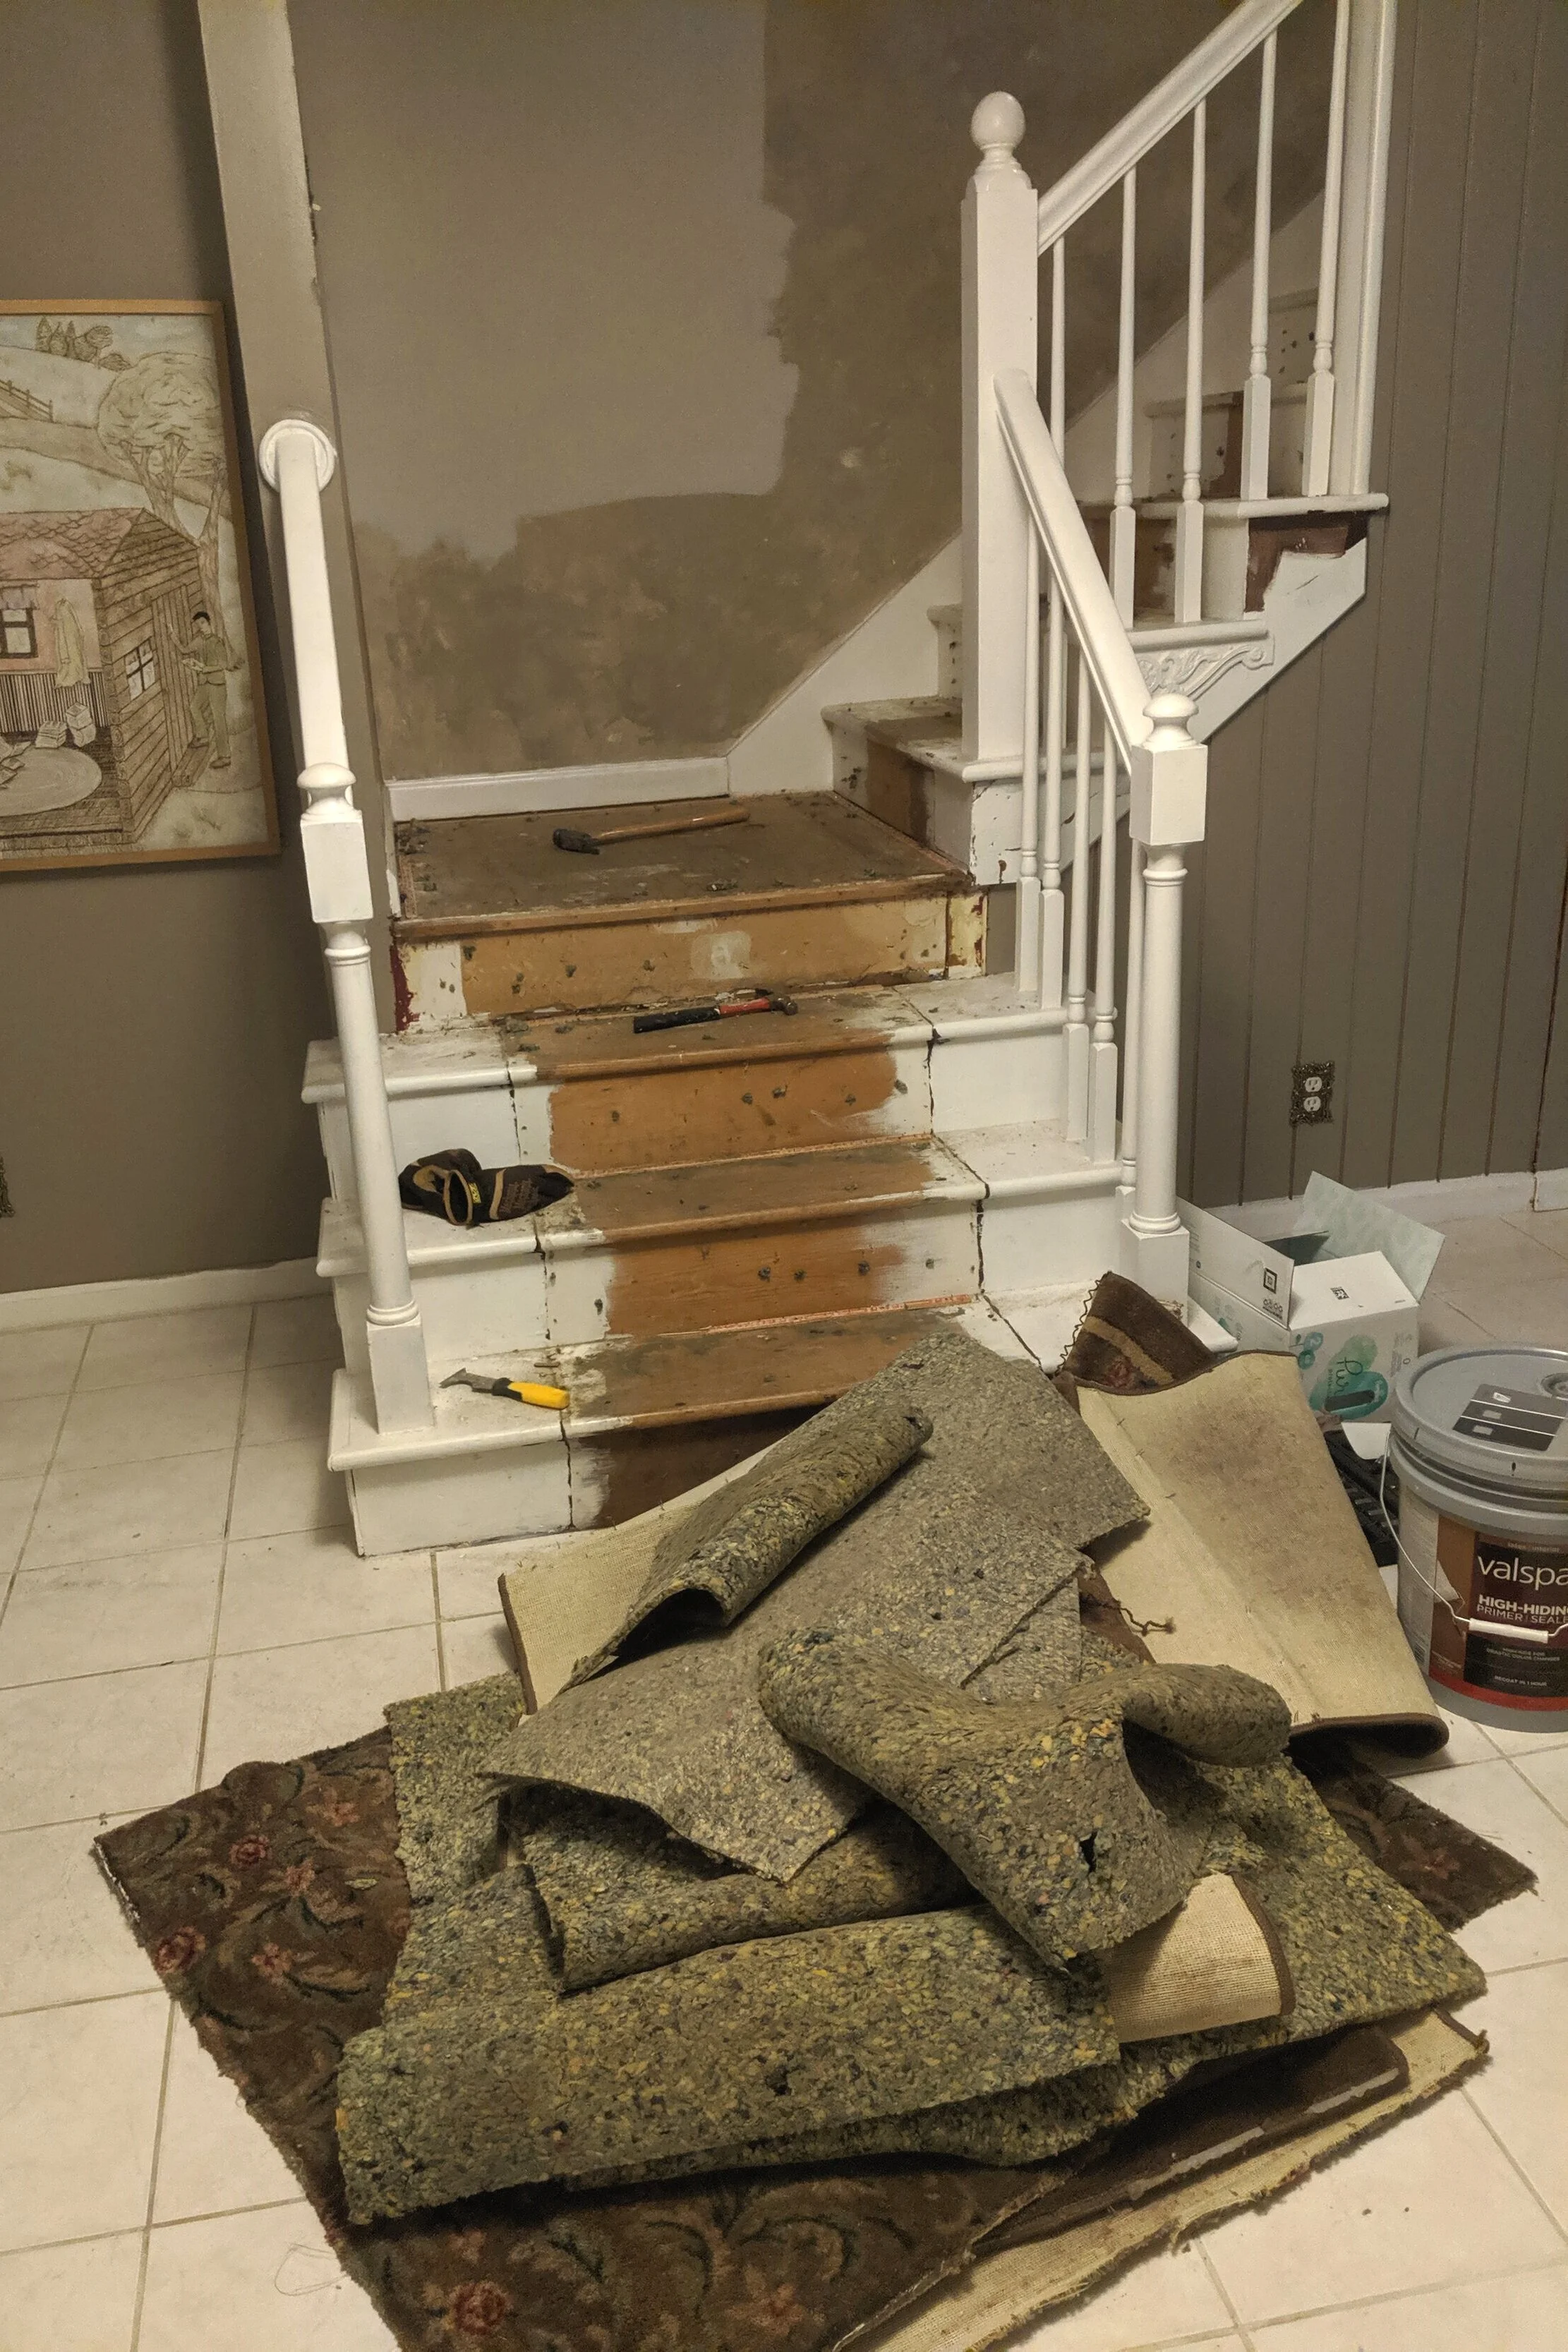
Carpet be Gone!
I didn’t get a chance to refinish the stairs at our previous house before we moved, so I was especially excited to get a chance to makeover these bad boys.
But after I ripped up the carpet, the stairs stayed bare… for 3 months. There are so many things in this house we want to get our hands on, so it was easy to get distracted painting the loft, the foyer, and our oldest daughter’s room.
But once those rooms were painted (though I don’t consider any of them to be complete yet), I felt like I could shift my focus back to the stairs. Here’s how I tackled them!
Getting started - prep work
(so.much.prep work.)
First thing’s first…. If you’re starting with carpeted stairs like I did, you’ll need some good pliers and work gloves to rip it out. Those saved my dainty little lady hands from a lot of pain.
Next, take out the staples. It’s tedious and will take a whole bunch of time, but getting all the staples out is key to a nice end product. Just throw on some music, a movie, or a podcast (if you’re a true crime fanatic like I am, I highly recommend My Favorite Murder) and get comfortable. You’re gonna be there for a while.
If you already have bare stairs, I’m jealous because you’re at a way better starting point than I was. Either way, once your stairs are bare, CLEAN THEM! I wiped mine down with a Magic Eraser and some water and was appalled (yet oddly satisfied) at how much dirt came off them.

Next, fill the crap outta all the little holes you just created with wood filler. Here’s what I used.
I went through so much more wood filler than I anticipated. Since the holes were so small, I just used my fingers to push the filler into them, rather than a putty knife.
Also, I learned a new trick - when your wood filler starts to dry out, add just a little bit of water and mix it together to revive it. Dry wood filler would rather stick to your fingers than the wood and it’s infuriating. This trick saved the stairs from a lot of unkind words.
As you can see below, I wasn’t shy about filling in not just holes, but also dents, nicks, and cracks.

Once your wood filler is dry, you’ll need to sand off the excess.
I started sanding by hand and after about an hour when I had only completed 3 stairs Lucius asked me why I wasn’t using our palm sander. In my stubbornness, I almost said, “I’m too far in!” and kept painstakingly sanding by hand, but my reasonable side luckily stepped in and said, “girl, just try it”. And I’m so glad I did.
Although the palm sander spread dust EVERYWHERE (like, I really should have closed the bedroom doors before I started), it was way faster than hand sanding and the end product was a lot more smooth and consistent.
Our sander is similar to this one and I used 100 grit sandpaper. I could have/maybe should have used a finer grit, but 100 grit was what I had on hand and I didn’t notice any significant scrapes or roughness so I think it turned out fine. You could also use an orbital sander.
Once your sanding is complete, you need to thoroughly clean the stairs again. I started by vacuuming the stairs. Then I gently wiped them down with wet paper towels. I didn’t want to wipe the wood filler out of any crevices so I opted not to use a Magic Eraser this time. At this point, I realized it was a good idea to caulk any gaps or cracks to make everything look seamless. Make sure you’re using paintable caulk for this.
FINALLY, it was time to prime! I planned on using a latex primer, but ended up using oil for two reasons: 1 - I feel that oil primer typically dries harder and holds up better, and 2 - I have a stupid amount of oil primer on hand. I should really stop buying more before checking my stock first.
I typically steer away from oil-based paints and primers because of the VOCs (fumes and chemical off-gassing), and the fact that you have to use mineral spirits or paint thinner to clean your tools after you use them, which feels chemically and gross to me. But since stairs need to be pretty darn durable (compared to a wall that no one will be walking on several times a day), it made sense in this situation. I used Killz Original Oil-based Primer and applied it with a cheap brush similar to this that I could just throw away when I was done.
I knew there would be holes that I missed while filling the first time around. Adding a coat of primer to the stairs helped identify any holes I missed as well as some stray staples. I pulled out the remaining staples and filled the rest of the holes.

After this round of wood filler dried, I had to sand again. I didn’t want to sand off the primer, and there were way fewer areas to sand this time around, so I just sanded these areas down by hand.
Afterward, I vacuumed the stairs again, and to take it a step further to make sure the stairs were super duper clean before I put down my first layer of paint, I wiped them down with tack cloth. Tack cloth is just a sticky version of cheesecloth used for picking up dust and small particles for jobs just like this. It’s super inexpensive (less than $2.00 for two of them) and well worth it.
The exciting part - Painting!
After hours of prep work, I was so excited to get some uniform color on these sad, ugly stairs. I knew I wanted to paint the stairs, rather than buying an actual runner. I hate vacuuming stairs, so painting the stairs was really the only option. For the last several months, I had been researching different design ideas. Here were the three contenders:


The third example is actually a carpet runner, but I did consider painting a runner (without the extra stripes on either side like the one in the middle) in a similar color. The third example also has the treads painted a different color than the risers so I guess I had 4 ideas I was considering. Initially, I was really leaning toward painting a runner similar to the second and third options above, until I covered the stairs with rosin paper between work sessions…

…and realized how much more narrow the stairs felt. This stairway is already fairly narrow, and the “runner” just seemed to emphasize that. At that point, it was pretty clear that I needed to lose the idea of painting any kind of runner and just focus on painting the treads, like in the first example above.
From doing loads of research I knew I needed to buy floor paint for this project, so off to Lowe’s I went! And I was honestly kind of underwhelmed. Usually, I LOVE Lowe’s (and frequently refer to it as the happiest place on Earth… and may have seriously considered working there part-time when I retire years and years from now), but their selection of paint for this project seemed to be lacking. Valspar seemed to be my only choice of paint and only in a select range of colors and sheens. I ended up grabbing a quart of this in satin in a tan color called Covered Bridge and applied it with my preferred 2-inch angled brush.
Once I started on the first tread, I quickly realized that I needed to break out my painter’s tape. Painting under the lip of the tread (the part of the stairs you step on) without getting a ton of paint on the risers (the vertical parts of the step) was proving trickier than I thought. Typically I don’t use painter’s tape (I feel like it gives me a false sense of security and I usually end up making a bigger mess), but with this project it was necessary.
Finally, I was able to get to painting the treads, which was so, so satisfying. This part really only took about an hour for all the treads.
When I got to the bottom and looked up I was… again underwhelmed. The color clashed a little bit with the greige walls (it looks like it matches perfectly in the pictures, but trust me, it clashed) and although it lightened the staircase and looked cleaner, there was just something missing. The next day when Lucius walked up the stairs in his shoes and left prints on the freshly painted treads, I knew that I had to buy a different sheen anyway, so I decided to take that opportunity to check out some other colors too.


Back to Lowe’s I went!
I looked over the colors and decided to go with something darker and with a little more gray in it to pull out some of the grays in the walls, rather than the beige. The color I used was Elkhorn Cactus, and I was immediately happier with it. Unfortunately, the only sheen available other than satin was gloss, and they didn’t have any additives that I could buy to add texture. I’m a little nervous about the glossy sheen, but we’ll give it a little while and if there’s too much slipping and sliding going on, I’ll consider adding some anti-slip tread covers, like this.

Final Thoughts
Our stairs are now looking a bajillion times better than what we started with, but there’s still lots of work to be done - painting the handrails, newel posts, and balusters, and figuring out what in the world we’re going to do with the landing.
In case you didn’t notice in the pictures above, the landing is its own animal. Below is a picture to save you from scrolling back up.

The above is actually an improvement from what we started with when I pulled the carpet off - knotty, thin plywood. But it’s similar to an MDF type material and I really don’t think it’ll stand the test of time, so we’ll find a better solution.
Once we come up with a game plan for the landing, I’ll be sure to write a step-by-step (hah, I couldn’t help myself…) post about it and show the complete, finished product. In the meantime, stay tuned. This story isn’t over yet.
Related Painted Stairs Posts
Refresh Your Staircase with Paint

A room makeover for a unicorn-loving 4-year-old
Our oldest daughter is all girl. She loves pink, hair bows, rainbows, dresses, nail polish, all of it! I had a blast putting together her nursery when I was pregnant (with both our daughters we didn’t know the gender… gender neutral nurseries for the win!). When we moved into our last house, I got the opportunity to design a room more specific to her interests. And now that she’s getting a little older and is able to tell us her likes and dislikes, and since we’ve moved yet again, I had so many ideas for her new room - but where to start?
Our oldest daughter is all girl. She loves pink, hair bows, rainbows, dresses, nail polish, all of it! I had a blast putting together her nursery when I was pregnant (we didn’t find out the gender of either of our daughters… gender neutral nurseries for the win!):

When we moved into our last house, I had the opportunity to design a room more specific to her interests:

And now that she’s getting a little older and is able to tell us her likes and dislikes, and since we’ve moved yet again, I had so many ideas for her new room - but where to start?
We started off with a dark blue/grey room. The picture below is from the house listing and as you can see it’s certainly not the room a little girl dreams of.

I thought of doing an accent wall with a stencil, or maybe with wallpaper. I considered painting the ceiling a bold color and leaving the walls white - like this, or painting the ceiling a softer tone - like this. I even considered decals (this one here was especially tempting). Then I got lost on Pinterest looking at ombre walls and I fell in love.
Now that I had my general design idea, I needed to figure out a color scheme. While she’s getting more opinionated, when I asked my daughter what color she wanted her room to be she promptly told me every single color she could think of. So I had to scratch that idea.
I knew I wanted to steer away from all pink since that was the color of her room at our old house, but I still wanted something bright to keep it fun. I’ve always loved coral and teal together so after mulling it over I landed on that combination. I decided to paint the whole room in teal and use the coral as a transition color for the ombre wall. (Don’t worry, I’ll write a post about painting an ombre wall soon enough.)

Once her walls were complete, I could move on to decorating and pulling the whole room together.
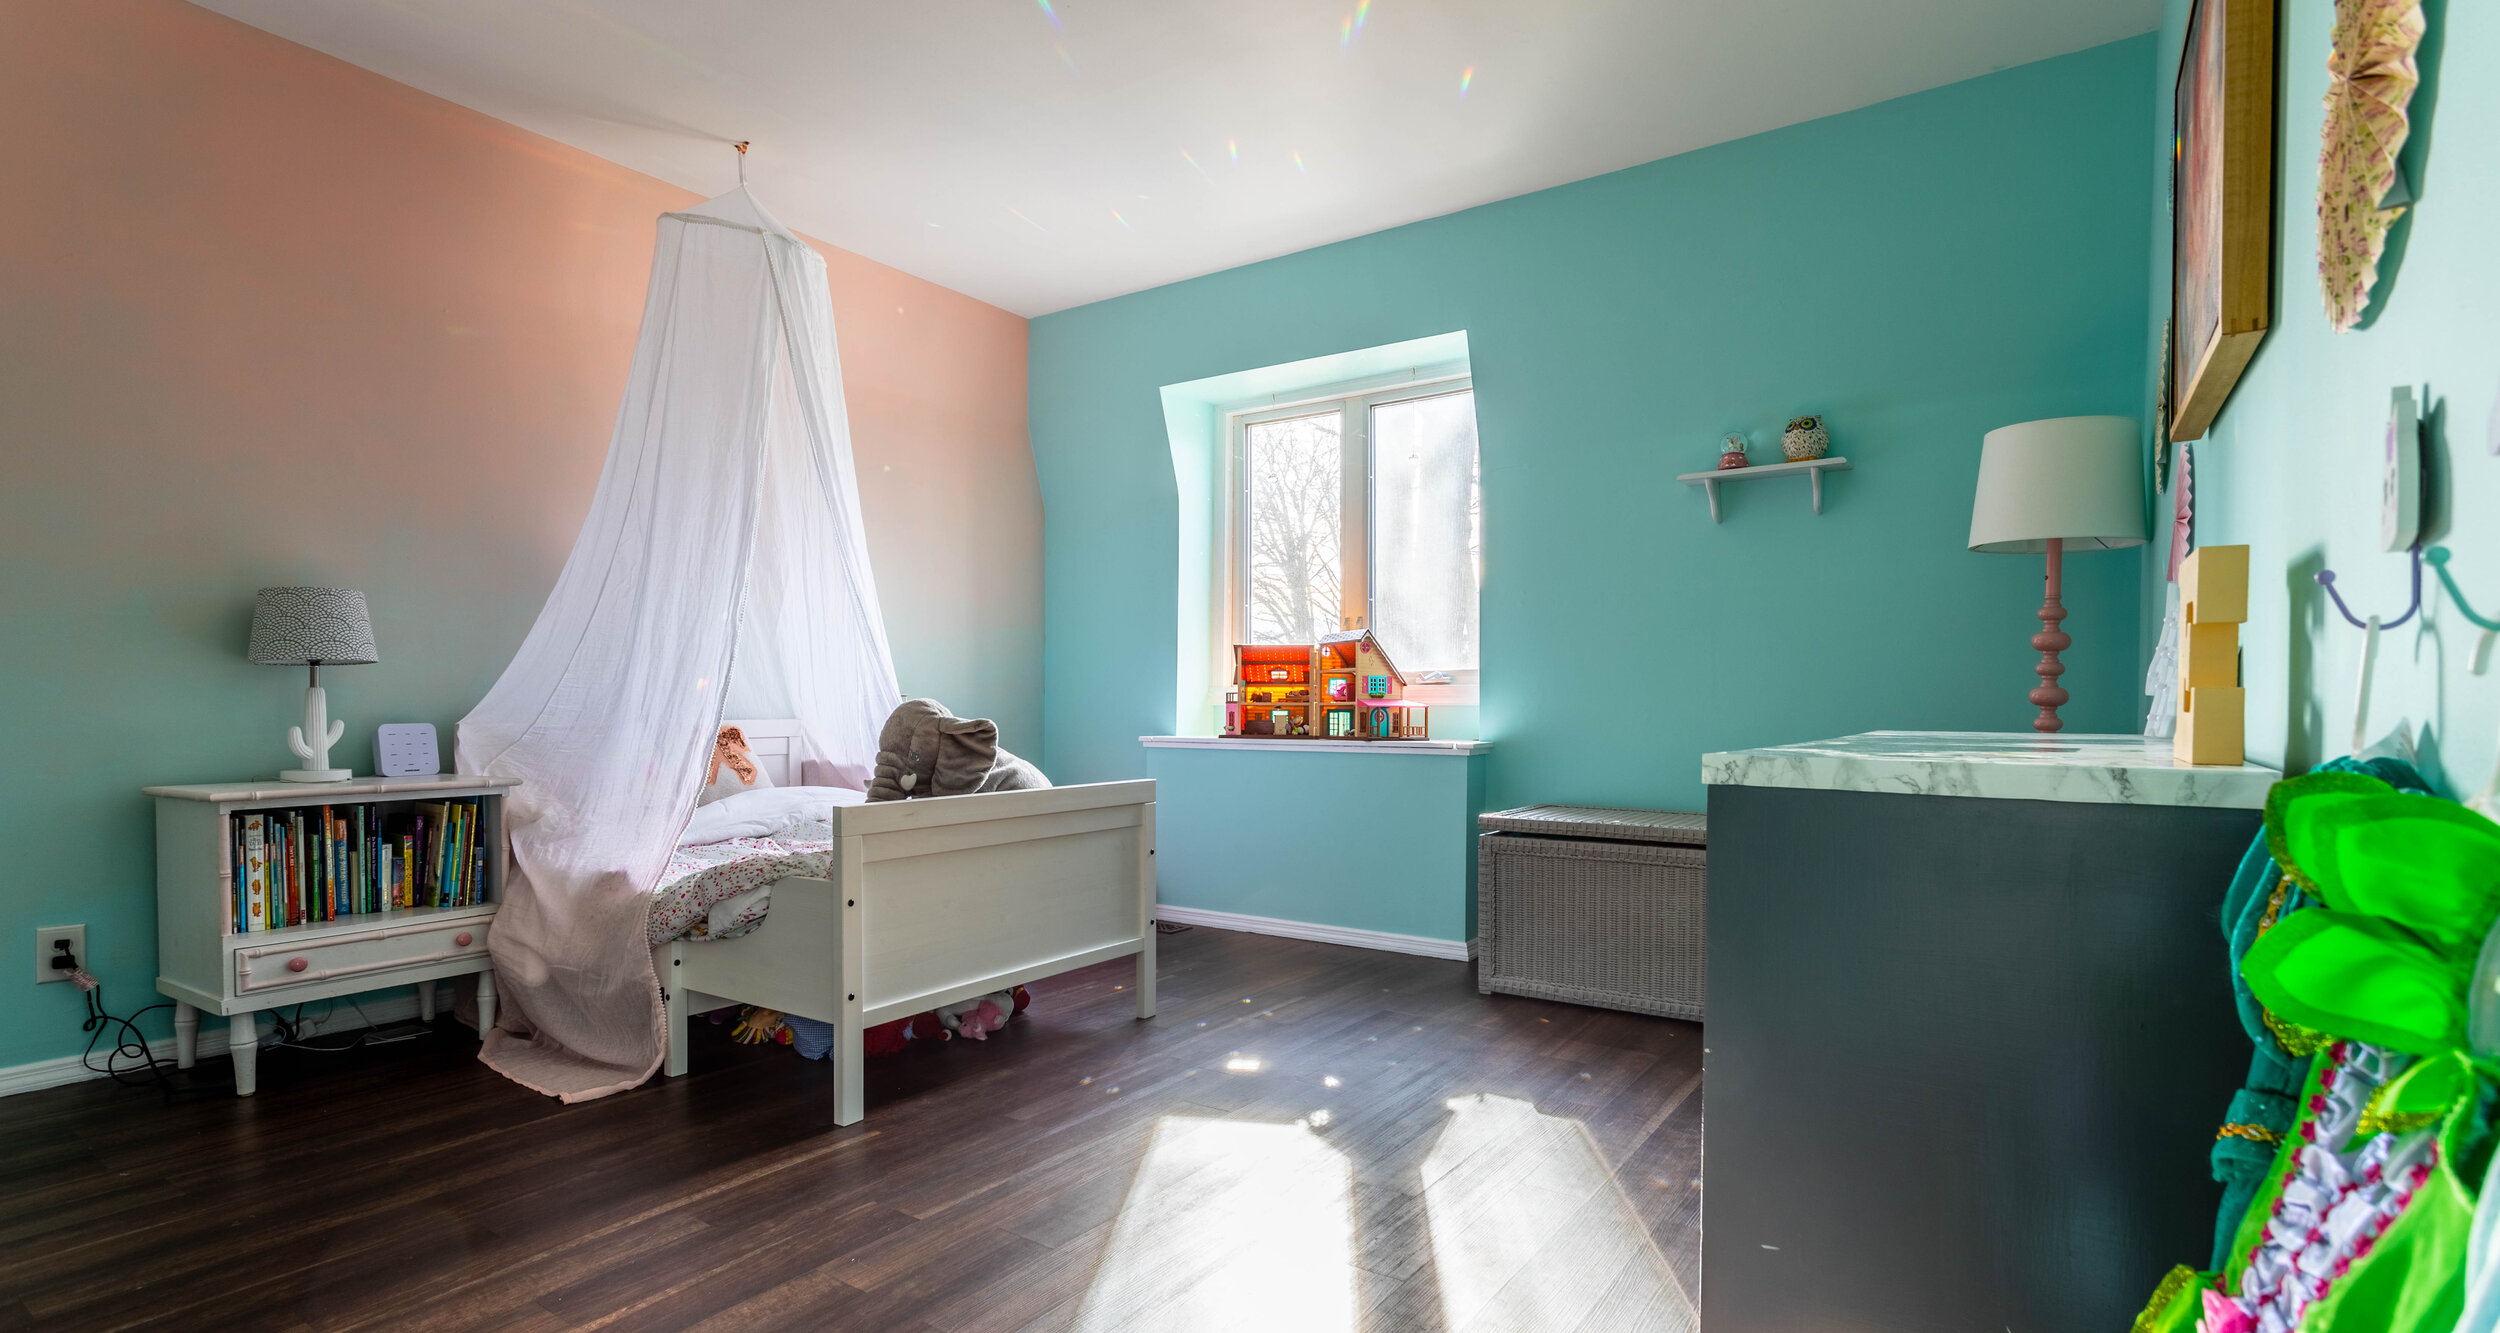
I knew I wanted the ombre wall to be the focal point and would therefore be the wall her bed was on. We saw the canopy over her bed at Target before Christmas and she got so excited we thought she was going to burst into kittens, so we picked it up as a Christmas gift. It’s also ombre, (hard to tell in photos, but the bottom is pink and it transitions to white) so that may have played into the overall design a bit! The nightstands were a second-hand find on Facebook Marketplace and were conveniently already painted pink and white.
Although I’m very hesitant to hang anything on the ombre wall (I don’t see patching holes going very smoothly), I think it needs something more, so I’ll likely hang some pictures on either side of her bed once I get the confidence to drill into the wall.

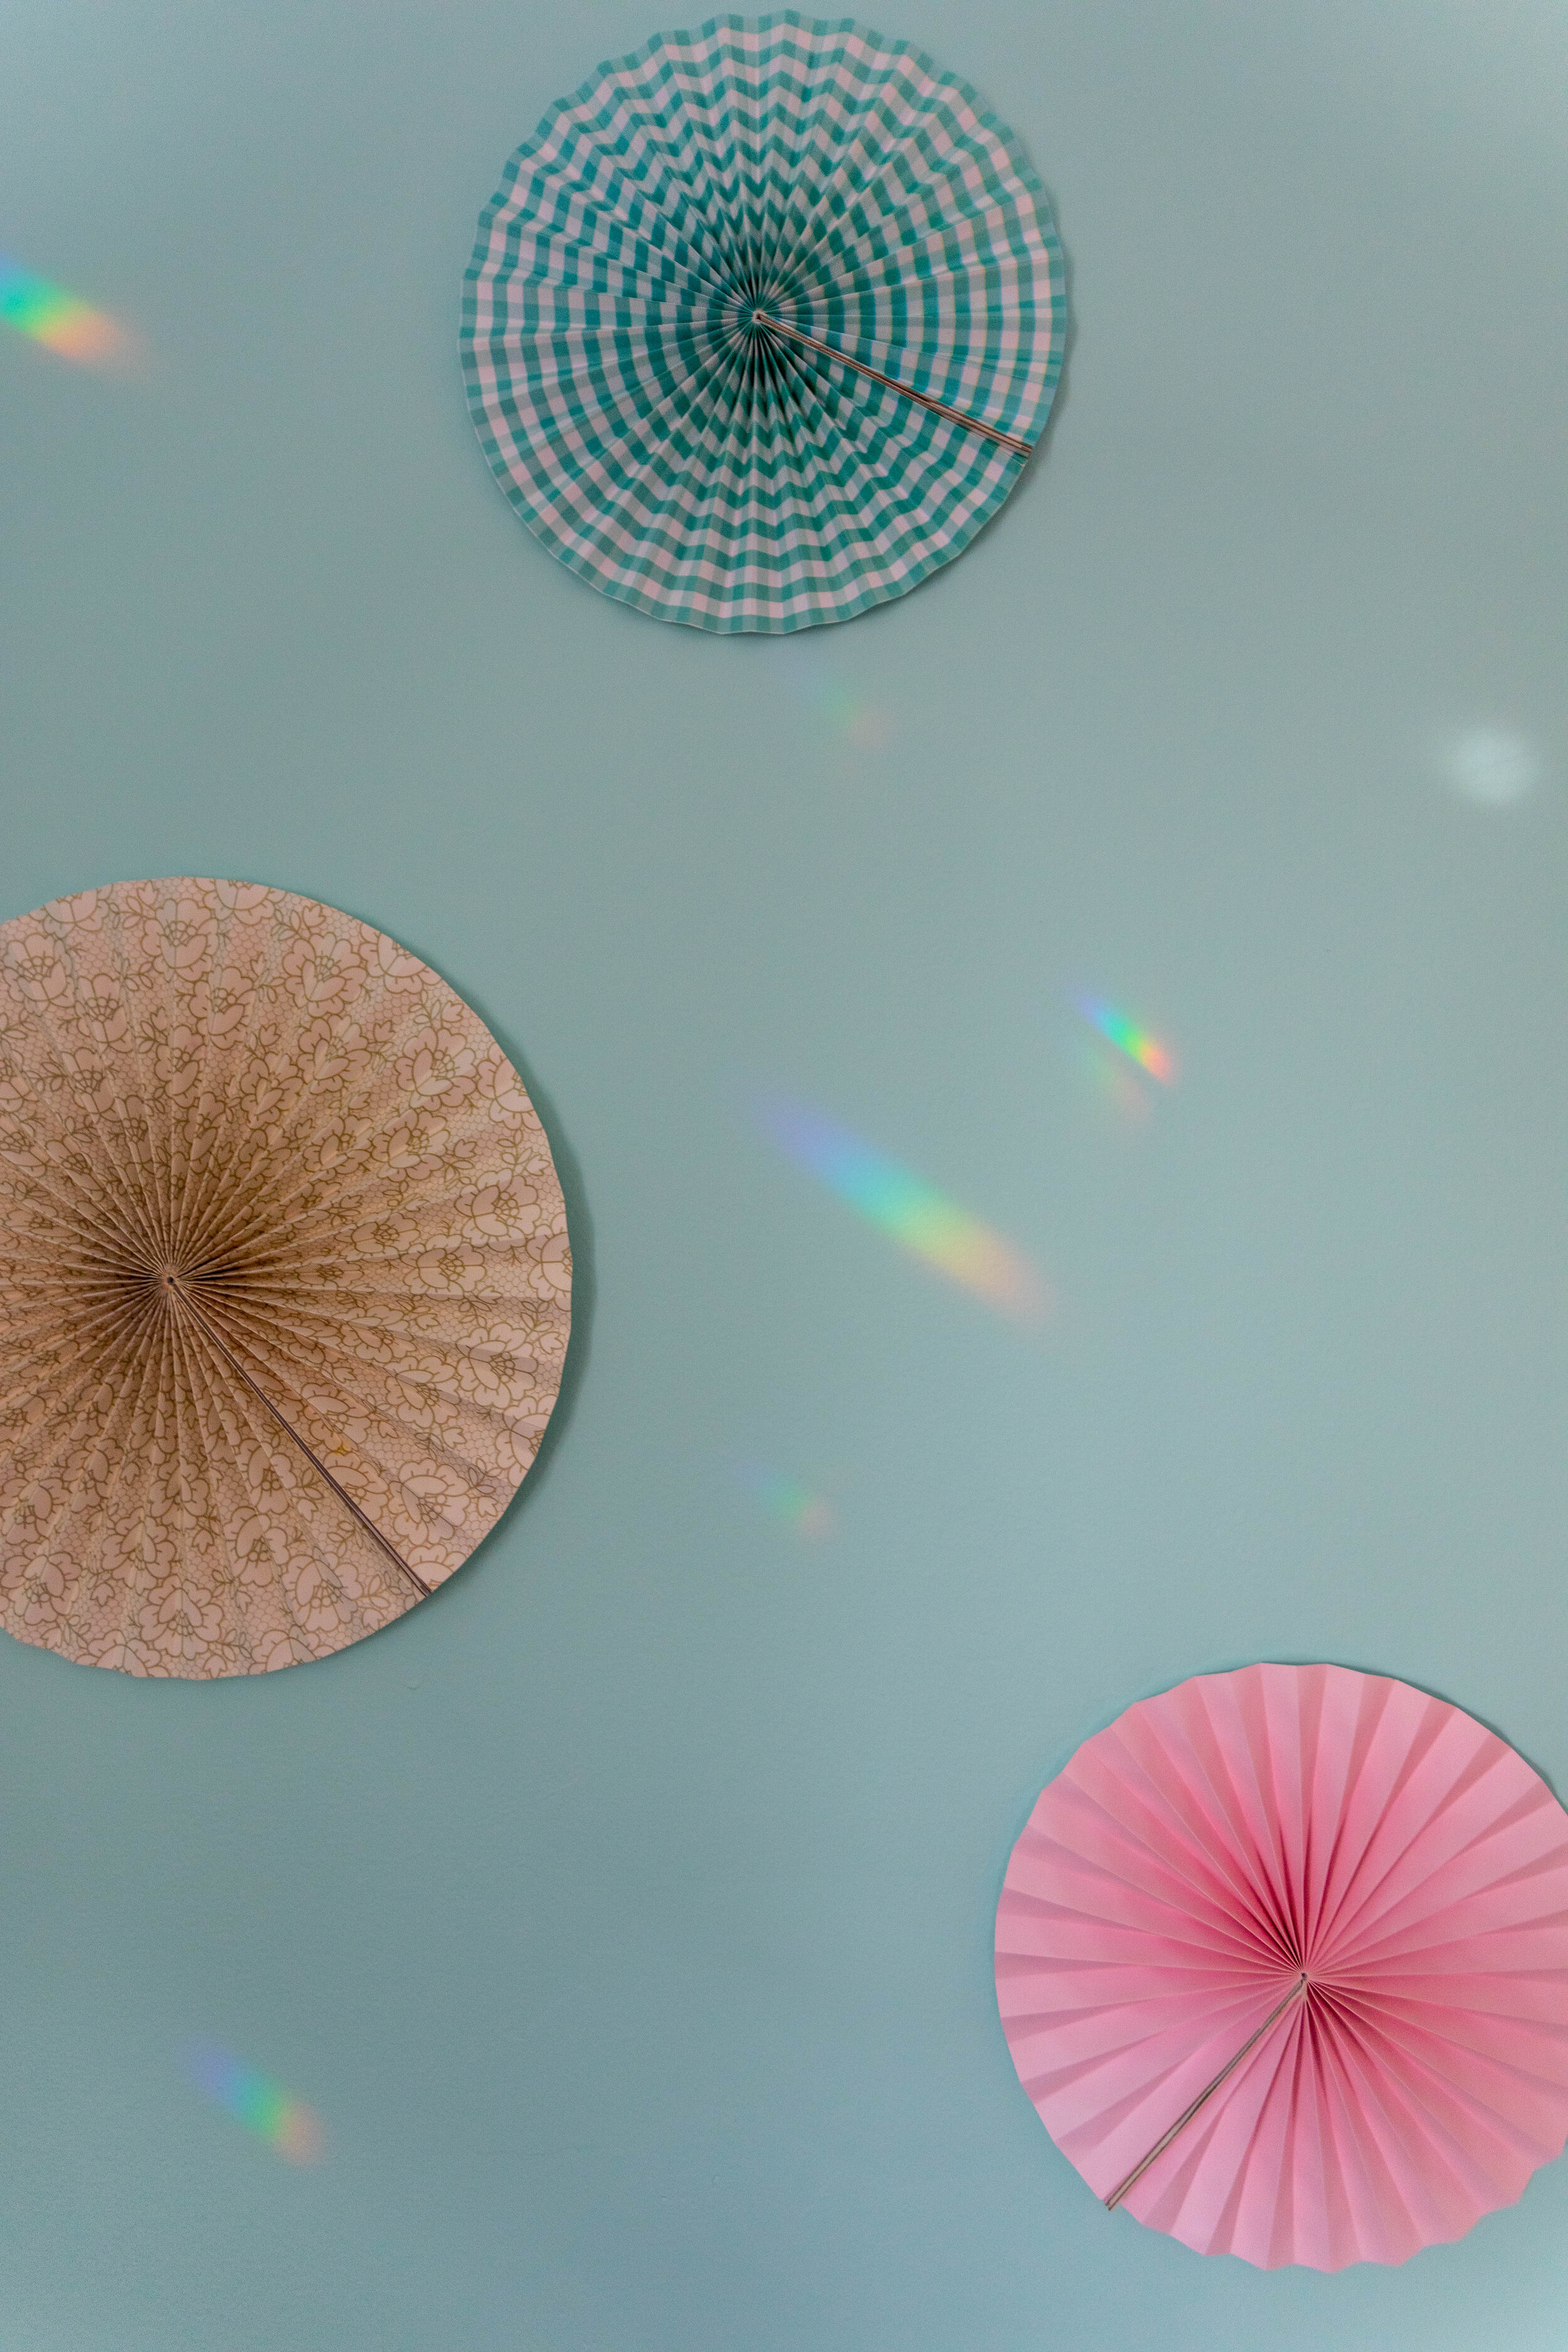
For Christmas this year we were definitely less focused on buying toys that she’d get bored with in 5 minutes and more focused on buying things she’d enjoy for longer, so I picked up this unicorn lamp, this unicorn laundry hamper, and some unicorn hooks (I can’t find the original link, but these are similar) knowing that I would incorporate them into her new room. Above her dresser is a painting that I made several years ago that I think goes well with the color scheme. Surrounding the painting are some fan decorations that I bought for a friend’s bachelorette party a few years ago. I’m glad I kept them, because now they get a second life living on my daughter’s wall! I just opened them all the way and attached one side of the fan to the other with a Command strip, then used another Command strip to stick them to the wall. They’re lightweight and so far they seem to be staying up pretty securely.
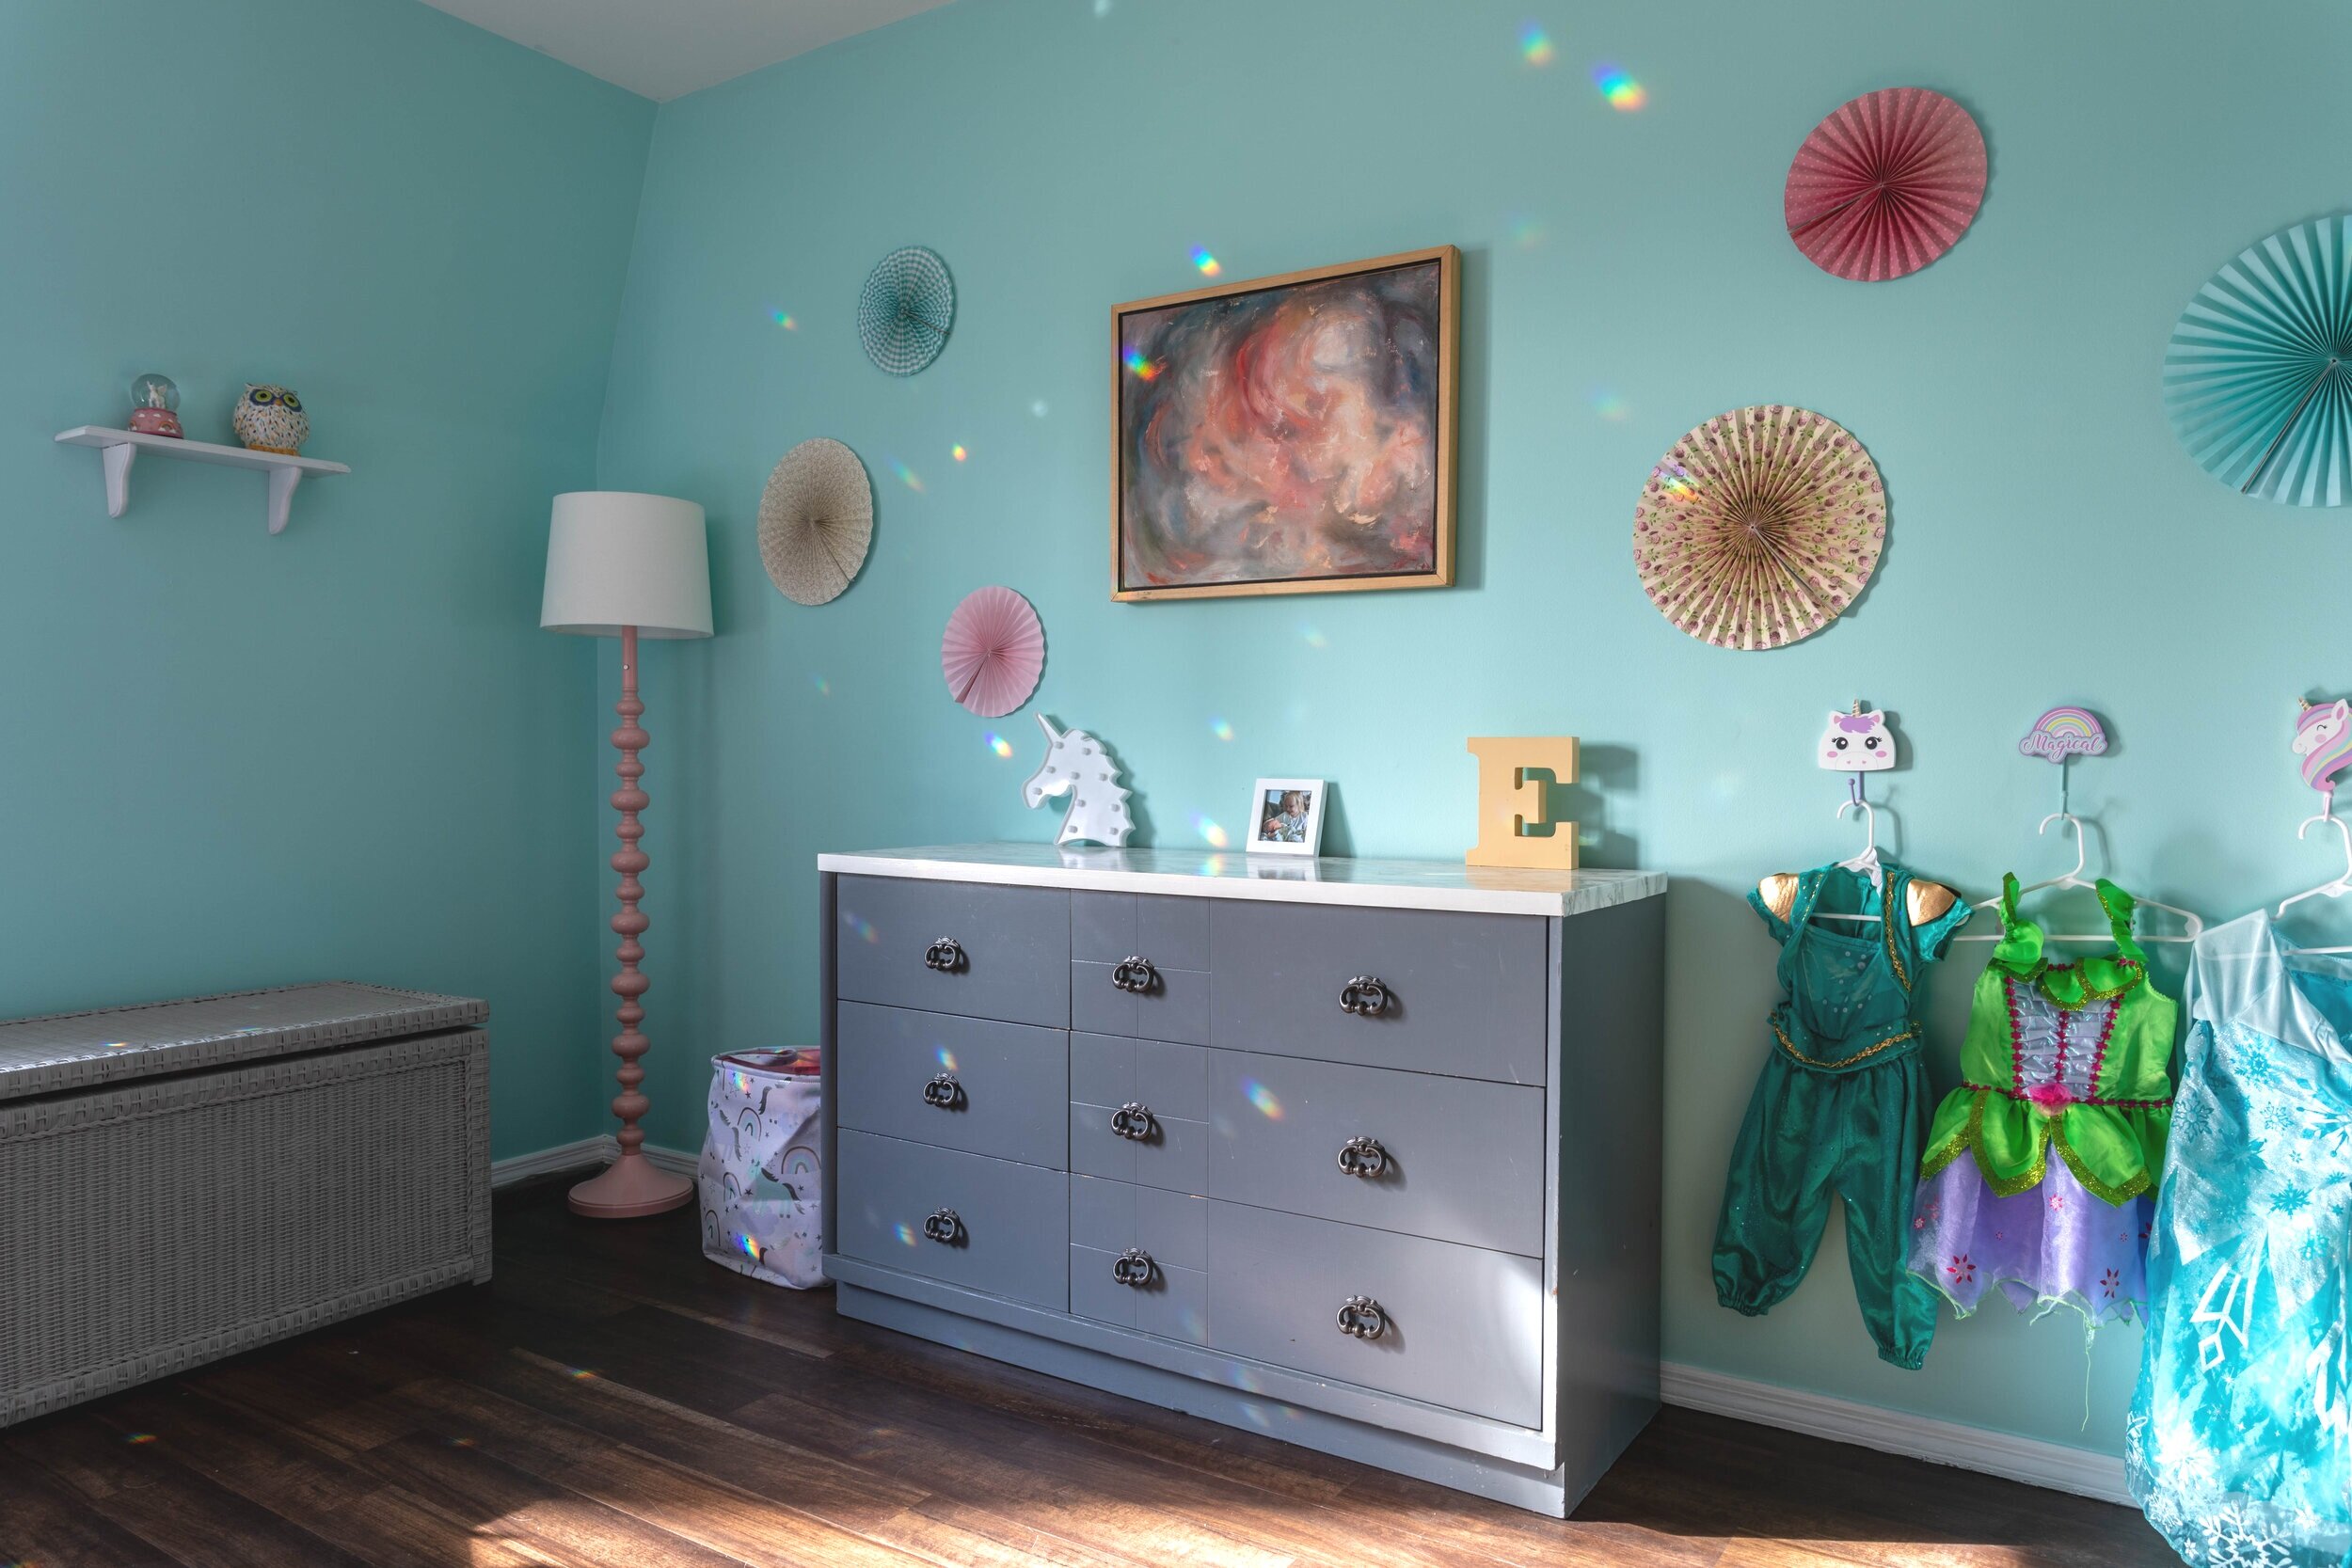

On the wall with her window is an (admittedly undersized) shelf with a couple of her more breakable items, like this unicorn globe and her owl piggy bank. I plan to either get a larger shelf or balance out the wall with pictures on either side. Also, we need to replace the blinds in her window, so I didn’t bother to hang the old ones up.

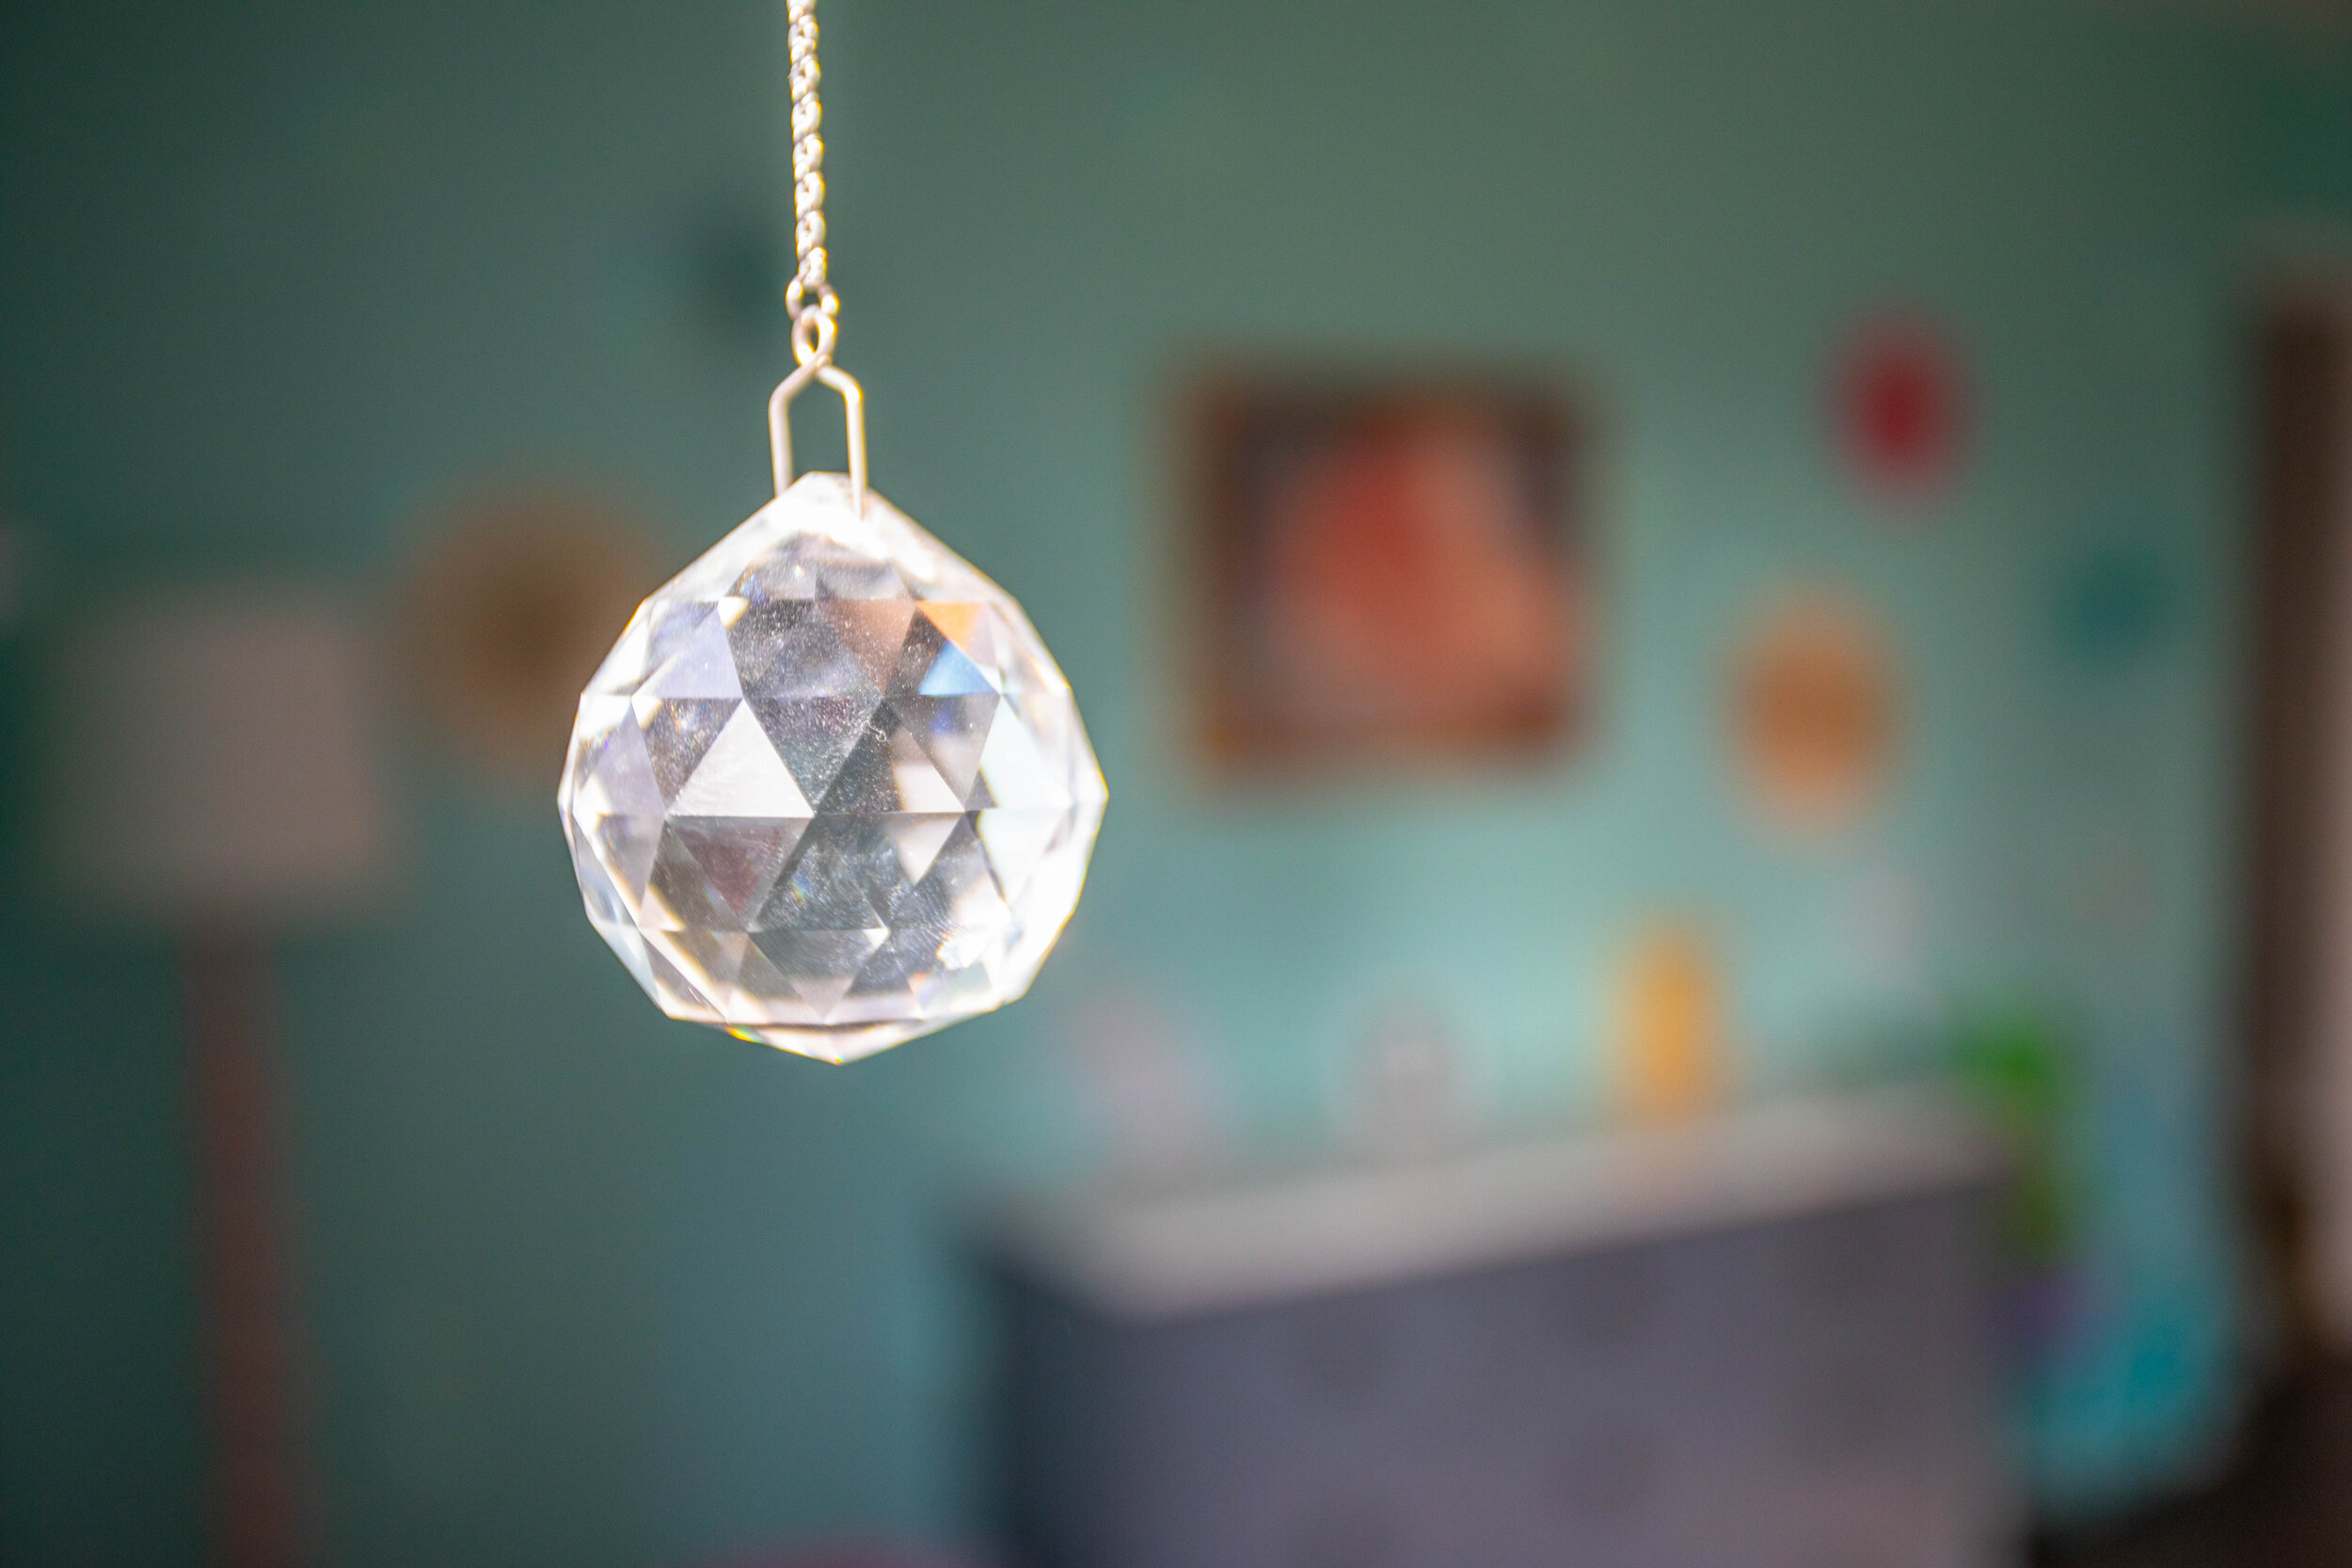
In the meantime, she can enjoy the rainbows that the prisms I hung in her windows cast all over her room whenever the sun shines in.
I was also PUMPED to find that pink lamp in the corner at a thrift store for $30!! I was eyeballing this guy at Target for quite a while, but I tend to put things in my online cart and let them sit there for months before I click the “checkout” button. What can I say? I have commitment issues.
I usually shy away from buying lamps at thrift stores - the potential fire hazard scares me and having them rewired is kind of an inconvenience. But this one was listed as new and even had the plastic on the lampshade and styrofoam bits stuck to it. It’s not the same one from Target, but you really can’t tell unless you put them side-by-side. And it was $50 cheaper!

This room is definitely still a work in progress, but I have big plans to round it out.
I mentioned previously all the pictures I need to hang and the fact that I need to replace the blinds. I also have some work to do on the closet doors. If you’ll notice below, two of them are missing. We have the doors in the spare bedroom, but after the flooring was replaced by the previous homeowners, the doors get caught on the floor in the middle of the door frame and won’t slide. We’re not quite sure how to fix that yet. I’m thinking we’ll need to cut a sliver off the bottom of each of them. Aside from that little hiccup, painting the trim bright white has made it glaringly obvious how dull the closet doors are, so those will be getting a fresh coat of paint before long.

Another thing to tackle is painting the dresser (again). I bought this dresser and the tall counterpart (currently living in the master bedroom) at a thrift store years ago and refinished them. The color I chose conveniently worked for a long time, and it’s not terrible in this room either, but I think a crisp white would be better. Plus, I’m itching to change the drawer pulls out for something fun and quirky.
Lastly, this room is screaming for an area rug, and I’m ready to deliver. Honestly, if I could spend a couple of hours a day shopping for area rugs I’d be so happy. I’ve been pining over oriental rugs for years but I’m having a hard time convincing Lucius that they can look great. I think our daughter’s room would be a great place to start incorporating them, and I have my eye on several:


So, obviously there’s still lots to do here but I’ll keep chipping away and one day it’ll be complete… just in time for us to move again for me to update her room for the next stage of her life. We’ll see!

That time we bought a new microwave on accident
Ok, so not entirely on accident. But we didn’t realize we didn’t need a new microwave.
New houses sometimes come with appliances included, which I’ve learned can be a blessing and a curse.
For instance, in our latest house, we were lucky to have all the kitchen appliances included, but we had to buy a new washer and dryer when we moved in. Of course we weren’t pumped about spending money on a new washer and dryer (especially considering all the expenses that come with moving), but we didn’t mind too much since the washer and dryer that we would have inherited, had the previous owners left them, would have needed to be replaced before long anyway.
While we were fortunate that all the kitchen appliances that came with the house were in working order, they had their quirks, specifically the microwave. Not only did it sound like it was going to shake itself off the wall mount whenever it was running, it would beep incessantly when the timer went off. We definitely had plans down the line to replace all the appliances at the same time to hopefully get a bit of a discount (and perhaps even plan our purchase around a big sale to get even more money off!). Oh, to dream.
Cut to a few weeks ago.
So there I was minding my own business just heating up some lunch. When the microwave stopped shuddering and the timer beeped over and over and over again I went to check on my food. It was still a little cold so I put it back in for another minute. But nothing happened. I opened the microwave door and closed it again. Still, no nothing. Thinking I blew a fuse I tested the surrounding lights and outlets, but everything was in working order. Perturbed, I ate my not-really-that-warm lunch and when Lucius got home I told him about my annoying adventure. Lucius also checked the lights and checked the outlets and confirmed that everything (except the microwave) had power (thanks dear, I could have told you that).

View the 4 outlets (there’s one behind the olive oil on the counter) and 4 switches (we’re in progress of replacing one, hence the blank space) on the image above. We checked all of them!
Anywho, it was ultimately decided that we needed a new microwave. Not the end of the world, but not ideal as we hadn’t planned on replacing the rest of the appliances yet, and would therefore likely miss out on a little bit of a discount when we replaced them.
So a couple of days later, Lucius buys a shiny new microwave. He spends some time installing said microwave, with help from yours truly. Once it’s installed we go to plug it in and…. nothing. Nothing happened. No power. Nada. What!?
Cue Lucius once again testing all the light switches, the outlets, and the fuse boxes (we have two, for some reason). When everything proved to be in working order he goes into the closet on the other side of the wall that the microwave lives on, which conveniently enough is exposed because that wall is shared with the stairs and our water heater is under the stairs.

Lo and behold…. there’s ANOTHER FRIGGIN’ FUSE BOX in the closet under the stairs…. JUST FOR THE MICROWAVE and apparently the oven too. And of course the breaker had flipped.

So long story short, we didn’t need a new microwave. Once we flipped the breaker, voila! We had power. *cue facepalm. We ultimately decided to keep the new microwave because it was kind of a pain to install and we were planning on buying it down the road anyway BUT, here’s a PSA to check your house for 8 million fuse boxes before you go buy new stuff, or something.
And speaking of quirky appliances, check out the hilariously long symphony our washer and dryer play when they’re done:
Samsung washing machine melody - this isn’t my washing machine but obviously I’m not the only one who owns this appliance. I found the video on YouTube and some of the comments are hilarious.

Well, hello there.
So I’ve been thinking about starting a blog… for about 6 years.
So I’ve been thinking about starting a blog… for about 6 years.
In the summer of 2012 my husband, Lucius, and I bought our first home – a cute little one story, two-bedroom, one-bathroom house that was pretty much a white box, aside from the wallpaper in the kitchen and the pink tile in the bathroom.
I’ve always been creative. I love art and I even have my degree in painting. I suppose it was only natural that I made my home my canvas. To my delight, Lucius quickly jumped aboard the home renovation train. Shortly after we started making home improvements, I toyed with the idea of starting a blog to document our renovations, certainly inspired by my favorite DIY blog YoungHouseLove.com. As I often do, I talked myself out of it and continued renovating simply for the love of renovating.
Five years later, we snagged a gorgeous two-story, four-bedroom, one-and-a-half bath 1927 American Foursquare. From these two houses we learned so much about home renovations, from HVAC, plumbing, and installing windows to painting, stripping wallpaper, and the best way to hang curtains.

Unfortunately, due to circumstances out of our control, we had to make the decision to move out of that amazing and historic home last fall. At the end of October, we moved into a two-story, four-bedroom, two full and one half bath French Provincial-style house.

My family lives a couple of hours away. When I visited this past Thanksgiving I was a little overwhelmed by how many of my family members wanted to see pictures of the house and our plans for renovating it. Historically I’ve kept a fairly good account of our progress on our homes on Facebook but have been slacking on this house because, simply, life is crazy, and we have a 4-year-old and an 8-month-old. But thinking about it, I realized we’ve only lived here about 4 months and have already started making so many updates (we just can’t help ourselves!) and got the urge to start documenting our progress again. So here I am, beginning this exciting (and admittedly intimidating) journey. Stay tuned!