

We Bought a Hair Salon!
/
Yes, folks, you read that right. We bought a hair salon! Are we getting into the hair styling business? Nope! Let me give you the skinny.
Read MoreYes, folks, you read that right. We bought a hair salon! Are we getting into the hair styling business? Nope! Let me give you the skinny.
Read MoreWhen you’re always working on a home project, sometimes it feels like you never actually accomplished anything. That’s why I like to pause at the beginning of each year and reflect on the projects we tackled the previous year to get some perspective. This is that post!
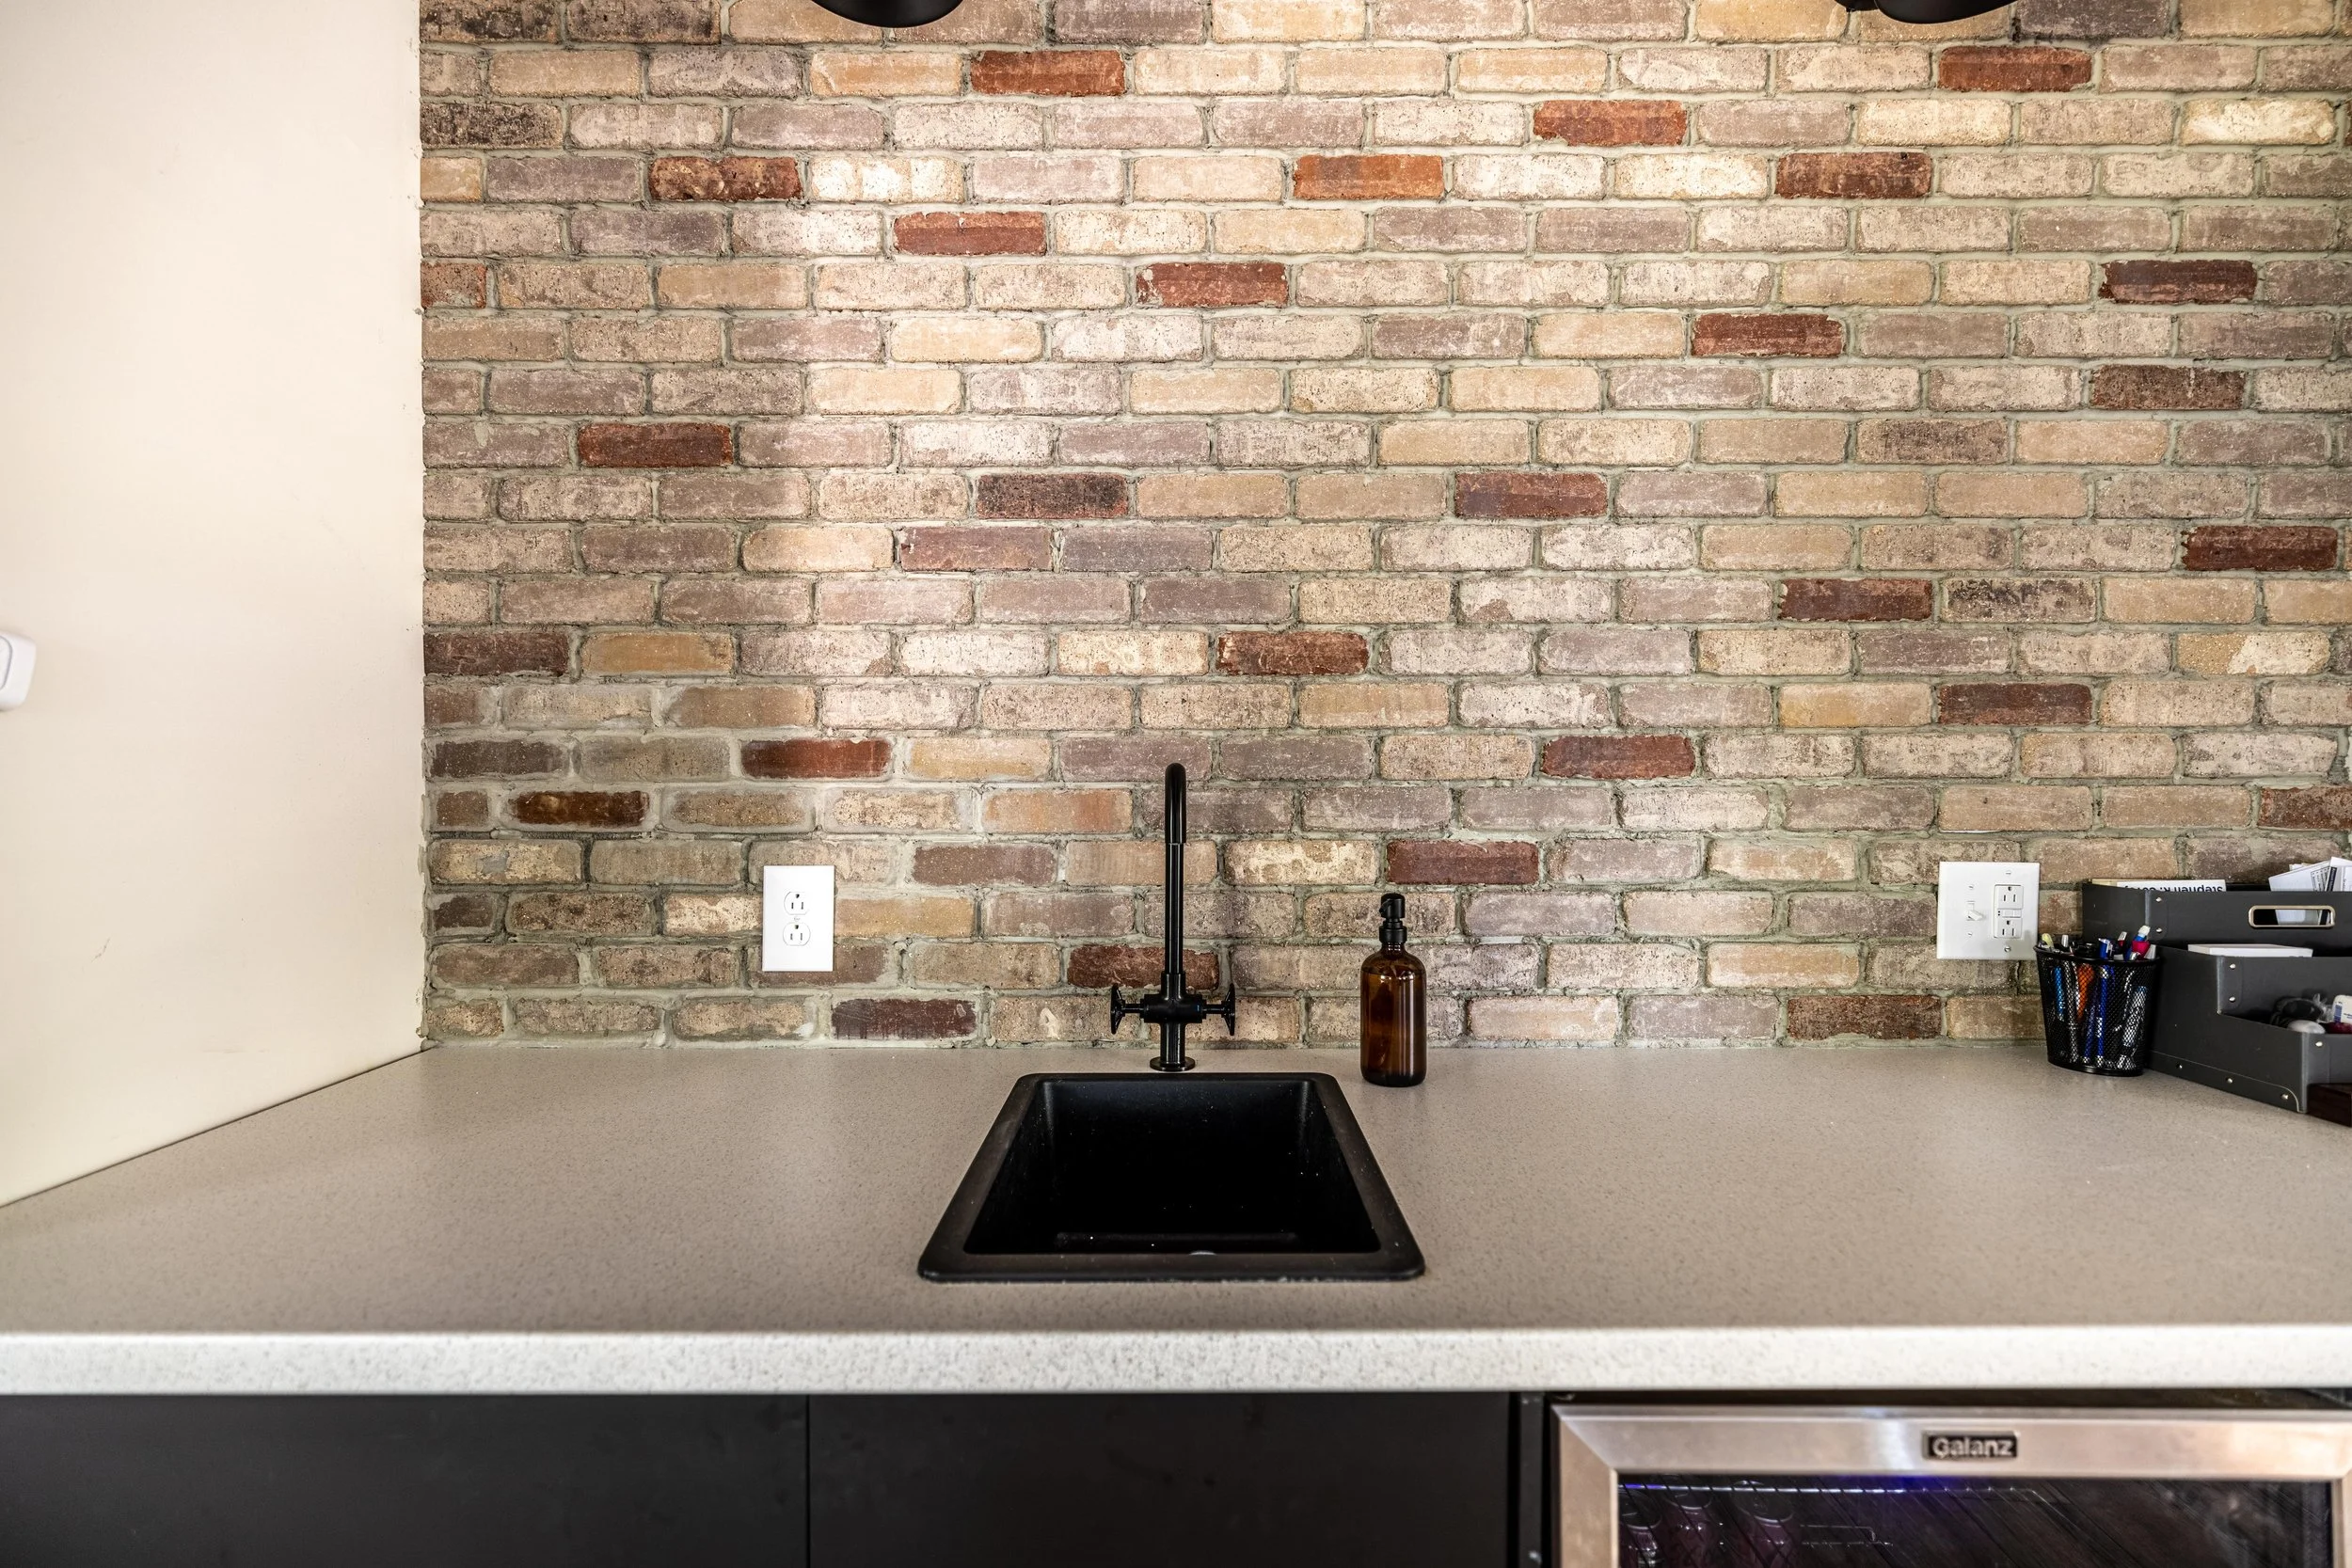
Read MoreLast week I shared the reveal of our loft kitchenette - but how the heck did we hang shelves on the brick veneer? While hanging shelves on any sort of tile is terrifying - it’s totally doable! In this post, I’ll teach you the step-by-step process of how to hang shelves on a tile backsplash.
Read MoreBefore I created an entirely new laundry room for the One Room Challenge, my focus was finishing up projects around the house. One of those projects was the outstanding items in the loft. And while I’ve looped back around to working on it, I’m not ready to call the whole loft complete just yet. But I am excited to say that the kitchenette is finished!
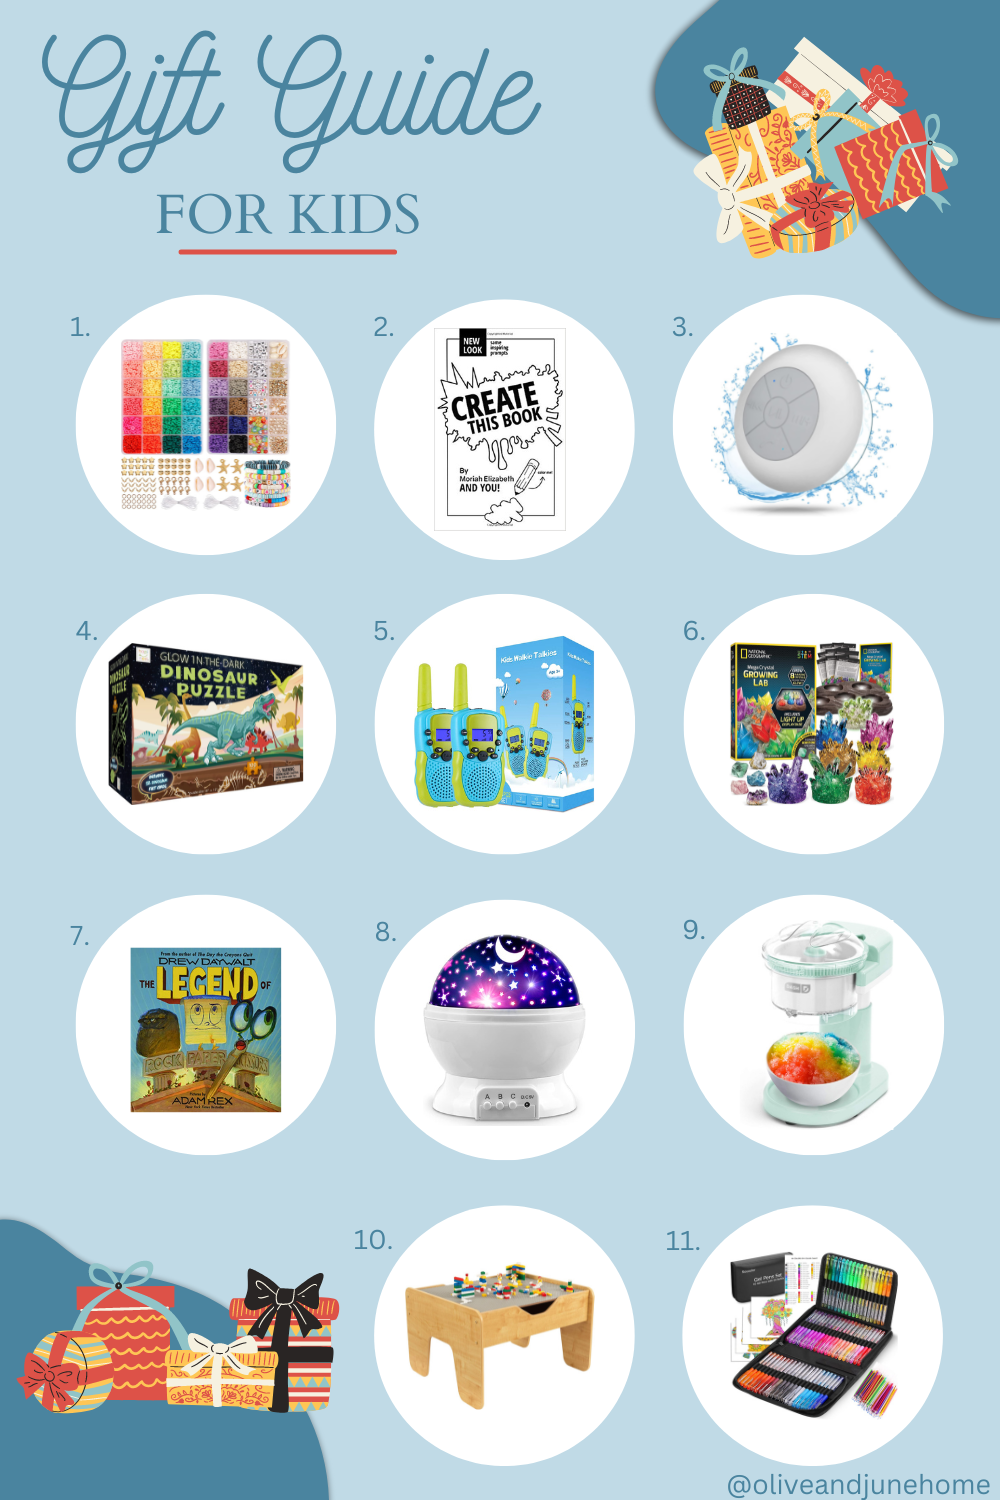
Read MoreAre you a late shopper? Me too! But there’s no need to panic - I’ve got you covered with these last-minute gift guides filled with items that you can still have delivered by the holidays!
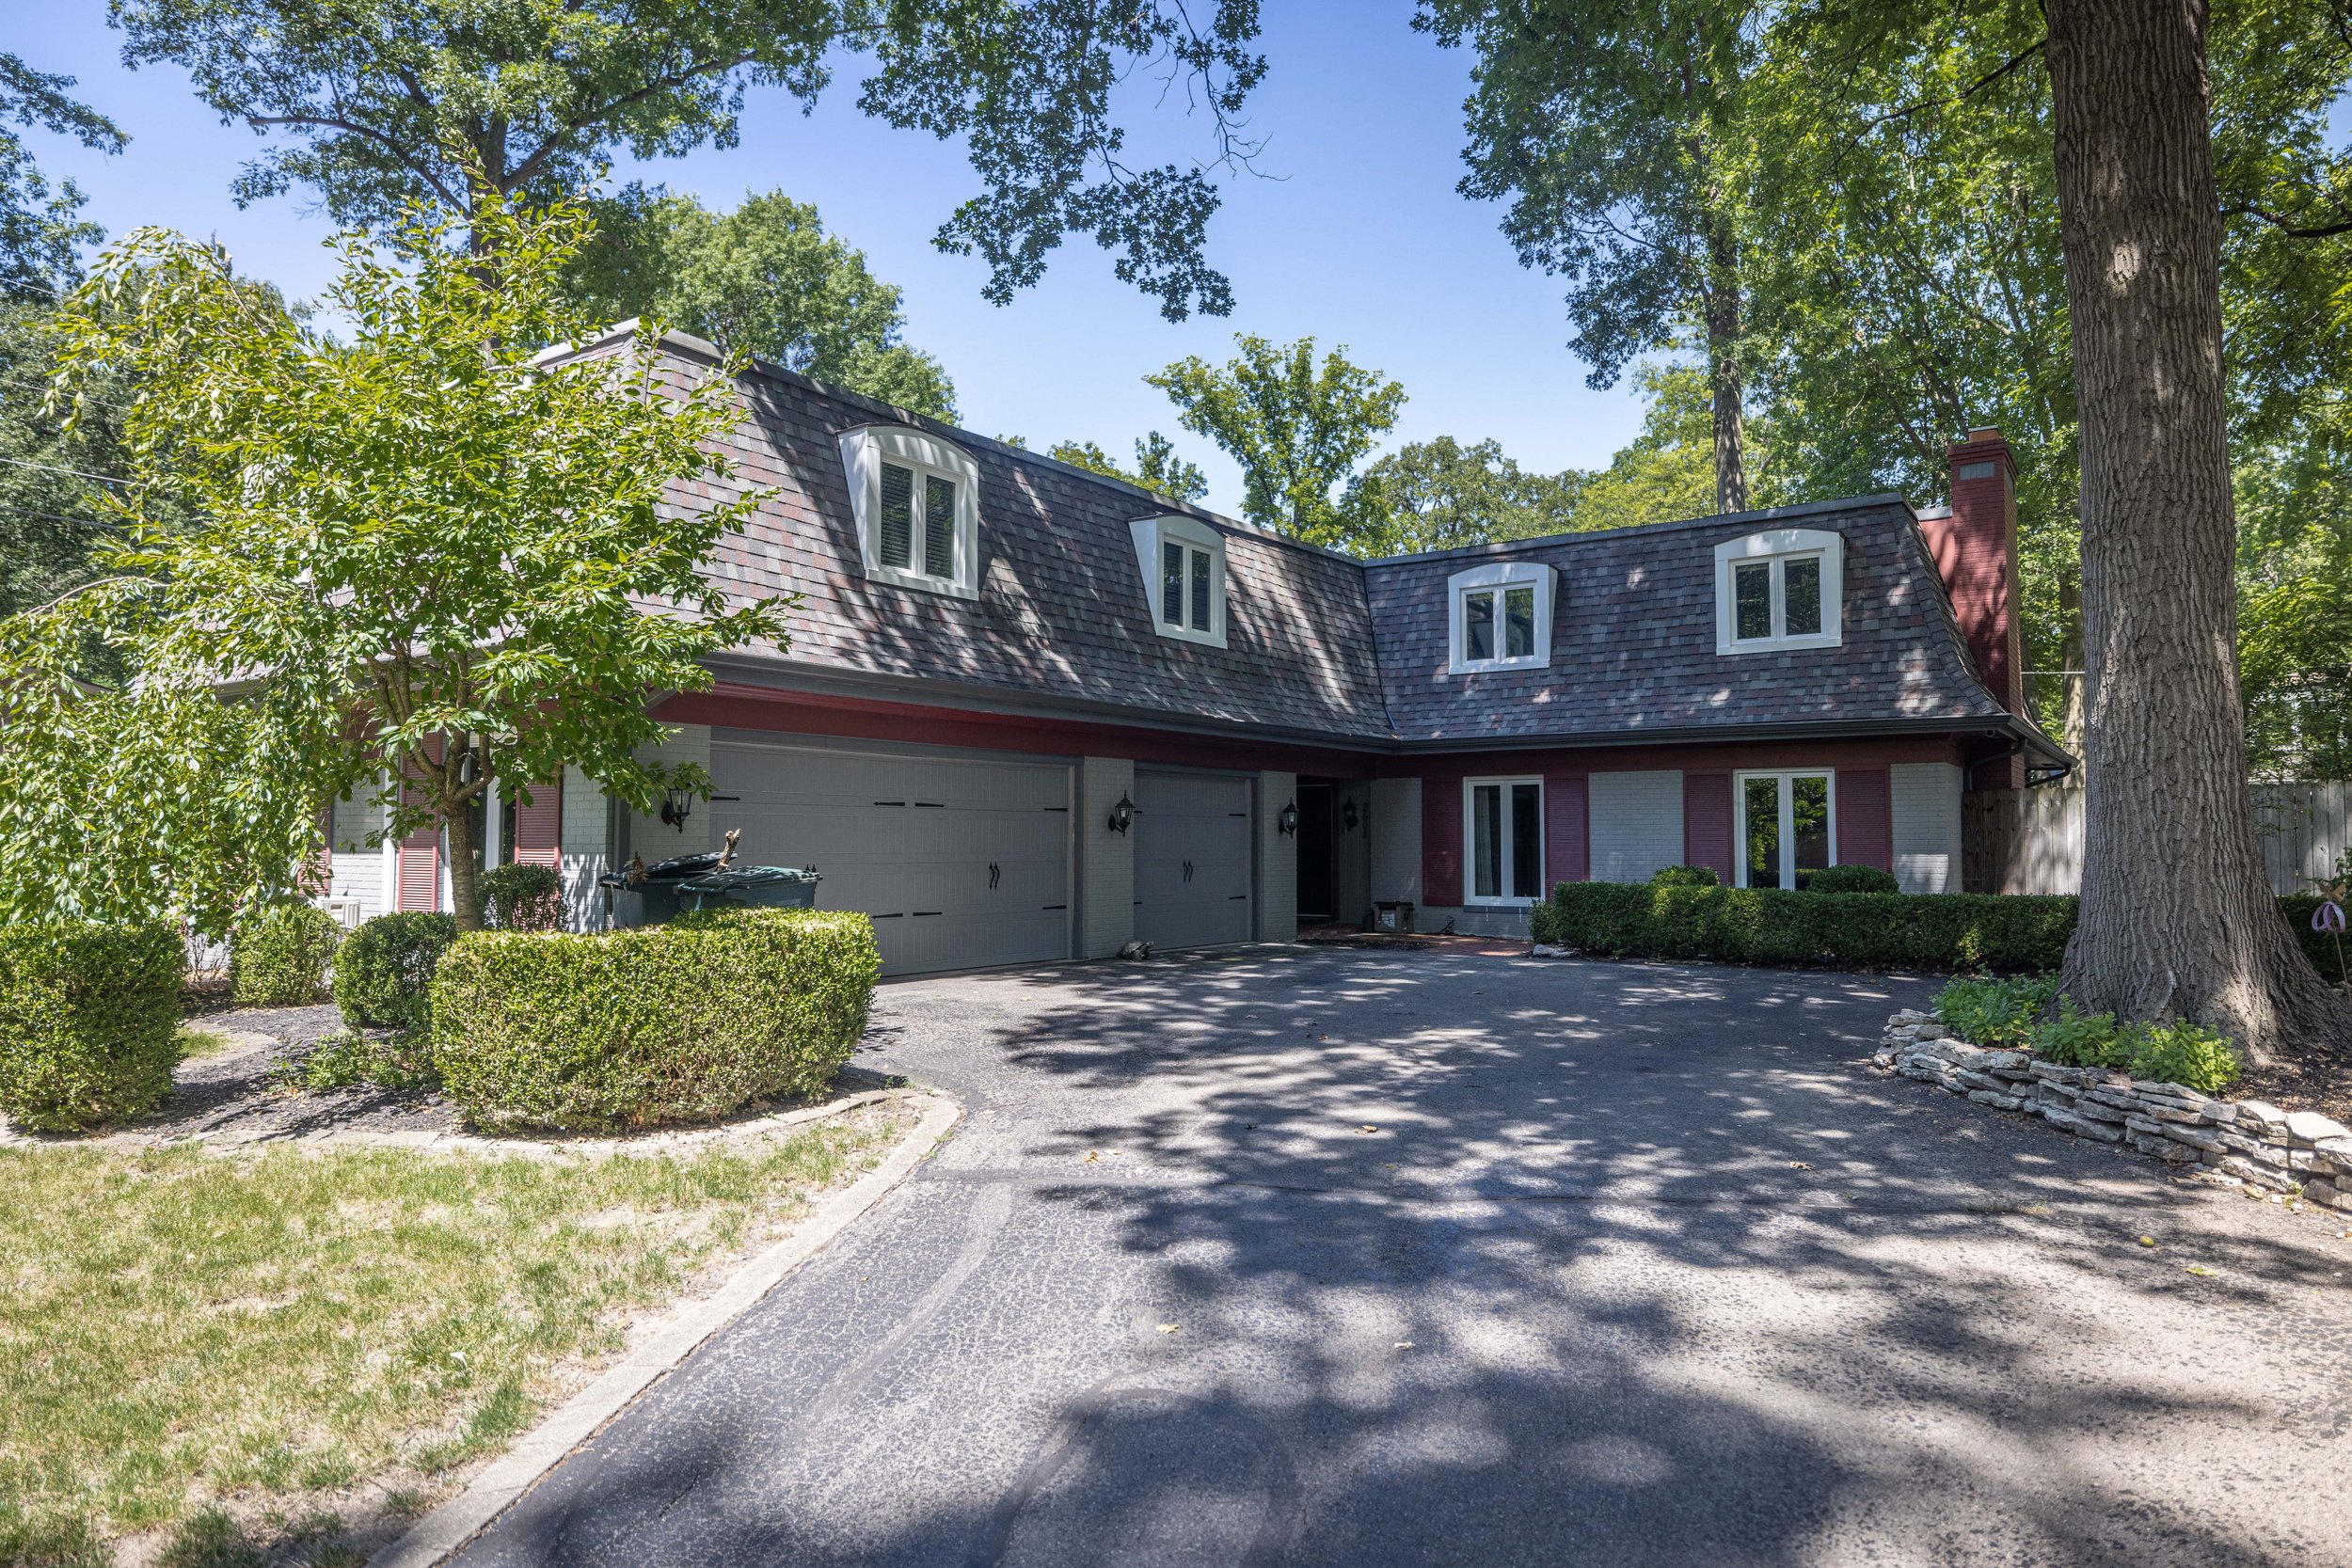
Read Moret’s been a good three years since we moved into this house and A LOT has changed. Although I share bits and pieces of various rooms as we’re working on them, I’d say it’s about time for a good old house tour! Complete with lots of before and after comparisons, because those are just so dang fun - let’s jump in!
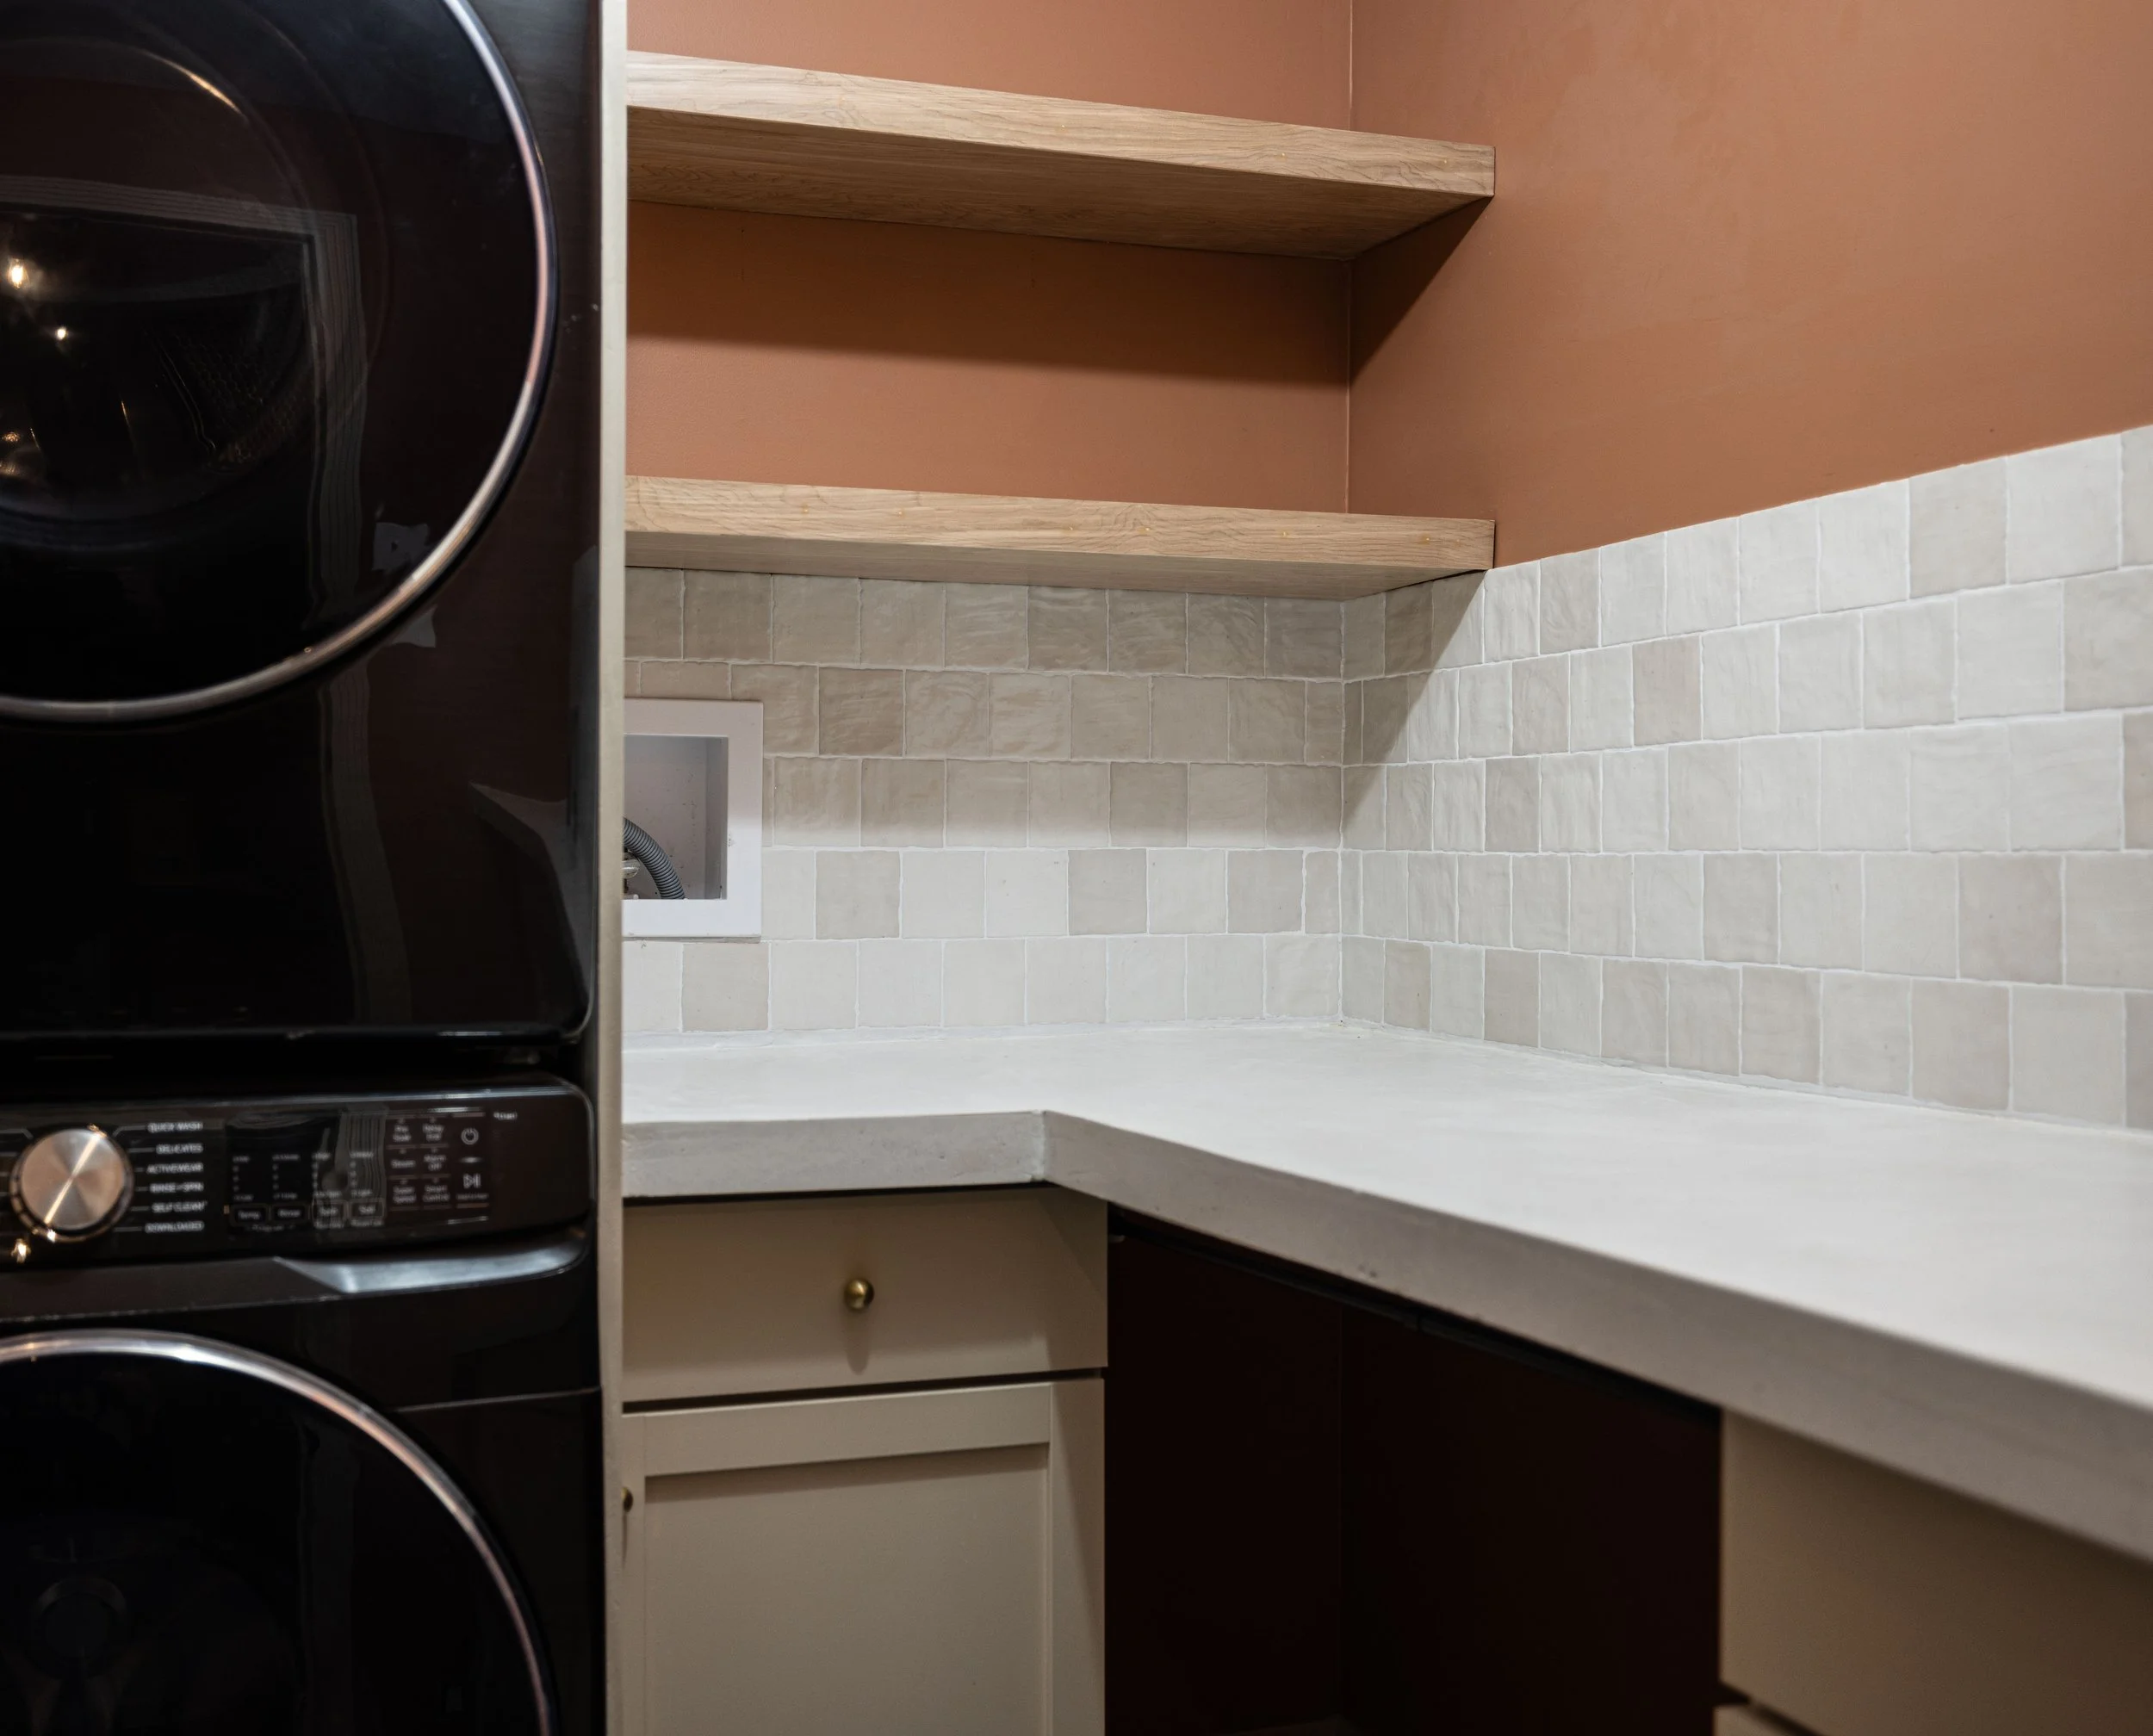
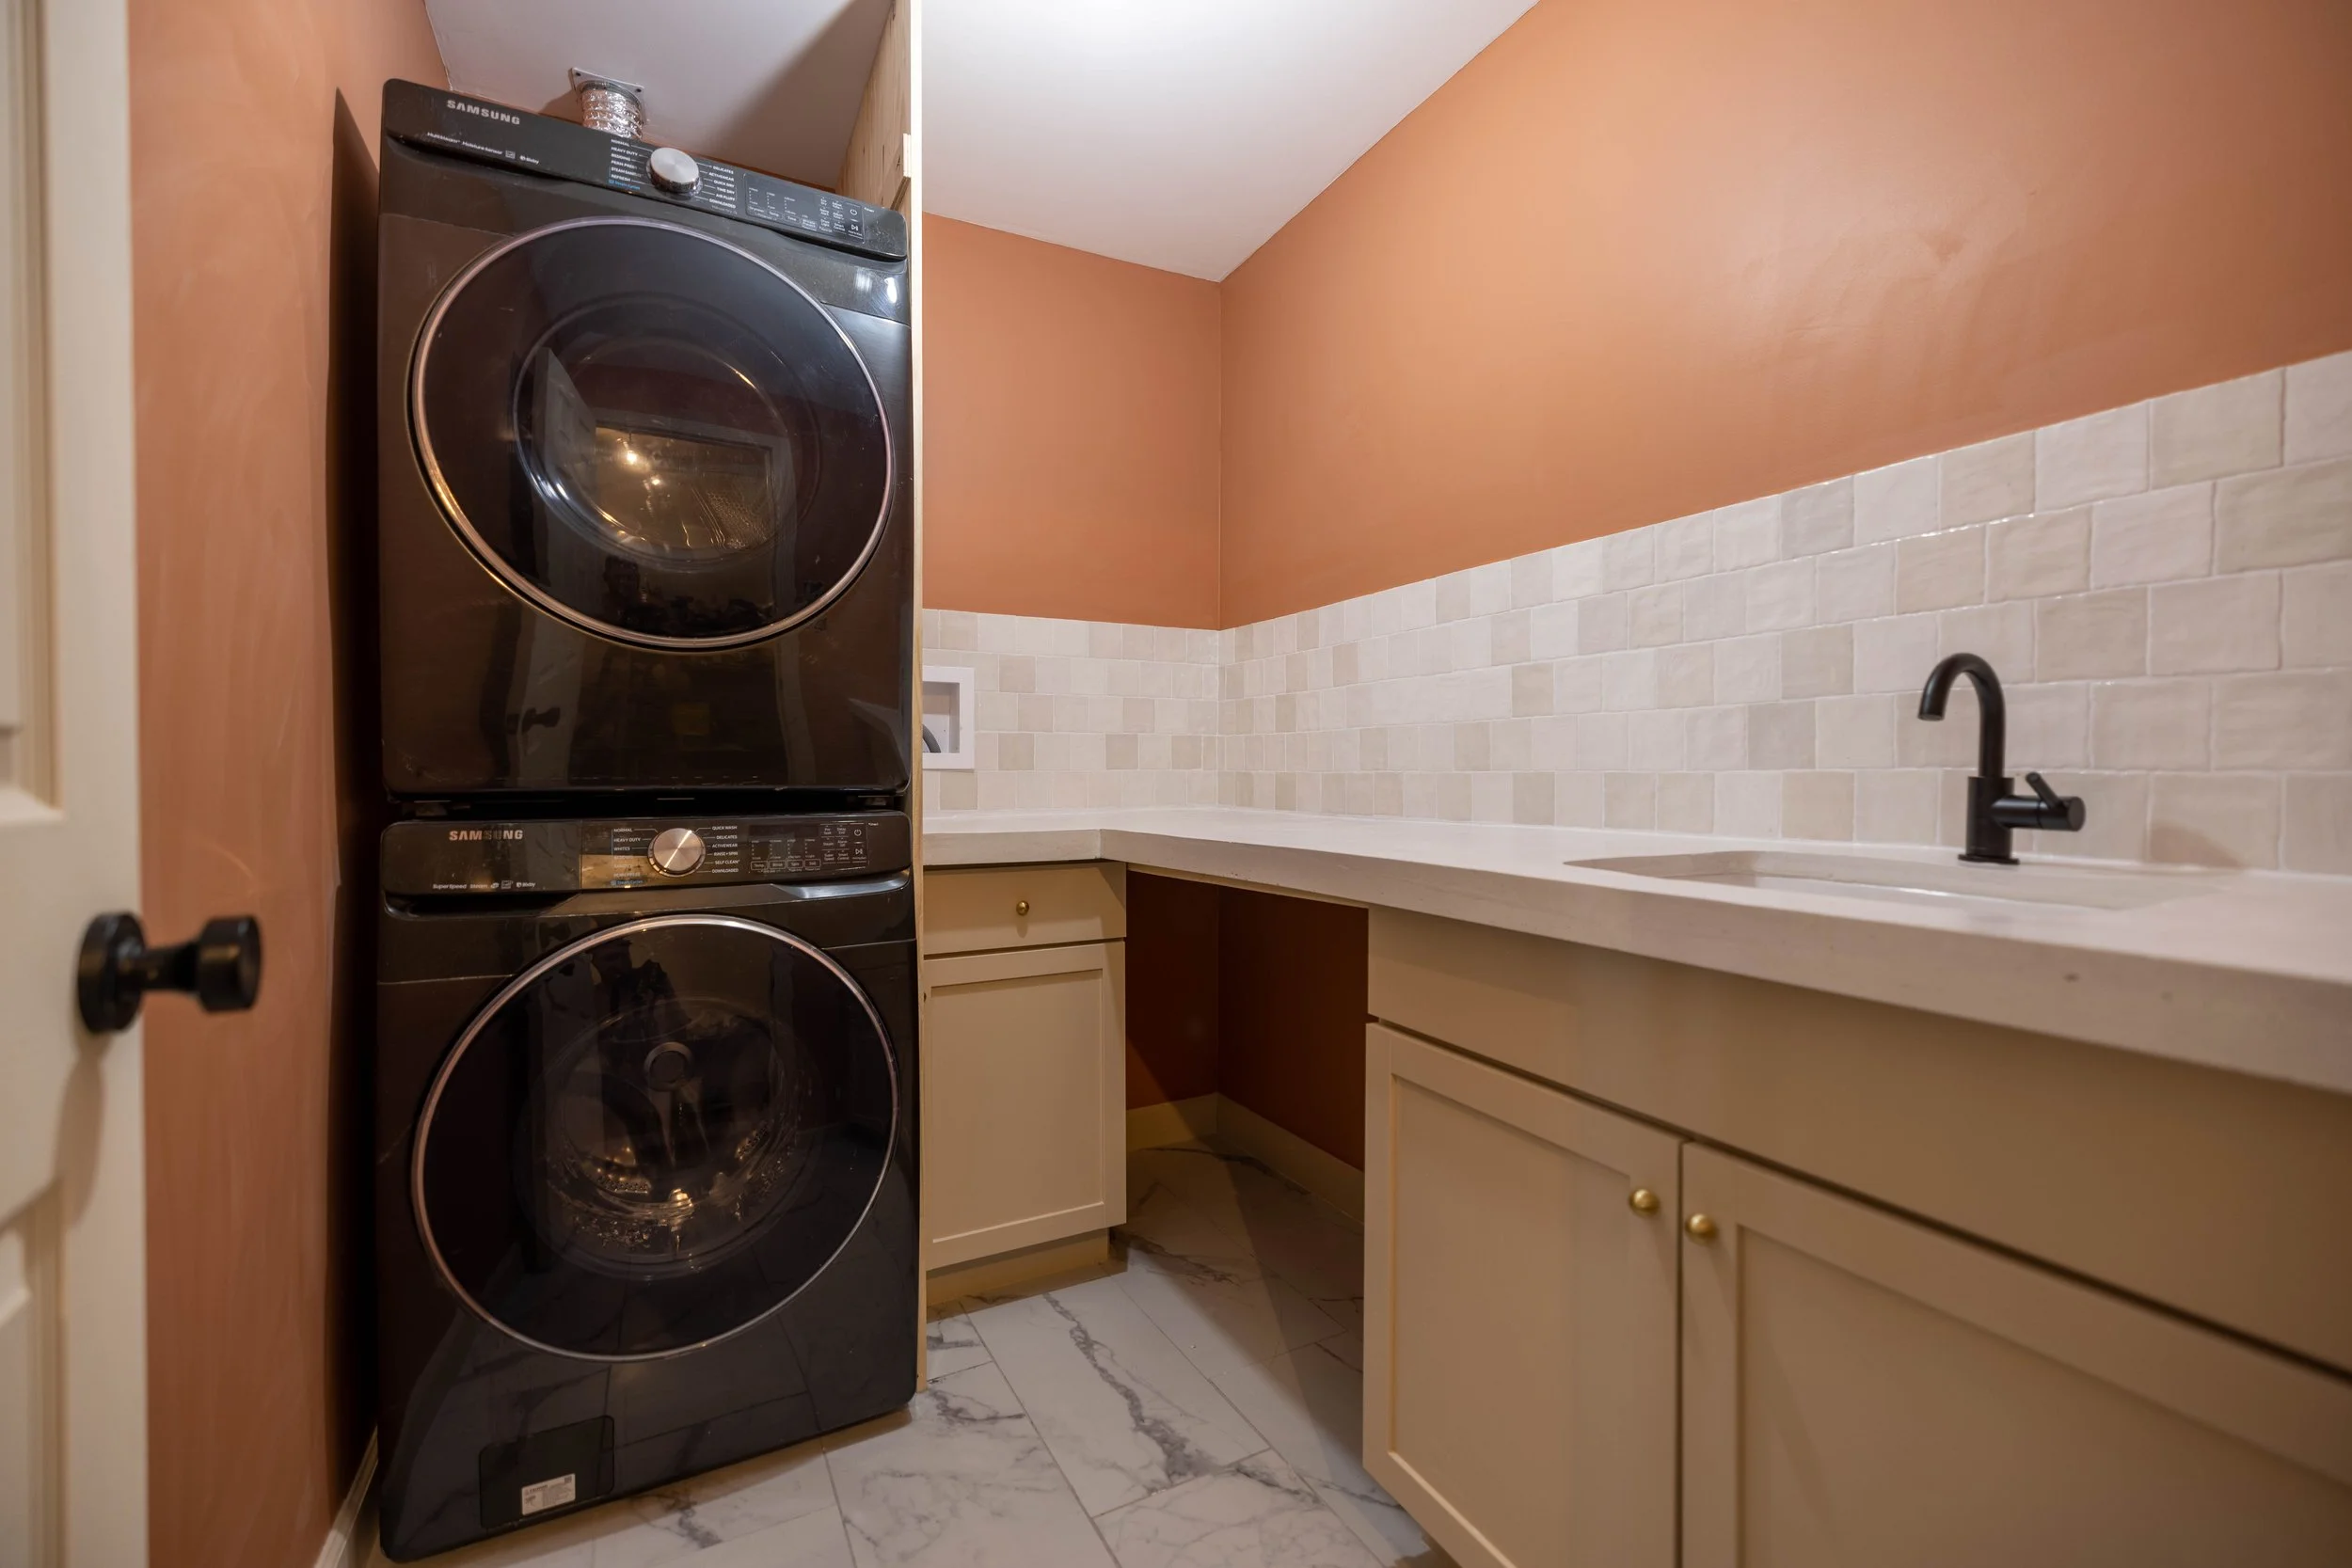
Read MoreIt’s hard to believe it, but we’ve reached the end of the One Room Challenge and the laundry room is done! Well… almost. I’ll get into that later.
Read MoreFloating shelves are pretty stinkin’ cool. I mean, how are they even attached to the wall!? Looks like magic, if you ask me. Well, I uncovered the mystery this week when I made some for my laundry room renovation for the One Room Challenge. In this post, I’m sharing the step-by-step process I used to build my floating shelves!
Read MoreThere’s a first time for everything - and this week of the One Room Challenge marked my first time at tiling! And you know what? It’s a super beginner-friendly project that makes a really big impact! In this post, I’m sharing the steps I took to tile my laundry room backsplash.
Read MoreAre you looking for beautiful and unique countertops that don't cost thousands? Give concrete countertops a try! In this post, I'm sharing the step-by-step process of how I installed white concrete countertops in my laundry room as part of the One Room Challenge.
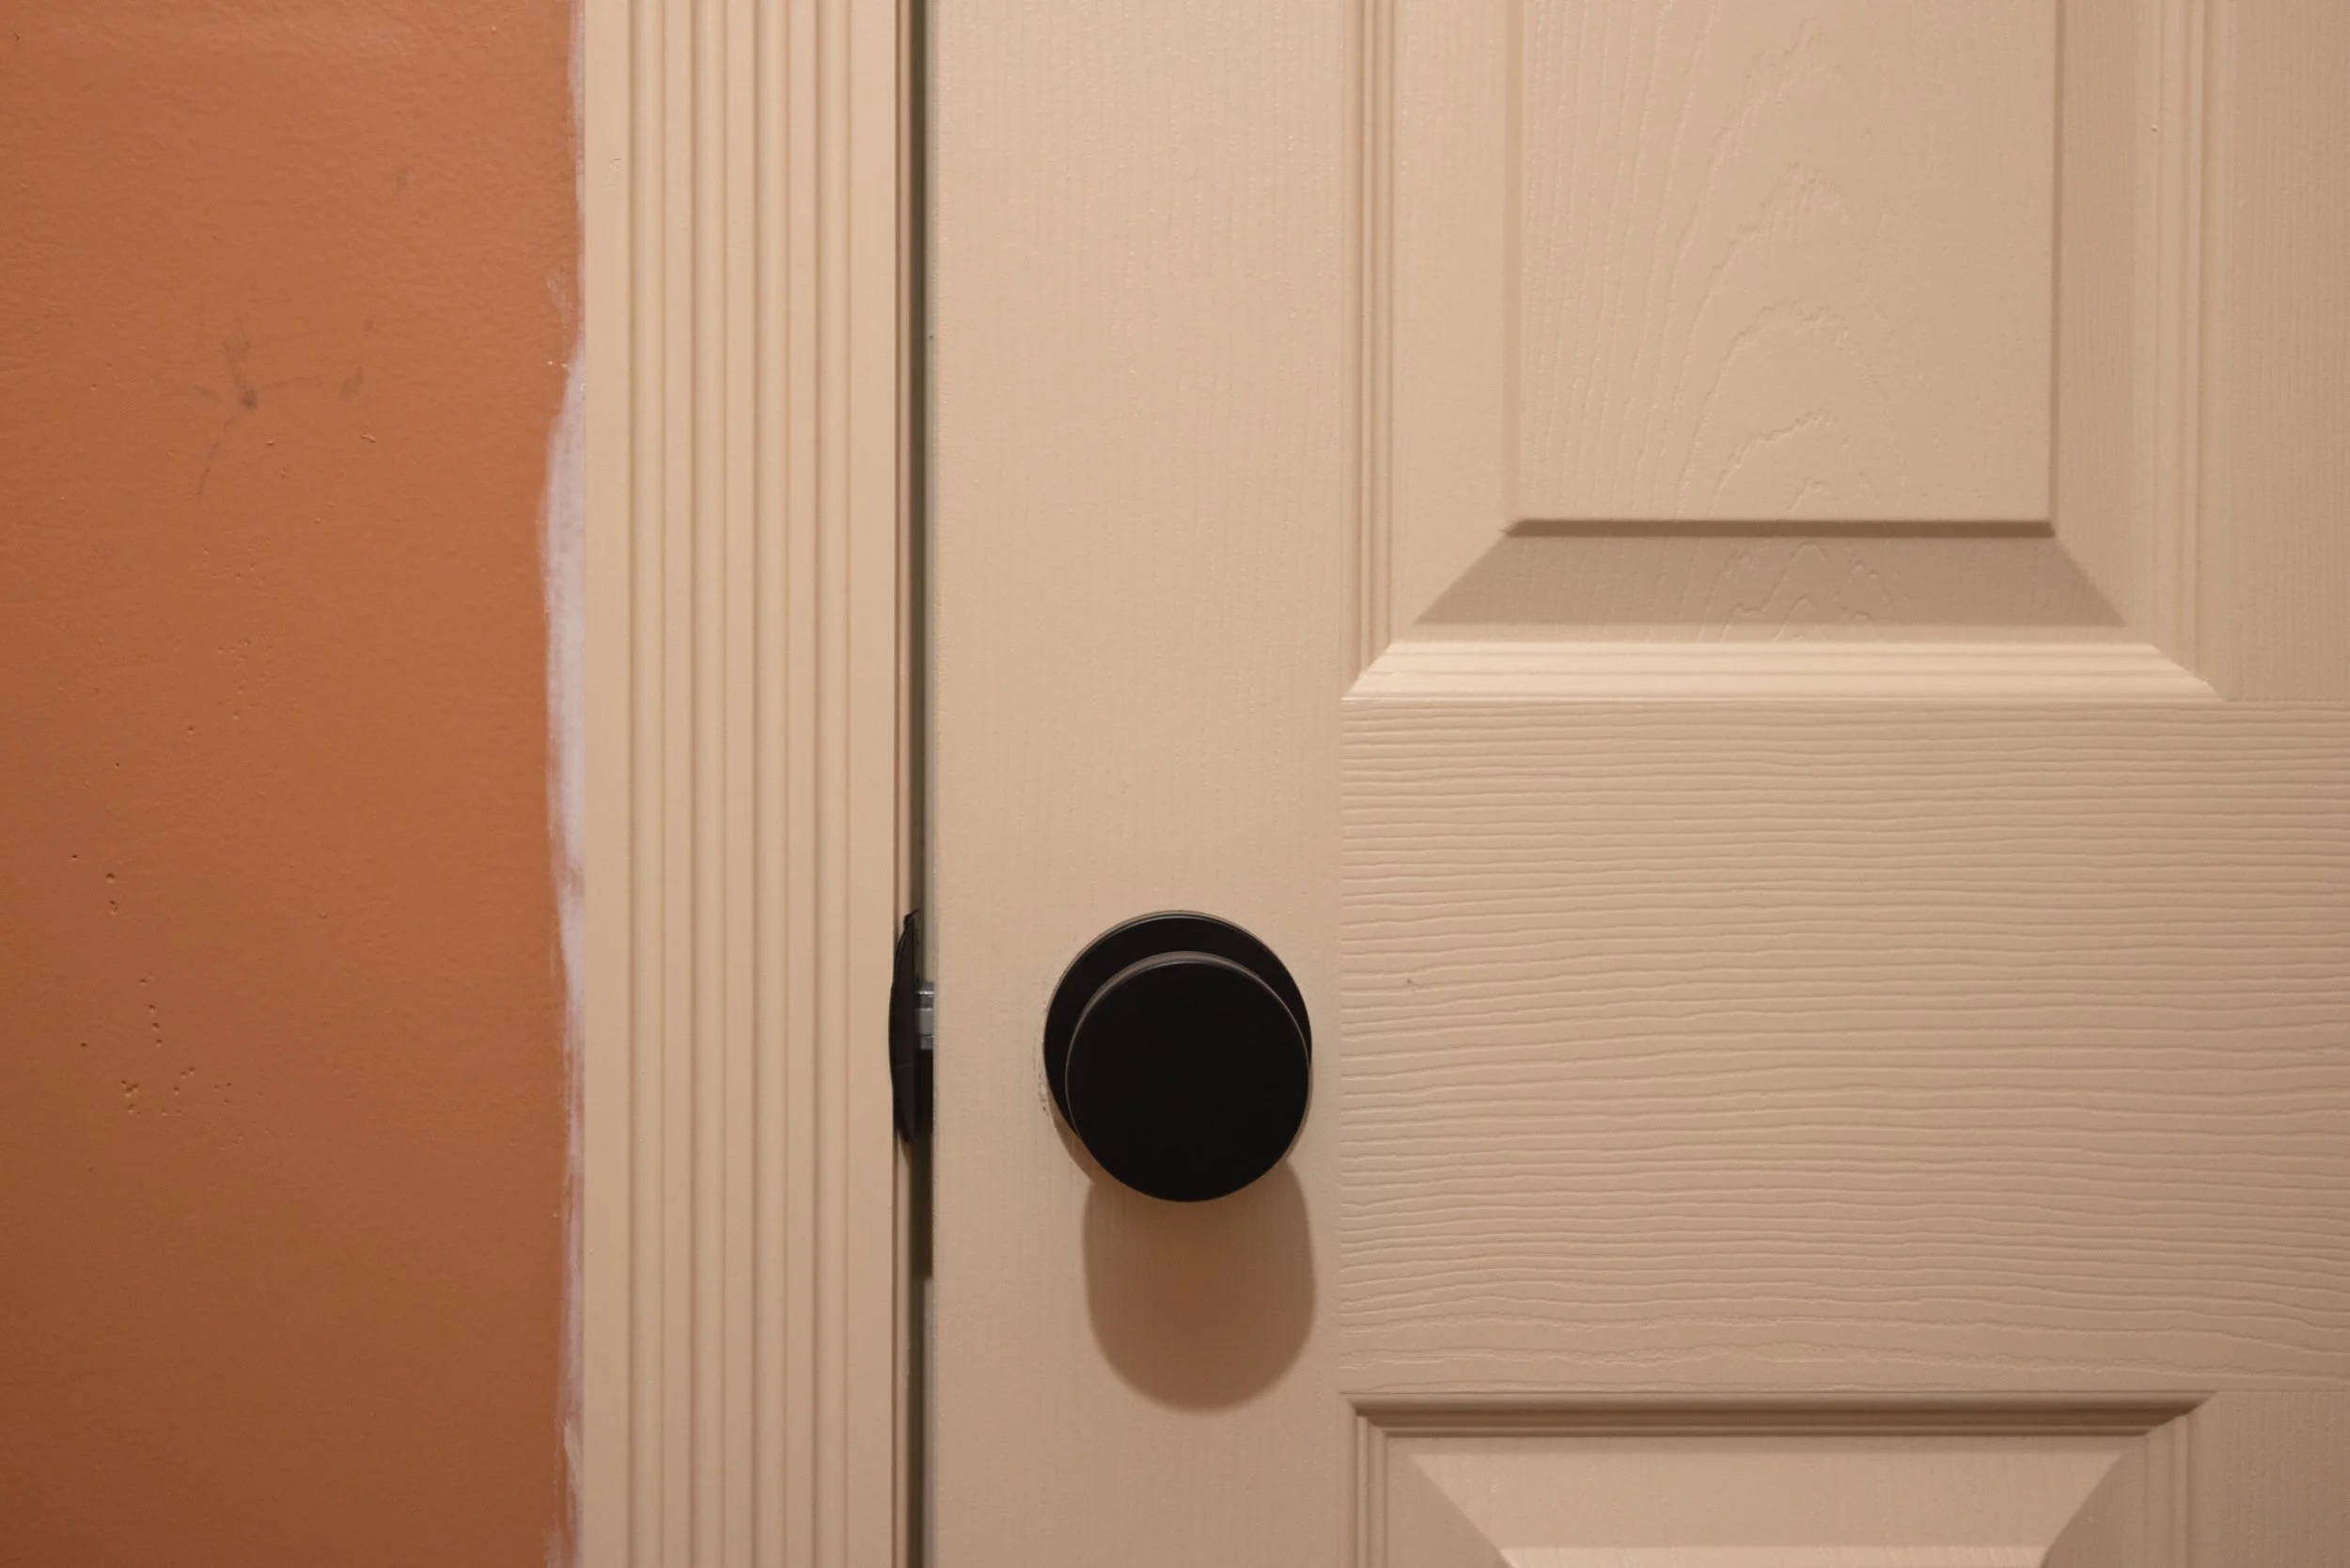
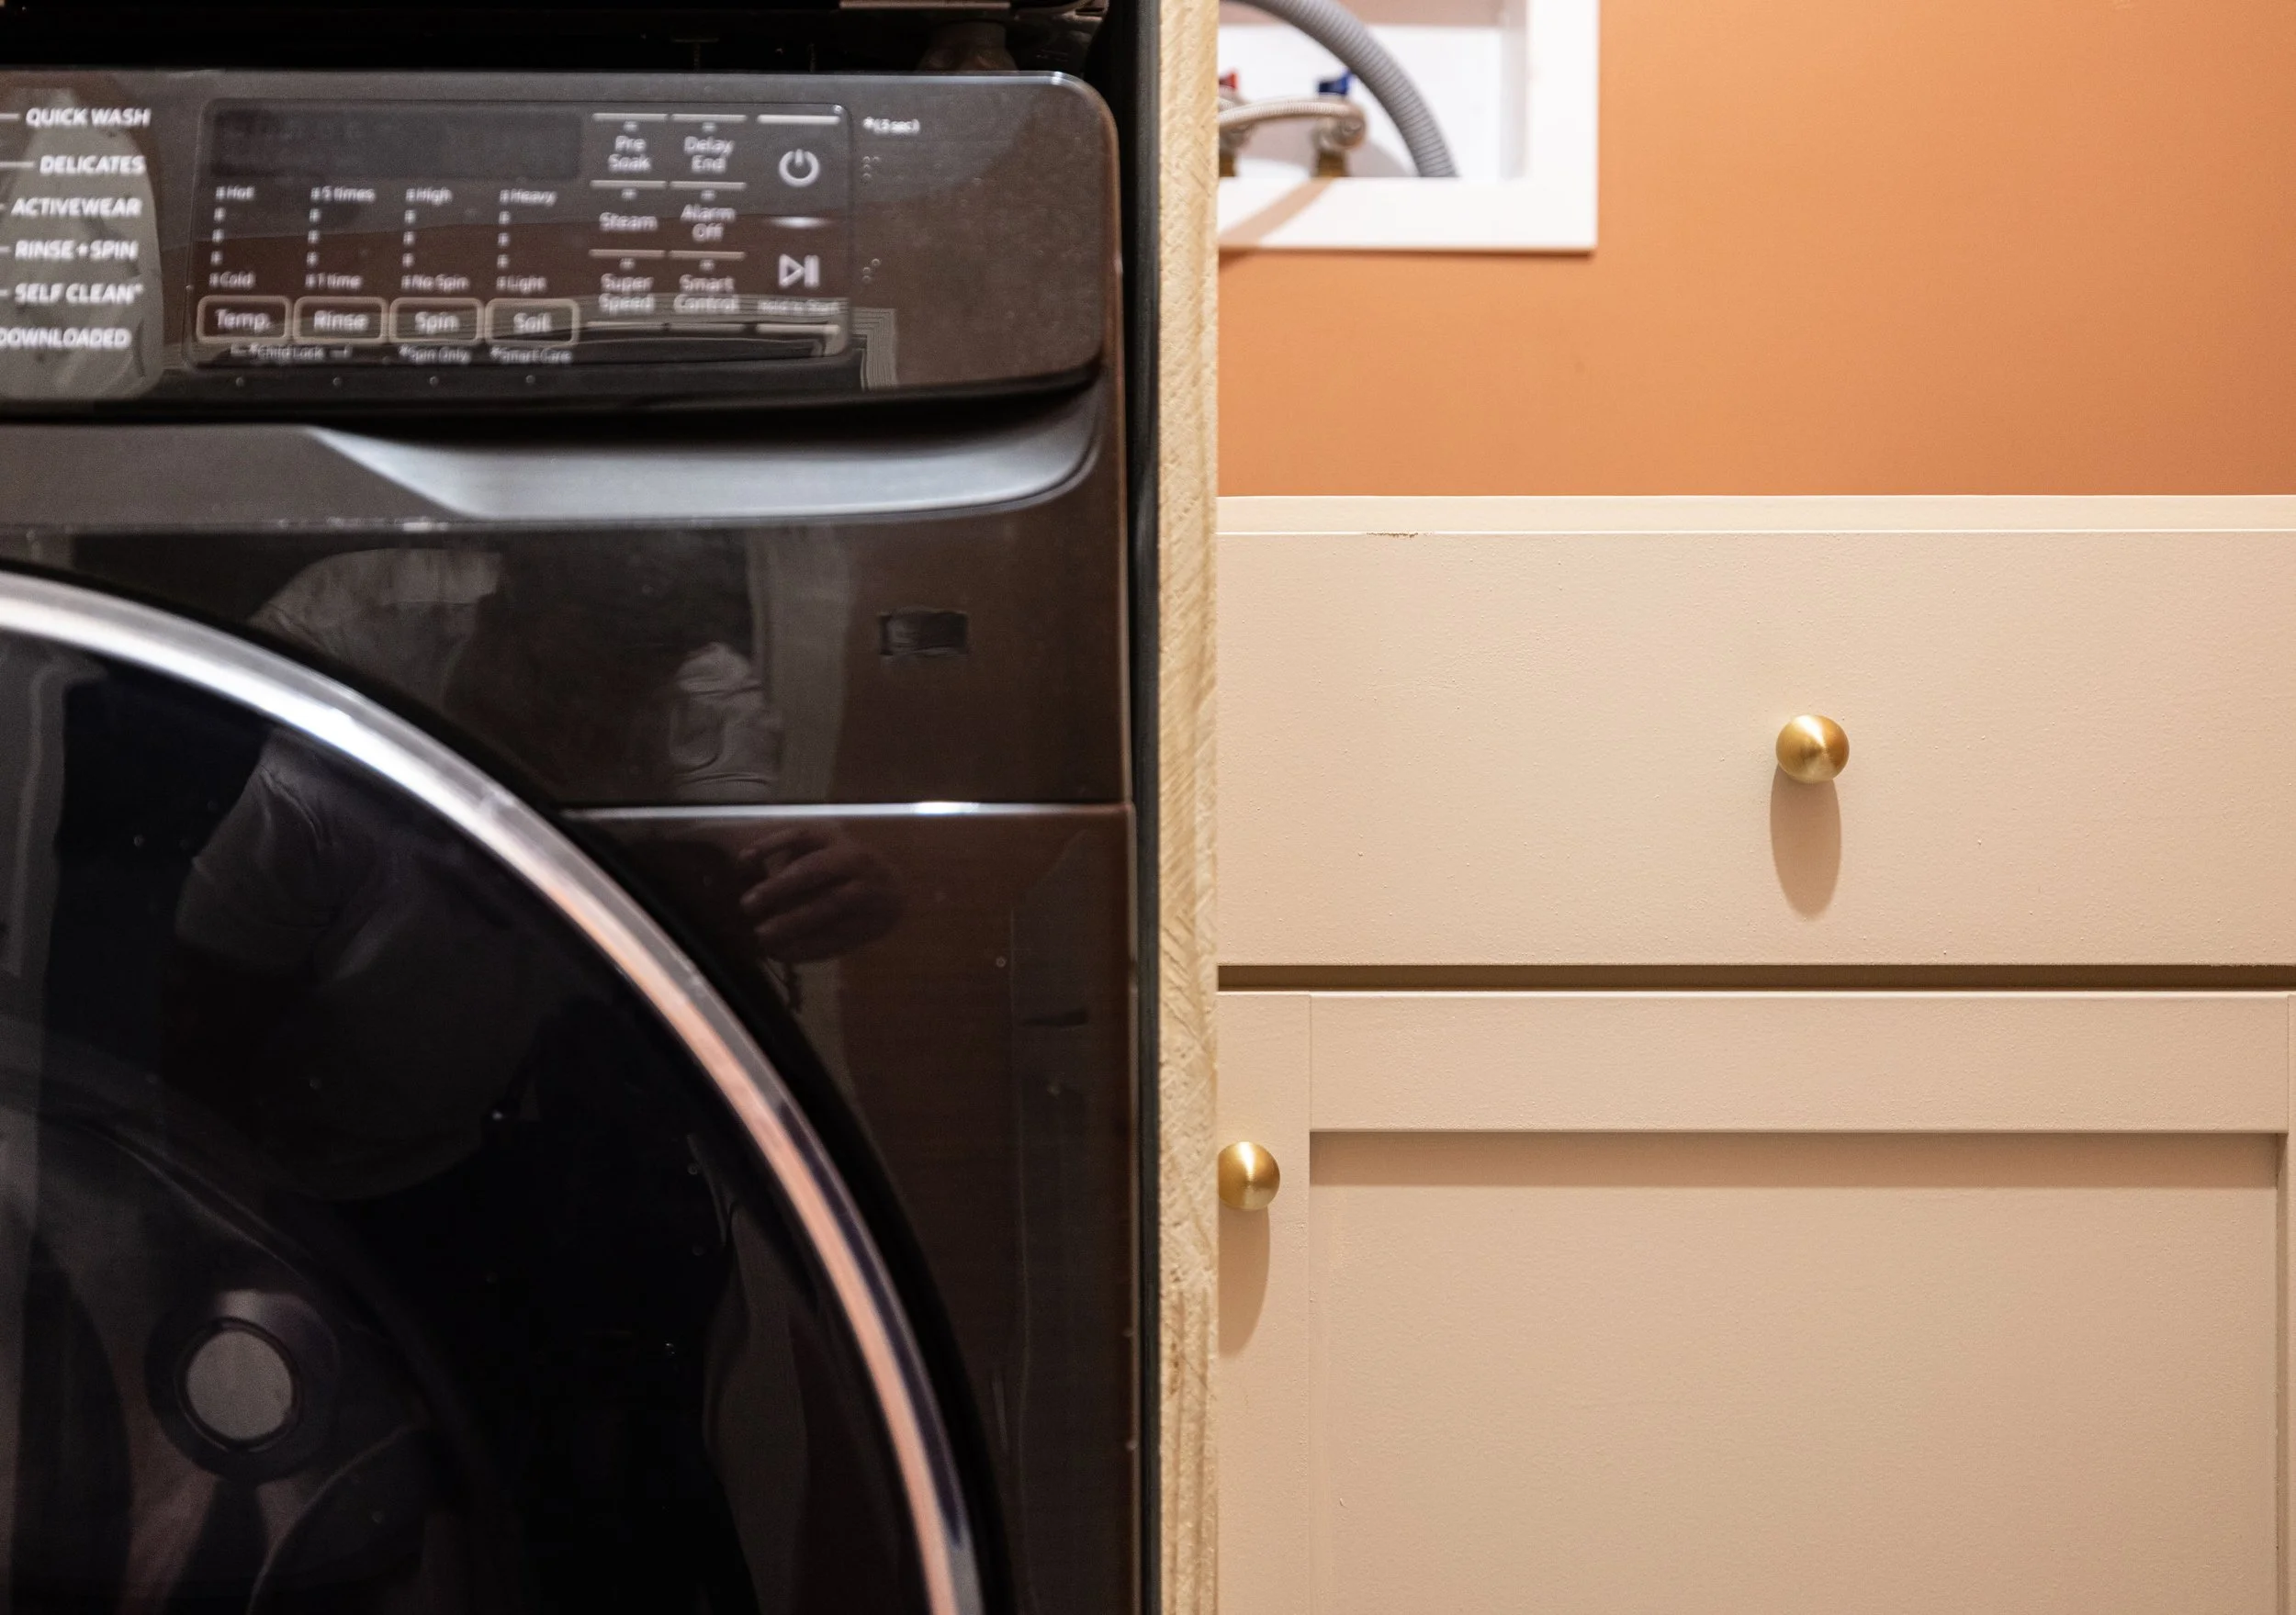
Read MoreIt’s week 4 of the One Room Challenge and we’re officially halfway to the finish line! This week the laundry room got a big upgrade when we installed the freshly painted cabinets, a new door, and the trim!
Read MoreAt this point, I've painted 4 kitchens worth of cabinets and have learned A LOT along the way. Since I was painting the cabinets for the laundry room this week anyway, I figured this would be the perfect opportunity to share my process for painting cabinets - breaking down what does and doesn't work so you get the best finished product.
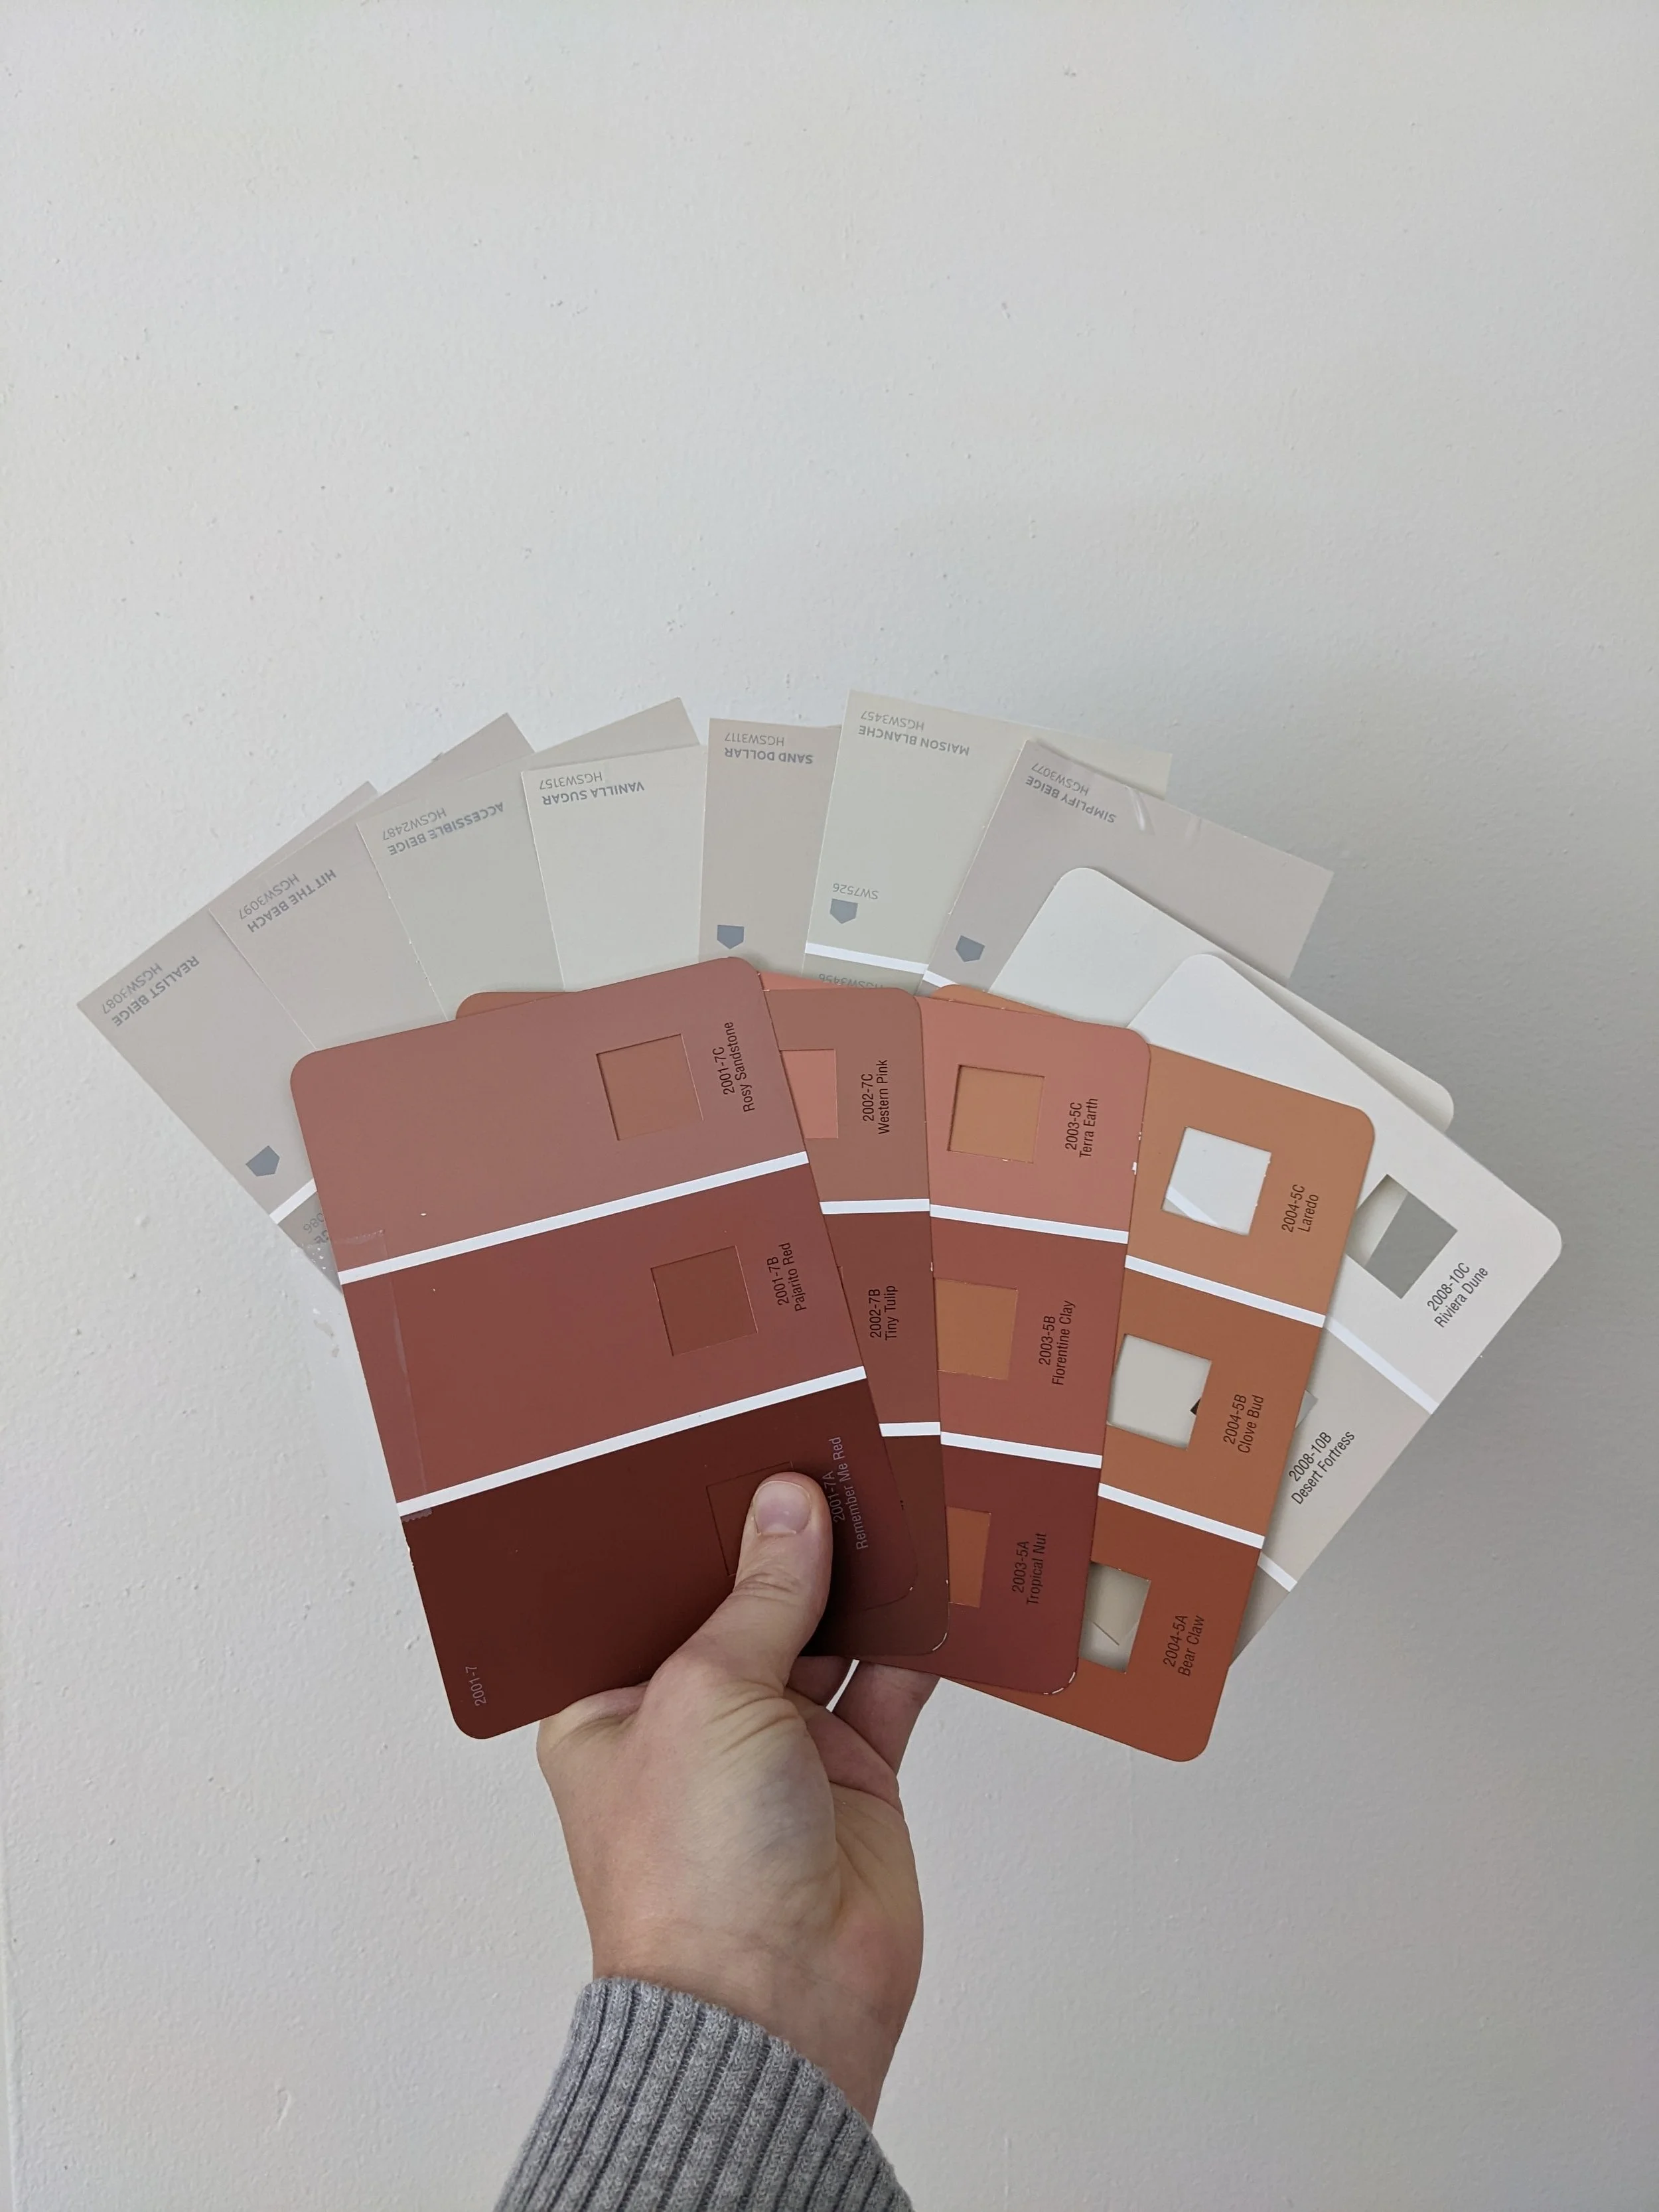
Read MoreIn last week’s post, I shared the design I’ve had rolling around in my head for the laundry room renovation that I’m tackling for the One Room Challenge. This week, I shifted my attention to picking the perfect paint colors for the walls and cabinets - and thought it would be fun to bring you along for the ride!
Read MoreI often share pictures of rooms as we're working on them. What you don't see (and what I strategically choose not to share on the regular) are the rooms that have sat unfinished - like our laundry room.
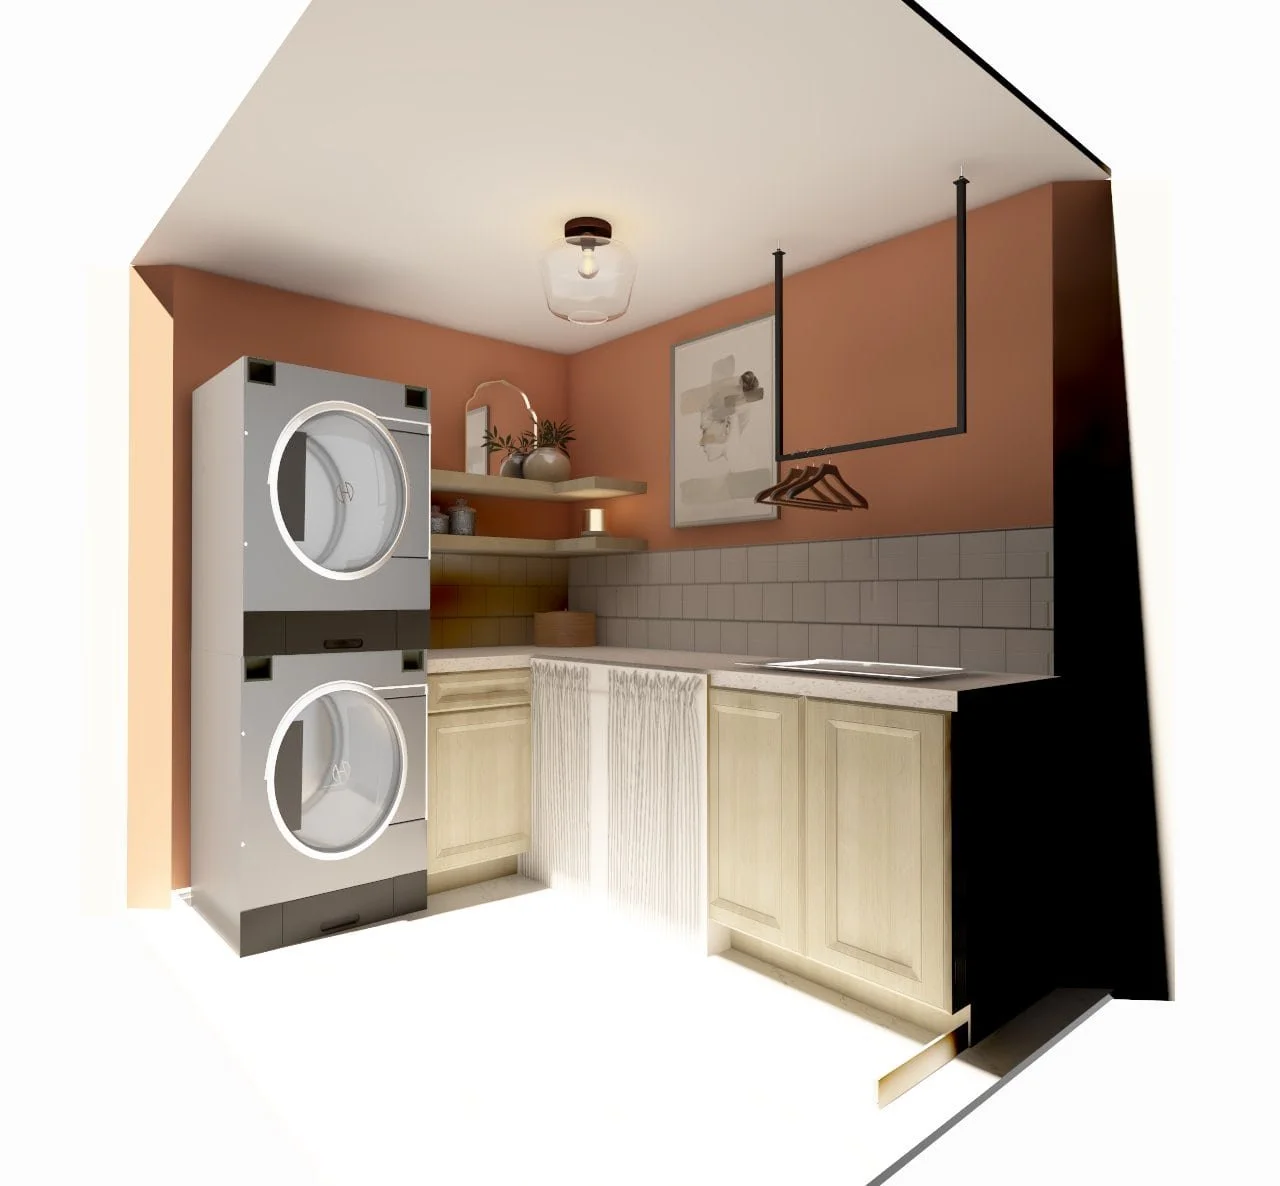
That’s why I’m super excited to share that our next project will be finishing the laundry room as part of the One Room Challenge! I'm kicking things off in this post with my design plans for this space.
Read MoreSpooky season is here!
As a self-proclaimed summer-lover, I was caught off guard when this year I actually had to restrain myself from decorating for Halloween before Labor Day! (Who even am I anymore!?) You better believe as soon as I felt it was a little more socially acceptable, I broke out the spiders, pumpkins, and bats in a hurry! In this post, I’m sharing how I decorated our home for Halloween and a tutorial for a cute kid-friendly DIY you can do to up the spooky factor in your home.
Read MoreI’m not usually a fan of antique-looking decor, but when I first saw this antiqued mirror I wanted it right away! It’s not available for sale anymore but let me tell you, it was too expensive for my blood. So, naturally, I made my own antiqued mirror! Here’s how…
Read MoreIt’s been SIX MONTHS since my last loft update. What!??? That’s why I’m so excited to report that we finally installed the brick veneer above the kitchenette in the loft! And I can’t wait to show you how we did it. Oh, yeah, and we also installed the kitchenette!
Read MorePlants have a way of effortlessly bringing a pop of color, life, and energy into any space. If you haven't noticed, I have quite the collection of plants (30 as of writing this post!). And now that everything is in full bloom and thriving, I figured it might be fun to share some of my favorites and how I do my best to keep them happy and healthy.
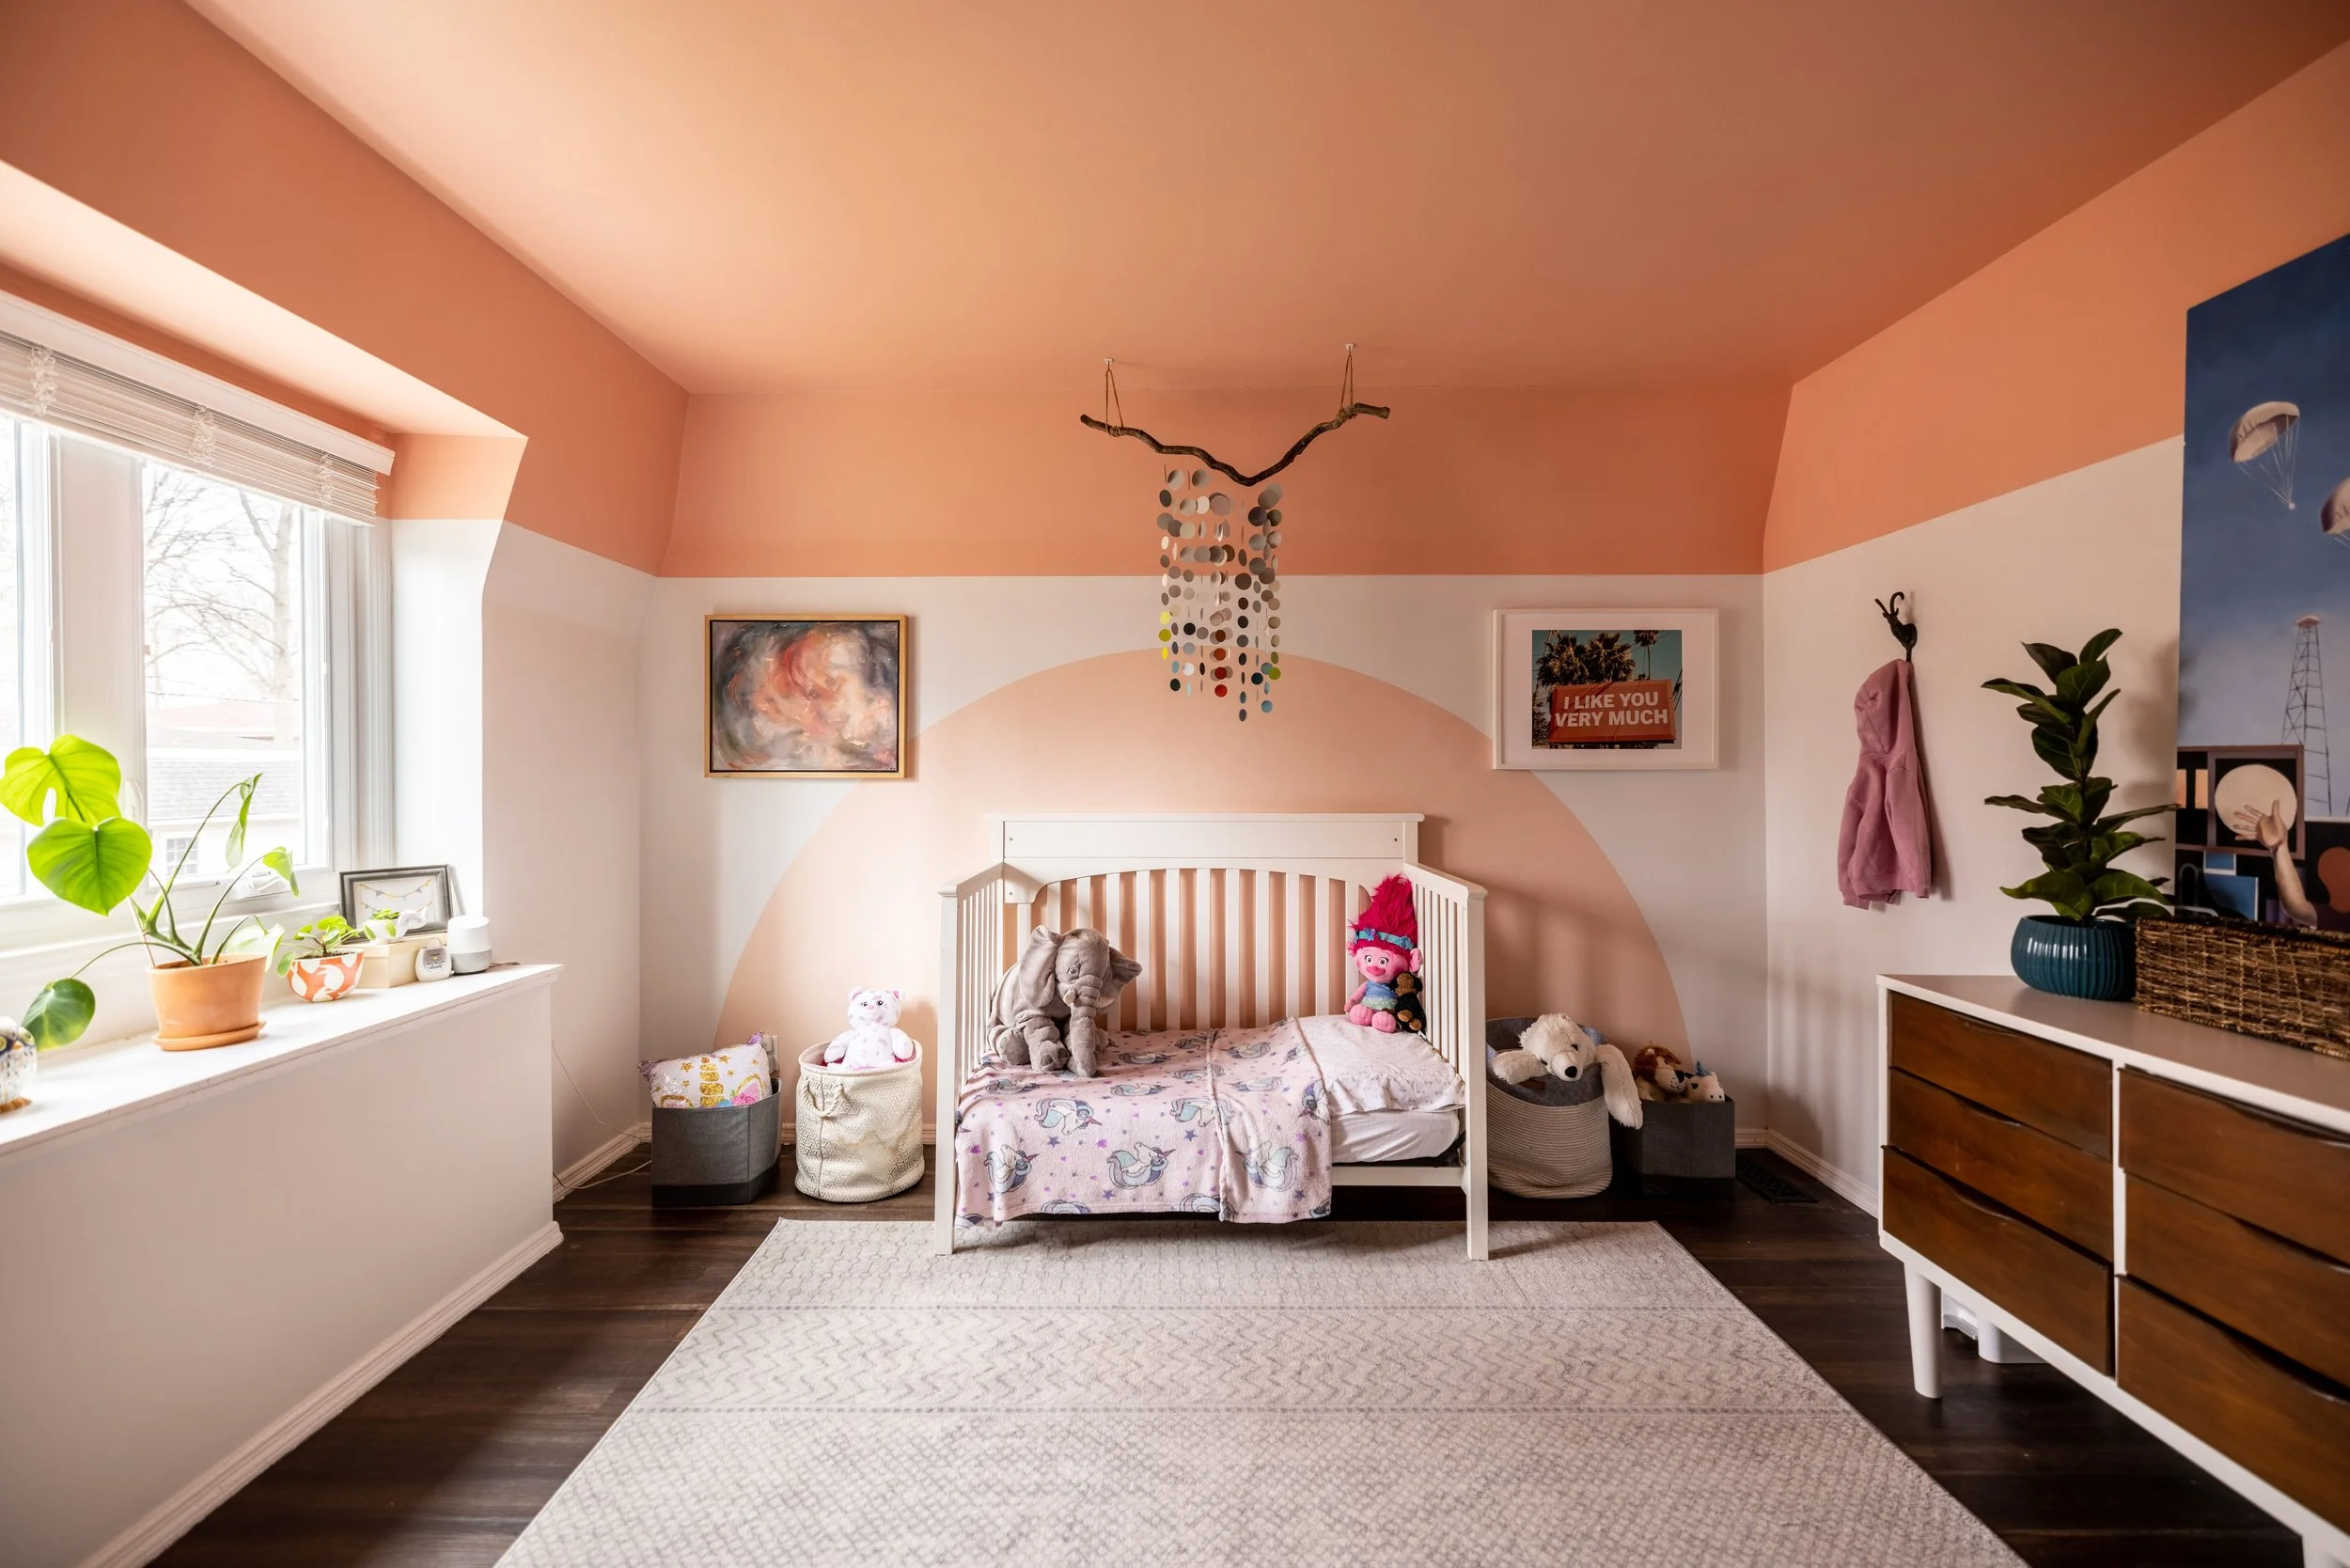
Read MoreWhen I wrote the post outlining our project goals for this year, I mentioned that our younger daughter’s room was on the list. Given that this was declared the year of finishing projects, we didn’t really plan to tackle it so soon (if at all). Yet, here we are.
Read MoreIn my last post, I shared how to curate art for your gallery wall. But what good is all that art if there aren't any frames to ground them? That’s why in this post, I'm covering how I gathered and oftentimes altered, frames for my gallery wall to create the overall look I was going for - without spending a fortune. There may even be a special trick that makes hanging artwork a breeze at the end of this post!
Read More
Hi! I’m Erika.
I have a passion for high design, but realize that comes at an unrealistic cost for most people (including me!). Here, you’ll find the daily feats and failures of creating a budget-friendly high-class design from conception to completion - providing tutorials for you to do the same along the way!
They say the devil’s in the details—but in design, I think that’s where the magic is. My mudroom has been begging for custom storage for years, and now that I’m finally building my own DIY locker built-ins, I’m realizing just how many small design choices can take this space from “functional” to “freaking fabulous.” In this post, I’m sharing all the plans for how I’m turning a blank wall into a thoughtfully designed custom storage moment.
If you’re dreaming of a moody color drenched space but you’ve got an open concept floor plan, I hear you. It’s a common conundrum—especially with how popular open layouts have become. One of my readers recently asked this same question. Here’s my take.
Want the look of a designer light fixture without the price tag? I DIYed a $140 version of a $340 AllModern fixture using a tube of Rub ‘n Buff—and it turned out so good.
My once “meh” mudroom is starting to give serious main character energy. Let’s dive into the three big updates that changed everything.


Looking to up your Halloween decor game? You’ve come to the right haunted place. This 3D skeleton picture frame DIY is easy, inexpensive, and seriously spooky. Perfect for anyone who wants to make a big Halloween statement without spending a fortune.