

Yearly Project Pulse Check - 2023
It’s that time of year again to step back and take a look at what we actually worked on all year long. And maybe even share some loose plans for next year, too!
4 Big Projects We Tackled This Year
It’s that time of year again to step back and take a look at what we actually worked on all year long. And maybe even share some loose plans for next year, too!
The Office
At the end of last year, my husband, Lucius, had a vision to turn an old local hair salon into his real estate office. So we got to work! We spent the first quarter of the year demoing and rebuilding. Then I spent another couple of months with finishing work - like painting and laying tile and stone.
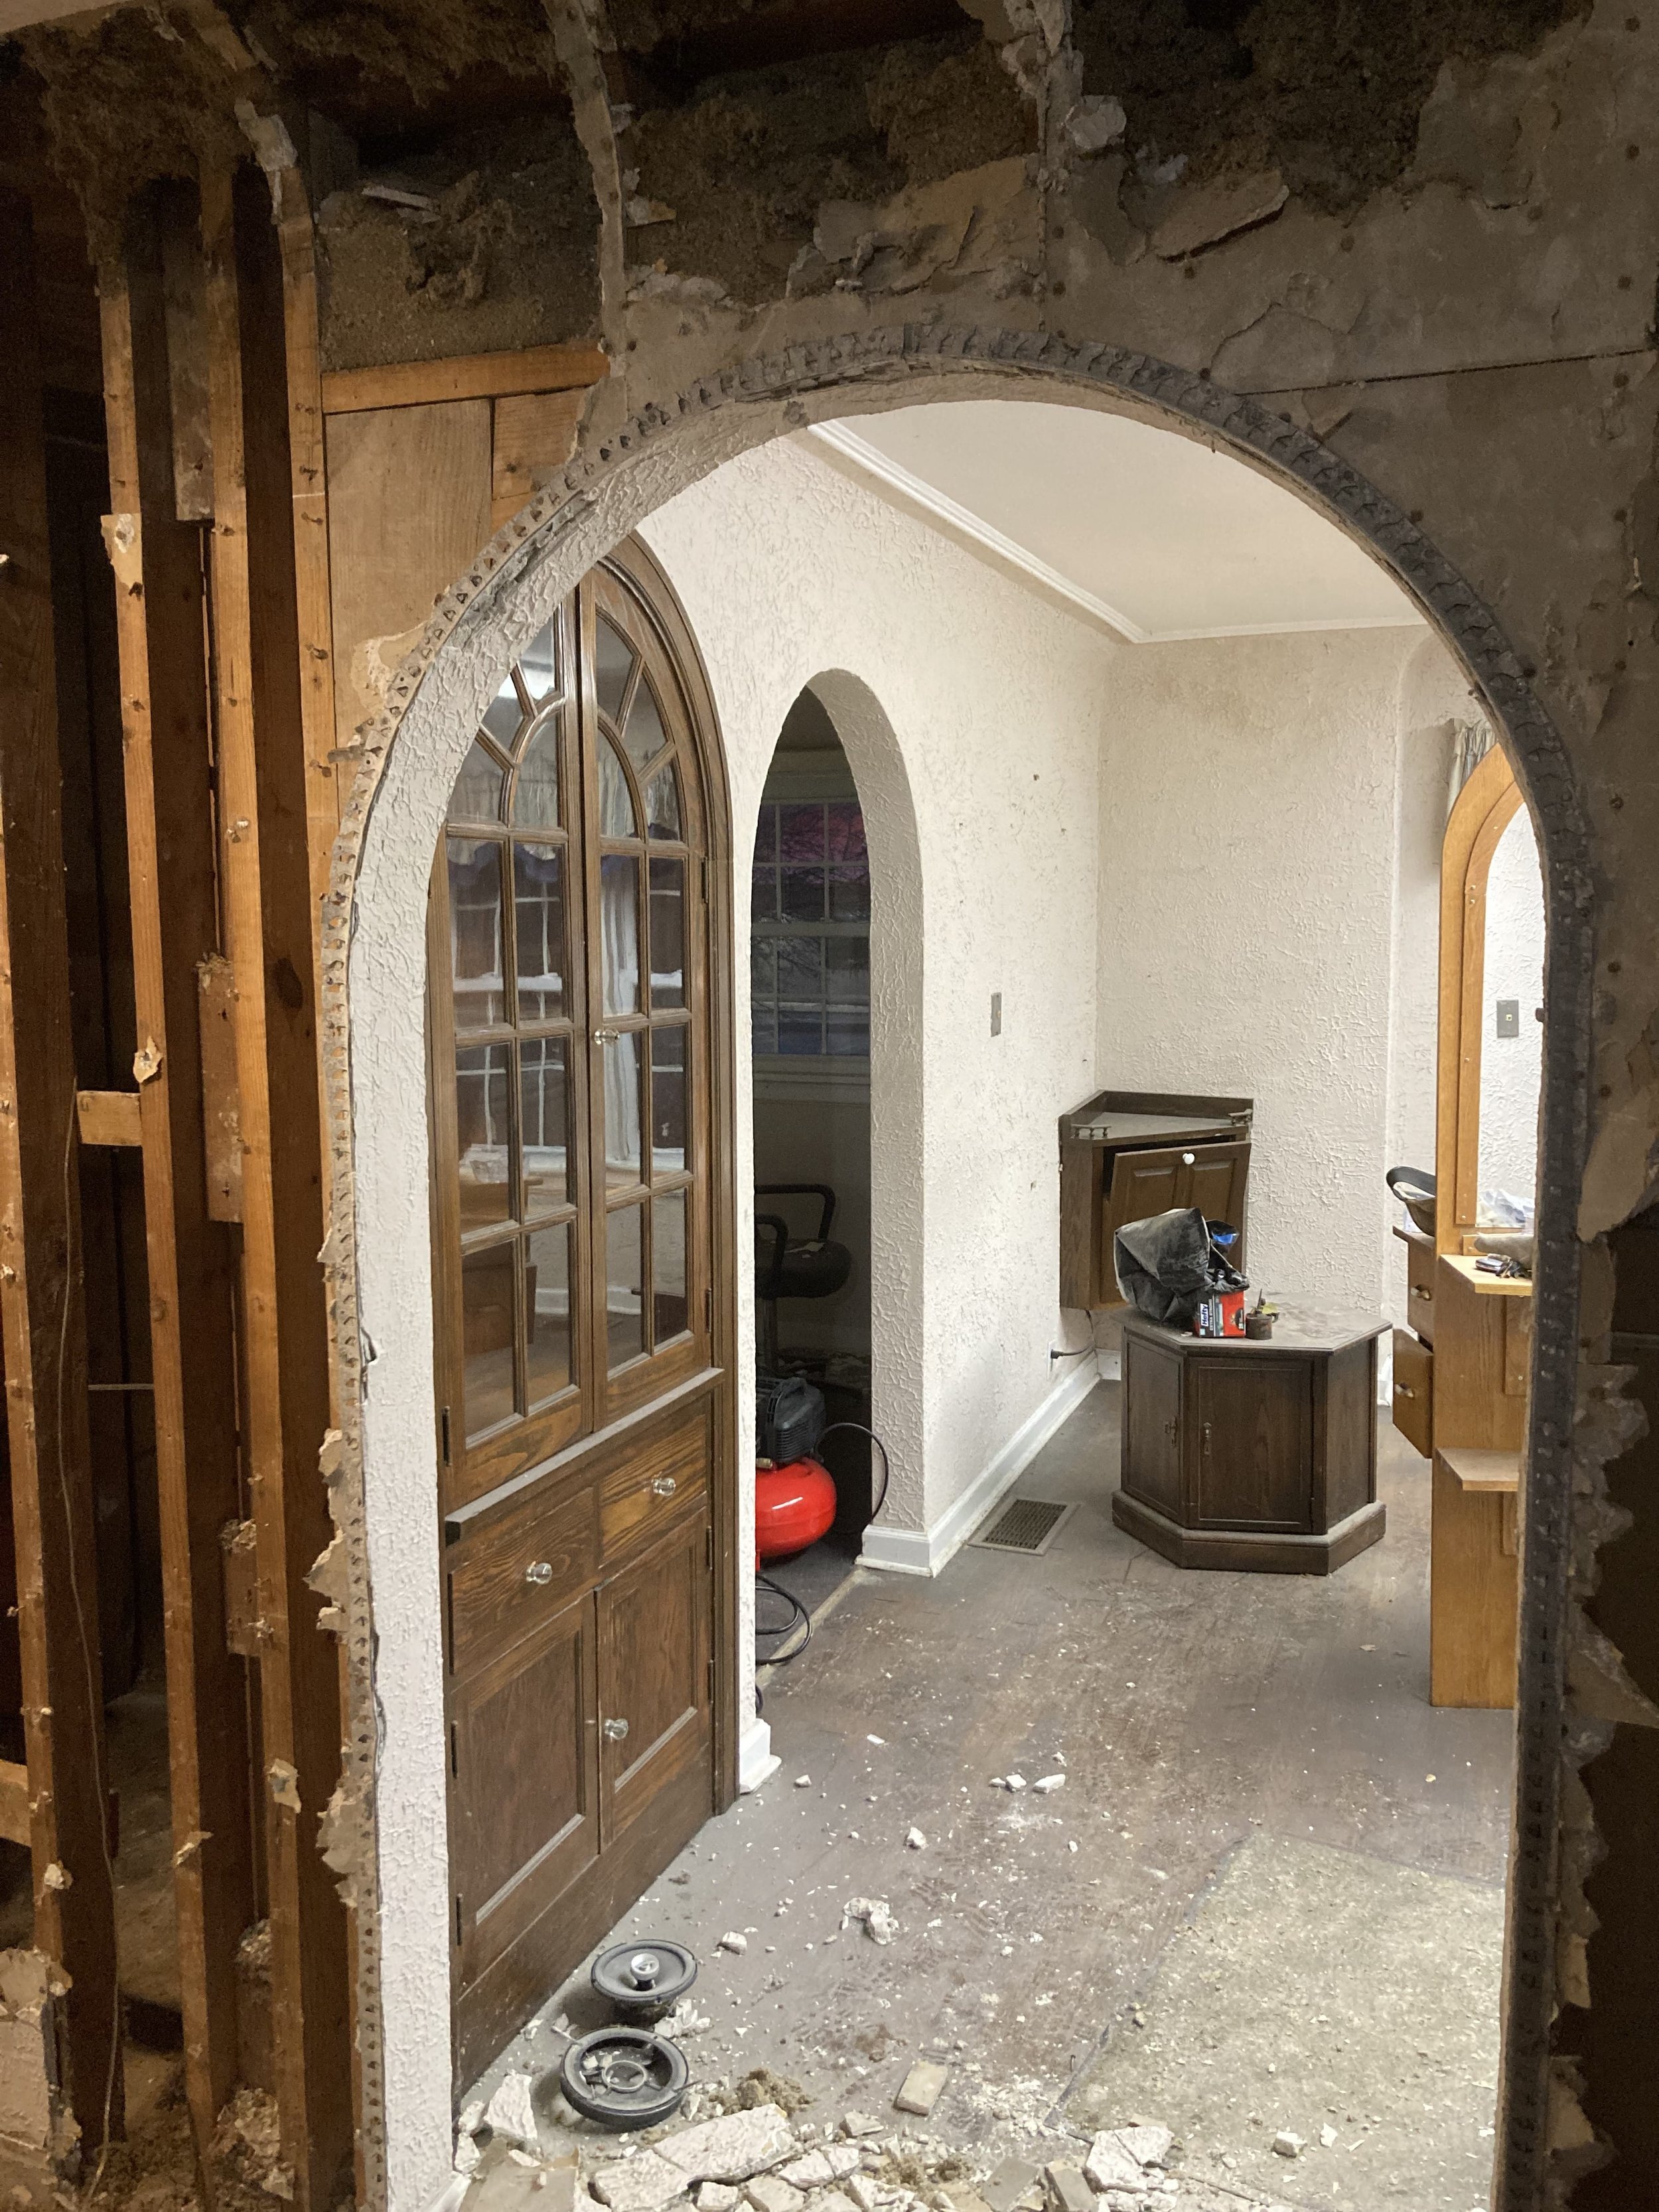

It was an incredibly challenging project. By the summertime, we were able to actually begin using the building. There are still tons of little things I’d like to finish up before I begin to officially share the spaces, but don’t worry! Reveals are coming!
Related Office Posts
Charlie Foursquare
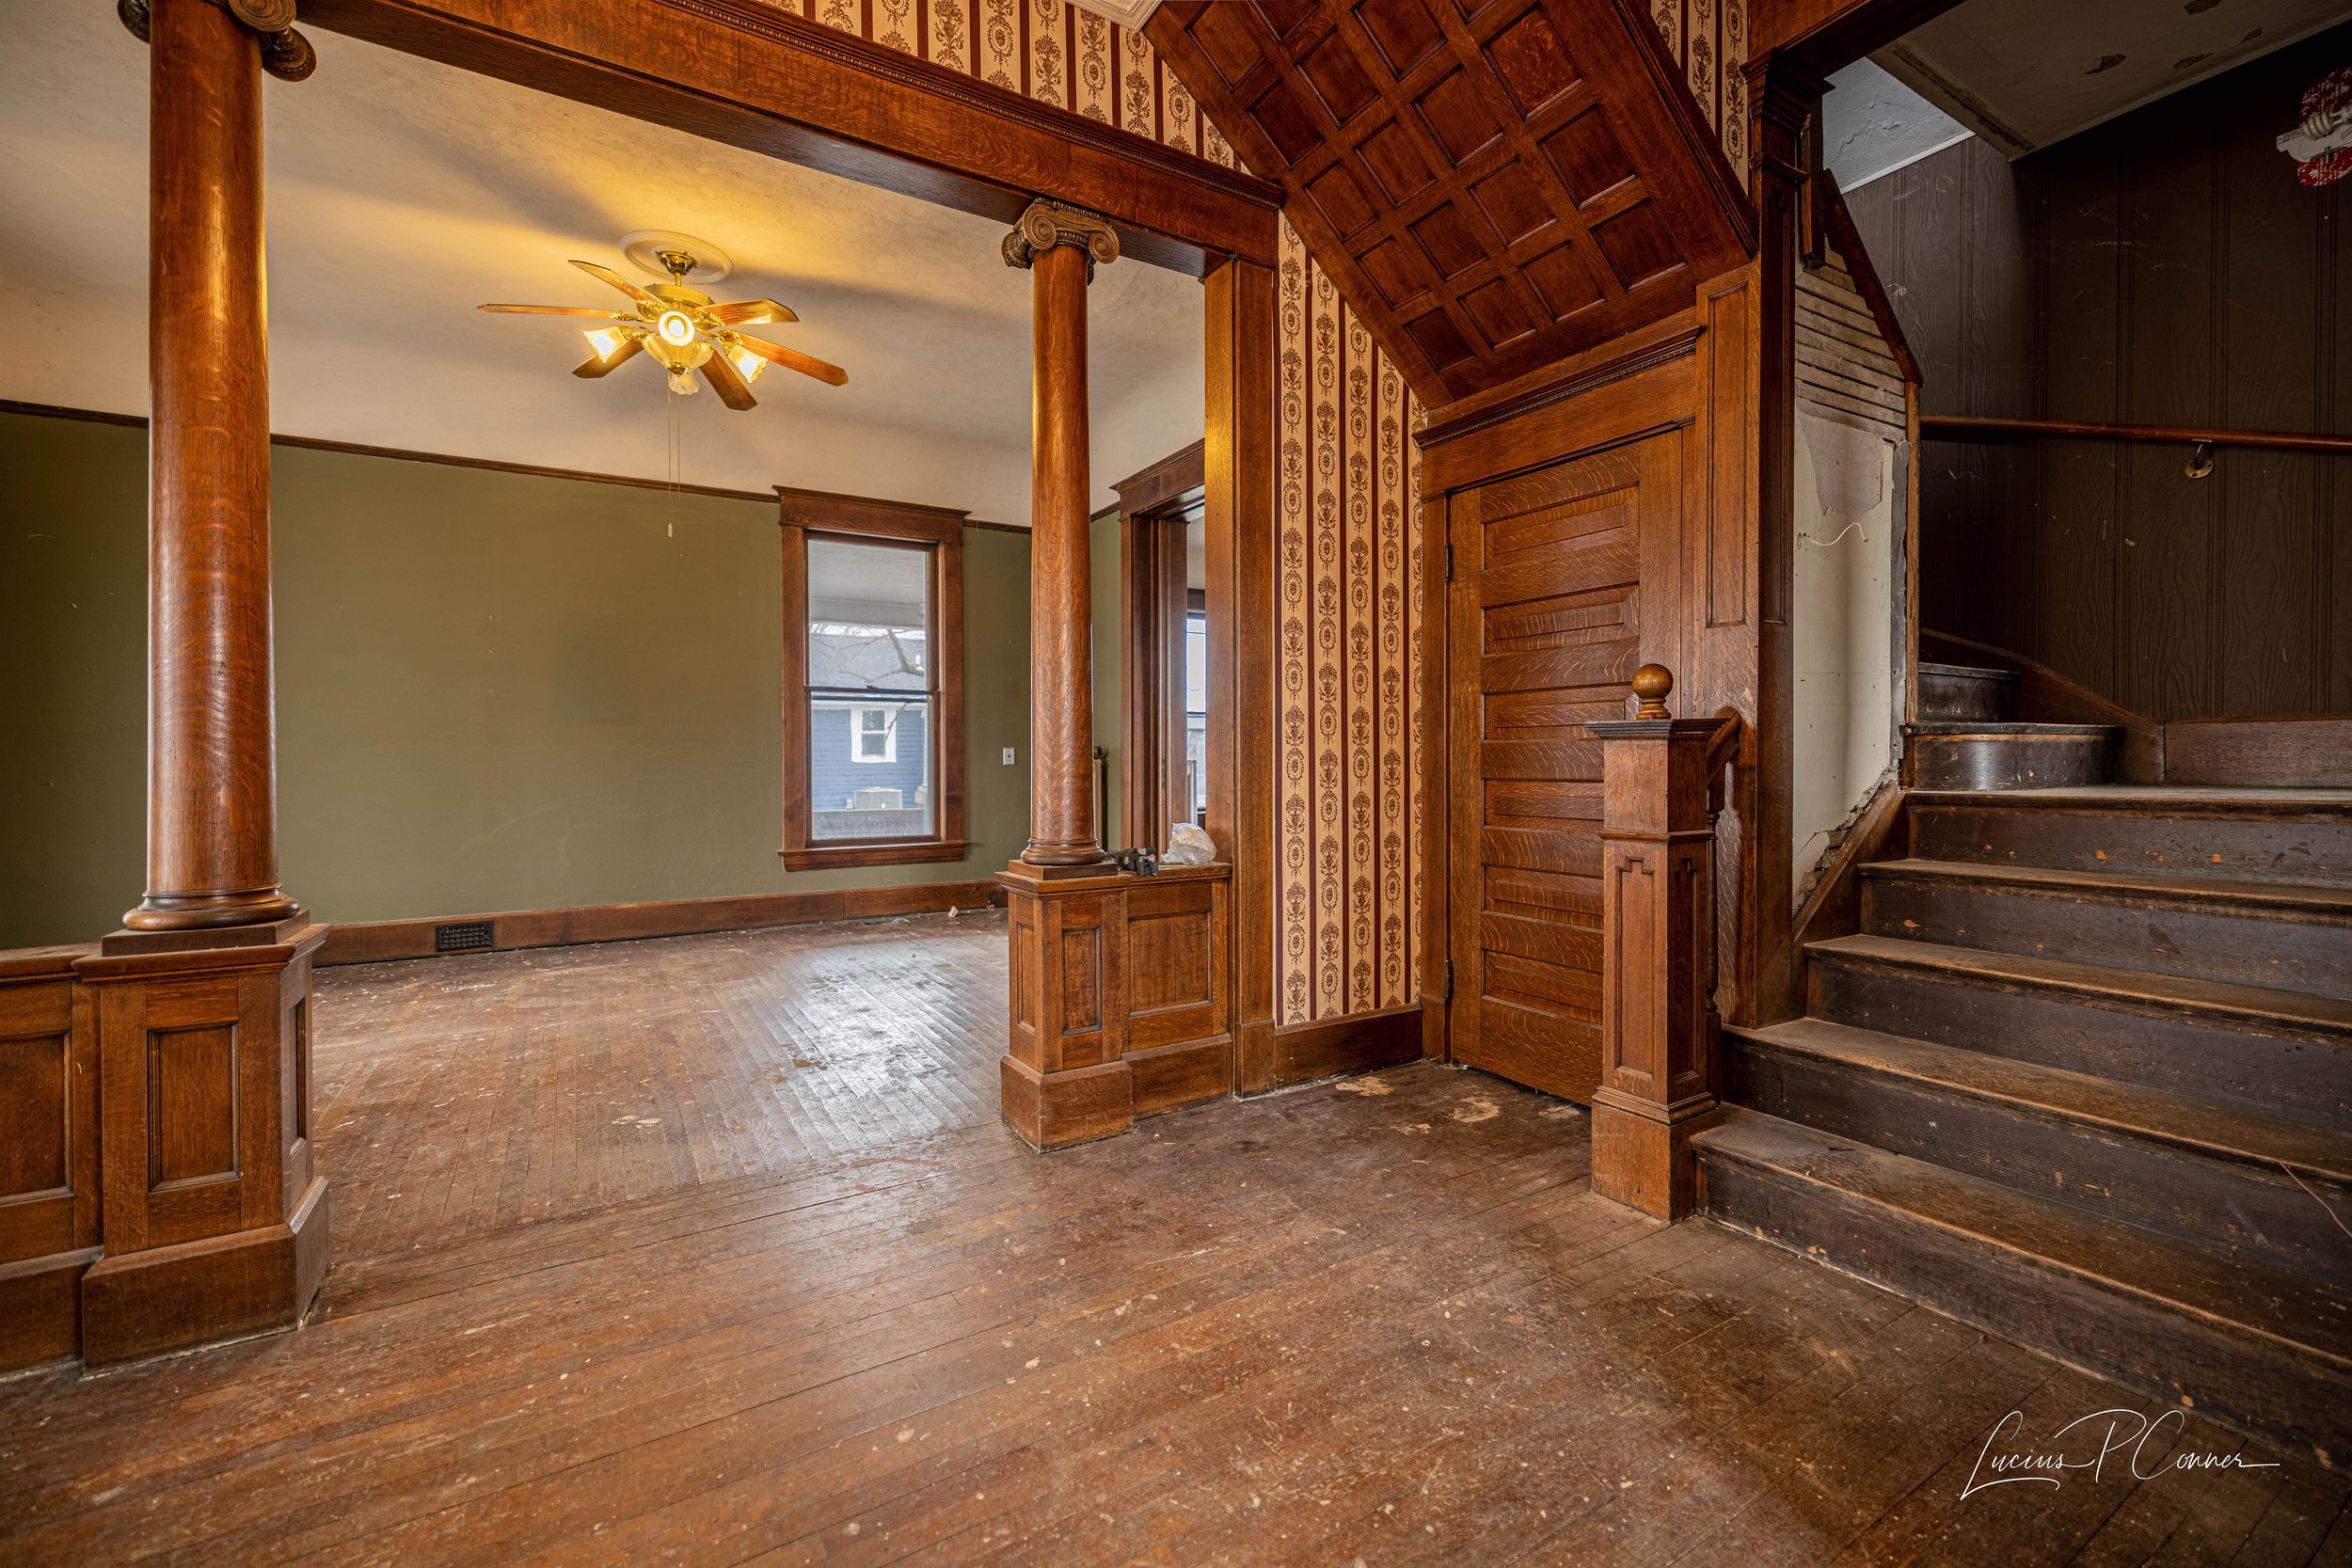
While working on the office, Lucius also decided to purchase an investment property that we hoped to turn into an Airbnb. The house was beautiful, but it took a lot of work to clear it out.

So, on the days I wasn’t at the office tearing down drywall, I spent my time at Charlie Foursquare cleaning up the huge amounts of junk the previous owners left. Then, I moved on to ripping up the gross carpet that covered every room.

Much to my sadness, we ultimately decided it wasn’t the right time to move forward with the Airbnb and are currently in the process of selling the property. I was really excited about the design challenge this property presented and am pretty bummed I don’t get to follow through with our plans. But that’s investing for ya!
Related Charlie Foursquare Posts
Powder Room
After I renovated our laundry room for last year’s One Room Challenge, I was excited to take part in it again. This year, I tackled our powder room.

I had a blast shooting for the moon with my design and finding ways to see it through (on a budget!) I’m thrilled with how this space turned out, and I gained so much confidence with all the new projects I got to try to make it happen.

Related Powder Room Posts
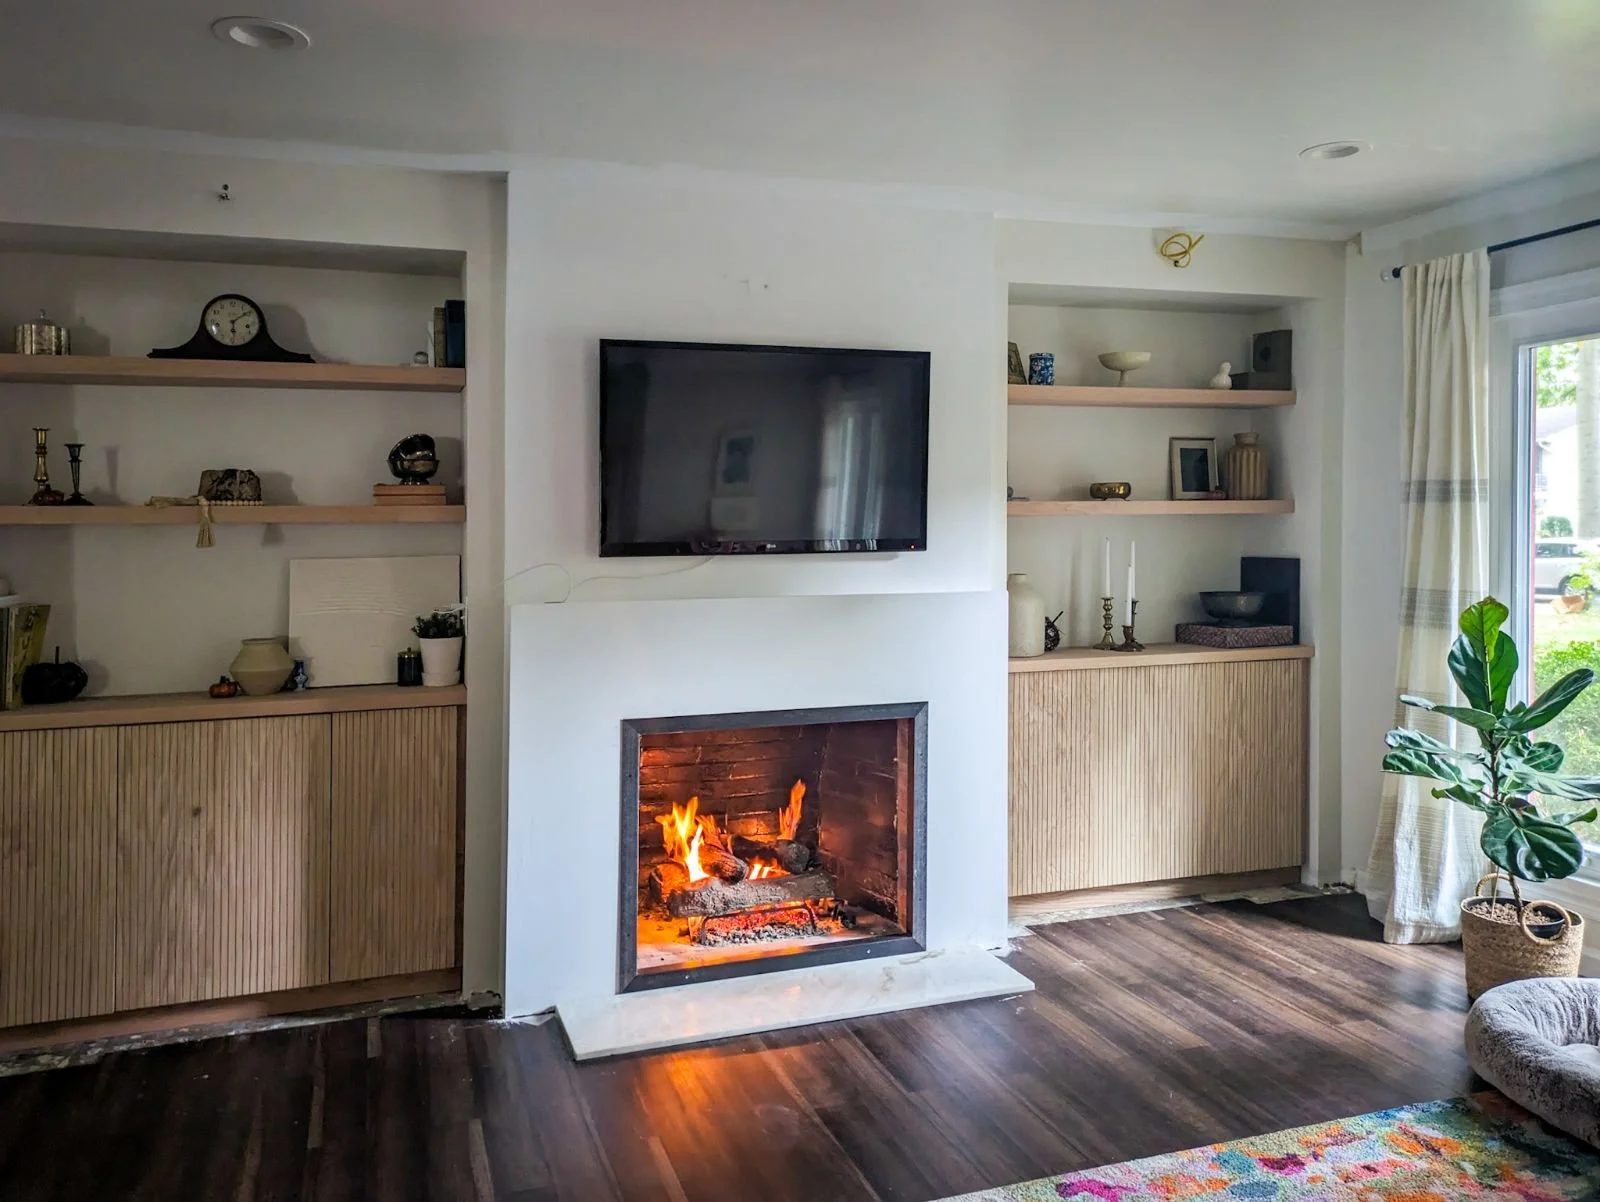
Playroom
Several months before I began the powder room renovation, on a whim I decided to start renovating the playroom. I planned on doing some simple updates to make it more aesthetically pleasing until we were ready to take on the big renovation. But with some egging on from Lucius, we jumped right in a completely demoed the built-ins.

I spent the next several months slowly rebuilding everything until the One Room Challenge devoured all my time. Now that the half-bathroom is complete, I’m turning my attention back towards this room. I’m excited to finish the built-ins and fireplace, and I have several more ideas to make the best use of this space. Make sure you follow this project in 2024!
Related Playroom Posts:
What’s Next?
I used to write really thorough lists of exactly which projects I wanted to accomplish each year. But after renovating properties for a while, you learn that you can’t plan that far in advance.
As you can probably glean from the above projects we worked on this year, sometimes an investment pops up when the time is right, or you decide you just can’t take looking at <insert room here> anymore and pick up a hammer.
That being said, here are the spaces that are bothering me enough to be high on my to-do list currently.
The Mudroom
Our mudroom has felt like the slowest renovation in the world… probably because we’ve never actively said, “Okay, this is what we’re renovating next!” But I think I’m to the point where I’m ready to say just that.
It’s been bumming me out a lot lately that this room has the potential to be incredible, but it’s just been used as a passthrough since we’ve lived here. There have been two major things that have kept me from tackling this room so far:
One - I wasn’t sure I could build the cabinets and bench I envisioned in this space. But now that I’ve proved myself with the built-ins in the playroom, I feel a lot more confident in my abilities.
Reason number two is…
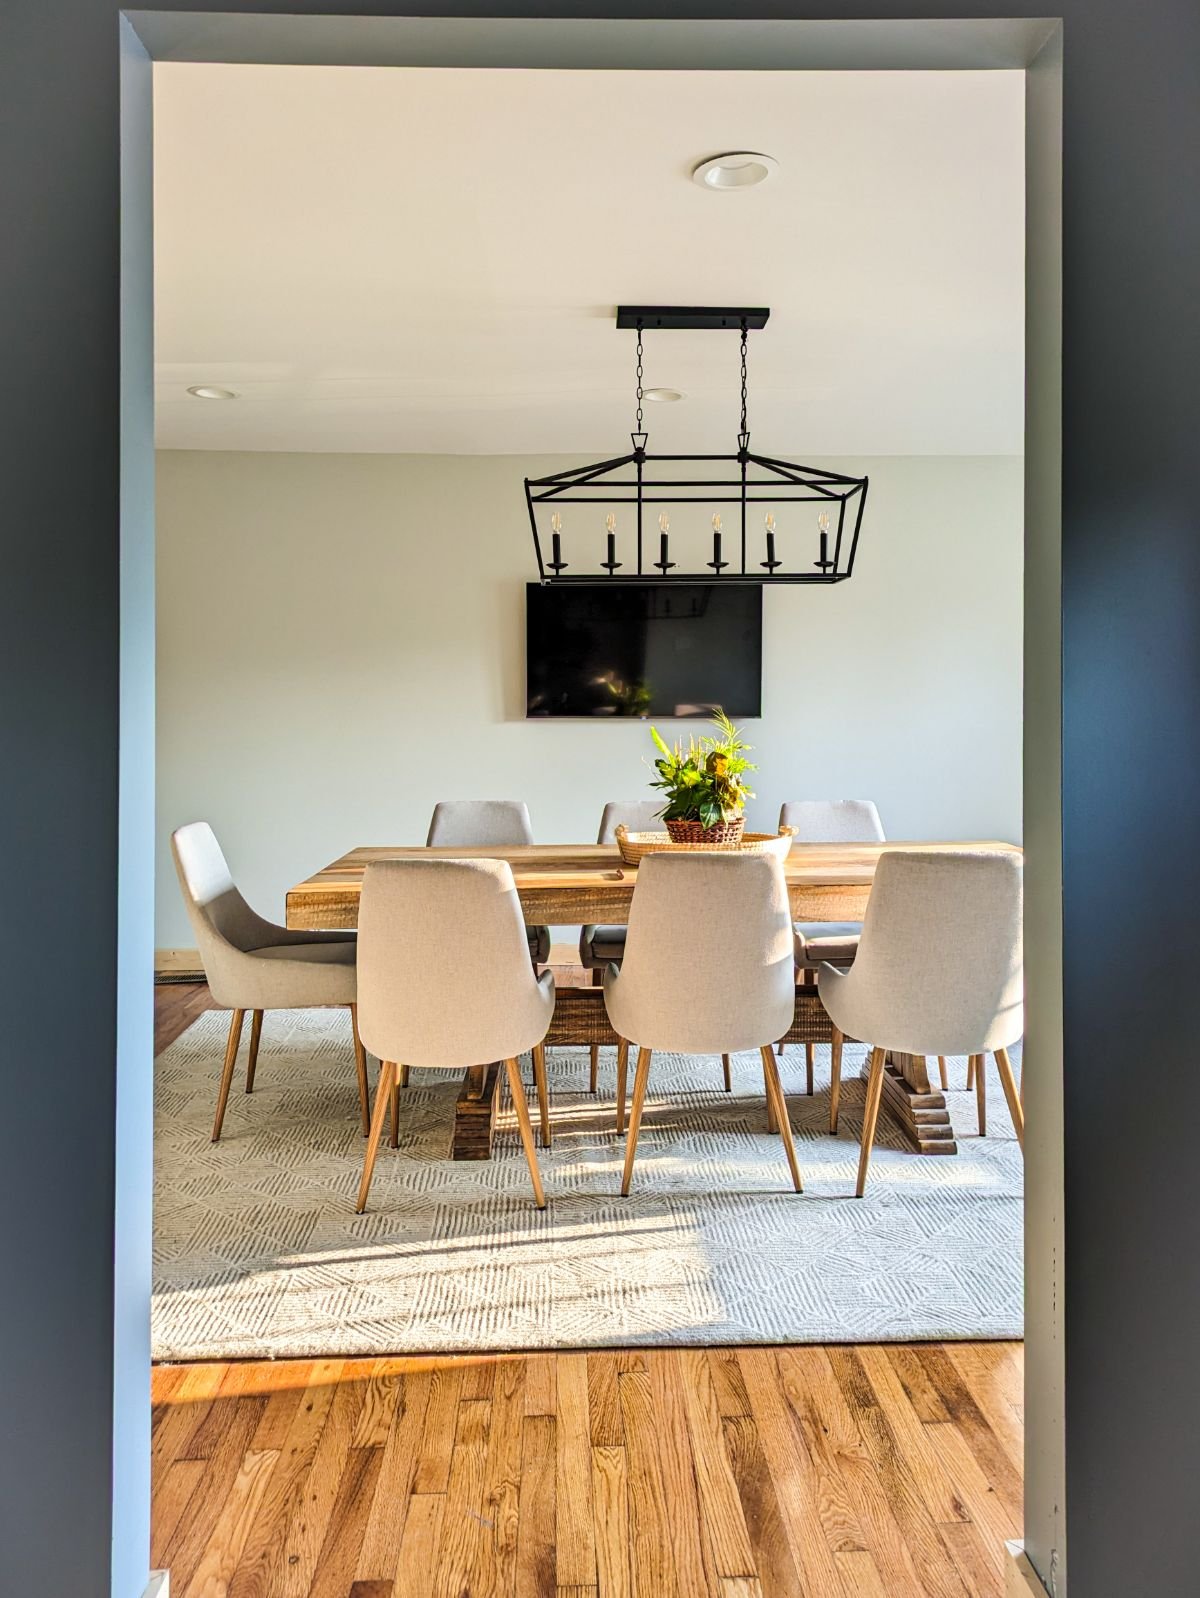
New Flooring
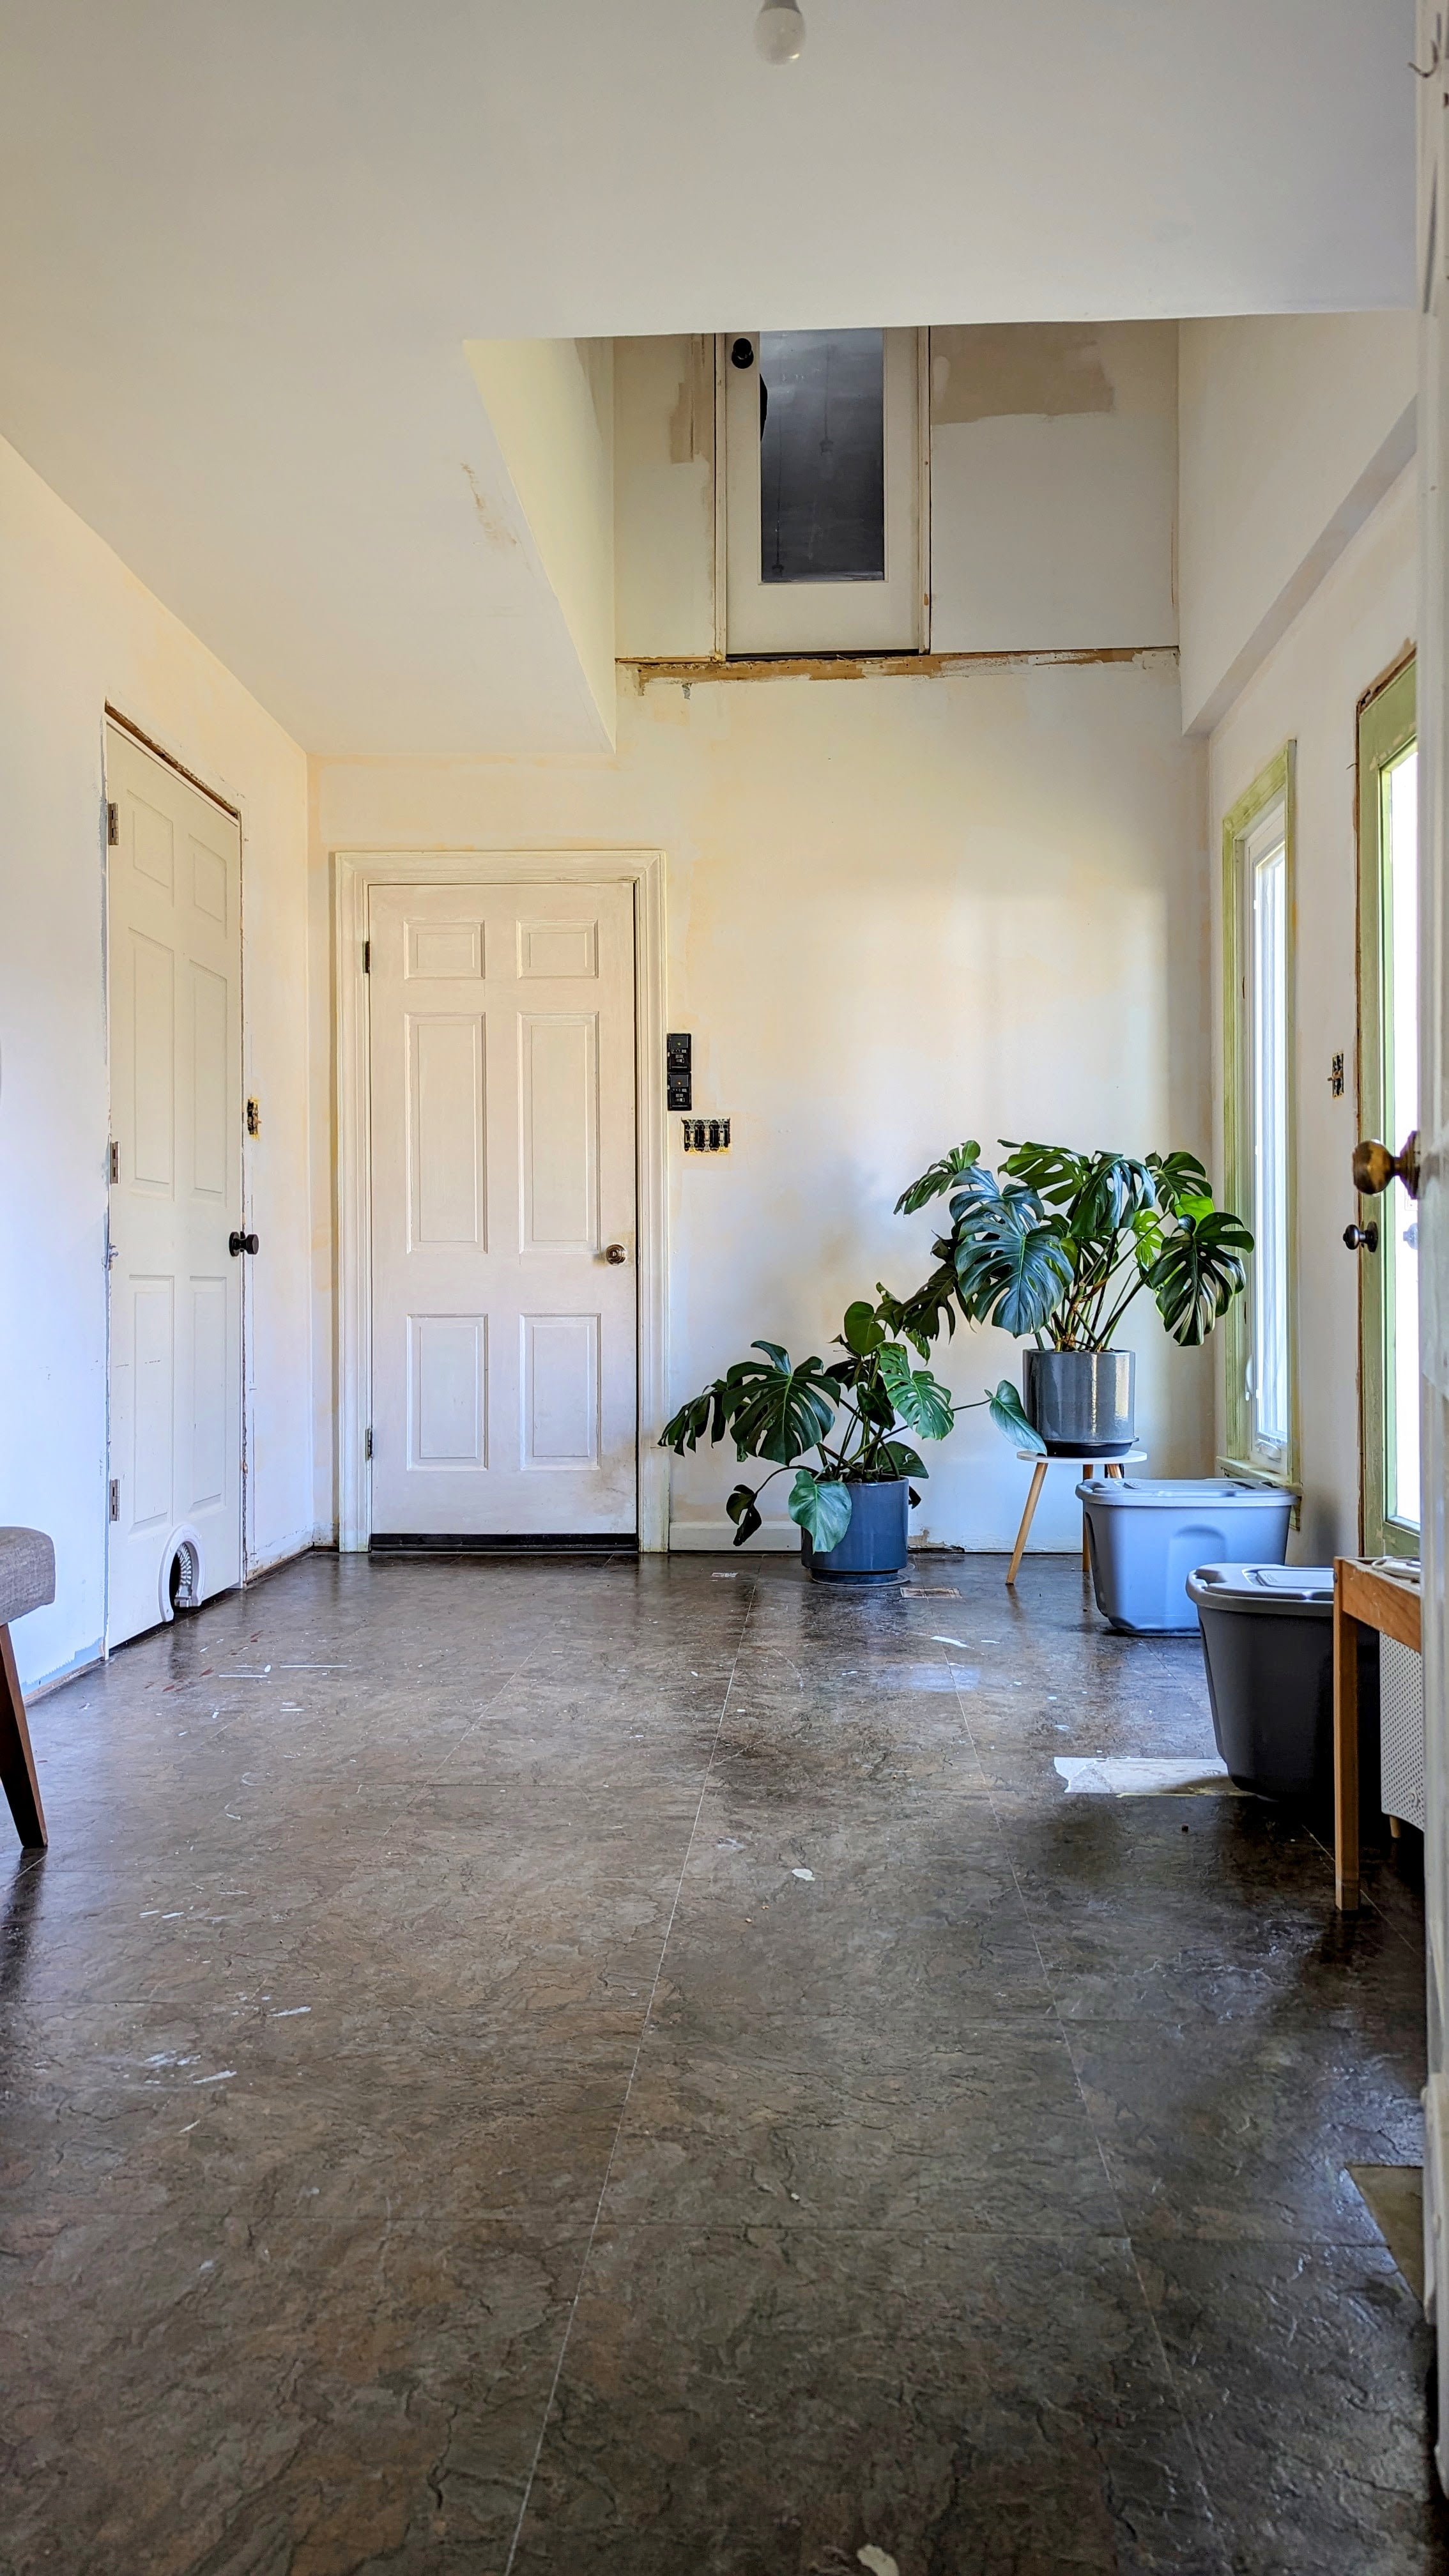
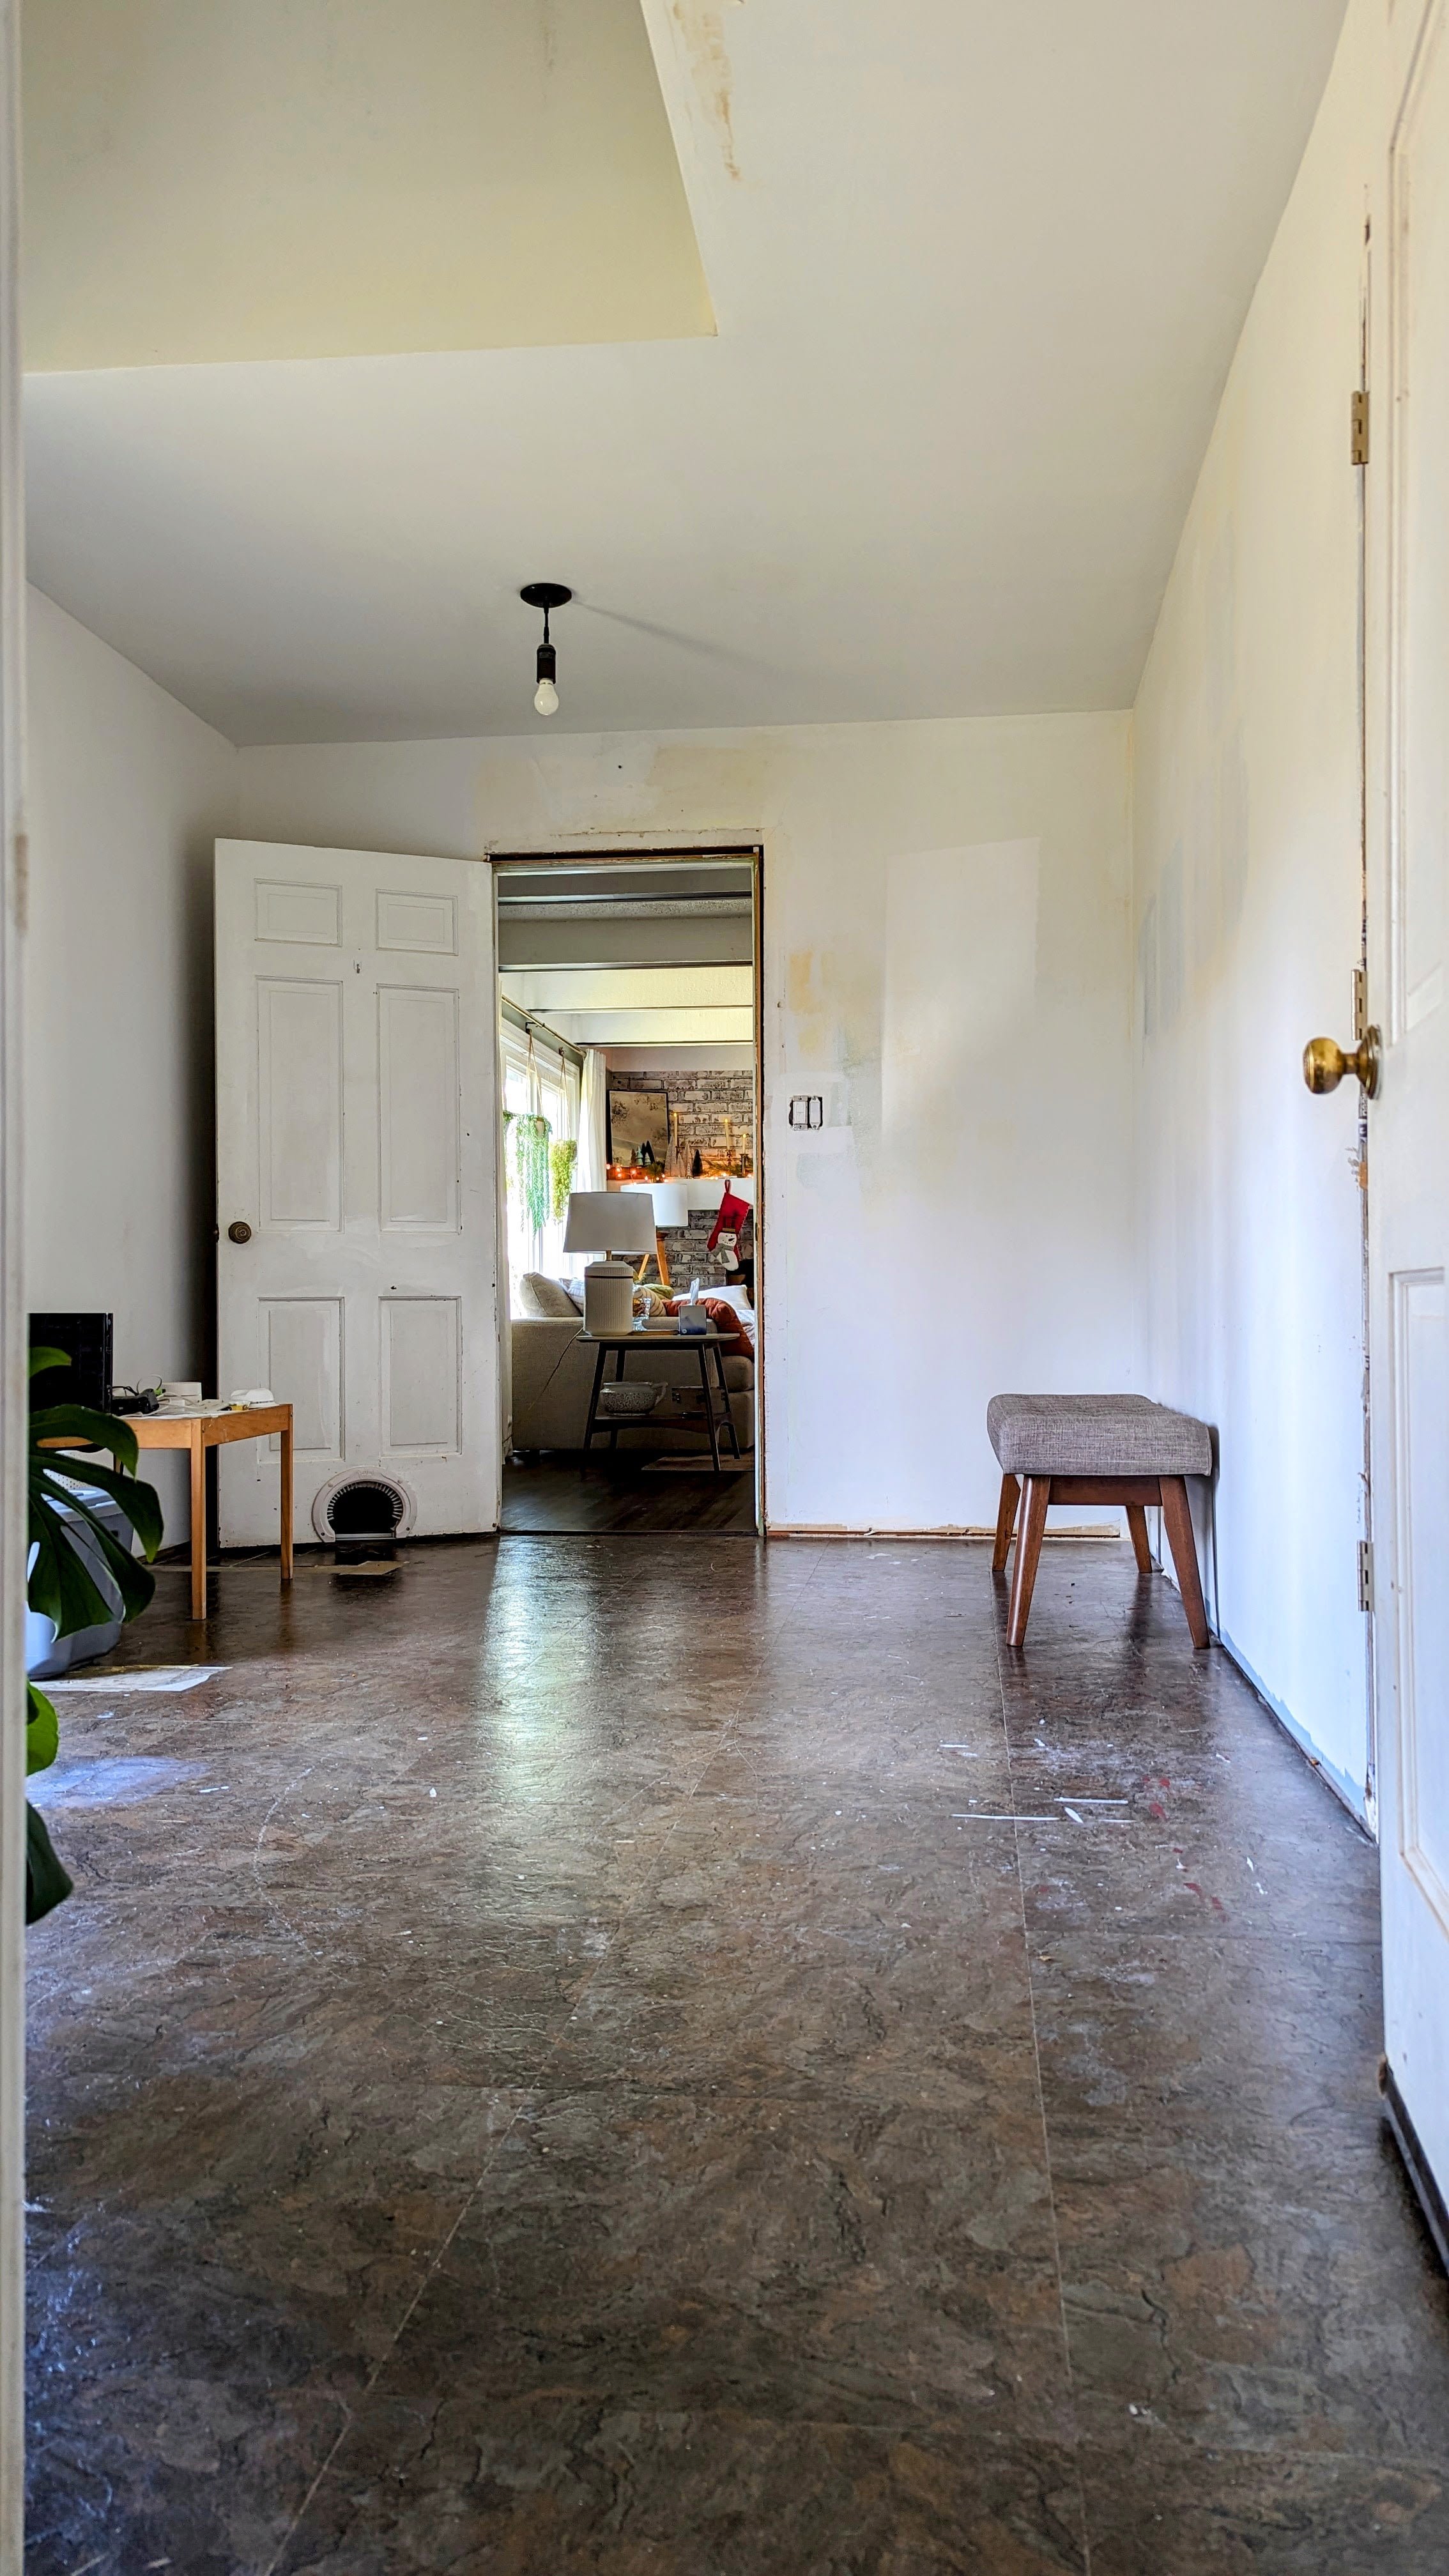
We’ve never liked the flooring on our main floor. Not only does it look and feel cheap, it’s really dark. You might think that would be good for hiding crumbs and dirt, but in reality, it shows everything! For a long time, we’ve discussed replacing it. And I think this is the year!
Here’s a good view of the current floors:
It would be ideal to carry the new flooring into the mudroom for a more cohesive feel, hence why I’ve been holding off on that renovation. But at this point, if I get to the mudroom before we get new flooring, I might just have to pivot and come up with a new plan (tile, maybe!?)
Storage Closet
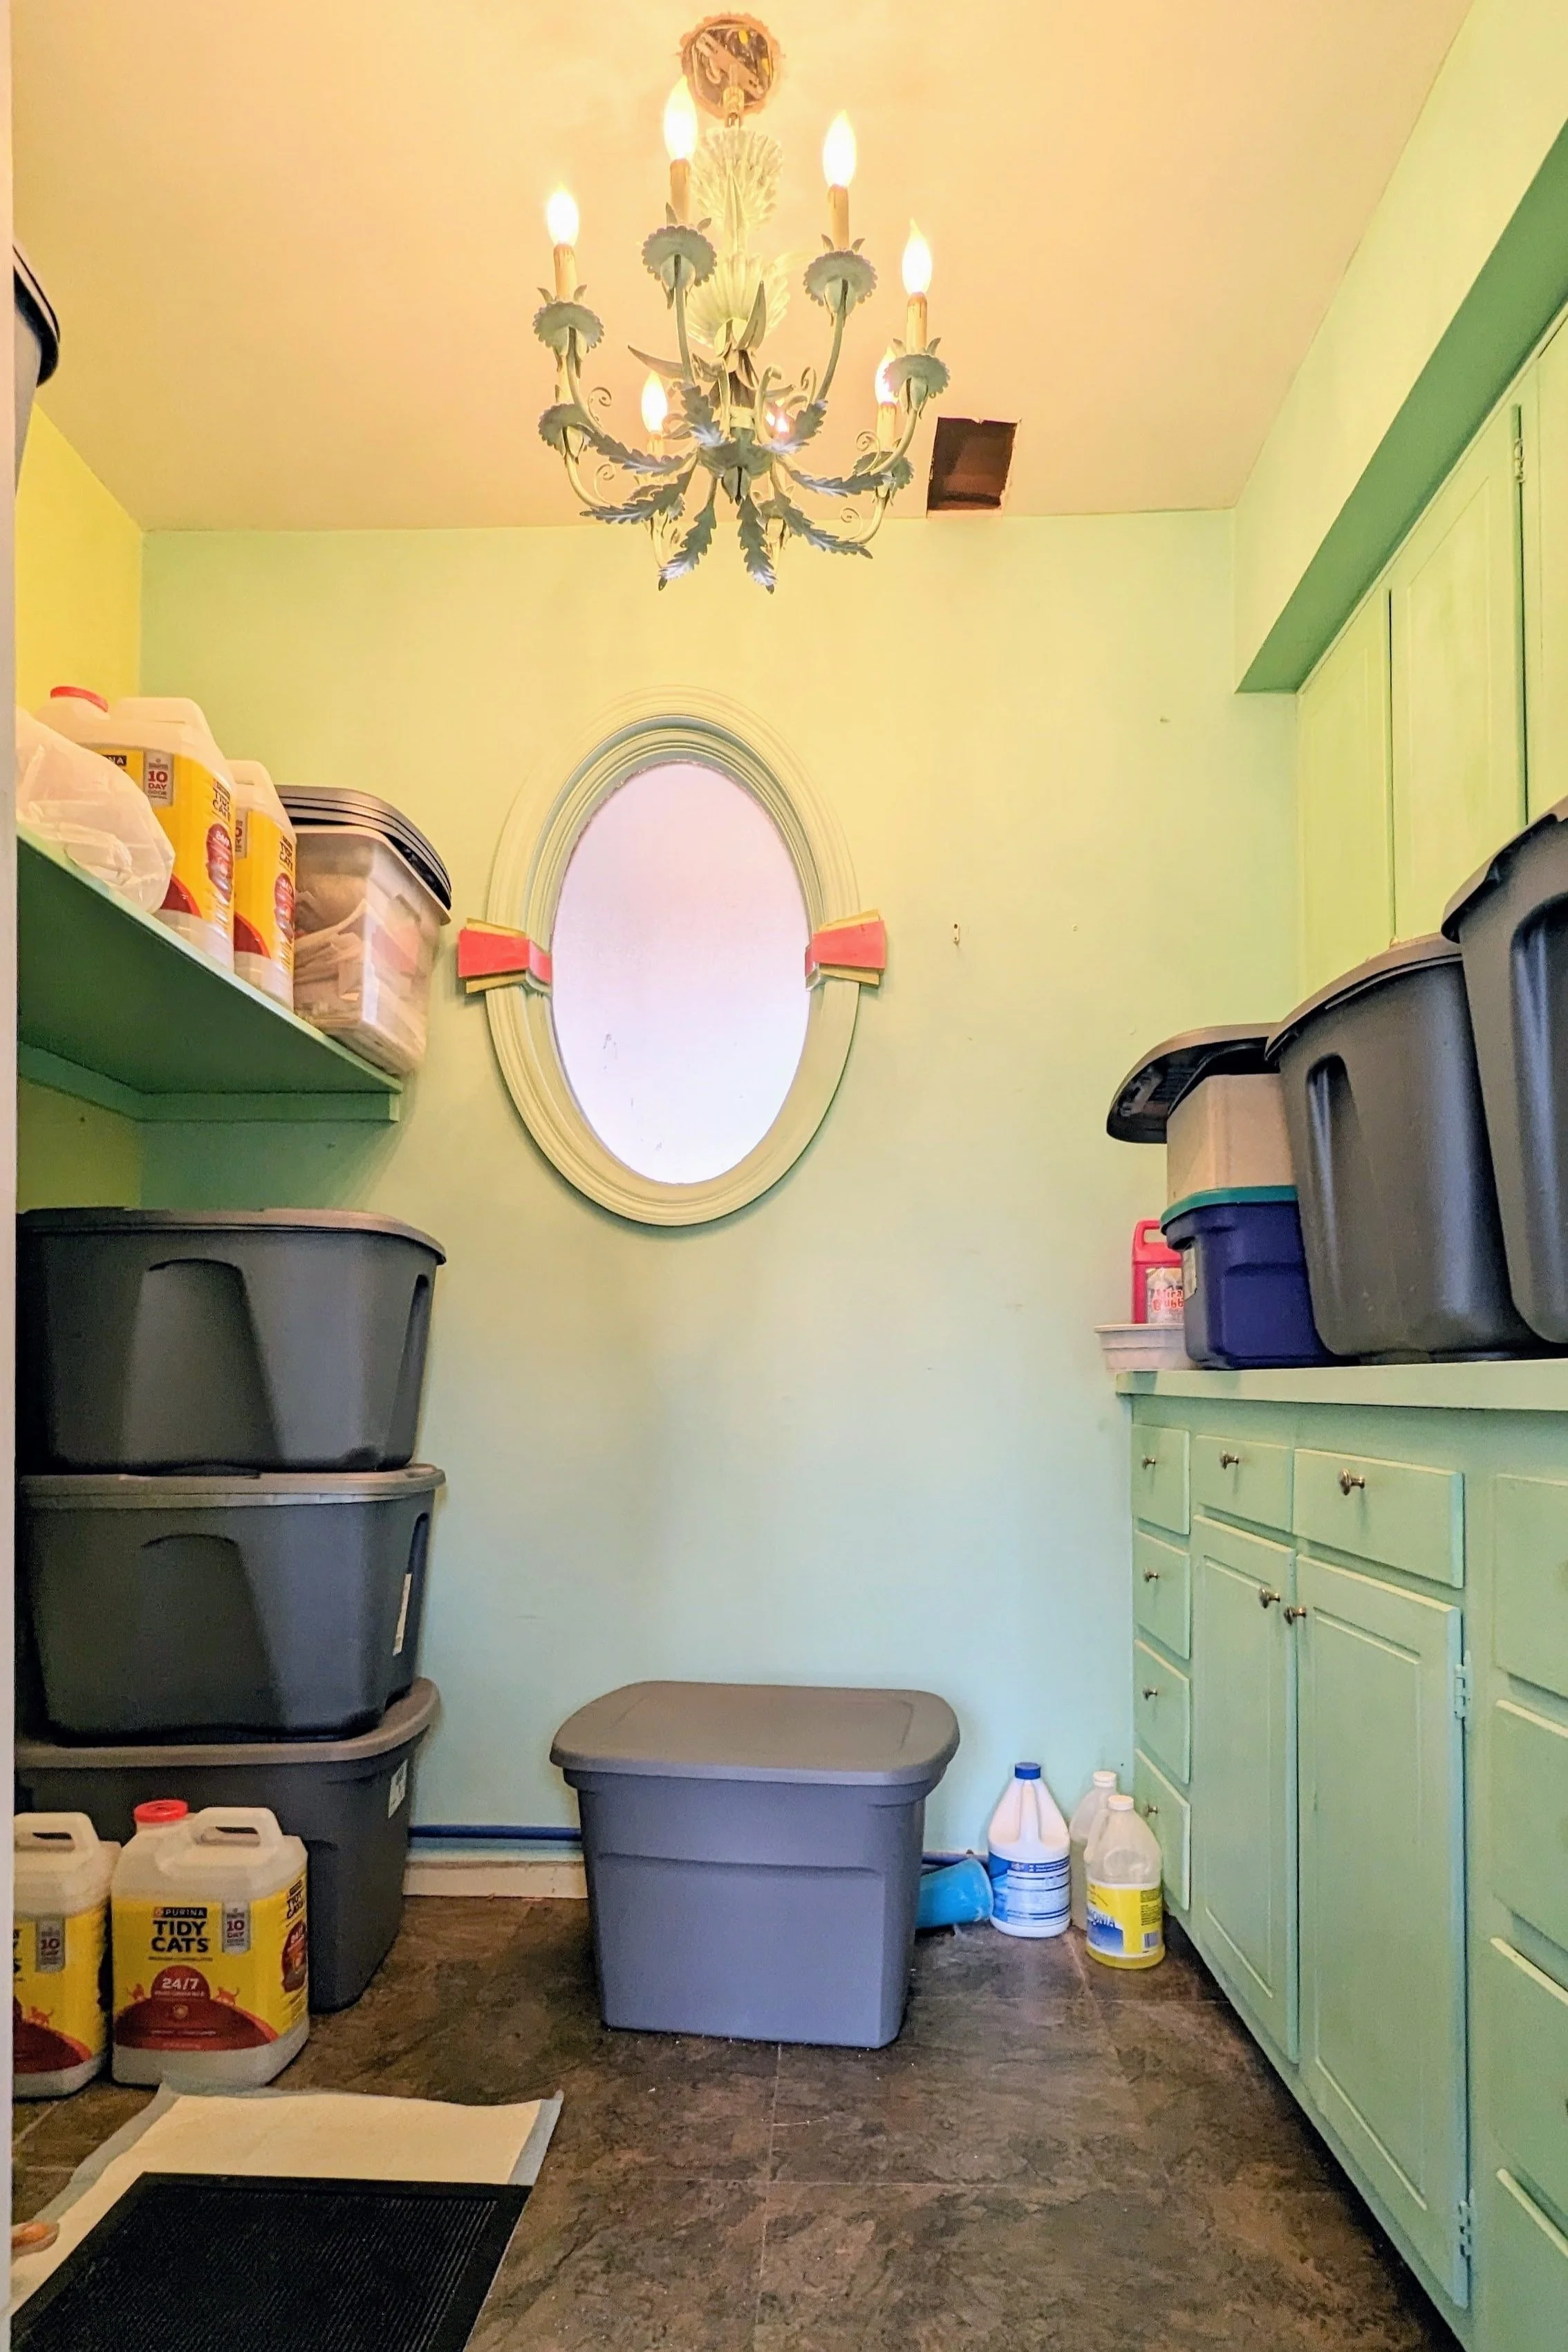
Before we moved our laundry room upstairs, it used to be its own room in the mudroom. However, since then, that room has become a poorly designed catch-all storage closet. This is the year I’d like to change that!
We don’t have an attic or a basement in our house, so a large, functional storage closet would go a long way. And this is the perfect room!
I would start by removing everything that’s currently in here, repairing drywall, repainting, and building/installing floor-to-ceiling shelving on both sides of the room.
Of course, I’m also trying to think of some way to insert an exciting design element into the space.
Final Thoughts
It’s hard to say whether my list is ambitious or not ambitious enough. Either way, I’m excited to jump in and start transforming these spaces. Keep following along to see how they turn out!


Surprise! I've Been Renovating the Playroom!
With the powder room renovation complete, you may be wondering what project is next on my list. And the answer isn’t necessarily what’s next. It’s what’s already been happening…
Built-in Bookshelf DIY
With the powder room renovation complete, you may be wondering what project is next on my list. And the answer isn’t necessarily what’s next. It’s what’s already been happening…

Last spring, while I was in the midst of helping out with the office renovation and cleaning out Charlie Foursquare, I decided it was the perfect time to also start work on our playroom! Admittedly, it wasn’t actually the ideal time to jump into another project. But, it was also a low-risk project that I could easily work on in the background at my own pace.
While I shared real-time updates on Instagram stories and the occasional update via Instagram reels, I never had the opportunity to write a blog post about it. So, for my blog audience… this post is for you. And we have a lot of catching up to do!
Where It Started
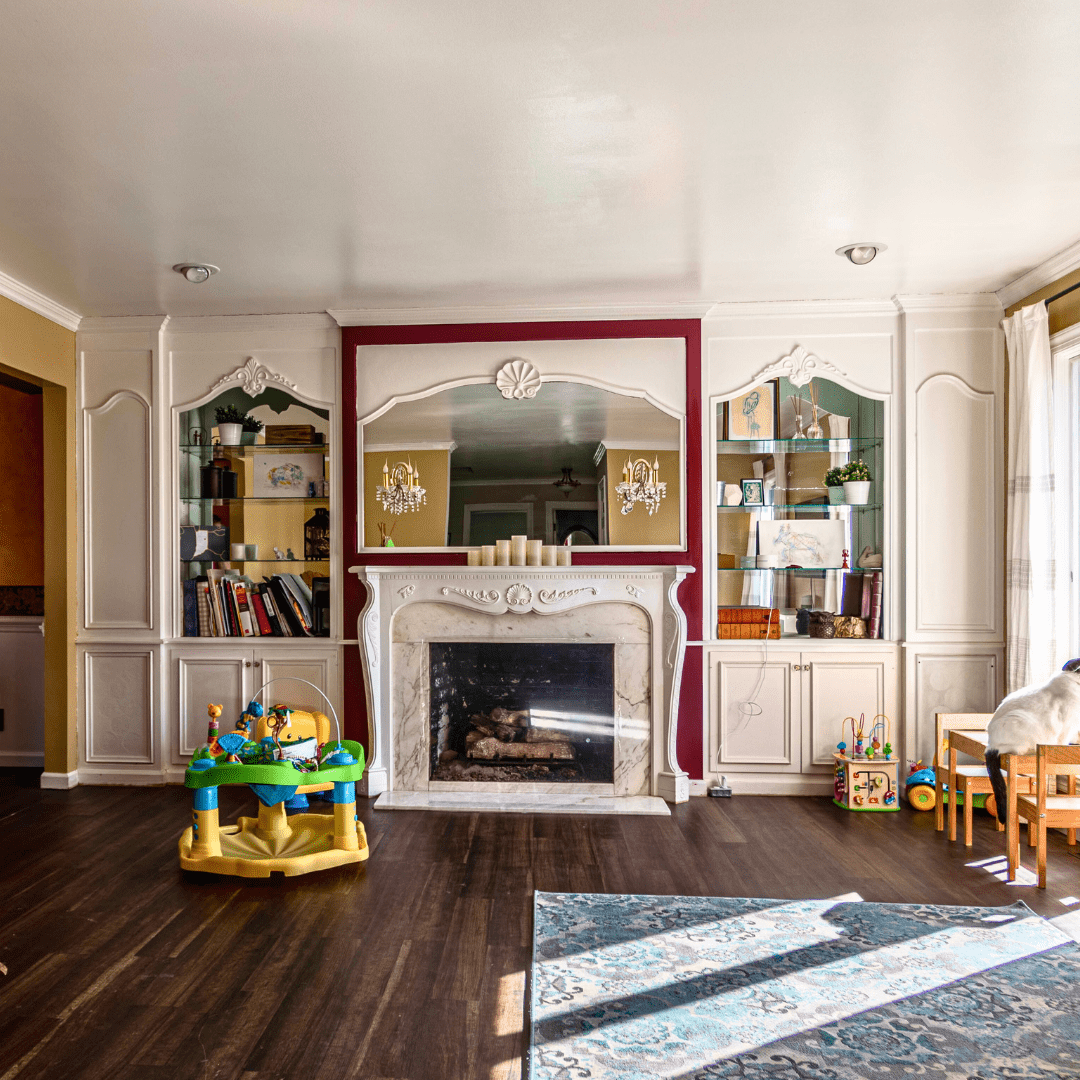
This was the playroom when we moved in. I think it’s actually intended to be a formal sitting room, but with young kids, using it as a playroom makes more sense.

Aside from swapping out the rug and some toys, we didn’t make any changes for the first 3.5 years we lived here. However, from the first time we stepped foot in our house, we knew we didn’t want to keep the built-ins as-is. For our taste, the mirrored backs, glass shelves, and swirly trim were way too ornate.
Inspiration for the Built-Ins
It didn’t take me long to start saving inspiration for the makeover of the focal point and main eyesore of this room: the built-ins. I quickly noticed a few similarities between my inspo pictures.
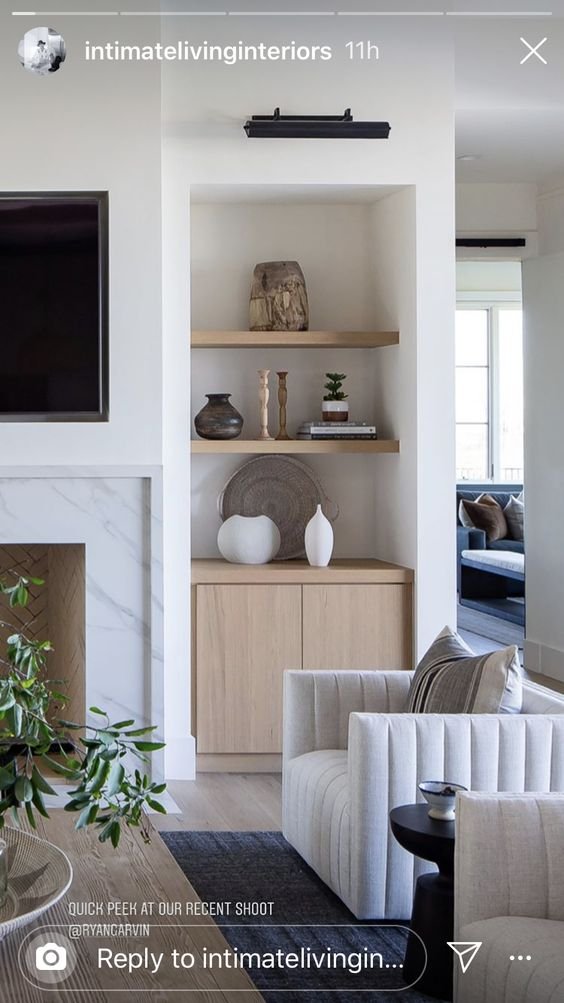
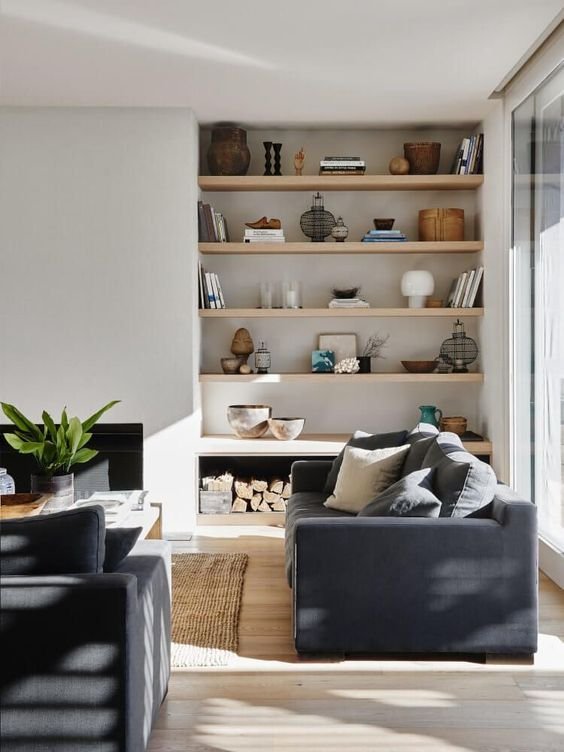
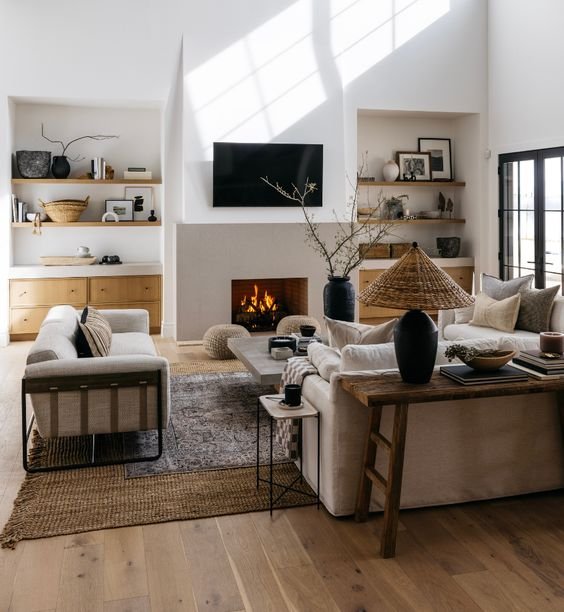
Okay… a LOT of similarities.
Although we’re currently using this space as a playroom, I didn’t want it to lean too childish for two reasons: 1) Eventually, our kids will grow up and probably start locking themselves in their rooms as they become moody teenagers. And 2) this room is open to the rest of the first floor, and I didn’t want it to stand out like a sore thumb.
Design Plans for the Built-ins
Once my design direction was clear, I picked the pieces that resonated most with me and sketched them to fit my space.
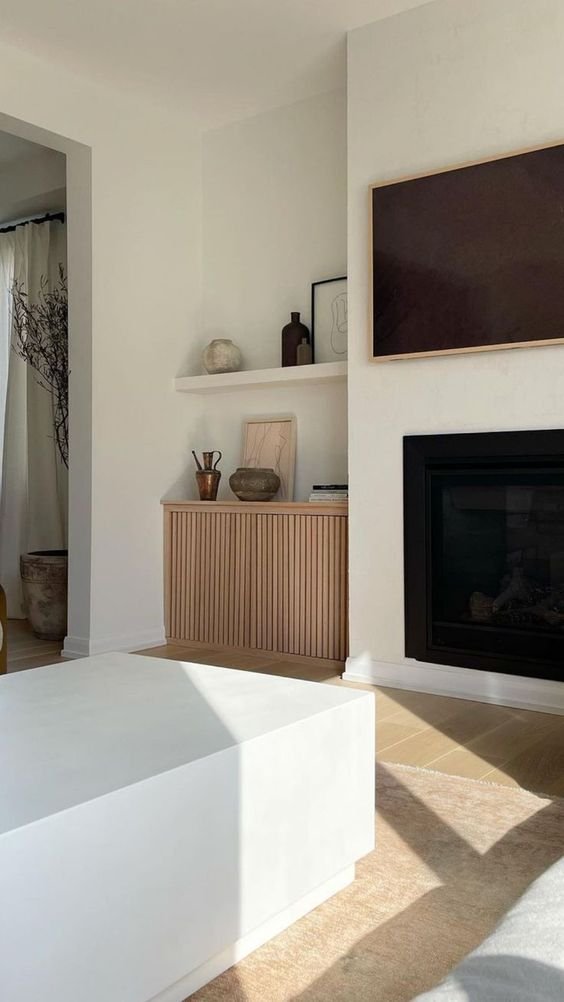
I was really drawn to the modern aspects of the inspiration pictures - like the squared-off edges on the built-ins and fireplace, as well as the slab doors of the cabinetry.

Because this is such an open room, I really loved the idea of painting it off-white so it can flow from one room to the next. I also like how the shadows in the architecture of the built-ins can play when everything is a lighter color.
You’ll notice all my inspiration pictures also have wood shelves and/or cabinetry. I loved the look but didn’t think I could make that happen since I planned to build my cabinets, and I was concerned with my woodworking skills. In the image below, I mocked up the room with taupe cabinetry instead.
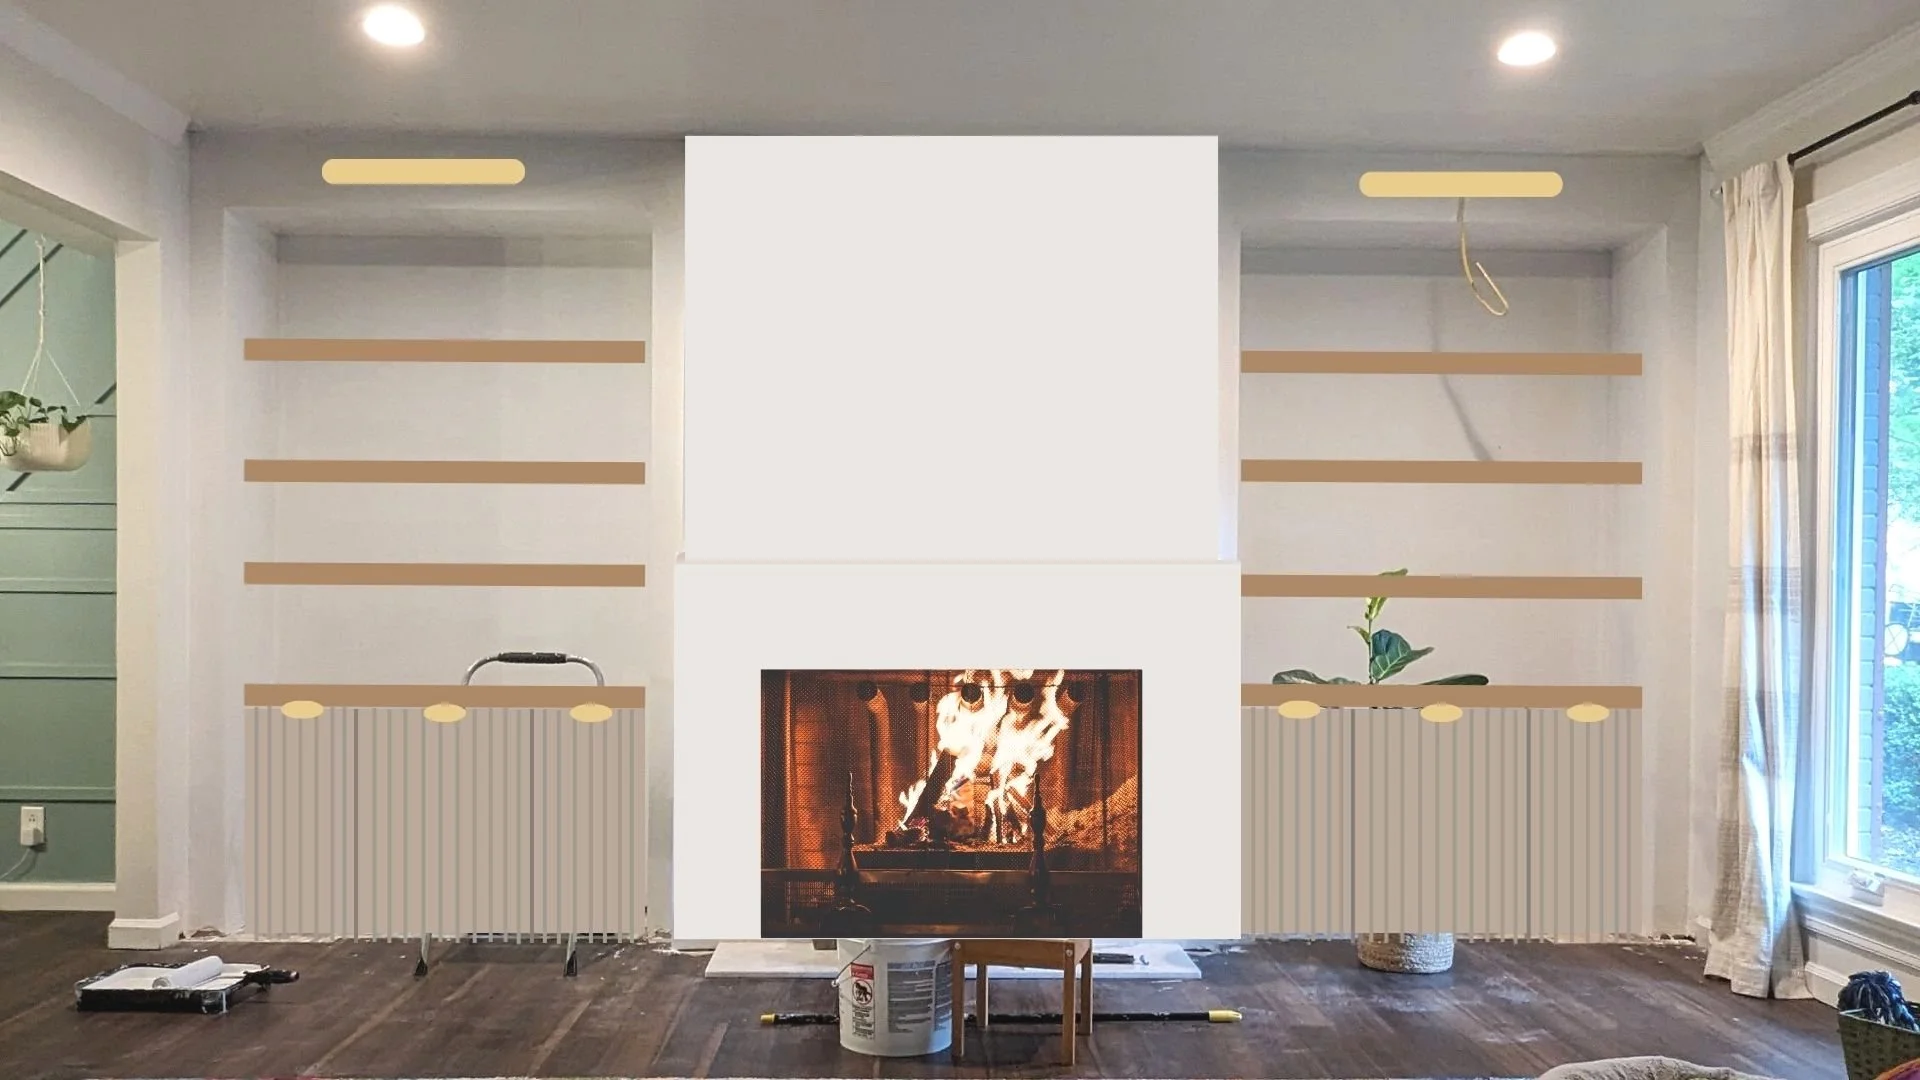
Scratching that Renovation Itch
Last spring, I just couldn’t take this “pocket of ugly” (how I like to refer to the unfinished spaces in our home) anymore. I tried doing a phase 1 update by painting the walls and modifying the built-ins, but that quickly spiraled into tearing them out completely.

I love learning, honing my skills, and looking for new ways to push myself, so I took on as much of this project myself as I could - including drywalling everything. It’s not perfect by any means, but I learned a ton, and it actually turned out pretty good.


Once the drywall was complete, I started building the cabinets. I must have gained some confidence along the way because I decided to keep them wood rather than paint them. I even created hinge pin holes so I can adjust the shelves!
Then, it was on to building the countertops out of a couple of pieces of thick red oak and building the doors out of red oak plywood.
In one of the inspiration pictures, the cabinet doors are fluted. I absolutely fell in love with them. So, I figured out a way to cost-effectively recreate that look (find the tutorial here!). Lastly, I built floating shelves for each side.
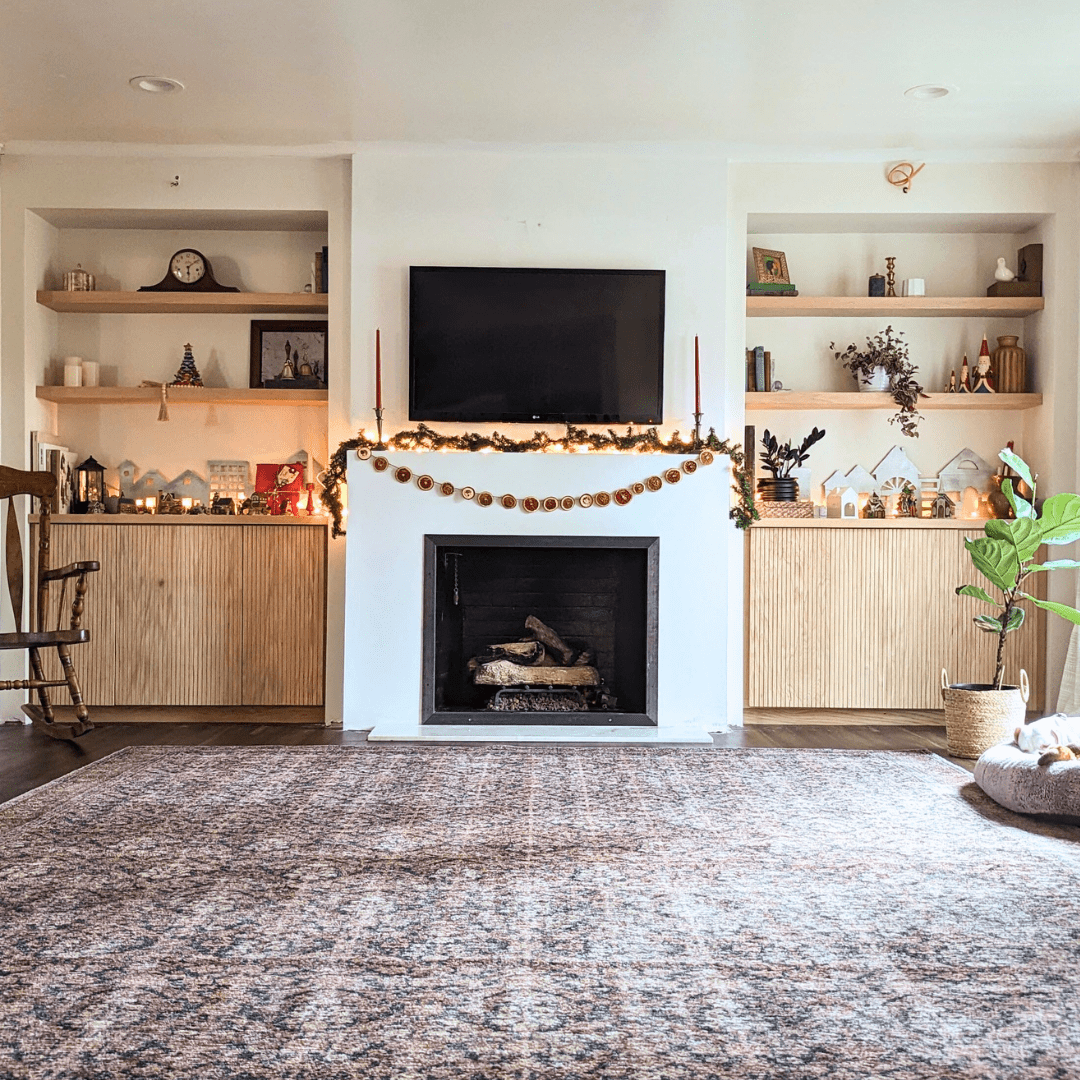
And here we are!

Final Thoughts
I love the decorations in this room right now (check out how I made the garland here!), so I’m waiting until after Christmas to resume this project, but I’m so excited!

For the built-ins alone I still need to fill all the nail holes, stain, and seal them. As for the rest of the room… I have plans. But you’ll have to stay tuned to see what else I have up my sleeve!
Make sure to follow along on Instagram to catch all my real-time project updates!

Looking for more? Check out these project reveals!
Family Room Makeover
Half-Bathroom Budget Breakdown
Wanna know how much it really cost to completely renovate my half-bathroom? Find it here with an itemized breakdown!
My Tips for Renovating on a Budget
Wanna know how much it really cost to completely renovate my half-bathroom? Find it here with an itemized breakdown!

Budgets are so subjective. What may seem super expensive to one person could be nothing to the next person. In fact, a quick Google search varies in estimates for a half-bath remodel from $2,500 all the way up to $15,000! That's a pretty gigantic range.
I’m an insanely budget-conscious person. Truth be told, I’m actually kind of terrible at spending money. So, naturally, I aimed to renovate my bathroom on the absolute lowest end of the range without sacrificing the overall style I wanted.
My goal was to renovate this bathroom for $2,000. Do you think I stuck to my budget?
As an Amazon Associate, and partner with other brands, I earn from qualifying purchases. This post may contain affiliate links, meaning I receive commissions for purchases made through those links at no cost to you.
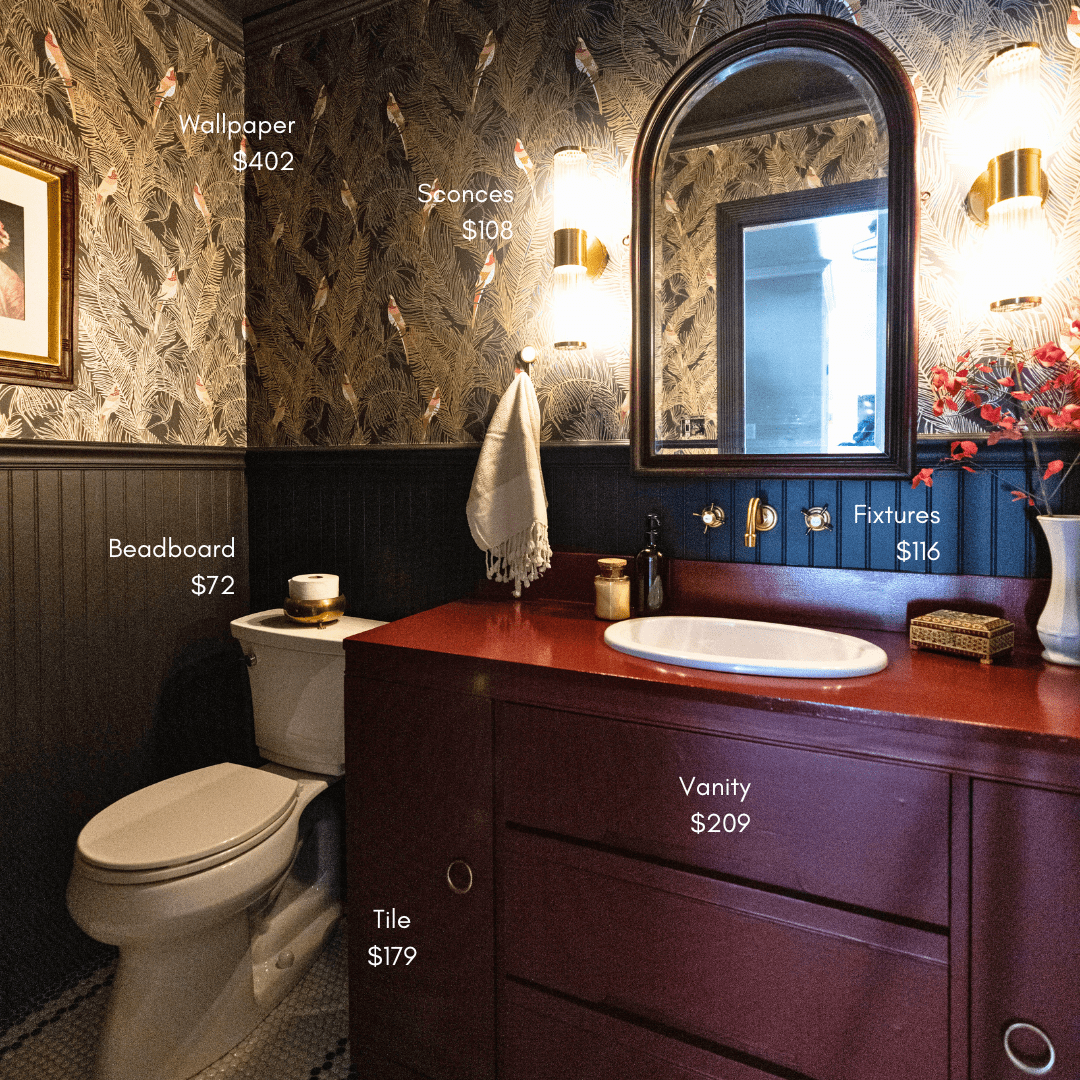
Itemized Half-Bath Cost Breakdown

- Drywall: $21.96
- Misc Materials (Spackle, Adhesive, etc): $45.46
- Black & White Penny Tile: $178.46
- Grout & Sponges: $46.95
- Schluter Edging: $18.99
- Thinset: $26.98
- Beadboard: $71.97
- Wall/Trim Paint: $52.94
- Console Table (aka Vanity) & Backsplash: $104.62
- Vanity Paint/Sealer: $78.87
- Vanity Hinges: $25.17
- Sink: $110.85
- Faucet: $115.99
- Plumbing: $43.39
- Misc (Decor, Toilet Paper Holder, Trash Can): $32.21
- Electrical: $93.40
- Door: $112.35
- Door Trim: $74.95

- Door Hinges/Stop/Knob: $46.23
- Toilet: $179.00
- Wallpaper: $402.00
- Wallpaper Smoother: $1.99
- Wallpaper Paste: $24.98
- Wallpaper Primer: $29.98
- Baseboard: $31.52
- Chair Rail: $34.16
- Crown Molding: $44.97
- Sconces: $107.58
- 7% Tax: $149.52
- Total: $2,285.48
Okay, so I didn’t quite hit my goal of keeping my half-bathroom renovation to $2,000. But, considering I replaced everything in this bathroom aside from a few sheets of drywall, I’d say I came pretty darn close!
Here’s how I renovated my bathroom for less than $2,500:

DIY vs. Hired Labor
Bottom line, the biggest reason I was able to keep my budget so low with this renovation is because I didn’t hire out any of the labor. The labor alone for this renovation would have likely blown my budget before I got started. Lucky for me, I really enjoy DIY, so doing it all myself didn’t feel like a chore in the least!
I Didn’t Buy Any New Tools
If you notice, in the budget breakdown, I didn’t include the cost of any tools. That’s because I already owned most of the tools I needed. And I borrowed the few tools I didn’t have from a friend.
I realize this isn’t a reality for everyone. Buying new tools would definitely increase your project cost. However, keep in mind that once you buy a tool, you get to use it over and over again on future projects!
Related: 10 Best Tools for DIY Beginners
Compare Prices

Whenever I’m sourcing items for a room, I spend an excessive amount of time looking for the best deals without sacrificing quality. The penny tile in this room is the perfect example.
It was really tricky to find a resource that sold both black and white penny tile at a reasonable price (black penny tile was surprisingly hard to track down!) I was close to buying mine from Tile Bar because they sell both colors for a fair price, but the shipping added 1/3 of the cost!
I found tiles at Floor and Decor, but I was nervous about how they’d look next to each other since they were from different brands. Luckily, I had a chance to stop by a store to see them side-by-side, and they looked great together.
Know When to Splurge and When to Save
I knew wallpaper would be a huge part of my bathroom design. But I also know that wallpaper can get really expensive really fast.

Although I definitely splurged by using wallpaper in my bathroom (it was over $400 for just the wallpaper), I saved a lot of money by installing beadboard on the bottom half of the room. Not only is beadboard really inexpensive (only $72 for all the sheets I needed), but it adds so much character!
Buy Secondhand
Buying secondhand items is not only a great way to add character to a space, but it is also a big cost-saver. The mirror and almost all of the decor are secondhand, but the biggest secondhand item in this bathroom is the vanity.
While I sacrificed a stone top for the vanity (which would have significantly added to the cost), a few coats of Polycrylic easily made the top waterproof. In addition, I never would have been able to find a store-bought vanity in the color I wanted, and I know I would’ve been hesitant to paint something new.
Final Thoughts
It’s easy to watch people transform their homes in what looks like an instant (hello, Instagram transitions) and with infinite funds. I hope this blog post, as well as following along during this entire renovation, helps give you insight into some of the behind-the-scenes work that makes these projects possible.
Don’t forget to save this post to reference during your next renovation!


Catch up on the full powder room renovation with the posts below!
How I Remodeled My Bathroom for Less Than $2500

Gift Guides for the Whole Family
Sometimes gift ideas come easily. Sometimes I remember to write them down throughout the year to refer back to right about now. But, to be honest, most of the time I need a little help. If you’re anything like me, gift guides are the perfect cheat sheet for getting your wheels turning, so I’m sharing what I came up with this year. Enjoy!
Gift Guides for Him, Her, and The Kids
Sometimes gift ideas come easily. Sometimes I remember to write them down throughout the year to refer back to right about now. But, to be honest, most of the time, I need a little help. If you’re anything like me, gift guides are the perfect cheat sheet for getting your wheels turning, so I’m sharing what I came up with this year. Enjoy!

As an Amazon Associate, and partner with other brands, I earn from qualifying purchases. This post may contain affiliate links, meaning I receive commissions for purchases made through those links at no cost to you.
Gifts for Her

- Travel Jewelry Organizer Box | $19.98 For years, I've dealt with tangled jewelry while traveling. It seriously never occurred to me to just get a travel jewelry box - until now! This one gets bonus points for being beautiful!
- Clinique Skincare and Makeup Set | $52.50 I may be in my mid-30s, but I’m still overwhelmed by the amount of skincare products on the market. This skincare and makeup set would be perfect to introduce someone like me to a limited amount of products to get their feet (or face) wet.
- Roomba Self-Emptying Vacuum and Mop | $349 I’ll be the first to admit that I have a love/hate relationship with my Roomba (aka Rhonda). But with all her faults (she LOVES to get stuck under our buffet table), I love knowing that she's handling the day-to-day upkeep, so I don't have to.
- Laser Hair Remover | $79.78 Let's face it. We're all getting older, and hair is popping up where we'd prefer it didn't (hello, rogue chin hair). Get rid of it for good with a laser hair remover!
- Candle Warmer | $29.98 I’m cheap, so when this candle warmer started popping up everywhere, I thought I didn’t need it. I bought a boring old-school candle warmer instead, and I’m regretting it for sure. This is just so cute!
- Disco Ball Planter | $17.93 If I don’t get one of these disco ball planters from Santa this year, I’ll definitely be buying one (or more) for myself. I mean, plants and disco balls? What more could you ask for!?
- Faux Fur Blanket | $33.75 (price varies by size) My husband is over 6 feet tall and hates how tiny throw blankets are. I bought him this blanket in the king size, and he carries it around with him like a child. The only problem? It’s so cozy, I want one for myself!
- Digital Picture Frame | $119.99 Every year, I go through my pictures and pick out my favorites to print, but they never seem to end up in a photo album. This would be the perfect gift to make sure those pictures actually get seen and don’t end up in the bottom of a box forever (whoops).
- Grande Cosmetics Five-Star Favorites | $69 I started using Grande Lash MD about a year ago and am amazed at how long my lashes have gotten. I’m eager to try some of their other products! This would be the perfect gift for someone who's still figuring out what products they do and don't like!
Gifts for Him

- Beard Grooming Kit | $17.98 It’s getting colder, and for many men, that signals time to grow out their beards (no-shave November, anyone?) Make sure your guy doesn’t look like a mountain man with this complete beard grooming kit.
- Cocktail Infusion Kit | $85 I love a fun cocktail. This cocktail infusion kit has 7 different infusion blends and makes it easy to craft delicious cocktails right at home.
- Heated Stadium Seat | $119.97 If you’ve ever been to an event where the weather was less than warm, you know it can really bring down the vibe. This heated stadium seat is sure to make your seat the coziest in the crowd!
- Multi-Device Charging Station | $27.99 I don’t understand how men can have so many electronics, but somehow they do. A multi-device charging station is the perfect solution for keeping everything organized and in its place when not in use.
- Popcorn Seasoning Variety Pack | $53.08 My husband is obsessed with popcorn. In fact, last year I bought him this popcorn maker. What could be better with popcorn than a bunch of fun seasonings?
- Men’s Skincare Kit | $56 I recently went on a girl's trip. By the time I got back, my husband had gone down a TikTok rabbit hole about male skincare. But, like me, he's overwhelmed by the amount of products on the market. A kit like this would be perfect for a skincare novice!
- Racing Simulator | $248.99 We recently bought one of these and then shortly after hosted a party. Holy smokes was this a hit! There was a line awaiting their turn for the entire party. And when we don’t have guests? I can always find my husband racing his little heart away.
- Smokeless Firepit | $199.99 Love bonfires but hate being blasted in the face by smoke? Then this smokeless firepit (which is also PORTABLE, btw) is for you!
- Rocketbook Reusable Planner and Notebook | $22.53 Elevate his note-taking game with the Rocketbook Reusable Notebook and Planner – the perfect gift for the modern man who values both innovation and organization! This sleek, eco-friendly notebook lets him effortlessly transition between the tactile joy of writing and the digital convenience of syncing notes with a simple scan.
Gifts for Kids

- Uno Attack | $24.99 My seven-year-old recently learned how to play Uno and is begging for the classic game. I can’t wait to surprise her with this version that adds a little oomph by spitting out additional cards when you least expect it.
- There’s a Monster In Your Book | $11.59 & Stick Dog | $8.99 Books are ALWAYS on my gift list for my kids. We already have these books, but they’re such a big hit with my kids (4 and 7) I wanted to share them with you!
- Acrylic Paint Set | $25.99 My older daughter is always asking to use my (ahem, expensive) paints. This complete paint set is the perfect gift to encourage that creativity without breaking the bank.
- Origami Paper & Guidebook | $10.99 Speaking of crafty kids, I’m sure both of mine will get a kick out of this origami kit. It’s filled with tons of cute patterns and a book to show you exactly how to fold them.
- Custom Neon Sign | starting at $52.98 What kid wouldn’t feel like a star with their name in lights? Now they can with this customizable sign!
- Slushy Maker Cup | $11.99 If your kids are anything like mine, they’re convinced that everything tastes better as a slushy. I can’t wait for them to give themselves brain freezes nonstop with this cup that turns any liquid into a slushy!
- Toniebox | $69.99 I’ll be honest, I don’t exactly understand the appeal of a Toniebox, but my 4-year-old is obsessed with the one at her friend’s house. Maybe Santa will be bringing her one this year?
- Nintendo Switch & Mario Kart Bundle | $299 Yes, this gift is a little more on the expensive side, but it's seriously fun for the whole family. Not only do my kids like playing on their Switch independently, but we also have a blast hooking it up to the TV for some epic Mario Kart battles.
- Scooter | $40.12 Let your kid roll into the new year and impress their friends on some sweet new wheels with a scooter!
Happy Holidays!

Need more ideas? Check out last year’s gift guides!
Last-Minute Present Ideas
Powder Room Remodel Reveal
Looking for a dramatic before and after reveal? Then you’re in the right place! Dive into this post to see how I took my powder room from boring and outdated to dramatic and sophisticated.
Dark, Moody, and Oh-So-Dramatic Half-Bathroom Makeover
Looking for a dramatic before and after reveal? Then you’re in the right place! Dive into this post to see how I took my powder room from boring and outdated to dramatic and sophisticated.

It’s here! It’s here! We’ve reached the end of the One Room Challenge, and I’m TIRED, but so happy!

I completely forgot how much work it is to gut and put an entire room back together over an 8-week period. I guess after last year’s reveal, the memories of stressing over each week’s deadline and all the long nights working faded away almost immediately. It just feels so dang good when I get to share the finished product!
Of course, before we get into the reveal of this space, let’s take a look at the room before I got my hands on it.
As an Amazon Associate and partner with other brands, I earn from qualifying purchases. This post may contain affiliate links, meaning I receive commissions for purchases made through those links at no cost to you.
The Powder Room Before

There was literally nothing in this room that I wanted to keep. From the crown molding down to the dated tile - it all had to go. So I got rid of EVERYTHING and turned it into…
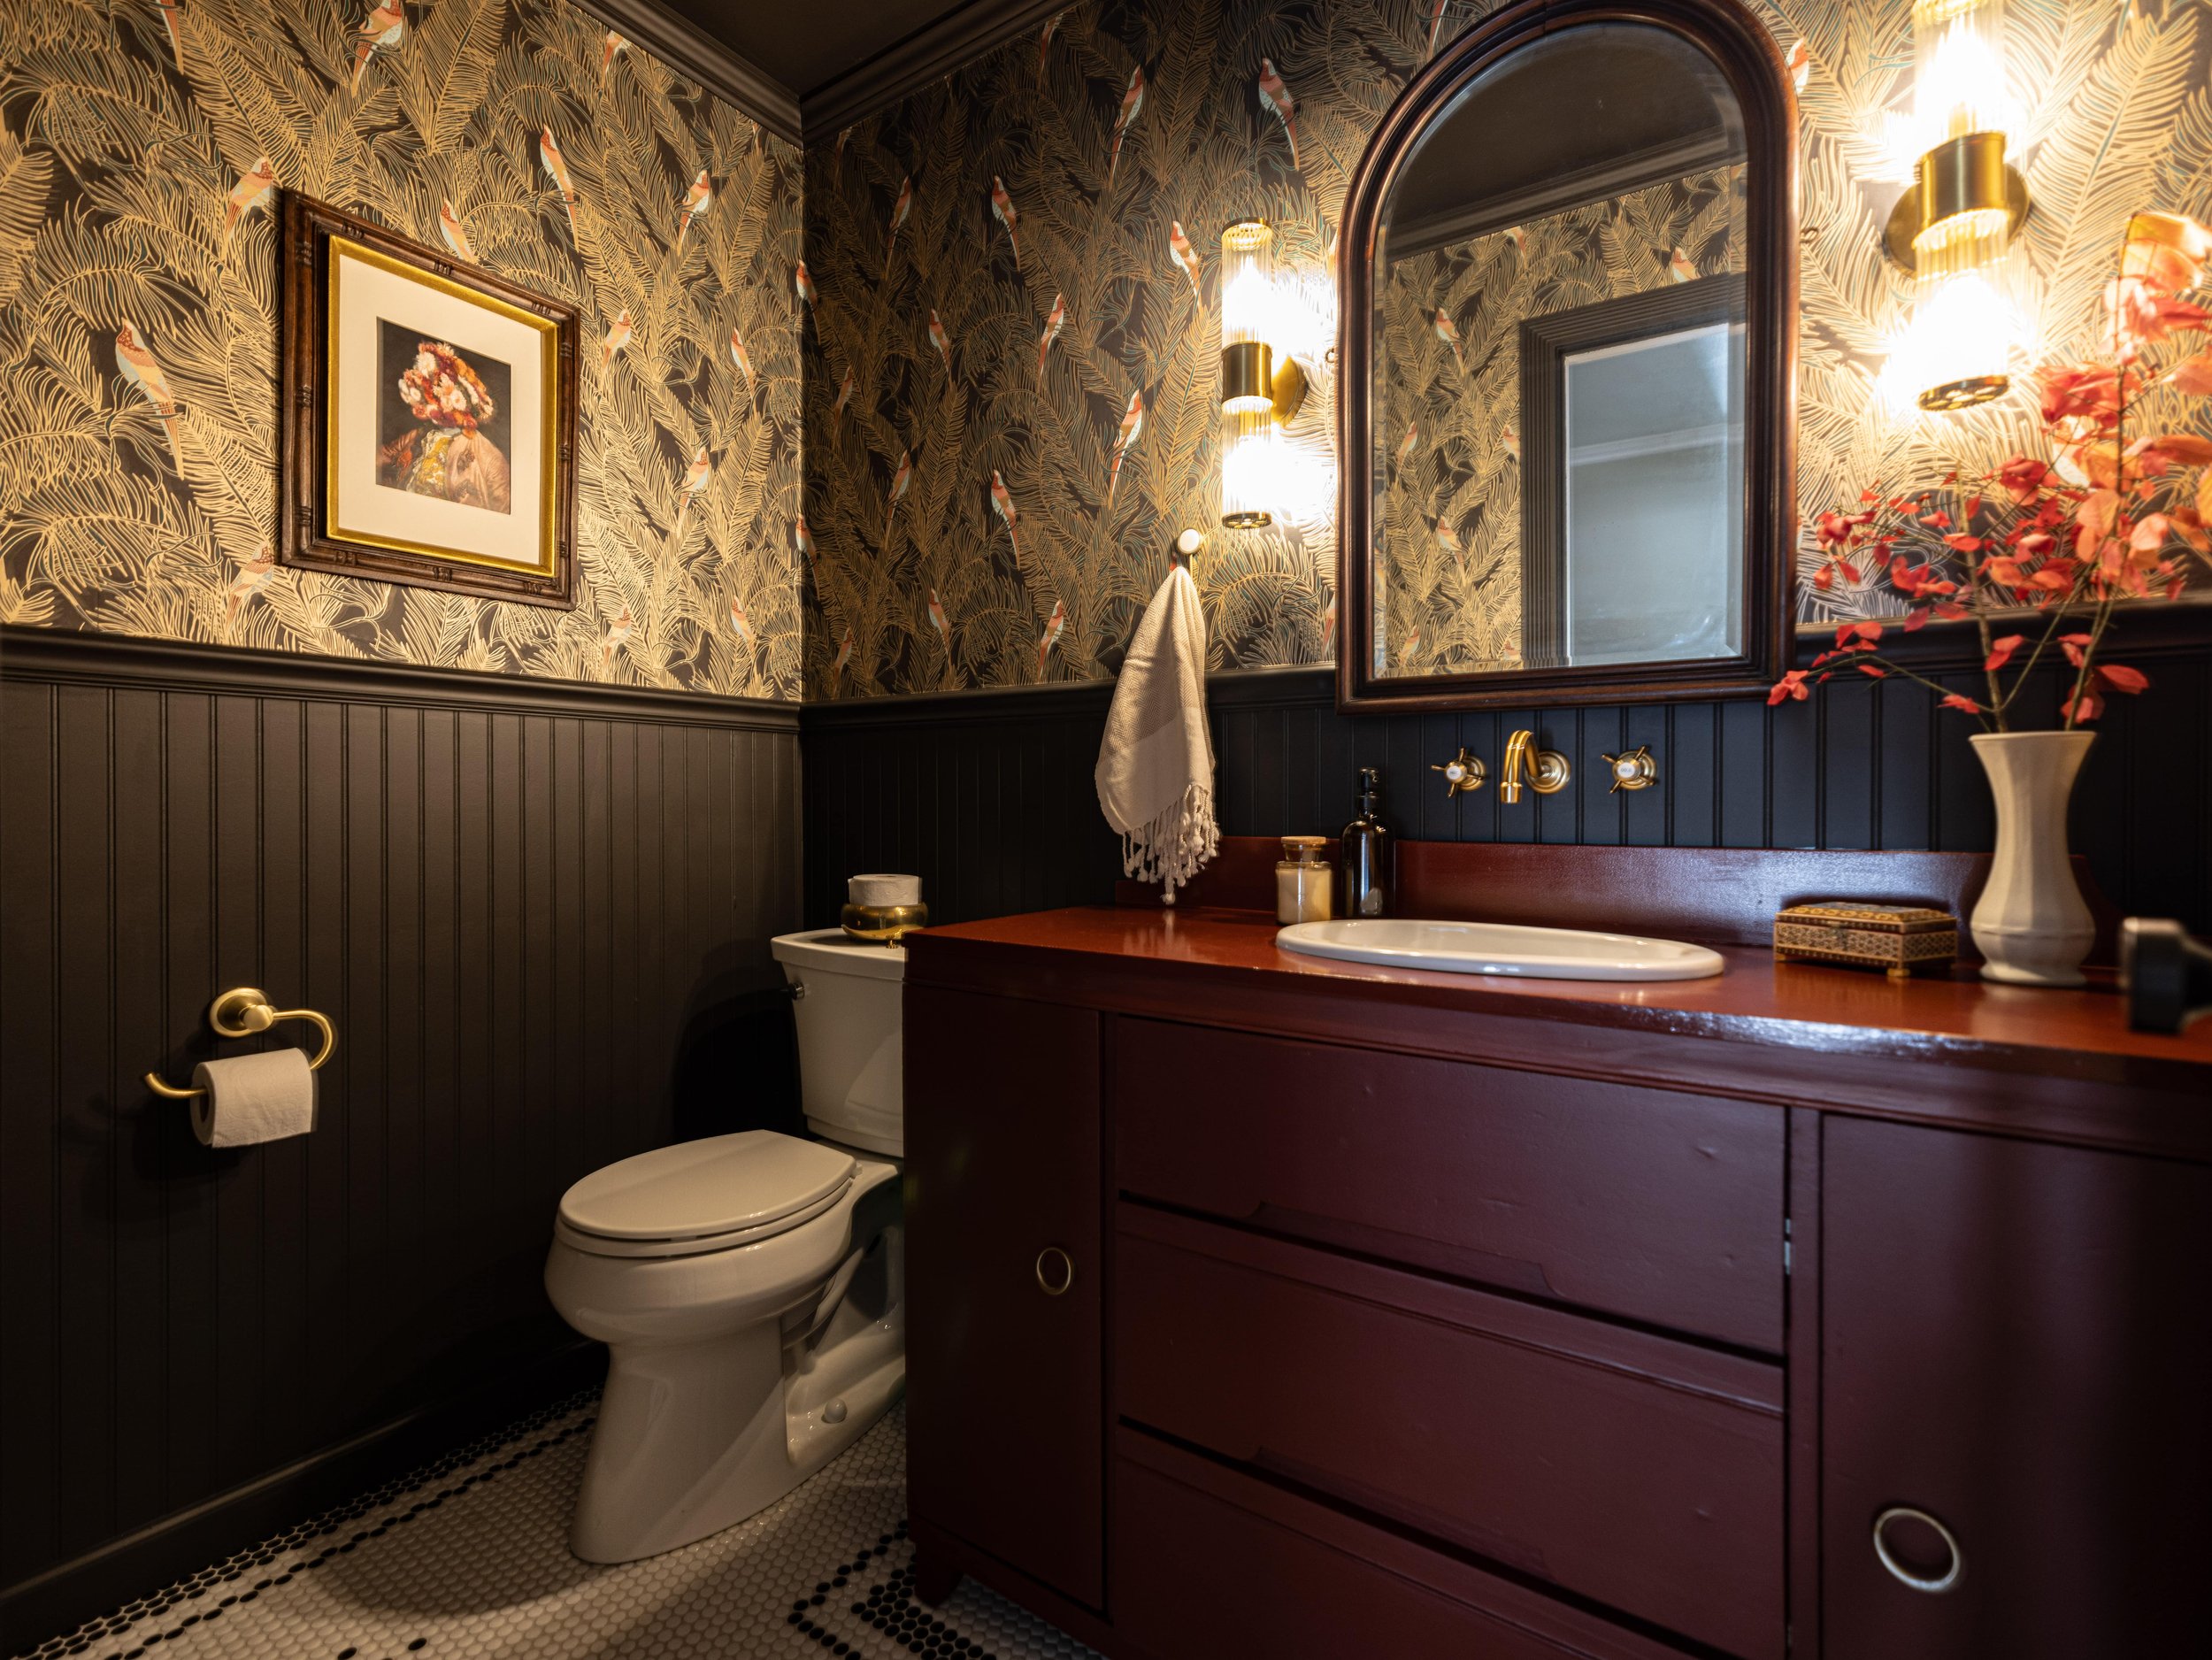
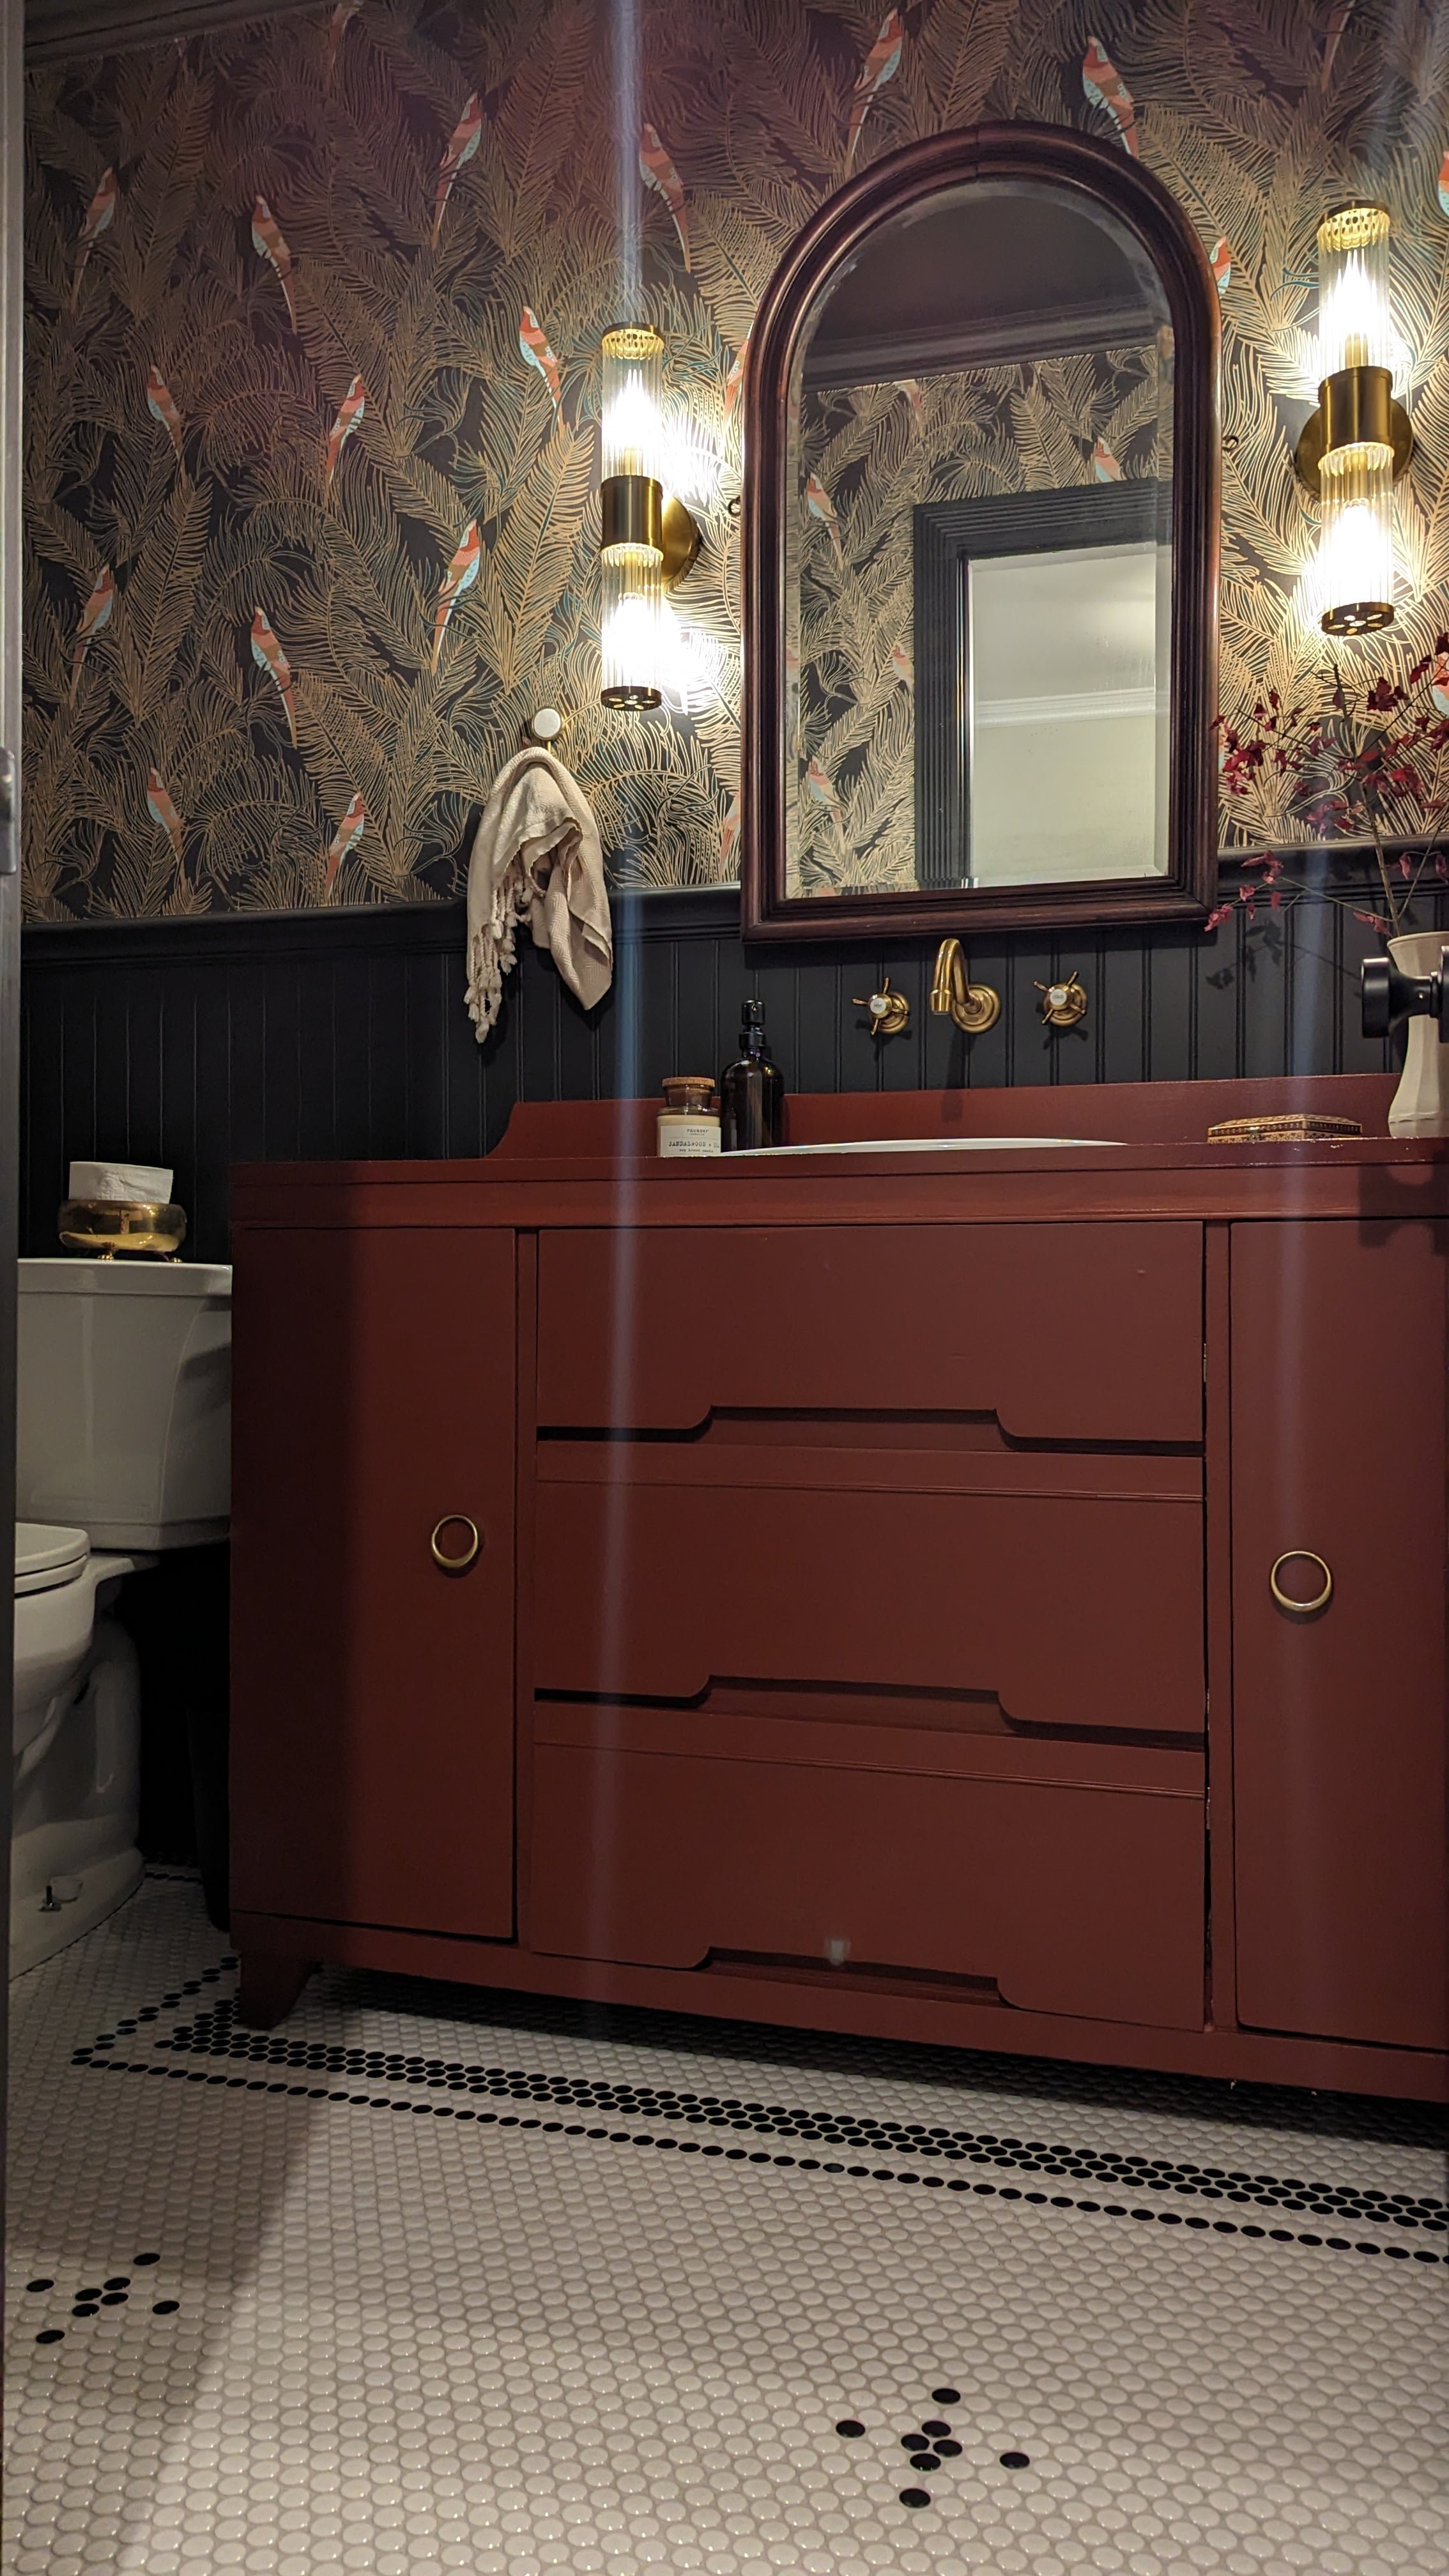
The Powder Room After
…this.

She’s dark. She’s moody. She’s oh-so-dramatic. And I’m in love!
It took a lot of work to get here, but I couldn’t be more proud of this space. This was the first time I’ve ever let myself stop worrying about the resale value of our house and let my creativity reign supreme. I think it paid off in the best way.
Now let’s get into the details because I can’t wait to show you around!
*Quick FYI - I linked as much as I could below each picture, but some items are vintage, thrifted, or no longer sold. Anything with an asterisk indicates the link is for a similar item.
Paint It Black
Most people assume that a small room should be painted a light color to make it feel larger, but I vehemently disagree. While this room is large for a half-bathroom, it’s still a small space (less than 5x7 feet). So what did I do?
I painted it black!

The key to painting small rooms a dark color is eliminating harsh color transitions. By painting the beadboard, door, trim, and ceiling all the same color your eye doesn’t notice the break between, for example, a dark wall and white ceiling. Instead, it all blends together and actually makes the room look and feel larger.
For this room, I chose Onyx by Pittsburgh Paints. I love that it’s a softer shade of black with some brown undertones, which pair perfectly with the wallpaper.
Add Eye-Catching Wallpaper
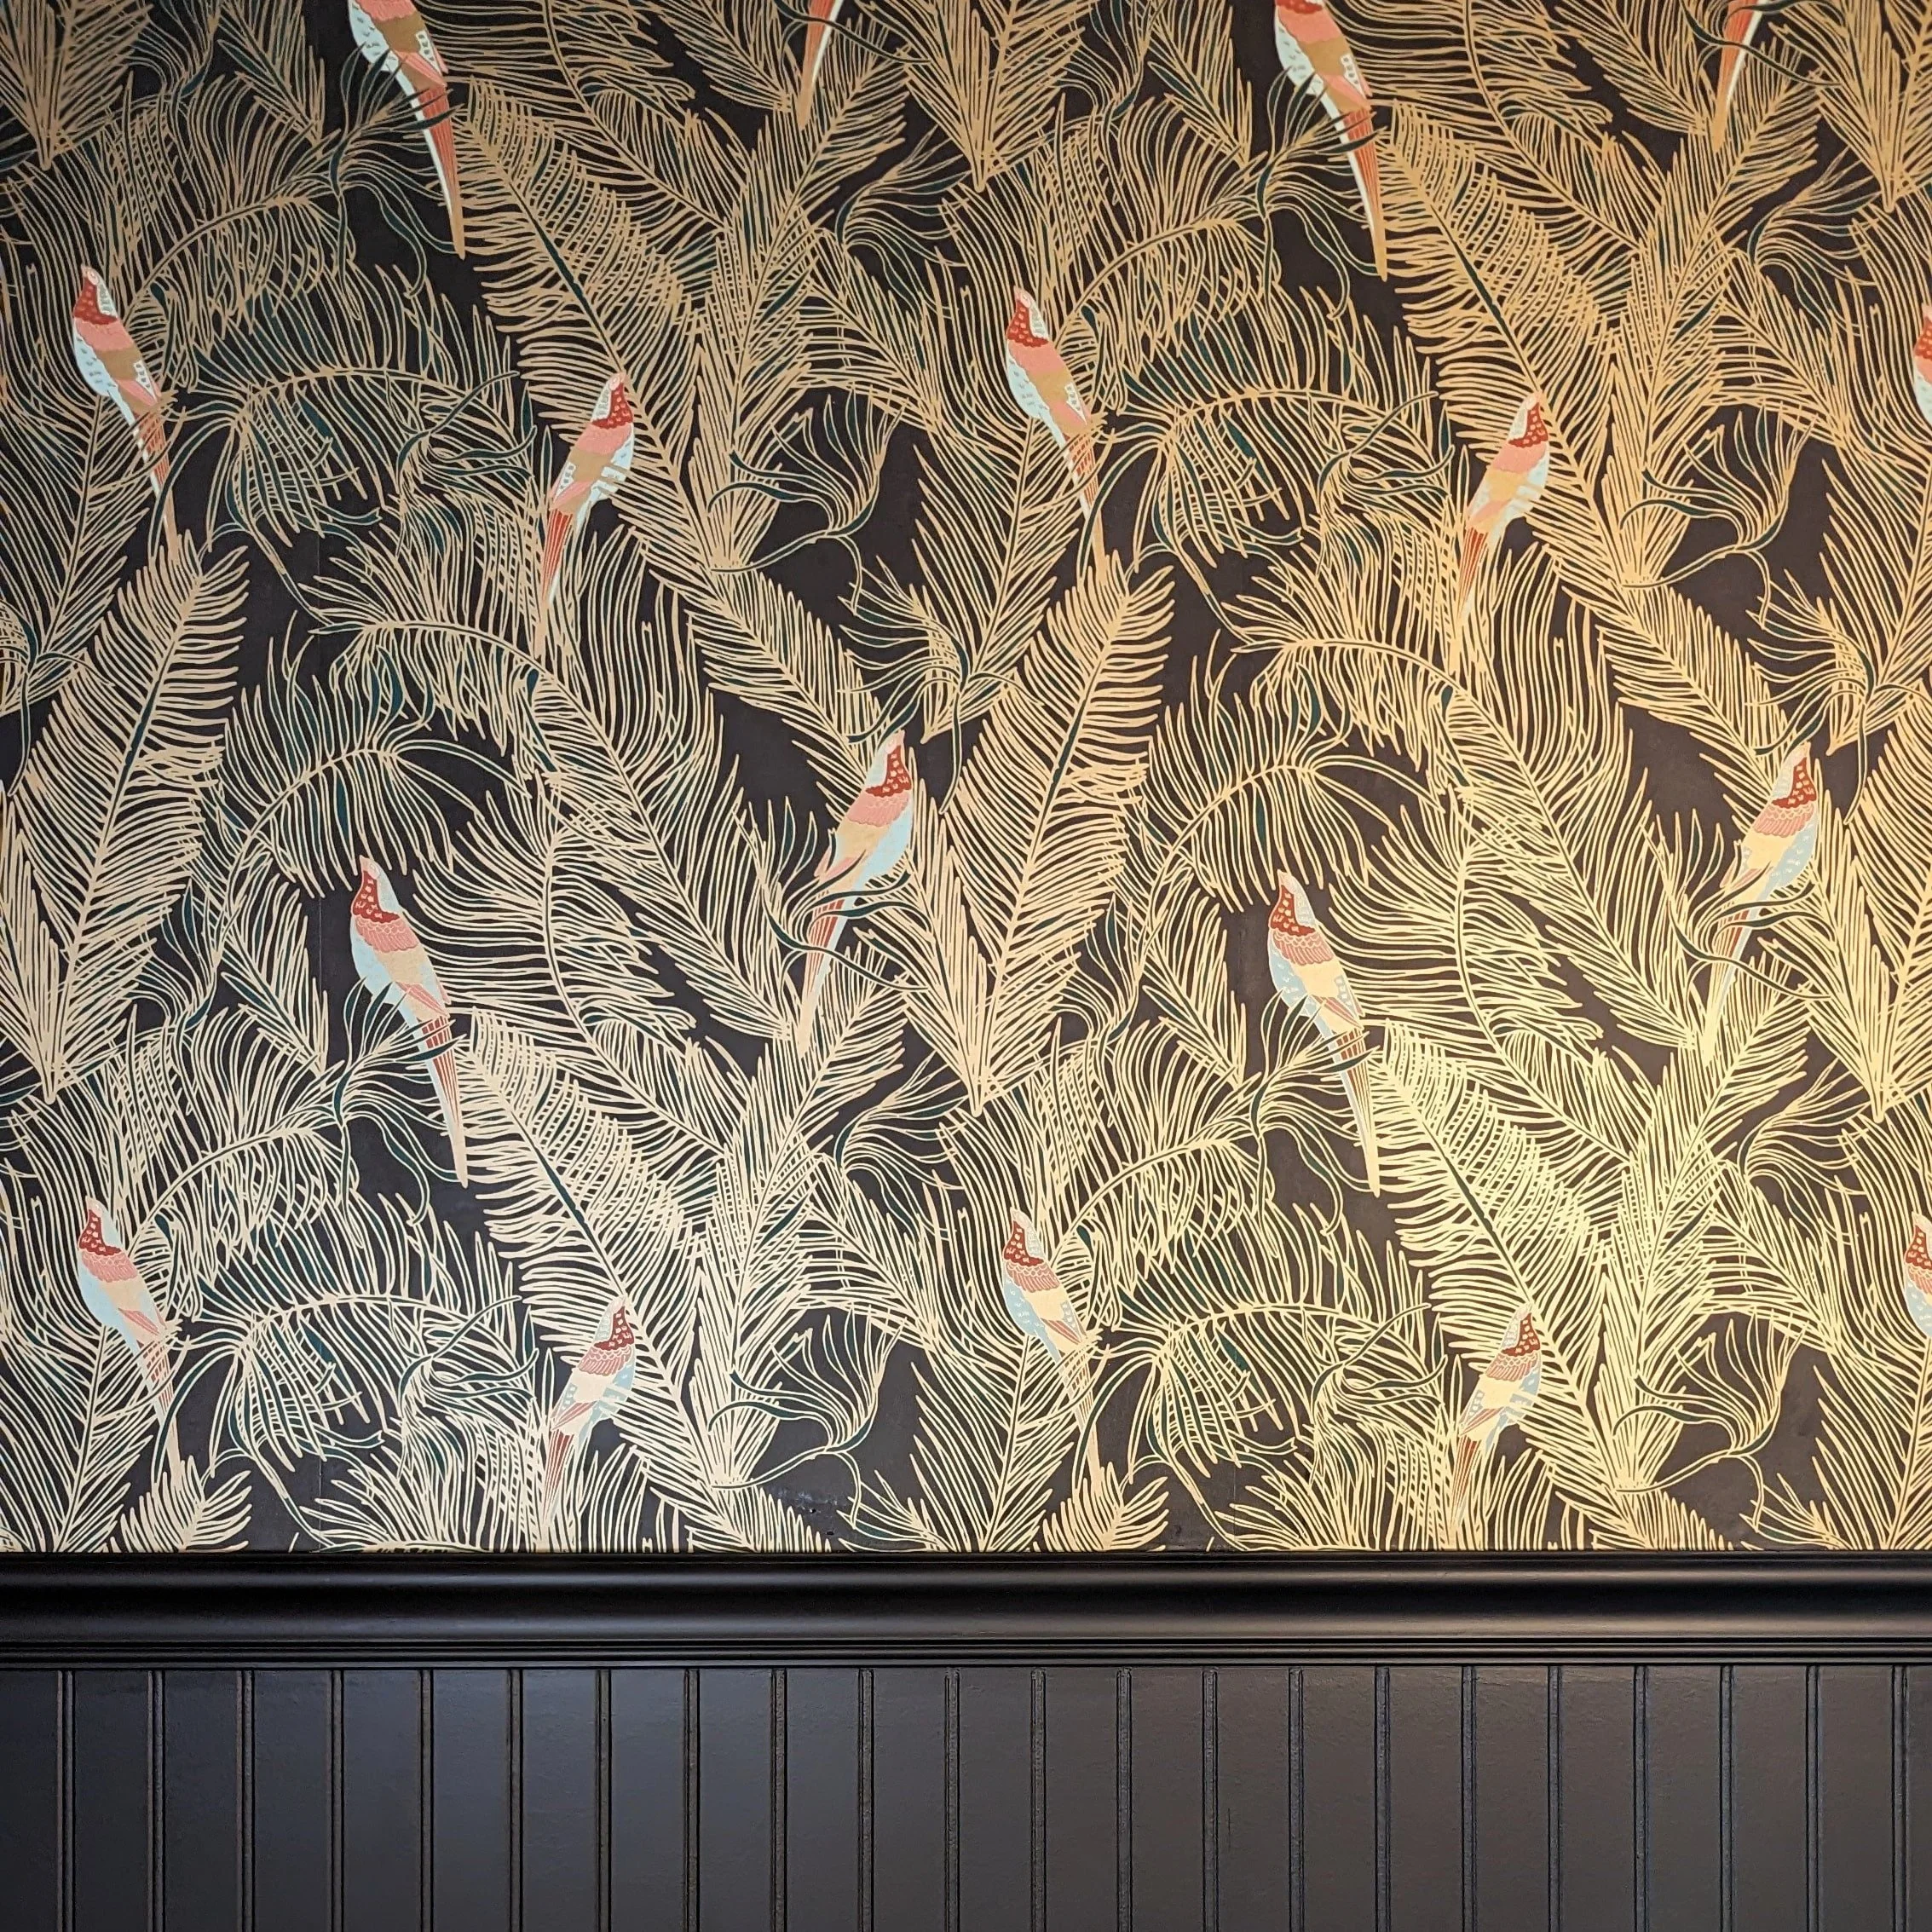
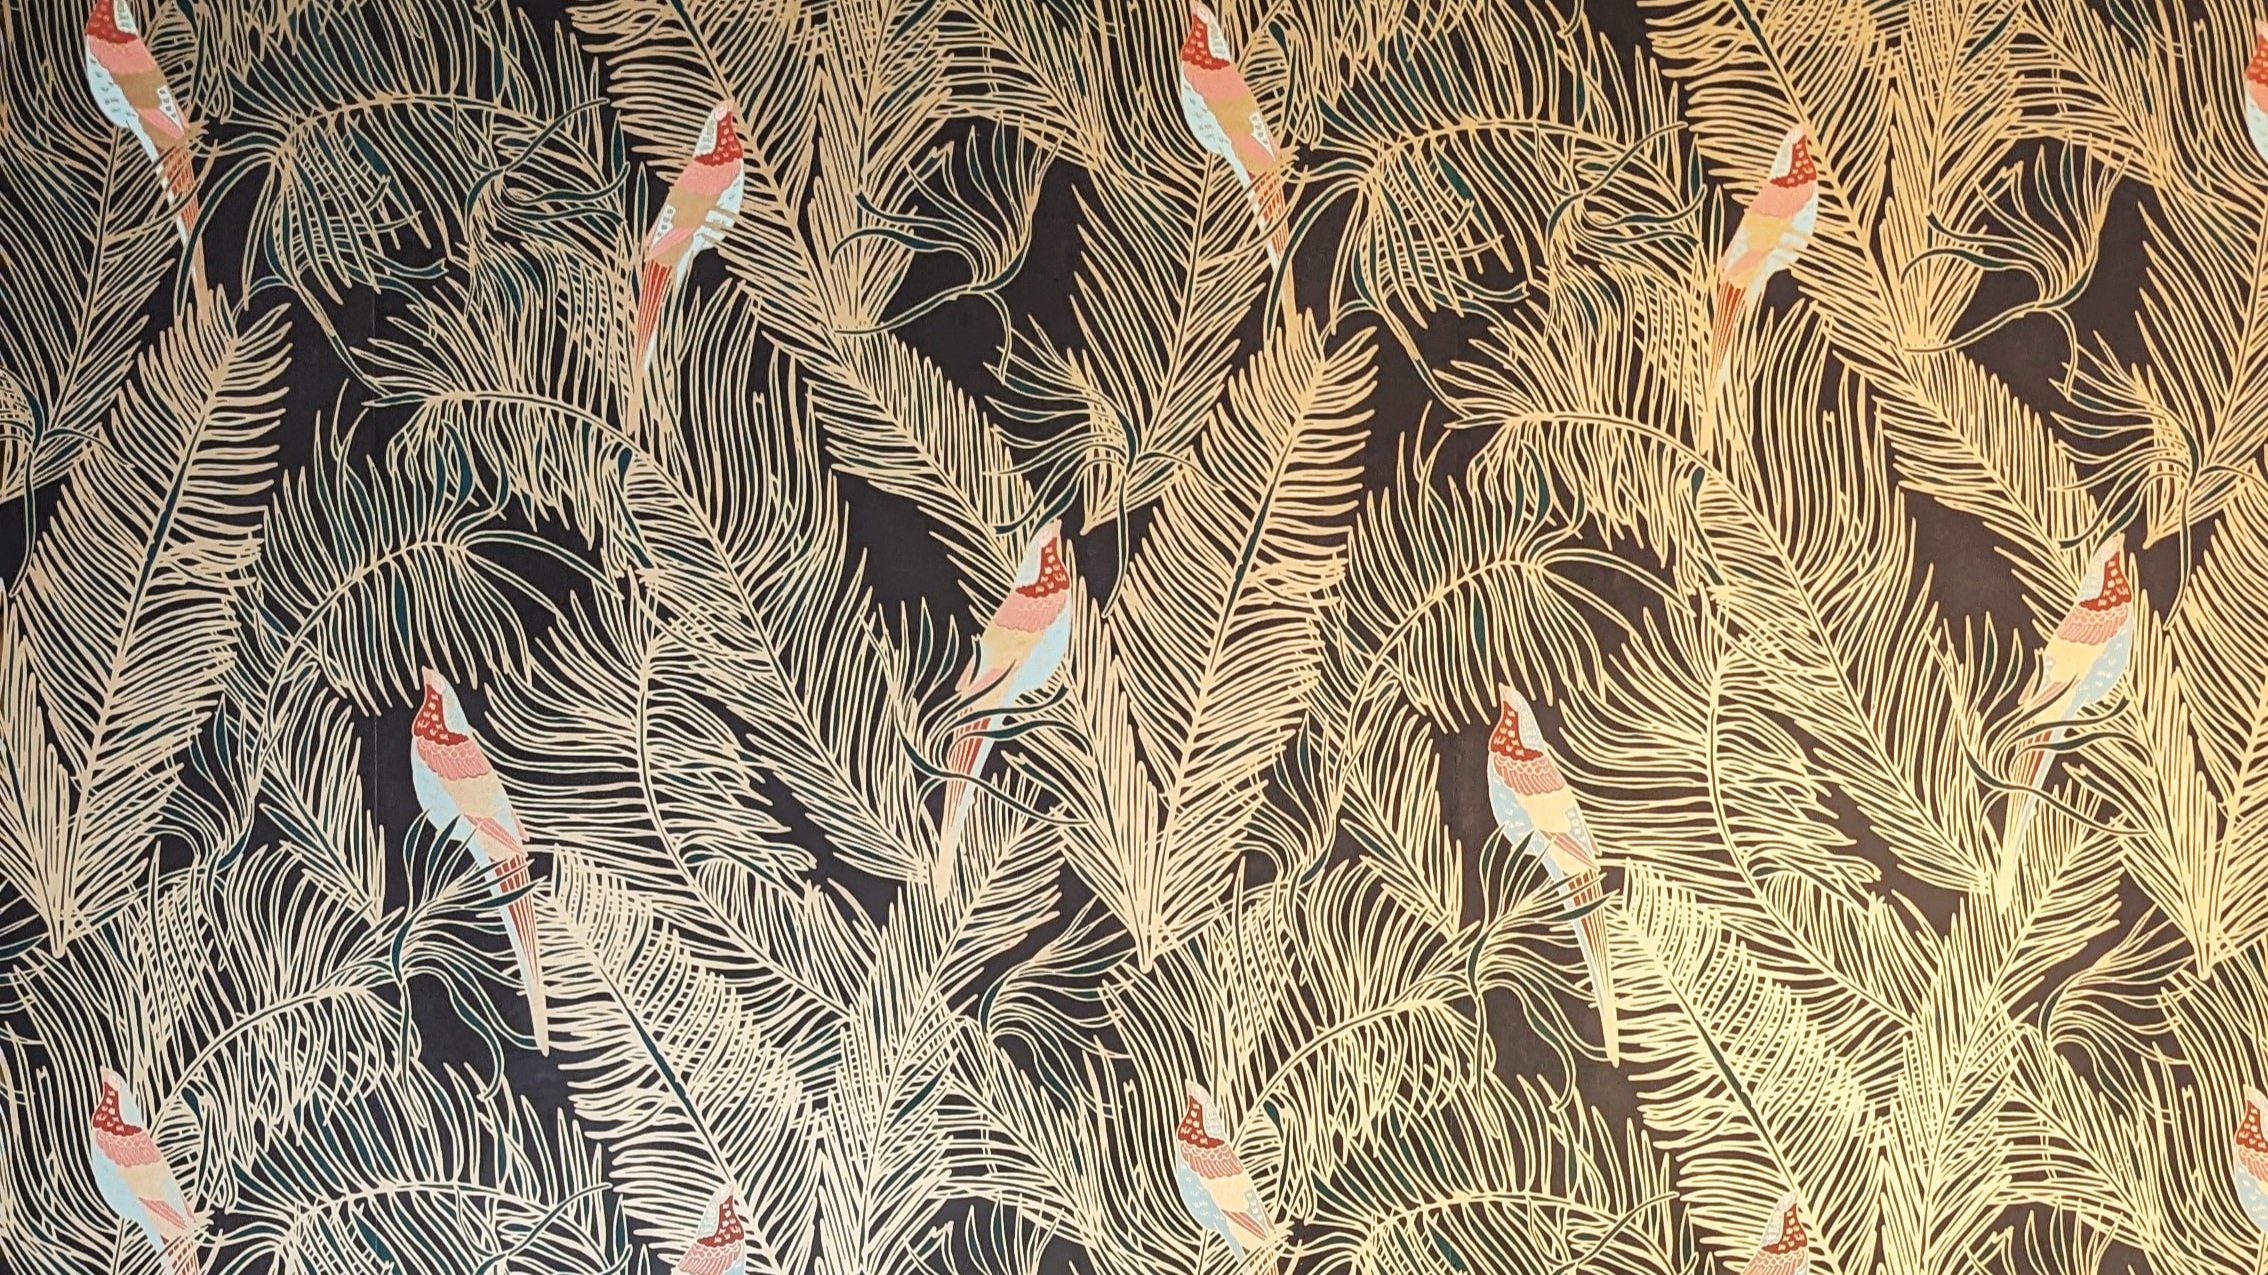
Speaking of the wallpaper… I’m in LOVE.

This wallpaper takes my breath away. I love the organic feel of the leaves with the subtle green and metallic gold outline. I especially love the pops of color in the birds.
From the beginning, I was certain I wanted the vanity to be green. (I was inspired by this one.} But once I started testing colors, I was shocked that green no longer felt right. Instead, I was drawn to the warm red tones of the birds in the wallpaper.
I don’t typically like red, but I went with my gut and, well, I’d say it was worth it…

The color is Rustic Red by Sherwin Williams. I was a little nervous at first because it was much brighter when I was painting it in the mudroom. However, in this darker space, it adds so much drama and depth. As much as I love green, I have to admit that it wouldn’t have had nearly the same impact.

Not only was installing penny tile a really fun DIY, but it added so much character and sophistication to this room!
Light It Up
Moving on up the walls… can we talk about the sconces for a hot second?

I’ve been fawning over these sconces for quite a while, so I was ecstatic when I found a place to use them! I’m really drawn to the vintage look with the brass and ribbed glass, and I think they fit right into the overall feel of this bathroom.
Something Old, Something New
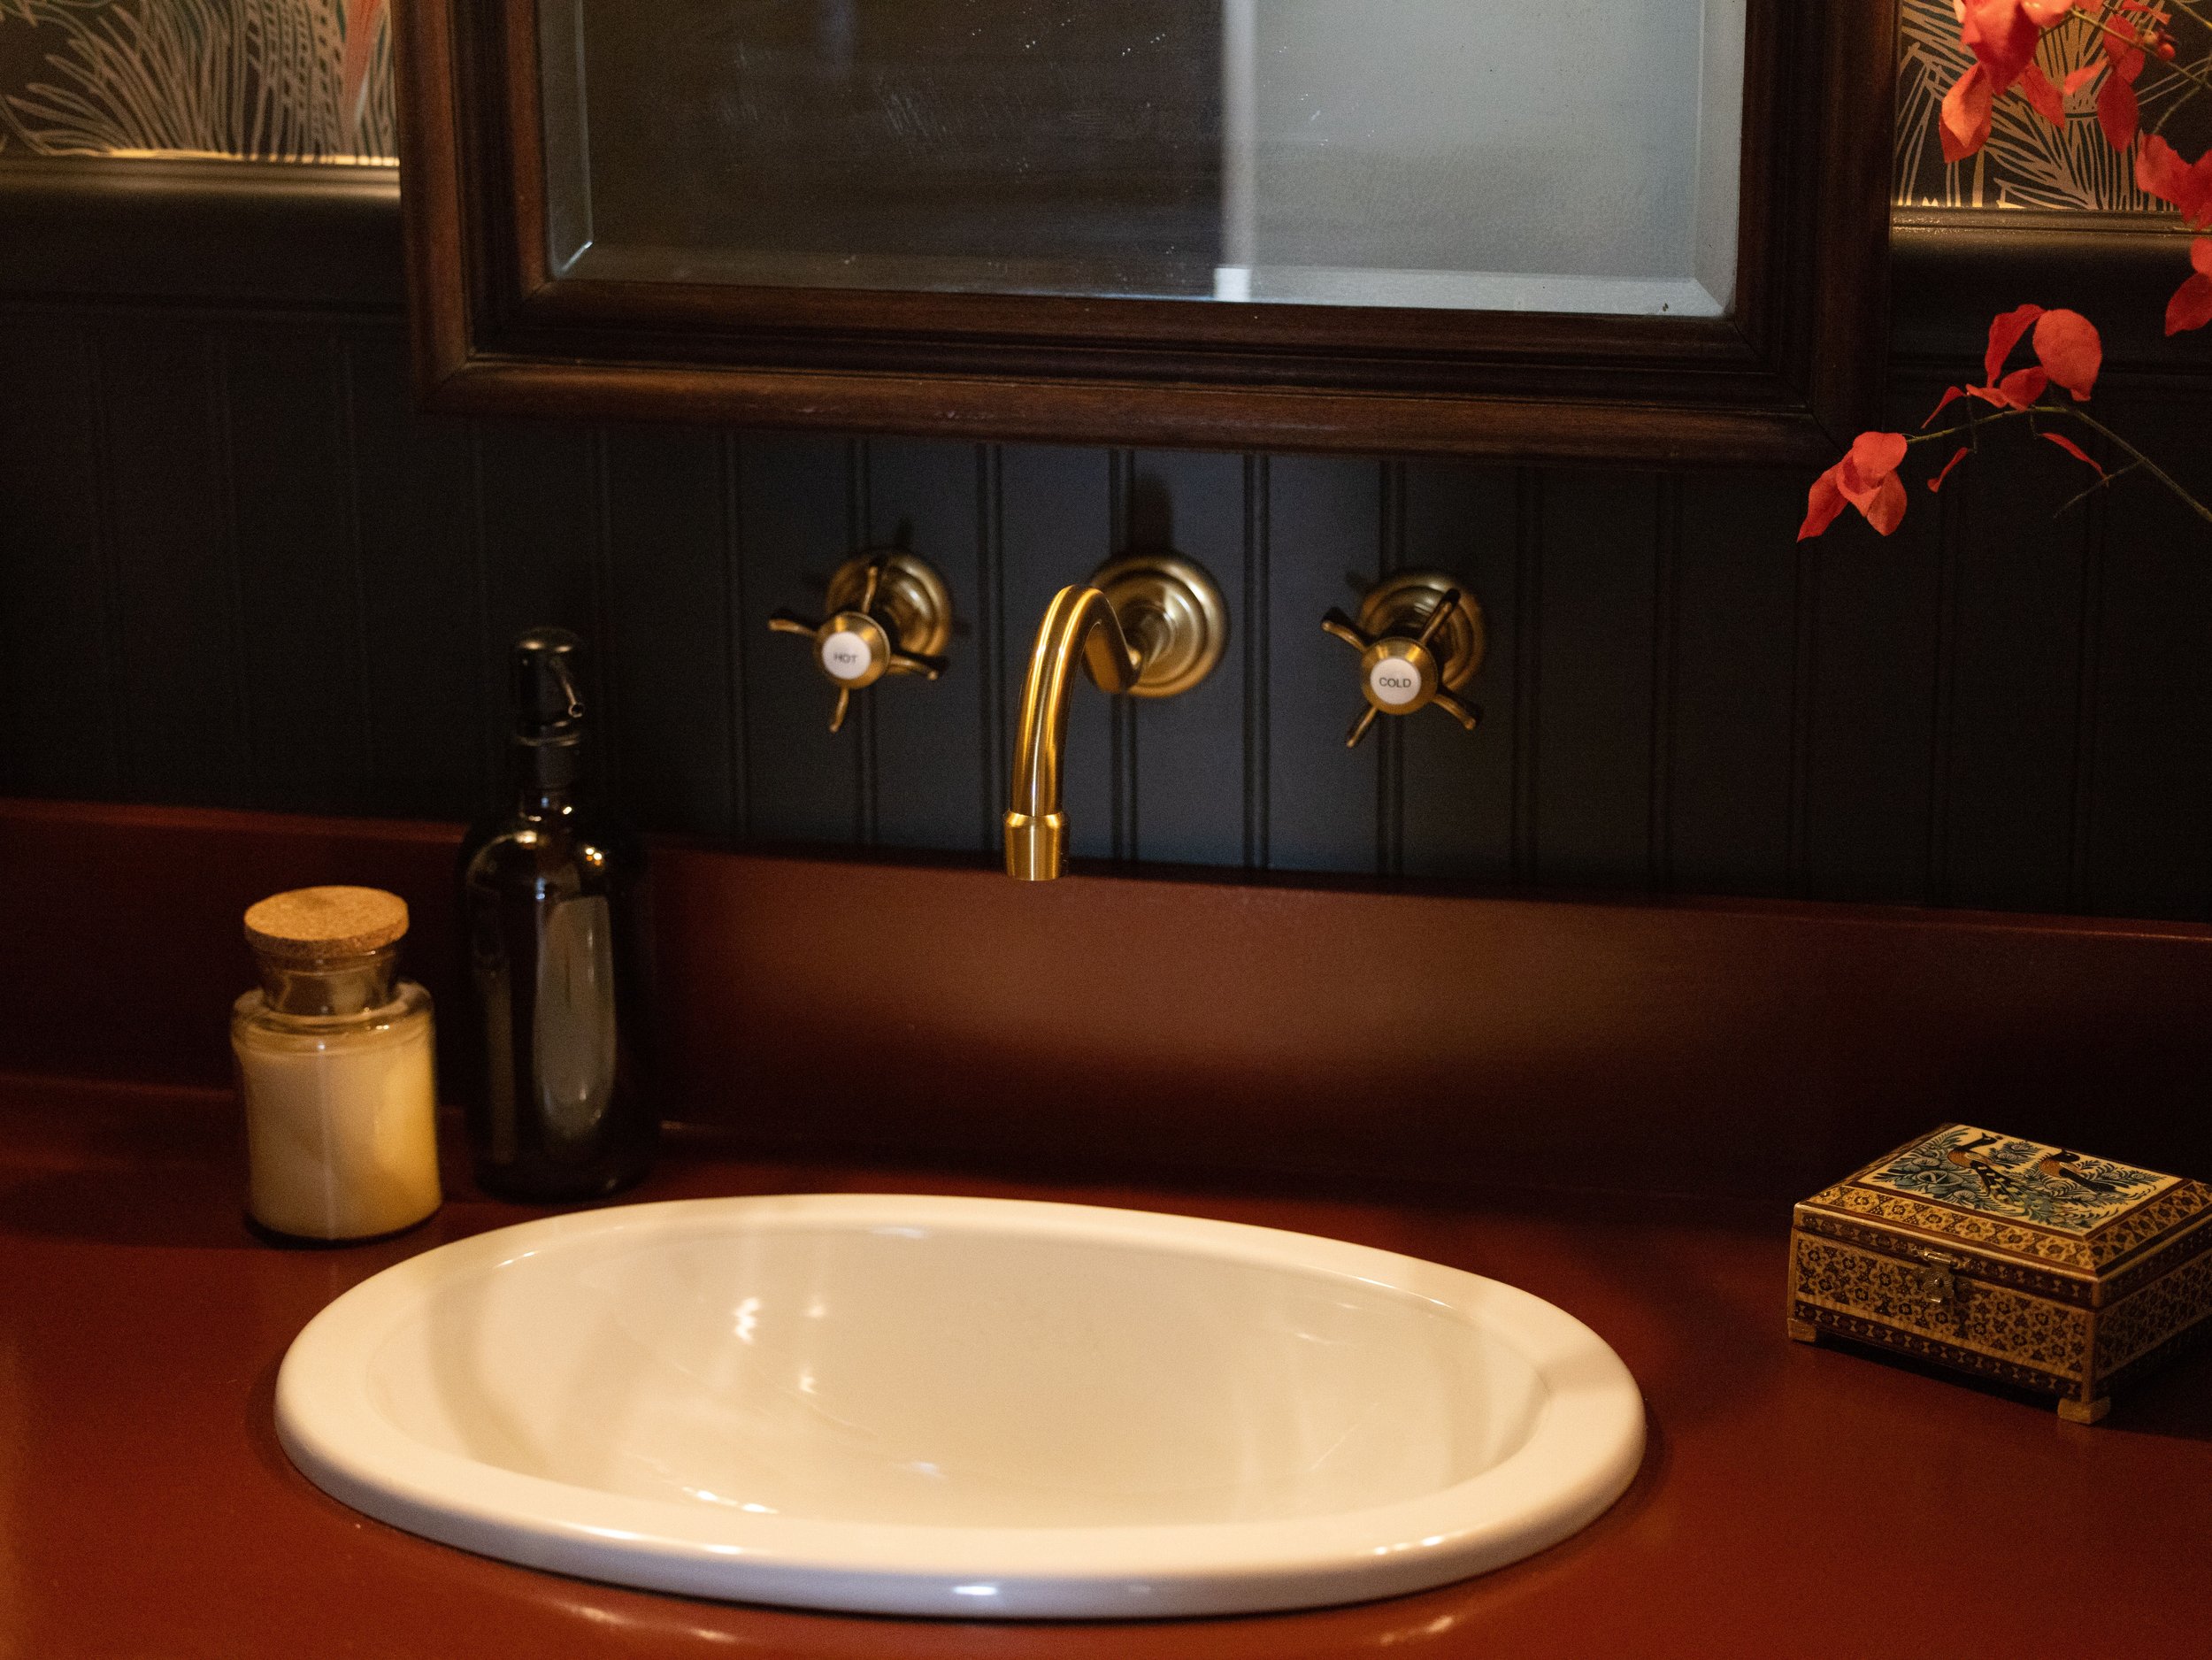
While we’re talking about vintage, there are several actual vintage items used throughout this space. In fact, most of the decor is thrifted, like this awesome brass bowl with feet that fits a roll of toilet paper perfectly.

It’s seriously the happiest little accident! (I found a couple of similar pieces here, and this one comes in a set of two!)
The box on the vanity was also a thrifted find ( this one is similar), and I thrifted the vase and painted it when I did this project a while back. Here and here are a couple other vases that caught my eye.
I stole the branches from a Burning Bush in my backyard, but now I’m on the hunt for a look-a-like faux version like this or this so I can keep the look year-round.

The mirror above the vanity is one of my favorite parts of the bathroom because it’s actually from our Charlie Foursquare house! The arch, the details in the wood, and the slight bevel of the glass are perfect.
(This mirror has a similar look, but I'm especially fond of the shape and details of this one.)


It’s the perfect weird addition to this room, don’t you think!? I’m so happy I found a place for it!
(Visit this post if you’re stumped on how to source vintage picture frames!)
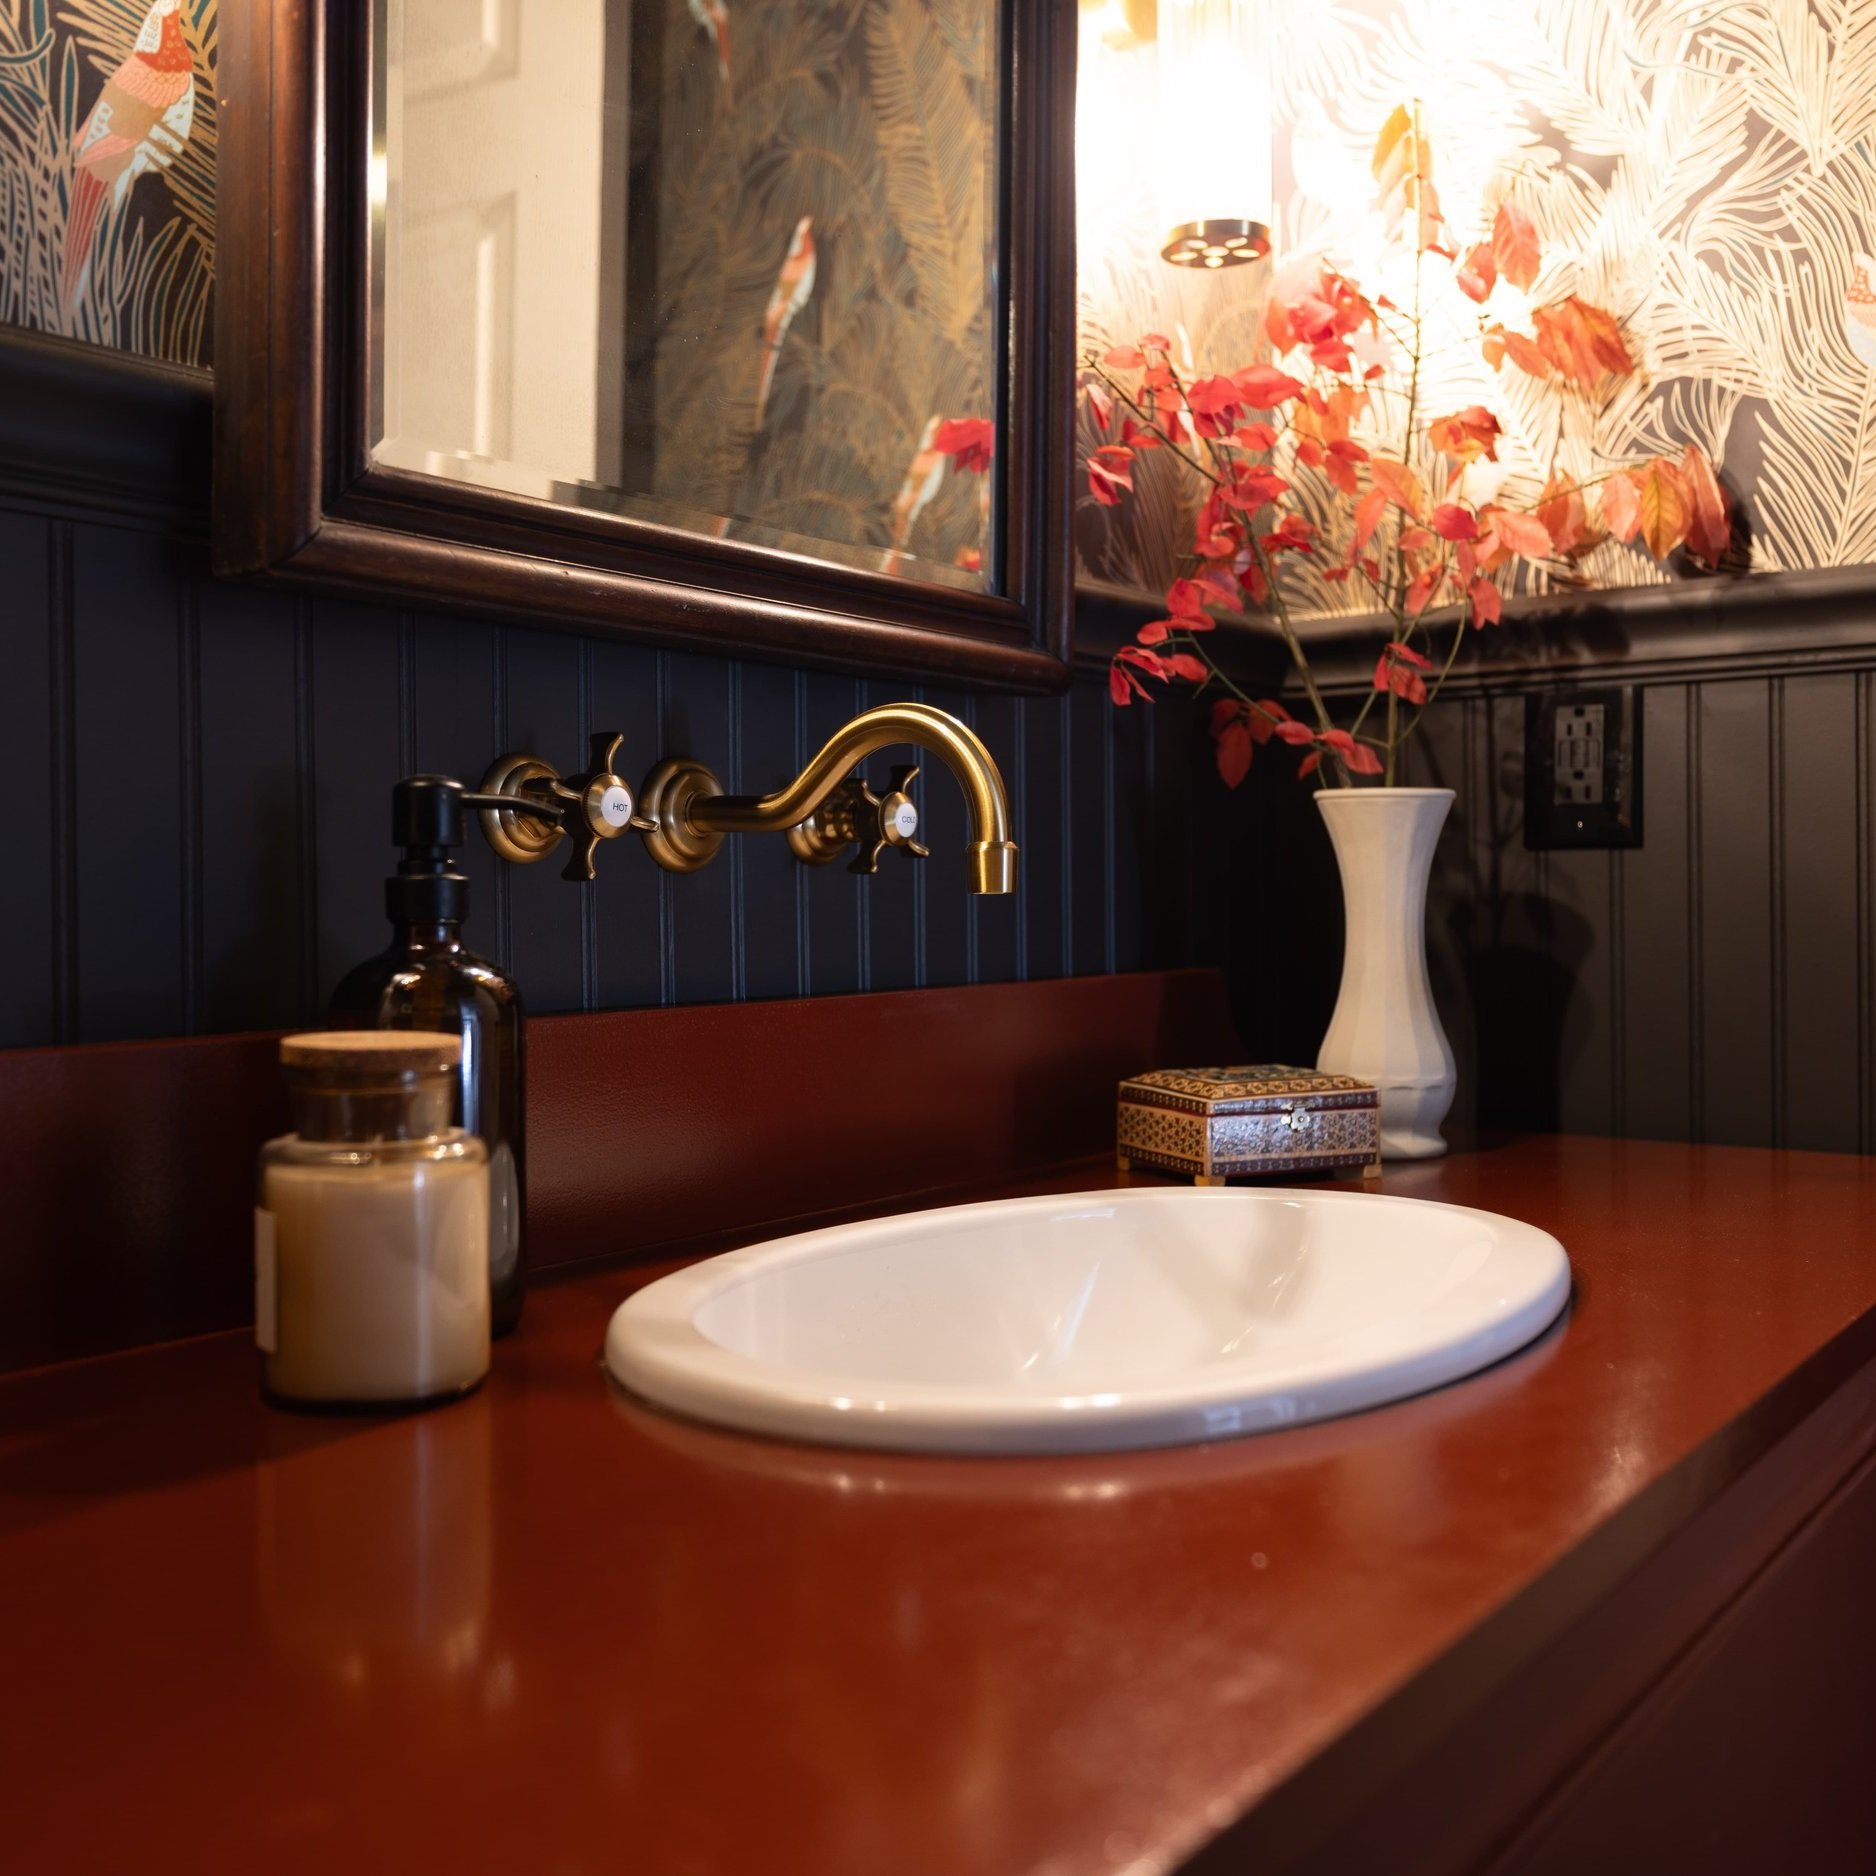
Lastly, I can’t forget to call out the wall-mounted faucet because it’s simply gorgeous.
Not only do I love the look, but I’m pleasantly surprised by how heavy and solid it is. I can’t wait to actually use it!
Oh yeah… we still have to hook up the drain line for the sink, ha! Soon!
Final Thoughts

I’m giddy with excitement over how this bathroom turned out, and so, so proud that I made it happen from start to finish. I had so much fun pushing the boundaries with this design. I can’t wait to do it again in the next room!
What do you think of this space? Let me know in the comments!

Catch up on all the projects in this One Room Challenge:
Small Powder Room with a Big Impact: Before & After

How to Convert an Antique Dresser into a Vanity
Converting an old piece of furniture into a one-of-a-kind custom vanity is a great project to add a unique style to your bathroom. In this post, I’m sharing the step-by-step process for how I turned a dresser into my new bathroom vanity!
Repurposed Dresser Turned Bathroom Vanity Tutorial - Fall ORC ‘23 Week 7
Converting an old piece of furniture into a one-of-a-kind custom vanity is a great project to add a unique style to your bathroom. In this post, I’m sharing the step-by-step process for how I turned a dresser into my new bathroom vanity!

We’re less than ONE week away from the end of the One Room Challenge and the reveal of my half-bathroom makeover! The vanity is, obviously, a huge part of the design of this tiny space, so I’m excited to share how I gave this old piece of furniture destined for the landfill new life as my vanity.

Because this DIY is typically done with dressers, for SEO purposes, that’s the term I’ll be using (Mama didn't raise no fool!). However, I think my piece of furniture is actually a console/buffet/credenza (whatever you choose to call it). Either way, the same steps apply.
You’ll also notice that I converted my dresser out of the order of the steps provided. I was nervous to start cutting my piece apart so I started with what I felt most comfortable with. In the end, it doesn’t really matter, but following the steps in the order below is a little more efficient.
Let’s jump in!
As an Amazon Associate and partner with other brands, I earn from qualifying purchases. This post may contain affiliate links, meaning I receive commissions for purchases made through those links at no cost to you.
Materials and Tools:
- Dresser or Console Table
- Sink and faucet
- Jigsaw
- Drill
- Drill bit
- Hole saw or spade bit
- Orbital sander
- Sandpaper
- Primer and paint or wood stain
- Paintbrushes and foam rollers
- Sealer
- Drawer pulls or knobs
- Caulk Gun
- Silicone caulk
- Plumbing supplies (P-trap, water supply lines, etc.)
- Adjustable wrench and pliers
- Finish nailer and nails
- Wood glue
Choose the Dresser
Obviously, to convert a dresser into a vanity, you actually need to acquire a dresser. Vanities are expensive! This is a great place to save a little money so you can splurge elsewhere in your bathroom.

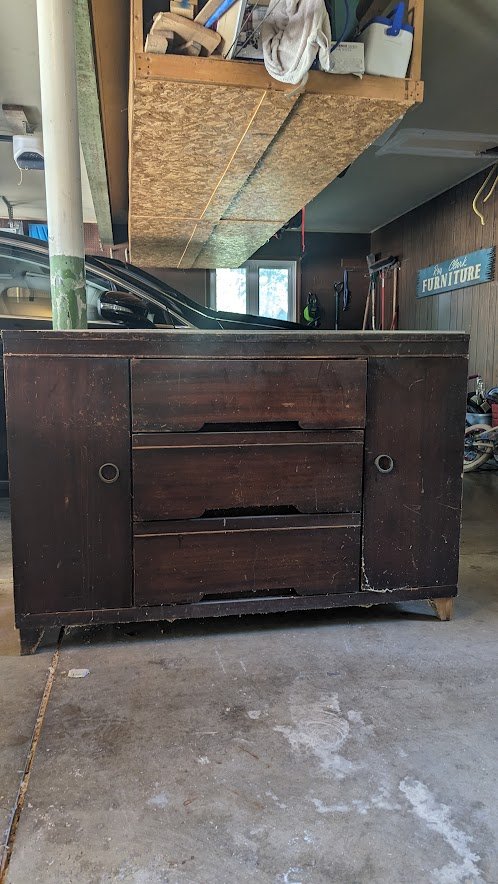
Start by taking measurements of your space, taking note of the width, depth, AND height you need. Typically, vanities are around 34” high. You’ll also want to be sure your dresser is deep enough to hold a sink. Then search your local thrift stores or Facebook Marketplace for the perfect piece.
I’ve mentioned that I started designing this bathroom two years ago. I knew at that time the current vanity would need to be replaced. Based on my design, I was looking for a green vanity. I loved this one, but it was out of budget.
So, I hopped on Facebook Marketplace and fell in love with this buffet. Not only was it the perfect dimensions, but I loved the style. I picked it up, and there it sat in my garage, gathering sawdust for a few years until this project rolled around.
Cut the Hole for the Sink and Faucet
Remove the hardware and drawers and set them aside.
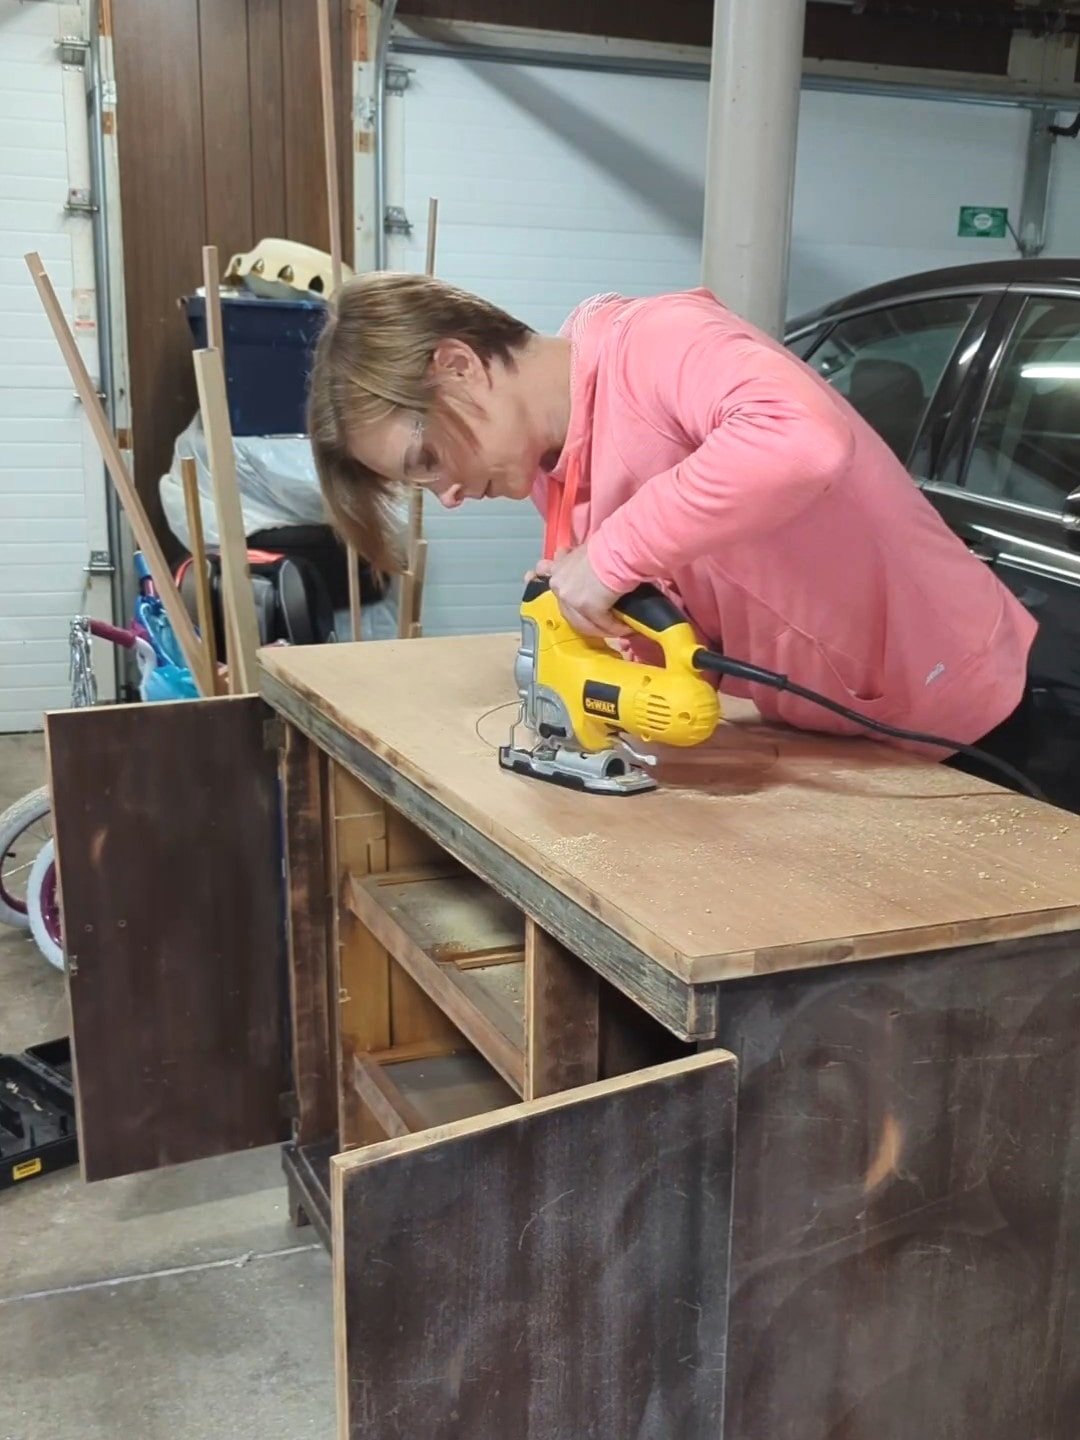
Measure to find exactly where to install your sink (or sinks if it’s a double vanity). Then, using the template that came with your sink, trace the outline. Make sure to leave room for your faucet placement!
Drill a hole large enough for a jigsaw blade to get through on the inner edge of the outline. Then, cut along the outline with the jigsaw until the hole falls out.
Because I’m using wall-mounted fixtures, I didn’t need to drill holes for the faucet in the vanity itself. But if you’re using standard fixtures, you can use a hole saw to make your faucet holes.
Modify Drawers for Plumbing

If your dresser has drawers in the way of plumbing, you’ll need to modify them. There are loads of tutorials online on how to do this. This isn’t one of those tutorials. Instead, I opted to remove the drawers completely and use the fronts to create a faux door for easier access to the plumbing if something goes wrong down the line.
First, I separated the drawer fronts from the drawer with a rubber mallet. Then, I cut a scrap piece of 1/4” plywood to the size of the opening on my table saw. Using wood glue and my finish nailer, I attached the doors to the plywood. Then I added some 1x2s for extra support.
Using a Kreg Concealed Hinge Jig, I drilled the holes for my hinges to sit in.
Sanding and Staining/Painting
How you prep for paint or stain will vary slightly. If you’re staining, you’ll want to sand off the existing finish to bare wood, beginning with a medium grit (120) and moving down to a high grit (220). If you plan to paint your piece, you’ll likely just need to scuff up the surface.
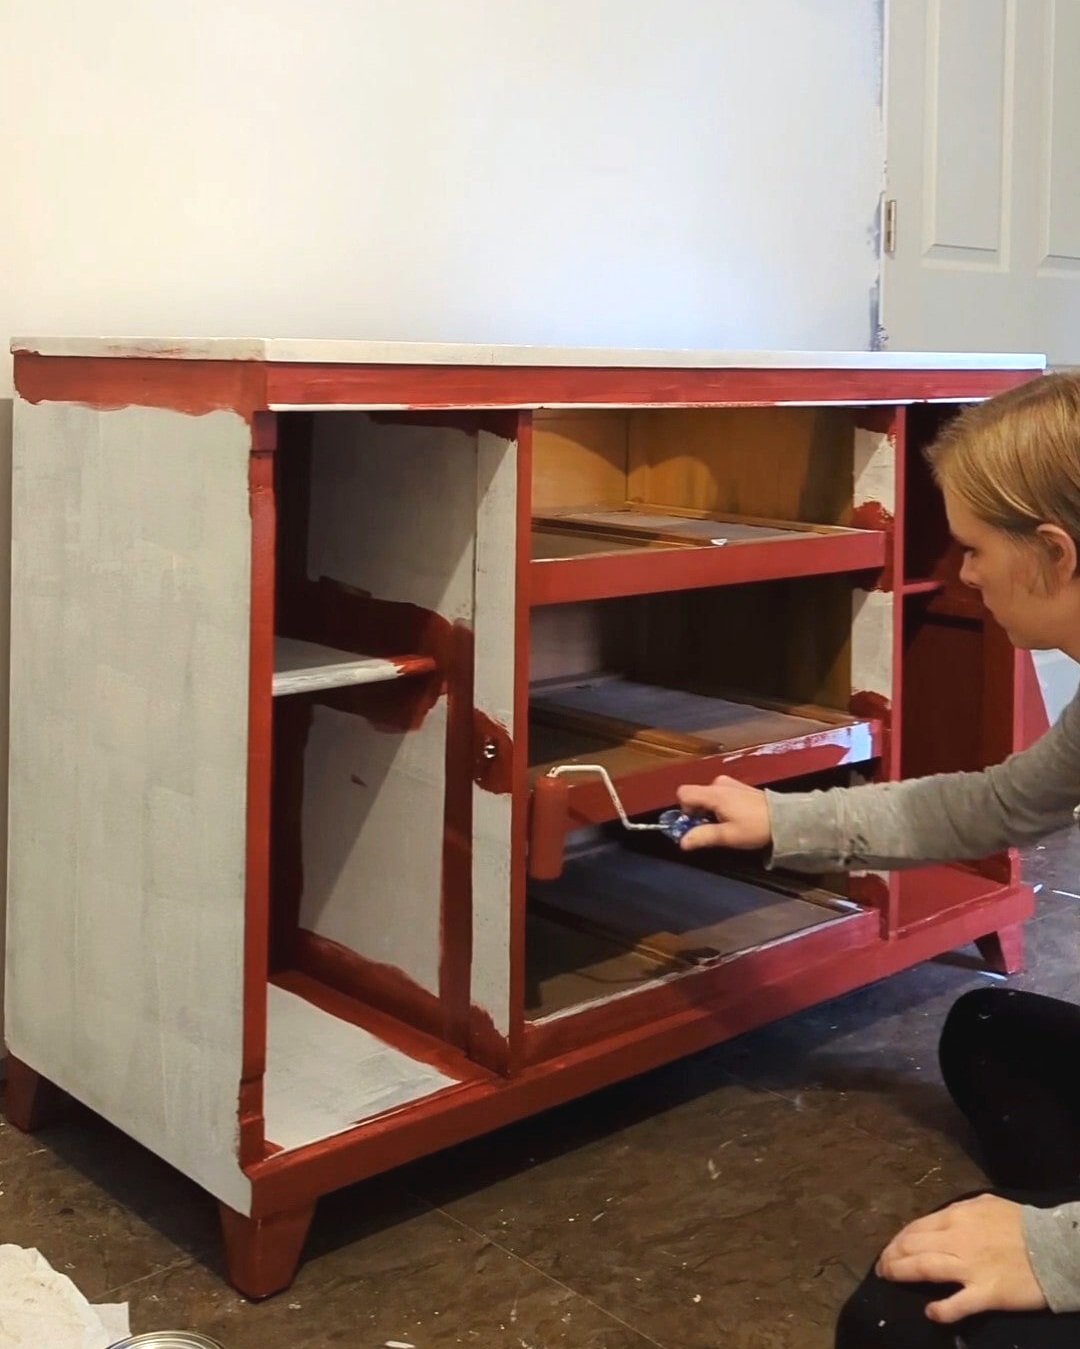
I sanded my piece down with 150 grit, primed it with an oil-based primer, and then painted it with Valspar’s Cabinet and Furniture Enamel.
I mentioned above that I originally wanted a green vanity. But when I started choosing colors, green didn’t feel right in the space anymore. I shocked the heck out of myself when I ended up going in the opposite direction and choosing Rustic Red by Sherwin Williams.
I sealed the top of the vanity with a couple of coats of semi-gloss Polycrylic.
Once everything is dry, apply silicone caulk to the sink and faucet where they meet the vanity top to prevent water seepage.
Connect Plumbing
Connect the water supply lines to the faucet and the drain to the sink. You’ll probably need to cut holes in the back of the dresser to accommodate the plumbing lines, which can be done with a hole saw. Make sure there are no leaks and that the plumbing functions correctly.
Finishing Touches
Lastly, reinstall your doors and drawers and add knobs or pulls. I cleaned up the pulls that came with my dresser and spray-painted them Rustoleum Antique Brass.
Your vanity is now complete!
Final Thoughts
I’ve always wanted to tackle this type of project, and I’m excited to have had the opportunity! I love how much more customized my half-bathroom is now. Besides, I always love tackling a project I’ve never done before.

This room has come such a long way from where it started just seven short weeks ago. Be sure to follow along for the reveal of this room next week!


Catch up on the rest of the One Room Challenge:
How to Turn a Vintage Dresser into a Custom Vanity
The Easiest Wallpaper for Beginners - Tutorial
Several years ago, I hung peel-and-stick wallpaper in my (still unfinished) closet thinking it would be the easiest kind of wallpaper to install. Boy, was I wrong! Although I wouldn’t go so far as to say any wallpaper is “easy” to hang, the experience between hanging paste-the-wall vs. peel-and-stick is worlds apart.
Paste the Wall Wallpaper Tips - Fall ‘23 ORC Week 6
Wallpaper is a great way to add character and personality to a room. This detailed tutorial shares the step-by-step process for hanging paste-the-wall wallpaper, including a round-up of moody wallpapers I love!
Several years ago, I hung peel-and-stick wallpaper in my (still unfinished) closet, thinking it would be the easiest kind of wallpaper to install. Boy, was I wrong! Although I wouldn’t go so far as to say any wallpaper is “easy” to hang, the experience between hanging paste-the-wall vs. peel-and-stick is worlds apart.
It’s week six of the One Room Challenge, and there are only TWO weeks until the finale! This week, I made big strides in the half-bathroom by hanging this dramatic paste-the-wall wallpaper, and I have to say, I’m never going back to peel-and-stick!

What Are The Different Types of Wallpaper?
Peel-and-stick wallpaper is essentially a sticker that clings to everything it touches. While it’s removable and repositionable, it can stretch and lose tackiness.
Traditional wallpaper, on the other hand, requires a large workspace and careful precision to apply paste directly to the paper.
Paste-the-wall wallpaper is probably the simplest because you apply the adhesive directly to the wall, which lessens the mess and allows you to easily reposition the wallpaper as needed.
Here’s how I hung the wallpaper in my half-bathroom:
As an Amazon Associate and partner with other brands, I earn from qualifying purchases. This post may contain affiliate links, meaning I receive commissions for purchases made through those links at no cost to you.
Materials and Tools Needed:
- Paste-the-wall wallpaper
- Wallpaper adhesive
- Wallpaper smoother
- Utility or X-Acto knife (with extra blades!)
- Scissors
- Measuring tape
- Level
- Pencil
- Step ladder
- Paintbrush
- Paint roller & Cover
- Paint tray
- Handy Paint tray cover
- Clean sponge and water
- Drop cloth or plastic sheeting to protect the floor
- Wallpaper primer*
*If your walls are finished, primer may not be necessary.
Prep
Check Your Wallpaper Batches
Like tile, wallpaper color can vary from batch to batch. When you receive your wallpaper, I highly recommend checking that it’s all from the same batch number.
Clear the Room

Before you begin wallpapering, move any obstacles away from the walls. Wallpapering is hard enough. Don’t make it more difficult by having a bunch of stuff in your way - this is why I’ve been waiting to install the new toilet in my bathroom!
Prep Your Walls
My walls were a doozy to prep for wallpaper. If you remember, I had to remove multiple layers of wallpaper and texture to get to the drywall underneath… which was unfinished.
After removing the old wallpaper, I had to skim-coat the walls, sand them smooth, then prime them. I used Shieldz Wallpaper Primer and asked the hardware company to tint it as dark as possible since my wallpaper is almost black.
If your walls are finished, you’ll just need to clean the walls and fill any holes.
Determine Your Starting Point & Draw a Level Line

If you’re wallpapering a whole room, your starting point will also be your endpoint - and the pattern absolutely won’t line up perfectly when they come together. Because of this, choose a starting point in the least conspicuous area of the room. Then, draw a level line to use as a guide when placing your first strip of wallpaper.
In my case, I started/ended my wallpaper above the doorway since it’s a small stretch of wall that doesn’t draw a lot of attention. Can you find the seam??
Measure and Cut a Few Sheets of Wallpaper
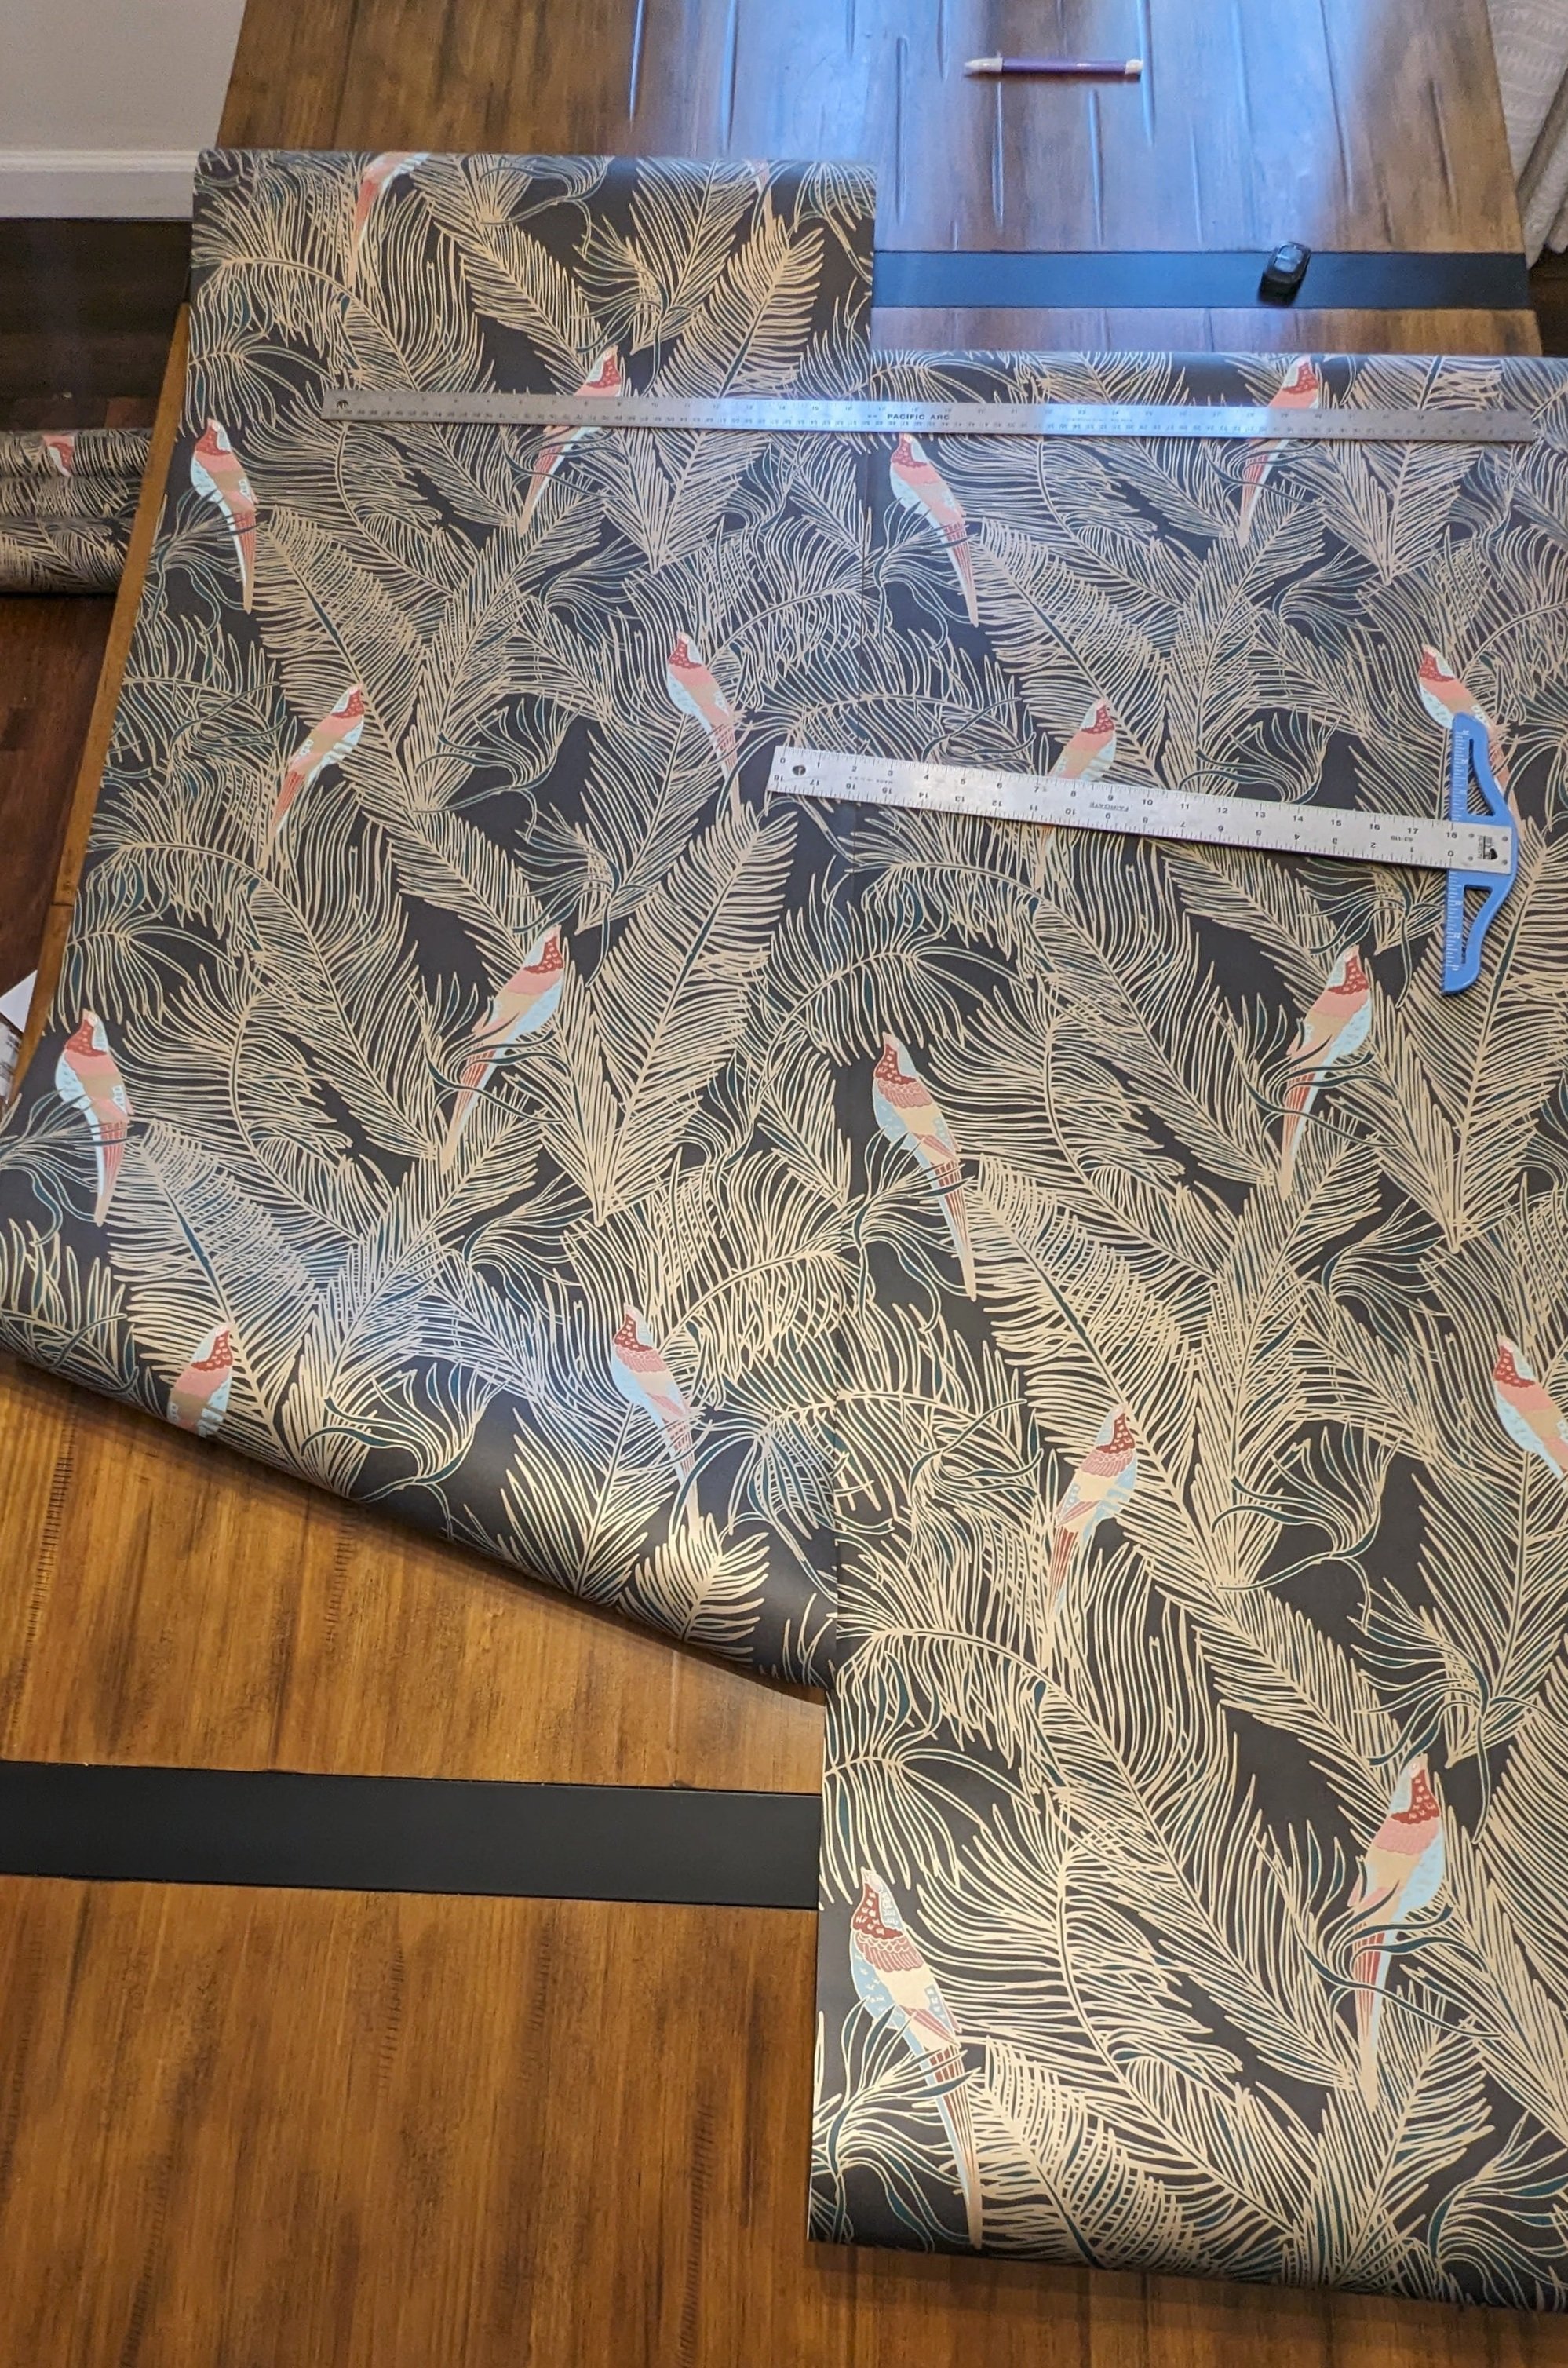
Measure the height of your wall. Roll out the wallpaper on a clean, flat surface. Then, measure your wallpaper and add a few inches to allow for trimming at the ceiling and baseboard (or, if you're doing a half-wall, the chair rail).
Mark your cut line with a pencil, and cut a few strips to the appropriate length. This T-square was perfect for making sure I drew a straight line to cut.
Line up your pattern before you cut each strip and cut off the excess. You’ll definitely feel like you’re wasting a lot of paper (and you are), but it’s a necessary evil.
I got into a rhythm where every time I hung a piece of wallpaper, I cut a new strip. This was helpful to ensure I didn’t cut more than I needed.

Apply Wallpaper Adhesive to the Wall
Using a paint roller, apply your adhesive on the wall to cover just a little more than the width of your paper. Then, cut in around the edges with a brush.
I used Roman Wallpaper Adhesive, a standard 3/8” roller cover, and a 2” angled paintbrush.
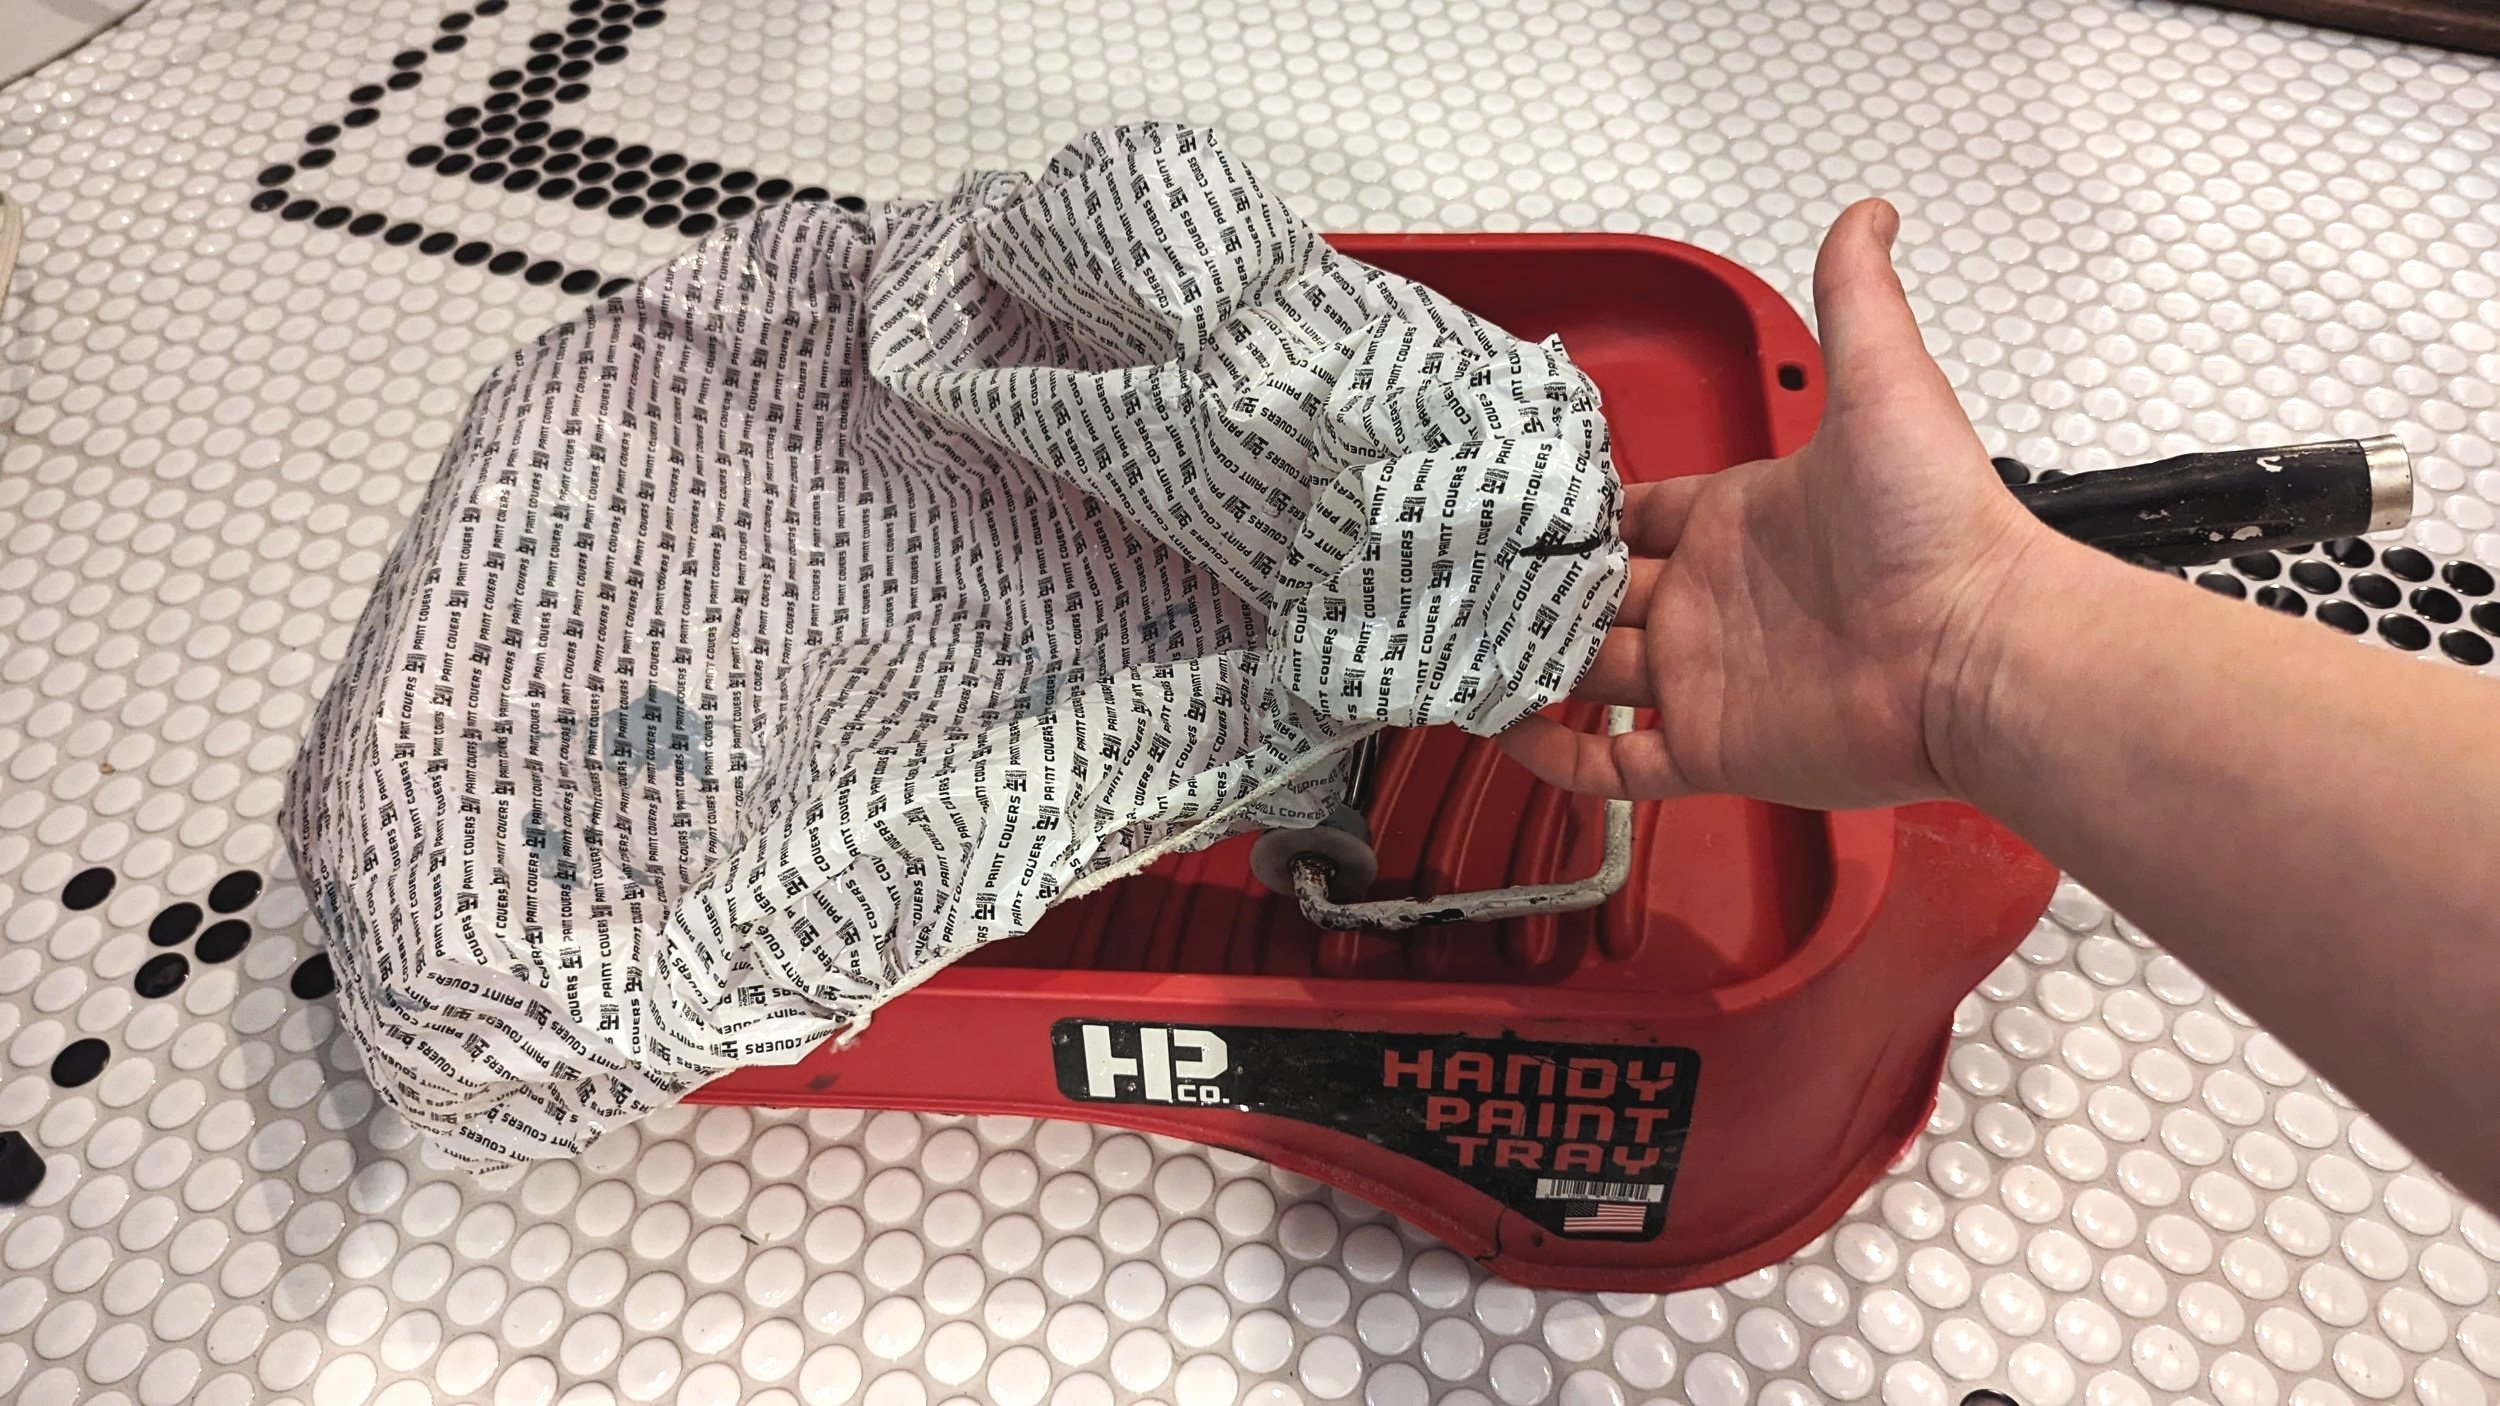
I also made sure I had some Handy Paint Covers nearby to cover my adhesive and roller between hanging strips of wallpaper so they didn’t dry out. They’re like little shower caps for your paint tray and are super easy to take on and off as many times as you need!
Hang the First Strip of Wallpaper

Line the edge of your first strip of wallpaper up with the level line you drew, leaving extra wallpaper at the top and bottom for trimming. This first strip is the most important to get level because it will dictate how the rest of your wallpaper hangs.
I didn’t have a good image of me hanging the first strip of wallpaper, but for the subsequent strips, keeping a level line is just as important.
Gently smooth out any air bubbles or wrinkles with your hand. Then, using your wallpaper smoother, push out any leftover air bubbles, working from the center towards the edges.

Trim Excess Wallpaper
After hanging each strip, trim the excess at the top and bottom using a utility or X-acto knife and a straight edge. I ran my wallpaper smoother along the edge as I cut to ensure a straight line.
Swap out your blades every few strips to avoid snagging and tearing your wallpaper.
Clean Up
Keep a bucket of water and a sponge handy to wipe off any stray adhesive. I changed my water frequently.
Hang the Remaining Strips of Wallpaper

Repeat the process for the remaining wallpaper strips, ensuring that the pattern of each strip lines up with the previous one. Also, occasionally take a moment to check the levelness of your wallpaper.
Wallpapering Around Obstacles

You’ll likely have to work around windows, door frames, corners, or other obstacles during your wallpapering adventures. While I can’t advise you on every hurdle you’ll encounter, I can tell you that relief cuts are your friend.
A relief cut is a small cut in the paper to help it wrap around whatever is in the way and lay flat against the wall. These cuts are made at the corners at a diagonal angle.
I relied on my scissors to make a clean cut rather than my utility knife. Typically, I had to make several small cuts to get my wallpaper to wrap the way it needed to. As long as you’re patient and take it slow, you’ll be able to work through these obstacles just fine!
Final Thoughts
I’m completely taken aback by the transformation this room has undergone in just the last week alone. The wallpaper made SUCH a huge difference, and now I’m really seeing my vision come to life (my favorite part of any design project!) I can’t get over the wallpaper, beadboard, and floors together. I love them so much!

While wallpapering isn’t the easiest DIY, with a little patience, it’s a completely doable beginner’s project and makes such a dramatic impact. Don’t forget to follow along to catch the final reveal of this space!
Moody Wallpaper Round-up!
While designing this room, I looked through countless wallpaper designs to find the perfect moody design for my space. If you love dramatic wallpaper too, below I’ve put together a round-up of some of the other wallpapers I considered!

These wallpapers were sourced from Wallpaper Direct, Photowall, Milton & King, Hygge & West, Lionheart Wallpaper, The Pattern Collective, Etsy, and Home Depot.

Catch up on the rest of the One Room Challenge:
How to Hang Paste-the-Wall Wallpaper
Beadboard: Instant Character on a Budget
Beadboard is an easy and cost-effective way to add texture and character to any room. In this post, I’m sharing all the details of how I hung the beadboard in our half-bathroom, including the mistakes I made so you know what NOT to do!
How to Install Beadboard Paneling - Fall ‘23 ORC Week 5
Beadboard is an easy and cost-effective way to add texture and character to any room. In this post, I’m sharing all the details of how I hung the beadboard in our half-bathroom, including my mistakes, so you know what NOT to do!
It’s week 5 of the One Room Challenge!

This week, I focused not only on hanging the beadboard but also on installing the door, door casing, baseboard, chair rail, AND crown molding. Woo! It was a busy week.
Add in a slight water leak, which set me back a bit, and I was RUSHING to get this post out in time. But I did it! So let’s dive into the tutorial, shall we?
As an Amazon Associate and partner with other brands, I earn from qualifying purchases. This post may contain affiliate links, meaning I receive commissions for purchases made through those links at no cost to you.
Materials and Tools You'll Need:
Materials:
- Beadboard panels
- Construction adhesive
- Finish nails (I used 1 3/4”)
- Sandpaper
- Wood filler or spackle
- Paintable caulk
- Paint
Tools:
- Measuring tape
- Standard level or laser level
- Pencil
- Stud finder
- Table saw or circular saw
- Caulk gun
- Finish nailer
- Paintbrush
- Paint roller and cover
- Oscillating Multi-Tool
- Drill
- Spade Drill Bit or Hole Saw (if you're working around plumbing)
Prep the Wall
Start by removing any baseboards, switch plates, and outlet covers.

In my case, I had to remove the texture that was on the walls originally. I also had to replace some drywall we tore out when we re-routed the plumbing. However, I didn’t bother finishing the drywall since it will be covered with beadboard anyway.
Then, draw a level line around the room about a half inch higher than the top of where your beadboard will stop. Don’t skip this step. I did, and it bit me in the butt later on.
Lastly, find and mark your studs on or above that line.
Cut Your Beadboard
Beadboard is kind of great because it typically comes in 4x8-foot sheets, which is perfect for covering the entirety or exactly half of a standard-height wall.
How to Cut Your Beadboard to Length

Because I have this gorgeous wallpaper I’ll be installing above the beadboard, I chopped mine right in half at 4 feet high with a circular saw.
Then, I cut my beadboard to length for each stretch of wall. I used my table saw for this, but since beadboard is pretty thin and flimsy, I recommend having a helper or just using a circular saw. It felt pretty sketchy doing it by myself TBH.
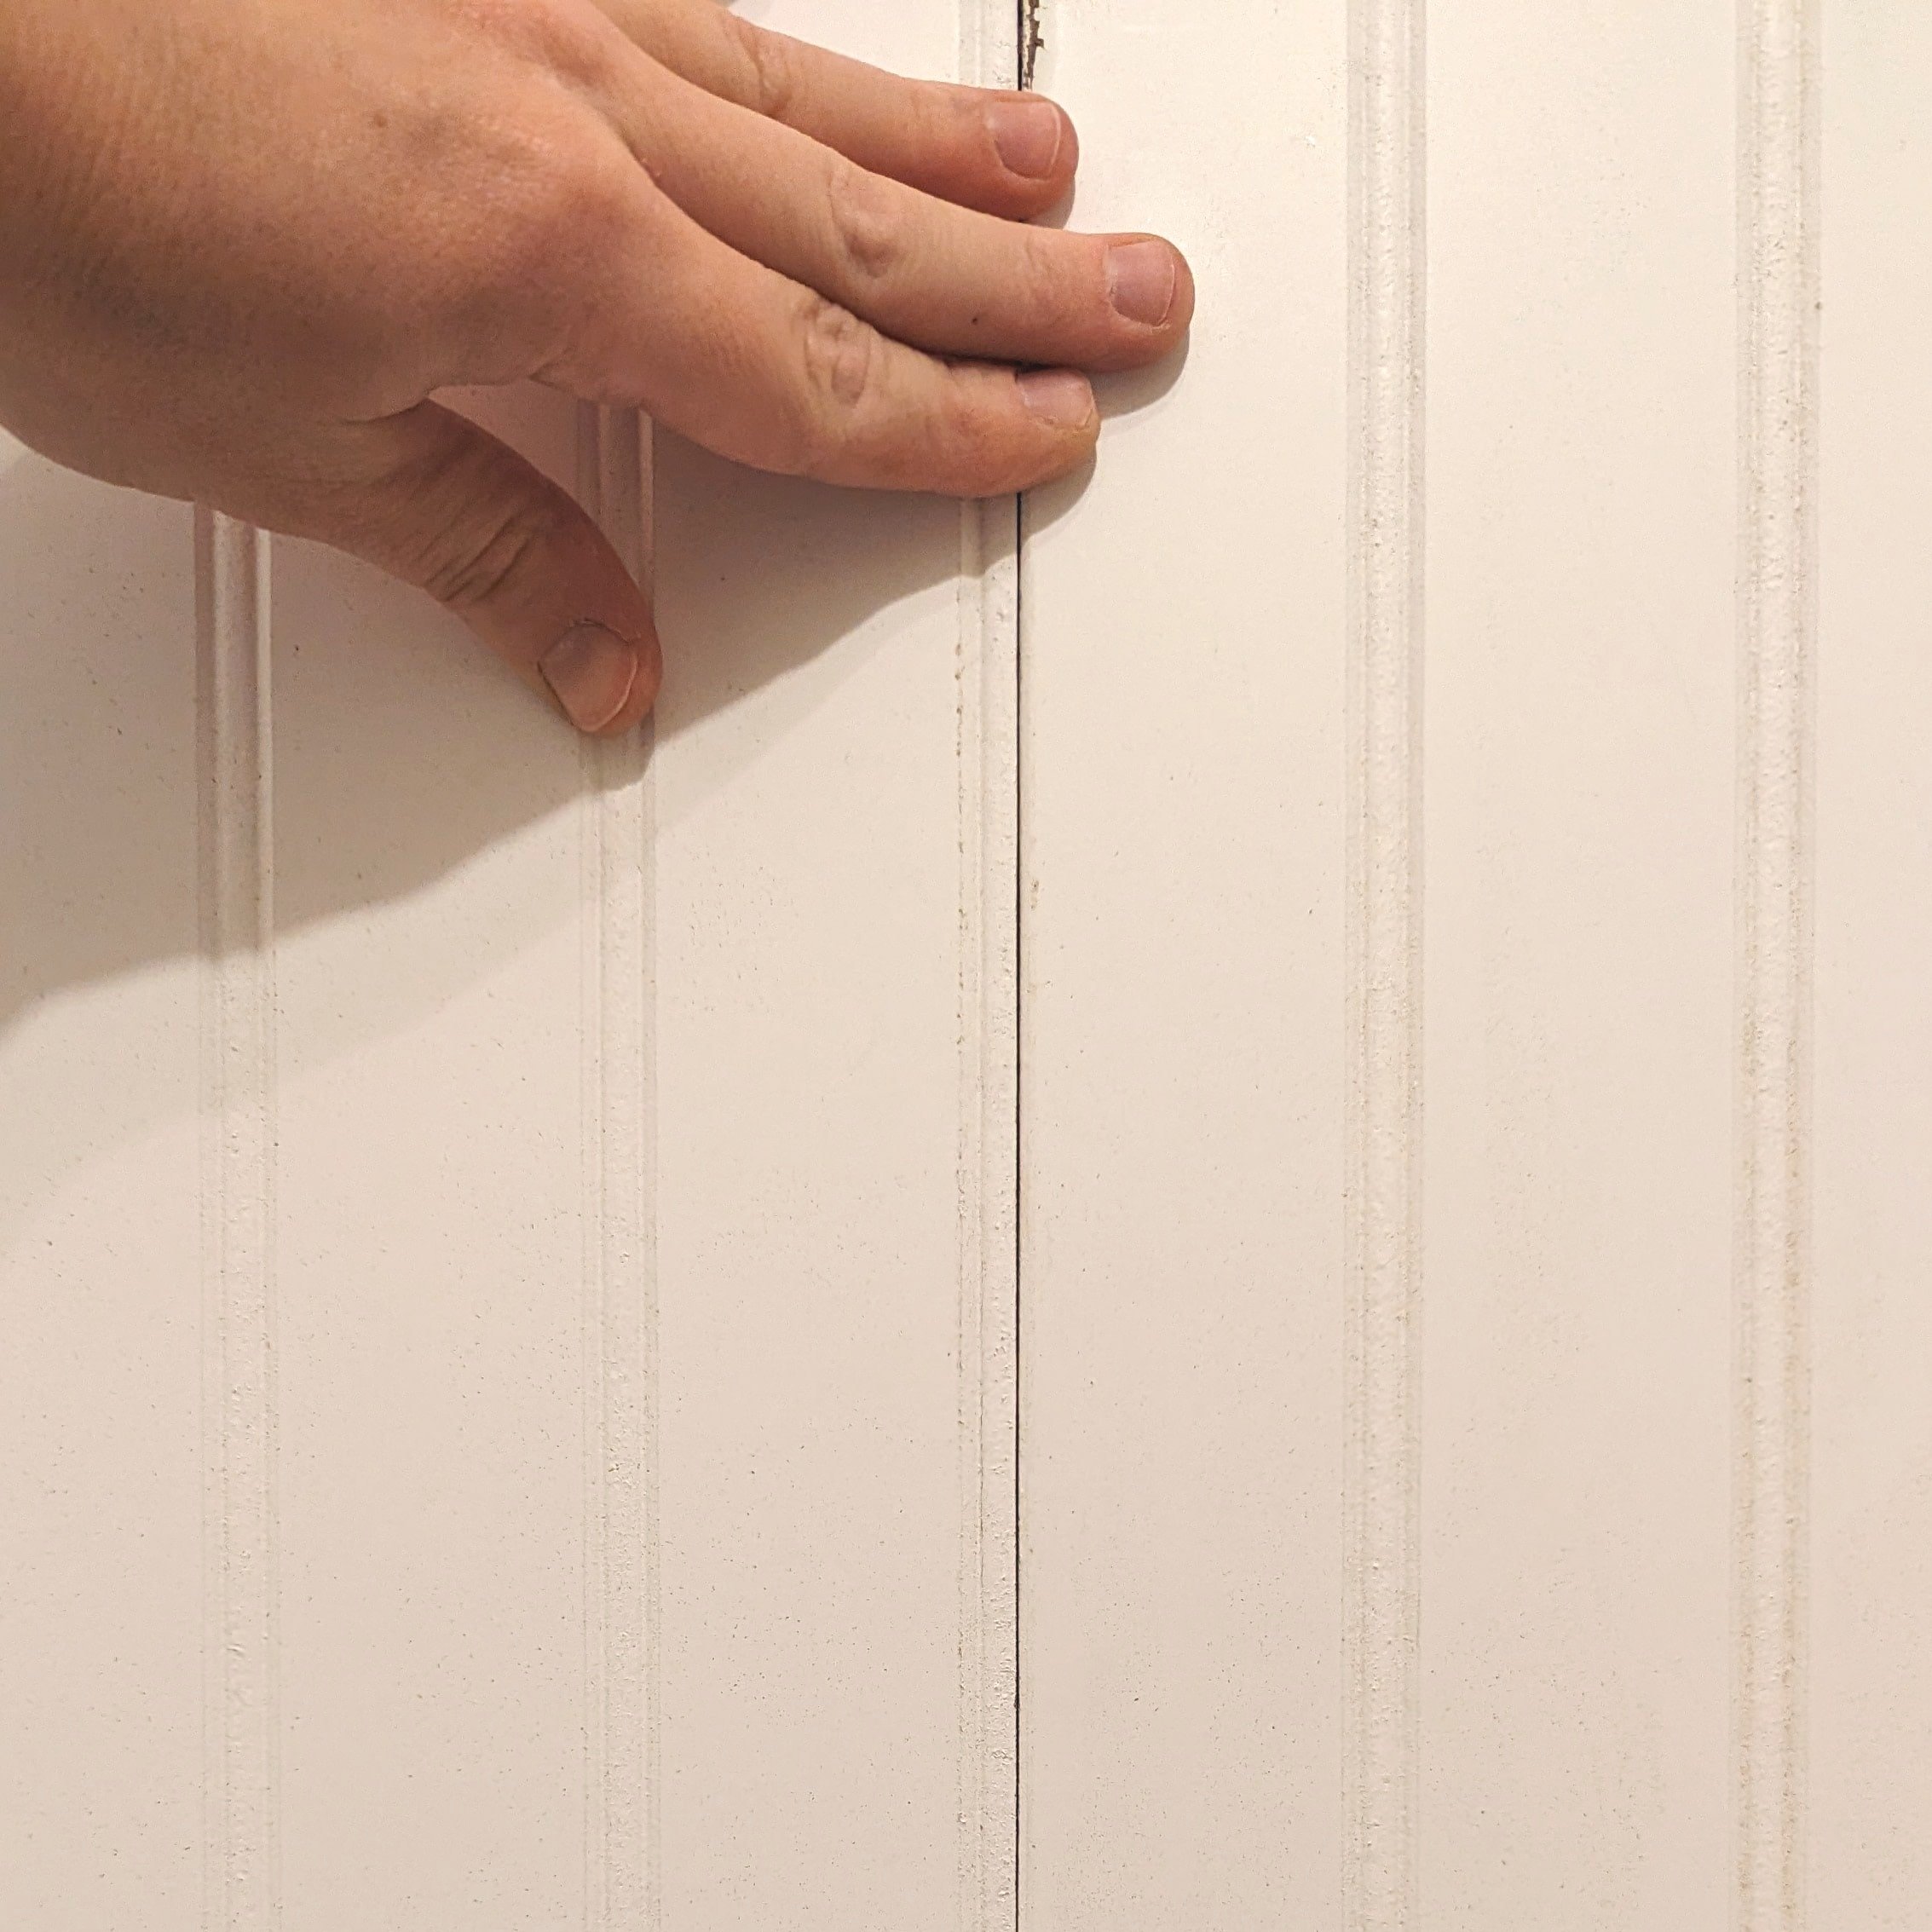
One thing you need to consider when cutting beadboard is to make your cuts along the pattern so that the piece that butts up against it looks seamless.
How to Cut Around Plumbing and Electrical

You’ll inevitably run into at least a little electrical and possibly some plumbing (depending on where you’re installing your beadboard). To work around these obstacles, start by measuring where they’ll hit on your beadboard (or follow this hack that seems ridiculous but actually works super well!)
My oscillating multi-tool made quick work of cutting out the holes for my outlets. For the plumbing, we started off by using a spade drill bit, but we didn’t have one that was quite big enough, so we switched to a hole saw. Both worked equally as well.
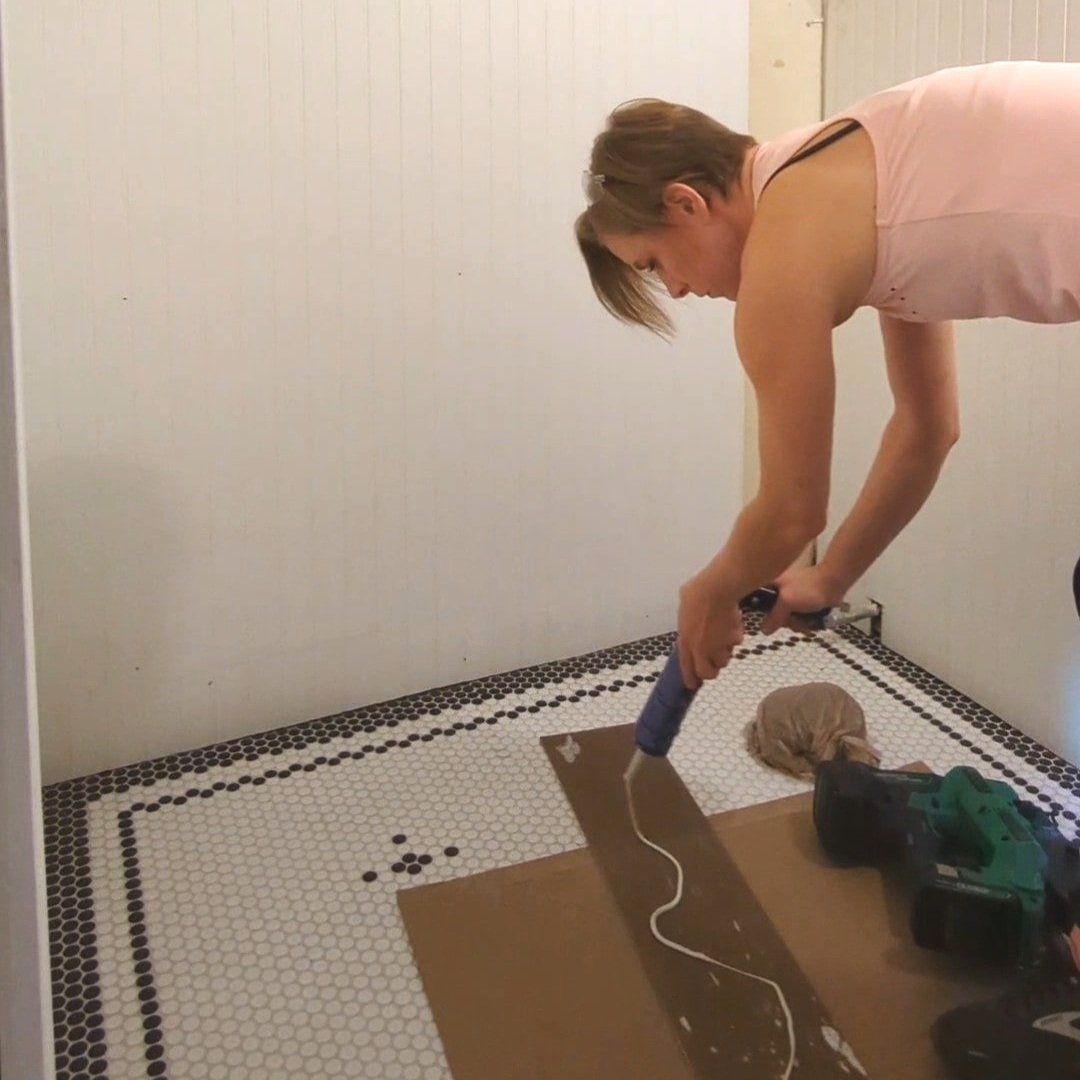
How to Hang Beadboard
Using your caulk gun, apply construction adhesive to the back of the beadboard in a zigzag pattern.
Remember that level line I had you draw around the room? Line the top of your beadboard up with that line, then press it to the wall.
Lastly, nail the beadboard to further secure it to the wall. I made sure to nail on each stud near the top (where my chair rail would cover), in the middle, and near the bottom (where my baseboard would cover).

Add additional nails where necessary even if there isn’t a stud.
Then, you can install your baseboard and chair rail! This is where the level line would have come in handy for me. Because my beadboard wasn’t a consistent height across the top, I couldn’t hang my chair rail above it like I originally planned without a weird gap in some areas. Instead, I installed the chair rail on the beadboard itself.
It’s a fine solution, but I was hoping to carry the overall look up a little higher on the wall.
Finish It Up!
Using spackle or wood putty, fill your nail holes. Then caulk along any seams with paintable caulk.
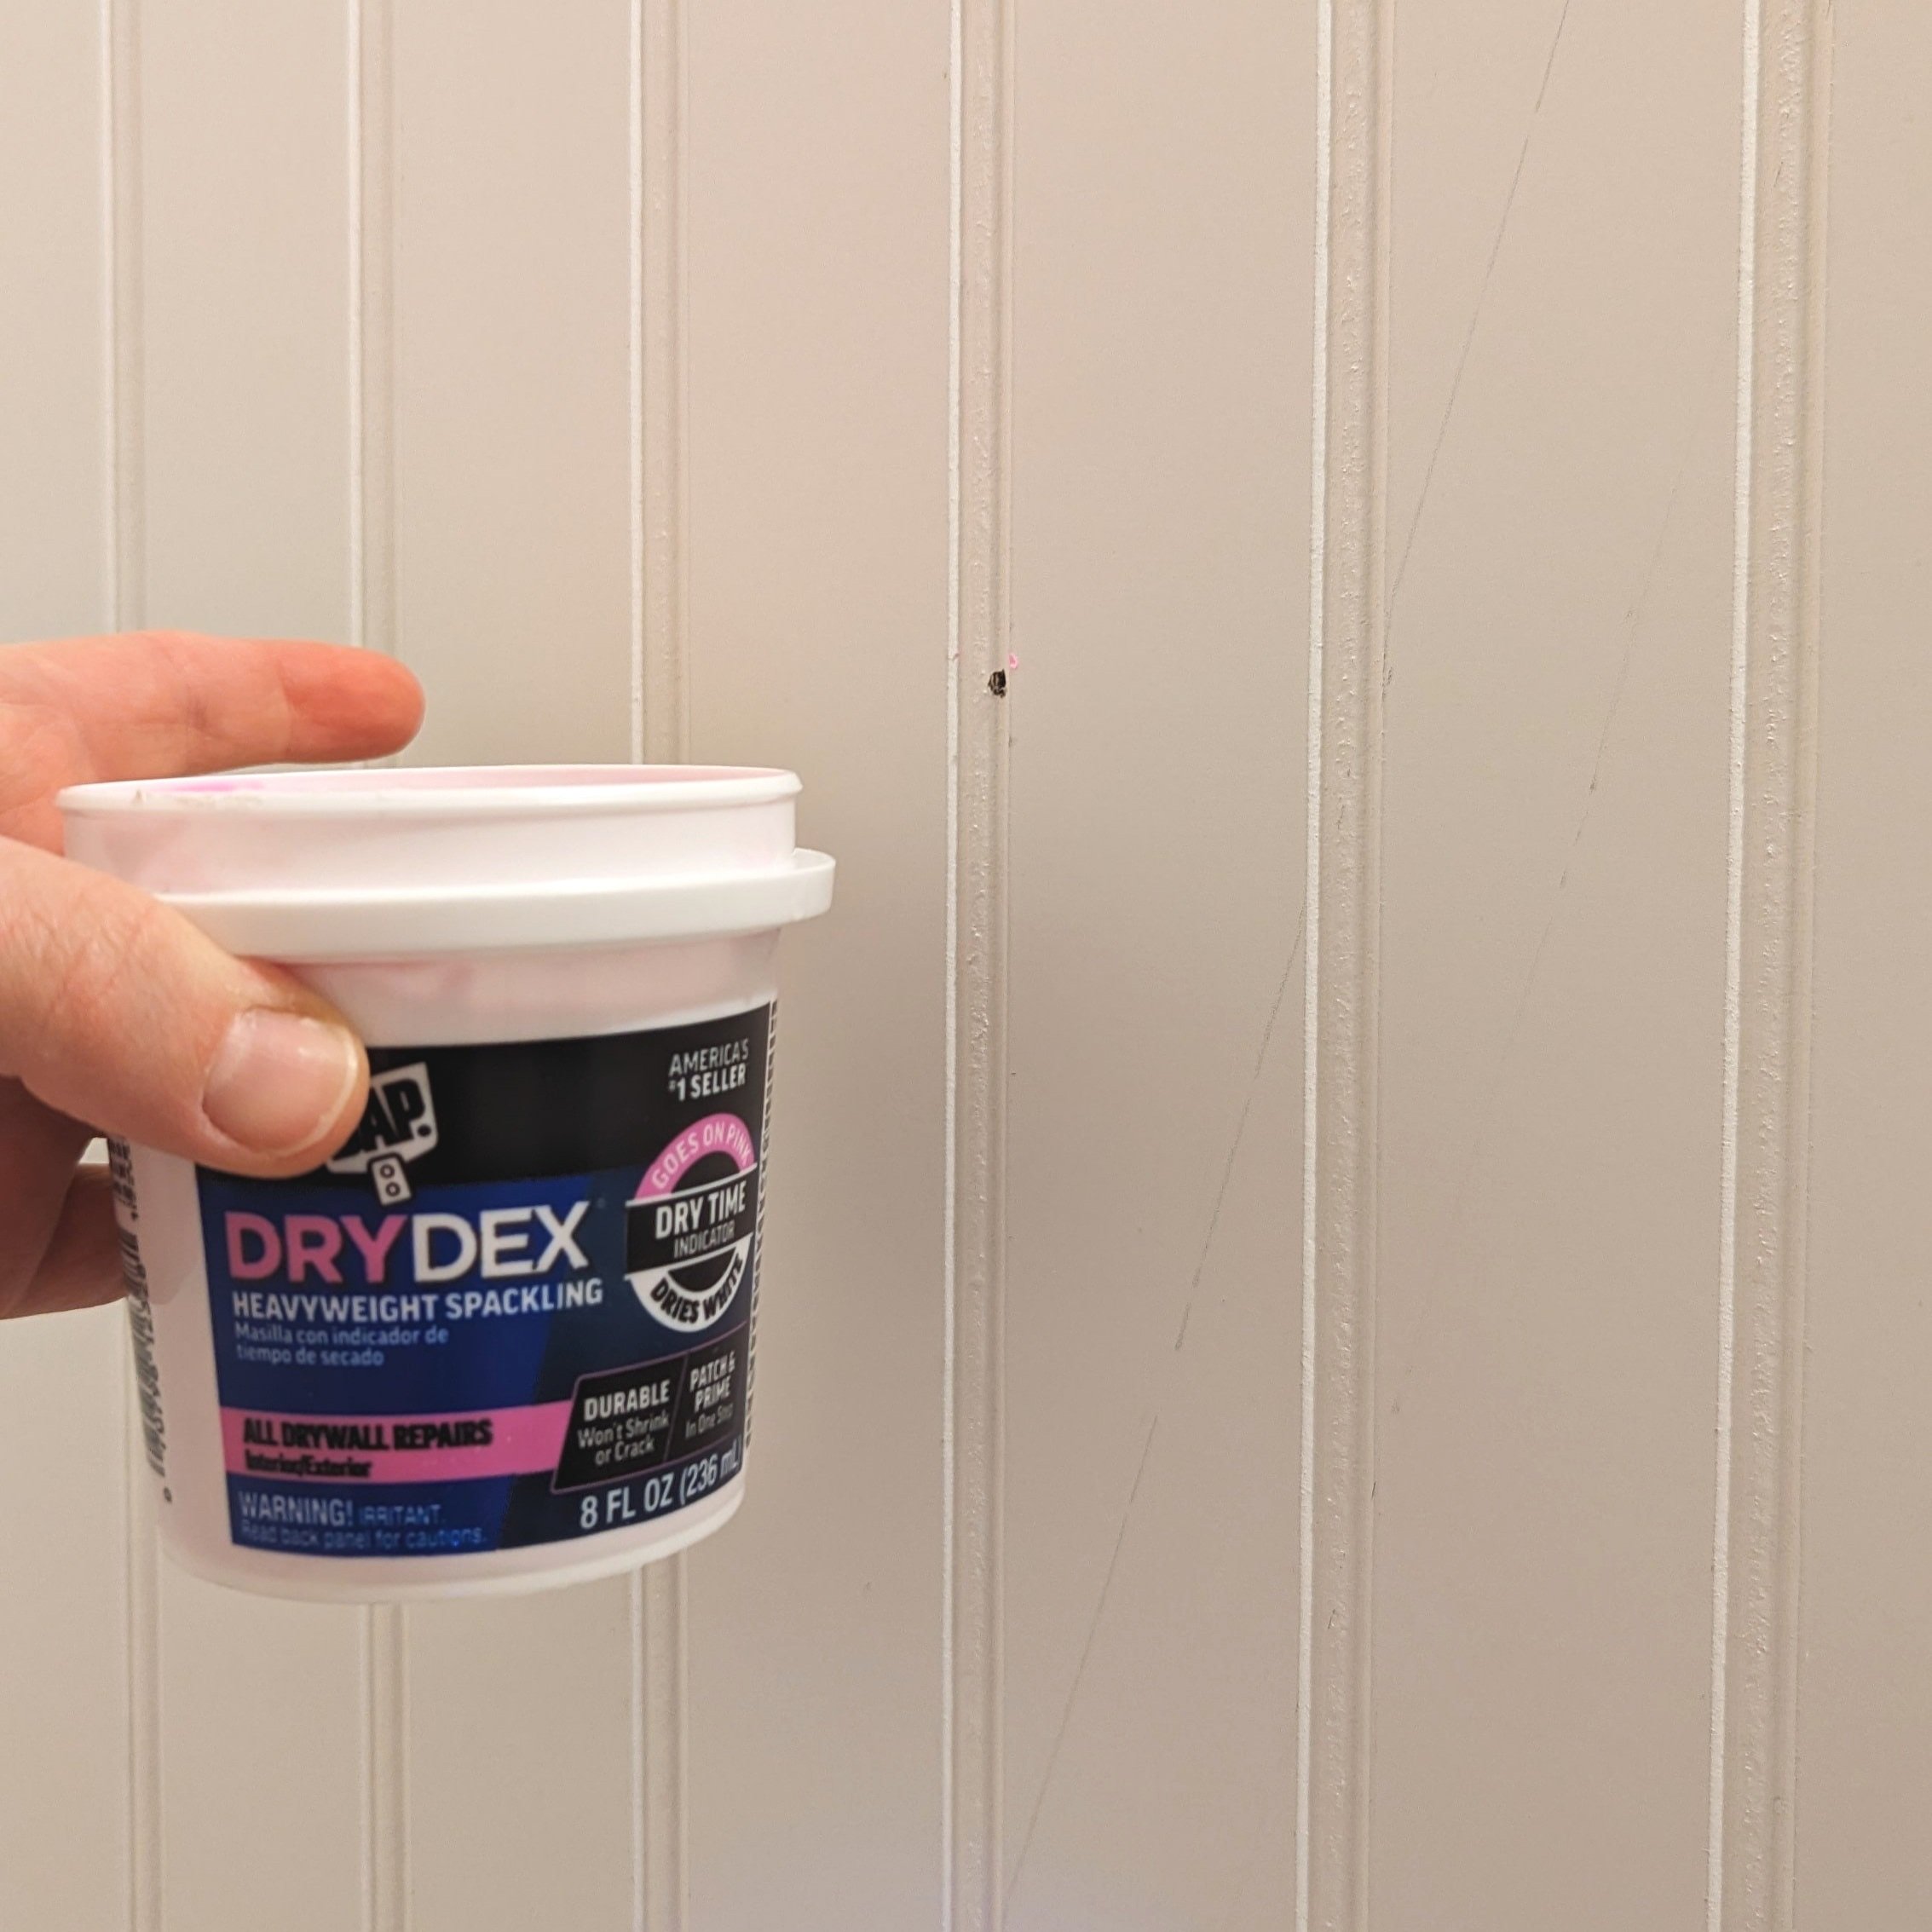
Once dry, sand the nail holes and wipe clean. Then it’s on to painting!
I used a paintbrush and roller to cover my entire room in the moody off-black paint I envisioned.
The last step is to reinstall your outlet covers or switch plates.
Congratulations! You've successfully hung beadboard on your wall, adding a touch of classic charm to your space.
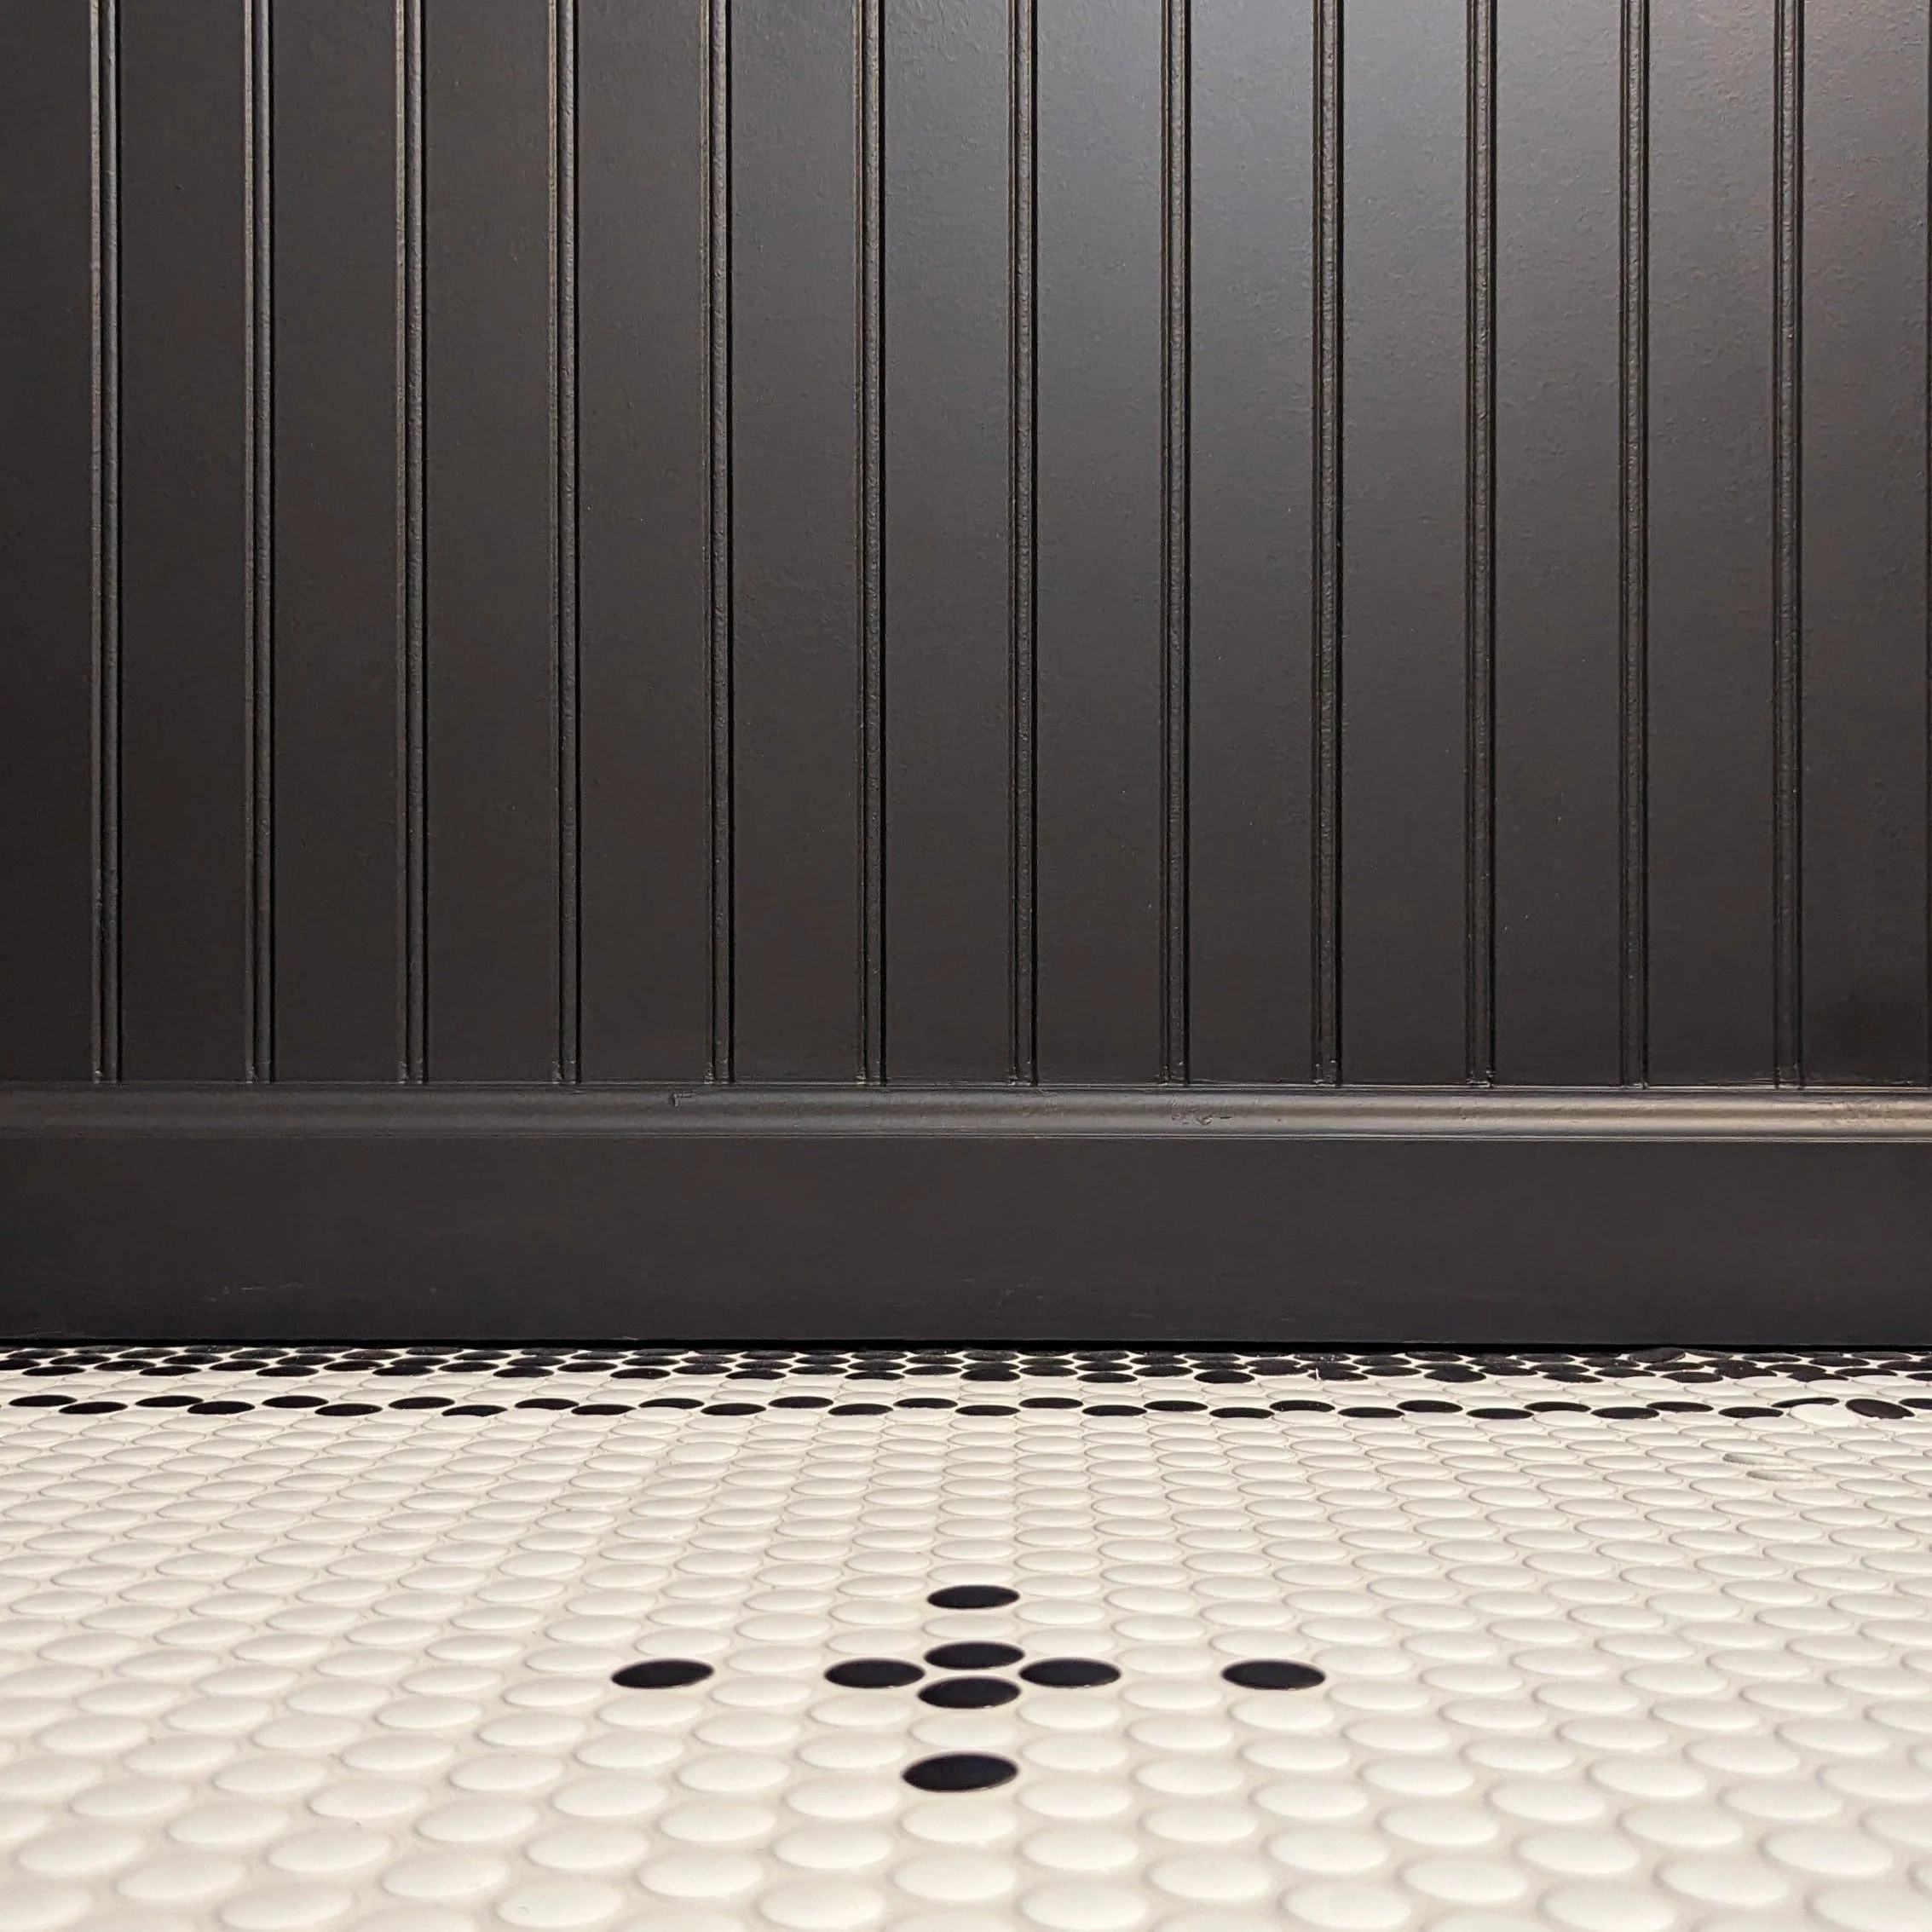
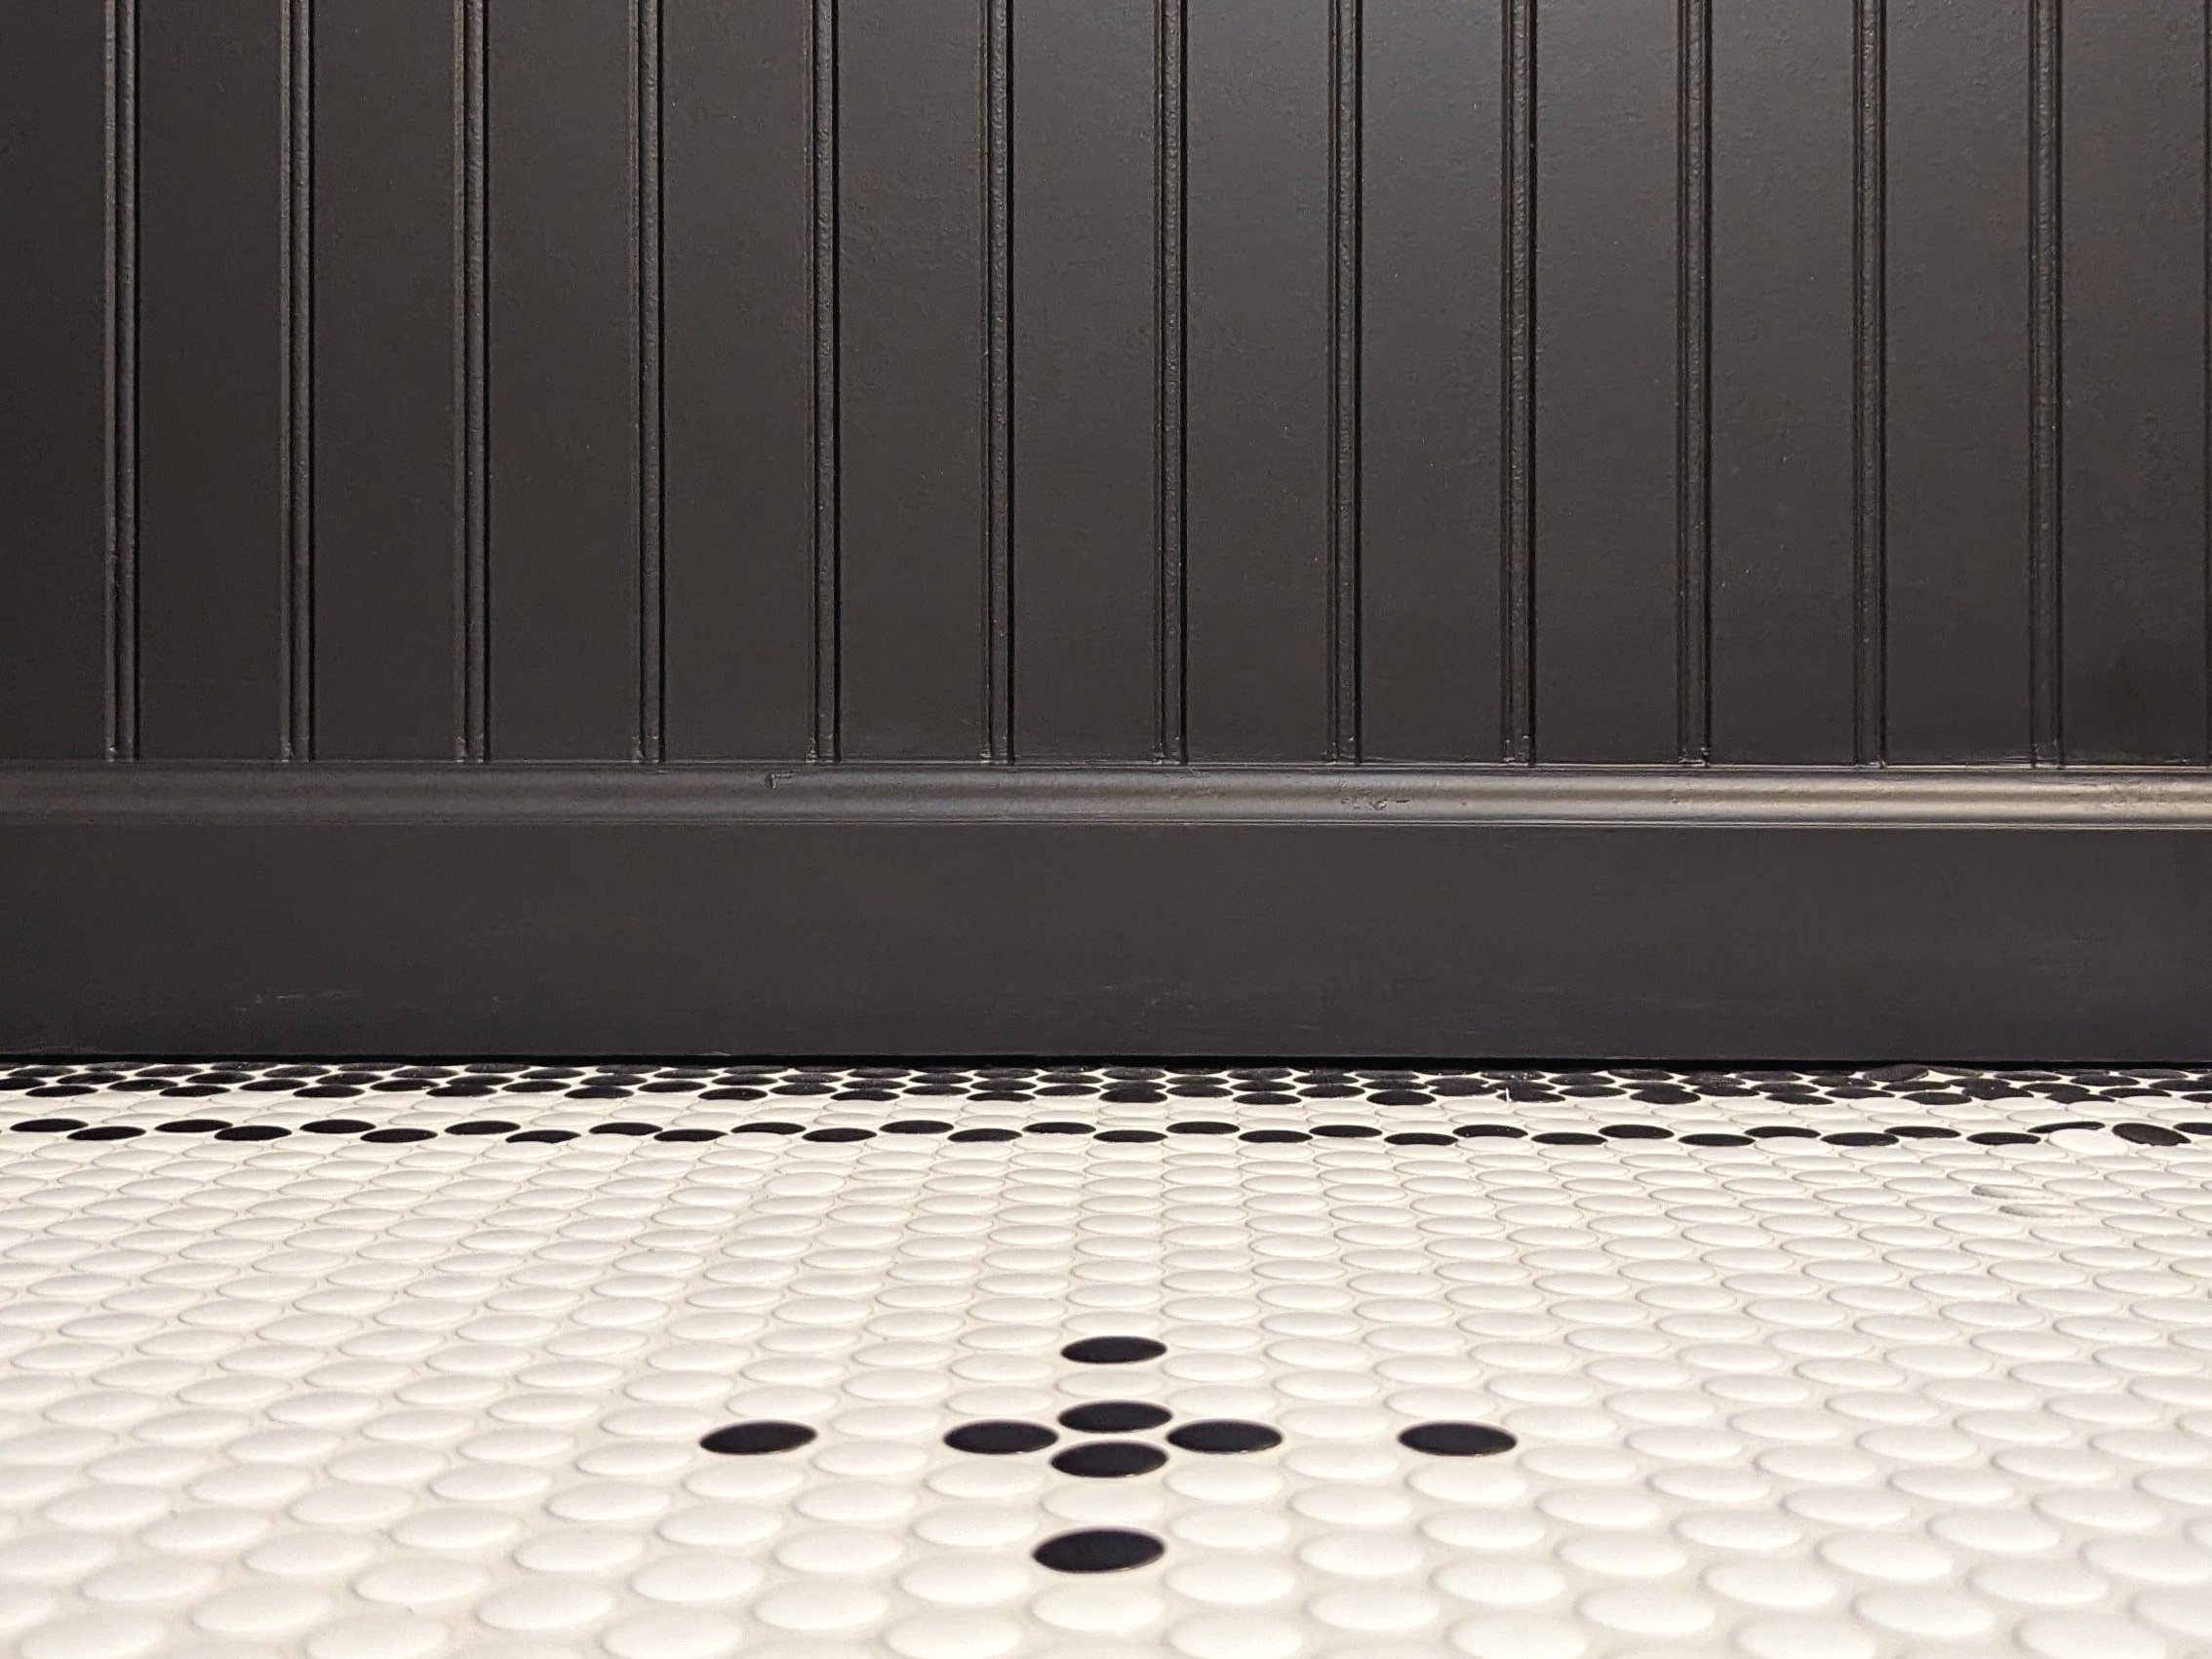
Final Thoughts
I’m in love with the look of the classic beadboard paneling next to the penny tile floor.

There’s a reason the top half of the “after” photos is missing in this post, though. My bathroom looks a little insane right now with the lack of… really anything except for the floor and beadboard. I still have modern wallpaper (coming next week!), the vanity, and all the finishing touches to add to this space. Once the rest of the elements are added, this space will make a lot more sense. Do you trust me!?
Be sure to follow along on Instagram and Facebook for all the behind-the-scenes of this remodel!


Catch up on the rest of the One Room Challenge:
DIY Bathroom Beadboard
My Top Tips for Installing Penny Tile
It’s week 4 of the One Room Challenge, and we’re officially halfway there! This week was all about tiling the floors in the half-bathroom. I took a stab at installing penny tile, and I’m in love with how it turned out.
How to DIY a Penny Tile Design - Fall ‘23 ORC Week 4
Looking for a timeless tile for your bathroom? Look no further. Here are all my tips for installing penny tile - with a classic pattern!

It’s week 4 of the One Room Challenge, and we’re officially halfway there! This week was all about tiling the floors in the half-bathroom. I took a stab at installing penny tile, and I love how it turned out.

Admittedly, I was never a big fan of penny tile until I saw Chris Loves Julia use it in their half-bathroom and swooned over the classic design. I felt like it would be the perfect contrast to the more modern elements in my own half-bathroom design.
I once had a contractor refuse to install penny tile in a client’s house because he said it was too difficult. So I was understandably a little nervous about this project. Luckily, I have an inexplicable love for tedious tasks, so this project was right up my alley!
Here’s what you need to lay round penny tile:
As an Amazon Associate and partner with other brands, I earn from qualifying purchases. This post may contain affiliate links, meaning I receive commissions for purchases made through those links at no cost to you.
Materials
- Black and White Penny Tile (Mine is from Floor and Decor, but Home Depot also carries it here and here.)
- Drill
- Mixing Paddle
- Buckets (I used 3)
- Trowel
- Mortar
- Pre-Mixed or Powdered Grout
- Grout Sponges
- Straight Edge
- Utility Knife
- Dry Erase Marker
- Flathead Screwdriver
- Grout Sealant
- Tile Nippers*
- Wet Saw*
*If your tile is bumping up next to a straight edge that won’t be covered by something else (like the edge of a bathtub, for instance), you might need a wet saw for this project. Fortunately for me, all my edges will be covered by the baseboard. In fact, I bought tile nippers but didn’t actually end up needing them at all!
Prep
As with any project, the key to a good end product is in the prep. Before laying your tile, I recommend following the steps below.
Check Your Tile Batches
Tile color can vary from batch to batch. Before you even think about tiling, check the batch numbers on the boxes to ensure they’re all from the same one. (This tip goes for any tiling project, BTW!)
Remove Baseboards
To greatly reduce (or eliminate) the amount of tile cuts you’ll need to make, I recommend removing your baseboards and laying the tile up to the wall. Afterward, you can reinstall your baseboards on top and cover any rough edges or gaps.
Prep Your Floors

If you have a plywood subfloor, you'll need to install cement board before tiling.
Because I installed my tile over a cement slab this wasn't required.
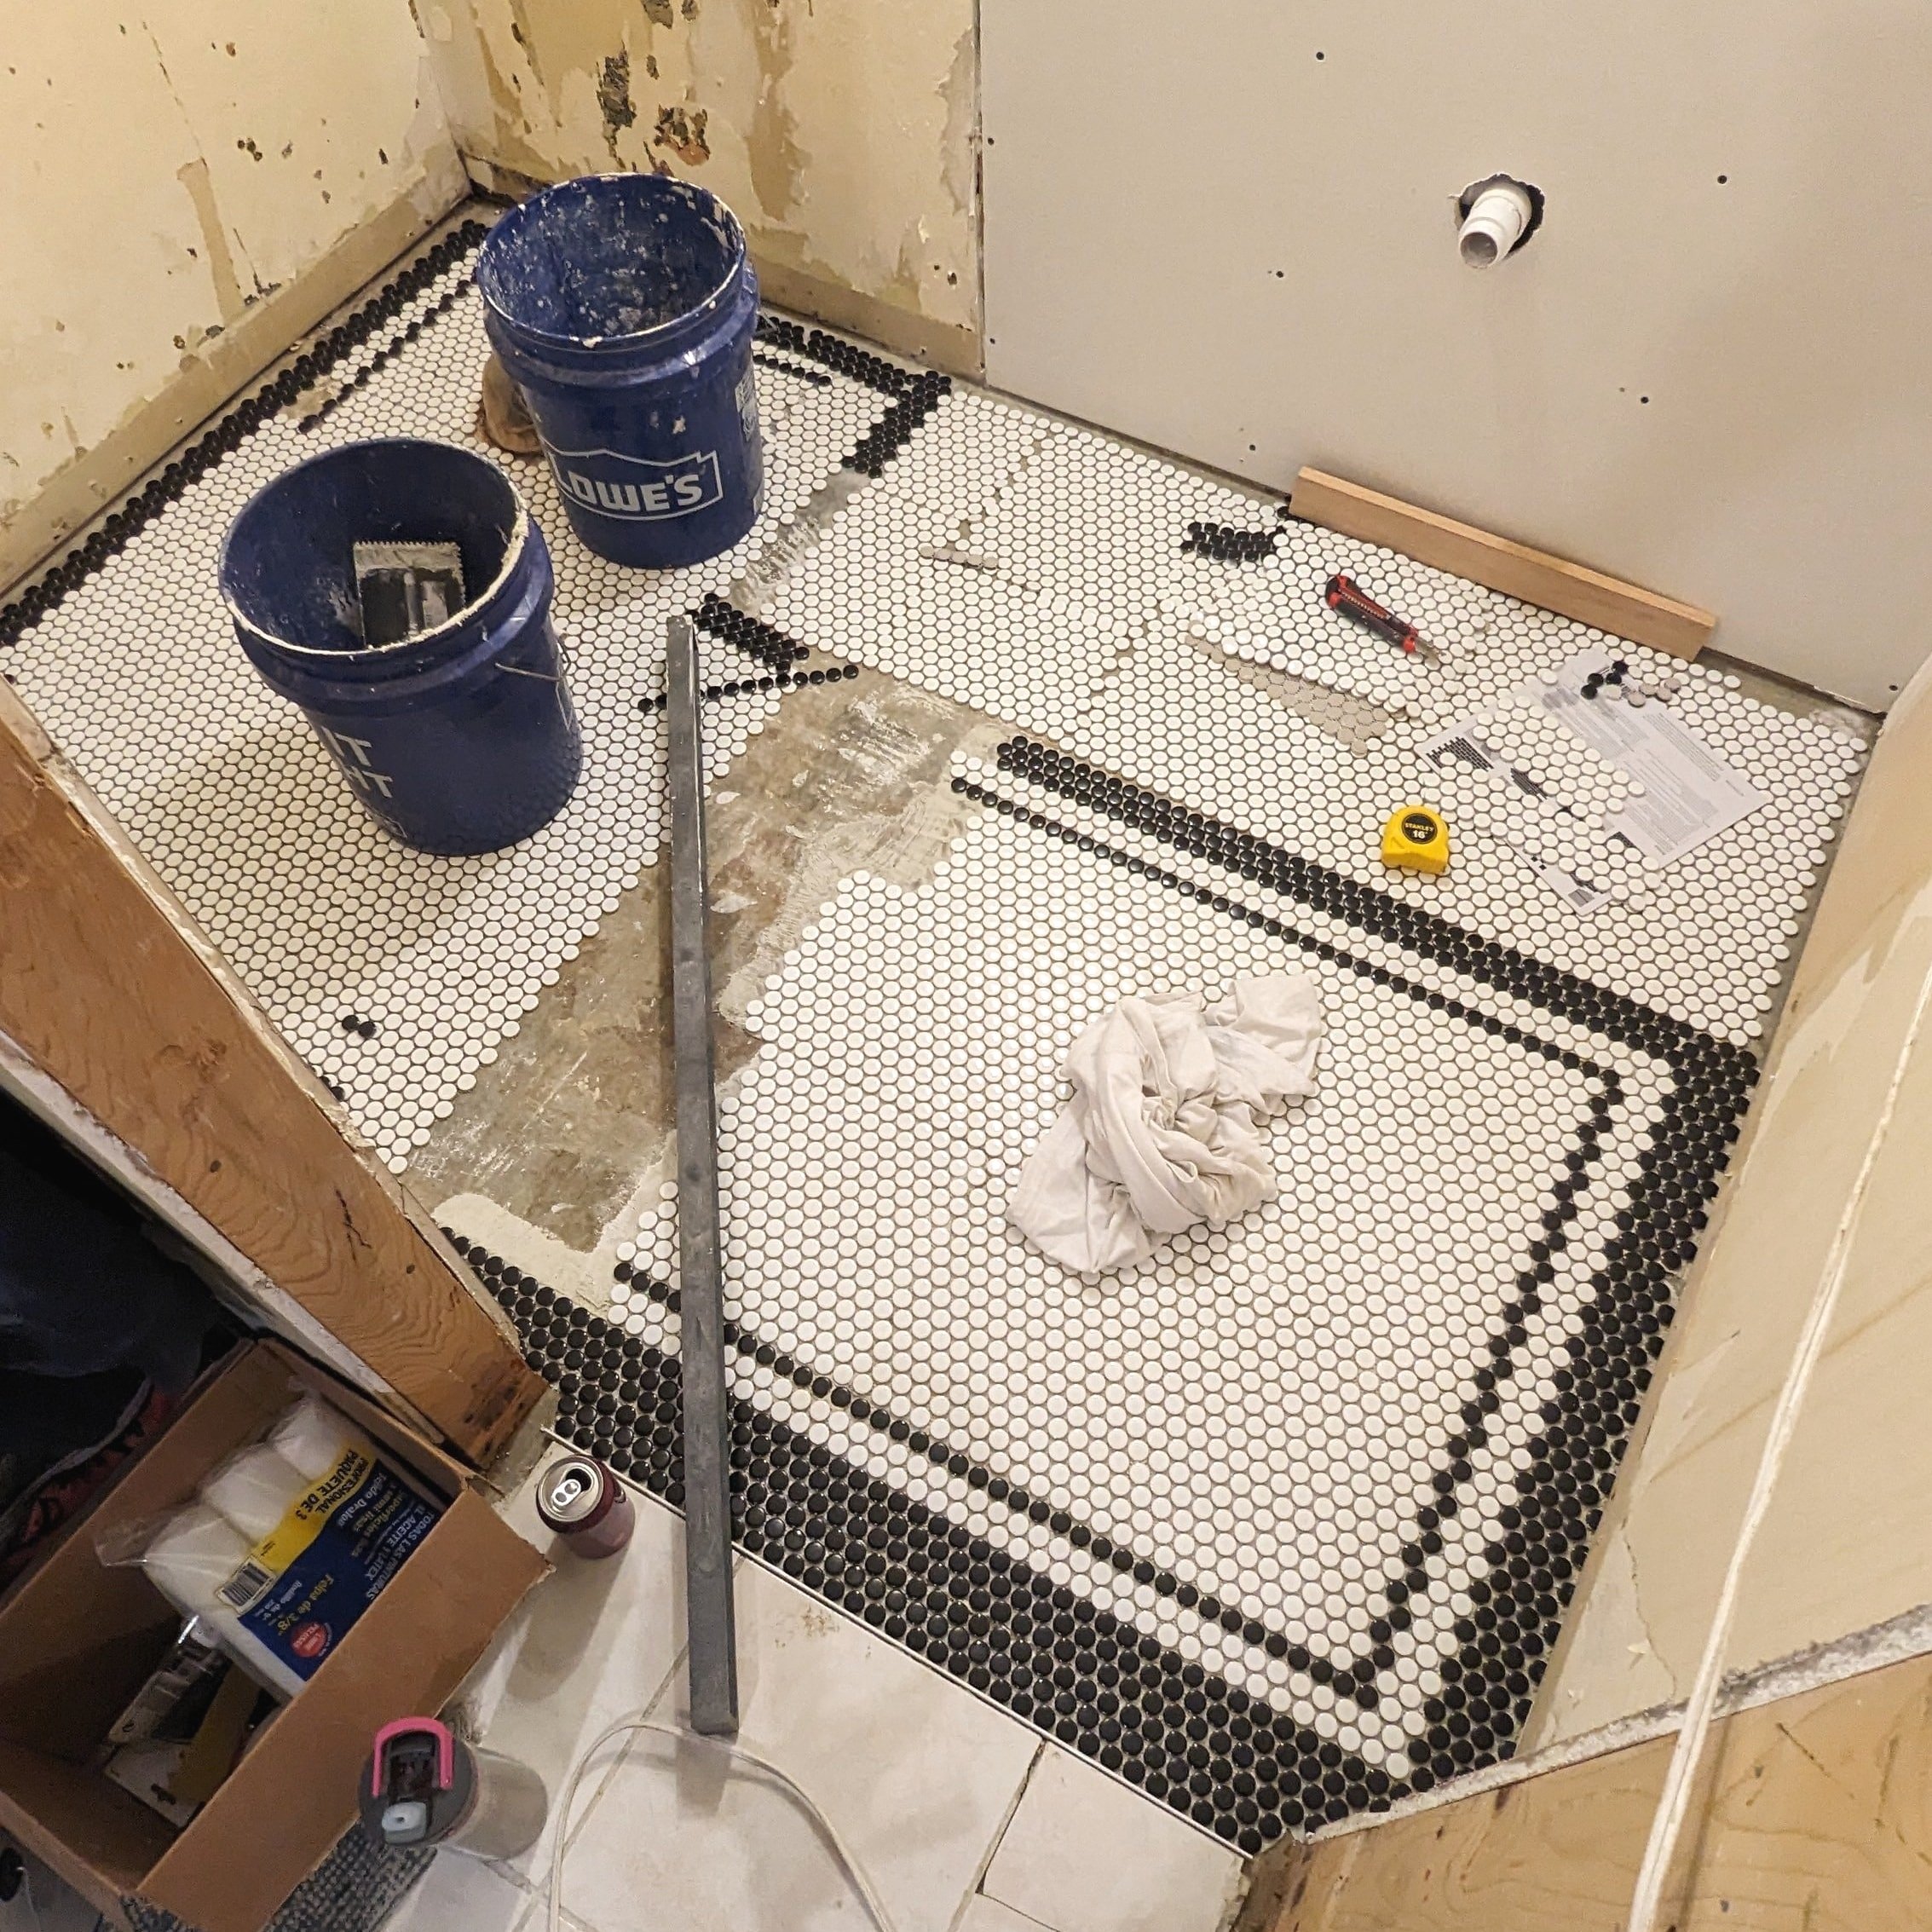
However, before I could lay my new tile, I had to chip up all the mortar left from the old tiles to create a smooth surface. Luckily, it was pretty easy to chip up with my handy dandy 5-in-1 tool.
Plan Your Layout

Now we start getting to the fun part - figuring out your design! Forewarning: this part will probably take longer than you think. But it’s worth it!
I initially assumed I would only use a couple of sheets of tile to plan out my design, but I actually dry-laid the entire bathroom.
This might not be necessary for every project. But it was very reassuring to know exactly what the whole design would look like and that I had enough tile to do what I wanted. It was also fun to play without any commitment.
Additionally, the tile mesh backing is easy to cut apart with a utility knife, so it wasn’t a huge chore to dry-lay.
Before I started, I gathered lots of inspiration so I had an idea of the direction that I wanted to go. Each bathroom is unique in its dimensions, so not every design will be exactly the same. And that’s part of the fun of this tile!

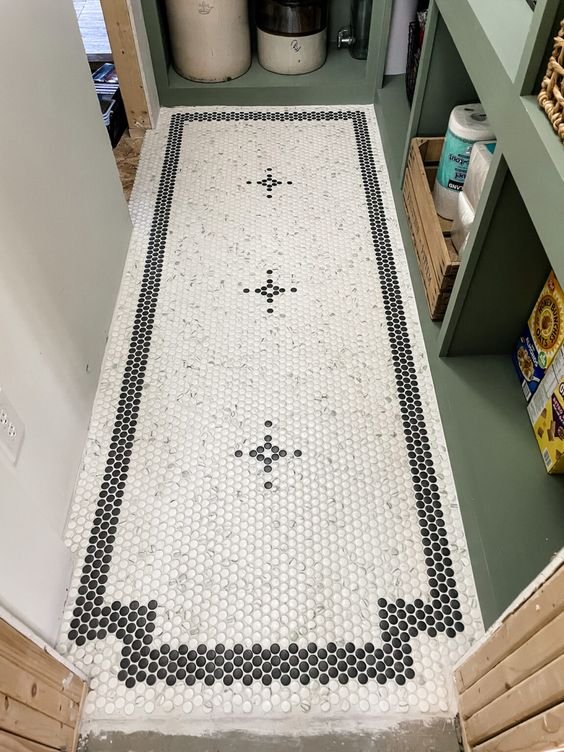
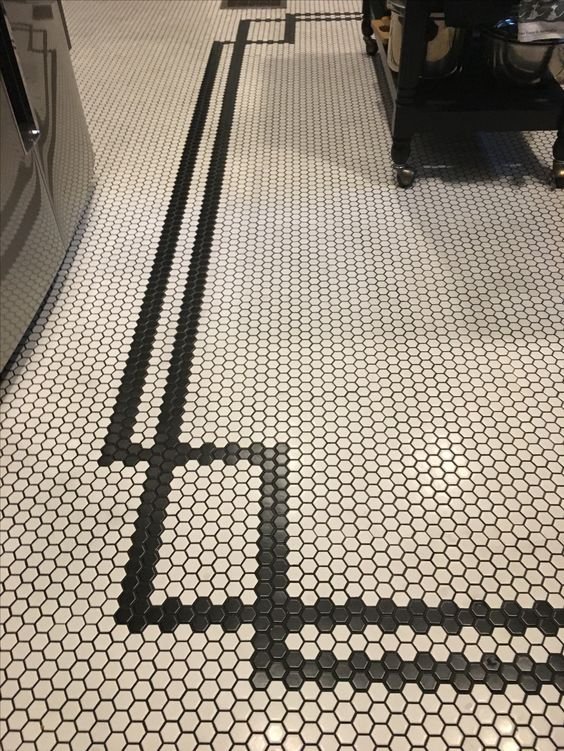
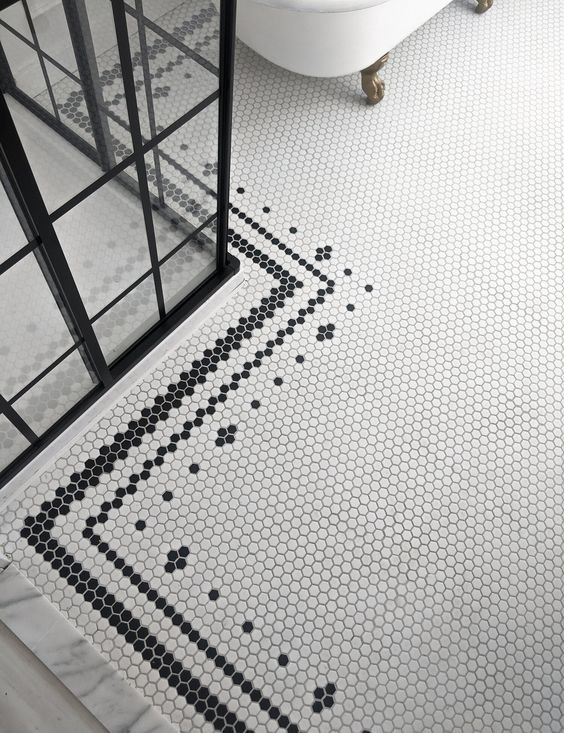
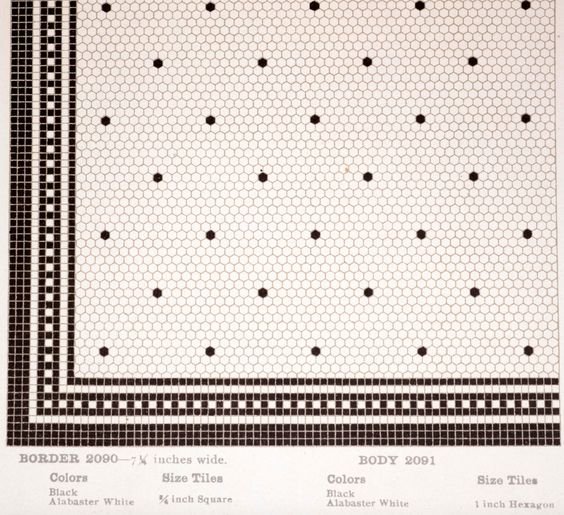
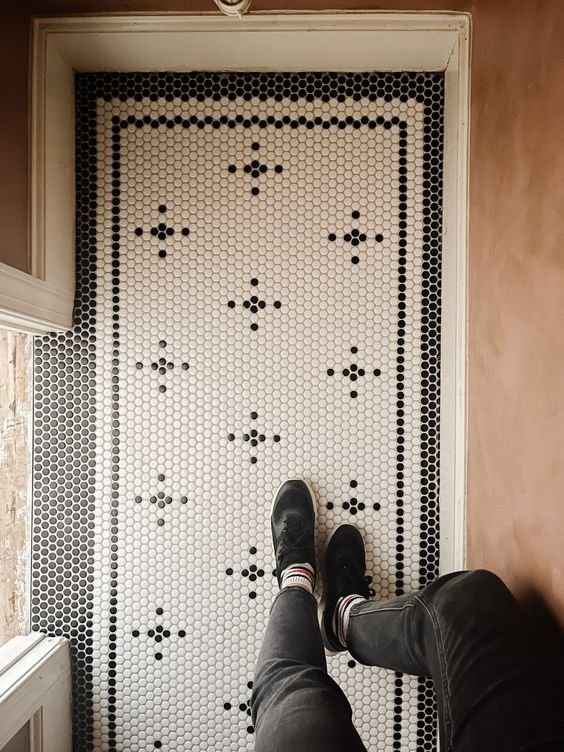
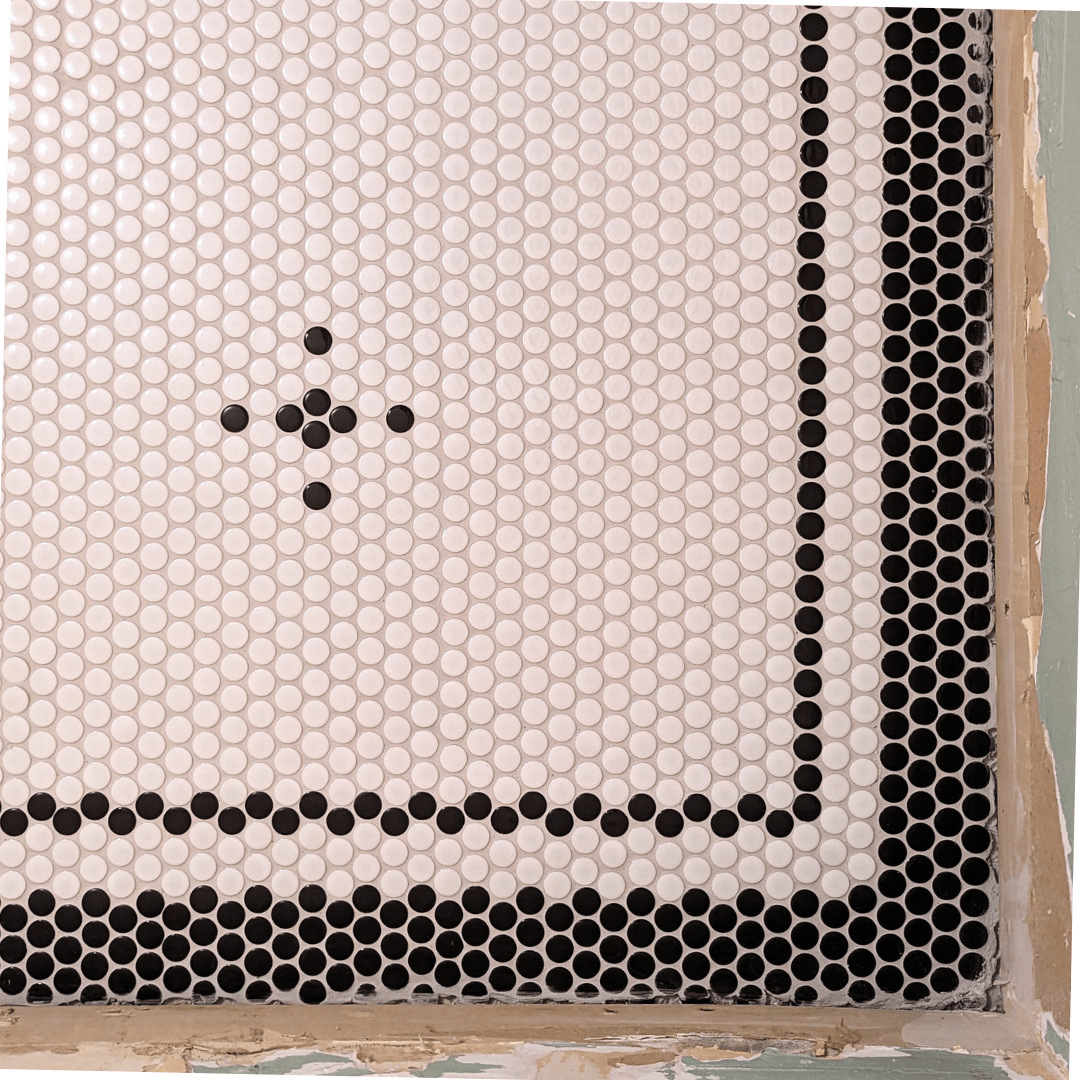
I decided to create a border with my design, which is a recurring theme in all my inspo pictures. But since my vanity isn’t open at the bottom, I opted to run the border in front of the vanity so it wouldn’t be hidden. At the last minute, I chose to add a little bit of a design down the center with the stars, too (asterisks? I don’t exactly know what they are in this case).

Installation
Finally, we’ve reached the installation stage!
Use The Right Color Mortar
Use mortar in a similar color to your grout in case any pushes up between your tiles, and you don't catch it (trust me, it always happens). Since I used a light gray grout, I chose white mortar.
You can further prevent this from happening by using the right-sized trowel.
Use The Correct Size Trowel
Your trowel size depends on the size of your tiles. The larger the tile, the larger the notches you’ll need on your trowel. This is to make sure the correct amount of mortar is applied for your specific tile and it doesn’t ooze up between them.
For my penny tile, I used a 3/16” x 5/32” v-notched trowel. If you’re not sure what size trowel you need, a quick Google search can point you in the right direction.
Start in the Most Noticeable Spot

This is going to sound counterintuitive because it means I literally tiled myself into a corner, but I started tiling at the doorway. By doing this, I was able to ensure that the most commonly viewed part of the tile was perfectly aligned. That way if things got wonky further into the room, they’d be hidden by the vanity or toilet.
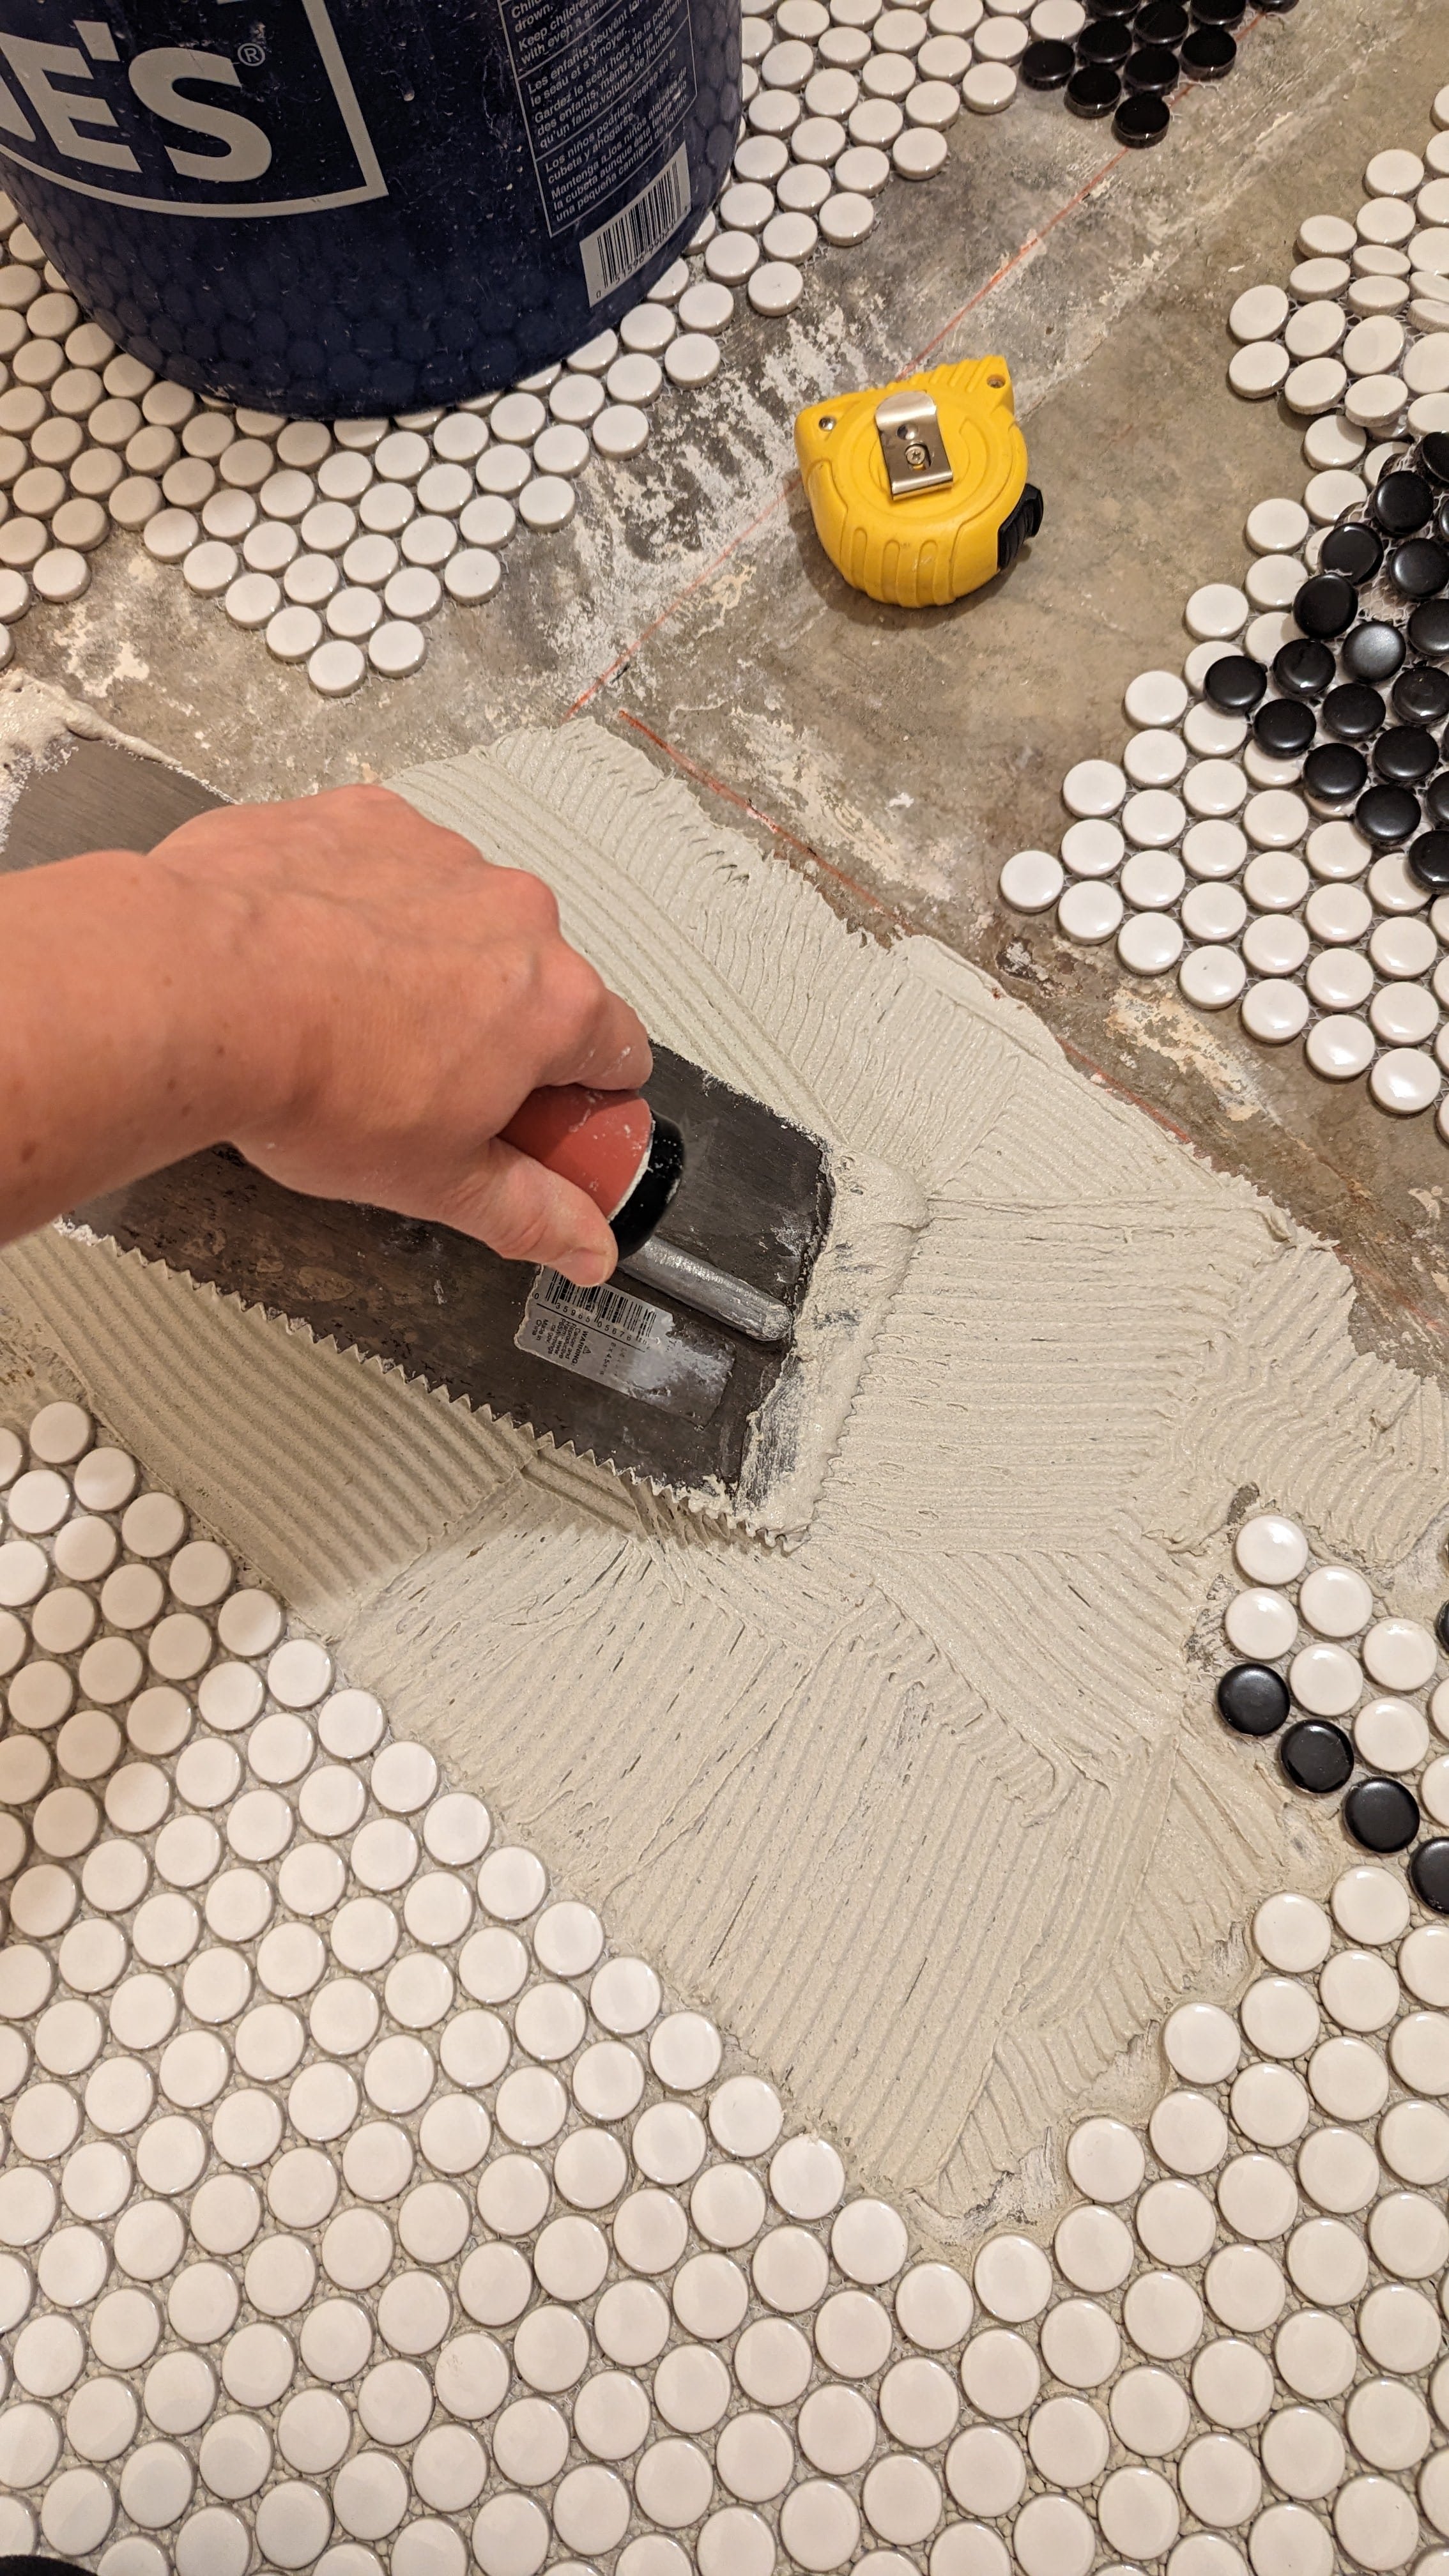
Install in Small Sections
Installing penny tile with a pattern is a meticulous process. To keep your mortar from drying out while you’re checking your design and spacing, only spread a small amount at a time.

Watch Your “Flowers”
While we’re talking about spacing, a cluster of penny tiles will make a little flower. The best way to make sure your spacing is correct with penny tile is to step back and look at the flowers the different sheets of tile make together. If you can’t tell where one sheet ends and one begins, you’re golden.
Use a Straight Edge
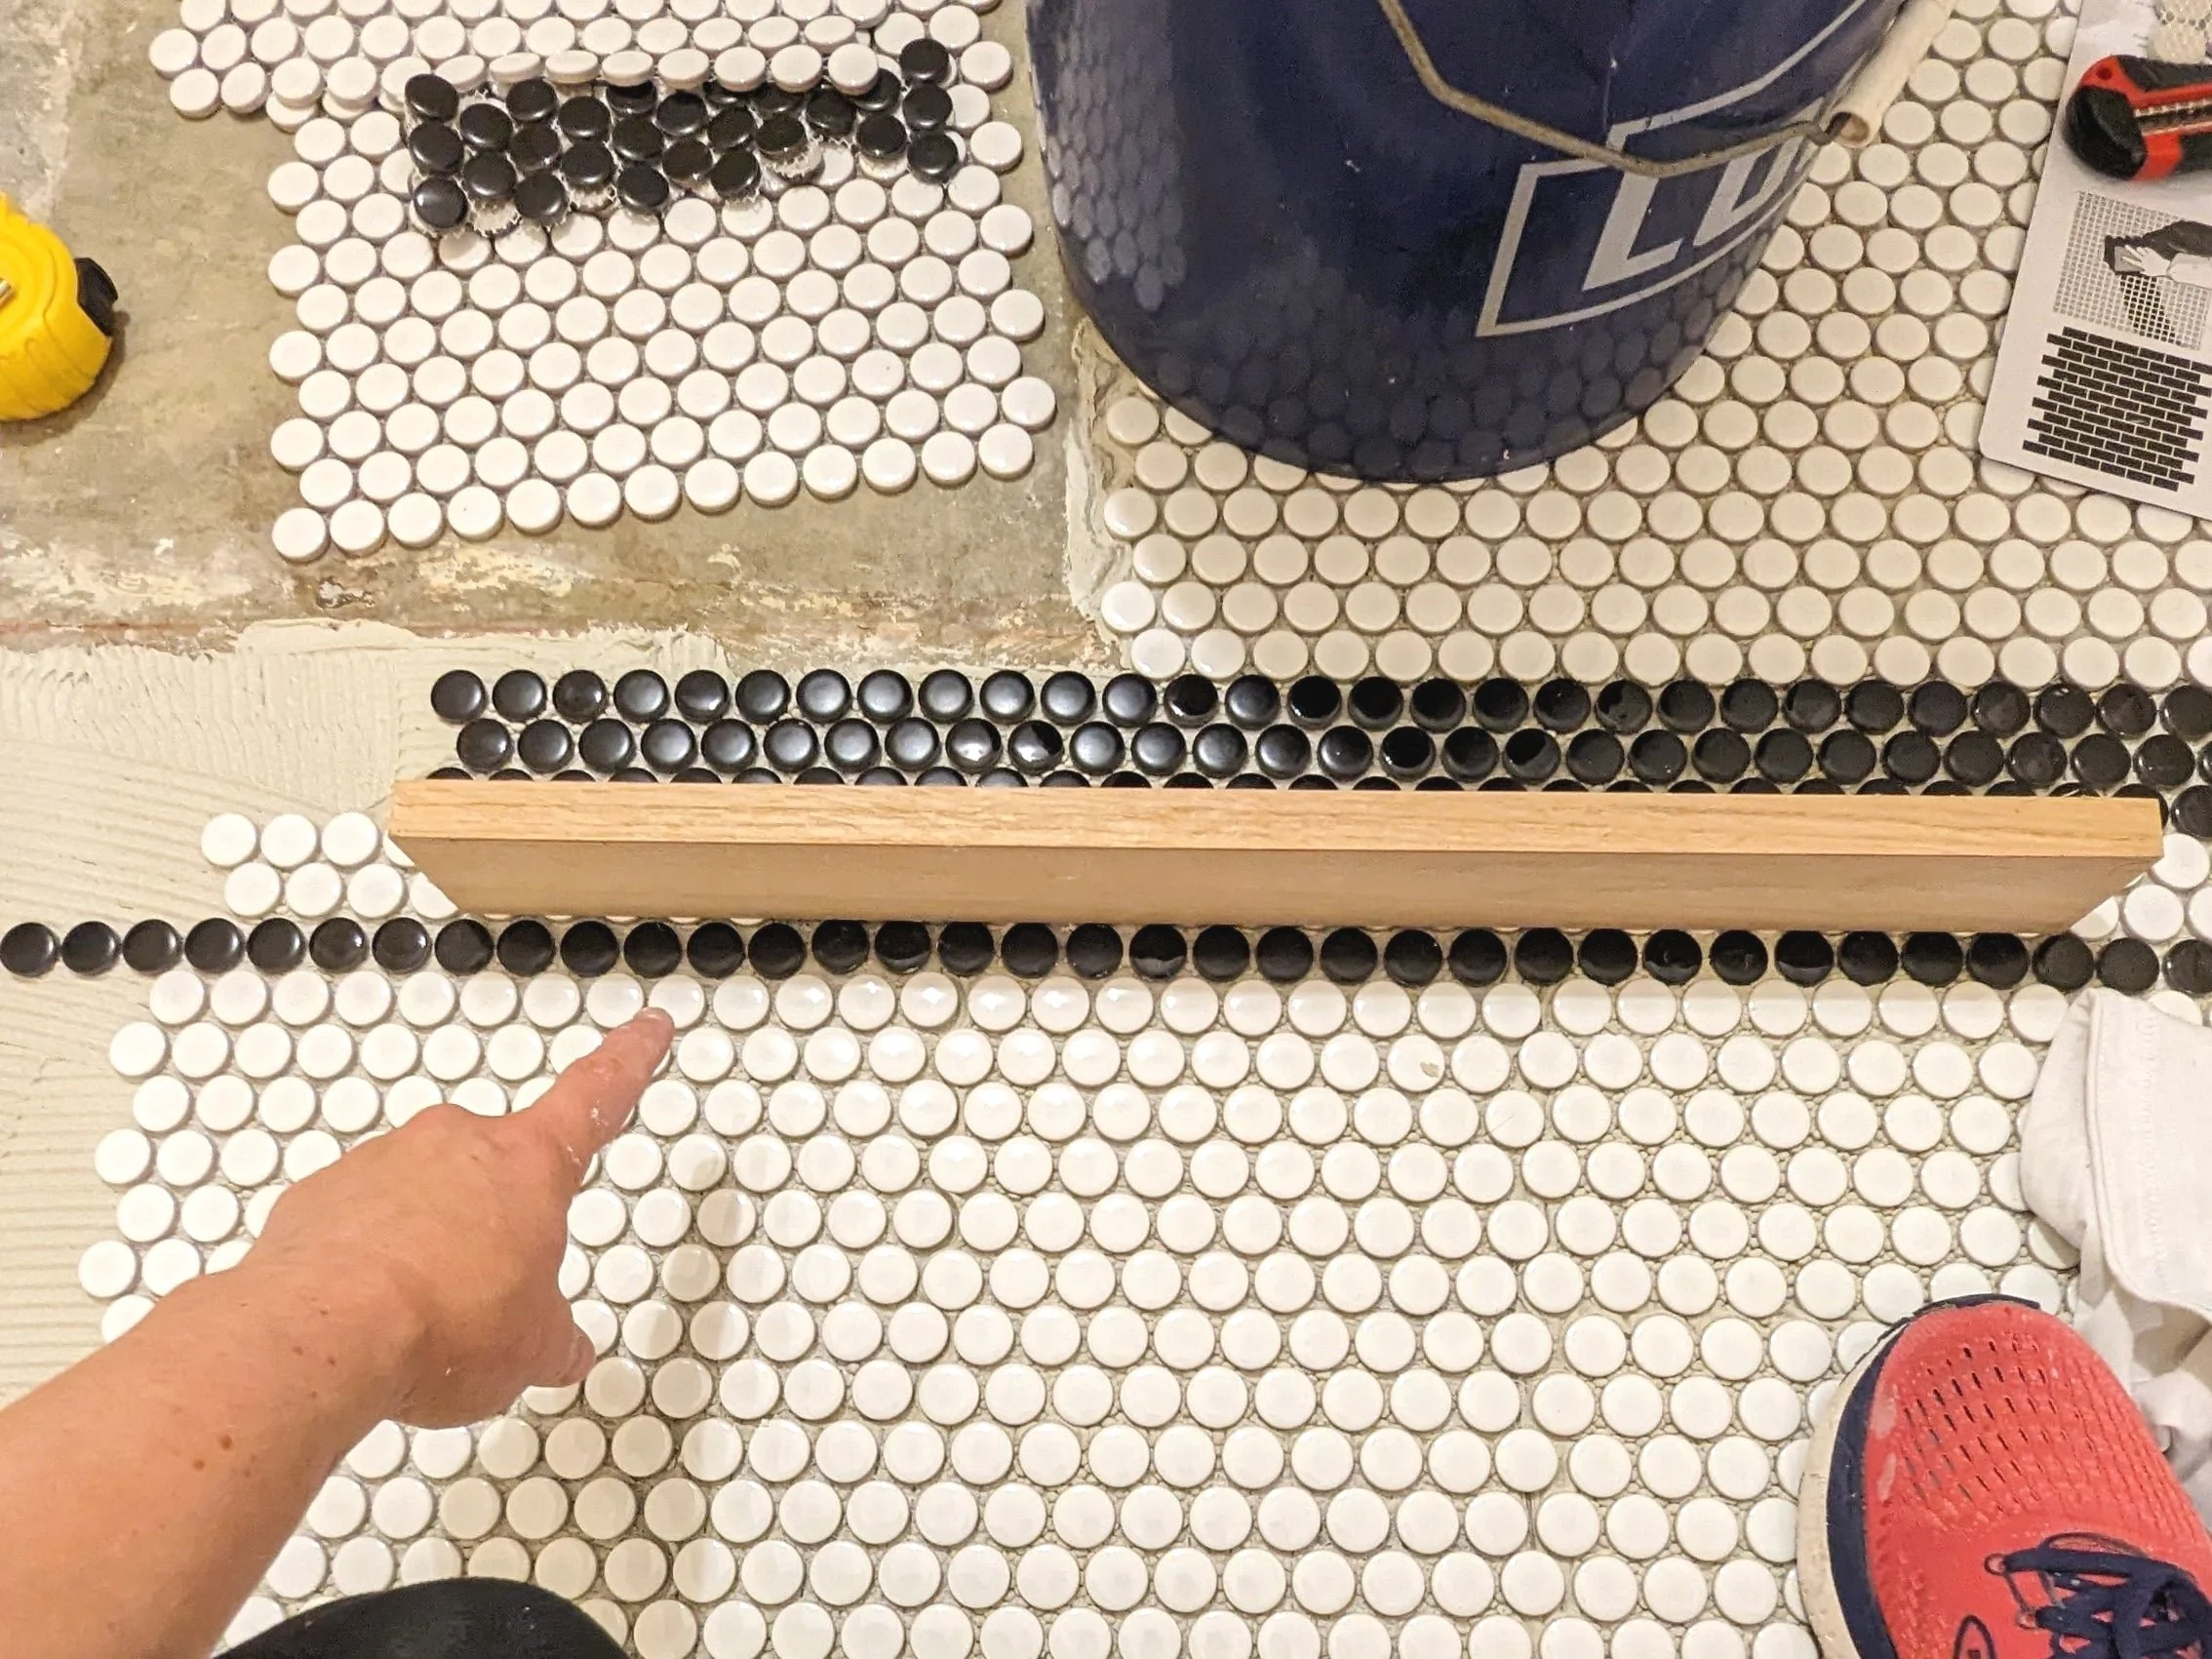
It’s easy for your pattern to start to slip out of alignment as you’re installing your tile. Use a straight edge like a scrap piece of wood or a level to check that your sheets are lining up evenly as you go.
Adding a Pattern
So you’ve installed your penny tile, and now you want to add the pattern to the middle, eh? This is actually really simple to do!
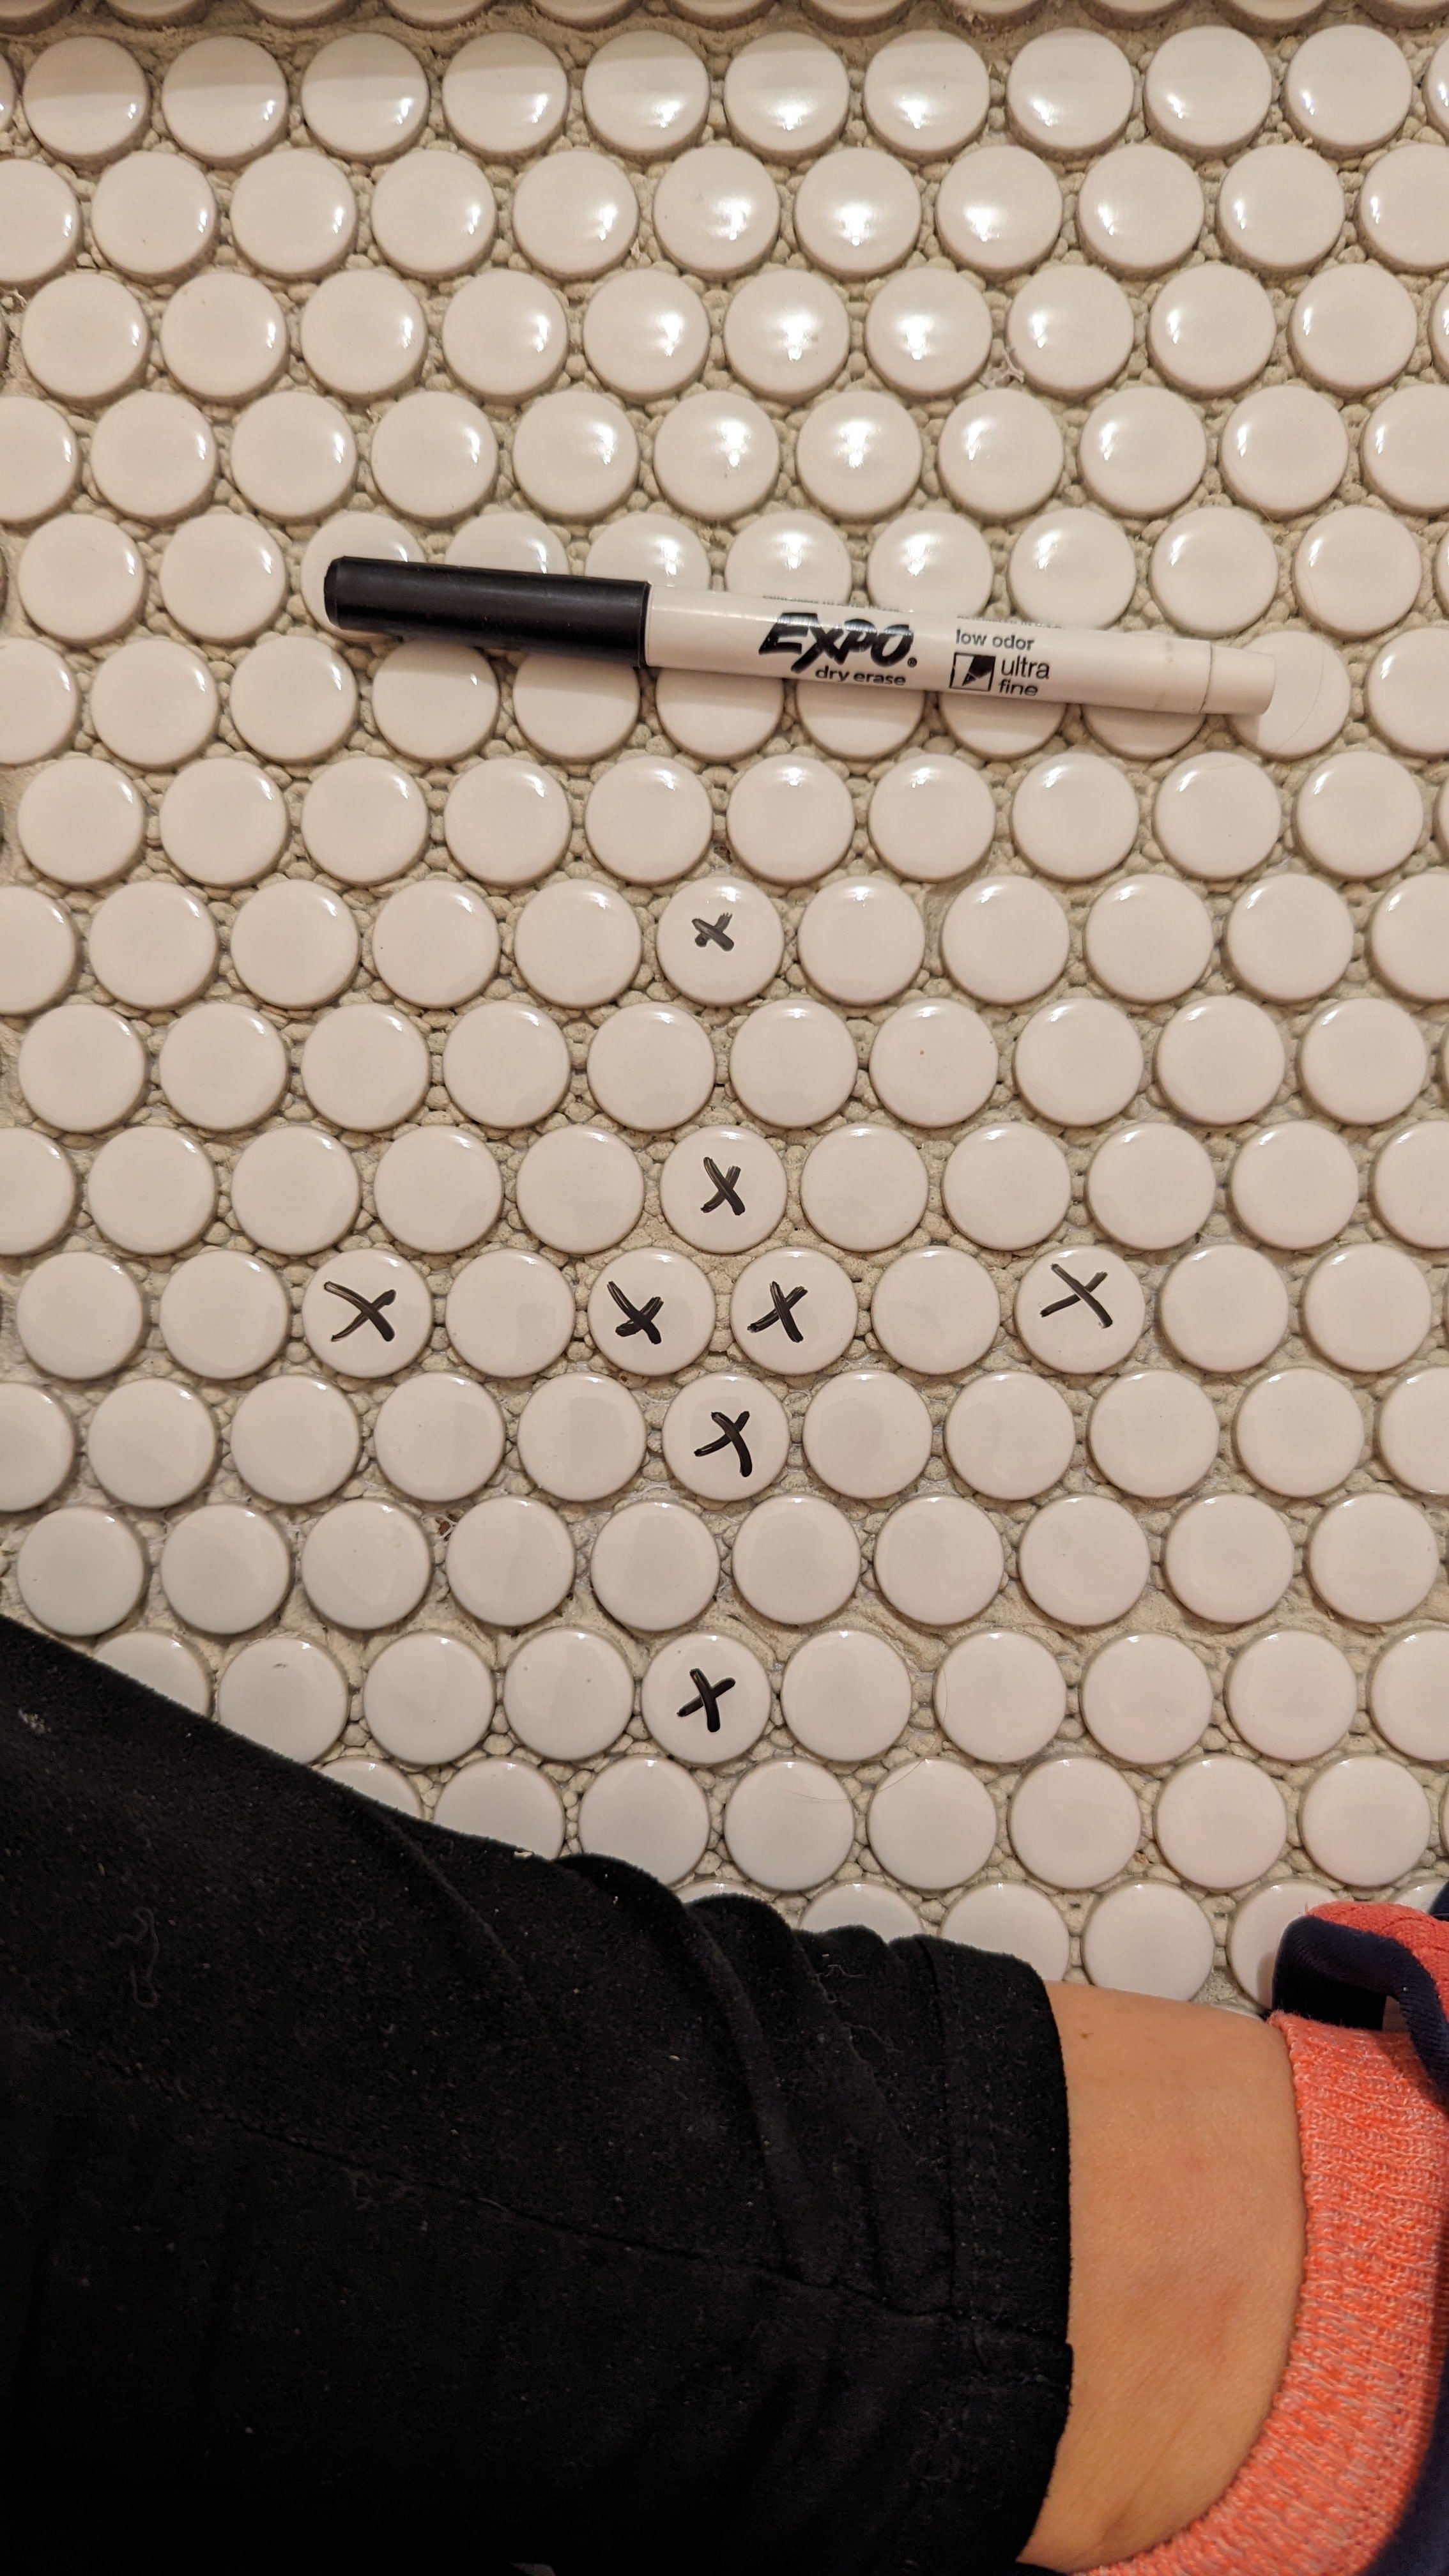
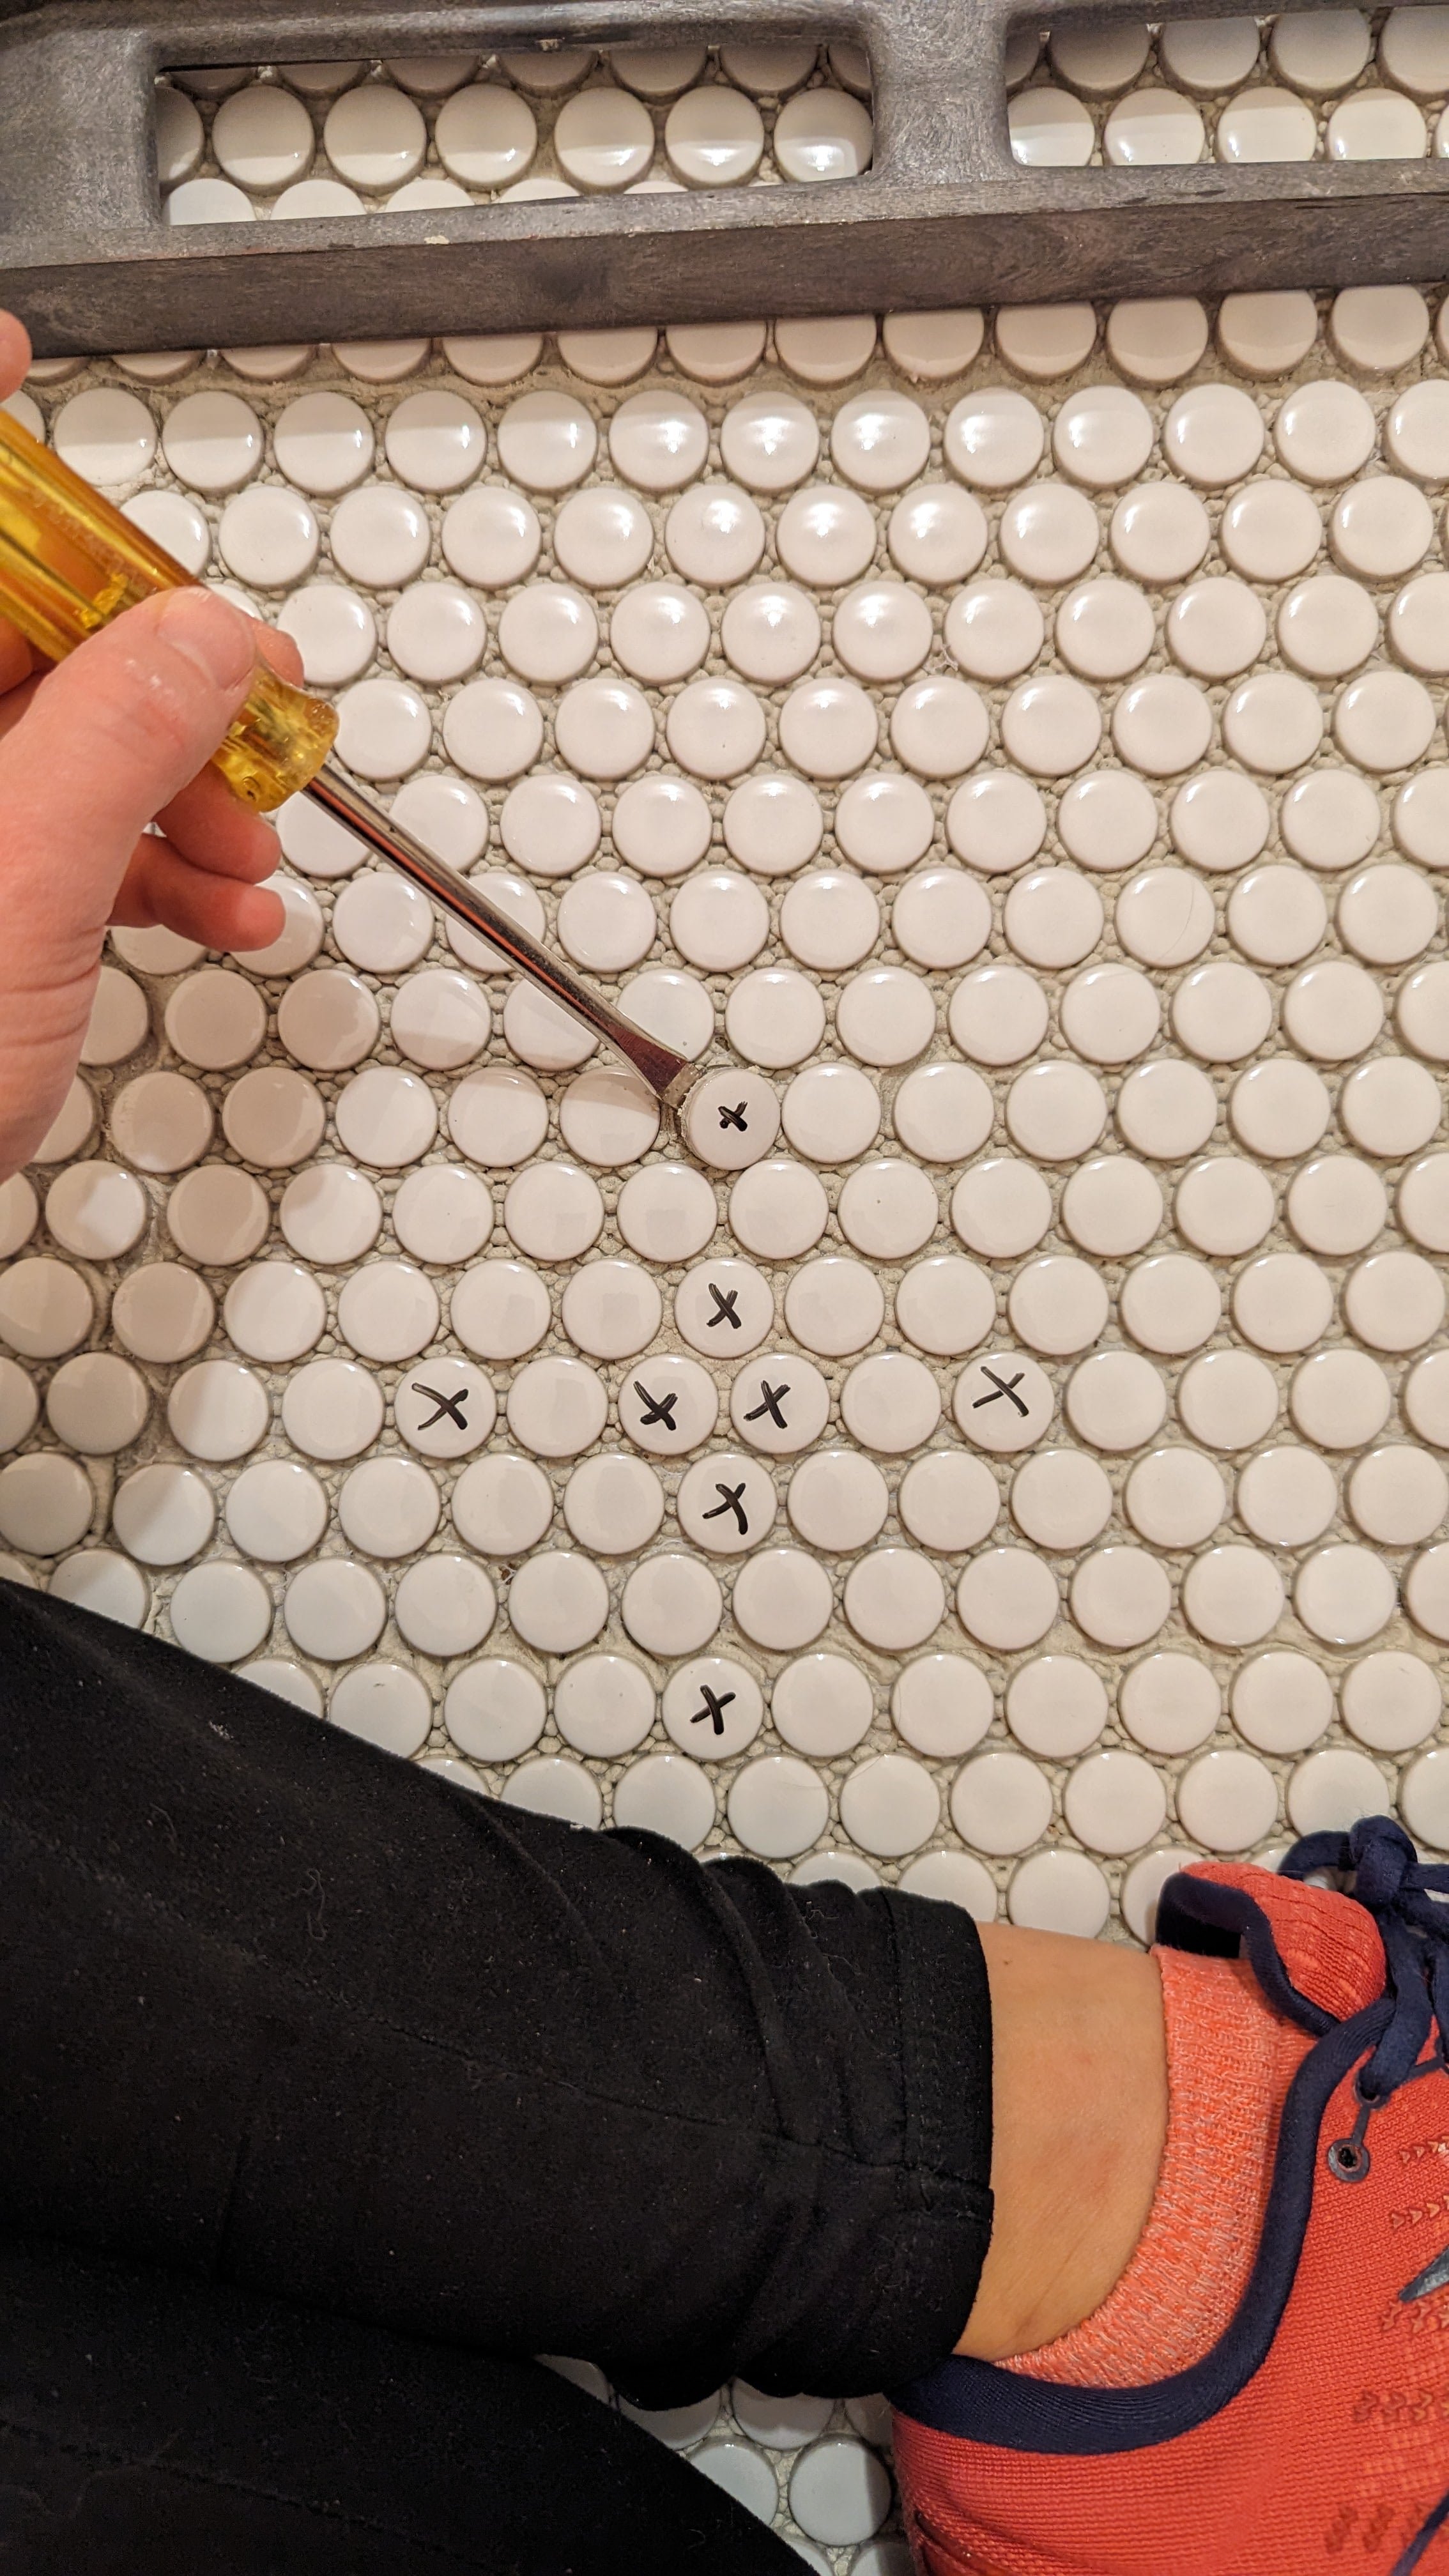

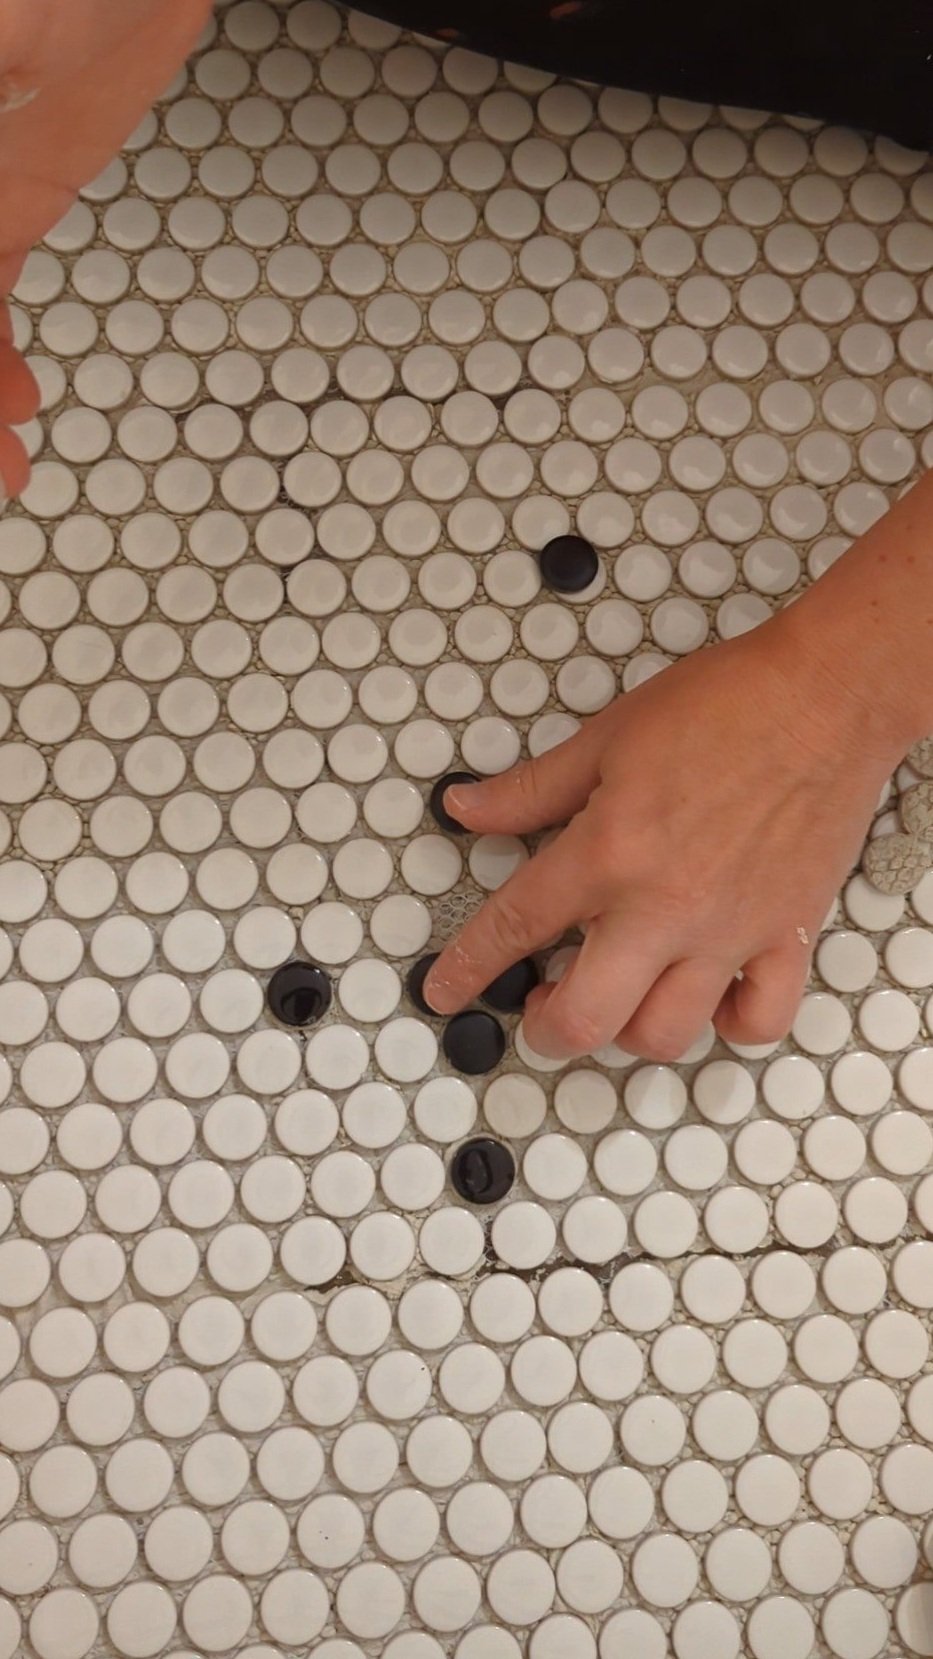
Start by marking the tiles you want to replace with a dry-erase marker. Then, using a flathead screwdriver, pop them out. Next, dab a little mortar on the replacement tile and pop it into place.
Voila! Easy peasy.
Grouting
After the mortar has dried the recommended amount of time, you’ll need to grout. Here are my tips:
Buy Plenty of Grout

Because penny tile is small, there are a lot of gaps to fill with grout. You’ll end up using more grout than you think, so make sure you buy plenty.
Consider Grout Color
Tone-on-tone grout color can minimize mistakes. This is true not only for penny tile but really for all tile. However, with the amount of joints in penny tile it's especially noteworthy. I chose to use Mapei’s Warm Gray grout. The pre-mixed kind is more expensive but worth it to ensure a consistent color.
Grout Haze Hack
After your grout has dried, you’ll need to clean off the grout haze. If you have porcelain or ceramic tiles, mix 1 part vinegar with 4 parts water and scrub off the grout haze with a cloth. I just learned this hack during this tile project, and it saved me a ton of time, so I wanted to share it here!
Seal Your Grout
If your grout requires it, don’t forget to seal your tile after the grout dries! This is my preferred grout sealant.
Final Thoughts

Penny tile is unlike any other tile I’ve ever installed - which isn’t necessarily a bad or good thing. It’s just different.
I really enjoyed the ability to customize my pattern to my space and the flexibility penny tile offers. It was also pretty nice not having to run to the wet saw to make a million cuts, ha! But it’s definitely easier to make mistakes when you’re dealing with so many grout lines. Regardless, I would absolutely tackle this project again.
If you found this post helpful, please share! And be sure to follow along during the rest of the One Room Challenge on my Instagram where I’m sharing every step of the process!


Catch up on the rest of the One Room Challenge:
How to DIY Penny Tile Floors in the Bathroom
10 Best Tools for DIY Beginners
Do you find yourself hesitating to start a DIY project because you don't know what you're doing? Then this post is for you! Keep reading for the essential tools for beginner DIYers!
Must-Have Tools to Get Started with DIY - Fall ‘23 ORC Week 3
Do you find yourself hesitating to start a DIY project because you don't know what you're doing? Then this post is for you! Keep reading for the essential tools for beginner DIYers!

You might be surprised to hear that in a lot of ways I still consider myself a beginning DIYer.
In fact, until recently, I had never used a circular saw! I still don’t trust myself to do electrical. And plumbing is, frankly, overwhelming. Regardless, I've DIYed my way through project after project.
Between you and me - I STILL get nervous before every DIY project! But I know by the end of it, I will have learned something new and gained tons of confidence. I want that for you, too.
But first, a little update about week 3 of the One Room Challenge!
What's The One Room Challenge?

The One Room Challenge is a celebration of creativity, inspiration, and original ideas where creators encourage and motivate one another as they transform a room over a period of 8 weeks. I’ll be sharing a new post with my progress each Wednesday until the final reveal on November 15, 2024!
ORC Week 3 Recap
As an Amazon Associate, I earn from qualifying purchases. This post may contain affiliate links, meaning I receive commissions for purchases made through those links at no cost to you.
Full disclosure: this post was supposed to be about laying penny tile (you can find that post here!), but getting the bathroom to a blank slate took longer than anticipated. Anyone who's taken on a home renovation project knows that they often take longer than you think they will.
In last week's post, I shared that I demoed the room - including the time-consuming task of stripping wallpaper.

After that was complete, it was time to run new plumbing and electrical, hang new drywall, mud that drywall, and chip the mortar off the floor in preparation for tile. I was even able to finally remove the old lantern and put up one of the new lights (minus the shades)!
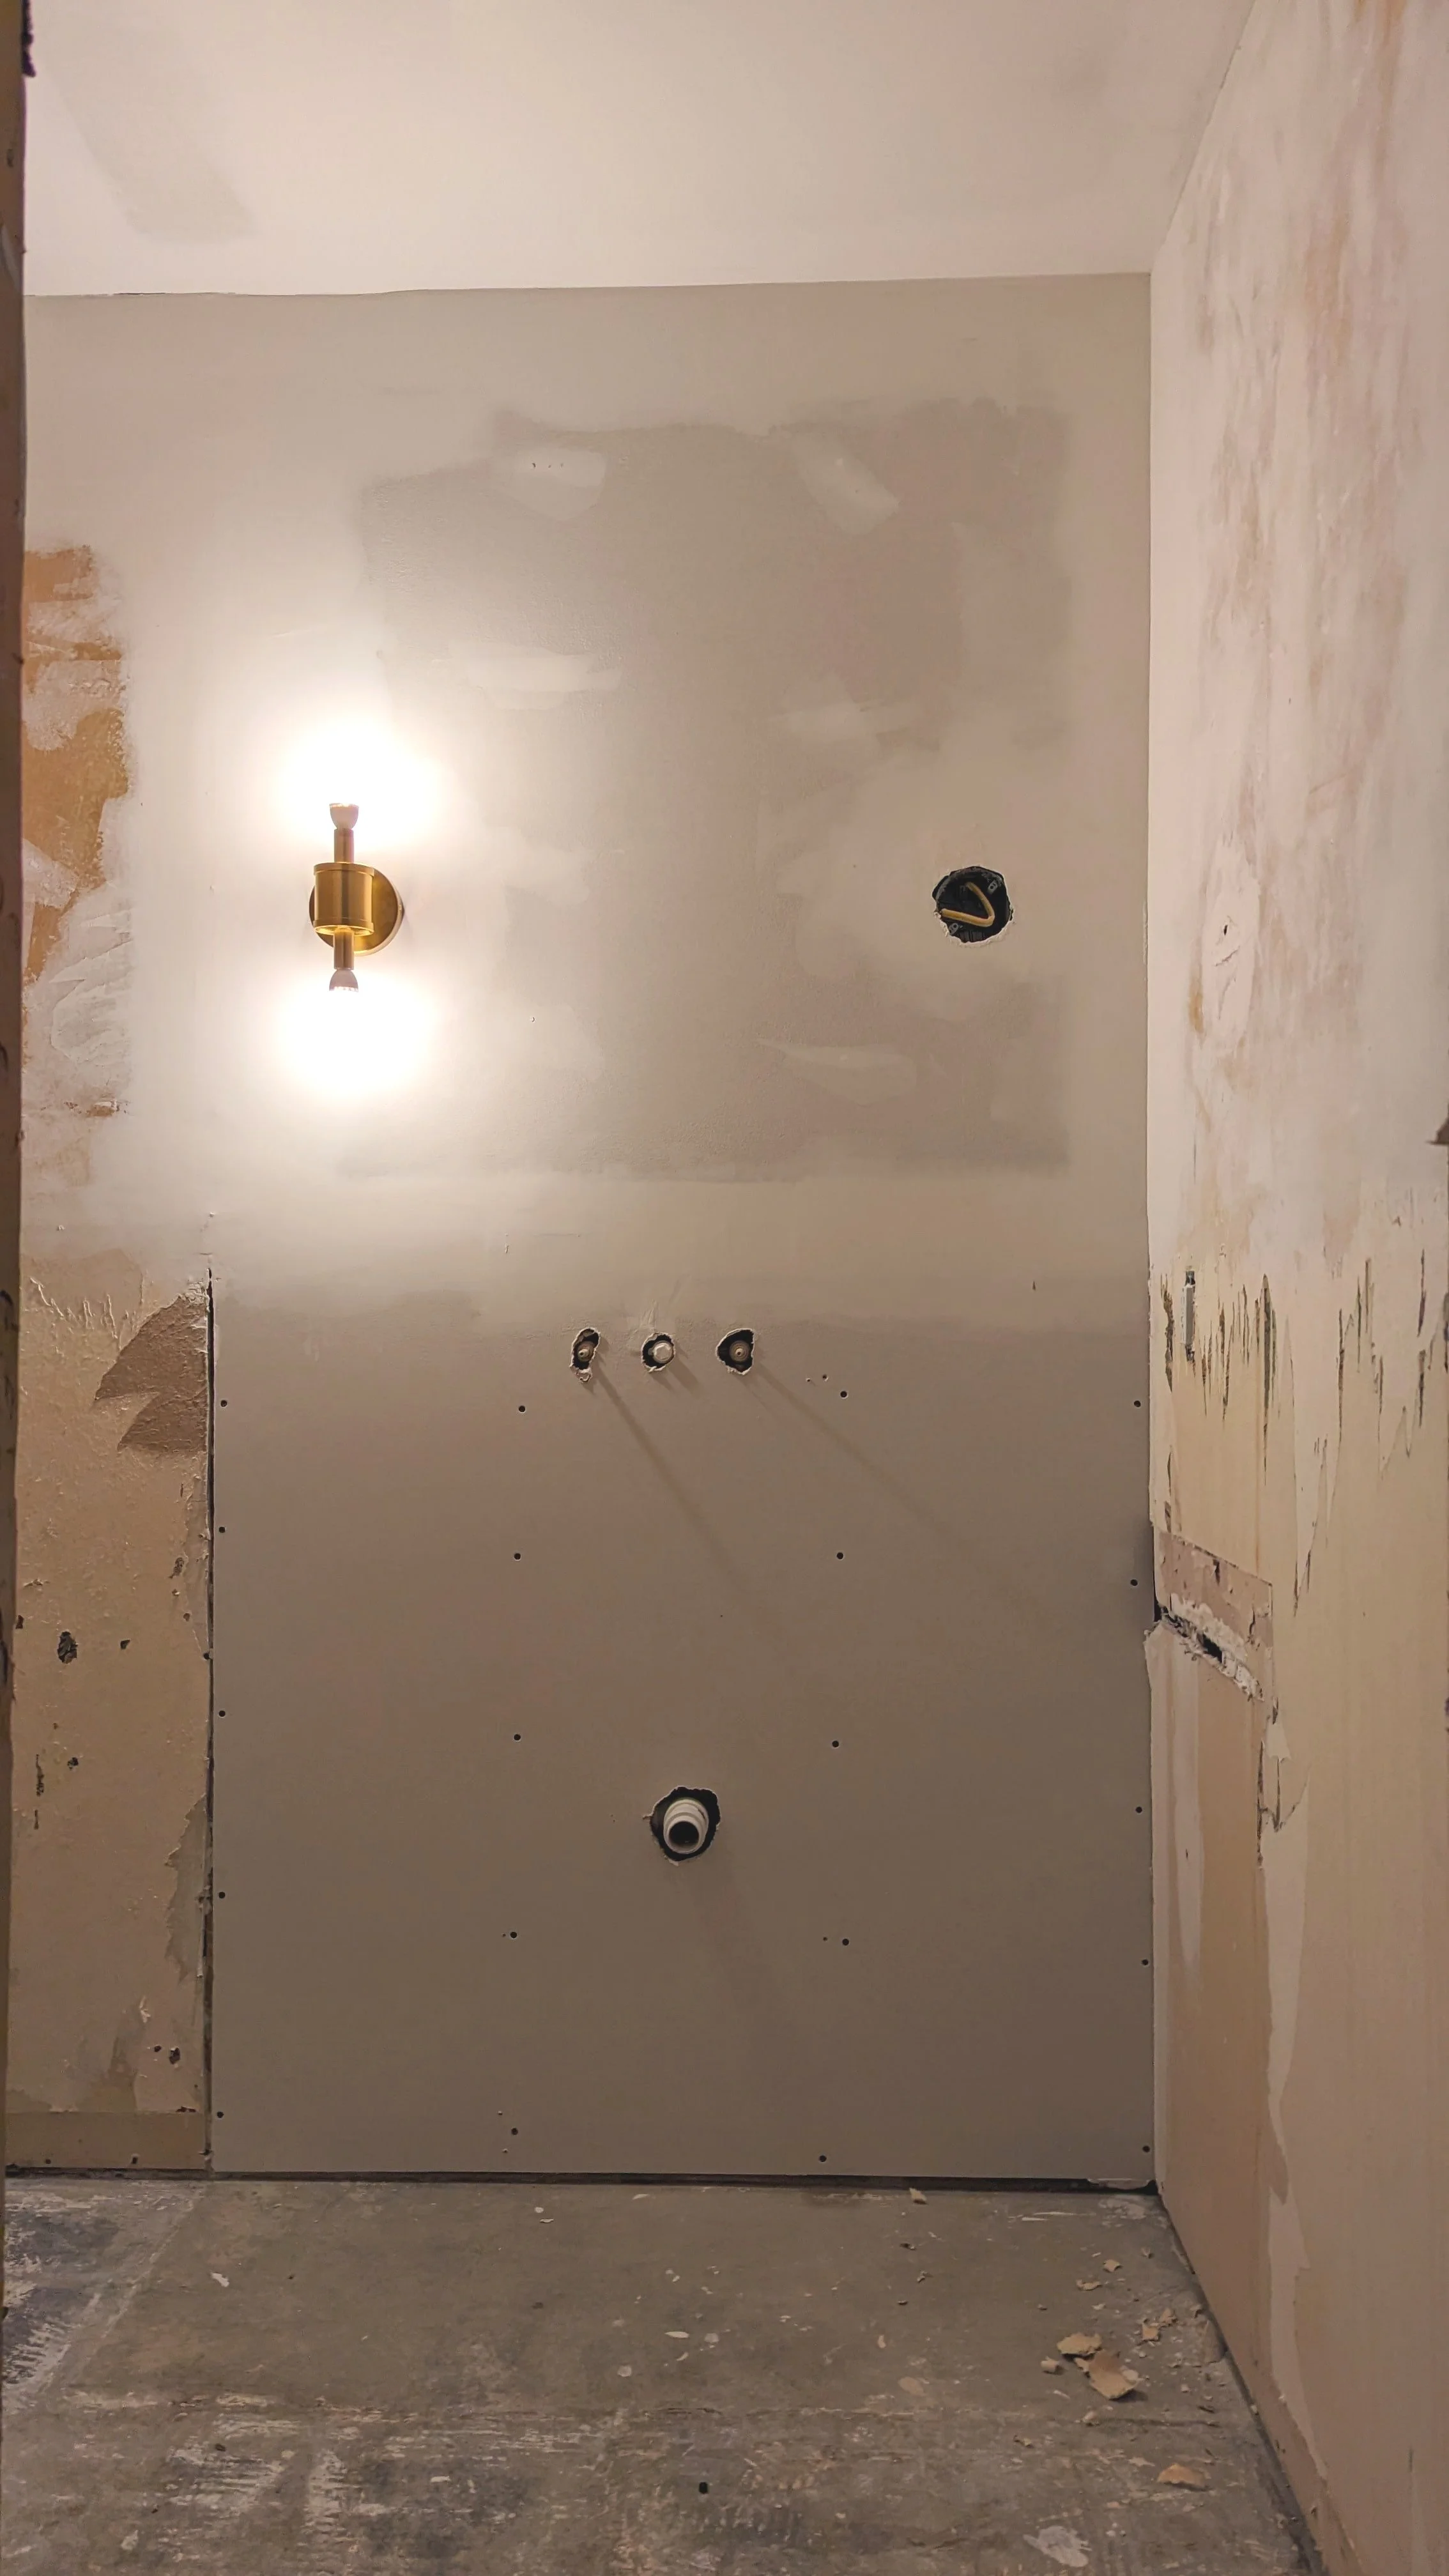
While working through that punch list, I thought a lot about how far I've come with becoming comfortable using a wider variety of tools and taking on more challenging projects. I was inspired to share the best tools for beginner DIYers so you can take on your own projects, too!
What Are The Best Tools For Beginners?
I do want to say that depending on what type of project you’re doing, the tools you need will vary. In my personal experience, these are the tools that I started off using on my projects (and the actual tools I own and use) as I grew my confidence and skills.
Measuring Tape
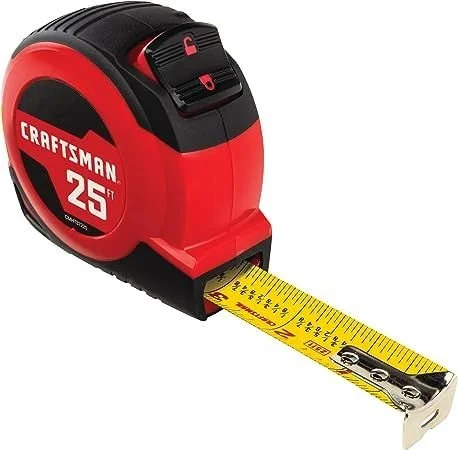
Starting with the basics.
A tape measure is quite possibly the least intimidating tool there is. And it’s a must! In fact, it’s likely you already have one of these in your home. But if you don’t, this one is a great length (yes, they come in different lengths!) and has the measurements broken out very clearly (not all of them do!).
Screw Driver Set

Another low-key must-have tool is a screwdriver set. Having a set of flatheads and Phillips in various lengths will get you a long way on your DIY journey.
Hammer

Another tool you may already have in your toolbox is a hammer. But if you don’t, this little guy is the perfect addition!
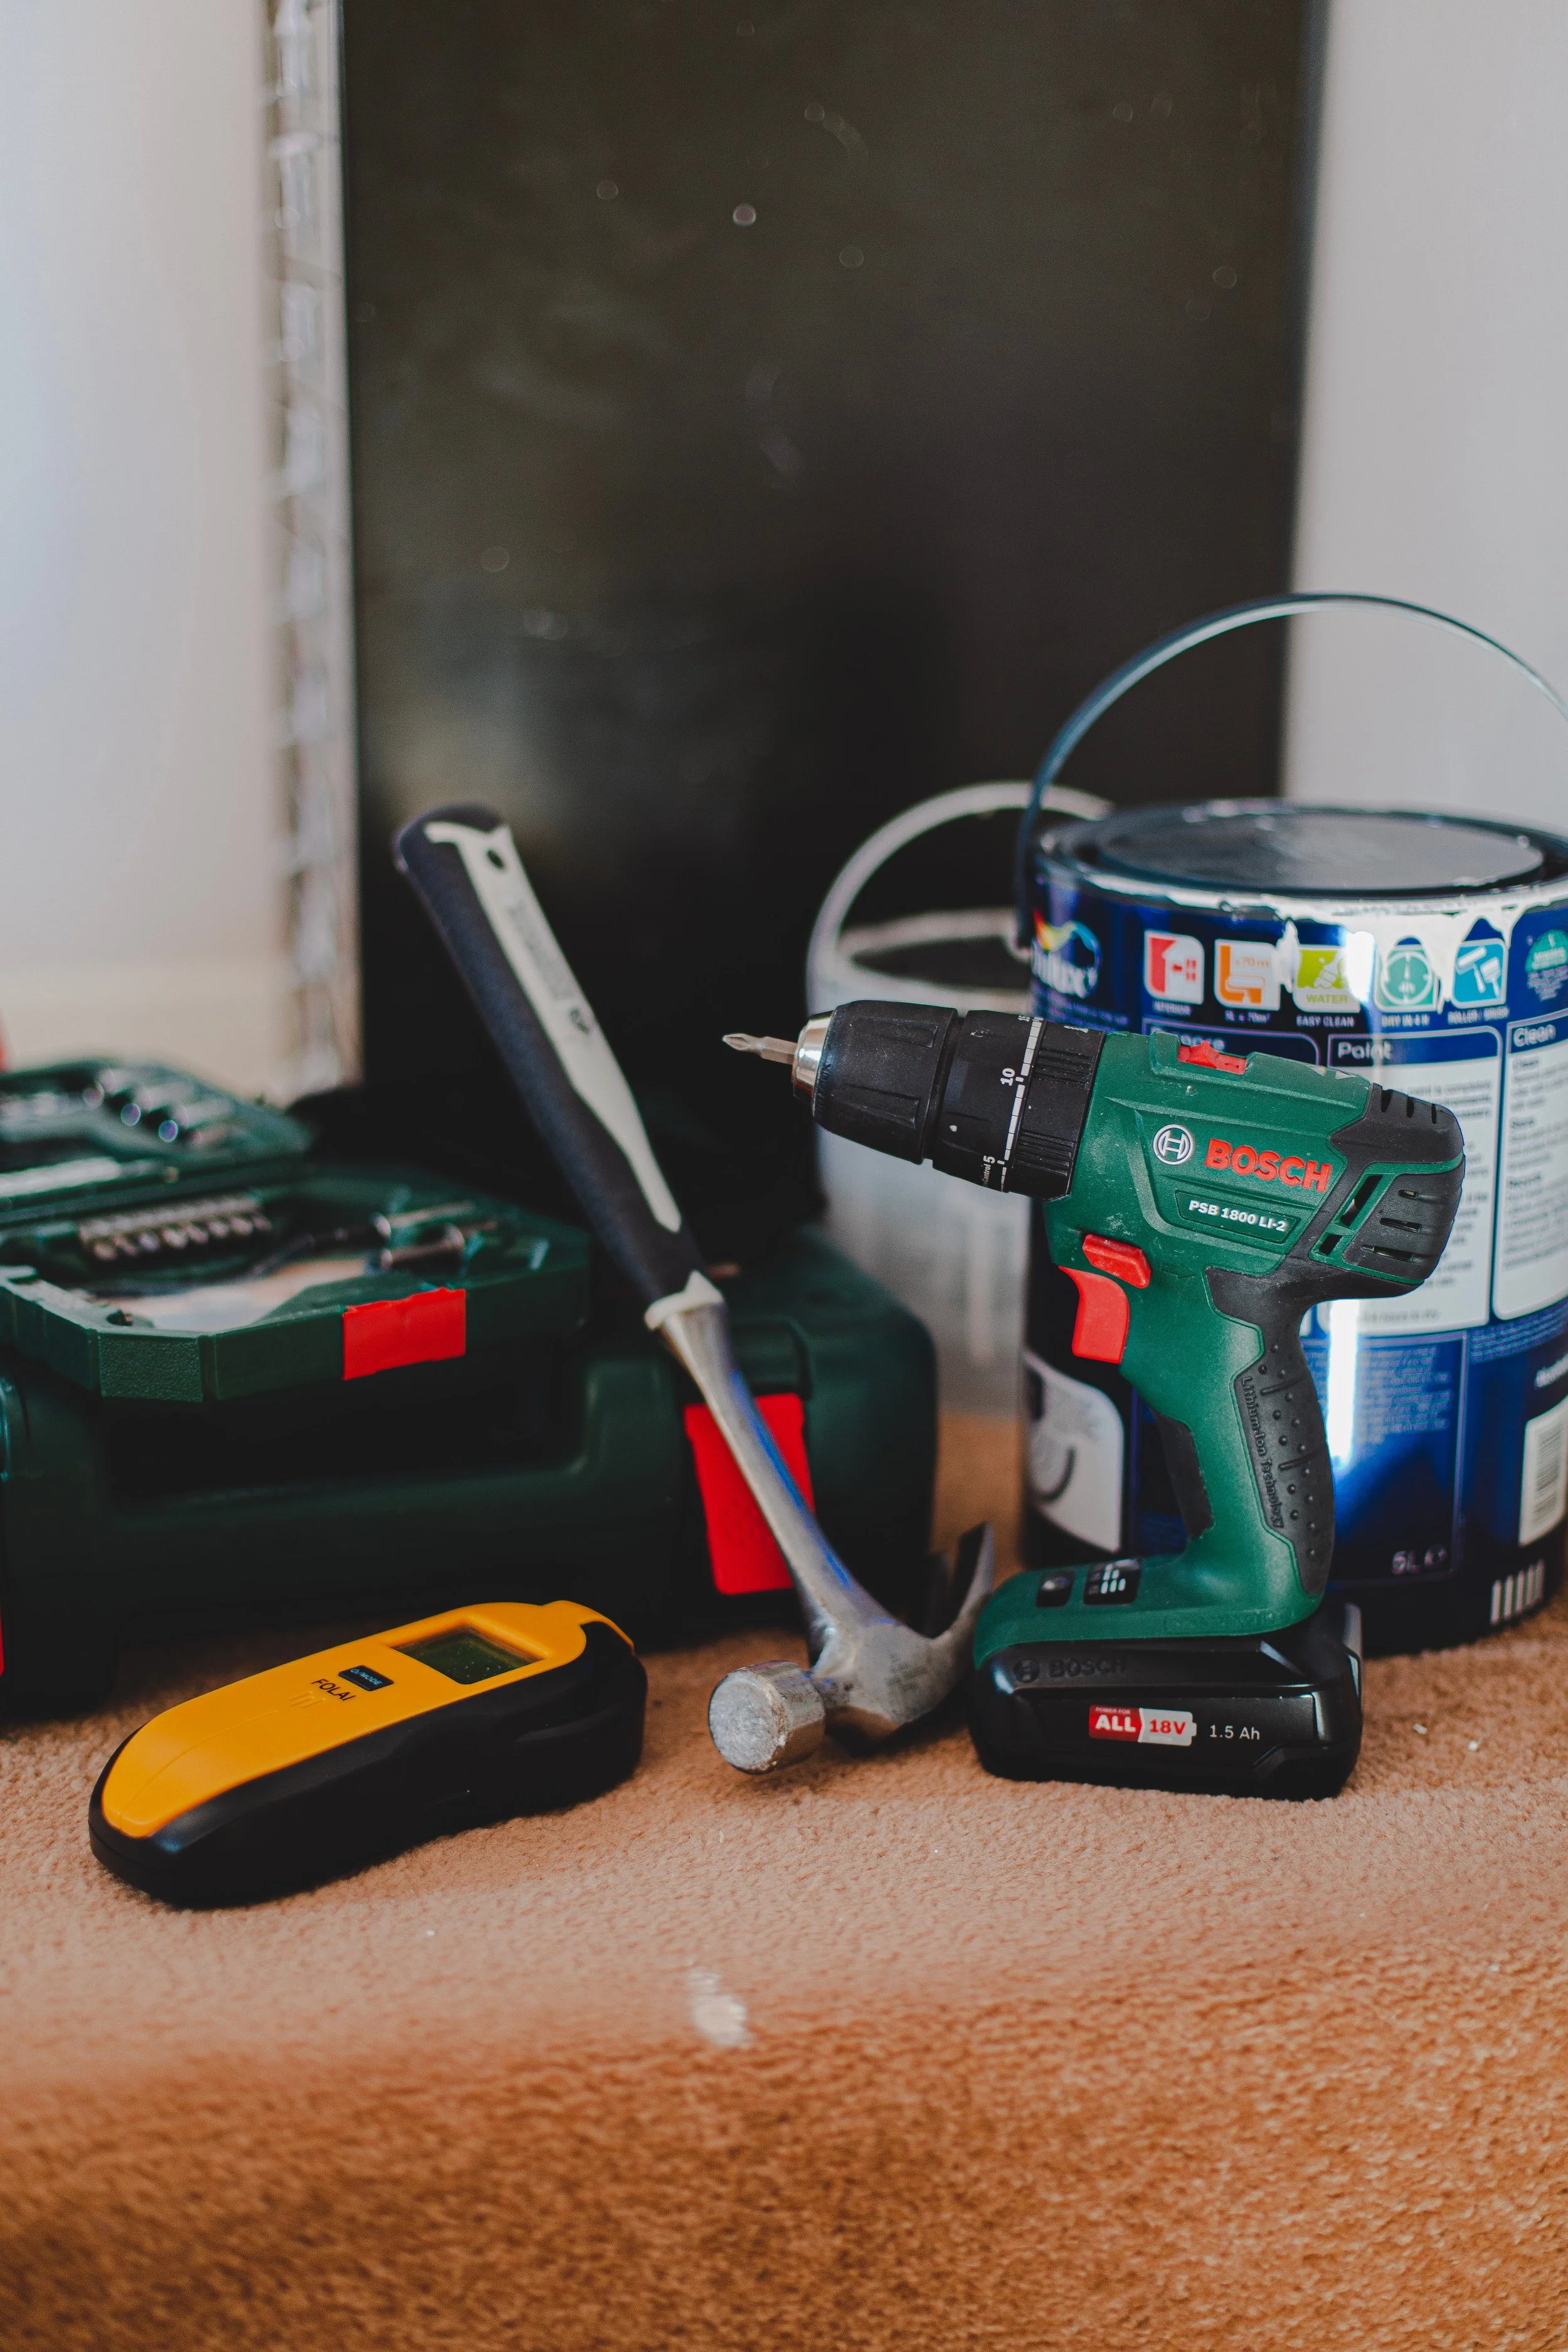
Drill with Bits

While a set of screwdrivers is a must, they’ll only get you so far before you’ll need to invest in a drill. A drill is perfect for introducing you to using power tools.
I prefer a cordless drill whenever possible because of their convenience. And don’t forget to grab a screwdriver bit set to go with it!
Level

Depending on your project, you’ll need a level from time to time. I recommend buying a set of different-sized levels, so you always have the right one for the job (no, you can’t use the tiny level for everything).
While standard levels typically work just fine, sometimes a laser level is better suited for the project at hand. I have and use this Bosch laser level quite a bit for projects where I just don’t have enough hands.
Caulk Gun

Caulk is the MVP of finishing work. But to take advantage of it, you’ll need a caulk gun.
Get one with a built-in nozzle cutter (that little hole near the handle) and boasts that it’s drip-resistant for the least frustrating experience - like this caulk gun by Newborn.
And to go with it, this is my go-to for paintable caulk.
Orbital Sander

Once I started using more and more power tools, I used a palm sander for my sanding projects for a long time. Take it from me: a random orbital sander is a much more versatile electric sander.
While you can buy cordless versions, I’ve always used corded sanders, and it’s rarely an issue. And don’t forget that you’ll want to have a variety of different-grit sanding discs on hand!
Paint Supplies

Okay, okay. I know “paint supplies” encompasses more than just one tool. However, paint can easily make such a big impact I’d be remiss to leave it out. So I’m making an exception. Here’s what you’ll need to take on a basic painting project.
Miter Saw

We’re getting into the big guns now. But there will come a time when your projects will get more advanced, and you’ll need to cut some wood. Personally, I was terrified of the table saw for a long time, so I made do without it and got along just fine with a miter saw. This is the miter saw I use and love.
However, I will say that a table saw can make miter cuts and more with the right kind of jig. I own this Dewalt table saw.
I recommend weighing your options and making an educated decision on which type of saw is right for you when you’re just starting out. And, of course, wear your safety glasses!
Finish Nailer

If you’ve gotten to the point where you’re cutting wood, you'll likely need to nail it back together. That’s where the finish nailer comes into play.
I used a pneumatic nailer for a long time, and it was a huge pain in the butt (it was also super loud because it had to be hooked up to an air compressor). We just got this Metabo cordless finish nailer last summer, and I love it!
Final Thoughts
I get it, that urge to DIY but the hesitation to start because you, well, don’t know WHERE to start. Hopefully, with this list, you’ll feel a little more confident taking the reigns and jumping right in. Don’t forget to save the Pin below to come back to this post later!


Get started on your first DIY project with these tutorials:
Don’t forget to follow along on this year’s One Room Challenge journey!
Essential Tools for Beginner DIY
3 Ways to Remove Stubborn Wallpaper
I've owned three houses in my lifetime, and I've removed wallpaper in each of them using a variety of methods. In this post, I'm sharing three ways to remove wallpaper - including my favorite way!
How to Easily Strip Wallpaper - Fall ‘23 ORC Week 2
I've owned three houses in my lifetime, and I've removed wallpaper in each of them using a variety of methods. In this post, I'm sharing three ways to remove wallpaper - including my favorite way!

All the houses I've owned have been older, i.e. before removable wallpaper was popular. Therefore, I've never had the luxury of simply peeling it off the wall and moving on with my day. As I learned during week 1 of the One Room Challenge, my half-bathroom was no exception.
What's The One Room Challenge?

The One Room Challenge is a celebration of creativity, inspiration, and original ideas where creators encourage and motivate one another as they transform a room over a period of 8 weeks. I’ll be sharing a new post with my progress each Wednesday until the final reveal on November 15, 2024!
Where We Started…
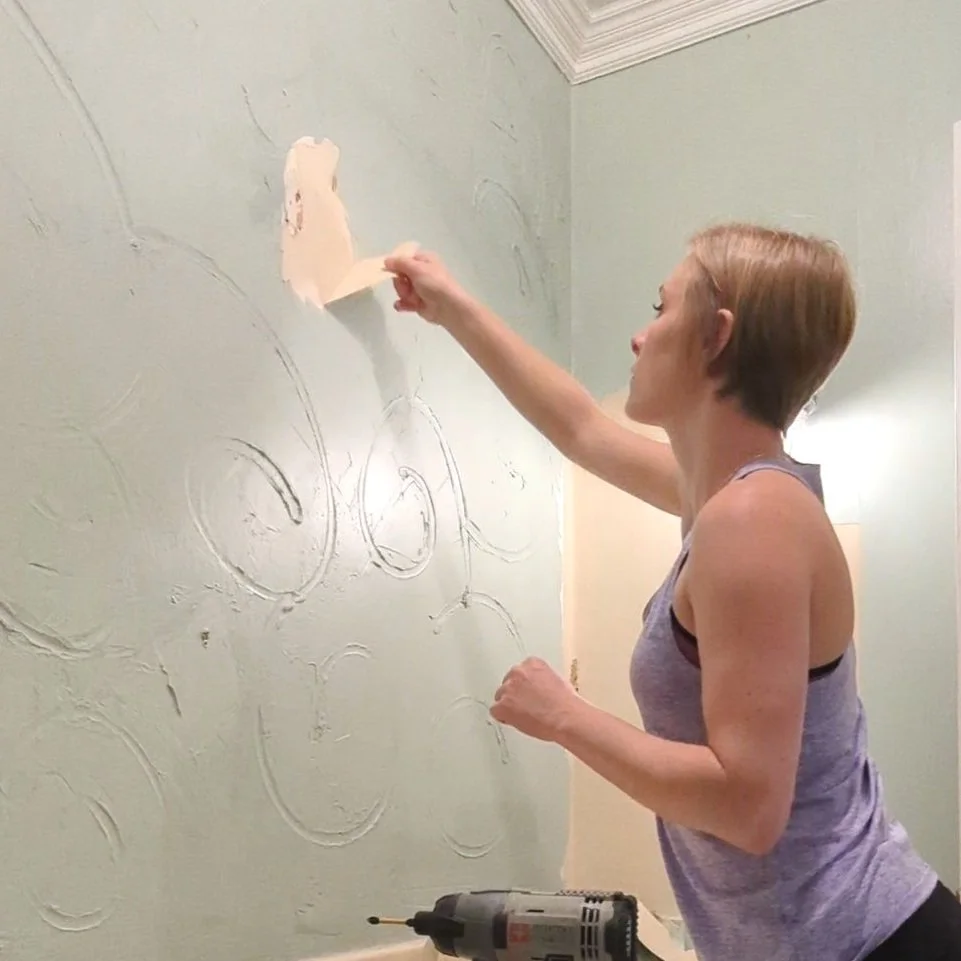
In last week’s post, I shared the current state of the half-bathroom and mentioned the weird wall texture that was on top of wallpaper. Here’s a reminder:
What I didn’t realize at the time was that the texture was actually on top of TWO layers of wallpaper.
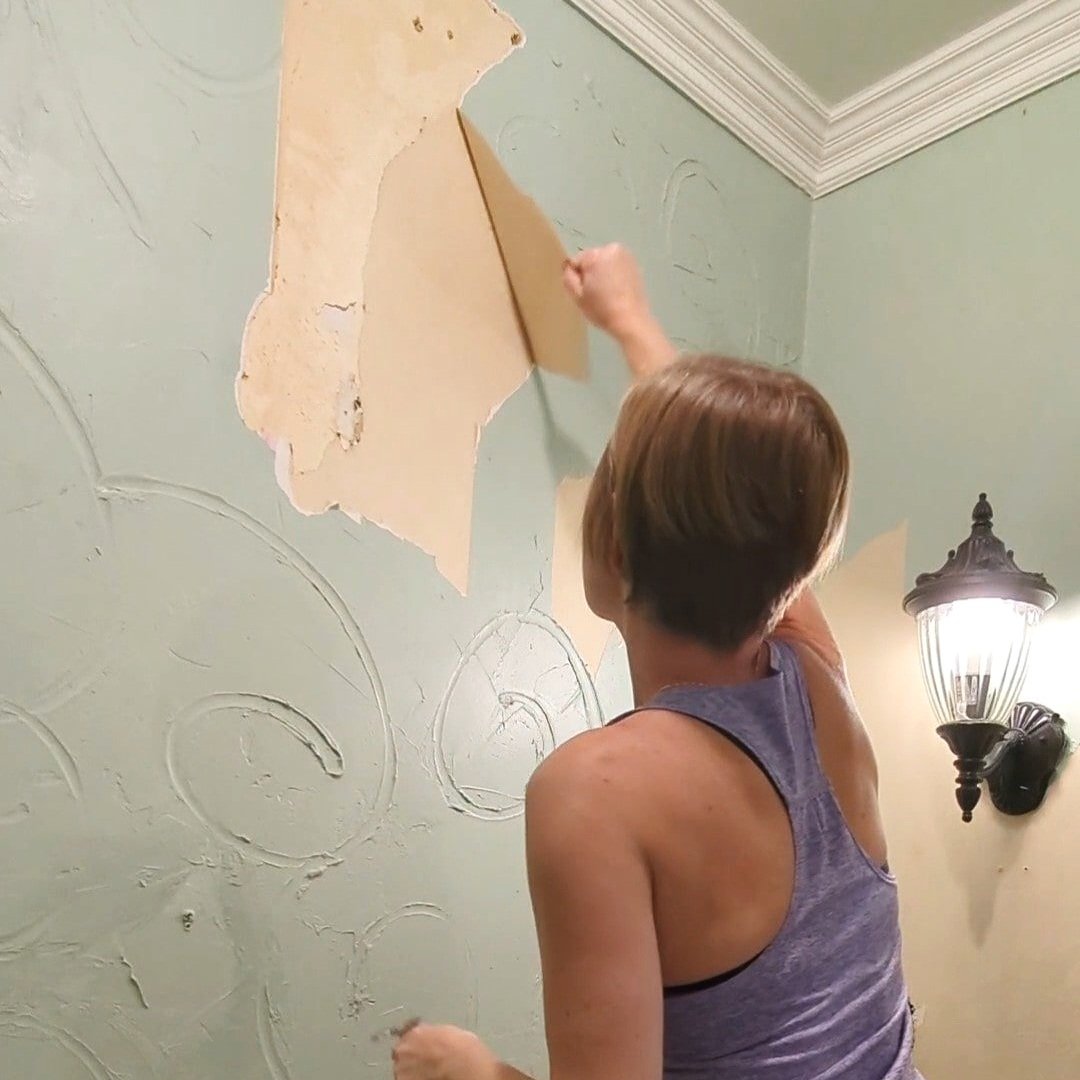
I initially thought I would have to gut the entire room because of the wall texture. Much to my surprise, the wallpaper actually worked out in my favor because it allowed me to peel the texture right off with the top layer! However, there was still a considerable amount of wallpaper backing left to deal with.
Below, I’m sharing how I removed my wallpaper, as well as some other methods you can try.
Quick note: Before you try any of the methods below, if there's even a slight possibility that your wallpaper is removable, try simply pulling at a loose corner to see if it comes off. If so, consider yourself lucky!
If not… you've come to the right place. Keep reading!
As an Amazon Associate, I earn from qualifying purchases. This post may contain affiliate links, meaning I receive commissions for purchases made through those links at no cost to you.
Materials Needed*
- Plastic Dropcloth
- Painters Tape
- Trash Bags
- Wallpaper Scraper, Putty Knife (or my favorite: 5-in-1 Tool)
- Wallpaper Scorer
- *Additional materials needed for each method are listed within those sections
Step 1: Clear the Room & Protect the Floors
Start by moving everything away from the walls and give yourself plenty of room to move around. For me, this meant removing everything from the room since I’m not keeping any of it anyway!

Next, remove the outlet covers and put painters tape over the outlets.
Lastly, wallpaper is sticky. If you like your floors, throw down a dropcloth so your discarded wallpaper doesn’t stick to it.
Step 2: Pry Up the Wallpaper
Find a loose edge or corner and try to peel the wallpaper off the wall. If you're lucky, it’ll come up easily (paper backing and all!). But, to be honest, it’s unlikely that it will all come off cleanly without some elbow grease, especially if the wallpaper is old.
If you're sort of lucky, you'll at least be able to peel up the top layer.
If you can't get at least the top layer up, or some sections won't come up, don’t panic!
Step 3: Use a Wallpaper Scoring Tool
If you’re struggling to get the top layer of wallpaper up, I recommend using a wallpaper scoring tool. Simply run the scorer over the wallpaper, applying enough pressure to puncture the wallpaper but not so much that you’re digging holes into the wall.

This will allow water/steam/whatever mixture you’re using to get under that top layer of wallpaper and saturate the backing so it releases from the wall.
From here, there are several ways to remove what’s left of your wallpaper, so I’m breaking them down for you below!
Step 4: Methods of Removing Wallpaper
How to Strip Wallpaper with a Steamer
As mentioned above, I’ve removed wallpaper using several methods over the years. But the one I always defer to? Using a steamer!

Wallpaper steamers are fairly inexpensive (this newer version of mine is less than $75 and comes with an extra attachment for small spaces), and they can even be rented from the hardware store. At this point, mine has paid for itself several times over!
And if you already have one, I’ve even seen people use a clothes steamer as an alternative (though I can’t speak to how effective it is).
Here’s how to remove wallpaper with a steamer:
Fill the steamer with water and let it heat up. Mine starts bubbling like a witch’s brew when it’s ready.
Hold the steamer on the wall for at least 10 seconds. I like to start at the top so any excess condensation drips down to the wallpaper below and begins loosening it up before I even get there.
Move the steamer to a new section of the wall while you scrape off the current section. If you have a stubborn piece of wallpaper, you may need to repeat these steps.
How to Remove Wallpaper with Wallpaper Stripper
The one and only time I used a chemical stripper was the first time I removed wallpaper. In my experience, I’ve found wallpaper stripper to be only semi-effective, and it was a goopy mess. With the amount I needed, it ended up being pretty expensive, too. On top of that, my hands were super sore from spraying it by the end.
If you choose to go this route, here’s what you need to do:
Spray the stripper on the wall
Wait 5-10 minutes
Scrape it off (repeat if needed)
How to Remove Wallpaper with DIY Mixtures
Lastly, there are several more cost-effective wallpaper stripper mixtures you can use, including fabric softener, vinegar, or dish soap mixed with hot water. After I tried the wallpaper stripper in my first house, I finished the task with fabric softener and water.
While this method was effective, the smell… oh man. The smell of fabric softener was STRONG and lingered for quite a while. Regardless, I’m not here to gatekeep. Here’s how you strip wallpaper the DIY way:
- Mix your solution of choice in a spray bottle, garden sprayer, or bucket
- Equal parts fabric softener & hot water,
- Equal parts vinegar & hot water, or
- Tablespoon of dish soap to a bucket of hot water
- Spray your mixture on the wall or apply it with a sponge
- Wait 15-20 minutes
- Scrape (repeat if needed)
Step 5: Remove Wallpaper Adhesive
Once you’ve successfully stripped your wallpaper, you’ll likely have some paste left behind that you’ll need to remove as well. Here’s where a little bit of dish soap and hot water will go a long way.
Simply use a sponge, wipe the walls down, and you’re ready to go!
Final Thoughts
Yes, removing wallpaper can seem daunting, but hopefully, with this tutorial, you’ll feel more confident to tackle this project yourself. Once you’re finished, let me know which method you chose and what you thought!
And if you found this post helpful, please share!

Don’t forget to follow along on this year’s One Room Challenge journey!
Visit these posts for other helpful DIY tutorials
Remove Old Wallpaper in 5 Steps

Half Bathroom Design
I’m excited to announce that I’m participating in the Fall 2024 One Room Challenge! I’m even more excited to share that a total half-bathroom makeover will be the focus this time. In this post, I’m sharing the current state of the bathroom, the design plans, and the inspiration!
Half Bathroom Mood Board - Fall ‘23 ORC Week 1
I’m excited to announce that I’m participating in the Fall 2024 One Room Challenge! I’m even more excited to share that a total half-bathroom makeover will be the focus this time. In this post, I’m sharing the current state of the bathroom, the design plans, and the inspiration!
What’s the One Room Challenge?

If you’re unfamiliar, here’s what the One Room Challenge is (straight from the official site): The One Room Challenge™ will provide participants with a supportive, enthusiastic forum in which to share the process of transforming a room. The ORC is not a competition, but rather a celebration of creativity, inspiration, and original ideas.
The Challenge lasts for 8 weeks, where I’ll be sharing a new post each Wednesday until the final reveal on November 15, 2024.
As an Amazon Associate, I earn from qualifying purchases. This post may contain affiliate links, meaning I receive commissions for purchases made through those links at no cost to you.
Current Half Bathroom
I am not a fan of our current half-bathroom. There. I said it. And I don’t care who knows it!

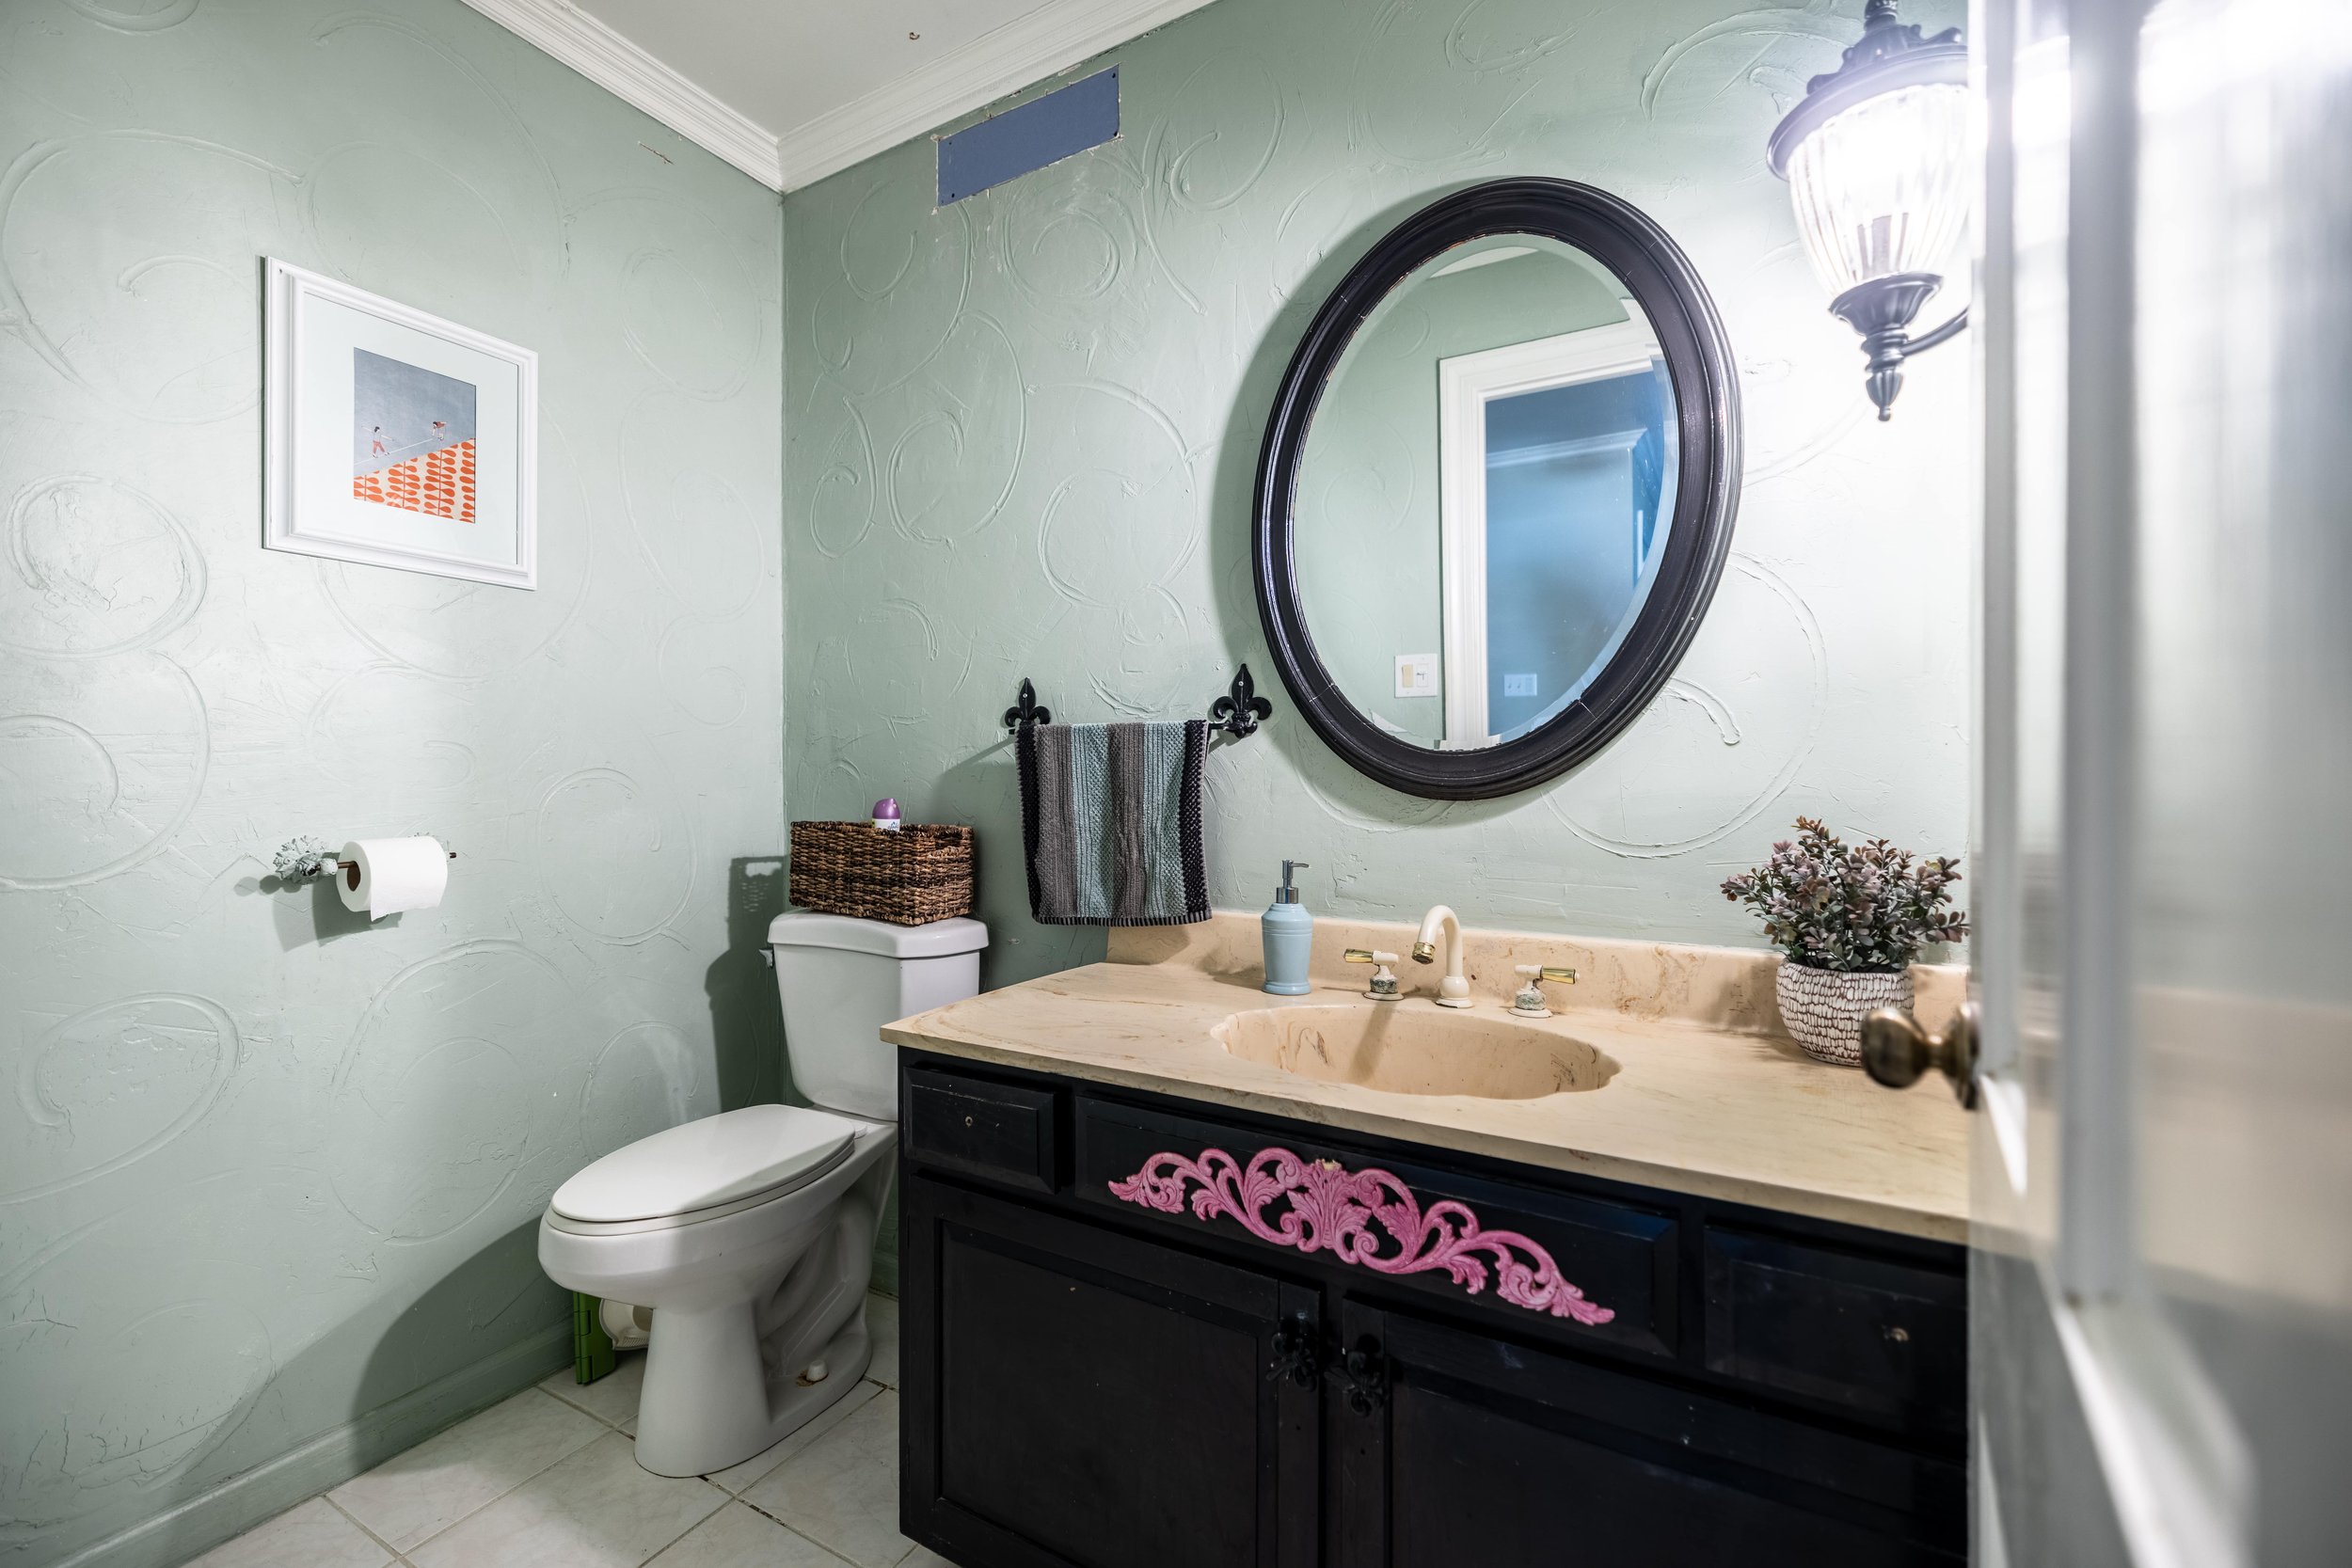
The half bathroom is the only bathroom on the first floor. It’s right off the foyer and is the primary bathroom for guests… and it never ceases to surprise me how many perplexing things are happening in this small space. Let’s take a closer look.

For starters, let’s chat about the vanity. Or, as we (JOKINGLY) call it, the urinal because it’s so ridiculously short men could pee in it.
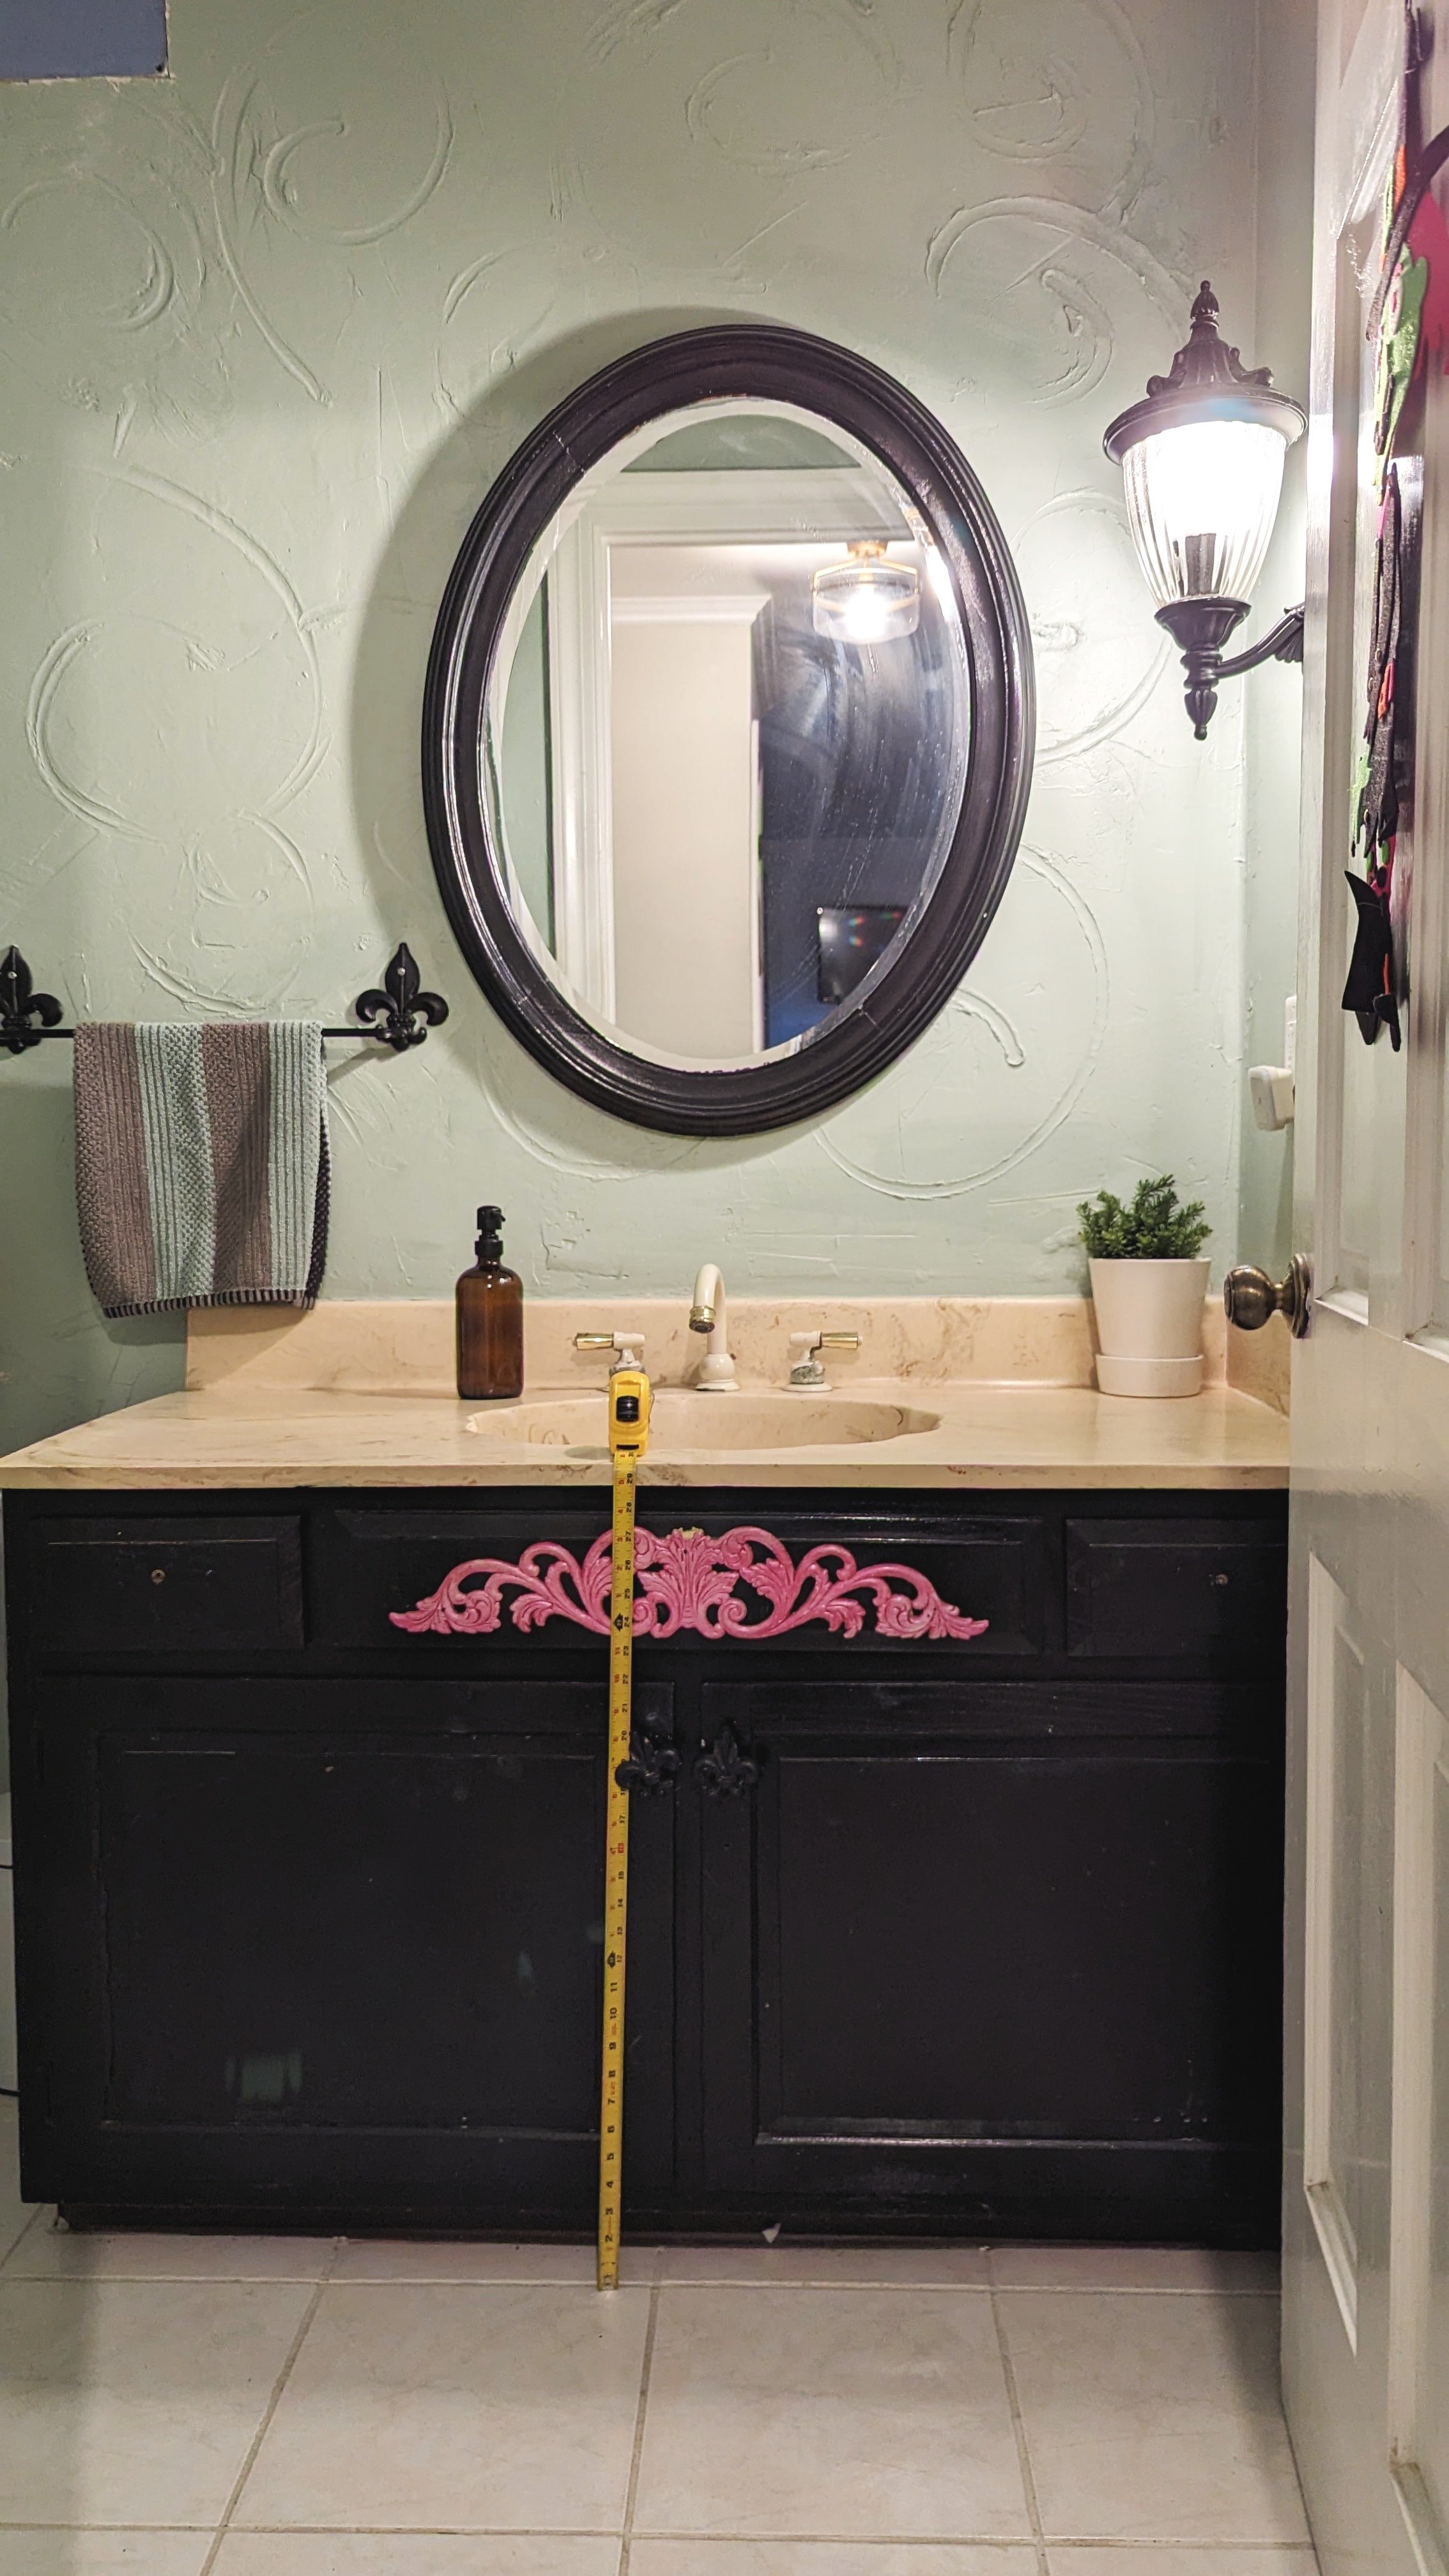
Sure, it’s great for the kids to easily reach, but it’s constantly an awkward point of discussion among our taller guests.
And let’s not forget about the outdated seashell sink and the bright pink detail on the front!
Next, we have the textured walls.

Having textured walls is one thing… but these were pretty obviously made by someone swirling a finger in joint compound. On top of wallpaper, no less!
My last major point of confusion is the outdoor lantern that’s being used as a sconce… on a dimmer!
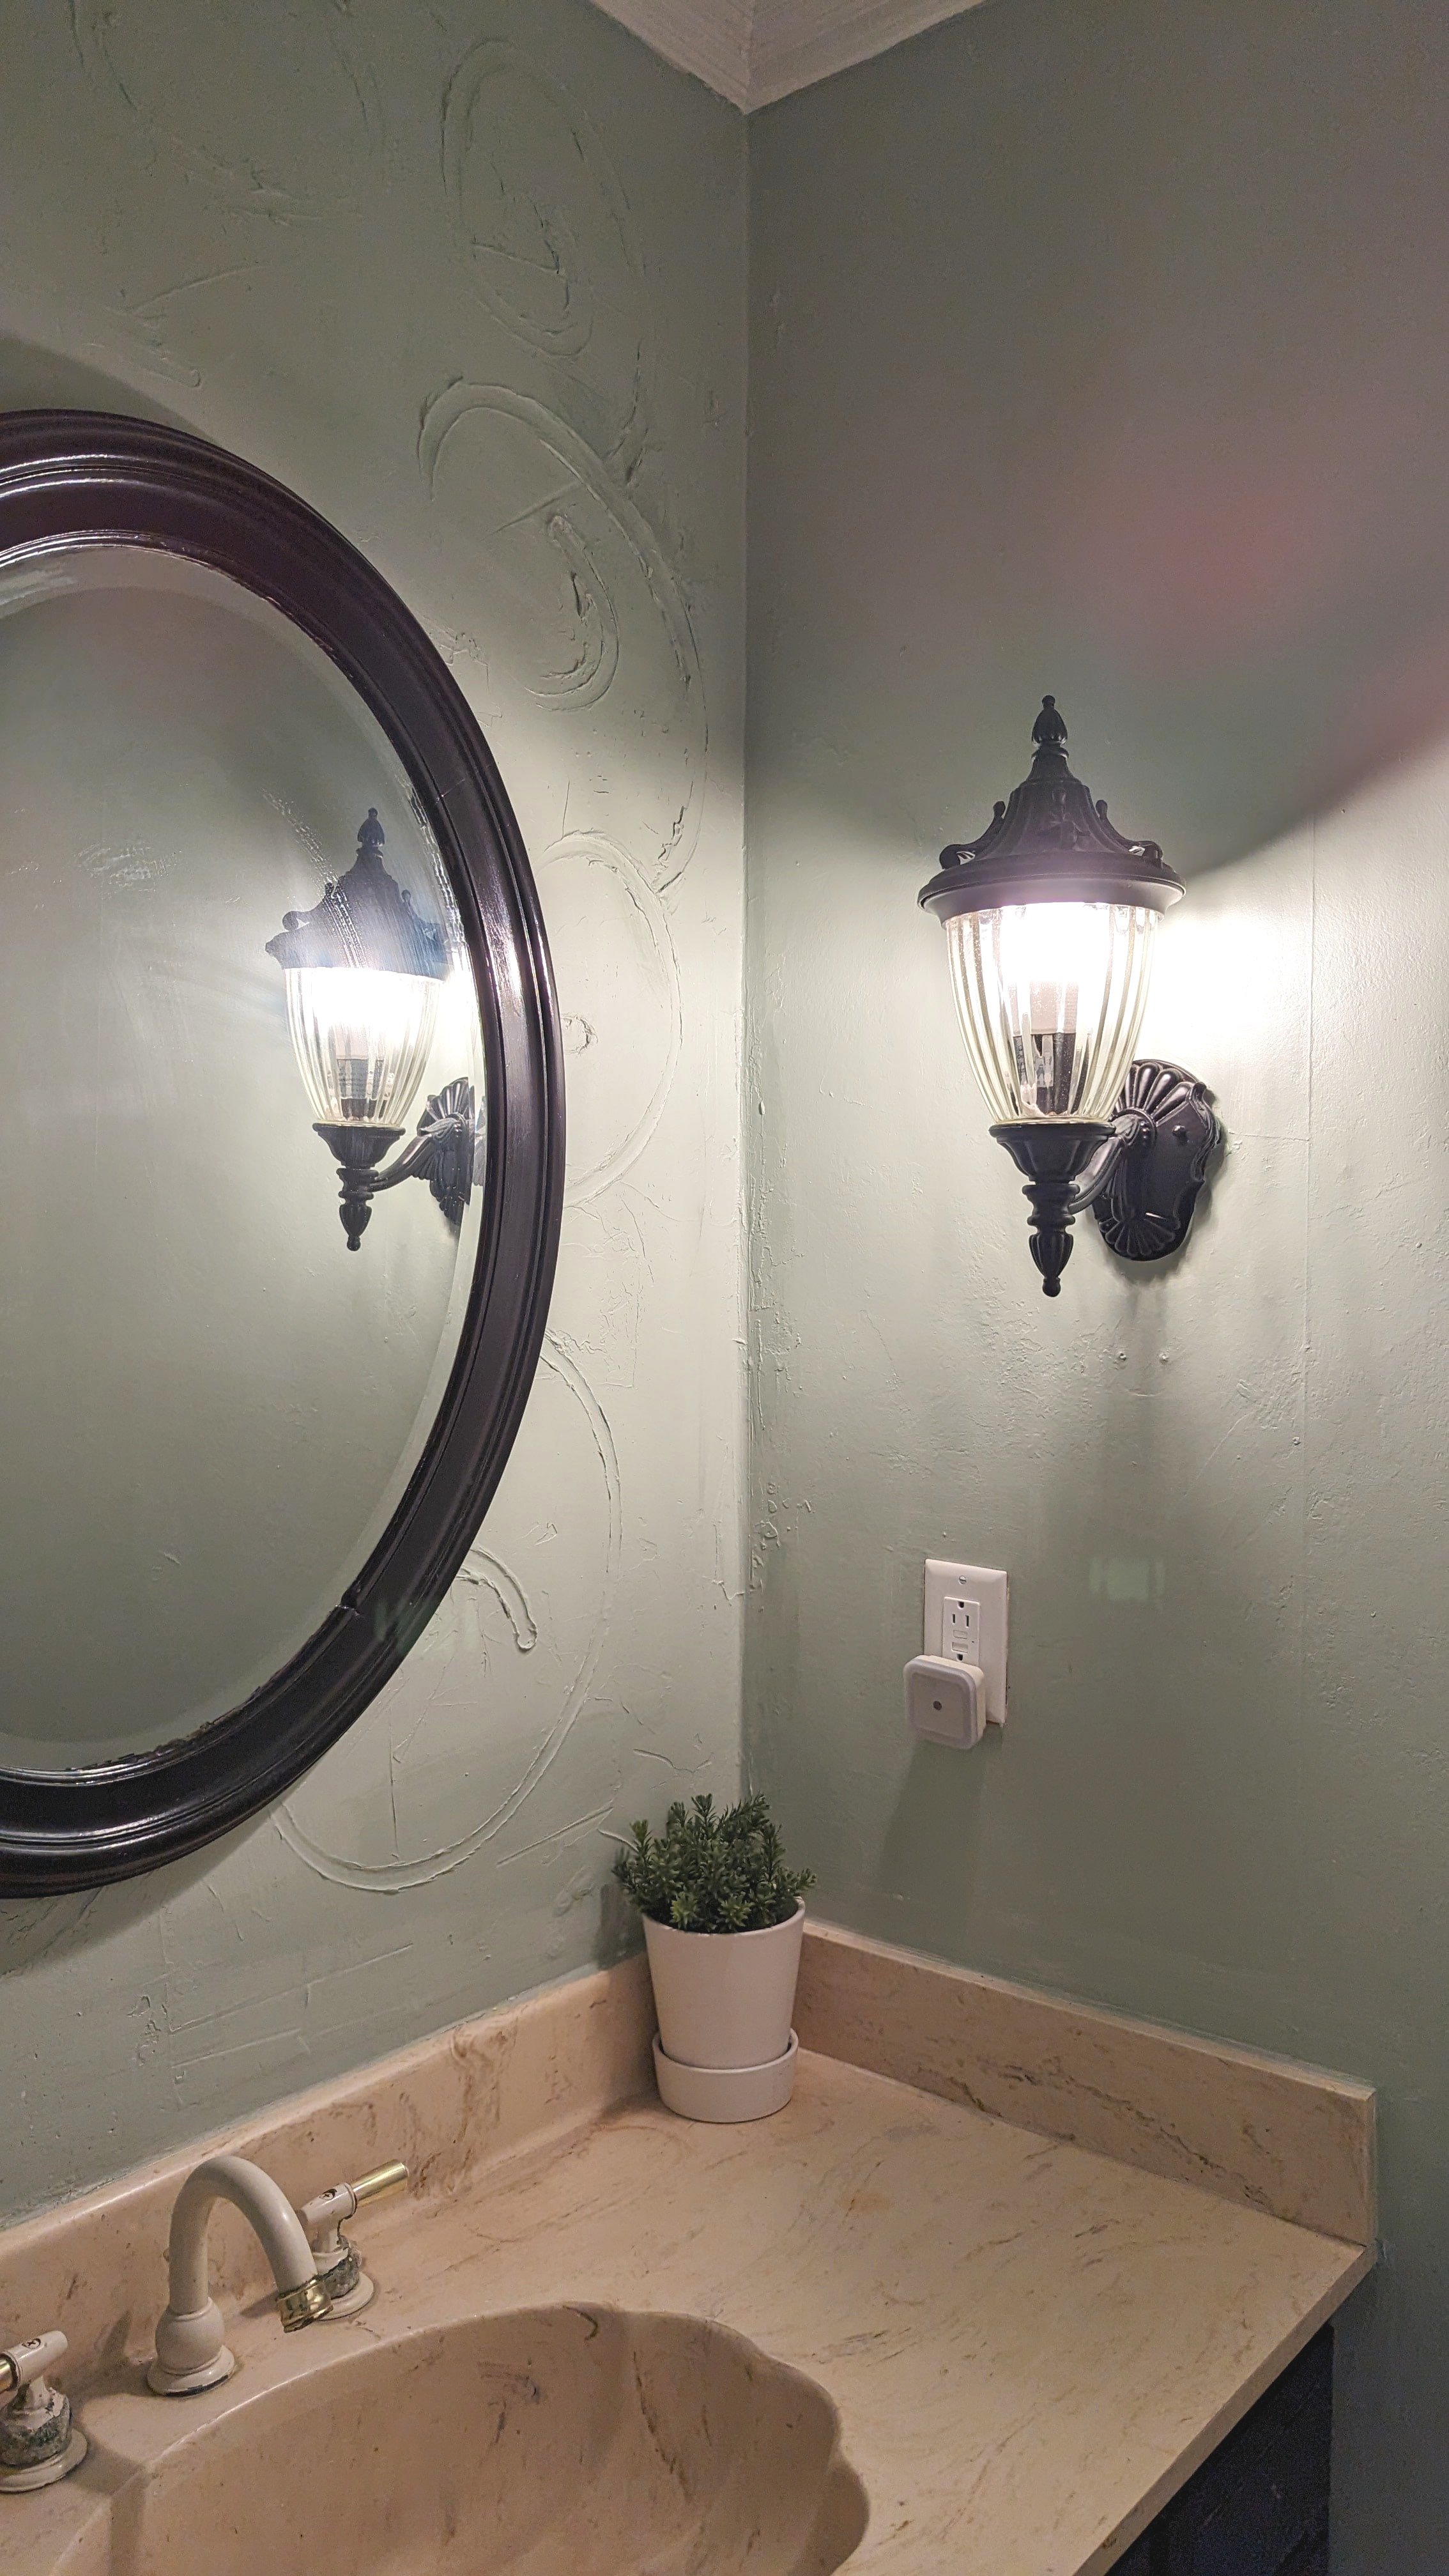
I assume it’s in case you want to use the facilities with some ambiance? But in the time we’ve lived here, it’s never been utilized for that, so I think it’s safe to remove.
While those are just a few examples of items I’d like to change, I actually plan on gutting the entire thing and starting from scratch. In fact, I first started designing this room TWO YEARS ago. Here are some rooms that really got my wheels turning.
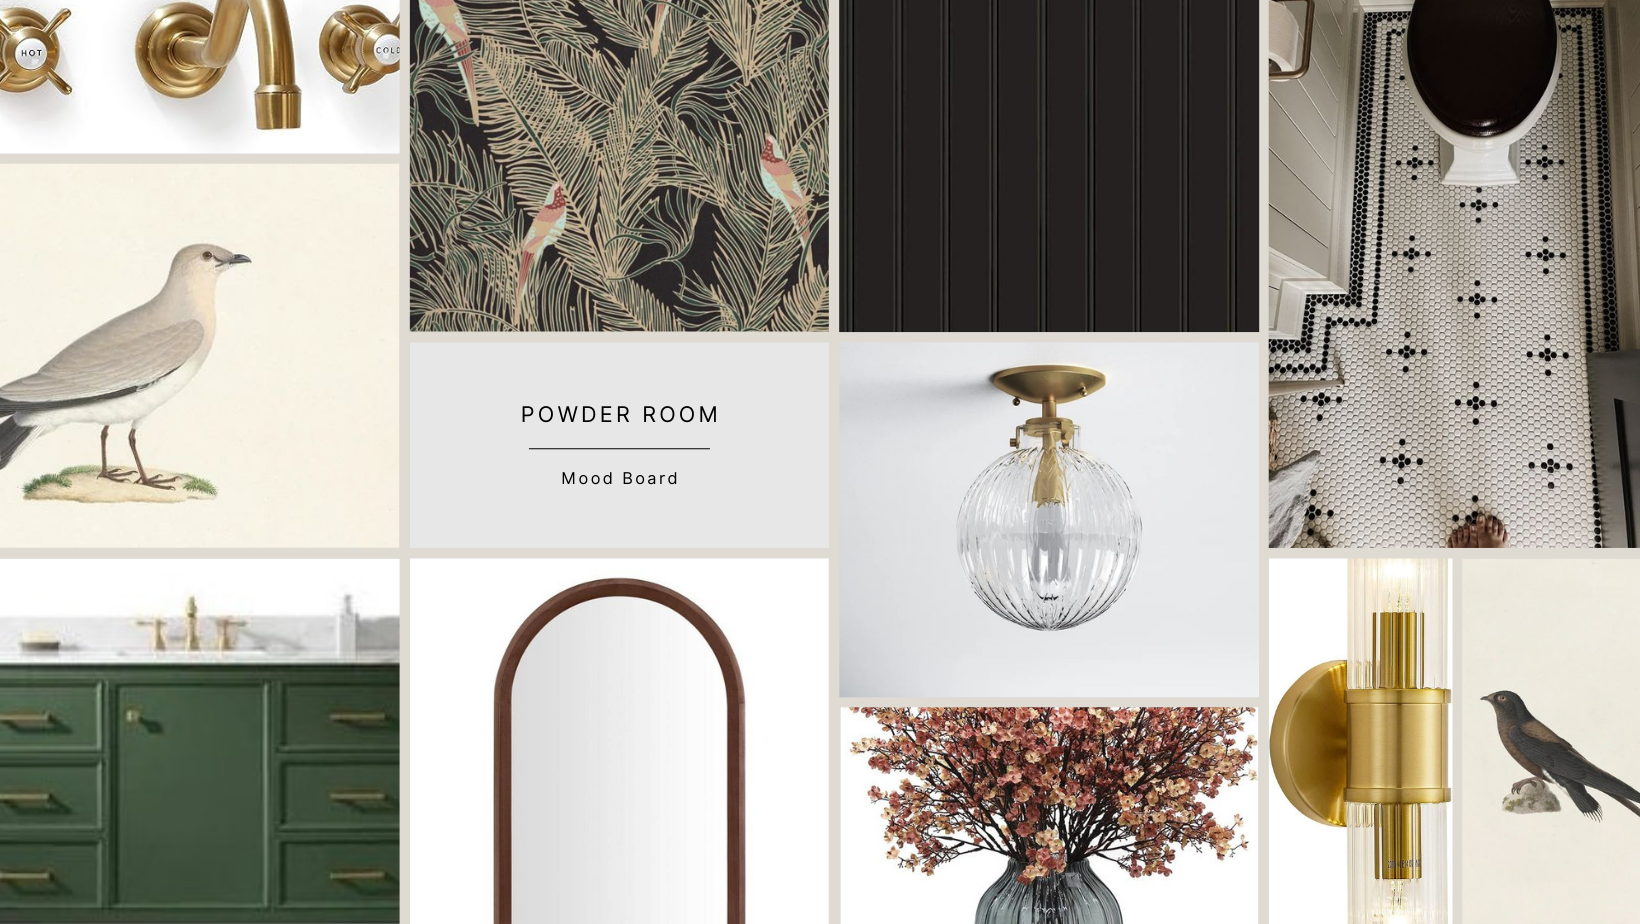
Half Bathroom Inspiration
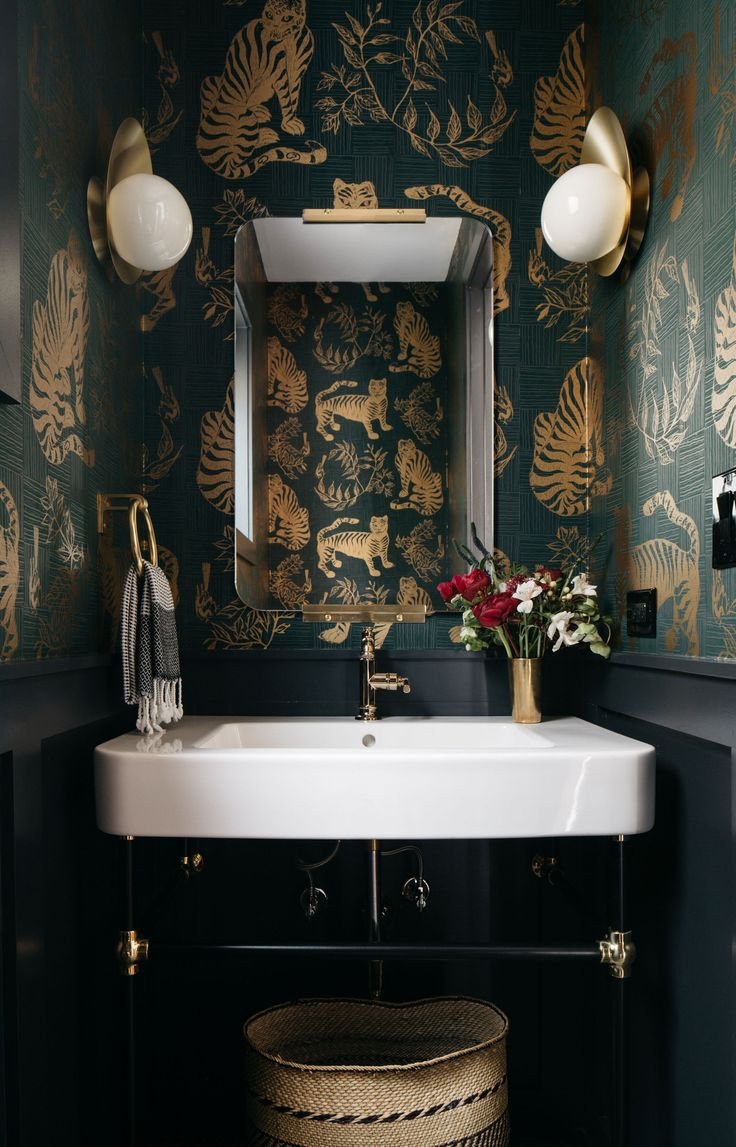

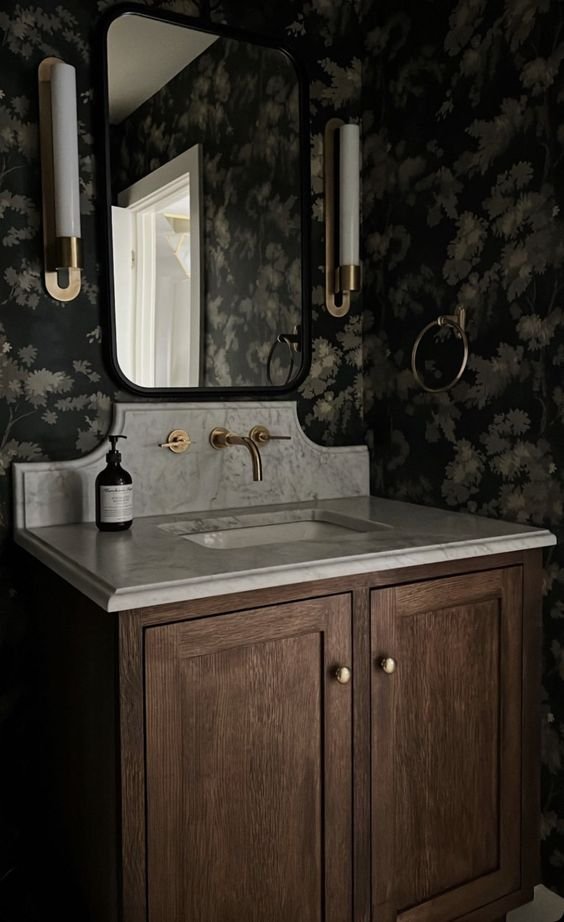
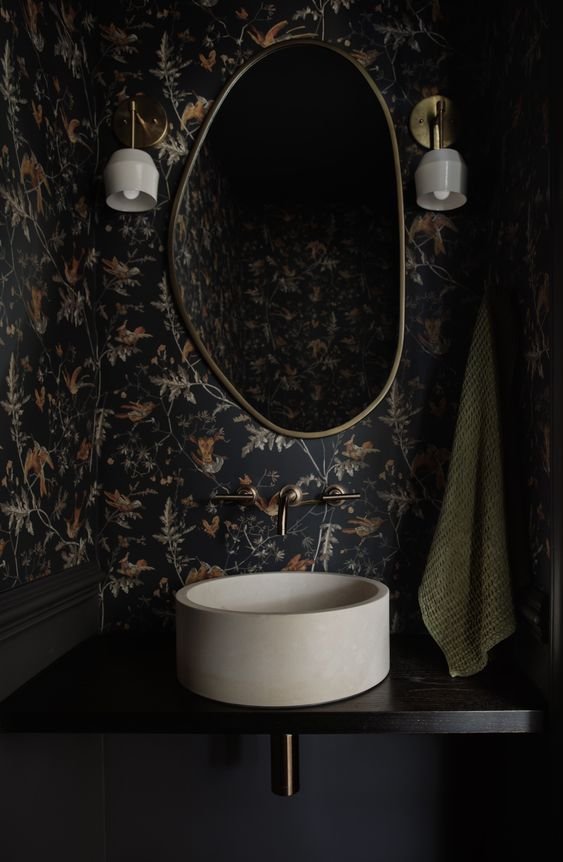
Are you sensing a theme here!?
I first fell in love with the funky, modern wallpaper mixed with some more classic elements in the picture on the top left. From there, I went down a dark and moody bathroom rabbit hole that I don’t regret one bit.
A Case for Dramatic Bathrooms
People tend to think small spaces are the last place you want to use dark colors or busy patterns, but it’s actually the complete opposite! Here’s why you should go dramatic with your next bathroom renovation:
Encompassing an entire room (especially a small one) in dark tones actually makes the room look bigger by tricking your eye into eliminating boundaries.
The smaller scale of bathrooms allows space to splurge a little, play with different design elements, and try things you may not have had the budget for otherwise.
Creating a dramatic feel in a small space is an opportunity to surprise people with a tiny room that packs a punch.
Half Bathroom Design Plans
Now that you know where my thoughts are headed, let’s dive into my bathroom design.

The Walls
If you didn’t pick it up from my inspo photos, I want to go dark with this room. I spent countless hours scouring sites for the perfect wallpaper. There were SO MANY that I considered using, but ultimately, I chose this one from Lionheart Wallpaper.

I love the organic feel of the design and the tones in this wallpaper. Of course, I like that the primary tone is black, but the ferns are actually a subtle dark green, and the birds have some interesting, yet subtle, colors going on, too.
On the bottom half of the wall, I’ll be installing either beadboard or tongue-in-groove paneling for two reasons: 1) to break up the wallpaper and add some visual interest and 2) to save money. Wallpaper is expensive, ya’ll!
The bottom half of the walls, trim, and ceiling will all be painted a soft black or charcoal gray to coordinate with the wallpaper.
The Floor
I’m so excited to try my hand at installing black and white penny tile in this bathroom - and adding a fun border and pattern!

I have yet to decide on the exact pattern I’ll be doing, but I’ve definitely been inspired by the picture above. I look forward to experimenting and trying a few designs to see what works in my space.
The Vanity
When I originally started designing this space, I jumped on Facebook Marketplace and began searching for something I could retrofit to use as a new vanity (a project I’ve always wanted to tackle)… and I found something almost immediately!
Unfortunately, plans shifted (over and over again), and this renovation was put on the backburner. Now with this project back at the forefront, I recently unburied my future vanity from under its mound of random tools and spare wood in the garage and fell back in love with it all over again!
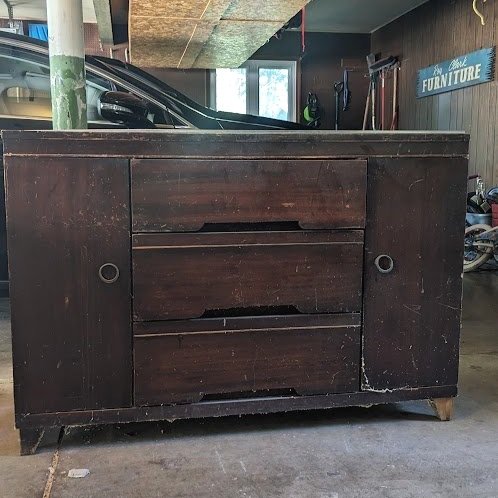
It might not look like much in its current state, but this baby has potential! Trust me.
My mock-up shows the vanity painted green, which I chose based on my memory of the vanity being in worse shape than it is. We’ll see how she fares during the refinishing process, but there’s a possibility I’ll be able to salvage the wood.
The Faucet
Paired with the vanity, I purchased this gorgeous hardware that was just delivered, and I’m super impressed by the quality so far.

I can’t wait to see it in action!
The Mirror
Of course, every vanity needs a mirror. I immediately spotted this mirror the first time I walked into Charlie Foursquare and was drawn to it the minute I laid eyes on it.

I love everything about it - the details on the wood, the shape, the slight bevel in the glass, even the subtle aging of the glass! (This gal is OLD.)
I didn’t consider using it anywhere in my house until recently when I got curious and brought it home to try on for size in the bathroom. It fits the space PERFECTLY! I can’t wait to add a little bit of antique flair to this room.
The Lighting
To really add dramatic flair to the bathroom, I knew I needed dramatic lighting. Enter: these Art Deco-esque sconces on either side of the mirror.

And fot the ceiling, I love the look of this light fixture (and the beautiful patterns the glass makes on the walls!)

Final Thoughts
I’m so excited to get started on this project and to see the ideas that I’ve come up with come to life. But first, I have to do the dirty work: gutting the entire room. Be sure to follow along here for weekly updates and on Instagram and Facebook to watch the project come to life in real time!


Follow along with this year’s One Room Challenge:
Powder Room Design

Overdue Office Renovation Updates
It definitely wasn’t my intention to take the summer off of blogging, but the office renovation needed as much attention as it could get - so that’s where I’ve been just about every day. While I’m not officially ready to reveal any of the rooms, you’ll get plenty of updates and sneak peeks in this post. Keep scrolling!
Holy accidental summer break!
It definitely wasn’t my intention to take the summer off of blogging, but the office renovation needed as much attention as it could get - so that’s where I’ve been just about every day.

But all that time spent at the office was well worth it. We’ve made an insane amount of progress! While I’m not officially ready to reveal any of the rooms, you’ll get plenty of updates and sneak peeks in this post. Keep scrolling!
Refinished Floors
In my last post about the office, I shared that the months-long saga of demo was complete, and drywall was being installed. Shortly after that post, our floor guys started making headway, too. And let me tell you, it was a game-changer! Just look at the difference between the next two photos!
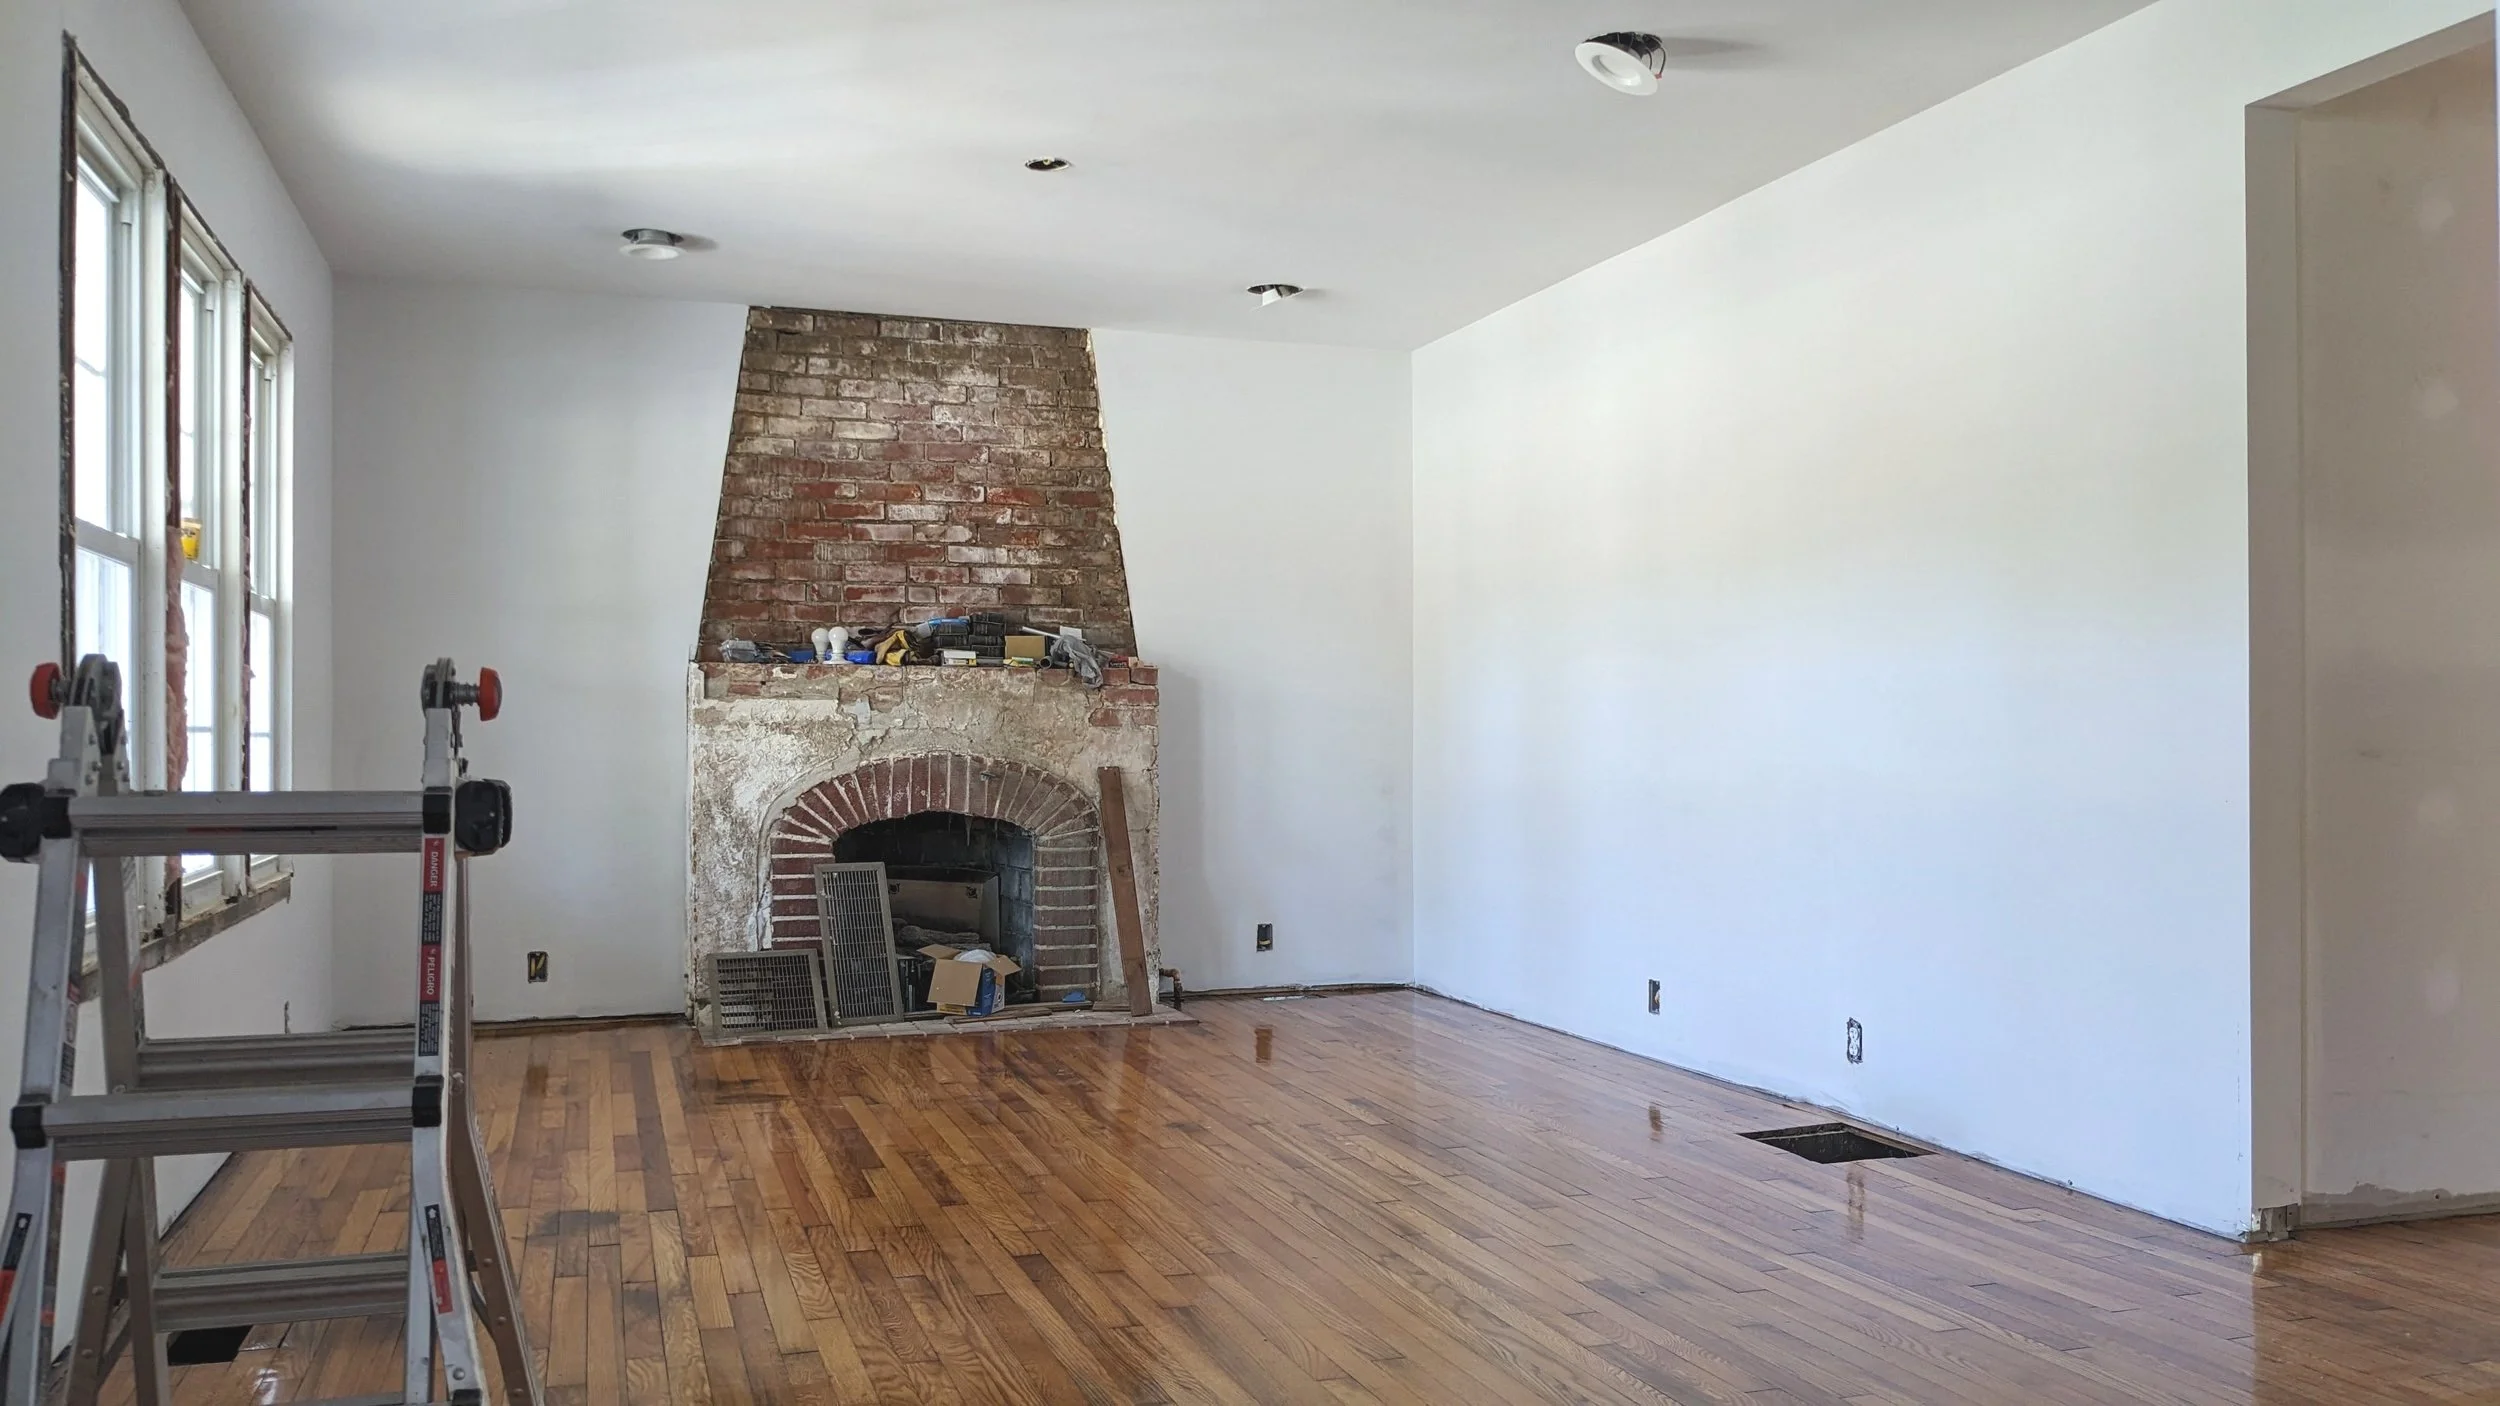
Considering the state of this building when we bought it, we didn’t think the floors could be salvaged. We weren’t even a little bit kind to them during demo. Even after all the debris we ruthlessly dropped on the floor, chucked down the stairs, and scooped up with shovels, these floors amazingly came back to life!
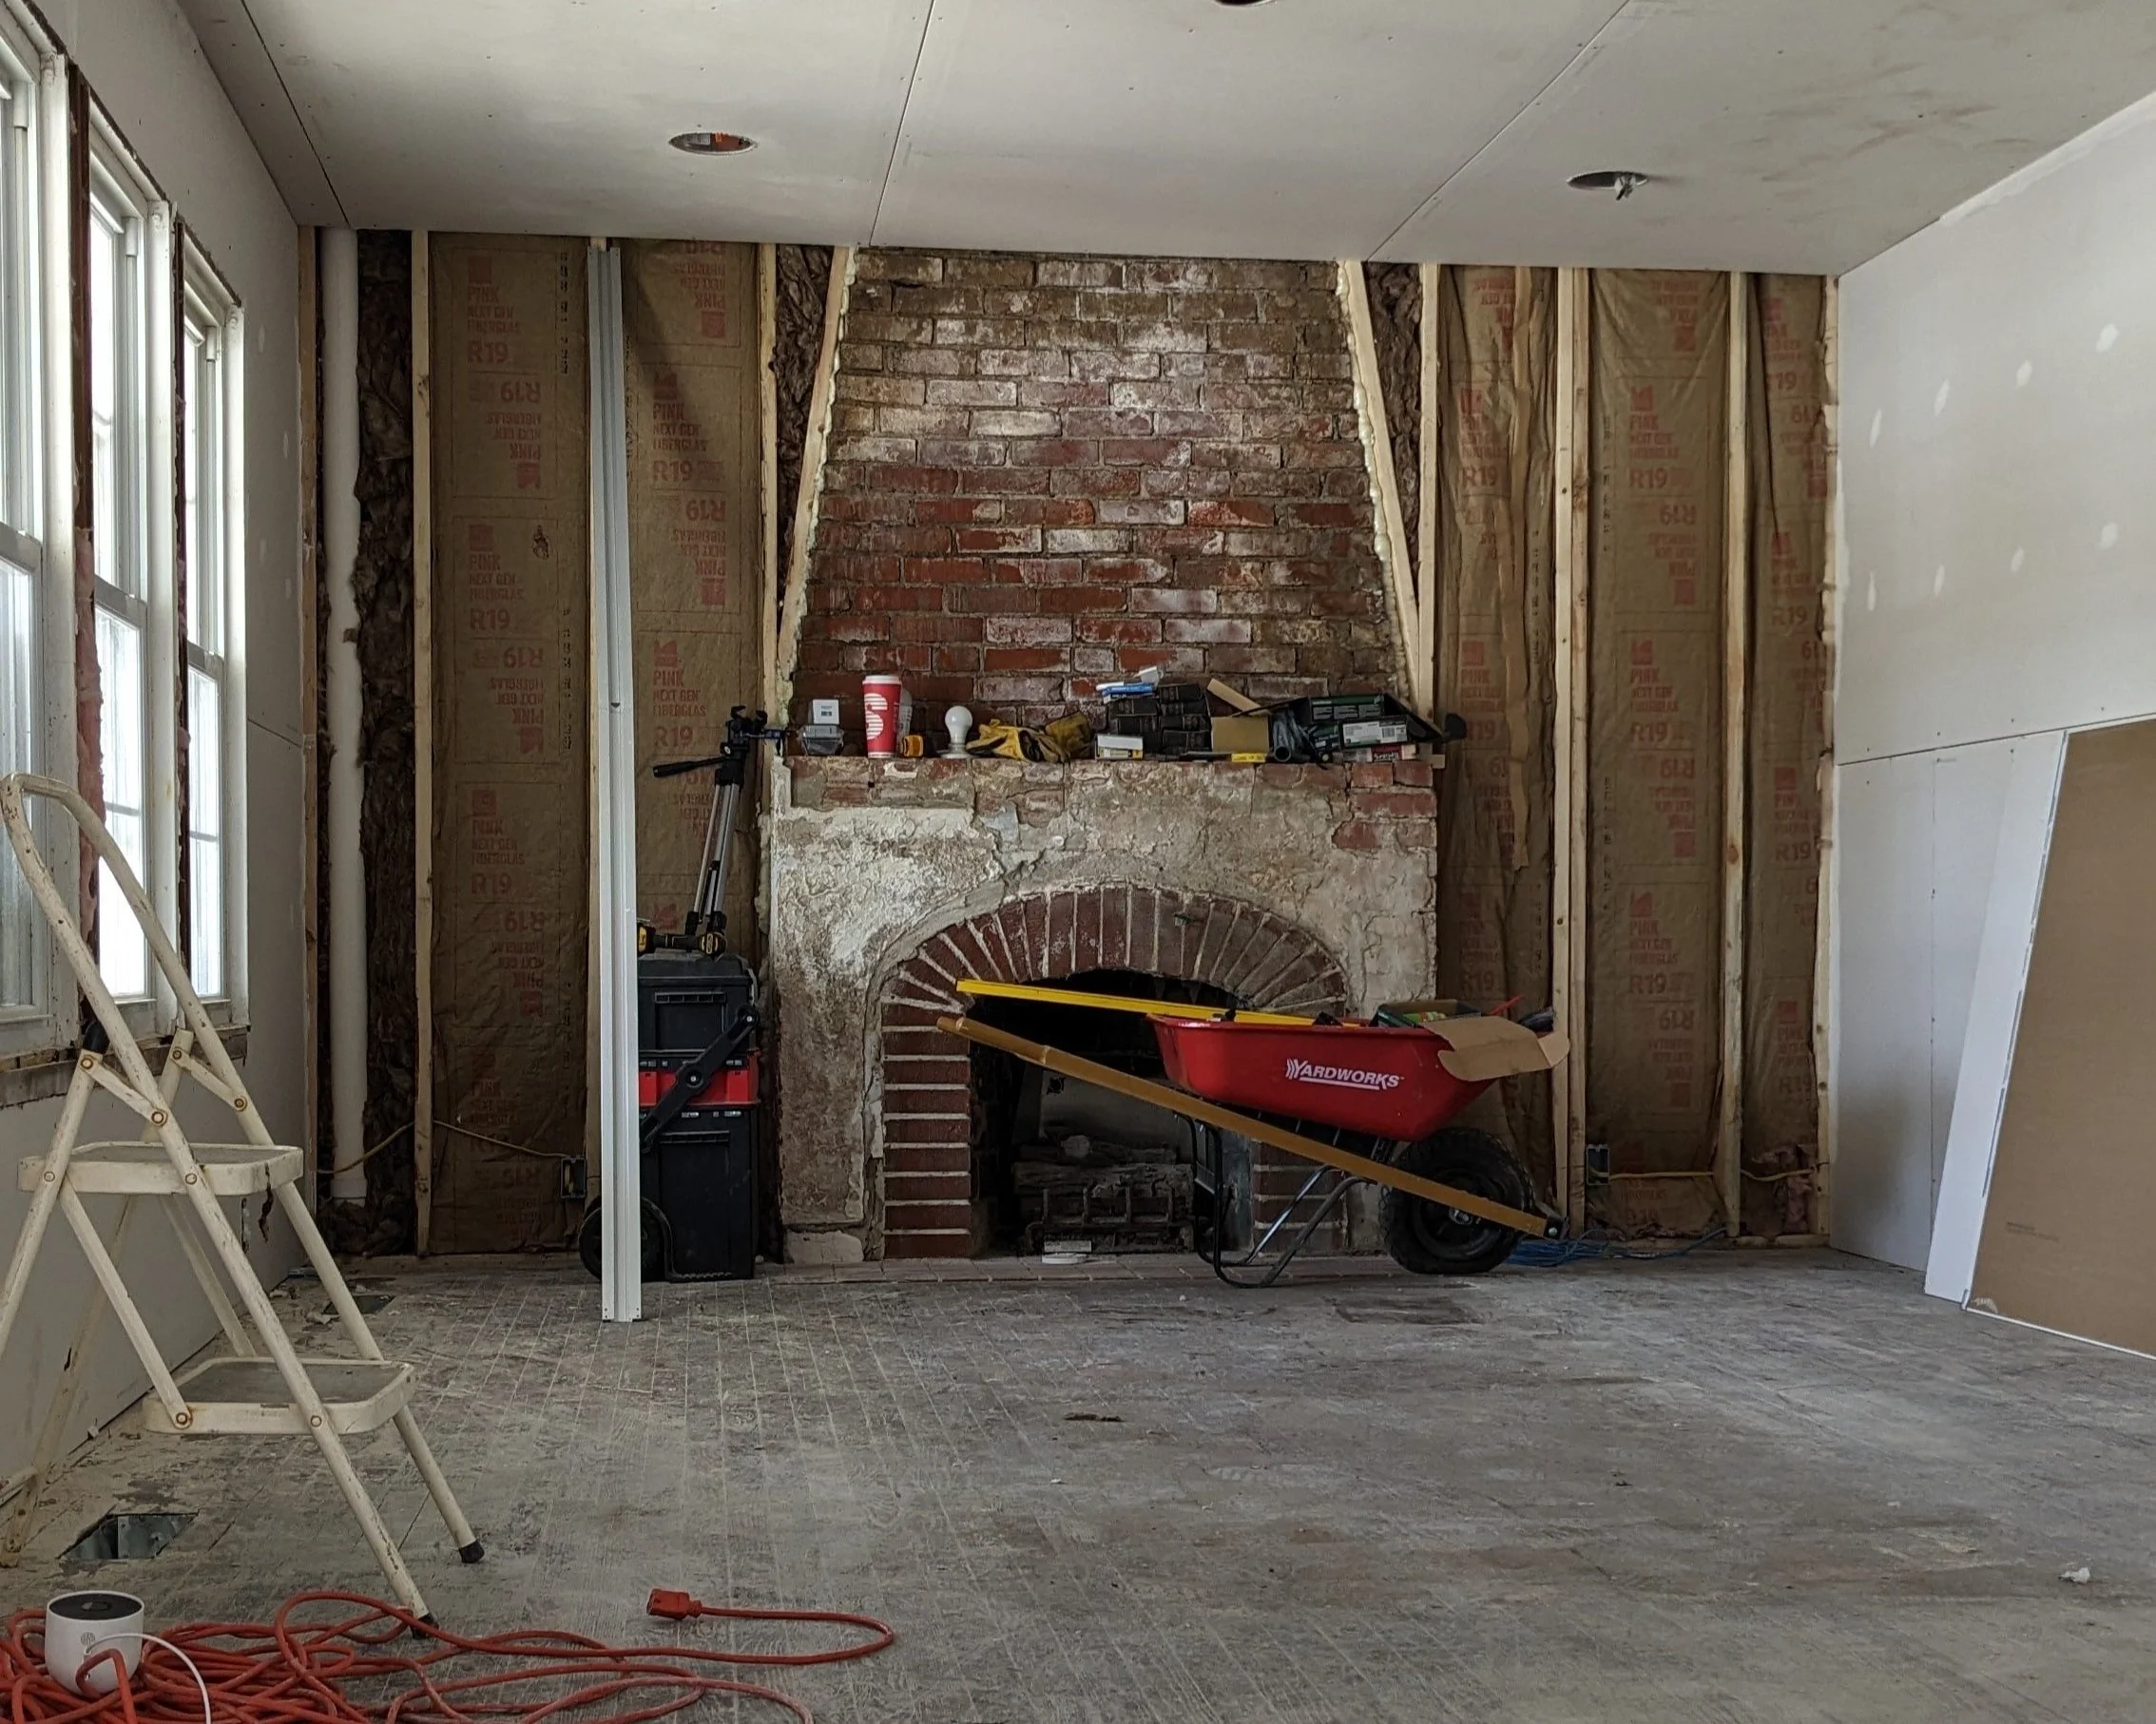
Once drywall and flooring were finished, I spent a few weeks priming and painting (with a little bit of help) every single wall and ceiling so I could move on to the more fun projects. (Though let’s be honest, I actually really love painting too!)
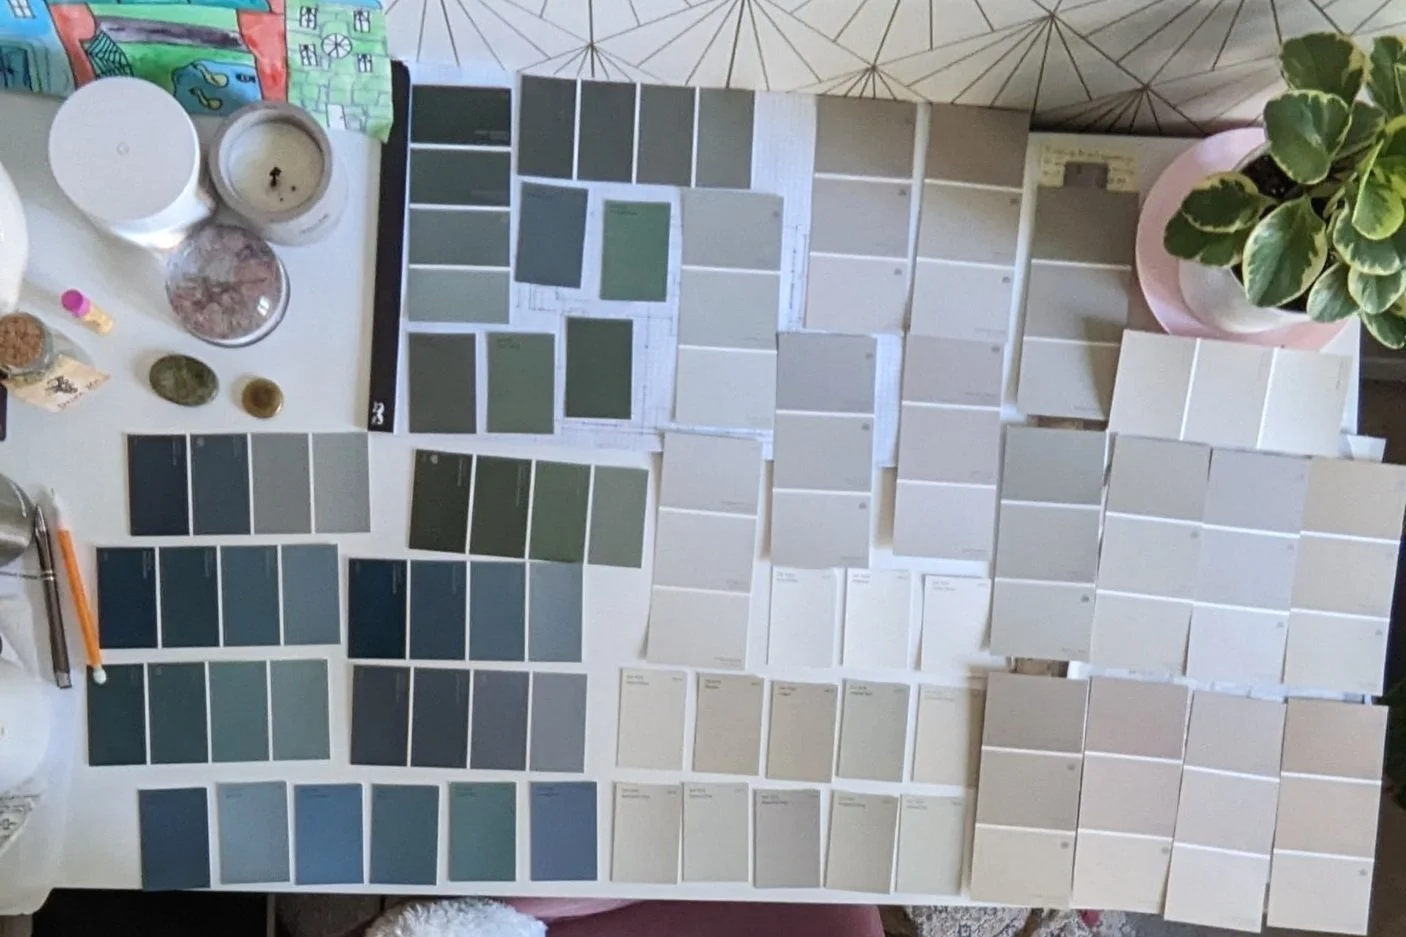
Here’s a quick rundown of what’s been happening in each room in the building - without giving too much away! I’ll share more detailed posts and tutorials once each room is completed.
As an Amazon Associate, I earn from qualifying purchases. This post may contain affiliate links, meaning I receive commissions for purchases made through those links at no cost to you.
Lobby
This room is pretty far along. The showstopper here is the stone veneer accent wall and wood-clad fireplace. There’s still some styling left to do (as there is in every room in this building), finishing the trim, and replacing the three smaller windows with one big picture window.
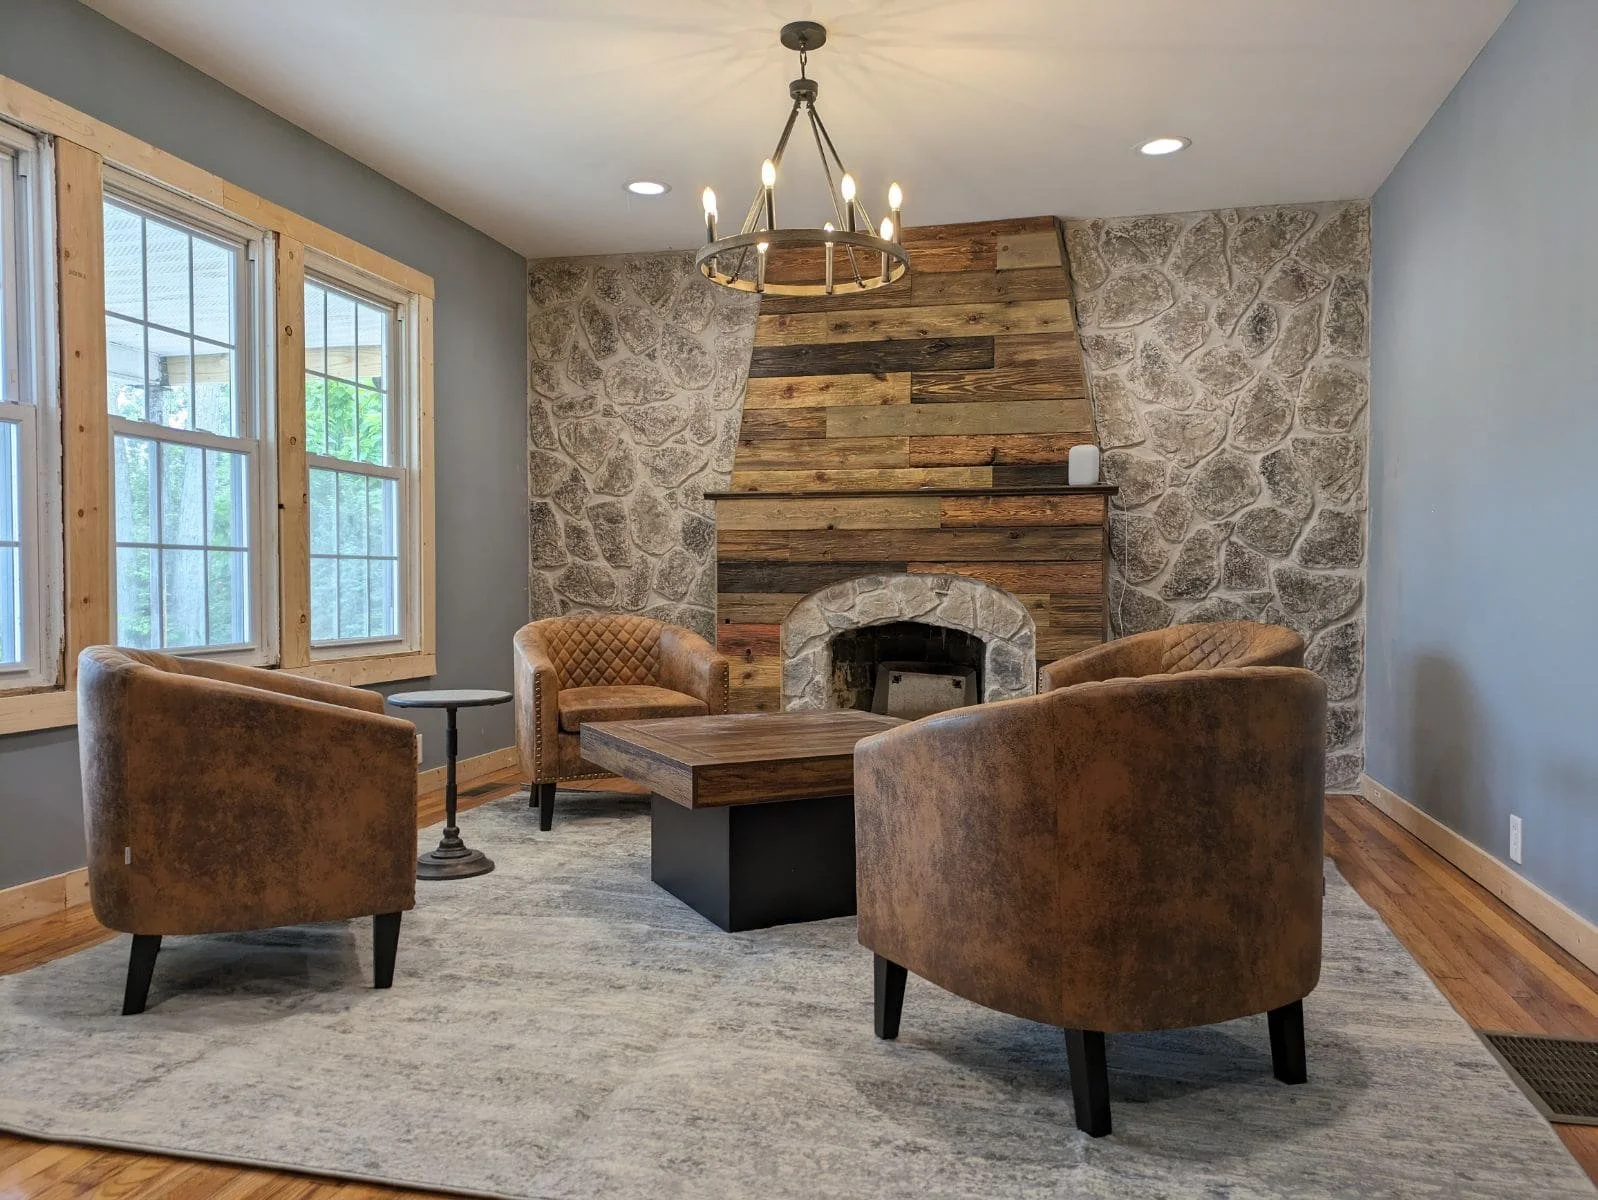
On the other side of the room, I have plans for a reception desk that I originally wanted to be clad in wood very similar to the fireplace. Now I’m worried it’ll be too much, so I’m rethinking the design.

Conference Room
This room is the furthest along out of all the rooms, and I’m in love with how it’s coming together.

Can you even believe this before and after view from the same angle!?


There are still a couple of things left to do in here, like swapping the two smaller windows out for one large picture window (not pictured). We also plan on adding (DIYing, perhaps??) a sliding door for privacy when needed.
Agent Office
This room looks a little empty right now, but it’s actually farther along than it may seem. The largest project of installing the desks (made out of IKEA Havstorp cabinets and butcher block countertops) around the perimeter of the room is complete.

Now it’s a matter of building/installing the corner pieces between the cabinets, installing hardware, building bookshelves on either side of the windows, waiting for the center window to arrive, and styling the space.
Bathroom
This bathroom has been a labor of love for me. What started as a grimy little bathroom now has tall board and batten, hexagon tile, and a toilet! (which we went a surprisingly long time without)

A little bit of art (and fixing the board and batten around the new window) is all that’s needed to complete this space.
(Pst, you can see how I frosted the window in this tutorial!)
Media Room
This room has gone through a bit of an identity crisis. For a long time, we didn’t know what it would be used for, so we just called it the back room or the kitchen (because apparently, it was a kitchen at one point?). It’s now been deemed the Media Room.
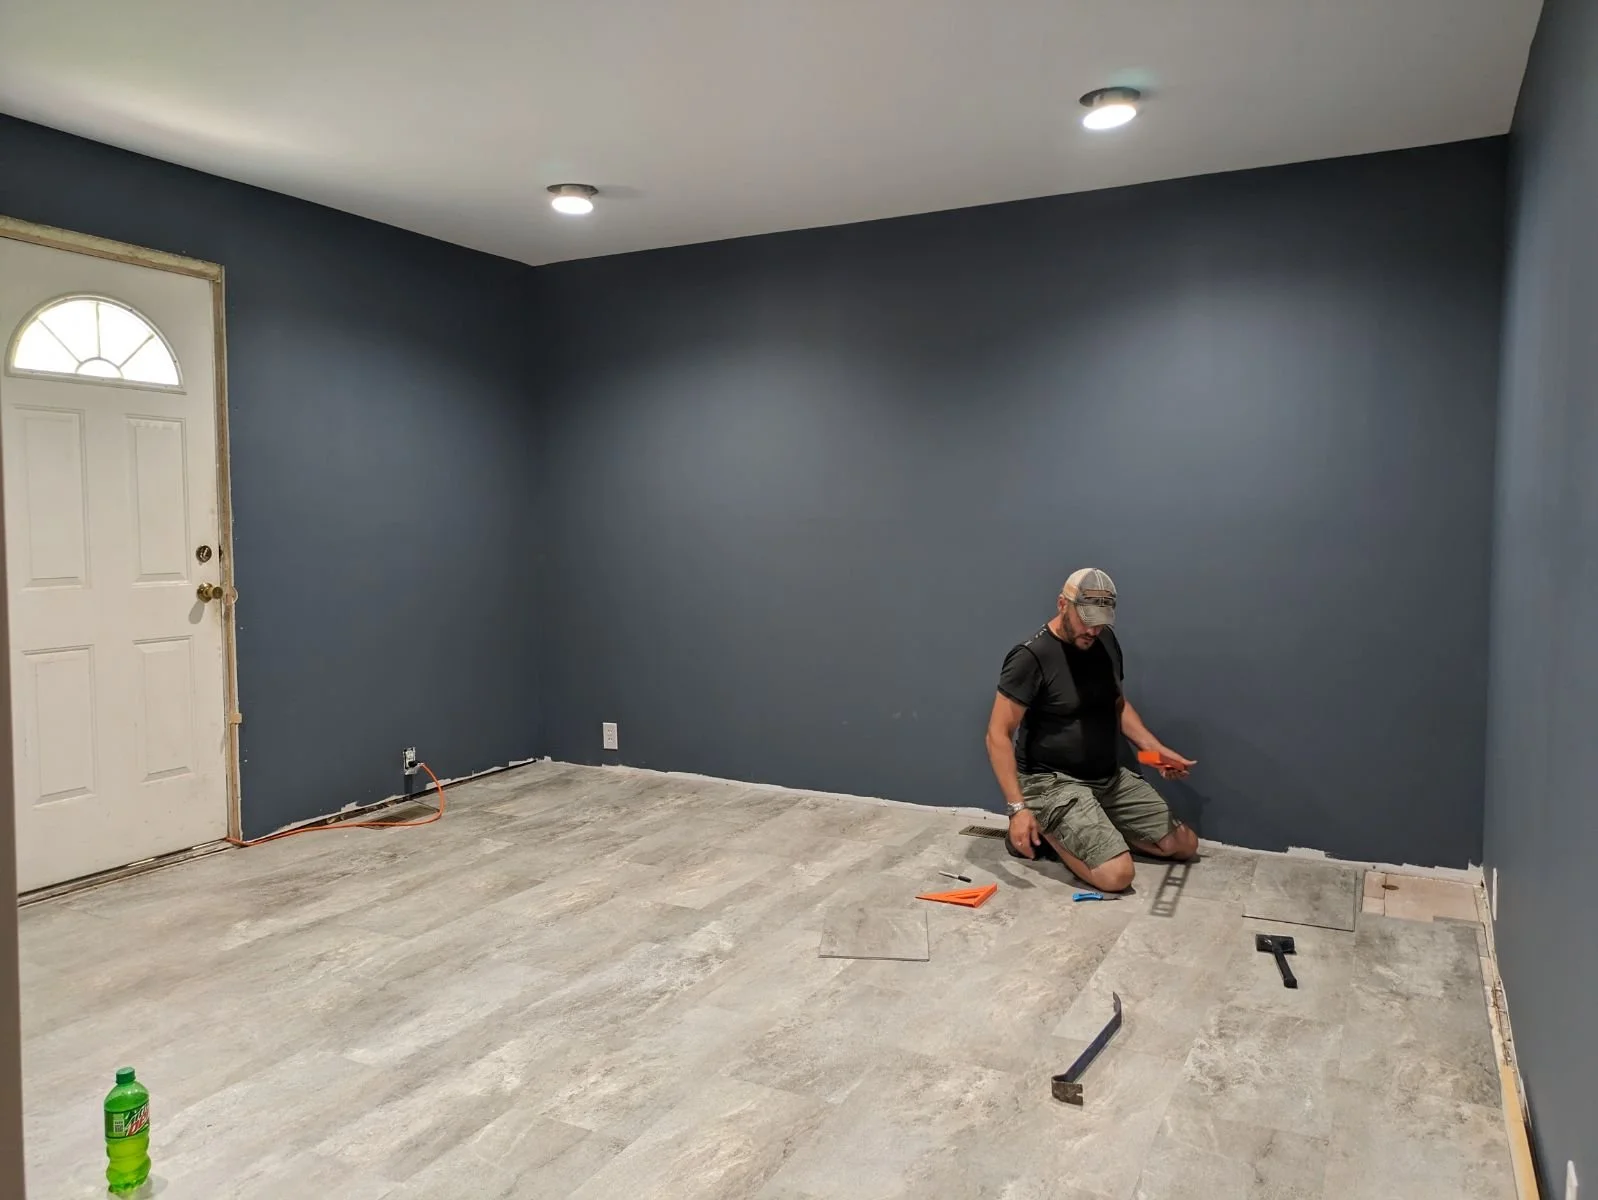
It feels good to have a direction for this room and definitely helped narrow down the design. So far, it’s been painted a really pretty dark grayish-blue color (Past and Present by Sherwin Williams), and we’ve replaced the flooring.
On the wall you see in the picture above, we’ll be installing acoustic panels in some sort of design to help with the echo and add an aesthetic backdrop. We'll also be replacing the door and adding trim, and painting it all the same color as the walls.
Upstairs
The main room upstairs is a long, lofted room that will be rented out for use by other businesses.
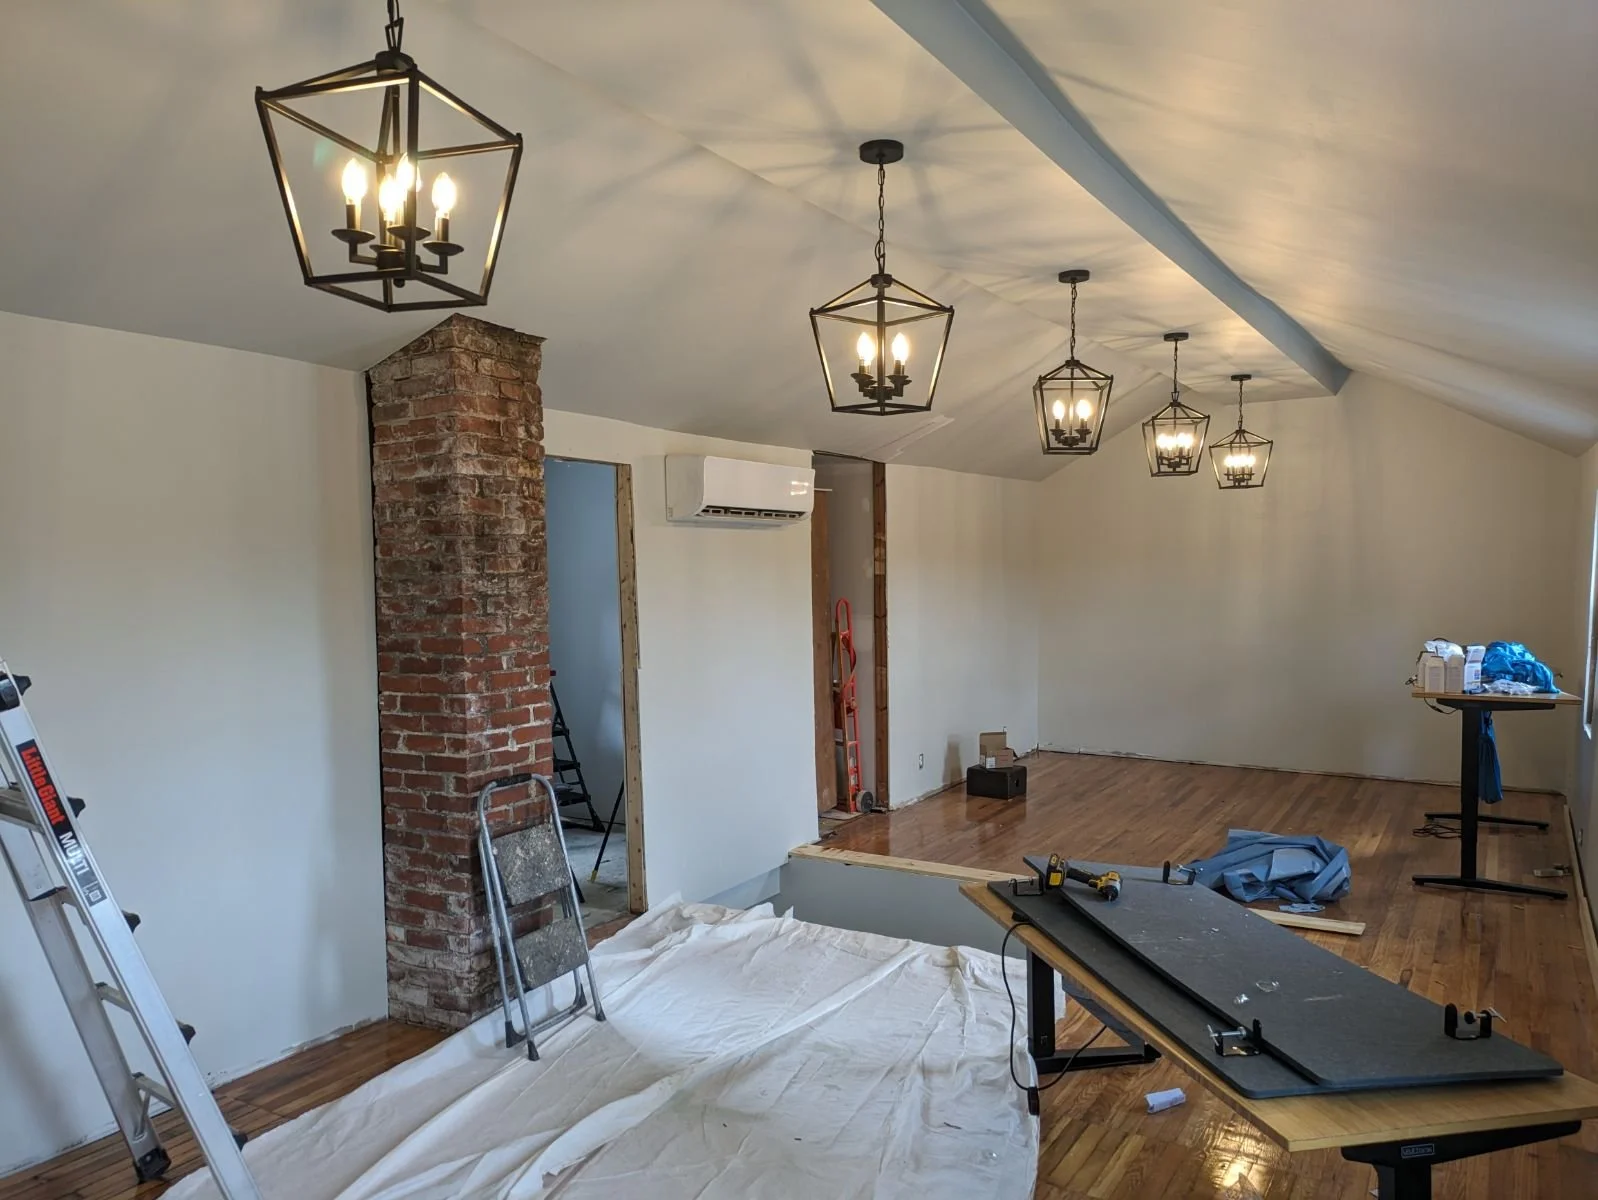
There’s still a little work to do up here including installing doors on either side of the staircase and, oh yeah, a railing around the staircase. Important stuff. But I’m already loving the open space, the hanging lanterns, and, of course, the exposed brick chimney!
Robb’s Office
The only other room upstairs is Robb’s office, which has new flooring and a fun accent wall. Aside from missing a door and trim, this room is thisclose to being finished.
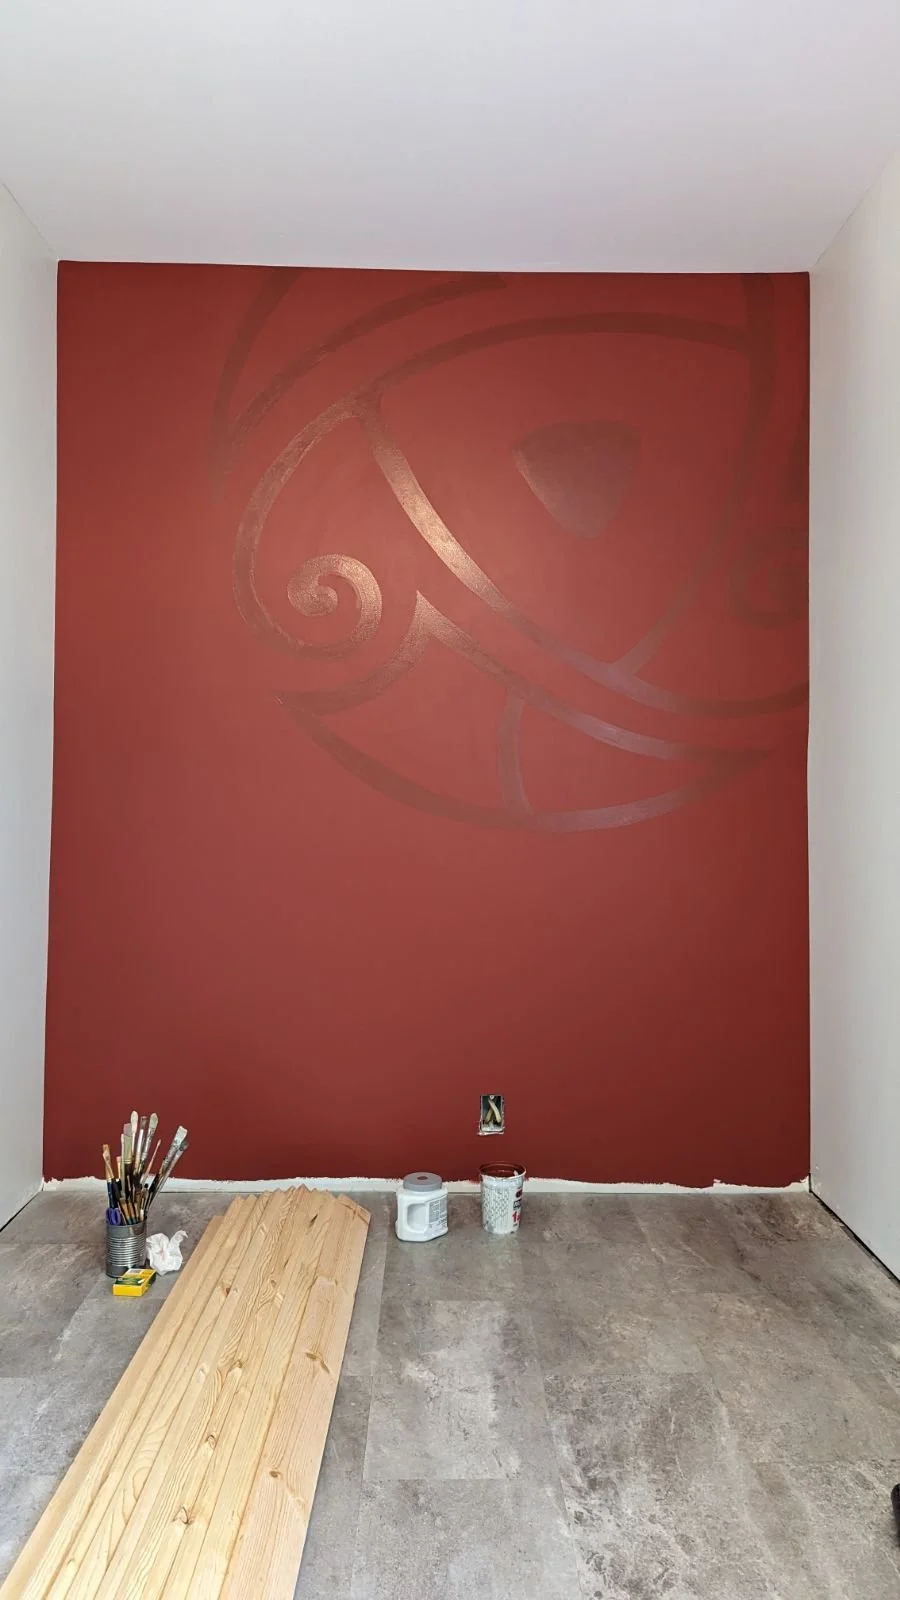
Exterior
Along with the interior updates, the exterior of the building has seen its own share of changes. We removed most of the stucco and all the siding, rebuilt all the rotted exterior walls, wrapped the building in a protective barrier, and installed board and batten siding.
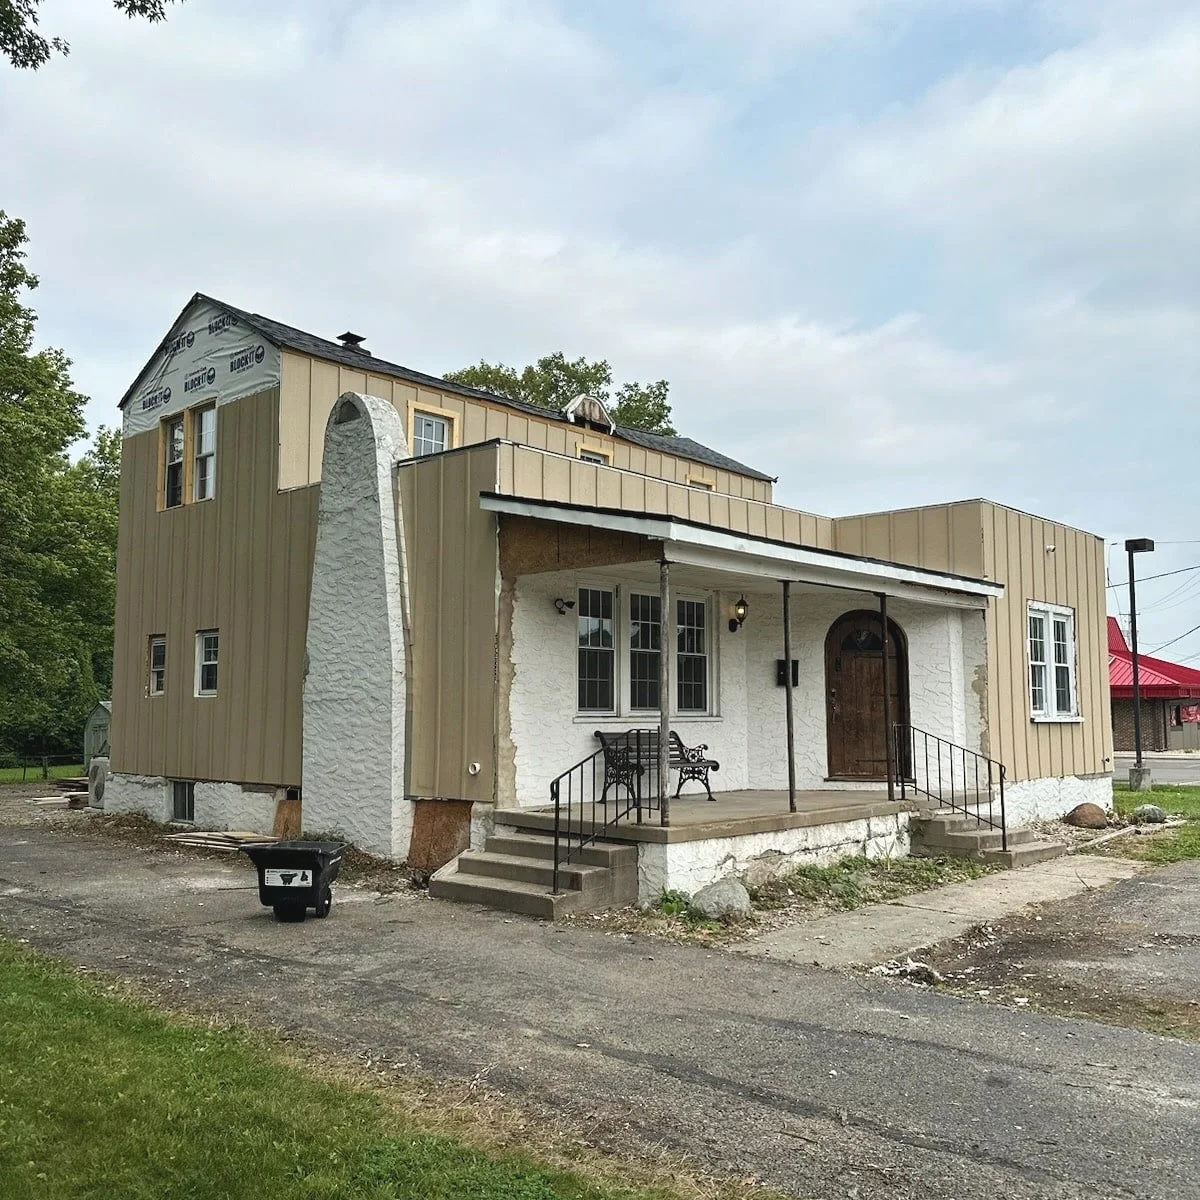
We also recently got copper-colored gutters, which are going to pop once the nude-colored siding is painted. I can only guess what people are thinking as they’ve been driving by a nude building all summer. Any guesses on what color we’re going with!?
There’s also landscaping in the works, which will bring it all together.
Final Thoughts
All in all, we’ve been working on this office for about nine months so far. It’s been a wild ride! I’m blown away by the transformation this building has undergone in that short amount of time and that we’ve done most of it ourselves. I can’t wait to share the spaces with you as we finish them up. Keep checking back here for those posts, and follow along in real-time on Instagram!

Catch up on the rest of the office renovation by visiting the posts below:
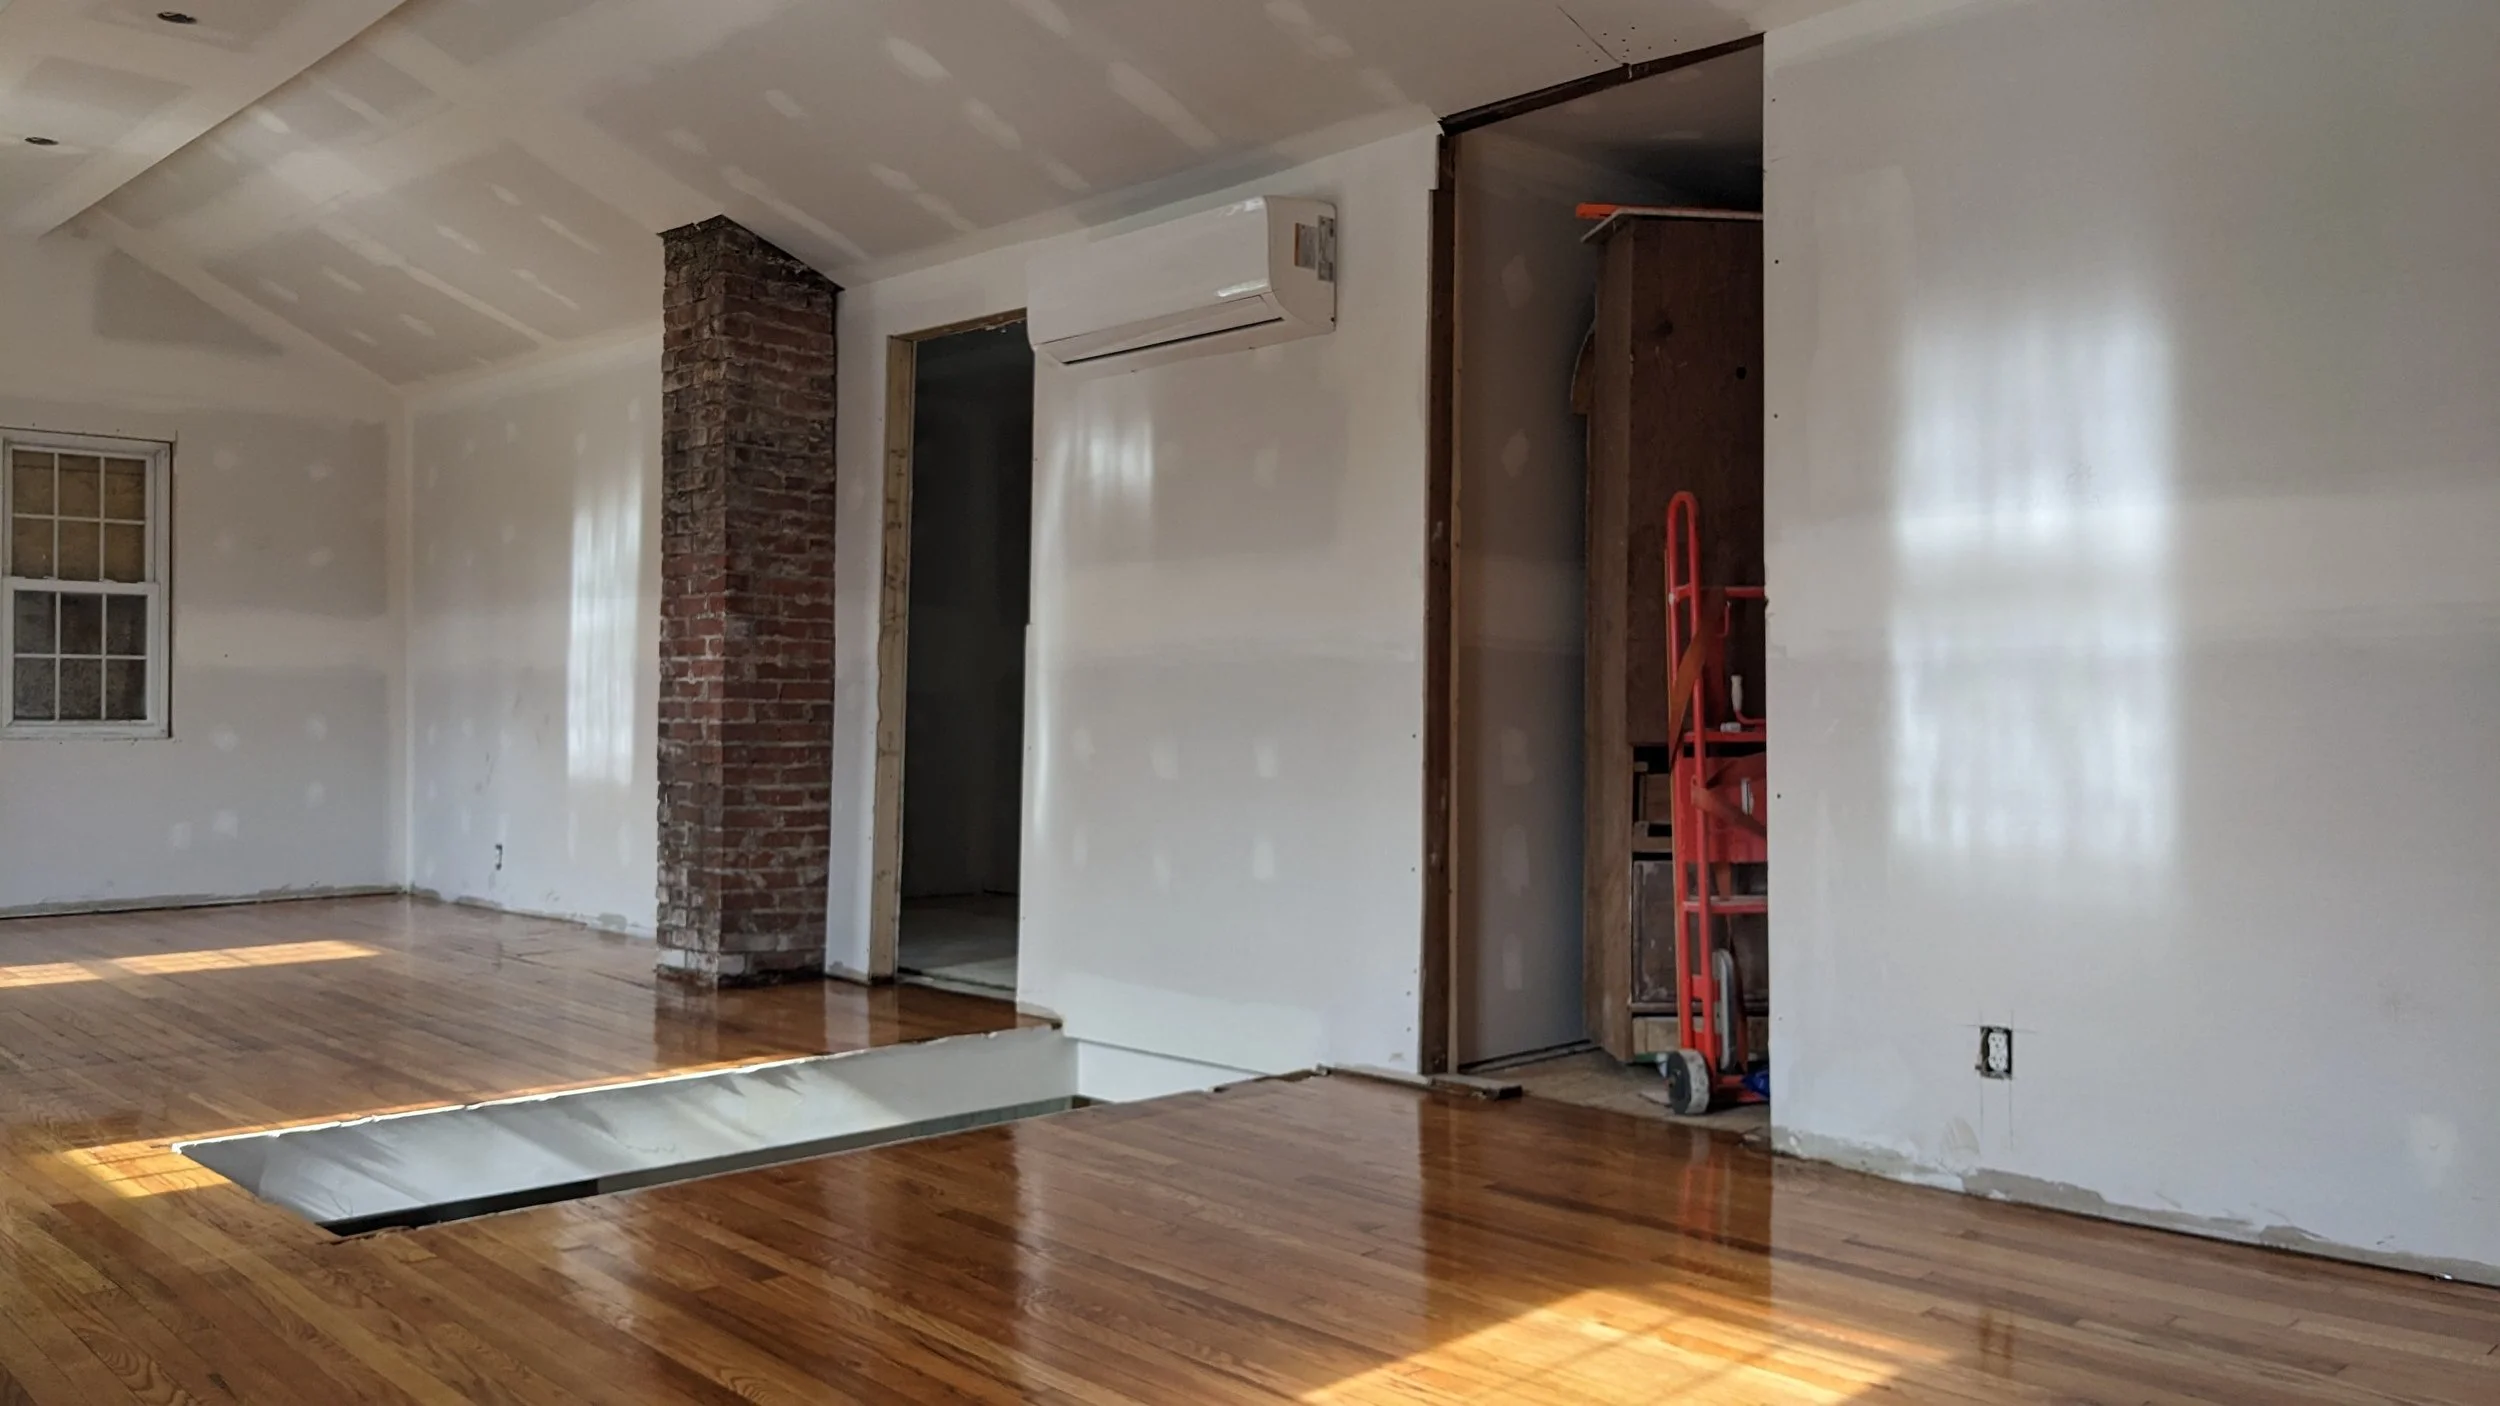
Office Reno - Bathroom and Loft Design
Recently I’ve been busy sharing the designs for most of the spaces in our office building, like the lobby and reception area, the kitchenette and conference room, and the agent office. Today I’m wrapping up this series with the bathroom, loft, and remaining spaces.
Half Bathroom Mood Board
Recently I’ve been busy sharing the designs for most of the spaces in our office building, like the lobby and reception area, the kitchenette and conference room, and the agent office. Today I’m wrapping up this series with the bathroom, loft, and remaining spaces.

Bathroom Design
Let’s jump in by talking about the bathroom. This building has a half bath on the first floor that once looked like this:

As an Amazon Associate, I earn from qualifying purchases. This post may contain affiliate links, meaning I receive commissions for purchases made through those links at no cost to you.
During demo, we decided to take out the closet from the adjoining room that juts into the space on the left-hand side to make this bathroom ADA-Accessible.
Right now, it’s more or less a blank box. But when I came across this bathroom by styleitprettyhome, I knew this was the design I had to run with for the office bathroom - with my own spin, of course.

The first thing that drew me in was the walls. I love the tall board and batten with the earthy green and white above to keep it light. Paired with the wood vanity and hexagon tile? So. Much. Yes!
So I got to sourcing and shopping and came up with this design:

I love making small spaces into little surprises to walk into. I’m really looking forward to making this bathroom something special.
Related: Check out this post sharing the half-bathroom mood board for our own home!
Loft Design
While the entire office has undoubtedly gone through a lot of changes, the second floor is the most changed. Long story short, there used to be two rooms up here. During demo, we knocked down some walls and ended up with this one long glorious space.
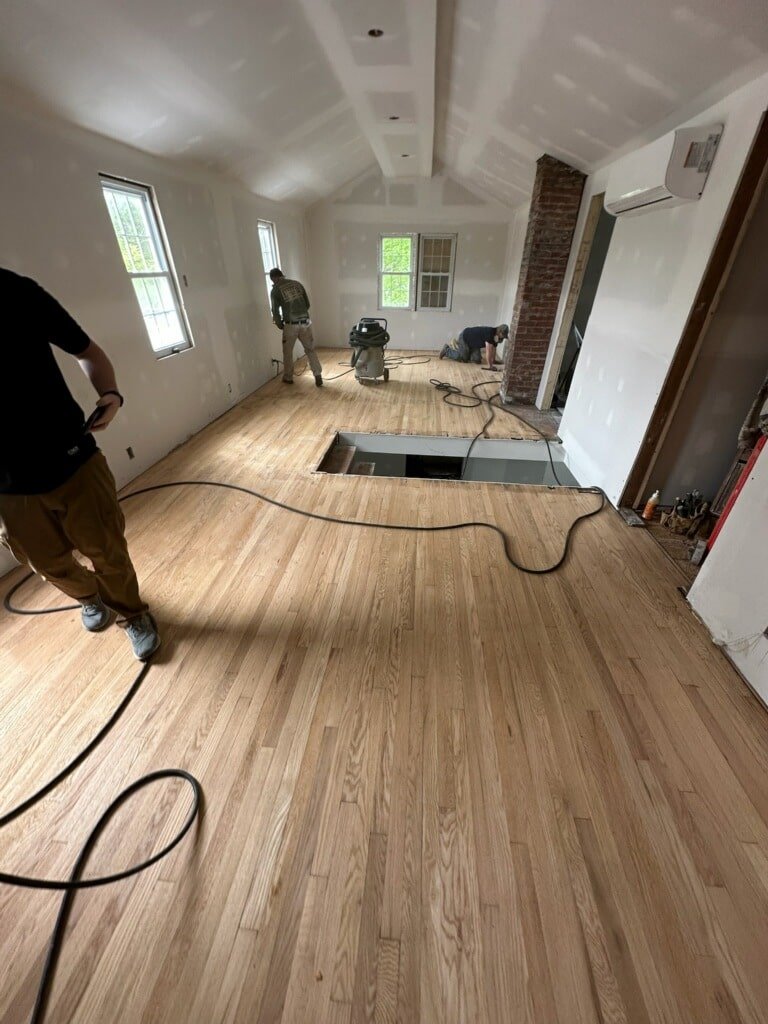
We don’t even have all the windows installed yet, and this space already feels so light and airy. As good as I think the agent office will look, I’ll honestly be surprised if people aren’t fighting to work up here.
While my plans for this space are fairly loose, there are some design elements already set in motion.
To keep the space light, I’ll be painting the walls (and ceiling) Agreeable Gray by Sherwin Williams. The hallway downstairs and the stairwell will also be painted this color, which will lead to a seamless transition between the spaces.
We’ll be installing five of these pendant lanterns down the length of the room. I think they’ll look amazing in the space.
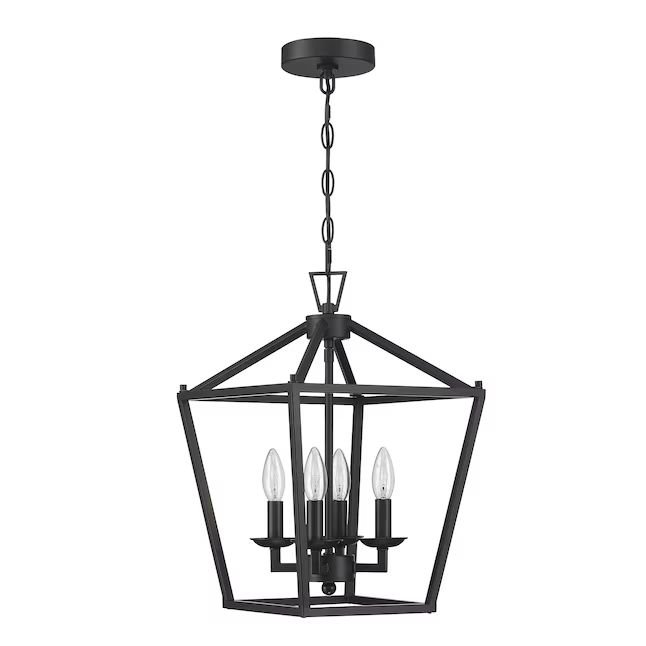
Obviously, we have the beautiful character added from the exposed chimney. But you know what would be even better? More character!
When I shared the design for the kitchenette, one of my designs included the built-in that came with the building.
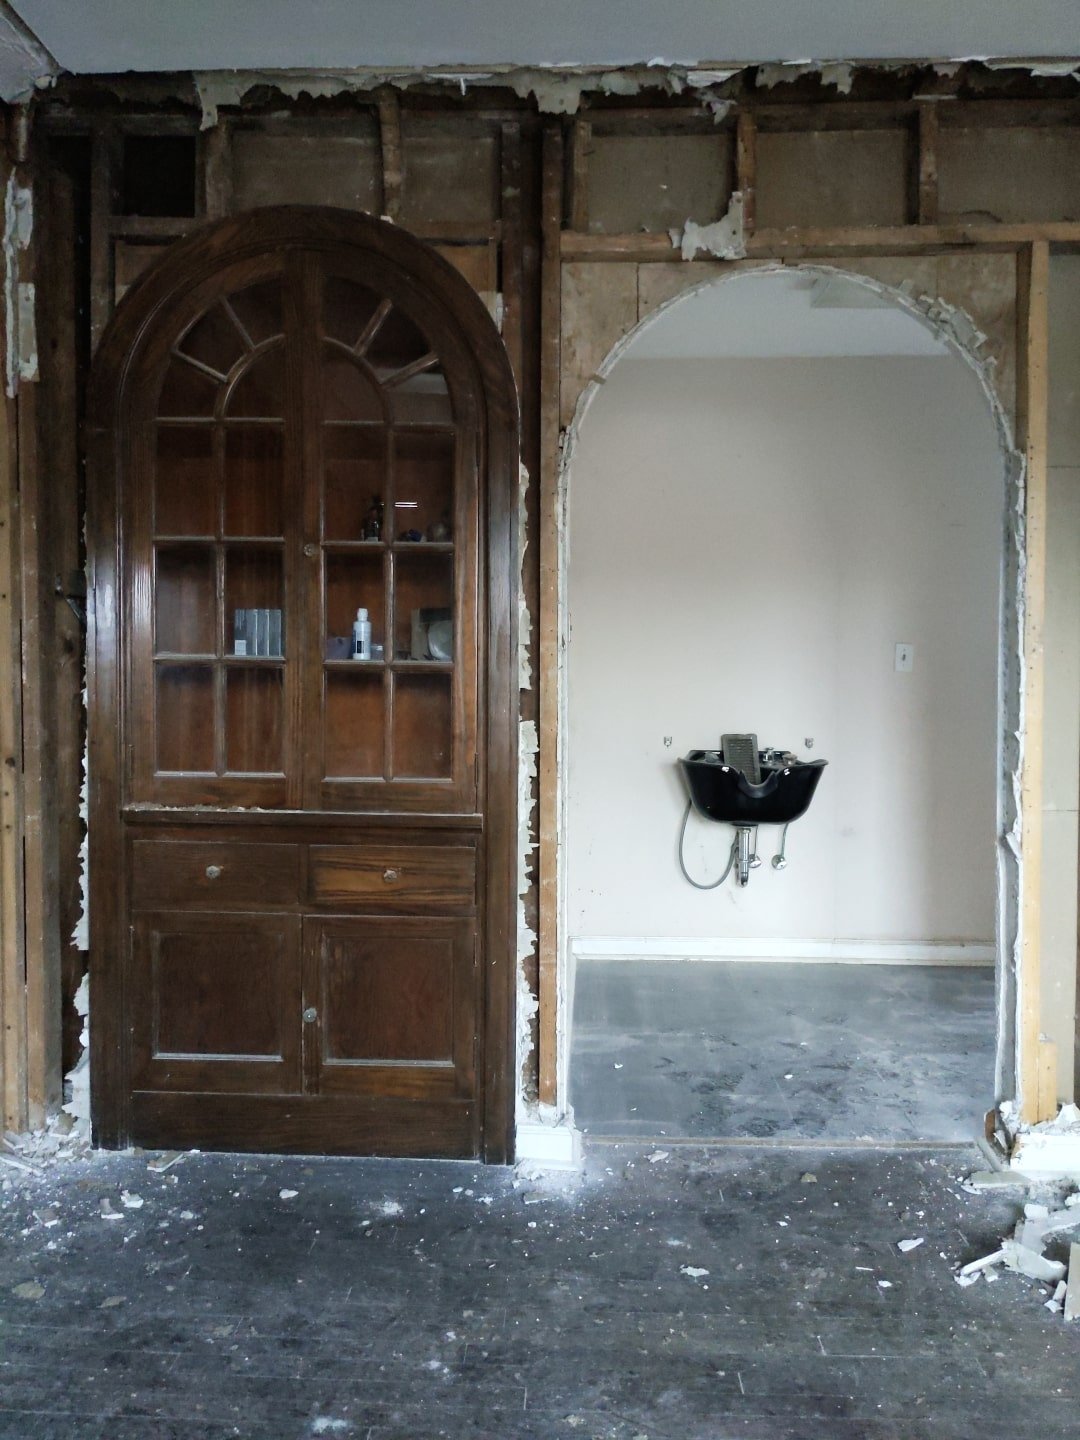
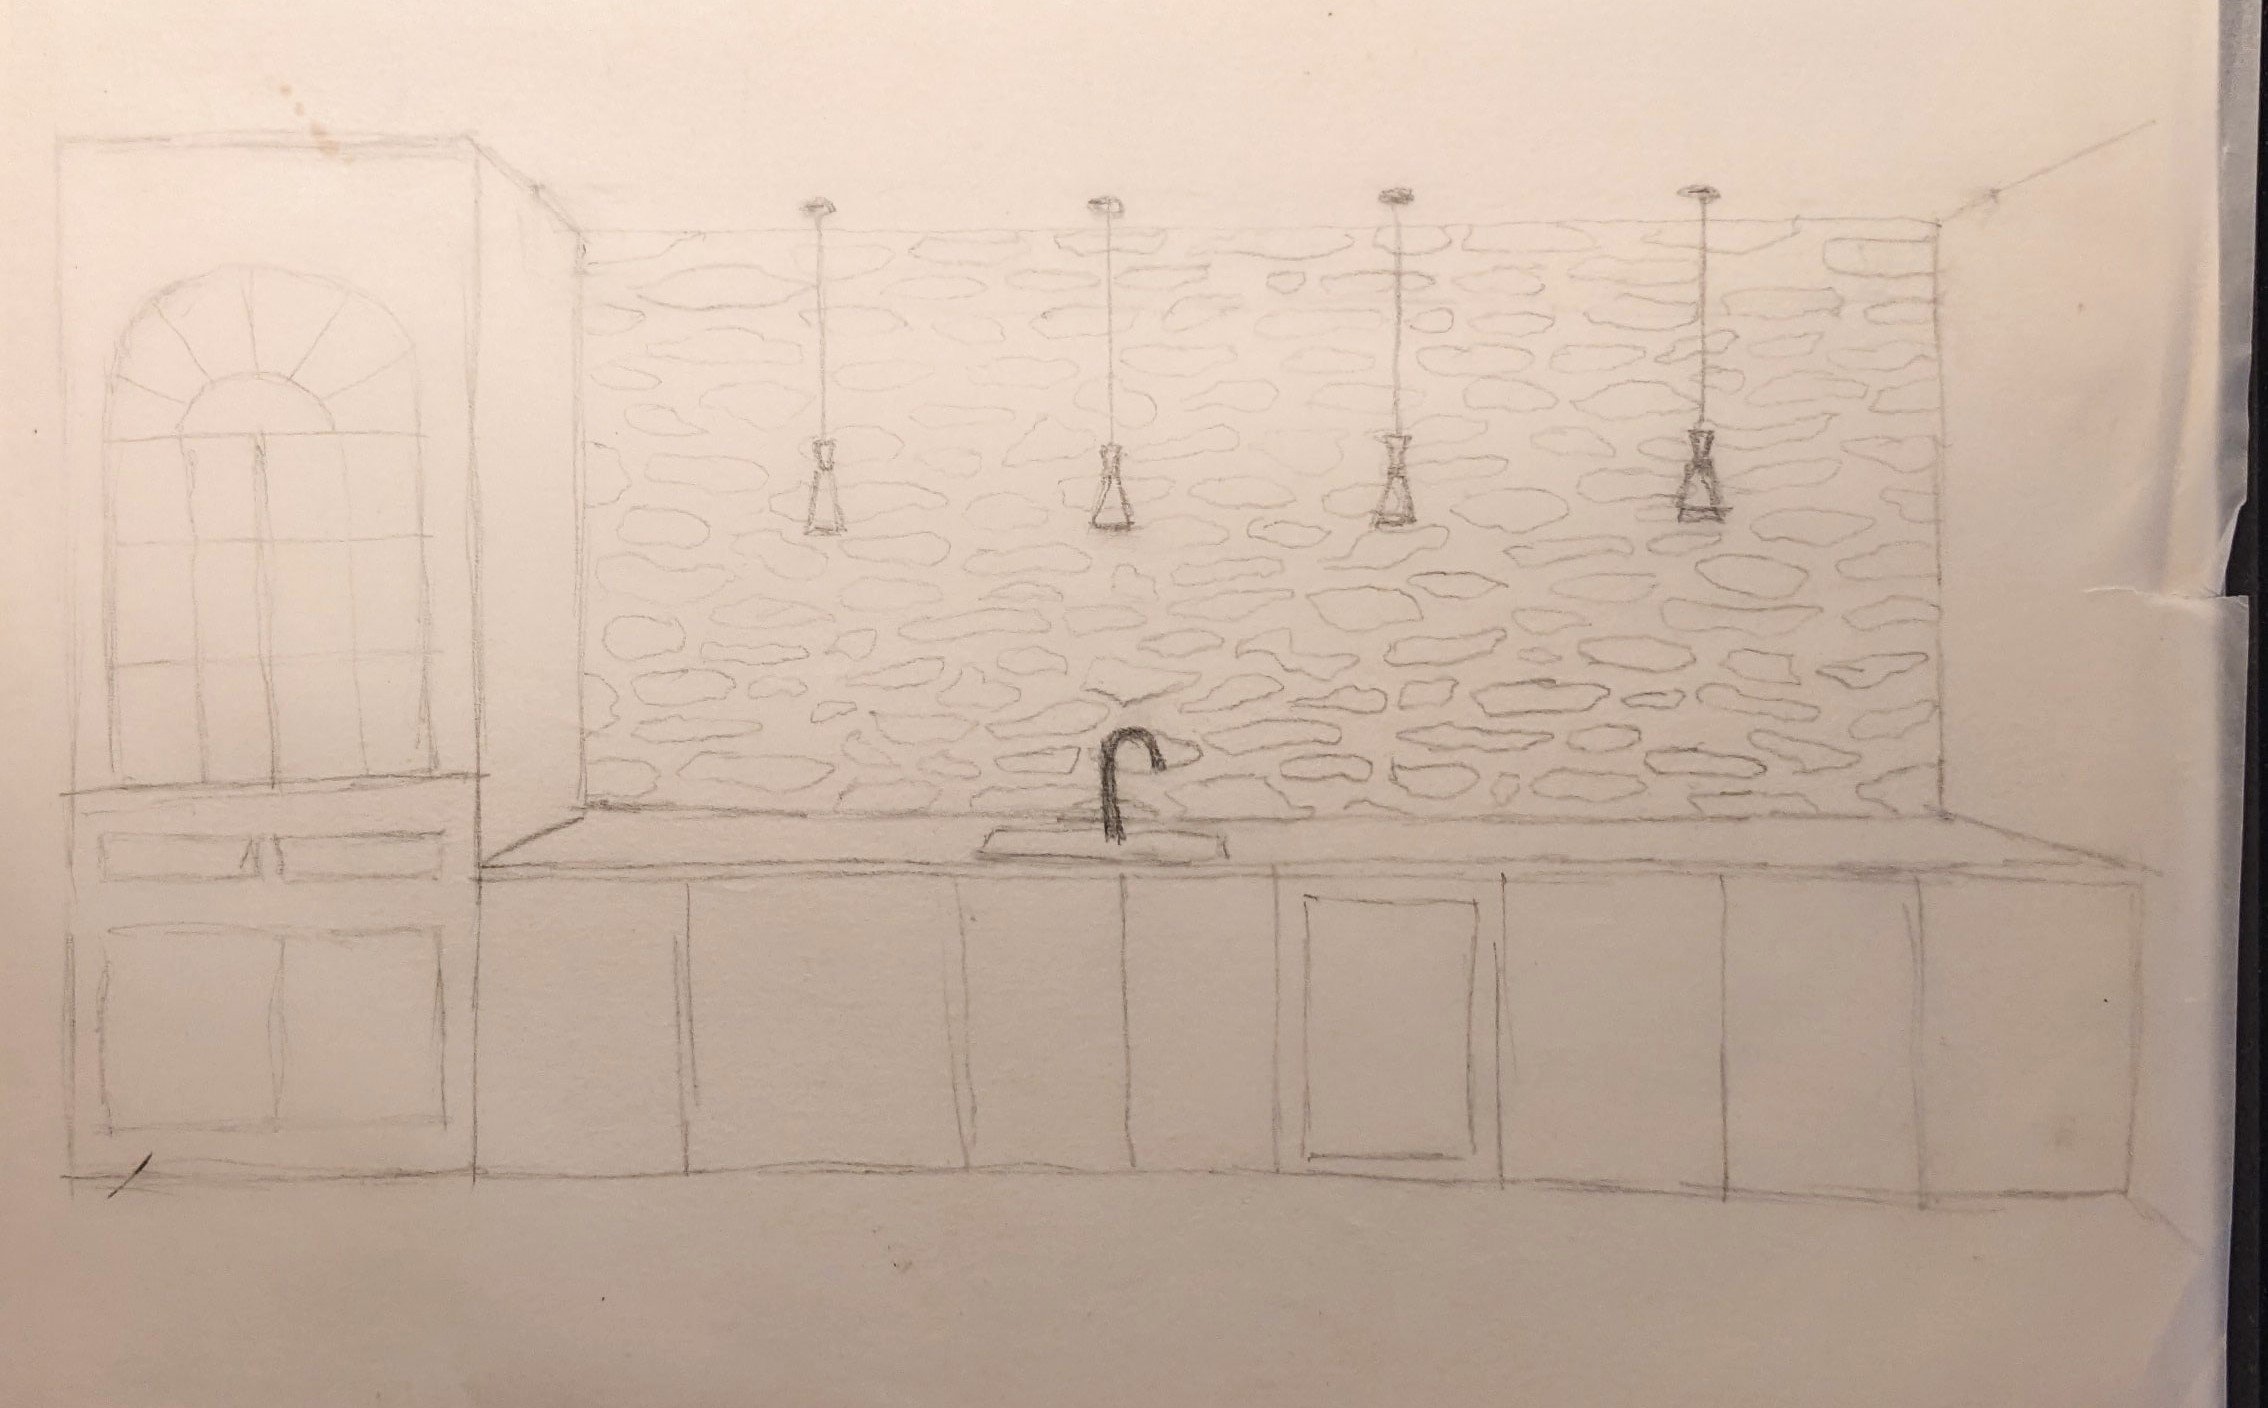
In that post mentioned that it didn’t make the final cut for that design but that we had other plans for it. Well… we’re turning it into a secret door that will take you to the closet on the right of the staircase!

I think it’ll be such a cool addition to this space. In fact, we already put it on casters! Plus, who doesn’t love a secret door!?
It needs a little love, but I’m absolutely willing to refinish it if I have to. To balance out the view from the top of the stairs, I’d love to install a wood door stained to match on the other doorway. And maybe even add some faux beams on the ceiling down the line….
We don’t have any specific plans for furniture for this room, but that’s okay! Not everything has to be figured out 100% at once.
Remaining Spaces
While I have a good idea of how most of the spaces in the office will look, there are a couple of spaces that are still fairly blank slates.
Robb’s Office
Our office building used to have a full bathroom on the second floor (see the doorway to the left of the staircase above). Not anymore!
With this renovation, we decided we only need the half bath downstairs, and the space that was once the full bathroom upstairs will now be an office. It’s a fairly long and skinny space, but here’s what it looks like from either end:
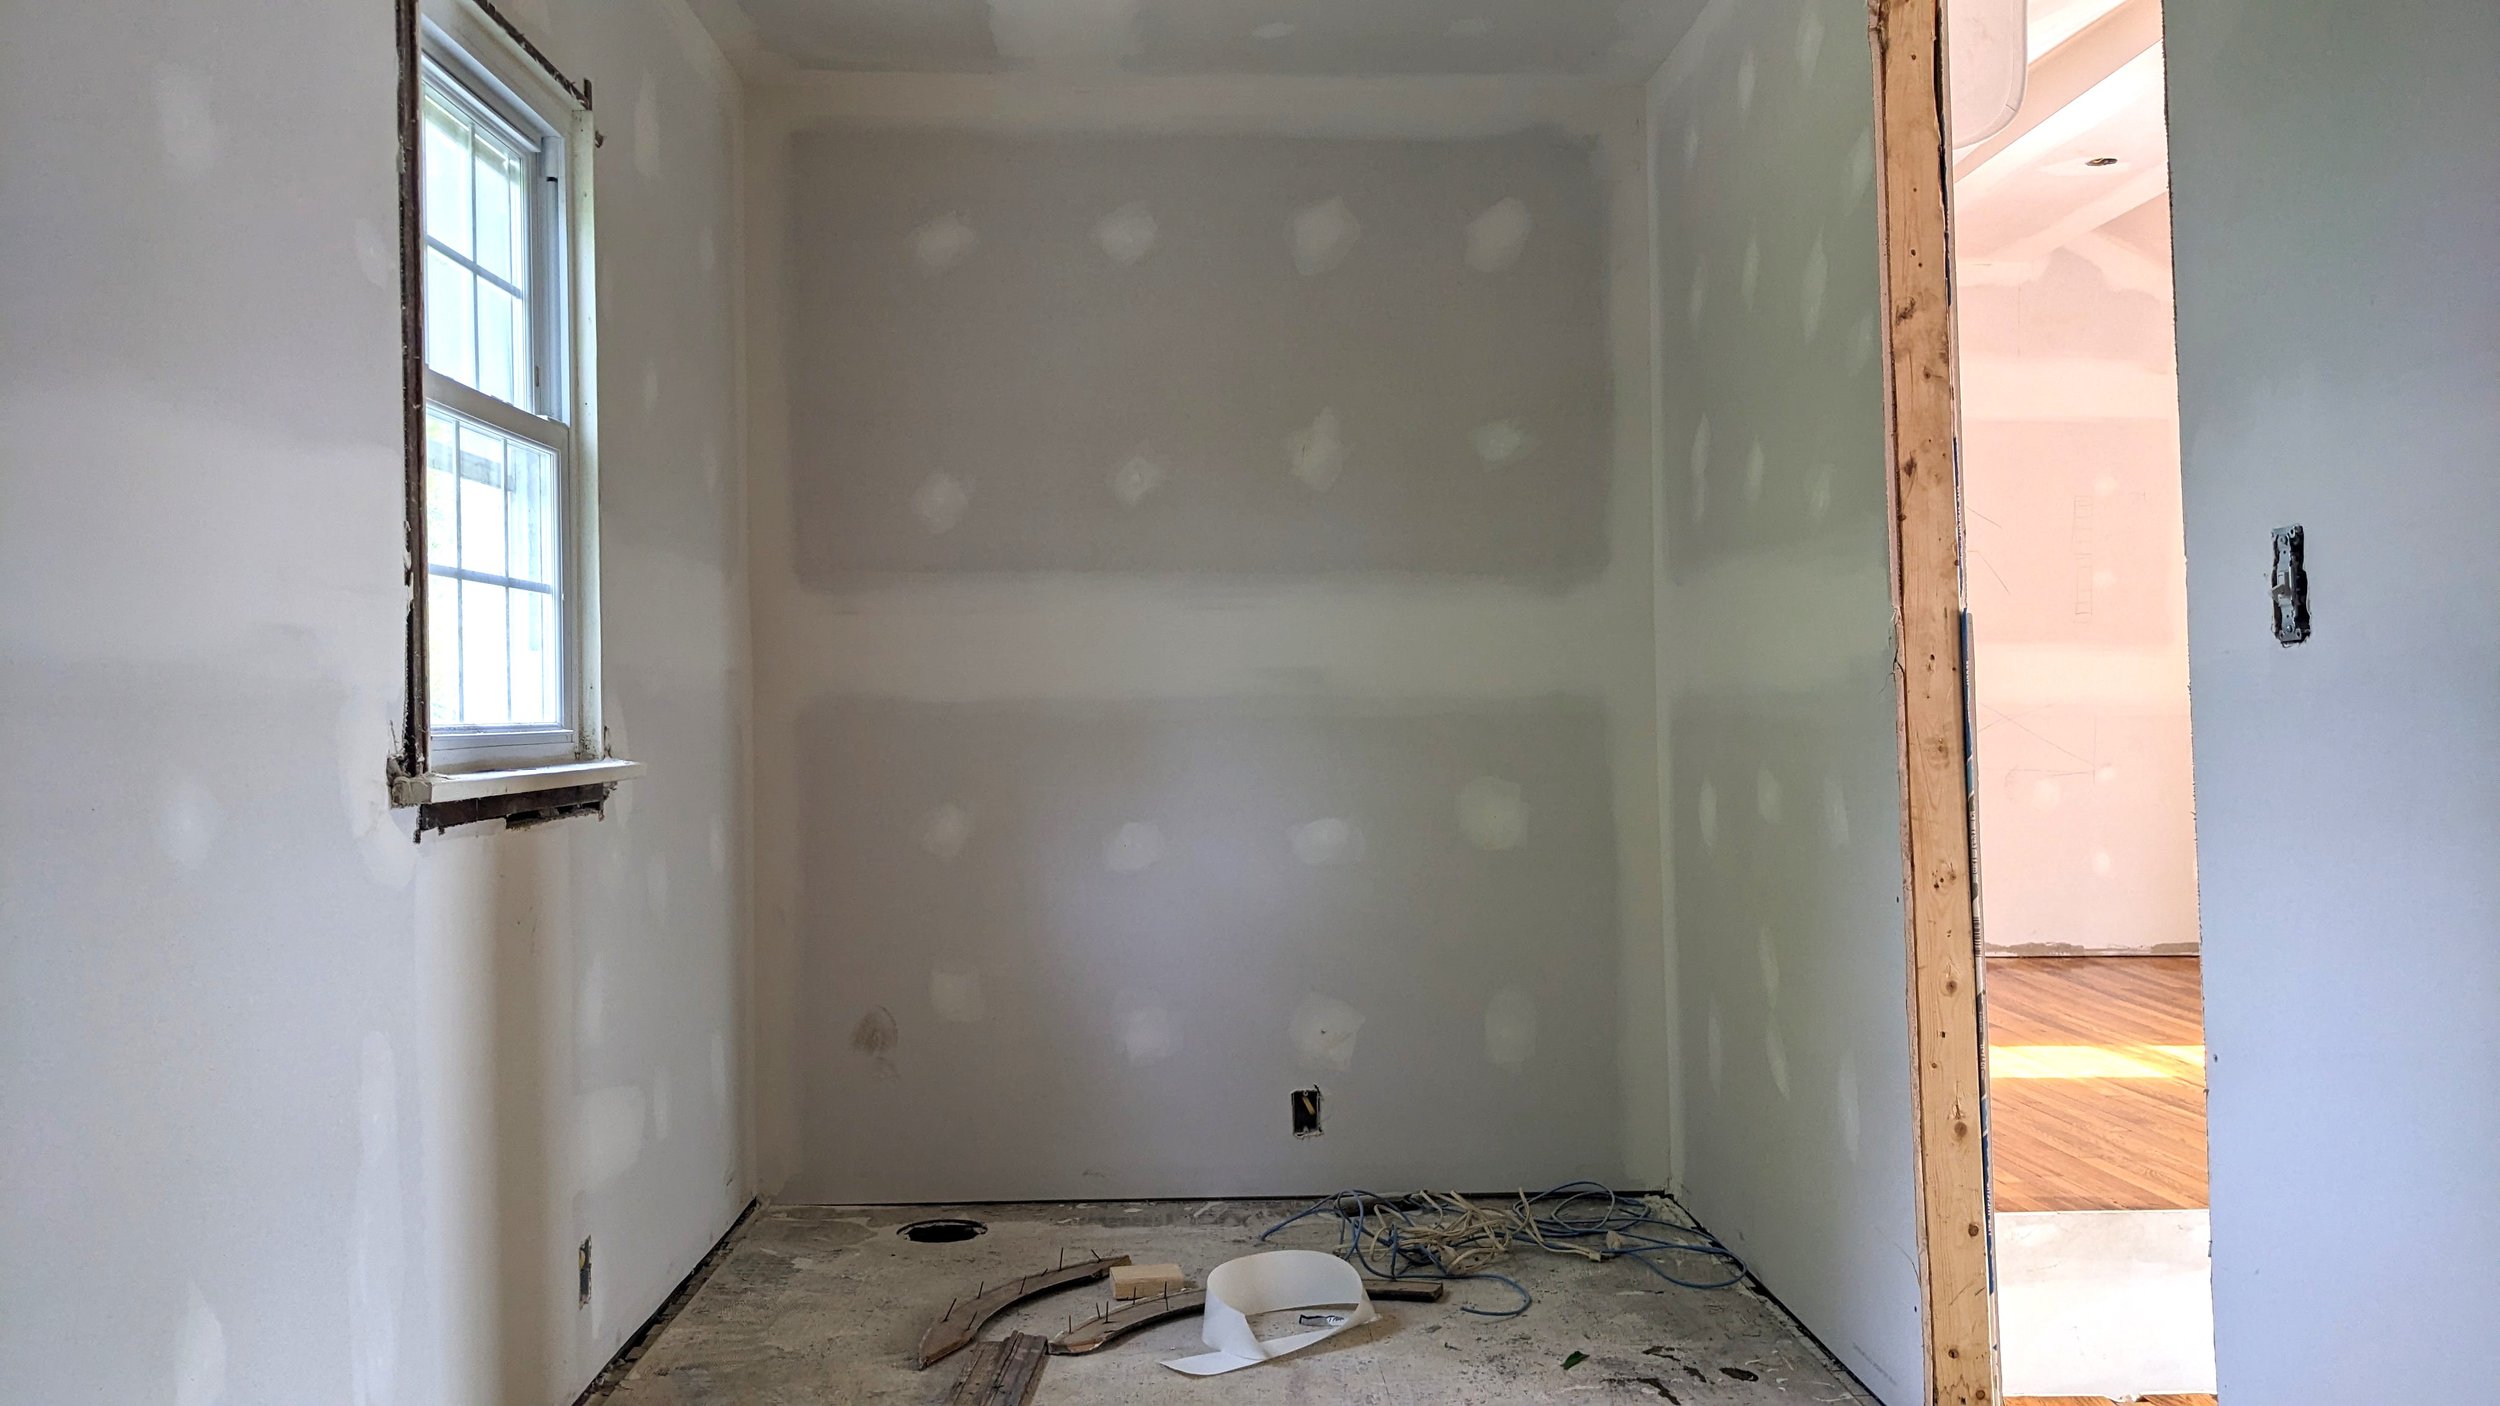
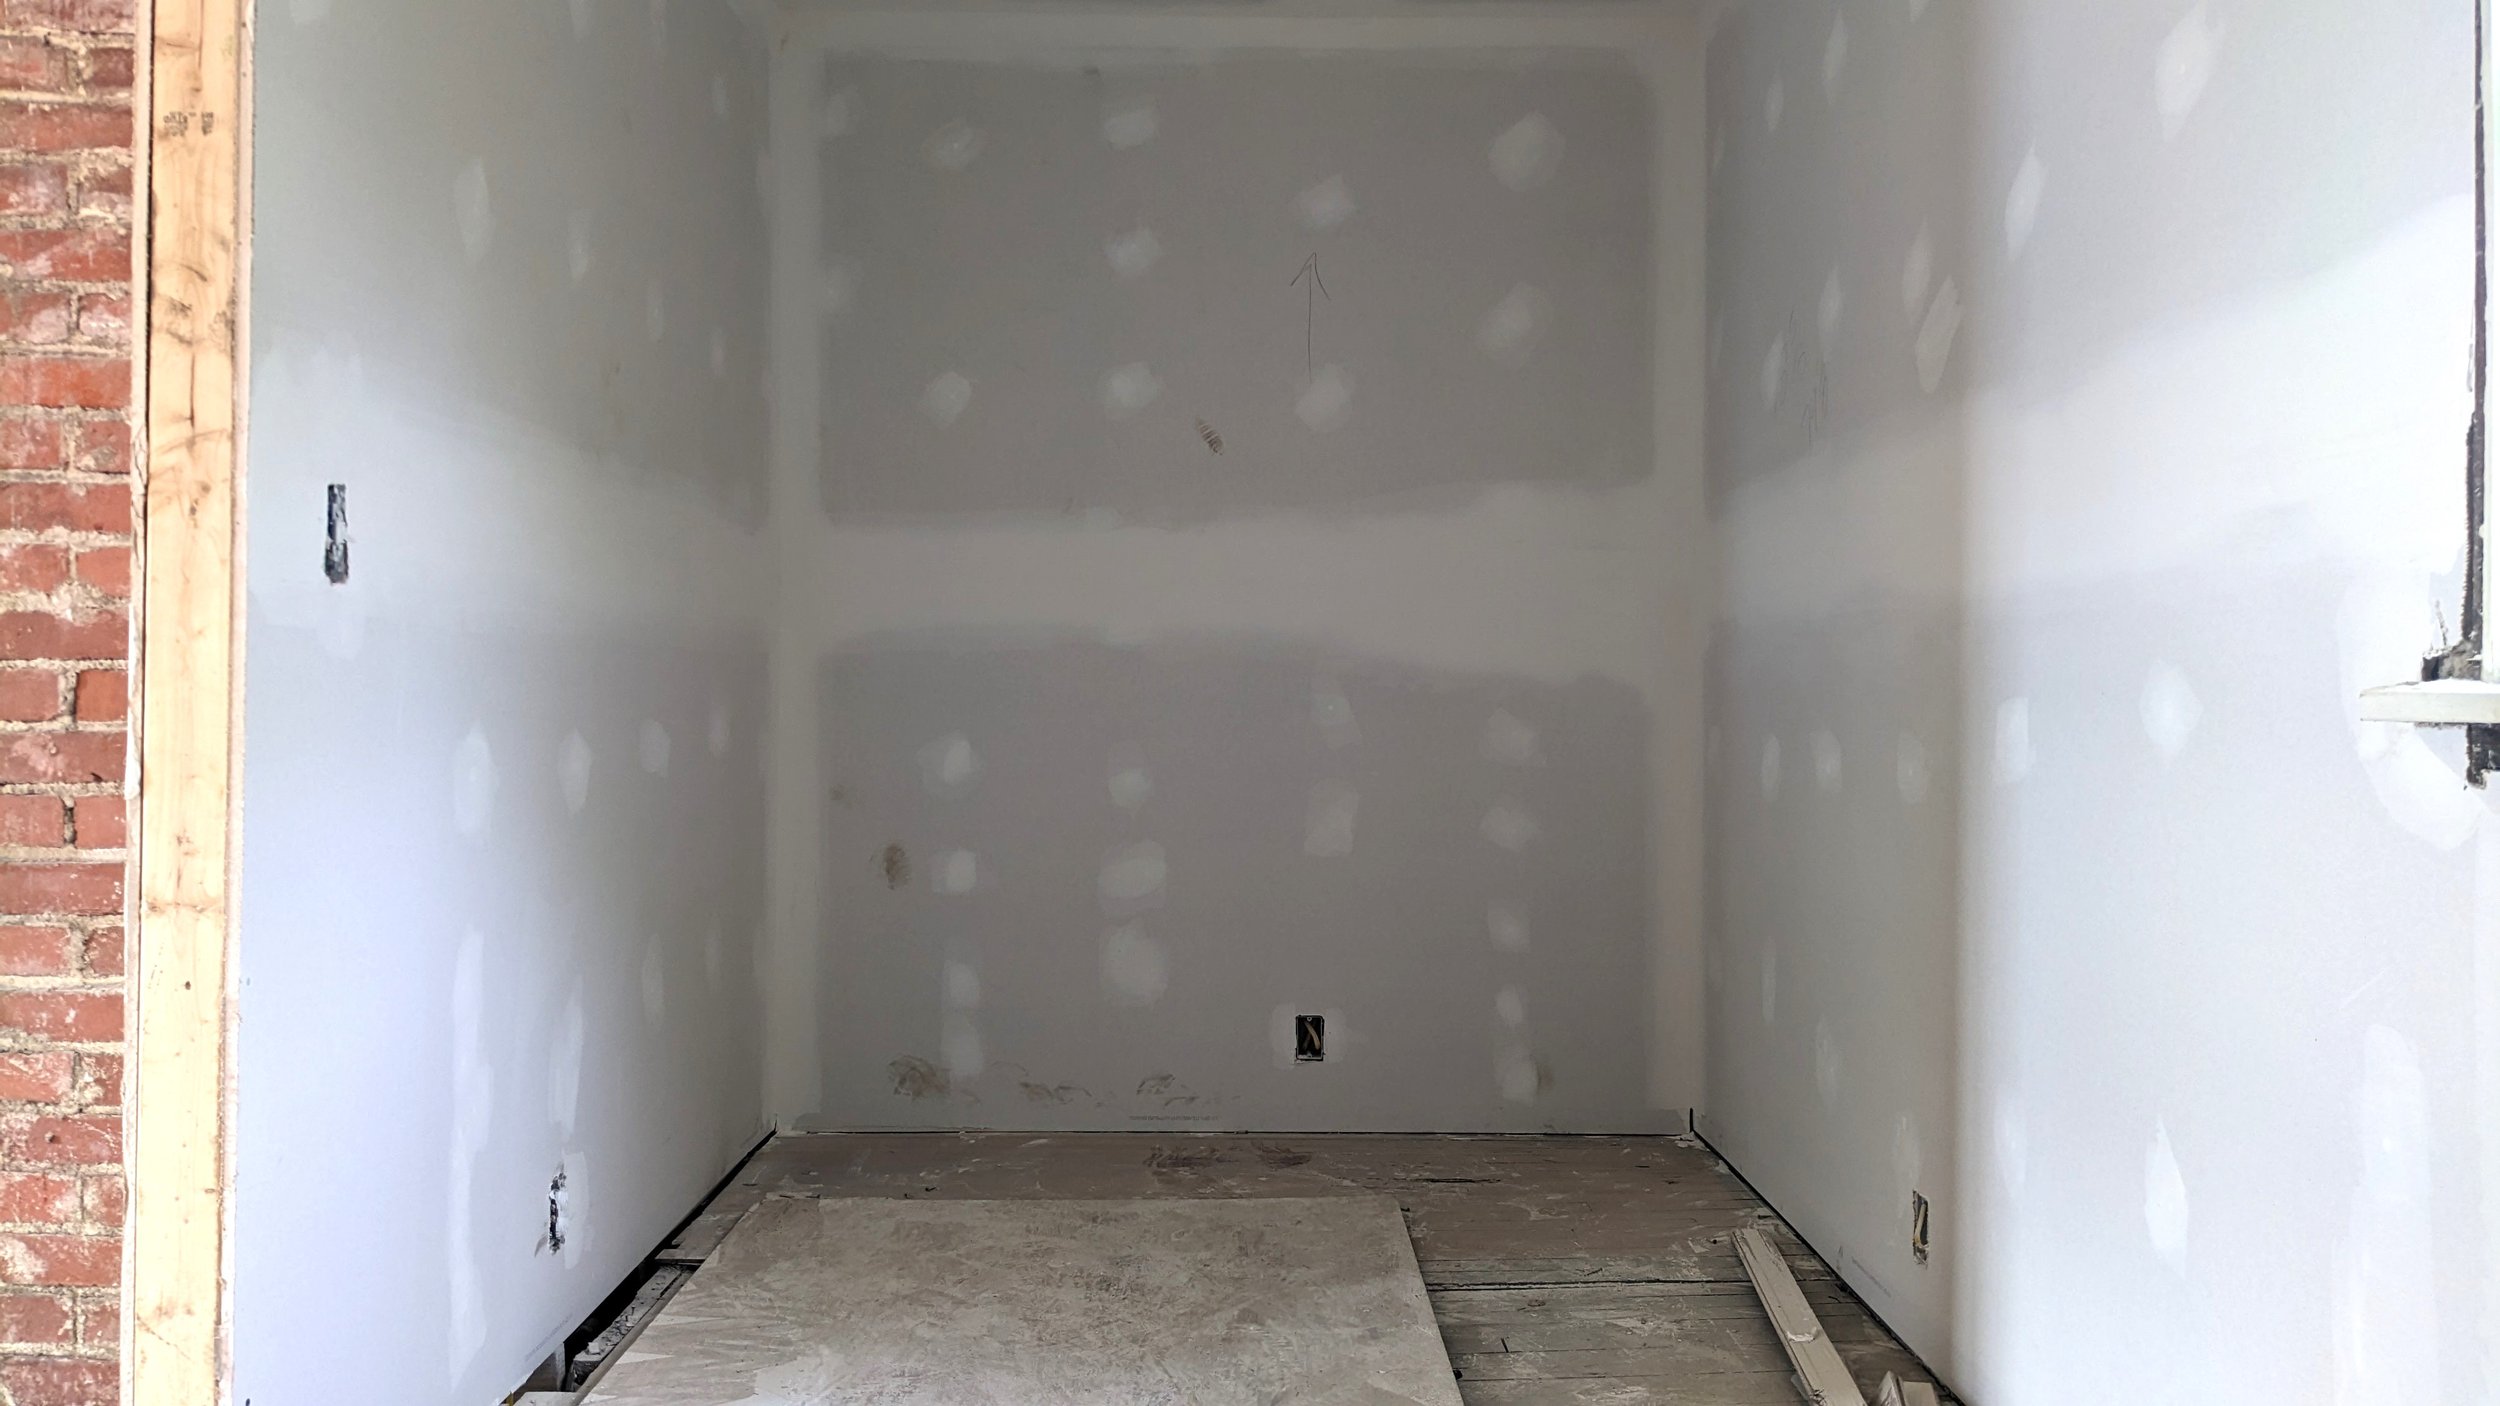
Robb is my husband’s business partner. Since Lucius didn’t want a dedicated office space, this room will be Robb’s little haven to design… sort of.
I’ve already picked out this light fixture.

Since there was tile in here, we’ll have to install new flooring. We haven’t 100% decided what flooring we’ll install yet, but I’m looking at some cost-efficient options.
Robb and I are in negotiations on the paint color.
Back Room
There’s one more room on the first floor that I haven’t covered. It used to look like this:

But nowadays looks more like this:

As with the other rooms, we demoed this one down to the studs and got all new drywall. We’ll be installing new windows along that back wall down the line too.
We’ve discussed using this room for additional workspace, but I think everyone needs to work in the building for a while to see if this room would serve a better purpose for something else before jumping in with a whole design plan.
For now, I’ll paint it to match the rest of the color scheme for the office and let it be until we have a better idea of what we want.
Unfortunately, this room didn’t have hardwood that we could refinish. I’ll likely install the same flooring we use in Robb’s office space once we have that hammered out.
Final Thoughts
We’re on the cusp of putting these designs into action. The drywall and floors were just completed last week, and we’re already almost finished priming. The transition this building has already seen since we bought it is overwhelming - in the best way. I can’t wait to put my designs into action!

Don’t miss out! Read about the rest of this project in the posts below:
We Bought a Hair Salon! (Office Building Reno Intro)
Loft Design with Vaulted Ceilings

Office Reno - Agent Office Design
I’ve shared the designs for the lobby and reception area, as well as the conference room and kitchenette in the office building we’ve been renovating. Let’s keep that trend going. Today, I’m sharing the design for the agent office!
Built-in Desk Design
I’ve shared the designs for the lobby and reception area, and the conference room and kitchenette in the office building we’re renovating. Let’s keep that trend going. Today, I’m sharing the design for the agent office!
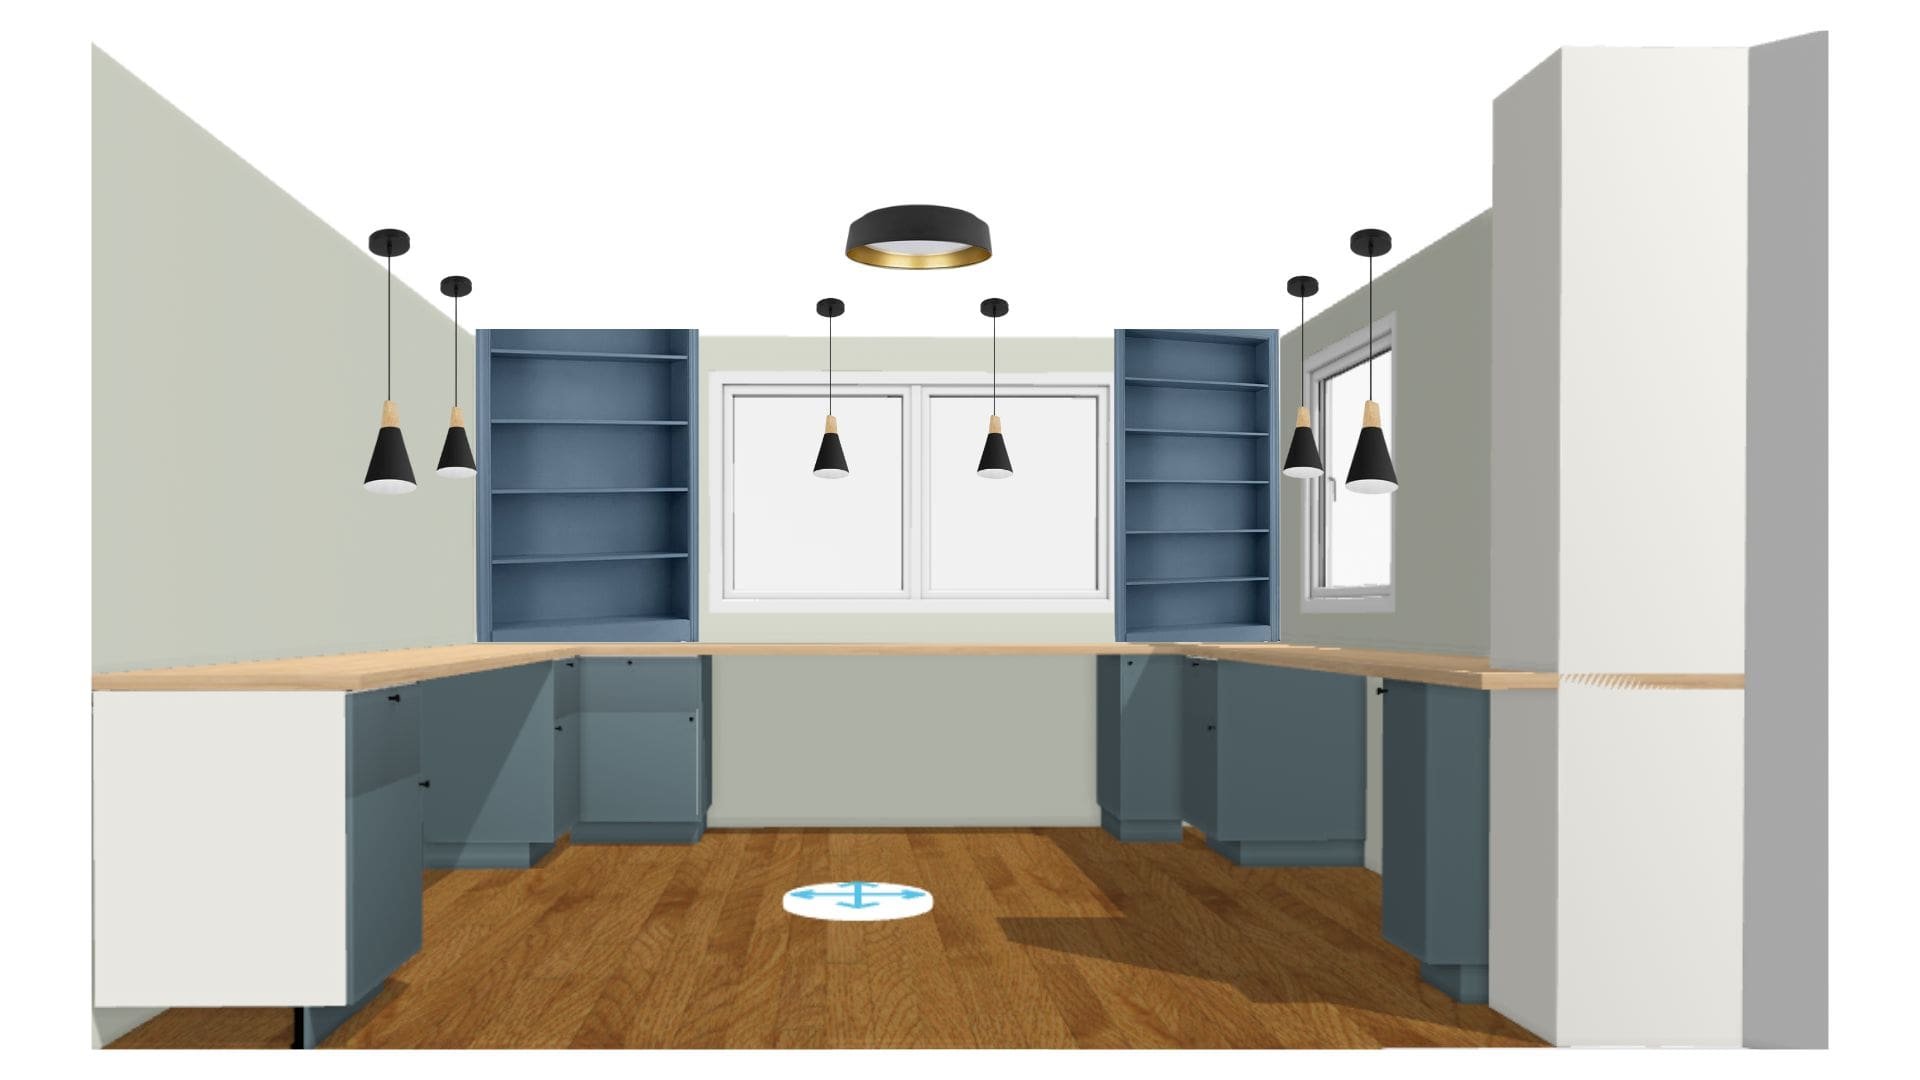
As a reminder, my husband is part-owner of a real estate brokerage. We, along with several other investors, bought this building to renovate as the office for the brokerage. So, naturally, we need places for the agents to actually do their thang. That’s what this room is for.
The Floor Plan
When Lucius told me I needed to figure out how to fit six workspaces into this 13x13-foot room, I probably looked at him like he had three heads. The picture below was after we started demo, but it’s the best picture I have to give you a good idea of the room size.
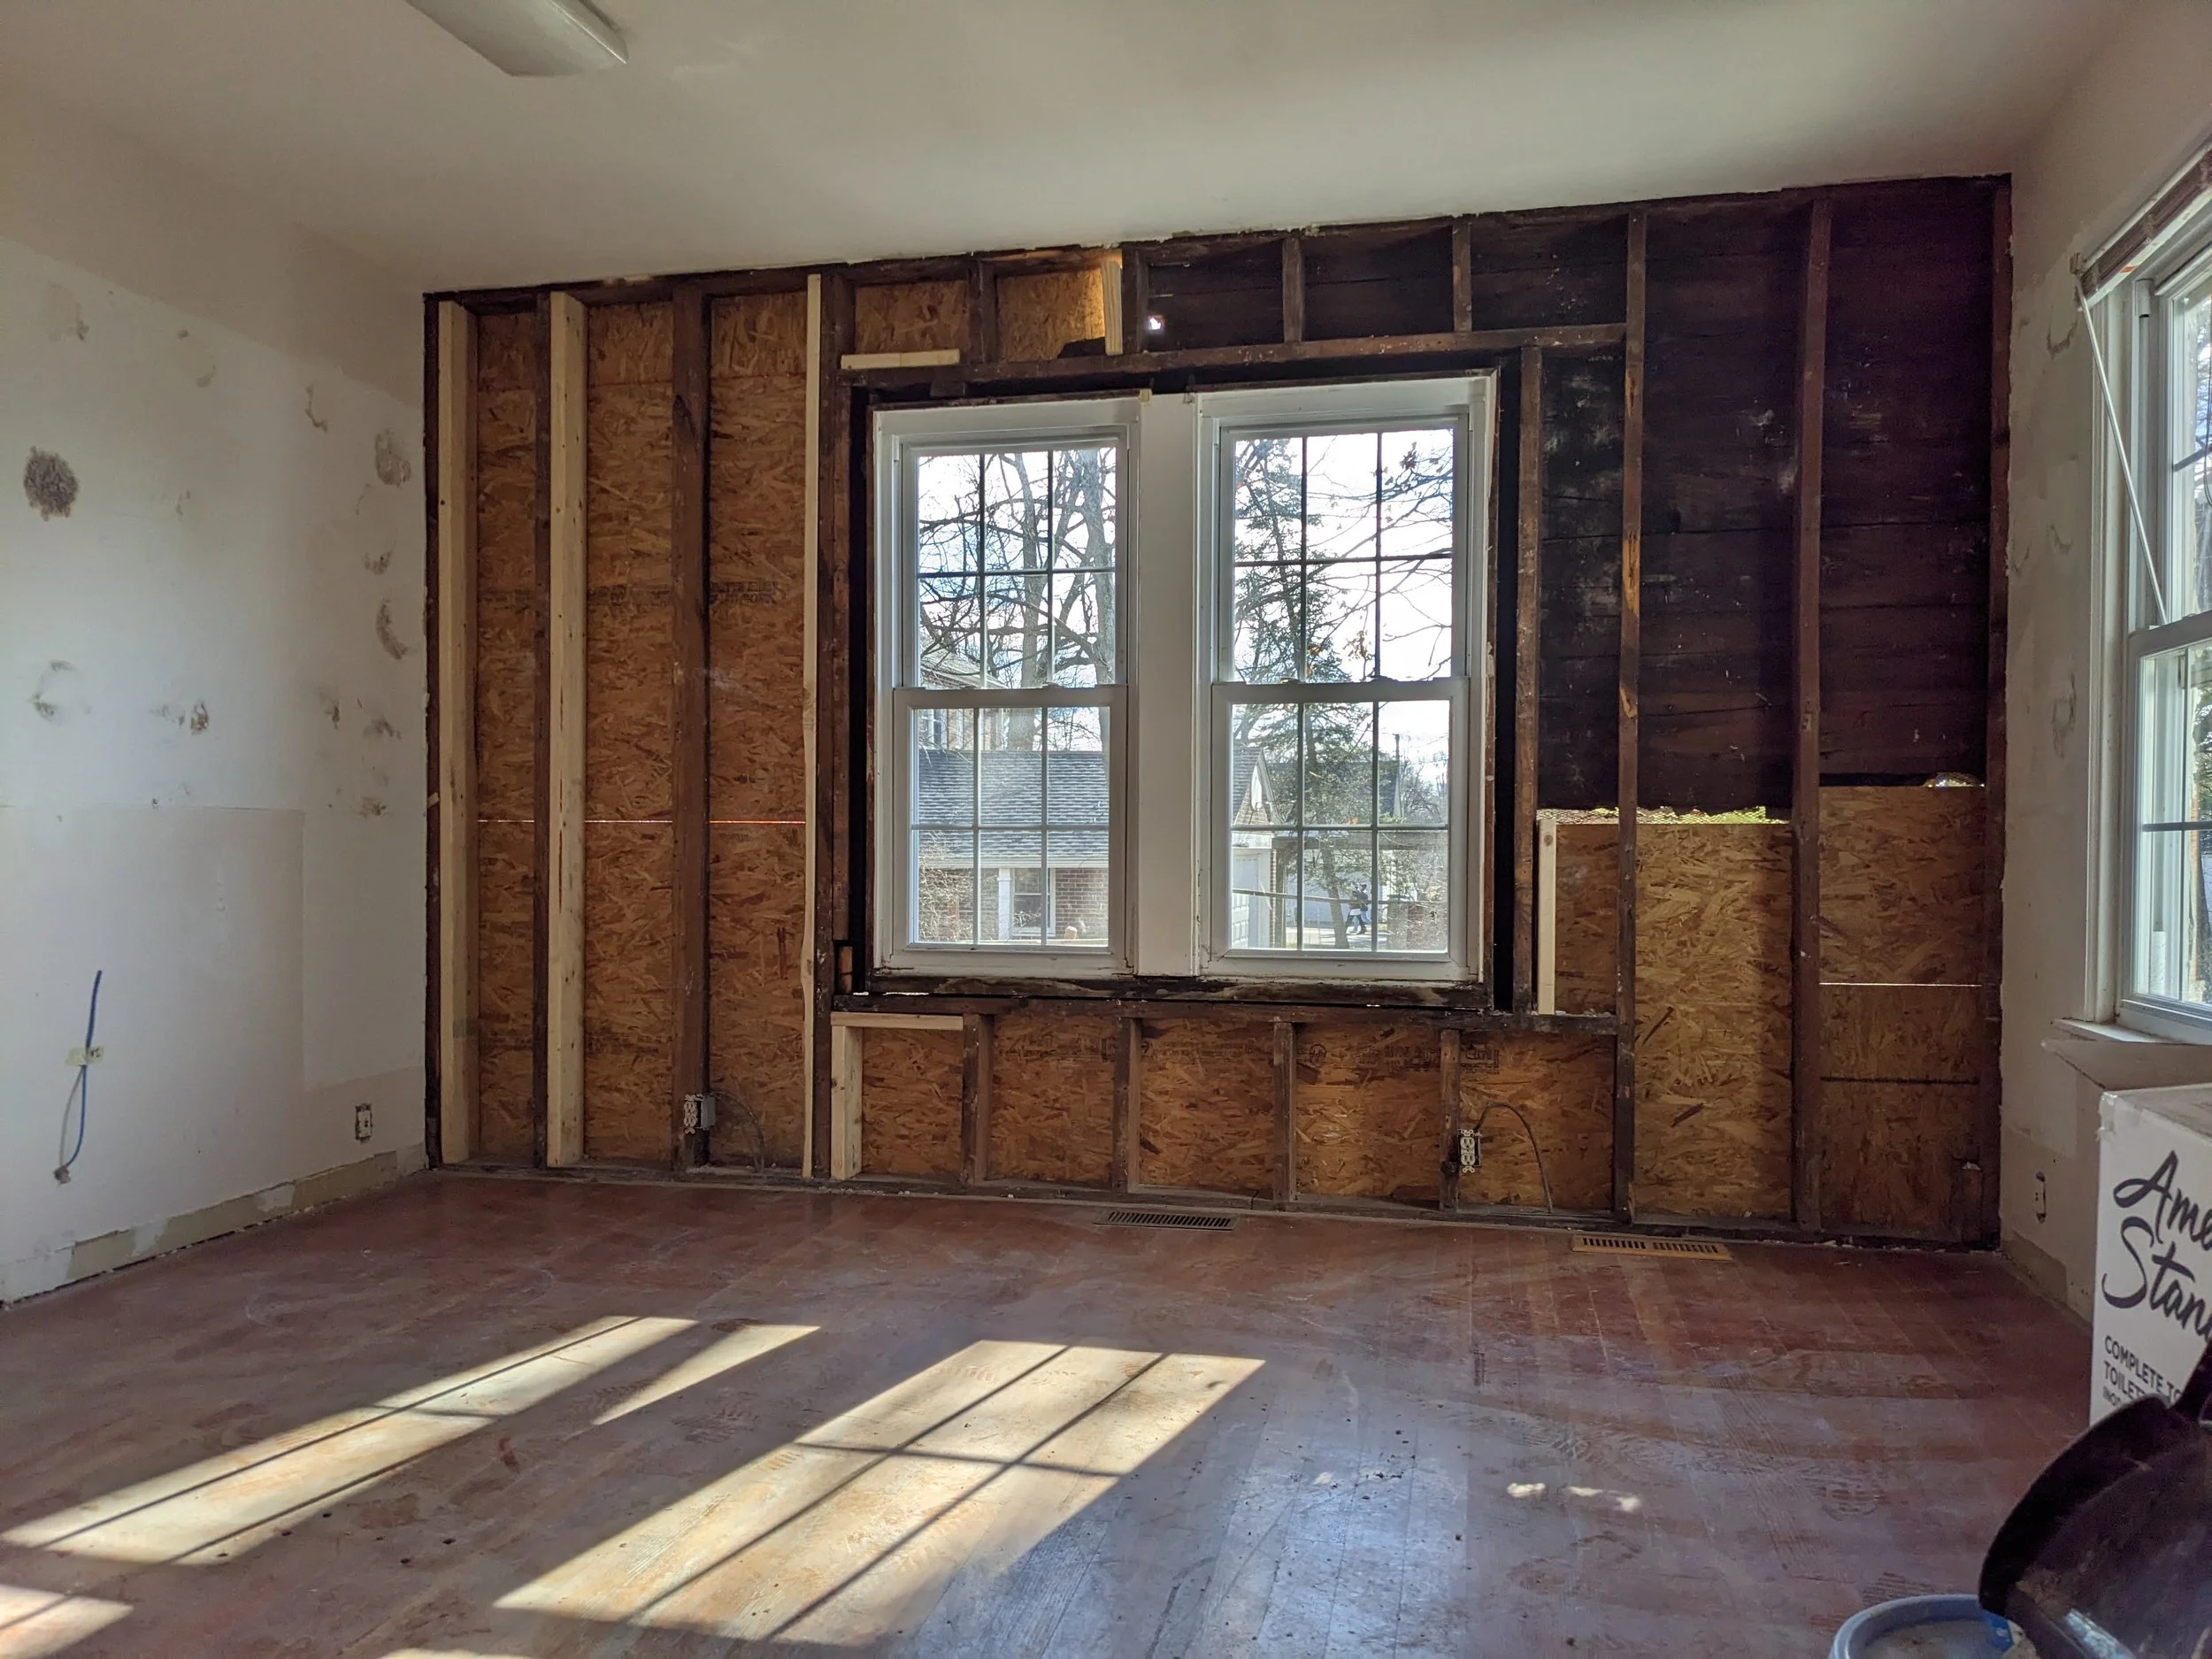
While it took some brainstorming and research, I finally came across a few examples of other spaces that made me realize that built-in desks around the perimeter of the room would make this possible.
Here’s a little floor plan I threw together to help visualize my plans.
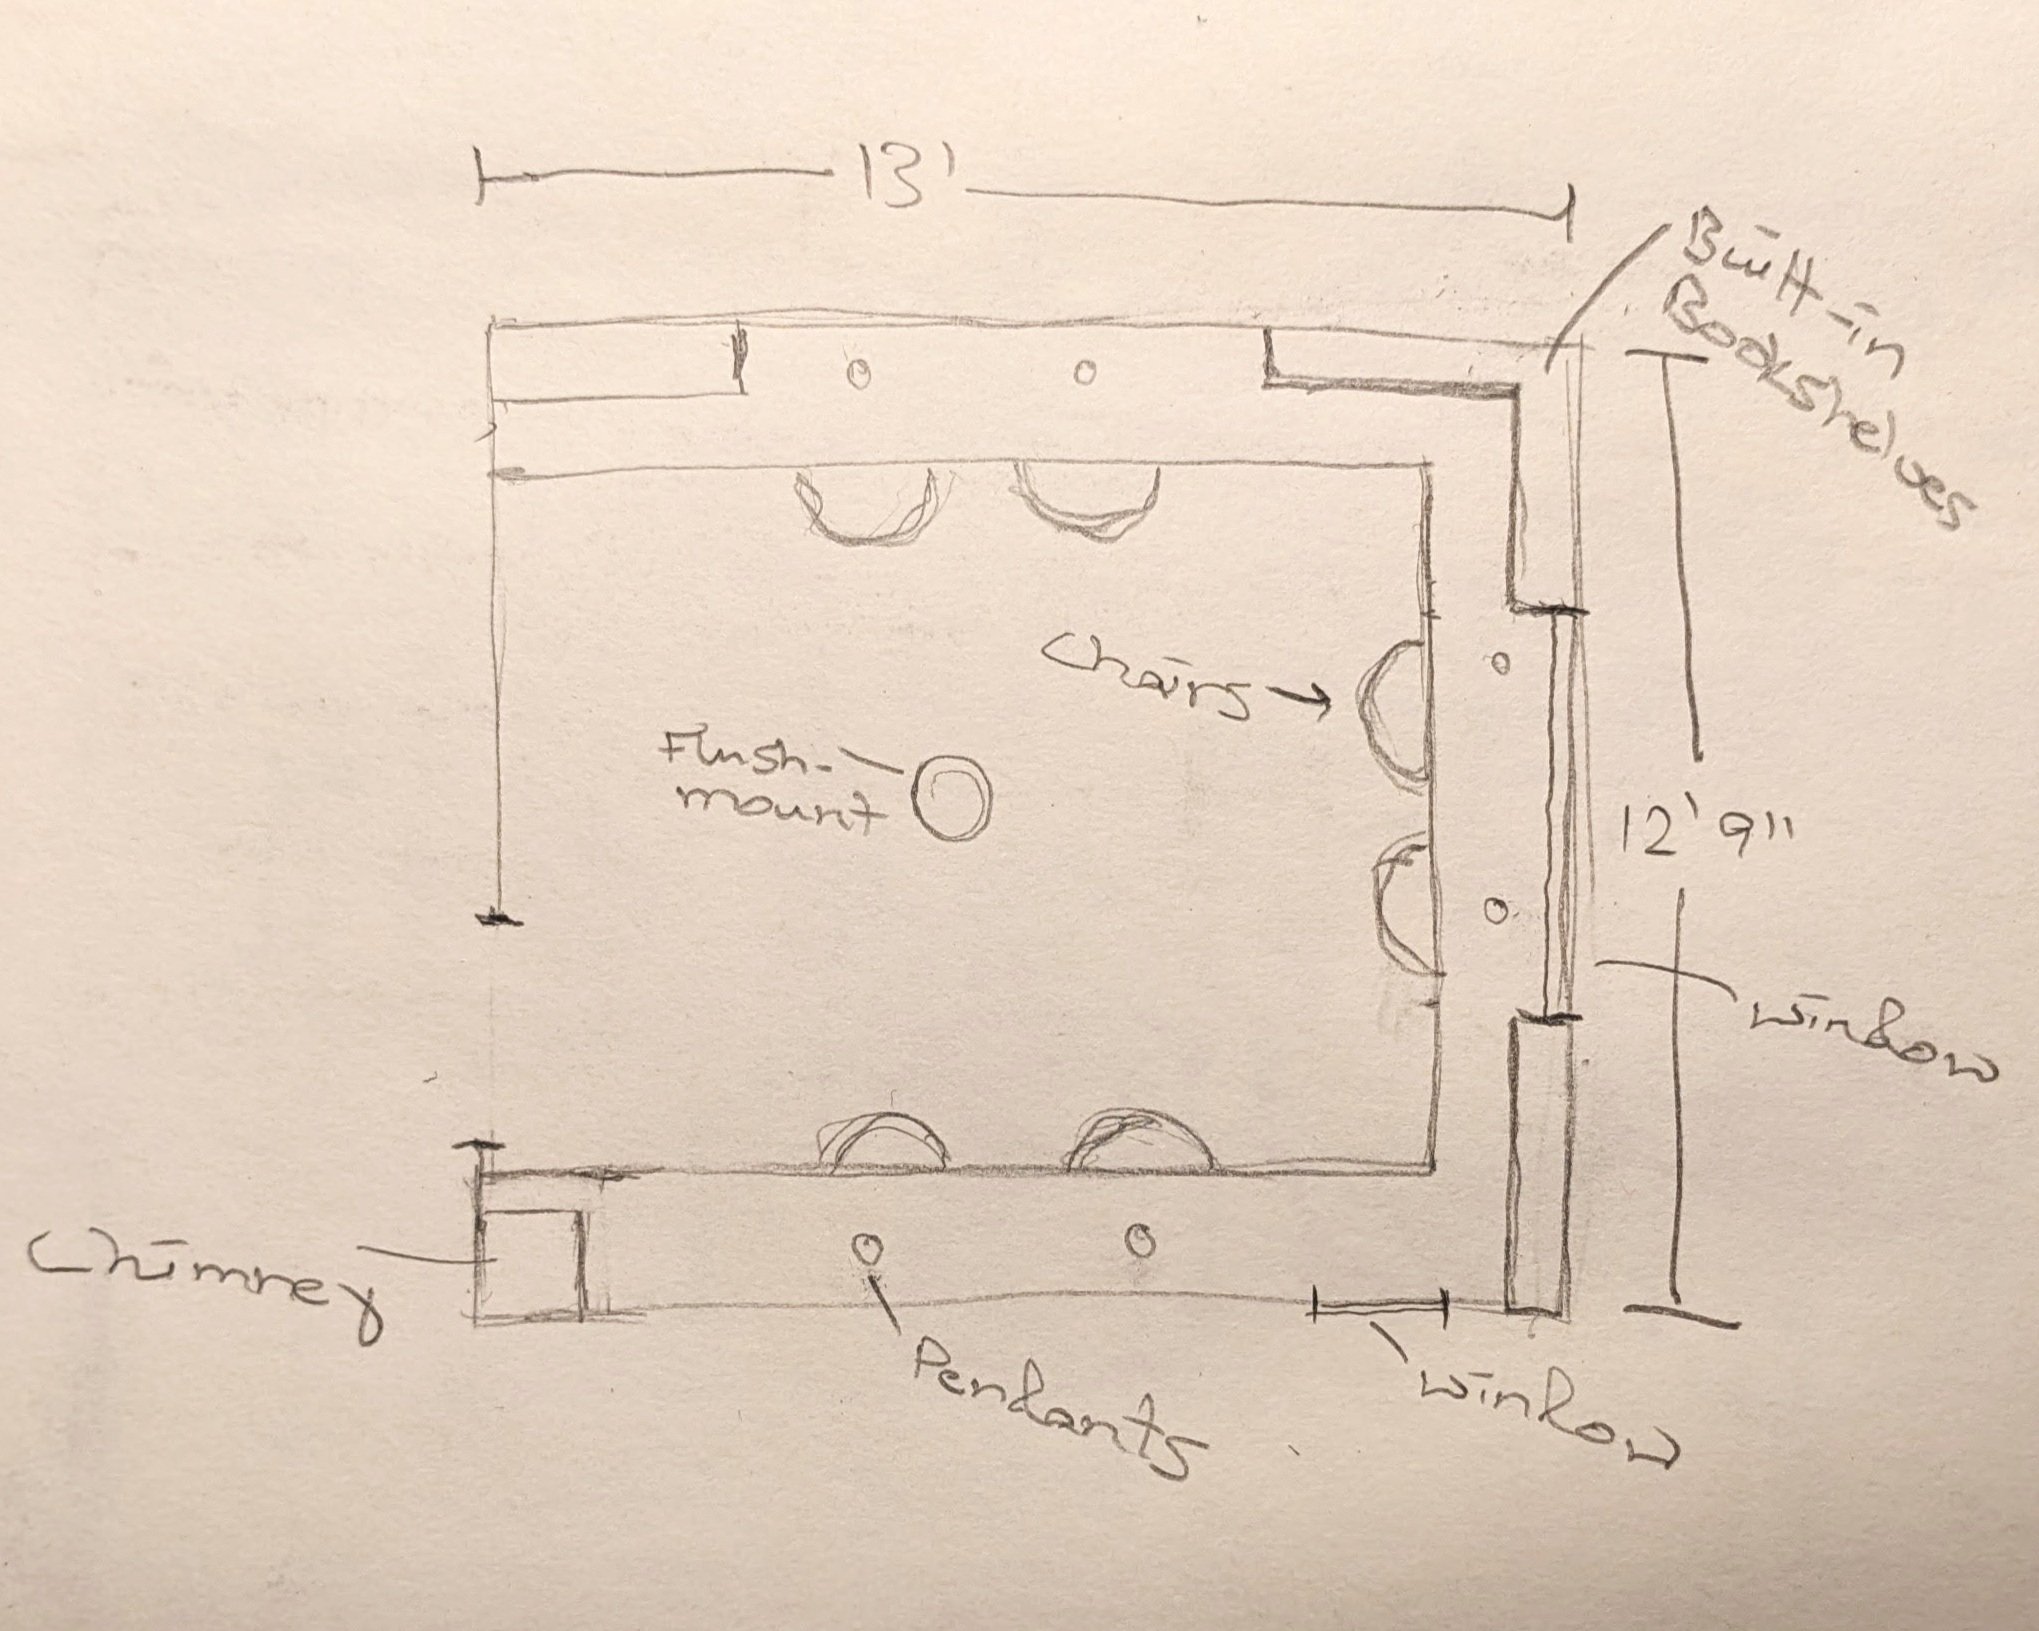
And here are the preliminary sketches of the three “desk walls” I drew to run the idea past the hubs and get his seal of approval.
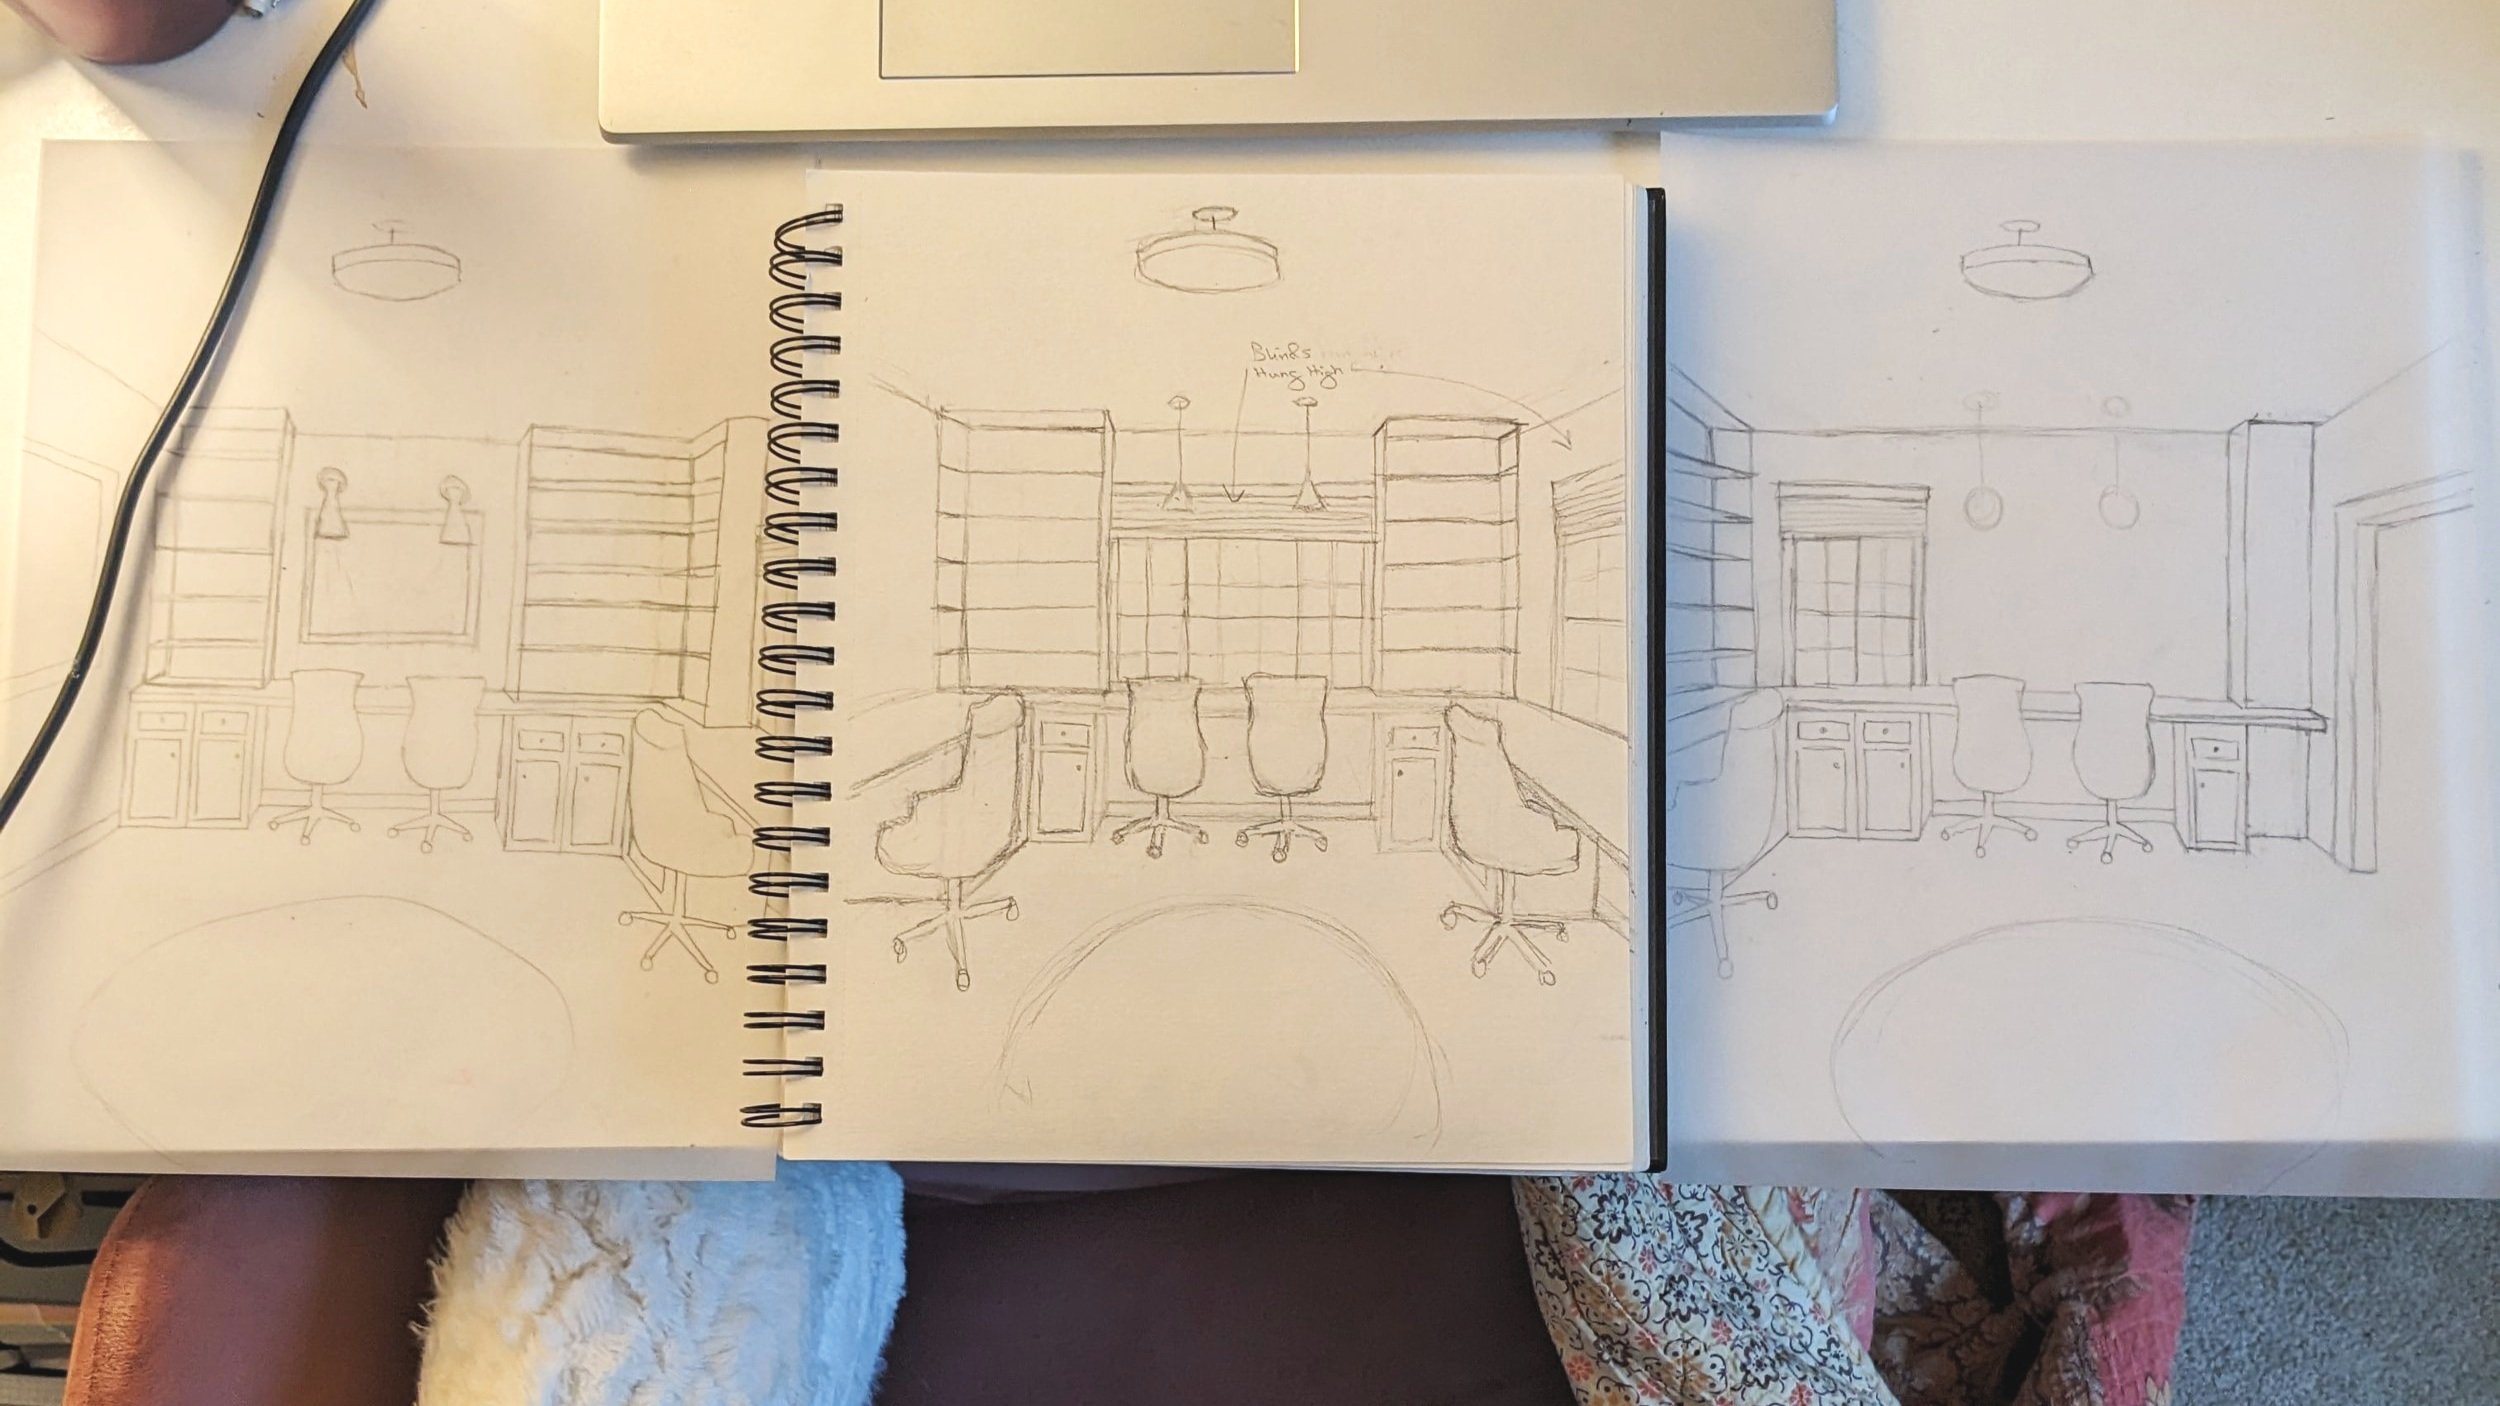
As you can see, I’m imagining three out of the four walls of the room with desk space. Each opening will have enough room for two people to work, allowing for cabinetry on either end of the desk for storage.
The Design
As an Amazon Associate, I earn from qualifying purchases. This post may contain affiliate links, meaning I receive commissions for purchases made through those links at no cost to you.
Let’s break those sketches down, eh?
Walking through the door, you’ll see windows above the desk area straight ahead. Flanking either side of this desk, I’d love to add built-in bookshelves. We don’t really need them, but I think it’d look good.
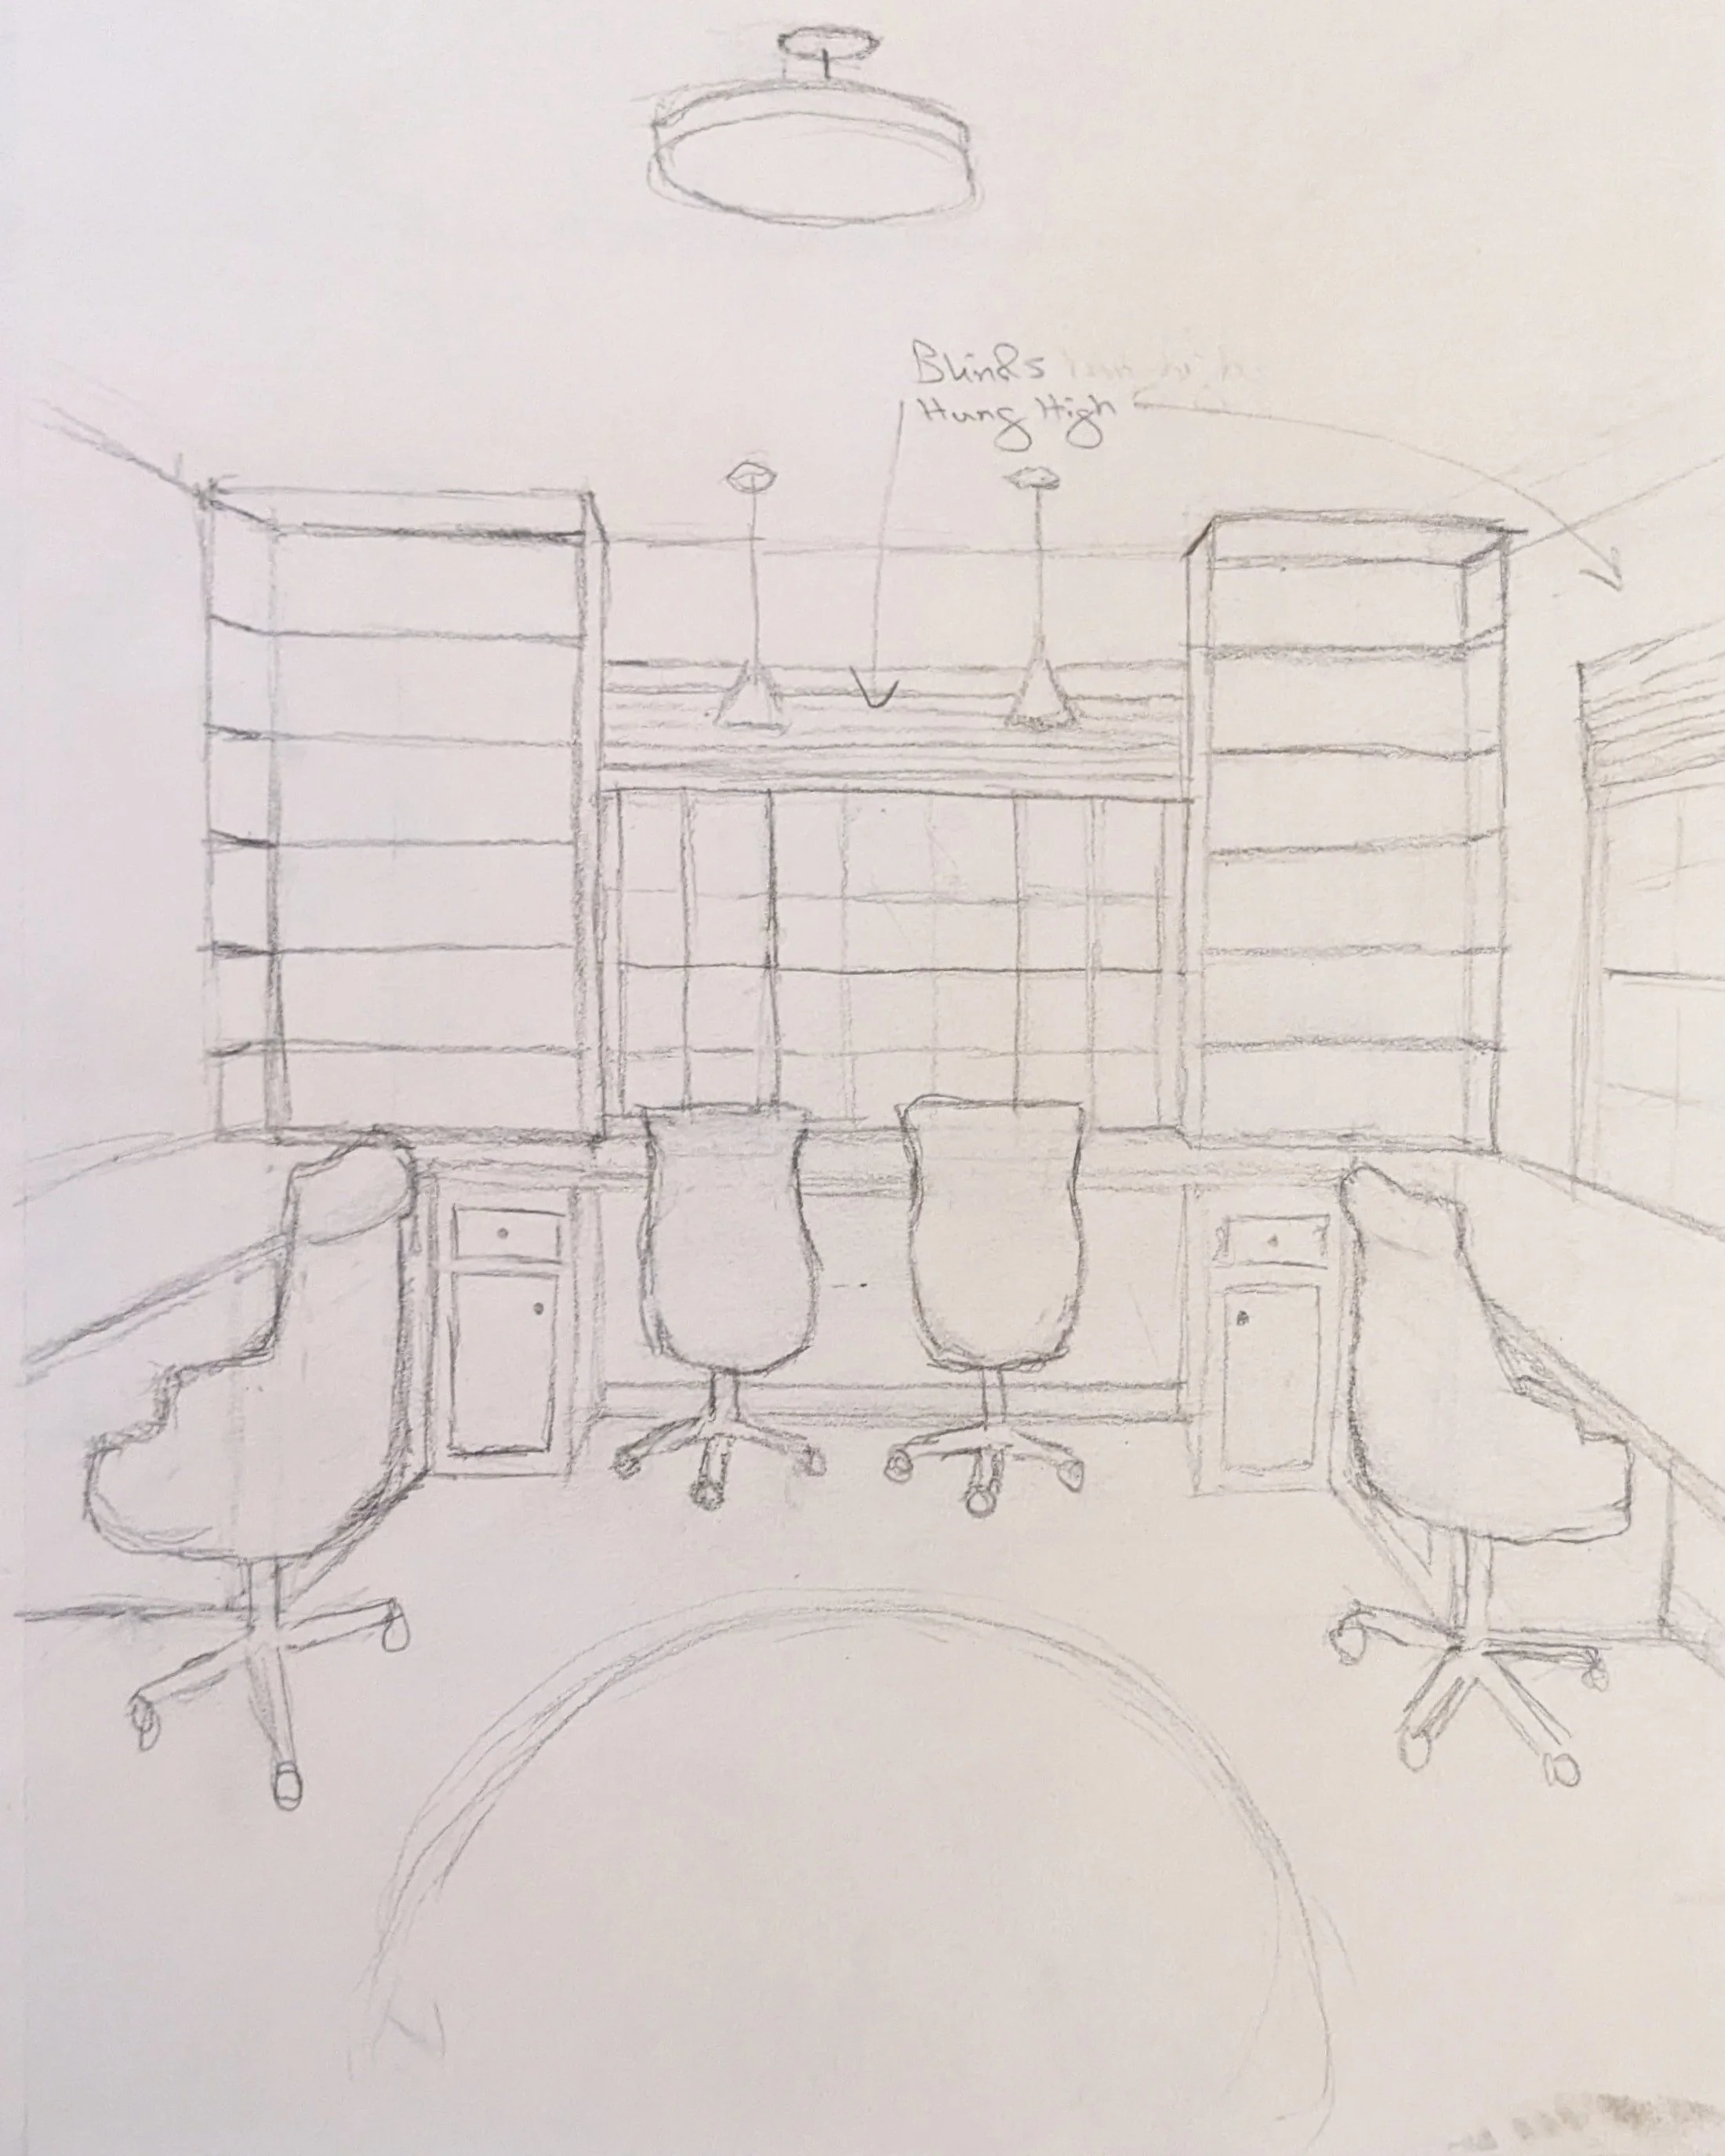
Above each desk area, there will be two pendant lights hanging down. These are the pendants I’m leaning toward, along with the flush mount that will be centered in the room:

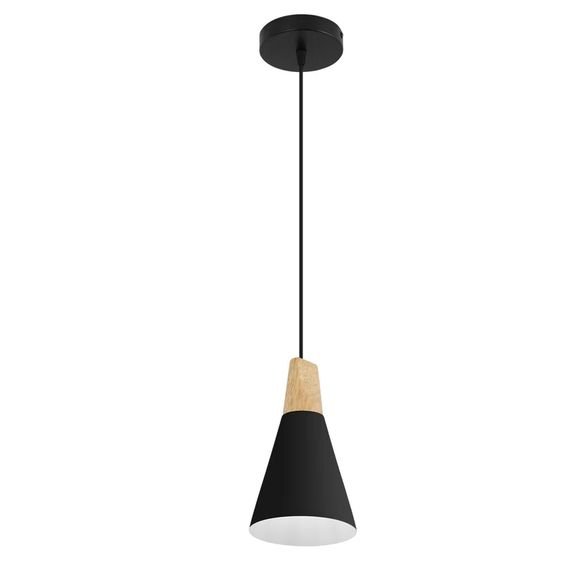
On the left-hand wall will be another desk, with the same concept minus the windows. I think a beautiful piece of artwork or a mirror would make sense in their place. I really like the vibe of this mirror.
I’m undecided on the bookshelves in this desk area as of right now.
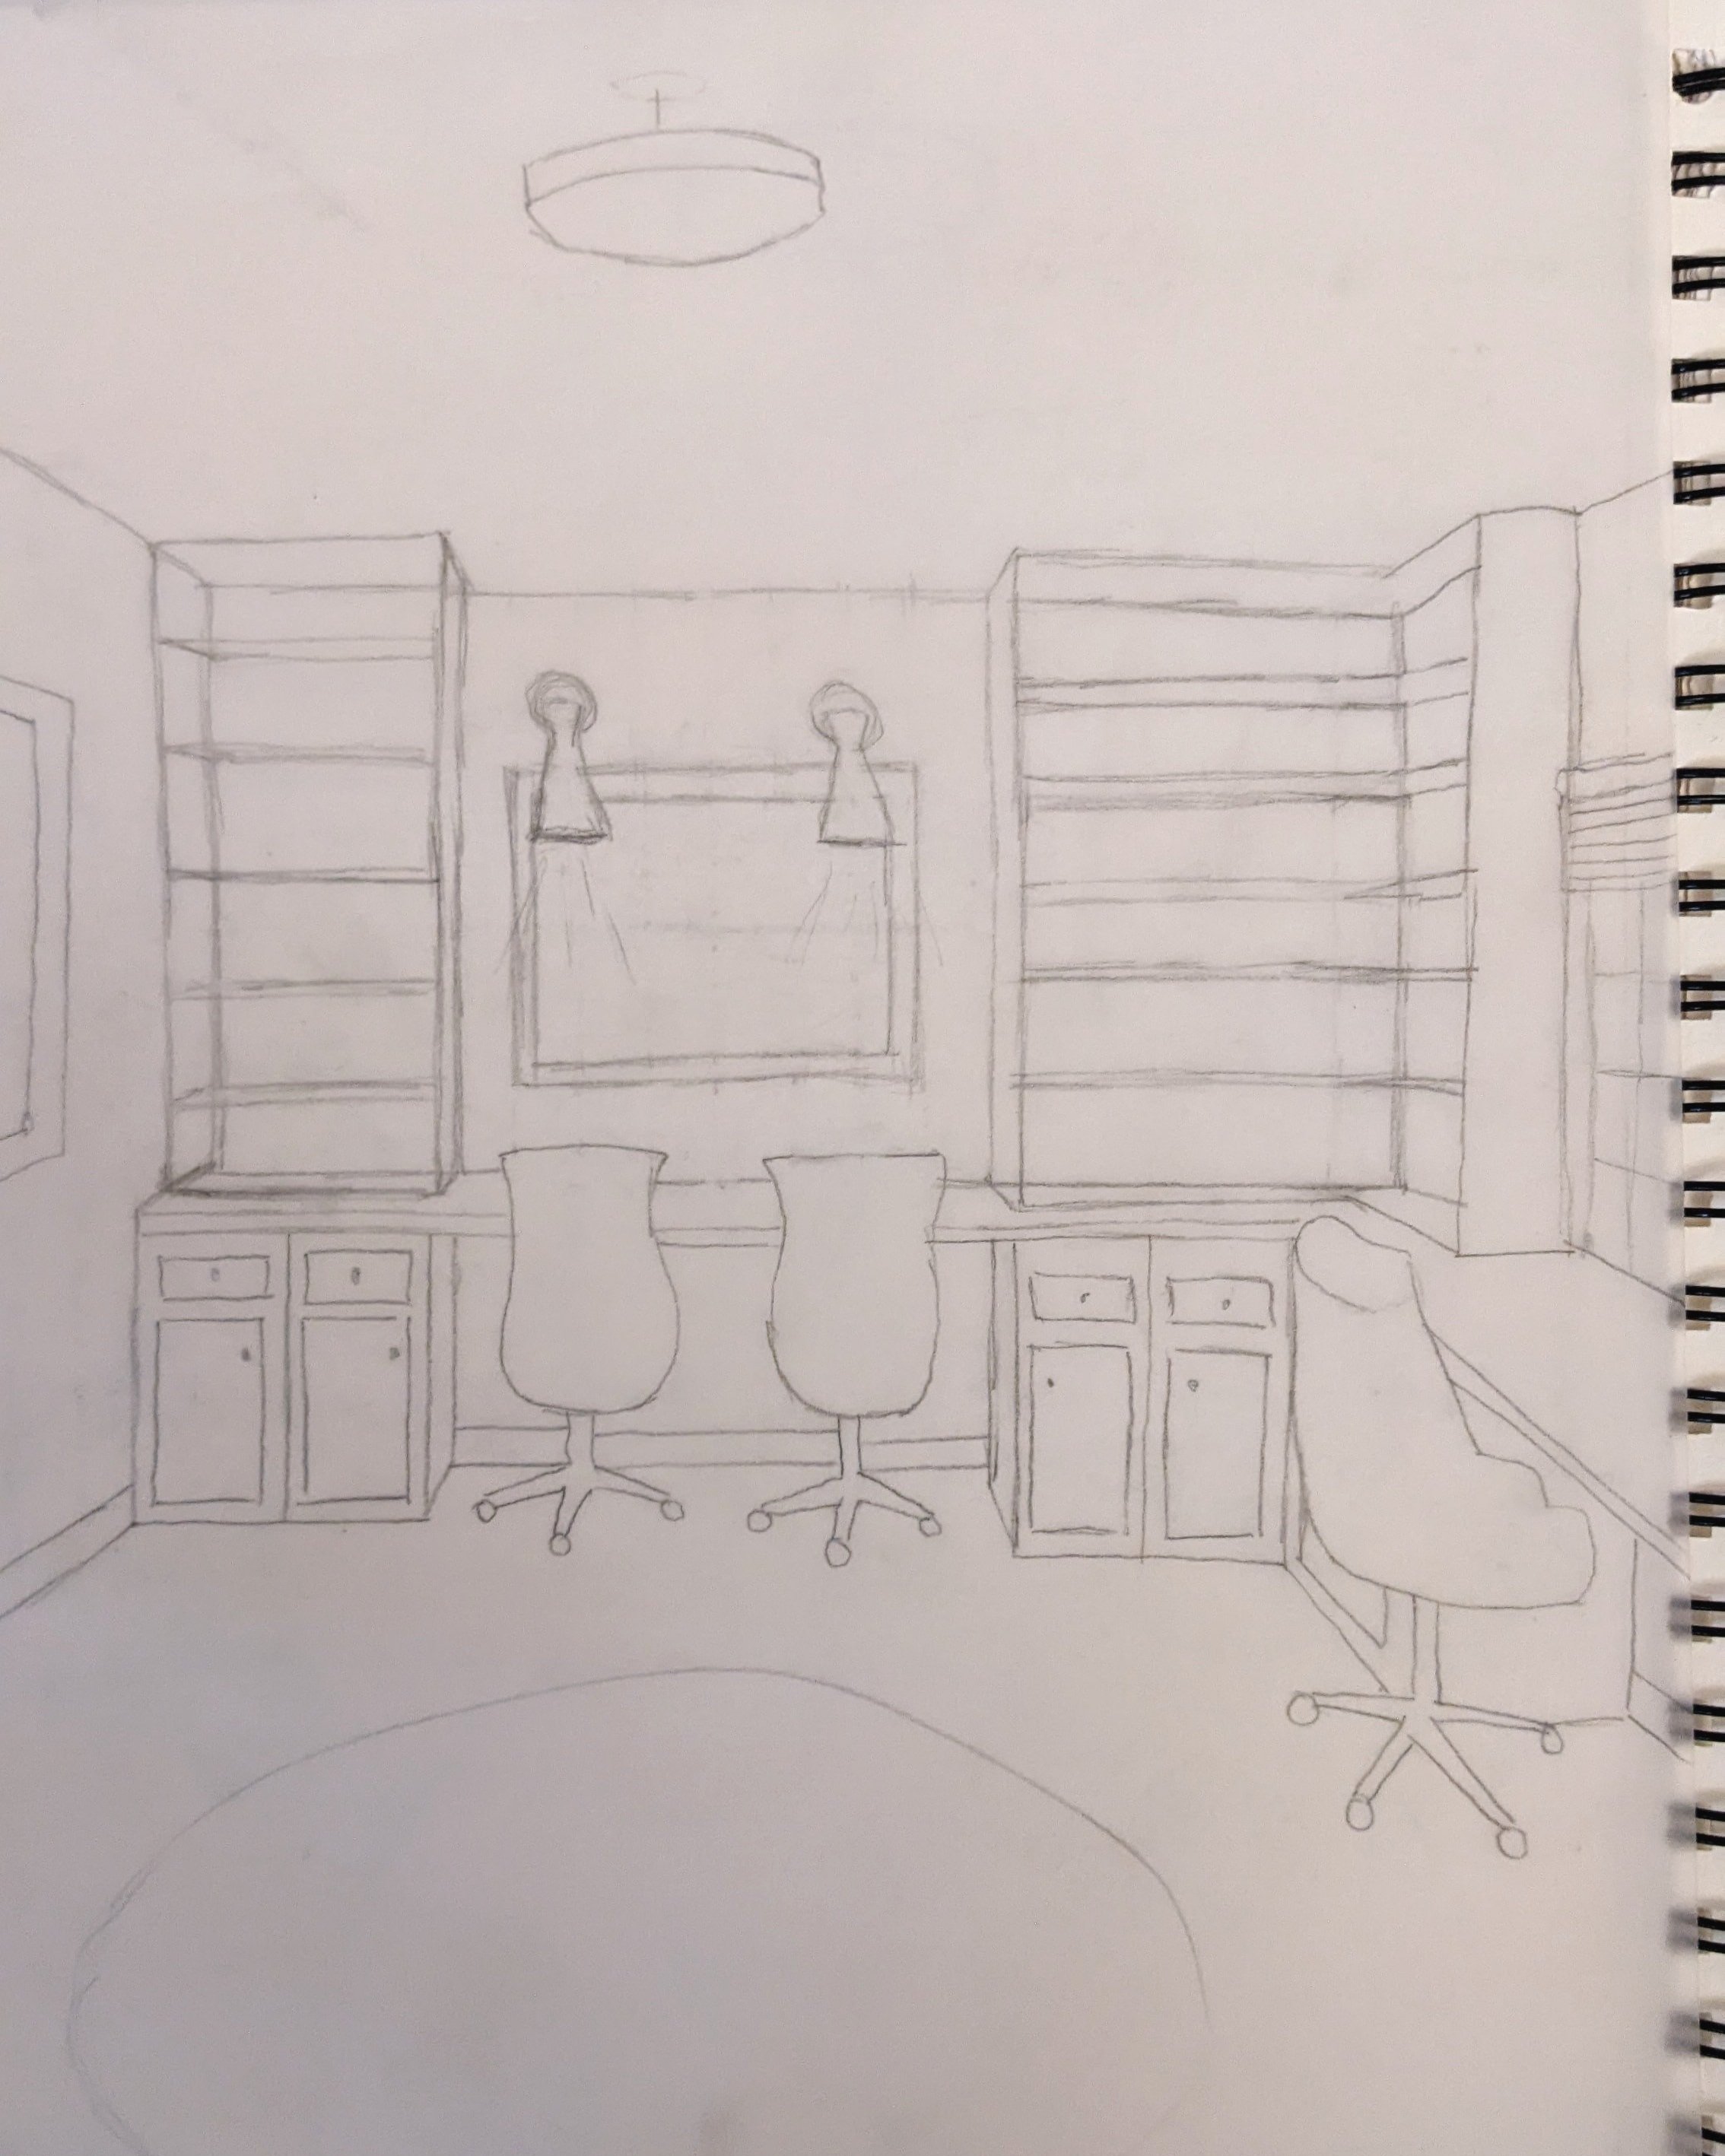
This sketch shows sconces above the desks. I was still playing around with light fixtures when I made these sketches, so I was trying out some different looks. Since then, we’ve officially had the room wired for pendants.

Lastly, the right-hand wall follows the same general idea, except we have another window and a chimney. We’ve exposed the brick on the chimney, and I’m so excited to leave it just like that. It adds so much character!
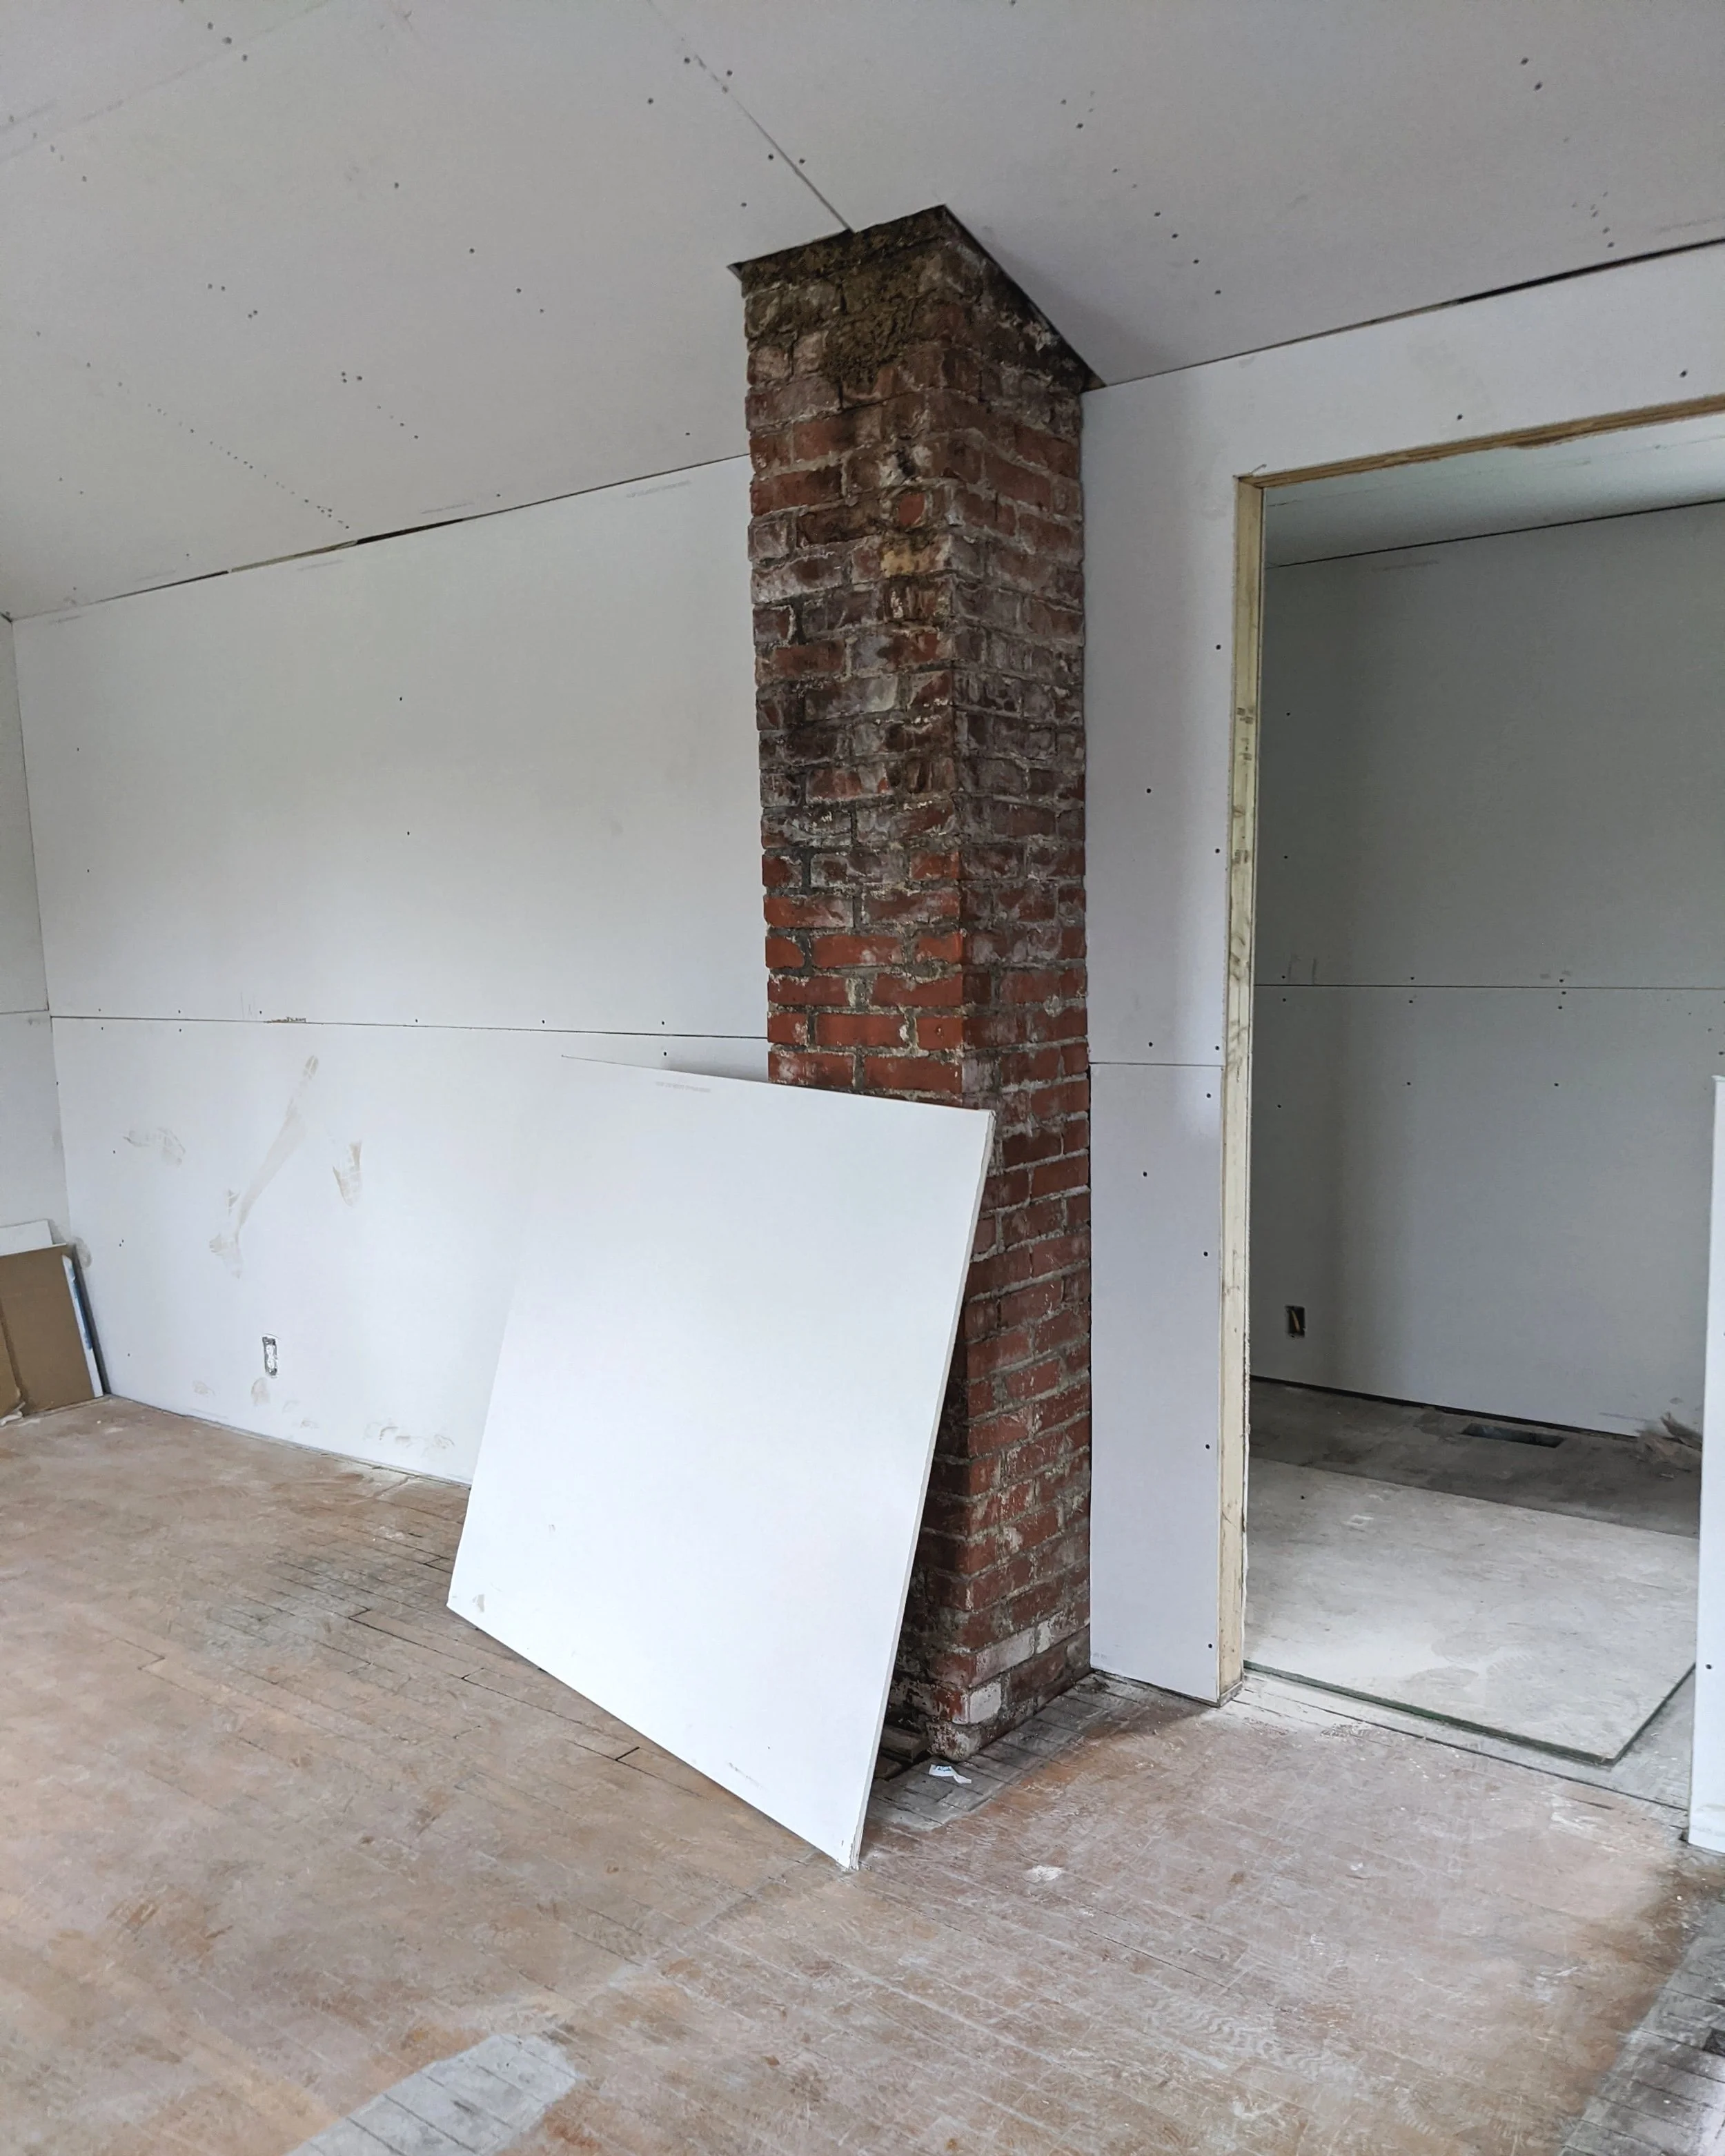
After I made sure Lucius was on board, I put my plan on graph paper to get exact measurements and headed over to the IKEA site to use their kitchen planner again since, as with the kitchenette, we’ll be using IKEA cabinetry.
This is the rendering I put together using the kitchen planner for the cabinets and added additional elements using Canva.

Because we’ll need so much counter space for this design, I think butcherblock is the route to go so the seams are a little less noticeable.
Color Scheme
I don’t know what came first here - me imagining blue cabinets and built-ins on my own or because that’s primarily what I’ve come across when looking for inspiration (classic chicken or the egg, amirite?). Either way, that’s the route I’m going!
I ping-ponged back and forth a lot about whether I wanted to go with blue since I’m not 100% sure what shade of blue the “Havstorp Turquoise” IKEA cabinets are. After doing as much research as I possibly could without driving an hour to the nearest IKEA, I decided to just go for it.

I’d like to use a blue color for the walls in the lobby and reception area. My hope is that these cabinets are a nice call-back to that room.
Once the cabinets are installed, I think we’ll have to custom-build the bookshelves and color-match them to the cabinets since I can’t find the exact sizes I’m looking for.
As for the walls, I’m leaning toward a light neutral that will probably be repeated throughout several rooms - Agreeable Gray by Sherwin Williams.
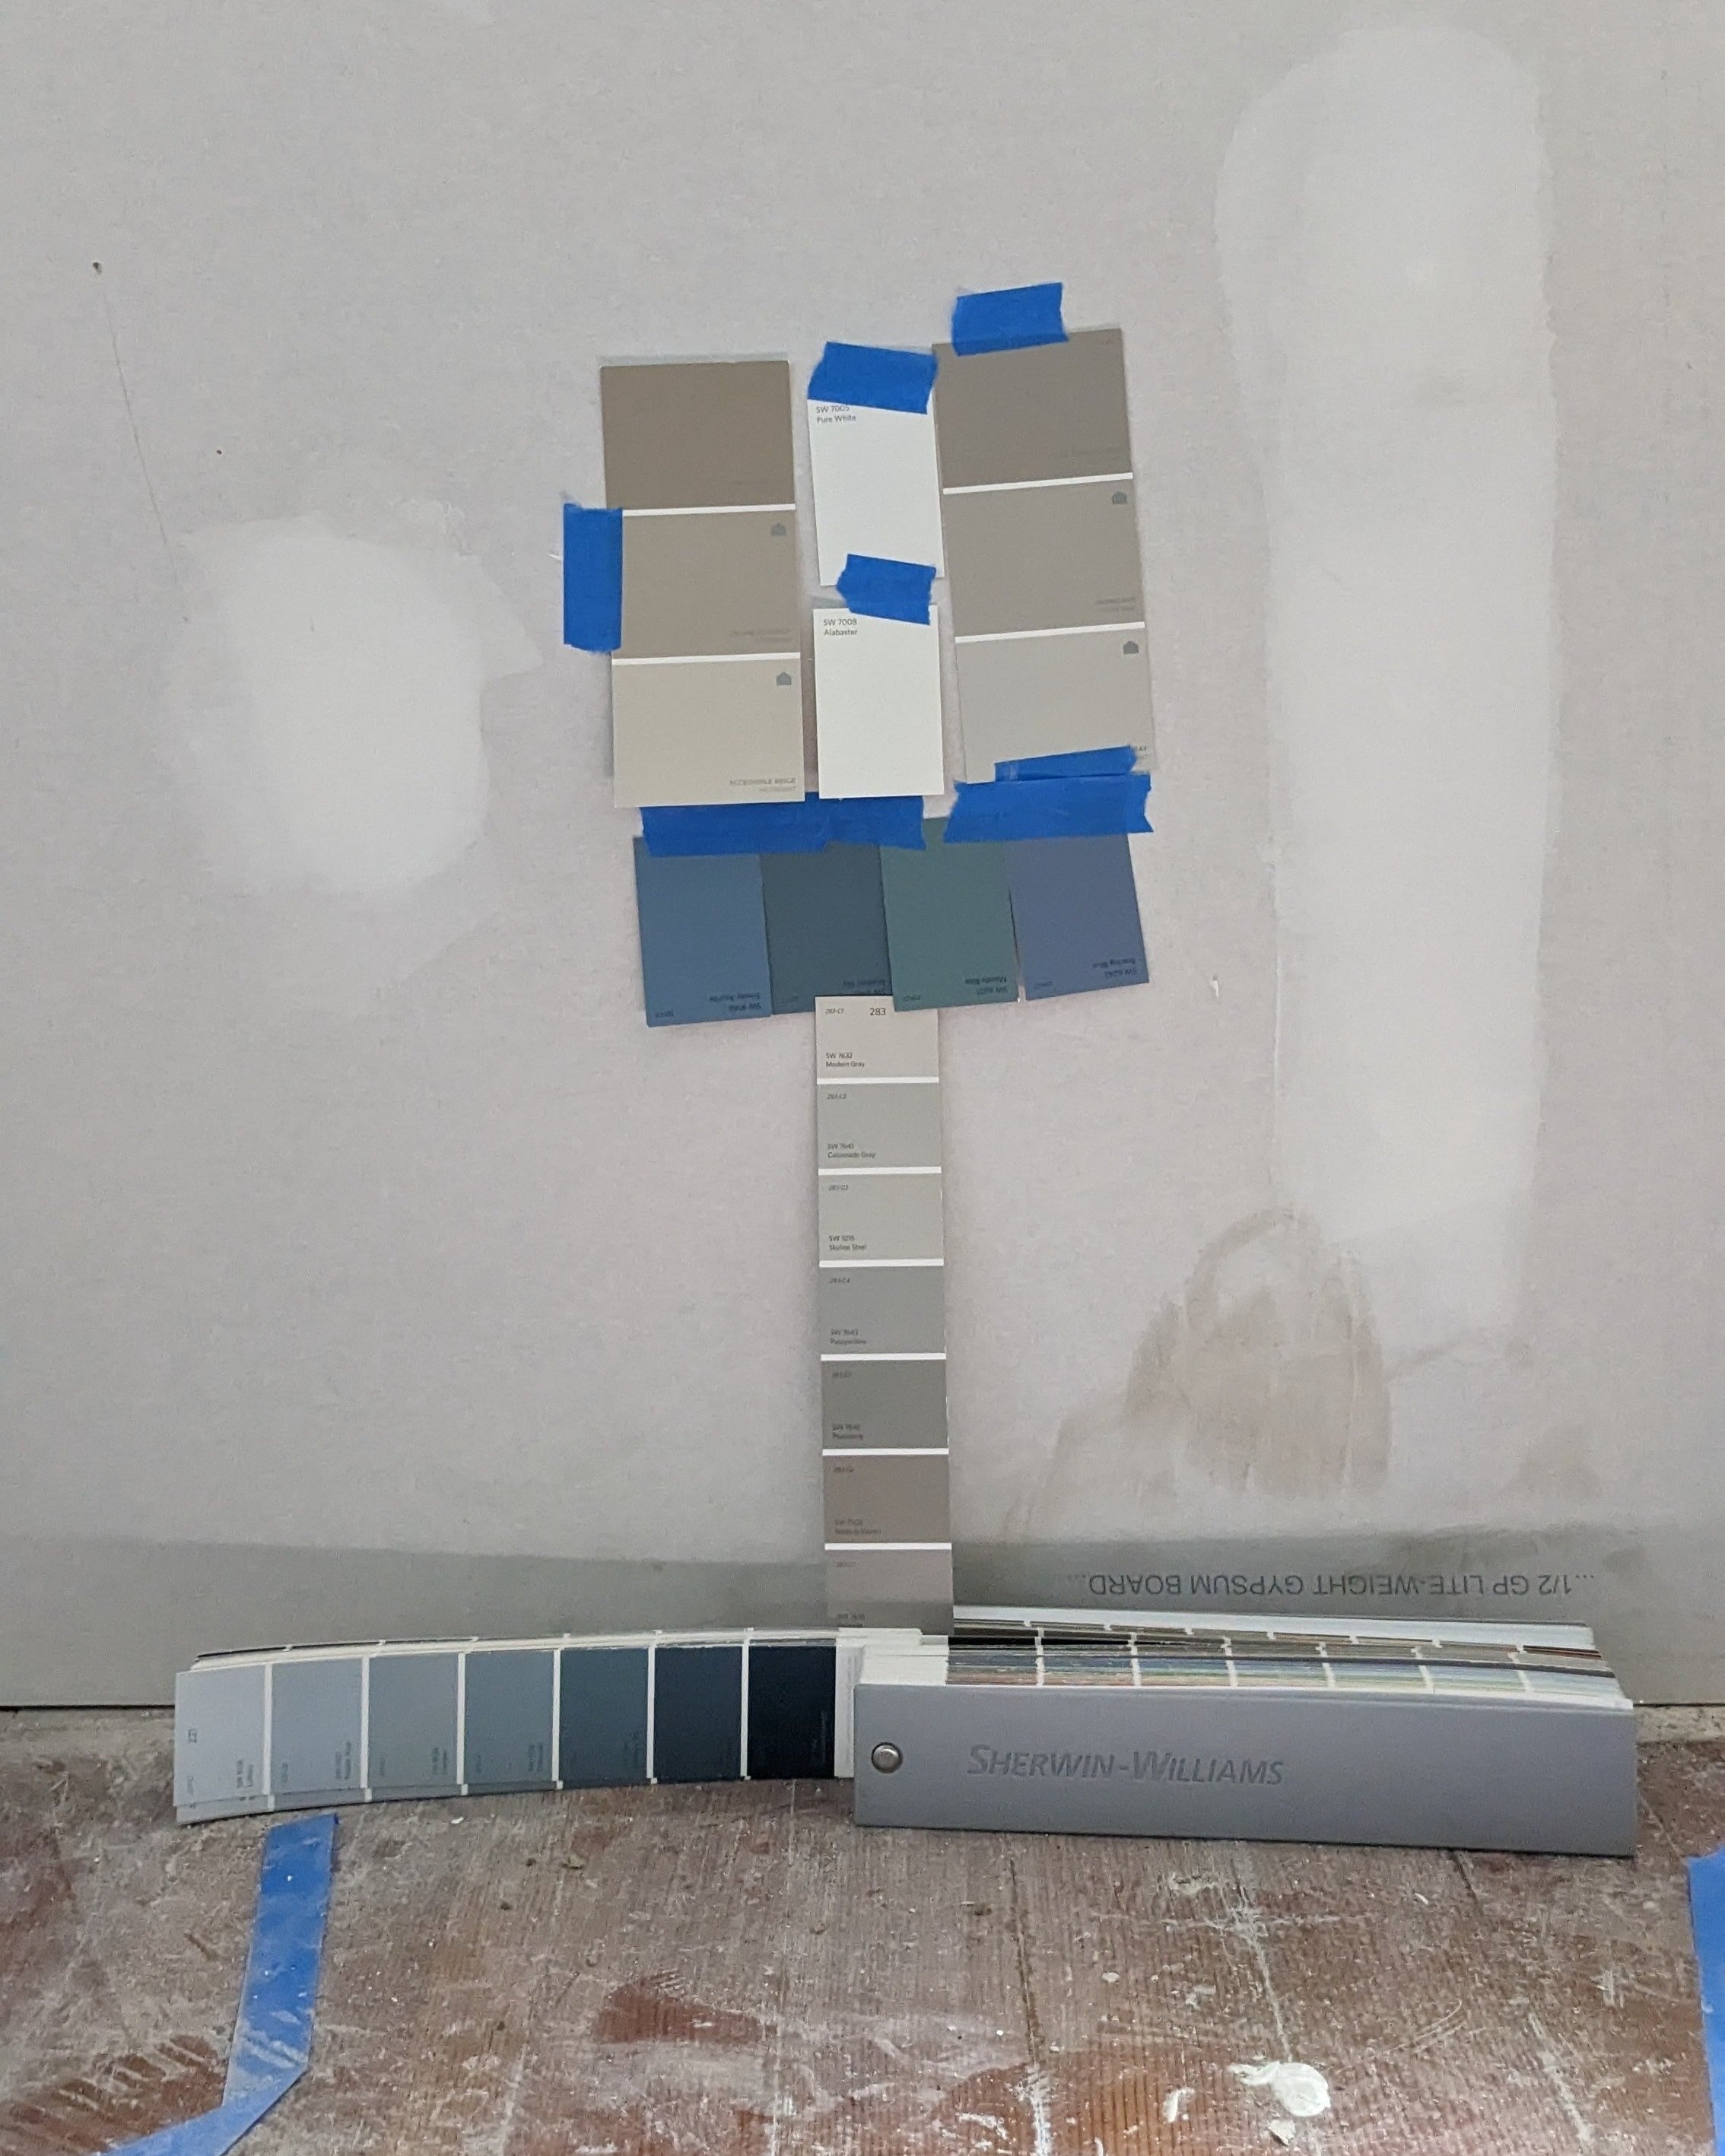
I’m holding off on my final decision for the color of the butcherblock countertops until the floors are refinished (they’re currently in progress!) to avoid any clashing in the wood tones. They’ll likely be either of the extremes - walnut or ash. I used the ash finish in my rendering and am really digging the look.
Final Thoughts
Once I nailed down the floor plan, my vision for this room was pretty clear. I’m so excited to see it come to life, which will be happening very soon!
Drywall will be completed this week, and the floors have already been patched and are well underway for refinishing. Follow along on Instagram and Facebook to see all the progress in real-time!

Catch up on the full office renovation with these posts:
We Bought a Hair Salon! (Office Building Reno Intro)
Office Layout Plans
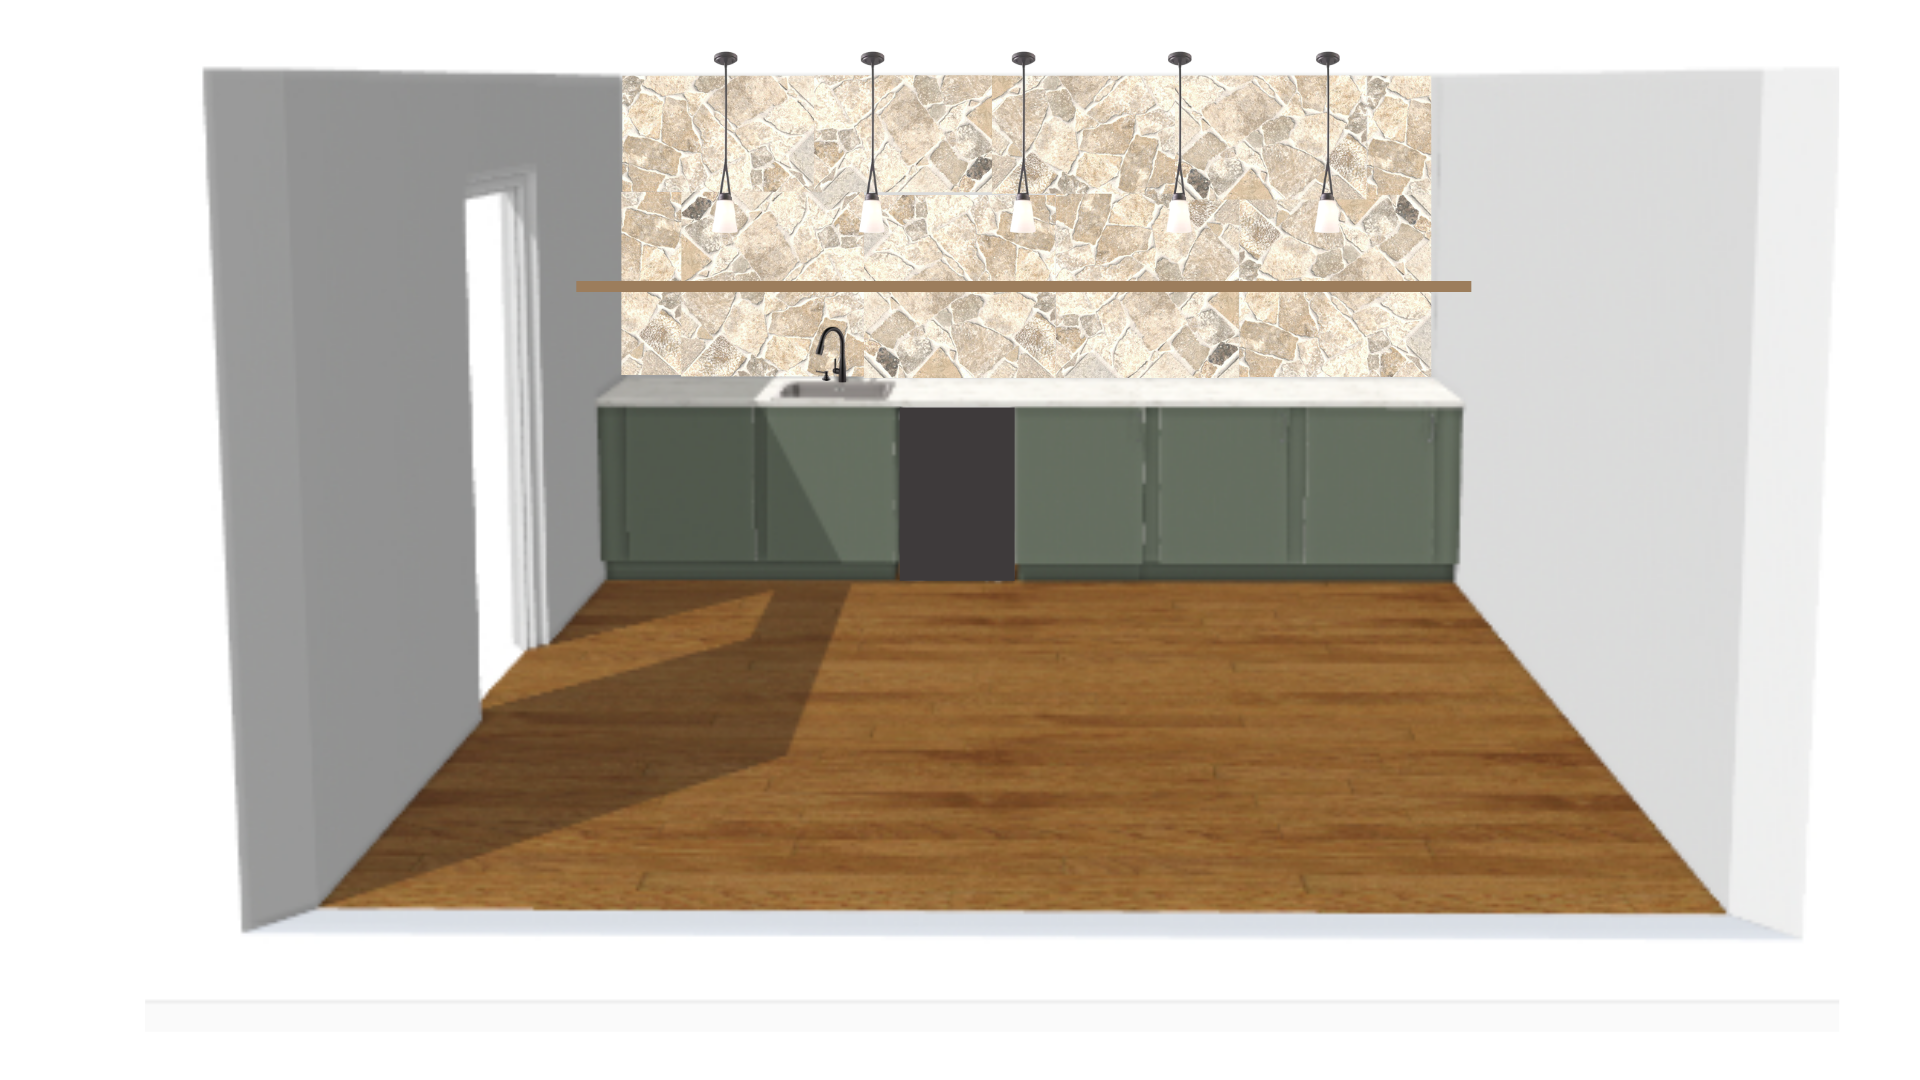
Office Reno - Conference Room Design
Last week I shared that drywall is finally being installed at the office! And as exciting as that is, I’m even more excited for what’s to come. I’ve been working hard behind the scenes on the design of this building. Today we’re diving into the conference room!
Meeting Room Design Plans
Last week I shared that drywall is finally being installed at the office! And as exciting as that is, I’m even more excited for what’s to come. I’ve been working hard behind the scenes on the design of this building. I’ve already shared the lobby and reception design. Today we’re diving into the conference room!

But before we jump into the design, let’s remind ourselves what it looked like before.
The view into the conference room (after a little bit of demo had already begun) used to look like this:

These days, this view is looking more like this:

I mentioned in last week’s post that we shifted some walls around during this renovation. Well, that wall you see below with the built-in is one of those walls. And we decided to remove it completely.

The plan was always to turn the space behind the wall into a kitchenette. By removing the wall this room is much more spacious, and the kitchenette plan is still in full swing.
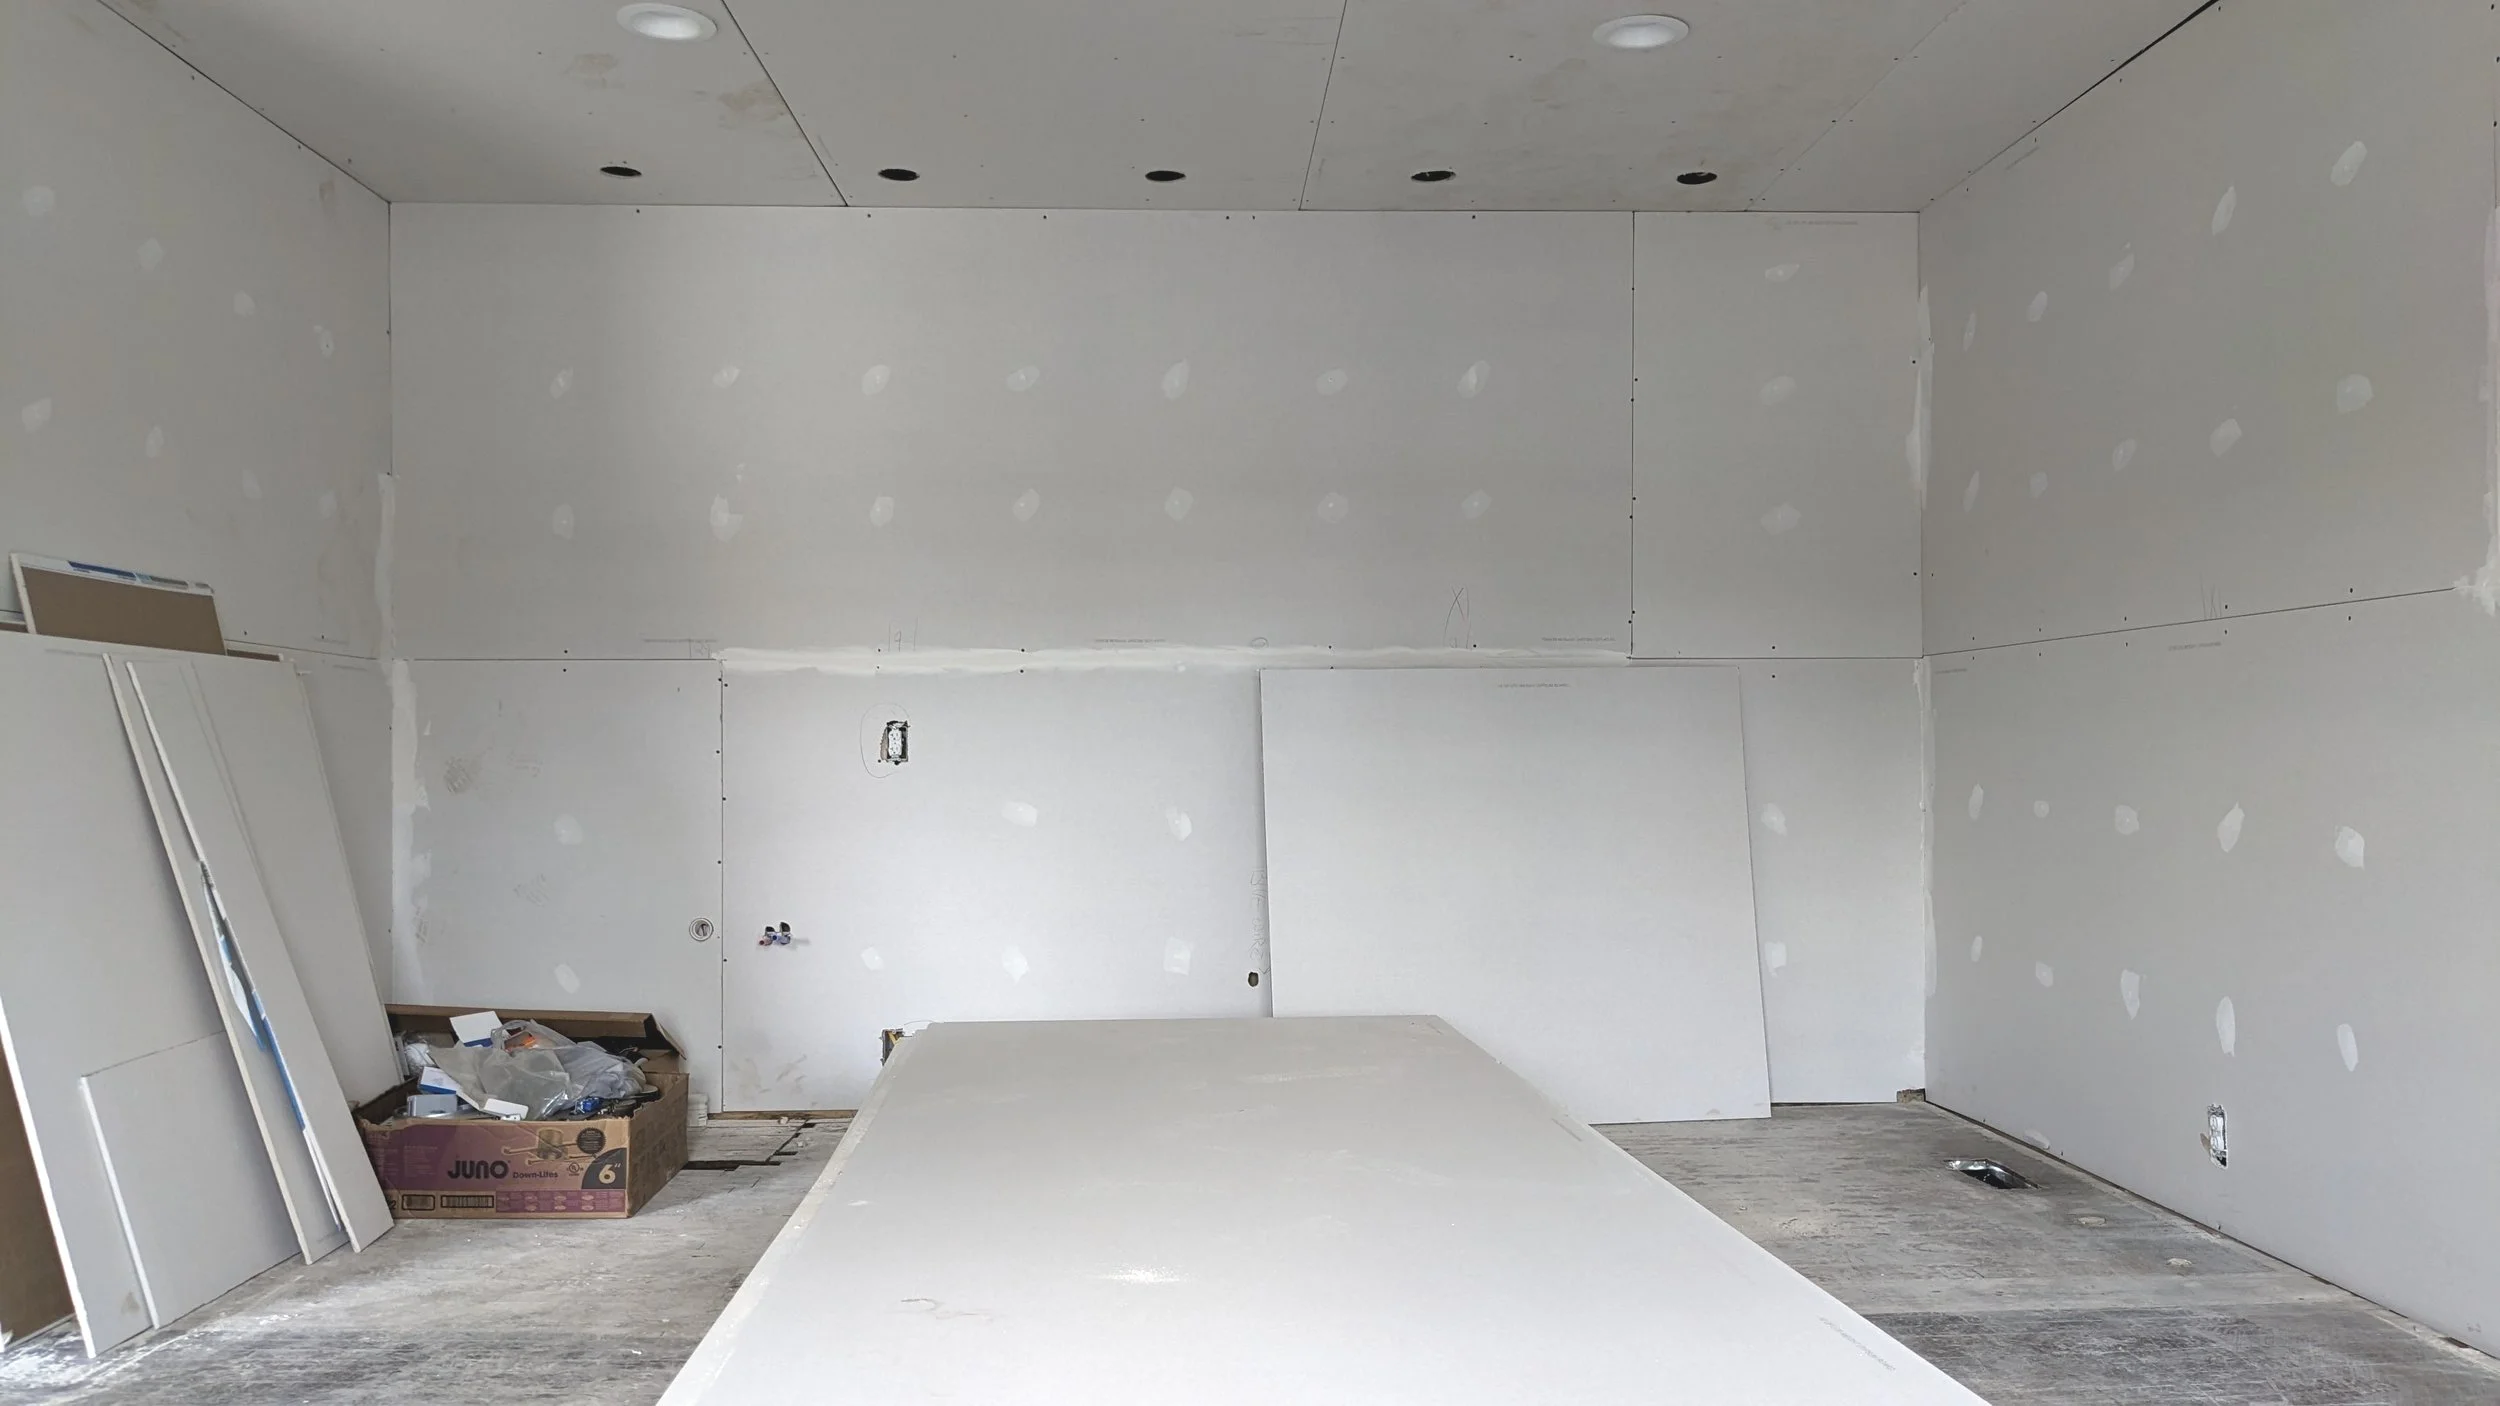
In fact, we actually gained some room by removing the built-in and the closet that used to be behind it, too. (Don’t worry - we’ll be repurposing the built-in elsewhere.) Actually, I’ve had a blast designing the kitchenette.
The Kitchenette Design
As an Amazon Associate, I earn from qualifying purchases. This post may contain affiliate links, meaning I receive commissions for purchases made through those links at no cost to you.
The whole feeling I’m going for in this building is a cozy/rustic/Nordic vibe with a twist of modern. Think: earthy colors and natural textures paired with clean lines.
When I was searching for inspiration for the kitchenette, this image immediately got my wheels turning.

There’s so much about this image that I love, but I was specifically attracted to the color scheme and the sleekness of the design. I honestly really love the tile, too, but it just wasn’t right for our space. Enter inspiration photo number 2.
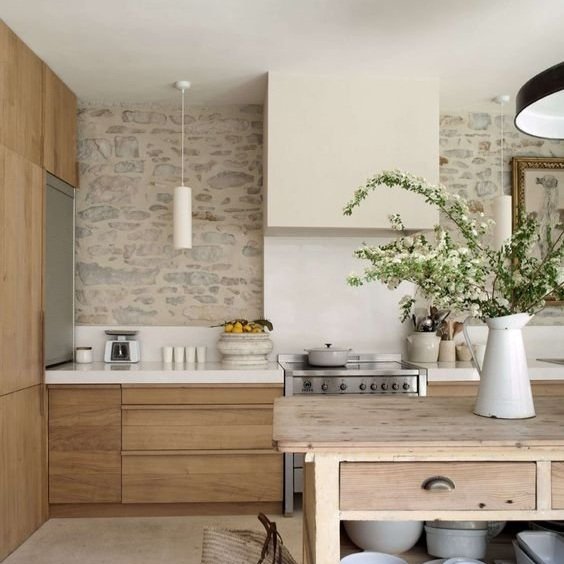
This image gave me my “ah-ha” moment for the backsplash. If you read the post where I shared the lobby design, you know I planned on installing stone around the fireplace. Once I saw this image, it became abundantly clear that I should carry the stone to the backsplash of the kitchenette too.
Once I smooshed my two inspiration pictures together (and had way too much fun in the IKEA kitchen planner + Canva), the design came together pretty quickly.

For the backsplash, I considered using these panels from Amazon, but I’m actually going to try my hand at installing stone veneer instead. I’m hoping to over-grout them and end up with something that looks similar to the inspo picture.
We had a really good experience installing IKEA cabinets during our loft renovation. We’re planning to use those again here. The Bodarp green/gray door color is right in line with my color palette for this building.
I love the look of the pendants in front of the backsplash in the inspo pictures above, so that was a must. These are the pendants I’ve picked for this space.

Lastly, I’m toeing a fine line with some of the elements I’ve included in the overall design, so I’m worried butcher block countertops might lean too farmhouse. To combat this, I’m thinking of using a budget-friendly white laminate (stone is expensive, ya’ll!) and building a looooooong wood floating shelf (13’6” to be exact) to go above the counters.
Conference Room Design
As for the rest of the room, we’ll have a large conference table with a chandelier above and a TV along the back wall. The layout will look something kind of like this….

…except imagine that picture is a TV.
I would love to add a special element to the TV wall too, like box molding or building something to make it stand off the wall a little. This idea really caught my eye.

Subtle, yet visually interesting.
As for the rest of the details, I haven’t worked out the exact furnishings yet, but I know we plan on using this chandelier.

I’m picturing a lighter-toned color on the wall. Not a stark white, but maybe an off-white, light taupe, or greige. And I’d love to have a big, chunky wood table. I’m divided on whether to add an area rug just yet.
The doorway to this room is large (around 4 feet), so we plan on building a sliding barn door.
As I mentioned above, I’m trying to not lean TOO farmhouse chic. That being said, a more modern door design might be a good option. I really love the look of the one below!

Final Thoughts
While there are still some details to work out, I’m really excited about the direction this room (and the whole building, honestly) is headed. Stay tuned for next week’s post, where I’ll be sharing the design for the agent workspace!

Catch up! Check out these other posts about this project:
We Bought a Hair Salon! (Office Building Reno Intro)
Office Building Design
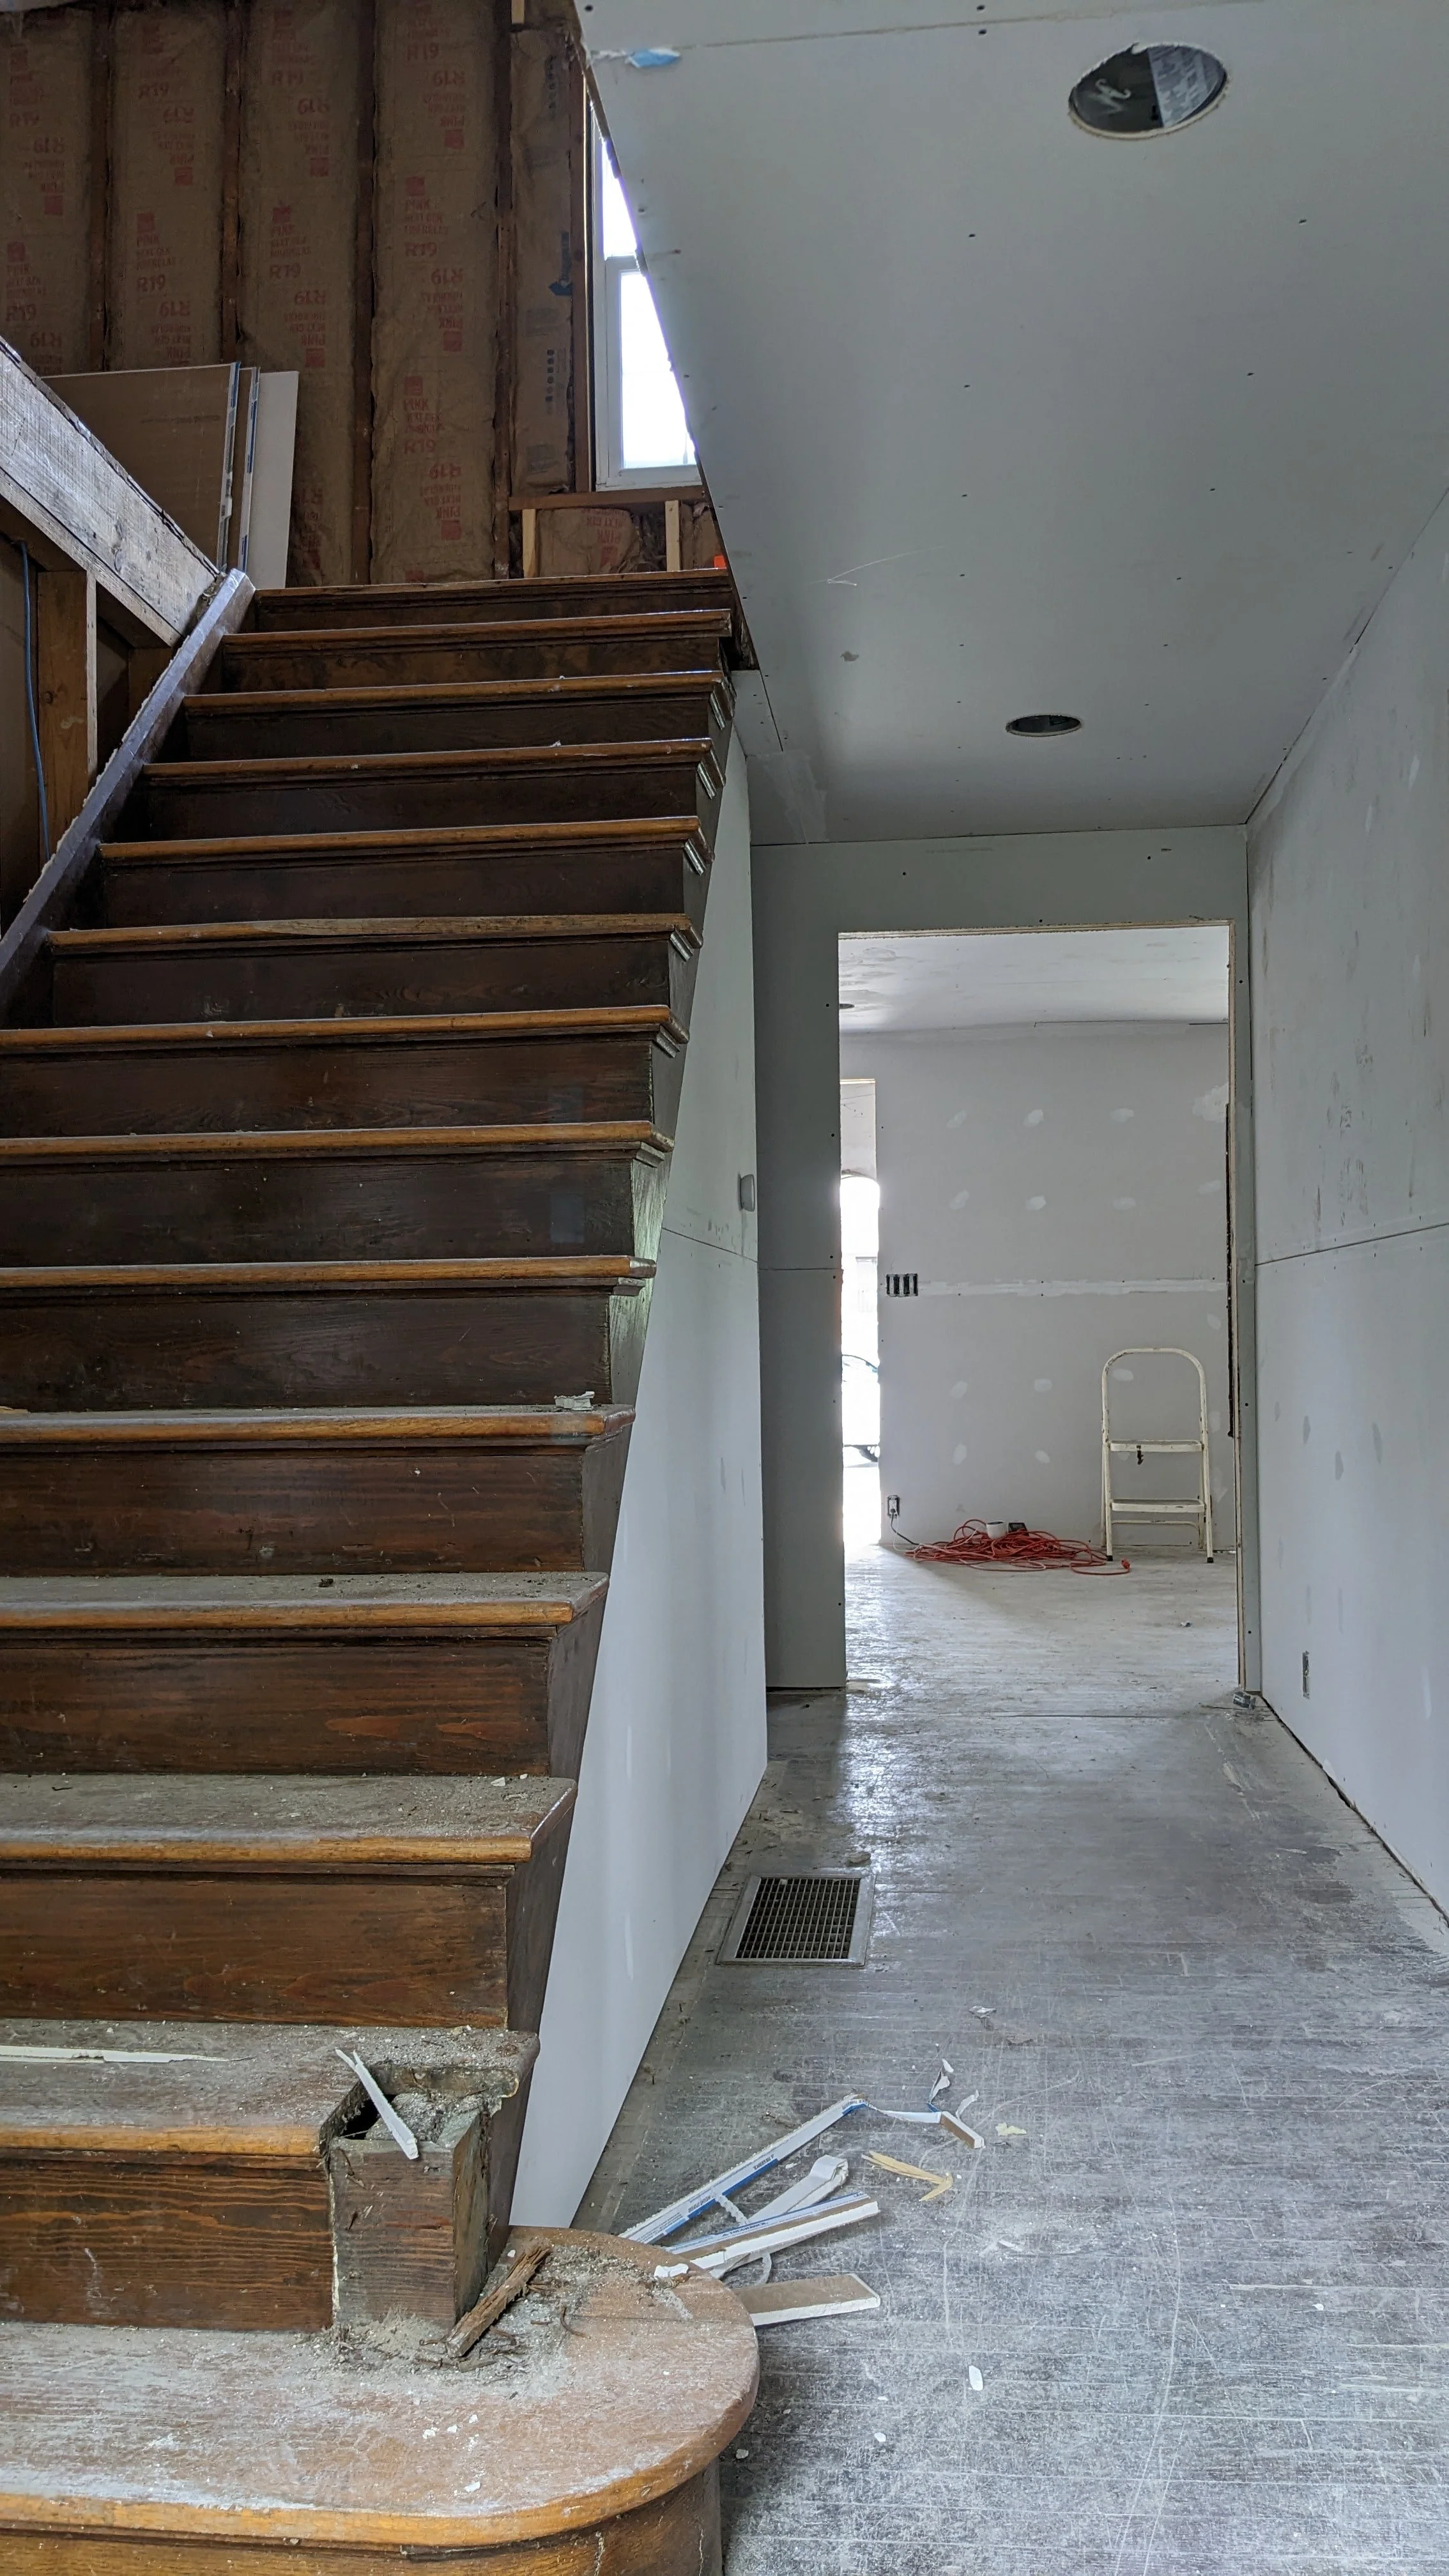
Office Reno - Project Status Updates
It’s hard to believe, but the last post I wrote about our new office building was four months ago! In that post, I shared the design for the lobby and reception area. In real life, we were deep in the demo phase. We’ve made a lot of progress since then, so in this post, I’m sharing what the building looks like today!
Renovation Progress Report
It’s hard to believe, but the last post I wrote about our new office building was four months ago! In that post, I shared the design for the lobby and reception area. In real life, we were deep in the demo phase. We’ve made a lot of progress since then, so in this post, I’m sharing what the building looks like today!
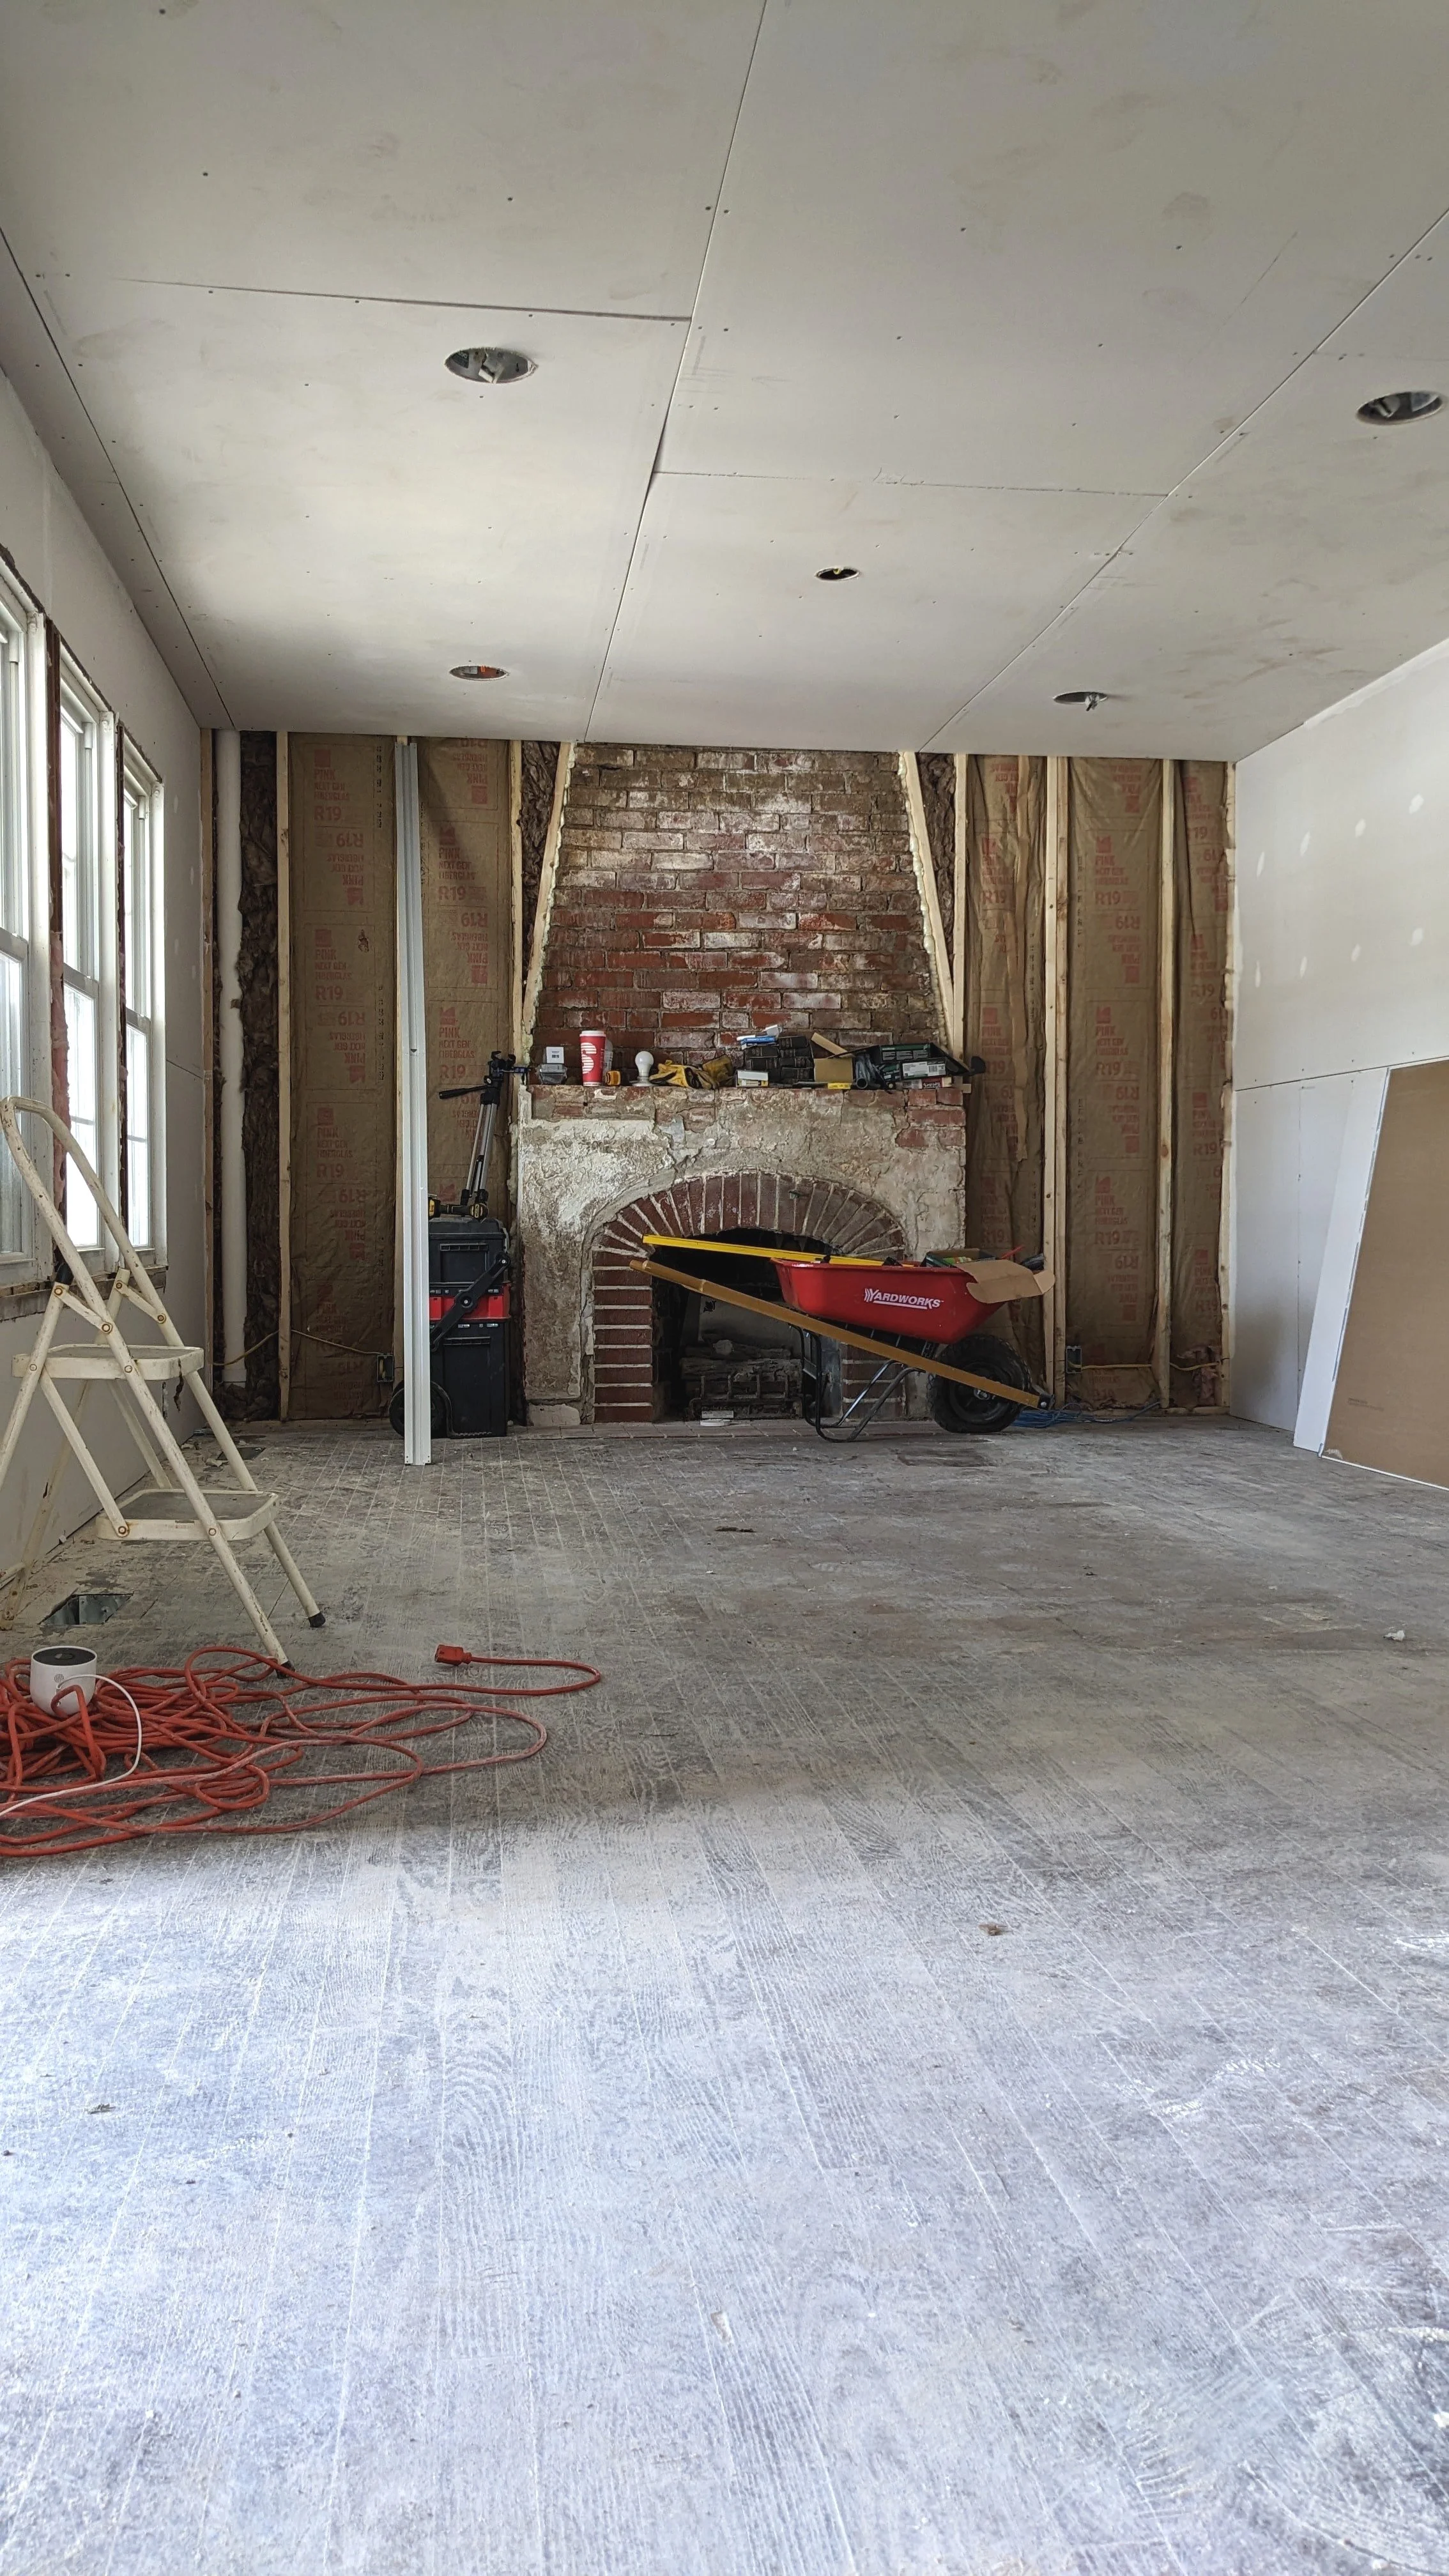
I know it doesn’t look like much yet, but this is a huge improvement from where we started!
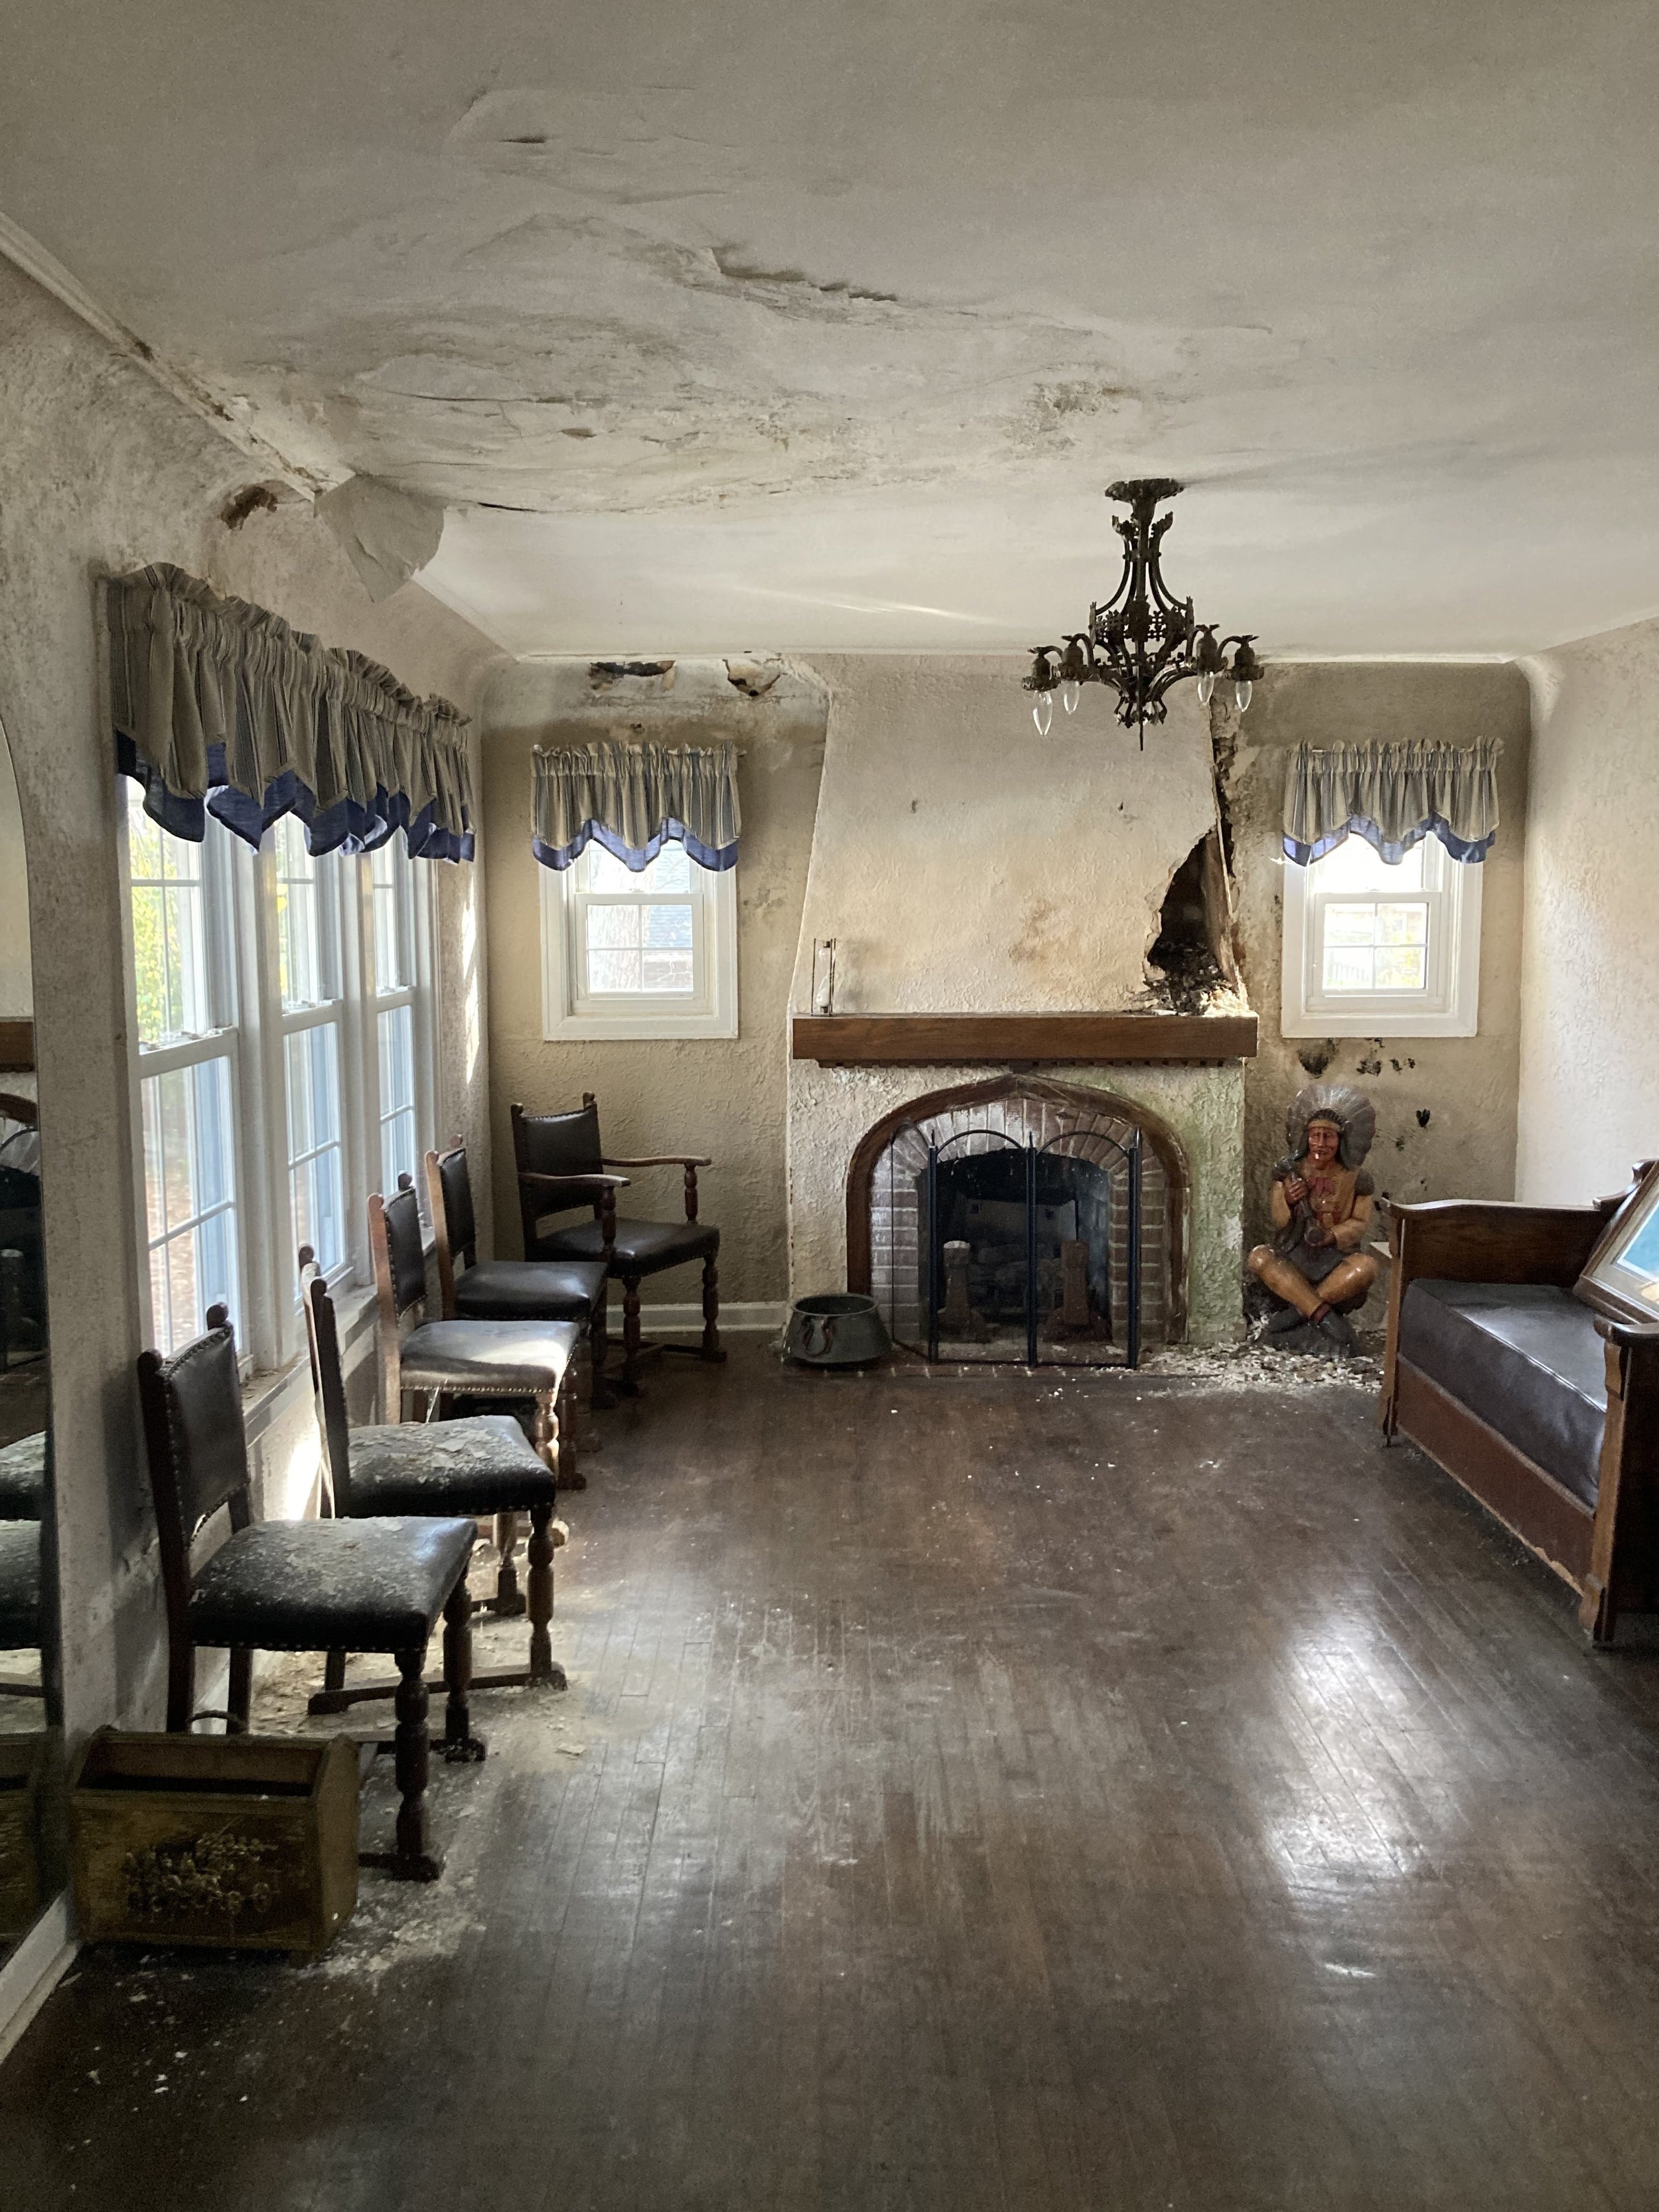
How we got here…
When I first shared that we bought a new office building, I made lots of naive statements such as, “demo will be minimal in <insert random room here>” and “we’re going to focus on <insert different room here> for now so we can get back in the building quickly.”
Ha! What a fool I was!
Over the past four months, we actually ended up taking everything down to the studs. And I mean EVERYTHING.
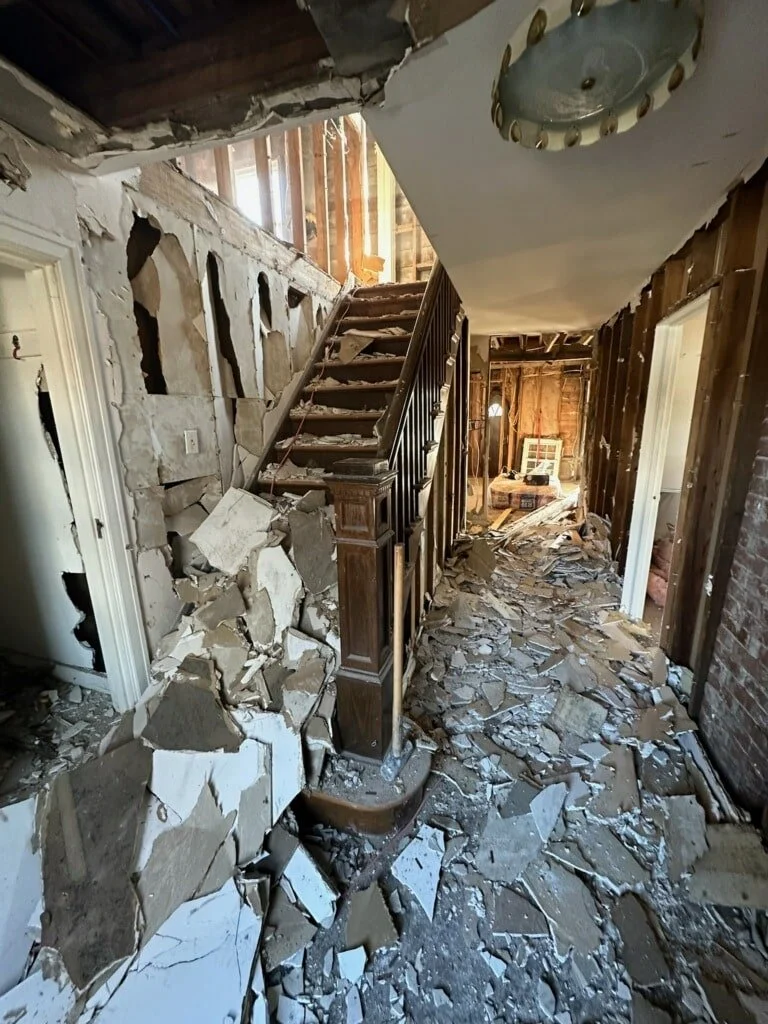
It seemed like everywhere we turned, we found more and more rotted wood or problematic areas that needed to be addressed. We were scared of what we weren’t seeing, so we took it all out.
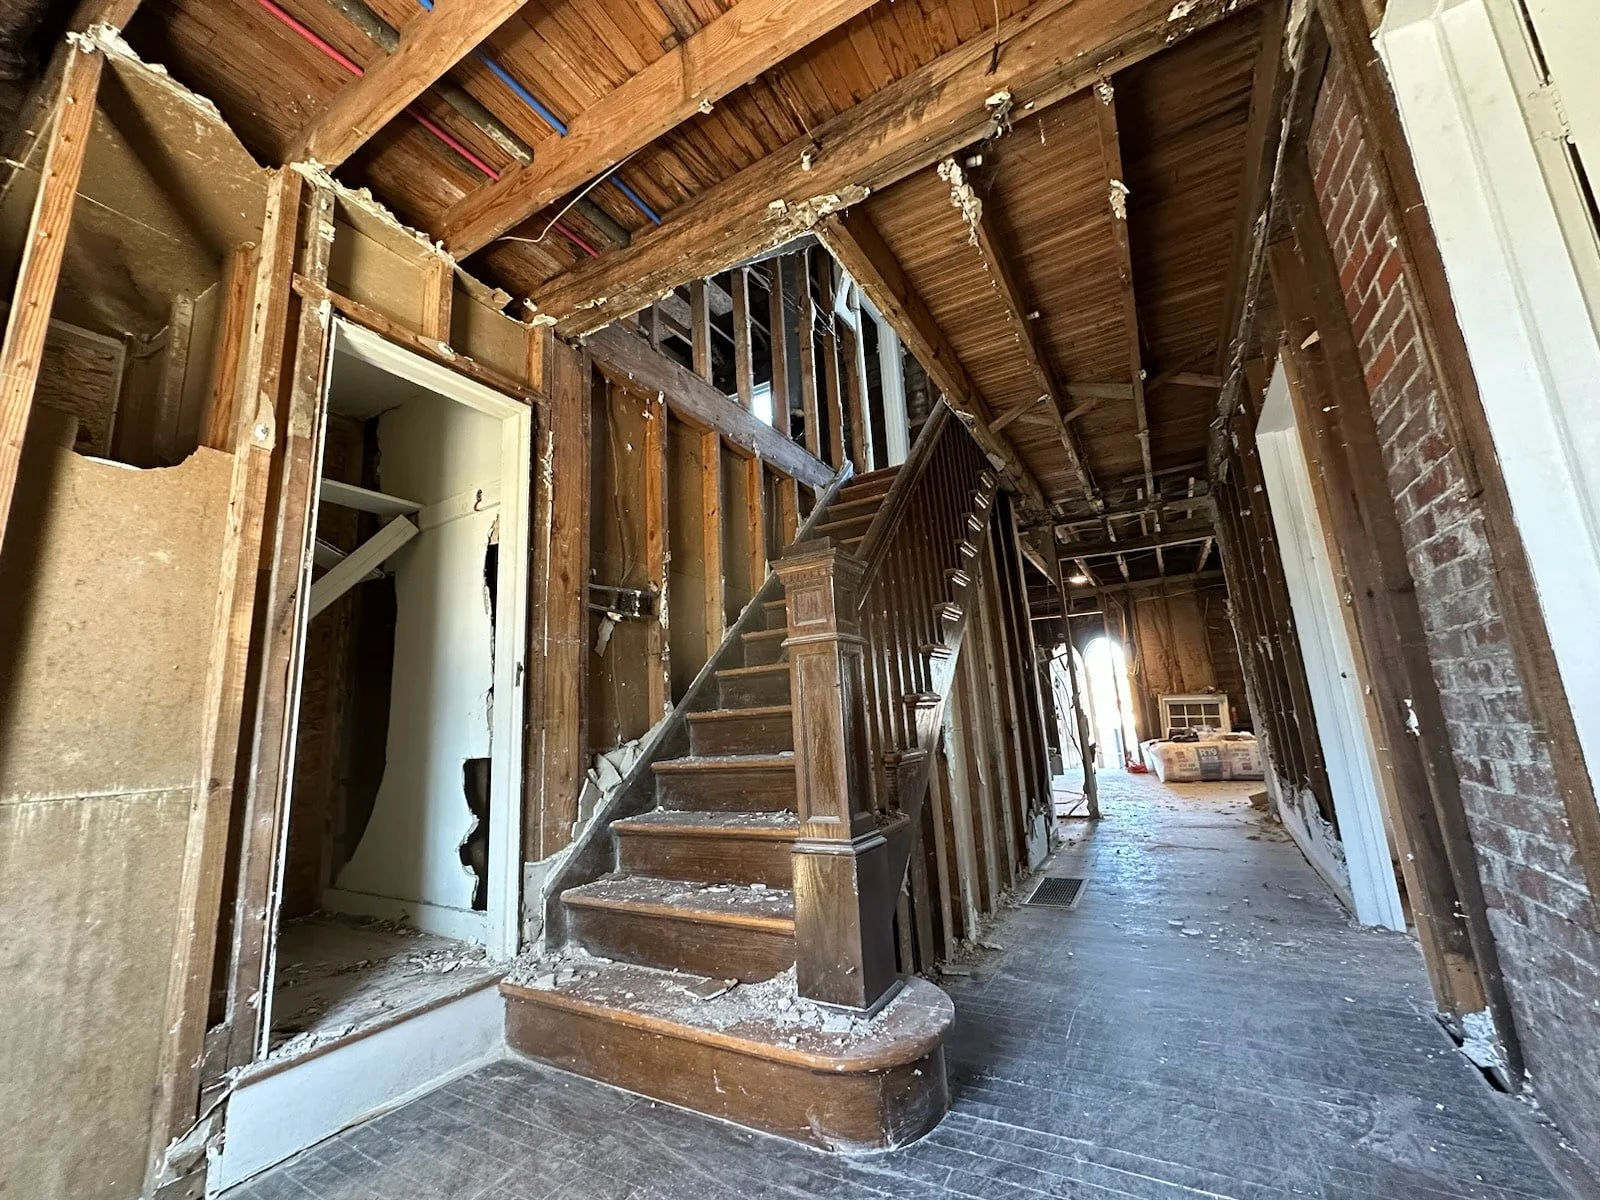
At the time, it honestly kind of sucked. Every single wall had at least two layers of drywall and one layer of plaster. Hours upon hours of hauling buckets, shovel-fulls, and trash cans filled with debris in the freezing cold still haunt my dreams.
But honestly, it was the right call. See Exhibit A, where we discovered there was no flooring left underneath the toilet:
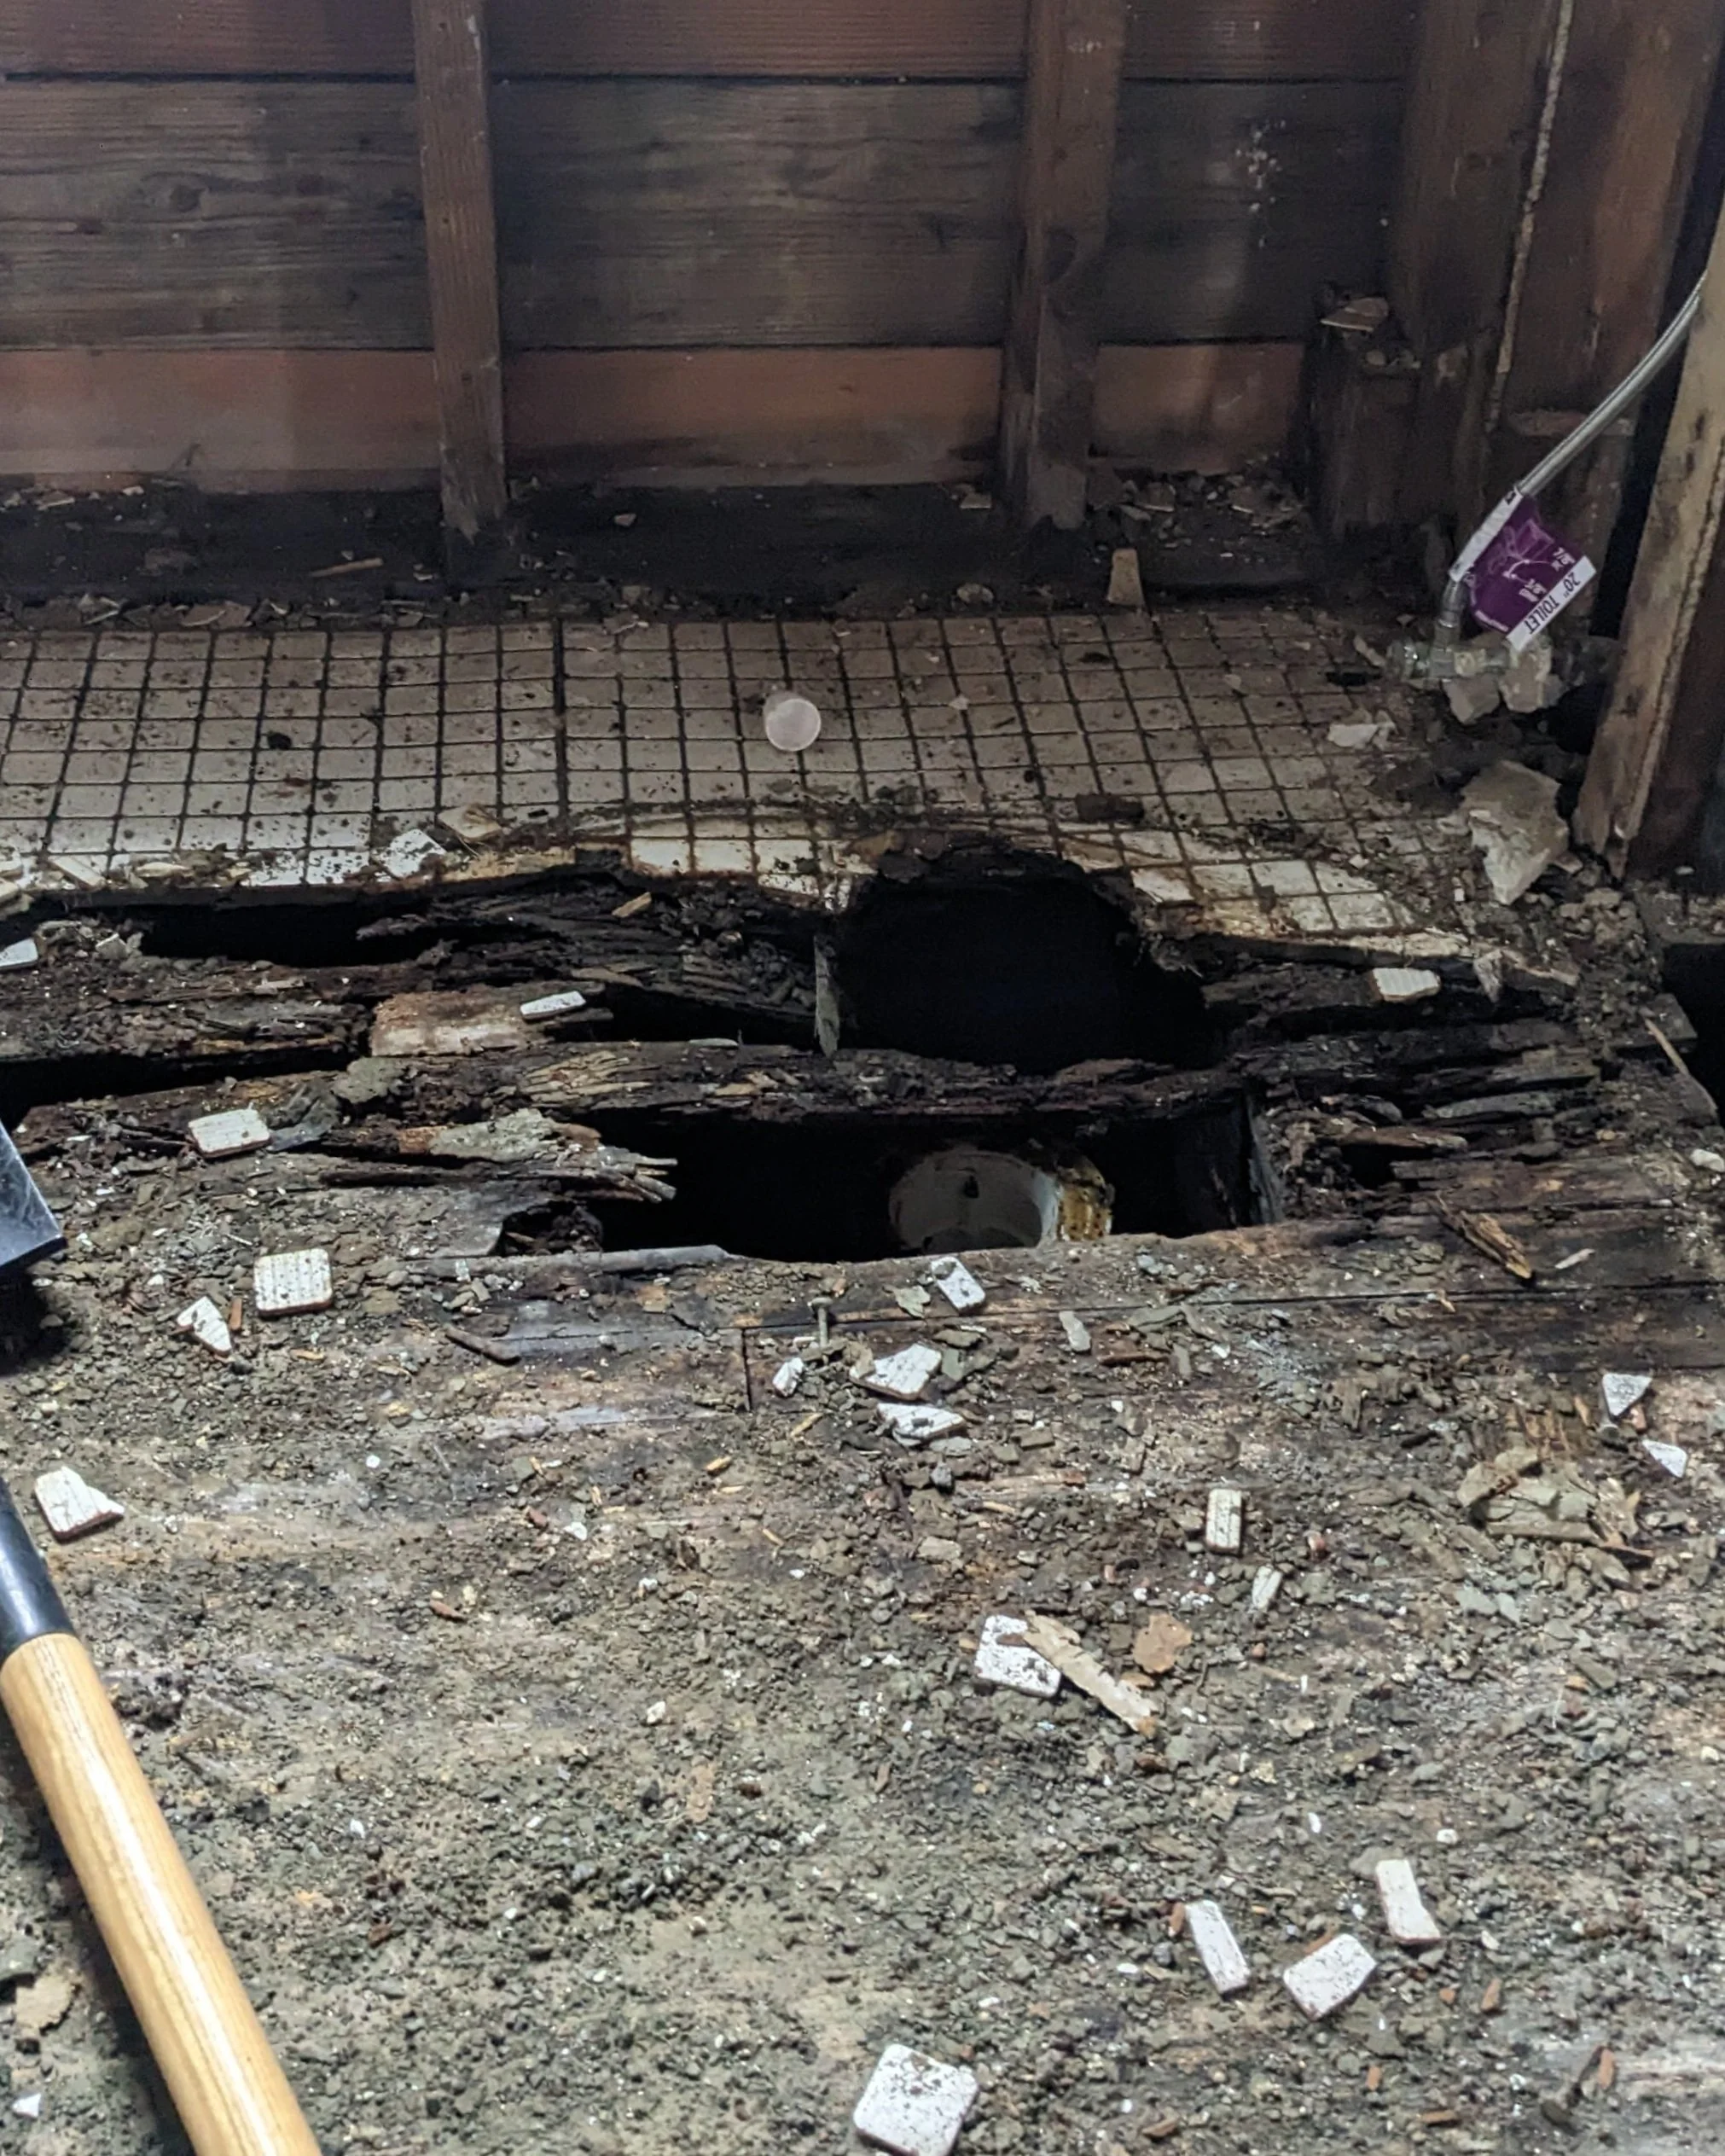
Exhibit A
And while it pains me to lose any bit of character from the building (here’s looking at you, arched doorways), demoing everything allowed us to shift and remove some (non-structural) walls to really make this building our own.
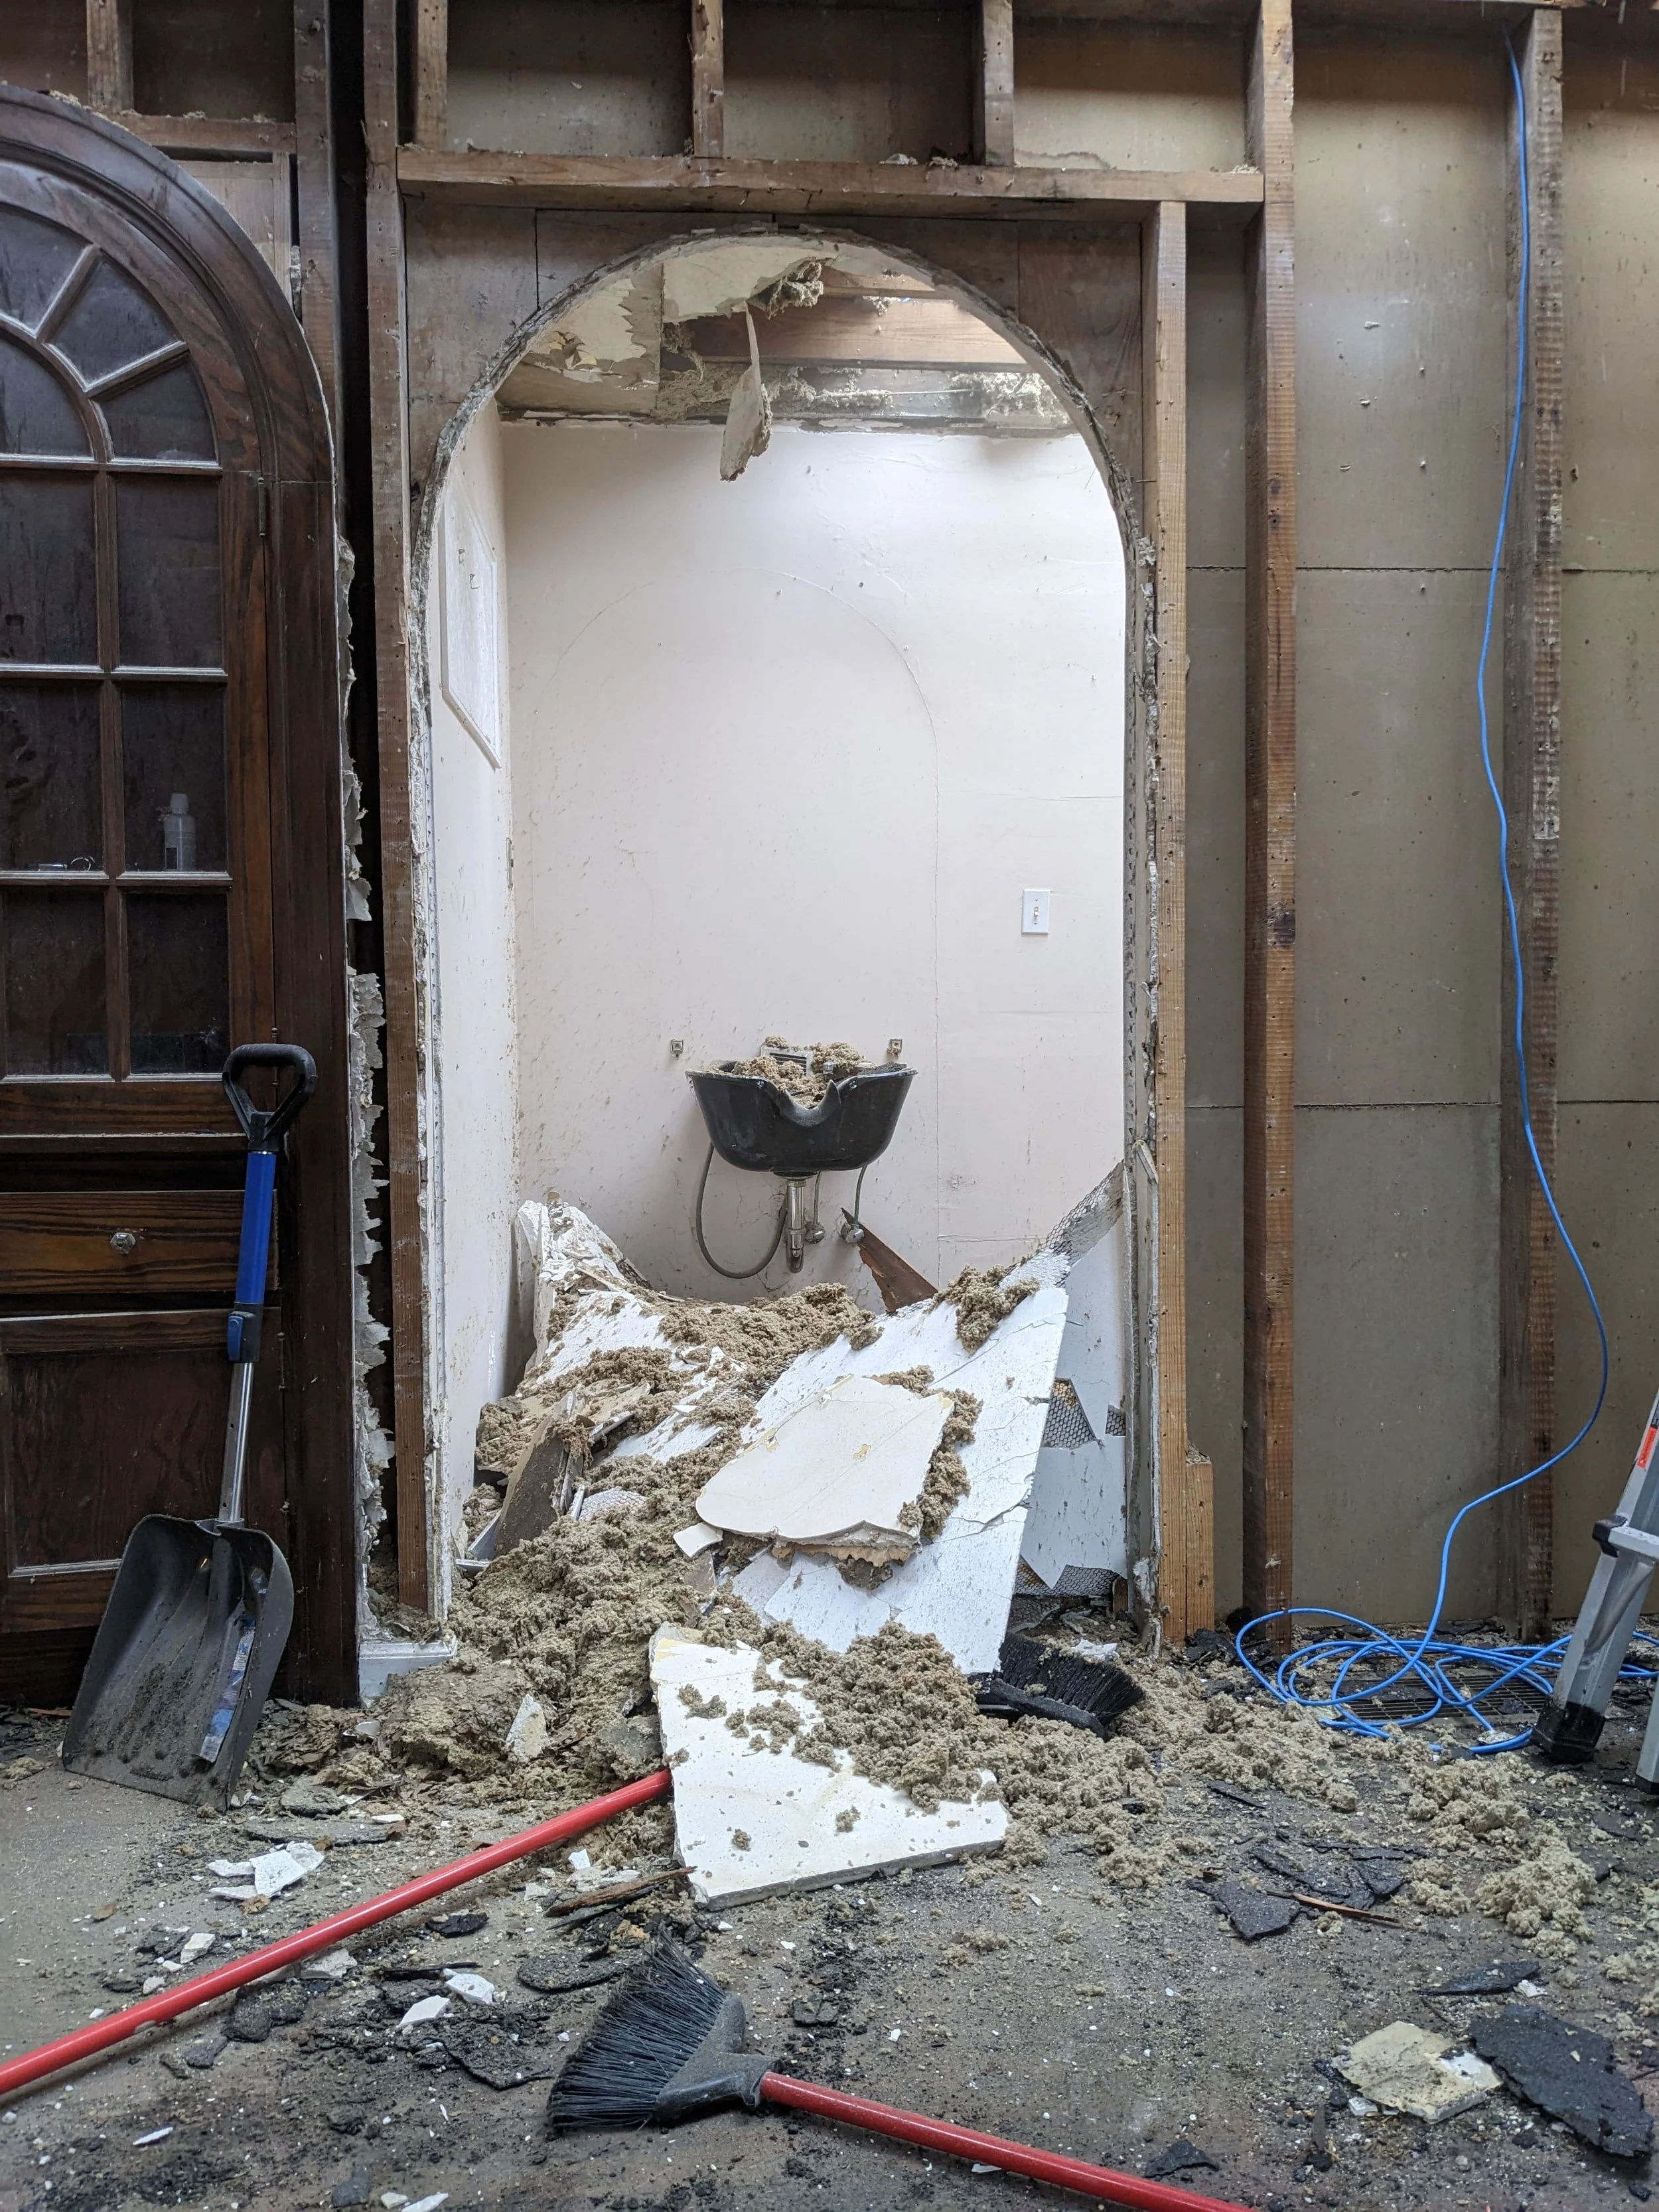
Finally, after months of demo and EIGHT 30-foot dumpsters of rubble, I’m thrilled to say we’re deep in the process of installing drywall. And better yet - we’re not doing it ourselves! Woop!
How it looks today
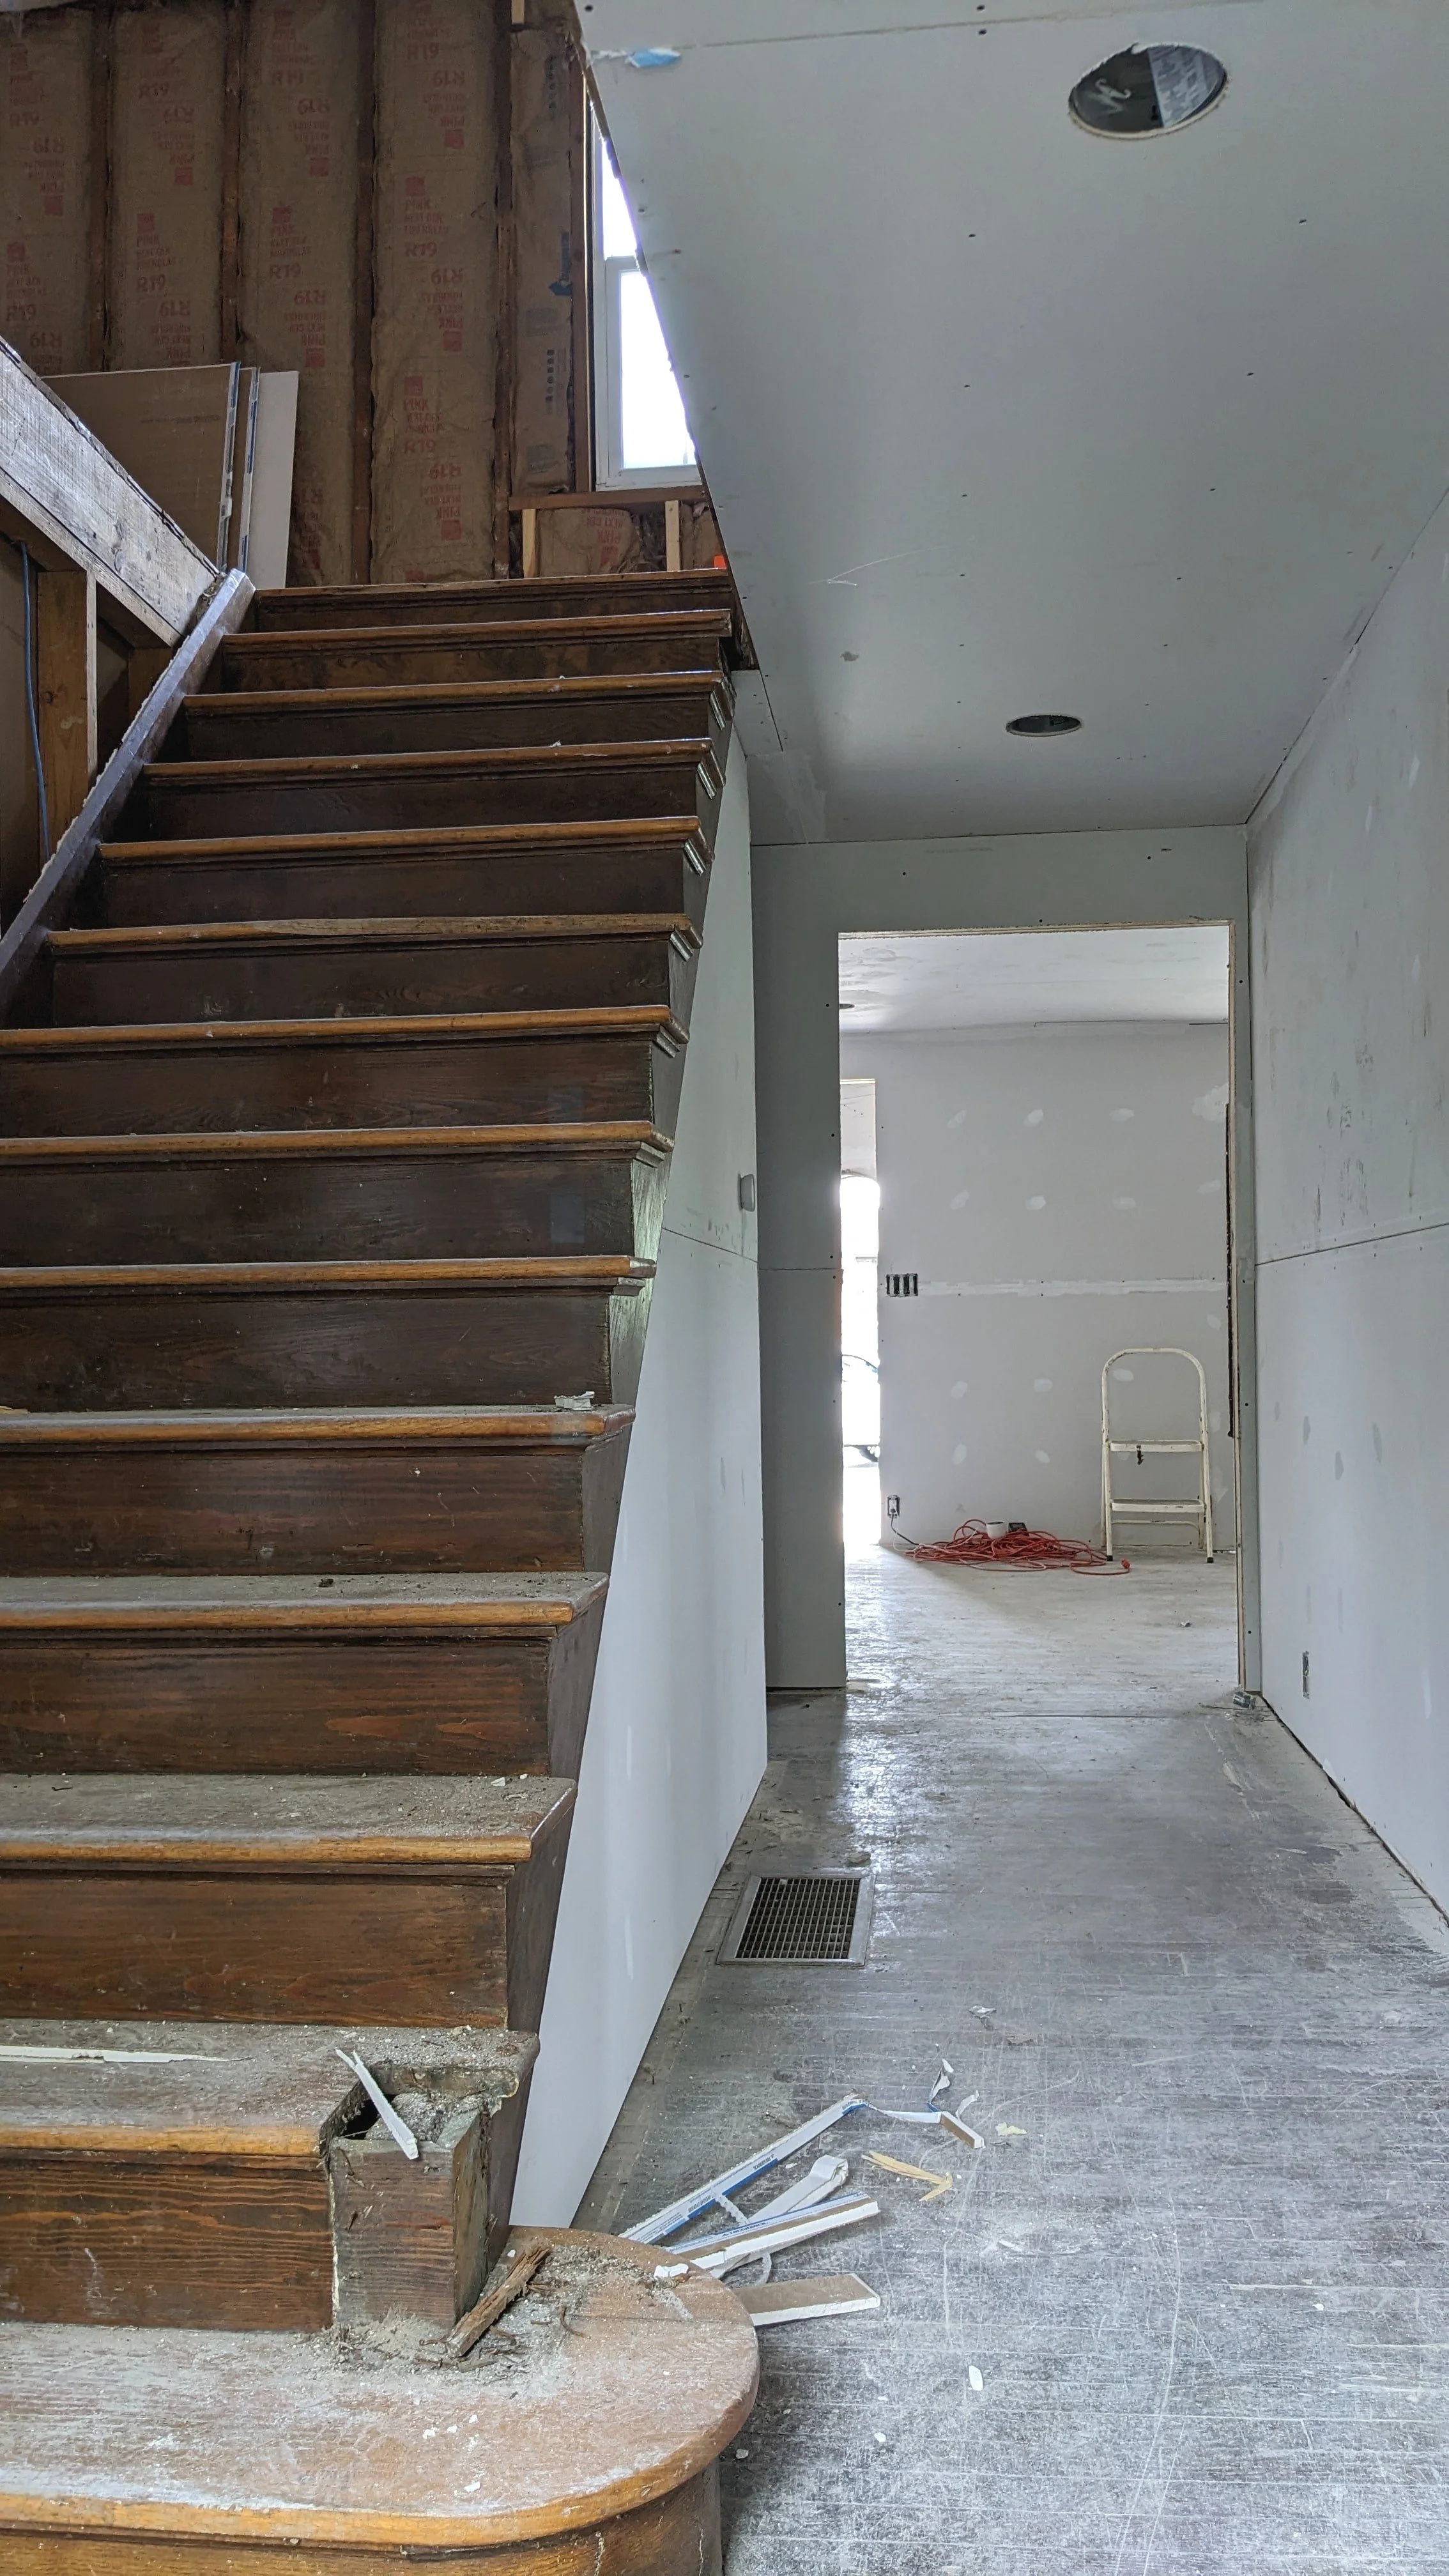
I know a building full of unfinished drywall doesn’t look very exciting. But for all of us who have been working on this project, it feels like a huge accomplishment.

As soon as the first sheets of drywall started going up, I think it really hit everyone just how far we’ve come. Obviously, there’s still work to do before we can officially call it “done”, but it feels so much closer to the finish line now!
What’s Next
Once the drywall is complete, we’ll jump back in to prime, paint, install trim, and do all those finishing touches. Somewhere in there, we’ll also have the floors refinished.
We assumed they were too far gone, but our flooring guy thinks they’re salvageable. We forgot what they looked like without all the crud on them and even mopped a spot so we could daydream about what they’ll look like in the end.

In the meantime, I’ve been staying busy with our other renovation project (Charlie Foursquare) and working on the designs for the rest of the rooms here. I can’t wait to share them with you. Stay tuned for those posts coming up soon!


Project List for Charlie Foursquare
We’re already about five weeks into having possession of Charlie Foursquare and are moving full steam ahead! So, I figured now would be a good time to share what needs to happen to prepare this property for the next steps.
American Foursquare Renovation Project Plans
We’re already about five weeks into having possession of Charlie Foursquare and are moving full steam ahead! So, I figured now would be a good time to share what needs to happen to prepare this property for the next steps.

As a reminder, our goal is to turn Charlie Foursquare into an Airbnb. But if things go sideways and that doesn’t work out, we’ll sell. Either way, many (maybe even all) of the items below need to take place to get the most bang for our buck. Let’s dive in!
Clean
Status: Complete
If you read my last post or have been following along on Instagram, you know that the previous owners left a ton of stuff behind.

To most people, this would be a huge inconvenience. But luckily for me, amongst all the dust and garbage, I’ve actually been having a blast finding treasures in every room. Most of these items suit the house really well, and I plan to keep them in the house to use as decor.

As of right now, all the rooms (except the sunroom and basement) have been cleaned out completely because we had to get them prepped for…
Refinish Floors
Status: In Progress
One of the best parts about old Charlie Foursquare is that the original hardwood floors are intact throughout! When this house was flipped years ago, all those gorgeous floors were covered up with carpets (and in the case of the kitchen and foyer - linoleum). But they aren’t anymore!

Lucius, I, and a couple of our incredibly selfless friends spent hours ripping up carpet, pulling staples, and scraping linoleum to prep the floors for refinishing. We also had to remove everything from the house. It was a ton of work, but I think it’ll prove to be totally worth it after we see the finished result.

In fact, the floor refinishers are doing their magic right now! It’s taking everything in me not to stop by to check it out.
Repairs
Status: Unfinished
Compared to the hot mess we’re dealing with in our office building, Charlie Foursquare has surprisingly little repair work. Here are the items that absolutely need to be fixed no matter what happens with this property:
Ceiling Patching
There are three rooms (the kitchen, den, and one of the bedrooms) where large chunks of the ceiling are missing. Fortunately, this is a pretty easy fix and won’t take much time.

Half Bathroom
Luckily, the room that is the most in need of help is also the smallest - the half bathroom. In fact, it’s so small this is the best picture we could get of it.

I’m thinking this room might need to be gutted simply because the beadboard that currently exists is falling off the walls. I would love to transform this little bathroom into a bite-sized design surprise with some cool wallpaper and floor tile.
HVAC
Before it got super cold out, the boiler in the house broke. We planned to install HVAC throughout the home anyway, but we had to do it quicker than planned on the first floor to prevent pipes from freezing.
To finish the job, we’ll need another system installed in the attic for the second floor.
Additional Tasks
As an Amazon Associate, I earn from qualifying purchases. This post may contain affiliate links, meaning I receive commissions for purchases made through those links at no cost to you.
Lastly, here are the items that don’t necessarily HAVE to be done to make the house functional but will go a long way.
Treat Woodwork
Not only are the floors original to the house, but so is the rest of the woodwork throughout. Most of it has just been stained, but there are a couple of rooms where it’s been painted. I’d like to strip the wood down in these rooms to restore it.
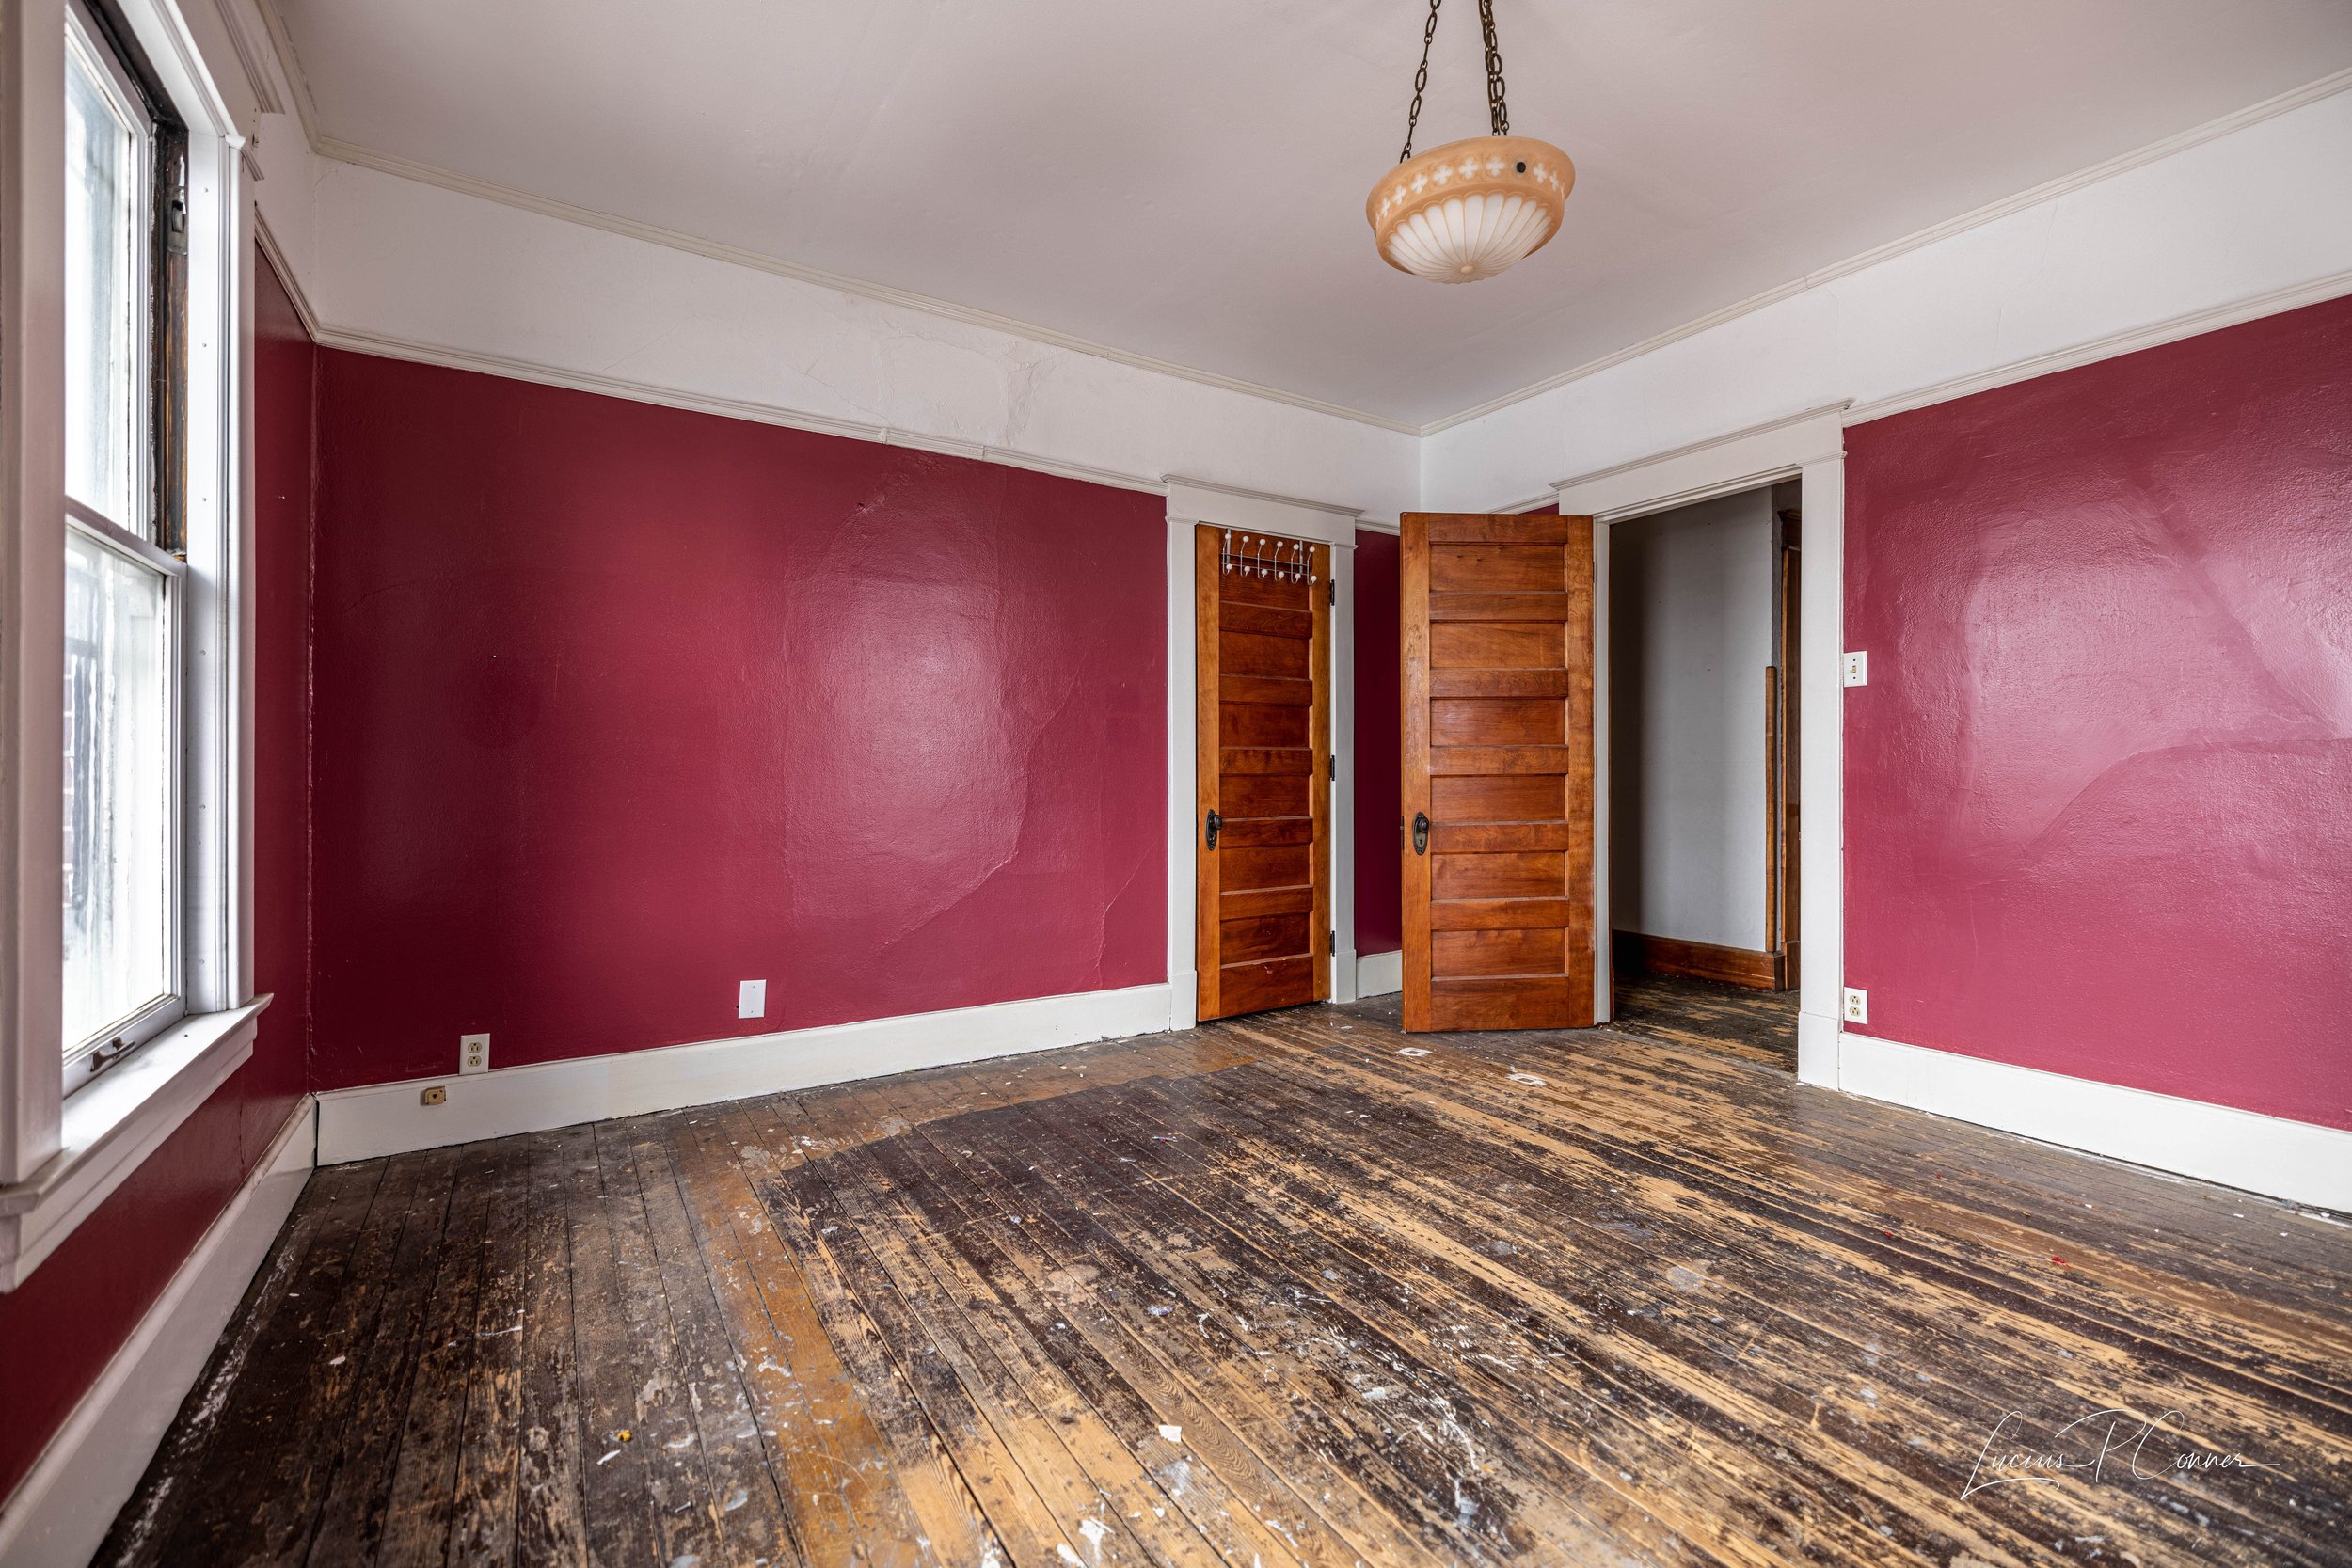
As for the other wood, it really just needs a good cleaning, and I’m going to apply some Restor-A-Finish to see if it can bring the wood back to its best self.
Lastly, I’ll need to install quarter-round throughout the home to cover up the gaps between the baseboards and floors.
Remove Paneling
There’s a small amount of paneling that isn’t original to the house (some in the den and some in the stairwell that you can see in the picture below) that we’d like to remove.

The paneling in the den doesn’t bother me much, but the paneling in the stairwell draws too much focus since it’s practically the first thing you see when you enter the home. I can’t wait to tear it out and paint that area a lighter color!
Paint/Wallpaper
A fresh coat of paint can go such a long way. After I give the whole house a good deep clean, I’ll start removing wallpaper and repainting.

I’ve already been working on the overall design for this house, and I’d actually like to add some new wallpaper - likely in the dining room, foyer, and half bathroom. I’m excited to continue working on the design and watch it come together.
Replace Light Fixtures
We’re fortunate that there are several original light fixtures left in the house.
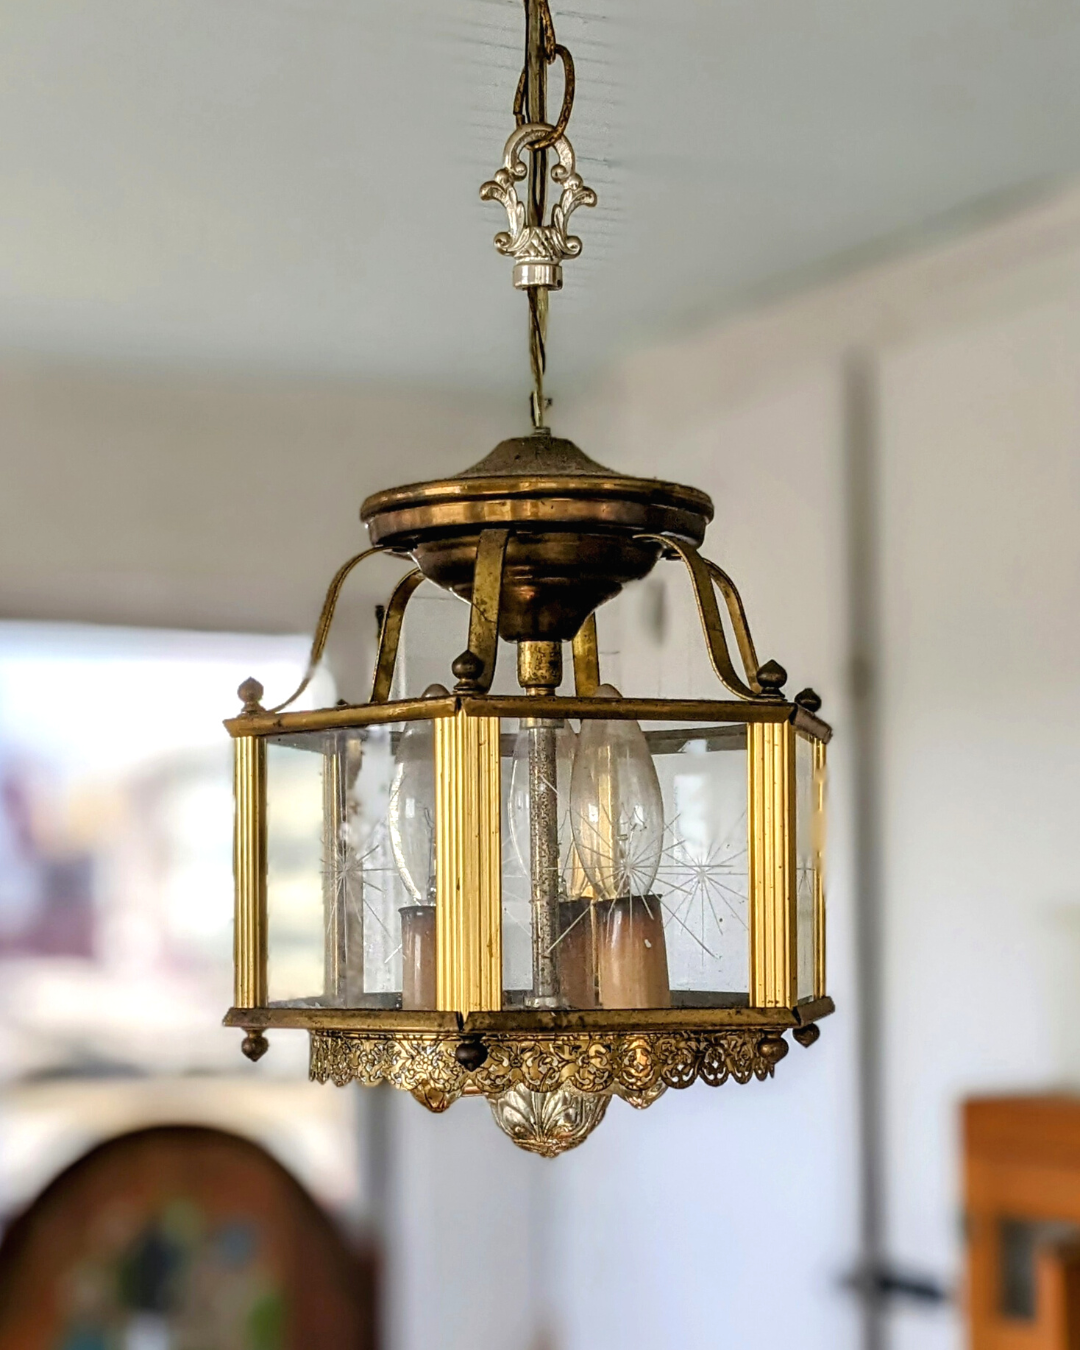
But there are still quite a few that are newer and don’t exactly fit the style of the home, so we’ll be swapping those out.
Furnish
Lastly, if the Airbnb plan works out, we’ll load it with furniture (and I’ll style it to my little heart’s desire). I’m thinking a mixture of old and new throughout the home.
I’d love to find some second-hand items (like dressers, nightstands, coffee tables, maybe a hutch) and have been keeping close tabs on Facebook Marketplace. Once it gets closer to time to start furnishing, I’ll be scoping out thrift and antique stores too. But I plan to buy area rugs, couches, chairs, and most likely bedframes new.
Final Thoughts

While this list may seem long, it actually feels completely manageable - especially considering everything we’ve had to do on our office building renovation (hopefully, I’ll be able to give an update about that project in the next few weeks!)
I can’t wait to see the finished flooring and start checking things off of this to-do list. Keep following along to see how this project progresses!

For related content, visit the posts below
Historic Home Renovation
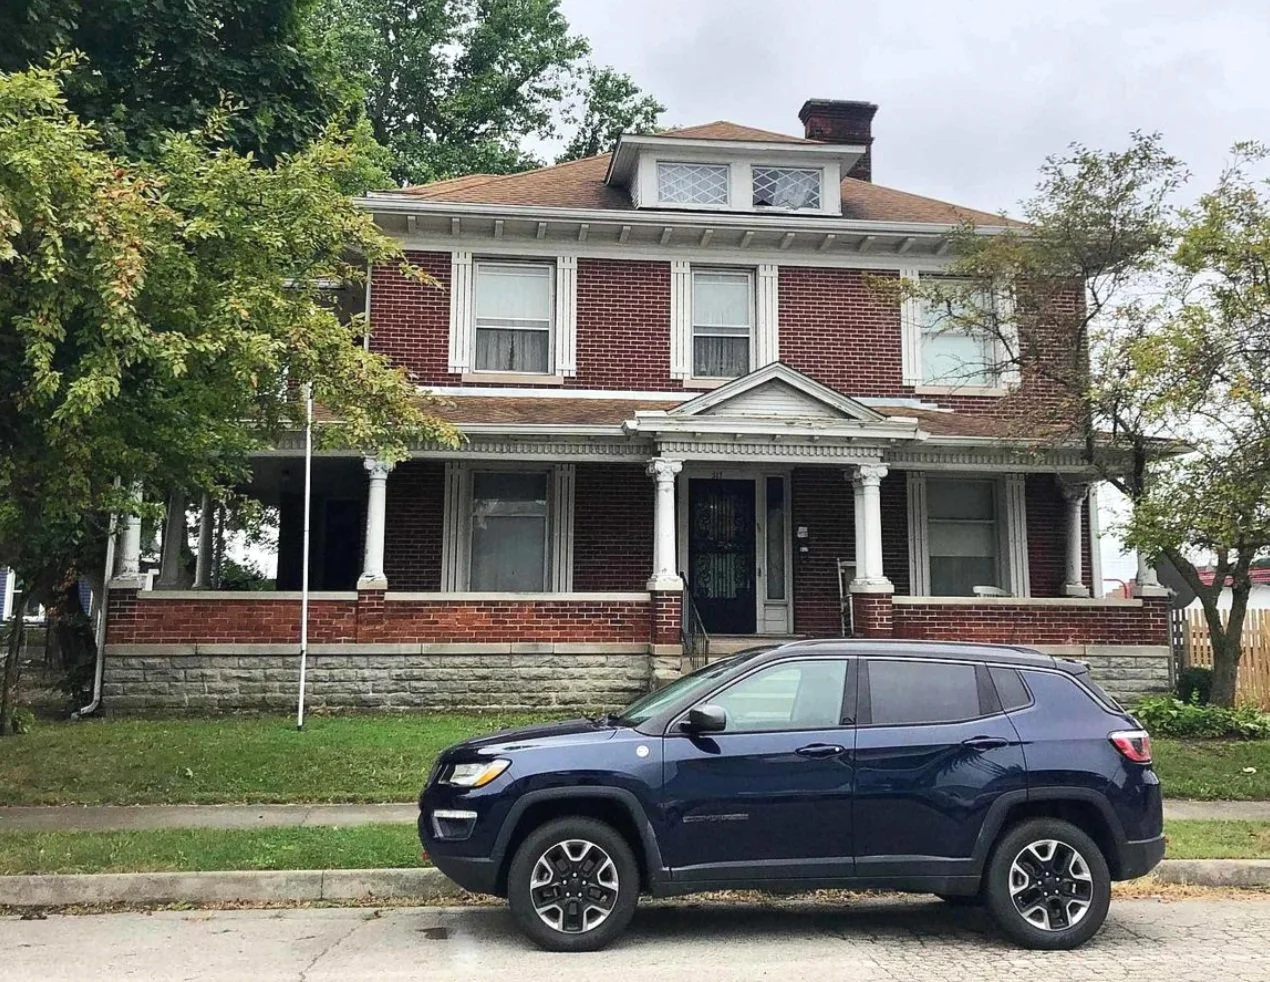
Oops, we did it again
If you’ve been following along, you’ll know that we recently purchased a dilapidated hair salon that we’re renovating into an office space. While that property is still very much a work in progress, we like to keep ourselves on our toes - so we added another one to the mix!
Meet Charlie, the 1904 American Foursquare
If you’ve been following along, you’ll know that we recently purchased a dilapidated hair salon that we’re renovating into an office space. While that property is still very much a work in progress, we like to keep ourselves on our toes - so we added another one to the mix!
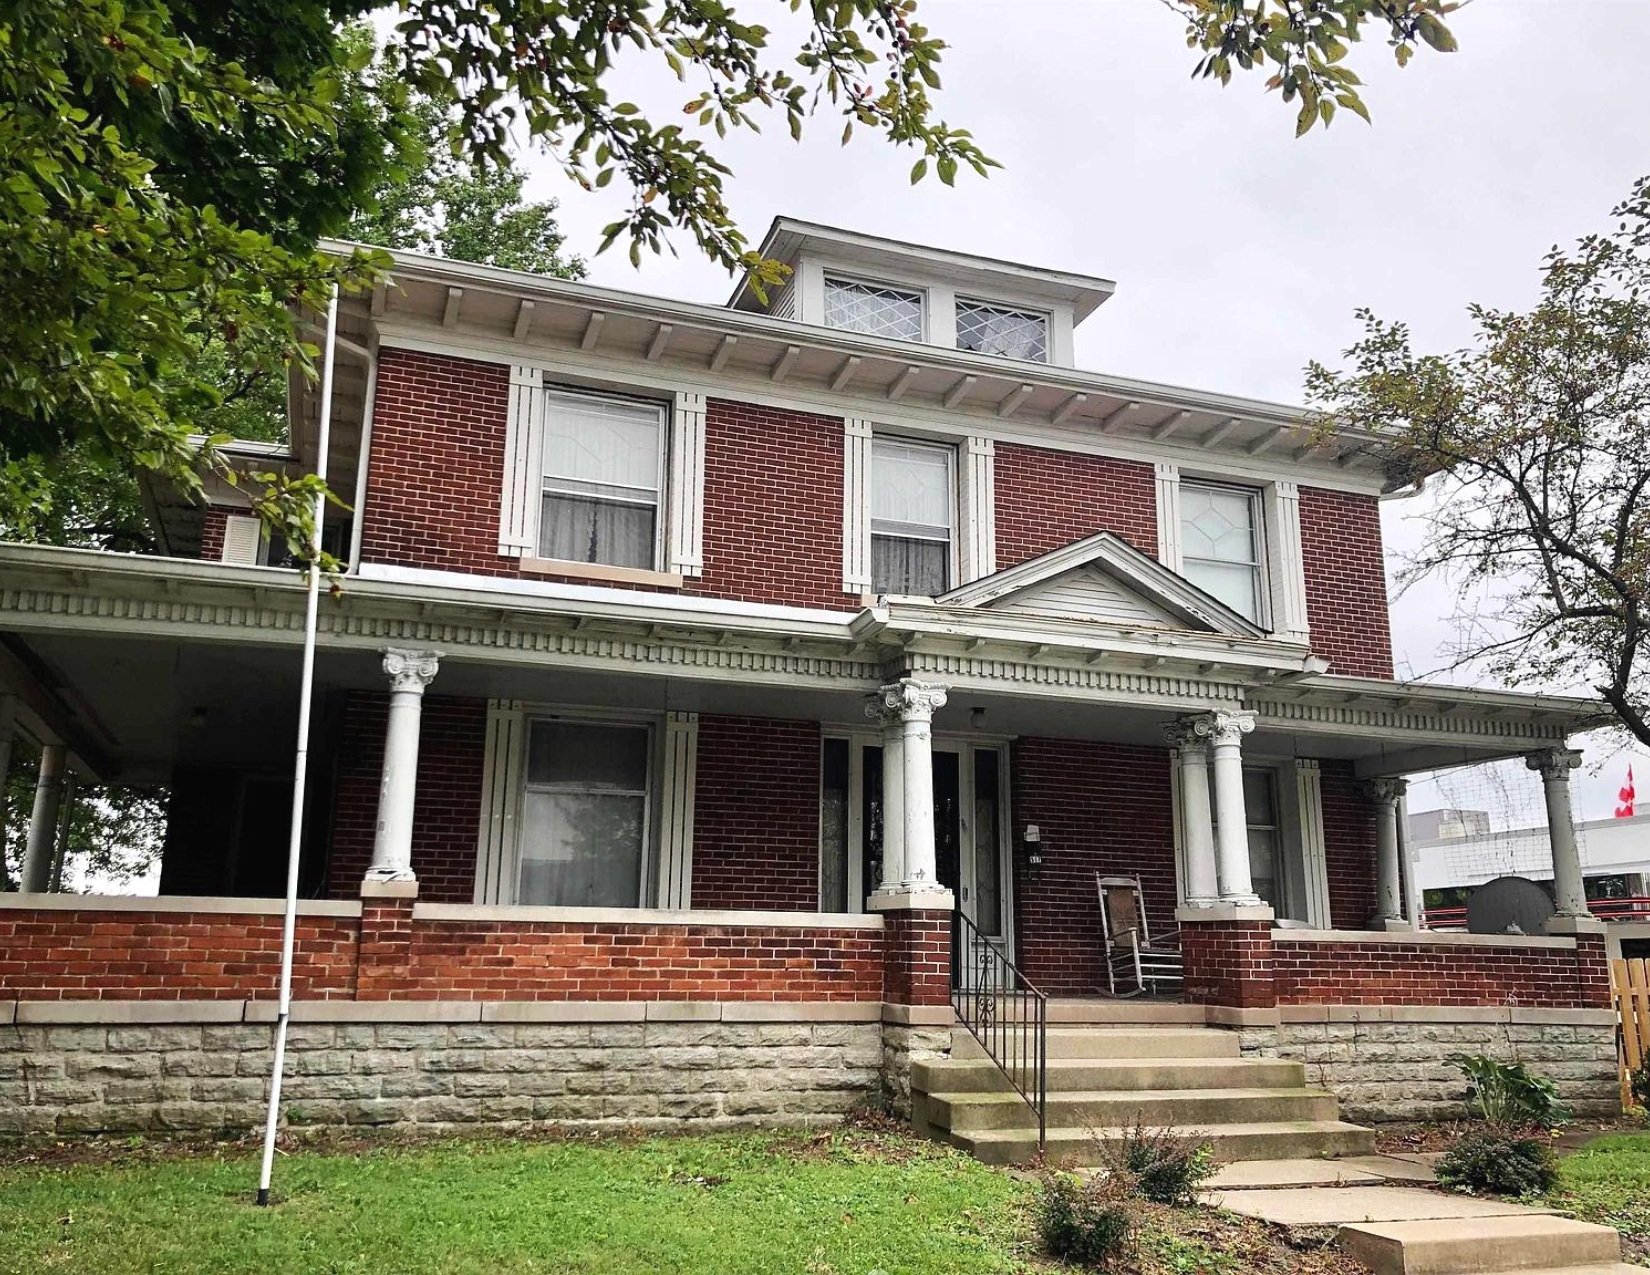
We bought this house, which we've been calling “Charlie Foursquare” as an investment property, with plans to turn it into an Airbnb. It was built in 1904 in the American Foursquare style, and MAN, is it a beauty! Boasting 10-foot ceilings and incredible original woodwork, I can’t wait to bring it back to life.
But before we jump in, here’s a little bit of background for ya…
What’s an American Foursquare?
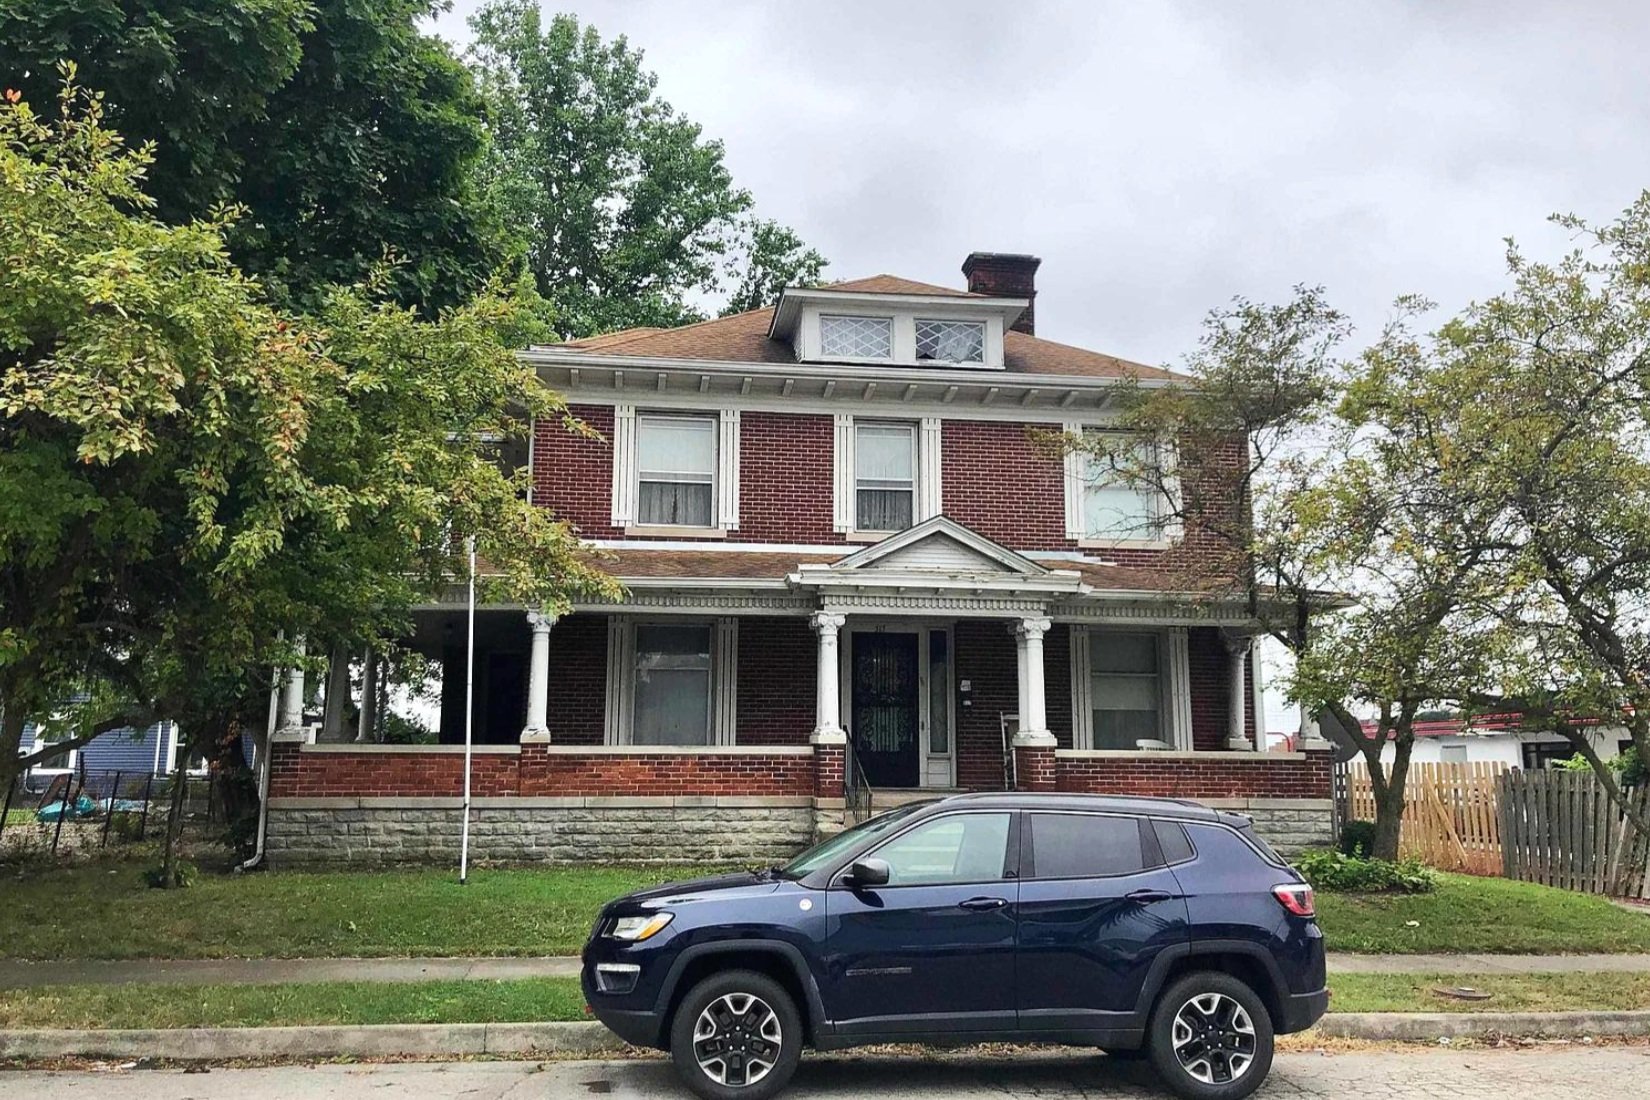
The American Foursquare style was popularized between the 1890s and the 1930s as a reaction to the highly ornate Victorian houses that predated them. The typical layout of an American Foursquare is… well… a square with four rooms on each of the two floors.
Typically, there’s a large front porch with a centered doorway where you’ll enter into the foyer. While the downstairs layout isn’t always four distinct rooms (sometimes the living room footprint spans an entire half of the first floor), two of the rooms usually contain the dining room and kitchen. Each corner of the second floor holds a bedroom. The staircase and bathroom (sometimes the only bathroom in the home) are located in the center.
Our house follows the standard to a T. So, come on in. Let me show you around!

Forewarning - the previous owners left a ton of stuff to clean up so the house is looking a little rough. I challenge you to look past all the trash and clutter to see the potential though because there’s. so. much!
Downstairs
Foyer
Upon entering through the front door, you’re greeted with a large foyer. While I love the woodwork throughout the whole house, this room really showcases its beauty.
To the left, you see the columns leading to the living room, and to the right are pocket doors leading into a den. And then, straight ahead, you get your first look at one of the many gorgeous 6-paneled wood doors.

My only disappointment here is that the staircase is a lot less grand than many homes from this era, but obviously, that isn’t a deal-breaker.

I kind of like the wallpaper in the foyer and may end up keeping it, along with the radiators simply for aesthetics (they no longer work). The flooring, however, is cheap linoleum that I can’t wait to replace. I’m thinking tile would look amazing here and really elevate the space.
Den
As I mentioned above, this room is to the right of the foyer and repeats the amazing columns that lead to the living room. I especially love the built-ins surrounding the fireplace and their leaded glass.

You can see that this room has a little bit of repair work needed to the ceiling, and the light fixture will be replaced with something more period-appropriate. We’re fortunate that many of the original light fixtures are still with the house, but not all of them.
On top of that, we’ve already started removing the carpets throughout the whole house, and the hardwoods underneath are all salvageable. Refinishing will begin in a couple of weeks!
Living Room
On the opposite side of the foyer is the living room, where you get your first real glimpse of the super tall ceilings (they’re just as tall in the foyer and den but it’s hard to tell in photos).

As with the den, plans for this room are paint, a new light fixture, and refinishing the floors.
Dining Room
This picture doesn’t do it justice, but this room is actually pretty large - 18x13 feet to be exact.
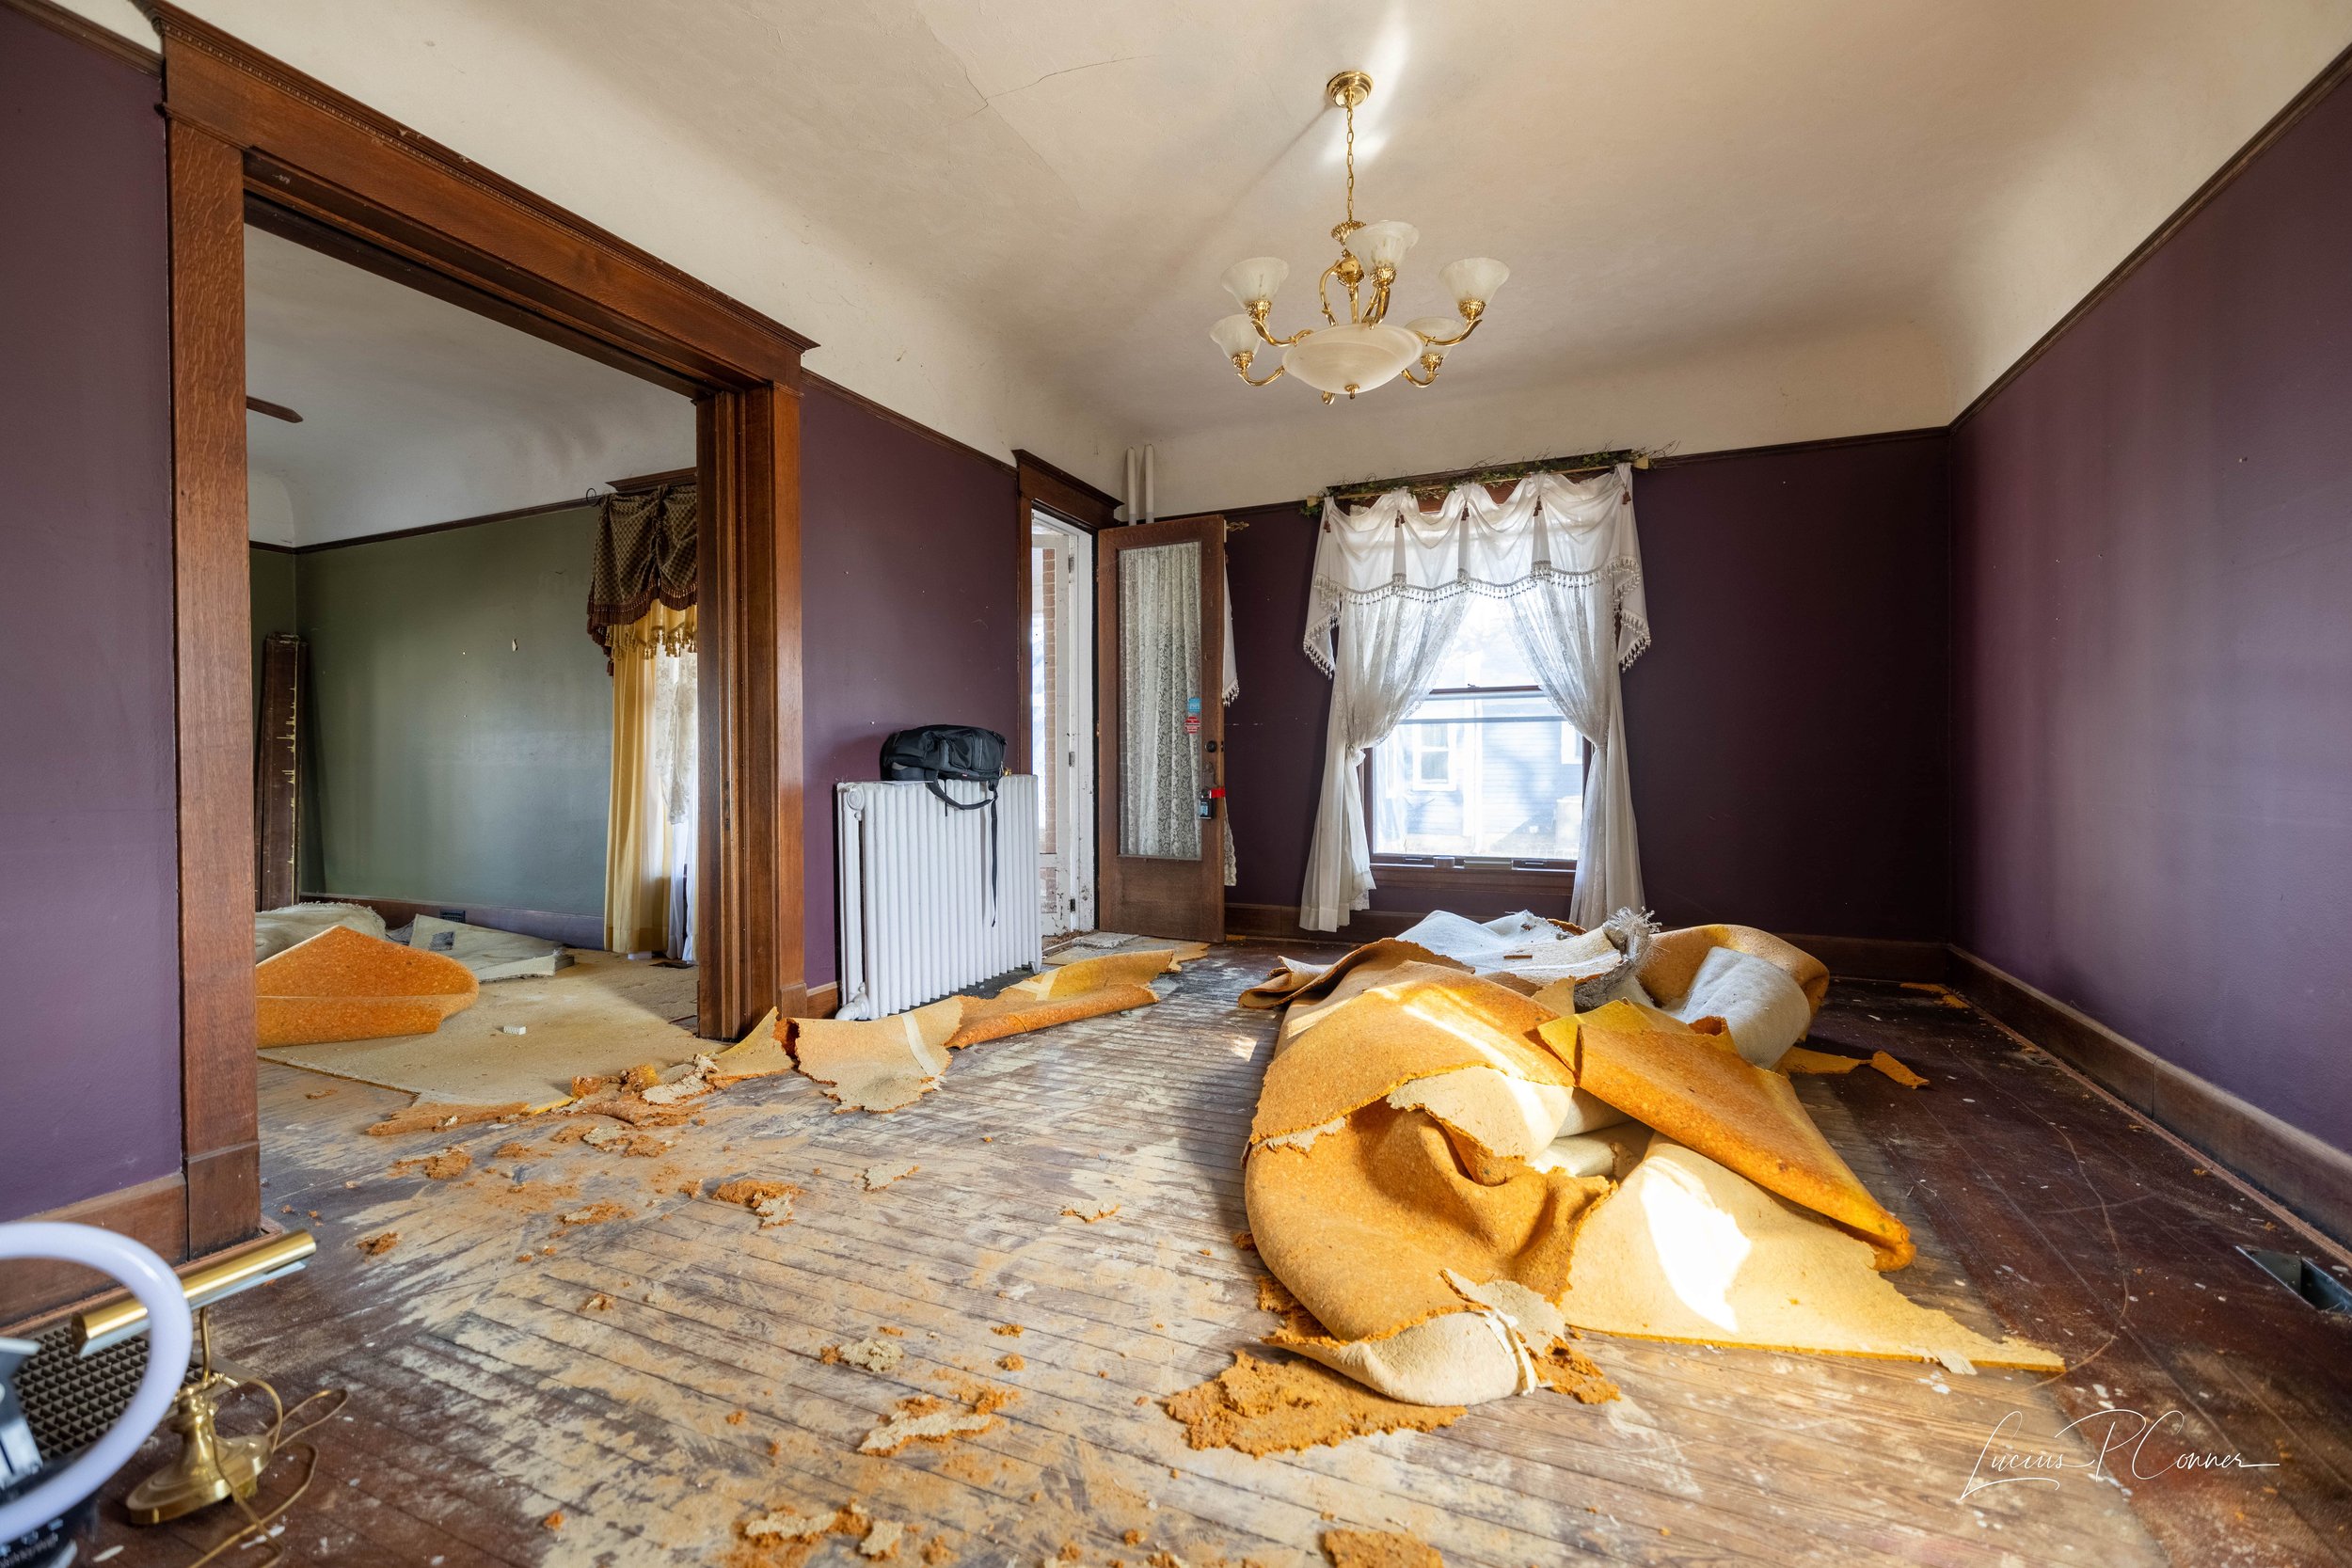
I can’t wait to fill this space with a large table and a beautiful area rug. (Actually, all the rooms will be getting new area rugs.) Again, paint, a new light fixture, and floor refinishing are on the list, but I would also love to add wallpaper to this room to really make a statement.
Butler’s Pantry
Between the dining room and kitchen is a passthrough with a small butler’s pantry.

While it’s not large, this pantry extends from the floor all the way to the 10-foot ceiling, so it still feels grand. To the right of the pantry is the basement - which actually has 10-foot ceilings, too!
Half Bath
Opposite the pantry is a small half-bathroom.

This room will likely need the most work out of any throughout the house as the beadboard is in really rough shape. But hey - at least it’s tiny!
Kitchen
The kitchen is a good size but was left in a disgusting state. That being said, the cabinets are still in good shape and just need a really really thorough cleaning.

Our hit list for this room is to repair the ceiling, swap out the light fixture, paint, and peel up the linoleum. I was able to get a little bit of the flooring up pretty easily just to see what we were working with, and there’s hardwood under there. If at all possible, we’d love to restore them.
Upstairs
The second-floor houses all the bedrooms and a full bathroom.
Bedroom 1
This bedroom is by far the messiest in the house, but look past that at all the potential!

Nursery
Next to the bedroom above is a small room (less than 8x8 feet) that would have originally been used as a nursery. In fact, the door to the right connects to the room next door.

Bedroom 2
On the other side of the nursery is this bedroom that has a cool surprise. That bookcase on the left-hand side is actually secret storage! It swivels open!
Right now it holds a gun rack, but we’ll remove that and repurpose it for something more our speed.

Bedroom 3
This is the one room in the house without carpet. Unfortunately, it’s also the only one with painted trim. I may try my hand at stripping it back to the original woodwork.

Full Bathroom
Bathrooms back in the day weren’t quite the hot commodity they are now - so they weren’t typically very large. This is no exception.
Opposite the toilet is a walk-in shower which seriously makes me wonder what was there originally because there’s no way there’s enough space to hold a clawfoot tub.

Bedroom 4
This is the master bedroom, which coincidentally is the furthest away from the nursery. (They really knew what they were doing in 1900!) It’s a good size at 18x14 feet!

Final Thoughts
If you’ve been following the blog for a while, you know that we actually lived in an American Foursquare before we moved into our current home. I’ll always have a soft spot for this style of house.

Looking back at it, if we lived there now I would do so many things differently design-wise. And now I kind of have the chance!
For Charles, I’d like to make sure the design reflects the home’s history while mixing in some modern elements.

I absolutely plan on keeping the woodwork intact and reusing the original light fixtures that are still here. I can’t wait to take advantage of all the picture rails and add some wallpaper strategically throughout.
I’ve been deep in searching for inspiration and have come across some images that have really gotten my wheels turning… but you’ll have to wait a bit for me to finish clearing out all the mess so I can see the house without the clutter and really let my imagination run wild.
Keep following along here and on my Instagram to watch this house return to its former glory. I can’t wait to share it with you!

If you love old houses you may also enjoy these posts…
American Foursquare Home Tour

How to DIY Shaker Cabinet Doors
When I finished up the 2022 fall One Room Challenge (ORC) a few months ago I mentioned that there were a couple of outstanding items I didn't get to before it ended. One of those items was building doors for the cabinet above the washer and dryer. Well, I'm excited to say that they're now complete!
Easy Shaker Cabinet Door Tutorial
When I finished up the 2022 fall One Room Challenge (ORC) a few months ago, I mentioned that there were a couple of outstanding items I didn't get to before it ended. One of those items was building doors for the cabinet above the washer and dryer. Well, I'm excited to say that they're now complete!
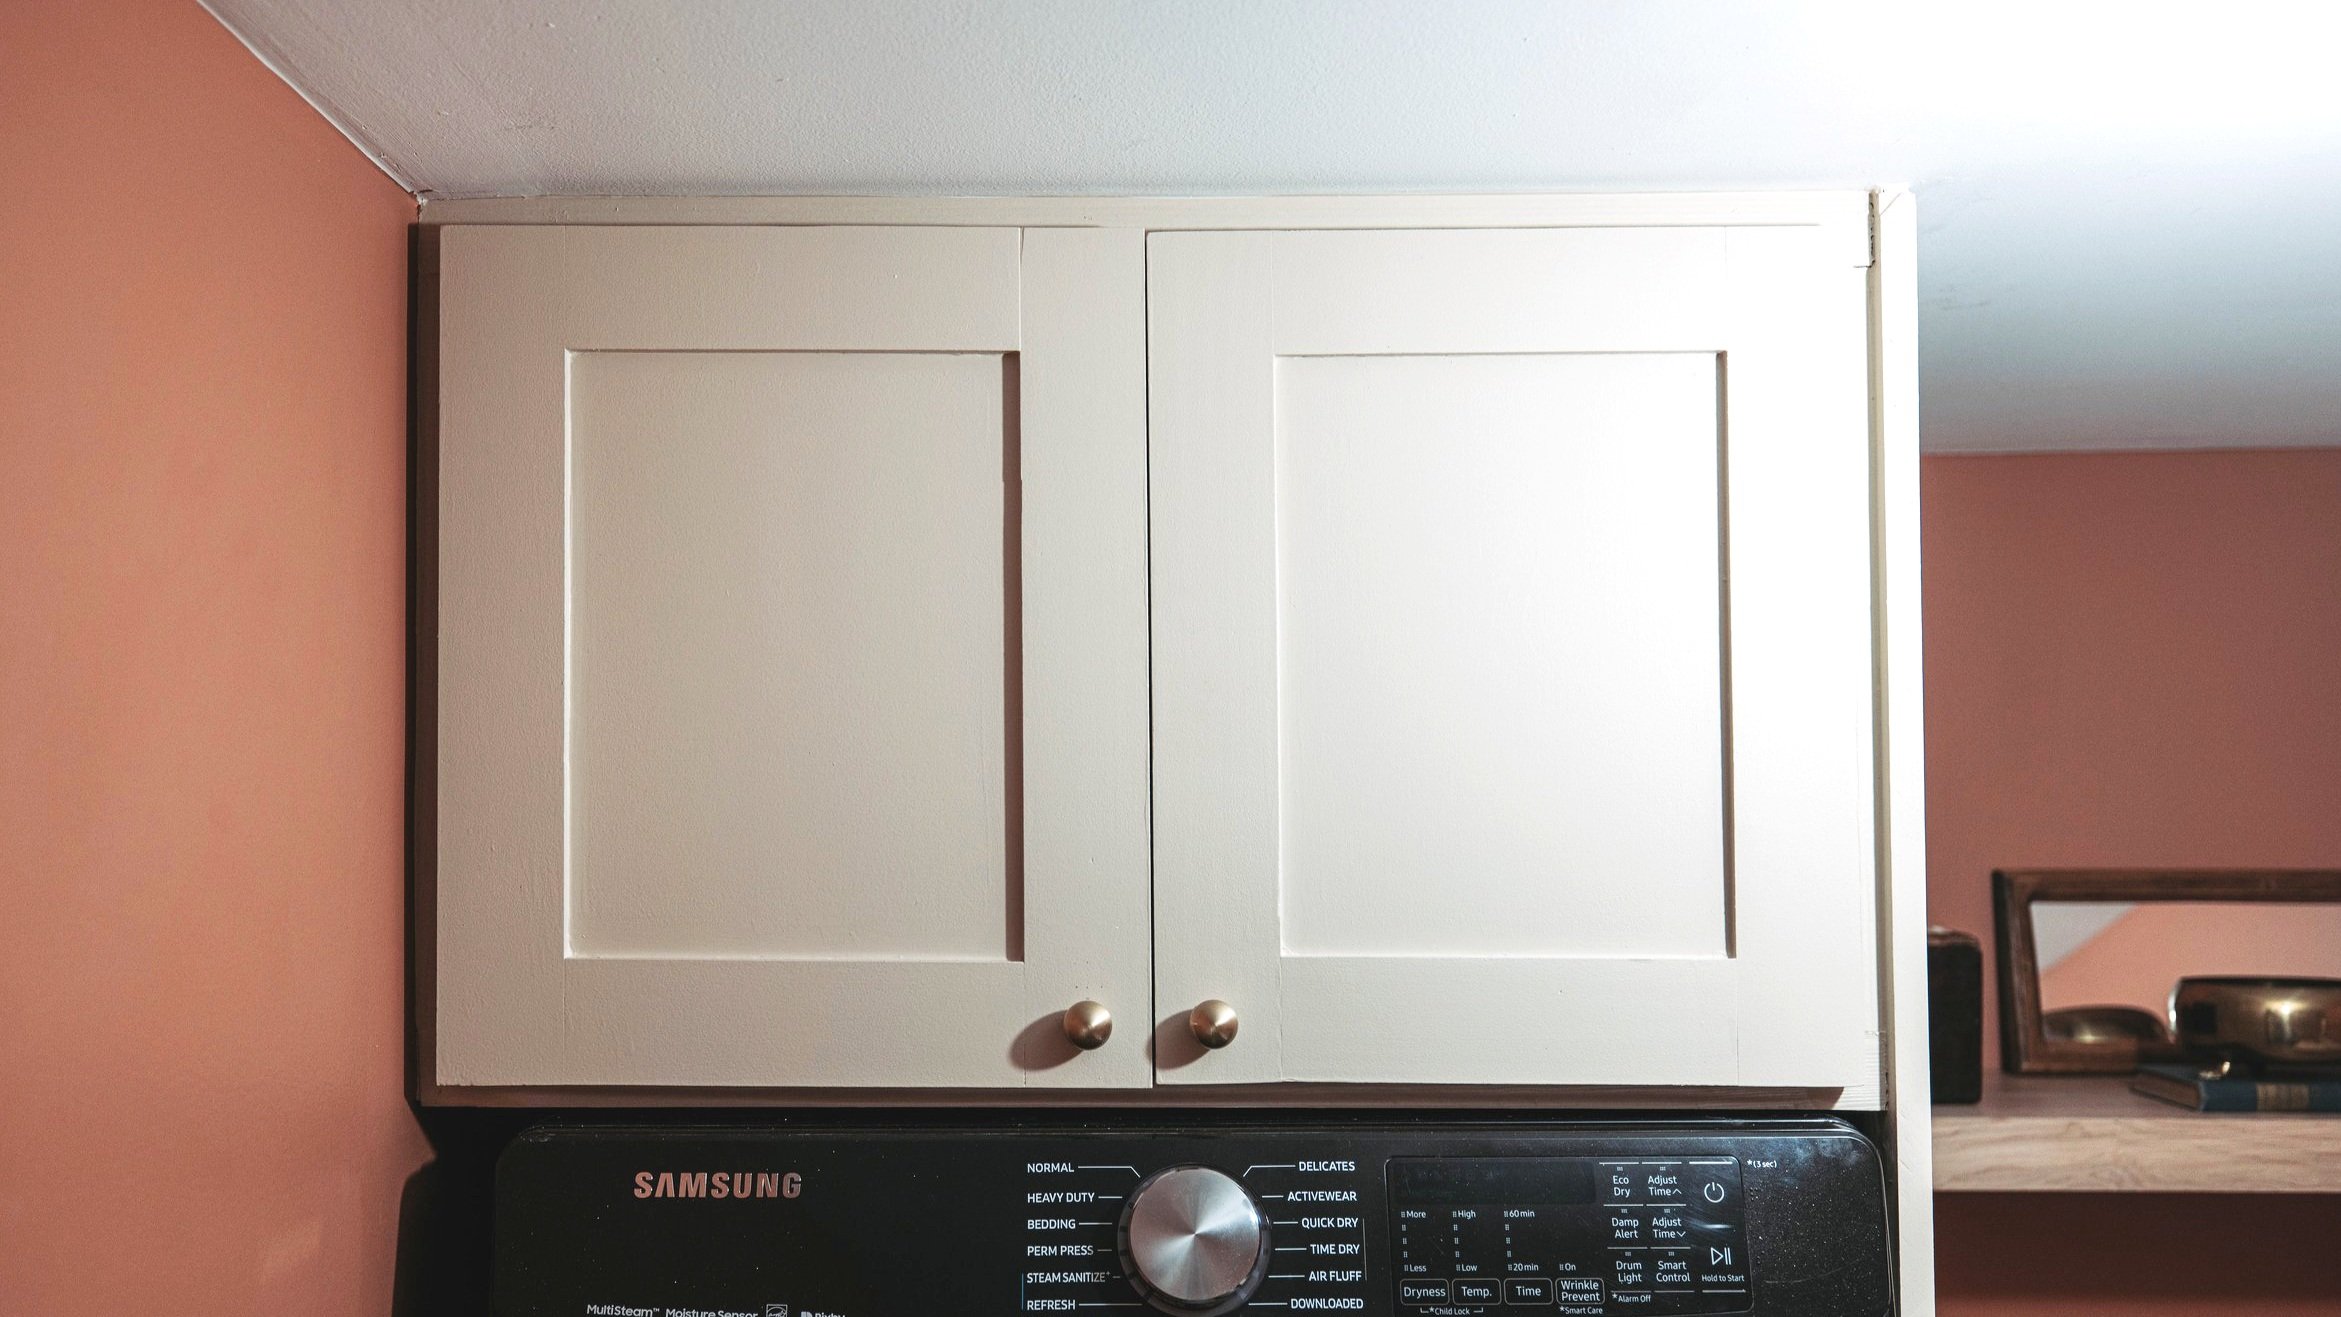
In this post, I'm sharing how I, a novice woodworker, built my own custom shaker cabinet doors. (And how you can, too!)

I admit I procrastinated on this project because I was nervous. I'm really new to woodworking, and I wasn't sure I could actually pull it off. I mean, the open cabinet didn't look that bad, right?
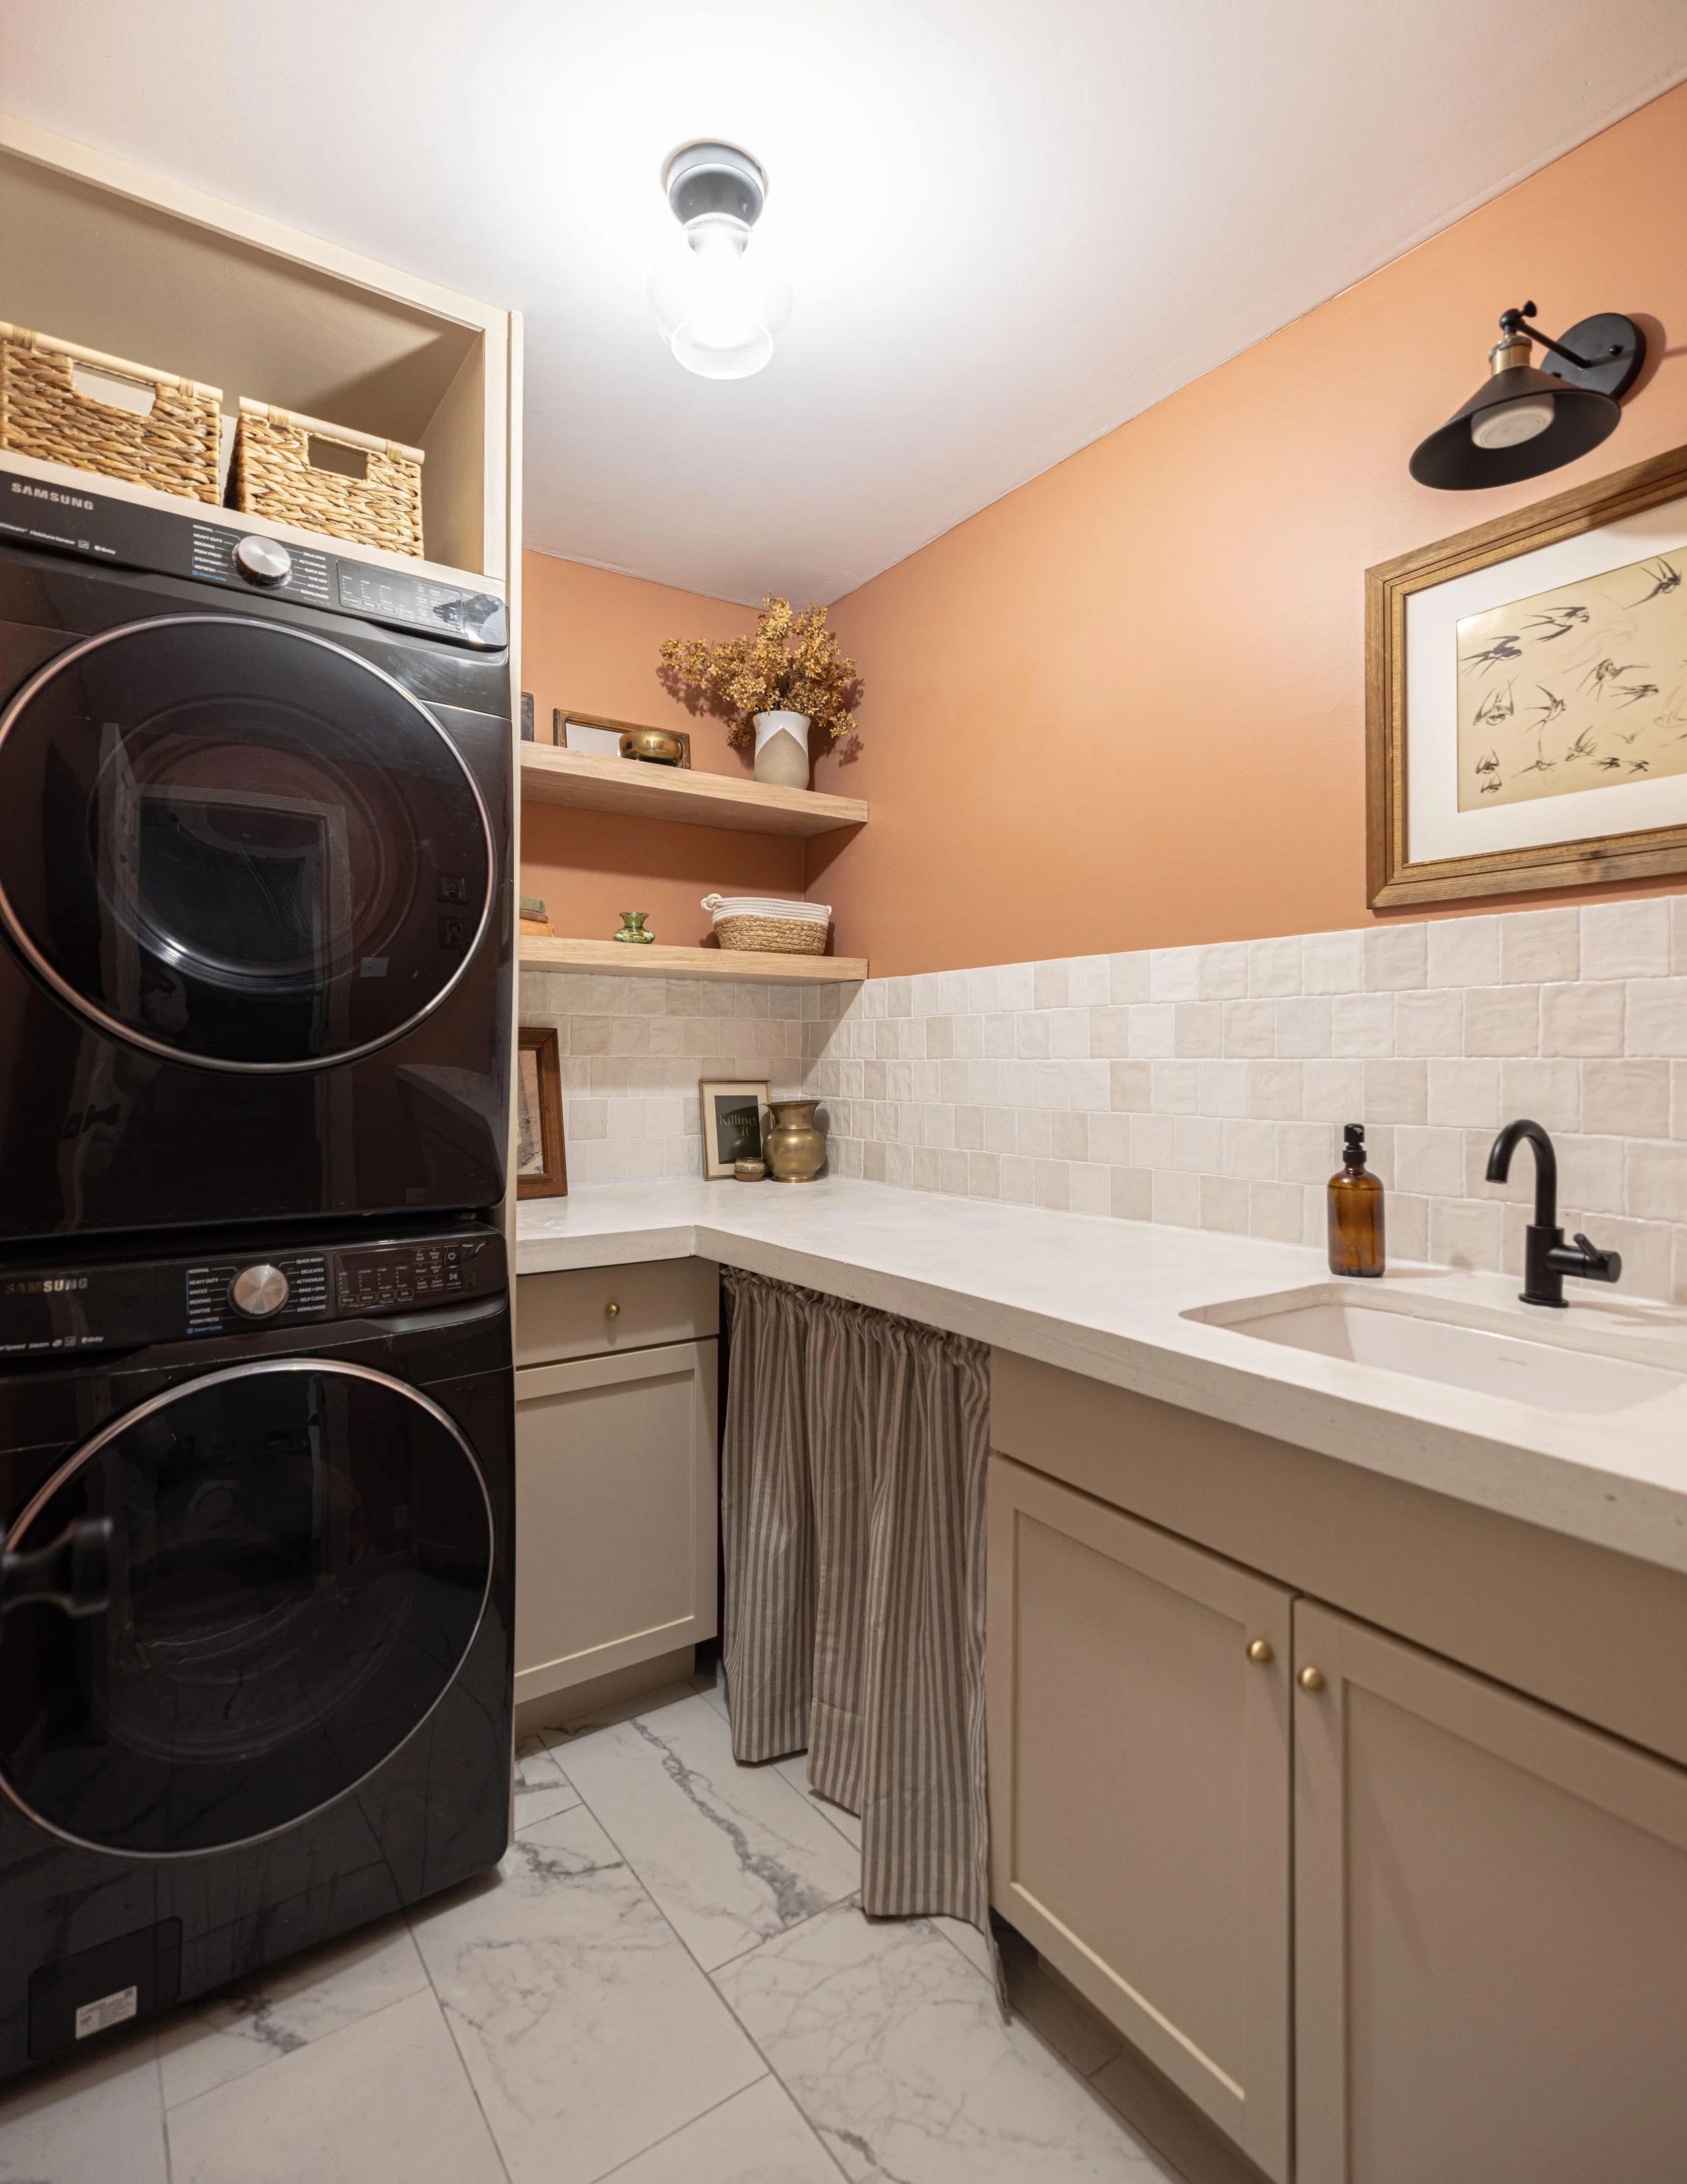
But I knew it would look better and more finished with doors to match the rest of the cabinets. Plus, the feeling I had every time I finished a piece of the puzzle for this room during the ORC was so empowering - I kinda wanted to feel it again.
I do want to mention that I really took my time with this project and did dry-fits every step of the way, which I found really helpful to catch any mistakes before it was too late.
Here's how you (even if you're a beginner) can DIY your own shaker cabinet doors.

As an Amazon Associate, I earn from qualifying purchases. This post may contain affiliate links, meaning I receive commissions for purchases made through those links at no cost to you.
Materials for Door Build
- 1x3 wood (I used Poplar)
- 1/4" plywood (I used Birch)
- Miter saw (or miter box)
- Table saw
- Drill
- Drill bits
- Clamps
- Speed square
- Kreg Pocket Jig*
- Screws (The instruction manual for the Kreg Jig will guide you to what size screw you should be using for your wood depth.)
- Wood glue
- Tape measure
- Pencil
Additional Materials (optional)
- Concealed hinges (the size of your hinges will vary depending on how much the doors overlay the cabinet)
- Kreg Concealed Hinge Jig*
- Bondo
- Orbital sander
- Sandpaper discs
- Caulk
- Primer
- Paint
- Paintbrush
- Foam roller
Take Measurements
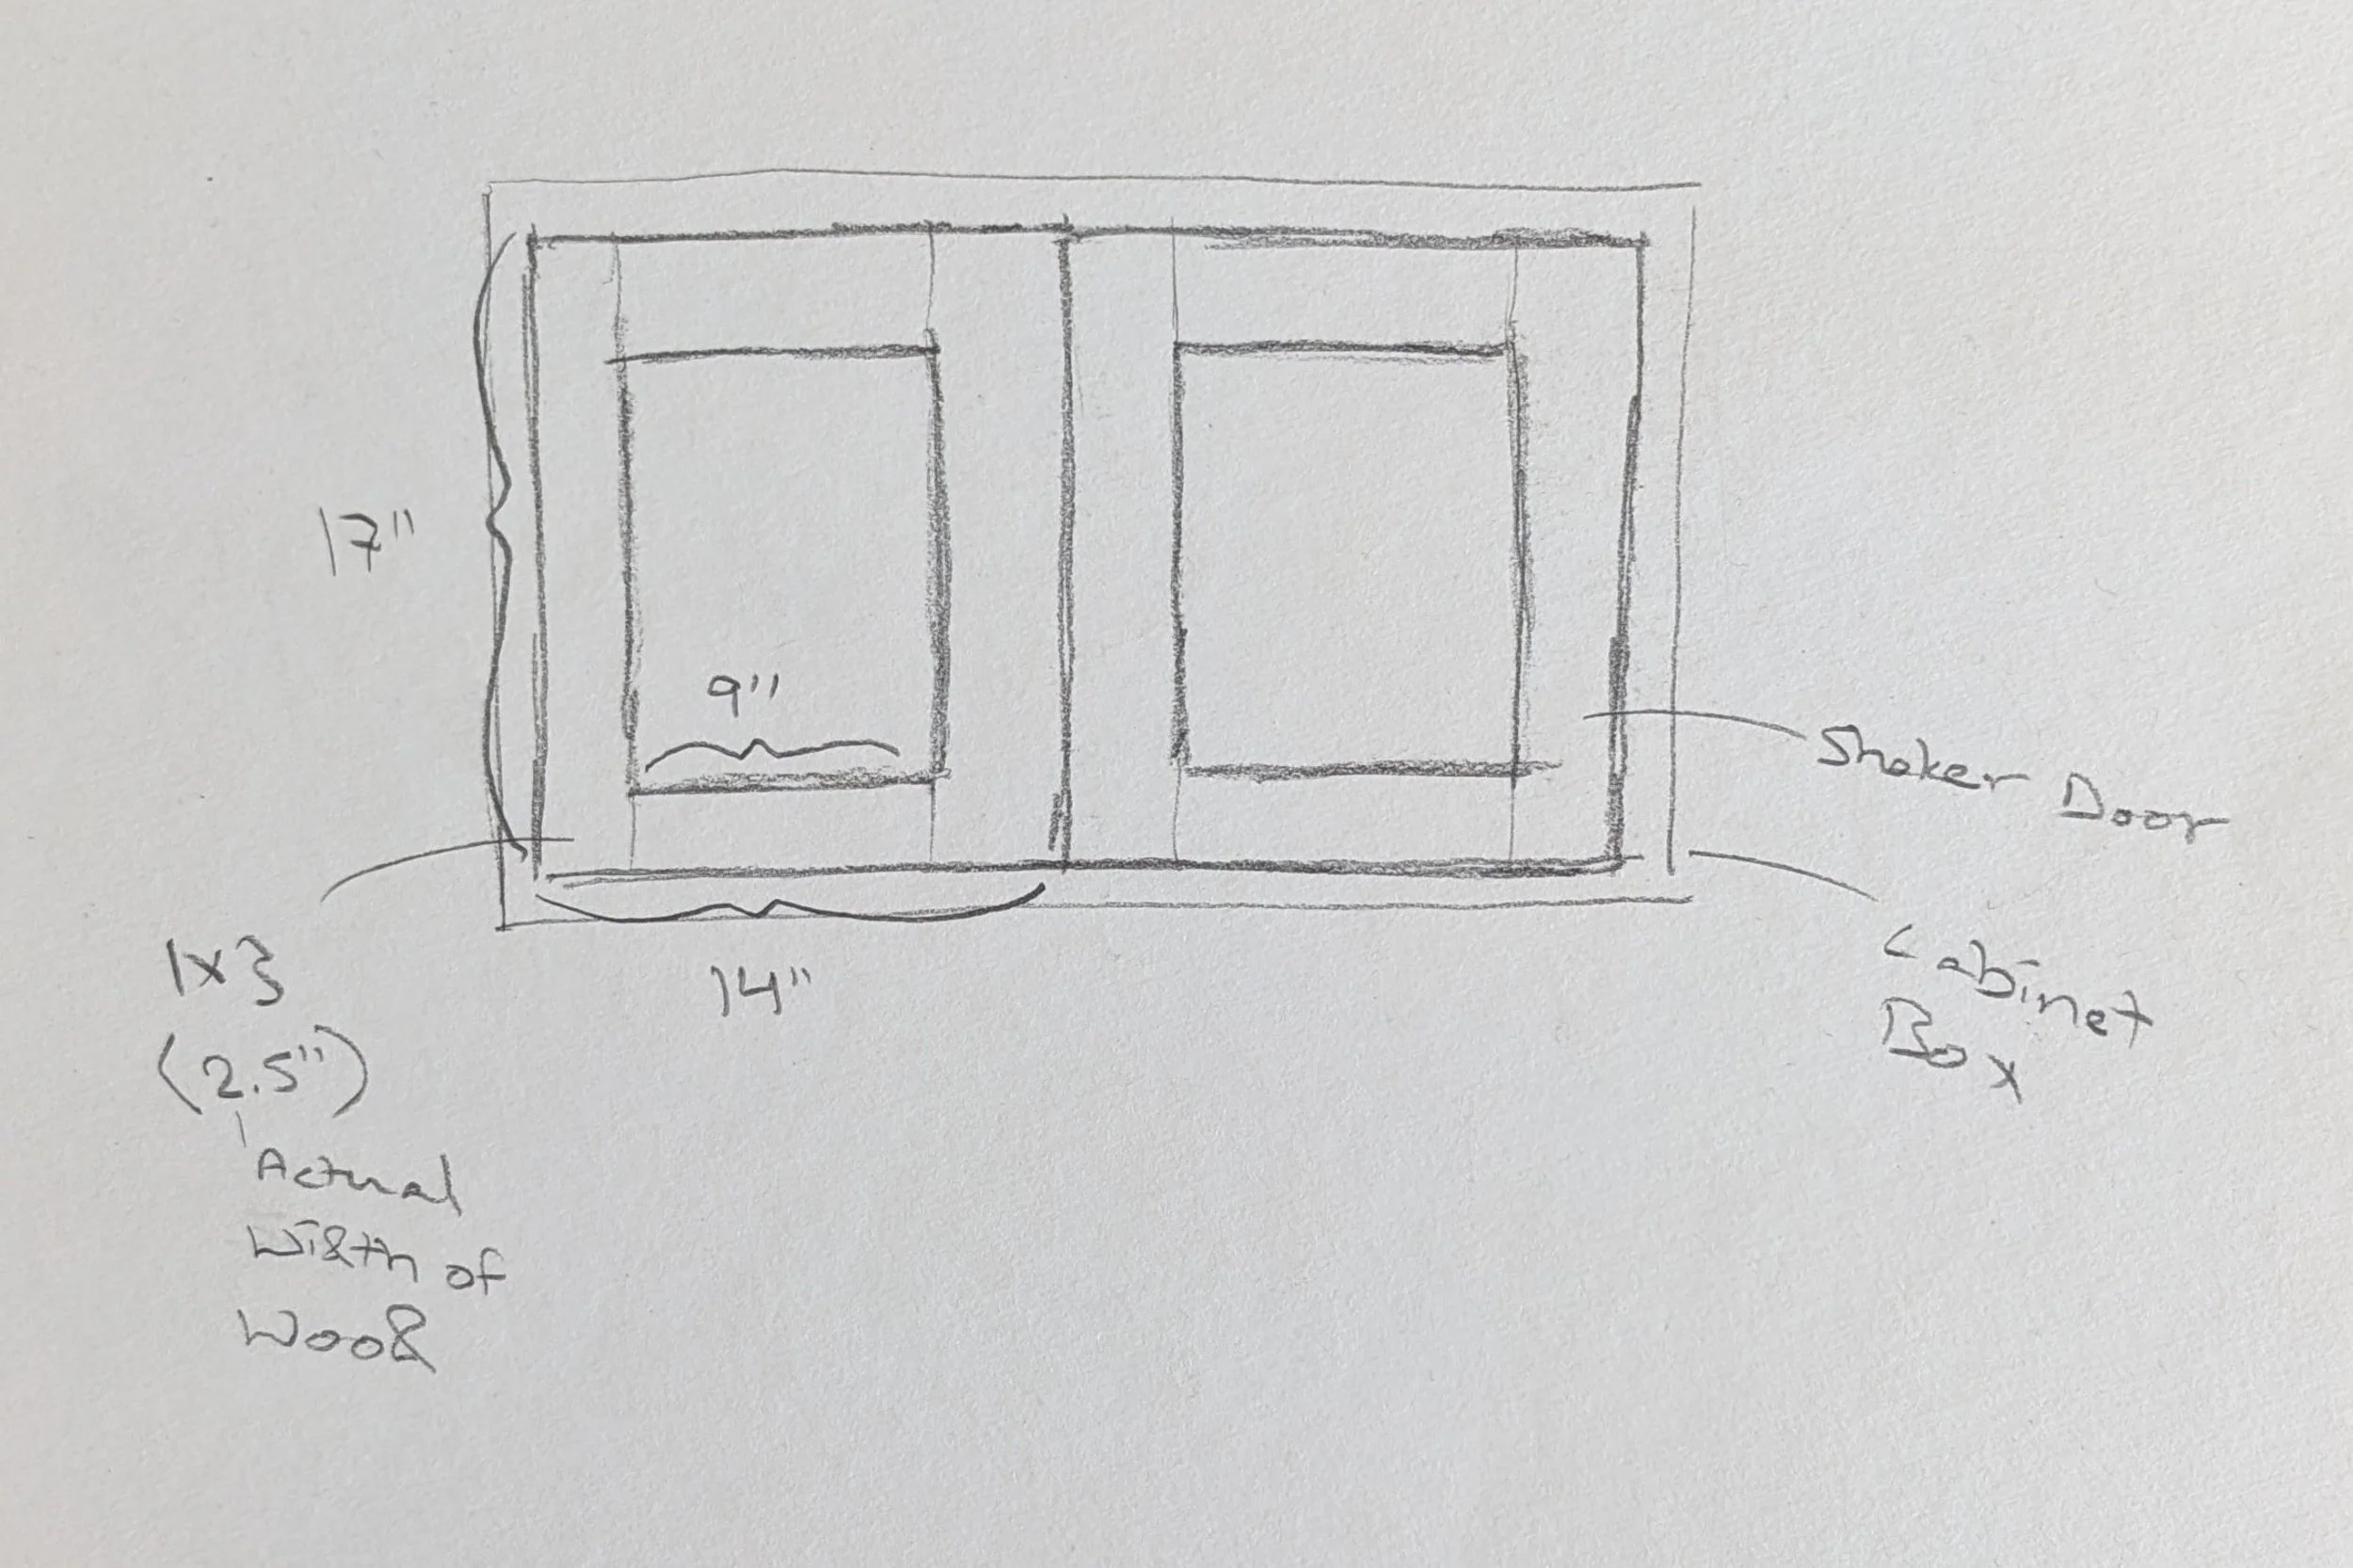
I started my project by taking measurements of the interior and exterior of my cabinet box to determine the size my doors needed to be. Since each project is unique, I won’t reference my exact measurements throughout this tutorial.
However, I’m a very visual person, so I sketched out my doors with my measurements which helped me verify my math. Quick tip: note that 1x3 boards are actually only 2.5” wide.
Cut Rails and Stiles
A shaker cabinet is made up of stiles (the vertical boards on the sides) and rails (the horizontal boards on the top and bottom) with thin wood (in this case, plywood) as the interior panel. My stiles and rails are made of 1x3 Poplar.

One benefit of shaker cabinets is that there are no mitered corners. The stiles run the entire length of the door while the rails span the distance in between.
You could make these cuts with a table saw, but if you have a miter saw handy, it’s a little easier. I highly suggest saving any extra pieces of wood to use in future steps!
At this point, I did a quick dry-fit by holding my boards up to the cabinet. Once I was sure everything looked good, I numbered my pieces clockwise 1-4 to make sure I used the same placement of each piece for future steps.
Drill Pocket Holes*
I’ll preface this step by saying you can build shaker doors without drilling pocket holes and instead using mortise-and-tenon joints, but I didn’t feel ready to add another new thing to an already new-to-me process. Maybe next time!

Using my Kreg Jig, a drill, and a strong clamp, I drilled two pocket holes into each end of each rail. The Kreg Jig comes with instructions for how to set up the jig depending on the width of your wood, so I won’t get into specifics here.
Before I drilled into the wood I cut for the doors, I drilled a couple of pocket holes into my test pieces. This helped me realize I needed a stronger clamp so my wood wouldn’t shift while drilling. (Slow and steady, people!)
Cut Notch for Plywood
On the inside edge of your stiles and rails, you’ll cut a small notch that will hold the plywood in the center of the cabinet door. Here’s where your scrap pieces of wood really come in handy.
First, make sure the blade on your table saw is set low - mine was a little less than 1/4” inch.

Next, mark the center of a piece of scrap wood and set the fence of the table saw so the blade is on one side of your mark.

Then, run the scrap wood through the table saw. Flip the board end-to-end and run it through the table saw again on the other side of your mark.
Now check to see if your plywood fits in the notch.
You’ll likely have to make adjustments and test it again on another piece of scrap wood - and that’s okay! Make sure you get this step right before cutting your good pieces.
Cut Plywood
Once my notches were cut, I measured the distance between the rails and the distance between the stiles. I added 1/4” to each of these measurements.
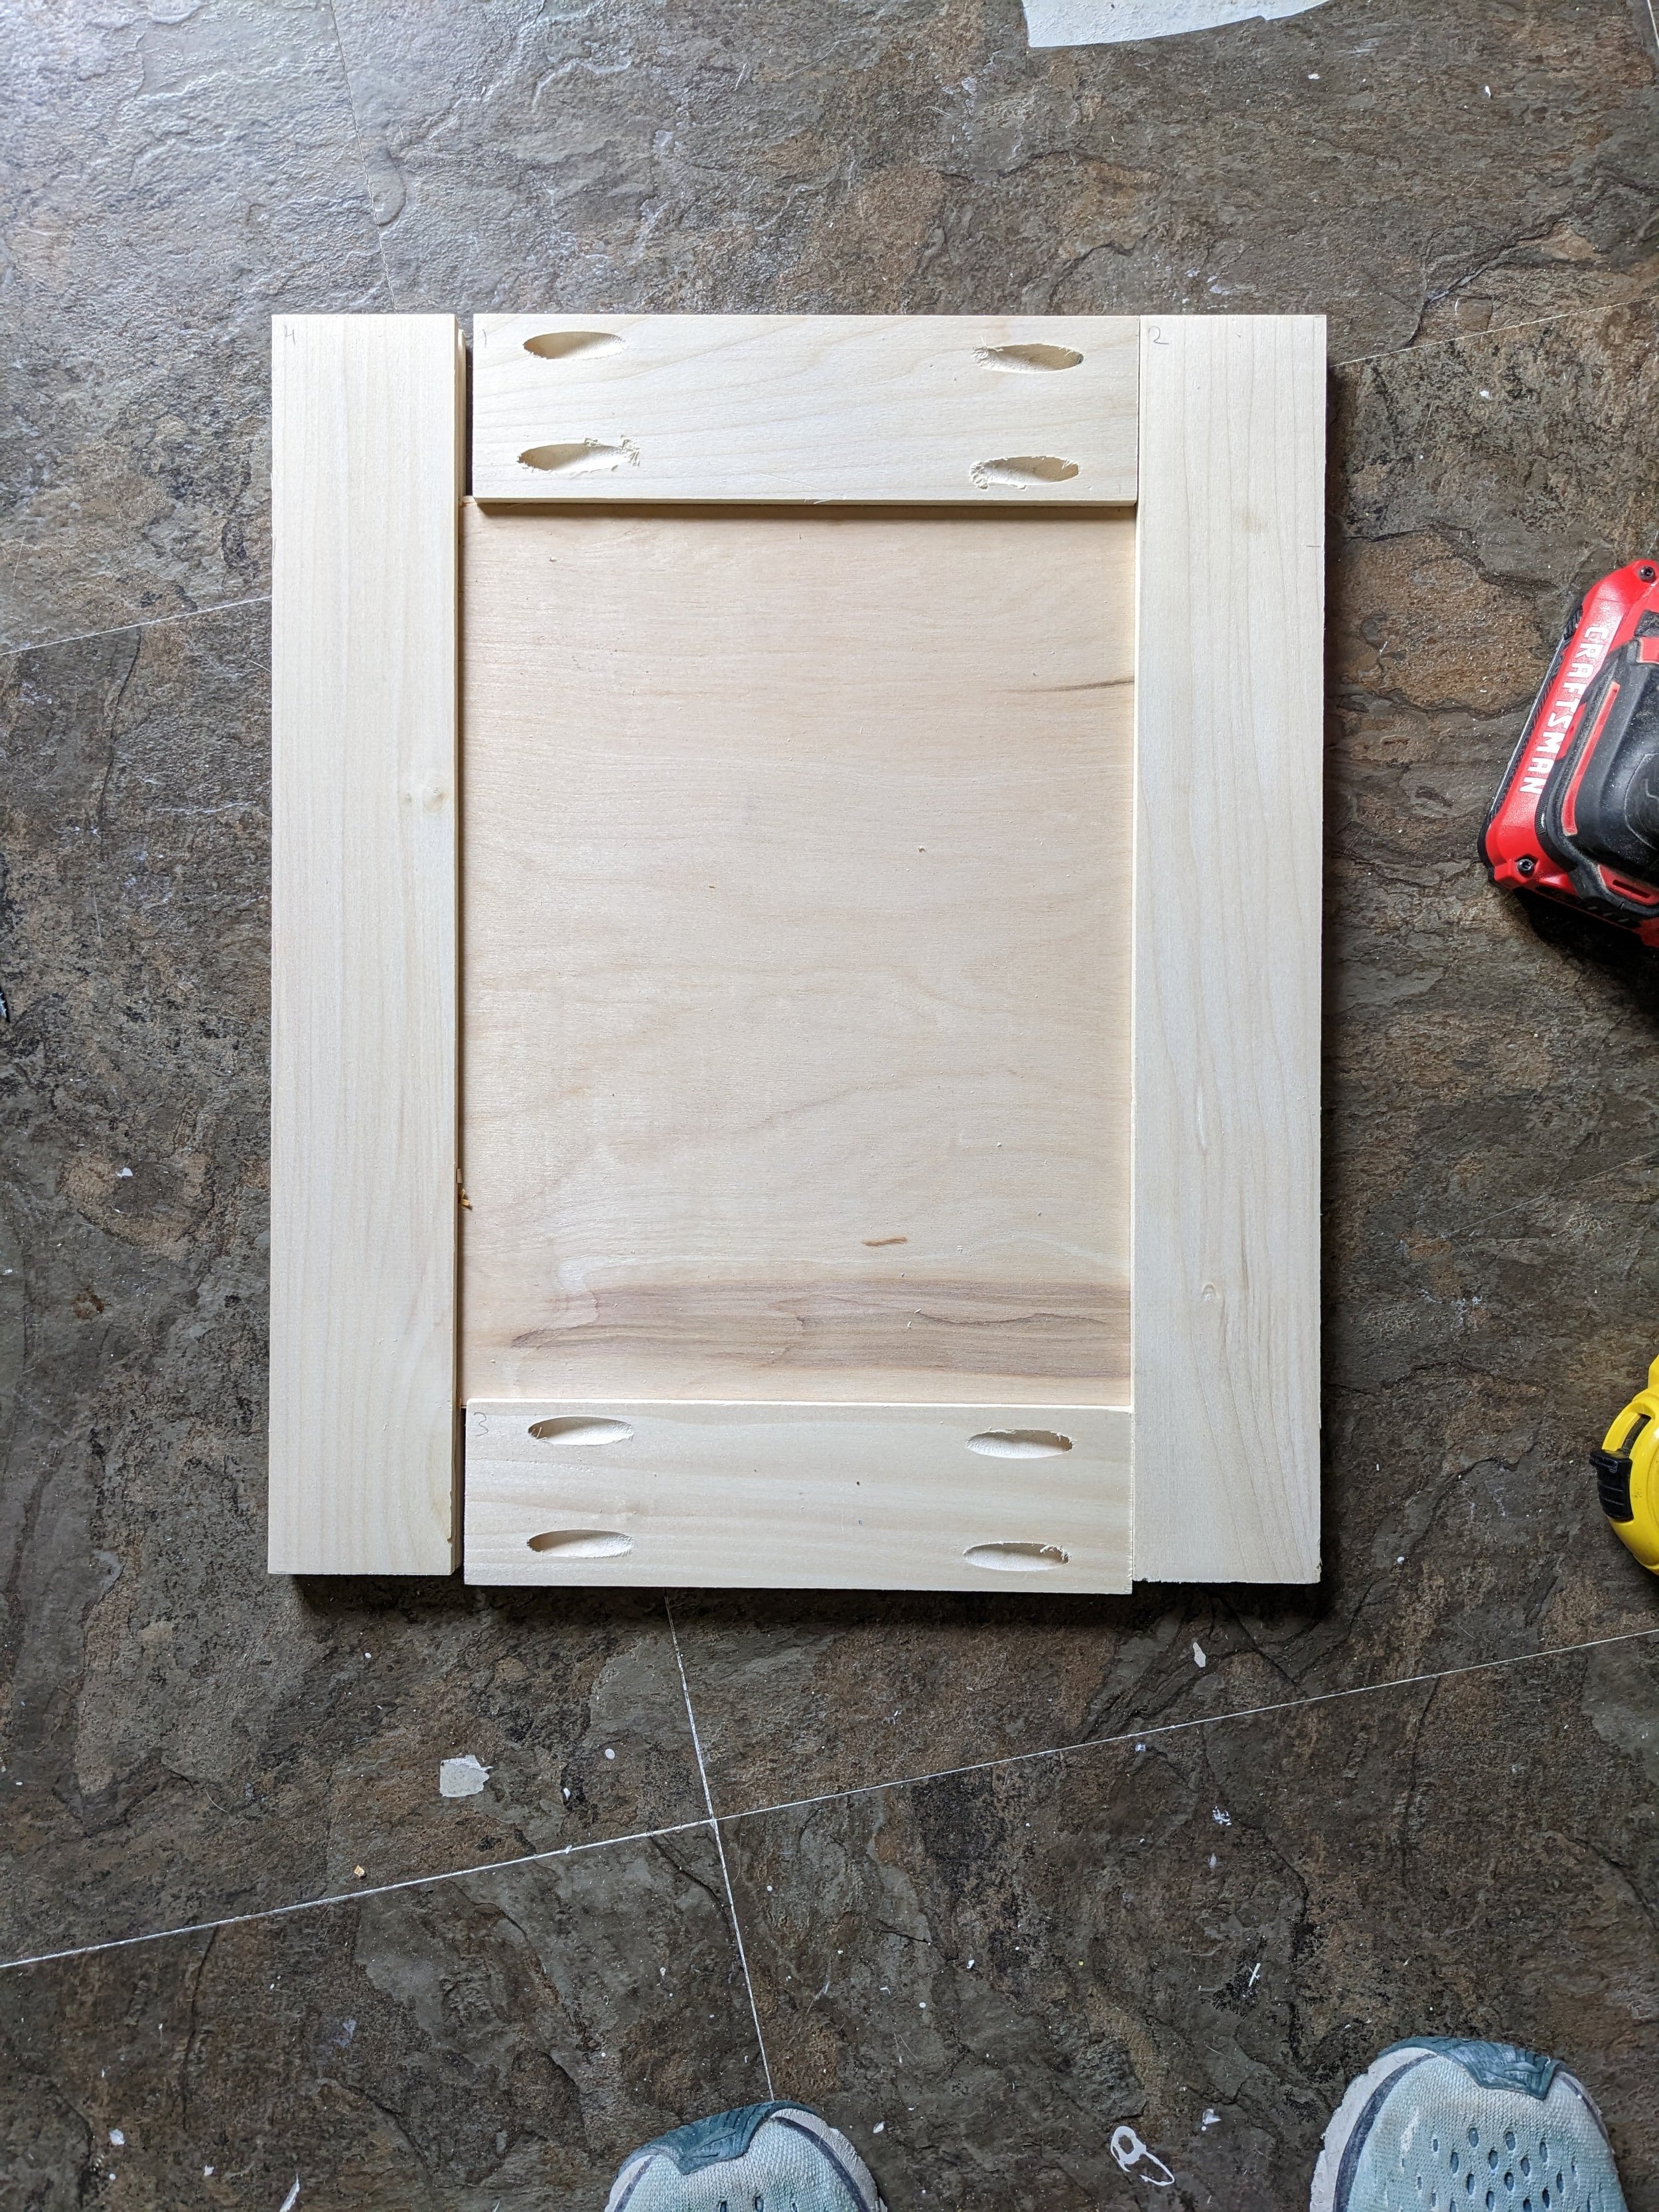
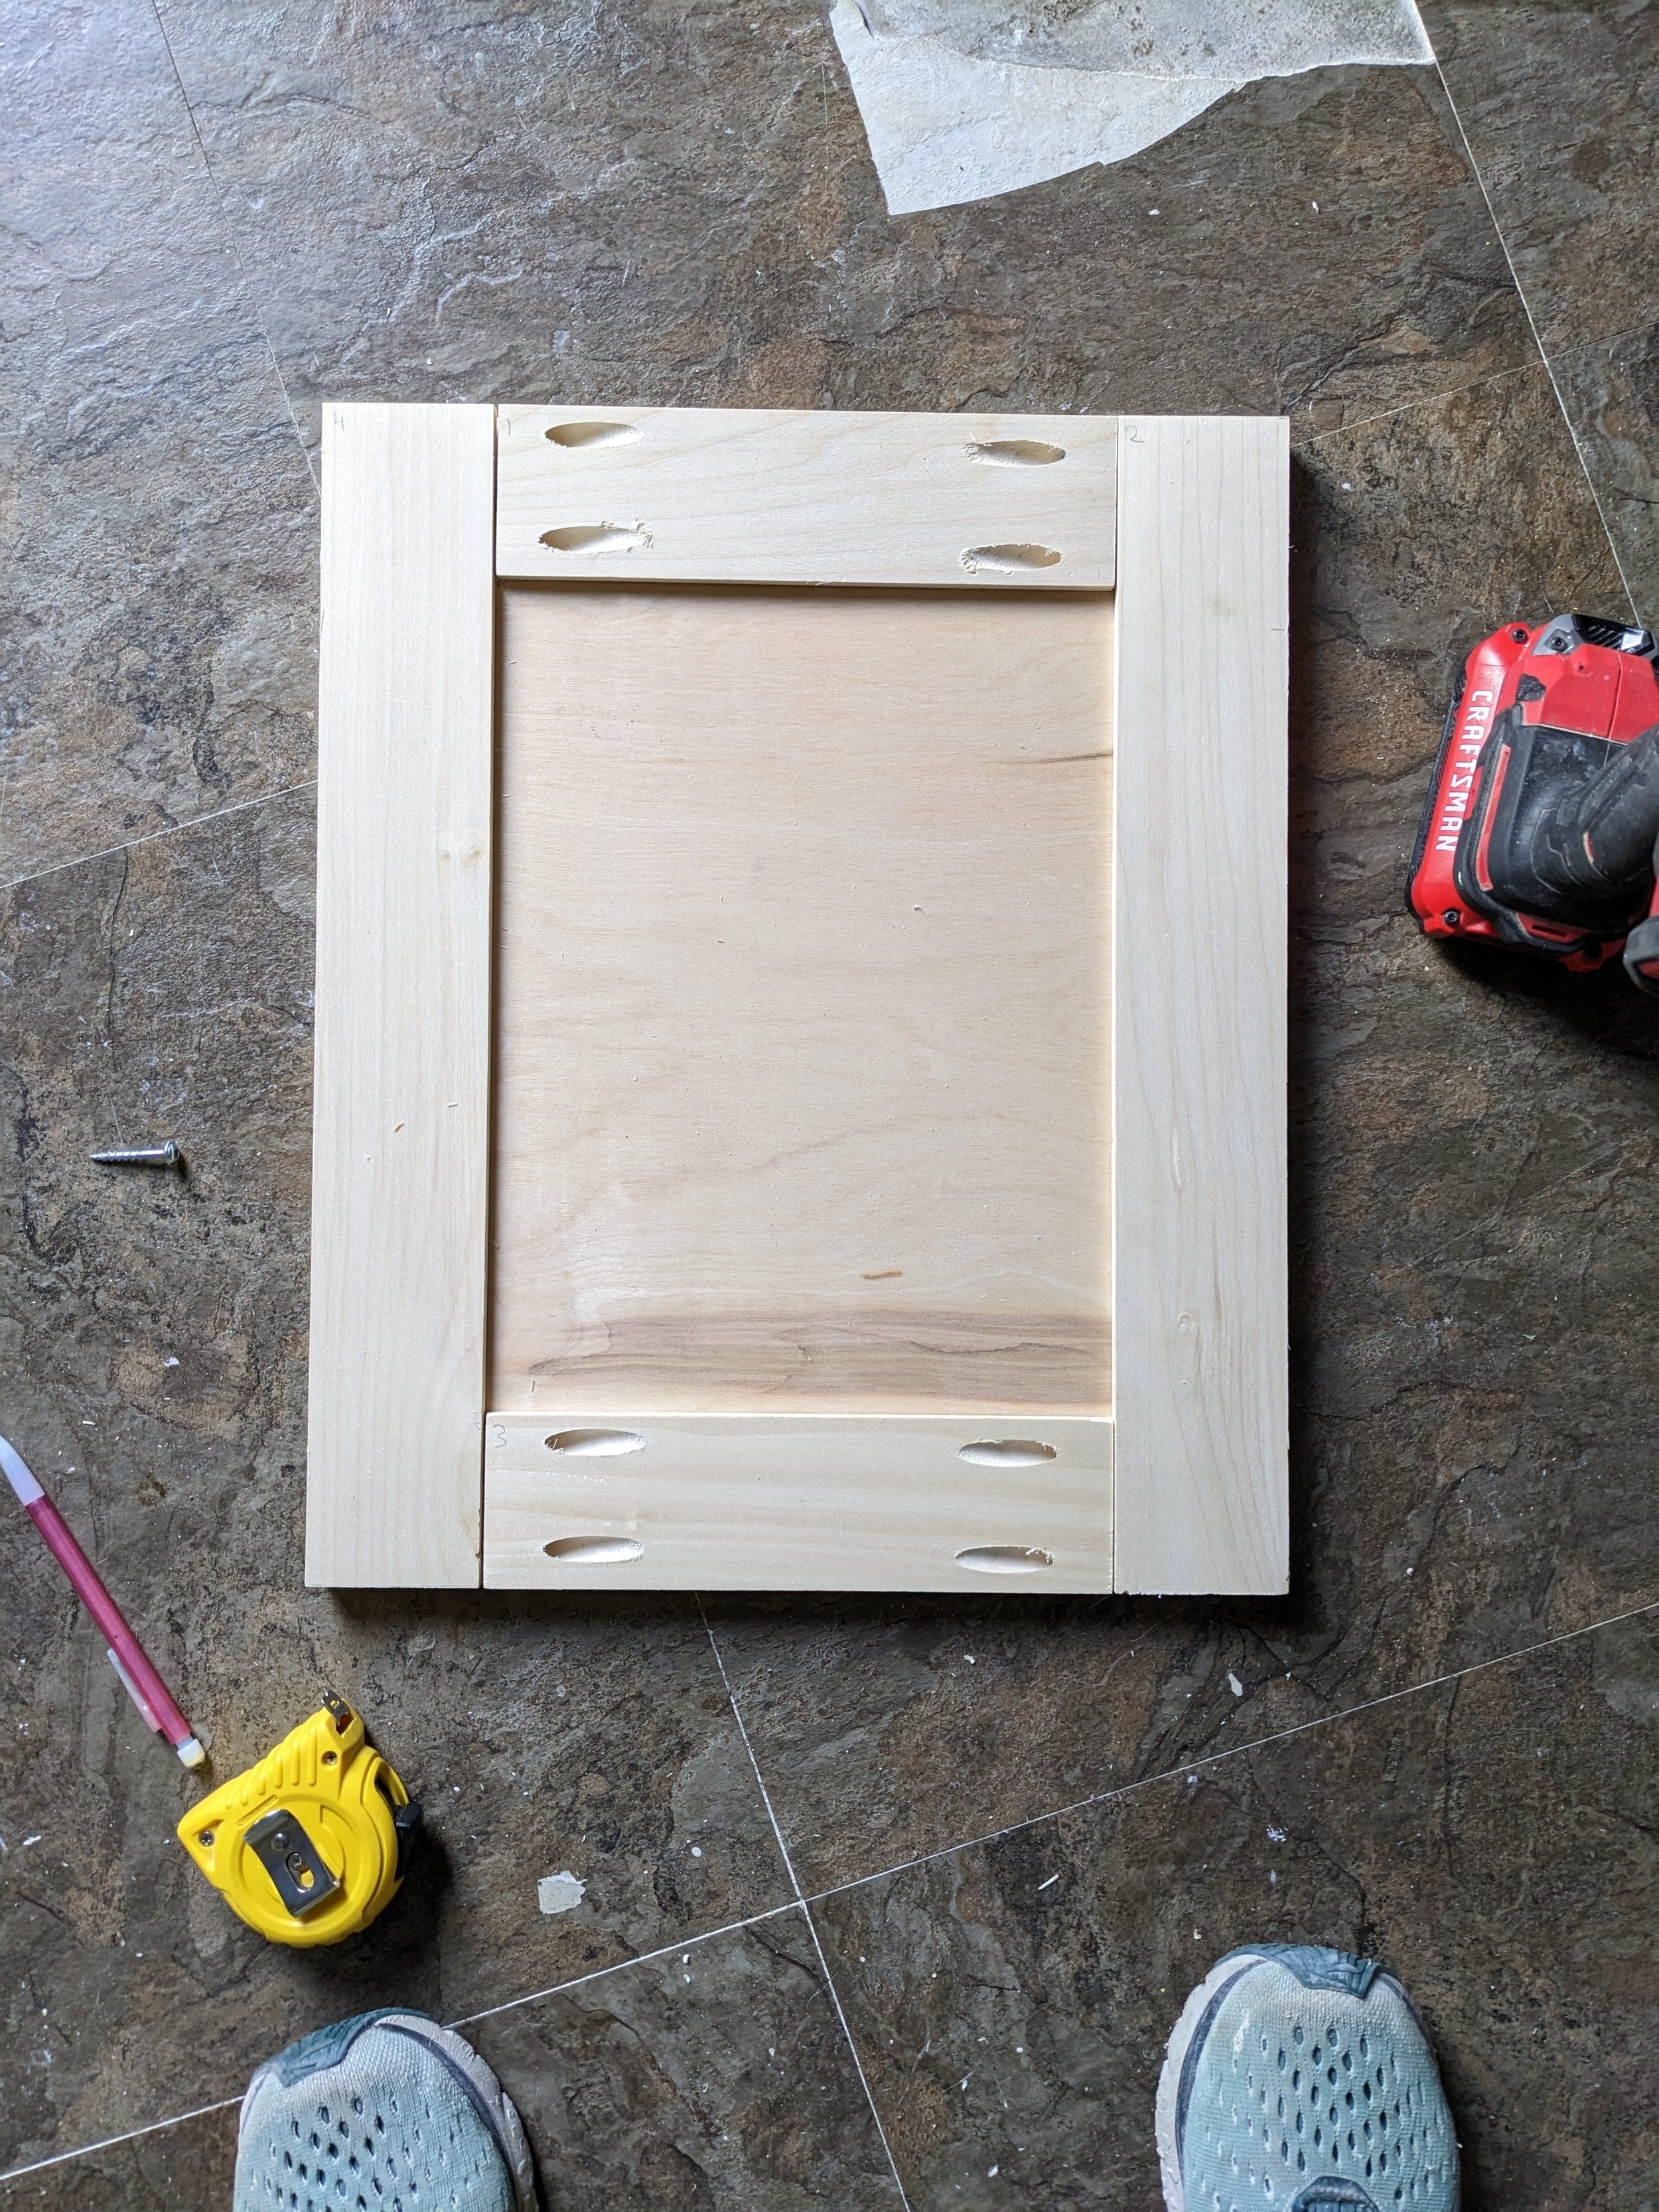
Again, I did this step slowly. I purposely cut my plywood a little big, knowing I could always make it smaller until it fit perfectly.
Put It All Together
Using a speed square and plenty of clamps, screw the rails to one stile.
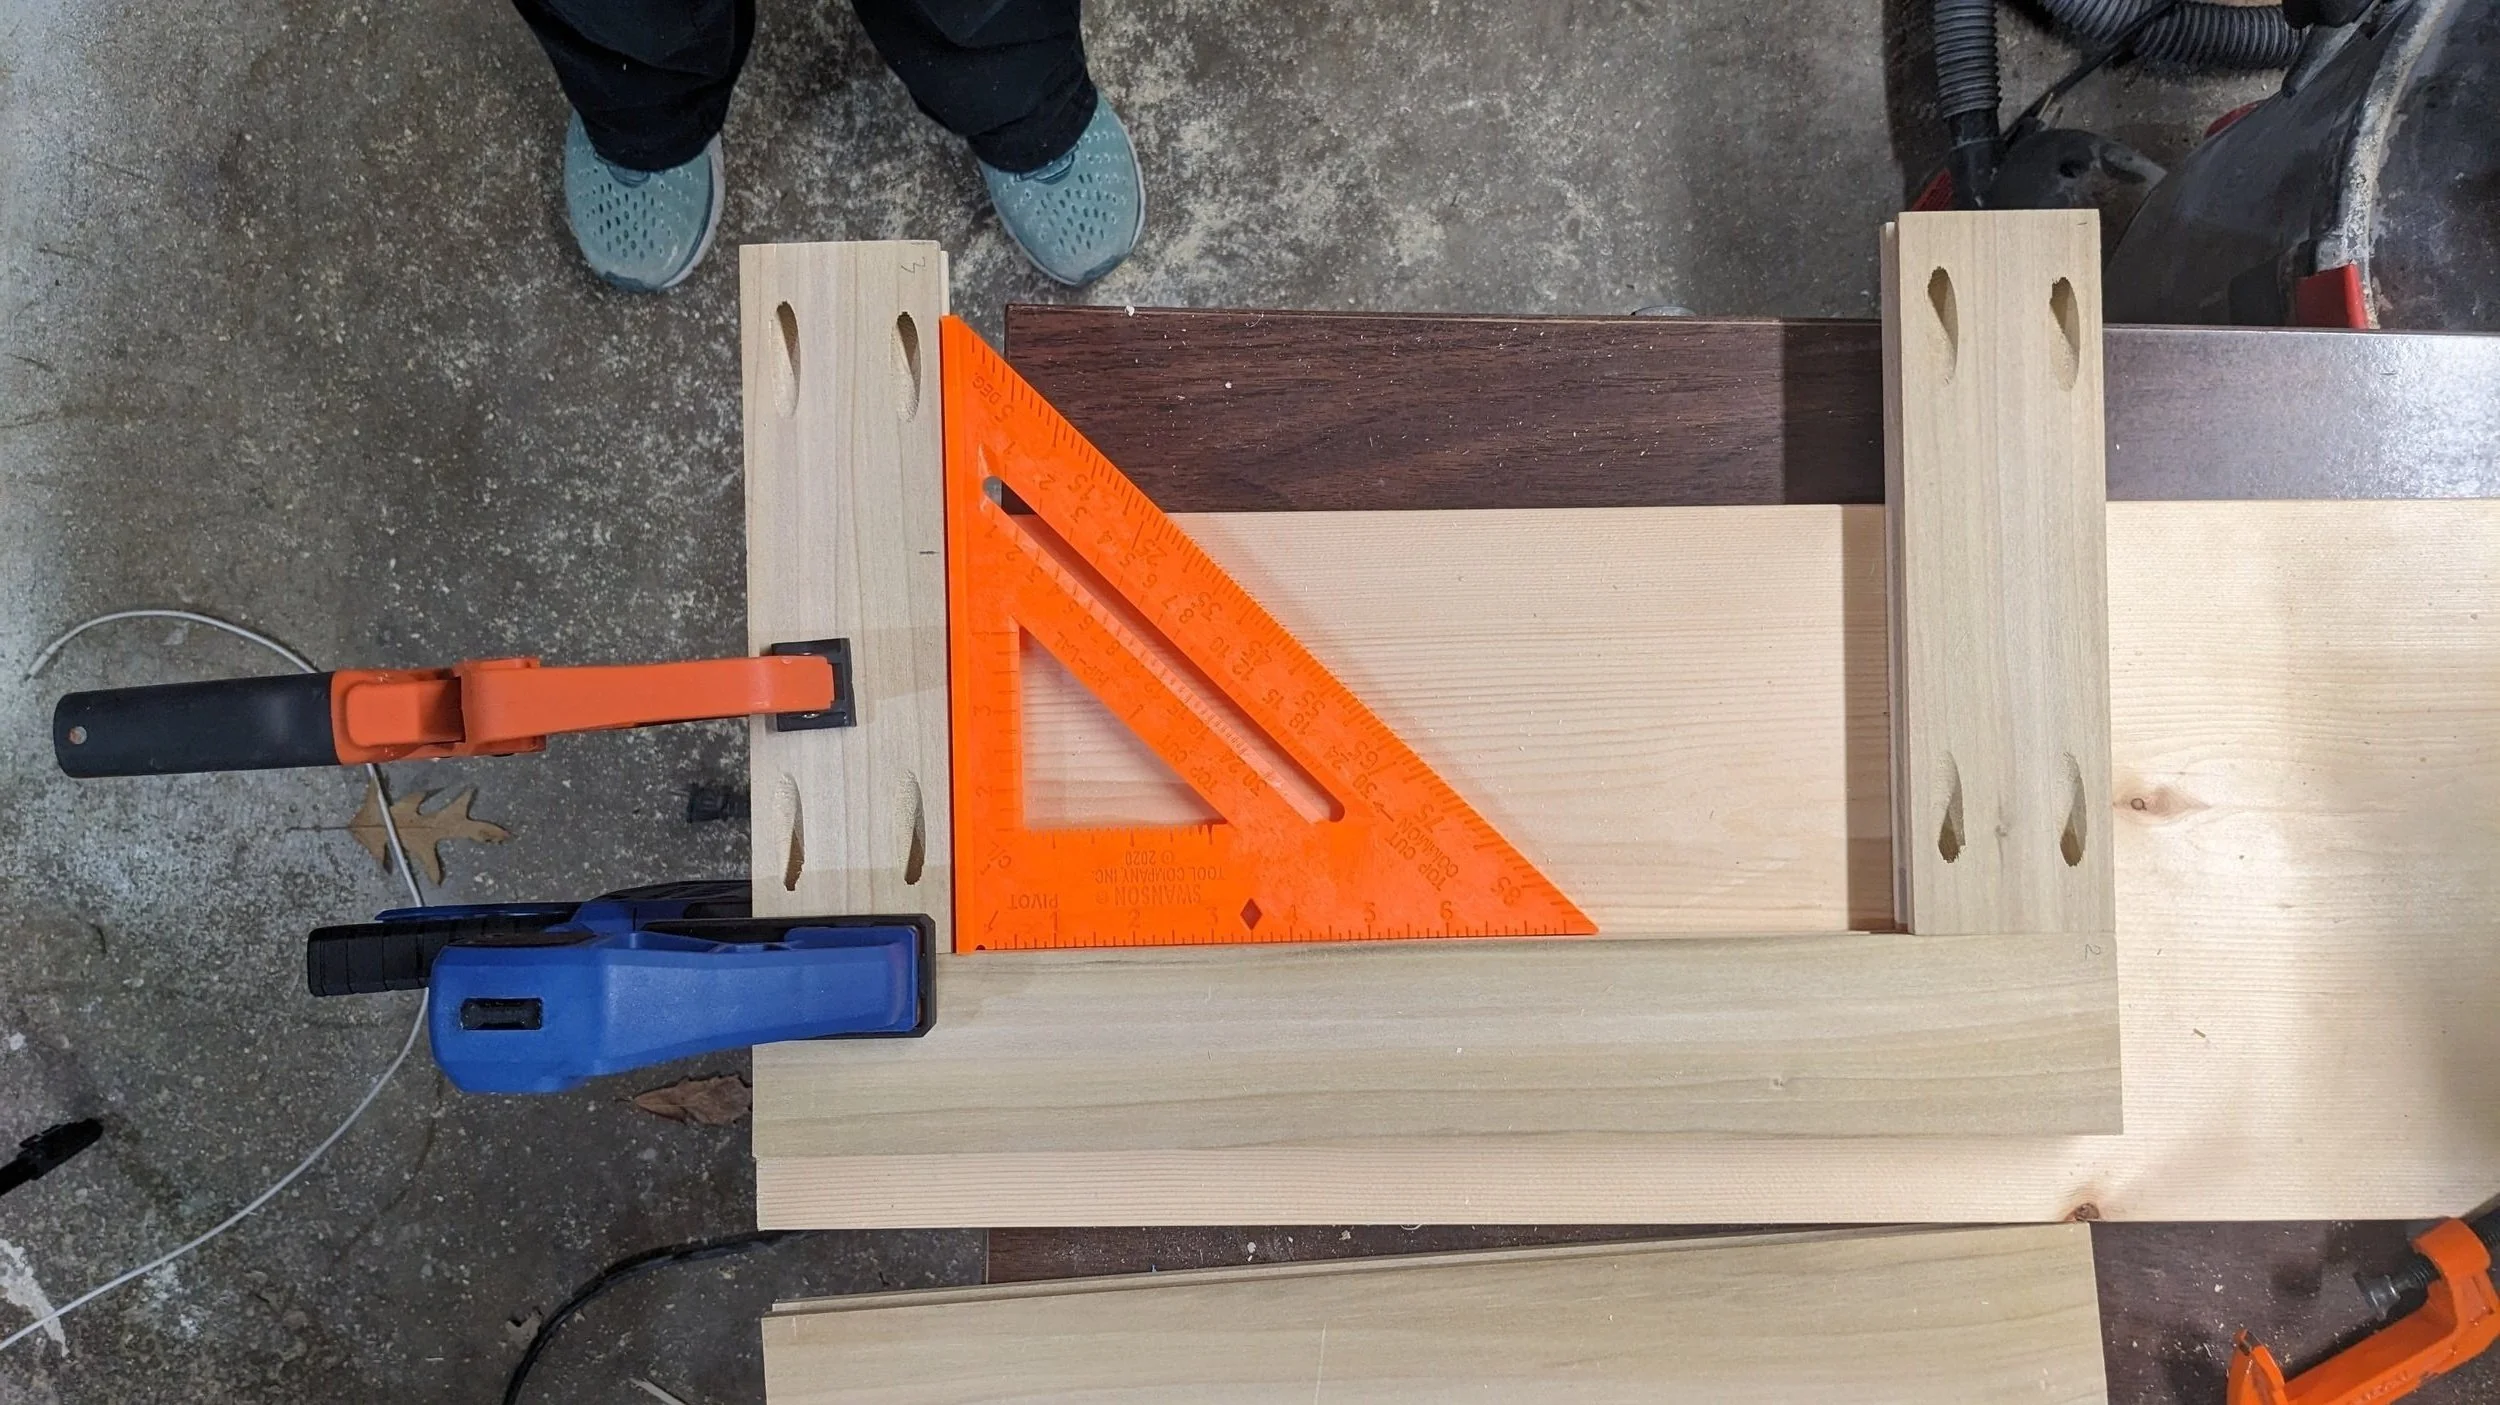
From here, slide your plywood into the notches. If everything fits well, run a bead of glue along the notches and add the other stile to secure it all together.

You’ve officially built a door! But there’s still more work to do…
Fill, Caulk, Prime, Paint
Even though they’d be on the inside of the cabinets, I chose to fill my pocket holes with Bondo. Once dry, I sanded it down with 80-grit sandpaper. I also caulked around the inside frame of my doors (where the 1x3s meet the plywood).

Lastly, I primed and painted my doors with a foam roller to match the rest of the laundry room.
Install Hinges*
Because the other cabinets in the laundry room have concealed hinges, I wanted to add them to these doors, too.

To install a concealed hinge, I used a Kreg Concealed Hinge Jig. However, it is possible to do this without a jig if you don’t want to buy one - but you’ll need other tools. OR, you could use an entirely different type of hinge.
As with the Pocket Jig, I followed the instructions provided for my door measurements and watched a YouTube video or two. I was really nervous I’d mess them up, which is why I chose to drill my hinge holes before painting.
Install Cabinet Doors
And now, the moment you’ve been working towards - installation!

Since your hinges are already installed on your doors, you just need to figure out where you want your doors to hit on the cabinet box.
Mark on your cabinet box where to drill, and pre-drill the holes to prevent your wood from splitting. Then screw them in!
Add Handles or Knobs
Stand Back and Admire

Now take the time to be impressed by your newfound skills. You built a friggin’ door! How cool is that!?
Final Thoughts
Building these doors 100% gave me the feeling of empowerment I was looking for and made me really look forward to expanding my skills with my next project. It’s so easy to look at something and think, “I could never do that.” but I’m learning every time I try something new that if I just take it step-by-step, I’m capable of way more than I realize.
Be sure to Pin the image below for later so you can build your own shaker cabinet doors!

