
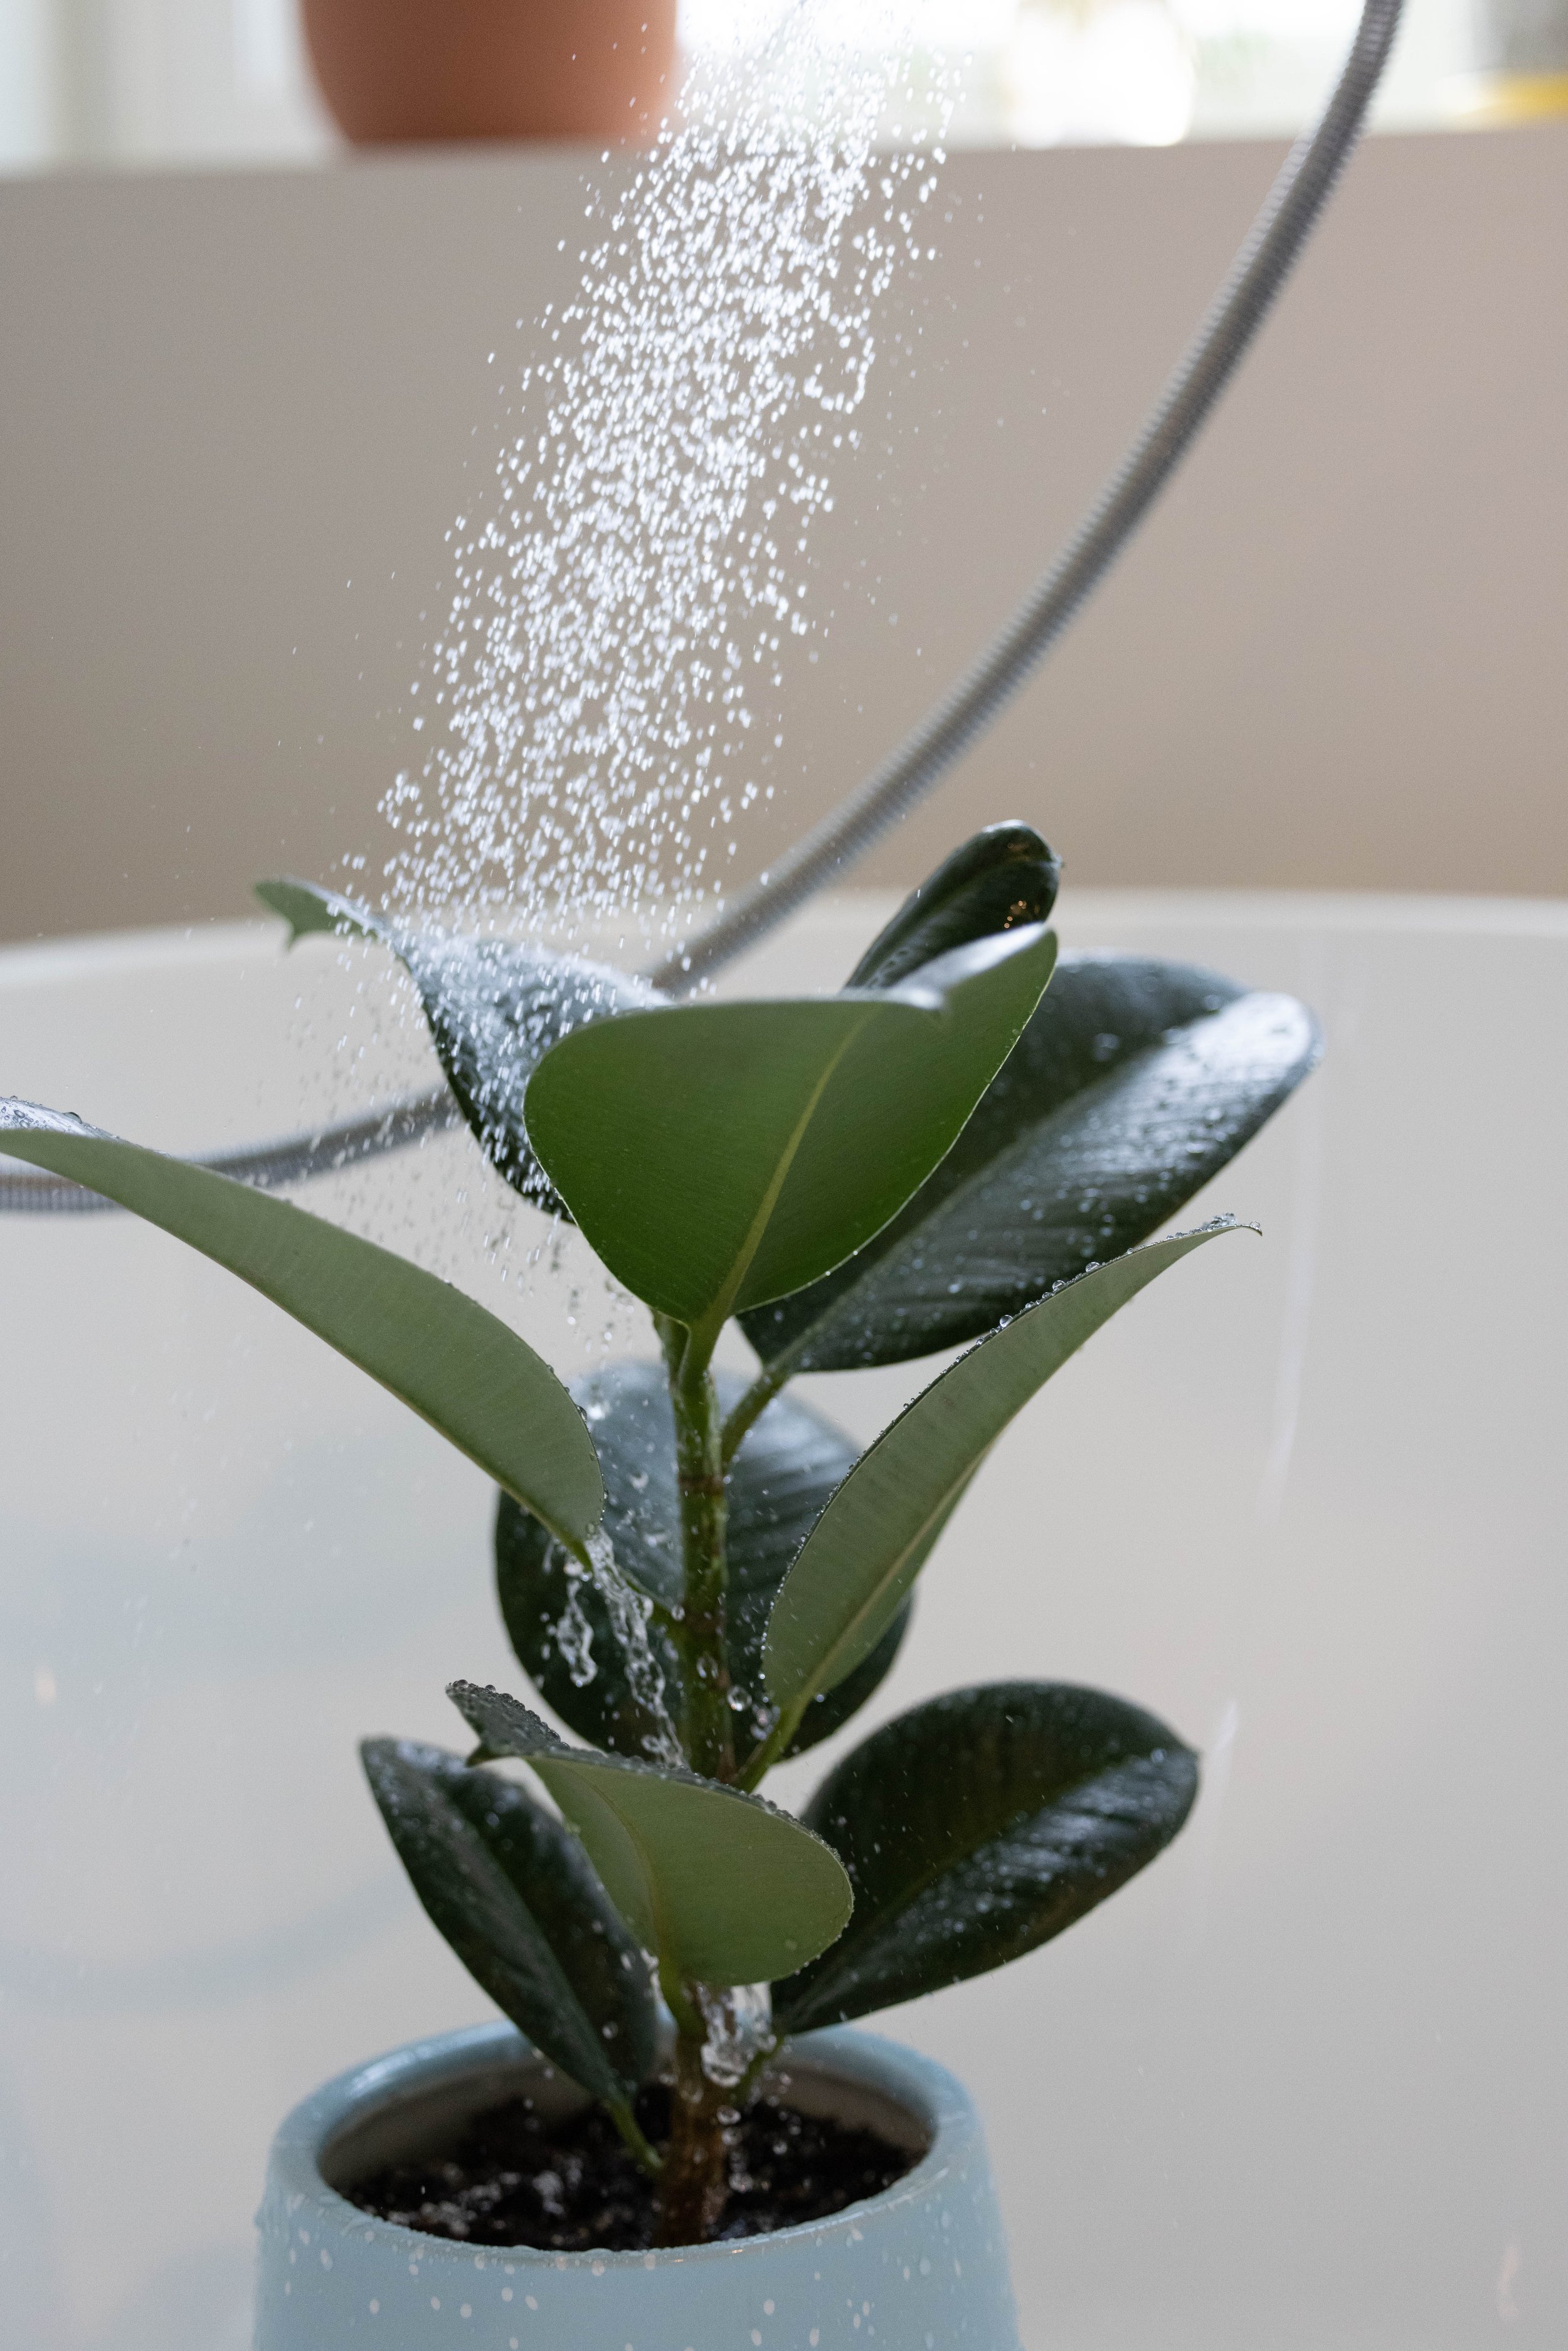
How I Got Rid of Fungus Gnats
Everyone has been bothered by the occasional gnat flying around their face. But if you have houseplants, that little gnat could actually be a big problem. In this post, I’m breaking down how I eliminated my fungus gnat infestation, and how to prevent it from happening again in the future.
Fungus Gnat Infestation? Here’s How to Get Rid of Them
Everyone has been bothered by the occasional gnat flying around their face at some point. But if you have houseplants, that little gnat could actually be a big problem. In this post, I’m breaking down how I eliminated my fungus gnat infestation and how to prevent it from happening again in the future.
A good while ago (longer than I'd like to admit), I started noticing gnats flying around my house. I'd squish them and move on, but the problem persisted - and then multiplied.
It got to a point where I couldn't sit and watch a show in the living room anymore because I was constantly distracted by these obnoxious little insects. Then I realized it wasn't just a few summer bugs that made their way inside - it was coming from my plants!
After some research, I quickly discovered that I had a *gulp* fungus gnat infestation.
What Are Fungus Gnats?

Source: Empress of Dirt
Fungus gnats are tiny flies that survive off the fungus in your plant soil. They're dark gray in color and only about 1/8" long. They don't bite and are harmless to humans.
Will Fungus Gnats Hurt My Plants?
Aside from being unbearably annoying, adult fungus gnats won't directly harm your plants. I say "directly" because their offspring most definitely can.
Fungus gnat larvae survive by eating fungi, organic matter in the soil, and the roots of plants, which can cause damage.
How to Get Rid of Fungus Gnats
I tried several methods to kill my herd of intruders before I finally found a solution. But first, here are some frequently-mentioned remedies that didn't work for me or were just too inconvenient to try:
As an Amazon Associate, I earn from qualifying purchases. This post may contain affiliate links, meaning I receive commissions for purchases made through those links at no cost to you.
Apple Cider Vinegar
Every time I’ve looked up a method to get rid of fungus gnats or fruit flies, the mixture of apple cider vinegar, dish soap, and water is always at the top of the list - and it has NEVER worked for me. This time was no exception.
It seems like the smell is just as obnoxious to the bugs as it is to my nose, and no one wants to go near the stuff.
Neem Oil & Other Sprays
Neem oil is a naturally occurring pesticide and came up frequently as an option to rid my life of fungus gnats, so I gave it a whirl. But I had some issues with it.

First of all, the suggested application was to drench my plants in neem oil - including the tops AND bottoms of leaves as well as the stems. This proved to be a really messy endeavor, especially when dealing with an oily substance.
On top of that, although the smell isn’t super strong, I definitely wasn’t a fan. Needless to say, this method didn’t work either.
I also tried other sprays that claimed to kill fungus gnats but to no avail.
Waiting Longer Between Waterings
Because fungus gnats thrive off the decaying material in soil, which is exacerbated by dampness, the idea behind this method makes sense. This seemed to work in the short term, but I ended up needing to water my plants before they died and the gnat problem picked right back up.
Drench in Water
I realize this remedy seems counterintuitive to the recommendation above. Let me explain.
The idea isn’t to just water your plants into oblivion, but rather to either put them in the shower and give them a good spray or dunk them in a bath to wash away the pests.
The problem here is that A) not all of my pots have drainage holes or nursery pots (something I’m working on switching out, don’t @ me), and B) it’s unlikely that this would wash ALL the larvae away. I didn’t even bother giving this idea a try.
Repotting
I have A LOT of plants, so it would have been wildly inconvenient to repot them all, but if you only have a couple this would be a viable option. Just make sure you throw out the old soil and maybe give your plant a good rinse before repotting.
Here's what finally worked:
Sticky Traps
I actually started using sticky traps while I was trying other methods of eradication. They work really well to capture adult fungus gnats as they’re flying past, but they don’t get to the root (pun intended) of the problem - the larvae.
The sticky traps can’t possibly catch ALL of the adults, so the gnats continue to reproduce, and the problem persists.
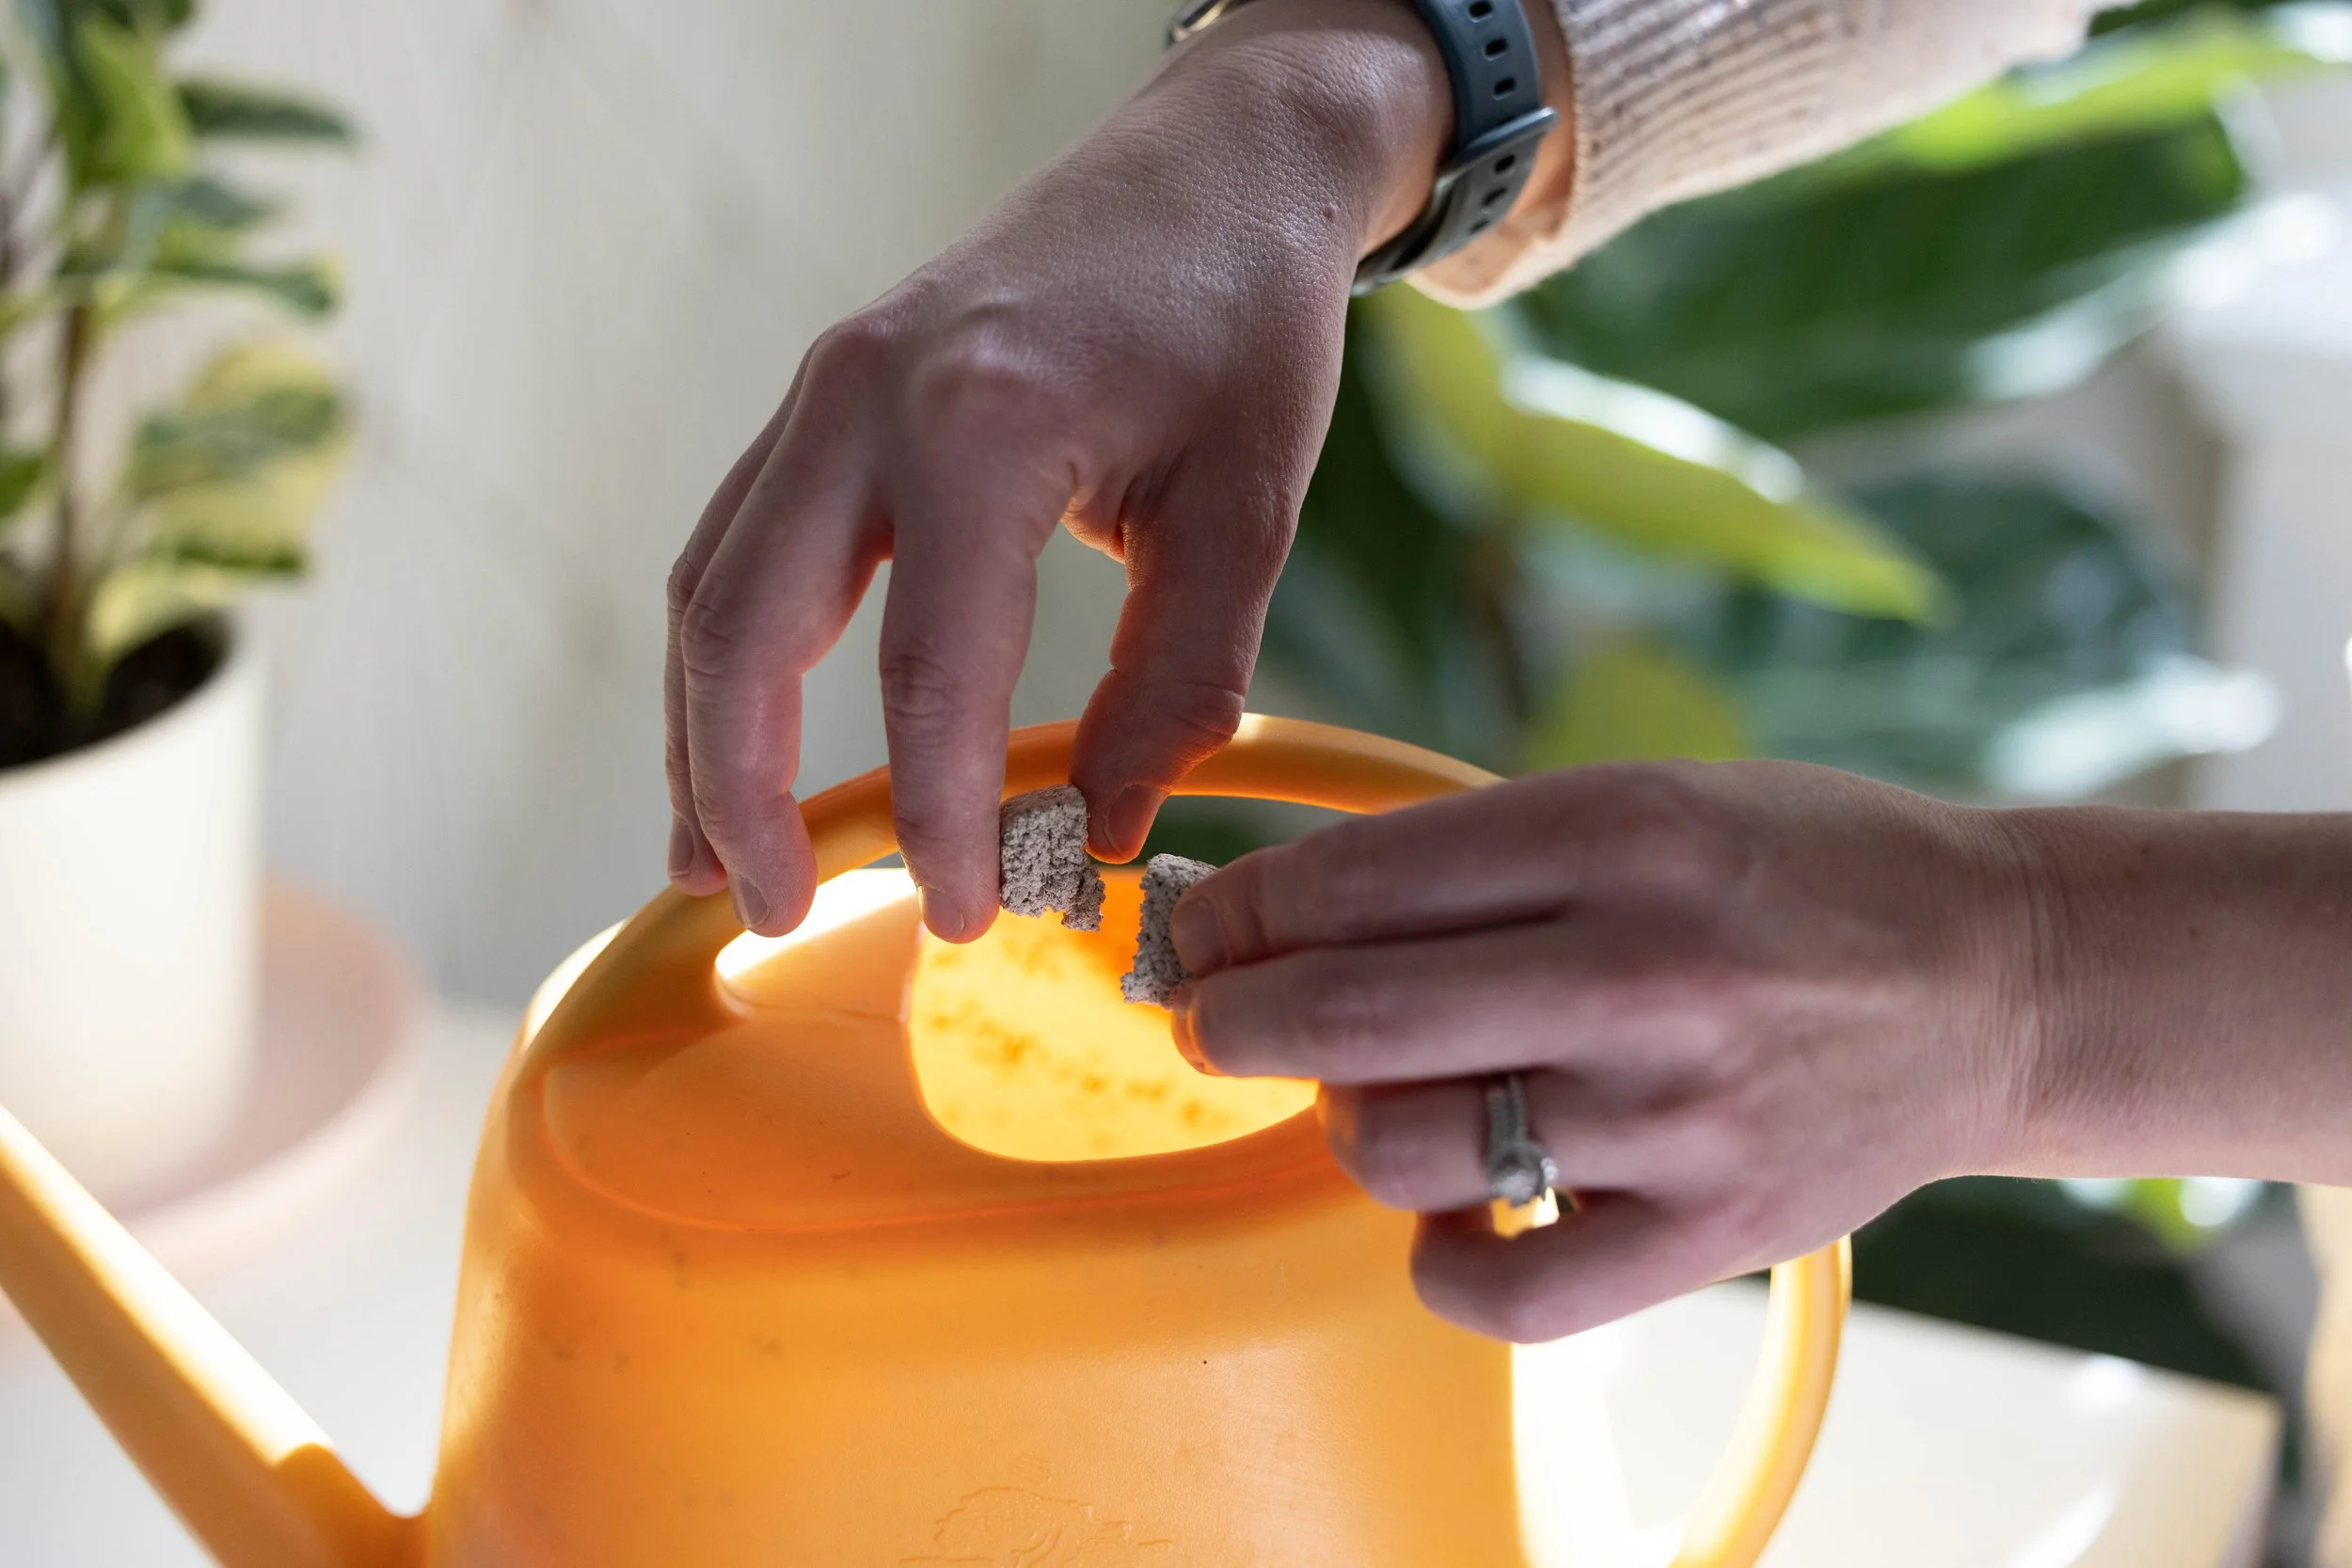
Mosquito Dunks
In the depths of the interwebs, after reading about oh-so-many solutions that didn’t work, I came across an article that recommended using mosquito dunks.
Mosquito dunks are small beige discs that are typically used for standing water (i.e. birdbaths). As they dissolve, they release a bacteria that is poisonous to mosquitos - and apparently to fungus gnats!
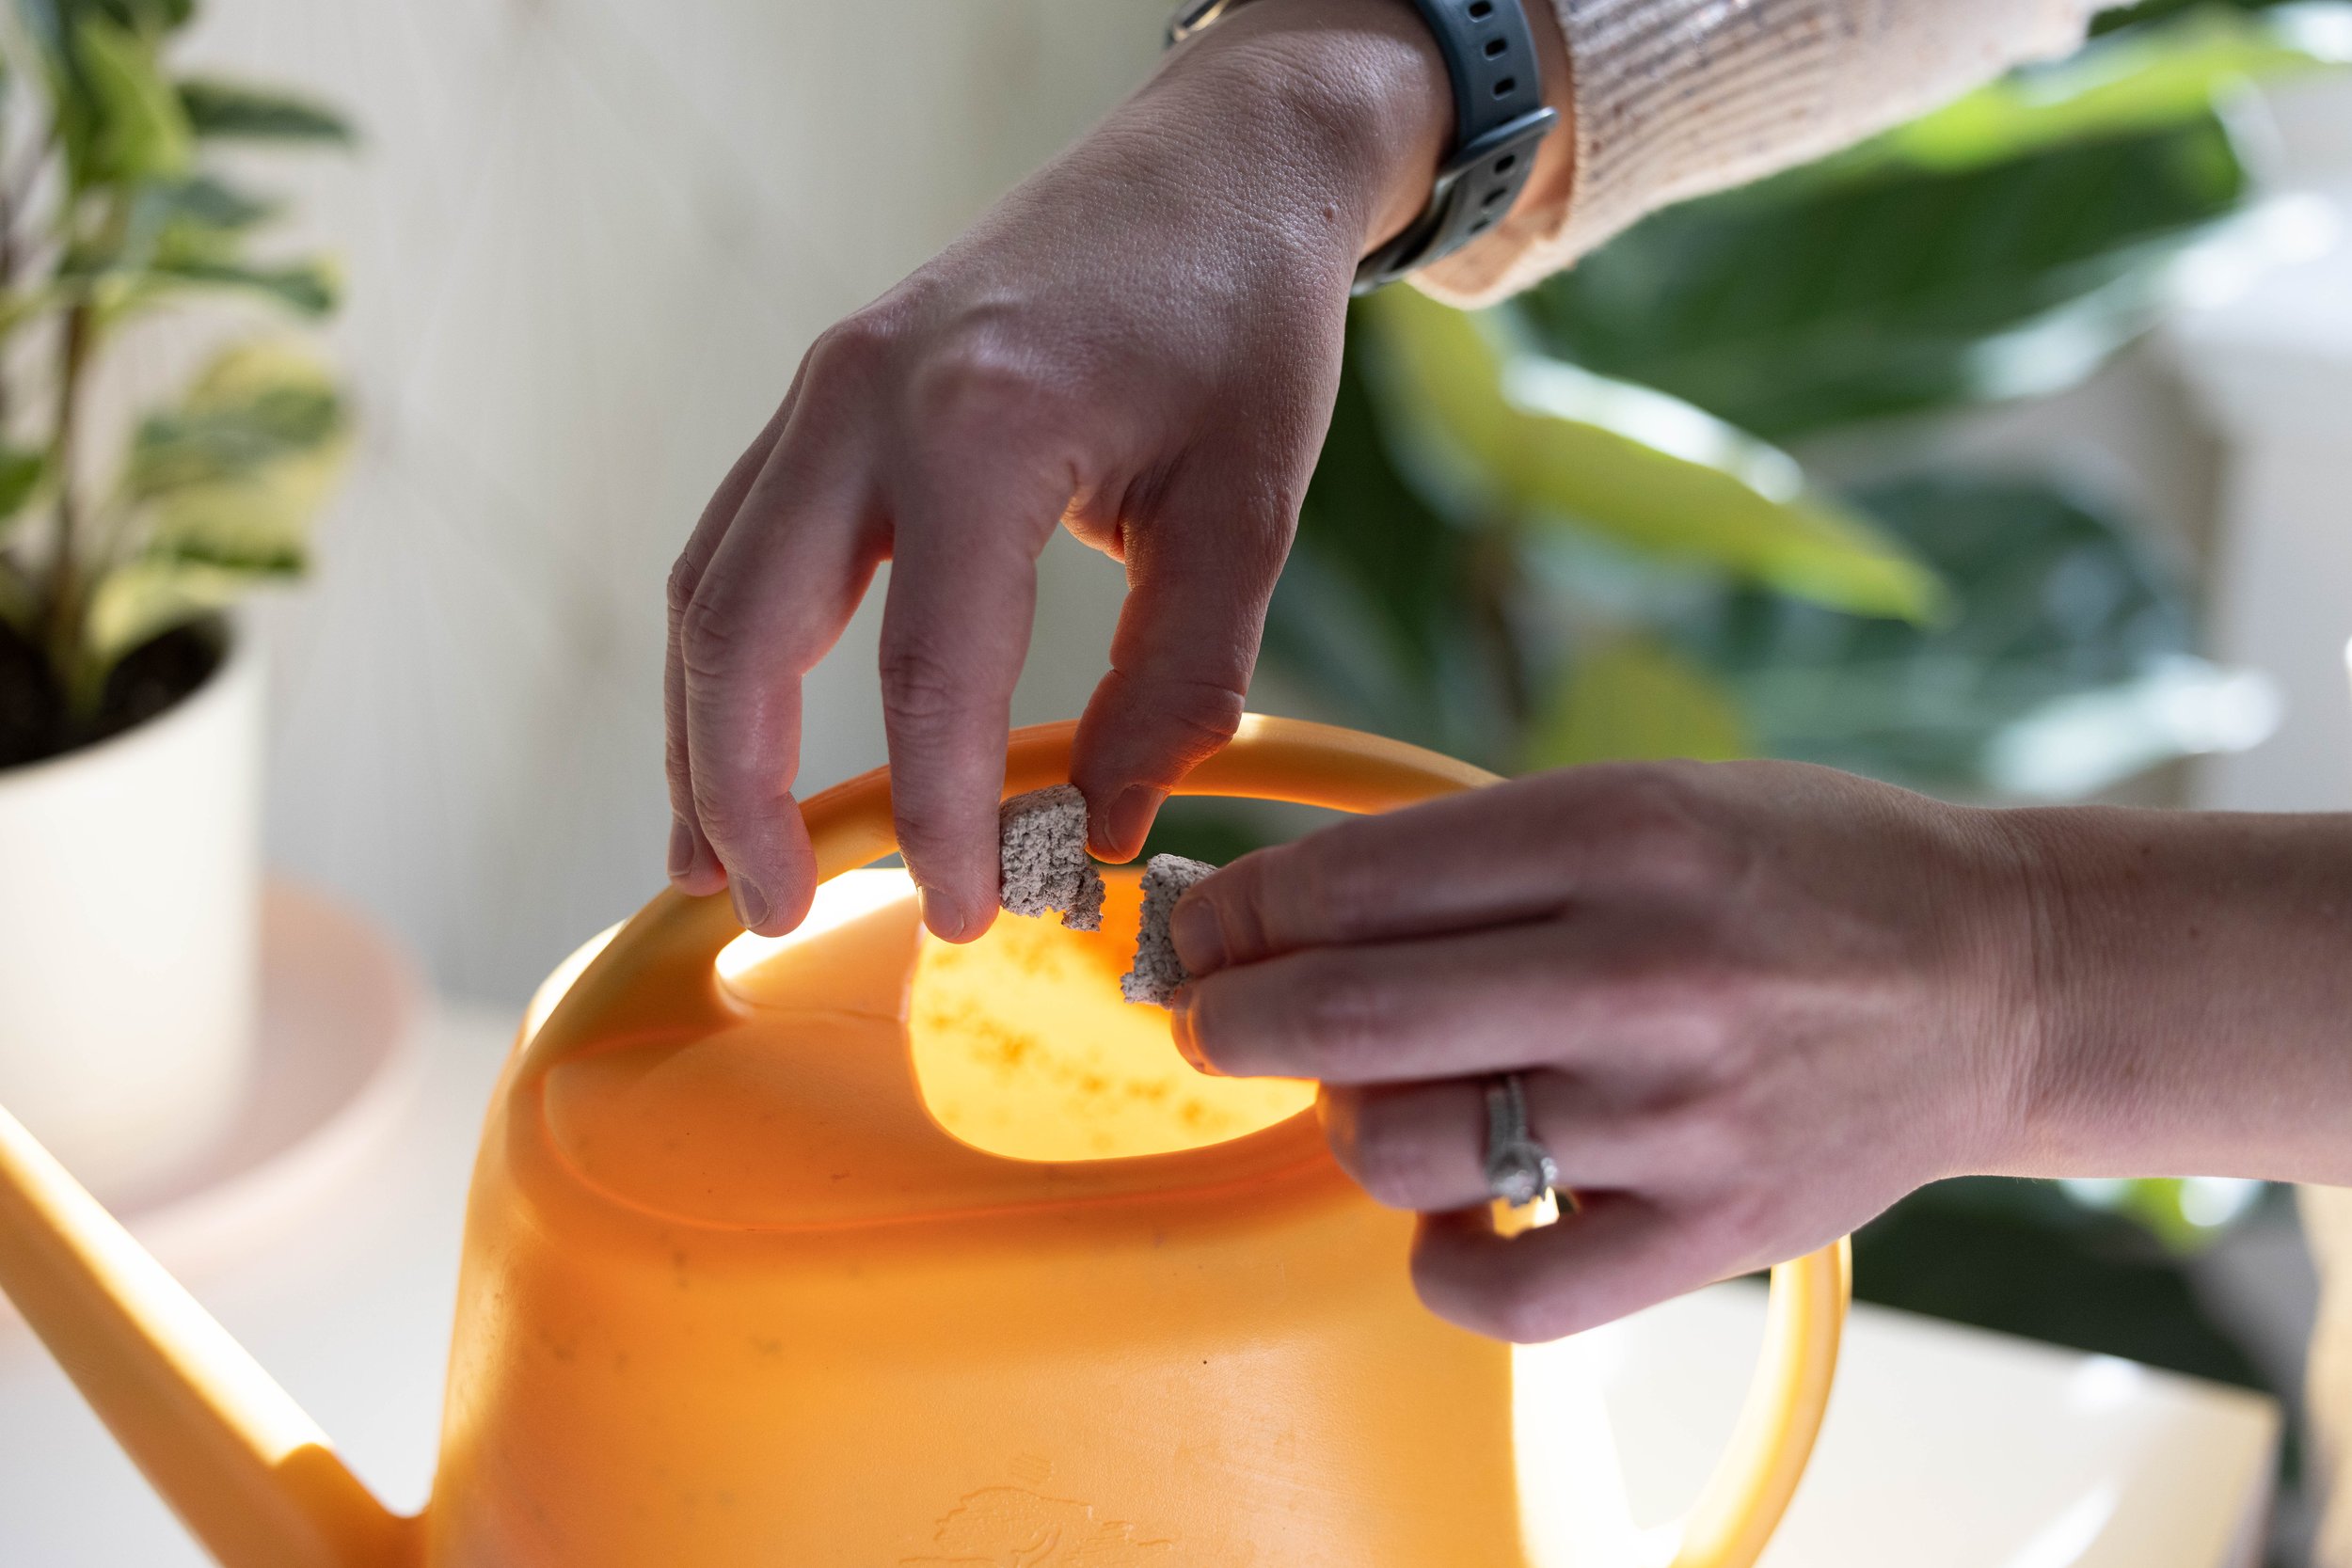
For the next couple of months (yes, you read that right), every time I watered my plants, I would break off a quarter of a disc, crumble it into my watering can (which holds about a gallon of water), and let it sit in water overnight to give it time to release the bacteria. I would then water my plants the next day.
While the sticky traps stopped the adult gnats in their tracks, the mosquito dunks killed them early in their lifecycle. I started noticing a difference after the first watering, but it took about 8 tries to completely get rid of the gnats.
During that time, I kept a close eye on the sticky traps and switched them out as needed. This helped me gauge how many gnats were still reaching adulthood and whether I needed to continue the mosquito dunk treatment.
And now, I’m so happy to say that I’m gnat free! I’d really prefer not to deal with this little problem ever again (and I bet you feel the same!), so below are some tips to avoid a gnat relapse.
How to Prevent a Fungus Gnat Infestation
Thoroughly Check, Clean, and Isolate New Plants
Before you even hit the check-out line, look closely for any small bugs flying around the leaves of your new buddy. Also, check the soil for larvae - which will be clear or whitish in color with a black head.
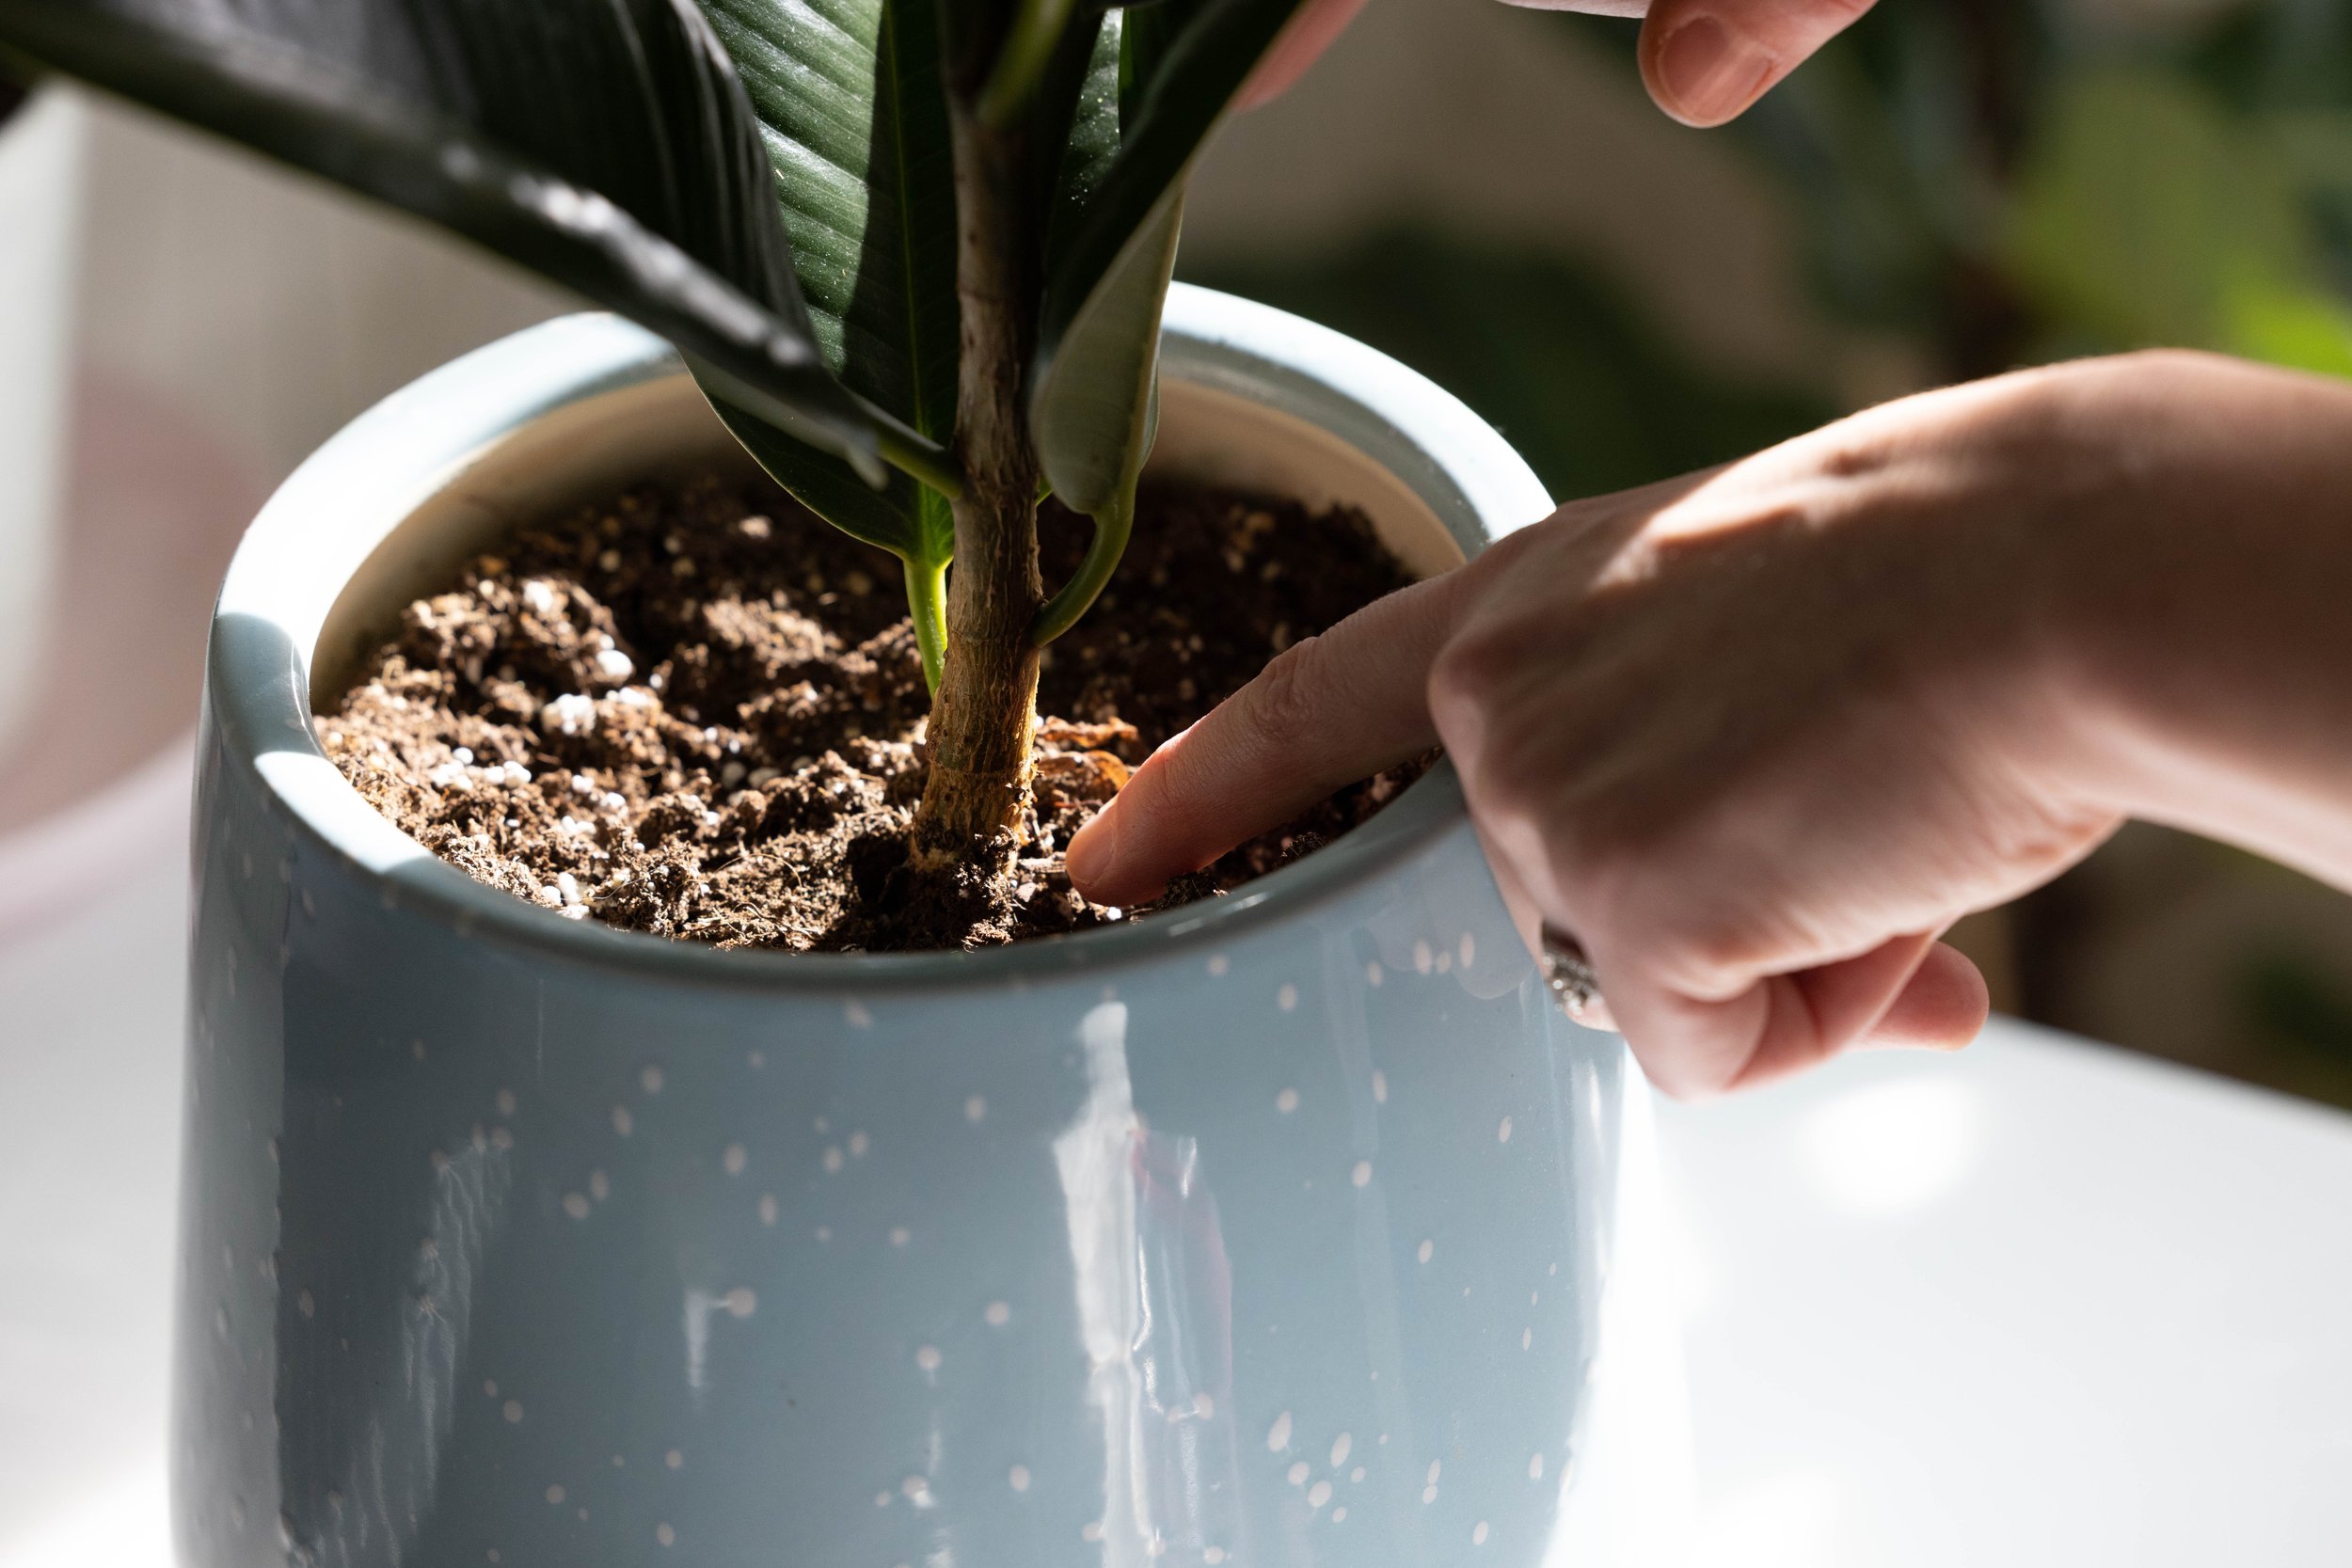
Once you bring your new plant home, give it a good shower to wash away any potential hitchhikers. And although it may not be the most effective in entirely ridding your plants of gnats, wiping down the leaves with neem oil will help prevent bugs from sticking around (and it adds a nice shine!).
Lastly, isolate your new plant for the first month before you introduce it to the rest of the gang. This will give you time to identify any critters you may have missed and treat the individual plant before the problem can spread.
Provide Drainage & Don’t Overwater
As I mentioned above, fungus gnats LOOOVE damp soil. To make your plants less appealing, make sure to only water when the top couple of inches of soil is dry and make sure any extra water has somewhere to go. Overwatering can also lead to root rot in plants, so consider this an extra important tip!
Final Thoughts

In the grand scheme of things, I’m a relatively new plant owner - and I’m learning new things about their care all the time! This experience was definitely a lesson learned for me, and hopefully, you found it helpful if you’re dealing with the same pesky problem. If you enjoyed this post, please consider sharing!

For more plant-related content, check out these posts:
Looking for the latest posts and projects? I gotchu!

Indoor Plant Gnats
New Office - Lobby and Reception Design
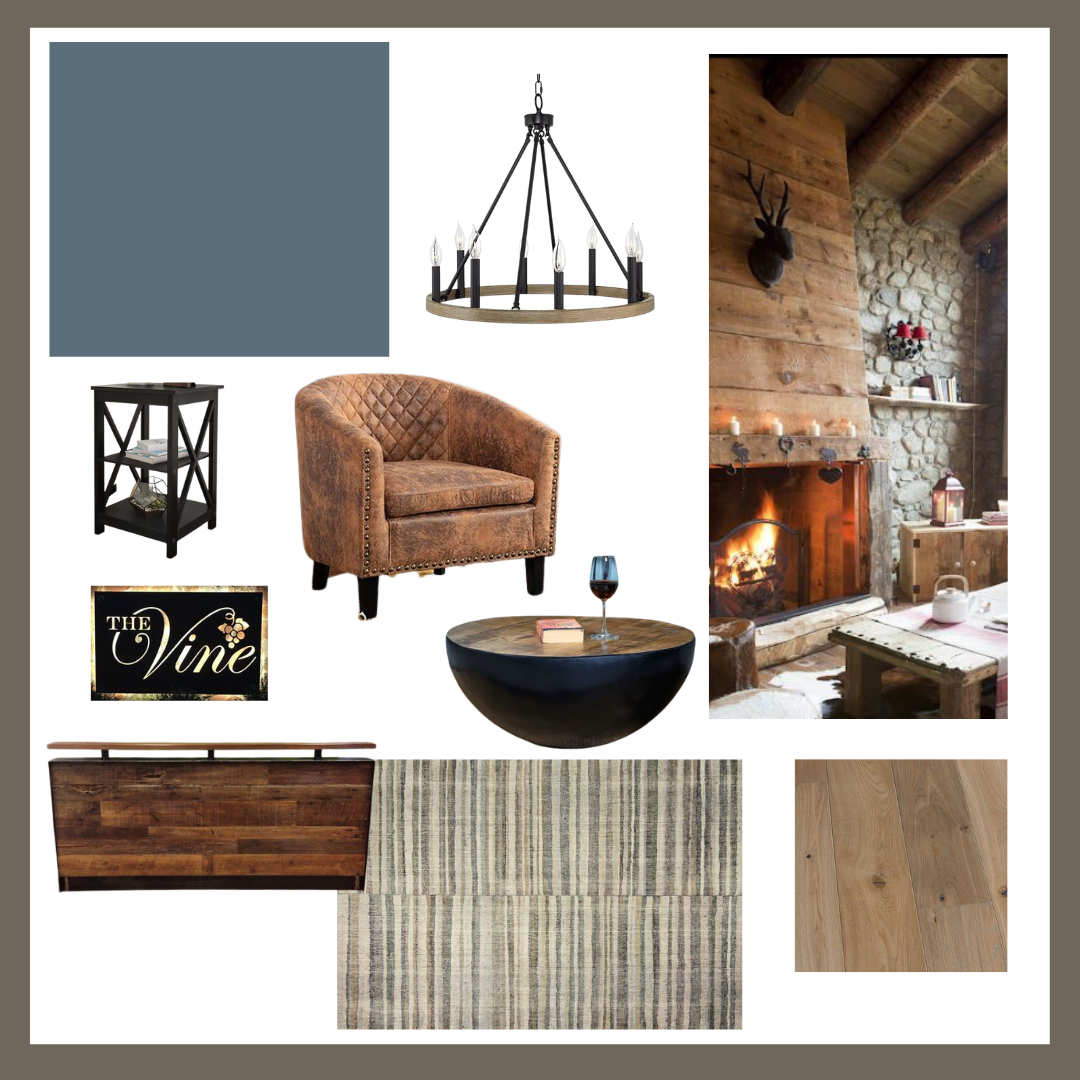
Last week I shared that we bought a new building that will be used as my husband’s real estate brokerage - and it needs a LOT of work. Today I'm sharing the design of the first room we'll be tackling: the lobby and reception area!
Office Lobby Mood Board
Last week I shared that we bought a new building that will be used as my husband’s real estate brokerage - and it needs a LOT of work. While we still have some demo to do, we're actually not too far off from a major turning point: putting it all back together!
That being said, I've been working hard designing the interior so that when the time comes, we're ready to jump right in. Today I'm sharing the design of the first room we'll be tackling: the lobby and reception area!

As an Amazon Associate, I earn from qualifying purchases. This post may contain affiliate links, meaning I receive commissions for purchases made through those links at no cost to you.
The Inspiration
In talking with my husband and his business partner about their vision for the office, they expressed that they wanted this front room to feel inviting and comfortable - somewhere people would want to come and hang out or bring their laptops and work together.
I was immediately inspired by the fireplace to the left of the entryway as an obvious gathering space.
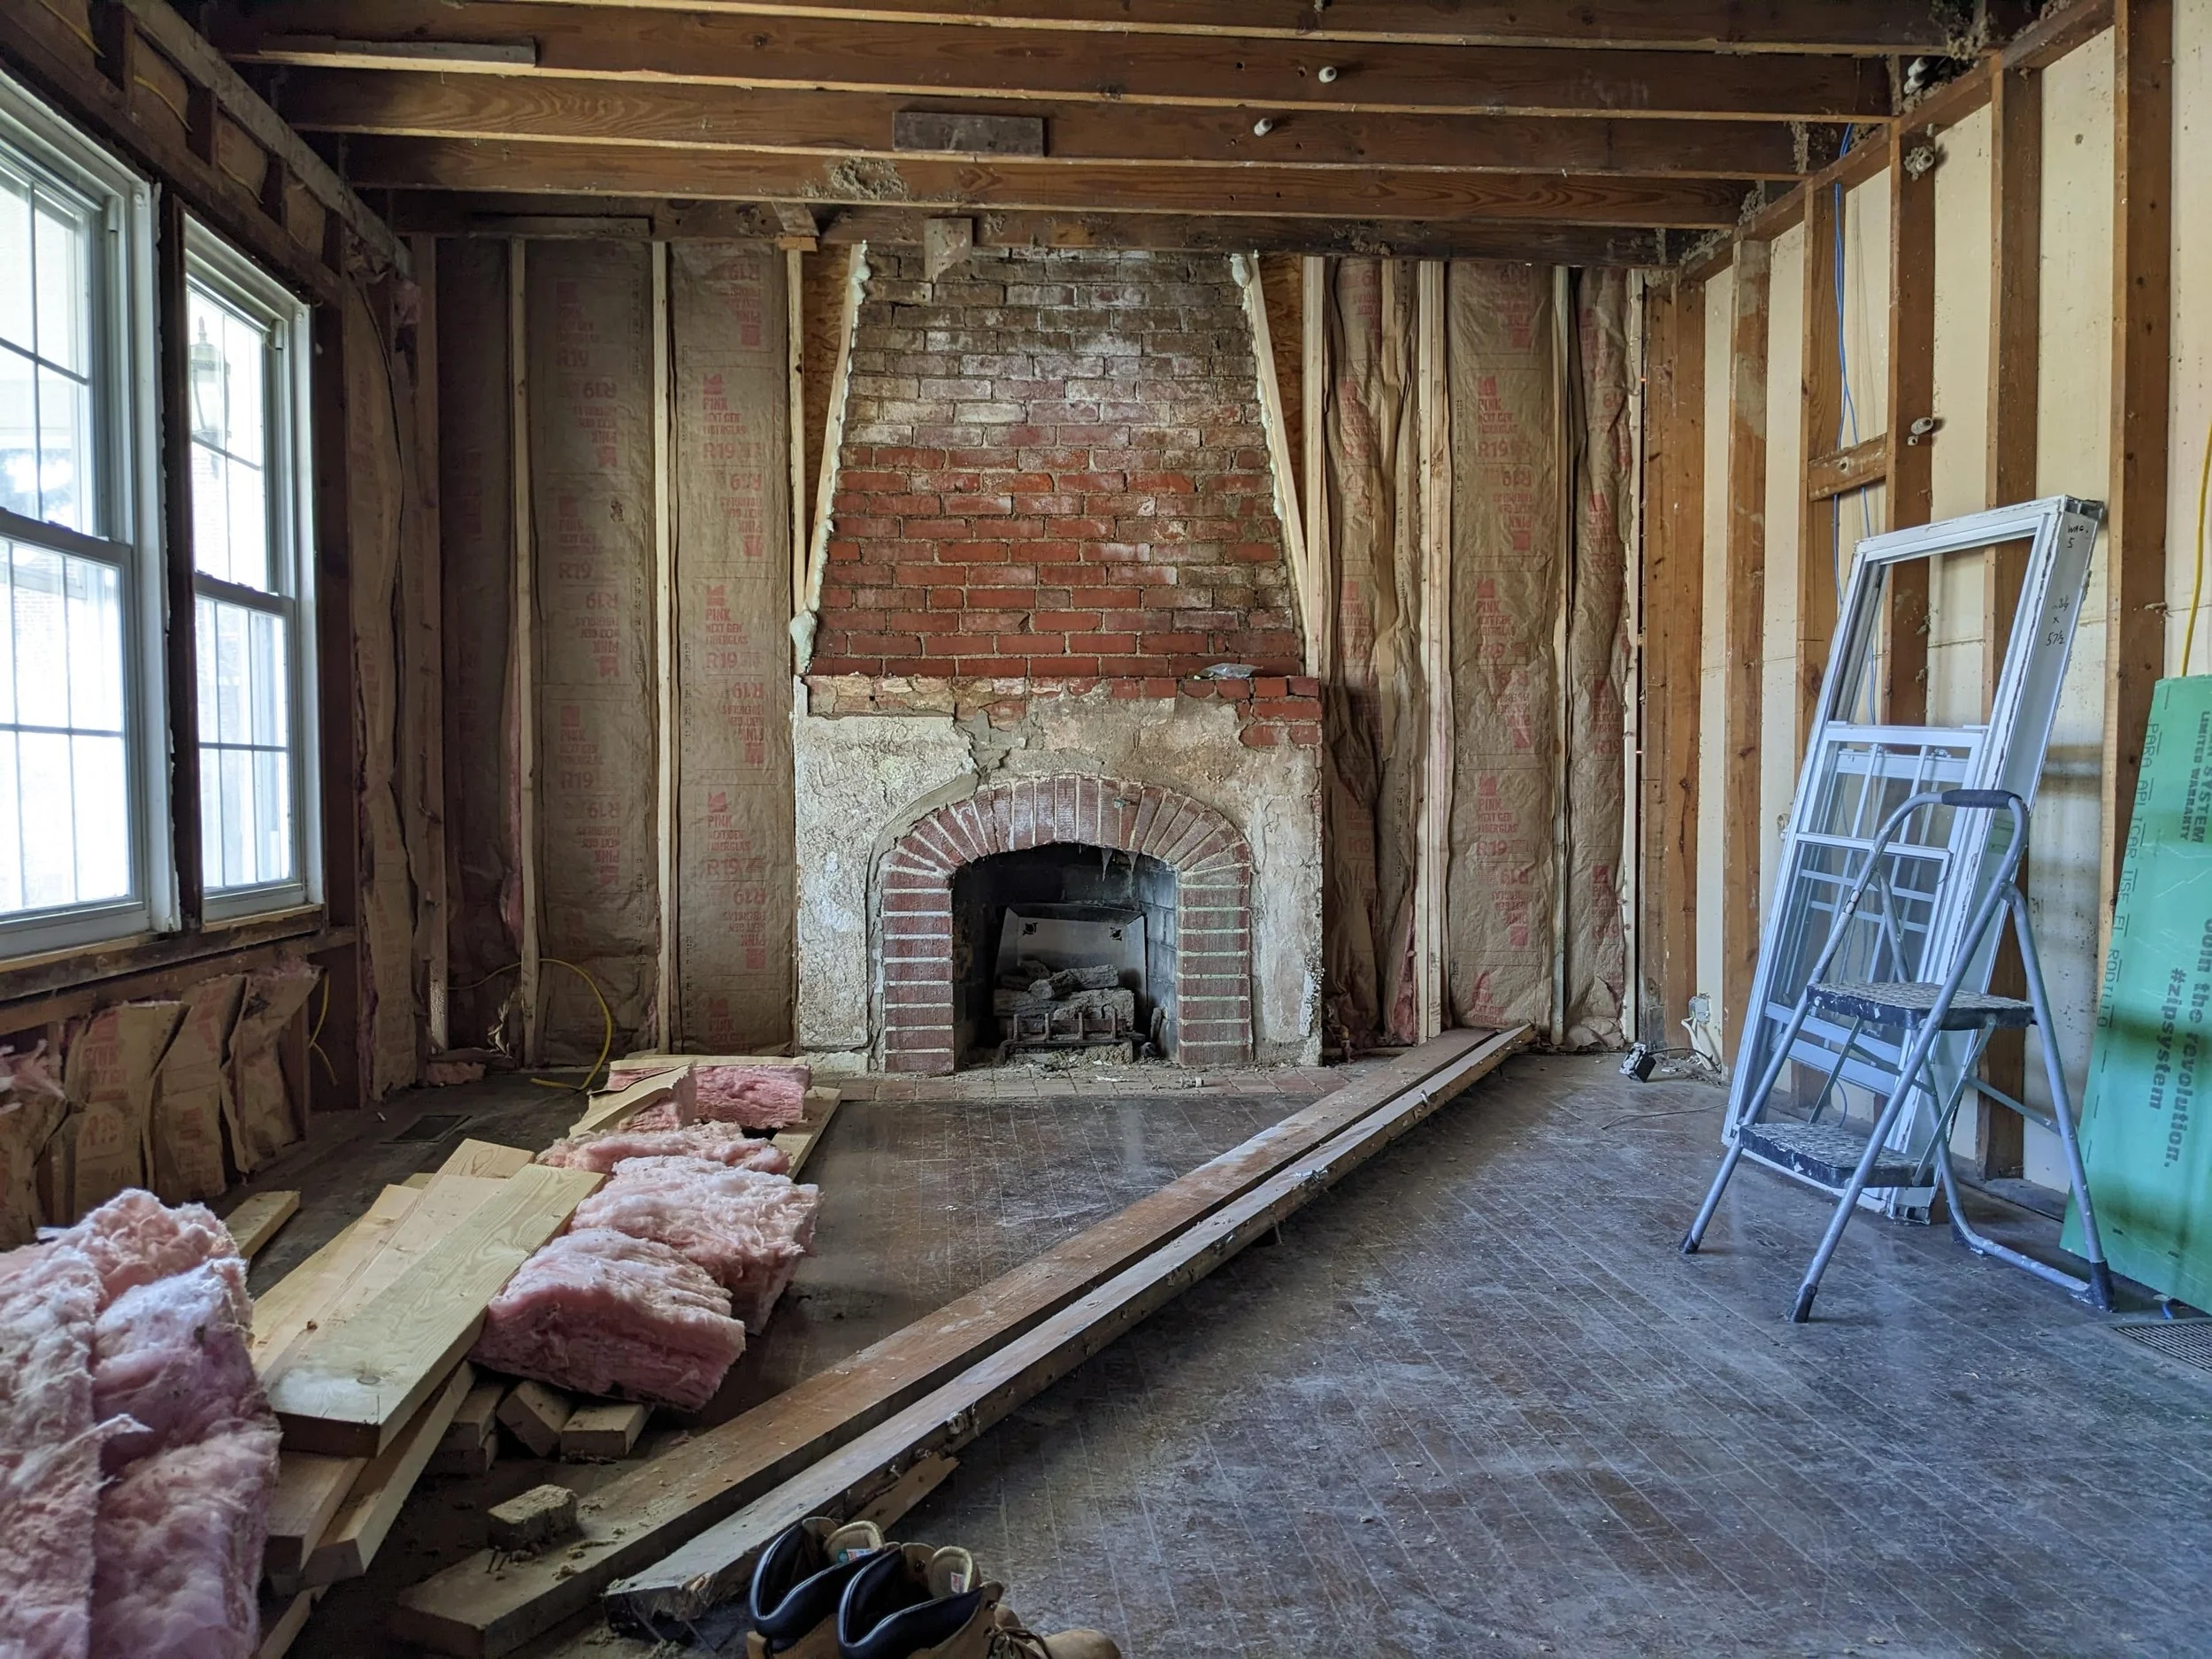
I know it doesn’t look like much right now, but picture the fireplace clad in reclaimed wood. Now imagine it surrounded by floor-to-ceiling stone on either side. Can you picture it!? No? Here’s the image that got my design wheels turning:

Can you see it now!?
As much as I love the fireplace wall in that image, the rest of the room isn’t doing it for me - it’s way too woodsy for what I imagine. I picture a room that’s a little more formal without being stuffy. Once I came across this image, it all started to come together:

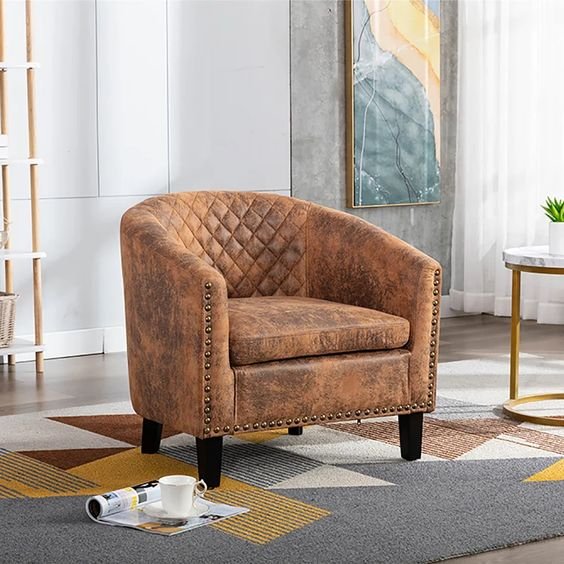
I love how this room feels cozy but still inviting. I could easily see someone curling up in one of those chairs with their laptop and a hot cup of coffee just working away. (Pssst - it’s me. I’m “someone”.)
The only problem? The color. As much as I love black, I don’t think this room is the right place for it. But a mid-toned blue might just do the trick.

I really like this color palette for this building. I likely won’t use these exact colors, but the tones are in the right family (especially that blue/gray) and they’ve proved to be a good jumping-off point.
Lobby Details
Once I got my initial direction nailed down, I started to put my ideas down on paper. Like, actual paper. For the first time in forever, I sketched out my design old-school style and had a blast doing it! It’s been soooo long since I’ve felt that spark. (It felt pretty great!)

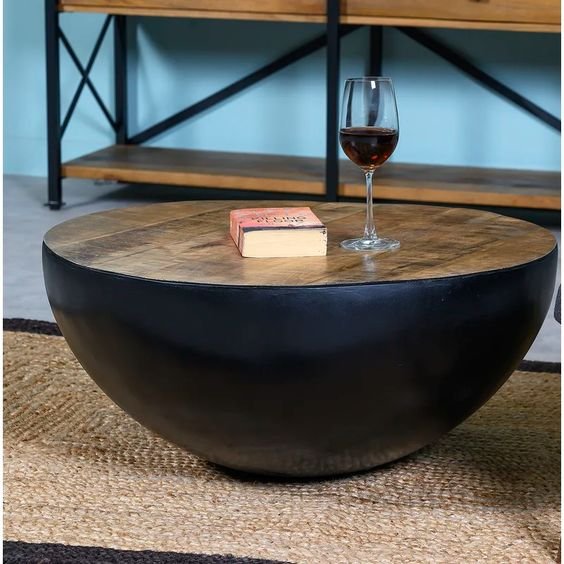
As you can see above, we have the fireplace wall as the focal point with matching barrel chairs surrounding a coffee table. I really like the lived-in look of the chairs below paired with a round dark-toned coffee table in the center.
To define this space, I love the idea of using one of these Loloi rugs from the Chris Loves Julia Humphrey line. I think the tones are neutral enough not to draw too much attention but will tie in nicely with the other colors throughout the room and add a little pattern.

We originally wanted to salvage the flooring in here (and the conference room), but it’s looking less and less likely that’s going to happen. Instead, we’ll probably replace the flooring throughout the main building with a light-to-mid-tone laminate.
And I don’t think we’ll have enough space for a console table as I’ve drawn in the sketch. Instead, we could put a couple of black end tables between the chairs on either side of the fireplace.

As for lighting, we’re planning to install 6 recessed lights in this front room - 4 will be over the lobby and 2 in the reception area. Additionally, I think a wagon wheel chandelier over the coffee table would look phenomenal and really be the cherry on top.

To top it all off, I’m picturing wood blinds or linen roman shades on the windows and a big piece of art on the opposing wall. Maybe with a picture light above it!?
Reception Design
While the reception area is in the same room as the lobby, it’ll have the same blue/gray walls but will be defined as its own space. When you walk in, this is the first thing you see. We’re planning to put a small reception desk facing the front door of the building.
Obviously, the finished product will have walls. Here’s what I’m thinking:
To repeat some of the design elements from the lobby, I’d like to cover the front of the reception desk in the same wood we’ll use on the fireplace surround. I also think that a metal back-lit sign with the company name would look stunning directly behind the reception desk and tie in some of the black elements from the lobby.
I picture something like this, except with the correct company name:


For other design plans, visit these posts:
New Office Design Plans

We Bought a Hair Salon!
Yes, folks, you read that right. We bought a hair salon! Are we getting into the hair styling business? Nope! Let me give you the skinny.
New Renovation Project
Yes, folks, you read that right. We bought a hair salon! Are we getting into the hair styling business? Nope! Let me give you the skinny.
My husband is part owner of a local real estate brokerage. Previously the brokerage rented office space out of a local co-op building. But as the brokerage grew, things were feeling a little tight. So we started looking for a building and snagged this beauty:

Now, you may be wondering why, of all the possible buildings, we bought one in such bad shape. Well, as they say in real estate (and, considering who bought it, they should know better than anyone): location, location, location.
While this building most definitely needs some serious renovations, the location is excellent. On top of that, because the building was for sale for so long, we bought it for a pretty great price. Of course that comes with drawbacks: there are lots of repairs needed before we can even start using it.

We closed on the building at the beginning of December, and my husband, Lucius, and some of the agents at the brokerage started working on it right away. I didn’t actually get to visit or start helping until the beginning of this month and man, a LOT has happened since we took possession. Let me take you on a little tour as I catch you up on the progress so far.
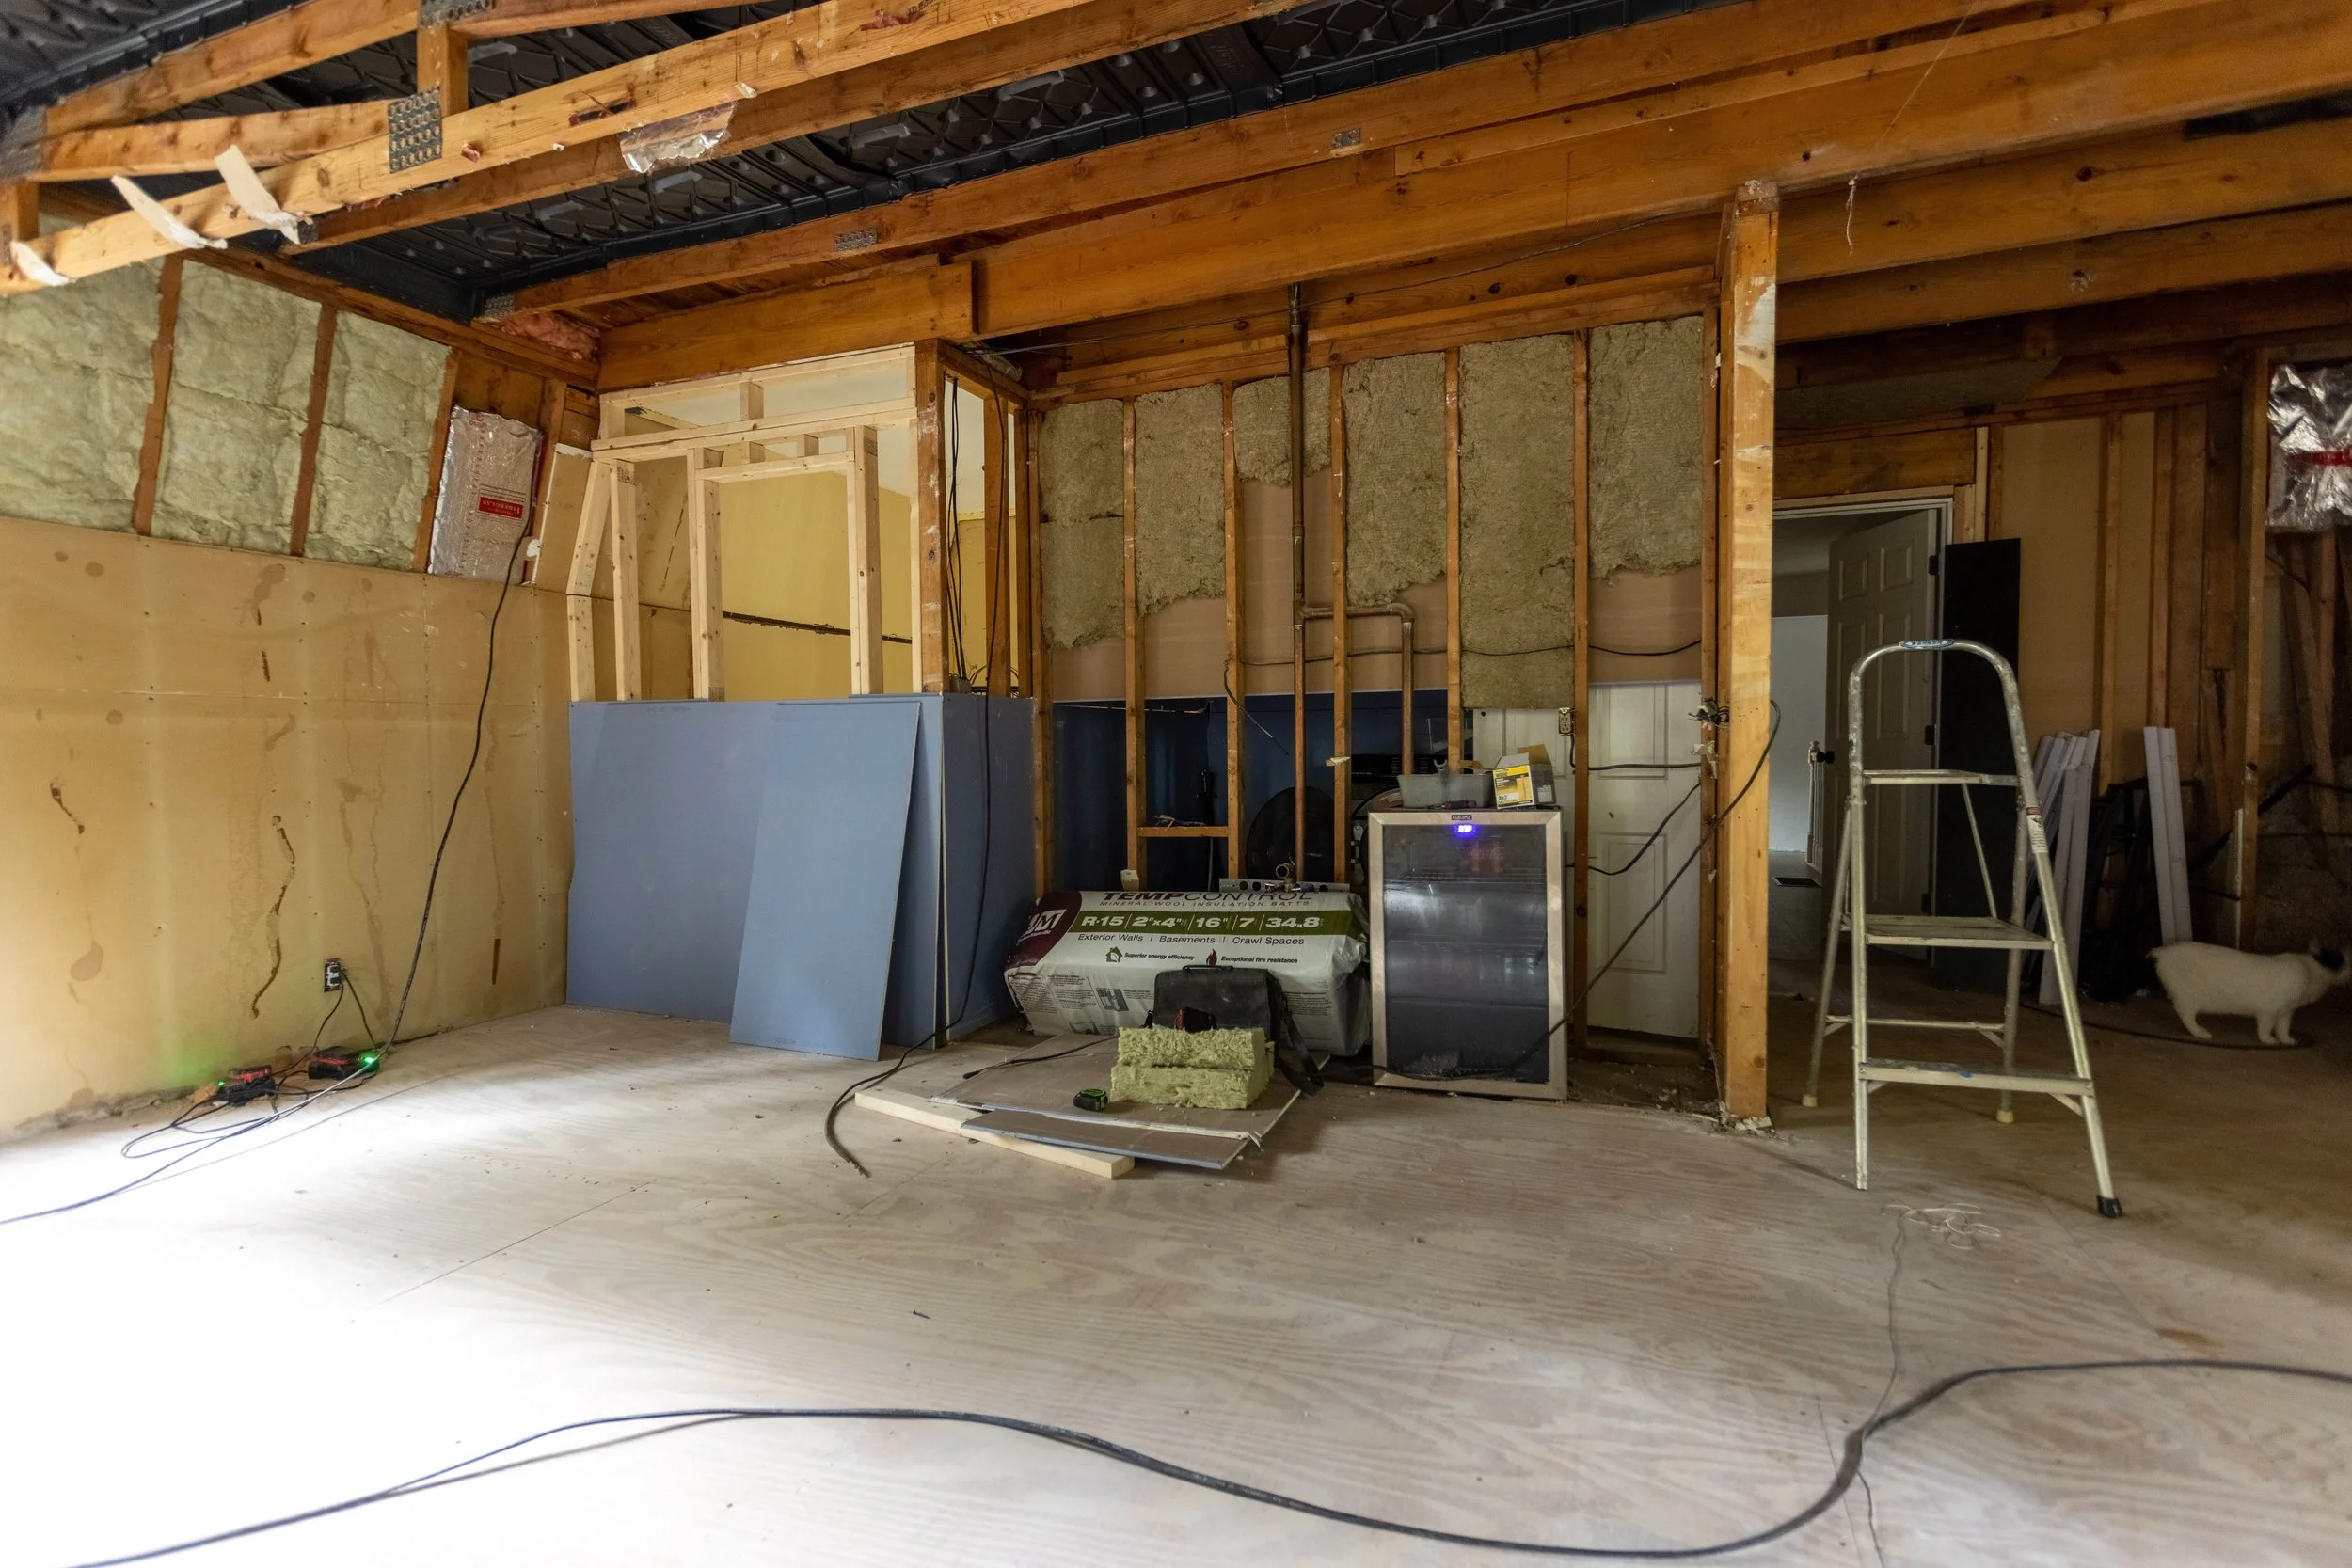
The Exterior
As you can clearly see from the pictures above, there’s significant termite and water damage to the wood on the exterior walls. On top of that, the stucco is falling off in sheets, sometimes with barely even the tap of a hammer (whoever thought stucco in the Midwest was a good idea?). You can see in this picture where it’s already buckled and separated from the wall.

So, we’ve been busy removing the stucco and replacing any damaged wood - which, in many cases, requires rebuilding entire walls. Or sometimes the entire corner of the building!

We’ve also had part of the roof replaced. Unfortunately, the flat section of the roof can’t be done until it’s consistently 60 degrees for several days in a row. In the meantime, we’re trying to seal up the building as best as we can and keep water, drafts, and pests out.

And if you think the exterior looks bad… just wait!
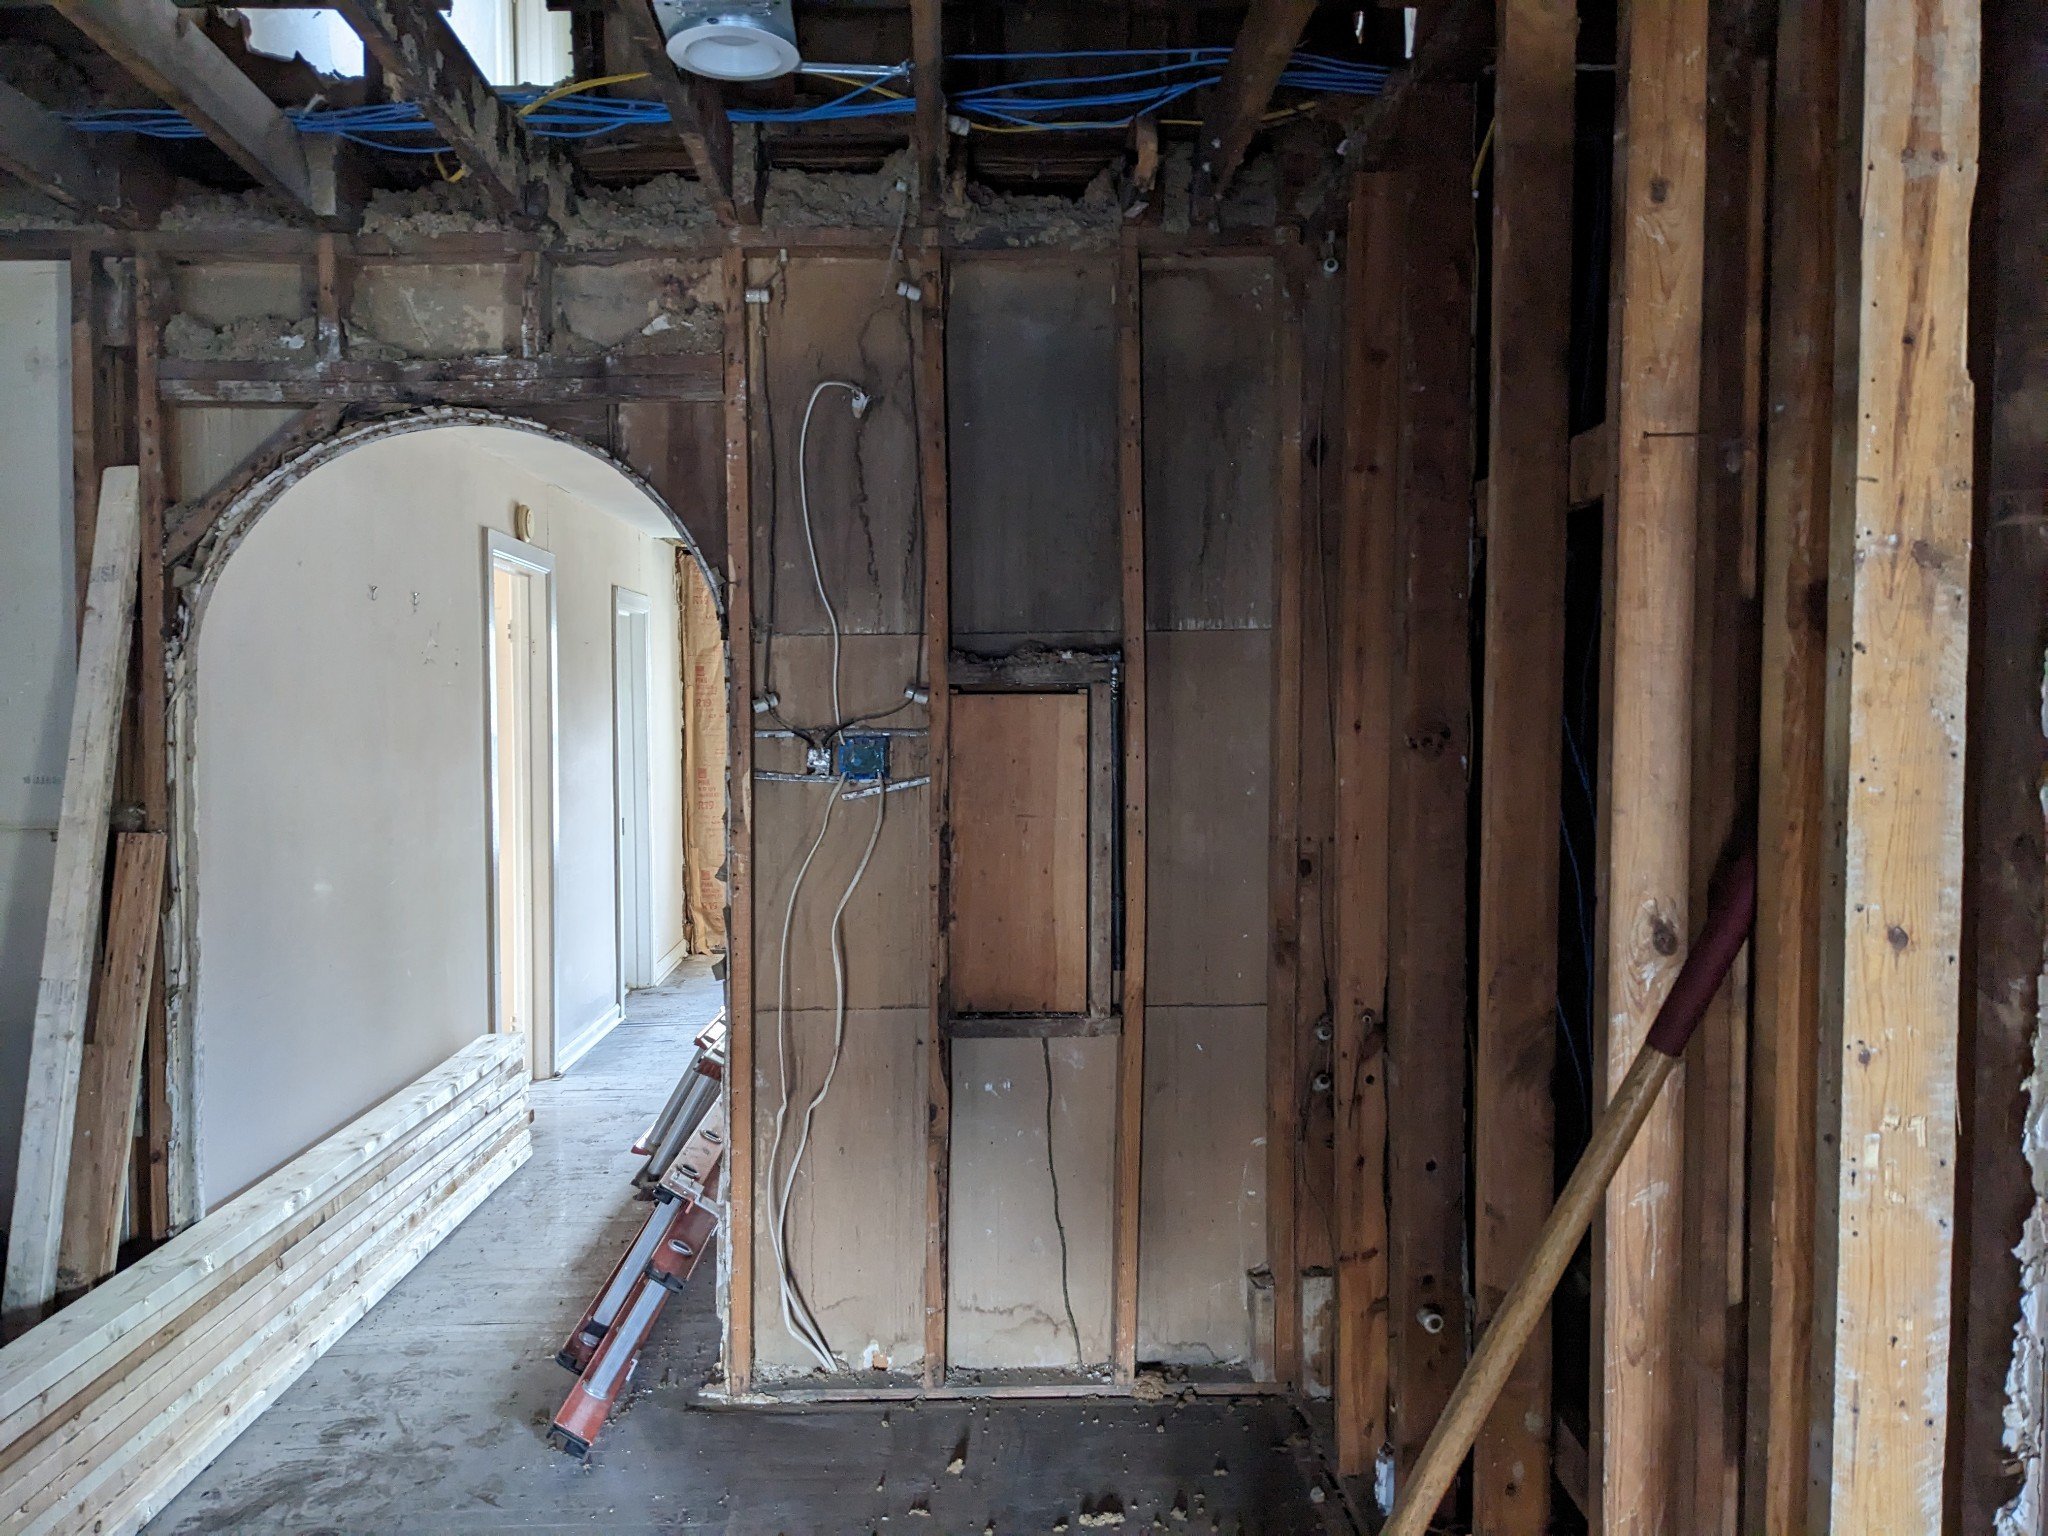
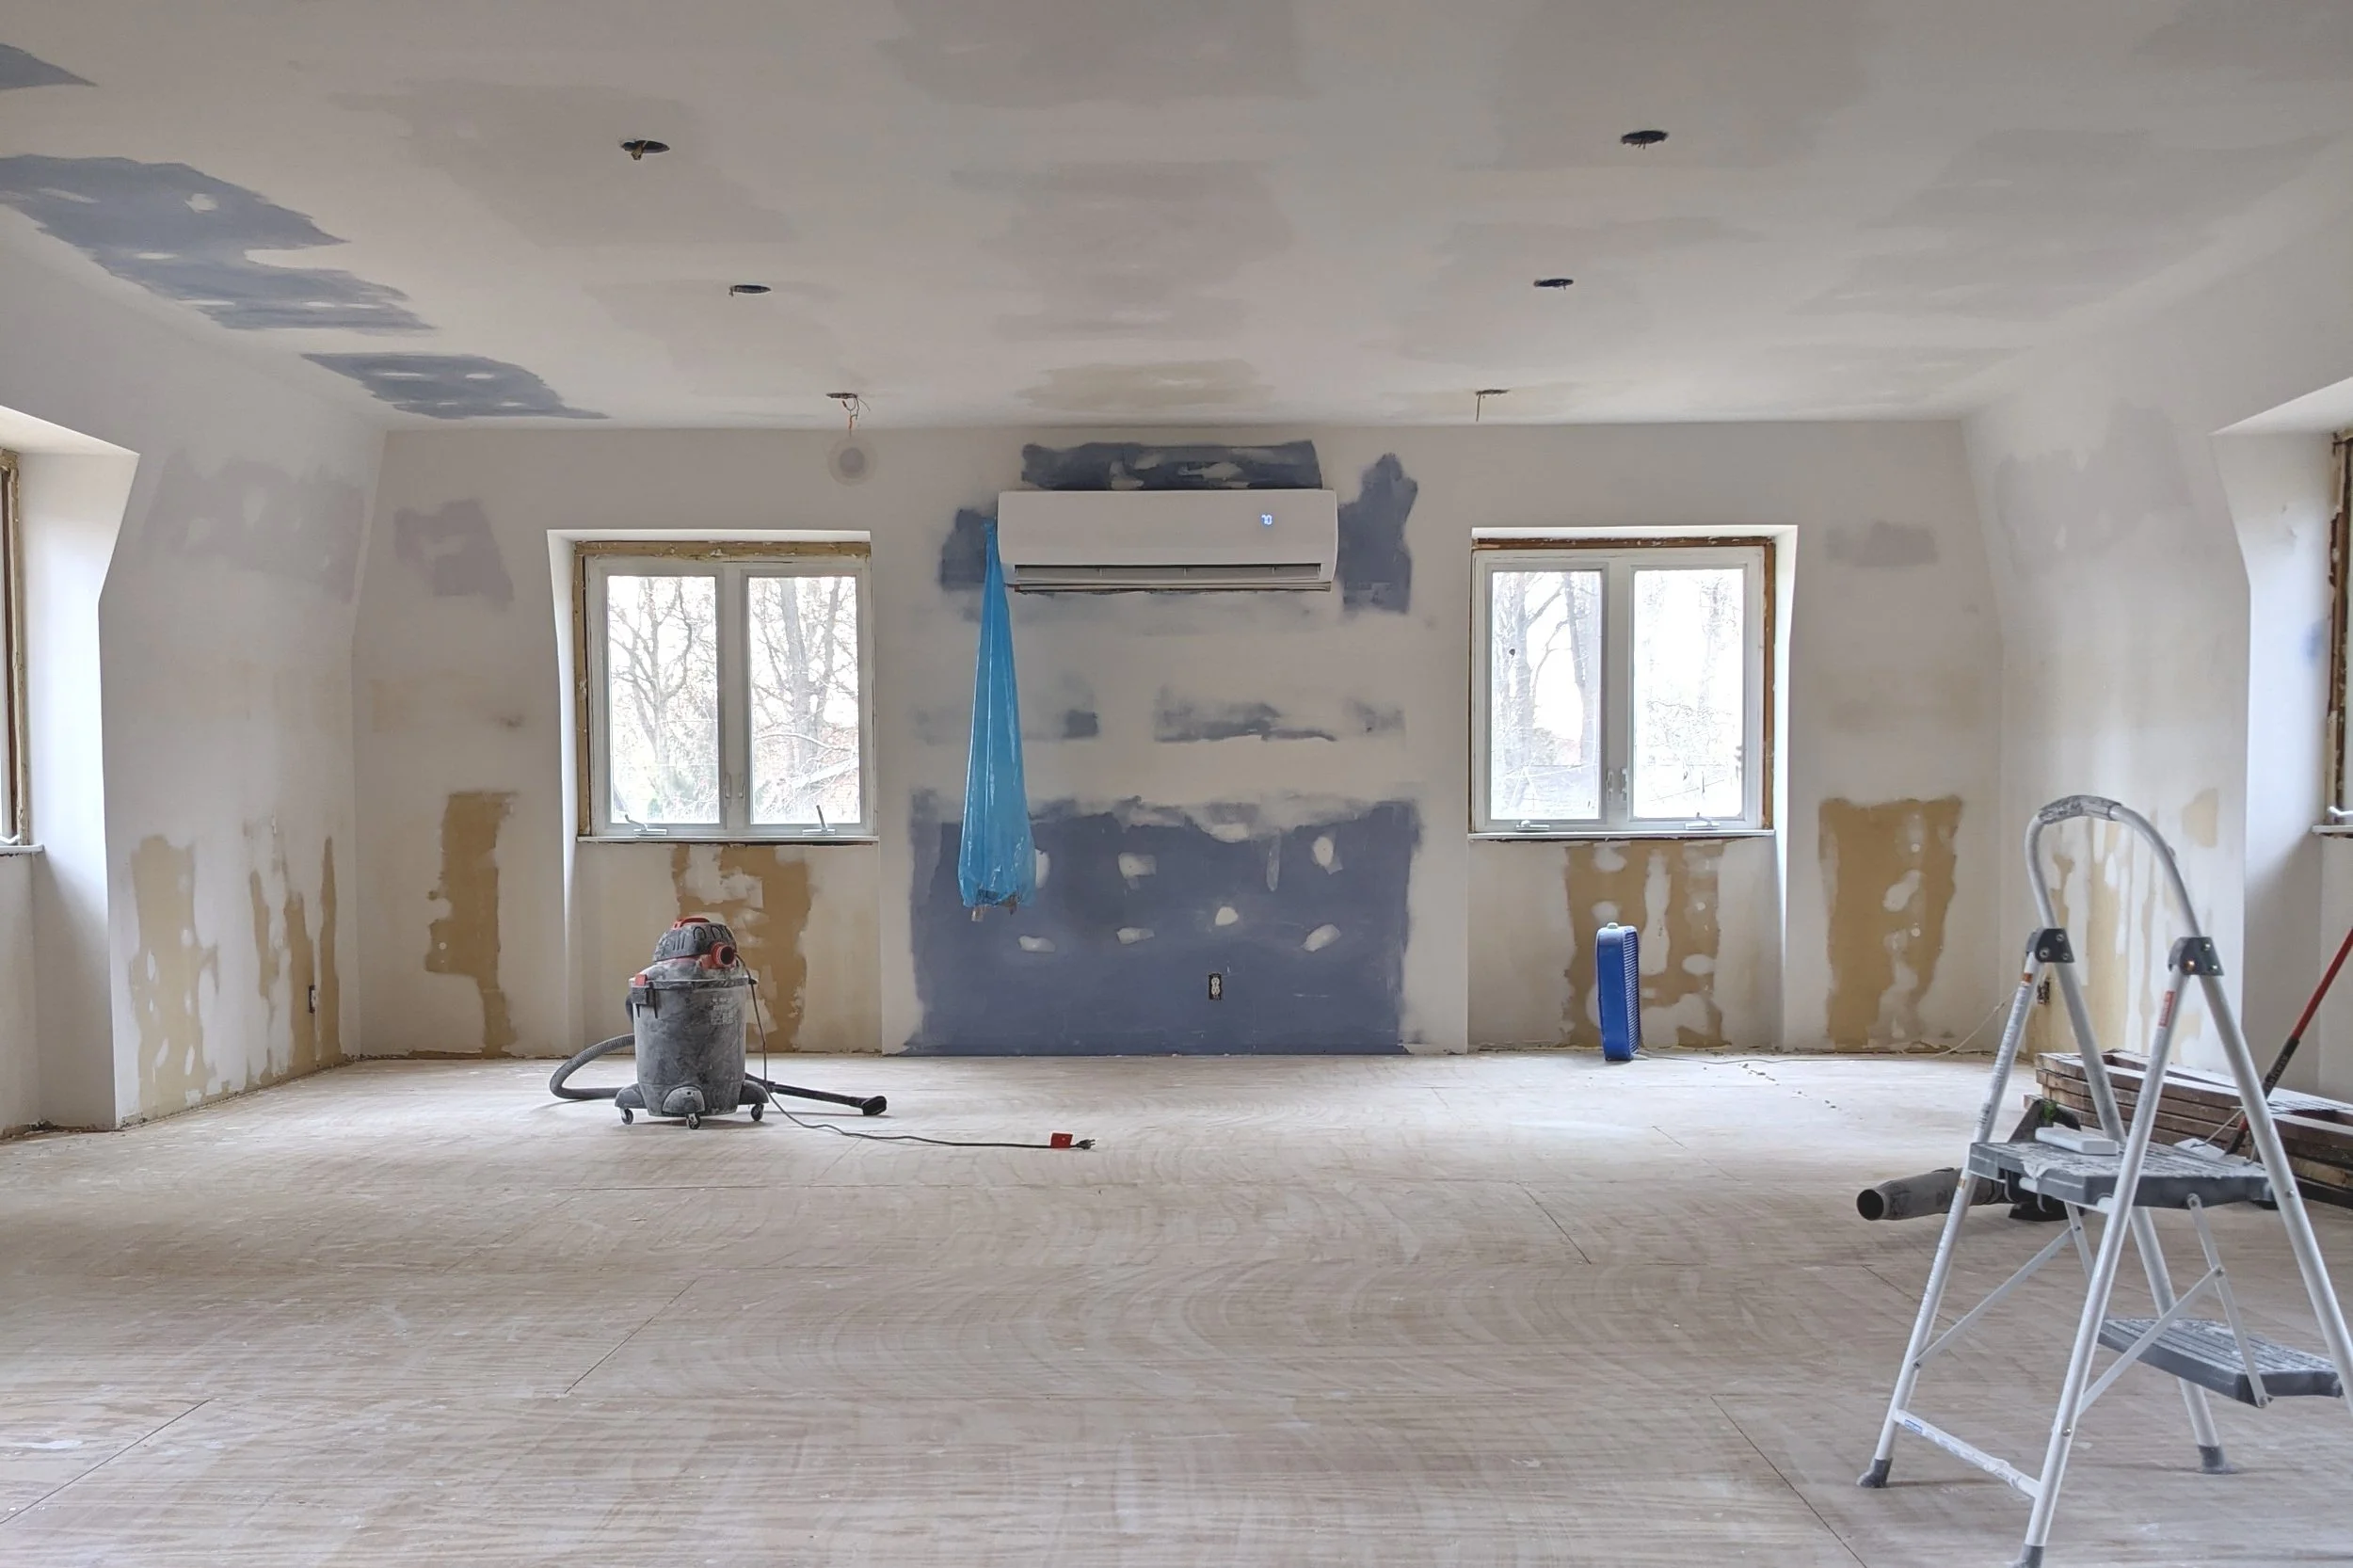
Almost every wall inside is covered in flaking texture, all of which has to be removed. On top of that, none of the exterior walls are insulated. Needless to say, there’s been quite a bit of wall removal, nail pulling, and reinsulating.
Front Room
When we bought the building, you’d walk through that cool arched front door you see in the picture above and enter this dreamy space:

Pretty much everything in this room had to be demoed…

But luckily the fireplace is staying! I already have so much design inspiration for this room, and I can’t wait to start putting my thoughts together. (update: here are the plans for this room and here’s the reveal!)

What I can say definitively so far is that this will be an inviting waiting room/casual work area with plenty of cozy seating. Can you picture it!?
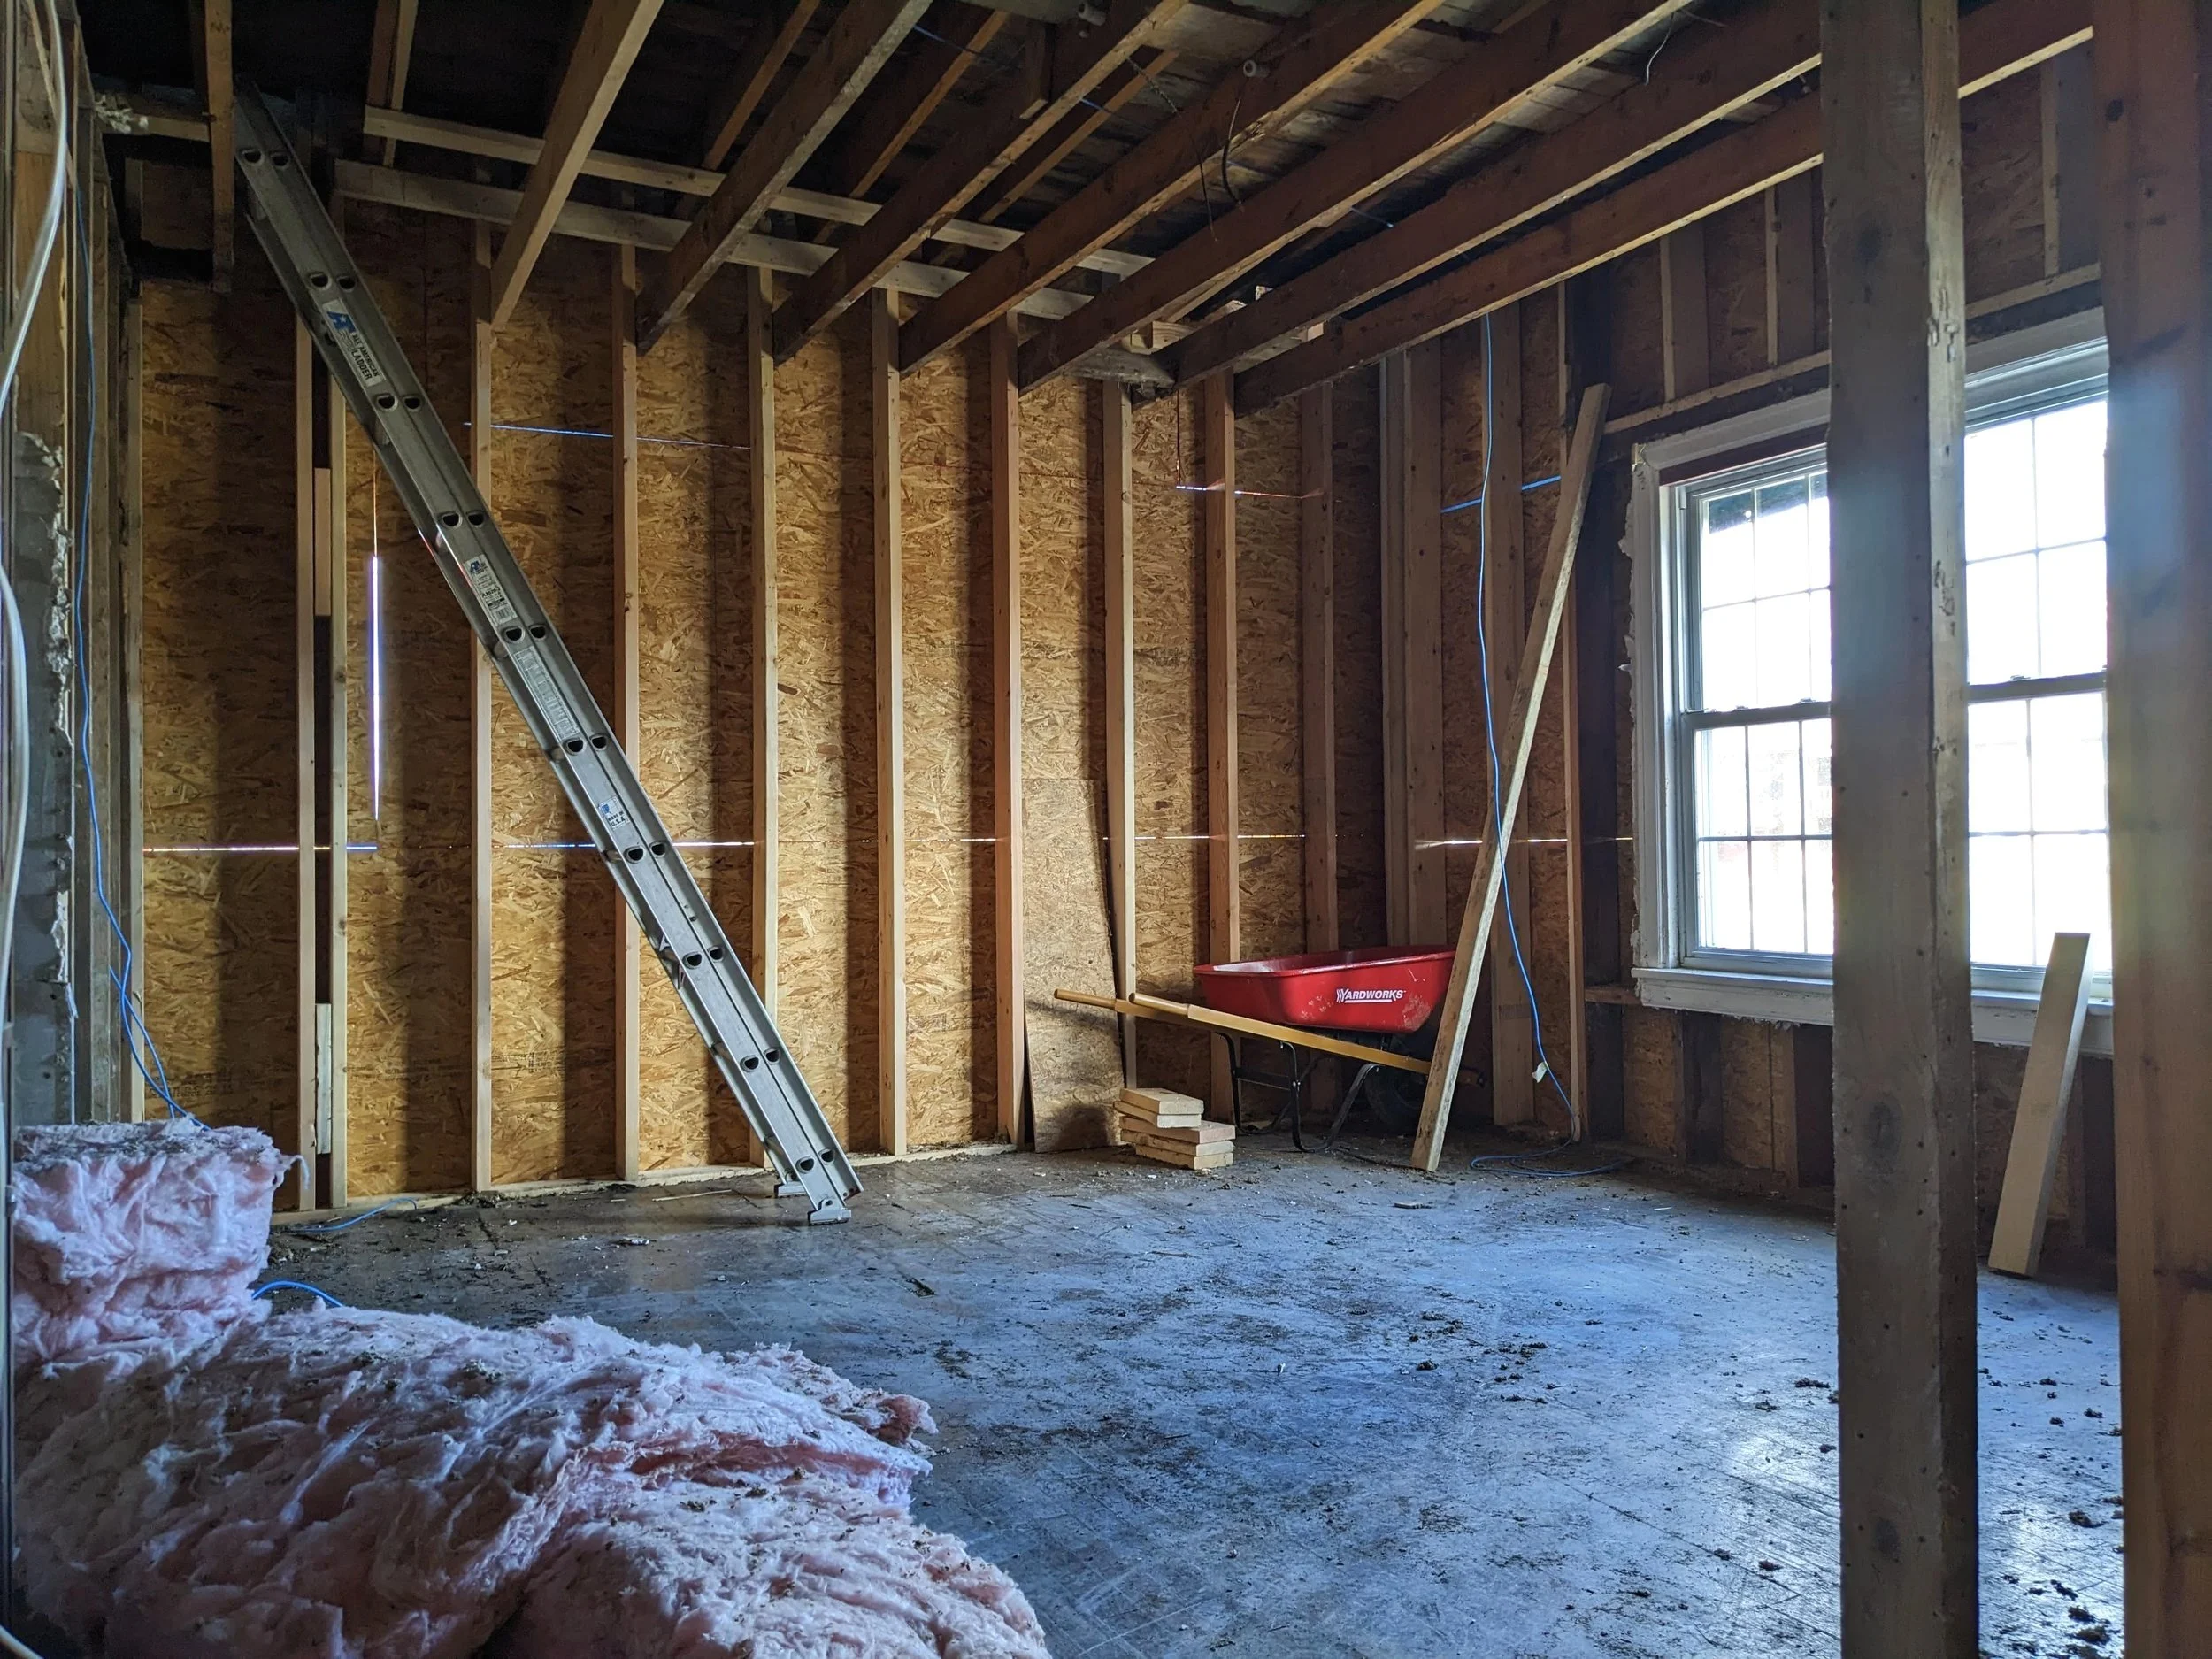
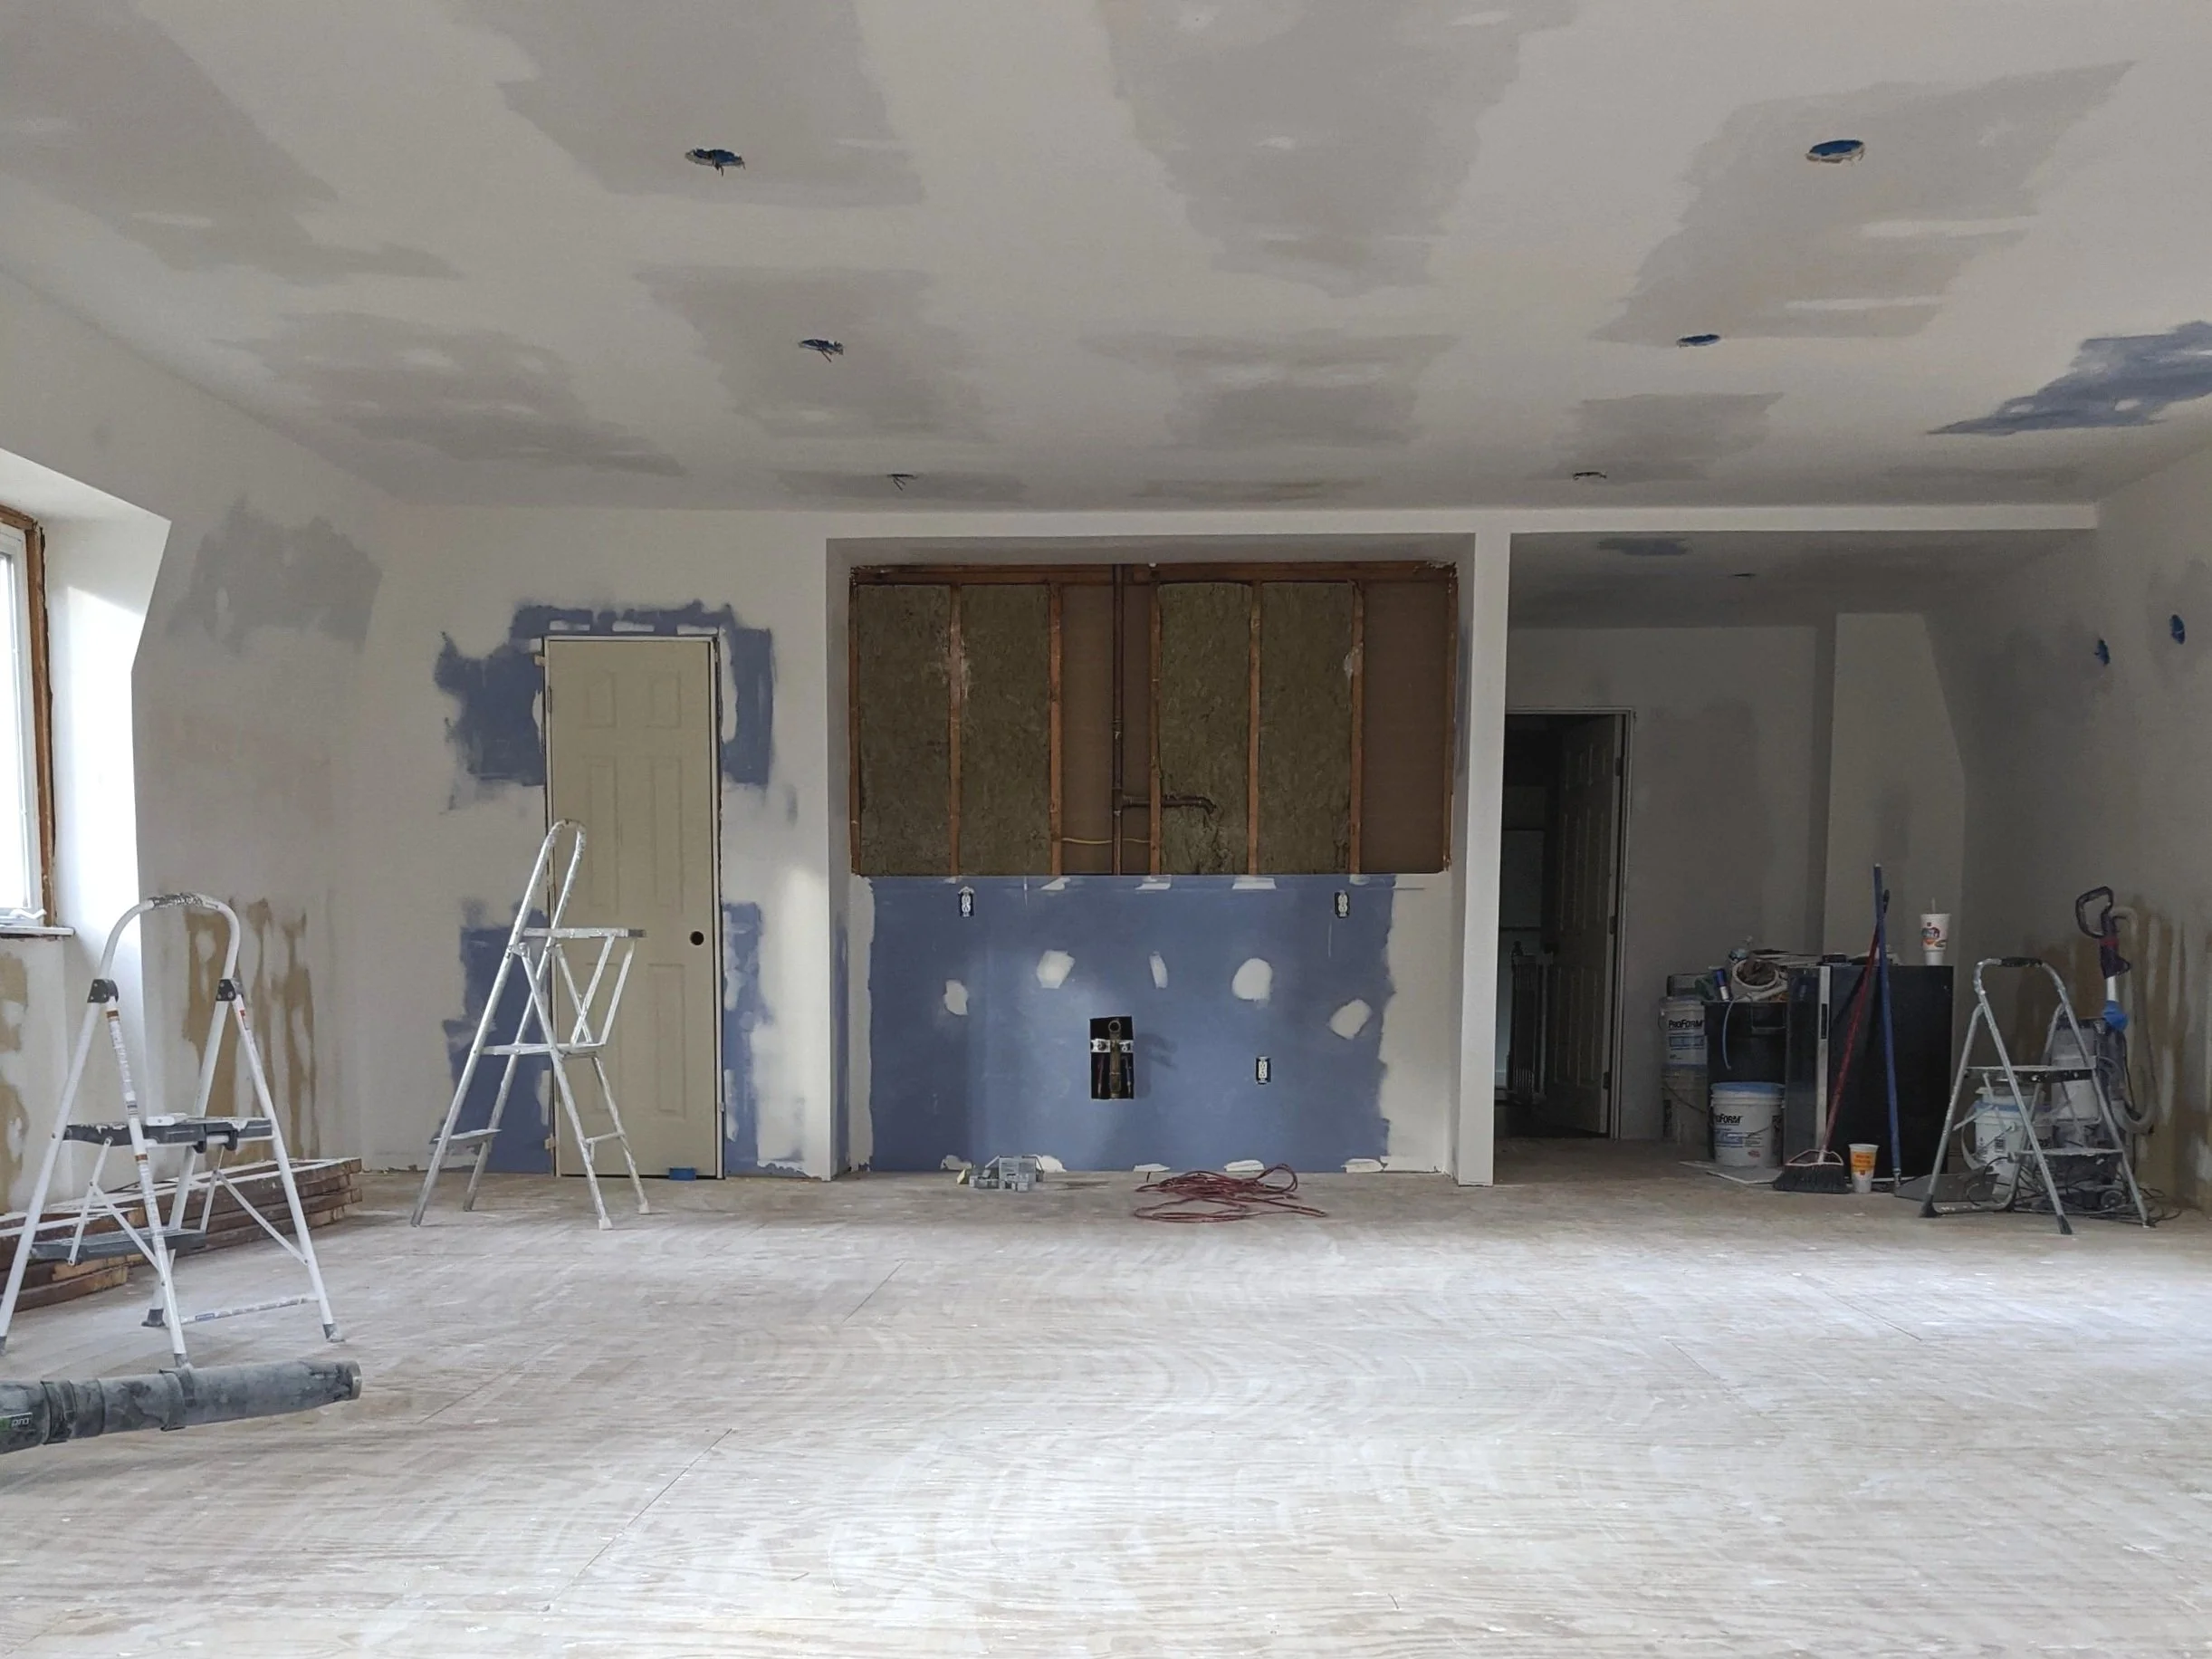
Conference Room
To the right of the front entrance is what will be the future conference room.

This room also had to be demoed down to the studs.

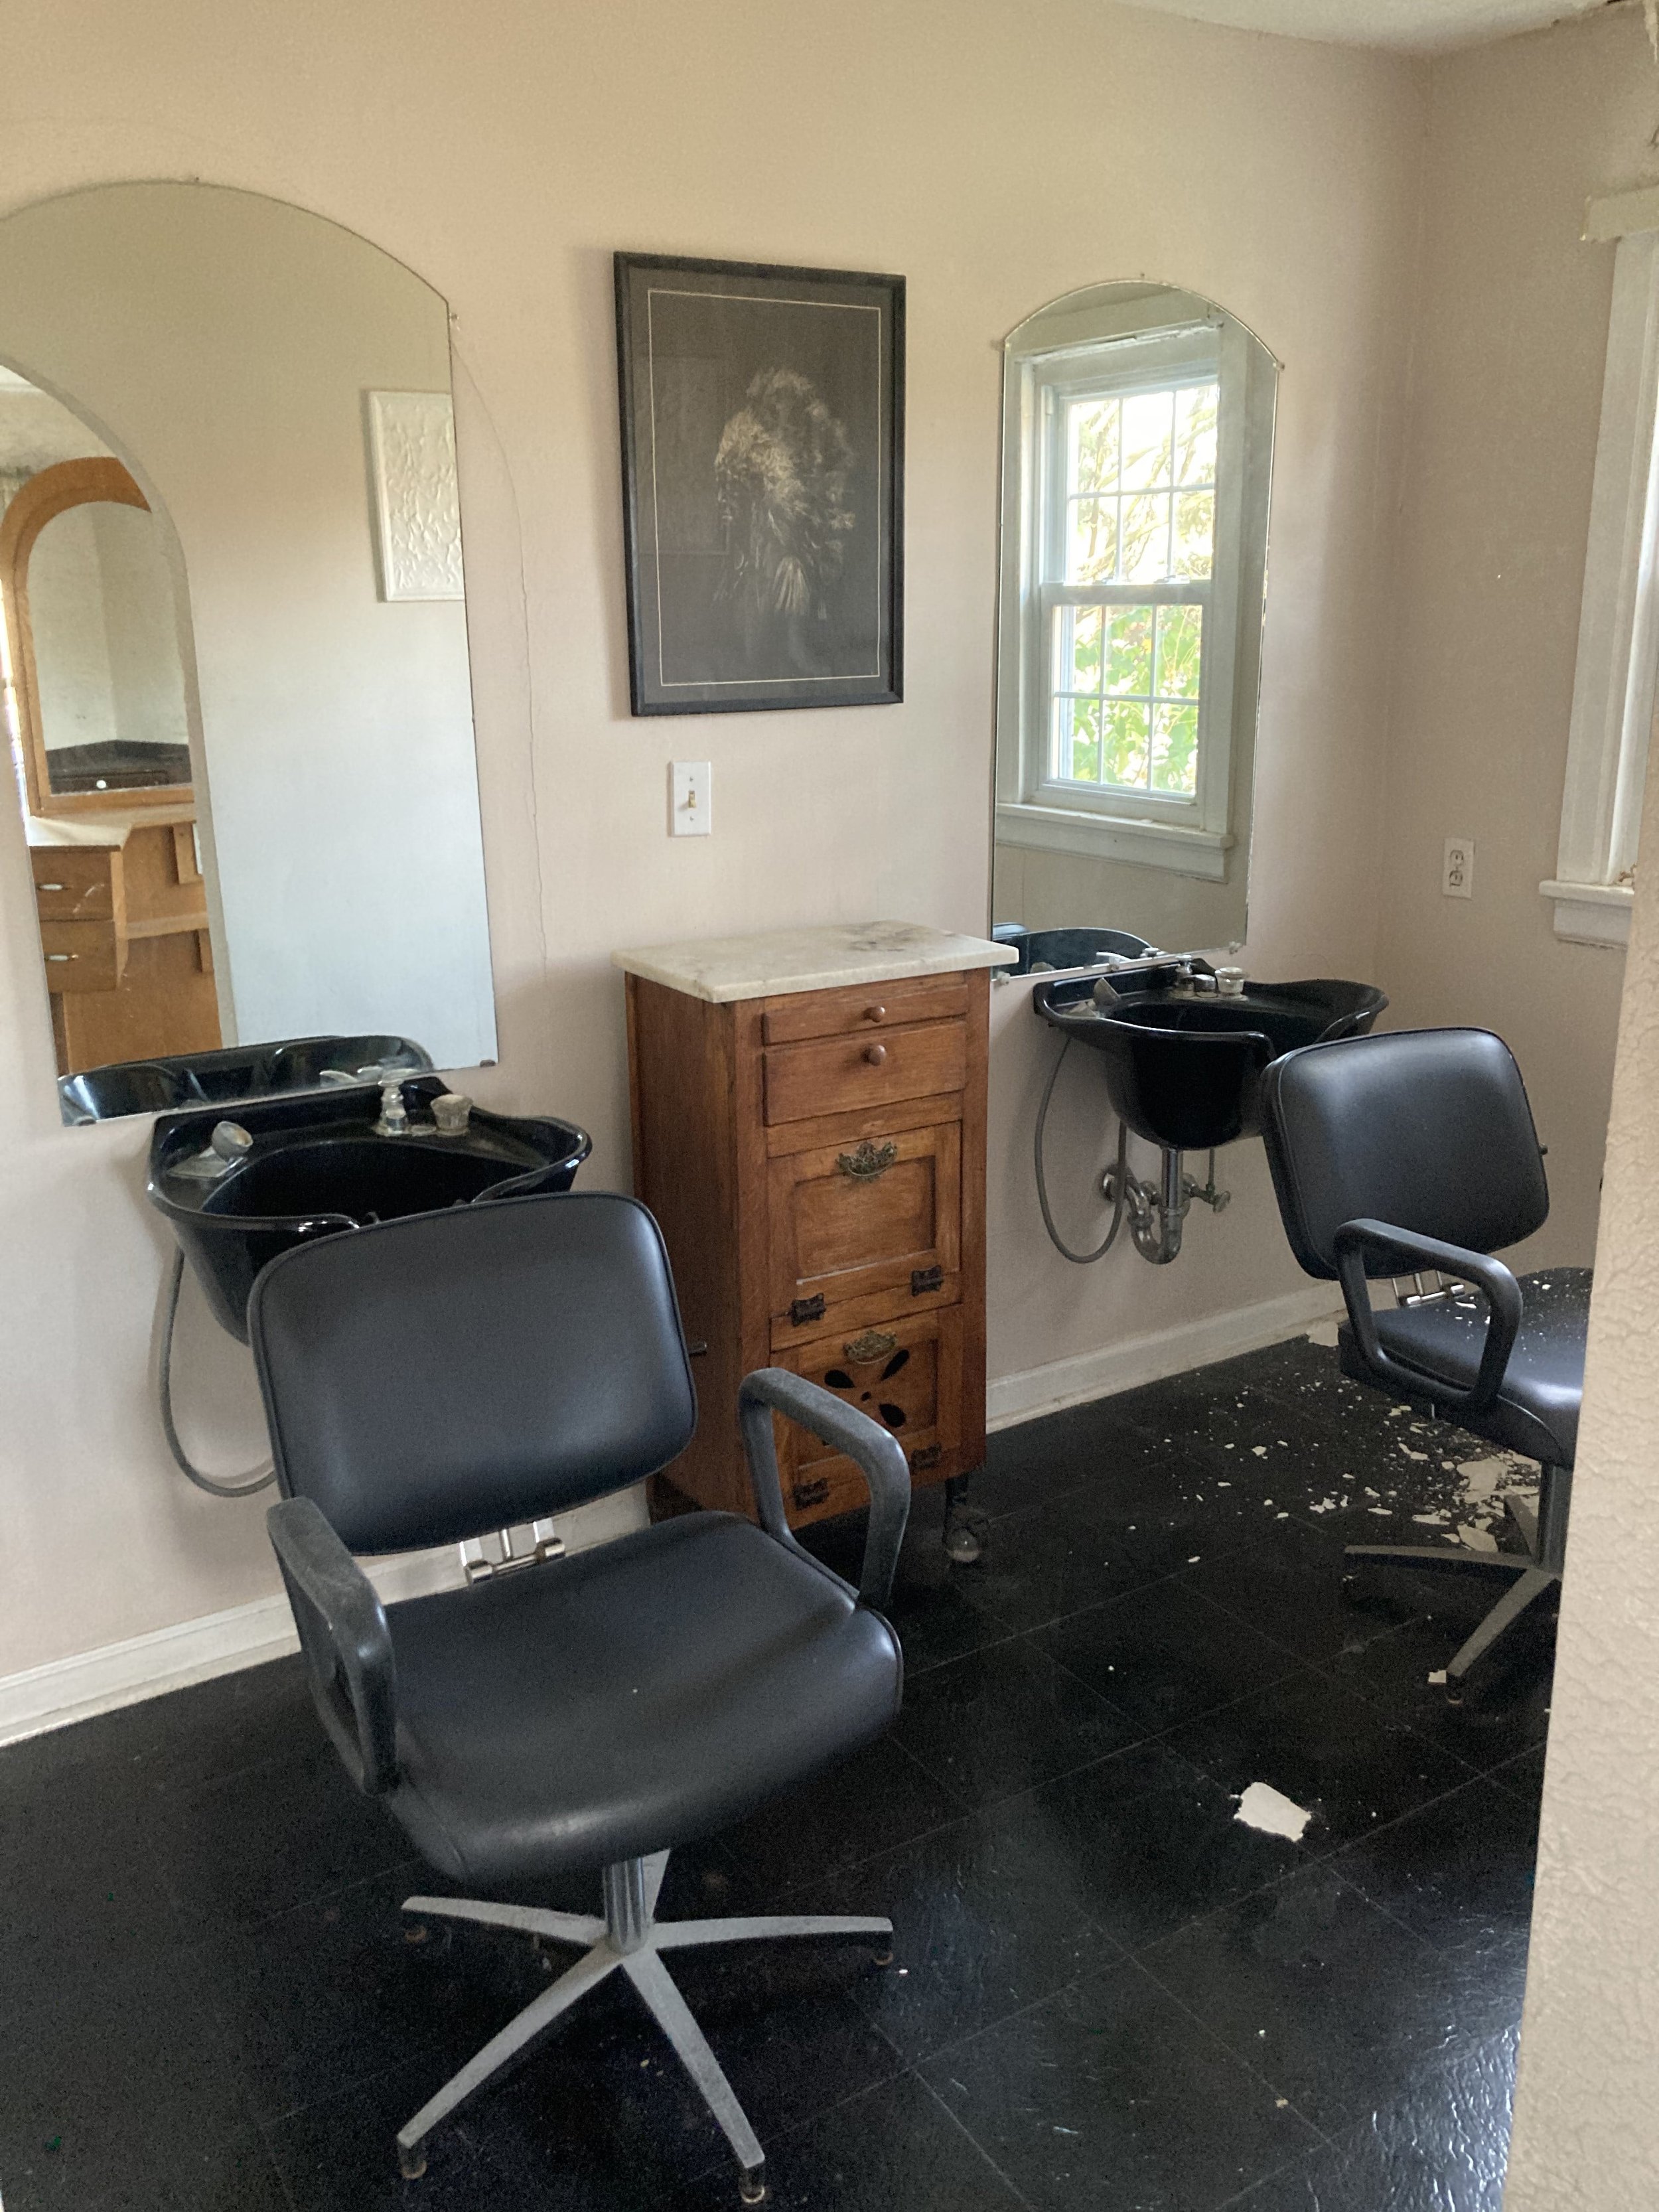
But again, we still get to keep some of the character - like this built-in cabinet! I’m hoping to rebuild some of the arched doorways as well.

The little room you see straight ahead will become a small kitchenette area with a counter and appliances spanning across the wall with the hair-washing sinks.
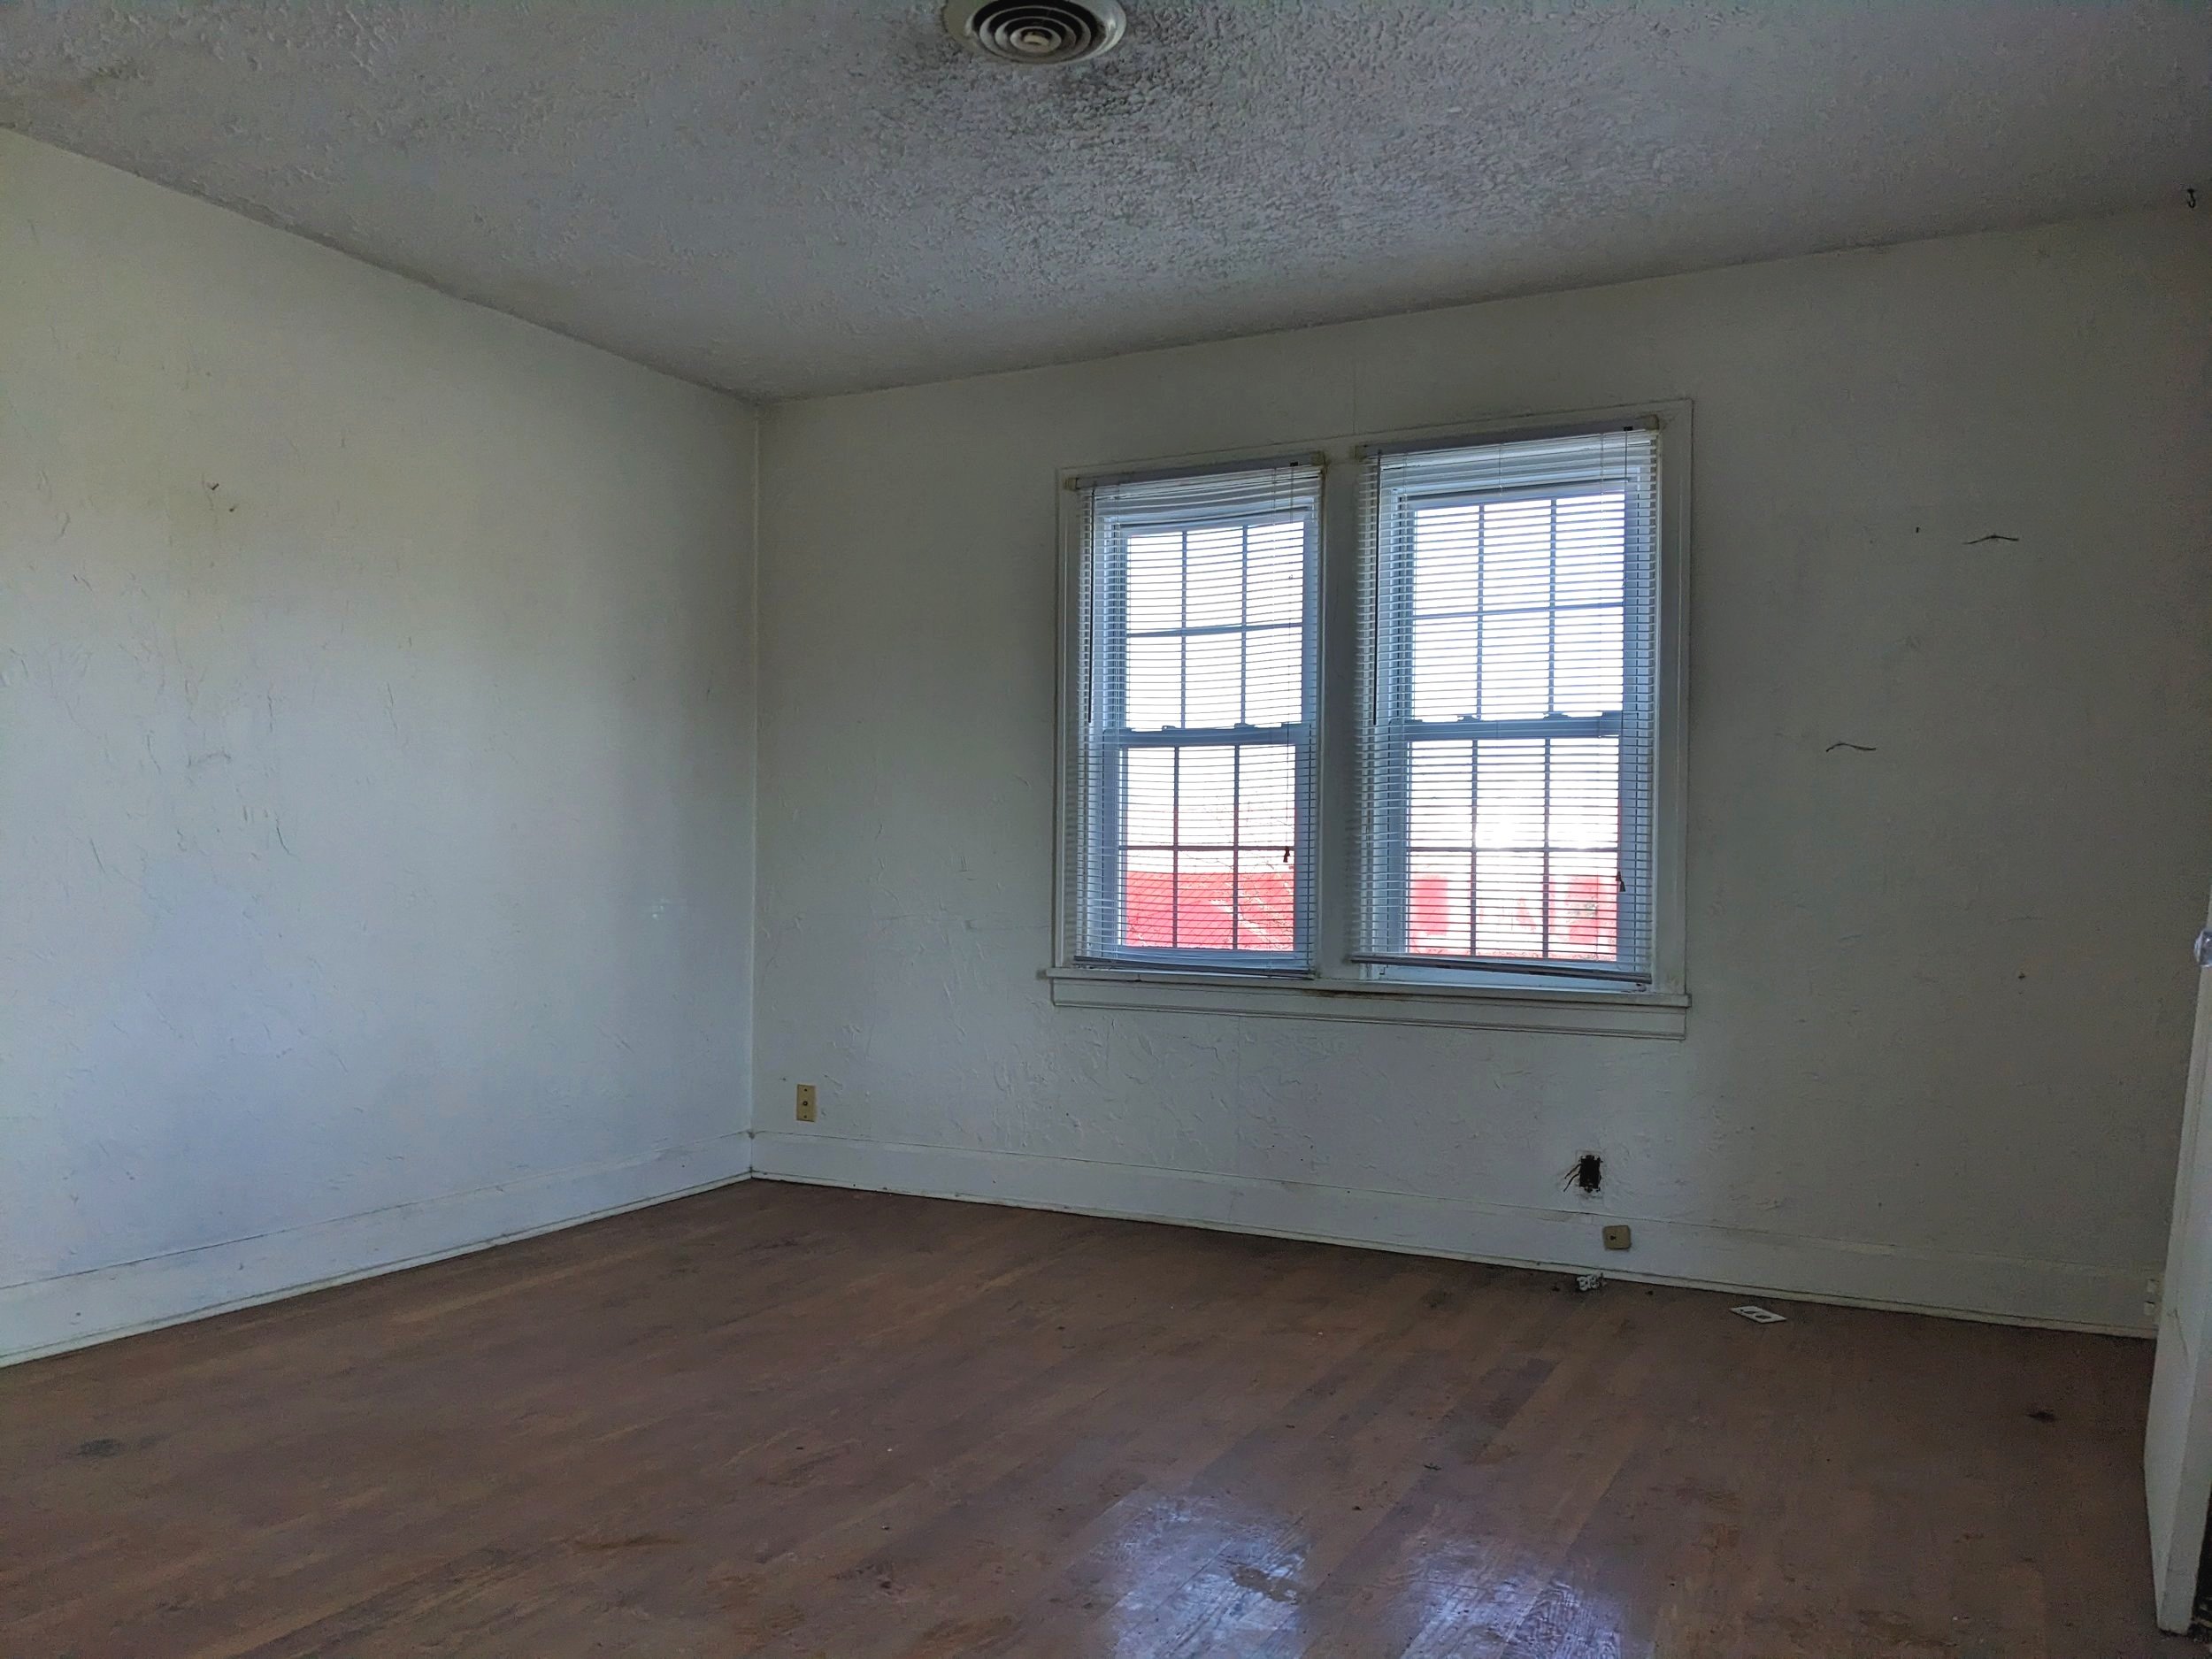
Office
There are also a couple of rooms in the back half of the building, one of which will be the future agent office.

Although it may not look like it, demo has actually been kept to a minimum in this room (we have plenty to repair elsewhere!)
Our main focus for the time being is to finish the front room, conference room, and office so we can at least move in and make use of the building. The other rooms will be tackled at a later date. Nevertheless, here’s what else we have to look forward to.
Everything Else
TBD Room
We’re not sure what this other room on the first floor will become just yet, which is fine for now! We’ll obviously have to remove the sinks, but I think for the most part demo will be minimal when the time comes (this is one of the few rooms without textured walls!)

As we start to utilize the building, I’m sure it’ll become more apparent what the best use for this room will be.
Downstairs Bathroom
Not much to see here, just a grubby little half-bath!

The toilet has already been replaced. We’ll obviously clean this bathroom up and replace the vanity in the short term, but may make more significant changes down the line (here’s looking at you, textured walls).
Upstairs Rooms
There are two rooms on the second floor that will become office spaces. One will be used by Hoola Managed IT (you can see the office I originally designed for them right here), and the other will be for Lucius and his business partner.
As with many of the other rooms in the building, there will likely need to be some decent repairs needed in these rooms - like removing the textured walls and insulating them.

But, again, these rooms aren’t the priority, and we’ll loop back around to them later.
Upstairs Bathroom
Lastly, we have the upstairs bathroom.

Other than a thorough cleaning (and a toilet) this space will remain as-is for a while, but I do have an interesting story about this room for you!
When some of the plaster near the bottom of the stairs (which shares a wall with the bathroom) was demoed, we were faced with this scene:
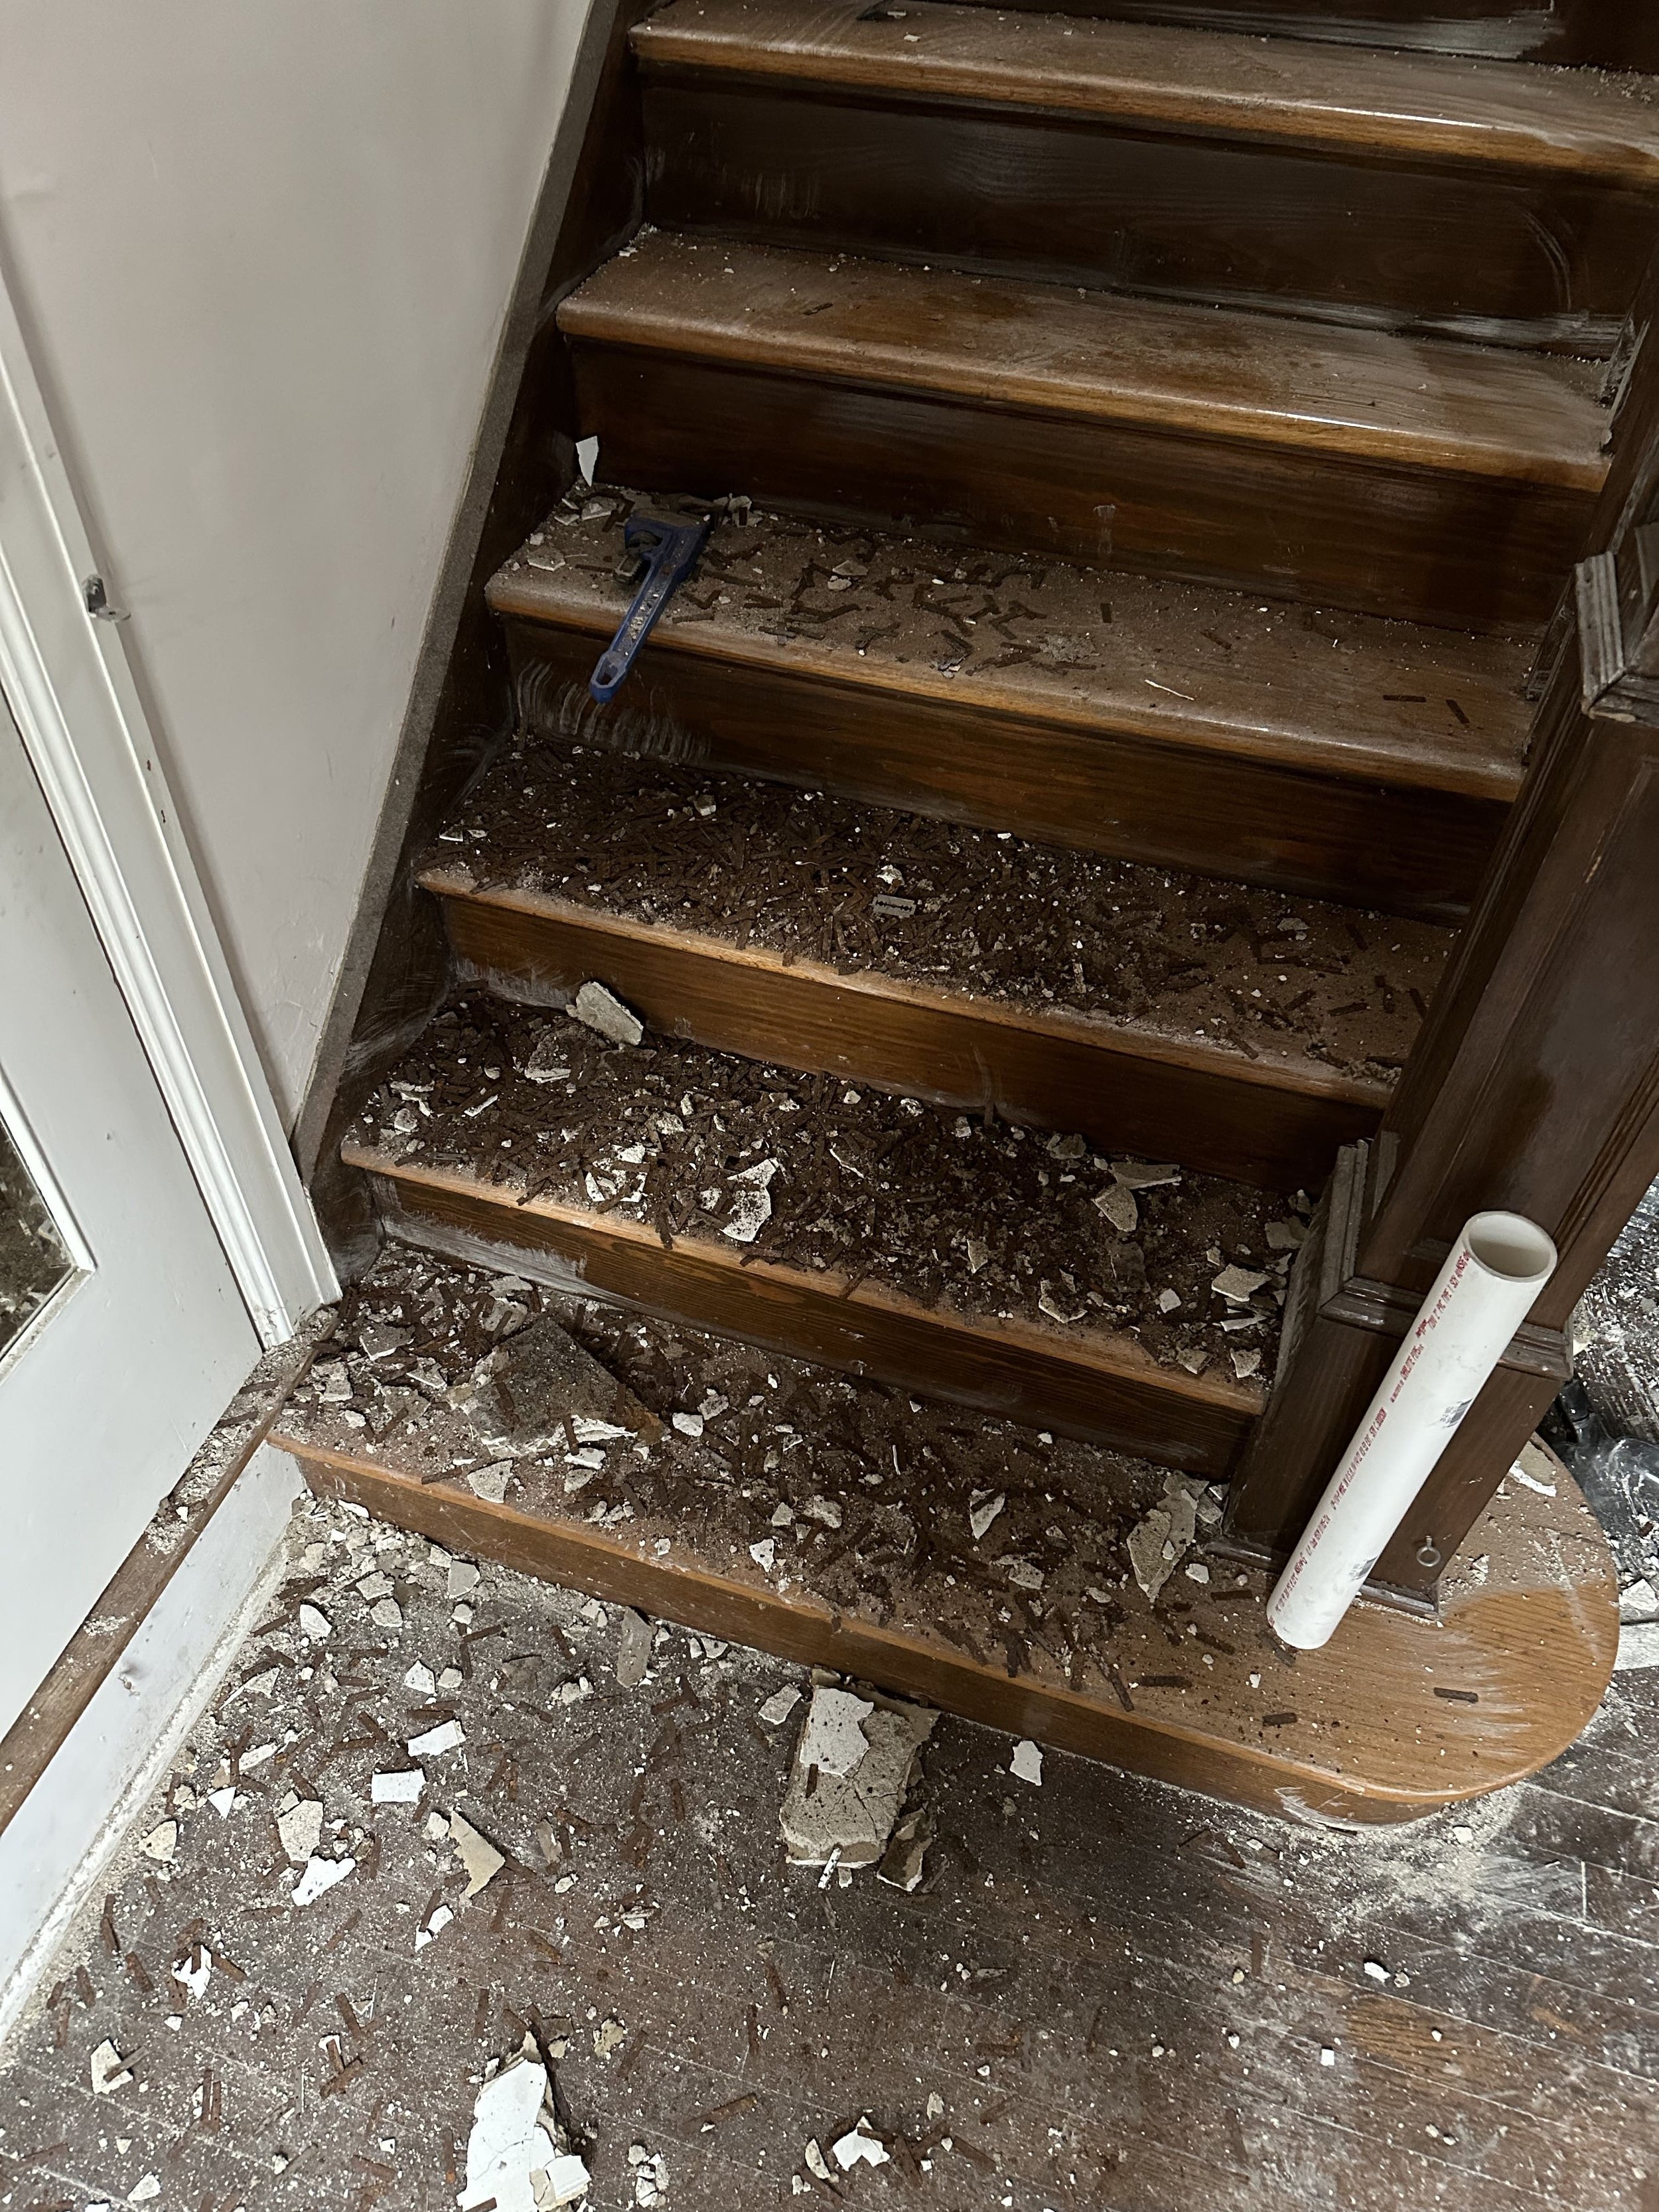
That’s not your average demo debris - its hundreds of razor blades!
In houses built before 1970, oftentimes there would be a slot in the medicine cabinet for men to drop their used razor blades. This slot simply opened to a hole in the wall for the razor blades to pile up for all of eternity - or at least until some unsuspecting DIYer came along.
I’d heard about this before, but this was my first real-life encounter, and although it’s kind of gross, it’s also fascinating! This article by Apartment Therapy gives a little more background on why this was even a thing in houses back in the day.
Final Thoughts
And that, my friends, concludes the tour of our very own hair salon real estate office!
So what do you think? Would you take on this project or run for the hills screaming? Let me know in the comments!

We’re all very excited about what this building can be and are absolutely up for the challenge of making it happen.
Keep following along to see how we transform this dilapidated building into a badass office space anyone would be lucky to work out of!

Follow along with this journey - check out these related posts:
Looking for more dramatic makeovers? Check out these posts:
Office Building Renovation

2022 Project Recap, 2023 Plans
When you’re always working on a home project, sometimes it feels like you never actually accomplished anything. That’s why I like to pause at the beginning of each year and reflect on the projects we tackled the previous year to get some perspective. This is that post!
Before and Afters of 2022
When you’re always working on a home project, sometimes it feels like you never actually accomplished anything. That’s why I like to pause at the beginning of each year and reflect on the projects we tackled the previous year to get some perspective. This is that post!

Giant, Expensive, Low-Visual Impact Projects
Last year we had two big home projects that we talked very little about - replacing all the windows throughout the house and getting a new roof.
While we don’t regret moving forward with either of these projects (energy efficiency, anyone?), they weren’t exactly blog or social media-worthy content. Windows aren’t that exciting in itself. And since we have a flat roof that you can’t even see, the new roof adventure would have been pretty underwhelming to share too. While we tackled these updates quietly, if you have questions about something related to either of these projects feel free to ask!
Now on to the much more visually exciting projects…
Toddler Bedroom Makeover
After nearly three years of living in this house, our younger daughter’s room finally got a makeover! I loved getting the chance to try out a new design concept in this space and I’m really happy with how her “dipped” room turned out. It’s so much brighter and more cheerful from where it started!
Upstairs Laundry Room Renovation
This was my first year taking part in the One Room Challenge, and it was a blast! I decided to finally finish my laundry room. I loved sharing weekly updates and trying some new techniques. I really pushed myself with this project and gained a lot of confidence doing things I didn’t believe I could do on my own.


Plus, I got a pretty sweet laundry room out of it!
Loft/Bonus Room Overhaul
We started our loft renovation on a whim late in 2021. By the end of the year, we had gutted the room and hung new drywall. In 2022 we really made the space come to life with new floors, paint, and tons of finishing touches.
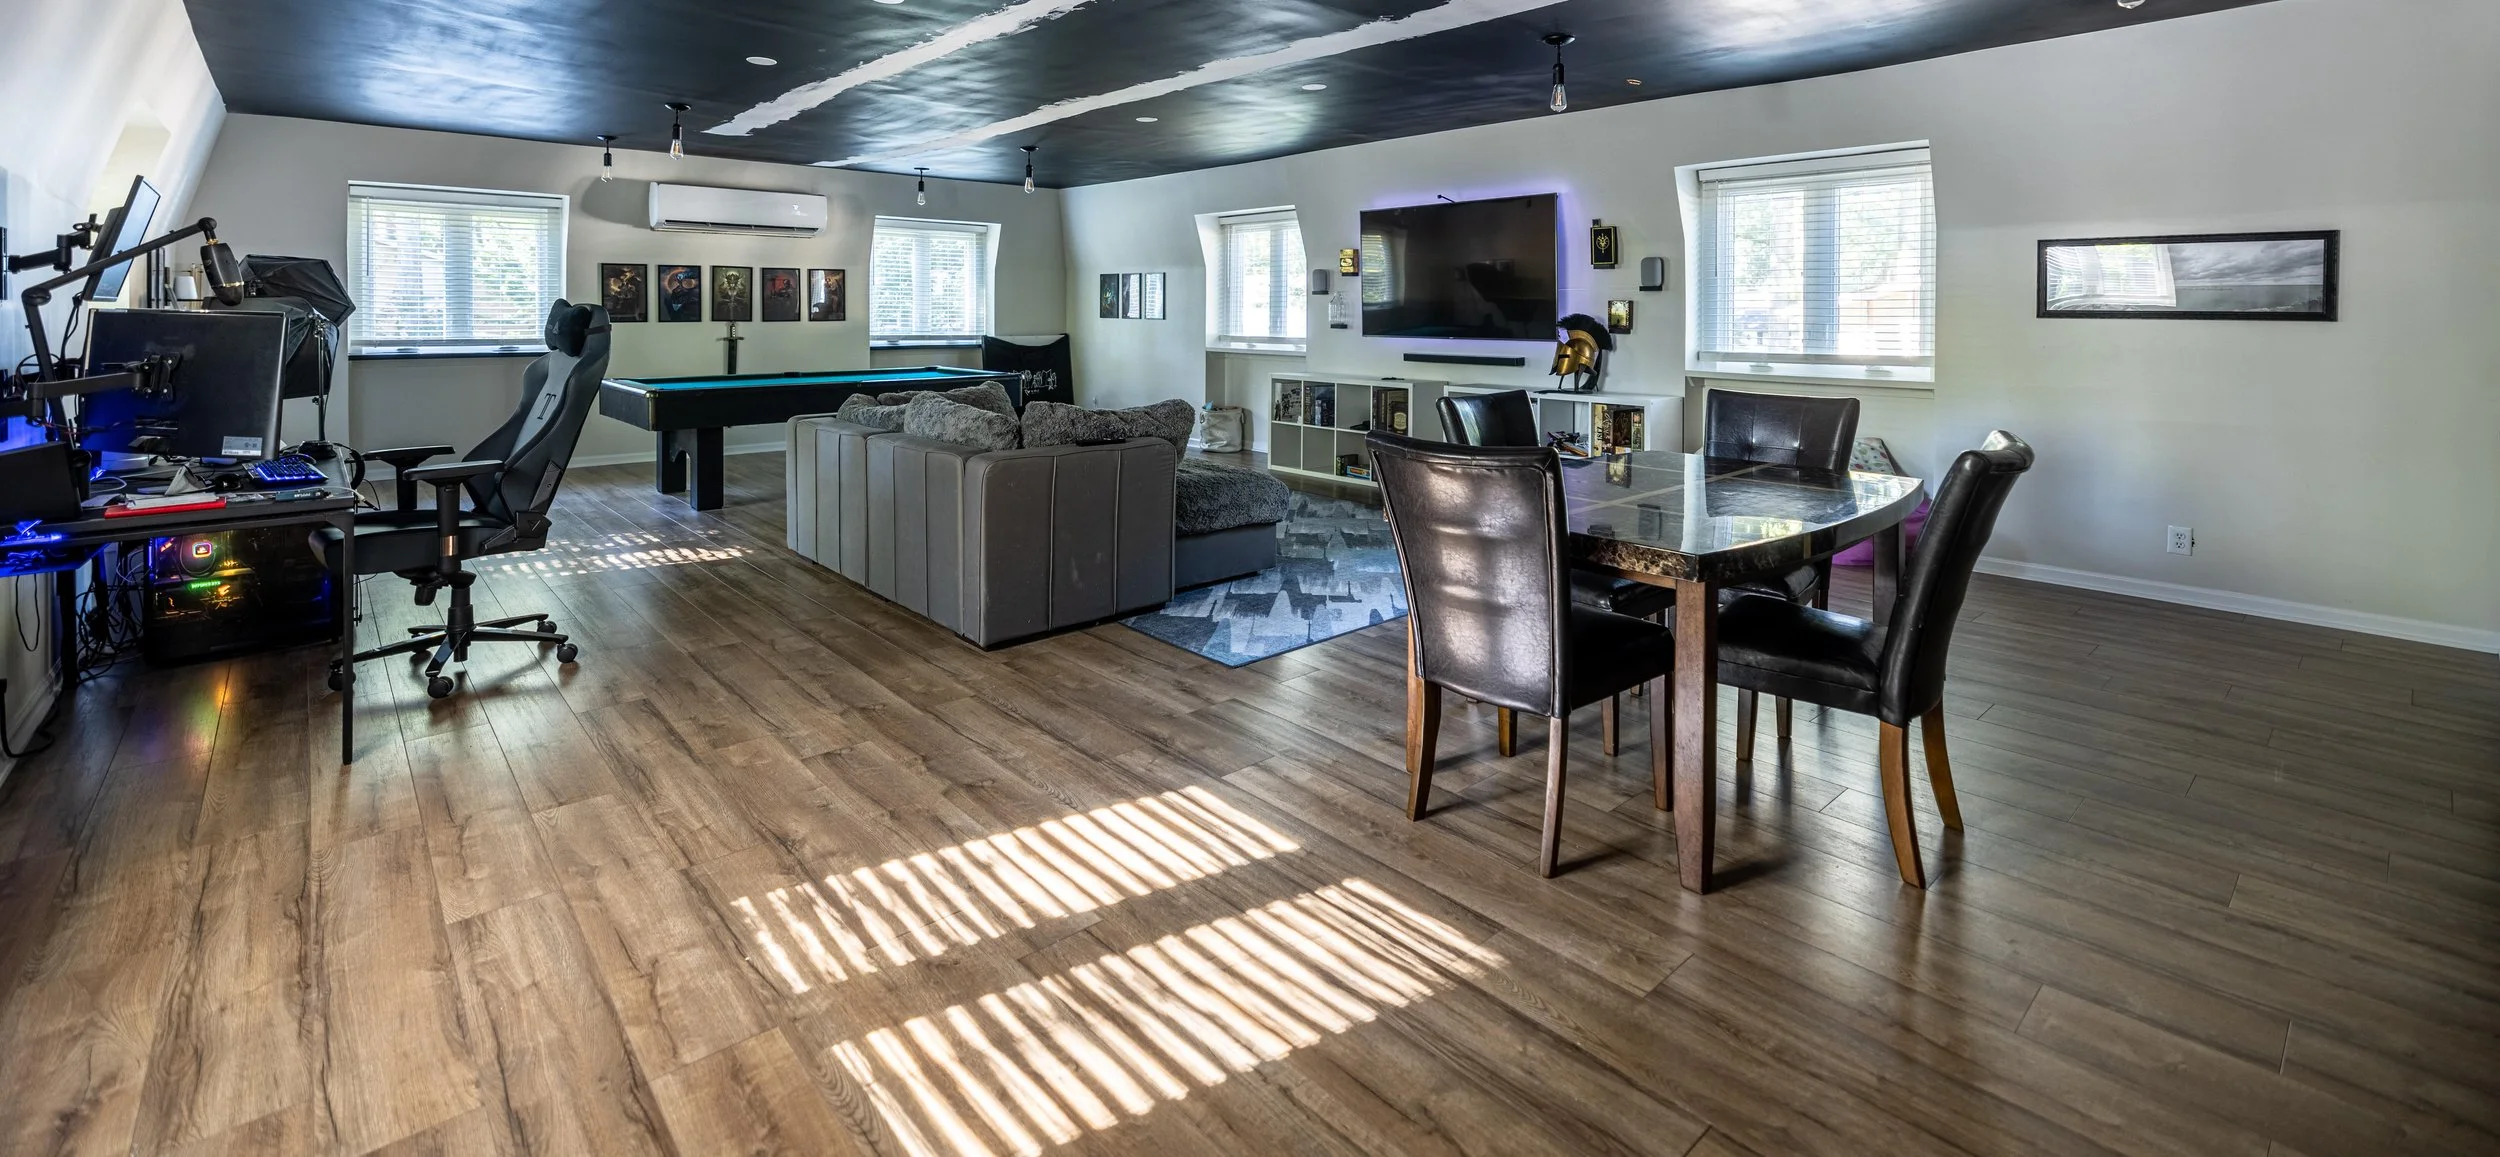
And while there are still little changes I’d like to make throughout the room (heck, since this picture was taken, we’ve already fixed the ceiling and swapped out the table!), it’s safe to say it’s mostly complete - especially the kitchenette!
Partial Progress: Mudroom
We haven’t talked (or shown) much about the mudroom over the last year, but some changes have actually happened in there. This is where it started:


This is where we left off last summer after we removed the staircase (temporarily!) and the closet:


And here’s where we are today:


The wallpaper is no more! And when we had the laundry room drywalled, we went ahead and had the drywall finished in this room at the same time.
While the space obviously isn’t in its finished state, we’re ever so slowly heading in the right direction. Once we’re ready to officially work on this room, I’ll be sure to share all the steps along the way! I have PLANS (peep the paint samples I’ve been testing on the wall).
Looking Ahead
I usually take the time to write a separate post about our project plans for the new year, but this year is a little different. If you’ve been following along on Facebook and Instagram, you might already know that I quit my day job!
I'm excited, terrified, grateful, anxious, and so many more emotions all wrapped into one. At this point, I’m not really sure what my home improvement goals will look like this year. But I do have some other goals for this year…
I'm really looking forward to slowing down next year and taking my time to learn new skills without leaning on Lucius to help (but I’m admittedly a little nervous too!). I'm so excited to not feel rushed to pack everything into the weekend because now I’ll have time during the week to work on projects!
What's interesting is that with my new work/life balance, slowing down is actually going to mean better and more frequent content for you! Plus, it won't be so disjointed, which makes my type-A brain very content.
I'm SO looking forward to learning how to relax and spend the weekends with my kids and with friends. I can't wait to practice being in the present moment instead of always planning 5 steps ahead.
All that being said, there are, of course, projects I’ve been giving the side-eye recently:
Tying up loose ends
Last year I officially declared 2022 the year of getting ish done! Which meant leaving the 95% club.
Have you ever heard anyone talk about being in the 95% club? If you're not familiar with DIY, that's where you get 95% done in a room and move on without finishing the last piece.
We have several rooms that have just that little 5% before we can call them complete, and I would LOVE to stop noticing all the loose ends around the house - a piece of trim here, some paint that needs to be touched up there. Finishing these small tasks will feel just like crossing something off a list, which is oh so satisfying.
Loose Plans
I'm resisting the anxious thoughts that are telling me to plan all my projects for the next year out right now, but it’s a struggle!
I have to be honest, I don't entirely believe in my own abilities. I want so badly to build out the mudroom of my dreams and finally finish my closet, but I don't feel confident that I can do those projects on my own just yet.
To ease myself into those projects, I'll probably be starting with something smaller like renovating the old laundry room into a functional storage closet (it’s a wreck!) or building out Lucius' closet (which is pretty pathetic right now).
I'm also looking forward to flipping some furniture and spending time painting pictures instead of just walls. Oh, and we may or may not have some other properties we've purchased that I'll be working on…
Keep following along to see all that I have in store for this year!

Want more? Check out these posts!
New Year, New Projects

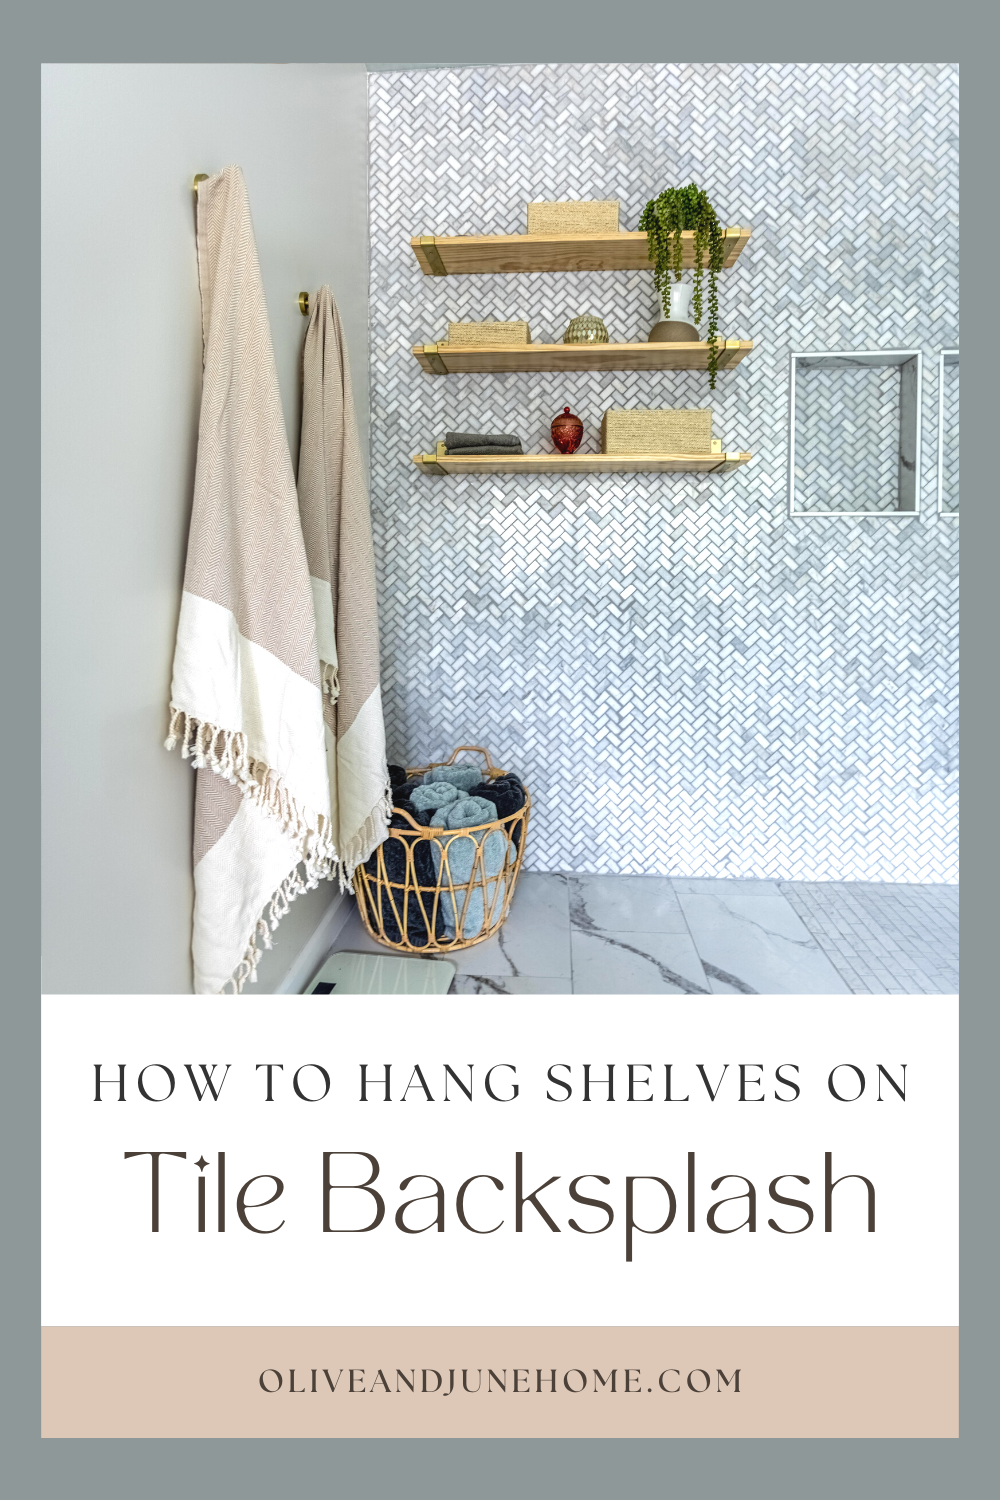
How to Hang Shelves on Tile Backsplash
Last week I shared the reveal of our loft kitchenette - but how the heck did we hang shelves on the brick veneer? While hanging shelves on any sort of tile is terrifying - it’s totally doable! In this post, I’ll teach you the step-by-step process of how to hang shelves on a tile backsplash.
How to Hang Open Shelving on Tile
Last week I shared the reveal of our loft kitchenette - but how the heck did we hang shelves on the brick veneer? While hanging shelves on any sort of tile is terrifying - it’s totally doable! In this post, I’ll teach you the step-by-step process of how to hang shelves on a tile backsplash.

Although the shelves in the loft are hung on brick veneer, the process is exactly the same as hanging shelves on tile. One of the final steps to completing our master bathroom renovation was hanging shelves on the tile wall there, too.

Needless to say, this isn’t our first rodeo! Let’s jump in! Here’s what you’ll need to get the job done:
As an Amazon Associate, I earn from qualifying purchases. This post may contain affiliate links, meaning I receive commissions for purchases made through those links at no cost to you.
Materials
- Drill
- Diamond/Carbide Drill Bit (for glass/tile) OR Masonry Drill Bit (for brick veneers)
- Water (in either a cup or a spray bottle)
- Drywall Anchors
- Painters Tape
- Writing utensil
- Laser Level
- Stud Finder
- Measuring Tape
Step 1: Find Your Studs
If you haven’t tiled yet, I highly recommend using a stud finder to mark your studs before you start tiling.
In this picture from our brick veneer installation how-to, you can see on the ceiling where we put tape where each stud was located. Since we were working with unfinished drywall, we just followed the line of screws (no stud finder needed!).

If you didn’t think to mark your studs ahead of time, and you’re fortunate enough to have pictures of the wall-less room to reference, you can use those as a guide.
Step 2: Mark Your Bracket Locations
Before I made any commitments, I put up some painters tape to figure out where I wanted my shelves. As you can see in the original design, I knew I wanted the shelves to be staggered. Using tape beforehand allowed me to fiddle with them until I got them to the exact placement I wanted.
In a perfect world, you’ll be able to screw your brackets directly into the studs. Buuuut because of the “special” shelves I wanted, putting the brackets on the studs didn’t make sense aesthetically. (Of course, I had to make it difficult.) I’ll show you what to do in that scenario a little later.
For now, using a laser level, make sure your tape is, well, level. Then mark on the painters tape where your brackets will be installed.
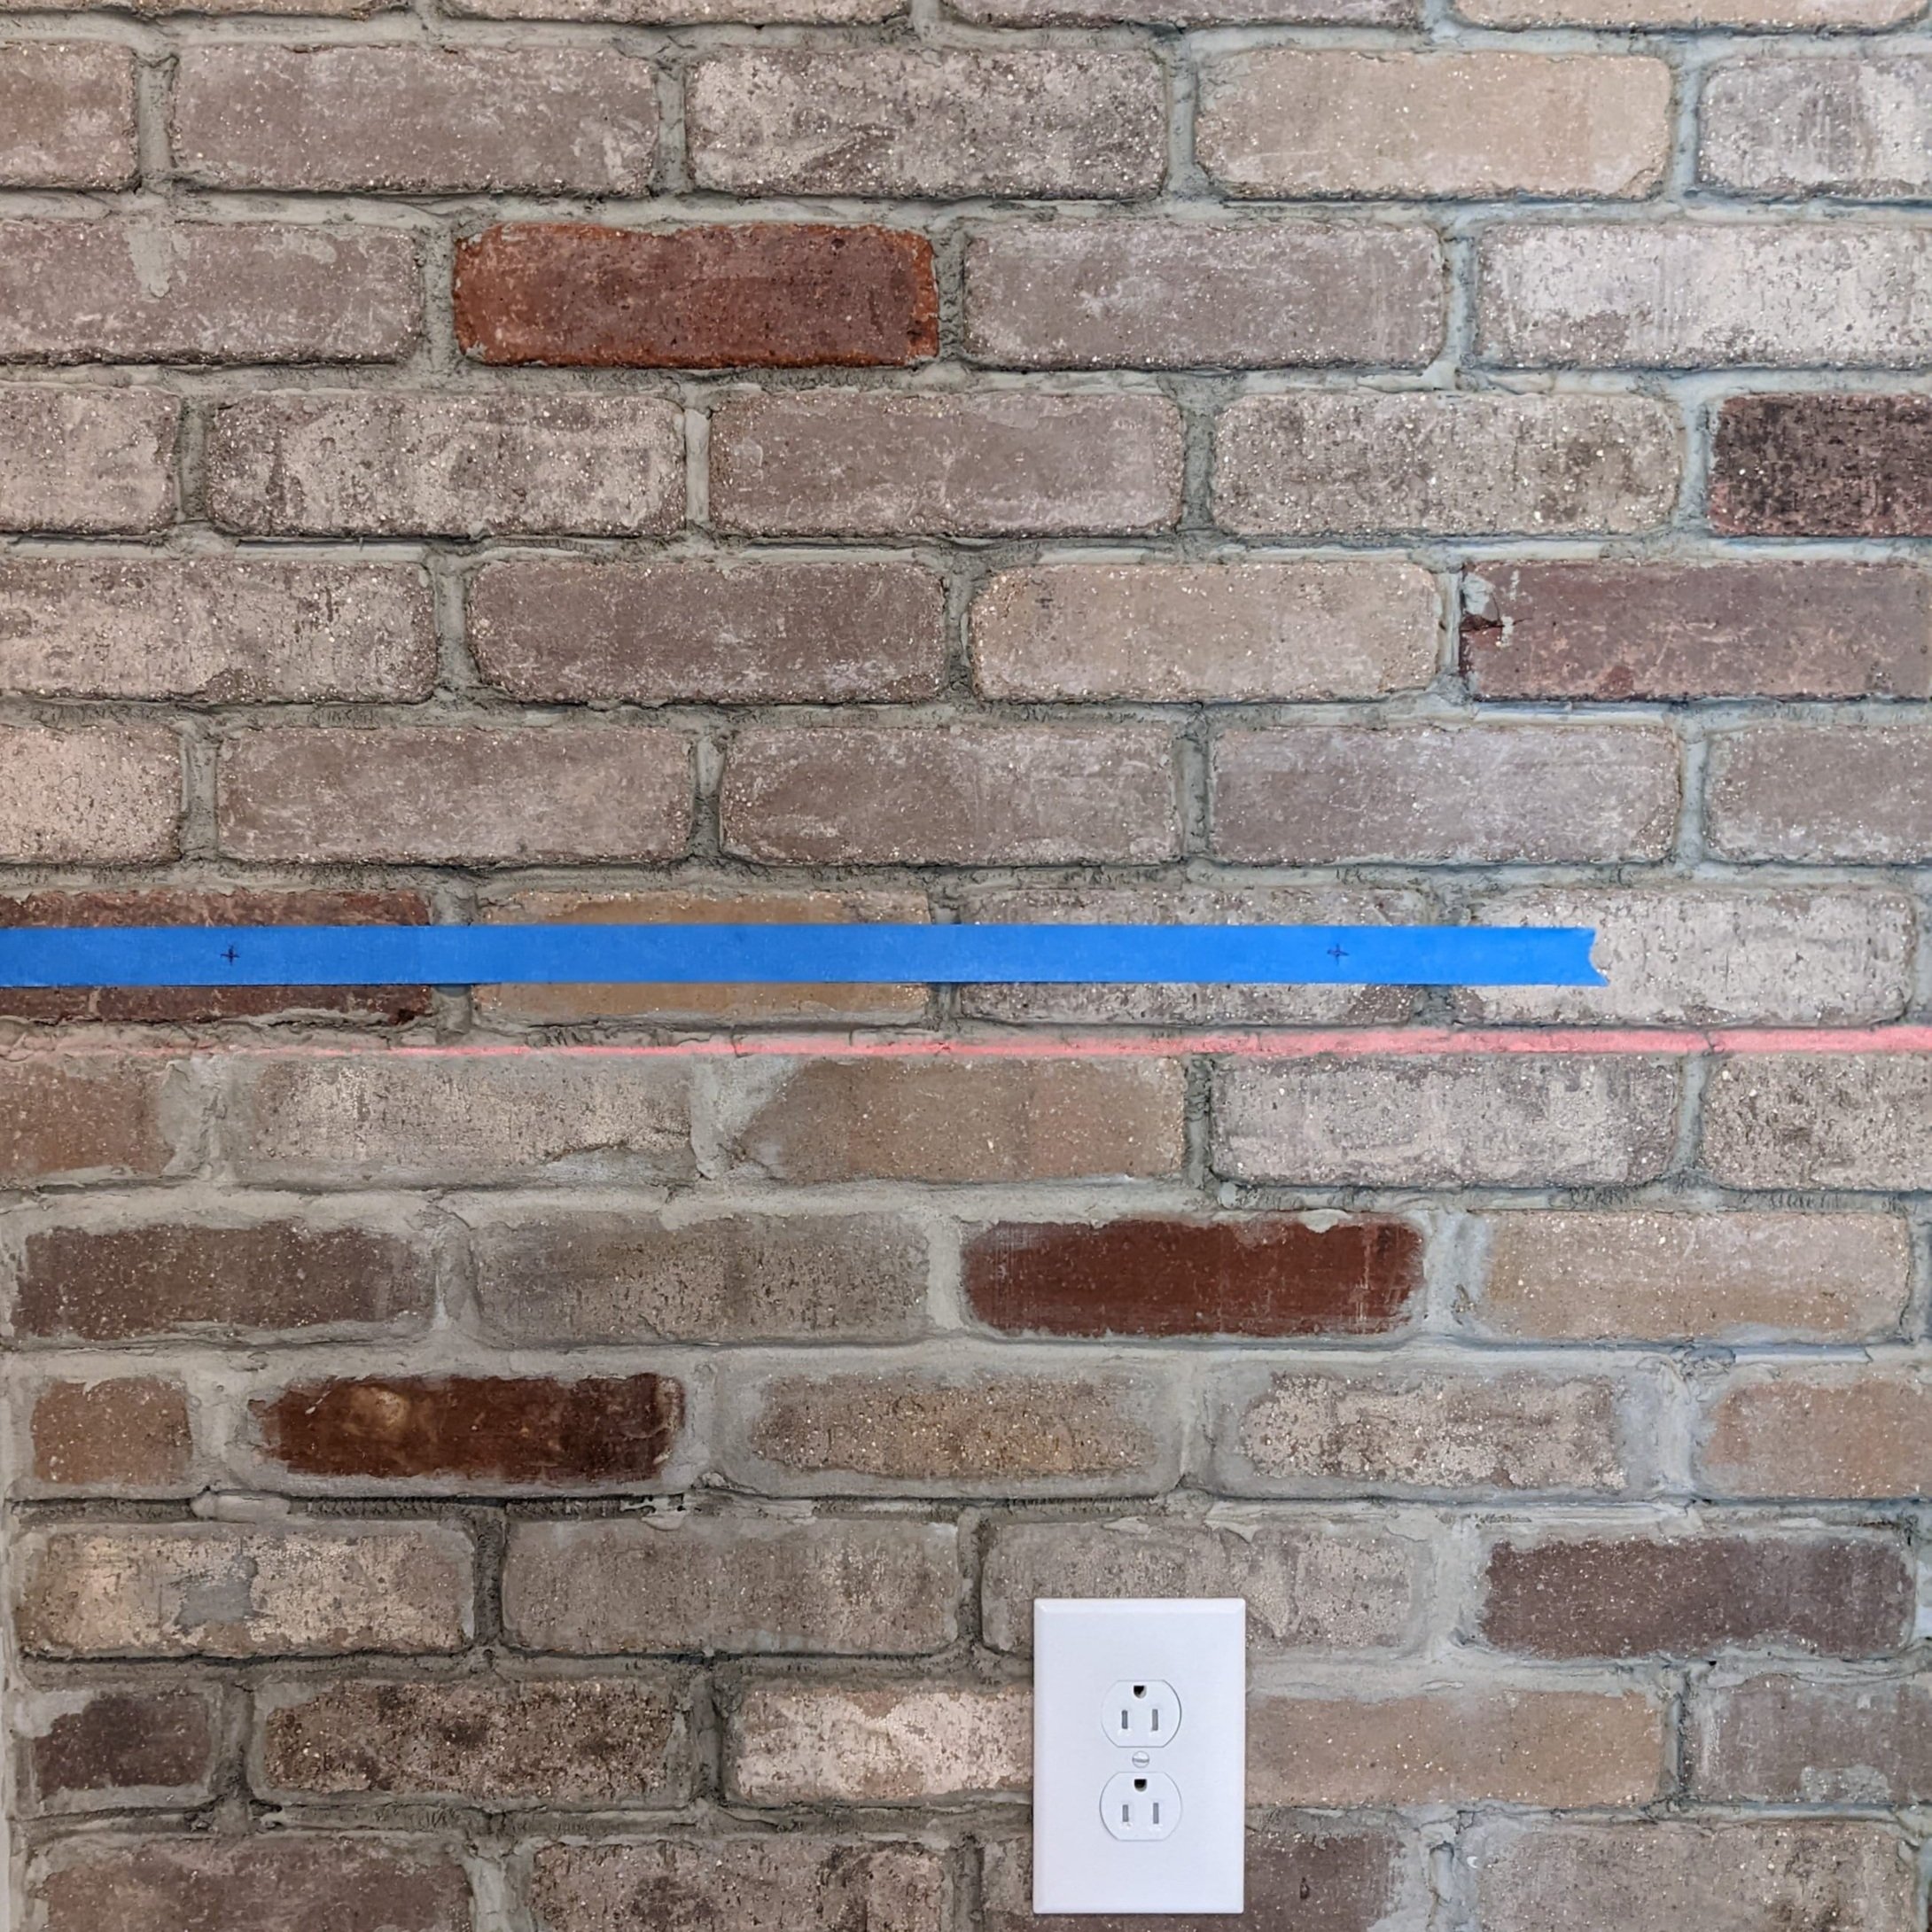
Since my shelves weren’t all the same length, we measured how far from the wall I wanted the brackets (about 4ish inches). Then used that same distance on the other end of the shelves for the other bracket.
Here’s a sneak peek of the finished product just to illustrate my point. You can see on the right-hand side how the laser level is vertically lining up the brackets by the wall, but the brackets on the other sides of the shelves aren’t aligned vertically.
Step 3: Drill, Baby, Drill
I’ll warn you upfront - drilling through tile is a slooooow process. Like, it took several minutes to drill each hole. But it’s really important to take your time so you don’t crack a tile or wear out your drill bit (both of which would suck). Here are a few tips to make sure neither of those scenarios happens:

Use the right type of drill bit
It’s incredibly important to use the correct drill bit for your specific type of tile for this process. For our bathroom tile, we used carbide-tipped drill bits. And for the brick veneer in the loft, we used masonry bits.
It’s also never a bad idea to start with a smaller drill bit and work your way up!
Keep your drill bits cool

Drill bits tend to get really hot when drilling into tile. To make sure you don’t wear them out, you can either dip the tip of the drill bit into a cup of water every 10-15 seconds or have someone spray water on the bit as you’re working.
Step 4: Insert Drywall Anchors & Screw in Your Brackets
If you run into a scenario, like mine, where some (or all) of your brackets won’t be screwed into a stud, you’ll need drywall anchors. Before you screw in your brackets, gently(!) tap a drywall anchor into the hole. Sometimes you can just push them into place, but you might need to break out a rubber mallet for assistance.
Then, you can screw your brackets in place.

Step 5: Hang Your Shelves
The last step is to hang your shelves!

Luckily, my shelves are as easy as they come and just lay on top of the brackets, but this process would work with trickier scenarios (like floating shelves, for instance), too!
Final Thoughts
I’m really happy with how these simple shelves turned out. I love the unexpected staggered pattern and the extra character they add to the kitchenette area. I especially love that no tiles were cracked in the hanging of them! What do you think!? I’d love to hear from you in the comments.

To catch up on the loft renovation, check out these posts
Mount Shelves to a Tile Wall

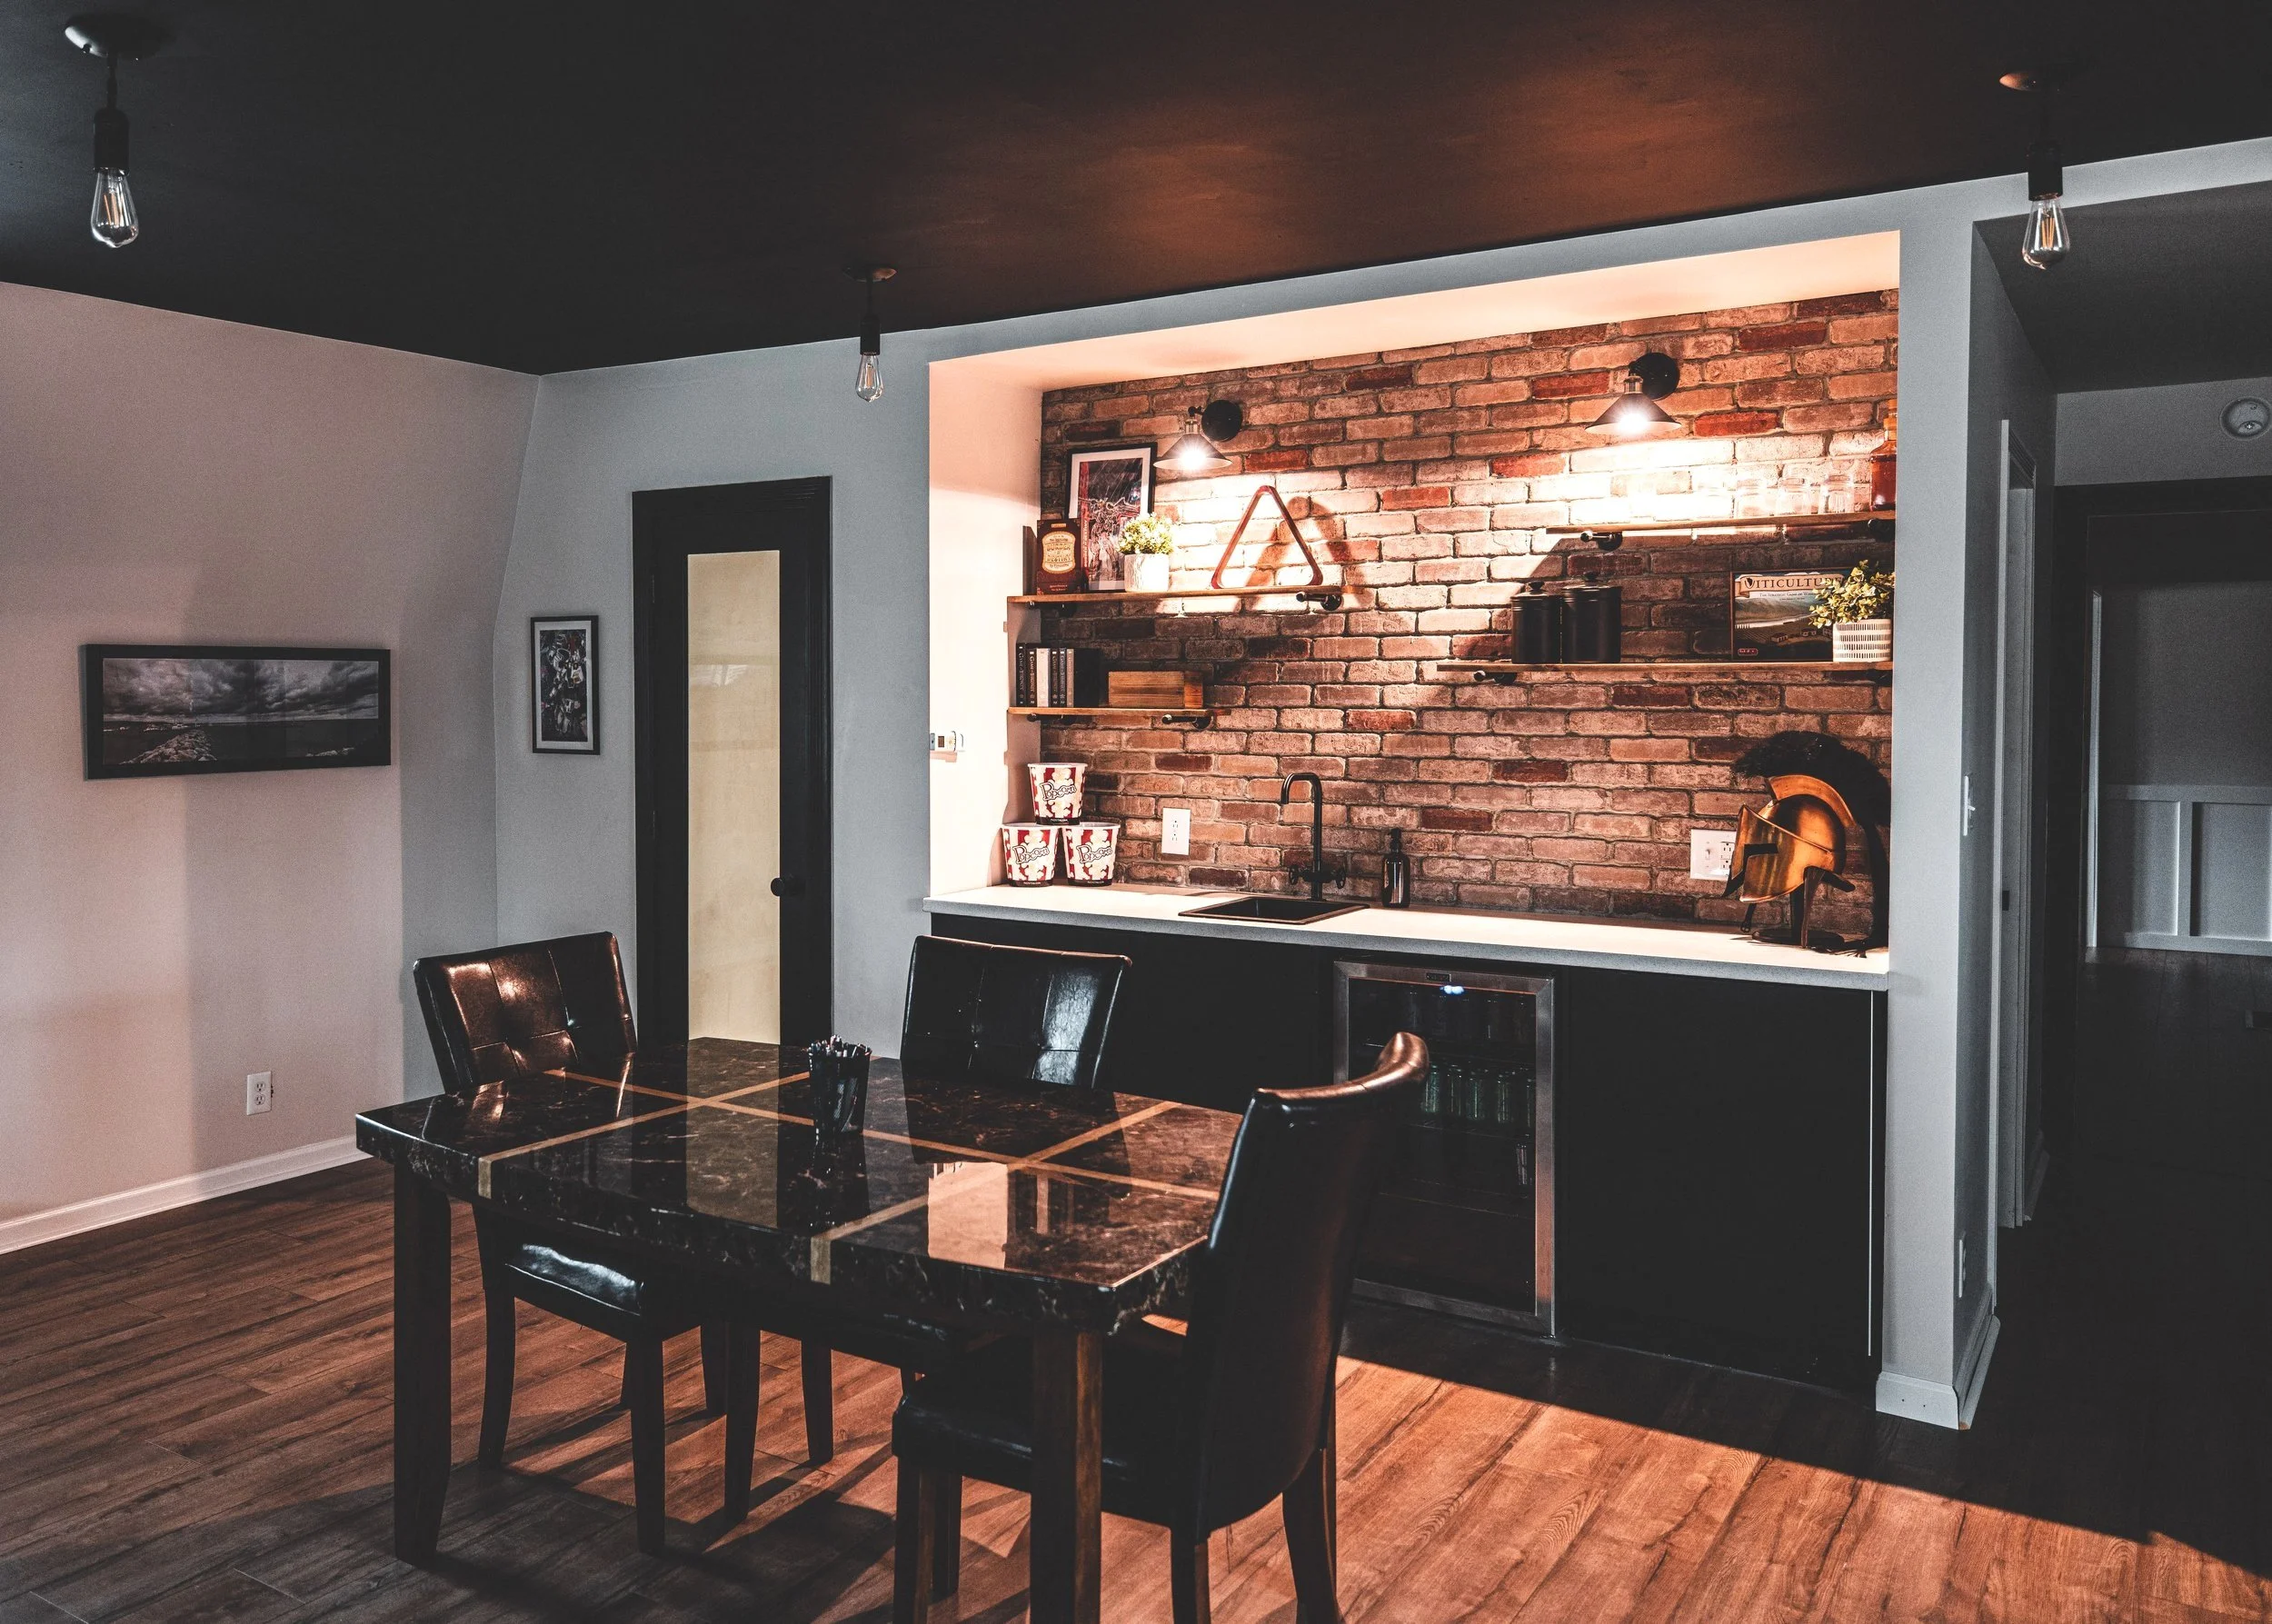
Loft Kitchenette Reveal
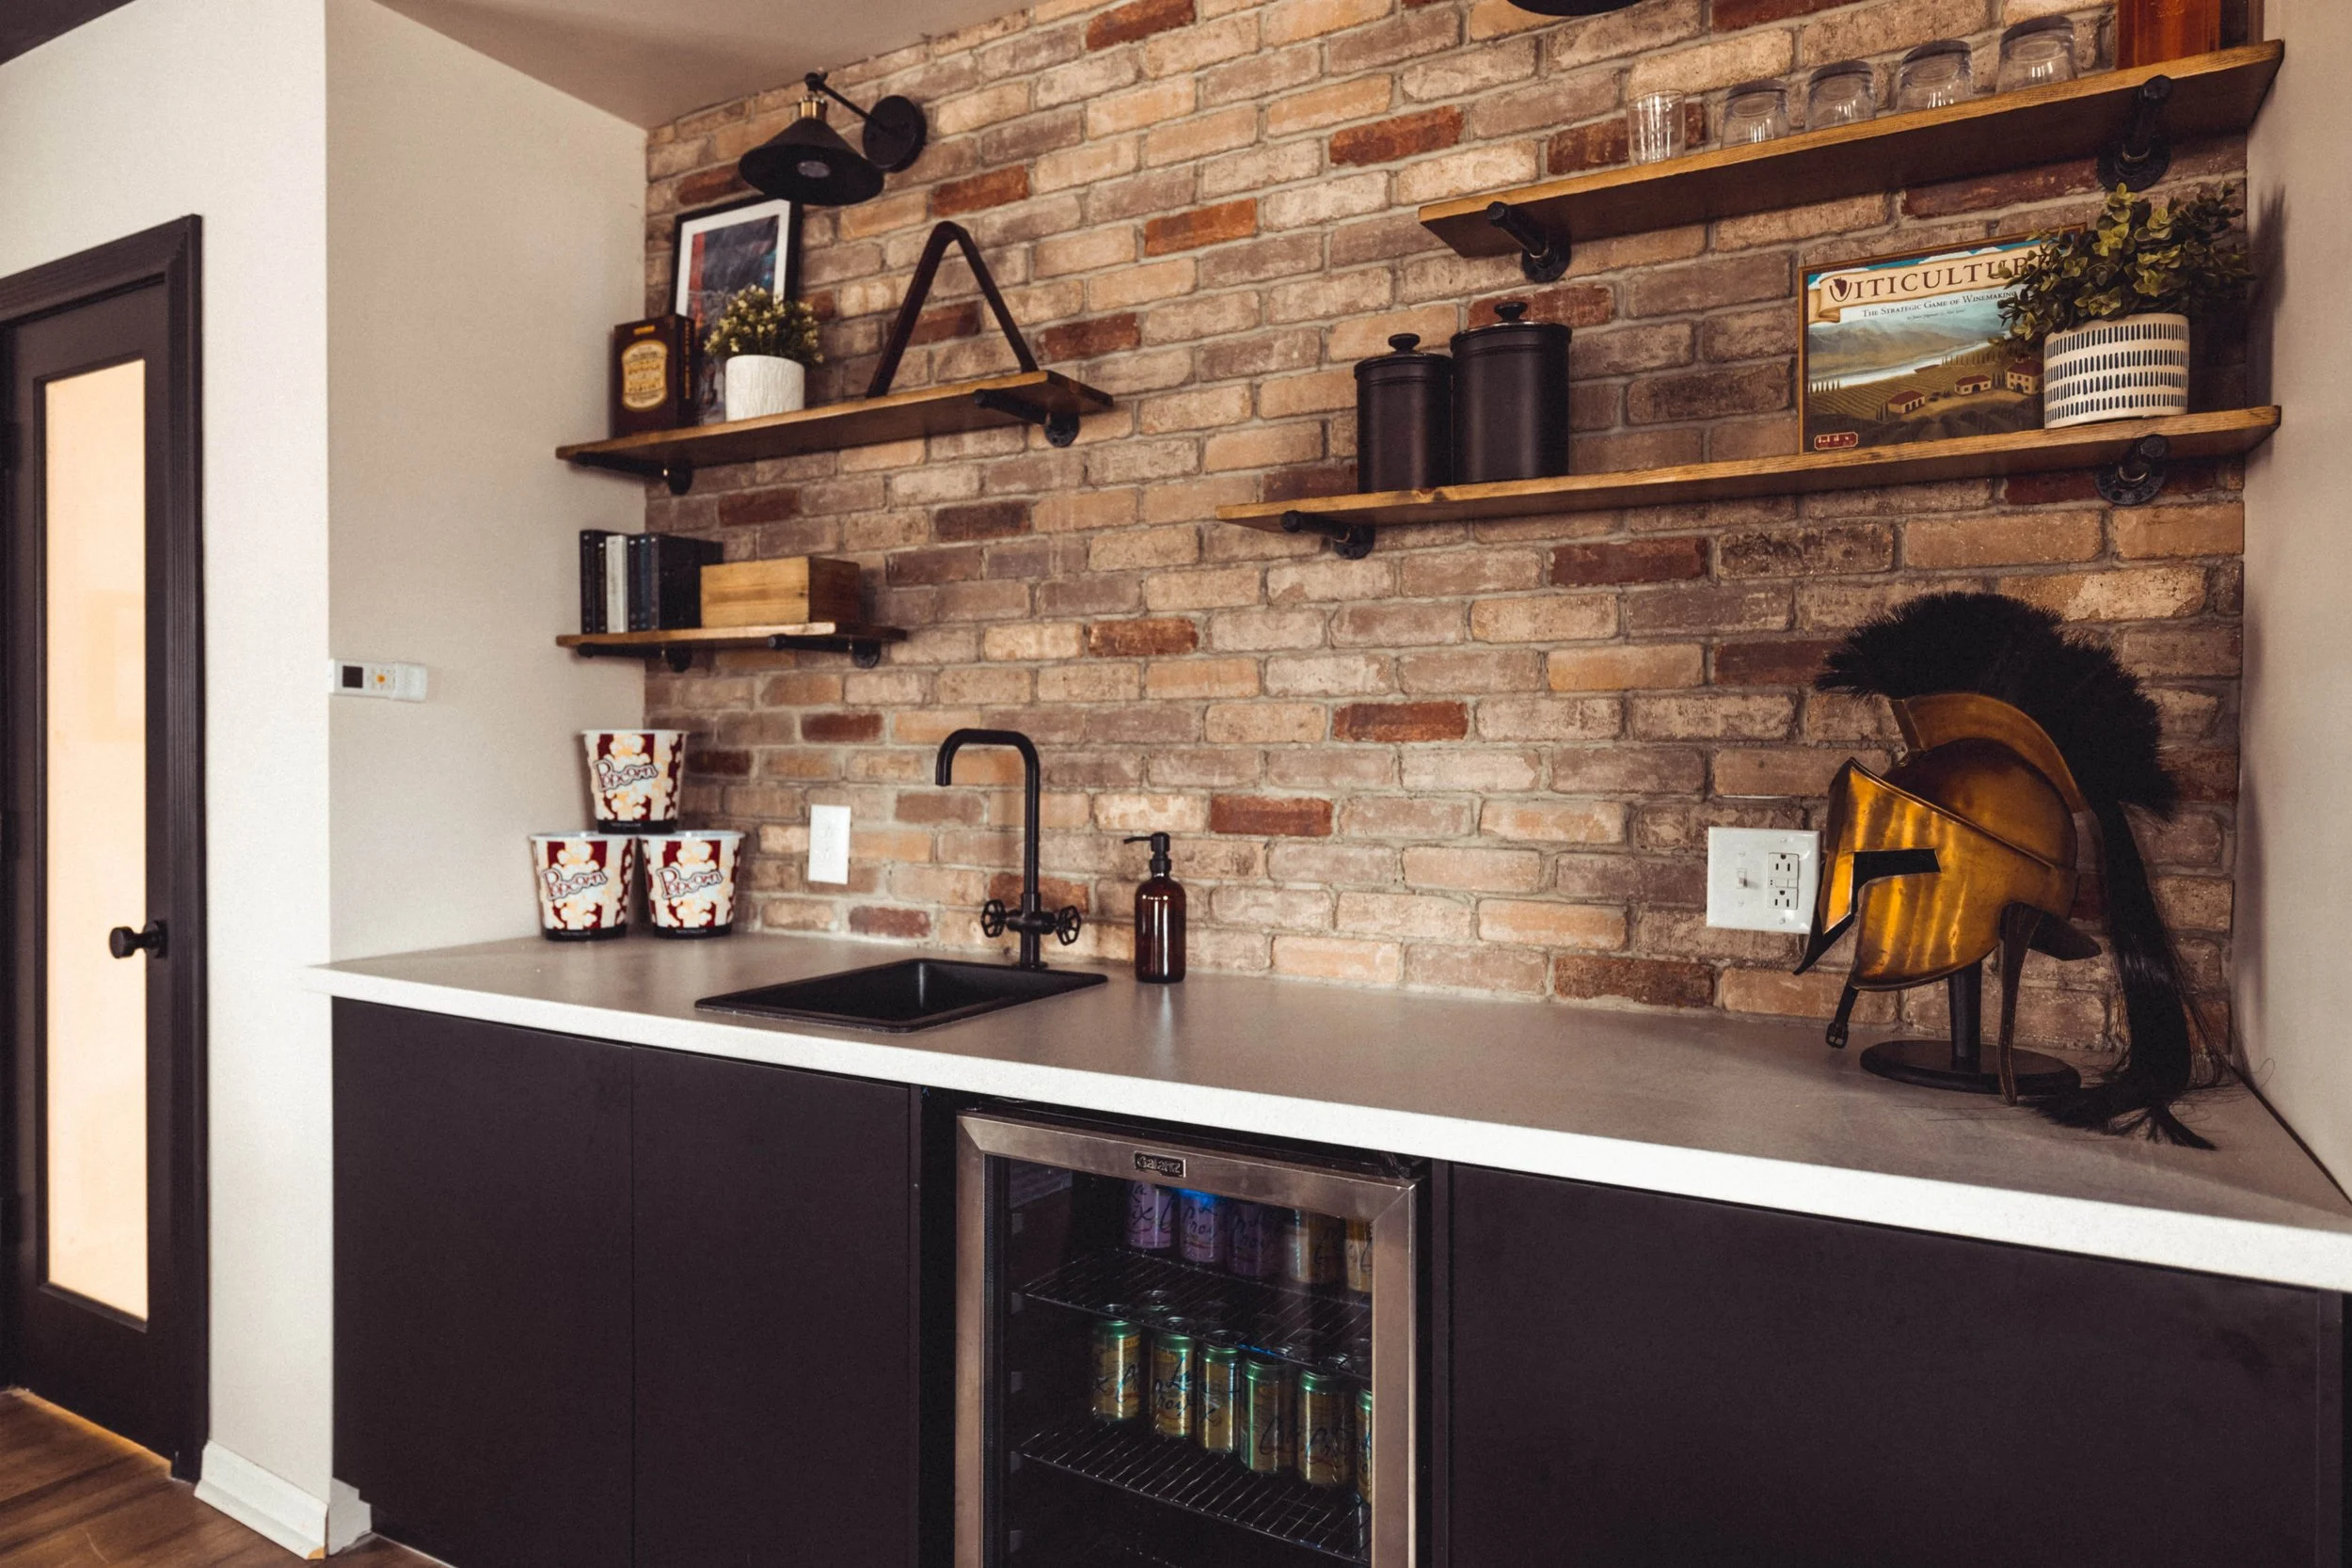
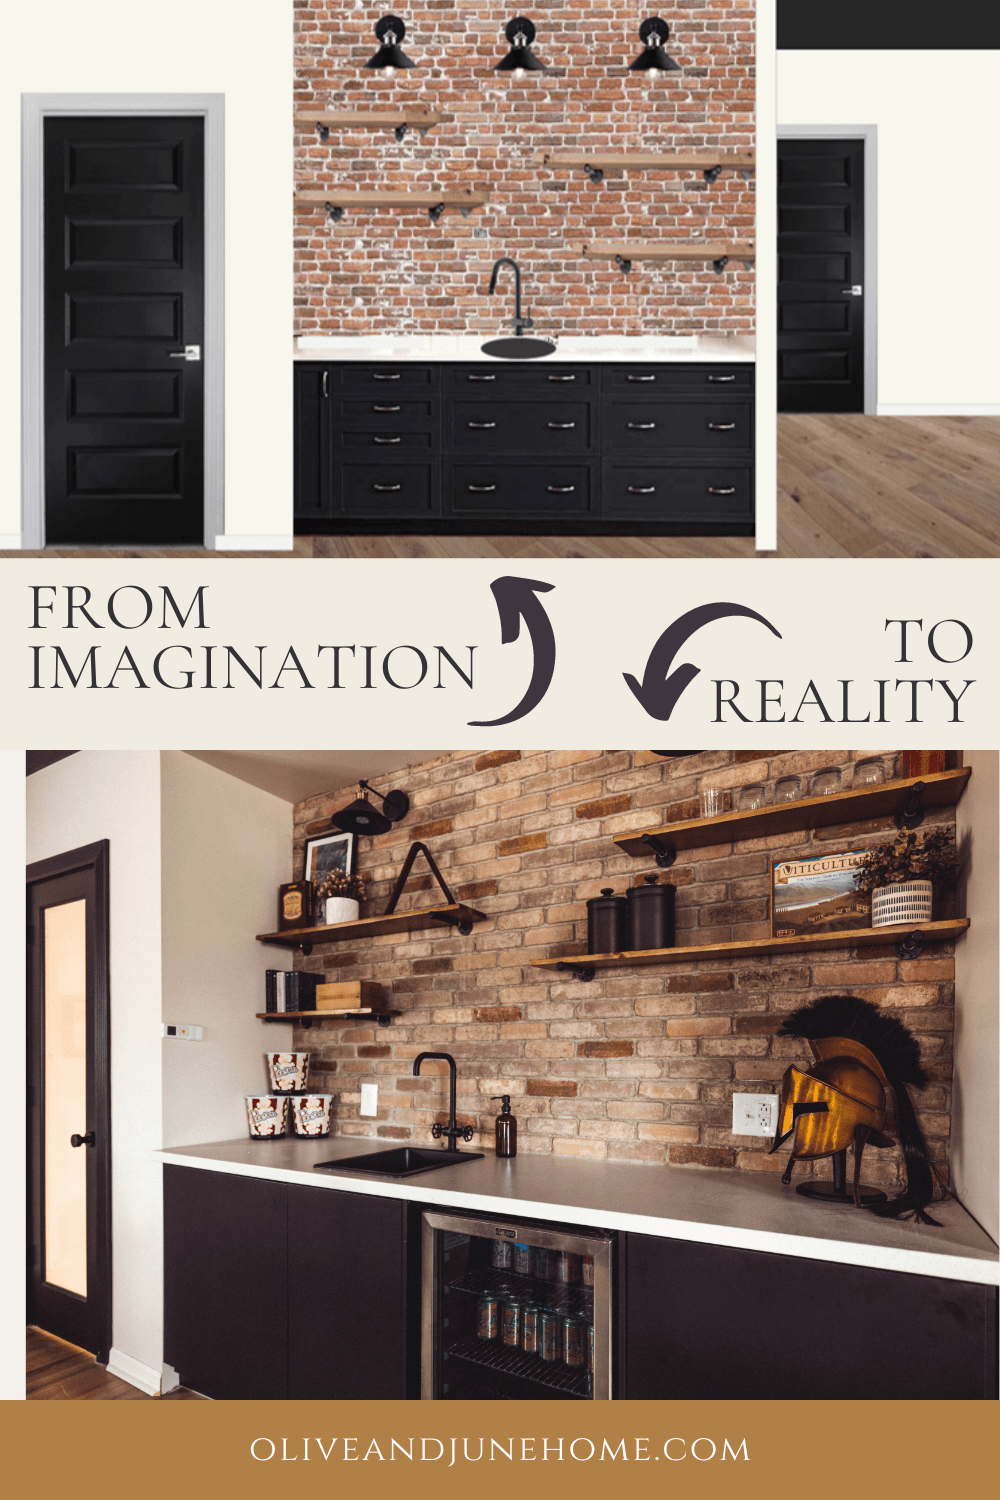
Before I created an entirely new laundry room for the One Room Challenge, my focus was finishing up projects around the house. One of those projects was the outstanding items in the loft. And while I’ve looped back around to working on it, I’m not ready to call the whole loft complete just yet. But I am excited to say that the kitchenette is finished!
Bonus Room Kitchenette Makeover
Before I created an entirely new laundry room for the One Room Challenge, my focus was finishing up projects around the house. One of those projects was the outstanding items in the loft. And while I’ve looped back around to working on it, I’m not ready to call the whole loft complete just yet. But I am excited to say that the kitchenette is finished!

It’s hard to believe that we started renovating the loft a full year ago. Where has the time gone!? But today, I’m only focusing on this small section.
As a refresher, this is the view of the kitchenette from the listing photos:

For perspective, that doorway behind the kitchenette is the laundry room, and the bookshelves straight ahead now open to a hallway that didn’t exist when we moved in. You can read more about that renovation here.

The idea of a kitchenette in the loft made a lot of sense, but this one just wasn’t working for us.
First of all, we had no use for all those cabinets. Secondly, there were so many layers of paint on them the finish looked pretty bad. And don’t even get me started on the old (most likely original) electric stove and intercom inserted into the countertop - which, as the cherry on top, had an old-timey newspaper pattern printed on it.
So, we did what we do and we tore it out!

And then we started putting it back together.


Of course, before we got too far ahead of ourselves I put together my design.
Since we use this as a rec room/hangout spot, we wanted it to feel relaxed and carefree. We decided to go with a semi-industrial look. The images below were a big inspiration for the final look.

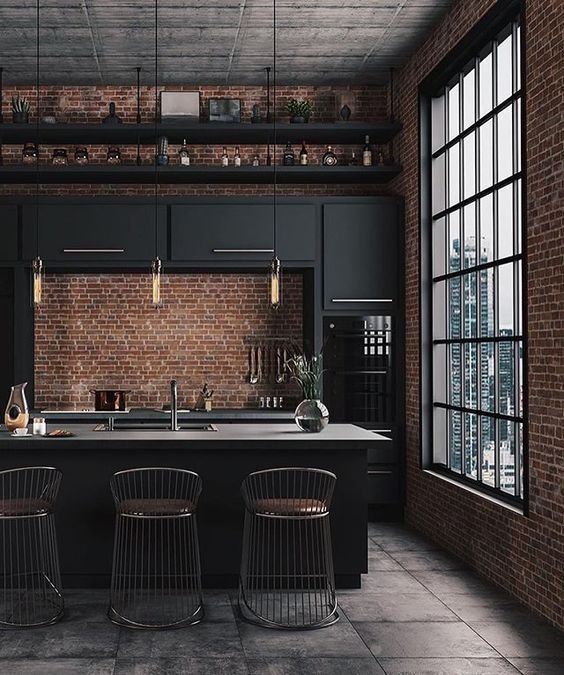
Image Sources: Unknown
I went more in-depth about my design in this post, but here’s the final mock-up.

And here’s the finished product!

Now, let’s break it down!
As an Amazon Associate, I earn from qualifying purchases. This post may contain affiliate links, meaning I receive commissions for purchases made through those links at no cost to you.
Cabinets and Countertops
Clearly, the one thing we liked about the original kitchenette was the fact that the cabinets were black. We ended up giving IKEA Sektion cabinets a whirl, and Lucius was really impressed with their installation system.

Of course, since they’re IKEA we had to assemble them ourselves, which is never particularly fun. But instead of the standard cabinet-installation process of shimming, leveling, shimming, and leveling, Lucius was able to make sure the bracket provided was level and secure to the wall and just hang the cabinets on that. Then they come with little legs that you tighten until they touch the floor.
We planned the layout to have a cabinet for trash and recycling and another to store a microwave (which is pretty much strictly used for popcorn). And of course, we left a space for the mini-fridge (gotta keep that La Croix cold!).
To go with the design, I also chose an affordable white laminate countertop, a black sink, and a matte black faucet all from IKEA.
Backsplash
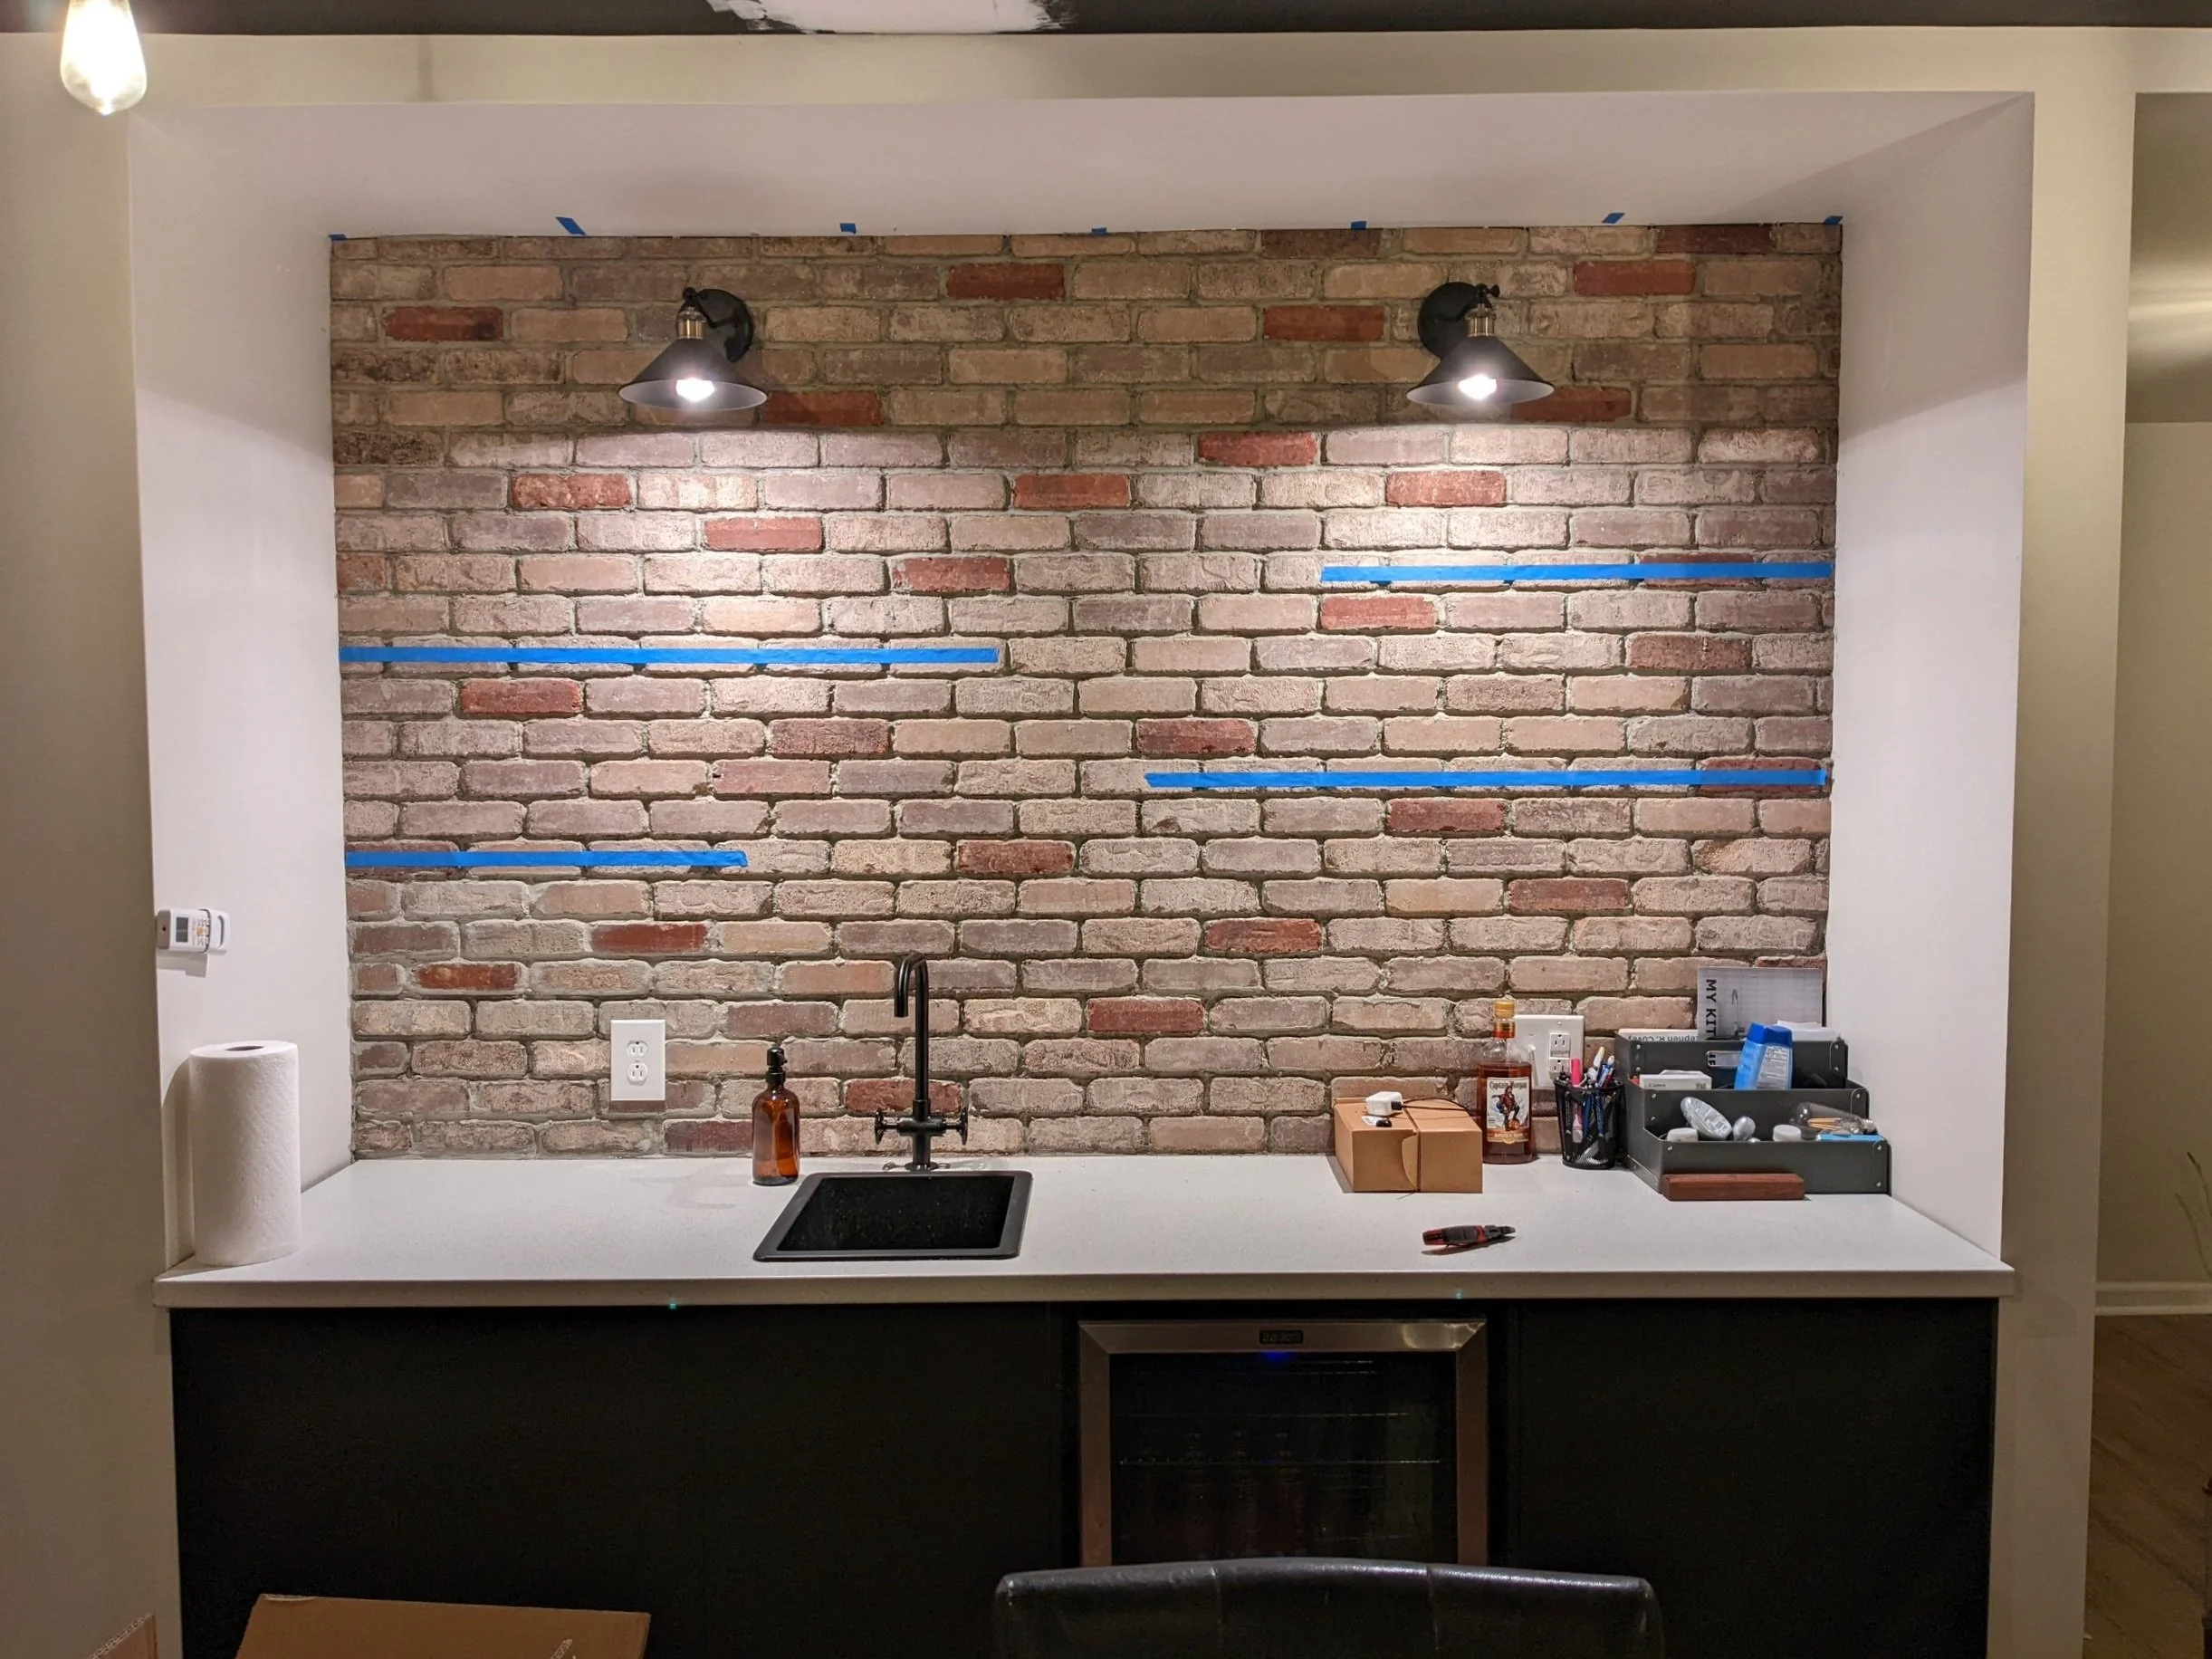
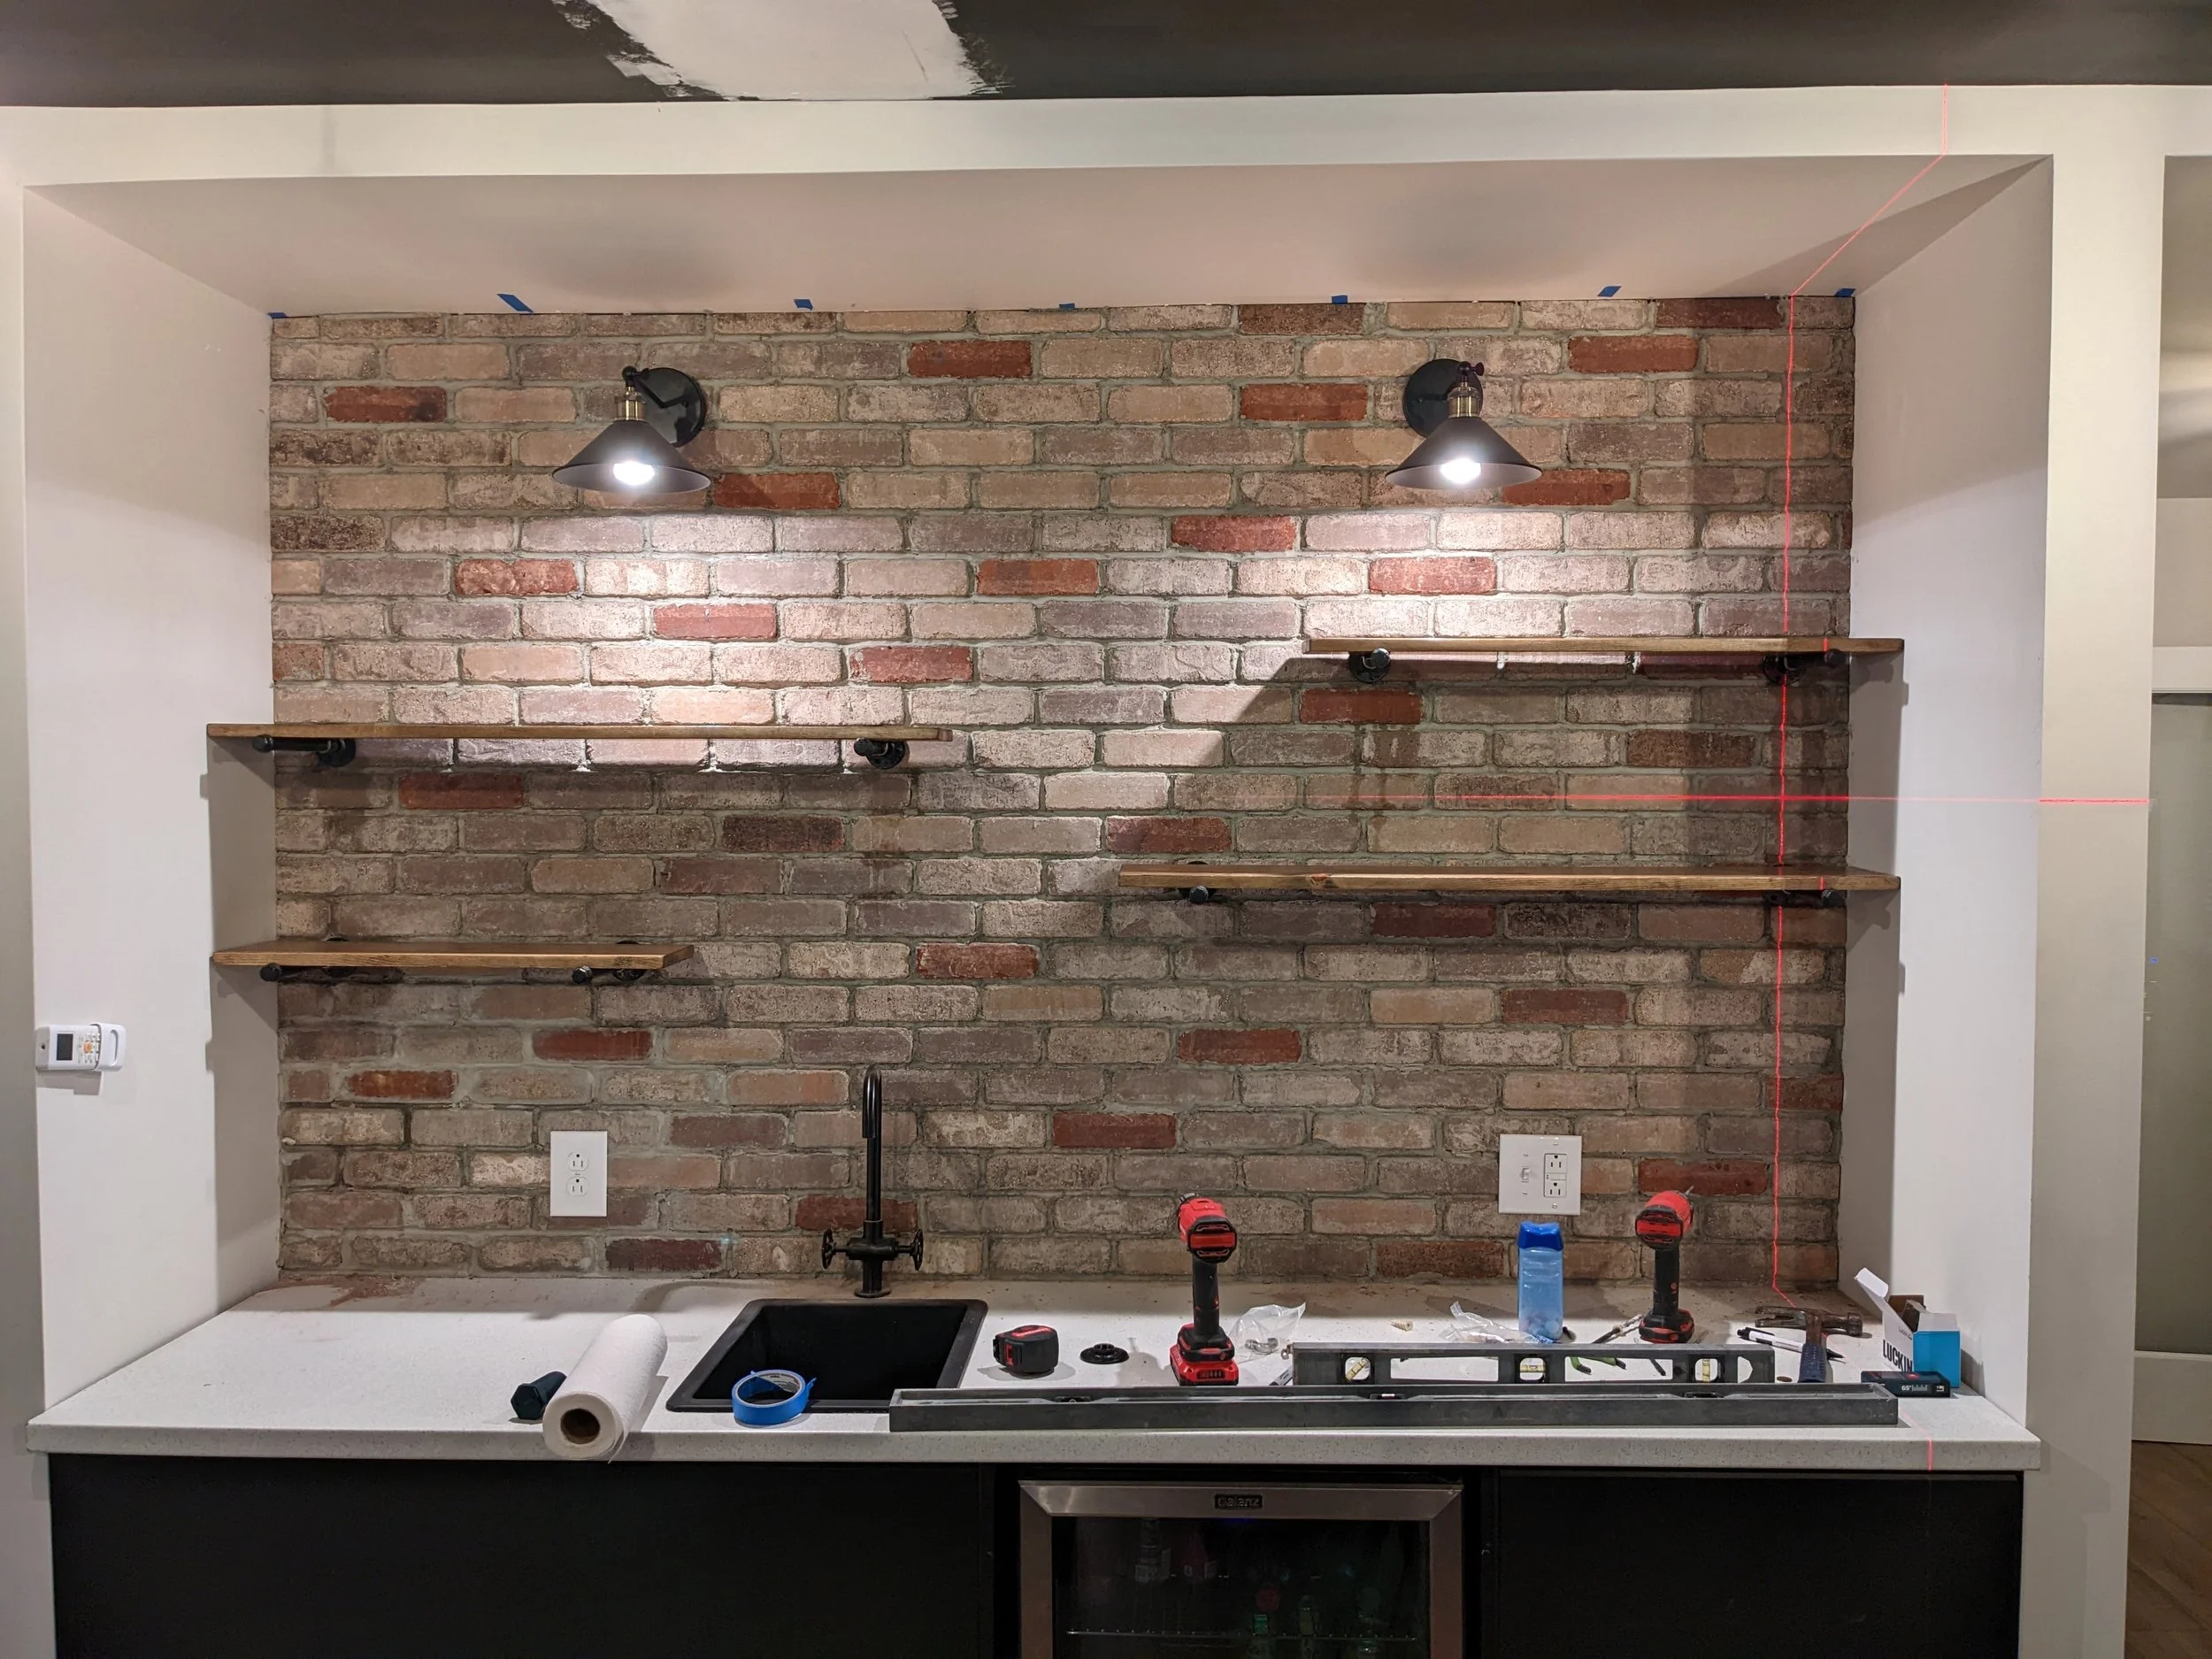
While the dark cabinets ground the kitchenette, the real star is the brick tile veneer backsplash we installed. I chose a combination of two different colored veneers and mixed the darker color strategically with the lighter color.

I love how much character, warmth, and texture the backsplash adds to this room. And it was a pretty simple DIY! All the sources for that project (and the step-by-step instructions) can be found in this post.
Shelves
As you can see from my mock-up, staggered shelves were part of the plan all along. And I’m so happy with the visual interest they add!

I don’t remember exactly what type of wood I used for these (sorry!) but there’s nothing complicated about the shelves themselves. They’re simply boards of wood that I stained, sealed, and hung on some brackets.
Speaking of the brackets, to go with the whole look, I used these cool pipe brackets that I got online.
Lights
Lastly, I finished this nook off with a couple of sconces. These sconces come in a pack of three, and while I originally planned to use all three in my design, in person it seemed too cluttered.
I’m really happy with how it looks with just two lights, and it’s plenty illuminated. Plus, I was able to make use of the leftover light in the laundry room as a last-minute addition!

Final Thoughts
While I love the process of working on projects, there’s a certain satisfaction in knowing one is complete. I’m happy to finally check this one off my list and shift my attention to the last 10% that still needs to be finished in the loft.
If you’ve been following along on Instagram, I’ve already repainted the ceiling, and it looks SO MUCH BETTER! Next up: switching out that table by the kitchenette for a proper game table that Lucius and a friend are building, plus a whole bunch of loose ends throughout the room.
Stay tuned to see how the rest of this room shapes up!

To catch up on the loft renovation, check out these posts
Rec Room Bar Renovation
2022 Holiday Gift Guides
Are you a late shopper? Me too! But there’s no need to panic - I’ve got you covered with these last-minute gift guides filled with items that you can still have delivered by the holidays!
Last-minute Gift Ideas
Are you a late shopper? Me too! But there’s no need to panic - I’ve got you covered with these last-minute gift guides filled with items that you can still have delivered by the holidays!

As an Amazon Associate, I earn from qualifying purchases. This post may contain affiliate links, meaning I receive commissions for purchases made through those links at no cost to you.
Gift Guide for Him
First up is the gift guide for the lucky fella in your life (but heck, there are even some items on this list I wouldn’t mind for myself!)

- Crep Protect Ultimate Sneaker Care Pack | $40 If your guy is anything like mine, he likes his shoes crisp and clean. This would be a great gift for anyone obsessed with their kicks.
- Manscaped Tool Box 4.0 | $139.99 My husband is a big fan of Manscaped. This is a perfect all-in-one kit - and it even comes with a bag!
- The Purple Pillow | $100.50 I’ve heard such rave reviews about The Purple Pillow this is actually one of those gifts that I would like to try for myself, but I guess it’d make a good gift for someone else, too.
- Bombas | $59.99 My family is OBSESSED with these socks - and for every pair you purchase, they donate a pair!
- Virtual Reality Headset | $349.99 For the nerd in your life you can’t help but love, make their day by letting them escape to a different world for a bit with this VR headset.
- Italian Leather Charging Station | $129.99 Tired of dealing with a different charger for every device? Maybe you need a sleek leather charging station. AND it comes in a variety of colors!
- Tech Organizer Bag | $12.99 Now that you’ve gotten rid of all those chargers, here’s a handy place to store them!
- Traeger Wood Pellett Grill and Smoker | $599.95 Treat the cook in your life (and yourself, too) with a grill and smoker.
- Gourmet BBQ Sauce Sampler | $46.99 Obviously, you need BBQ sauce for all that delicious food cooked on the Traeger grill and smoker. This BBQ sauce sampler would be the perfect pairing!
- Minimalist Wallet | $25.97 My husband got a slim wallet a couple of years ago and loves it. This wallet would be a great gift for anyone looking to downsize a bit.
- Temperature Control Smart Mug | $99.95 Have someone in your life who takes forever to get through their cup of coffee? This smart mug is a game-changer! No more cold coffee for the win!
Gift Guide For Her
This list is filled with items that I’m eyeballing right now, I’ve already bought for myself and love, and even some things I may or may not have on my Christmas list.

- Faux Fur Throw Blanket | $32.97 Who wouldn’t love a super fuzzy throw blanket? This one has a ton of reviews and comes in so many colors! I have my eye on the taupe (hint hint).
- Crossbody Purse | $32.89 I love a crossbody purse for more casual events - and the woven pattern of this one is perfection.
- Hanging Toiletry Bag | $23.99 I bought this toiletry bag for myself a couple of years ago, and I’m in love. It’s a great size to hold the surprisingly large amount of junk I take when I travel, and the pattern is way more appealing than plain old black.
- Ceramic Ring Dish | $14.99 I spotted this ring dish while I was searching for a jewelry organizer and was immediately smitten. I started justifying why I should buy it for myself right away.
- Marble Bookends | $49.99 Ah, form and function. Now we’re speaking my language. For the book lover in your life, some stylish bookends might be the perfect gift to tame their stacks of reading material.
- Luxury Bathtub Tray | $50.97 This tray truly has everything to create the most epic bath you’ve ever had. Sign me up!
- Bouquet Subscription | $48.99 per box I’ve never considered a bouquet subscription - until now! The thought of getting fresh flowers every month without even thinking about it sounds like a dream come true.
- Makeup Brush Set | $16.99 A new set of makeup brushes would be a great gift for just about anyone who wears makeup. Who couldn’t use new brushes!? And if you don’t wear makeup, I’ve heard they work really well for painting crafts.
- Ankle Bootie | $39.95 I had to replace my favorite pair of boots this year and bought some more expensive ones. I returned them and got these instead and I’m in love! These are understated yet still classy. And comfortable! They also come in loads of colors.
- Jade Roller & Gua Sha | $16.99 I’m really bad about self-care, but I’ve heard such good things about this jade roller I’m on the brink of buying one for myself.
- The Adventure Challenge | $59.99 A book for couples full of date ideas where you scratch off a square to reveal what your date entails. This sounds like a great option to make sure you don’t fall into the dating slump!
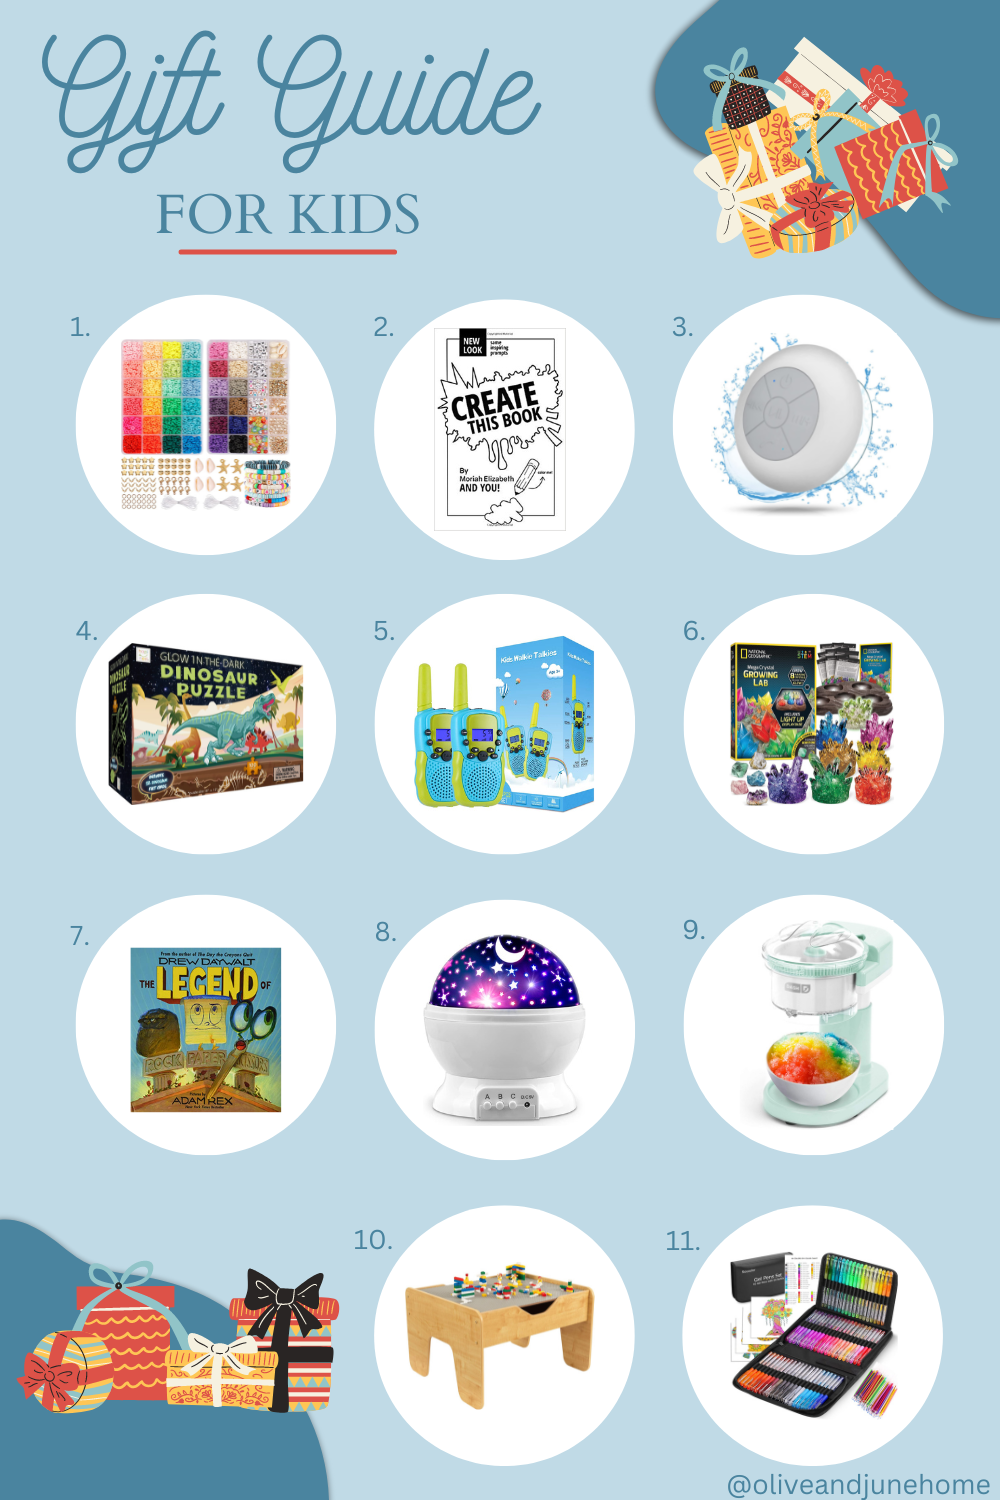
Gift Guide for Kids
Aaaand of course, I had to include a gift guide for the kids to round it all out! While I have two little girls, I tried to include gifts everyone would love at a variety of ages.

- Bracelet Making Kit | $13.99 I used to love making jewelry for myself and my friends. This kit would keep a kid busy for hours coming up with new, creative patterns for all their BFFs.
- Create This Book | $13.78 If my daughter were just a little older she would go bananas for this book. It’s filled with prompts to spur creativity as you fill in each page. I’ll have to keep this one in mind!
- Shower Wireless Bluetooth Speakers | $29.99 Why not make bathtime more fun with some tunes? Give your kid a chance to discover the awesome acoustics of the bathroom with these Bluetooth speakers!
- Glow in the Dark Dinosaur Puzzle | $19.99 Puzzles are fun, but when they glow in the dark they’re EXTRA fun. Bonus: if dinosaurs aren’t your kid’s thing, there’s a unicorn version, too!
- Walkie-Talkies | $24.99 My kids have a cheap-o set of walkie-talkies that barely span the length of our house. These work up to 3 miles! I could even see my older daughter giving one to her friend down the street to plan a playdate.
- Crystal Growing Kit | $39.99 Spark a love of science with this neat crystal growing kit. It even comes with a light-up display base so once your crystals are done growing, you can continue to enjoy them!
- The Legend of Rock Paper Scissors | $9.49 I recently read this book with my kids (ages 3 and 6), and they LOVED it. The story is incredibly silly, the illustrations are awesome, and there’s even a line that says, “You, sir, look like a fuzzy little butt!” which continues to be a fan favorite. What more could you want!?
- Star Projector Light | $16.99 Wouldn’t it be nice to fall asleep under the stars? Well, you can with this star projector! This one has tons of reviews, and you have the option to change the projection colors or even make the stars spin.
- Shaved Ice Maker | $39.99 I don’t know a single kid who wouldn’t want shaved ice (or slushies!) on demand. Plus, let’s be honest, adults can reap the benefits of this gift, too! (Margaritas, anyone?)
- Lego Table | $62.29 Everyone knows the horrible feeling of stepping on a Lego with bare feet. With this table, your kids can store their legos right inside! (Hopefully, they get them all in there.)
- Gel Pens Set | $19.99 I bought this gel pens set for my older daughter last year, and it has gotten so much use! There are a bajillion colors (some have multi-colored ink and some are sparkly), there are refills for every pen, and it even comes with a cool little coloring book. This would be a great gift to pair with the “Create this Book” book up above!
Happy holidays!

Need more ideas? Check out this post!
Gift Guides for Everyone
House Tour! - 2022
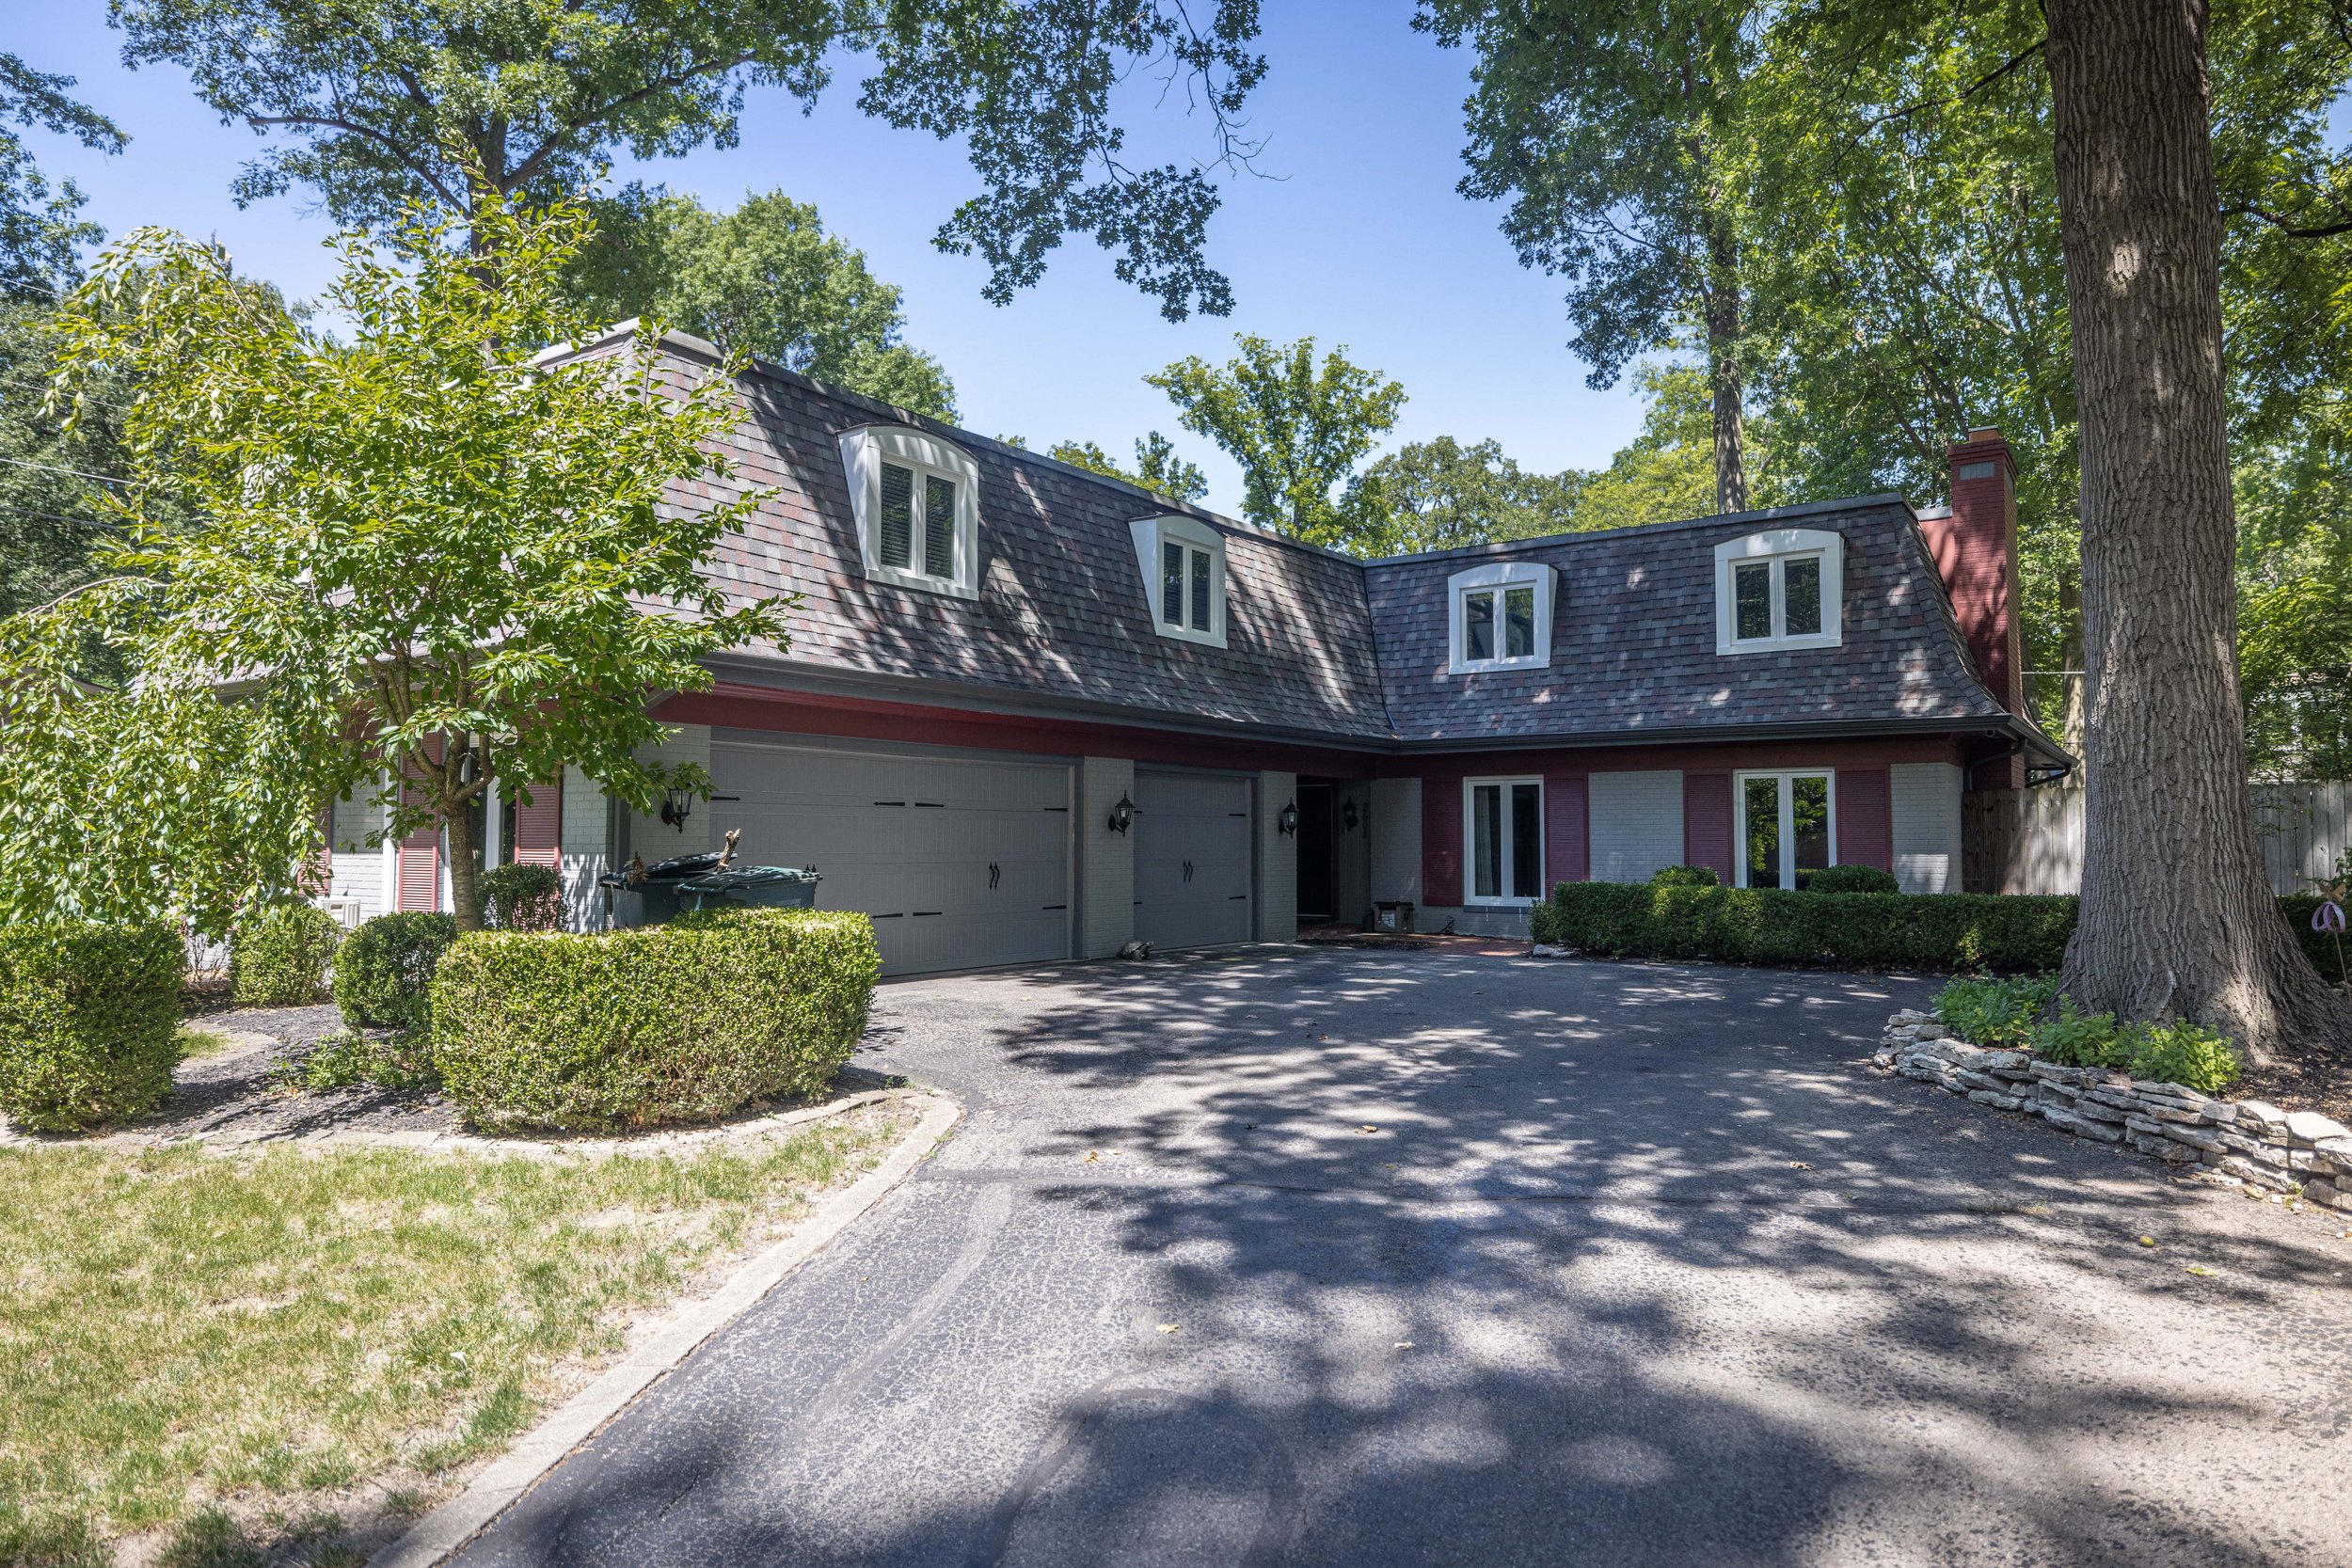
t’s been a good three years since we moved into this house and A LOT has changed. Although I share bits and pieces of various rooms as we’re working on them, I’d say it’s about time for a good old house tour! Complete with lots of before and after comparisons, because those are just so dang fun - let’s jump in!
It’s been a good three years since we moved into this house, and A LOT has changed since I last showed you around. Although I share bits and pieces of various rooms as we’re working on them, I’d say it’s about time for a good old house tour! Complete with lots of before and after comparisons because those are just so dang fun - let’s jump in!
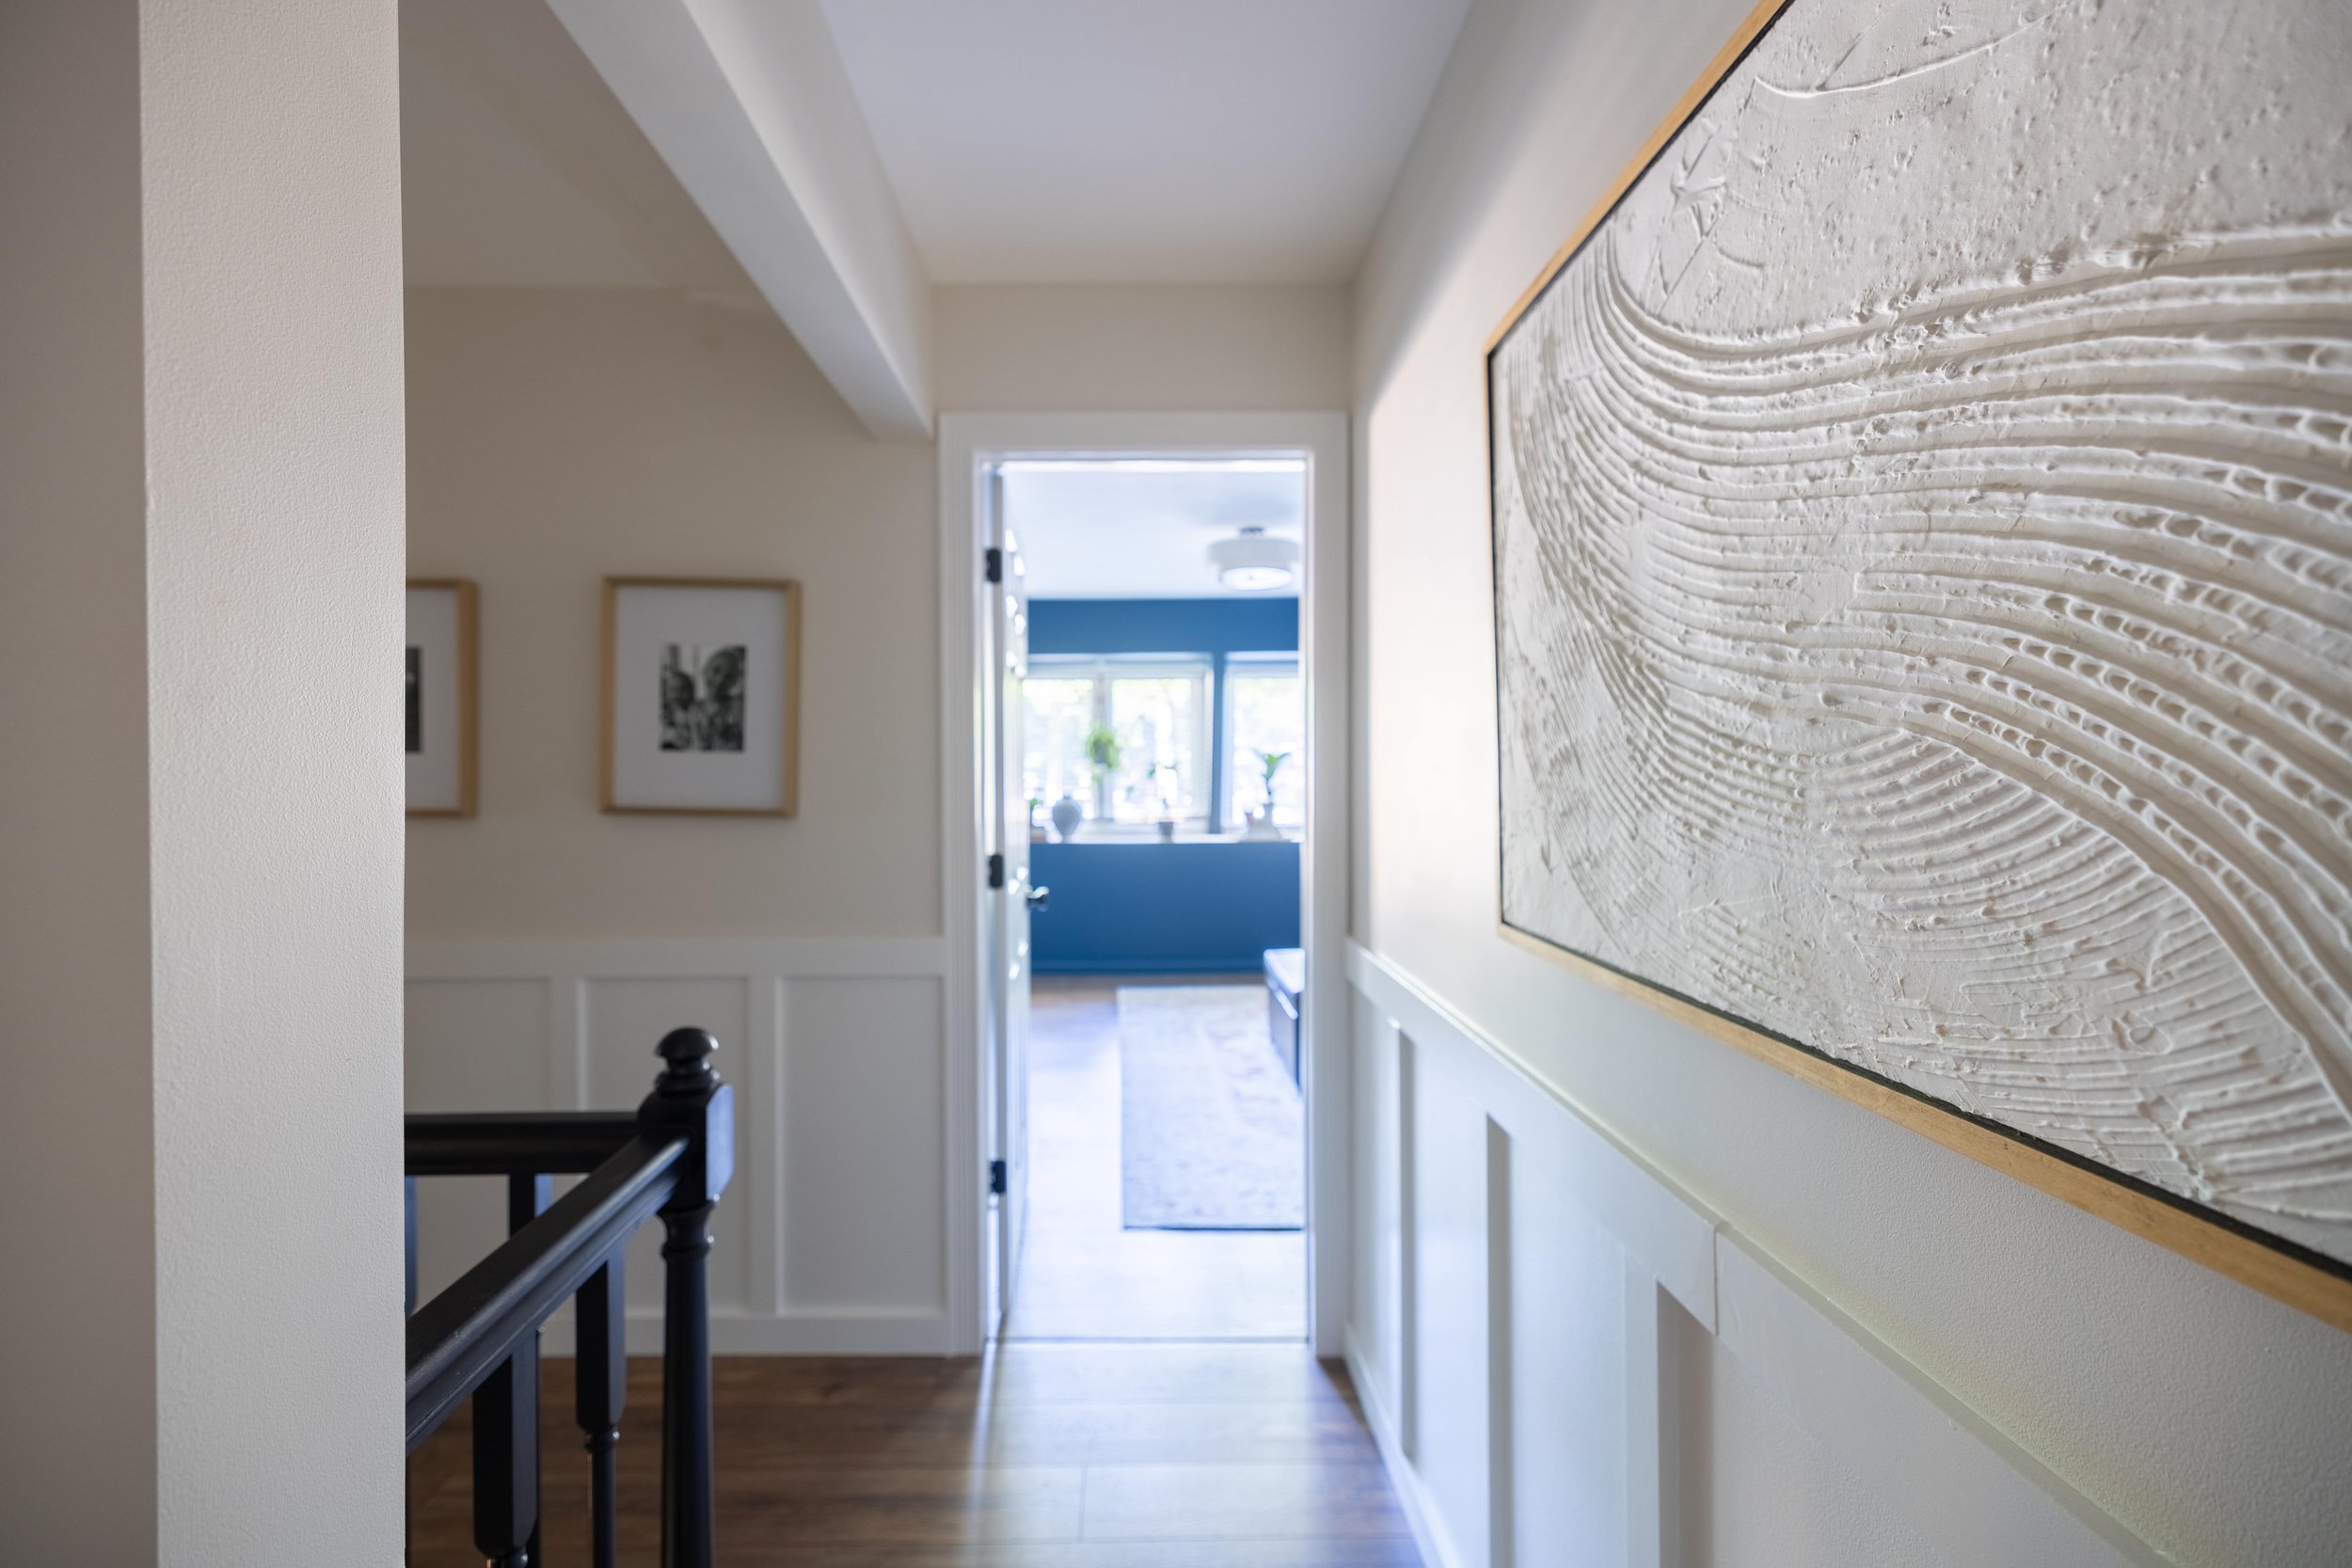
The Foyer
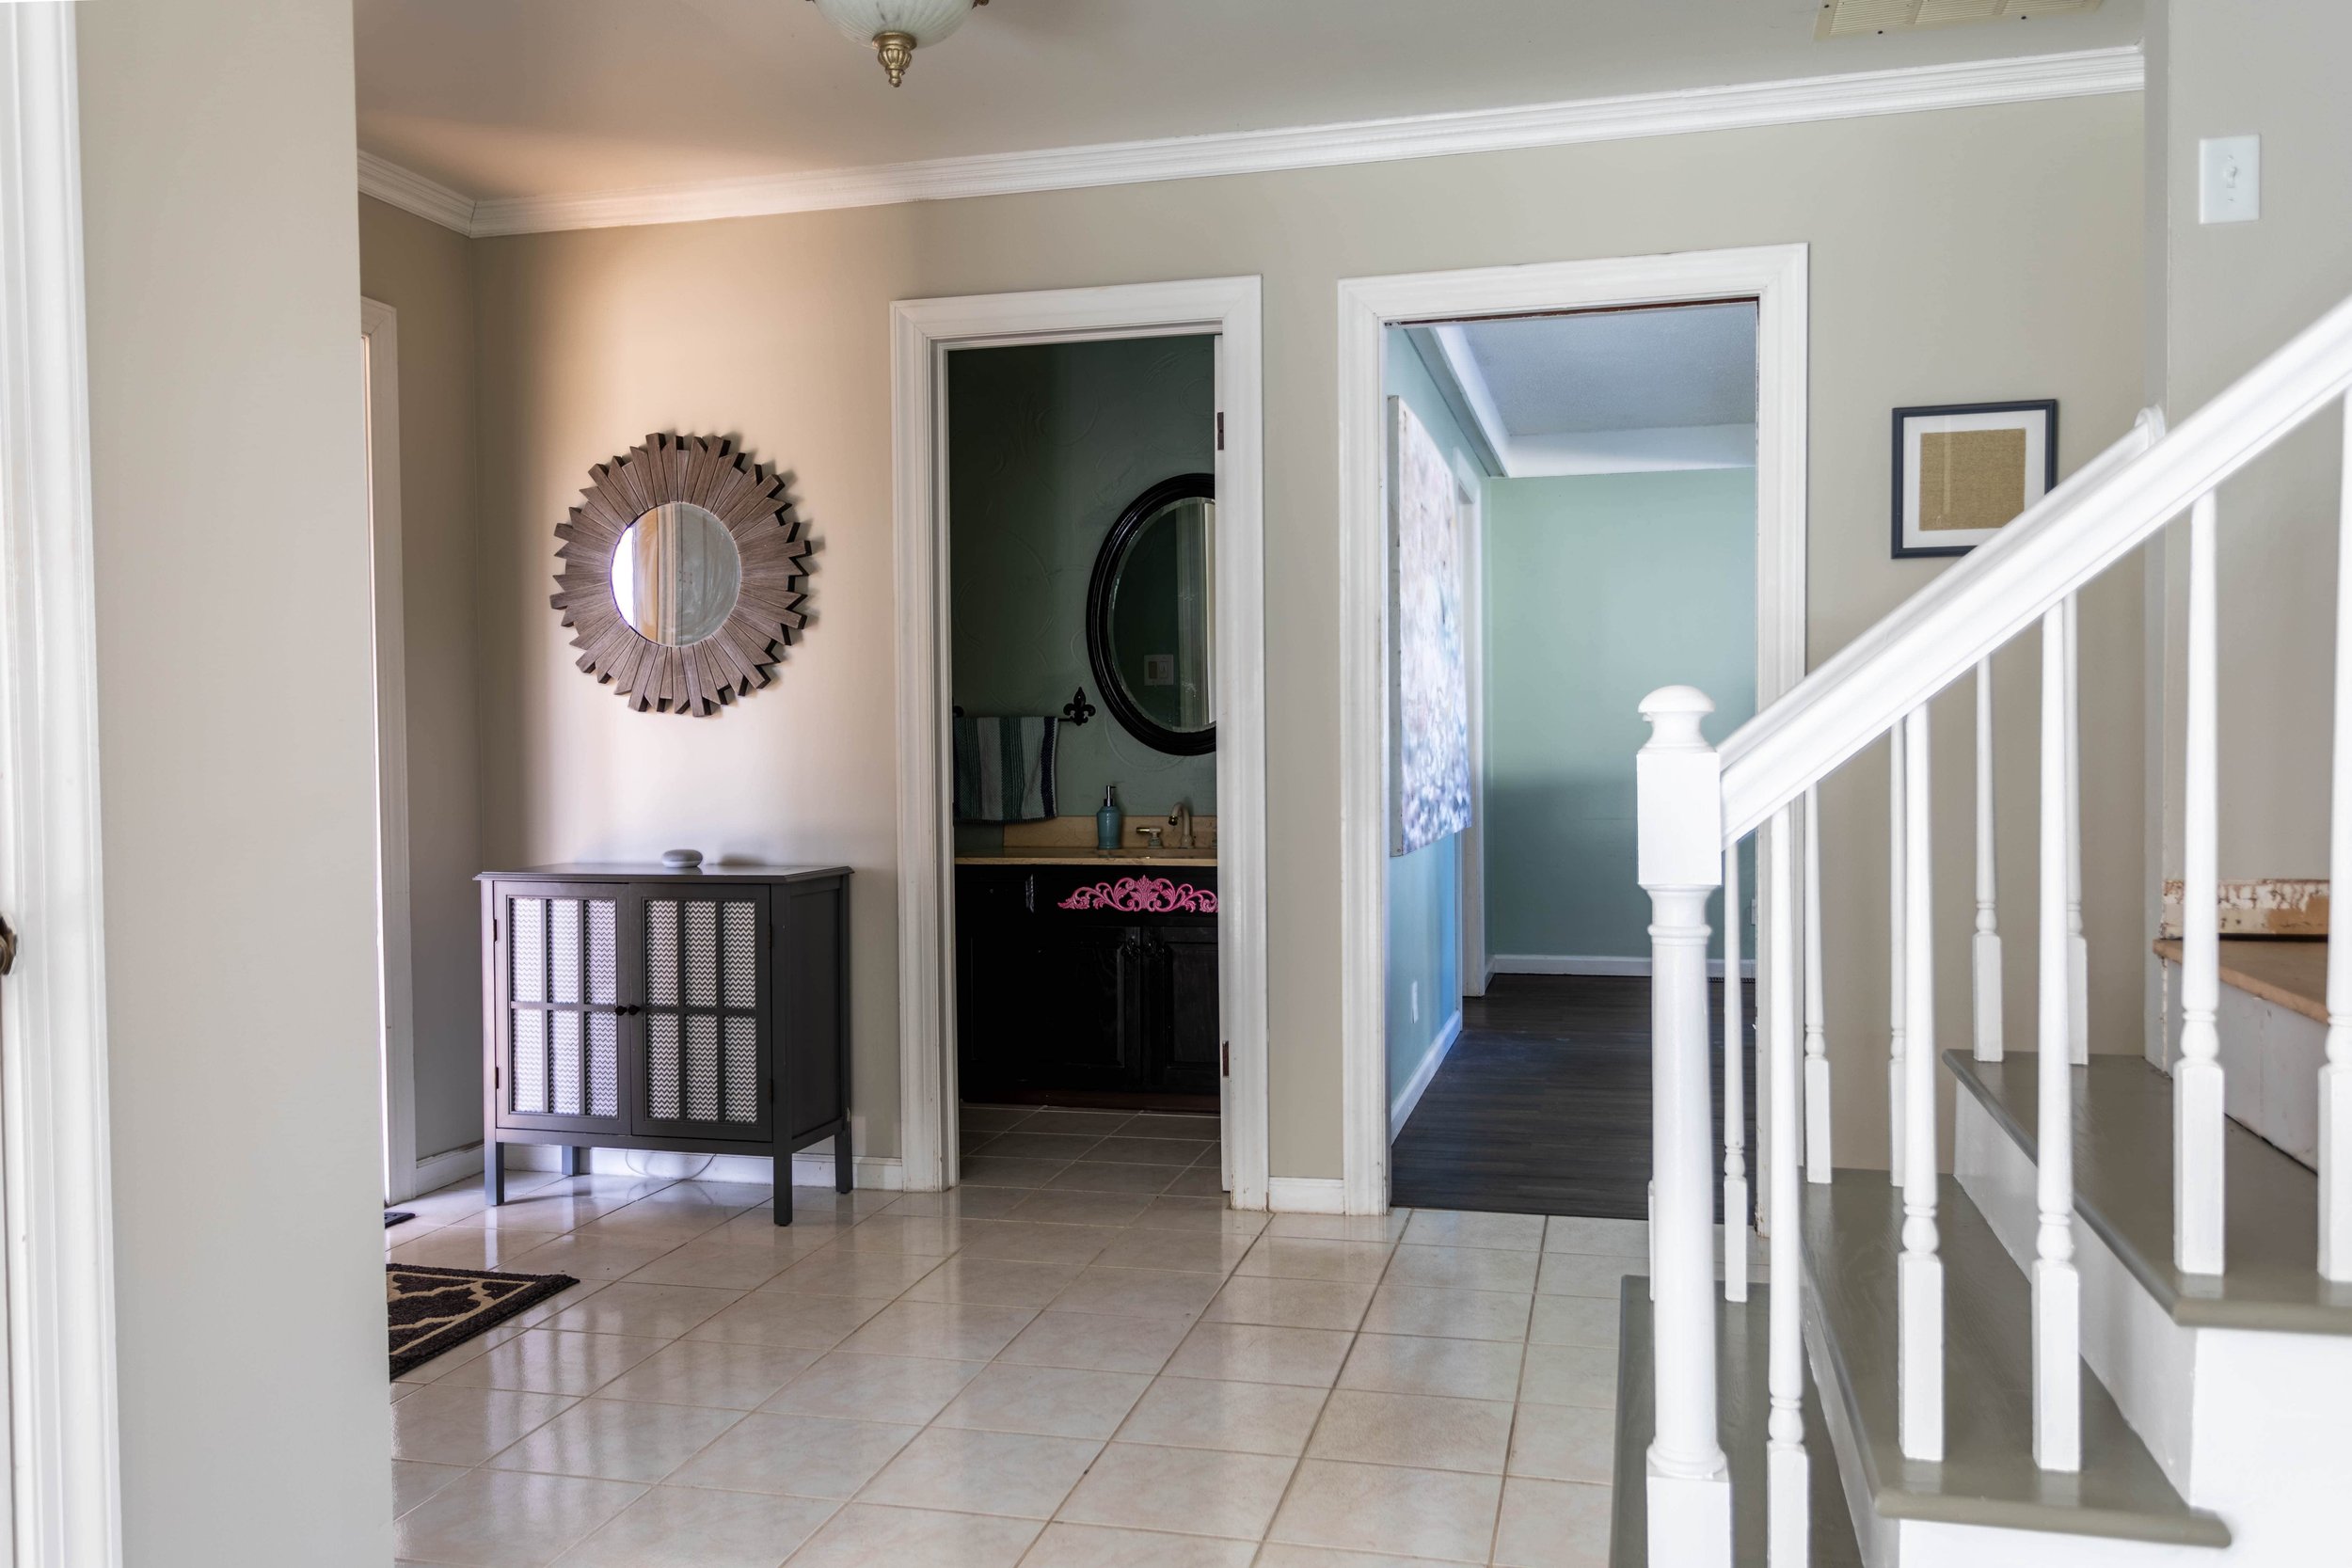
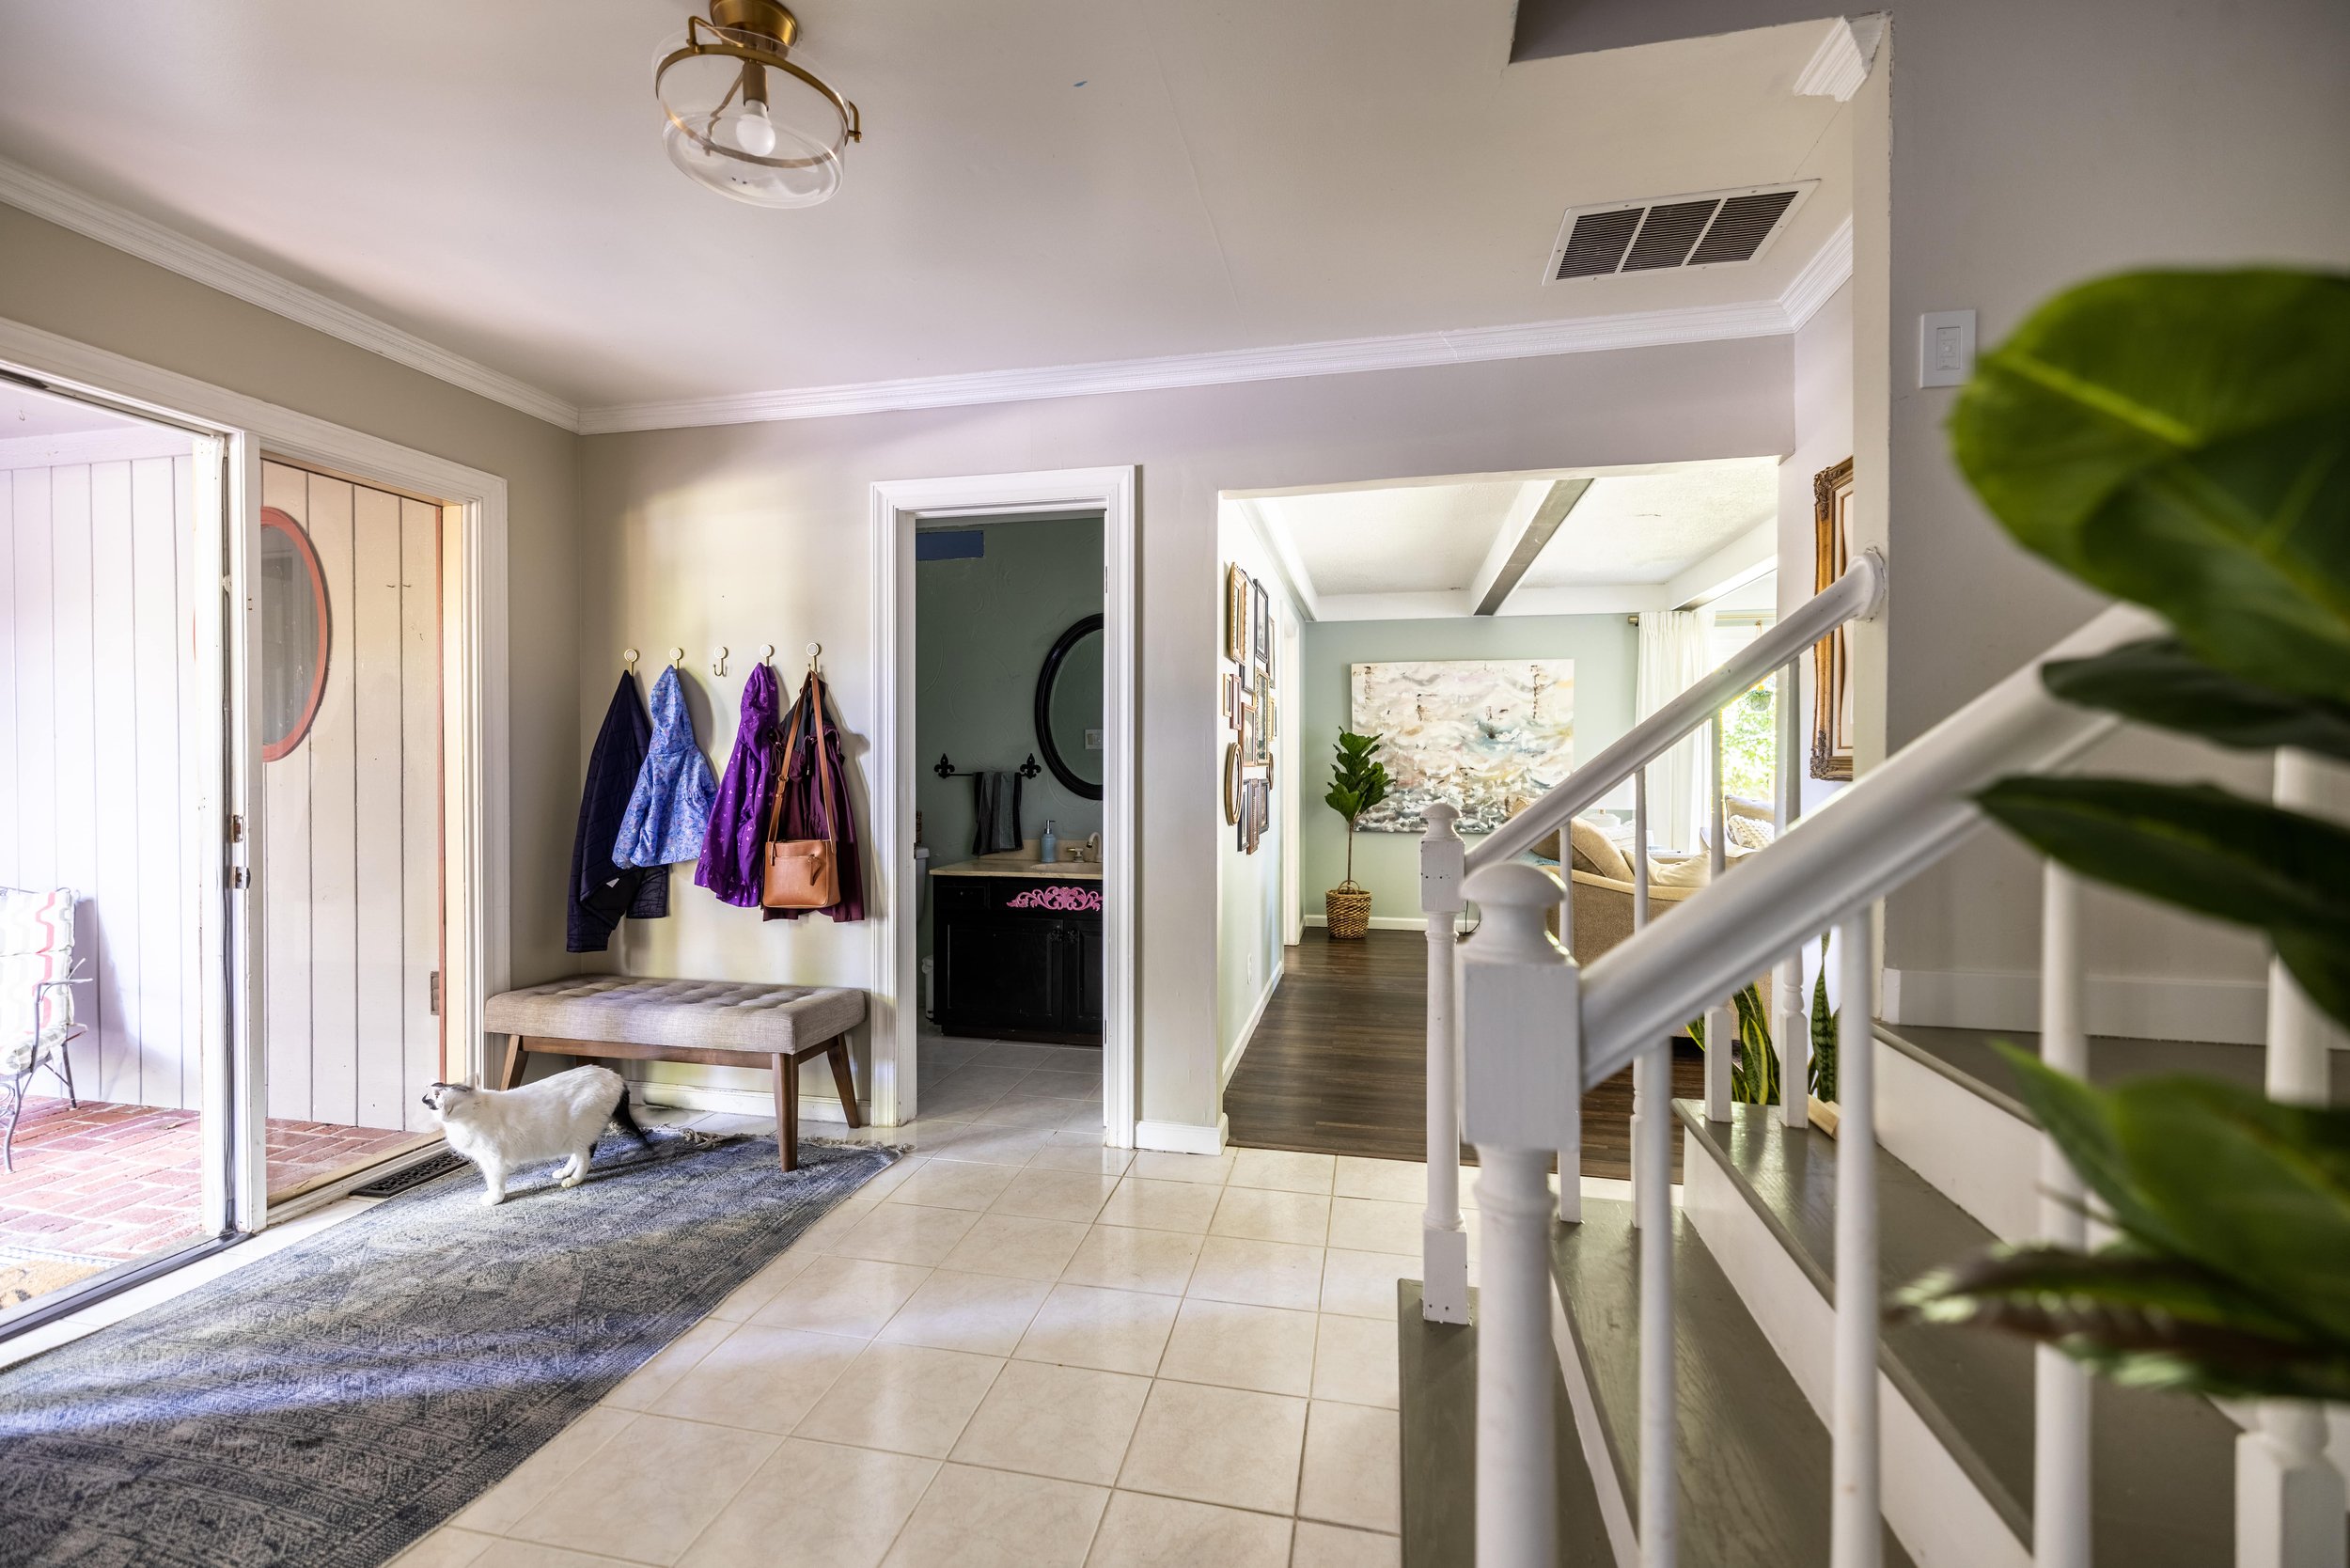
A few things have changed in the foyer since our last house tour - most notably, we opened up the doorway to the living room, which added SO much more light to this space. It’s still darker than I prefer. We have plans to upgrade the solid front door to a glass door down the road, but I think that might actually turn into an entire foyer overhaul.
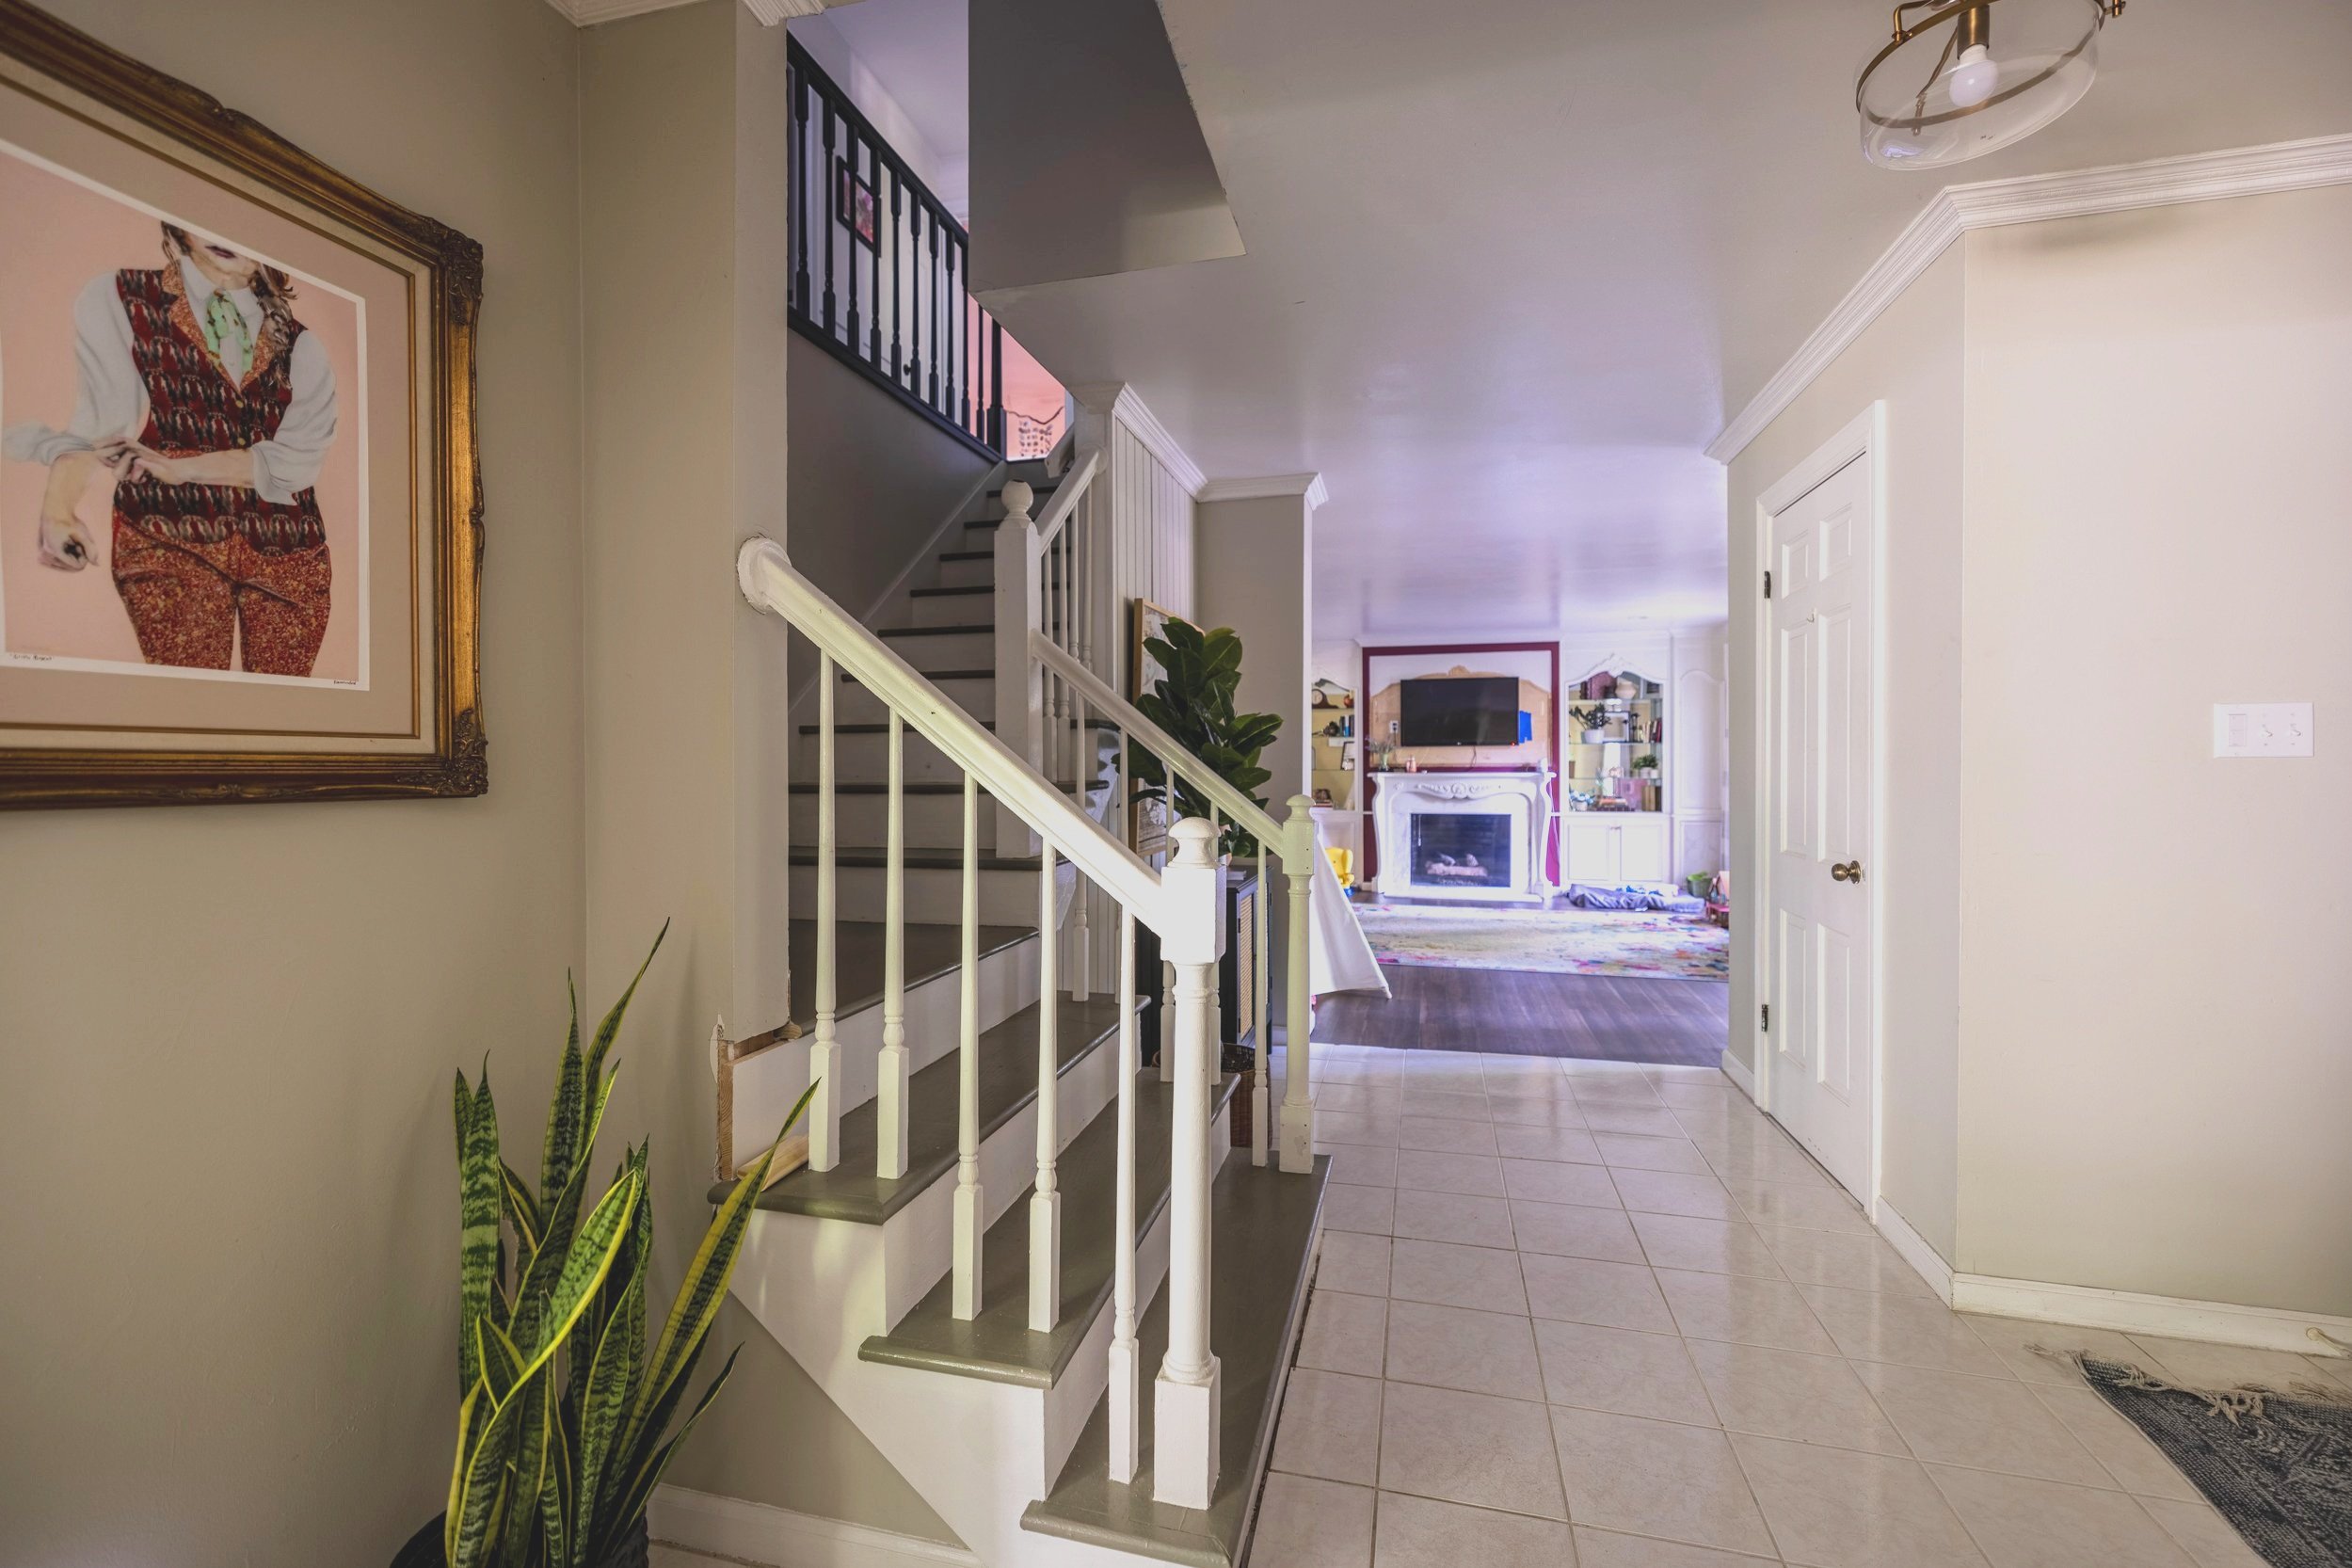
I also still have plans to paint the railing and the stairs black and add a runner. Oh, and replace the flooring throughout the entire downstairs so it’s cohesive. You know, just a few things.
Related: Painting Our Stairs / Do Painted Stairs Actually Hold Up?
The Half Bath
You’ll notice a theme in this house that while some rooms look wildly different, others look exactly the same, or worse than when we moved in. The half bath off the foyer is no exception. Aside from a few pieces of drywall we had to cut out to reach the plumbing during our master bathroom remodel, this room hasn’t changed one bit.
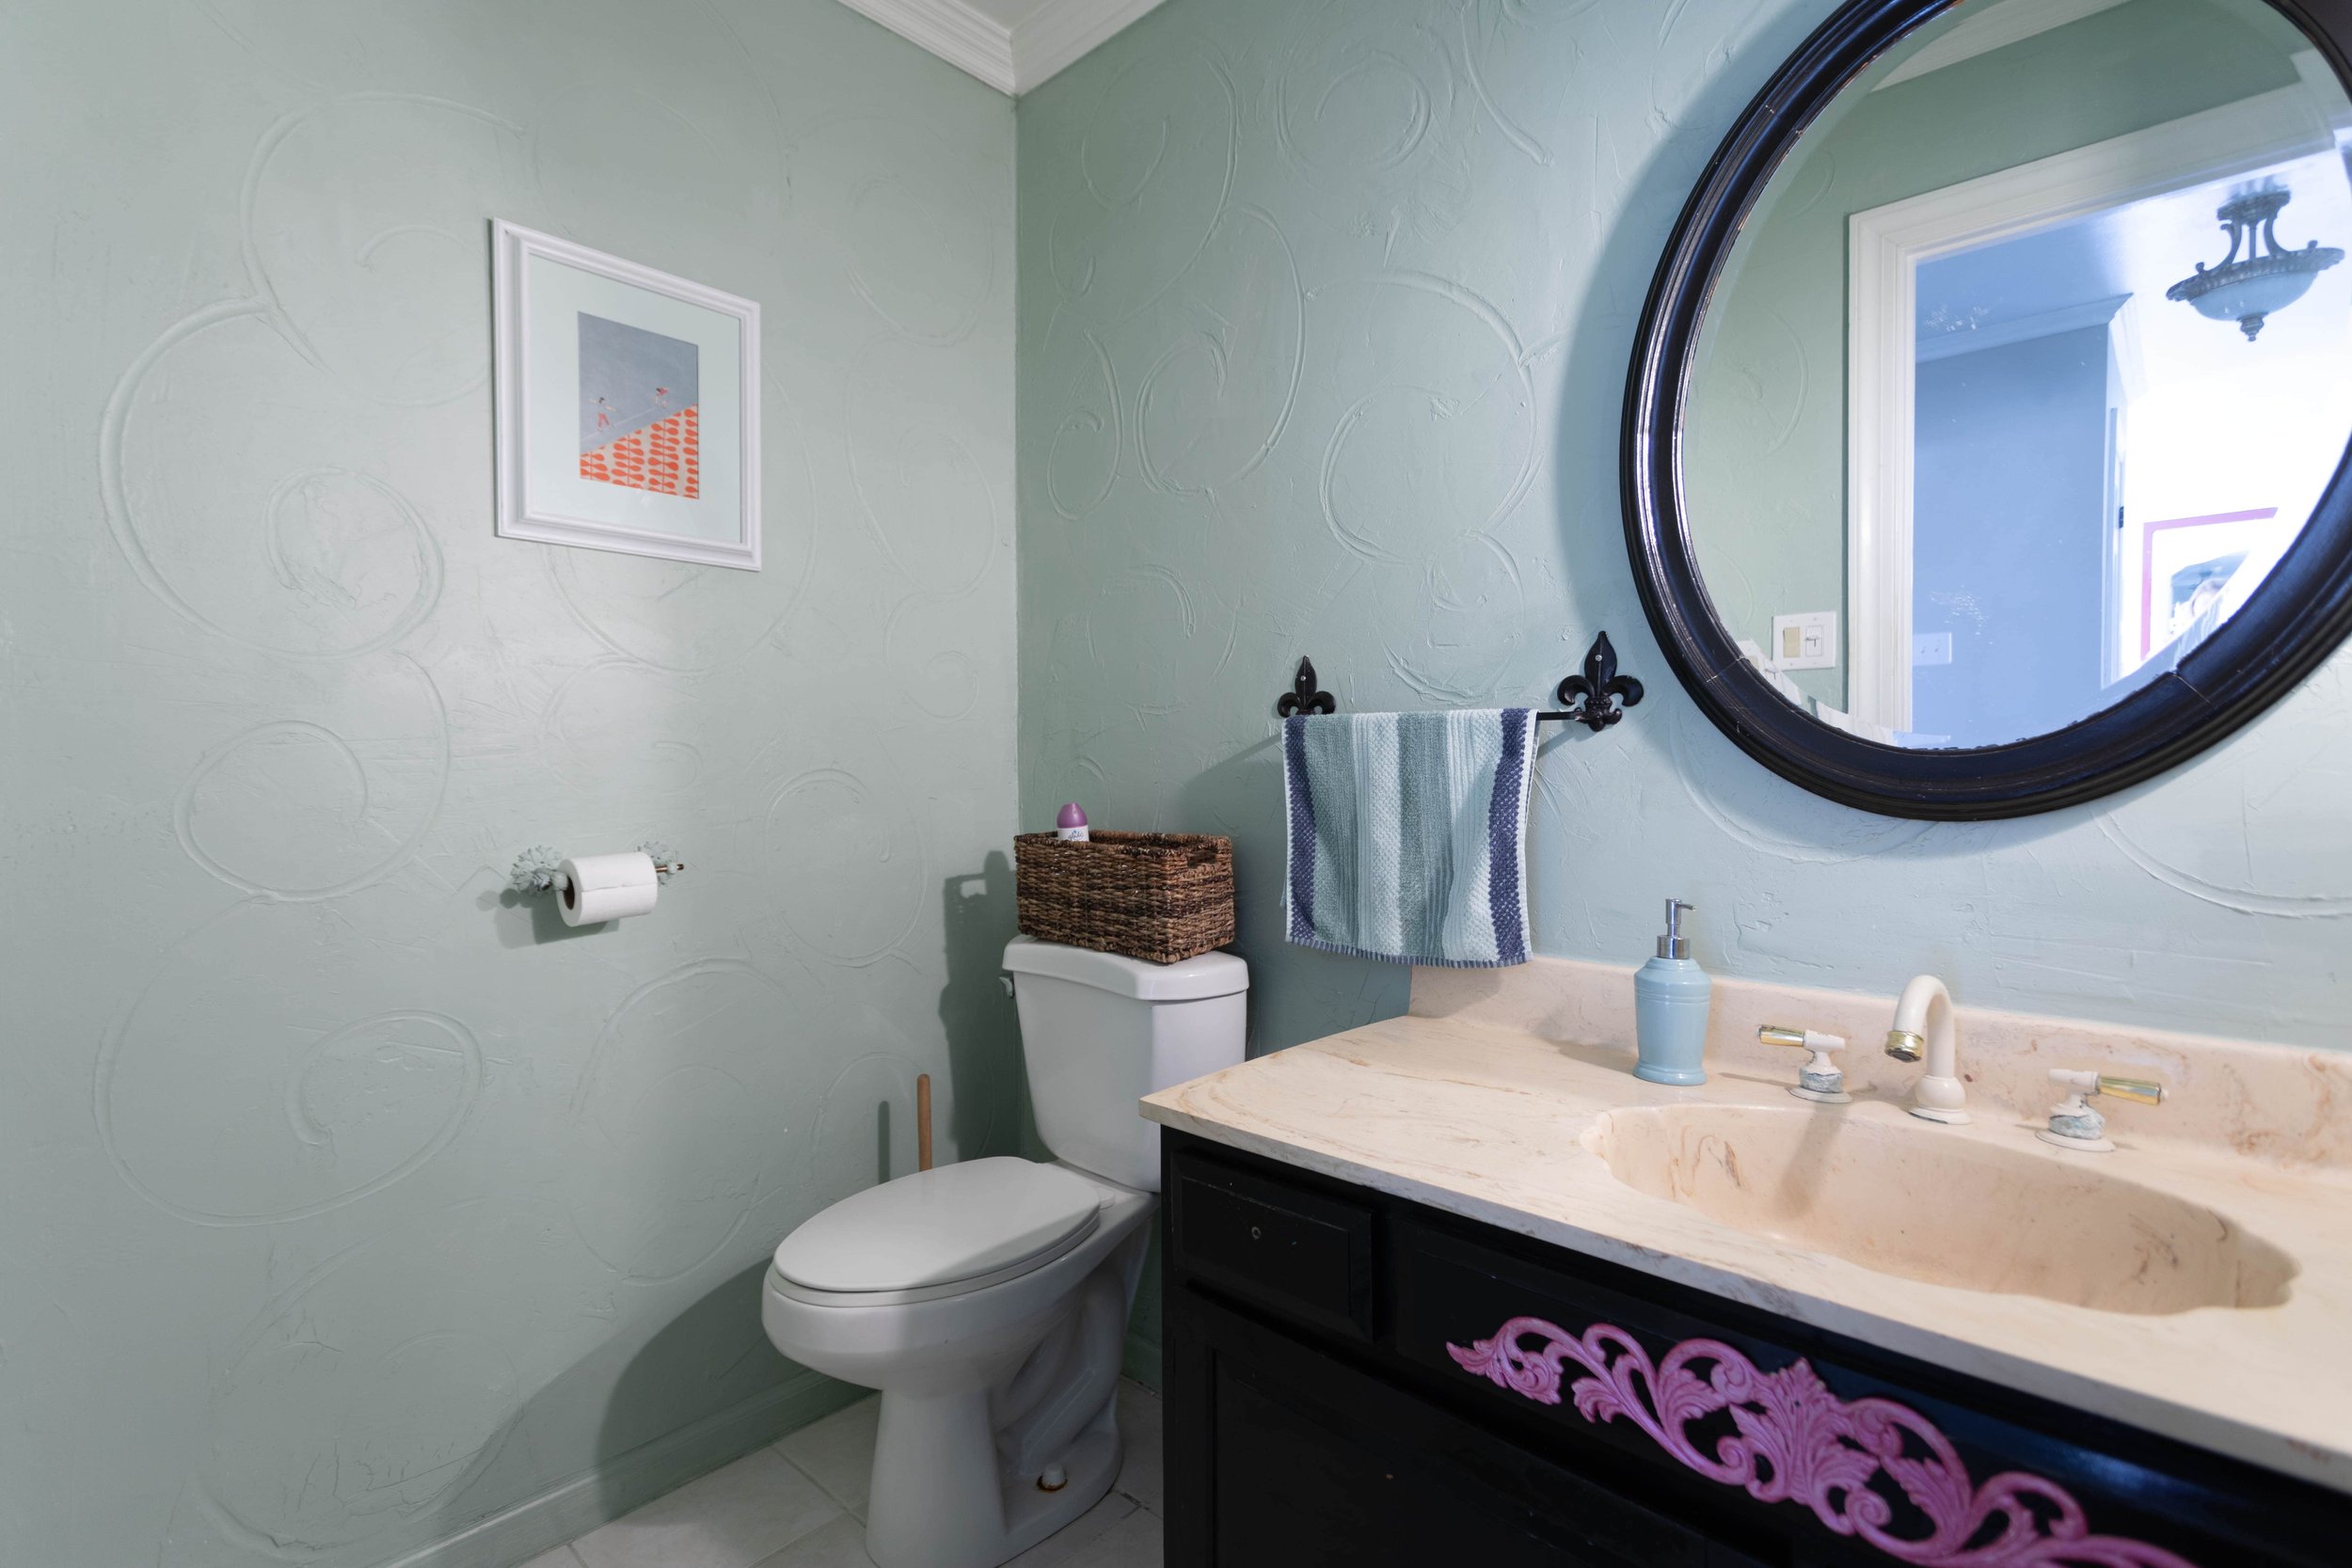
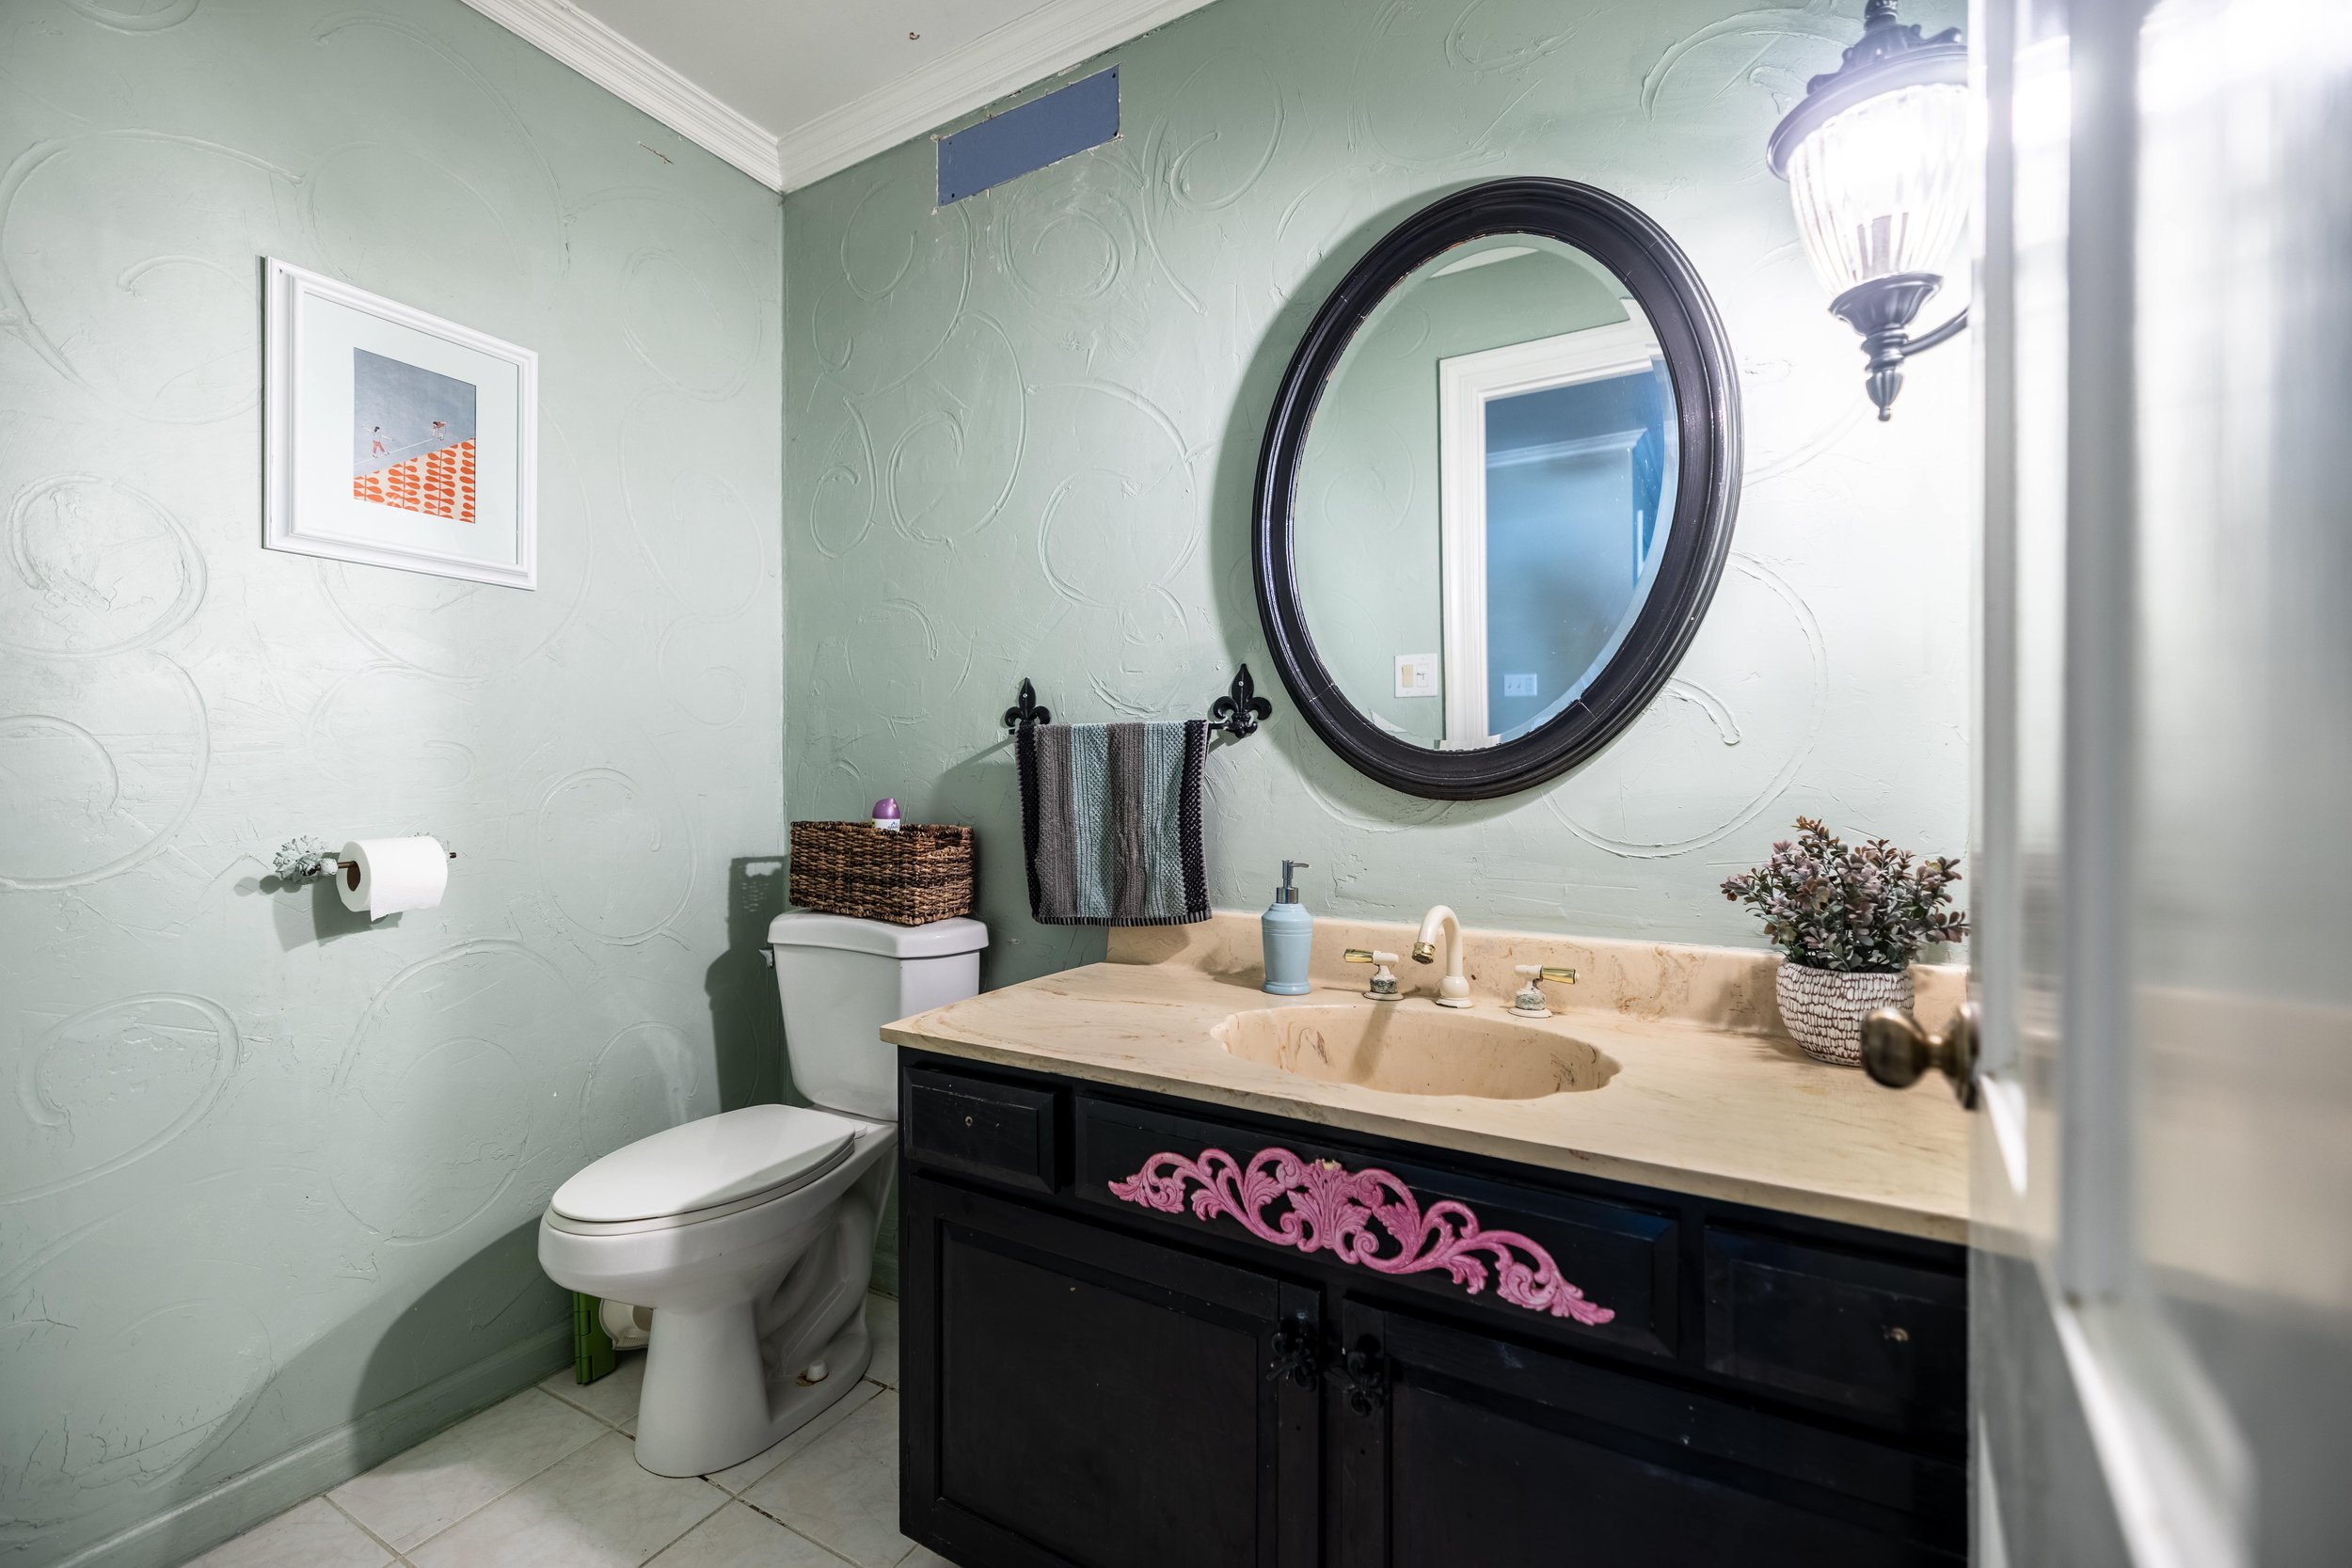
While I have a design mocked up and am ITCHING to get my hands on this room, I’m impatiently holding off until we finish up the various other projects we have in flight.
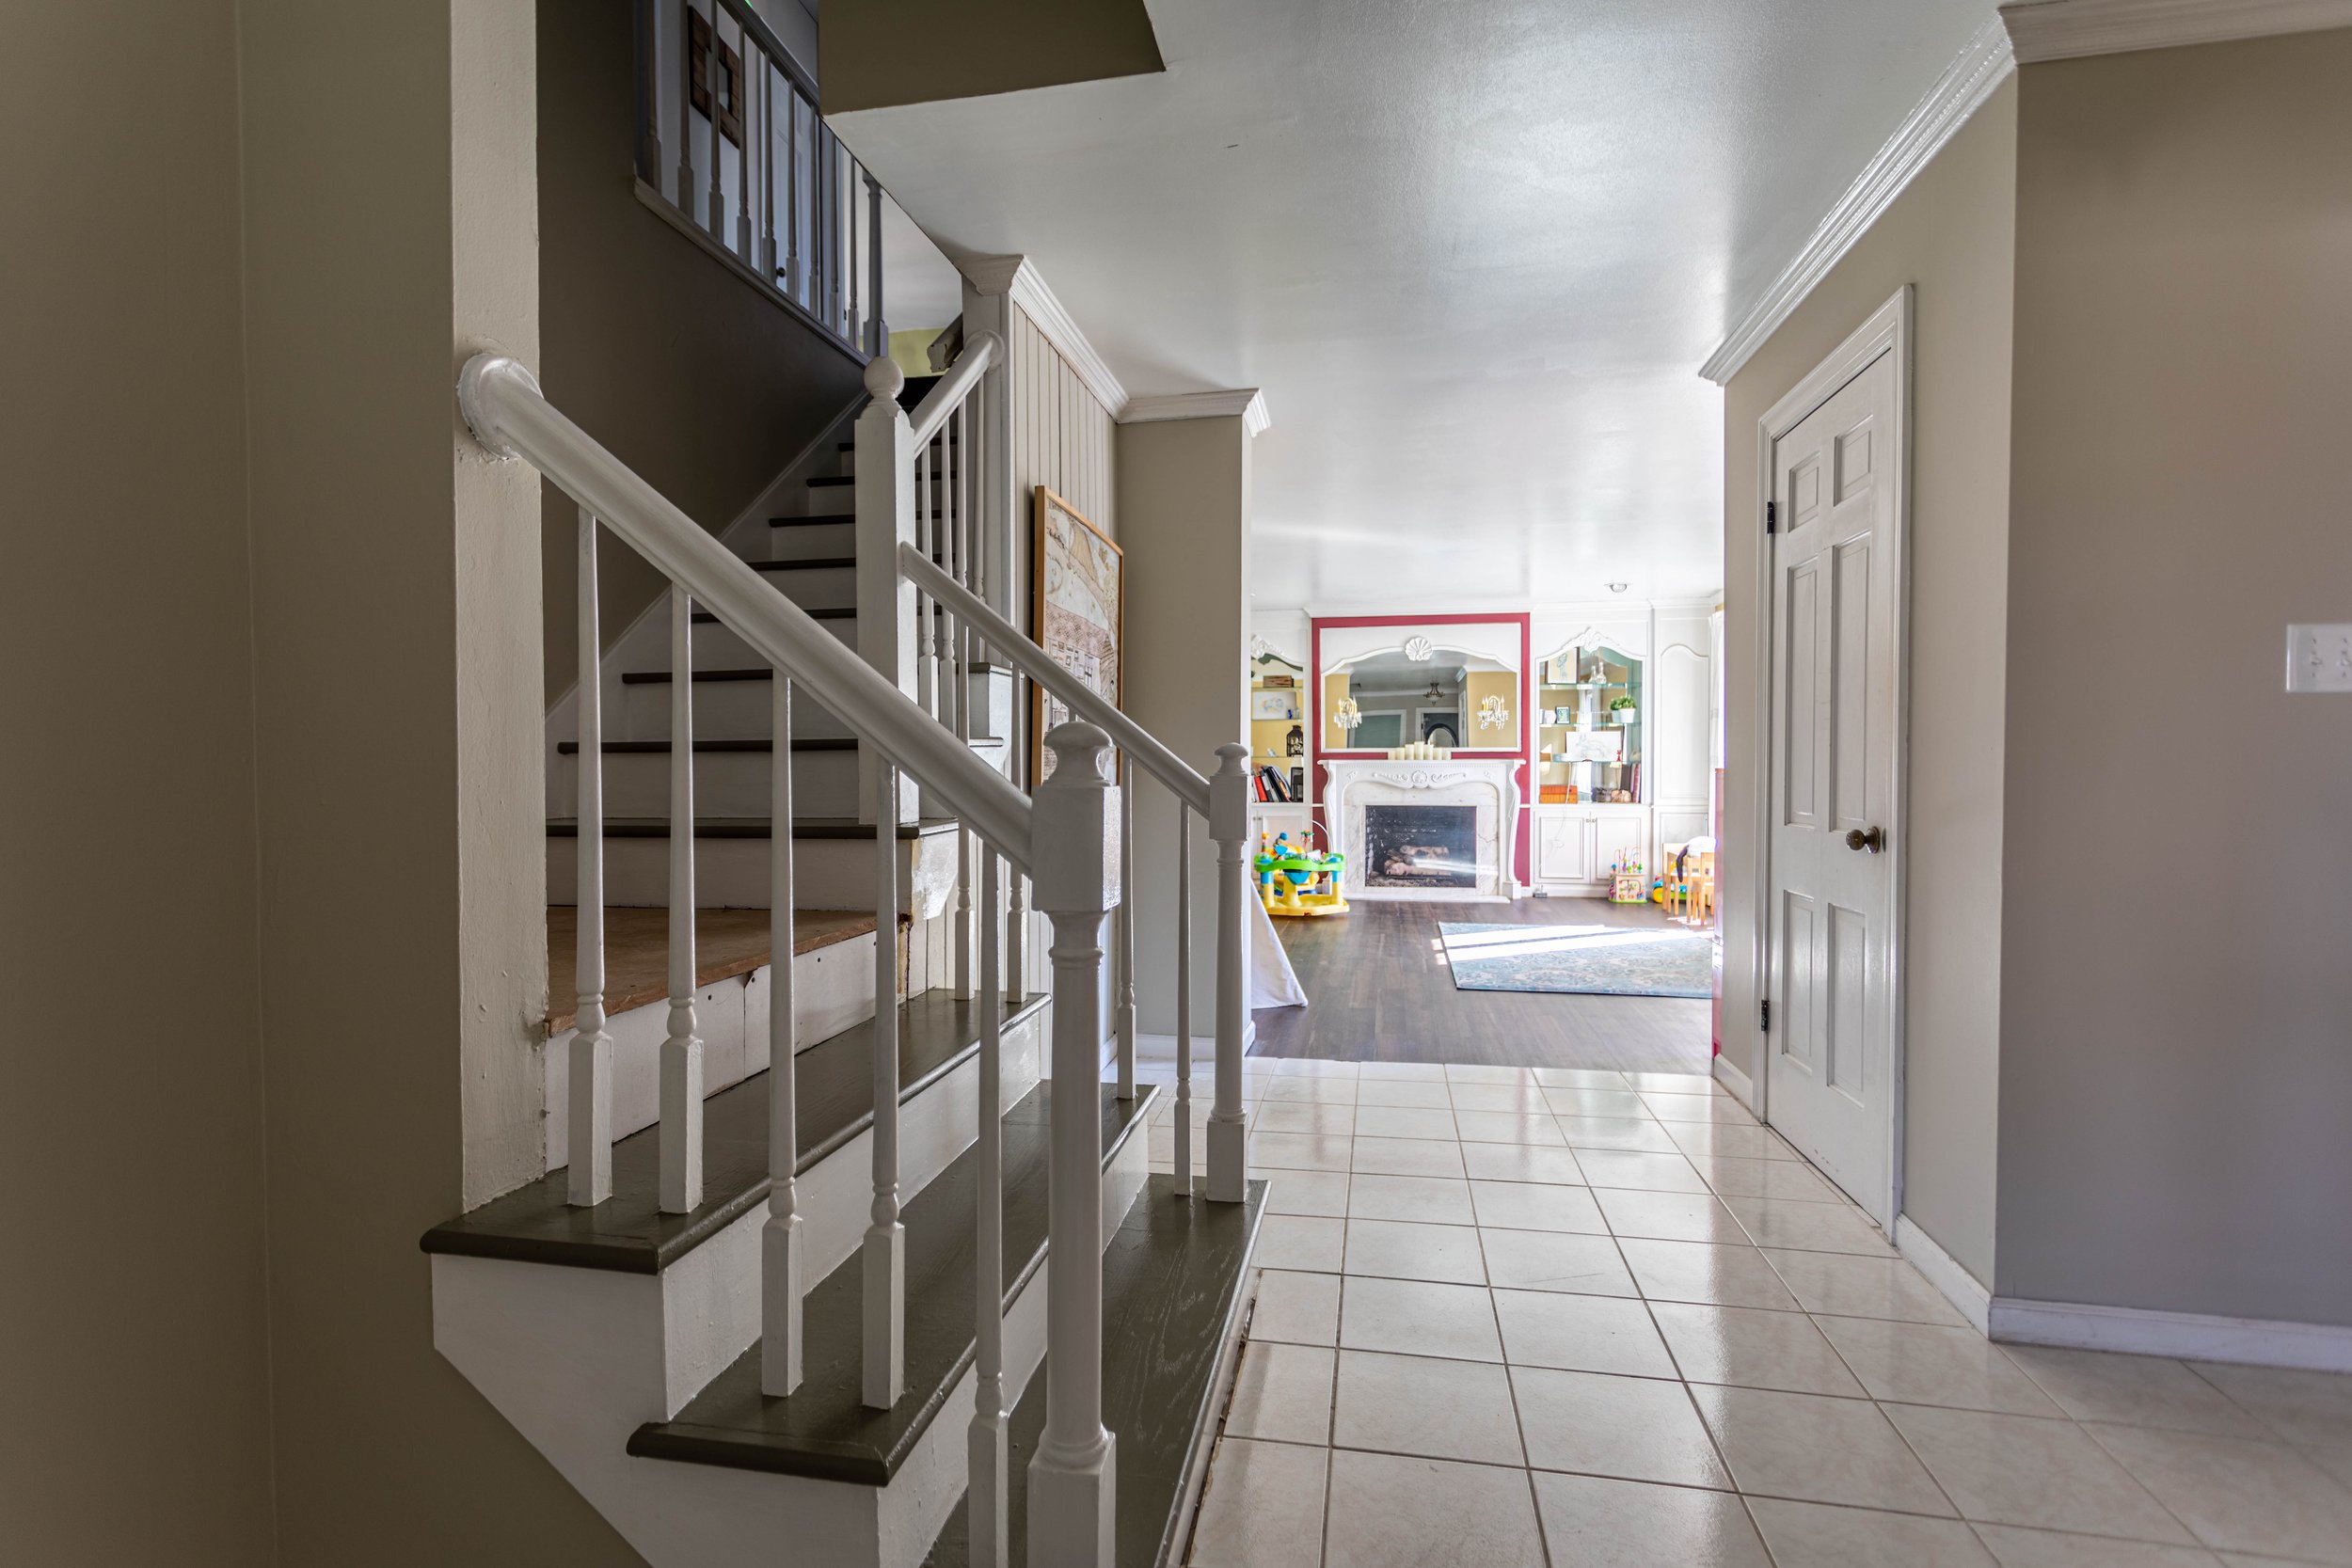
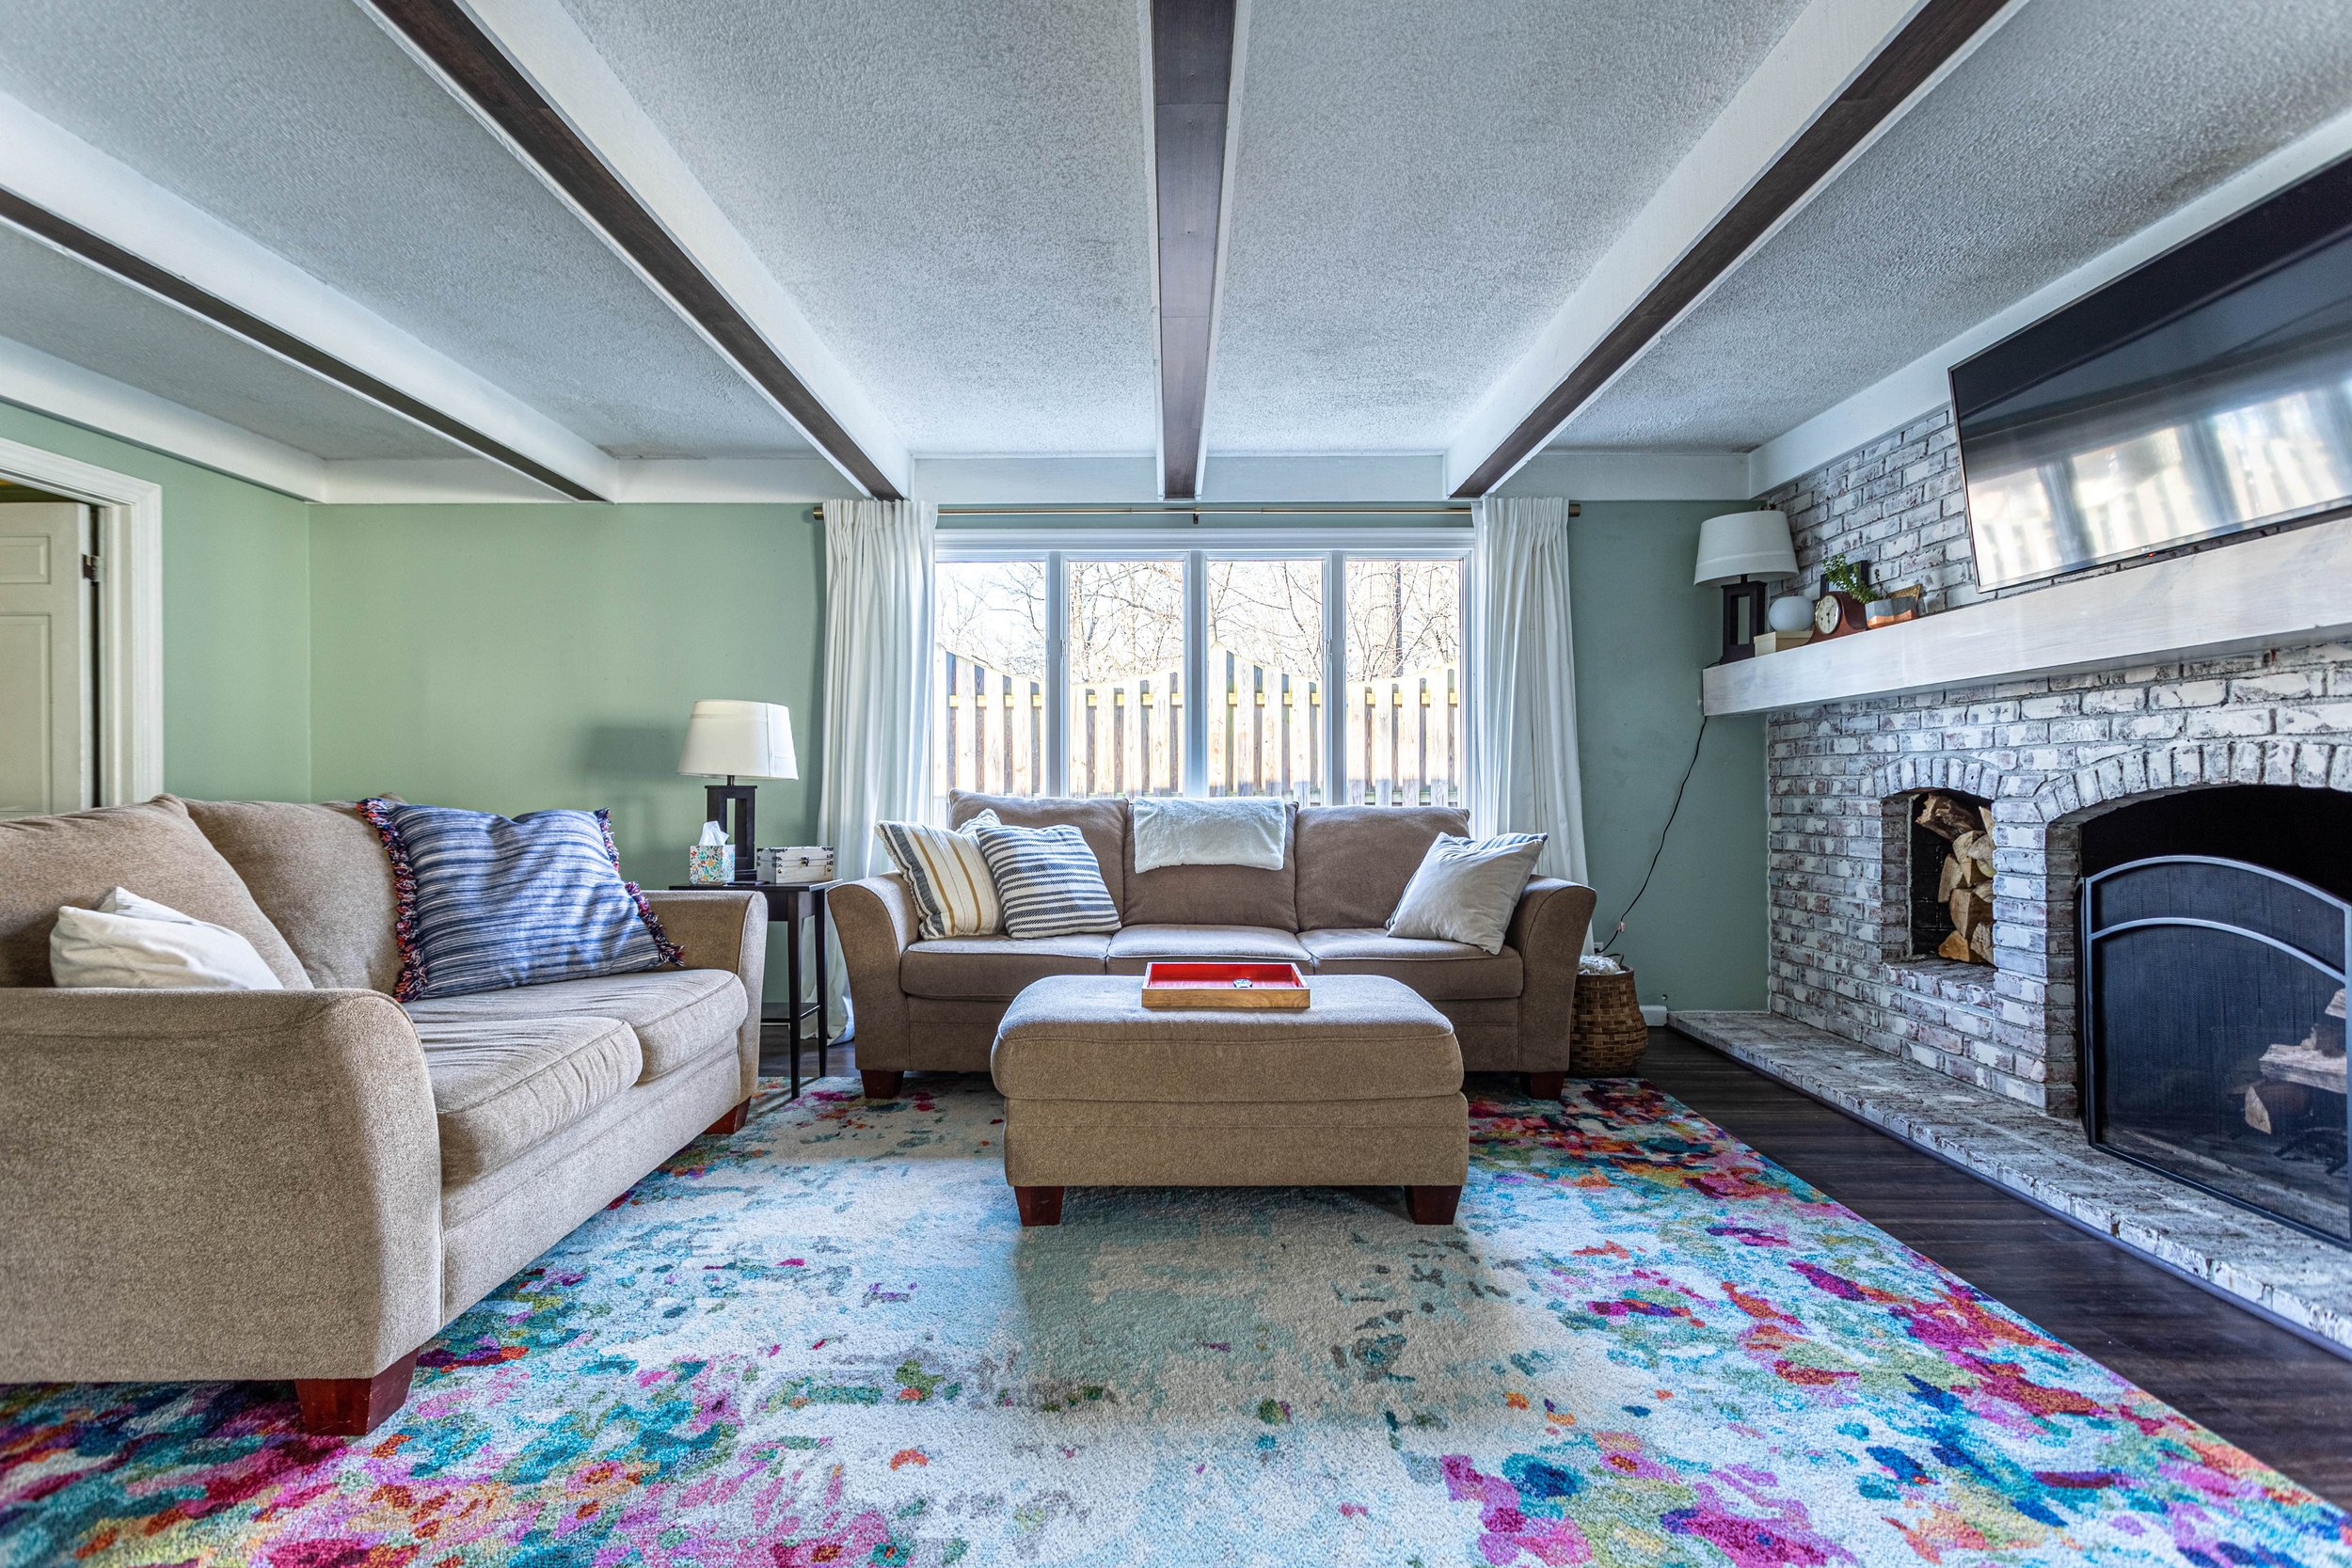
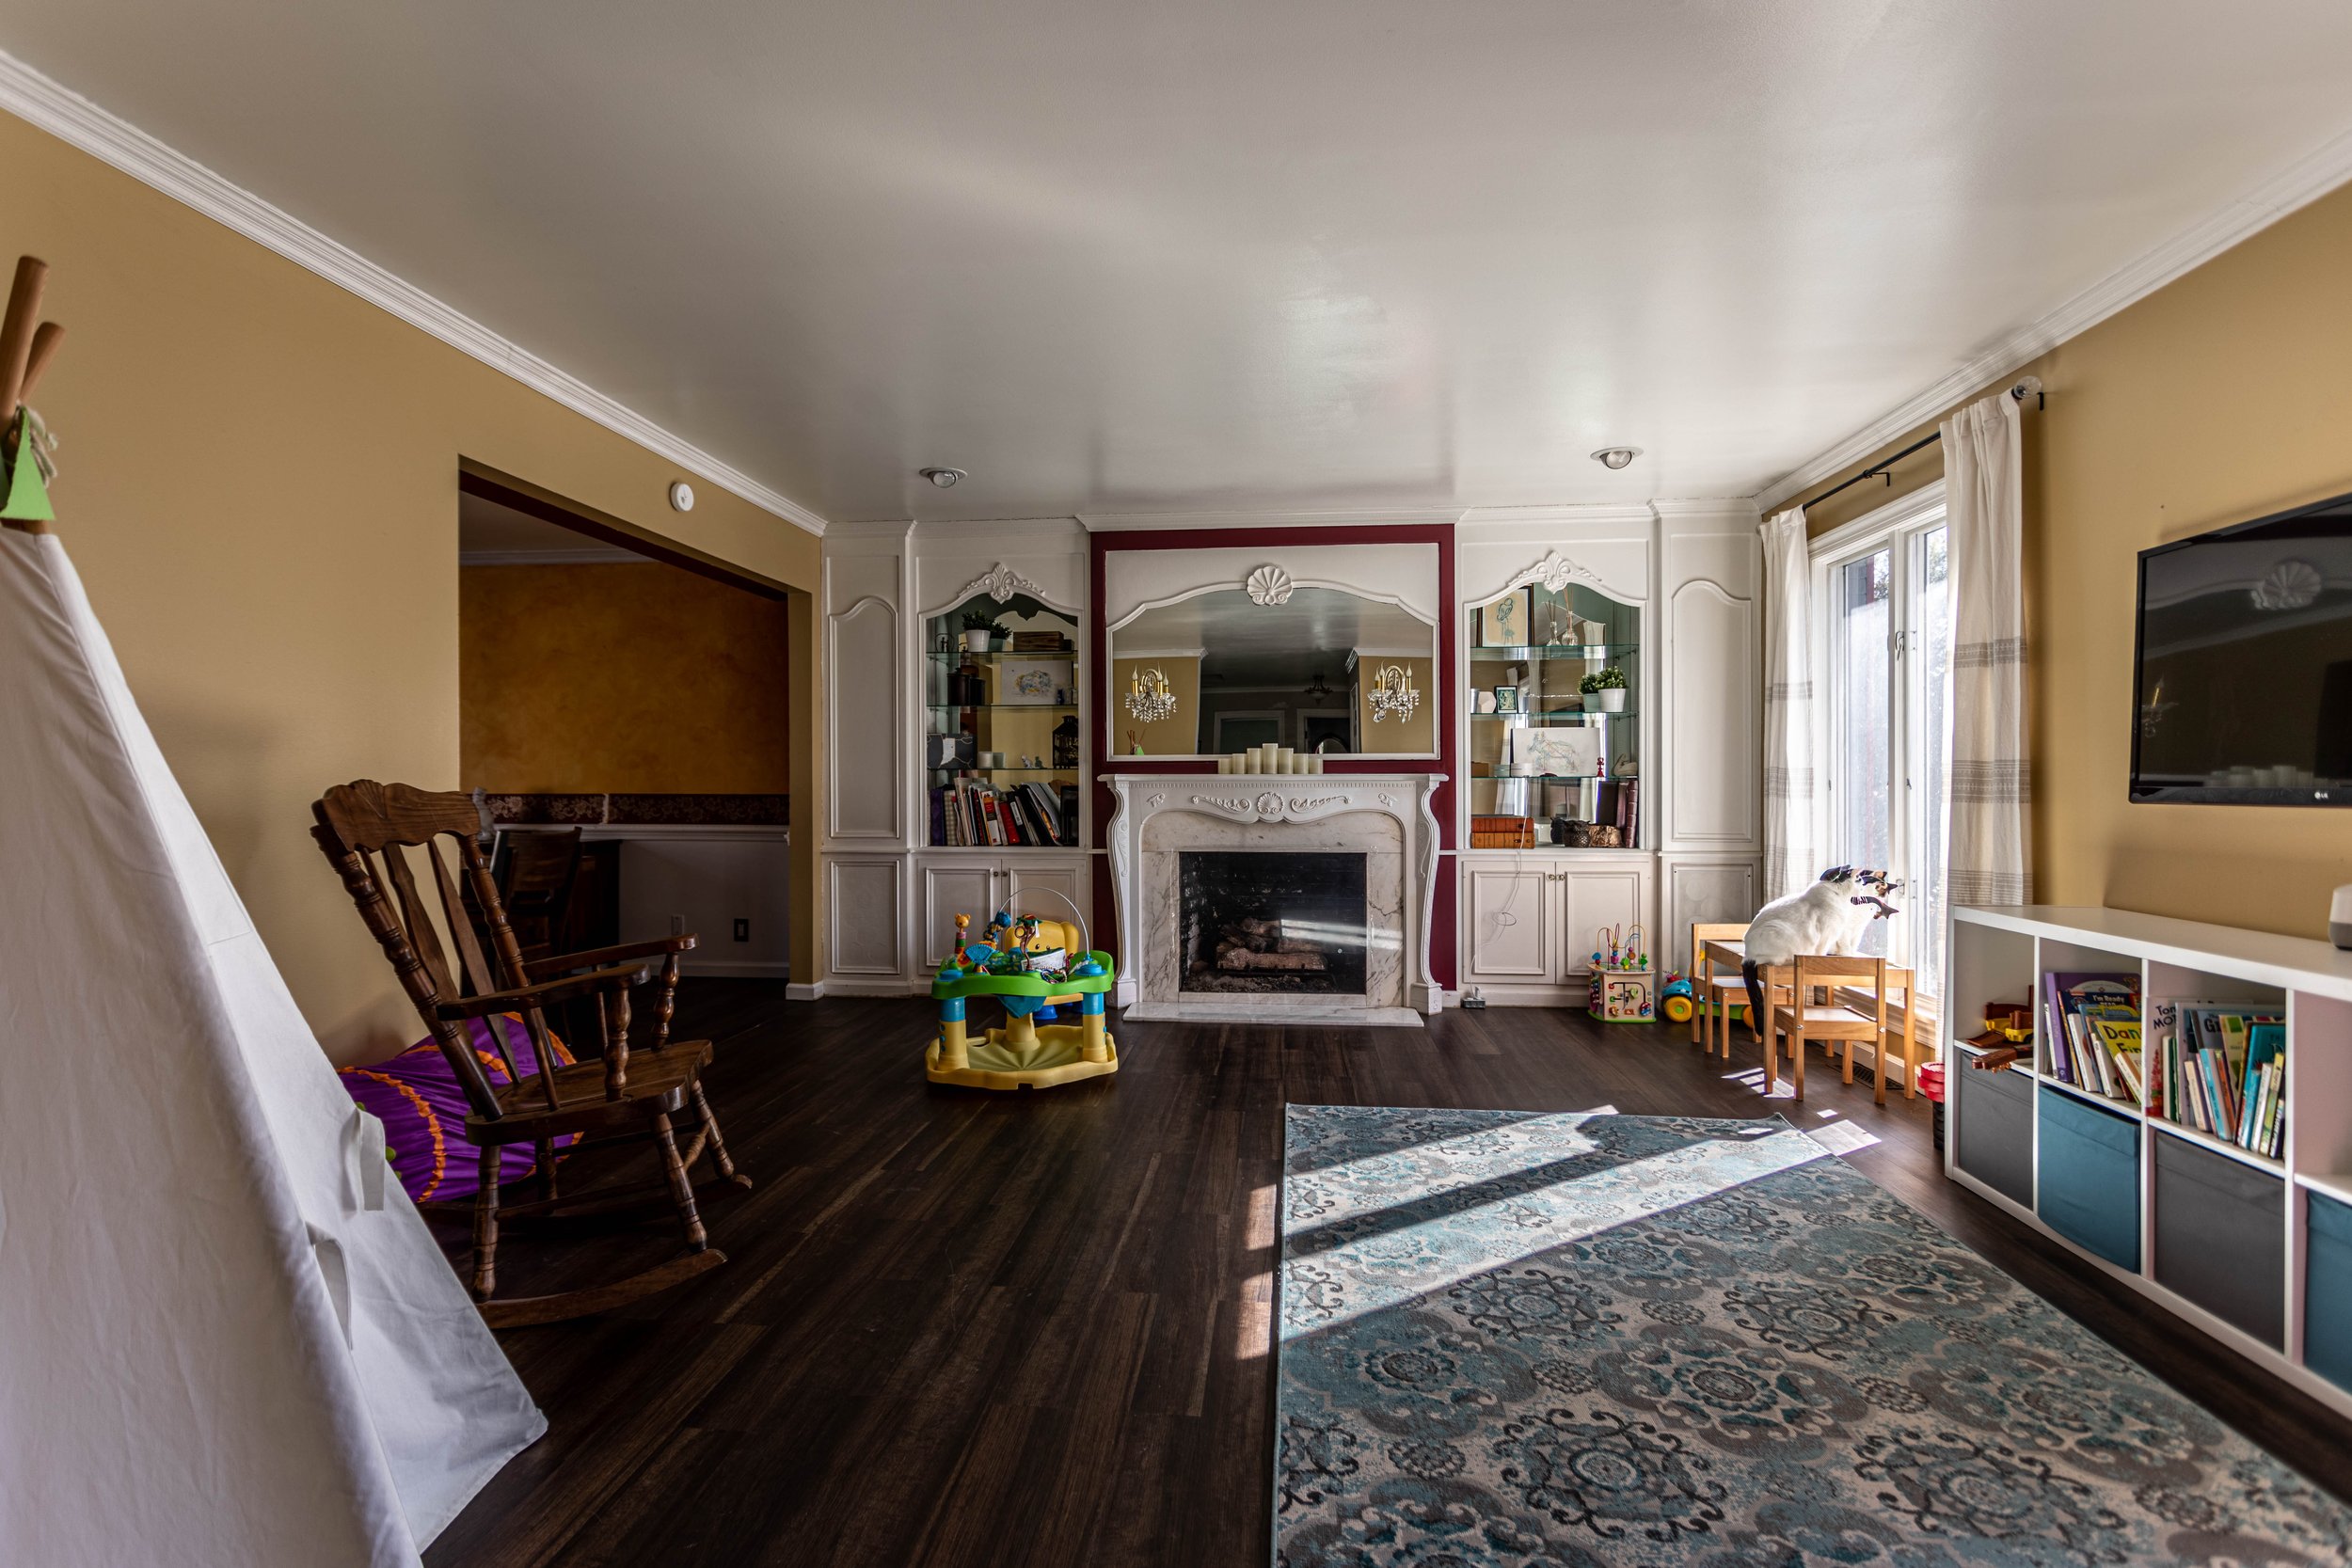
The Living Room
The living room has undergone slight changes over the last couple of years, like swapping out some decor, repainting, and greatly improving the view out the windows.
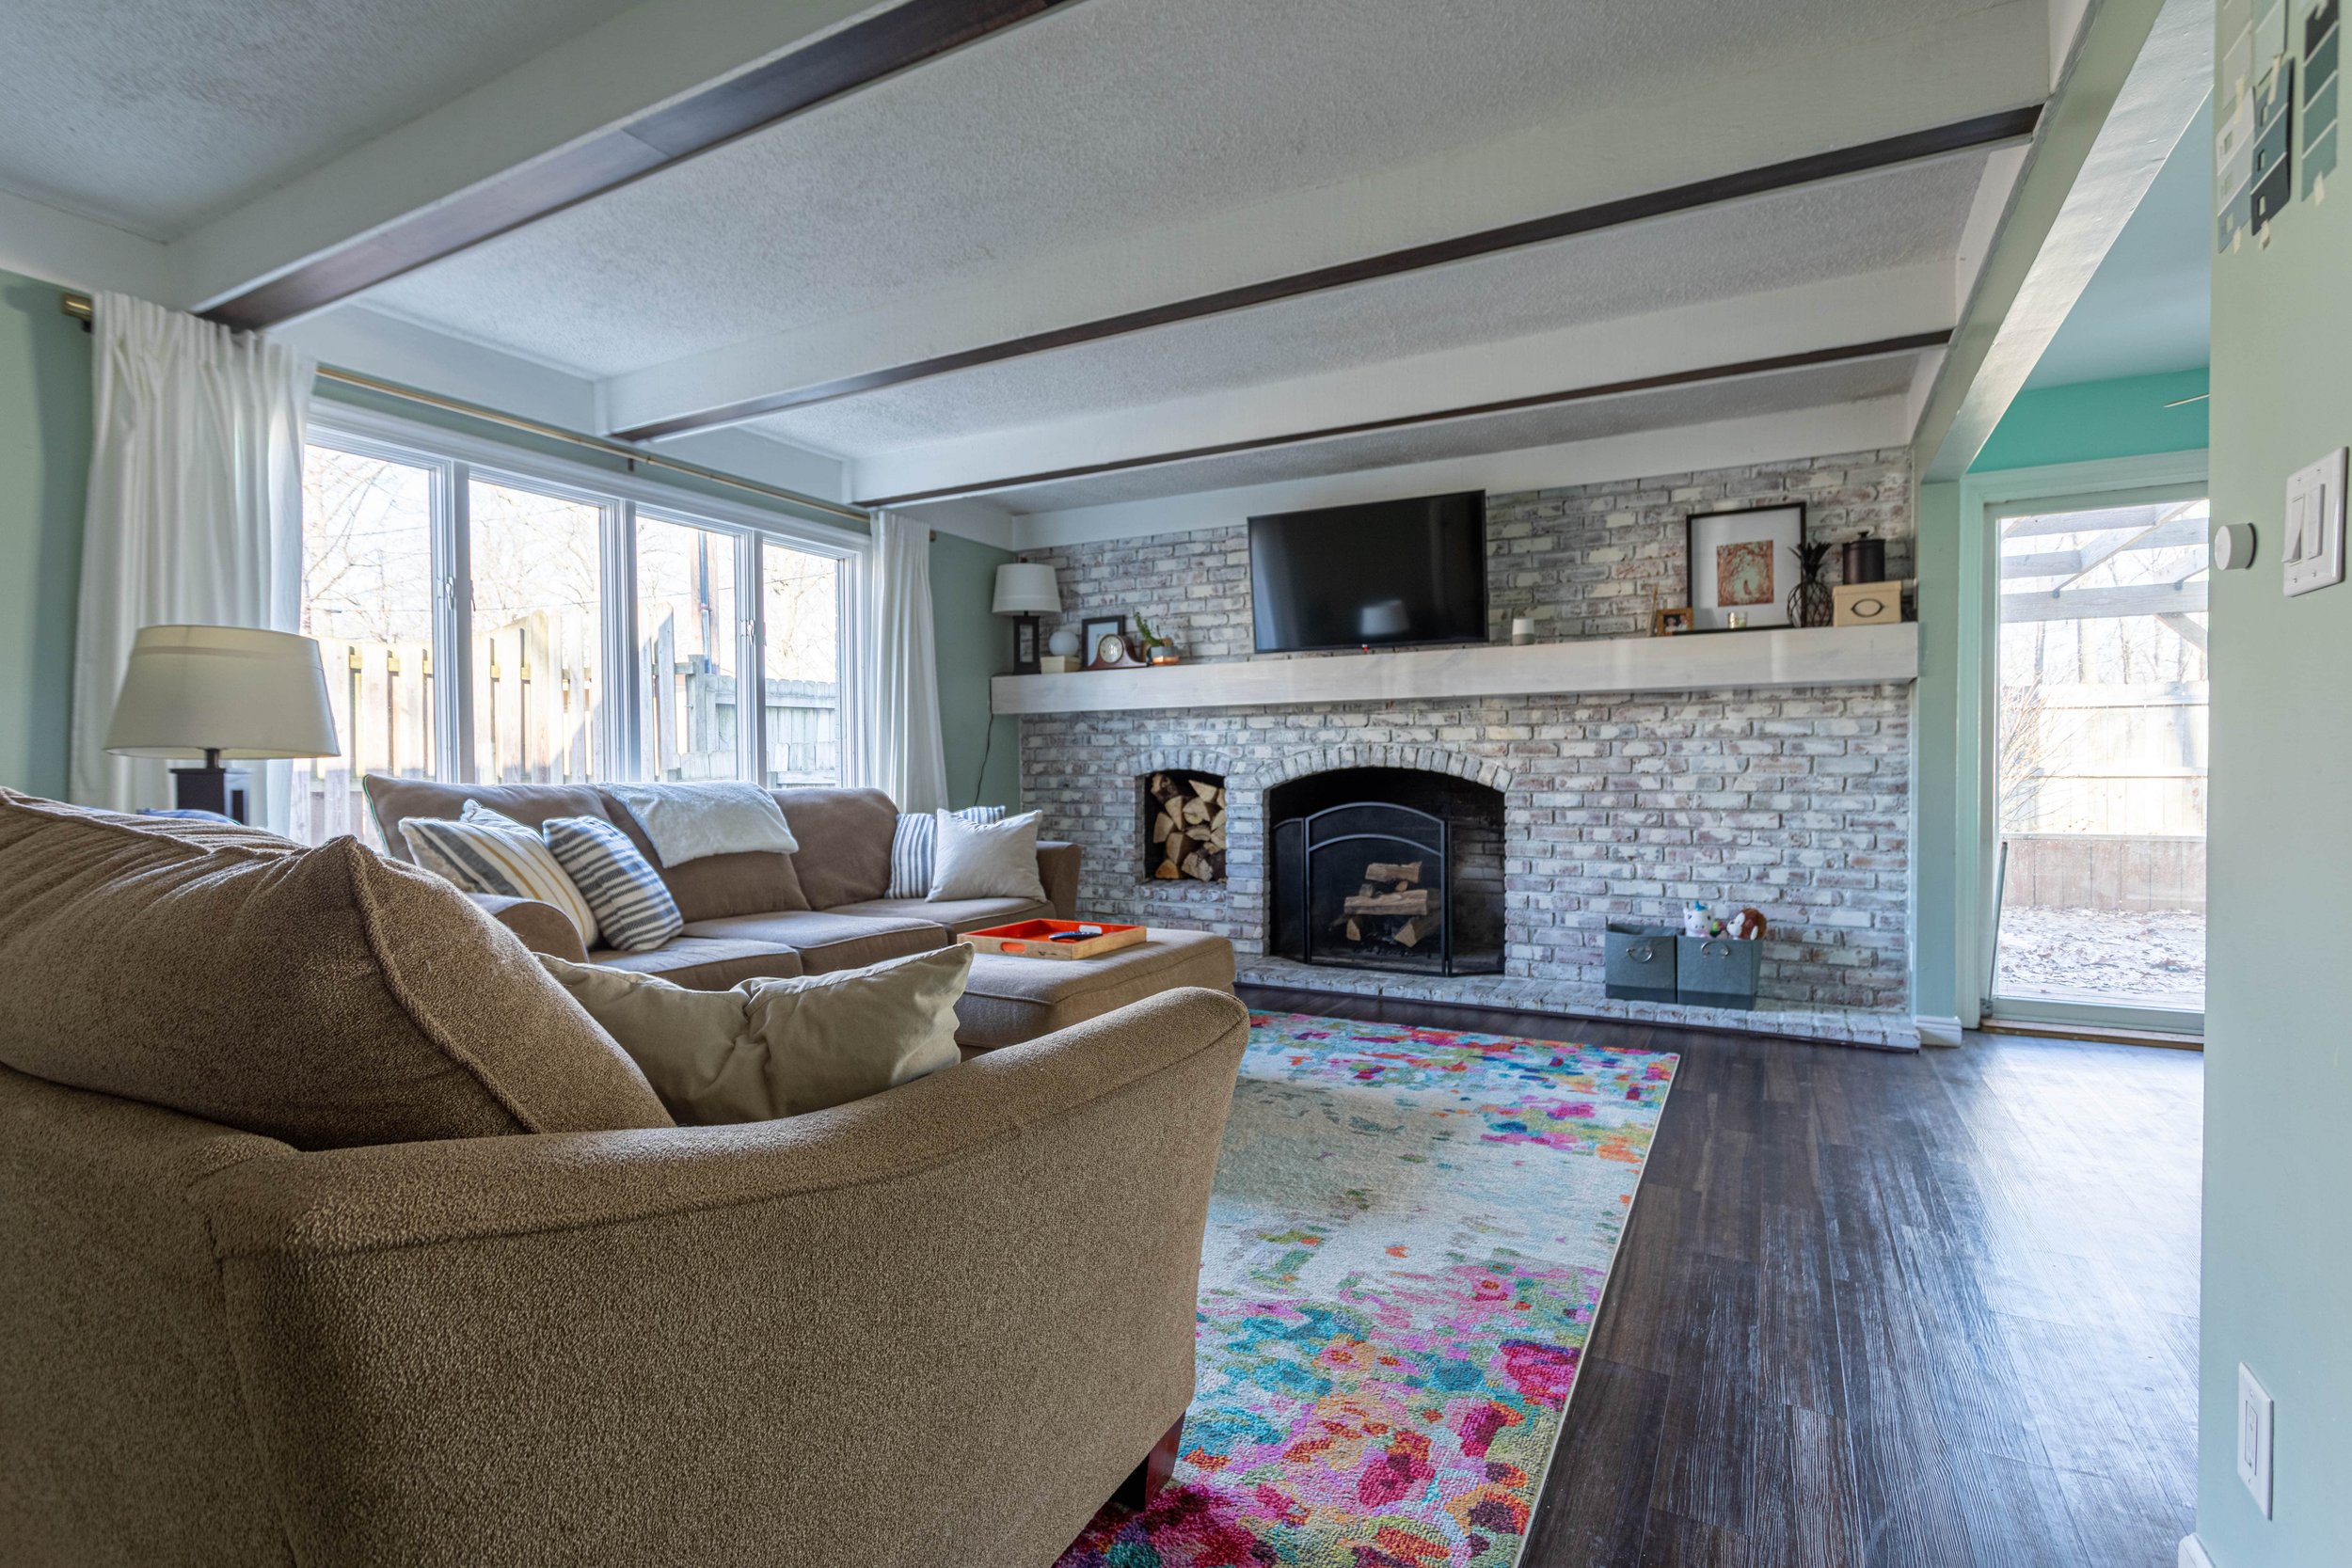
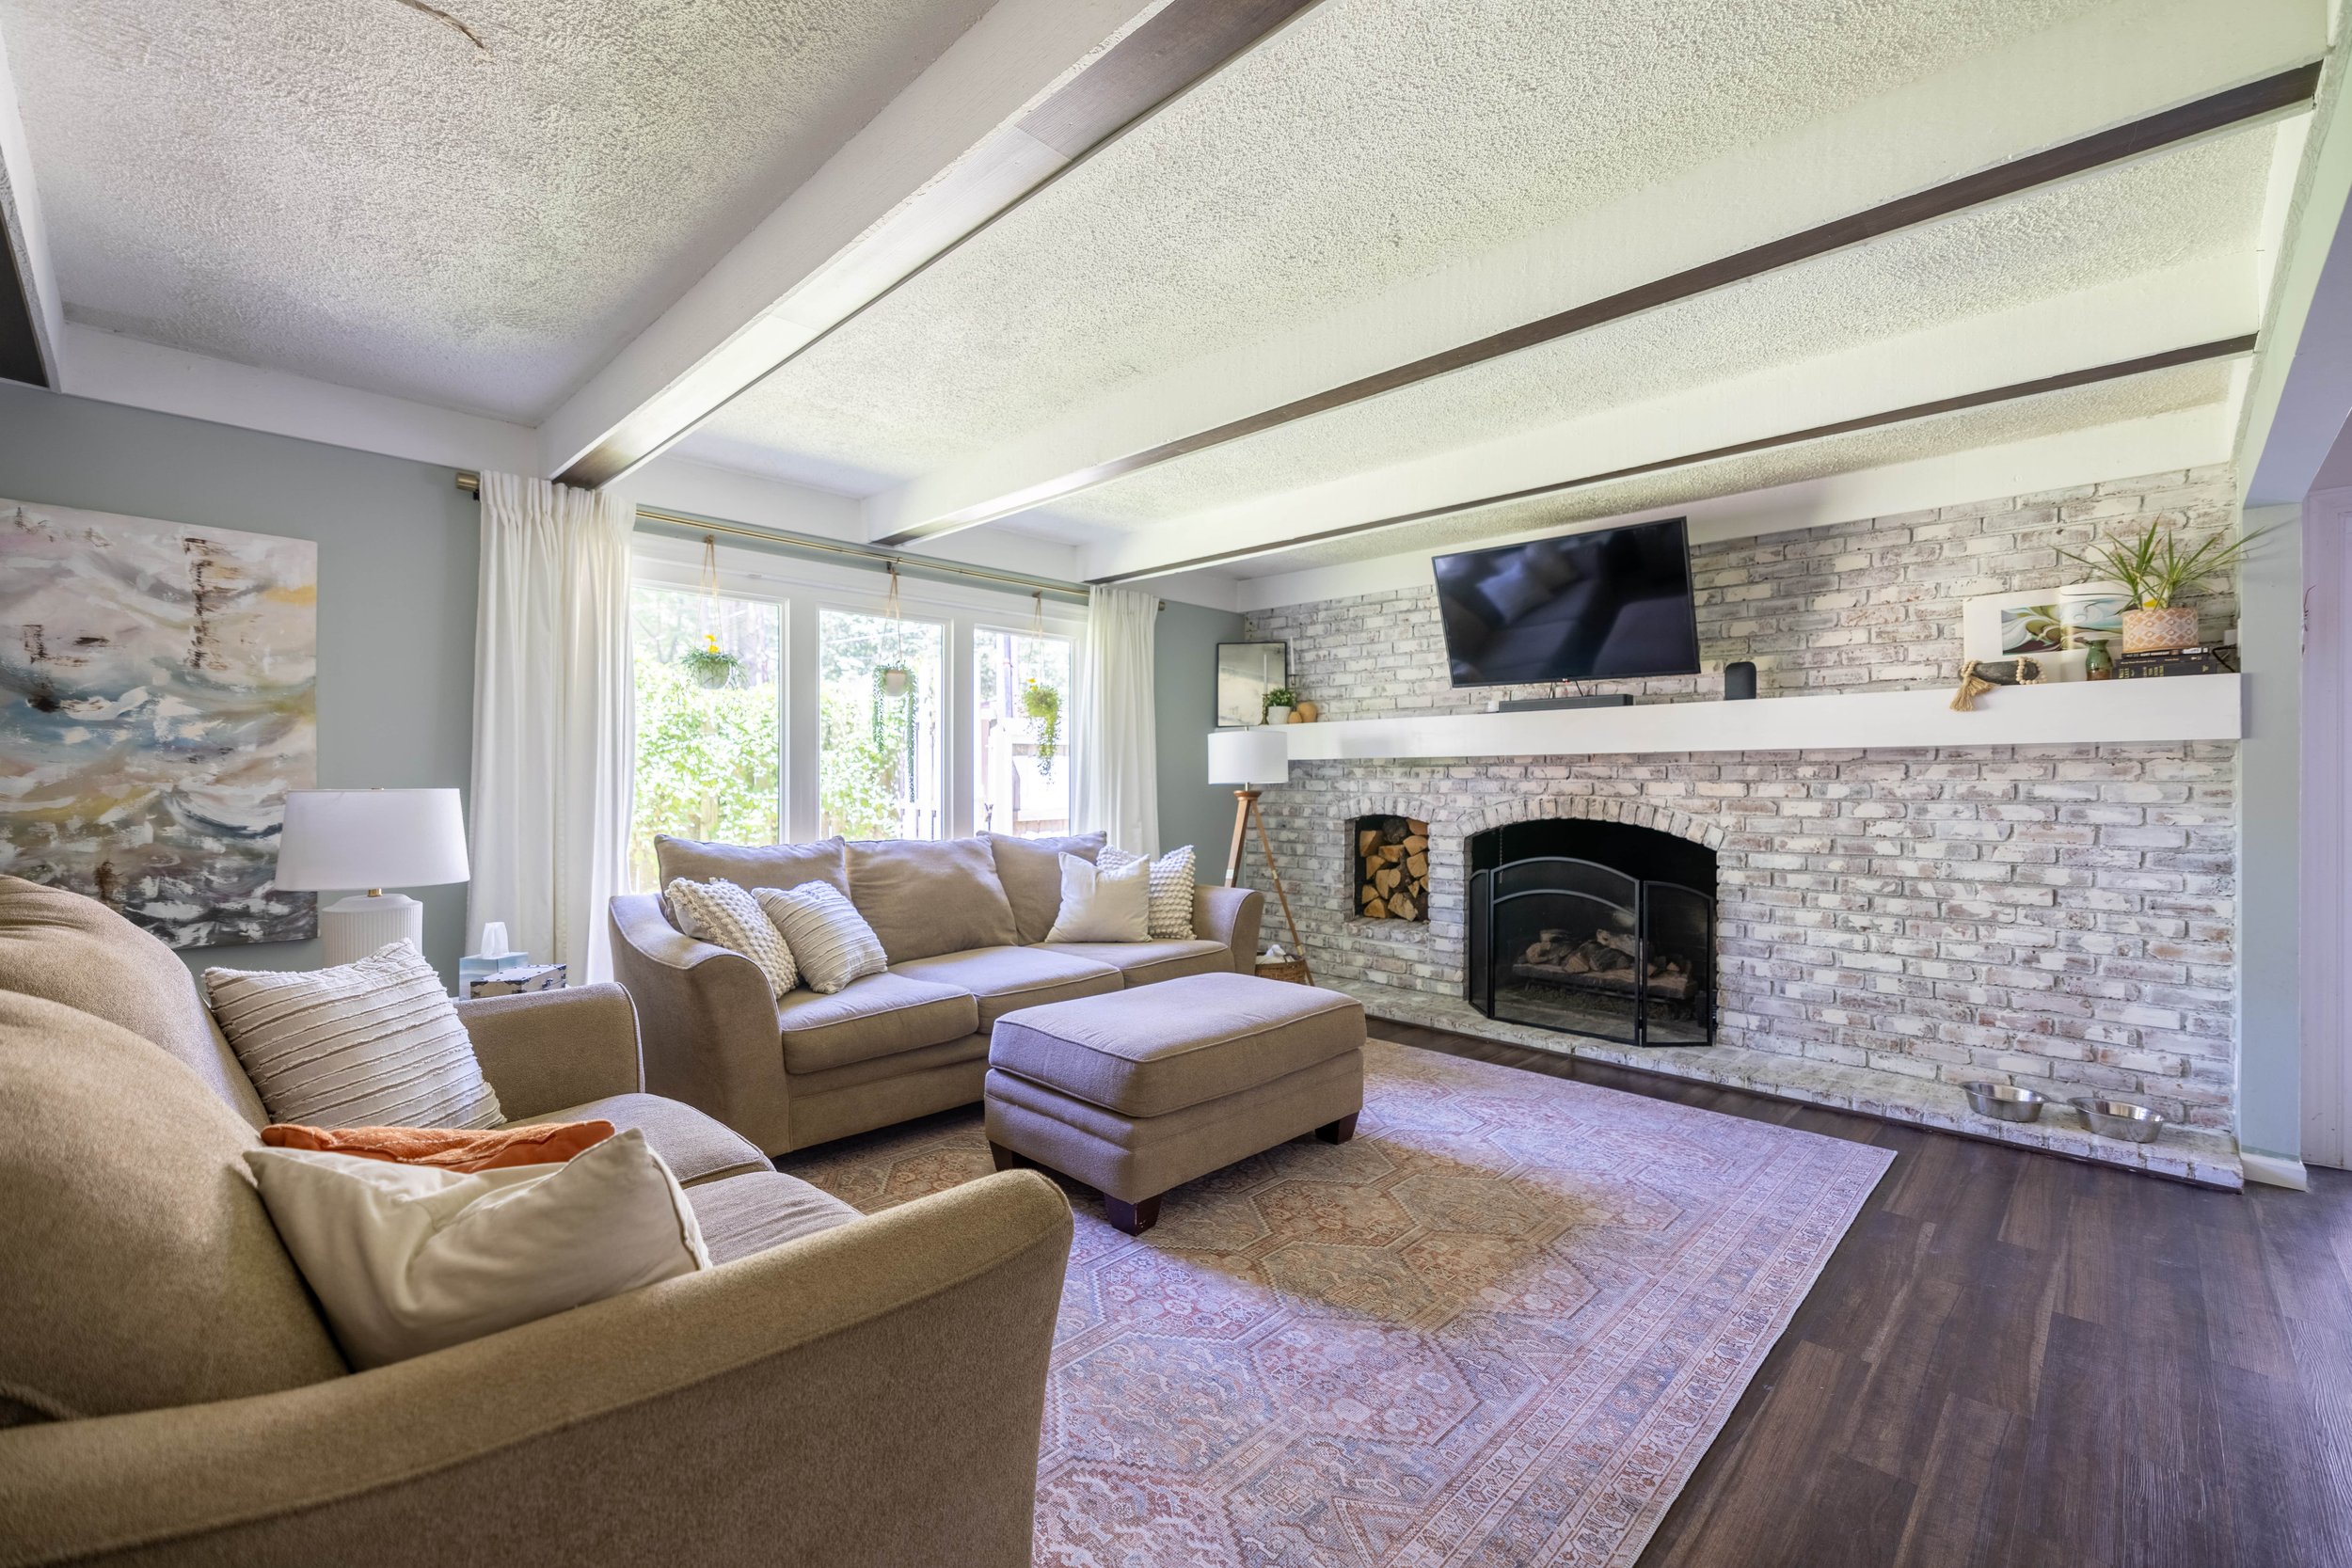
While I’d love to replace the couches and remove the textured ceiling, those items are low on our list compared to everything else we still want to tackle in this house. Besides, when it comes to kids, these couches have been close to impenetrable, so I’m a little hesitant to replace them until the kids are older.

Related Posts: How to Assemble a Gallery Wall in 4 Steps
The Mudroom
Oh boy, the lovingly nicknamed “Frankenstein” room of the house. This room undoubtedly looks worse than it did during our last house tour - but for good reason!
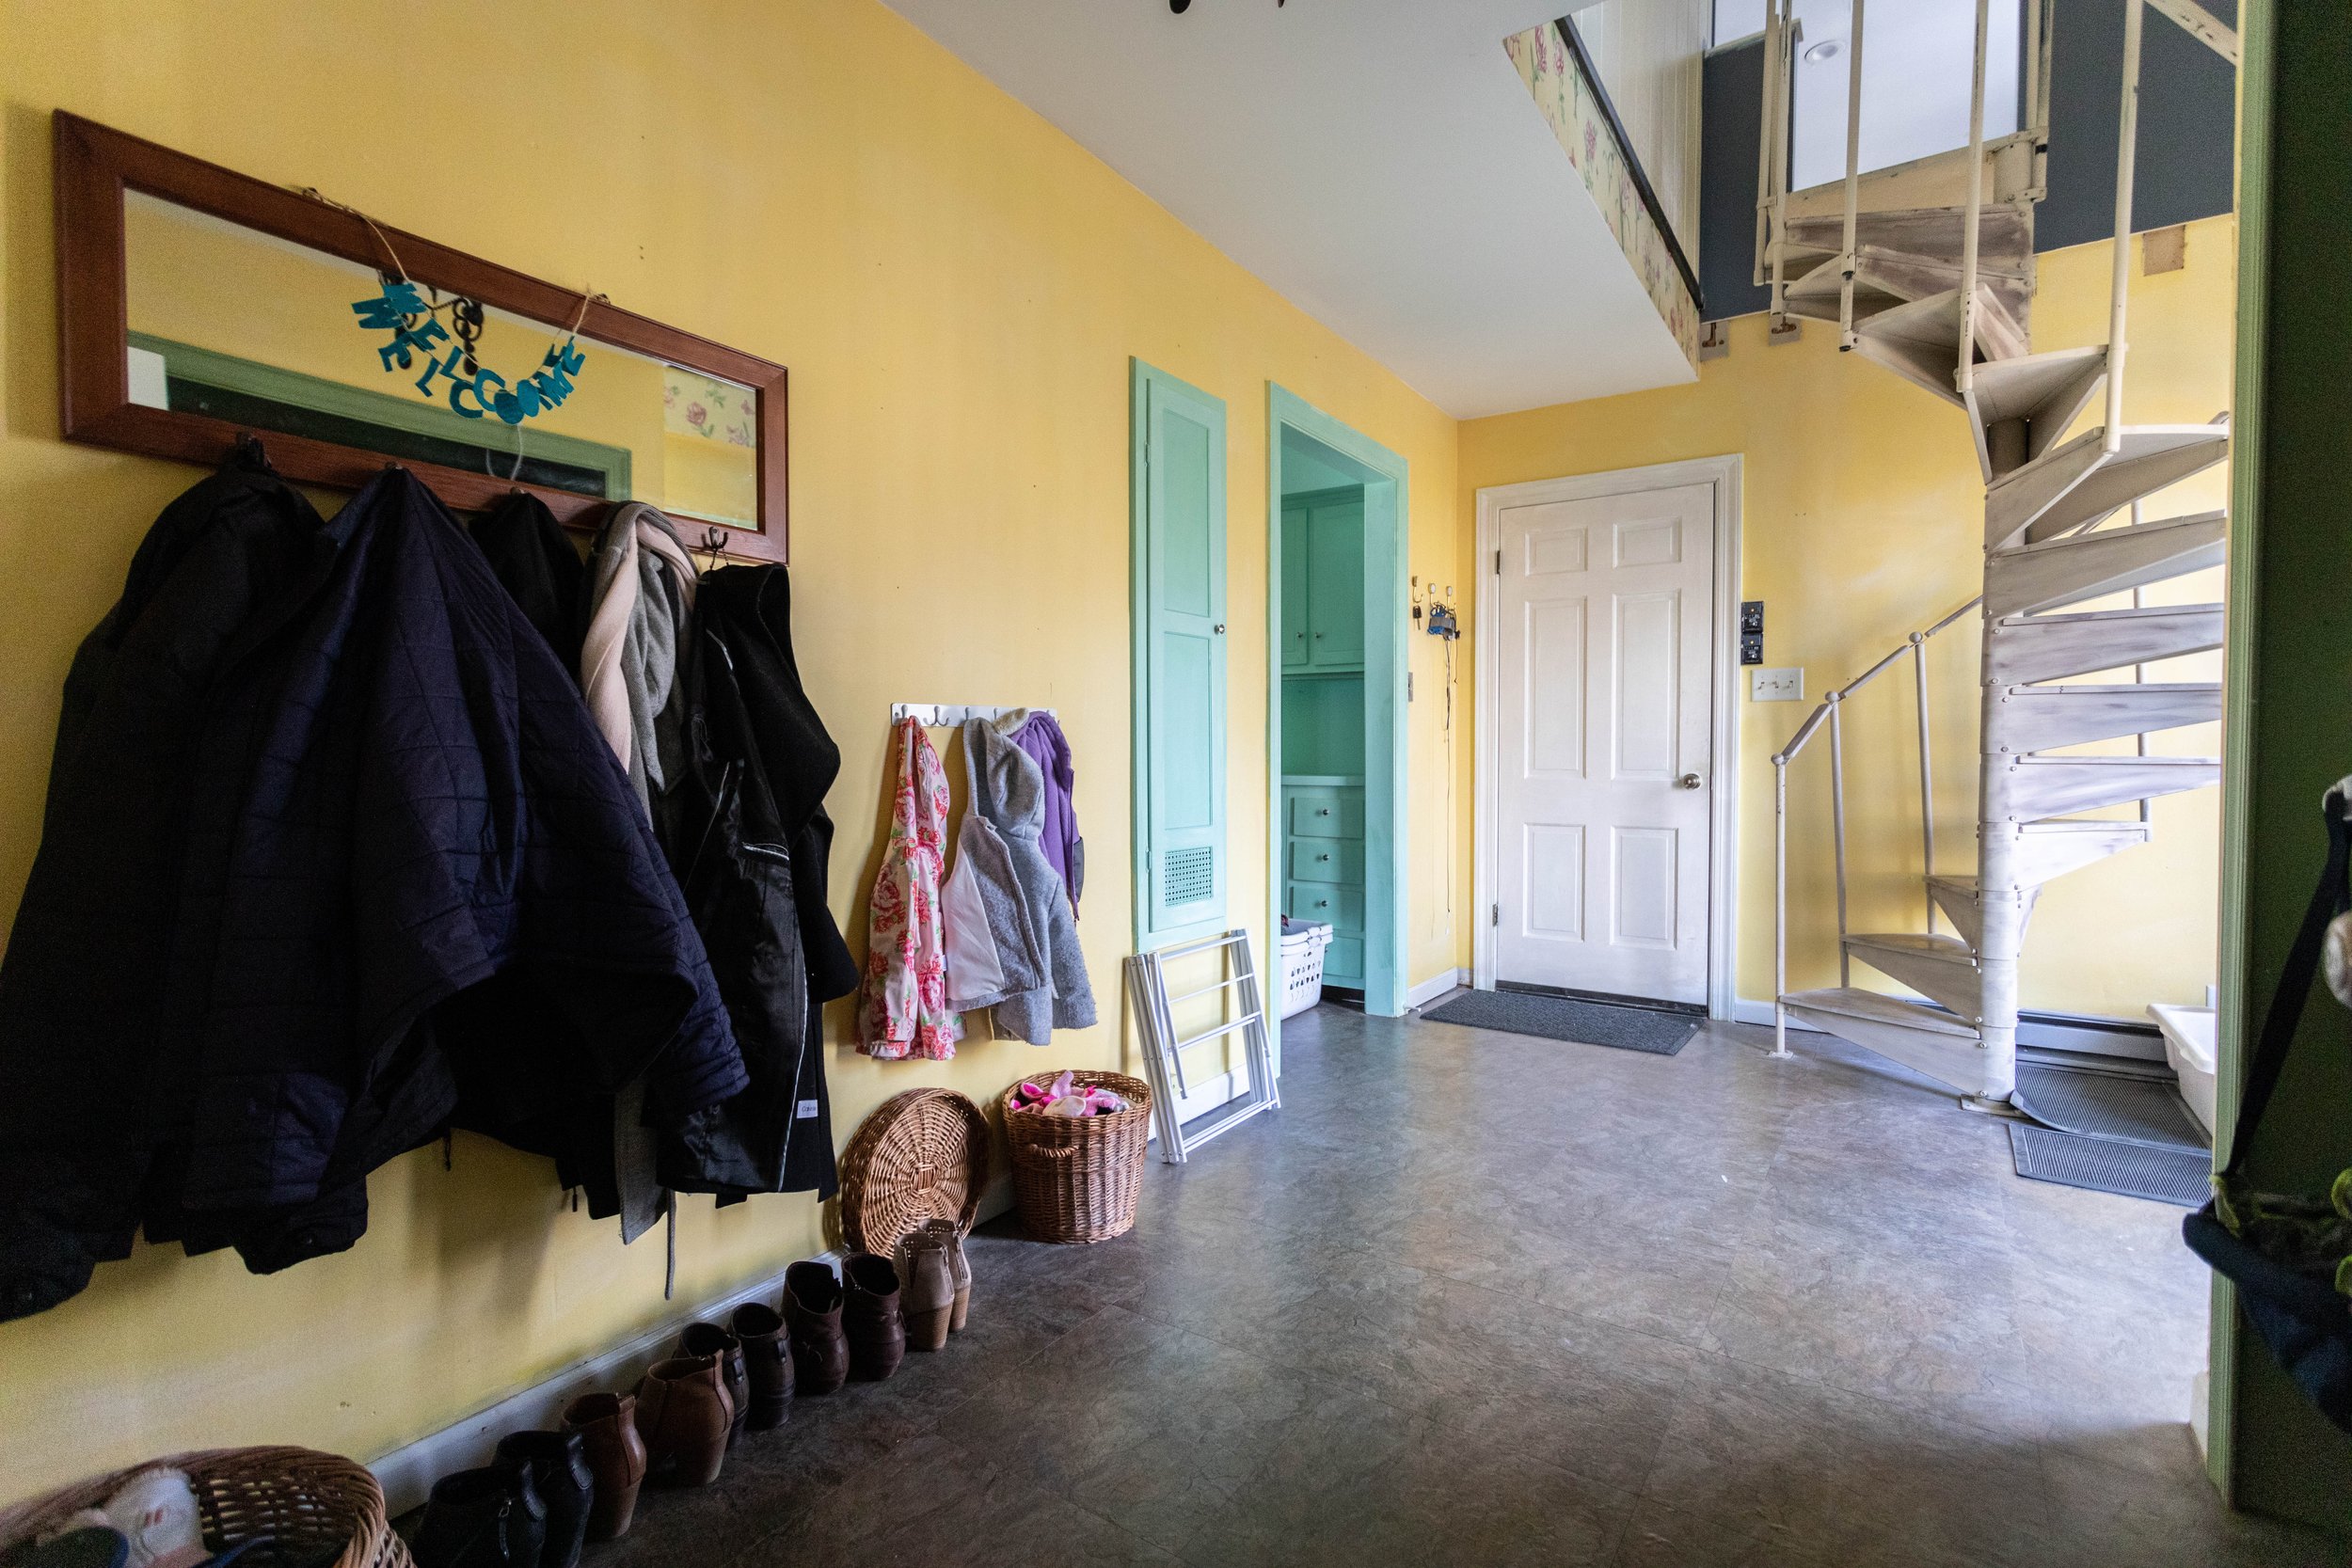
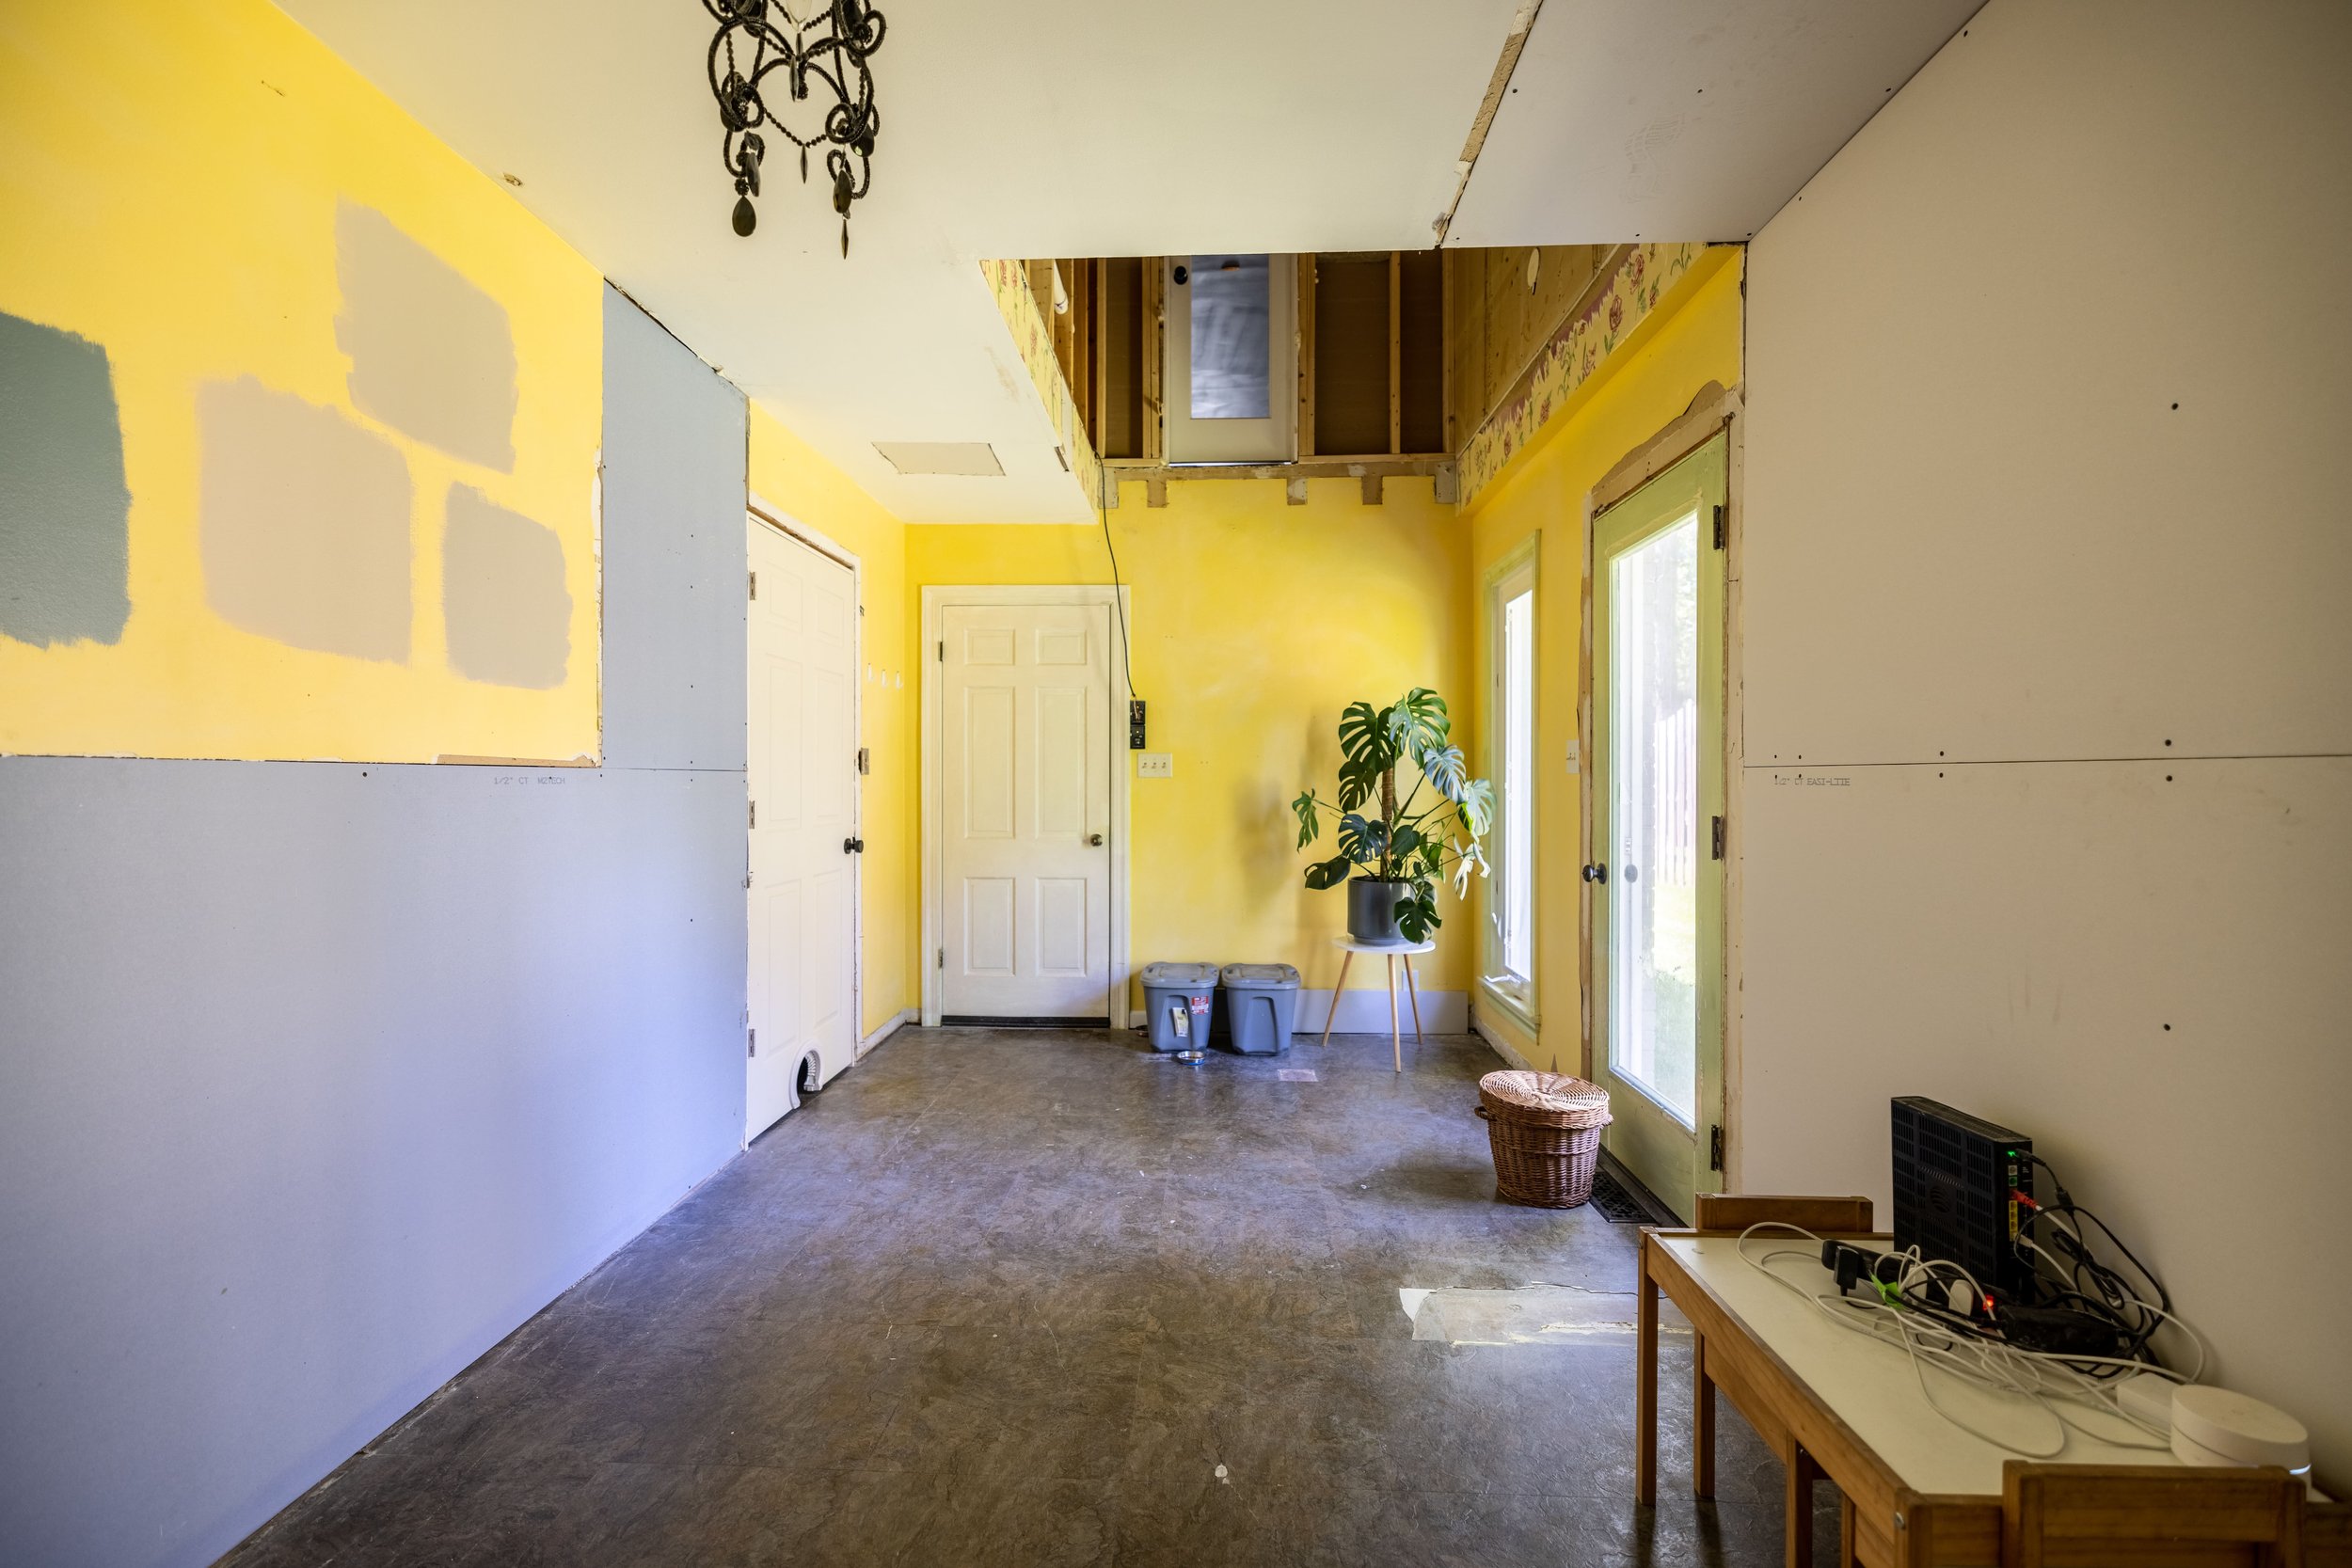
What we’ve realized is that typically when renovating one room, the surrounding rooms tend to take a hit. In this case, the mudroom room took a BIG hit when we renovated our master bathroom, master bedroom, and loft. Project creep is real, y’all.
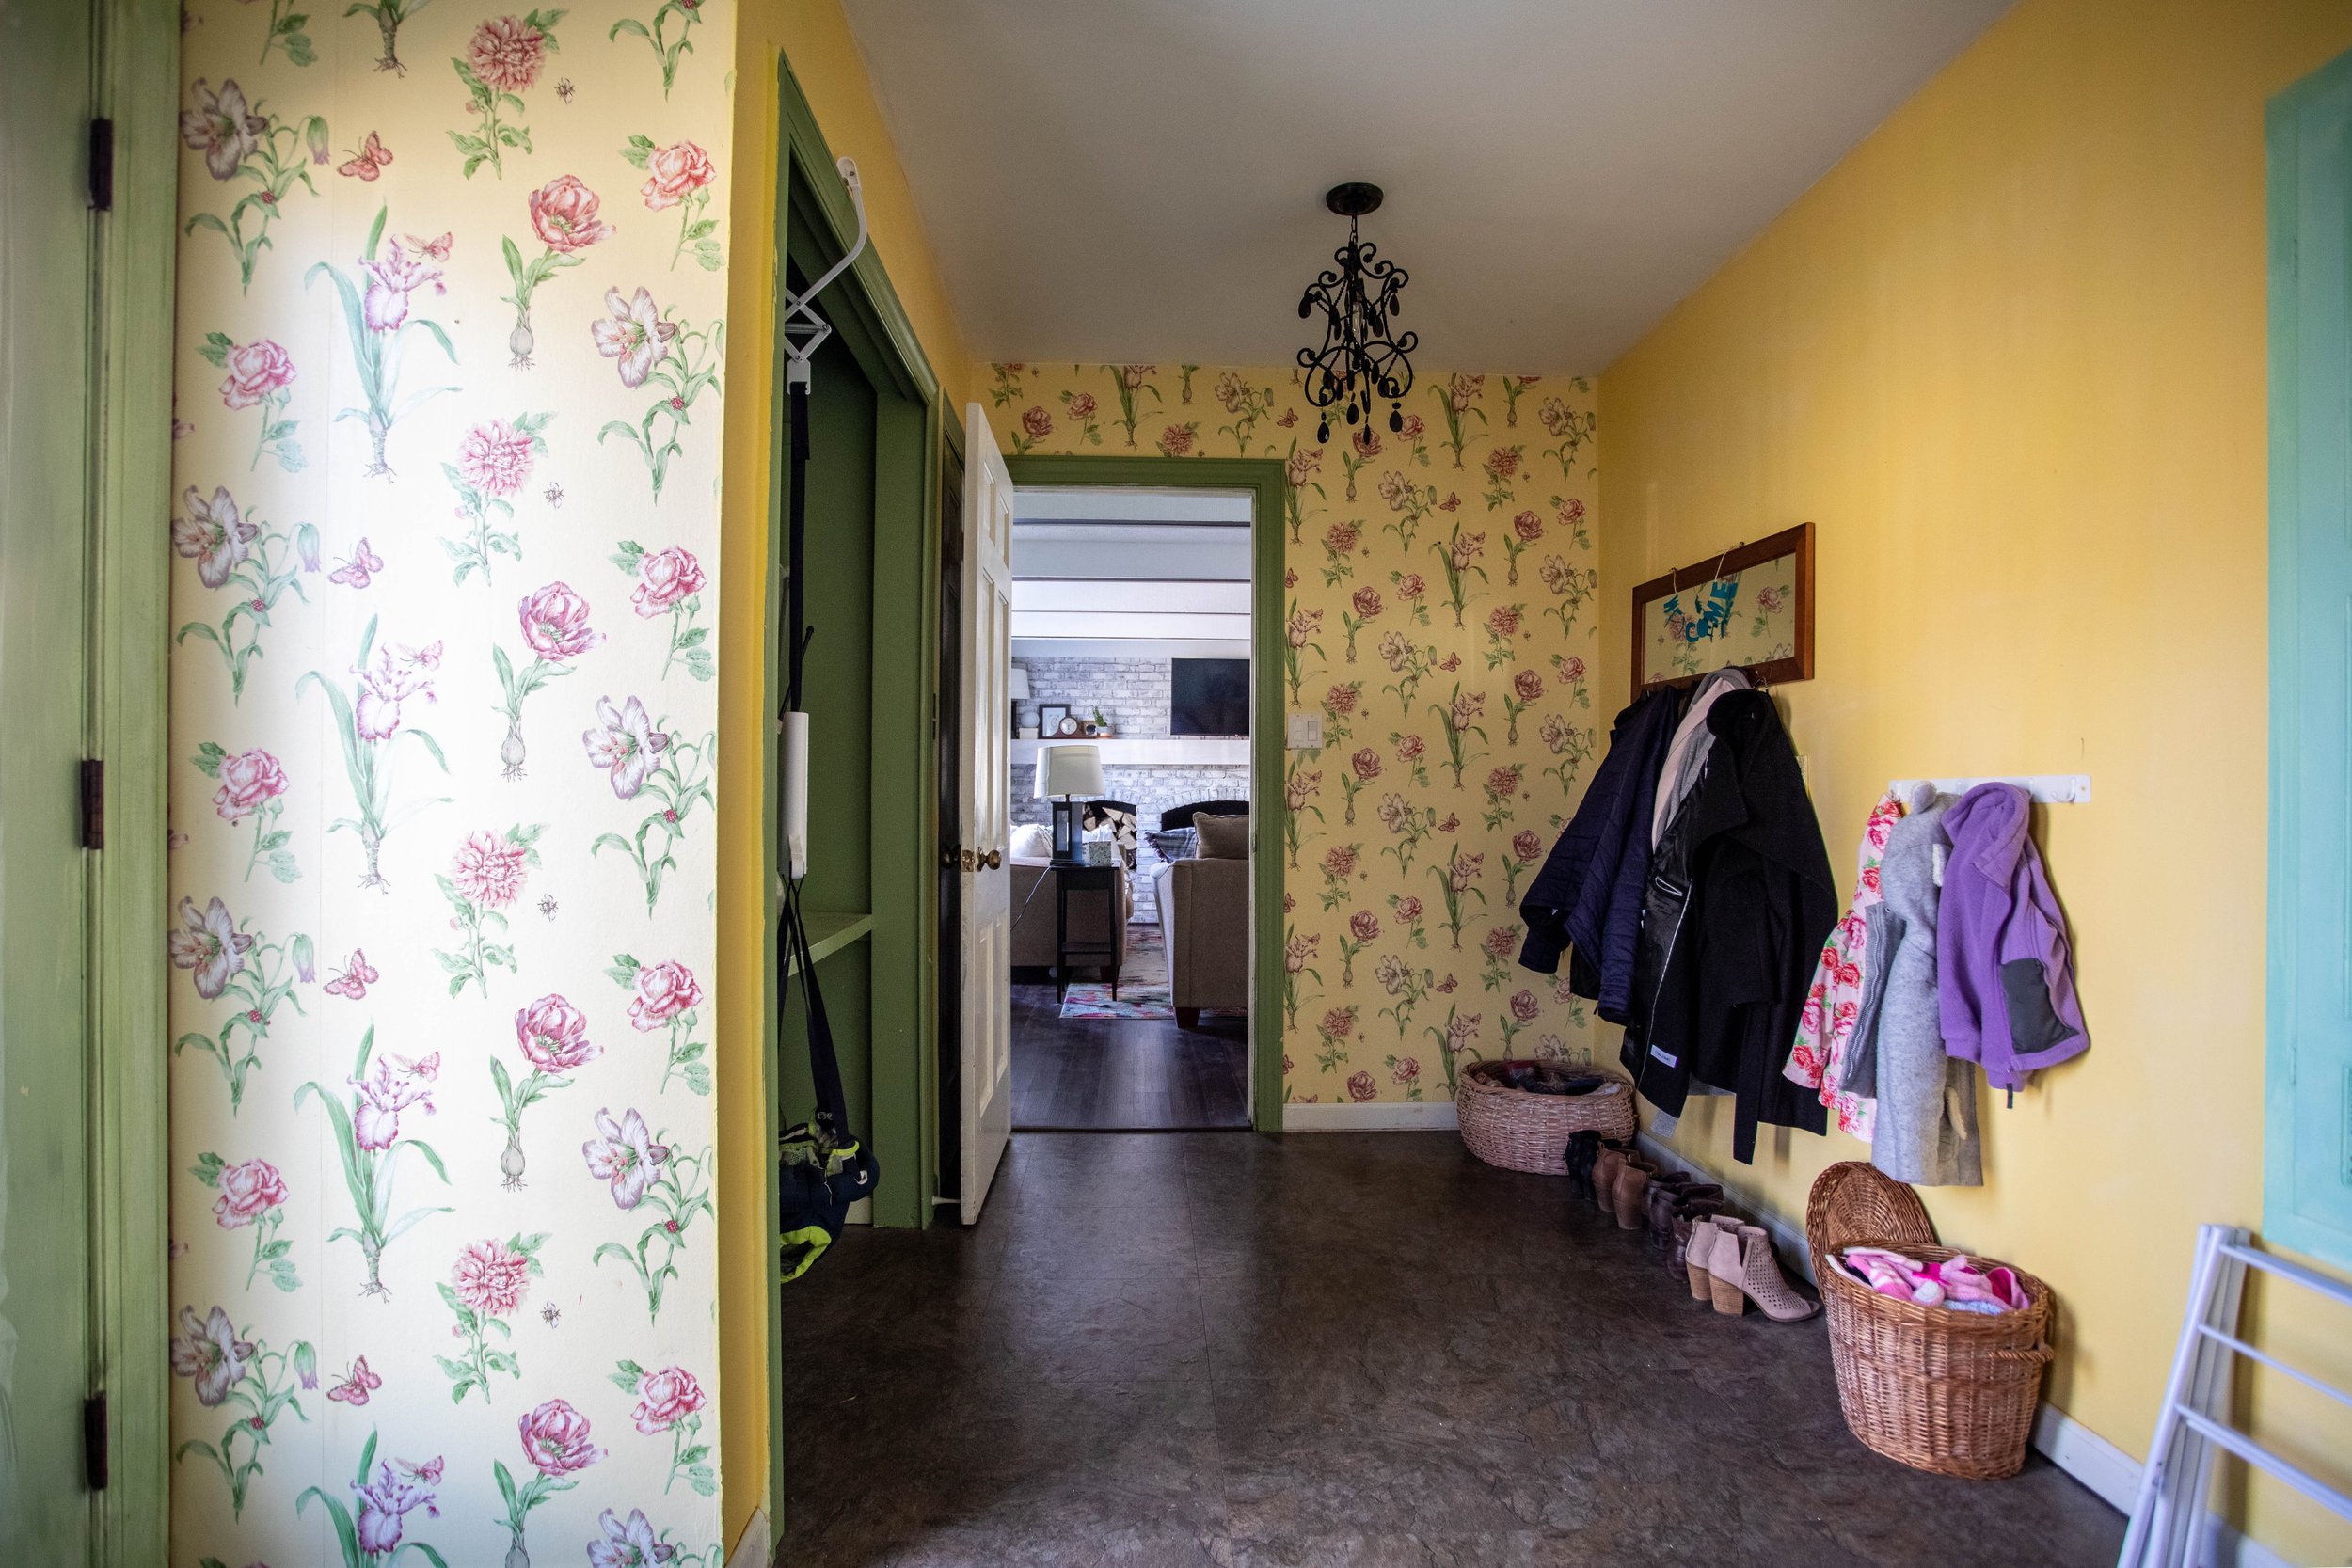
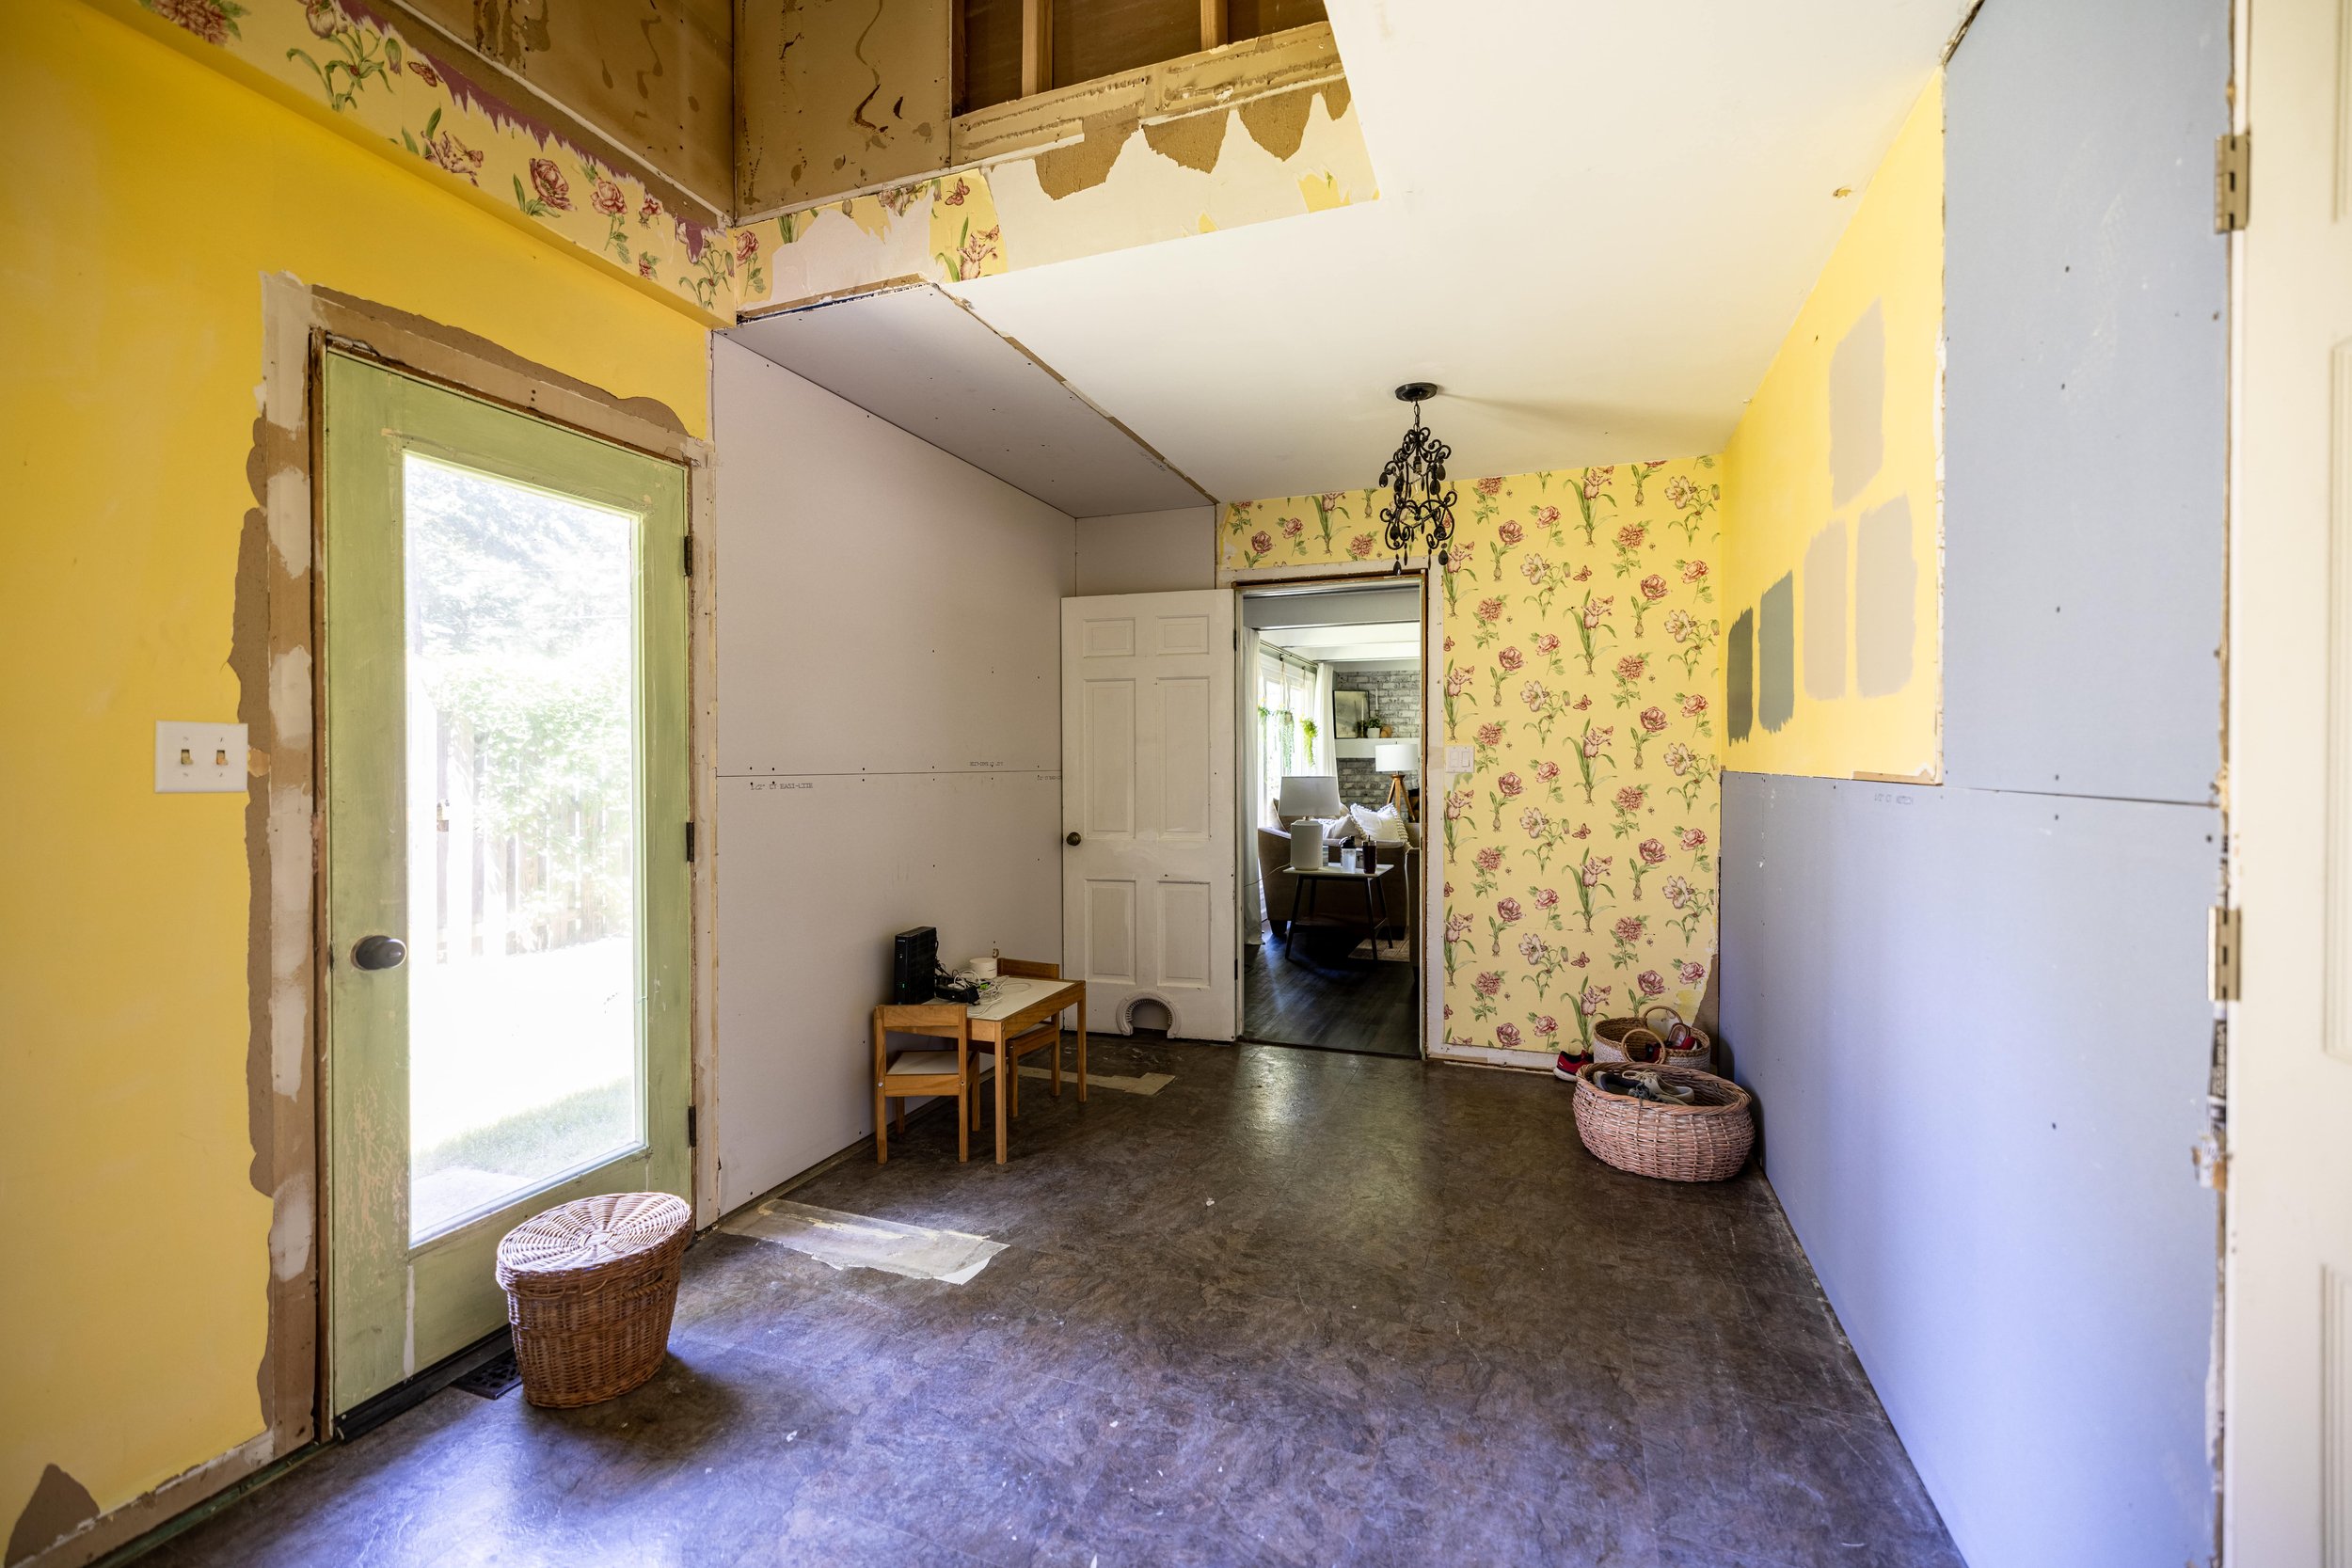
Not to mention that we recently removed the two closets in this room because we have ideas for what this room will look like long-term - but I’m not ready to share them just yet!
Oh, but don’t worry, those plans DO include adding the spiral staircase back in. (And I feel that I should mention the door at the top of where the staircase once was is locked from this side so no one can accidentally fall out of there.)
The Kitchen
Unlike the mudroom, the kitchen has seen a little improvement over the last couple of years that can simply be attributed to the power of paint! And new hardware.
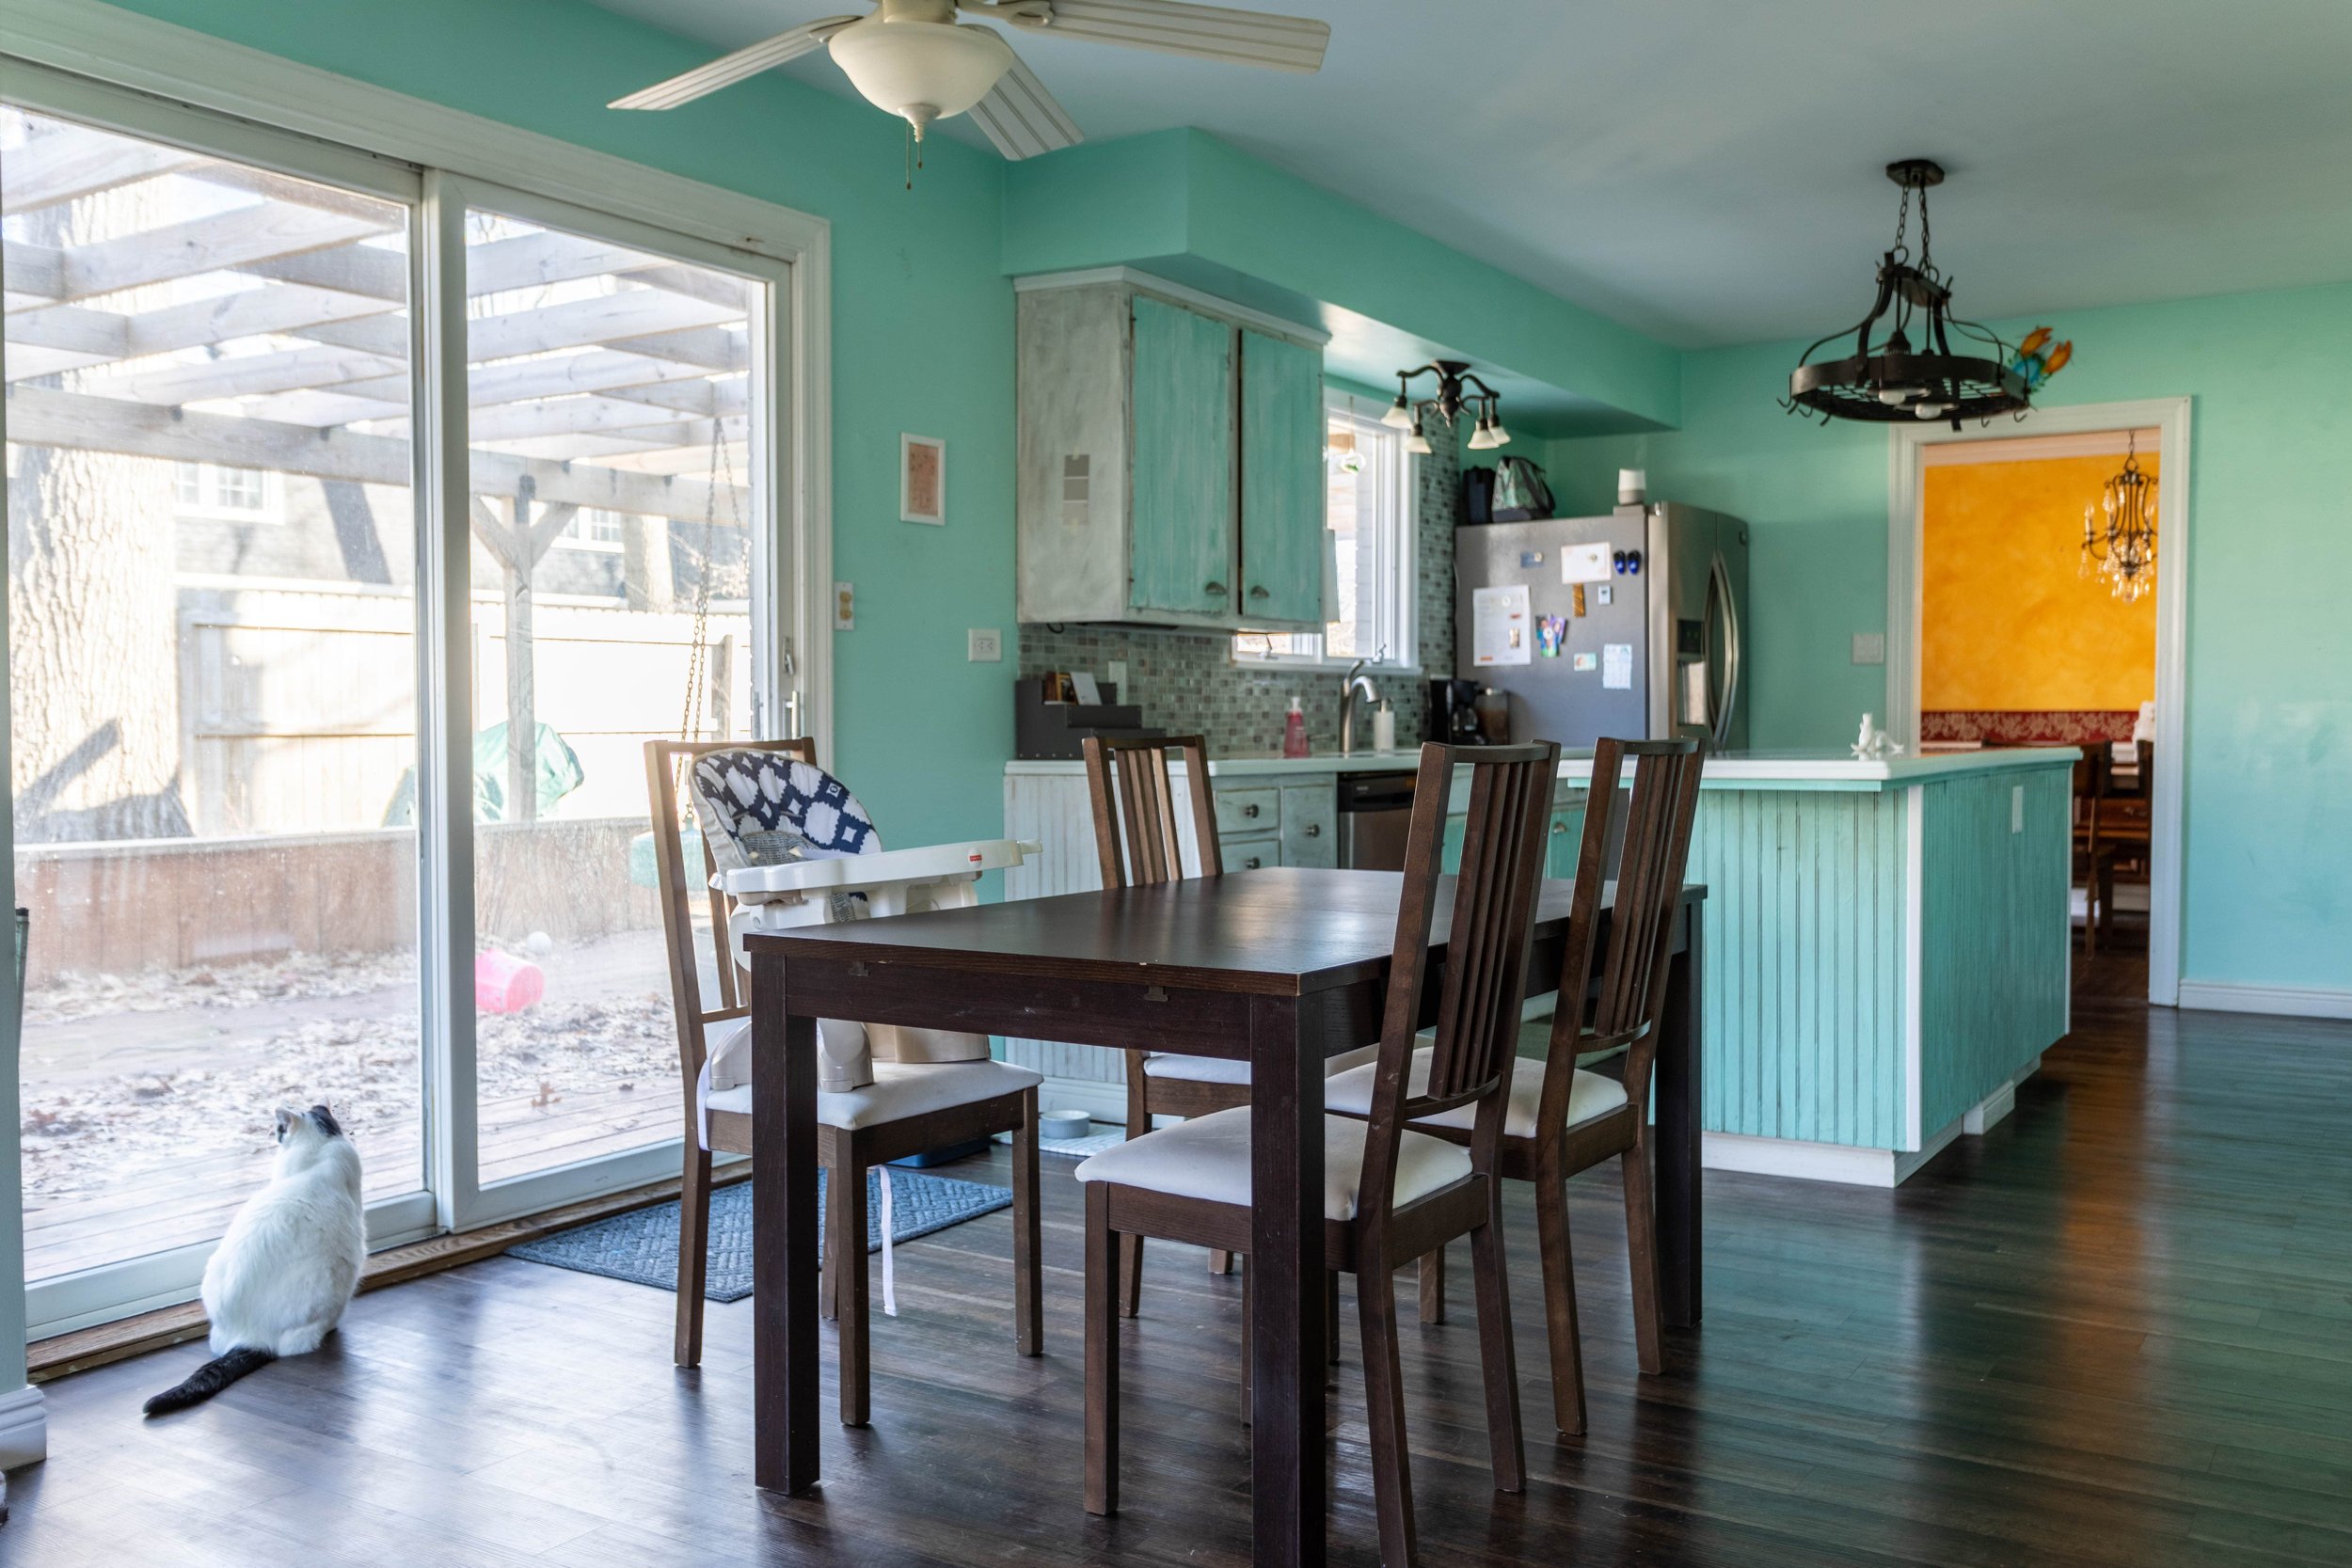
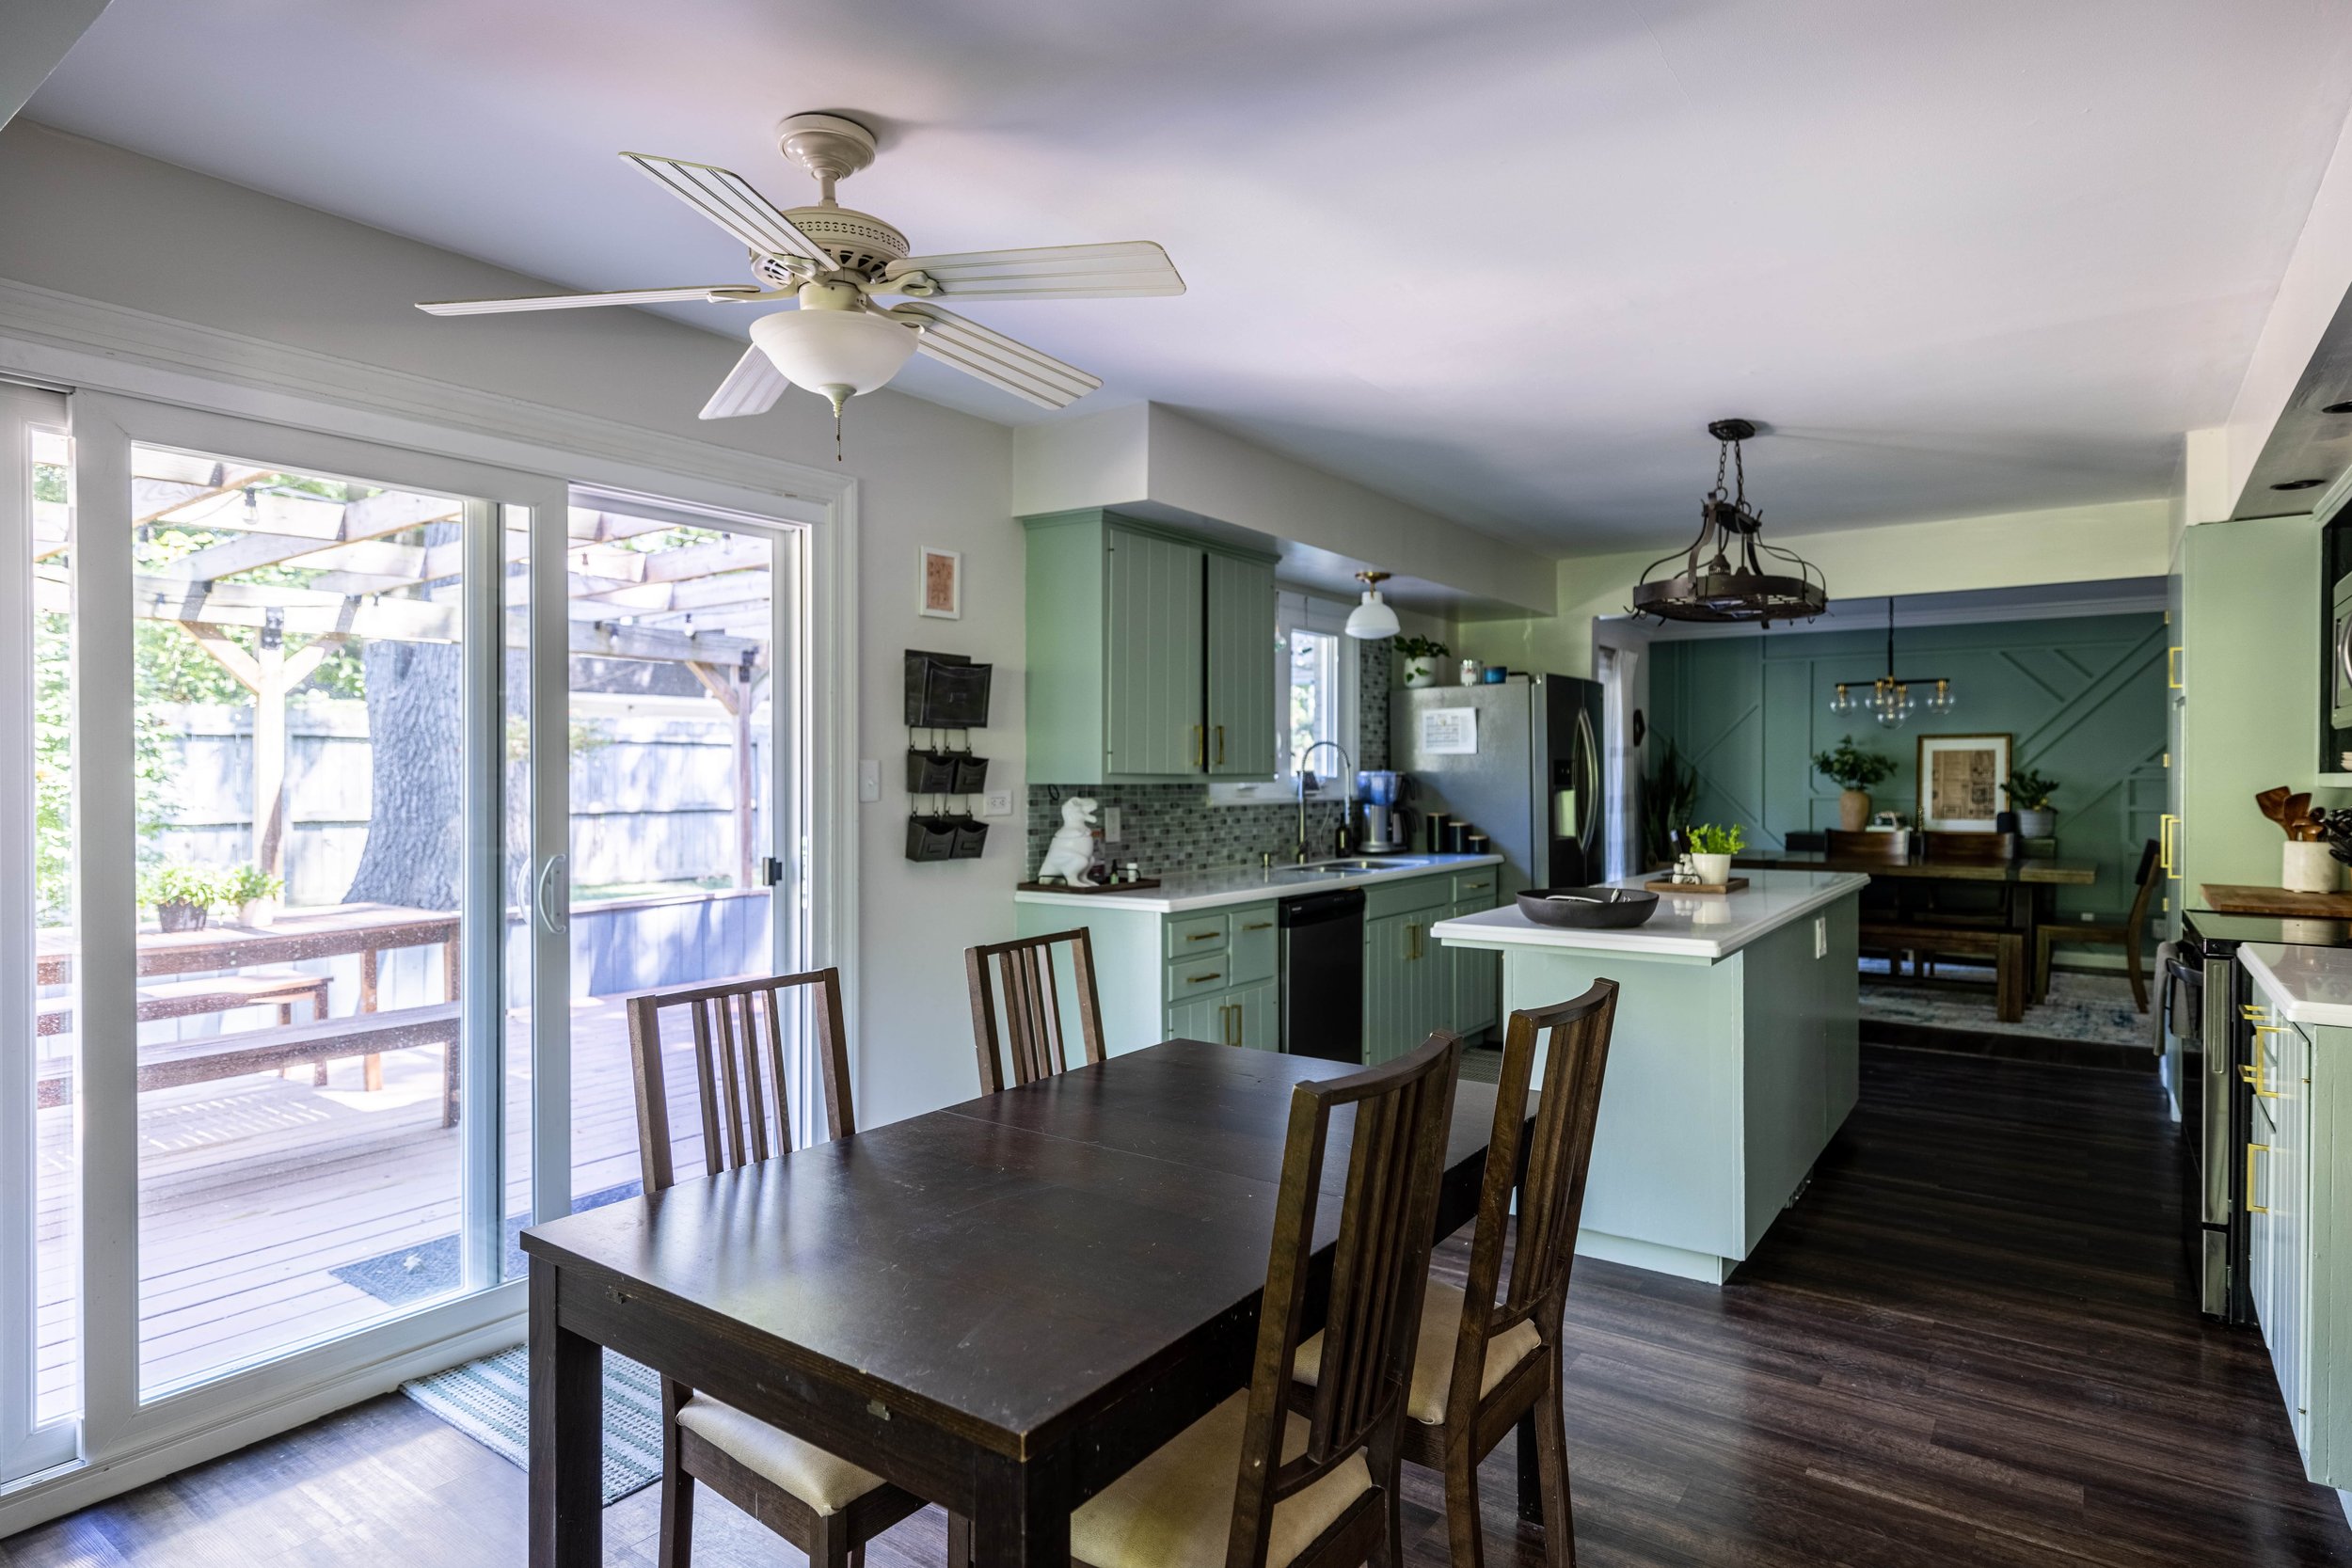
I shared a post a while back about the green cabinet trend I was noticing and I hopped right on it! I actually painted the cabinets (and walls) about two years ago and NEVER shared the tutorial. That being said, I wrote a new tutorial when I painted the laundry room cabinets recently.
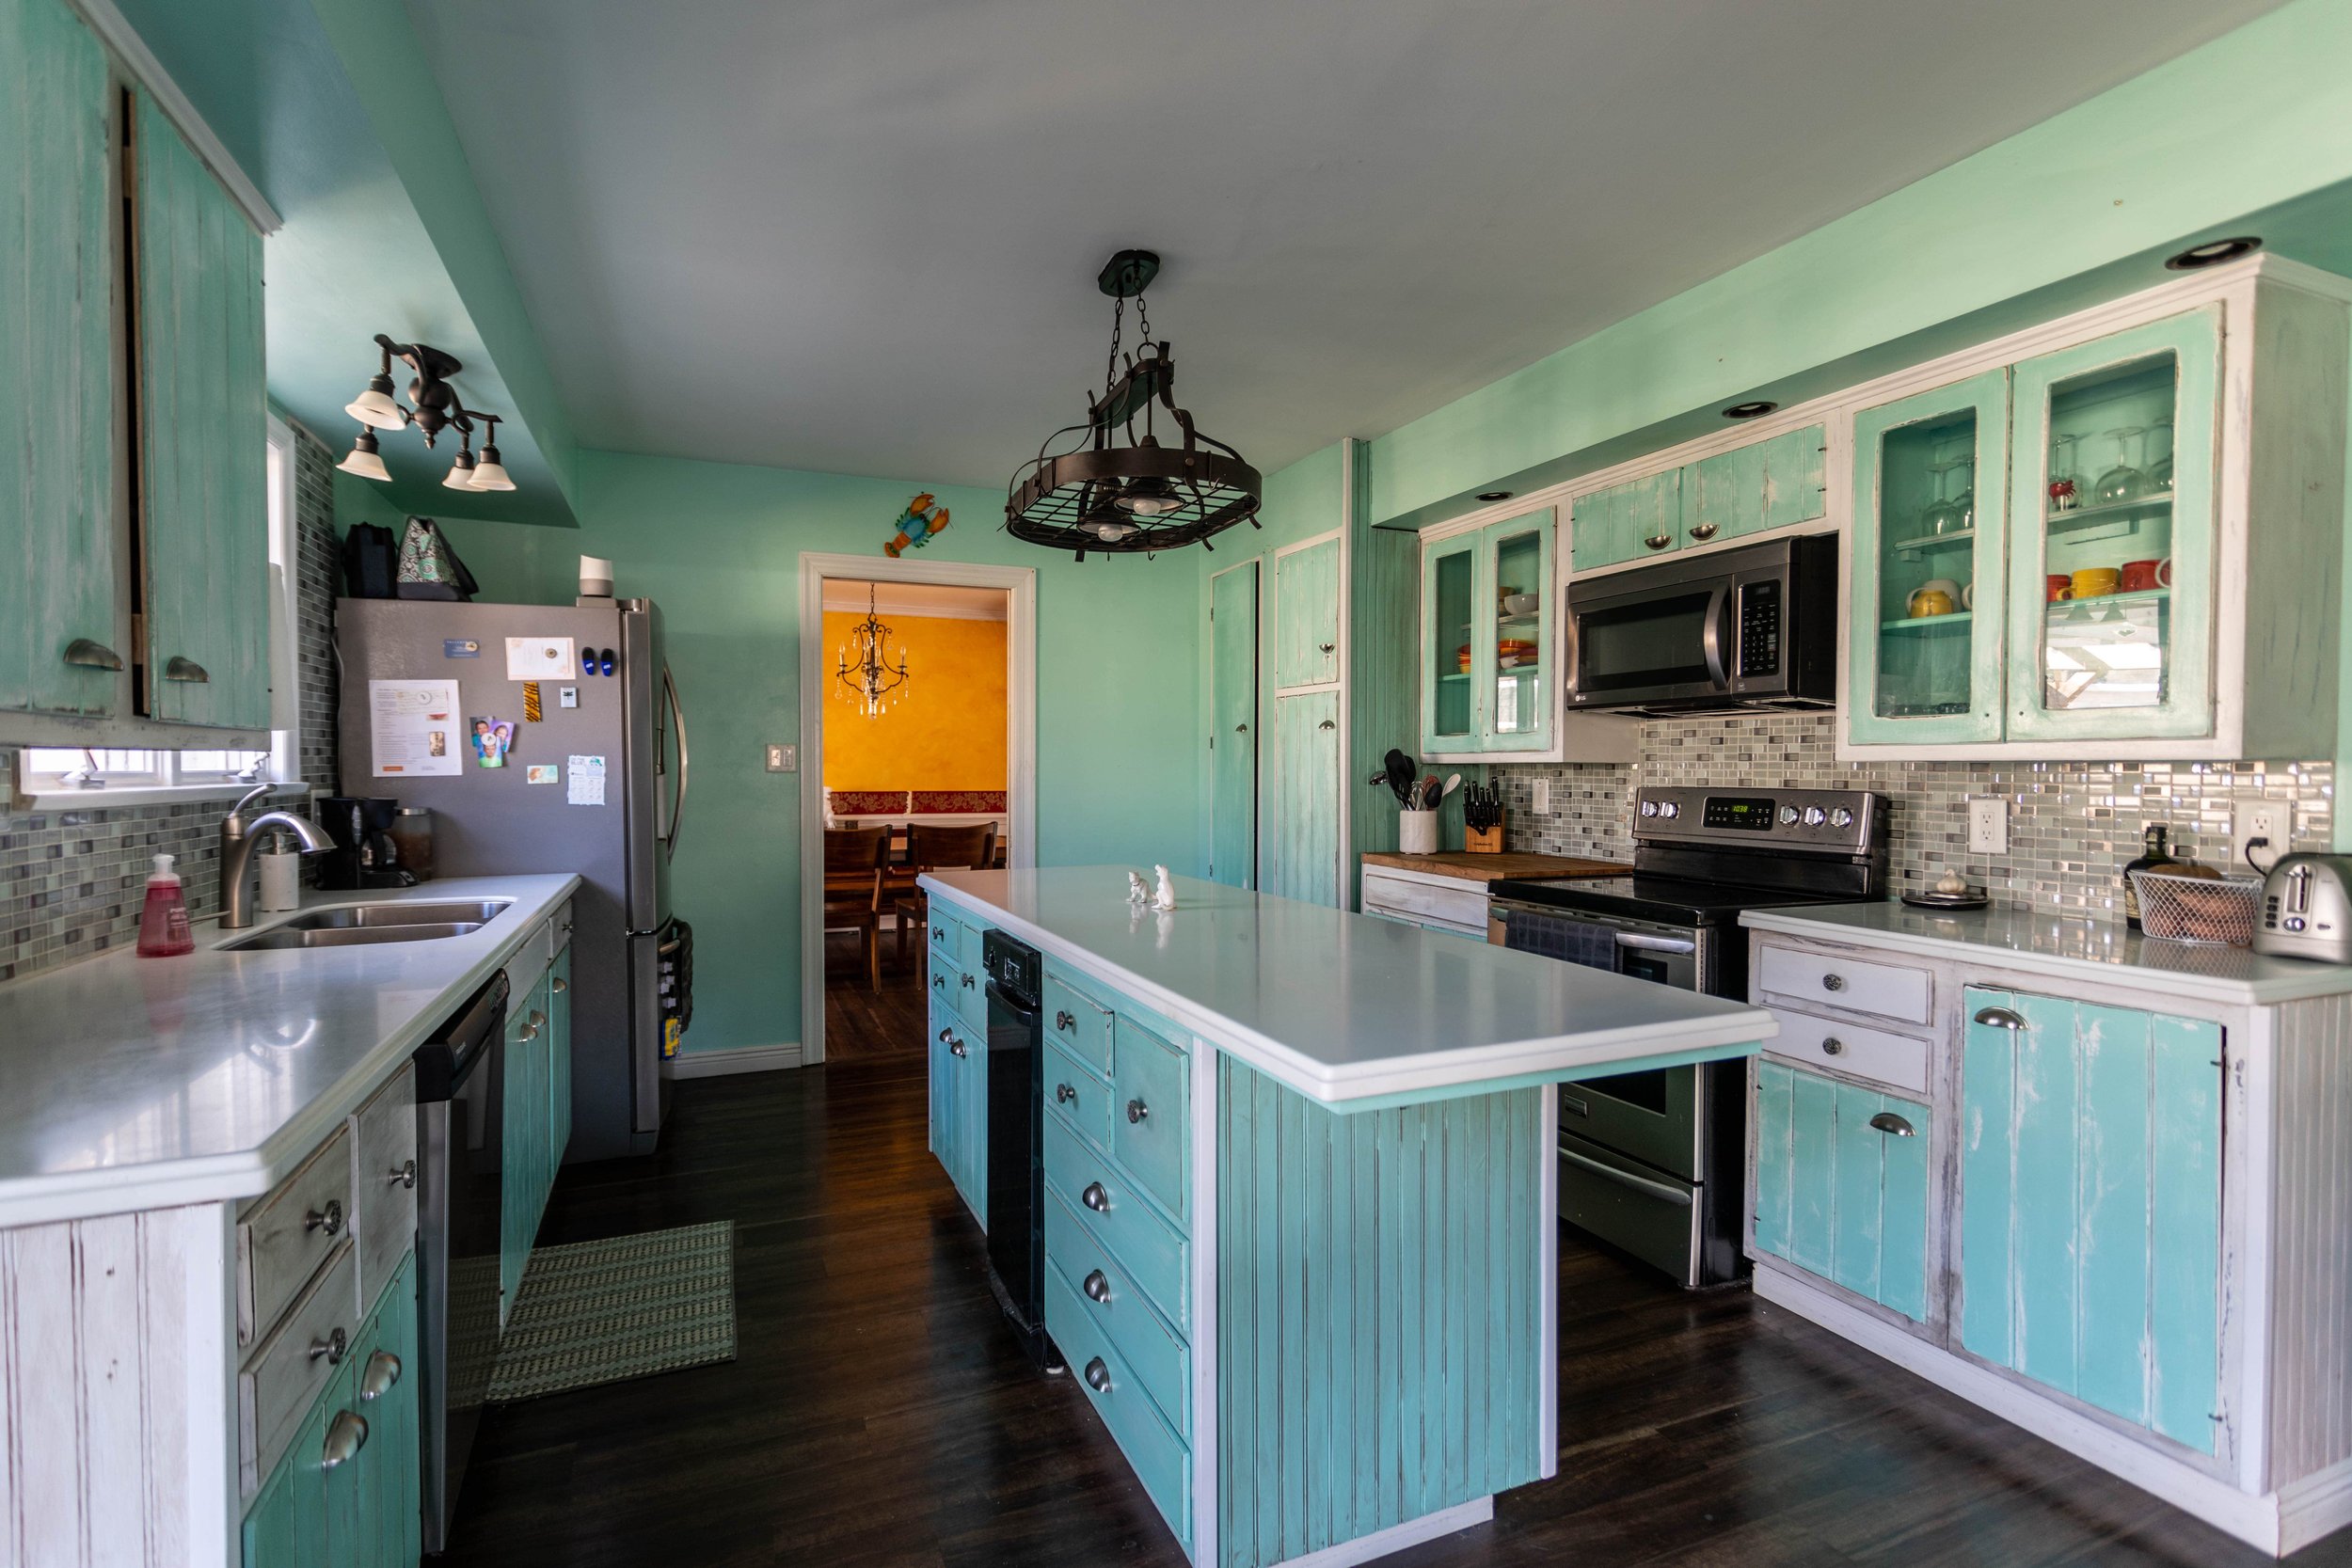
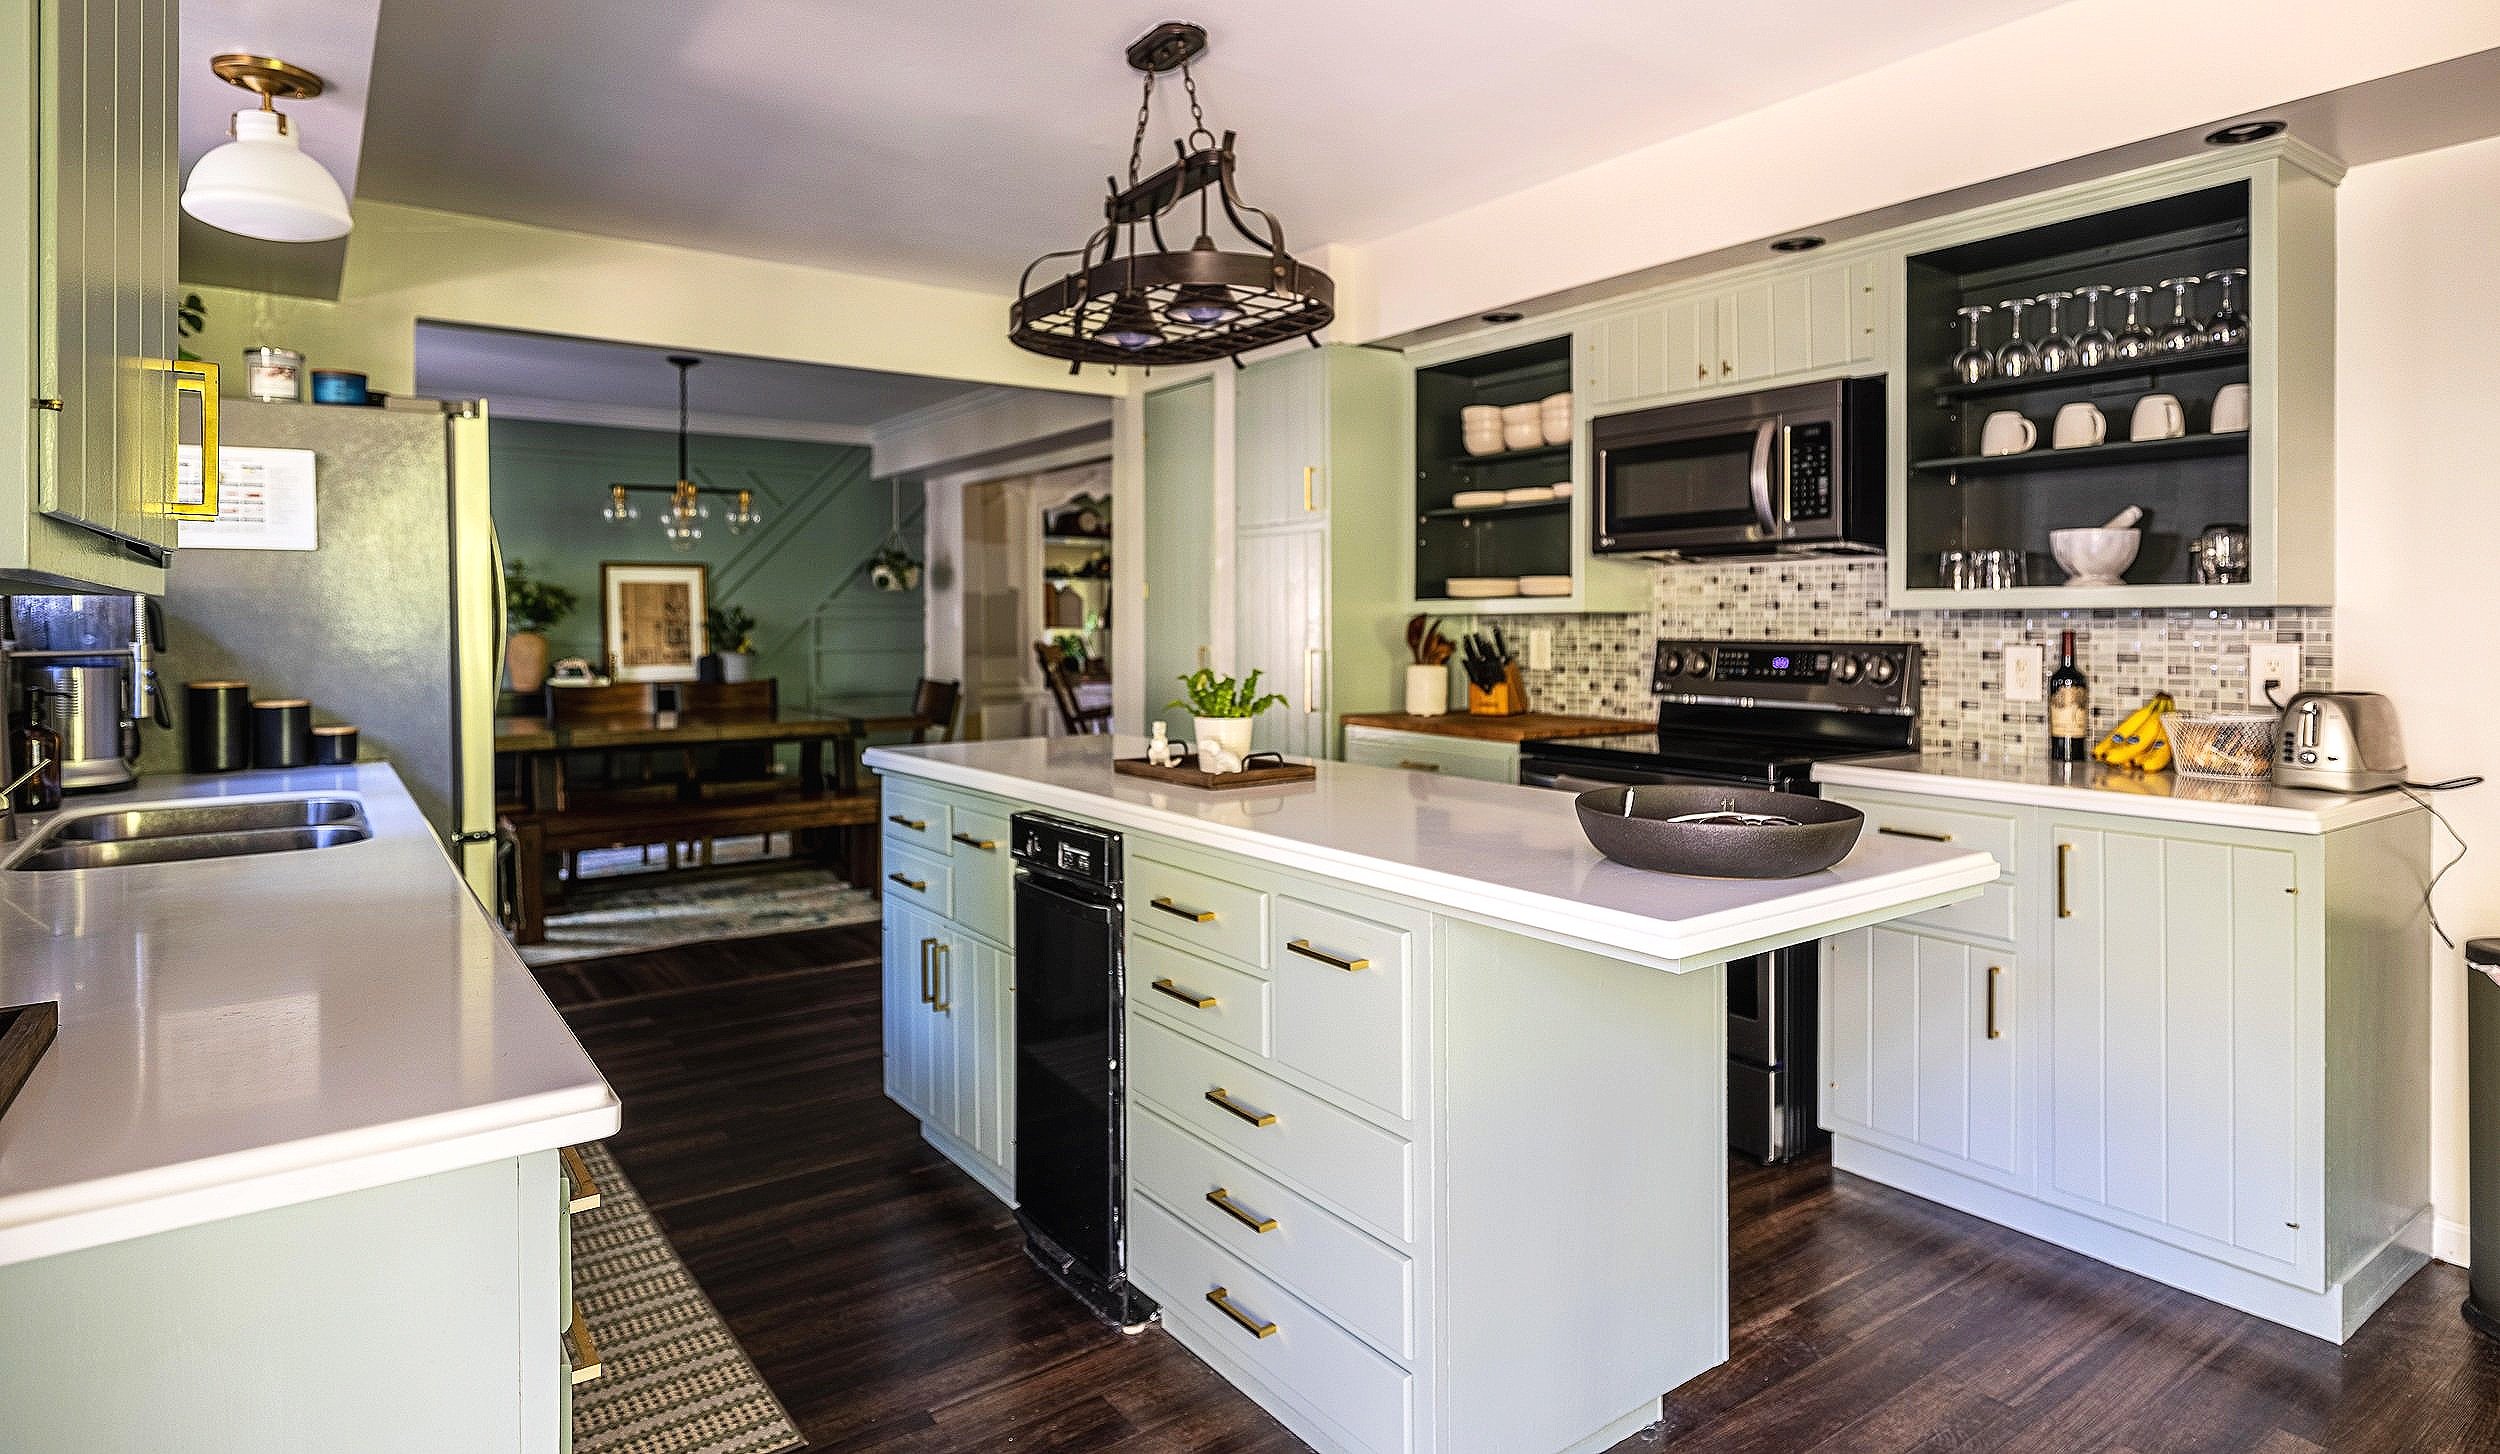
Obviously, opening up the doorway to the dining room was a huge improvement to this space. But aside from that, we haven’t done any construction in the kitchen area.
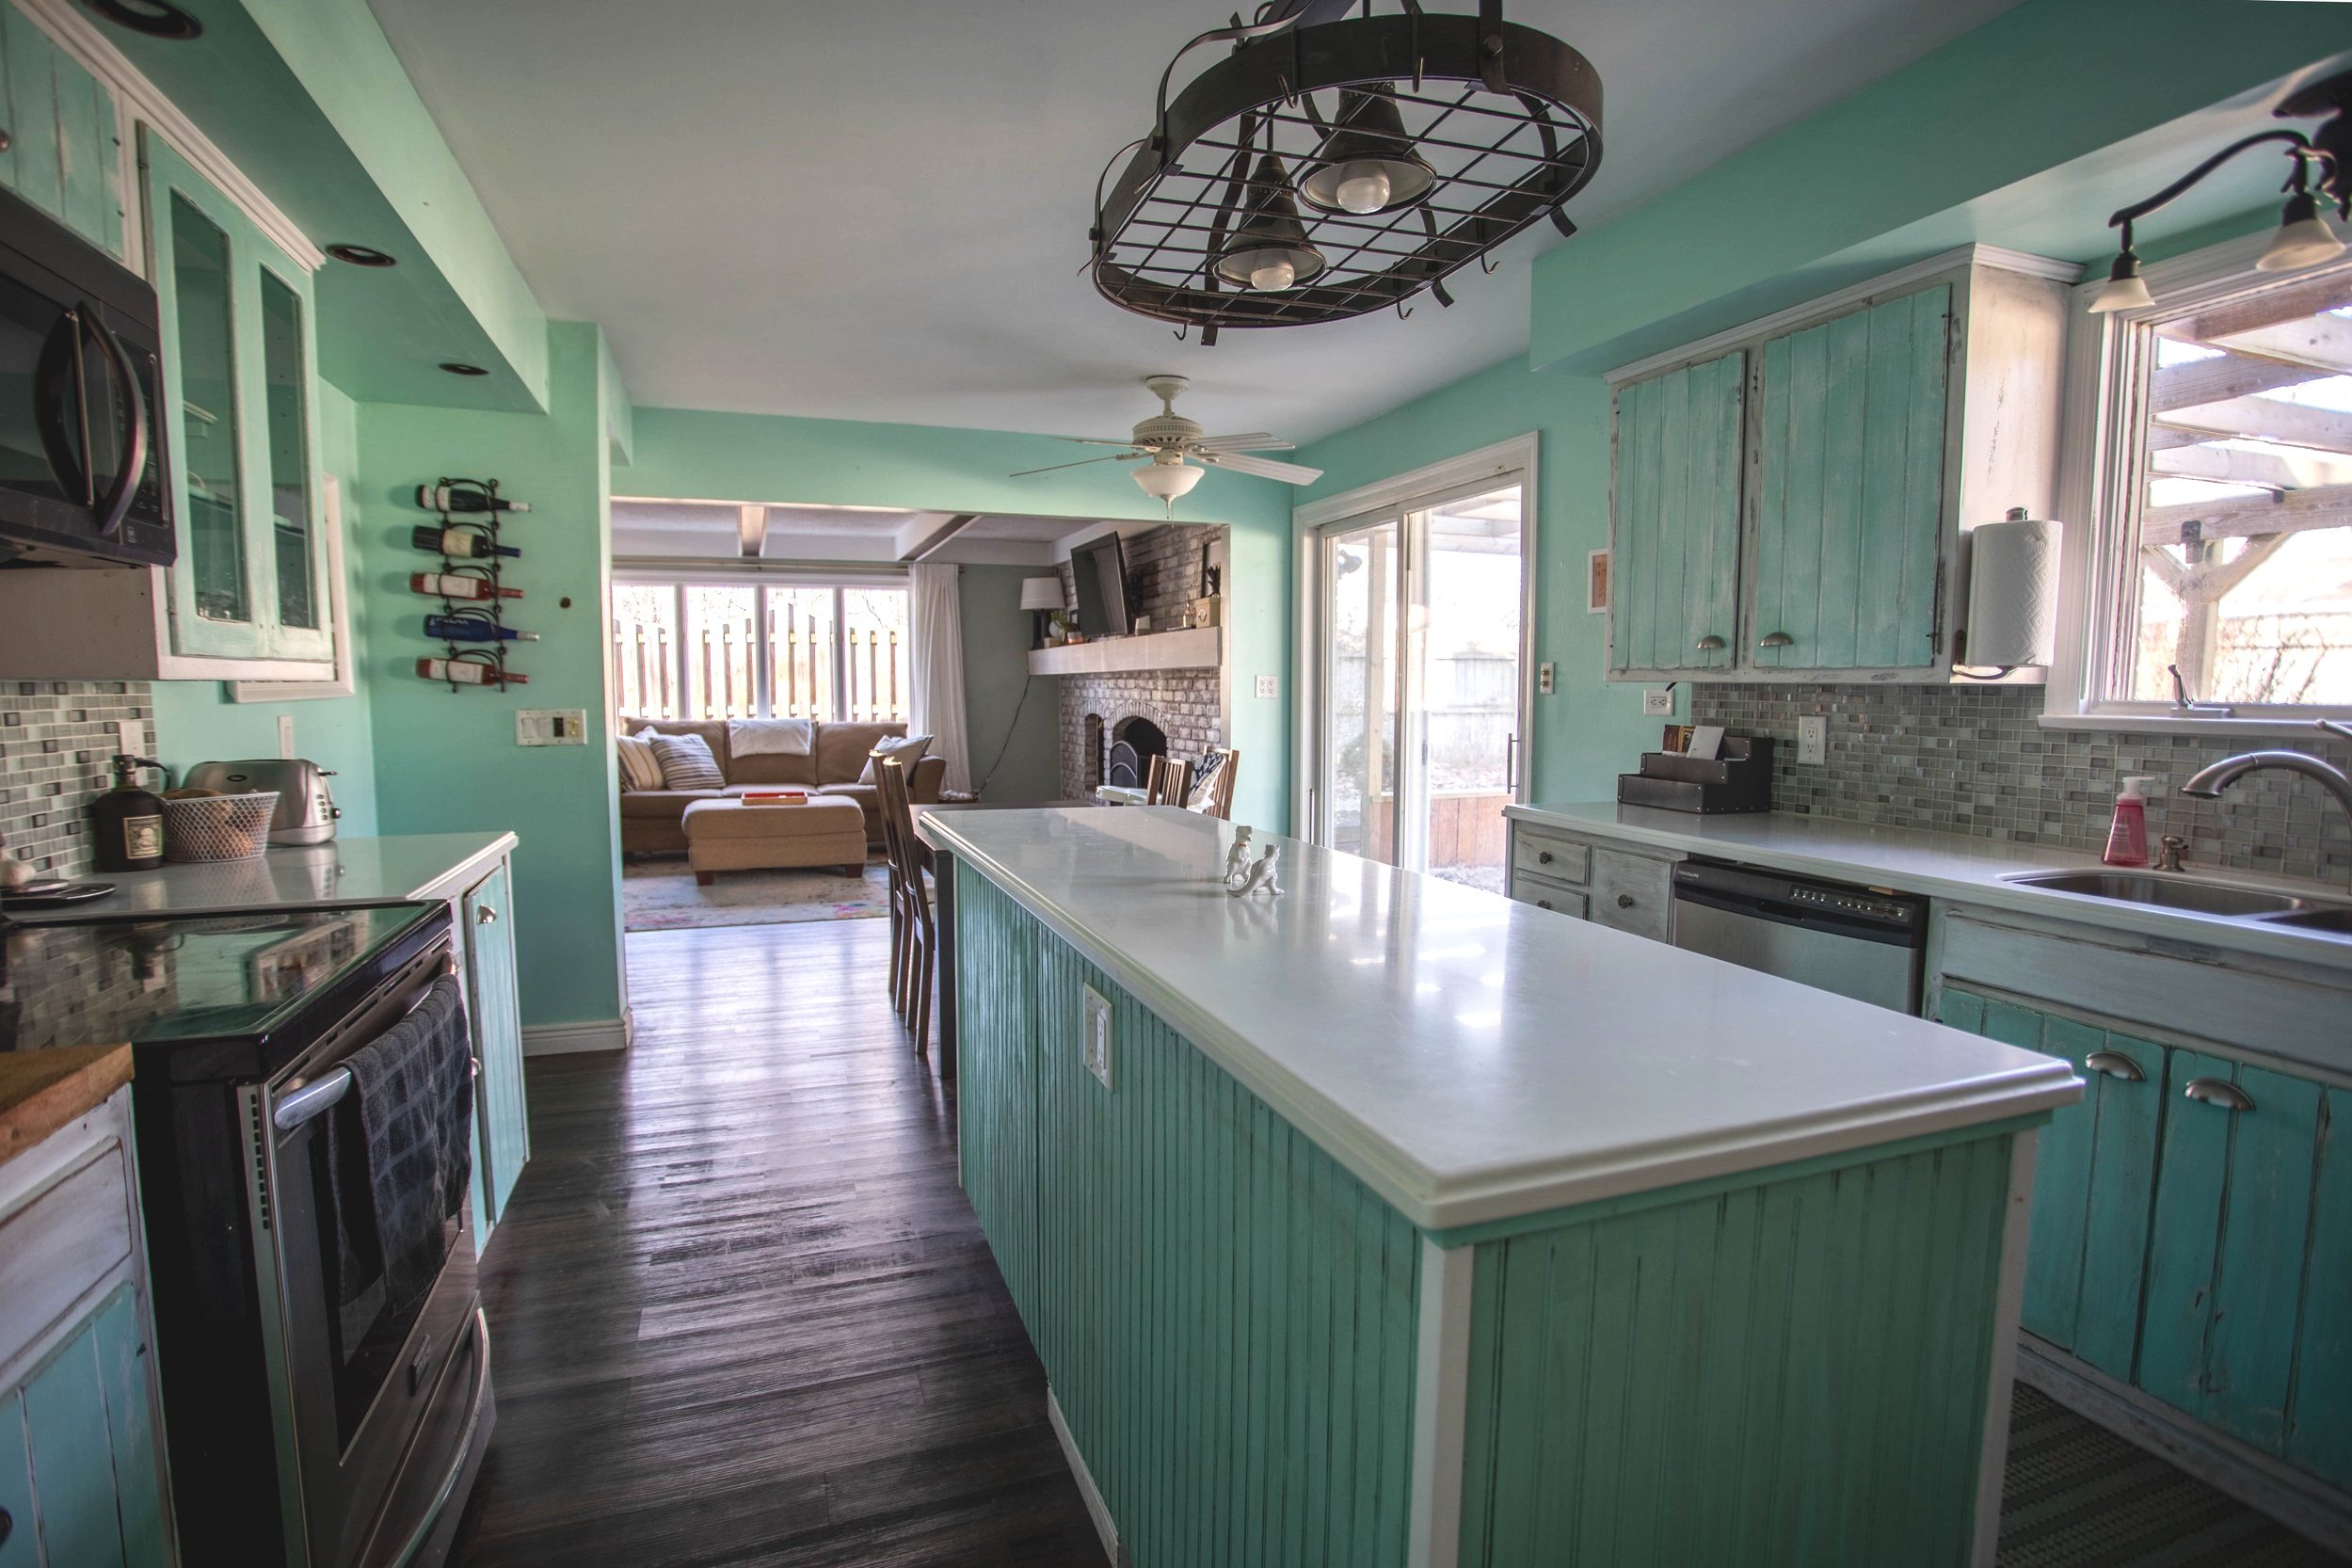
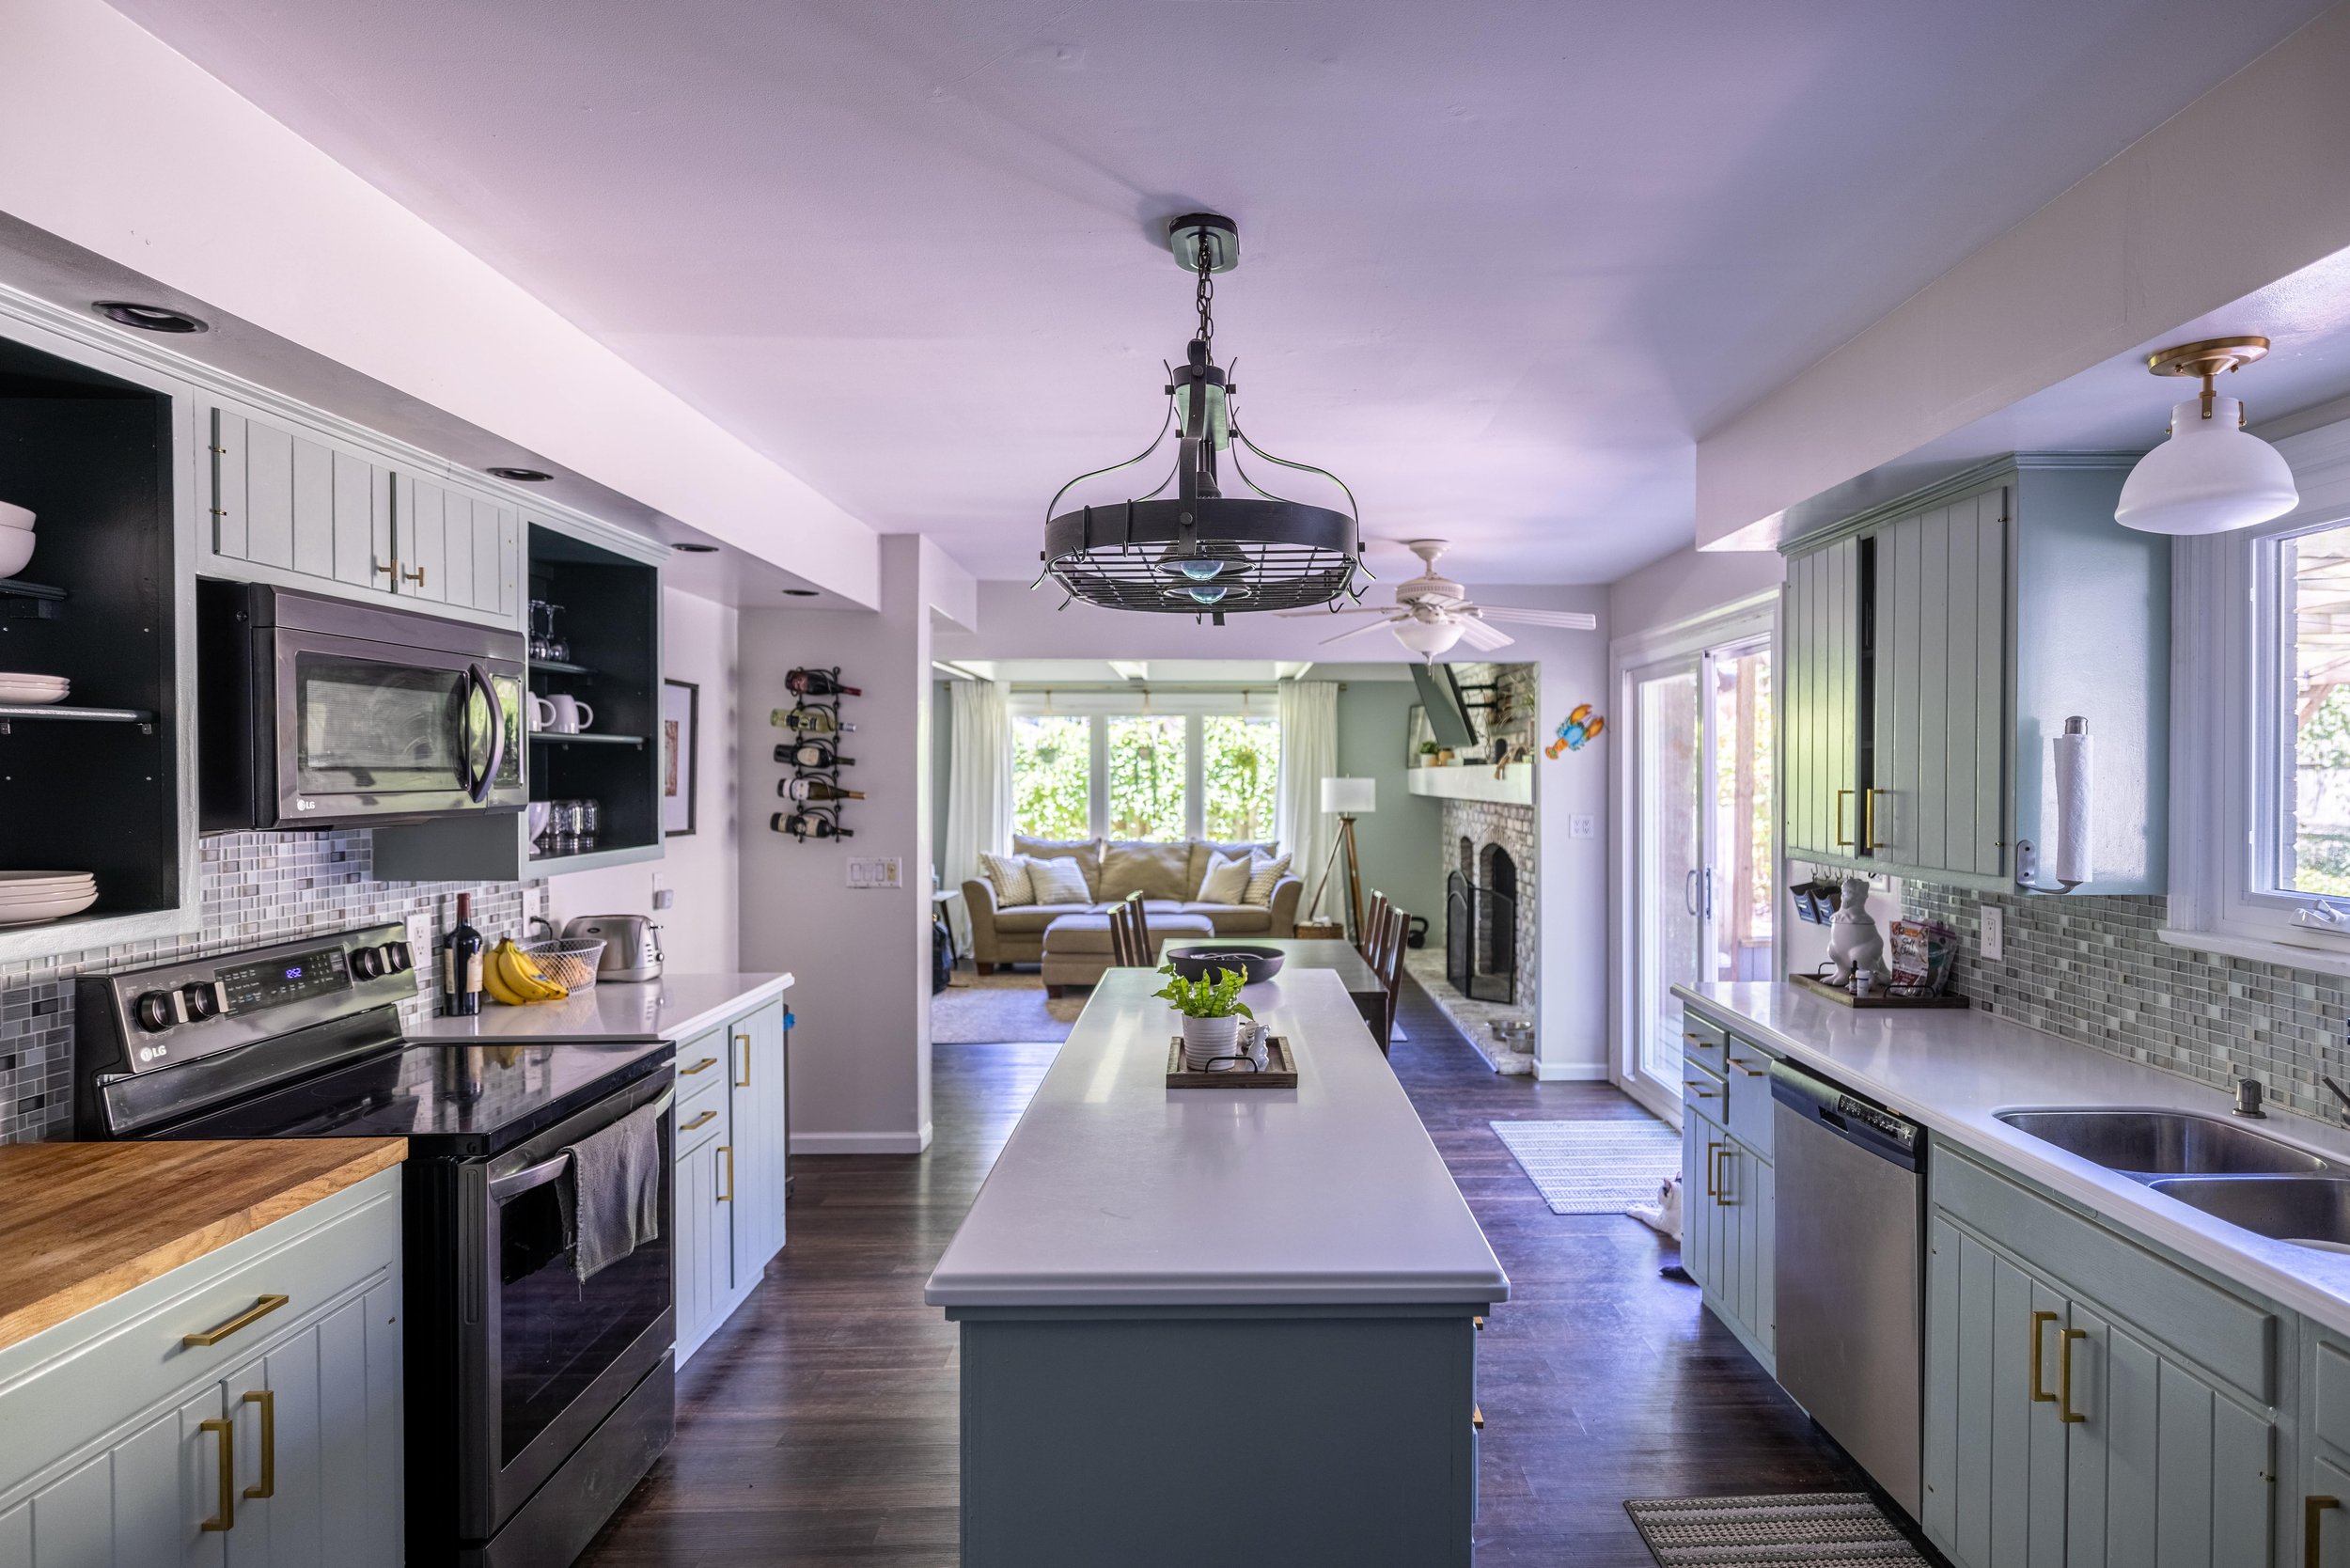
While this is the best layout I’ve ever had in a kitchen, it still has its faults. The magical “kitchen triangle” was poorly thought out, and we do laps around the island while cooking. Plus, I hate that you can see the trash cans.
If we stay here long-term, we’ll likely gut this space and start from scratch. In the meantime, I’d be happy swapping out the light over the island and centering (and replacing) the fan over the eat-in kitchen area.
Related: Green Kitchen Cabinet Inspiration
The Dining Room
The dining room has seen the biggest change out of any room on the first floor of our house.
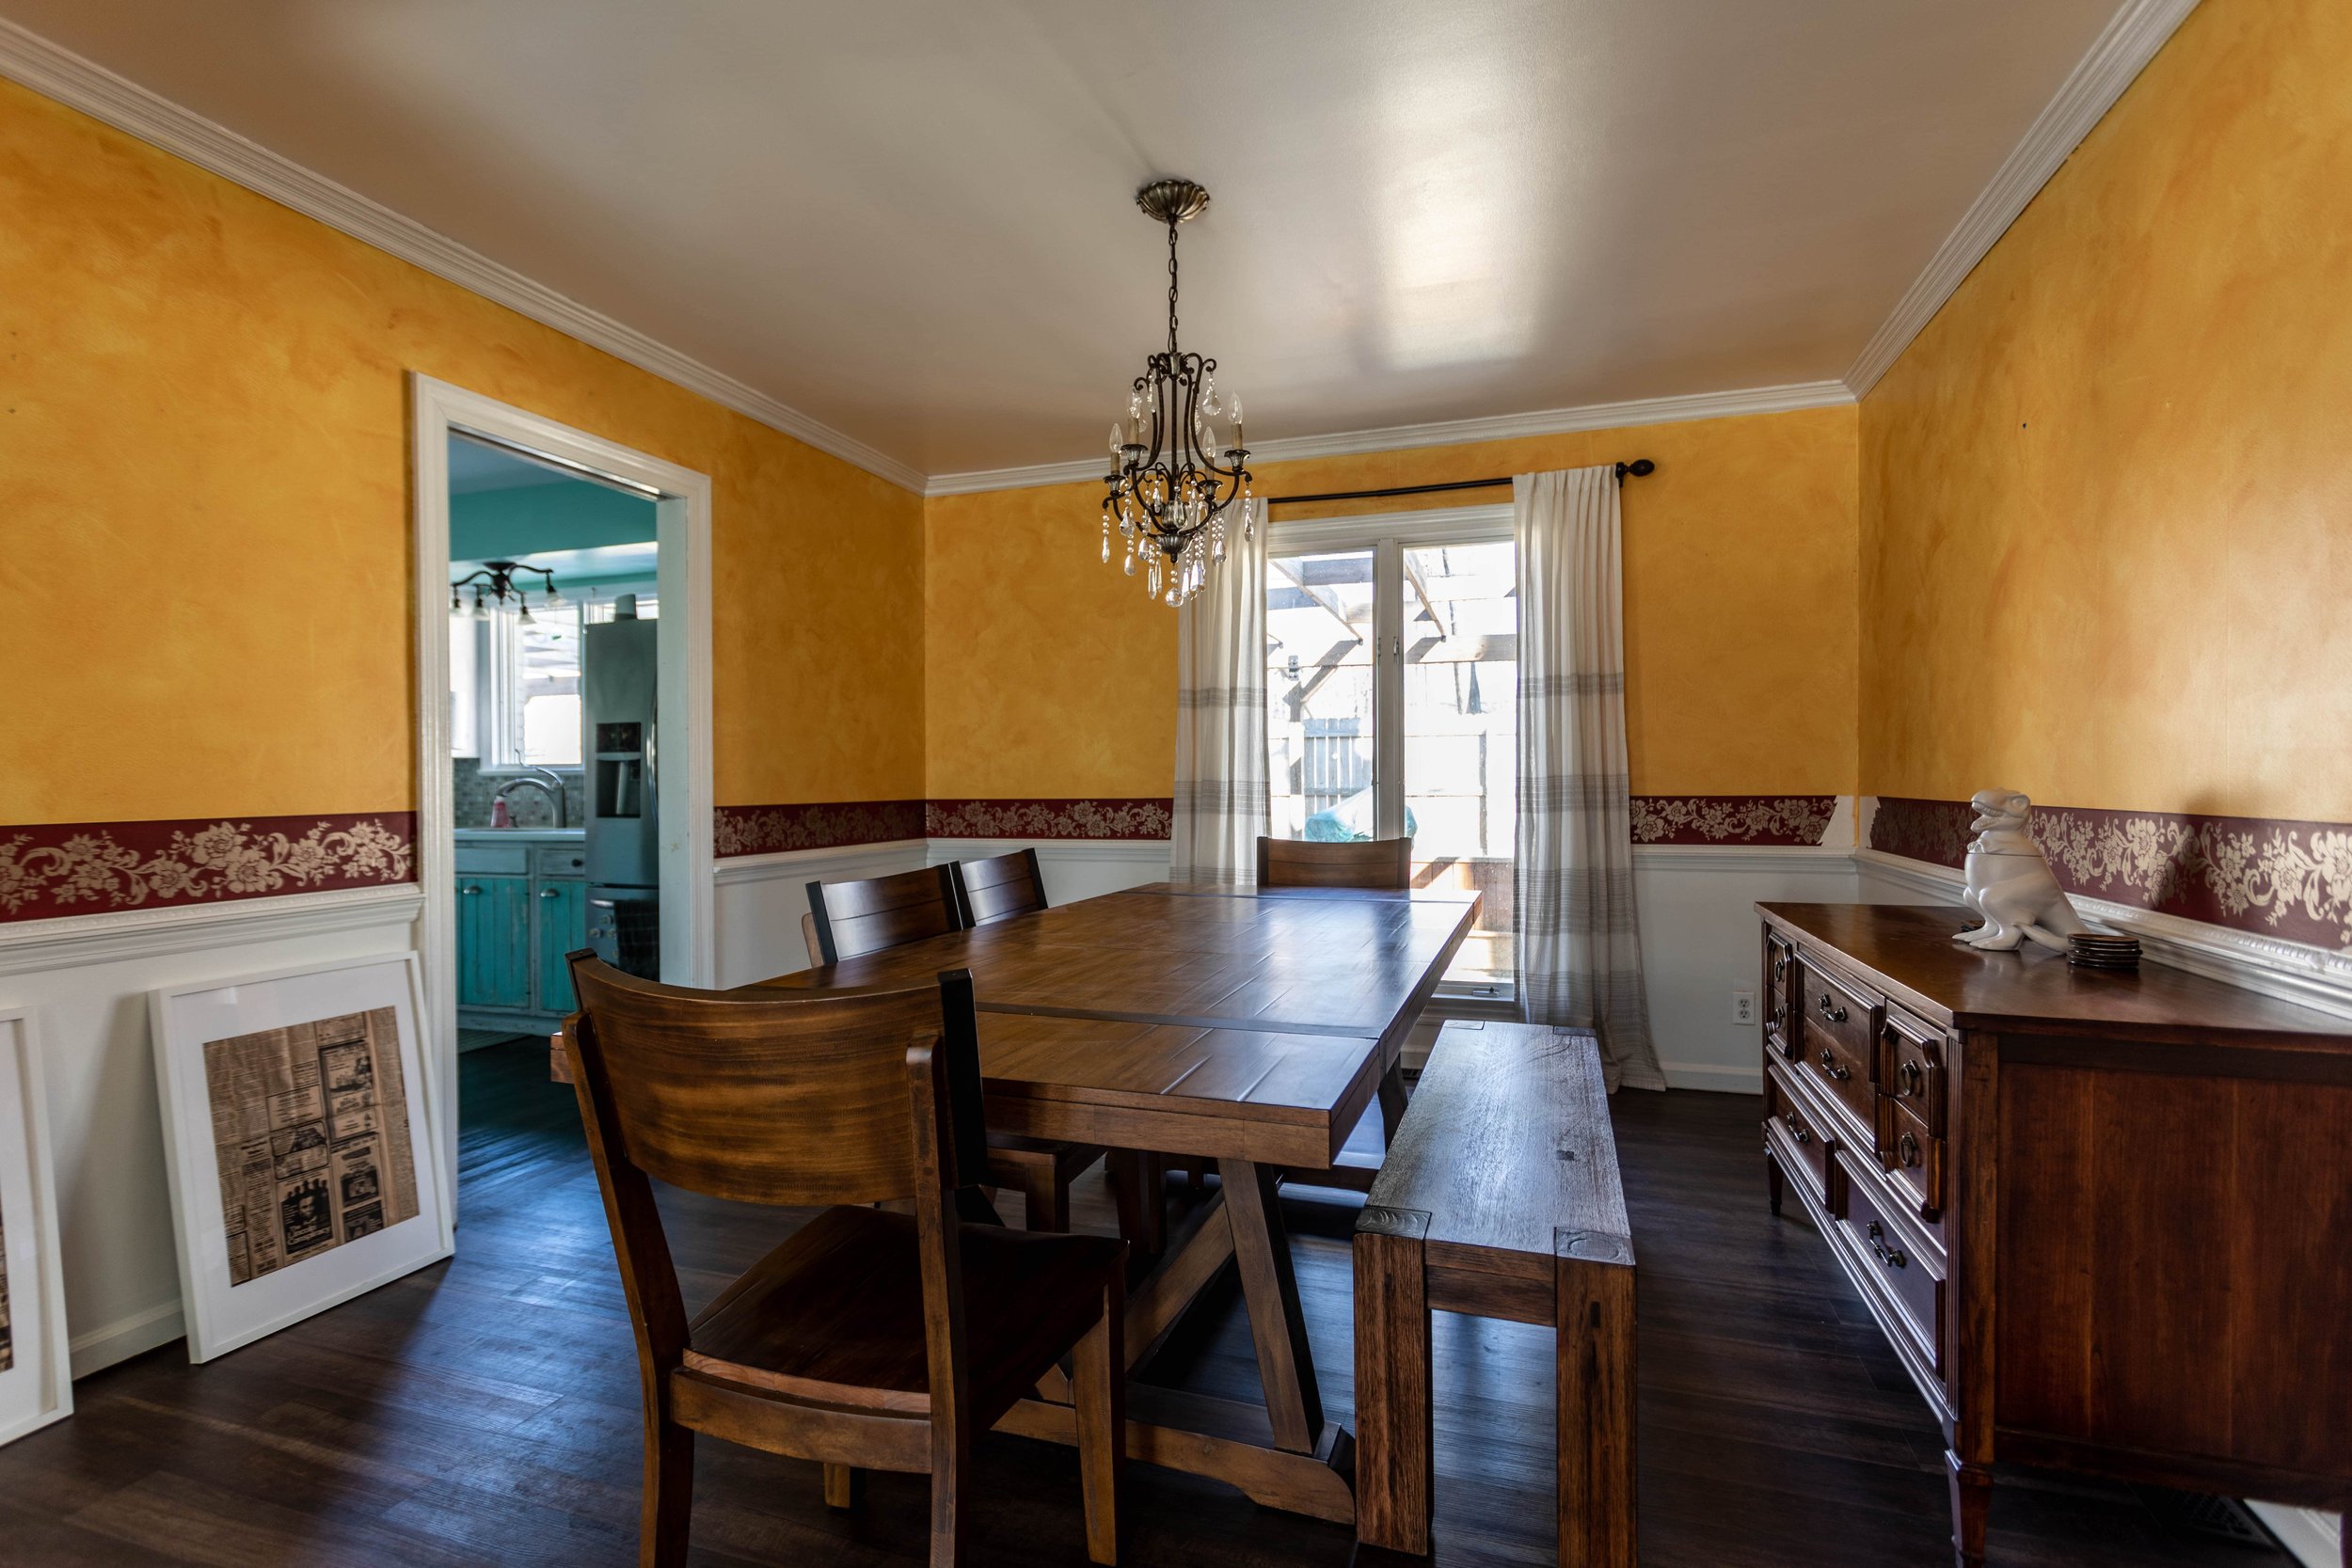
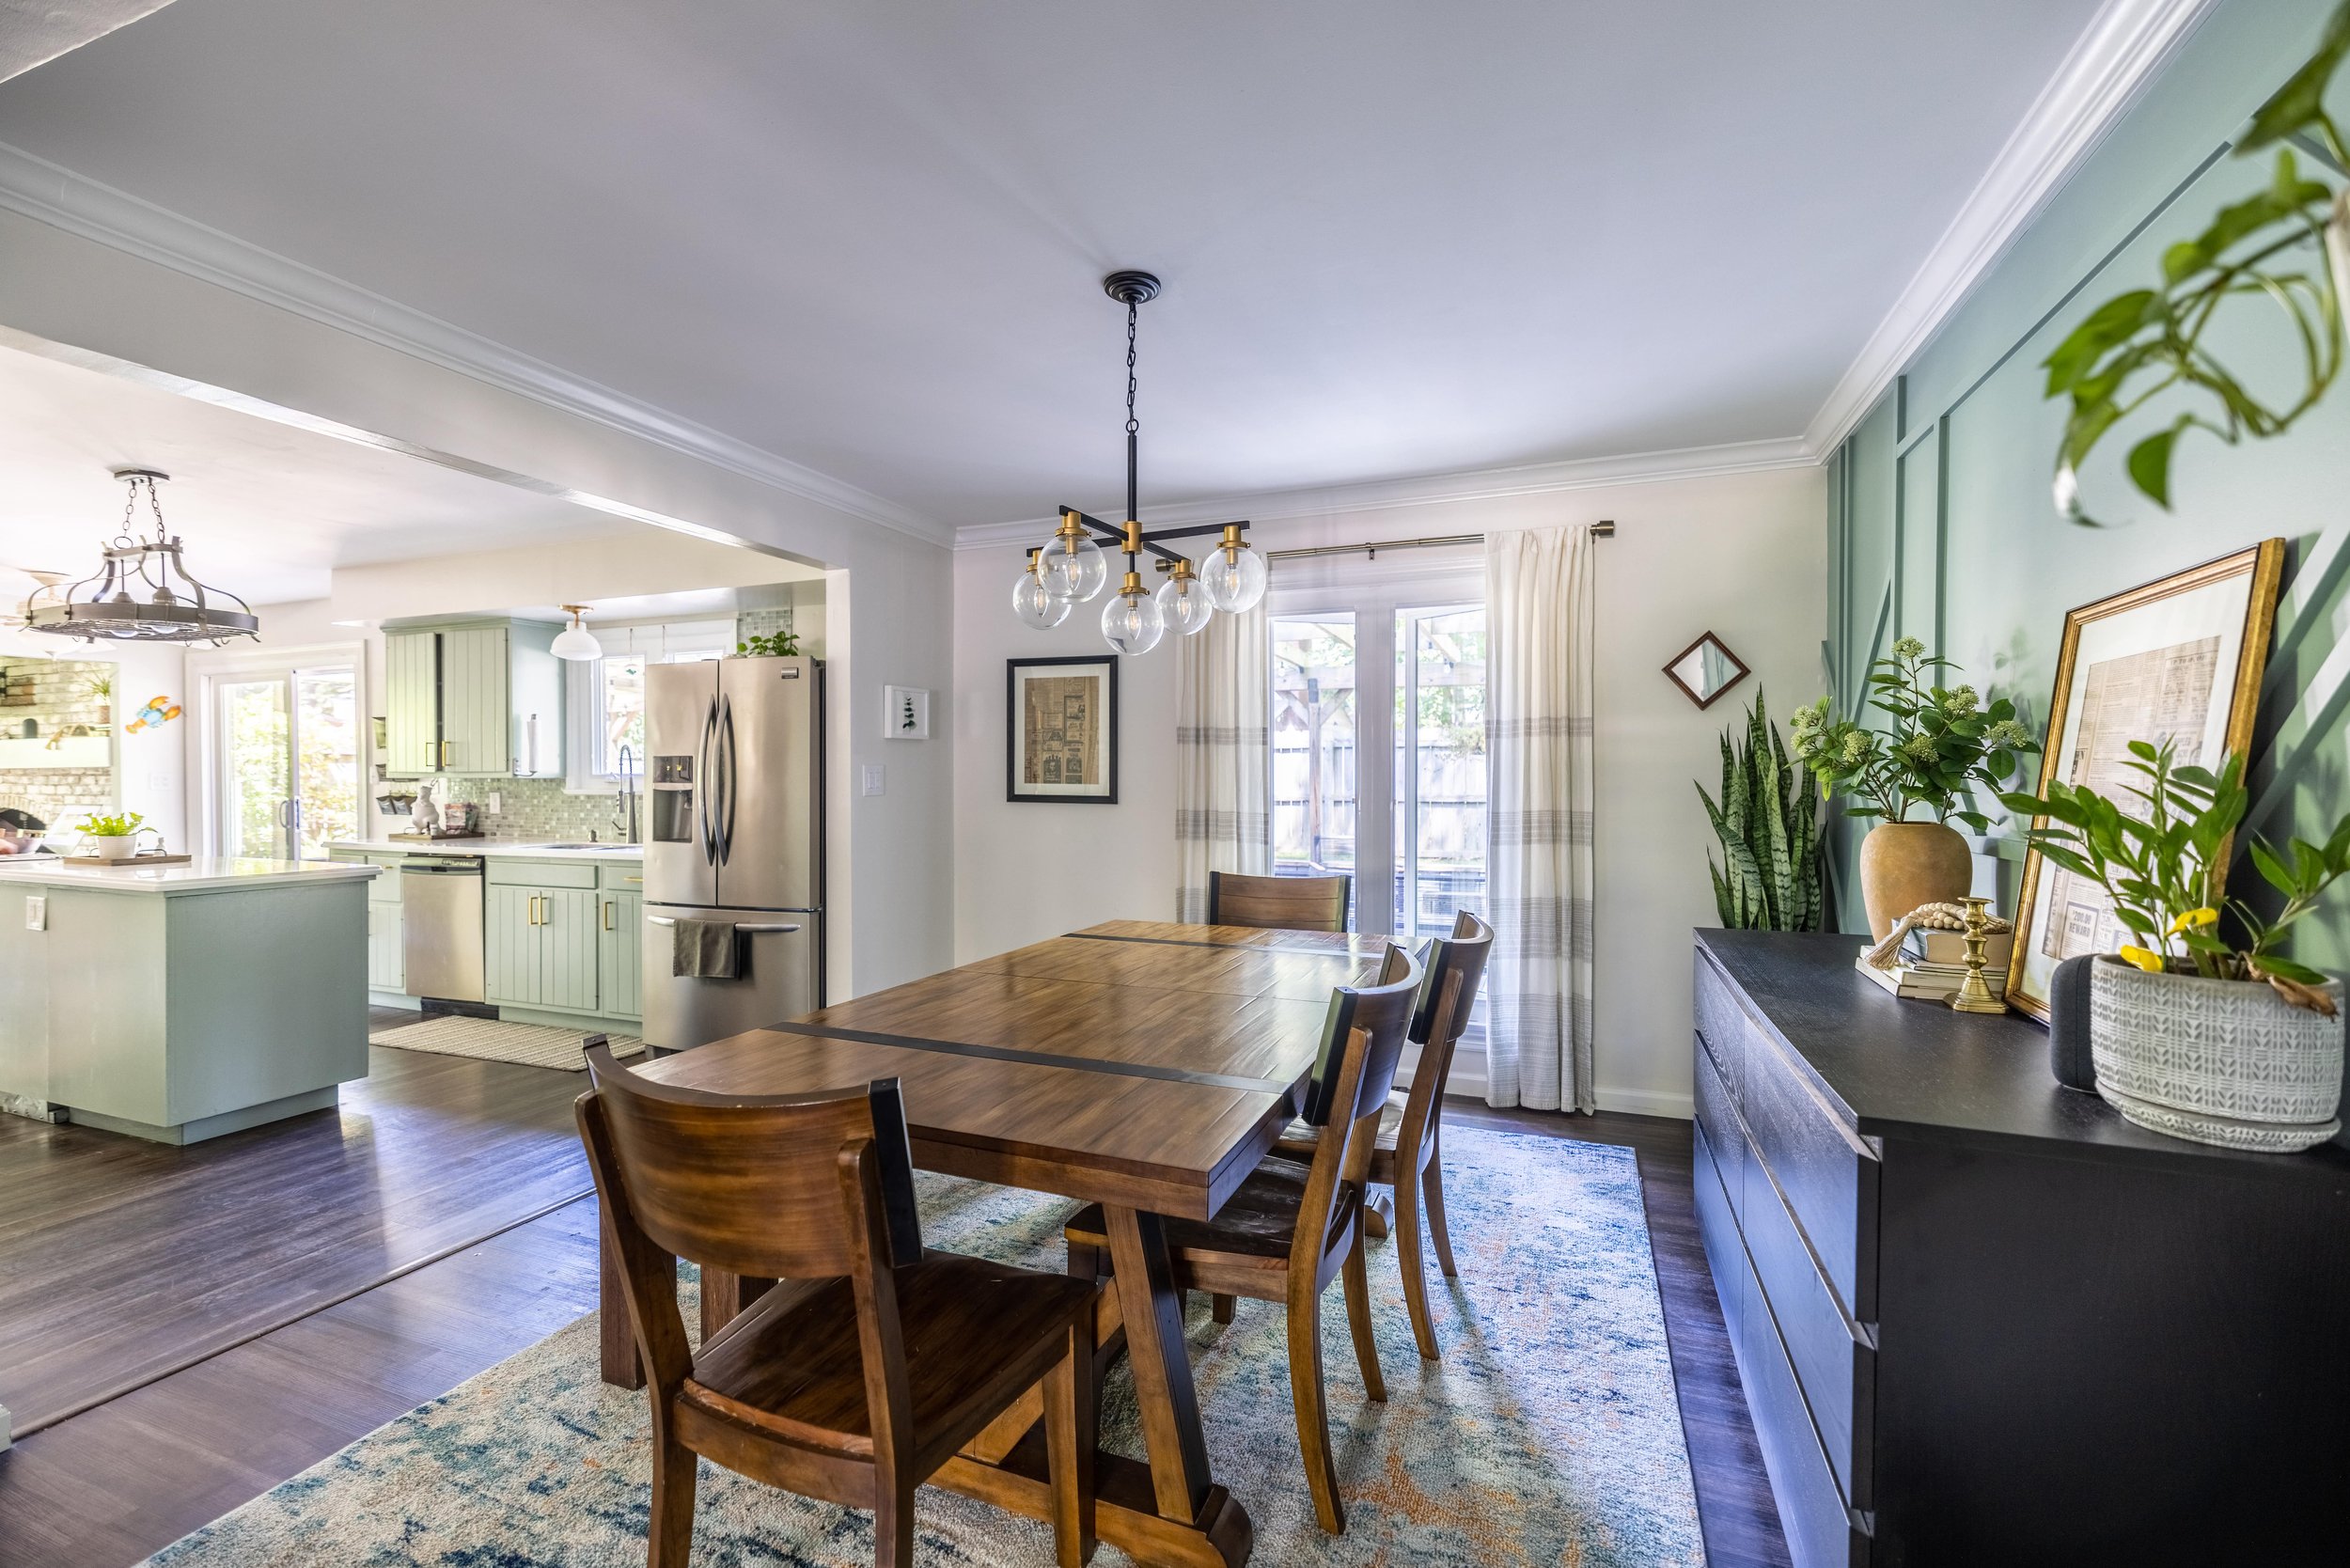
I couldn’t wait to tackle this room when we moved in, so we hit it really early on, and it was absolutely worth all the painstaking effort. The accent wall was even featured on The Spruce, which was so.freakin’.cool!
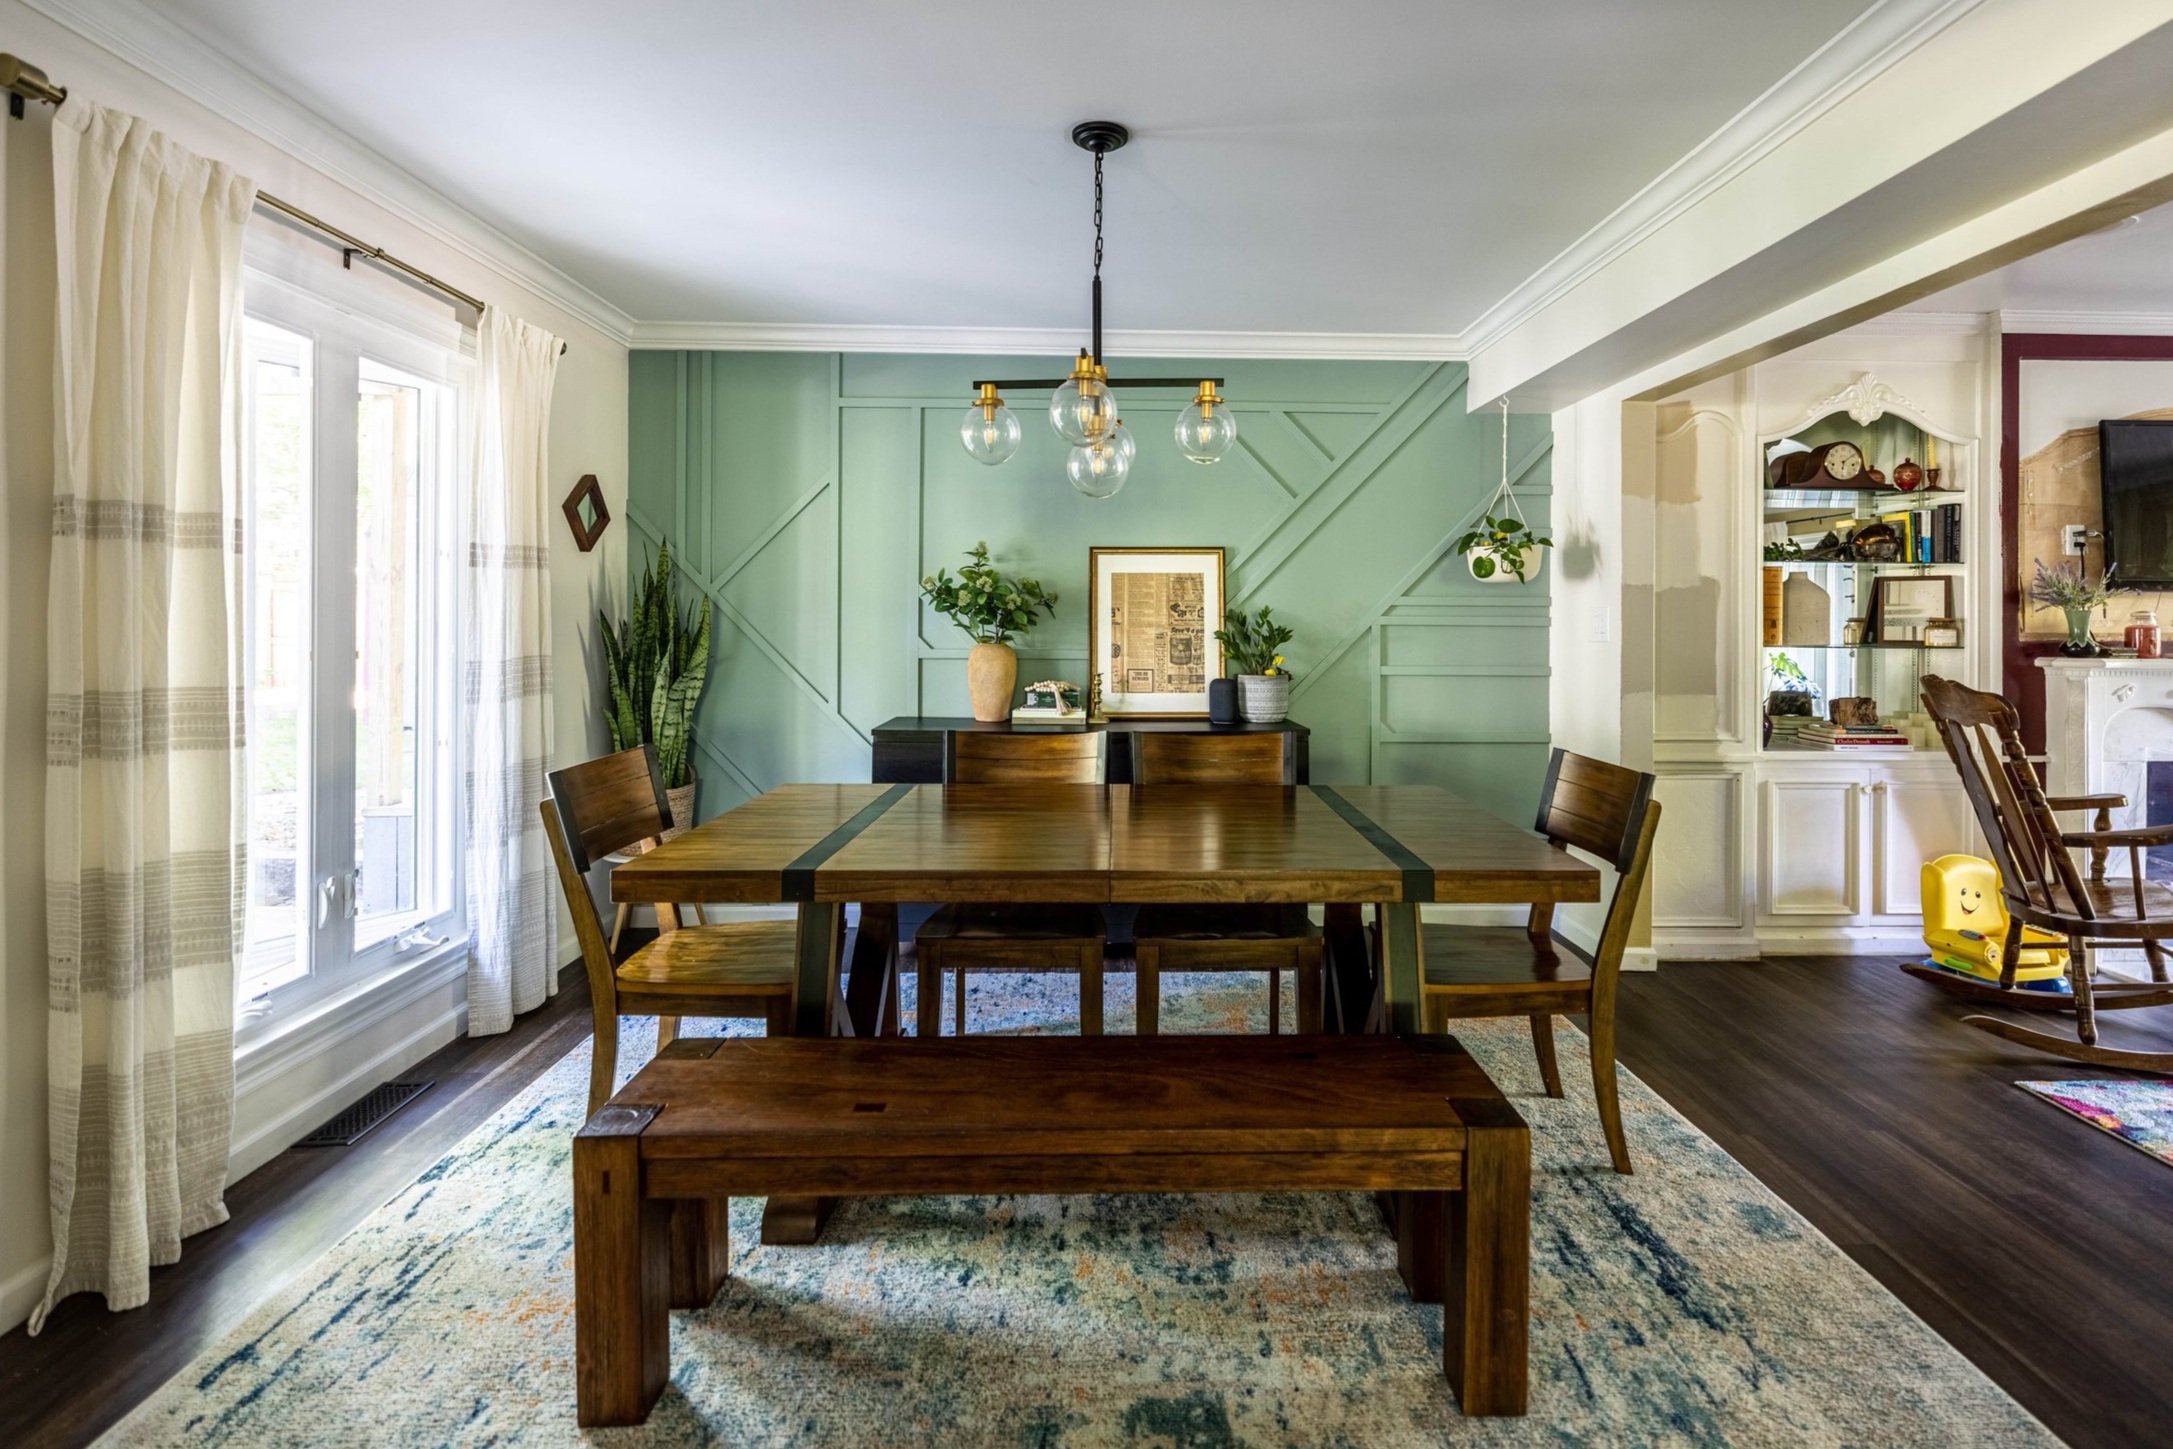
Related: Dining Room Renovation Kick-Off / Dining Room Renovation Progress / Dining Room Mood Boards / DIY Geometric Wood Accent Wall / Modern Dining Room Reveal
The Playroom
Ooof, this poor conundrum of a room.
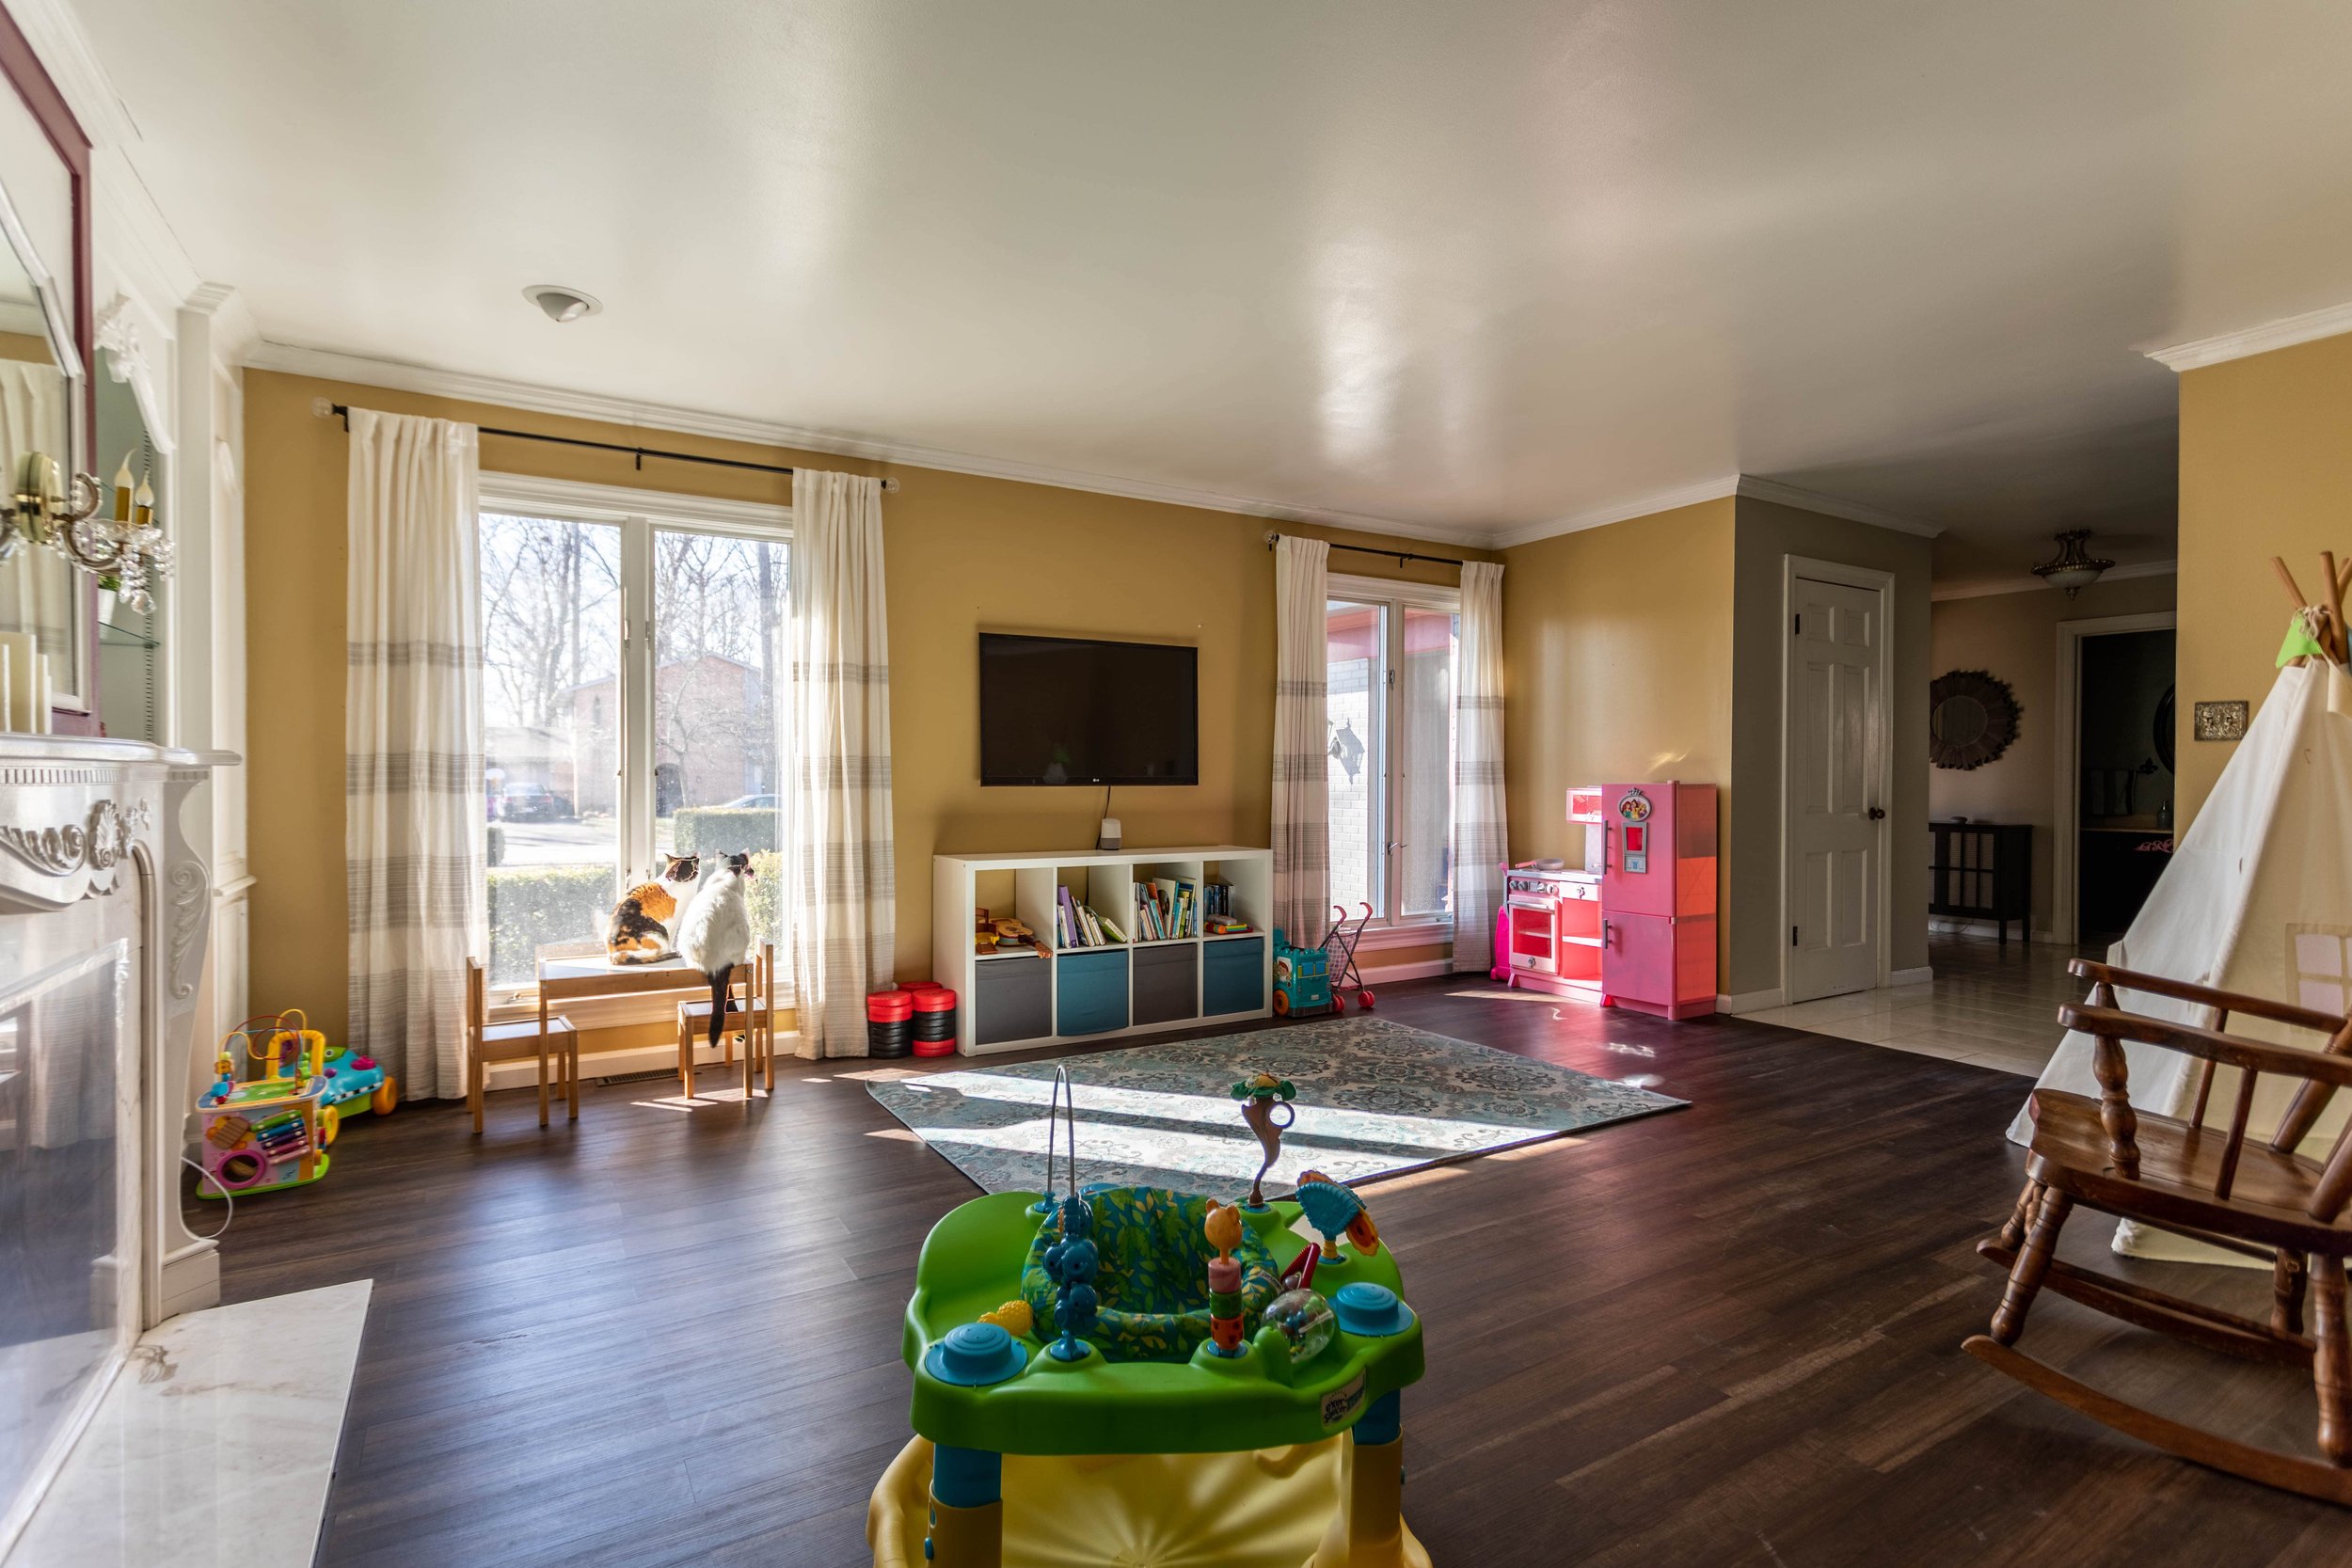

We’ve put zero effort into updating this room so far. Other than holding the overflow of toys, it’s rarely used. Plus, the layout makes furniture placement really tricky, so we’ve honestly been kind of stuck with what to do with it.
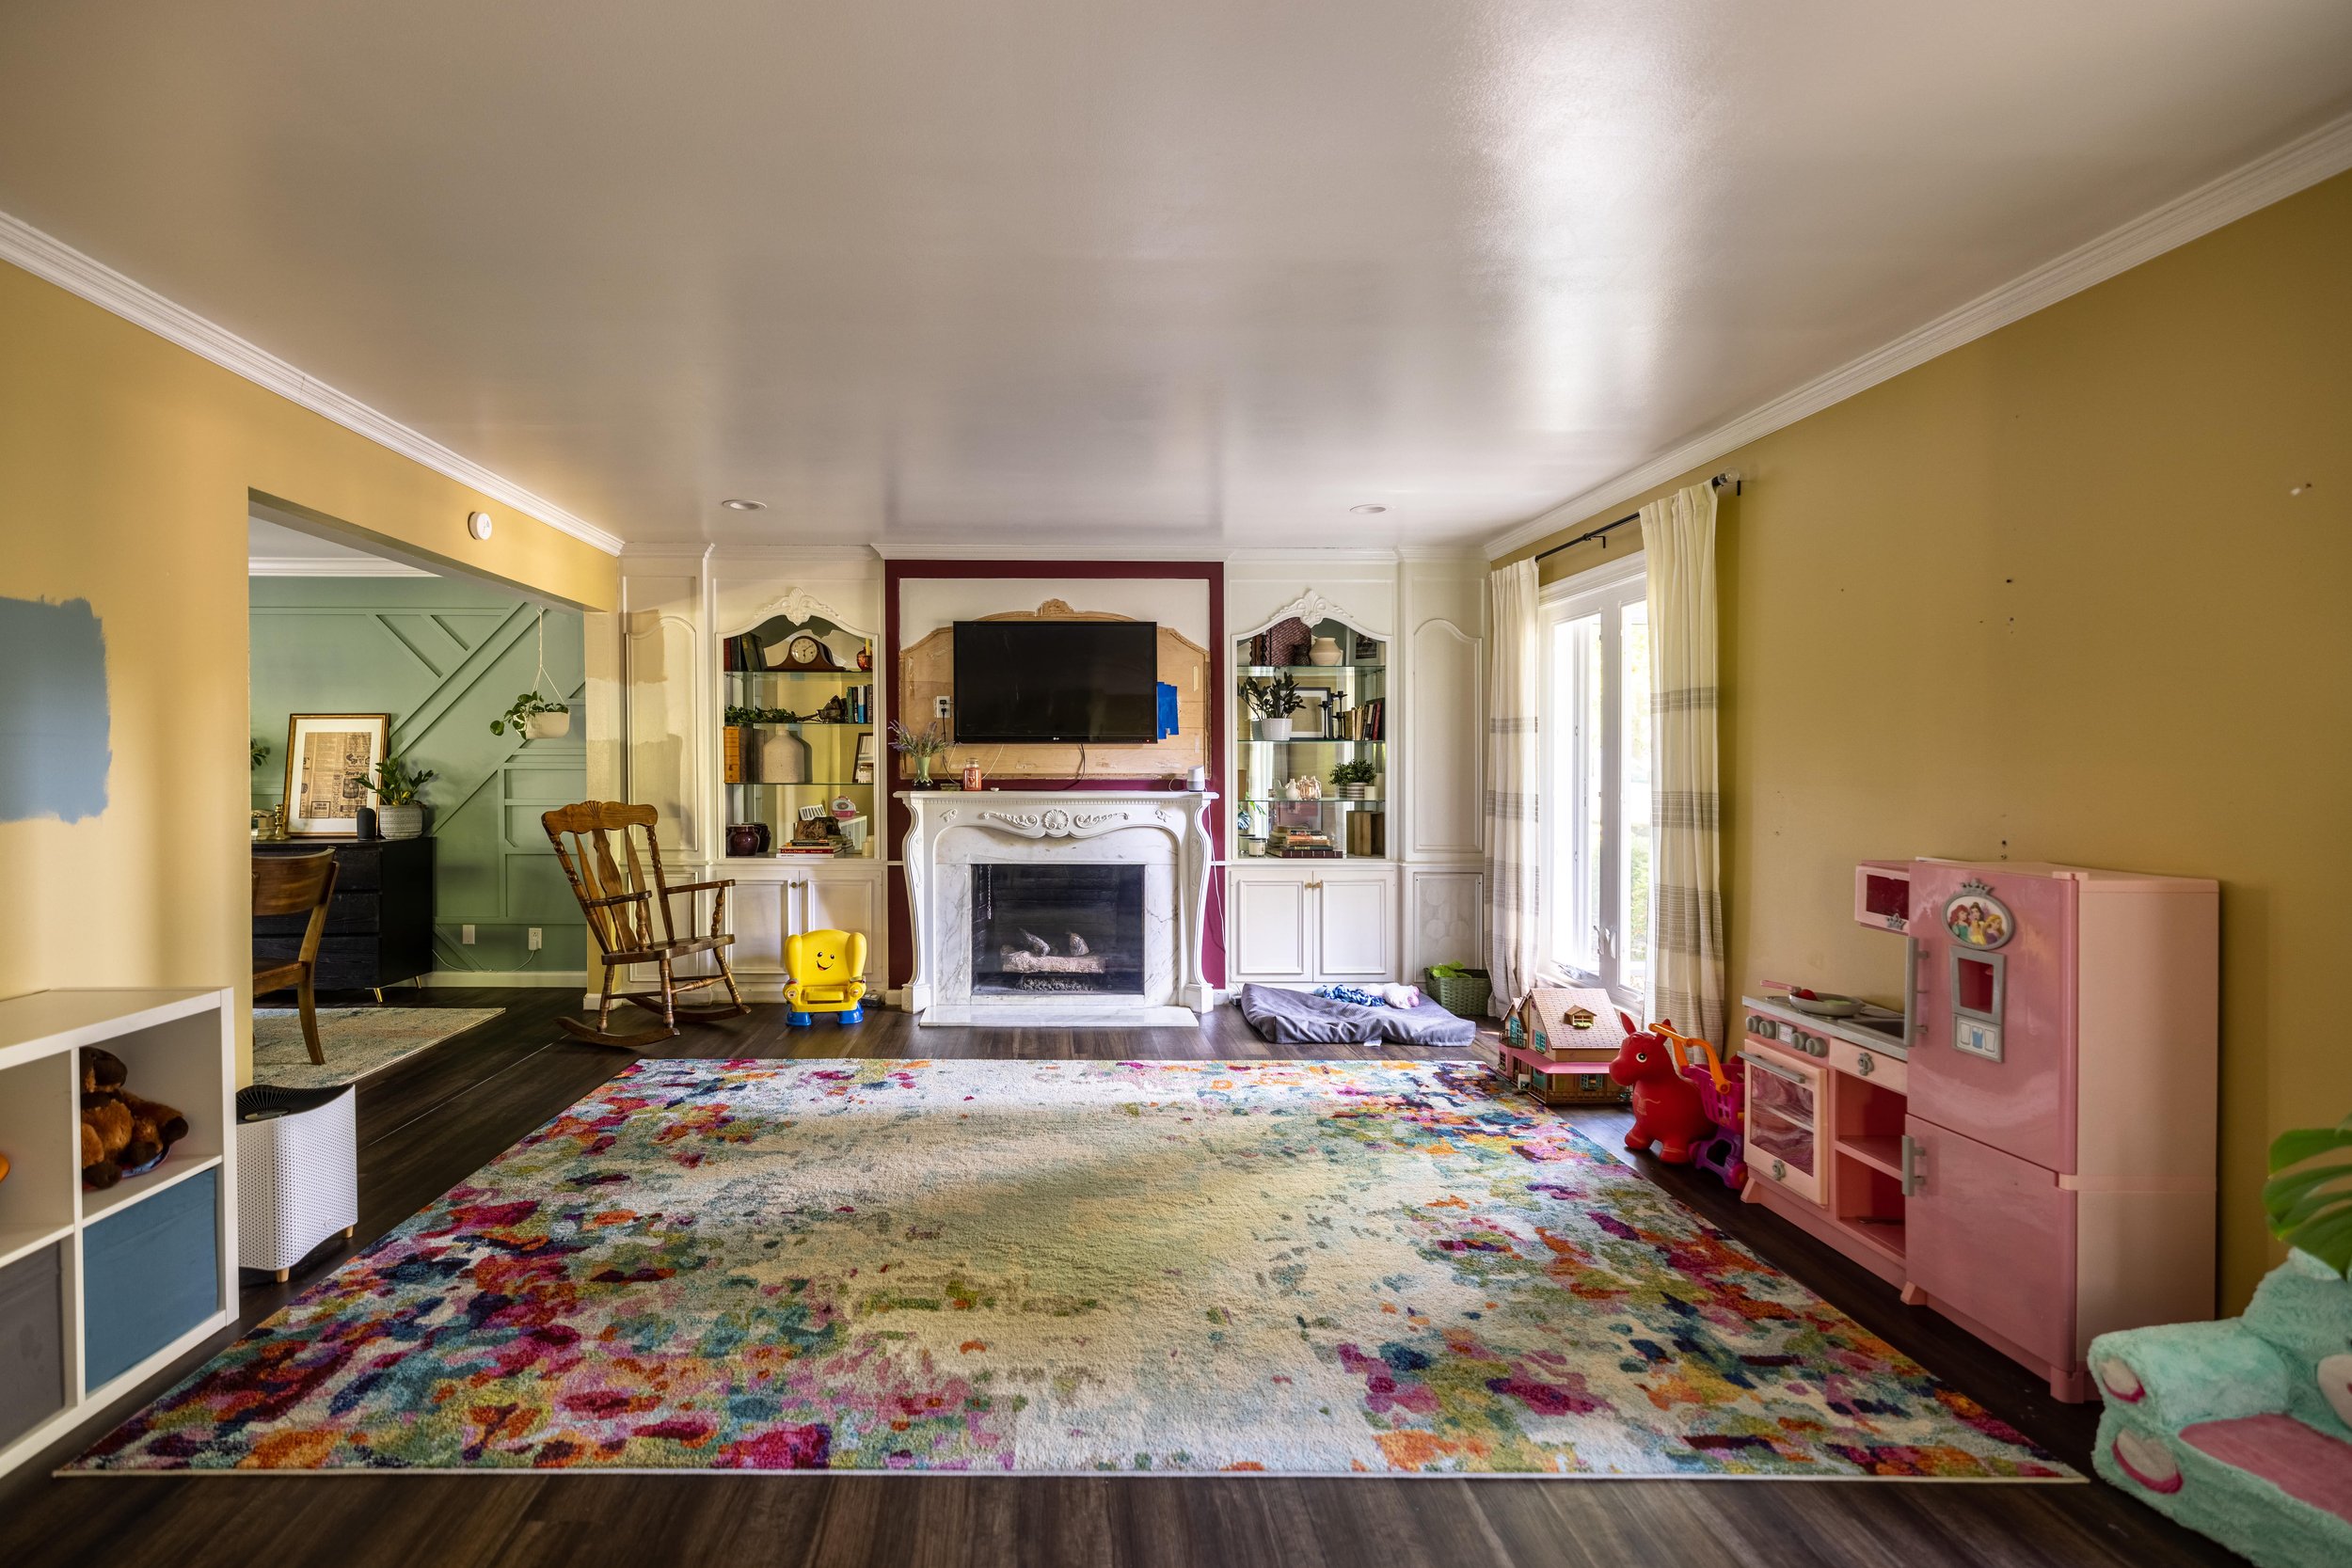
But we’re starting to get inspiration! I have a good idea of what I’d like to do with the fireplace and bookshelves, and we’ve even brainstormed about maybe turning it into an office for me down the road. Speaking of which…
The Spare Room
Since we moved in, I’ve been using the spare bedroom as my home office/wardrobe.
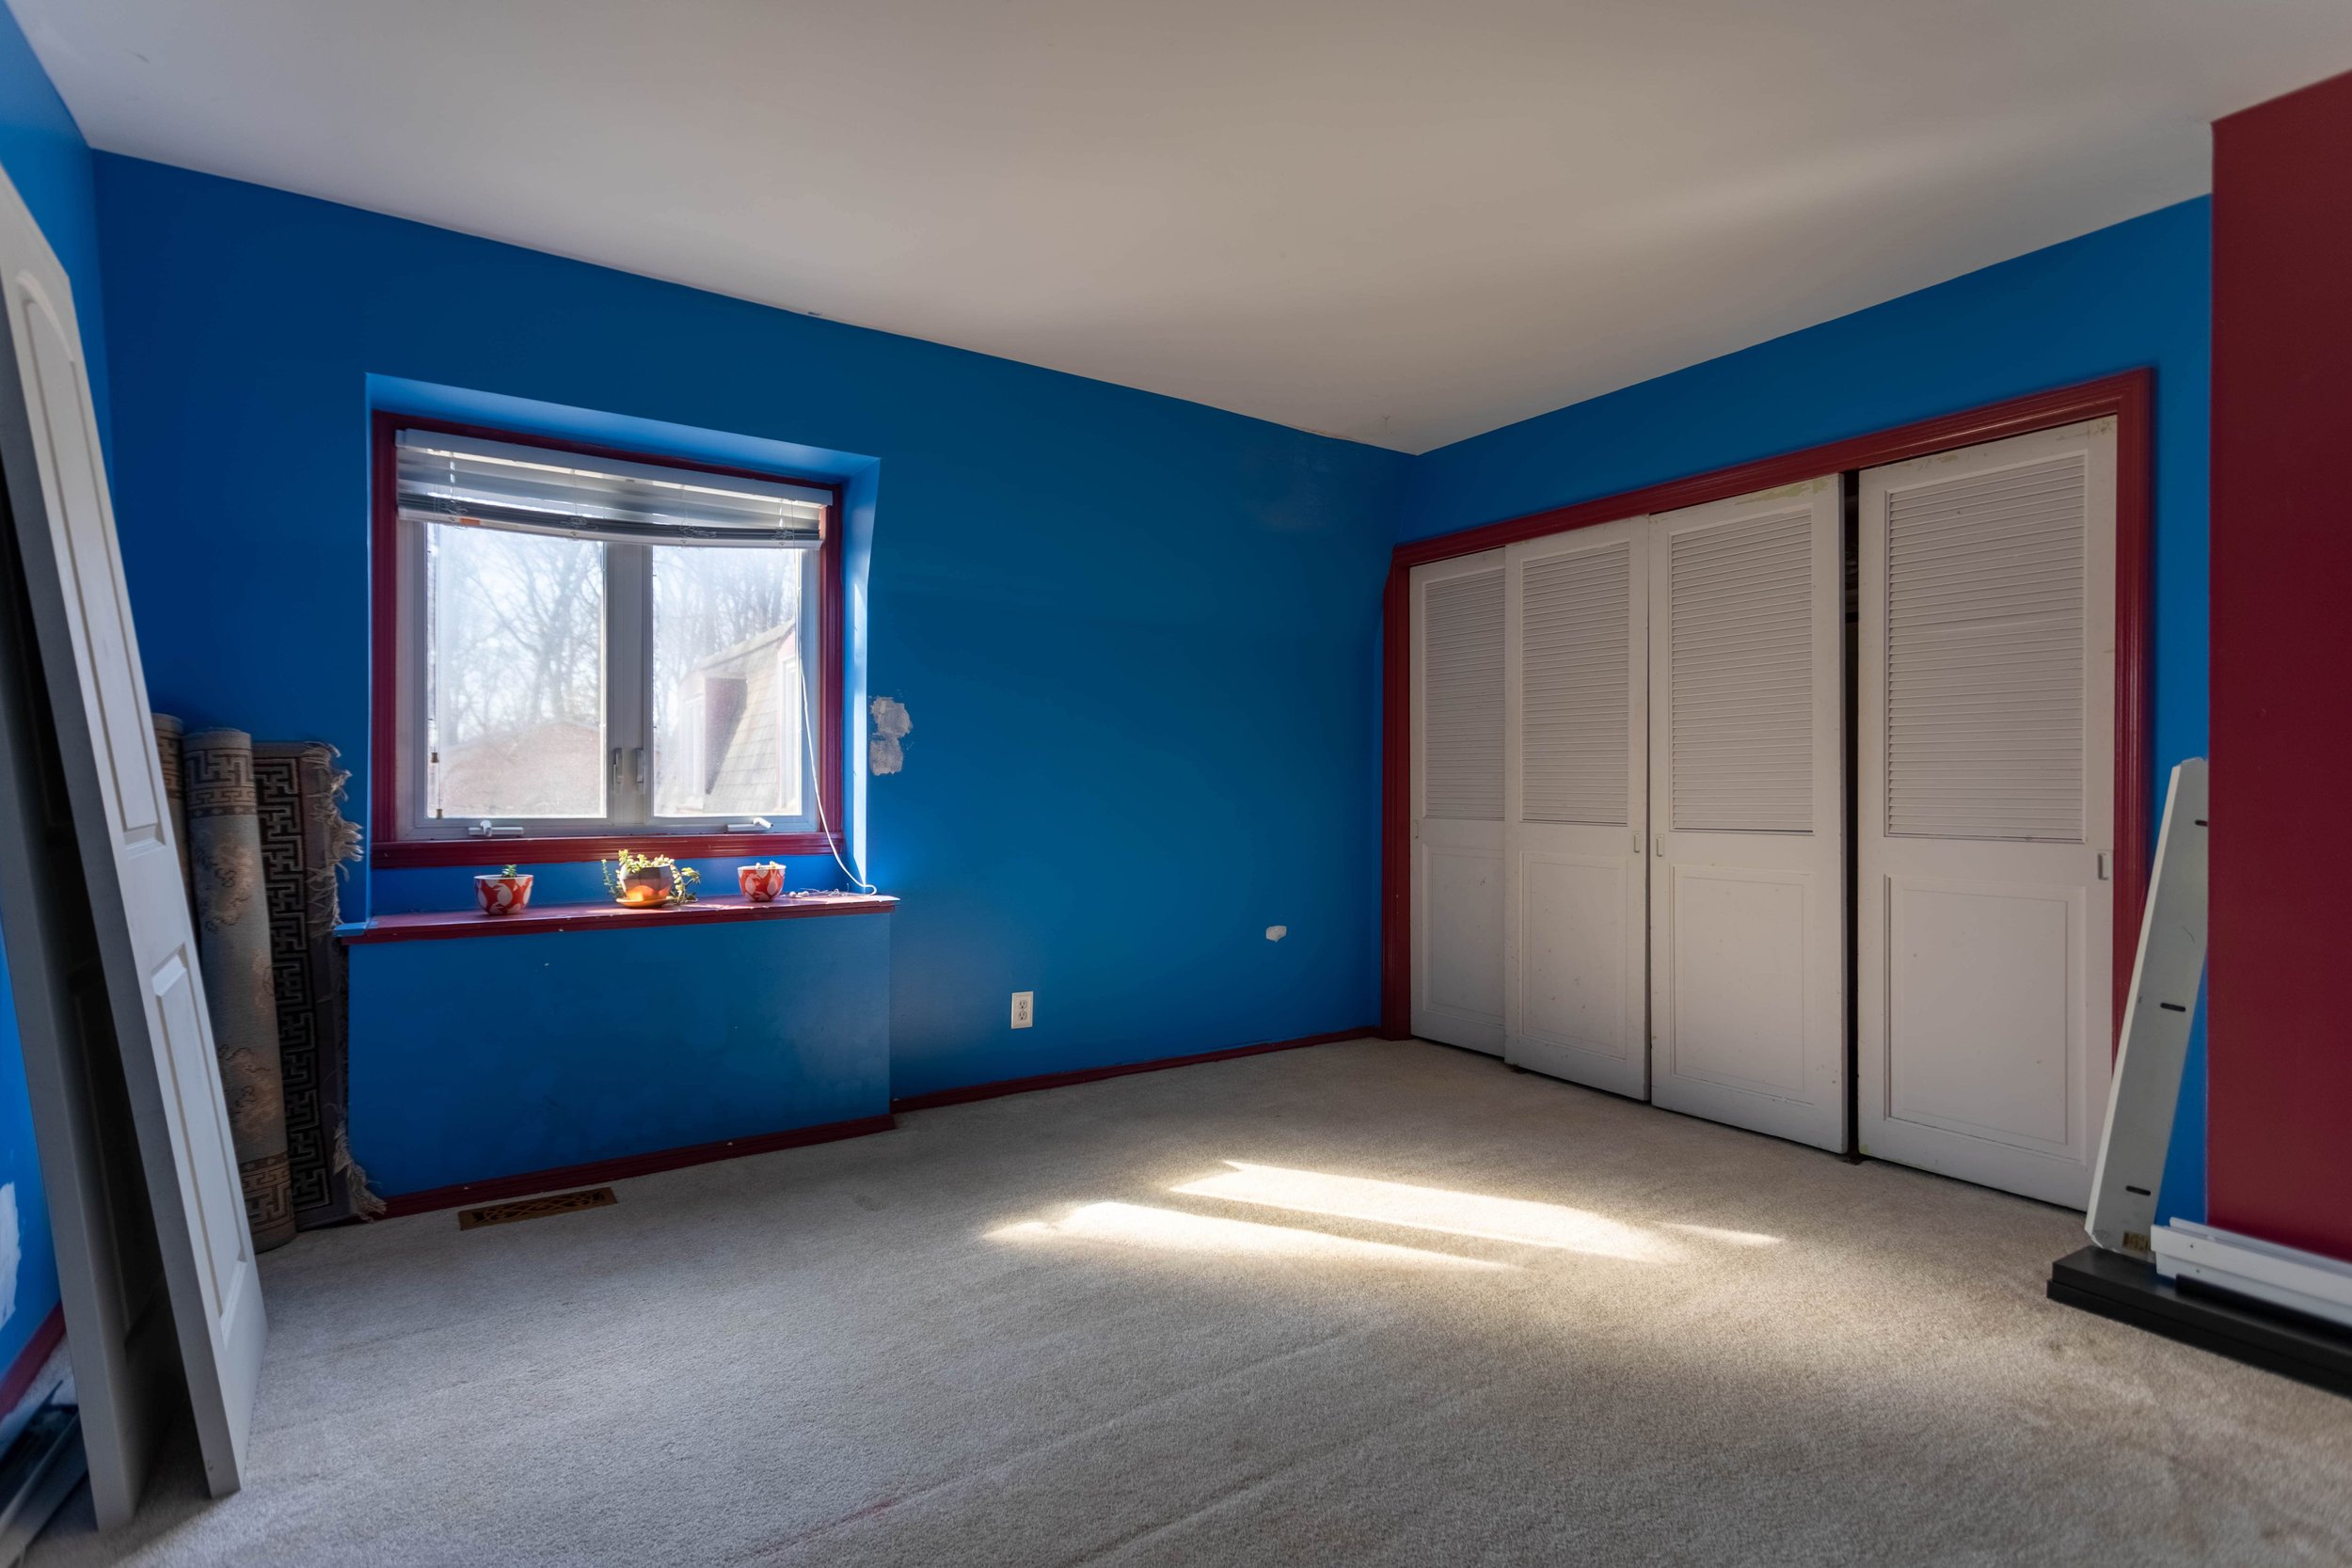
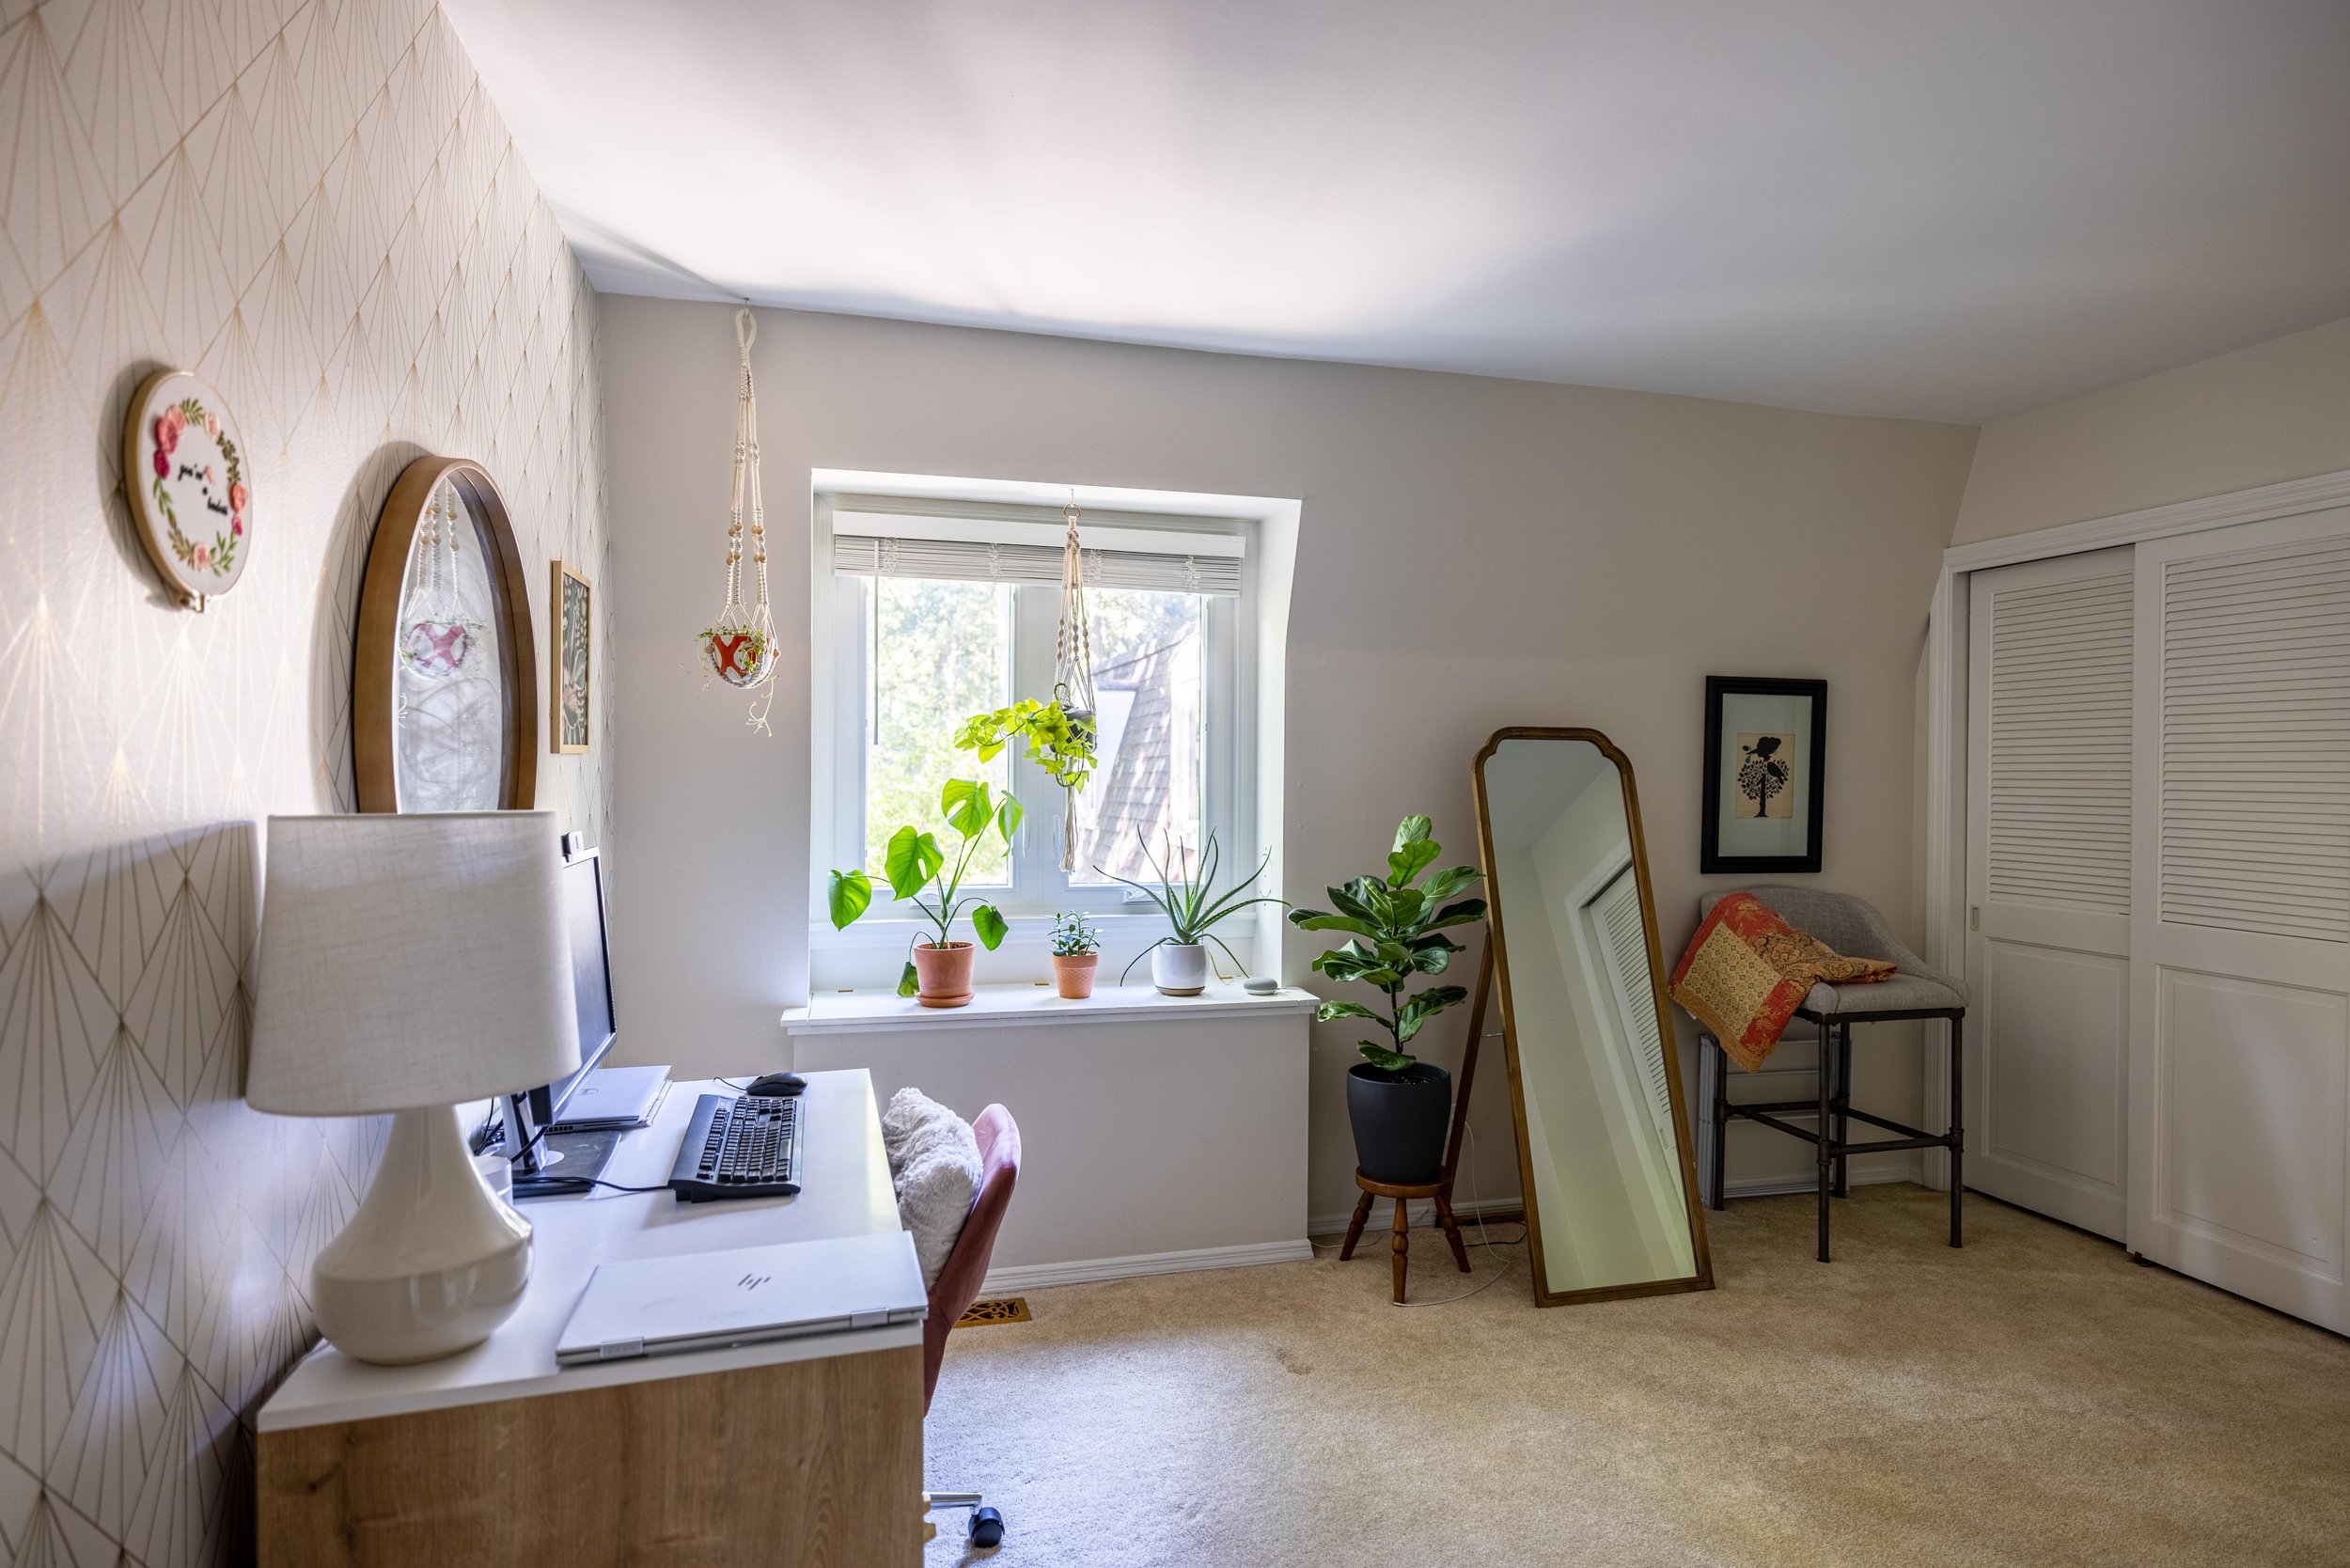
While I really love this room (especially my DIY Sharpie Wall), I’d also like to have a dedicated guest bedroom for when friends and family stay with us. Or an extra place to sleep when Lucius’ snoring keeps me awake…
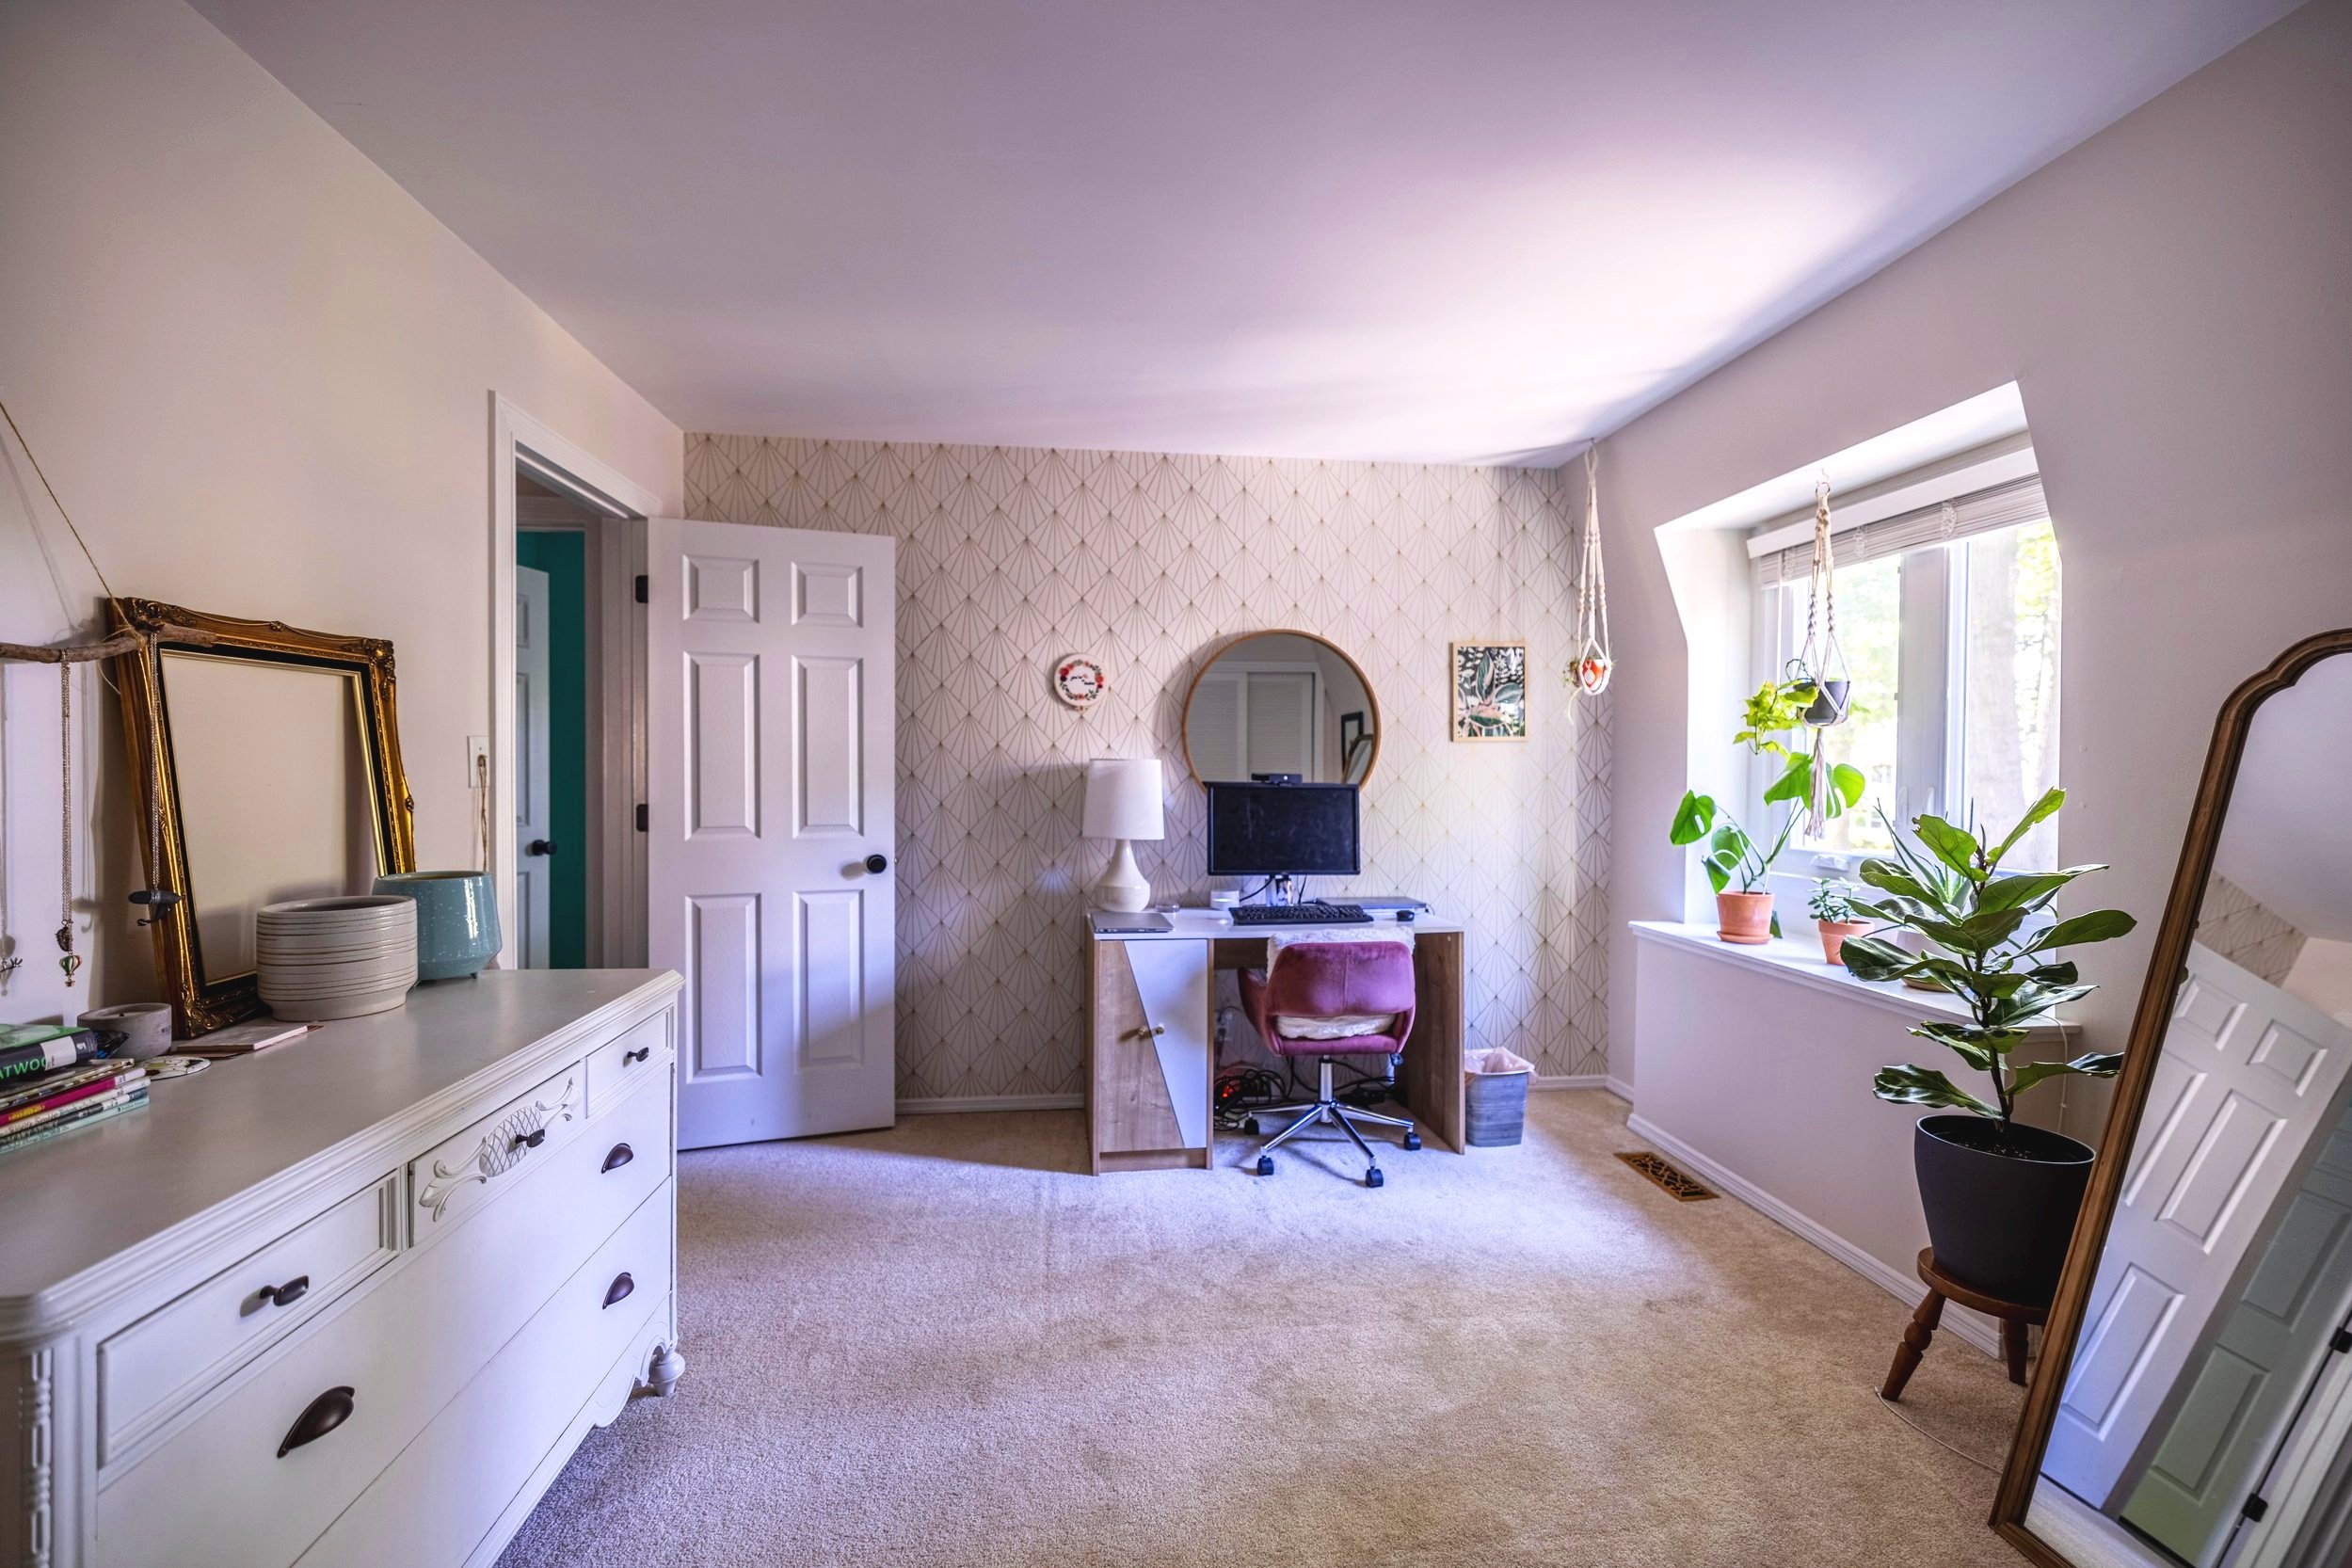
Besides, when we finally finish my walk-in closet in our bedroom, I’ll use this room less frequently.
Related Posts: Designing a Home Office / DIY Sharpie Wall Tutorial
Our Oldest Daughter’s Bedroom
One of the first things I did when we moved into this house was tackle our oldest daughter’s bedroom to make this house feel comfortable for her right away. Aside from adding items here and there, not a lot has changed in this room since then.

Related Posts: Unicorn Room Makeover / Ombre Wall Tutorial
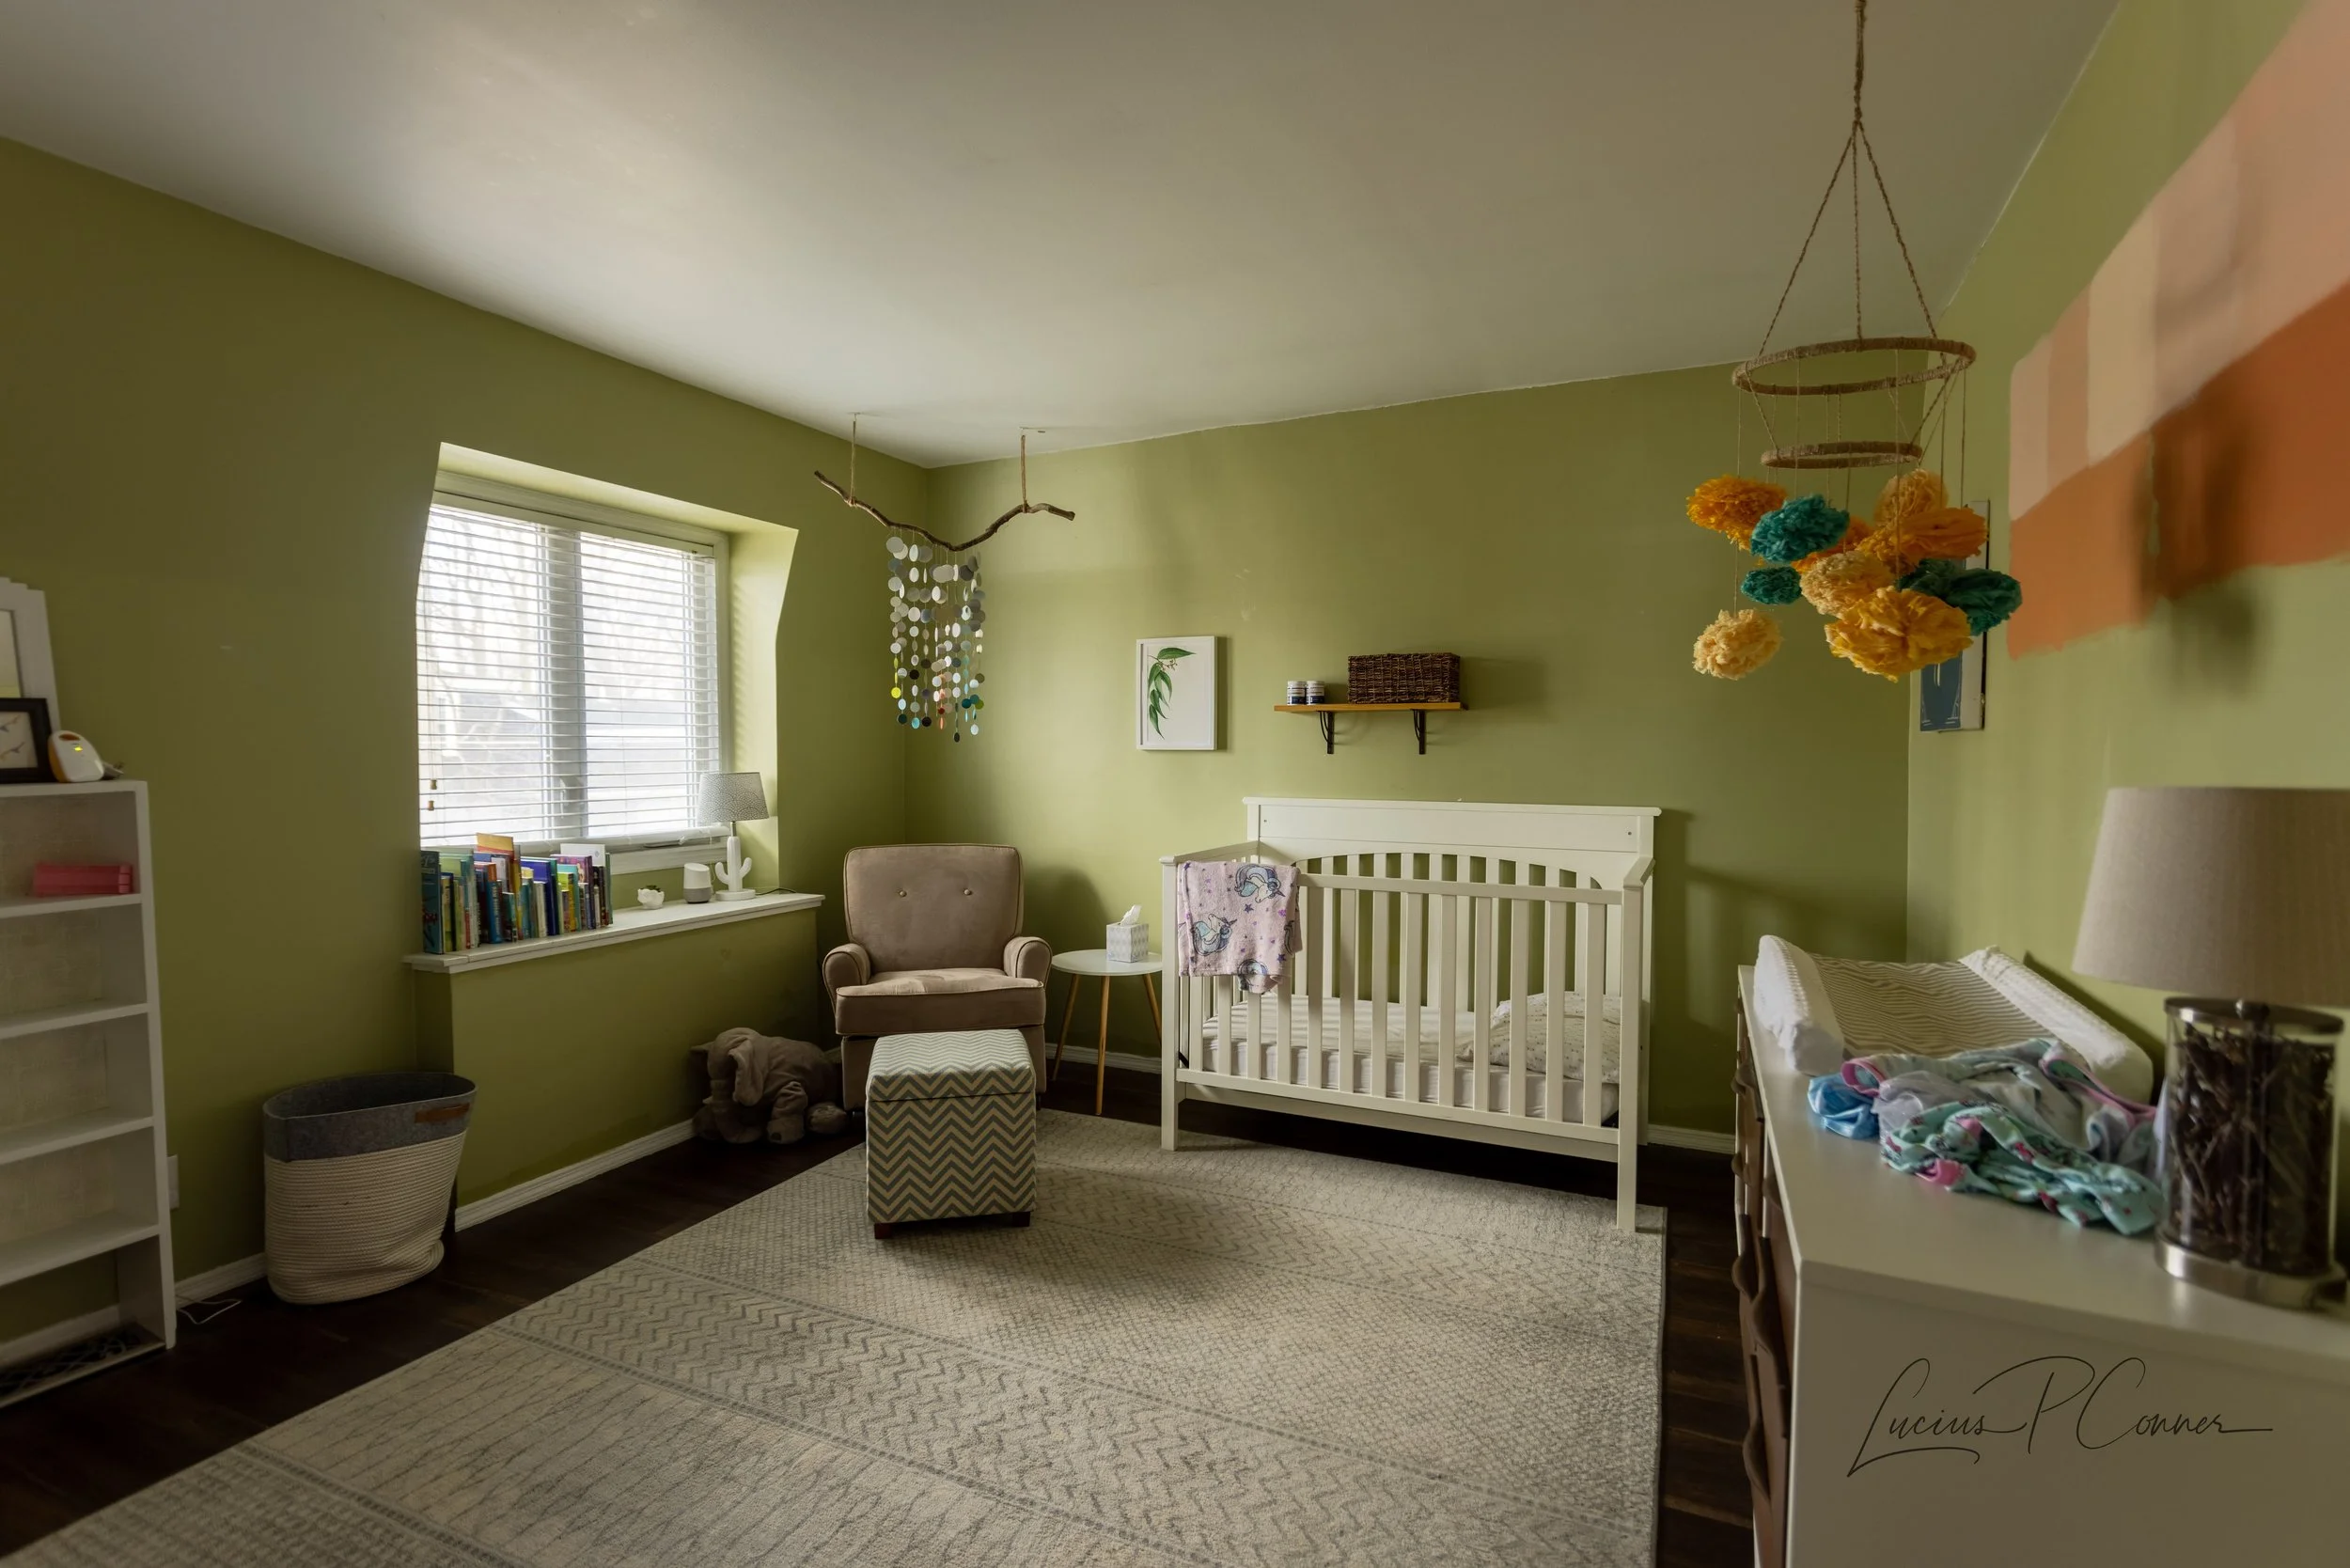
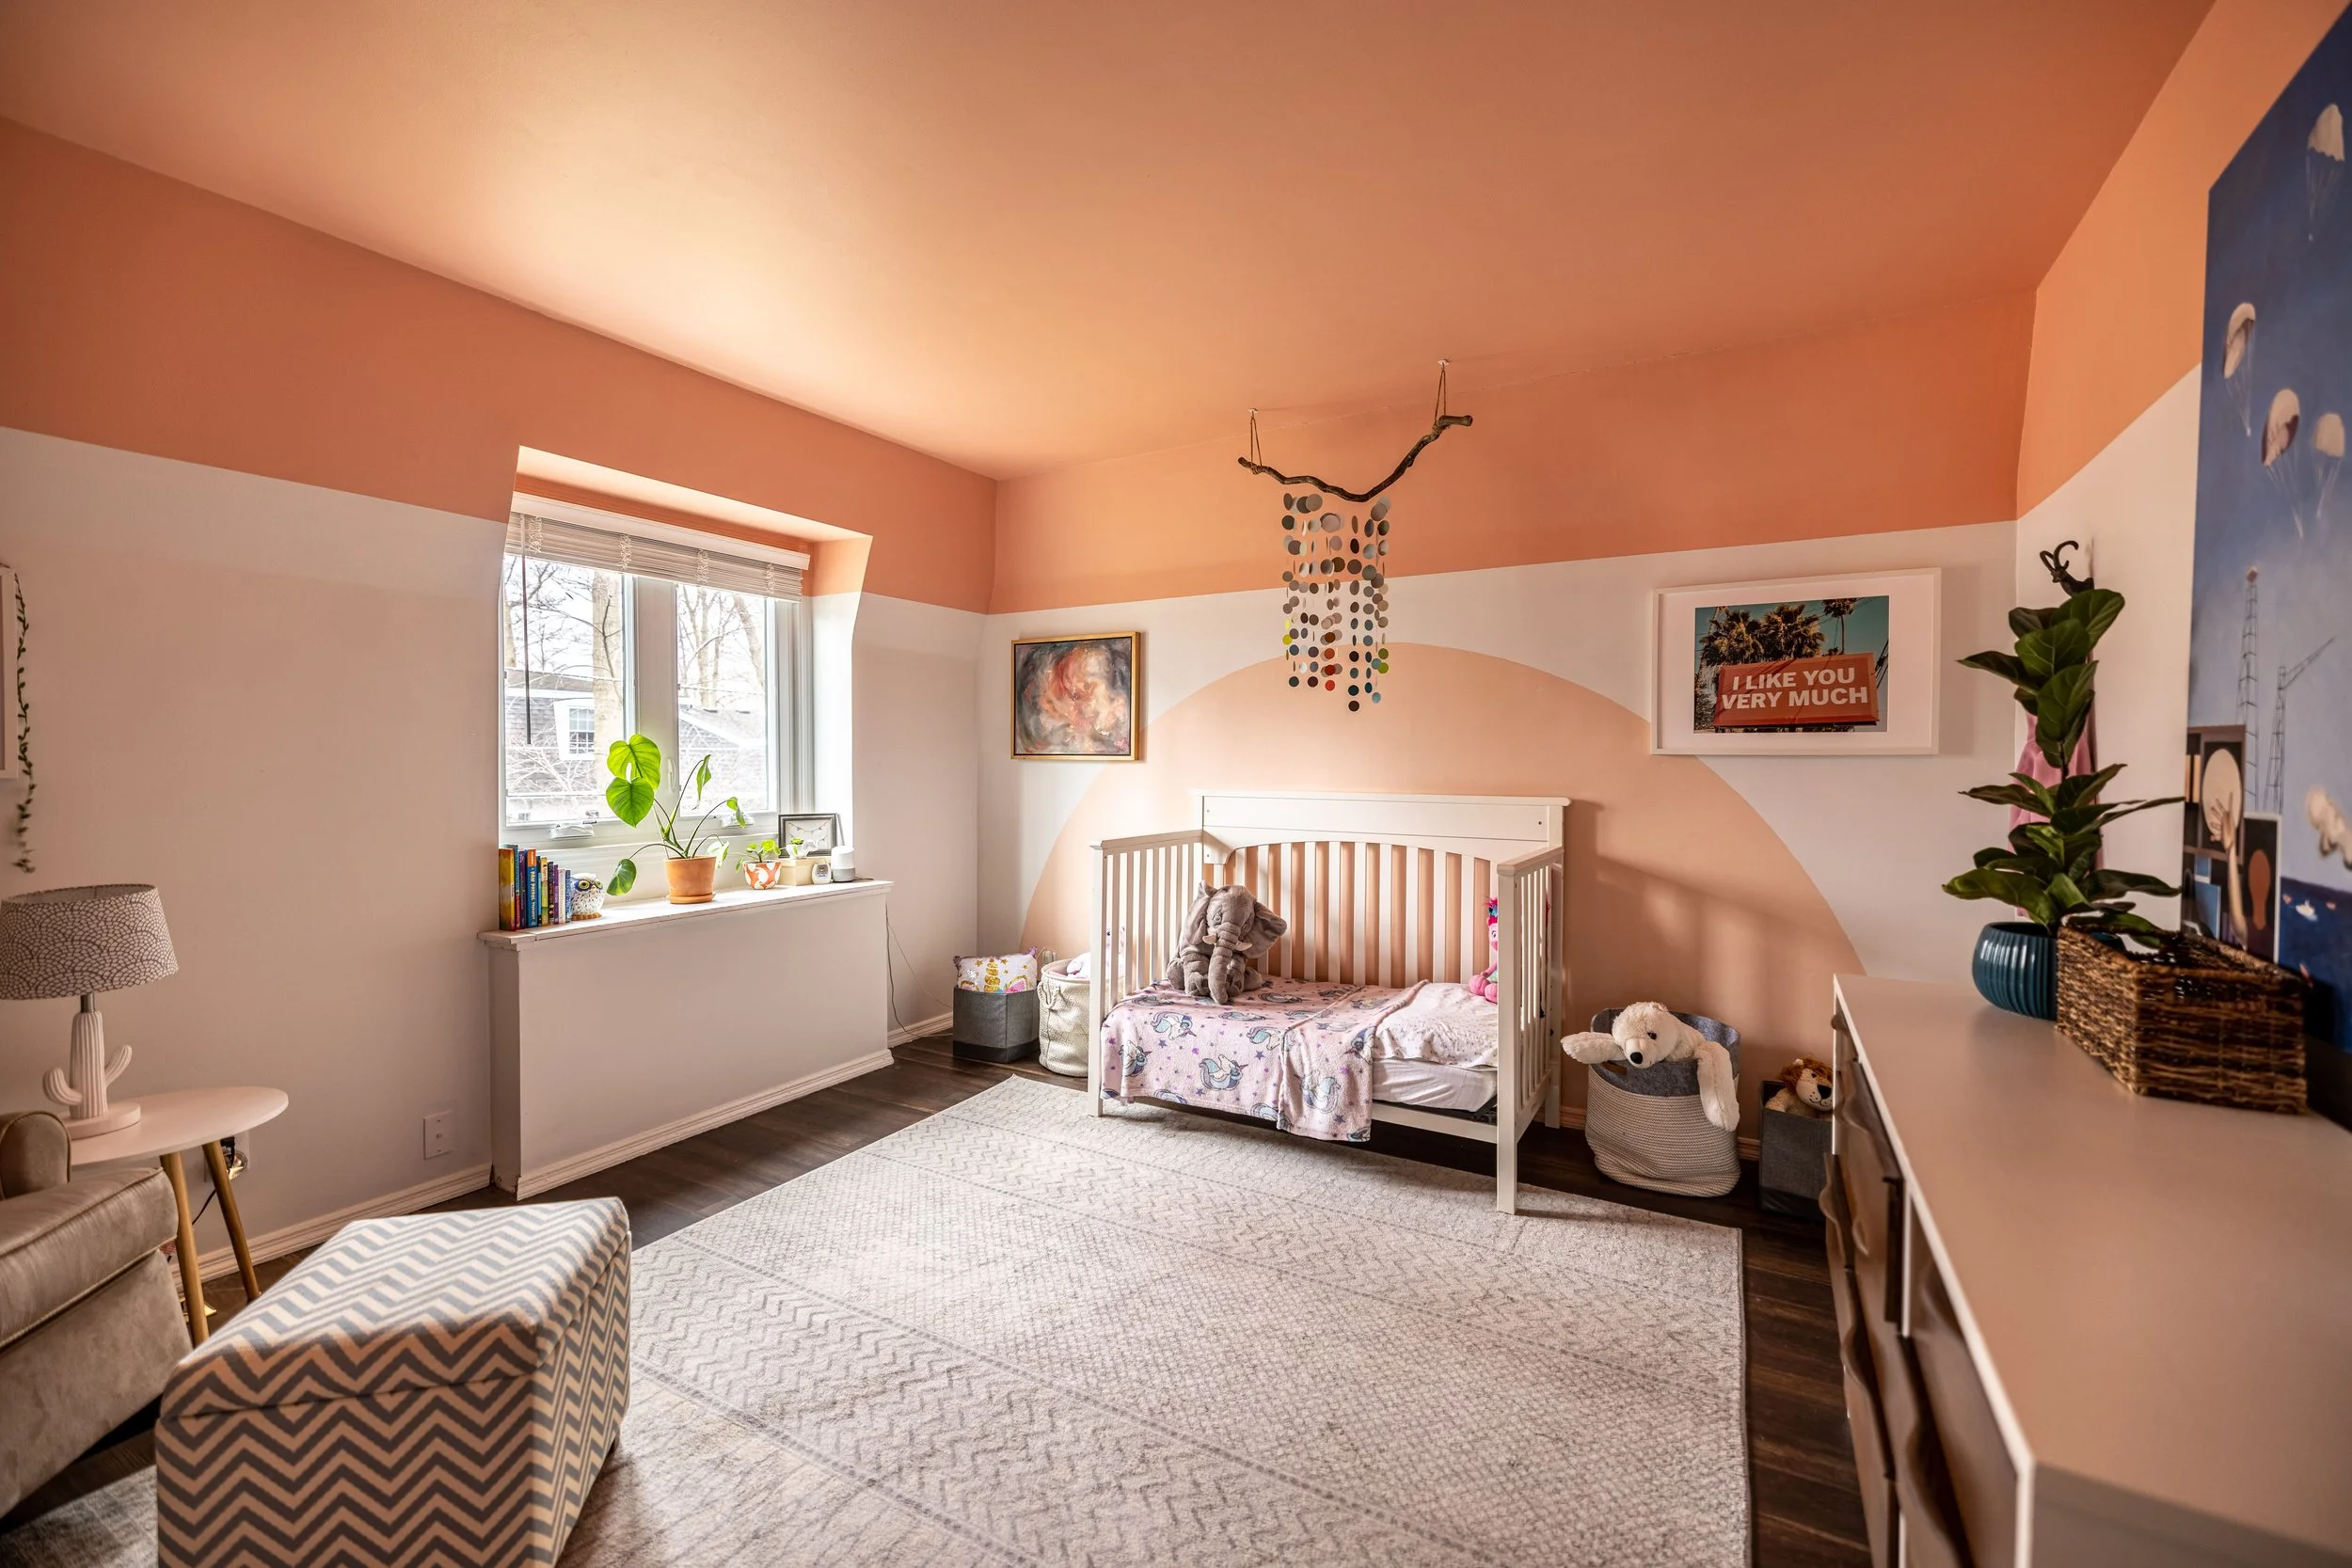
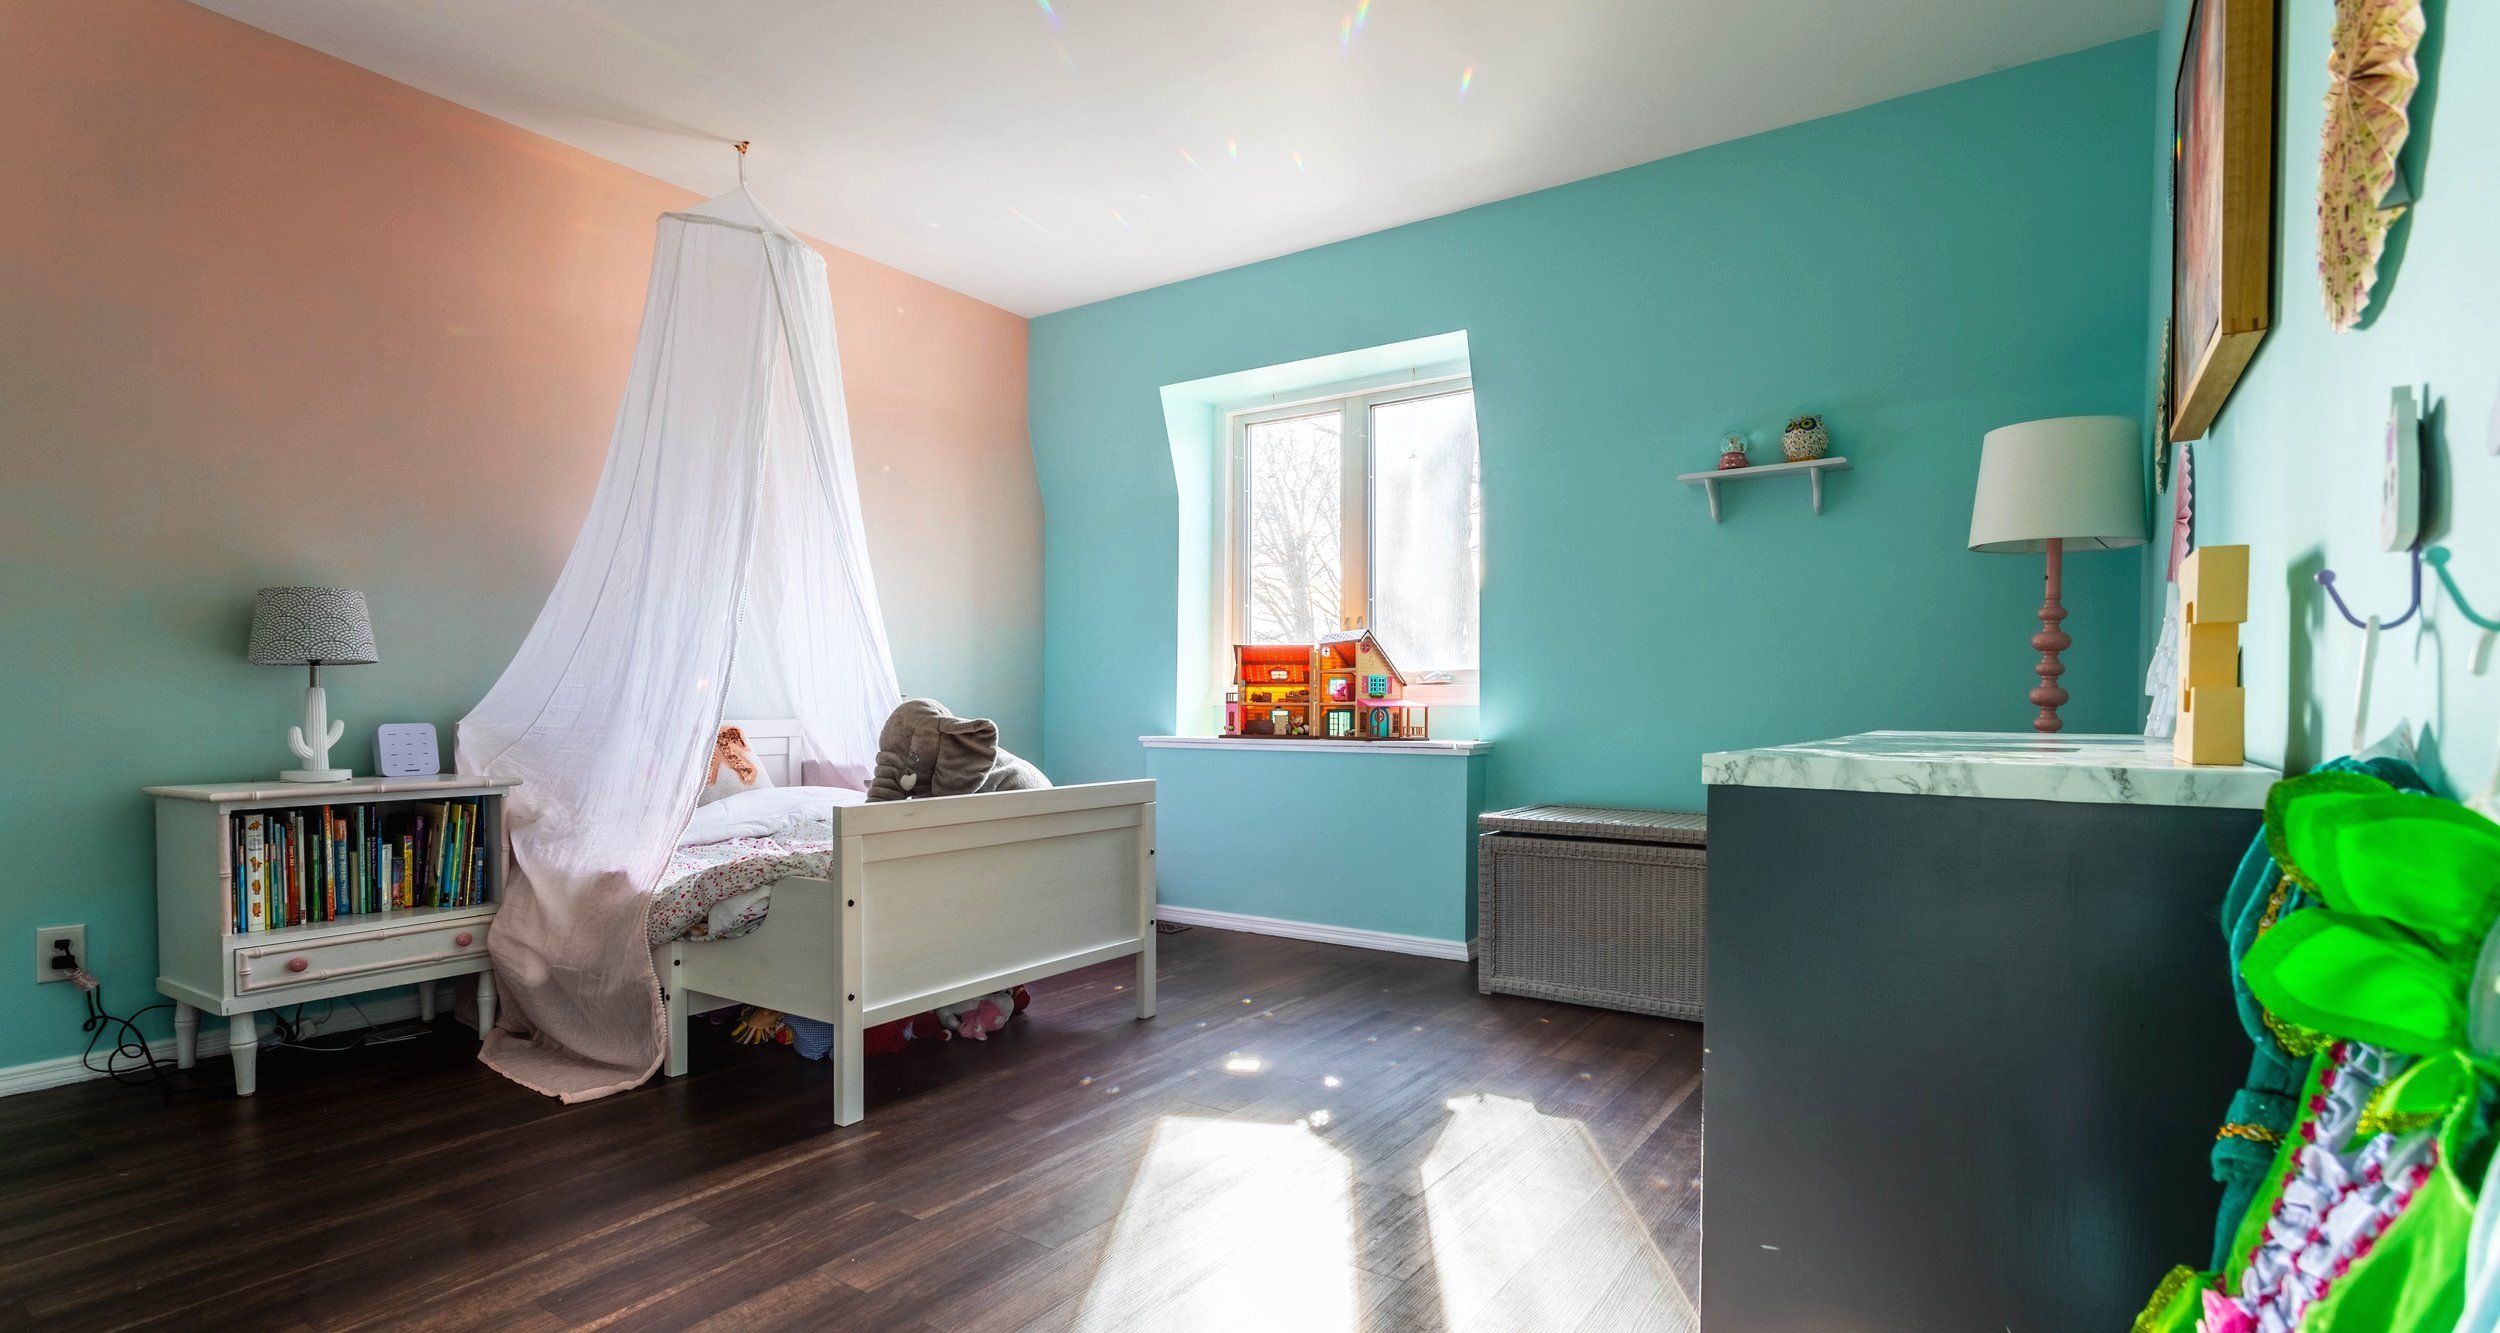
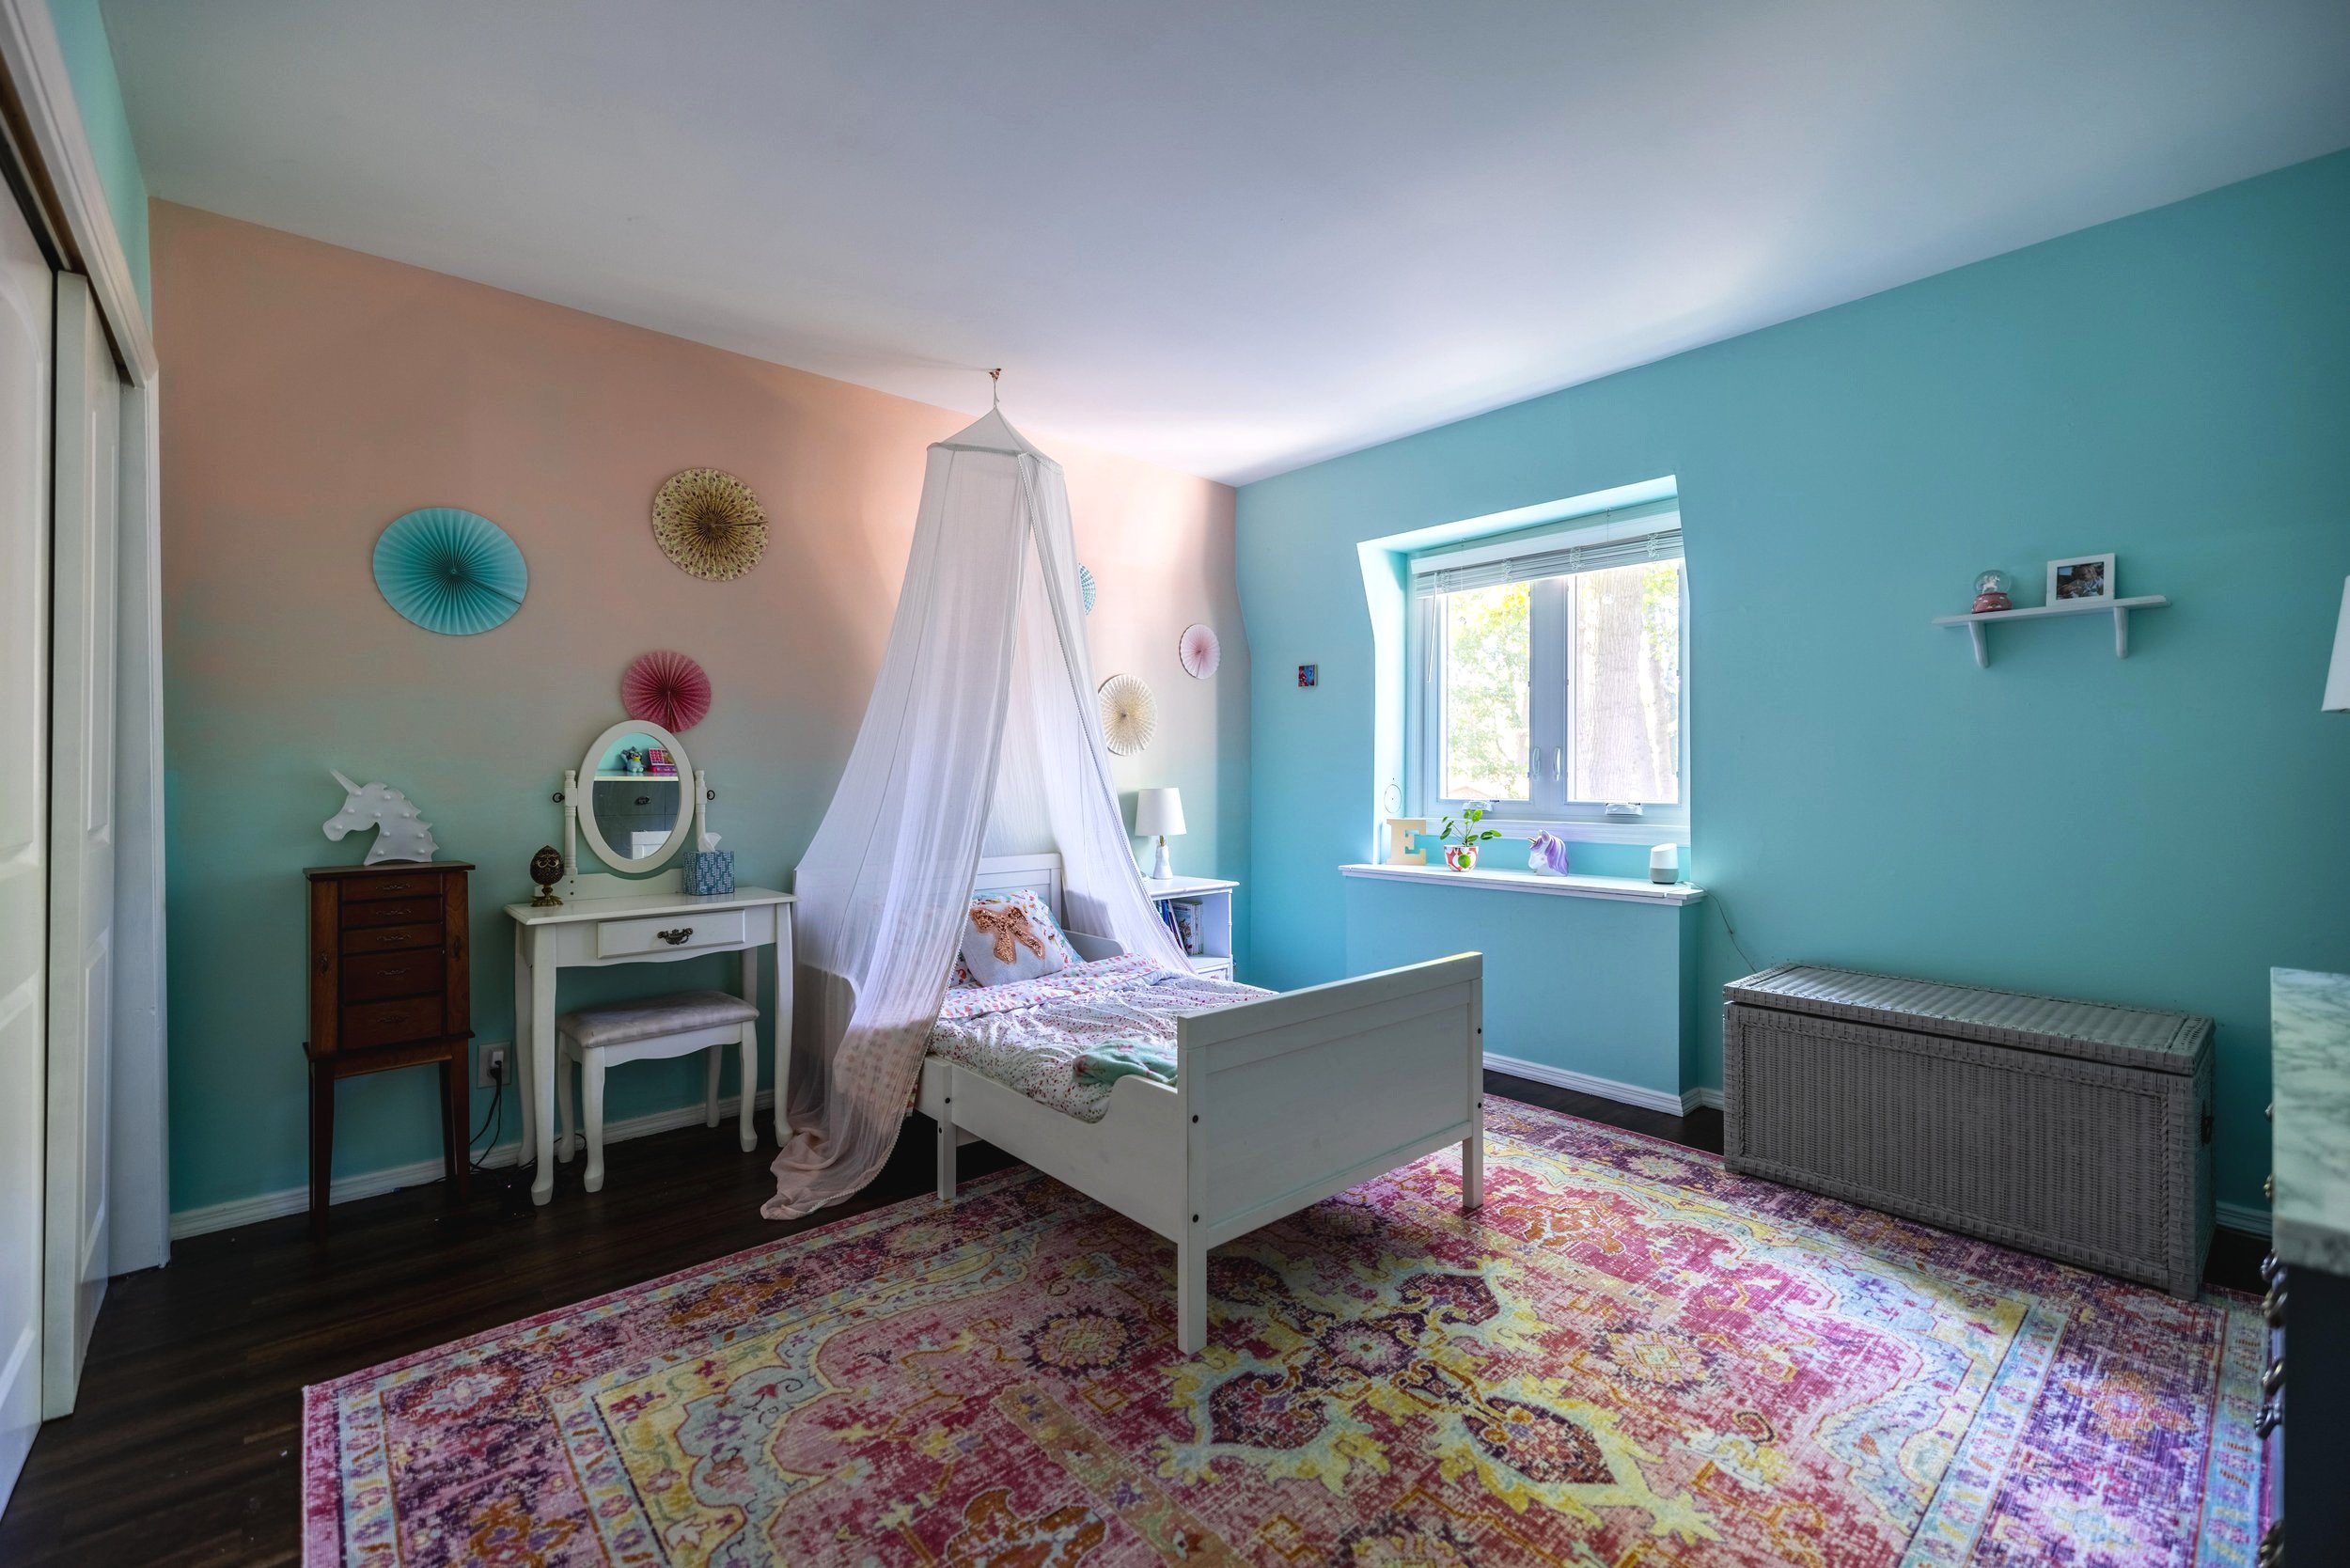
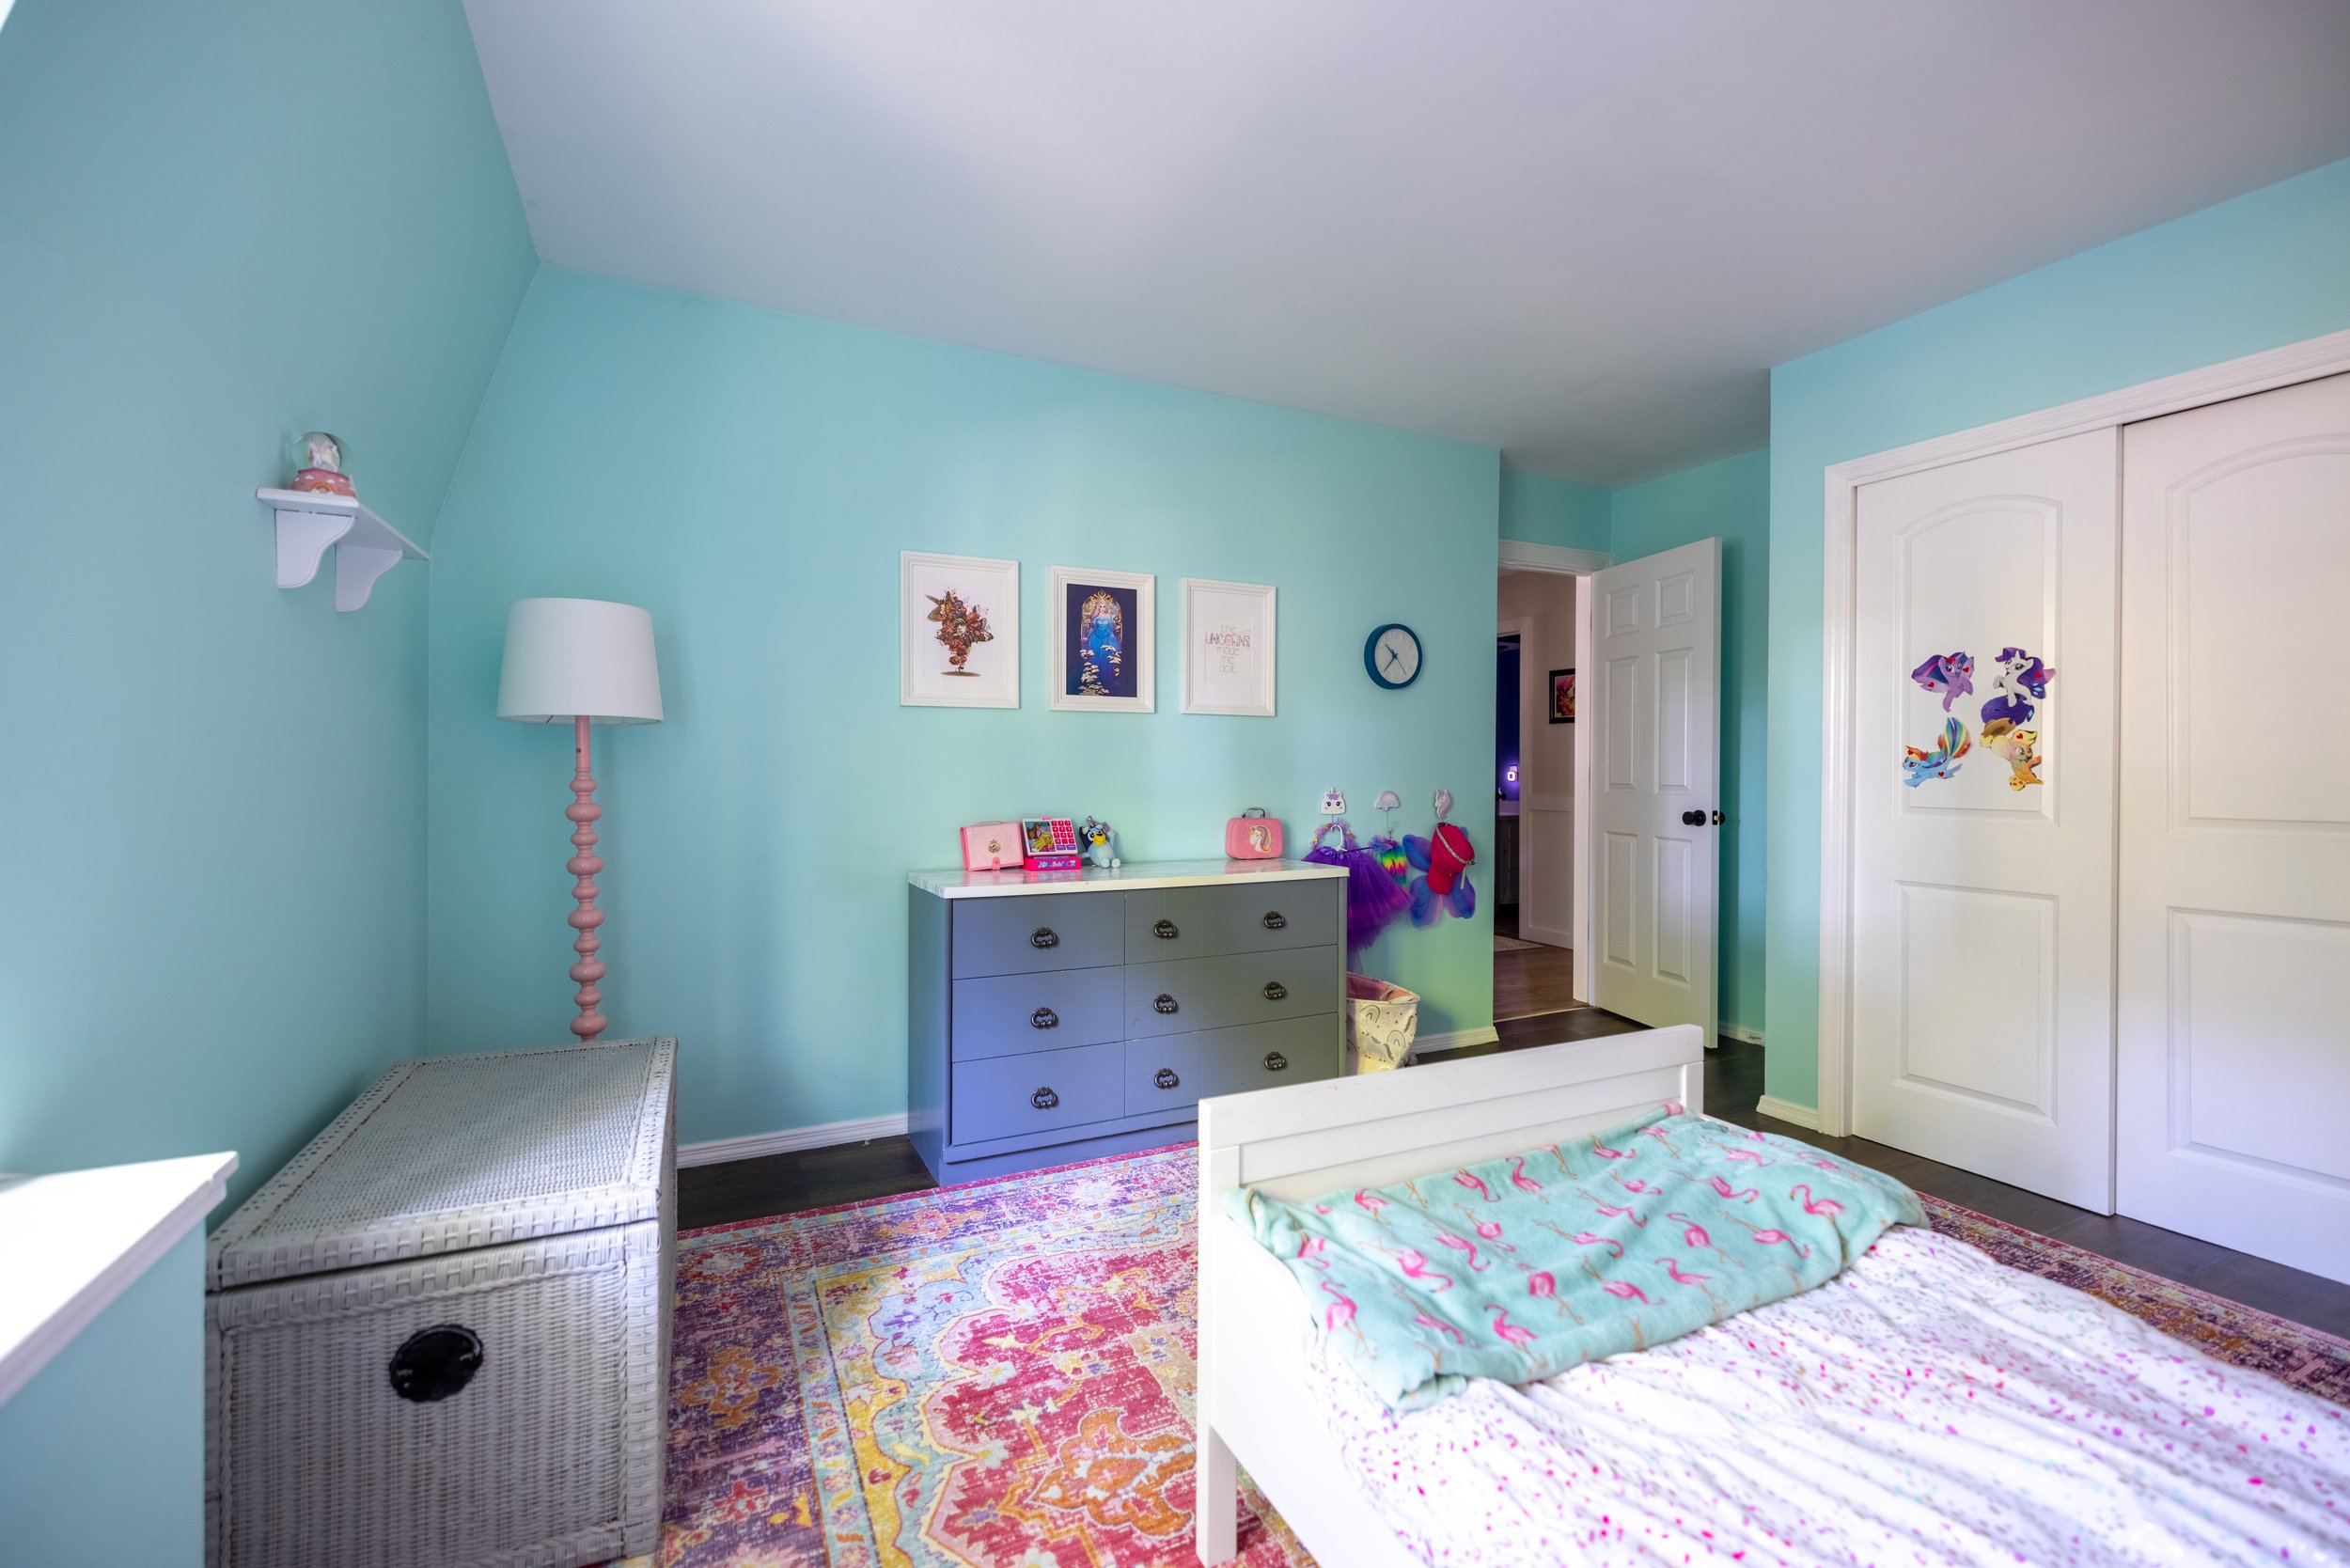
Our Youngest Daughter’s Room
Last summer our younger daughter’s room (finally) got a makeover. At that time, I shared a big ‘ol blog post, but here’s a before/after shot anyway…


Related Posts: Toddler Bedroom Makeover
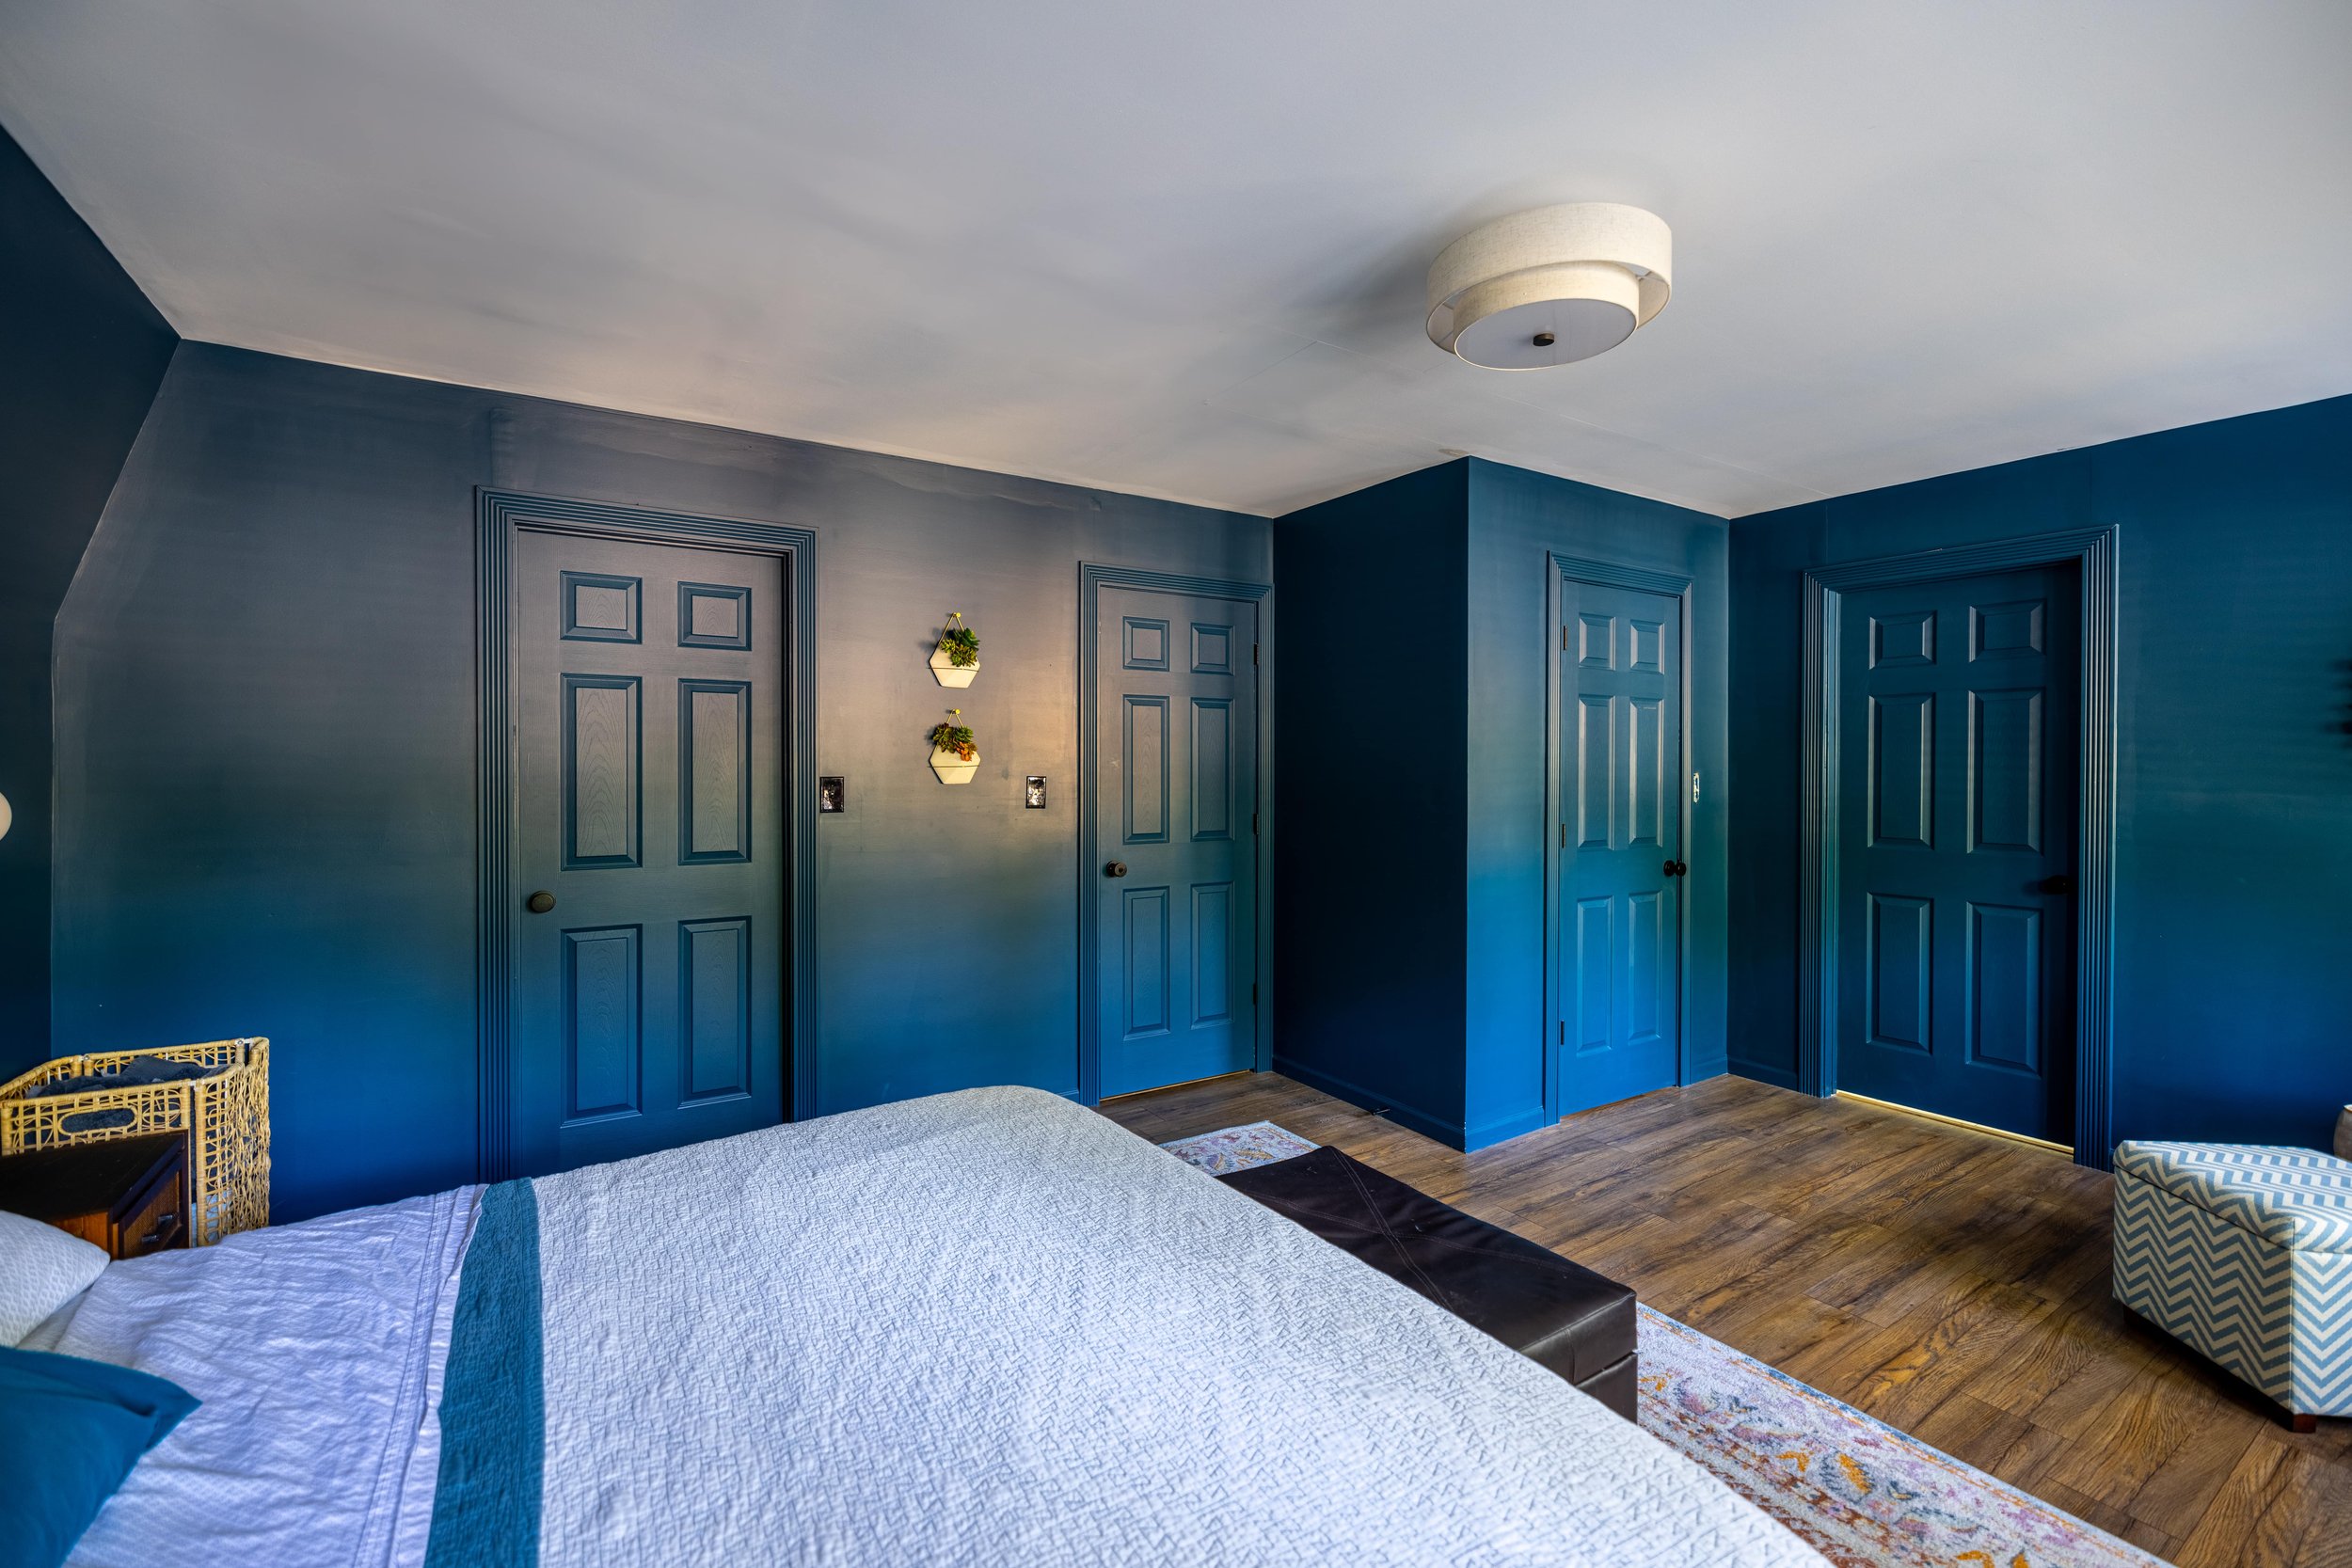
The Master Bedroom
Our master suite went through a total reconfiguration after we bought this house. I never actually did an official “reveal” of the bedroom so…. here’s your reveal? (Cue anticlimactic “Ta-da!”)
I still don’t necessarily consider it done (new furniture is definitely on my list!), but we had a blast taking pictures from the same angles we took them from originally to show how the footprint changed (honestly though, pictures just don’t do it justice).
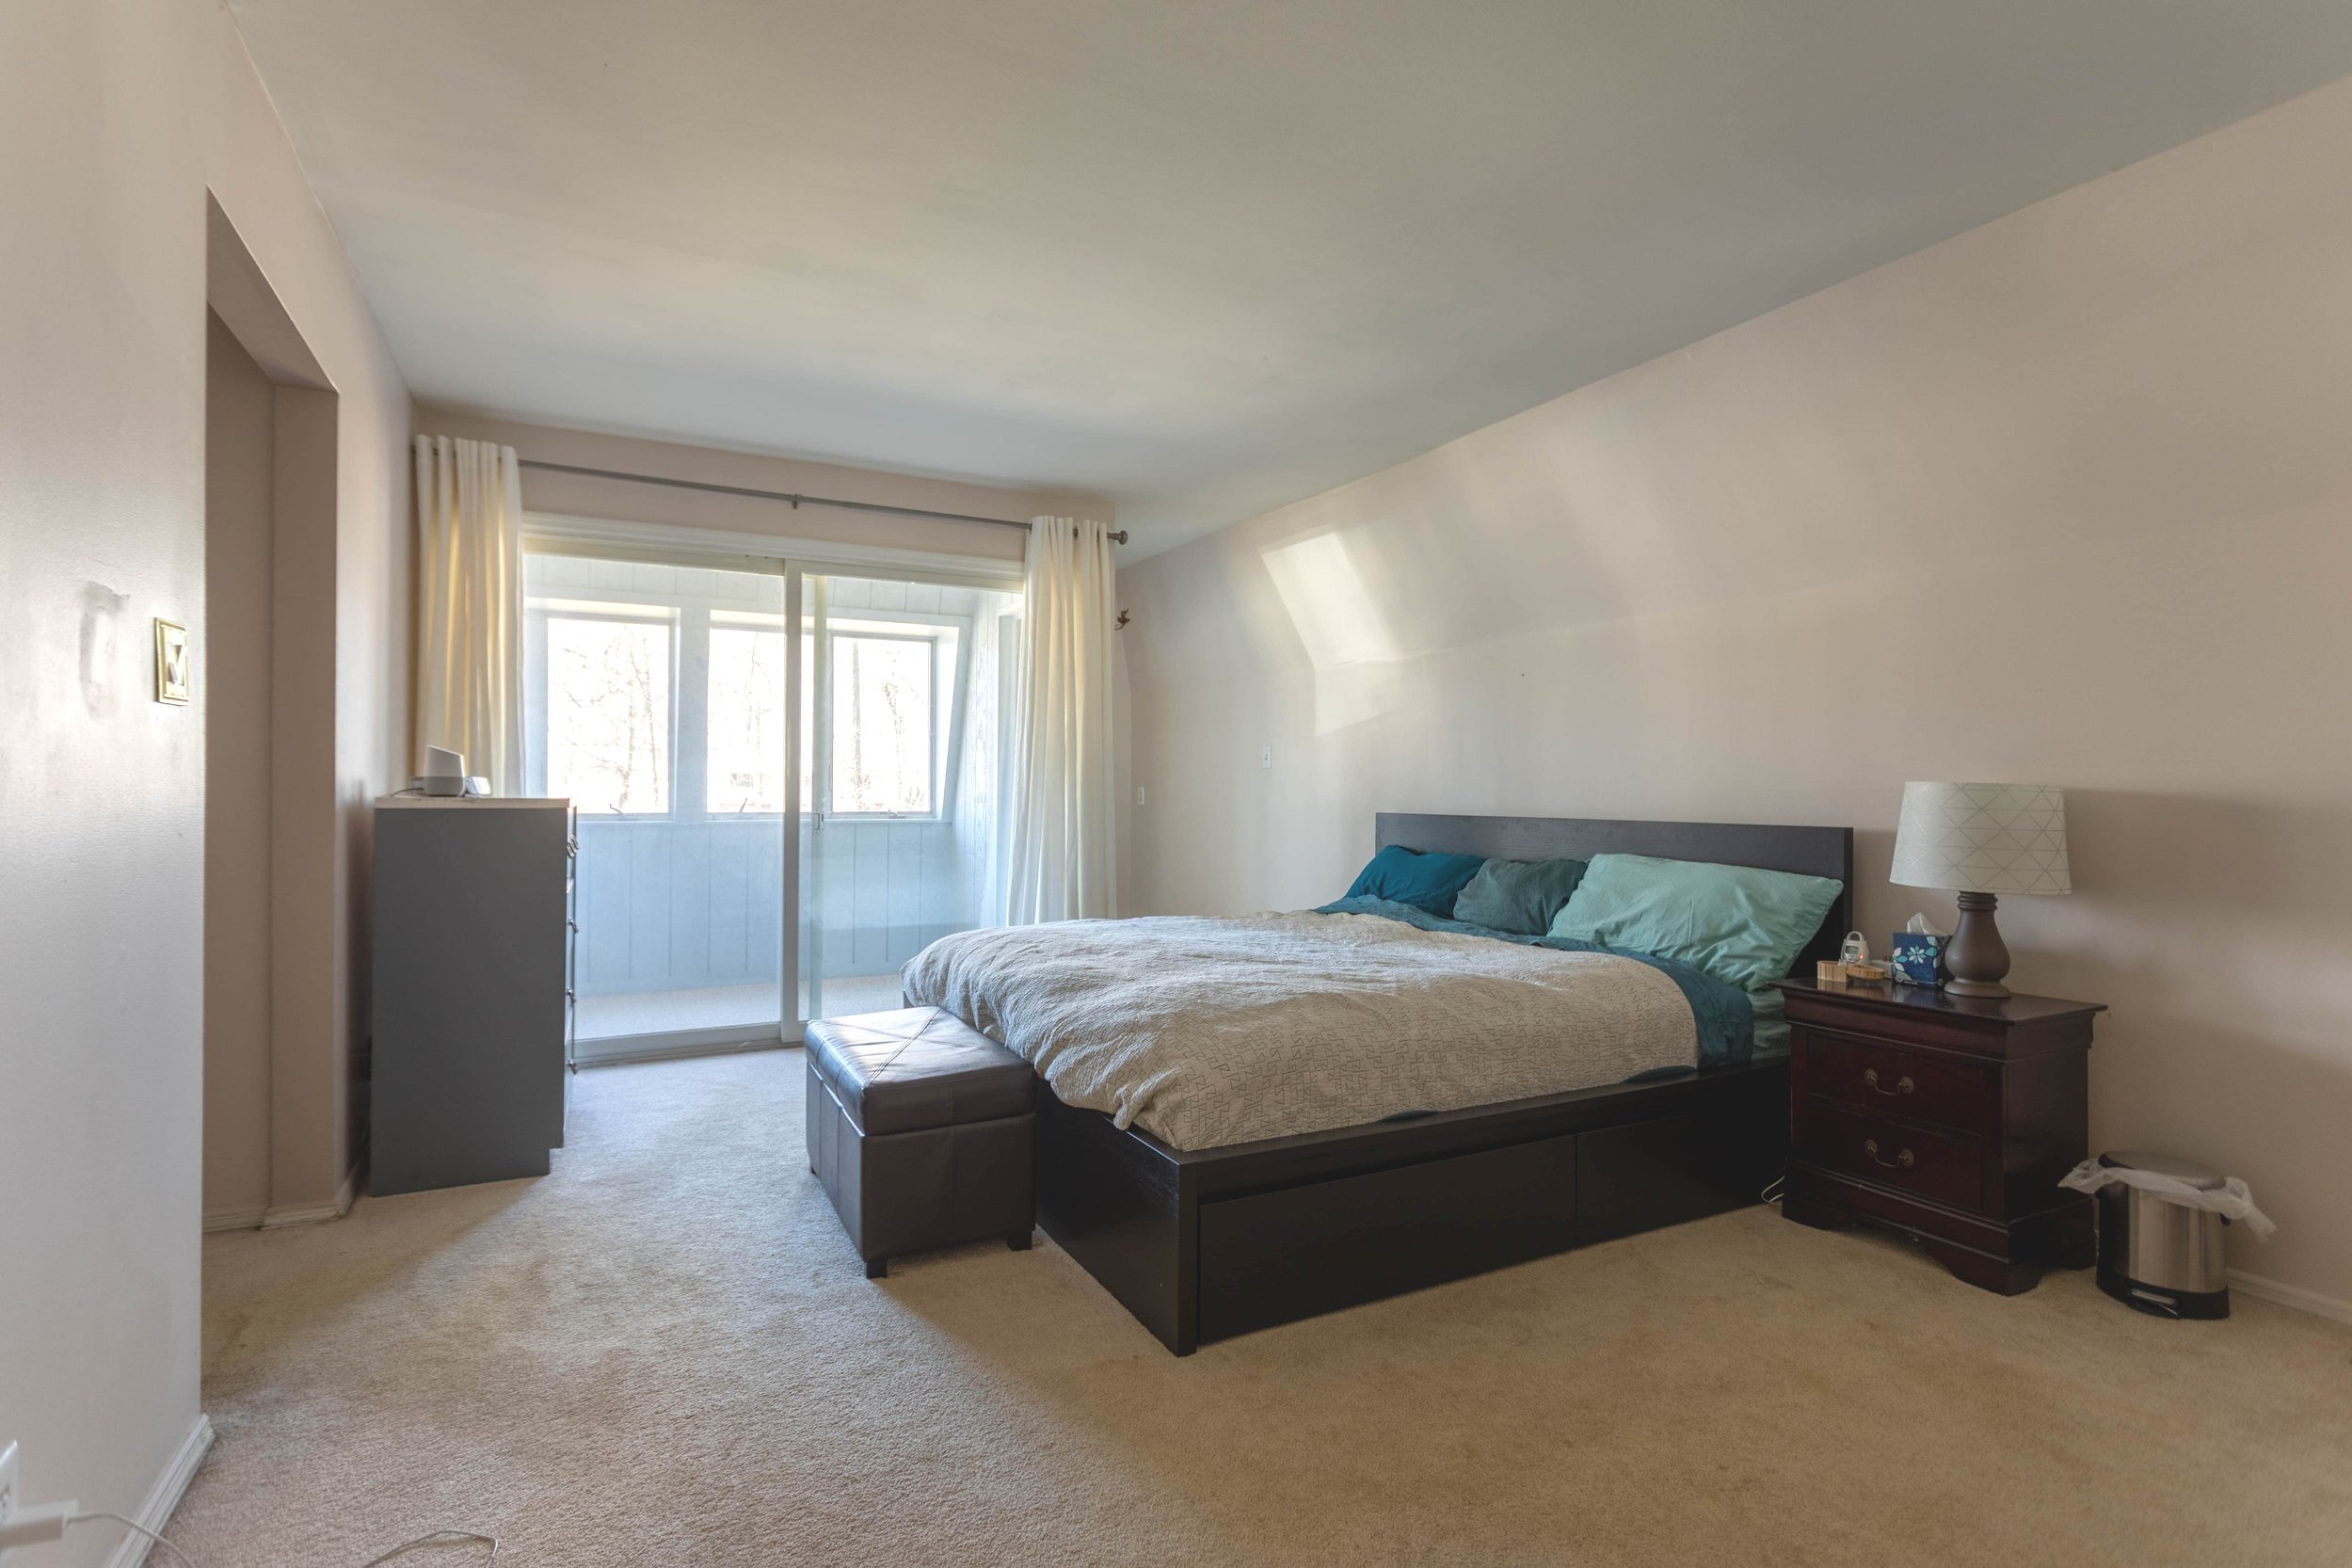
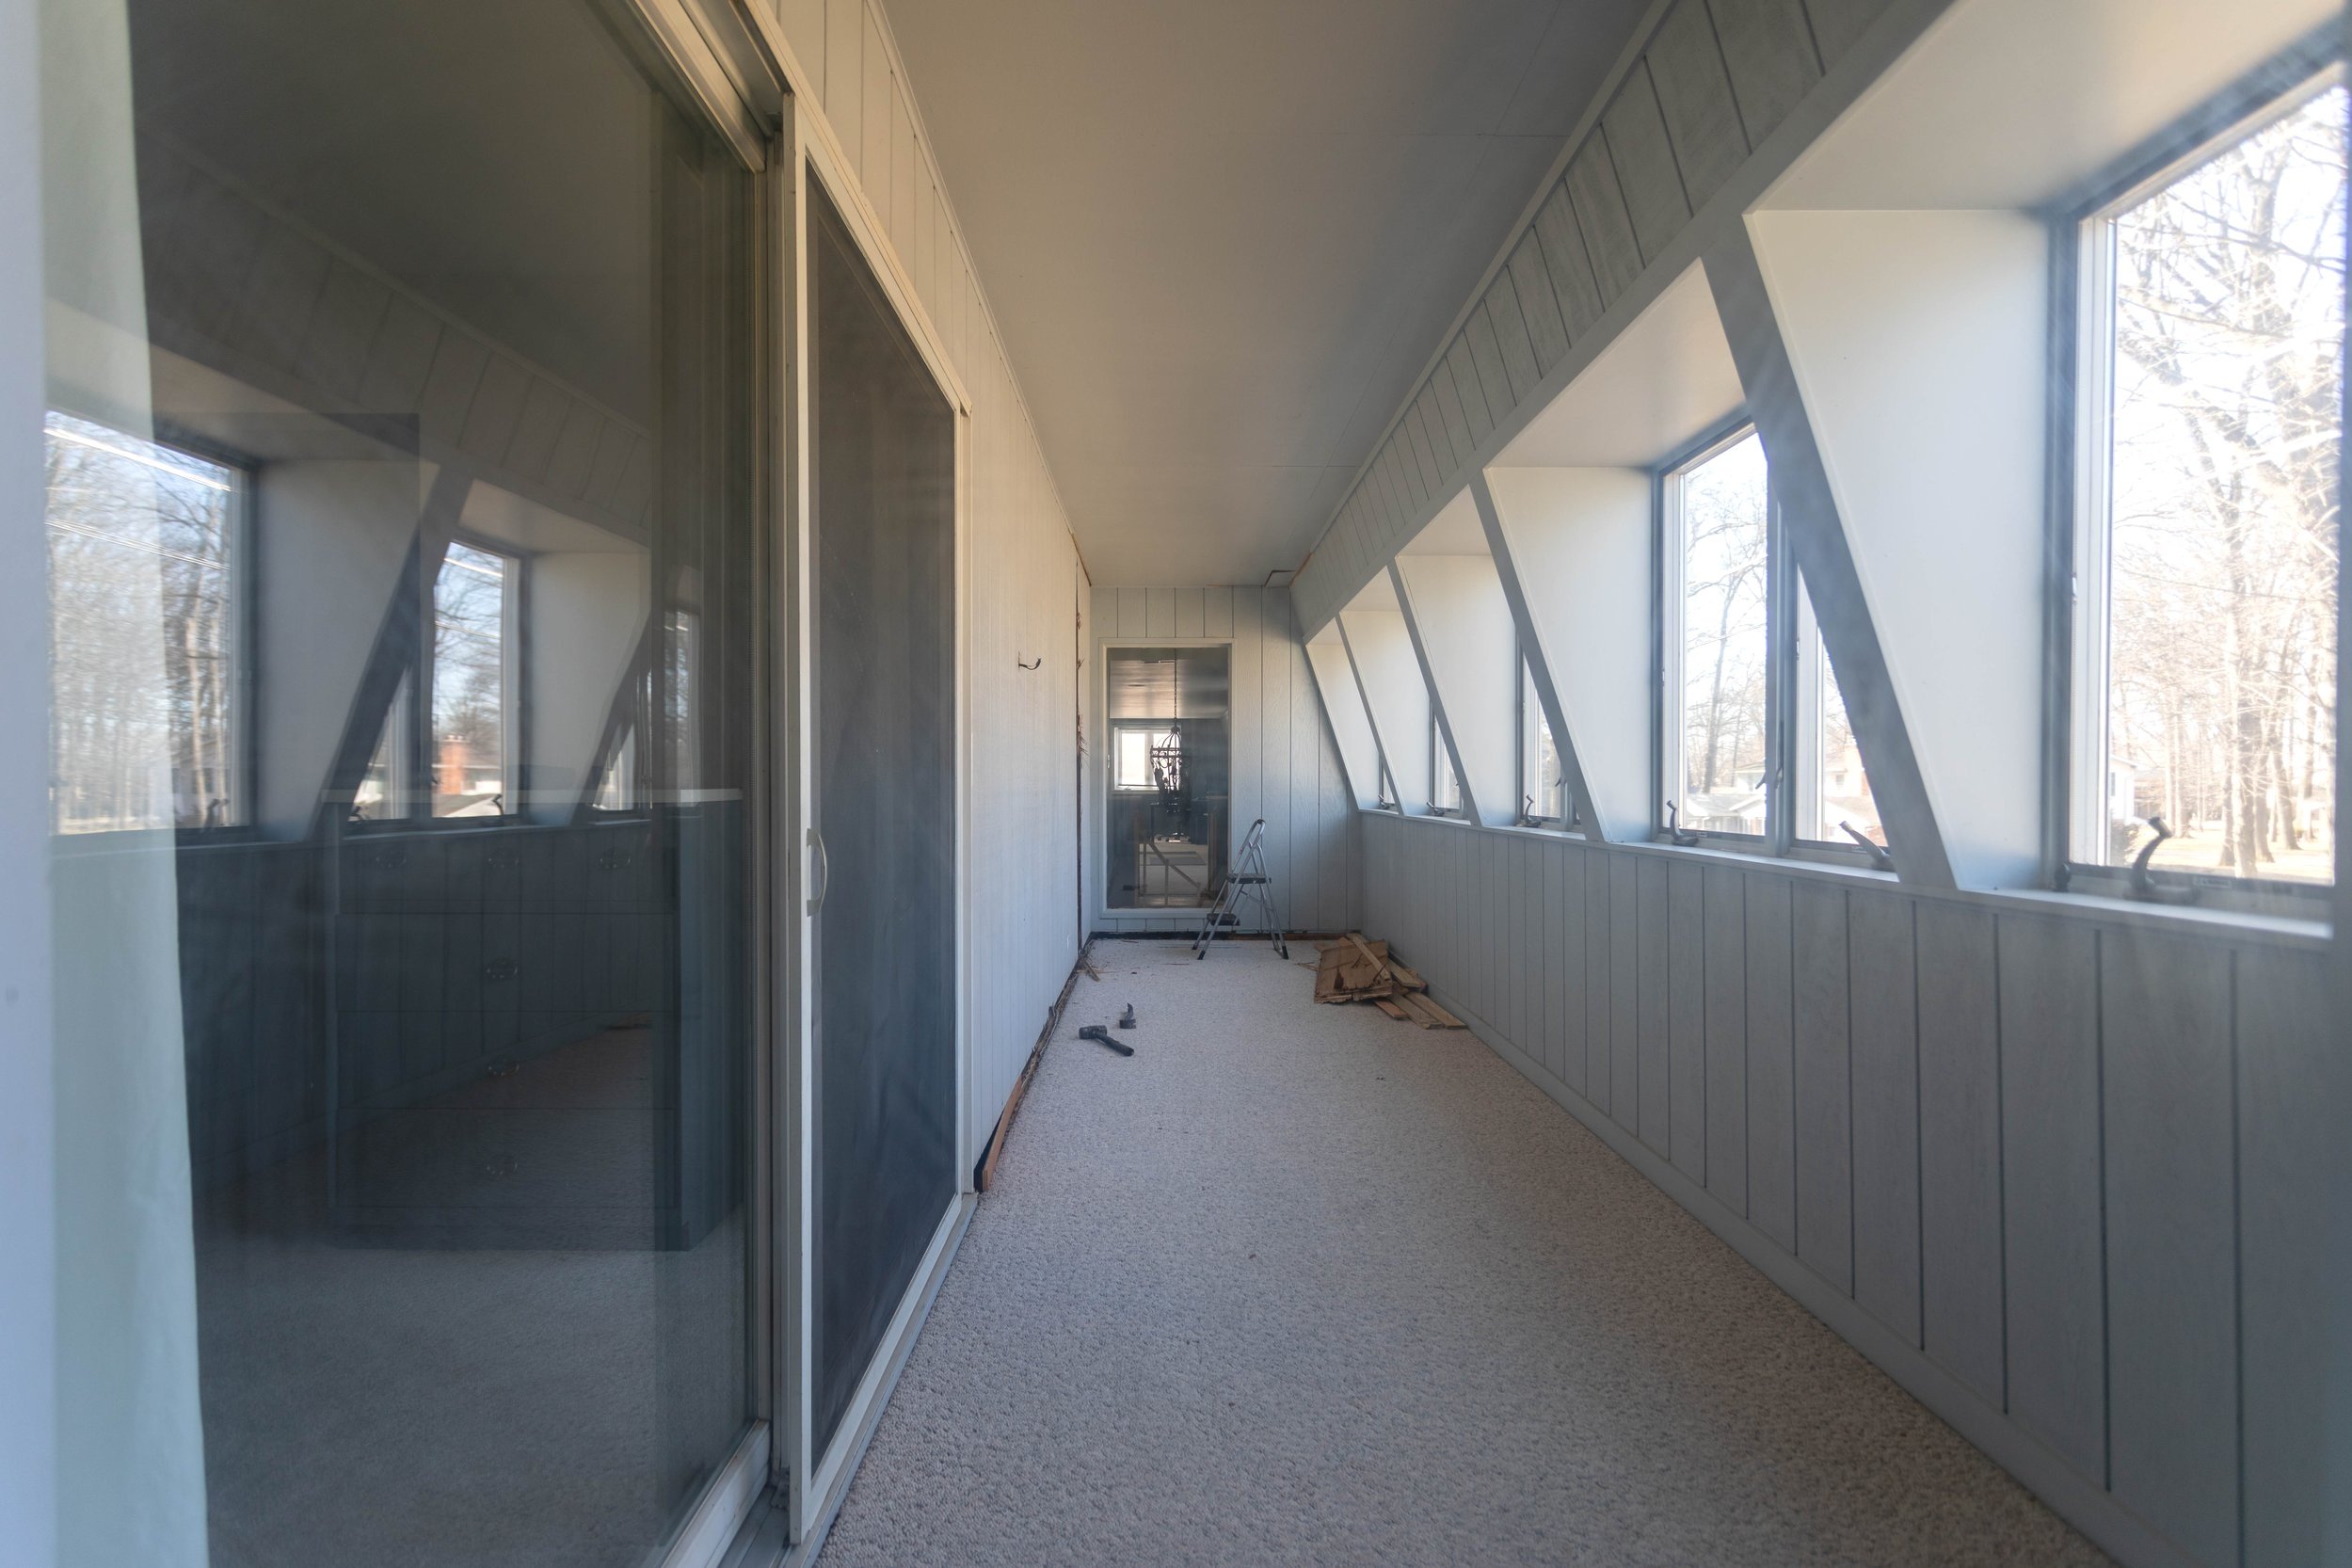
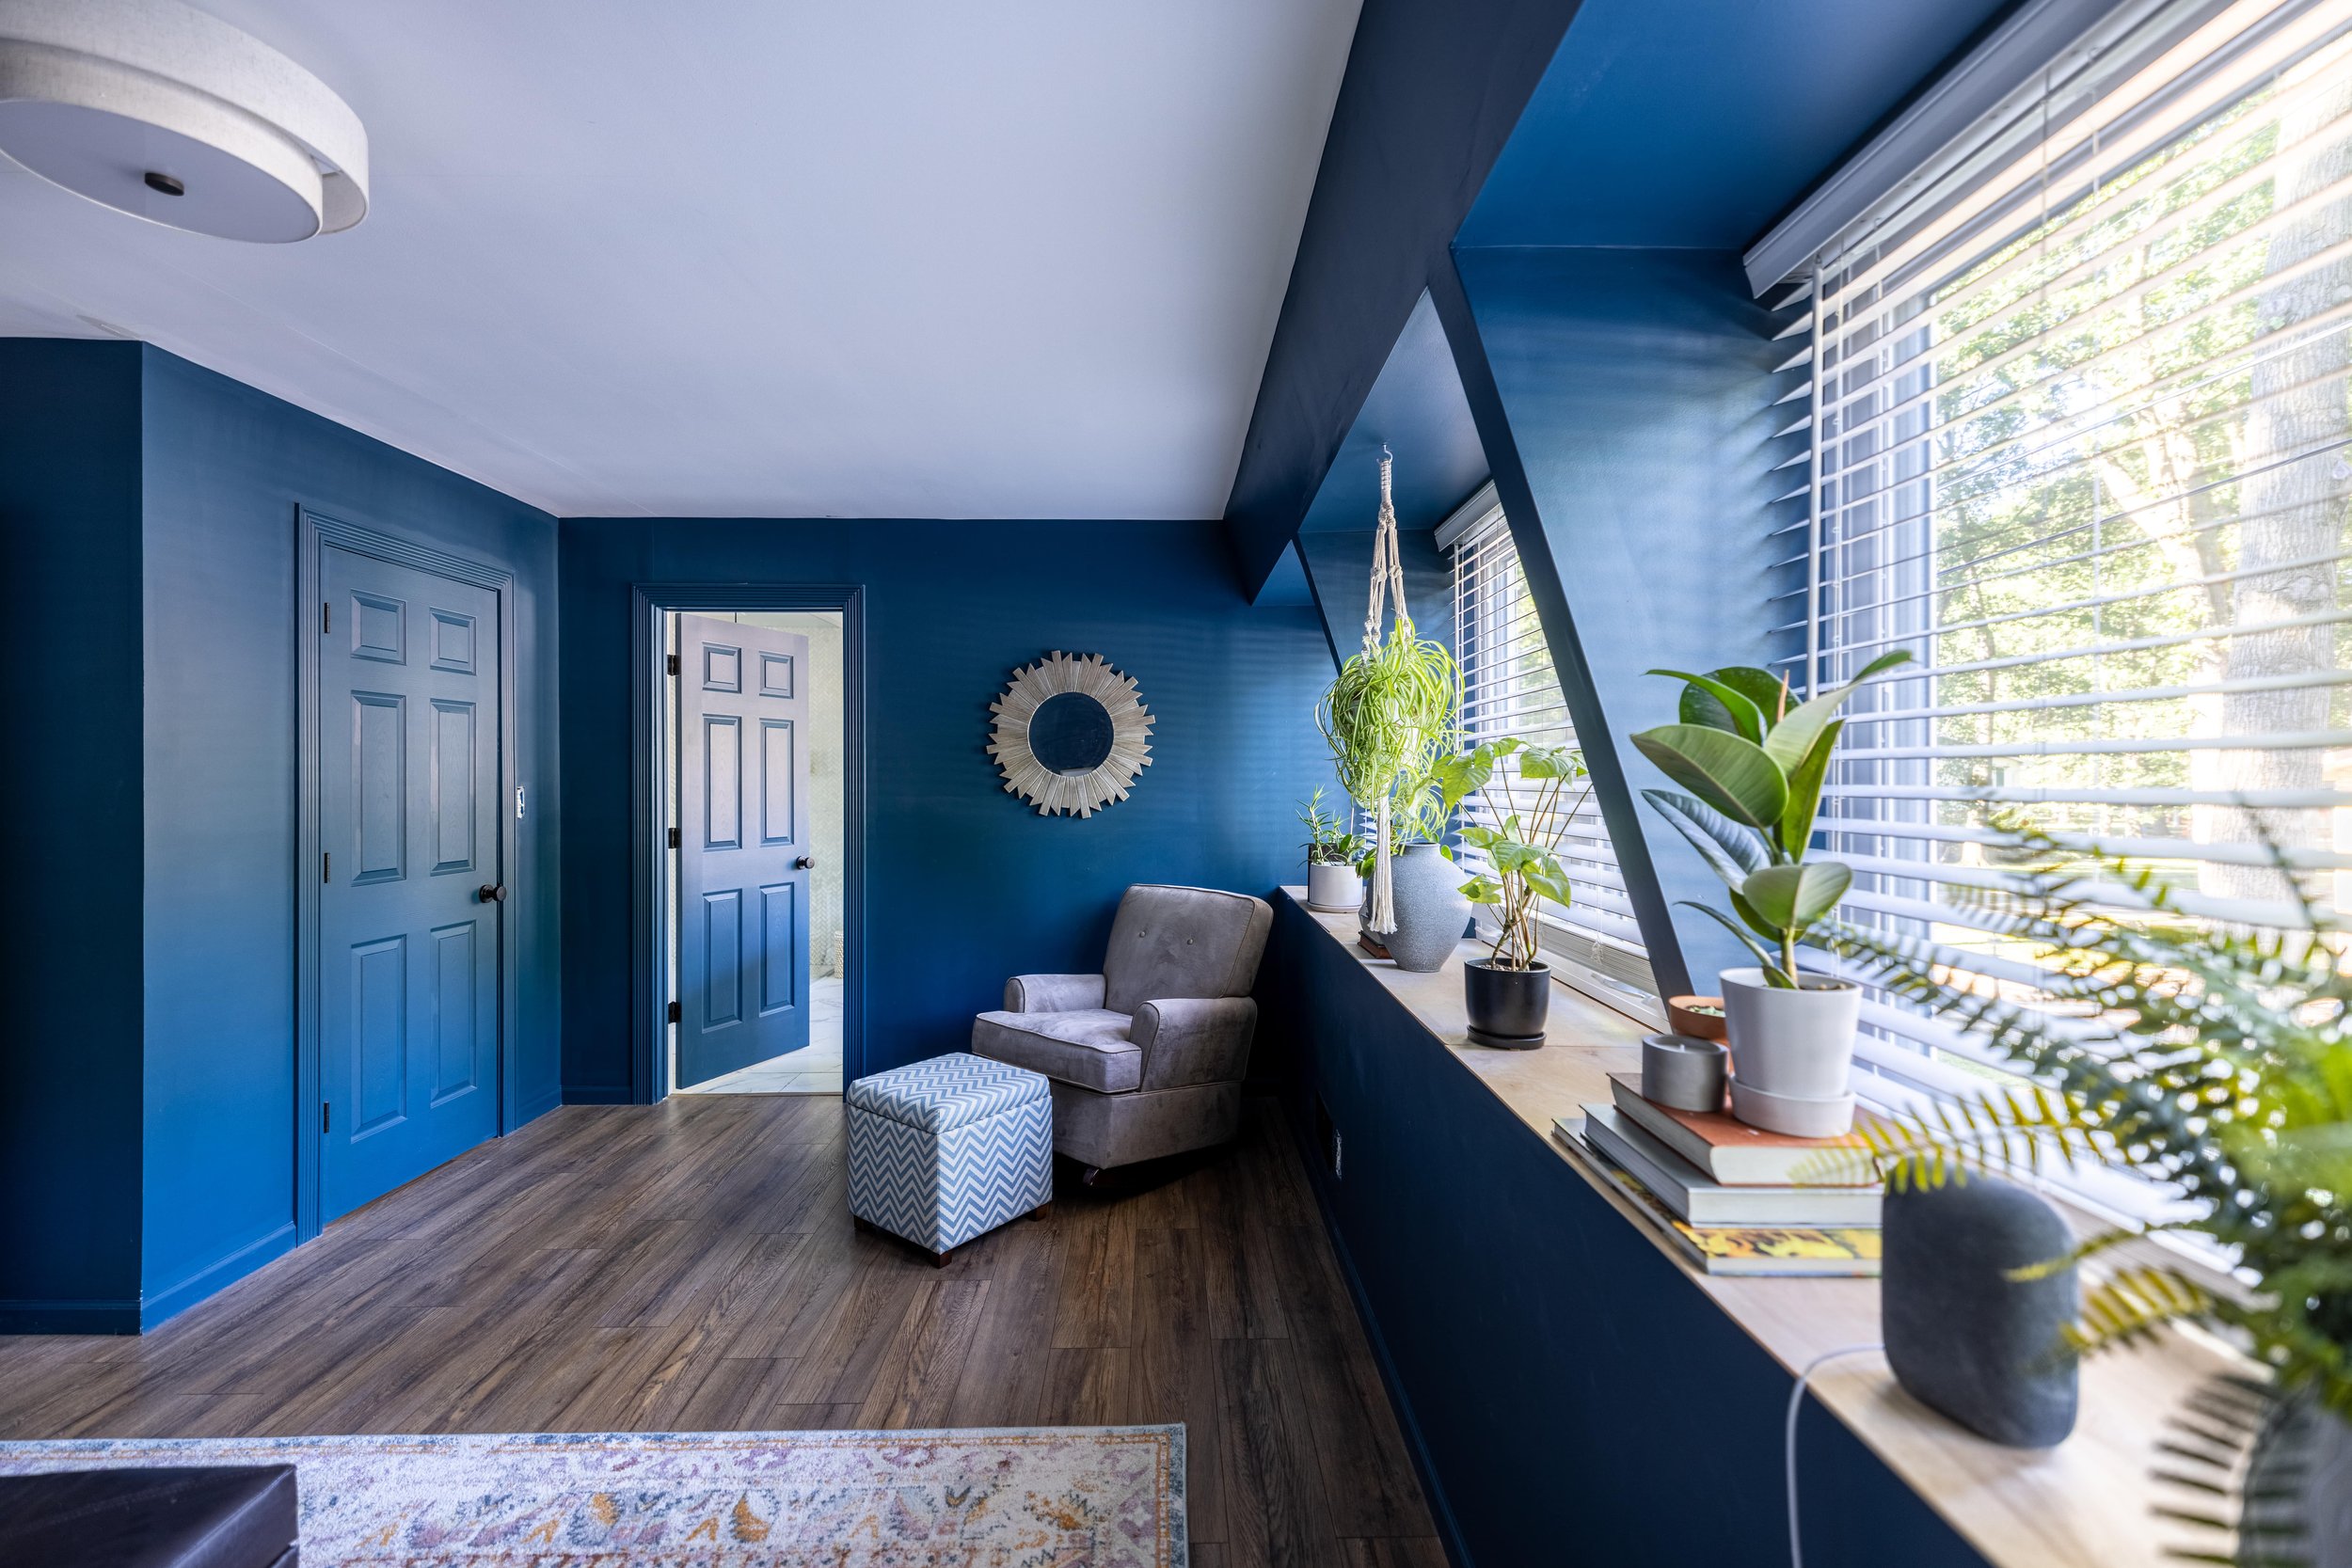
As you can see, allll those glorious windows that are now in our current master suite (and master bath) were once hidden in that long, narrow sunroom. Aside from a little bit that came through the sliding glass doors in the first picture above, most of the light was blocked in the original layout.
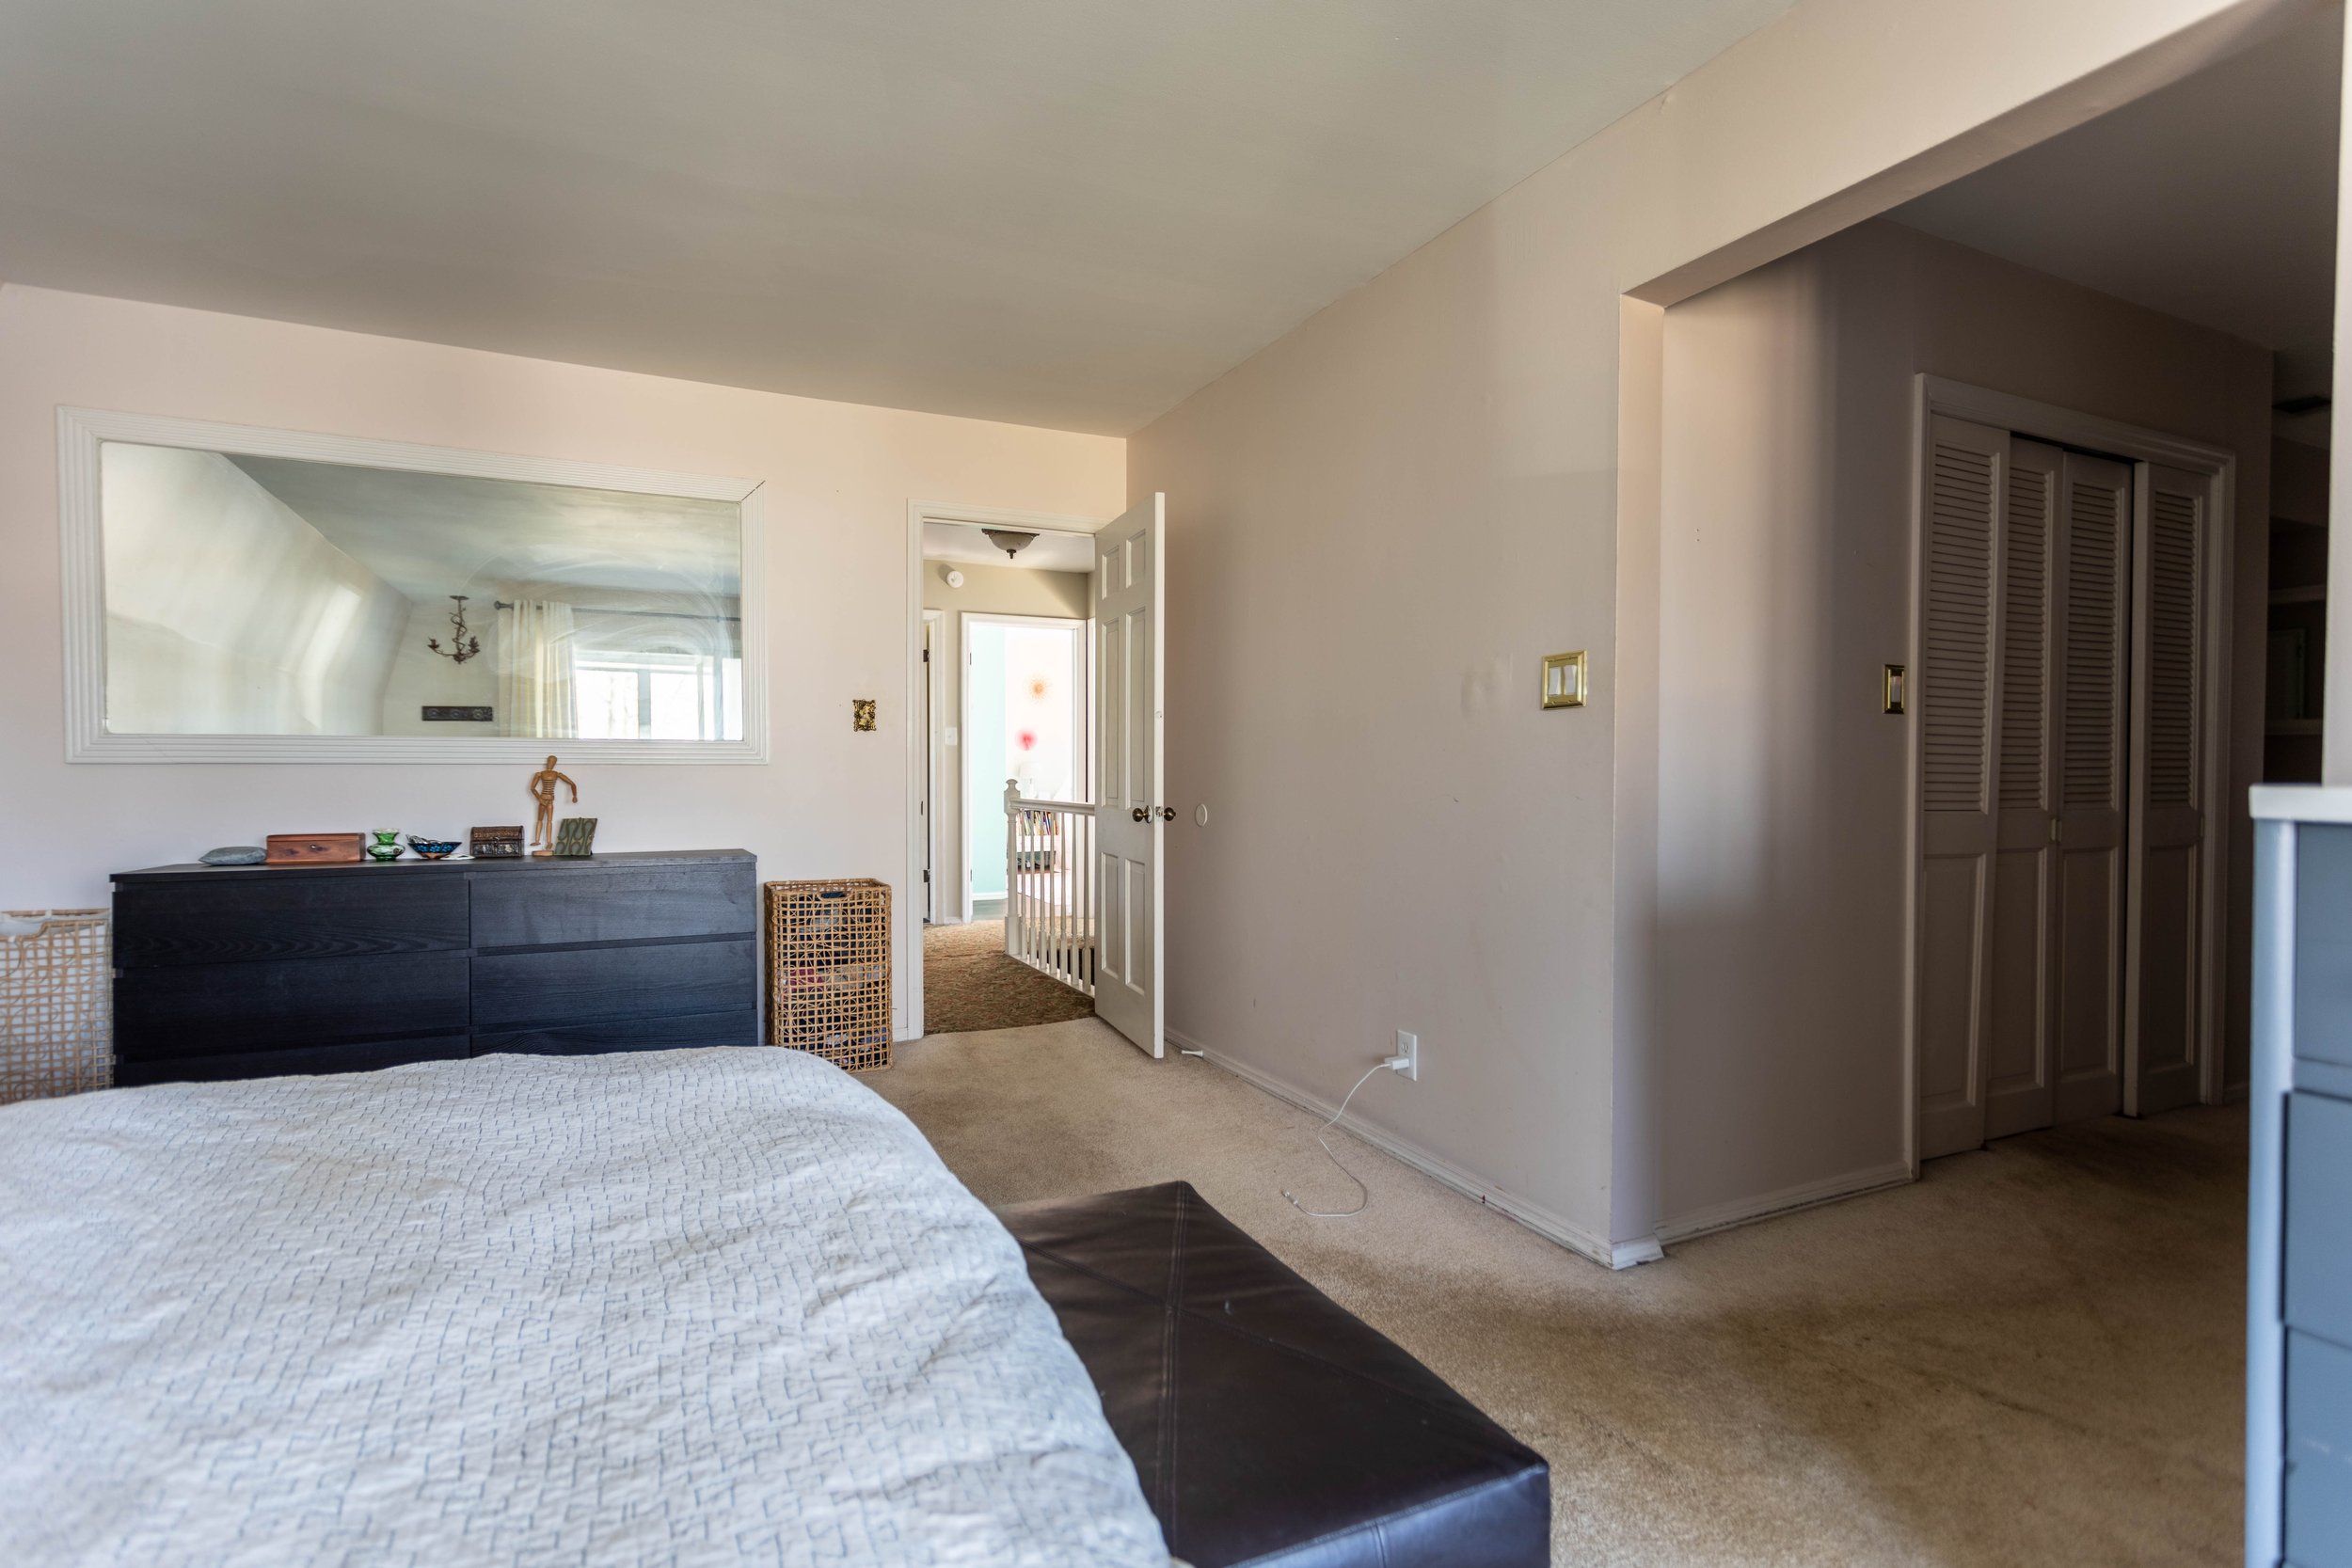
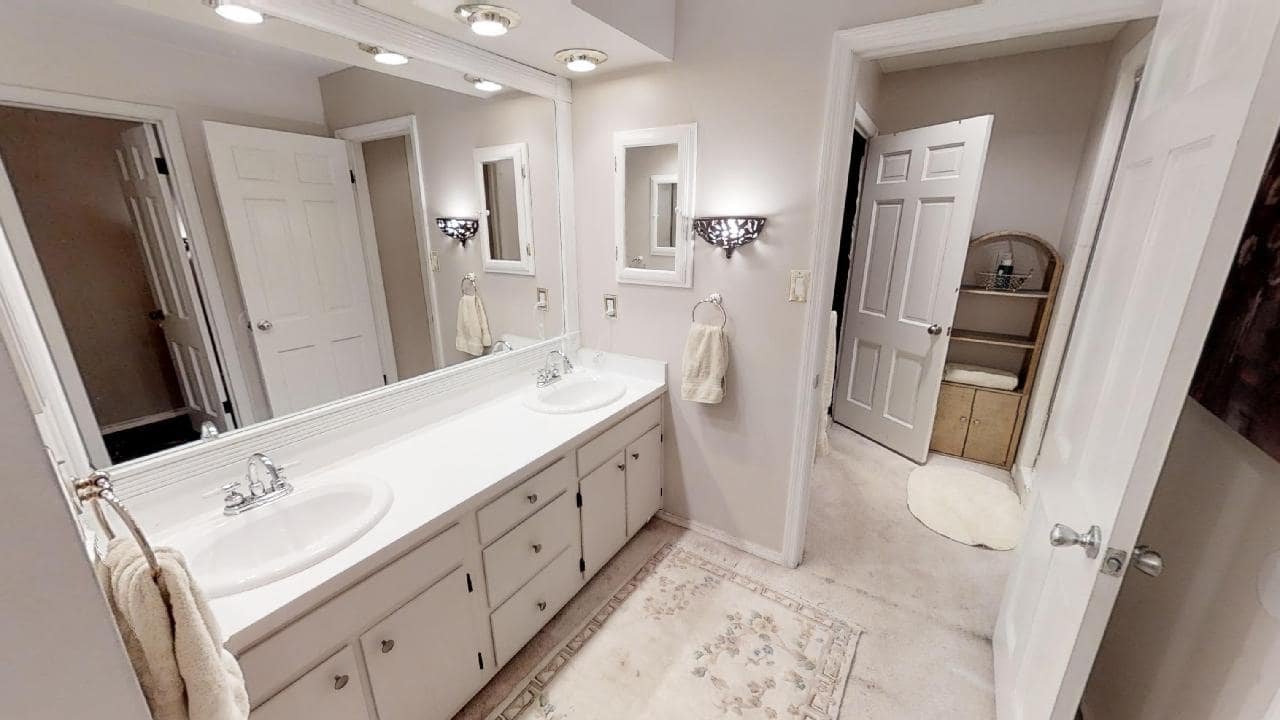
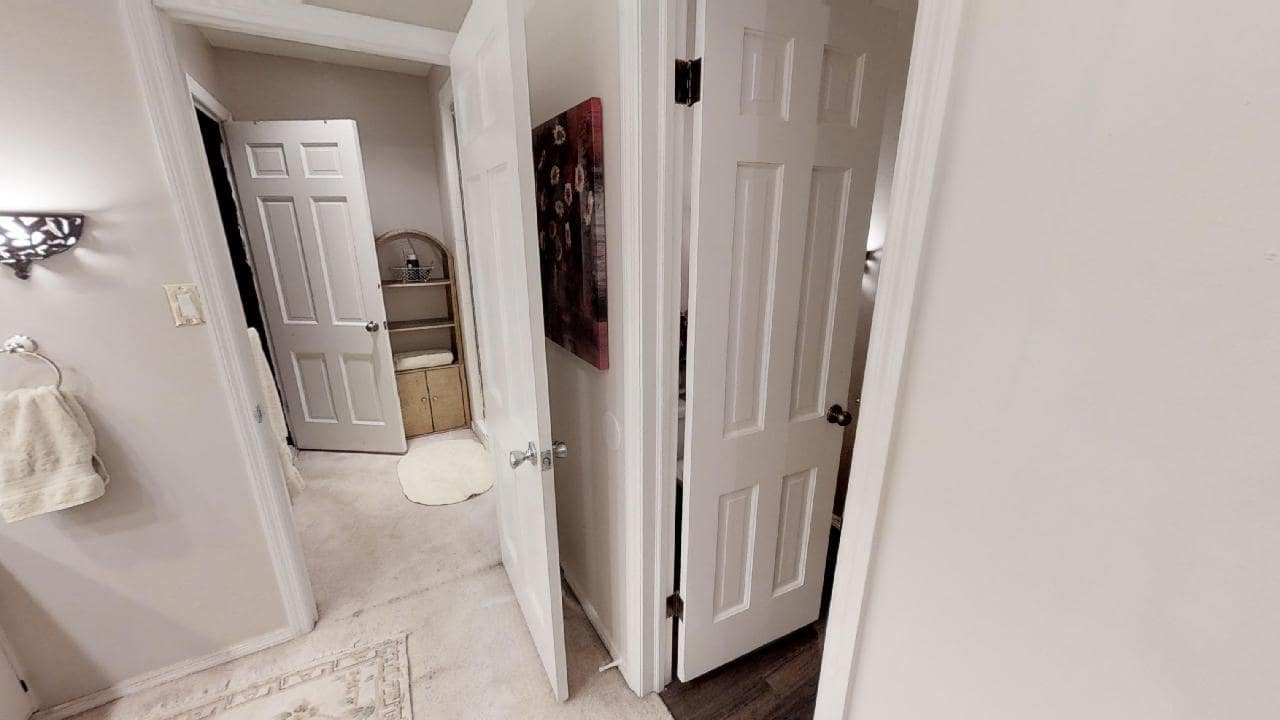
This angle shows the change in footprint from the other side of the room. In the “after” picture from left to right, the doors lead to: my closet, the hallway, Lucius’ closet, and the master bathroom.
On the flip side, this is what our former journey to our closets and master bathroom looked like.
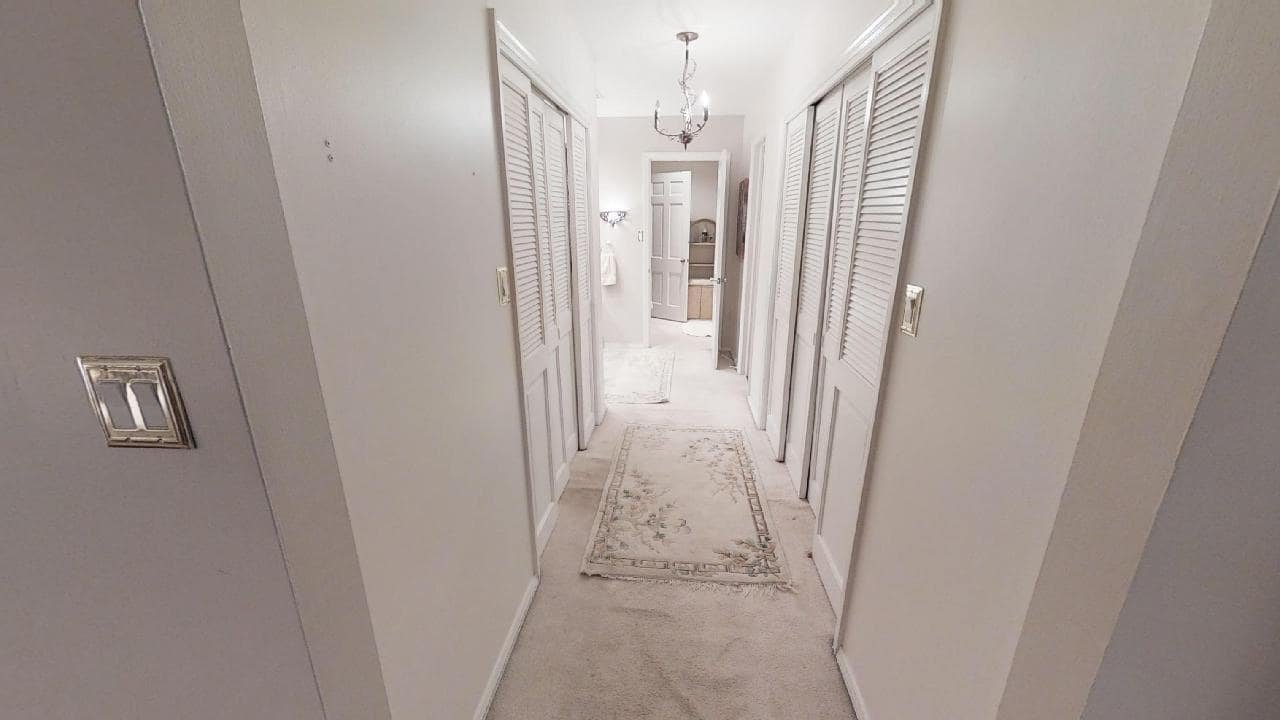
Lucius’ closet was on the left, mine was on the right, and beyond that was the vanity (left), water closet (right), and shower (through the doorway straight ahead - which is now our laundry room!).
Aaaaand now that view is slightly different since we created a hallway and scooted our entire master suite footprint over.
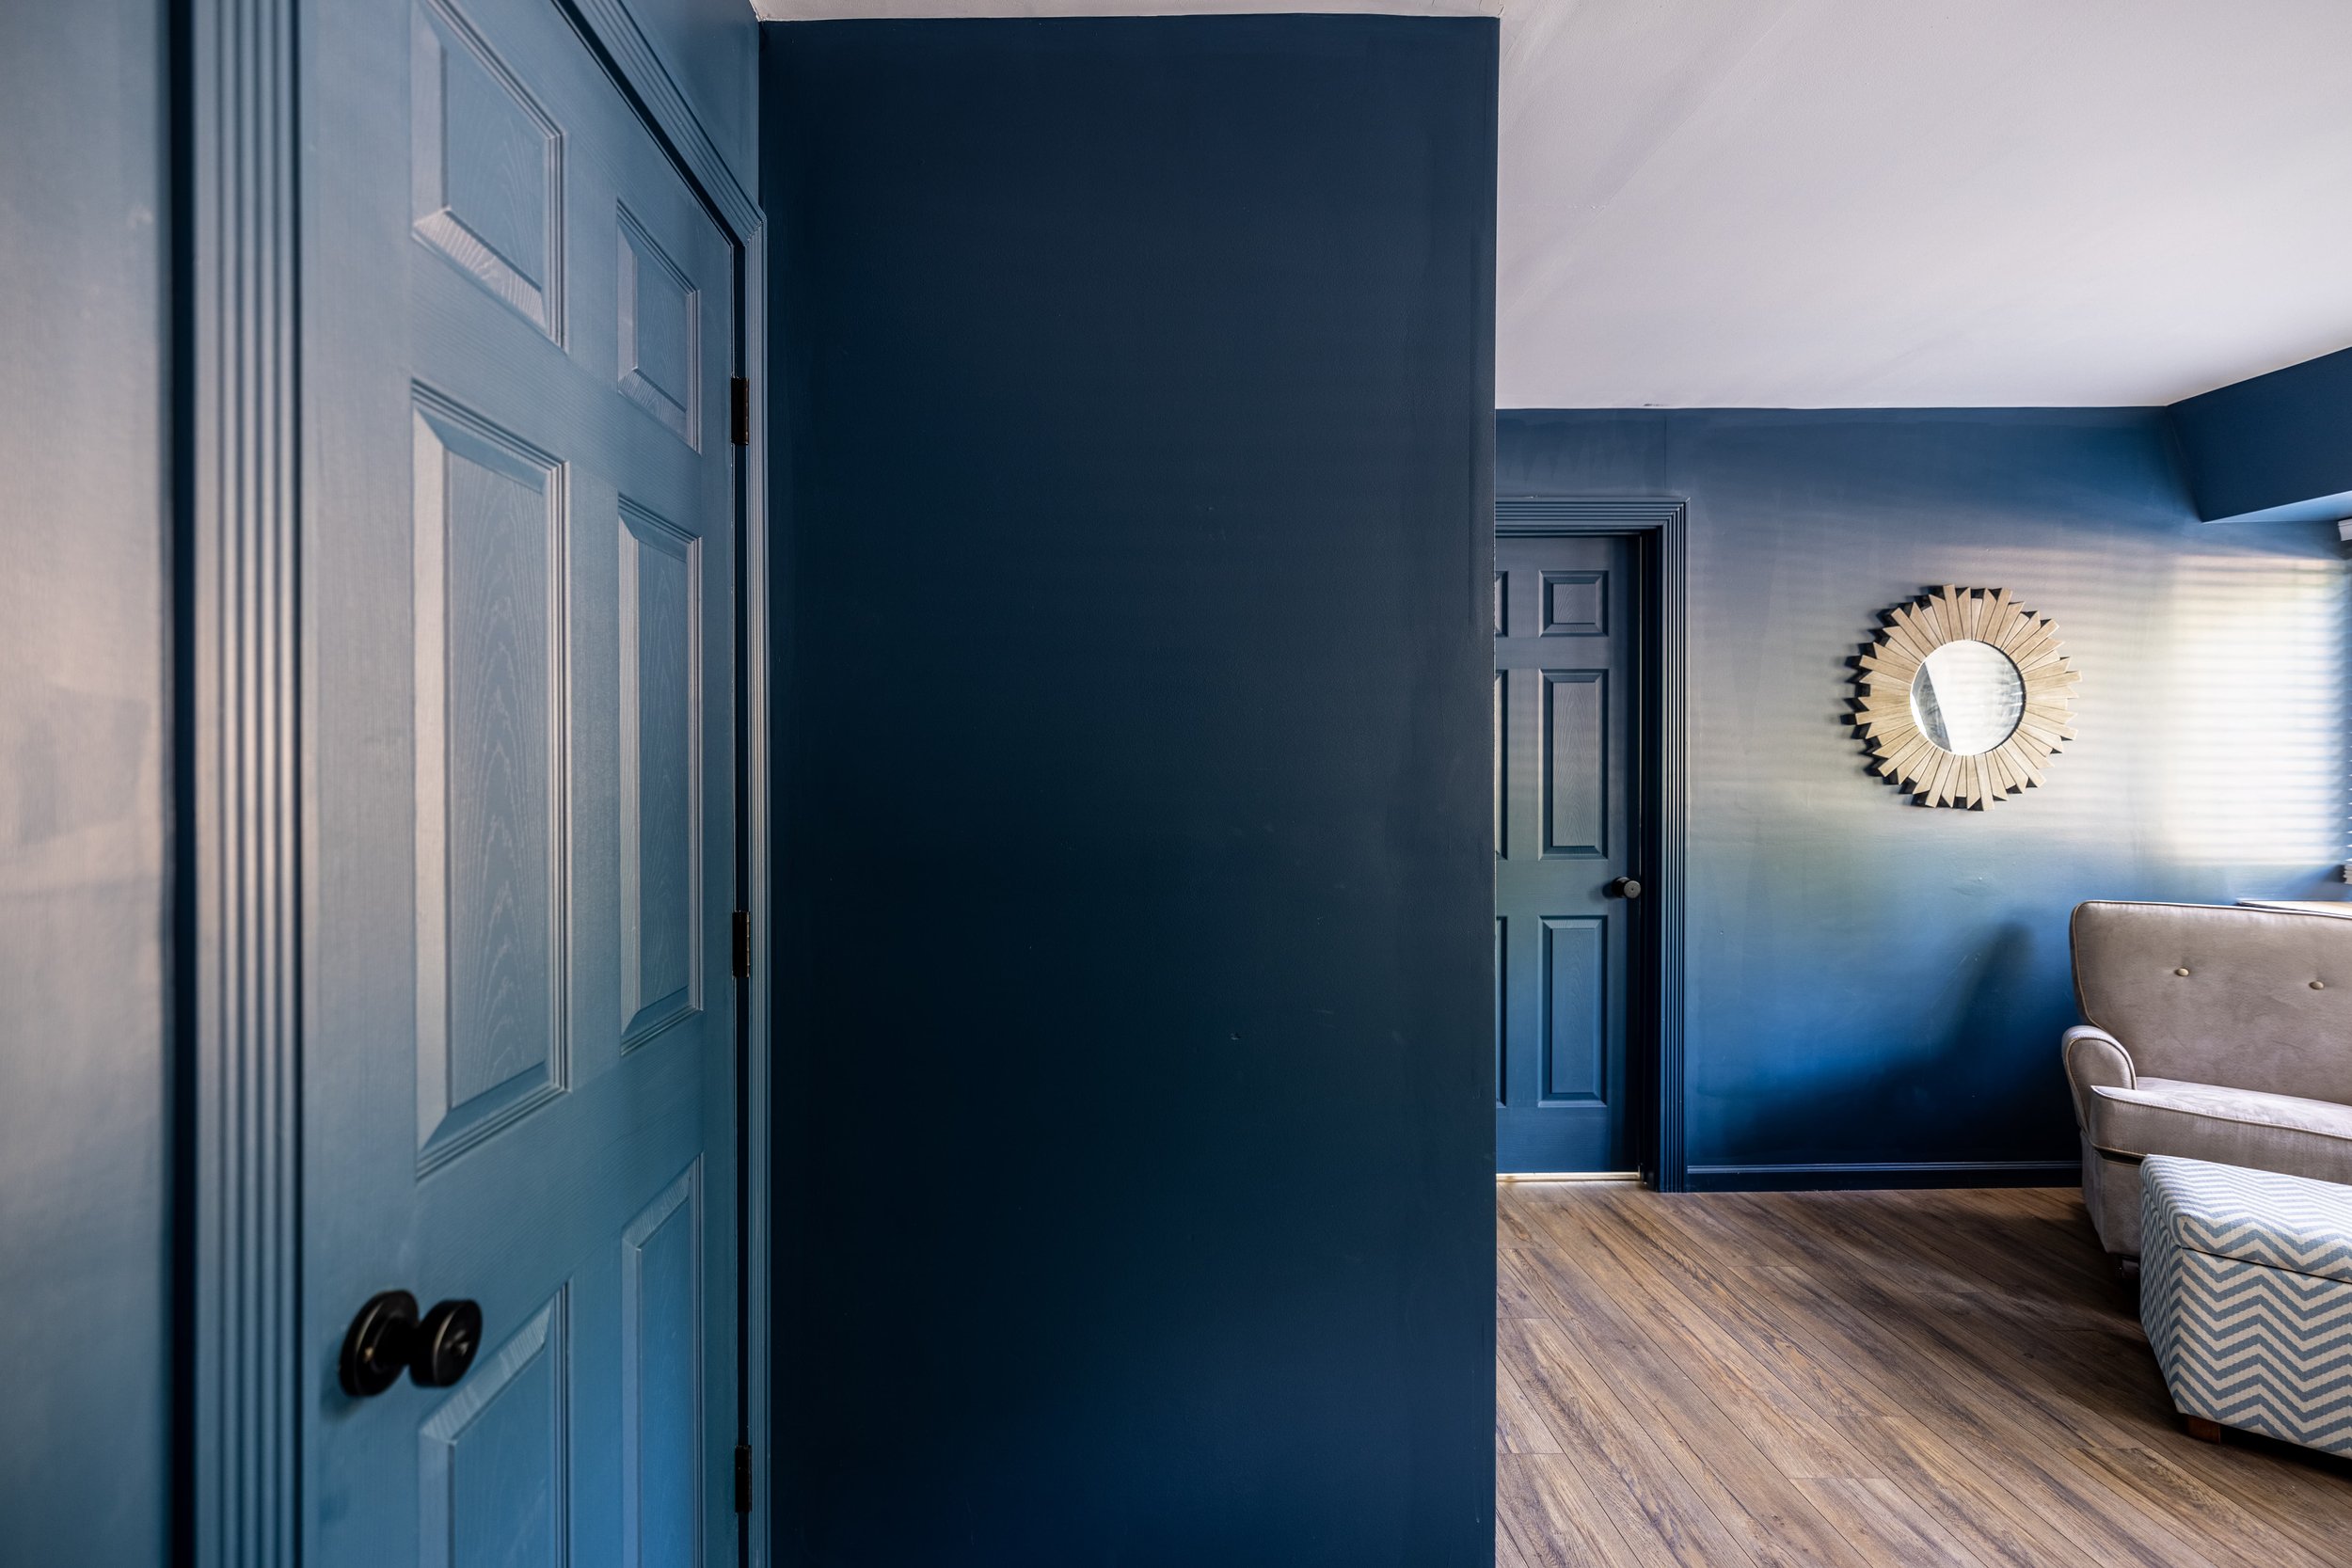
Those four angles were pretty much the extent of our master bedroom previously. Here’s a better picture of the bedroom today in its entirety.
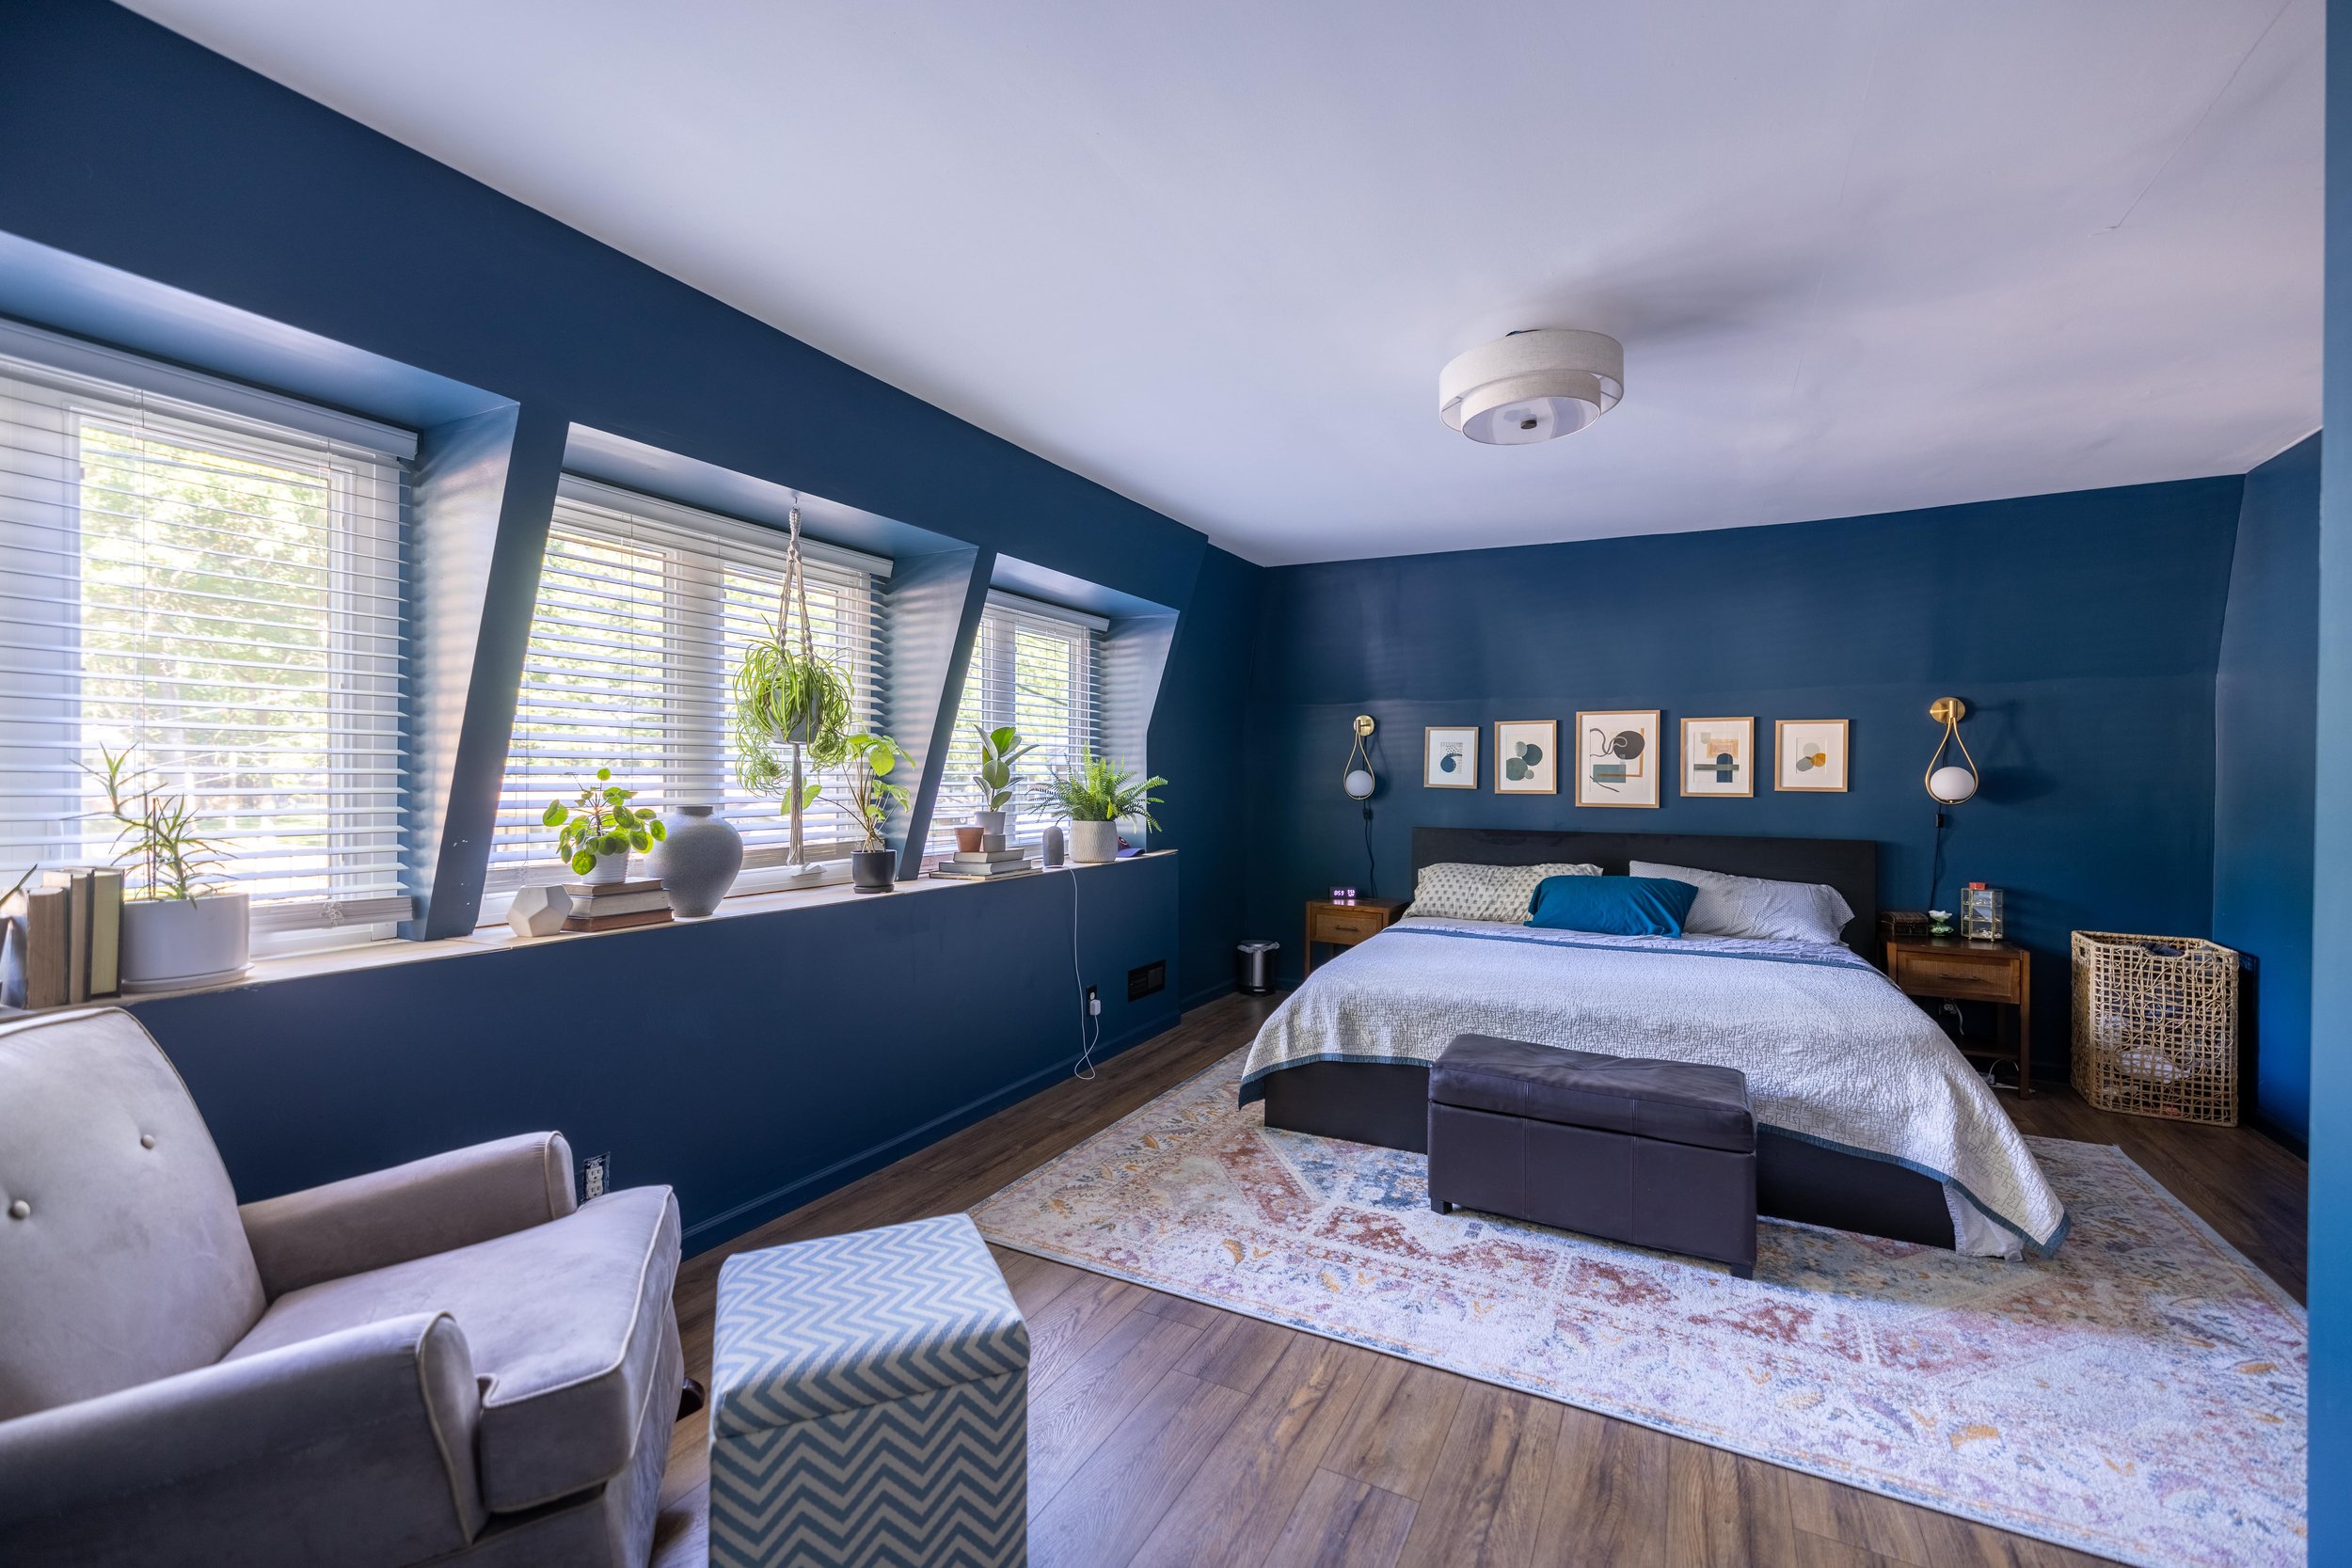
I’ll never get tired of all the light in this room now, especially at sunset.
And like I mentioned before - I still don’t consider this room done. The bed and bench are on my shortlist of items to replace. And the chair and ottoman are just stand-in pieces for now that I pulled from the nursery (making room for more toy storage - IYKYK). They will also eventually be swapped out for something more in line with what I envision for this space. They’re looking very… nursery-ish to me.
Related Posts: Master Suite Remodel Kick-Off / Master Suite Floor Plans / Mid-Century Master Bedroom Mood Board
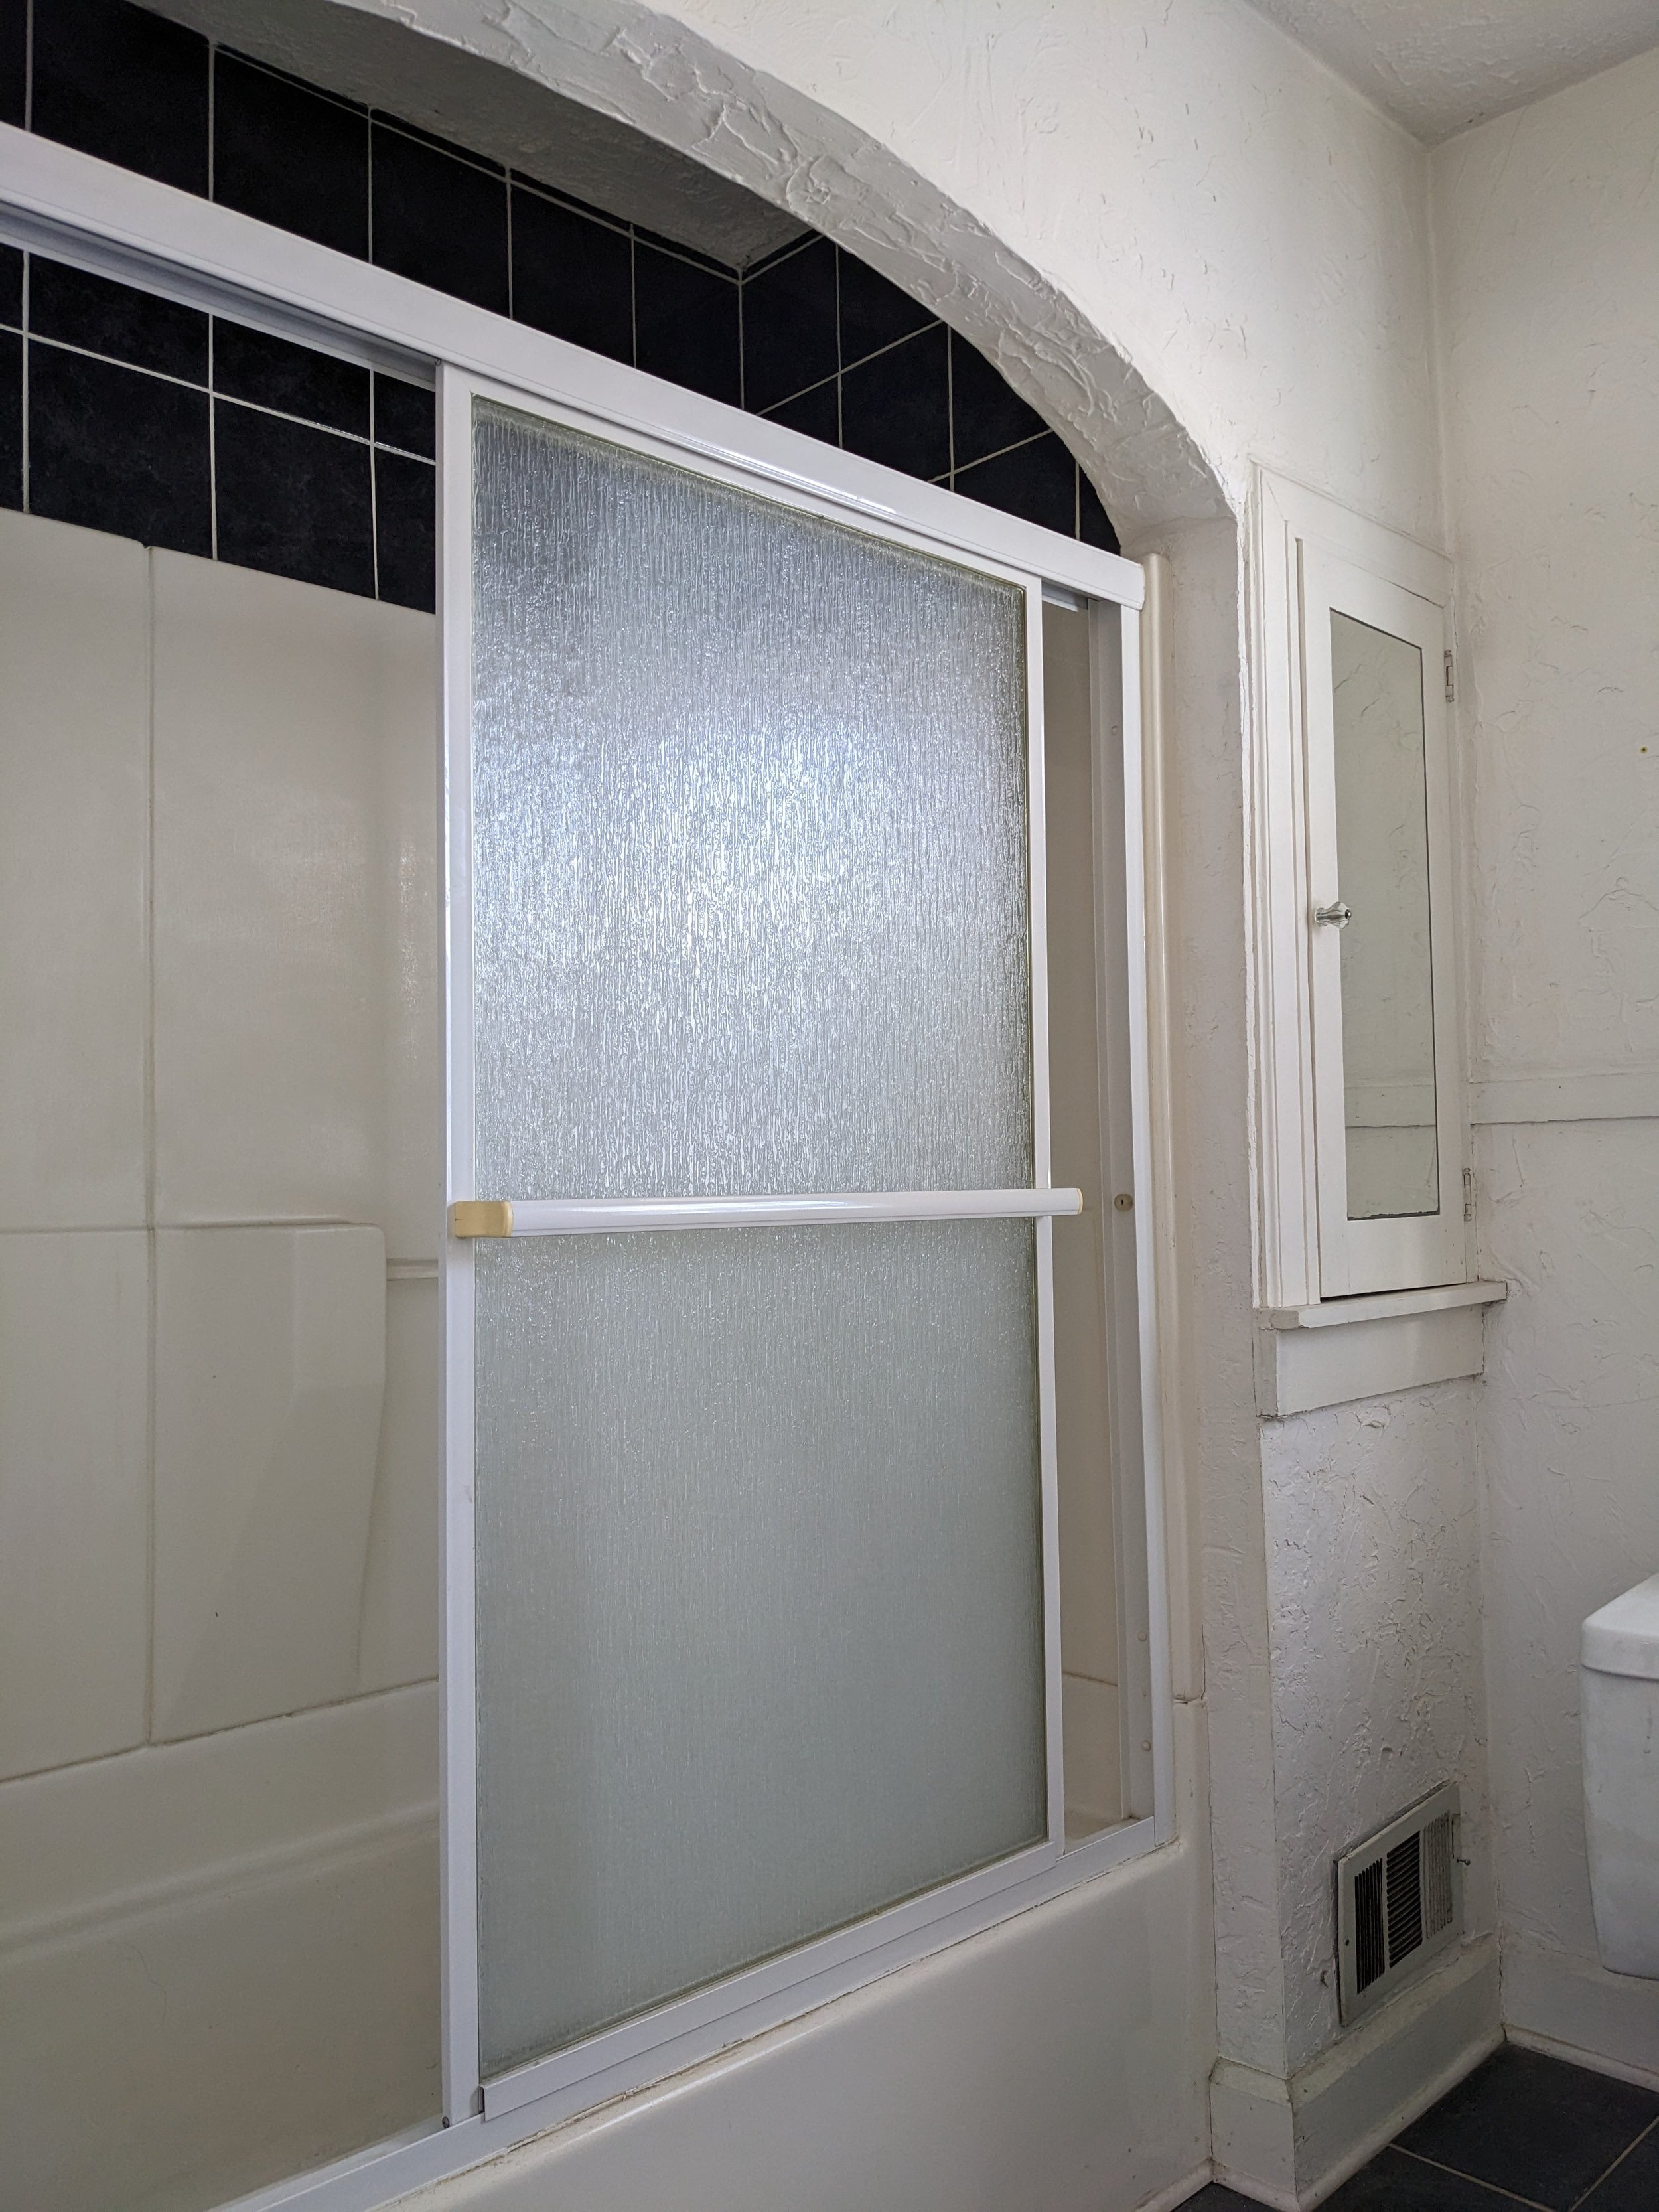
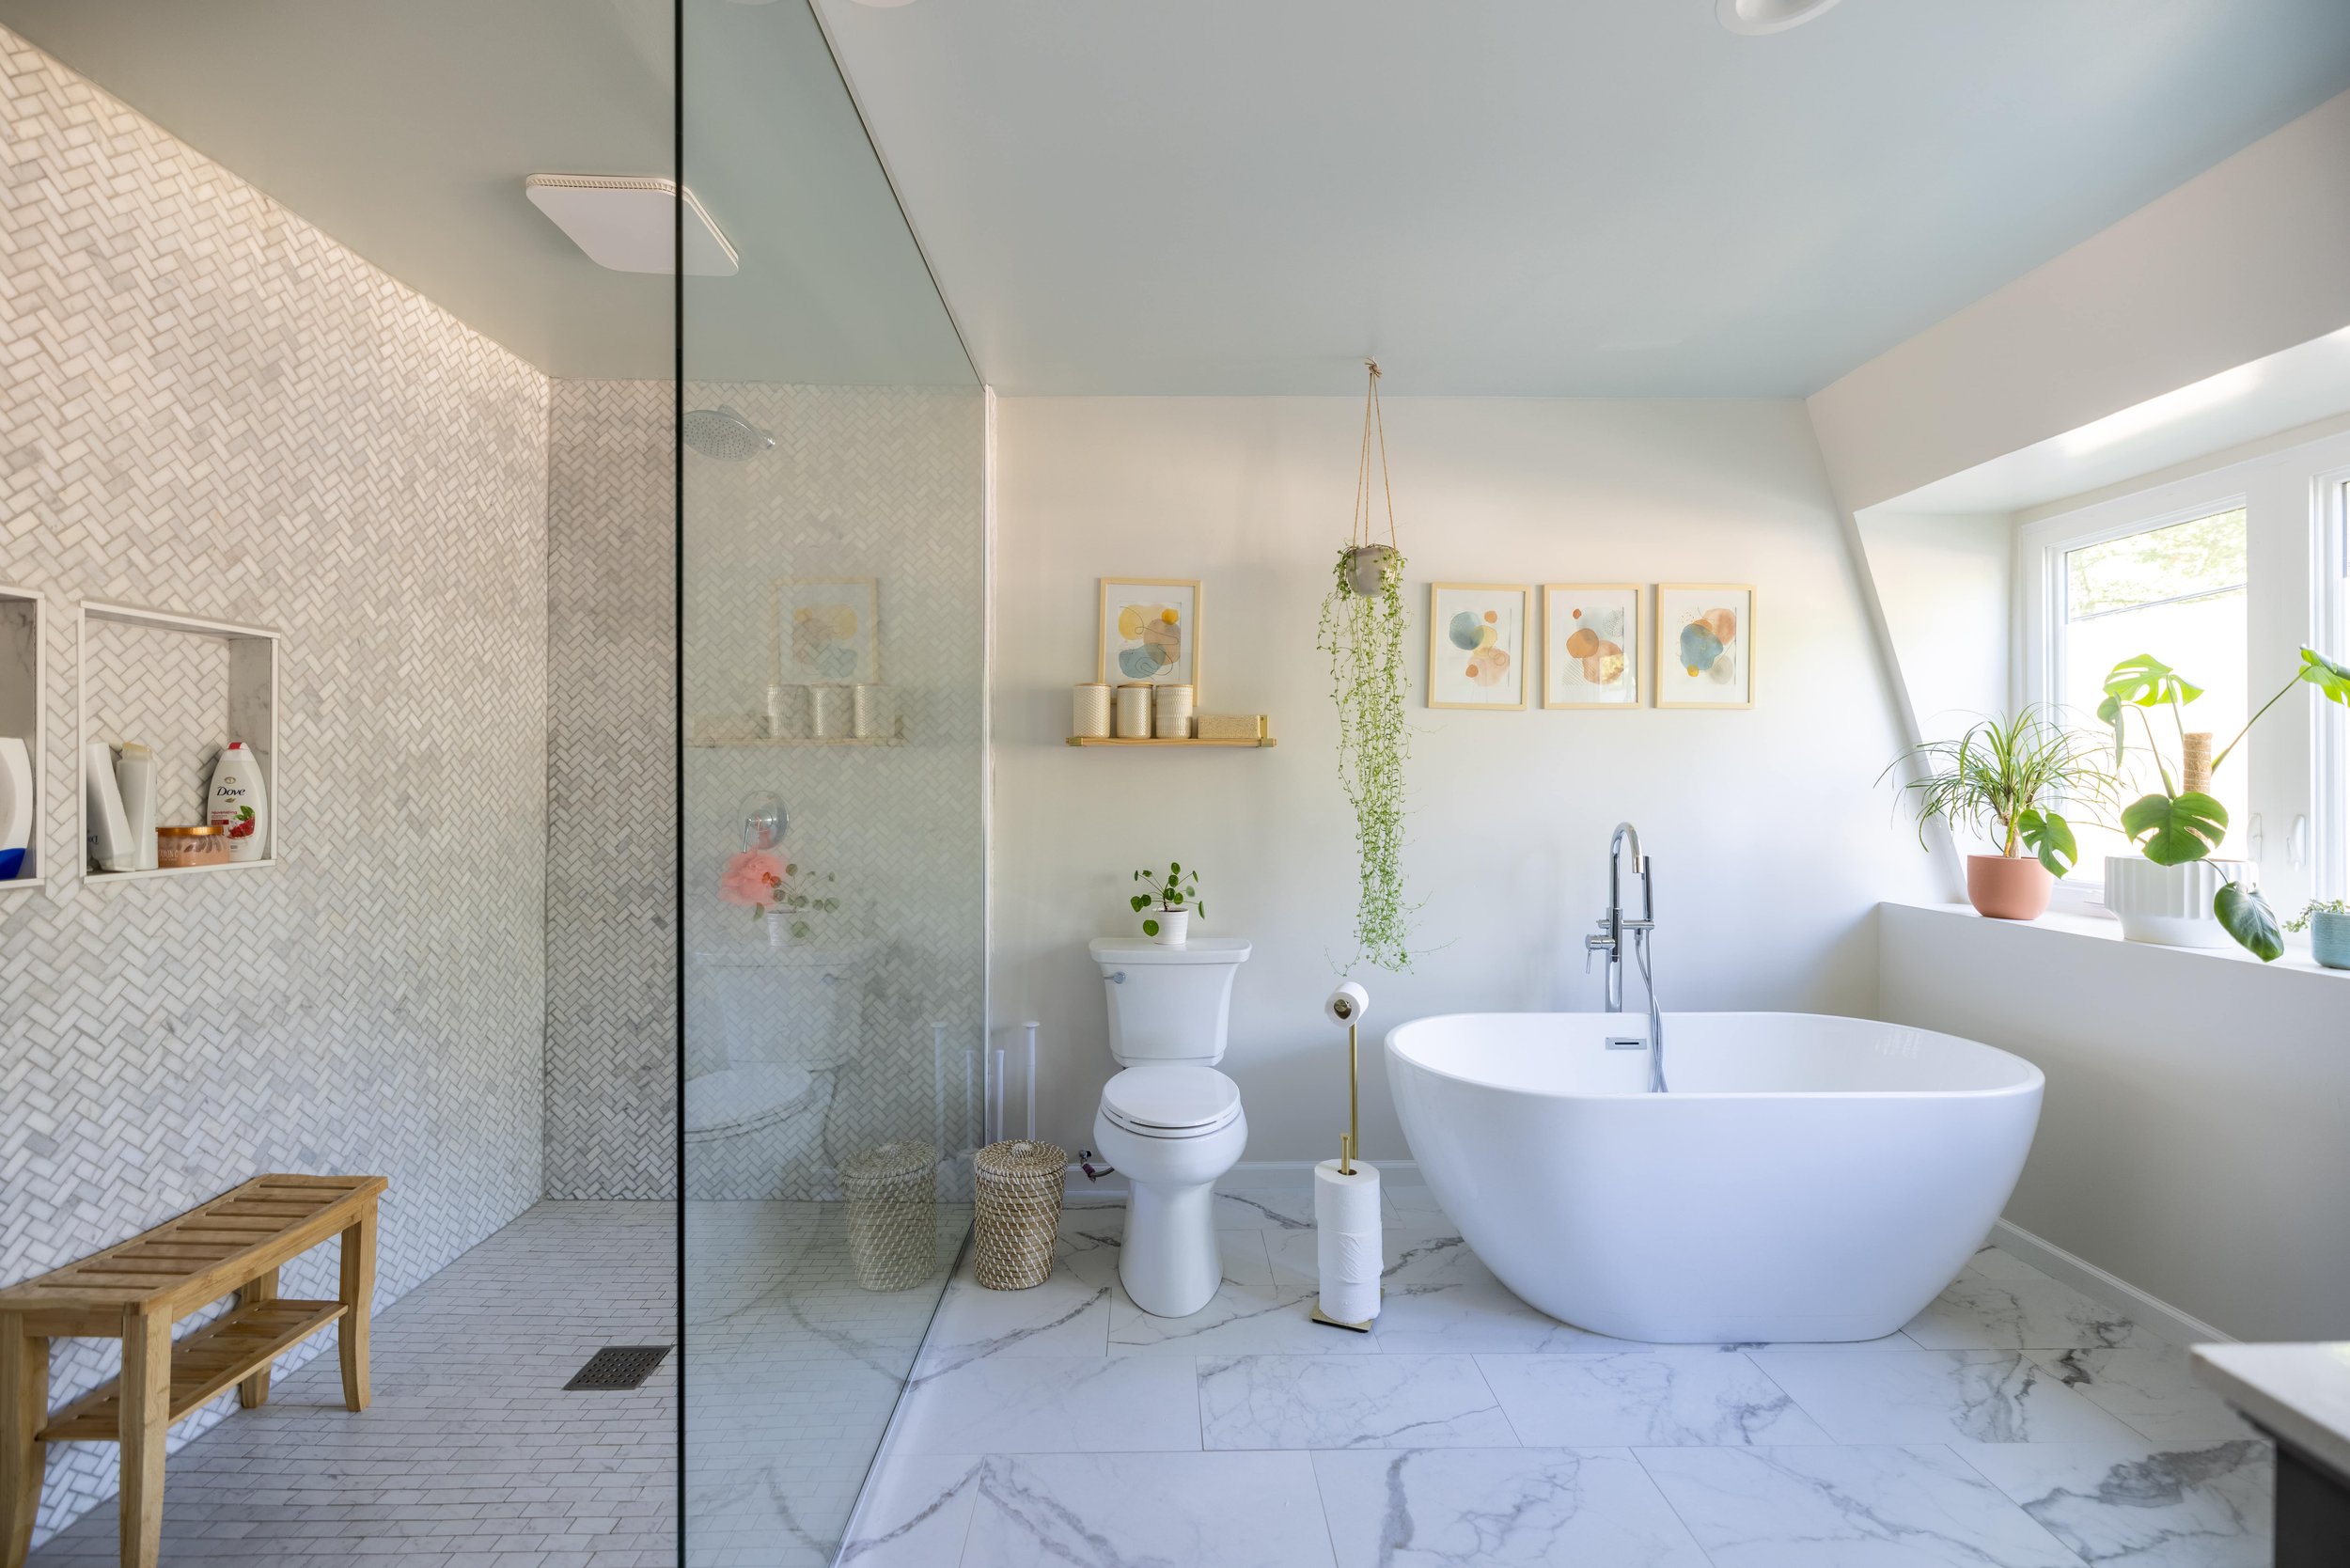
The Master Bathroom
One of the most exciting transformations in our house so far has been the complete renovation of our master bathroom.
The layout originally felt very much like a hotel (and not a super nice one) - where the vanity is separate from the shower.
These days, it’s looking quite a bit different.
I wrote a whole master bathroom reveal post when we finished it last summer so I won’t dive in too deep in this post, but here are some pictures for the sake of comparison.
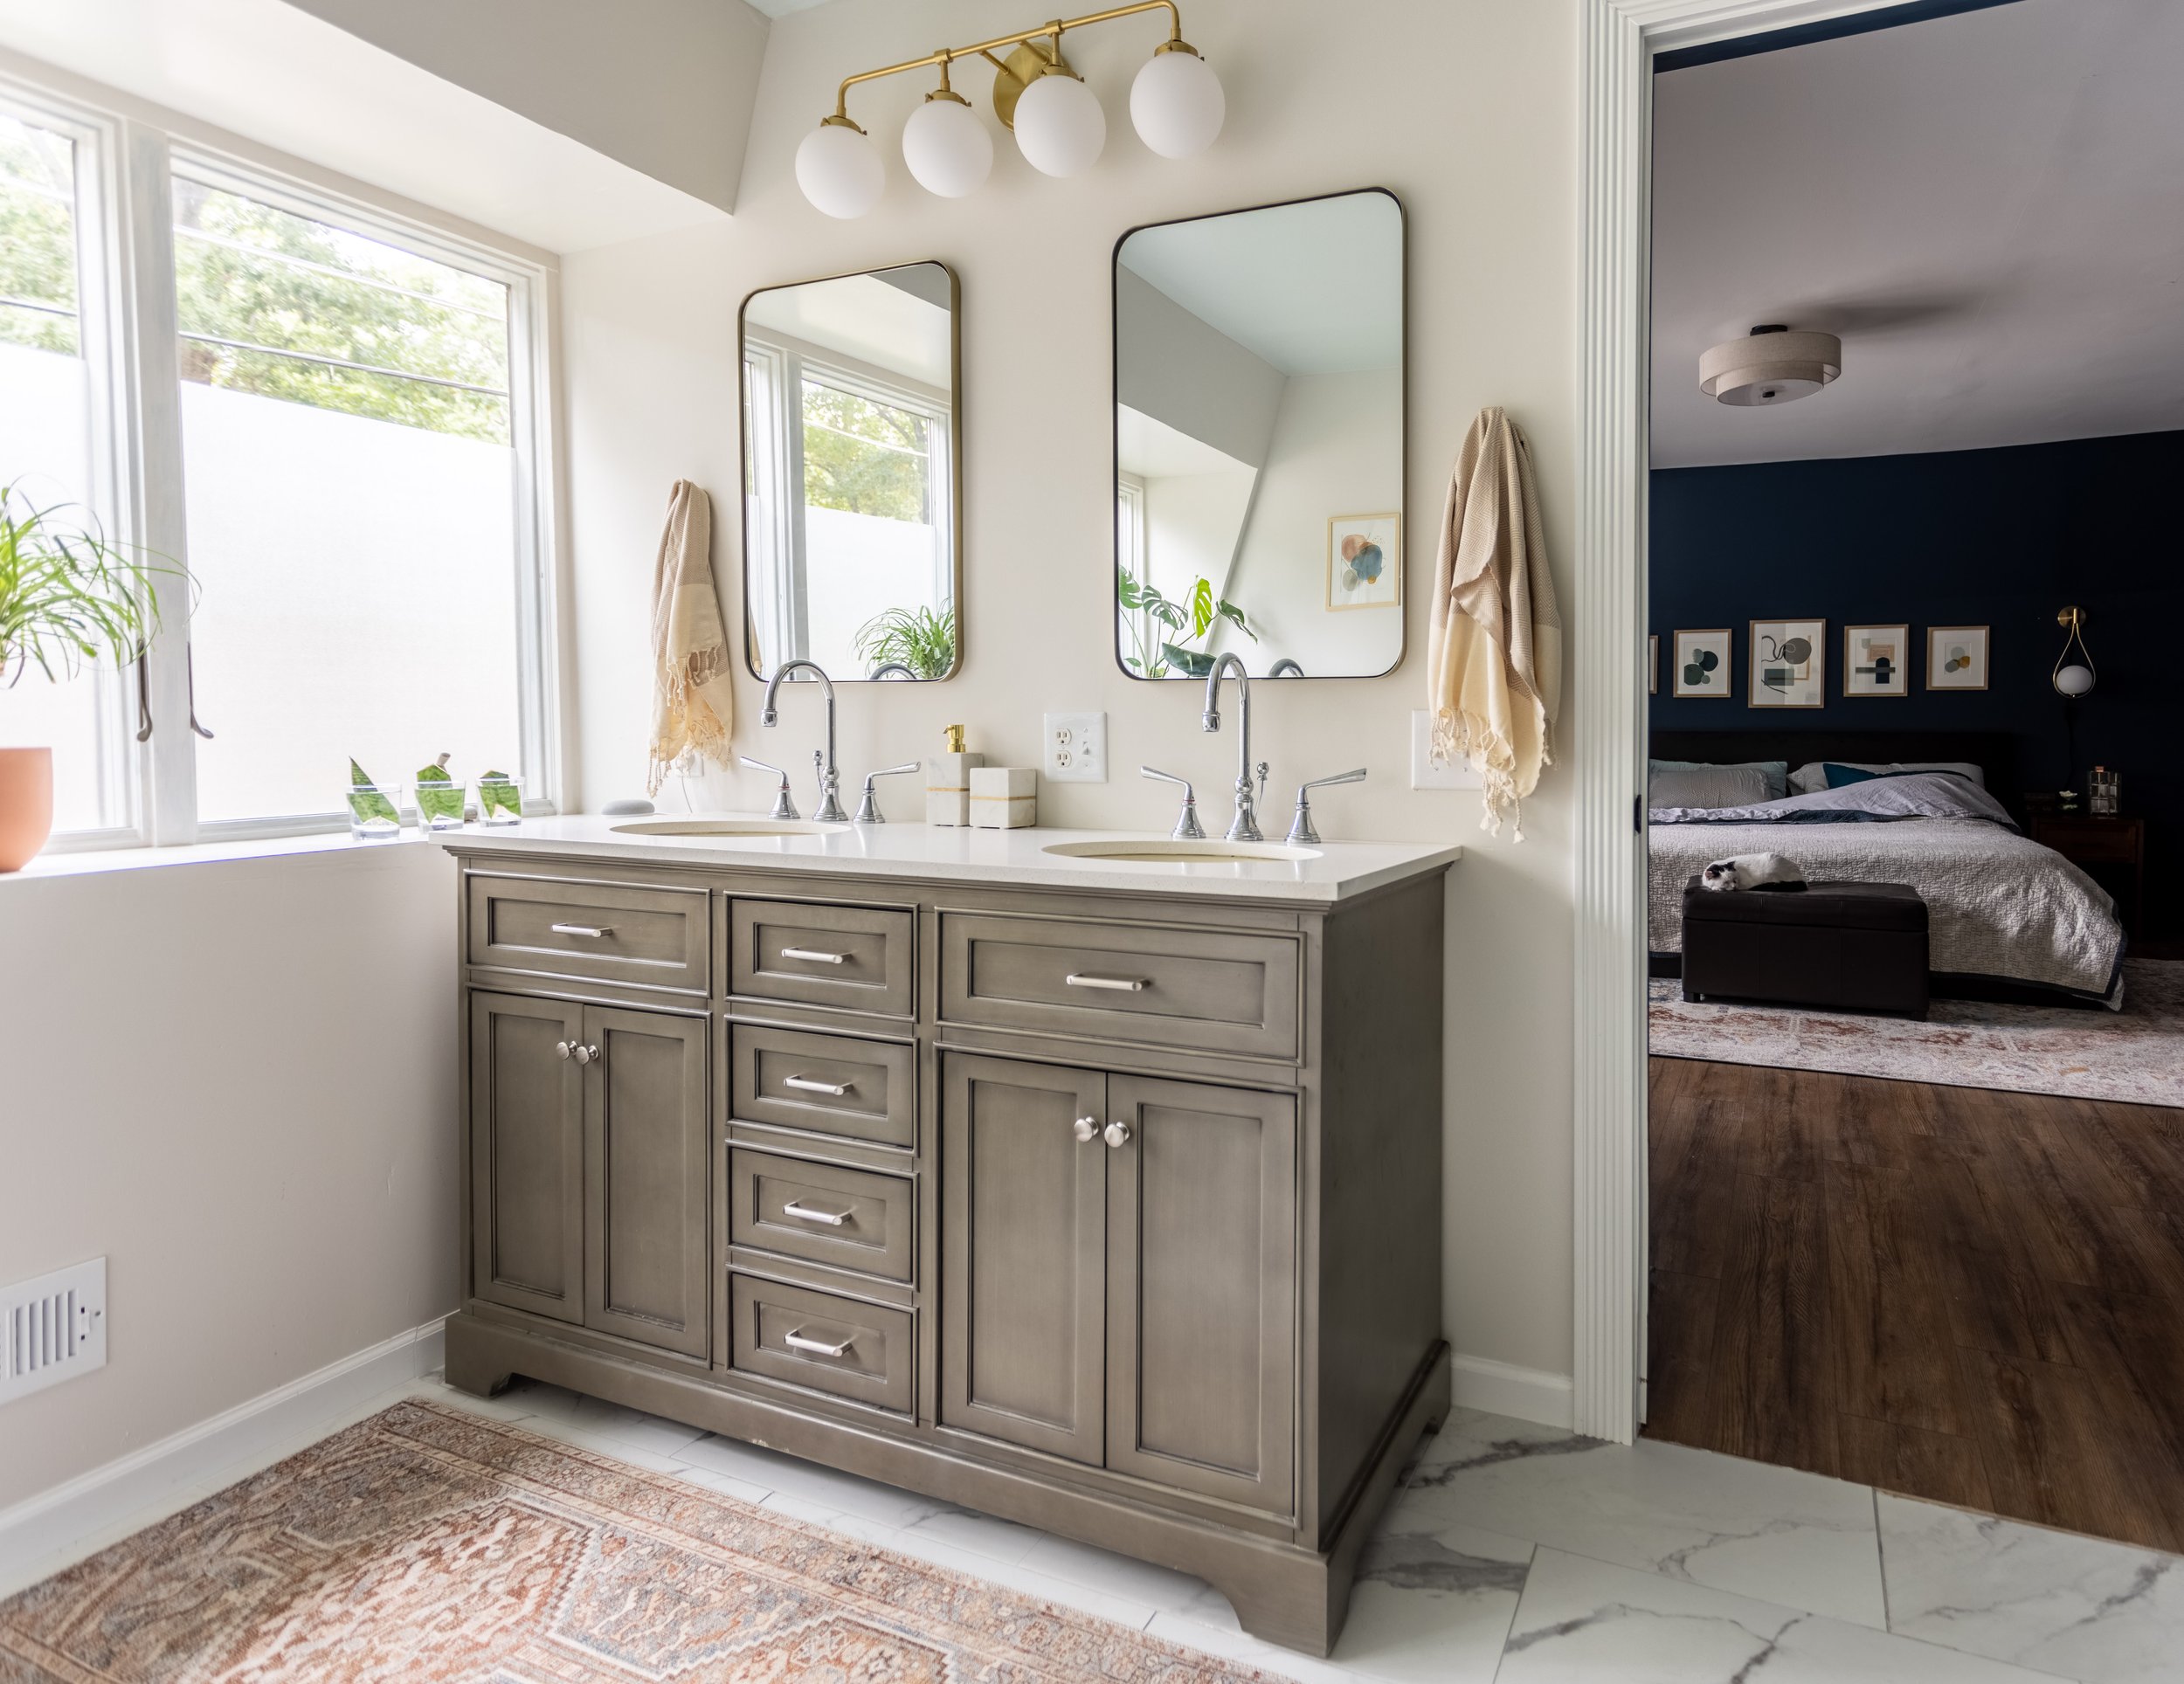
Related Posts: Master Bathroom Mood Board / DIY Frosted Windows / Master Bathroom Reveal
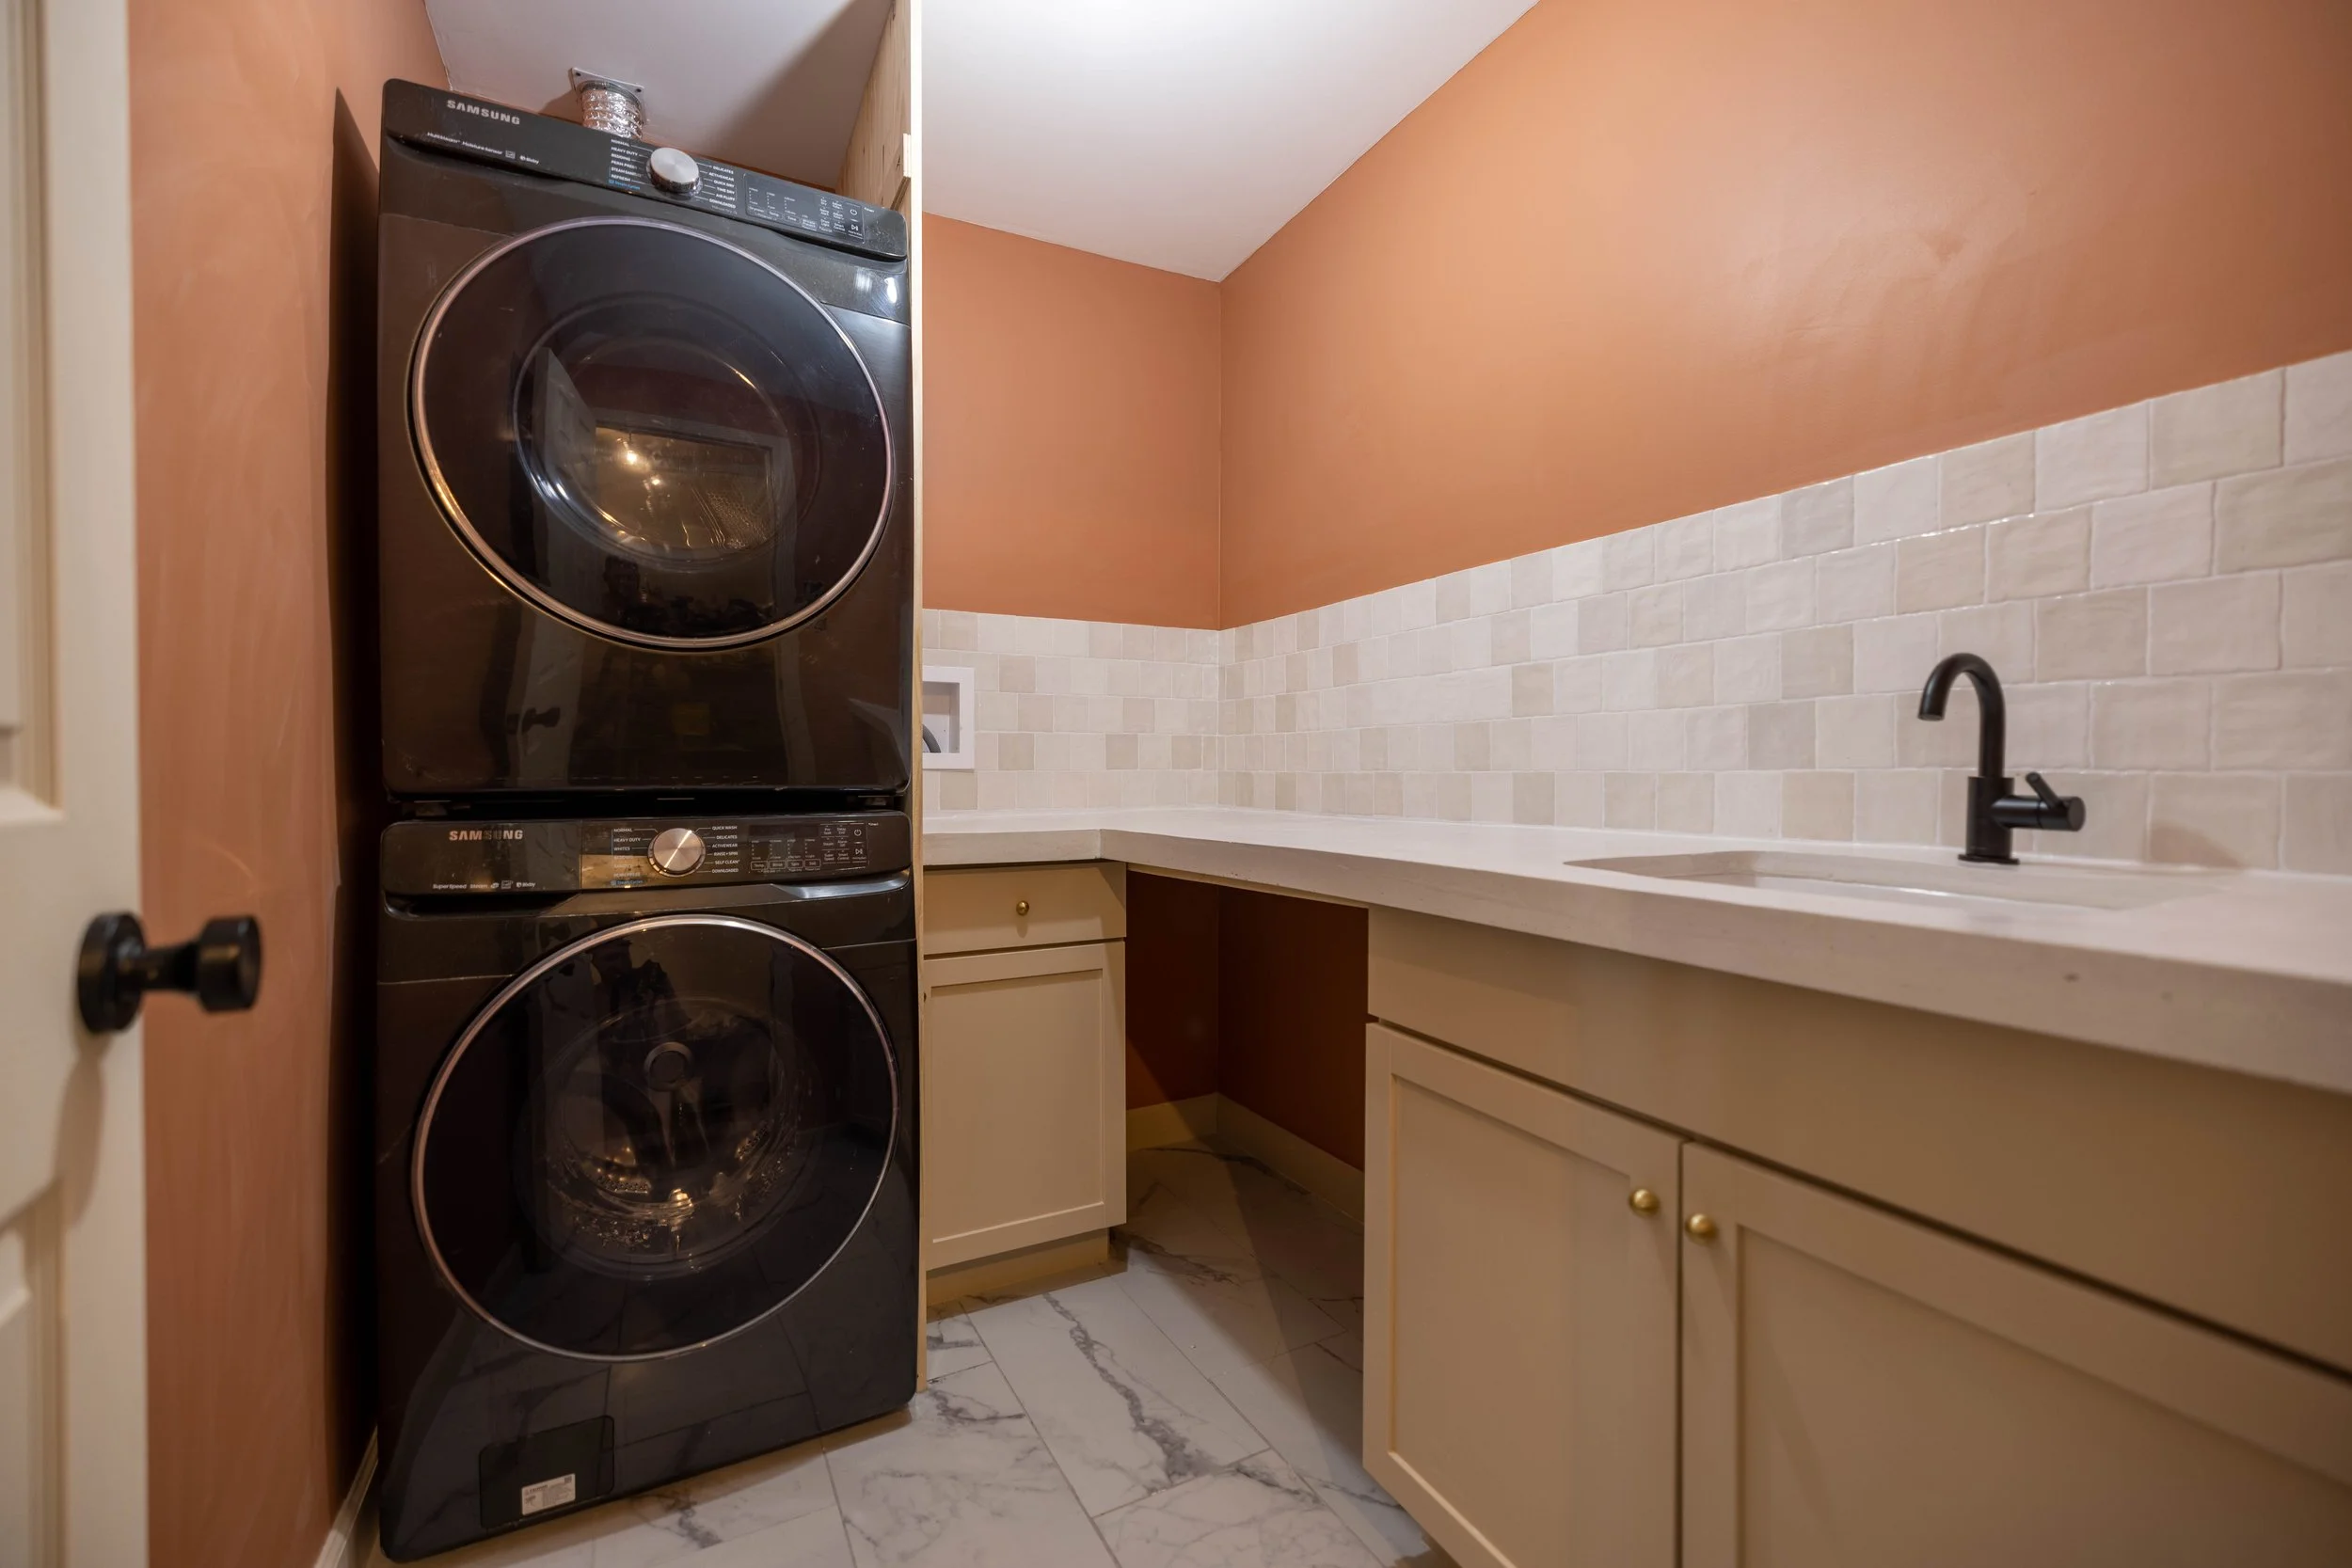
The Laundry Room
The most recent addition to the “renovated room” club is the laundry room - which I just wrapped up for the One Room Challenge!
When we moved in, our laundry room was actually downstairs in the mudroom.
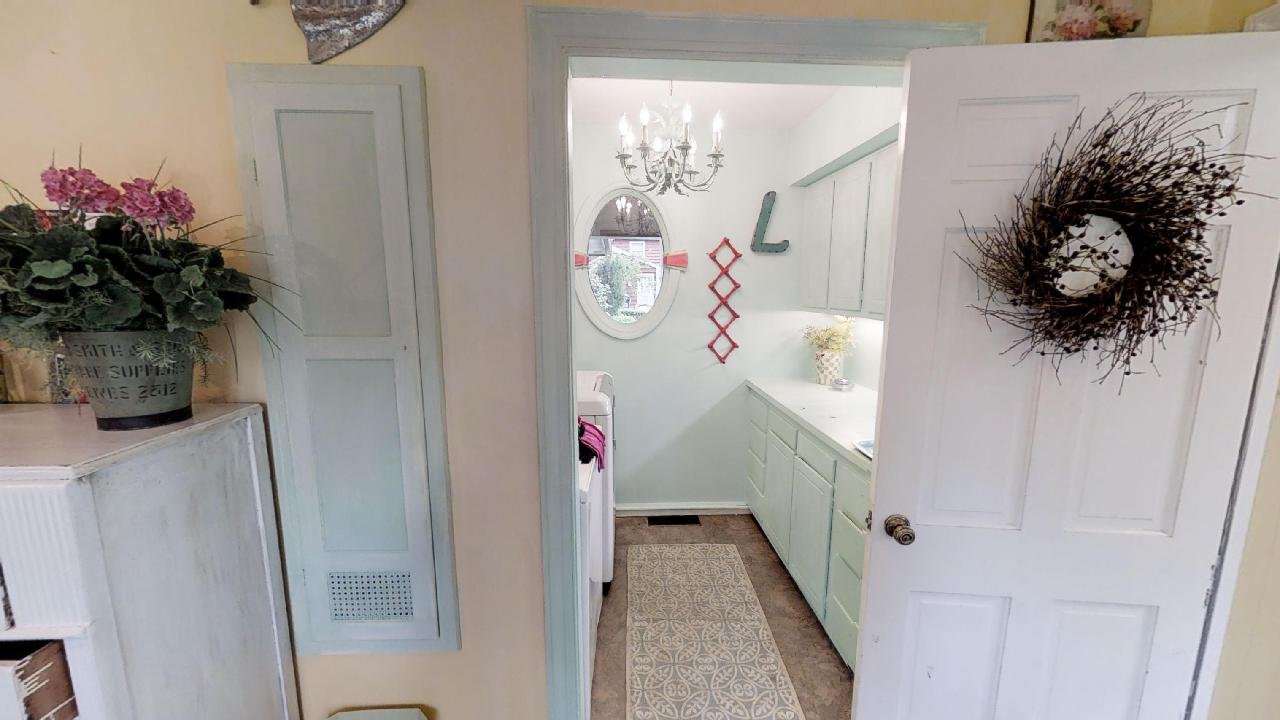

But when we renovated the master suite, we turned the former “shower room” into an upstairs laundry room with allll the bells and whistles.
And can I just say how glorious it is to have a laundry room on the same floor as the bedrooms!? The old laundry room is now a makeshift storage closet, but I have plans to make it much more functional than its current state.
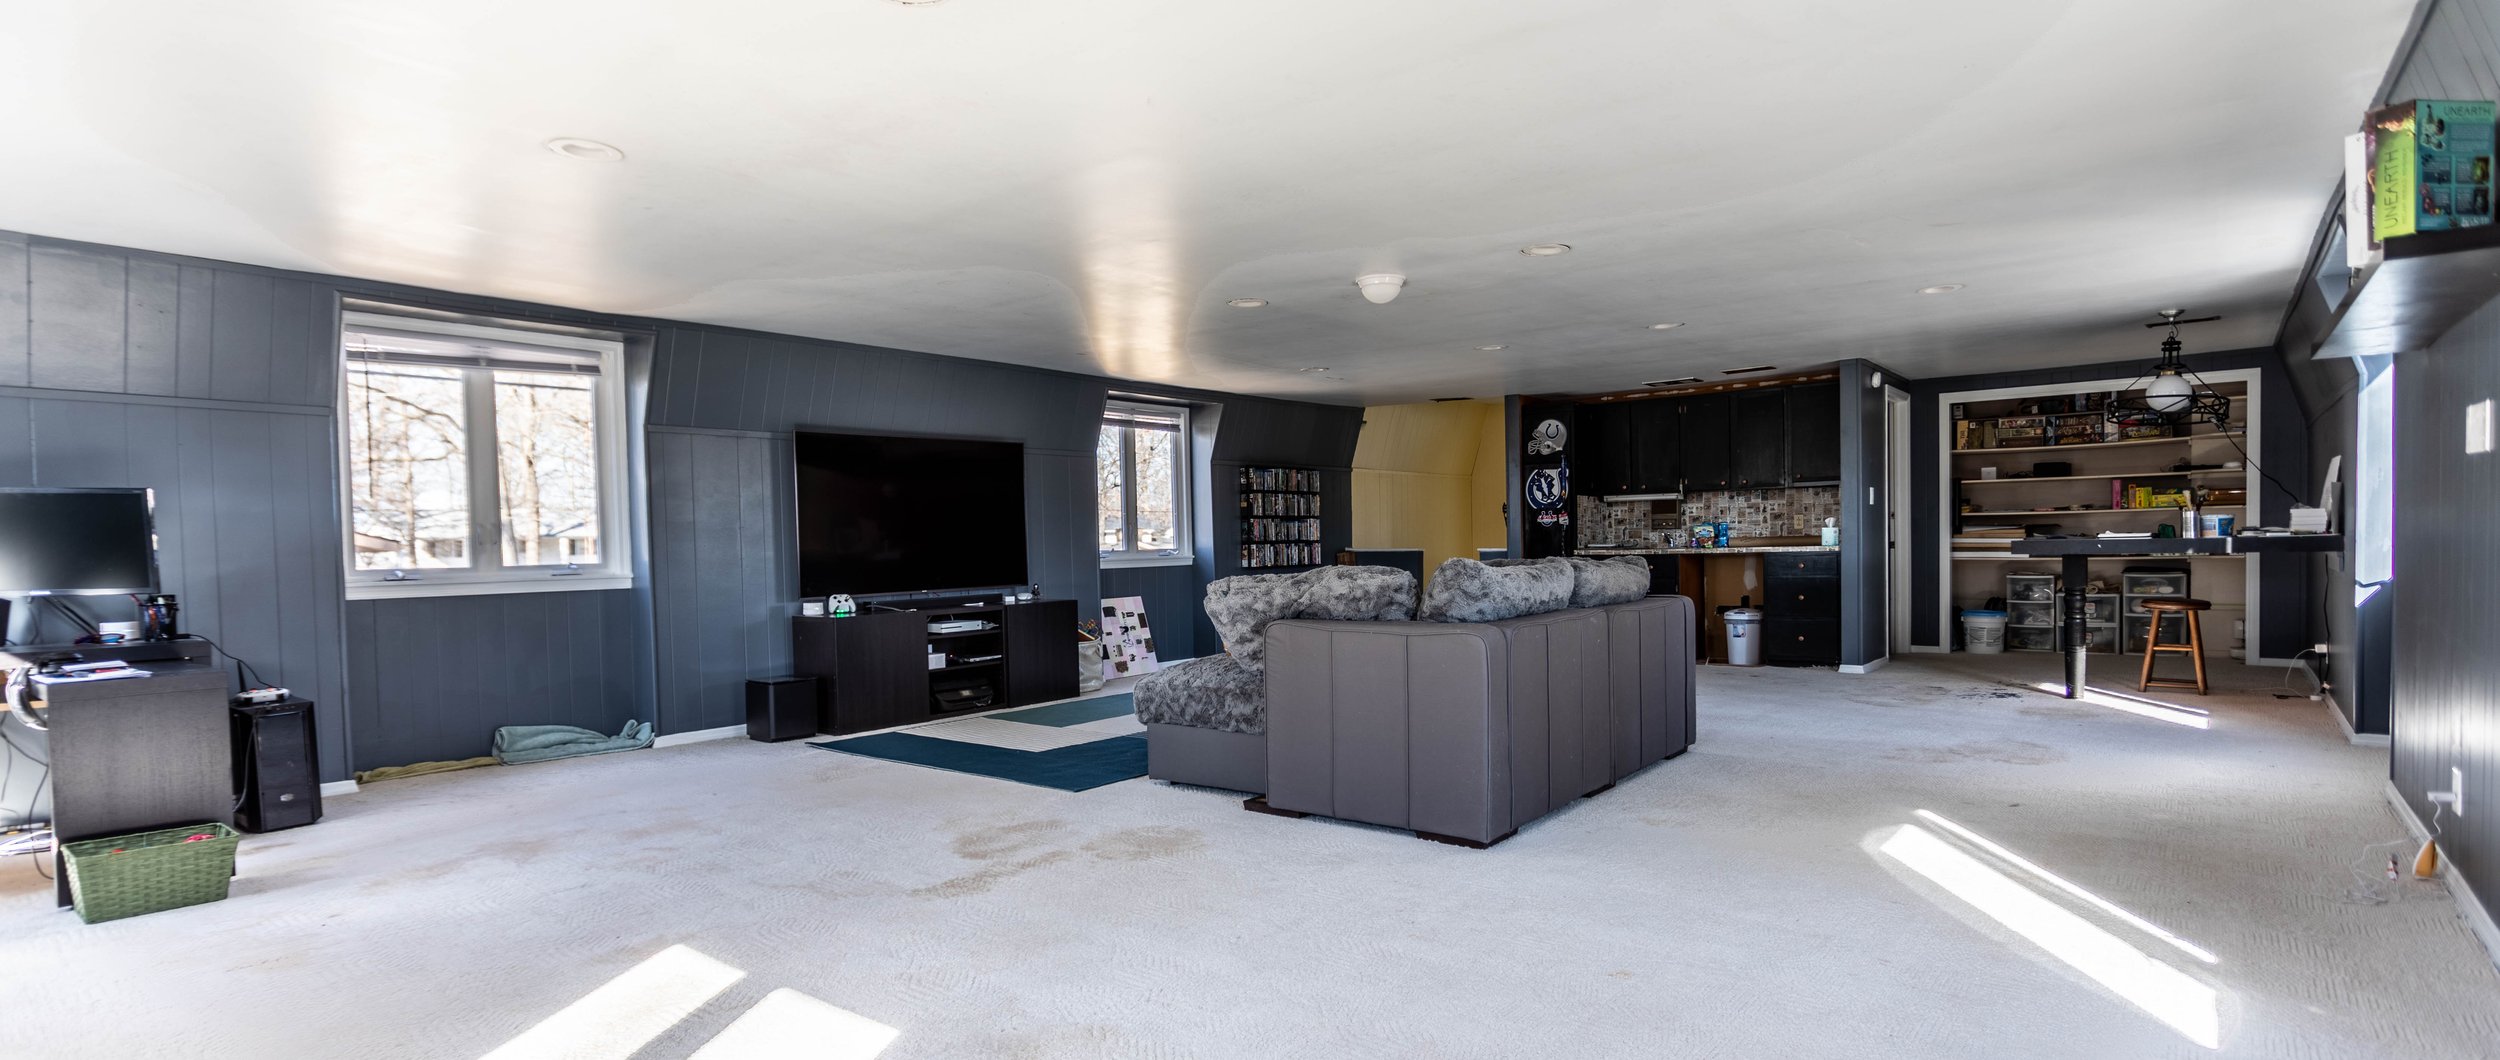
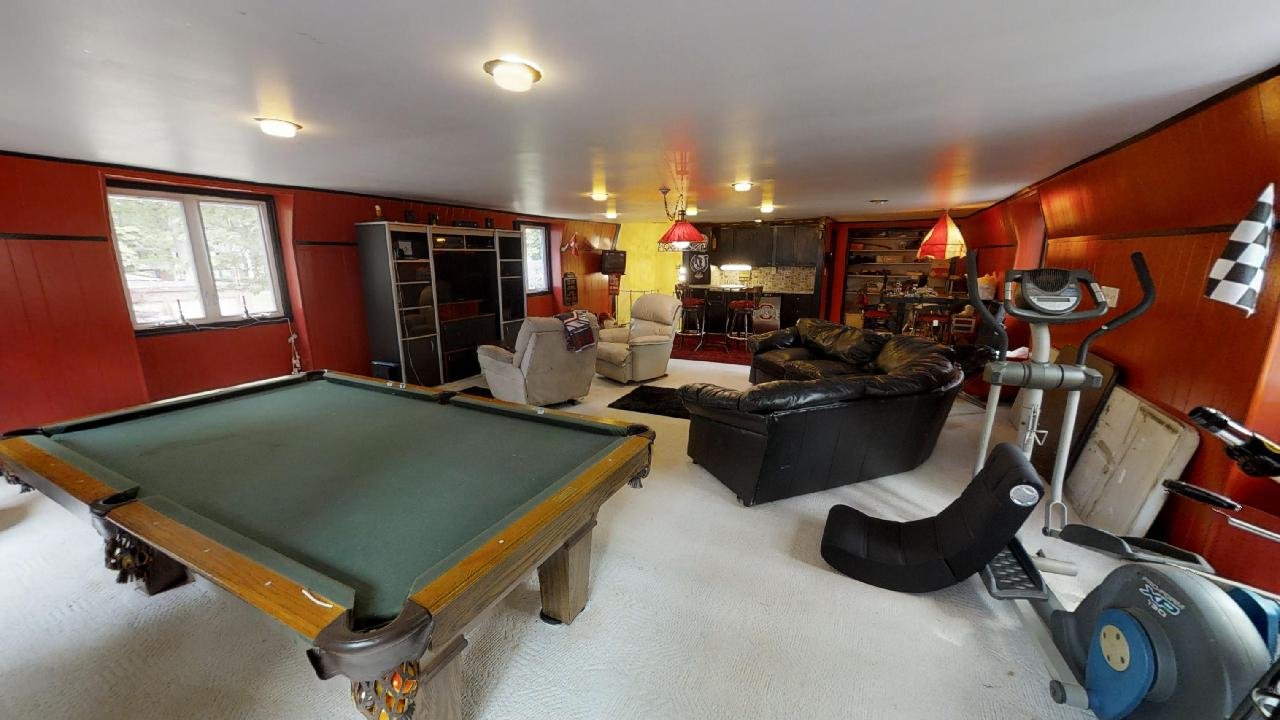
The Loft
If you’ve been here for a while, you know a lot of changes have happened with the loft. Here’s what it looked like after our phase I update.
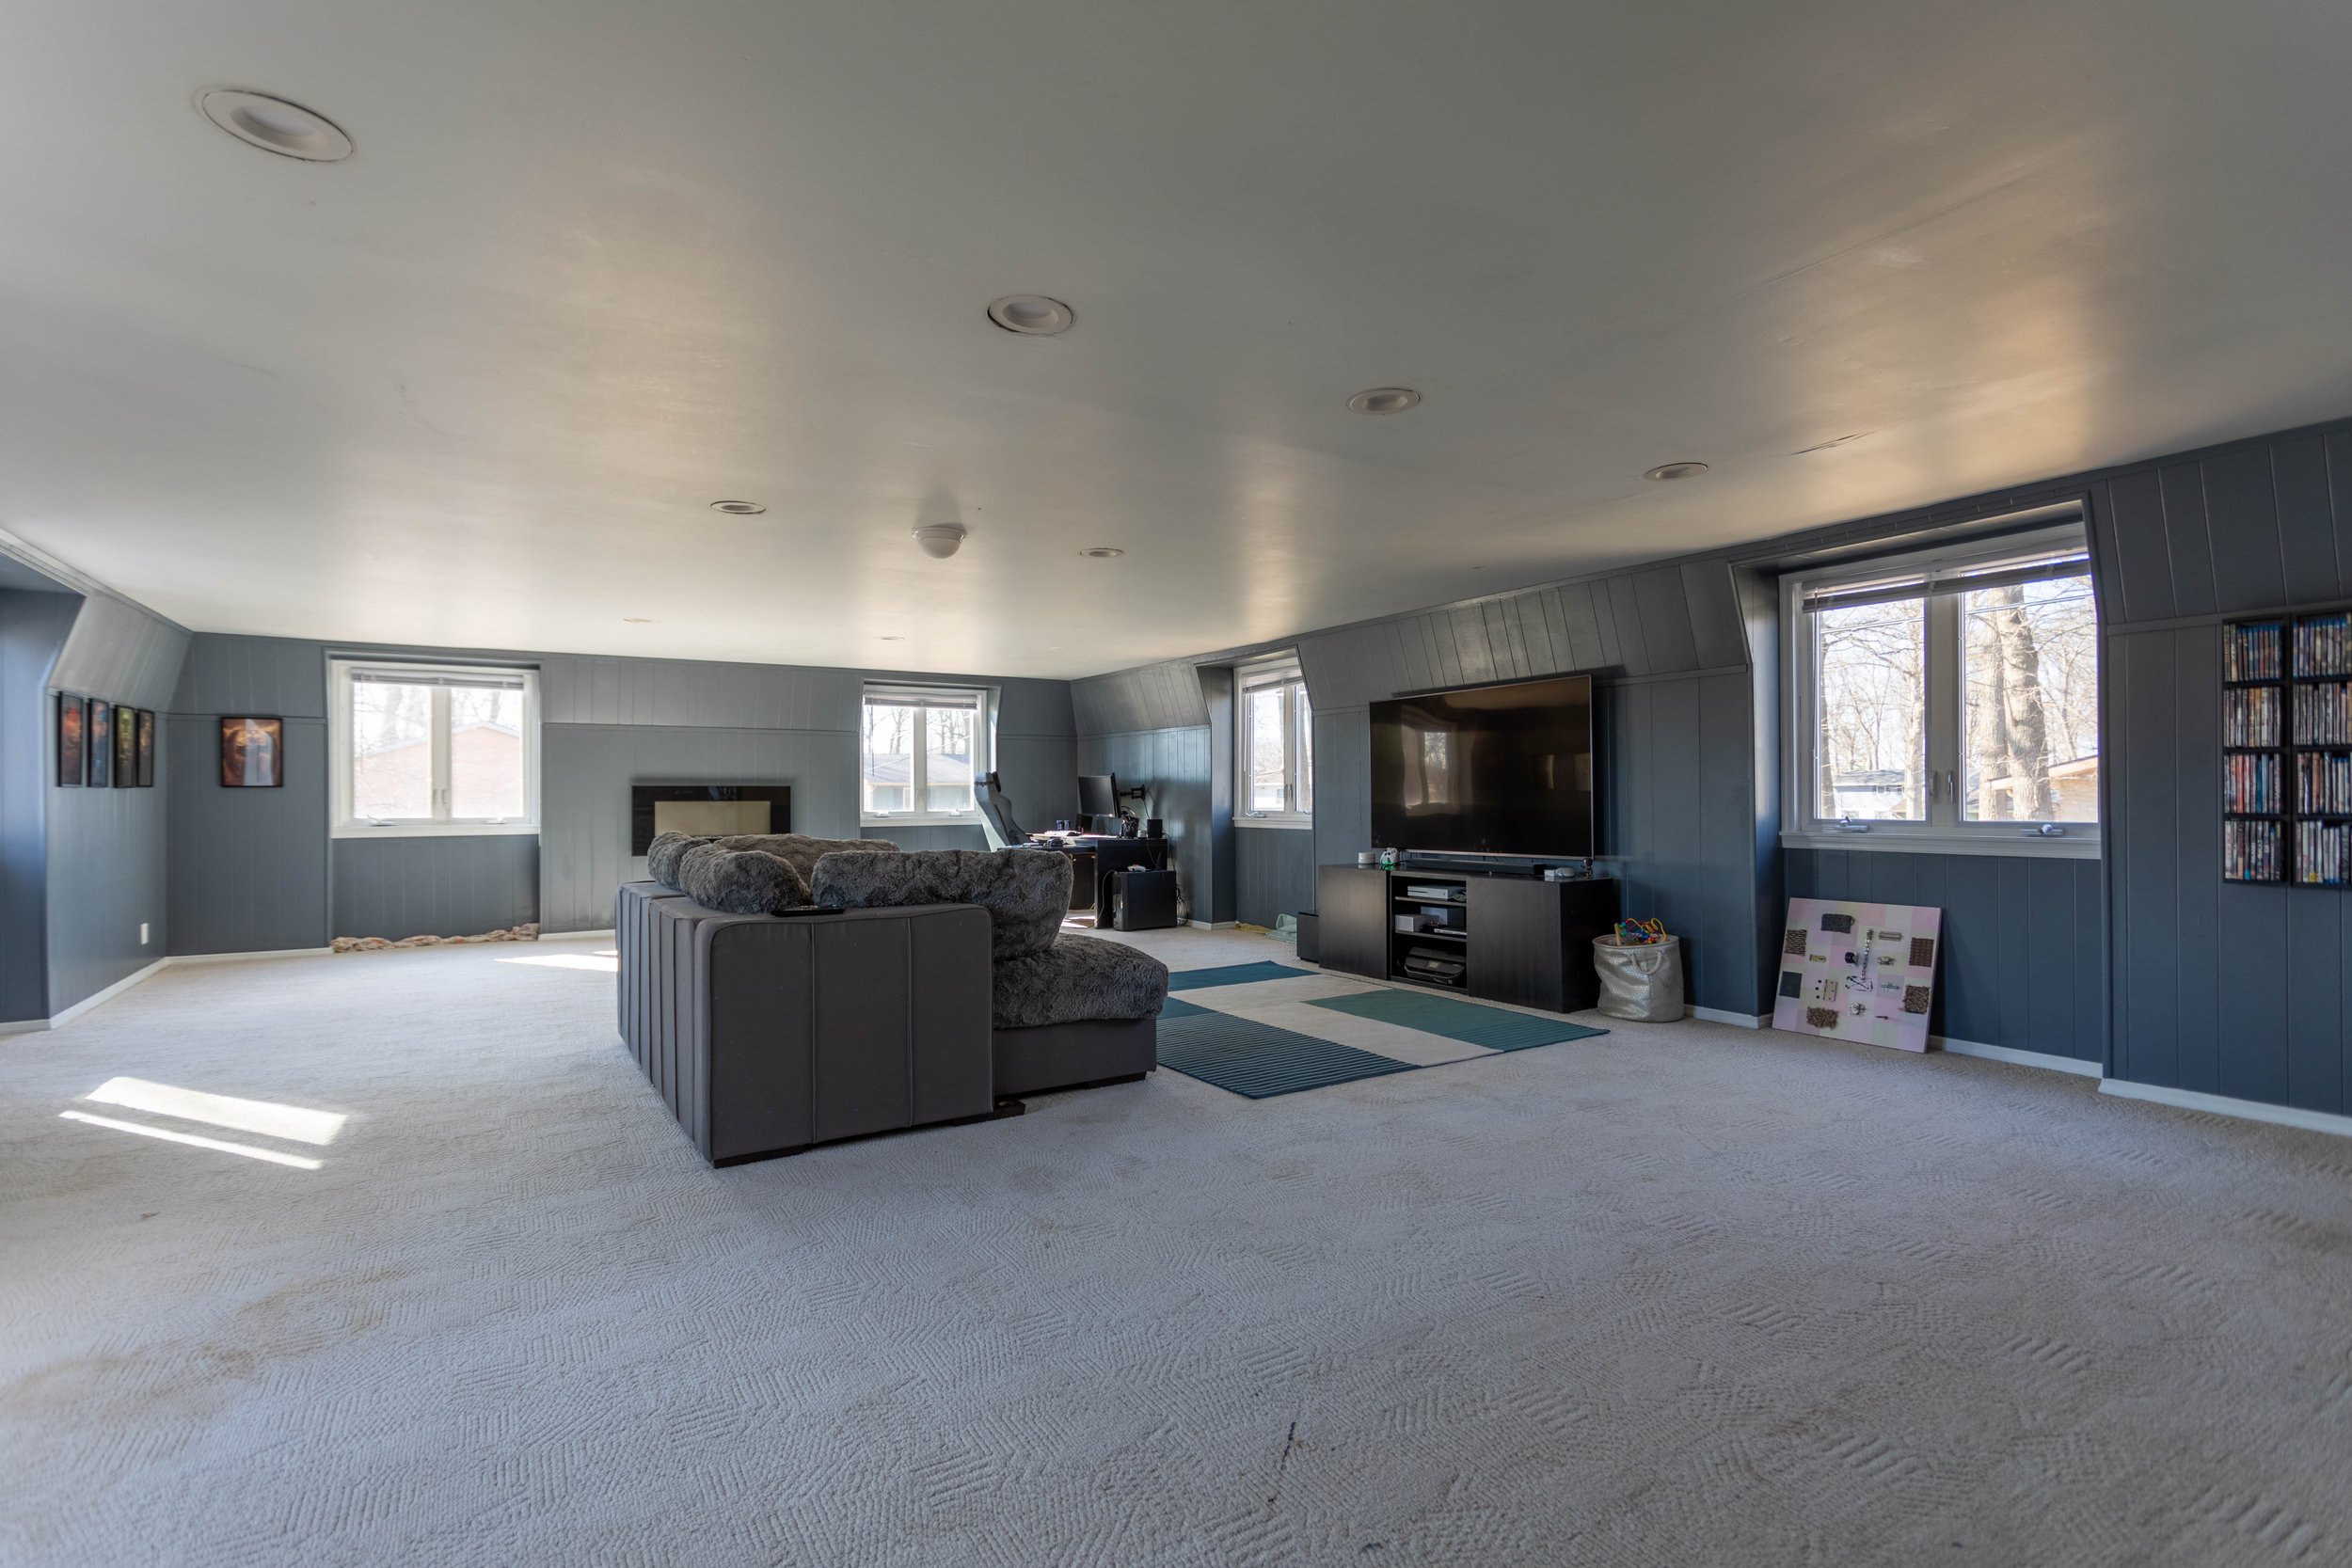
And here’s what it looks like today!
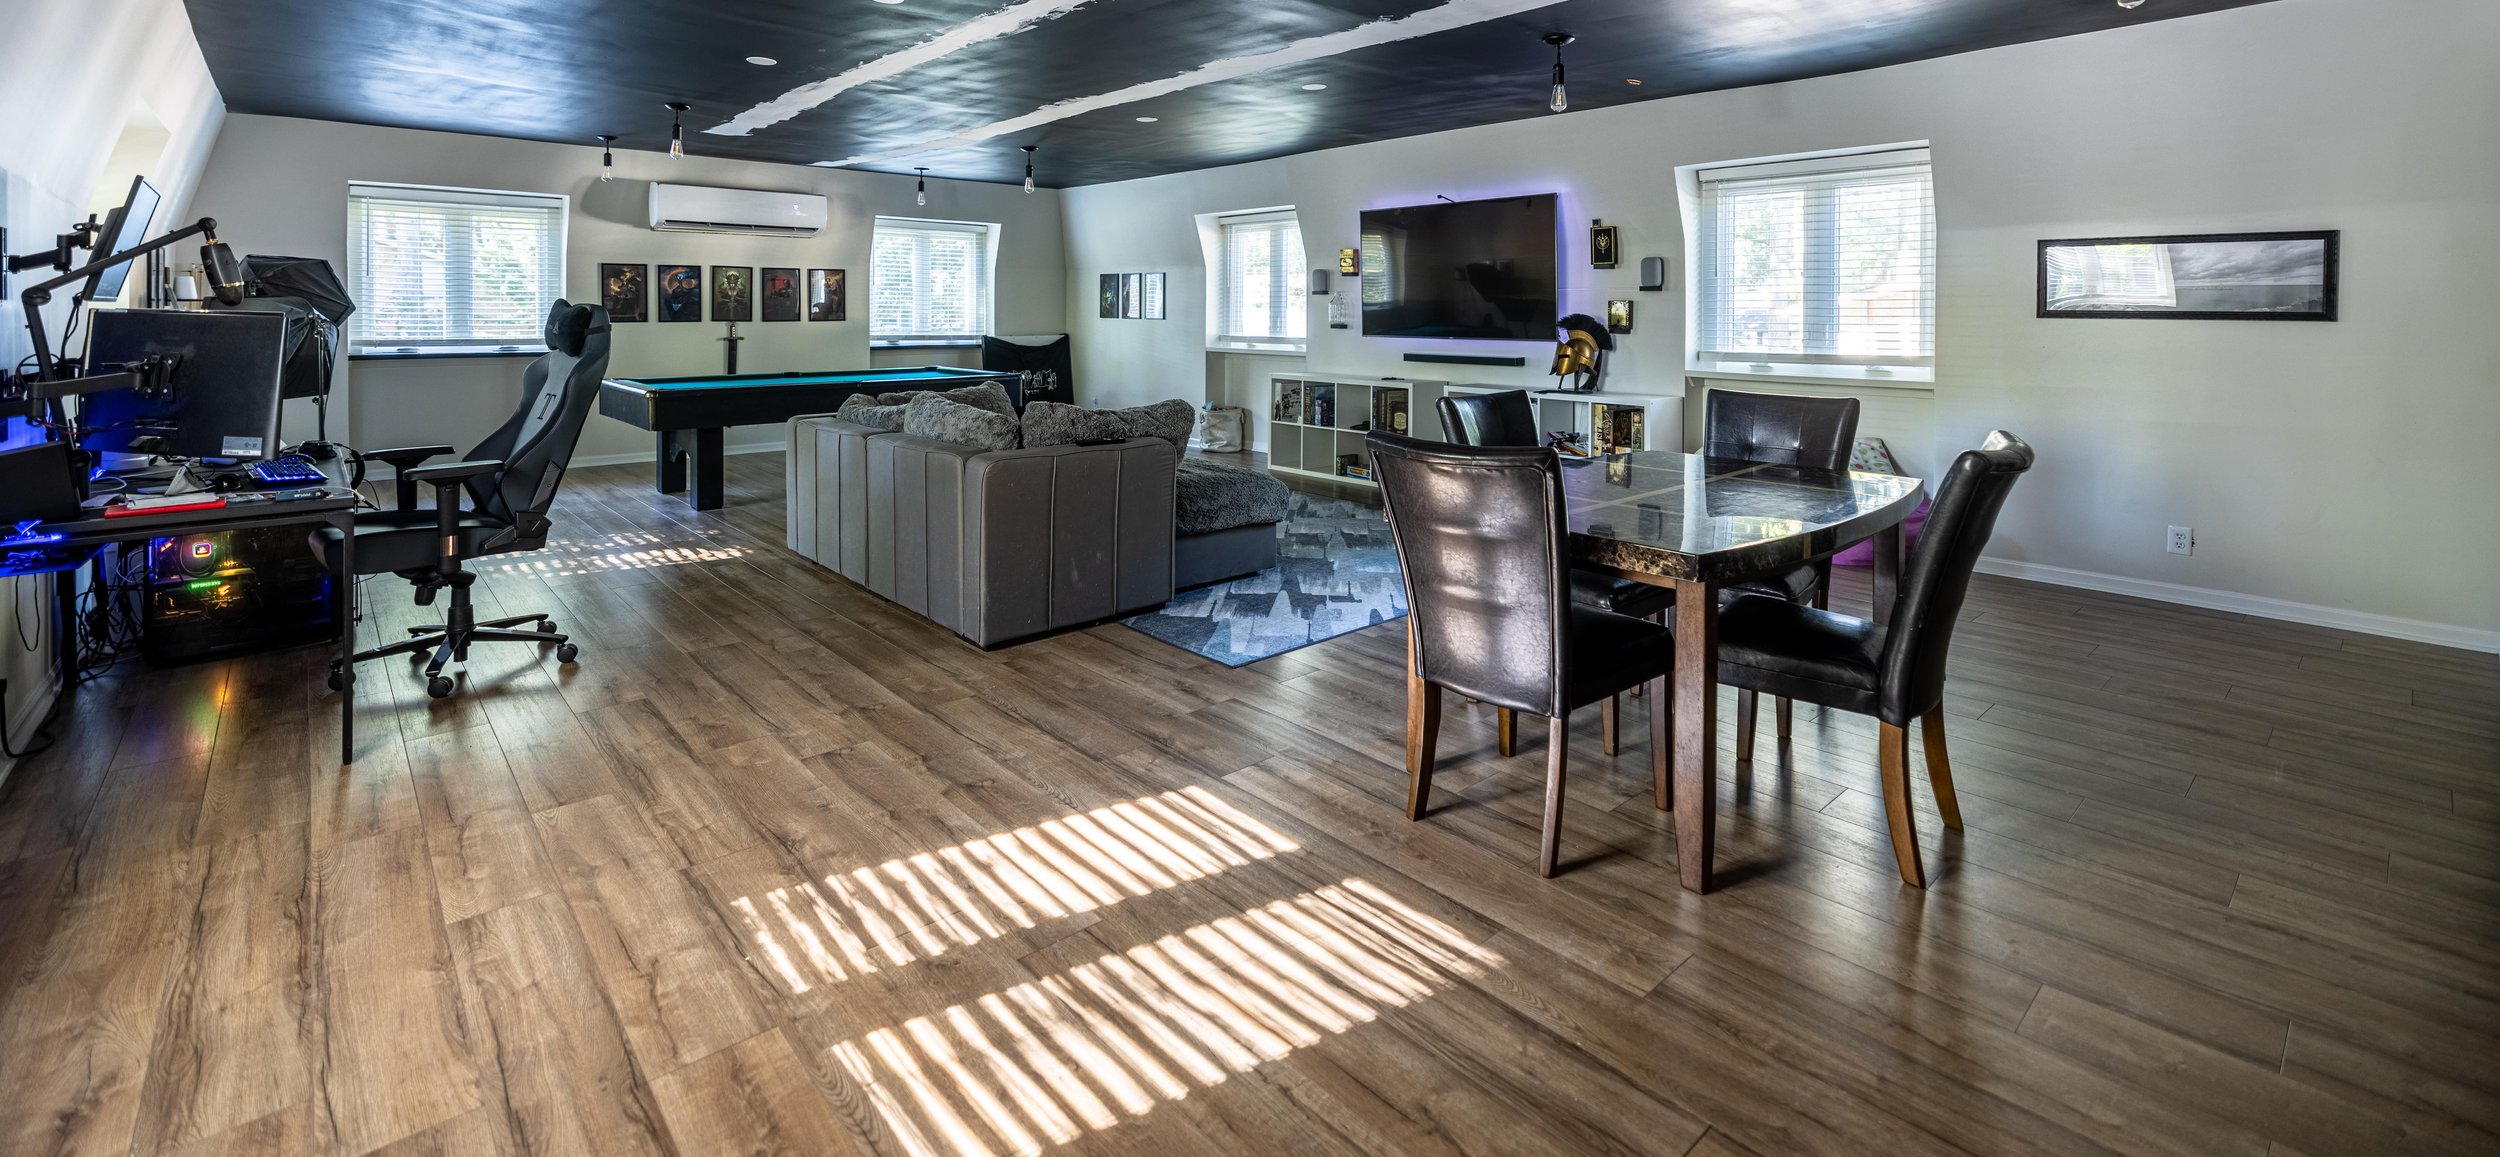
Disregard the racing stripes on the ceiling. We’re in the process of repairing the drywall that was poorly installed when we renovated.
Here’s a peek from the opposite side of the room, complete with the brick veneer we just installed in the kitchenette!
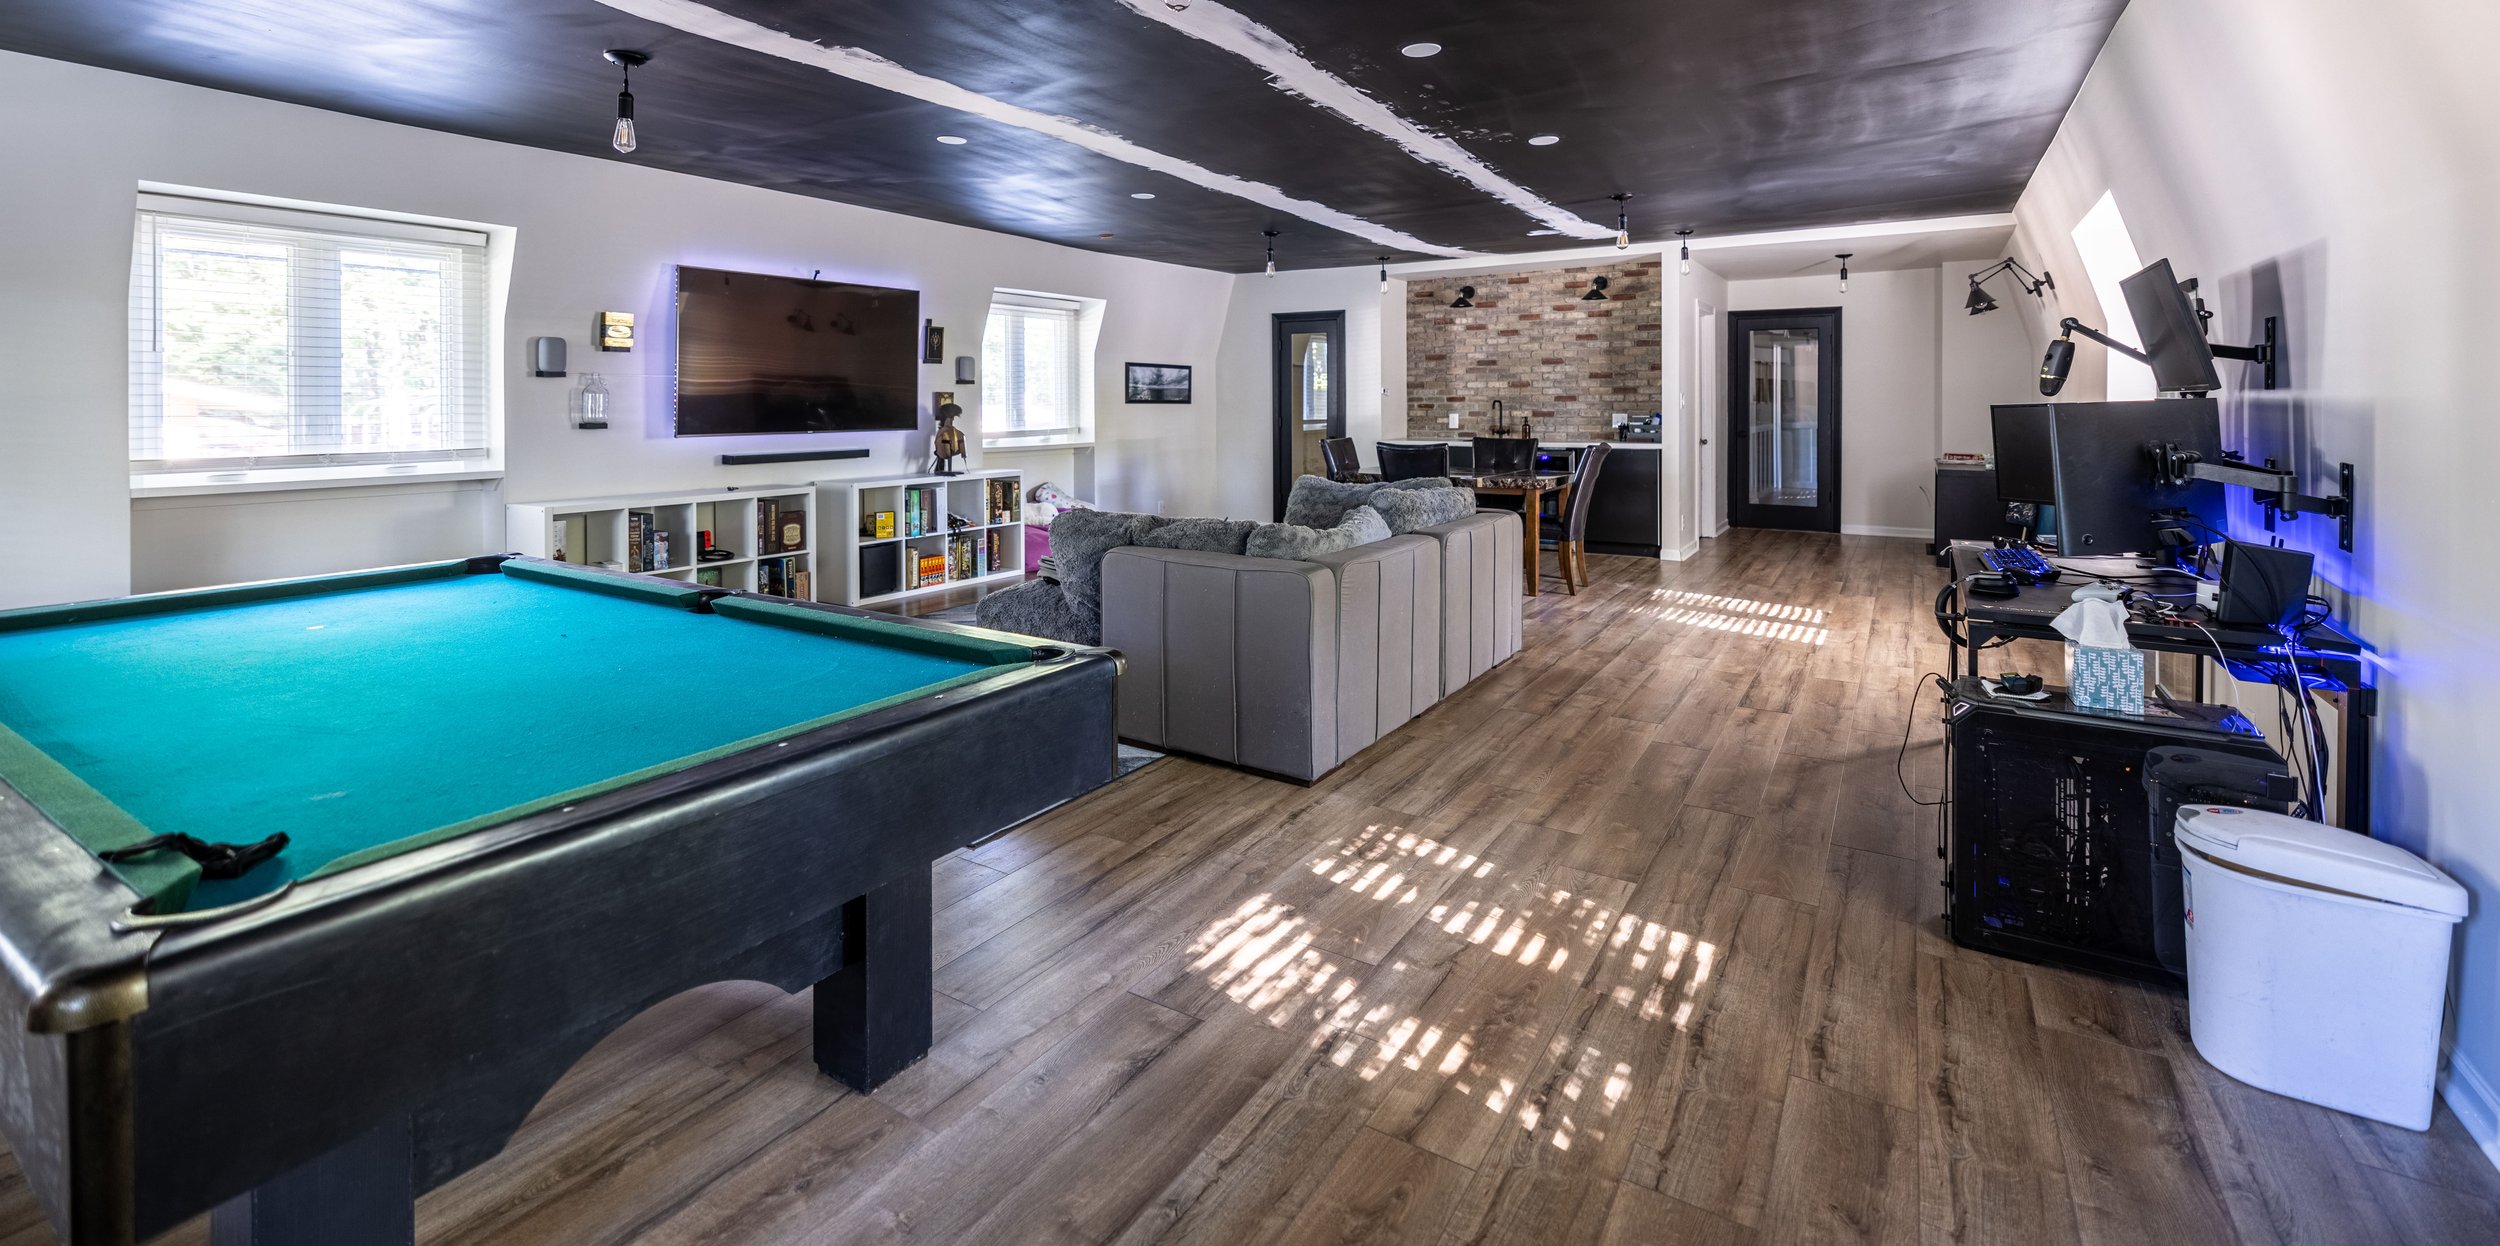
Although we still have some work to do, I’d say it’s looking quite a bit different from where it started:
Related Posts: Loft Renovation Kick-Off / Kitchenette Design Plans / Loft Renovation Updates / How to Install Brick Veneer
Now let’s take this party outside, shall we?
The Exterior
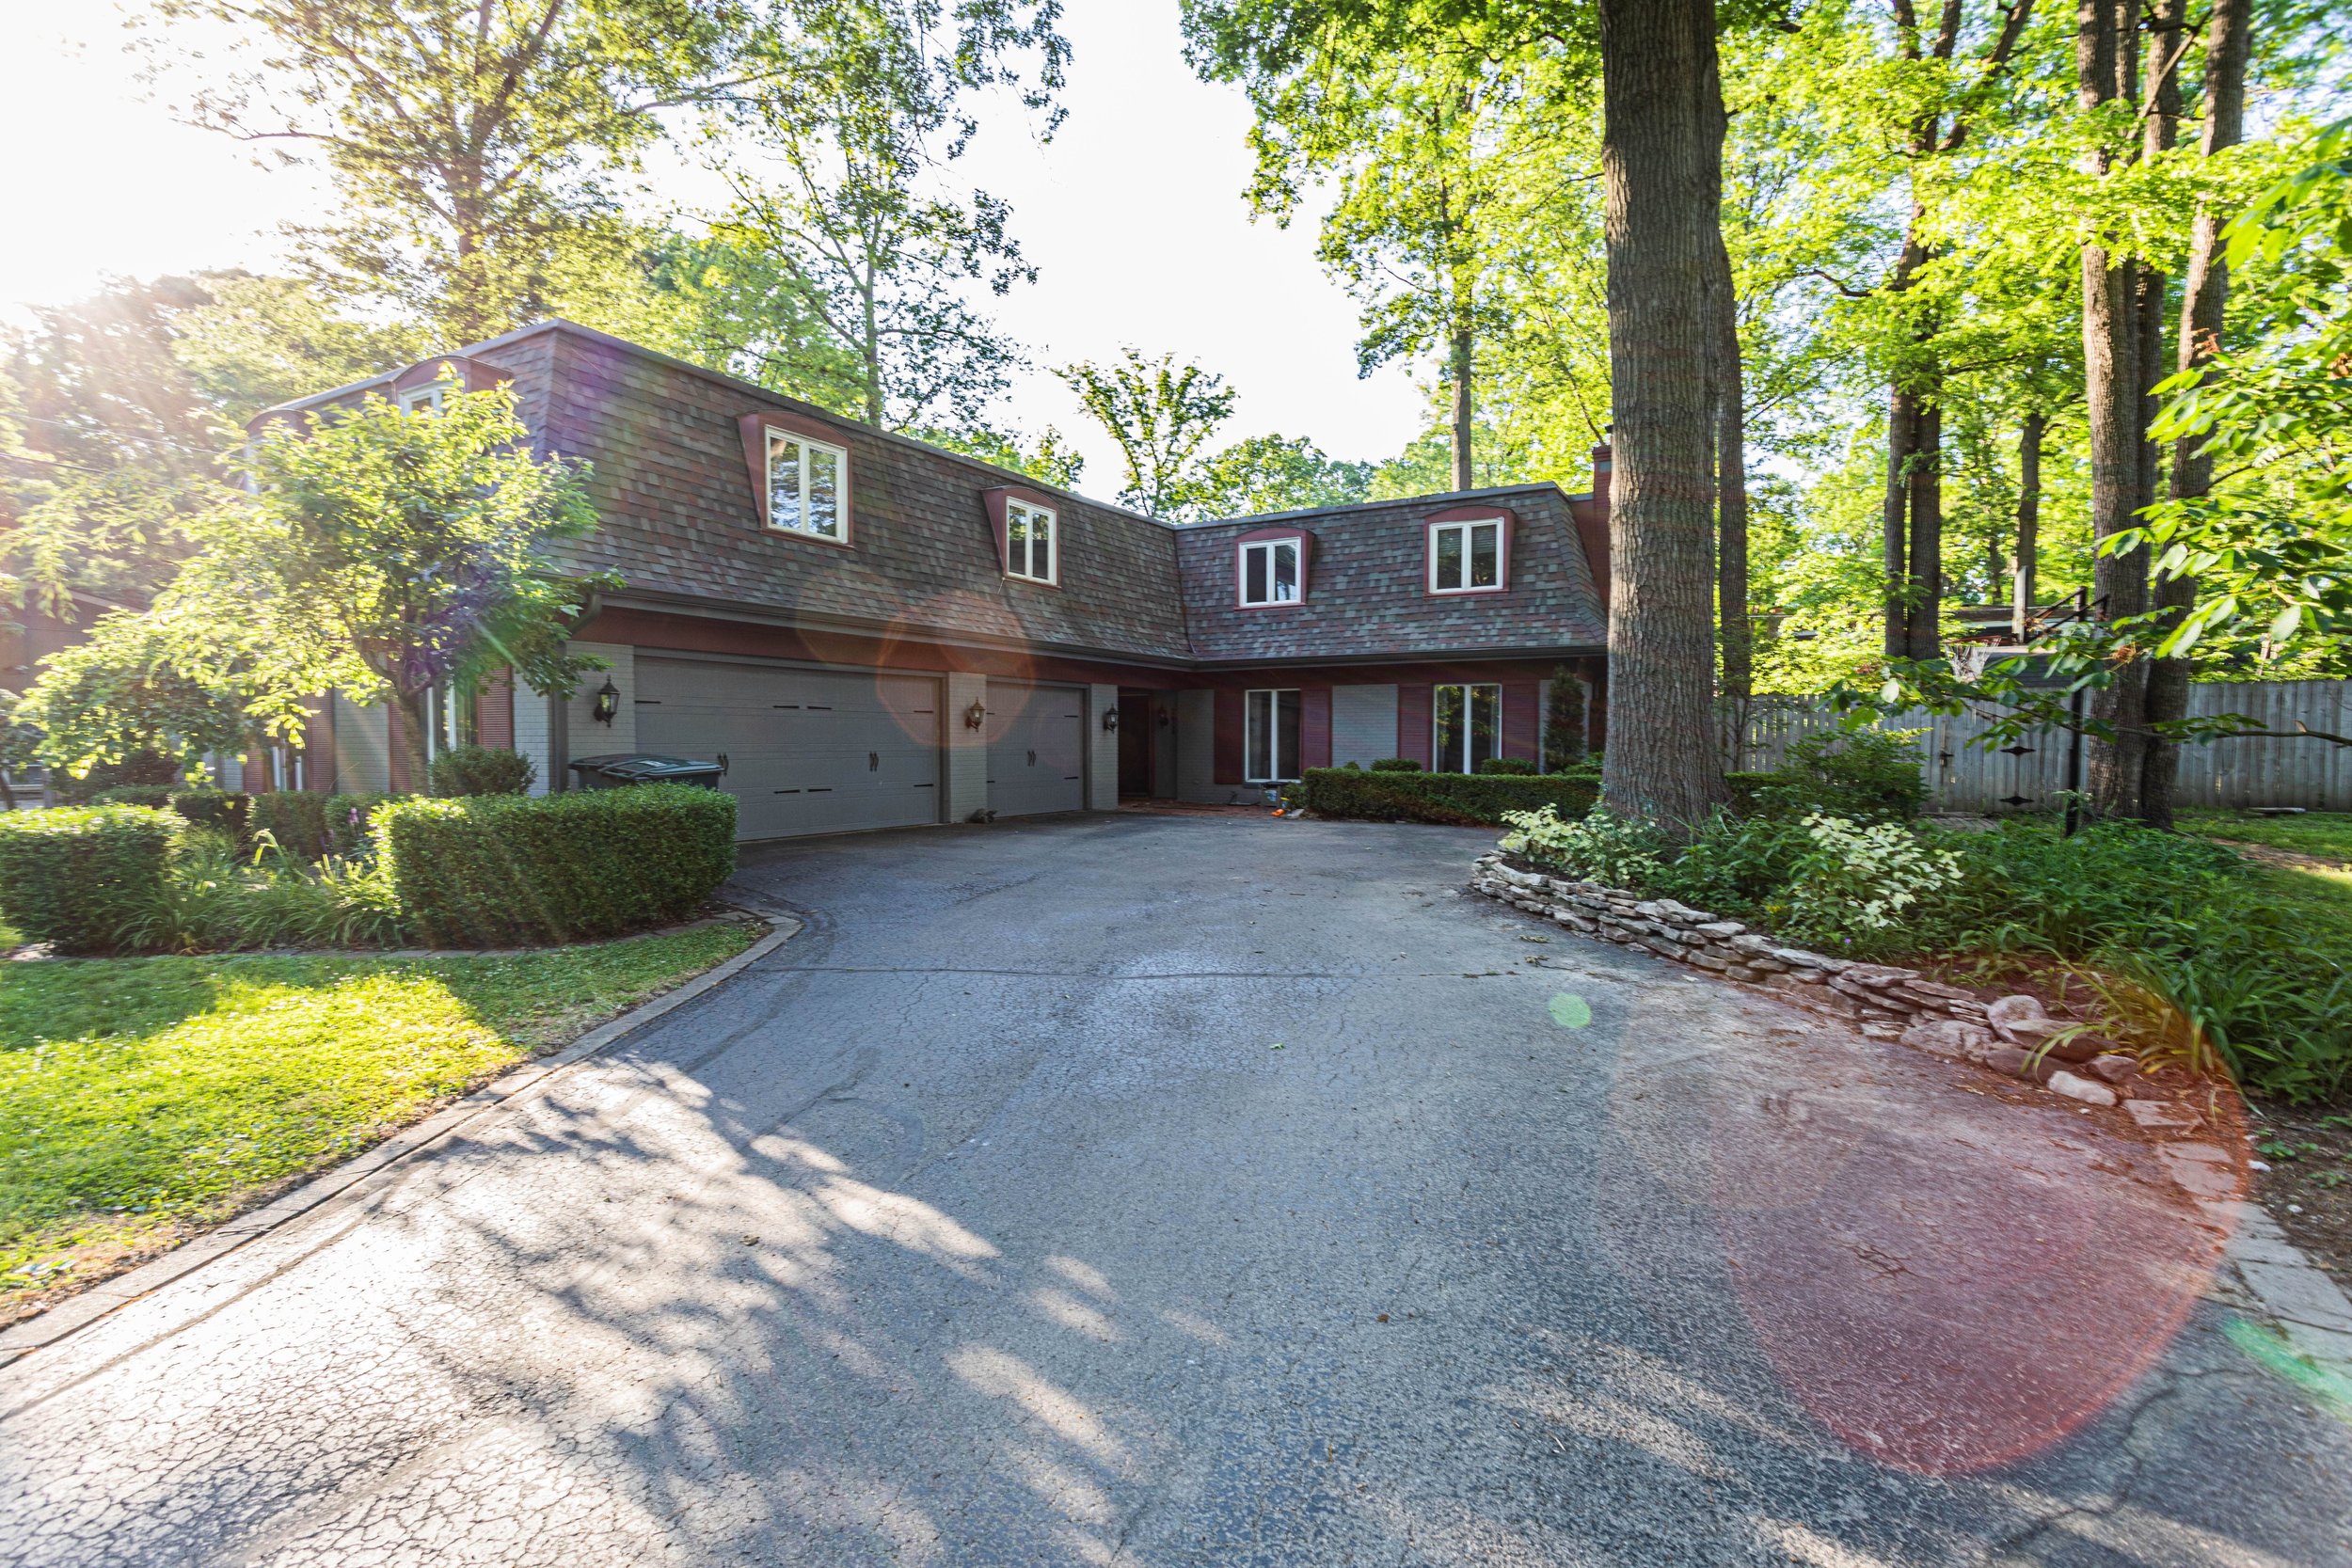

The front of the house hasn’t changed drastically, but you’ll notice the windows on the second story are now white. As I mentioned in our project plans for 2022, we had new windows installed throughout the house last winter!
Also, I’ve spent a TON of time cleaning out the flower beds around the house, so you’ll notice the flower bed on the right is looking a little clearer. I’m slowly working on adding plants back in.
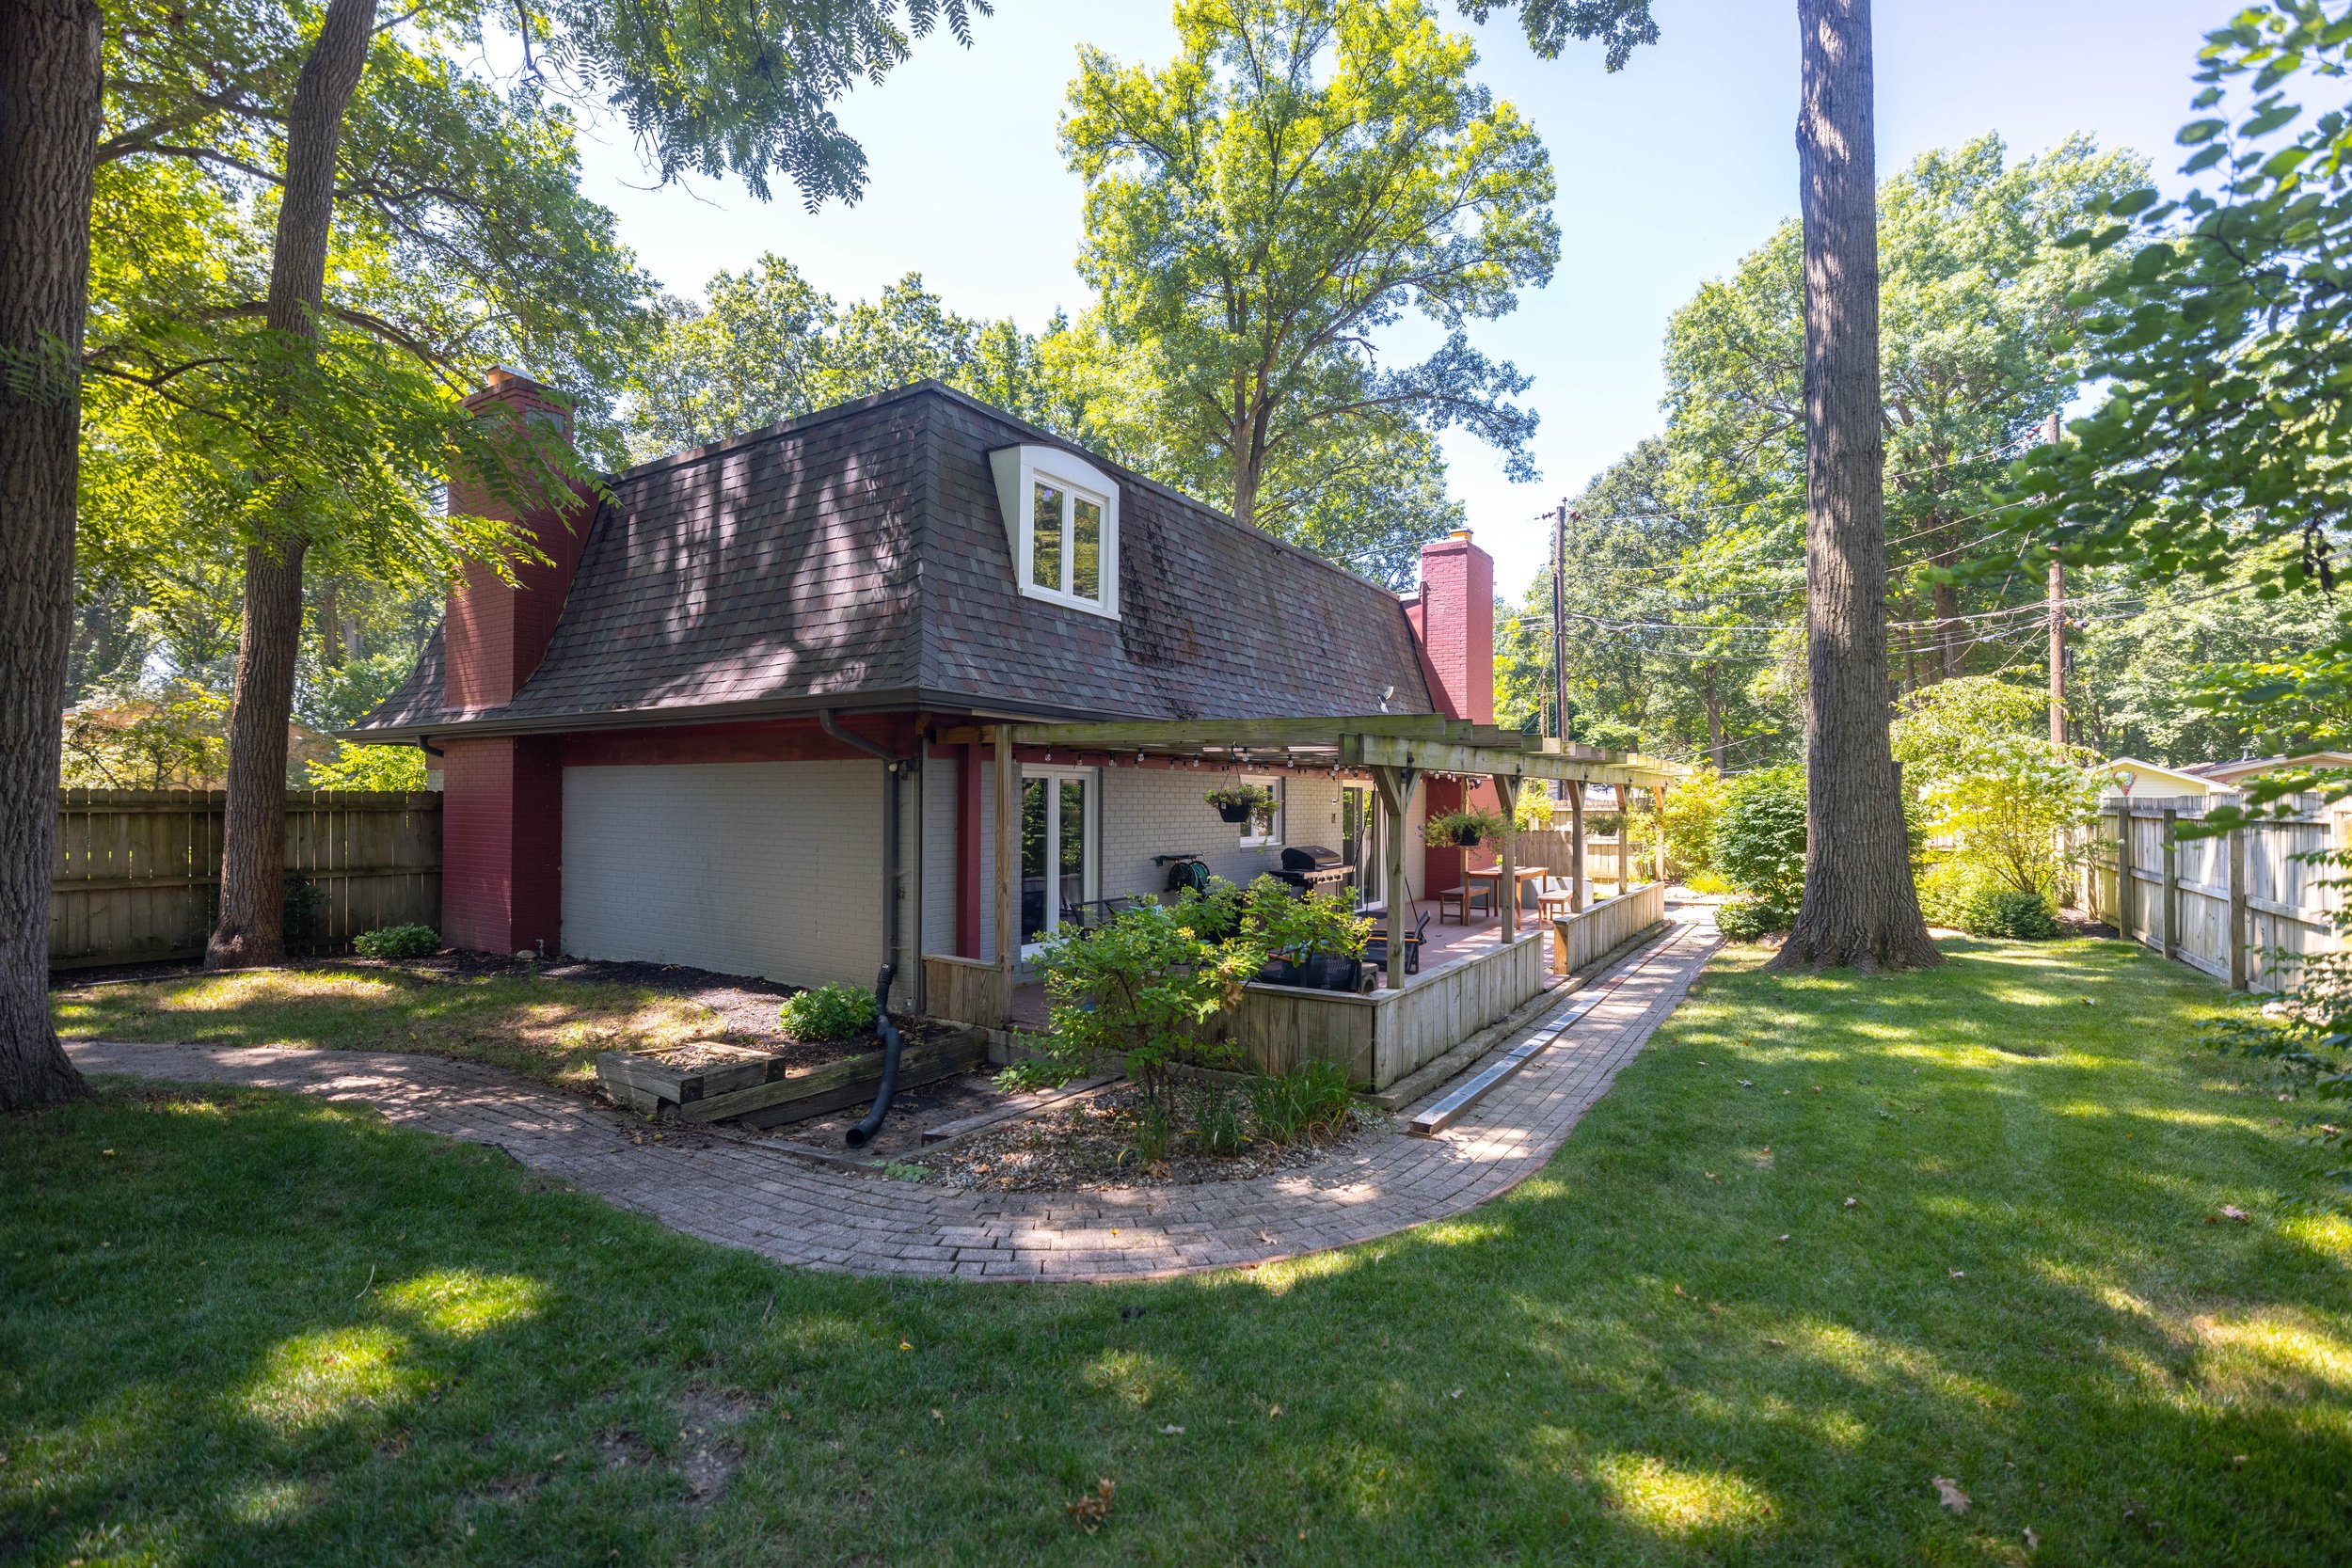
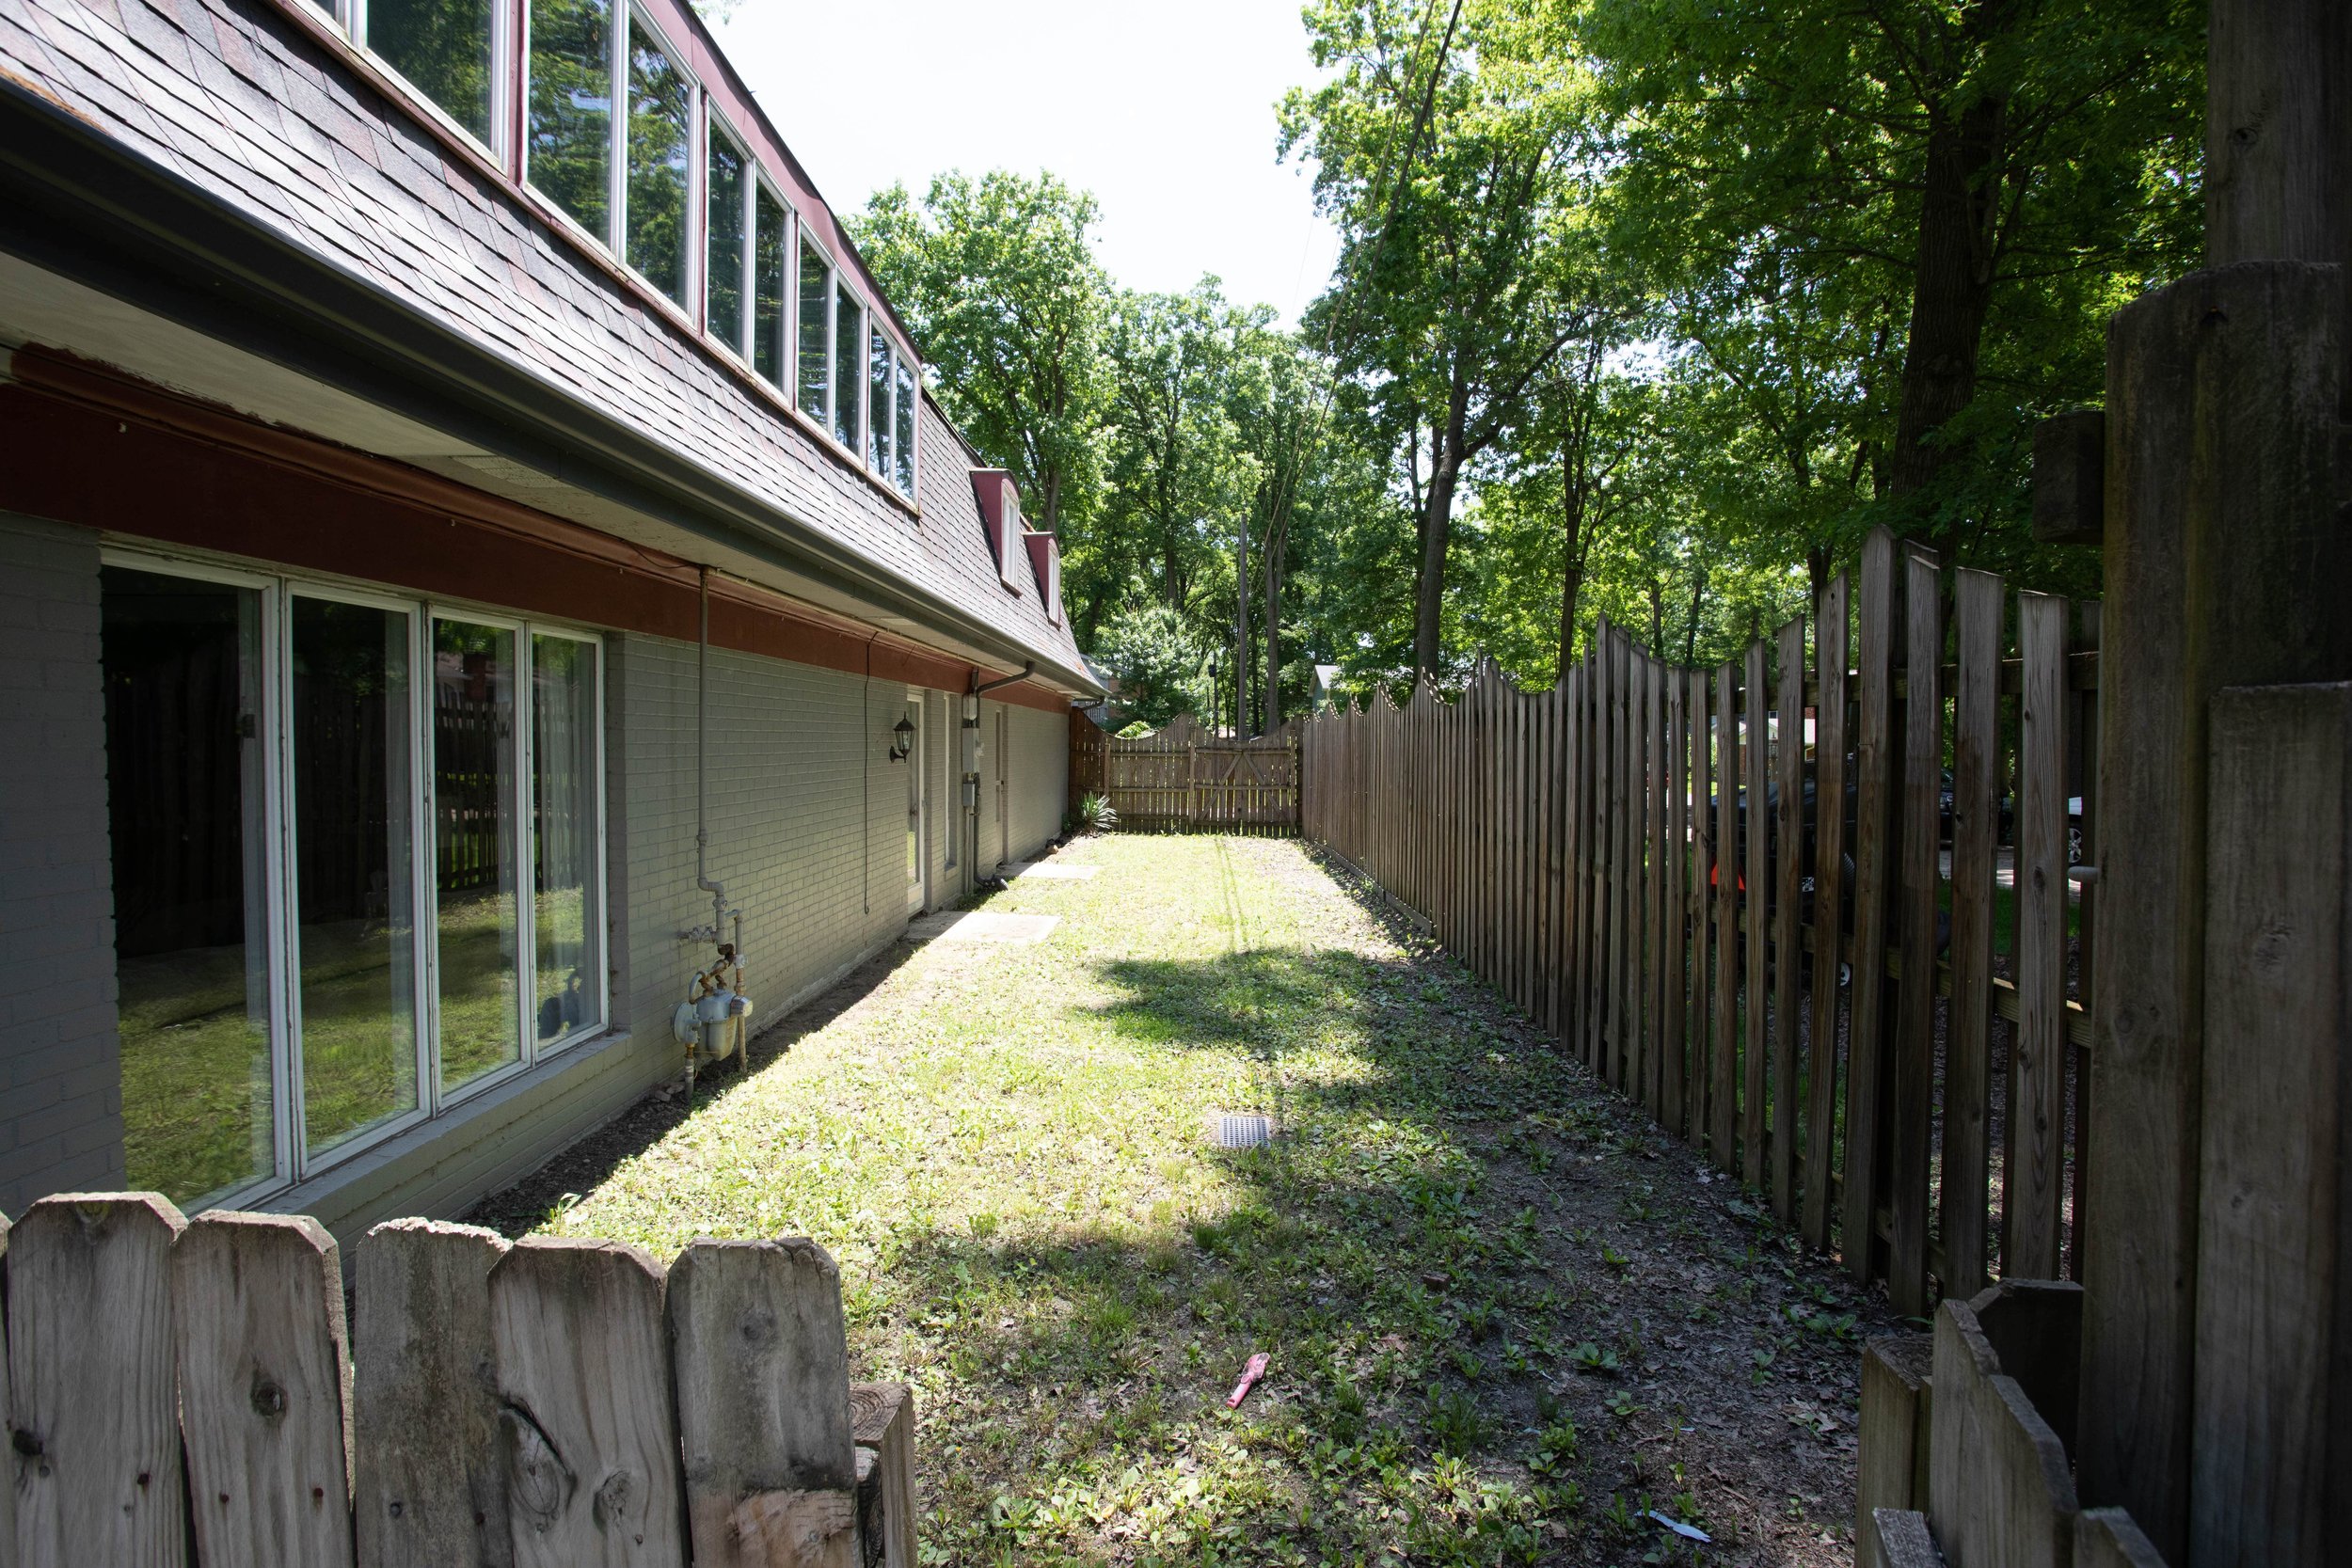
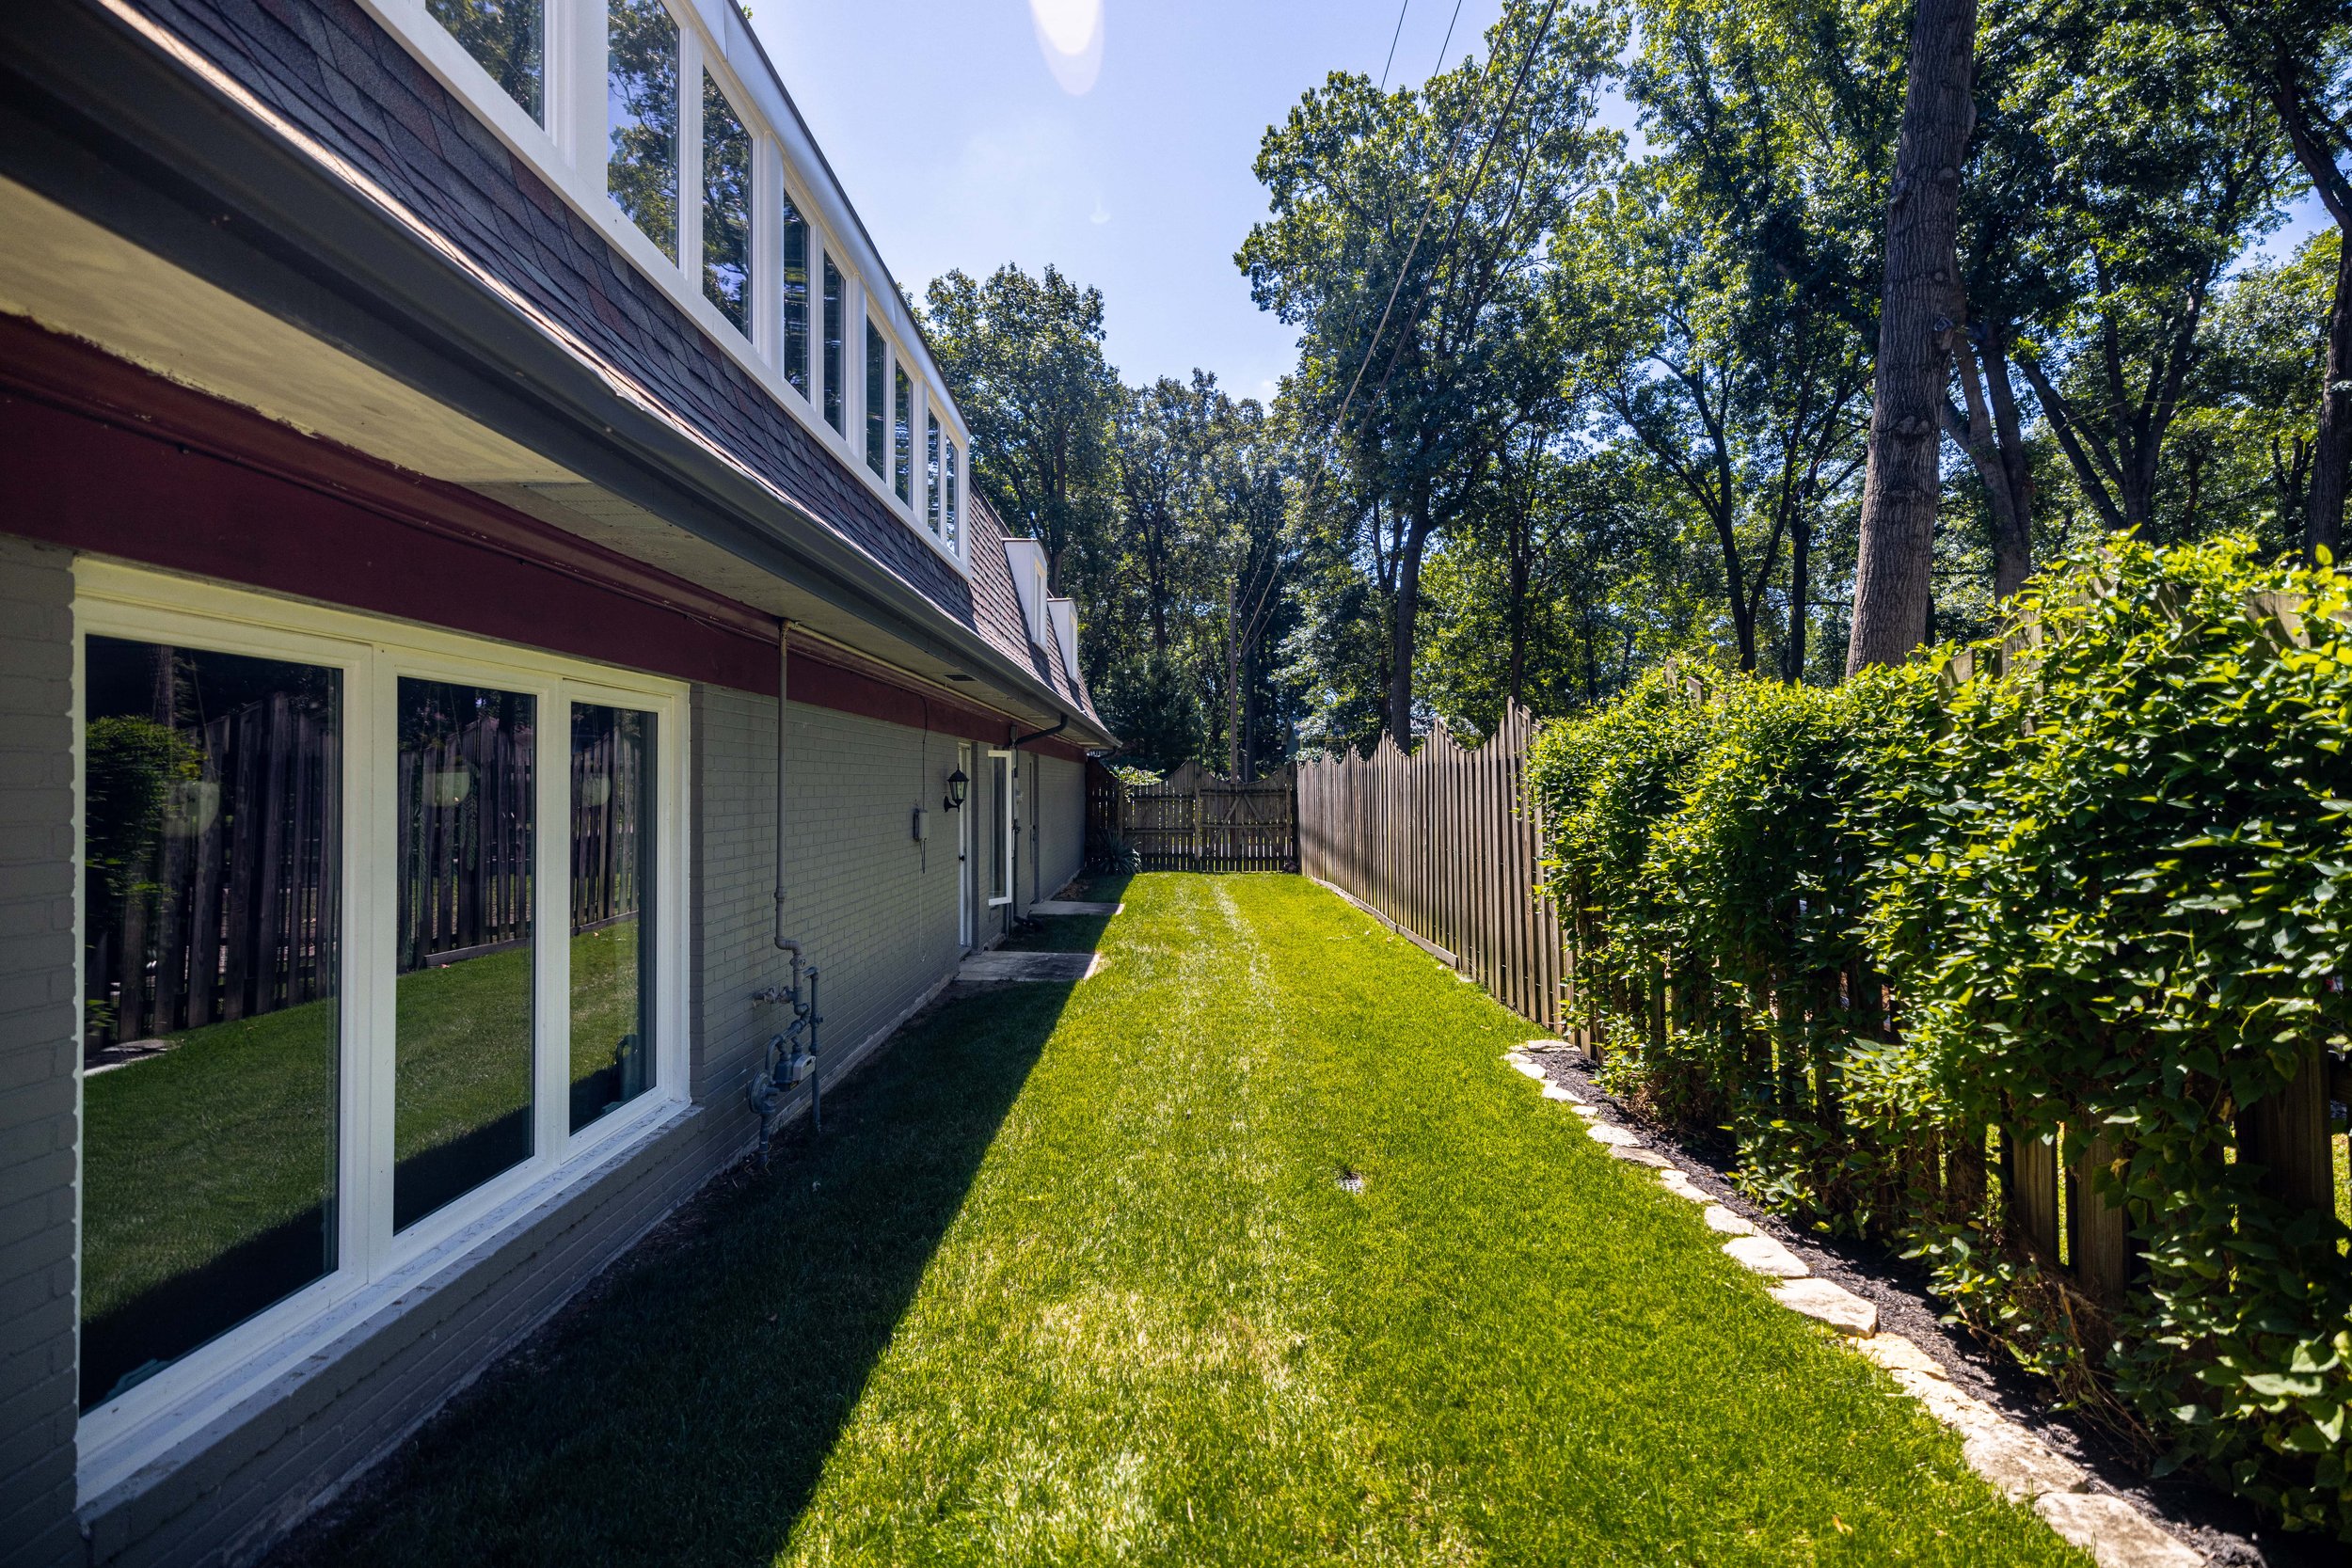
The backyard is where our efforts really shine because WE HAVE GRASS!
When we moved in, the backyard was just dirt and weeds, which the kids loved (mudpies, anyone?), but I wasn’t a fan. It feels so good to have some luscious green grass back here.

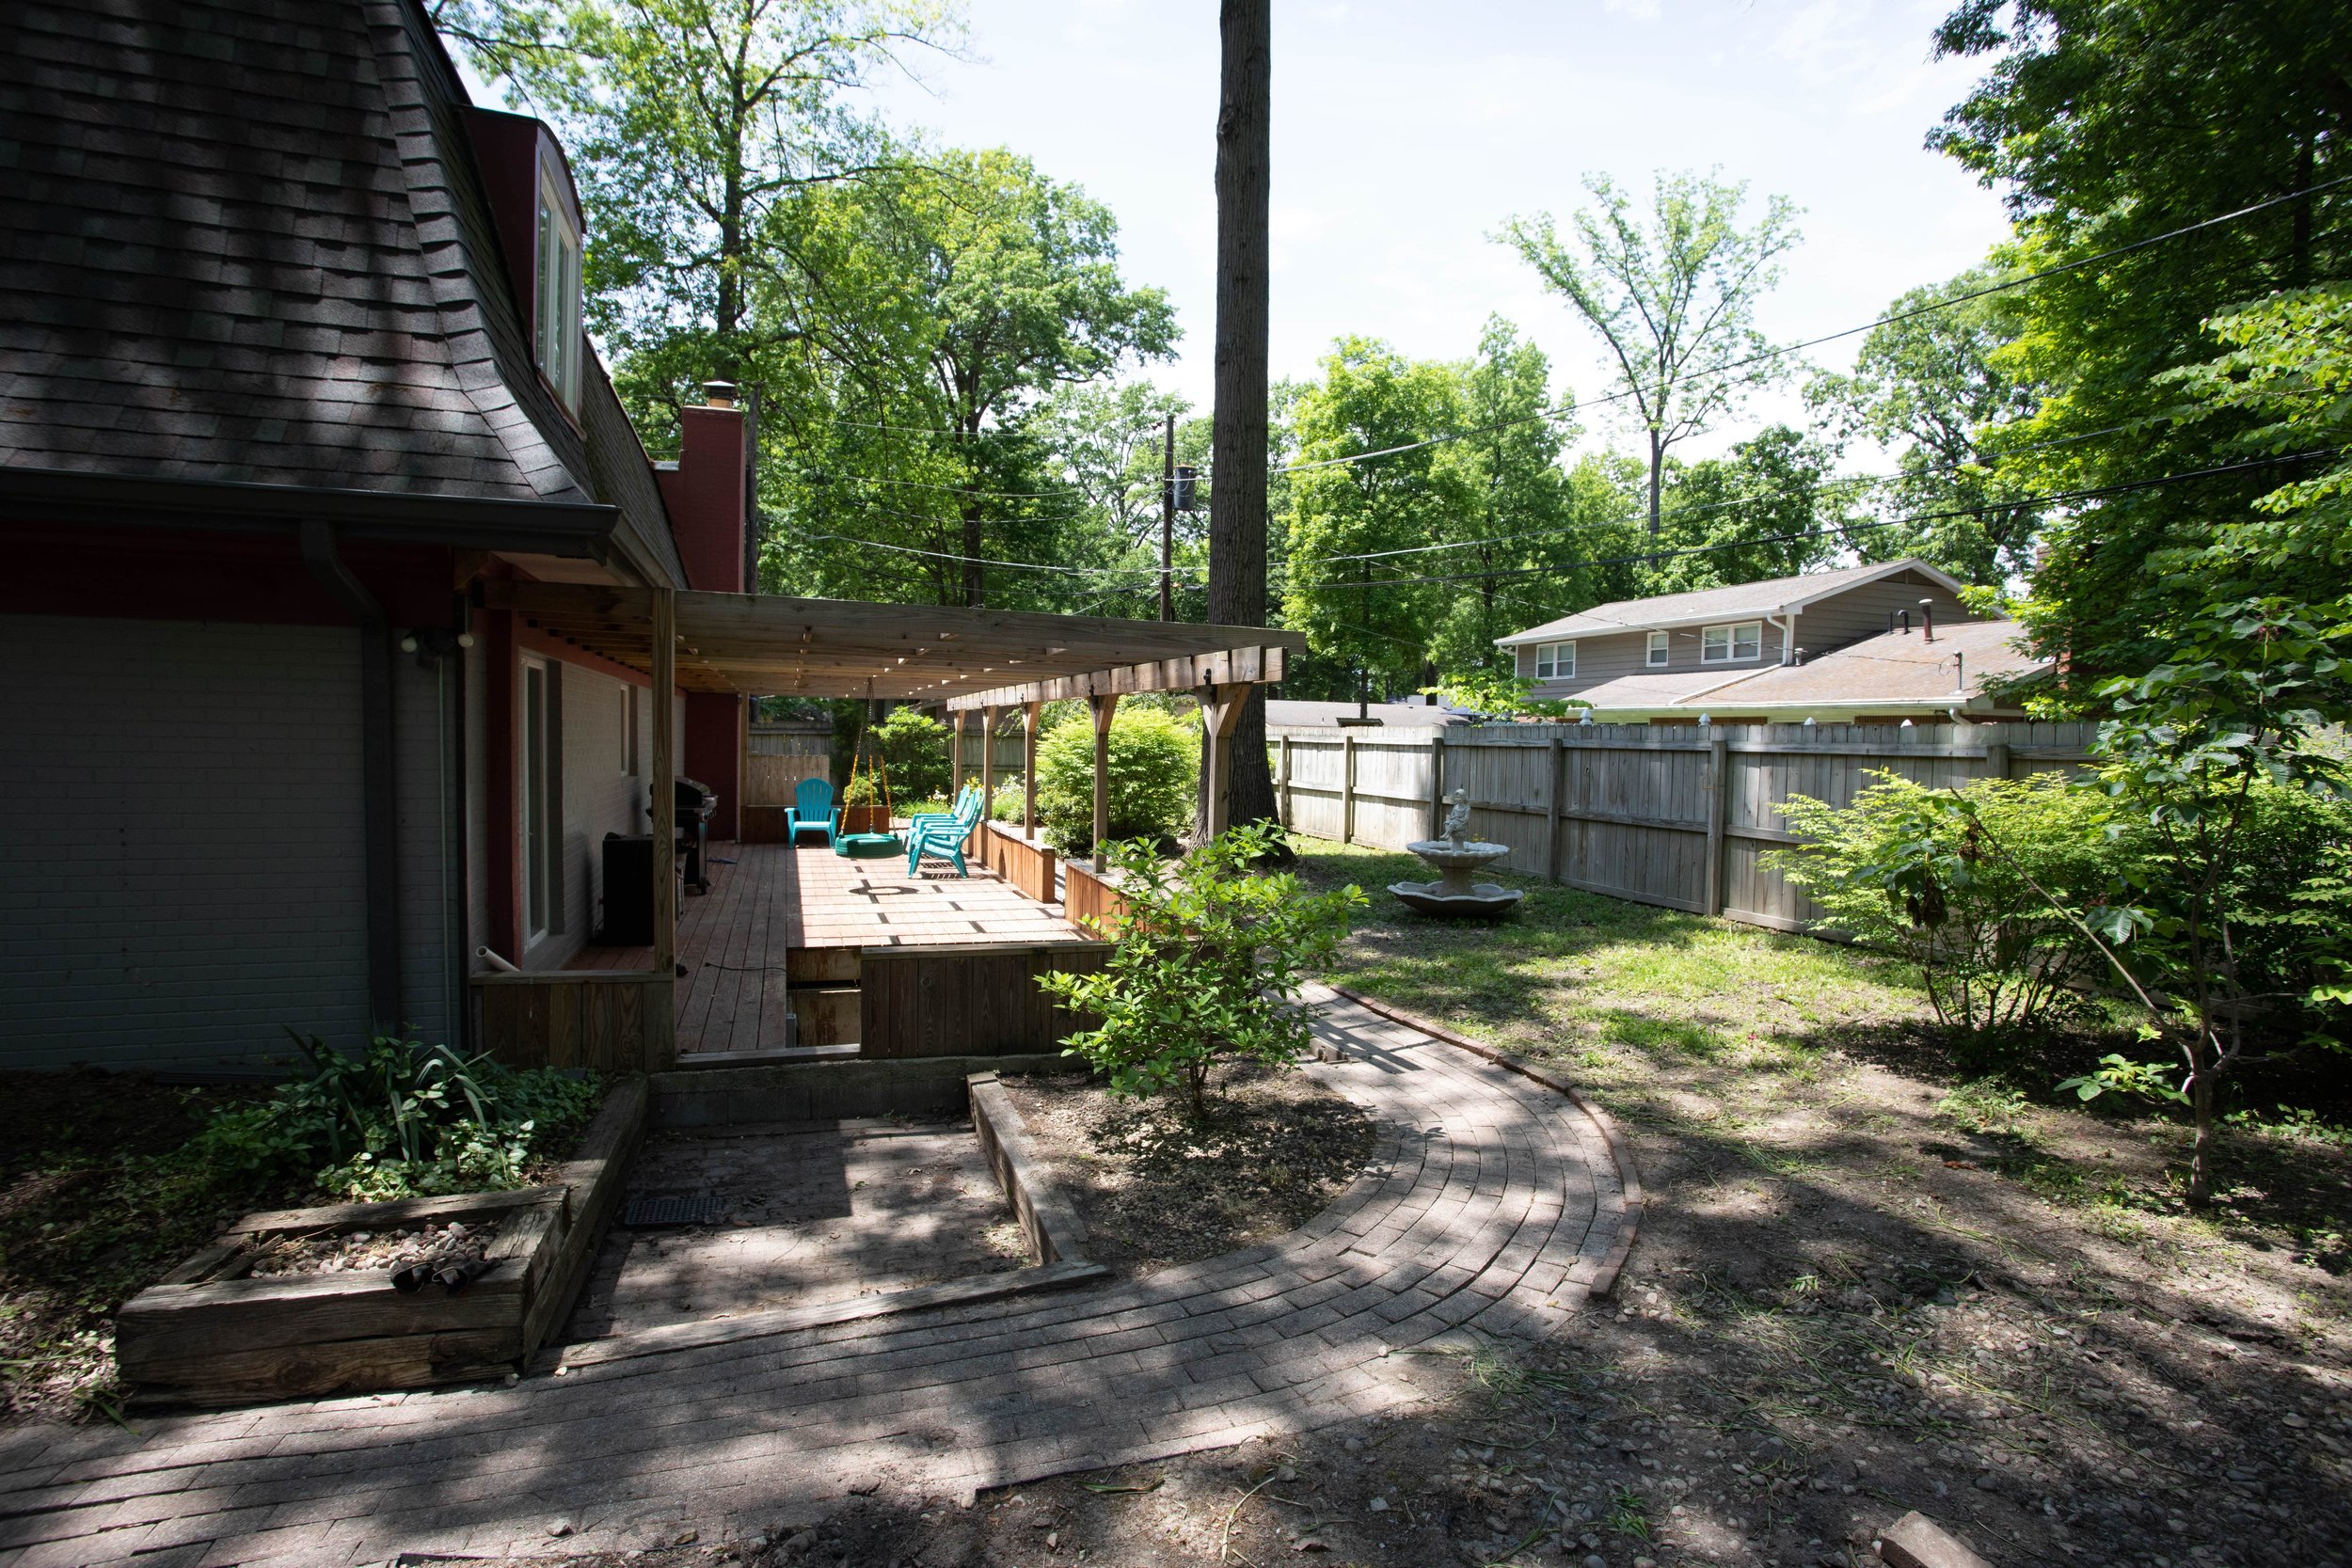
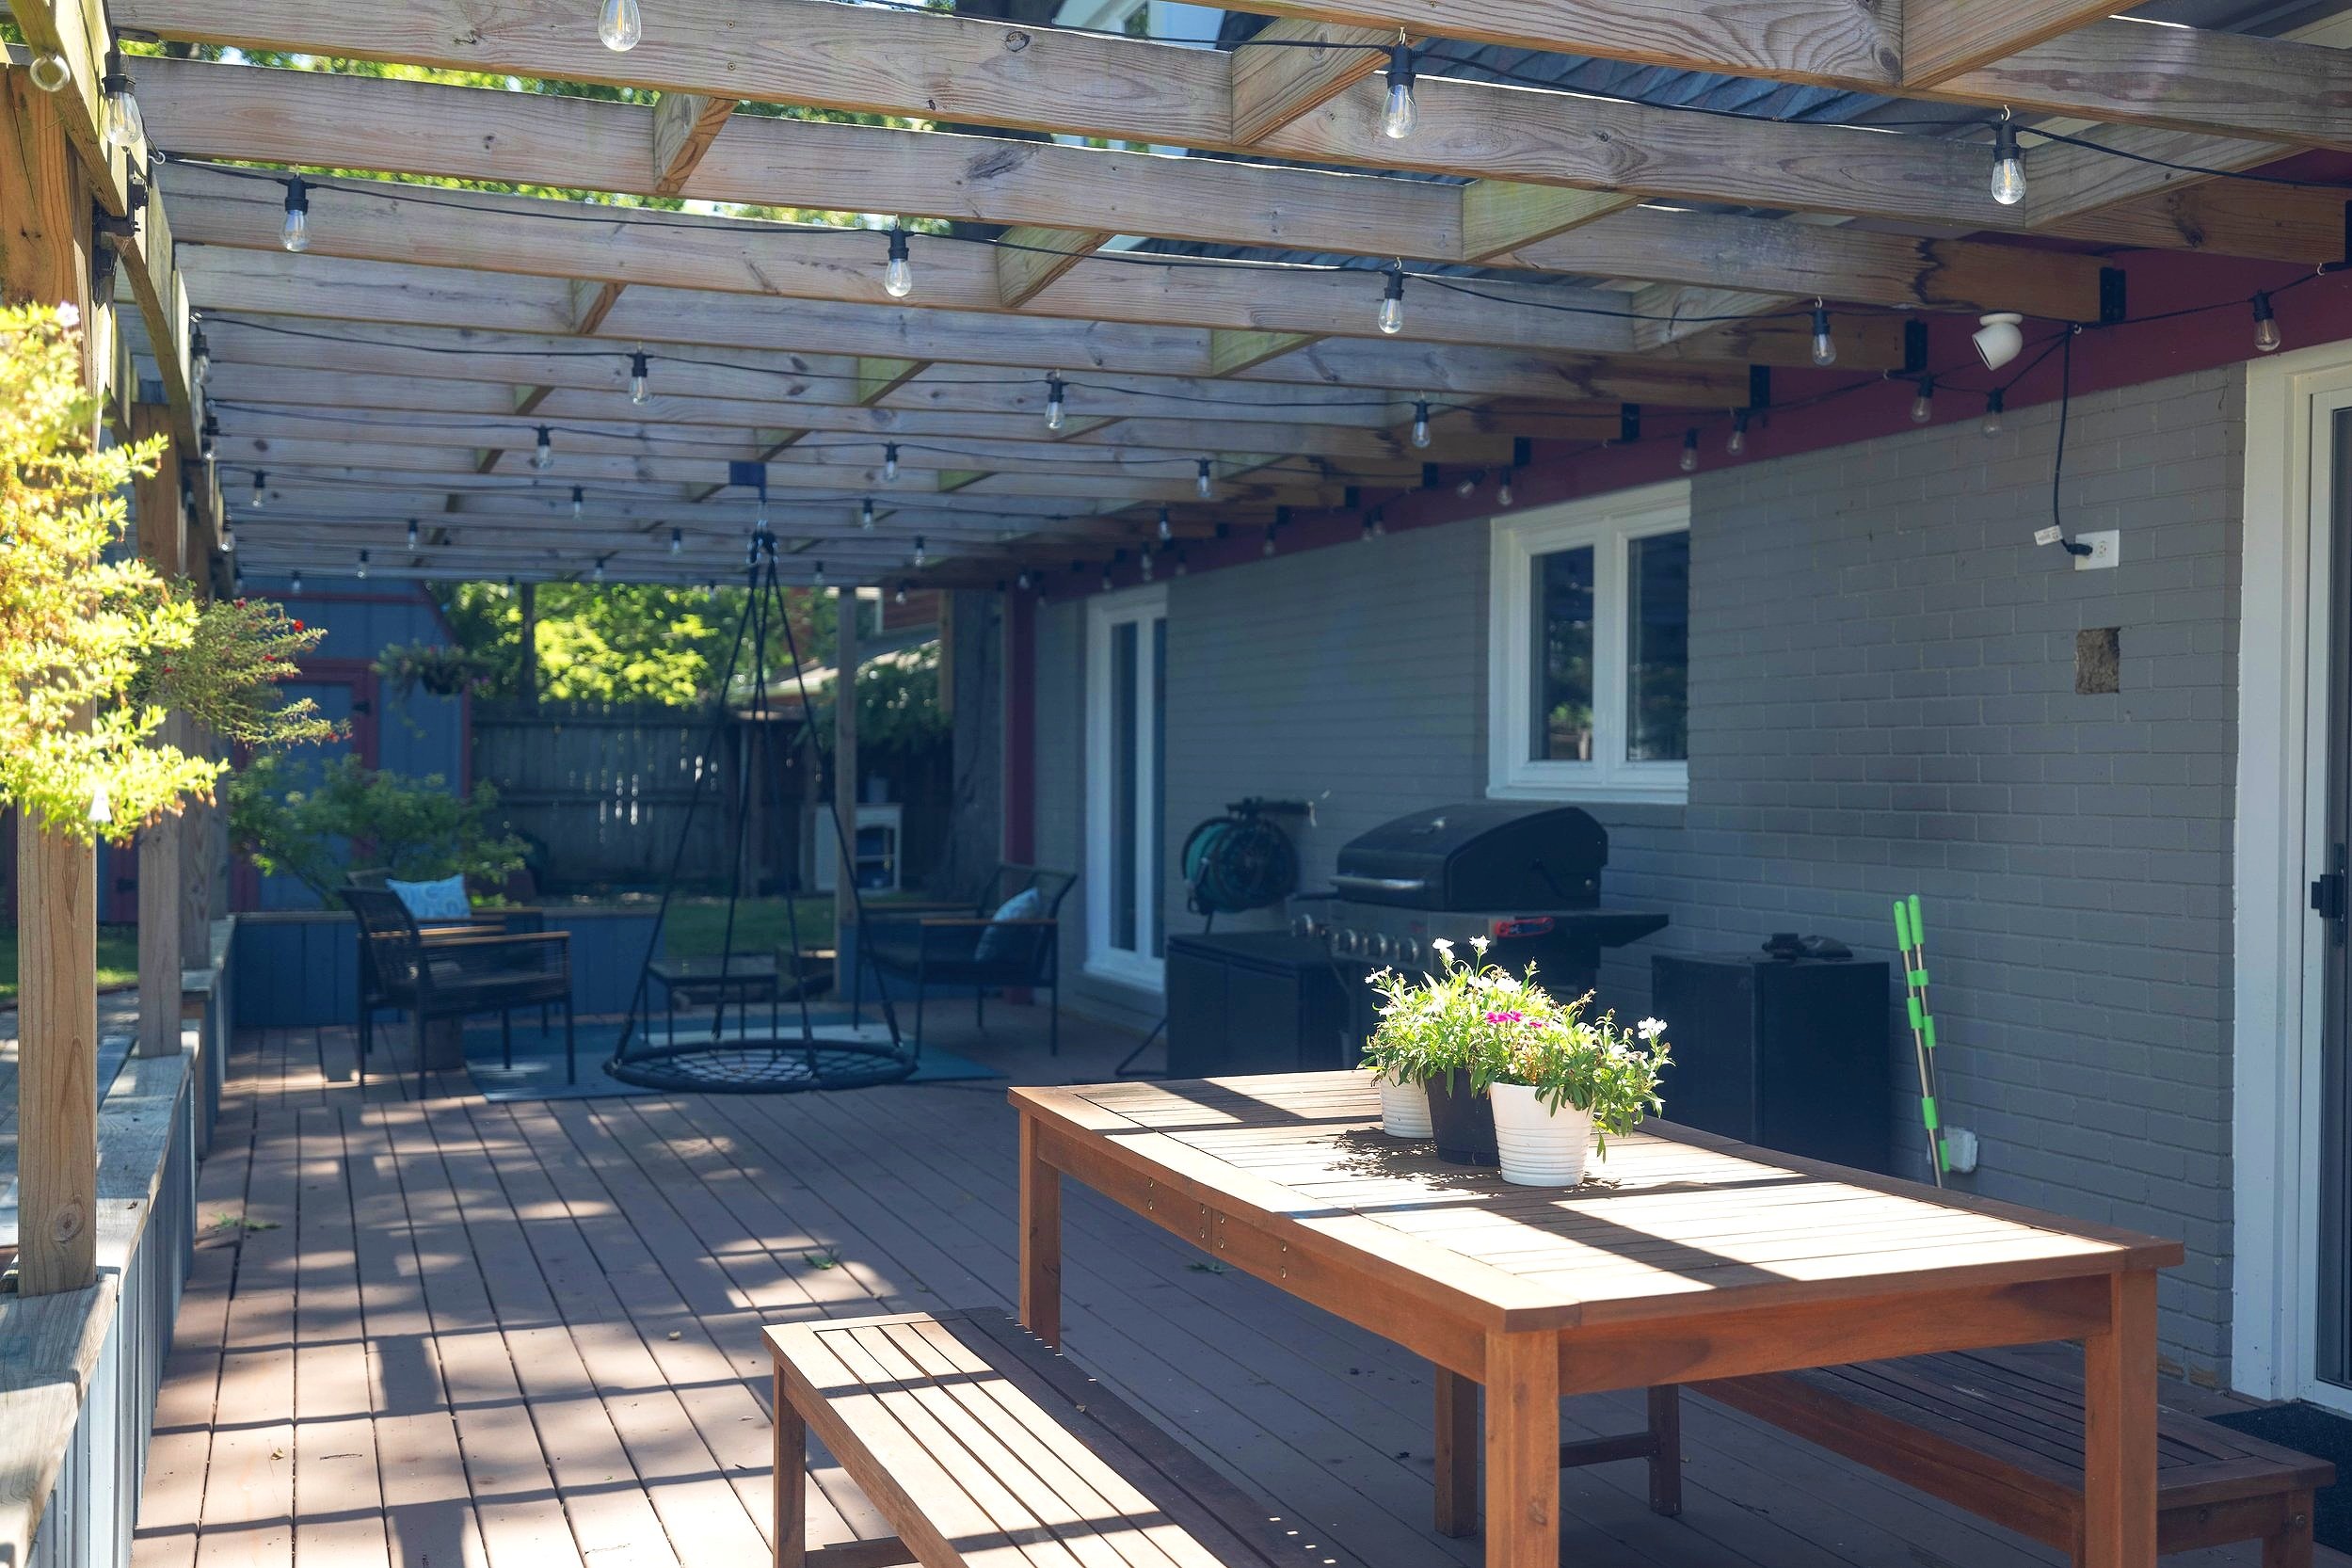
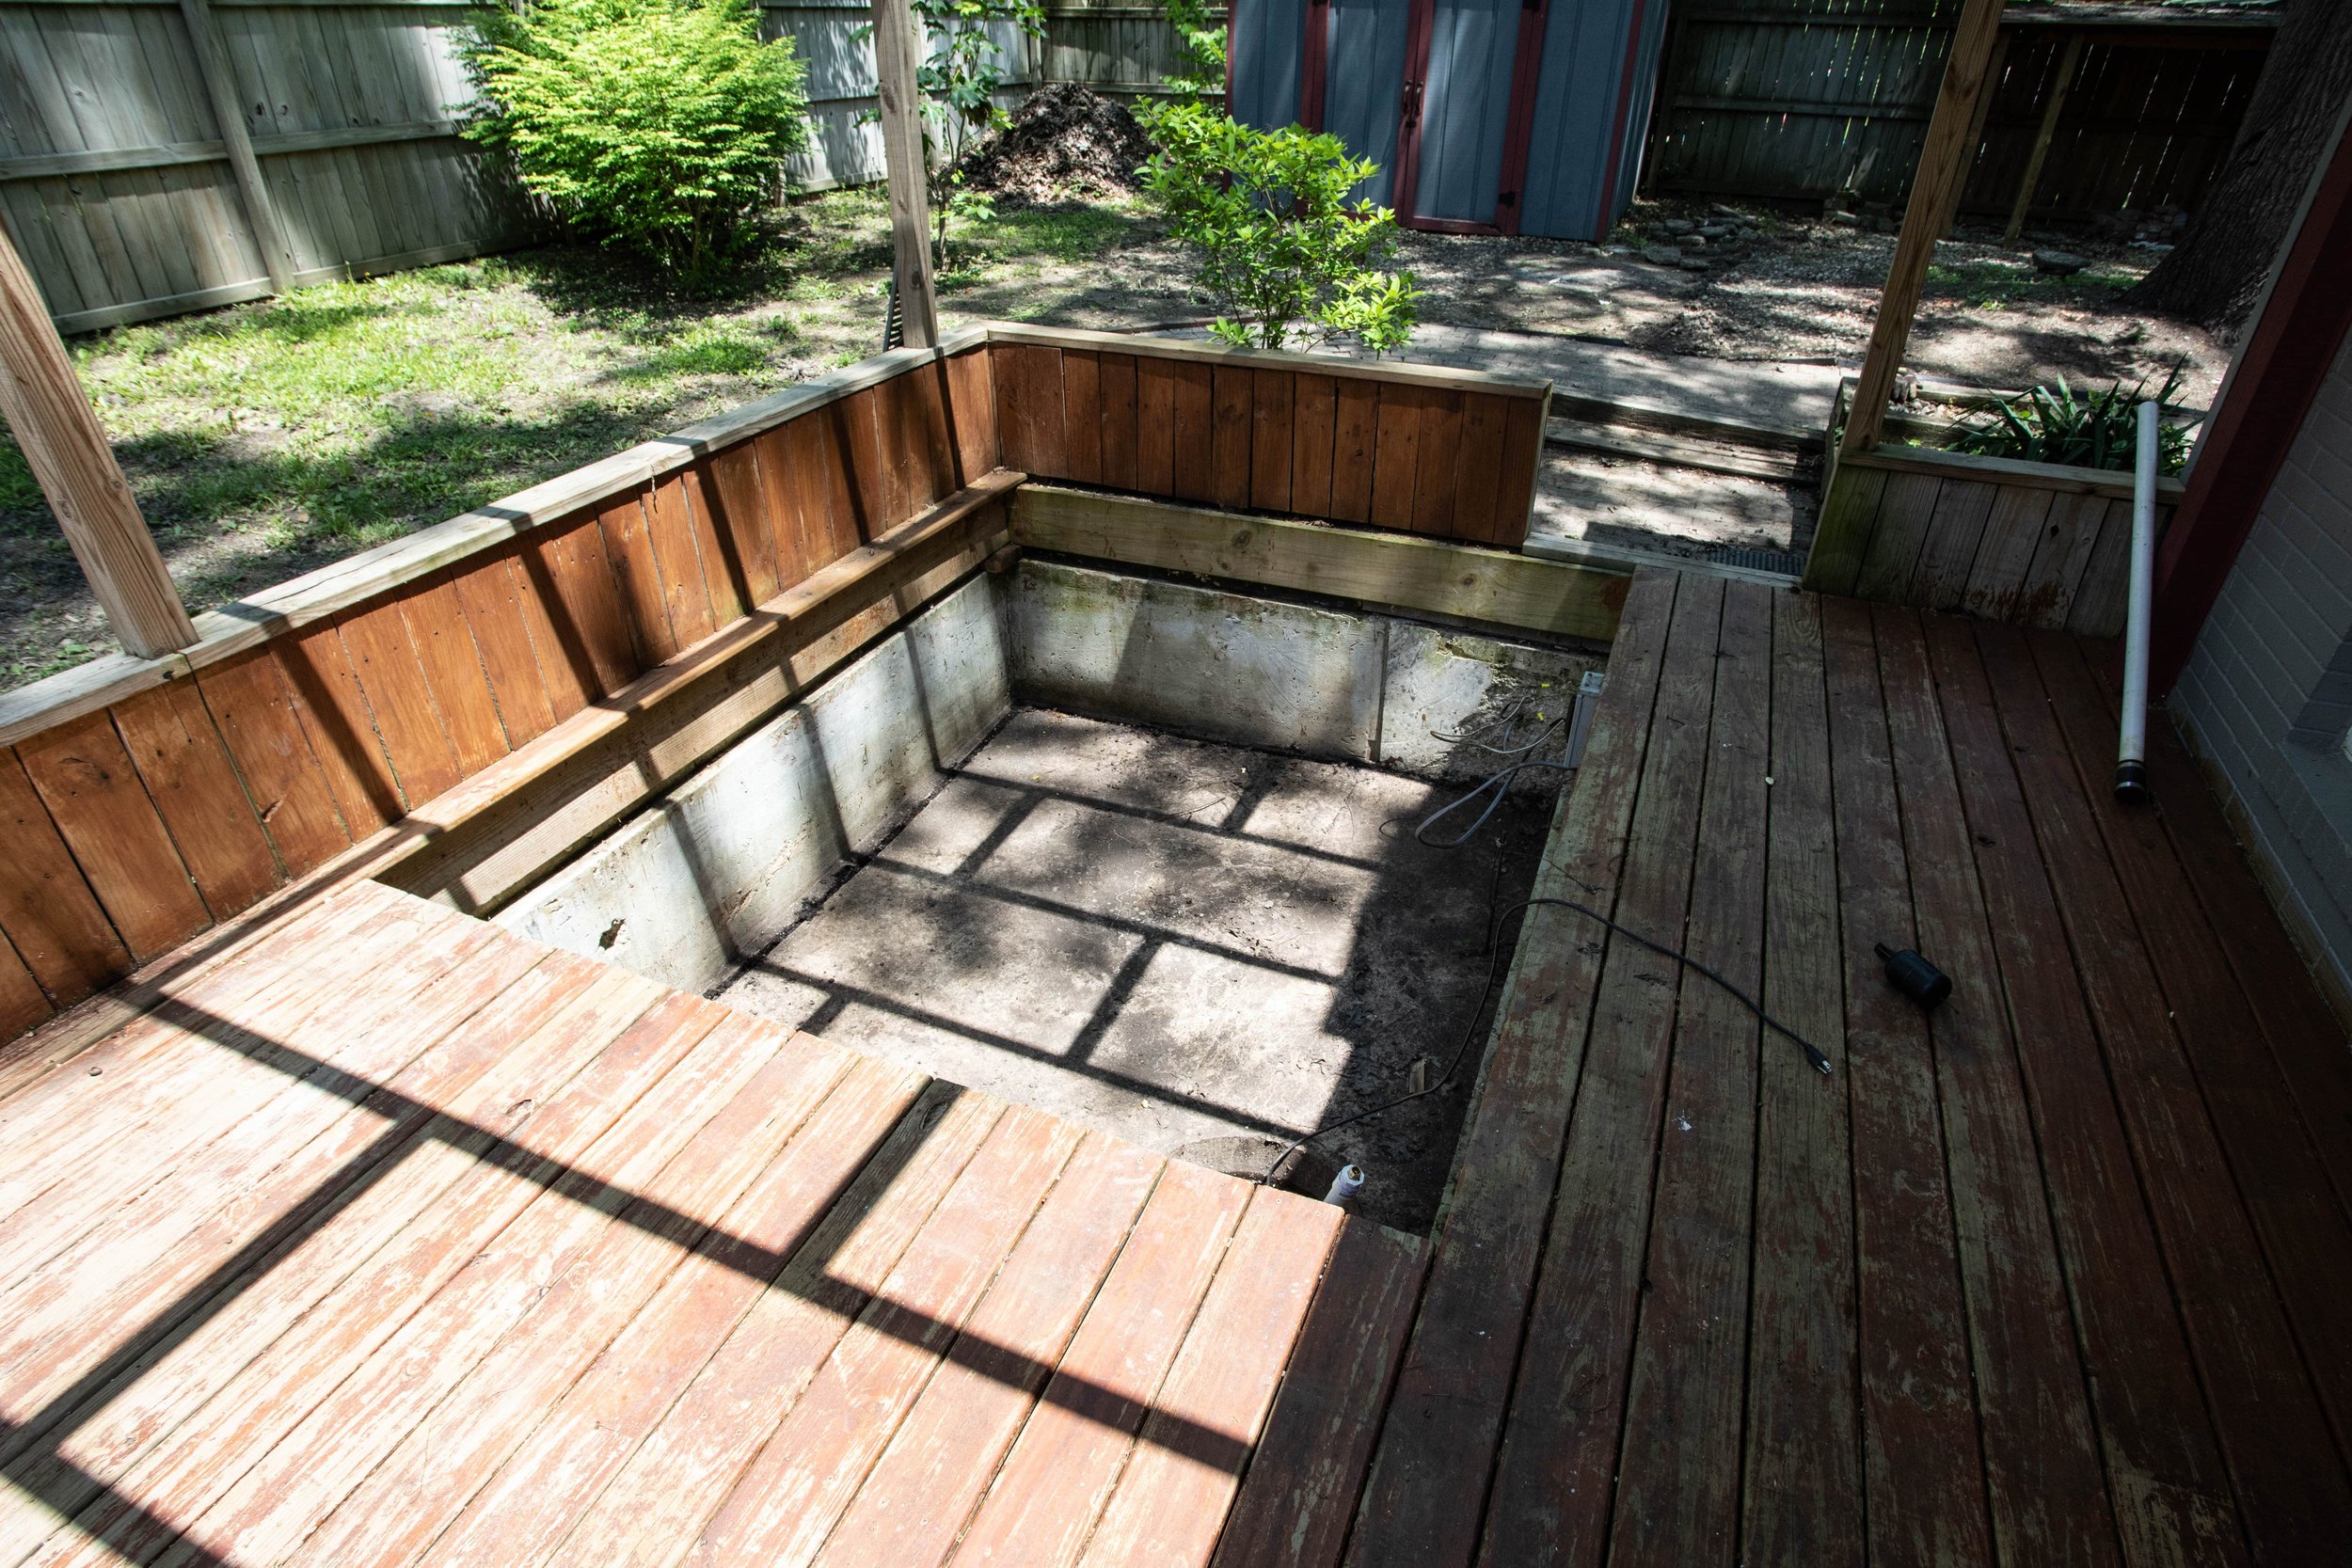
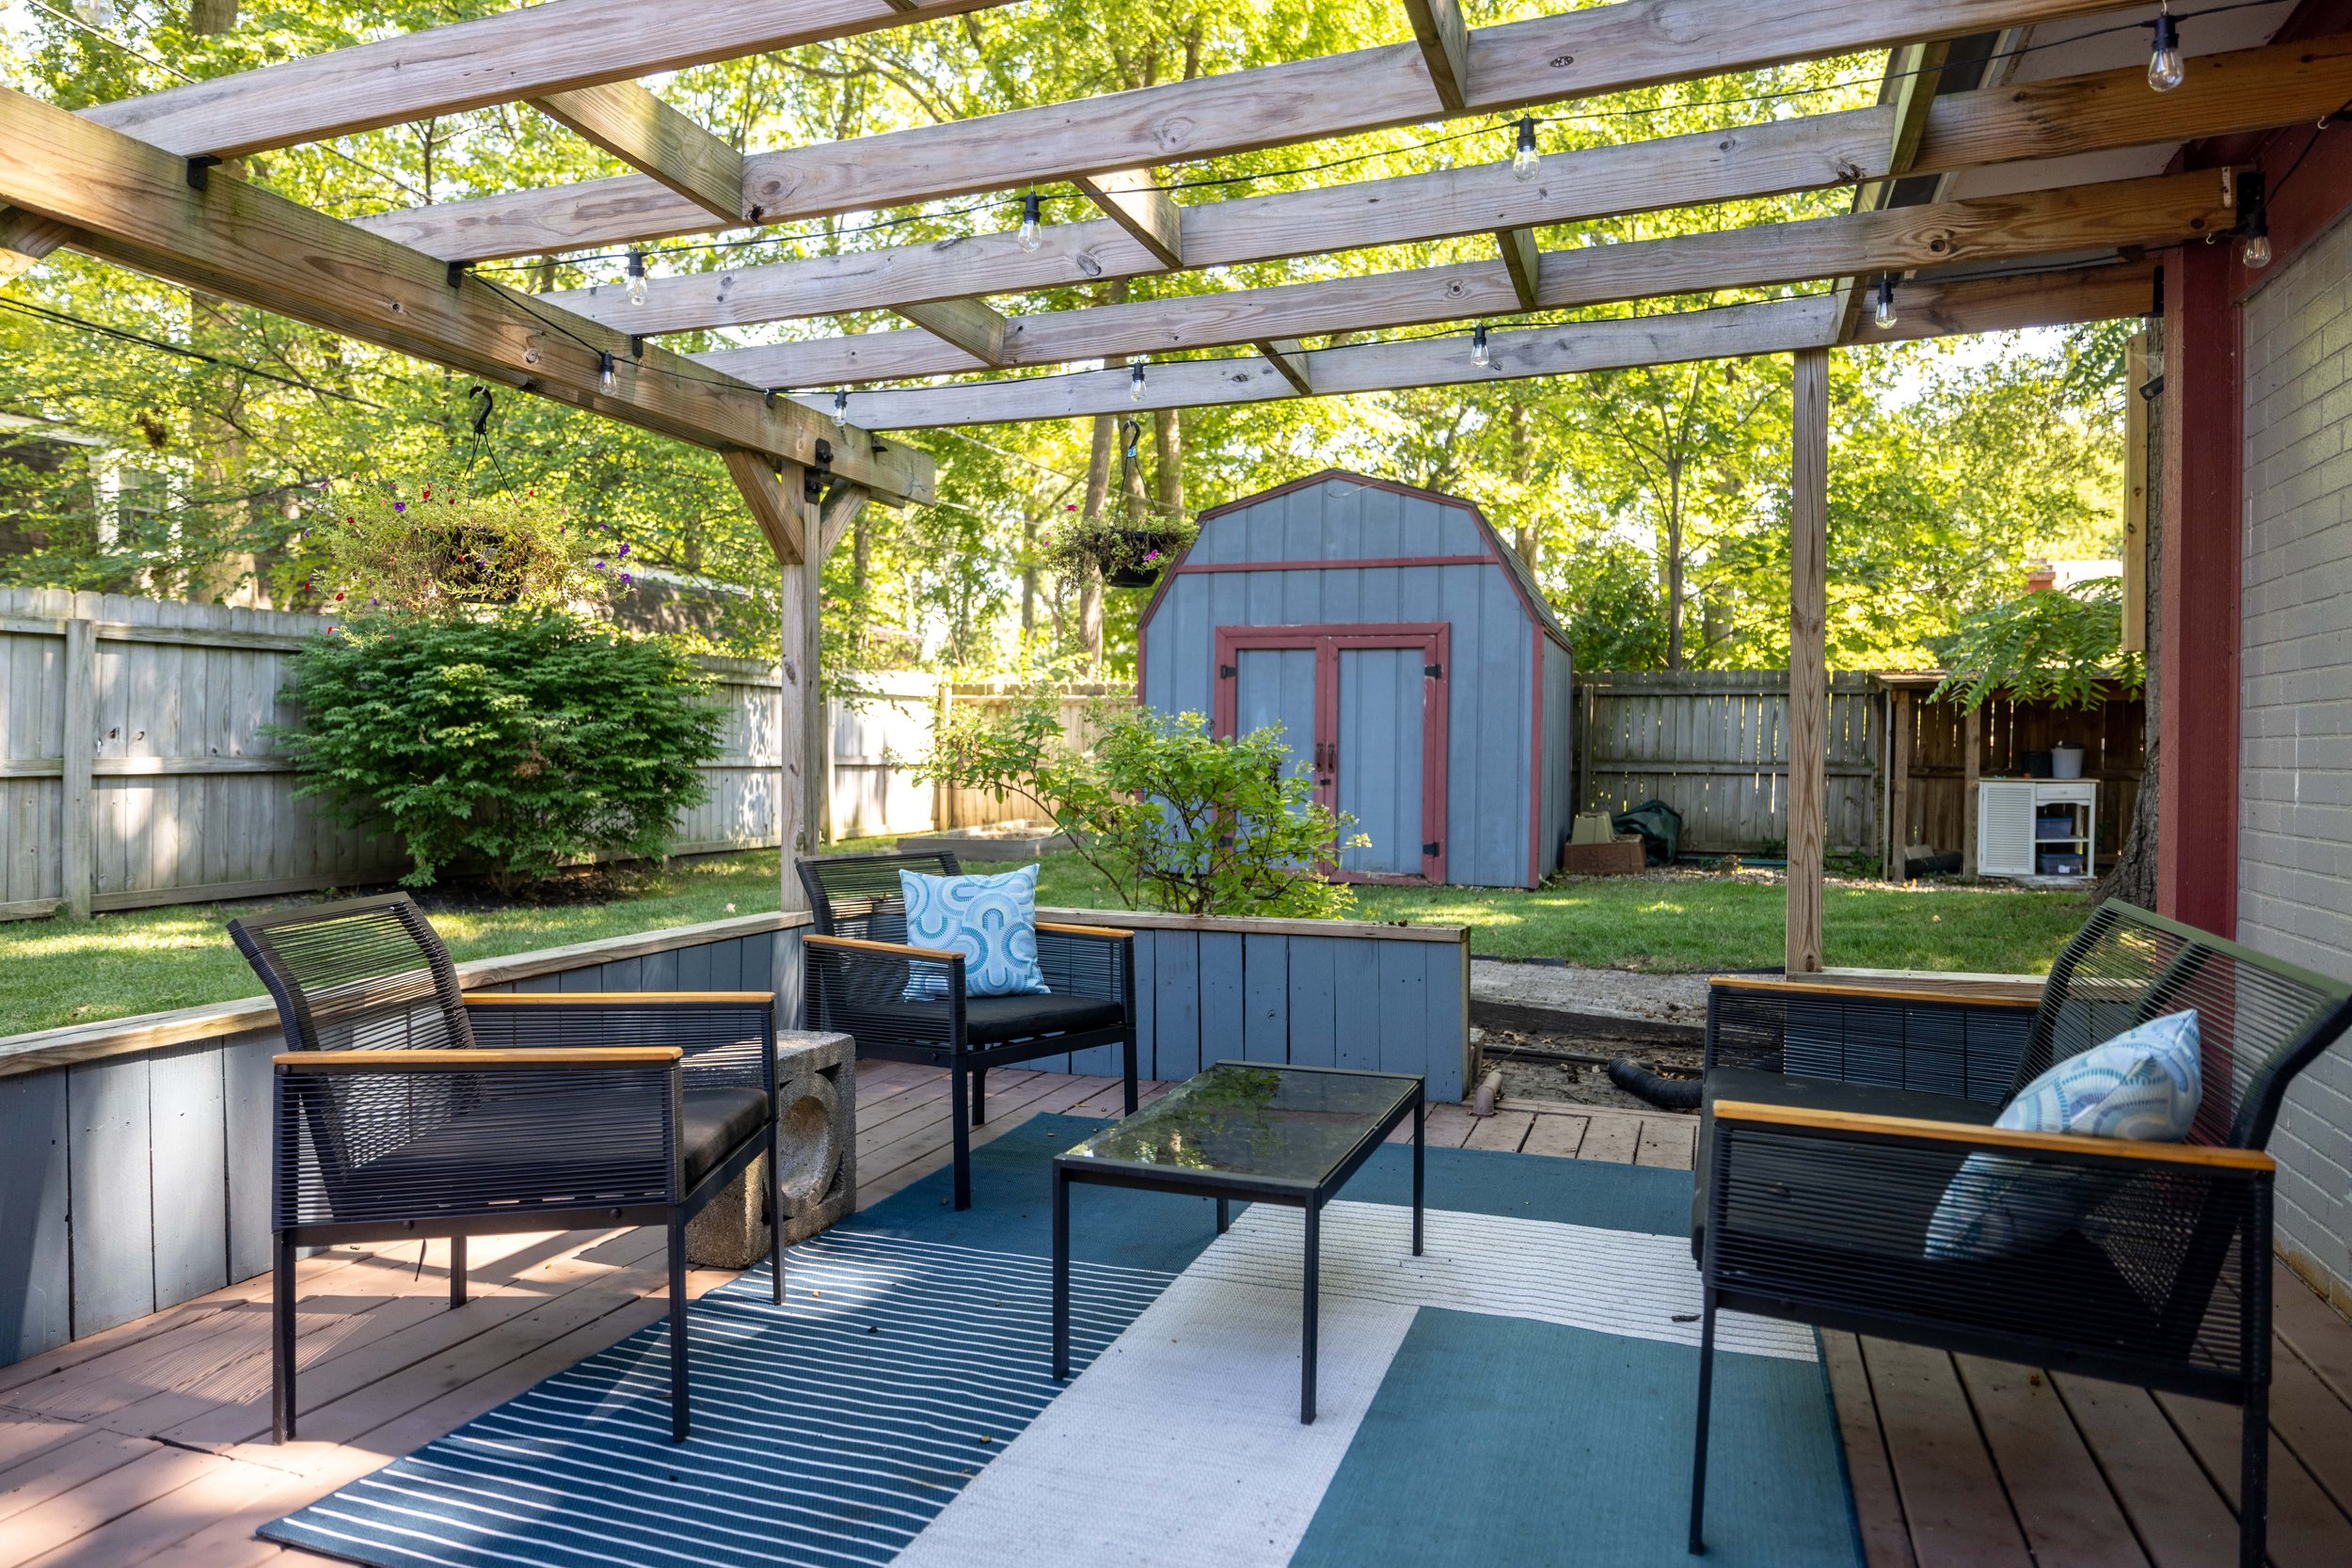
Aside from the grass, the other big transformation in the backyard has been the deck. While we made do before, the stain badly needed redoing, we were lacking sufficient outdoor furniture, and there was a giant hole for a hot tub at the far end of the deck.
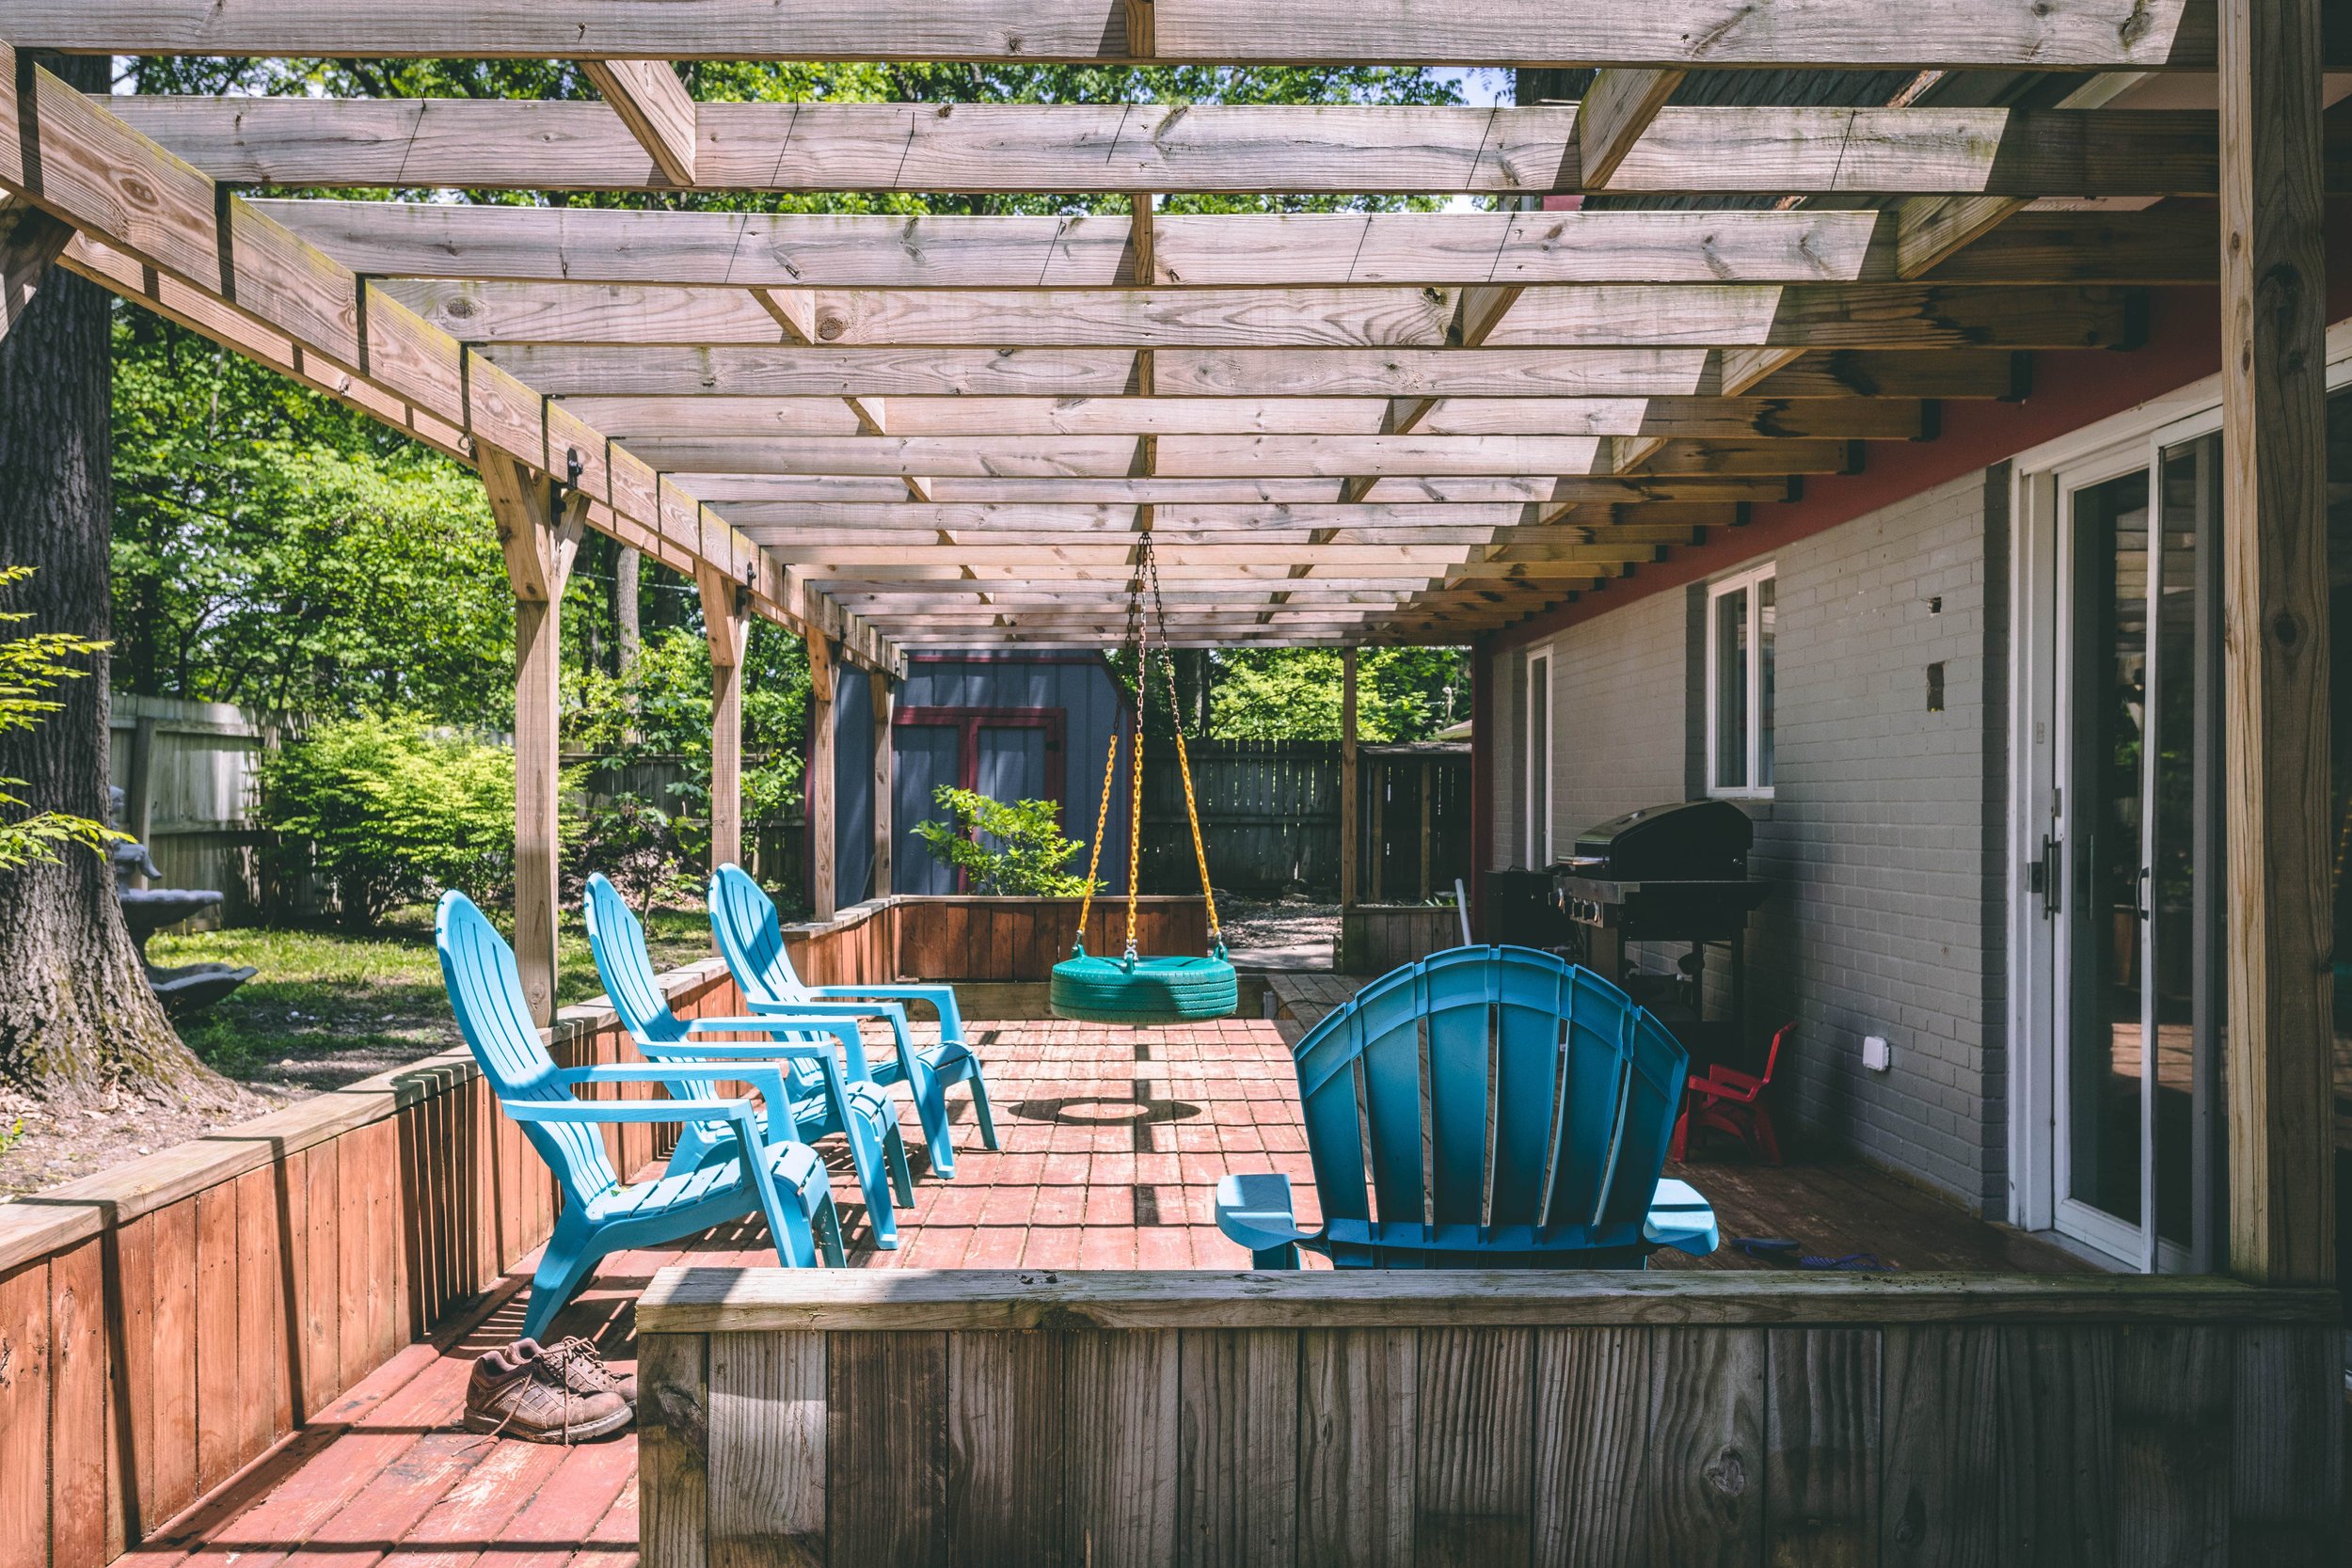
I’ve since jazzed it up by creating “zones” with seating, repainting the deck, and…
Boarding up the hot tub hole!
I really love our backyard now and spend as much time as I can out here in the warm months.
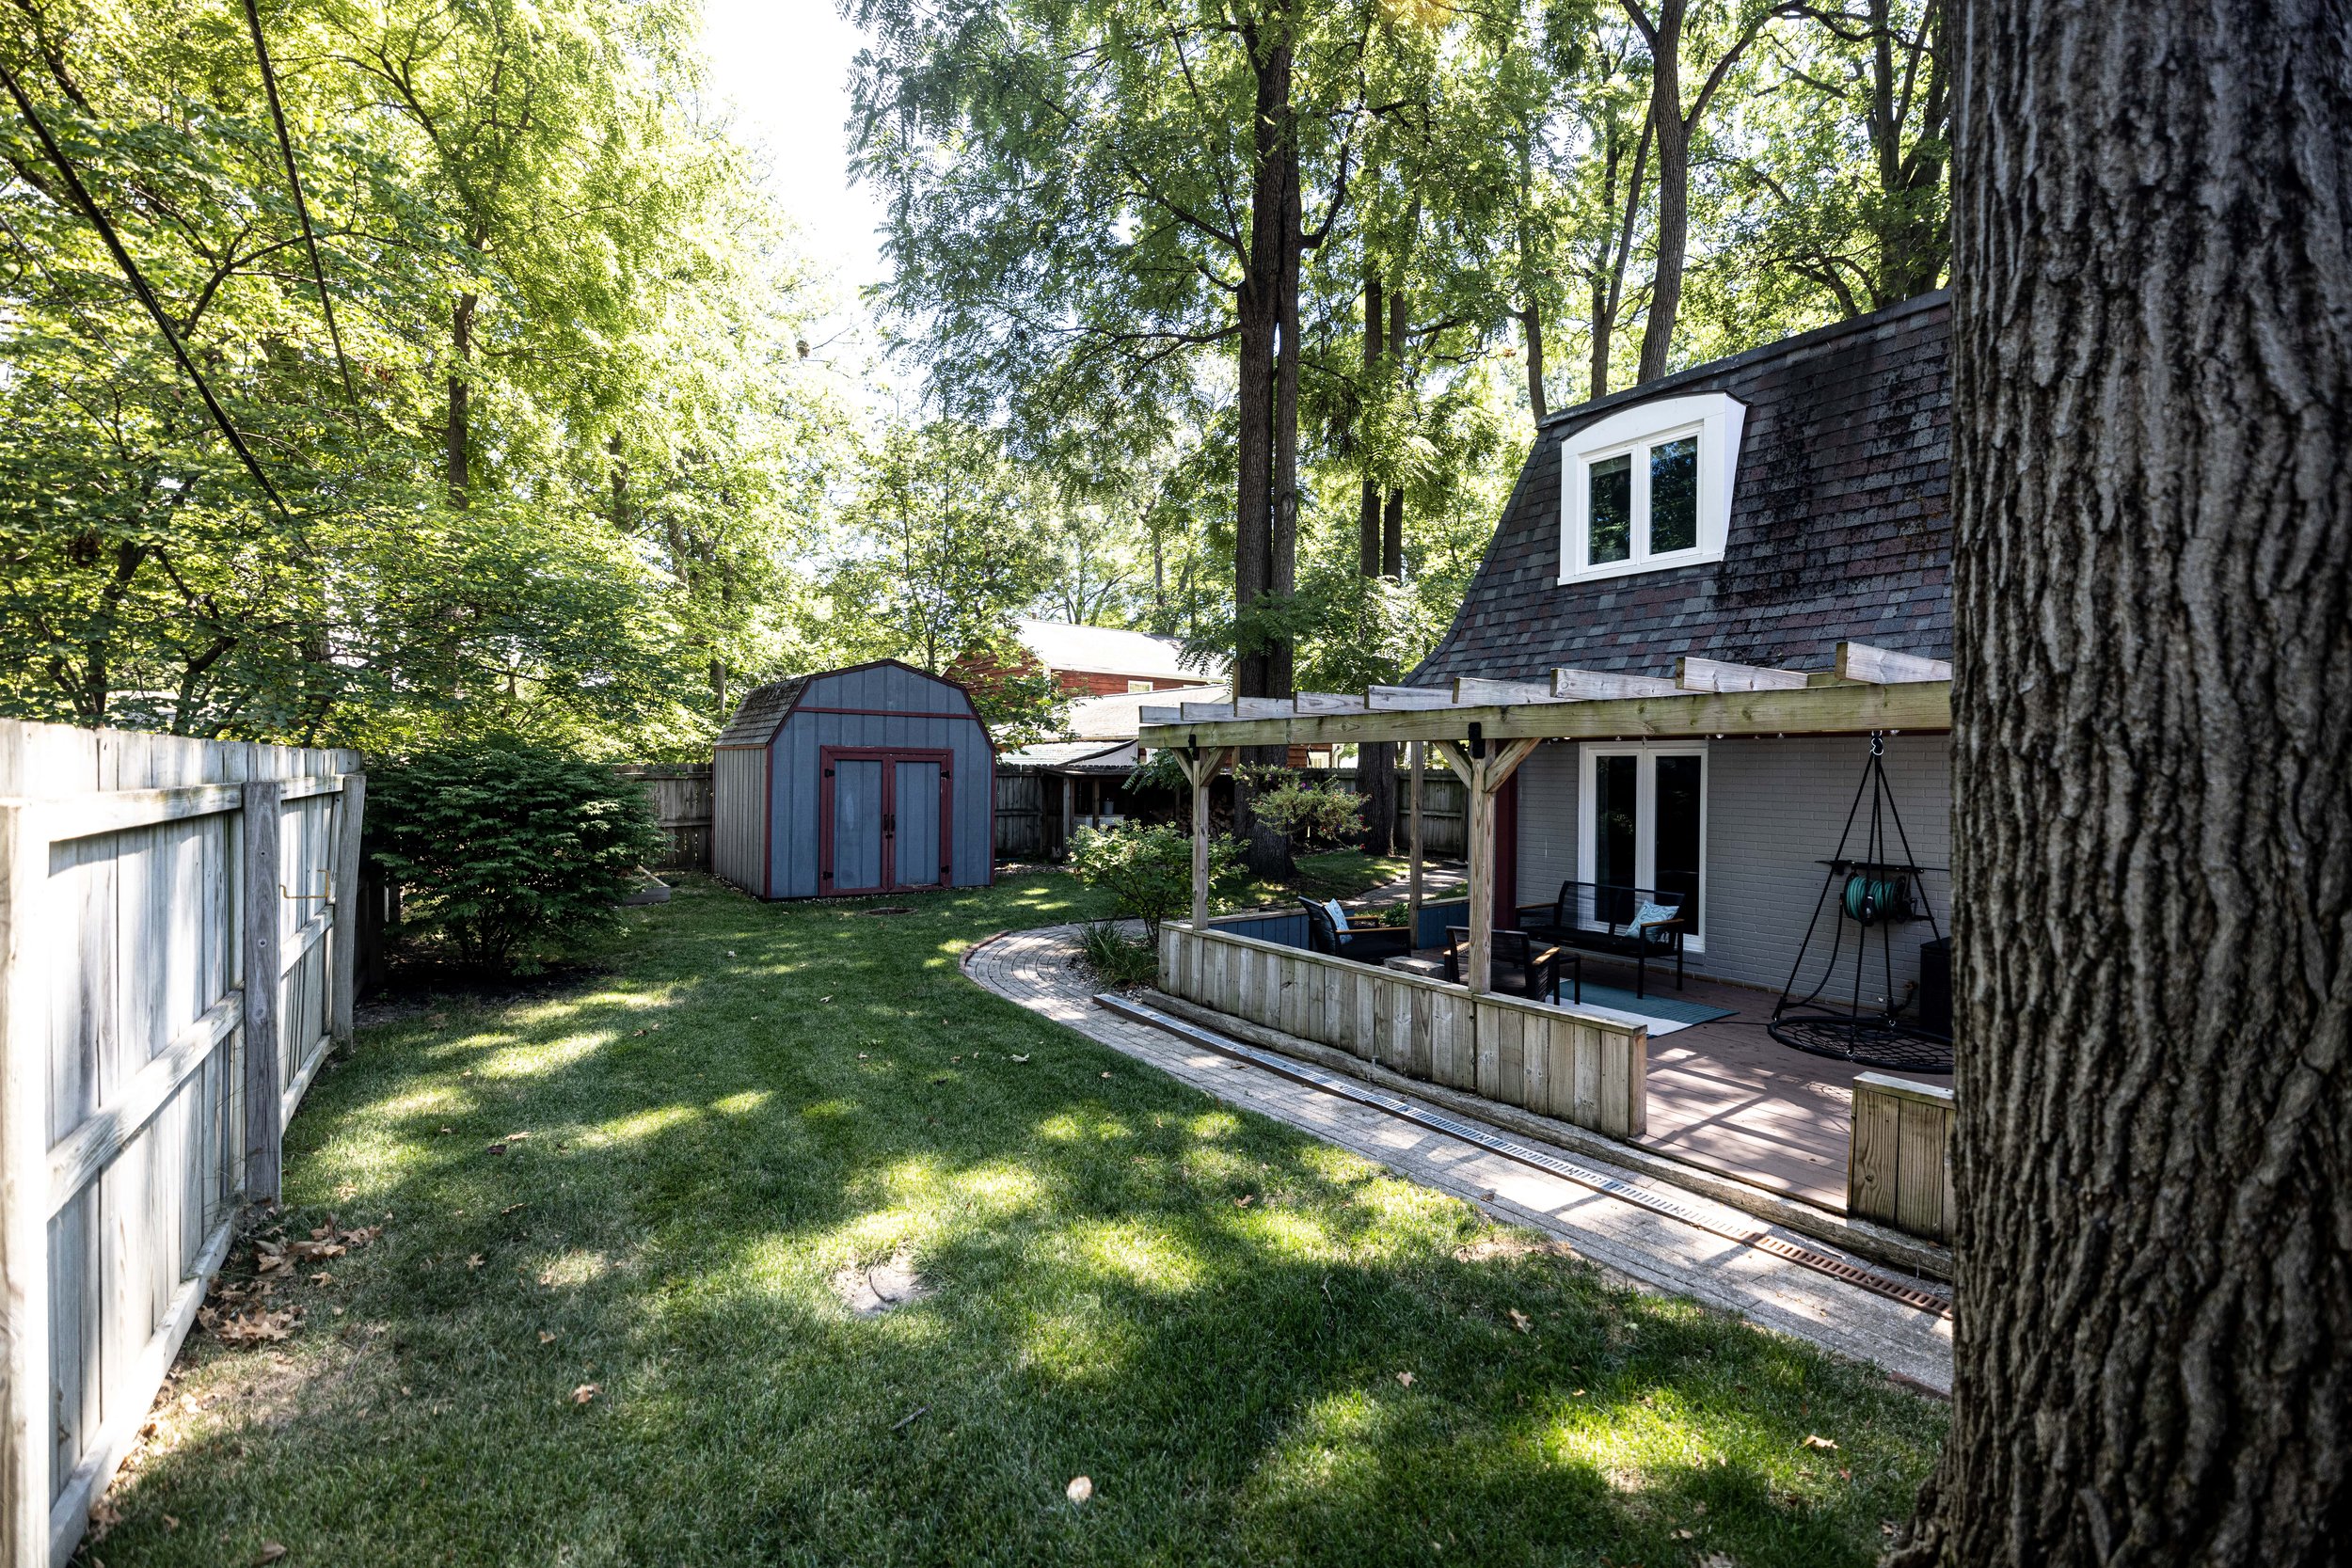
Here’s one more space that’s seen some improvements in the backyard…
How could I forget my Clematis vine trellis!?
But seriously, considering the sorry state of the grass on this side of the yard when we moved in, I wasn’t so sure we’d get anything to grow. I’m happy to report how wrong I was!
And that wraps up the tour!
Final Thoughts
We get asked all the time if this is our forever home, and I can confidently say… I have no idea!
As cool as it is to design a space and get to enjoy it day in and day out, for me part of the fun is the journey. If we finish this house and run out of projects we’ll HAVE to find something else to renovate, right?
I guess only time will tell what’s next for us. In the meantime, we have plenty of rooms in this house to keep us busy still! So tell me - what project are you looking forward to us completing next?


ORC Week 8 - Laundry Room Reveal
It’s hard to believe it, but we’ve reached the end of the One Room Challenge and the laundry room is done! Well… almost. I’ll get into that later.
Laundry Room Before and After
It’s hard to believe it, but we’ve reached the end of the One Room Challenge, and the laundry room is done!
Well… almost. I’ll get into that later. But here she is in all her 95% complete glory!

What’s the One Room Challenge?

I know I’ve explained the One Room Challenge in every post, but let’s do it one more time for the people in the back!
The One Room Challenge is an event where DIYers from all around encourage and motivate one another to makeover one room in their homes over a period of 8 weeks. In my case, I finally tackled our laundry room remodel.
Each week I’ve shared my progress here with a blog post and over on Instagram, and now we’ve reached the end!
As an Amazon Associate, I earn from qualifying purchases. This post may contain affiliate links, meaning I receive commissions for purchases made through those links at no cost to you.
The Before
It always blows my mind to look at where a room started, so let’s go into the way way back machine to a time when I was doing laundry in this glamorous space:

Certainly nothing to write home about.
And as a reminder… before we turned it into a laundry room of any sort, it was the old master bathroom shower room! (Yes, apparently the builders of our house thought they needed an entirely separate room for the shower.)

Needless to say, this room has come a long way.
One of my favorite parts about the design process is looking back at the beginning and realizing that I made a room I dreamed up out of nothing come to life.
This is the design I came up with in the beginning. And while some things changed for one reason or another (as they often do), the room is more or less the same as my original vision.

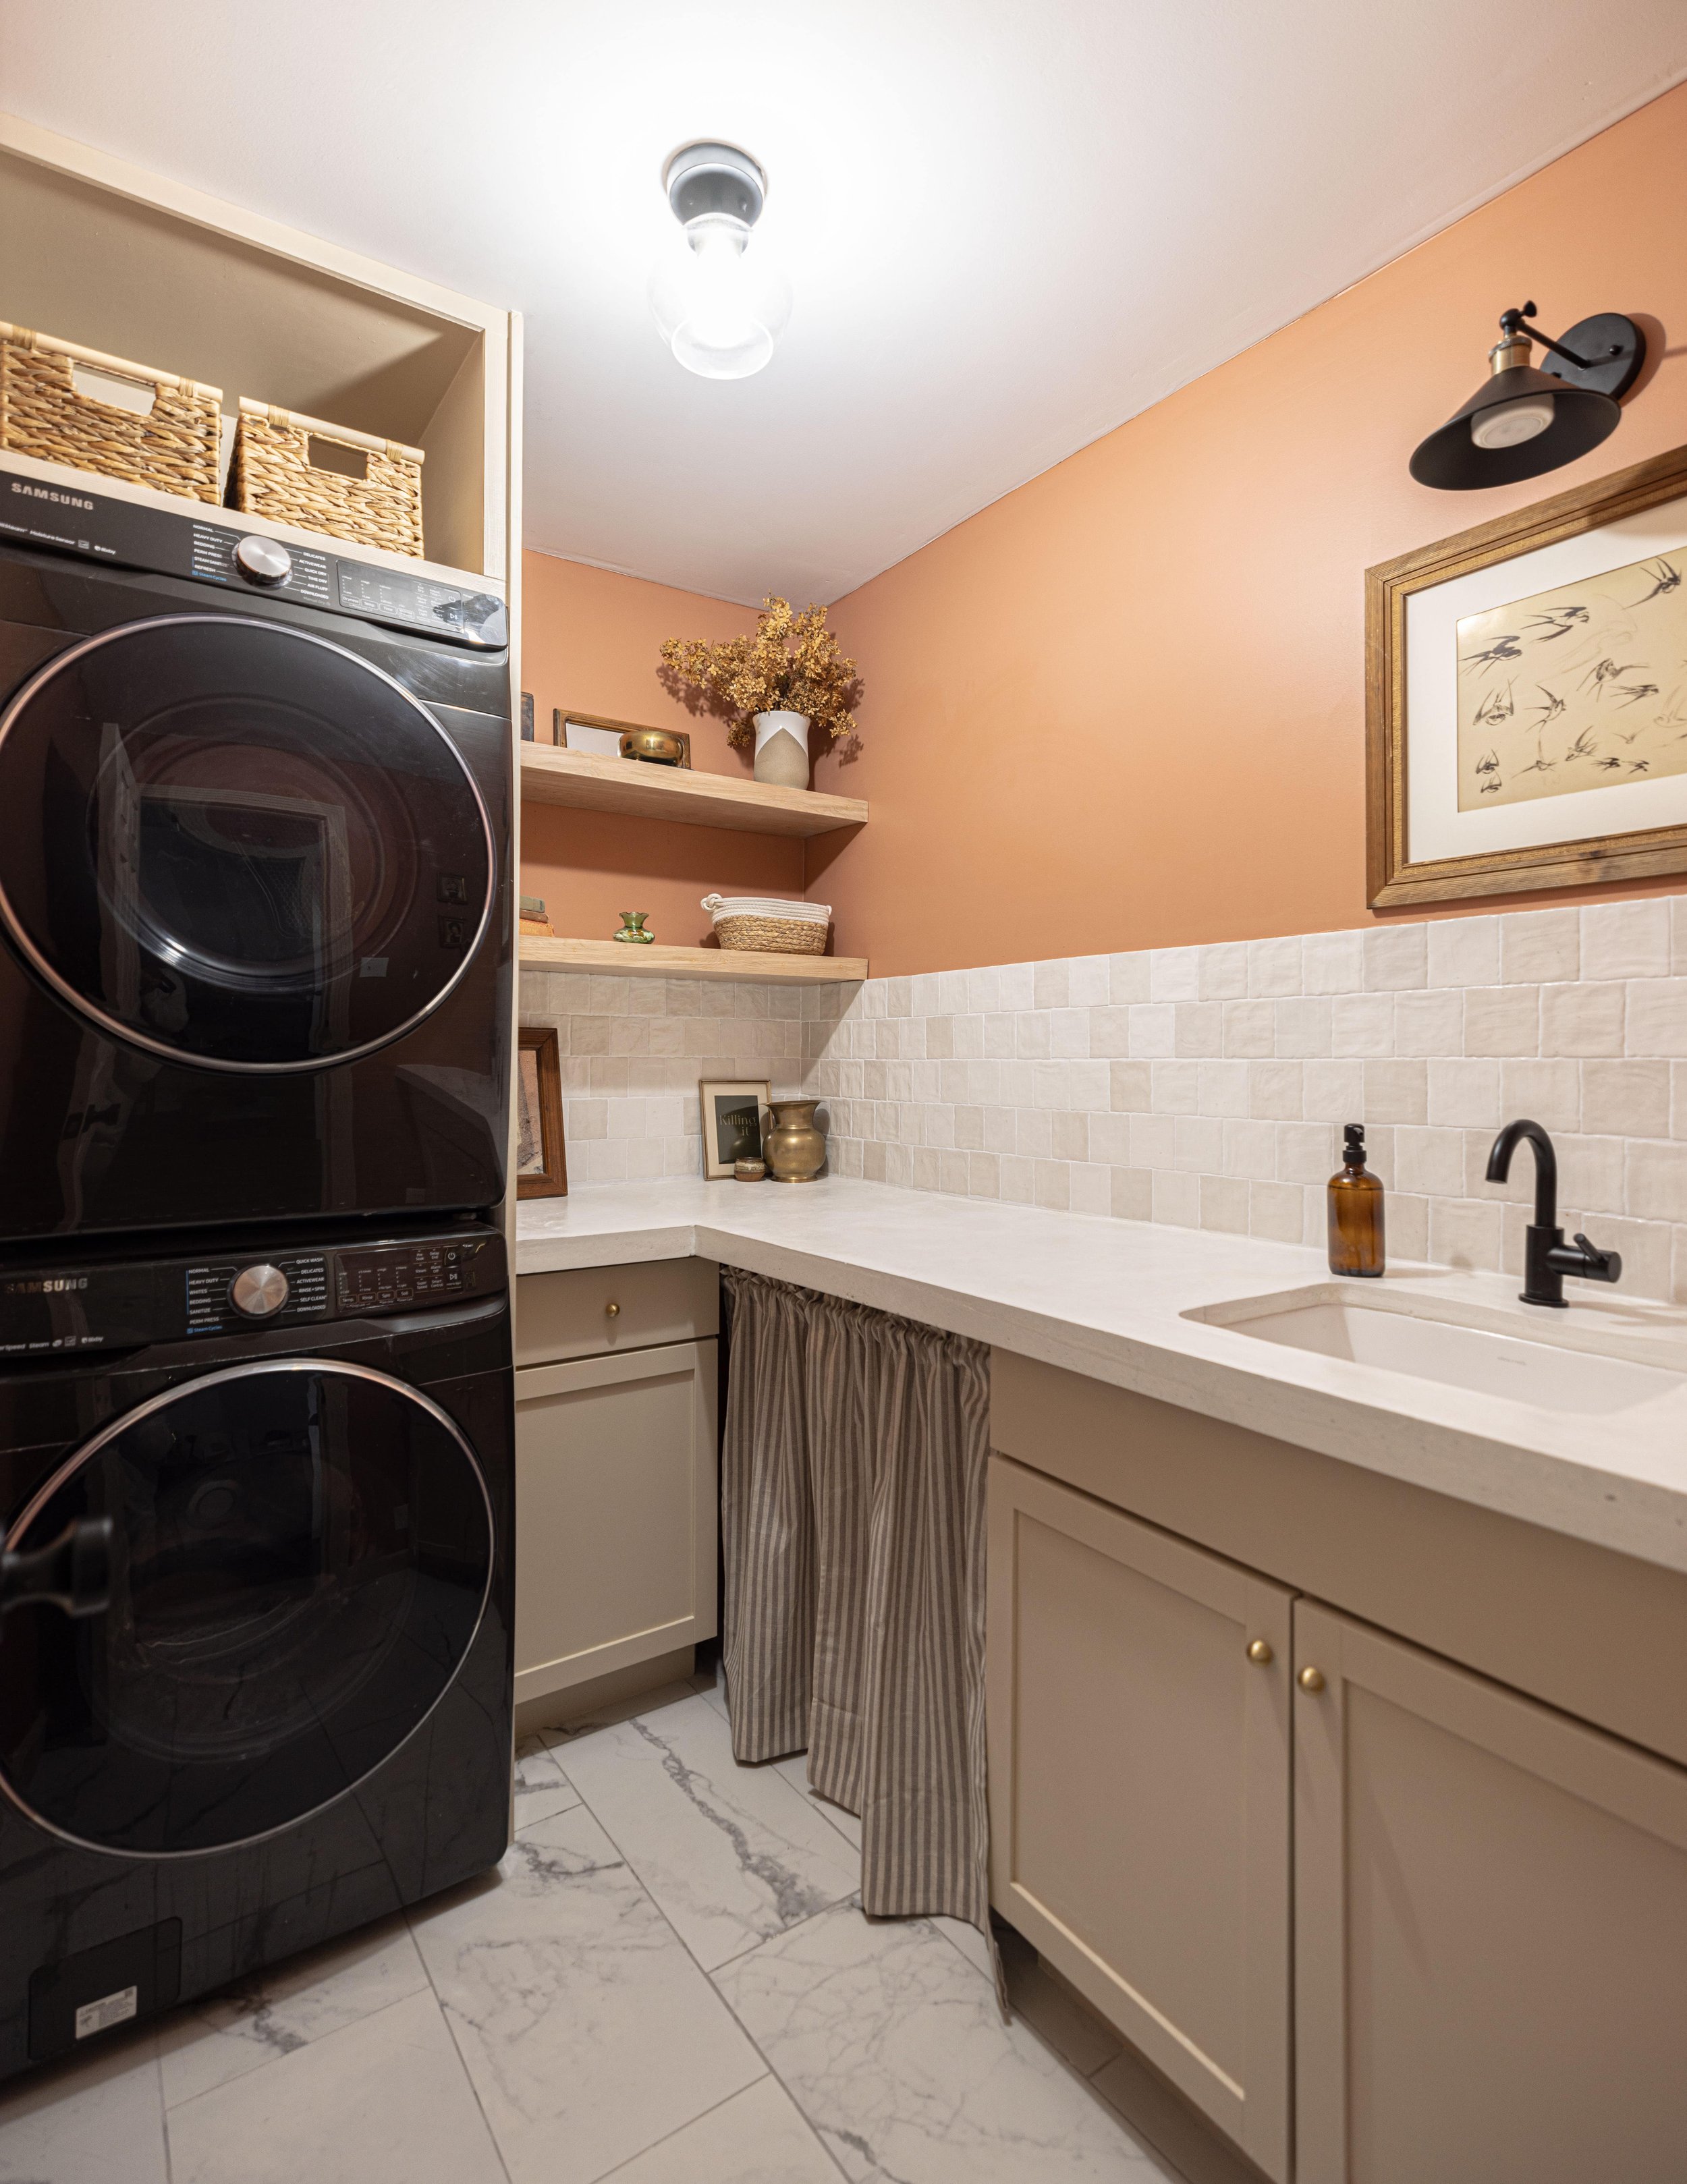
The After
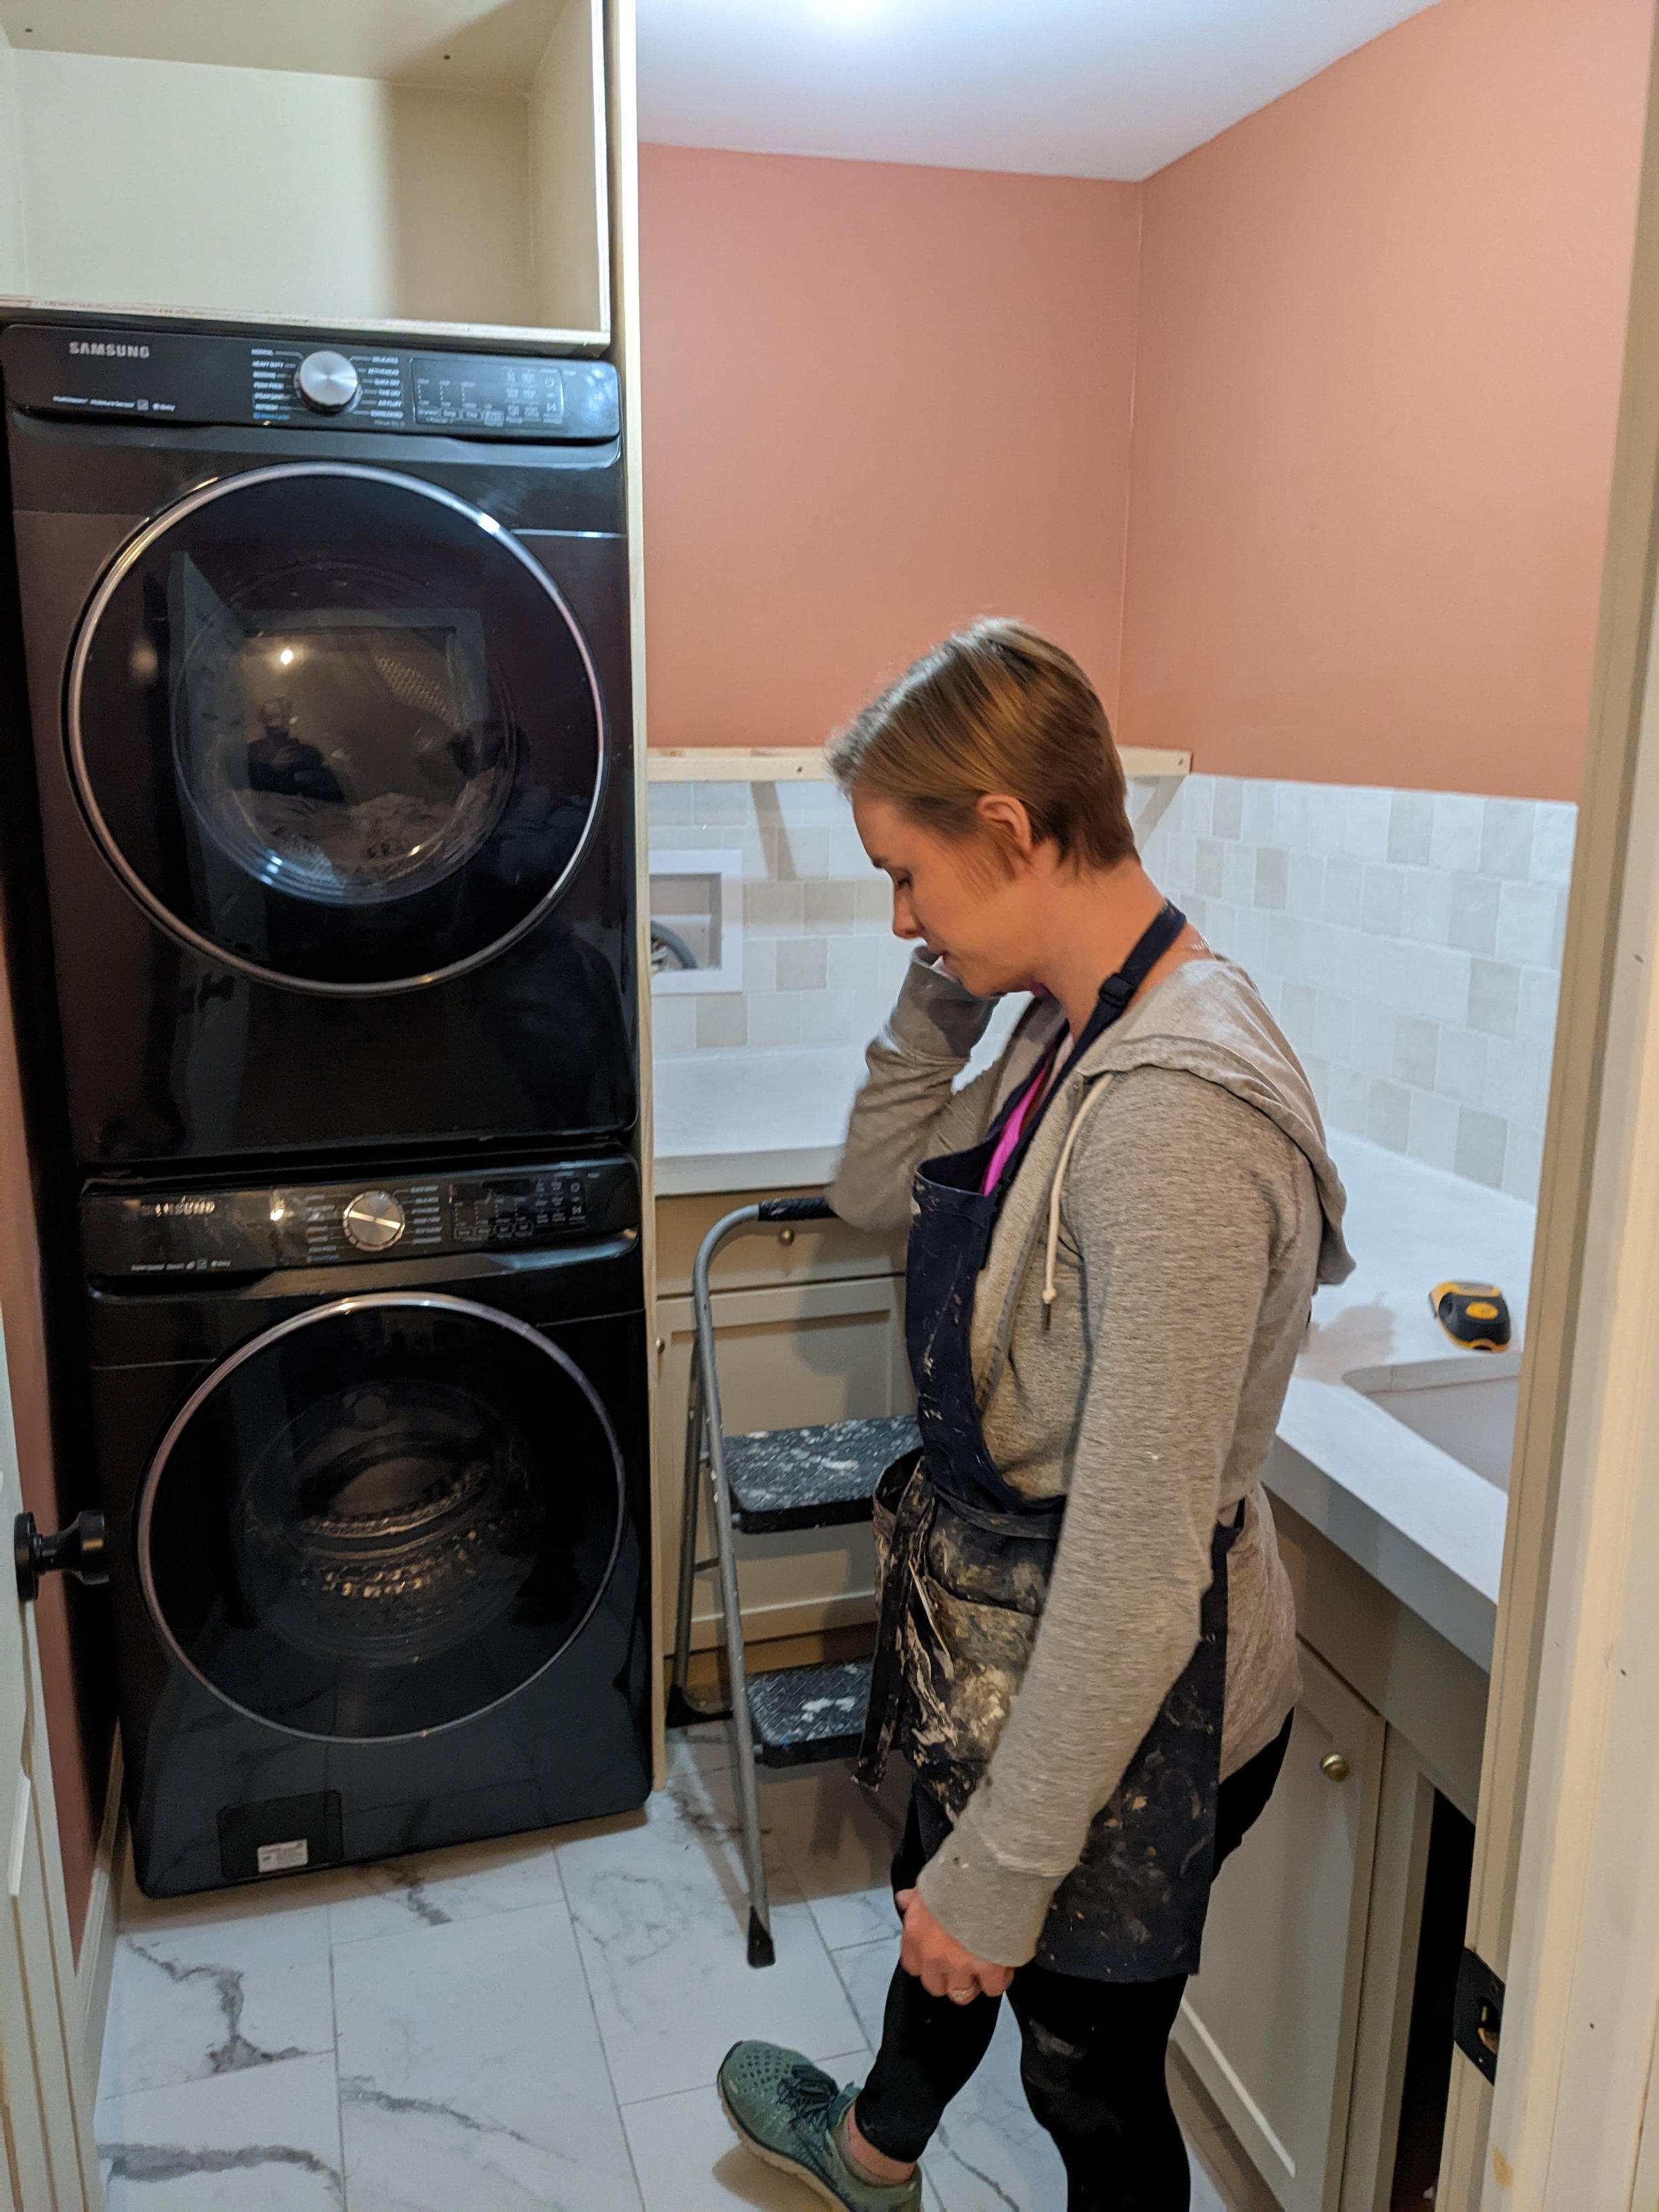
This little room packs a punch! Let’s take a tour, shall we?

When I was thinking of what I'd like this finished space to look like, I really let myself go wild. Since it's such a small space, I knew I could push the limits and still make it an affordable project, so I let myself dream.
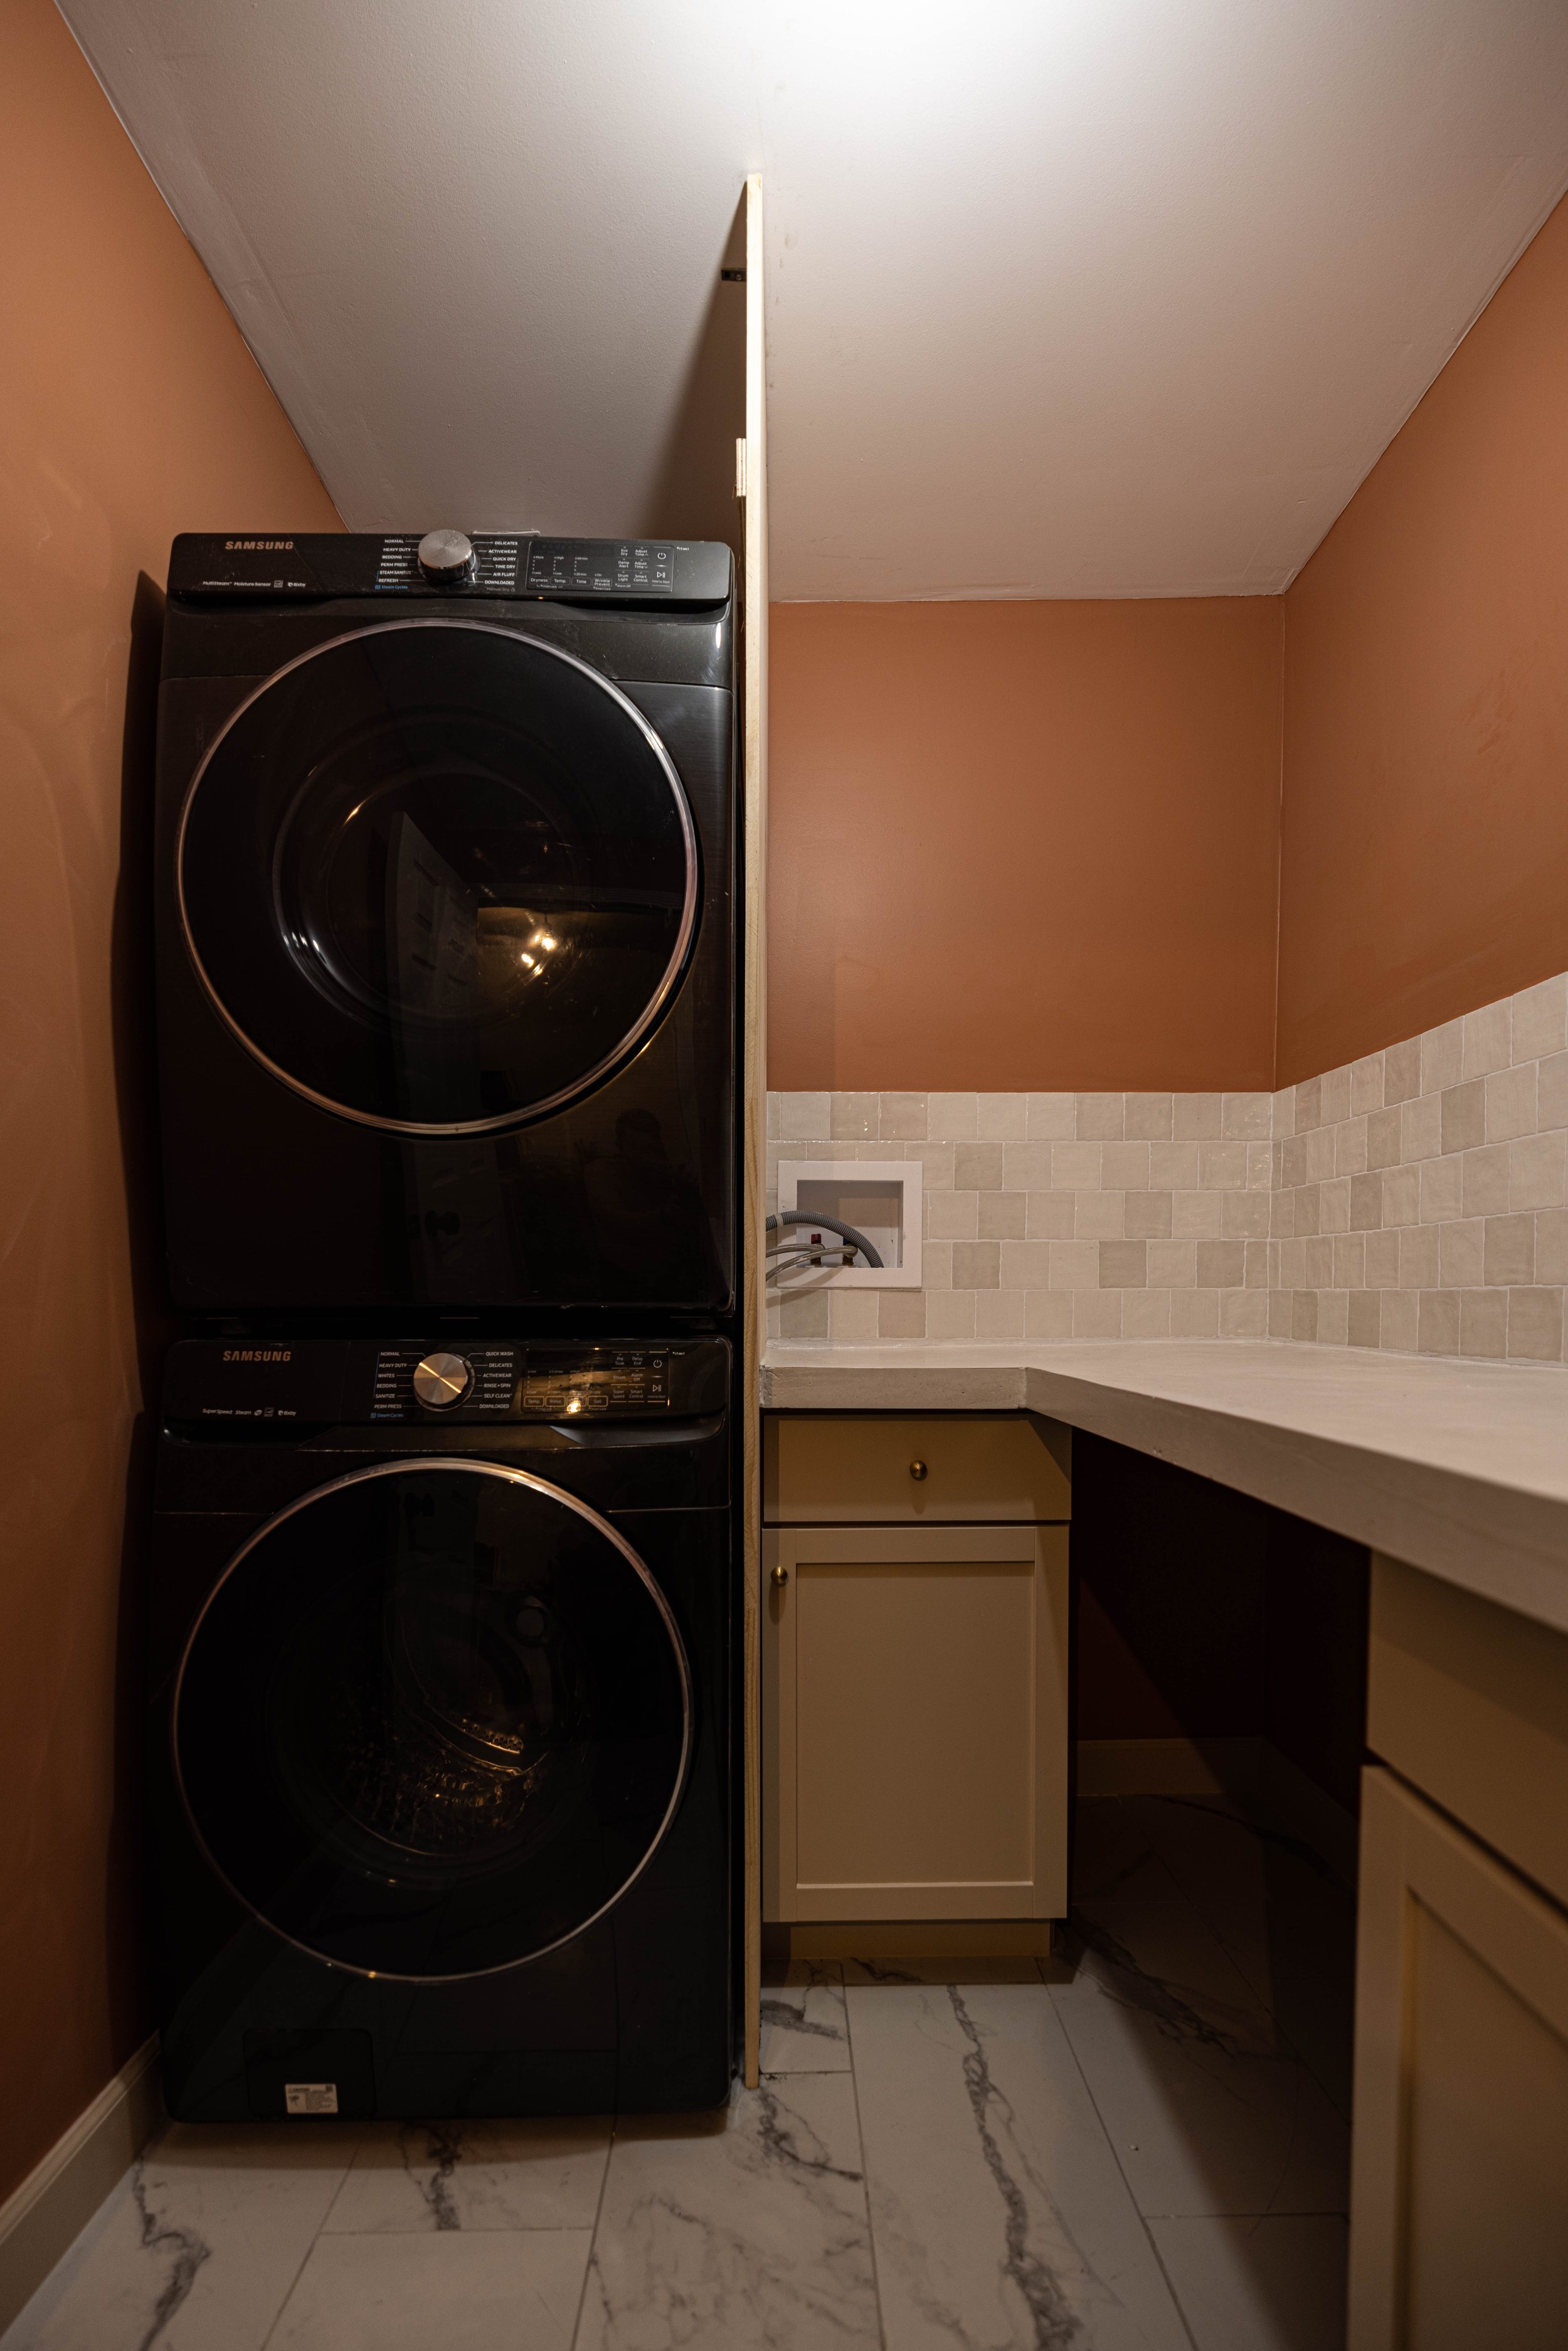
After living with the washer and dryer side-by-side for over a year in the unfinished room, it was clear the layout needed to change, so that’s where I started. Although this required us to move the water lines and dryer venting, it was well worth it.
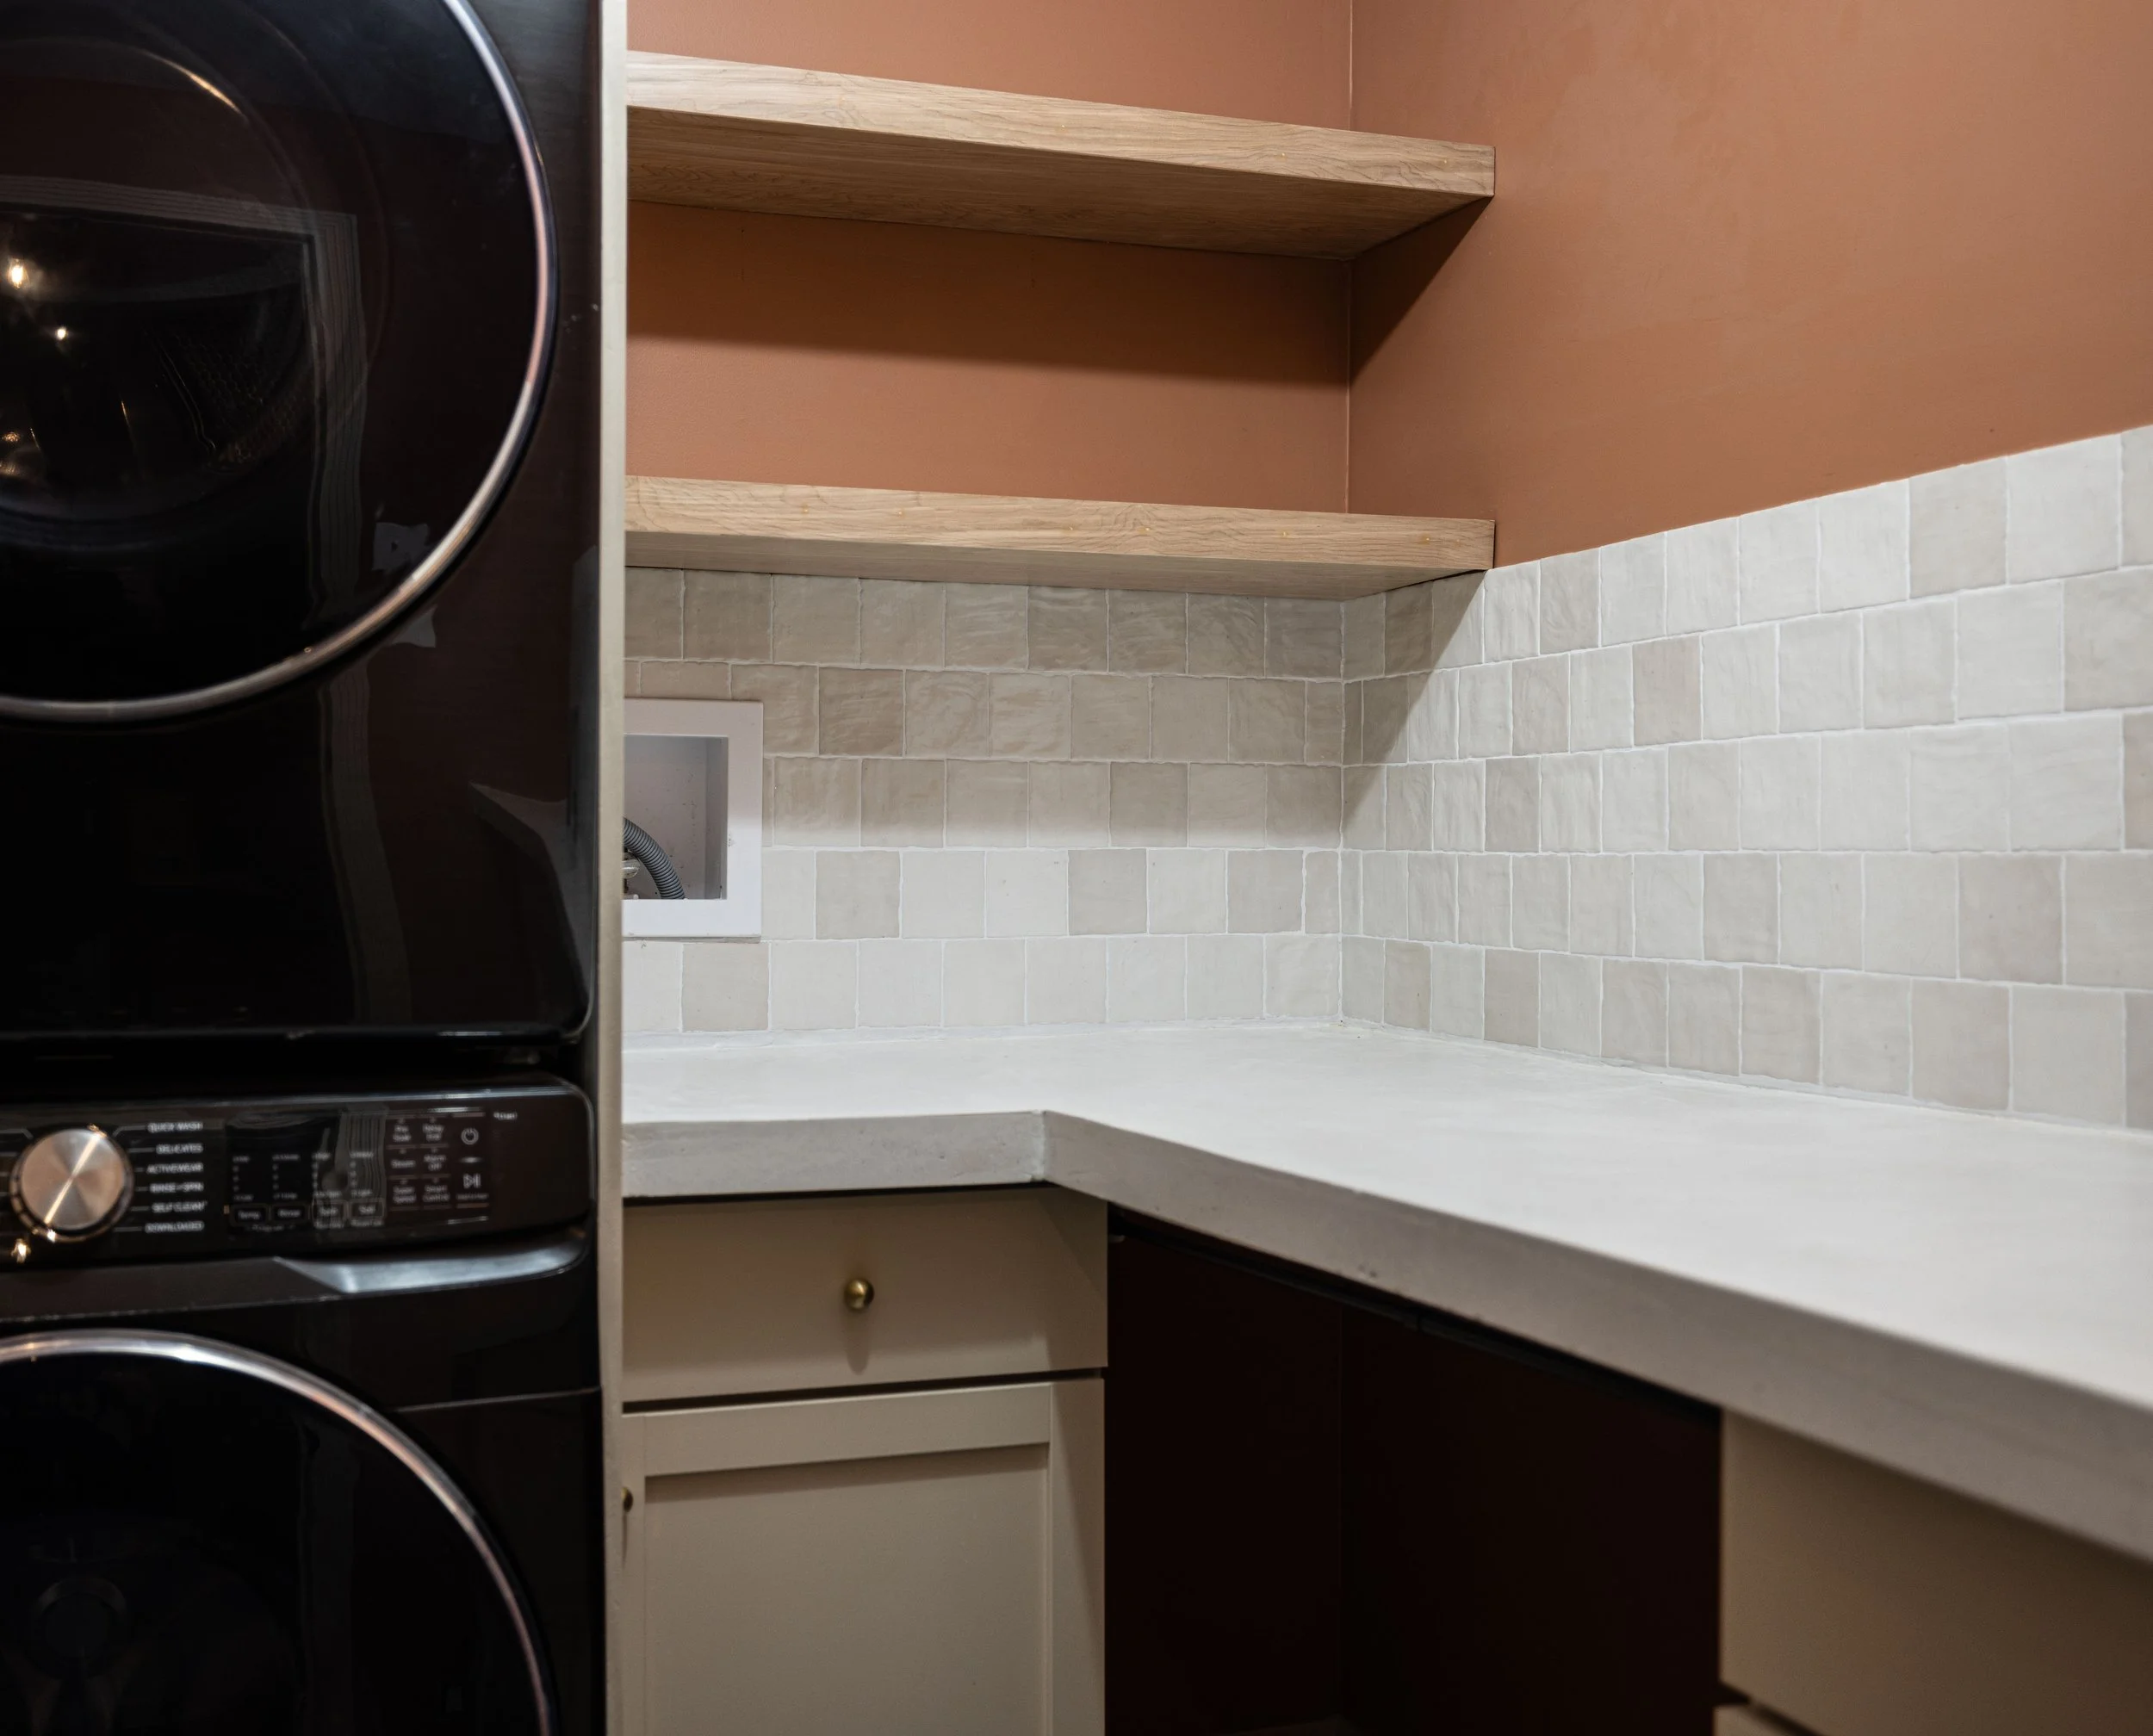
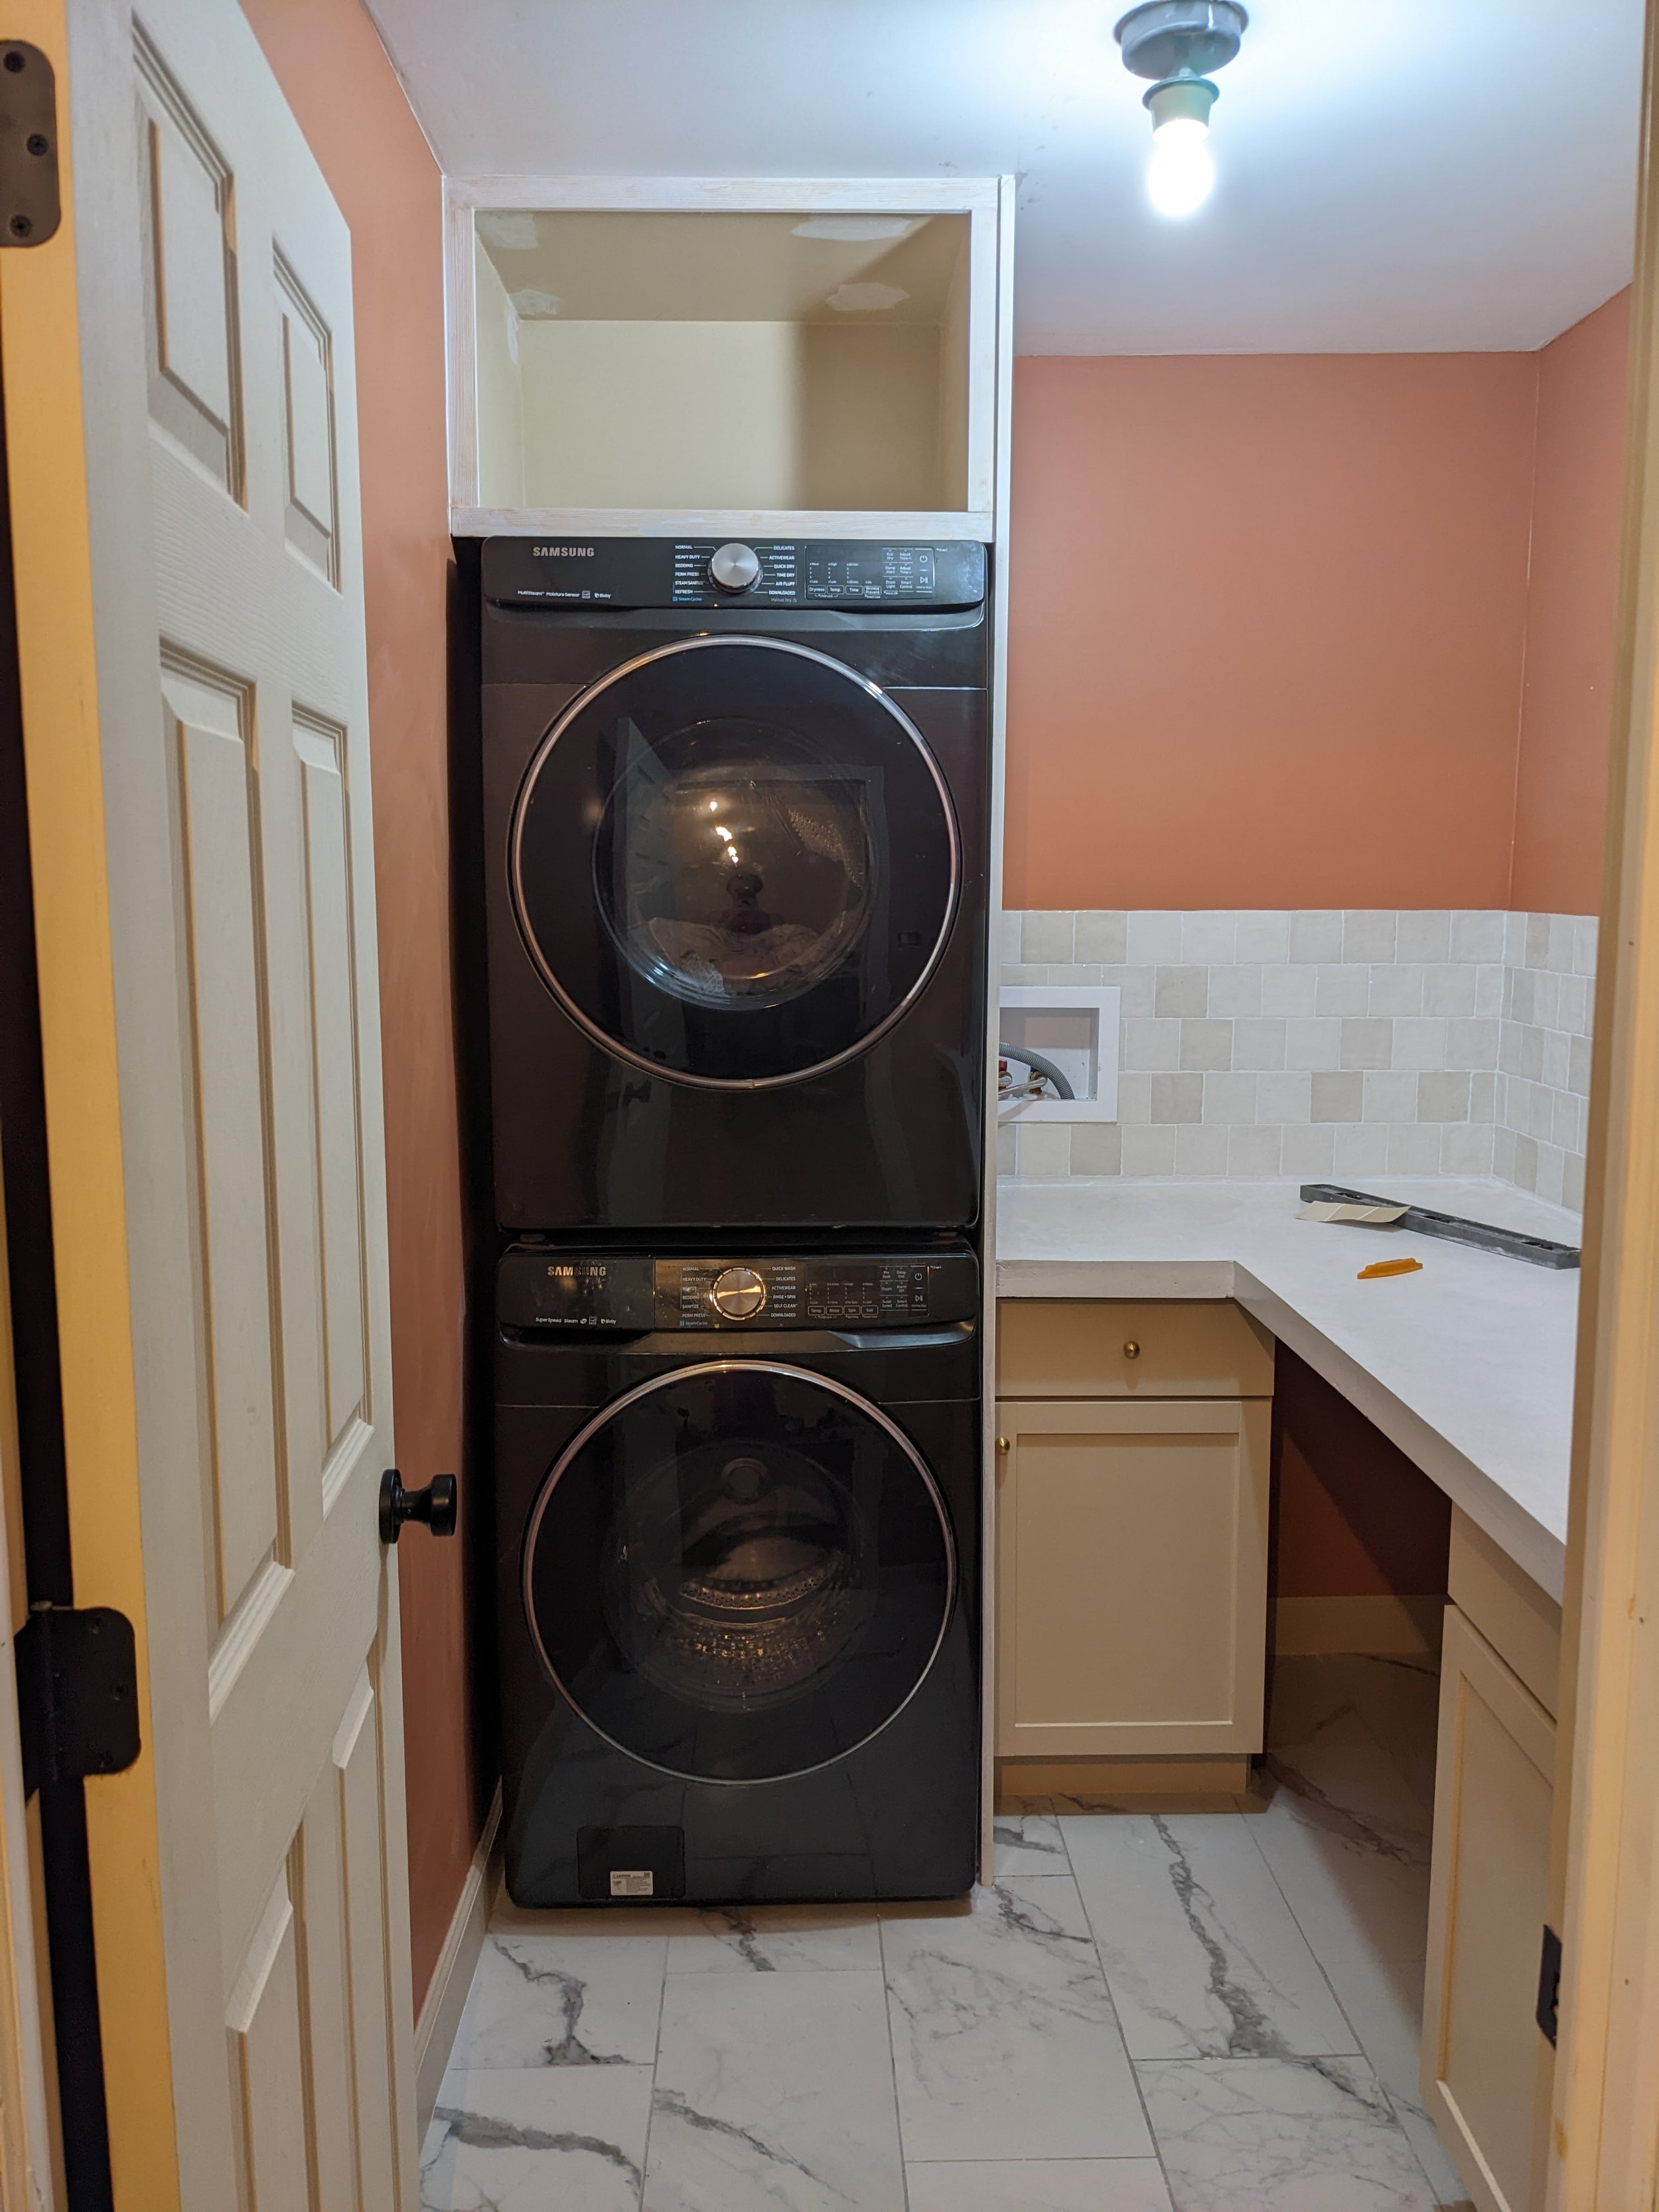
The new layout also made it clear that we could now fit some cabinetry, a good chunk of counter space, and a sink! I even managed to build a custom cabinet above the washer and dryer for extra storage and a truly built-in look!
As for the design, after I saw the inspo picture below I couldn't get the idea of a warm, terracotta wall color mixed with natural tones and textures and black accents out of my head. So I ran with it.

The terracotta walls were admittedly a bold choice, but I love the color so much. And although beige can easily be considered dated, I think the cabinets pair incredibly well with the wall color. The walls are Kitchen Terracotta by Valspar, and the cabinets are Kilim Beige by Sherwin Williams.
To tone down the walls and brighten the room, I knew I wanted to incorporate white countertops. I didn't realize when I was designing this room that I would end up pouring my own concrete countertops!
They turned out perfectly imperfect (bubbles, inconsistencies, and all) and pair amazingly well with these 4x4 handmade-look square tiles I had been eyeballing for A WHILE. I was stoked to be able to use them as the backsplash for this space.
As originally planned, I added additional functionality with floating shelves along the back wall. And while I don't necessarily need them for storage, they sure do provide a good place for décor to make this laundry room inviting.

I had a blast styling this room with thrifted items, curated prints, and dried flowers from my backyard. I even DIYed an antiqued mirror for this space using a thrifted frame. And do you spot one of the vases from another DIY project?
Also, I can't get enough of this thrifted spittoon and badass print.

Below the countertop, I left the perfect little nook to hide laundry baskets. The kids have also discovered that it's a great cubby to play in.

I covered up the opening with some adorable cafe curtains that are hung on a simple tension rod.
On the opposite end of the counter, we installed a small sink with a matte black faucet to tie into the black stainless steel washer and dryer.
Over the sink, I hung a cute bird print from Etsy in this gorgeous thrifted frame. And I got EXTRA bougie when I installed this leftover sconce from our loft kitchenette (they come in a 3-pack!). It was a bit of an afterthought - we didn’t think to run electrical for a light there. To make it functional I screwed in a remote-controlled puck light.

I found these pretty brass frames while thrifting too. While I was initially drawn in by the frames I kinda fell in love with the two creepy little girls that came in them.

What's Left
As for the last 5% that needs finishing…
Plumbing
While the sink is plumbed, the drain line isn't hooked up yet. There's no problem with it, just something we couldn't finish in time.
While that's the only "must-have" left to do, there are a couple of things I want to do just for me.
Cabinet doors

I'm so proud of myself for building the cabinet above the washer and dryer - but I'll be even more proud if I can build shaker doors to finish it off. (Pssst - I did! You can see how in this post.) So that's the plan! I'll be sure to keep you in the loop as I tackle that project.
Under-Cabinet Shelves
This is a super duper "nice-to-have" that I'm not 100% sold on yet - building a shelf so I can store more laundry baskets in the nook under the counter. I don't necessarily need it, but this laundry room is already so over the top, so why not?
Final Thoughts
I think my favorite part about this room is how much of it I renovated by myself.

Please enjoy this picture of me with the longest arms in the world
Honestly, I've been on a journey to find my confidence and self-worth for a really long time, and with every project I complete the more I feel myself grow. I've learned that I am capable and can do more than I think I can. I can't even describe how happy that makes me.
And let’s be real, with every project I do by myself I can be as perfectionistic as I want, and I don't have the fear of annoying anyone, which is pretty great.

Catch up on my other posts from the Fall 2022 One Room Challenge:
Laundry Room Inspiration
ORC Week 7 - DIY Floating Shelves Tutorial
Floating shelves are pretty stinkin’ cool. I mean, how are they even attached to the wall!? Looks like magic, if you ask me. Well, I uncovered the mystery this week when I made some for my laundry room renovation for the One Room Challenge. In this post, I’m sharing the step-by-step process I used to build my floating shelves!
Make Your Own Custom Floating Shelves
Floating shelves are pretty stinkin’ cool. I mean, how are they even attached to the wall!? Looks like magic, if you ask me. Well, I uncovered the mystery this week when I made some for my laundry room renovation for the One Room Challenge. In this post, I’m sharing the step-by-step process I used to build my floating shelves!

What’s the One Room Challenge?

I know I’ve explained what the One Room Challenge is in every post, but let’s do it again for the people in the back!
The One Room Challenge is an event where DIYers from all around encourage and motivate one another to makeover one room in their homes over a period of 8 weeks. In my case, I’m finally tackling our laundry room remodel.
Each Wednesday, I’ve shared my progress with a blog post, and now we’re in the home stretch with the reveal coming next week!
DIY Custom Floating Shelves
As a nervous novice woodworker, and in true Erika fashion, I did plenty of research before I dove into this project. I found several different ways to make floating shelves, but this one seemed the most straightforward. Maybe down the line I’ll try another way and see which I like better. Long story short: there’s more than one way to skin a cat. This is just one of those ways. (Of all the sayings I could have picked…)
As an Amazon Associate, I earn from qualifying purchases. This post may contain affiliate links, meaning I receive commissions for purchases made through those links at no cost to you.
Supplies for Floating Shelves
2”x2”x8’ boards - I knew I didn’t want my shelves to be super duper thick, so instead of 2x4s for the supports, I chose 2x2s.
1/4” birch plywood
Stain (this is the one I used)
Tools Used
Drill (impact drill recommended)
Rag (for stain)
Paintbrush (for poly)
Draw Out Your Plans
Here are my initial plans for my shelves as if you’re looking at them from the top down.
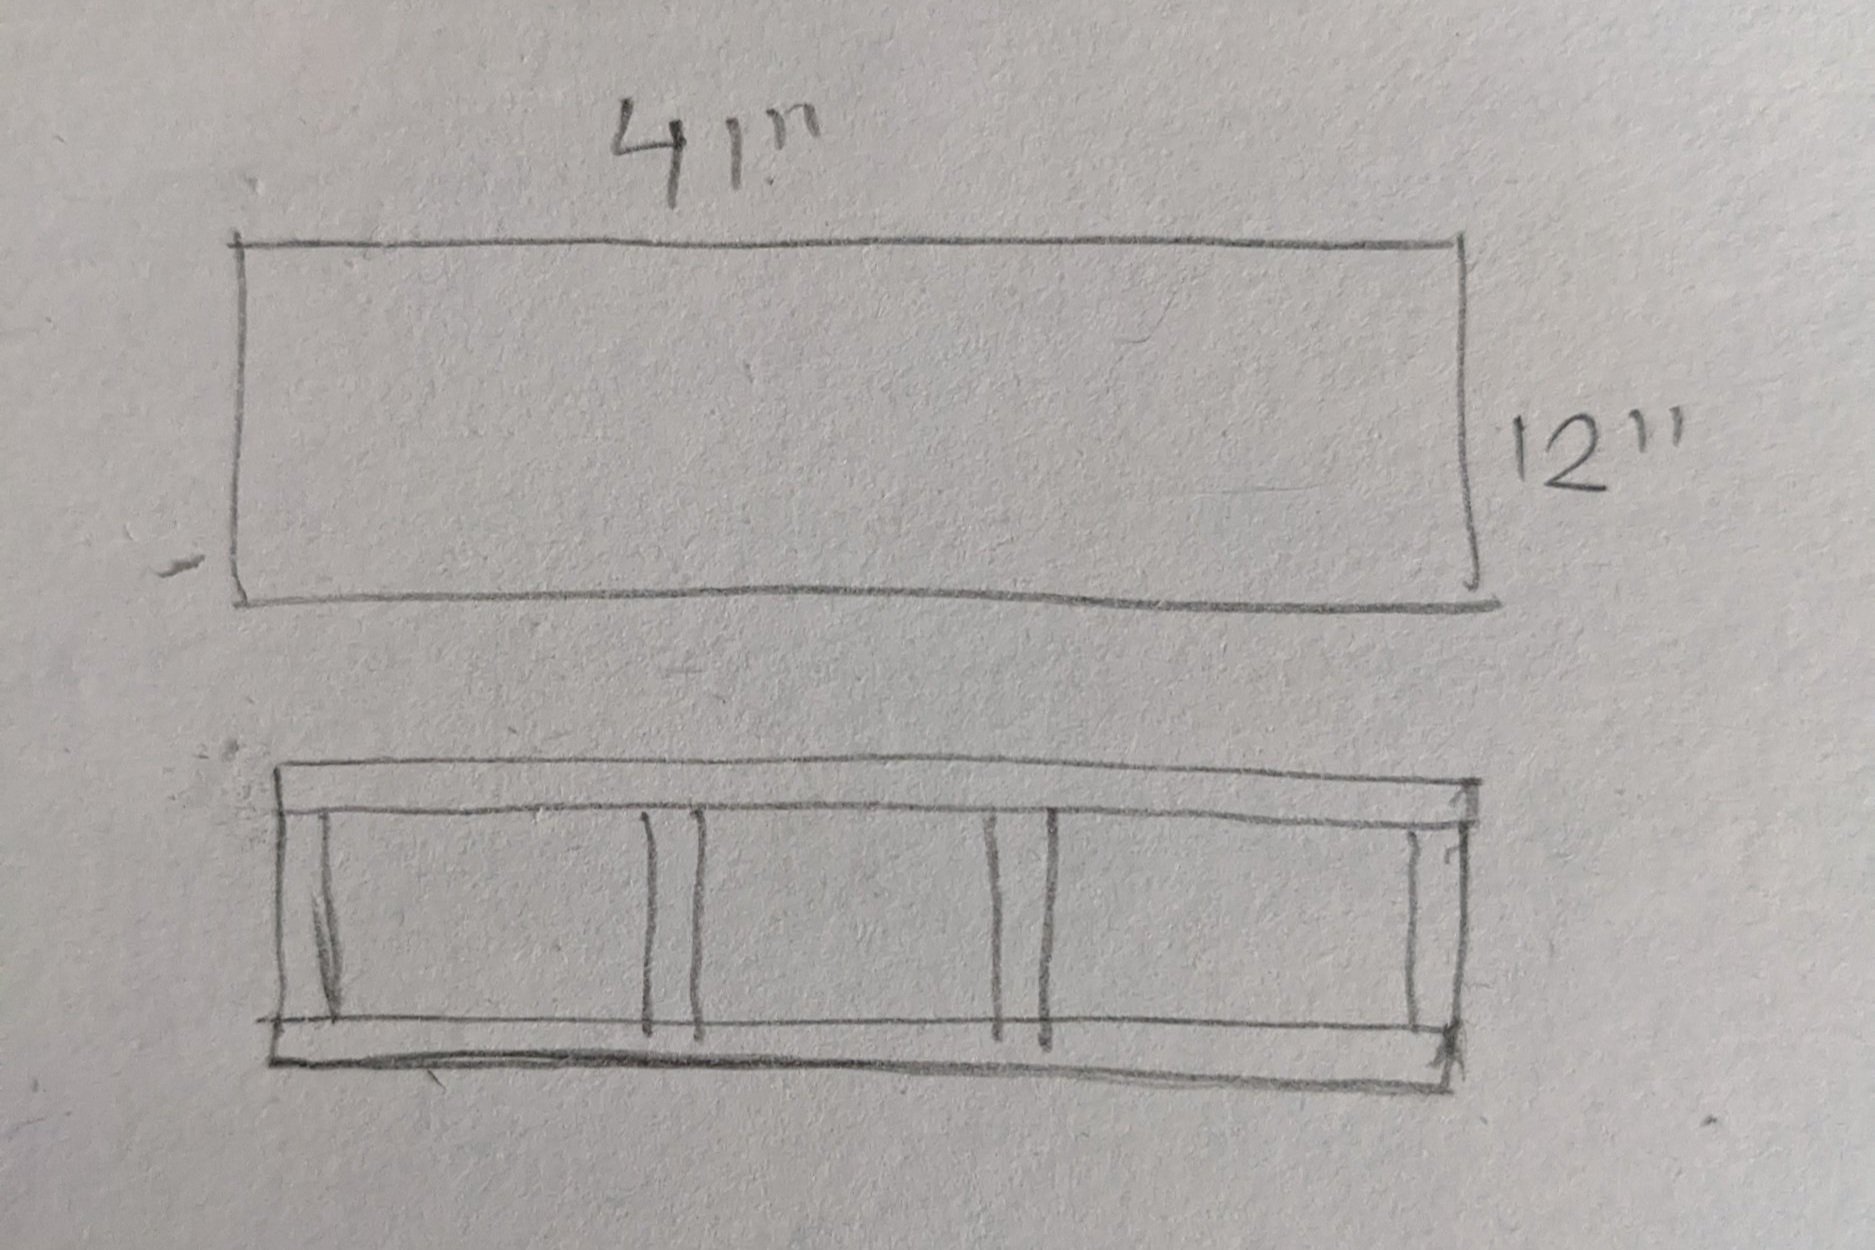
Super simple, right? Just a ladder frame that will be covered in plywood.
I’m not going to throw a ton of measurements at you in this tutorial because your shelves will have unique measurements for your space. The more important aspect to take from this step is that sketching out your plans beforehand will help you determine how much material you need.

I was able to determine that one 2’x4’ piece of plywood would give me enough for the tops and bottoms of one shelf, so I would need at least 3 pieces of plywood for my whole project (can’t forget about that little sliver of plywood needed for the front!).
Cut the Supports
Because my shelves were going in the nook between the faux wall and the actual wall in the picture below, the long boards of my frames needed to be the exact width of the space. I cut 4 of these (2 for each shelf front/back).

Quick note: measure your shelves independently because drywall is rarely exactly square, and your measurements could vary.
Next, I determined the measurement I needed to cut the small supports so my shelves would be 12” deep like I wanted. I cut 4 small supports for each shelf (you can see them in the sketch above) - 2 for each end and two in the middle. However long your shelf is, I would plan to add a support about every 12 inches.
Mark the Studs
Before you assemble anything, take the time to find the studs on your wall. I put my frames together first and lucked out that nothing was in the way of my studs. They were close though!

Assemble the Supports
Now that everything is cut, you can start to assemble your first frame!
Start by putting wood glue on the ends of the supports.
Then, line up your wood, making sure it’s square. It’s advised to use an actual square to do this, but I have no idea where I put mine, so I used the next best thing: a trowel. It’s also advised to flip your head upside down and take a picture at the most opportune time.

Clamp everything in place and check to make sure it’s square once again for good measure.

Next, make your life way easier (and prevent your wood from splitting) by pre-drilling a hole with a countersink bit. Then, using your 3” screws, screw it all together.

Rinse and repeat until everything is connected.
Now you can dry-fit your frames to make sure they’re everything you dreamed of before you officially attach them to the wall.

Look, Mom! No hands! Or Screws! That picture was taken moments after the bottom frame fell down. I’d say they’re a pretty good fit!
Install the Supports
Now that you’ve determined where the studs are and that your frames fit, it’s time to officially install them.
I started by measuring where the studs would hit on my frames and pre-drilling holes. Then, I nudged them in place with a rubber mallet (it was tight!) and made sure they were level side-to-side and front-to-back.

I secured the frames by screwing them to the studs with 3” screws.
Add the Faces
Now it’s time to add the faces of the shelves - this is what really makes them.
The more I work with wood, the more I realize how important it is to measure things individually, so that’s what I did here. It took way longer, and there were lots of trips up and down the stairs, but I didn’t make any bad cuts! (Note to self - make sure the next project I work on is closer to the power tools.)
Quick tip: when cutting plywood, use painter’s tape to avoid splintering your wood.

Using a nail gun, I installed the top and bottom of each shelf face first, then installed the front piece so you don’t see the raw edge of the plywood as easily.

Finishing Touches
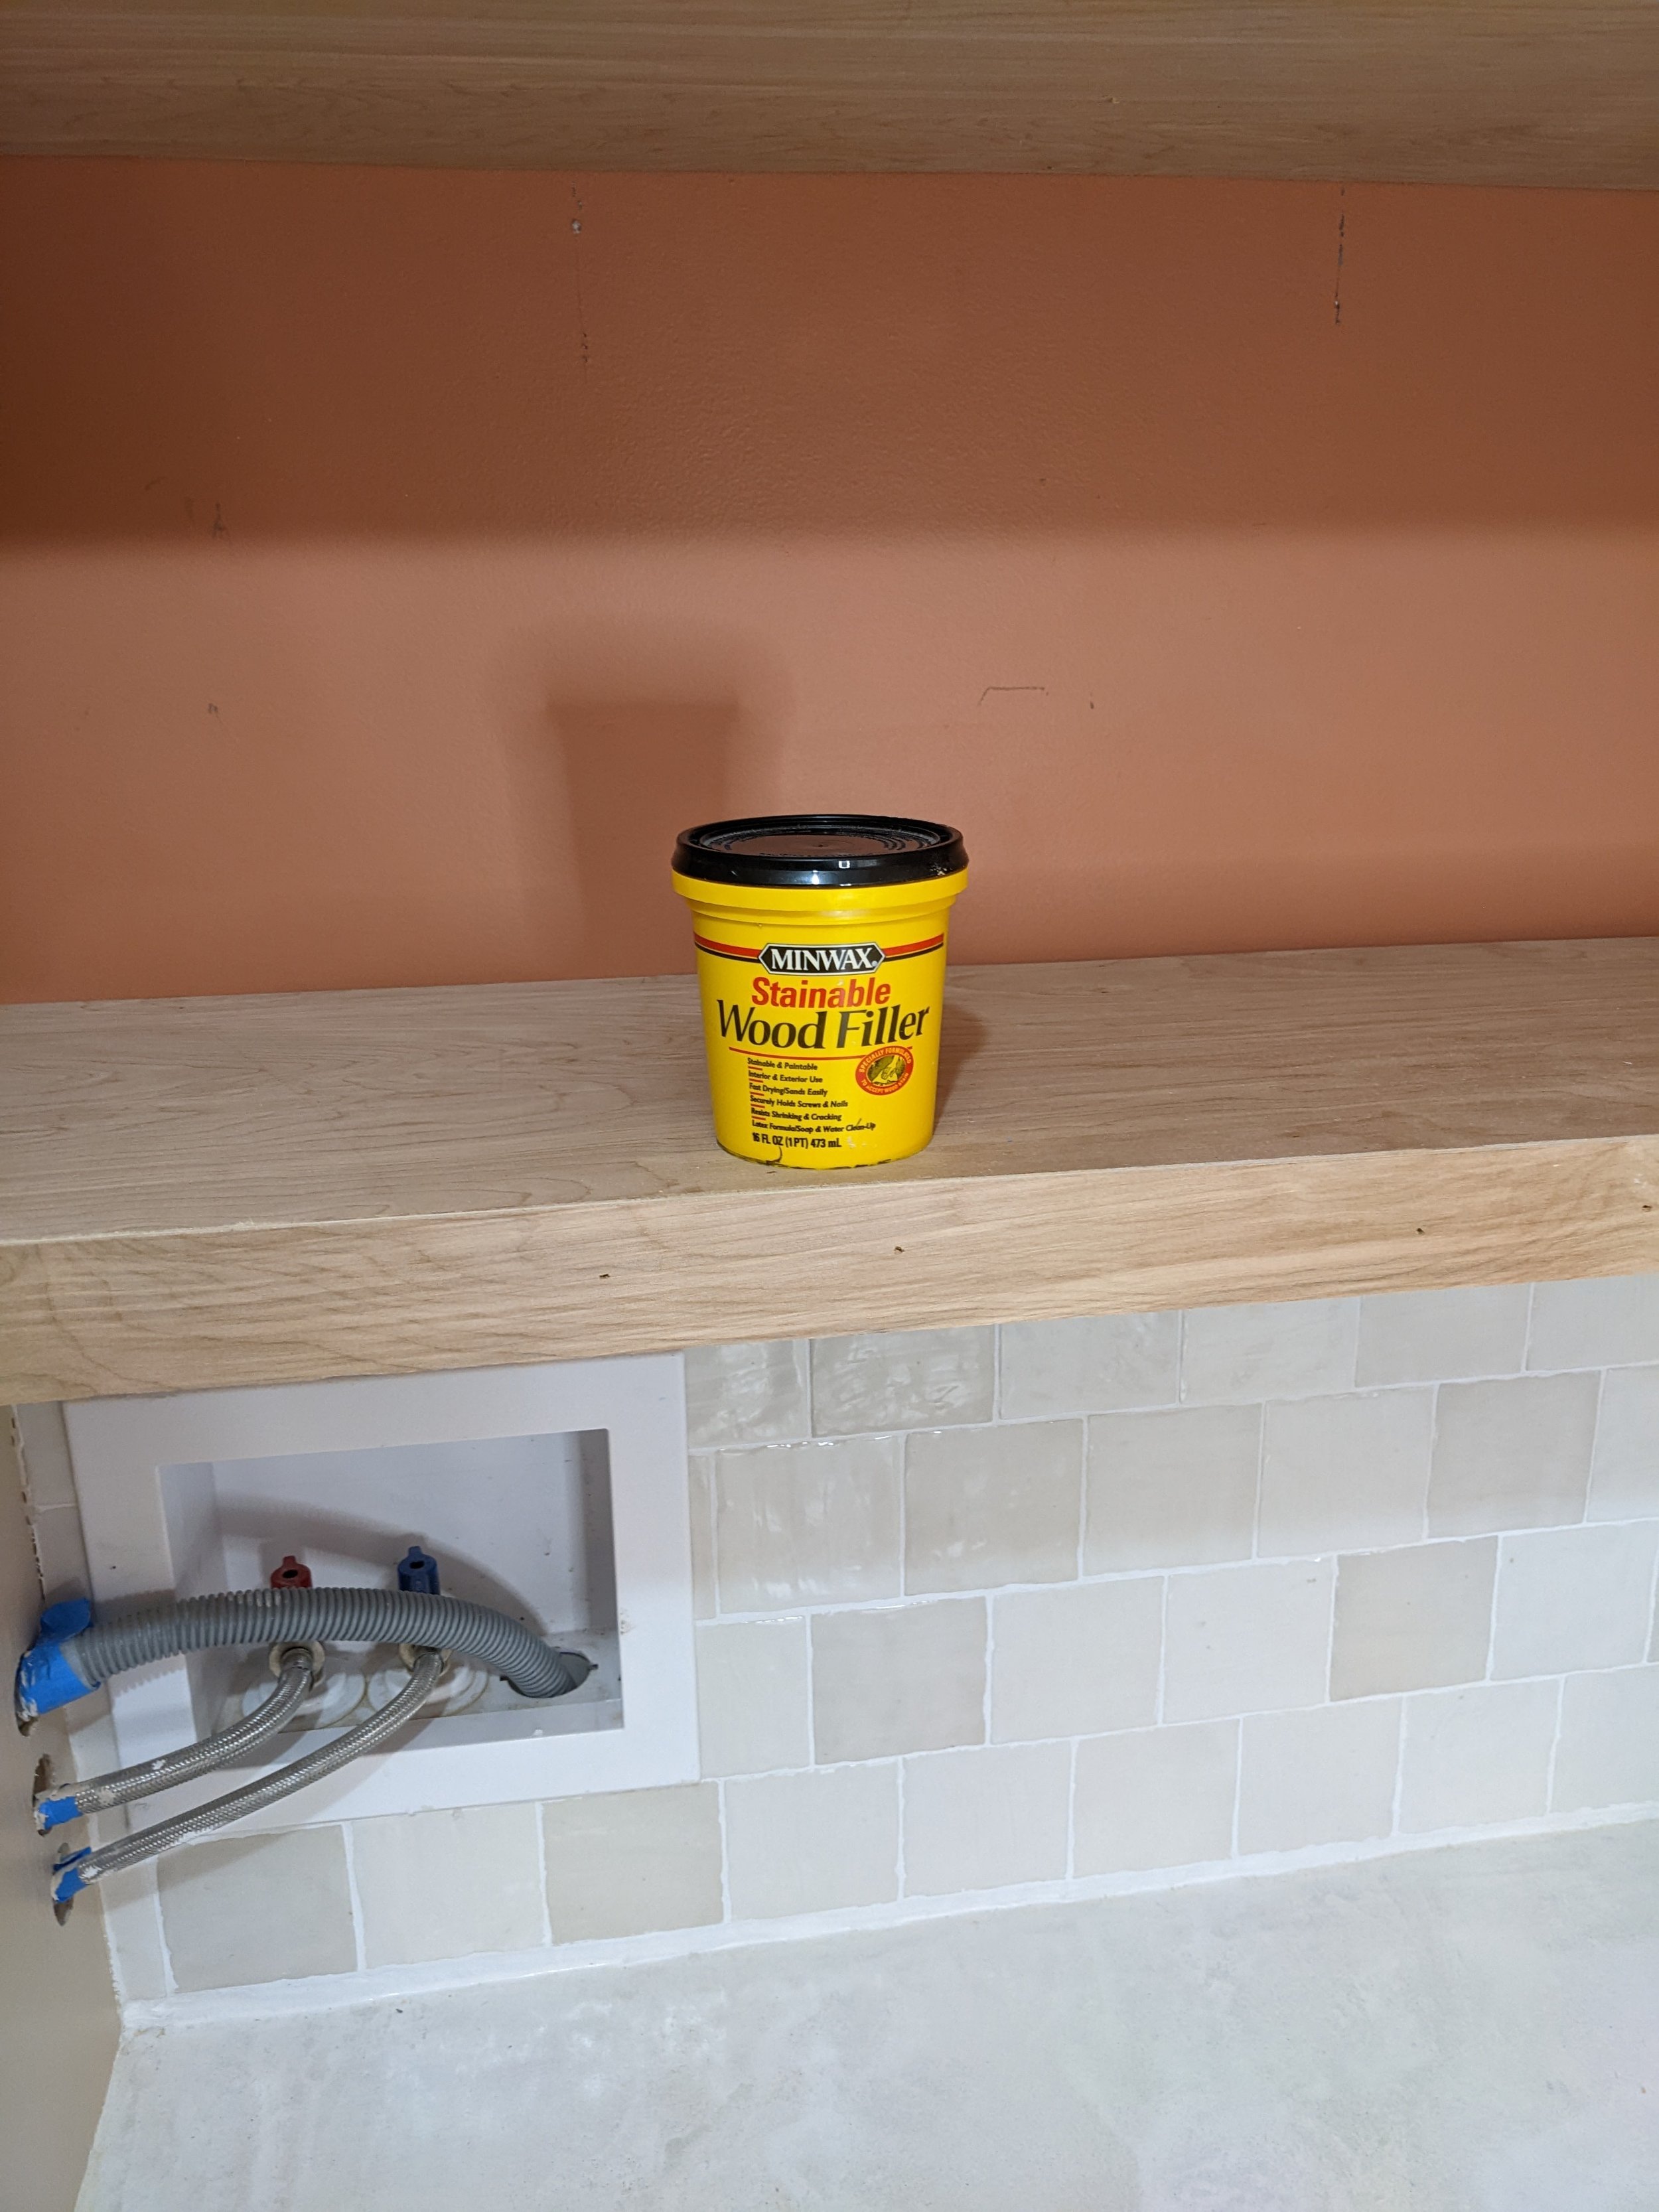
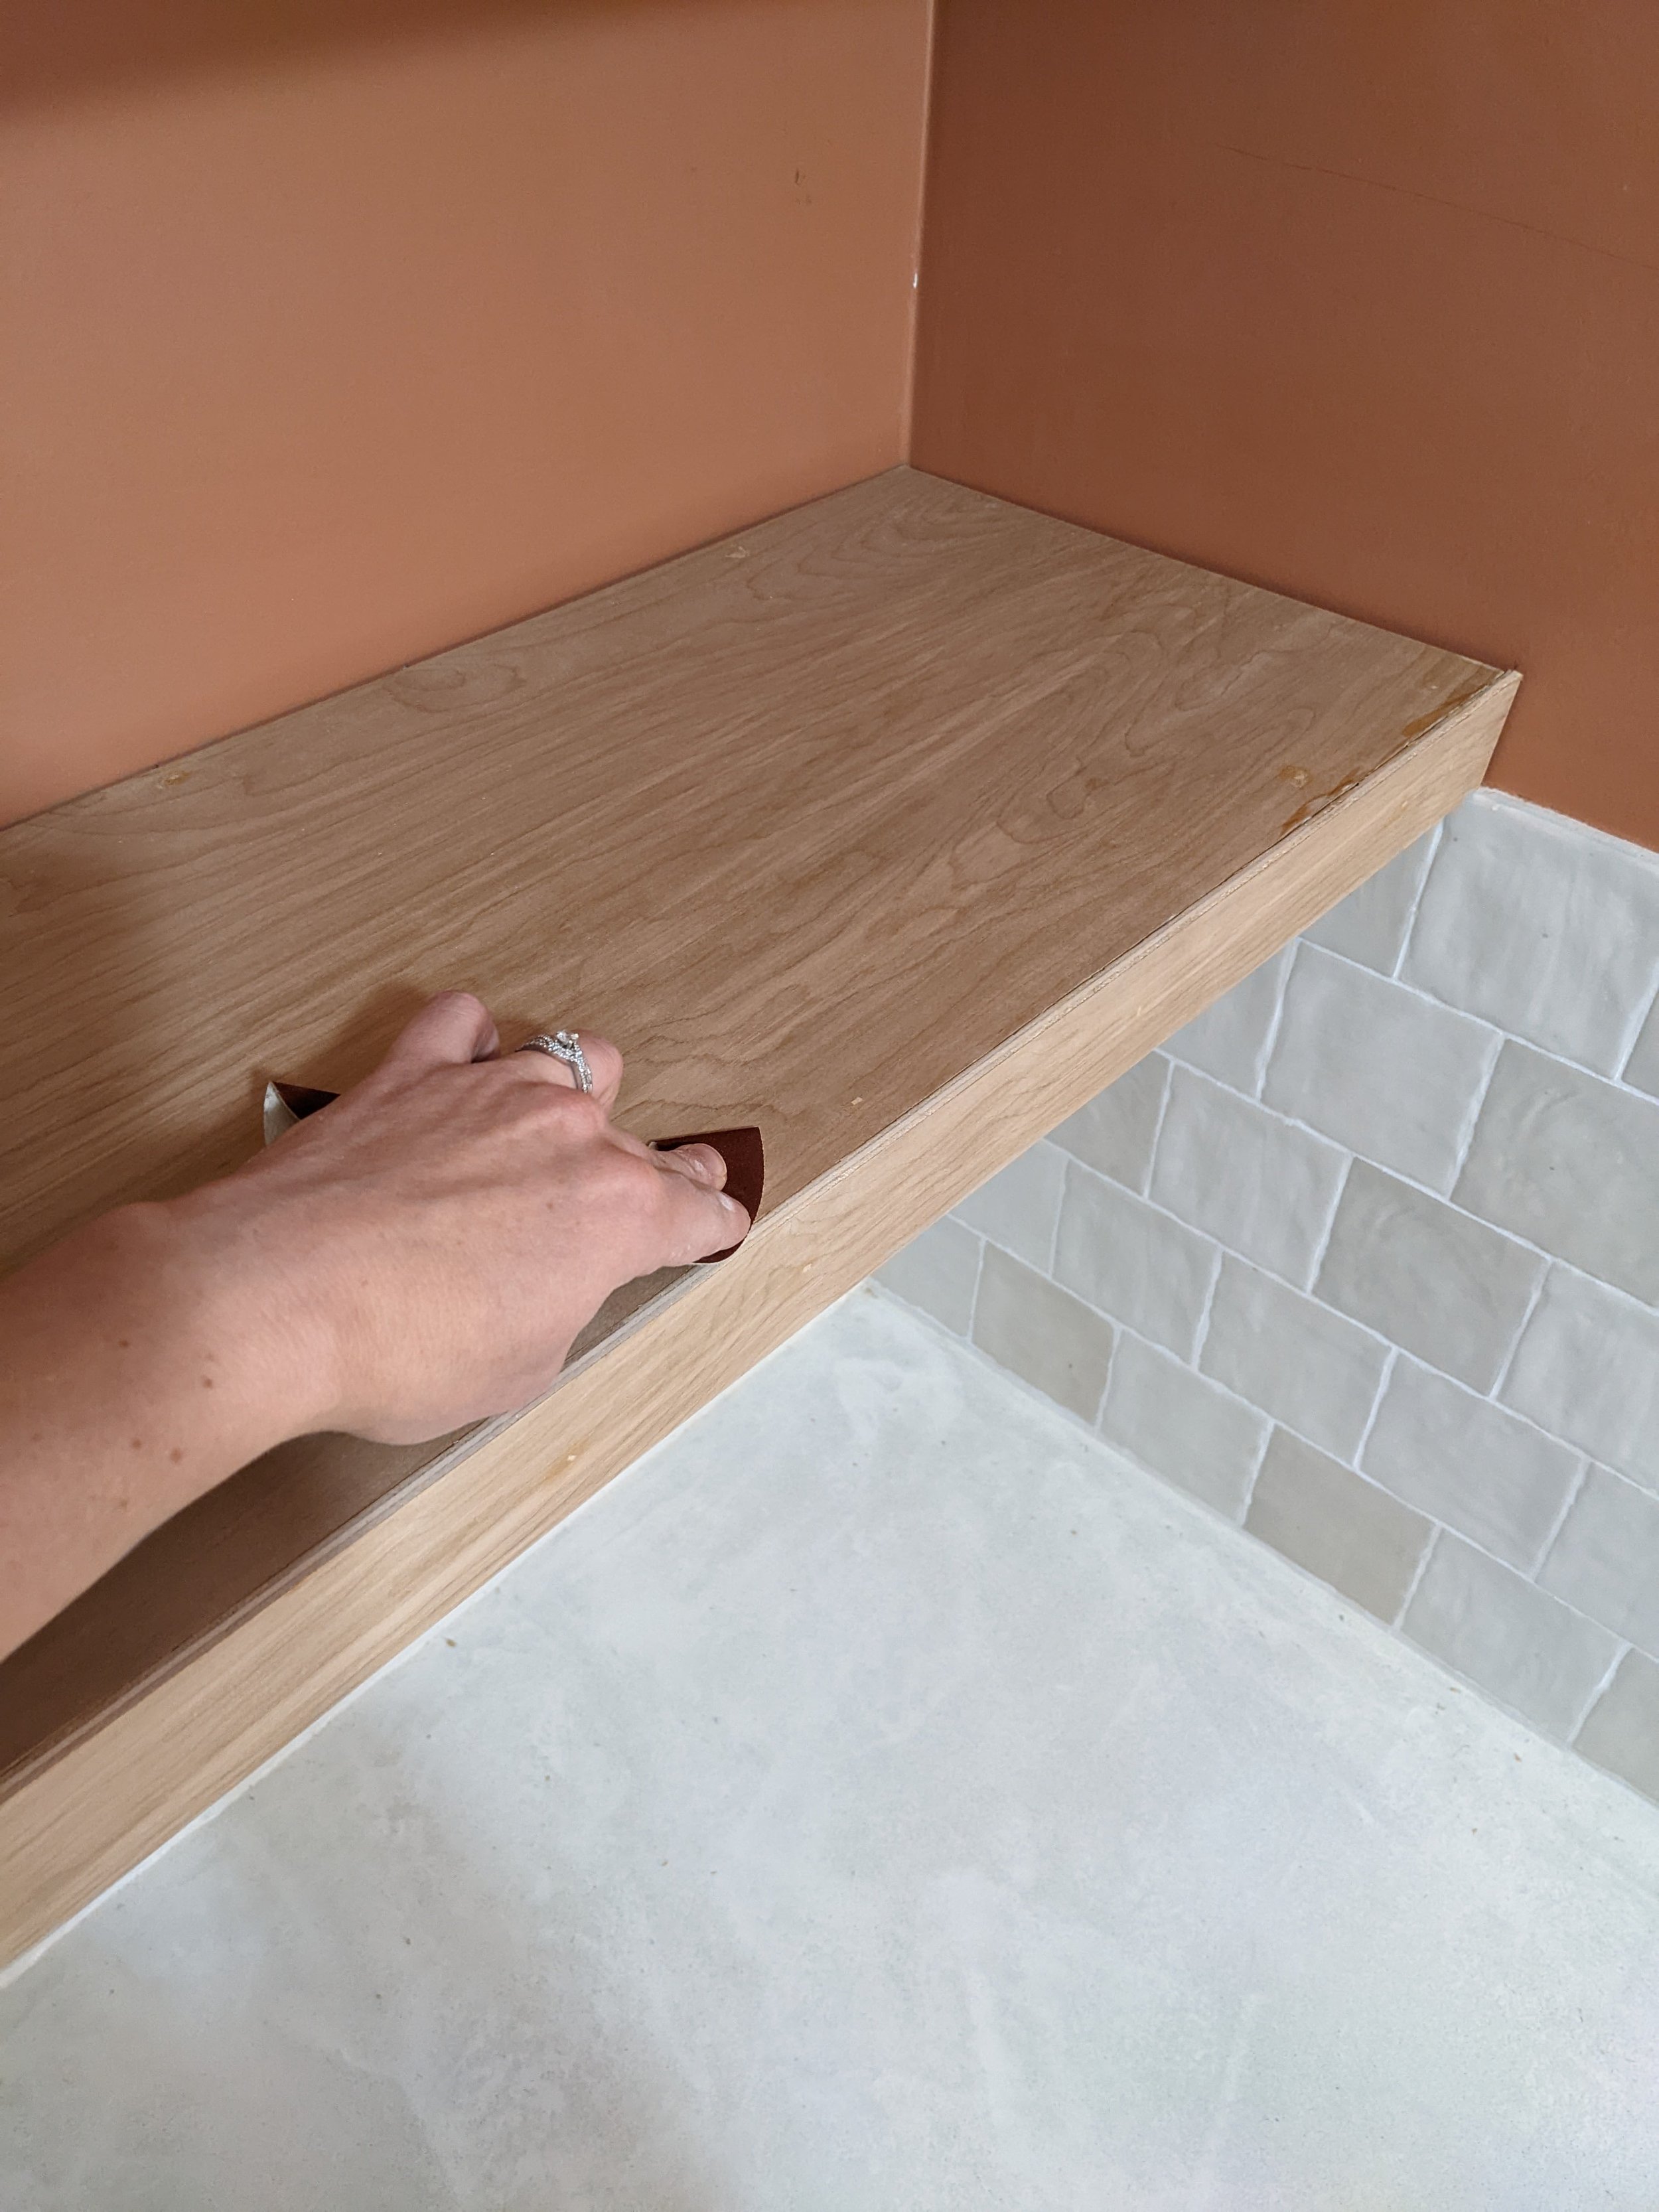
After I put in all that work to build my own shelves, I wanted them to look their absolute best. I started by using wood filler to fill in the nail holes. Then I sanded everything down with 220 grit sandpaper, wiped it clean, and applied wood conditioner.
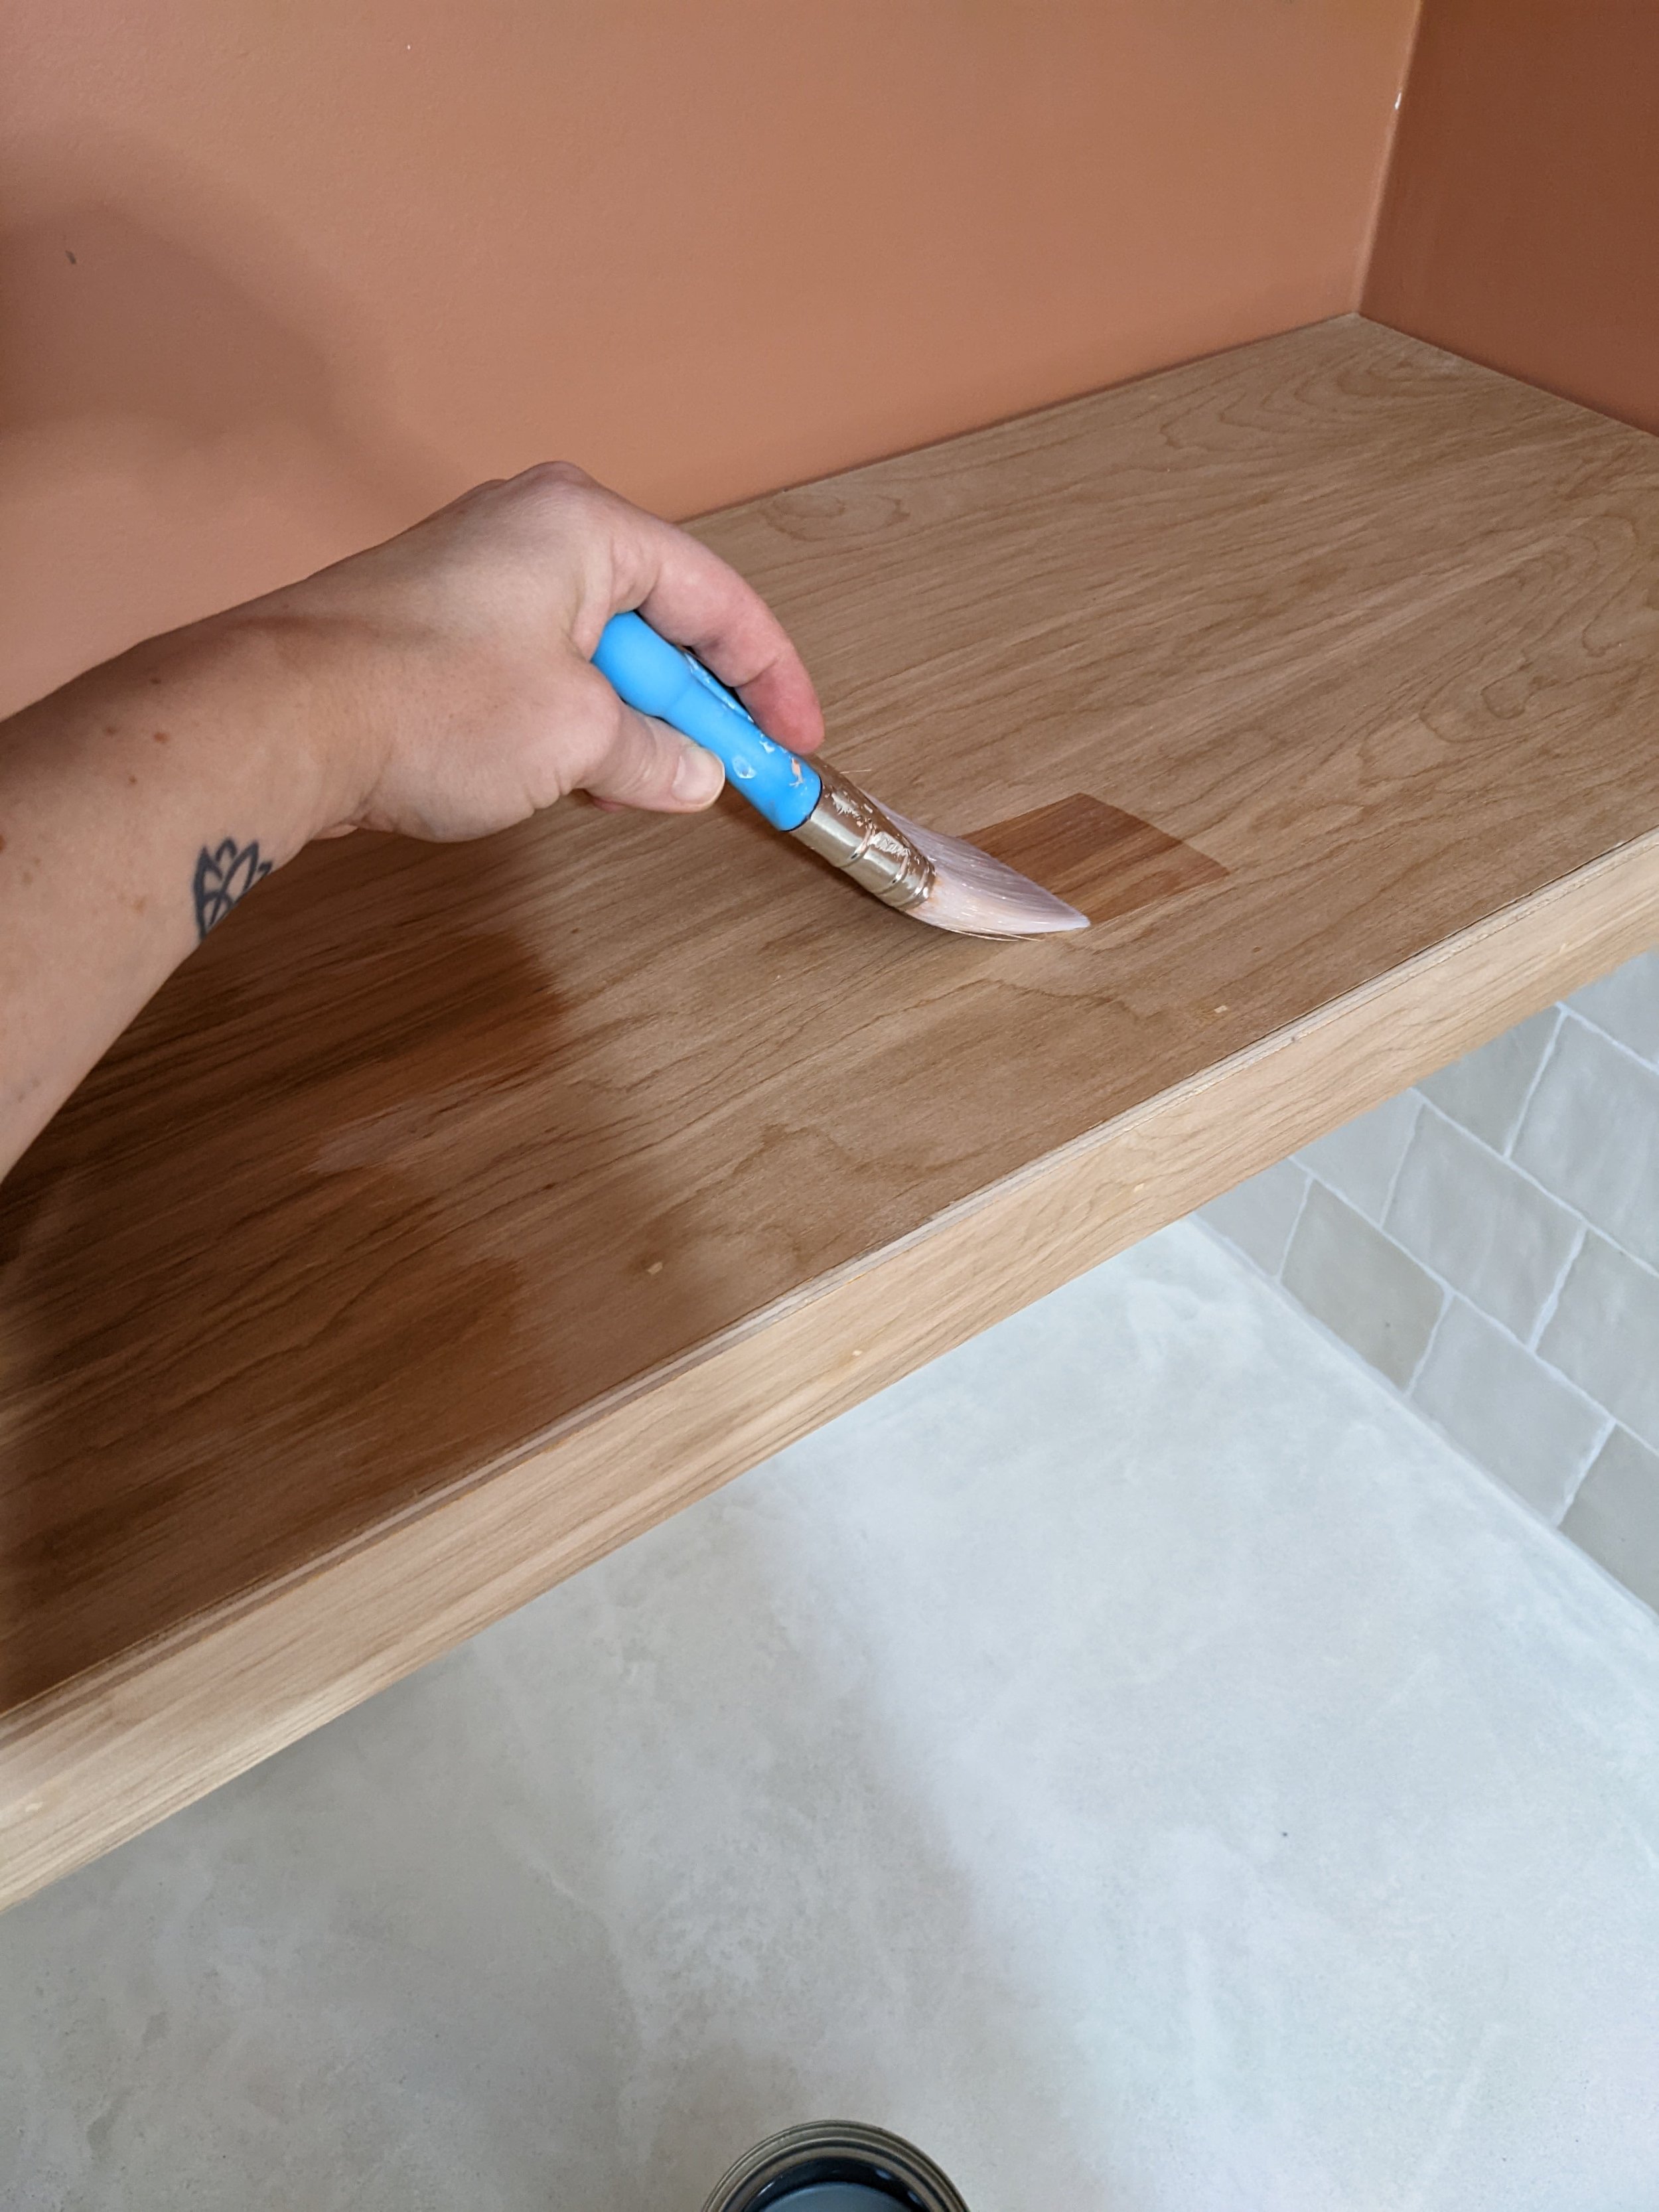
The wood conditioner really seemed to bring out the red in the wood, which I didn’t love (it made the shelves blend into the wall too much). You can see for yourselves in the picture below where the top shelf has wood conditioner and the bottom doesn’t.

So I tested a few different stains to tone them down. I ended up using Minwax Simply White semi-transparent stain. One coat did the job perfectly!
I finished my shelves off with a couple of coats of Polycrylic, and I’m absolutely in LOVE! I can’t wait to style them.

Built-in Cabinet
Did you catch the other addition to the laundry room this week? The cabinet above the washer and dryer has been built and installed!
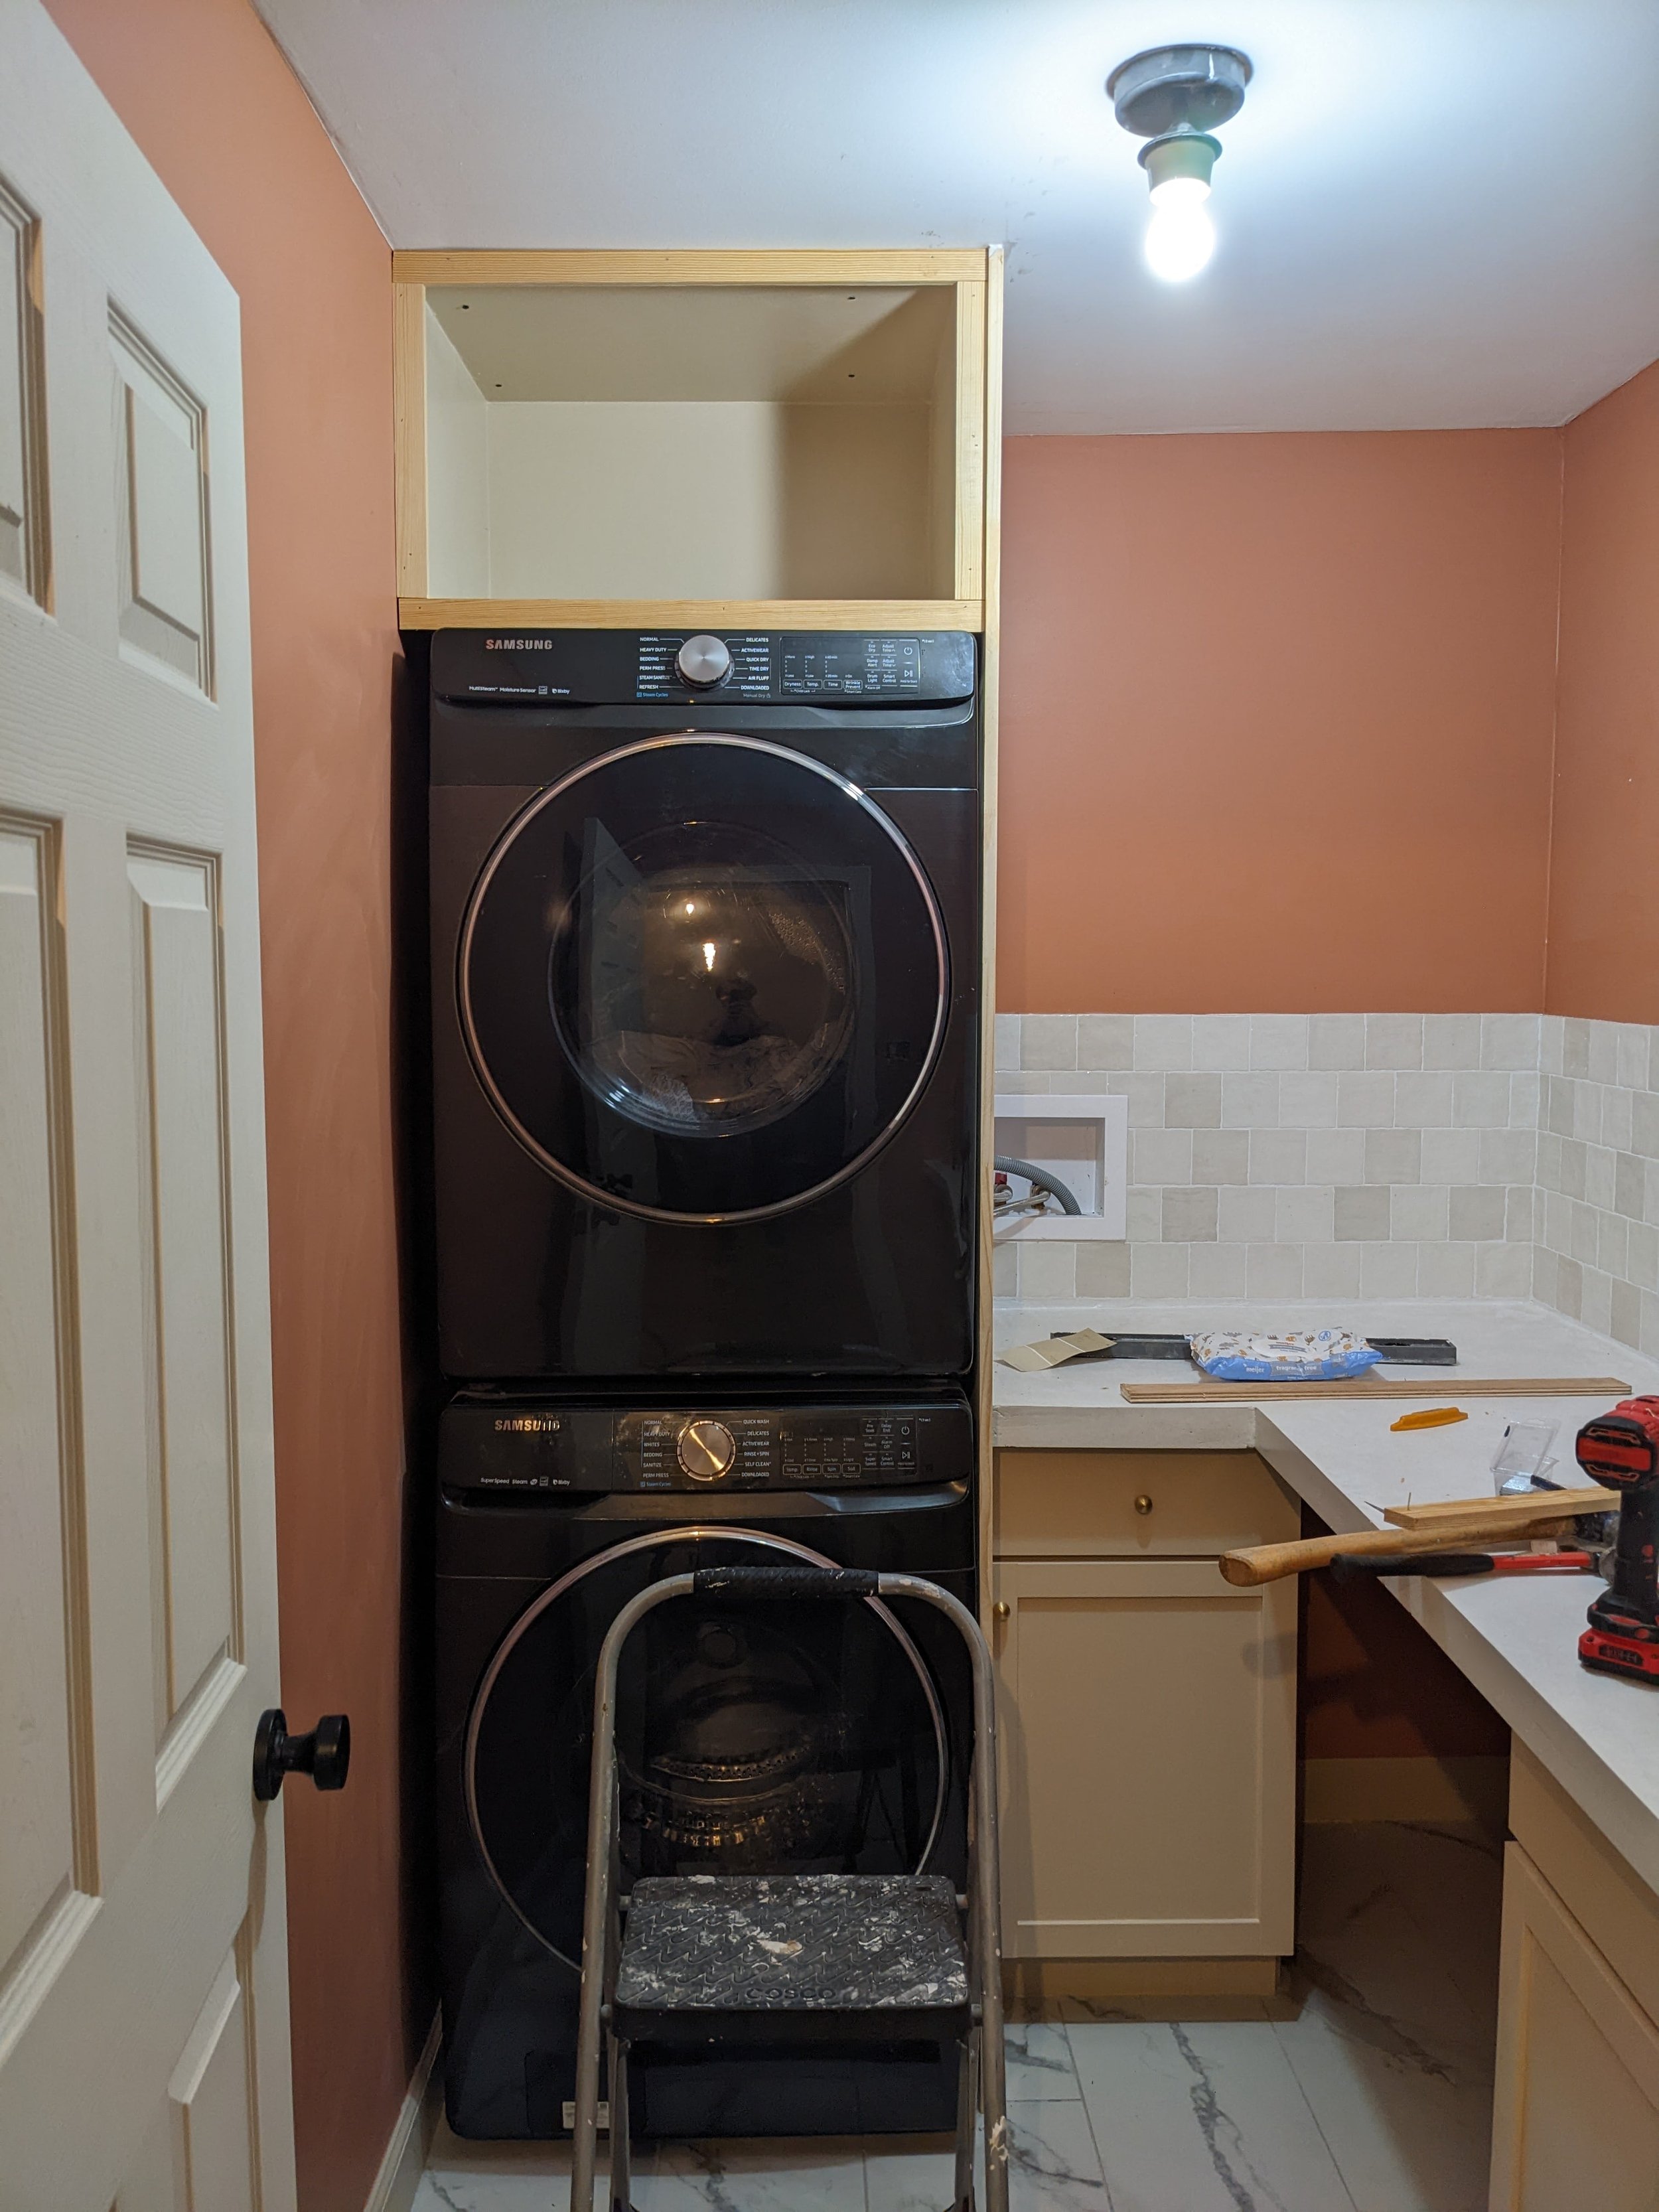
`Who knew you could build a cabinet with just some plywood and a Kreg pocket jig? Not me! But now that I have these two projects under my belt I feel unstoppable! You can watch this process in my Instagram highlights.
But seriously, the cabinet up there makes this room feel 10 feet tall, and I can’t wait to build doors for it. I’m already researching how…
Update: after the One Room Challenge wrapped up, I DID build doors! You can check out the tutorial here.
Final Thoughts
In writing this tutorial, I took out a lot of fluff about my struggles with building my shelves so I could get to the point and provide a concise tutorial. However, I want to mention that I definitely had my challenges. (I was SWEATING while hanging the supports - both from nerves and lack of strength.) BUT, I didn’t give up when I started to doubt myself, and that makes this project that much sweeter.

There have been so many projects I wanted to tackle over the years that I shrugged off because I didn’t think I could. But with every little project I complete, I gain a little more confidence in myself and I can’t express how good that feels. I have the bad habit of thinking about eating the whole elephant at once and getting so overwhelmed I don’t even try - when really I just need to eat it one bite at a time… (What is with me and these sayings today!?)
All that is to say - if you’re anything like me, just start somewhere, and you’ll be amazed at how far those little steps can take you.
I can’t wait until next week when I get to share this room in all its glory in the One Room Challenge reveal!


Don’t miss out! Catch up on my other One Room Challenge Posts:
How to Build Easy Floating Shelves
ORC Week 6 - How to Tile Backsplash
There’s a first time for everything - and this week of the One Room Challenge marked my first time at tiling! And you know what? It’s a super beginner-friendly project that makes a really big impact! In this post, I’m sharing the steps I took to tile my laundry room backsplash.
DIY Tile Backsplash
There’s a first time for everything - and this week of the One Room Challenge marked my first time at tiling! And you know what? It’s a super beginner-friendly project that makes a really big impact! In this post, I’m sharing the steps I took to tile my laundry room backsplash.

What’s the One Room Challenge?

If you’re new here, the One Room Challenge is an event where DIYers from all around encourage and motivate one another to makeover one room in their homes over a period of 8 weeks. In my case, I’m finally tackling our laundry room remodel.
Each Wednesday during the challenge I'll share a post with the previous week's progress until the final reveal on November 16th!
The Tile I Chose
I’ve been fangirling over the look of handmade 4x4 tiles in a staggered (technically called running bond) pattern for A WHILE. The tile in the image below is exactly what I had in mind.

When I realized I had an opportunity to use them in the laundry room I was pumped!
My initial design called for these tiles, which are almost exactly what I was looking for - the right size and texture - but I didn’t love the iridescent finish. And once I read some reviews, I learned that there was little variation in color from tile to tile (something I wanted in my design!)
BUT they were the closest tiles I could find in my price range. As I was on the brink of buying them, I came across a close cousin that checked all my boxes.
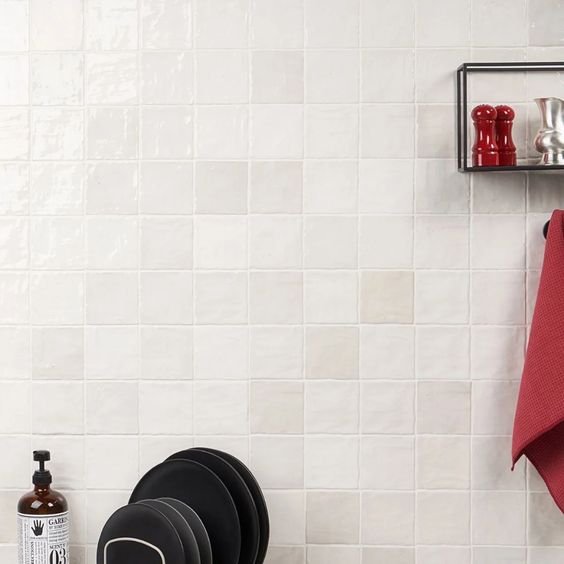
I purchased them immediately!
If you were here for our master bathroom reveal, you’ll know we tiled the bejeezus out of that space.

As an Amazon Associate, I earn from qualifying purchases. This post may contain affiliate links, meaning I receive commissions for purchases made through those links at no cost to you.
But in reality Lucius and a friend tiled the whole thing while I peeked in between work meetings and grouted on the weekend. So in the grand scheme of things, this was my first foray into the tiling abyss. Here’s what you need for your own tiling adventures:
Materials
Note: These are the materials I used for my tile so please just use them as a guide. Depending on the type and size of your tile, you may need slightly different materials.
Tiling
- Your tile of choice
- Mortar Thin Set
- Drill
- Mixing paddle
- Water
- 5-gallon bucket
- Trowel
- Shims and/or Tile Spacers
- Plastic sheeting (optional)
- Painter's tape (optional)
- Laser Level or Standard Level
- Tile Saw, Tile Snap Cutter, or Handheld Tile Snipper
Grouting
Grouting
Prep
Yeah, yeah, yeah, always with the prep. Before you bust out your mortar and get to mixing, start with these steps!
First, I laid down some plastic sheeting (the kind with tape attached) on my countertops. There's NO WAY I was going to mess those babies up! I even added extra painter’s tape to get my grout line where it would meet the countertop nice and straight.
I ended up with 4 boxes of tiles, so I started by mixing them together to make sure I had a good variation of coloring. Then, I started to figure out my design.
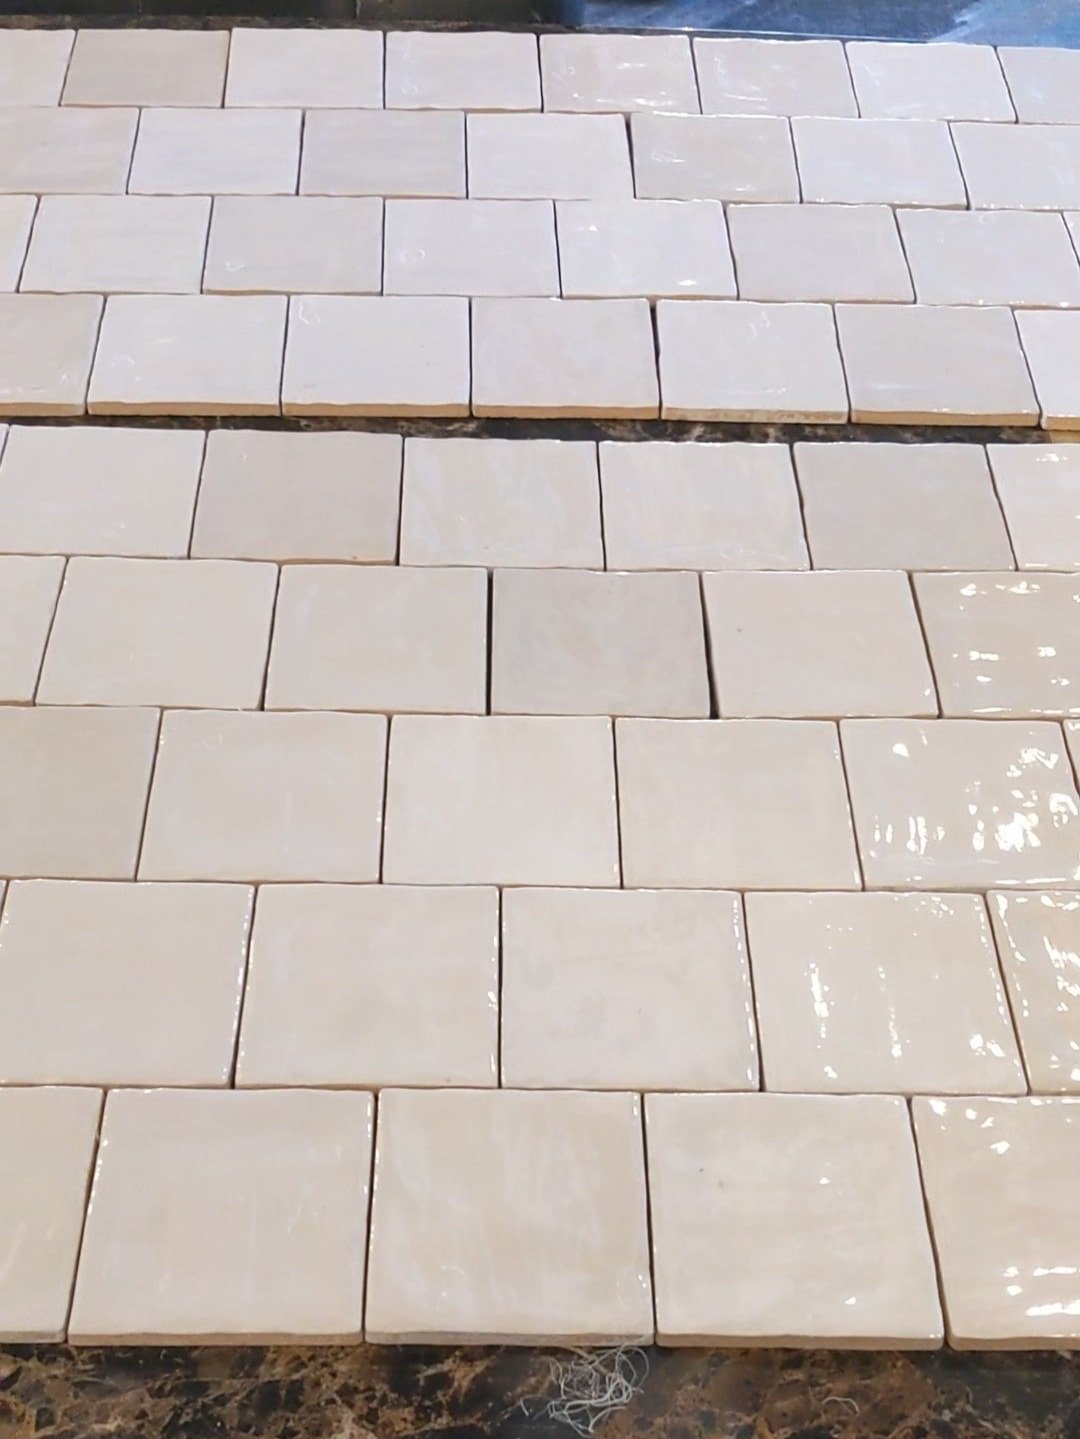
I knew the pattern I wanted to use, but I still had to determine where to start and end my rows. I decided to start in the corner where the walls meet and install a whole tile. Then move out from there.
That left me with enough at the ends that I didn't have any awkwardly weird slivers to deal with. I even laid out my first row along the countertop to make sure the different shades of tile were nicely mixed.

This is important because sometimes you'll have tiles that have coloring that's just a little bit off and it can be really obvious when installed. Not laying out the tiles and looking them over beforehand is my one regret in our master bathroom (see the group of darker tiles in the top left corner of the shower in the picture above? Ugh).
Next, I set up my laser level at the same height as the top of my first row of tiles.
Installing Whole Tiles
Once everything was prepped, I was ready to mix up some mortar. Using COLD water (as I mentioned when we installed brick veneer in the loft, hot water will speed up drying time) and the mixing attachment on my drill, I added a little mortar at a time until it was a peanut buttery consistency. Because mortar only has a workable time of a couple of hours, I only mixed up a small amount.

Did you know there are different colors of mortar? There aren't a TON - just basic shades. It's recommended that with light-colored or glass tiles you use white mortar. So that's what I did.
You're also apparently supposed to start your tile in the middle of the row, but because I knew I wanted a full tile on a certain end, that's where I started.

Using my trowel, I spread mortar on the wall in small sections. I realized my tiles weren't picking up as much mortar as I needed by just putting it on the walls, so I also back-buttered the tiles (a fancy term for "spreading mortar on the back of the tile").
There are lots of different shapes and sizes of trowels, which can be confusing. If you're not sure what to use for your specific tile, check on the manufacturer's website.

Then, I smooshed the tile to the wall and wiggled it back and forth a little. I finished up by adding shims where needed to make sure the top of my tile was touching the laser level line.

As you can see above, the shims definitely came in handy as my countertops weren't quite as level as I'd hoped.
The manufacturer of my tile suggested using 1/16" spacers, but I found that the inconsistencies in the tile created spaces about that wide on their own and the spacers just fell out. I opted not to use them and I’m super happy with how it ended up looking.
The first row was definitely the hardest, but after it was installed, the other rows were a breeze. I still had to use shims here and there to make sure the tiles were staying level where I didn't get them quite level enough on the first row.

Cutting Tile
After I had all the whole tiles installed, I started making my cuts!
Using a crayon, I made marks on my tiles approximately where they needed cut. Then, set the guide on the tile saw and ran them through. If you don’t have a tile saw, you can use a tile snap cutter for basic cuts, but some cuts won’t be possible without a tile saw.
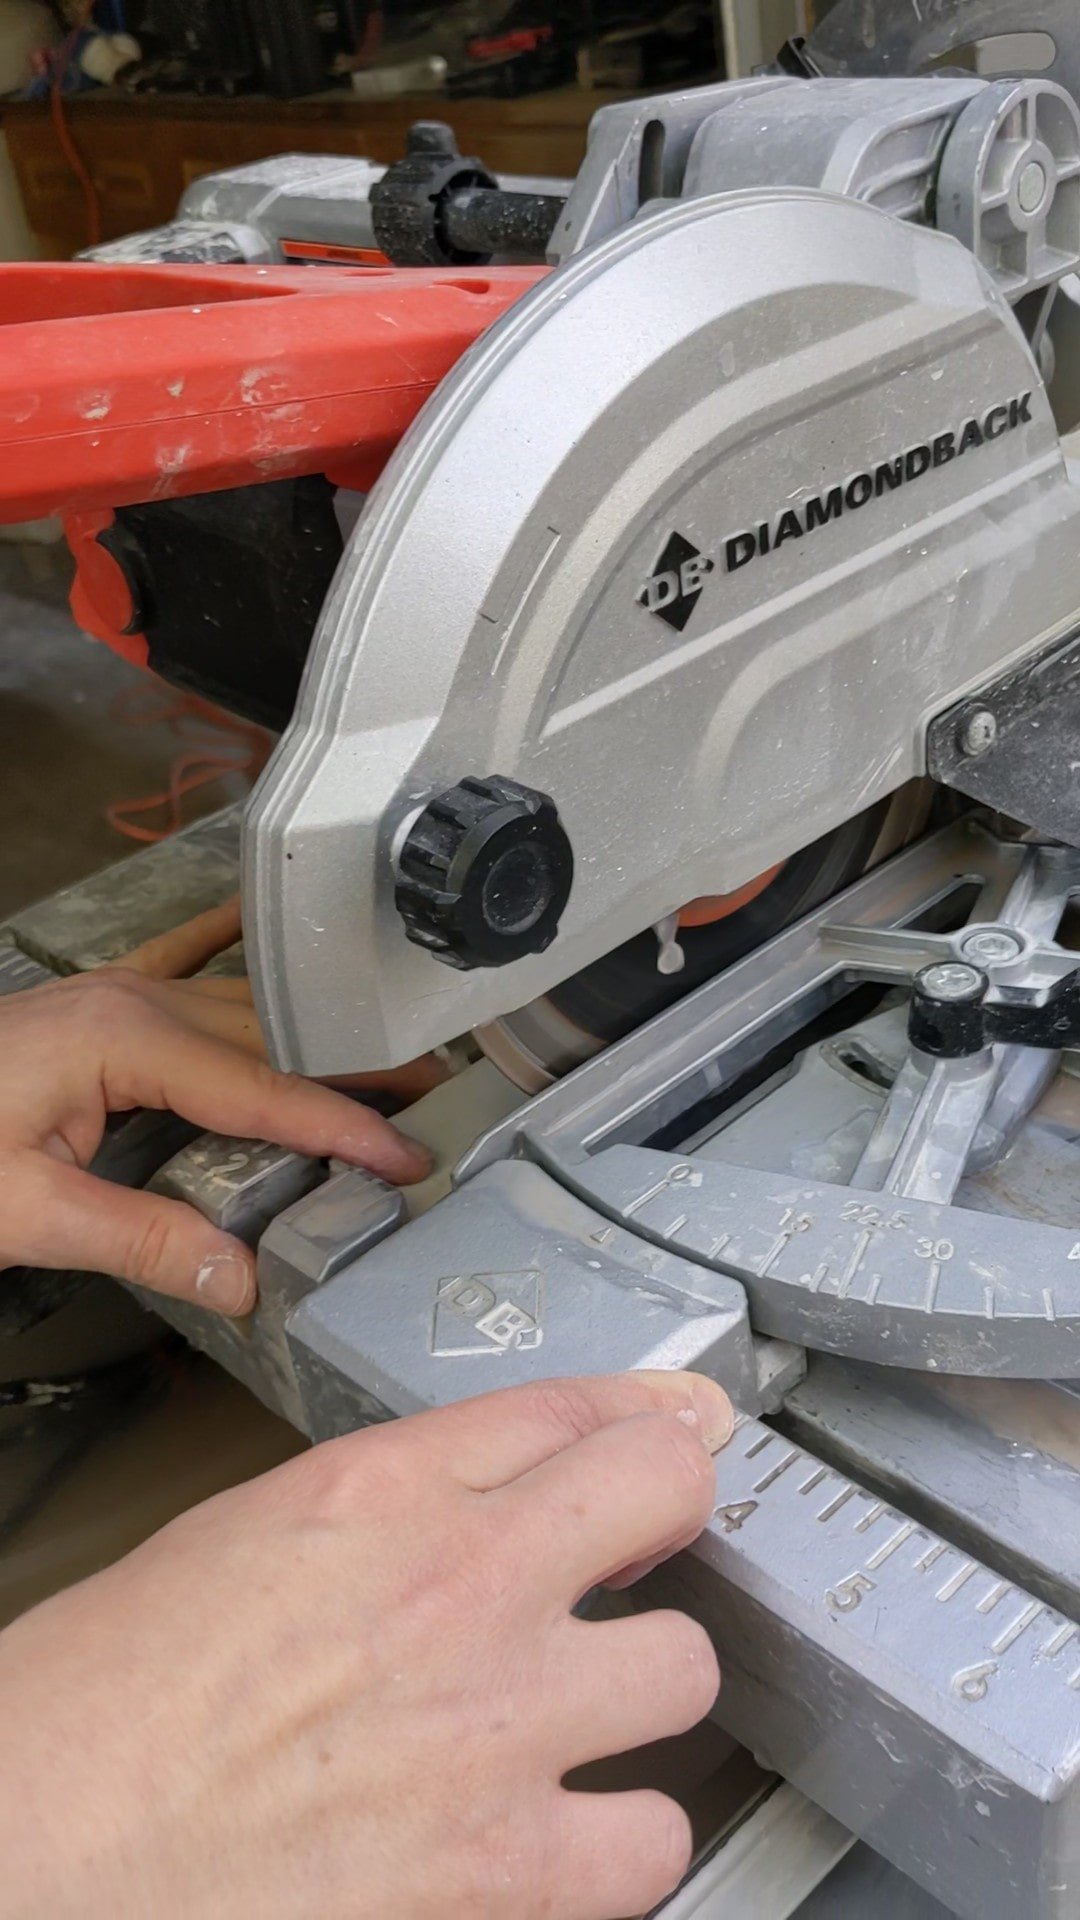

A couple of tips for using a wet saw:
Make sure water is running off the saw blade before you start cutting.
Don't be like me - wear protective glasses! (whoops)
Corner cuts are a bit tricky. I found it easiest to cut through as far as I could on the front side of the tile, then flip it over and do the same on the back. This didn't always cut clean through so occasionally I had to snap the piece off. Luckily, all my corner cuts are hidden under the thingy that holds the washing machine hoses (I’m sure that’s the technical name for it).

Grout
Once you're done installing the tile, you need to give it at least 24 hours to dry before you grout.
Picking a grout color is easy to overlook, but it can make a big impact on the look of the finished product. There are lots of grout colors to choose from - the chart below doesn’t even cover all of them!
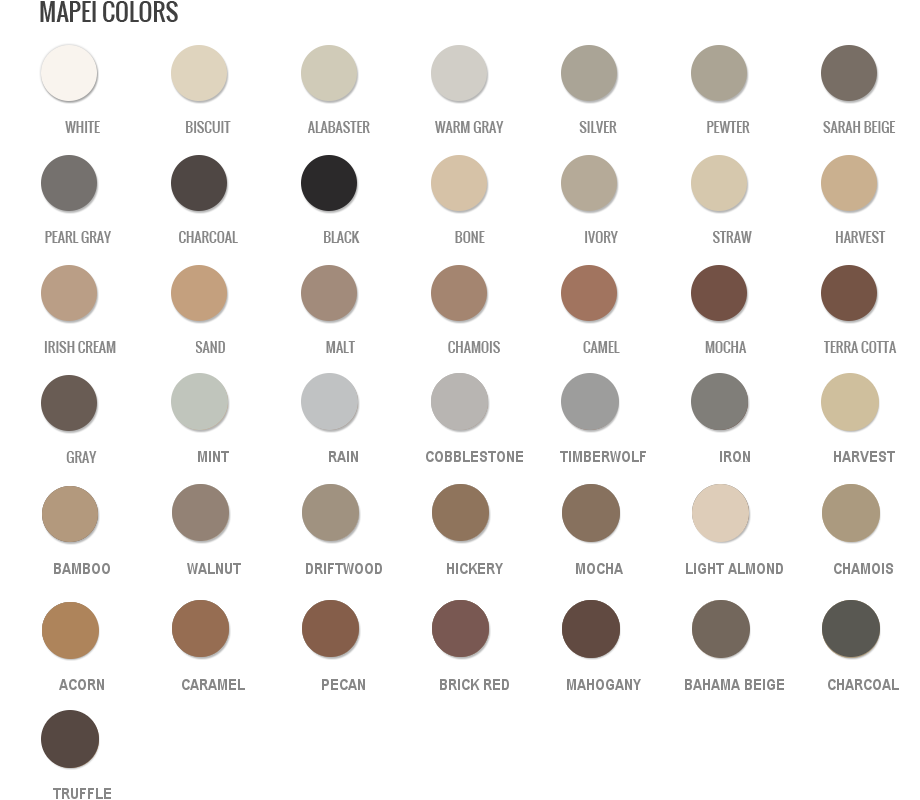
In my case, I knew I wanted something on the lighter side to go with the overall feel of my room. I debated using the color biscuit but opted for white to hide the imperfections in my tile installation (specifically that big ol’ gap between the countertop and tile).
You’ll also need to determine if you need sanded or unsanded grout. Sanded grout is typically recommended for tiles that are spaced greater than 1/8” apart. It has better adhesion and is less likely to crack.
But for tiles with smaller spacing, you’ll need unsanded grout. Unsanded grout is also recommended for certain types of tile that would be easily scratched by sanded grout. Make sure you read the tile manufacturer’s installation instructions before you start to determine which type to use!
As with mortar, grout only has a certain amount of time that it’s workable - so gather your materials before you mix it up.
Mixing grout is similar to mixing mortar - you’ll want it thin enough to spread but not so thin that it falls off the grout float. And since grout is only being applied between the cracks, you’ll need to mix up less grout than mortar so keep that in mind.

Start by scooping some grout onto your float and spreading it on the gaps between the tiles. The goal isn’t to cover the tiles, but the smaller your tiles are, the more likely this is to happen and it’s no big deal (see exhibit A).

Exhibit A
Work in small sections because after the grout sets up for 15-30 minutes, you’ll have to come back with a sponge and wipe it off. If you wait too long the grout will dry and be much more difficult to remove.
To wipe off the grout, dip a big grout sponge in water and wring it out really well. Then, wipe in a circular motion. This process not only removes the grout from the surface of the tiles but helps smoosh it into any spaces that need a little more.
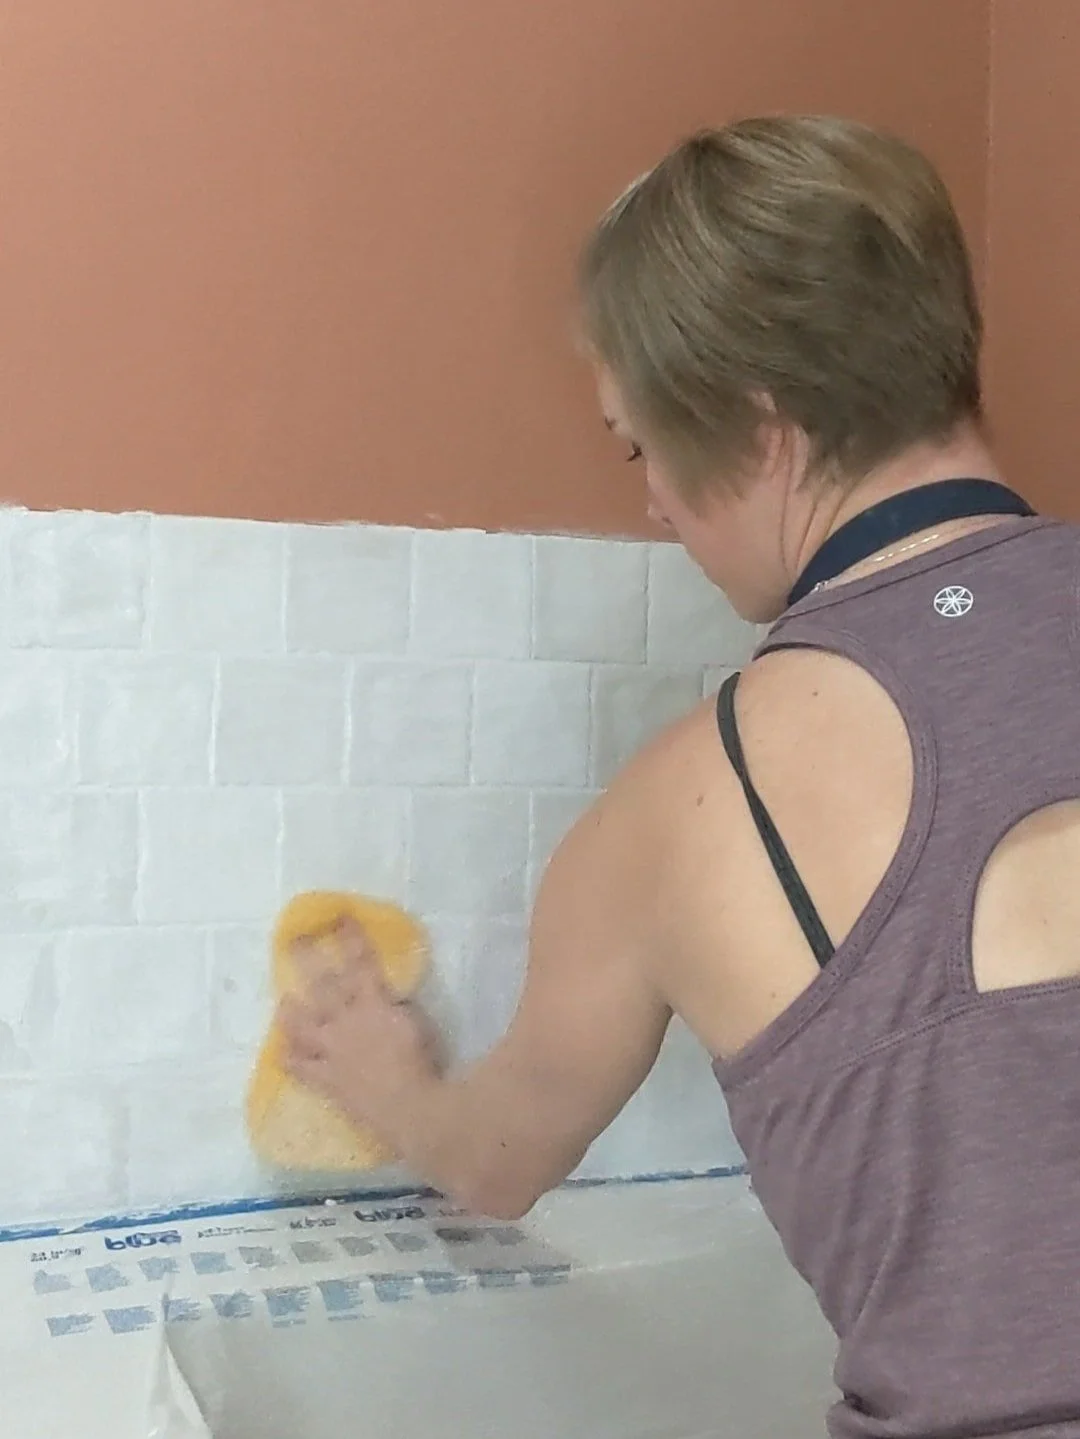
You’ll need to rinse your sponge (and probably change out your water) frequently. You can see in the picture below where I’ve wiped the grout off the top right-hand side.

Get as much grout off the surface of the tiles as you can, but it’s completely normal (and okay) to have a little bit of a film - aka grout haze - left over.
After the grout has had plenty of time to dry (at least several hours or overnight), come back with a cloth (I used a microfiber cloth) and buff off the grout haze “wax on/wax off” style and watch those babies sparkle! Unless you have matte tile… then they won’t necessarily sparkle.

Finishing Touches
It’s worth noting that some tiles need finish pieces for the edges, but I didn’t love the options I had for my tiles. I decided not to use any to help maintain the handmade look and instead finish my edges with a bead of caulk. If my tiles didn’t terminate into the walls I probably would have installed edging but since the only exposed edge of my tile is the top I’m okay with leaving it as-is.
Most tile and/or grout needs to be sealed after they’re installed. There are lots of sealers available to use. In our master bathroom, we used this spray-on sealer, and it has worked well so far, so I used it again in this space. Though I'll warn you - it's smelly!
Final Thoughts
I’m absolutely enamored with my backsplash and knowing that I did it completely on my own makes me love it even more! I’ve really been trying to push myself to step out of my comfort zone and work on projects on my own during the One Room Challenge.
It’s slower and tough at times, but the confidence boost when I tackle a project feels amazing! Plus, I can be as nit-picky as I want without the worry of annoying anyone else with my perfectionistic tendencies. I see a whole wide world in front of me.

Dare I say I'm almost looking forward to the projects I have in store for myself next week: building out the cabinet above the washer and dryer and the floating shelves for the back wall. Be sure to follow along here and on Instagram to see all the step-by-step progress of this laundry room renovation!


Don’t miss out! Catch up on my other One Room Challenge Posts:
Step-by-Step Backsplash Tutorial

ORC Week 5 - DIY Concrete Countertops
Are you looking for beautiful and unique countertops that don't cost thousands? Give concrete countertops a try! In this post, I'm sharing the step-by-step process of how I installed white concrete countertops in my laundry room as part of the One Room Challenge.
Pour In Place Concrete Countertops
Are you looking for beautiful and unique countertops that don't cost thousands? Give concrete countertops a try! In this post, I'm sharing the step-by-step process of how I installed white concrete countertops in my laundry room as part of the One Room Challenge.
This is an in-depth monster of a post, so grab a cup of coffee, sit back, and enjoy!

Thank you to Concrete Countertop Solutions for partnering with me and sponsoring this post. As always, all thoughts and opinions are 100% my own.
As an Amazon Associate, I earn from qualifying purchases. This post may contain affiliate links, meaning I receive commissions for purchases made through those links at no cost to you.
What’s the One Room Challenge?

If you’re new here, the One Room Challenge is an event where DIYers from all around encourage and motivate one another to makeover one room in their homes over a period of 8 weeks. In my case, I’m finally tackling our laundry room remodel.
Each Wednesday during the challenge, I'll share a post with the previous week's progress until the final reveal on November 16th!
A Journey Into DIY Concrete Countertops
When I originally started hammering out the details for the laundry room design, I assumed we’d just use the same laminate countertop we used in the loft kitchenette. However, we were really concerned about getting a clean cut on the mitered corner we’d need.

Then we considered quartz. My excitement about the prospect of a stone countertop was quickly diminished when the quote came back at $2600! As beautiful as it was, I couldn’t justify spending that much on a countertop for a laundry room. So back to the drawing board I went!
I remembered, once upon a time I saw Young House Love use Ardex feather finish on their kitchen counters. I’ve wanted to try it ever since, but we were concerned about its durability. Then I figured – well, why not do actual concrete countertops?
I was nervous about properly building the molds needed to pour concrete countertops in the garage, carrying them inside after they dried, hoping that they fit perfectly, and crossing my fingers that they didn’t break in the move (yikes!)
Then I came across a company called Concrete Countertop Solutions and was really impressed with their product. They have everything you need for DIY pour-in-place concrete countertops – plus a white concrete option that I knew would go perfectly with my design!
And if it seems overwhelming trying to figure out what exactly you need, they have this super handy “What do I need?” form. I filled it out with some basic information and the next day got an email with a link to a cart with all the products added. As a habitual second-guesser and overthinker, I was pumped to know that I wasn’t missing anything or buying more than I needed.

Here are the items you'll need that aren't supplied by Concrete Countertop Solutions:
- Cement board
- Measuring Tape
- Level
- Miter Saw
- Styrofoam (for the sink cut-out)
- Oscillating tool or jigsaw (again, for the sink cut-out)
- Silicone caulk
- Caulk gun
- Drill
- Mixing paddle (or you could see if your local hardware store rents out cement mixers)
- Utility knife (with a sharp blade to cut cement board!)
- Gorilla tape
- Gloves
- 5-gallon bucket
- Orbital sander
Additional materials for our specific project:
- Rosin paper and painter's tape (to protect the floors)
- Plastic (to protect the walls & cabinets. This kind with the tape attached is pretty nifty!)
- Stud finder, 2x4s, & screws (to create supports where we didn't have cabinets installed)
- Heat gun
Step 1: Protect Your Surfaces
Chipping dried cement off the floor and walls didn’t sound like my idea of a good time, so I started my project by taping rosin paper to the floors and sticking pre-taped plastic to the cabinets and walls.
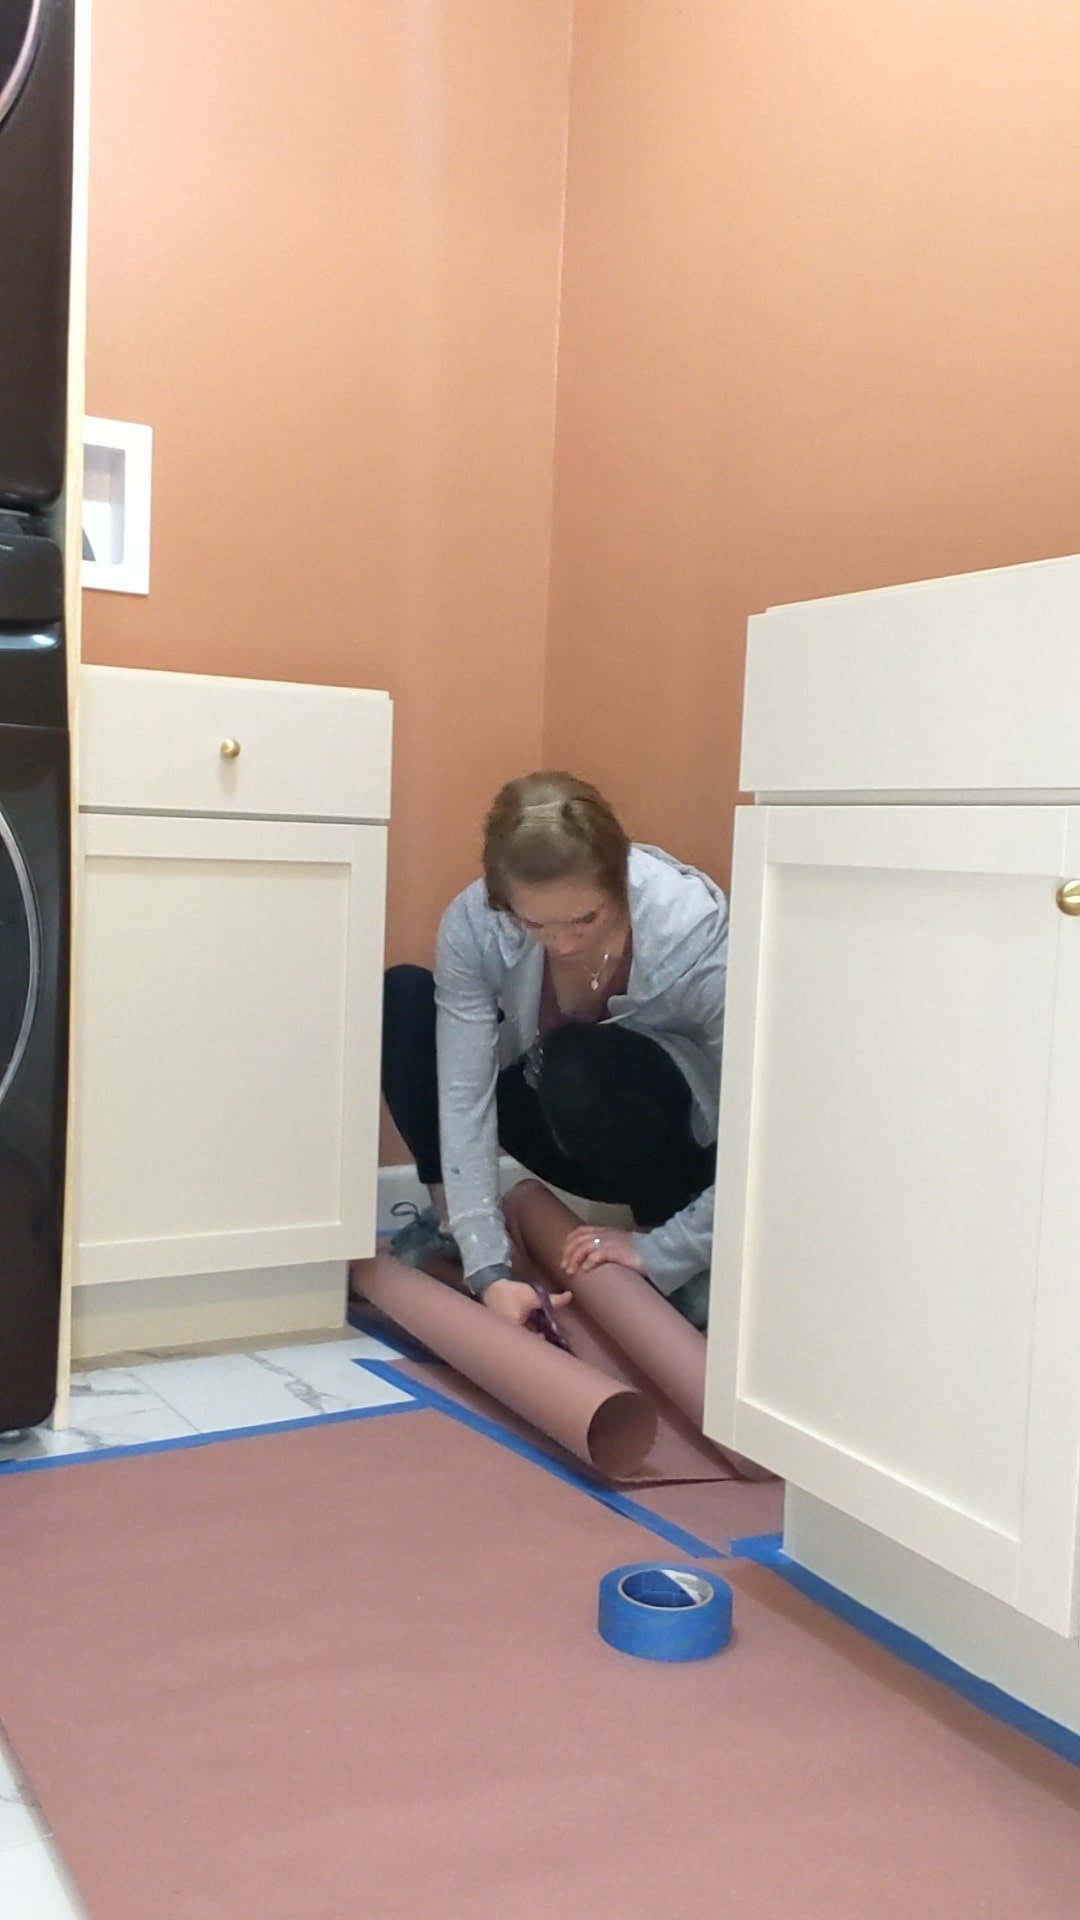
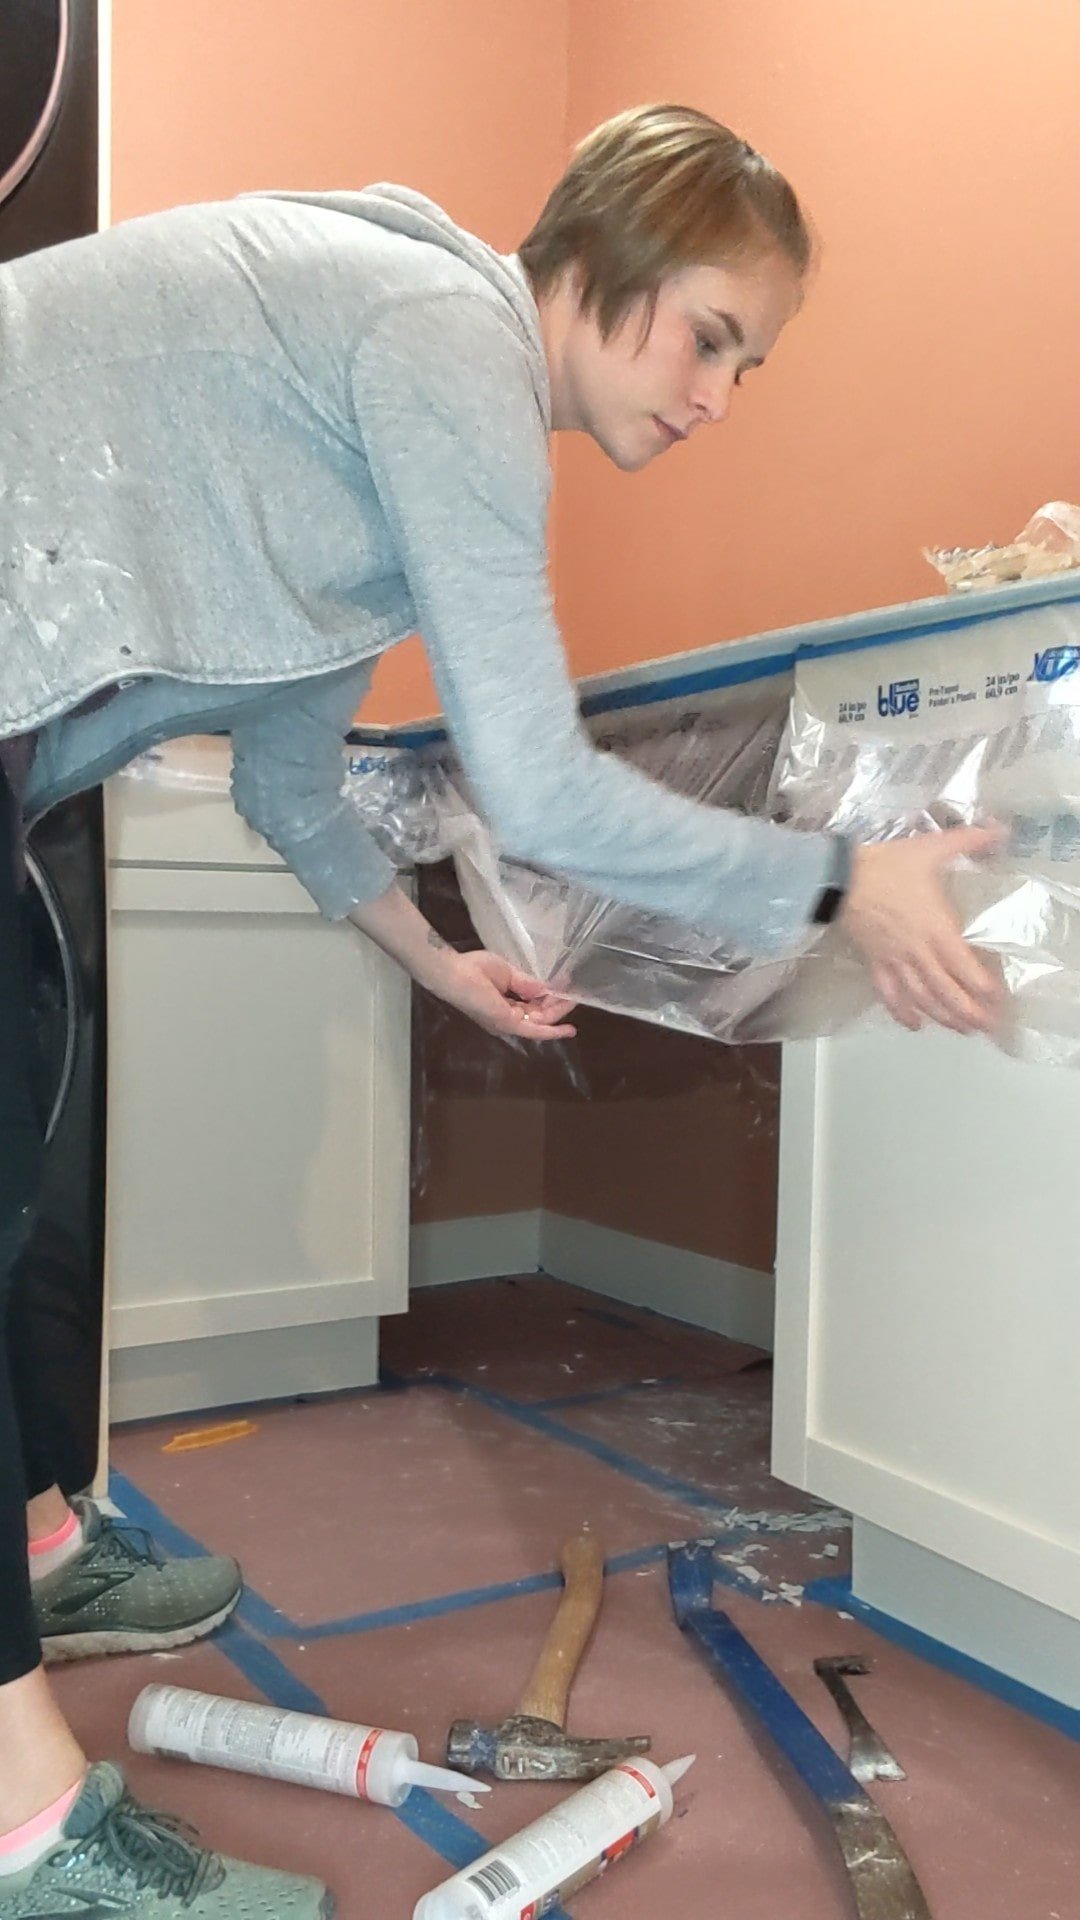
Step 2: Cement Board
Next, measure your countertop surface and score the cement board using a utility knife. Scoring the cement board will quickly wear down the blade on your knife, so make sure you have extras!
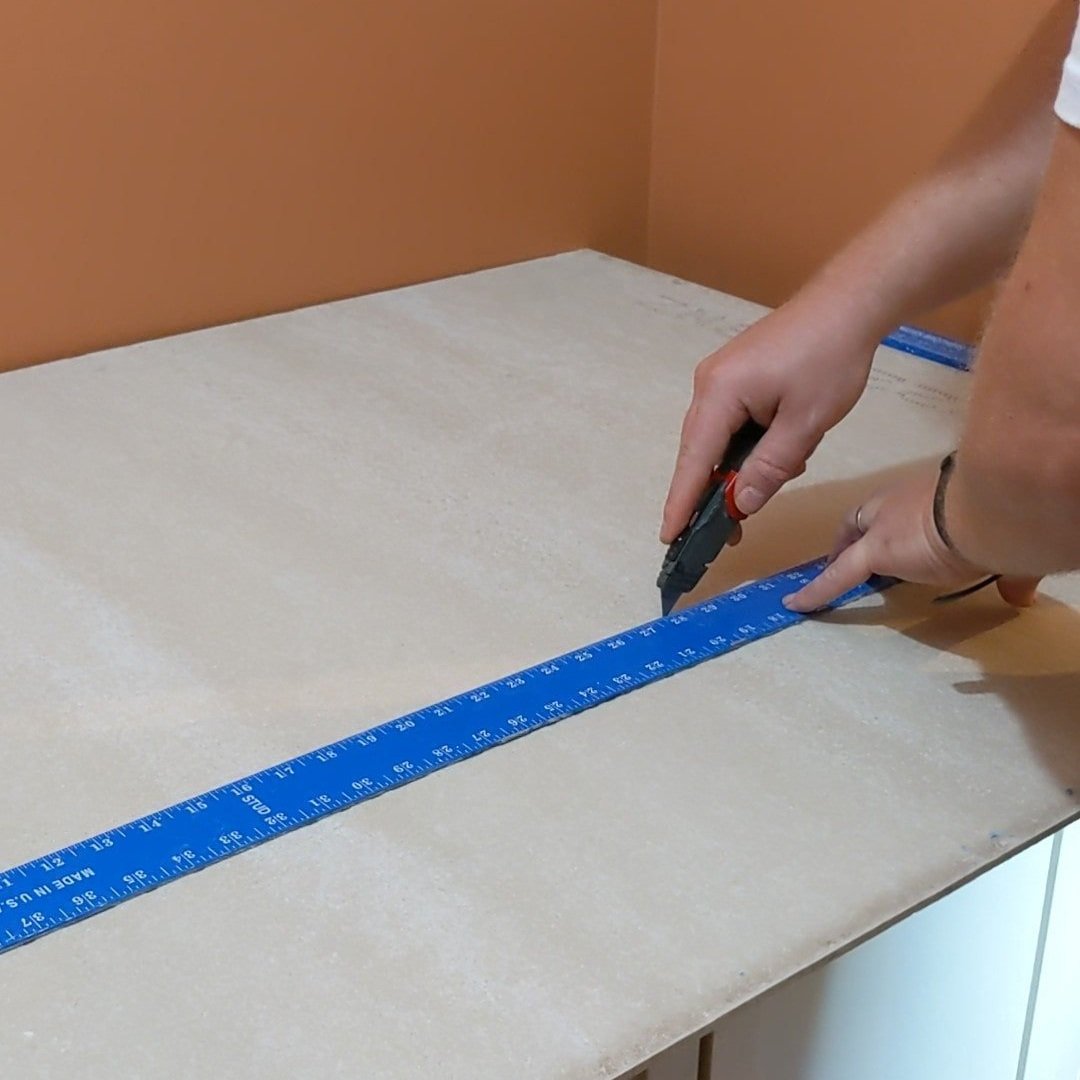
Cement board cuts similarly to drywall - score the surface, then snap the board.

Something I wish I had thought about earlier - you don’t need to worry about adding an overhang on the cement board because the countertop forms already come with it.
Once your cement board is all cut to size, adhere it in place using silicone caulk. Tape any seams using Gorilla Tape.

Step 3: Install Countertop Forms
Now you’re ready to cut the countertop forms. Using a miter saw, cut the forms to size. Try to create as few seams as possible so you don’t have to worry about them appearing in your finished countertops.
I will warn you, connecting the odd shape of the forms for the front of our countertops to the forms for the backside was a little mind-bending. Just be sure to measure twice and cut once!
Once all your forms are cut, using the recommended screws attach the forms to the cement board.

Next, it’s time to seal it all up. Start by taping the outside corners where each form meets with Gorilla Tape. Then apply caulk to any seams - including corners and where the form meets the cement board. I don’t think there’s a way to go overboard with this step.
Step 4: Sink Installation
Although we have a 36” sink base, I was more concerned about having the extra counter space than a big sink. Therefore, I bought a smaller porcelain undermount sink. But when we got to the point of installing it with the specific sink form, it wasn’t making sense.
I couldn't find any good tutorials on how to install an undermount sink using the Z Counterforms so I reached out to Concrete Countertop Solutions. They got back to me within 24 hours with recommendations on how to troubleshoot. Hopefully, I can help someone else with these tips.
Here's how we ended up installing our sink:
We started by measuring a hole big enough for our sink to fit in, but small enough that the flanges would sit on top of the cement board. Then we cut it out using an oscillating tool.
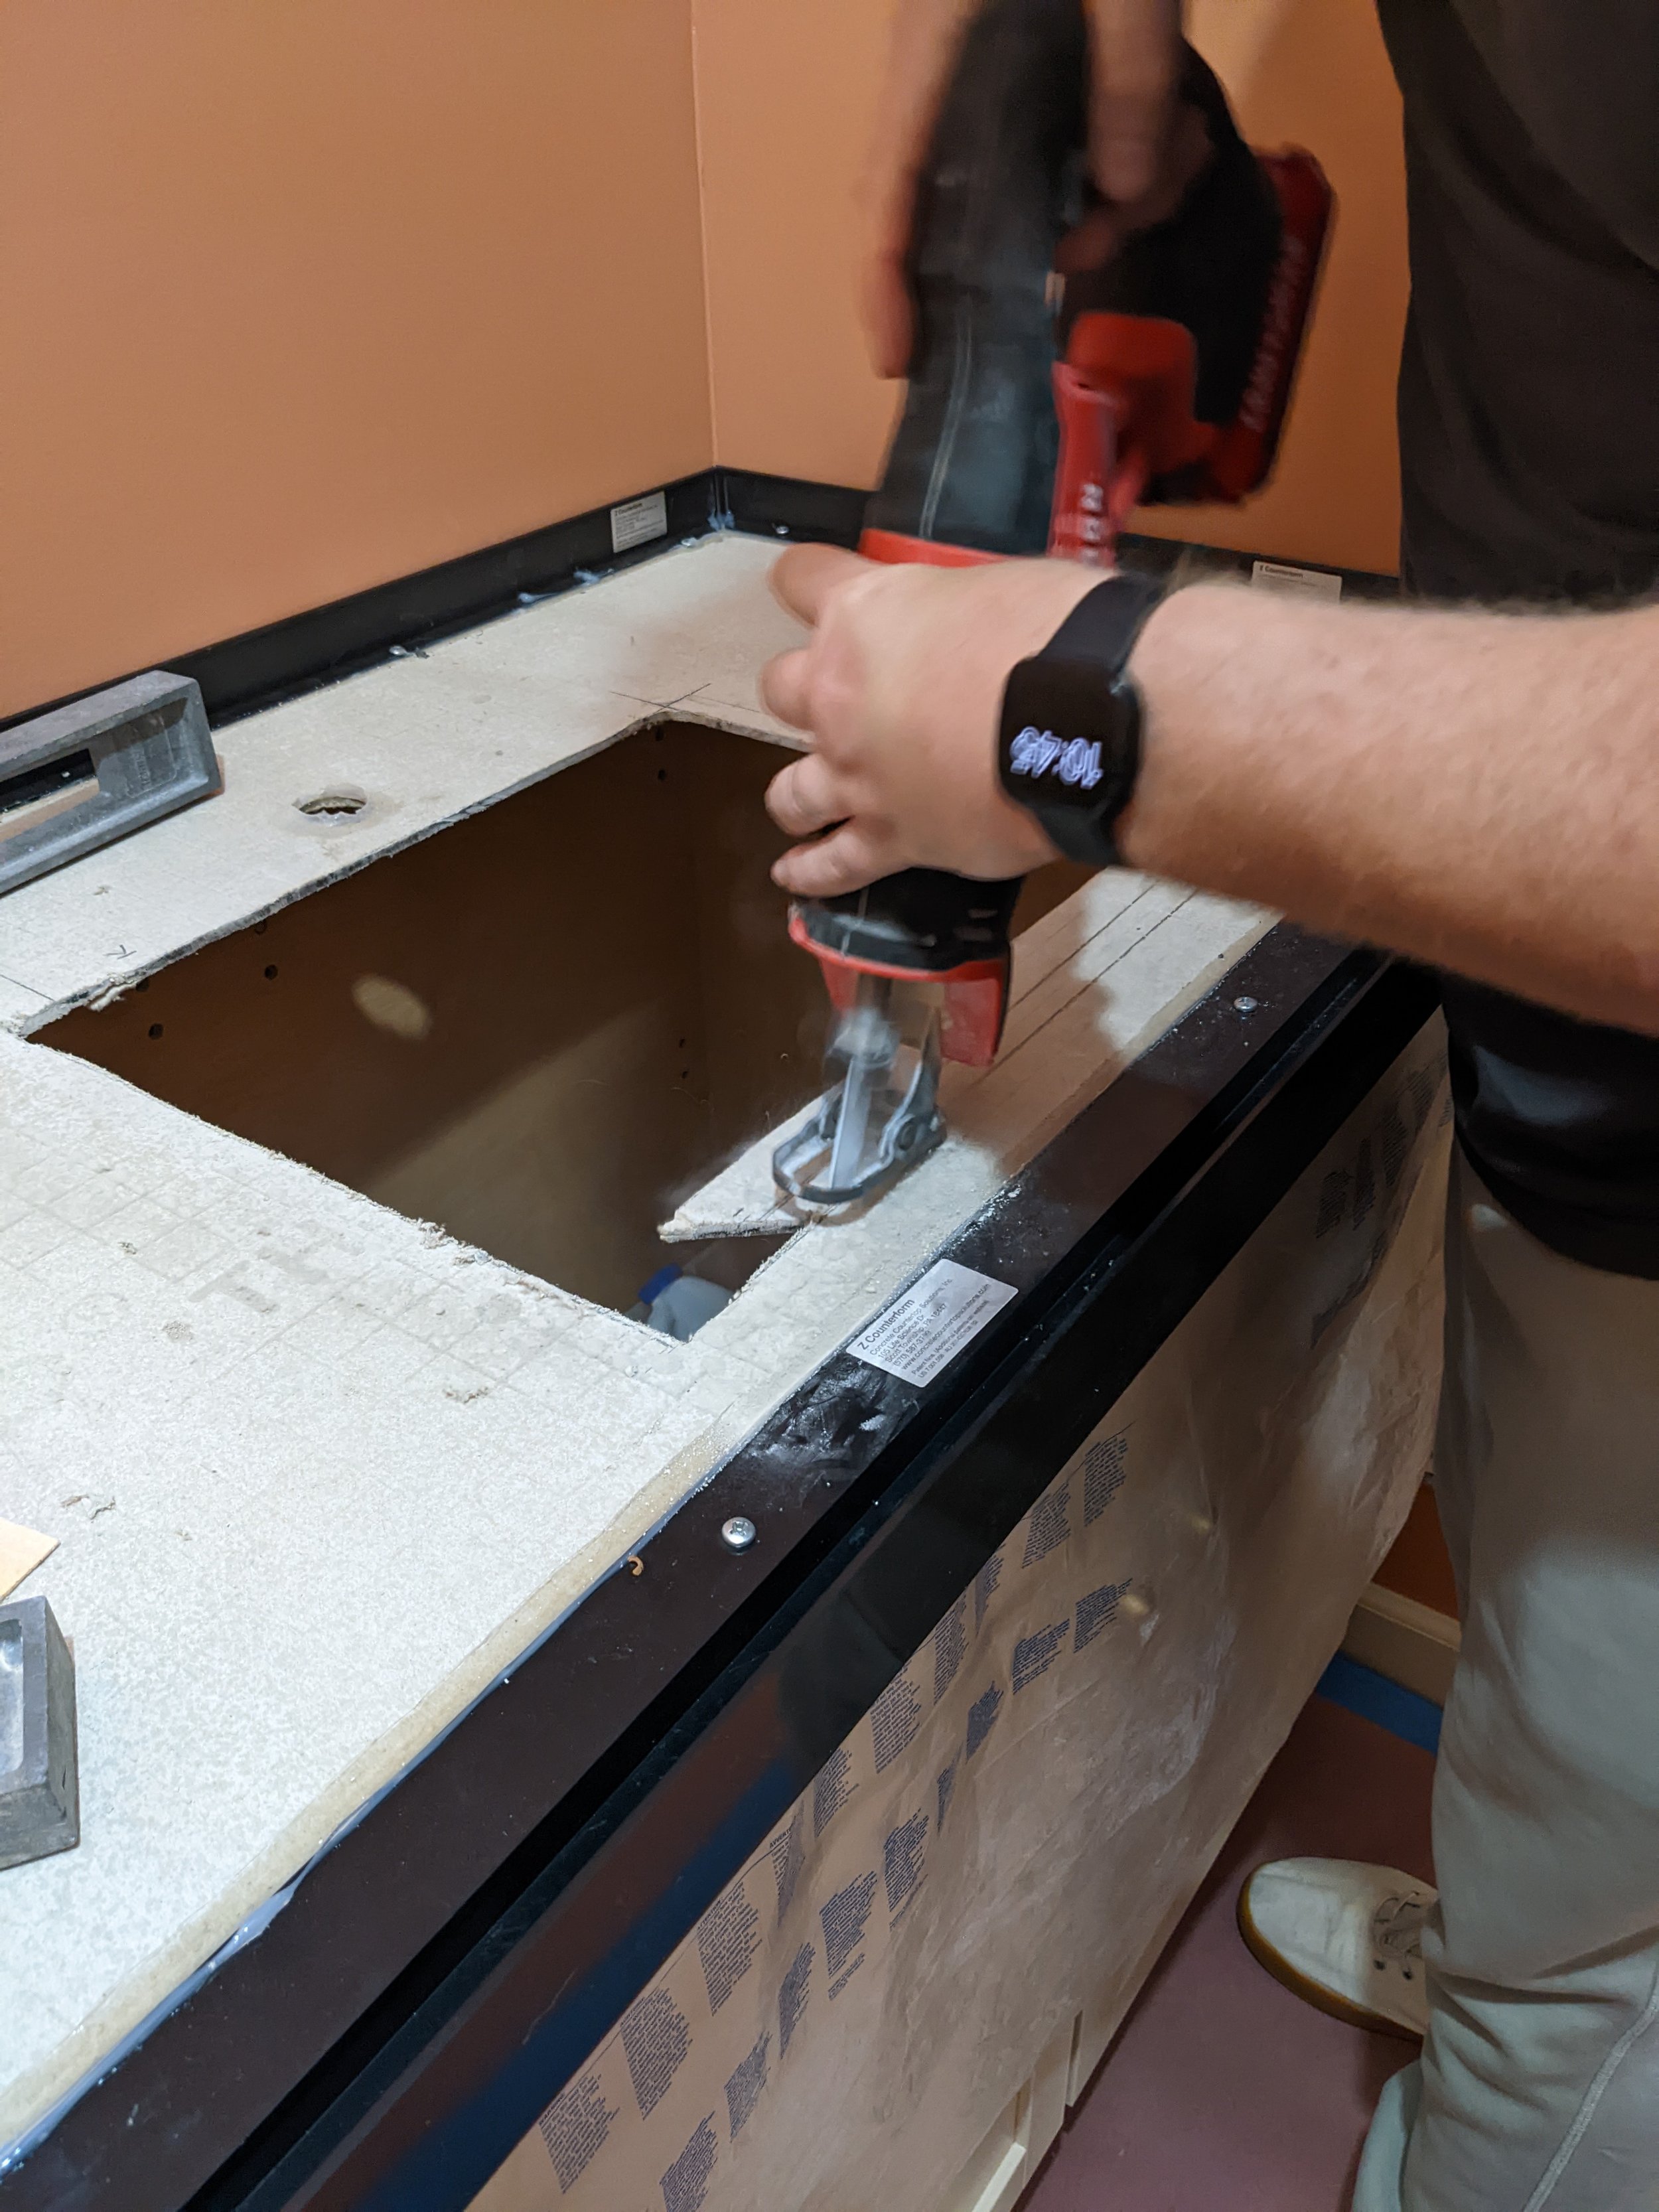
We also cut out the hole for our faucet.
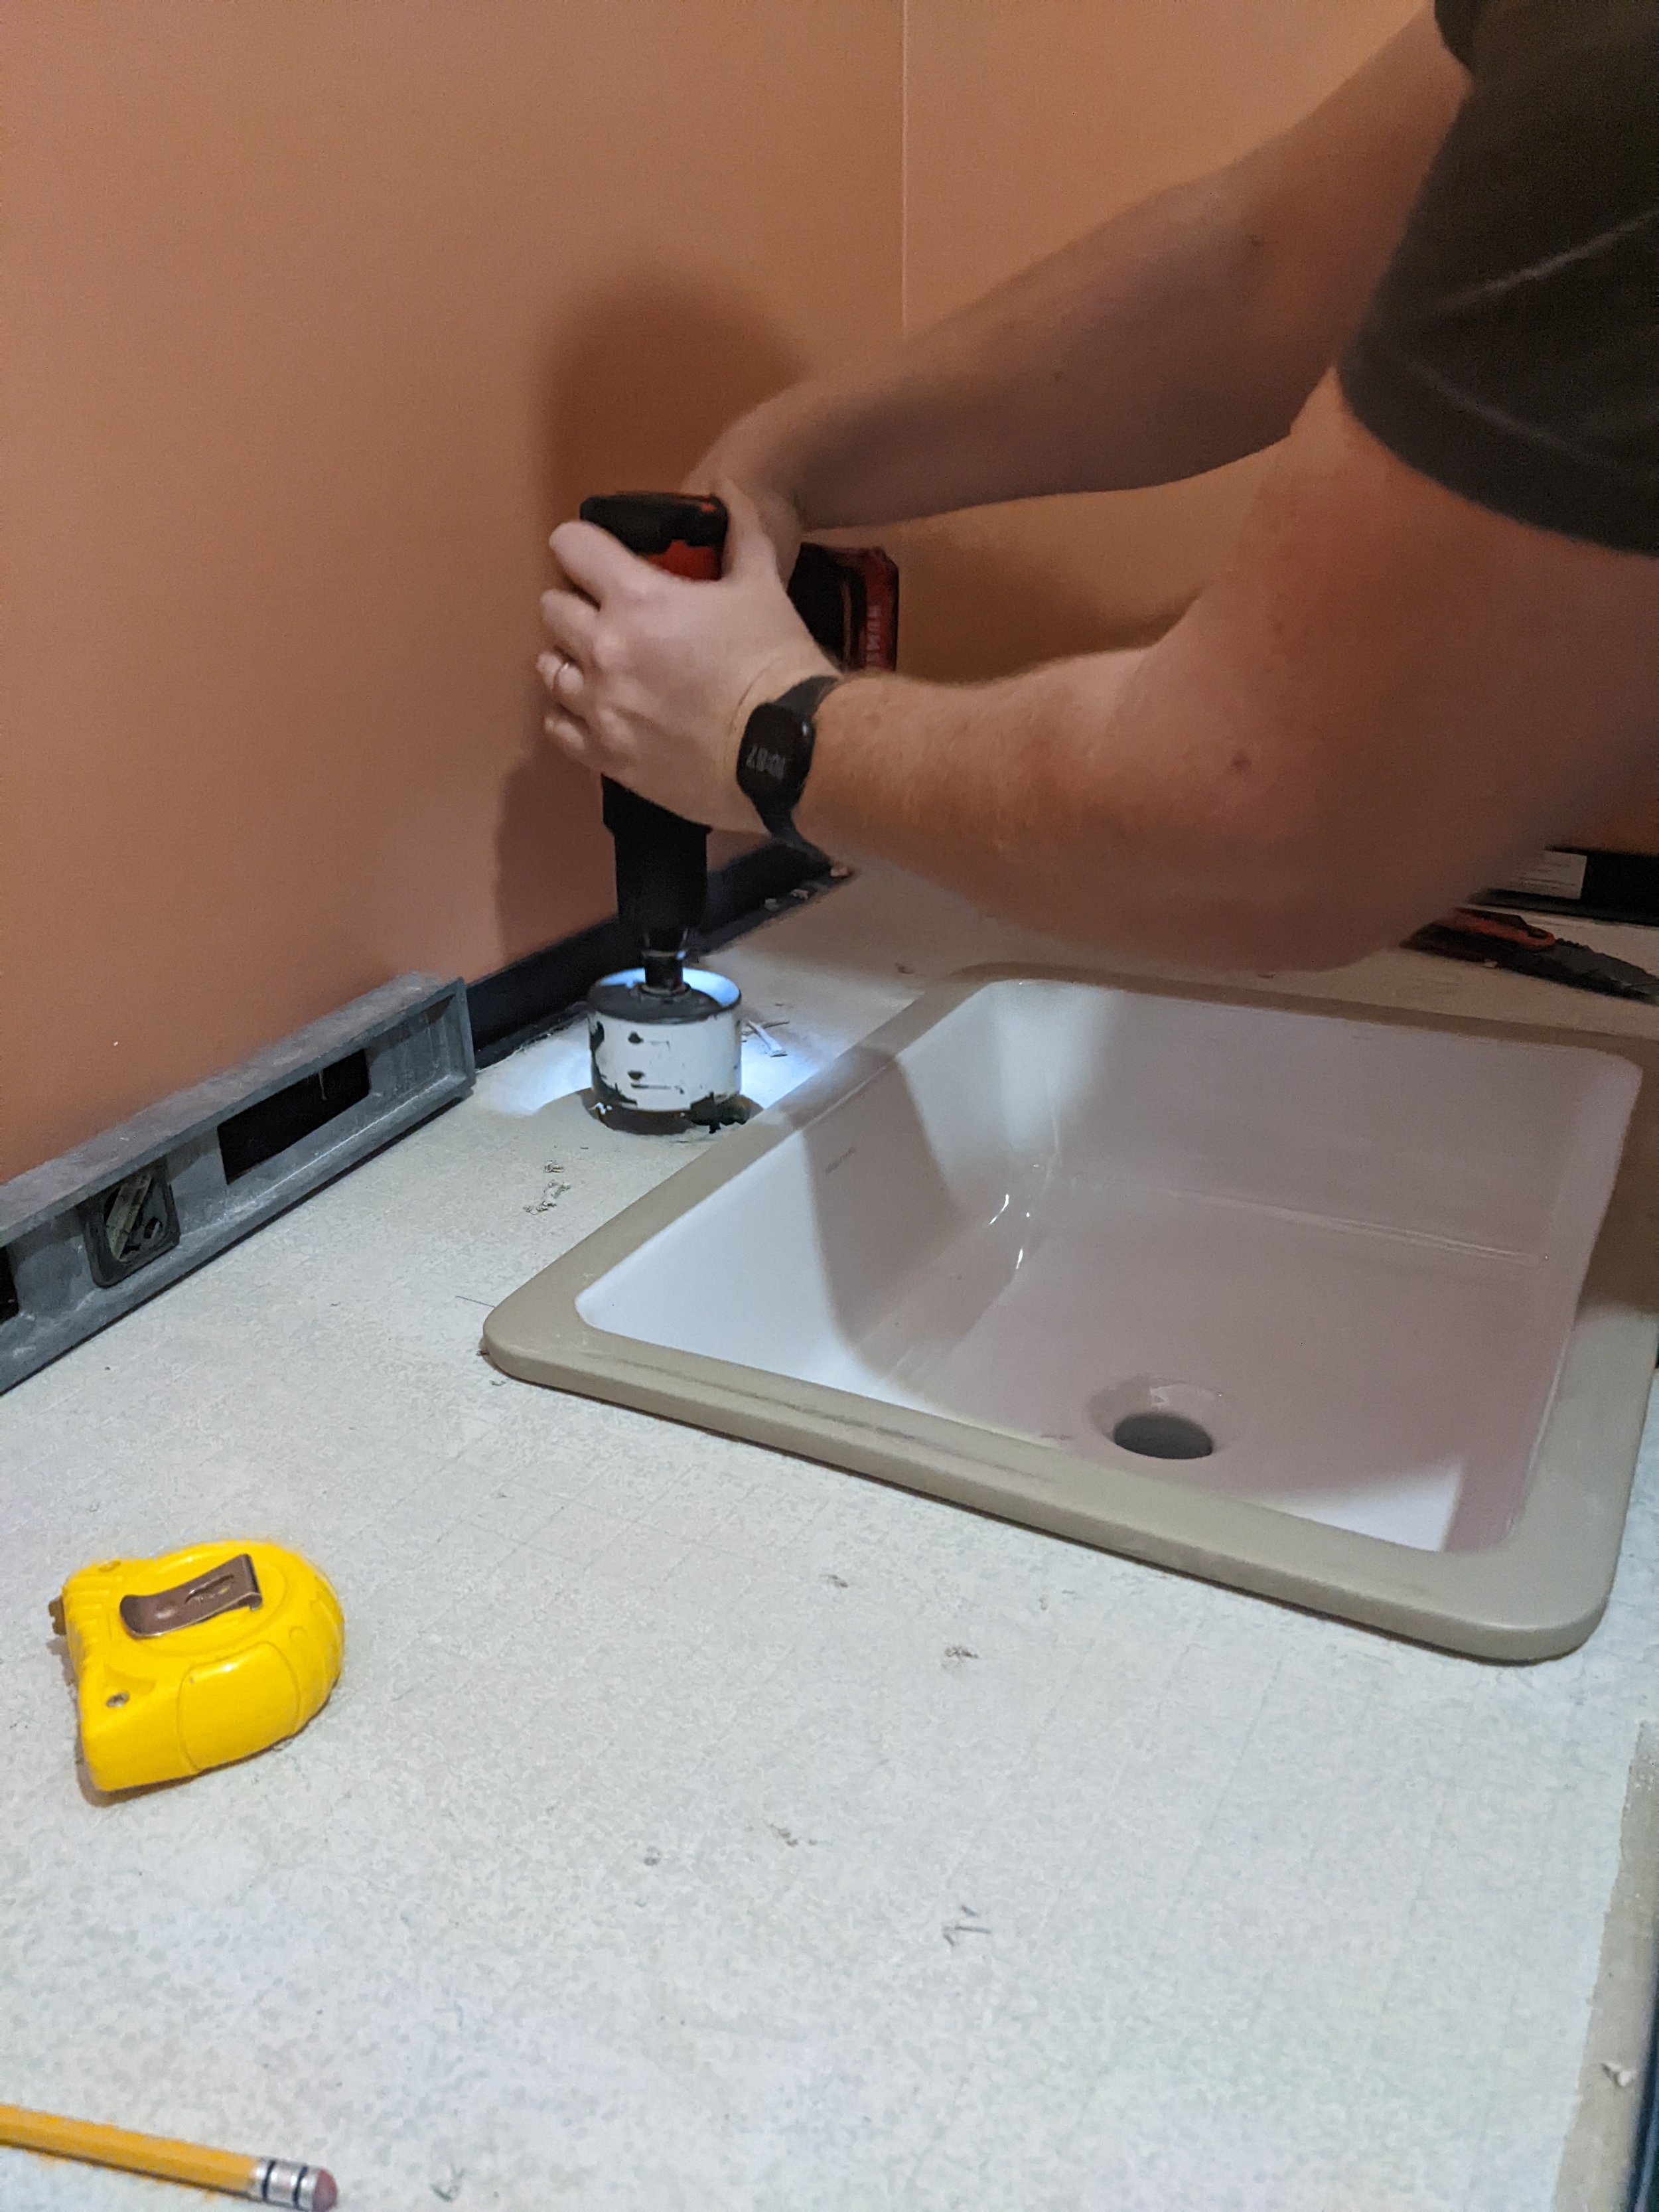
Then, using a couple of pieces of styrofoam (and a bread knife!), we created a knockout for the sink, sanded it smooth, and wrapped it in packing tape.

Notice there’s styrofoam in the sink as well.
From here, we used a heat gun to soften the sink form so we could mold it around the styrofoam. I don’t know if it’s typical to have to use a heat gun but it worked for us!

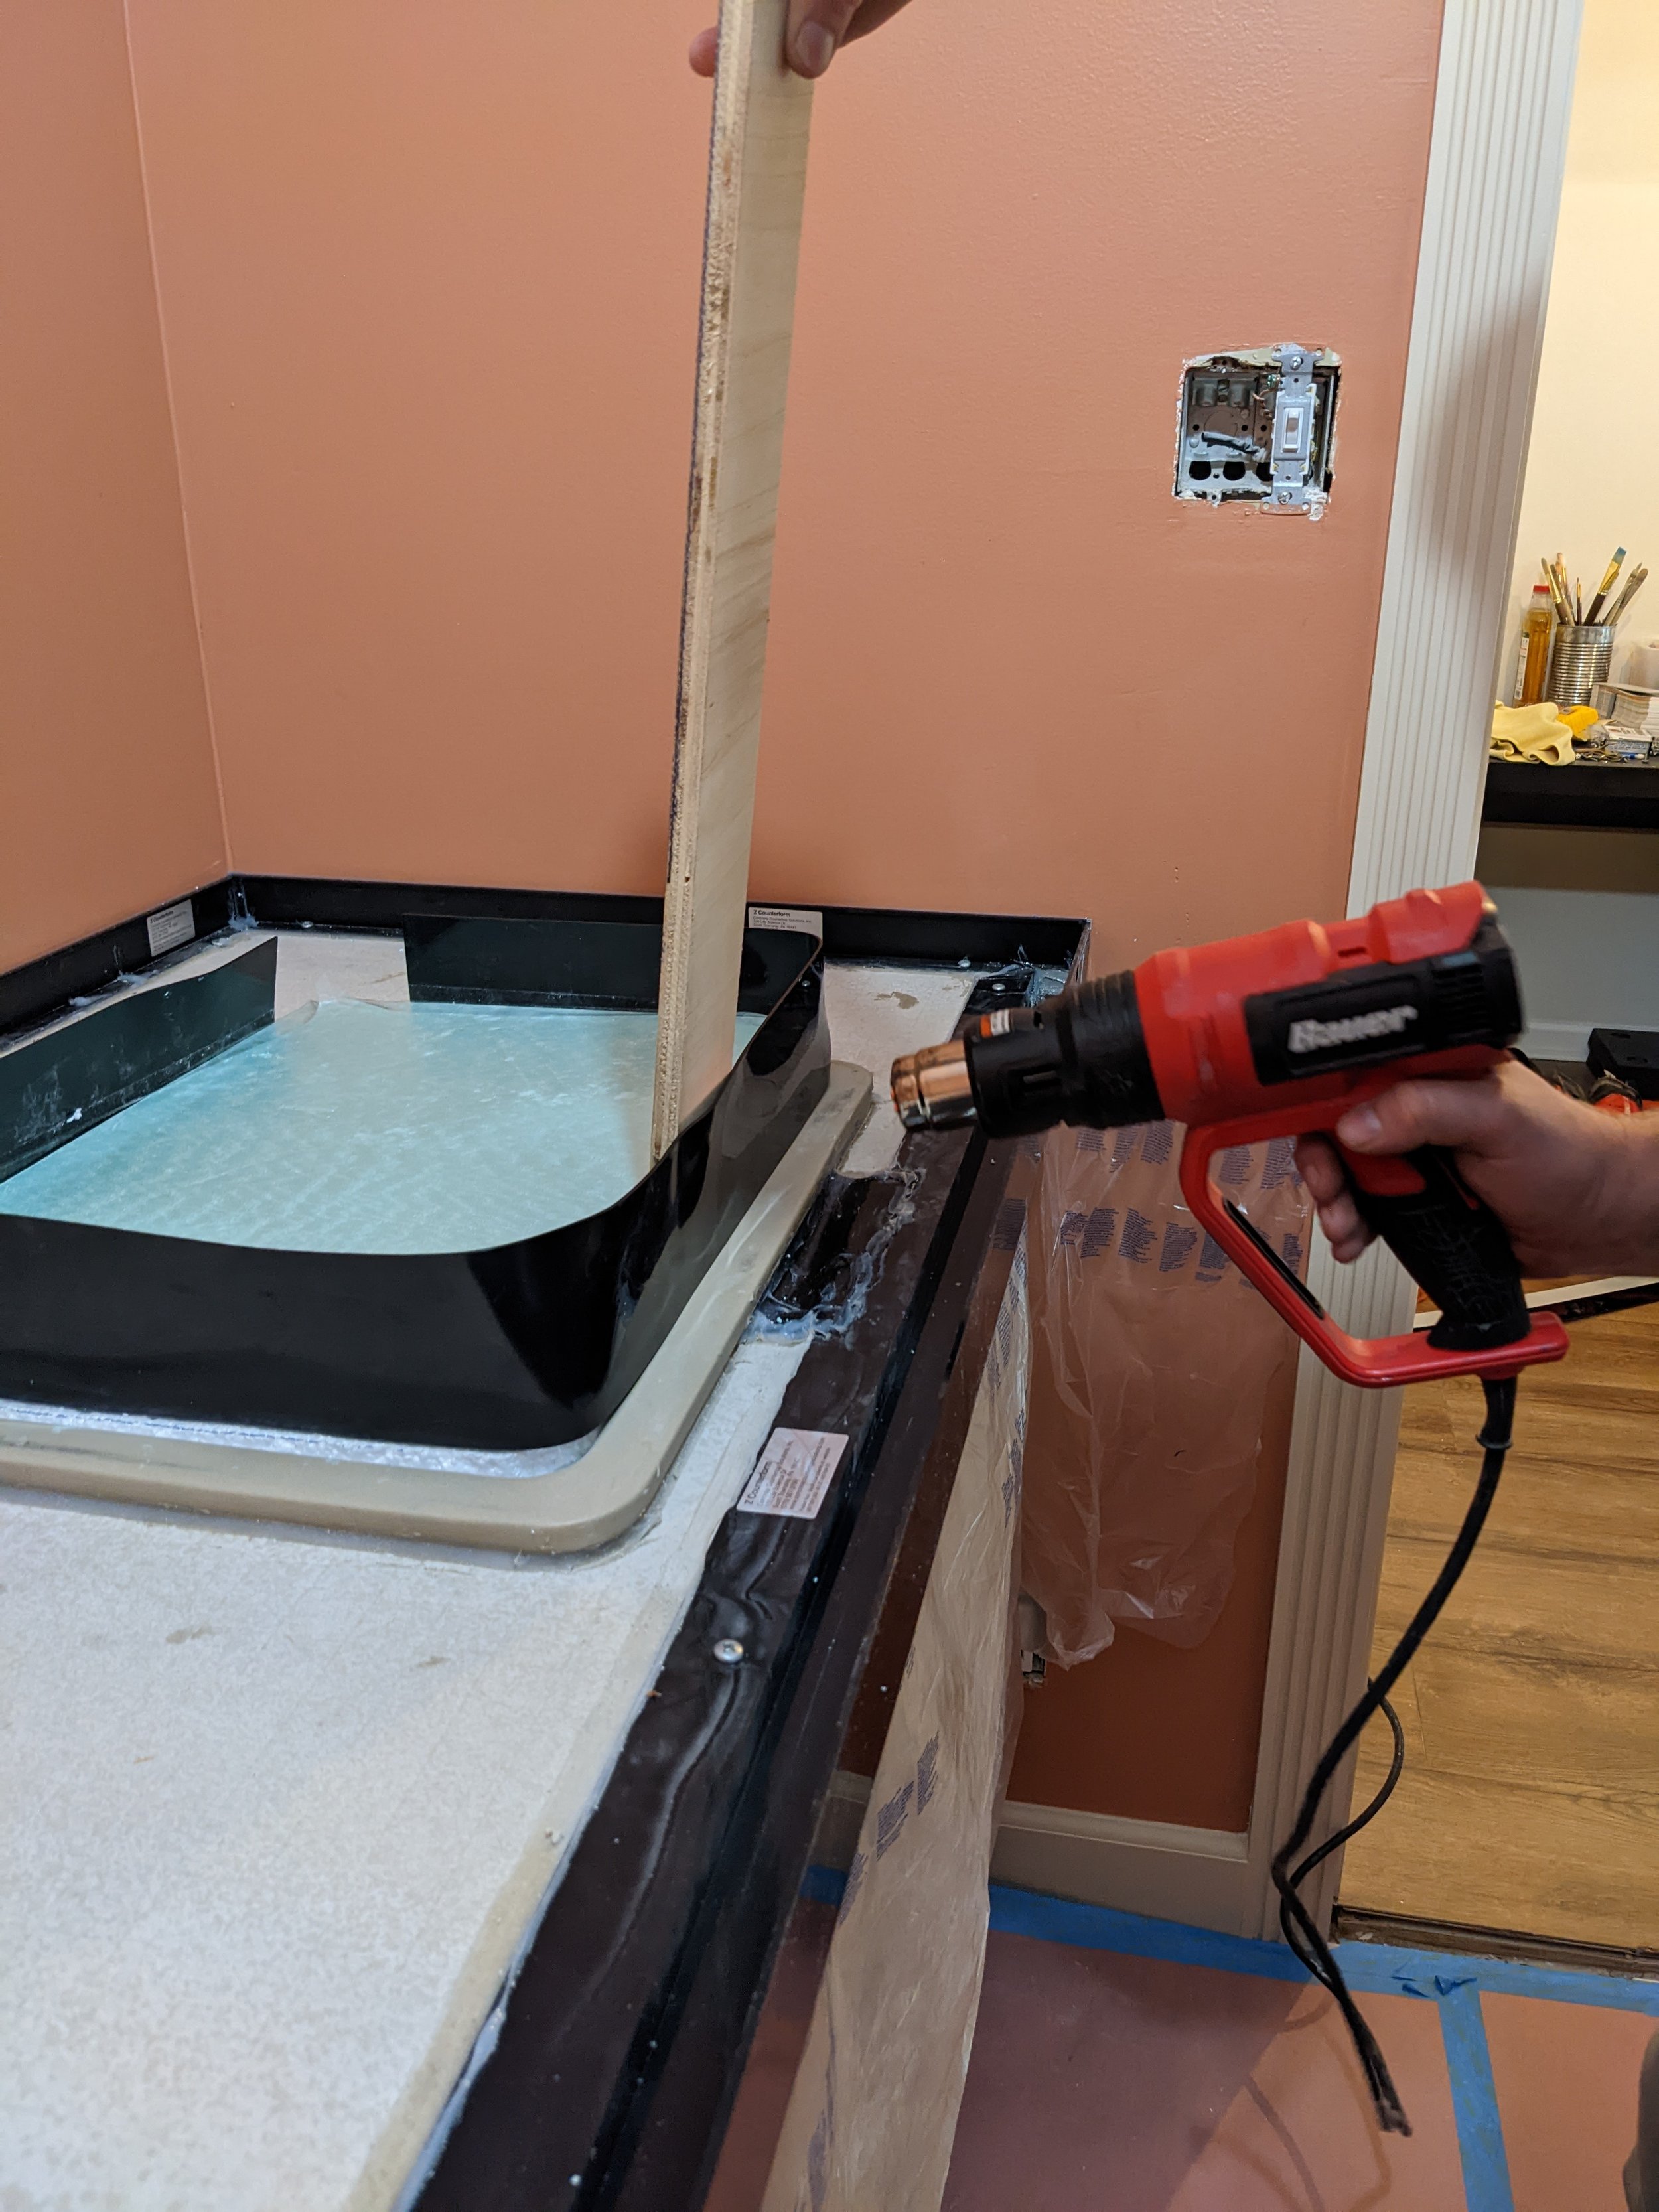
Once the sink form was on, I caulked around the sink where it met the cement board and around where the form met the sink.
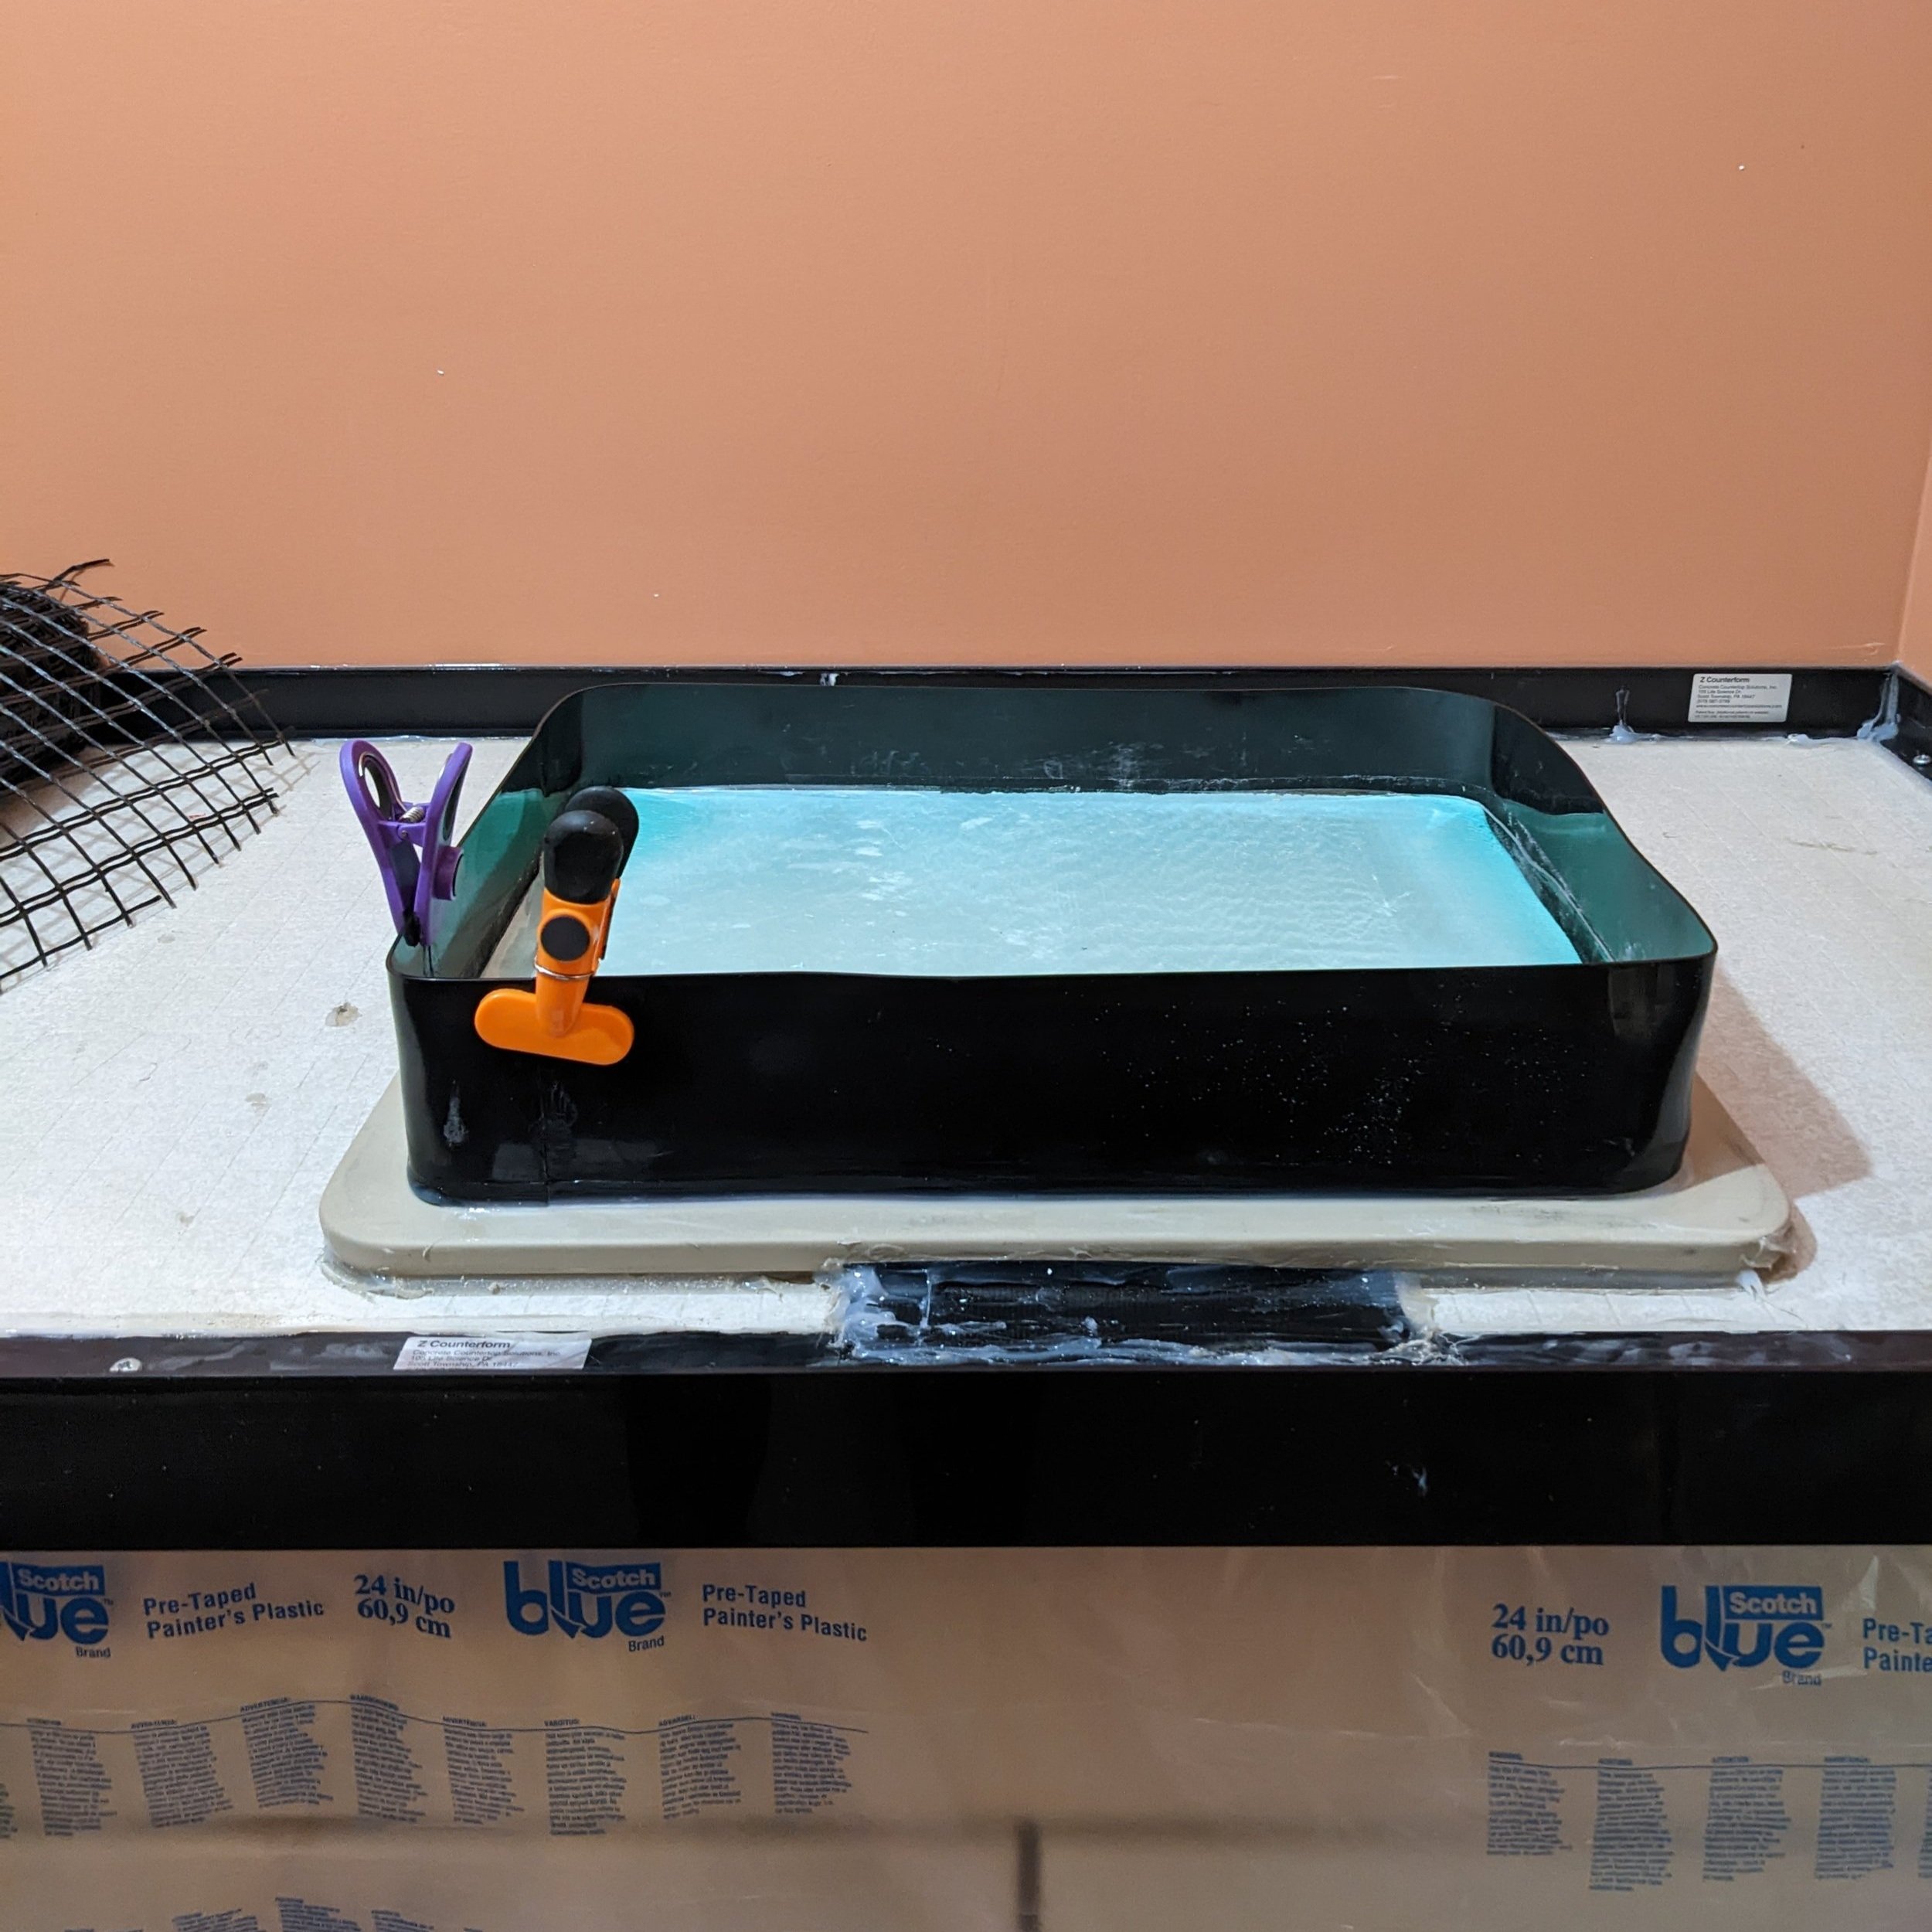
Don’t mind the chip clips. We cut the form a little too small and had to patch the gap. We used the clips as clamps to get as clean of a seam as possible.
At this point, we also installed the faucet knockout and caulked that in place too.
Step 5: Mesh
Once the caulk is dry, you can install the mesh. Make sure you wear gloves for this part.
I just rolled mine out over the countertop and cut to size using regular scissors. Then I slid the Z-clips (the white clips below that hold the mesh in place) underneath every 8-12 inches. After that, you simply drill the Z-clips in place using the screws provided.
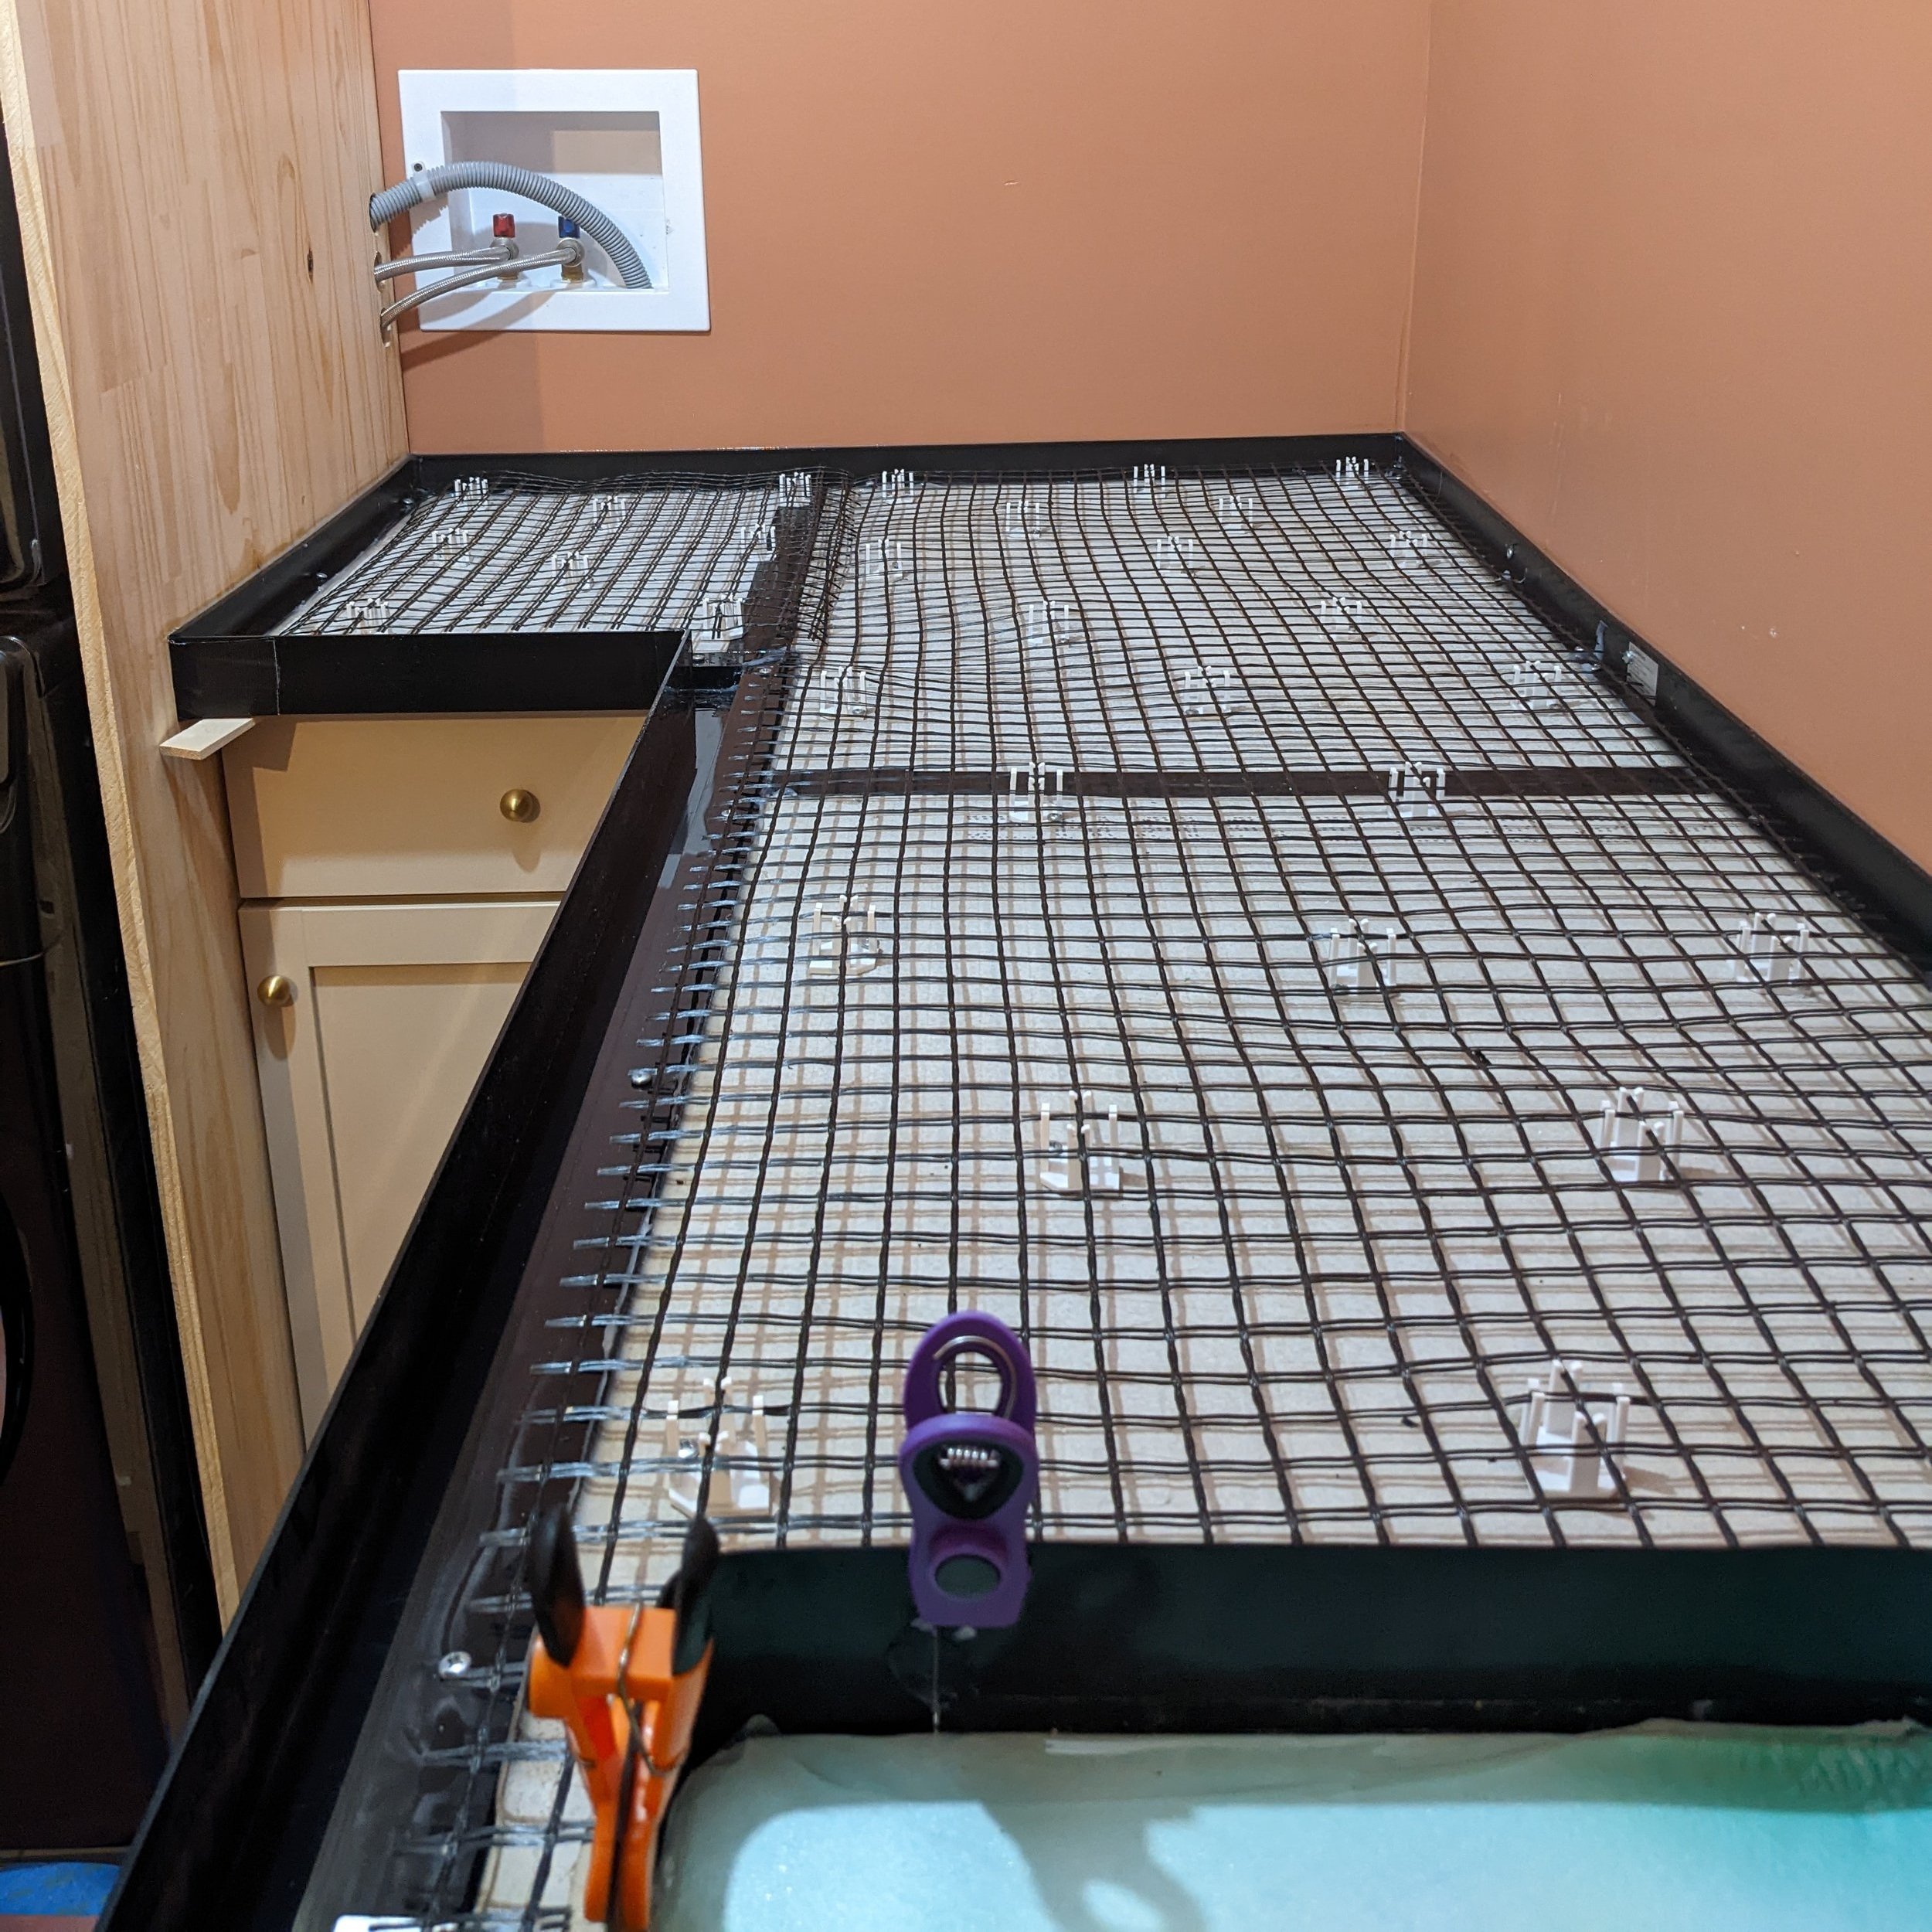
Step 6: CONCRETE
When you think of DIYing concrete countertops, you may underestimate the amount of prep that needs to happen before you can actually start pouring concrete. I know I did! I’m happy to tell you that FINALLY, at step 6, you can start mixing your concrete.
We found that a thinner mixture worked best for us. We ended up using about 4 quarts of water per bag. With this ratio, we found way fewer lumps when pouring and it was easier to mix overall (our drills thanked us for that).
We started with a couple of quarts of water and half a bag of concrete, then slowly added more water and concrete until the whole bag was mixed up. We used one bag of concrete per bucket.

Mixing up enough concrete for our small countertop was a LOT of work! While Lucius literally did the heavy lifting by carrying the buckets to the laundry room, it was even physically taxing on me simply using the drill to mix. If I were to DIY concrete countertops again, I’d definitely consider renting a concrete mixer.

As we poured each bucket, we used our small trowel to spread out the concrete and push it into the corners and to the edges of the mold. While you do want to work fast, it’s worth noting that it took us over an hour to mix and pour all 7 bags and the concrete was still malleable. Here’s an action shot for ya:
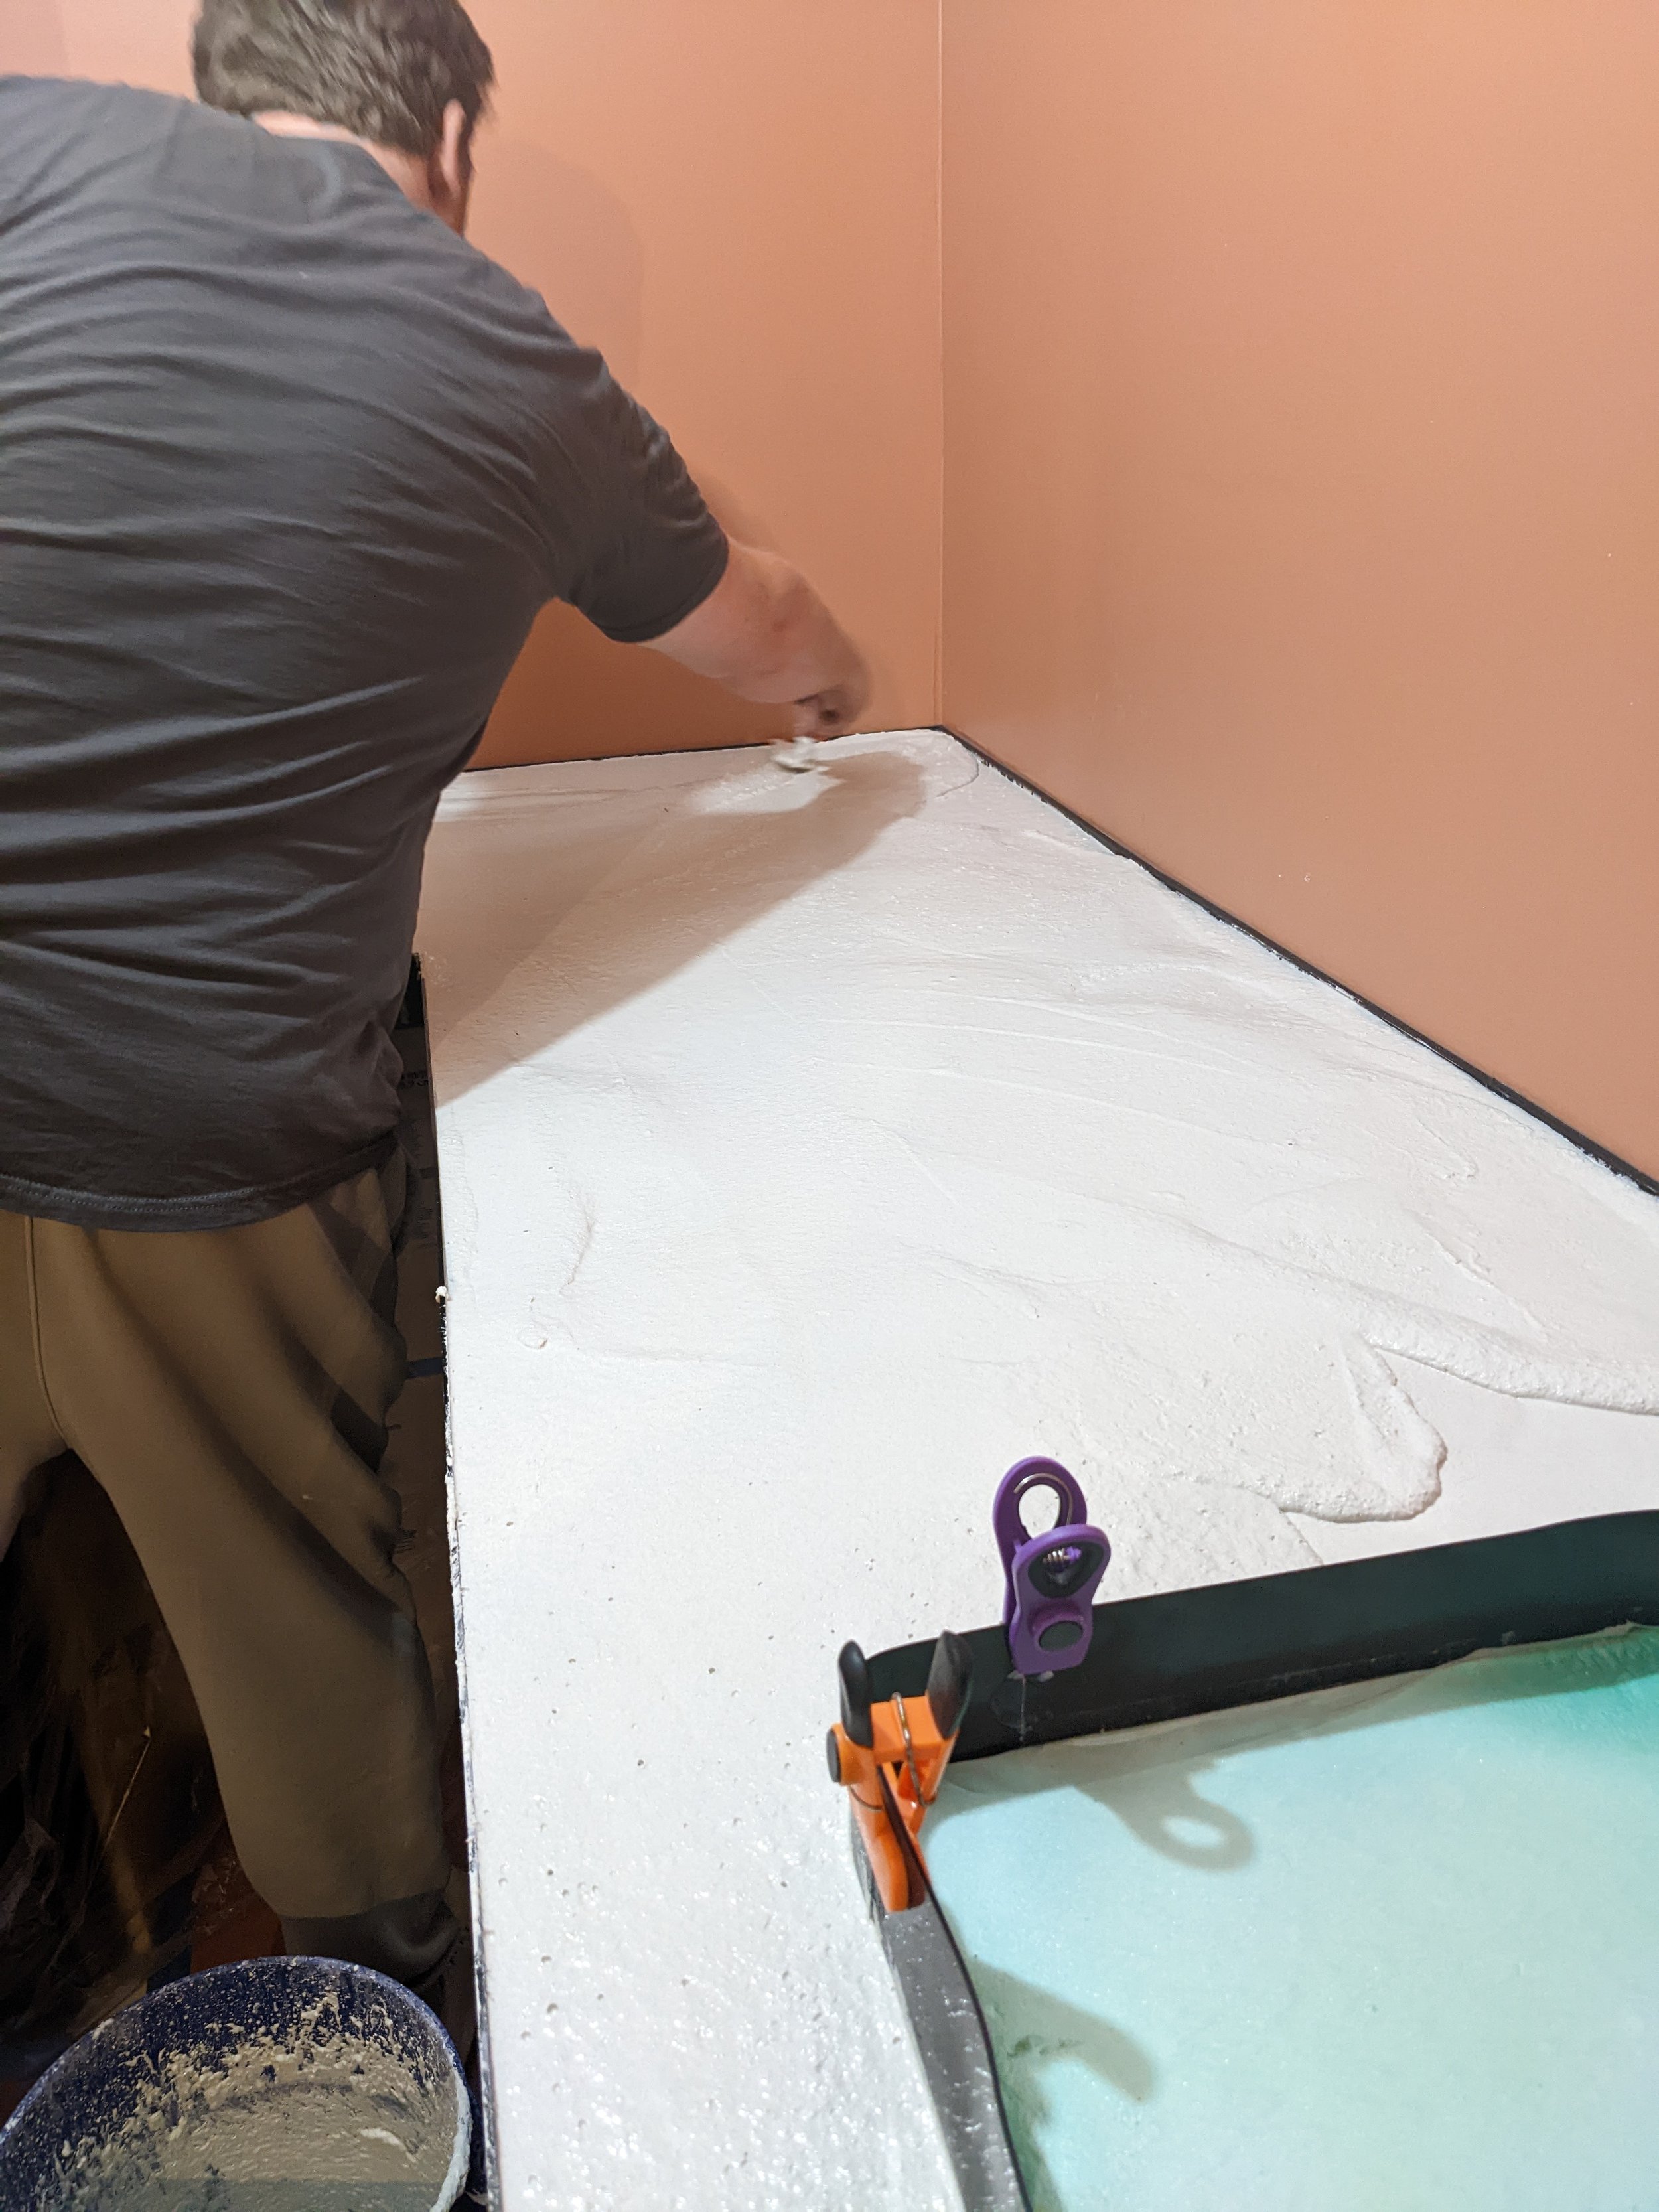
Once your concrete is poured, level it out. We didn’t trust that any of the wood we had on hand was straight enough, so we used an actual level.
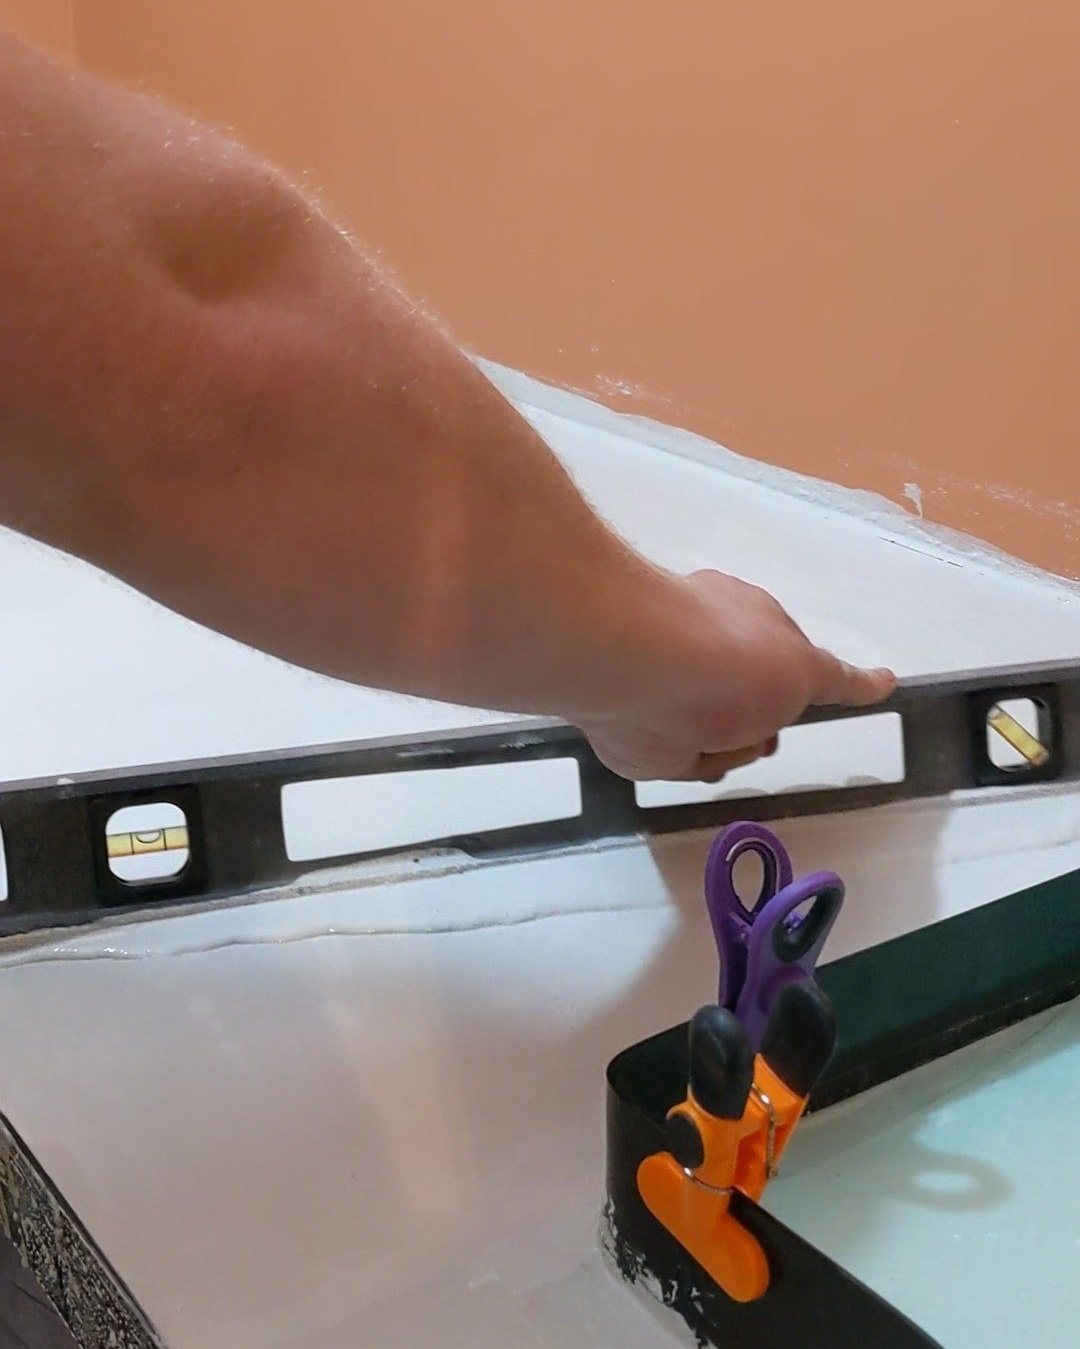
Once your concrete is level tap the outside of the form until all the bubbles are out. I used the handle of my trowel. If you skip this step you WILL end up with visible air pockets along the edges of your countertop.
After the concrete is de-bubbled, let it sit for 30-minutes or so. Once it starts to firm up, take your plastic trowel and work on smoothing it out. Make sure you hold the trowel at a bit of an angle as you drag it across the surface.

Wait another hour or two, then come back in with your steel trowel and further smooth out the surface. You can apply more pressure this time around. And if you wait a little too long for this step (like I did), you can spritz your countertops with some water to reactivate the concrete a bit.
Step 7: Remove the Forms
After you finish up with the steel trowel, let your countertops dry for 24-48 hours. Then comes the moment of truth: breaking off the forms!
Lightly sand along the top of the form if the concrete is covering it at all with 220-grit sandpaper.

Then, run the edge of a putty knife between the form and the concrete along the entire edge of the countertop to separate the two.

Now you can pry the form away from the countertop with your fingers. The form is made to break underneath so the front of the form should pop off. My little lady fingers weren’t strong enough to do this on my own so I had to enlist Lucius’ man hands to help but it was a success!

We have some bubbles in our final product but since concrete is expected to be imperfect, I don’t necessarily hate them. If they bug me enough, Concrete Countertop Solutions has a patch product I can buy to fill them in.

To remove the sink form, Lucius oh-so-gently punched a hole in the styrofoam knock-out we created. Then we were easily able to pull the sink form off. This part was especially nerve-wracking but it also turned out well!
I have quite a bit of caulk to clean off, but it did its job of keeping concrete out of the sink so I’d say it was worth it.
Step 8: Sand
To smooth out the surface, the next step is to sand starting with 80-grid sandpaper and working your way down to 220. I started off sanding with my orbital sander and within less than 3 minutes the room was FILLED with dust.

There’s no window in the laundry room so I ended up hand-sanding my counters to keep the dust at bay. Luckily, I don’t have a lot of counter space. But this is definitely something to keep in mind if you decide to tackle your own concrete countertops.
Sanding will also expose the aggregate in the concrete, which I love. It’s subtle but really beautiful.

Oh yeah, and if it wasn’t obvious, WEAR A MASK!
Step 9: Seal
Once the dust has literally settled, thoroughly clean off your countertops to prep for sealing them.
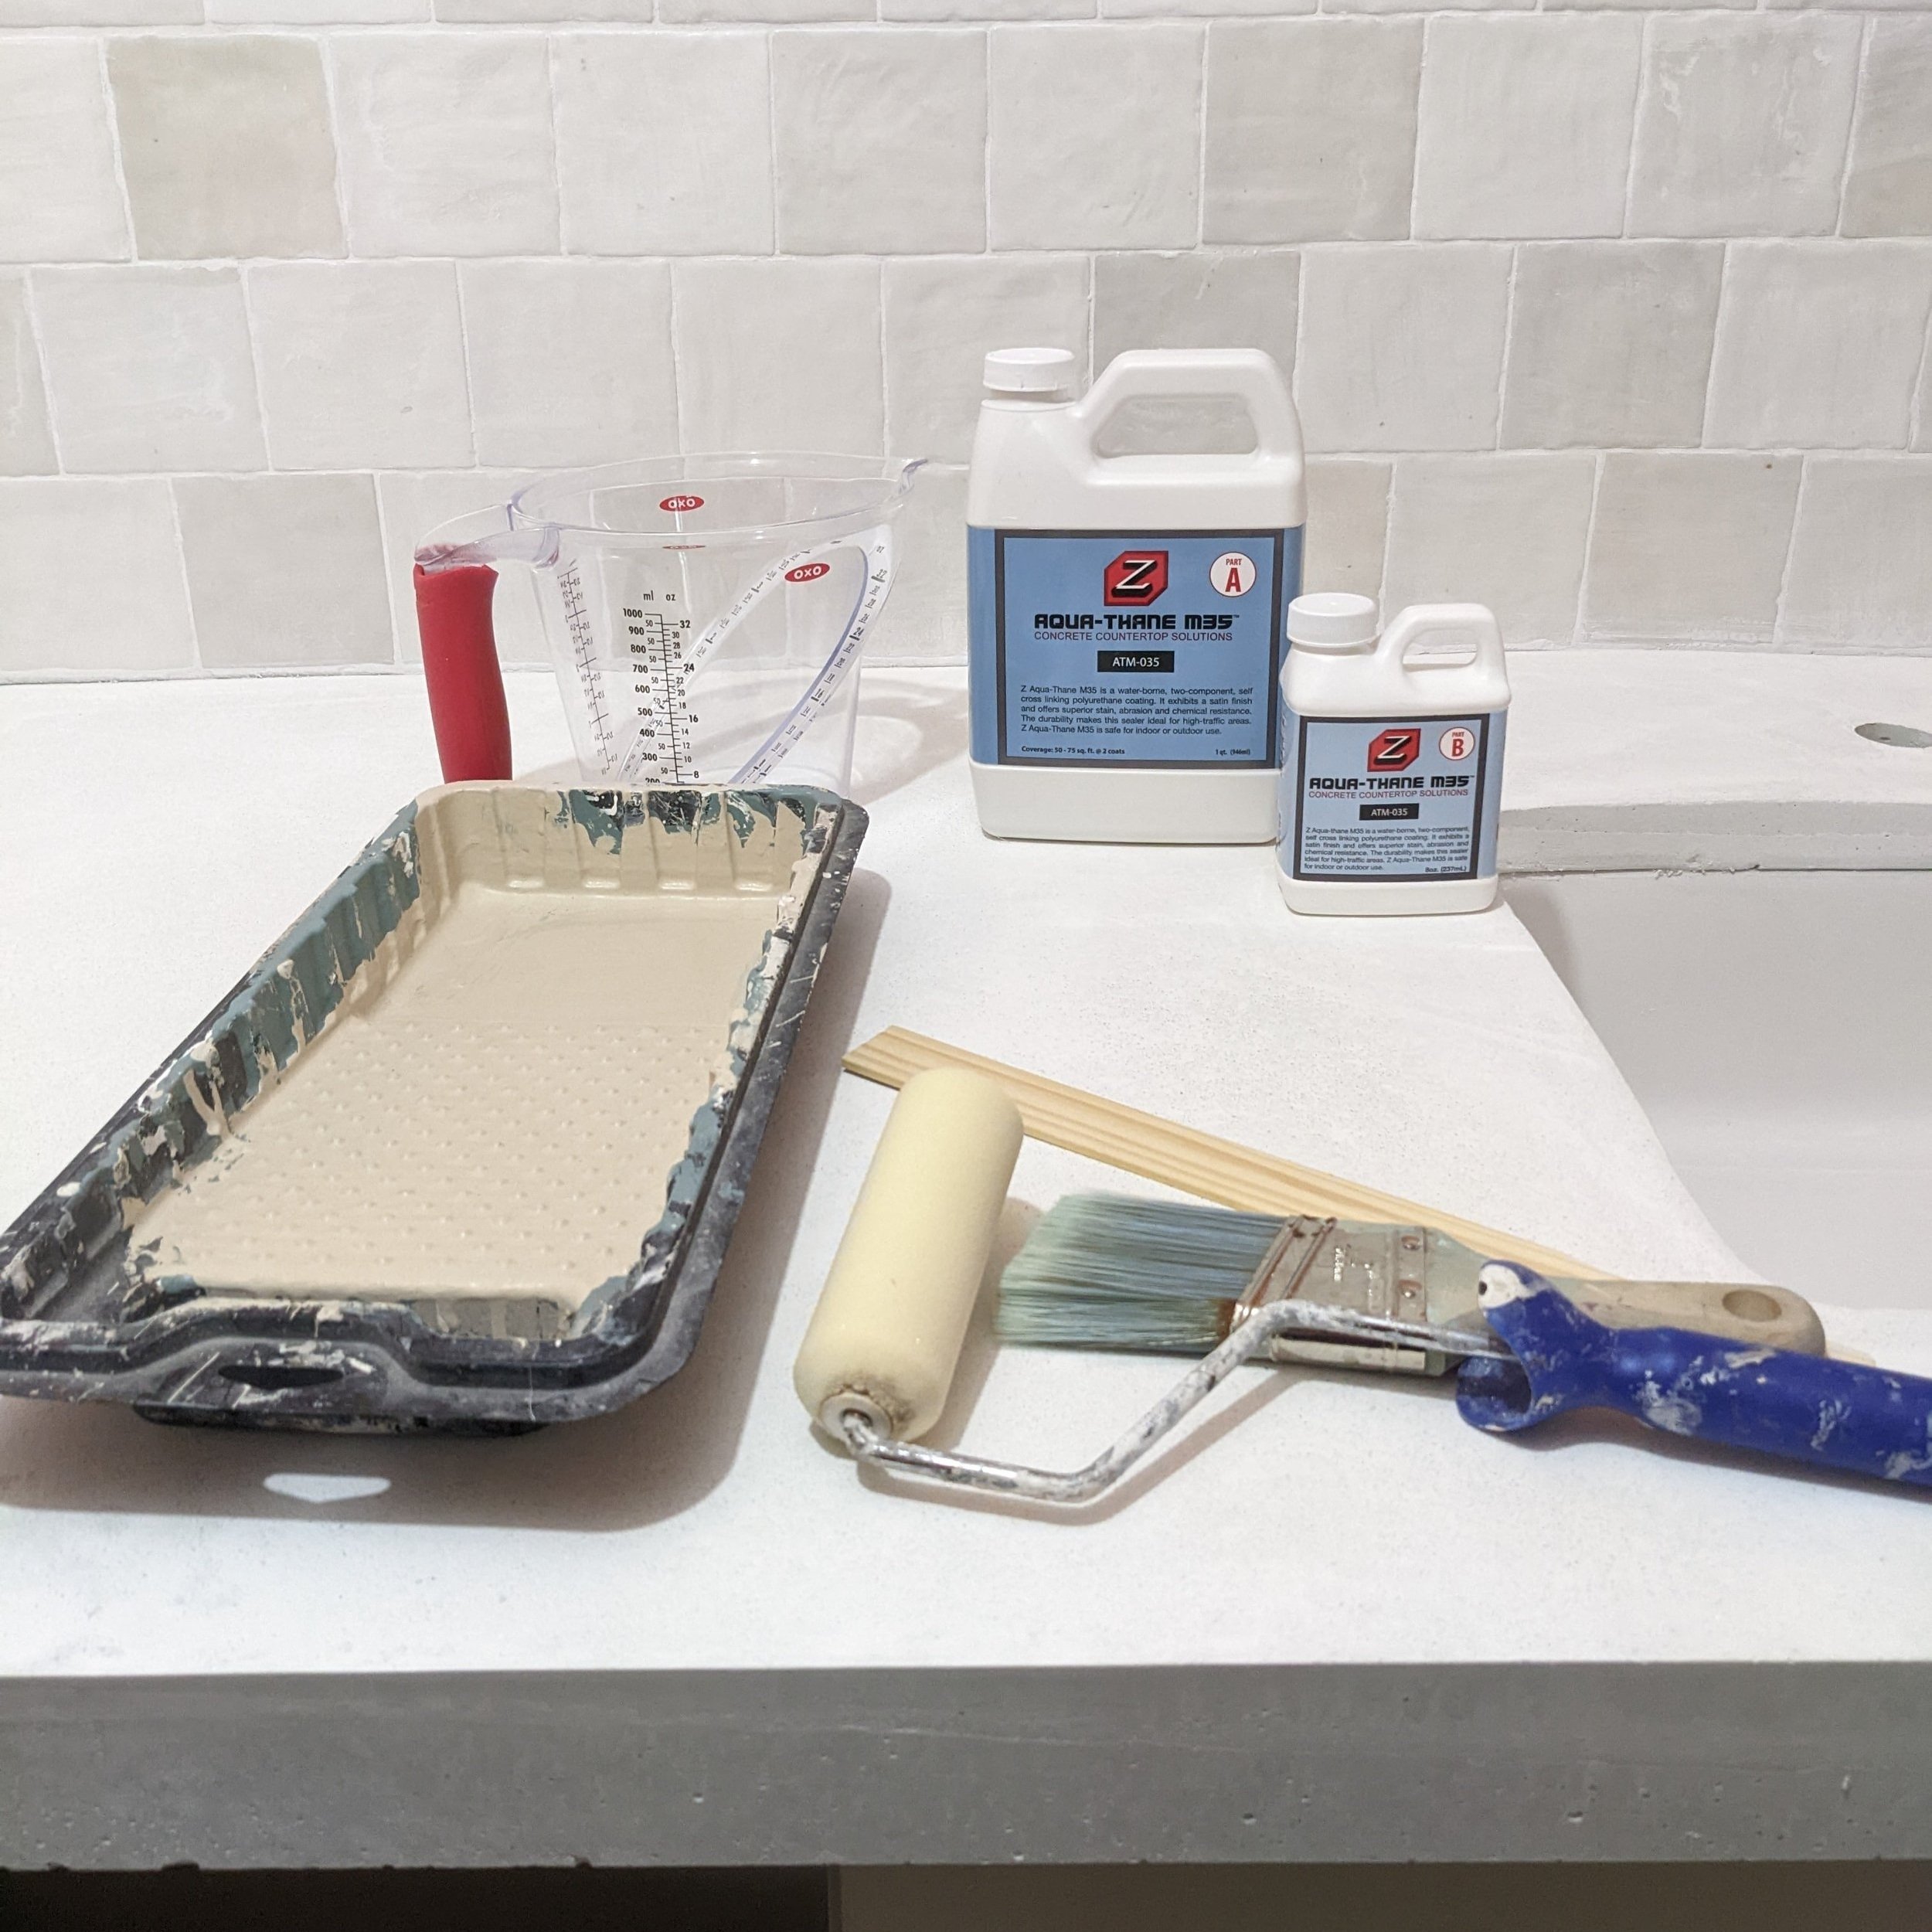
I used Concrete Countertop Solutions Aqua-Thane to seal mine. It comes in two solutions that you mix together according to the directions and then apply with a roller. I applied two coats.
Final Thoughts

I’m really happy with how my countertops turned out, but I’ll admit that they were a lot more work than I expected! I bet a lot of you are wondering, was it worth it? I think that answer really comes down to personal preference and whether you’d rather save the money and put in the sweat equity or just pay someone else to do it. Here’s some perspective:
The total cost for our concrete countertops came out to roughly $1000. That cost includes the supplies from Concrete Countertop Solutions and anything additional we had to purchase to complete the process. It does NOT include tools we already had on hand.
The cost to have concrete countertops installed can cost between $65 and $135+ per square foot - but it would save you a lot of time and energy.
That being said, Lucius and I have already discussed using up our excess materials on concrete countertops in the garage - which should be easier since we won’t have to haul buckets of concrete upstairs, and we’ll DEFINITELY be renting a cement mixer.
There are only THREE MORE WEEKS of the One Room Challenge. Any guesses on what I’ll be tackling next week to really make this laundry room sing???


Don’t miss out! Catch up on my other One Room Challenge Posts:
Make Your Own Concrete Countertops
ORC Week 4 - Cabinet, Door, and Trim Installation
It’s week 4 of the One Room Challenge and we’re officially halfway to the finish line! This week the laundry room got a big upgrade when we installed the freshly painted cabinets, a new door, and the trim!
Installing Trim, Interior Doors, and Cabinets
It’s week 4 of the One Room Challenge and we’re officially halfway to the finish line! This week the laundry room got a big upgrade when we installed the freshly painted cabinets, a new door, and the trim!

What’s the One Room Challenge?

If you’re new here, the One Room Challenge is an event where DIYers from all around encourage and motivate one another to makeover one room in their homes over a period of 8 weeks. In my case, I’m finally tackling our laundry room remodel.
Each Wednesday during the challenge I'll share a post with the previous week's progress until the final reveal on November 16th!
As an Amazon Associate, I earn from qualifying purchases. This post may contain affiliate links, meaning I receive commissions for purchases made through those links at no cost to you.
Cabinet Installation
This was my first time installing cabinets. No tutorial here today, folks. I definitely don’t feel like I have enough experience to teach someone else how to install cabinets.
But I will sum it up by telling you there was a lot of shimming and leveling - which is typical for an older home. Luckily, we only had two cabinets to install so it didn’t take a ton of time.
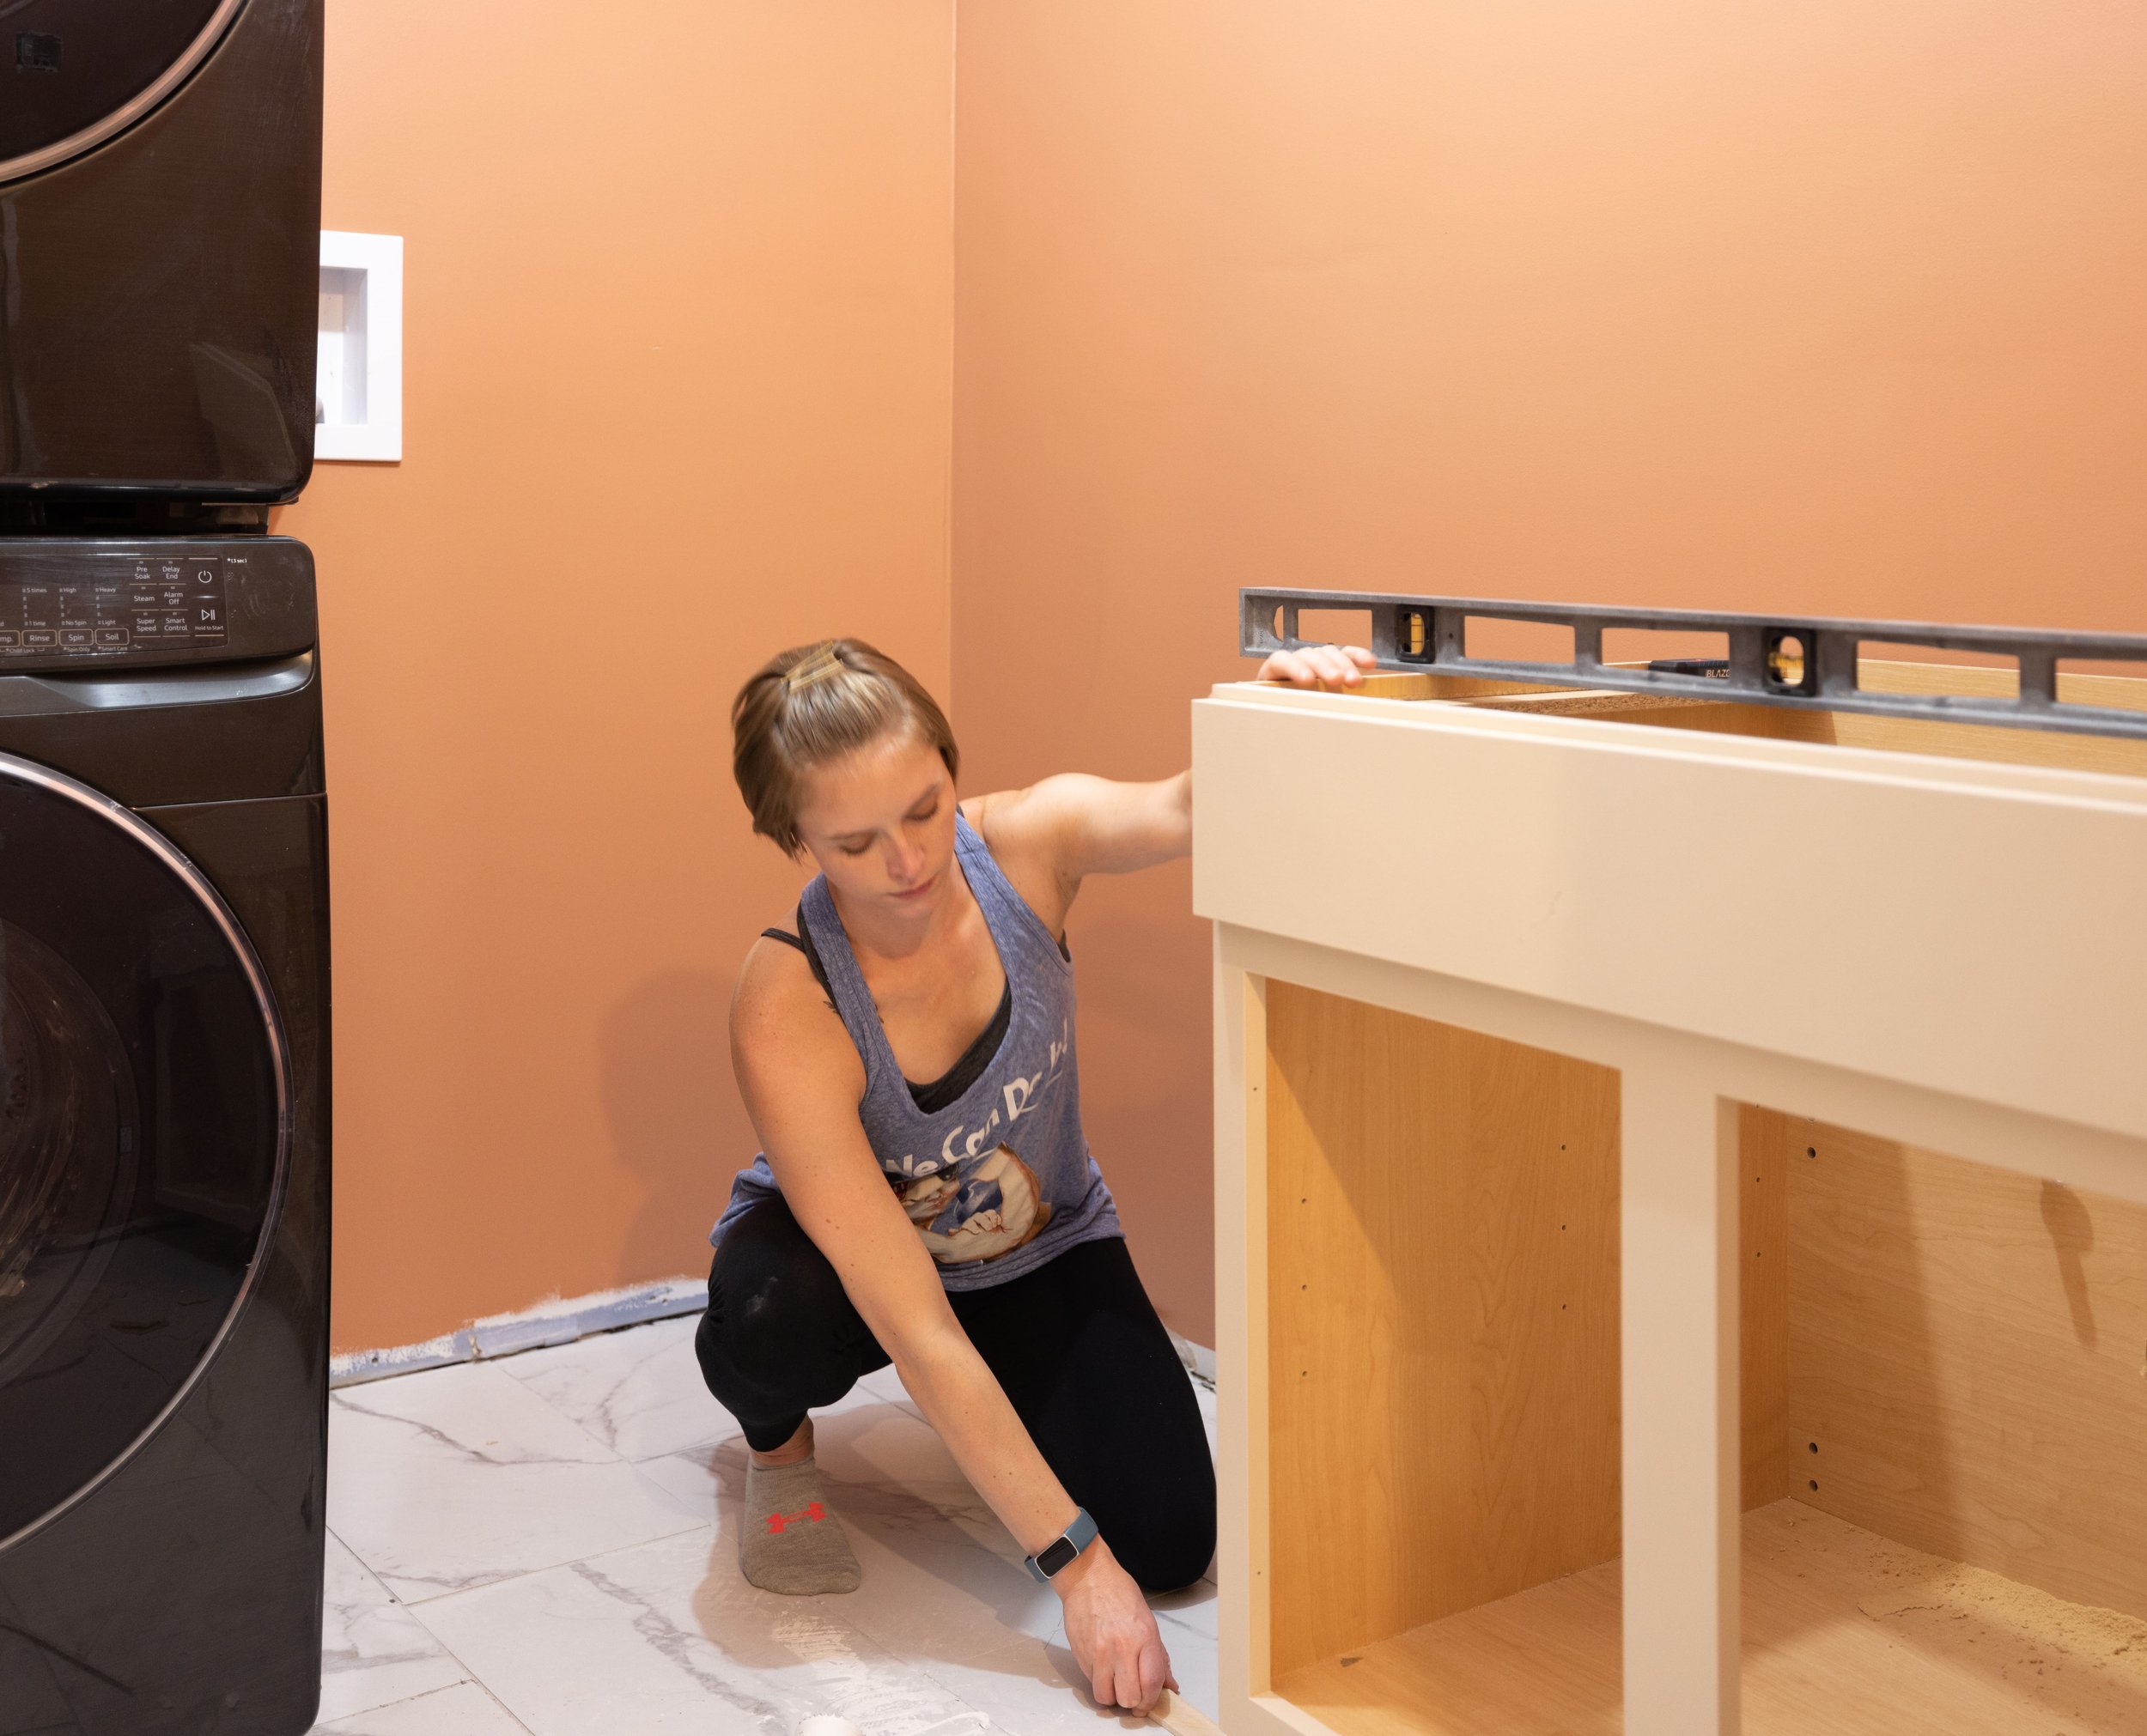
As a side note, how good is the color combination of the beige cabinets against those terracotta walls!?
We also added a couple of floor-to-ceiling boards between the smaller cabinet and washer/dryer to eventually make the appliances look built-in.

In our last two houses, the washer and dryer lived in an unfinished basement flush with cobwebs and interesting smells. And before we moved our laundry room upstairs, the washer and dryer were in a more finished space, but still not as nice as I've always wanted. And then, of course, they moved up here where they sat in the unfinished room for a year.
Needless to say, I’m ridiculously happy about the idea of having built-in appliances in a beautifully finished space! I can’t wait to see the clean, finished look they’ll have when everything is permanently in place and painted. I feel so fancy already. Plus, having a place to FINALLY store my laundry detergent feels like a dream.
To thread the washer hoses through, we bored some holes in the faux wall. I’ll probably hide the access to the waterlines with a piece of artwork or something.

As I mentioned in my design plans, I’m still planning on building a cabinet to go above the washer and dryer that will finish that corner off nicely and hide the dryer vent too.
It’s definitely intimidating to think about building it myself, but there’s no way we’d be able to buy a stock cabinet in the measurements we need. Plus, it’s an opportunity for me to grow, learn something new, and build some confidence!
Door Installation
We also took some time last week to install a new door! This is especially exciting because this is the last door on the second floor we needed to replace! Feels like a bit of a milestone.

As with cabinets, door installation involves a whole lot of leveling and shimming - with the added task of removing excess flooring and drywall to make it fit juuuuust right.
I left most of the door installation to Lucius but made sure I was at the ready with tools, snacks, and entertainment. I don’t like to brag, but I’m pretty sure it turned out so well simply because I was present.
Trim
Our other big change last week was adding trim, specifically baseboards and door casings, which immediately made everything feel more finished.

We used the same basic baseboard that we have throughout the house and installed the same fluted trim that we've used on all the other upstairs doors. Once all the trim was nailed and caulked into place, I decided to paint it the same color as the cabinets.

I talked about my longing for contrast trim during the loft renovation. And although Lucius talked me out of it in that space, I went for it in the laundry room! I painted the back of the door in the same color too. I’m unstoppable now!

I still need to touch up the wall color around the trim for a nice, clean finish, but I’ll save that for another day.
While we were working, we also decided to switch the hinges on the dryer to the opposite side. Unfortunately, during that process, the bracket that holds the door in place fell into the dryer cavity. So at the end of the day, Lucius went on a fun little adventure to retrieve it.

He wasn’t particularly thrilled. BUT, we found the bracket and were able to put it back where it belongs.
Final Thoughts

One of my favorite parts about DIY is seeing the designs I come up with come to life - and knowing I did it myself! This room is no different. I can’t express how pumped I am to see this room come together.
Stay tuned for next week because we’re trying our hand at installing CONCRETE COUNTERTOPS and I won’t lie that I’m a little nervous! I’ll be sharing updates over on Instagram as well so make sure you follow along there too.

Don’t miss out! Catch up on my other One Room Challenge Posts:
Door, Trim, and Cabinet Installation
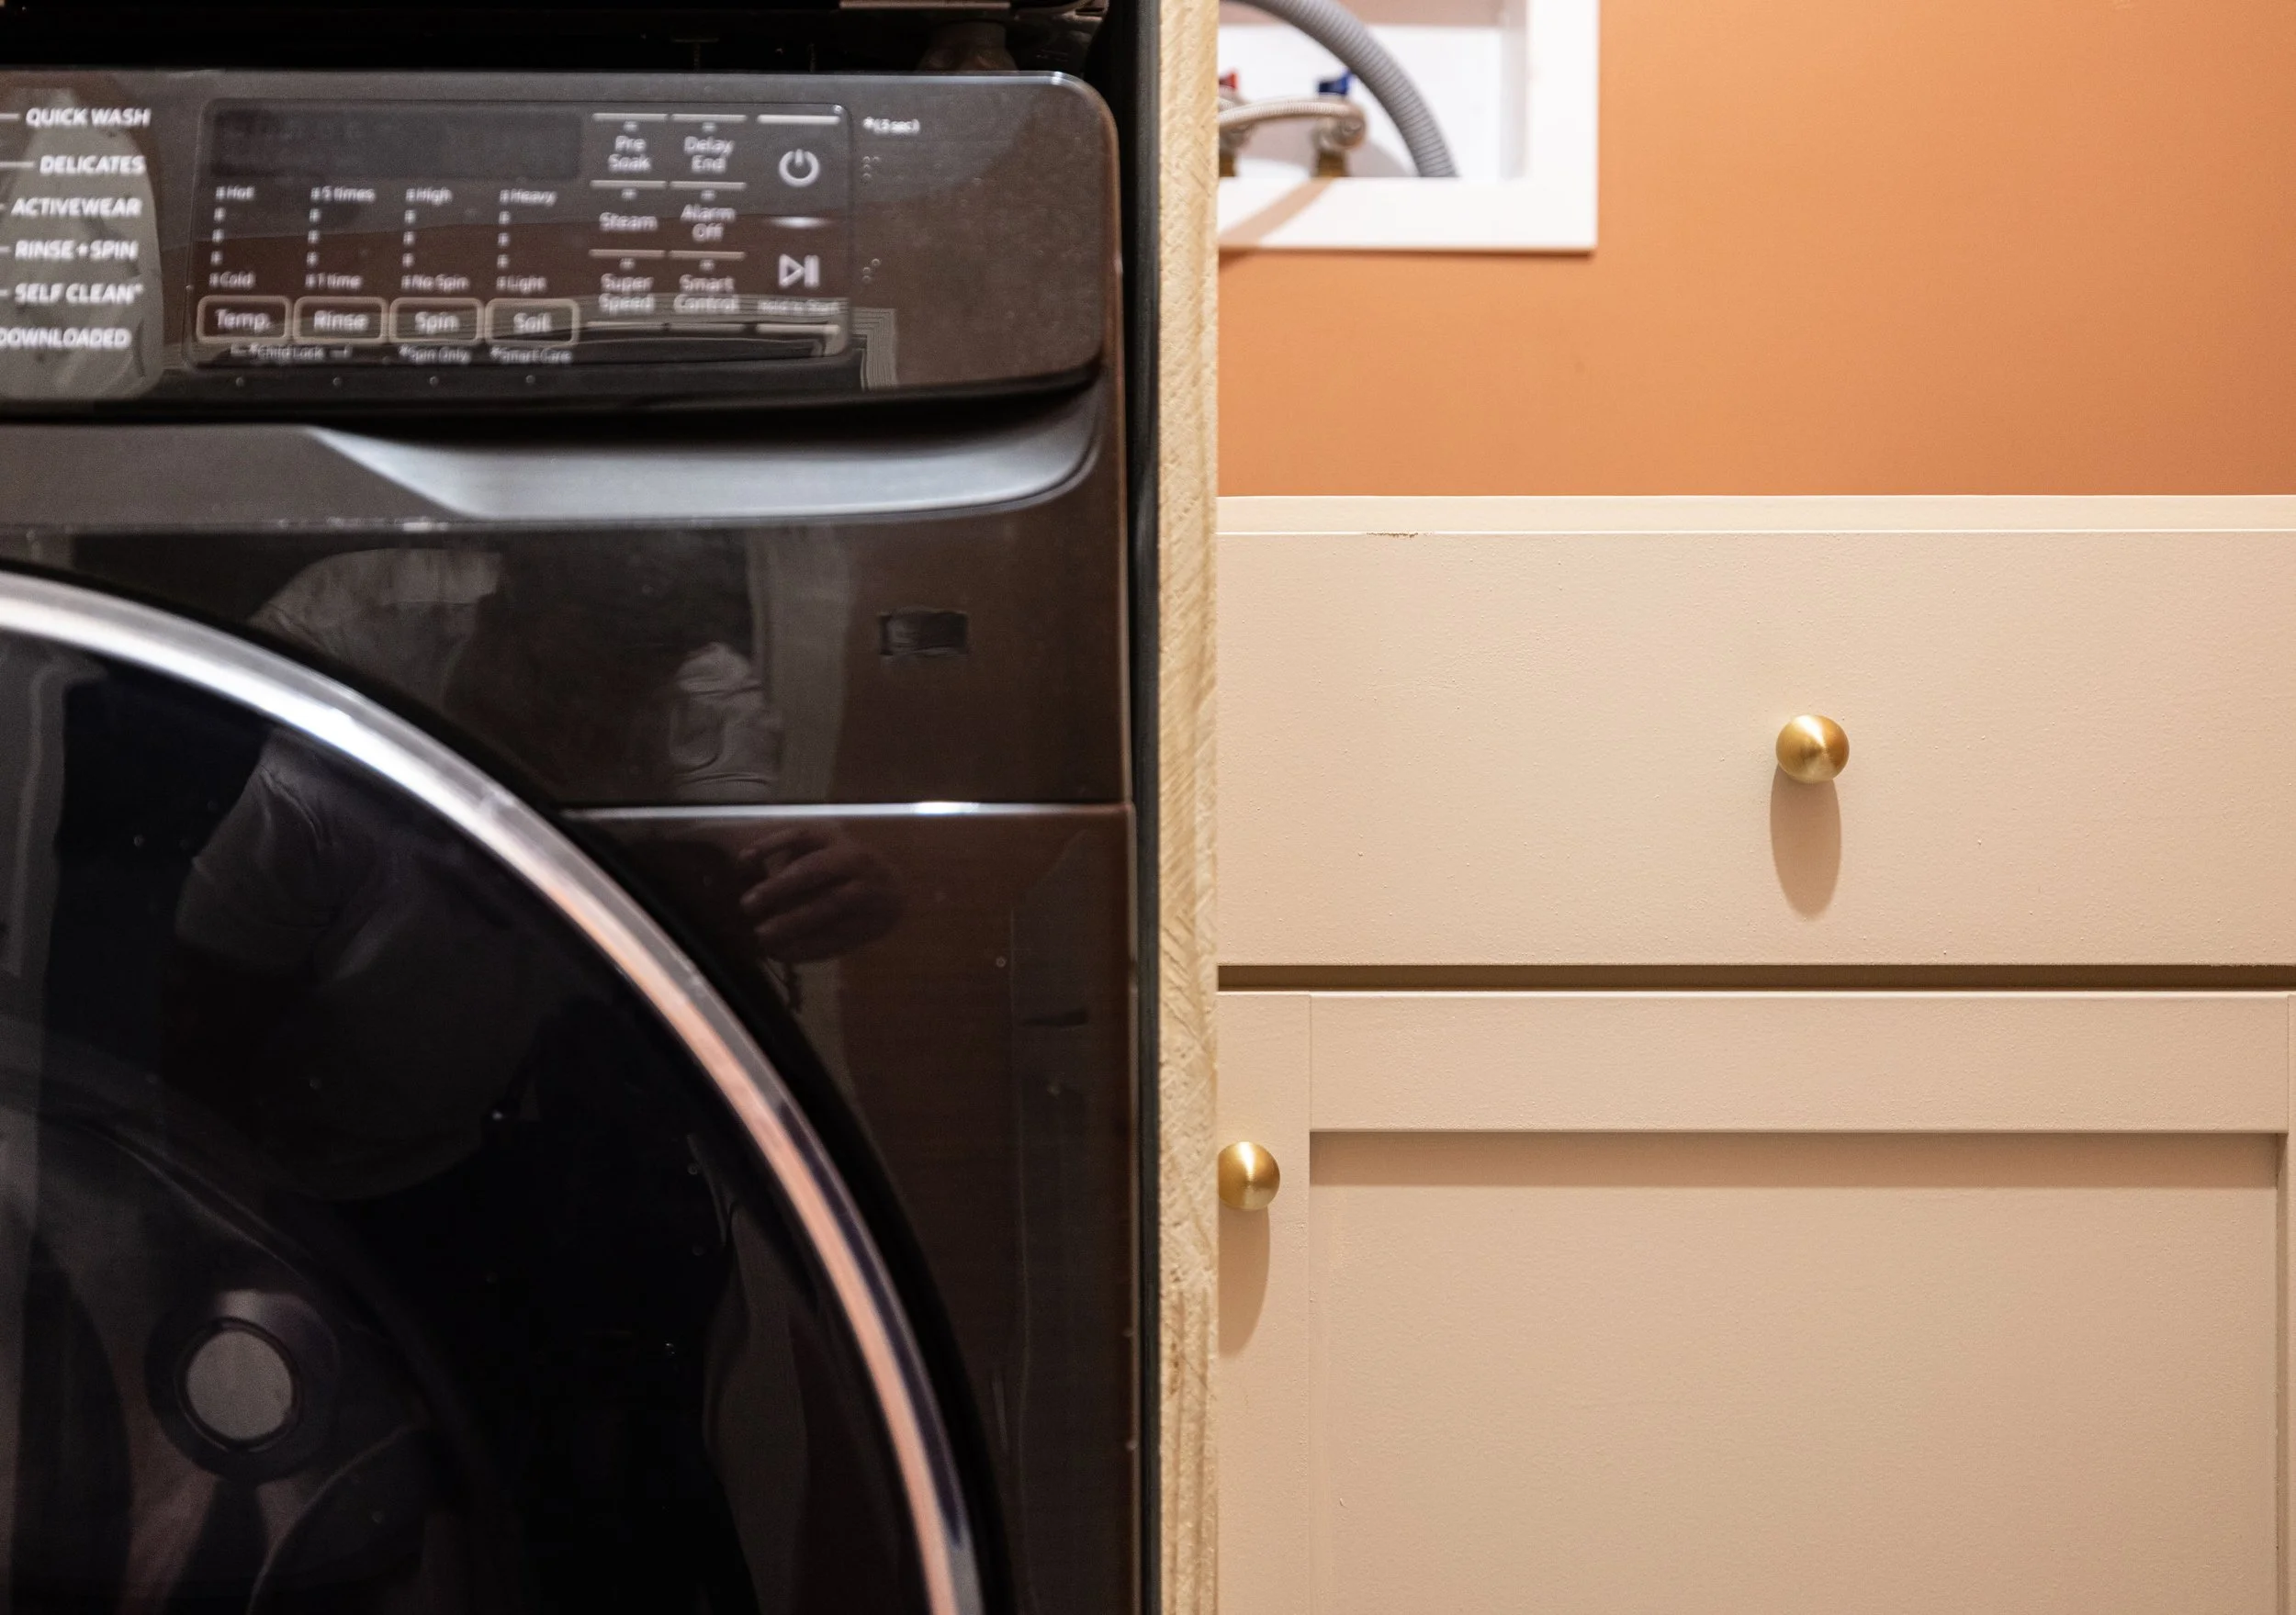
ORC Week 3 - My Foolproof Method for Painting Cabinets
At this point, I've painted 4 kitchens worth of cabinets and have learned A LOT along the way. Since I was painting the cabinets for the laundry room this week anyway, I figured this would be the perfect opportunity to share my process for painting cabinets - breaking down what does and doesn't work so you get the best finished product.
How to Paint Cabinets in 4 Steps
I can’t believe it’s already week 3 of the One Room Challenge! So far, I’ve figured out my overall design, painted my laundry room a beautiful terracotta color (Kitchen Terracotta by Valspar), and last week I painted the cabinets for the laundry room!

What’s the One Room Challenge?

If you’re new here, the One Room Challenge is an event where DIYers from all around encourage and motivate one another to makeover one room in their homes over a period of 8 weeks. In my case, I’m finally tackling our laundry room remodel.
Each Wednesday during the challenge I'll share a post with the previous week's progress until the final reveal on November 16th!
At this point, I've painted 4 kitchens worth of cabinets and have learned A LOT along the way. Since I was painting the cabinets for the laundry room this week anyway, I figured this would be the perfect opportunity to share my process for painting cabinets - breaking down what does and doesn't work so you get the best finished product.
As an Amazon Associate, I earn from qualifying purchases. This post may contain affiliate links, meaning I receive commissions for purchases made through those links at no cost to you.

Materials
- Wood Filler (optional)
- Putty Knife (optional)
- Orbital Sander (optional)
- Drill
- TSP Cleaner
- Sandpaper (150 & 220 grit)
- Liquid Sandpaper (optional)
- Oil-based primer
- Paintbrush (2)
- Foam Roller (2)
- Mini Cone Paint Stands, or Solo Cups
- Paint Can Opener
- Enamel Paint
Step 1: Prep
I know, I know, “Prep work is sooooo boring! Can’t I just skip it all and jump to painting already?” NO! I mean, you could, but your cabinets probably won’t look that great and won’t stand the test of time.
As dull as prep work is, it’s really important. So just do it already, okay?
Take it all apart
Start by removing doors, drawers, hinges, and hardware. If you’re planning on switching up the handles, knobs, or hinges, you might need to fill the old holes with some wood filler.

Clean it real good
Next, I recommend wiping everything down with TSP (or at the very least with some soap and water, you filthy animal) to get it nice and clean. TSP is especially good at degreasing all those yucky kitchen cabinets.
Sand
Before you mention it, I too have seen the copious amounts of Pins for articles touting methods of painting cabinets that don’t require any sanding. And to that I say, “Lies!” I don’t believe it for a second. But I do have my own little alternative methods here.
In the case of my laundry room makeover, my cabinets were new so I sanded them entirely in the garage the old-fashioned way. BUT, if I’m painting cabinets that are already installed, I typically use liquid sandpaper on the cabinet boxes to keep from making a giant dusty mess in the house.
Since doors and drawers are touched so much more, however, I recommend using an orbital sander and 150-grit sandpaper to scuff up all your surfaces to get them nice and grippy. You can sand by hand as well - it just takes longer.

Once everything is sanded, wipe off all that dust.
Step 2: Prime
Now we’re getting closer to the real party - it’s time to prime! I guess you can consider this the appetizer. The pre-game, if you will.
I’ll say it ‘til I die - I hate oil-based primer. BUT, I always recommend using it when painting cabinets. As smelly and messy as it is, once it cures it holds up amazingly well. I like to use this kind by Zinsser.
I start by cutting in with an on-it’s-way-out brush wherever my roller won’t be able to reach. Then, I use a small foam roller to roll primer onto the rest of the surfaces.

Cabinet doors are the most tedious part because you have to wait for one side to dry before you can flip them over. To keep the doors off the ground, you can prop them up on these little mini cone stands.
If I ever have the foresight, I’ll have to grab some to try next time I paint cabinets. I’ve always resorted to using Solo cups, which also work well.

While I’m waiting for each side of my doors to dry, I simply store my brush and roller in Zip-loc bags so they don’t dry out. Once everything has one coat of primer, I just throw the brush and roller away instead of trying to clean off the primer with mineral spirits.
Step 3: Paint!
FINALLY, it’s time to party paint! The most important part of this step is using the right kind of paint.

I’ve found over the years that enamel-based paint holds up better than any other. I painted our kitchen cabinets TWO YEARS ago and although they’re abused daily by two little kids, the only damage they show is one tiny chip in one of the doors. So, naturally, I chose the same kind of paint for our laundry room. The color is Sherwin Williams Kilim Beige in satin.
Also, please enjoy my ever-impressive modeling skills in the still shot below. I’m practically Vanna White.

The process here is exactly the same as when you prime, except you’ll want to do two coats of paint on everything. Remember, two thin coats are WAY better than one thick gloppy coat.
To get a smoother finish, you can do a quick sanding with 220 grit between coats of paint too.
Step 4: Reinstall and Admire
And as they say, after the party is the afterparty. (Do they still say that? Did I just age myself?)

Once you’ve given everything ample time to dry (waiting a couple of days is a good idea!), you can reinstall your doors and drawers. Or, in my case, you can install the cabinet entirely since ours were brand spanking new.
Oh, and if you’re drilling for new hardware, these templates make that task a breeze.
I finished my cabinets off with these cute little knobs.
Final Thoughts
And there you have it: beautifully painted cabinets that will stand the test of time!
I’m really happy with how my cabinets turned out and I especially love the color. You can see how I decided on Kilim Beige in last week’s post.
Next up: actually installing these bad boys, switching out the door, and finishing the trim. I can’t wait to see this room come together! Don’t forget to follow along every week as I share my progress of the laundry room makeover for the One Room Challenge!


Don’t forget to check out the other weeks of my One Room Challenge progress:
How to Paint Cabinets That Last
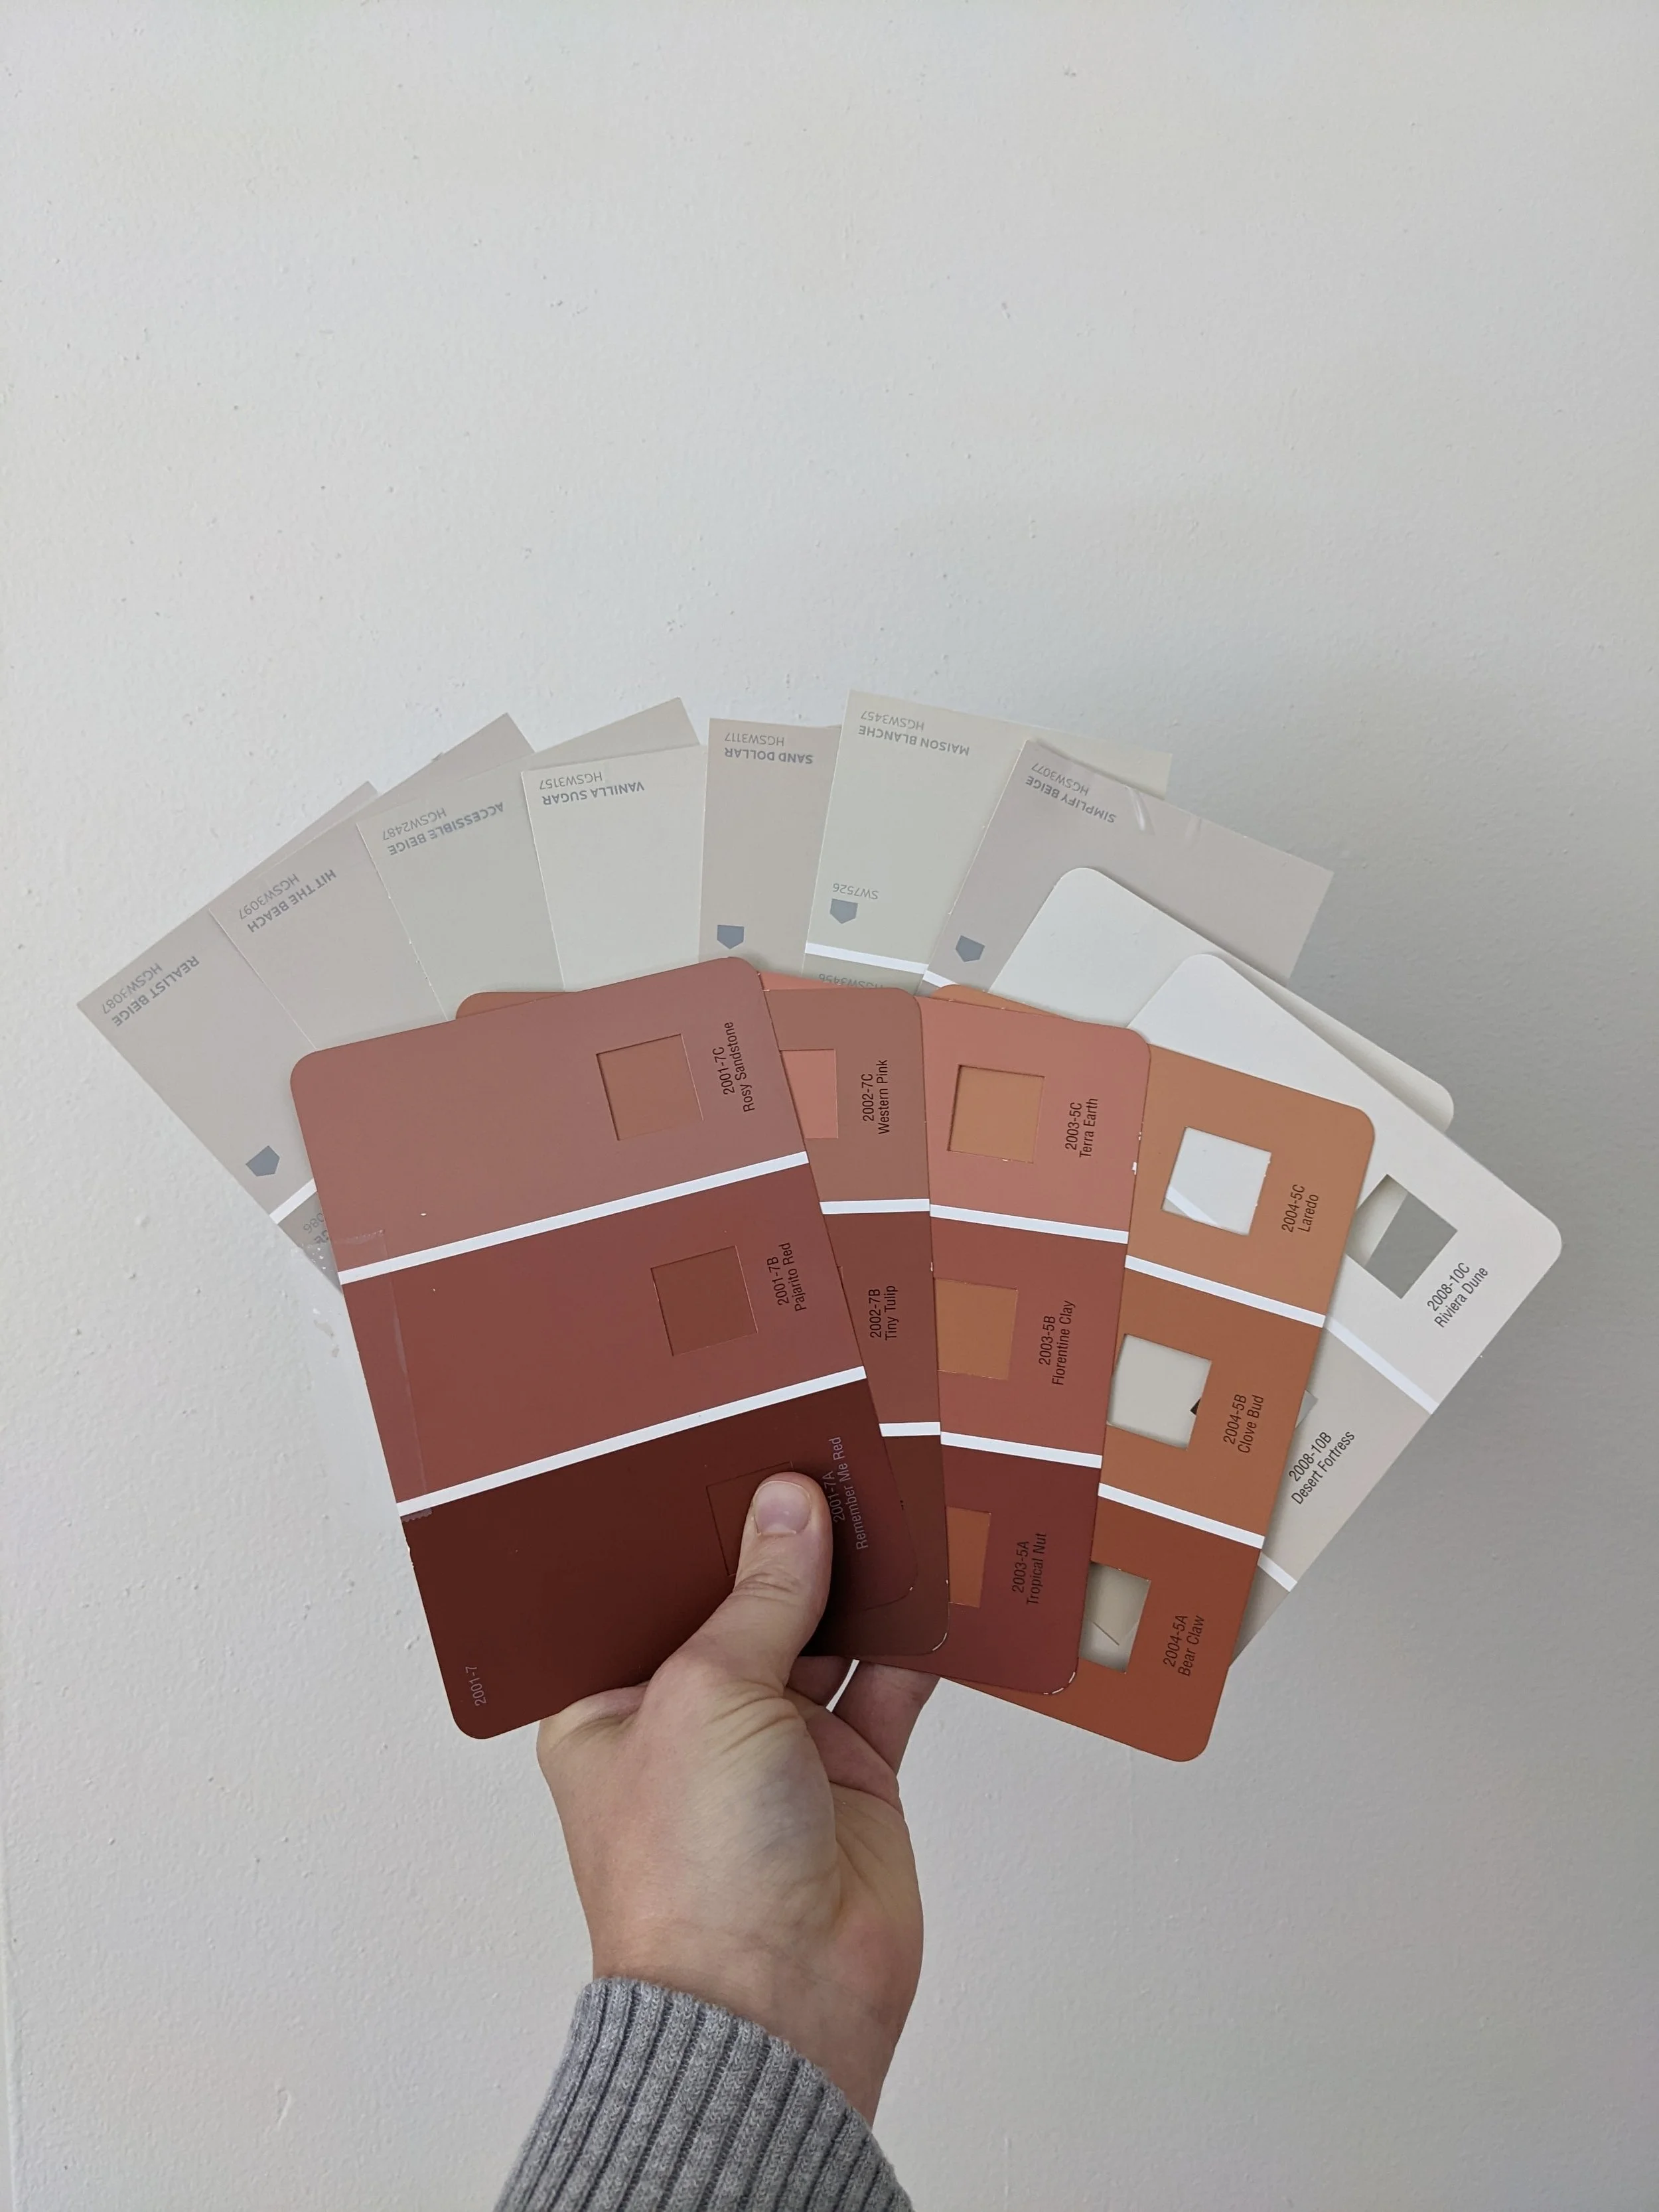
ORC Week 2 - How to Pick the Perfect Paint Color
In last week’s post, I shared the design I’ve had rolling around in my head for the laundry room renovation that I’m tackling for the One Room Challenge. This week, I shifted my attention to picking the perfect paint colors for the walls and cabinets - and thought it would be fun to bring you along for the ride!
Never Choose the Wrong Paint Color Again
In last week’s post, I shared the design I’ve had rolling around in my head for the laundry room renovation I’m tackling for the One Room Challenge. This week, I shifted my attention to picking the perfect paint colors for the walls and cabinets - and thought it would be fun to bring you along for the ride!
What's The One Room Challenge?

If you’re new here, the One Room Challenge is an event where creators from all around encourage and motivate one another to makeover one room in their homes over a period of 8 weeks. In my case, I’m finally tackling our laundry room remodel.
Each Wednesday during the challenge, I'll share a post with the previous week's progress until the final reveal on November 16th!
Now back to our regularly scheduled content….
While I was dreaming up my laundry room plans, we hired a contractor to finish the drywall, and then I was able to prime the walls. After living with unfinished drywall in here for over a year, I’ve never been so happy to have a white box of a room.
As an Amazon Associate, I earn from qualifying purchases. This post may contain affiliate links, meaning I receive commissions for purchases made through those links at no cost to you.
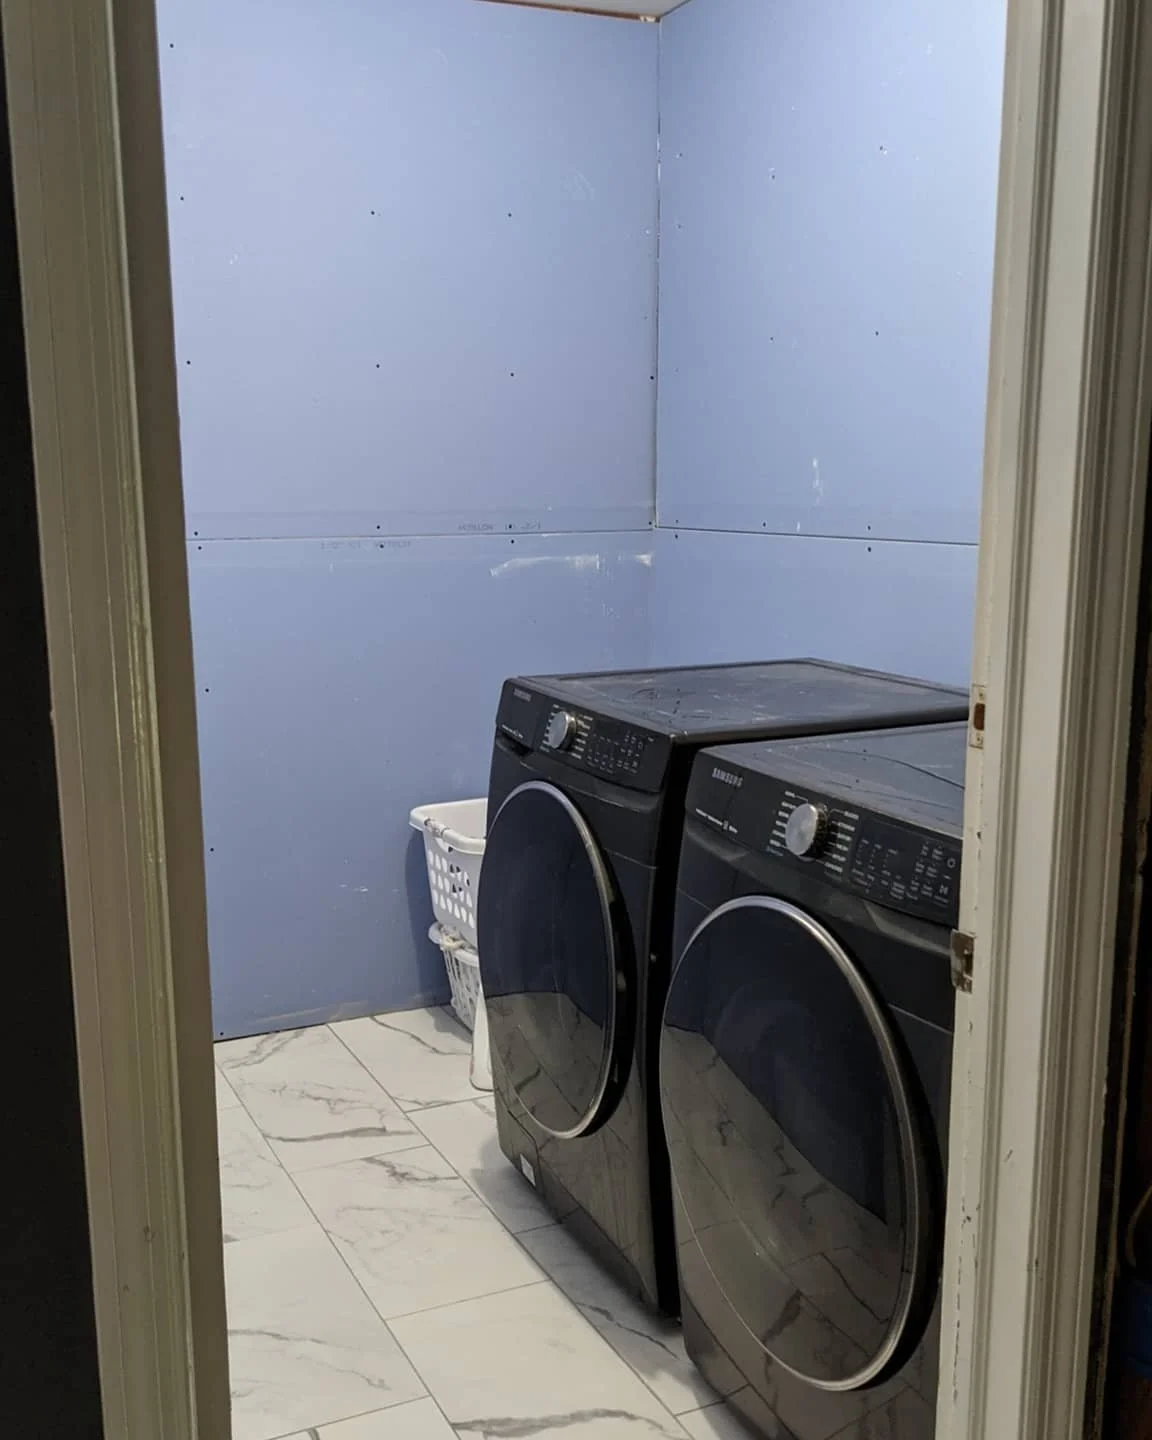
This is a small room, yet it never ceases to amaze me how much drywall dust creeps into every crevice it can find. Although the drywall process didn't take long, it felt so good to encapsulate all that unfinished drywall in primer.
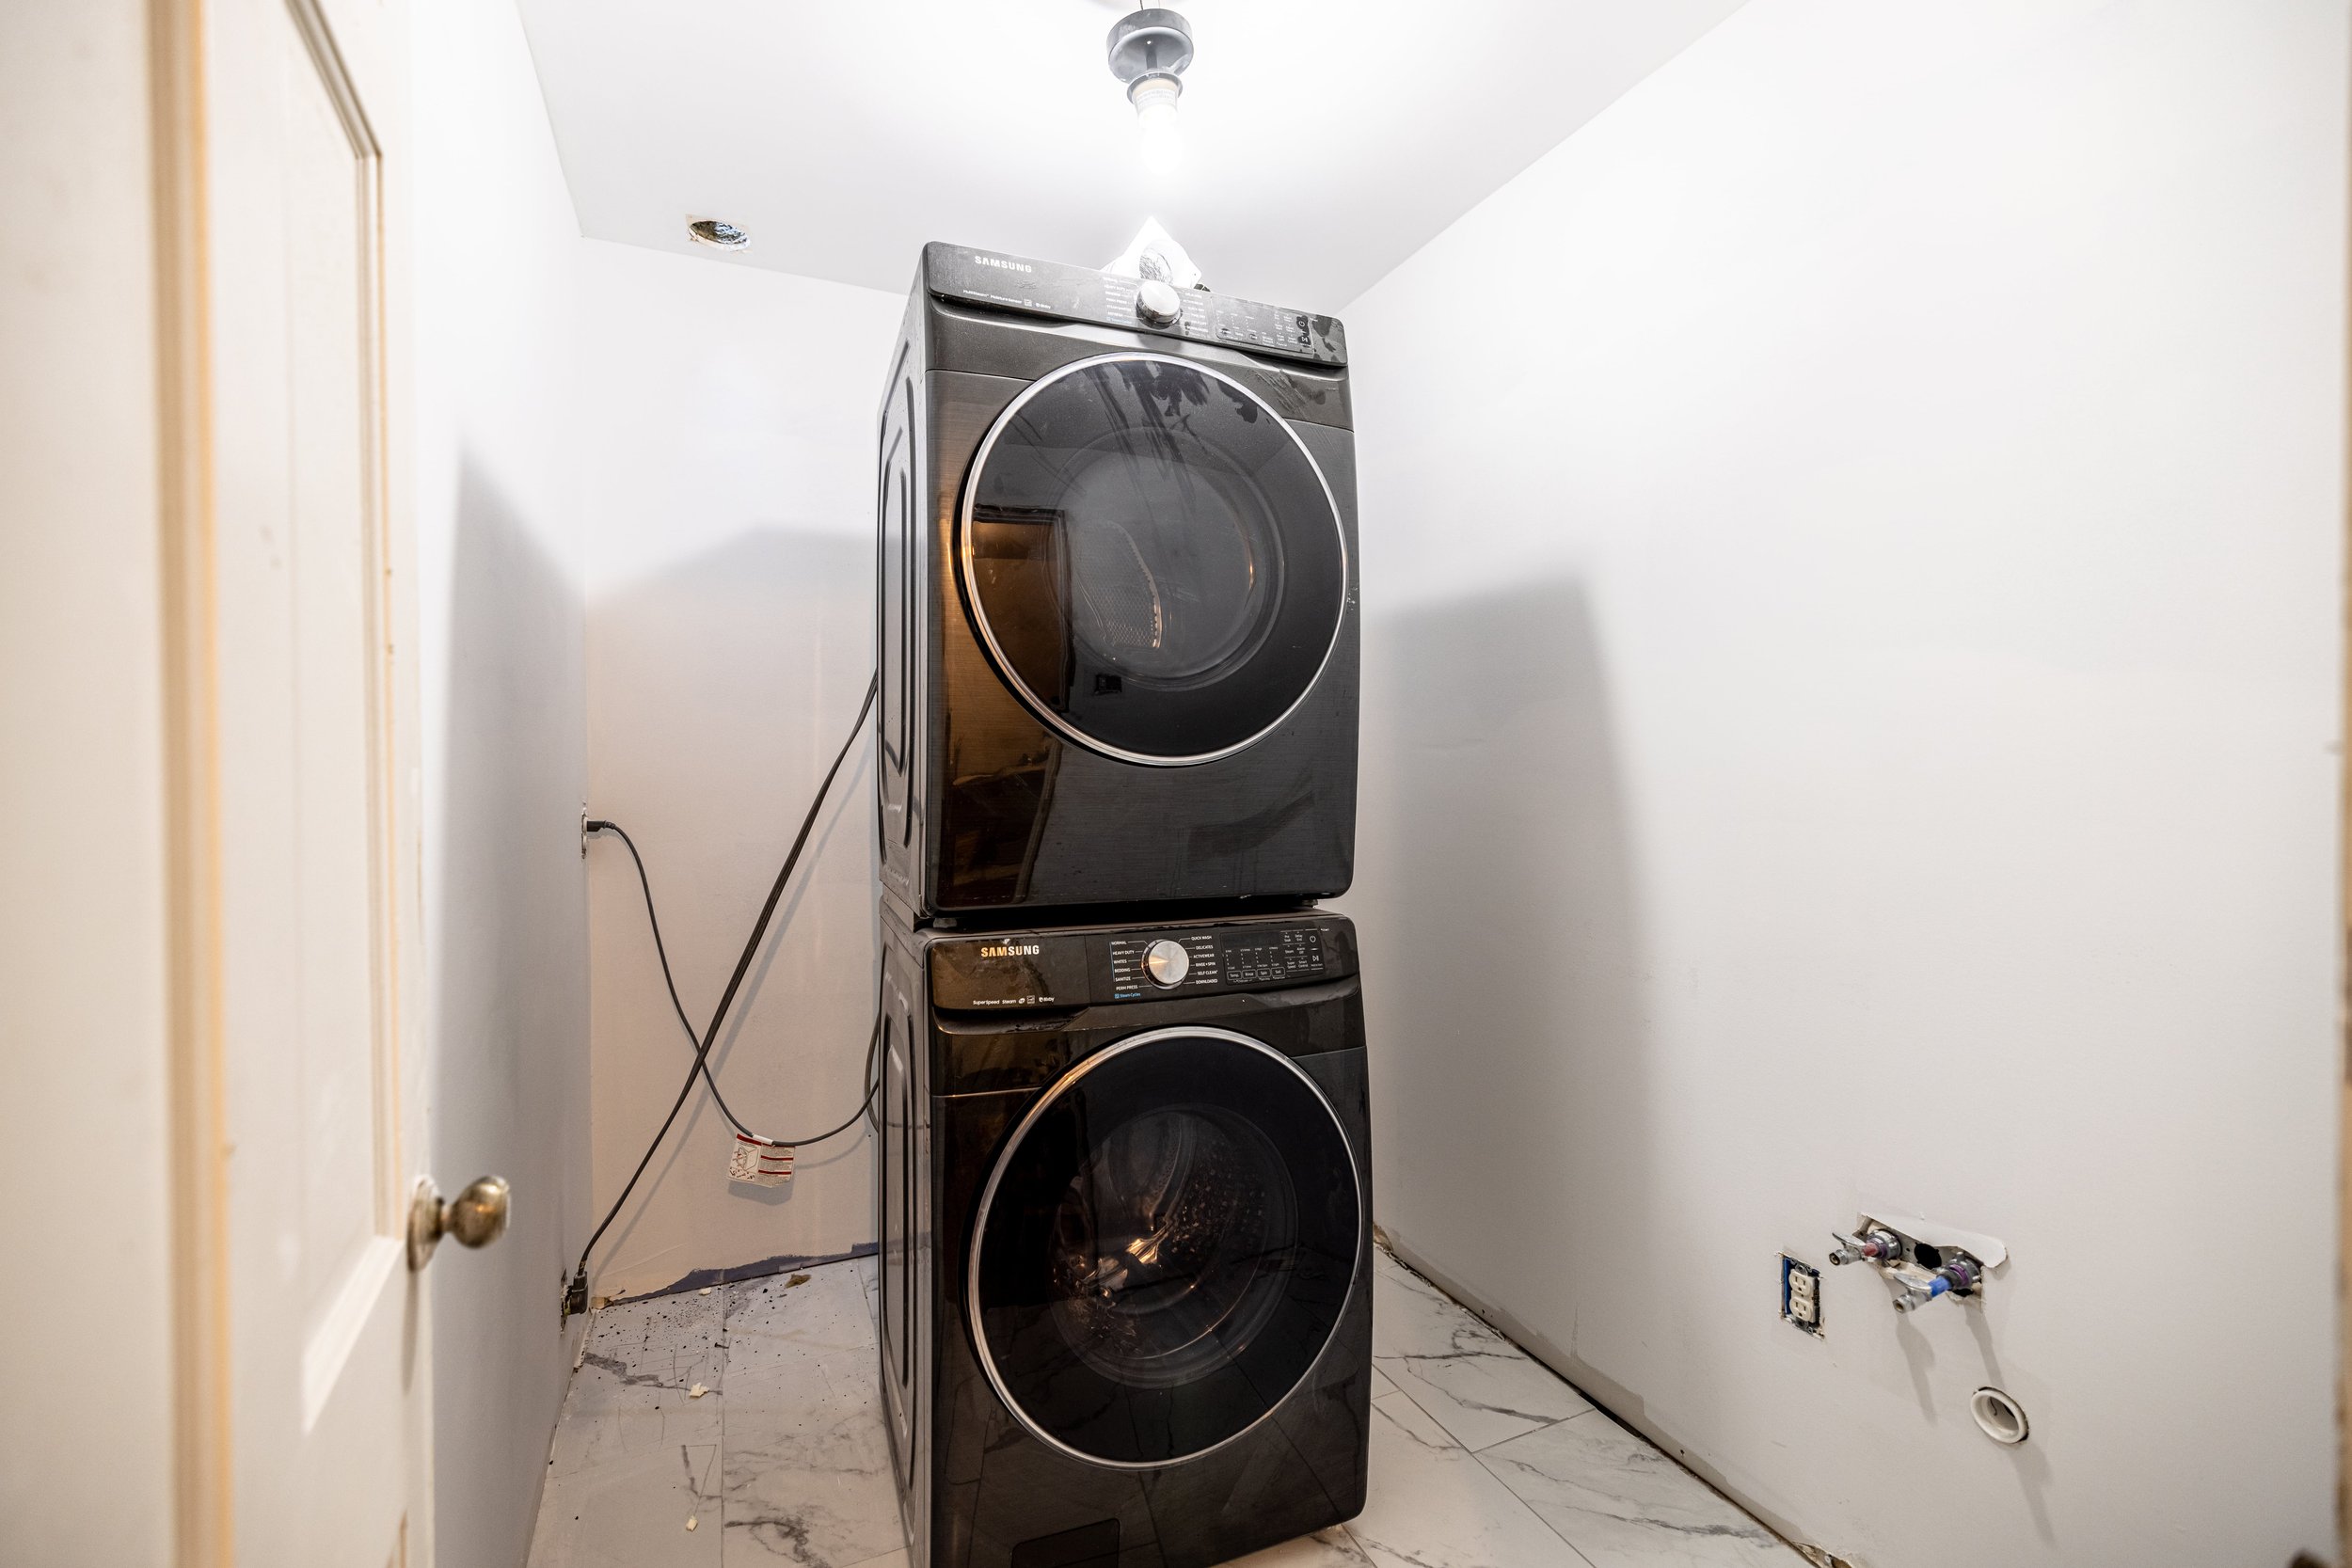
I mentioned in my last post that I was thinking of terracotta for the walls and beige for the cabinets. But as anyone who has picked a paint color has realized, there are SO MANY options to choose from. How do you pick the perfect one?
I’ve seen loads of blog posts that tell you you have to look at the undertones of your paint color, understand the color wheel, and practically take a class on LRV (light reflectance value) before painting a room - but even to a paint-choosing veteran (such as myself), that’s overwhelming!
So, buckle up while I share the simple steps I follow to choose paint colors EVERY TIME.
Step 1 - It All Starts With An Idea
To start, simply come up with a general idea of what you want.
In my case, I found inspiration by searching Pinterest for rooms that caught my eye and pulled colors from the palette below.

But your colors could really come from anywhere - nature, a fabric swatch, etc. It's okay if you don't have it completely narrowed down to one color family just yet because in the next step you…
Step 2 - Shamelessly Take ALL the Paint Chips
Go to the paint or hardware store and grab any paint chip options that catch your eye - they’re free! But seriously, I’m surprised at this point I don’t have at least one of every color available.
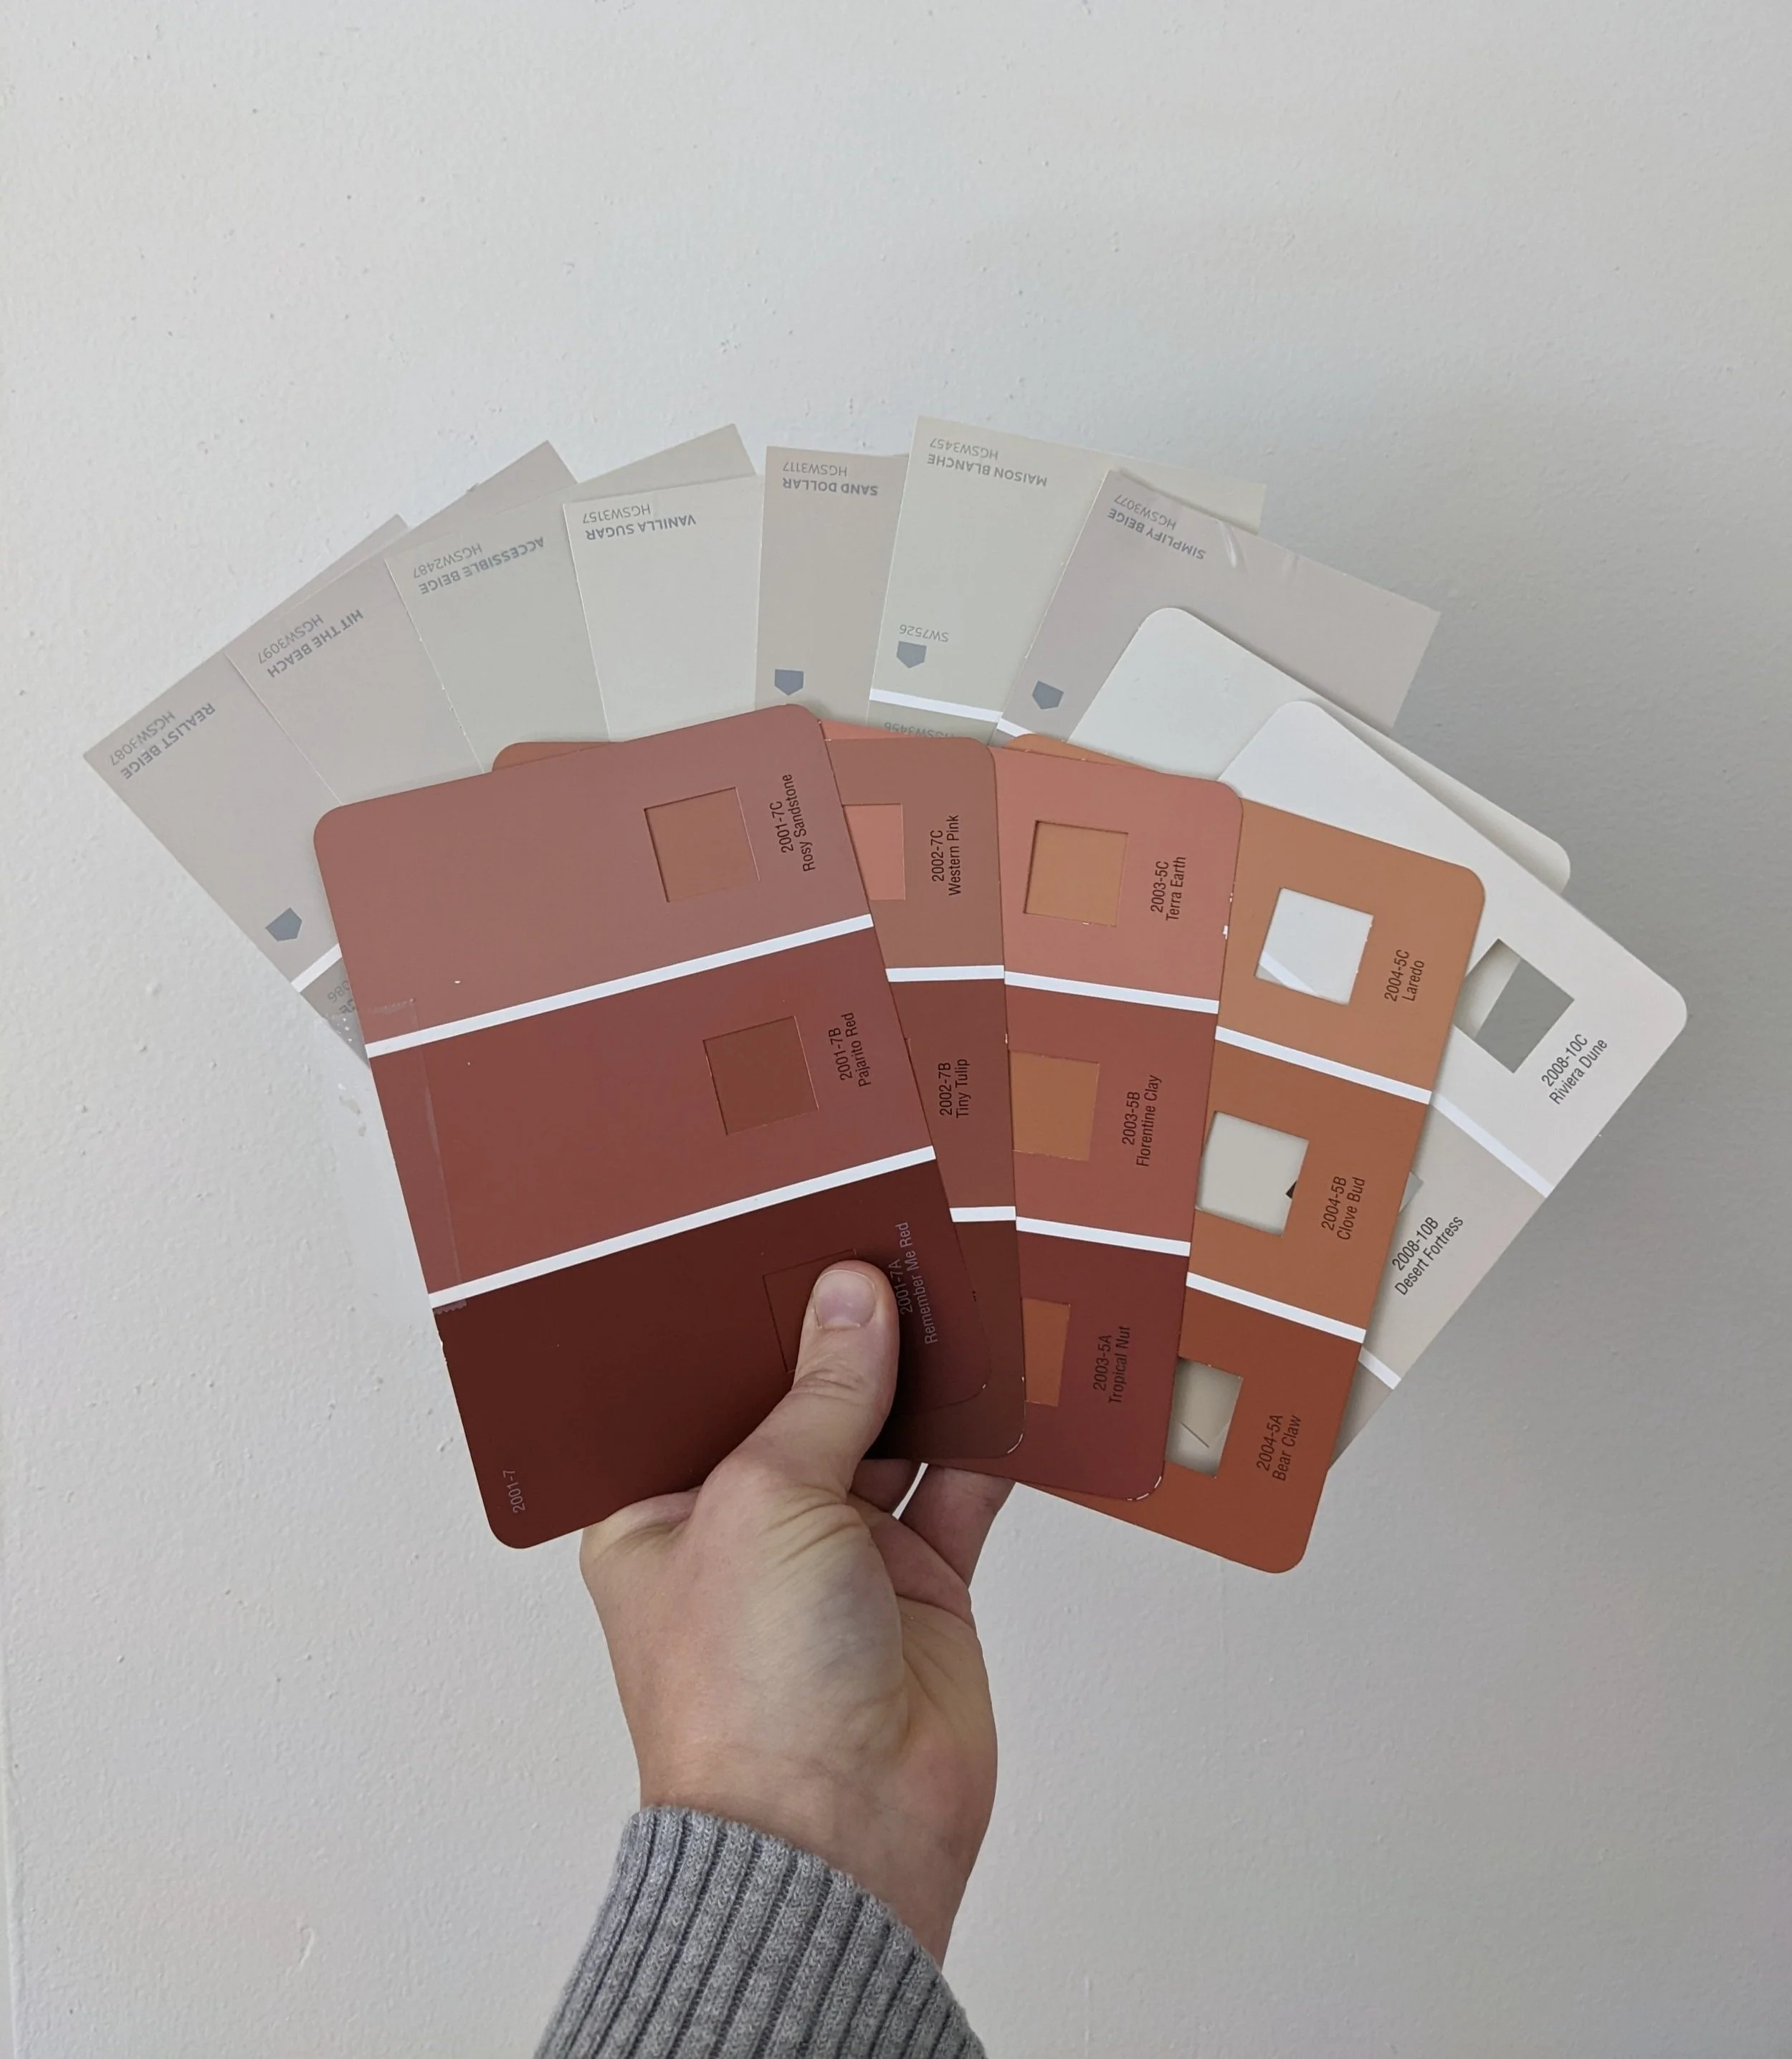
While at the store, you may think you know exactly what color you want to use, but you’re probably wrong! It really is important to get a variety of options to take home and see in your room - the lighting of your space and other objects that will be used in the room will make a big difference in how the color is perceived.
Once you get home, tape all the chips to your walls and see how they look throughout the day.

Sometimes I even like to take a few days and move the chips to other walls in the room to see how they change in different lighting. Yes, I said DAYS. Don’t rush this step. Or the next step. Or life in general. Let’s all just slow down and take it all in. Everything is dust.
Wait, what was I talking about? Oh yeah…
Step 3 - Paint Samples Are Your Friend
Once you’ve analyzed your paint chips in the space, remove the definite no-gos and buy samples of any serious contenders.
In my case, I was quickly able to rule out any samples that looked too orange or pink for what I pictured on the walls. And for the cabinets, I was able to narrow down the color right away by seeing the tones of the other chips in comparison - some were obviously too gray, others too yellow.
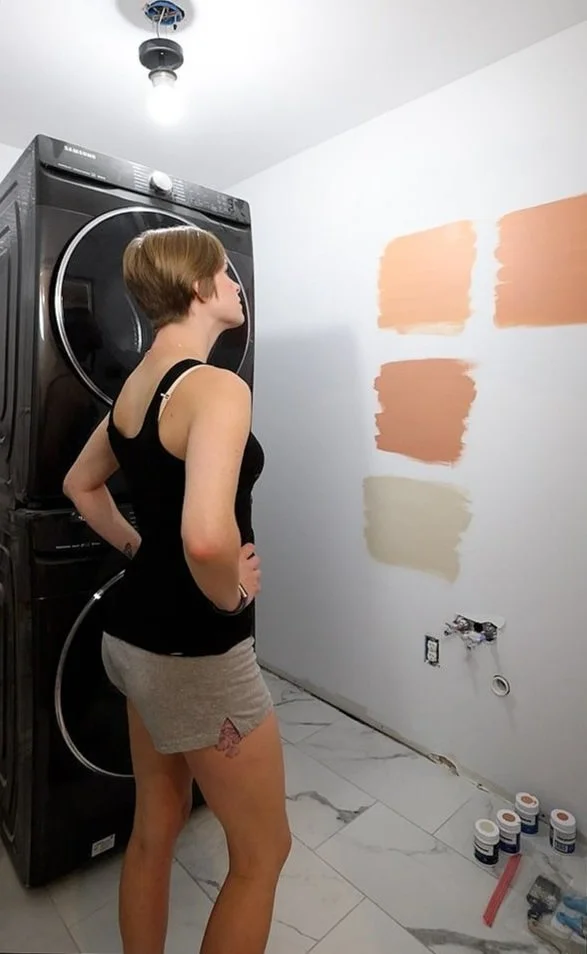
Samples are typically about $5 a piece and well worth the small investment to help ensure you don’t waste your time and money slapping an entire $40 gallon of paint on the wall and realizing you hate it.
Plus, I like to keep them to use for crafts and other projects. Admittedly, I might have a paint sample hoarding problem.
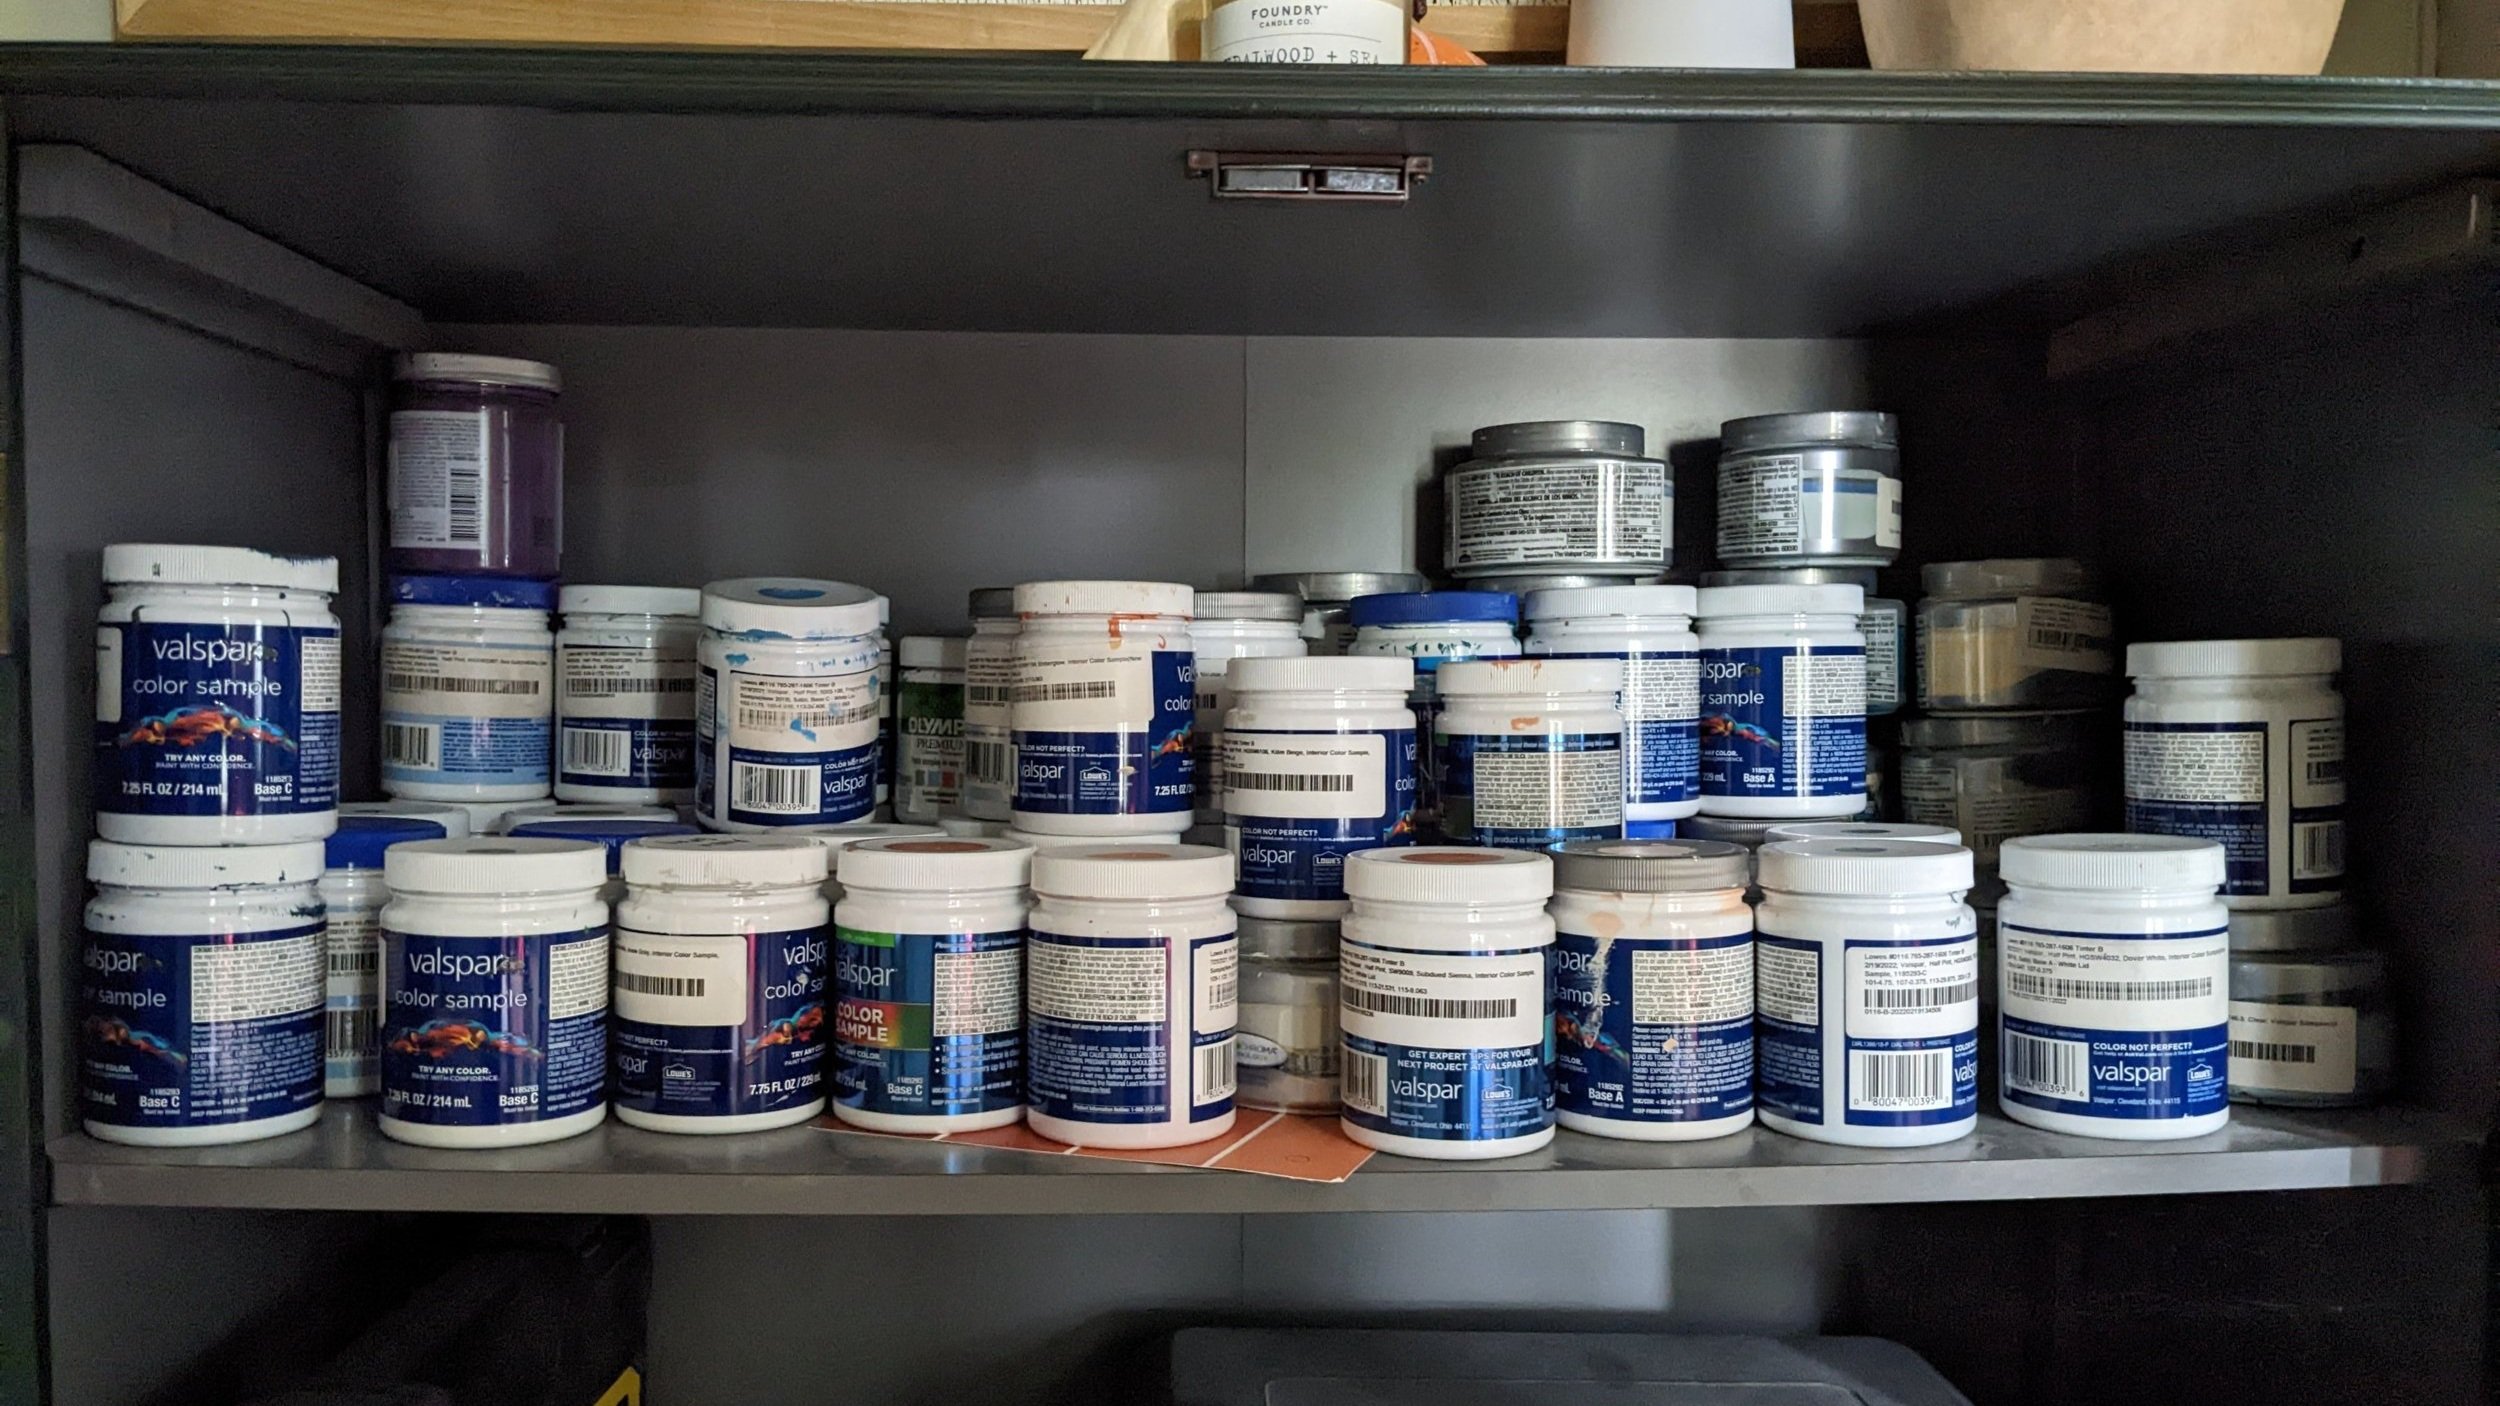
Here are a few tips for painting your samples:
- Paint a good-sized sample (at least 1 x 1 ft)
- Paint two coats - you want to mimic what the final product will look like!
- Leave some space between each sample so they don't compete with each other. Sometimes I'll even cover some of the samples up so I'm only seeing one at a time.
- If you're choosing multiple colors, paint them near each other to see how they work together (like the terracotta and beige that are near each other on my wall).
- As with the paint chips, it's never a bad idea to paint samples on multiple walls to see how they look at different times of day.
Pro-tip: Get an angled brush that is 2” wide (any wider and it won't fit in the paint sample can). This is my FAVORITE paint brush to use. So smoooooth.
Step 4: Pick The Winner & Get Painting!
And now, the moment you’ve been waiting for - pick the winner and paint the dang room!
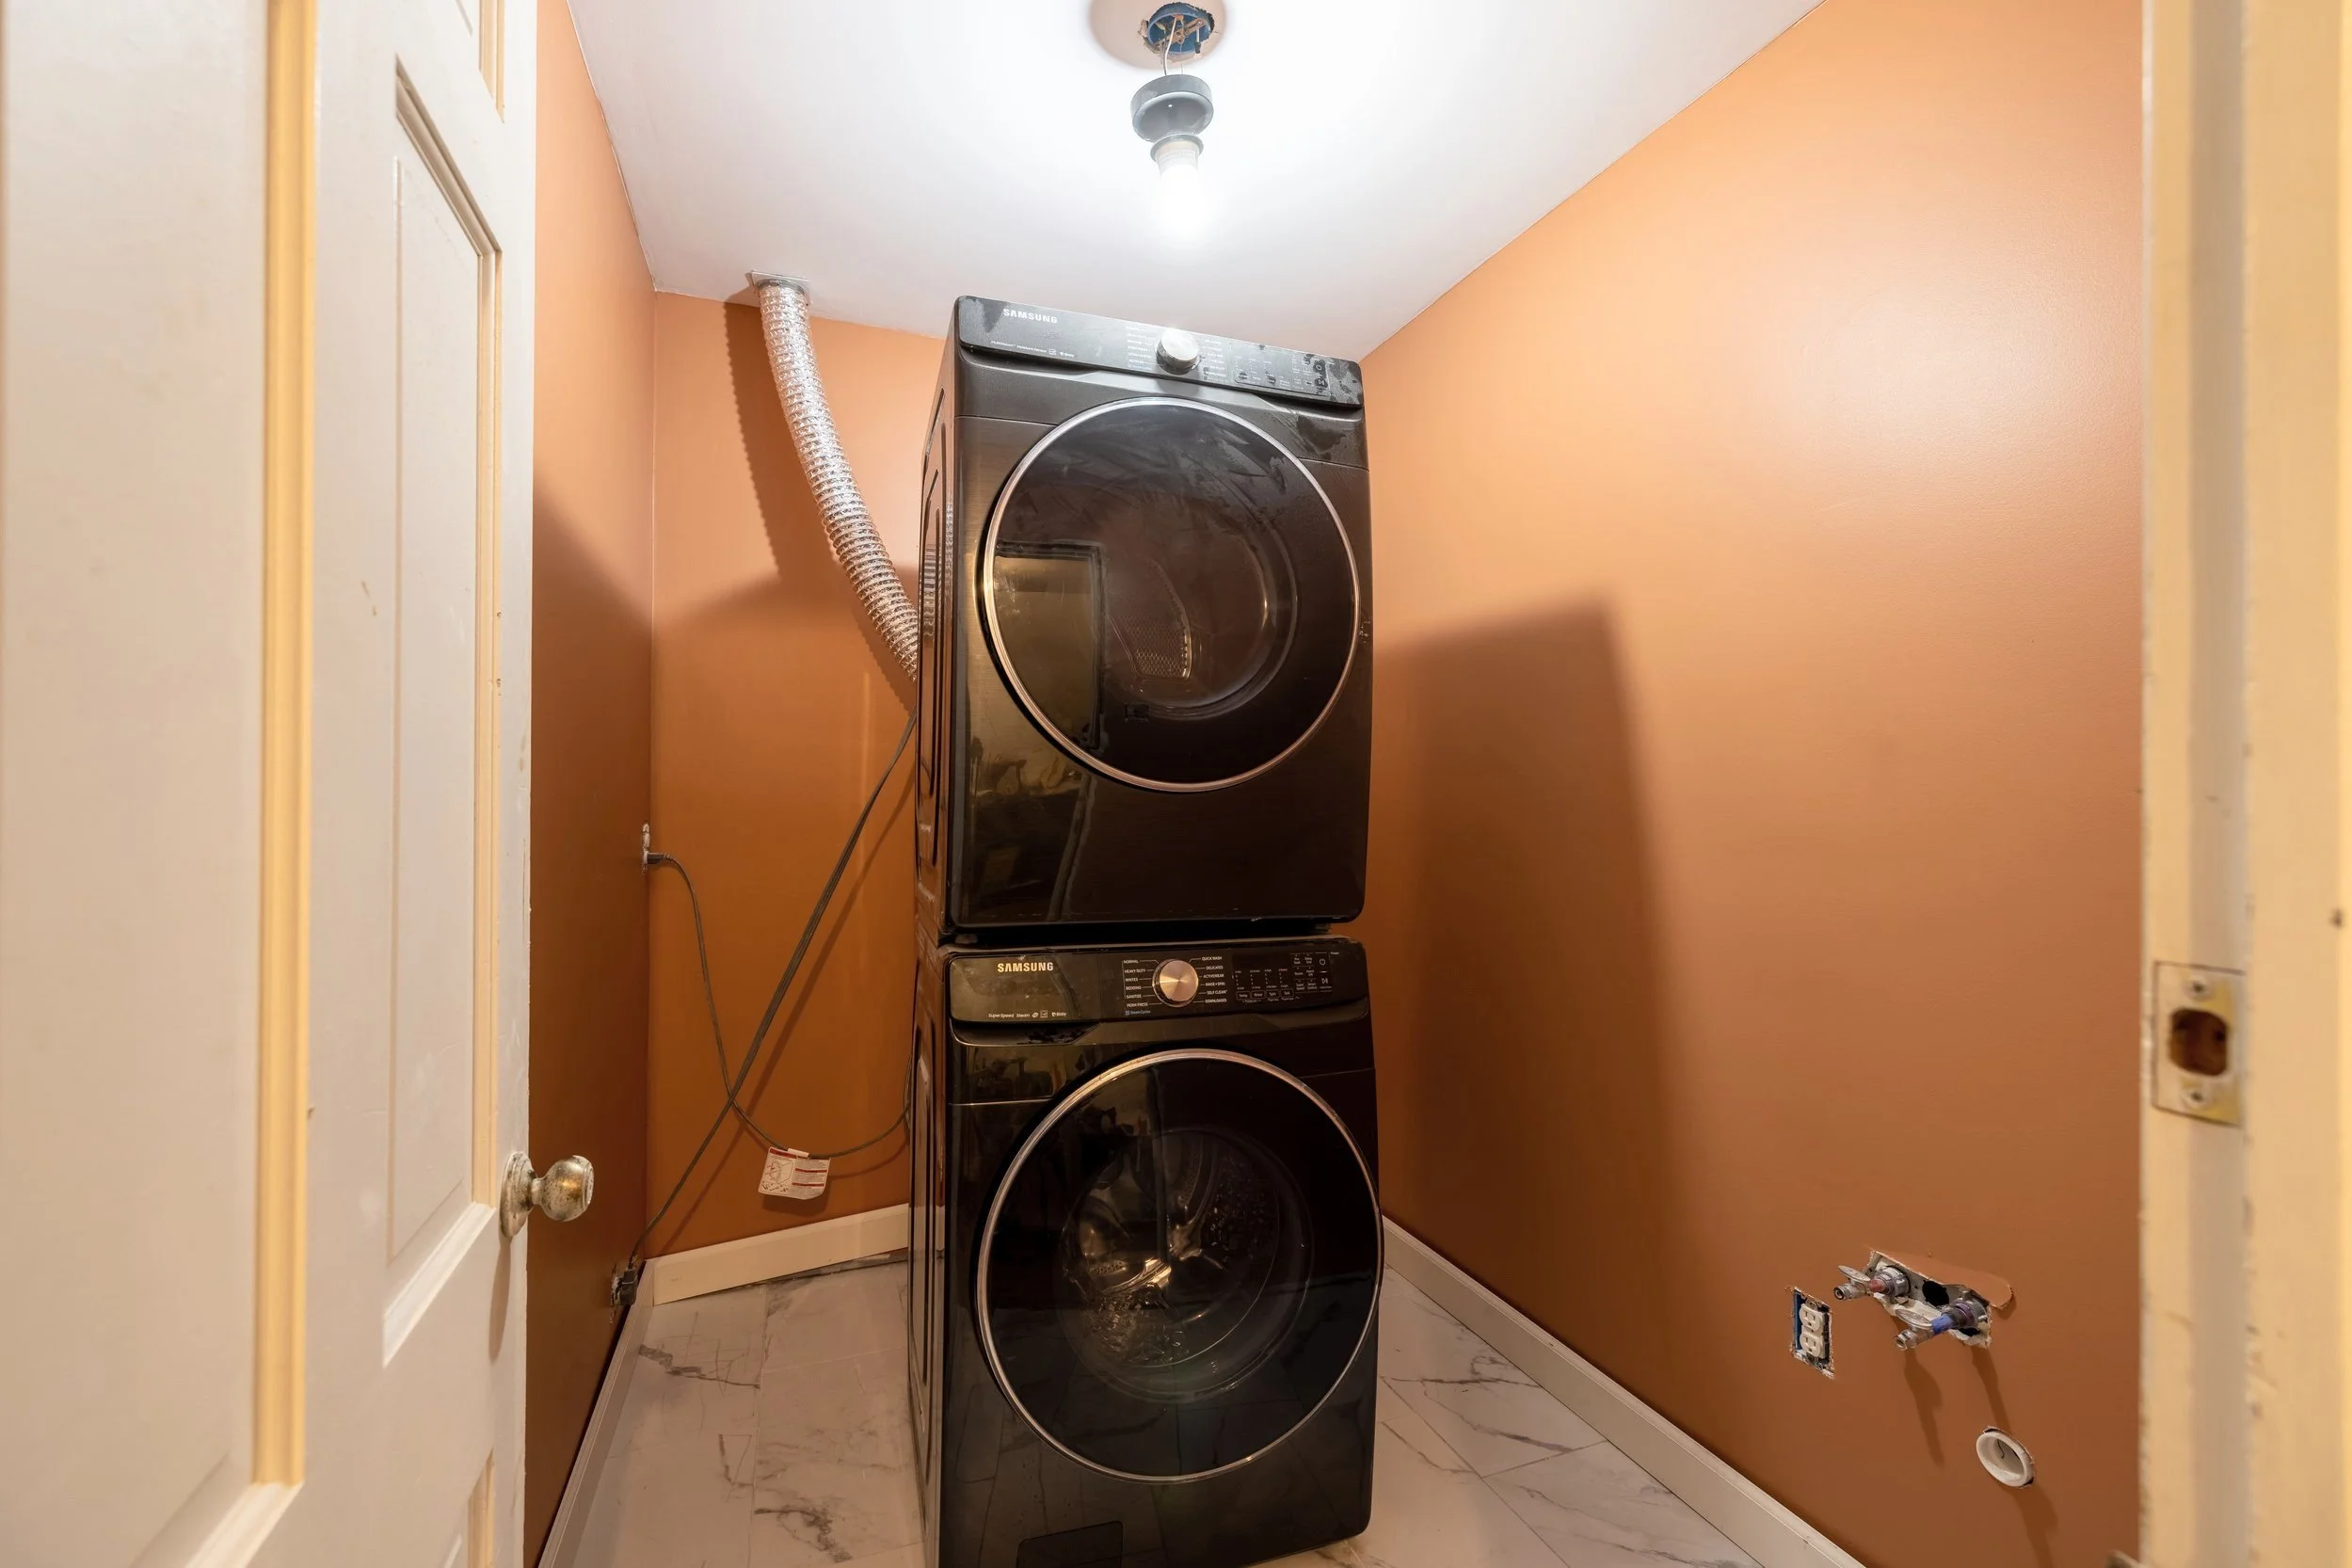
Yep, it’s that easy.
Be prepared you’ll have to tell the sales associate what paint sheen you want, but have no fear! I’ve already covered that in this post.
In my case, I chose eggshell for the walls (Terracotta by Valspar) for just a little bit of reflection and wipeability. And I chose satin for the cabinets (Kilim Beige by Sherwin Williams) for some extra durability and contrast. (I’ll be sharing more about the cabinets next week!)
While I was admittedly nervous to use such a bold color on the walls in my laundry room, using these steps I truly feel like I picked the right color. It feels like a warm hug in here, and with the other elements in my design I think it’ll be the perfect backdrop!
What If You Don’t Like It?
Here’s the full truth: there’s no tutorial out there that will 100% guide you to picking the perfect paint color every time. Sometimes you think everything is hunky dory, you put the color up, and BAM it just doesn't look right. It sucks, but IT’S OKAY! It’s just paint.
While using my steps will help minimize those “aw crap” moments, even I get it wrong sometimes (like, very rarely. I’m practically perfect, you know.) And in those cases, I just pivot and course correct. No need to beat yourself up.
Final Thoughts
And there you have it, my steps for picking the perfect paint color! I hope you found this post helpful. And don’t be shy about saving the Pin below to reference the next time you’re stumped on a paint color!
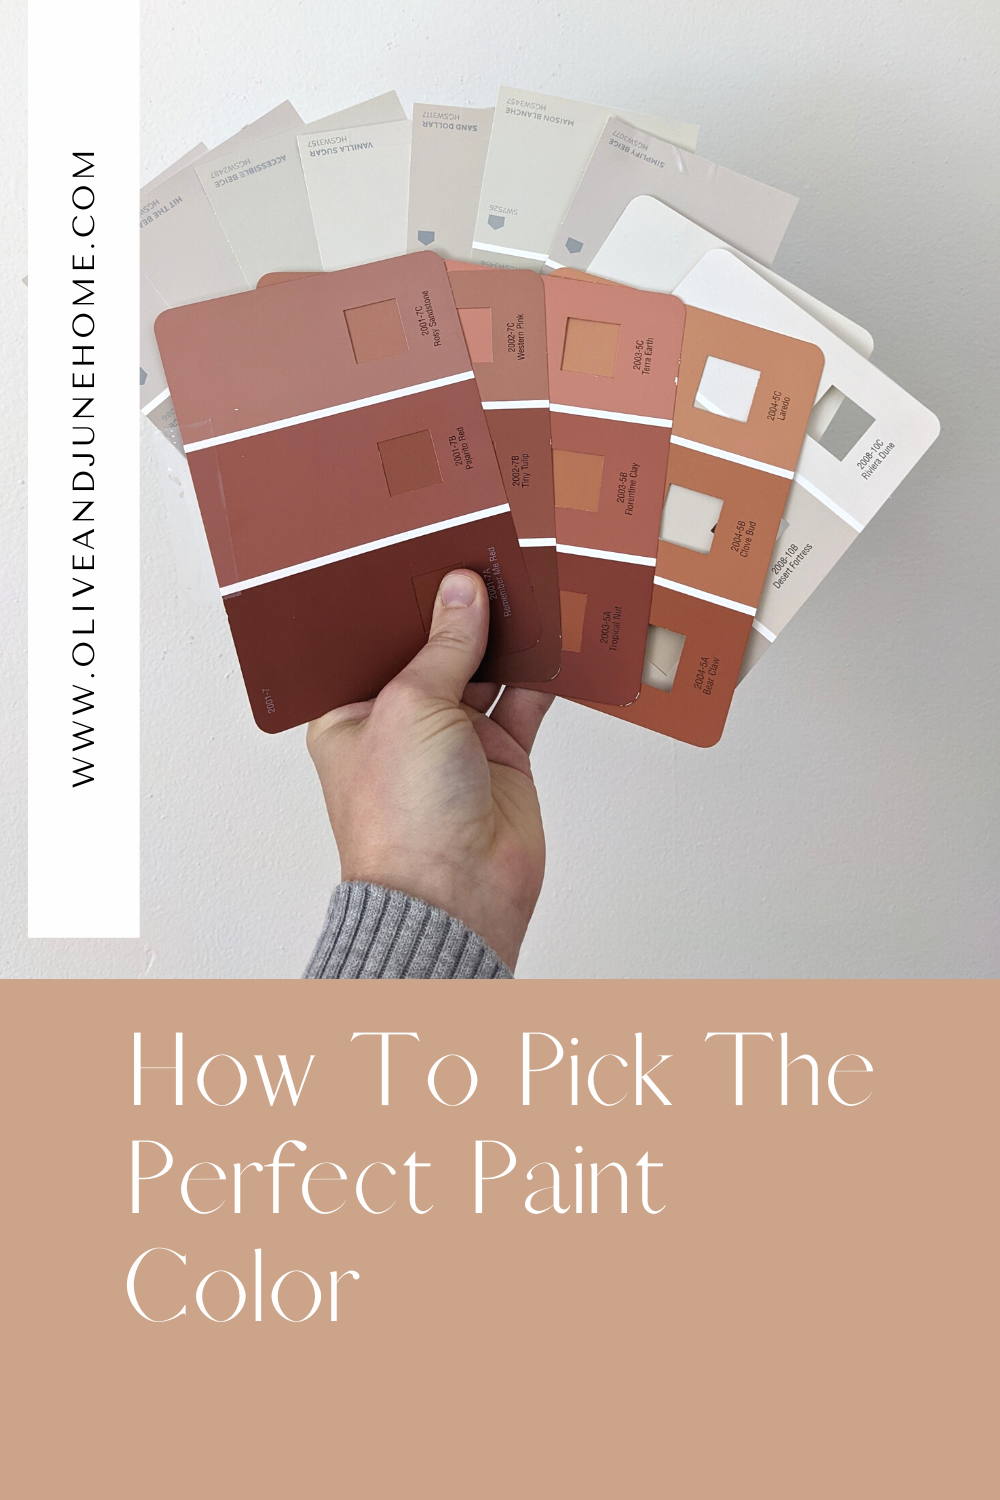

If you’re following the One Room Challenge, don’t forget to check out my other posts:
For more paint-related posts, check out these articles:
Find the Perfect Paint Color in 4 Steps
ORC Week 1 - Laundry Room Design Plans
I often share pictures of rooms as we're working on them. What you don't see (and what I strategically choose not to share on the regular) are the rooms that have sat unfinished - like our laundry room.
That’s why I’m super excited to share that our next project will be finishing the laundry room as part of the One Room Challenge! I'm kicking things off in this post with my design plans for this space.
Laundry Room Mood Board
I often share pictures of rooms as we're working on them. What you don't see (and what I strategically choose not to share on the regular) are the rooms that have sat unfinished - like our laundry room.
That’s why I’m super excited to share that our next project will be finishing the laundry room as part of the One Room Challenge! I'm kicking things off by sharing my design plans for this space.
What's The One Room Challenge?

The One Room Challenge is an event where creators from all around encourage and motivate one another to makeover one room in their homes over a period of 8 weeks. Each Wednesday during the challenge, I'll share a post with the previous week's progress until the final reveal on November 16th!
I've wanted to take part in this event for a few years now, so I'm finally gonna do it! I'm anxious about finishing in the timeline allotted but also really excited to have a finished laundry room and share the progress every step of the way. But first, a little background…
As an Amazon Associate, I earn from qualifying purchases. This post may contain affiliate links, meaning I receive commissions for purchases made through those links at no cost to you.
Where It All Began
Did you know that our laundry room used to be downstairs off the mudroom?


How about that during our master suite renovation we turned the room that once was our shower into an upstairs laundry room?


True story!
In fact, I even came up with a “genius” design plan for the newly-built laundry room a while back.
Once our new laundry room was somewhat established, we installed the same tile we have in our master bathroom, hooked up the washer and dryer where I thought I wanted them, and… well, that’s how it’s sat for the last year or so.
Current Laundry Room Situation
Here's what the laundry room looks like today:
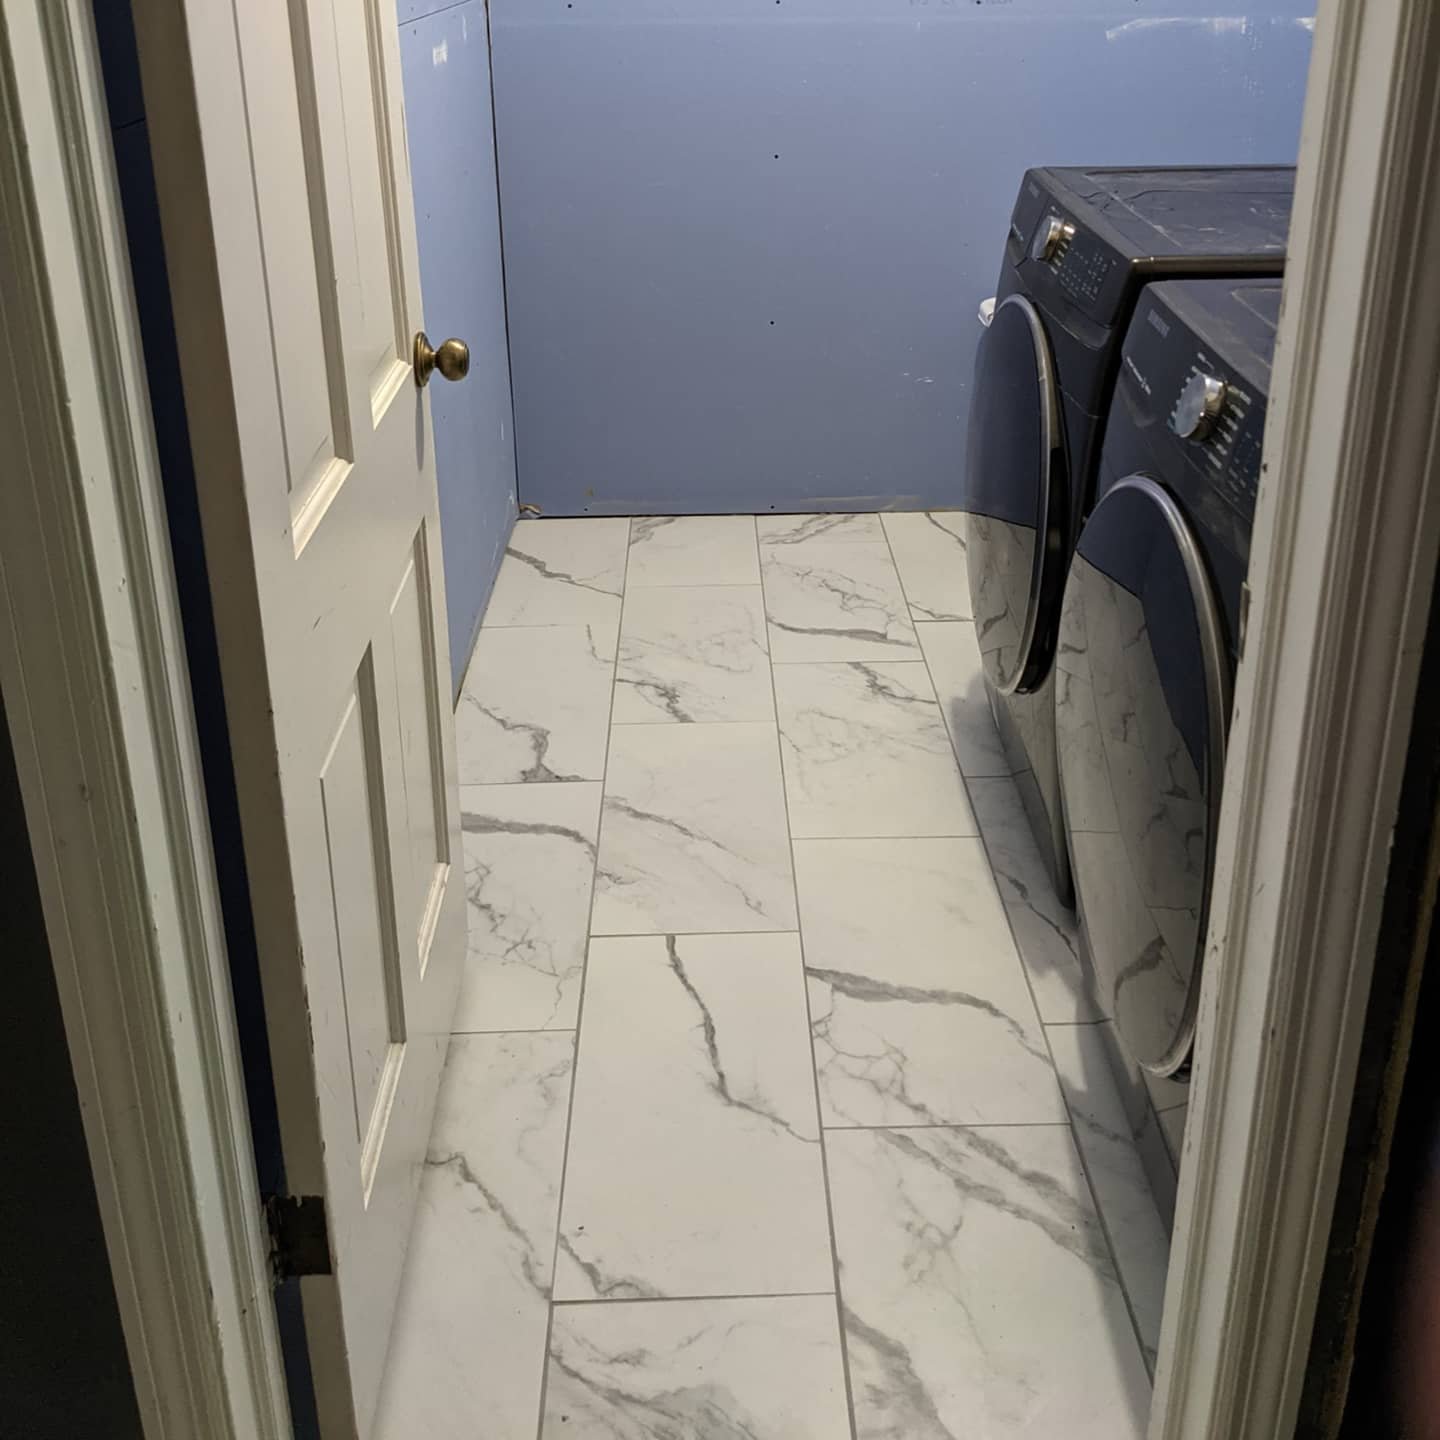
Not much to look at, huh?
As much as I love having the laundry room on the same floor as our bedrooms, I quickly realized how much I HATED the layout. In its current positioning, the placement of the washer and dryer annoyingly requires me to shuffle in and out of the laundry room while performing a weird juggling act of laundry baskets.
But as inconvenient and unfinished as the space is, it’s functioning, so we’ve focused our attention on other projects. UNTIL NOW.
Lucius has already begrudgingly lovingly agreed to relocate the water line to the back wall and reroute the dryer vent (straight through the roof!) for our new configuration. Now the fun really starts. Well, after the ever-luxurious task of finishing the drywall.
Since we've learned just how much we loathe drywall (and that we’re not very good at it), we've hired out this task. In the meantime, I’ve been working on the design!
Laundry Room Design Plans
Inspiration
I was honestly struggling for a long time to get excited about a design plan for the laundry room. Then I came across the picture below and felt those idea butterflies in the pit of my stomach start a’fluttering. (Anyone else get those, or should I maybe see a doctor?)

That terracotta pink with the contrast of darker tones and natural materials really caught my eye. Finally, with that spark of inspiration my design wheels began turning at full speed, and I was able to put my plans together.

Now, let’s break it down!
Paint
Obviously, I’m feeling a terracotta paint color for the walls - I may have been drawn to this tone because of the cabinet color Yellow Brick Home chose for their kitchen, or maybe I’m still on a warm-toned kick since I made over our toddler’s bedroom.
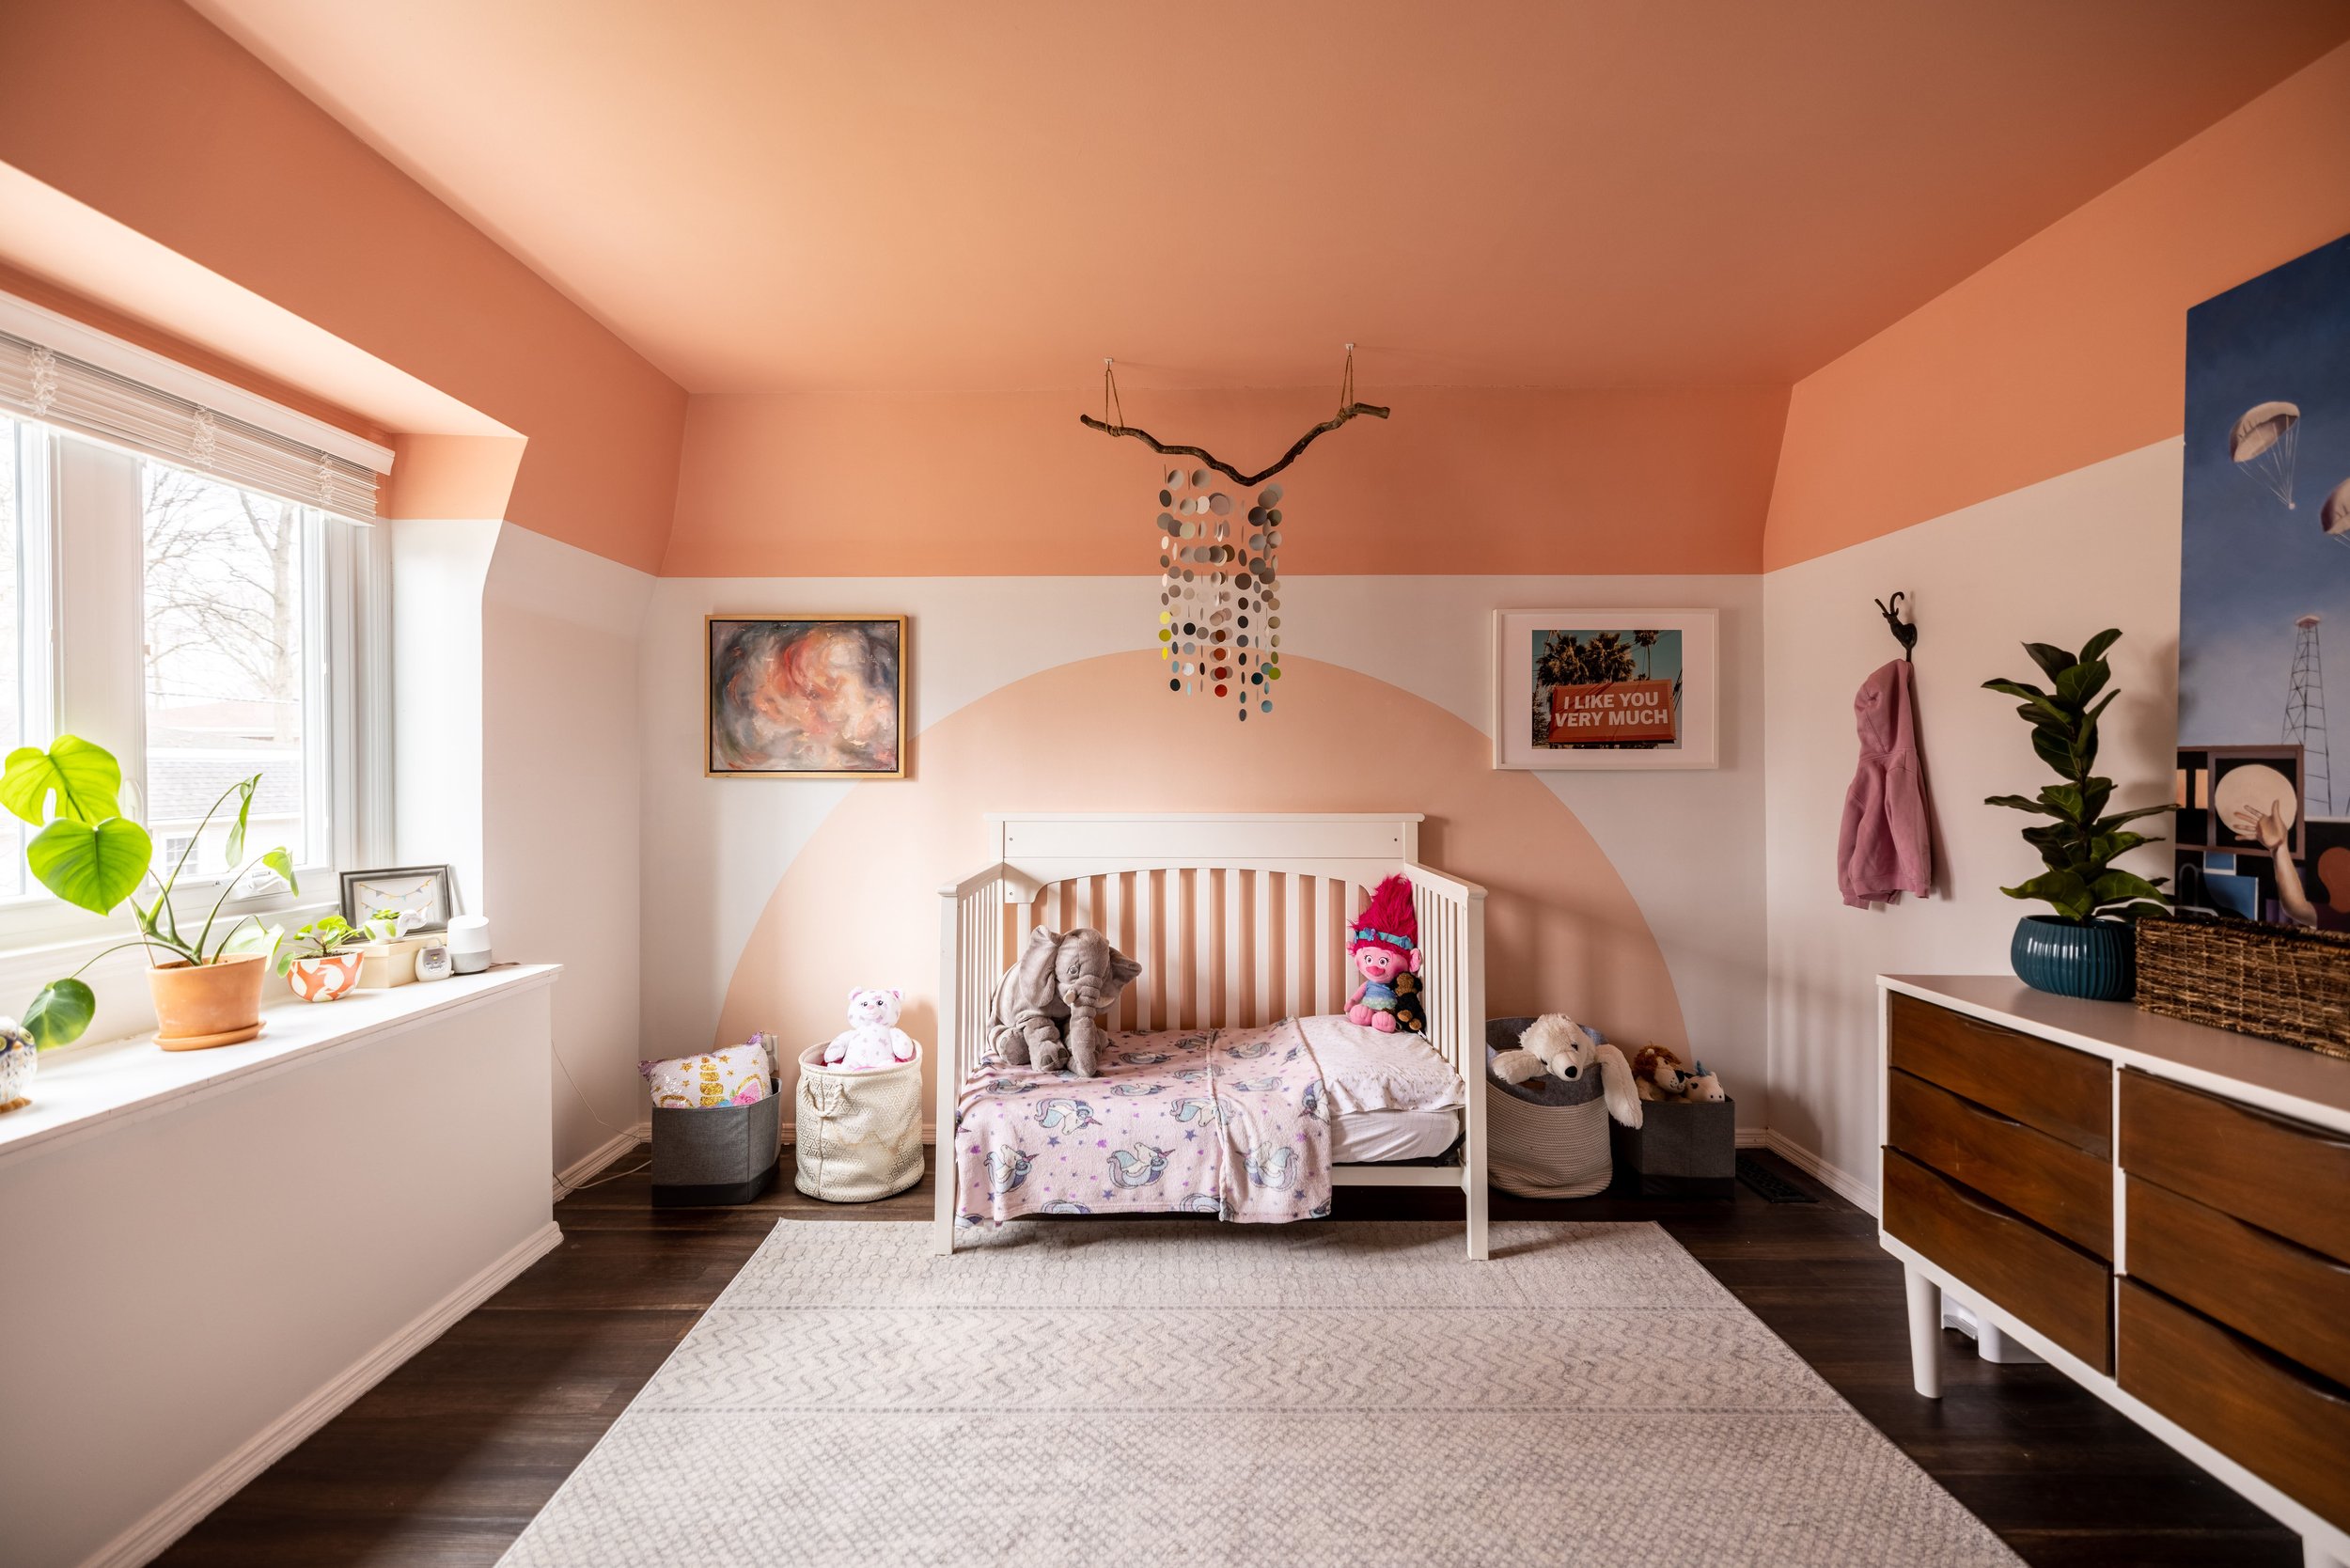
Either way, the wall color will be the star of the show in this room - but in a subtle way. I imagine it being bold without being in your face. My goal is that it’s a grounding backdrop for the other elements that will be added to this small space.
Floors & Lighting
As I mentioned above, we already installed this porcelain marble-look tile that we used in our master bathroom before we even had finished walls in the laundry room!
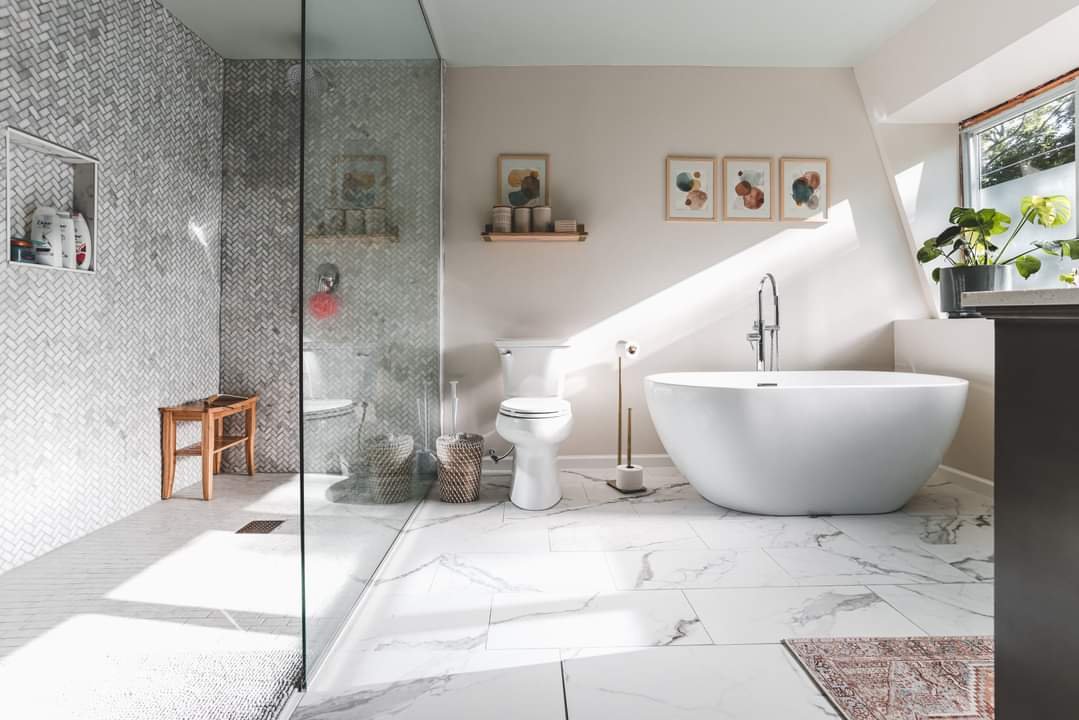
Around that time, we also installed the same flush mount light fixture we used in our hallway. Needless to say, these items will be staying.
Cabinets
I love the look of shaker cabinets. I've been pricing out a couple of options and found some at Menard's that will work. We’ll have a 36” cabinet right inside the door with a small undermount sink. Next to the washer and dryer, there will be a 20” cabinet to hold general laundry supplies.
Between the cabinets there will be an open space to store laundry baskets under the counter. I’d love to build a little shelf in this open area so I can store more than one basket at a time! Either way, I’ll cover the gap with a sweet café curtain (held in place with a tension rod) to add some softness and more texture.
This all makes more sense in the rendering I share a little further down.

We’ll also build a small cabinet to sit above the washer and dryer that will be strategically placed in front of the dryer vent hose to conceal it.
I picture the cabinets being finished in a sandy beige (similar in tone to the cabinets in the picture above) to help tone down the color of the walls and bring in some light. I might even extend that color to the trim and door as well.
To tie the brass in the light fixture into the rest of the room, I’d like to add brass knobs like these to the cabinets.
Backsplash
I’ve recently become enamored with this 4x4” Zellige tile in the color Gin. I love the variation in color and the uneven surface of each tile. The finish also has a bit of gorgeous iridescence.
I’ve been on a tile pattern kick lately. You can check out some of the tile patterns I’ve been obsessing over on my All About Tile board on Pinterest - specifically the staggered pattern in the example below. I think installing my tiles in this pattern will add some movement to the room. I’ll finish them off with white grout.

Countertops
To add even more light to our laundry room, I’d like to install white or off-white countertops. We’re exploring the possibility of using the same laminate as we used in the loft kitchenette, or maybe even quartz!
We’ve also toyed with the idea of using butcherblock, but I worry that will be too warm against the walls. Concrete is another option - I’ve always wanted to try Ardex feather finish. Maybe this is the perfect spot!
The sink will likely be undermount and I’m picturing a matte black faucet to balance the black stainless steel appliances and the black in the light fixture.
Accessories
To complete the design, I’d really like to add mid to light-toned wood shelves in the corner (possibly floating shelves that maybe perhaps I build myself!?). And, of course, some décor because why not make doing laundry just a little bit more enjoyable, eh?
It All Comes Together
Using all those ideas, I created the rendering below to see how I would like the finished product. Heck - even I was hesitant about the idea of using such a bold color for the walls!

Seeing it all together, I feel good about this design plan and am excited to get to work! Make sure you follow along here and on Instagram to see all the updates as I work my way through the One Room Challenge! And if you like the design, Pin the mood board below!


Check out these posts to follow along with the One Room Challenge!
For more renovation content, check out the posts below!
Small Laundry Room Ideas

Halloween Decorating Ideas - and a Tutorial!
Spooky season is here!
As a self-proclaimed summer-lover, I was caught off guard when this year I actually had to restrain myself from decorating for Halloween before Labor Day! (Who even am I anymore!?) You better believe as soon as I felt it was a little more socially acceptable, I broke out the spiders, pumpkins, and bats in a hurry! In this post, I’m sharing how I decorated our home for Halloween and a tutorial for a cute kid-friendly DIY you can do to up the spooky factor in your home.
Halloween Mantel Decor
Spooky season is here!
As a self-proclaimed summer-lover, I was caught off guard when this year I actually had to restrain myself from decorating for Halloween before Labor Day! (Who even am I anymore!?) You better believe as soon as I felt it was a little more socially acceptable, I broke out the spiders, pumpkins, and bats in a hurry! In this post, I’m sharing how I decorated our home for Halloween and a tutorial for a cute kid-friendly DIY you can do to up the spooky factor in your home.
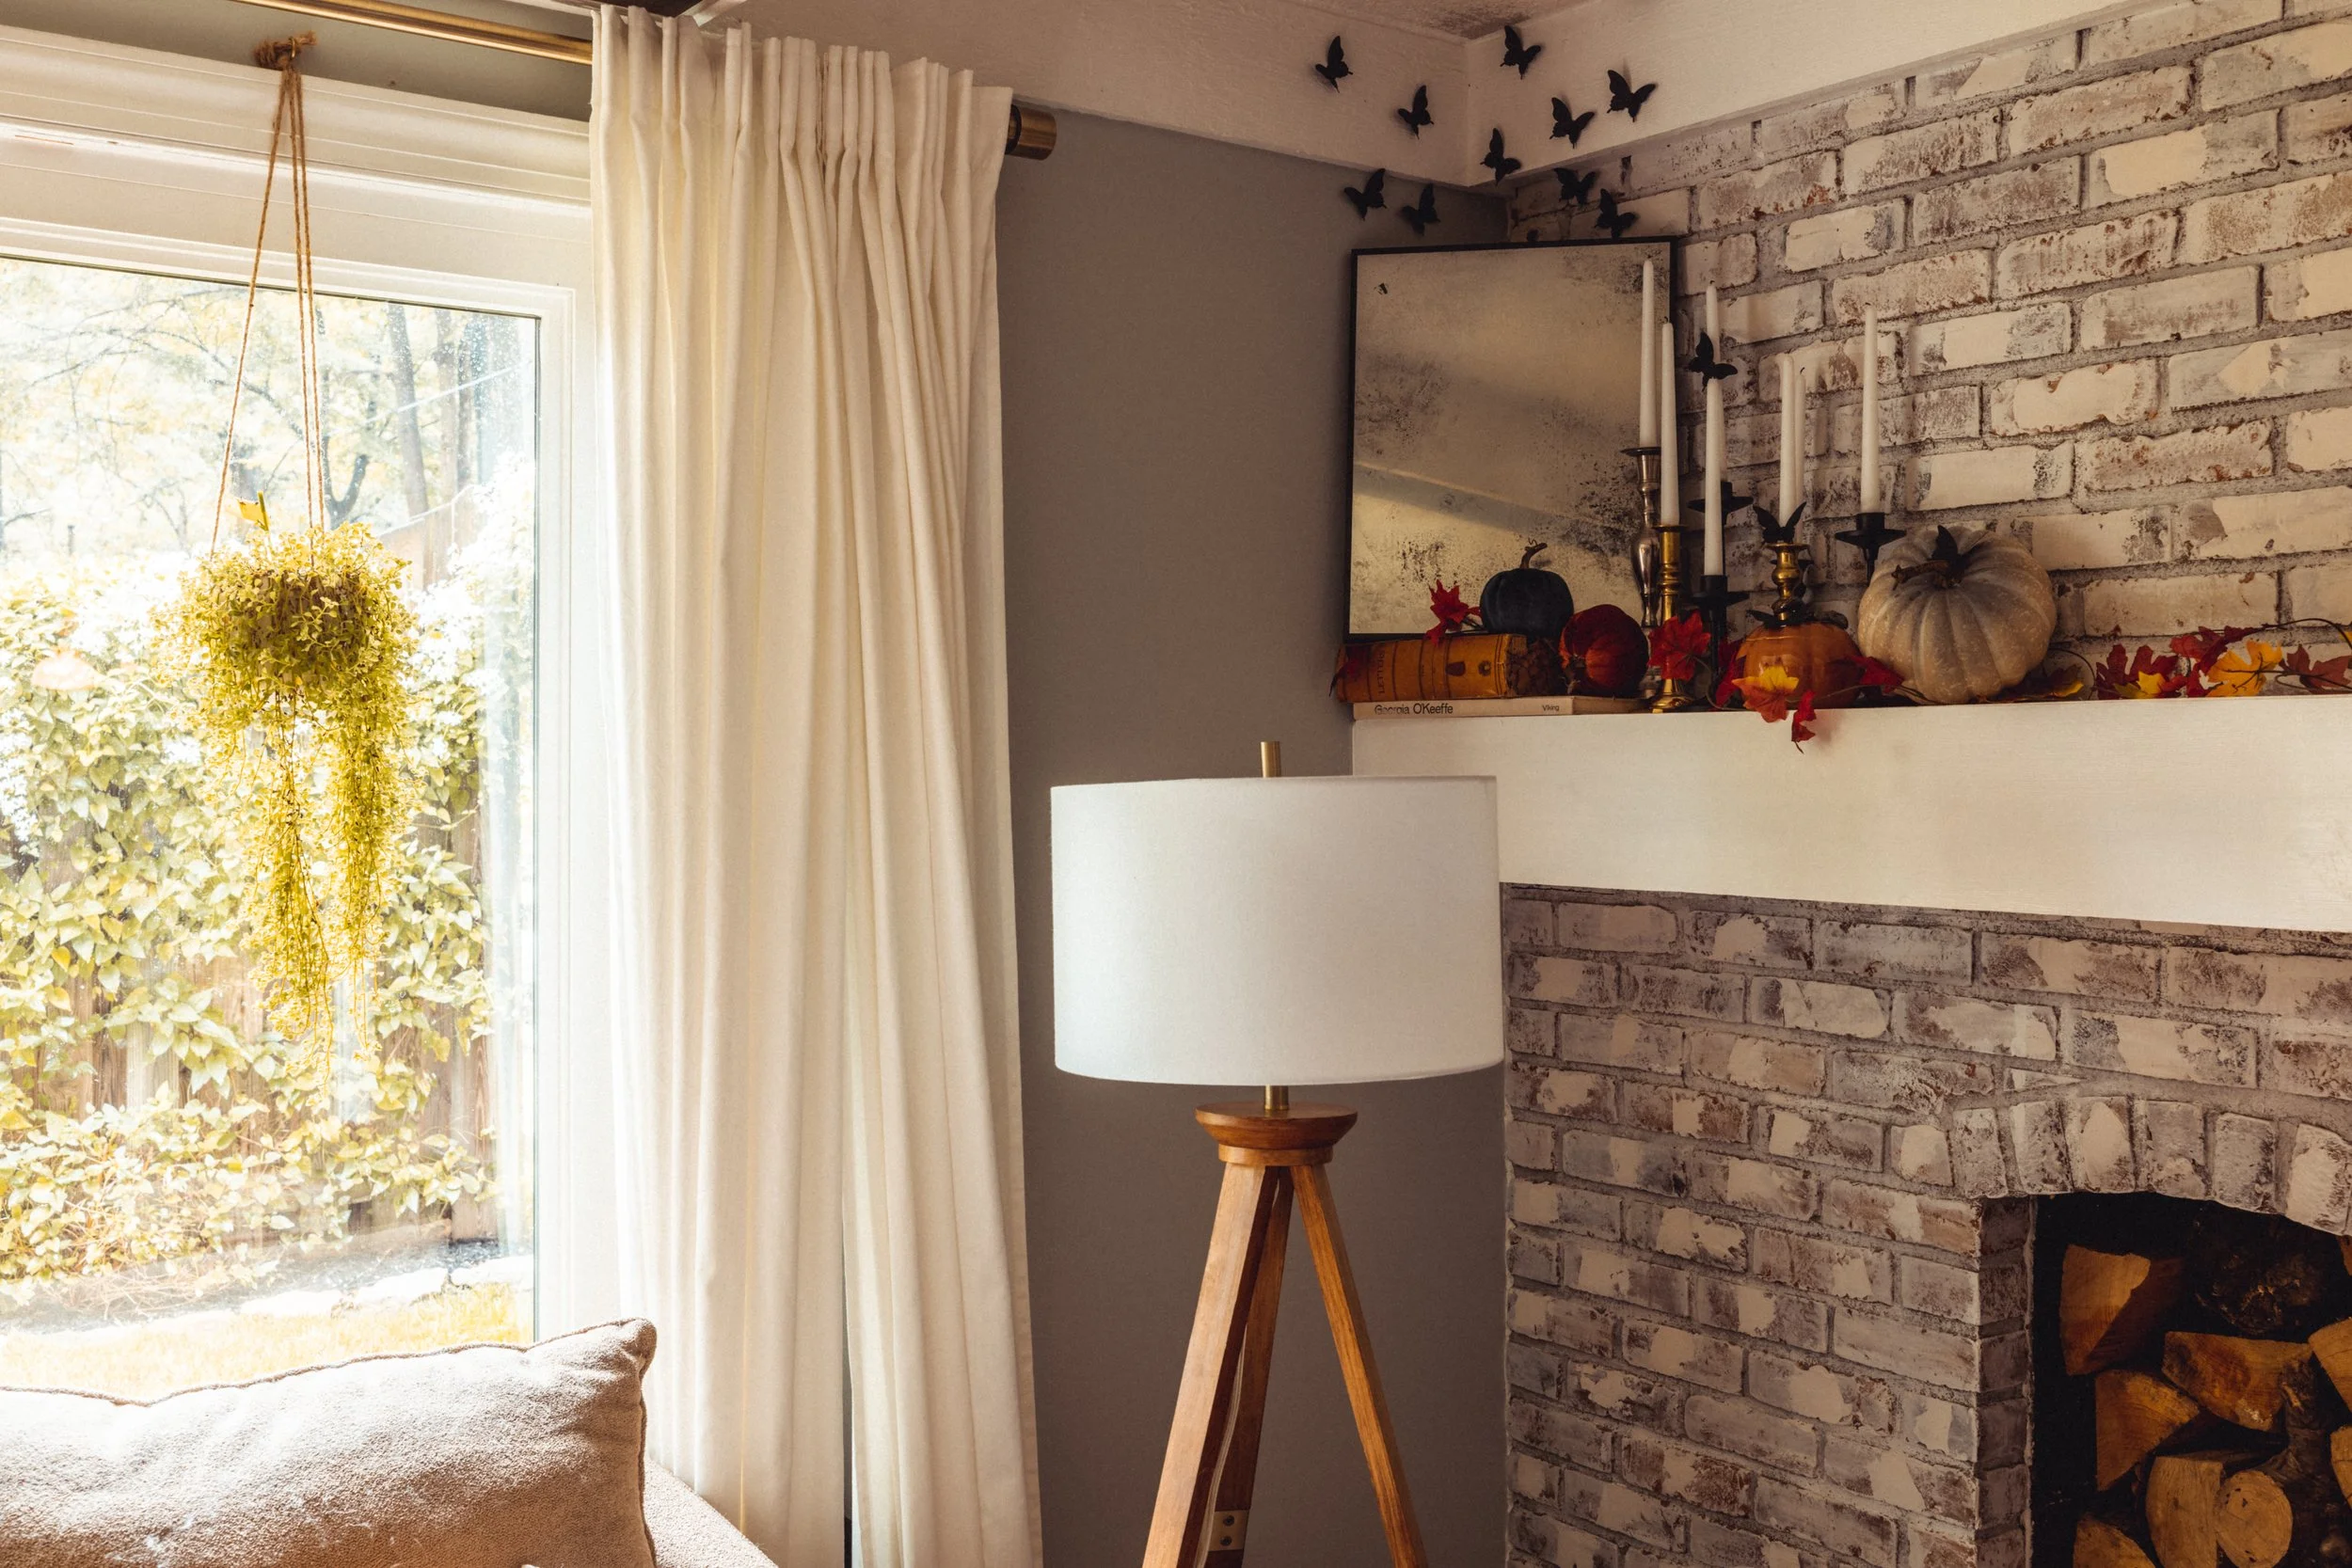
As an Amazon Associate, I earn from qualifying purchases. This post may contain affiliate links, meaning I receive commissions for purchases made through those links at no cost to you.
Halloween Decor Ideas
As the focal point of our living room, our mantel has always been the main space I decorate for the holidays.
During our first year in this house, I chose to decorate with Dollar Tree pumpkins I painted, hand-cut construction paper bats, and a festive bunting I made from leftover fabric.
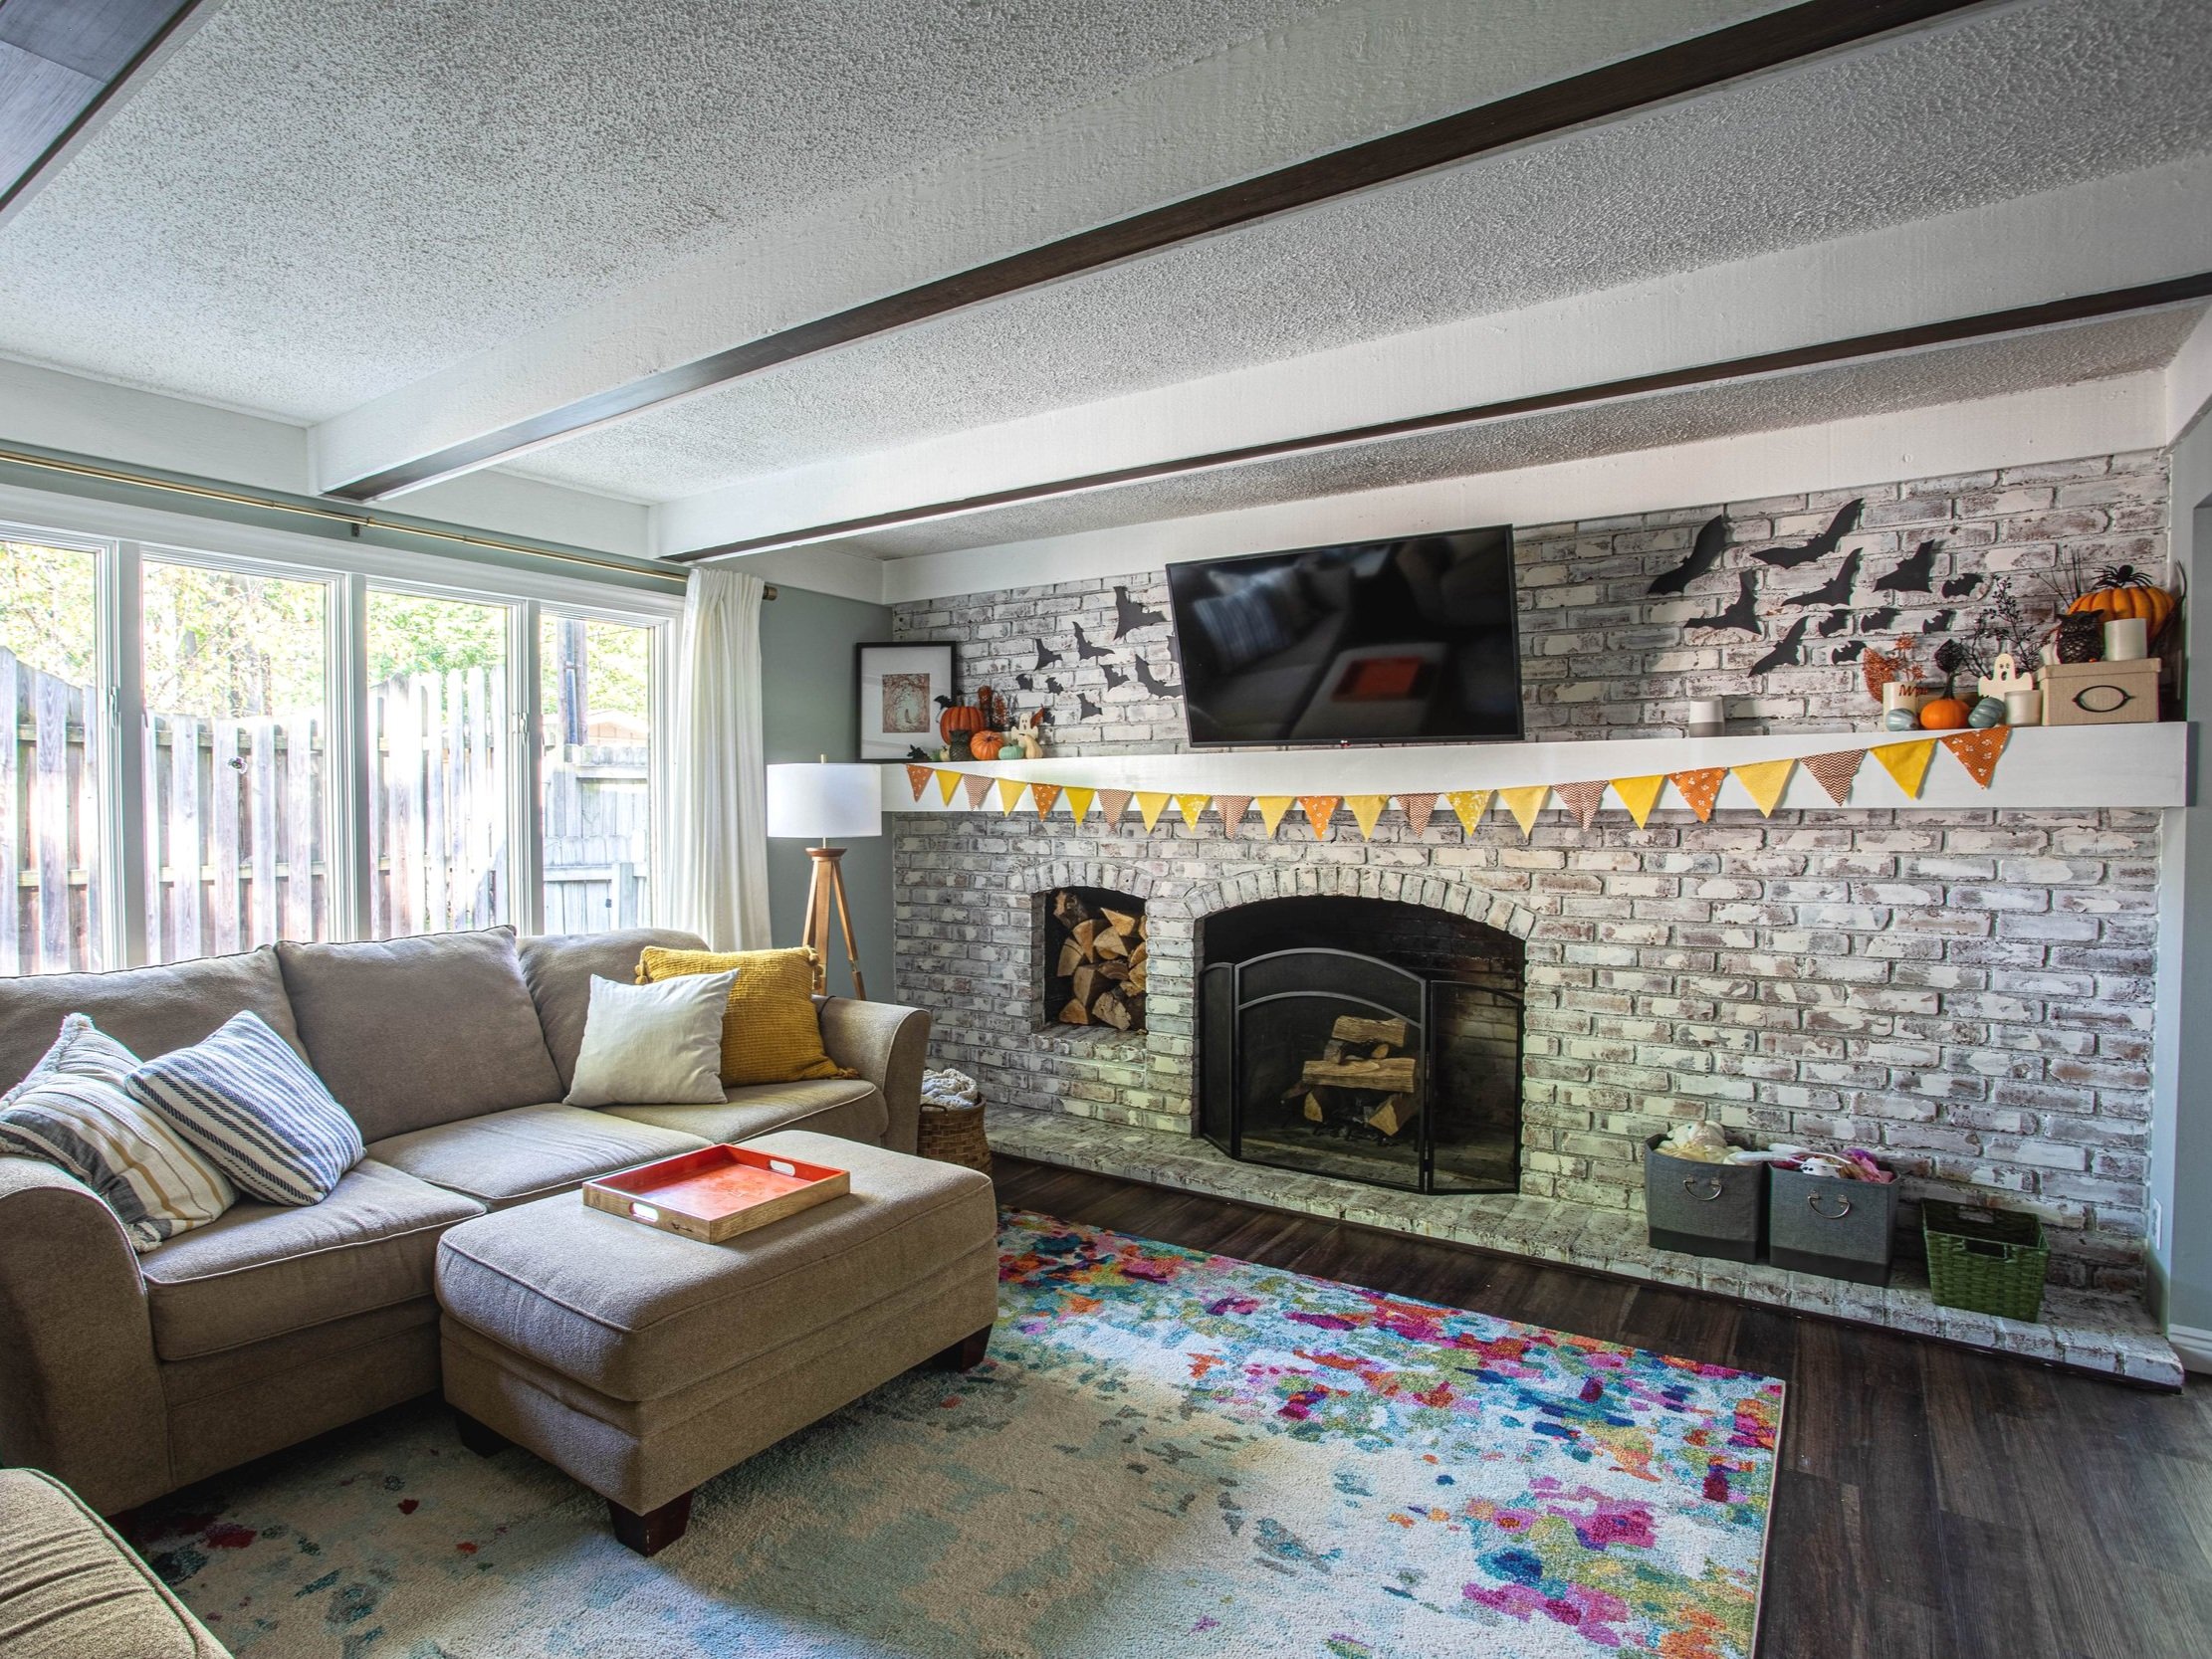
Last year I nixed the bunting and modified my Christmas DIY luminaries for Halloween by painting the backs of them black and adding some orange lights.
This year I was feeling a more moody and serious design, so I switched things up yet again!
The Backdrop
To add height to my overall design, I like to layer taller objects in the back and work my way forward.
In this case, my DIY antiqued mirror felt very fitting in scale and overall look and feel. To add a little bit more height I stacked it on a couple of books.
On the other side of the mantel, I scoured Etsy for the perfect vintage-y Halloween picture - this picture and this picture were strongly considered as well! Then I matted it and stuck it in this thrifted frame I’ve been holding on to.

The Foreground
I realized my thrifting habit led to a bit of an accumulation of candlestick holders over the last year - so I figured I’d gather them all up and use them for Halloween decor!
I have a fun mix of brass, copper, black, and silver in various sizes. I played with different combinations of candlestick holders on either side of the mantel until I was happy with how they looked in their groupings.

If you don’t have a thrifting problem surplus of candlestick holders on hand, there are a ton of options online.
I love this set of candlestick holders for their aged coloring and the variety of silhouettes. Or if you’re looking for something in black - these have a great shape too. And don’t forget to get some candlesticks! I used white, but black would look especially spooky.
As in previous years, I still used pumpkins in my overall design but chose fewer pastels and a more toned-down palette. I grabbed some velvet pumpkins from the Dollar Tree. But if you can’t find them at your local store, here’s a similar option I found on Amazon.

I added a few strings of leaves from, you guessed it, the Dollar Tree to fill in the gaps and add a little bit of color. Then I finished the overall design by retiring my handmade bats altogether and giving these butterflies a whirl.
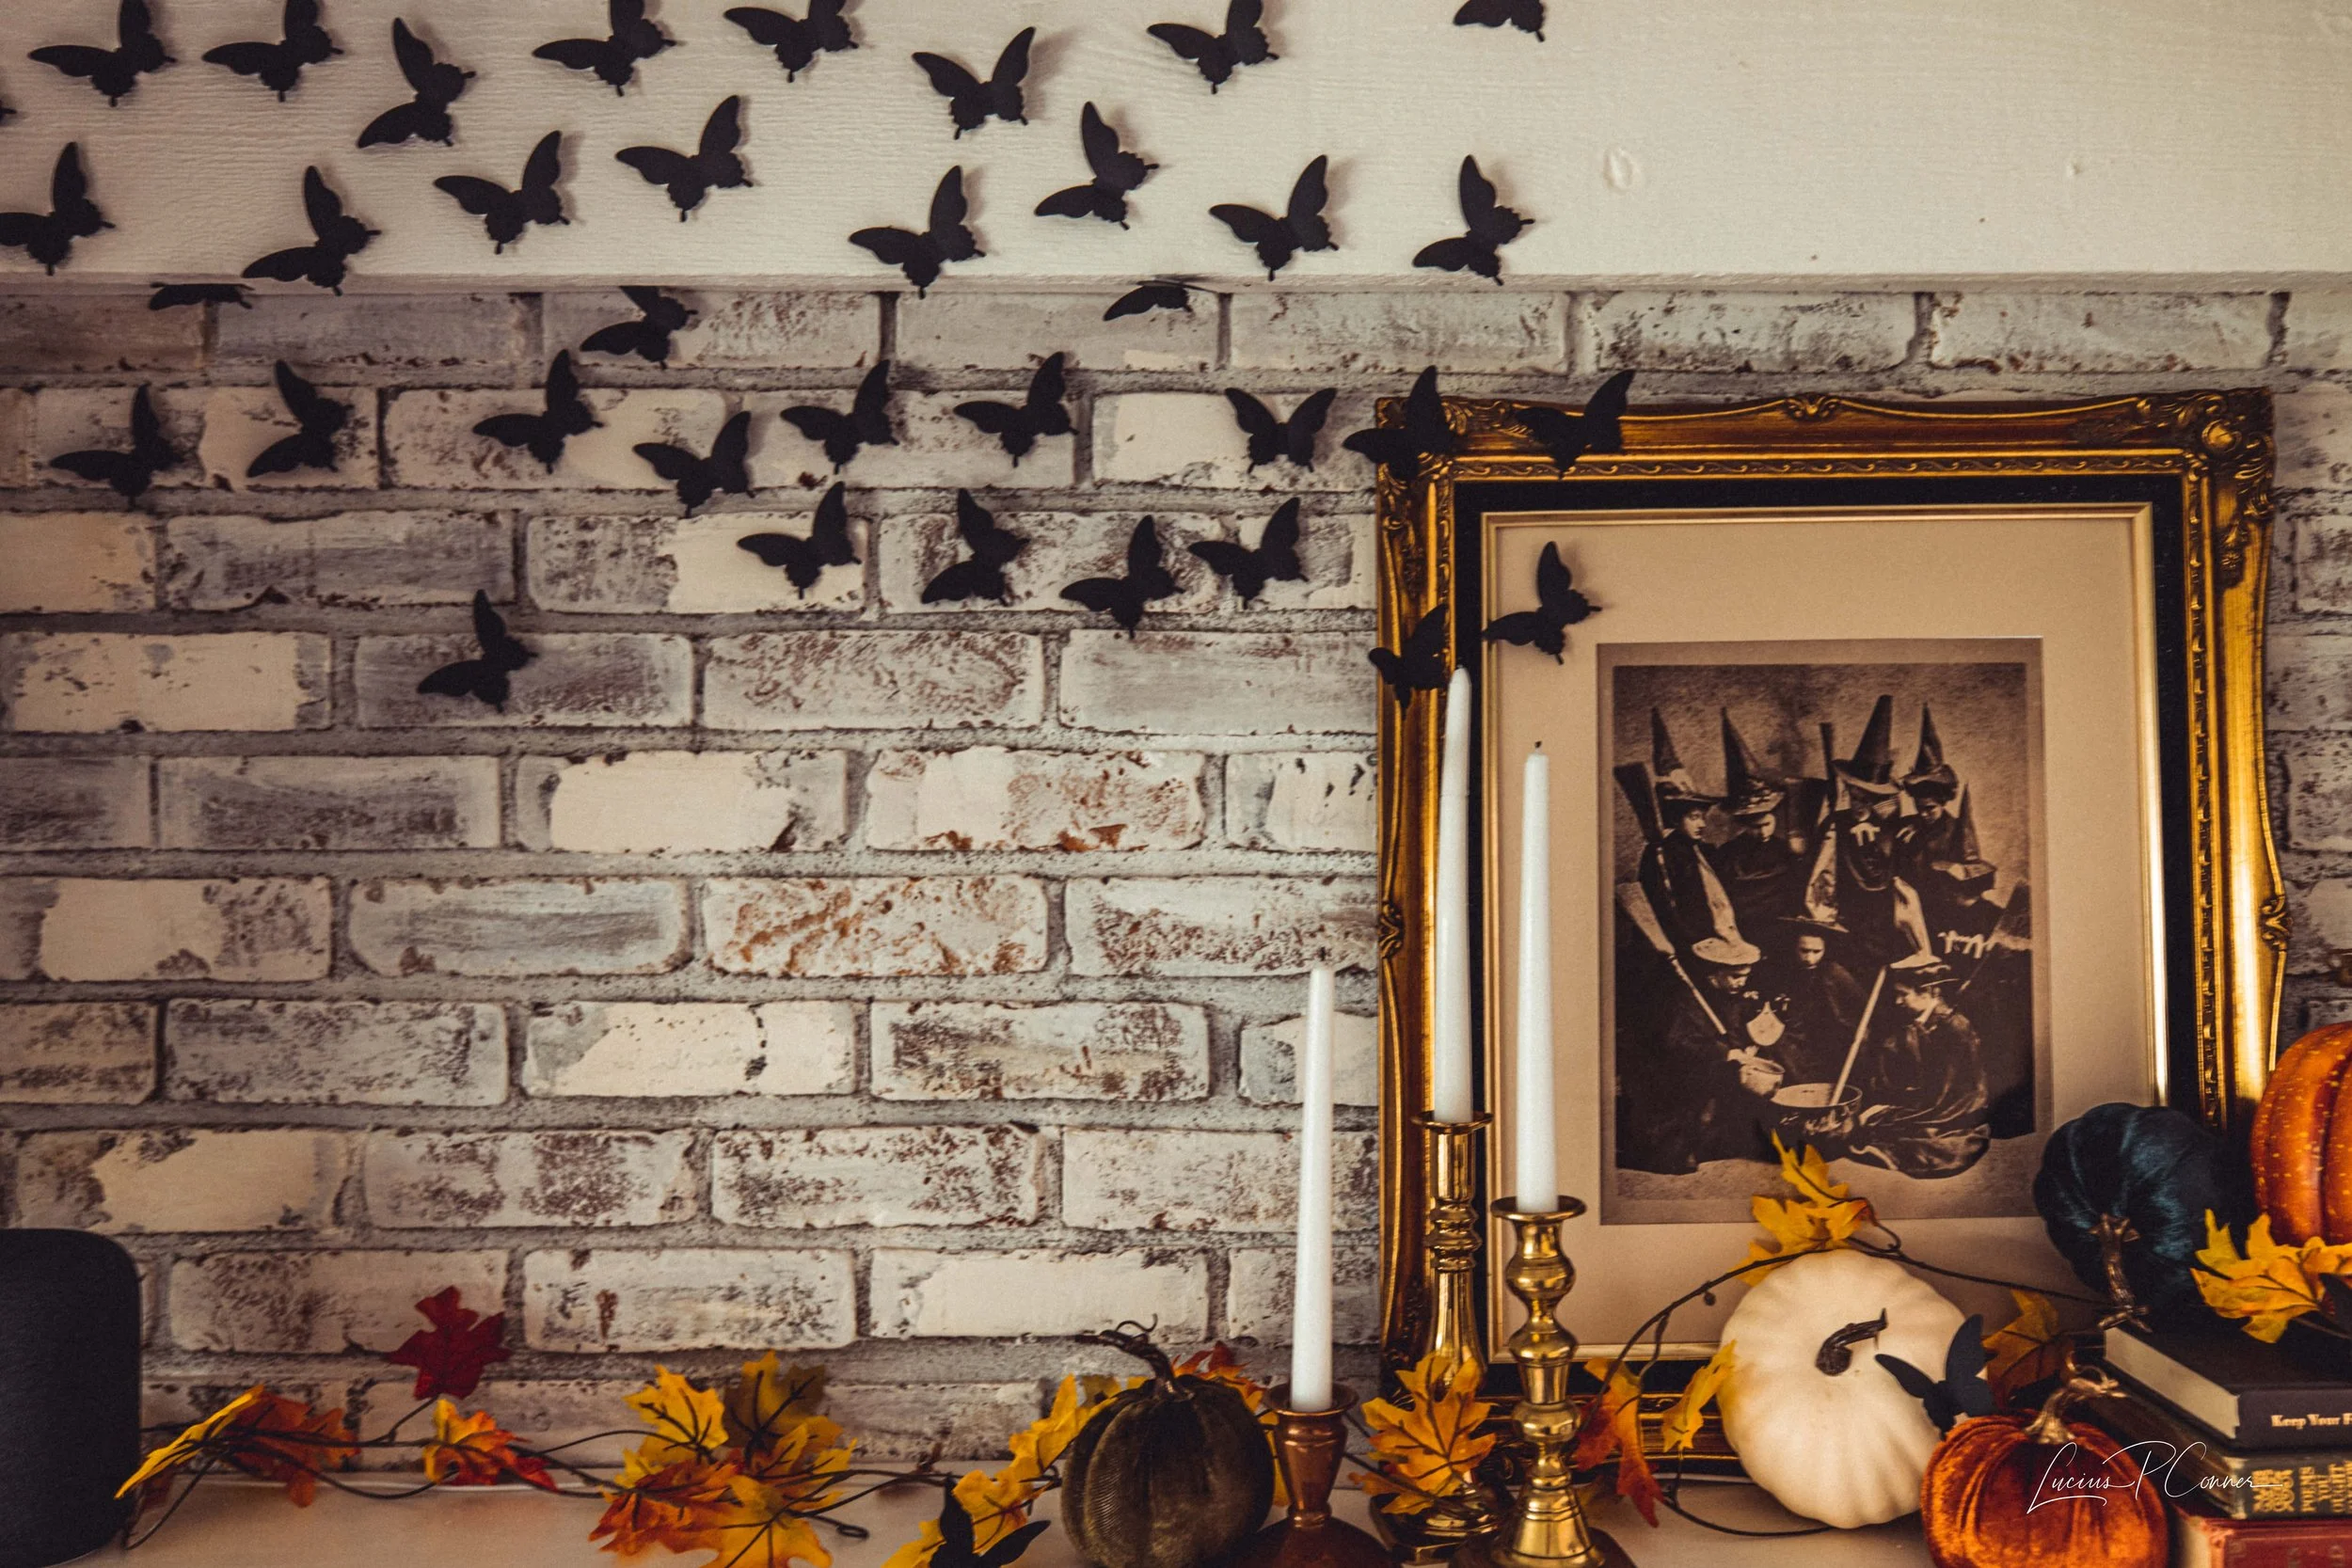
I like the switcheroo with the butterflies - especially because they stick to the ceiling, which my bats never did with regular old tape. But if I were to use them again, I’d make sure to get a pack with multiple sizes, and I’d space them out differently.
I also switched up the decor on the buffet table in our dining room with my faux yellow ginkgo branches and pumpkins. Mine are from Target, but it looks like they’re no longer sold - however, these ginkgo branches look really nice and come with six stems!

And since I am who I am, I had to find a way to make some sort of Halloween craft - so I gathered the kids, and we made DIY floating ghosts!
DIY Floating Ghost Tutorial
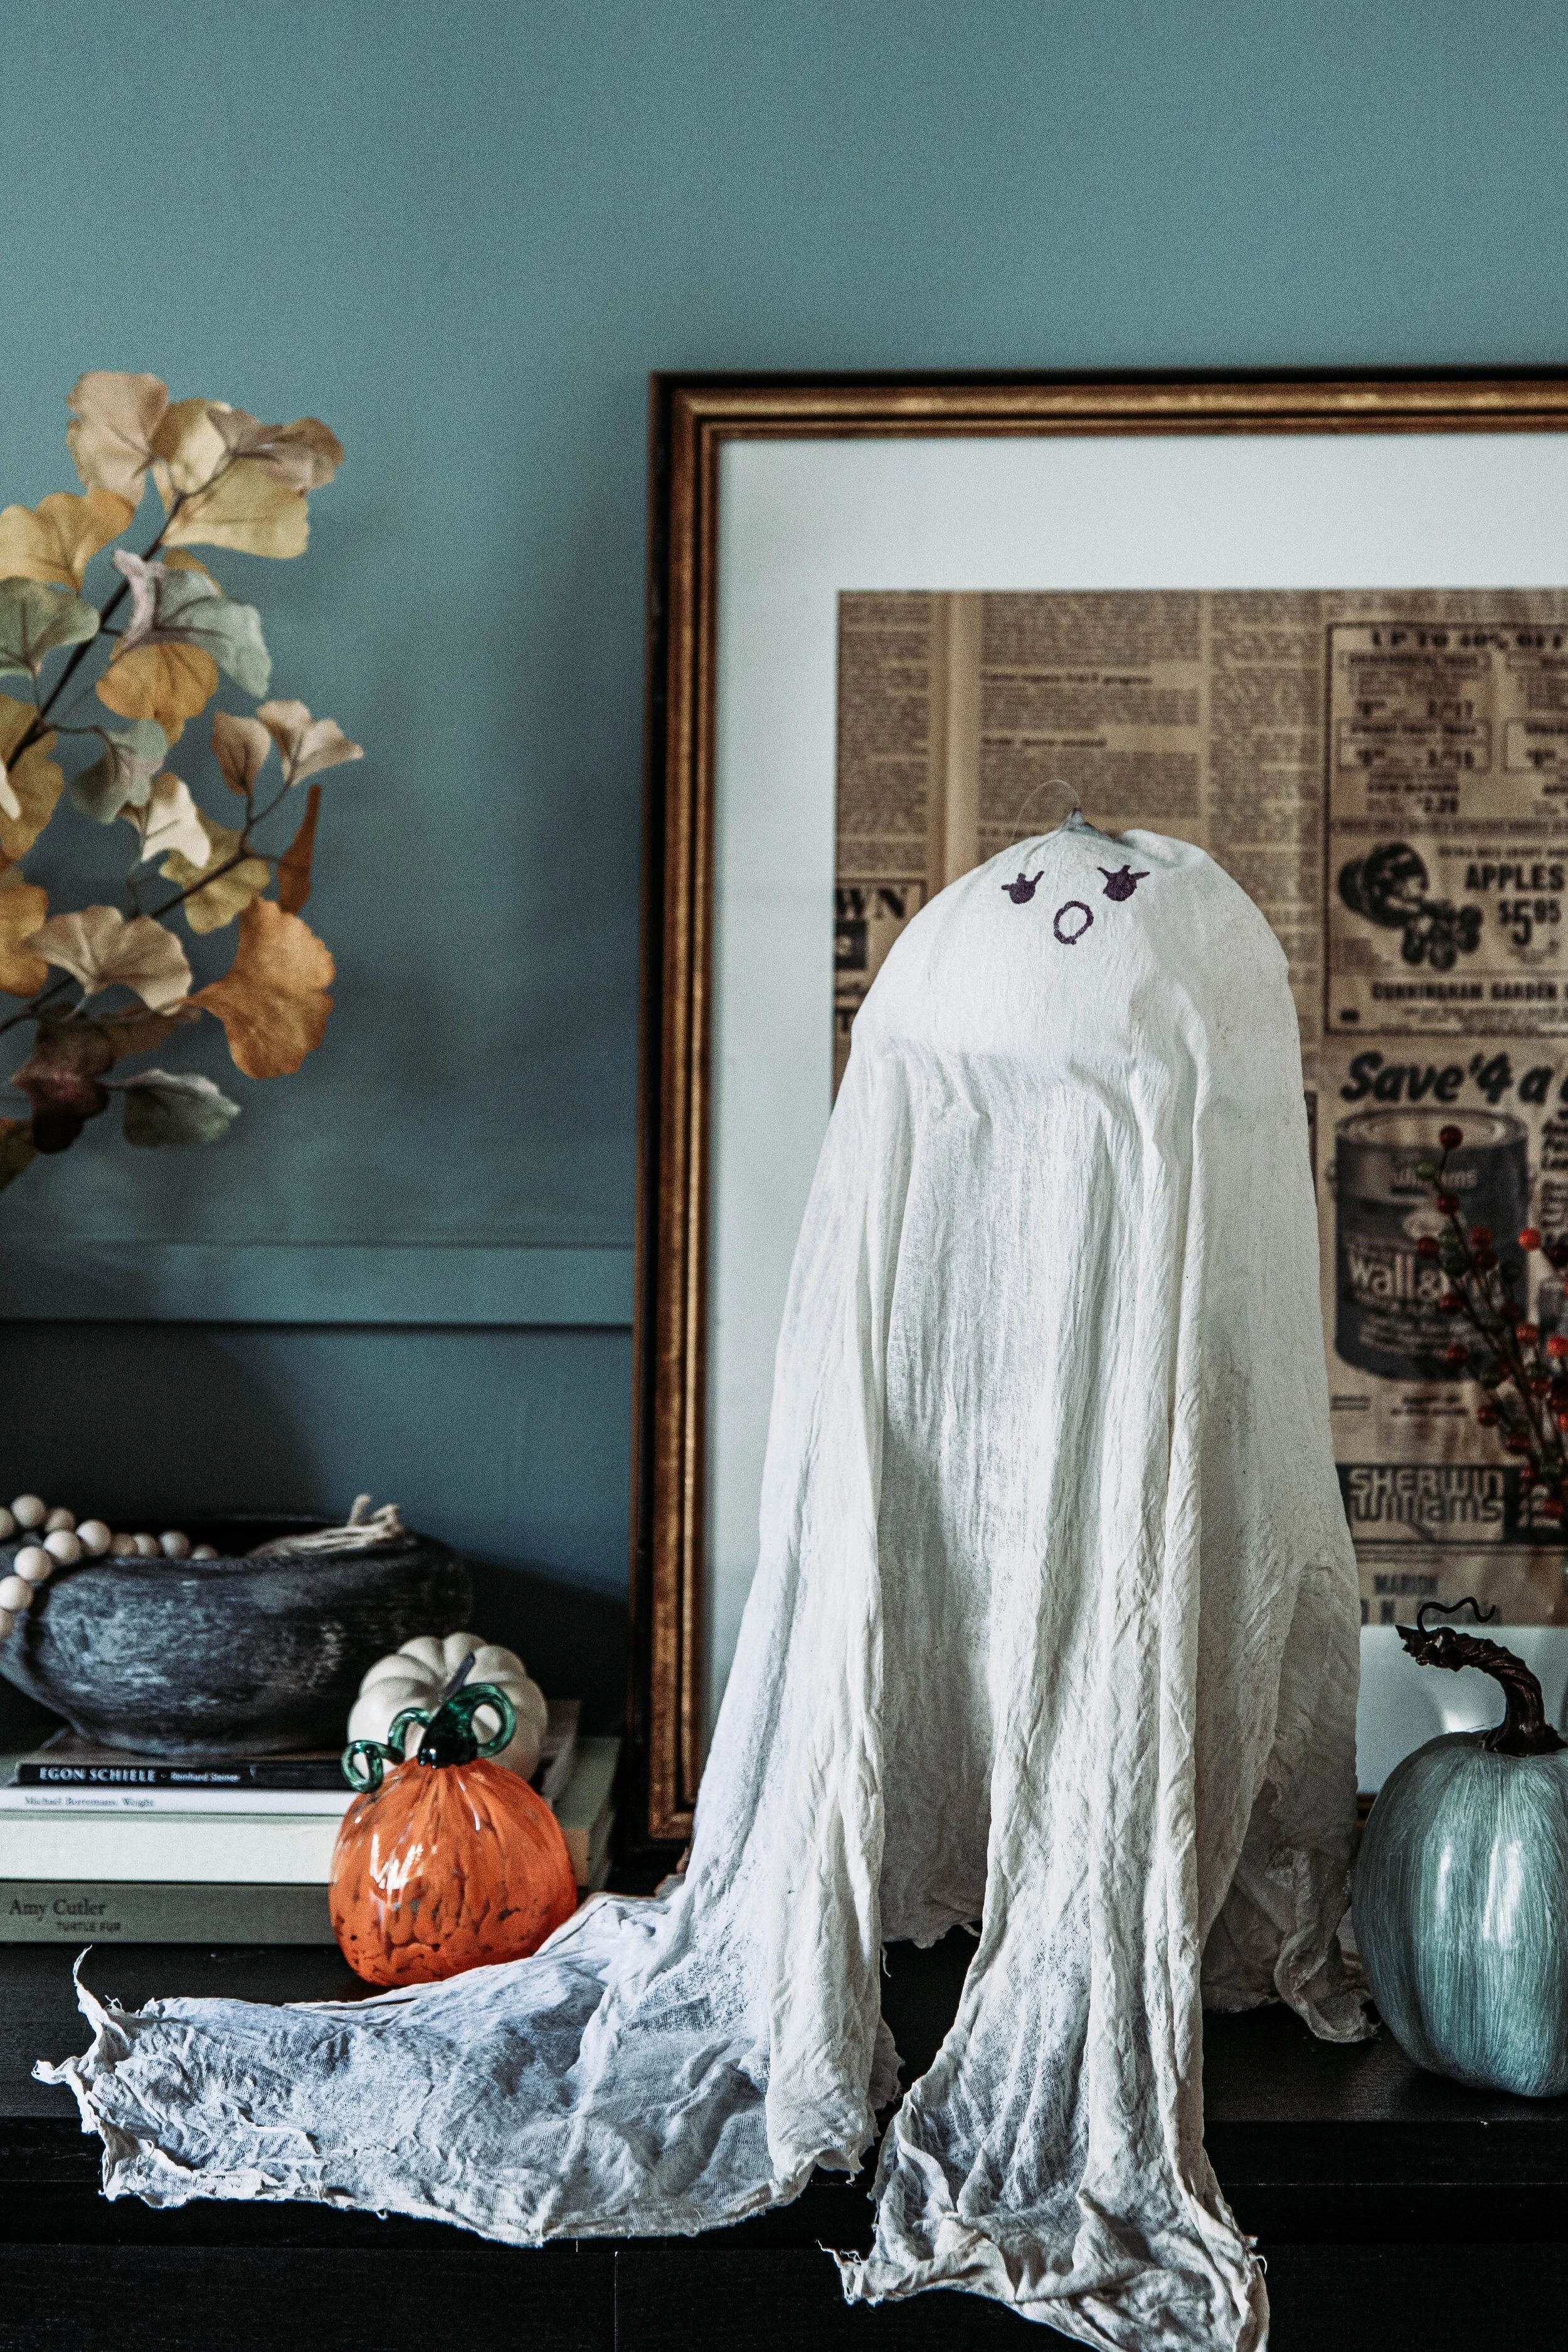
How cute is that!?
This craft took a little bit of troubleshooting, but luckily I did that work for you, so now you don’t have to. Here’s the best method I found to make DIY Floating Ghosts:
Materials
- Cheesecloth
- Flour
- Water
- Large Bowl
- Duct Tape
- Solo Cups
- Dowel Rods (I bought two 3-foot dowel rods and cut them in half to get the sizes I needed)
- Styrofoam Circles
- Scissors
Start by making a hole in the bottom of a Solo Cup and sticking the dowel rod through it. Then, brace the dowel rod in the cup with duct tape. The end of the dowel rod should be even with the opening of the cup.
Tape the cup face down. Add some extra tape around the dowel rod to make sure it’s nice and sturdy.
Then, push the styrofoam down on the dowel rod and drape the cheesecloth on top to figure out how much you need, and cut to your desired length.
My daughters and I made three ghosts - one with starch and water, one with Mod Podge, and one with flour and water. Surprisingly, flour and water held the ghost shape the best! This is where the project gets pretty messy, which means it was the kids’ favorite part.
Once you’ve determined how much cheesecloth you need, create a mixture of flour and water in your bowl. The water and flour mixture isn’t an exact science - be generous with the flour and make enough to soak your cheesecloth because… next, you’ll dip your cheesecloth in the mixture and squish it around until it’s nice and soaked.
Now drape the cheesecloth over the styrofoam ball and let it dry overnight.

Once your ghosts are dry, you can use a Sharpie to draw faces on them. And if you’re a creative 6-year-old, you can also add eyelashes.

To hang mine, I used a needle and threaded fishing line through the top of the ghost. Then I used a Command Hook to hang it from the ceiling.
Final Thoughts
While this craft was quite messy, the kids loved it, and the clean-up was actually pretty easy. Plus, the end result is the perfect amount of eerie. Save the Pins below to reference this project or the decoration ideas for later!

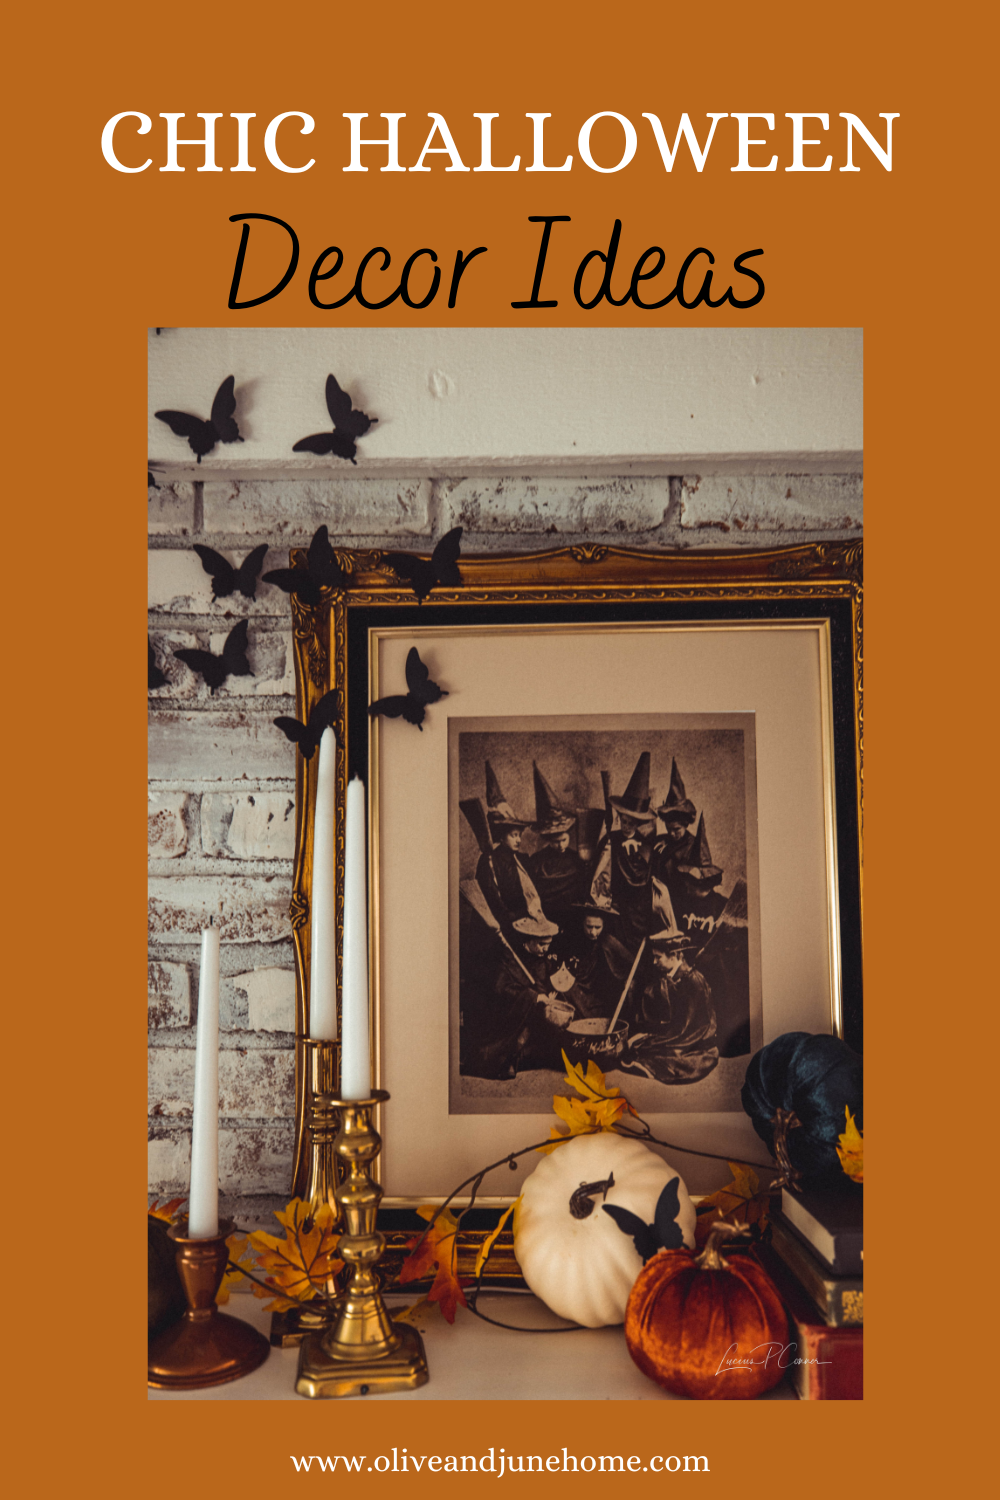

For more crafty projects, take a gander at these posts:
Kid-Friendly DIY Ghost Craft

DIY Antiqued Mirror
I’m not usually a fan of antique-looking decor, but when I first saw this antiqued mirror I wanted it right away! It’s not available for sale anymore but let me tell you, it was too expensive for my blood. So, naturally, I made my own antiqued mirror! Here’s how…
How to Turn Glass into an Antique Mirror
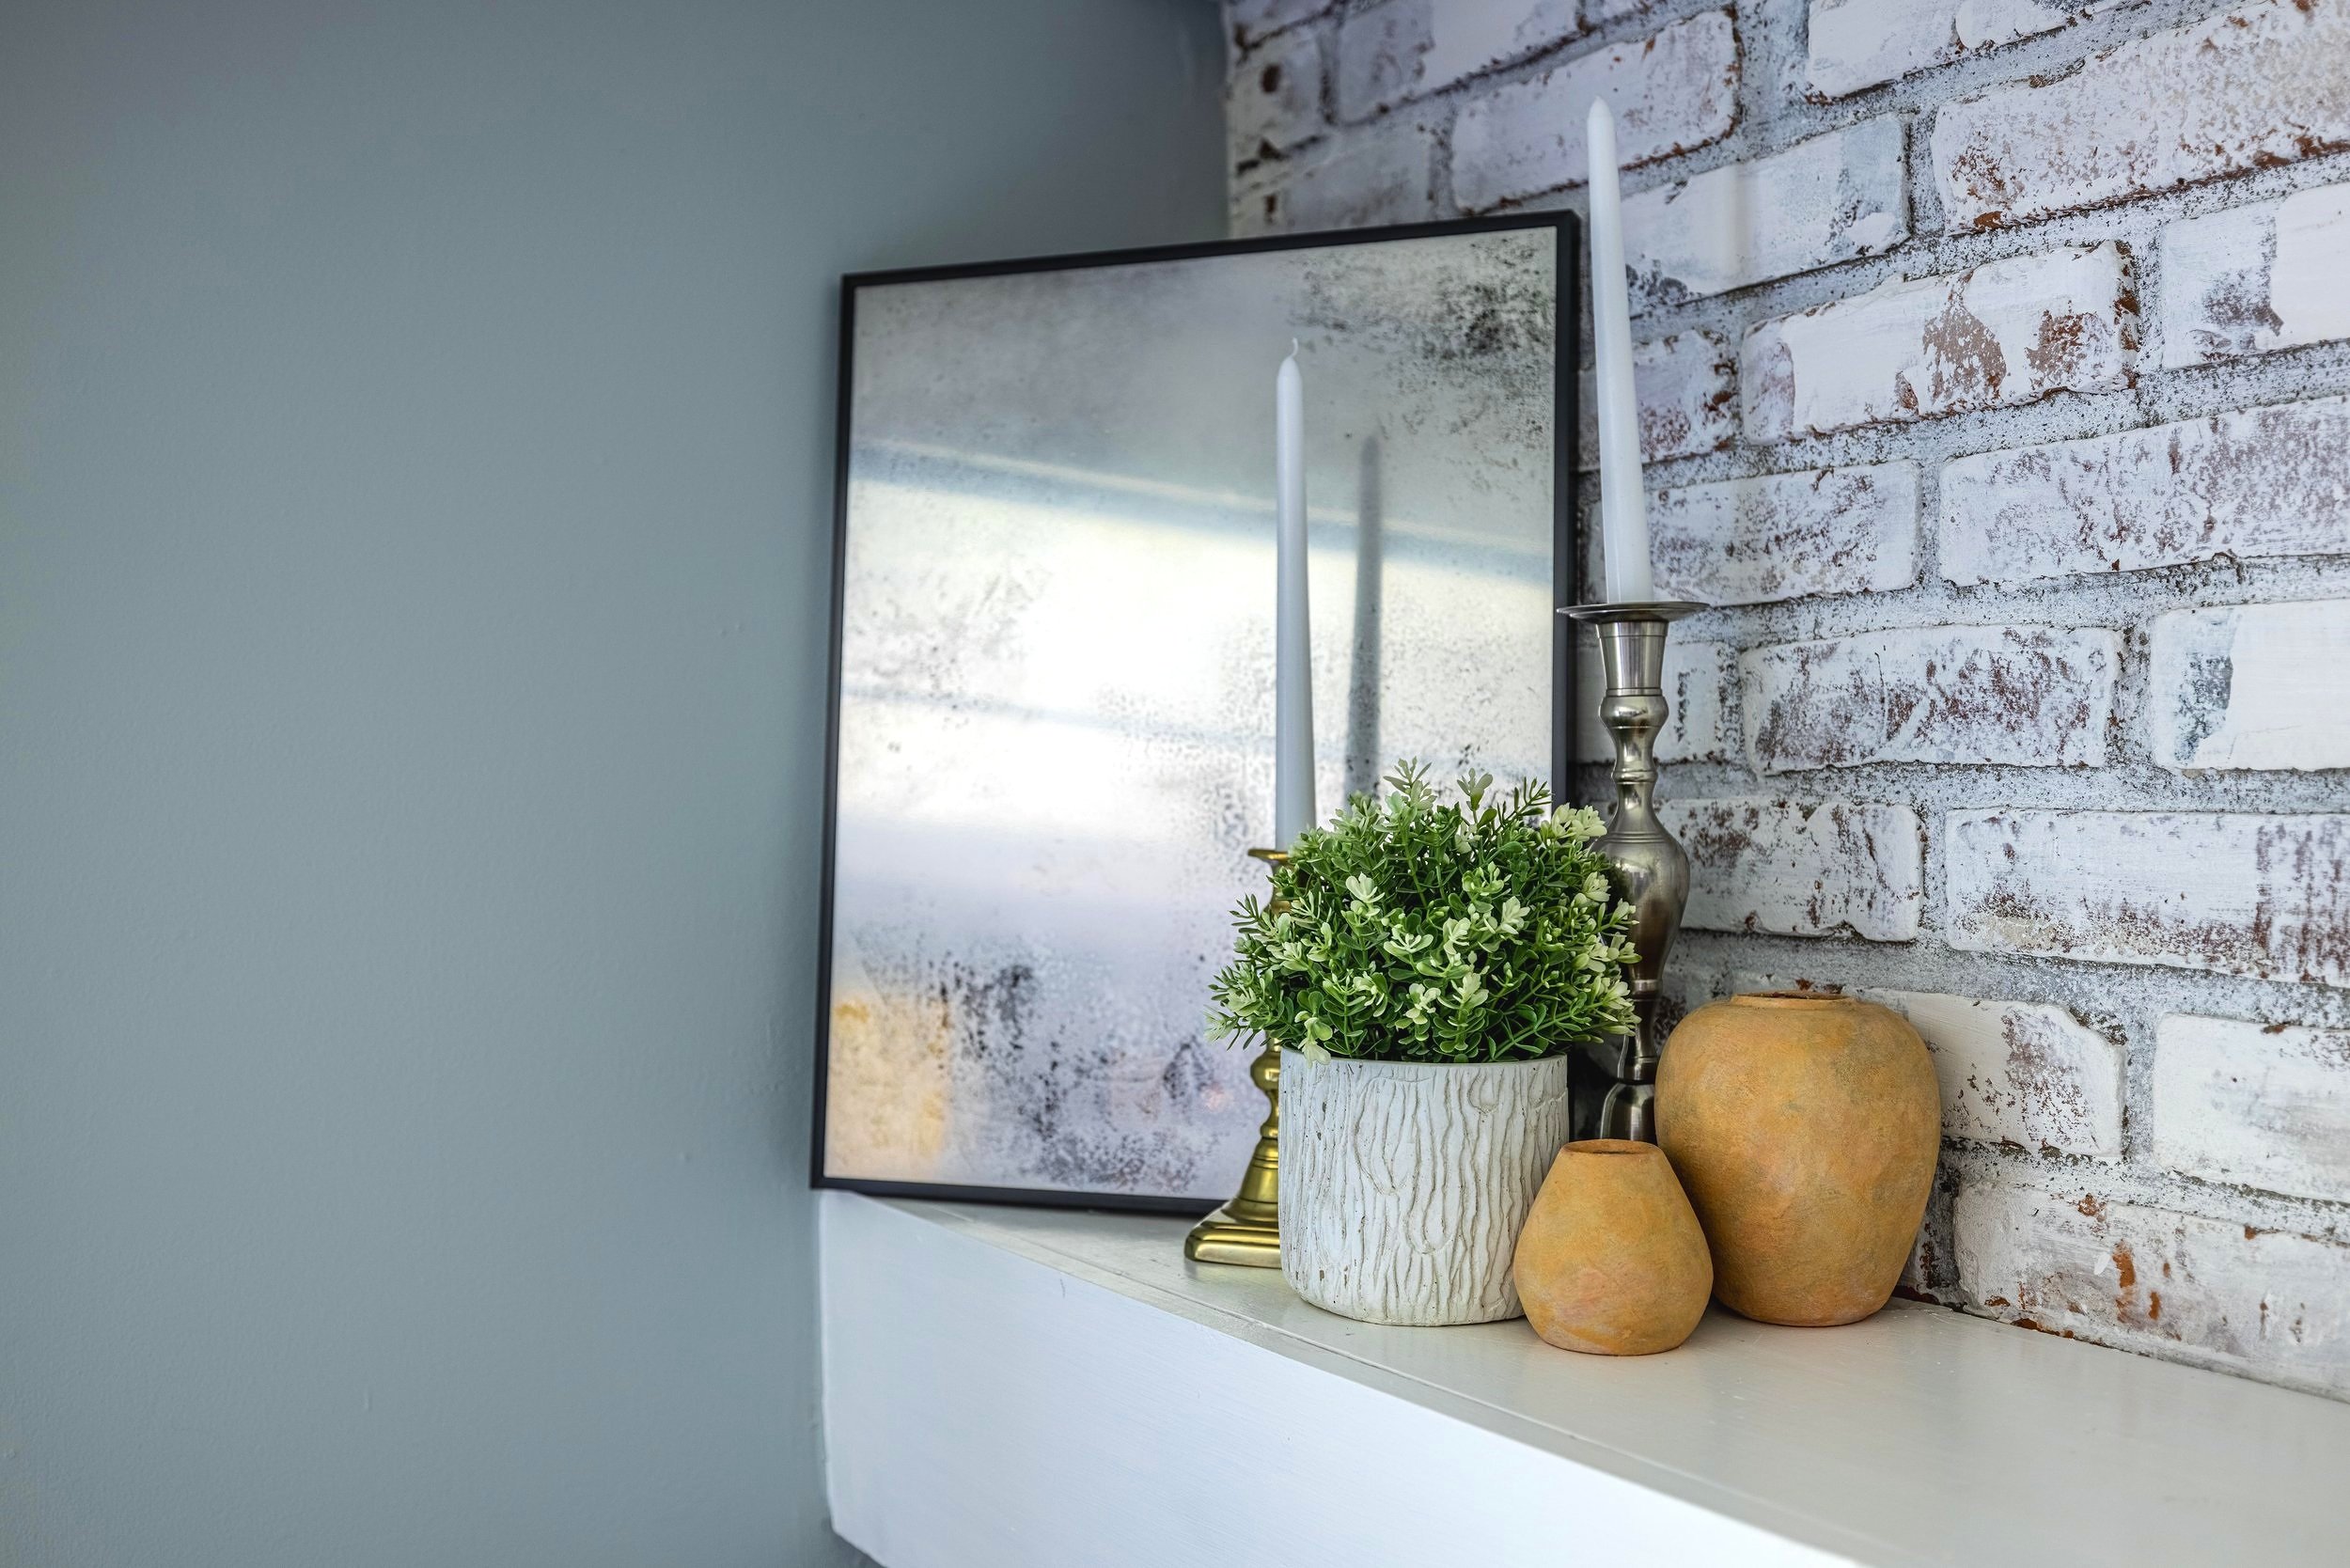
I’m not usually a fan of antique-looking decor, but when I first saw this picture on Chris Loves Julia, I wanted that antiqued mirror right away!

The antiqued glass paired with the modern frame is just *chef’s kiss*. And then I looked at the price…
It’s not available for sale anymore but let me tell you, it was too expensive for my blood. In fact, every antiqued mirror I’ve found is more expensive than my cheap-o self is willing to spend. Plus, this seemed like a fun DIY. So, naturally, I made my own antiqued mirror! Here’s how I did it…
You can watch the tutorial by clicking the video below or continue reading for a step-by-step guide.
As an Amazon Associate, I earn from qualifying purchases. This post may contain affiliate links, meaning I receive commissions for purchases made through those links at no cost to you.
Materials
A picture frame (with glass - plexi won't work!)
Distilled White Vinegar
Paper Towels
Prep Your Glass
To recreate the mirror from my inspo picture, I found this simple black aluminum picture frame online. No, it’s not nearly as big as the inspiration mirror, but I also don’t have anywhere to put a mirror that big, so that's okay!
If you’re not searching for a specific style of frame, you could easily find one that is cheaper and larger at a thrift store.
No matter what frame you choose, you might need to prep it first. For instance, my glass was held in place with clear silicone. That was certainly a surprise and took a bit of finesse to pop free without breaking it - but I did it! Once I was done, I cleaned the glass off with Windex.
Apply Black Spray Paint

Next, you’ll spray black spray paint on one side of the glass. You may need more than one coat for full coverage. Remember - multiple thin coats of paint are better than one super runny thick coat!
Make a Mirror!
Now, the fun part. Once the black spray paint is dry, flip your piece of glass over. Using your spray bottle, strategically spritz on some vinegar. Depending on the look you’re going for, feel free to use a mixture of fine mist as well as larger droplets. I purposefully applied mine around the edges to look more authentic like my mirror was slowly wearing away with time.
Next, spray on a thin, even coat of mirrored spray paint.

Then, using a paper towel, lightly dab up some of the vinegar.
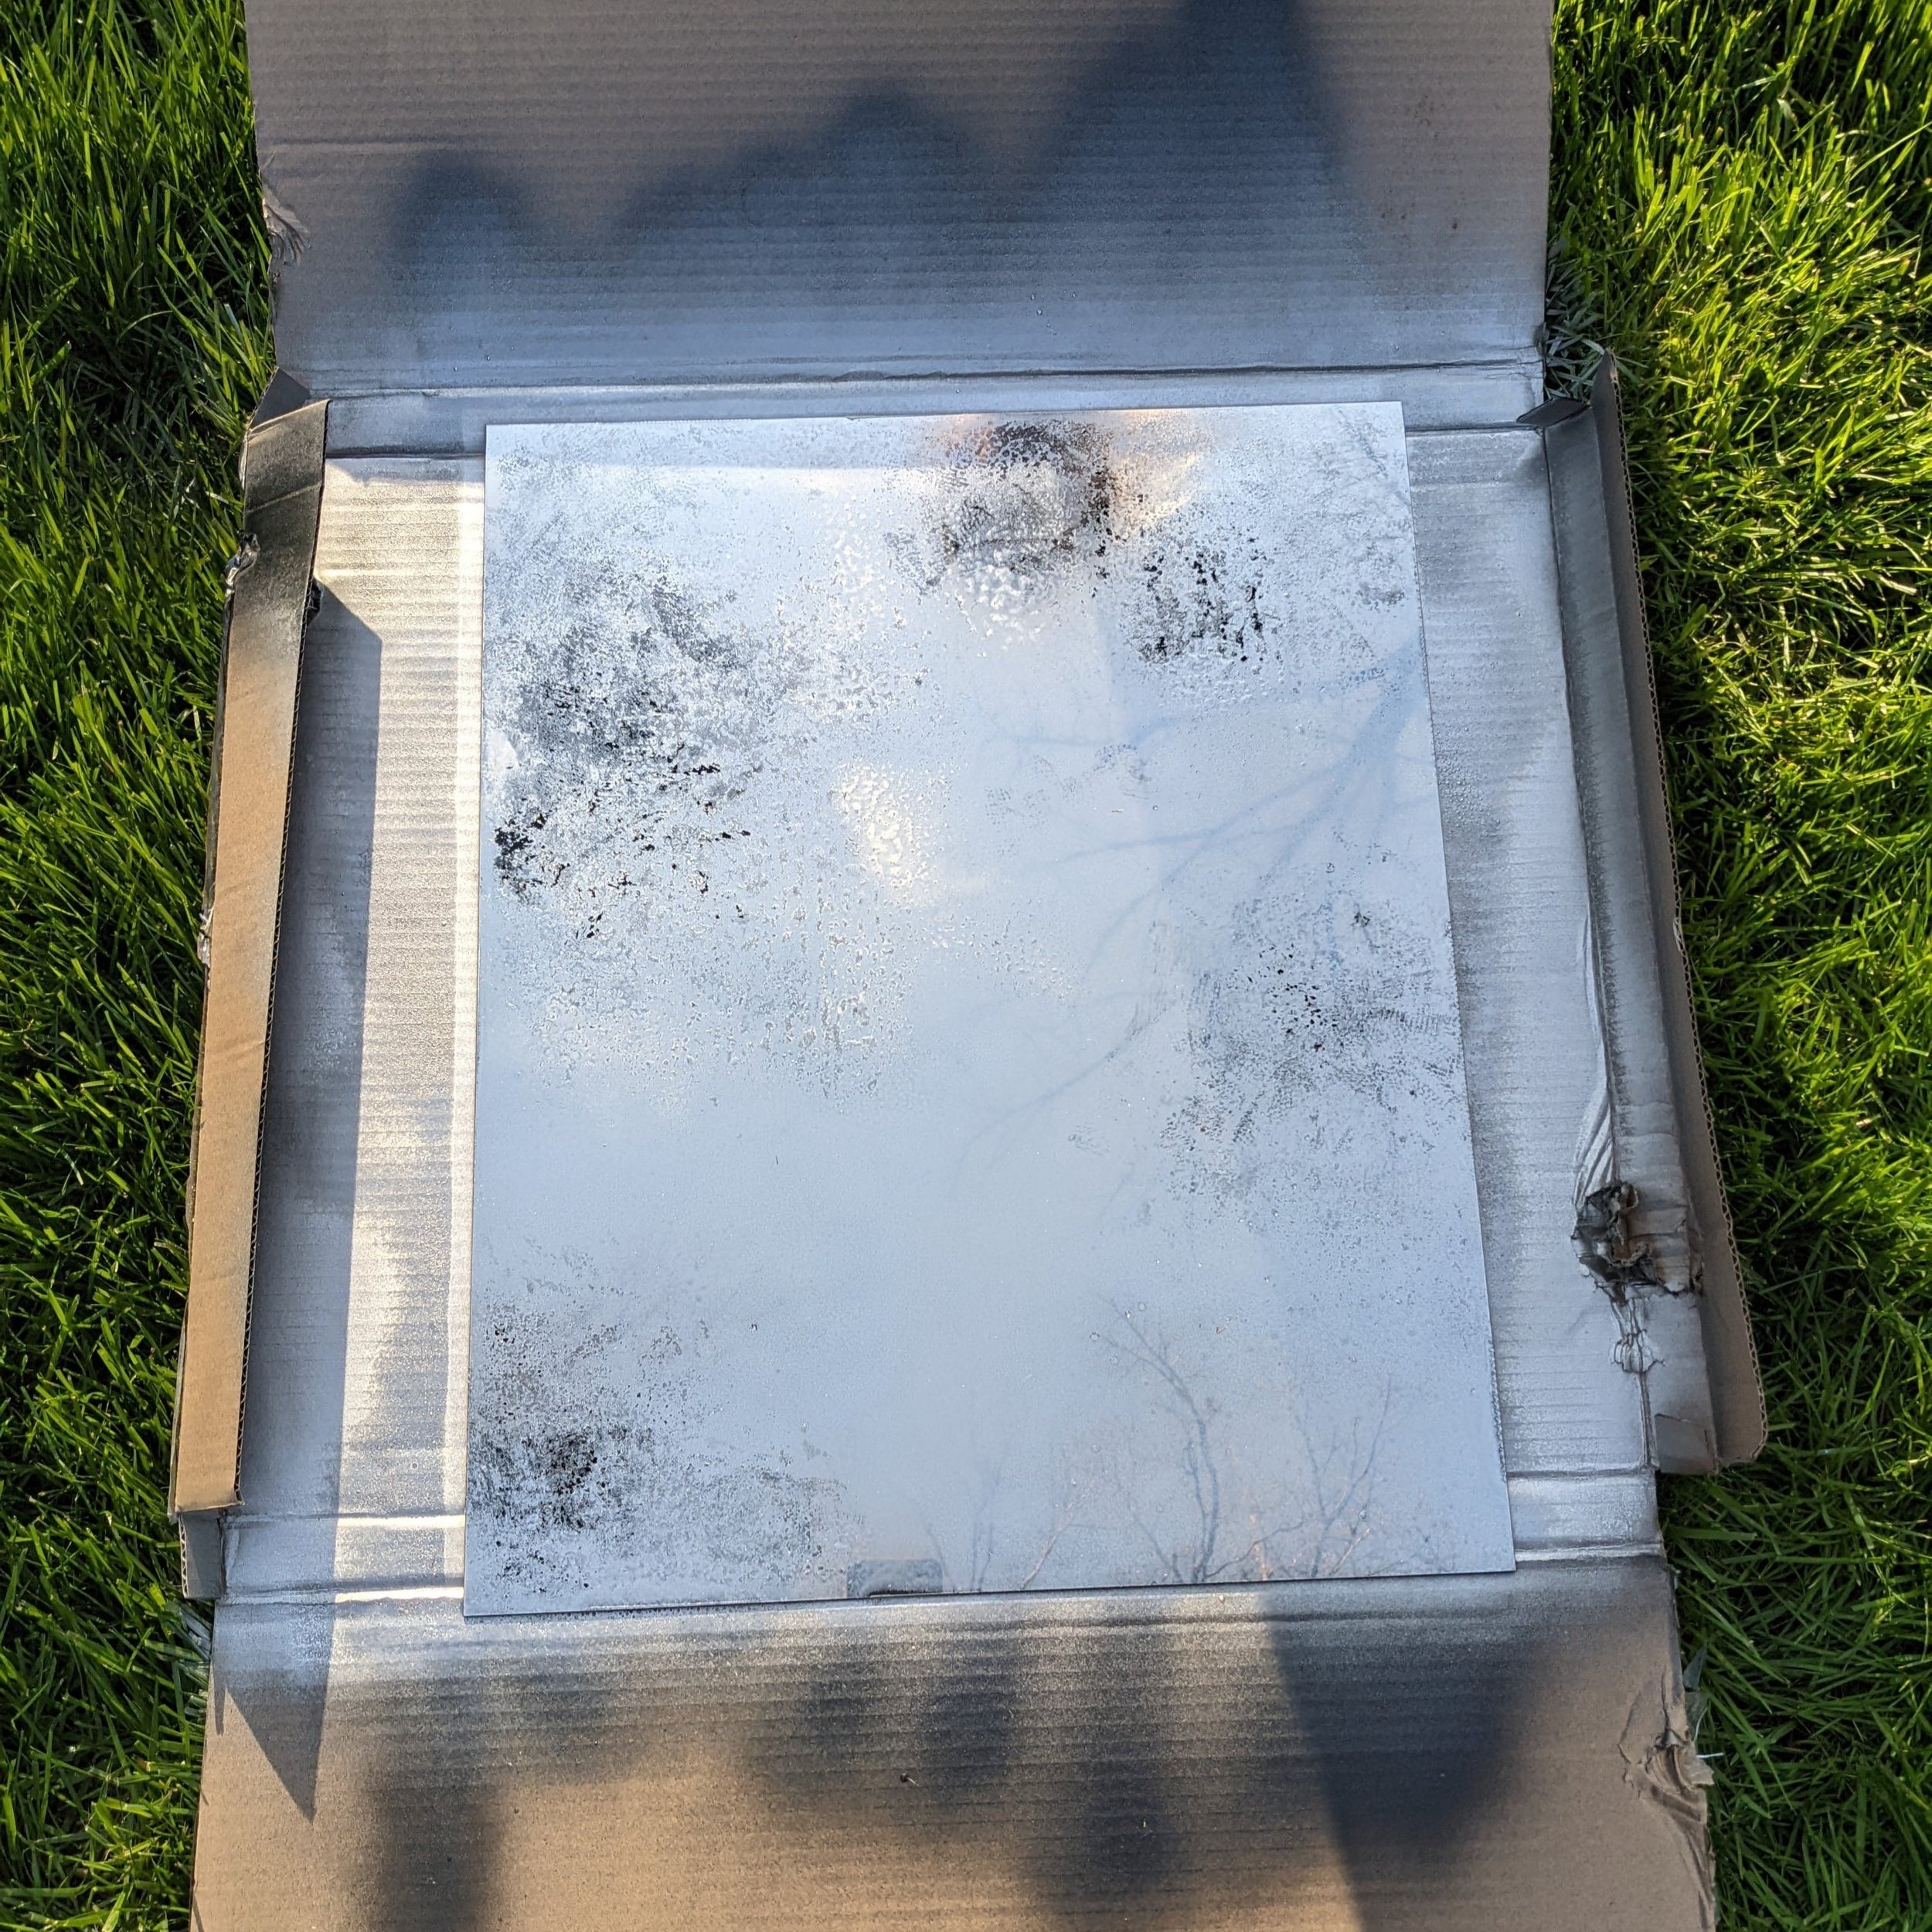
This sequence of steps might take a little bit of practice, and that’s okay! I repeated these steps multiple times until I got the final look I was going for. And if the end product isn’t what you were hoping for, it’s easy to start over by spraying window cleaner on the glass and scraping it off with a razor.
Final Thoughts
This ended up being a hat trick of a DIY project - fast, easy, and quick! My favorite! All-in-all it probably took less than an hour and cost about $50 - most of which was spent on the frame.
Plus, I felt oddly accomplished when my three-year-old told me my mirror was dirty and I needed to clean it. #projectsuccess (I think.)

For more easy DIYs, check out these posts:
Distressed Mirror Tutorial
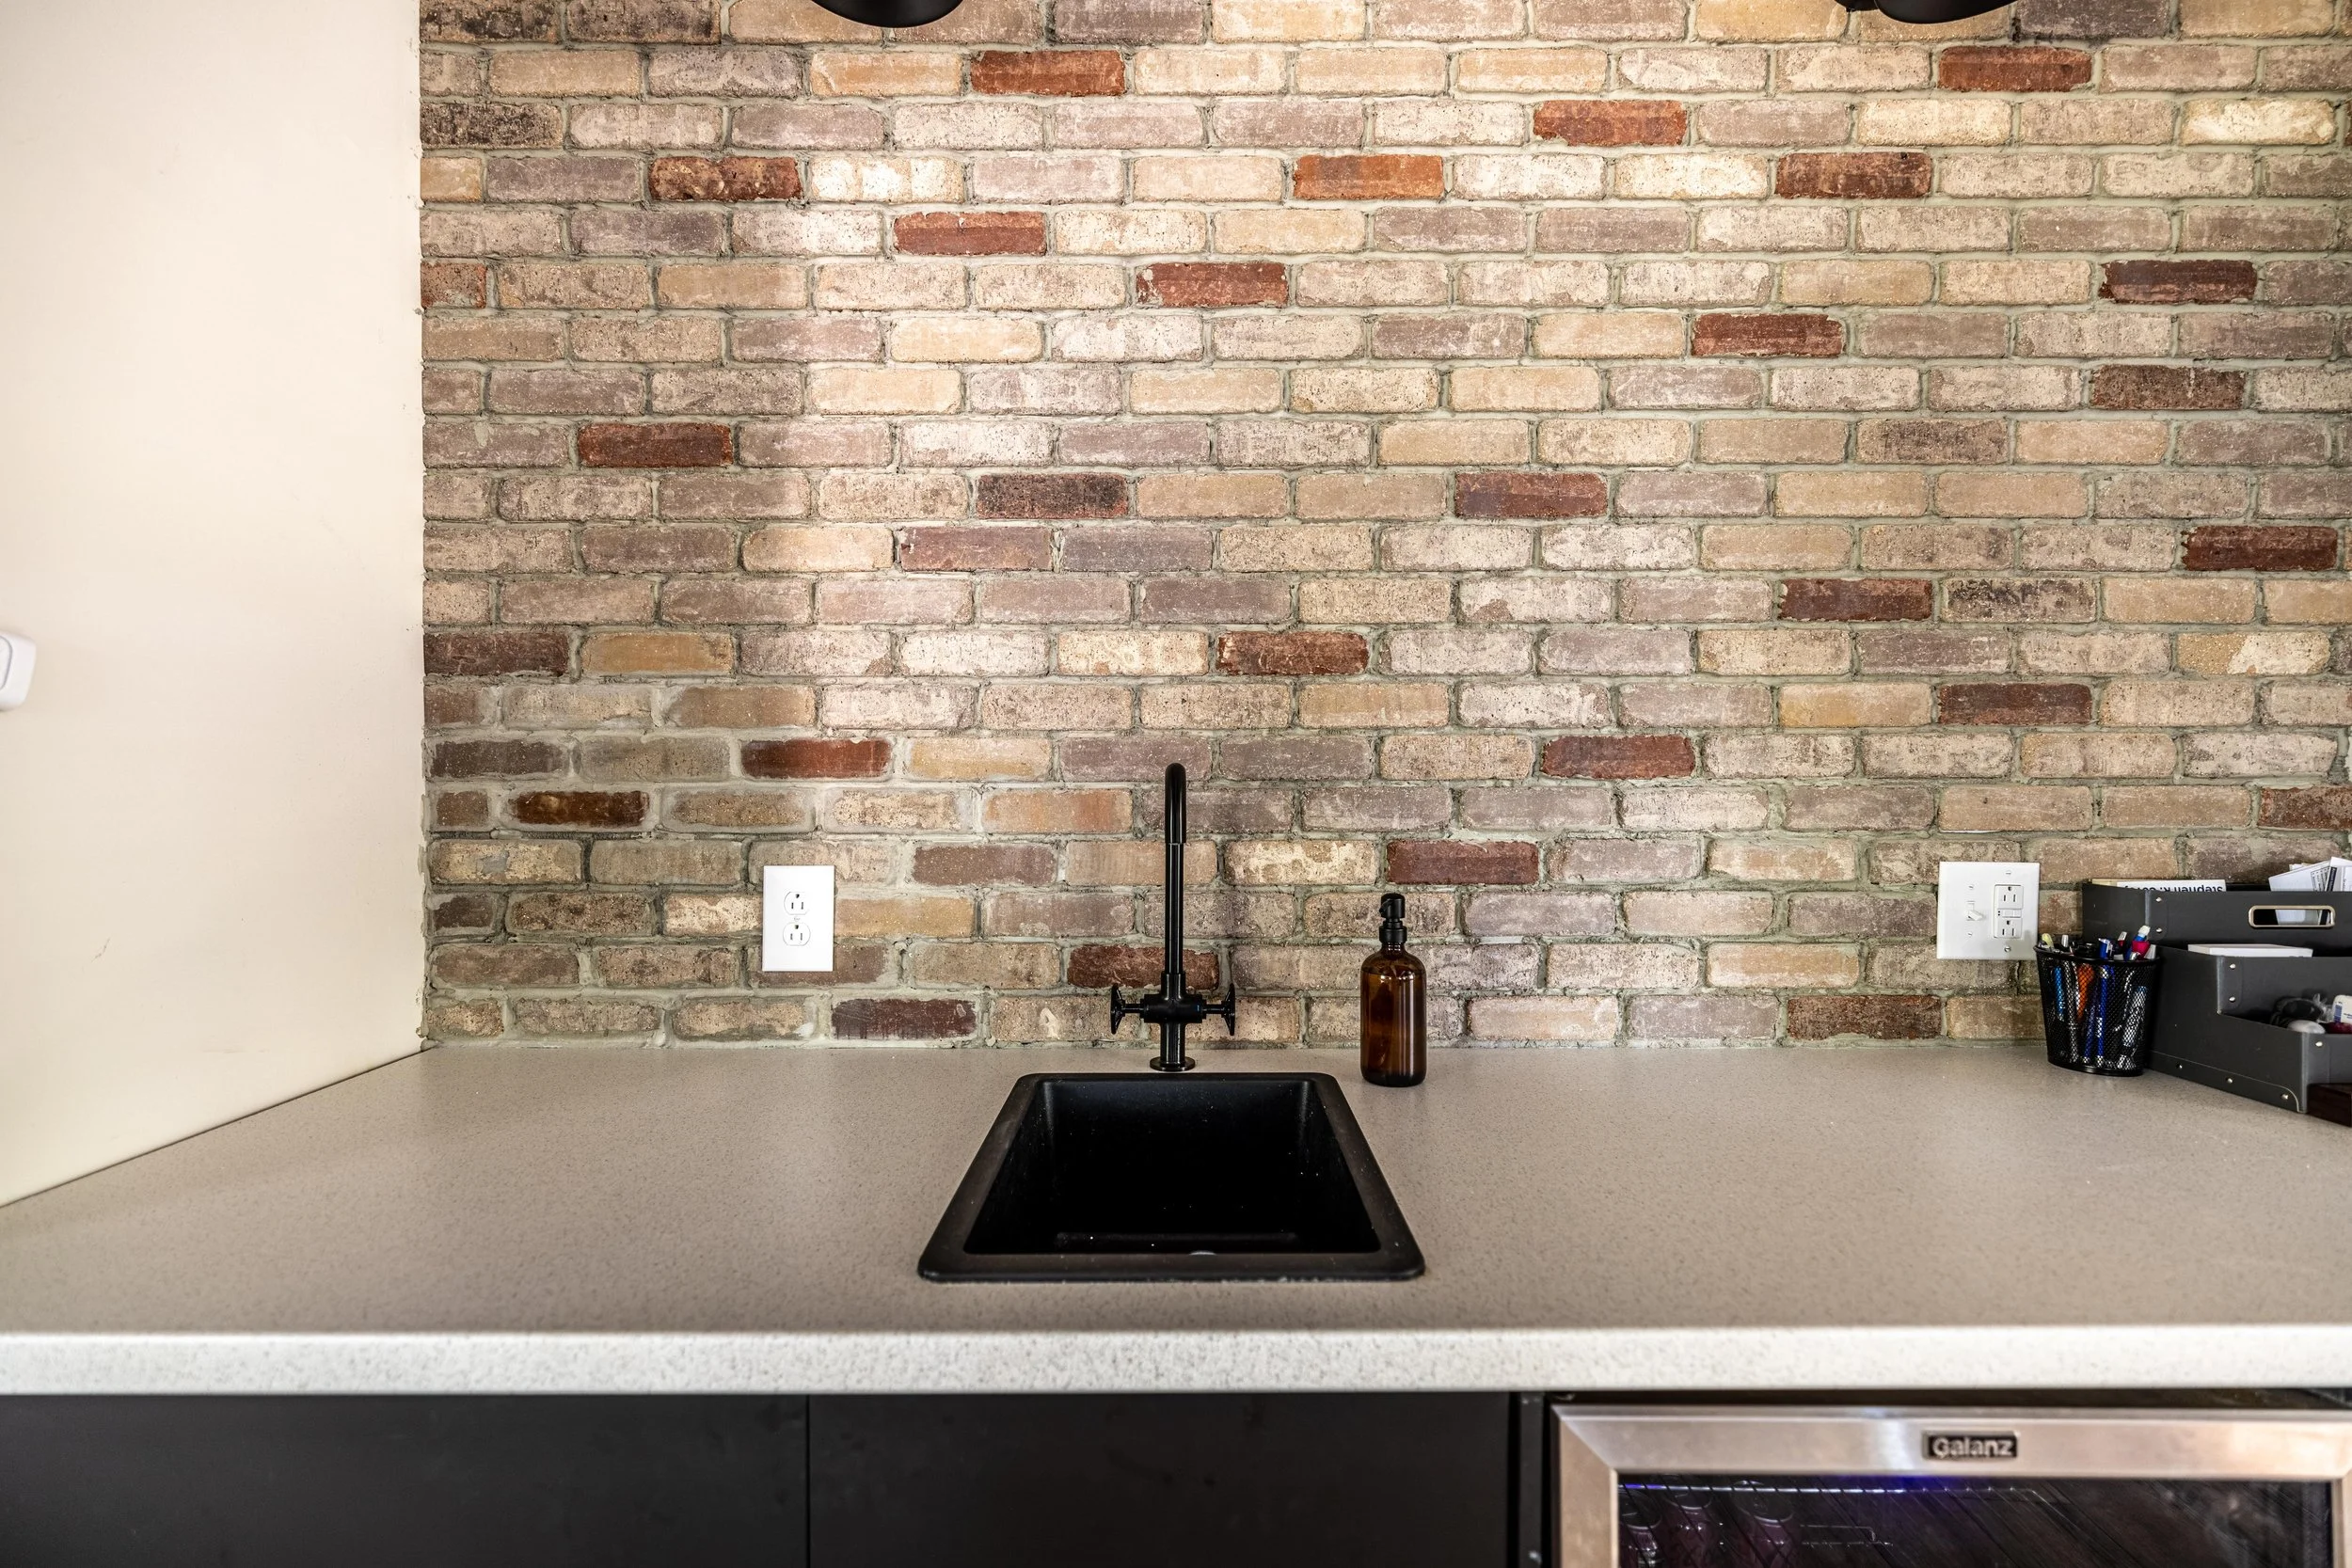
How to Install Brick Veneer
It’s been SIX MONTHS since my last loft update. What!??? That’s why I’m so excited to report that we finally installed the brick veneer above the kitchenette in the loft! And I can’t wait to show you how we did it. Oh, yeah, and we also installed the kitchenette!
Loft Kitchenette Tile Backsplash
It’s been SIX MONTHS since my last loft update. What!??? That’s why I’m so excited to report that we finally installed the brick veneer above the kitchenette in the loft! And I can’t wait to show you how we did it. Oh, yeah, and we also installed the kitchenette!

Lucius and I have always had a thing with exposed brick. This is evident in our last house, where we uncovered the brick on the chimney running through our kitchen.


And again with the giant brick fireplace in the living room of our current house.

So, when I was working on the design for the loft and Lucius mentioned he wanted it to look kind of industrial, I knew it would be the perfect opportunity to add more brick! He was definitely on board. Here’s how we did it:
As an Amazon Associate, I earn from qualifying purchases. This post may contain affiliate links, meaning I receive commissions for purchases made through those links at no cost to you.
Materials for Installation
Brick Veneer (we used 6 boxes for our 40 sq. ft. wall)
Loctite Power Grab (we used 5 tubes)
Square Dowel Rods (ours were 3/8 inch)
Tile Saw, Tile Snap Cutter, or even a Handheld Tile Snap Snipper
Prep Work
First thing’s first - I laid down plastic sheeting to protect our countertops. While the installation isn’t terribly messy (just some brick dust), I knew adding mortar to the joints would require plastic anyway. Plus, placing a little bit of a protective barrier on top of the counters added some peace of mind.
Second, we cut a couple of small pieces off one of our dowel rods to use as vertical spacers. The remaining longer dowel rods were used as horizontal spacers.
Third, we set up our laser level on Lucius' camera tripod to make sure our lines didn’t get out of wack. A large, standard level will work too.
Finally, I laid out my first row of bricks to make sure that the pattern made sense.
Aaand at this point, I was ready for a snack. Much to Lucius’ dismay I ran down to the kitchen to get something to eat.
Brick Veneer Installation
With my appetite sated, we were finally able to dive in! This is definitely a DIY you can do solo, but Lucius and I developed a pretty good system together to get a majority of the bricks up on the wall quickly.
We started our first row by placing spacers along the countertop. Then, while Lucius piped Loctite onto the back of each brick in the line I pre-laid, I followed behind him smooshing the bricks onto the wall, being sure to use my vertical spacers as I went.
A good zigzag of Loctite is all you need. Then just wiggle the tile a little as you smoosh it to the wall. It’s also worth noting that we installed our bricks on unfinished drywall, which I read is a-okay to do!
For our design, we used a mixture of General Shale Providence Series brick veneers from Lowe’s in the colors Carbon and Stillwater. The majority of the wall is Carbon, and I strategically peppered in the red Stillwater veneers.
Once we did a couple of rows like this, we decided to dry-lay several rows at once. This helped speed things up and made it easier to see as a whole how the bricks looked together (specifically the pops of red brick).

As you can see, at this point we only worried about installing whole bricks. This part of the process went pretty fast!
One regret I have is not buying more dowel rods. While the Loctite adheres pretty quickly, we found ourselves waiting a minute or two between rows so the prior row could adhere. We would have saved some time if we could have kept a row of spacers on the previously installed row before starting on another.
Cutting Brick Veneer
Once we had most of the whole bricks installed, we shifted our focus to where we would need to cut bricks - at the edges of each row, around light fixtures, and around outlets.
To get our measurements for these bricks, we simply held them up to where they would be installed, marked the cutline, and ran them through the tile saw!
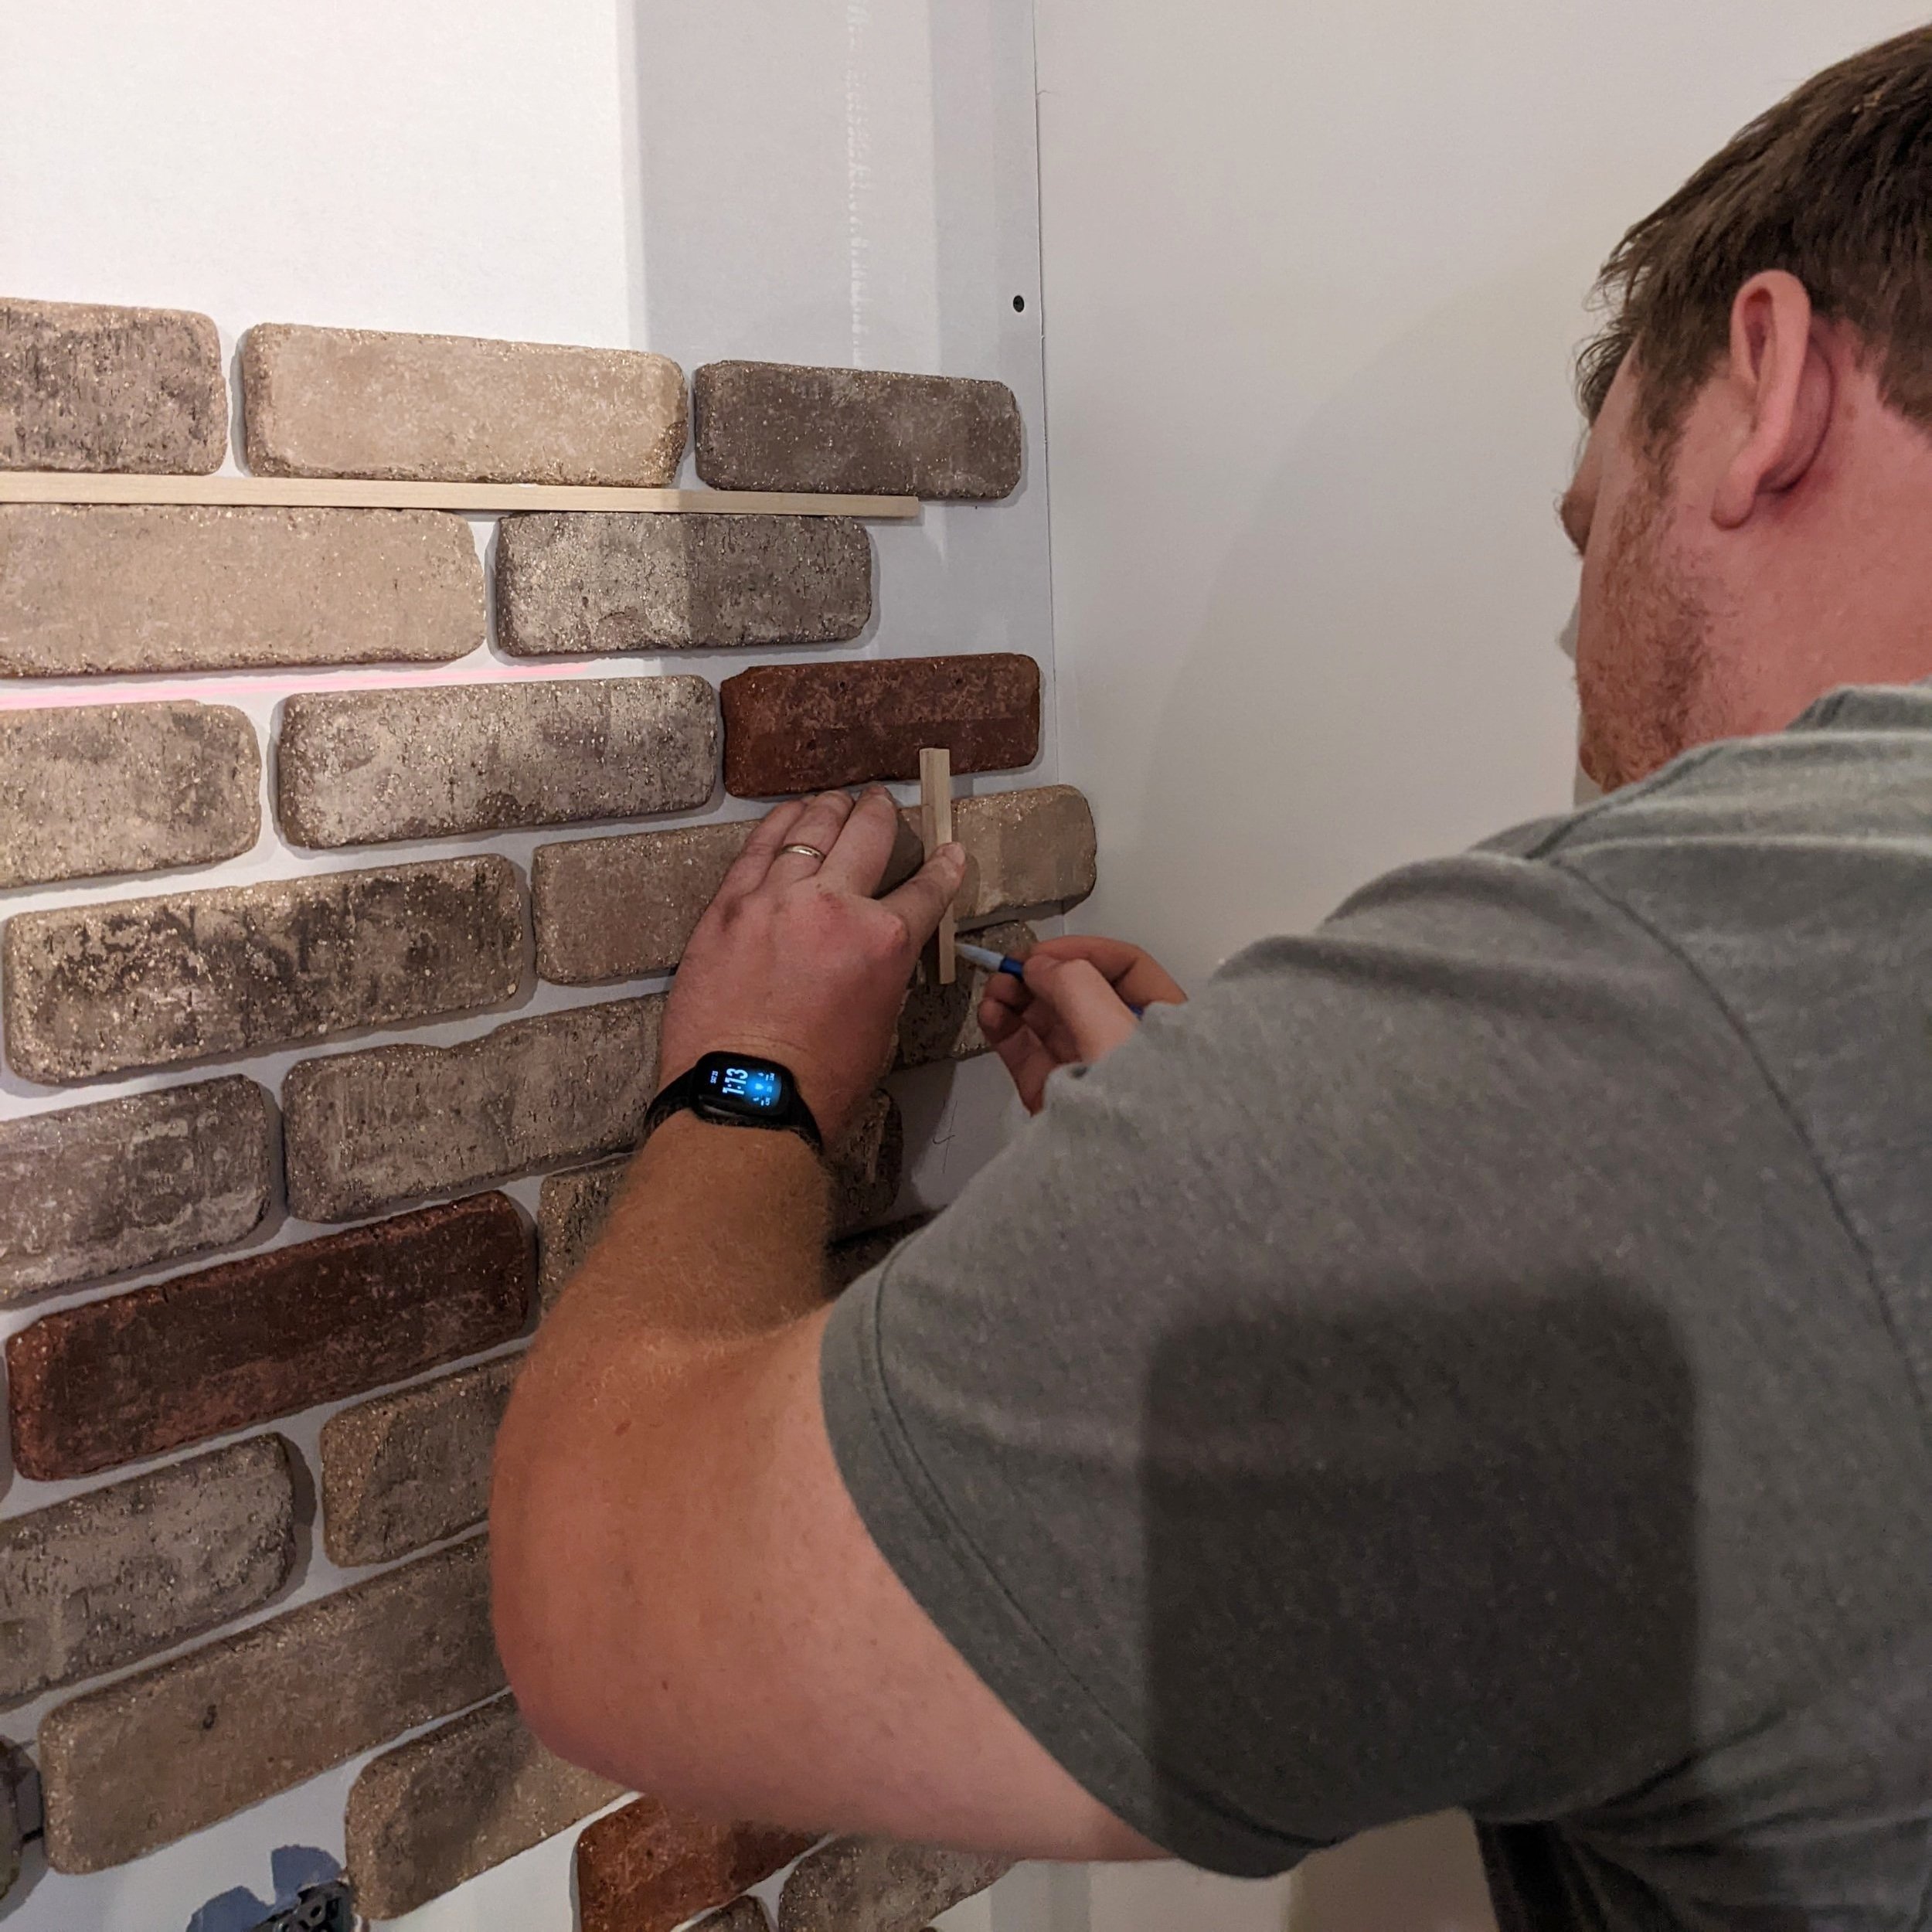
Luckily, we’re fortunate enough to know someone who lent us their wet saw (which cuts the bricks like buttah), but you can use a tile snap cutter too (though I’ve heard the cuts aren’t always as clean).
I don’t recommend cutting all your end pieces at once - here’s why.
Unless you’re REALLY diligent about keeping your bricks perfectly stacked, your design will likely shift left or right slightly on each row. If we had assumed all our rows were perfectly aligned and cut our end pieces all at once, we would have ended up with a bunch of brick pieces that didn’t fit anywhere.
If we had multiple bricks to cut, we measured each one individually and numbered them on the back. Then we wrote the corresponding number in the space it would be installed on the wall. There were still lots of trips to the garage for tile cutting, but this helped minimize that!
Filling in the Gaps - Take 1
After we installed all of our brick, we let it dry overnight. Much to our relief, none of the bricks fell off the wall!
Now, it was time to apply mortar in the gaps. Here’s what you need:
Materials for mortar
Start by adding a little bit of cold water to your bucket. (Warm water will speed up the drying process of the mortar.) Don’t go crazy adding a ton of water or you’ll end up with so much mortar it’ll dry before you can use it all. About 2 inches of water in a 5-gallon bucket made enough mortar for our whole wall.
Next, slowly add mortar. Using the mixing paddle attached to your drill, mix it together a little bit at a time until you reach the consistency of thick pancake batter. Beware - this is a fine line. Too thin and it’ll make a mess everywhere. Too thick and it’ll be impossible to squeeze out of the mortar bag.
Once your mortar is the right consistency, scoop it into your mortar piping bag (a second pair of hands makes this step much easier!). I’ll tell you here and now - a Zip-loc bag CANNOT be used in place of a proper piping bag. How do I know this? Well…
We couldn’t find a piping bag at the hardware store, so we tried to improvise. See exhibit A.

On the left-hand side, you can see where we made a giant mess in our first attempt at applying mortar. In this case, it was WAY too runny and wouldn’t stop spilling out of the piping Zip-loc bag. On the right-hand side we mixed the mortar thicker, but it was so thick, it popped the Zip-loc bag.
This ended day 2 of our tiling adventure in a flurry of sloppy mortar, curse words, and frustration. Don’t be like us.
Filling in the Gaps - Take 2
Once we bought an actual piping bag, we were finally able to apply the mortar!
Applying the mortar was much more labor-intensive than I expected. If I was doing it myself, it probably would have taken a lot longer. Luckily, I had Lucius to help! And he made it look way easy…
A slow and steady application is your best bet. And don’t freak out if you make a bit of a mess - I’ll talk about how to clean that up below.
A couple of hours after we applied the mortar (when it was no longer squishy but more of a sandy texture), we went back in with our brick jointer to scrape off any excess.

Once everything was good and dry, we were able to work on…
Fixing our Mistakes
There were a couple of items that needed to be fixed before we felt like we could call the installation finished:
Cleaning the mortar off the bricks after our disastrous Zip-loc bag attempt went awry.
Removing the tape from under the mortar where it was stuck to the counter.
Let’s start with cleaning up the mortar.
During our panicked attempt at cleaning up the mortar mess we initially made, we ended up with several bricks that were covered with a thin layer of mortar.

Upon researching, we learned mortar could be removed using Muriatic Acid and a wire brush… so that’s what we did!
I mixed the Muriatic Acid with water per the directions (while wearing the appropriate protective gear!) and applied it to the messy bricks. I realized it worked a little better if I soaked the bricks and then let them sit for a minute.

Once I felt like they soaked for long enough, I came back and scrubbed with the wire brush.


Then, I wiped them down with a paper towel. If I didn’t feel like they were clean enough, I just repeated the steps above.

Once our bricks were nice and clean, we turned our focus to cleaning the tape off the counter from under the mortar. Would it have been a better idea to start the first row of bricks flat on the countertop? Possibly. The world may never know.
Luckily, mortar is surprisingly easy to cut/chip away with a utility knife - so that’s what we did. The line isn’t quite as crisp as I would prefer, but it works.
Final Thoughts

Now that the bricks are installed, I realize how much character was missing from this room! I’m really pleased with how it turned out overall. Obviously, we couldn’t wait to install the lights, and now I can’t wait for the finishing touch… shelves! Continue following along to see the final product! And, if you found this tutorial helpful, Pin it for later!


Need to catch up on our loft renovation? Check out these posts!
DIY Thin Brick Tutorial

My Favorite Houseplants (And How I Keep Them Alive)
Plants have a way of effortlessly bringing a pop of color, life, and energy into any space. If you haven't noticed, I have quite the collection of plants (30 as of writing this post!). And now that everything is in full bloom and thriving, I figured it might be fun to share some of my favorites and how I do my best to keep them happy and healthy.
How to Keep Your Plants Happy and Healthy
Plants have a way of effortlessly bringing a pop of color, life, and energy into any space. If you haven't noticed, I have quite the collection of house plants (30 as of writing this post!). And now that everything is in full bloom and thriving, I figured it might be fun to share some of my favorites and how I do my best to keep them happy and healthy.

Considering the size of my plant collection nowadays, it might surprise you to know that up until just a few years ago I didn't own a single plant!
Before I started scooping them up left and right, I used to shy away from plants, doubting my ability to keep them alive and afraid of wasting money. That is until one day at the park my curiosity got the best of me and I may or may not have plucked this cute little succulent from the ground (still have no idea what it's called) to test my abilities.

It wasn't an honorable start, I know.
Now that I have plants tucked into just about every room, I can't imagine my home without them. I do want to note that I learn more and more about how to take care of my plant babies every day. I’m by no means an expert. Either way, here are my faves and how I keep them alive.
As an Amazon Associate, I earn from qualifying purchases. This post may contain affiliate links, meaning I receive commissions for purchases made through those links at no cost to you.
Favorite Low-Light Plants
Although we have some areas of the house that are the perfect habitat for plants (here’s looking at you, master bathroom), we have several spaces that are just plain dark. For these spaces, I turn to my tried and true low-light plant faves.
Snake Plant

We currently have two different varieties of snake plants, both of which are relatively new because I killed my last two with root rot (ope!). Snake plants thrive on neglect, and I just love too hard, guys. Basically I overwatered them and killed them. But like I said - I’m still learning!

Either way, I love snake plants for sprucing up a dim corner, like in my dining room and foyer. They add interest, color, and height to what could easily be a boring, empty spot.
ZZ


Pothos
Last but not least is the pothos - also referred to as devil's ivy.

These too come in multiple varieties (variegated, neon, and jade, to name a few) but so far I only have jade pothos. Mine live, you guessed it, in another couple of dim corners of my house - like on top of the fridge and in the dining room. While pothos are a good option for low-light areas, they really do thrive in bright indirect light too.
The one in the picture above is a newbie that came from propagated pieces from a friend's mother plant!
Favorite Hanging Plants
Mistletoe Cactus & Burro’s Tail
Some plants just make a statement, and these are it!
I’m 99% sure this guy is a mistletoe cactus. I love how it looks like a crazy head of hair that just keeps sprouting new strands.

Similarly, my burro’s tail looks like a head of weighty dreadlocks and I can’t get enough. I look forward to trying my hand and propagating this one when I can bear to part with a strand.

I’ve only had these two plants for about a year and a half and they’ve really taken off! They get mostly bright indirect light with a little bit of direct sun late in the day. Plus, I love the hanging planters they live in.
It definitely doesn’t hurt that they have the beautiful clematis trellis that I built last summer as a backdrop!

String of Dolphins
This is one of my absolute faves. I’ve had my string of dolphins also for about 18 months and it has gone bananas! (On that note, there's also a plant called string of bananas that looks similar.)

It used to live in the same window bay as the two plants above but it got so long it started to grow behind the couch! I love having it in the bathroom now - and it loves living here. I’ve actually snipped strands from this gal three times so far to propagate for friends - and she just keeps growing!
I’ve nicknamed our master bathroom “the nursery” because plants THRIVE in the semi-damp atmosphere with bright, filtered light thanks to the frosted windows.
Favorite Goofy-Looking Plants
Ponytail Palm
Another one of my absolute favorite plants is my ponytail palm. (Why is it that I love the plants that look like hair so much!?) But seriously, it’s such a unique-looking plant!

My brother and sister-in-law thoughtfully gifted my ponytail palm to me from The Sill after I helped them decorate their nursery, so it has a bit of sentimental value. Everyone loves getting mail, but to open my mystery delivery only to open it and find a beautiful plant was the bees knees! There a loads of plants on The Sill with some really gorgeous pots (like the one this plant came in), so definitely worth checking out!
Unfortunately, my cats also love this one. This is the only plant my cats chomp on (I assume to floss their teeth)? Luckily it’s not poisonous, unlike MANY other plants (always check before buying!). I've used this bitter lemon spray with semi-successful results. But mostly I've resorted to crowding the space around my ponytail palm to keep the kittens away. The combination of those methods seems to be working a bit since I see some leaves FINALLY growing out.
Pilea Peperomioides
AKA the Chinese money plant. How could you not fall in love with those weird-looking satellite leaves?
I’ve had a lot of luck in all different types of light keeping these guys alive. In fact, I have three around the house right now and they’re all sprouting babies! A good, thorough watering every week to week and a half and they’re good to go!
There are lots of varieties of pilea though, so maybe I should branch out and expand my collection??
Climbing Aloe
I got my climbing aloe as a cutting from a friend a while back not entirely knowing what it was. I’m still only sort of sure it’s actually a climbing aloe, but by the way it’s taken off recently I’m feeling more confident in the name.

As with any aloe and/or succulent, neglect is the name of the game. I’ve also learned rotate this guy so he doesn’t climb only in one direction. I might even try adding some of these moss climbing poles to help it grab onto something.
Ric Rac Cactus

I don’t own a ric rac cactus yet, but I’d love to get my hands on one! I mean, doesn’t the name just describe it perfectly!? The shape of this plant is so cool. I MUST HAVE IT!
Favorite Trendy Plants
Fiddle Leaf Fig
One of the first plants I actually bought was this fiddle leaf fig - most likely because I was seeing them EVERYWHERE at the time. While it’s still on the small side, it’s grown quite a bit over the last couple of years and makes me one proud plant mama. In fact I even bought a more mature one for our mudroom, not to mention the fake one we have in the living room!
Monstera Deliciosa
Another super trendy plant is the monstera and it’s easy to see why!

Pssst, peep that cute lil’ ponytail palm in the back.
These plants with their ginormous leaves truly are show-stoppers. I have four of them now - two of which broke apart from this behemoth the last time it was repotted.
This one on the other hand was propagated from just a few cuttings and gifted by a friend!
Rubber Tree
Yet another plant I don’t own yet - but I will! Mark my words….
There are many varieties of rubber plants. I specifically have my eye on a ficus burgundy for its beautifully dramatic color or ficus tineke because of its gorgeous variegated leaves.
I’ve even enjoyed the look of rubber trees so much that I've painted them! While I haven’t pulled the proverbial trigger on buying a live rubber tree yet, I do own a faux version that I love!
Plant Care Tips
Believe it or not, the list above doesn’t include all the plants around my house. I started to write that post… and it was looooong. Instead, I’d like to share some quick tips I’ve learned during my plant lady adventures that keep my little buddies thriving.
Don't water all your plants on the same schedule
Remember how I mentioned at the beginning of this post that I’ve tended to over-love (i.e. - kill) some of my plants? Well, watering them all on the same schedule is typically what has gotten me in that boat. You may think your plant is thirsty because it’s been a week since you last watered it, but more than likely it’s fine.
A good watering method is to let your plants tell YOU when they want some water. Just look for the warning signs - they’ll typically get droopy or may become less vibrant or drop leaves. And if you’re not sure, stick your finger in the dirt a couple of inches. If it’s bone dry, feel free to water it. You can also use a moisture meter to help with this, but I warn you to not over-rely on them.
Additionally, keep in mind the type of plant you’re dealing with. Most plants can go a LOT longer without water than you realize whereas I don’t know of any plant that will do well in constantly soggy soil.
Drainage, drainage, drainage
As I mentioned above, root rot is my biggest downfall in plant ownership. Proper drainage (and not overwatering) can help with that! Here are a few ways to deal with drainage.
Buy pots with a hole in the bottom (or drill one yourself) and use a saucer for excess water to drain out.
Sometimes pots don’t come with holes or you may not want to drill into them. Here’s how you can deal with that:
Keep your plant in the nursery pot (or another small pot) and prop it up inside of the main pot so that water can drain out the bottom.
Fill the bottom of your pot with rocks or pebbles so excess water has somewhere to go.
Dust the leaves
Do you remember a little thing you learned in elementary school science called "photosynthesis”? Turns out, it’s a real thing! And plants dig it.
But for real - if your plants are dusty, they can’t take in the sunlight they need to live their best lives. So give your plants a little love and wipe them down now and then.
Final Thoughts
There are loads of other plant care tips out there, and as I get more experience under my belt I may do a follow-up post with what else I’ve learned along the way (propagation techniques perhaps!?). In the meantime, feel free to add your favorite tips in the comments. And I’m dying to know: what are YOUR favorite house plants?
