Target Accent Cabinet Makeover - with Cane Webbing!
In my post outlining our home improvement goals for 2021, I mentioned I wanted to work on whipping the foyer into a better, more inviting space. So why not start by flipping a piece of furniture I already have in there!?
How to Upgrade a Cabinet with Cane Webbing
In my post outlining our home improvement goals for 2021, I mentioned I wanted to work on whipping the foyer into a better, more inviting space. So why not start by flipping a piece of furniture I already have in there!?

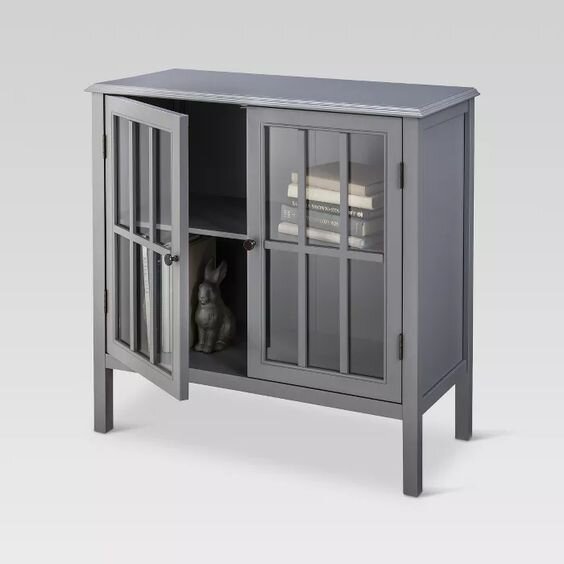
I got this wildly popular cabinet from Target as a Christmas present probably 7 or so years ago and in that time it has served us well, generally housing random tools that we use frequently enough to keep close by. Lucius and I have even lovingly taken to calling it “The Gray Thing” when referring to it.
As an Amazon Associate, I earn from qualifying purchases. This post may contain affiliate links, meaning I receive commissions for purchases made through those links, at no cost to you.
Right off the bat after putting this lil’ guy together I realized I didn’t necessarily like being able to see inside. I mean, random hammers, measuring tape, extension cords, and paint supplies aren’t exactly the most luxurious home decor. So I took some double-sided tape and stuck a couple of sheets of a patterned paper to the inside of the windows. And for a long time, that was that.

But once we moved into our most recent house, The Gray Thing just seemed to fall flat where it lives in our foyer. I was actually on the verge of buying a console table to replace it when I found this image:

I was immediately inspired. I love the contrast of the black paint with the warmth of the brass and cane.
In our foyer, I’m really drawn to the dark greens of the snake plant I have on the side of the staircase and how the black basket it sits in pops against the more neutral tones in this space, so I figured trying to balance that out by painting my cabinet a darker color was worth a shot. Plus, I was really excited about the prospect of incorporating cane webbing into my space! And if it didn’t work out… no loss. I was planning on replacing it anyway. So I got to work!

How I Flipped my Cabinet
Materials
These are the tools you’ll need for everything except the cane webbing installation (we’ll get to that down below):
- Drill
- Oscillating tool
- Box cutter
- Sandpaper
- Orbital sander (optional)
- Primer
- Paint
- Paintbrush
- Foam Roller
- Paint Tray
Remove Doors and Hardware
This step is pretty self-explanatory - just grab a drill and go to town!
Remove Glass from Doors
Although it looks like there are 6 panels of glass in each door of this cabinet, it’s actually one piece of glass per door. Unfortunately, I kinda jumped into this step really quickly and failed to take pictures, so I’ll explain what I did as best as I can.
Using my oscillating tool, I stuck the blade between the frame of the door and the wood that made up the “windowpanes”. Gently do this around each piece of wood and it’ll pop right off. You should then have one piece of glass, intact. Hopefully, the picture below helps explain a little better.

As you can see, the wood that made up the “panes” pops out in one piece.
Then, to remove the piping holding the glass in (I’m sure there’s actually a term for whatever that is, but I don’t know it), I took a box cutter and pried it out.

Sand, Prime, & Paint
Next, you have your general prep work - sanding, priming, and painting. I simply took my orbital sander and some 80 grit sandpaper and roughed up the surface of the cabinet. Then used a brush and small foam roller to apply a coat of primer. Lastly, I used my brush and foam roller to apply two coats of paint.
I painted my cabinet Jasper by Sherwin Williams. It’s a super dark, almost black, green. I used this same color on the interior of a couple of our kitchen cabinets and love it! I figured seeing it in another area of the house would tie the spaces together nicely.

Add Cane Webbing

Now, this is what I bet most of you are here for - cane webbing!
This material is all over the place right now, and rightfully so! It’s a beautiful material that easily brings a natural element to any space. I even wrote about how it was trending in this post a while back! And I was super excited when I realized I found a way to incorporate it into a DIY project.
I ordered mine from this shop on Etsy, but you can also find it on Amazon. I added it to the doors of my cabinet using a staple gun. Here’s how:
- Soak your cane webbing
- Soaking the cane webbing for about 30 minutes before you begin work makes it way more pliable.
- Gather your materials
- While your cane is soaking, grab the following items:
- Scissors
- Measuring tape
- Staple gun
- Staples (I used 1/4 inch)
- Needle nose pliers
- While your cane is soaking, grab the following items:
- Cut the cane webbing
- Measure the inside of the frame of the cabinet door and cut the cane webbing to size. It’s okay (and honestly, not a bad idea) if you cut it just a hair bigger than the opening.
- Staple it in place
- I was fully expecting the installation of the cane to be WAY harder. I bought spline expecting to push the cane into the notch around the edge of the door frame that held the glass. But before I tried that, I thought I’d at least have to use wood glue. Nope, not true. I didn’t use either of those. I simply stapled the cane to the lip on the interior of the cabinet door that held the glass panes.
- A few hints here:
- Remember how I said to cut the cane a hair bigger than you measured? This is why. The cane wants to unweave itself. Cutting it a little larger gives you some extra material to work with.
- Be liberal with your staples. As you’ll see below, I put my staples so close together, they even overlapped at times. It’s hard to aim with a staple gun, so using lots of staples helps ensure you’re grabbing the cane webbing all along the edge. And if a staple goes in a little wonky, just use your needlenose pliers to pull it out.
- After you staple the cane webbing to the door frame, it’ll look a little wavy. Have no fear! As it dries, the cane tightens up and straightens itself out.


And that’s it! Installing the cane webbing was as simple as that. Now you get to put it all back together!
Reinstall Hardware
Lastly, I decided to change up the knobs on my cabinet, but you could definitely keep the ones that came with it. I did end up using the same hinges that came with the cabinet though.
Final Thoughts
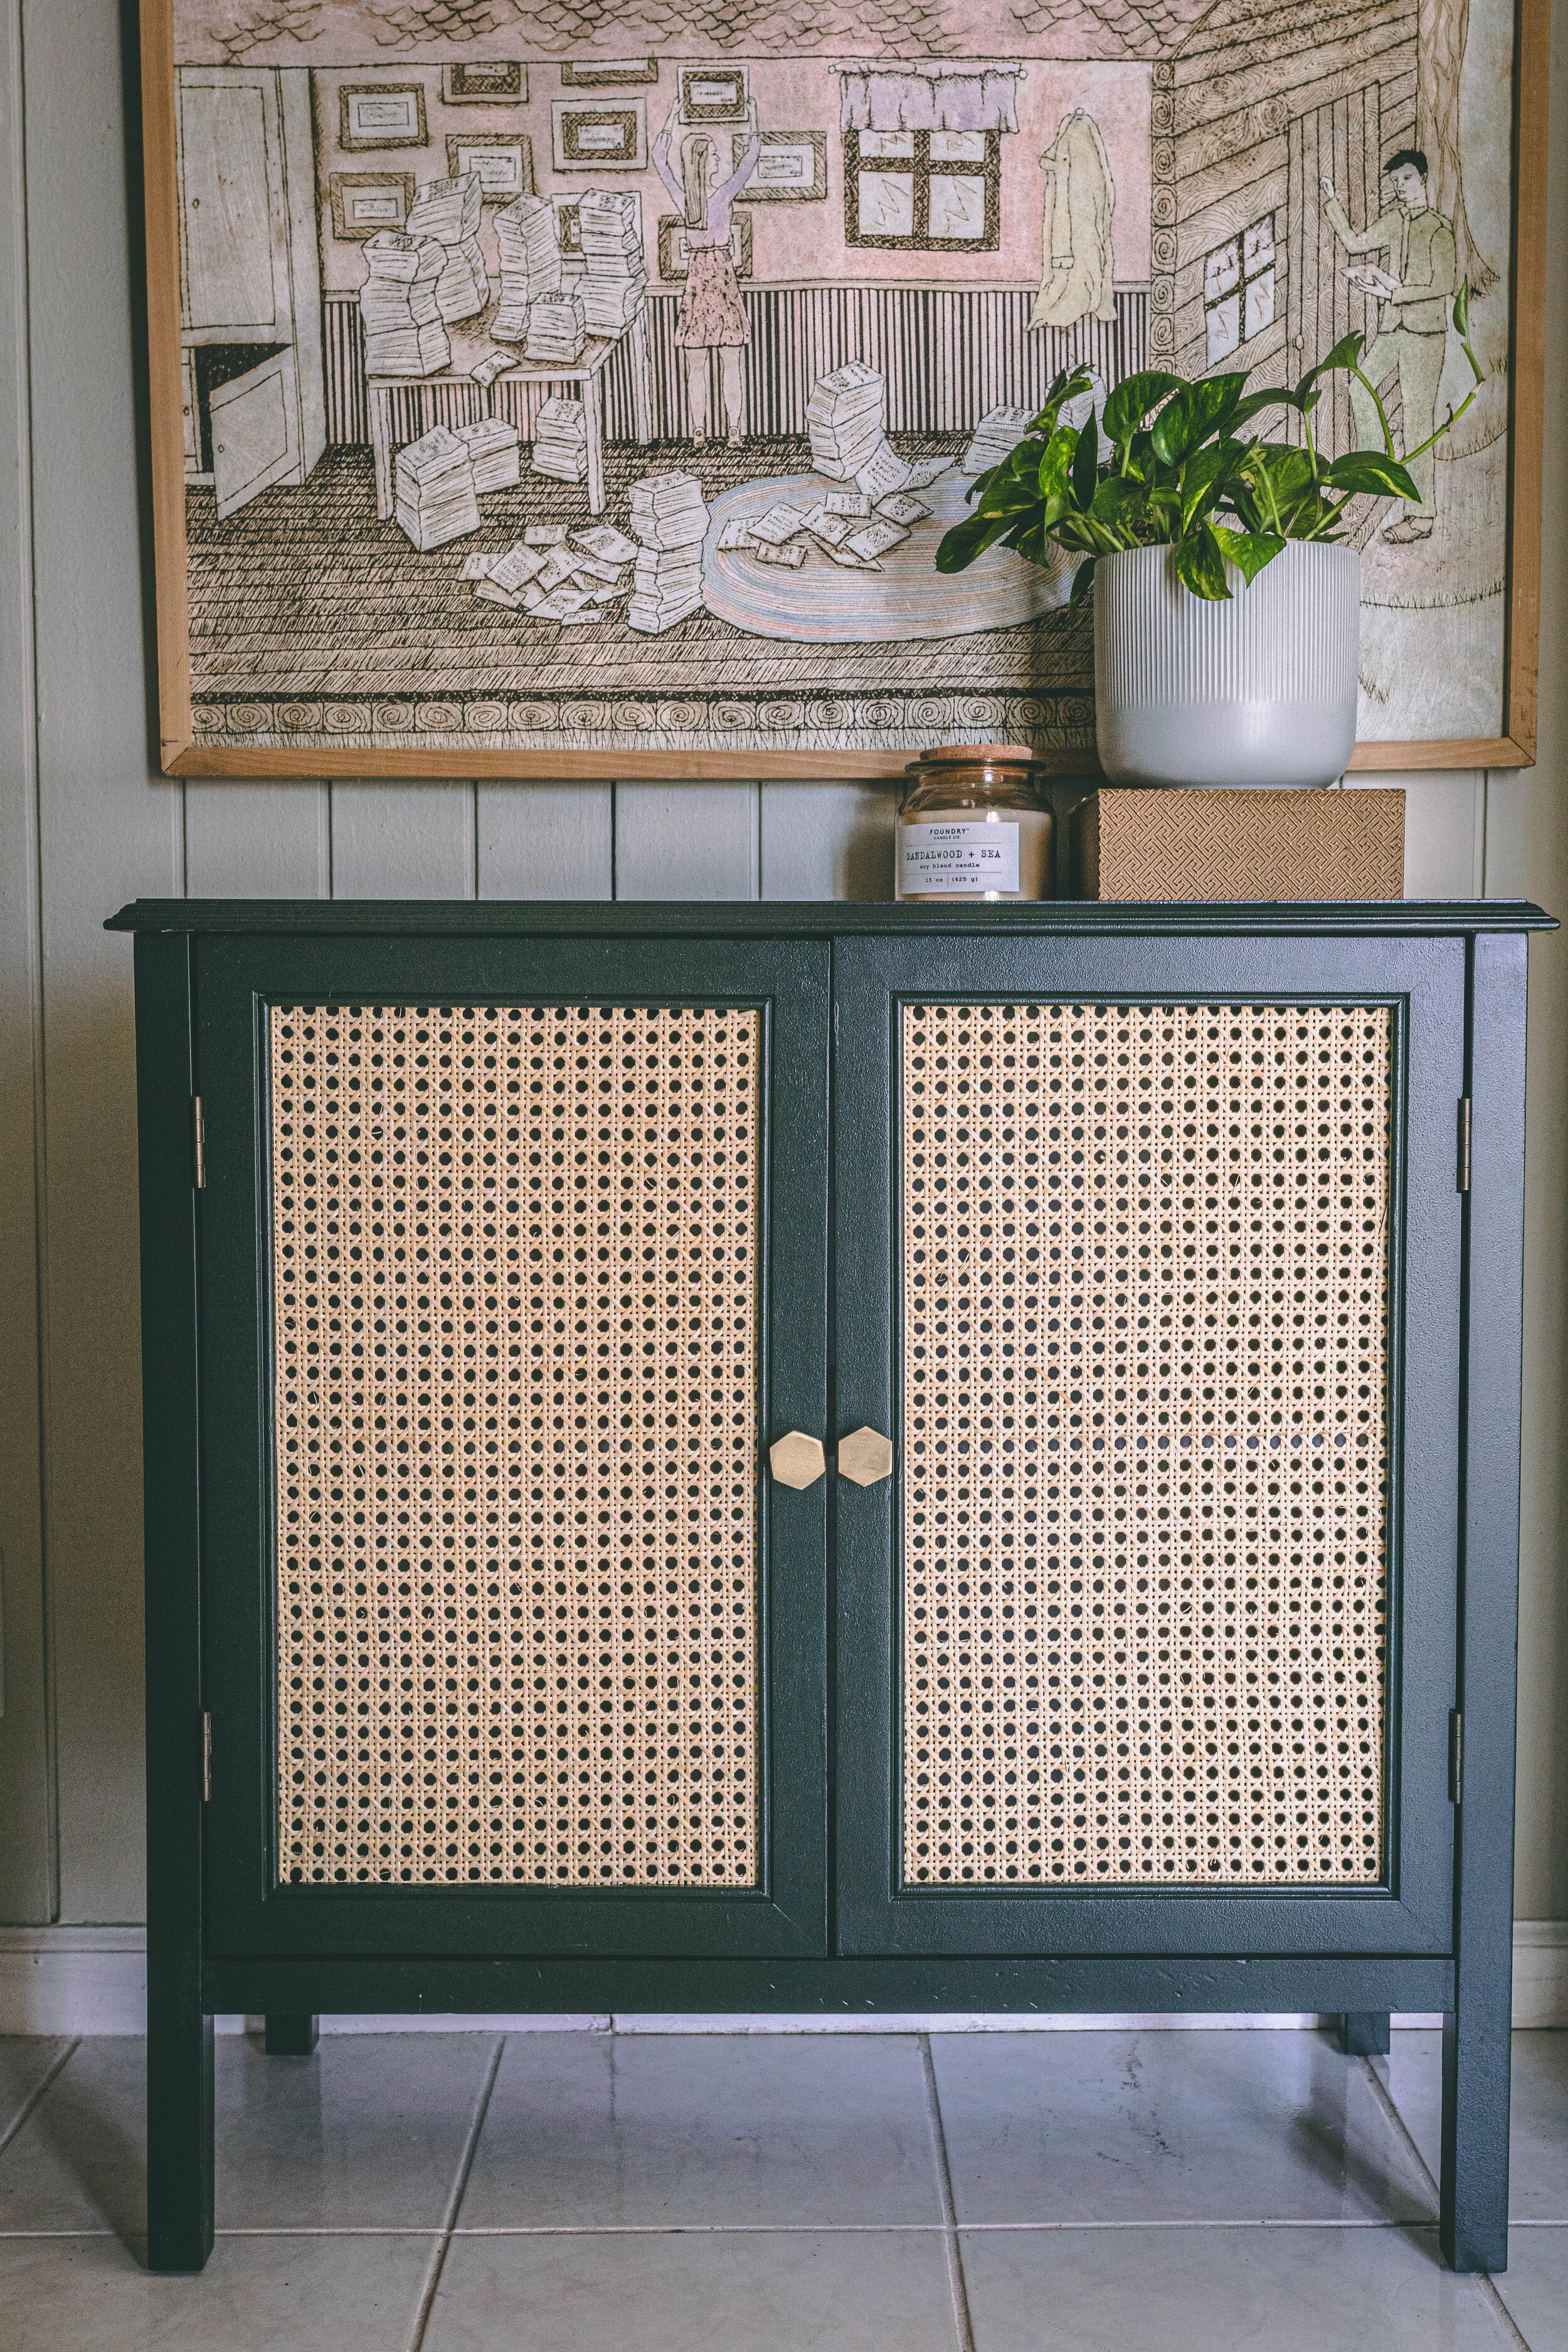

Aren’t these the best DIY projects? The ones that are low-risk and turn out exactly as you wanted? I feel like it rarely goes this smoothly in DIY so I’ll take this one as a win! Plus, I’m loving how my updated cabinet is helping to transform the foyer into a much more put-together entryway. There’s still some work to do in this area… obviously finishing the staircase is on the list but I’m also picturing a big rubber tree next to the cabinet (now renamed “Jasper” after the paint color it’s painted). More to come!
For more DIY projects, check out the posts below:

Entryway Furniture Flip
How to Install Peel and Stick Wallpaper
I've removed my fair share of wallpaper. In fact, I removed an entire house full of wallpaper at our last place, and I've even removed some in this house too! And let me tell you, it's a huge pain. You'd probably think at this point I loathe wallpaper, but surprisingly that’s not the case at all.
Hang Peel and Stick Wallpaper
I've removed my fair share of wallpaper. In fact, I removed an entire house full of wallpaper at our last place, and I've even removed some in this house too! And let me tell you, it's a huge pain. You'd probably think at this point I loathe wallpaper, but surprisingly that’s not the case at all.
I freaking love wallpaper!
As you may have been able to tell from the Sharpie wall I drew in my office, I love patterns in general. Heck, I've even been working to incorporate more patterns into my paintings! I can't get enough. And there are countless patterns and designs available for wallpaper.
Why I Decided to Install Wallpaper
After I've suffered through hours and hours of removing wallpaper, what in the world would make me want to potentially subject the future owner of my home into doing the same thing? Four words: peel and stick wallpaper.
Peel and stick wallpaper is a huge game changer! While traditional wallpaper I'm sure has its benefits, after installing peel and stick wallpaper, I can't imagine trying to install traditional wallpaper by myself. And I can't justify the likelihood of some other poor soul potentially having to remove it. But peel and stick wallpaper is not only super forgiving during installation - it's easily removable down the line! Win-win!
So one day, a friend texted me to ask my thoughts on leaving the doors off her pantry and installing wallpaper inside. I immediately egged her on to do it and to use a bold and bright pattern. I mean, a pantry is a small space that a bright and fun pattern wouldn't be too overwhelming. And then I went to bed… but my mind didn't. It was dreaming about wallpaper.
The next day I knew I had to find a place to install some of my own. I immediately knew my master closet would be perfect for my first try with wallpaper. It’s a space where I can enjoy it every day and not even have to take into consideration whether anyone else in my family likes it. Perfection.
As I previously shared, we built my master closet to be LARGE. I want to be able to get ready in here in the morning without waking up my husband. It's like its own little room. So why not make it a bit of an oasis?
As an Amazon Associate, I earn from qualifying purchases. This post may contain affiliate links, meaning I receive commissions for purchases made through those links, at no cost to you.
Choosing the Perfect Paper
Typically when I make a purchase I take my tiiiime. I mull it over. I pin tons of options and compare. Then I read the reviews and compare some more. Then I’ll usually put it in my cart and wait a few days before actually making the purchase because apparently, I have commitment issues. It’s a process.
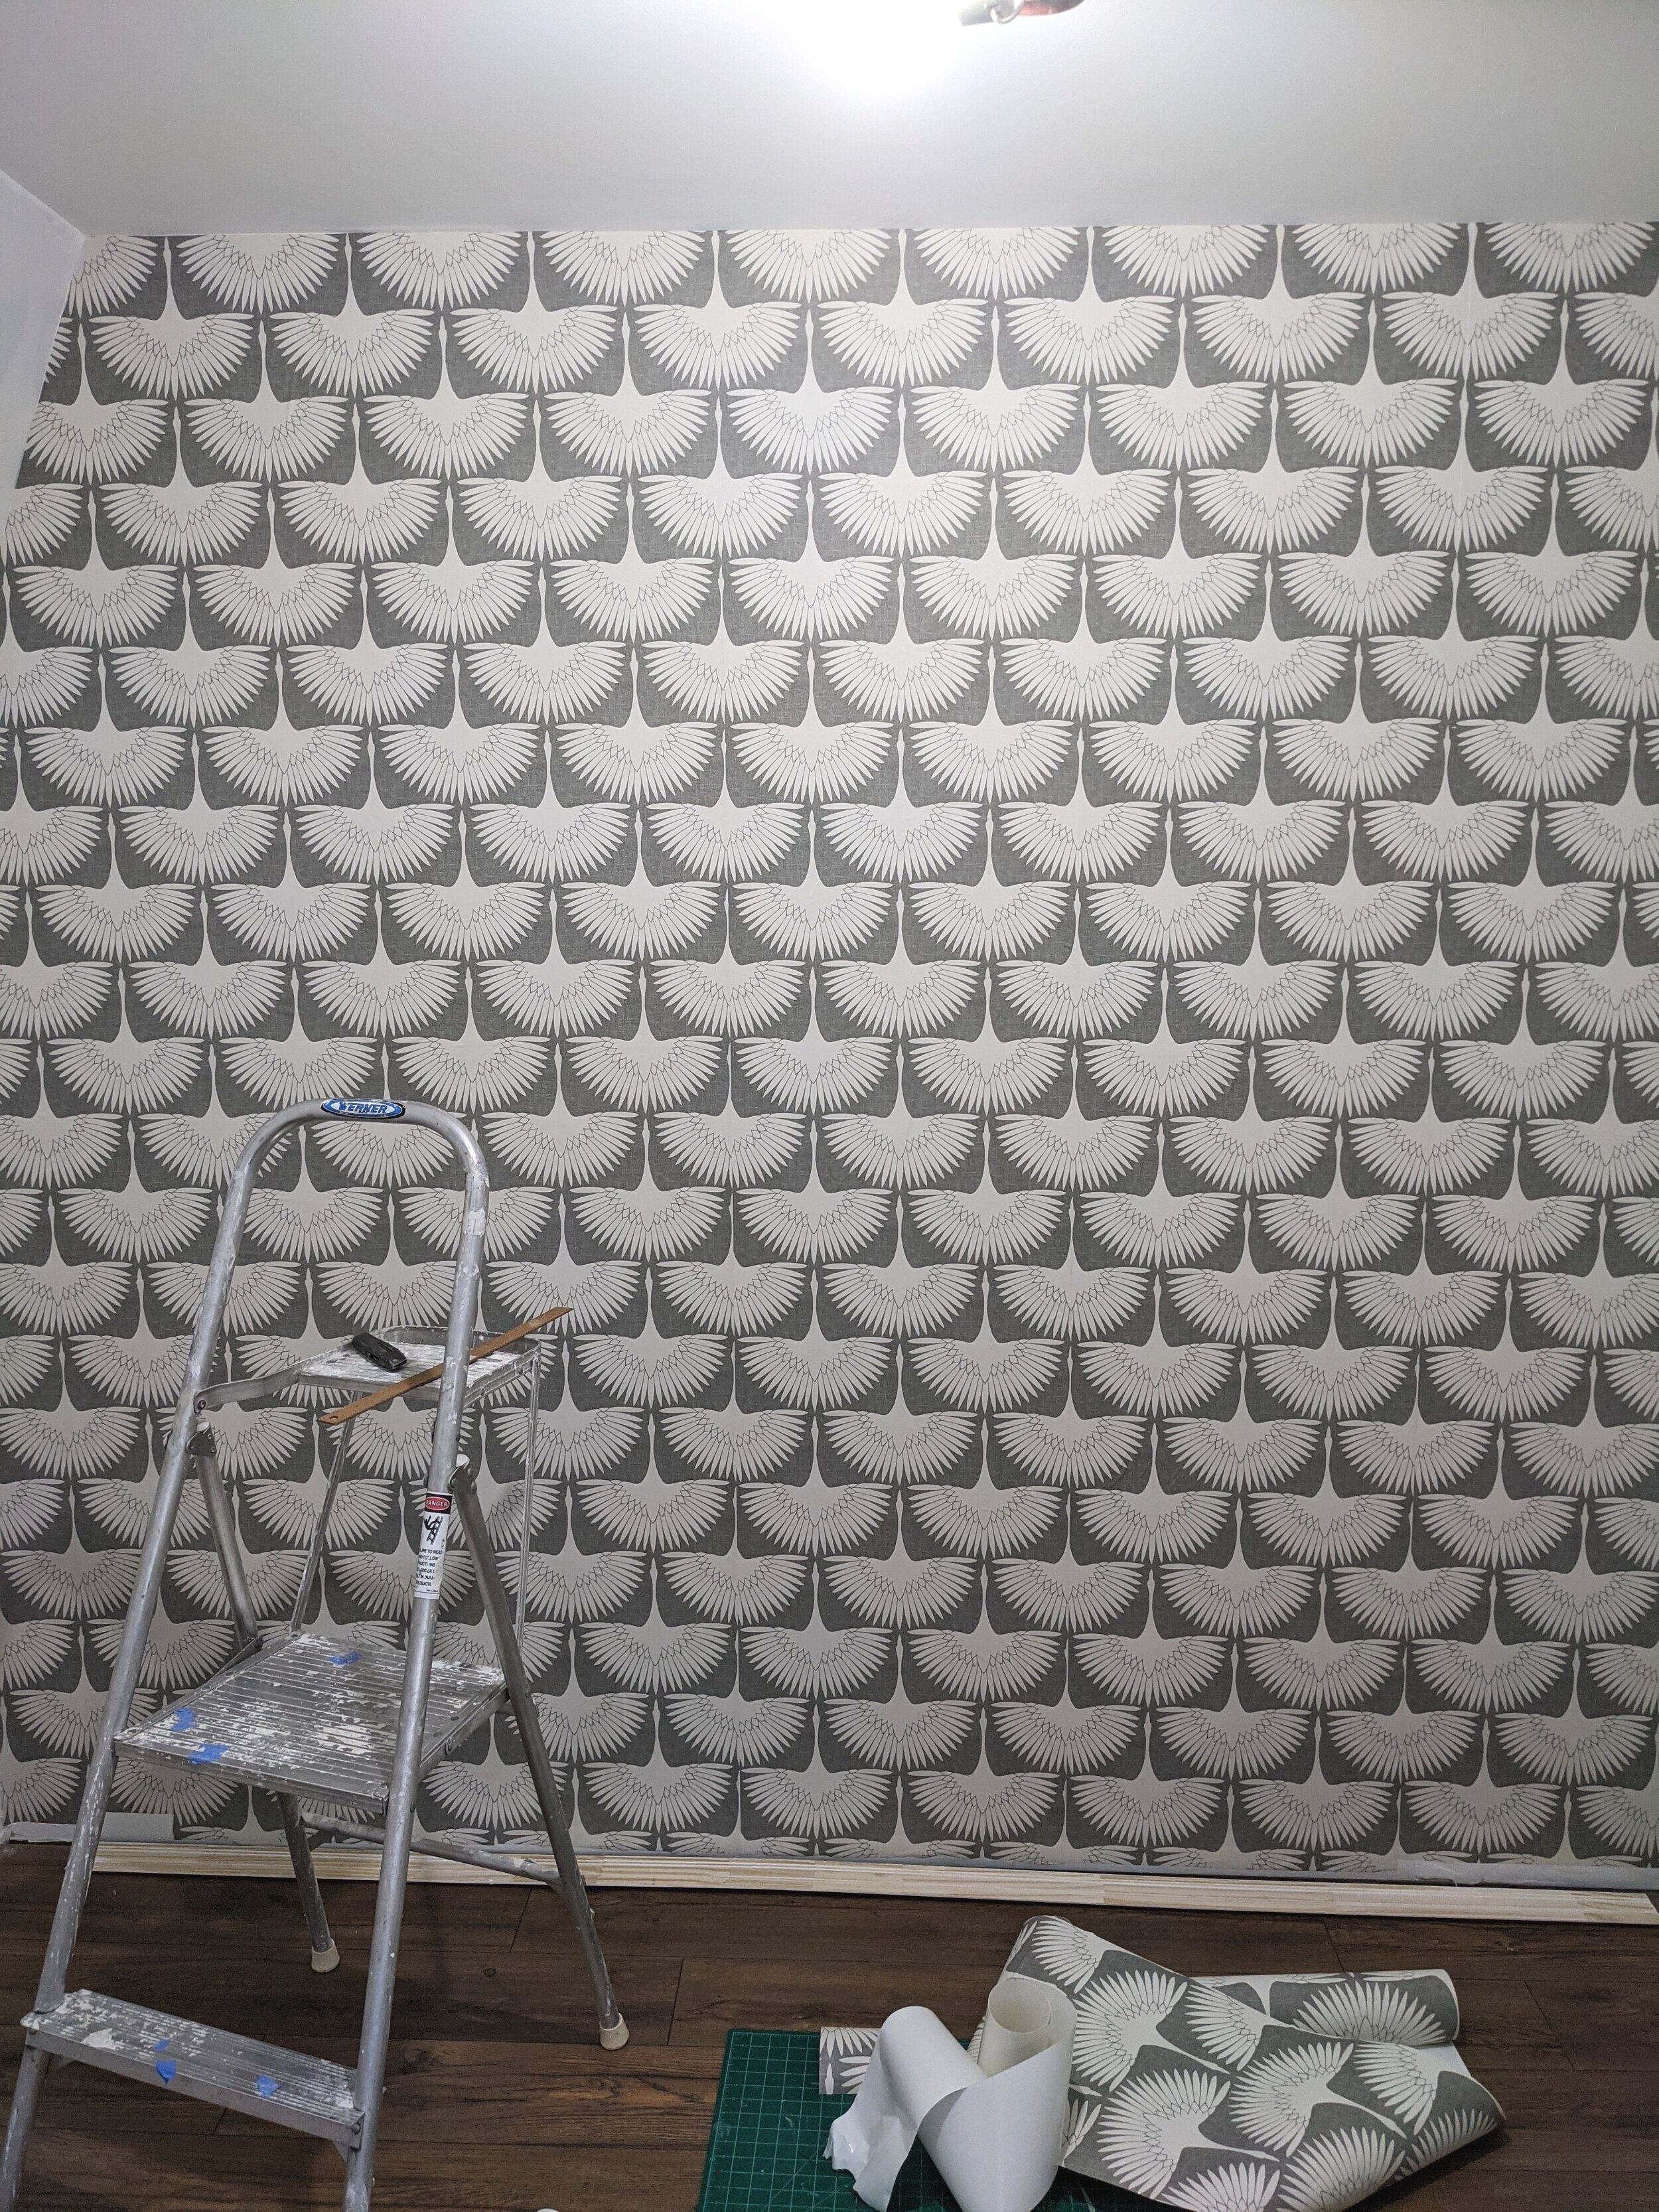
But picking a wallpaper was a shockingly easy decision. I immediately knew I wanted this one:
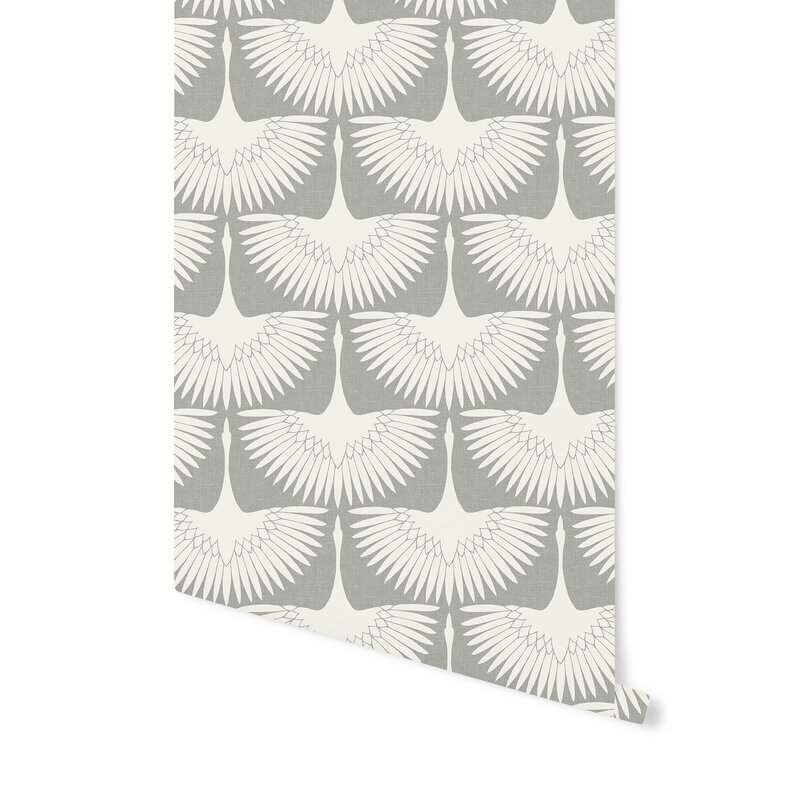
It's a pattern I've been swooning over forever. It feels soothing, yet dynamic. I love the soft tones and how the pattern almost turns the birds into abstraction when you look at a wall full of them. Plus, I figured, hey, it’s a small space that only I’ll see most of the time, why not take my own advice and go bold? So I measured my walls to figure out how much I needed and ordered it!
I didn't waste any time and installed it the day after it was delivered. Here's how to install your own:
Materials

- Step stool
- Level
- Pencil
- Exacto knife or box cutter
- Measuring tape
- Cutting pad
- Squeegee (or an old gift card if you’re me)
- Wallpaper!
Read the Directions!
First thing's first, read the directions before installing your wallpaper. Some designs require overlap between panels for the design to match up, or they may have other special instructions.
I'm not sure if this is standard, but the instructions on my wallpaper advised me to install the paper on a semi-gloss surface. So the day before I wallpapered, I threw a coat of leftover semi-gloss white paint onto the wall I was applying my wallpaper to (it was previously only primed).
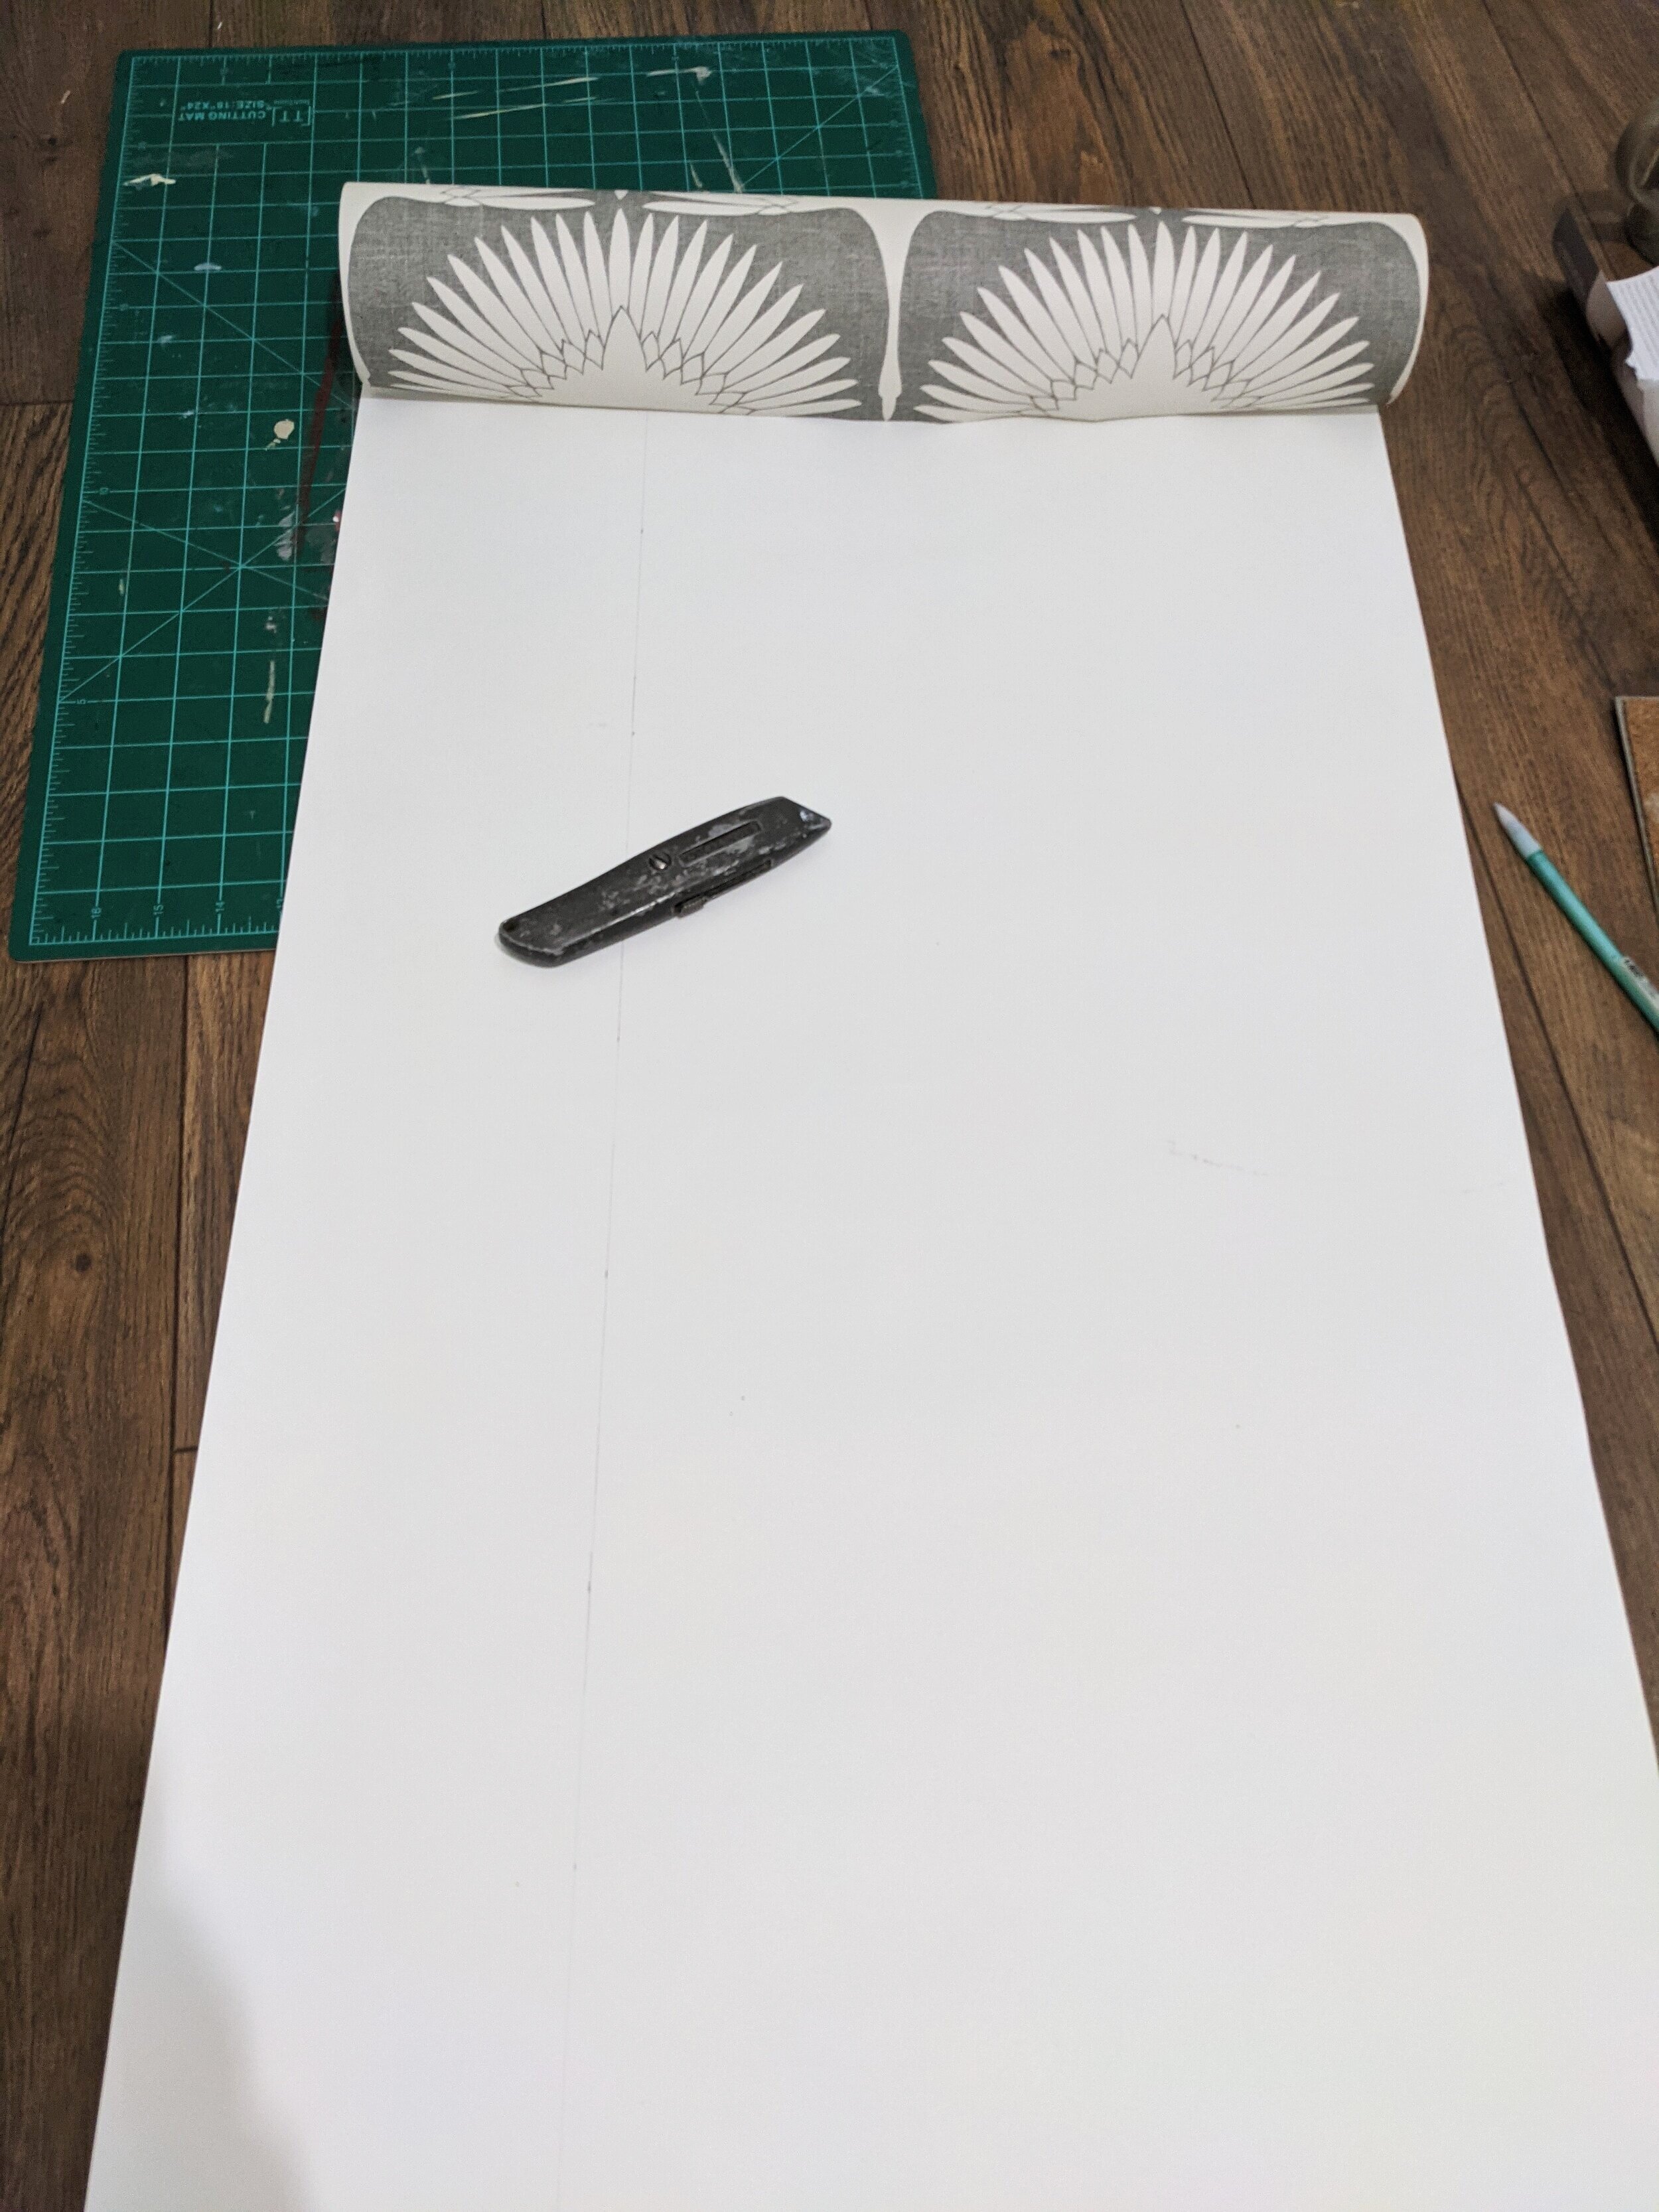
Prep Your Panels

When you're ready to wallpaper, you'll first need to cut your panels down to size by measuring the height of the wall and leaving a couple of inches for wiggle room. It's suggested to cut all your panels before you start the installation, and to match up the design from panel to panel on the floor as you go and number the panels on the back.
Draw a Plumb Line
I rarely dive into a project head-first, and this was no exception. A lot of tutorials I read before wallpapering my closet suggested starting at the top left-hand corner of the wall. But because my closet has an angled wall on the left-hand side, I felt more comfortable starting on the top right. I'm not sure if it makes a difference with other designs - I didn't have any issues starting on the right.
Either way, measure the width of your wallpaper. From whichever side of the wall you'll start hanging it from, mark how far out your first panel will hang. Using your level and your mark, draw a vertical line from the top to the bottom of the wall.
Hang Your Wallpaper
Grab your first panel and try to line it up as best as you can with the vertical line you just drew. Walls are rarely straight, so this line helps ensure the pattern on your design doesn't go completely haywire by the last panel. This being said, it's also not a bad idea to let a little bit of the wallpaper wrap onto the ceiling too. Don't worry - you'll cut off any excess later.
Peel back about 12-18 inches or so of the backing and carefully stick your wallpaper to the wall.

Using your squeegee (or in my case, an old gift card - which worked just fine!) as you apply the wallpaper, push out any bubbles to the edge of the paper. Continue peeling off the backing and squeegeeing out the bubbles until you get to the end of your panel.

If you start to notice that your panel isn't lining up with your guideline, simply peel it off and reapply! The earlier you do this while applying the panel, the better. It's much easier to work with a small area that is missing the backing than a large area that wants to stick to literally everything it touches (including itself).

Once you get to the bottom of the wall, carefully use your Exacto knife to trim off the excess wallpaper. You can trim off any overhang on the ceiling or adjoining walls (if you're only doing an accent wall) at this point as well.
Next, line up your second panel and follow the same steps, being careful to pay close attention to how the pattern is matching up.
Finishing Up
For my last panel, I only had about 6 inches of wall space to cover. I figured it would get a little hairy if I tried to use the entire width of the panel and them trim off the overhang because there would be so much. So before I applied my last panel, I cut it closer to the size I needed it, leaving a little extra in case the wall wasn't entirely square (it wasn't).
Since this is where the adjoining wall angles, I was especially concerned I would mess this panel up, but it was easier than I expected! I just took it slow and cut the backing off as I removed it so it didn’t get in the way.
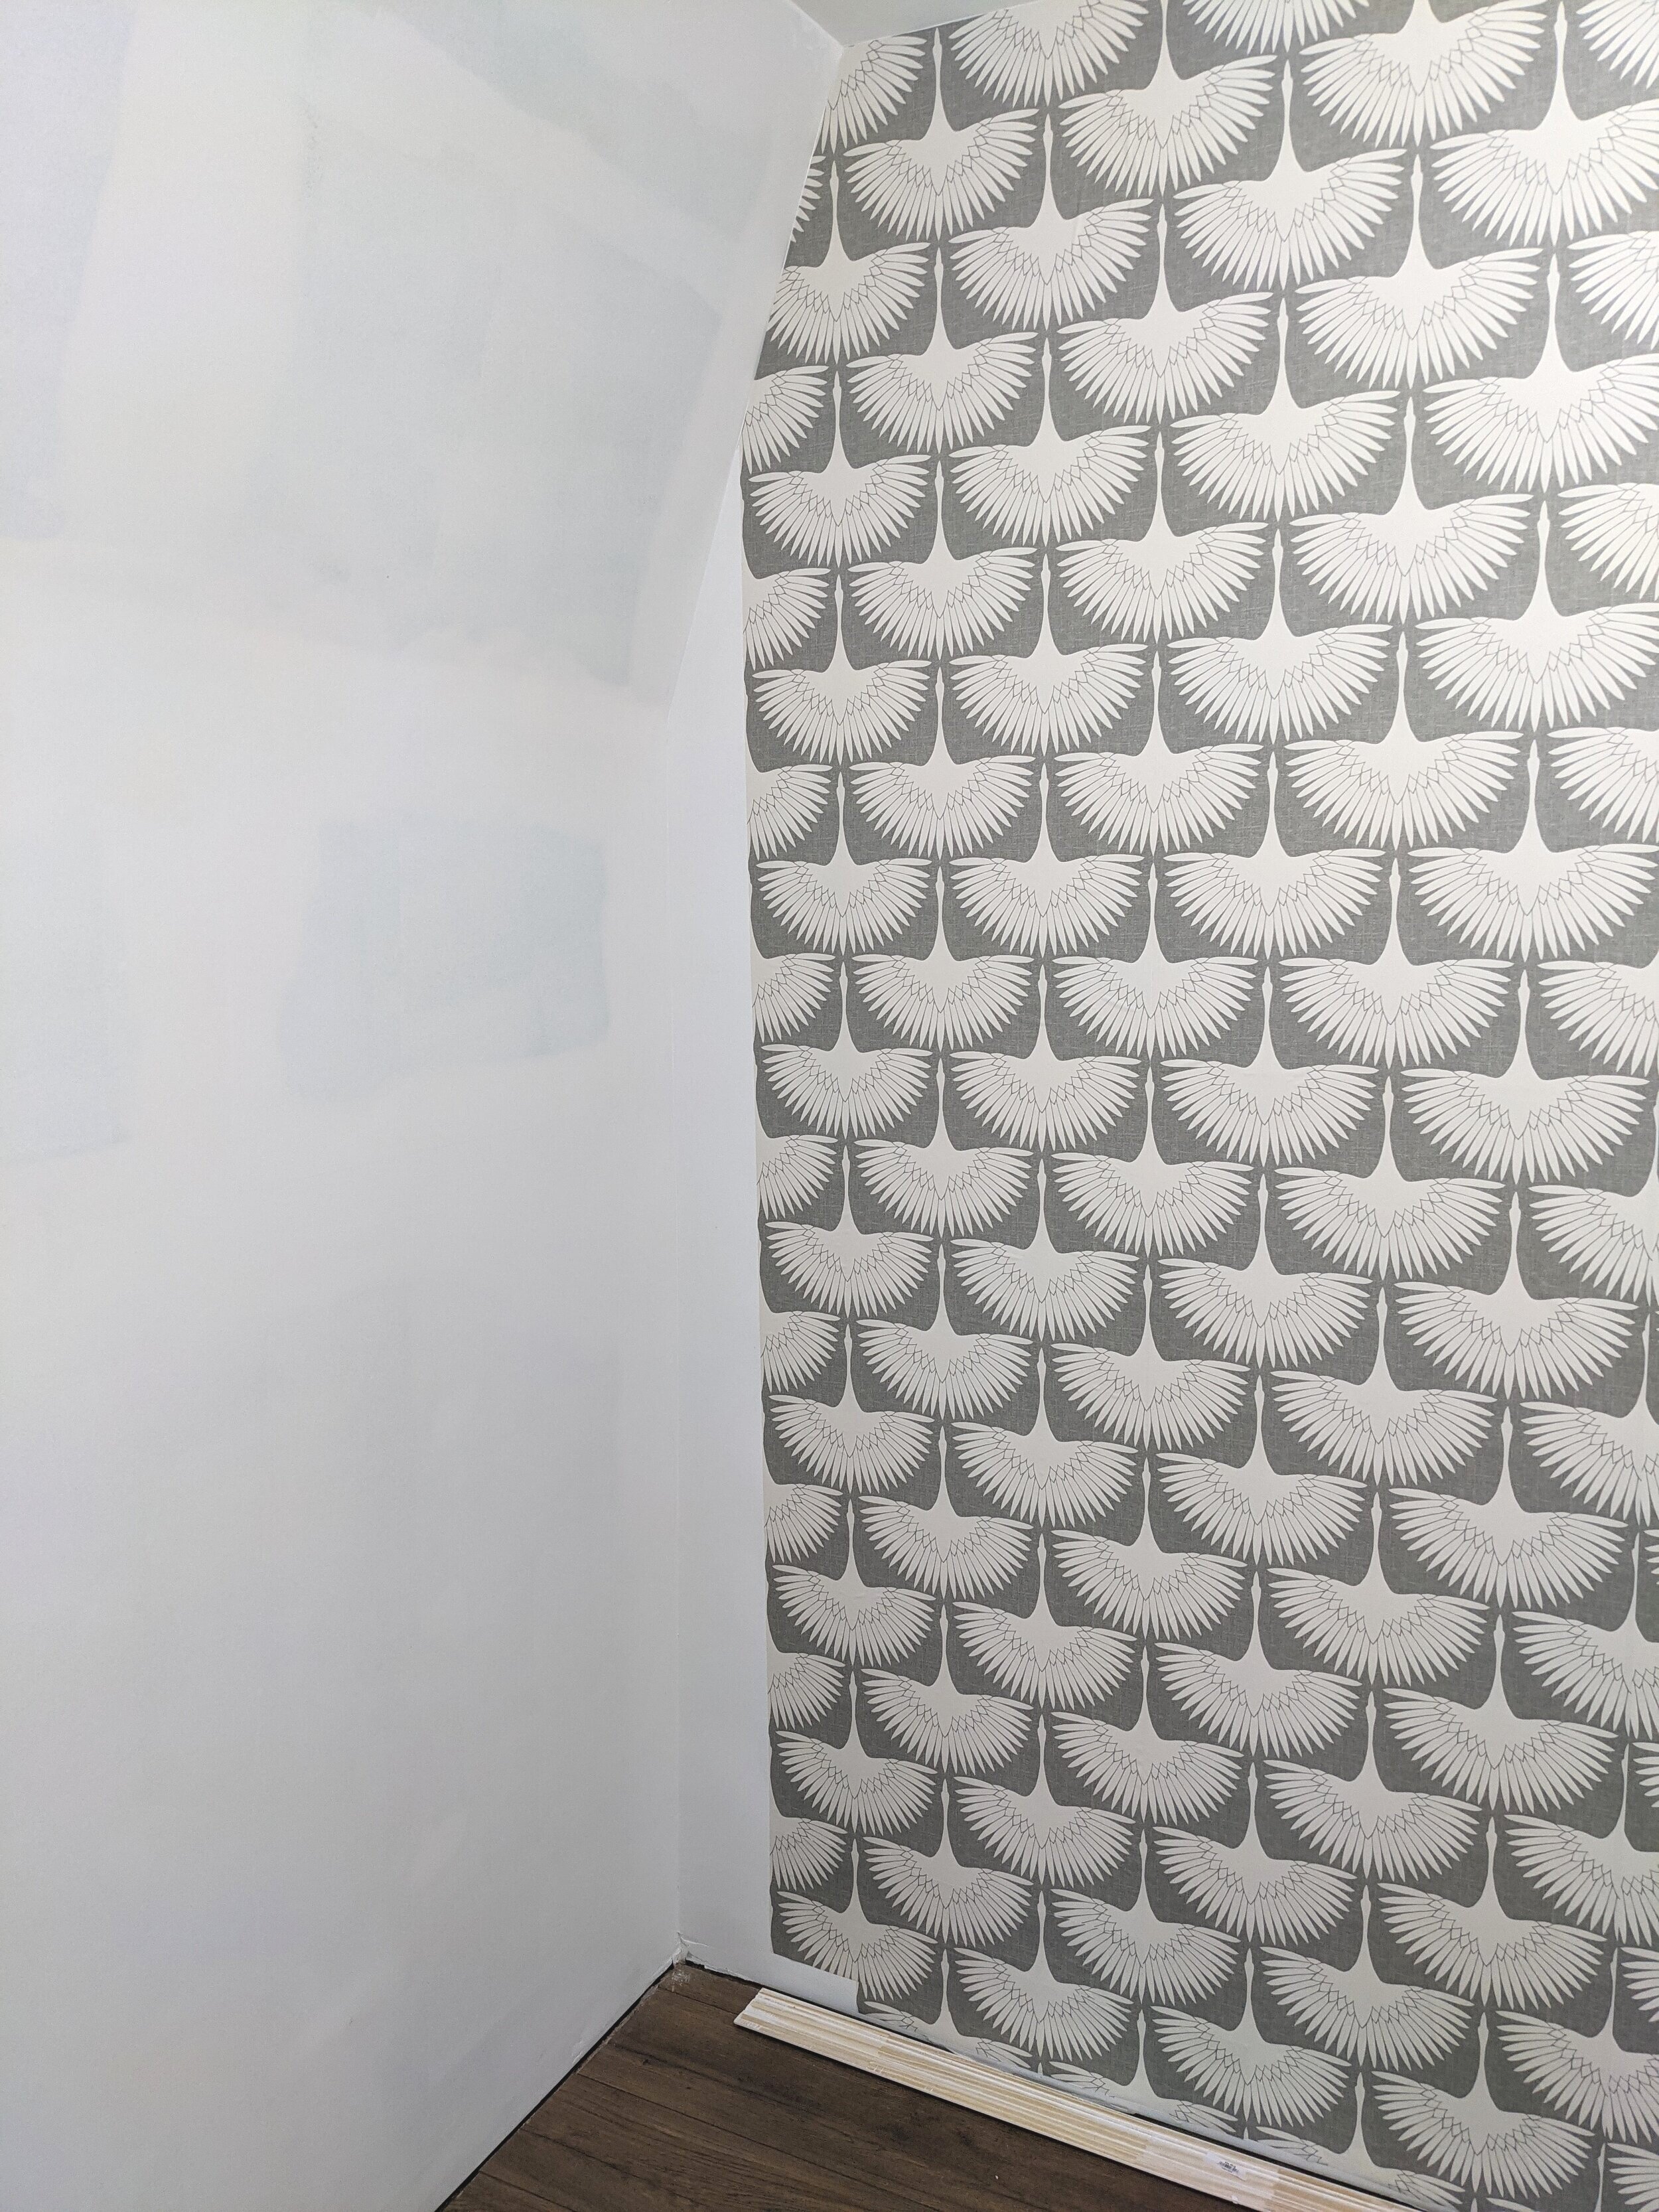
Admire Your Work
Now that your wallpaper installation is complete, stand back and take it all in! You deserve it.
Final Thoughts
While hanging wallpaper wasn’t necessarily easy, it was an easy enough project for me to be completely willing to attempt it again. The payoff of seeing that beautiful design and creating a more interesting and dynamic space is totally worth it. Though I did learn some things along the way that I summarized for you below.
Tips for Installing Wallpaper
Start Small
While peel and stick wallpaper is forgiving, it's still not an easy job! I recommend sticking to a small surface area if you're a newbie wallpaperer until you can get the hang of it.
Choose a Forgiving Pattern
I didn't realize how tricky my pattern would be to line up from panel to panel. I love how it turned out, and I think any imperfections will be hidden, but if I knew then what I know now, I would choose a more abstract and less grid-like pattern for my first wallpapering extravaganza.
Know How Long Each Roll of Wallpaper Is
Make sure you know how long each roll of wallpaper is before you start cutting your panels. I didn't realize that one roll of mine was only enough for two panels. Luckily this didn't become an issue, but I cut it verrrrry close. (Get it!?)
Grab an Extra Pair of Hands
If you have someone to help you, utilize them! I did this project by myself. And while I'm really happy with the outcome, there probably would have been fewer curse words if I had another pair of hands.

Related Master Closet Posts
How to Hang Removable Wallpaper
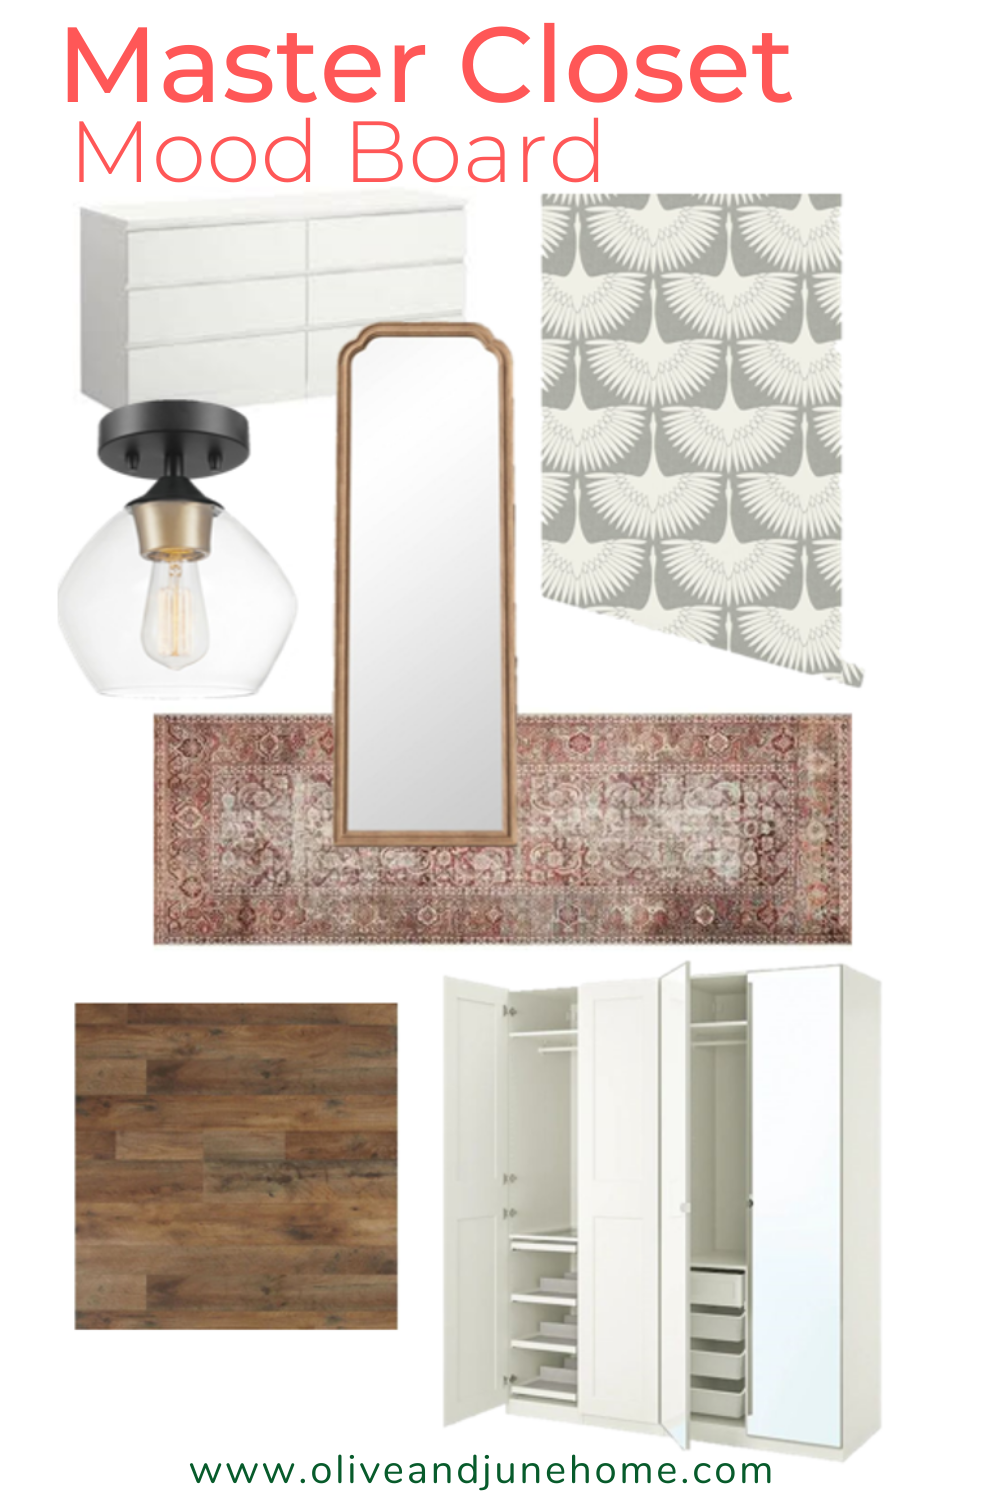
Master Closet Mood Board
We built my master closet with the intent that it would be like its own little room inside of our bedroom. So of course, since I have this little space that is truly all my own, I'm going all out and REALLY making it my own. Which is why I created a mood board to plan out the entire design of my closet. (Also, I love mood boards.)
Master Closet Mood Board
You may not think that you need an entire design scheme for a master closet. But you'd be wrong.

Just kidding! To each his own. BUT on that note… we built my master closet with the intent that it would be like its own little room inside of our bedroom. My goal is to use that space to get dressed in the morning without waking Lucius up by turning on a light or trying to get ready by fumbling around in the dark.
And yes, you read that right, MY master closet. Lucius has his own (much smaller and much less exciting) closet.
So of course, since I have this little space that is truly all my own, I'm going all out and REALLY making it my own. Which is why I created a mood board to plan out the entire design of my closet. (Also, I love mood boards.)


So while mine may not be quite at the level as some of the spaces I've been fawning over, it'll be perfect for me. Here are my plans.
Accent Wall
As an Amazon Associate, I earn from qualifying purchases. This post may contain affiliate links, meaning I receive commissions for purchases made through those links, at no cost to you.

I decided to put an accent wall in my closet because, why not? And I'm head over heels in love with it! The best part was that I didn't have to run the idea past anyone else before diving right in. A tutorial is coming soon!
Storage
I really wanted to install floor-to-ceiling storage on either side of my closet like many of my inspiration pictures, but because of our roofline, the left side wall of my closet slopes in about 3/4 of the way up.
My new plan is to install an IKEA PAX system on the right-hand side of the closet and build it in to really look seamless. It won't be exactly like this example, but it'll be similar.

On the left-hand side of the closet, I plan on buying a white IKEA MALM dresser and putting a hanging rod above it.

With this layout, I should have more than enough storage and I think it'll make the best use of the space.
Paint
Because I want to build in the PAX system, and it already comes in white, I'm going to try to match the white as closely as possible and paint all the walls the same color.
Flooring
At this point, we've installed the flooring in the bedroom and carried it into the closets. It.is.beautiful! It's a gorgeously rich mid-tone that really grounds the space.

Rugs
But to make my closet really cozy, I've been researching runners like a madwoman. I mean, who wants to walk on a cold floor first thing in the morning? C'mon! I've narrowed it down to two runners.
I included this Chris Loves Julia x Loloi runner in my master bathroom mood board and I still can't stop thinking about it. I can really see it working in my closet too. There is a possibility that I'll buy the same rug for both spaces, but there's another contender that might just make the cut in the closet.

This runner also looks beautiful in the mood board. I'm having a really tough time making a decision, so I might just have to see each of them in the space and go from there.

As an aside, it's surprised me that I've been gravitating towards rugs with more red tones in them. I don't hate red, but it's just never been the color I've been most drawn to. But it seems like ever since I bought our bedroom rug, which has a lot of rust and orange in it, my tastes may be starting to shift.
Mirror

Of course, any good closet needs a full-length mirror! There were several that I considered, like this one and this one, but I kept coming back the one above.
I really like the natural wood tone and the softness of the curves at the top. I think it has a feminine touch that will go nicely against the wallpaper and either runner option.
Lighting
For now, I'm keeping the light fixture in here pretty simple. I snagged several of these lights from Amazon for my closet, Lucius' closet, the laundry room, and the hallway. I really like the two-toned metal and the shape of the glass. Plus, they were crazy affordable! I may splurge and get something nicer for my fancy pants closet later on, but for now, it'll do just fine.
Final Thoughts
So there you have it - who knew you needed a mood board for a closet, eh? (I'm starting to think I can find any excuse to make a mood board though.)
I'm really looking forward to finishing up my closet and getting my clothes off my office floor. Yes, since I moved my old dresser to the dining room and turned it into a buffet table, my clothes have been living on the floor of my office.
If that's not motivation to finish the closet, I don't know what is!
Related Moodboard Posts

Master Closet Moodboard
Easy Ways to Make Your Faux Plants Look Real
There’s no shame in incorporating fake plants into your decor BUT, you don’t necessarily want people to realize they’re fake. So in this post, I’ll share an easy DIY and some tips to help make your faux plants look real.
How to Make Fake Plants Look More Lifelike
Are you a proven plant killer? Maybe you’re just afraid to bring live plants into your home for fear of not being able to keep them alive. Perhaps you don’t want the responsibility. Or maybe, like me, you just want MORE plants and need some of them to be as low-key as it gets.
No matter your reasoning, there’s no shame in incorporating fake plants into your decor! BUT, you don’t necessarily want people to realize they’re fake. So in this post, I’ll share an easy DIY and some bonus tips to help make your faux plants look more realistic.
Believe it or not, a year ago, I only had two plants in my house. They were little succulents that I snagged from the park and potted to see if I could actually keep them alive. And they survived!
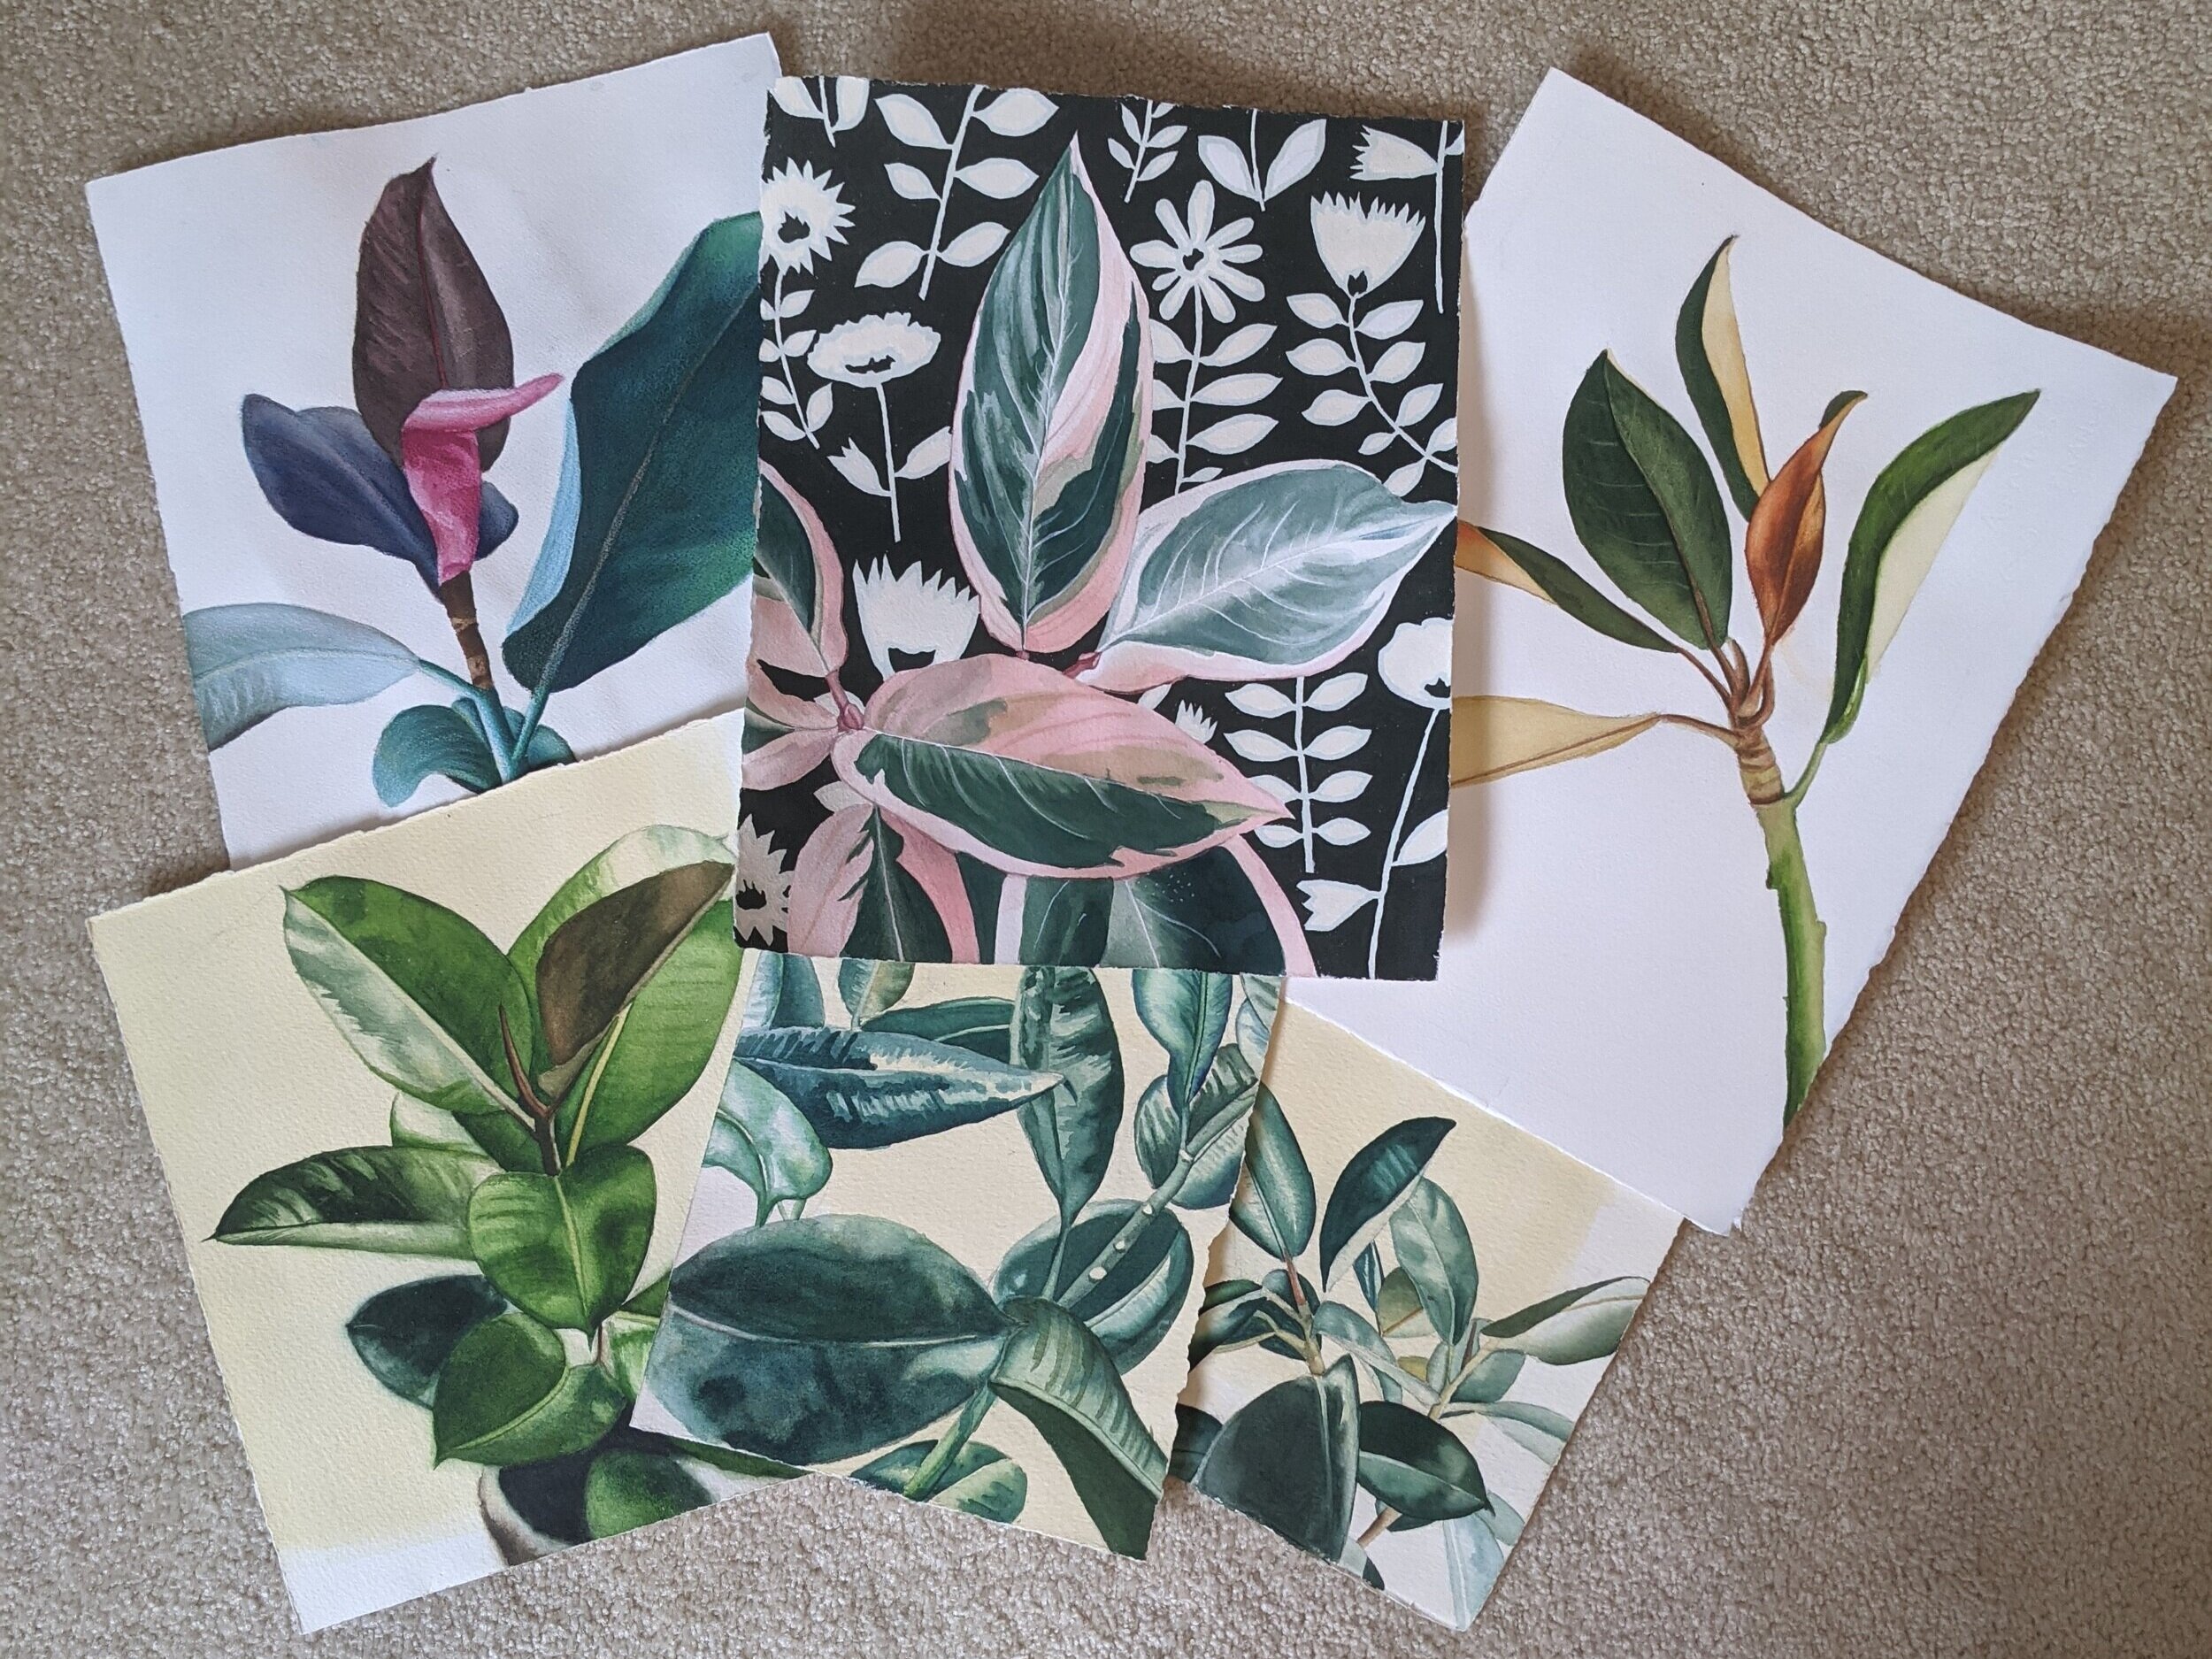
Since then, I’ve become OBSESSED with adding plants to my home (at this moment, I have 23!). Heck - I even enjoy painting plants! Not to mention my beautiful plants outside.
I didn’t realize how much my decor was missing by not having the splash of color and softness that plants can bring. But, there are simply some areas of my house that aren’t the best for plants to survive, not to mention that it can be a little stressful having loads and loads of plants to care for (“When did I water these ones last?” “Oh crap, did I just overwater them?” “Should this guy be repotted?” “Is this one happy on this shelf?”).
So what do you do when you want to add more plants, but don’t want to risk killing them? You go out and buy some faux plants!
(As an aside, there are countless places to buy faux plants. If you’re looking for a little help deciding where to buy some realistic-looking ones, Apartment Therapy has a couple of articles comparing faux fiddle leaf figs and snake plants from different companies.)
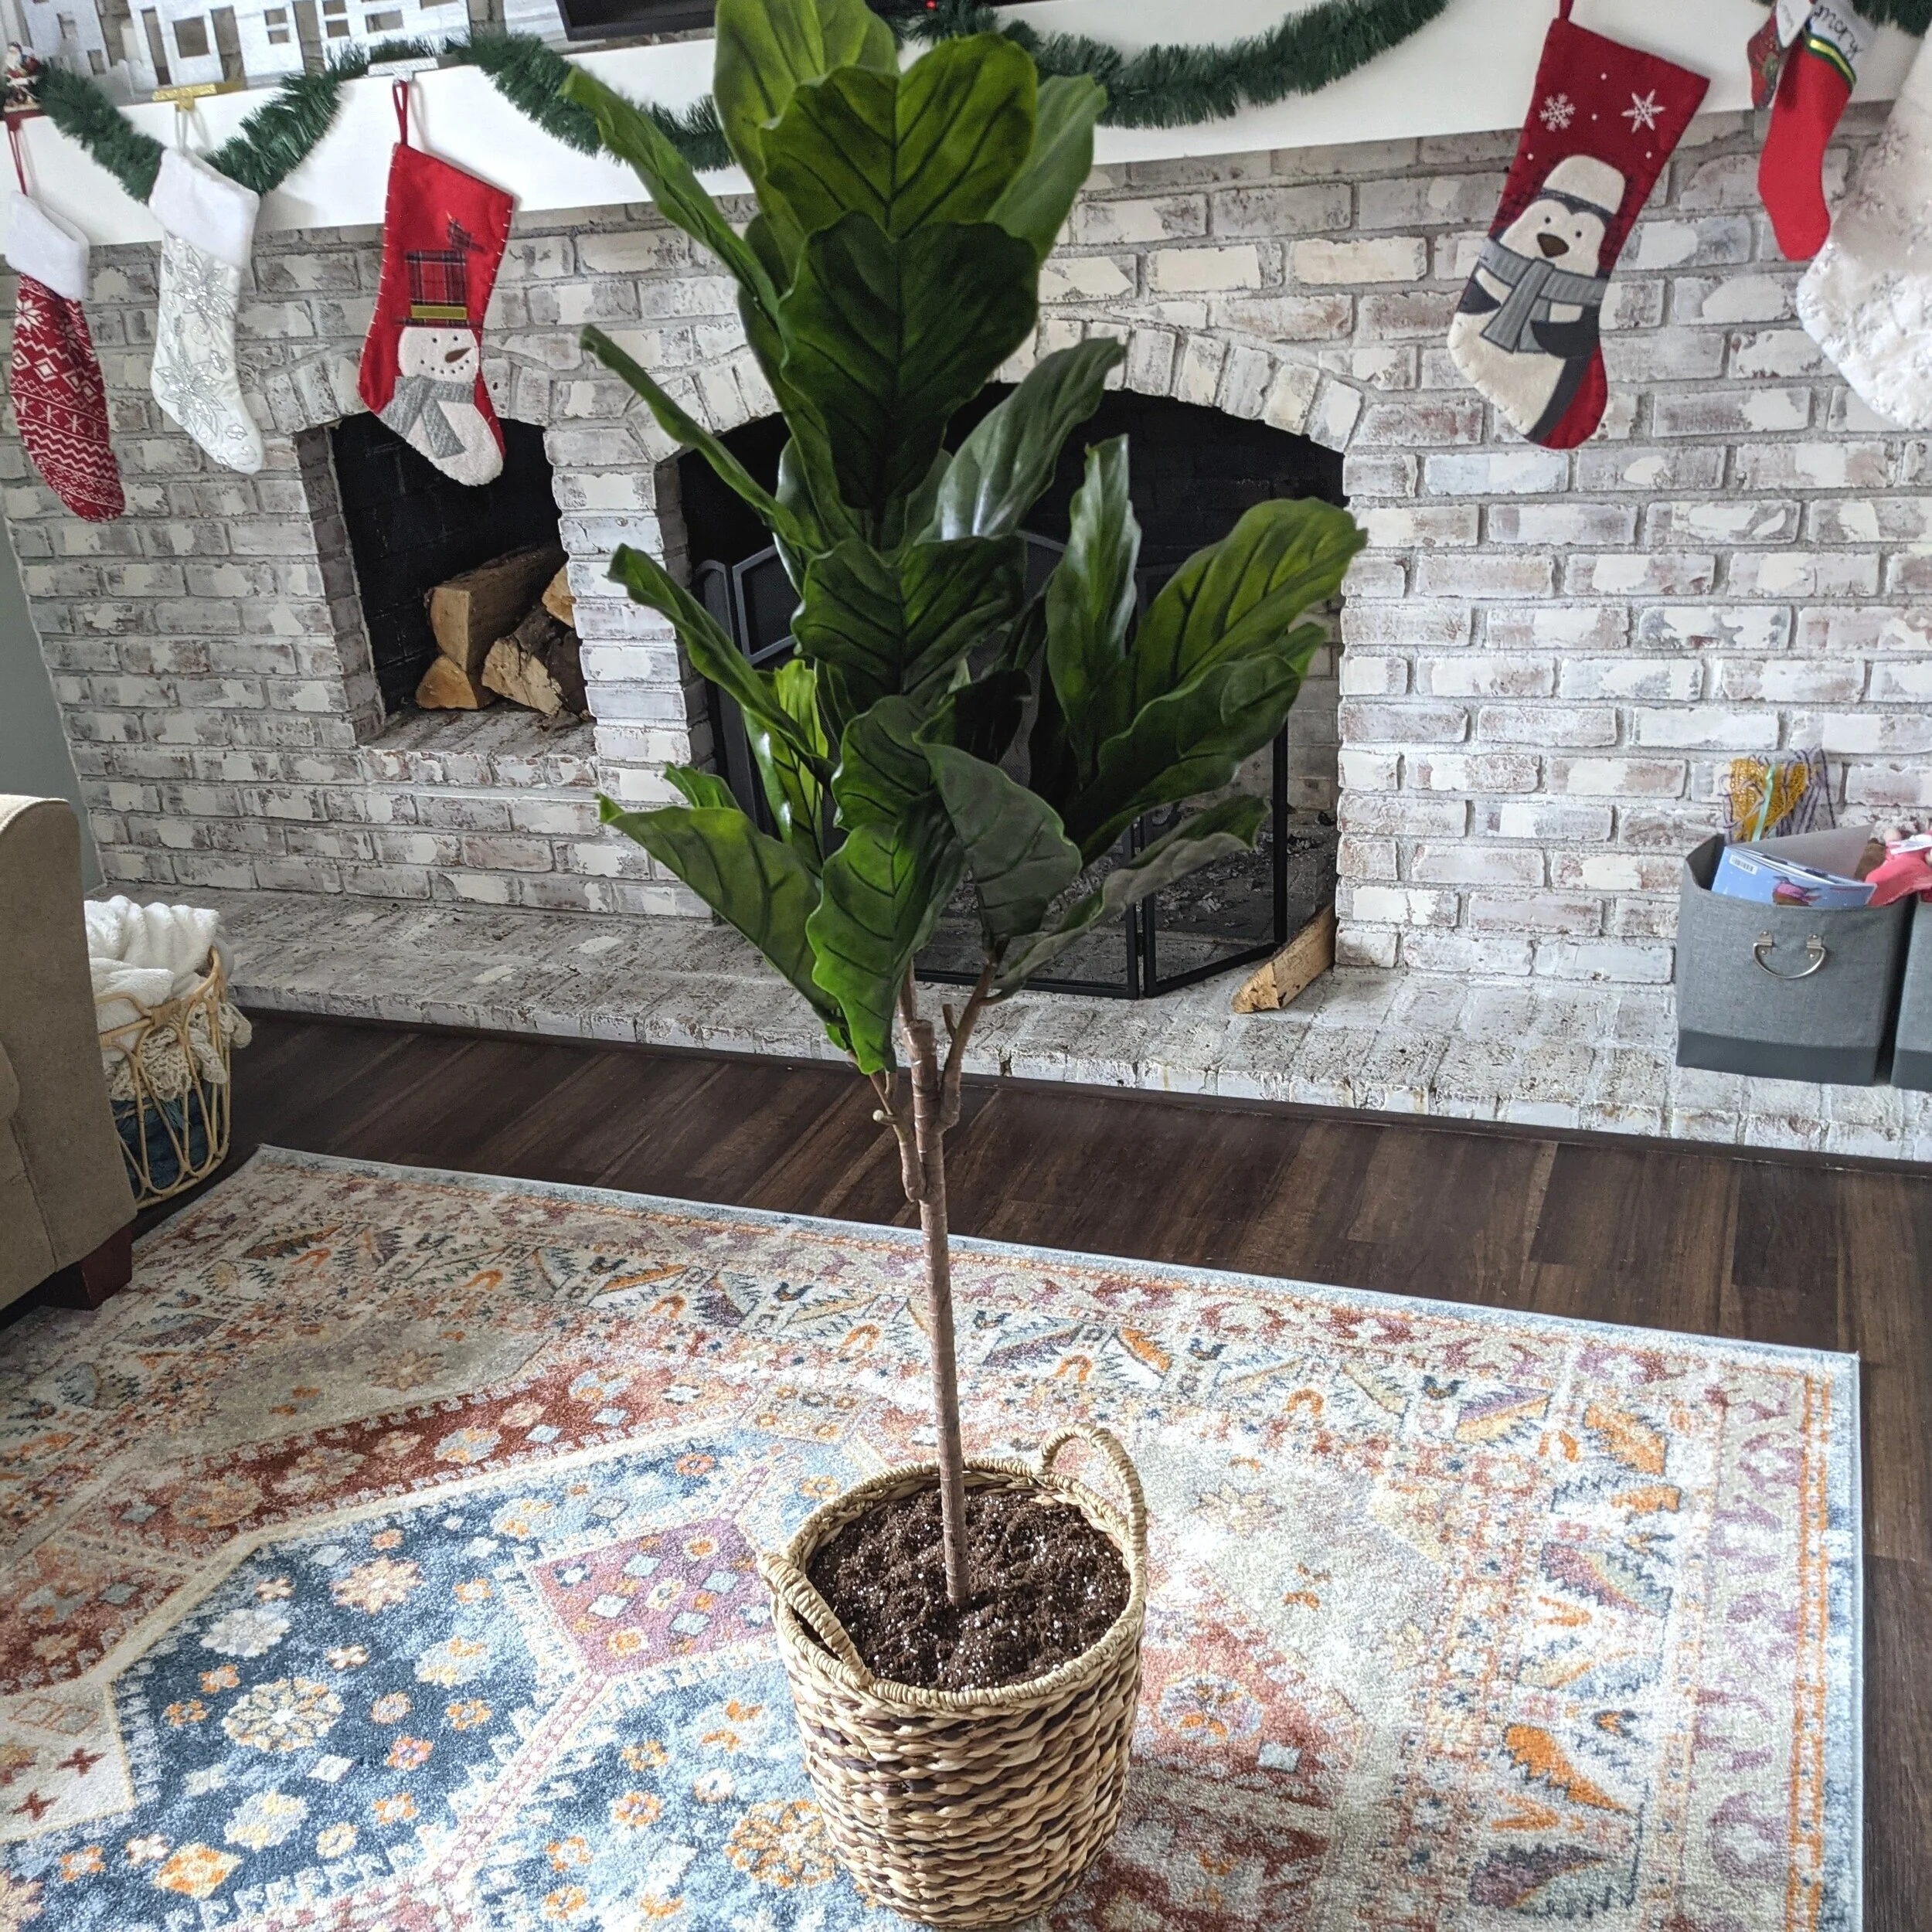
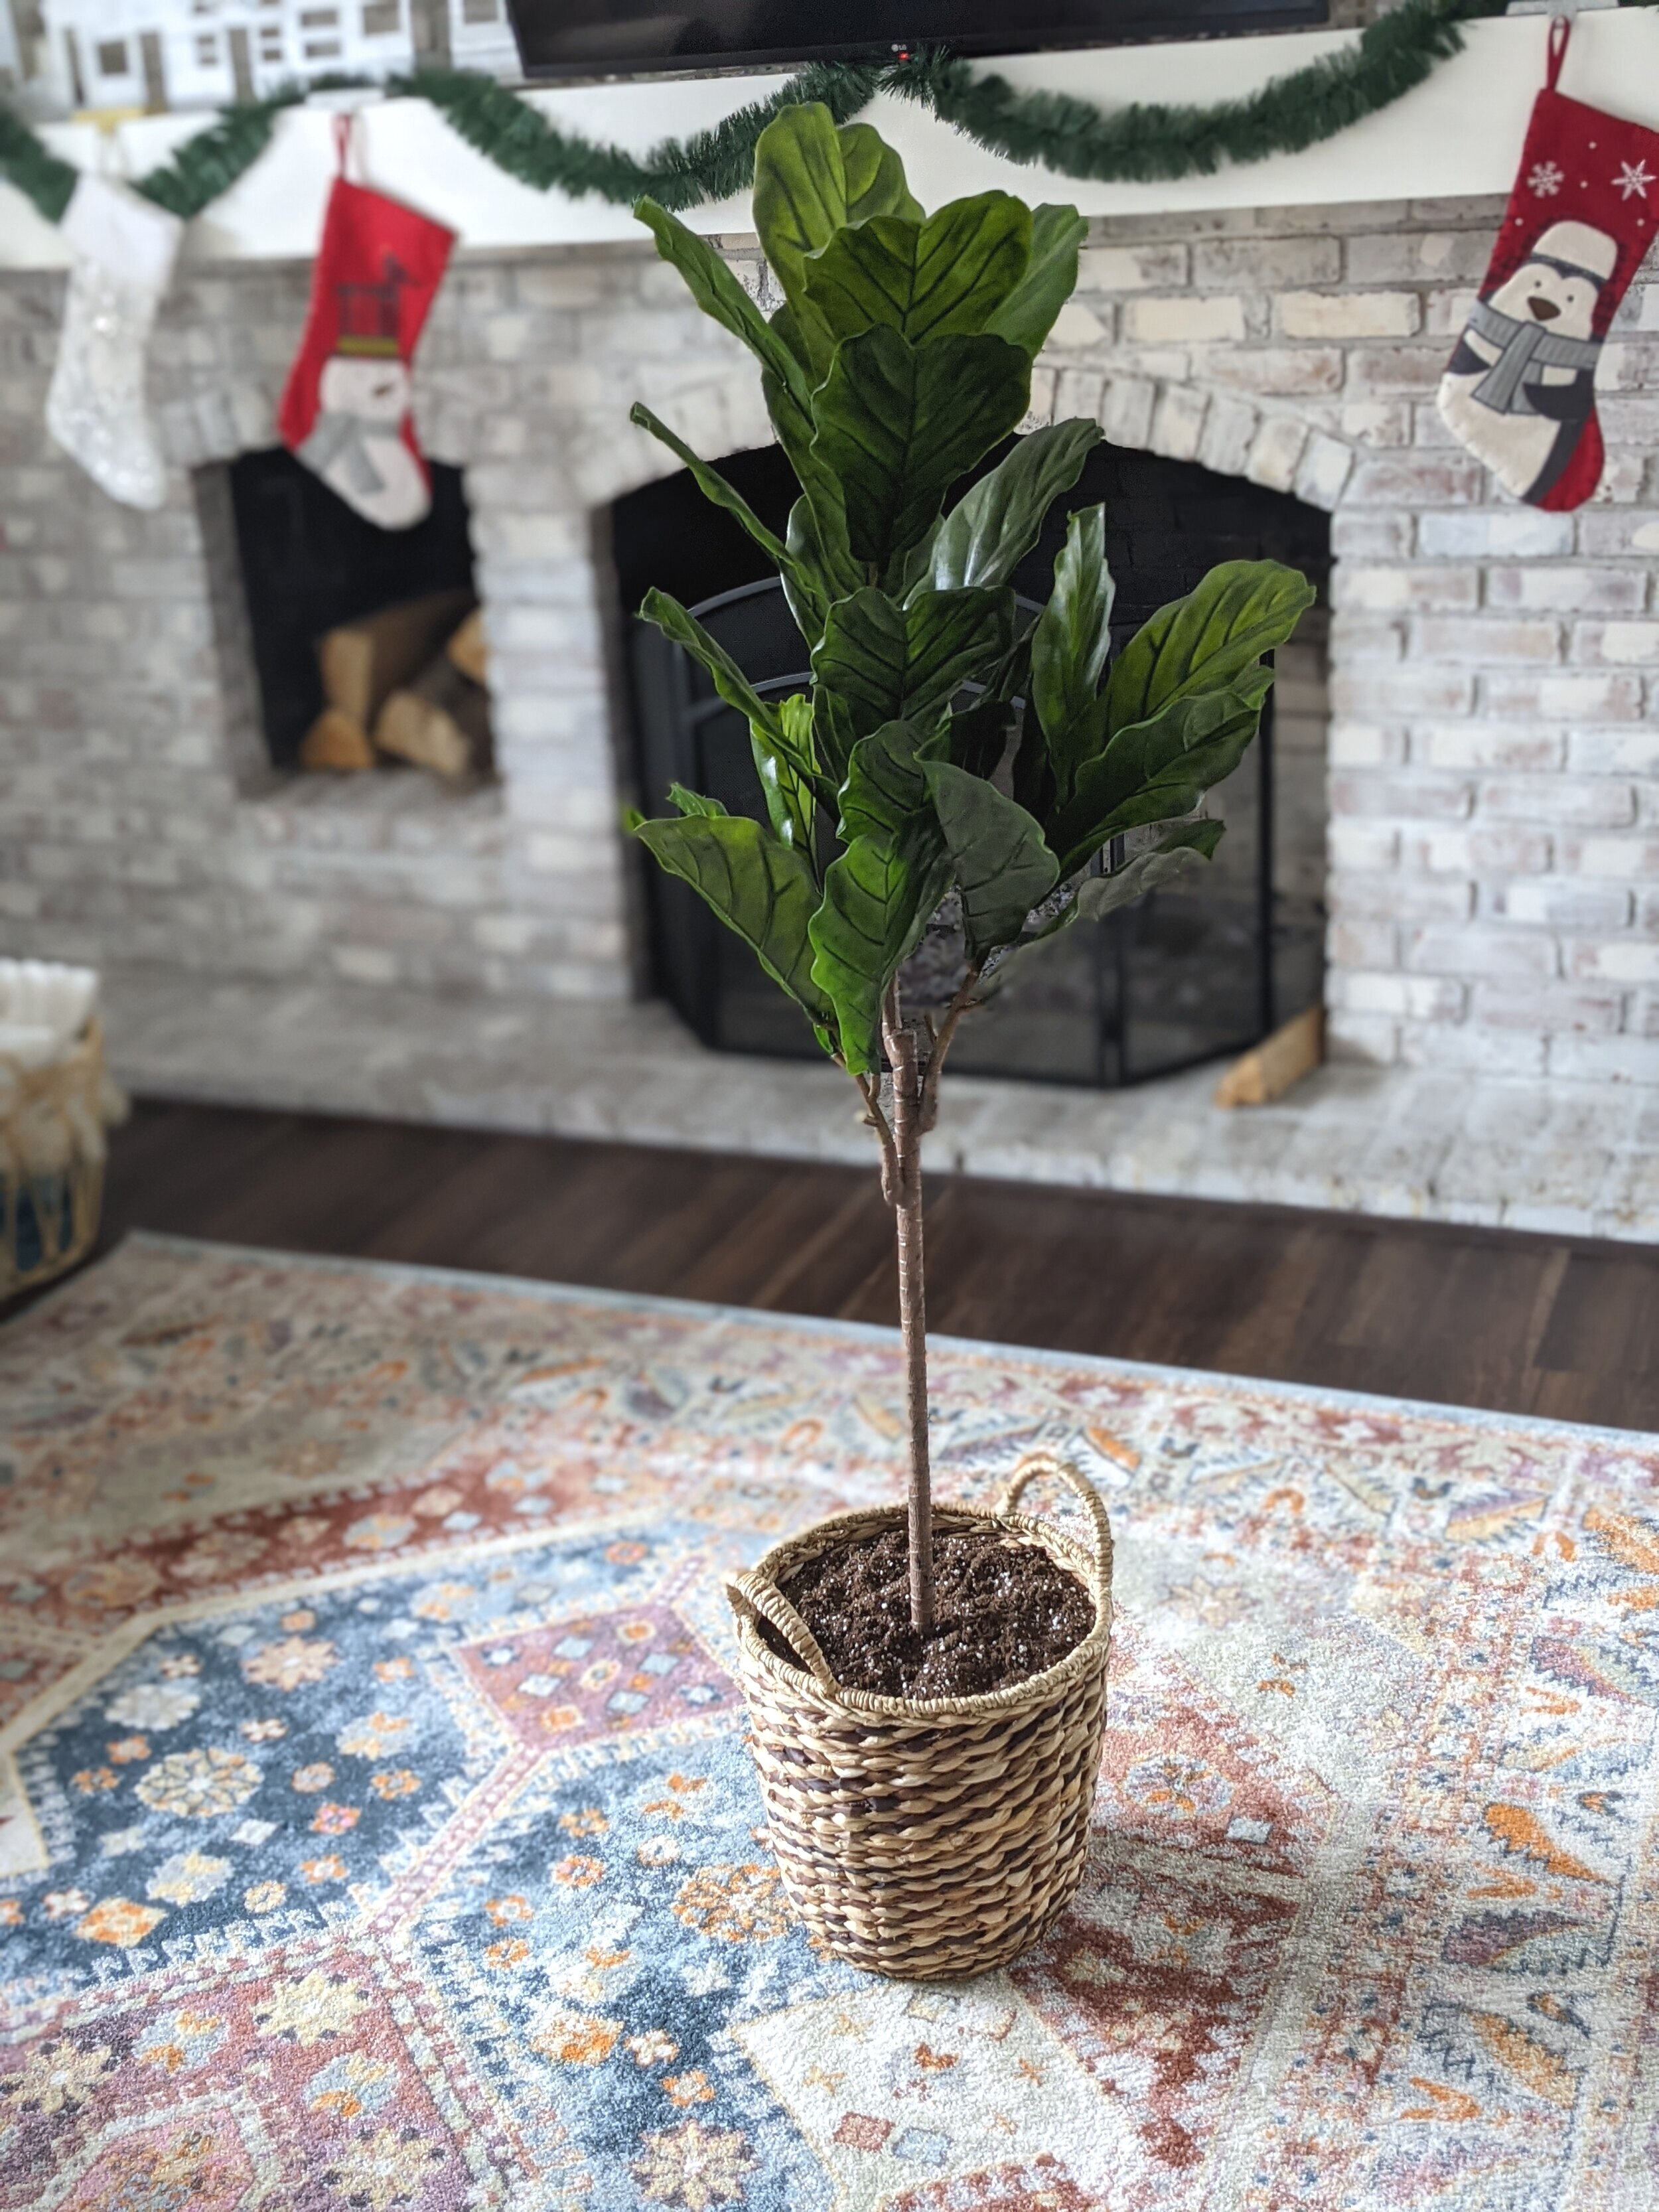
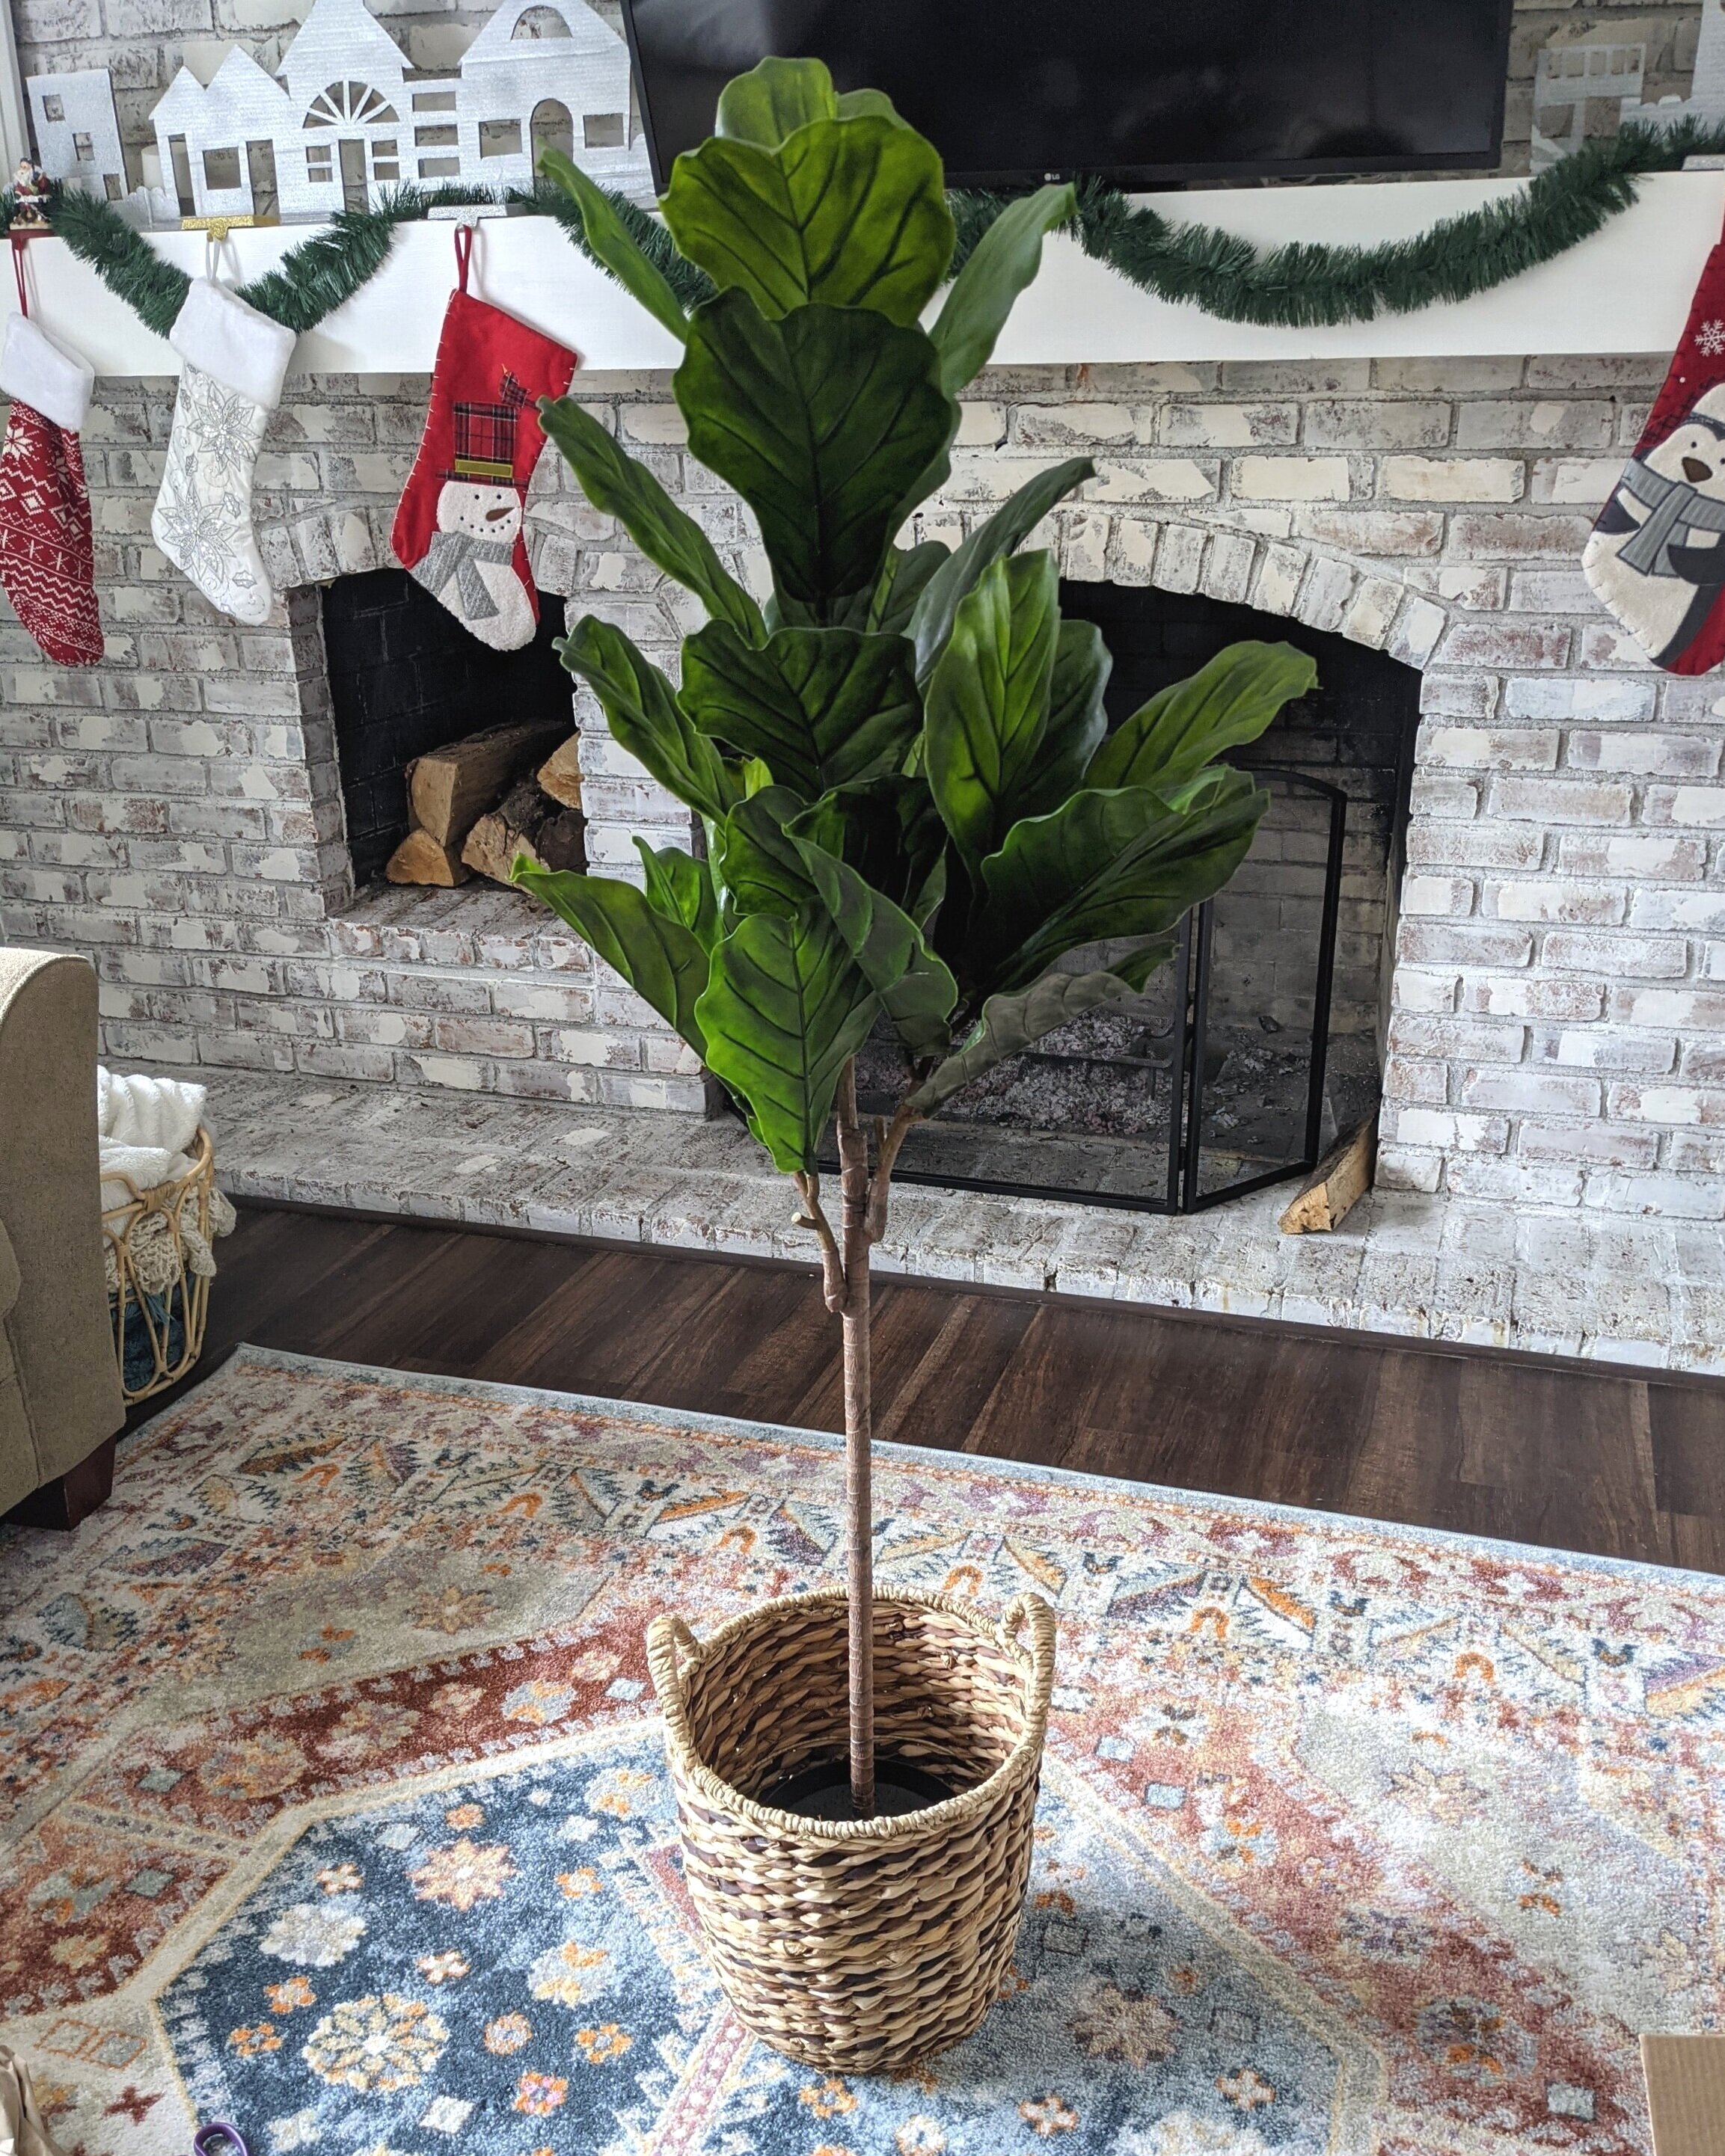
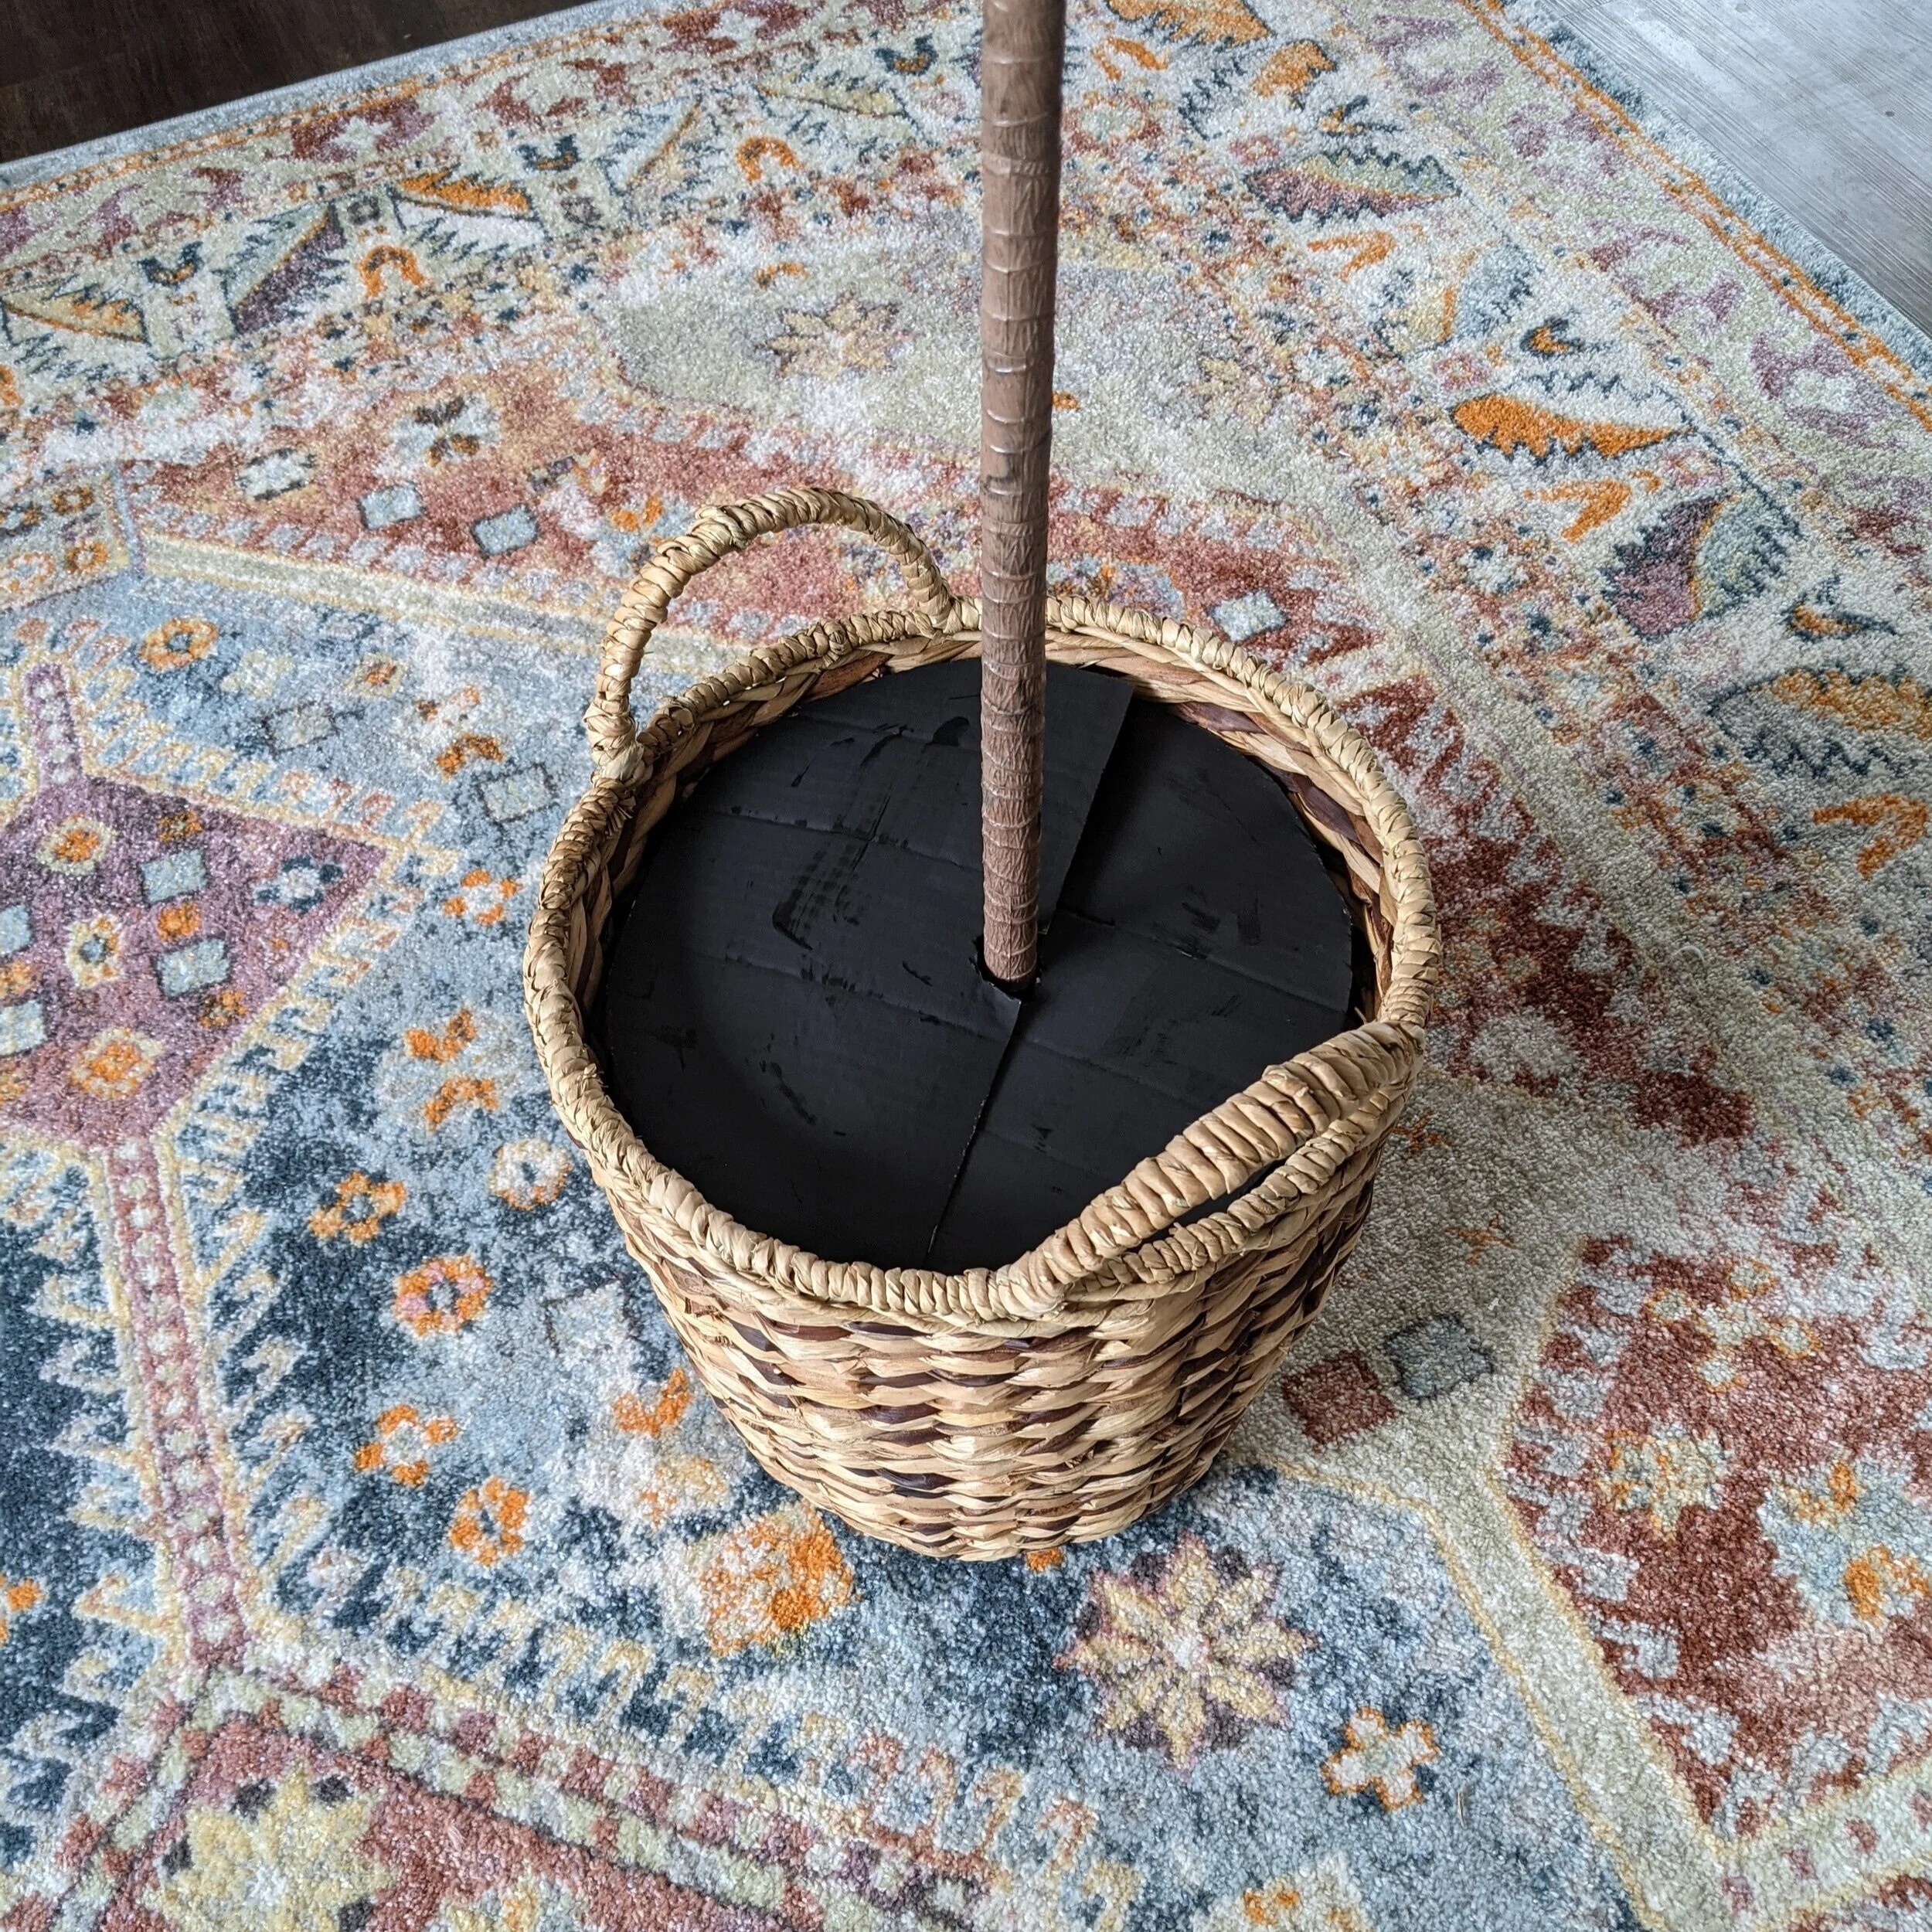
The last time I was at IKEA I picked up this faux fiddle leaf fig for an empty corner in my living room that just needed SOMETHING. It’s definitely not the most realistic-looking plant out there, but what makes it more unrealistic is the hilariously small base. To help up the “real” factor I put it in a basket, but that dinky little base in a giant basket still looked impractical.
So what’s a girl to do but to fill the basket with potting soil? However, instead of filling the whole thing with dirt (which is kind of a waste, not to mention the basket isn’t lined), I only filled it with a tiny bit of dirt but made it look completely full. And whaddyaknow, I have a little tutorial to show you how to “fill” your faux plant’s pot with dirt without actually filling it with dirt. Here’s what you’ll need:
Materials

As an Amazon Associate, I earn from qualifying purchases. This post may contain affiliate links, meaning I receive commissions for purchases made through those links, at no cost to you.
- Faux plant
- Basket or pot
- Empty box or other cardboard
- Filler material (I used some paper that came with one of our packages)
- Scissors
- Writing utensil
- Potting mix or dirt
- Black or brown craft paint (not pictured)
- Craft brush (not pictured)
- Tape meausre (optional)
Make A Cardboard Base
The cardboard will serve as the base for your dirt or potting soil to sit on - this may be the most important part of the project - but that doesn’t mean it’s hard!
First thing’s first, you’ll need to figure out the dimensions of the interior of your pot or basket and trace it on a piece of cardboard. You can use your measuring tape to measure the opening, or simply trace the base of your pot.
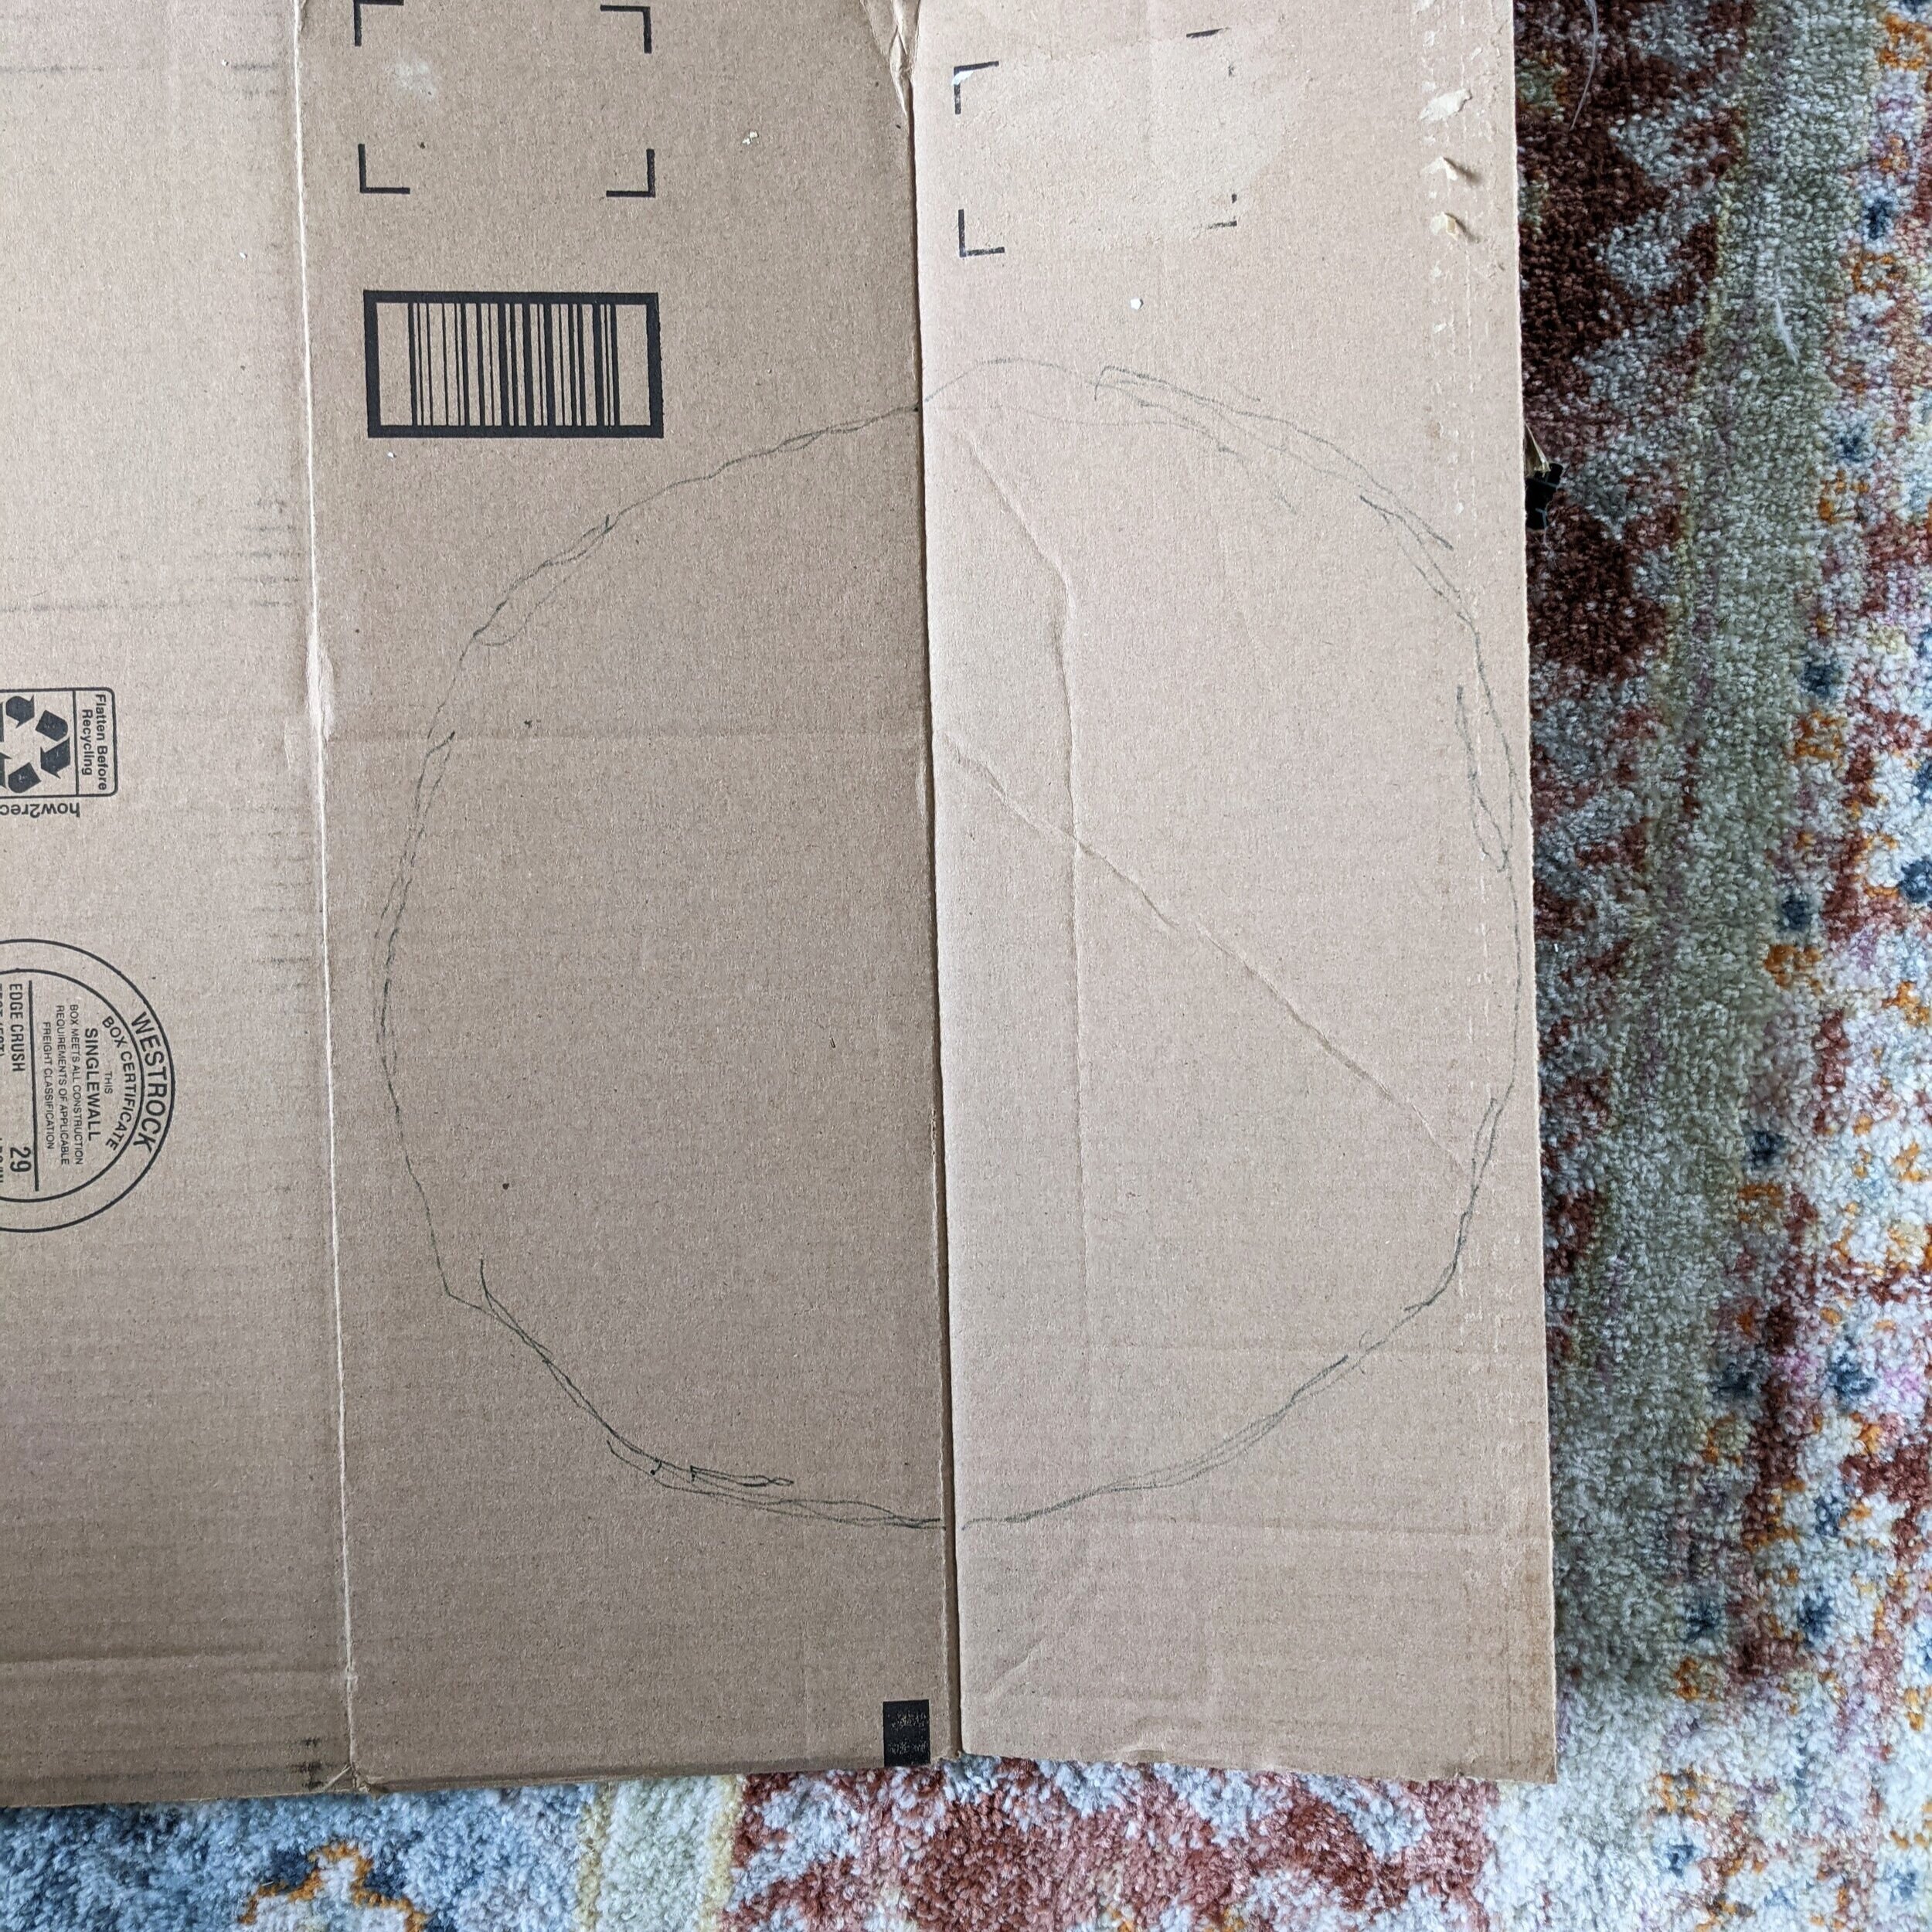
Then, cut out your circle and cut your circle in half.

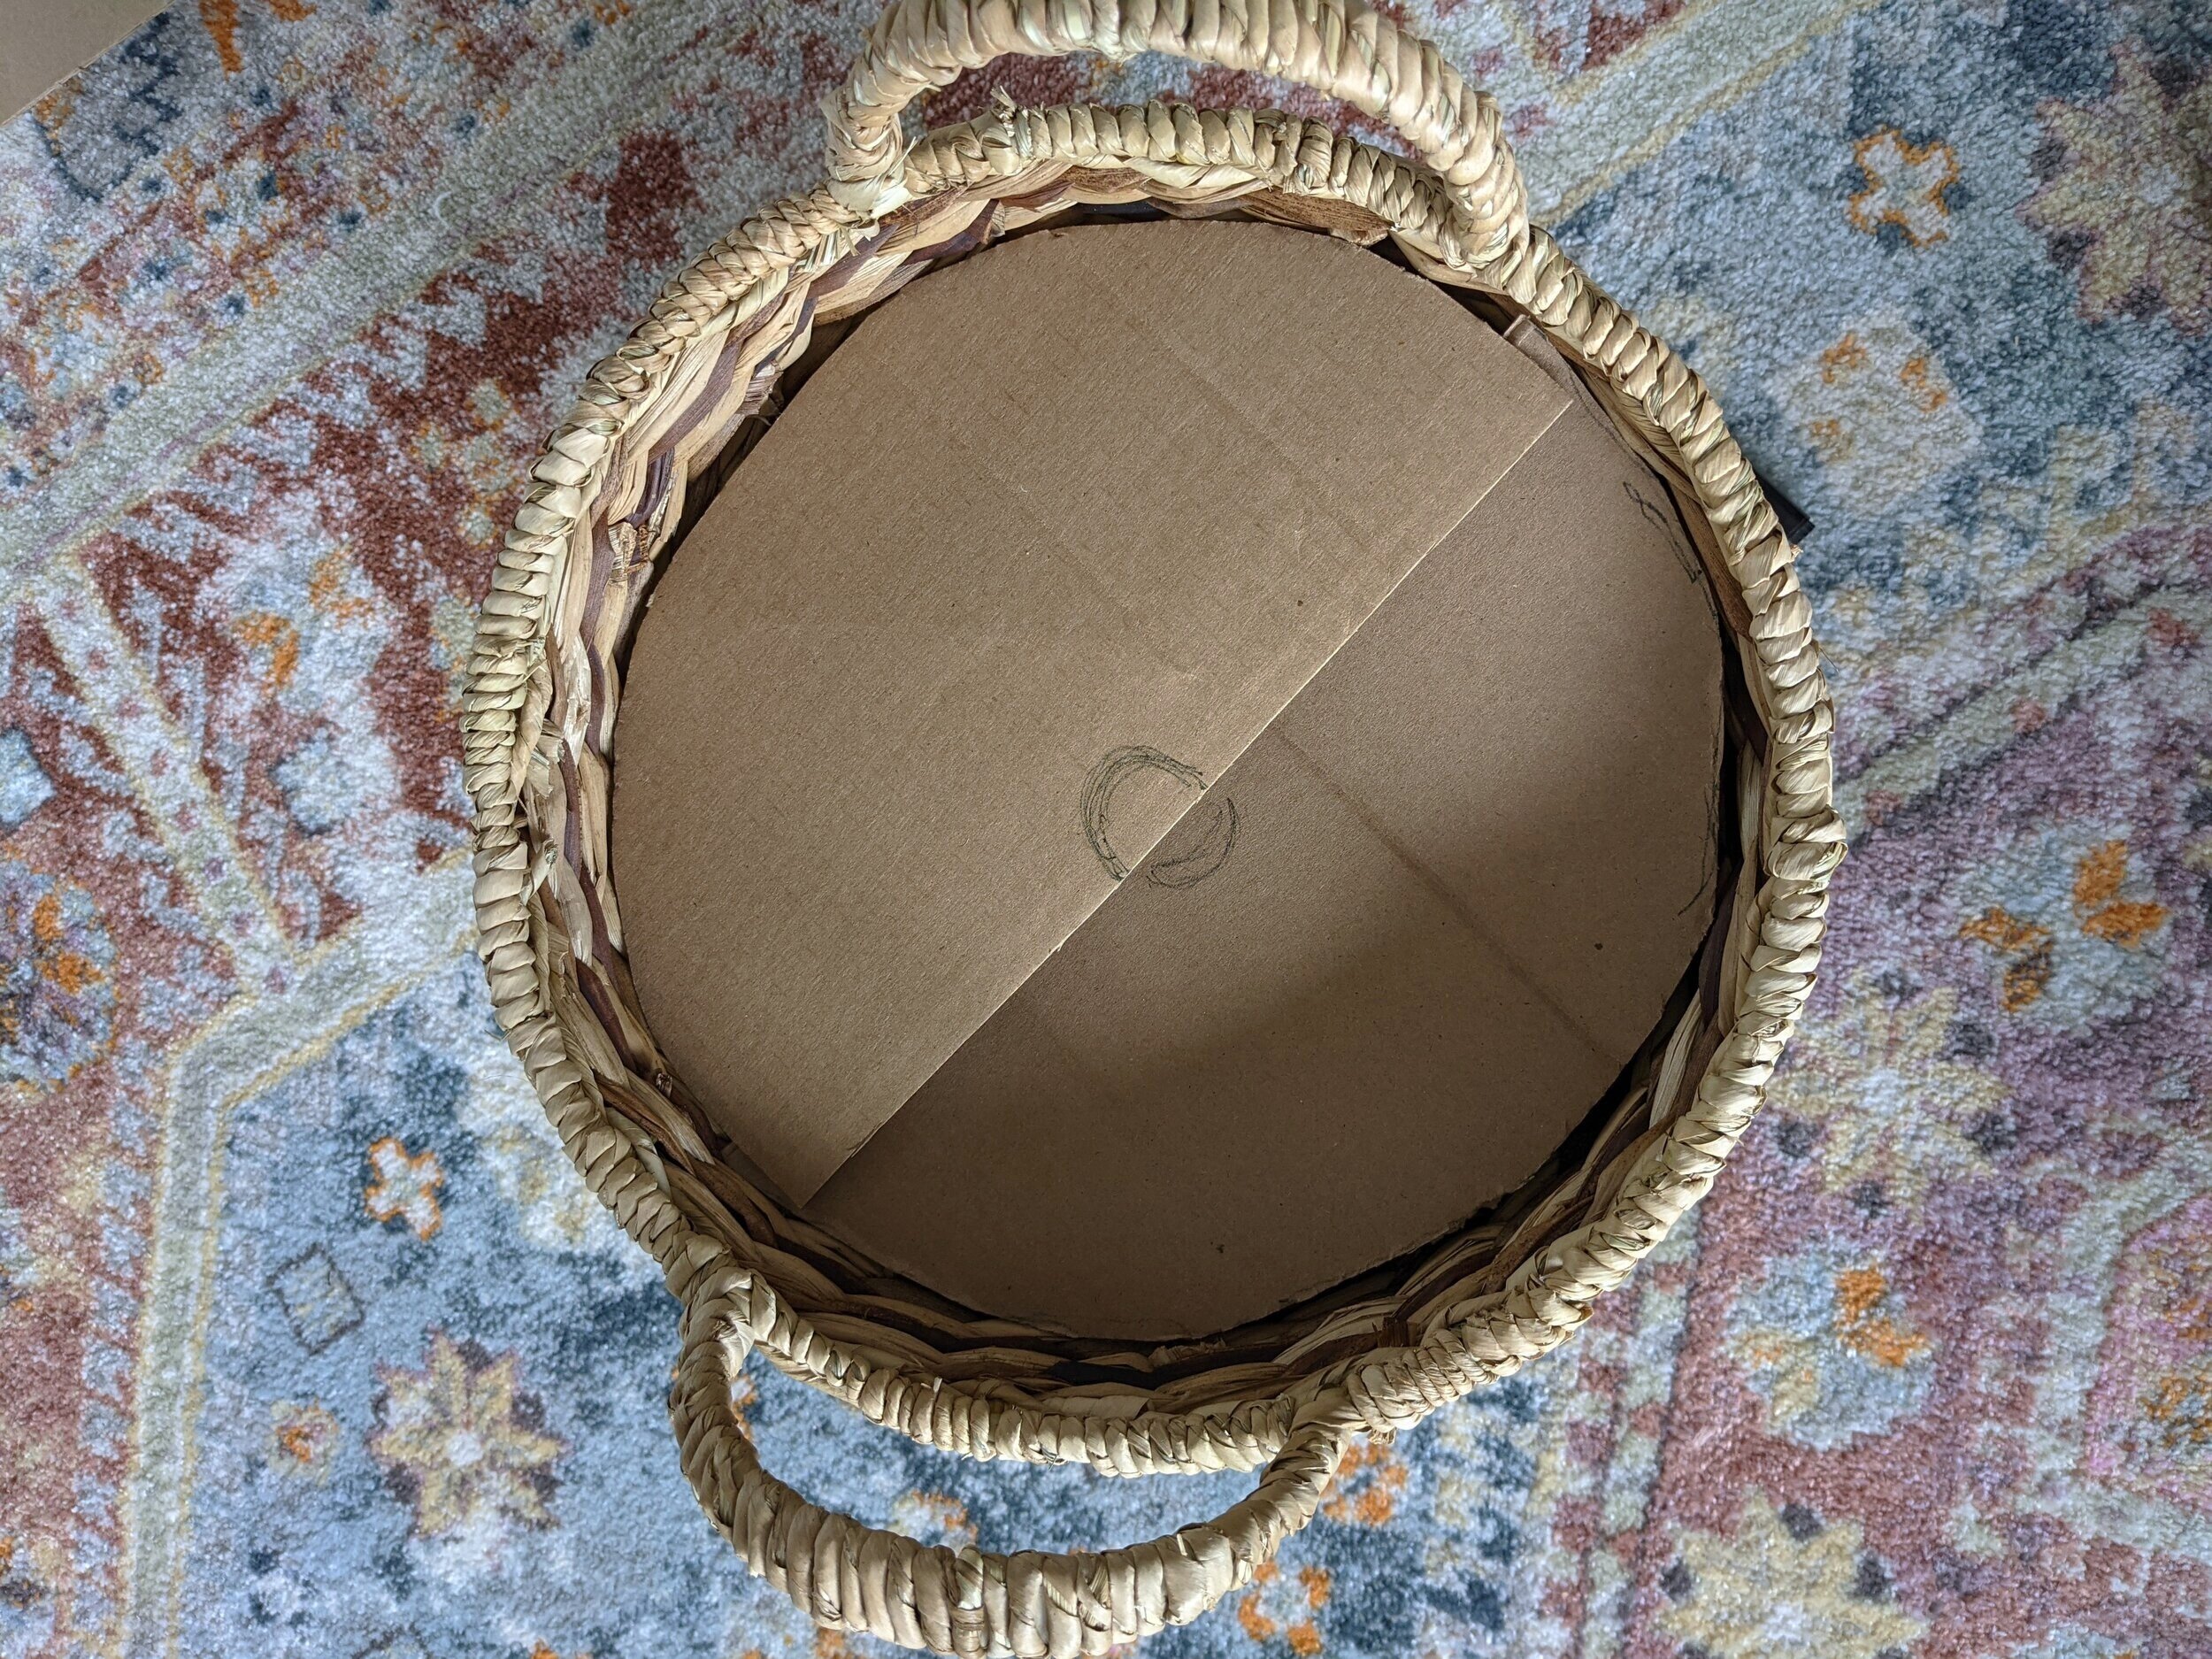
Fit your semi-circles in your pot and trim as needed.
Once you have a good fit, trace a circle in the middle of the semi-circles and cut it out. This is where your plant will stick out of the pot, so get some rough measurements of how large this circle should be.
Using black or brown paint, paint the cardboard base. I used black acrylic craft paint, but this could be done with leftover spray paint or house paint too. It doesn’t have to be perfect, you’re just trying to camouflage the cardboard.
Put Everything Together
Now you just have to put everything together!
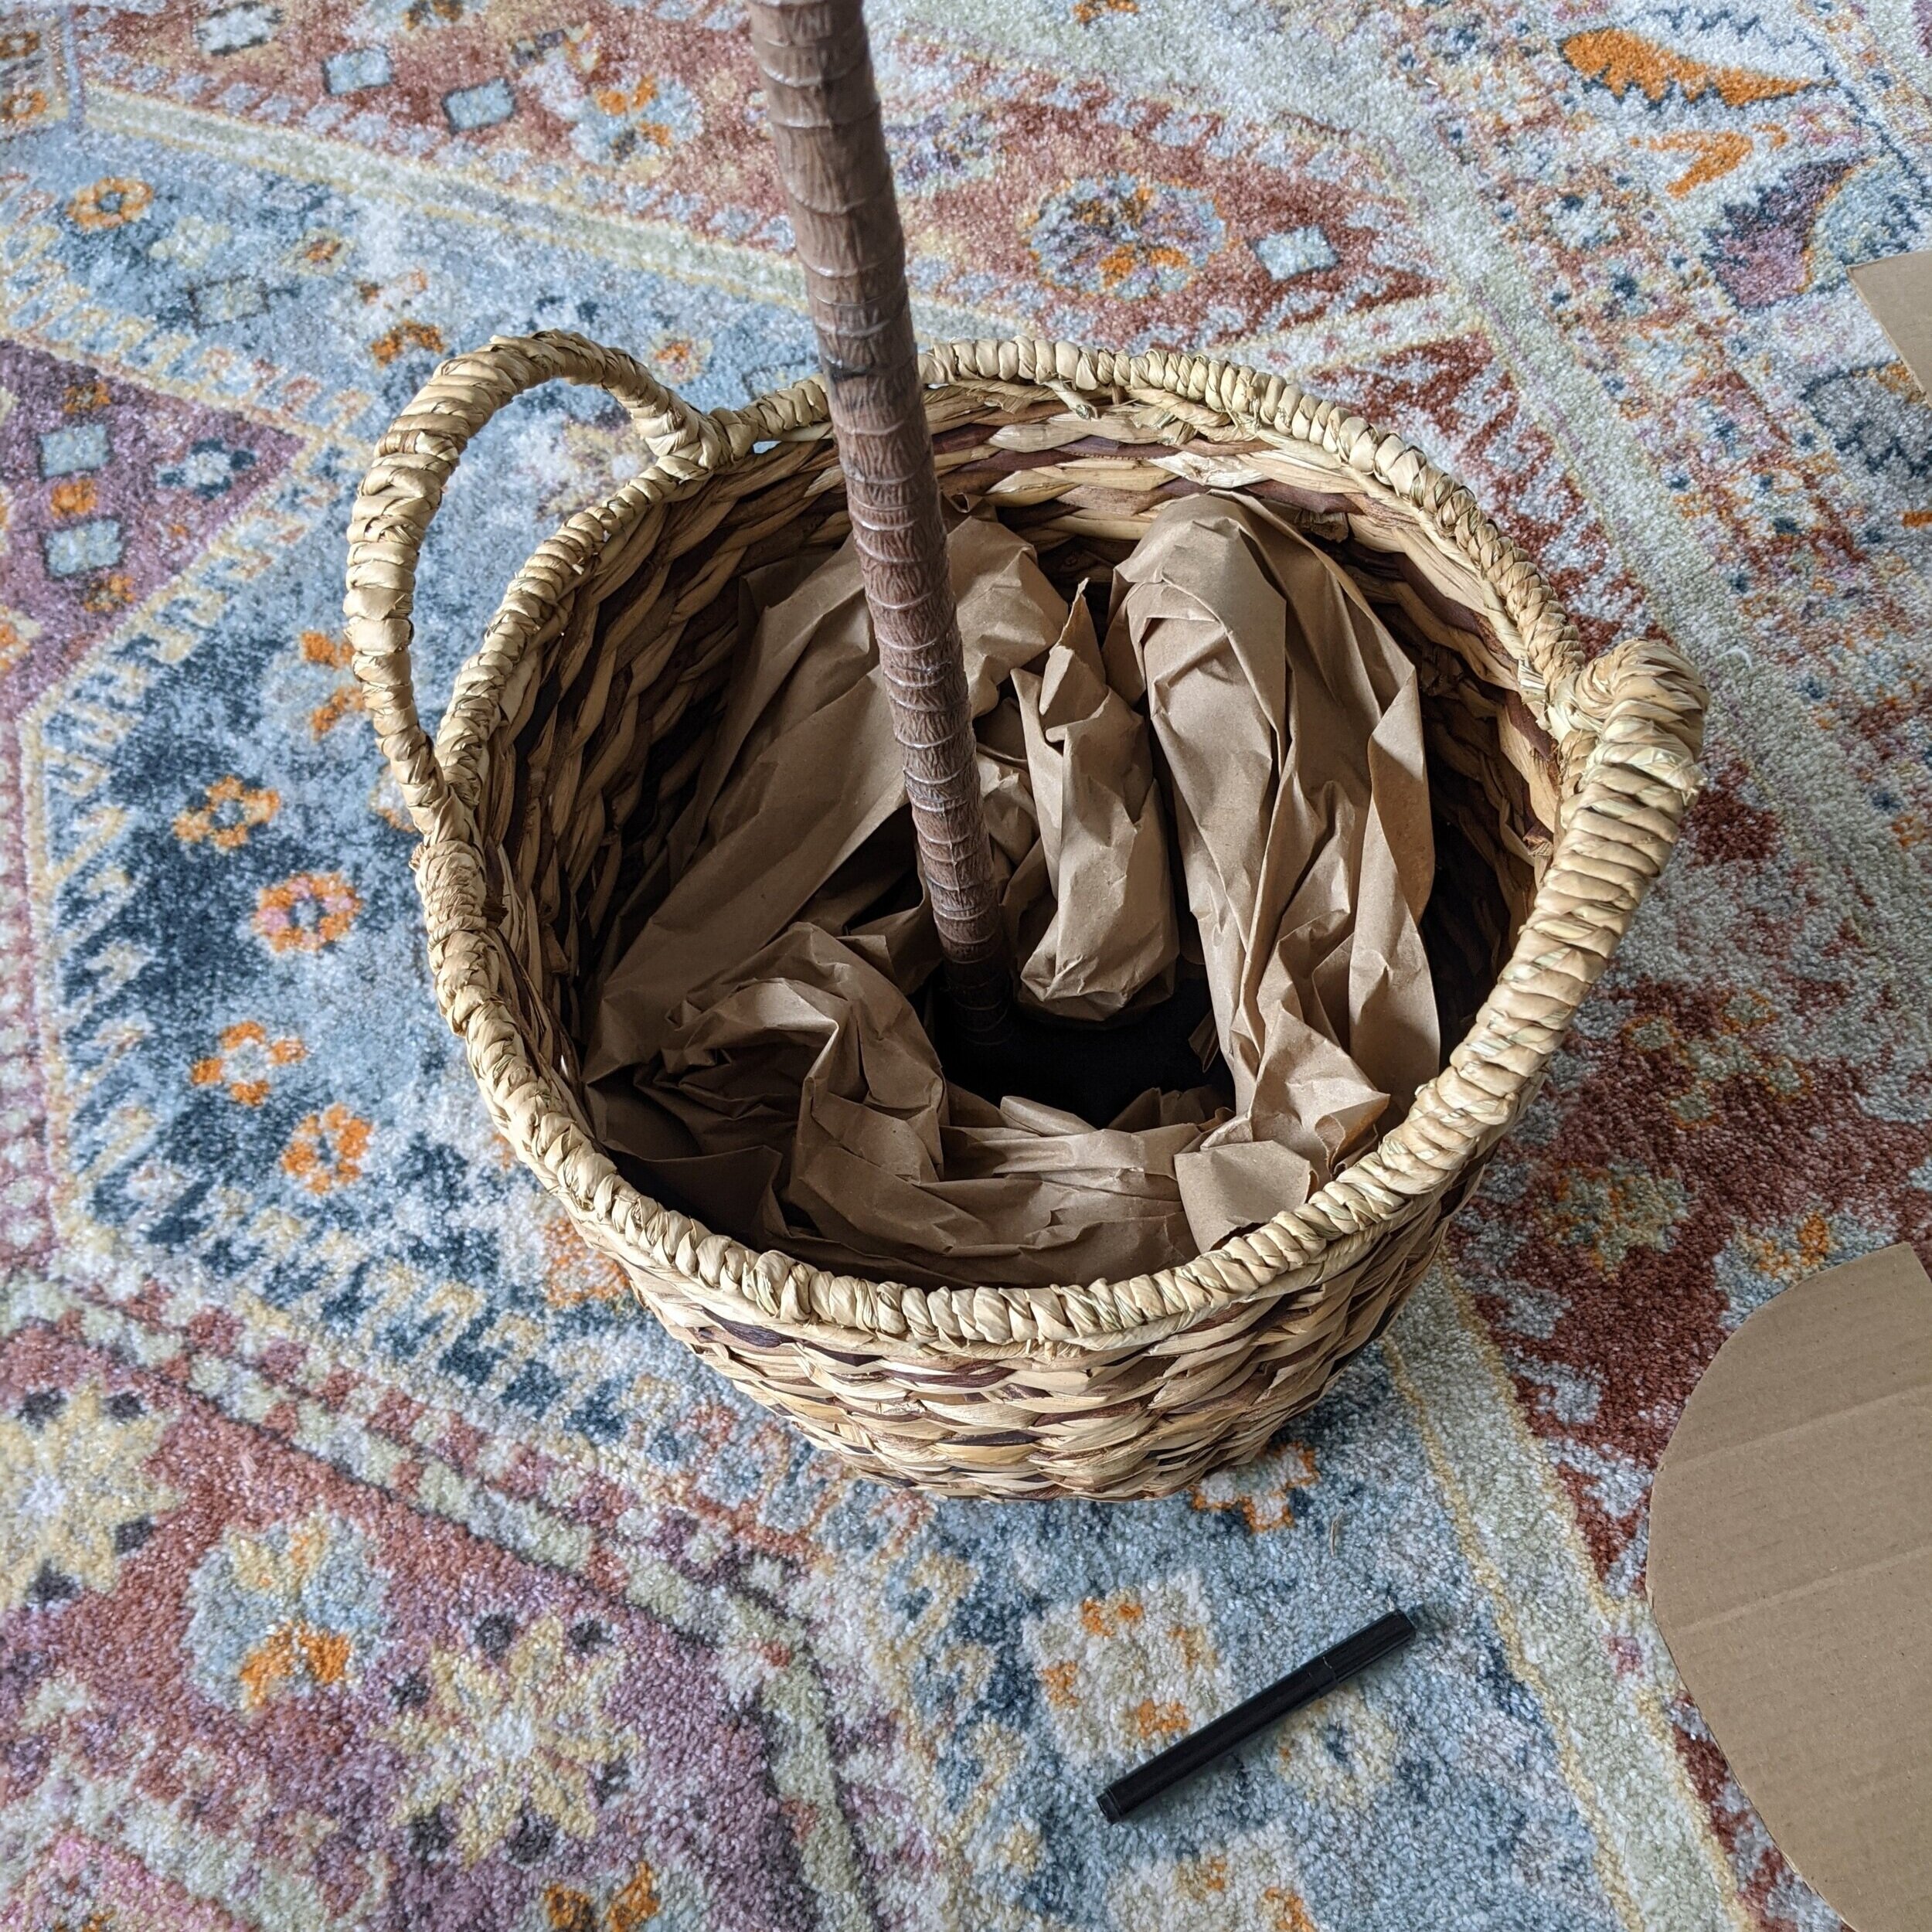
Start by placing the plant in your pot or basket, then layer in your filler. As mentioned above, I used some leftover paper that was used for packing material with one of our packages, but whatever you have on hand works - newspaper, plastic bags, styrofoam, etc.
Next, place your painted cardboard semi-circles on top of the filler, making sure they’re a little below the lip of the planter.
Then, pour in some dirt! You really just need enough to cover the surface (using as little as you need is kinda the whole point of this project, after all).
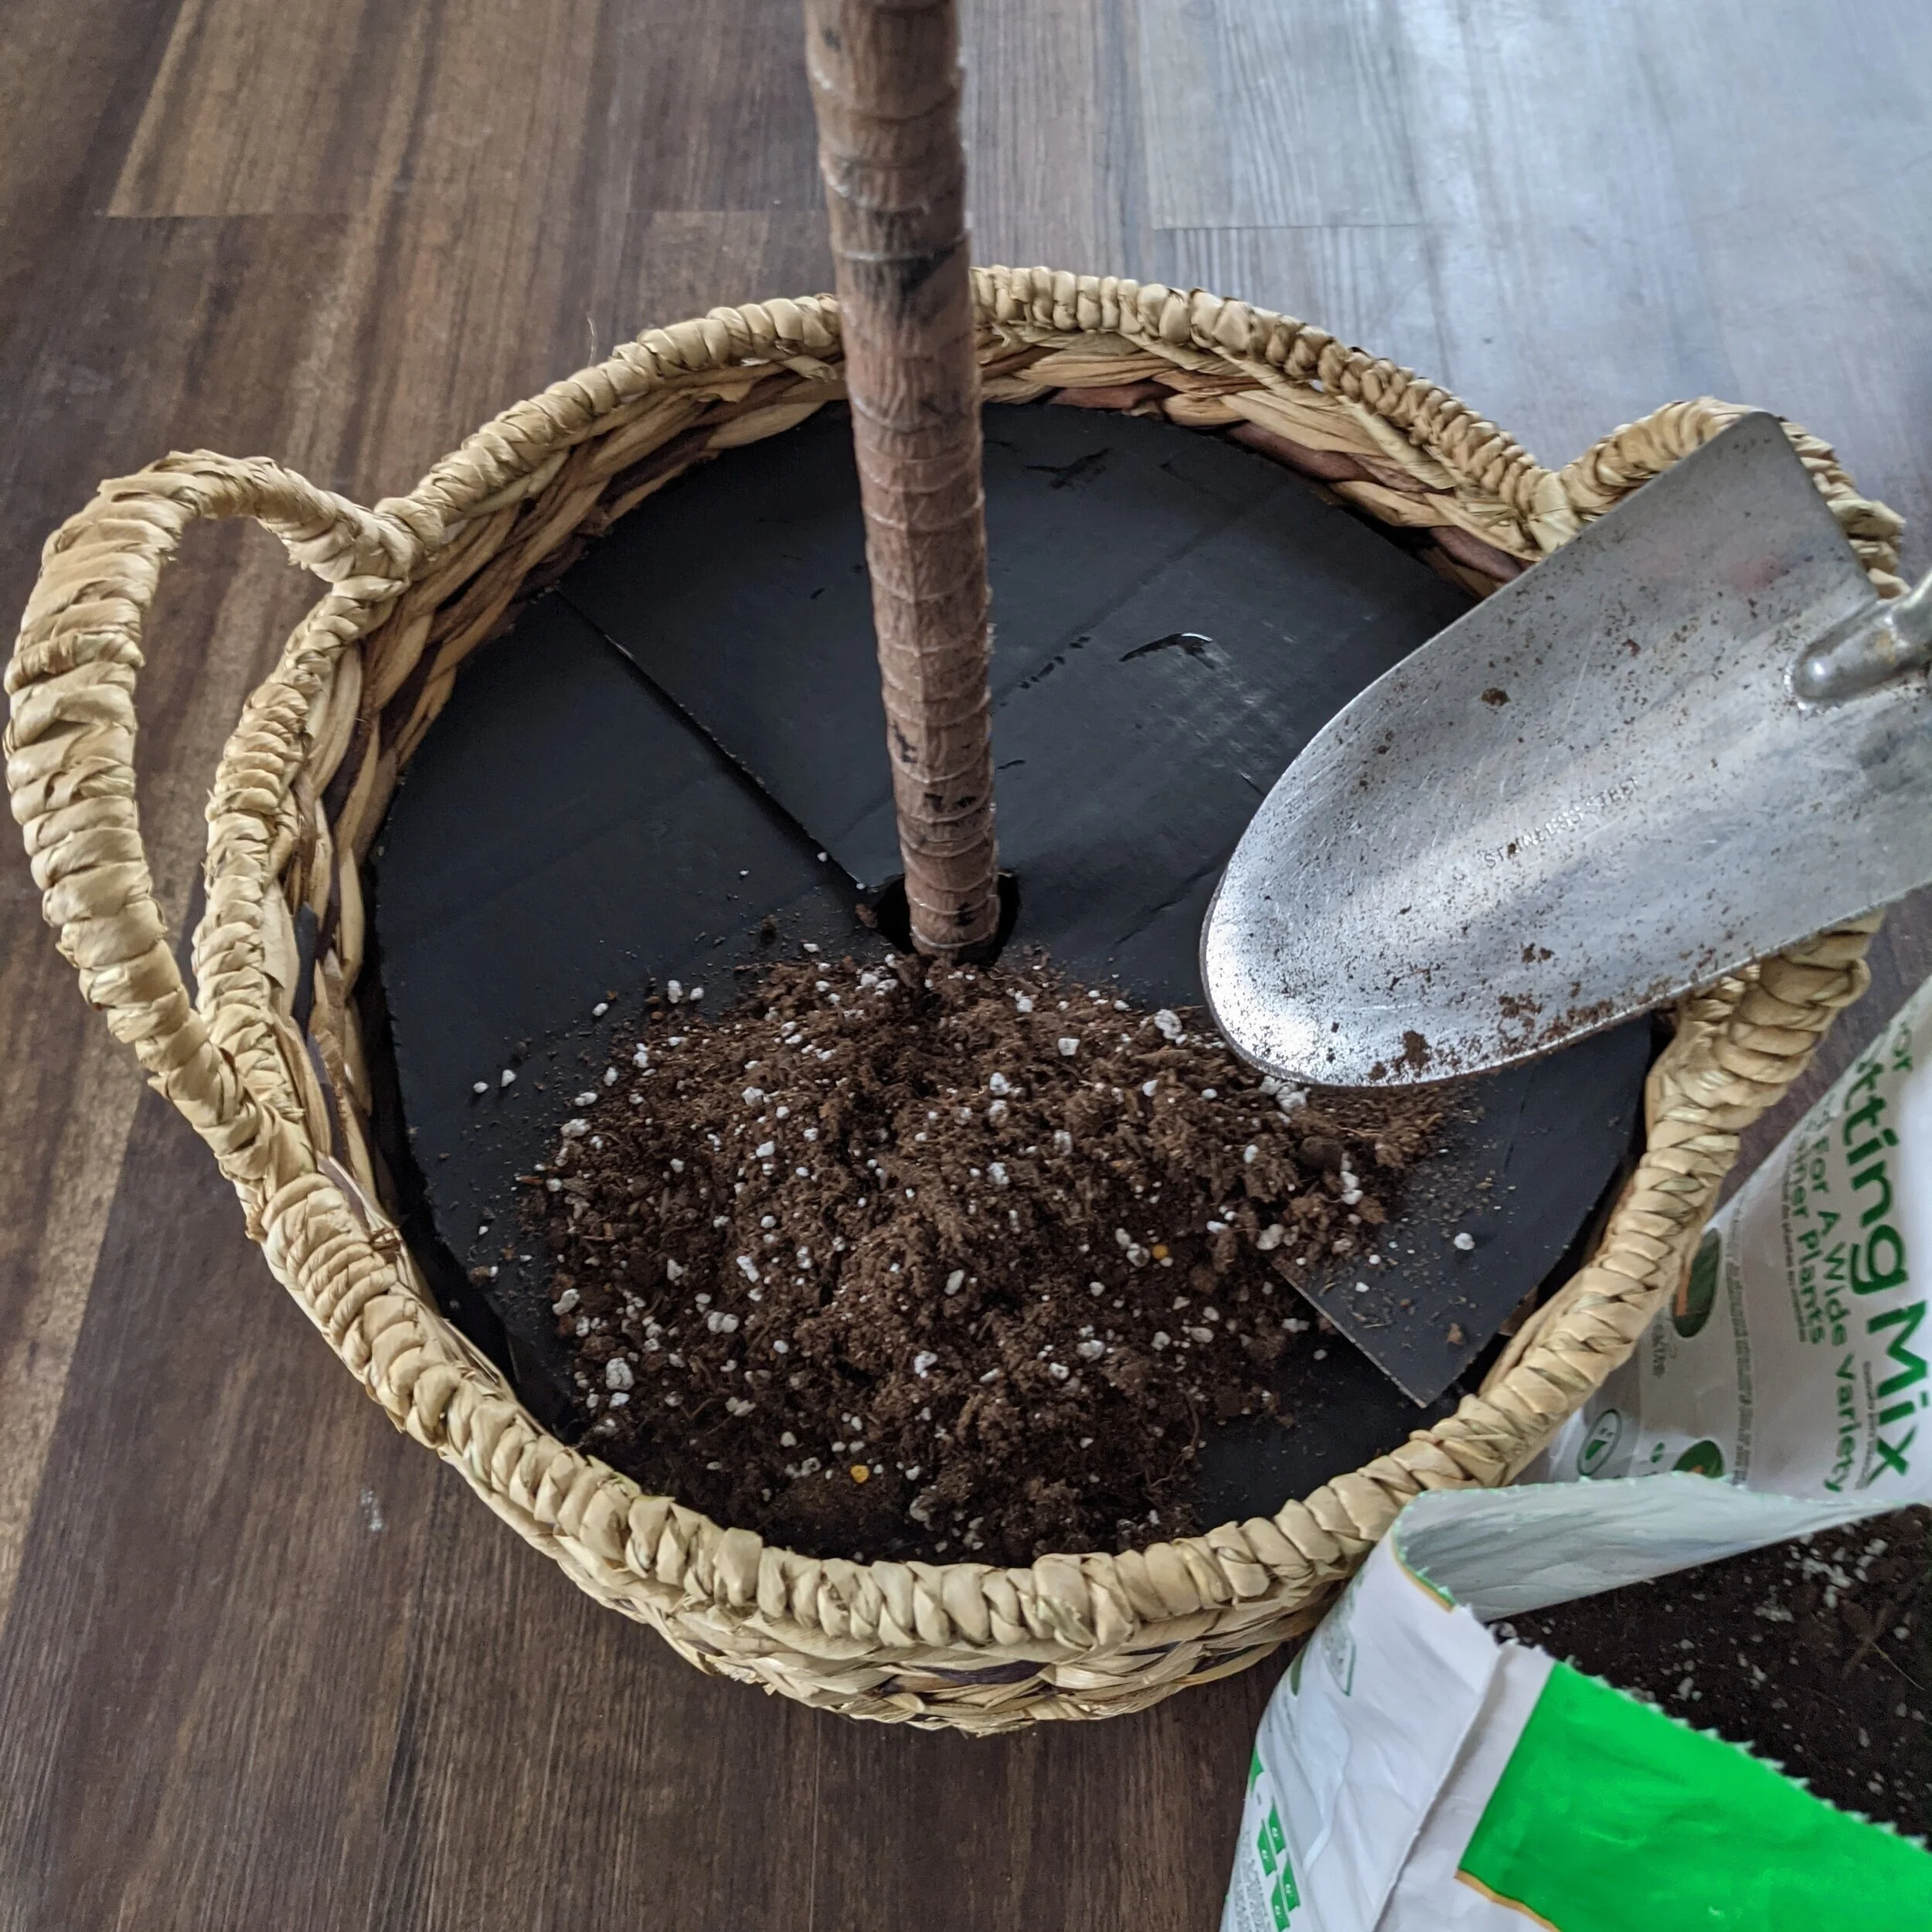
Notice how I didn’t even wait for the paint to dry?
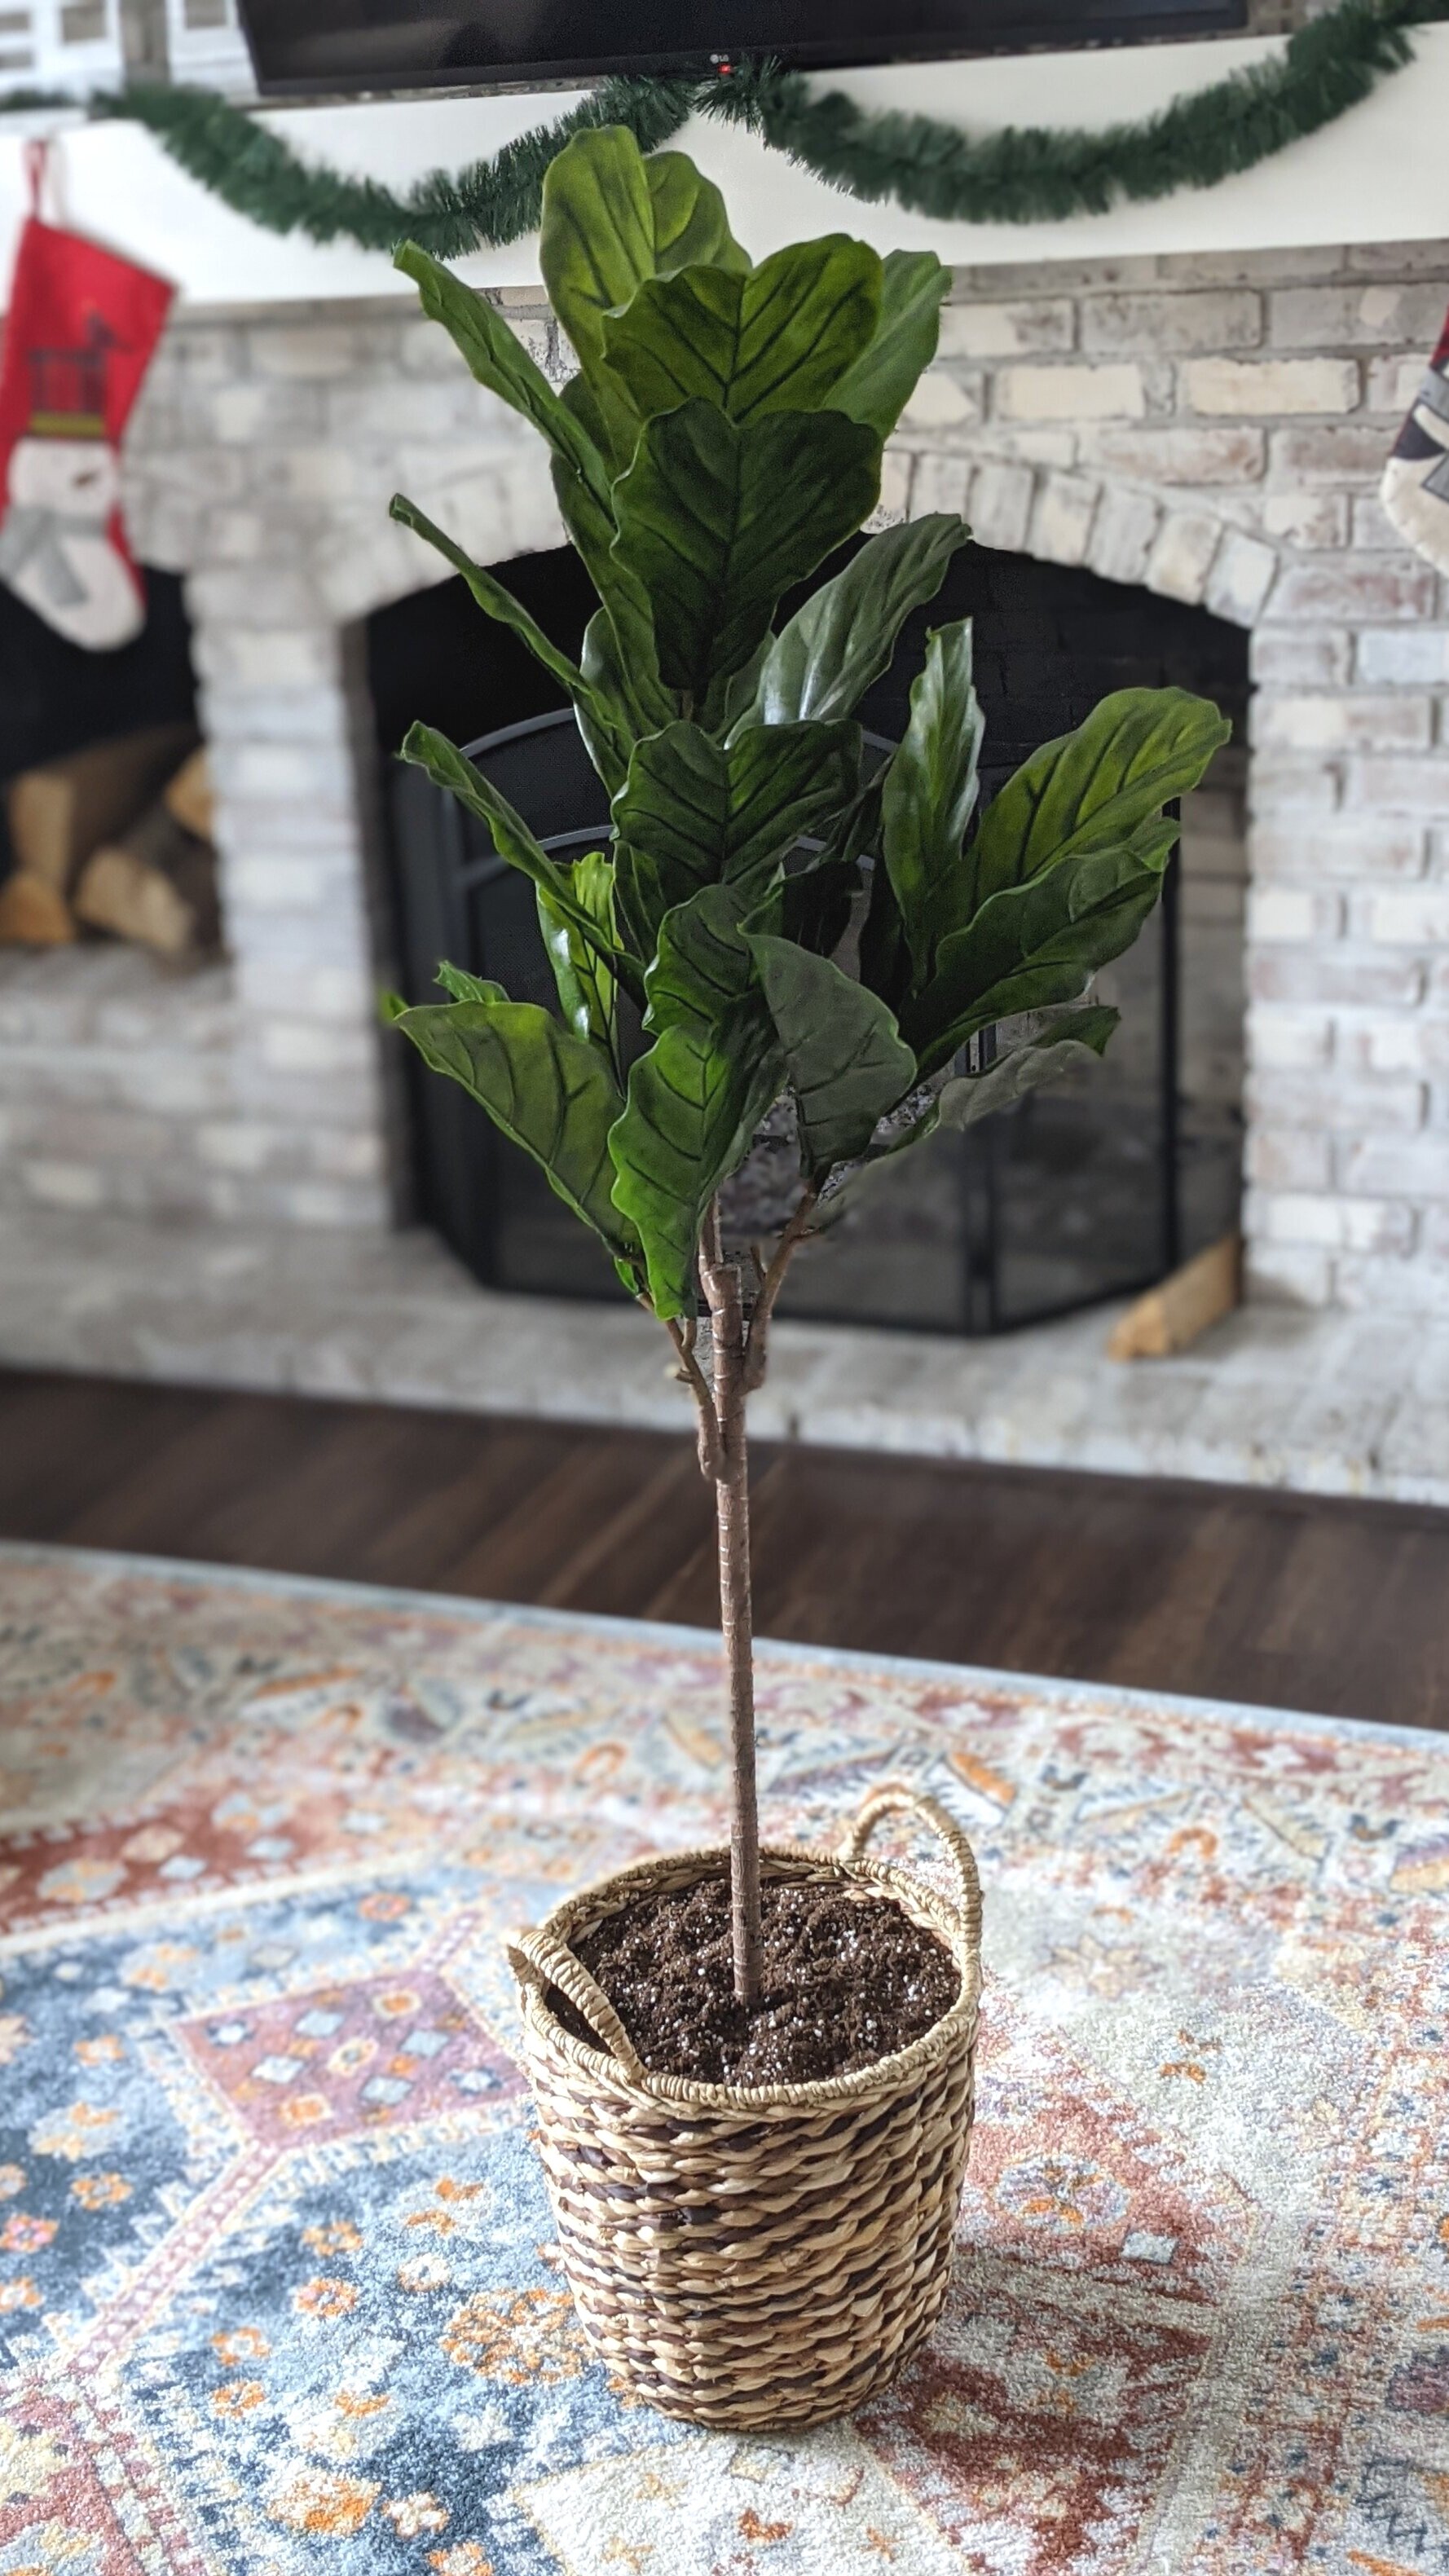
And voila! Now your fake plant looks a little less fake!
More Tips to Make Your Faux Plants Look Real
The tutorial above is just one way to help camouflage the fakeness of your plants, but here are 4 more tips you can incorporate as well!
Use a combination of real and fake plants throughout your space, or even in the same pot!
Don’t forget about them. Just because you don’t need to water your fake plants, doesn’t mean you can set them and forget them! Like real plants, fake plants will need a good dusting every once in a while to look their best.
Don’t be afraid to invest. If you’re going to buy a plant you can’t kill, you might as well spend some extra $$ and buy a good quality faux version!
On that note, look for imperfections. Plants aren’t perfect in nature, so why would you want to buy a fake plant that looks too perfect? Some fake plants even come with branches that can be repositioned - take advantage of them!
Final Thoughts
Admittedly, I was hesitant to heed my own advice and invest in my faux fiddle leaf fig - there are some out there that are way more realistic looking than my $45 IKEA version. Now that I’m getting more ideas of where I want to incorporate some faux plants, I’ll put a little more effort into shopping around for a good quality fake next time. On the bright side - one of my friends already touched this one thinking it was real!
For more plant-inspired posts, check out these articles:

Tips for Making Faux Plants Look More Realistic

Home Improvement Goals for 2021
We accomplished so much last year – it’s a little crazy to look back on. When you’re in the thick of it, sometimes it seems like projects move at a snail’s pace. Especially when I compare myself to bloggers who don’t have a separate full-time job. But considering our circumstances, DAMN, we made some progress! But of course, a house is never done! So here’s what we’re hoping to accomplish in 2021.
Home Improvement Projects to Tackle in 2021
Now that we’re already about a month into 2021, I figured we should set some home improvement goals for this year.
We accomplished so much last year – it’s a little crazy to look back on. When you’re in the thick of it, sometimes it seems like projects move at a snail’s pace. Especially when I compare myself to bloggers who don’t have a separate full-time job. But considering our circumstances, DAMN, we made some progress!
But of course, a house is never done! So here’s what we’re hoping to accomplish in 2021.
Finish the Renovation
At the top of our list is probably pretty obvious: to finish the renovation. We’re getting there! But I can’t wait to actually start utilizing these beautiful spaces we’re creating. They’re going to be SUCH a huge improvement from what we started with. I still scratch my head at why the master suite was built the way it was in the first place.
Since the renovation involved so many spaces, let’s break down the specifics, shall we?
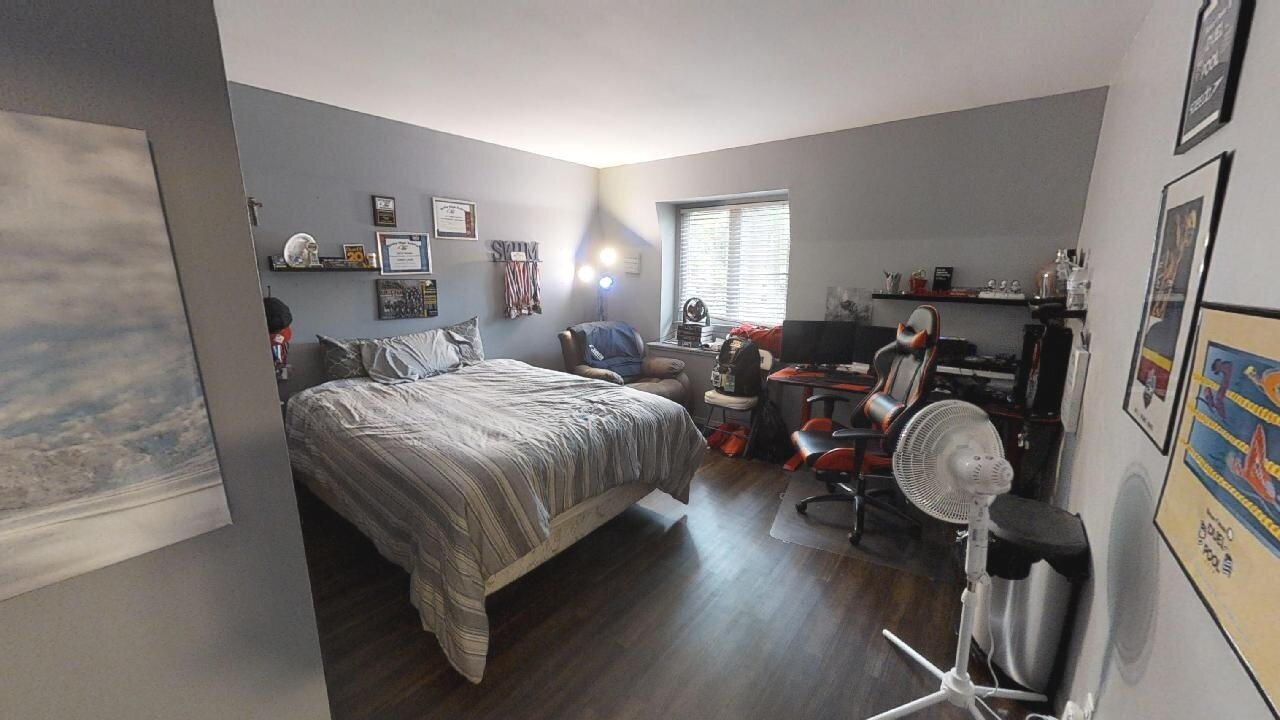
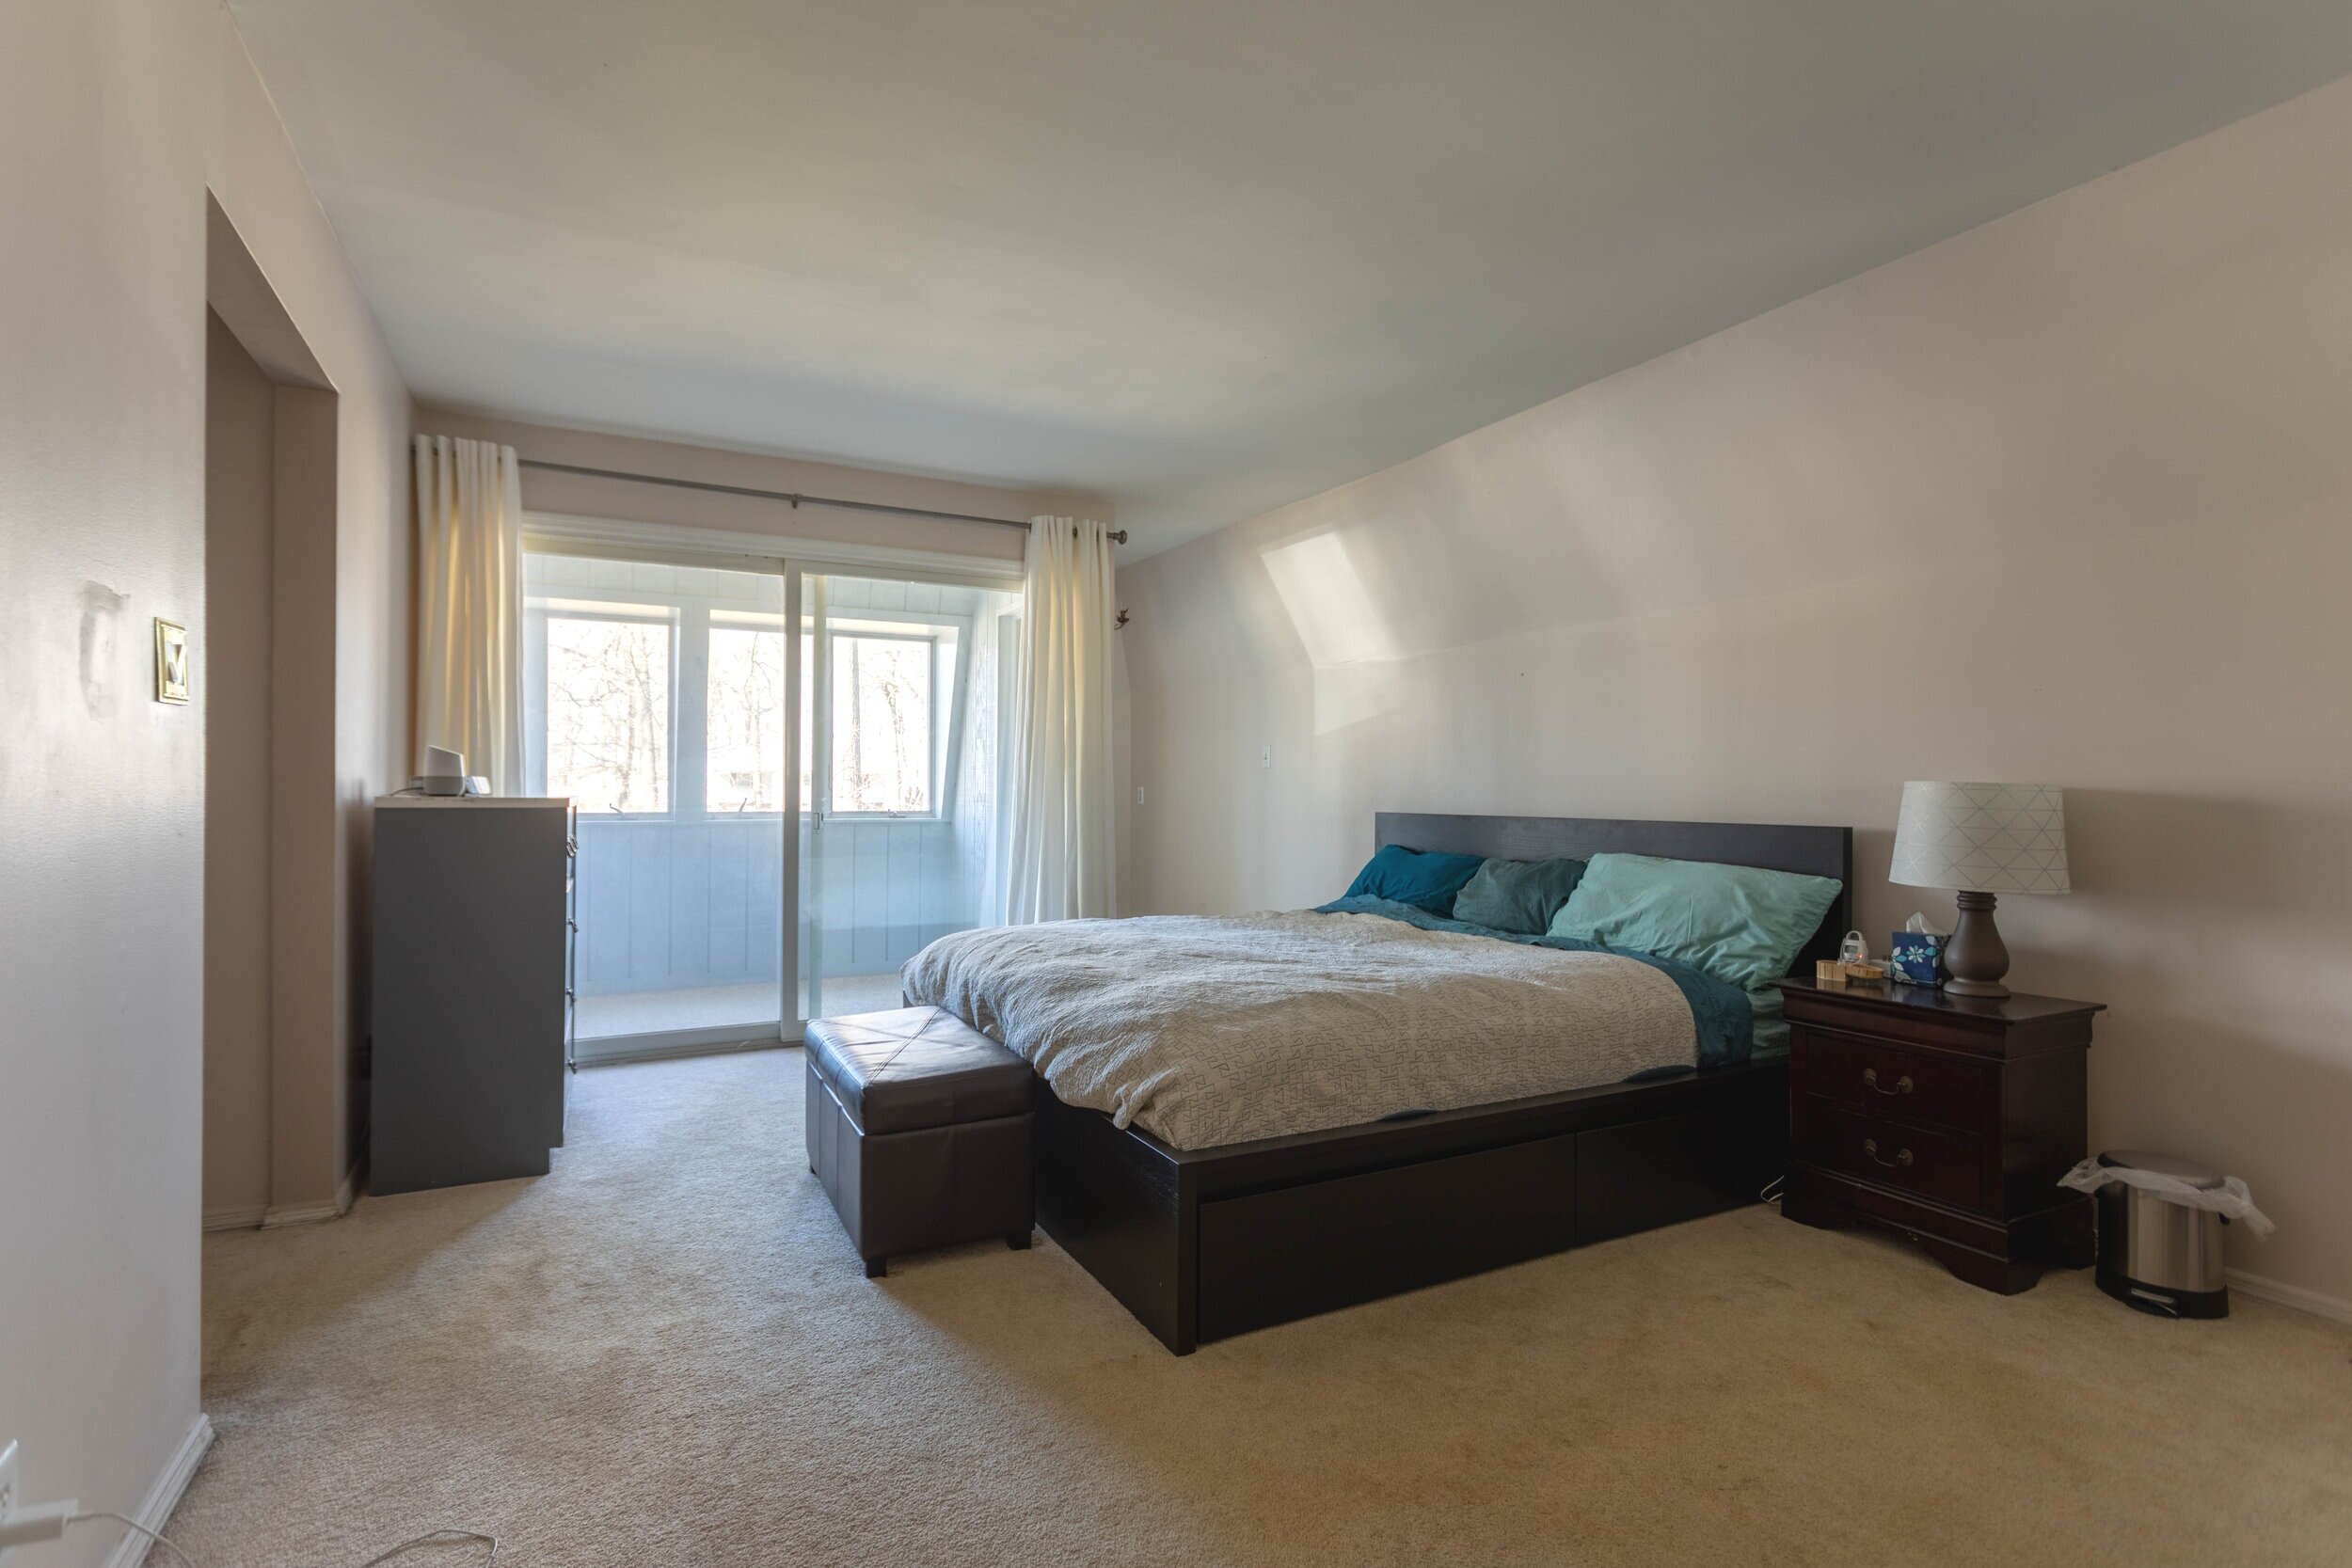
Master Bedroom

The master bedroom is so.stinkin.close. to being completed! We FINALLY had the floors delivered and Lucius wasted no time installing them (sorry, I don’t have a good picture of them yet!). Now we just have to install the doors and trim and then I can go to town painting! After that, all that’s left is to do is move back in.
Related: Master Bedroom Mood Board
Master Bathroom
Lucius has been hitting the construction of the master bathroom really hard lately – determined to just get it done! We’ve started hanging drywall. Then it’s on to tiling, painting, and permanently installing everything.
Related: Master Bathroom Mood Board
Laundry Room
The laundry room is a pretty small space, so luckily it shouldn’t take long to finish. BUT, it’s also lower on the priority list so it may be a while before it’s actually complete. We have some of the drywall up, but still have a few sheets to hang. Then we need to install the floors and the sink. Then it’s on to paint and finishing.
Related: Creating a Functional and Stylish Laundry Room
Hallway

When we started this renovation, I don’t think I realized how impacted the hallway would be. I mean, I guess I did in a sense. Of course, I knew there would be demo and rebuilding, but it didn’t really occur to me all the drywalling we’d have to do. On the plus side, the hallway is becoming a design element of the house and a space I can actually make look good instead of the tiny, crowded landing we started with. I’m excited to start thinking of ways to make it a design element.
Related: Hallway Progress and Plans
More Posts Related to Our Renovation:
Fix Our Hot Mess of a Yard
I shared a tour of our yard several months ago and… it still looks like that. We were so focused on the master suite renovation all last summer that the yard had to take a backseat. But we’re hoping we can finish up the renovation before it gets nice out and spend the warm weather getting the exterior in shape! Again, there are a lot of spaces out there that need attention, so here we go with the subheaders!
Grass

Bottom line: we need some. Okay, the front yard has some grass, but admittedly it’s mostly weeds. Which is surprisingly better than the backyard, which has zero grass. Last fall we got a quote on how much it would cost to completely start from scratch on our yard and it was pretty reasonable. So, come spring, we’d like to follow through with that plan!
Garden Beds

I tried to weed and make our garden beds work, but by the end of the summer, I was so lost as to what was weeds and what was actually supposed to be there. I did, however, learn the hard way where we have poison ivy!
We have a few different garden areas and they were all equally overgrown when we moved in. I’d honestly like to just pull everything up and start fresh. I may not be able to tackle them all this year, but hopefully, I can get a good start!
Deck

I love having a deck in our backyard, but it is definitely due for some love.
First of all, we still have the giant hot tub hole that we need to board over (way at the end of the deck in the picture above). That’s probably at the top of our outdoors to-do list. But on top of that, the deck really needs to be painted and I’d love to get some nicer furniture to replace our cheap-o plastic Adirondack chairs. I’m picturing a table and chairs on one end of the deck and a seating area on the other end with some pretty lights strung through the pergola. And Tiki torches! (The mosquitos in our neighborhood don’t mess around!)
Front Porch/Entrance

Our front porch is… lacking. I made a minimal attempt to make it more inviting by grabbing a cute entry mat, but beyond that, I haven’t put much effort into it. I’d definitely like to figure out how to add a little more somethin’ somethin’.
The View Outside our Living Room Window

I’ve learned to love how tucked away our living room is, but the view is pretty “meh”. The fence right outside the windows above is, simply put, boring. So this summer I’d really like to grow some clematis vines along the part of the fence you see looking out the living room windows.
In the yard right outside these windows, I’d like to build a raised garden. My older daughter asked a little too late in the season last year if we could plant a garden, so this is our year!
Kitchen

The kitchen is very close to being done, but I still need to install toe-kicks under the cabinets and replace the trim. In a perfect world, I’d replace the lighting in there too, but we’ll see where that falls into the grand plan.
Related: Green Cabinet Inspiration
Playroom

We have loathed the ornate design of the fireplace in the playroom since we moved in, so we’re hoping we can modernize that and the surrounding built-ins this year. I’d also like to make this room more functional for our girls. We have a lot of their toys in here, but there’s a lot of unutilized space too. We haven’t really put any thought or effort into this room thus far so it’s way past due for some attention.
Foyer

Behind the scenes, I’ve slowly been working to make the foyer a more inviting entryway. It’s one of those things that I can kind of work on between projects with no real timeline or rush. There are just a few more tweaks I’d like to make in this space before I call it “done”, and I think I can easily accomplish that this year.
Mudroom
I imagine our mudroom eventually as an insanely functional space with cubbies and storage galore! However, right now, it’s definitely looking worse for wear as we had to remove some of the drywall to get to some of the plumbing for the renovation (the master bathroom is directly above the mudroom). I doubt we’ll be able to tackle the mudroom fully this year, but I’d like to at least replace the missing drywall and hang our coat racks back up. Baby steps.
Final Thoughts
It feels like there are a lot of items on our to-do list for this year, but honestly, this is my restrained version - ha! But in all seriousness, priorities will shift and some of these items will get replaced with other projects. And that’s okay! I’m already looking forward to covering all the projects we tackled in 2021 this time next year!
Related Home Improvement Posts
2021 Design Goals

8 Big Projects We Worked On in 2020
Looking back over the last year(ish) I'm amazed at how many changes we've made throughout our home! Every day it's becoming more and more "us”, which feels amazing. So right about now seems like a good time to recap 8 big projects we worked on in 2020 - with before and after pics! Including one project I never even wrote about and the first picture I’m sharing of the kitchen since I painted it!
What We’ve Changed In Our Home Since Moving In
We moved into this house at the end of October 2019 and quickly started doing our thang and updating it to our liking. Although it's actually been a little over a year since we moved in, I think it was close enough to the end of the year that we're going to pretend we've only been here since January 2020 and make this a nice and clean starting point, cool? Cool.
Looking back over the last year(ish) I'm amazed at how many changes we've made throughout our home! Every day it's becoming more and more "us”, which feels amazing. So right about now seems like a good time to recap 8 big projects we worked on in 2020 - with before and after pics! Including one project I never even wrote about and the first picture I’m sharing of the kitchen since I painted it!
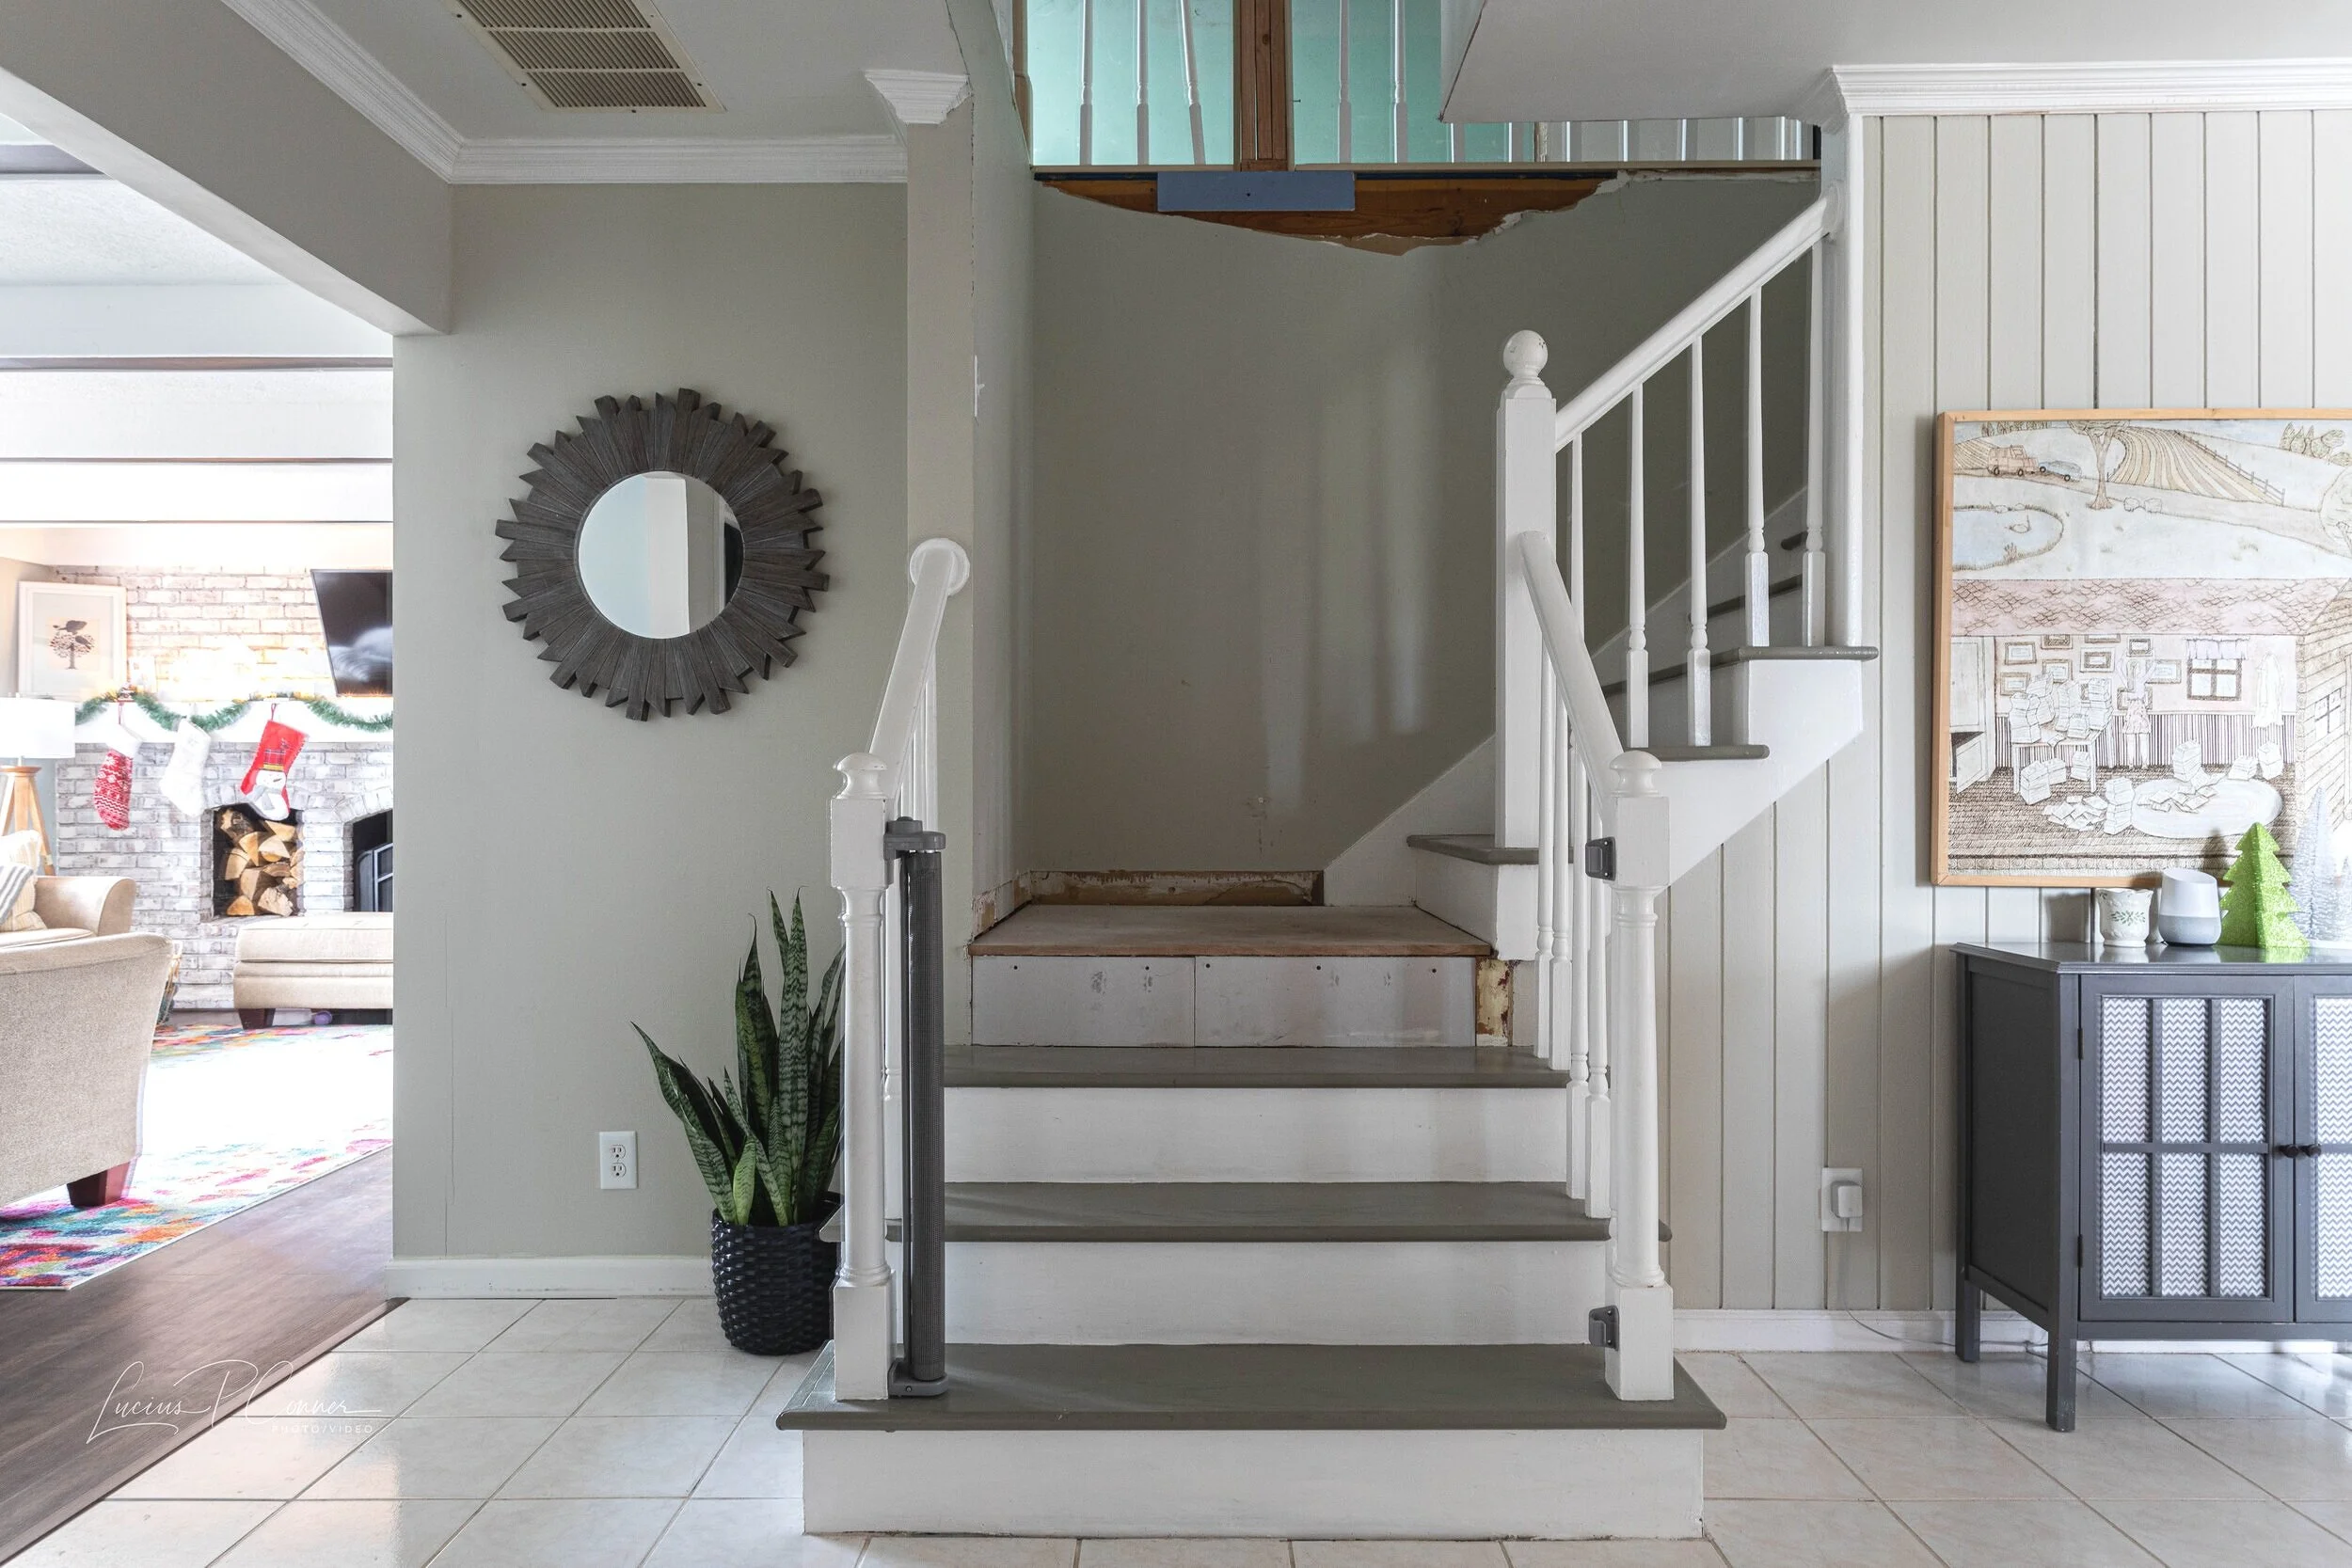
#1 - Painted the Stairs
One of the first projects I tackled when we moved in was painting the stairs. And while they not entirely complete, and definitely need touch-ups after the abuse they've received during the renovation, it was a big project to take on and made a huge impact on our foyer.

Posts Related to Painting Our Stairs
#2 - Made Over Our Oldest Daughter’s Room
Another project I completed shortly after moving in was making over our older daughter's room. I really wanted her to feel comfortable and at home when we moved into this house so it was a priority to make it "her" space asap. I love kids’ rooms and the flexibility you have with pattern and color. I had a blast making her ombre wall and love how it all came together.

Posts Related to Making Over Our Oldest Daughter’s Bedroom
#3 - Designed a Home Office
Ah yes, 2020, the year of working from home. Once I knew I wasn't going back to the office, I knew I needed to make our spare bedroom into a beautiful space I actually wanted to spend time in stat. So I got to work repainting it in a bright off-white color and drew an accent wall with a Sharpie paint pen. Now, this room makes logging into work way less of a bummer.


Related Posts About My Home Office
#4 - Renovated Our Dining Room
Like my office redesign, this room started off as a space we were anything but drawn to. It's amazing how opening the wall between the kitchen and dining room and modernizing the dining room overall actually made us want to use the room! Now we use this room every day for meals (as opposed to the eat-in kitchen) and because the buffet table houses all the kids’ craft supplies, this room gets a ton of use for coloring/crafting sessions.


Posts Related to Our Dining Room Renovation
#5 - Opened the Wall Between Our Foyer and Living Room
Speaking of opening up walls, I never actually wrote about this project, but around the same time we opened up the dining room wall, we also opened up the wall between the living room and foyer. Just like the above, it makes the spaces feel so much more connected, and we love that it allows some more light into our dark foyer. Plus, it's really handy to be able to see from the couch if our 5-year-old is trapped on the stairs by the baby gate now.


#6 - Started Our Master Suite Renovation
In case you weren’t aware, we started a huge freaking renovation last year! Obviously, this is the biggest project on our list. And while it's not done yet, these spaces look completely different from a year ago. I’ve loved watching the old layout disappear and see my vision for a more functional layout come together.


Posts Related to Our Master Suite Renovation
#7 - Painted the Kitchen Walls and Cabinets
I've shared bits and pieces here and on Instagram about how I've been working on the kitchen. And while there’s still a little work to be done before I call it finished (trim, toe kicks, replacing light fixtures), I’ll leave you with the current “after” below.


Posts Related to Painting Our Kitchen Walls and Cabinets
#8 - Flipped a House
Oh yeah, and we flipped a house last year! It feels like so long ago I almost forgot. Flipping our little house was definitely a challenge, but it was also a fun experience that I'd like to do again in the future. We just have to find that perfect flip… and some time.


Posts Related to Our House Flip
Final Thoughts
It’s a bit of a whirlwind to think of everything we’ve updated in just a year. I think an updated house tour is in order! But we’ll cover that another day (soon!).
Want More?
Come see what we have up our sleeves for this year!
Home Projects We Tackled in 2020

Master Bathroom Mood Board
Our master bathroom renovation is trucking along. In fact, almost everything is already ordered! So I think it’s about time I shared the design with all of you!
Master Bathroom Design Plans
As per usual, we’re up to our elbows in multiple projects at the moment. I took a break from working on the kitchen and shifted focus to finish sanding and priming the bedroom while Lucius has been working on the master bath. Needless to say, the kitchen reveal will have to wait - but I assure you it’s lookin’ goooood!
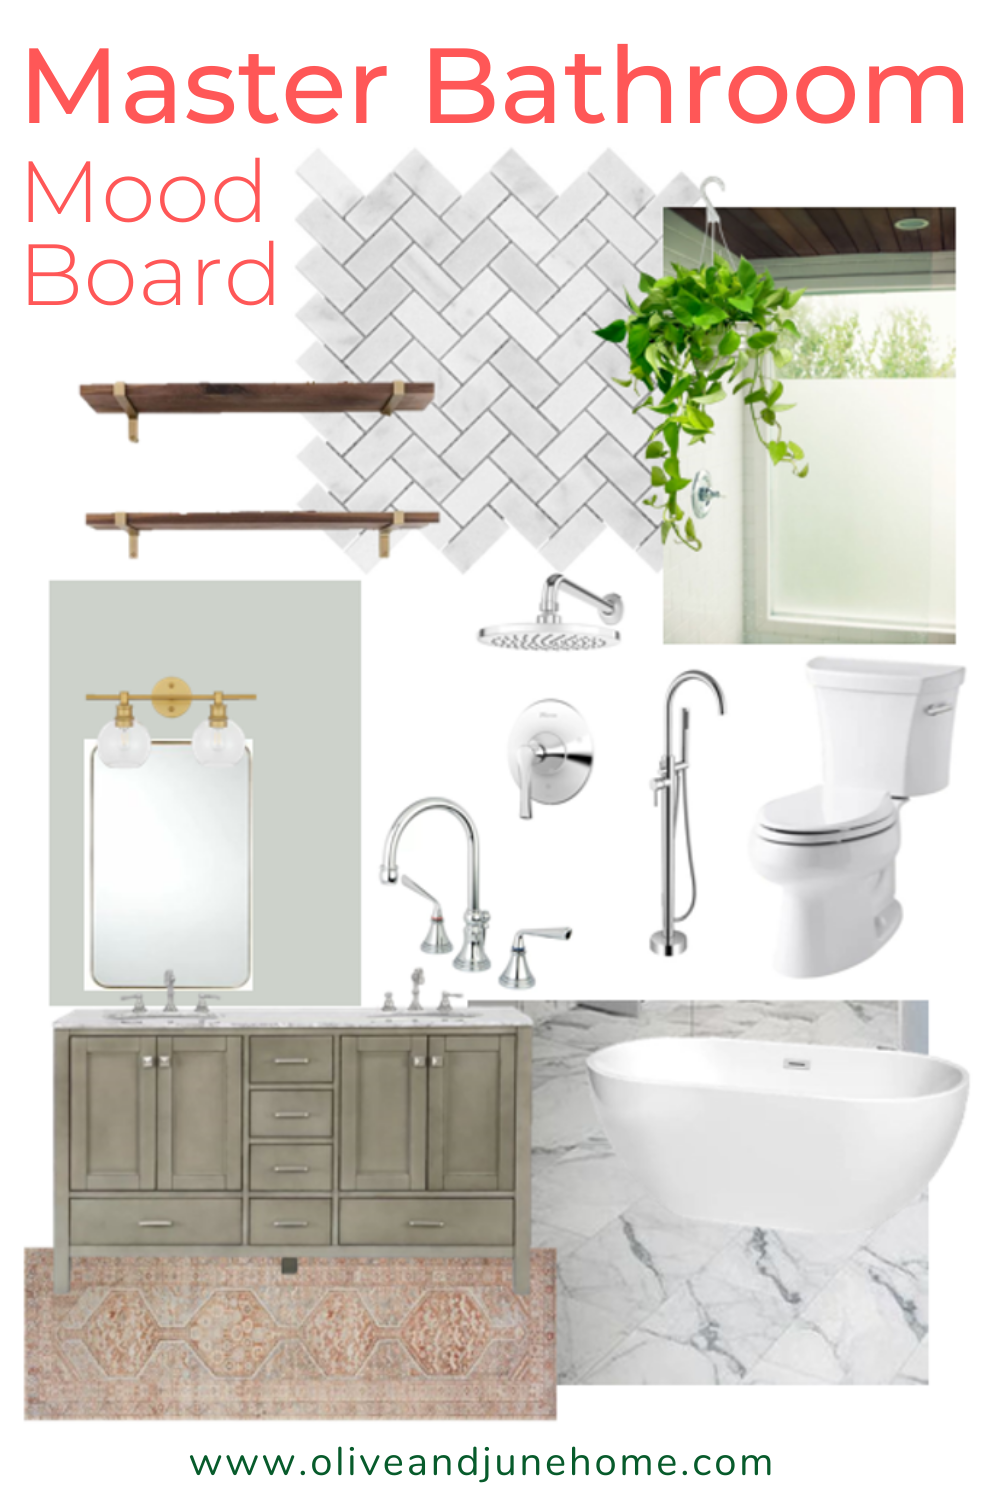
While we still have a ways to go on the bathroom, I’ve been planning the aesthetics for a while and I have a VISION. Considering the current state of the bathroom, you’ll have to use some imagination to see how it’ll all come together.
But I’ve thrown together a mood board to help! Here’s where my head is at:

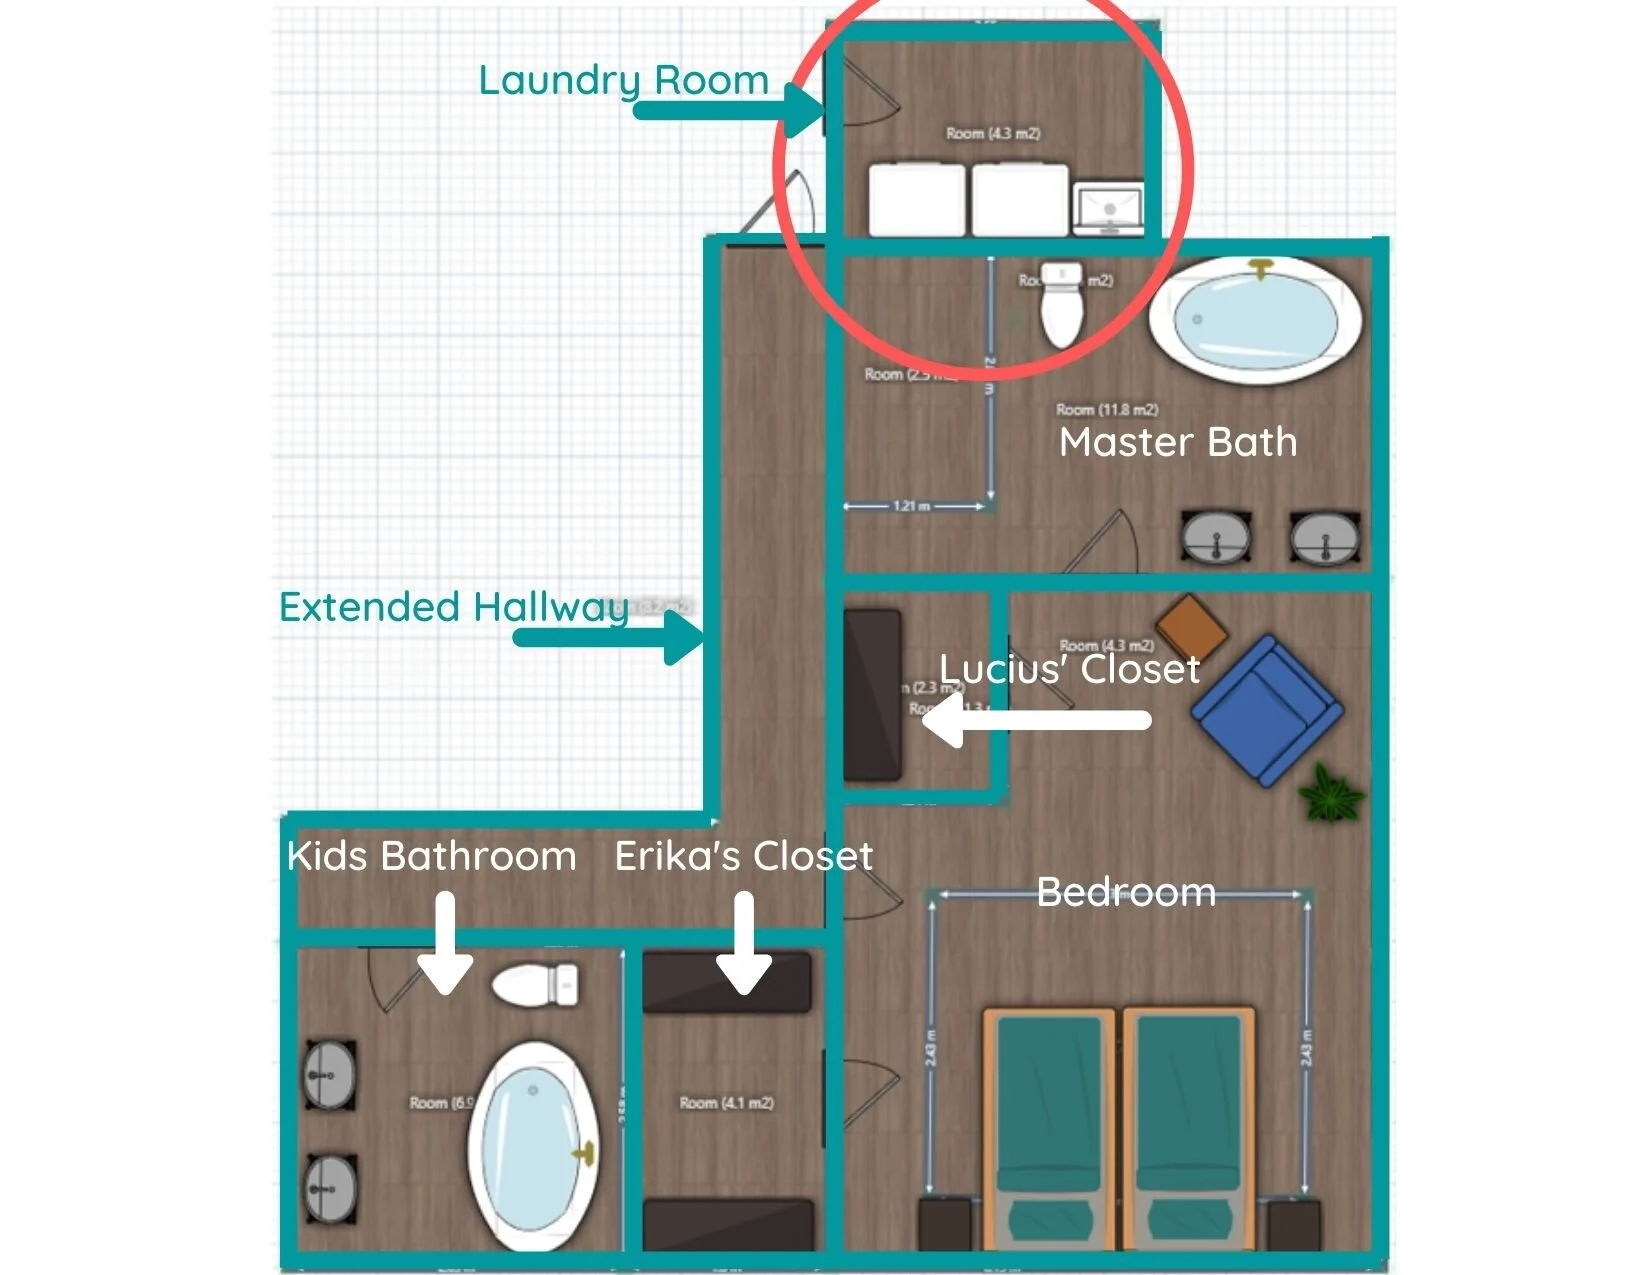
To help you get a better frame of reference for the layout, here’s the overhead floorplan.
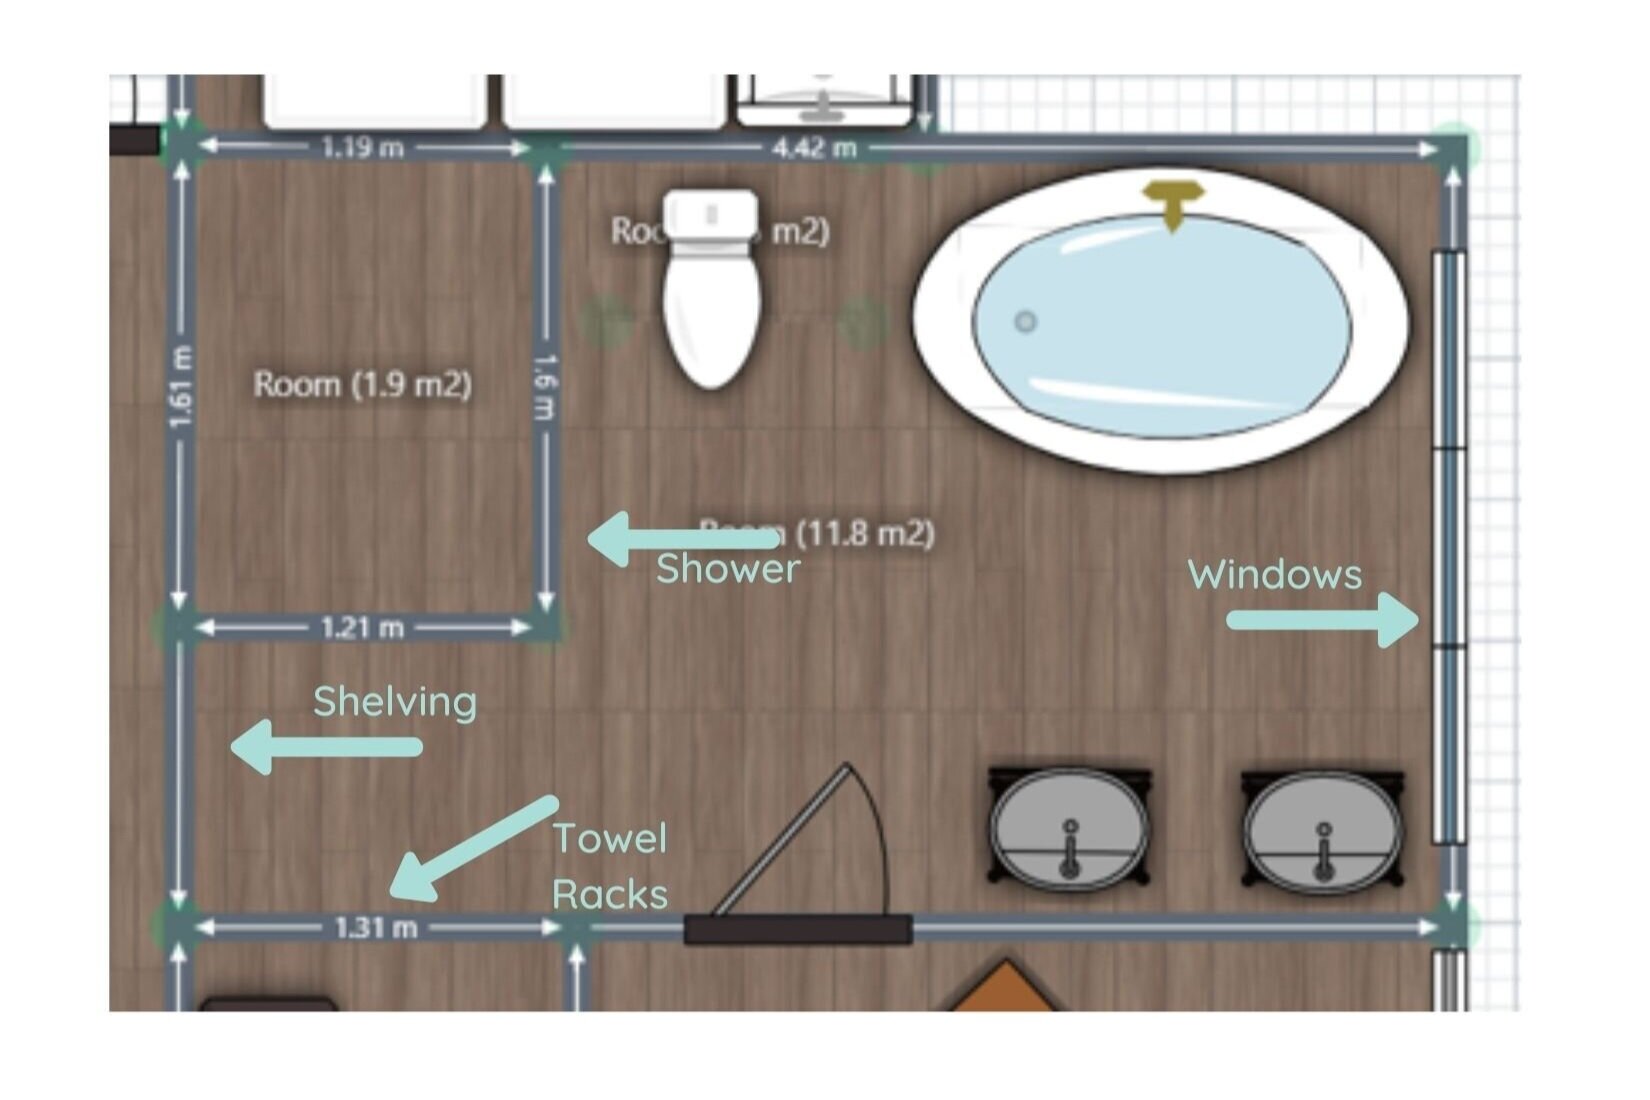
My goal for this room is to create a space that feels luxurious, without completely blowing our budget. I spent HOURS finding just the right everything - the style of items I wanted at a decent price with good, solid reviews.
Now let’s get into the details of what I picked out, shall we?
As an Amazon Associate, and partner with other brands, I earn from qualifying purchases. This post may contain affiliate links, meaning I receive commissions for purchases made through those links at no cost to you.
Flooring
Starting with the big hitter: the floors!

Floors are a big design decision. They kind of take up a ton of visual space, after all. But they were honestly pretty easy to choose for this space.
As I started gathering ideas of elements I wanted to include in our bathroom, these tiles just seemed like the best fit for the look I was going for. I love the classic look and the flowy veins running through them. They’re not too in-your-face but definitely aren’t boring. And at less than $2 per square foot, I couldn’t resist!
The tiles are porcelain made to look like marble. There was a ceramic look-alike but after doing some research, it seems that porcelain is more durable. Plus, I like that these tiles have a matte finish, which should help decrease the risk of slipping and sliding all over a wet bathroom.
Lastly, I love the large 12x24 inch size of these tiles because we plan on using a smaller tile pattern in the shower. Varying the size of patterns in the same space keeps them from competing with one another, so the size was another bonus!
Shower
While we’re talking about tile, our shower walls will sport this gorgeous herringbone tile.

As mentioned above, the pattern of this tile is much smaller than the floor tile so I think they’ll complement each other nicely. Plus, I’m a sucker for a herringbone pattern and had to have it. In contrast, the floor tile will be laid in a staggered pattern.
Now, let me see if I can explain how it’ll all flow together…

In the picture above, I’ve outlined where the glass shower wall will be installed (green) and where the shower tile will run (orange). The shower itself will actually stop a bit before the end of the glass shower wall. But the tile is going to run floor to ceiling along the entire left-hand wall above and around the front shower wall.
Where the shower ends, we plan on adding open shelving for storage. Since there’s so much grey going on in this room, I’d love to incorporate some wood tones to warm it up. I’m thinking of rich wood shelves with pretty brass brackets.

Obviously, mine won’t be filled with kitchen supplies, but you get the drift. You’ll see how these elements will tie into other areas of the room a little further down.
Lucius has also somehow managed to talk me into a) installing a curbless shower so the floor tile will carry through seamlessly and b) not installing a shower door. My hope is that the rainfall showerhead we bought, the slope of the drain, and the depth of the shower will keep the water (and warmth!) fairly centralized. Though I did warn him that if I get goosebumps while shaving my legs he’ll hear about it forever.
Bathtub
While we’re talking about splish-splashing around, we’re installing a soaker tub and I’ve never wanted to take a bath more in my life! It’s already been delivered and roughed into place. I got to hop in for a dry test run and it’s HUGE!

Fixtures
I decided to get a bathtub with polished chrome drains, which inspired me to get polished chrome for all the fixtures - including this stylish shower head, tub filler, and vanity faucet.

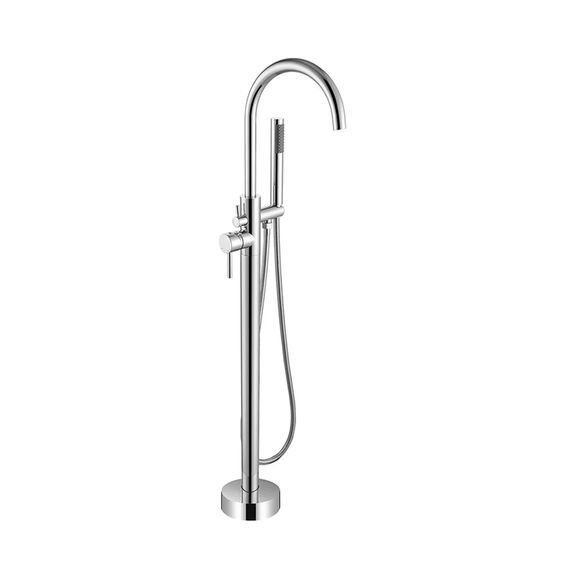

BUT, as I mentioned above, I’d like to warm this room up with some wood tones and brass accents. Here’s where those will come in:
Lighting, Mirrors, and Accessories
While we’re installing two recessed lights in the ceiling, I snagged two of these brass beauties to be installed above each of our mirrors over the vanity.

On that note, the vanity lights will be paired with a couple of these mirrors:

I don’t think these exact mirrors are sold anymore, but here’s a link to a very similar mirror with great reviews (and it’s even a couple of inches bigger!)
To add wood tones in more places than just the open shelving, I’m eyeballing some wooden hooks like the ones below to hang between the mirrors to be used for hand towels.

I couldn’t find the link for the exact hooks you see above but these hooks are similar. And there are tons of other styles of wooden hook options like these, these, and these!
Vanity
I talked a lot about what is going on around the vanity, so this feels like an appropriate time to actually talk about the vanity.
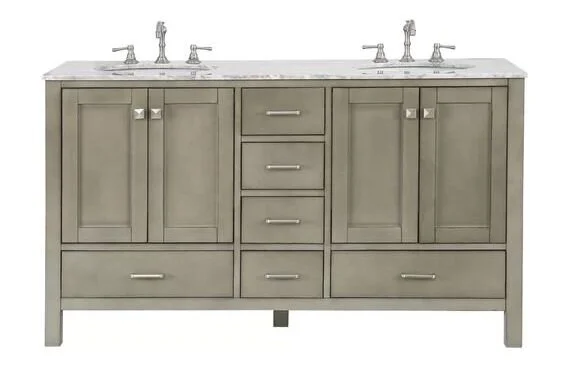
I went back and forth a lot on whether to get a basic white vanity or get one with some color. The finish actually looks more intense in the picture above than in real life. John and Sherry over at Young House Love used the same one in their master bathroom and I may have been swayed by how gorgeous it looked there. We got it with a quartz top and it’s beautiful!
The only problem is… when it arrived, both the sinks were broken. The good news is that we were able to get a full refund and don’t have to return the base! So we’re going to try our hand at ordering some new sinks and attaching them ourselves.
This one isn’t sold anymore, but here’s a very similar vanity.
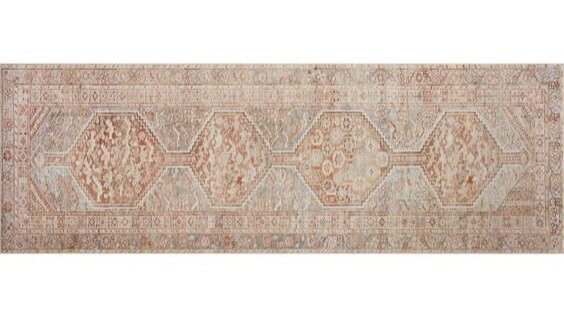
I’m imagining a pretty patterned runner in warmer colors in front of it, kinda like this one:
Wall Color
While we’re talking about color, one thing we can’t forget to mention is wall color. Depending on how everything comes together, I might paint the walls off-white. But I really love the thought of using Sherwin Williams Sea Salt in here. I used it in the bathroom at our last house and it’s such a beautiful spa-like blue/green/gray color. In fact, I used the next darker shade on the paint swatch in our living room in this house!

Windows
And lastly, from the picture of the bathroom earlier in this post, you may have noticed we have four large windows that span one entire wall… which looks straight at our neighbor’s house. So what do you do with windows in a bathroom? Well, I don’t know about you, but I plan on frosting mine!
I love how in this example they only frosted the bottom 3/4ths or so. I’d like to do something similar to ours.

Naturally, I can’t wait to add some light and humidity-loving plants to this room to really make it cozy and bright.
And since the sun blazes onto this side of the house late in the day, we plan on throwing up some blinds for those days when it’s just a little bit too intense. But most of the time, I’d love to let it shine in.
Final Thoughts
So there you have it - the full design plan for the master bathroom renovation! We should be well on our way to drywalling very soon here and then tiling, painting, and installing everything!
I can’t wait to see my vision come to life, because in my head it looks reaaaaal good. I might just end up moving a sleeping bag into this room when it’s all said and done because I think I’m going to love it way too much to ever want to leave!
For more renovation-inspired posts, check out these:
Spa Inspired Bathroom
DIY Cardboard House Luminaries
I’ve mentioned in the past that I have a bad habit of overcomplicating things. Well, not this time! I created these sweet little cardboard house luminaries in just a couple of hours (including time for the paint to dry). Let me show you how!
Easy DIY Luminaries
I’ve mentioned in the past that I have a bad habit of overcomplicating things. Well, not this time! I created these sweet little cardboard house luminaries in just a couple of hours (including time for the paint to dry). Let me show you how!

When I shared my mantel after I decorated it for Halloween, I mentioned that I didn’t have a lot of holiday decorations. Really, Christmas was the only holiday I decorated for in the past.
But after I decorated for Christmas this year and looked around, the house was looking a little… meh. To my surprise, I think I enjoyed decorating for Halloween and fall more than I realized, and now that I was decorating for Christmas I wanted more.
Yeah, yeah, yeah, it’s a little late for Christmas decorations. But who says you have to take decorations down right after Christmas!? I might just leave these bad boys up through winter. Anywho…
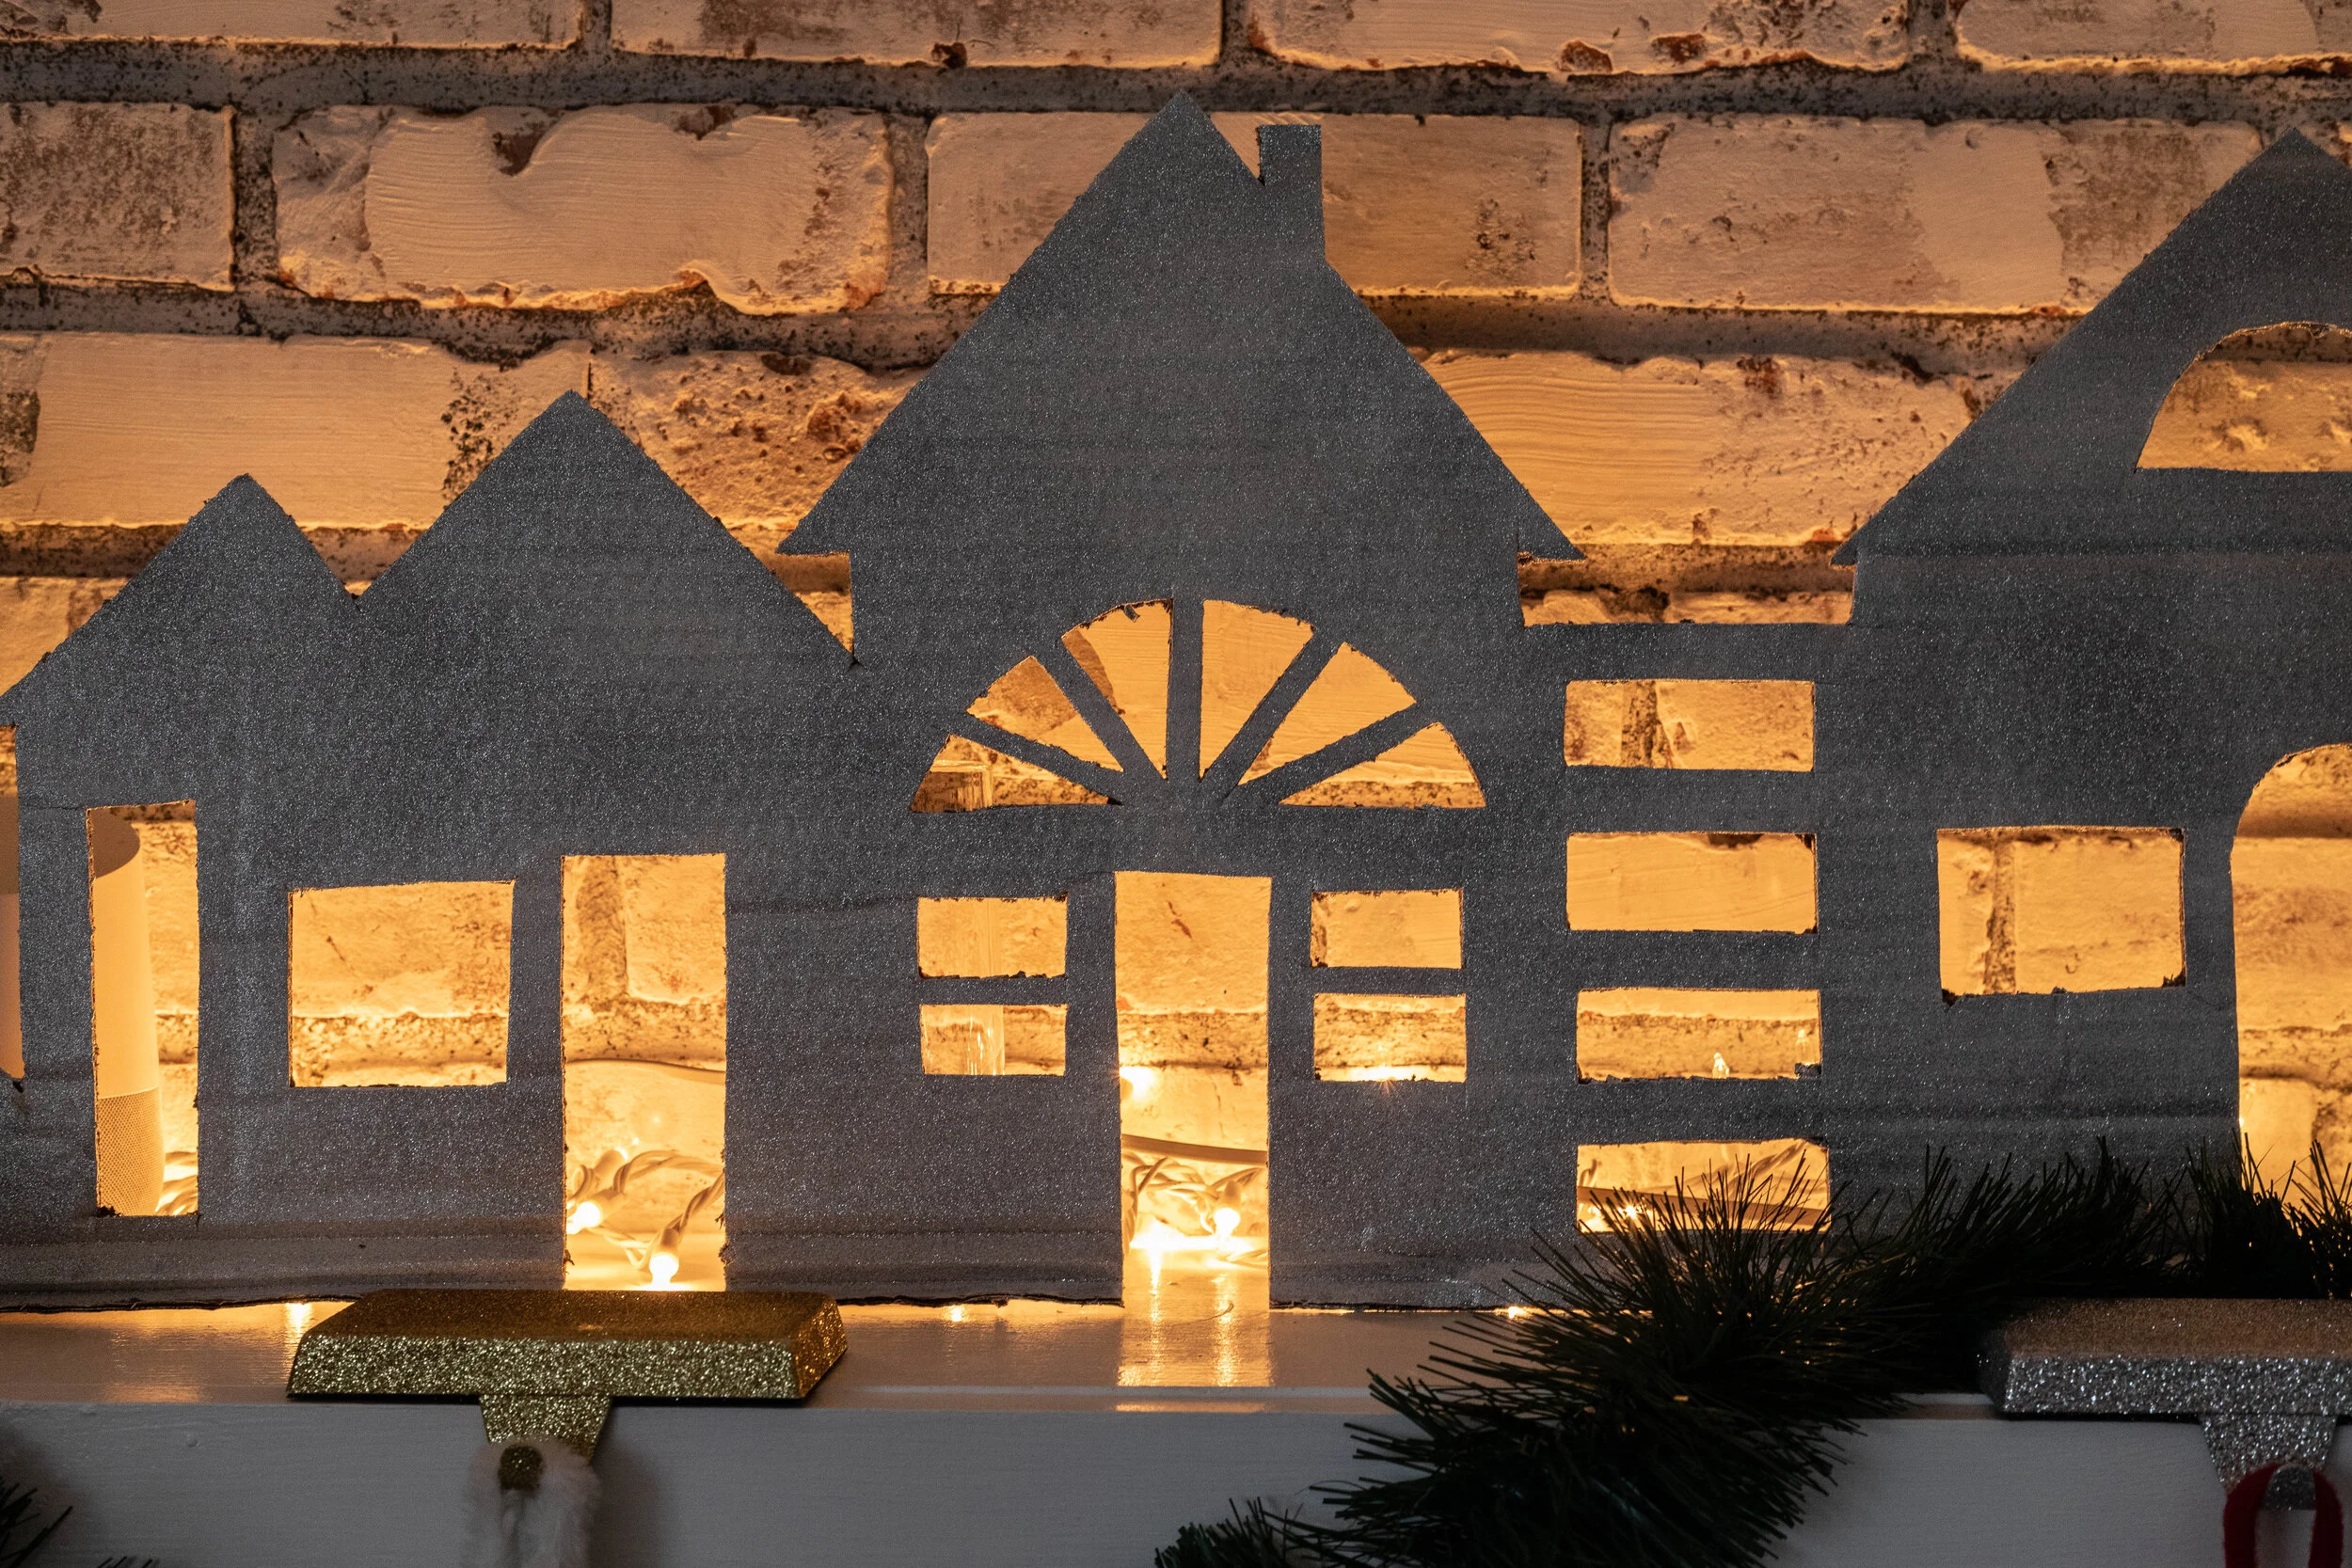
Since our mantel is giant and seems to be the star of the show, especially because that’s where our stockings hang, I felt like that was the perfect place to really add a little somethin’ somethin’. But of course, being me, I didn’t want to drop a bunch of cash on decor when I didn’t know exactly what I was looking for. Then I came across this image and my wheels began to turn:

Like many folks this time of year, I’ve definitely had an influx of cardboard boxes lying around. So why not put them to use and make some cheap and easy Christmas-inspired luminaries!?
While the tutorial from the source above shows you how to make actual little box houses, I wanted and needed something to span the length of the mantel so I left mine flat so it’s just like you’re looking at a row of houses head-on. Here’s how to make your own:

As an Amazon Associate, I earn from qualifying purchases. This post may contain affiliate links, meaning I receive commissions for purchases made through those links, at no cost to you.
Materials
- Cardboard
- Box Cutter
- Pen/Pencil
- Craft Paint
- Craft Brushes
- Lights
- Glitter Spray Paint (optional)
Draw Your Houses
First, cut your box so you have the length you want. Then, start drawing silhouettes of the front of different houses.
This is where I went really off the rails (for me) and didn't.even.use.a.ruler! (What!?) I really just wanted an easy, low-key, slightly whimsical project so I freehanded everything and didn’t mind if it wasn’t perfectly straight (or at all straight - check out that wonky door).

A couple important things to remember here:
Your houses all need to connect
You’ll be cutting all the shapes out with a box cutter in the next step so don’t torture yourself by making your designs super intricate
Cut Out Your Houses

Using a box cutter, cut out the silhouettes of the houses, and all the windows and doors. I put a cutting mat underneath mine as I cut, but if you don’t have one you could also use a scrap piece of cardboard to make sure you’re not scoring the surface underneath.
Paint
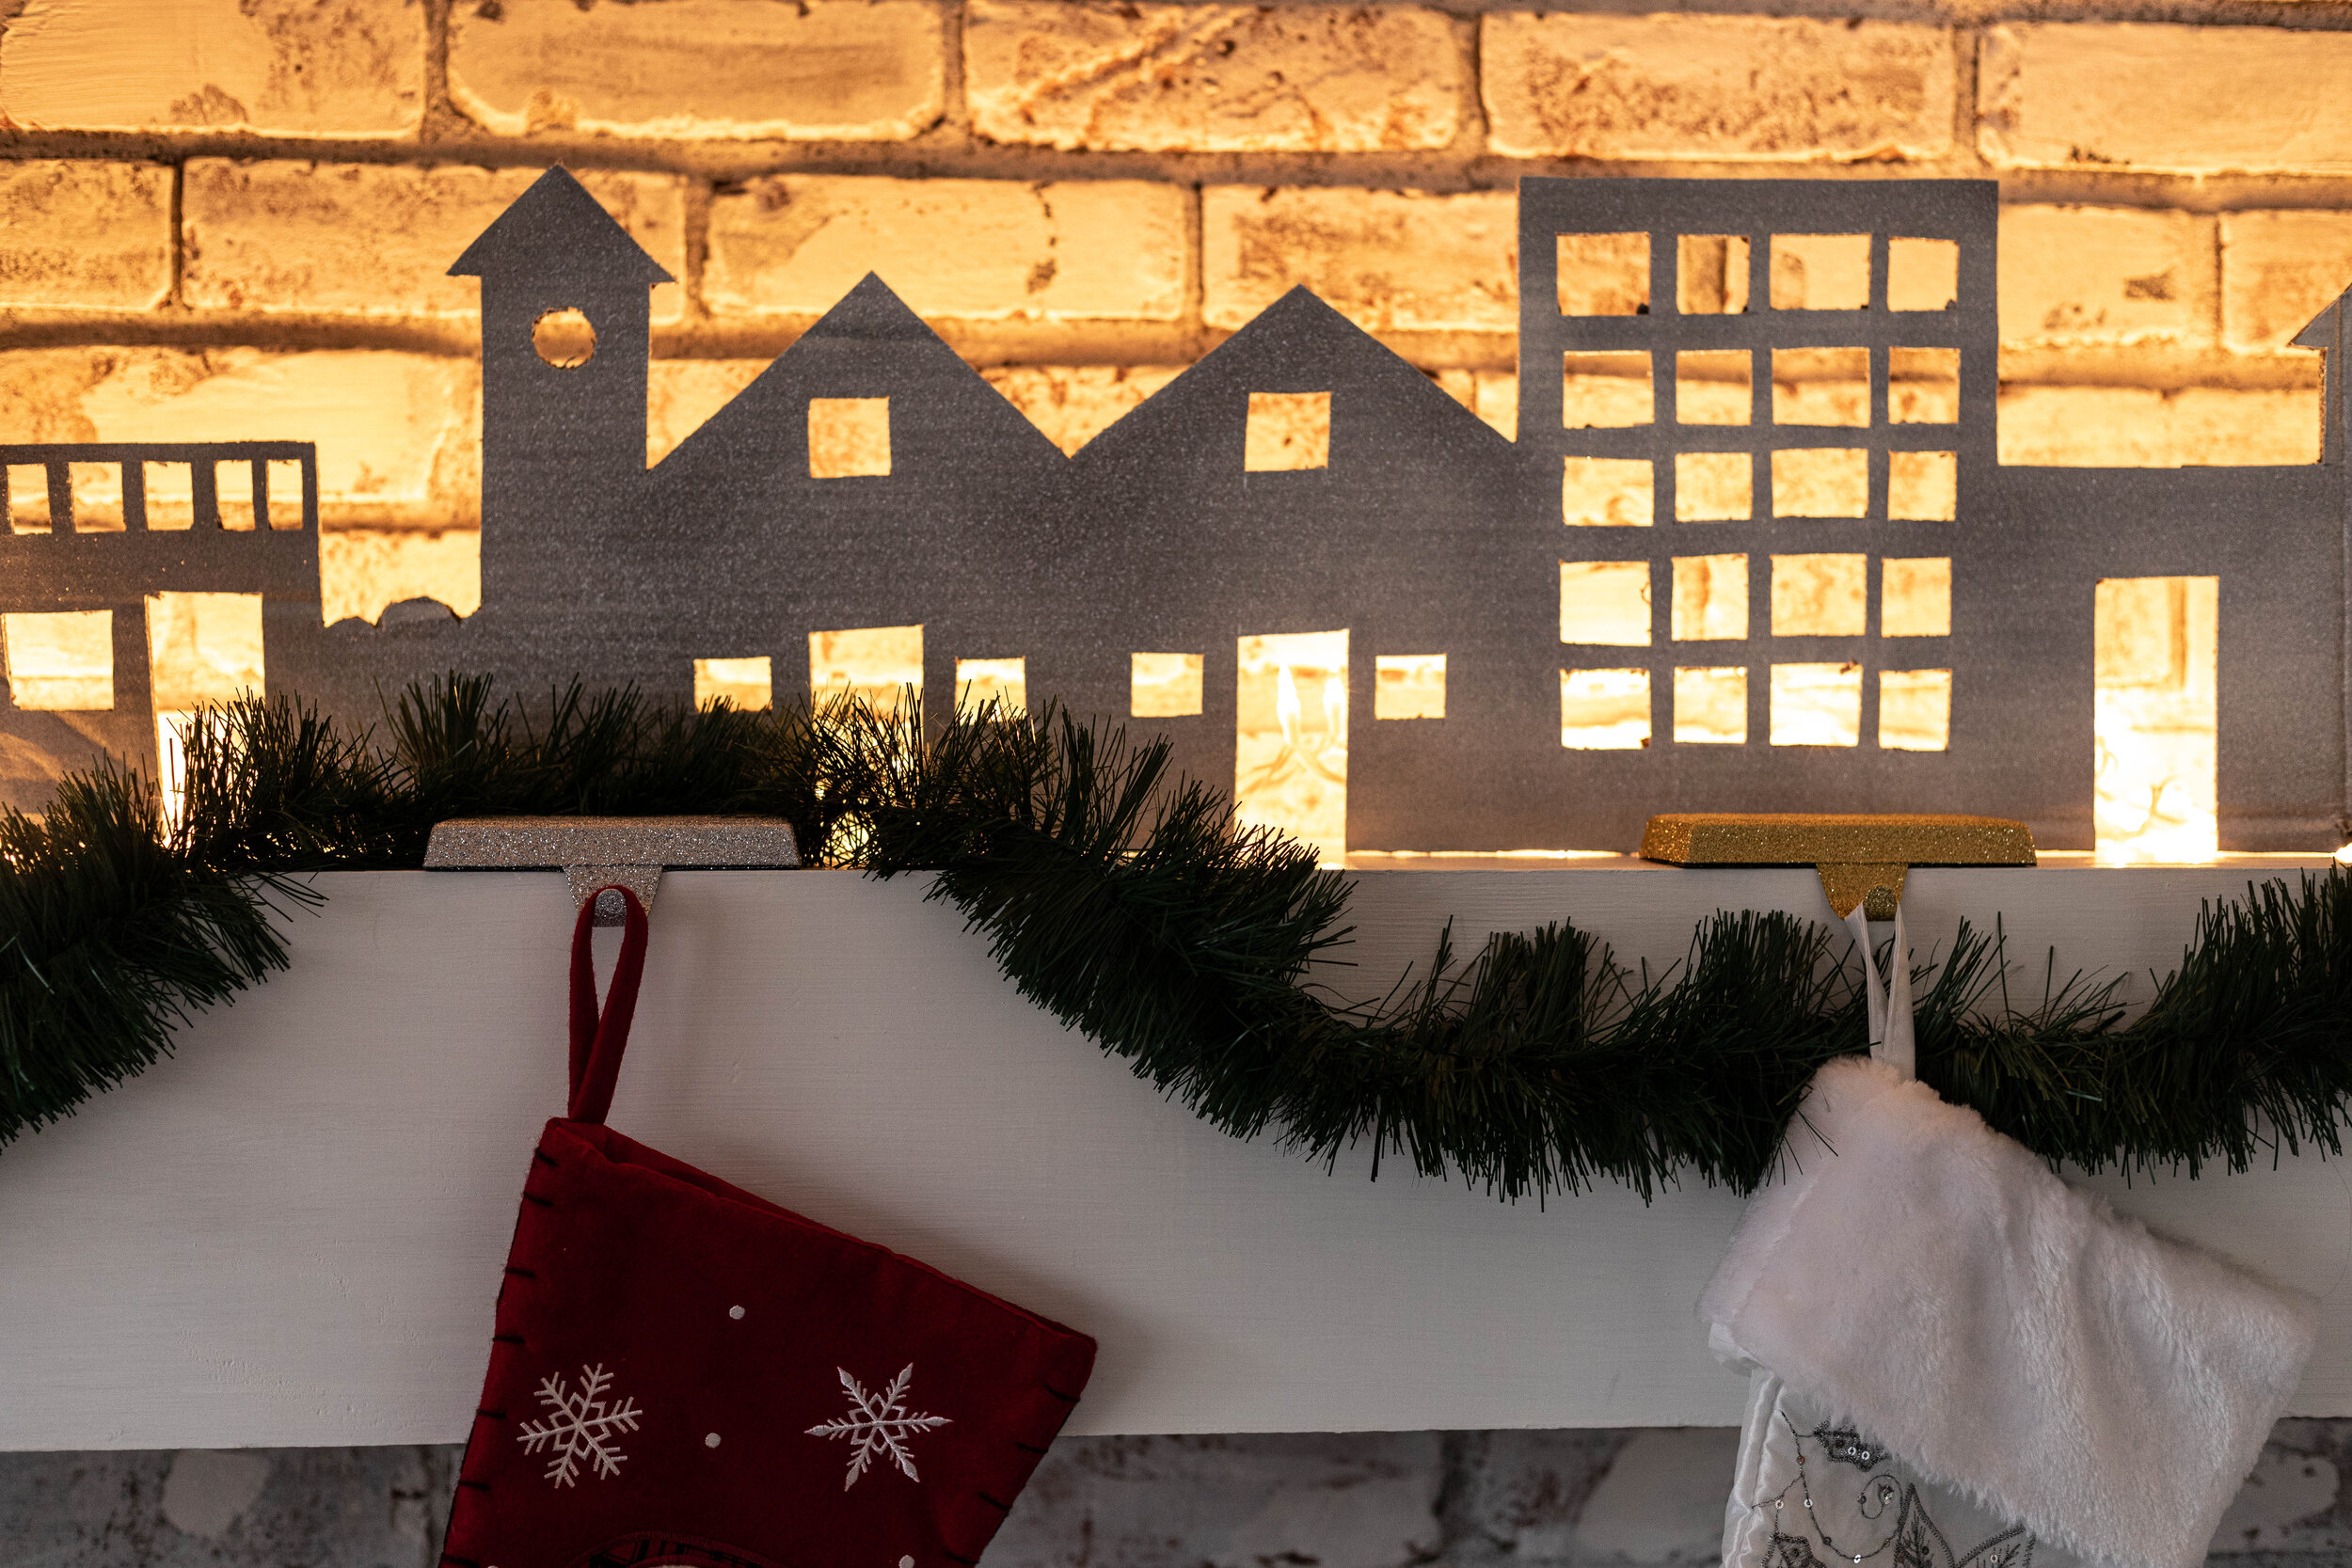
Naturally, white paint was my choice for these Christmas-inspired luminaries, but you can paint them any color you want. I picked up some cheap acrylic paint and craft brushes and applied two coats, letting them dry in between each coat.
Enjoy!

While the paint was drying, I strung Christmas lights along the top of my mantel. Happy accident - I picked up lights with white cords, which ended up being perfect for this project! 10/10 would recommend.
Then, I simply placed my houses in front of the lights and ta-da! Luminaries!
Actually, lefty over there kept tipping backward so he’s leaning against a tall glass. It’s clear, so it’s pretty unnoticeable. Except now I just told everyone. Whoops.
Bonus Step!
After I lived with my luminaries for a little while, I ended up coming across some glitter spray paint and figured I’d add a little sparkle to my luminaries - and I’m loving it!

Final Thoughts
While I may replace these down the road with some pretty, ceramic luminaries or other Christmas decorations, I’m actually loving these little houses right now! The extra glow they add to the living room is cheery and beautiful and the kids are enamored by them.
PLUS, I’d like to get at least one more use out of them for Halloween next year by painting the backside black and maybe putting some orange lights behind them. SpoooOOOOOooooky.
For other easy projects, check out these posts:
Make Your Own Luminaries - with Tutorial!

Do Painted Stairs Actually Hold Up?
Painting your stairs can be an inexpensive way to give them a completely new look, but do they actually hold up? No one wants to take the time to do a home improvement project that doesn't last. Lucky for you, in this post, I'm sharing the pros and cons of how my painted stairs are standing the test of time after 1 year so you can decide if this type of project is right for you!
The Pros and Cons of Painted Stairs
Painting your stairs can be an inexpensive way to give them a completely new look, but do they actually hold up?
No one wants to take the time to do a home improvement project that doesn't last. Lucky for you, in this post, I'm sharing the pros and cons of how my painted stairs are standing the test of time after 1 year so you can decide if this type of project is right for you!
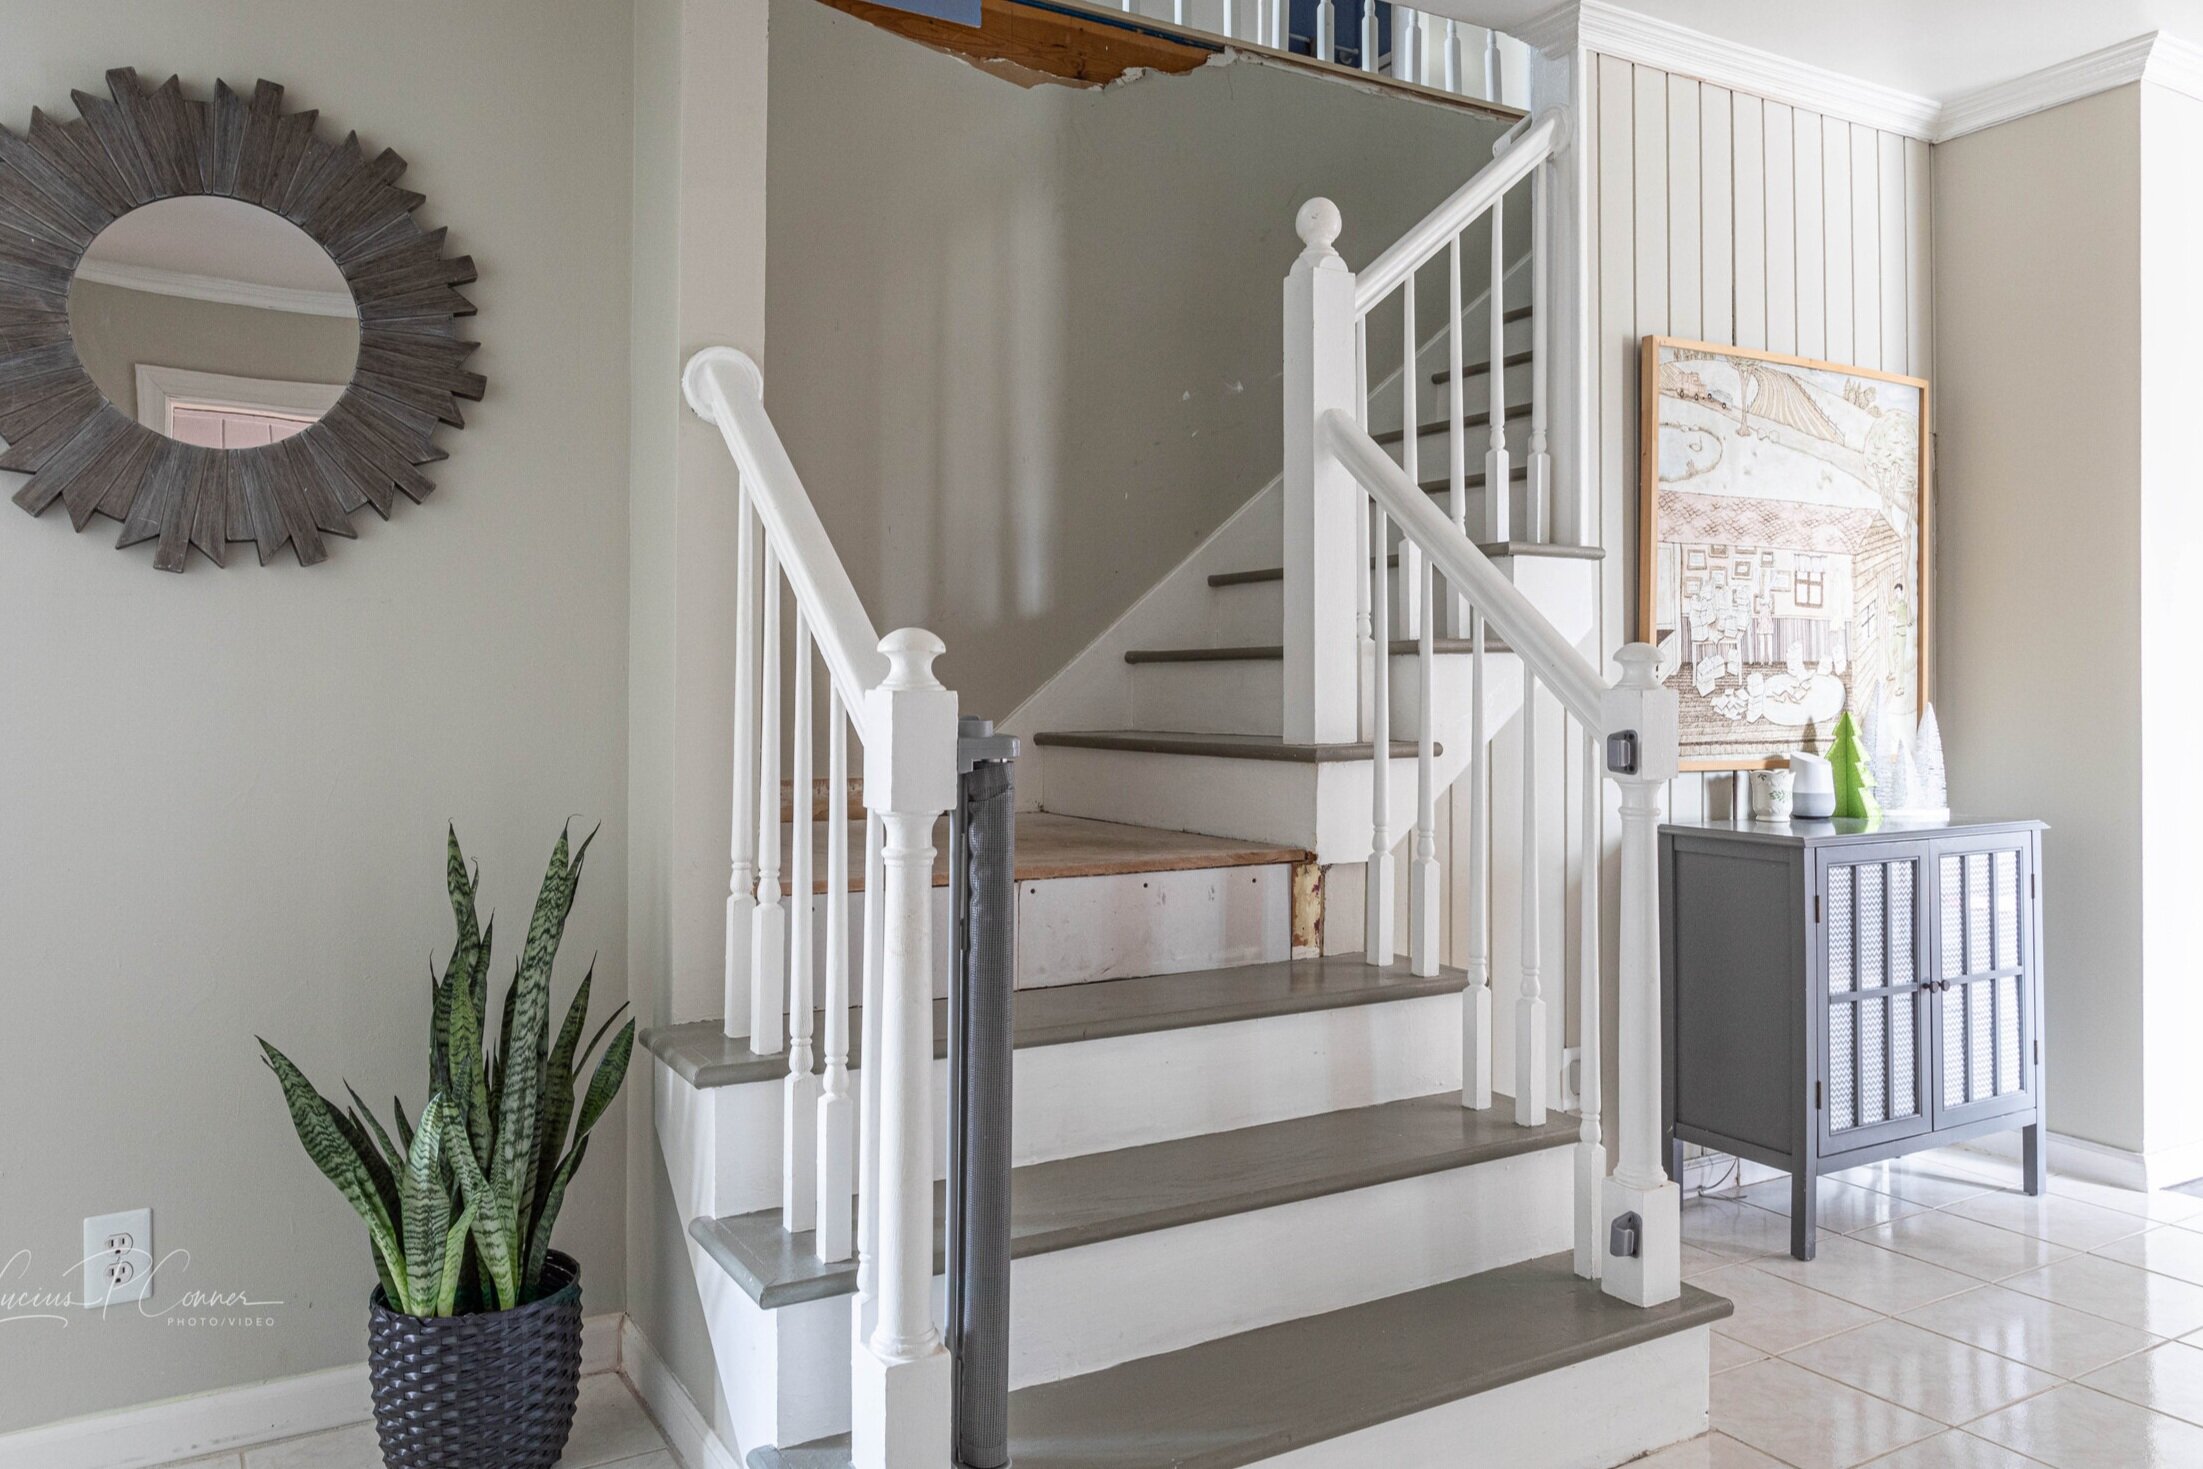
We moved into our house a little over a year ago (at the end of October 2019). I immediately knew there was no way I wanted to be met with this image when I walked in my front door:

So the first project I tackled was ripping up the gross, dingy carpet and painting the stairs. In fact, that was one of the first projects I posted about here on the blog, too!
In the original post, I wrote all about how to rip up carpet on your stairs, prep, and paint them. But today I'm giving you the skinny on the question you might be wondering about…
Do Painted Stairs Actually Hold Up?
And my answer is a resounding YES! Better than I imagined, in fact!

Now, our stairs (and the surrounding walls) aren’t looking quite as pristine as they were when I first painted them. That’s to be expected. But ours have been particularly beaten up because a few months after I painted them, we decided to start our master suite renovation (that was a pretty significant lack of planning on our part).
However, considering they've had to endure the abuse of Lucius as he has not-so-gently carried loads of construction materials up and down them, they've held up amazingly well! I really do think our stairs have held up so well because of the time I took to prep them, and because I used a good quality porch, floor, and patio paint.

So, would I do it again? Absofreakinglutely! But painted stairs aren't without their faults. Here's a breakdown of the pros and cons of painted stairs to help you decide if painted stairs are for you.
Pros of Painted Stairs
DIY
Although it can be time-consuming, painting your stairs is totally a doable DIY project. Compared to the amount of time it would have taken me to sand, stain, and protect the stairs to return them to hardwood, painting my stairs was a much quicker (and cleaner) option.
Surprisingly not slippery
I mentioned in my original post that I was concerned the glossy paint used on the stairs would be slippery. Boy, was I wrong. I've lived in houses with carpeted stairs and I can honestly say I've slipped on the carpet way more often than I've slipped on my painted stairs - and that's coming from a self-proclaimed klutz!
Cleanliness
Sweeping the stairs with a broom is so.much.easier than hauling a vacuum up and down.
Cons of Painted Stairs
Cleanliness
I know, I know, I listed this as a "pro" too, but while you don't have to vacuum painted stairs, you do have to sweep and mop them every once in a while. Not the worst job in the world, but certainly not something I look forward to.
Upkeep
While prepping your stairs and using a high-quality floor and porch paint will help keep your stairs looking nice, nicks and general wear and tear are more noticeable than on hardwood and you'll have to touch them up occasionally.
Mystery
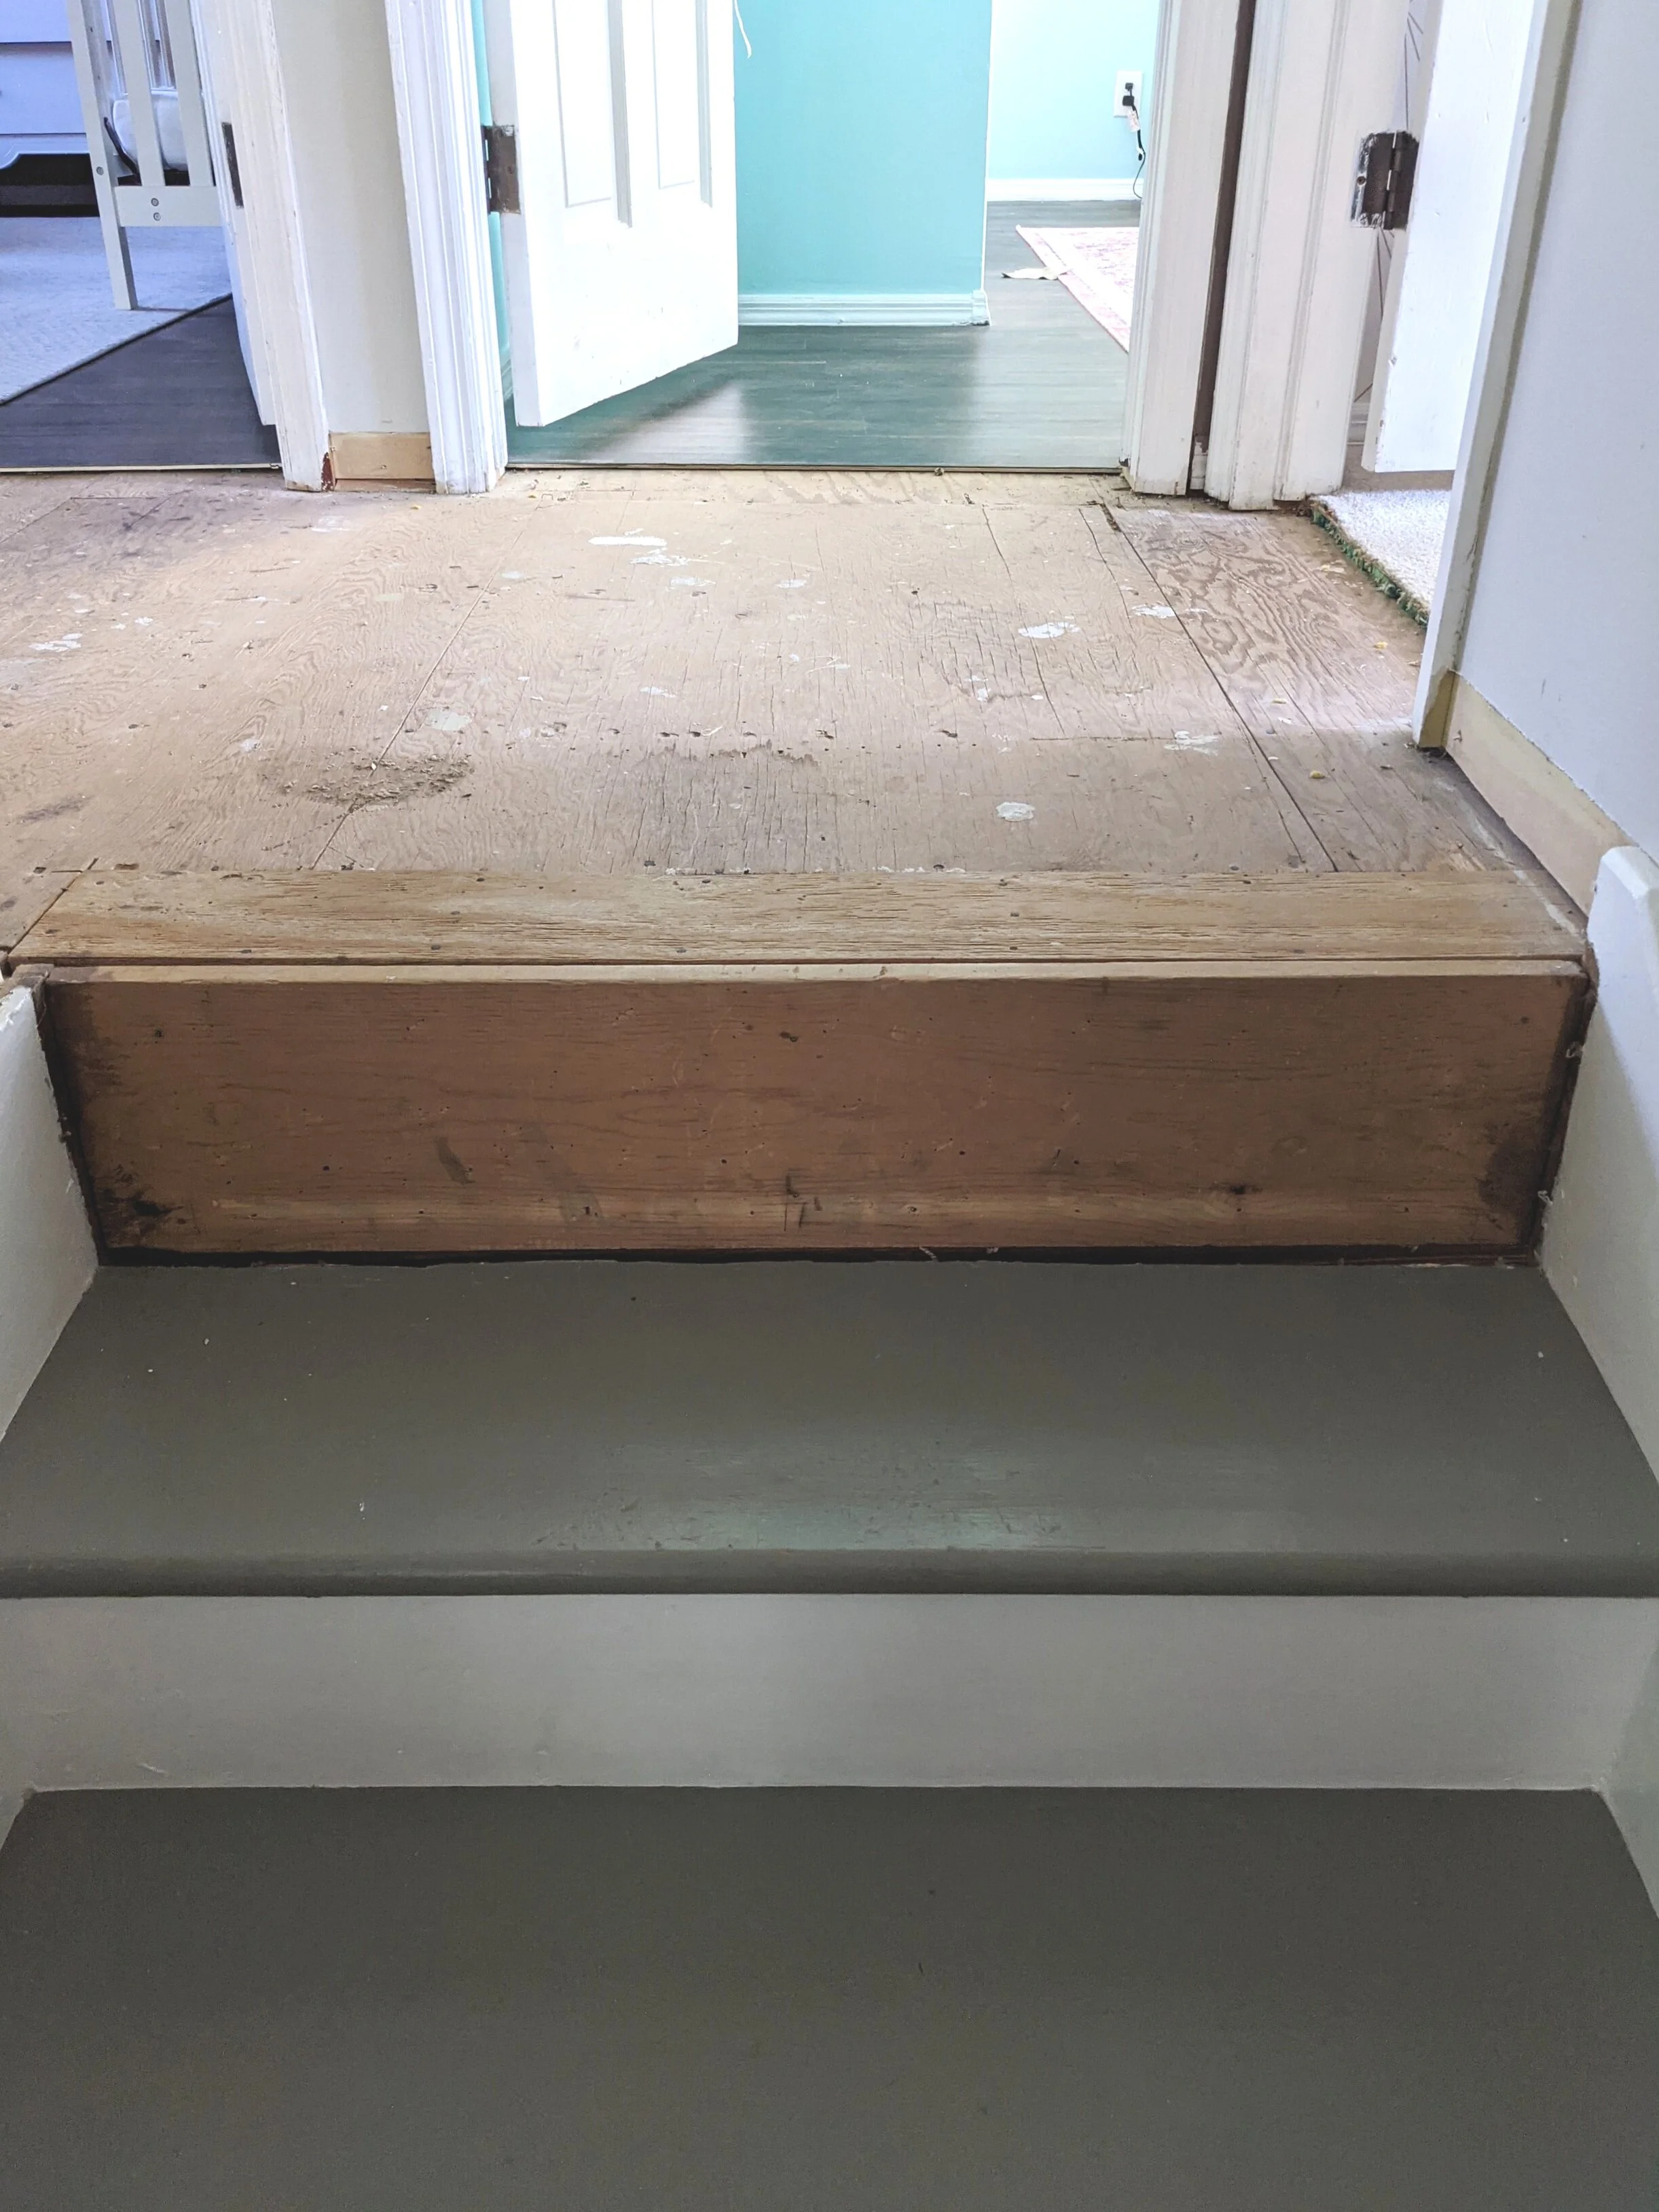
If your stairs are carpeted and you don’t know what kind of shape they’re in underneath, you might run into some unpleasant surprises, like we did with our landing. In fact, just a few days ago I ripped up the rest of the hideous carpet that was at the top of the stairs and unearthed more things we’ll need to fix (cue the big ol’ gap between the tread and riser). Bwomp Bwomp.
The Elephant in the Room
Since I mentioned the landing… what the heck is going on with it? (Or, in other words, “why does it still look like crap?”)

As you can see, our landing hasn’t been replaced yet. I mentioned in the original post that we installed a temporary landing made out of some thick MDF-type material until we could figure out how to replace it.
We've discovered during this process that finding stair landings is oddly difficult. I don't know if we're just not looking in the right places, but we've only found one company near us that sells solid stair landings and they're about 3 hours away. Our current plan is to wait until the master suite reno is complete and we're not running the risk of ruining the new landing, then take a little road trip to pick it up.
Is the current landing ugly? Heck yes! But it works and it's not the final version so I think we can live with it a little while longer. Plus, in case you didn’t notice, we'll have to do some other repairs once the reno is done anyway.
What About the Railing?
So while the stairs are holding up nicely, and we’ve addressed the landing situation, the handrails, balusters, and newel posts (all of which will now be referred to as “the railing” because that’s way too much stuff to list out over and over) have seen better days, and I think I know the issue. This is one of those mistakes that I’m kicking myself for because I should have known better and now I’m going to have to fix it.

When we moved in, the railings were newly repainted and already peeling a little bit. I should have bit the bullet then and stripped the paint off then, but this was at the end of prepping and painting the stairs and I was tired. Now I’m paying for it.
When I painted the railings AGAIN, the paint never seemed to fully adhere and remained a bit tacky. Because of this, anytime the railing gets nicked or looked at the wrong way, it peels some more. You can easily take a fingernail and start to peel the paint off. Ugh.
BUT, I suppose that goes to show that even those of us that do this stuff all the time still make mistakes. And on the bright side, we had to remove the railing at the top of the stairs and replace the whole thing anyway because of the new layout, so I have a little less to fix than I originally painted.
Final Thoughts
So… painted stairs - yay or nay?

Honestly, I hate vacuuming stairs so much that the surprises we uncovered under the carpet are worth it. I think it’s also worth noting that I love natural wood. If our stairs were in better condition and our house was a different style, sanding a repainting them would have been a viable option. But for our house, painting the stairs just made sense and I’m happy with the result - even if it’s not 100% finished (still).

Related Posts about Painting
How My Painted Stairs Are Holding Up After 1 Year

Green Kitchen Cabinet Inspiration
I'm going to share with you some of the images that have inspired me to paint my own kitchen cabinets GREEN! But not just that, we'll also cover the other elements that visually pull a kitchen together - hardware, counters, and wall color. Let's get to it!
Best Shades of Green For Your Cabinets
In case you haven't noticed, green kitchen cabinets are having a moment right now. Gone are the days when everyone painted their cabinets white (still a beautiful and classic choice for cabinets, though!). Green cabinets in every shade are popping up all over my Pinterest feed and have set my creative wheels into overdrive.
So today, I'm going to share with you some of the images that have inspired me to paint my own kitchen cabinets GREEN! But not just that, we'll also cover the other elements that visually pull a kitchen together - hardware, counters, and wall color. Let's get to it!
I first got wind of the green cabinet trend when I read a post by Sherry and John on Young House Love about their friends' kitchen makeover.
At first, I honestly had my reservations. I mean, green cabinets? Isn't that a little out there? But once I saw this image from that kitchen makeover I couldn't get it out of my brain.

Source | Color: Sherwin Williams - Halcyon green
How gorgeous is that color!? And paired with that hardware? And of course, the subway tiles! Do I even need to mention that fun yellow door?
So I did what I do and started gathering inspiration images for my own kitchen makeover because I have absolutely loathed our kitchen from the day we first looked at our house.
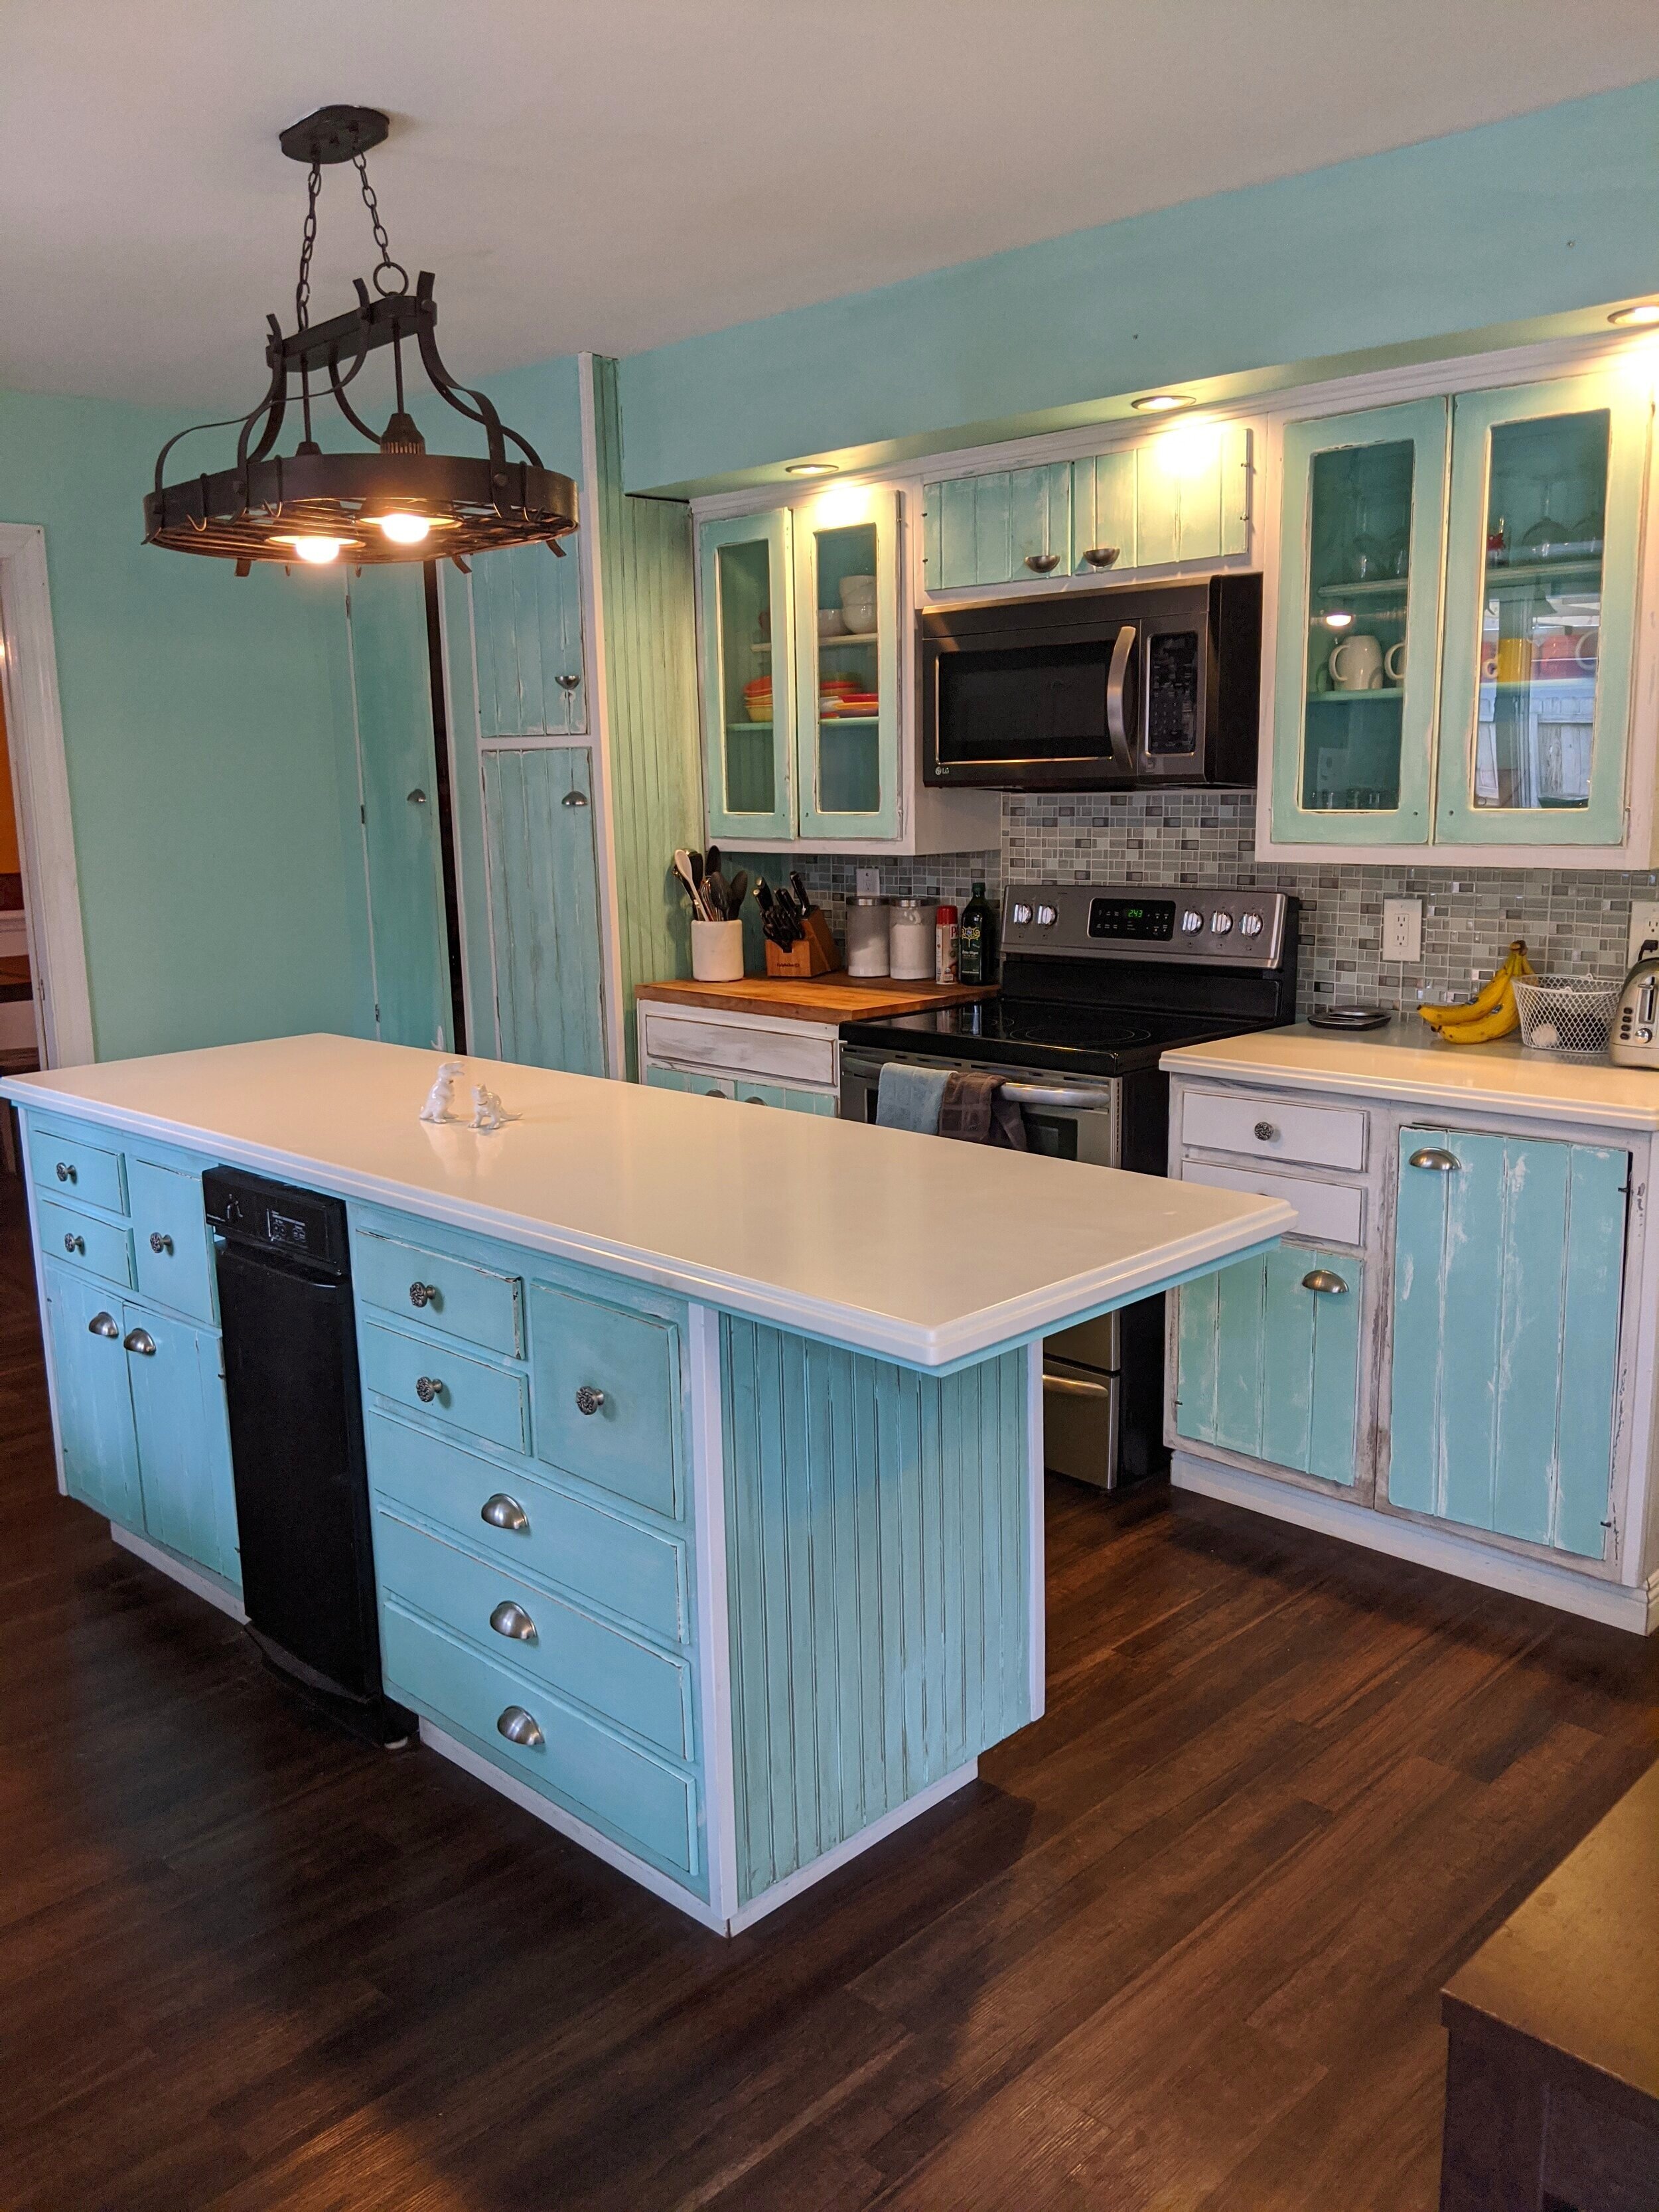
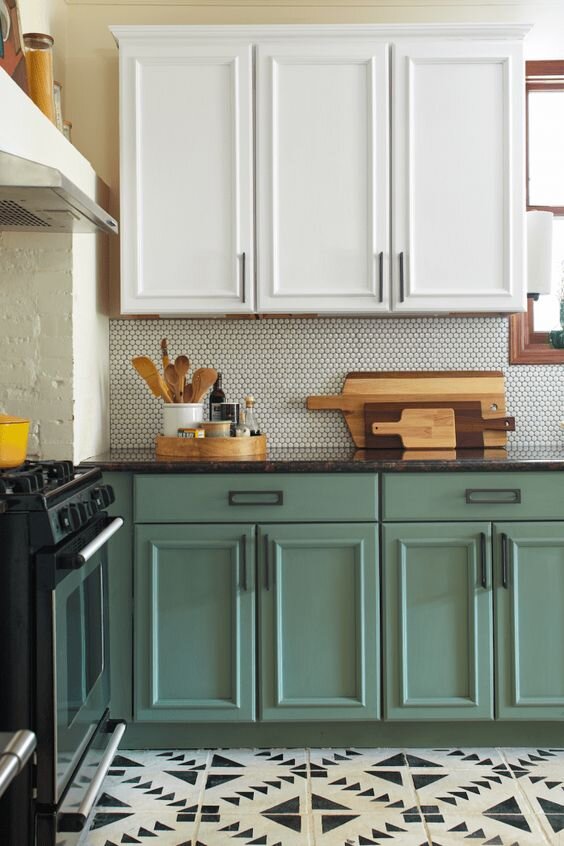
While it doesn’t look terrible in photos, in person our kitchen looked like the previous owners were going for what I can only imagine was “farmhouse on the beach”. The teal was much brighter than appears in pictures and the cabinets were painted to look distressed, but really just looked sloppy.
I found SO MANY beautiful kitchens online in every shade of green that I think will prove my point that green kitchens are the next big thing.
And guess what guys? I've actually already painted my cabinets - and you better believe they're green! The kitchen as a whole is still a work in progress, but there might just be a sneak peek at the end of this post for you….
Anywho, let’s check out some beautiful green kitchen inspiration, shall we?

Lovingly Lime
You probably never thought a lime green kitchen could look GOOD, did you? Wrong! Check out this beauty.
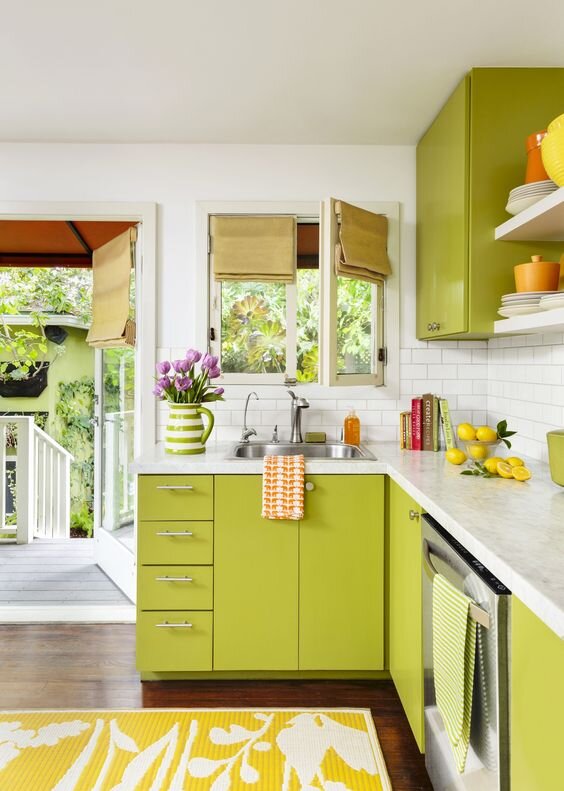
Source | Color: Dunn-Edward’s - Palm Frond
Although the cabinets in this kitchen are intense, they’re actually not overwhelming because of the more plain elements in the room: straight lines, flat cabinet fronts, classic subway tile, and white walls. They also stuck with white counters with subtle veining and complimented the cabinets with simple, modern brushed nickel hardware.
A+ for Avocado
I love avocados. I eat them for breakfast just about every day. But did I ever picture smearing them on my cabinets? NO! But now I might…

Source | cOLOR: uNKNOWN
This kitchen definitely evokes a 70’s feel with the avocado green cabinetry and clean, straight lines. In fact, I bet this is a mid-century modern house through and through (just take a look at the paneling in the adjoining room) - but it works perfectly!
Similar to the kitchen above, this kitchen understates the intensity of the paint color by keeping the surroundings simple. Plus, I can’t get enough of those looooong drawer pulls.
I Love Olive
This is another one of those images that I can’t stop looking at.
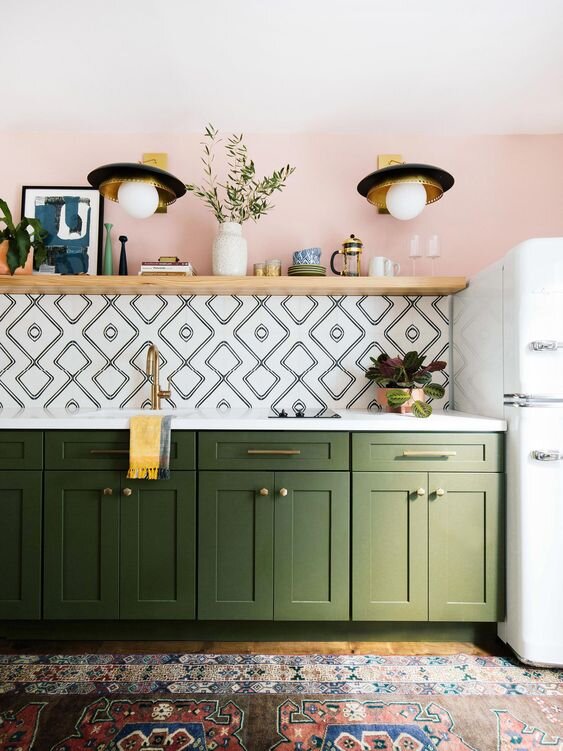
Source | COLOR: bEHr - fIG tREE
The daring use of colors and patterns in this kitchen is admirable - and totally works! Pink and green are a classic combination. The tones used here are desaturated enough so that you don’t look at this image and say, “Holy crap! That’s a green and pink kitchen!”. Instead, the pattern of the tile becomes the star of the show and then you start to realize all the other details of this kitchen.
Plus, it proves the point that just because you’re painting your cabinets a color other than white, doesn’t mean you have to stick with white walls.
Mighty Mint
When I started updating our first house, which was an older gal, I noticed that there was mint green paint under everything. In fact, it looked a lot like this:
source | cOLOR: uNKNOWN
I used to wonder how someone could love painting everything mint green. Now I know…
The mint green used in this kitchen has a softness to it. And while this minty kitchen has a classic feel, it’s modernized by the brass hardware (check out that faucet!) and the herringbone pattern in the backsplash.
Rain, Rain, (Don’t) Go Away
Scared to commit to full-on green? Try a lighter shade! Like this kitchen in Sherwin Willams Rainwashed.

Source | cOLOR: sHERWIN wILLIAMS - rAINWASHED
Just from this little photo, I can tell that this kitchen has a light and airy feel. The soft green cabinets with white walls, tile, and counters make everything feel delicate, fresh, and open. Keeping the hardware brushed nickel also helps keep the room light as your eye isn’t instantly drawn to them.
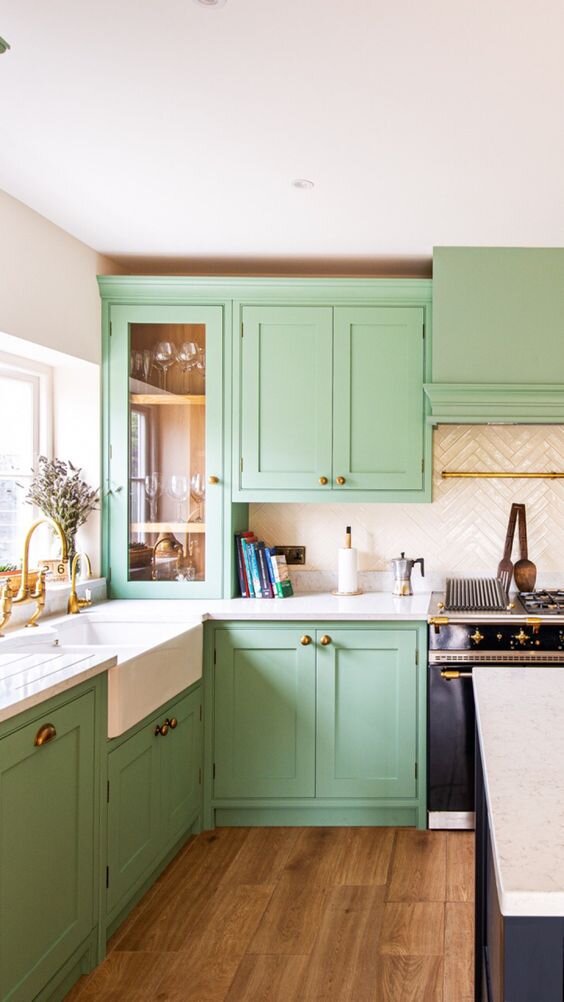
Soft Sage
I have to be honest, while I love all the green kitchens I’m sharing in this post, I’m most drawn to sage green.

source | cOLOR: bENJAMIN mOORE - rAINDANCE
If you’ve been following the blog, you’ve probably noticed that I kind of love blue/green/gray tones - and these cabinets are right up that alley! I also can’t help but swoon over all the other elements in this picture though - the brass hardware paired with the cabinet color is a match made in heaven. And the natural wood shelves really pull in some warmth and emphasize the hardware while the white counters and walls are clean and simple, letting the other elements shine. What’s not to love?
Here’s another inspiring, more modern, take on sage cabinetry.
Source | cOLOR: uNKNOWN
This kitchen is a great example of what you can do if you let your imagination run wild. Obviously, I love the cabinets, but they’ve done a few things here that I haven’t shown yet, like painting just the lower cabinets green (a good option if you’re nervous to take the leap), and using a black countertop and hardware which really ties into the pattern on the floor. On that note - take a look at that floor! I’m loving the bold pattern mixed with the subtle penny tile backsplash.
Totally Teal
If you love jewel-toned colors, why not paint your kitchen teal?

Source: Color: Unknown
From the saturated cabinets to the light fixture all the way down to the bold runner, this kitchen is dripping with fun. I love the use of bold elements and how they really went all-in with the design. To keep the cabinets from being too overwhelming, however, they left the island a matte black and used classic white subway tile on the backsplash allllll the way up to the ceiling.
Homey Hunter
Last, but certainly not least, is a beautiful deep hunter green.

Source | Color: Unknown
Using a dark color like hunter green paired with the marble backsplash brings a sort of sophistication to this space. Yet the addition of the raw wood keeps it grounded. This kitchen proves the point that dark paint doesn’t necessarily equal a dark room. By keeping the surrounding elements bright, this space still feels open.
Have I Proved My Point?
So, there’s a quick taste of some of the options for green kitchens using different shades of green with various combinations of colors used for hardware, walls, and counters. But if you want a refresher, here’s a quick rundown of good pairings for green cabinets:
What Color Hardware Should I Use?
In the examples above, I shared examples of green cabinets using brass, brushed nickel, and matte black hardware. I think it’s safe to say you can use just about any color or finish on your hardware! That includes oil rubbed bronze, gold, and polished chrome.
What Color Counter Should I Get?
Although green isn’t technically a neutral color, it acts like one. While many of the examples above had white countertops or white with grey veining, black, concrete, stainless steel, and butcher block would all look really classy next to green cabinetry, too!
What Wall Color Should I Use?
When you search for images of green cabinets, you’ll most often see them paired with white walls - but that’s not your only option! Above, I showed one example of a kitchen with pale pink walls but you can get a little crazier than that if you want to. Heck, in this laundry room, they used orange wallpaper and it looks amazing!

Source | Color: unknown
With that being said, use some wallpaper! It doesn’t have to be as bold as what’s above, but it’s a great way to add some pattern and other colors to your space. Or consider that you don’t have to stop at wall color. You can incorporate some more color and pattern by using interesting tile in your backsplash, too.
Final Thoughts
Before I go, I’ll say it again one more time for the people in the back: YOU CAN USE COLOR ON YOUR CABINETS!
Oh, and for those of you that stuck around (you fabulous people, you), here’s a sneak peek of how my kitchen makeover is coming along.

I look forward to sharing more details and the reveal in the (near?) future!
Related Room Inspiration Posts
How to Pair Other Design Elements with Green Cabinets
Creating a Functional and Stylish Laundry Room
Well, we've gone and changed our floor plan again - we're moving our laundry room upstairs! And that means I get to design another room! So I've been doing some research and finding inspiration about how to create a functional (and stylish!) laundry room.
Efficient and Stylish Laundry Room Layout
Well, we've gone and changed our floor plan again - we're moving our laundry room upstairs! And that means I get to design another room! So I've been doing some research and finding inspiration about how to create a functional (and stylish!) laundry room. What are the must-haves? What can I actually fit in the space available? How can I make the best use out of the space? But before I get into all that, let me explain how we got here.
Back when I first posted about our big renovation, I shared our original reworked layout that actually had plans to move the laundry room upstairs.

But within a few weeks, we reconfigured our master suite and the space that was going to be the laundry room became my closet after I realized I apparently don't know how rulers work (notice how the closet is MUCH smaller than the laundry room).

We decided to compromise by adding a laundry chute down to the current laundry room and moved on with the renovation.
WELL, as I mentioned recently in my post about staying positive and motivated during renovations, plans change and you just have to roll with it. So roll with it we did!
You see, in all versions of our floor plans, we figured the most logical option for the "shower room" from the original master suite layout was to turn it into a full bath for the loft.

I was okay with turning it into a half bath but definitely wasn't pumped about adding ANOTHER full bathroom to clean. I mean, who would ever use the shower in there? We already have two and a half baths - adding a third full bathroom to this four-bedroom house seemed like overkill. But the room is actually a pretty good size, so only making it into a half bath would have been a weird use of the space.
So last week while Lucius was demoing that room (ha - and I bet you thought we were done with demo), he asked me how I felt about turning that it a storage closet instead of a bathroom. For having such a large house, we actually have very little storage, so this wasn't a terrible idea. But my first reaction was, "What about turning it into a laundry room?".
After talking it through, we decided that made a lot of sense. All of our bedrooms are upstairs, so 95% of the laundry is upstairs too. Not lugging baskets of clothes up and down the stairs sounds like an absolute dream! And we figure we can turn the current laundry room into a storage closet as we had originally planned.
So here's the new (and final?) renovation layout!

Now let's get into the details - how do you create a functional and stylish laundry room? Since we’re pretty much rebuilding this room, we have a lot to think about. Here’s how I’m tackling it.
Consider Plumbing and Venting
First thing’s first - you’ll likely be somewhat constrained by the placement of your plumbing for your washer and access to venting for the dryer.
Because of the door placement and the size of the room, we really only have two options on which walls the washer and dryer can easily go. We're fortunate that we have this room and the adjacent room demoed and can see all the innards (including existing plumbing) to help us determine if either placement is out of the question. We’re also lucky that the new laundry room will be directly above the old laundry room, so we can run the venting for the dryer out of the current vent that already exists.
Think About Function
Laundry rooms might just be some of the hardest working rooms in a house. They serve so many purposes! So when designing your laundry room, it's crazy important to really think about all the things you want to use it for.
Do you store brooms, cleaning supplies, pet food, or other items there? Plan for that. Do you want to soak and/or iron your clothes in your laundry room? Plan for that too. Of course, with the space you have available, the world might not be your oyster, but it doesn't hurt to see what you can shift around to make your laundry room work for you!
In my case, we have other areas of the house where we store brooms, cleaning supplies, and pet food so there's no reason to find a place to put that stuff. However, our current laundry room doesn't have a utility sink and it's a huge pain in the behind so that's something I definitely want in the new space.
Other must-haves: maximum laundry-folding space, a shelf for typical laundry supplies, a hanging rod, a drying rack, space for a small trash can, and room for laundry baskets. Would you believe that our laundry room will only be about 6x8 feet!? That's a heck of a wish list for a pretty tight space! But I think I can make it happen. The next step is figuring out how to get it all to fit.
Lay Out Your Plans
As an Amazon Associate, I earn from qualifying purchases. This post may contain affiliate links, meaning I receive commissions for purchases made through those links, at no cost to you.
Now that you have your wants and needs hashed out, take a good look at the space you have available to see how you can make it flow.
After thinking it through, I've determined that putting our washer and dryer on the longest wall in the laundry room will make the most efficient use of the space. Here's how I see it working:

Placing the appliances on the longest wall leaves room on either side of the washer and dryer. So, why not put the utility sink to the left of the washing machine? (The image above is obviously upside-down.) That way, I can soak my clothes and easily transition them into the washer when ready.
Next, because I have a front-loading washer and dryer, building a counter to sit on top of the appliances will give me the space I need to fold laundry. And I can actually extend that to the far wall on the right. Underneath the counter on the right, next to the dryer, is the perfect spot for a small trash can.
Above the utility sink, I picture a wall-mounted drying rack. And over the counter, I plan to build a shelf to hold detergent, fabric softener, dryer sheets, and other laundry-related items.
I’m picturing a butcher block counter and open shelves above. Something kind of like the picture below. Maybe with some cool looking brackets?

This is a good example of the layout I described above, though my drying rack would be above the sink instead of cabinetry and there would be a little space on the right-hand side of the dryer for a trash can.

In front of the utility sink, there should be enough room to put some laundry baskets. And above that, I'd love to install a rod for those items that need to be hung right away. Maybe something like this:

Although I really hate ironing clothes and rarely do it, it's something I should plan for. But that doesn't mean I need to find space in the laundry room to iron. I can just as easily store the ironing board on an over the door ironing board holder and pull it into another room, preferably in front of the TV, when needed.
Style It Up
And now for the REALLY fun part - making it beautiful and stylish!
I don't know anyone who actually looks forward to doing the laundry - so why not try to make your laundry room at least somewhat enjoyable by making it a beautiful, stylish space? This is where you get to have some fun! And because laundry rooms are typically pretty small, you can even splurge a little bit.
For instance, what about installing some cool tile as an accent wall?

I love me some scalloped tile. But look how it pairs with that pretty butcher block. And hexagon tile on the floor!? Ugh, pinch me.
Speaking of hexagon tile, I’m loving the smaller pattern in this laundry room.

But let’s be real. Obviously, that cheery wallpaper is the real star of the show. It makes me so happy!
Final Thoughts
I’m still working through the details of how the laundry room will look exactly, and considering it was just demoed, I’d say I have a little bit of time to figure it out.
As we get closer to putting the room back together, I’ll be sure to share my design plan!

Related Home Renovation Posts
How to Create a Functional and Beautiful Laundry Room
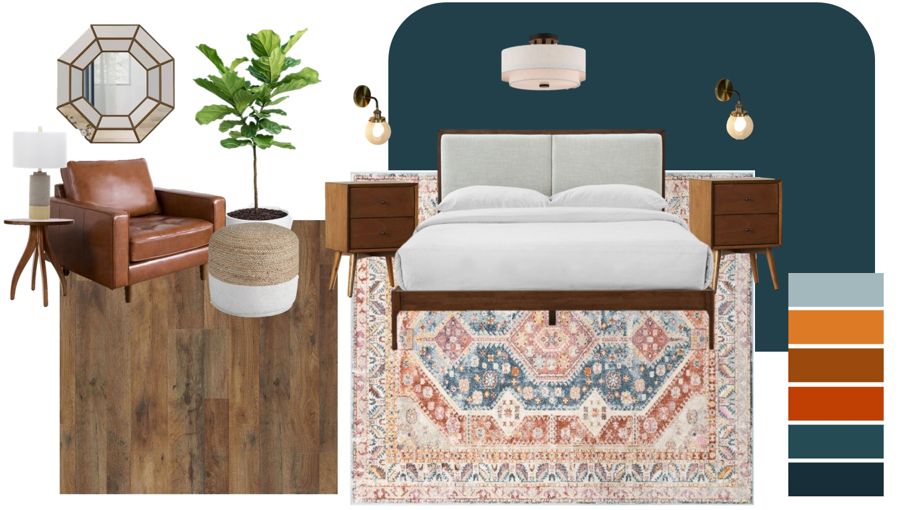
Mid-century Modern Master Bedroom Mood Board
We're getting SO CLOSE to being done with the bedroom renovation I can taste it (or maybe that's just the drywall dust floating in the air….). So while Lucius is mudding and sanding, and mudding and sanding some more, I'm planning the next stage of our master bedroom - PAINT, DÉCOR, AND FURNISHINGS!
Mid-century Master Bedroom Design
Guys, I can see the finish line. We're getting SO CLOSE to being done with the bedroom renovation I can taste it (or maybe that's just the drywall dust floating in the air….). So while Lucius is mudding and sanding, and mudding and sanding some more, I'm planning the next stage of our master bedroom - PAINT, DÉCOR, AND FURNISHINGS!
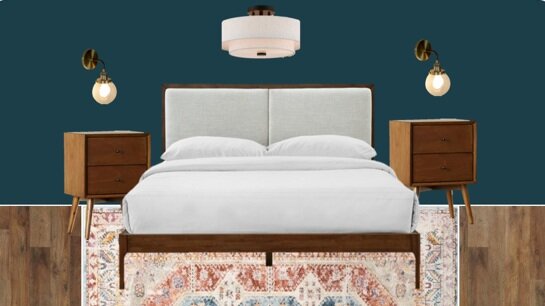
Can I be real for a second? It's honestly been really frustrating not being able to play a more active role in the renovation. I'm feeling like a little bit of a DIY fraud over here.
While Lucius and I both work full-time, his job as a realtor allows him pockets of time where he can step away and work on the reno, while I'm chained to my desk. And when I'm not working my 8-5, I'm usually trying to keep the kids occupied so Lucius can work on the renovation some more. But once the drywall is wrapped up, it's my time to shine! And boy, do I have a vision!
I first saw this picture while scrolling through Pinterest, and it sent my creative gears into overdrive.

That dark wall color. That geometric rug. That cozy, leather chair. I HAVE TO HAVE IT!
So, naturally, I started pinning ideas left and right and planning planning planning away. And of course, the final product won't look exactly like what I've put together, but I feel like I have a really clear idea of how I want to decorate this room that I can't wait to share with you today!
Like, right now.
Seriously, look below.

It’s definitely leaning towards the mid-century modern end of things, but hey, apparently that’s where my head it at right now. Let's walk through how I came up with this design, shall we?
Wall Color
Now that we've removed the stupid sunroom that once blocked all the windows in our bedroom, we now have 3 large windows spanning across the exterior wall that let in TONS of glorious, glorious natural light.

That being said, I think this room can more than handle a deep, moody color.
So far, I've narrowed it down to two colors: Archipelago (left) and Oceanus (right) by Sherwin Williams
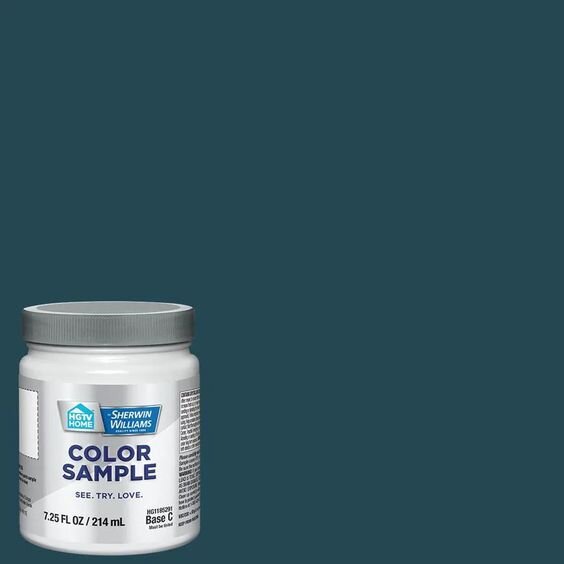
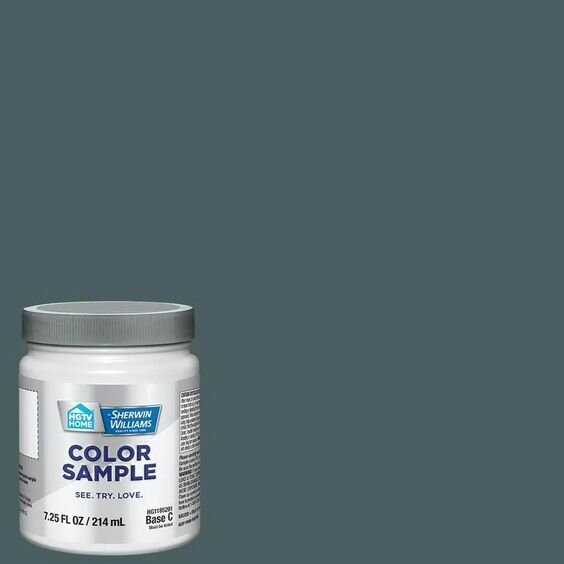
They're pretty similar, but Archipelago has a more intense, saturated color while Oceanus is more gray. Once the drywall is complete, I'll be able to prime the walls and slap on some samples to finally get a good view of how these colors look up on the wall.
But I don't plan on stopping with the walls. Oh no. I'm diving DEEP into this teal/navy sea and I'm gonna paint the WHOLE ROOM the same color. I'm talking trim, doors, baseboards. Only the ceiling will be safe. I've been so inspired lately by images like these, and I convinced Lucius to let me give it a whirl, so I'm going for it.
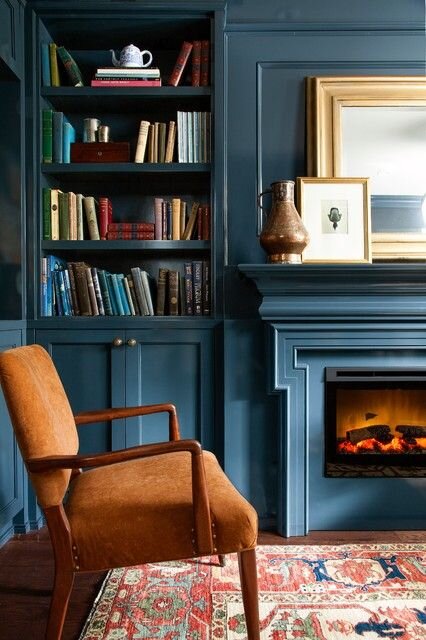
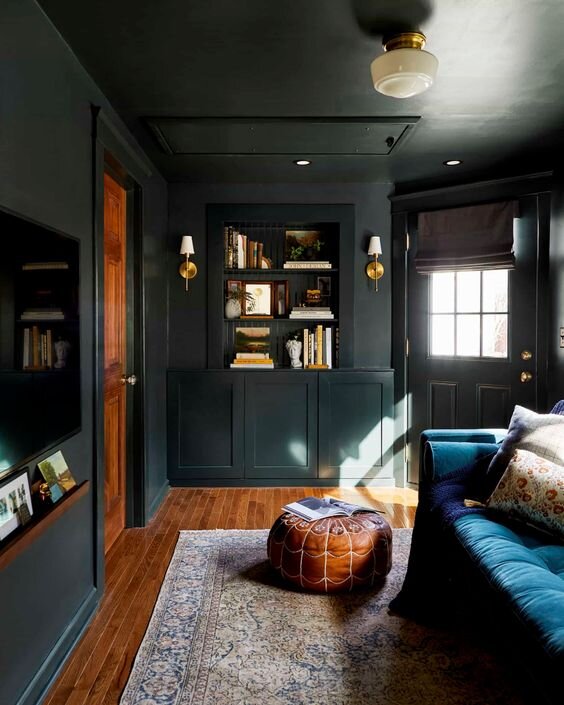
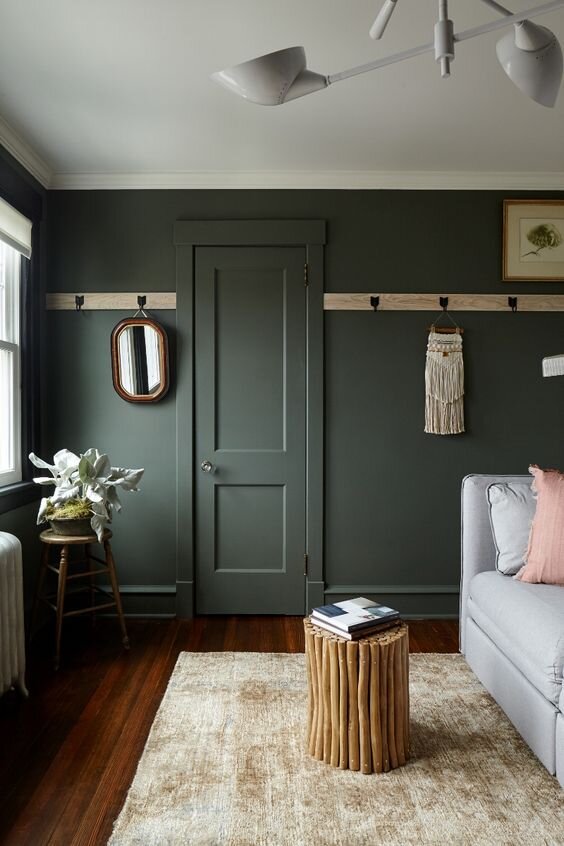
While we're talking about colors, I love the pop of warm tones in the leather chair and in the rug from my inspiration picture. So I’m looking to recreate that same feel, starting with a new area rug.
As an Amazon Associate, I earn from qualifying purchases. This post may contain affiliate links, meaning I receive commissions for purchases made through those links, at no cost to you.
Area Rug
I've mentioned previously that I really love oriental rugs. But Lucius? Not so much. Well, I THINK I'M WEARING HIM DOWN, GUYS. Because he agreed to get one for the bedroom!!
I looked at lots of them but kept coming back to this beauty.

I love the symmetry, the details, and the warm tones with some of the teal incorporated too. Plus, although there's a lot going on, it's a little lighter and less intense than some of the other rugs I was looking at, which I think will help brighten up the room a bit.
And you wanna know a secret? I already bought it! And I was so excited to see it that I already unrolled it in the playroom and I honestly love it even more than I did online!
There are way more colors incorporated in the rug than what I could see online. There's actually a couple of different shades of orange/rust, but there's also a little bit of pink and purple, too, which was a nice surprise.


Reading Nook
While the orange tones in the rug are a little less bold than I thought they'd be, I don't mind because I plan on incorporating some warm tones in with a big, comfy, cognac leather chair. In our new layout, we have a perfect spot for a big cozy chair in the corner that I plan on turning into a bit of a reading nook. I can see it now….

I'm not opposed to buying something new, but I've actually seen some pretty cool used chairs pop up on Facebook Marketplace, and I kind of like the idea of finding a leather chair that's already broken in. But honestly, as long as it's cozy I don't really care where it comes from.
And of course, I'll need an ottoman to go with the chair. I've had my eye on some that have some texture to them and a more natural color, like this:

But I could be swayed to get a cognac leather poof to match the chair too…
Next up, I'll need to add a little end table and a lamp. This end table is really popular right now - and for good reason! Check out those lines!

The nesting end tables here also showcase a classic mid-century pairing of brass and walnut that is another viable option.
And lastly, I plan on loading up that corner with oodles of plants too.
Flooring
One big thing to note in this design is that we have to replace the flooring in our bedroom (and the hallway), so we actually get to pick something we like instead of the laminate flooring throughout the rest of the house that we loathe. I know, I know, the floors won't match. But hopefully, down the line, we can upgrade all of them to the same flooring. In the meantime, the tone of flooring that we plan on putting in this room was important to consider, so I threw it into the design plan.
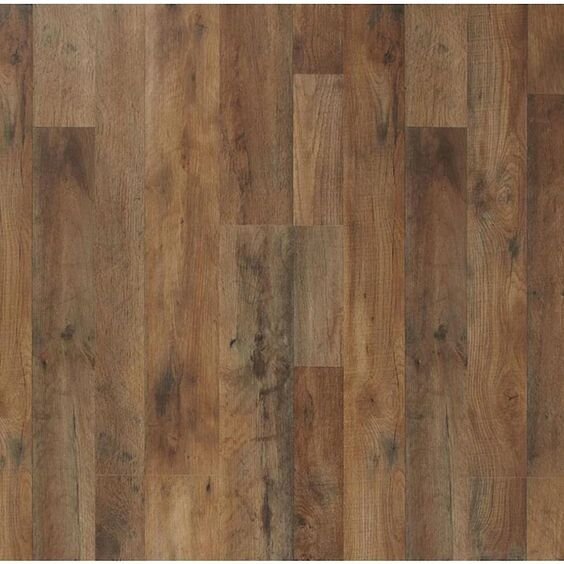
Our current flooring throughout the house is DARK and I feel like I can see every crumb that lands on it. I don't really want something too light either, so I think a mid-tone with some character is gonna be our sweet spot. We probably won’t go with this EXACT flooring, but it at least gives us a direction to work toward.
Bedroom Furniture
We already have a bed and likely won't purchase a new one right away, but when we do, I'm falling hard lately for partially upholstered bed frames. I really like the contrast between the color of the wood and the fabric, and between the textures.

I can’t find the bed in the mood board but here’s a similar one.
Currently, we only have one mismatched nightstand, so we'll want to replace that too sooner rather than later. I think something like this will work well with the bed.
In the interim, because we have an IKEA Malm bed with the drawers underneath that we use for storage, I might build some little floating nightstands to get us by.
Lighting
Lastly, lighting. Our ceilings are standard height so I don't want anything too big and crazy hanging from the ceiling. I feel like this semi-flush mount fixture is the perfect balance of practical, yet interesting. It's close enough to the ceiling without being a typical boob light and the tiered drums add some interest.

Here’s an example of a light that would also look great in the space. It’s not a tiered drum shade, but the lines in this fixture really caught my eye.
On either side of the bed, I'd like to add some classy sconces for additional lighting. I like the brass in the sconces I chose, which is echoed in the mirror and the lamp next to my cozy chair, but there are some brass/black combo sconces that I’m really drawn to also.
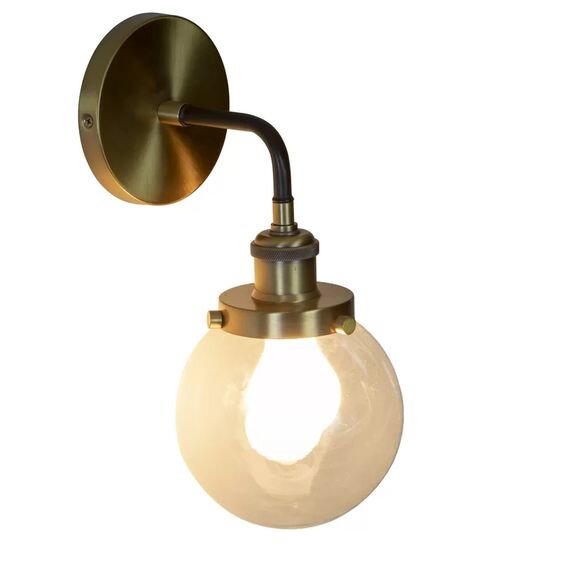
Which leads me to the lamp next to my cozy chair. I'd like to find ways to incorporate more natural elements into the room. I think this stone lamp does just that while also tying into the style of the rest of the room. Plus, it comes in a set of two so I could use one in another part of the house!

Final Thoughts
Of course, our room won't look like this mood board immediately, or maybe even ever! I'm not going to run out and buy everything I envision for this room right away - I'm not made of money over here! With that being said, it's very likely I'll find other décor that I like even more than what's in this mood board as I slowly fill up the room.
I also don't think the room would be complete with just what's on the mood board - I'll definitely need to add some artwork. Not only that, but I may even need to pick a separate, smaller rug to go over in my reading nook since I know the main rug won't extend that far. It'll come together more as we start to move back in so patience is key. But MAN, it's getting really hard not to BUY ALL THE THINGS! At the rate we're going, hopefully, in a couple of weeks we'll be moved back into our bedroom (and out of the loft!) and I can provide some progress shots!

Related Master Bedroom Renovation Posts
Dark and Moody Master Bedroom Mood Board
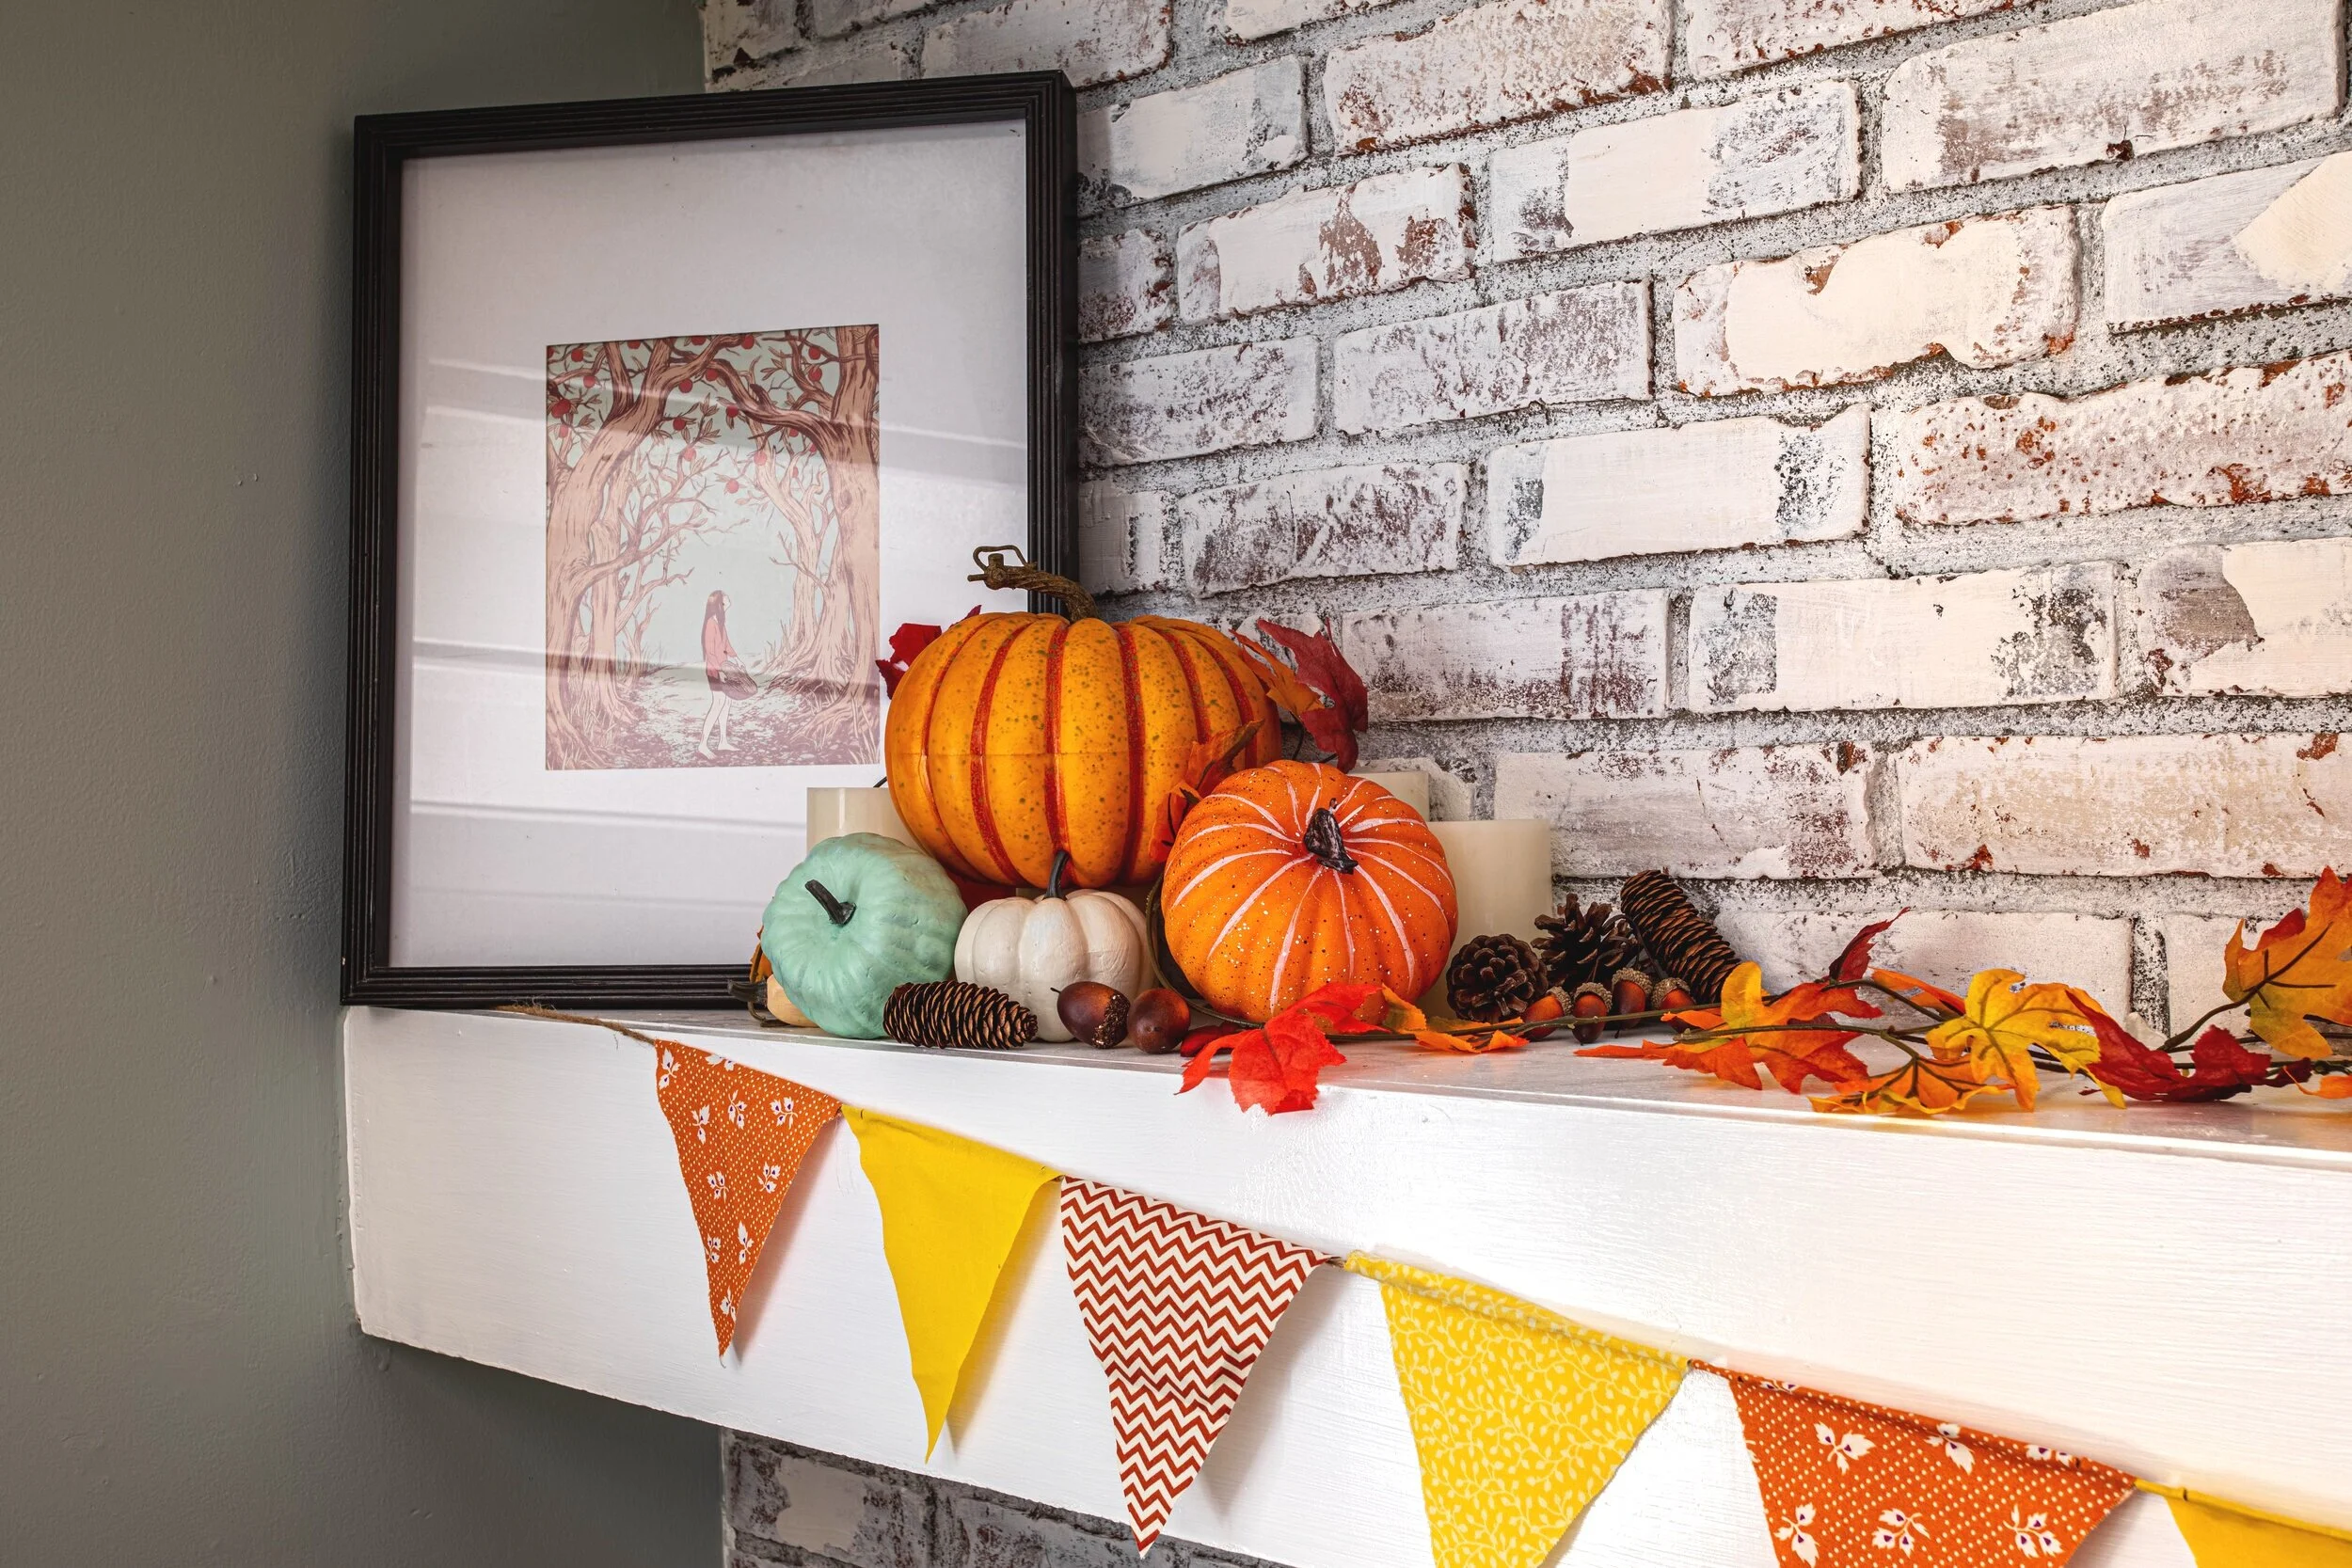
How to Reuse Your Halloween Decor for Fall
Now that Halloween is over, it was time to switch up my décor to something less spooky and more fitting for the autumnal season. BUT, of course, I didn't want to spend a bunch of money buying all new décor. So in this post, I'm sharing how to transition your Halloween decorations to general fall decor in 4 steps.
Transition Your Spooky Halloween Decorations to Cozy Fall Decor
If you love summer like I do, and refuse to admit the weather is getting colder until Oct 1st at the earliest, you'll likely be scrambling to decorate for Halloween by the time you get your butt in gear. At least, that's what happened this year. Believe it or not, this was the first time I've ever decorated my own house for Halloween!
A few weeks ago, I posted about how I decorated for Halloween on a budget, but with very little initial direction as to what I wanted it to look like. After some trial and error (and several trips to Dollar Tree), I finally put together a mantel design that I really liked.
But now that Halloween is over, I figured it was time to switch up my décor to something less spooky and more fitting for the autumnal season. BUT, of course, I didn't want to spend a bunch of money buying all new décor. So in this post, I'm sharing how to transition your Halloween decorations to general fall decor in 4 steps.

Gather All Your Decorations
When I started transitioning my mantel from Halloween to fall décor, I tried to leave everything as is and just pluck out the Halloweeny stuff. But I quickly realized the décor was kinda looking like I just threw some stuff up there with no real effort.
You see, when I decorated for Halloween, I styled the vignettes on either end of the mantel based on the decorations I had available.

Now that I removed a bunch of the décor, it just didn't flow anymore. I figured the best course of action was to start from scratch. So I cleared off the mantel and lay all the decorations out together on the kitchen table. If you’ve decorated multiple areas of your home, gather the decorations from all around your house.
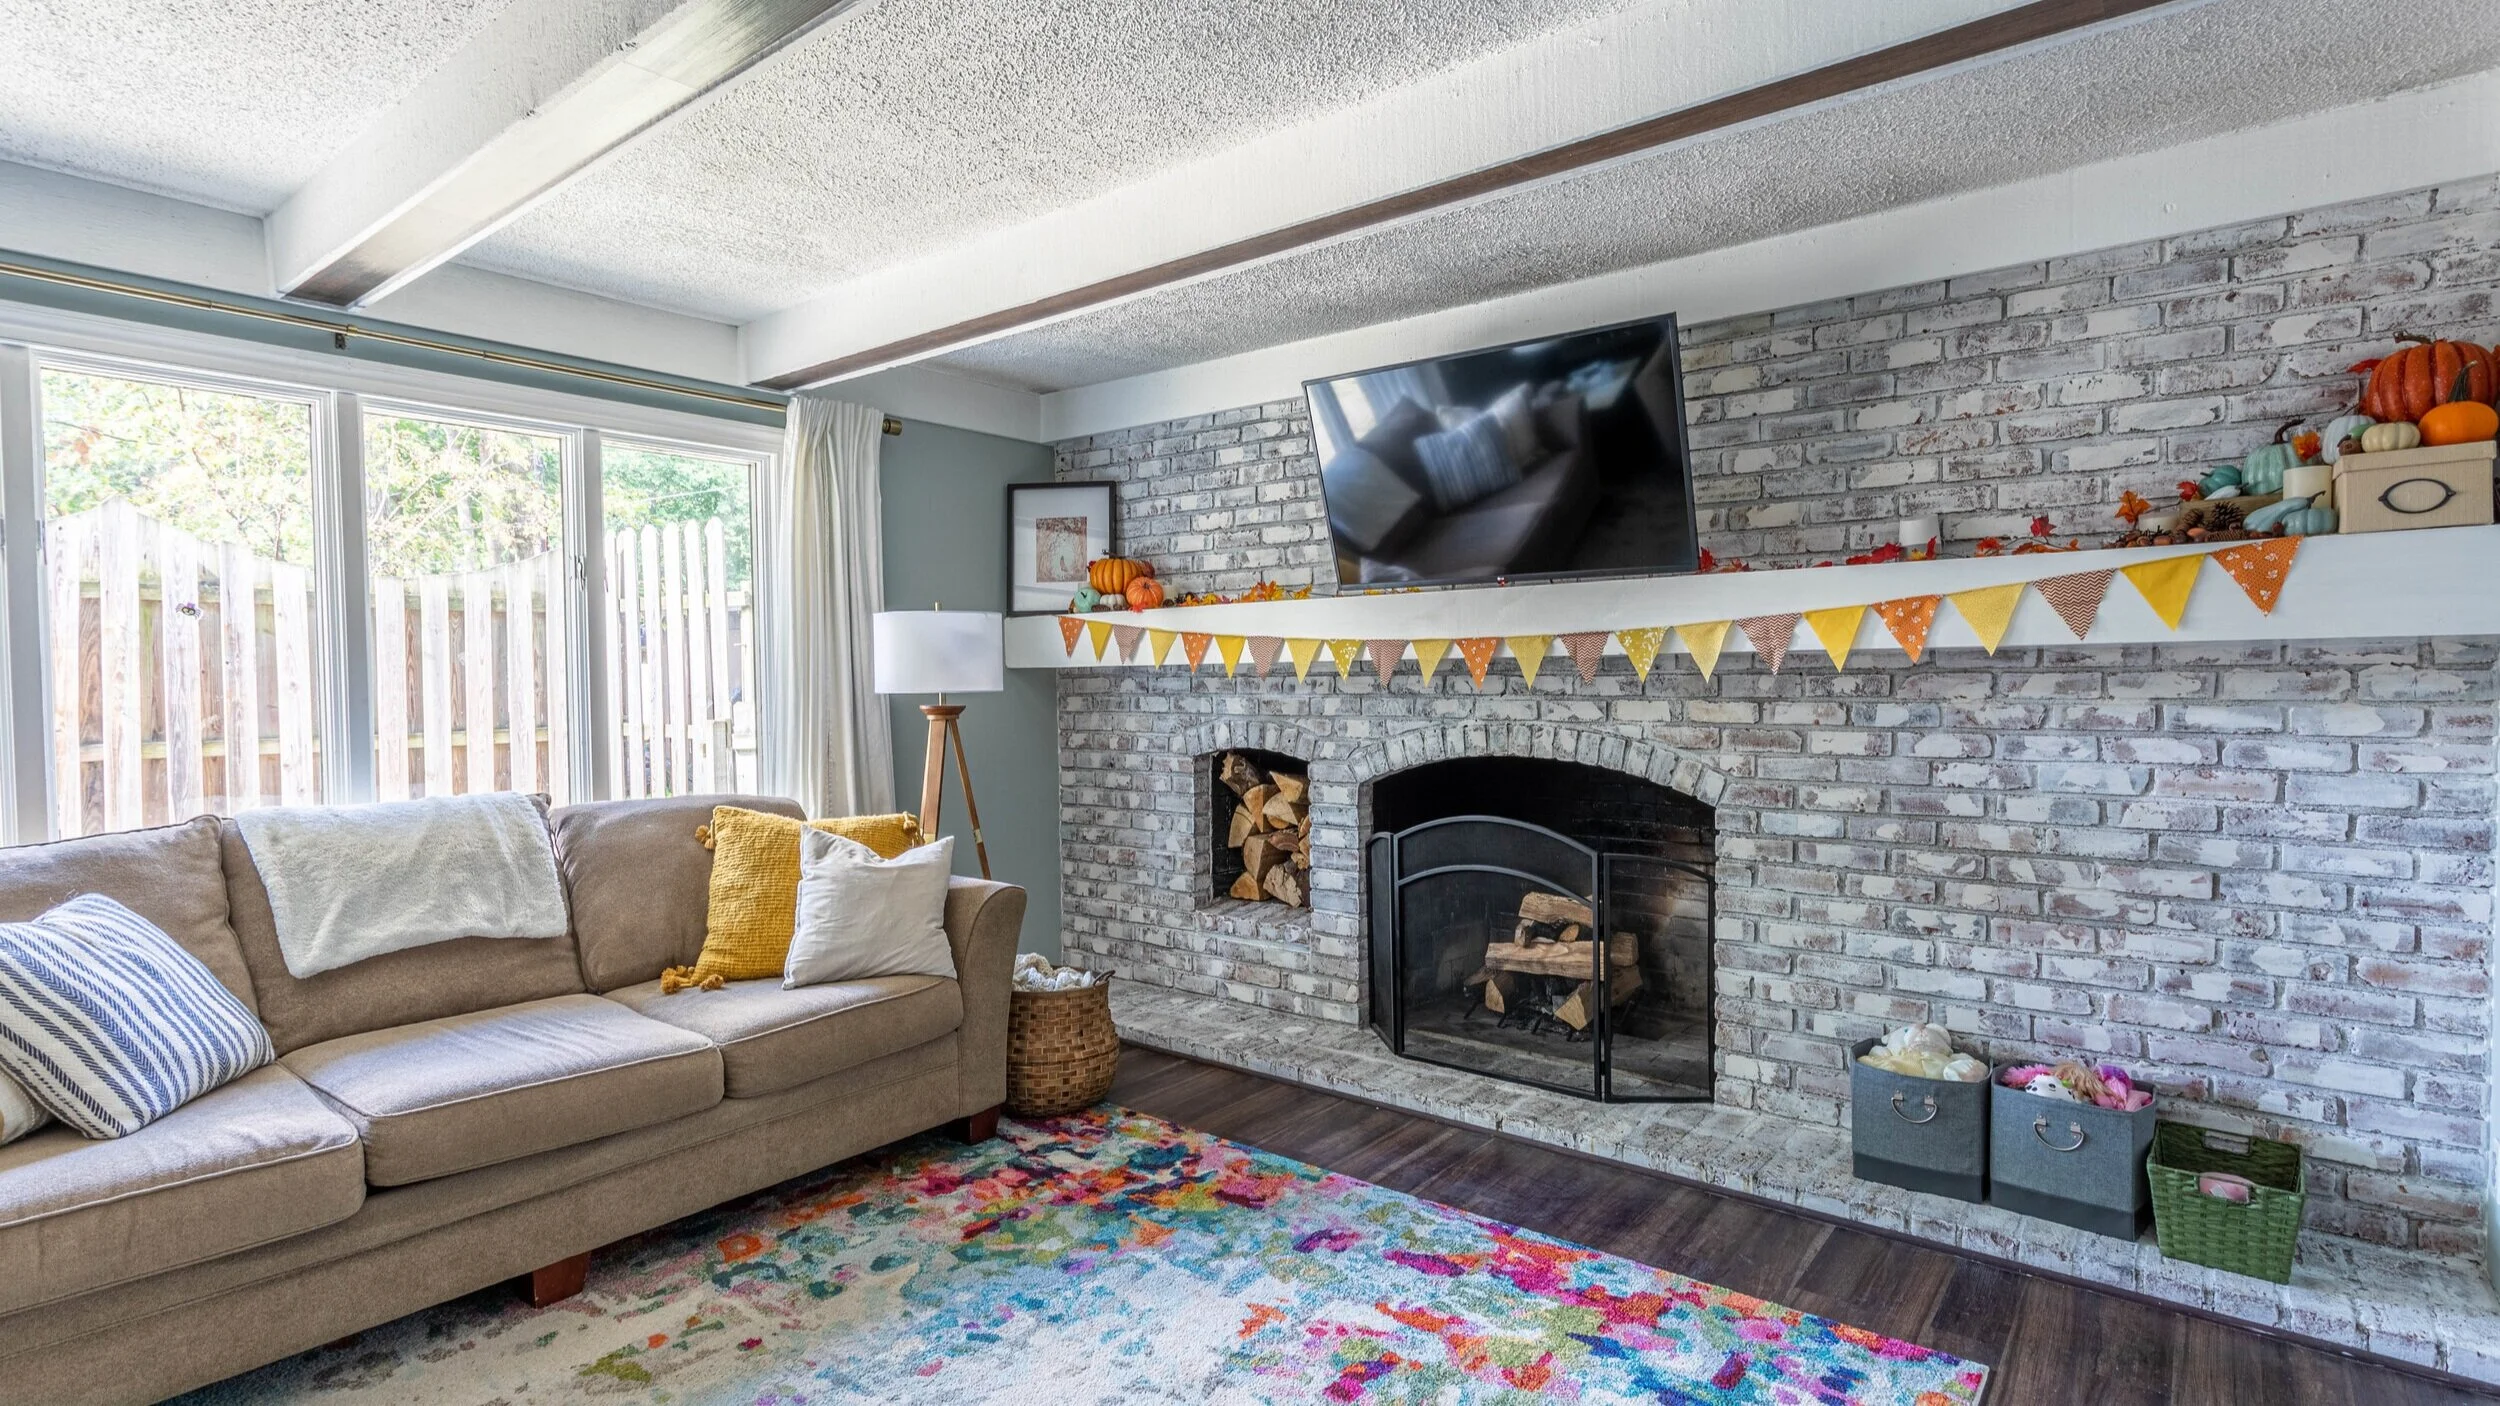
Remove All the Blatantly Obvious Halloween Stuff

Sorry, bats, ghosts, and spiders, but you gotta go.
This is a pretty obvious step, but it's worthwhile to say that you need to remove the Halloween décor from your pile to really see what you have left to work with. After going through my decorations, I still had pumpkins, gourds, and candles galore left. I also kept the bunting I made hanging on the mantel.
Decorate With The Decorations That Are Left

Now that you have a clean slate to work from, start creating new vignettes. Don't get stuck on which items you paired together before. Just start picking things up and placing them where you think they'll look good now. And don't be afraid to move them around a couple of times to see what looks best. You might be surprised at how much you like some of the items you put together.
Add a Few New Items
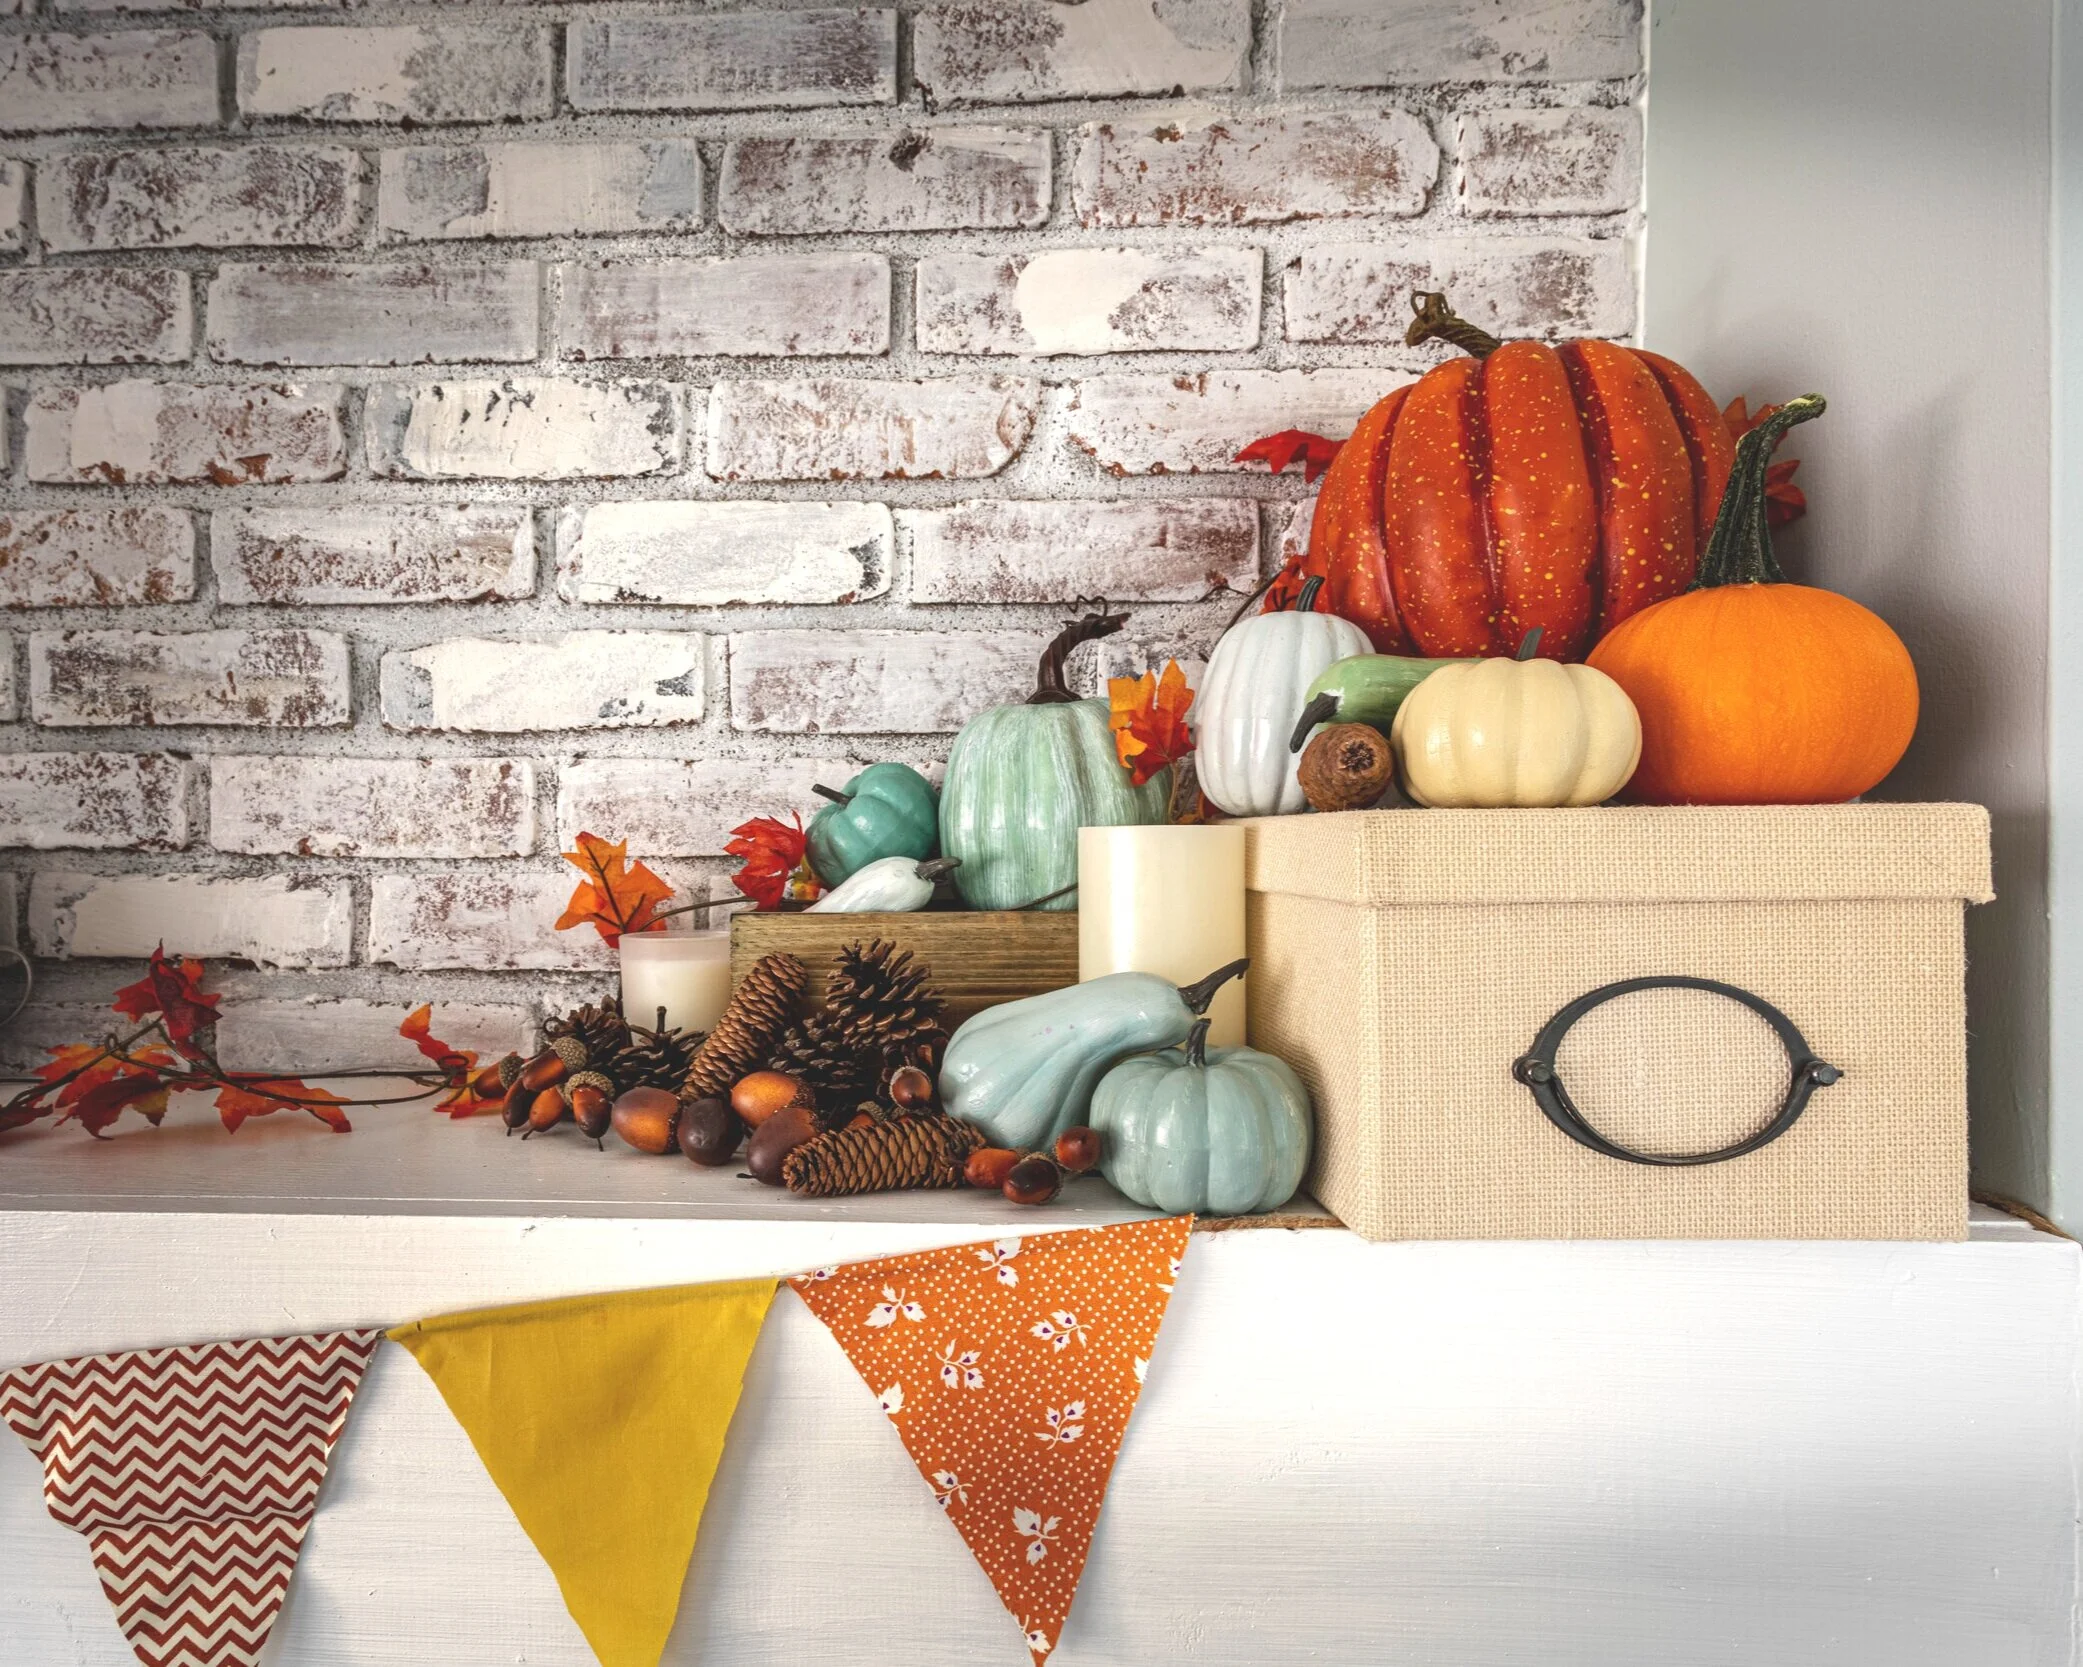
When you're happy with your décor, you can choose to be done. Or, if you feel like you still need to add a little sumthin' sumthin', do it! On my mantel, I added some leaf garland from Dollar Tree and a bag of acorns/pinecones I grabbed from Hobby Lobby. Everything else was leftover in my Halloween décor.
Bonus Step
If you’re feeling real crazy, knock some stuff over!
But seriously - to get a more natural look, don’t place all your decor perfectly upright or evenly spaced. Lay some items on their side, use different elevations to give other items height (I used boxes, bowls, and candles), and let your design be fluid. This will help your design flow better.
And there you have it
An easy peasy, inexpensive way to decorate for fall by mostly using what you already have on hand. Do you have any other tips on reusing your decor for different holidays? I’d love to hear them!

Related Holiday Decor Posts
Transition Halloween Decor to Fall in 4 Easy Steps
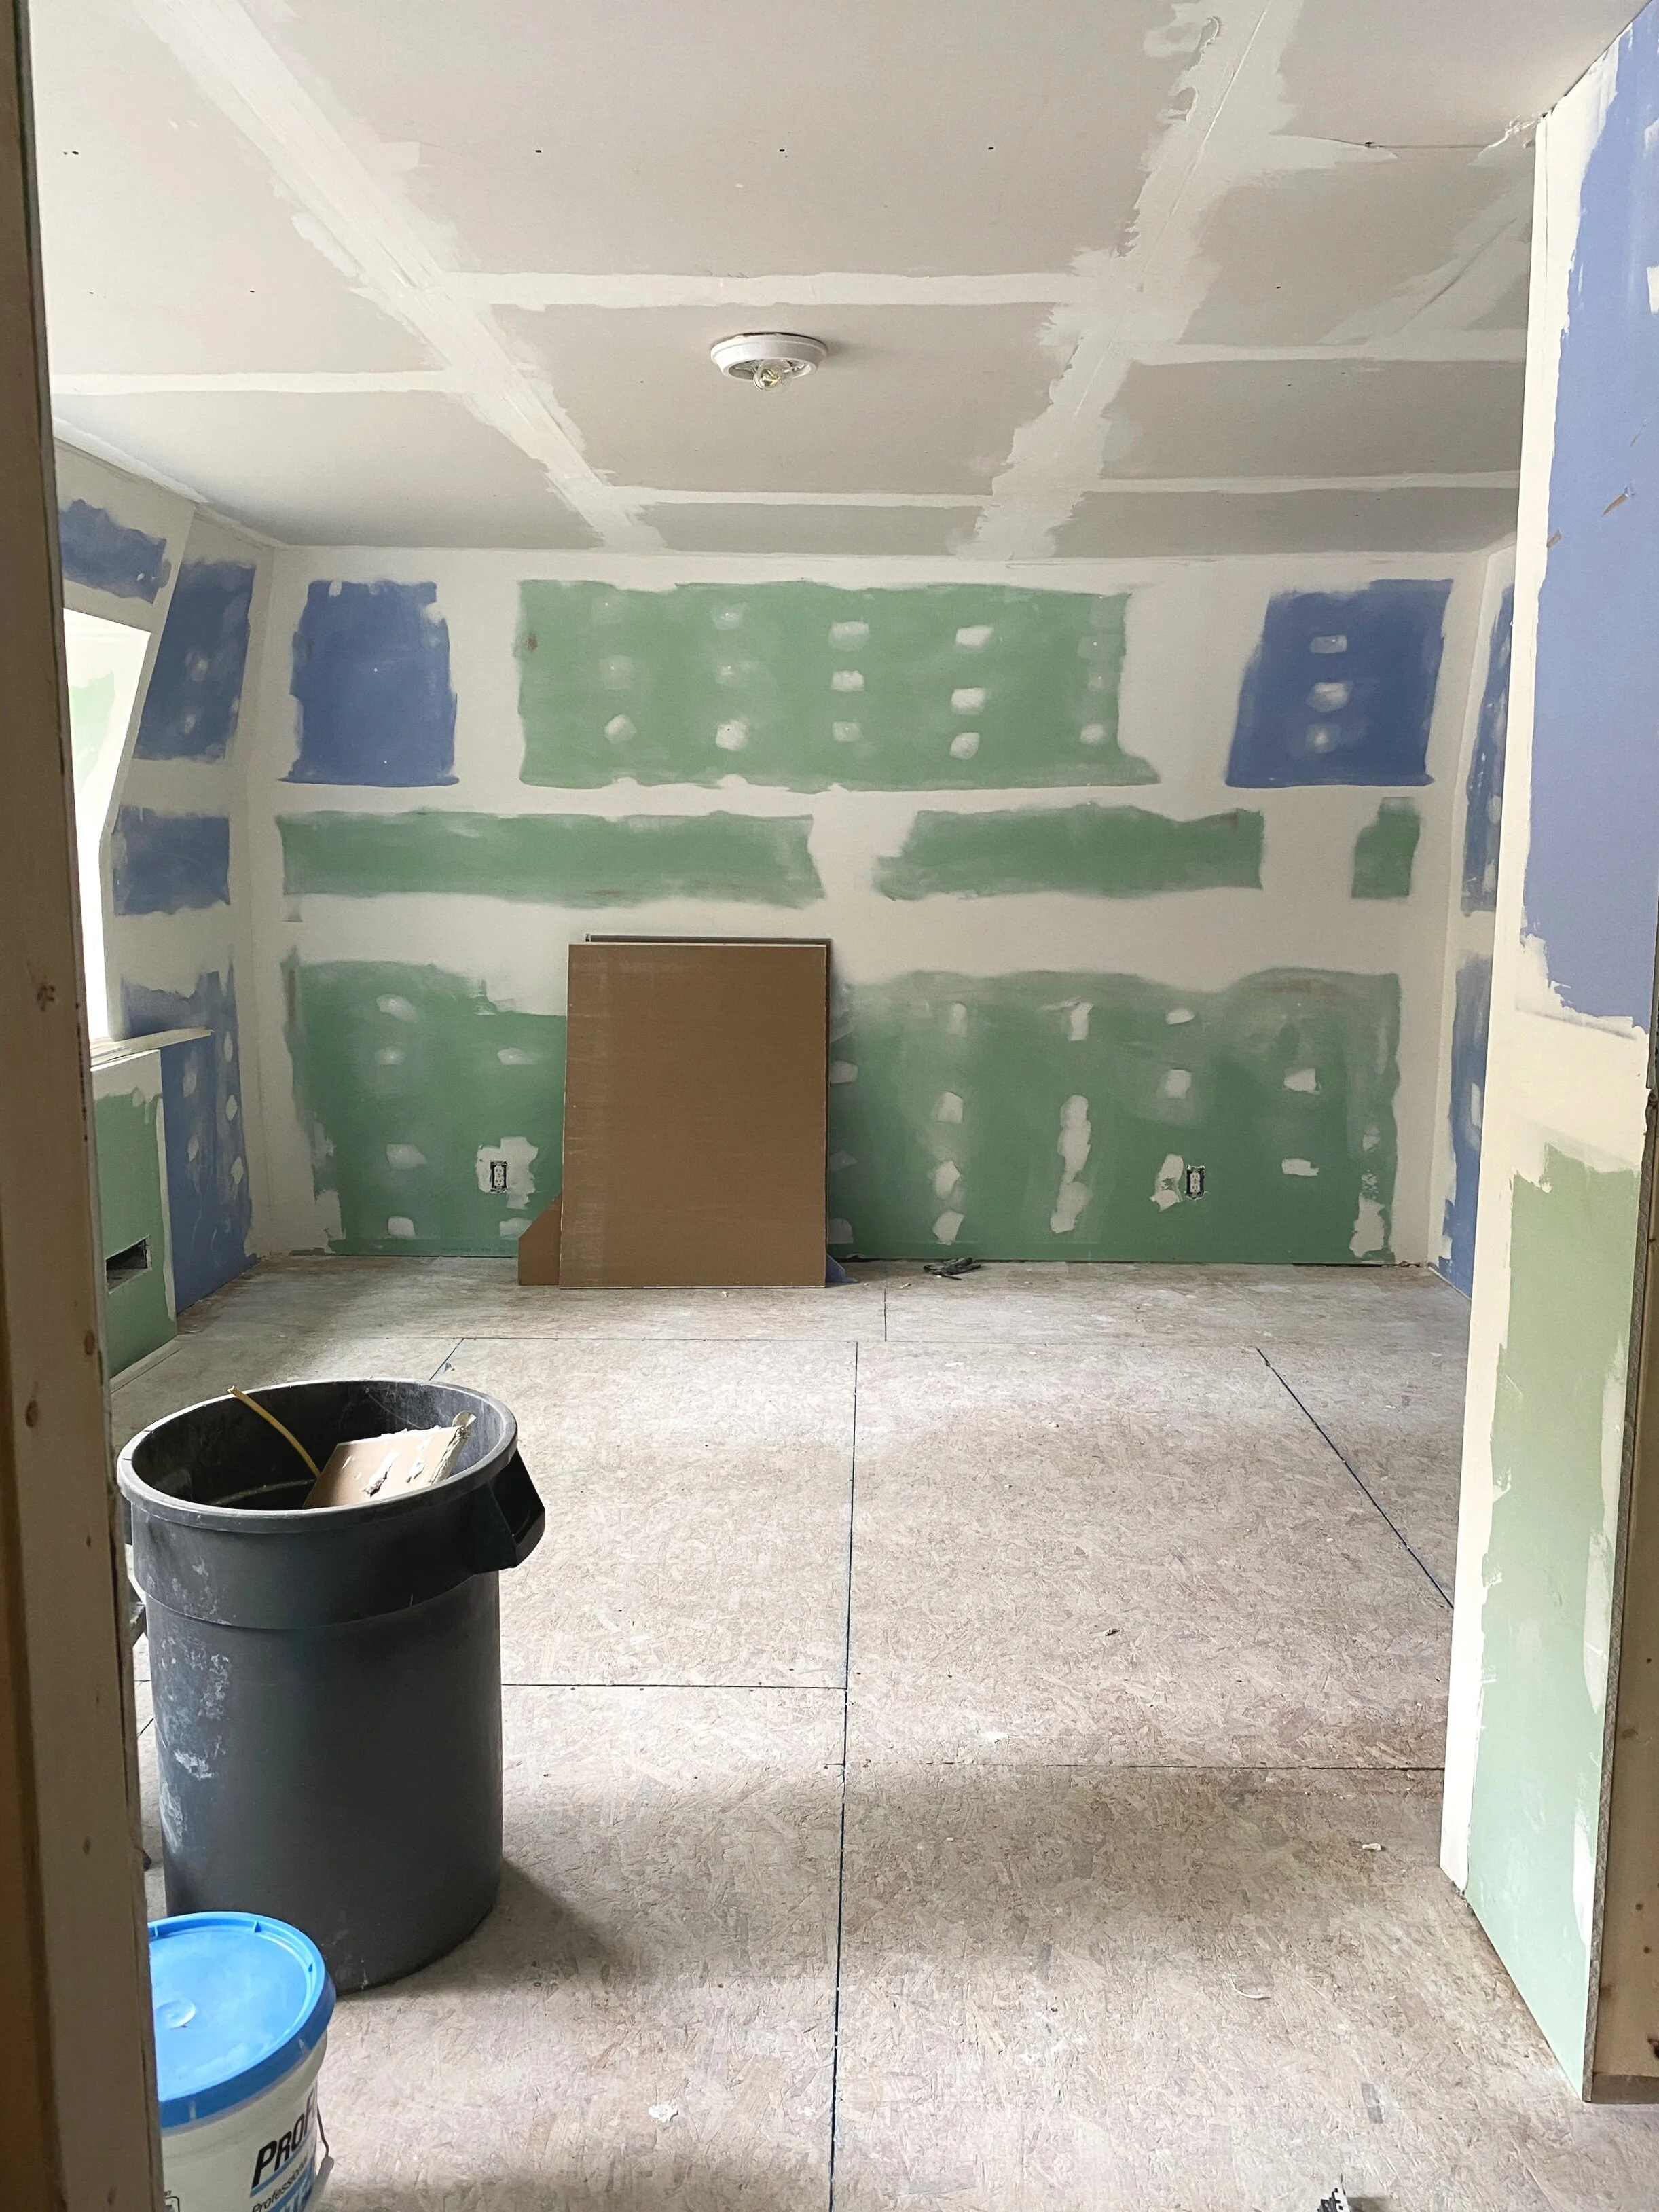
How to Stay Positive and Motivated During a Renovation
We've been in the midst of our master suite renovation for several months now and I'm sure you're not surprised to hear that it takes its toll on a person. This is our biggest renovation to date and it has certainly had its ups and downs. But although we’ve had our “off” days, overall I'd say Lucius and I have done a pretty darn good job staying positive and motivated along the way (bonus points for not killing each other!). But exactly how DO you stay positive and motivated during a renovation?
5 Ways to Stay Positive During a Major Renovation
We've been in the midst of our master suite renovation for several months now and I'm sure you're not surprised to hear that it takes its toll on a person. This is our biggest renovation to date and it has certainly had its ups and downs. But although we’ve had our “off” days, overall I'd say Lucius and I have done a pretty darn good job staying positive and motivated along the way (bonus points for not killing each other!). But exactly how DO you stay positive and motivated during a renovation?
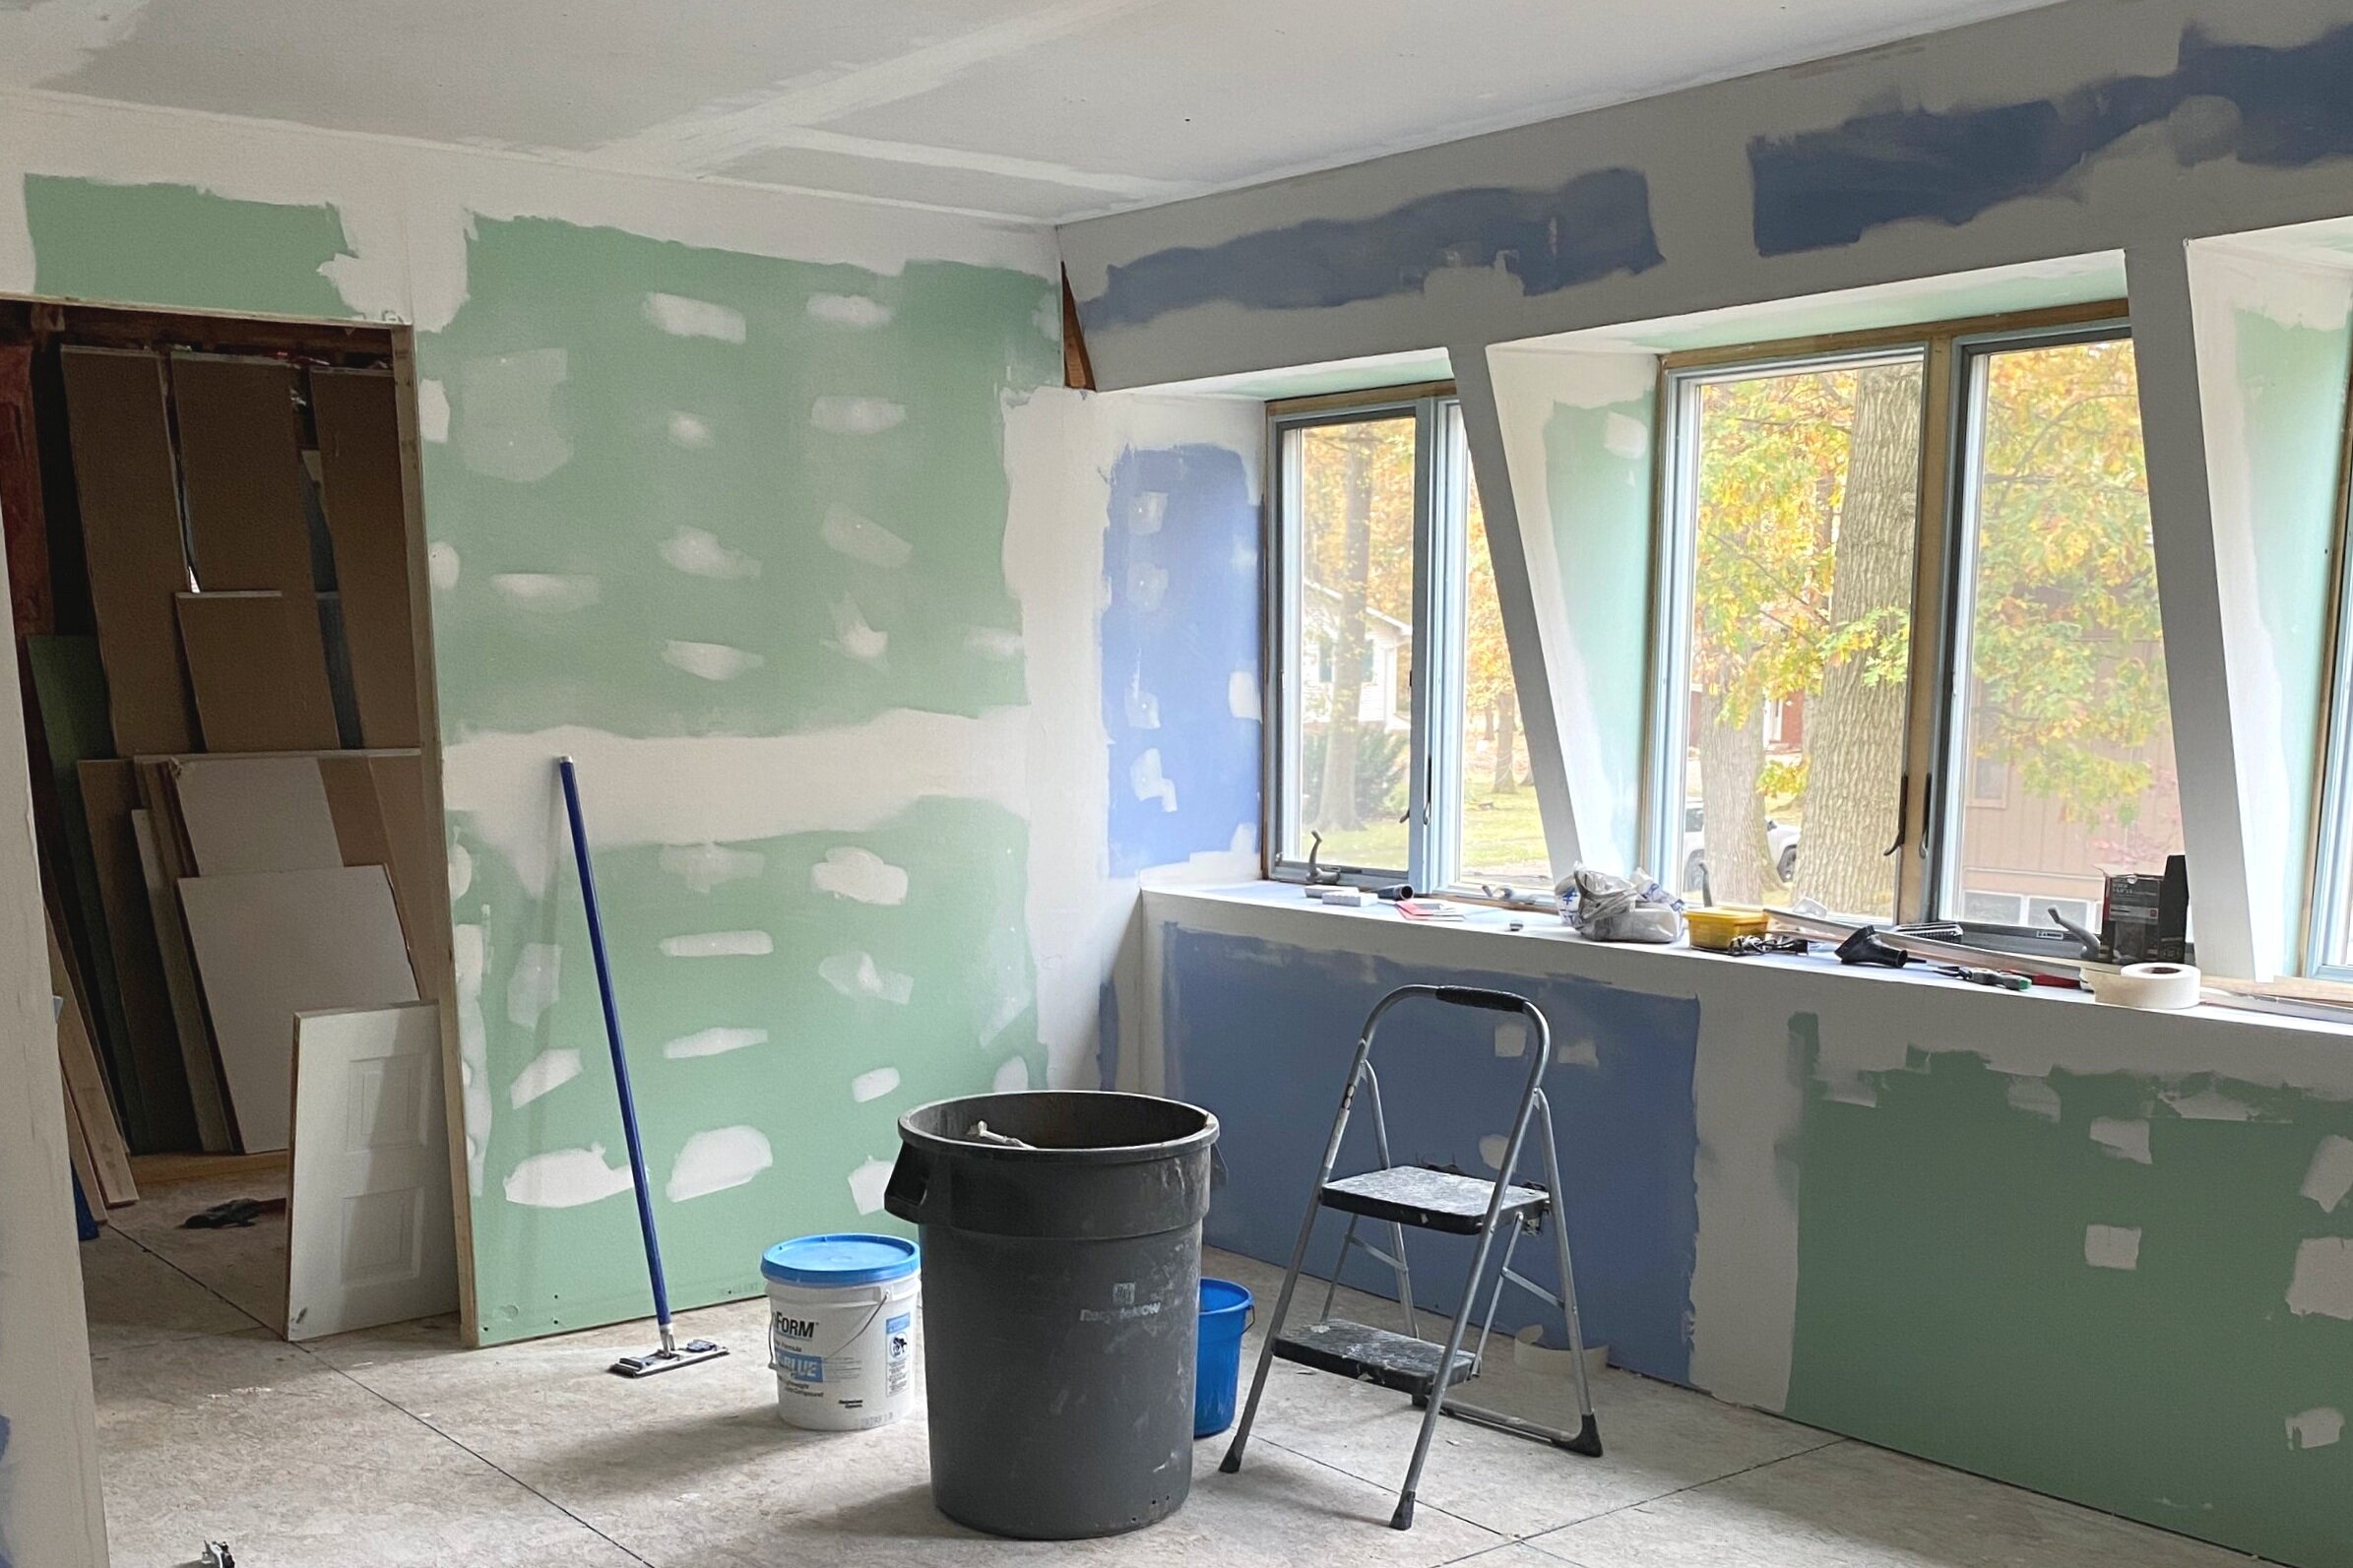
I have to be honest, staying upbeat, and inspired when your house is chaos and there's somehow a fine layer of dust on everything doesn't always come naturally. I recently came across a post by the blog Yellow Brick Home where they asked this question to other bloggers and it got me to thinking, how are we managing?
I quickly realized that it’s not a quick and simple answer - there are lots of ways we’re coping! So I put together some tips that have been working for Lucius and me to keep our heads up and looking towards that light at the end of the tunnel. So in case you too are in the thick of a renovation or are nervous to start one, I hope these tips are helpful to get you through to the finish line (or to the starting line if you haven’t taken the plunge just yet).
Set Realistic Expectations and Be Flexible
I thrive when I have a goal to work toward. My type-A personality eats that ish up! But during a renovation, plans frequently go awry and, especially for type-A people like me, that can be REALLY HARD TO DEAL WITH. But when this happens during a renovation, you simply have to learn to roll with it.
It's not uncommon during a renovation to discover an unwelcome surprise that throws your plans out of whack. For instance, once we pulled down the drywall in the master suite, we realized part of the bedroom we hoped to open up absolutely had to have a support under it. It was frustrating at first to have to rethink the layout that I was so excited about. But what choice did we have? In the end, we came up with a new layout we love even more than the original.

Or consider timelines for a second. We're mostly DIYing our renovation, so luckily our timeline is already flexible. But that doesn't mean we want to spend years without our master suite. However, Lucius and I both work full-time and we have little kids, so this project has been inevitably slow going. On several occasions, when we started to feel like we were putting too much pressure on ourselves to get the room knocked out quickly, we’ve had to take a step back and reevaluate.
If you're hiring out for your renovation, you'll want to prepare yourself for timelines to get messed up. You can hope and plan to have a project done by X date, but really it depends on your contractor and subcontractors and when they can have the work completed. Especially when you consider that a lot of the work depends on something else being done beforehand. If one of those tasks misses its deadline, it can have a Domino effect and you'll need to adjust accordingly.
Know That It's Going to Get Worse Before It Gets Better
There are so many feelings that come with a renovation. It's exciting to see your ideas come to life, but terrifying what you might find behind the walls (and the unexpected cost associated with it). But one thing is for sure: there's a point in the renovation when you're deep in demo and you look around and panic a little bit (okay, a lot a bit) because you realize there is no turning back. Truthfully, at this moment, the state of our master bathroom even makes my heart race a little.
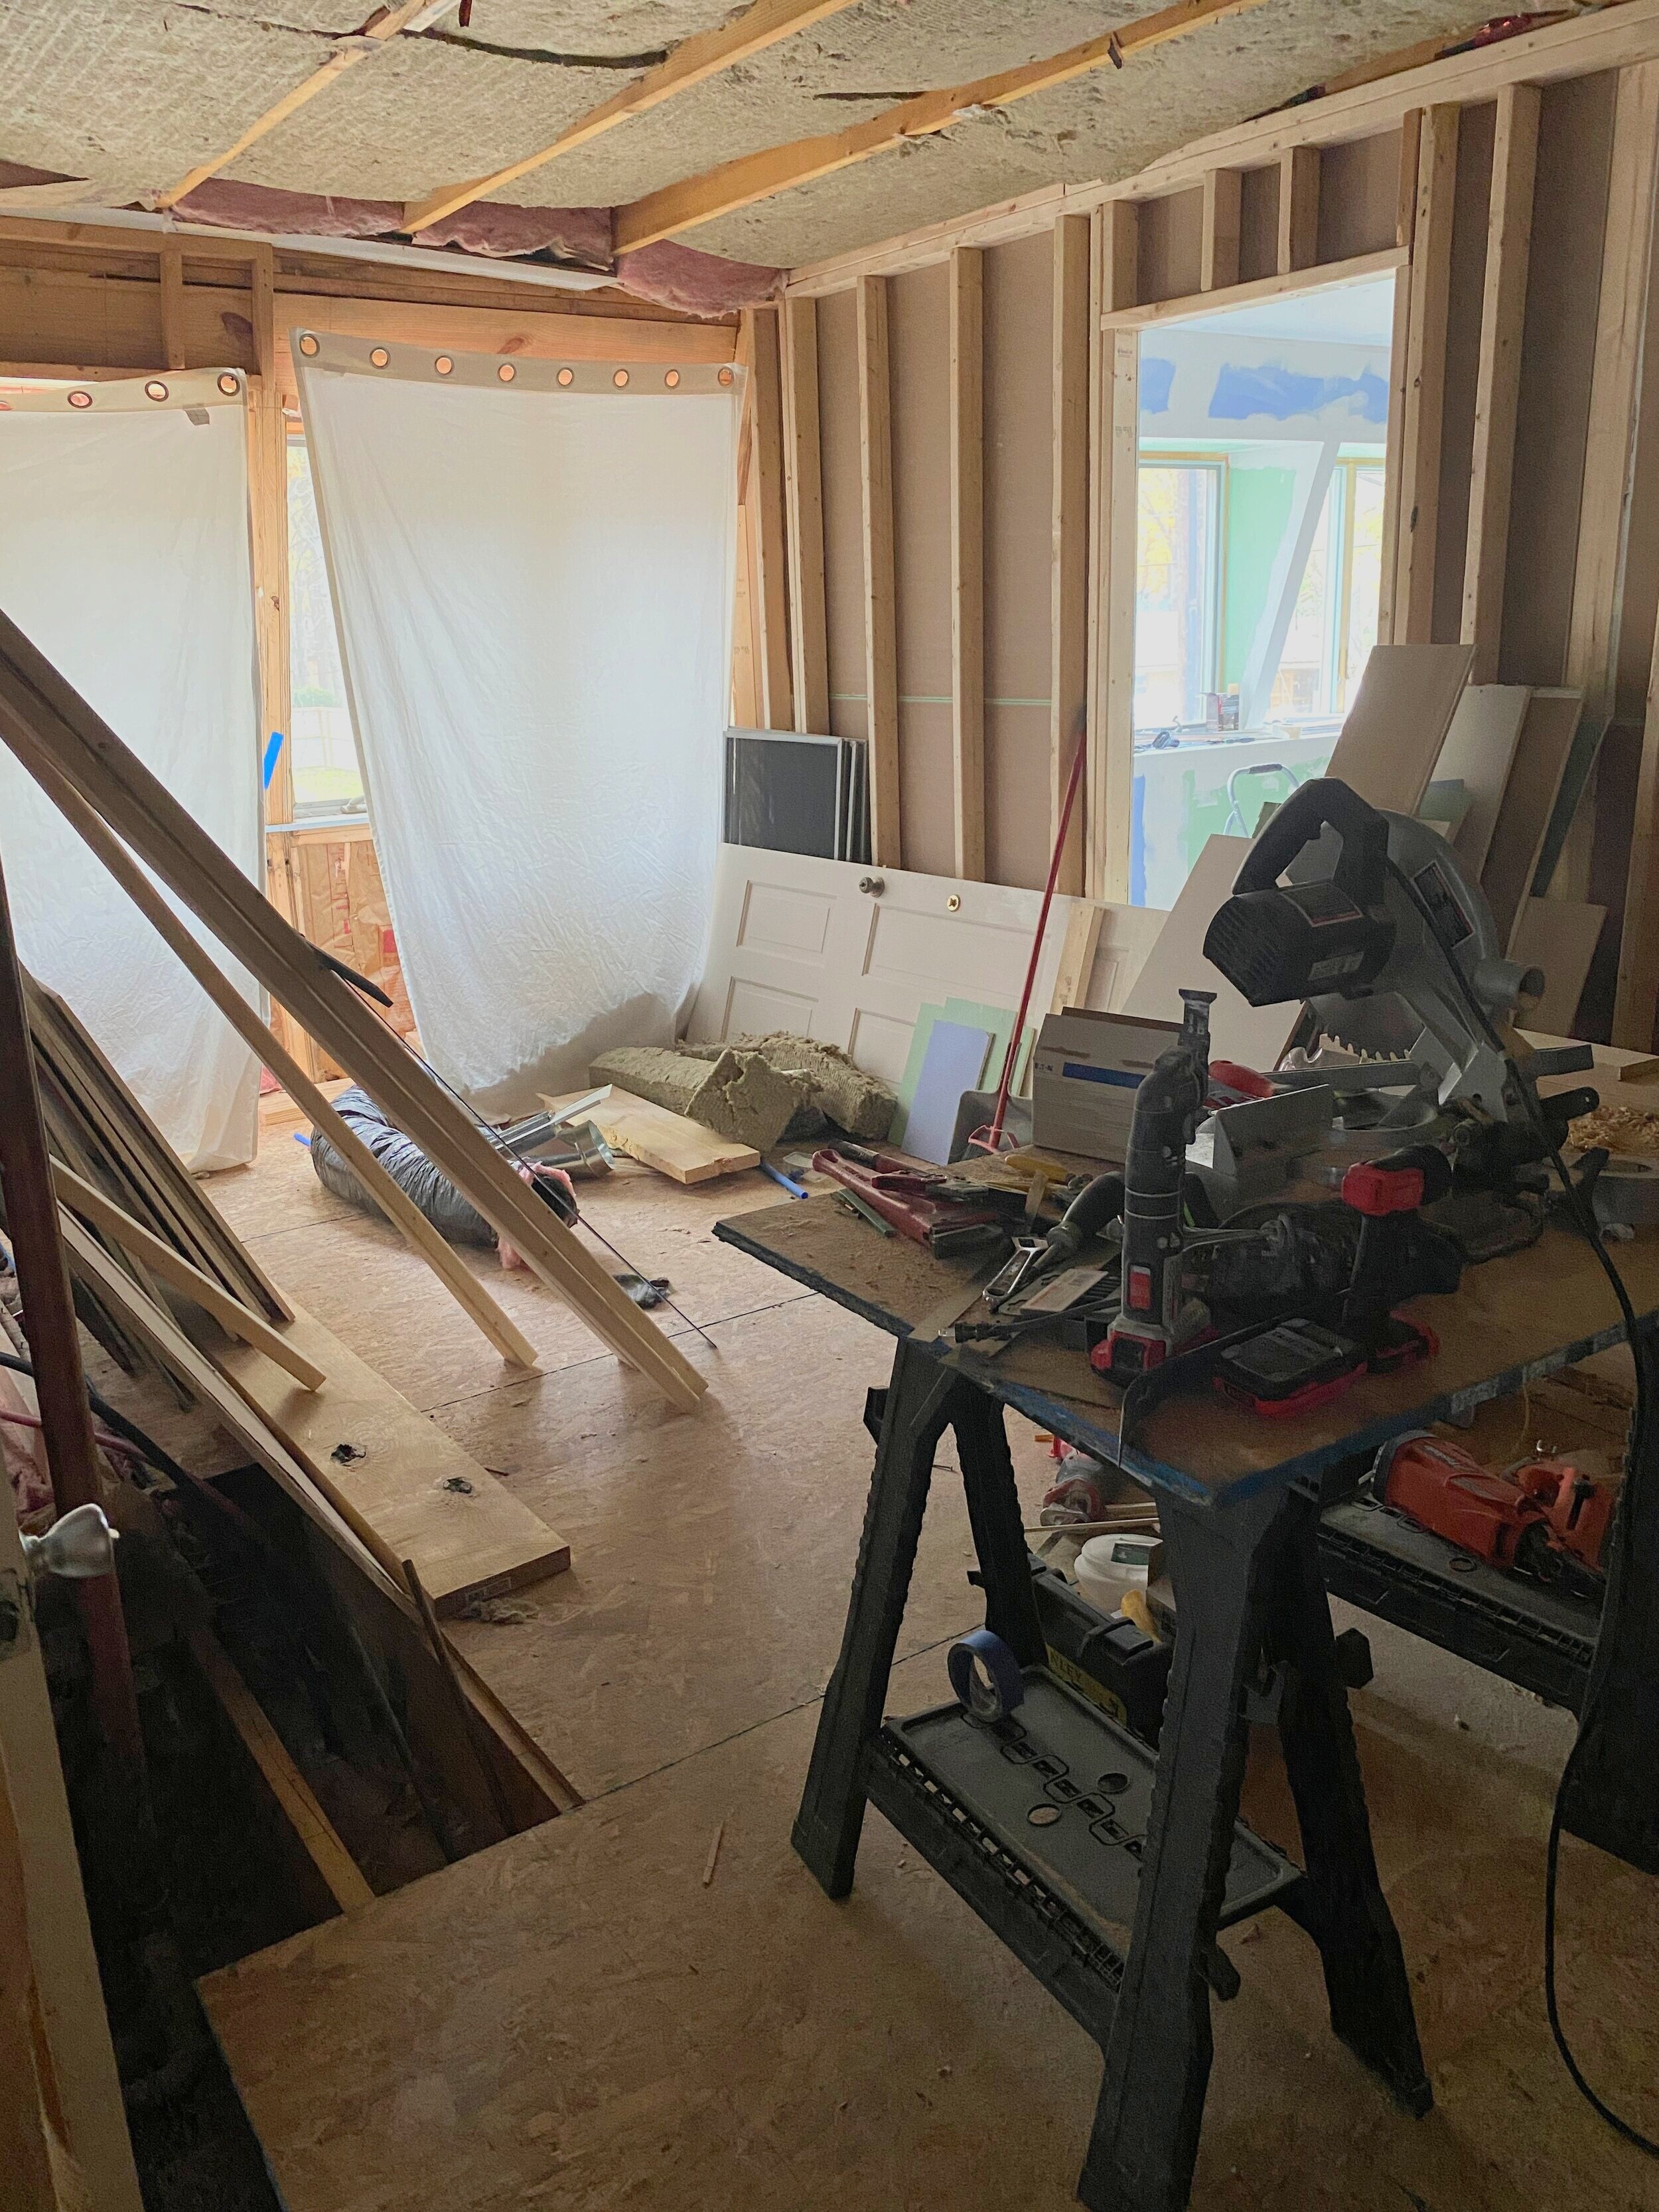
The best advice I can give here is to KEEP GOING.
Believe in yourself, your design, and your contractor that it's going to turn out okay… because, at this point, it kinda has to, right?
But seriously, you hit a point in the renovation that everything is a mess and it's hard to see past that to what's to come. Trust me, once the demo is done, the rebuilding begins and that part IS SO EXCITING that it'll get your spirits back up in no time. The middle of a renovation is confusing, messy, and makes no sense. Just keep swimming.
Take It One Day At A Time
So at this point, your original plans have gotten all messed up, but no sweat. You've stayed cool, calm, and collected. You've readjusted and you're back on track with a new plan. Now you're deep into demo, and panicking at the sheer chaos of the state of your house. How do you deal? You take it one day at a time.
It seems so simple! But really, taking our renovation one day at a time has been a huge help in staying positive. Remember that Rome wasn't built in a day and your house won't be rebuilt in a day either. With that being said…
Celebrate the Milestones - No Matter How Small
It’s overwhelming to think about your whole renovation as one big project. Instead, look at it as a slew of little projects. After all, how do you eat an elephant?
And each time you complete one of those projects, celebrate! You're one step closer to the end! You finished demo? Hooray! The framing for a new wall went up? Alright! You started drywalling? Margaritas, anyone!?

Celebrating the little milestones along the way has played a huge part in keeping us motivated. It doesn't necessarily mean we're throwing a party, or heck, even going out to eat each time we make some progress (#thankscovid). But Lucius and I love to dream together, talk about what we're tackling next, look at pictures of what the house looked like before we started, and congratulate ourselves on how far we've come. Each step along the way is truly something to be proud of, so don't hesitate to pat yourself on the back (over and over again)!
Keep Perspective - Know Your Why
Lastly, when you're in the thick of a renovation and it feels like you're miles away from being done, it's easy to forget why you started. Don't. It's important to keep perspective and remember your Why for starting a renovation to help keep you motivated to meet that goal.
Lucius and I started our master suite renovation because from the minute we walked into the bedroom during our initial showing, we started talking about how stupid the layout was. Planning to renovate the master suite was a huge factor in me agreeing to buy this house - so here we are.
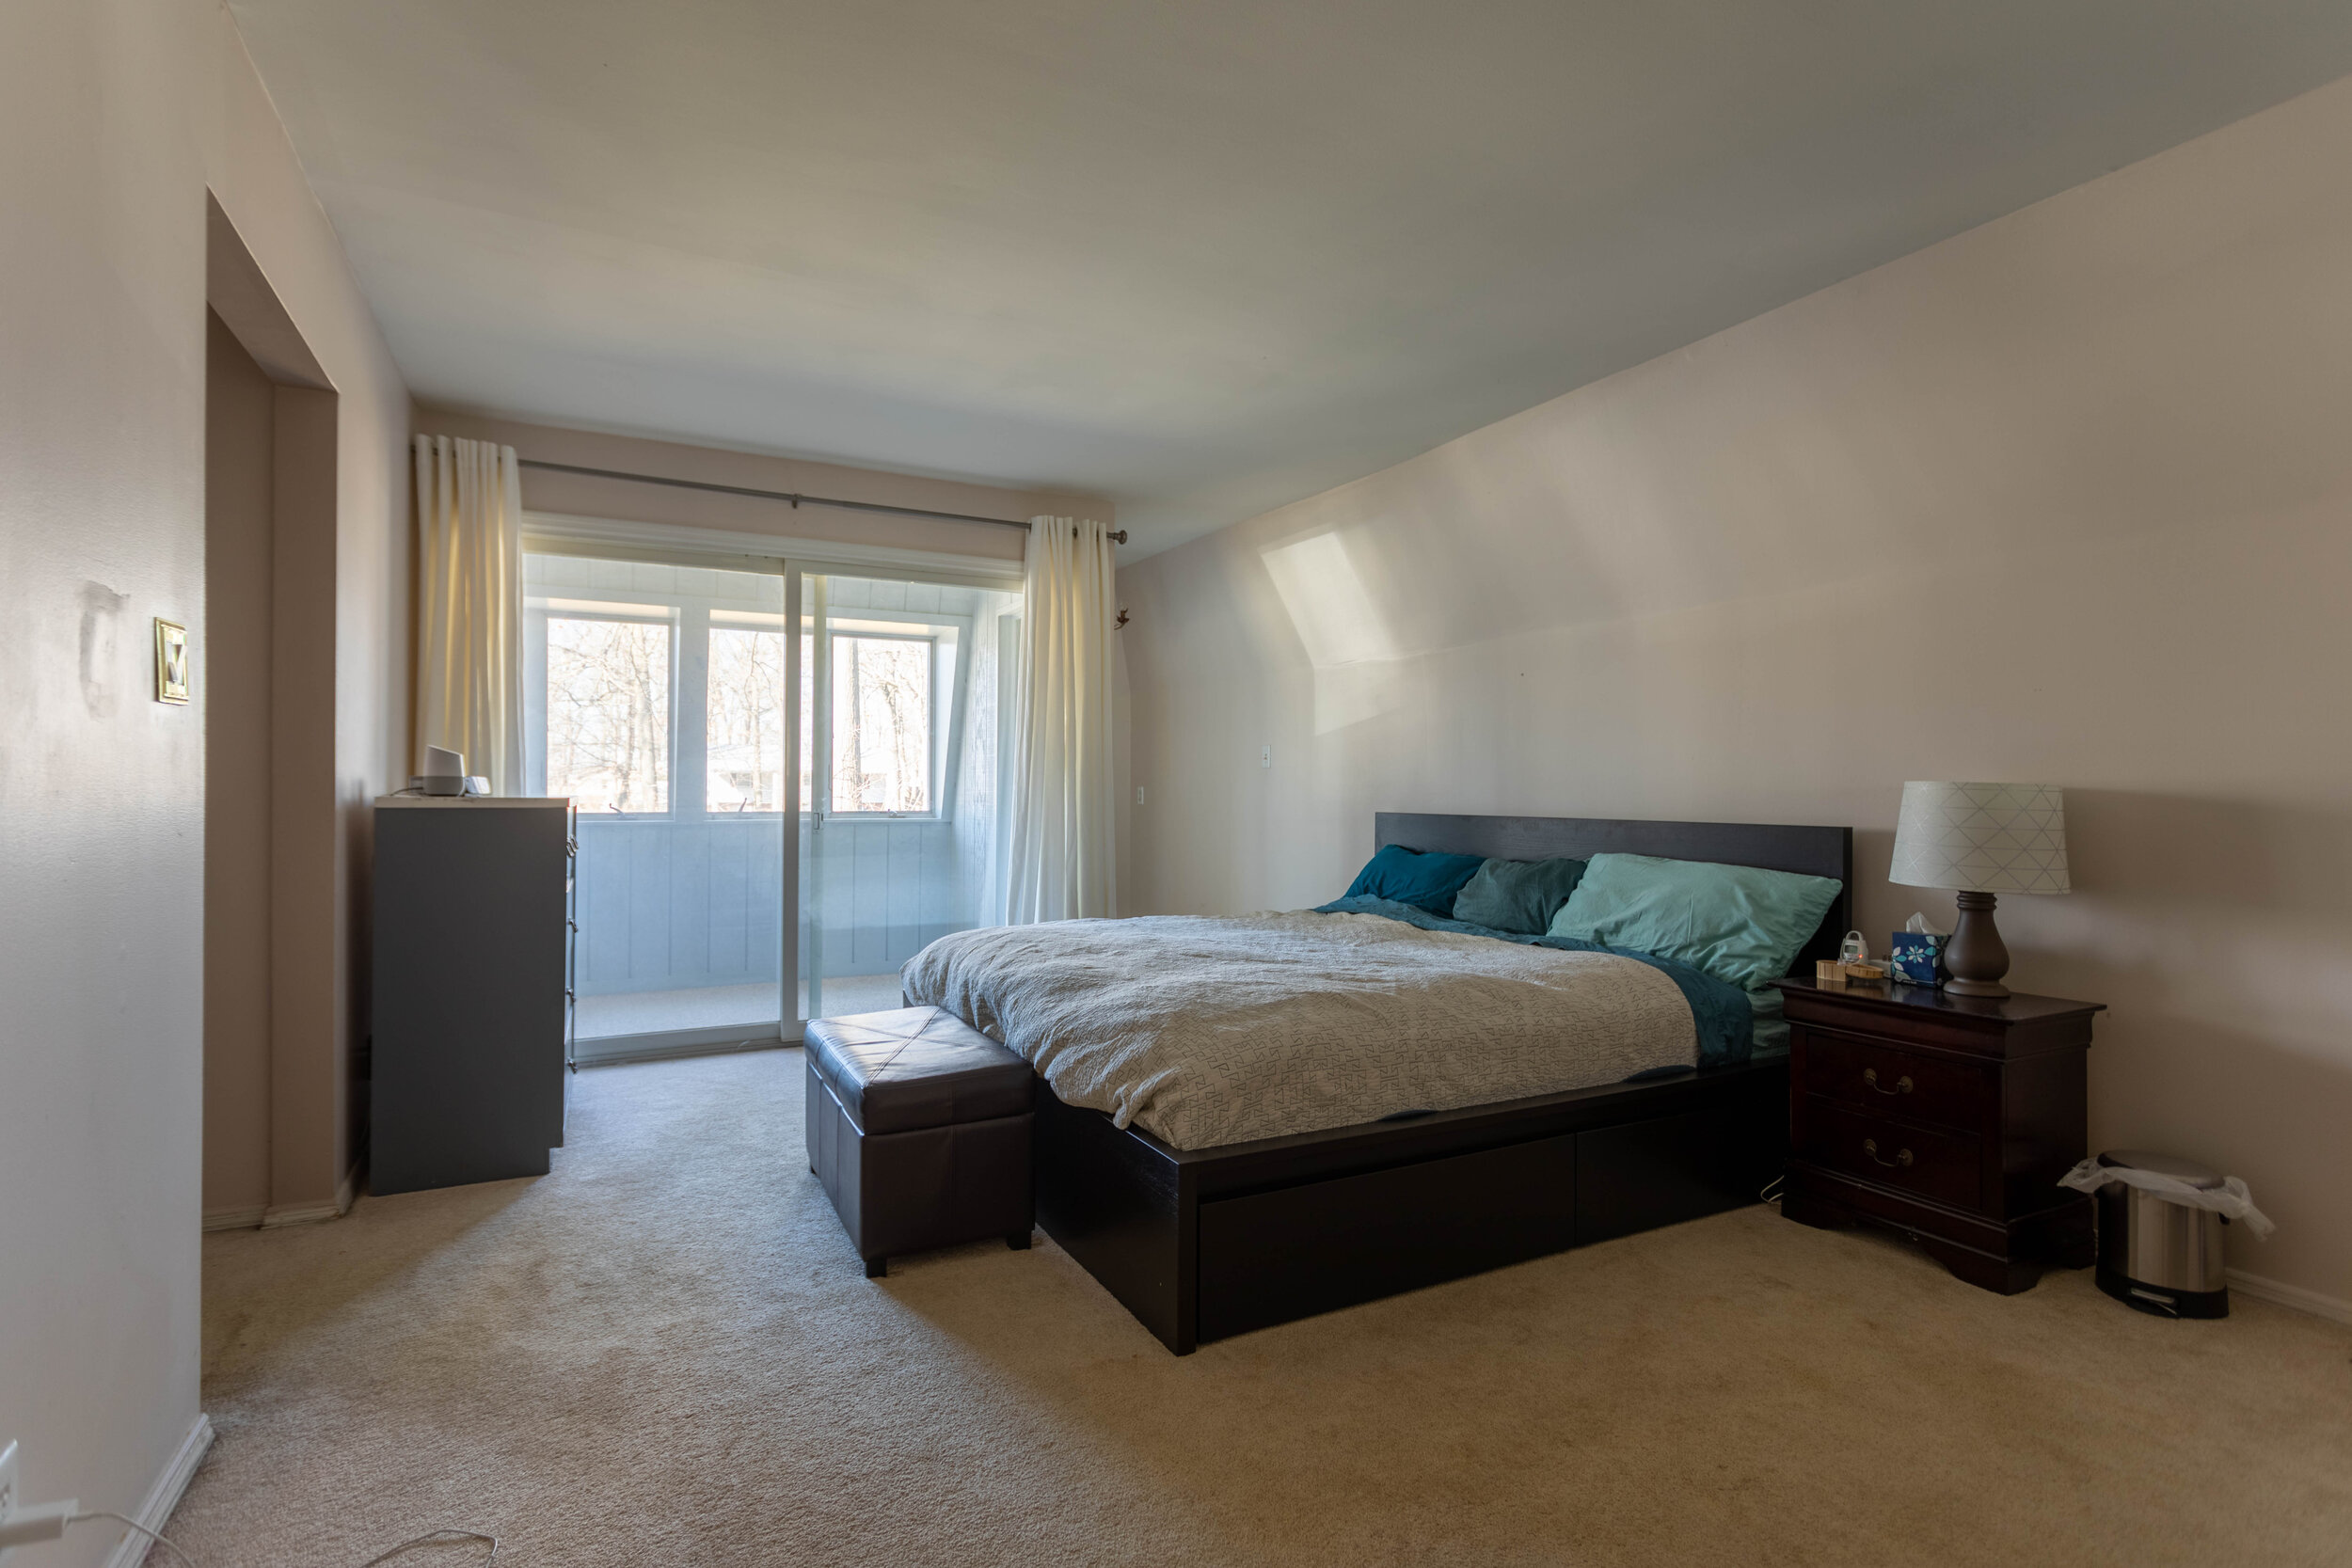
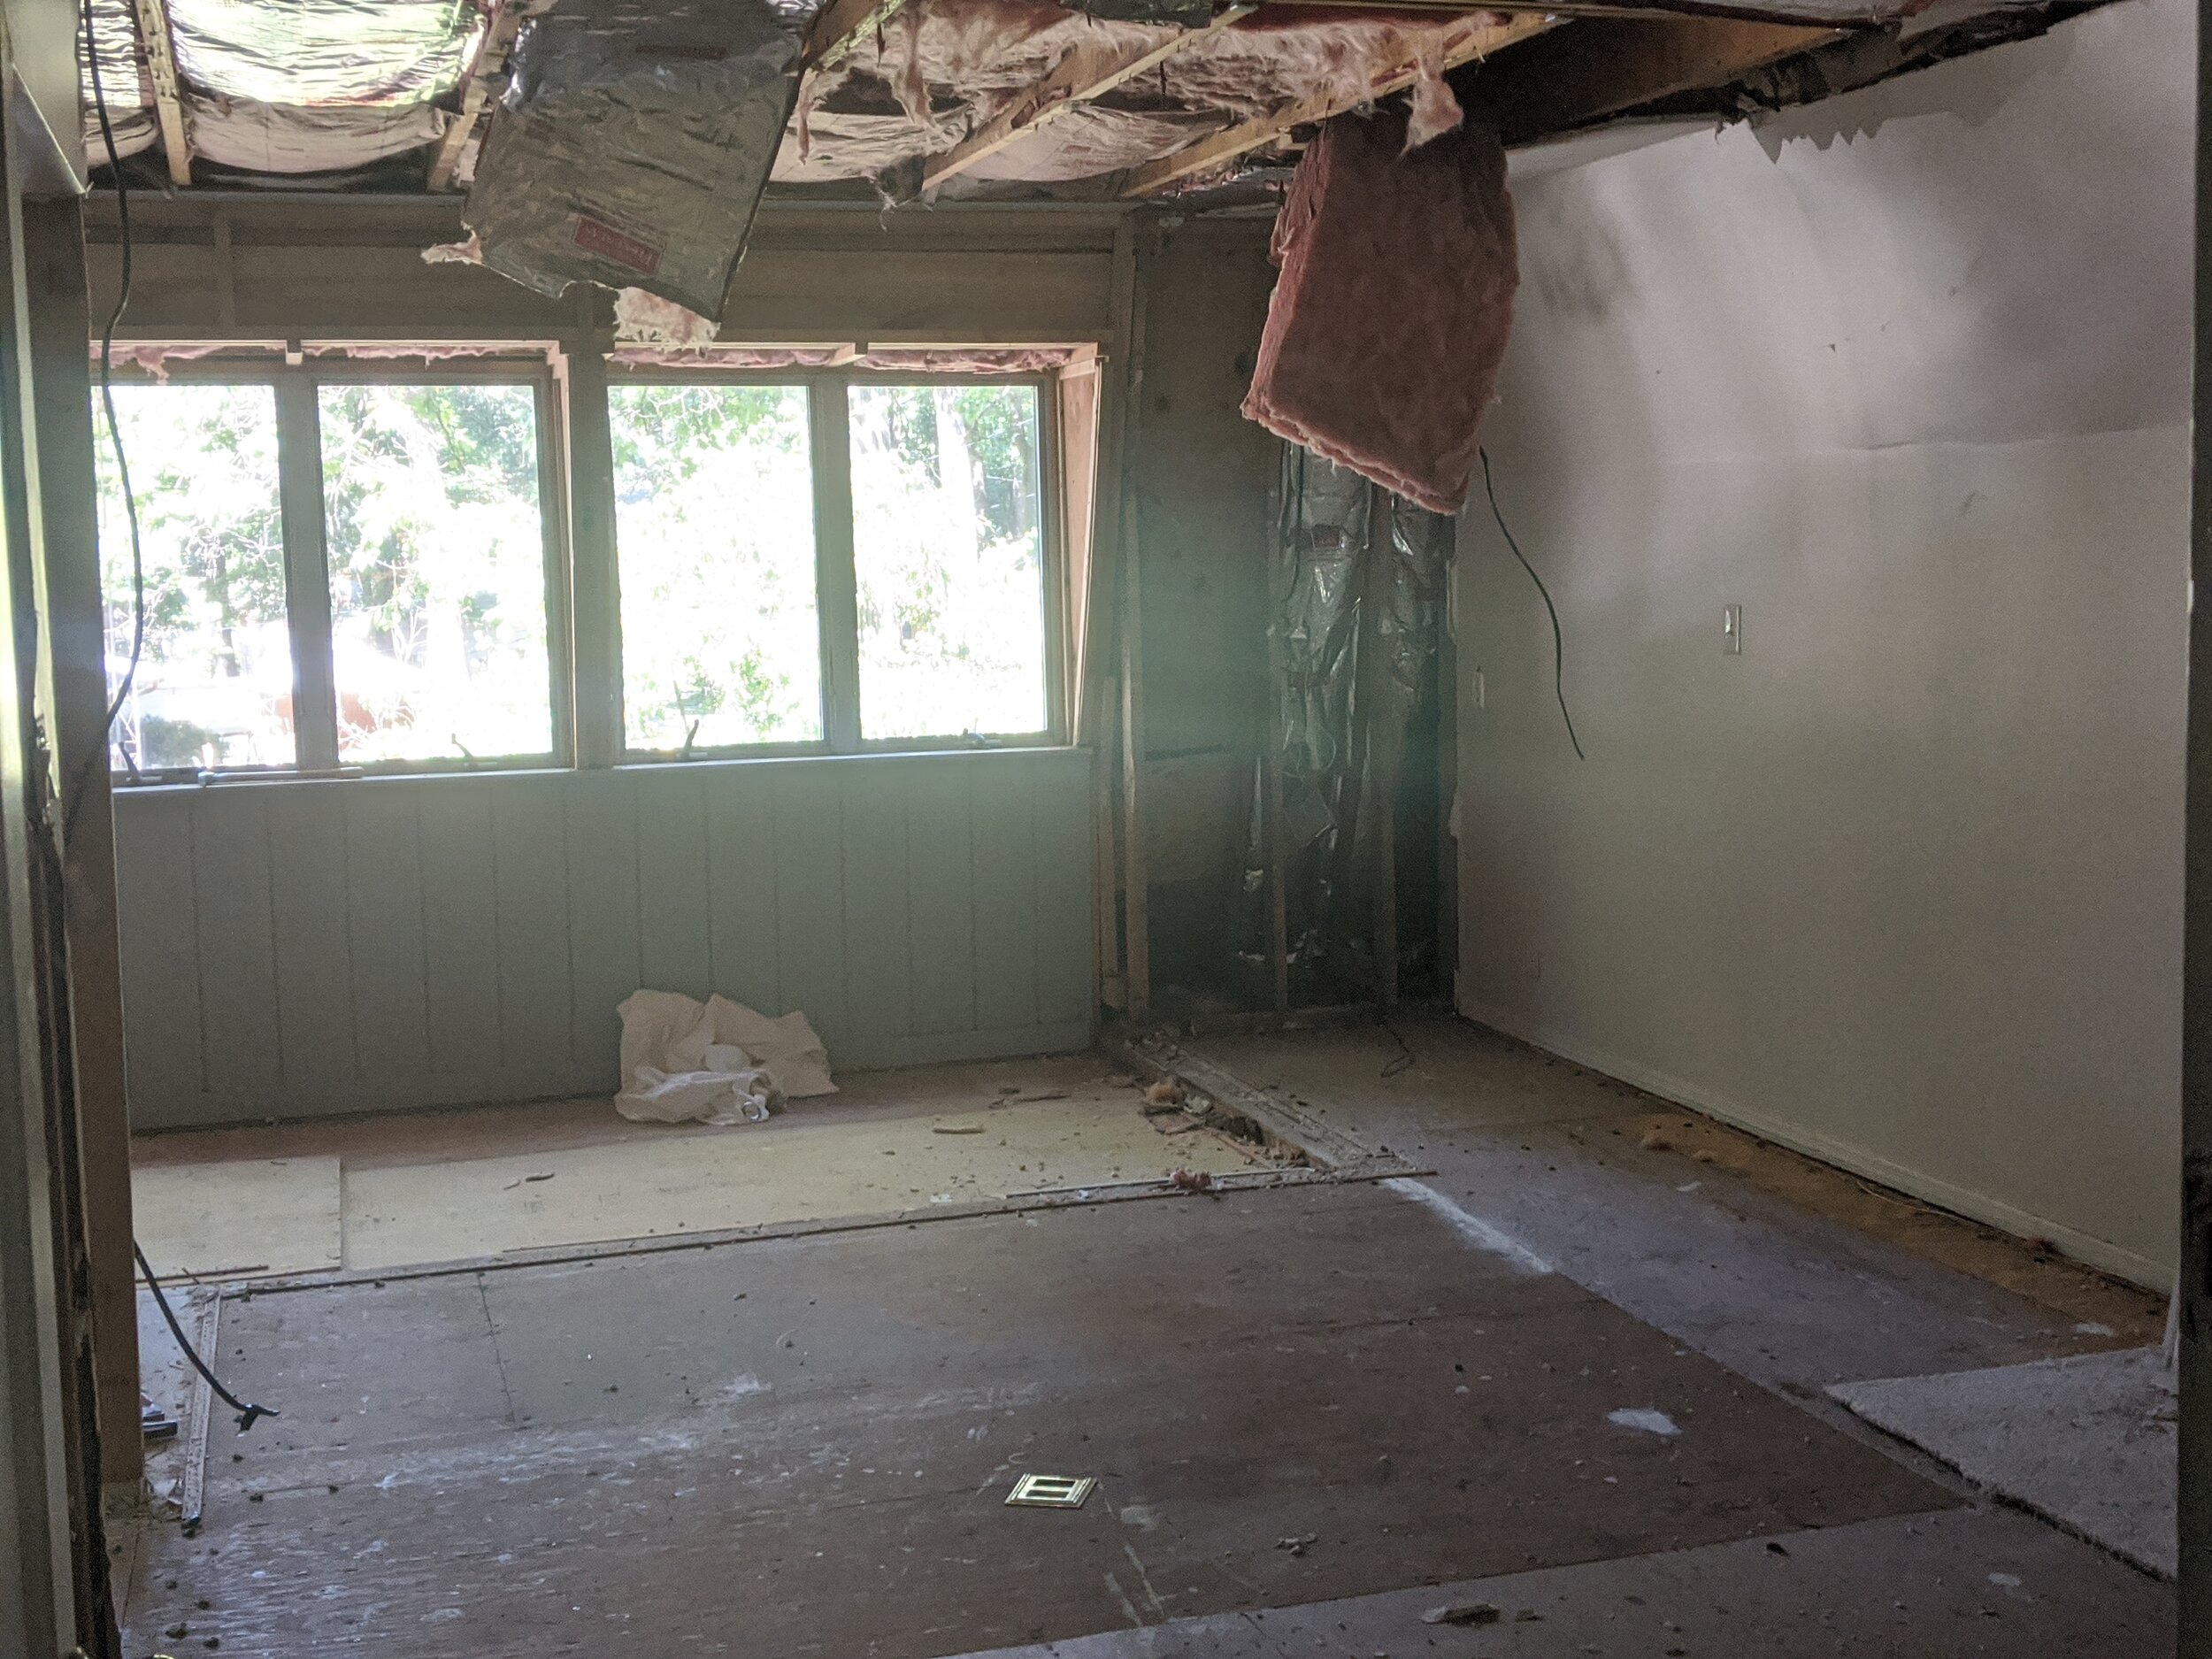
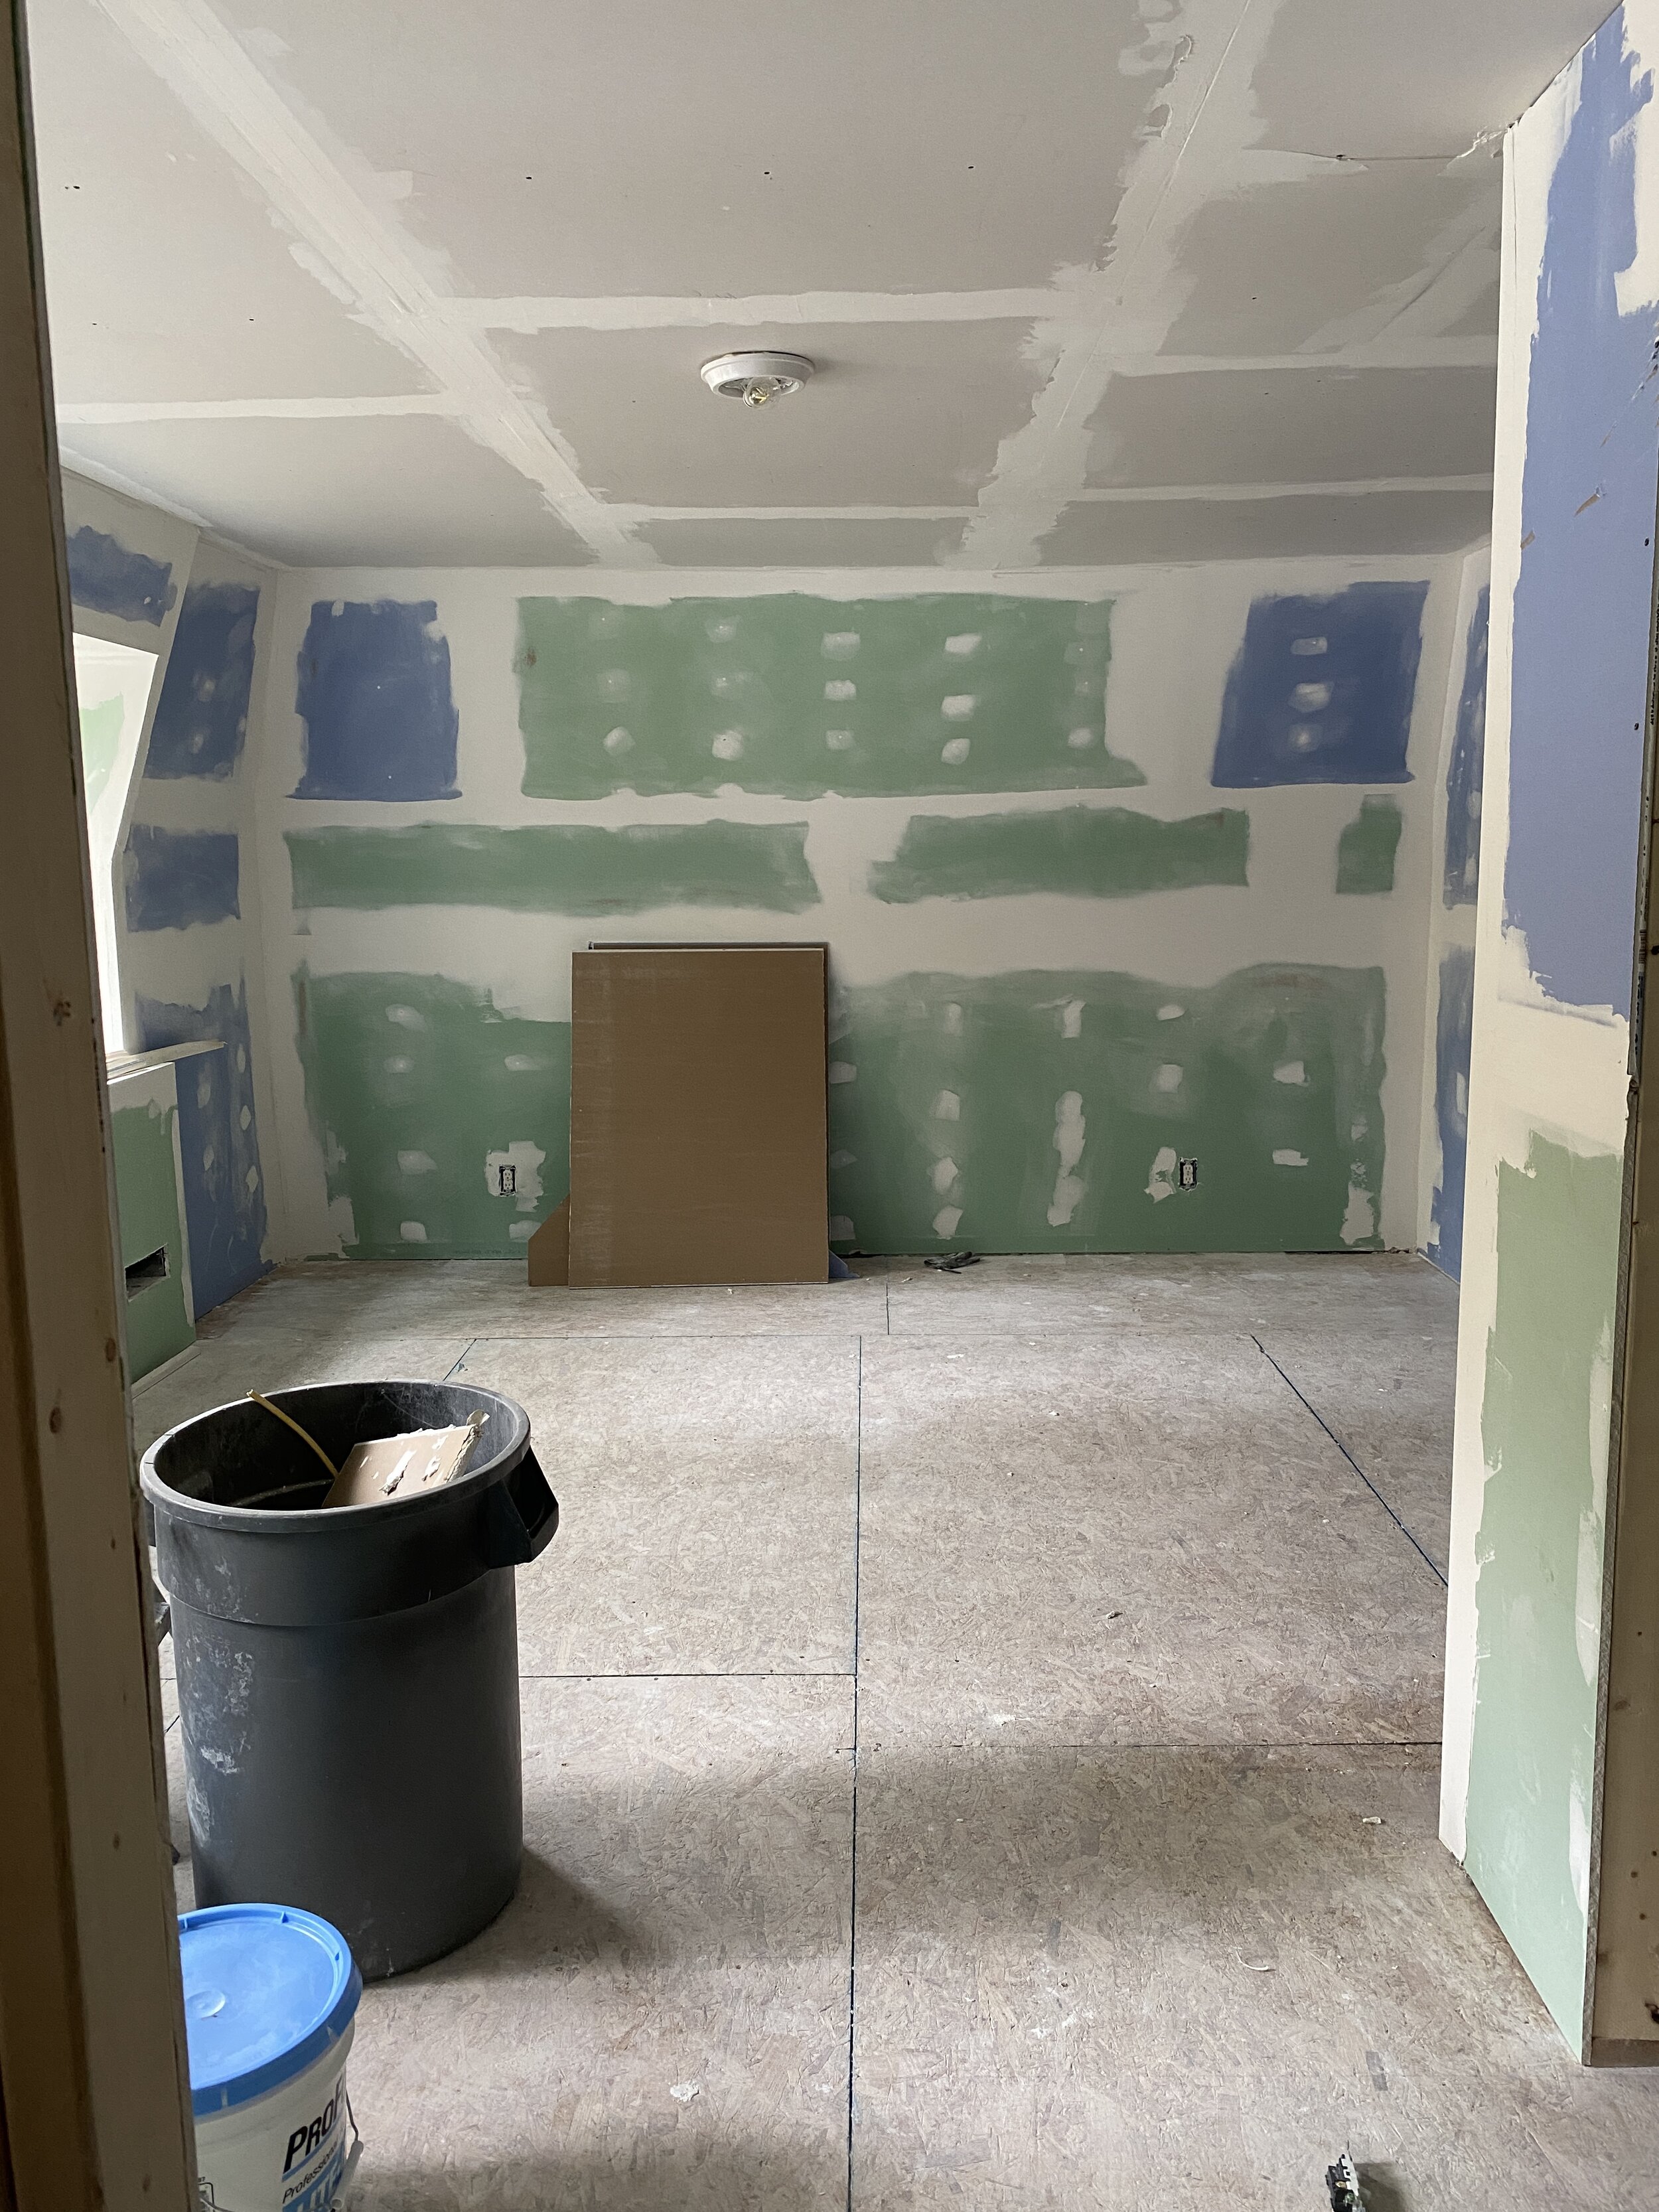
Our Why is because we know we can add resale value to our house by reconfiguring the master suite and turn it into a space we love to spend time in while we're living here. So in those times when I'm overwhelmed and have that sudden, "What did we get ourselves into!?" feeling, I remember that it'll be more than worth it in the end.
So whatever the reason, don't forget why you started.
Final Thoughts
There’s no sugarcoating it - renovations are HARD. But hopefully keeping these first-hand tips in mind will help get you through your next renovation a little easier. I know there will be days when I’ll need to come back and read through them myself!
Does anyone out there have any more helpful tips on how to stay positive or motivated during a renovation? I'd love to hear them!

Enjoy this post? Check out some of my other renovation posts:
Tips to Keep Yourself Motivated During a Renovation
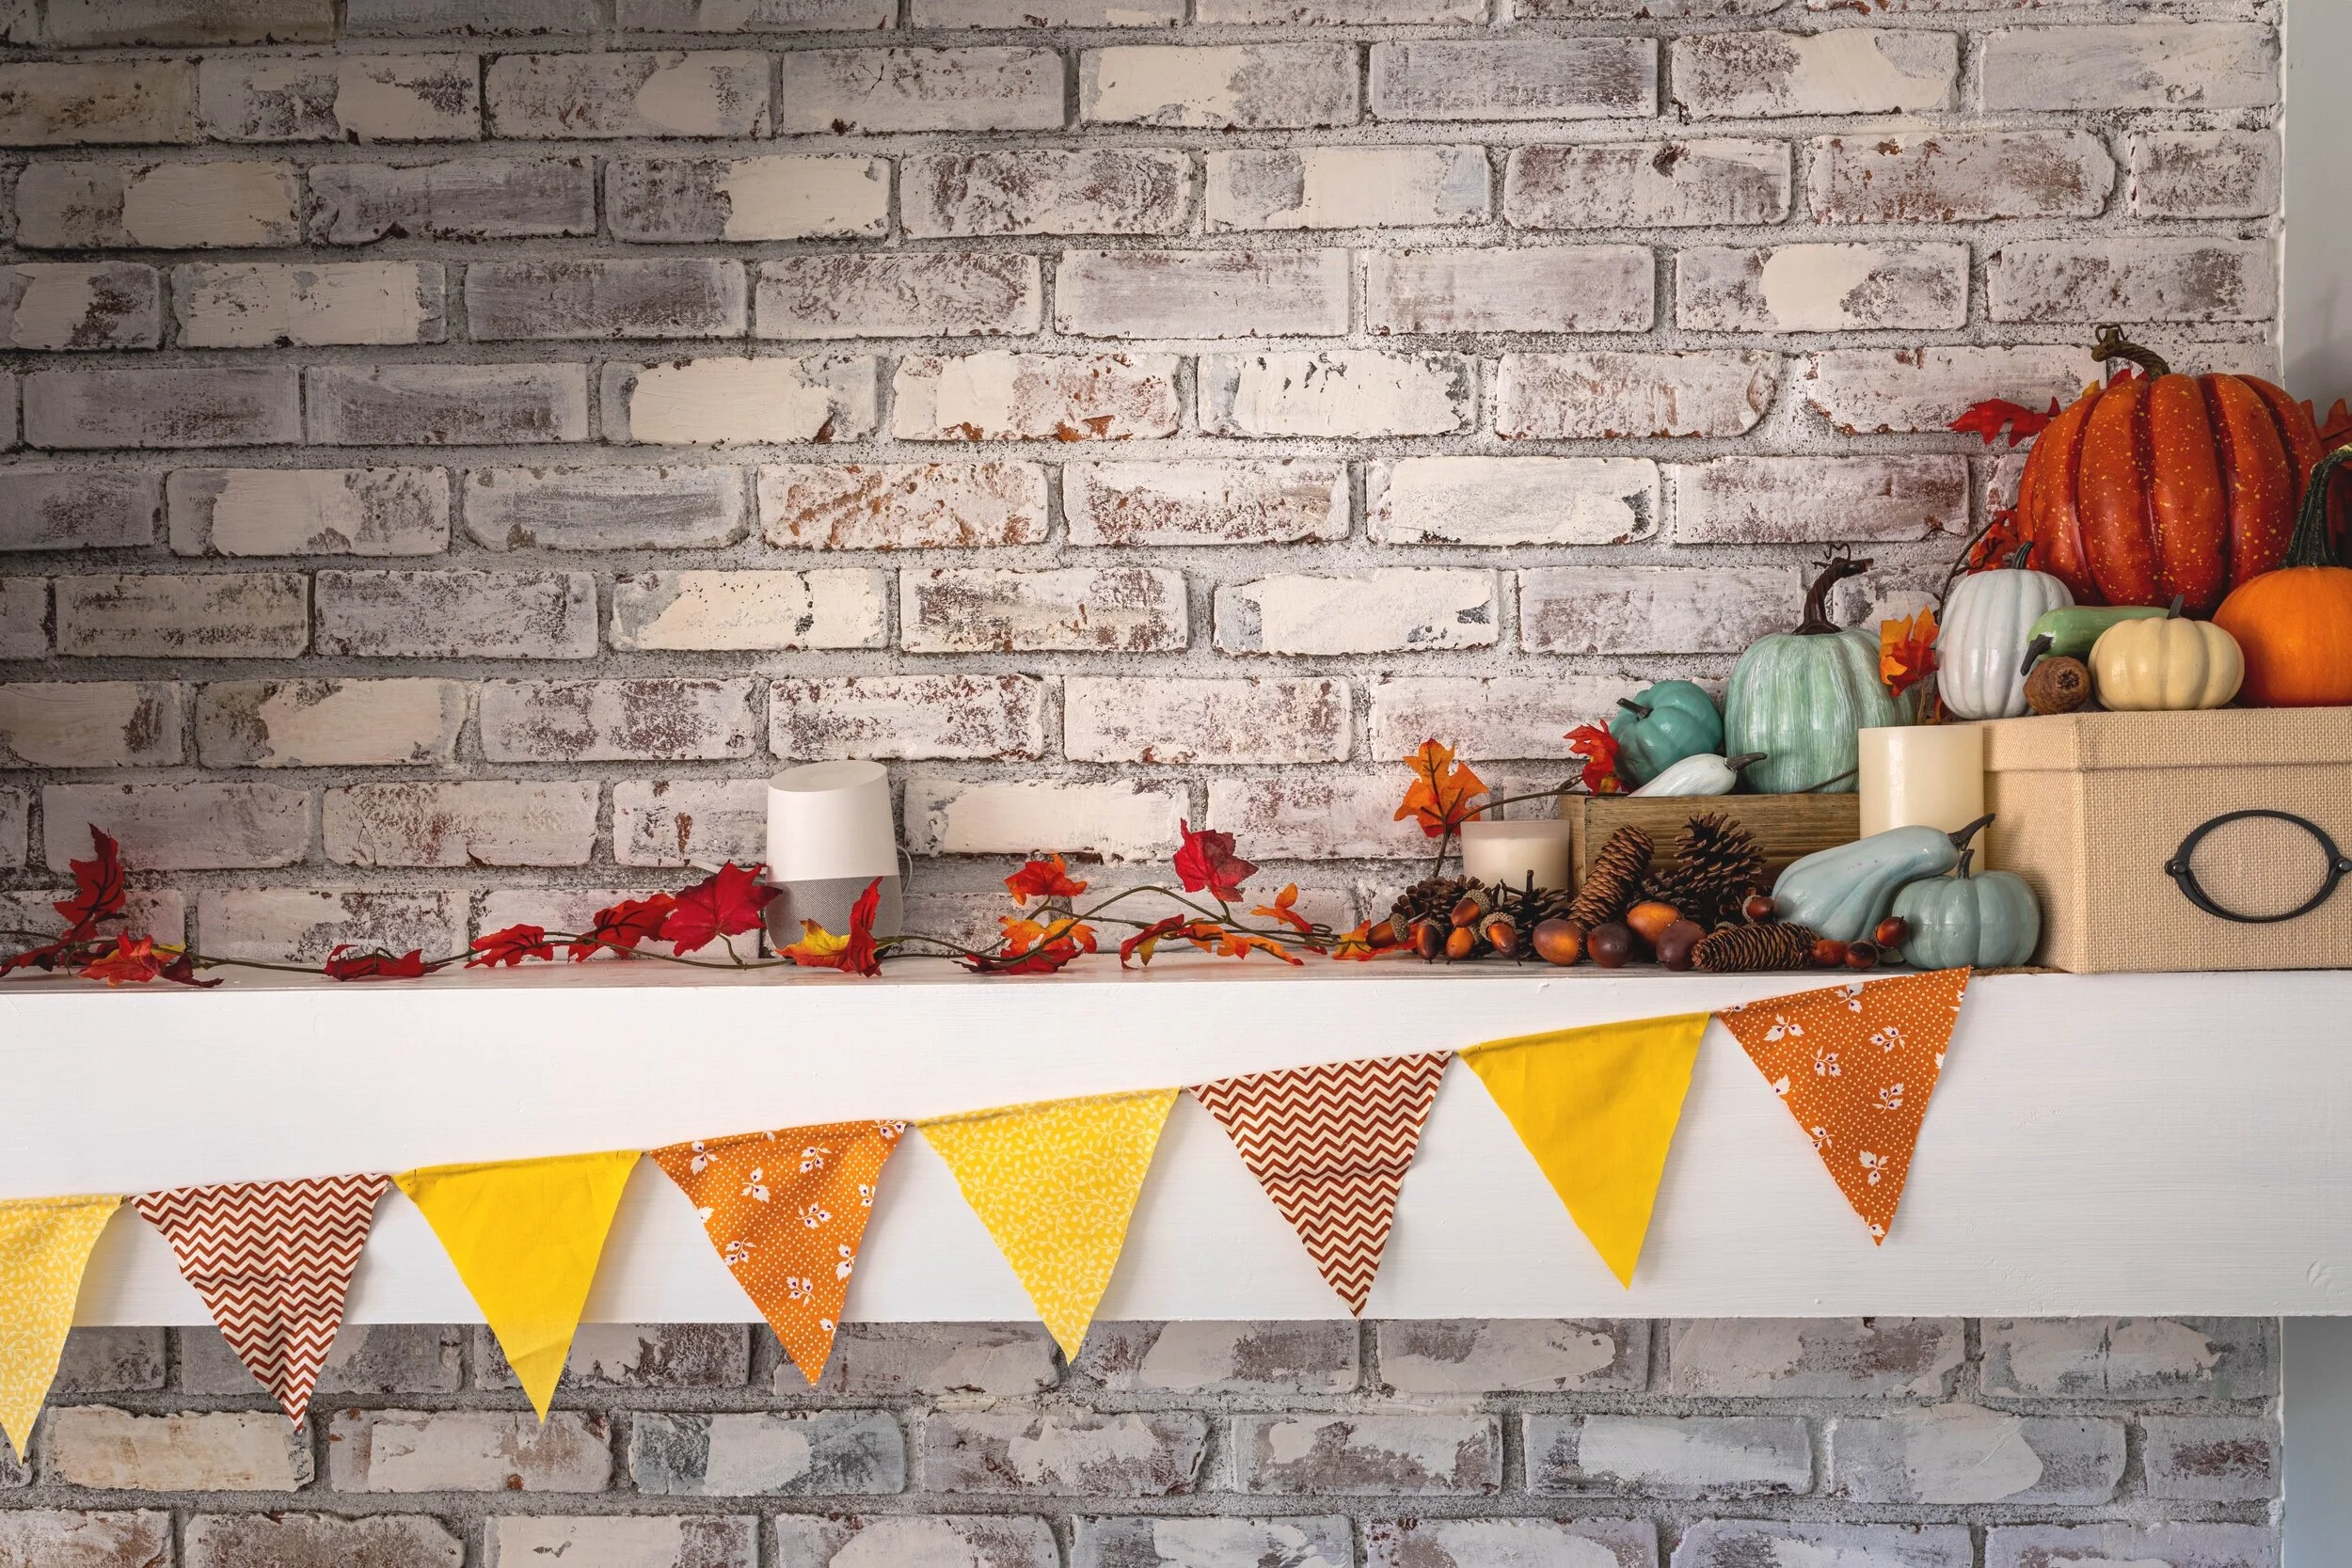
DIY Bunting - an Easy, No-Sew Tutorial
I obviously LOVE home design, but when it comes to seasonal decor, with the exception of Christmas, it’s always felt a little pointless to me. I mean, who am I decorating for anyway?
Well, let me tell you… now that my older daughter is almost 5, I need to get my ish together because there’s no way she’s letting me get away without any fall decor up in here! I couldn’t say no to her incessant pleas for decorations (kids, amirite?), so we’ve been spending a lot of time lately finding ways to create some festive decorations together, including the topic for today’s post: how to make an easy, no-sew bunting.
How to Create Your Own Bunting
As you may have learned from my previous post, I’m terrible about decorating for the seasons and holidays.
Don’t get me wrong, I obviously LOVE home design, but when it comes to seasonal decor, with the exception of Christmas, it’s always felt a little pointless to me. I mean, who am I decorating for anyway?
Well, let me tell you… now that my older daughter is almost 5, I need to get my ish together because there’s no way she’s letting me get away without any fall decor up in here! She is so excited about the changing seasons - and rightfully so! I couldn’t say no to her incessant pleas for decorations (kids, amirite?), so we’ve been spending a lot of time lately finding ways to create some festive decorations together.
One of those decorations is the topic for today’s post: how to make an easy, no-sew bunting. You may have even noticed it hanging out in my last post because I used it as part of my Halloween decor! And because it’s now deep into fall and I used fall colors in my bunting, I’m tagging this as a fall post. BOOM.

But really, this tutorial can be adapted to work for whatever holiday or situation suits your needs.
Before I get this party started, I have to admit that I have a tendency to make things more complicated than they need to be. Well, either I’m getting lazy or I’m turning over a new leaf (get it!?) because this project is fast, easy, and cheap! And lucky for you, it’s unlikely that you too have a ridiculously long mantel, so your bunting will likely be even faster, easier, and cheaper!
Here’s how to do it:

As an Amazon Associate, I earn from qualifying purchases. This post may contain affiliate links, meaning I receive commissions for purchases made through those links, at no cost to you.
Materials
- Cardstock, matboard, cardboard, or another stiff, easy to cut material
- Ruler or Tape measure
- Pen
- Scissors
- Fabric (in various colors/patterns - I just used leftovers of festive colored fabric I had stashed away)
- Twine or another type of thick string
- Hot glue gun
Create a template
Using your cardstock/matboard/cardboard, measure 6 inches horizontally and make a line from point A to point B. Then, find the middle of that line and measure down 6.5 inches (point C). Draw a line from point A to point C. Draw another line from point B to point C. Congratulations, you just drew a triangle!

From the middle of the top line of your triangle, measure up half an inch. Draw a line 2.5 inches to the left and the right from your point (your line will be 5 inches long total).

Then connect the ends of that line to points A and points B. This step creates the flap that you’ll fold over the string when you assemble the bunting… It’ll make more sense below.

Cut out your template.

Roughly measure your mantel (or wherever you plan on hanging your bunting)
This isn’t an exact science by any means. To measure my mantel, I just took my string and draped it where I planned on hanging my bunting. Then I made sure to add a little extra string that I would use on either end to hang the bunting before I cut it.
Keep in mind that your bunting will sag a little, so don’t actually measure your mantel and cut your string to match that measurement. It’ll be too short, you’ll regret it, and you’ll end up questioning your whole existence. Totally not worth it.
Determine how many flags you need to cut
Again, not an exact science. Actually measure your string this time, not including any excess you left on the ends for hanging. Divide that by 6 and that’s about how many flags you need.
Decide on a pattern & cut your fabric
You may want to have an idea of how your finished product will look so you know how many of each flag to cut. Or, you can be like me and just start cutting out flags, see what you end up with, and THEN figure out your design.
Either way, once you’re ready to start making your flags, using your template, simply trace the flag on the backside of the fabric with a pen and cut it out. PLEASE don’t use a Sharpie for this step - it’ll bleed through. Then repeat over and over again until all your flags are cut.
While making my bunting, my daughter had a good time just cutting scraps of fabric to shreds while I did all the hard work.
Iron the flags
You’ll want to iron the flags here for two reasons: 1: You want them to hang flat and 2: You need to iron down the flap at the top that will fold over and be secured to the string.

Assemble your bunting
Once all your flags are cut and ironed, you’re ready to assemble your bunting!
For this step, I laid out all my flags facedown, put the string under the flaps, and worked my way around one by one, putting a small line of glue on the underside of the flap as close to the crease as I could. Then I moved on to the next flag and the next and the next until I was done.

Then all that’s left is to hang your up your bunting to add a little festive fall flair!

Here are some other How-To projects you may like:
Easy Step-by-Step Bunting How-To
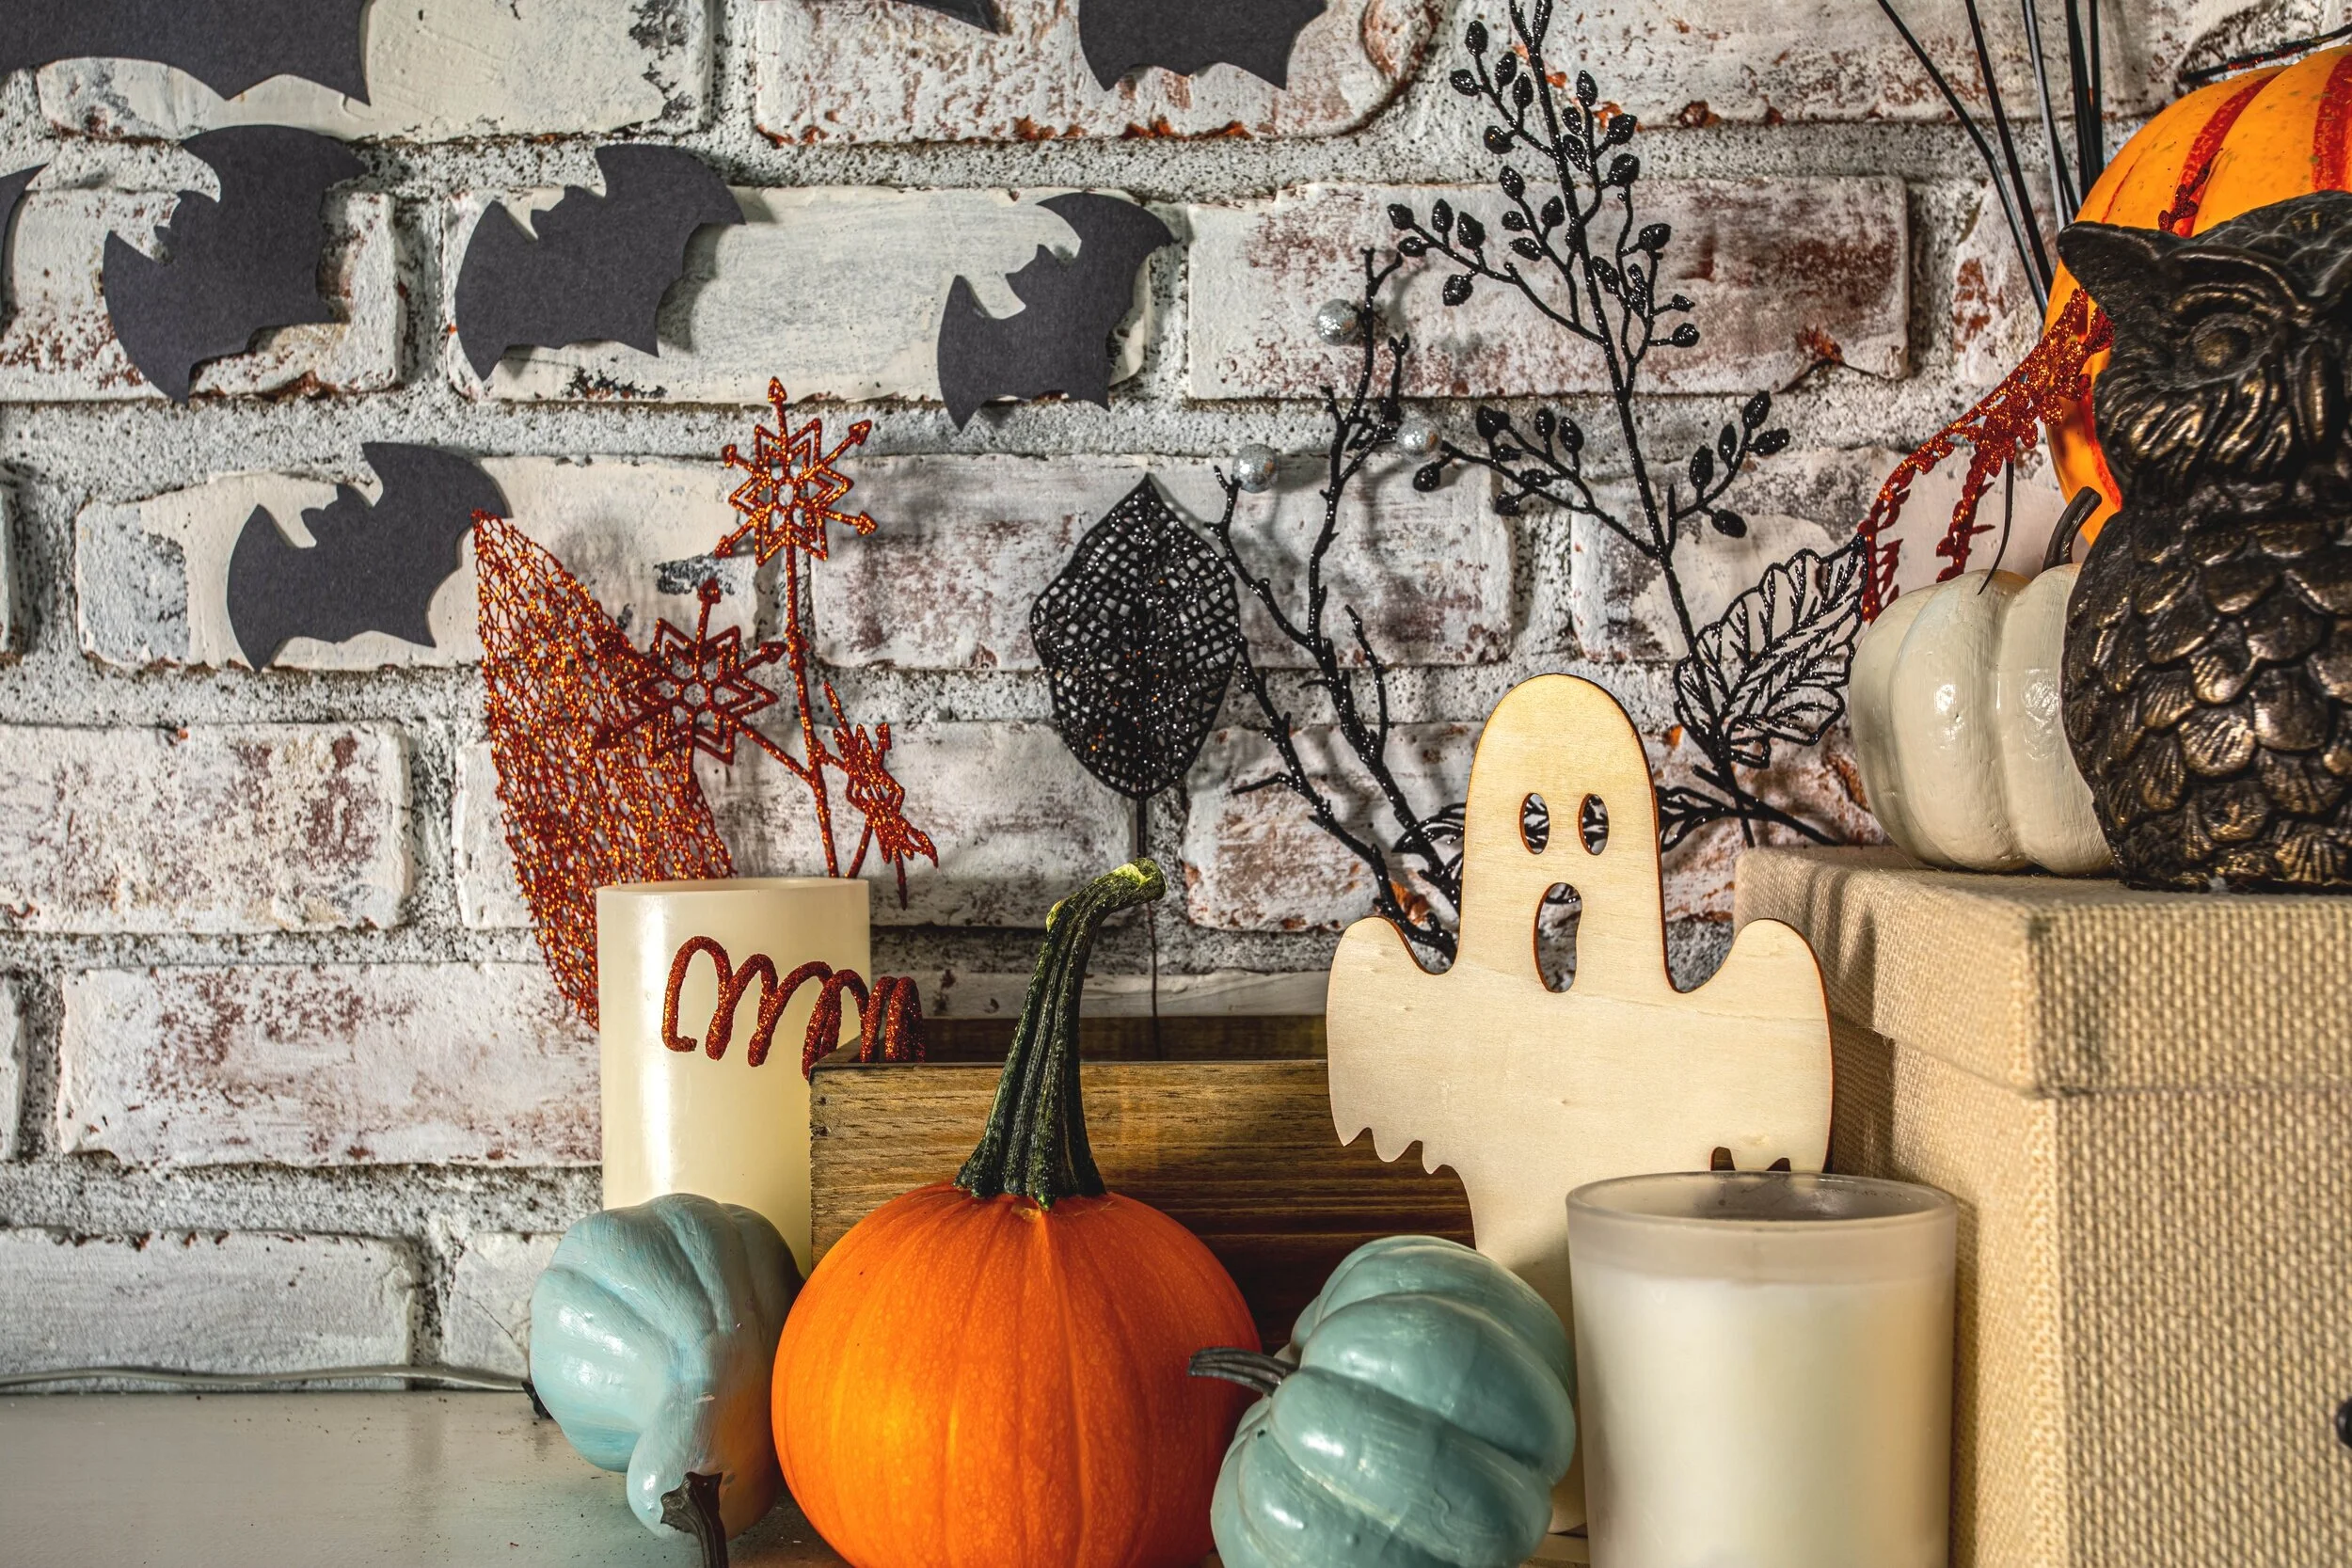
Halloween Mantel Decor on a Budget
Let me tell you, I have had a helluva time decorating my mantel for Halloween and putting this post together… because I’m cheap.
Let me explain…
How to Decorate Your Mantel for Halloween - for Cheap!
In the blogging world, this post is way overdue. Apparently, I’m “supposed” to have posted my Halloween-inspired decor posts like a month ago to give them time to spread all over the interwebs. But let me tell you, I have had a helluva time decorating my mantel for Halloween and putting this post together… because I’m cheap.
Let me explain…

A couple of months ago, I didn’t own a single Halloween decor item. Seriously!
Being my frugal self, I have a hard time spending money on nonfunctional items. And other than Christmas, I don’t get too excited about many holidays. But between feeling the pressure from the blogging world, not to mention my 4-year-old who is PUMPED UP about Halloween, I caved and bought a bunch of decorations, but I didn’t break the bank!
Let’s Go Shopping!
I knew I had to throw something together for Halloween, so being inspired by the craftiness of other bloggers, and the frugalness of my wallet, I headed on over to Dollar Tree and grabbed a bunch of cheap decorations - pumpkins, gourds, wooden ghosts, more pumpkins, flowers, leaf garlands, and more. I also made a pit stop at Wal-Mart for some larger pumpkins to add more interest since Dollar Tree really only carries smaller pumpkins. At Wally World, I also found some Halloween-inspired bouquet fillers for about $1 each so I grabbed those too.
Now that I had my decor items, I was honestly feeling overwhelmed with how to make the hodgepodge of decorations I bought work together. You see, while I was shopping, I didn’t really have a vision for what the end product would look like. But I did know one thing, some of the decor wasn’t quite my style.
Tweaking My Decorations
I wouldn’t necessarily consider myself a hoarder, but when it comes to paint and crafting supplies, I have a REALLY hard time letting go. That’s probably how I ended up with all these paint samples.

I’d been hoping to find some way to make use of all the paint samples I’ve collected, and this was a great opportunity! All over Pinterest, I’ve seen other folks painting their Dollar Tree pumpkins, and rightfully so because those things are insanely bright. So I figured, why not? Let’s give it a whirl…
My daughters and I spent a nice evening painting - my older daughter and I painted pumpkins and gourds together while she regaled me with tales from the playground and my younger daughter painted herself. The best part about using paint samples I already had on hand was that they’re colors I love and already use in my house, so they effortlessly look like they belong.
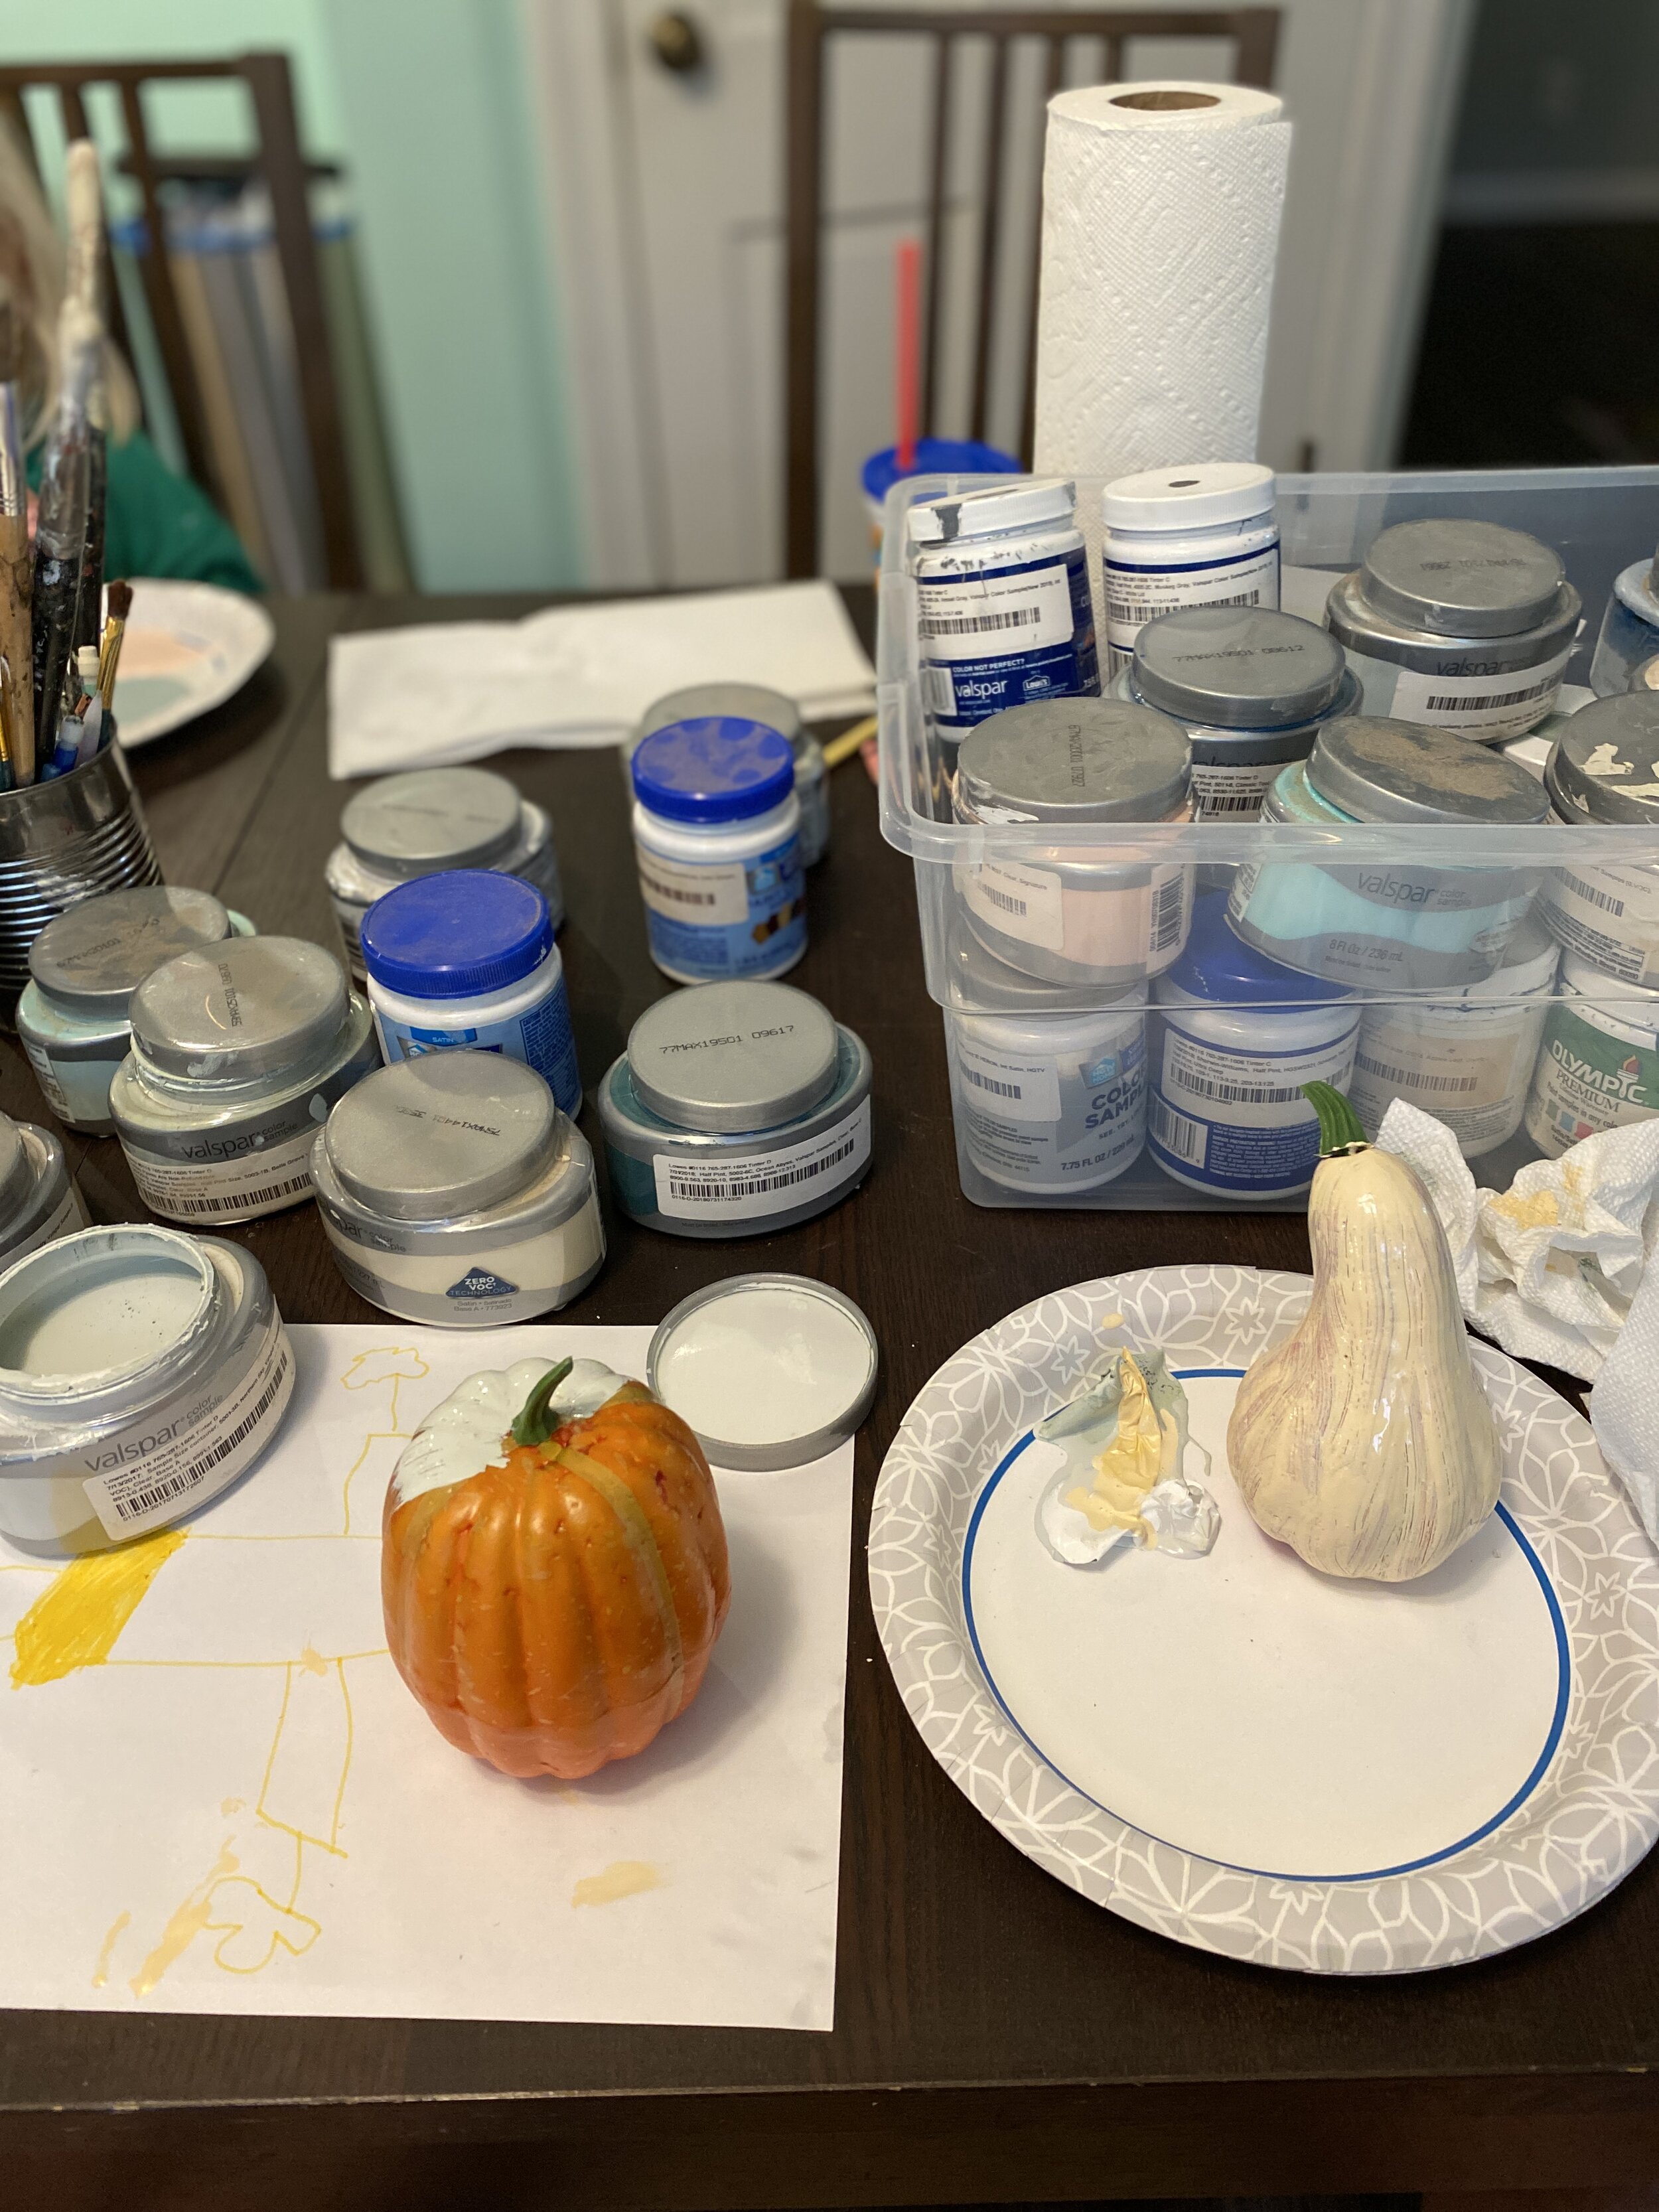
As for my daughter’s pumpkins, I gave her just a few colors to choose from so her pumpkins didn’t end up looking like they were dipped in mud. Then I conveniently arranged them together in a little grouping by themselves in the other room. (That sounds terrible… but it’s the truth.) And don’t worry, my younger daughter had non-toxic finger paints.
Once I modified my pumpkins, I was feeling more confident in my purchases. Here’s how I put it all together:
How I Decorated My Mantel for Halloween
Our mantel is abnormally large. It spans the whole wall! Plopping decor items all along the mantel like I did initially looked crazy busy. I actually wish I had snapped a picture of the hodgepodge of decorations I threw up on the mantel before I took them down and started giving it some actual thought because it was a HOT MESS. I ended up mimicking how I typically decorate this mantel and created groupings on either end.
Normally, I like to keep the groupings on the mantel pretty minimal, but that just didn’t look right to me in this case. I think it was because I had mostly small items that looked insignificant when there were only a few. So, I threw out my own rules, grabbed a whole bunch of my decorations, and put together some spooky little dynamic scenes on each end.

First, to give the larger pumpkins some height, I stacked them on random items that would lift them up juuust enough. I think I used a bowl to lift up one pumpkin and a candle for the other. I already mentioned above that my daughter and I painted the smaller pumpkins and gourds. I used those to hide the items that were raising the larger pumpkins and to add some variety.
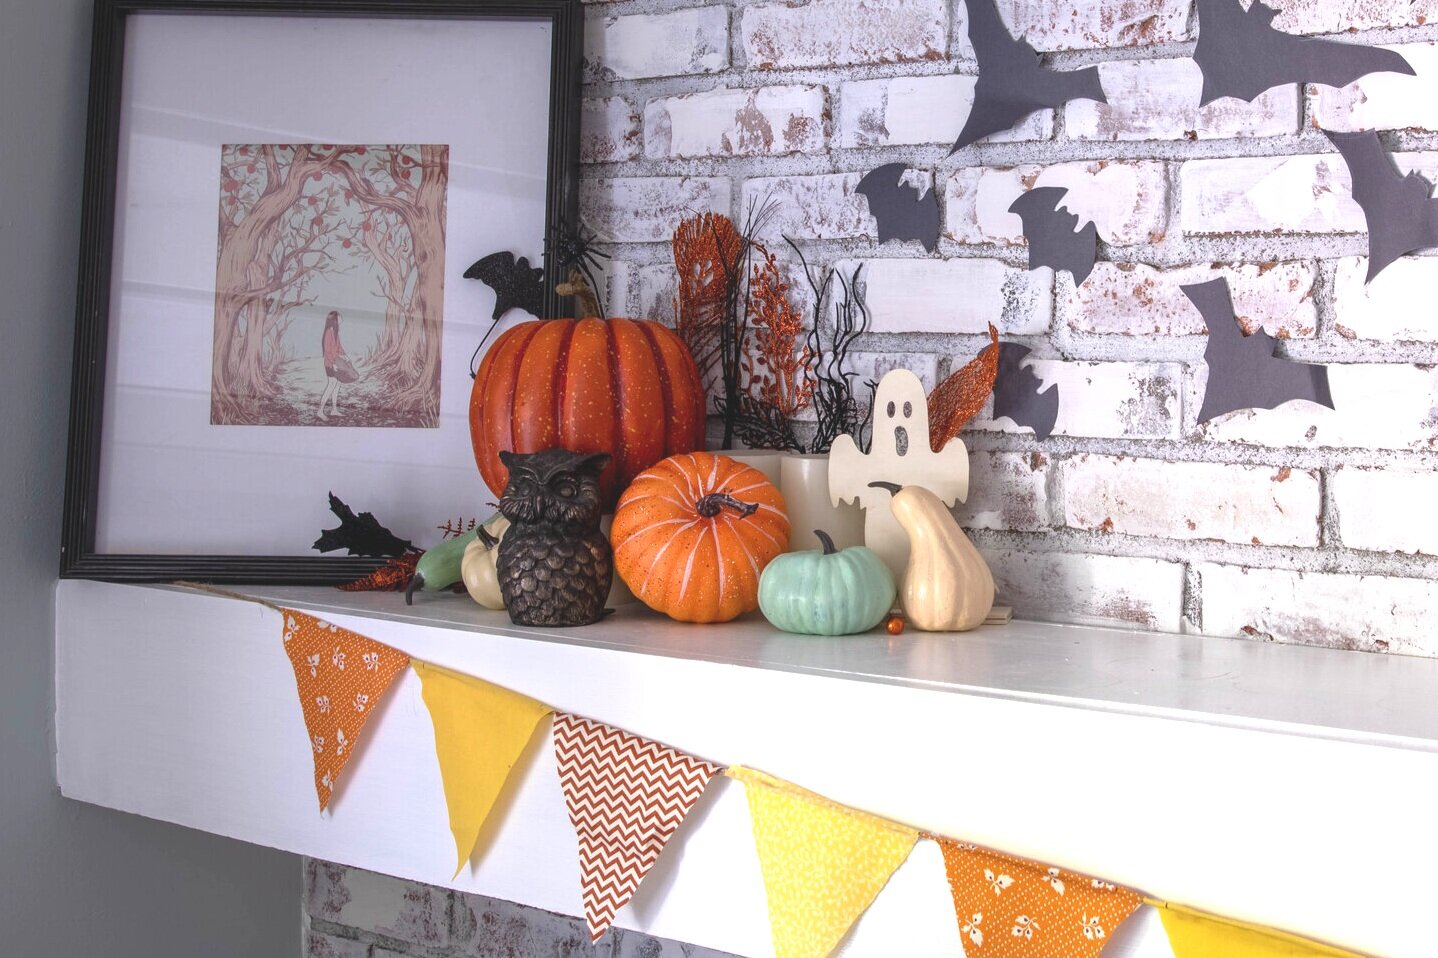
Next, I plopped on cute wooden little ghosts I grabbed from The Dollar Tree on each end of the mantel. I thought about painting them white, but I actually really like the blonde wood so I left them as is. I also used the smaller pumpkins to hide the base of the ghosts.
To add a spooky backdrop, I took the Halloween bouquet fillers that I bought, broke them apart, and spread them out behind the scenes I created. I also shopped around my house and grabbed some other things I already had - like some fake candles and my owl bookends that seemed to fit the theme.

As an Amazon Associate, I earn from qualifying purchases. This post may contain affiliate links, meaning I receive commissions for purchases made through those links, at no cost to you.
Then, there are the bats. THE BATS!
I think the bats are really the icing on the cake and they were probably the easiest and most enjoyable part of this little project. I took another opportunity to involve the kids in this project by drawing and cutting out bats while they colored and cut their own shapes and designs.
I LOVE how the bats add so much movement and really bump up the spook factor. (Admittedly, I bogarted all the black construction paper, but the kids didn’t seem to mind.)
If you don’t want to make your own bats, you can buy packs of them in all different sizes!

Lastly, there’s the bunting that I recently made. The bunting is cheap, easy, and completely customizable. I love how it visually links each end of the mantel, and I’ll be sure to share a tutorial on how to make your own soon.
There are a million other options for garland, lights, or something else I could have hung across the front of the mantel. And you know what? I’m kind of excited to brainstorm and see what I can come up with next year.
One thing to note is that I purposefully didn’t decorate at the base of the fireplace. In case you didn’t pick up on the fact that I have a mischievous little one, I most definitely do. And my mom-brain can’t stop picturing her pulling a giant pumpkin on herself or dragging smaller pumpkins throughout the house. Maybe in a couple of years, I’ll consider mixing it up and adding some decor within the her reach, but for now, I’m good with sticking to keep the decorations up high.

Final Thoughts
This honestly wasn’t a project I was really looking forward to. But once I stopped procrastinating and started putting my Halloween mantel design together, I started to have some fun. I can’t say exactly how much I spent because I didn’t use all the decor I bought and I shopped around my own house for some of it, but I guesstimate it was less than 50 bones (couldn’t help the Halloween pun there)!
So there you have it! It took me way too long to get my butt in gear and decorate, but I’m happy that I did - and the kids are pretty pumped too. I’m loving how switching up the decor is shaking up the every day just a little and really getting us in the spirit. I’m almost willing to say I’m excited to decorate for Christmas. We’ll see…

Related Mantel Decor Posts
Cheap Halloween Mantel Decor

Modern Dining Room Reveal
It’s done! It’s done! The dining room makeover is done!
If you’ve been following along, you saw last’s week post where I shared the accent wall we installed in our dining room. Well, as I was writing that post, I was working on putting the dining room back together for the grand reveal. It took a TON of restraint to not share a million sneak peeks, but I kept my trap shut and now I’m so excited that I can share it with the world!
Dining Room Makeover - Before and After
It’s done! It’s done! The dining room makeover is done!
If you’ve been following along, you saw last’s week post where I shared the accent wall we installed in our dining room.
Well, as I was writing that post, I was working on putting the dining room back together for the grand reveal. It took a TON of restraint to not share a million sneak peeks, but I kept my trap shut and now I’m so excited that I can share it with the world!

If you recall, our dining room looked quite a bit different when we bought our house last year.

Here’s a shot from the other doorway.

And here’s how it looks today.

When we moved in, the dining room was definitely not our style. In fact, it didn’t even seem like it was a part of the rest of the house! It had a mind of its own, with its bright yellow faux finish walls and deep red and gold border. Not to mention the ornate chandelier you see in the pictures above.
The doorway leading to the kitchen definitely wasn’t doing this room any favors either. It was the size of an average doorway but made the dining room feel needlessly closed off from the kitchen, so we took matters into our own hands.
We removed just about everything from this room and started from scratch - including stripping wallpaper, replacing the trim and crown molding, and widening that doorway (on a whim!) so it now spans 8 feet!


Then, after much deliberation, I finally chose a paint color and we installed our accent wall.
But of course, those steps were just the big pieces of the makeover. The icing on the cake and what makes a room really come together is the decor!
I made a whole bunch of mood boards during this overhaul to help get an idea of the direction I wanted to go with the decor (and because I just couldn’t help myself and wanted to see ALL the options). We ended up going with this design:

As a side note, I’m really just getting my feet wet with making mood boards, and I’M OBSESSED. They’re a fantastic and no-risk way to visualize a space in a ton of different ways. Why has it taken me so long to start making these!?
Plus, seeing the out of proportion design above compared to the real-life example below cracks me up. 10/10 would do again.

As an Amazon Associate, I earn from qualifying purchases. This post may contain affiliate links, meaning I receive commissions for purchases made through those links, at no cost to you.
Now… back to the decor! Let’s take a little tour, shall we?
Obviously, our dining room table made it back into the room… that was a no-brainer since it’s pretty new. But honestly, the table and the curtains are the only things that didn’t change!
One of the biggest changes was adding our new area rug. Since the table and chairs are a darkish color and the flooring is super dark, the rug really helped brighten things up. Plus, it added some more interest to the room with the blues, greens, and orange going on in the design.

Another big change is the new light fixture. We switched out the fancy pants chandelier with something more modern and in line with the style we were going for. It took about 3 tries to get the right light bulbs, but now that it’s completely installed I’m in love!

I mentioned at the start of this makeover that I planned on switching out the old buffet table with my IKEA Malm dresser… and I’m happy to report that I followed through and am pleased with how it’s working in the space. The only downside is that now all my clothes are hanging out on the floor of my office until we build my new closet in the master bedroom, ha!

Other changes you’ll notice in our new and improved dining room is artwork! Two of the pictures are simply pages from newspapers we found in the attic of our last house.
This one is from when the first Star Wars was in theaters.

And I’m fascinated by this one because of how cheap paint was!

Plus, it has this little section that makes me laugh.

We also threw some watercolors I painted in here. The colors tie in nicely with the accent wall and the direction I’m going with the rest of the house. I painted these before I got brave and started buying real plants. Perhaps I was living vicariously through my paintings, hoping that they could replace having real plants before I was brave enough to start buying real plants? (Answer: they couldn’t)


Anywho - that’s the dining room!
A complete 180 from where this room started and I am so happy for that fact.

There are still a few finishing touches I want to add because really, is a room EVER completely done? (No, it’s not.) But the finishing touches are minor - like adding leather pulls to the dresser, maybe switching out the white picture frames for something gold or brass, changing the pot of the hanging plant, and possibly adding another largish plant in one of the empty corners.
In the meantime, I’m thrilled with how this room turned out. Unfortunately, a lot of the rest of the house is still a hot mess at the moment. I shared on Instagram not too long ago that I removed all the cabinet doors in the kitchen so I can start painting those, obviously we’re deep in our master suite reno and therefore have been displaced to the loft, and half of my office still needs furniture, along with so many other incomplete spaces in the house.
That being said, we’re taking solace in the fact that even though the dining room is upstaging the rest of the house, at least we don’t have anything pressing left to do in there to make it functional and beautiful. Now we can pivot back to some of our other unfinished spaces - stay tuned!

Related Dining Room Renovation Posts
Modern Dining Room Makeover

DIY Geometric Wood Accent Wall
Well, we finally did it. Our geometric wood accent wall is complete and I’M SO IN LOVE WITH IT! In fact, I love the finished product so much, I wrote a tutorial about it! (Surprise, surprise).
How to Create a Modern Wood Feature Wall
Well, we finally did it. Our geometric wood accent wall is complete and I’M SO IN LOVE WITH IT!
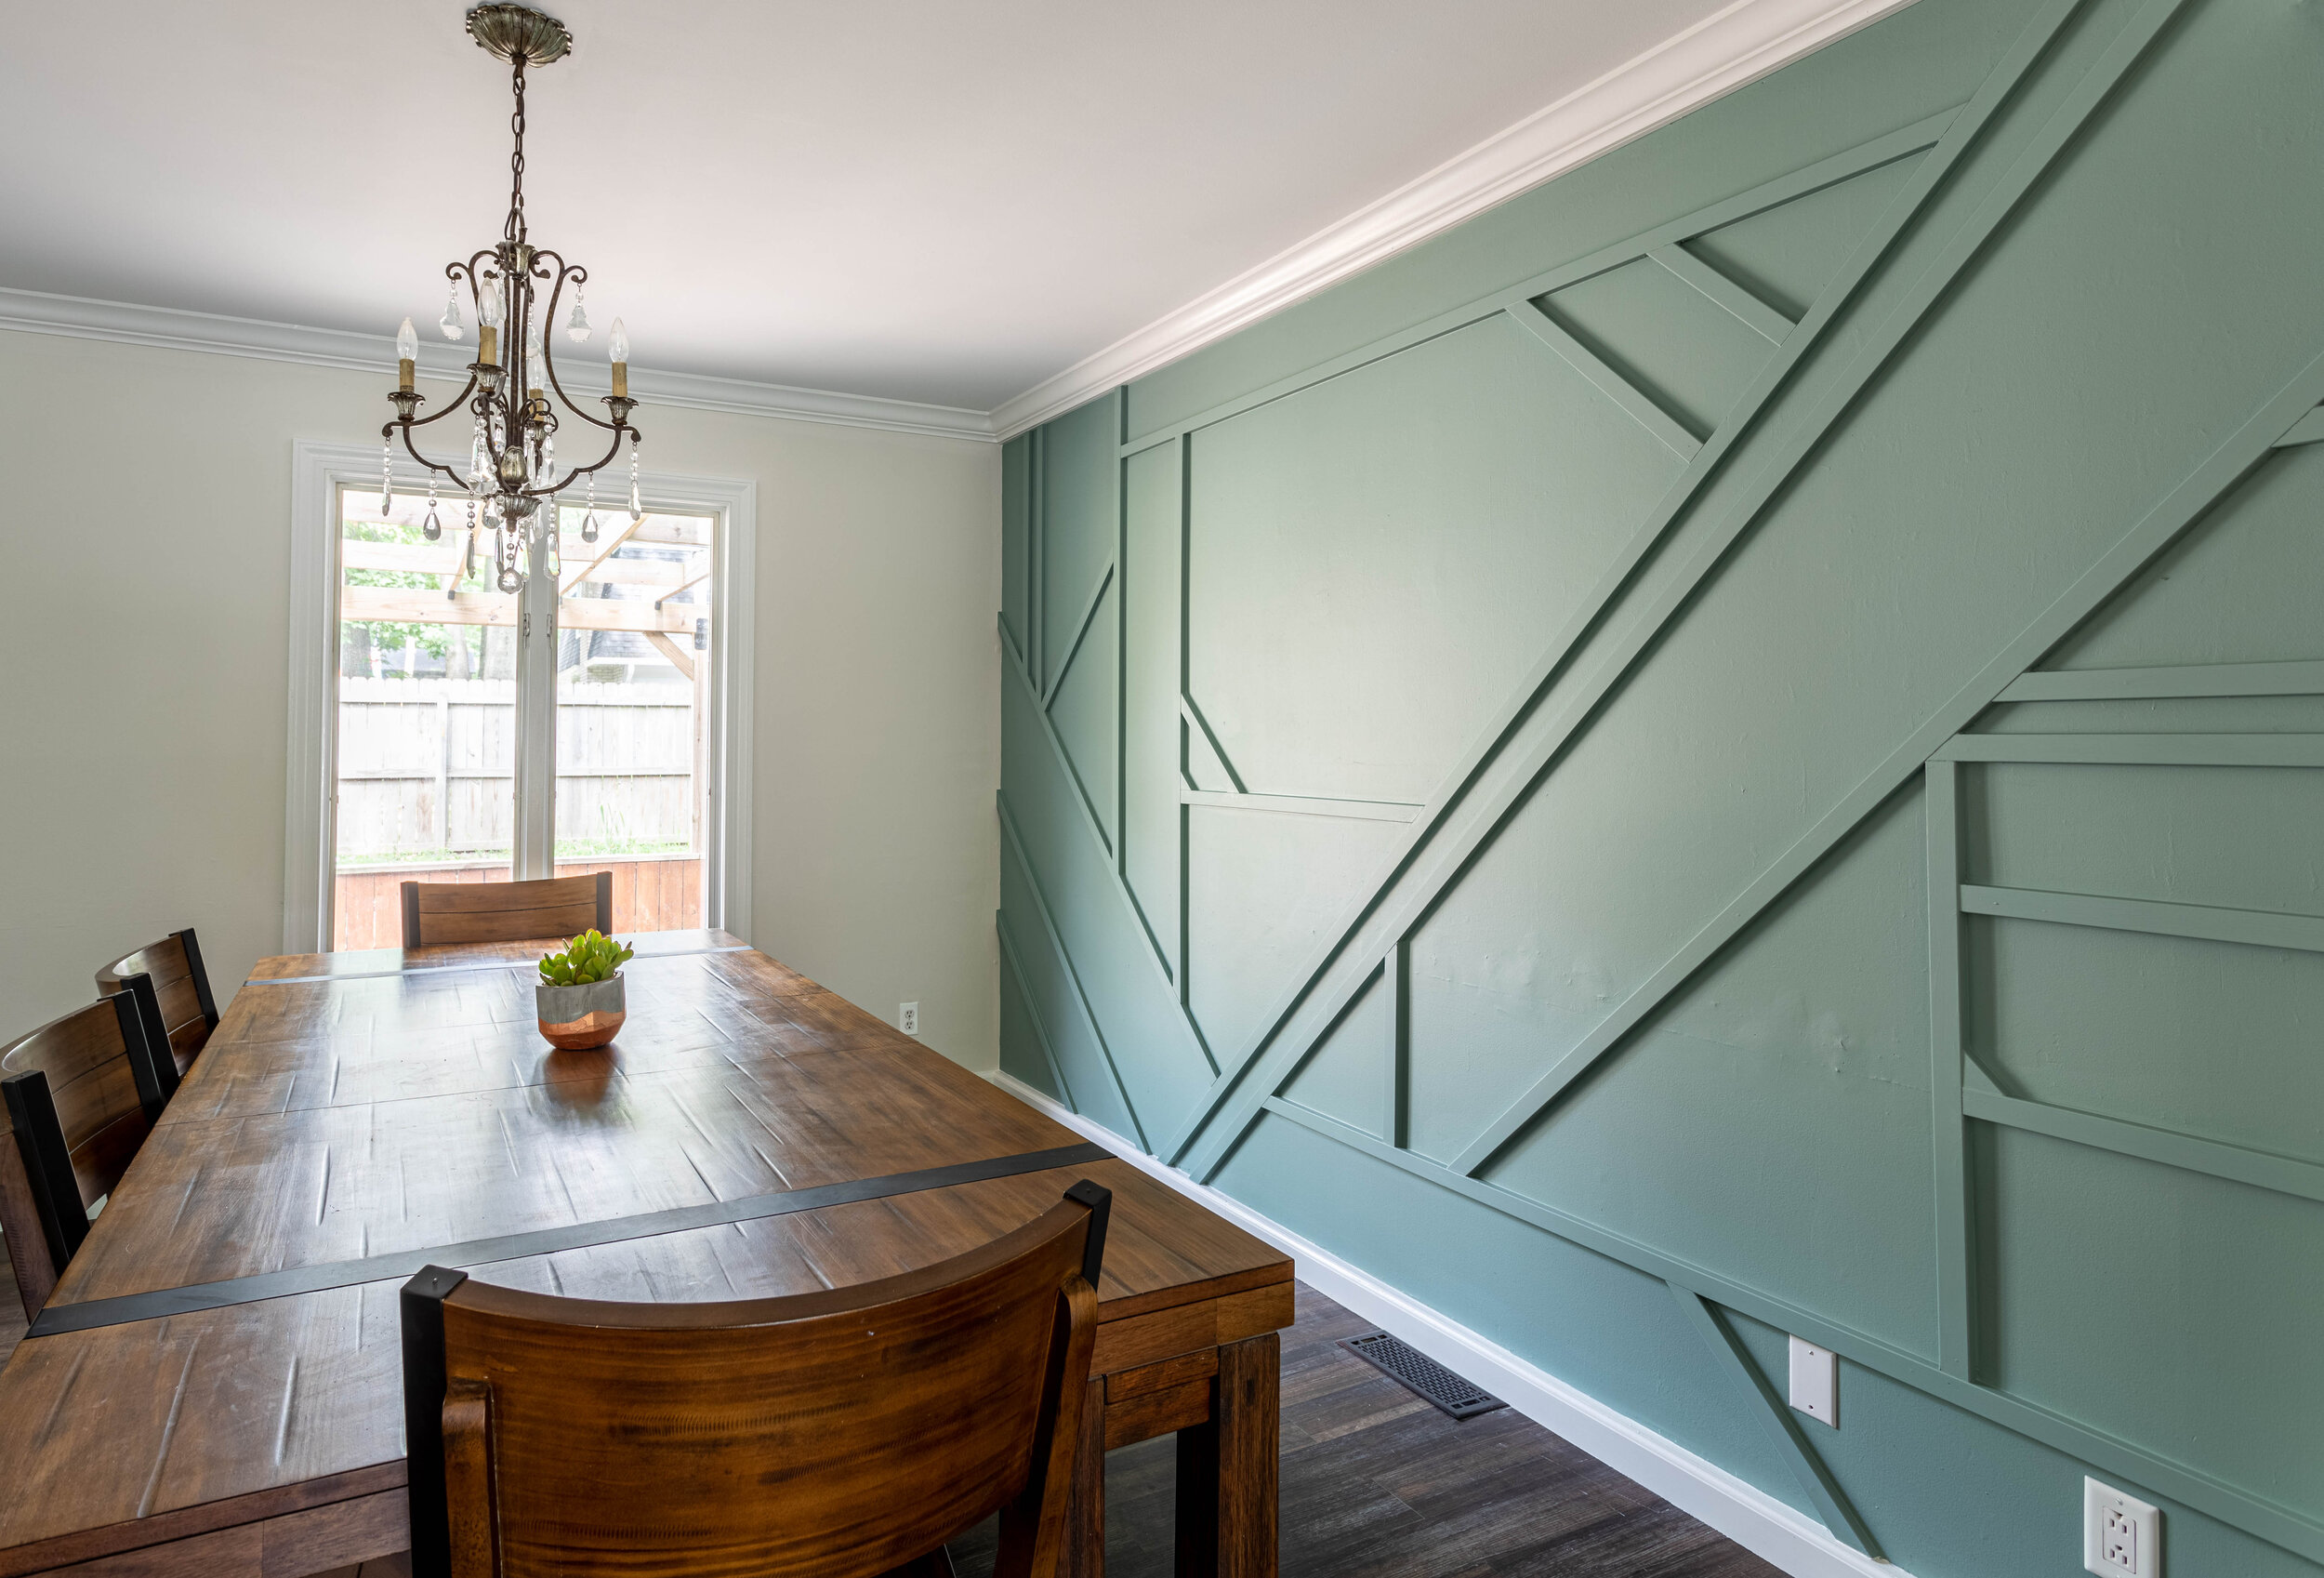
Waaaayyyy back in March, I started renovating our dining room. I was completely inspired by the accent wall Liz over at Within the Grove created and just knew I had to give it a whirl. And heck - I had nothing to lose considering what we started with!

But because we seriously lack focus as far as home renovations go, we got distracted working on my home office redesign, finishing the flip, and… what else?
Oh yeah, completely demolishing our master suite.
But FINALLY, we were able to take a little bit of time, find some childcare (toddlers and nail guns don’t mix - who knew!?), and put this wall up in just a couple of hours! Easy peasy. Then I just had to caulk and paint and now I spend most of my time gazing lovingly at it. I mean, wouldn’t you!?

In fact, I love the finished product so much, I wrote a tutorial about it! (Surprise, surprise). Here’s how I created my geometric wood accent wall:
Materials
As an Amazon Associate, I earn from qualifying purchases. This post may contain affiliate links, meaning I receive commissions for purchases made through those links, at no cost to you.
- Primed 1 x 2 MDF boards (the amount you need will vary based on your design)
- Brad nail gun
- Nails
- Paint
- Paintbrush
- Craft brush
- Paintable caulk
- Wood Putty
- Sandpaper
- Miter saw
- Level
Draft the Design of your Accent Wall
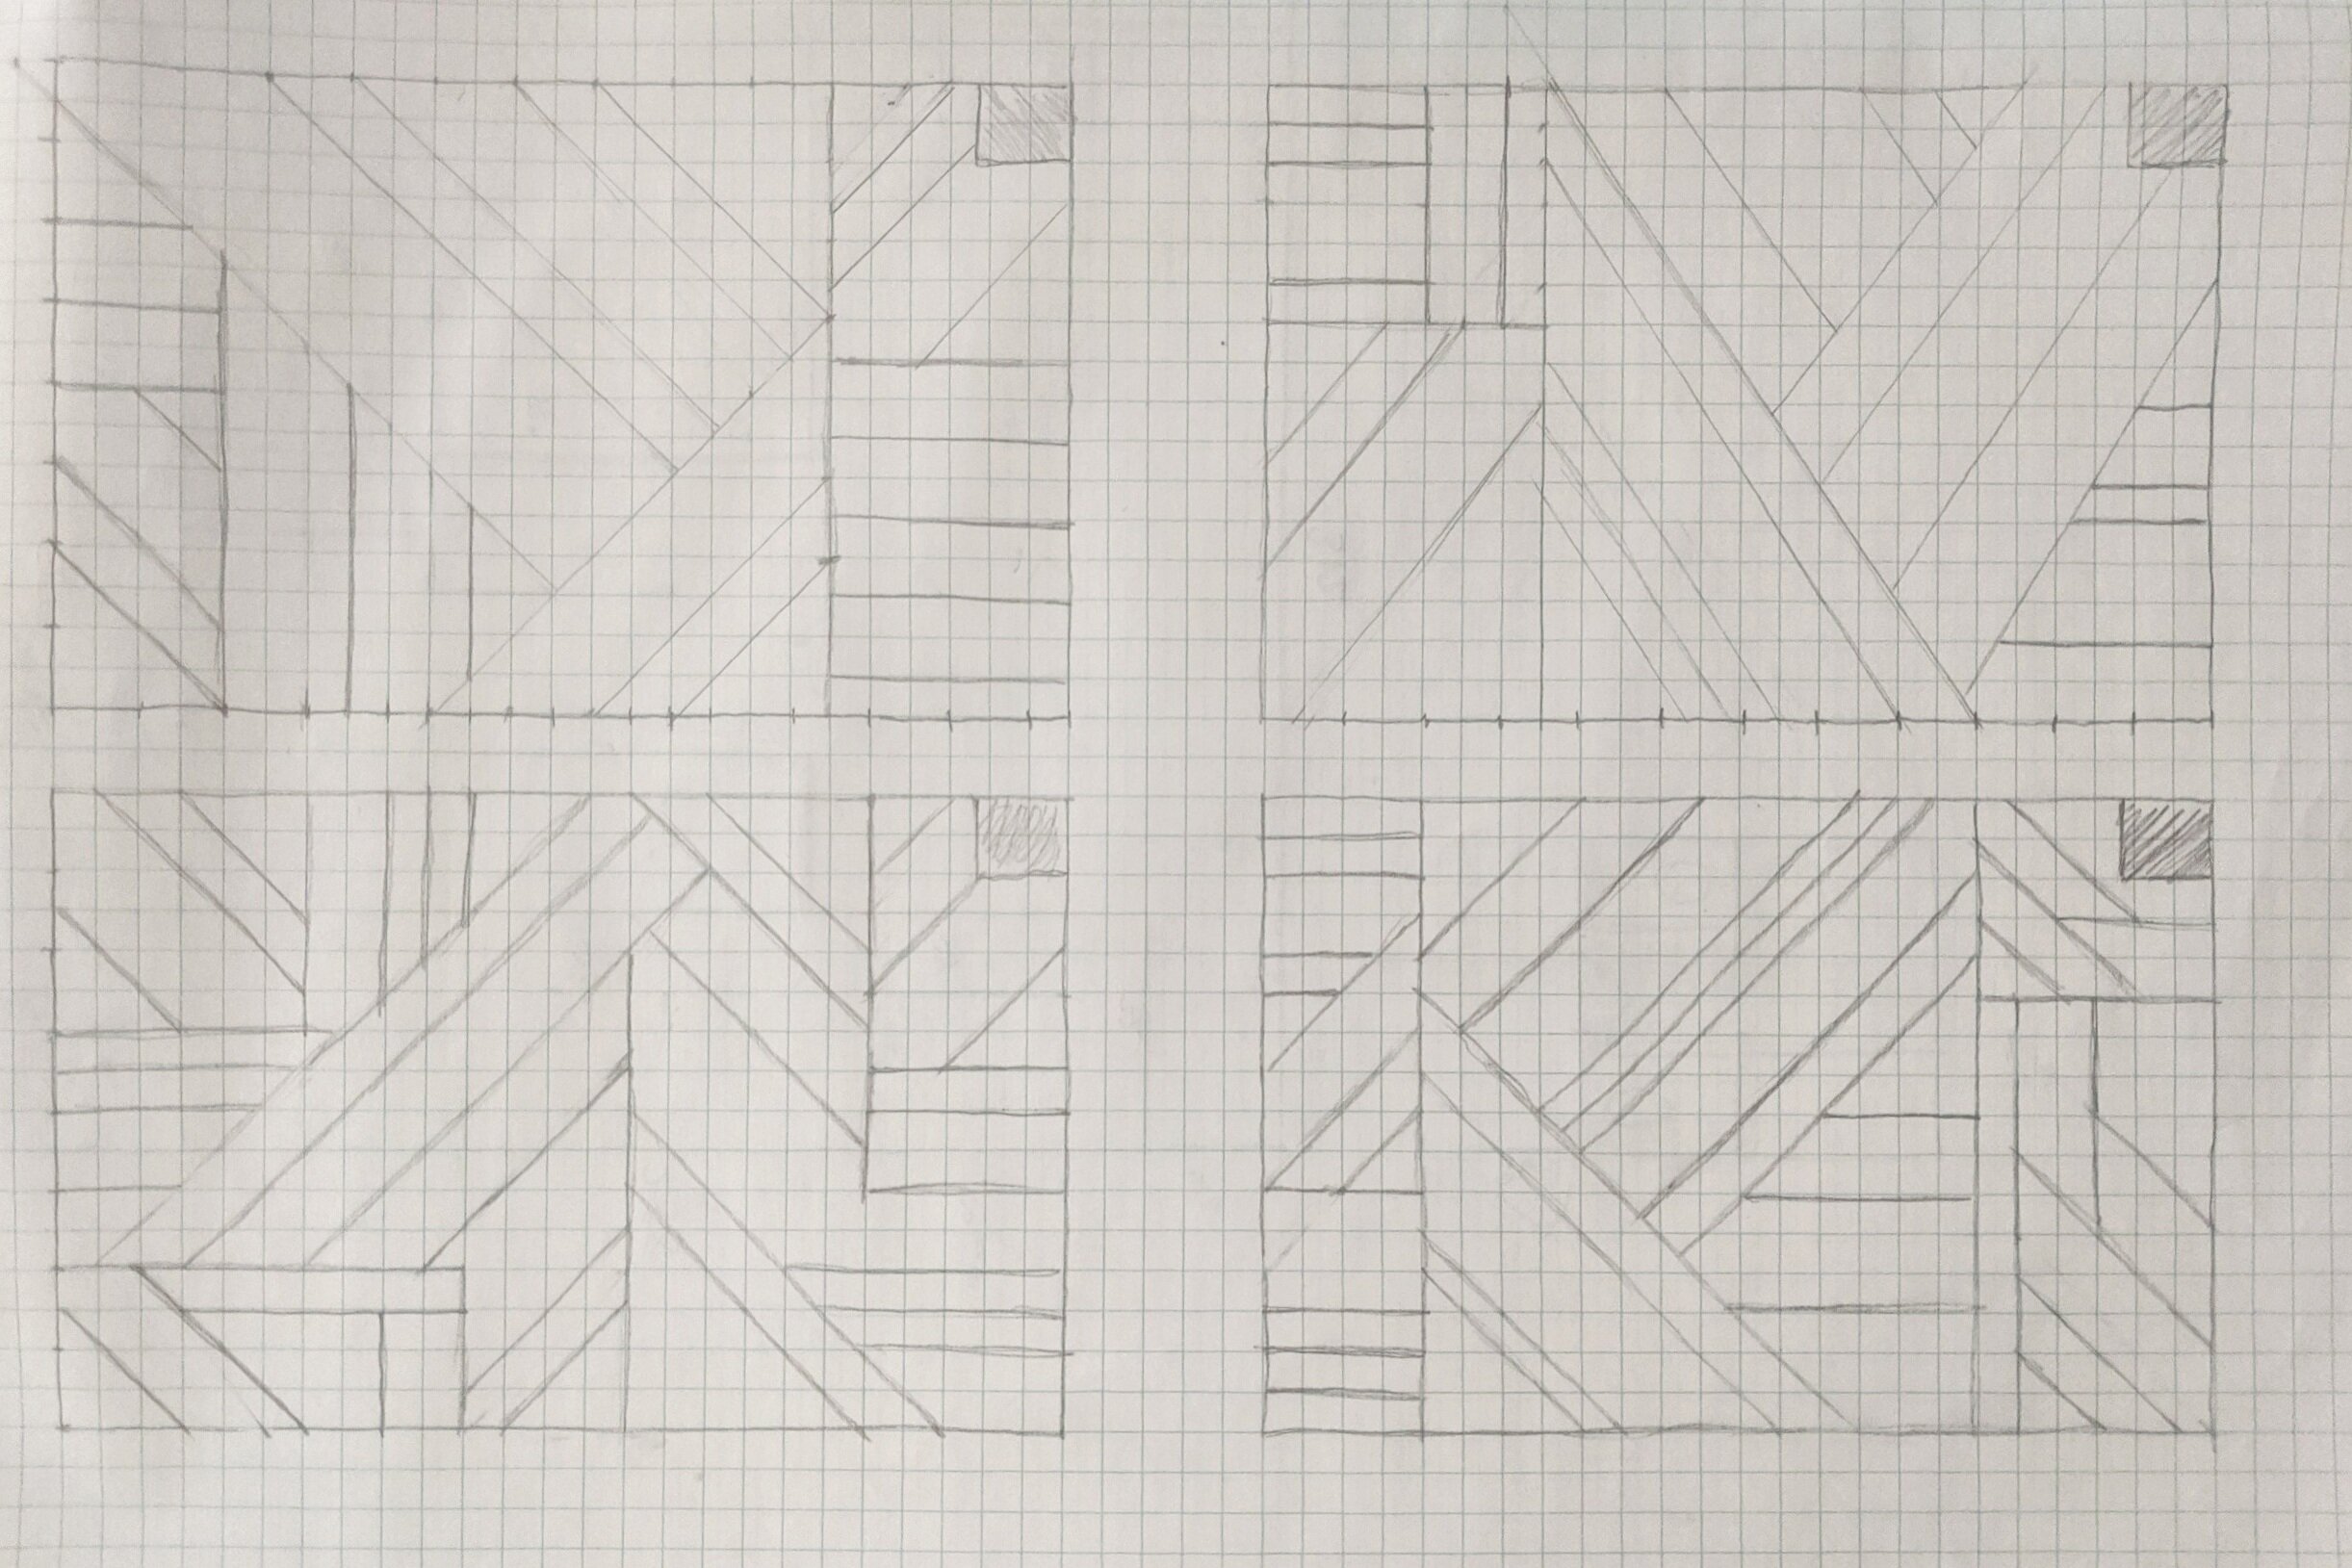
First things first, I started by drafting up a bunch of designs using graph paper. I initially drafted 4 designs and didn’t fall in love with any of them. Then I drafted 4 more. And you know what? I actually didn’t use anything I mocked up!
HOWEVER, I still think this step is important because it gave me an idea of what I definitely did and didn’t want to include in my final design.
Optional Step - Bump Out Your Crown Molding and Baseboards
This step is definitely not required, but I’m really happy we did it.
Since our crown molding and baseboards taper off on the edges, Lucius and I were concerned about how it would look where the MDF boards met up with them. Below is an example of what I’m talking about.

You see how the MDF sticks out further than the baseboard? We wanted a smoother transition. And since we were taking some of the trim off anyway to open the doorway, we just took it all down. Then on the accent wall, we put a piece of MDF up and placed the trim on top of that.

Paint
Once we had the trim finished, I painted the accent wall. This will save you time once your accent wall is installed.
My wall is Desert Lake by Sherwin Williams in an eggshell finish.
Install Your Accent Wall
Once the paint is dry, it’s time to install your accent wall! Here are a couple of tips to get you started:
Stick with 45 and 90-degree angles
Have an extra pair of hands available (especially when it comes to leveling/nailing the long boards)
From drafting a bunch of designs, I knew I wanted one long section that went from the bottom left to the top right, so that’s where we started. This also happened to be the longest section and was the trickiest to level and nail.
And honestly, from there we just held up boards at different angles and with various spacing to see what looked and felt right. Then we leveled and nailed as we went - even using some of our scraps as filler pieces!
Once we got into a groove, the install went by really fast and ended up being a really fun project.
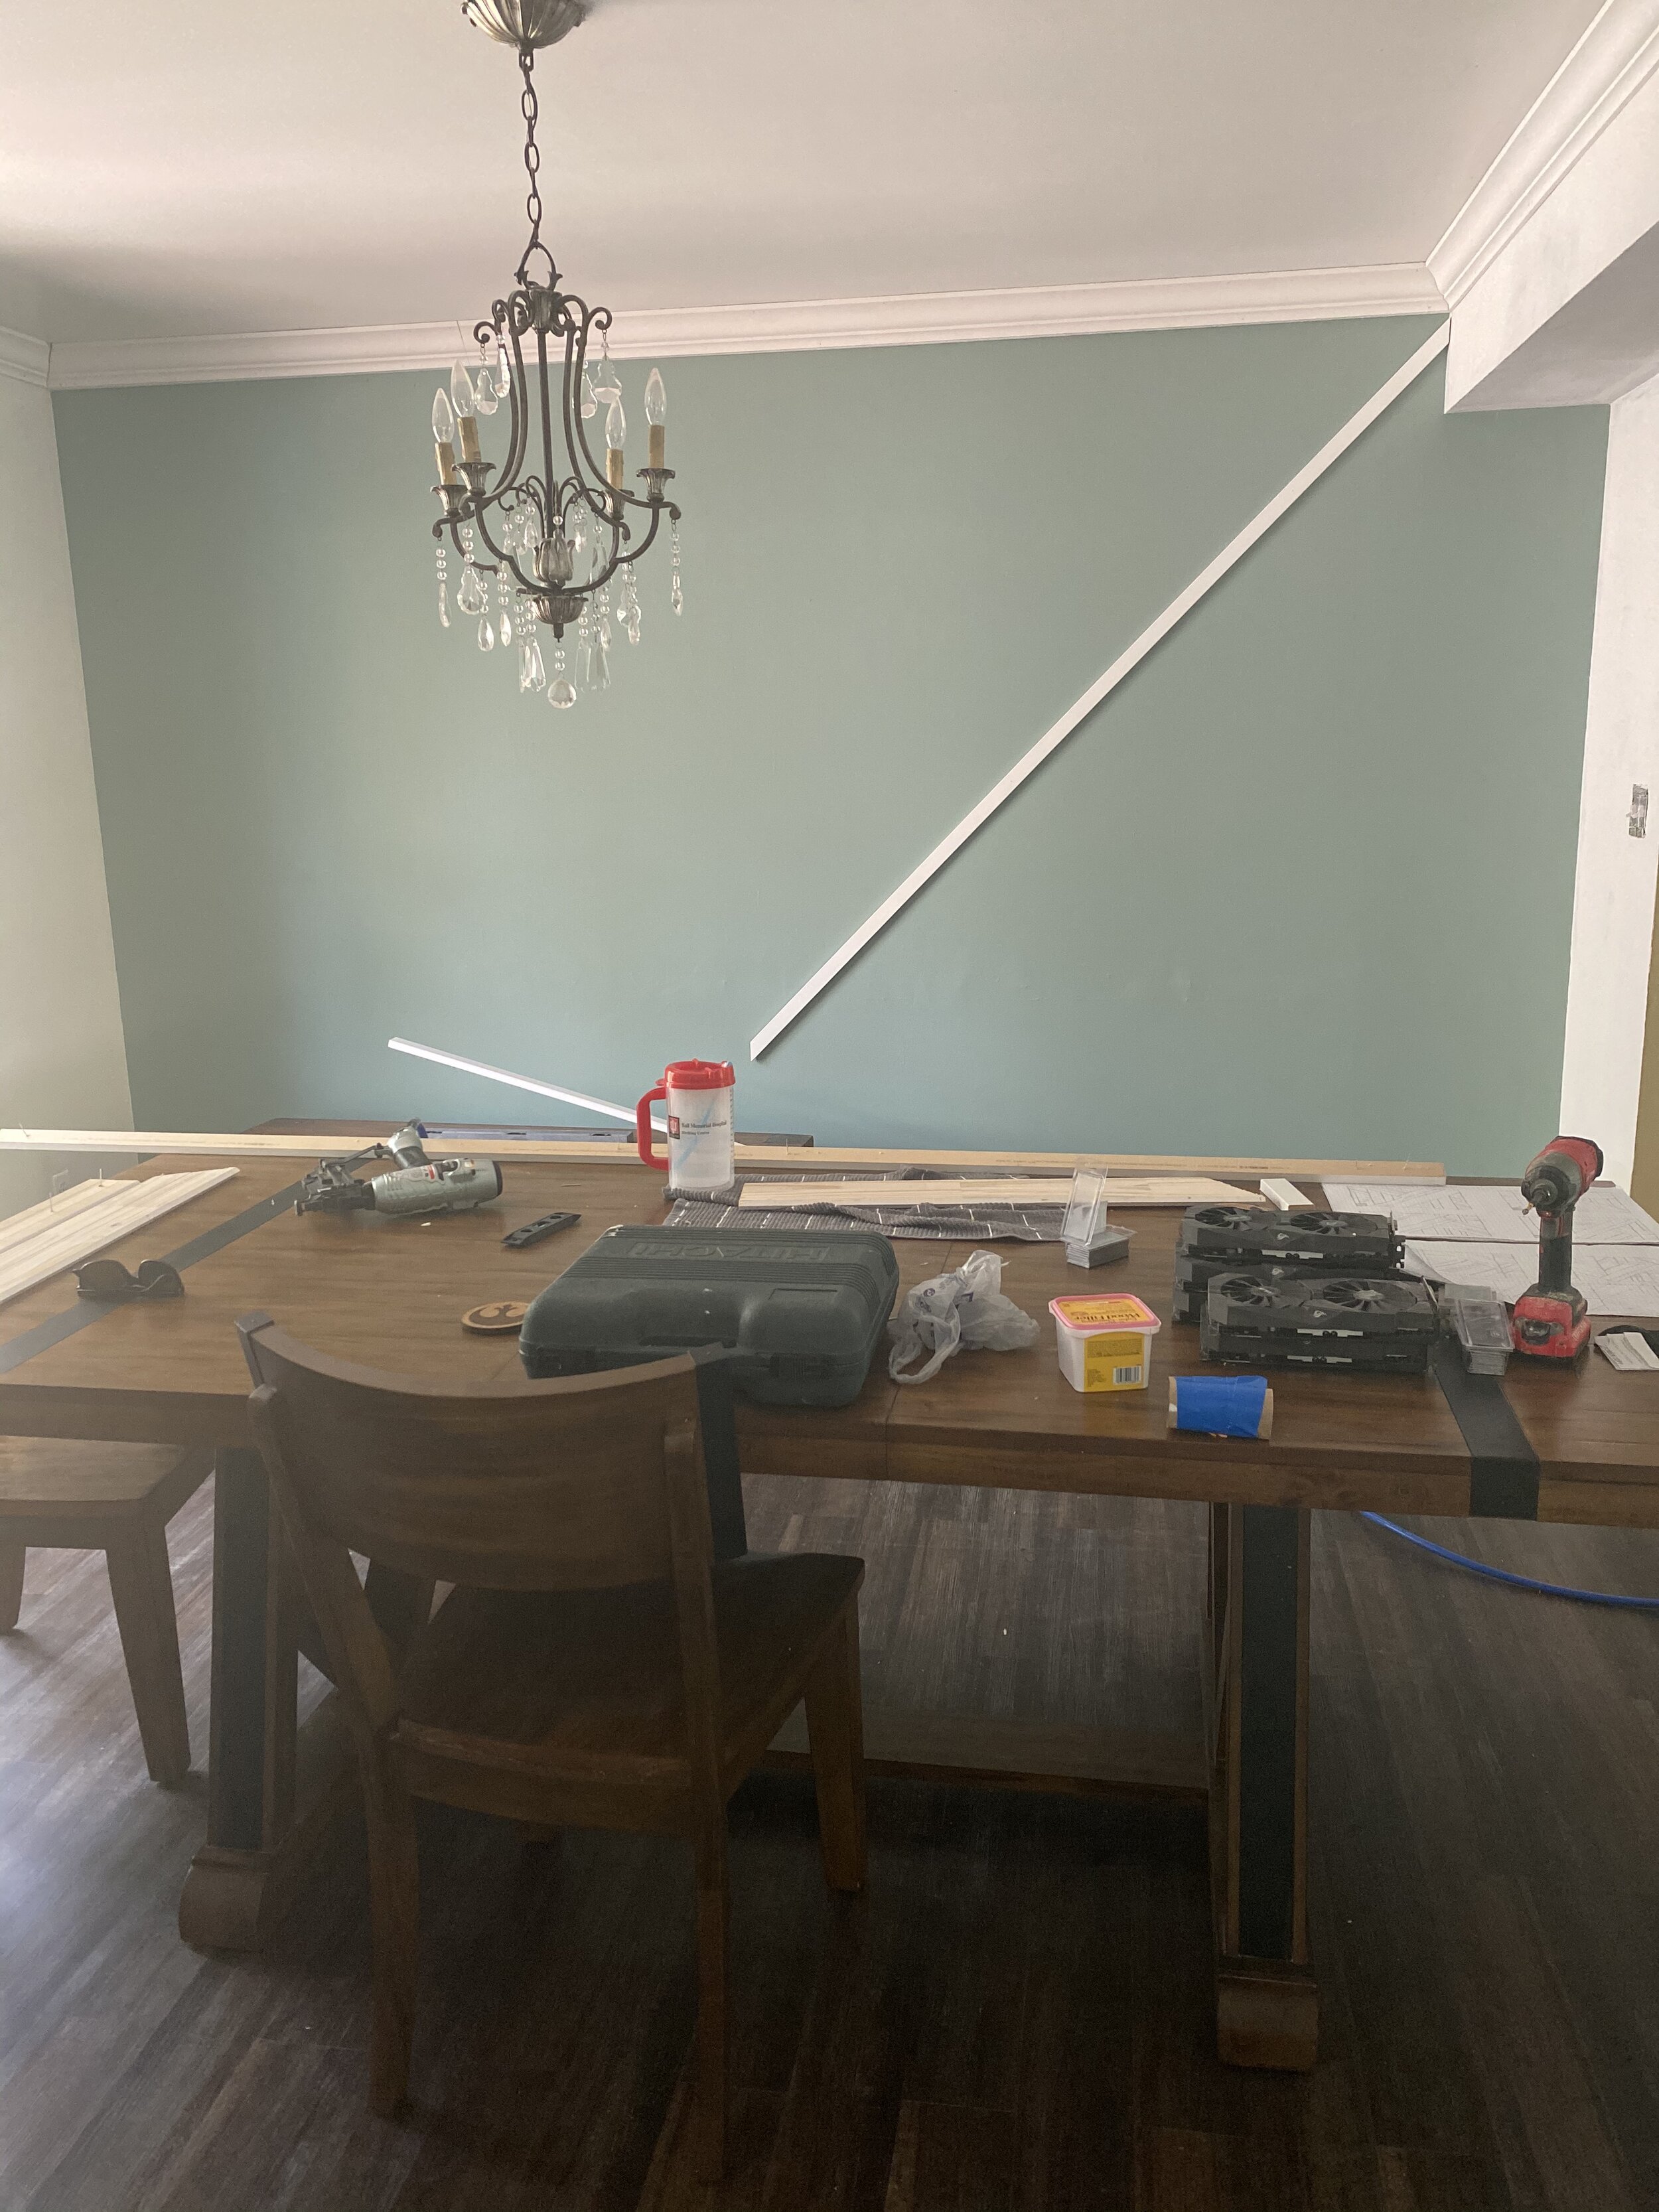
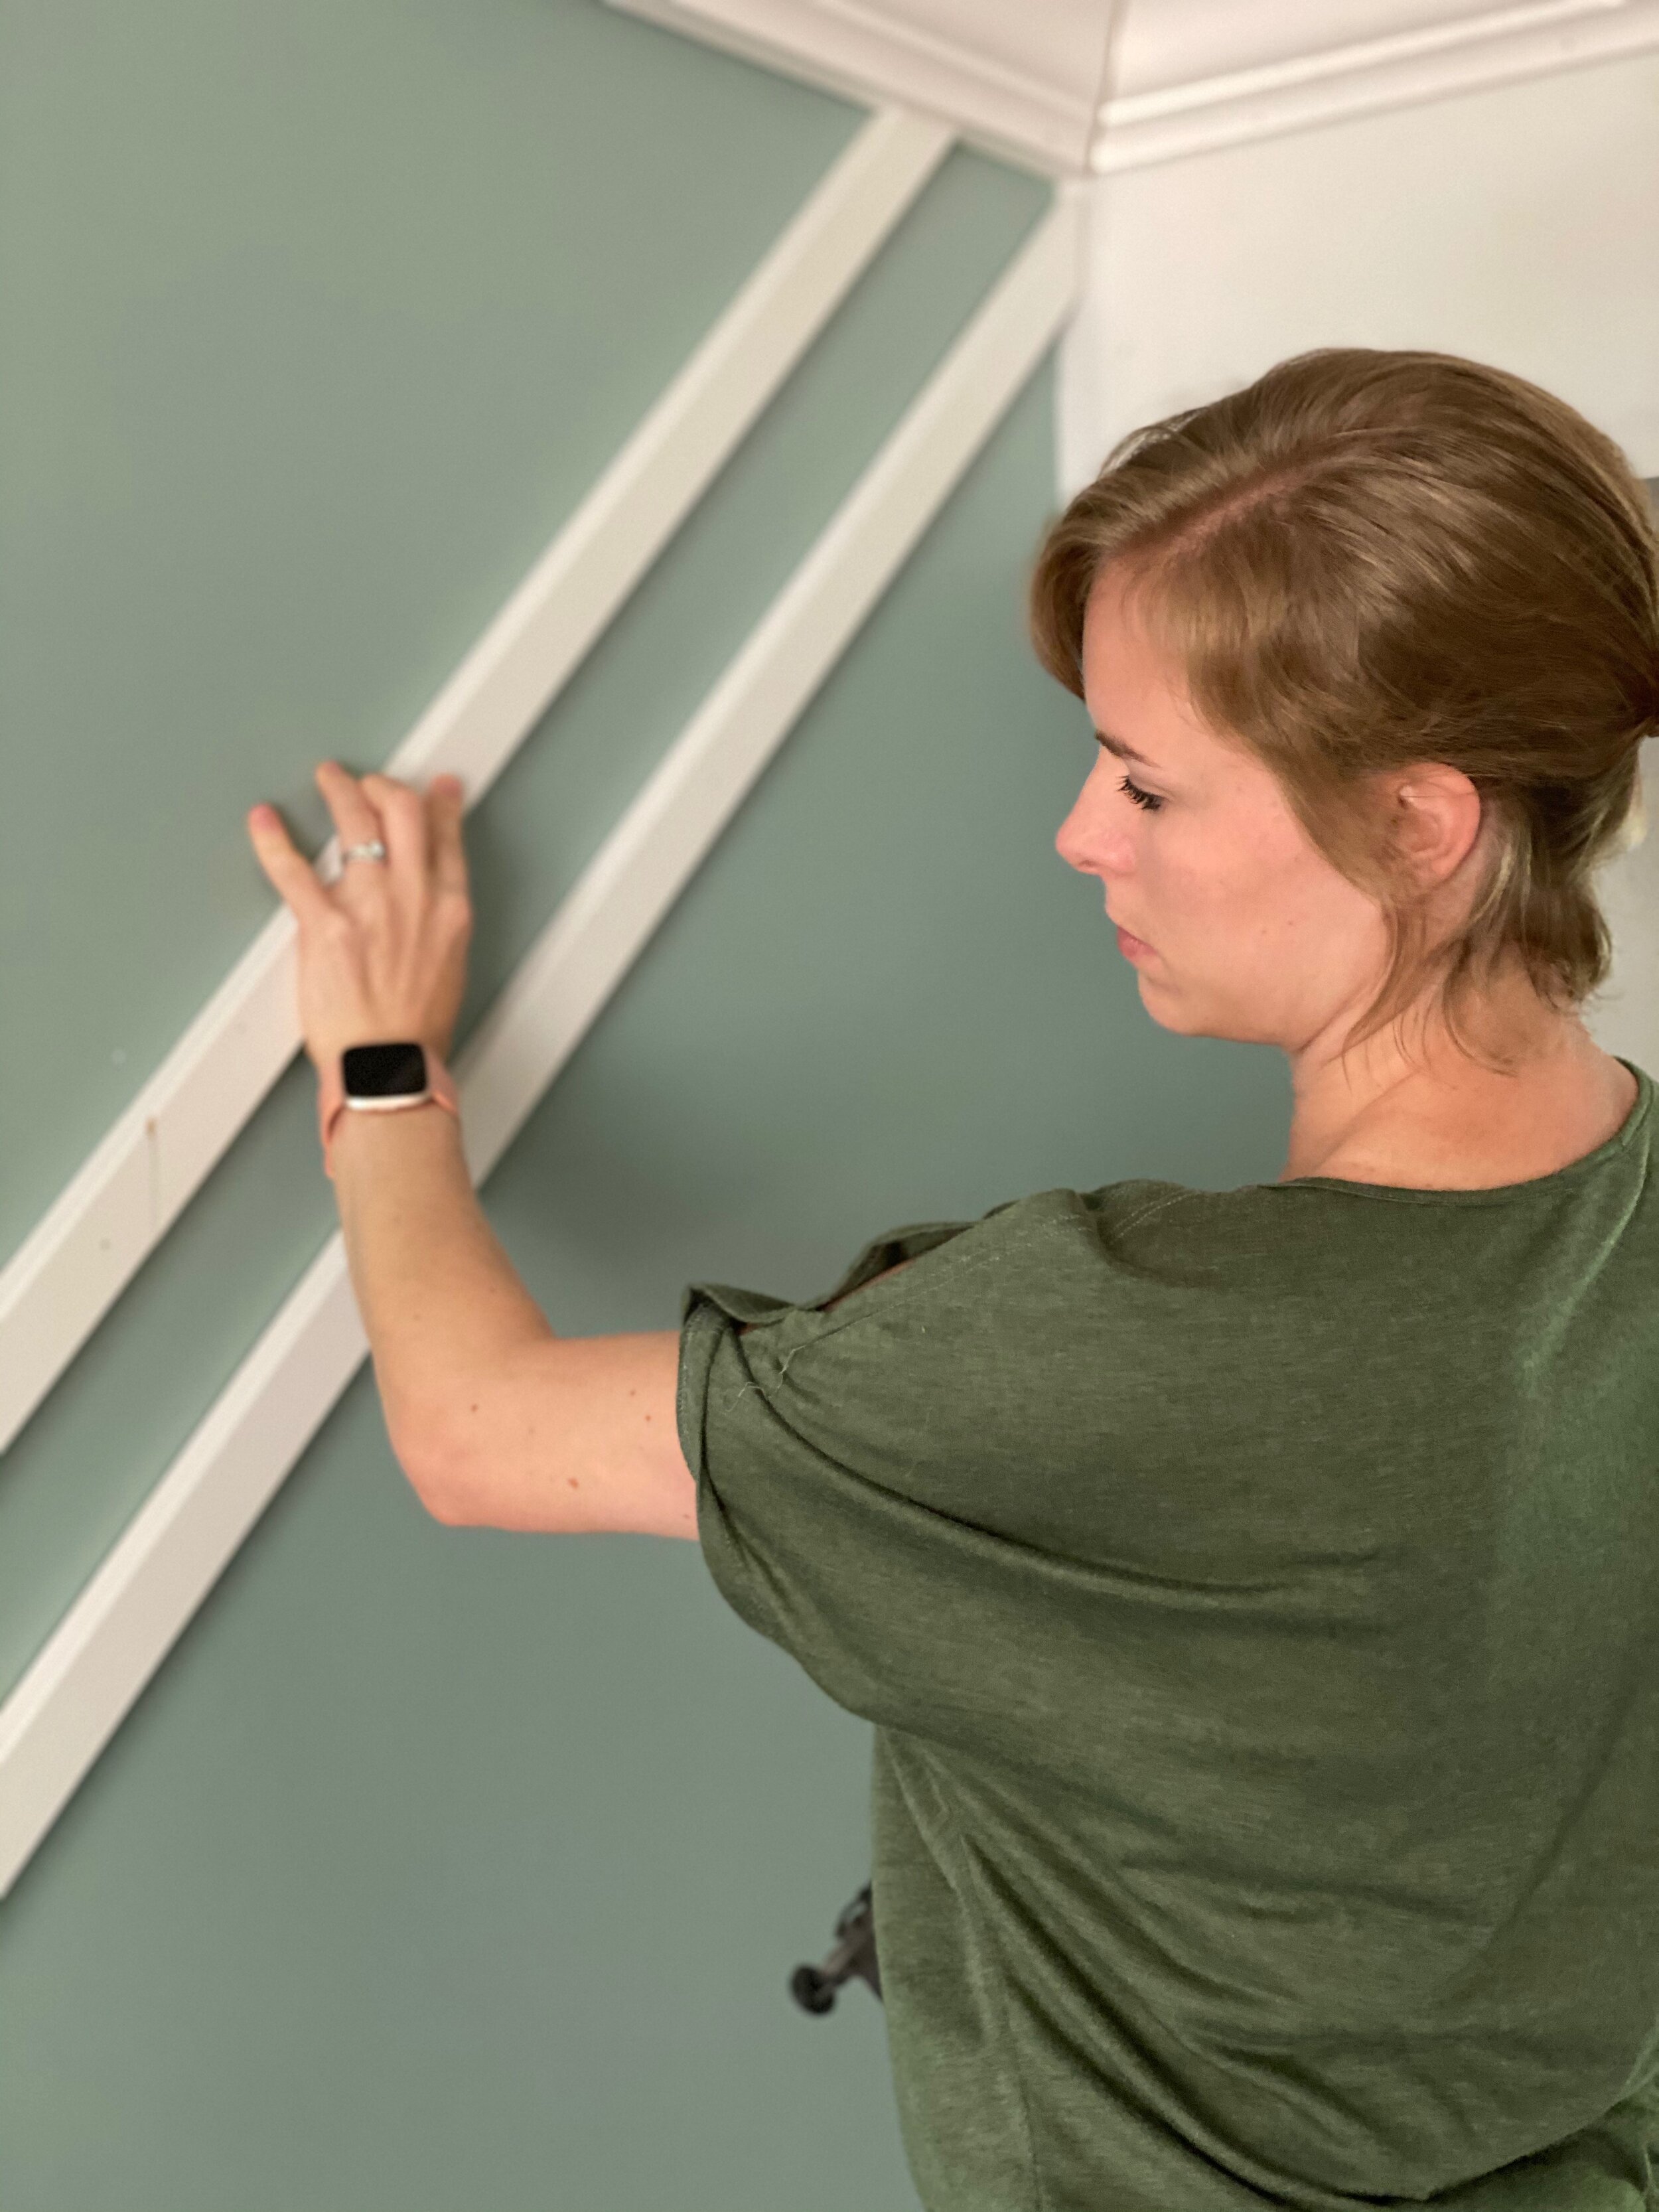
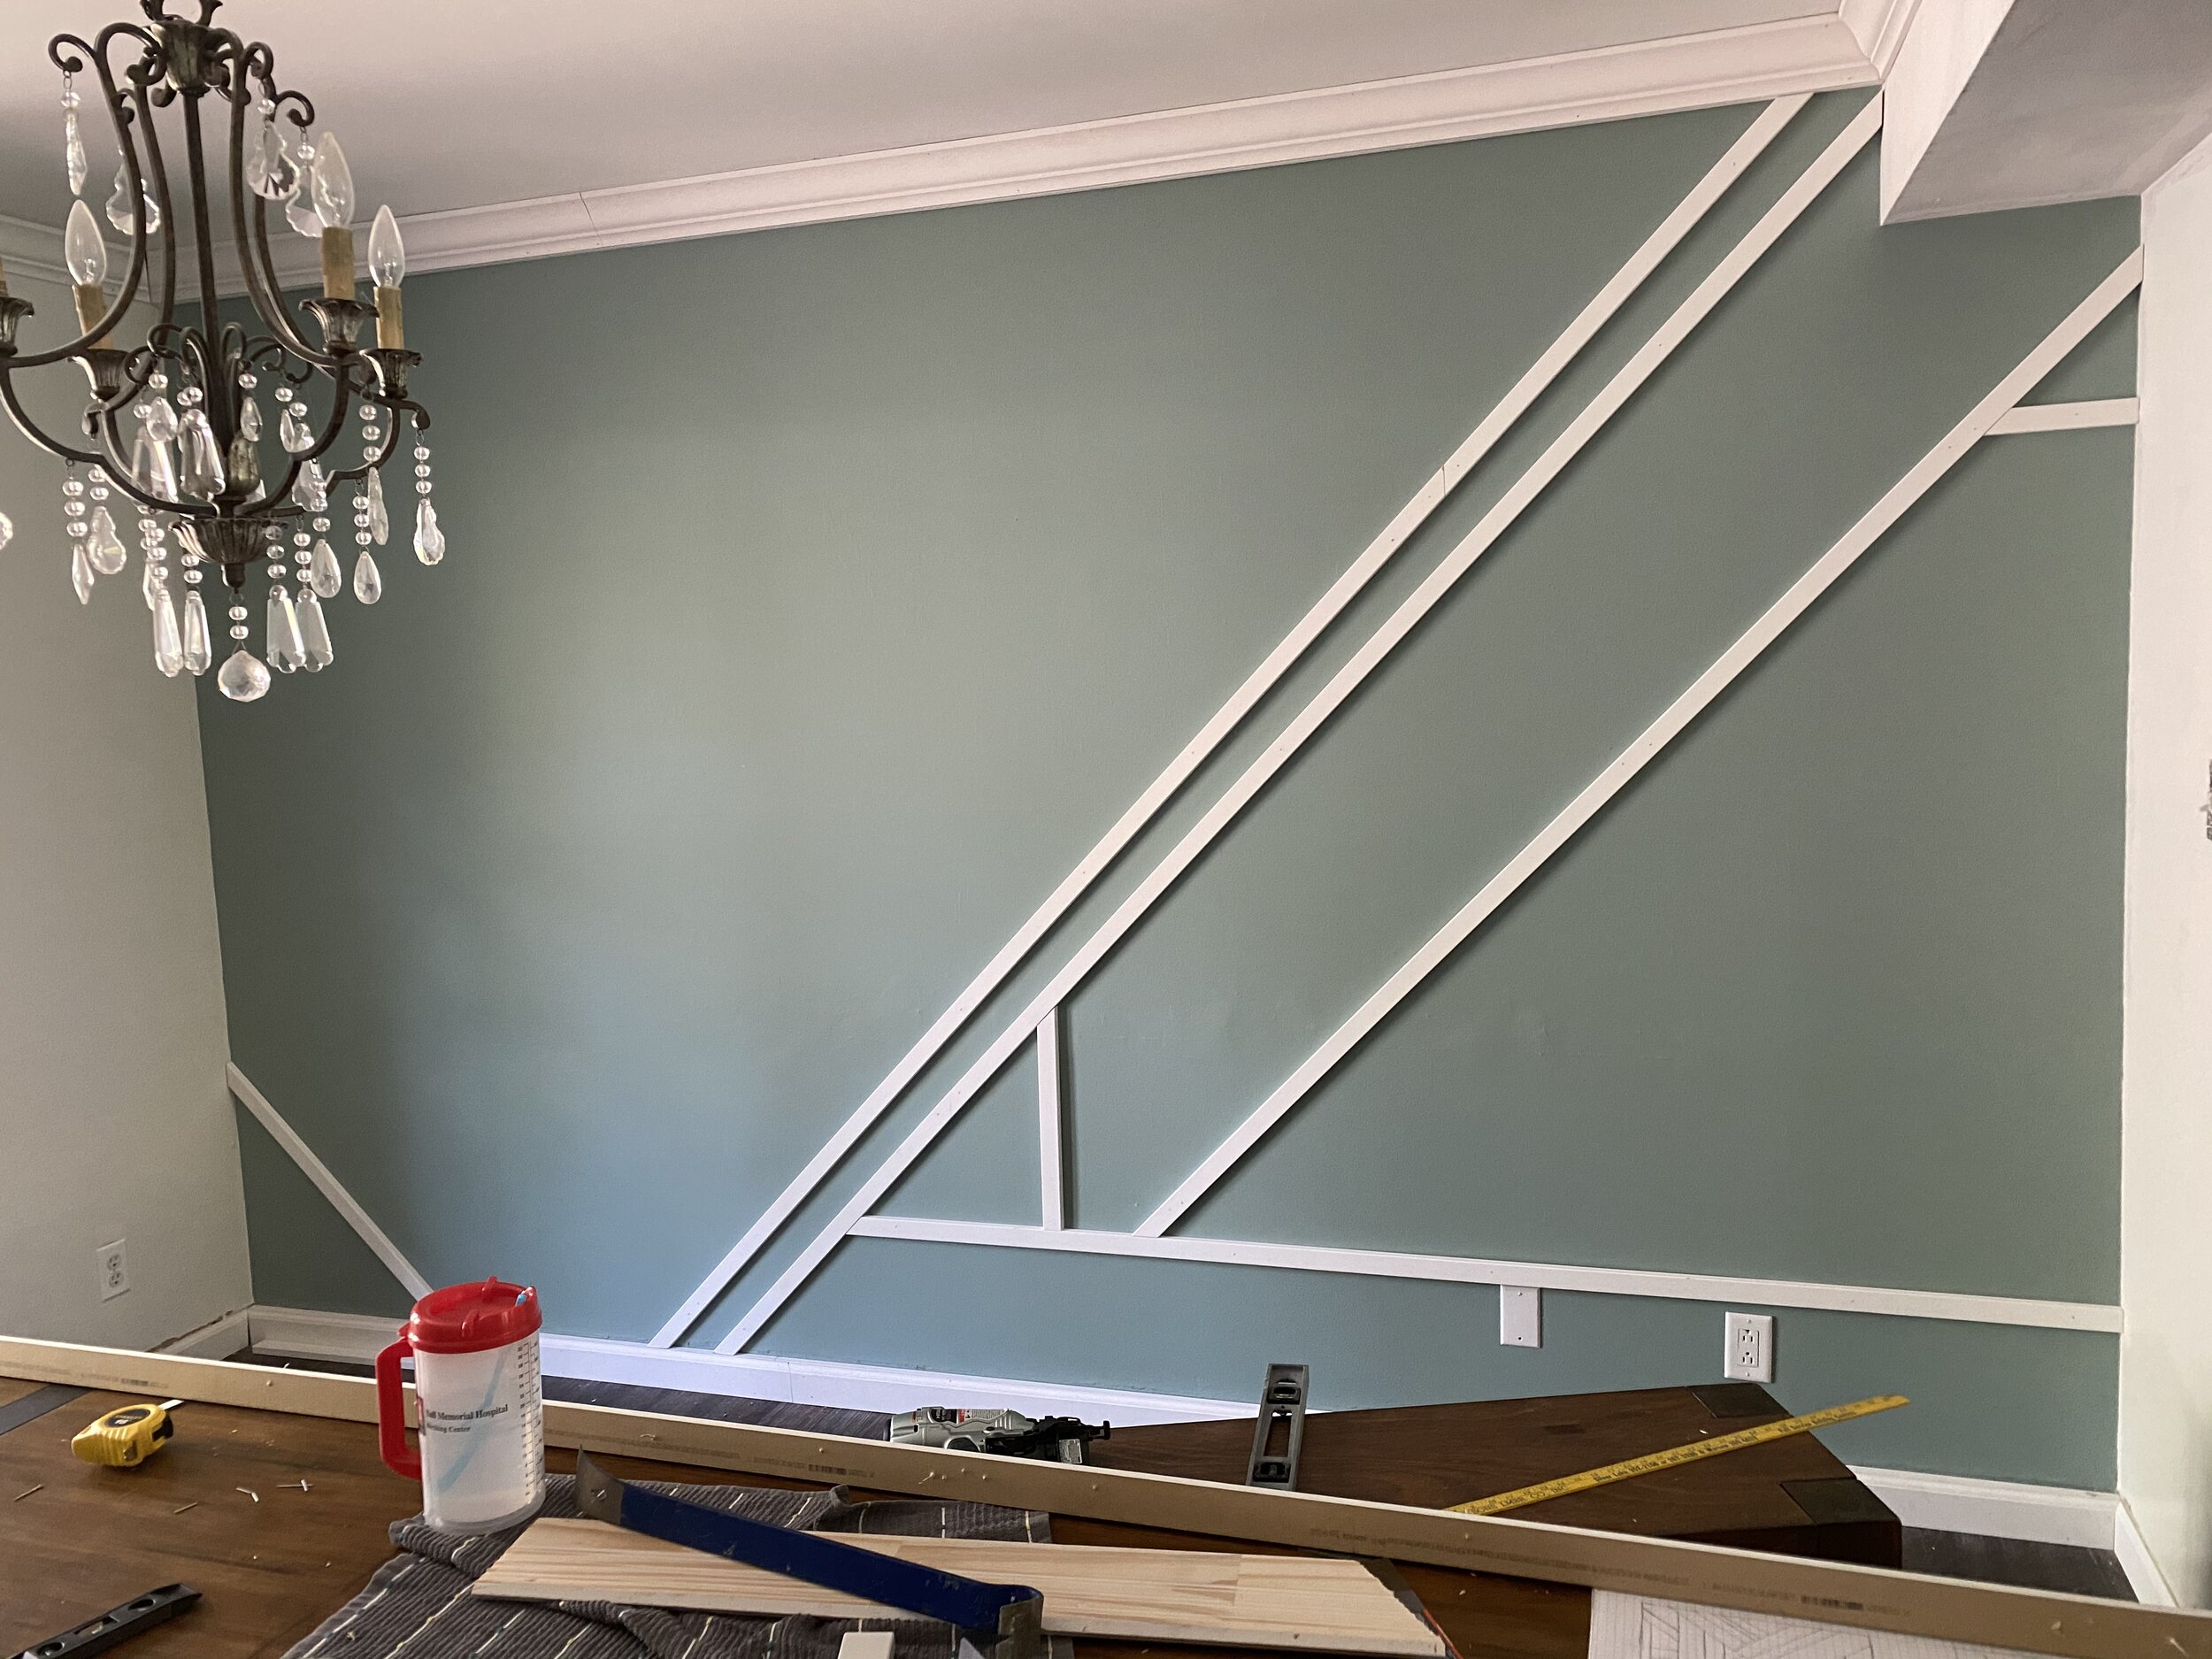
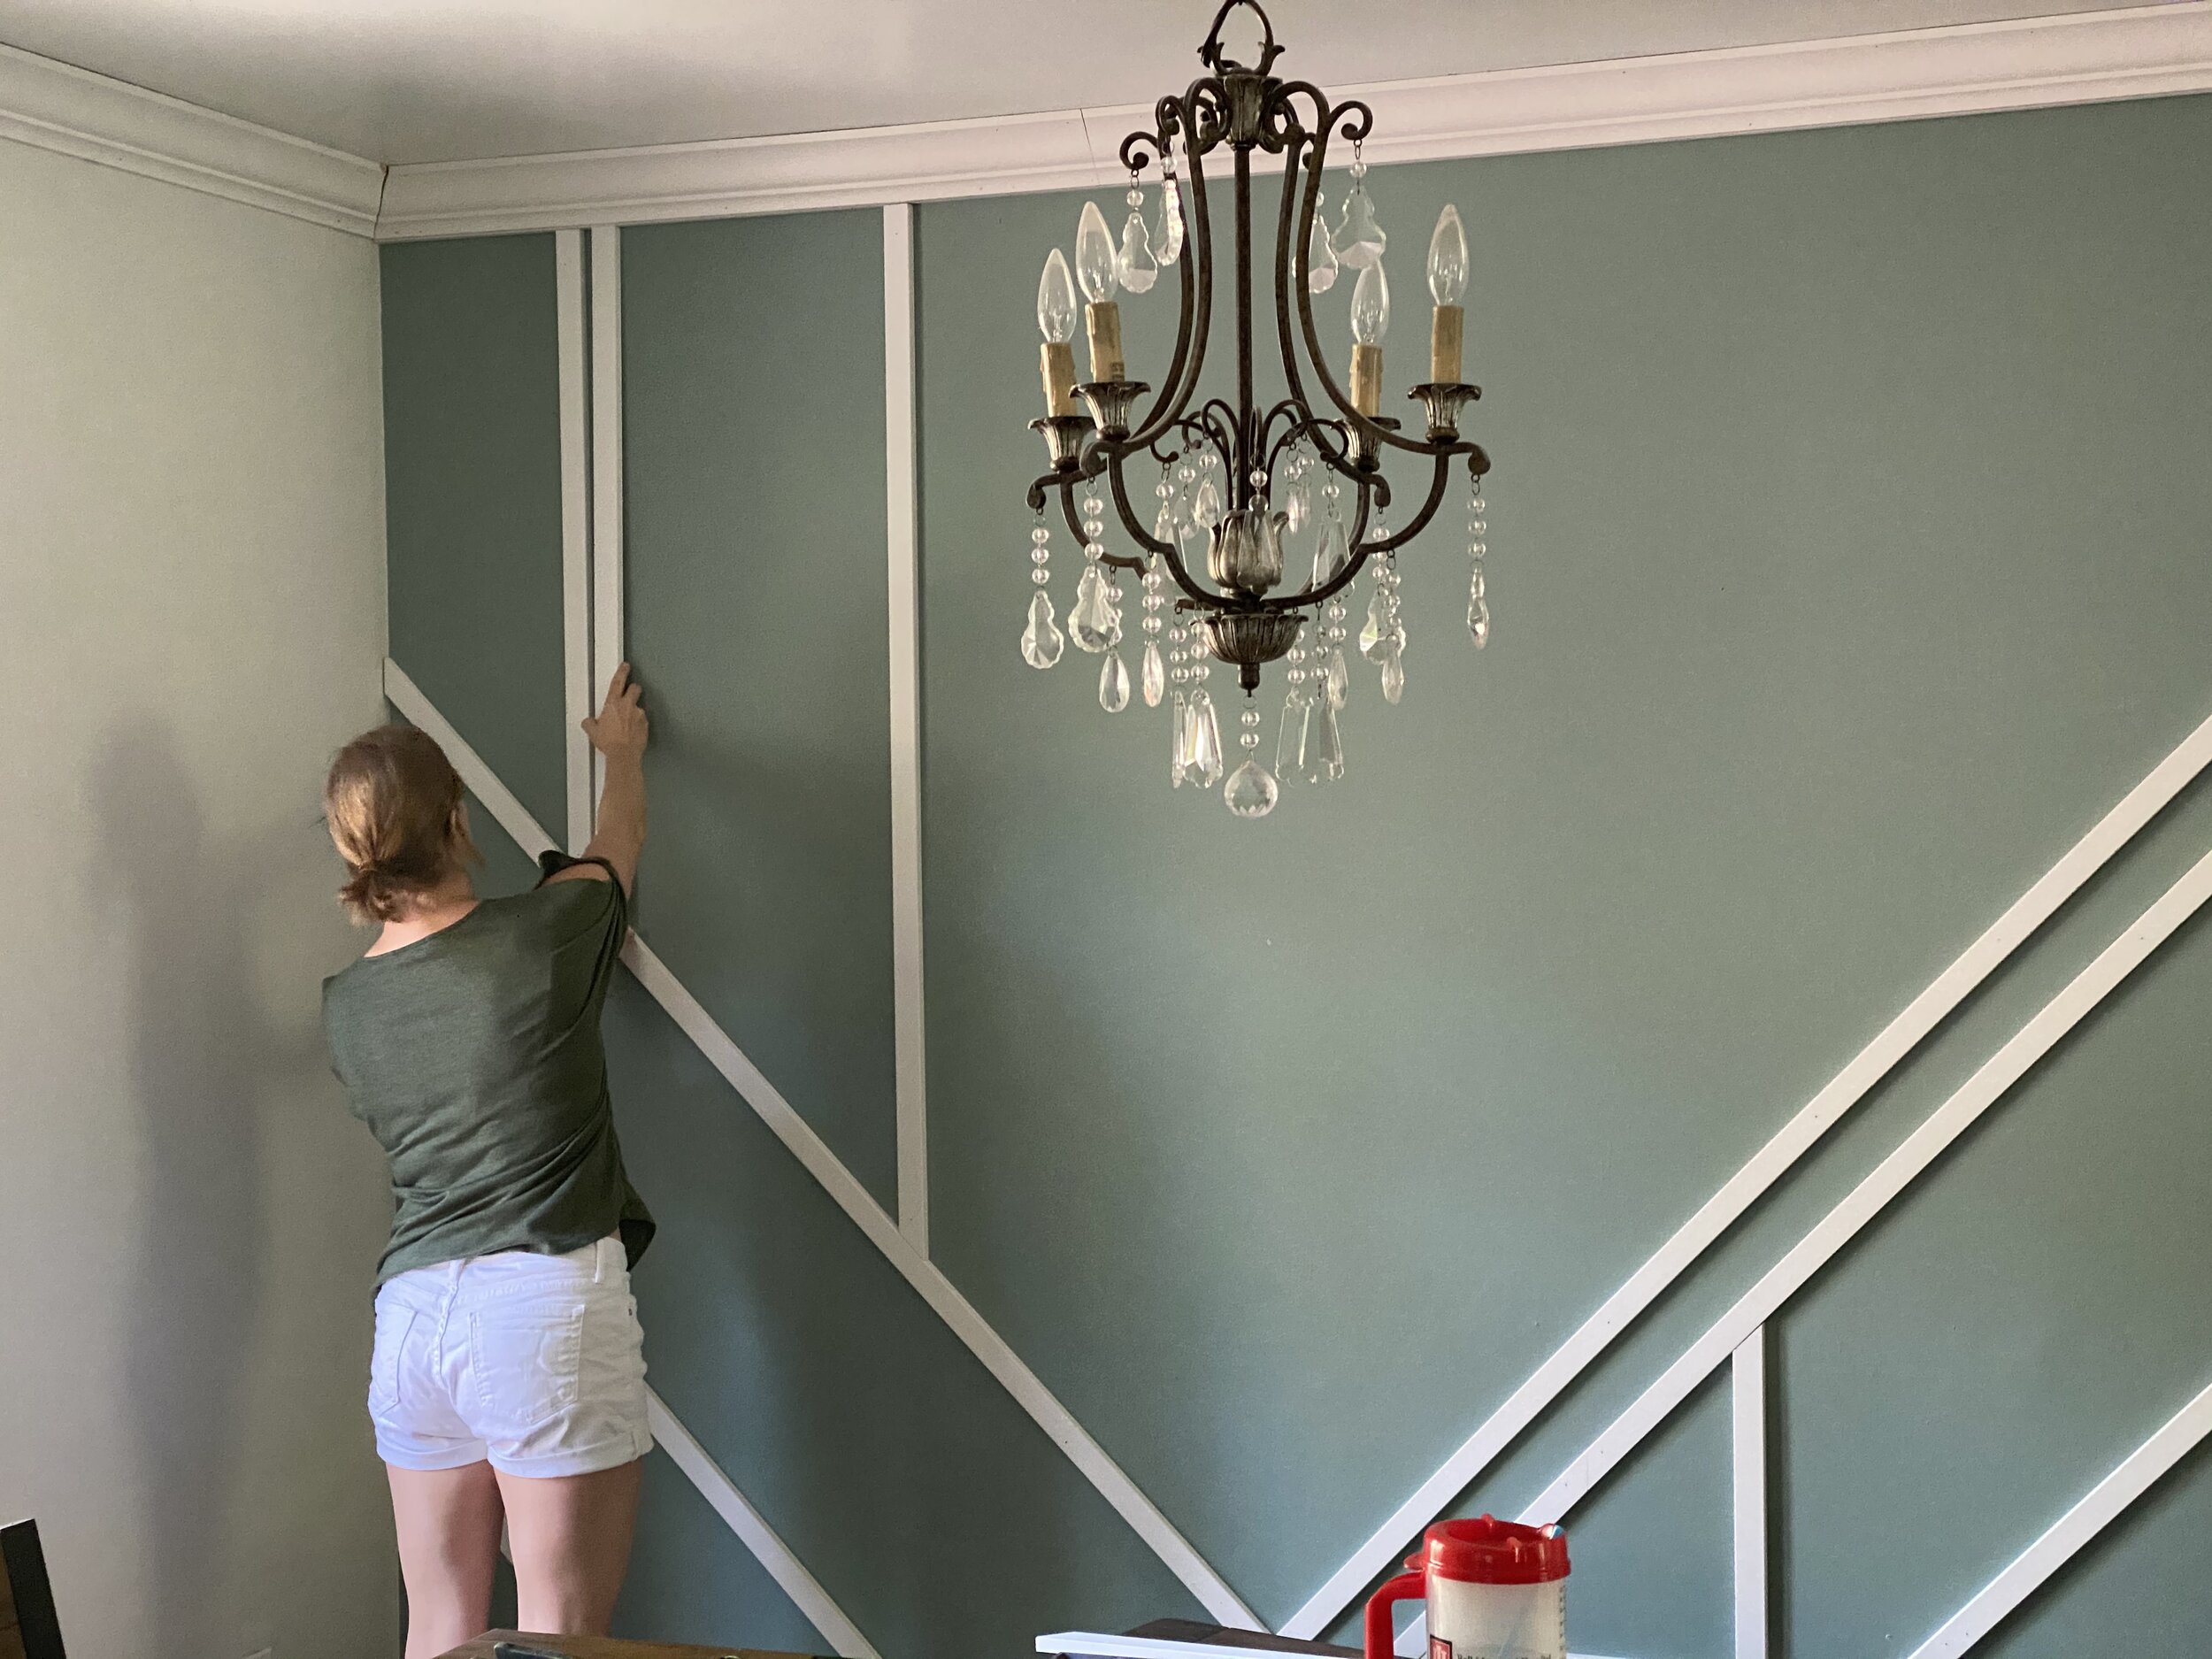

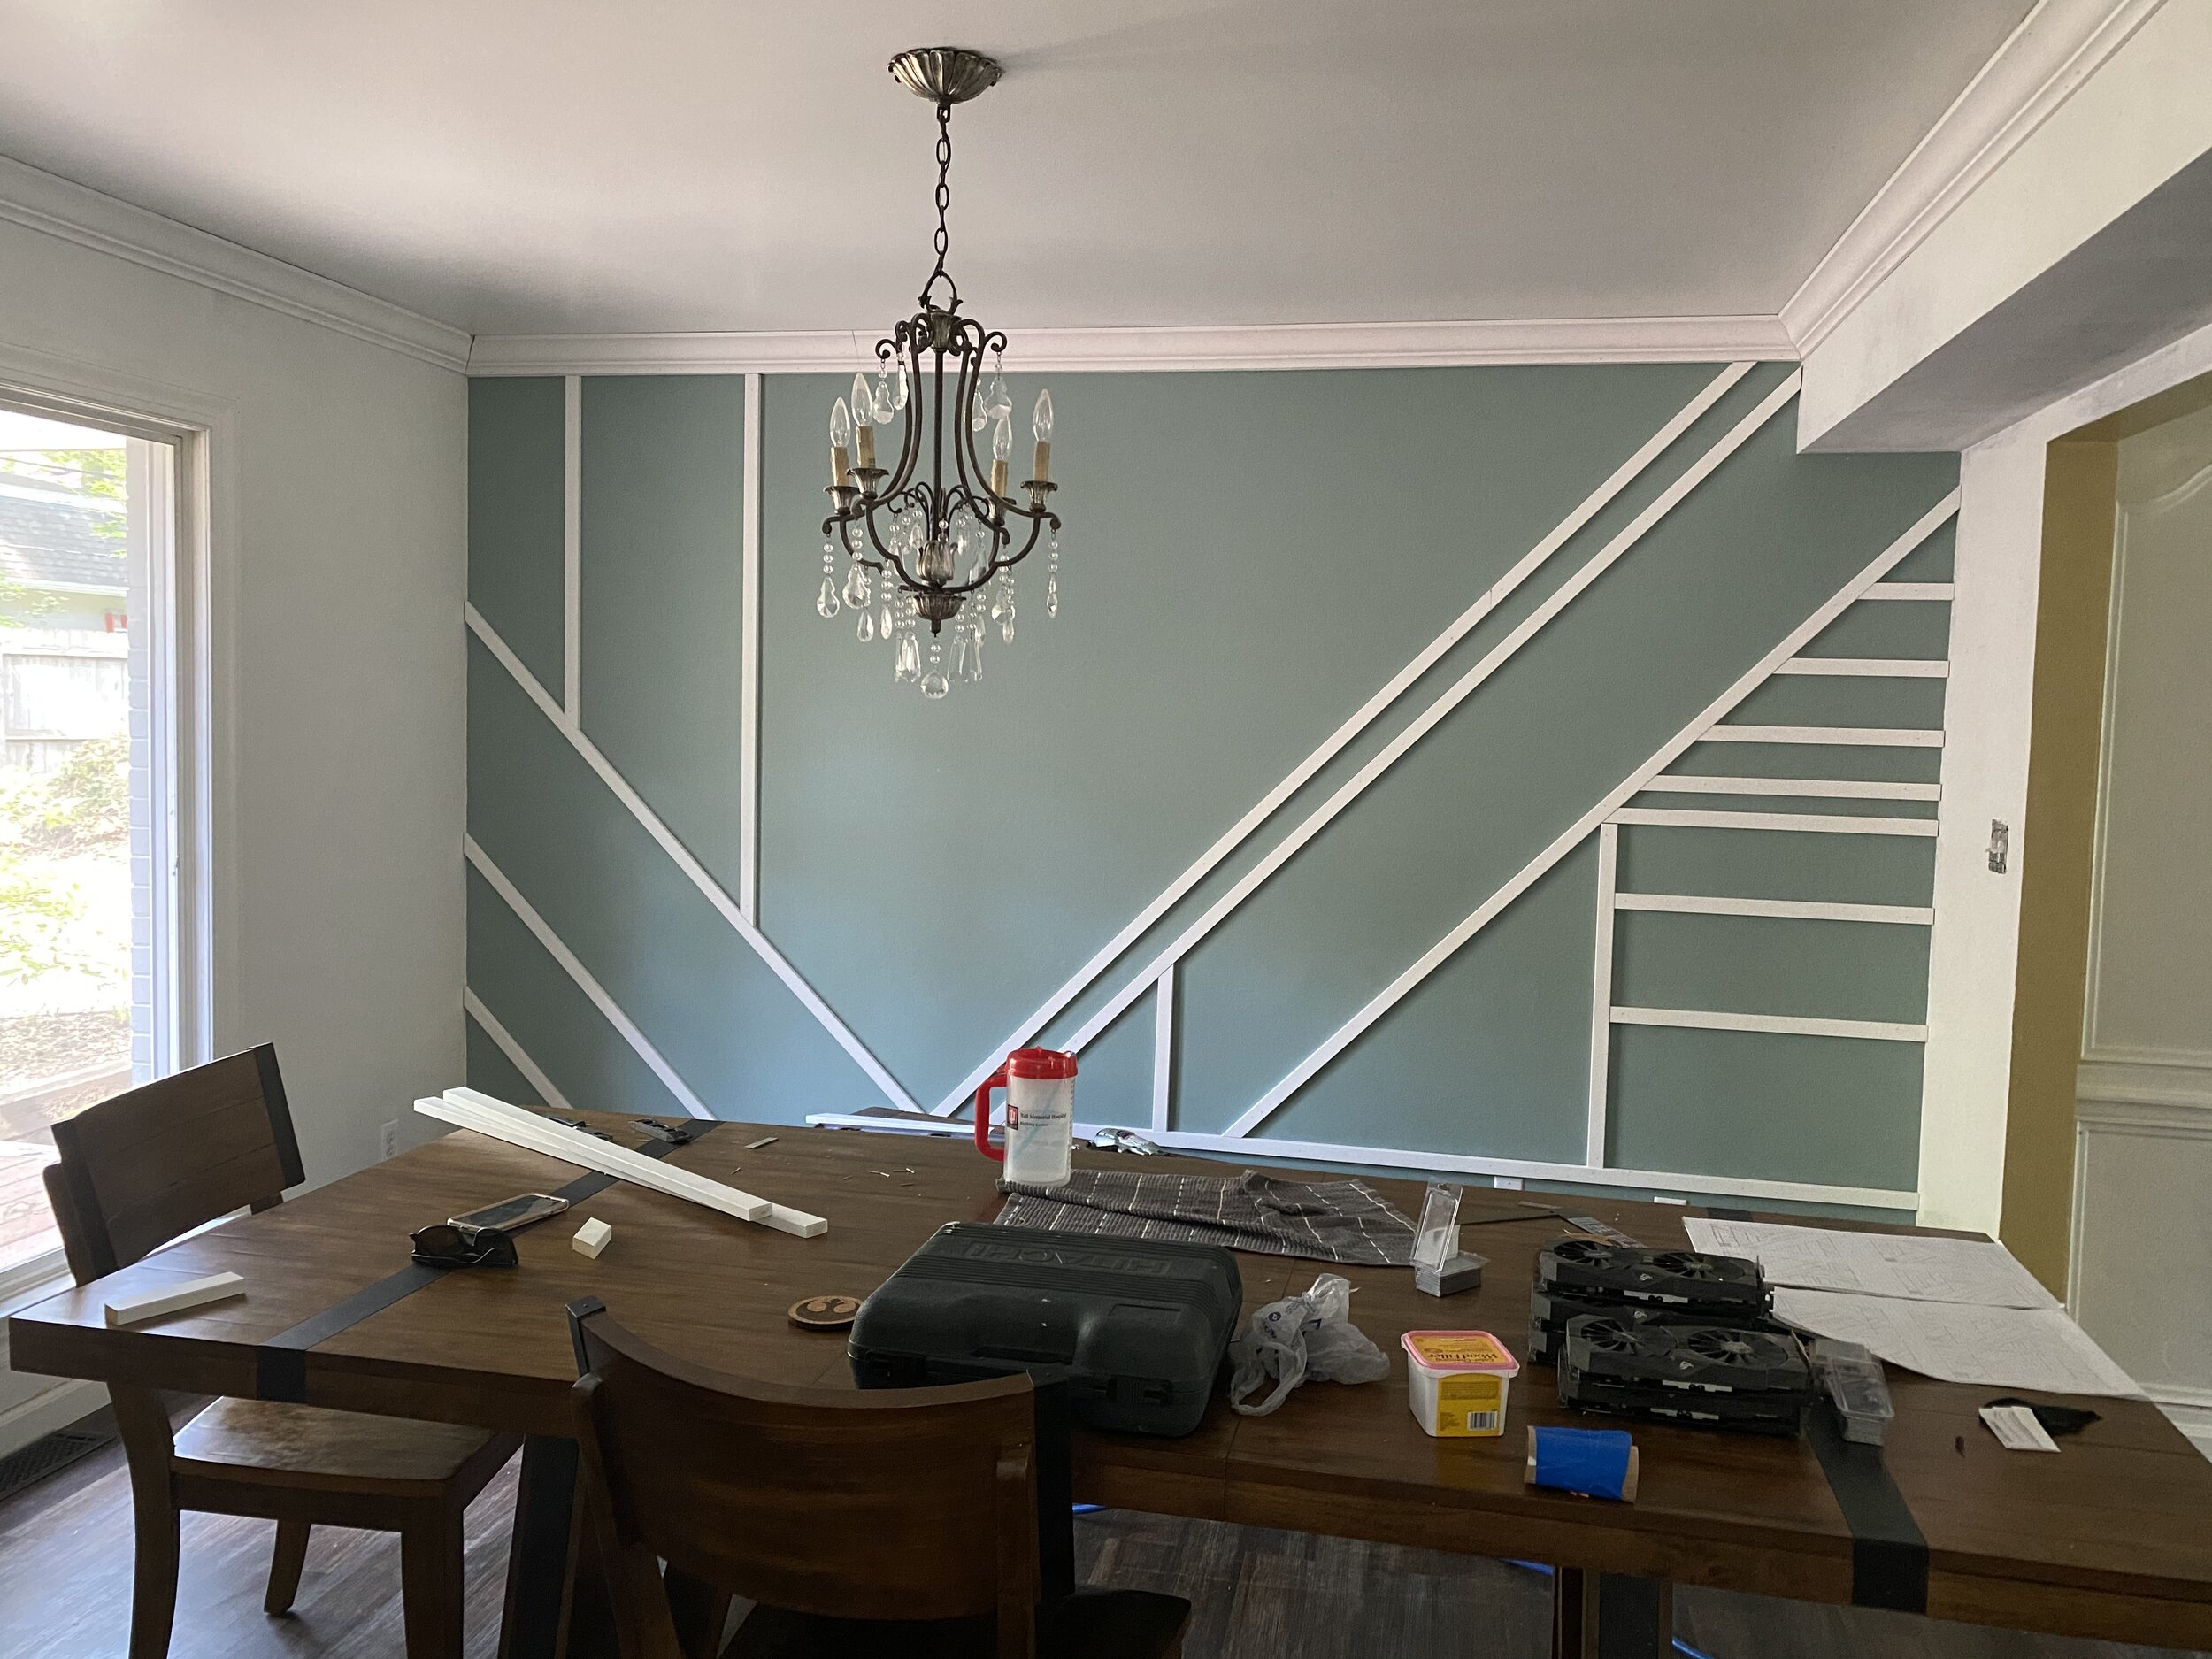
Fill the Gaps
Of course, installing the wall is only part of the project. Now you have to fill your nail holes with wood putty and caulk all your seams.
I caulked along the seams where the MDF met the wall. I also caulked where two pieces of MDF butted up against each other. You could use wood putty or joint compound here instead, which would probably be a smoother transition, but I really didn’t want to sand all that and I’m happy with the final product. I ended up using about 2 tubes of caulk.
Once the wood putty is dry, sand it down. And once the caulk is dry….
Paint Some More!
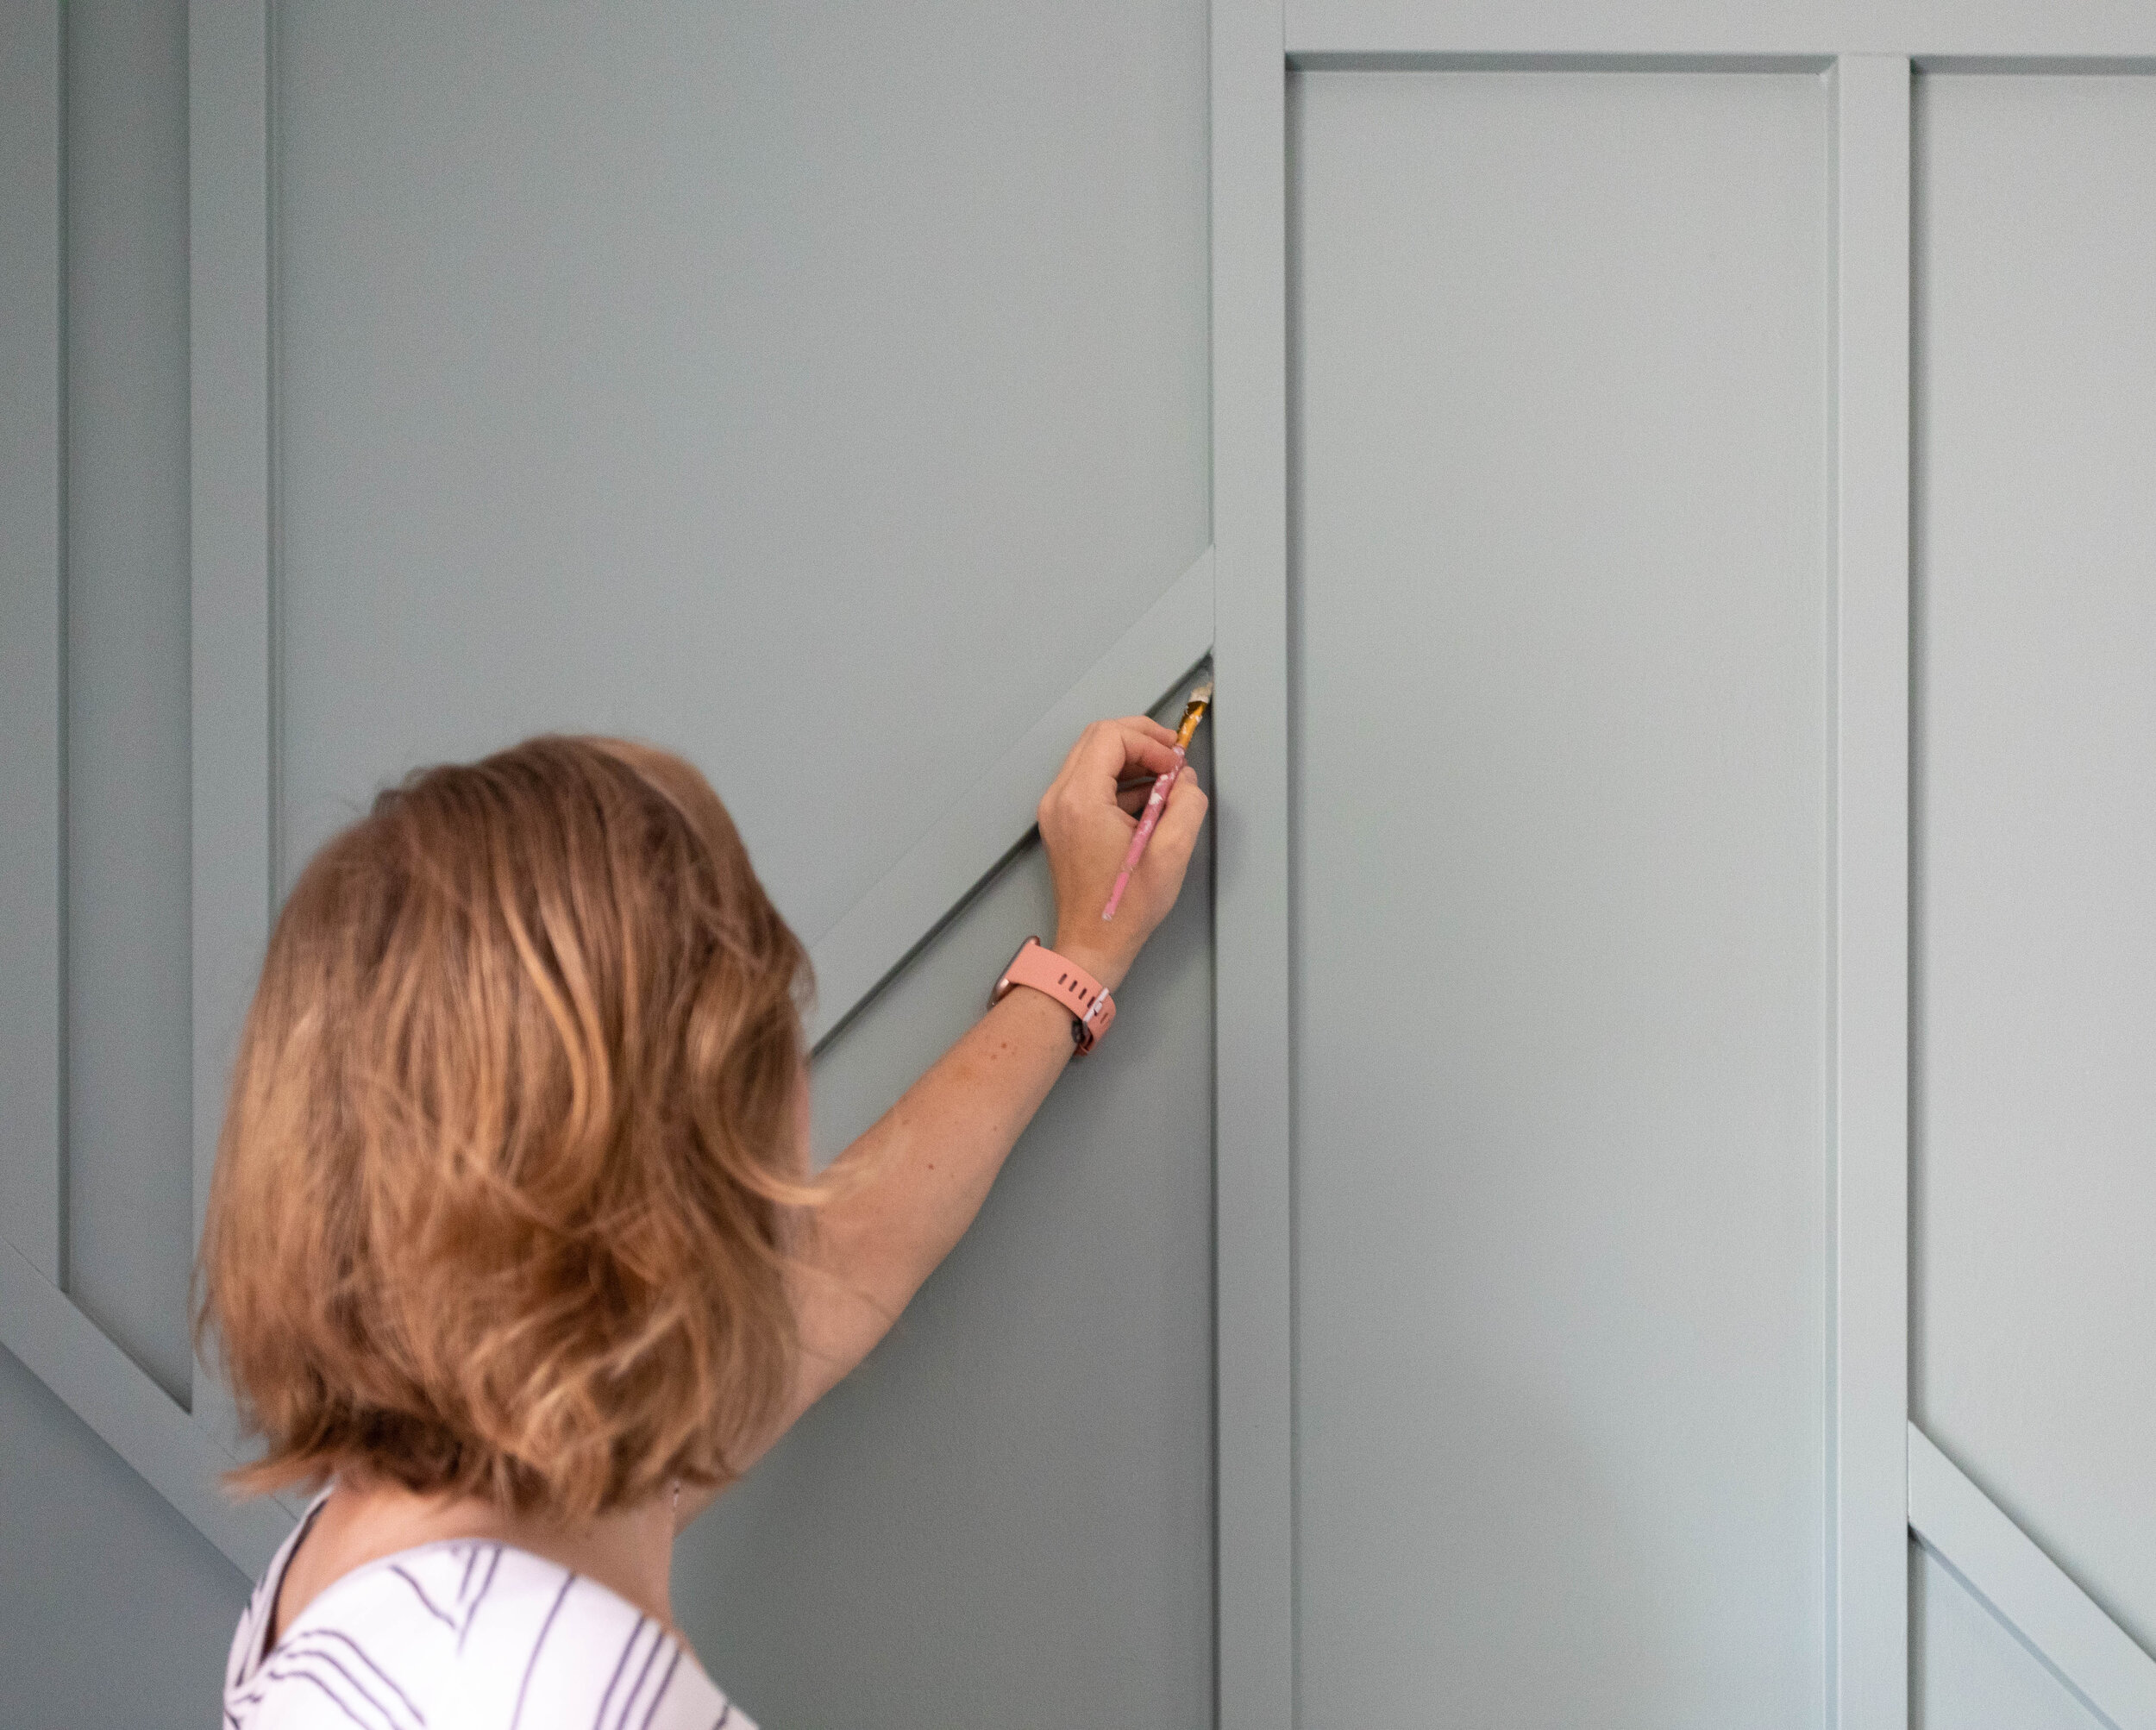
This part of the project gets a little tedious because you have to apply the rest of the paint with a brush, but you’ll get through it (I believe in you).
Make sure you get into every nook and cranny. I used a craft brush in the really tight spots where my boards met with an adjacent wall or the trim. You’ll definitely want to brush on two coats.
Once your paint is dry, you’re done! Now you can style your room and enjoy!
Final Thoughts About Our Geometric Accent Wall

I’m head over heels in love with it! Before this renovation, our dining room was so out of place. It was like it belonged in a different house. Although our house is still a bit of a mixture of different styles (there are several rooms we haven’t touched yet), it’s well on its way to having a cohesive look.
The only thing left to do now in this room is to fill it, and I.CAN’T.WAIT. And you better believe that light fixture is getting the boot! Watch for that post in the next couple of weeks!
Related Dining Room Renovation Posts
Build Your Own Geometric Wood Feature Wall

How to Plan and Hang a Gallery Wall
The thought of hanging a gallery wall can be intimidating. So many pictures. So many nails. So many potential mess-ups and unnecessary nail holes! Where does the madness end!?
Have no fear! I’ve got you covered with a step-by-step tutorial on how to hang a gallery wall that eliminates the probable accidental nail hole (or two, or three).
Hang a gallery wall with this easy step-by-step tutorial
The thought of hanging a gallery wall can be intimidating. So many pictures. So many nails. So many potential mess-ups and unnecessary nail holes! Where does the madness end!?
Have no fear! I’ve got you covered with a step-by-step tutorial on how to hang a gallery wall that eliminates the probable accidental nail hole (or two, or three).

I always seem to make my projects more difficult than they need to be. It’s a problem I’m highly aware of and I’m constantly working to improve upon.
I recently decided to hang a gallery wall in our living room. Unfortunately, true to form, I didn’t picture an asymmetrical one. Oh no. That would’ve been too easy! I envisioned a symmetrical gallery wall in a grid pattern. Meaning, it’s super-duper obvious if your pictures don’t line up properly.
Luckily, I have some hacks that made hanging my gallery wall stress-free - AND this tutorial applies to asymmetrical gallery walls too!
As an Amazon Associate, I earn from qualifying purchases. This post may contain affiliate links, meaning I receive commissions for purchases made through those links, at no cost to you.

A couple of years ago I started finding all sorts of silly quotes on Pinterest and I felt the urge to do something with them. (They’re all under my “Inspirational Quotes” Pinterest board if you’re looking for a laugh.) So, I decided to have some fun with it and play with different styles of typography while writing these quotes on some watercolor paper.

Once I had a bunch of them, I didn’t just want to stuff them in a drawer - they deserved to be displayed! So I threw some watercolor paint on them and hung them in our stairwell.

And then we moved.
Although we bought another two-story house, the staircase in our new house isn’t as conducive to this kind of artwork display. So I had to find another place to hang these pictures. A big, blank wall in our living room seemed like the perfect place! Here’s how I did it:
Materials

- Masking or painter’s tape
- Tape measure
- Level (either a laser level or manual level will work)
- Hammer
- Nails (I used some small, lightweight nails because my pictures aren’t very heavy, but of course you’ll need to use nails appropriate for your pictures)
- Paper
- Scissors
- Pen or pencil
- Toothpaste (yep, you’ll see why…)
Trace your frames and cut them out
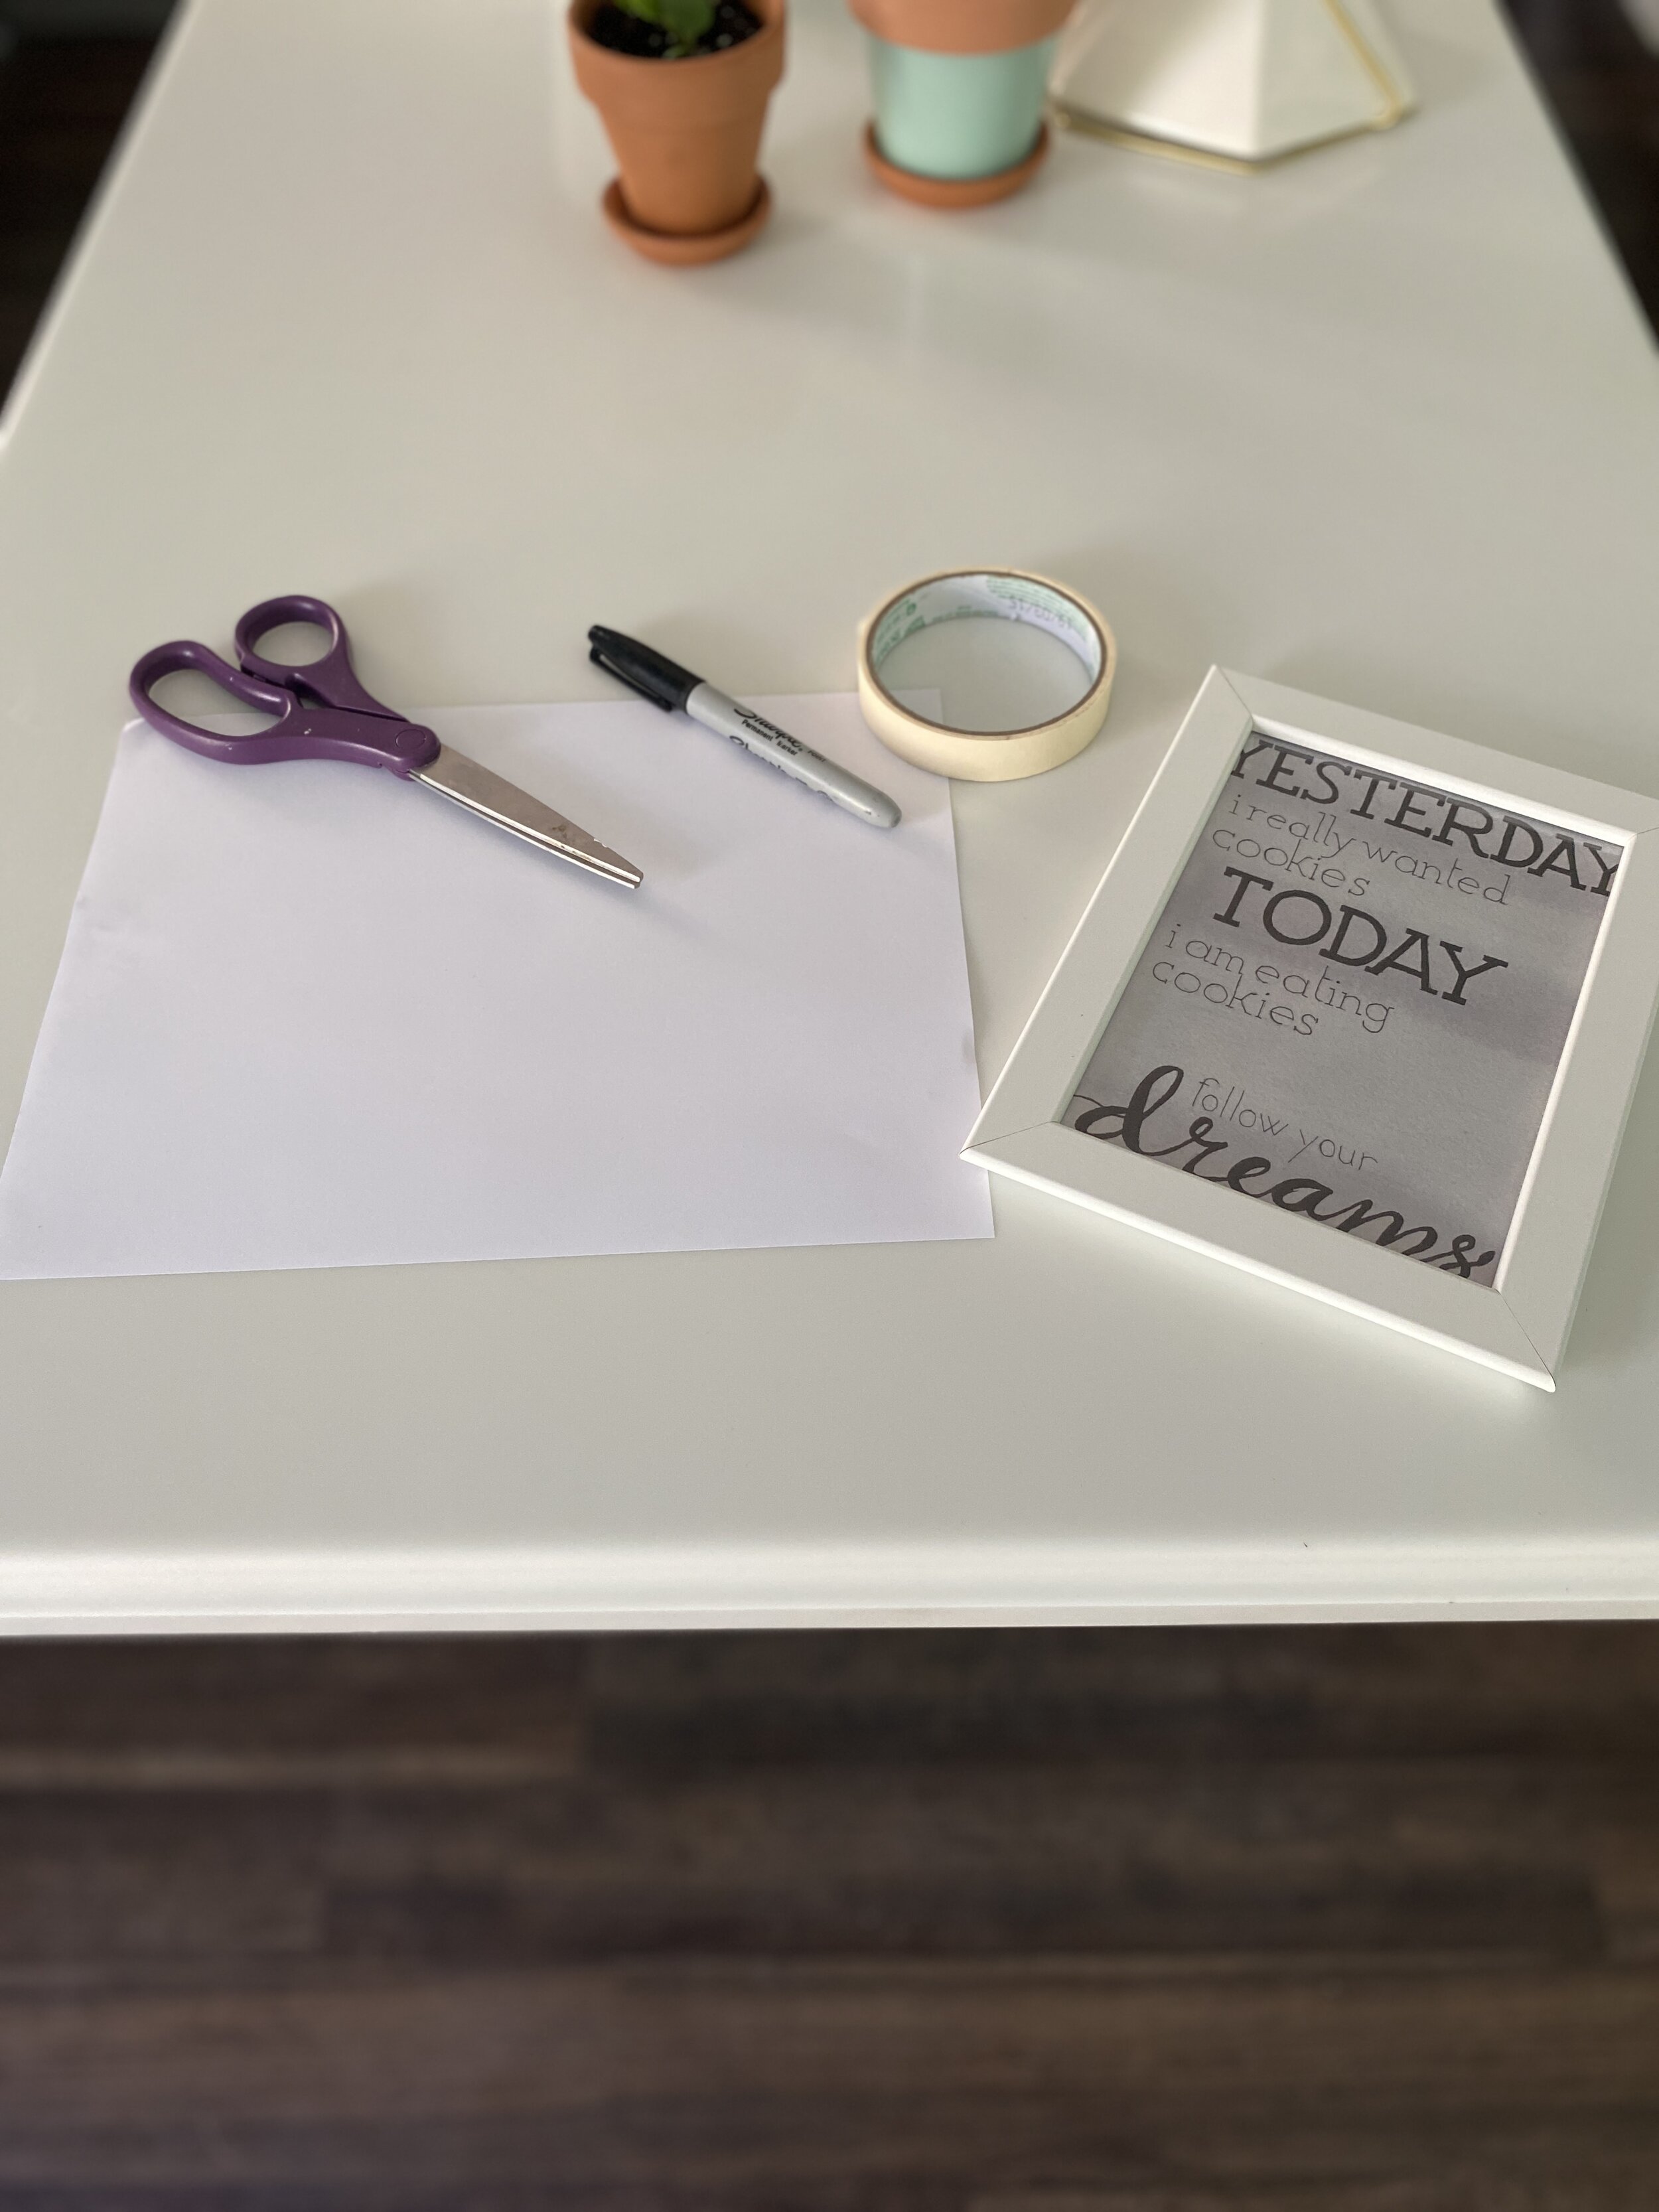
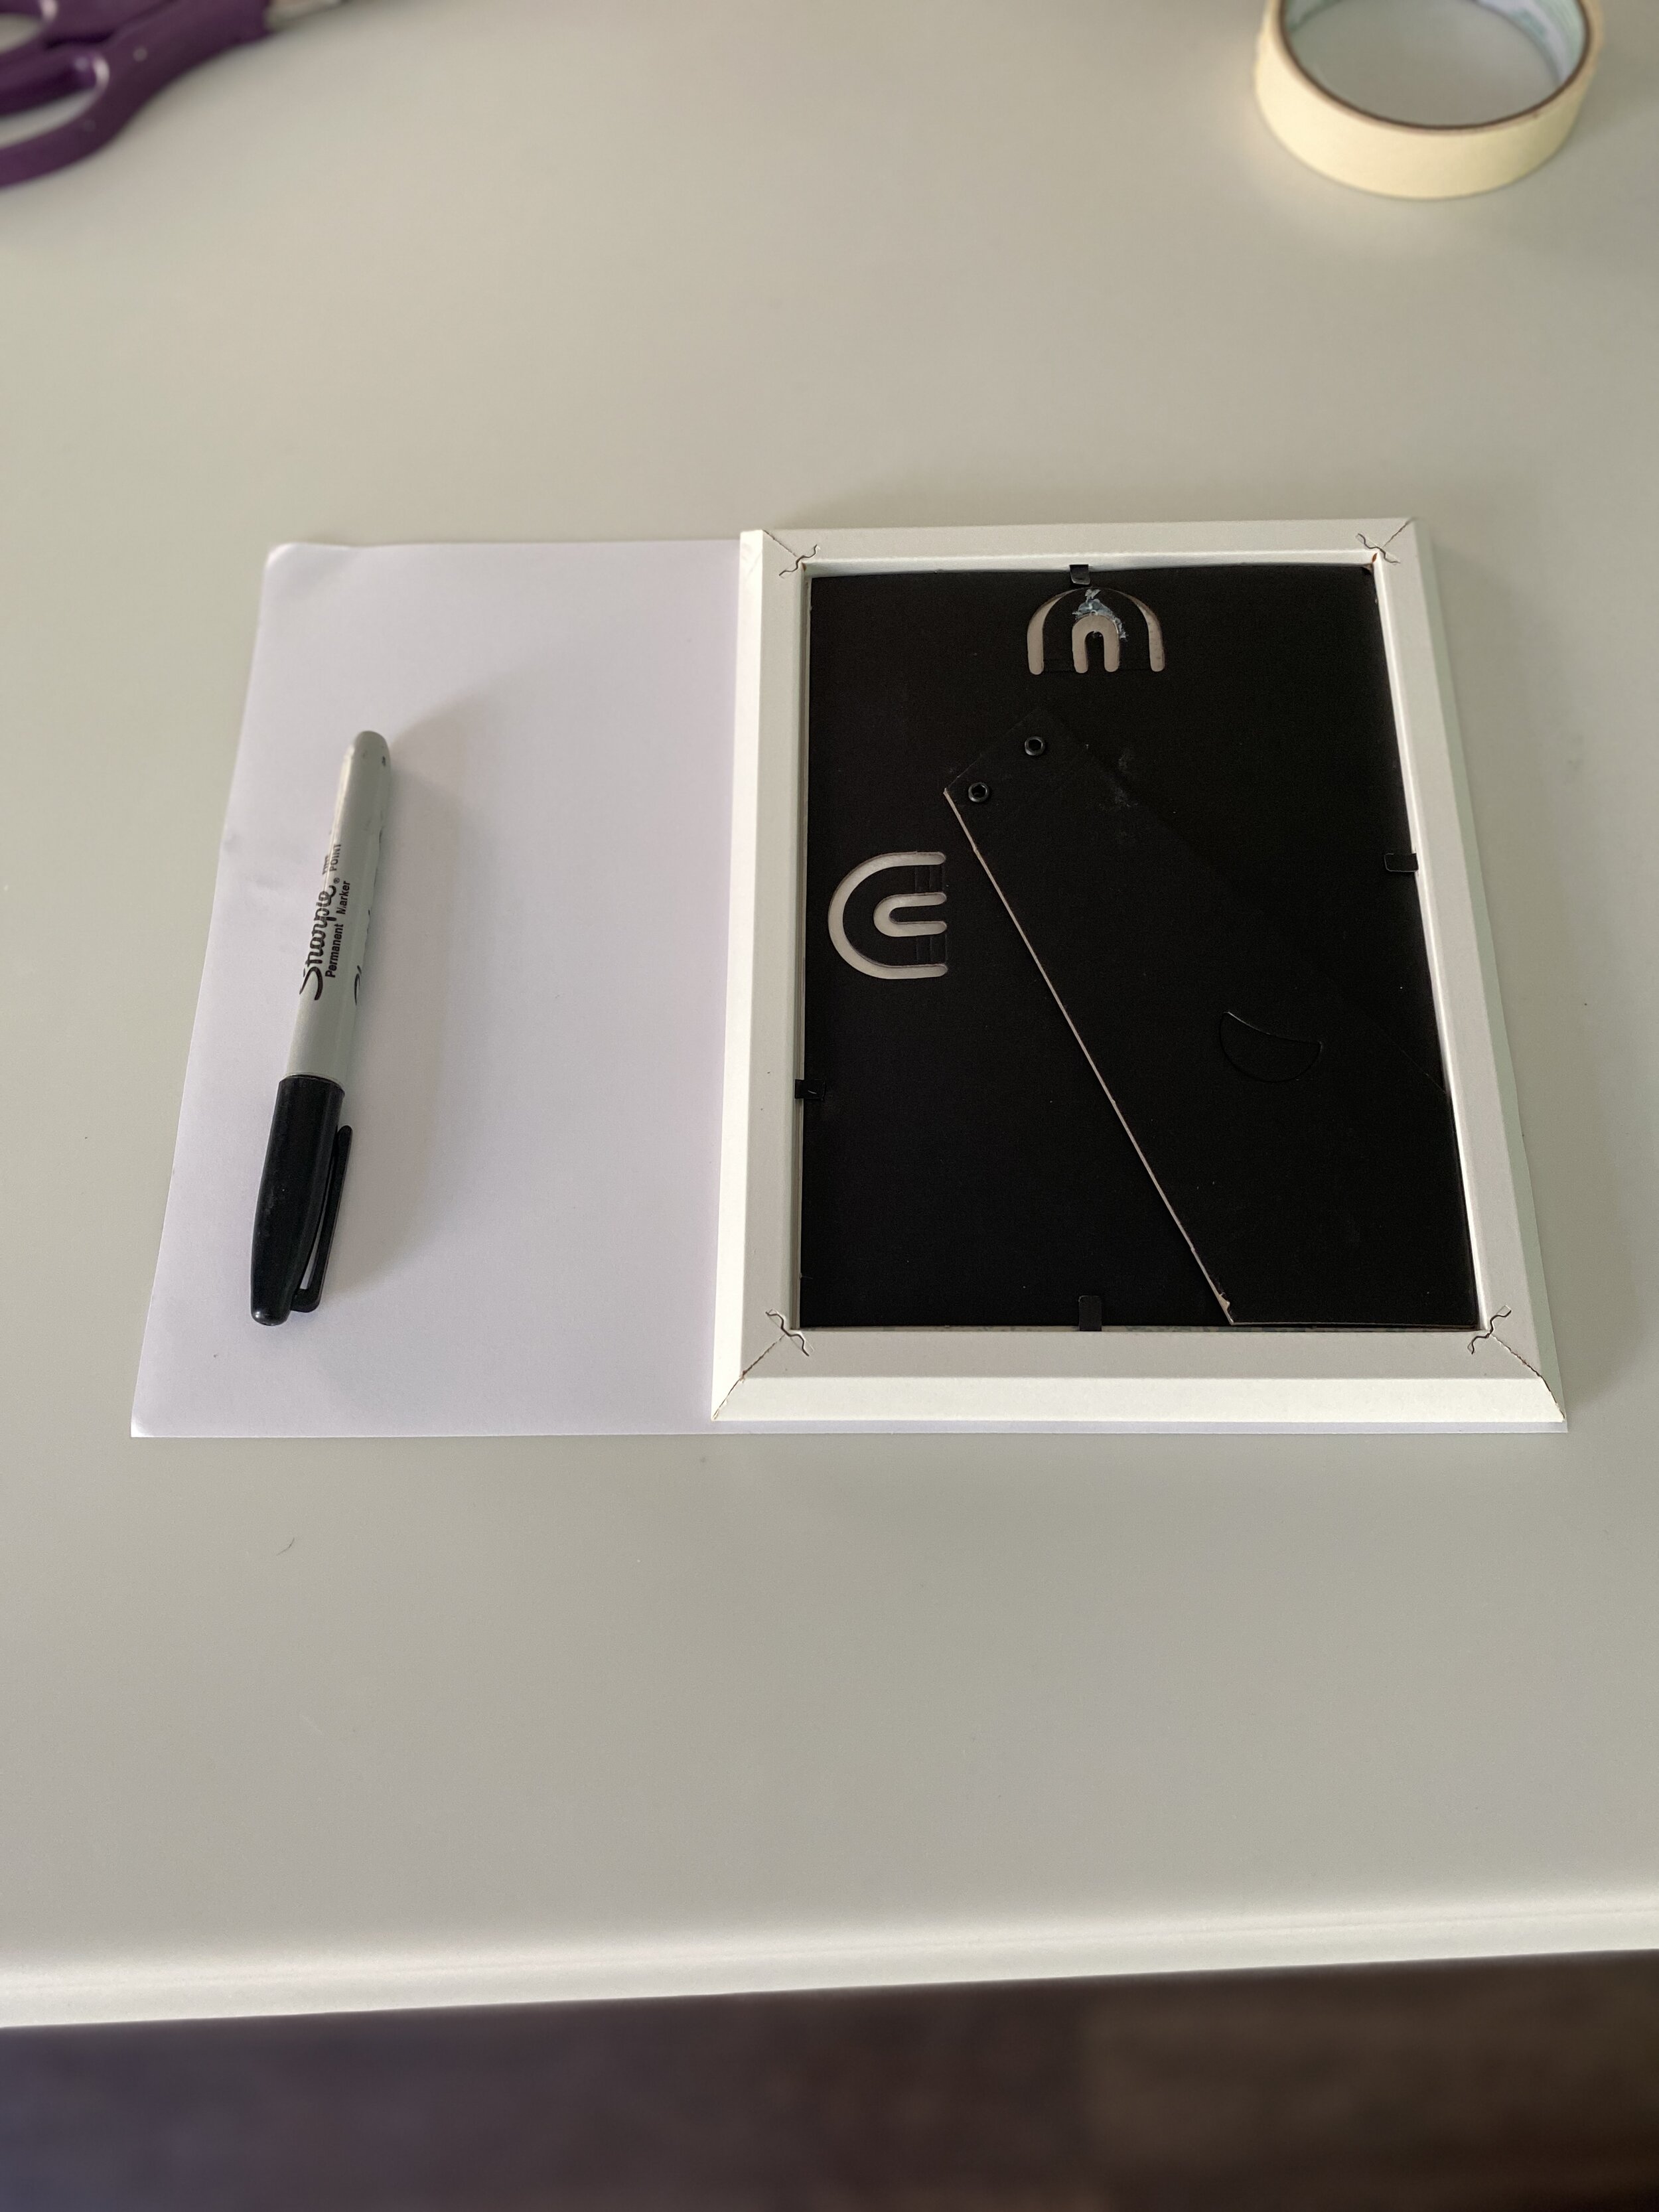
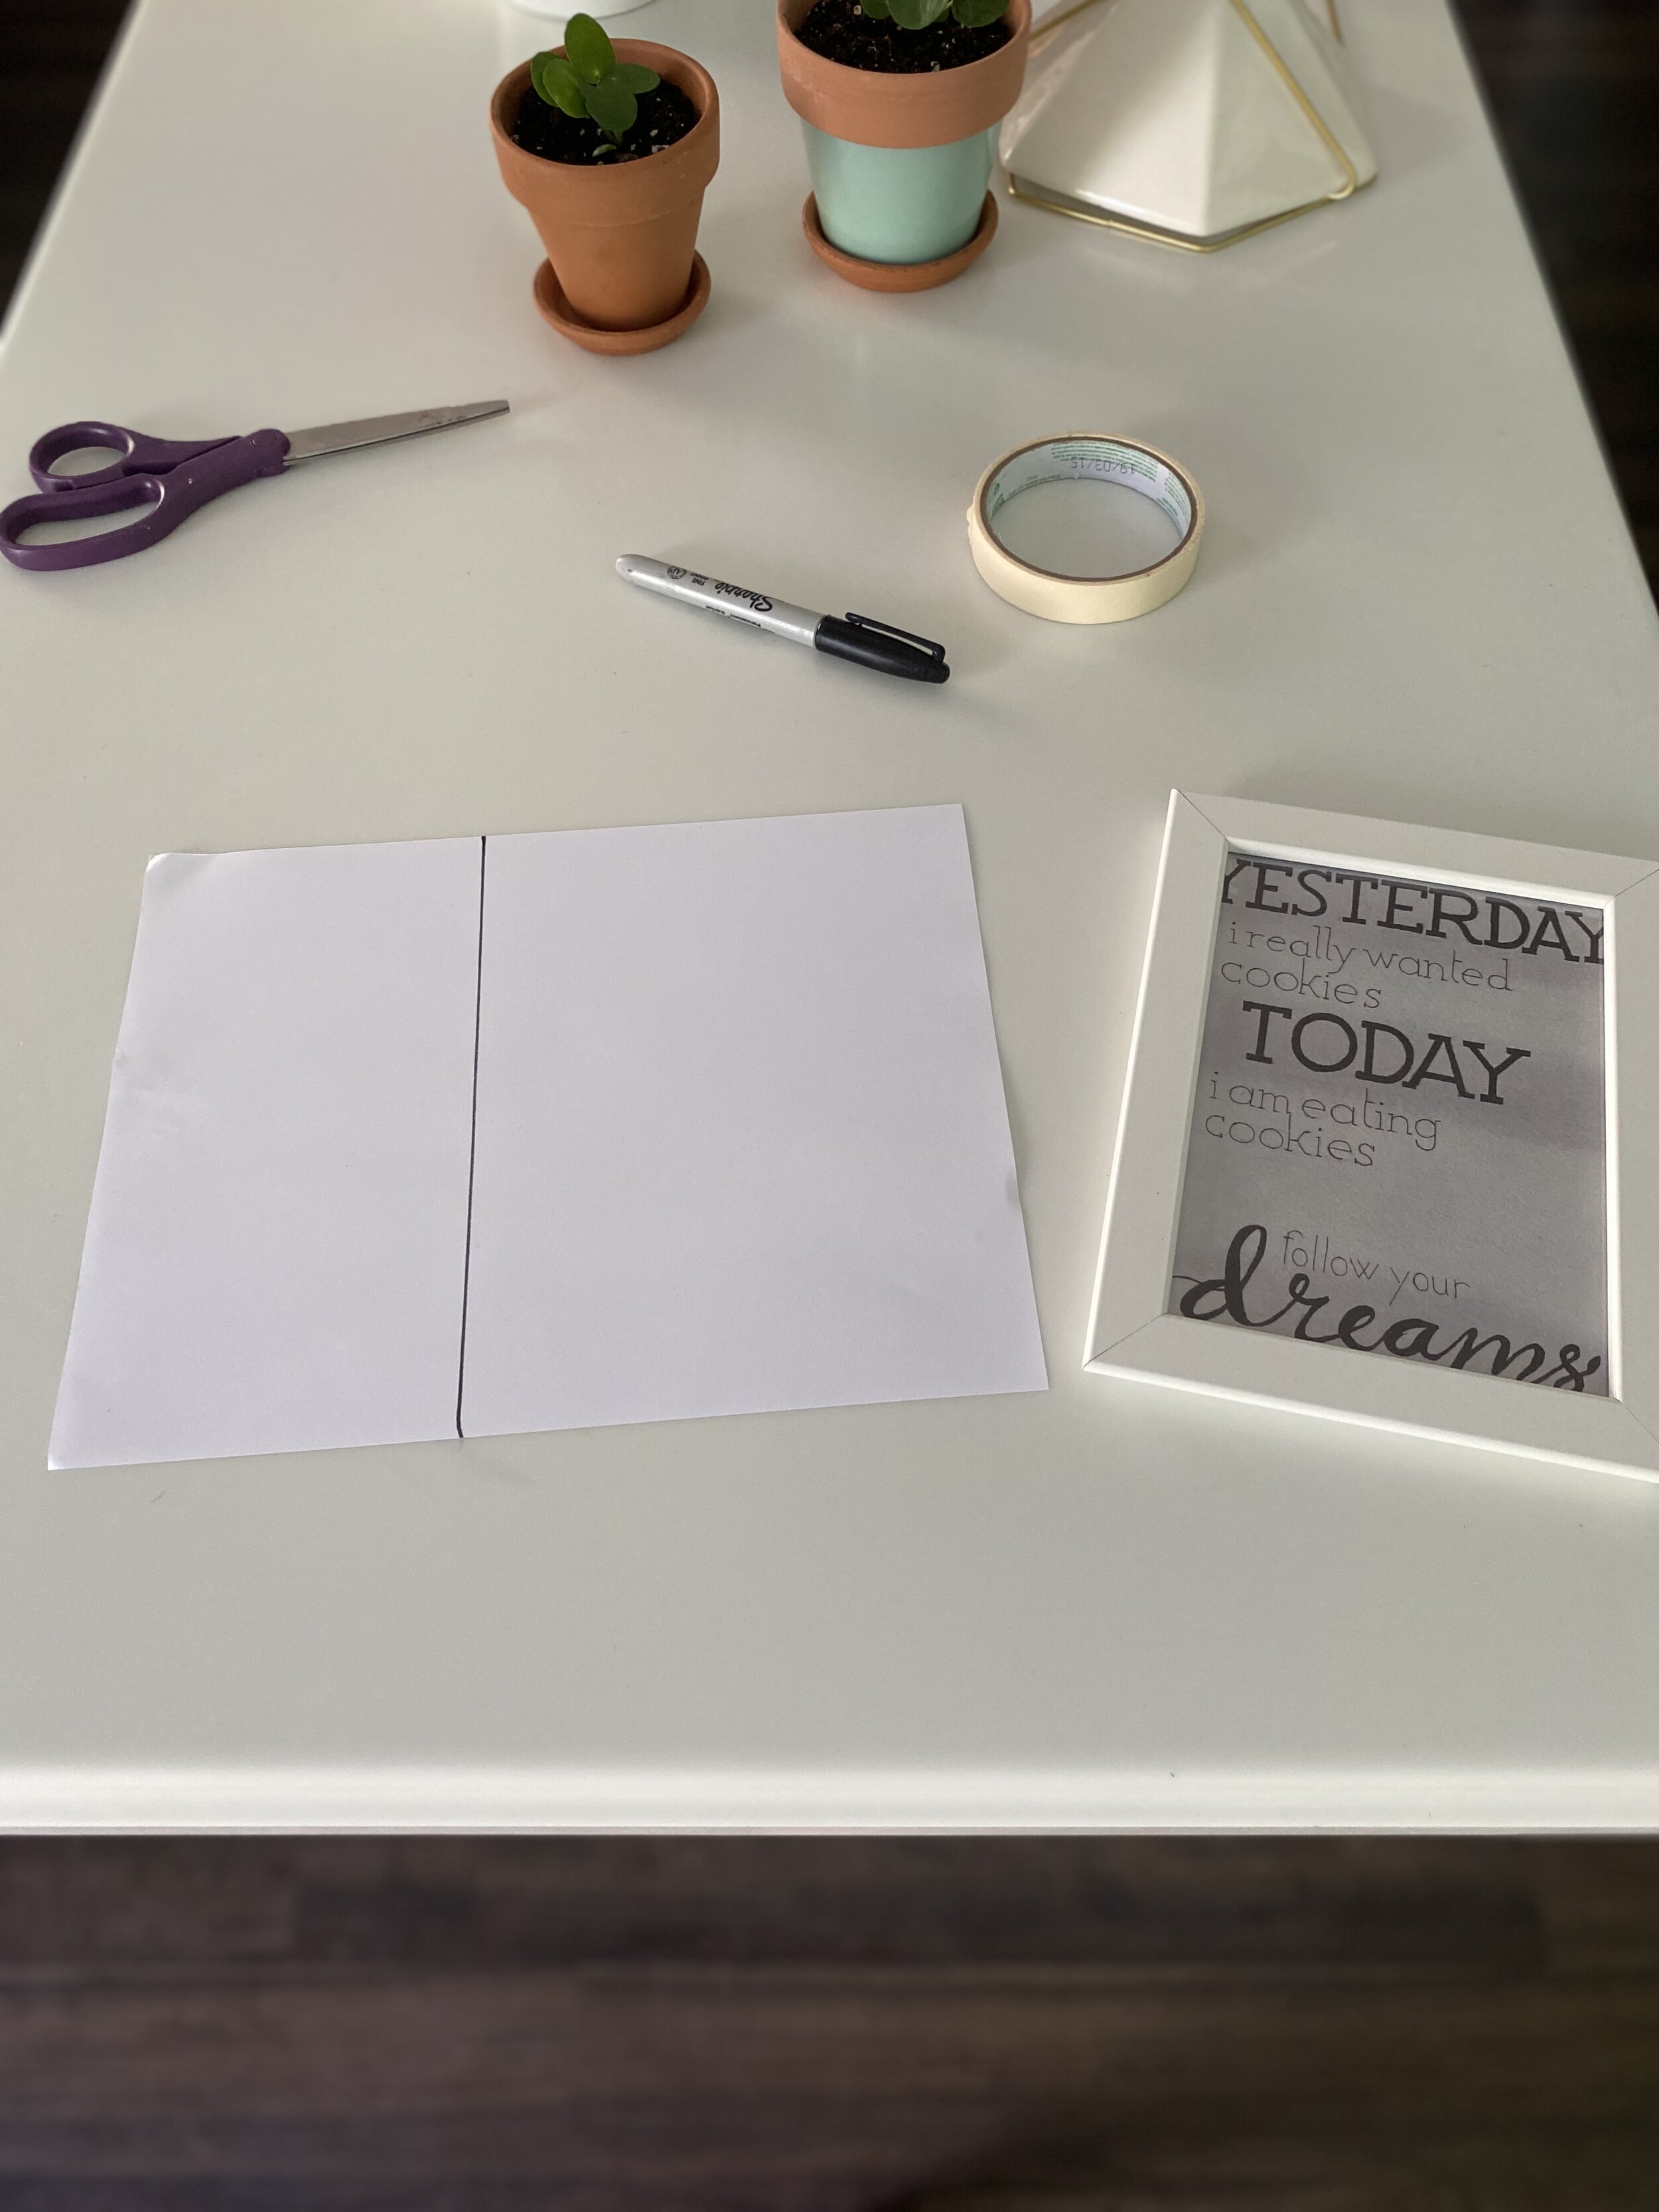
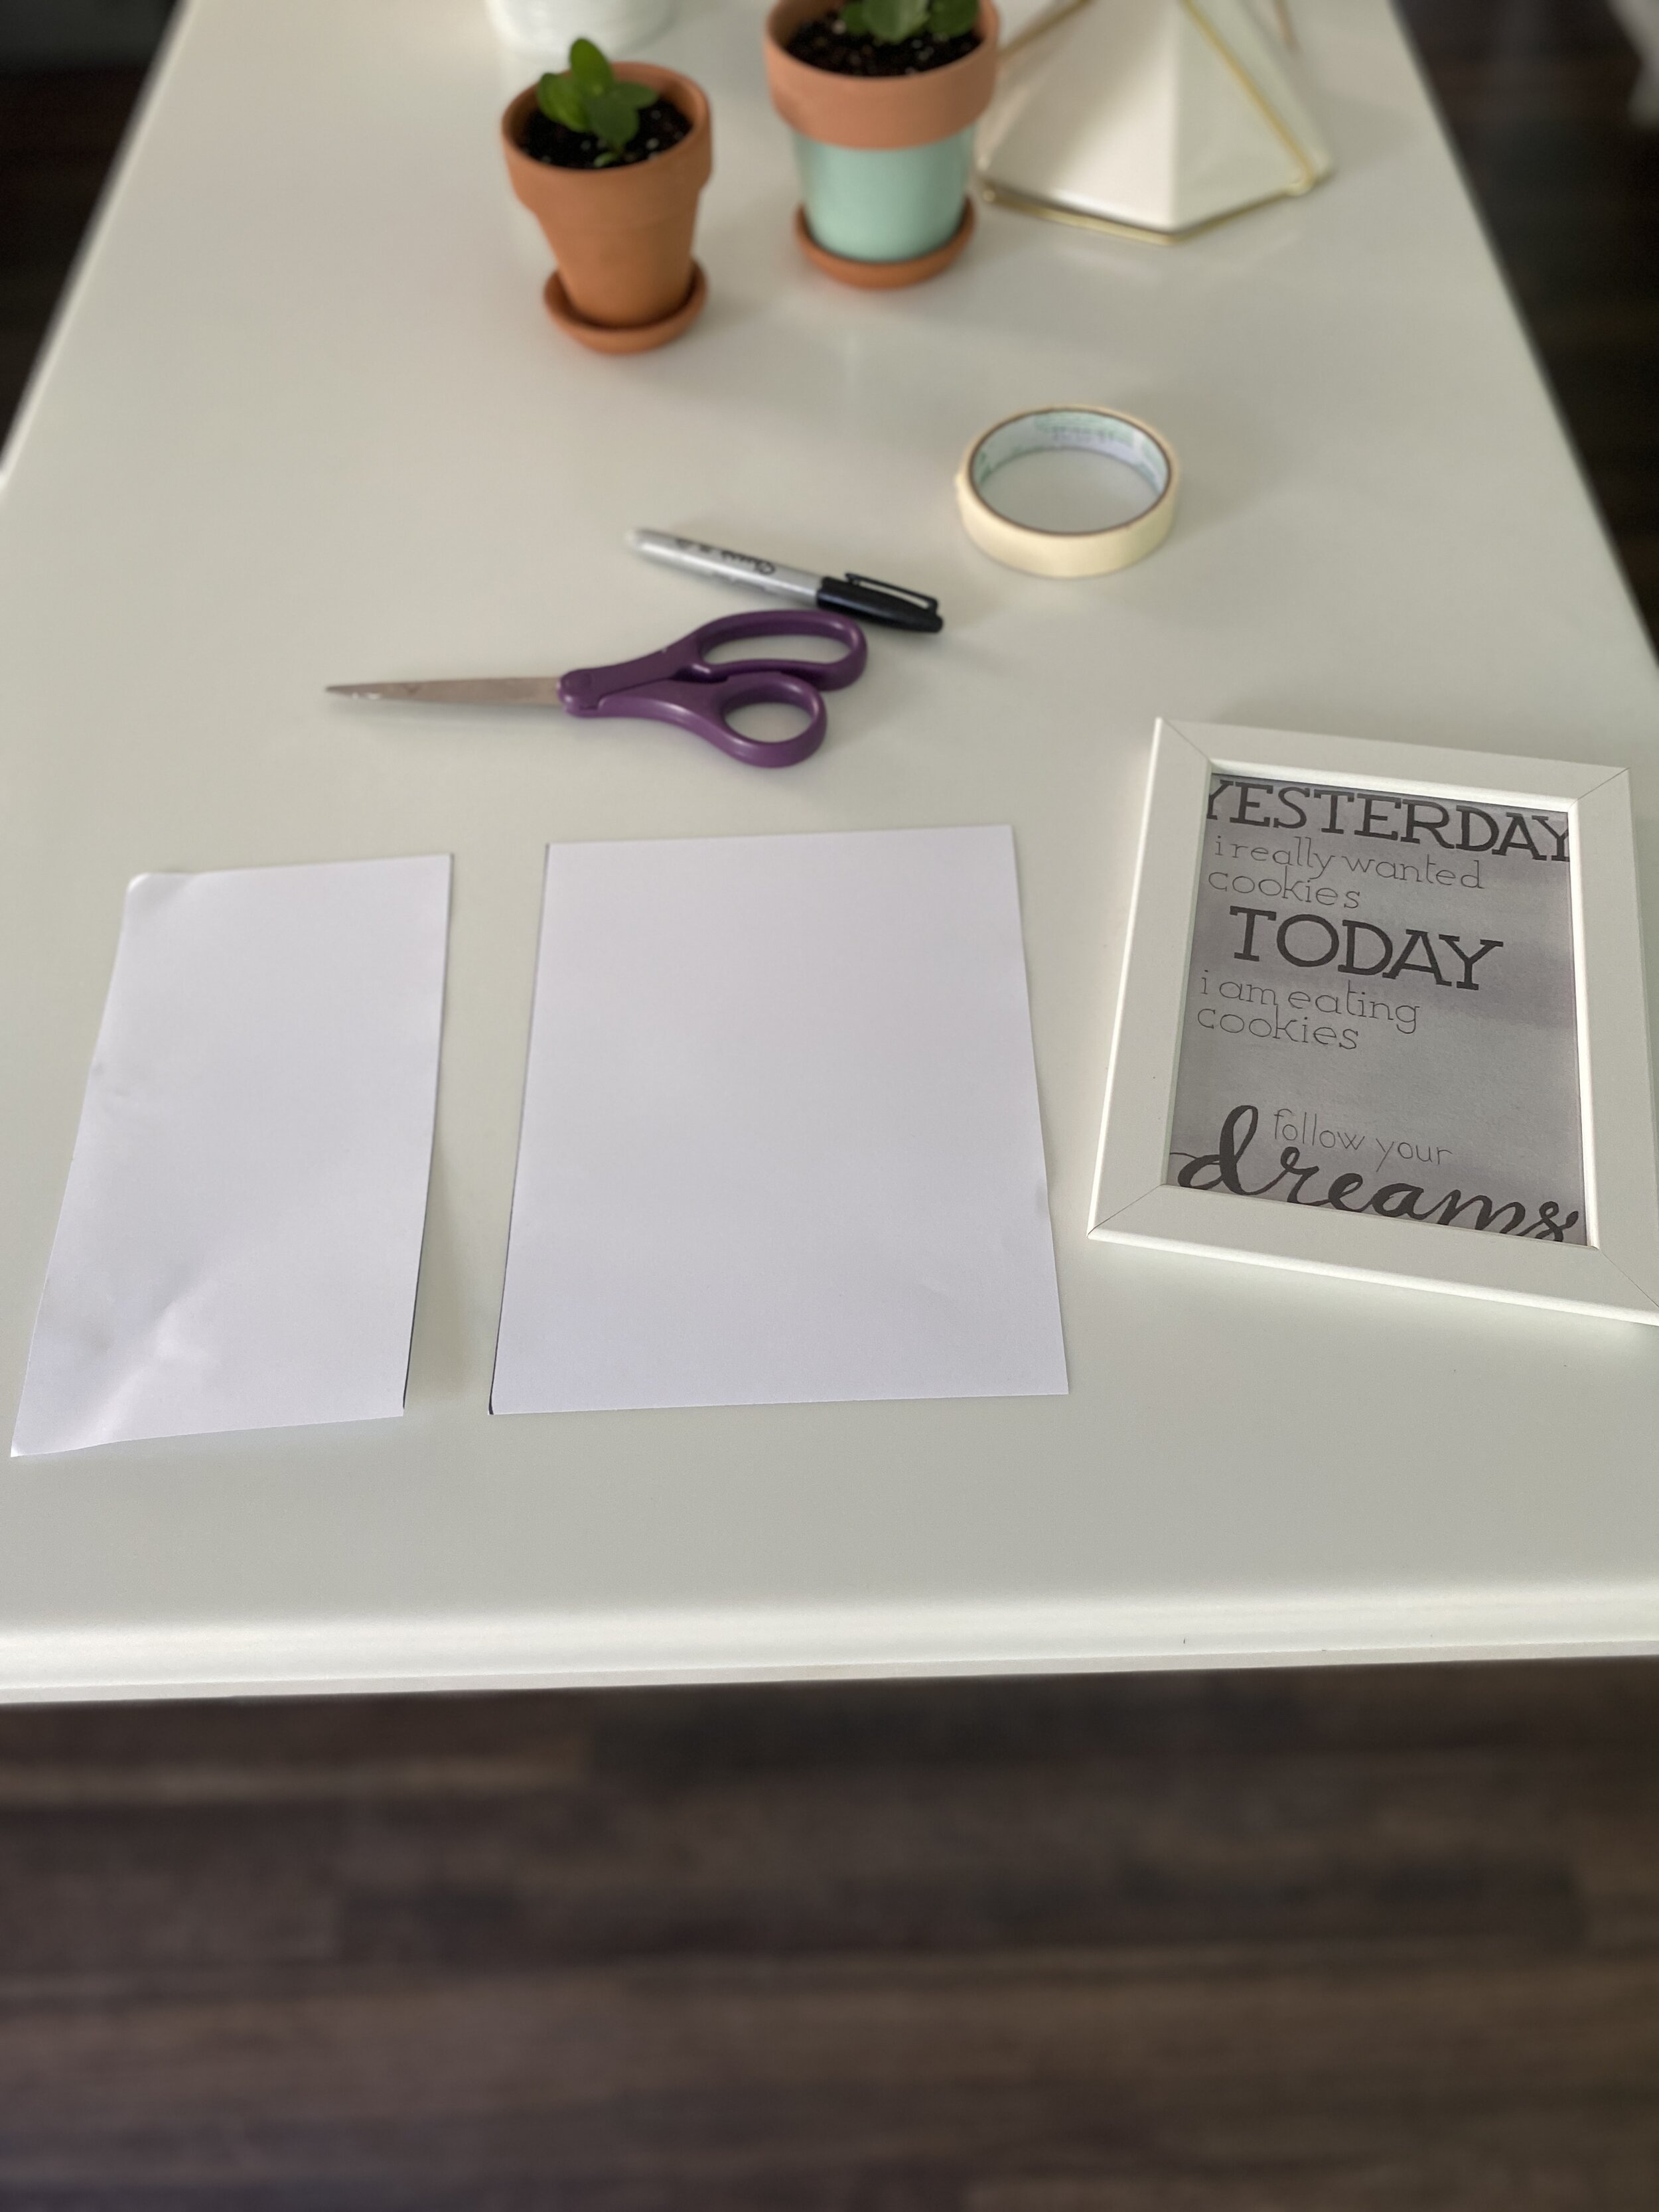
Regardless of if you’re creating a symmetrical or asymmetrical gallery wall, this step will make your life easier. Simply take a piece of paper (or tape a couple together if your frames are bigger than your paper) and lay your frames face down. Then trace around them and cut them out!
Find the focal point for your gallery wall
Measure your wall side to side and stick a piece of tape right in the middle. Then, measure up 57 to 60 inches from the floor. Move your tape to this spot. This should be where the center or your arrangement lies.
Plan your design

Now that you have templates of all your frames and you know where to center your arrangement, you can tape them up on the wall to figure out your design. Move them around as much as you need to. Take a step back and take a good hard look to make sure you like what you see.
Apparently, I didn’t take a picture of this step for this gallery wall, but oddly enough I still had a picture of the gallery wall from our previous house saved.
Space your frames
Okay, now things are getting serious… or, as serious as hanging a picture can get. Maybe tedious is a better word.
Once you have your design nailed down (figuratively speaking… we have a few more steps before we start nailing for real), you’ll want to consistently space your frames out. About 2 to 3 inches of spacing between each frame looks best. I spaced mine out 2 inches.
For asymmetrical designs, I recommend leveling your templates as you go and securing them down one by one.
For symmetrical designs, especially grid designs like mine, it’s a little more complicated…
To make sure everything was level all around, I first created a grid using masking tape.
I started by putting up one strip of tape alongside one of my templates and making sure that was level.
Then I lightly put up a second strip of tape and moved it as needed as I measured 2 inches and leveled as I went. Once I knew it was spaced evenly and level, I stuck it down harder.
I followed those same steps around each of my templates and ended up with this grid:

Tip: Don’t remove your templates yet like I did above. It’s better to leave them up until you’ve placed your nails.
Determine where your nail holes need to be
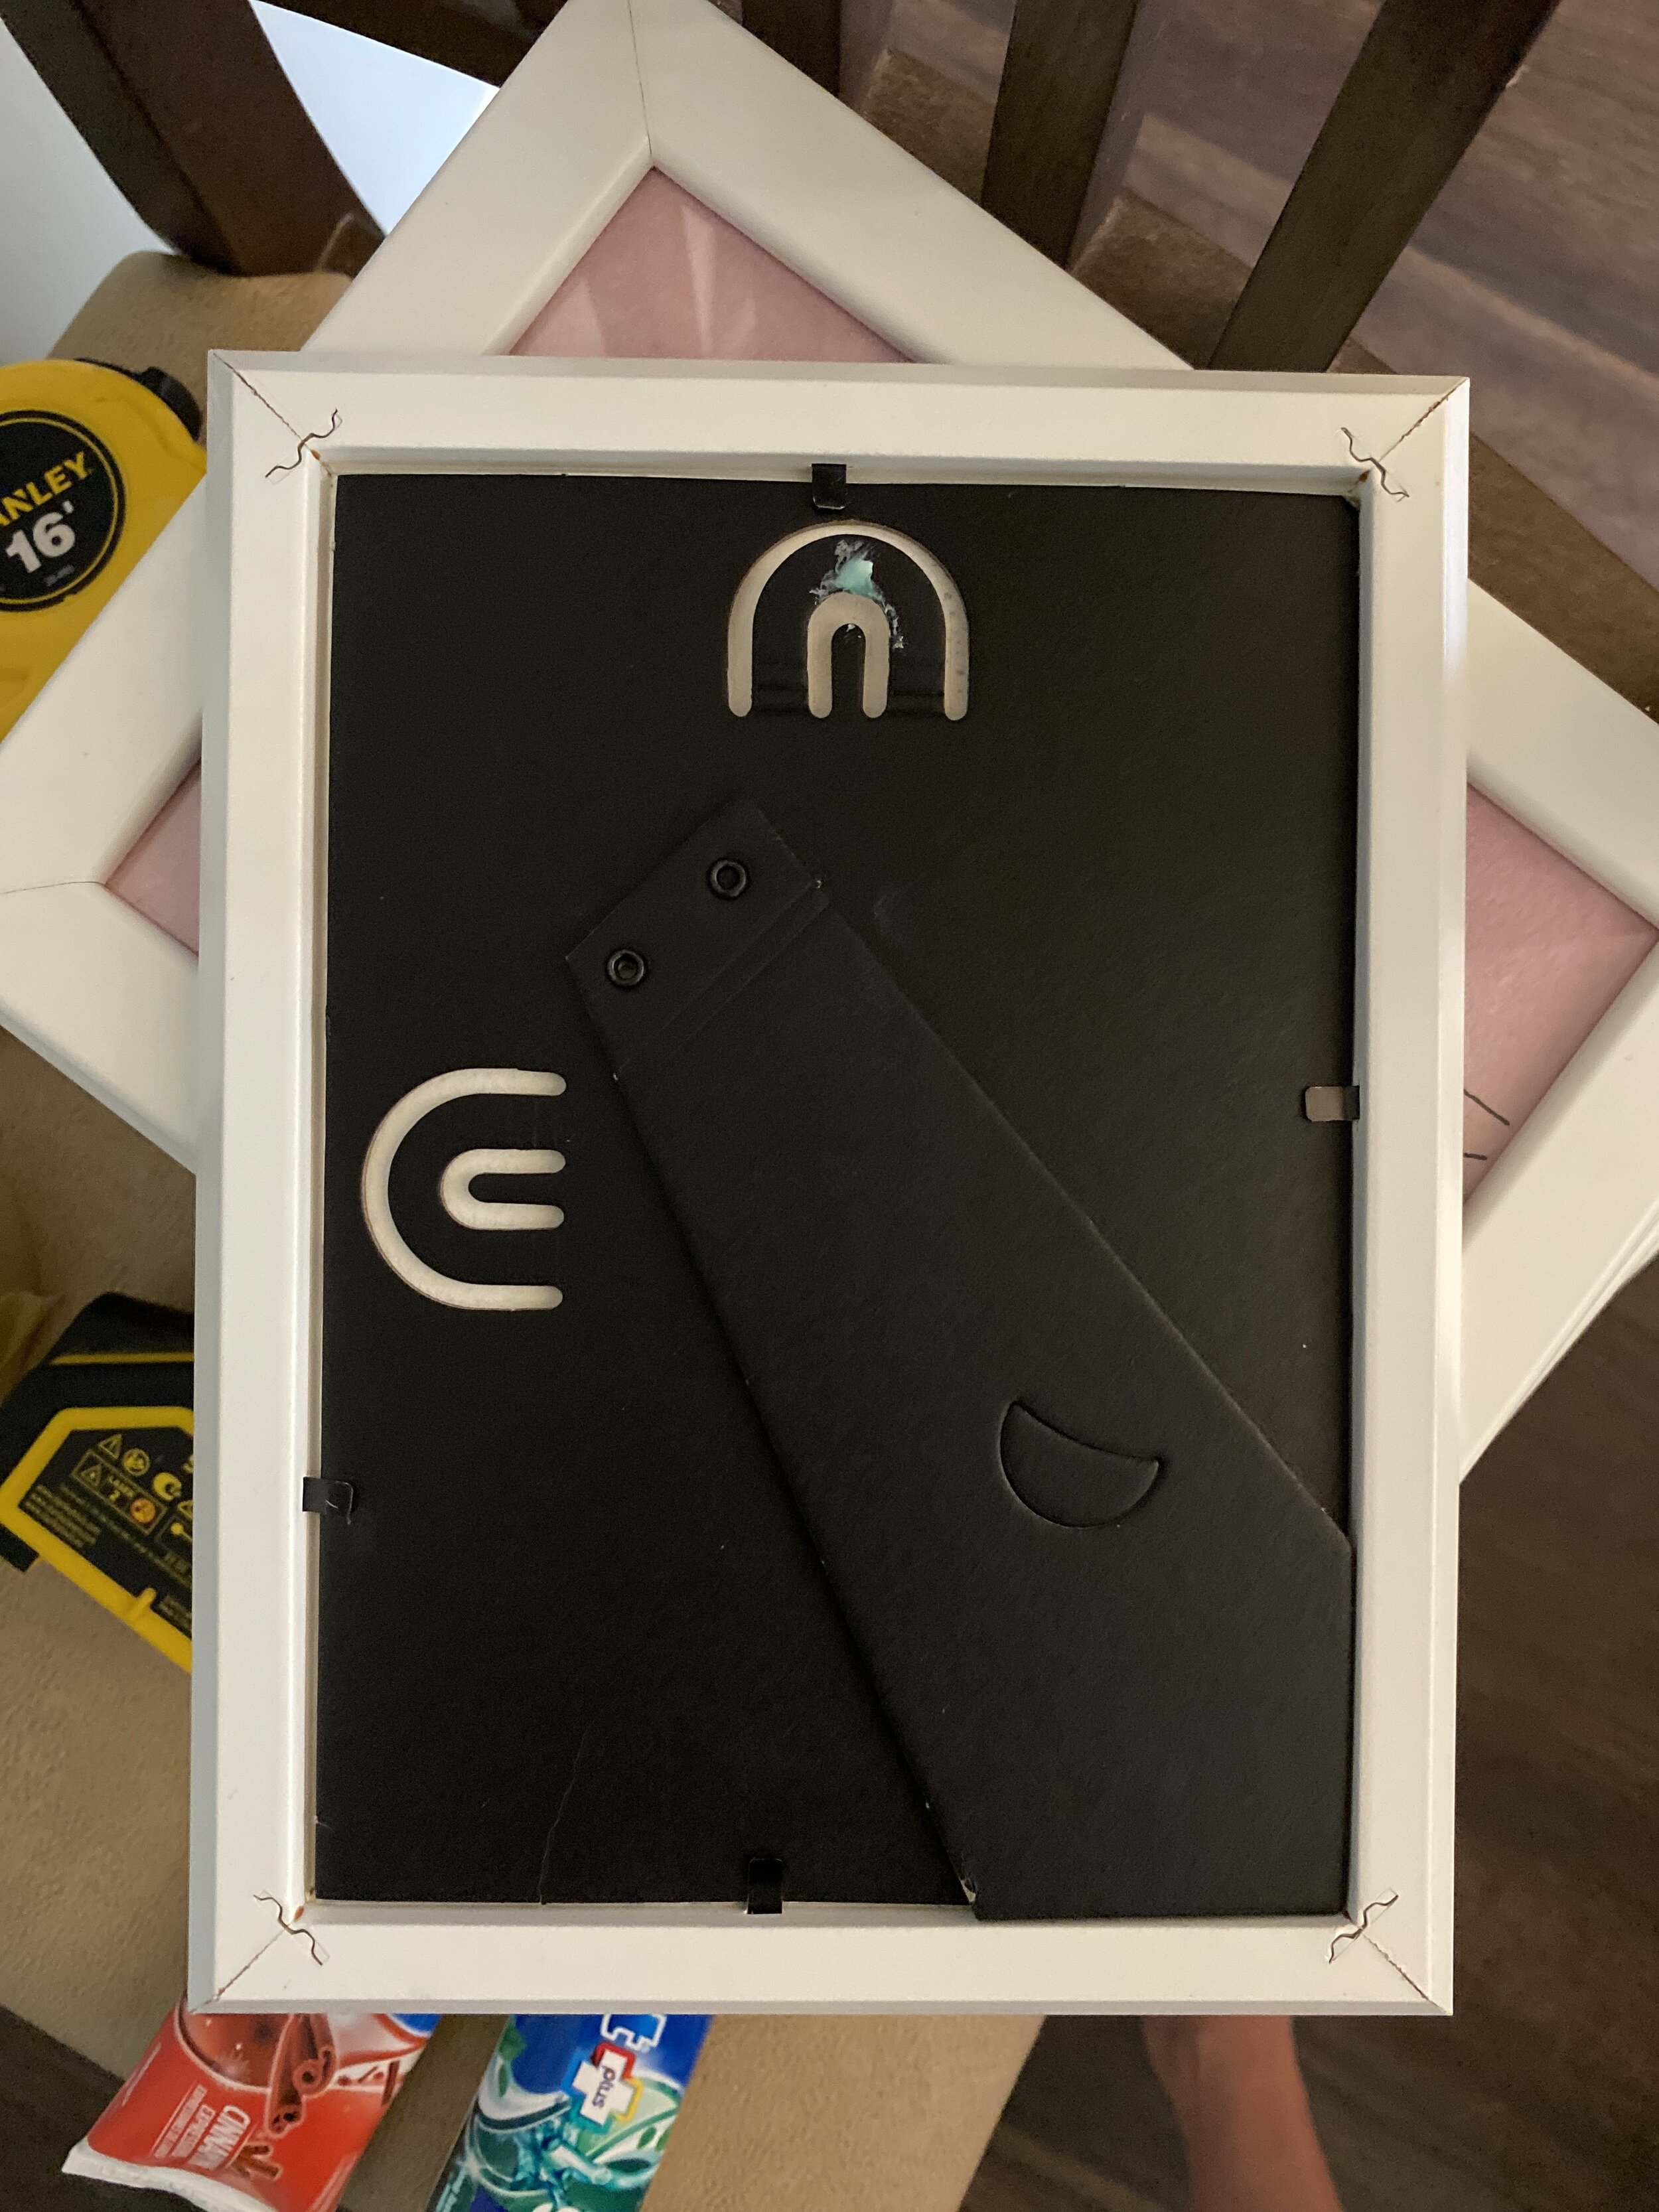
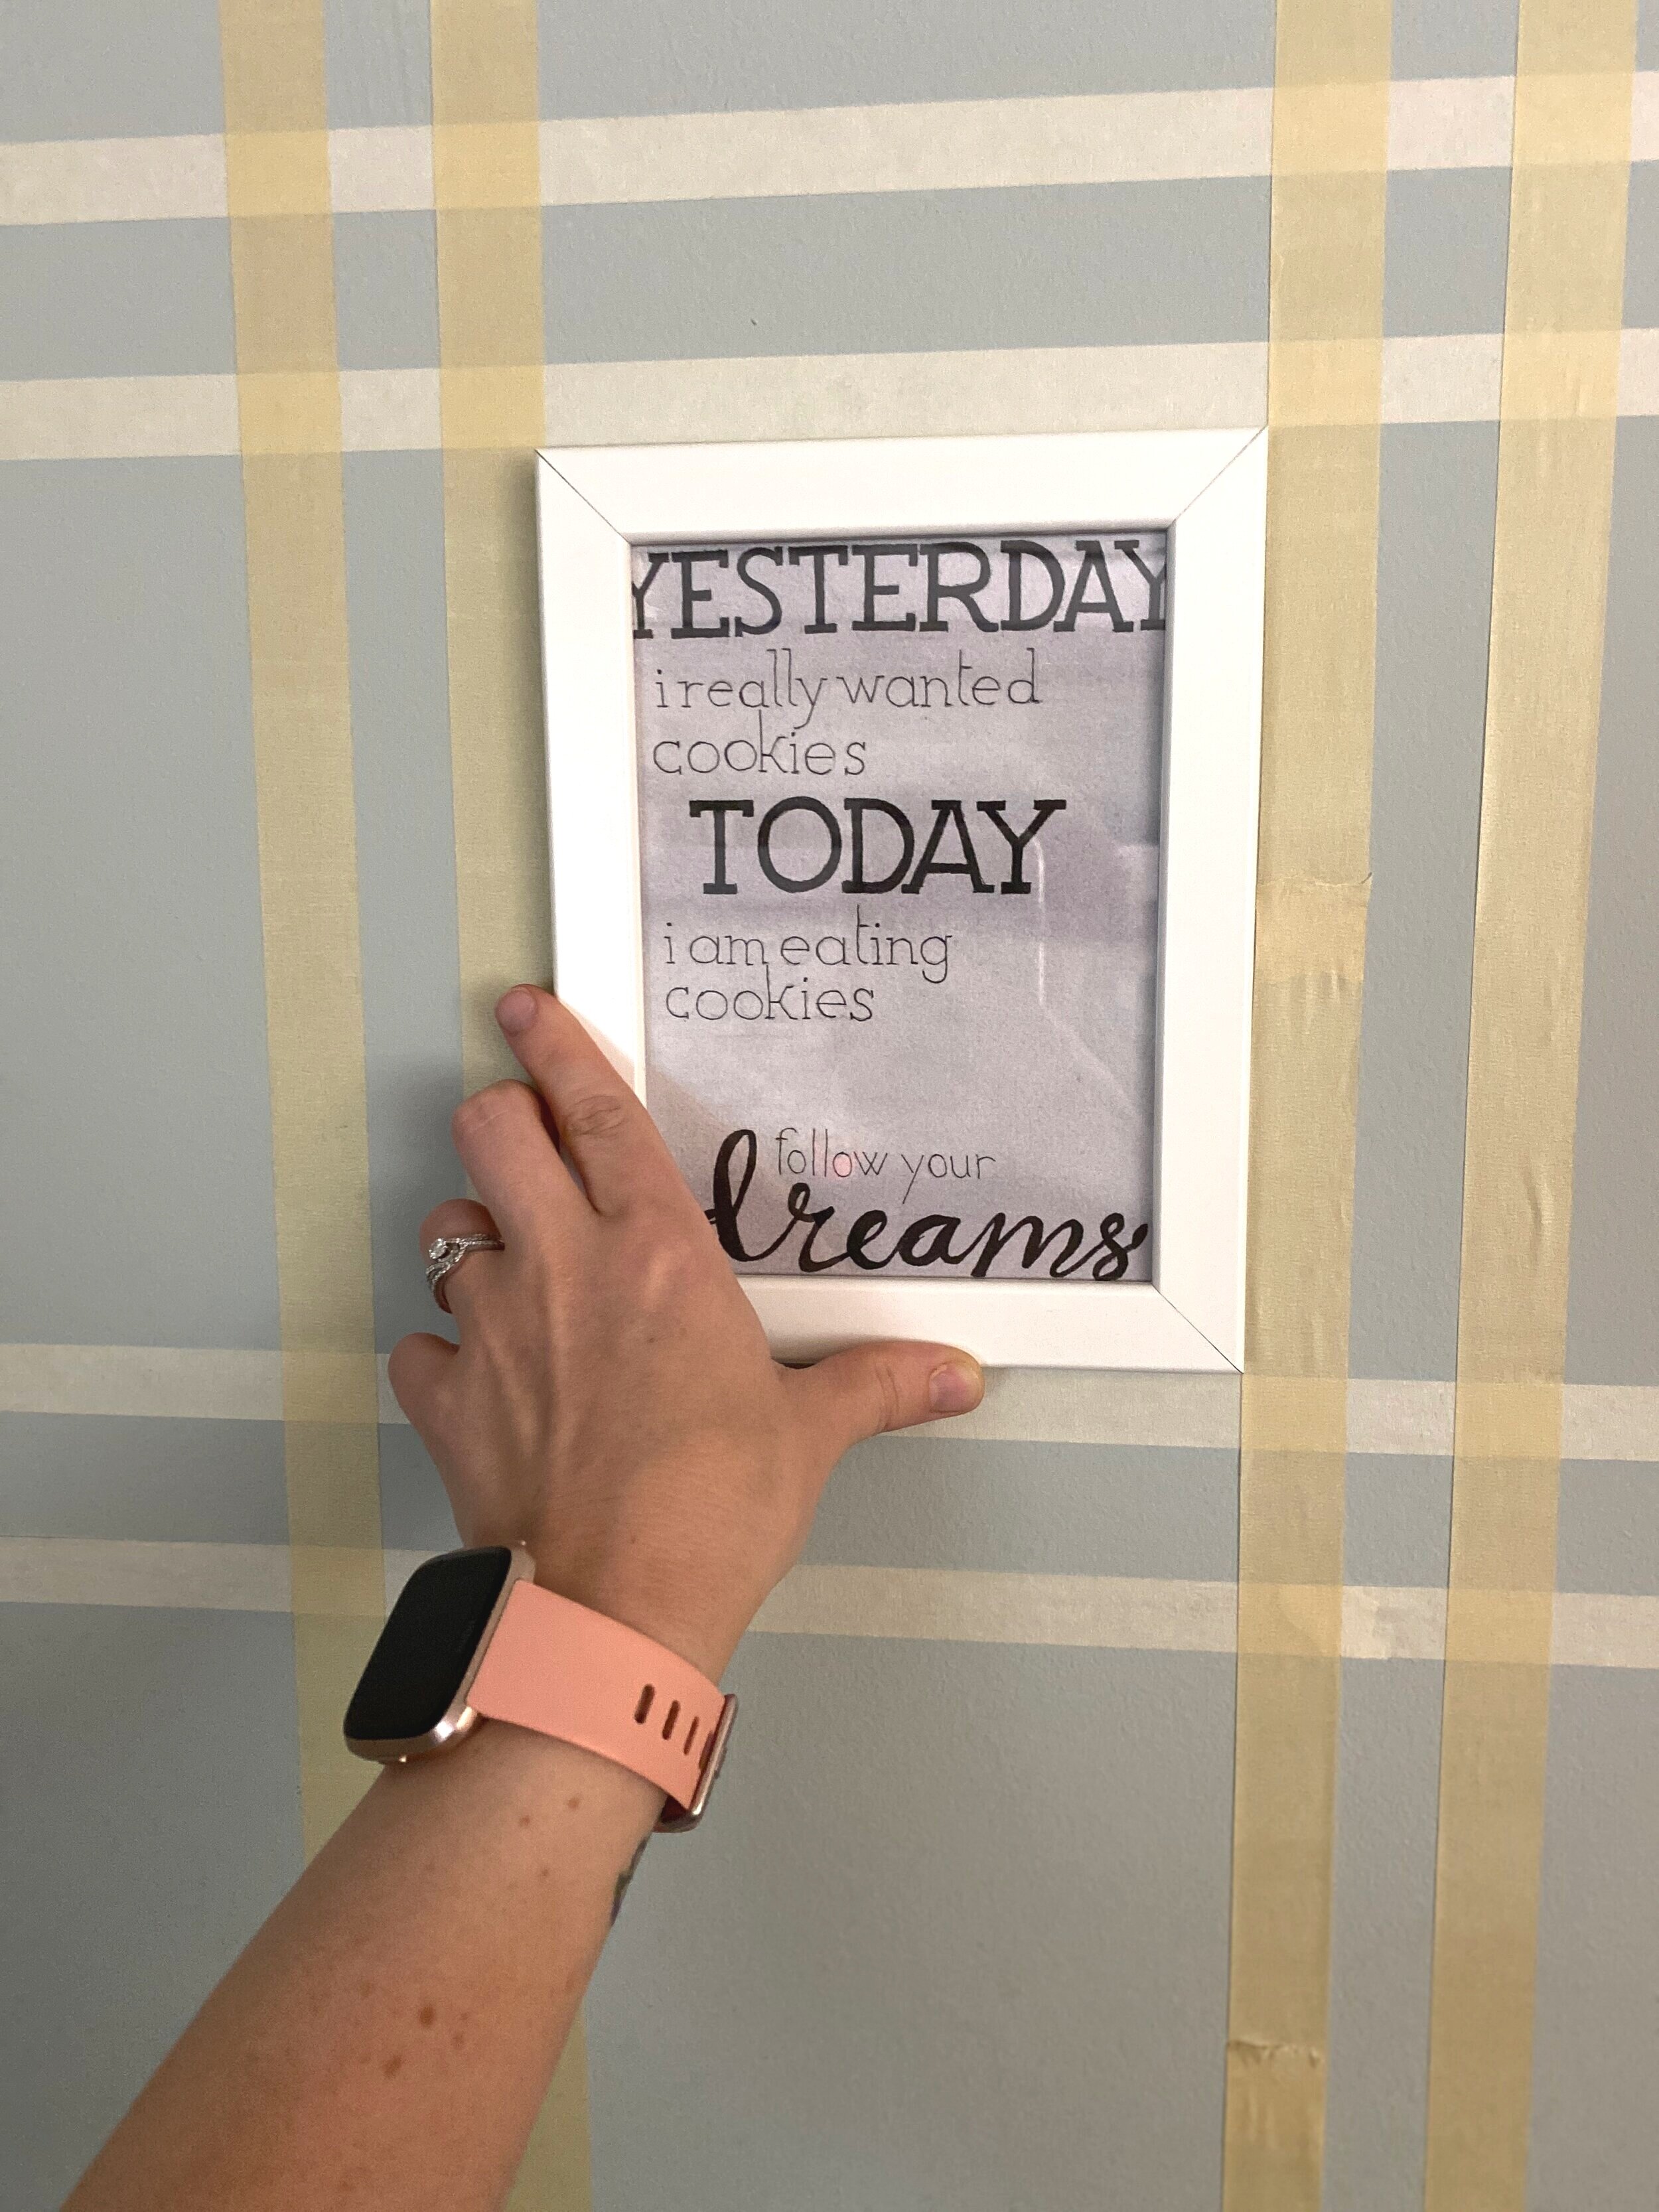
This is where the toothpaste comes into play! It’s such a simple trick that makes hanging pictures way easier.
Simply take your frame and put a dot of toothpaste on the hanger on the back. Then press it onto the corresponding template. This should leave a mark where you need to place your nail.
Level twice, nail once

Folks hanging asymmetrical layouts can skip this step. But if you have a symmetrical design, listen up!
I highly recommend breaking out your level once more before you commit to making a bunch of holes in your wall. I used a laser level to make sure all my toothpaste dots lined up vertically and horizontally, but a long, regular level will work too. If I found any that weren’t level, I leveled them and marked the new spot with a pencil.
Hang your pictures!

Alright, the moment you’ve been working toward… hang your dang pictures! You’ve taken the time to plan your design and mark where your nail holes should be. Now you can ACTUALLY nail them into the toothpaste dots you made and hang your pictures.
Bonus step: Secure your pictures


This isn’t required, but in a high traffic area like where my gallery wall hangs, this is a good tip.
Command Strips are your best friend here. I like to take a one, cut it in half lengthwise (a whole Command Strip will work too, but why waste them?), and stick it to the bottom of the back of my frame to hold it in place. That way, when someone inevitably grazes the frames as they walk by, they don’t shift them or knock them off the wall.
Final Thoughts About My Gallery Wall
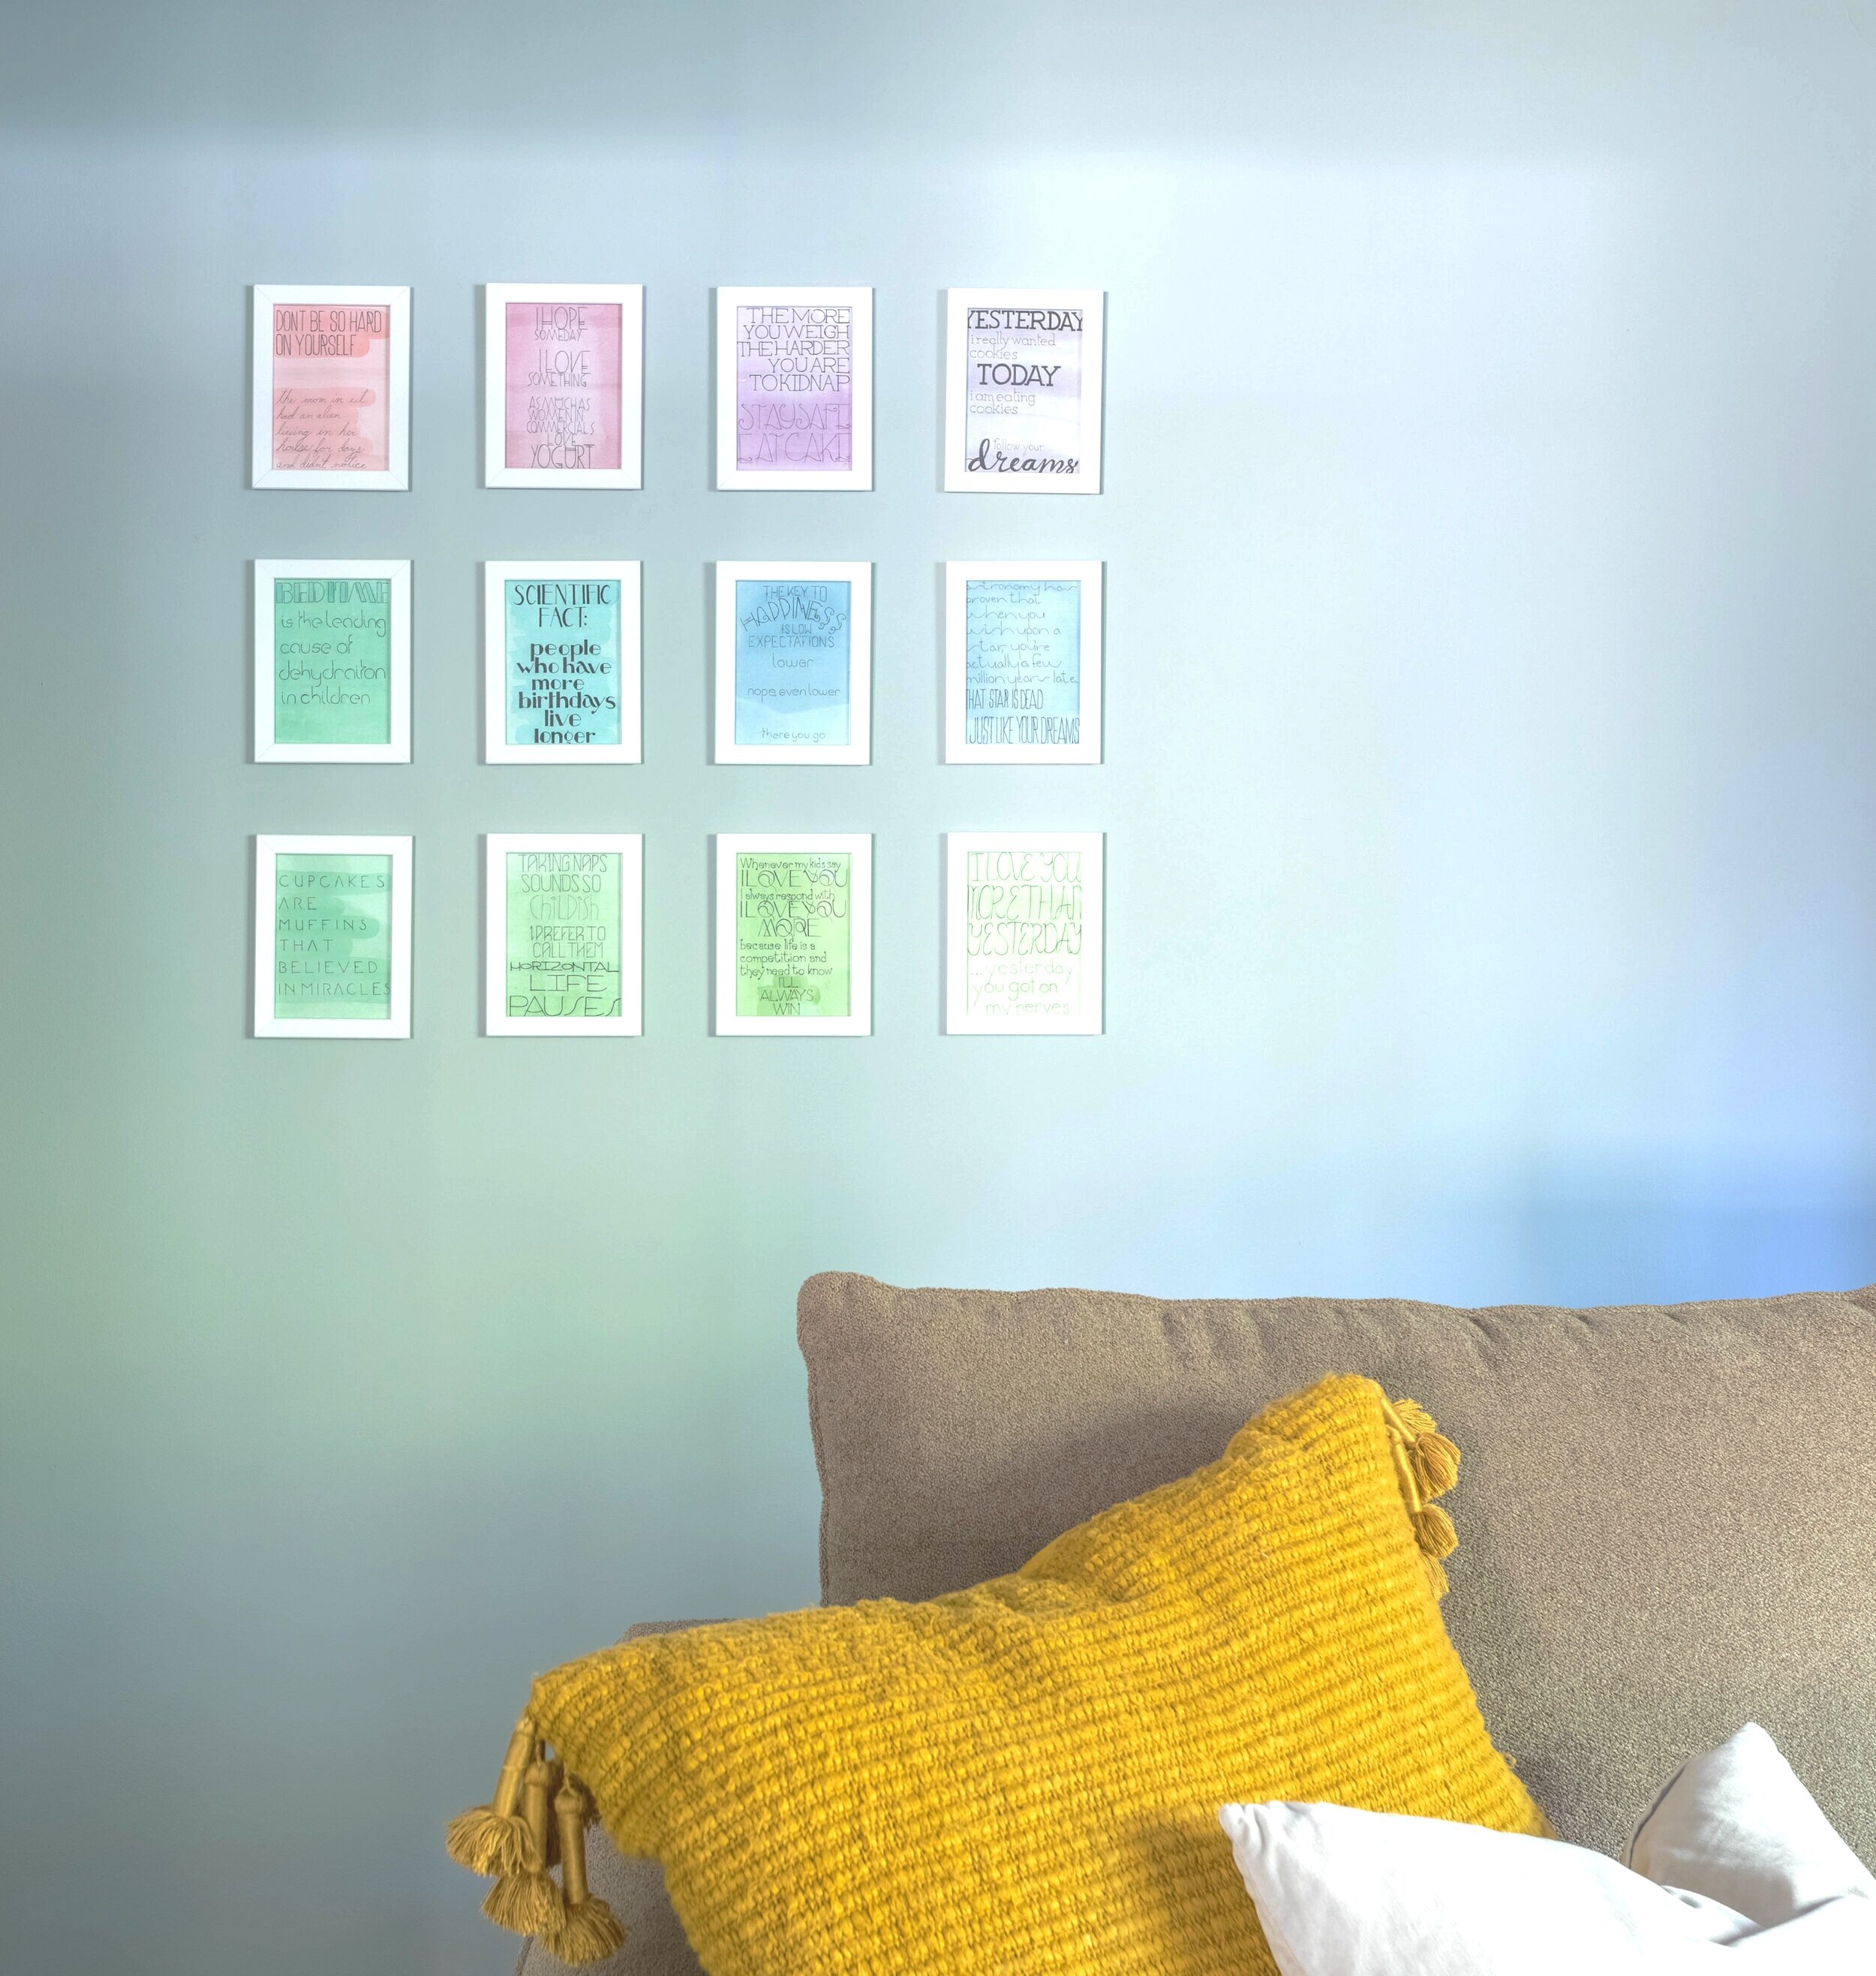
I’m loving having these pictures back up on the wall. They’re quirky and colorful and just add a bit of fun to the space. However, I admittedly should put them in larger frames with a nice white mat around them. There is more than enough space on this wall and the 4 x 6 frames they’re currently in cut off some of the text.
As I mentioned previously, I didn’t make these initially to create a gallery wall - that was just a happy coincidence. But now that they’ve become a focal point, why not make them the best versions of themselves they can be?
So, lucky for me, I’ll probably end up going through this whole process again before too long! In the meantime, there are PLENTY of other projects around the house to keep me busy - like our dining room renovation and master suite remodel. We’ve made good progress in both rooms and I’m looking forward to providing some updates really soon!
Related “How To” Posts
How to Hang a Gallery Wall (Without Creating Tons of Nail Holes!)

How to Pick the Right Size Lamp (Every Time!)
A lamp is a lamp is a lamp, right? WRONG. Although a lamp may easily serve its main purpose of lighting up a room, choosing the wrong size can really skew your design. But how do you pick the right size lamp? In this post, we’re going to talk all about how to choose the correct size table lamp, so you can select the perfect size lamp on the first try (and not try out a bunch like I did).
Choose the Perfect Size Lamp for Every Space
A lamp is a lamp is a lamp, right? WRONG. Although a lamp may easily serve its main purpose of lighting up a room, choosing the wrong size can really skew your design. But how do you pick the right size lamp?
You wouldn’t think picking out a lamp would be difficult, would you? I certainly didn’t… until I tried to pick one out for my desk.
As I was perusing my options, I quickly realized I have no clue how to choose the right size lamp! Standing in Target, I found myself with lamp paralysis, second-guessing every lamp I laid eyes on. (Don’t worry, I don’t think it’s contagious.)
You see, all these years, I’ve just been winging it. Sometimes I’ve bought the right size, but other times I’ve been way off base. But since I just ran into this issue, I figured other folks have likely had this conundrum before too - and that’s okay! There’s more to it than you’d think.
That’s why in this post, we’re going to talk all about how to choose the correct size table lamp, so you can select the perfect size lamp on the first try (and not try out a bunch like I did).
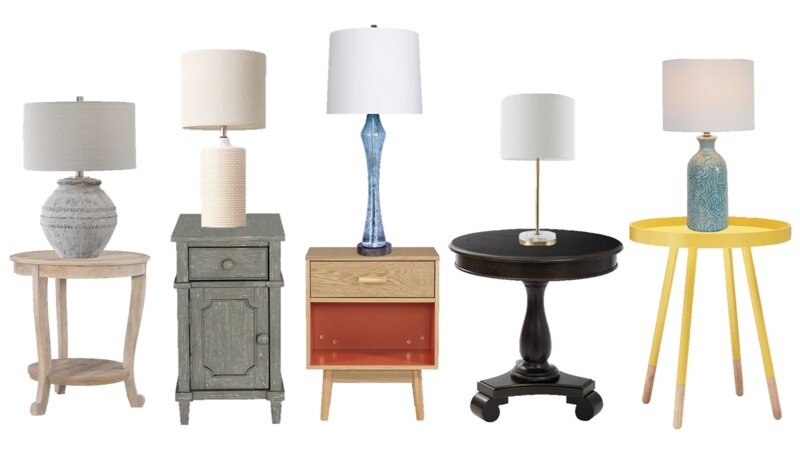
I’ve been researching this topic a ton, and I’ve learned that there are two main questions to consider: “what size lampshade do you need?” and “how tall should your lamp be?”. Simply picking out a lamp that’s pretty won’t cut it.
To buy the right lamp for your space, answering these two questions can make or break your room design. And the answer to both of these questions is more mathematical than I expected.
How to Choose the Right Size Lamp
Lamp base and shade requirements can vary depending on the room and what types of tasks are performed there. Height, width, and style all play an important role in choosing the best lamp for your space. And to demonstrate how these elements come into play, I’m going to regale you all with my astonishing photo manipulation skillz once again. You’re welcome.
Height
Height is one of the most involved factors in choosing the right lamp. Let me explain what I mean.
First of all, when considering the height of your lamp, you want to make sure that whatever surface your lamp is on, it isn’t so tall that it shines into your eyes. To prevent this, make sure the bottom of the lampshade is no higher than eye level. This should hide the glare from the light bulb and actually allow you to see. You’re trying to light the space - not blind yourself.
For example, in the image below, if you were to sit on the couch, the bottom of the lampshade should hit at or below eye level.
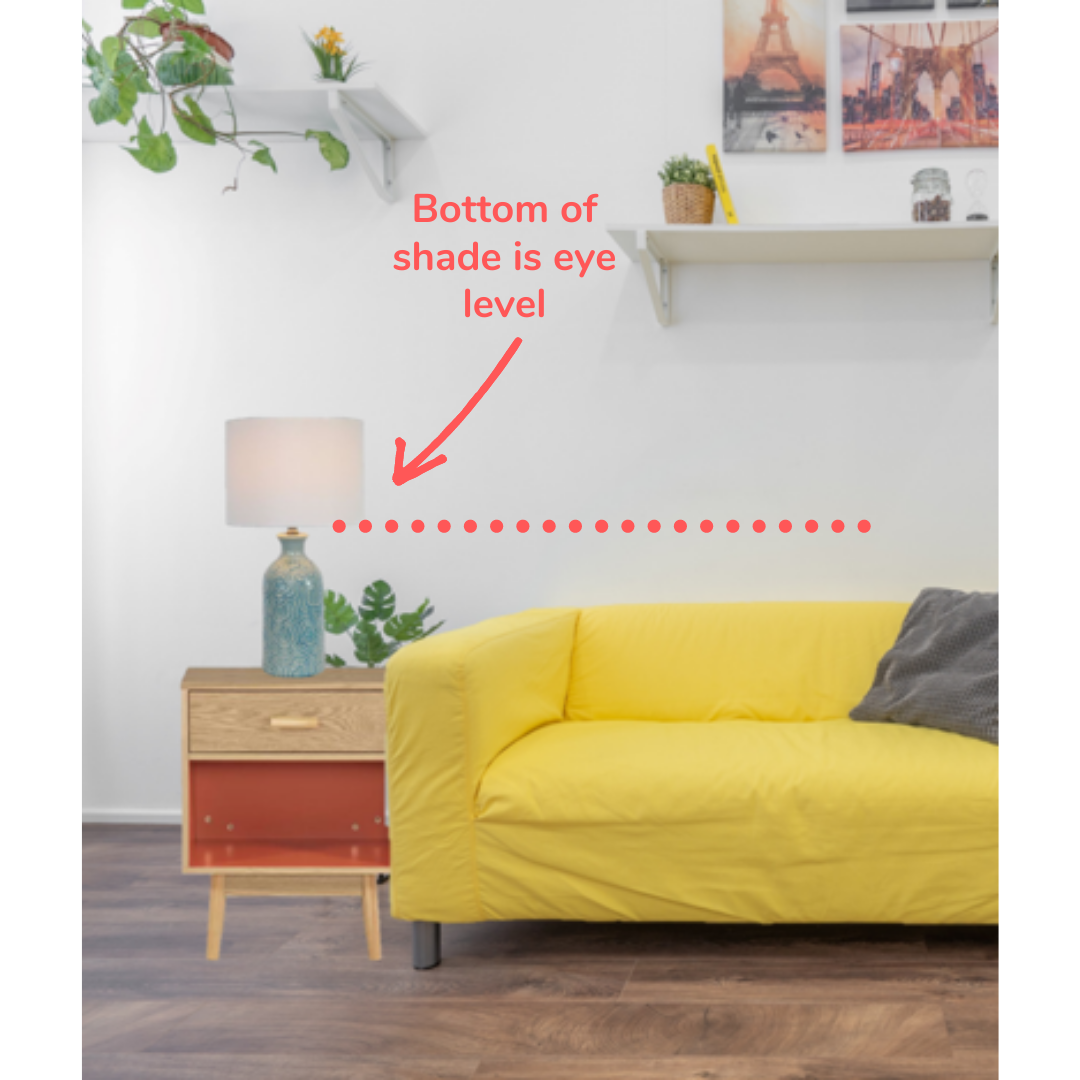
But you should also consider the ratio of the height of the shade to the lamp base. The shade should be approximately ⅓ the height of the entire lamp (including the bulb and/or harp). This means, if your lamp is 24 inches tall from base to bulb/harp, your shade should be around 8 inches tall.
I’m going to throw it out there up front - rarely will any base/shade combination have the perfect ratios, but as long as you’re within a couple of inches it’ll look fine. Take the below image for example. Although the shade is a little larger than 1/3 the size of the base, it’s close enough that it still looks okay.
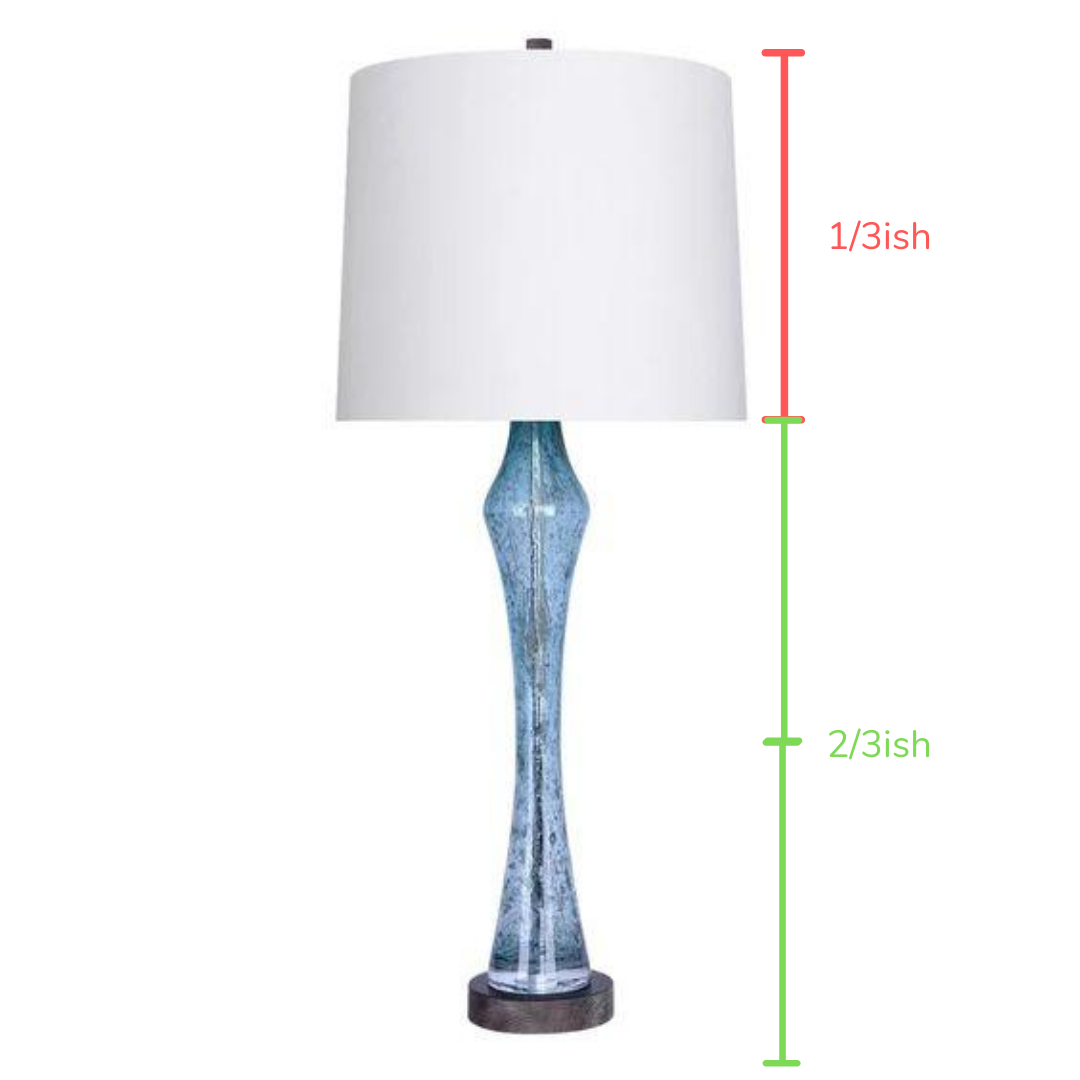
Lastly, it’s a good idea to consider the scale of the table your lamp is sitting on in relation to the lamp base. If you had a small end table and a giant lamp, it would certainly look (and probably be) top-heavy, and vice versa!
As a rule of thumb, consider that your lamp should be a maximum of 1.5 times the height of your table.


Width
To make things more complicated, it’s also advised that the measurement across the bottom of the shade should be twice as wide as the diameter of the base of your lamp.
For example, if the base of your lamp is 6 inches wide, the bottom of your lampshade should be 12 inches wide (give or take an inch or two). For a square or rectangular lamp base or shade, measure diagonally.
But don’t give up yet! In the example below, you can see how that measurement isn’t exact. Remember - within an inch or two is close enough! No one is going to take a tape measure to your lamp - and if they do, do you really want that person in your house anyway?
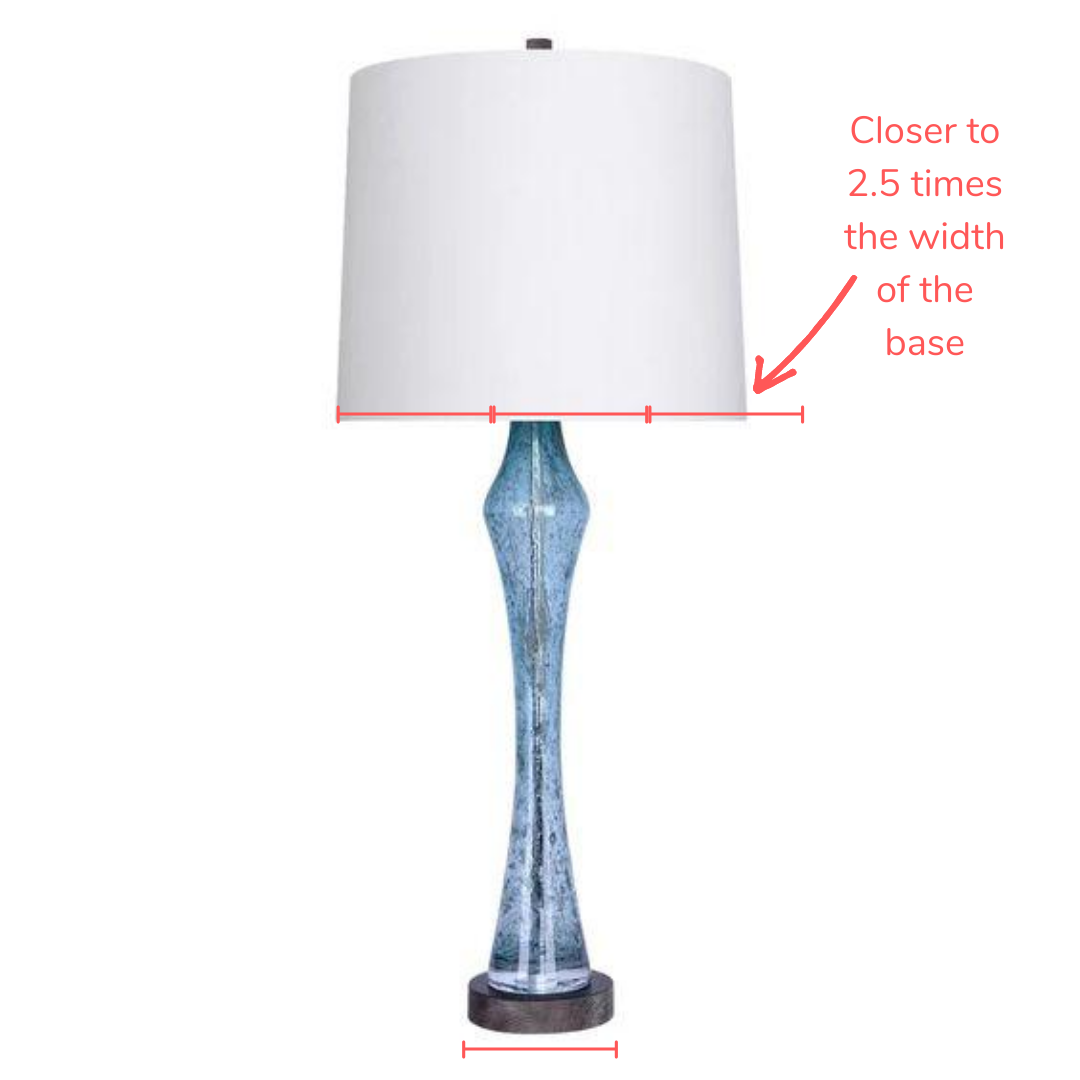
One other, more straight-forward aspect to lamp width: you should also consider the width of the table your lamp is sitting on and make sure your lampshade is no wider than the table. This not only looks better but also helps prevent it from being accidentally knocked over.

Style
The last element of picking the right lamp is definitely the most intuitive, least math-involved (yay!), and dare I say most important? Simply enough, you want your lamp to “go” with the style of the table it’s sitting on (say whaaat?).
For instance, if you have a big, chunky table, you can probably get away with a big, chunky lamp. But a super skinny lamp (even if it was tall) would look odd.
I would also think about the style of not only the table but the entire room. Your lamp is essentially a functional design element - have fun with it - but make sure it fits the space.


Summary
I know I just threw a lot of information at you, so here are the main points:
The bottom of the lampshade should be no higher than eye level.
The lampshade should be approximately ⅓ the height of the entire lamp (including the bulb and/or harp).
Your lamp should be a maximum of 1.5 times the height of the table.
The shade should be twice as wide as the diameter of the base of the lamp.
The lampshade should be no wider than the table it sits on.
Your lamp should “go” with the style of the room.
Choosing a Lamp for my Office
So, following these rules, was I FINALLY able to find a lamp for my office? Well, allow me to tell you the story of my little lamp adventure.
Of course a few weeks after I posted about the DIY Sharpie wall in my office, I learn that I have the completely wrong-sized lamp in there!

Granted, I want to save some face by saying that a) I’ve always felt like something was “off” with this lamp but never quite knew what and b) I stole this lamp from our bedroom because I needed one in my office in a hurry. It was never meant to be permanent. Excuses aside, I figured it was a prime example of what not to do when choosing a lamp. And here’s why:
Mistake #1: The biggest no-no here, and the reason I now realize why this lamp has always felt “off”, is the giant lampshade. It’s half the height of the lamp! And it’s probably 3 times as wide as the base.
Mistake #2: I know the desk looks pretty in the picture above, but in real life, I have my giant desktop up there and it feels CROWDED. This lamp is way too big to be functional in this space.

Mistake #3: I know I mentioned above that this lamp was a temporary fix, but to really drive the point home I think it’s important to point out the mismatching styles going on. First of all, the wall is so busy that the lines on the lampshade almost make you dizzy. And second, the style of the base is a little more traditional than this room can handle.
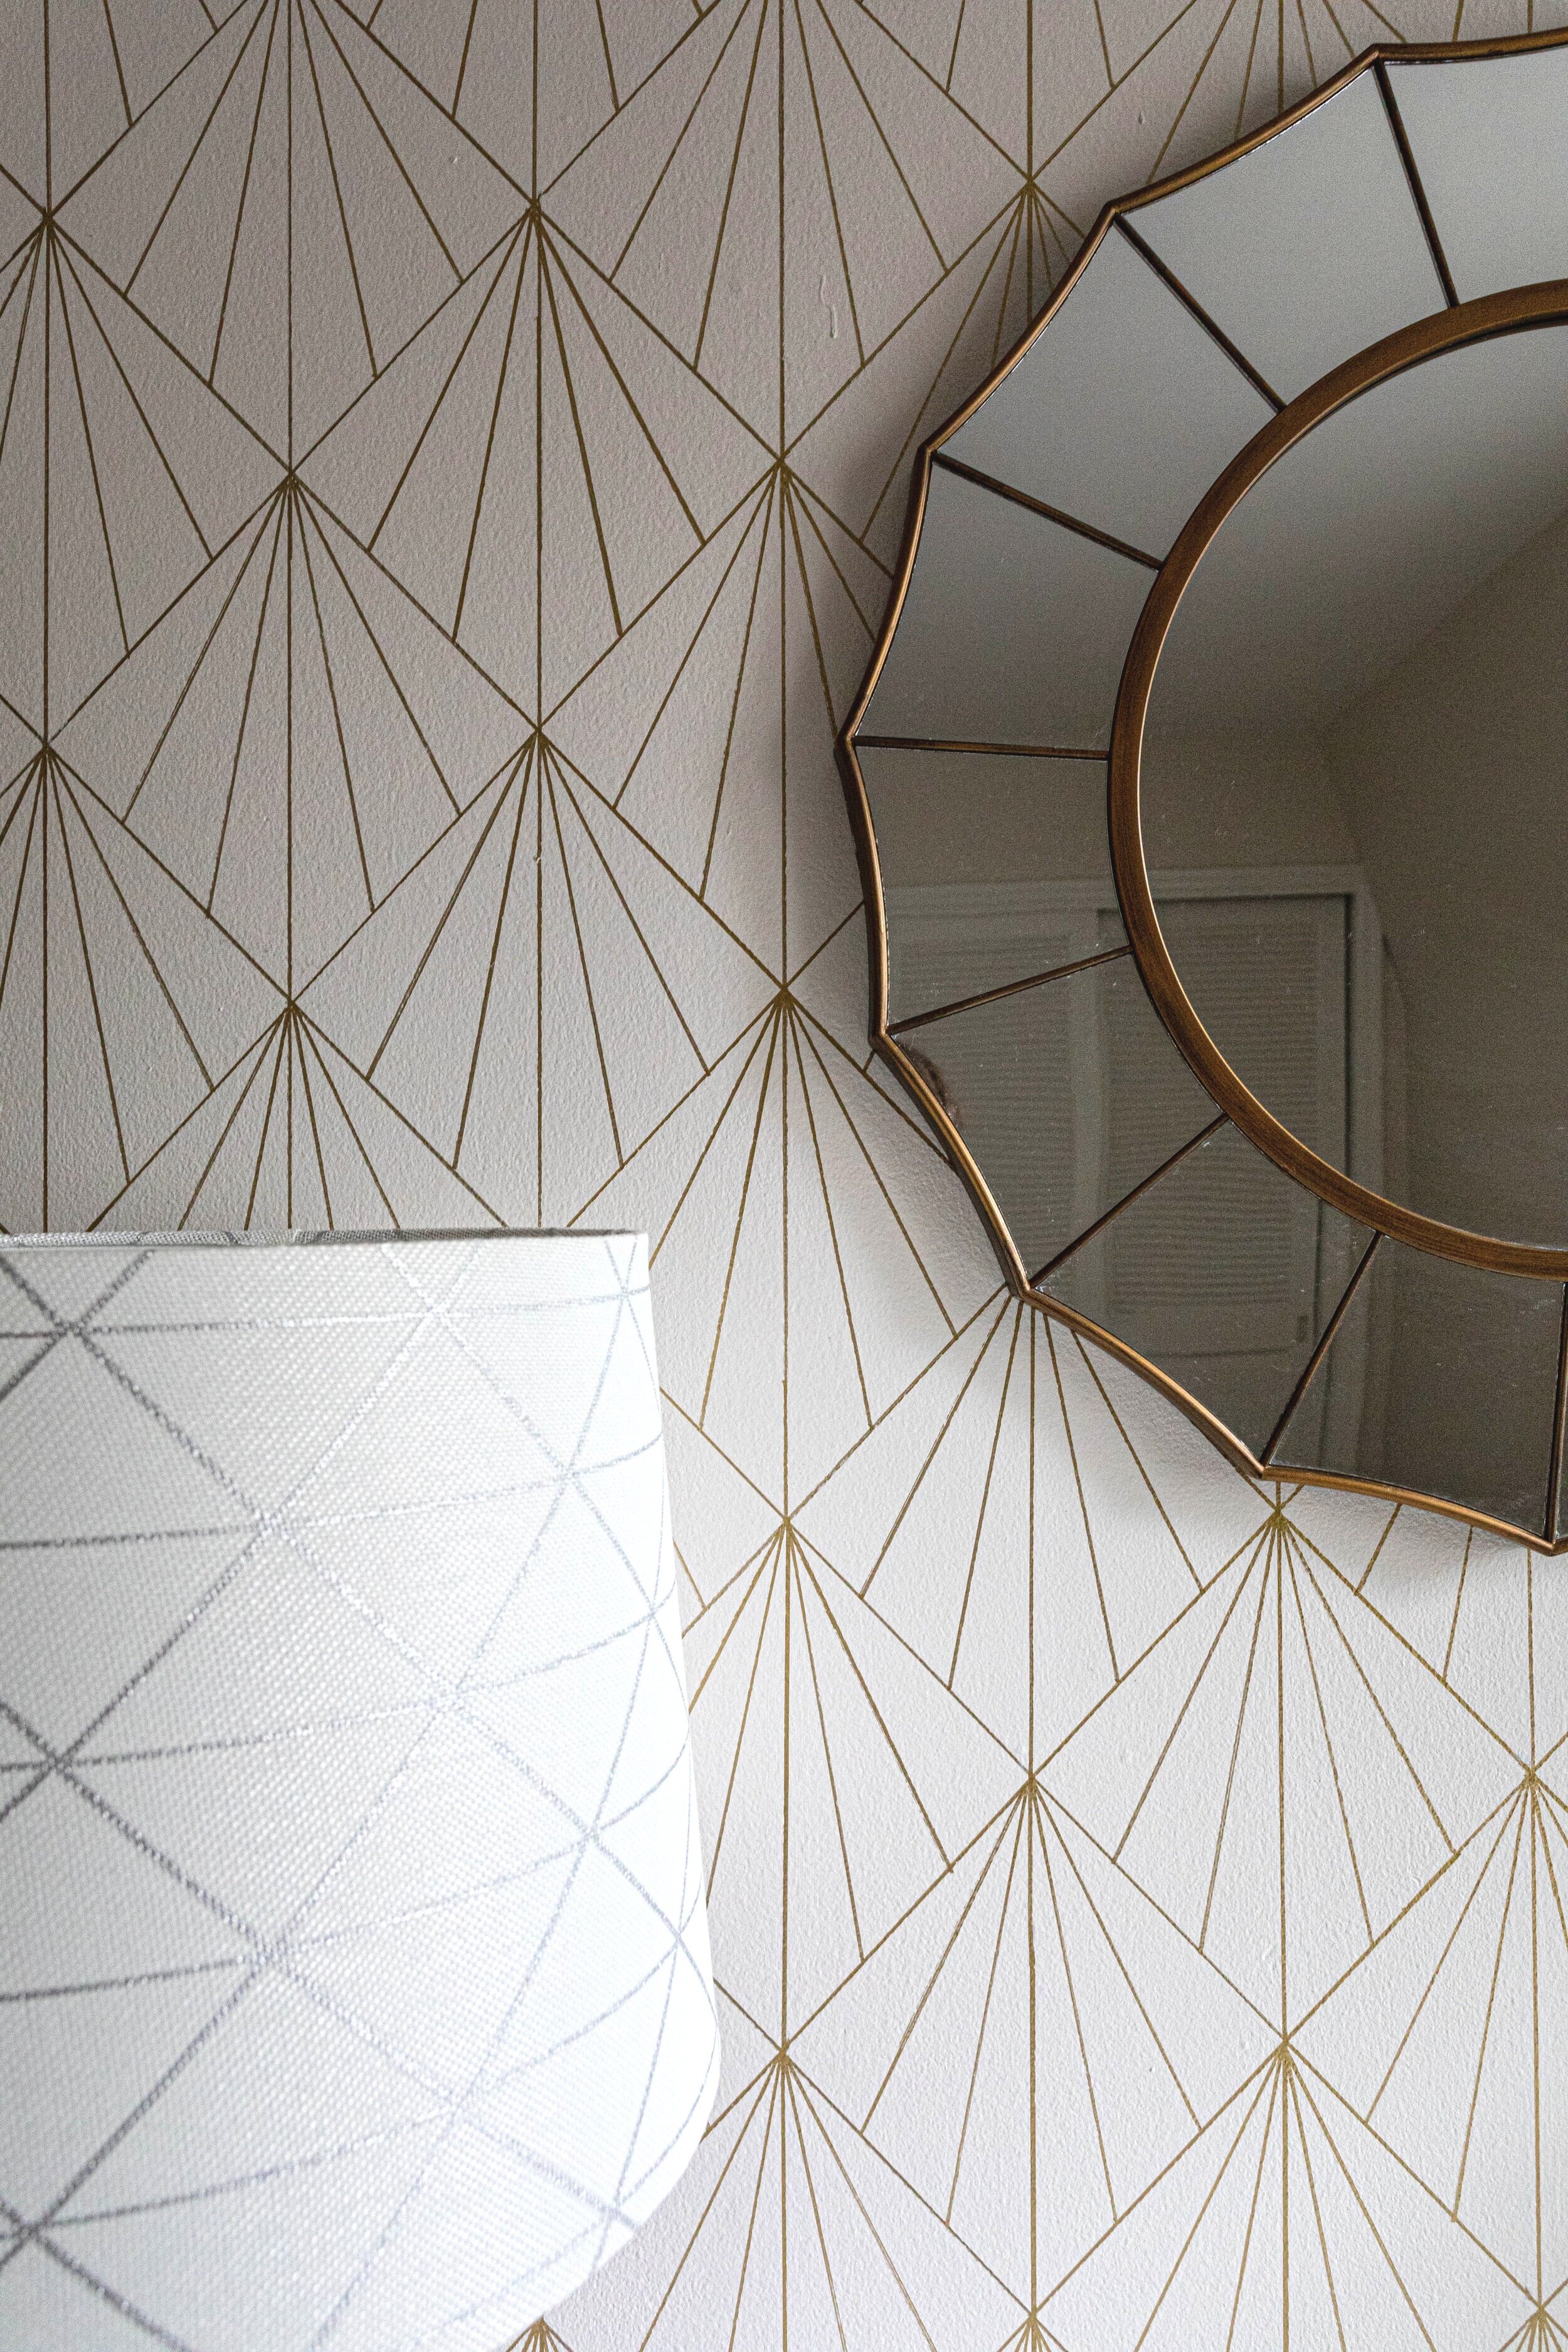
So while I was in Target on my lamp replacement adventure, I picked up this cutie, fully unsure of my purchase because I hadn’t yet written this post and learned all this valuable information! I came home and plopped it on my desk and had a couple realizations…
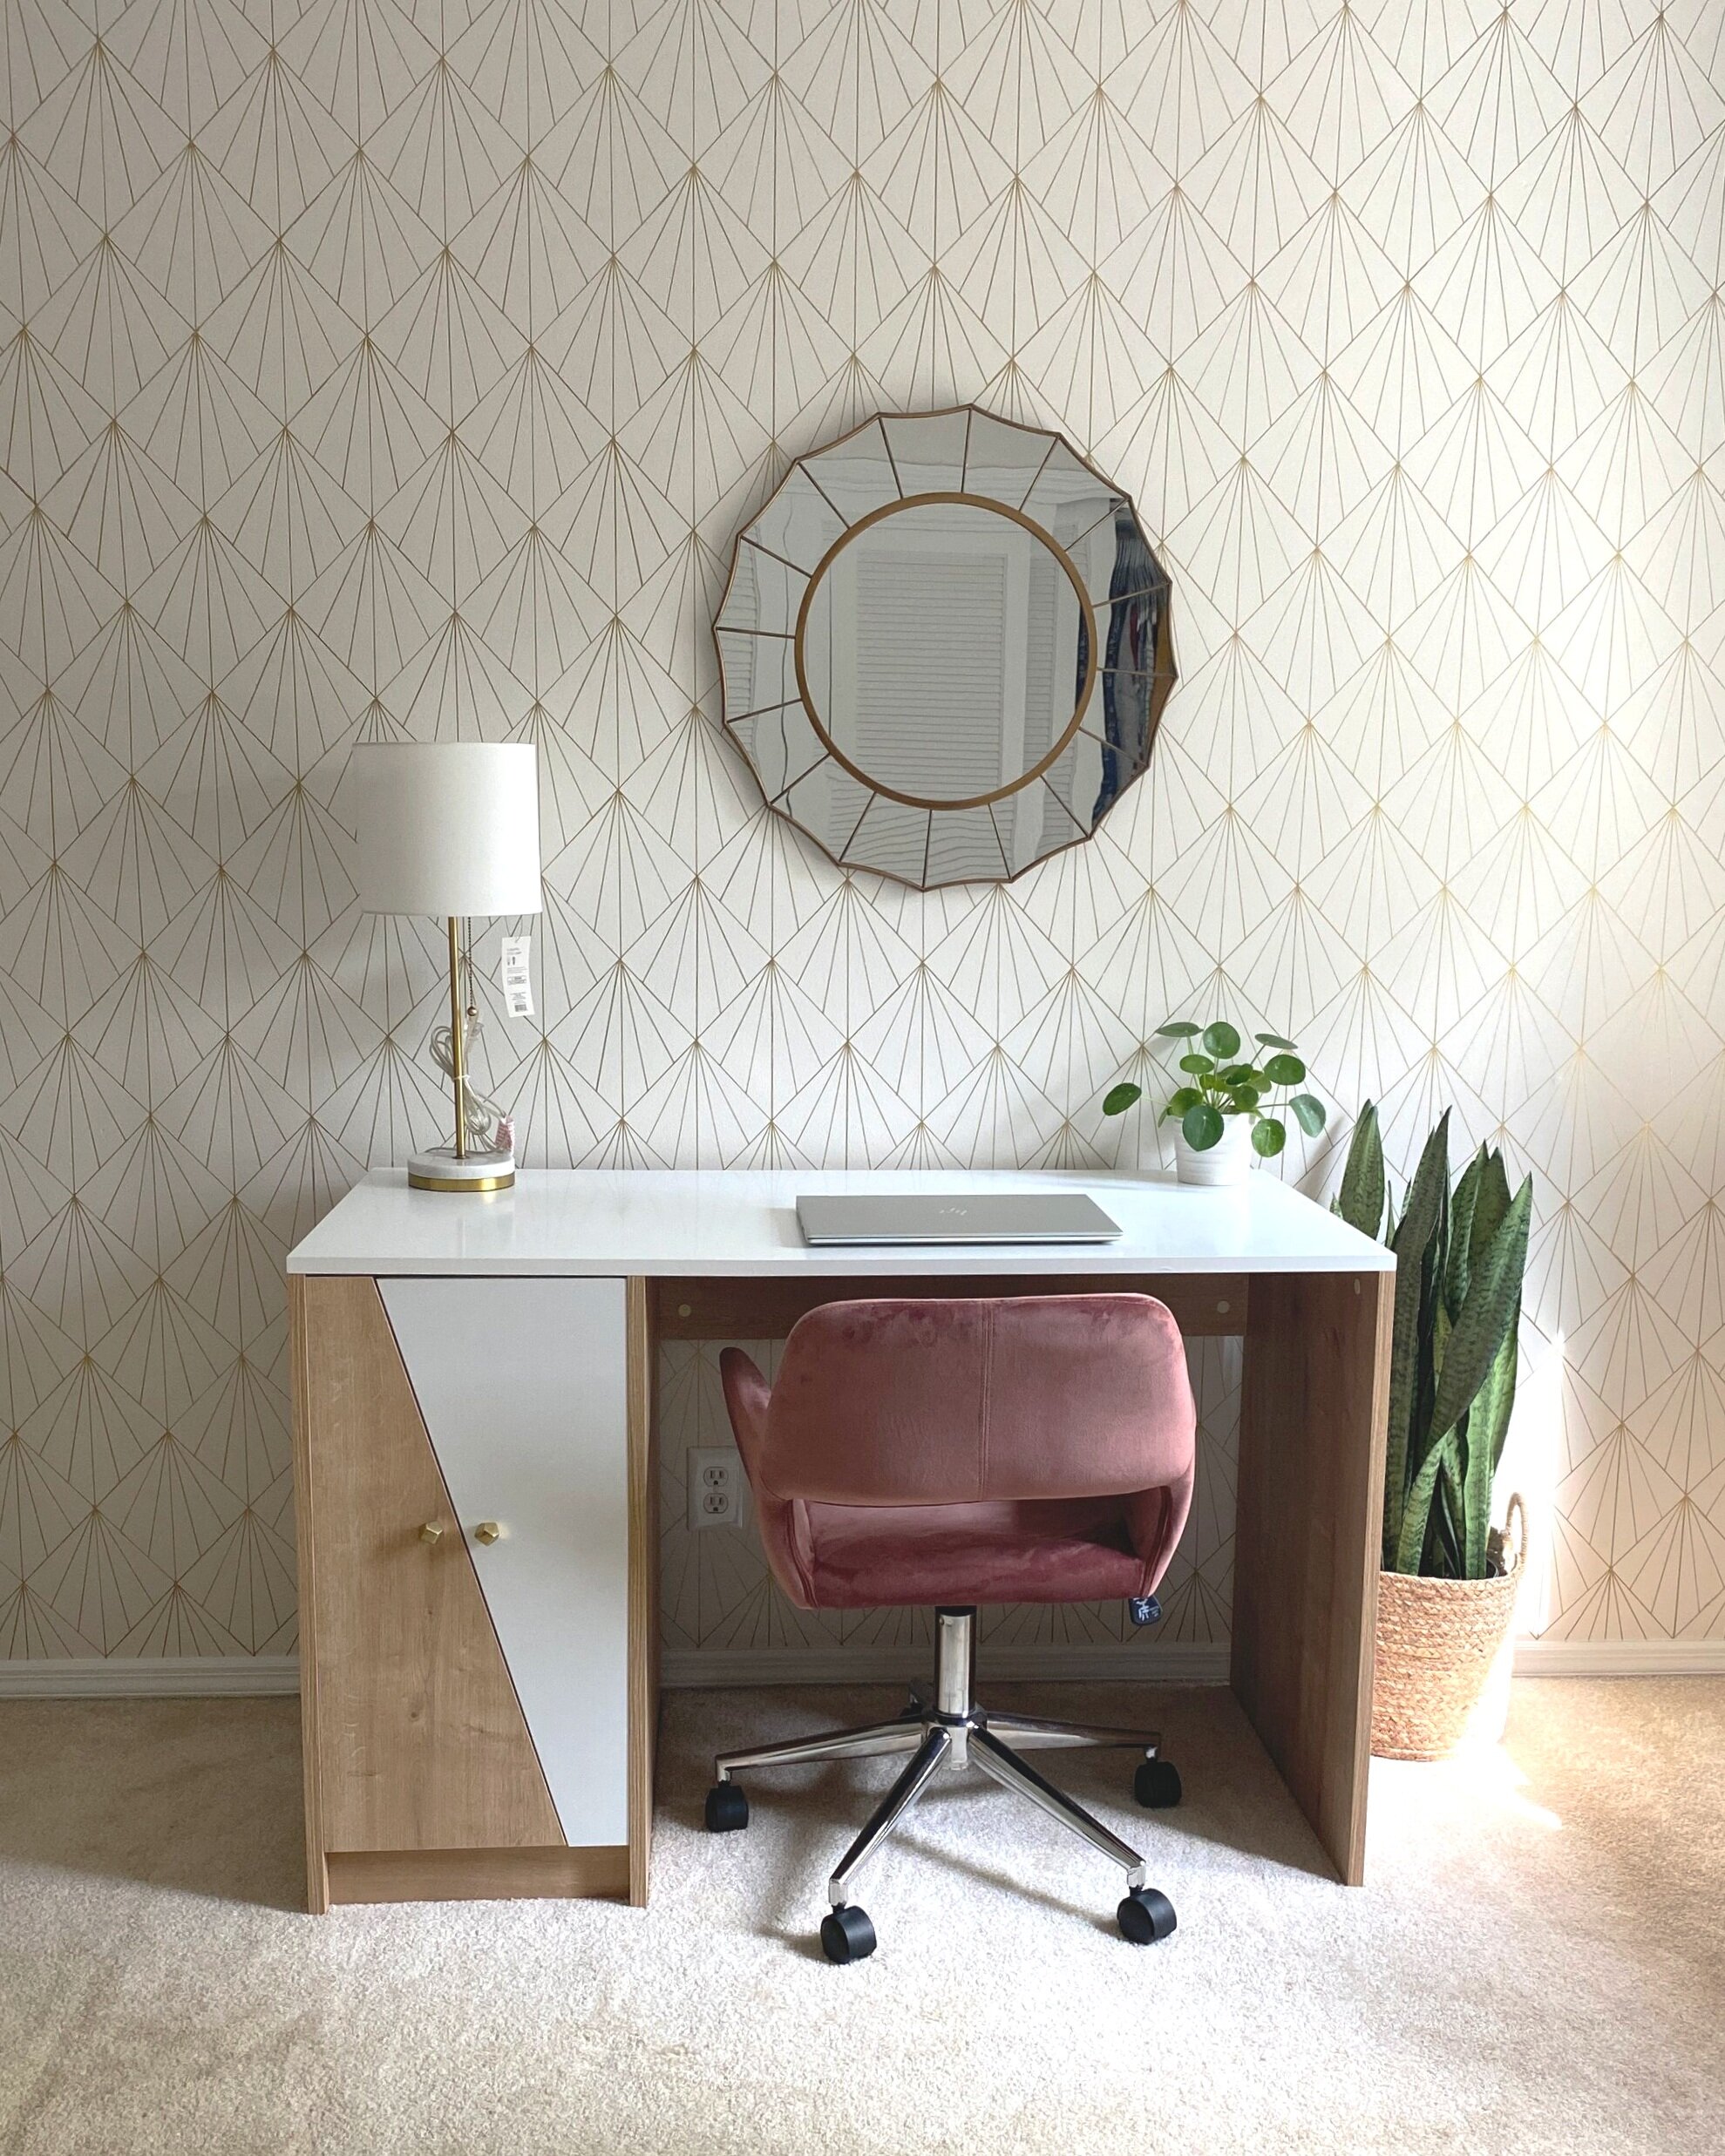
Remember earlier when I mentioned scale as an important element to consider? This is why.
While the style was okay (there are a lot of gold/blonde wood tones going on though), this lamp was way too dainty for this space. I could immediately tell I needed something bulkier.
And just to see if another size lamp that I already had would work better, I borrowed a lamp from one of my daughter’s rooms.
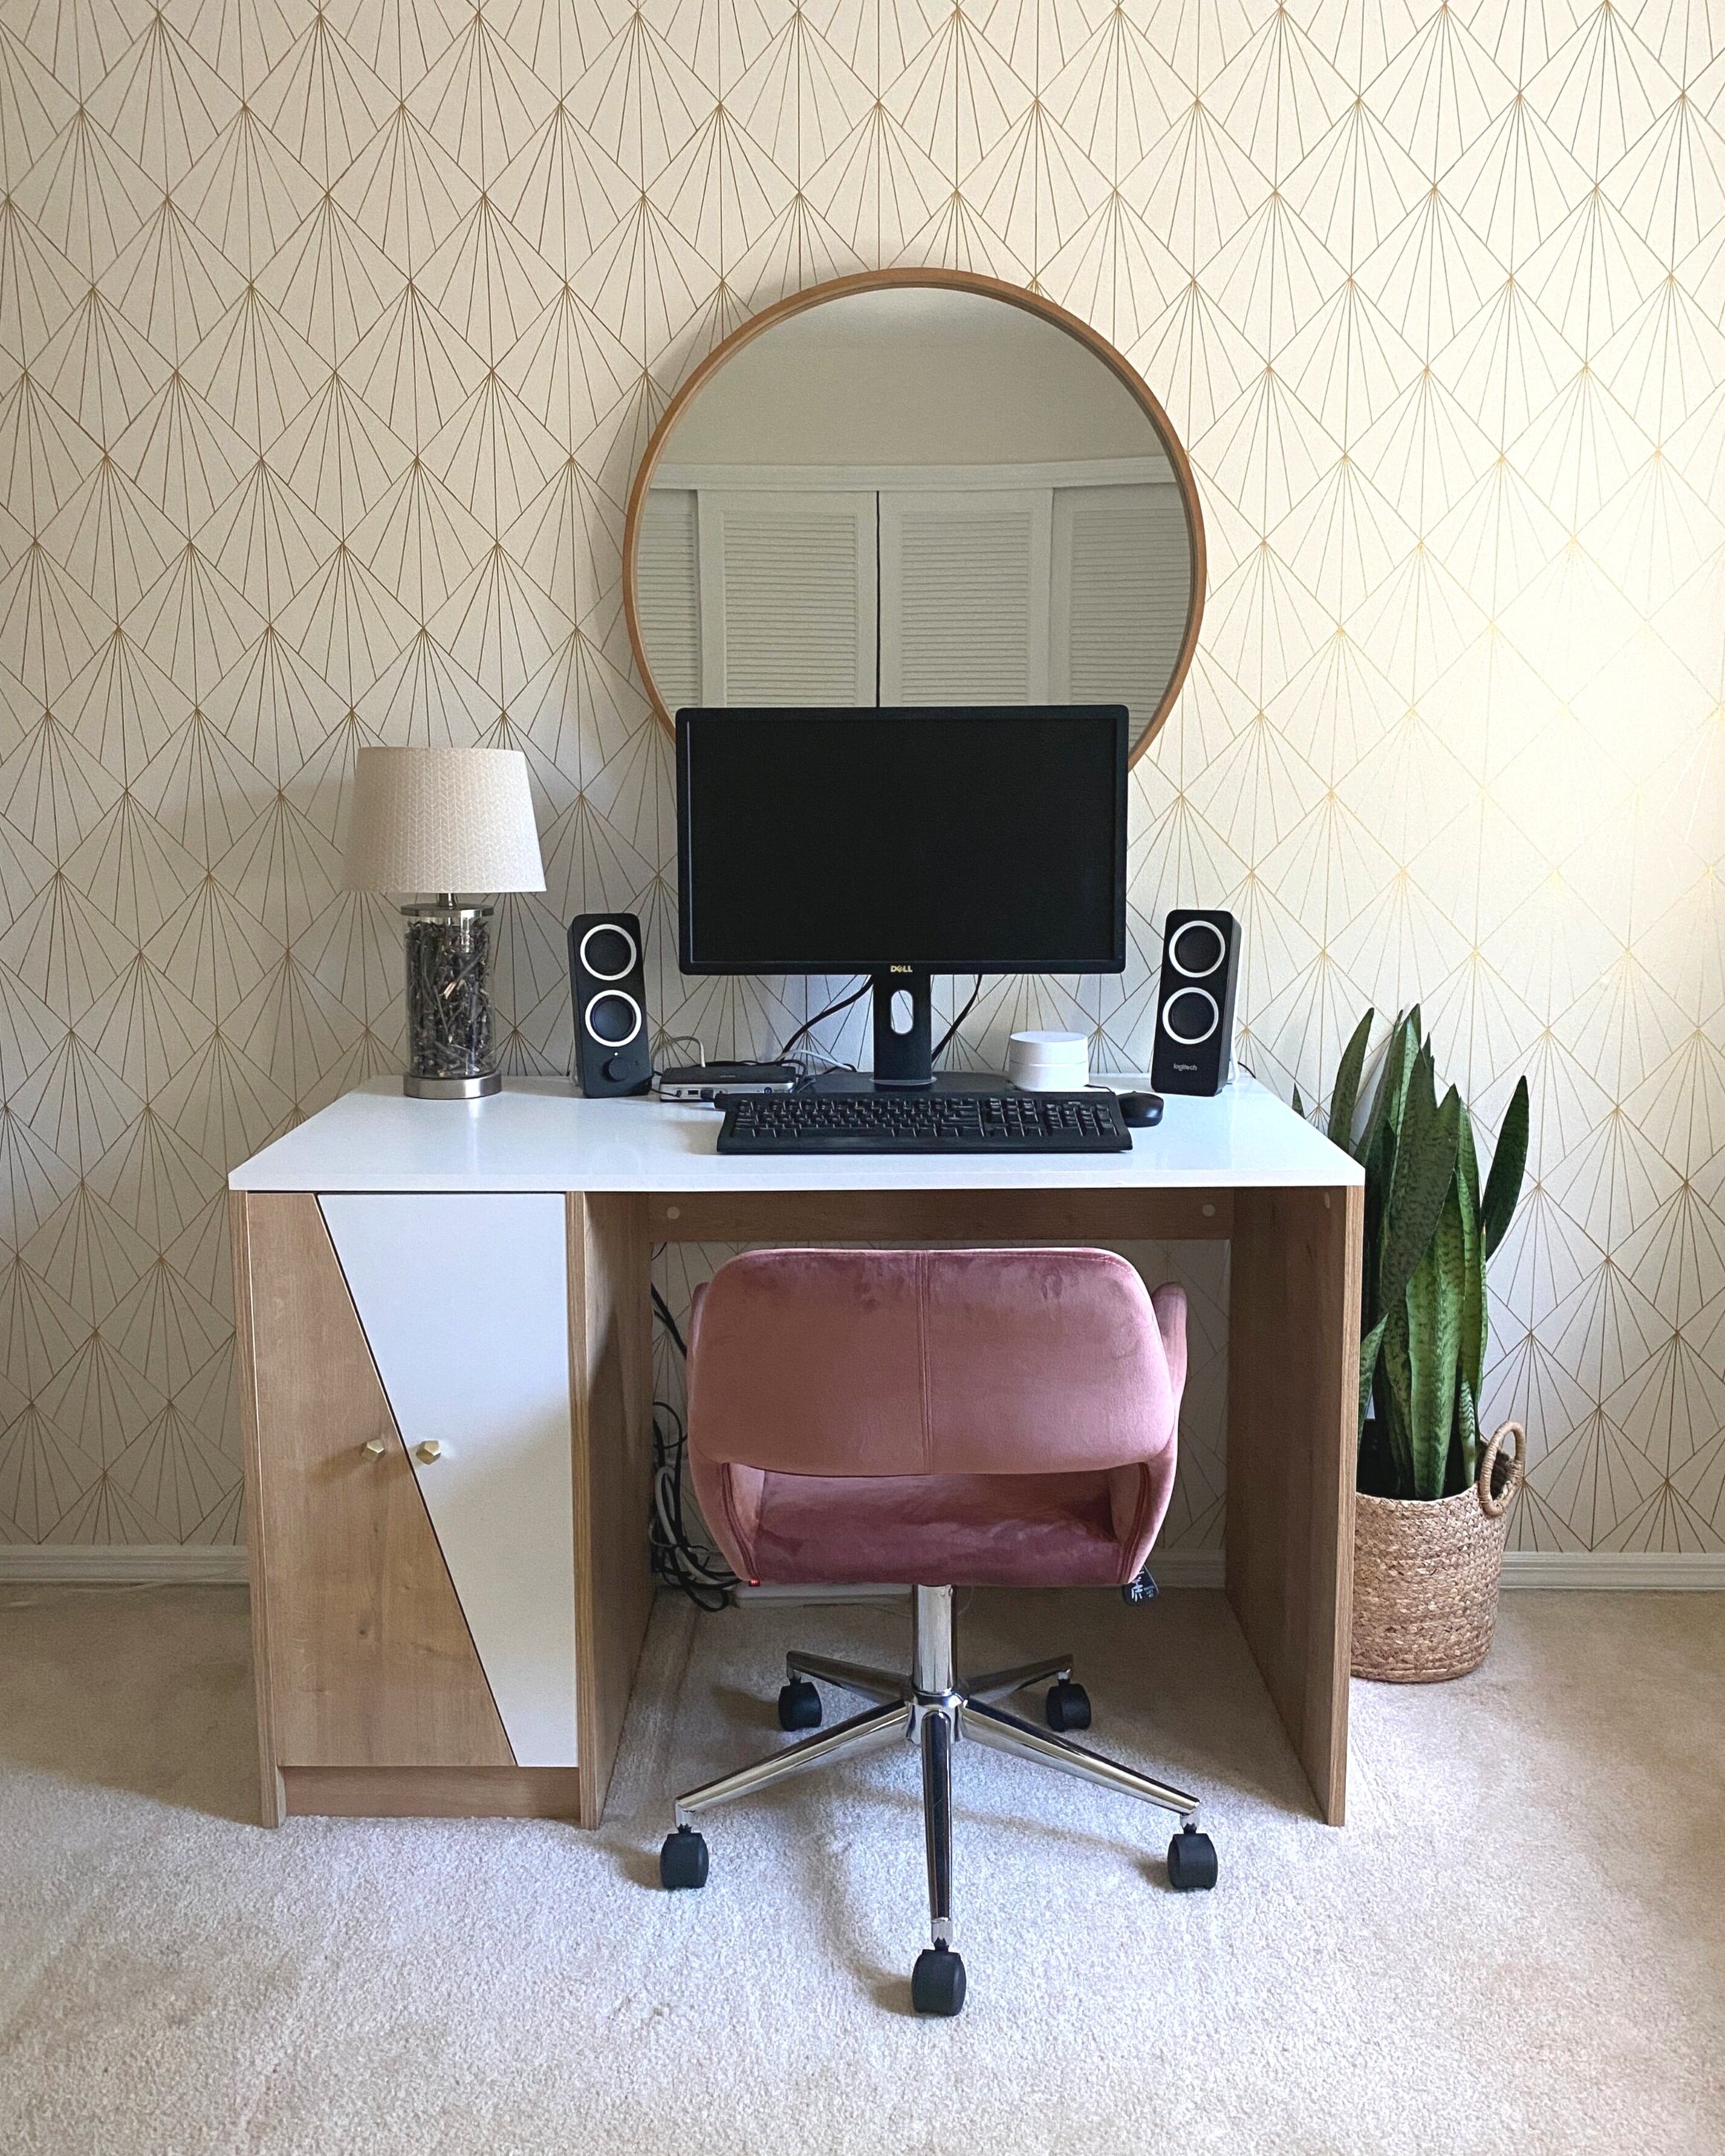
Right away it was glaringly obvious it wasn’t tall enough. At this point I started to feel a little like Goldilocks and started researching the correct lamp size… and a blog post was born. (Isn’t she beautiful!?)
Now, you may be wondering that since I’m putting the lamp on a desk why I didn’t just buy a desk lamp. And the answer is simply: I didn’t want to. A desk lamp would be fine, but I was more drawn to the table lamps so that’s what I went searching for.
So taking the information I learned about lamps, I took another stab at it and found this beauty!
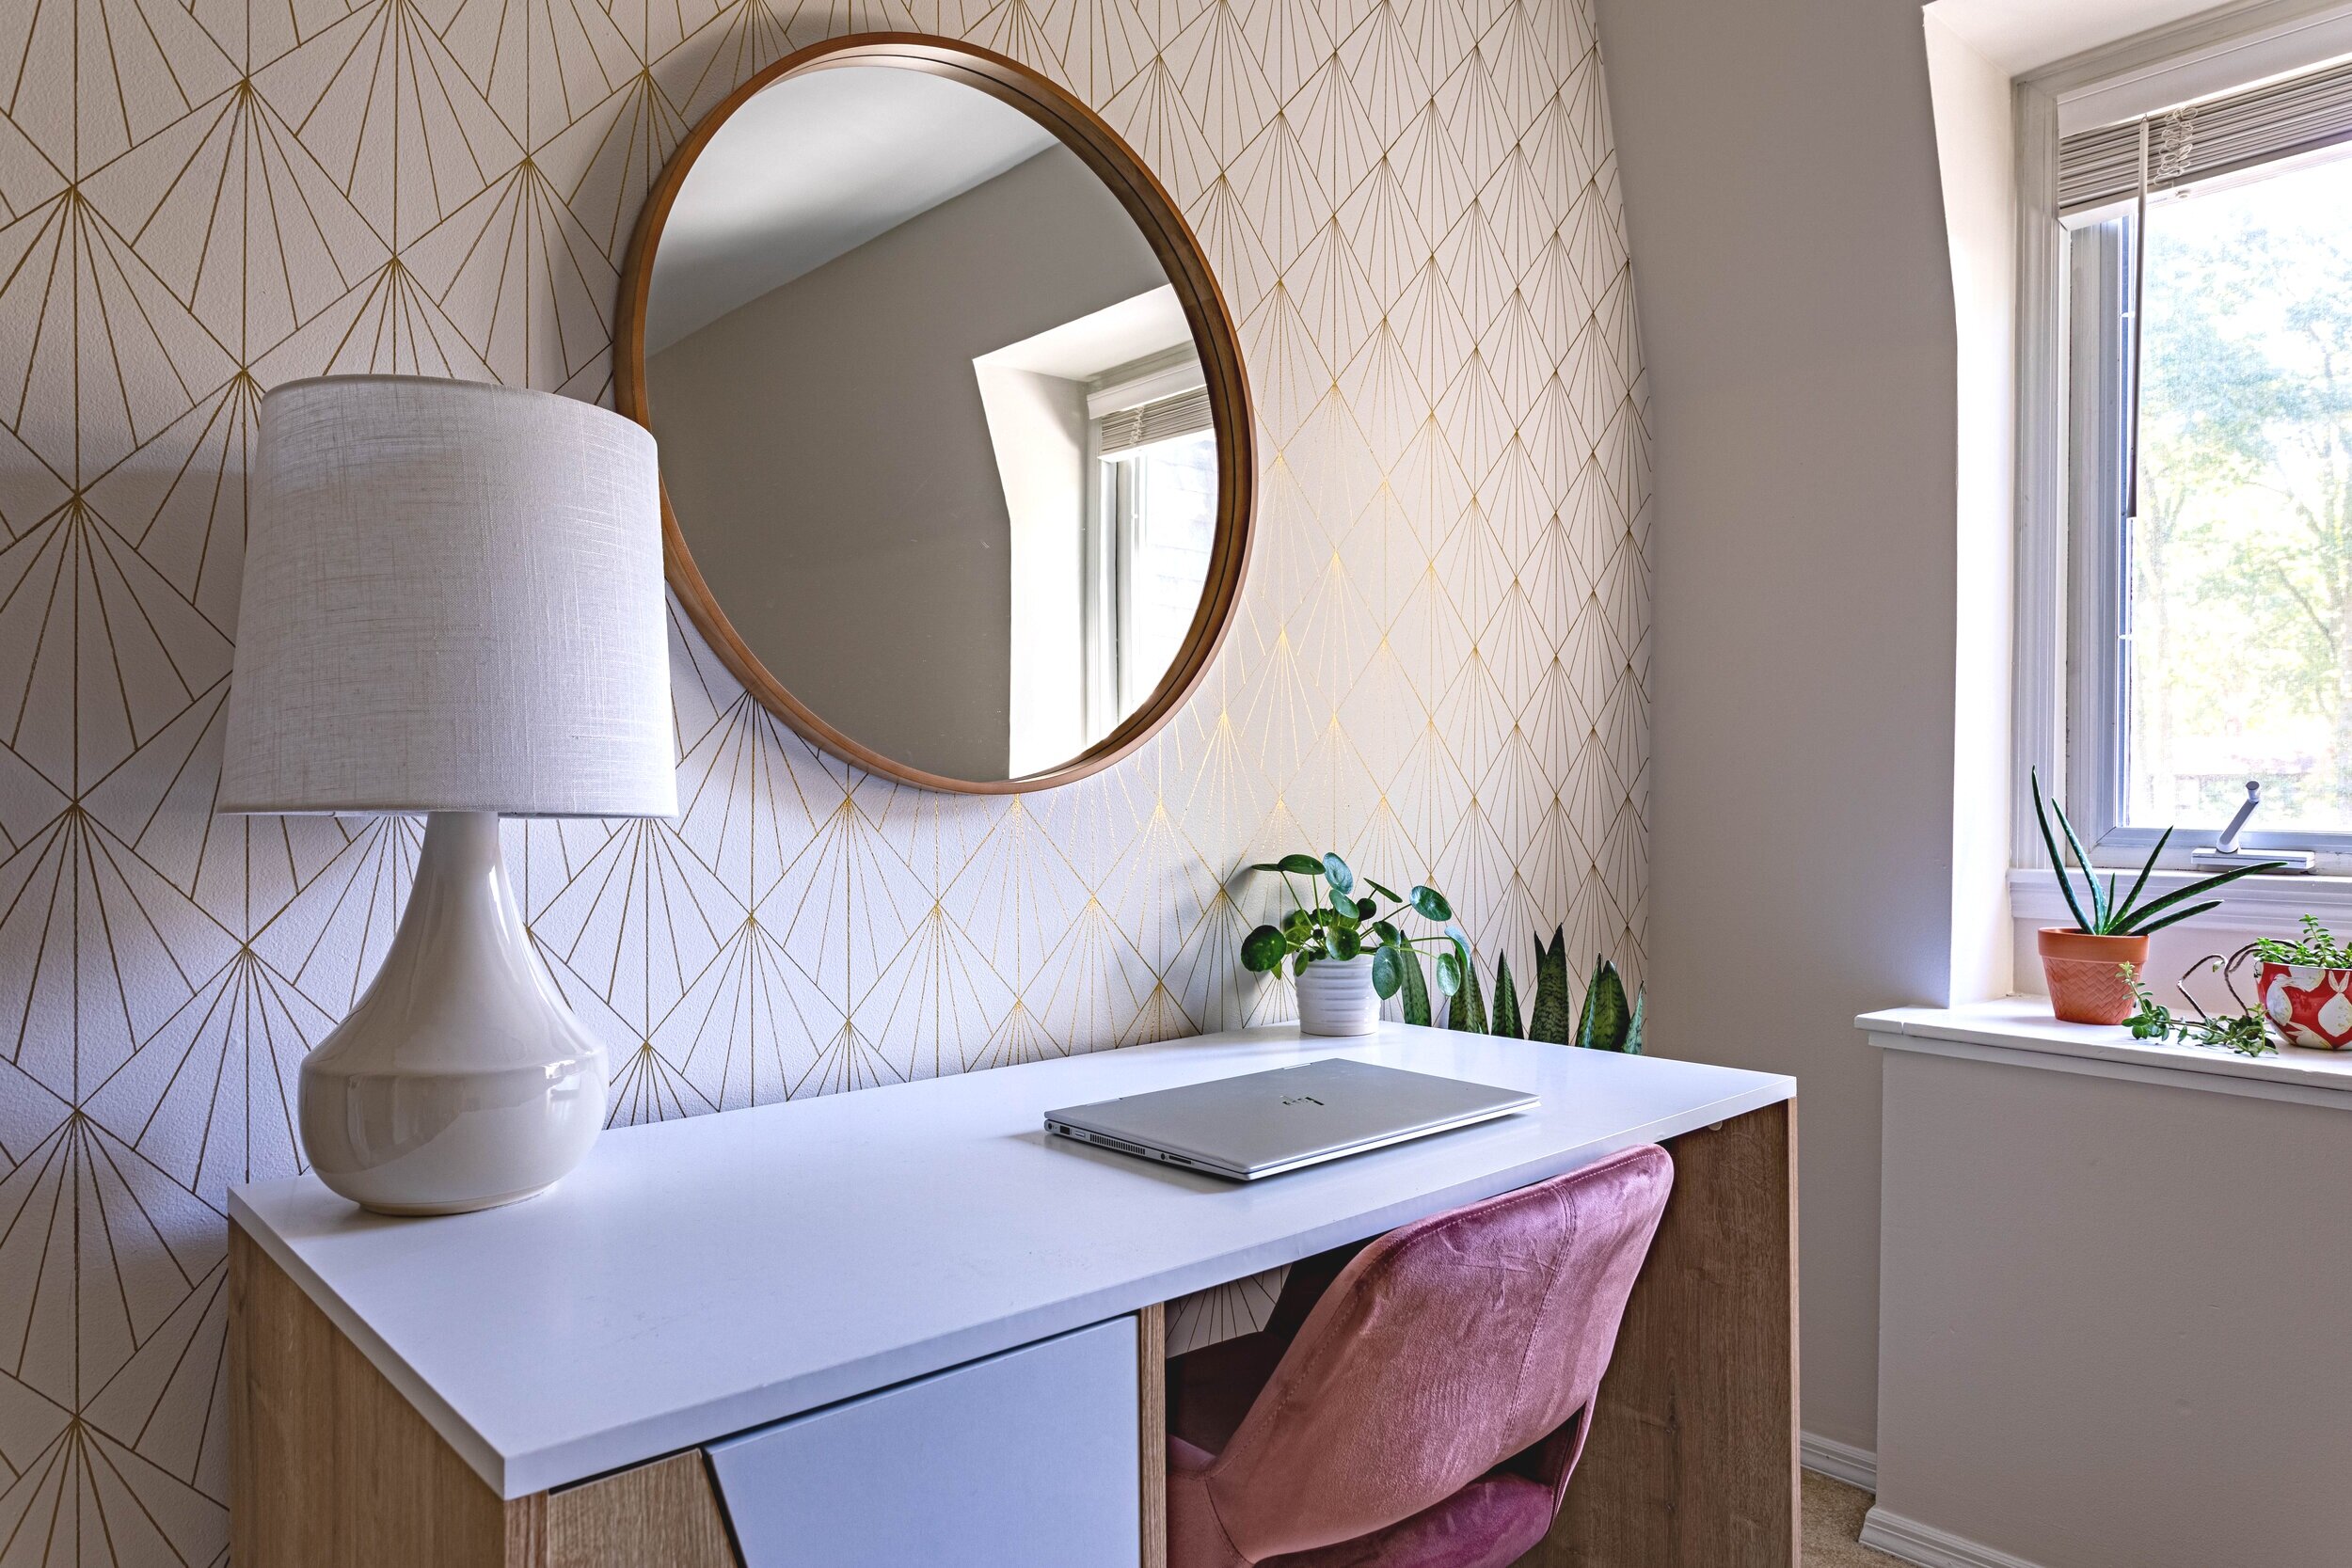
She’s the whole dang package.
The new lamp is weighty enough to ground the space, but not so big I bump into it all the time. It’s also a perfect height, and lastly, the style suits this room. The colors go well with the surrounding decor and the curved but sharp edges of the silhouette are a great contrast to all the straight lines on the wall and the angled line in the doors of the desk.
And remember how I mentioned above that style may be the most important factor? This is a perfect scenario because although the lampshade is pretty tall for this base, it “goes” with the style and makes sense. I think the fact that it’s a skinnier shade helps.

And here’s how the new lamp looks with my desktop. Because the lampshade isn’t so big, I have a few more inches of wiggle room so hopefully I don’t bump into this one all the time.

Who knew anyone could write so much about a friggin’ table lamp? But here I am! And I hope you were able to take away some valuable info to help round out your spaces.
Now, I’m going to go sit down by the warm glow of my beautiful new lamp and birth a new post. Ew… forget I said that…